hatch experiments

Questions about boat repairs with our resins and fiberglass: hull patches, transoms and stringers, foam, rot etc.
User avatar
tech_support
Very Active Poster
Very Active Poster
Posts: 12318
Joined: Wed Dec 31, 1969 7:00 pm
Location: Vero Beach, FL
Contact:

hatch experiments

Post by tech_support »

I have been playing with various idea on hatches for the seacraft. I want to make hatches with gutters and drains and that are water proof :) So here is what they will look like (at least 3 different sizes 8O )

Image

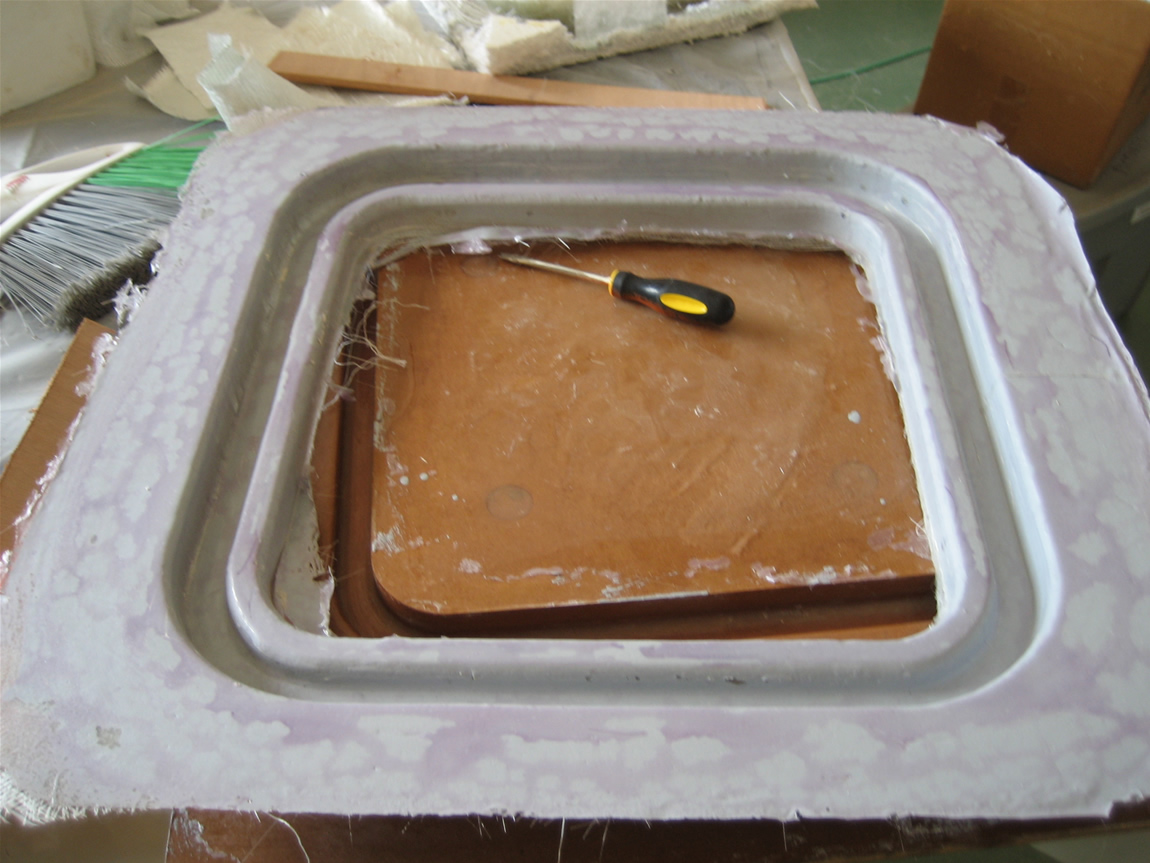
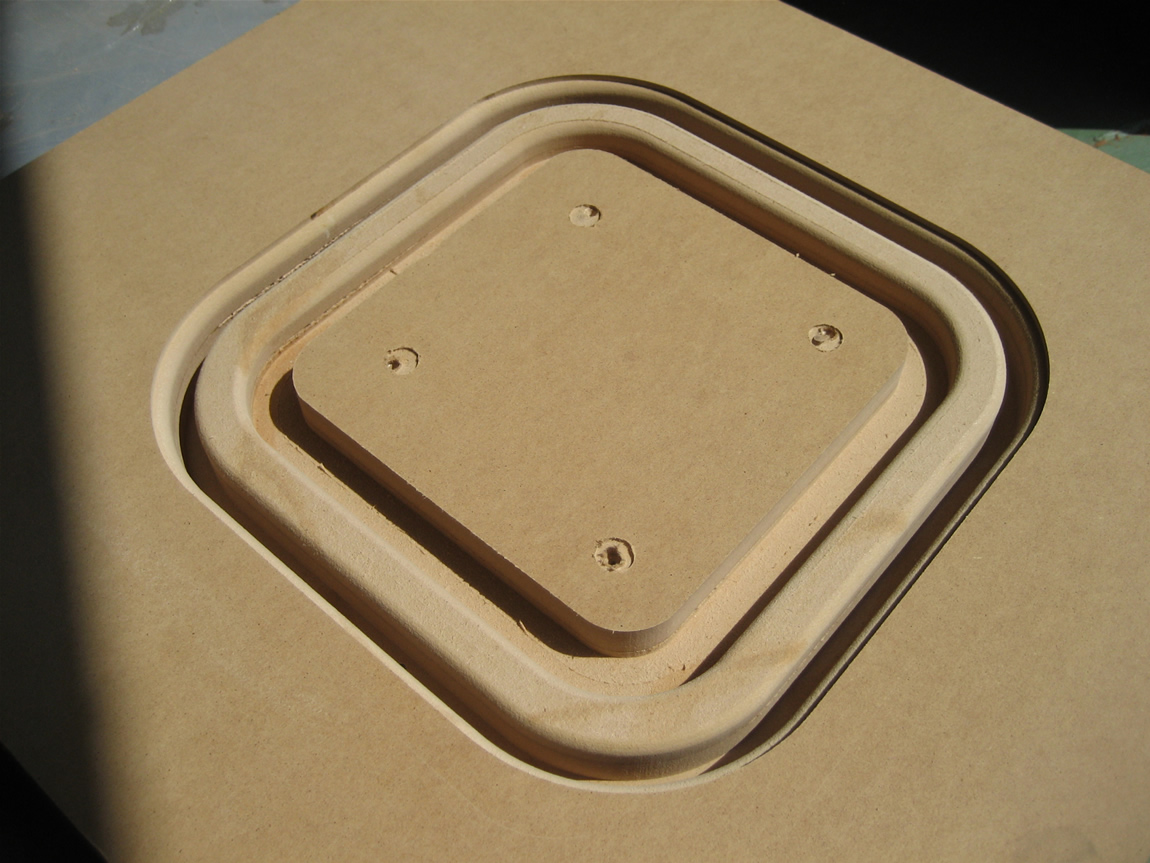
the above version is pulled from a MDF mold that I cut from the CNC machine then filleted and sanded. Its not a perfect mold but it 95% fair. The plan is to route out a recess around the hole in the sole and epoxy the hatch in. It will have about a 2" flange for gluing, plus I will cover the joint with glass. The hatch itself will be cored and will fit over the flange. My plan is to use piano style hinges for a flush mount

what it looks like after cutting
Image

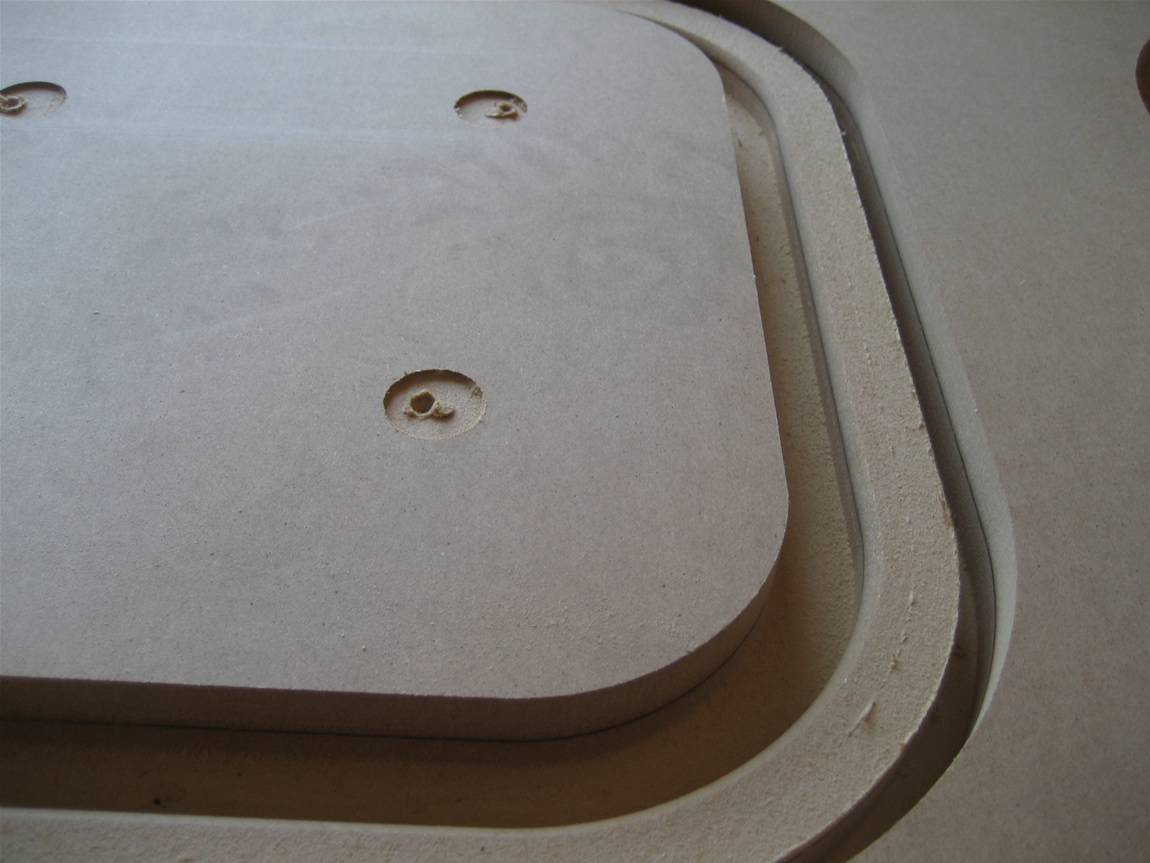
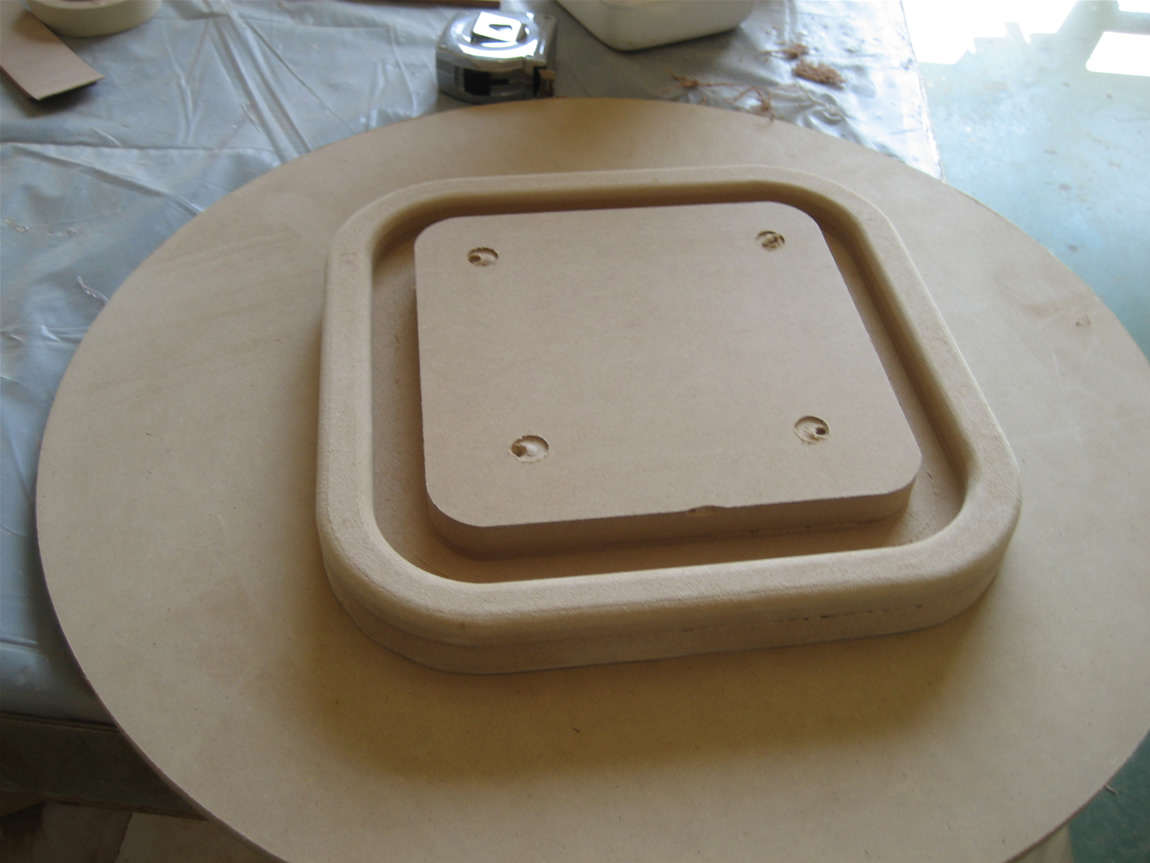
ran a round over bit on the outside corners
Image

cut it loose, then glued it down to another piece of MDF
Image

filleted inside corners (this is a pain, it has to be really good or the part will not pull)
Image

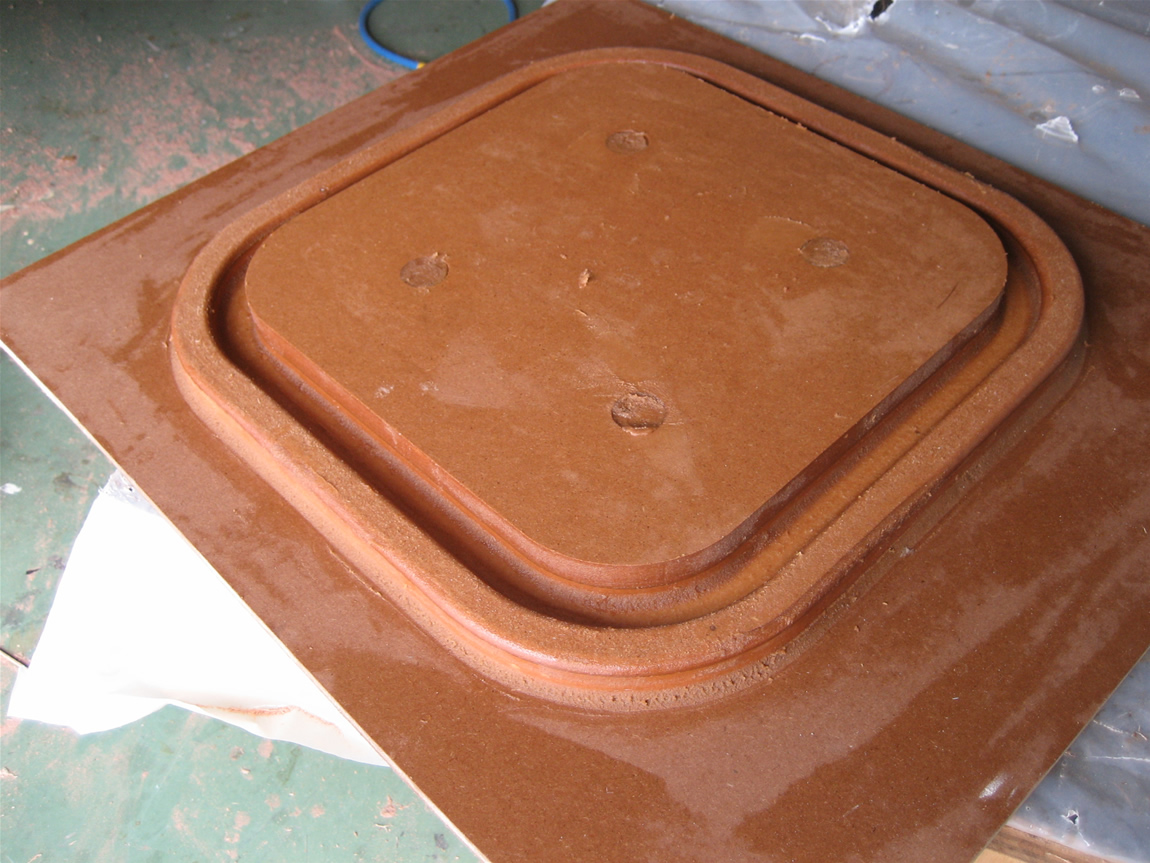
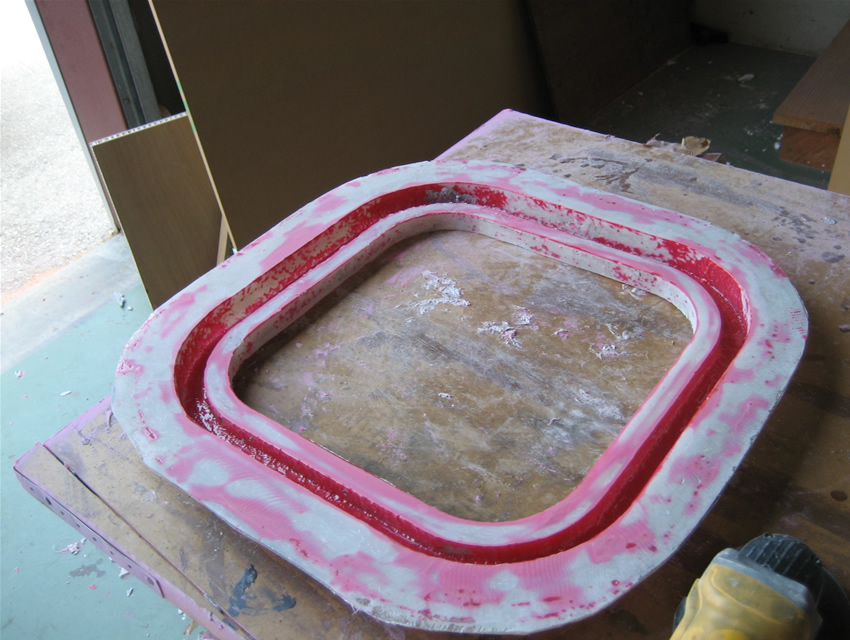
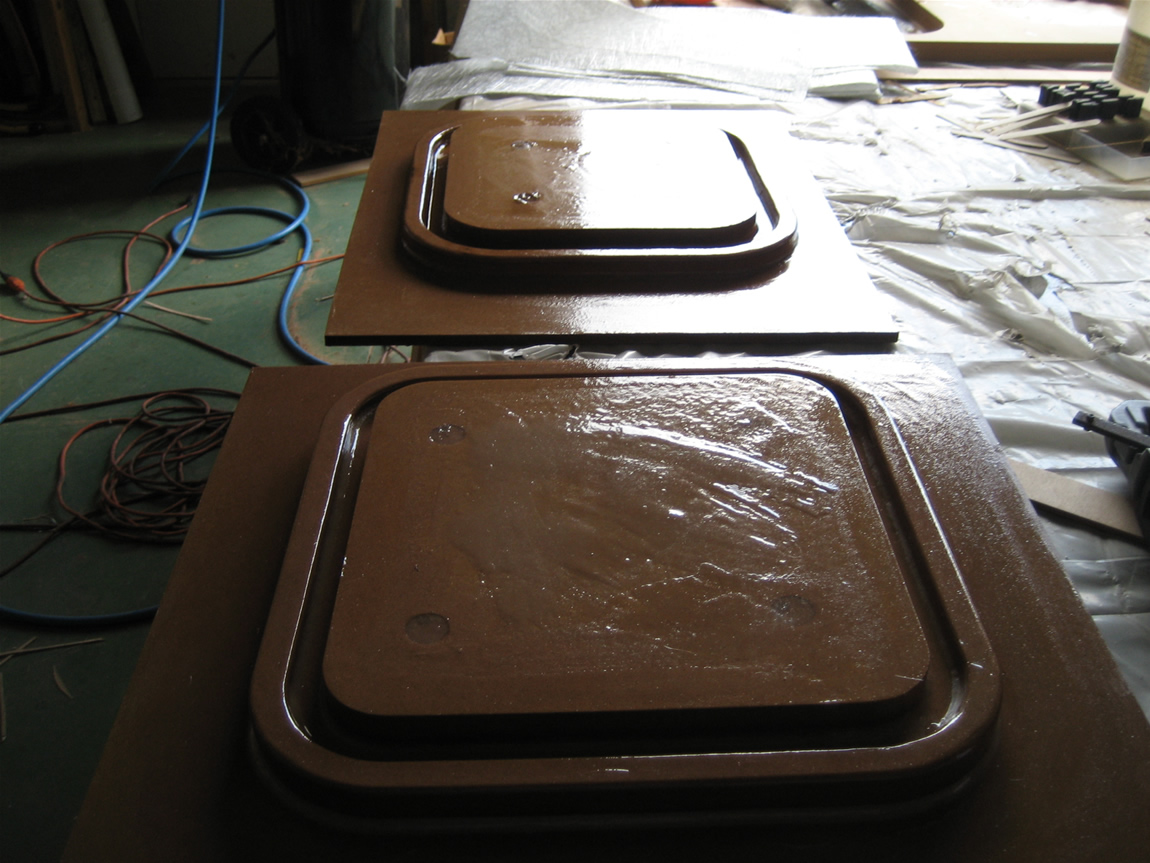
coated with more epoxy, waxed, then coated with heavy PVA (the mold is not perfect so the PVA helps to fill and crevasses that could cause binding)
Image

Its working with the MDF, but I do not like that it takes so long to make a new mold and I can only make one hatch at a time. After making a couple MDF molds I am now trying something new (to me), casting into foam.

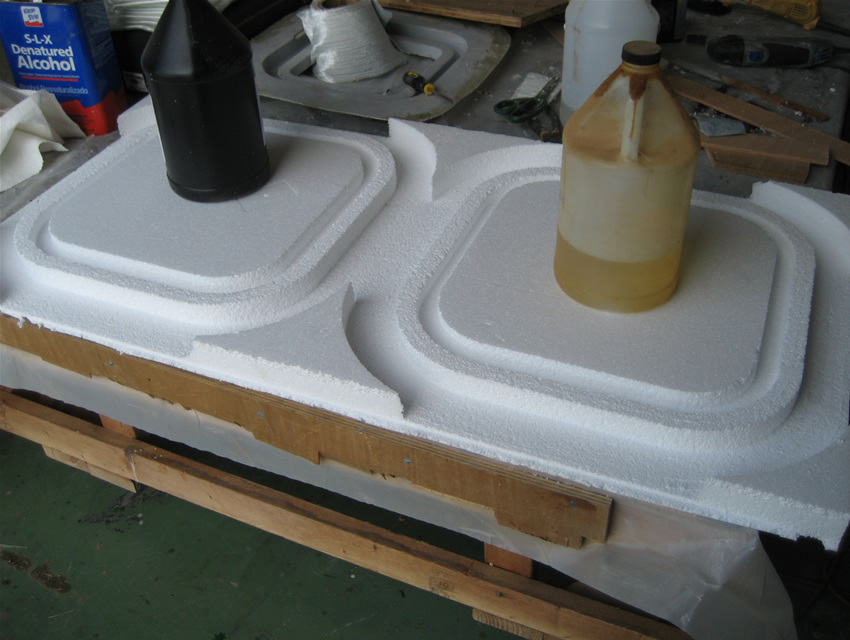
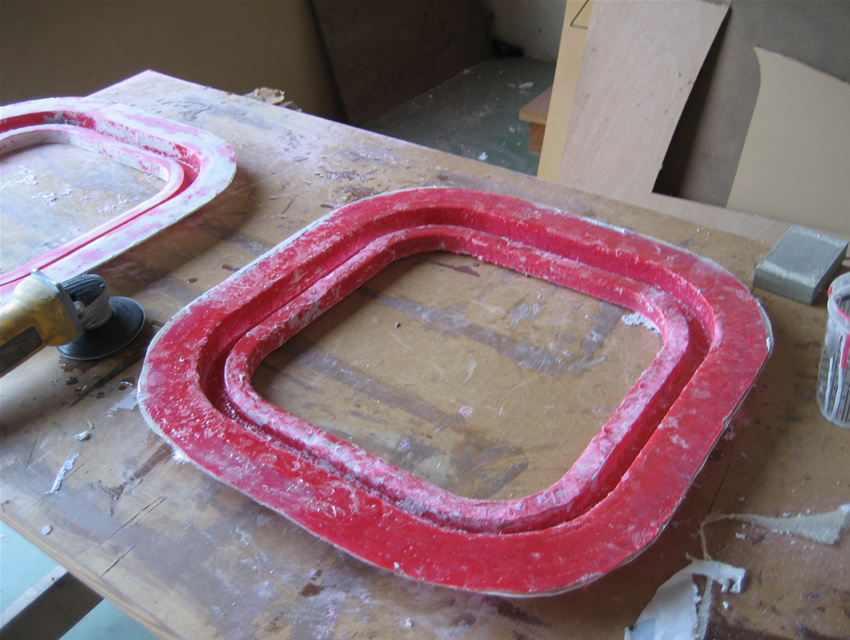
this is the result of the first try with casting hatches into foam blocks

Image

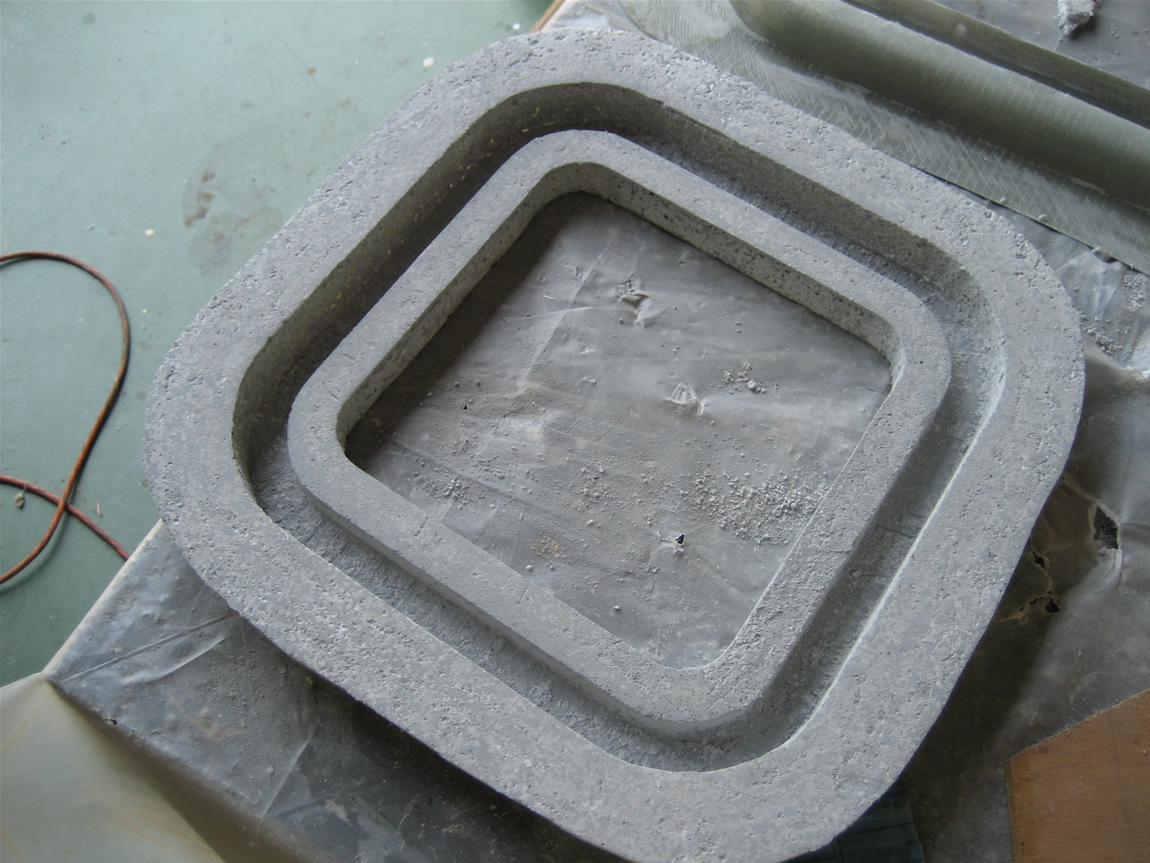
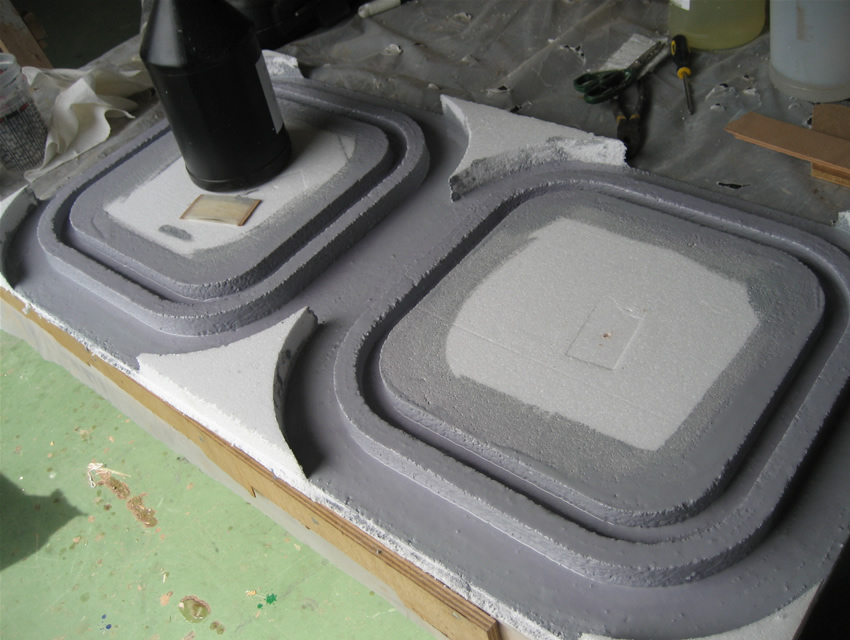
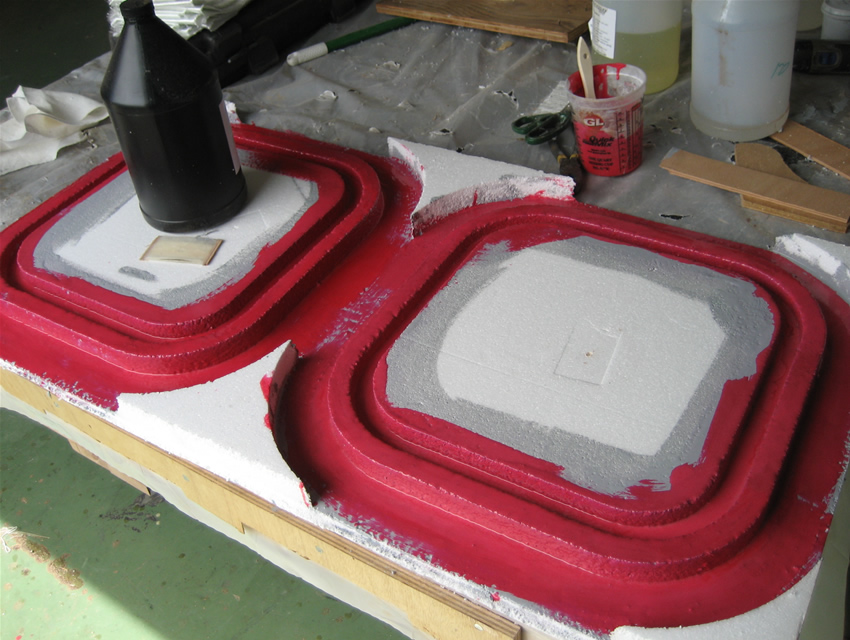
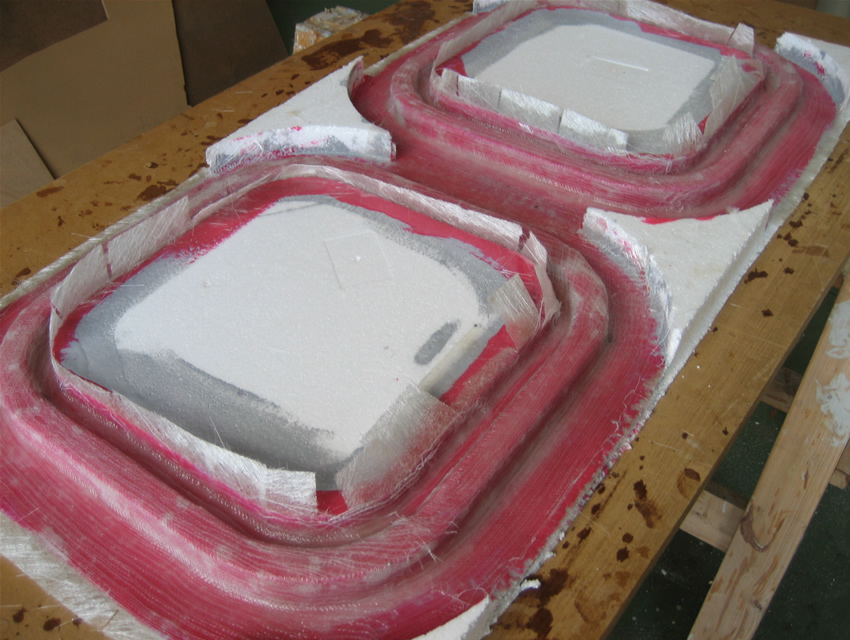
its rough, but I can improve that a little. Basically, I milled the same profile as I did with the MDF molds but I cut it into plain 2" thick EPS insulation foam. The I coated the inside with a couple coats of epoxy/pigment/fillers. After that tacked up I laminated in a layer of mat then 2 x 1708. After it cured I ripped off the foam and sanded it. I did not take any pictures of the process but now that I am a little more confident it will work I will show the entire process. The very best thing about this method is I can lay up all the hatch for a boat onto on 4'x8' sheet of foam, mill them in 30 minutes, then lay them all up with glass at once (no waiting on the mold), not to mention there is no cost to customize every hatch - each one can be different. Of course the down side is that they will require more fairing.

You do not need a CNC machine to do this BTW. I am not a proficient wood worker so I have to use machines to do the accurate stuff.

ks8
* Bateau Builder *
* Bateau Builder *
Posts: 8403
Joined: Mon Nov 24, 2003 1:00 am
Location: NC USA
Location: Now a much longer sail to Tampa Florida! Back to NC, Youngsville FM05tw

Re: hatch experiments

Post by ks8 »

Nice! A picture also after the PVA is washed off? :)

What was the schedule for that first pulled frame?

weights and resin?

Is this for a vertical mount, or will one be able to stomp on it horizontal? :)

User avatar
tech_support
Very Active Poster
Very Active Poster
Posts: 12318
Joined: Wed Dec 31, 1969 7:00 pm
Location: Vero Beach, FL
Contact:

Re: hatch experiments

Post by tech_support »

so another round with the experiment.

this time I milled two "lost" molds at once out of Styrofoam. Then coated in epoxy (pigmented grey), the filled in a little of the open foam cells, but it was still pretty rough. After the epoxy cured I brushed on PVA mold release. Then I began the layup of the hatch, used some epoxy with red pigment to start (so I could see the barrier between mold and hatch), then layered in my laminate, before starting with glass I used an couple applications of milled fibers and epoxy, this built up enough so that glass would take the tight bends

Image
Image
Image
Image
Image
Image
Image

cleaning it up

Image

It would have taken less work to get fair if I had used a tighter cell foam. Today picked up some 2" thick XEPS with is the more firm blue insulation foam. I only hae one more hatch to make, so I should have this perfected right as Im finished :D

User avatar
Mad Dog
Very Active Poster
Very Active Poster
Posts: 1945
Joined: Sun Aug 05, 2007 1:49 pm
Location: San Antonio, Texas

Re: hatch experiments

Post by Mad Dog »

I'm very interested in the hatch making tutorials. I will be replacing a broken hatch in the not to distant future. I'd like to build instead of buy cuz these plastic hatches don't last. So, once you have these hatches installed, will they be appropriate for a sole area that gets lots of foot traffic from hefty fellas?

MD :wink:
Ergo piscor, ergo sum

NOTHING ELSE MATTERS
Active Poster
Active Poster
Posts: 305
Joined: Thu Mar 11, 2010 11:26 pm
Location: LONG ISLAND NEW YORK

Re: hatch experiments

Post by NOTHING ELSE MATTERS »

Mad Dog wrote:I'm very interested in the hatch making tutorials. I will be replacing a broken hatch in the not to distant future. I'd like to build instead of buy cuz these plastic hatches don't last. So, once you have these hatches installed, will they be appropriate for a sole area that gets lots of foot traffic from hefty fellas?

MD :wink:

X 2

User avatar
tech_support
Very Active Poster
Very Active Poster
Posts: 12318
Joined: Wed Dec 31, 1969 7:00 pm
Location: Vero Beach, FL
Contact:

Re: hatch experiments

Post by tech_support »

yes, the three I have made so far are for the sole of my seascraft. You make them thicker and you core to hatch itself to stiffen it up. These are about 3/16" thick, maybe a touch more, very strong.

User avatar
Mad Dog
Very Active Poster
Very Active Poster
Posts: 1945
Joined: Sun Aug 05, 2007 1:49 pm
Location: San Antonio, Texas

Re: hatch experiments

Post by Mad Dog »

This may be a stupid question but will these hatch frames be mounted from the top of the sole or attached from below? I'm trying to imagine what the lid looks like and how it fits into the frame. :doh: I just can't see your vision yet.

MD :wink:
Ergo piscor, ergo sum

User avatar
tech_support
Very Active Poster
Very Active Poster
Posts: 12318
Joined: Wed Dec 31, 1969 7:00 pm
Location: Vero Beach, FL
Contact:

Re: hatch experiments

Post by tech_support »

mounted on top of sole. Will route out a recess into sole to make it fit flush, then cover it with a layer of glass and fairing - will look like its molded into sole. I may try to have it stick up proud of the sole by 1/8" or so, just to help divert water.

User avatar
Mad Dog
Very Active Poster
Very Active Poster
Posts: 1945
Joined: Sun Aug 05, 2007 1:49 pm
Location: San Antonio, Texas

Re: hatch experiments

Post by Mad Dog »

shine wrote:mounted on top of sole. Will route out a recess into sole to make it fit flush, then cover it with a layer of glass and fairing - will look like its molded into sole. I may try to have it stick up proud of the sole by 1/8" or so, just to help divert water.
Gotcha. Thanks. :D

MD :wink:
Ergo piscor, ergo sum

User avatar
davidtx
* Bateau Builder *
* Bateau Builder *
Posts: 929
Joined: Wed Oct 31, 2007 7:01 pm
Location: Derry, NH

Re: hatch experiments

Post by davidtx »

Instead of filets in your grooves, why not use a round nose bit? e.g. http://www.mlcswoodworking.com/ordersta ... _core.html
See my blog: http://buildingtx18.blogspot.com/view or drop "view" from the end for the old interface

Post Reply

Who is online

Users browsing this forum: No registered users and 2 guests