
BpB,
Its really looking good. Your doing a great job keep
us posted.
FS18 Done Deal...
-
Bayport_Bob
- Very Active Poster

- Posts: 520
- Joined: Wed Dec 31, 1969 7:00 pm
- Location: Tarpon Springs, FL

-
Super Spook
- Active Poster

- Posts: 288
- Joined: Thu Feb 16, 2006 2:11 am
- Location: Niceville, FL
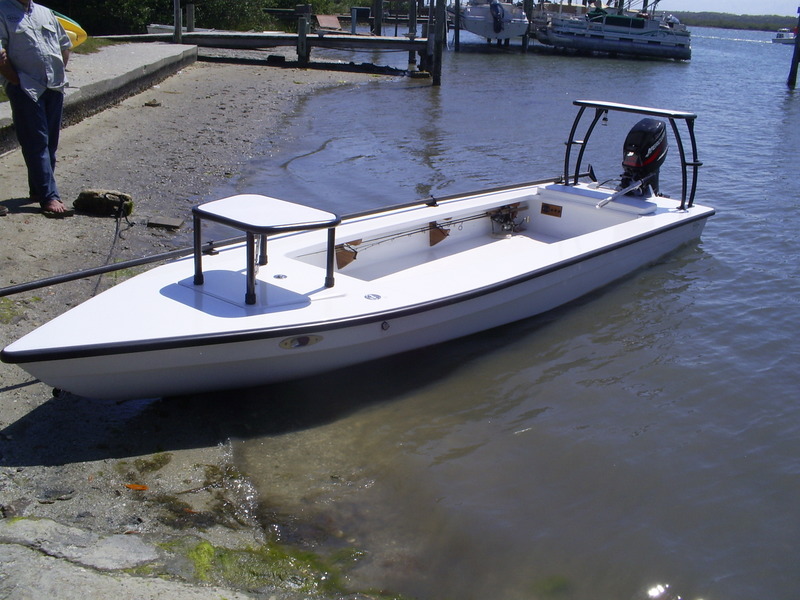
It looks like they've changed it up some for the new model. I'm sure some of this stuff is optional, but I think the front hatch is new, and the bright rod holders are new. The poling platform differs as well. It's a sharp looking boat. I hope can achieve a similar level of finish. Next time I head back to my hometown, I can take any pictures anyone needs of the previous model. I'll take requests before I go. 
Elie
Elie
-
mecreature
- Very Active Poster
- Posts: 770
- Joined: Thu Jun 29, 2006 4:54 pm
- Location: Indiana
-
Bayport_Bob
- Very Active Poster
- Posts: 520
- Joined: Wed Dec 31, 1969 7:00 pm
- Location: Tarpon Springs, FL
I've updated the site with my taping and and glassing the hull bottom.
What isn't on the site yet is glassing the sides and applying the 1st coat of fairing compound. I'll post those steps as time permits (I'll be sick of sanding shortly and be looking for an excuse to get away!).
Thanks for all the encouragement from everyone. Keep the questions coming & I'll answer them the best that I can.
- Boat Builder Bob
-
Super Spook
- Active Poster
- Posts: 288
- Joined: Thu Feb 16, 2006 2:11 am
- Location: Niceville, FL
Thanks for the update Bob. The detailed information you put on your site is really useful as you're always a step or three ahead of me. Just wanted you to know you're not posting into a void. I've started stitching up the round chine and for the rear half of it, the trick with the little sections of PVC works great. The area near the bow is proving to be "challening", particularly getting the three bottom panel strips to lay vertically. This is where Jacques' trick with the batten has been most useful. Thanks.
Elie
Elie

That web site is one of the best, just like his workmanship.
I will post a link from the study plans page.
I will post a link from the study plans page.
Jacques Mertens - Designer
http://boatbuildercentral.com
http://boatbuildercentral.com
-
Bayport_Bob
- Very Active Poster
- Posts: 520
- Joined: Wed Dec 31, 1969 7:00 pm
- Location: Tarpon Springs, FL
Thanks Jacques. Luckily the pictures are at the 10' distance to blur the "builder's blunders"!
Let me know if there's any thing that could be added. I'm trying to provide enough information so that a new builder with a set of plans & builder's notes can follow the steps with confidence so they pretty much know what to expect, and give them a little guidance on how to get there. Everything is done in "managable", one person steps and I try to think ahead as far as possible so the process goes smoothly.
- Bob
-
Bayport_Bob
- Very Active Poster
- Posts: 520
- Joined: Wed Dec 31, 1969 7:00 pm
- Location: Tarpon Springs, FL
The sanding is in the "just beginning" phase. I see several hours ahead. The areas that will require the most attention are the bow and the transom sections. This is where the tape and cloth have been built up and the large, low areas will require some attention to get flat. The bow will require some attention for the same reasons - the tape and cloth overlaps create a few areas of low spots and unfair surface.
The sides and a large portion of the hull bottom are close to fair with only a relatively small amount of work. Since the skeg is 8' long, it will cover a large portion of the keel intersection. Normally this would be a nice, very straight angle, but the only portion that will need this detail is about the 1st 8 to 9' of the bow section.
The 12 oz glass has a very rough weave that results in quite a bit of small "voids" in the weave that need to be filled. I basically sanded the large, stitched threads off and down to the surface of the glass weave without removing any substantial amount of glass fibers. This should be more than enough sanded surface area for the fairing compound to bond onto. I filled the weave with a "slurry" consistency fairing compound. This helped reduce pin holes, but I'm not convinced it was the correct consistency since it sagged quite a bit before curing.
Fairing is probably the one skill I can say that I really suck at when it comes to doing it efficiently. I'm sure someone with any autobody or other building experience could do the job in half the time and using a fraction of the materials and sandpaper.
Who is online
Users browsing this forum: Bing [Bot] and 10 guests