
Well, took a while but the jig is done. I measured and remeasured and hope its right. Tonight I layed the bottom panels up on the jig, looks like everything is going to line up. The outside edges of my panels overhang mold "B" a little bit, I hope they pull on in when every thing is stiched up.
Moving along slowly,
Daniel
Fs17 build in VA
-
colonialc19
- Very Active Poster

- Posts: 612
- Joined: Tue Apr 24, 2007 4:09 pm
- Location: Colonial Heights,VA
-
colonialc19
- Very Active Poster
- Posts: 612
- Joined: Tue Apr 24, 2007 4:09 pm
- Location: Colonial Heights,VA
Bottom panels are on and hung one side, botttom panels still hanging over frame "b" a little too much = side panel doesn't want to stich up like it should. Going to recheck my bottom panels before i go any farther. Just wondering Steve or Jeremy or anybody else, how hard was it to get the long panels together and bow pulled down? tried about 1 pkg of cable ties and the bow has a long way to come down. Stichn and restichin.
Howdy howdy howdy... It took me nearly 5 tries before I got them all to stich up correctly. The final attempt that worked was because I took my dear ole time sinching the straps.colonialc19 wrote:Bottom panels are on and hung one side, botttom panels still hanging over frame "b" a little too much = side panel doesn't want to stich up like it should. Going to recheck my bottom panels before i go any farther. Just wondering Steve or Jeremy or anybody else, how hard was it to get the long panels together and bow pulled down? tried about 1 pkg of cable ties and the bow has a long way to come down. Stichn and restichin.
I first laid the bottom on with lots (2"+) of space between pannels. Then attached both sides with 3"+ space between pannels. I started sinching in the middle and worked my way out.... don't rush it! I did one strap then went to the other side. I finished with the bow.
In the bow I used pvc under the straps to keep the pannels from overlaping. Along the chines I used large nails like Mr. Shine used in the FS 12. The nails made the pannels fit snug but with enough space for epoxy to fill.
I found the two days of stiching/cutting/re-stiching to be the most aggrivating of the build so far. I was aggrivated enough that I didn't want to take any pictures of that step. I wish I would have though.
Jeremy
-
colonialc19
- Very Active Poster
- Posts: 612
- Joined: Tue Apr 24, 2007 4:09 pm
- Location: Colonial Heights,VA
Jeremy, thanks for the reply, just got started stiching like you advised, but out of cable ties, need to run and get more. After posting earlier I decided it may be a good idea to go back and read the building notes/instructions, it mentions that most people start stiching to tight. Thanks for the info, great to here im not the only one that got a little frustrated, very humbling this build is, thought I had half of a brain till I started this thing.
Daniel
Daniel
Daniel,
I found I only had to stich every 12" or so along the straight bits of the keel & chine. use more around the bow (6" or so apart) or it won't pull in, also I tied the tip of the bottom panels to the bow mold.
some pics-
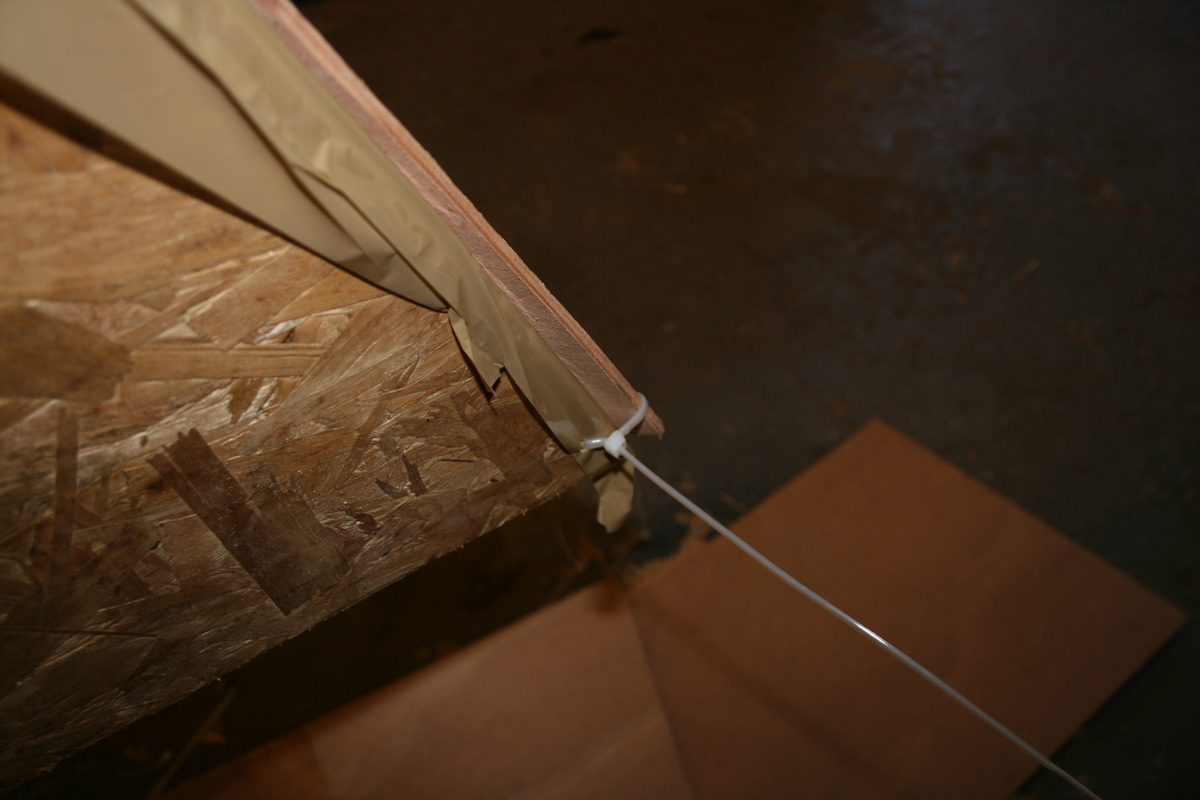
this is the first side panel cable tied to the mold,also if you go into my gallery & blow this one up below, you can see the tie wrap holding down the bottom panel.
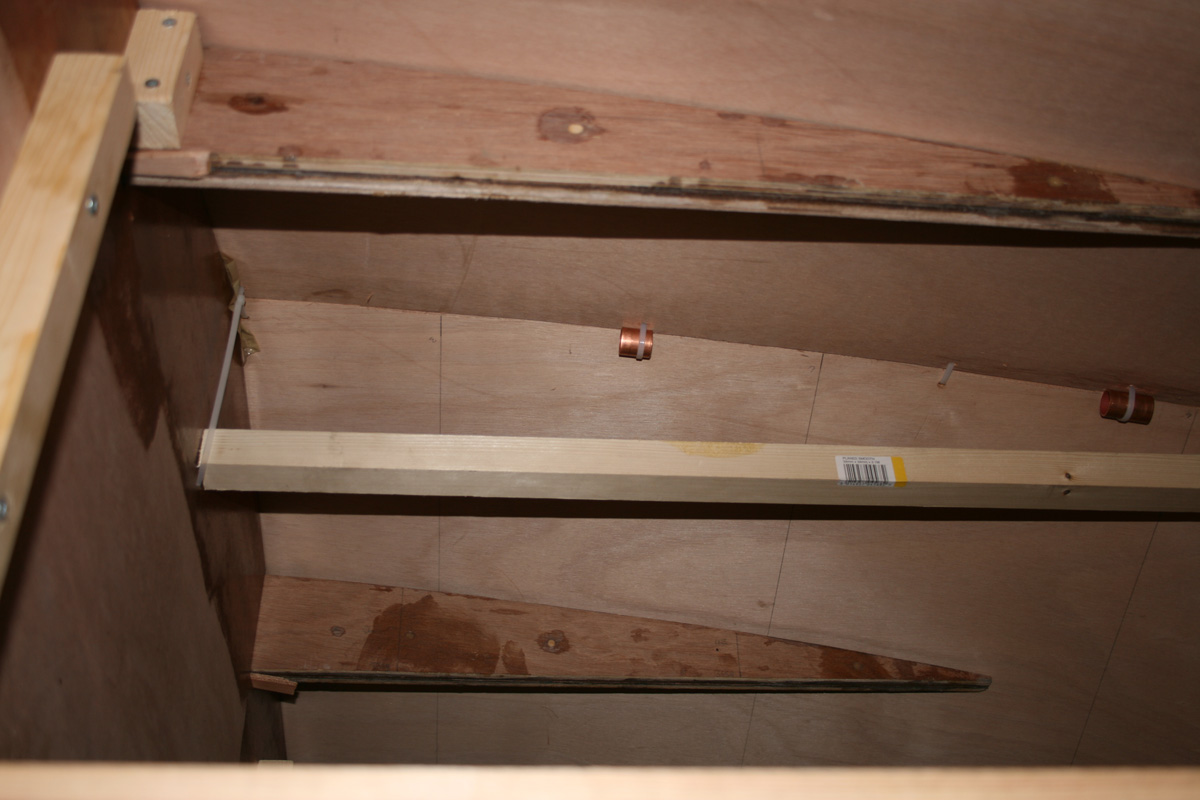
I use some 1/2 dowel & some short lengths of 22mm copper pipe(it was lying around) under the ties to stop the panels overlapping.I think i'd still be stiching now if it wasn't for these.
finally, look at this-
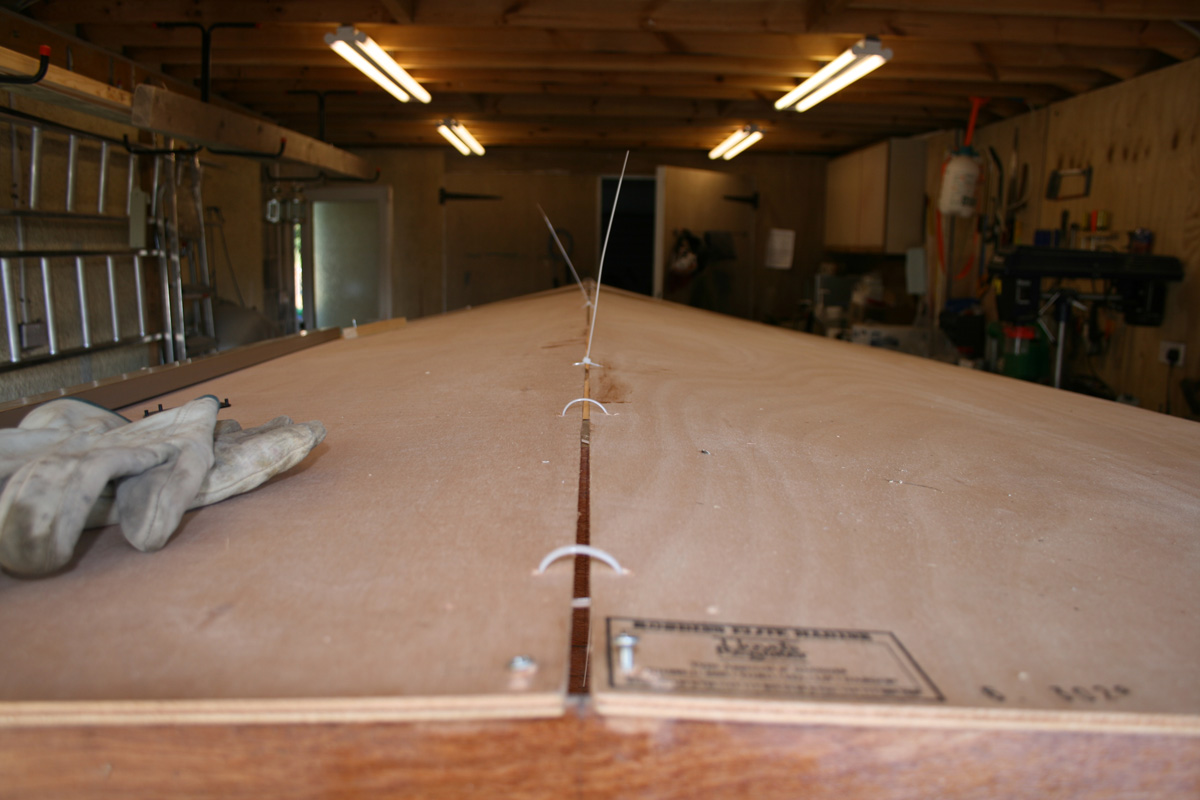
the panels, although pinned by 2 screws, have only 3 tight ties along the whole of the keel straight part, don't pull them to tight or you will end up with rocker or hook,I only had to get out a tiny bit.
hope this helps,
keep going !!!!! post pics if you are still struggling a bit(or even if your not ) It took me 4 evenings(3hrs a time) to do mine, main thing is tighten slowly, keep checking, keep a gap in the panels,(I used a jigsaw twice on the bow to get a gap when it dissapeared) you will get it in the end.
regards,
steve
I found I only had to stich every 12" or so along the straight bits of the keel & chine. use more around the bow (6" or so apart) or it won't pull in, also I tied the tip of the bottom panels to the bow mold.
some pics-
this is the first side panel cable tied to the mold,also if you go into my gallery & blow this one up below, you can see the tie wrap holding down the bottom panel.
I use some 1/2 dowel & some short lengths of 22mm copper pipe(it was lying around) under the ties to stop the panels overlapping.I think i'd still be stiching now if it wasn't for these.
finally, look at this-
the panels, although pinned by 2 screws, have only 3 tight ties along the whole of the keel straight part, don't pull them to tight or you will end up with rocker or hook,I only had to get out a tiny bit.
hope this helps,
keep going !!!!! post pics if you are still struggling a bit(or even if your not
regards,
steve
-
colonialc19
- Very Active Poster
- Posts: 612
- Joined: Tue Apr 24, 2007 4:09 pm
- Location: Colonial Heights,VA
-
tech_support

- Very Active Poster
- Posts: 12318
- Joined: Wed Dec 31, 1969 7:00 pm
- Location: Vero Beach, FL
- Contact:
-
colonialc19
- Very Active Poster
- Posts: 612
- Joined: Tue Apr 24, 2007 4:09 pm
- Location: Colonial Heights,VA
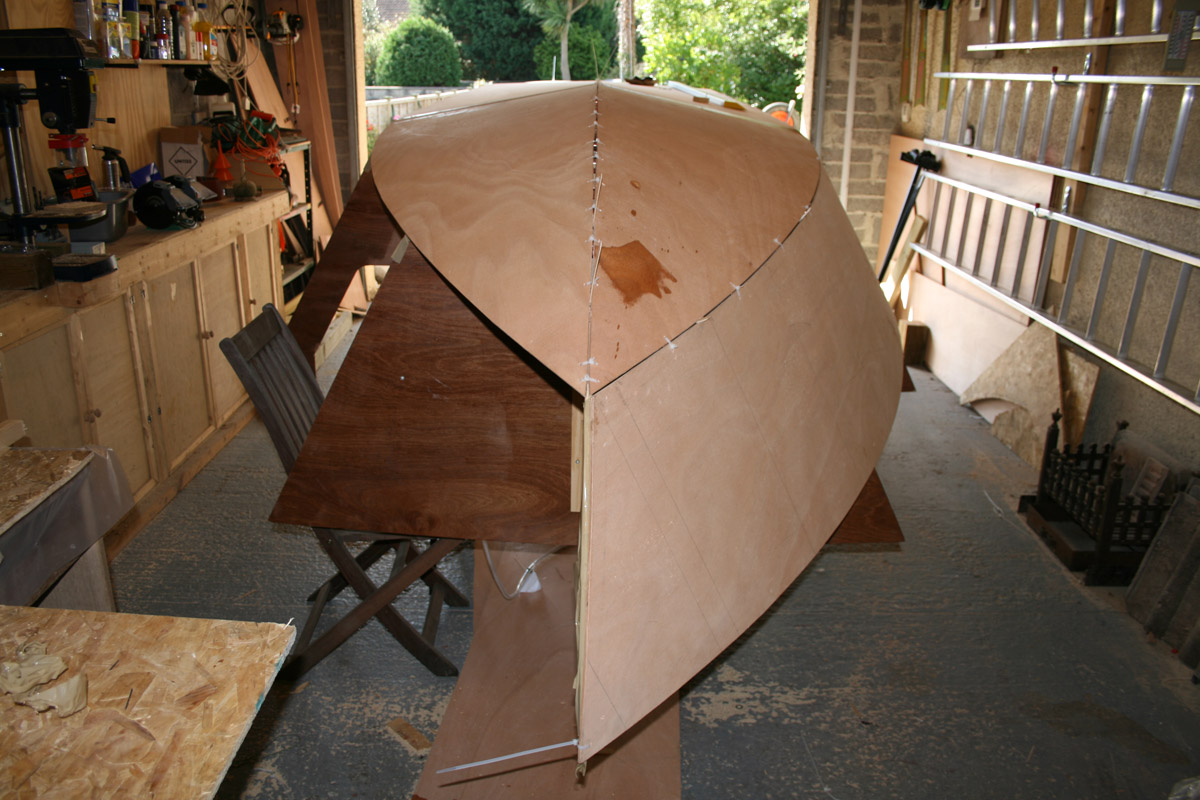
Everything is comming together nice!!  still have a little more to do, but man what a difference. I took out all old cable ties and restiched everything per Jeremy, and Steve's suggestions, looking good so far taking a break right now, will go out and take a couple pics. Man this thing is starting to look like a boat!!!!!!!

Who is online
Users browsing this forum: Amazon [Bot], Bing [Bot] and 8 guests