Page 1 of 1
New Pictures
Posted: Tue Jan 01, 2008 1:09 pm
by bushmaster
Happy New Year to you all.
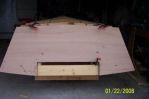
Just posted some new pictures. Please comment
Thanks
Posted: Tue Jan 01, 2008 1:15 pm
by steve292
Looks very nice.I like seeing the other FS17 pictures

you won't regret overbuilding the jig either.
Good luck,
steve
Posted: Thu Jan 03, 2008 9:56 am
by bushmaster
Thanks Steve
I saw your boat last night, It's looking great.
You said that you used 3/4" ply for the transom. Did you have to make adjustments to the motor well sides or the length of the hull panels?
I am thinking of using 1/2" for the transom and clamping boards, this way I may not have to cut back on too much.
thanks for your reply
Posted: Thu Jan 03, 2008 10:00 am
by bushmaster
Sorry
here is the link to my pictures
http://forums.bateau2.comthumbnails.php?album=751
Hope this works
Posted: Thu Jan 03, 2008 11:07 am
by steve292
bushmaster wrote:Thanks Steve
I saw your boat last night, It's looking great.
You said that you used 3/4" ply for the transom. Did you have to make adjustments to the motor well sides or the length of the hull panels?
I am thinking of using 1/2" for the transom and clamping boards, this way I may not have to cut back on too much.
thanks for your reply
I used 2 layers of 18mm ply for the clamping board, as I already had it,instead of 3 of 9mm & used 1 layer of 10 mm for the full transom. I just cut the cutouts in the motorwell sides 10mm deeper to compensate.the only meaurement that changed was that one. if you use 12mm(1/2) for the full transom instead of 3/8 I dont think it will matter.what does matter is that the total thicness of the transom including clamping boards is equal to or greater than that stated in the plans.fire away with trhe questions btw, I did, everyone here wants you to succeed.
I hope this helps,
Steve
steve
Posted: Thu Jan 03, 2008 11:47 am
by Lower
Dang...where are you located??? Your wearing shorts and we have 2' of snow on the ground with a high of 9 degrees today! hahaha. Puts a little damper on the boat building, but the skiing's been great!
Looks like things are coming out nicely for you. Look forward to seeing more. You'll probabaly pass me up in no time!
Posted: Thu Jan 03, 2008 8:37 pm
by bushmaster
Hey Lower and all
I am located in Homestead, Florida.
We had some cool weather here last night. went down to 27 degrees FH with the wind chill factor. My wife had to bring the chilly pepper trees inside the garage.
Nice tomorrow. 70 deg. may be I'll get some more done.
thanks guys
Posted: Thu Jan 03, 2008 8:47 pm
by bushmaster
Thanks Steve,
I am thinking of using throw away molds for every thing except the transom and clamping boards. Then use them as patterns to cut what is required for the console model.
Is this a good idea?
Has any one flipped an FS17 over as yet?, I would sure like to see the inside
Posted: Fri Jan 04, 2008 3:22 am
by steve292
If I was to start over I would use throwaway molds for everything except the transom, frame A & the stringers, you will save ply that way.the other permanent frames could be cut from less than one sheet I think.If you look in the gallery for Jimmac he has a flipped boat with a slightly modified bow sheer.
Steve
Posted: Sun Jan 06, 2008 10:37 am
by bushmaster
Thank Steve
I cut out the bow mold yesterday, but the measurement from the keel to the DL is 3/4" longer than the measurement of the "A" mold.
I have measured and remeasured several times. Has any one have the same discrepancy?
Please help.
Posted: Tue Jan 08, 2008 10:34 am
by Lucky_Louis
Was the bow mold a full size paper template or did you lay it out from measurements? Paper is very unstable and moisture/temperature will greatly expand or contract it.
Posted: Tue Jan 08, 2008 11:08 am
by jacquesmm
Look at the plans, it shows that dimension.
For frame it shows 3-1/8", for the bow mold 3".
The difference 1/8" is our dimension tolerance.
There should not be a 3/4" difference.
Posted: Tue Jan 08, 2008 9:33 pm
by bushmaster
Thanks Jacques and Lucky Luis
I am right on the BL measurement of 3". it's the DL on the bow mold line that does not line up with the DL line of the "A" frame. Off by 1/2".
I used Good ply for the molds
In the FS17 building notes on page 7 it says "Cut the bow molds. the bow mold will help the panels to bend but keep in mind that the plywood panels will define the shape, not the molds. Great Accuracy is not required for the bow mold."
Please look at my gallery.
Thanks
Posted: Thu Jan 10, 2008 7:50 pm
by bushmaster
OK!! Paid a visit to Jacques and Shine to pick up my Plywood and Fiber glass resin kit, also quick fair, while I was at it.
Very nice and friendly people, very helpful, took my cousin Manny with me, he met me there. He likes in Port St. Lucie while I drove all the way from Homestead, that's about 30 miles south of Miami.
Left home at 6:30 AM, my wife wanted me to leave at 5 AM. Crazy traffic. Took 4 hours to get to Vero Beach. But it was worth the savings in shipping.
Joseph was did a wonderful job of putting my order together. Jacques and Joseph helped with loading up the SUV. Joseph and cousin Manny also did a very excellent in strapping down the plywood sheets ...6 - 1/4" (6MM) and 8 - 3/8"(9MM). Of course Shine showed up just in time. Very nice gentleman also.
Great guys all of them.
Well.. i made it home safely ... at about 3:30 PM. No problem on the highways guys. Joel you were right, hit Miami at about 2:30 PM. Not too much traffic then.
Lots to keep me busy for next several months.
Thanks a lot guys for all the help and kindness you gave me and my cousin.
No problem
Posted: Tue Jan 15, 2008 4:00 pm
by bushmaster
Just added some new pictures. Feel free to comment.
Thanks
Posted: Tue Jan 15, 2008 5:59 pm
by Spokaloo
You should learn the process to post images, that way you can poke some here on the thread so browsers can see!
E
Posted: Tue Jan 15, 2008 6:33 pm
by steve292
Spokaloo has a point, you will get more comments if you put pics in the thread
.
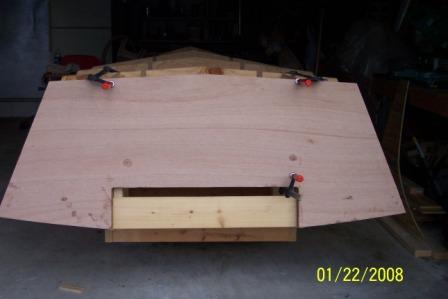
The motorwell sides should be flush with the transom,have you cut them with the angled side going the right way(there has been some discussion about this look for threads by bernd1).
as for the transom this is what I did-
only laminate one layer of clamping board to the transom at a time, line it up dry & drill & dowel it.I would fit all the layers dry first as it looks like your pieces are cut to finished size. I run round mine with a router after.Mix up a couple of ounces of epoxy, unthickened & use a foam roller to coat the mating faces of the wood.Have the other parts handy so you can put any spare epoxy on them,don't waste it, its waaaay to expensive.Then mix up some more epoxy, add the filler gradually, stirring all the time until you have a paste that has the consistency of a thick mayo. I used a notched spreader to put it on the pieces, quite thick(about 1/16 or more thick on each piece) then assemble with the dowels & clamp together. dont use excessive pressure, you dont want to squeeze out the epoxy. Then repeat at 24 hour intervals until the transom is complete.
hope this helps,
Steve
Posted: Tue Jan 15, 2008 7:45 pm
by bushmaster
Thanks Steve and Spokaloo
Yes, next time i will try to include the pictures in the post.
I did measure and cut the angle side right, I think.
Do you think I should try re-cutting?
Thanks
Posted: Wed Jan 16, 2008 3:01 am
by steve292
I would try to find out what is not right. The bottom panels should touch the motorwell all the way across.you are making good progress,the jig looks great.Are the motorwell sides temporary molds as well?
Posted: Wed Jan 16, 2008 2:35 pm
by Lower
I agree with Steve. The motor well sides definitly sparked conversation. I was greatly confused by it. You can see though, if cut correctly it does line up. I have some close up pictures of that area in my pictures.
As for the clamping boards...I lined everything up perfectly, clamped them together then drilled screws all they way through. Then took it apart and layed it out. Glued each piece and reassembled. Drove the nails back through to re-align. Seemed to work. Either way works, I just hadn't really done much with dowels. Good luck!
Posted: Wed Jan 16, 2008 8:07 pm
by colonialc19
If you use screws make sure to take them out before the epoxy cures, or their in there for good.
At first my motorwell sides didn't exactly line up, took about 3 tries measuring & tweeking my jig till all was straight and linned up, I was also off just a little in my measurements
hope this helps,
Daniel
Posted: Wed Jan 16, 2008 8:38 pm
by bushmaster
Hey. thanks very much guys.
I am using forms for every thing except for the transom and the clamping boards, which I already cut and dry fit. I would like to add that the keel line up almost perfectly from the mid section to the transom.
I measured a new motor well side again today, gained 1/8", still short by 1/8"
Question; on the side where the clamping board hangs, where does the 10 7/8" measurement begins? Does it start at the very top most right corner, or is there an off set by a perpendicular line to compensate for the 1 1/4" cut out.
If I use the off set measurement, I will drop an 1/8" on line up of the keel as mentioned above.
Does this matter?
maybe Jacques or Shine can add something to this.
Thanks again guys for all the encouragement.
Bushmaster
Posted: Sat Jan 19, 2008 5:05 pm
by bushmaster
OK guys
physic myself up and summed up the courage to mix up my first batch of epoxy ever. Well I poured 4 ounces(2 of Jacques pump) of resin and 2 ounce of hardener. stirred well for over 2 minutes ,closer to 3.
It was a hot morning (80 degrees FH) but had both garage doors open, I had more than enough to do the transom side and three sides of clamping board, I am only using one clamping board at this time. Tomorrow I will do the other two sides of clamping boards.
I mixed 6 ounce of epoxy, add one handful of wood flour...my hand is very small.. stirred well was like ketchup, add another handful came out like peanut butter.
Lay it on the transom part, did not even cover 33%. build another 9 ounces this time.. all the time my heart is racing hoping it would not harfde on me, i had no idea what I was doing.
This batch came out lovely. completed the transome part and 1/4" of one
side of the clamping board..like I said this is my limit..I am taking Steve's advice. Again hurried up and mixed up another batch of 9 ounces again no problem. Enough to finish the camping board side.
Before that I drilled 4 3/8" hole to insert the softwood dowel I bought.
Attached the clamping board to the transom aligned with the dowels. works great so far. Put some weight on it, half a cement block, 2 10lbs barbells, 4 container of resin.
An hour later I forgot to clean up around the transom, I used a plastic spreader to clean up the excess mayo and a rag soaked a bit with acetone. Did a wonderful job.
Now I have to wait until tomorrow to really check if I deserve kudos.
Question, should I sand the clamping boards that I had already covered with the left over epoxy and put a thin coat maybe or should i just lay the mayo on top of the already coated surface?
Please advice.
Pictures coming soon.
Thanks for all the advice and help guys.
Posted: Sun Jan 20, 2008 3:49 am
by steve292
Well done your away

.If the epoxy coat you put on has been on for more than 24 hrs, sand it to provide a key for the next layer.the pre coat of epoxy is there to seal the wood & help prevent the wood out gassing so you dont need to go wild, just use some 80 grit to scuff it up good.watch out for the dust tho',use a mask.
Steve
Posted: Sun Jan 20, 2008 8:47 am
by bushmaster
Thanks Steve for the quick reply.
It's 9 AM in the morning in sunny Florida, but there is no sun today. Cloudy and raining with wind gust 20-35 MPH. Still warm.
I finished the laminate at about 10 AM yesterday hope to get at it soon.
Thanks once again Steve.
Bushmaster
Posted: Sun Jan 20, 2008 12:10 pm
by bushmaster
Steve
After sanding (scuffing up) should I add a light coat of epoxy or just layer the mayo?
Thanks Steve
http://forums.bateau2.comthumbnails.php?album=751
Posted: Sun Jan 20, 2008 12:46 pm
by bernd1
Hi bushmaster,
nice pictures. Do you build the standard version of the FS17, or the raised one?
Good luck during your building !
B.R.
Bernd
Posted: Sun Jan 20, 2008 1:38 pm
by ks8
When wood is already sealed from a previous cured coat, there will be little benefit from another epoxy coat before the mayo. If you were laying mayo on bare wood, depending on the thirst of the wood, you would want a *soak* coat first, so the epoxy would not be wicked out of the mayo filler blend at the substrate bond surface, but this is not the case with you if there is already a cured seal layer on there. The mayo blend should have plenty excess epoxy in it to get into and bite into the sanding scuff marks, imho. As long as we're talking mayo and not stiff peanut butter. Peanut butter will not flow and fill well during the lamination, but neither should it be extremely runny. As you mix and spread, you'll know if it needs thinning or thickening. Be sure to use enough so that you get some ooze, but not so much pressure that it all gets oozed out. Mix thoroughly, but watch the clock too! Hold your breath. Don't forget to breathe. Hurry up and wait. All those fun things!

Posted: Sun Jan 20, 2008 2:56 pm
by bushmaster
Hi Berndl and ks8
I am building the standard console model of the FS 17 and I am thinking of hanging the Honda 50 hp, weighs about 205 lbs same for the 40 hp. price is about 200-300 dollars difference.
I don't know how much difference this makes in weight ratio to the over all design. I plan mostly to go to the Florida Everglades...shallow water.. and to the Byscane Bay just off from Homestead.
Flamingo is not very far away from Homestead.
Thanks KS8 for the advice.
Bushmaster
Posted: Mon Jan 21, 2008 9:47 am
by bernd1
Hi bushmaster,
I'am also building the standard console version - I'am starting when the temperature here in Germany is more than 18°C - because of the epoxy.
Good luck for building !
B.R.
Bernd
Posted: Mon Jan 21, 2008 7:40 pm
by bushmaster
Hi Bernd,
Good luck with your build, I am quite sure that you will be successful, since you already have one under your belt.
I finished the lamination of the transom today at a bout 12:00 PM, I figuered I would have alight snack and then do some work on the stringers. However it was not to be so. the winds picked up and the temp drop and the rain came down.
Tomorrow much the same. Gives me a chance to go to my favourite boat stores and stack up with some more supplies.
Keep in touch.
Bushmaster
Posted: Tue Jan 22, 2008 8:29 pm
by bushmaster
Hello all
Just posted some more pictures of the transom.
Steve, the dowels worked real good, except how do I seal the two ends that protrudes on the transom/clamping boards?. I already trimmed them dow to size.
Will this have any effect on the structure like water penetration, etc?
Also a little bit of damage to the skin. Would Quick Fair fix this?
Advice welcome.
Thanks Bushmaster

Posted: Tue Jan 22, 2008 9:41 pm
by colonialc19
bush, Transom is looking good, I think those dowl ends seal up with a good coat of epoxy just like the ply, as for the damage to the skin, are you talking about the face of the plywood? if so i'm sure quickfair will filler' in
my $.02
Daniel
Posted: Tue Jan 22, 2008 9:53 pm
by bushmaster
Thanks daniel
You just made my day
Bush
Posted: Wed Jan 23, 2008 5:38 am
by steve292
As daniel said,just give the dowel ends a coat of epoxy.I seal everything as the woods integrity depends on no water ingress into the ply's.The transom outside face you'll be glassing anyway,what i would do is just fill in the damaged skin with some epoxy/woodflour mix before glassing & just sand it smooth,so you dont get any air bubbles in the glassing.
I had a look in your gallery, it's looking really good
regards,
steve
Posted: Wed Jan 23, 2008 8:48 am
by bushmaster
Thanks Steve,
I will heed your advice. Thanks for the encouragement.
Bushmaster
Posted: Thu Jan 31, 2008 1:13 pm
by bushmaster
OK all
Just poster some new pictures of my progress.
I do need advice on some, Please.
Link to gallery
http://forums.bateau2.comthumbnails.php?album=751
Thanks
Posted: Thu Jan 31, 2008 3:18 pm
by colonialc19
Bush, that long panel splice with the gap, as I read it you spliced one side and flipped to do other side and had small even gap 1/16th or so.
If thats so I think it would be best to thicken a little epoxy & fill it in, let it set up for about 30 min. or so and lay your piece of 6" tape, and wet out to finish your splice.
If you dont fill the gap your splice may not hold up.
Thats my thoughs,
Daniel
Posted: Thu Jan 31, 2008 7:04 pm
by bushmaster
Hi Daniel
Not thinking, I taped the other side before reading your response.
I guess I ma too anxious to do as much as possible quickly just to see how the panels fit.
I think I will separate this panel and re do it. I think I learned my lesson.
See my wife .. Rose.. told me not to rush it, when I was joining the panels.
I didn't tell her what I did though.
Thanks Daniel
Posted: Thu Jan 31, 2008 7:13 pm
by Fred in Wisc
Before you cut that up, you may want to try this. Drill a few small holes (1/8) in the hollow, space them about 2 inches apart. Mix up a little epoxy, put it in a glue syringe, and inject it into the hollow. Then stick some tape over the holes and let it set.
Fred in Wisc
Posted: Thu Jan 31, 2008 7:34 pm
by colonialc19
The kids liquid medicine syringe works well for this, if all you need is one or two the local pharmacy will give them to you, at least mine does.
Had to fill a few air pockets myself
Daniel
Posted: Thu Jan 31, 2008 8:03 pm
by bushmaster
Thanks guys
I will try that.
Bushmaster
Posted: Thu Jan 31, 2008 8:56 pm
by ks8
I used syringes that West System sells. West Marine sells them... on sale now and then. I buy the 12 packs now so they are always handy. You basically get one, maybe two uses out of it, but you can really get the epoxy in those holes, after cutting a bit off the end of the syringe (they come with a very small hole that can be easily cut back wider with a single snip of the scissors). Let's say you have a 3 inch gap of air. You want to drill a small hole at each end of that gap, so that air can escape one hole as you squeeze the epoxy into the other. The strength of that seam depends on the glass and having a solid *core*. If there is a huge long air gap under the glass, this is not good.
The epoxy in the syringe, mixed, may cure faster than in a cup or bowl, so once you pull the mixed epoxy up into the syringe, work fast. Once the air gap(s) are filled, you can jam a woodflour blend in the holes so the epoxy doesn't wander.
I tend to think a good splice with a woodflour/epoxy blend in that seam is better than squeezing straight epoxy into the gap. Epoxy *glue* with woodflour in it will be stronger than plain epoxy. If you could squeeze a wood flour blend in there with a syringe, that would be better than plain epoxy, but that might be quite a job if the blend is too thick, getting it into and out of the syringe. You'd have to make all the holes larger. I've done this into some voids in plywood, with the blend just about at *ketchup*. *Peanut butter* consistency just doesn't get in there right, but ketchup can if you hold the syringe tight in the hole as you pump the syringe. I think even a thinner mayonaise consistency blend would be substantially stronger than plain epoxy, and certainly easier to get in there than ketchup, imho.
Enjoy the repair, or the grind and redo. These sorts of things are important and you might as well get it done right, right from the start.
Posted: Fri Feb 01, 2008 4:55 pm
by bushmaster
I need some advice on my transom innner radius, is the radius large enough?
It's about 1" right now. If it should be larger how do i fix this?
See picture
Thanks
http://gallery.bateau2.com/albums/userp ... 0_1783.jpg
Posted: Fri Feb 01, 2008 5:05 pm
by bushmaster
Another try at this image thing, I would like it to show up larger.
Posted: Fri Feb 01, 2008 5:44 pm
by jeremy
Don't link to the thumbnail, link to the actual image, like so:
Code: Select all
[img]http://gallery.bateau2.com/albums/userpics/18858/100_1783.jpg[/img]
The result:
Posted: Fri Feb 01, 2008 8:43 pm
by colonialc19
Bush, on the radius in the motorwell part of the transom I drew it with a kids tupperware cup, set it down on the ply and traced it,
I read how to do that somewhere in the how to files

, makes a nice round corner, if I had to guess the cup was about 2-2.5" across.
If you want to know for sure if your radius is large enough, post a question in the Power Boats section of the forum, Jaq. and Shine check that daily, and should reply.
Daniel
Posted: Sun Feb 03, 2008 8:03 pm
by colonialc19
Bush, I saw on another post you were wondering about stiching up the panels.
Steve292's thread has some great pics and some explanation if I remember correctly. It took myself 3 tries, I was trying to get them too tight first couple times, another good thread is the sticky Fs12 thread at the top of the builder's power boats section.
My suggestions
Buy a pack of at least 100 cable ties, it took me 200
Buysome dowl,cut them for use under the cable ties, you'll see why when you start pulling the bow together, it keep the panels from over laping.
Dont rush it, take your time and read those threads if you havent already, Good luck
Daniel
Posted: Mon Feb 04, 2008 7:14 am
by bushmaster
Once again, thanks Daniel.
Yes, I have looked at Steve site and read and re-read the threads, but I would like to know if I should pull the ties tight for the bottom panels first before I attached the sides.
I have about 200 ties and they are 8" length. Is this long enough.
Keep those pictures coming Daniel, you are all an inspiration to all other builders.
Bushmaster
Posted: Mon Feb 04, 2008 8:11 am
by gk108
It will probably work better to leave all the ties somewhat loose until you get all the panels on the mold, then pull everything up a little at a time. 200 ties is enough unless you have trouble and have to cut a bunch and stitch again. You'll probably have to do a few stitches that way, anyway.
Posted: Mon Feb 04, 2008 8:20 am
by colonialc19
Bush, I left the ties down the keel loose til the sides were hung, then started snug them up from the middle a little at a time and work your way out.
hope this helps
Daniel
Posted: Mon Feb 04, 2008 11:08 am
by bushmaster
Hey, thanks guys.
I aim to take your suggestions
Bushmaster
Posted: Mon Feb 04, 2008 11:46 am
by mecreature
I dont know what it is but there is a tendency to pull to tight. I know I had to redu my D-15 a couple times.. and its an easy flat bottom...I threw away 200 ties..
200 ties...jacques will say he can do that boat with 40 ties.. LOL
Posted: Mon Feb 04, 2008 12:12 pm
by davidtx
mecreature wrote:I dont know what it is but there is a tendency to pull to tight. I know I had to redu my D-15 a couple times.. and its an easy flat bottom...I threw away 200 ties..
200 ties...jacques will say he can do that boat with 40 ties.. LOL
I bet I redid the bow of my TX-18 10 times. I probably only used 40, but went through a lot more than that before I learned how to use the tip of my pocket knife to release a tie and loosen it.
The success rate on this surgery is probably 80% and you don't have to re-thread.
-david
Posted: Sun Feb 10, 2008 2:55 pm
by bushmaster
Hi All
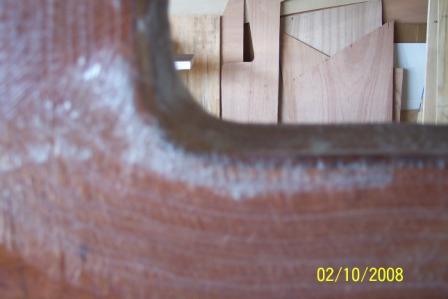
Just posted some pictures of the transom/motor well that I am trying to glass on the cut out edge but I am having a whole heap of troubles trying to avoid air pockets. This is my fifth try each time new biax tape.
please advise.
http://forums.bateau2.comthumbnails.php?album=751
Bushmaster
Posted: Sun Feb 10, 2008 3:21 pm
by steve292
I may be wrong,but I don't think that needs to be glassed.I have'nt done that so if you need to do it I'm in the brown stuff.
If not I would not bother.I believe the lamination schedule calls for two layers of tape on the hull to transom both sides, & one layer of biax both sides. I don't see how taping the transom top will acheive any thing except abrasion resistance. If you are set on it you will have to make slits in the tape to allow it to sit down.
If you don't mind me asking why are you trying to glass it?
Regards,
Steve
Posted: Sun Feb 10, 2008 4:04 pm
by ks8
I had a few areas that were doing that sort of thing... as in your photo...
It is amazing how biax can be coaxed into following some curves, as compared to the relatively unworkable woven cloth tape. I had four techniques in these situations... 1 through 4 are not steps, but each is a different situation, and what I did about it...
1- The area really didn't need that kind of *one piece* treatment, so I cut some relief cuts, And laid another final piece over that, but again, cut to take the curves better without *lifting*. Then this needed fairing because of overlap bumps. And generally, I did this final sort of work after the hull was taped together already, so that any remaining glass work like this, would add strength to the hull with overlaps in the corners, like transom to topside panel corner, etc.
2- The area didn't really need that much glass there so I sanded out air bubbles and faired with epoxy and filler (milled fibers or wood flour if it was an area that might take a beating).
3- I used masking tape to hold the glass tape tightly to the surface, and when wetting out, came just short of the masking tape. Then when cured, I removed the masking tape, ground the glass edge and faired. This is how I held one big piece in place to glass this entire transom... as you can see, after the hull was assembled and a faux plank transom surface laminate added (strictly for *looks*). The tape wasn't used to hold it too tight, else I would have had more bubble issues at the rubrail and engine pad height differences. The masking tape held the cloth *draped* in the right position. Curing epoxy held it to the surface as I watched and tweaked it for 4 hours.
You can see in the photo that the very edges of the glass cloth are not wetout, because that is where I had the masking tape holding it draped in place on the boat (I missed removing one piece before this picture... blue). But even on that lamination, I had bubbles forming at the rubrail bottom because of the different heights. This was woven cloth, not biax, and so was a bit trickier. And far far beyond what the plans called for!

So what I did here, to get rid of those bubbles, is in point 4...
4- I stayed at the lamination throughout the cure, with a chip brush and occasional small batches of fresh epoxy (fast hardener), and jabbed those bubbles as they'd form, to get them to sit down into the curve again. But not jabbing continuously like a crazed maniac, as that would have whipped air into microscopic bubbles, made the epoxy a milky color, and weakened it. As the *fast* epoxy began to set up, the brush technique had to change so that the brush would not pull up the glass again as it got tacky. THis was a critical point since it was at this tacky stage that the chip brush could get the glass to hold to the wood, if it didn't also lift it again when pulling the brush away! So, at that point, I would jab with the brush, with some more fresh epoxy, but then drag the brush lightly left or right along the ridge, lightly lifting as I did so, instead of lifting directly perpendicular to the surface. THis kept the glass from lifting, along with the fresh epoxy in the brush. After four hours of playing this game. The lamination was set enough that no more bubble lifting occured. Once cured, there were only two bubbles, about 1/4 inch each, which I ground out and filled with epoxy mixed with milled fibers (or wood flour), and faired. Being able to mix very small batches accurately made this possible over the four hour period of watching and working it this way. So... how did I do that?
I bought a 10 or 12 bag of West System syringes. I haven't used them in a few months, but I think they are 1/2 ounce syringes. With 2:1 epoxy, that means you can make 1.5 ounce batches very easily and accurately. I marked one syringe for resin and one for hardener. Two full syringes of resin into a cup, and then one syringe from the hardener syringe. Mix well, and dump into a small coated paper *salad bowl*. This bit in the bowl stays workable awhile and is just enough to deal with those few bubble areas. You don't even need to clean the syringes. Just set them in their own cup or glass for next use. I'd get about 50 batches mixed from a syringe before the rubber plunger head began to stick too much or disintegrate. Epoxy never cures in them since each syringe is dedicated to either resin or hardener.
The key though isn't so much too not have a bubble visible, but to really try and push those fibers down to get them to cure on the wood substrate, and not just fill a bubble with epoxy.
The main questions though are whether or not you need the one piece treatment in an area, or if multiple overlayed layers, with staggered relief cuts, will do just as well, but just need a bit more fairing. And whether or not you need to do this now, before the boat hull is glassed together. Taping seams will help develop glassing skills that may make this *edge* less frustrating later. Yu will develop a bag of tricks of skills and techniques, with every seam and laminate you do. Enjoy!
BTW, The syringes are also great for measuring small batches of S3 primer or topcoat, but the primer base or LPU you need to rinse out with water right away if you want to reuse the syringe. Again, dedicate and mark them accordingly. Great for small touchup batches, and, as Joel calls it, *blobbing* on primer in some pinholes.
Final suggestion... if you are going to watch and tweak laminates like this for 4 hours, I highly recommend wearing a good cartridge respirator to filter out the curing epoxy fumes, which are mostly odorless and harmless, but which some people can develop an allergy to after cumulative long term exposure.
Hope that helps. Of course, once this boat is done, you'll have all sorts of ideas for using your new skills for the next boat. Yes, indeed, this is how the disease spreads.
ks
Posted: Sun Feb 10, 2008 9:41 pm
by bushmaster
Steve and ks
Thanks a lot guys. I think I jumped the gun. I just went into the garage to check the curing..8 hours after lamination..well, well. it's hard has rock, no air pockets. Oh what a relief!!!
Steve, I figured that because this is where the motor hangs, it would be good to encase and at the same time, I would not want to strip any fairing and painting if I had to do this after the boat is flipped.
This goes back to the following reply from Jacques in the Power Boats secrion quote.
"Even a small radius is better than none. How about some glass tape over the edge in addition to the filler others suggest?"
This is with regards to the 1.24" radius I had in the inner corners..this is now rounded off to 2.25" with the help of epoxy filler.
Steve, I hope I have done the right thing..I spent a whole week fixing this problem.
Bushmaster
_________________
Jacques Mertens - Designer
Posted: Mon Feb 11, 2008 2:51 am
by steve292
That's as good a reason as any I can think of
I have an extra layer of glass where the engine mounting bolts will go.
Steve
Posted: Mon Feb 11, 2008 7:32 pm
by bushmaster
Very good Steve,
You always make my day.
I am ready to lay the panels on. I did the two bottom panels with very loose ties. Should I pull these tight before attaching the side panels? Is this what you did?
Please advise.
Bushmaster
Posted: Mon Feb 11, 2008 8:17 pm
by colonialc19
Bush, I hung my sides before I started to tighten the keel, I think it helped as I got to the bow, dont get frustraited to quick, more than likely it will take several tries.
Good luck
Daniel
Posted: Tue Feb 12, 2008 8:57 am
by steve292
Bushmaster,if you go to Daniels thread (FS17 In VA) 7 look on page 4.
Thats how I did it, There are more pics in my gallery as well.
keep going !!!!! post pics if you are still struggling a bit(or even if your not ) It took me 4 evenings(3hrs a time) to do mine, main thing is tighten slowly, keep checking, keep a gap in the panels,(I used a jigsaw twice on the bow to get a gap when it dissapeared) you will get it in the end.
regards,
steve
Posted: Tue Feb 12, 2008 9:26 am
by bushmaster
Thanks once again guys,
I will follow advise.
Bushmaster
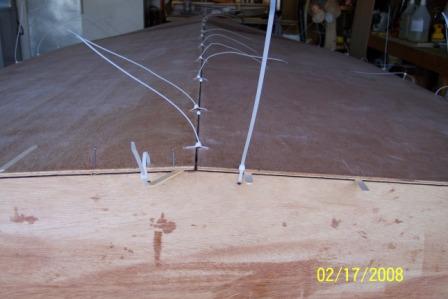
Posted: Sun Feb 17, 2008 3:09 pm
by bushmaster
Please comment on gap between panels and transom.
[img]ttp://gallery.bateau2.com/albums/userpics/18858/100_1823%7E0.jpg[/img]
Bushmaster
Posted: Sun Feb 17, 2008 3:11 pm
by bushmaster
Try this
Posted: Sun Feb 17, 2008 3:25 pm
by TomW
Not a problem only looks likd <1/8" fill with glue/filet compound. What is important is that the panels are fain and straight. You'll have plenty of fiberglass in and out, on there for strength.
Tom
Posted: Sun Feb 17, 2008 4:45 pm
by steve292
Thats good,whats the bow like?
the key is to let the panels bend in a fair curve.If you have a gap between all the panels like that you have cracked it.
Steve
Posted: Sun Feb 17, 2008 9:58 pm
by bushmaster
Steve
What do you mean that I have cracked it? Does that mean that it's good?
I haven't closed the bow as yet, I have to get some more 1/2" copper tubing for dowels for the starboard side chime and the keel. Just rough stitching at the moment.
Bow stitches so far.

Thanks Tom, I hope to keep the gap as close as possible to this.
Bushmaster
Posted: Sun Feb 17, 2008 10:04 pm
by bushmaster
Here is the link to what I done so far.

Took the day off to go to the Miami International Boat Show. Too rich for me.
Talk to the Honda reps about a 50HP OB. weighs 204lbs. much more for Yamaha, Evenrude, Suzuki, etc...that in weight and prices.
I am just about set on the Honda 50.
Bushmaster
Posted: Mon Feb 18, 2008 6:59 am
by steve292
bushmaster wrote:Steve
What do you mean that I have cracked it? Does that mean that it's good?
Bushmaster
British for "Got it"
Posted: Mon Feb 18, 2008 8:41 am
by davidtx
bushmaster wrote:...
Talk to the Honda reps about a 50HP OB. weighs 204lbs. much more for Yamaha, Evenrude, Suzuki, etc...that in weight and prices.
I am just about set on the Honda 50.
Bushmaster
What kind of pricing difference have you found between the Honda and Yamaha?
When I compared the technical specs (and I'm very much a newbie here) between the Honda and Yamaha, the weight advantage clearly goes to Honda. But for the 60 HP Yamaha weighs the same as the 50, so for 32 pounds more than the Honda, you can get 10 more HP. This
may be a reasonable tradeoff. My other concerns about the Honda are charging capacity (1/2 of Yamaha - but E-Tech blows them all away) - not sure how important this. And lastly, the Honda has 3 carburetors vs the Yamaha and E-Tech's fuel injection.
I'm leaning towards the Yamaha 60, but didn't even check the prices on the Honda - the lure of 10 more HP seduced me. After last nights epoxy and ezfillet order, engine cost may have risen some in my ranking system
-david
Posted: Mon Feb 18, 2008 8:42 am
by bushmaster
Sorry about the link. I will try again.
http://forums.bateau2.comthumbnails.php?album=751
Hey Steve, I got it. Should have known better, I was born and raised in Guyana..British Guiana..
Thanks guy.
Bushmaster
Posted: Mon Feb 18, 2008 9:43 pm
by colonialc19
Bush, looks like you "cracked it"
( I had to do it) , stiching looks great man!
Build on,
Daniel
Posted: Tue Feb 19, 2008 8:25 pm
by bushmaster
David
The quote for the Honda 50 HP was a little over $4700.00, this does not include controls, cables. wiring harness, etc. But it's for remote controls with trim and tilt.
The wiring harness plugs in quite easily at the engine power source.
I currently own two Honda vehicles, one Pilot and an 92 Accord. I also owned an 91 Honda accord. love them all, especially since I went through several GM cars and trucks.
Thanks guys for the encouragement. Haven't done any thing for a couple of days, will try tomorrow. I may have to fix a couple of hard spots at the bow along with a gap of 1/4'' or so at the keel just before the bow station..A..
Any idea how much of a gap one can have before it becomes critical.
Bushmaster
Posted: Tue Feb 19, 2008 11:59 pm
by TomW
Bushmaster 1/4" is liveable. Much more starts edging into is it really strong enough?
Tom
Posted: Wed Feb 20, 2008 2:44 am
by bernd1
......you are living in a dream land with this price for a 50 Honda HP. In Germany is this Motor about 7590€. In US Dollar 11.156,84 .
See the link
http://www.honda.de/nparcarticles/de_pe ... 1_2008.pdf
The price is three times more than in the US - I get a heart attack...

Bye
Bernd
Posted: Wed Feb 20, 2008 8:23 am
by davidtx
bernd1 wrote:......you are living in a dream land with this price for a 50 Honda HP. In Germany is this Motor about 7590€. In US Dollar 11.156,84 .
See the link
http://www.honda.de/nparcarticles/de_pe ... 1_2008.pdf
The price is three times more than in the US - I get a heart attack...
Bye
Bernd
Ouch! Do those prices include VAT or is that an additional 19%? I sure do miss New Hampshire's 0% sales tax (and 0% state income tax).
-david
Posted: Wed Feb 20, 2008 8:41 am
by bushmaster
Bernd
I suggest that you buy it in the US and have it shipped to you in Germany.
I have and excellent Honda Dealer in Homestead, Florida who would be willing to ship it to you.
Also. I saw the layout of the FS17 on your garage floor. Does this take the rub rail into consideration when doing all your calculations?
Keep up the good work.
Posted: Wed Feb 20, 2008 8:43 am
by bushmaster
Thanks Tom
I sure will.
Bushmaster
Posted: Thu Feb 21, 2008 3:26 am
by bernd1
Hi bushmaster,
thanks for this offer - I still have to consider about it - thanks!
@ David - tax is included - a poor consoltaion

...keep on working ( Germany -2°C - no glue climate)
Posted: Sun Feb 24, 2008 11:54 am
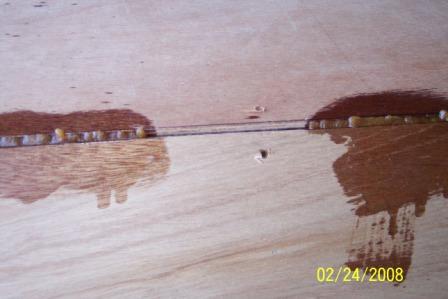
by bushmaster
Can I complete welding before I start the sanding, or do i have to sand first the weld I have just finished?

Please see my gallery
Bushmaster
Posted: Sun Feb 24, 2008 11:55 am
by bushmaster
Let's try again
Posted: Sun Feb 24, 2008 11:57 am
by bushmaster
Posted: Sun Feb 24, 2008 1:20 pm
by steve292
bushmaster wrote:Can I complete welding before I start the sanding, or do i have to sand first the weld I have just finished?
Please see my gallery
Bushmaster
Just rough up the surface of the tack with some rough paper & fillet over the top of it.
Steve
Posted: Mon Feb 25, 2008 7:41 pm
by bushmaster
Steve,
Thanks a lot buddy, I will do just that.
Any more pictures on your build.
I think I am coming down with the flu bug, although I had the flu shot in November. I think I will have to slow down, Tax prep time and all.
Bushmaster
Posted: Sat Mar 01, 2008 4:47 pm
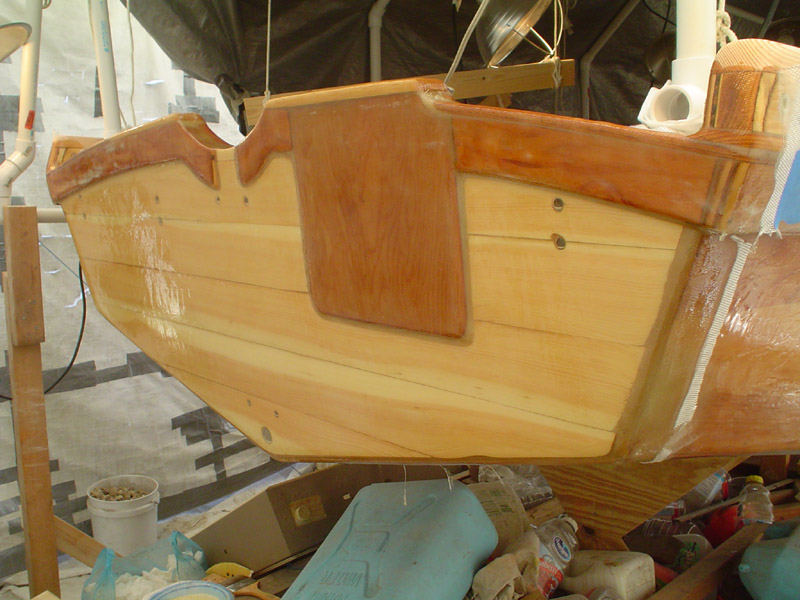
by bushmaster
Just added some new pictures before I lay biaxal tape. Any suggestion?
see link
http://forums.bateau2.comthumbnails.php?album=751
Bushmaster
Posted: Sat Mar 01, 2008 4:51 pm
by bushmaster
Some small holes
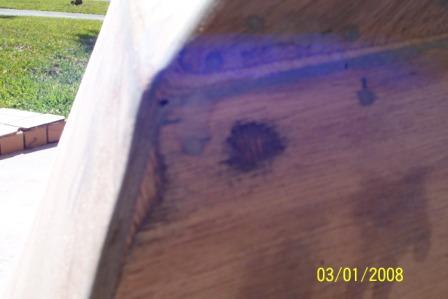
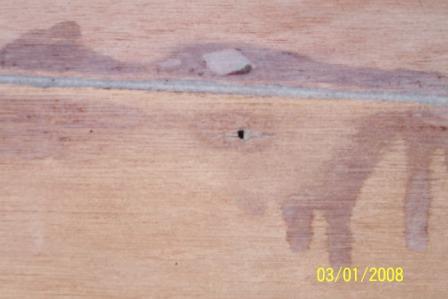
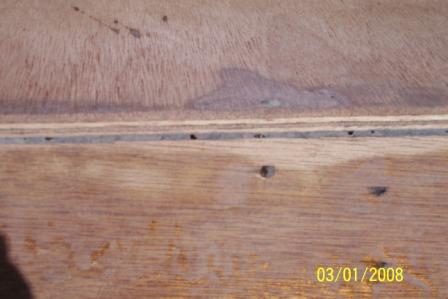
Should I fill these after the flip?
Bushmaster
Posted: Sat Mar 01, 2008 5:37 pm
by topwater
Looking good bushmaster
you will want to fill and sand those holes before
going to next step.
Posted: Sat Mar 01, 2008 5:38 pm
by steve292
I would fill the holes first-perhaps a thinner mix for the small (pin?) holes
because they may not go right through to allow filling from the inside.
I may be telling you how to suck eggs here but a nice smooth radius will help to avoid bubbles in the tape,& save you grief later on.
Nice pictures BTW.I must get back to mine
Steve
Posted: Sun Mar 02, 2008 8:09 am
by bushmaster
Thanks Steve, thanks topwater
I will fill the holes and sand as you suggested and make sure I have the edges rounded.
Bushmaster
Posted: Mon Mar 03, 2008 1:20 pm
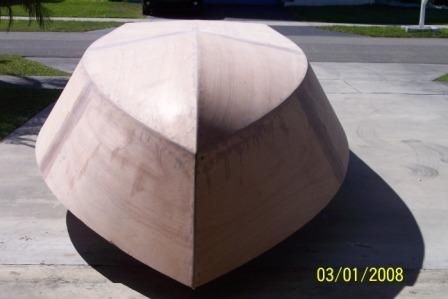
by WobblyLegs
Oh, that looks sweet!
Posted: Mon Mar 03, 2008 1:35 pm
by jacquesmm
That looks very nice, very fair. Great job.
Posted: Mon Mar 03, 2008 1:40 pm
by TomW
Beautiful job.
Tom
Posted: Mon Mar 03, 2008 3:37 pm
by ks8
Nice! Looking forward to how you layout the interior.
Posted: Mon Mar 03, 2008 6:00 pm
by Cracker Larry
That is a really good looking hull

Nice work and good design both
Bushmasterfs17
Posted: Mon Mar 03, 2008 6:36 pm
by cottontop
Great work fella. Boat is really looking fine. Cottontop
Posted: Mon Mar 03, 2008 8:46 pm
by bushmaster
Thank you all very much.
You have all been an inspiration to me so far. helping me to solve some of my problems and giving me advise.
Yes, the designer did a real nice job on the design. The dimensions on the plans were very good. Had to do some calculations on my own to get exact measurements.
Of course, i messed up the bow mold 4 times before i got it right, due to several factors. Like not figuring out the new B&D circular saw as quickly as possible after my 40 years old reliable sears circular gave out.
I have been taking it easy these past few day. Still have to fill some pin holes and a few missed, but not completely, stitch holes, then some more sanding and rounding off of edges before biax tape and cloth. I am little timid about this. some experience with joining the panels but nothing big.
Your help and advise are always welcome. I am looking forward to them and also the flip.
Bushmaster
Posted: Tue Mar 04, 2008 2:54 am
by steve292
Some advice I was given was to do the keel taping first as it is the furthest to reach.Cut the tape to length first & roll it up, precoat the seam with a little epoxy.Use a 4" foam roller it wastes less.I used about a 1/4 of a pint to precoat each one of the chines & the keel. Then roll out the tape onto the seam & wet out using the roller.Lay the second piece of tape onto the wet out first piece & repeat.It is that simple.The trick is to have everything you need,including something to wipe up the drips, near to hand.I did the taping one weekend, & the glassing the next as I ran out of time, so I can't tell you how much time you will need to do it all wet on wet.
One thing I will say though, is that if you can go wet on wet you will save lots of work fairing(WHICH IS A GOOD THING.) If you don't try to wipe up or scrape off as many drips as you can:as I spent ages sanding 'um off
Looking really good
Steve
Posted: Tue Mar 04, 2008 8:40 am
by bushmaster
Thanks Steve.
Good advise, I will do as you suggested,
Bushamster
Posted: Sun Mar 09, 2008 11:35 am
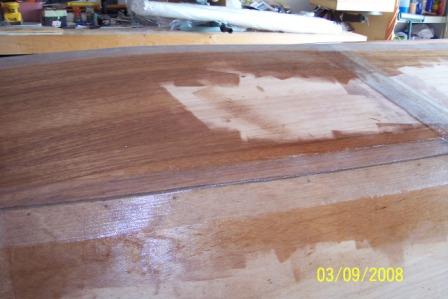
by bushmaster
Hey guys
Just added some pictures. Comments Please.
http://forums.bateau2.comthumbnails.php?album=751
Steve, I took your advise and did the biax tape first. I used a 4" foam roller.
This worked perfectly. No air pockets. This took me 5 hours..not a young man, you know... Hope to do the big cloth this week some time.
Thanks for suggestions all.
Should I rough up the epoxy before laying the big cloth? Part of the hull bottom is not epoxied.
Posted: Sun Mar 09, 2008 11:47 am
by BruceM
Looks great
If it were me, I would finish getting a coat of epoxy on all bare wood.
once it is all dry, then scuff it all by sanding, then clean, then layout all the cloth to fit, place it on the hull and wet it out with the help of a friend mixing.
Good luck
Posted: Sun Mar 09, 2008 11:52 am
by bushmaster
Thanks Bruce for the quick reply.
Very good advise. I was thinking about that, but was unsure.
Once again, thanks guy.
Bushmaster
Posted: Sun Mar 09, 2008 2:09 pm
by steve292
Looking good!!
Posted: Tue Mar 18, 2008 8:17 pm
by bushmaster
Just posted some new pictures.
link below
http://forums.bateau2.comthumbnails.php?album=751
Bushmaster
Posted: Thu Mar 20, 2008 8:50 am
by colonialc19
Bush, just saw your post
Have you wet out that fabric yet?
If not, I suppose you could wet out through two layers, but I think it may be a better idea to fold the top layer back and wet one layer at a time.
As long as you get that top layer down and wet before the bottom gets firm I think you'll be ok
If you can get someone to mix batches for you obviously it'll go quicker but this really helps
I poured instead of pumping out the resin, and I think I made my batches about 18oz total, it just about filled up a large mixing cup
Hope this helps,
Daniel
Posted: Thu Mar 20, 2008 10:12 am
by frazoo
Bushmaster, I just went through your gallery, what a super job! I can't wait unitl you and other builders of the FS17 splash and give us some real world performance data. What a great looking design and build!
frazoo
Posted: Thu Mar 20, 2008 8:17 pm
by bushmaster
Thanks Frazoo
I've just finished glassing the hull..outside.. next week will have to sand some of the excess epoxy off also some hard spots where the tape overlaps.
I would like to see the inside, much less to have it splashed.
Bushmaster
Posted: Fri Mar 21, 2008 9:58 am
by colonialc19
Bush,
A great milstone acomplished, good job
The real fun is about to start though
Fairing

Way to make some progress!!!
Daniel
Posted: Fri Mar 21, 2008 10:21 am
by bushmaster
Thanks Daniel
Right now I am very sore after 6 hours of mixing epoxy and laying down the wide cloth. Towards the end..at the bow.. I got carried away and poured too much epoxy mix on the cloth. Now I have a few shiny spots to sand before fairing.
How much should I sand off? I don't want to damage the cloth.
Bushmaster
Posted: Fri Mar 21, 2008 11:07 am
by steve292
If you leave the fairing till next weekend you will need to sand anyway for a key.I wouuld just sand all the uneveness out of it, or as much as I could without cutting into the cloth with 80 grit on the RO.
Welcome to fairing hell.
I can smile because I've about finished on the outside.
Steve
Posted: Fri Mar 21, 2008 8:17 pm
by bushmaster
Steve! daunting man!!!
I am not looking forward to this.....
Bushmaster
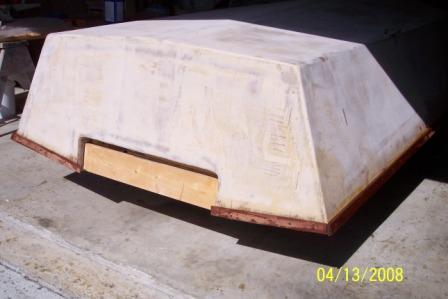
Posted: Sun Apr 20, 2008 8:37 am
by colonialc19
Bush,
Hows that fairing comming along ol' chap??

Had to check on you, havent seen a post from you in a while.
D
Posted: Sun Apr 20, 2008 10:45 am
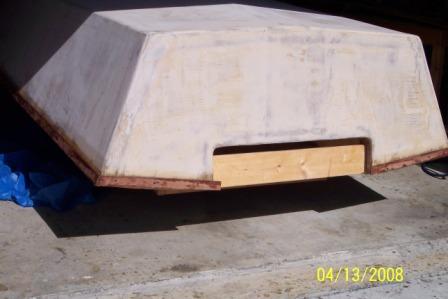
by bushmaster
David
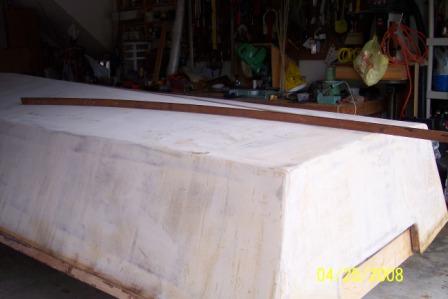
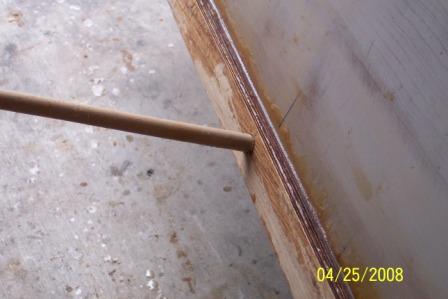
The fairing is coming along very good. I already laid the first coat on..look 1 1/2 gallons of quick fair.. had to order some more from Shine. I first started to lay it on very thick to actually a smooth finish until I see that I will run out of the stuff.
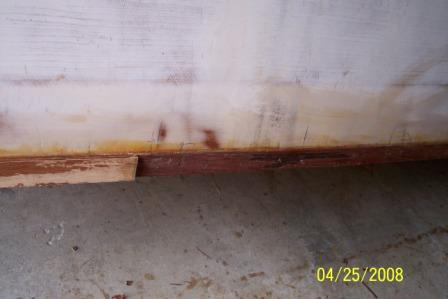
Right now I am having some problems with the rub rails. I laid the first strip on very well using clamps and drywall screws..next day it was all nice and dry..I took out the screws very easily. Next day I started laying the next set of strips..then cousin Lenny showed up...he insisted that he will help and that everything will go much faster, I should have known better. Of course the epoxy/wood flour mix was really hurried up and the rub rail is still waiting to be hardened..7 days later.. I spoke to Shine and he suggested i cover it with tape. I also told him I will put some dowels to re-enforce the whole thing.
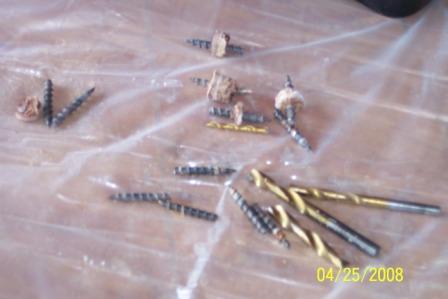
He thinks it's a good idea. Any ways I laid the third set of strips on after much cleaning of the still wet stuff. Used clamps and screws. This morning I had a rough time to remove some of the screws...some of the heads are stripped off completely leaving most of the screw in the rub rails and penetrating through the other side.
Couple of screws I can't remove, I was thinking of drilling most of it out.
Any Ideas????
Fairing with rub rail. first layer.
[img]
http://gallery.bateau2.com/albums/userp ... 0_1890.jpg
[/img]
I removed the rub rail from the transom end.
Bushmaster
Posted: Sun Apr 20, 2008 10:53 am
by bushmaster
David
The fairing is coming along very good. I already laid the first coat on..look 1 1/2 gallons of quick fair.. had to order some more from Shine. I first started to lay it on very thick to actually a smooth finish until I see that I will run out of the stuff.
Right now I am having some problems with the rub rails. I laid the first strip on very well using clamps and drywall screws..next day it was all nice and dry..I took out the screws very easily. Next day I started laying the next set of strips..then cousin Lenny showed up...he insisted that he will help and that everything will go much faster, I should have known better. Of course the epoxy/wood flour mix was really hurried up and the rub rail is still waiting to be hardened..7 days later.. I spoke to Shine and he suggested i cover it with tape. I also told him I will put some dowels to re-enforce the whole thing.
He thinks it's a good idea. Any ways I laid the third set of strips on after much cleaning of the still wet stuff. Used clamps and screws. This morning I had a rough time to remove some of the screws...some of the heads are stripped off completely leaving most of the screw in the rub rails and penetrating through the other side.
Couple of screws I can't remove, I was thinking of drilling most of it out.
Any Ideas????
Fairing with rub rail. first layer.
I removed the rub rail from the transom end.
Bushmaster
Posted: Sun Apr 20, 2008 10:58 am
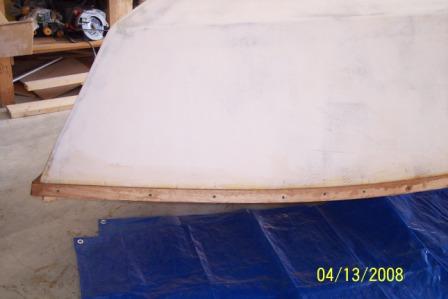
by bushmaster
Some more pics
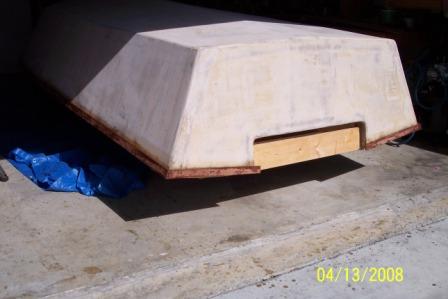
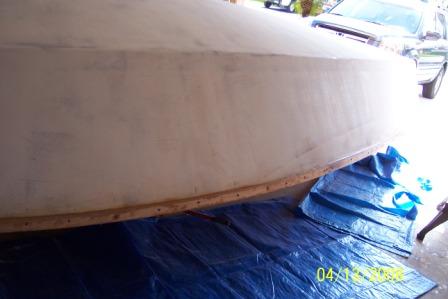
Still has to do skeg and then some more fairing before priming and painting.
Bushmaster
Posted: Sun Apr 20, 2008 10:58 am
by bushmaster
Some more pics
Still has to do skeg and then some more fairing before priming and painting.
Bushmaster
Posted: Sun Apr 20, 2008 11:01 am
by steve292
bushmaster wrote:David
Couple of screws I can't remove, I was thinking of drilling most of it out.
Any Ideas????
Bushmaster
If the pointy end is sticking out enough & you can get at it heat it up with a blowlamp or,better a soldering iron if you have one,then if the screw head is not completly stripped you should be able to back it out.If it is completly gone use plier on the pointy end to try to back it out enough to grip the screw head.If you want to avoid that problem wax the threads before assembly,it will stop the epoxy sticking.
Steve
Posted: Sun Apr 20, 2008 3:22 pm
by ks8
A waxed screw would come out easier, but personally, I'm very uneasy with any procedure that gets wax potentially into wood of a composite hull. You would have to get all that wax out again just to seal the hole afterwards with epoxy filler, or at least to get the best possible sealing of the wood with the epoxy. Trying to heat it with a soldering iron sounds like a good way to get the epoxy to loosen its grip a bit.
I too, am getting a skeg bonded on now. Great feeling, finishing up, isn't it?
Typically, you don't want to bond a structural part, like a skeg, on fairing compound. Fairing compounds are not structurally strong. They would break away more easily than, say, bonding to a previously cured and scratched up glass laminate. It looks like you've already faired the skeg area. Have you considered taking that area back down to glass before bonding the skeg on? It would make for a stronger bond, with only some final fairing around the skeg and skeg taping.
I wish the bottom of my hull were faired already. I've got that to do next month, after getting the skeg on, today. Keep the pictures coming!
Posted: Sun Apr 20, 2008 8:51 pm
by bushmaster
Steve, ks8
Thanks a lot guys,
I will sure to try some of those suggestions. I will probably do some more sanding to the skeg area before attaching skeg.
And I will try using a heat gun on the remaining screws to try to remove them. There are several with heads snapped off.
I was using 1" drywall screws and some points are sticking out, but by now much. I don't know if i will be able to drill them out.
Bushmaster
Posted: Mon Apr 21, 2008 1:15 pm
by ks8
If you have a Dremel or RotoTool, you can probably grind them down to 1/8 inch below the surface, then fill with epoxy and woodflour blend. It is best to remove them. Vibration may cause screws to back out over time and break through the finish, or so I've heard. But I've never seen that happen.

I don't recall exactly now, but I think I have 4 or 6 screws in the CV16. It was easier to leave them in and putty them over. They were countersunk. I know where to inspect each year to make sure they aren't trying to escape. Ah, I remember, for now... there are a total of 6 screws in there. Silicon Bronze.
How many screws and exactly where?
And careful with a heat gun, of course, as it may weaken nearby neighboring epoxy bonds within a couple inches. Soldering iron puts the heat right on the screw remnant, as Steve suggests.
Posted: Mon Apr 21, 2008 6:04 pm
by JIM M
I had a couple of screws that gave me trouble to, I drilled a hole right next to the screw then it could be worked into the hole and pulled out. drywall screws are fairly hard so it's tough to drill into them.
hope this helps
Jim
Posted: Mon Apr 21, 2008 8:25 pm
by bushmaster
Thanks again guys
With cousin Lenny's soldering iron I was able to remove about 8 screws that still had their heads on.
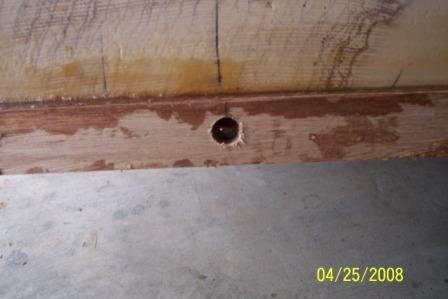
Now! those that are stripped, the ends that protrude on the inside of the hull i can't grab any with a locking pair of pliers, may be I should grind down them and then cover them with epoxy/wood flour mix or try to find a plug cutter..about 1" long and and make a hole where the broken screws are.
Since the plug cutter cuts around wood i might be lucky to cut around those screws. I can fill the holes with dowels or epoxy/wood flour mix.
I have to start looking around for a not too wide plug cutter..probably 1/4" -3/8".
Suggestions please.
Thanks
Bushmaster
Posted: Mon Apr 21, 2008 8:33 pm
by Cracker Larry
You could use a hole saw about 1" or so. Align the pilot bit right beside the screw. Then use the same bit to cut some holes in scrap ply to use for plugs.
There have been a few I've forgotten to get out
but I've never really had a screw in epoxy that I couldn't get out. Chisel around it a little bit, clamp vise-grip pliers on it and unscrew it. Fill in the hole.
Posted: Mon Apr 21, 2008 9:36 pm
by TomW
Bush, been watching your build since you started have only occasionally said anything as you are doing such a good job. Here is one hint that I always keep around for the situartion you are in now.
http://woodworker.com/cgi-bin/FULLPRES. ... 5244069--1 They work great and you can fill the hole with epoxy/wood fiiller.
Tom
Posted: Mon Apr 21, 2008 10:50 pm
by Cracker Larry
Tom will those work with drywall screws

Posted: Mon Apr 21, 2008 10:55 pm
by Fred in Wisc
There is a tool specifically made to do this. They always have ads in the back of Woodenboat. It's like a real small plug cutter designed to cut out the wood around a screw. Might be called un-screw-ums or something hokey like that.
If you only have a couple to do, I'm with Cracker Larry. Dig out some wood with a Dremel and crank them out with a vise grips. Then fill the hole.
Has anyone else noticed it's harder to break the gold drywall swcrews than the black ones? Also it seems like the coarse thread drywall screws are a lot stronger than the fine thread.
Fred in Wisc
Posted: Tue Apr 22, 2008 3:51 am
by steve292
Drill a 1/4 hole right alongside the screw,touching it if you can.Then punch the screw into it with a small chisel or a screwdriver blade.
Steve
Posted: Tue Apr 22, 2008 9:26 am
by bushmaster
Thanks Tom, CL, Fred, Steve
For your prompt and encouraging replies. I will look into some of these tools and methodologies to see which is more applicable.
At the moment, I don't know why my wrists are swollen. May be sanding, or drilling or chemical reaction.
Also my two grandsons are down from NY. Taking them to the keys today.
The week is shot. Give my arms some time to heal.
Bushmater
Posted: Tue Apr 22, 2008 11:05 am
by gerry
Hi hope your wrists get well, I have been watching your progress with interest, it is looking great
I second the soldering iron tip, I always use it now to remove screws, they seem to snap when you least expect it!
Gerry
Posted: Tue Apr 22, 2008 3:50 pm
by Cracker Larry
Drywall screws do snap easily. I usually use decking screws instead. They have several advantages, stronger, they are coated with something so they don't stick, and they have a square drive head that is more user friendly than phillips.
Posted: Wed Apr 23, 2008 7:58 am
by bushmaster
Thanks Gerry and Cracker
As soon as I get some relief from the swelling of he wrists I will have to determine how many of those screws I have left in the rub rail with broken heads before I start digging into the wood.
In the meantime the two grands are keeping me busy.
Bushmaster
Posted: Sat Apr 26, 2008 9:06 am
by bushmaster
Hi Guys
I finally got the screws out. First using various sizes of drill bits to drill around the broken screws and when this was taking too long, I finally found my set of plug cutter bits.
I used a 3/8" to cut around the screws then pry them out. I did not penetrate the complete 3 layers of the rub rail.
However, as soon as the screws were out a section of the second layer of the rub rail began to separate from the first layer. I knew that the batch of fillet mix was not that good, any way I cut this section out and cleaned the two contact layers.
I am thinking of attach these combined two layers to the first rub rail which is on solid and the using some dowels to re-enforce.
Suggestion Please.
Some pictures.
Bushmaster
Posted: Sat Apr 26, 2008 4:21 pm
by colonialc19
Bush,
If I read right, you had the last two layers in of rub rail come off in a spot where you were removing those screws, I've never had a problem with any fillets ( 1st time builder like you
) but I think all you can do is scuff em' up real good (remove old fillet material), mix up another batch of gooie stuff and try again, if it takes the shape, you should be able to laminate both layers as one.
Do you have any idea why it came apart? think the mix was off a bit?
Just wondering, maybe we both can learn something outa this
If you really want to be sure take a break from the boat, and post in the powerboats section, there are many people out there more experienced than I.
Daniel
Posted: Sat Apr 26, 2008 7:45 pm
by bushmaster
Hi Daniel
You are right. the epoxy and or fillet were off a bit. The first layer of the rub rail is on solid. The second layer was where I was off on the epo/fillet. Not realizing I apply the third layer of rub rail, which went on solid.
However, as you rightly said, the second layer started to separate from the first but still on tightly to the third. I pried open as much as I can then cut a section.. about 7 feet long... off.
I have cleaned out the gunk from the face of the first layer and the second layer. Will sand tomorrow and re-glued. One good thing the two layers together still has its shape, almost. With some clamps I can hold them together until the new fillet bonds.
Thanks again Daniel.
Bushmaster
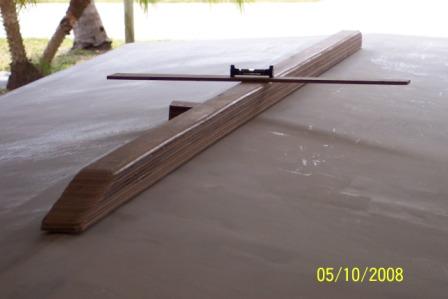
Posted: Sun May 11, 2008 1:17 pm
by bushmaster
OK all
Here are some pictures..the latest on my build
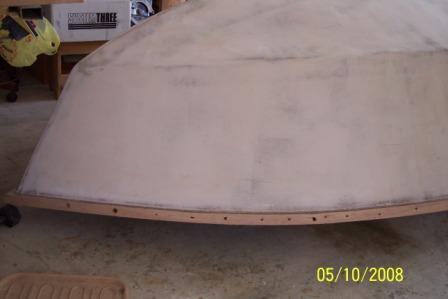
Still has more work to do on rub rails. seal all holes, glass then fair.

Skeg level..not permanent as yet.. hull has to be sanded and faired some more once skeg is on
http://gallery.bateau2.com/albums/userp ... 0_1926.jpg
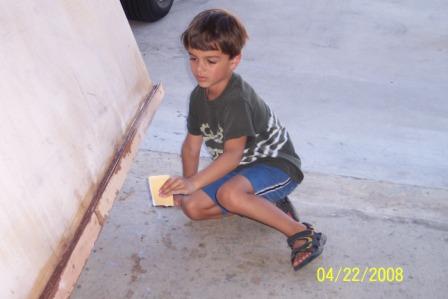
Grandson Alex, 8 years old. up from New York on spring break. He wanted to work on boat. He wanted 10 bucks after sanding a minute or two
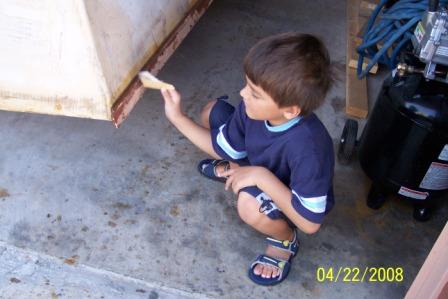
Grandson Eden, 5 years old. wanted to work on Nana's boat. He wanted 20 bucks. for sanding and washing the car.