Page 1 of 1
My GT23/22 Blog
Posted: Thu Jan 24, 2008 9:15 am
by Daddy
I can finally post the address to my blog, very amateurish, sorry, but at least there are some pics. The boat fills my shop.
http://cruisinghouseboat.blogspot.com/
Posted: Thu Jan 24, 2008 2:03 pm
by Daddy
BTW, I have a tentative name for the GT22, FESTIVUS, (a boat for the rest of us).
Posted: Sat Jan 26, 2008 5:05 pm
by Daddy
First coat of Behr 100% acrylic applied, going to need a couple of more, costing me lots of firewood in the shop to keep it from being too cold. If I am just sanding I dont mind the chilly days, sanding has a way of warming you up, two more coats of paint and I will flippit.
Daddy
Posted: Sun Jan 27, 2008 8:27 am
by gk108
Posted: Sun Feb 03, 2008 7:57 pm
by Daddy
Today we flipped FESTIVUS (a boat for the rest of us). Took two of us to do it. All 22 x 8. Didnt even raise a sweat. Check out my blog and see how it was done. You have to click on "Older Posts" to see the whole story and sorry to say it all came out in revers order of how it was done.
Daddy
Posted: Mon Feb 18, 2008 4:34 pm
by Daddy
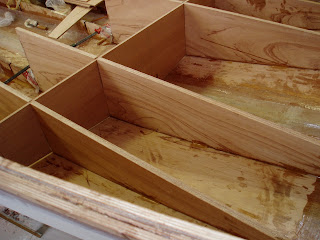
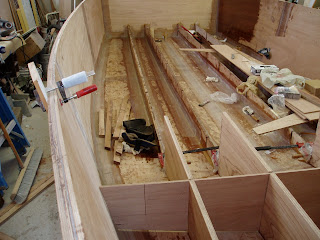
Now that the hull is flipped I have been at work glassing in the stringers. I was puzzled at first how to space them and hold them upright but found a solution. I first put all of the frames and stringers into the hull. Second I spot welded the stringers in place with 2' long shallow fillets between every other frame, putting the fillet on each side of the frame, let it cure overnight and removed all frames and the stringers stand tall and solid awaiting full fillets and then two layers of tape on each side. When I have finished that (only time today to do one stringer) I will reinstall the frames and fillet and tape them in. A bit tedious but more fun than fairing. I cant wait to put the sole down. I have decided to skip the foam. Twenty eight or so completely sealed water tight compartments under the sole work for me. I might consider foam up under the gunnels for upright floatation but cant imagine holing enough of those compartments to make the boat sink....., I can only go hull speed after all.
Daddy
Posted: Sat Feb 23, 2008 3:20 pm
by Daddy
Just posted a bunch of new pictures in my blog. Boat is going well if I dont run out of fire wood or if spring comes early.
Daddy
Posted: Mon Mar 03, 2008 4:38 pm
by Daddy
Glassing in the frames, stringers finished. Trying the "glassing off the boat" method of wetting out the glass. Not sure if I like it or not but it is definitely faster. Actually I am glassing in the boat, have set up a saw horse with a tray lined with heavy plastic sheeting. That part works well, the problem is that the glass "grabs" and is not as easy to slide around as when the area is wetted out first. I need to be patient and get the hang if it.
Daddy
Posted: Mon Mar 03, 2008 5:43 pm
by Cracker Larry
Daddy, looks like you're moving along nicely

Post a pic here once in a while too, it doesn't cost anything

Here's one....
Posted: Mon Mar 03, 2008 5:48 pm
by Daddy
Larry, pretty much lacking in negotiating the ways of moving pictures around, I would find it easier to move a one ton safe up a flight of stairs, but willing to learn...
Daddy
Posted: Thu Mar 13, 2008 9:08 am
by OzzyC
Hey Daddy, she's looking great! I'm glad that you and Gubbs have passed the progress that Greg and I have made... now
we can learn from your mistakes.

I'm going to put up a link from my blog to yours.
Posted: Thu Mar 13, 2008 10:20 am
by Daddy
Oz, I forgot to tell you, I made some radical changes to the foredeck, raised the stringers which are in front of the cabin by 5 inches so that the scuppers will be well above the waterline (keeping in mind that I moved my cabin back almost to the transom). I gotta post some pics
Daddy
Posted: Thu Mar 13, 2008 3:00 pm
by Cracker Larry
Larry, pretty much lacking in negotiating the ways of moving pictures around,
It's easy. I'll try to teach you. Since your pics are already on the web, just view the pic that you want to post here from your blogspot. Right click on the picture and select "Properties". A window will pop up. Look for "Location" and a line of info that looks just like this....(this is one of yours)...
It will always start with http://, and end with .jpg. Put your cursor on the start or end of this address, click and drag through it to highlight it. Now right click on the highlighted address and select "Copy" ( You can also just hit "CTRL C" on the keyboard to copy)
After you've opened your reply window here, put your cursor where you want the picture and either right click and select "Paste", or press "CTRL V" on the keyboard which does the same thing. This will paste the copied link here and it will look like this..
http://bp3.blogger.com/_p4ss4wWydSM/R8B ... 170003.JPG
Now drag your cursor over that to highlight it, just as you did before, and at the top of this reply window click on the "Img" button. This will put the {Img] tags around the link
Once submitted it will look like this...
There are several other ways to do this too, but this one works. your boat looks great
Posted: Thu Mar 13, 2008 8:15 pm
by Daddy
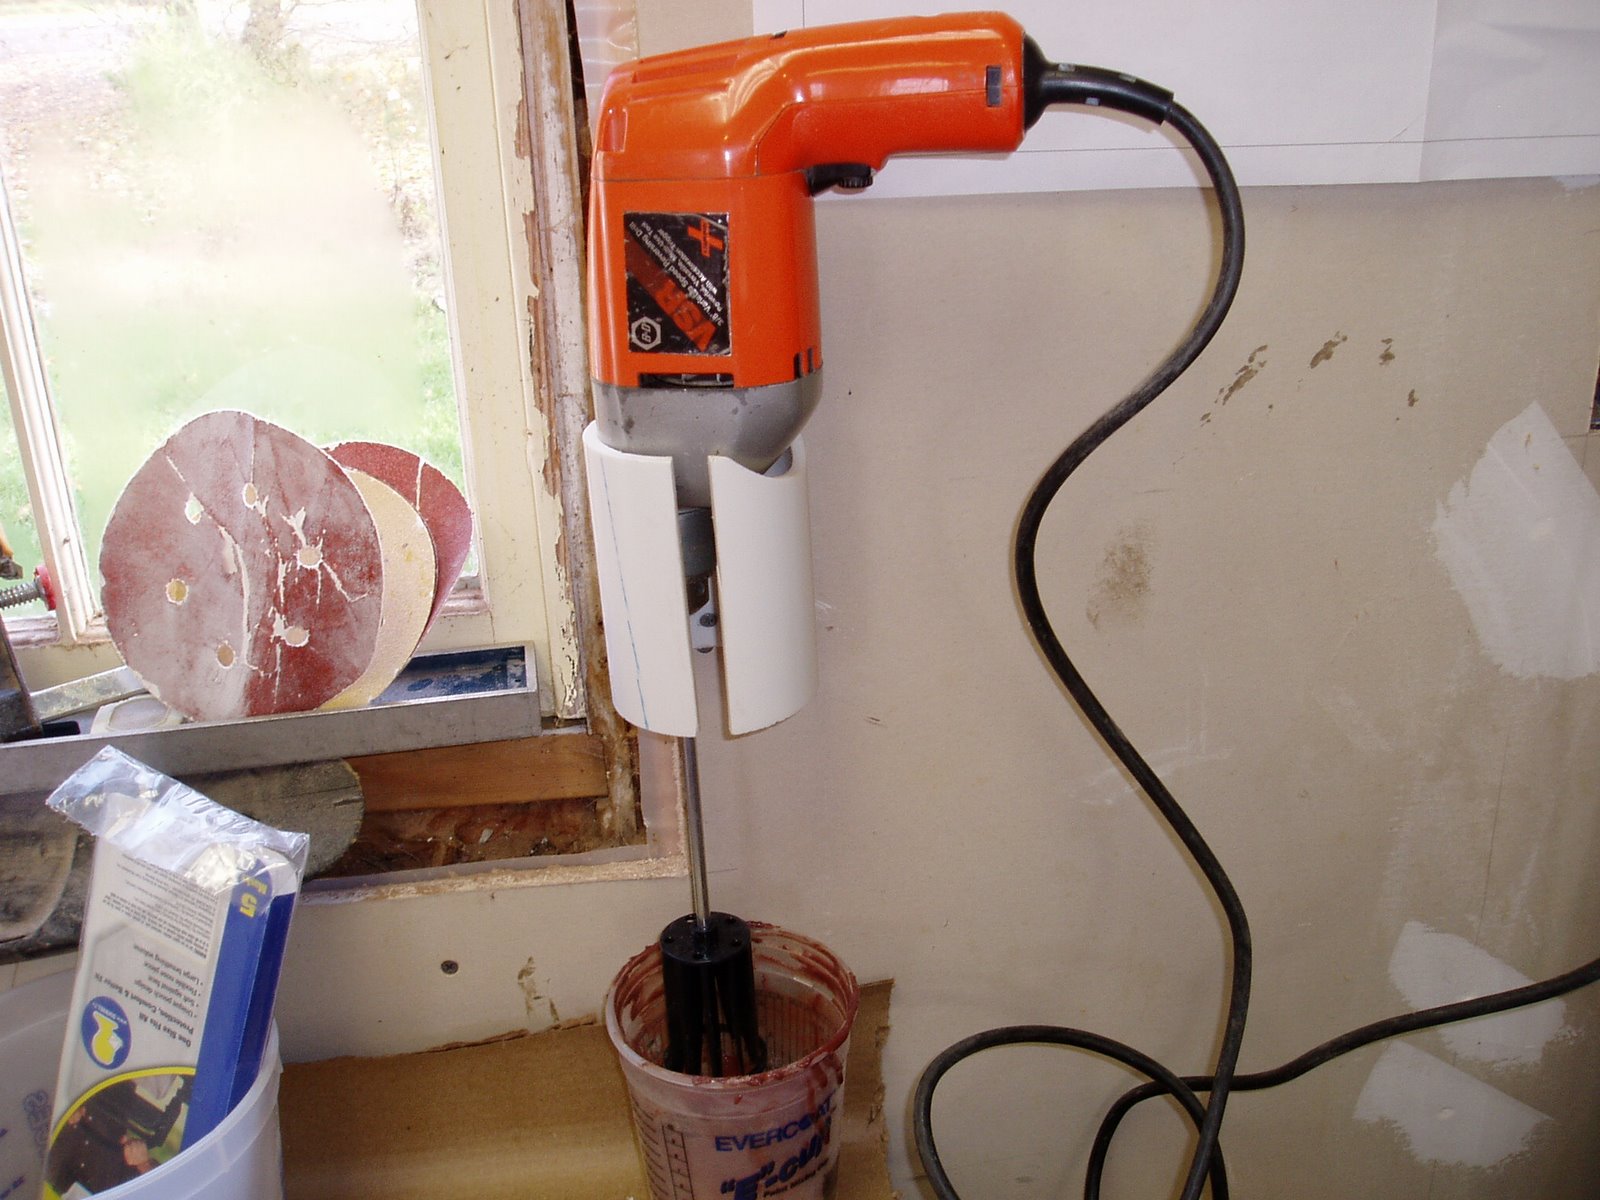
Many thanks Larry, I will give it a try. This is a picture of the epoxy mixing station, not sure why it is so big (the photo)
Daddy
Posted: Thu Mar 13, 2008 8:44 pm
by Daddy
Larry, when I right clicked on the picture in my blog I did not get a box that contained the word "properties". i got a lot of other choices but not that one. I clicked on the pic and it enlarged and then I saw the address at the top of the screen, I highlighted and followed the rest of your directions.. I think the problem might be that I am using a Mac. I wish I could make the picture small like you did. I will keep trying. I tried to add another picture the same way and it would not let me

Here is one of the boat in mid flight on flip day
Daddy
Posted: Thu Mar 13, 2008 9:48 pm
by Cracker Larry
Sorry. I know almost nothing of Macs.
Posted: Sat Mar 15, 2008 3:40 pm
by Daddy
We tried to find a way to make the pics a little bit smaller but no luck, maybe some Mac user will have an idea how to do it. Got almost all of my cleats installed today until I ran out of clamps. There is always tomorrow...
Daddy
Posted: Sun Mar 23, 2008 5:08 pm
by Daddy
Cleats all installed, ready to do deck, looking at height of sides of foredeck I am considering a rail about 8 inches higher than the gunnels. . Thinking of some kind of dowel every two feet or so capped with ???. Any ideas?
Daddy

Posted: Sat Apr 12, 2008 9:19 pm
by Daddy
Bought a trailer for my GT 22 last Thursday. As soon as I finish the cabin I will see if it fits'
Daddy
Posted: Sun Apr 13, 2008 3:48 pm
by Daddy
Cabin assembled and filleted, roof joined at the center and sitting in place, not glued yet. Tomorrow will tape all the joints and think about gluing down the cabin roof. I am planning on making my own grabrails out of 5/4 pine, wish I had a source for doug fir. Should I mount the funky old spotlight on the cabin roof? Be more for looks than anything else.
Daddy

Posted: Fri Apr 25, 2008 1:30 pm
by Iowa Boy Greg
Daddy,
Excellent progress. Can you post pics and make/model of trailer? Did you have to modify it much?
I read the thread on your motor bracket. Can't quite picture how you are setting that up.
Keep up the pace, you will be on the water in no time!
Greg
Posted: Fri Apr 25, 2008 5:06 pm
by Daddy
Hi Gerg, I will takes some pics of the trailer. I am going to change the rear bunks from 4 feet to 8 feet long so just about all of the flattest part of the hull will be supported. I will need to make some mods to the front of the trailer but will wait til the boat is on it to see what needs to be done.
I have posted some new pics of the progress on my blog. Still havent figured out how to reduce them so that I can post them here.
The ob bracket is going to be made of three layers of half inch. Because I am using a small 25hp motor I am making the bracket with a setback of 17 1/2 inches and it will be 24 inches wide and 12 inches high where the motor attachesã€
Posted: Thu May 01, 2008 11:17 am
by Daddy
Hey Greg, Ozzy and Gubbs I have posted some new pics on my blog of the cabin, and motor bracket.
Daddy