Page 1 of 1
FS18 baseline
Posted: Wed Apr 09, 2008 9:29 am
by Cracka
G'day guys.
I have done a search but am still a bit confused

. For the FS 18 plans on sheet D279/3 Station and Lines, the baseline indicated, is that the underside of the deck or the top of the deck as the boat is pictured in elevation (top diagram on that page).
Just need to know whether I need to subtract the 10mm thickness of the deck from the height of each station.
Thanks
Mick.
Posted: Wed Apr 09, 2008 9:47 am
by jacquesmm
If you use molds, there is nothing to subtract: a baseline is just a line that can be put anywhere. In old plans, you will find the baseline a few feet above or below the hull.
If you use the frames as molds, you can cut the inside to receive the deck at the baseline level.
I often put my baseline at the level of the lower or upper face of the deck.
It is a shortcut, it makes life easier for the builder.
For the FS18, the stations drawing says "BL (baseline) is the upper face of the deck)".
That means, to build as designed, you should cut the inside of the frames 3/8" (10mm) lower than the baseline.
This will put all decks a tiny little bit below the sheer.
It is my choice and if you prefer the deck flush with the sheer in the middle, then do not cut that 3/8". The parts will fit just as well.
Posted: Wed Apr 09, 2008 6:19 pm
by Cracka
Thanks for the reply Jacques. Geez you're on the ball I posted that late last night before bed, check this morning and low and behold you replied not long after I posted. Great service here, thanks mate.
That was the info I was after, I just wasn't sure whether to cut the 10mm off the top or not.
Mick
Posted: Fri Apr 25, 2008 8:08 am
by Zack Attack
Hi Cracka
I'm glad to see your getting started. I've been catching

lots of fish biggest so far 50lb striper . The boat does great you are going to love it!!
Posted: Sat Apr 26, 2008 3:36 am
by Cracka
Hi Zack,
Well I actually havn't started building the full size boat yet!!!!!Still off work with a buggered wrist, but I am in the middle of building 2 x 1/10th scale models of the boat.
I have built the standard sheer version (not painted yet) and I'm in the middle of the flush sheer version.
I built the models just like the full size, on the strongback and all. I will post some piccies when I finish if anyone is interested. I'm really impressed with the models and it has given me a bit of an understanding of the build method.
Mate where's the piccies of the big fish??? Only joking mate, but if you've got some to share that would be great. I'm really glad to hear the boat is working out. I have been thinking lately(obviously too much time on my hands) that maybe the ob15 with a flat deck might be a better option for me, like what Fly on Wall did,I just don't know though,
I really like the look of the FS18.
Mick.
Posted: Sun Apr 27, 2008 3:01 pm
by topwater
Yea post some pic's would love to see youre model work.
Posted: Wed Apr 30, 2008 7:20 am
by Cracka
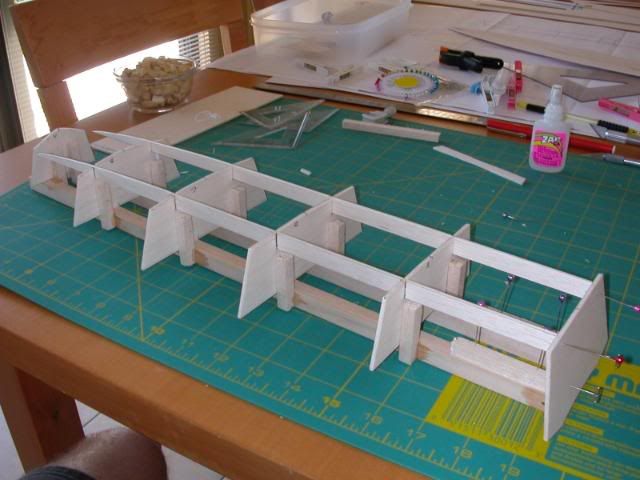
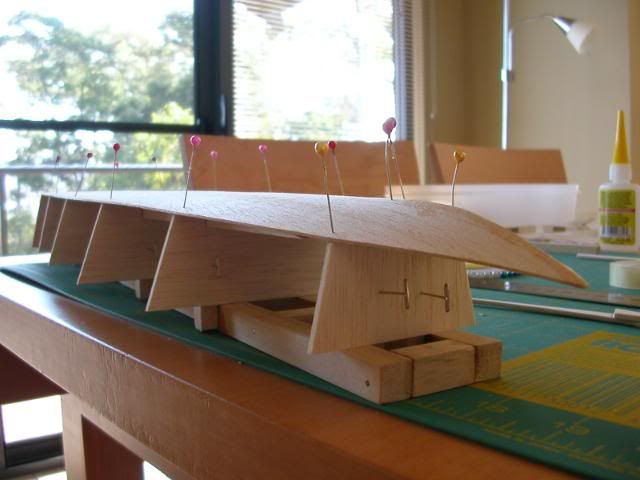
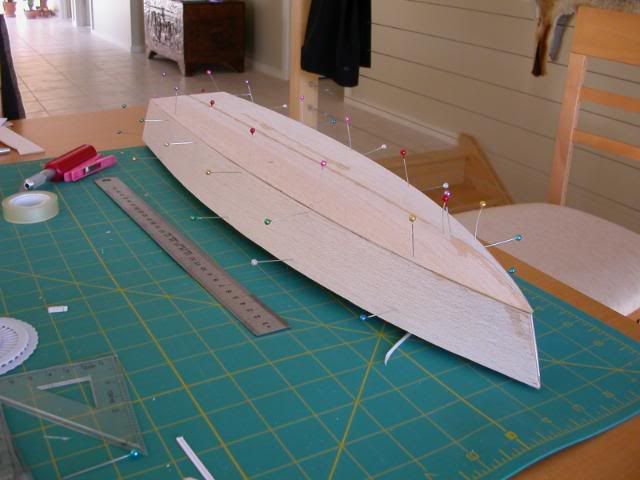
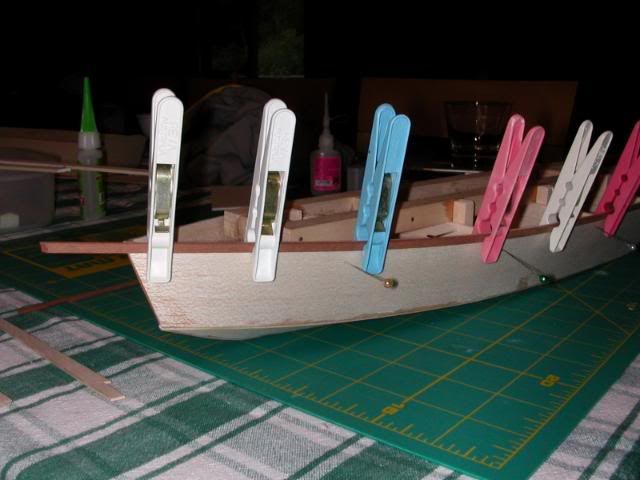
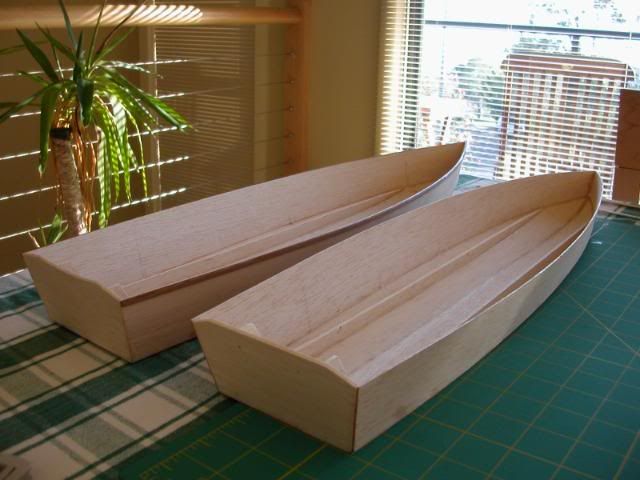
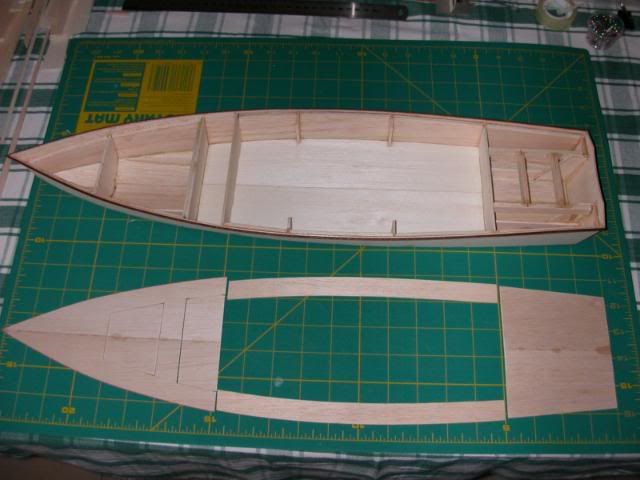
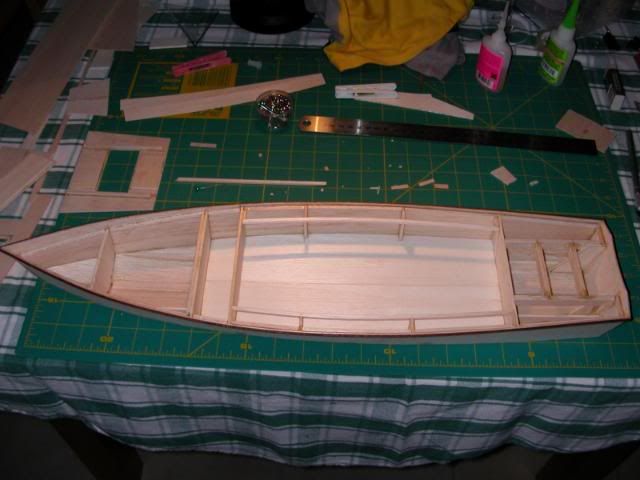
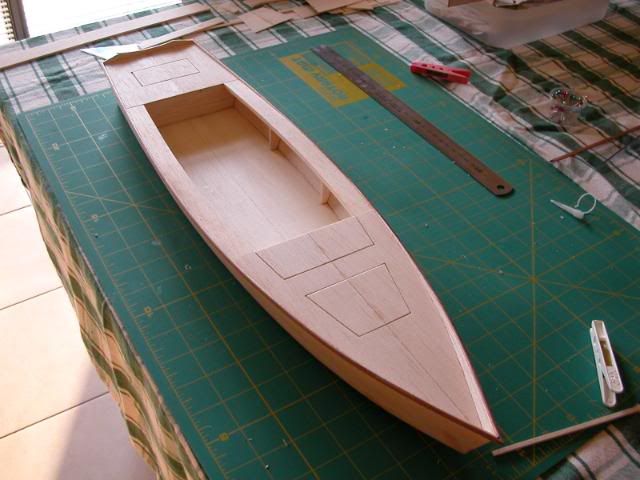
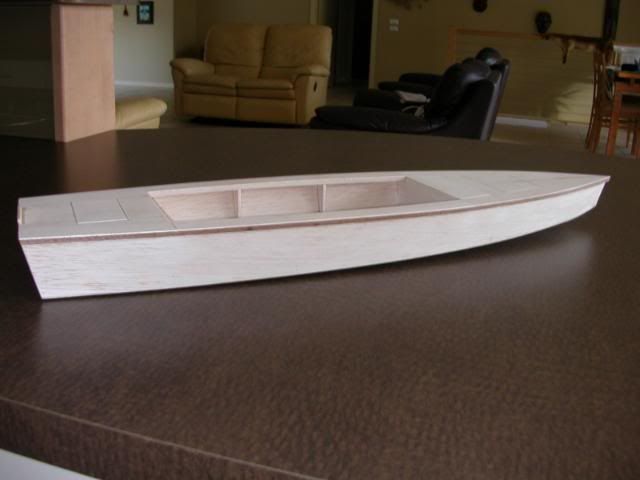
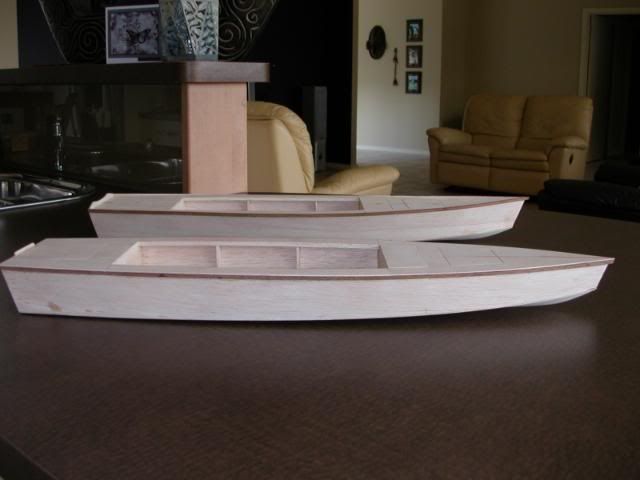
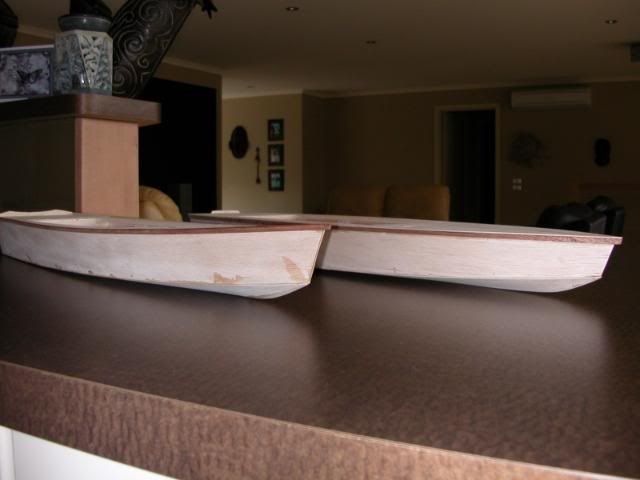
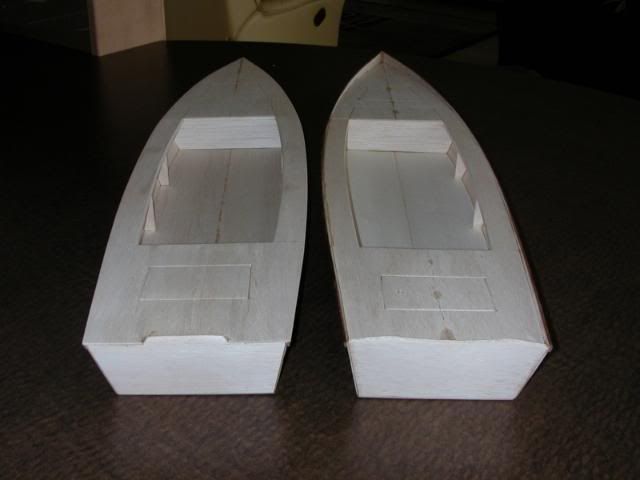
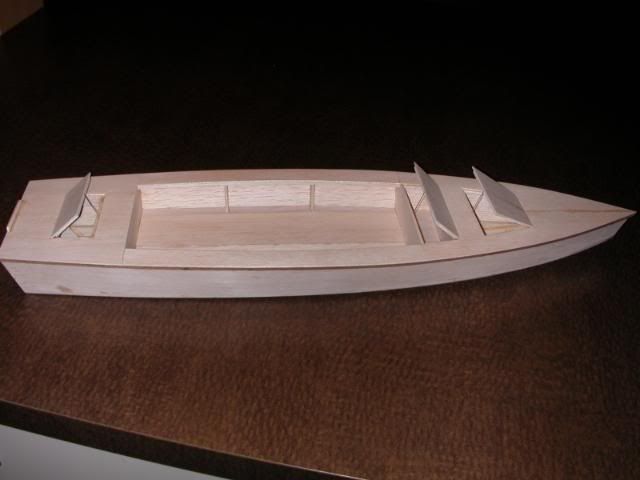
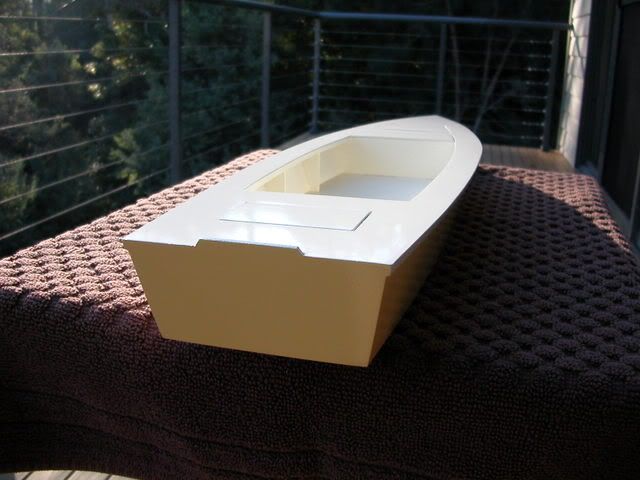
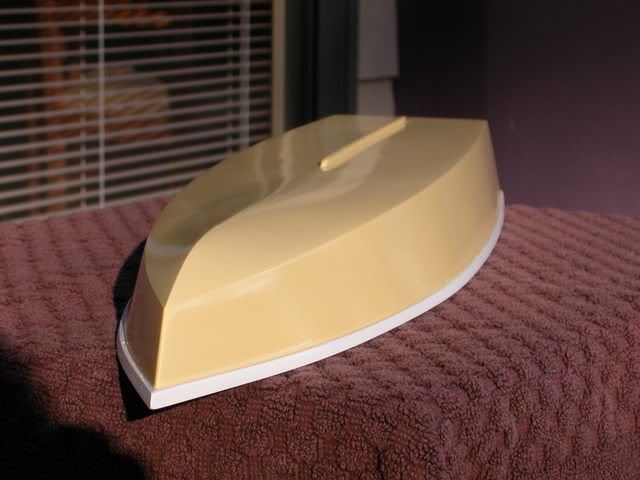
Well, I finished the 2 models as you'll see below. I did 1 in the original sheer version and a second with the flush sheer.
Both versions I have extended the front deck back by 300mm to allow for extra storage and extra fishing deck up front.
1. Strongback with frames/molds attached.
2.
3.
4. Fitting rubrails.
5. Original sheerline on left, flush sheer on right.
6. Frames/stringers fitted.
7.
8.
9. Finished original sheer version.
10. Finished flush sheer version.
11. Both for a comparison.
12.
13.
14.
15.
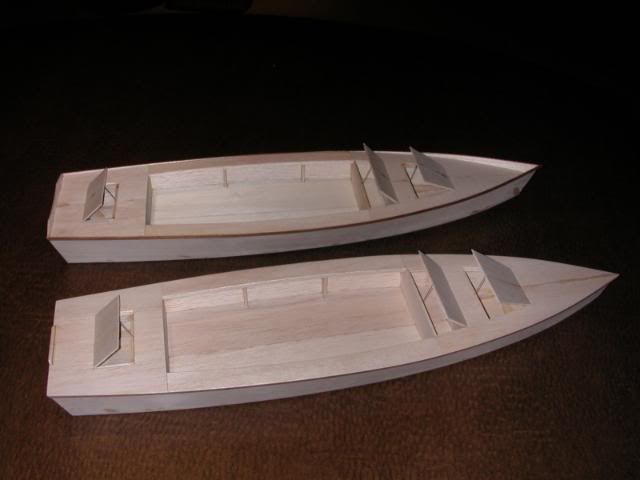
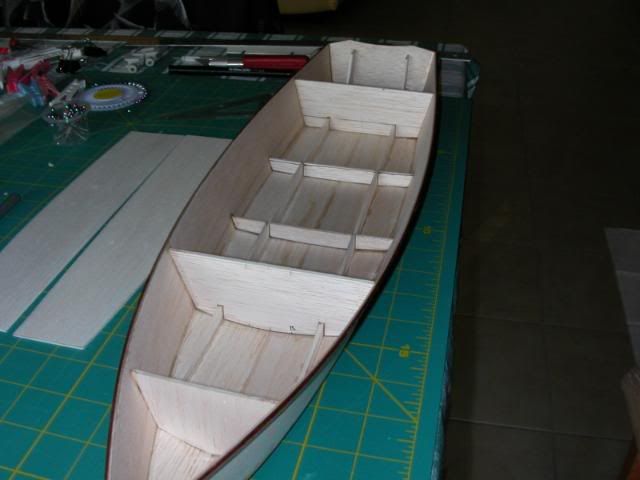
You will see in picture No. 7, I have extended the front deck to the rear by 300mm. I have put the frame on top of the cockpit sole. the side frames, C and D sit on top of the sole, directly over the top of their corresponding horizontal member.
As I have extended the deck, frames C and D are now not spaced evenly along the length of the cockpit. My question is, do these side frames which support the gunwhales need to be directly over the corresponding sole member, or can I space them evenly.
It's just really for aesthetics, (and I'm anal). I did it this way for the flush sheer version, (piccy 14) you can just see the difference between the 2 in piccy 11. It does look neater, but if it is needed for support reasons, so be it.
I'll post more piccies when I get them painted.
Thanks
Mick.
Posted: Wed Apr 30, 2008 8:06 am
by dborecky
VERY NICE!! That is a great way to see what you are building and make decisions. Nice looking models...
Posted: Wed Apr 30, 2008 8:42 am
by Cracker Larry
WOW

That is some fine modeling

You won't have any trouble building a boat

Posted: Wed Apr 30, 2008 9:28 am
by TomW
Wow thosw are gorgeous, Mick. You should have no problems with the big boat! What's your preference now that you have built them. I sort of like the original, but, both are nice.
Tom
Posted: Wed Apr 30, 2008 9:32 am
by jgroves
Flippin' awesome models!!! I like both of them, but like Tom ask... what is your favorite version?
Posted: Wed Apr 30, 2008 12:55 pm
by Bayport_Bob
Your customizations look familiar
If you re-space frames C & D components above the sole so they are equally spaced in the cockpit then the loads will be transferred to somewhat unsupported areas of the sole.
It might be better to get Jacques approval to move the portions of Frames C & D under the sole as well. The extra frame could also have a component under the sole which would make up for the adjustments of C & D.
Posted: Wed Apr 30, 2008 1:19 pm
by tech_support
very nice

Thanks for sharing
Posted: Wed Apr 30, 2008 2:10 pm
by jacquesmm
You can move the frames: space them evenly, the distance between them should not be much more than 36".
Posted: Thu May 01, 2008 4:06 am
by Cracka
Thanks for the compliments guys.
Cracker Larry, I hope I have no problems with the 'Big'boat when I start. The wood work part doesn't faze me, just the epoxy work.
TomW, Jgroves, I also like the looks of the original, but I want to fit a bowmount leccy motor up front like my last 2 boats and I think it will be neater and easier with the flush sheer version.
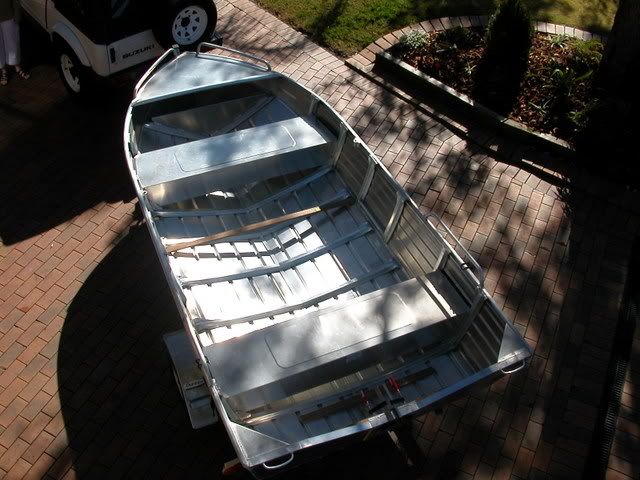
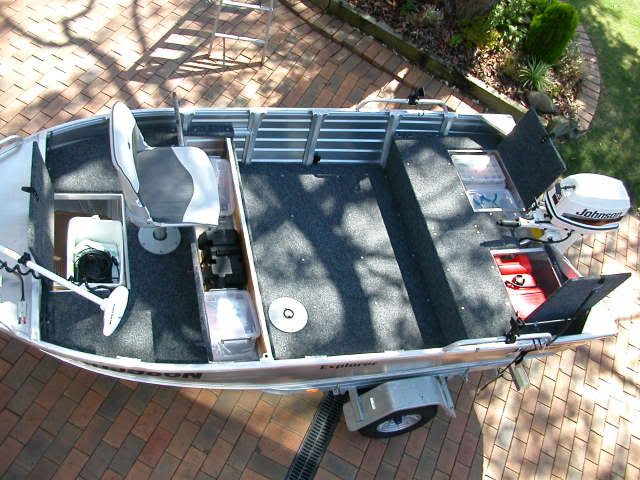
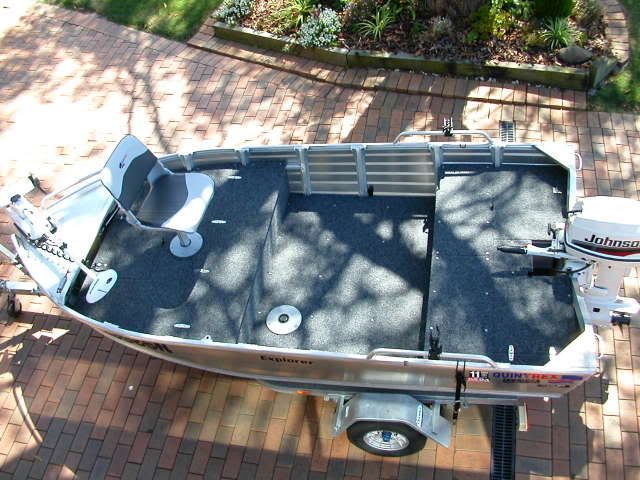
Bob, I have seen your boat, on your website, mate, it looks great, and yes I did sort of steal the extra frame idea from you but really liked it as the fron platform wasn't big enough for what I want.my first boat I bought as a bare tinny and fitted it out with sole and cast decks. I had put the same storage area behind the front thwart for storage and the leccy motor battery. See piccies 1,2,3.
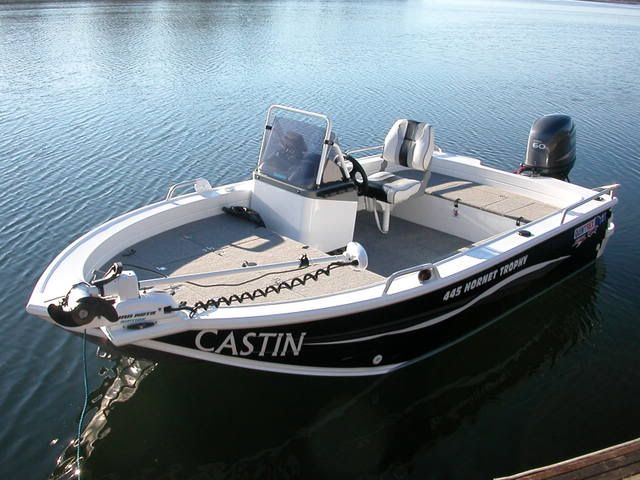
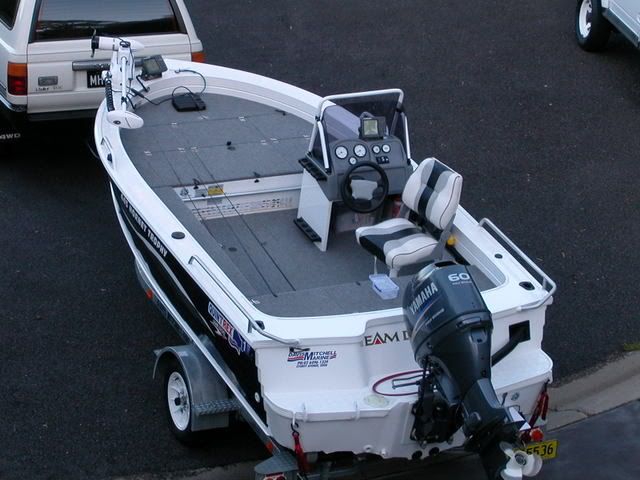
My next boat, which I sold last year had the same area for leccy motor battery/storage with a 80 litre livewell forward of that. See piccies 4,5.
Bob, have you made any more progress on your boat. I love those rod holders you built, very niiice.
As far as moving frames C and D go, would I be able to use the pattern for the original position (is the size going to differ that much). Just estimating from the model that D would move back about 100mm (4") and frame C move backwards about 200mm (8").
I have enjoyed building the models and I think it gave me an insight into the build method.
How do you reckon the boat would go with a very small side console like a number of 'other' boats of this type use.
Thanks
Mick.
P.S I had to put the piccies at the end today as everytime I put them in the body with text after them, when I previewed the post all I got was the address for the photo and no photo
1.
2.
3.
4.
5.
That worked this time.

Posted: Fri May 30, 2008 1:42 am
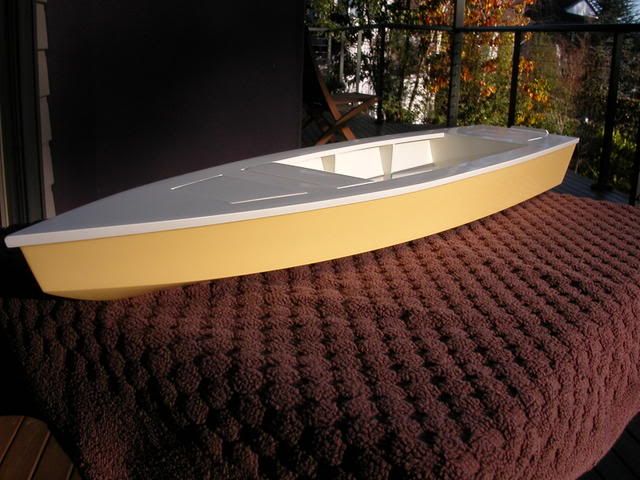
by Cracka
Well I finally got the model painted. Reading all of the negatives of fairing and painting etc on here, I think doing the model was proportional, I did the following.
1. Wood filler where needed.
2. 2 coats of model dope and acetone mixed 50/50.
3. 3 coats of dope/acetone/talcum powder, equal portions. This was used to fill the grain of the balsa (a bit like quickfair I suppose) sanded in between.
4. 3 coats of primer.
5. 3 coats of top coat.
But I was pretty happy with the end result.
I'd love to be able to find a scale, or even toy outboard in the right size to go on, I've scoured the net and toy shops but no luck so far. I suppose you can tell I'm bored can't you, still not back at work!!!
Posted: Fri May 30, 2008 2:51 am
by chicagoross
Nice! When I was searching for mercury outboards on e-bay a while back, a number of model outboards were coming up; you might try looking there.
Posted: Thu Jun 05, 2008 12:21 am
by Cracka
Thanks CR. I've been looking at Ebay and everywhere else. There only seems to be models of vintage outboards or large 250 300 hp jobs. I'll keep scouring though, it would finish it off nice.
Mick
Posted: Thu Jun 05, 2008 11:51 pm
by jj12672
Awesome models. I'm planing on building the same boat and want to do one with a flush sheer. Now I can visualize both boats together, I really do prefer the flush sheer over the original.
Thanks again for the great pics of the models.
JJ
Posted: Fri Jun 06, 2008 12:01 am
by TomW
Nice work Craka. now on to the big boat.
I really like that paint color, what is it and who produces it.
Tom
Posted: Fri Jun 06, 2008 1:50 am
by Cracka
JJ. Thanks, I think I like it better myself as well, however, I do like the look of the original but I want to fit a bow mount leccy so I think the flush sheer version will be easier for that.
Tom. The colour I wanted was something like you guys call Fighting Lady Yellow, I've seen it on a number of boats on the net and it looks real nice I think, JGroves's FS17 build looks great in it.
This was the closest I could find at the local hardware store in an aerosol pack enamel. the brand is Easy Way, colour is 4013 yellow. It's distributed in Australia by Master Distributor Paints
www.masterdistributors.com.au. Those details straight off the can. It's a bit darker than F.L.Yellow but it's nice. When I do the 'big'boat I'll have to see what's available out here for roll and tip anyhow.
Mick.
Posted: Fri Jun 06, 2008 2:50 am
by Jaap
Cracka,
Very nice work! It is great to see how people prepare themselves for the "job"! These would fit nicely in Jacques 's museum.
jaap
Posted: Fri Jun 06, 2008 3:52 am
by TomW
Mick, thanks don't know what I'll end up with in the states but really like that color over FLY. FLY is to common for me, I'm a little bit of a rebel so don't know what color I'll end up with.
Tom
Posted: Fri Jun 06, 2008 8:12 am
by jgroves
TomW wrote:Mick, thanks don't know what I'll end up with in the states but really like that color over FLY. FLY is to common for me, I'm a little bit of a rebel so don't know what color I'll end up with.
Tom
It looks like FLY in morning or evening light. But I agree I like the color! That is some nice model work!