
did you use real peel ply? Or what we all call "poor mans peel ply" here which is thick plastic?
Laying the wide cloth over that glass joint will be very easy, just buzz the edges of the tape with a sander and your set.
Sashimi-panga22-Kauai
-
tech_support

- Very Active Poster

- Posts: 12318
- Joined: Wed Dec 31, 1969 7:00 pm
- Location: Vero Beach, FL
- Contact:
-
mecreature
- Very Active Poster
- Posts: 770
- Joined: Thu Jun 29, 2006 4:54 pm
- Location: Indiana
-
Fonda@kauai

- * Bateau Builder *
- Posts: 558
- Joined: Fri Apr 18, 2008 9:39 pm
- Location: Kauai
- Location: kauai, Hawaii
I used poor mans peel ply. 5 mil plastic. After I lay the plastic over the lamination, I roll out all the air bubbles then put a scrap of 1/2" ply with some weight on it on top of that. It seems to really push the glass down through the epoxy. No worries on the edge of the splice. By the time I sand the edges and lay the biax cloth over it, you won't even know it's there 
Aloha
-
Fonda@kauai
- * Bateau Builder *
- Posts: 558
- Joined: Fri Apr 18, 2008 9:39 pm
- Location: Kauai
- Location: kauai, Hawaii
Okay guys, I need some sage advice  But first a few progress pics. In order to get the okoume to compound bend around the front frames I kerfed the front half of the bottom panels. I only cut through 2 of the plys but it helped a lot. Don't have a shot of the kerfs yet. The I made the bottom panels conform to the frames using temporary screws
 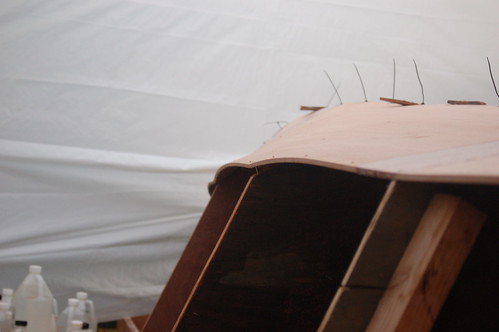 As you can see there were some nasty bulges
  Then I hung the side panels, pulled the stitches tight and removed the temporary screws. Much better! Here's looking back toward the transom
 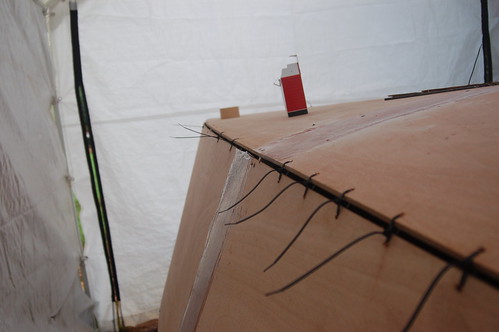 It's far from perfect and I'll definitely take my time fine tuning it. Here's a shot looking toward the bow..
 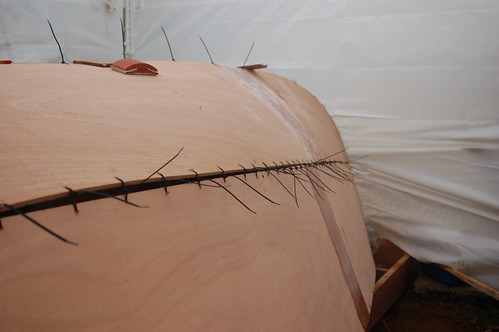 again not perfect yet, but we'll get there. Before I hang the other side panel I still have easy access under the hull. So my question is what do you think I should do about this
  The plywood scraps that are 90 degrees to the keel seam have a screw through them tightening the panels to the frames. Should I try to pull the panels down like Copro did? Or should I just stitch them tightly, pull out the screws holding the panels down at the frames, and let them do as they wish? Either way it's fairness first, but I'm looking for some confirmation
As you can see there were some nasty bulges It's far from perfect and I'll definitely take my time fine tuning it. Here's a shot looking toward the bow.. again not perfect yet, but we'll get there. Before I hang the other side panel I still have easy access under the hull. So my question is what do you think I should do about this The plywood scraps that are 90 degrees to the keel seam have a screw through them tightening the panels to the frames. Should I try to pull the panels down like Copro did? Or should I just stitch them tightly, pull out the screws holding the panels down at the frames, and let them do as they wish? Either way it's fairness first, but I'm looking for some confirmation Aloha
-
saltponder
- Frequent Poster

- Posts: 82
- Joined: Sun Sep 10, 2006 2:08 pm
To take out the seam bulges on my Panga 20, I used 2x4 sections underneath and screwed down and then tack welded seams with the wood flour/epoxy mix. Where the bow started to curve downwards, I used Copro's pull down technique in two spots on the keel, but all other bulges were removed easily with 2x4's, one on each side of the seam and parallel to the seams but an inch or two away from the seam. Afer spot welding cured, I removed the 2x4's.
Gil
Gil
-
Fonda@kauai
- * Bateau Builder *
- Posts: 558
- Joined: Fri Apr 18, 2008 9:39 pm
- Location: Kauai
- Location: kauai, Hawaii
-
saltponder
- Frequent Poster
- Posts: 82
- Joined: Sun Sep 10, 2006 2:08 pm
My panga and I are laid up on a lee shore waiting for a wind of motivation to get me off the rocks. Still need to finish fairing outside of hull and paint. Perhaps your efforts will shame me into action.
JASmine's panga 20 was the source of inspiration for the 2x4's. Be sure to use the skinny edge for screw down. I departed from his procedure by using putty fillets for spot-tacking rather than the fiberglass tabs. Figured it would make fairing easier. Be sure to tape the inside seam to control putty depth. The 22's panels are under less bending compression than the 20' panels so the fillets are more than adequate to hold the shape pending seam filling with putty and taping.
Gil
I struggled with 2 x 4s, straps, screws and various choice phrases, all to the good in the end. But if I were you, first I'd try the stitch 'em and let 'em fall where they will thing. It's easy and won't take long. I'd let 'em sit after stitching for a day or so, and experiment with loosening and tightening the stitches to get her fair. Gaps are good, up to 3/8" so there's room to play.
Says it looks pretty good from here already Dougster
Says it looks pretty good from here already Dougster
-
saltponder
- Frequent Poster
- Posts: 82
- Joined: Sun Sep 10, 2006 2:08 pm
Point of clarification: It was only on the keel seam that two 2x4's required. Only one is required per chine between stations. I was surprised how far back towards the stern the curving between stations appeared. I was not able snug the curves out with lock ties alone. That 3/8" bottom is tough stuff and I snapped a few ties trying. Once I got the 2x4s in place, the curves flattened out easily using sheetrock screws where needed. Working alone, I had to drop the sides to temporarily hold the 2x4's against the bottom to secure them at each end. I worked with 2 drills. One to predrill and the other to drive screws. I had to retie the sides to the bottom but that was no big deal. I had extended braces beyond the hull sides at the top of the sides (bottom while hull upside down) at several stations. This allowed the side panels to be almost in place for tying. I later cut them flush with sides as they were shin busters. Another pair of hands would have been helpful under the hull. I would have saved a lot of wasted time and frustration going to the 2x4's first.
Gil
Gil
-
Fonda@kauai
- * Bateau Builder *
- Posts: 558
- Joined: Fri Apr 18, 2008 9:39 pm
- Location: Kauai
- Location: kauai, Hawaii
Sounds like you're stuck in the doldrums Gil  No shame in that. Still I'd love to see another panga done, or at least a pic of your progress. You can post pix here if you don't have a thread going, can't remember if you do
  Spent a lot of quality time in pangas fishing with my dad, so they have a special place in my heart
  Anyway my friend james is gonna come help me on the boat today, so we're gonna try the 2x4 trick down the keel first, and if I can't get the keel seam perfectly fair that way I'll stitch em and see how that looks (thanx dougster, love nina by the way). Either way I'll get it. The 22 definitely seems easier than the 20 looks. The chine is almost perfect with just the zip ties. There's a little more bulge between "B" and "C" than plastic zip ties can handle so I'm off to get some wire for those stitches. But I can't imagine doing tighter compounding, like in the 20. Especially with meranti Just have to out stubborn it I guess
Aloha
Who is online
Users browsing this forum: Ahrefs [Bot], Amazon [Bot] and 20 guests