Page 1 of 1
Murry's gf16
Posted: Mon Oct 27, 2008 12:32 pm
by Murry
It's official

I've started my gf.
I picked up my wood Friday afternoon from Wanchese, N.C.. Saturday I was able to cut and laminate my side panels and cut out my transoms and seat frames.
More pictures and progress to follow.
Daniel
Posted: Mon Oct 27, 2008 1:31 pm
by Cracker Larry

The fun begins!
Posted: Mon Oct 27, 2008 2:11 pm
by TomW
All right another build to follow. Have fun!
Tom
Posted: Mon Oct 27, 2008 2:26 pm
by bernd1
Welcome in the GF-Club

Bernd
Posted: Mon Oct 27, 2008 10:31 pm
by robbiro
I second the welcome to the '"GF" club from bernd. I am trying to get mine finished, but everytime I get going something goes crazy with my body and I have to take a break. I hope to do the final seal on the bottom this next couple of weeks and then go from there. Welcome to the club, jump on in and ponder awhile and build awhile.
Keep on Buildin'
Robbie
Posted: Tue Oct 28, 2008 7:14 am
by Murry
Thanks for the warm welcome guys.
Well, I made my first mistake last night. I had a couple of spare minutes so I decided to precoat the frame locations on the side panels so that I could put the frames and side panels together tonight.
As I was about to drift off to sleep I realized that I marked and precoated the wrong side of one of the panels. (Two left sides won't work)

Silly mistake. Oh well, One thing I've learned so far, there is always something else to work on.
I'll cut and splice the bottom panel instead tonight.
Stay tuned, I'm sure this newbie will be needing some advice soon.
Thanks,
Daniel
Posted: Tue Oct 28, 2008 11:43 am
by bernd1
Daniel, don't hurry - take your build step by step......

If I look back to my first steps I carefully build one piece after one......but with the time you build faster as at the begin.
Make a checklist for all hardware you want to install in future - it saves a lot of time in further building.
My GF has at the moment about 35 backing plates for some hardware like clamps, rod holder, lights inside the box and outside, holder for a fishing umbrella, fishfinder, transductor, bow eye, battery holder........
After you made your side panels and your transoms and frames I highly recommend to build a jig which is on level and flat
.....on this jig I would mount my frames and then dry fit the transoms.
Please check then your boat for symetry /diagonal - don't glue the side panels to the transoms before this - I didn't - and it ended with a small error in symetry -but this error follows you through the whole build...I can tell you....

Keep on building
Bye
Bernd
Posted: Tue Oct 28, 2008 12:16 pm
by Murry
Thanks for the backing plate tip Bernd.
I am planning to dry assemble all frames and transoms without a jig.

I know this is against all advice that I have recieved concerning the gf bottom. Advice wich I have come to respect and appreciate but I have a theory/idea that I think will work without spending the money on jig
materials. My building area is a bit cramped as well.
I will explain through pictures in the near future, but I will not make anything permanent without getting the stamp of approval from you guys.

We all know that I'll probably have a jig built before this weekend, but you never know. I might be able to put that jig money towards Sterling paint instead.
Thanks for the tips Bernd,
Daniel
Posted: Tue Oct 28, 2008 1:47 pm
by bernd1
Daniel,
nothing expensive in a jig -just a panel flat and on level - or without if you have a floor on level in your garage.....
Bye
Bernd
Posted: Tue Oct 28, 2008 2:06 pm
by ks8
Hello Murry,
If the plans specify a jig... build a jig. There are all sorts of ways to measure costs. The designers take great pains to develop not only the designs, but the building method(s) to minimize costs measured in many ways. The cost of the jig, like the cost of the core plywood, is ultimately negligible compared to time and other materials invested by the end of the project.
Use good wood, and if the plans specify a jig, use a jig.
And welcome to the group.
Posted: Wed Oct 29, 2008 7:14 am
by Murry
Thanks for the welcome ks8, and thanks for all the lessons I've learned through your pictures and posts.
The plans for the gf have you building this boat flat on the ground (level ground) and there isn't a mention of a jig.
The problem is that many folks have ended up with severe hook/rocker
when built that way.
(can't remember the deference between hook and rocker, someone please help with that so that I don't confuse people)
I am not against a jig and may end up building one and Bernd if I do I'll get some ideas from you on how I should build it. So stay tuned

Progress: I was able to get the bottom cut, plained and spliced last night and I finished precoating the panels so that I can start putting this puzzle together.

I'm alsmost ready to see a boat.
One thing I ran into was that my wood was 2500mm and instead of 2438.
Took some extra figuring but wasn't difficult it just made it alot easier to make a mistake.
Thanks for the help on my boat,
Daniel
Posted: Wed Oct 29, 2008 12:16 pm
by Murry
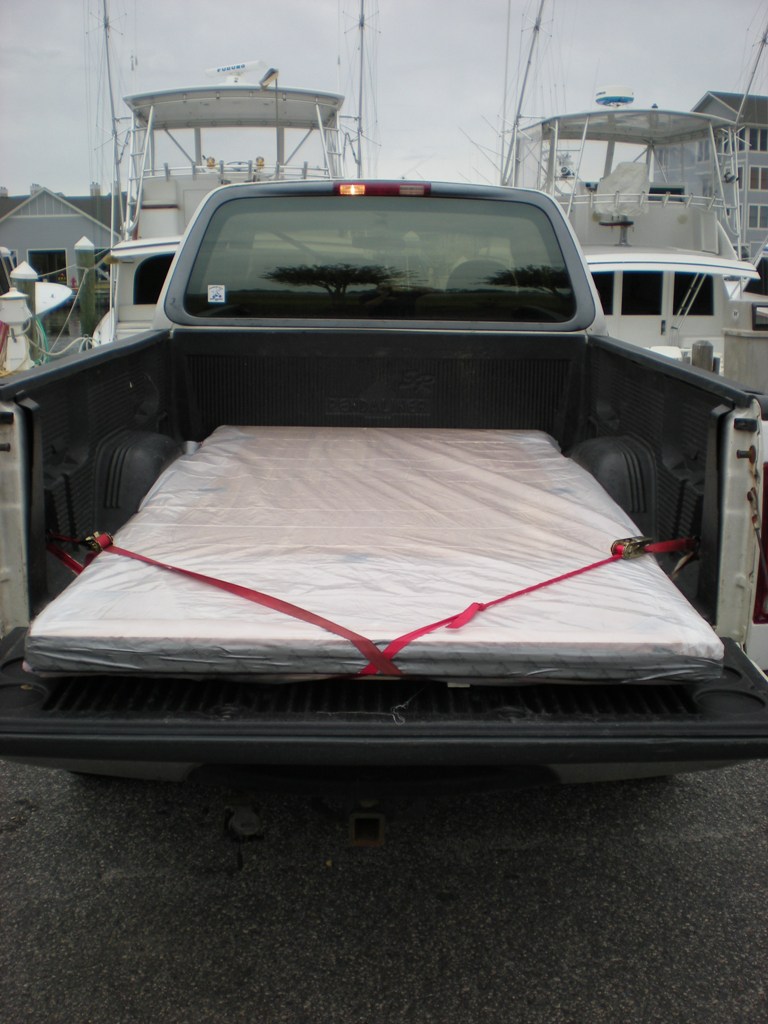
I just figured out how to get the pictures loaded.
I'll try not to get carried away.
Wood all wrapped up for the wet ride home....the only water this wood will see/feel will be full of fish... Did I mention how beatiful the wood is.
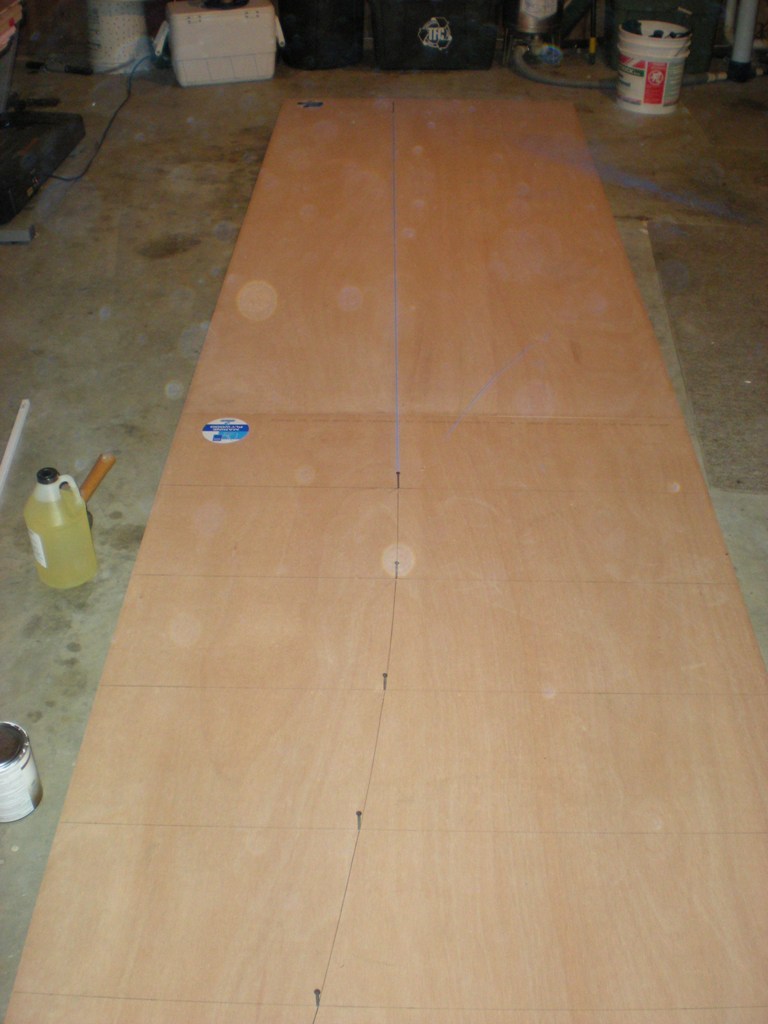
I really enjoyed drawing out the panels...plans are very easy to follow.
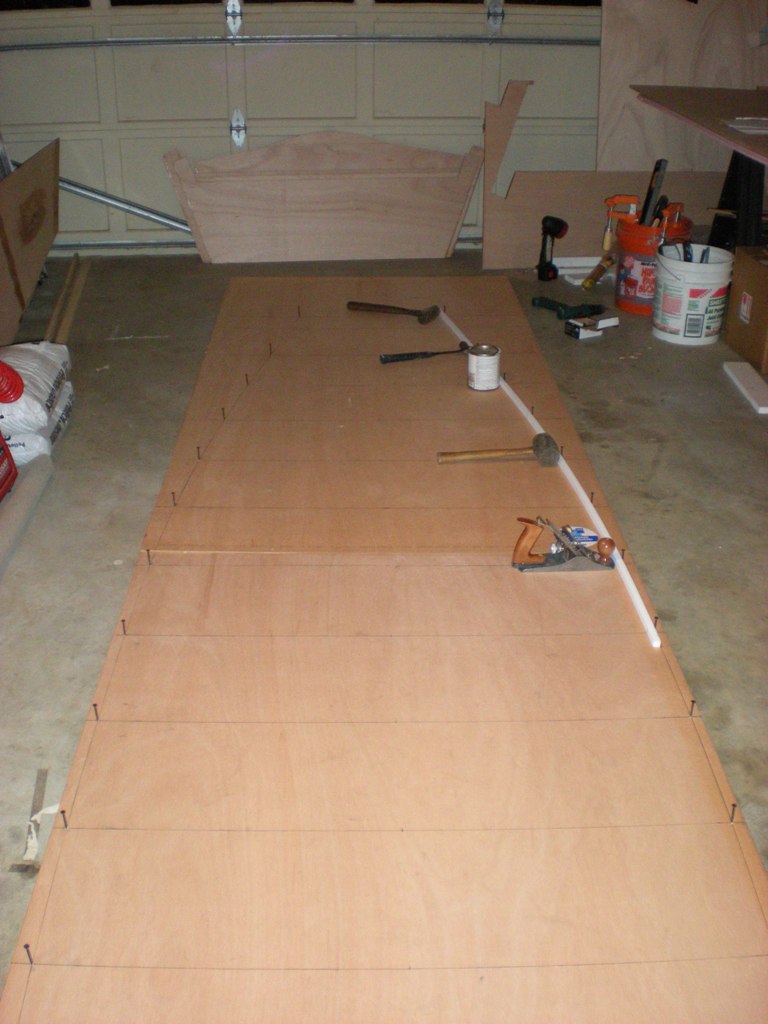
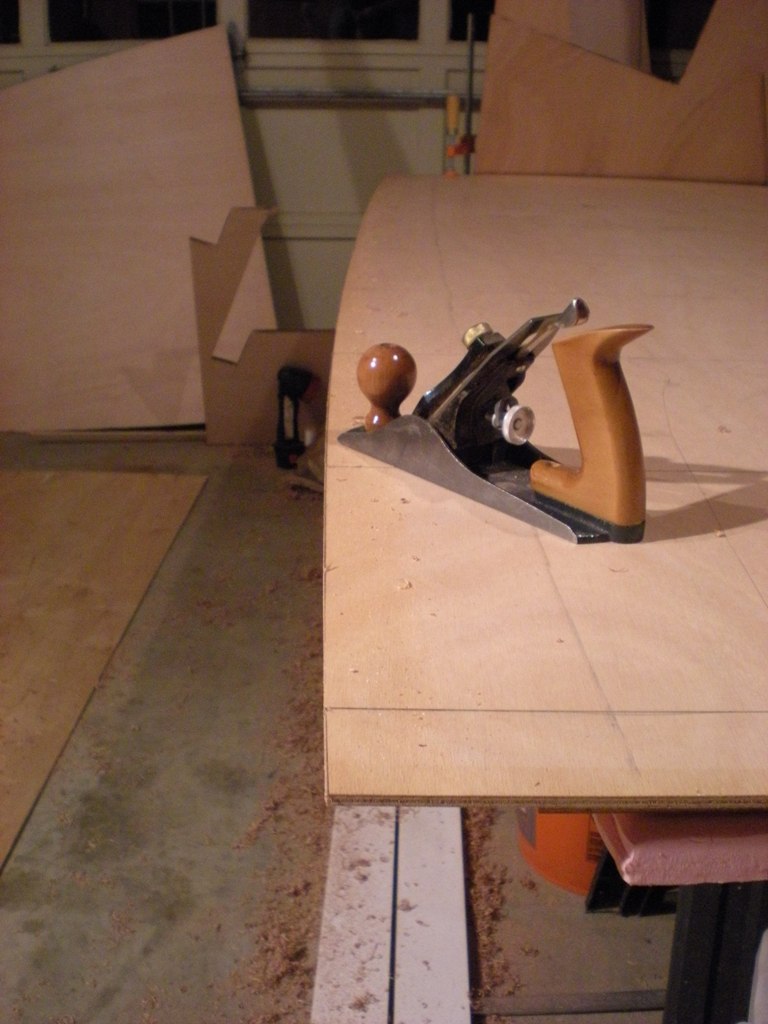
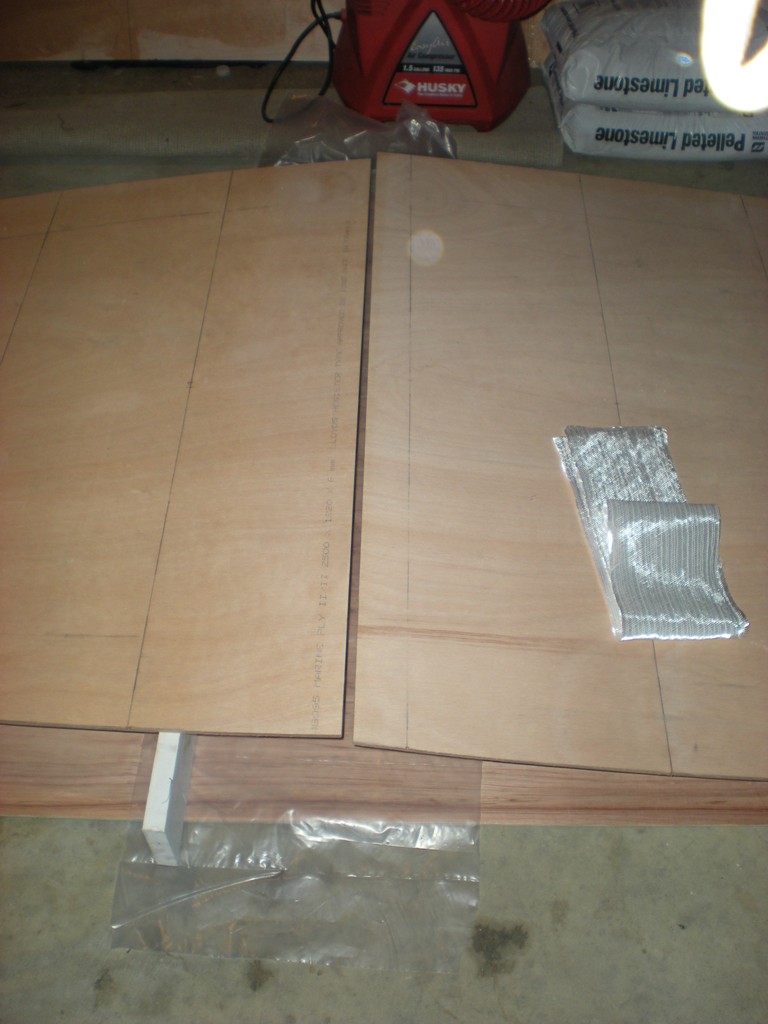
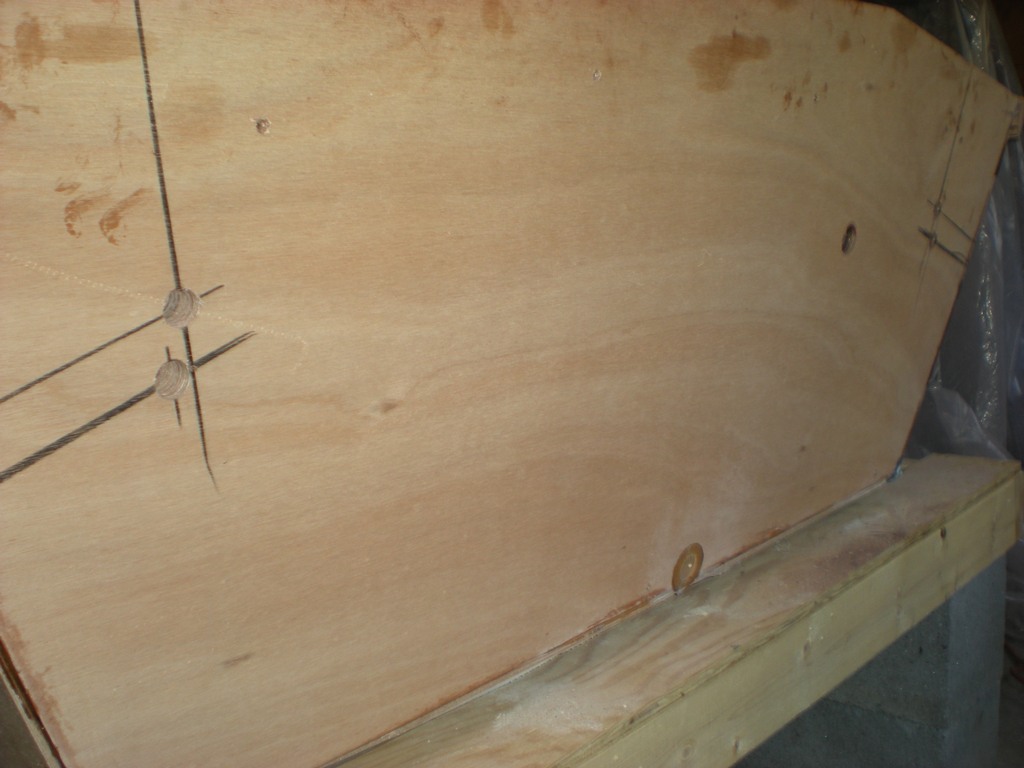
Both side panels after plaining...I had them screwed together while plaining them..... just need to splice.
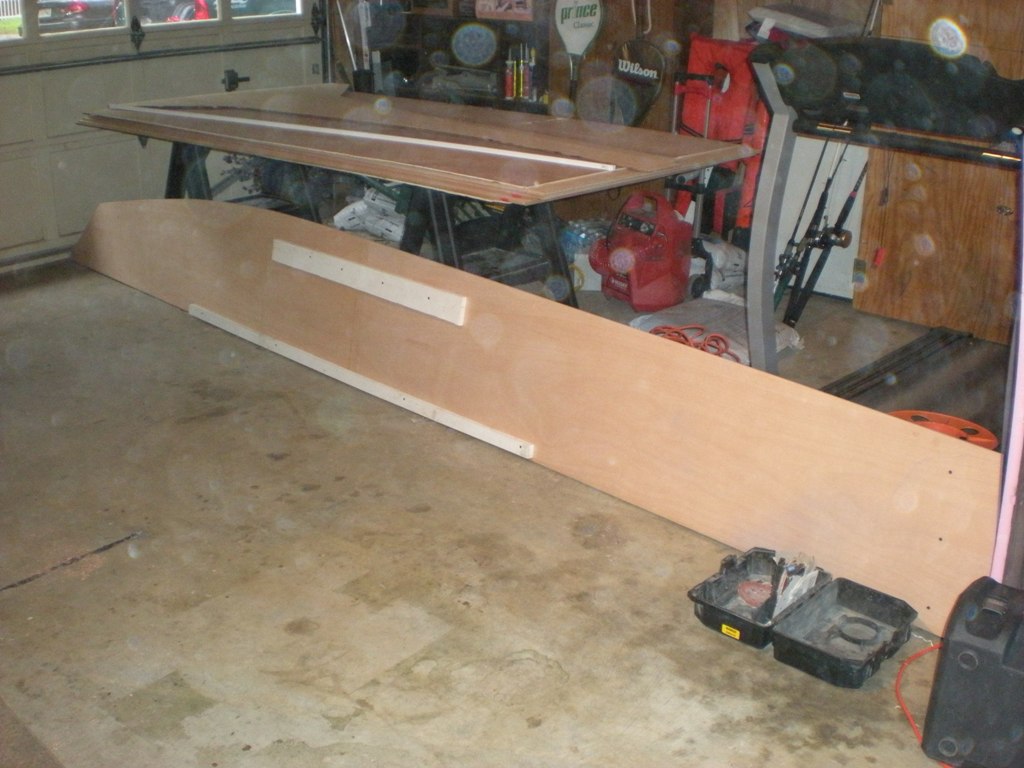
I left the side panels screwed together at the ends hoping to get two panels exactly the same after splicing... they came out nice.
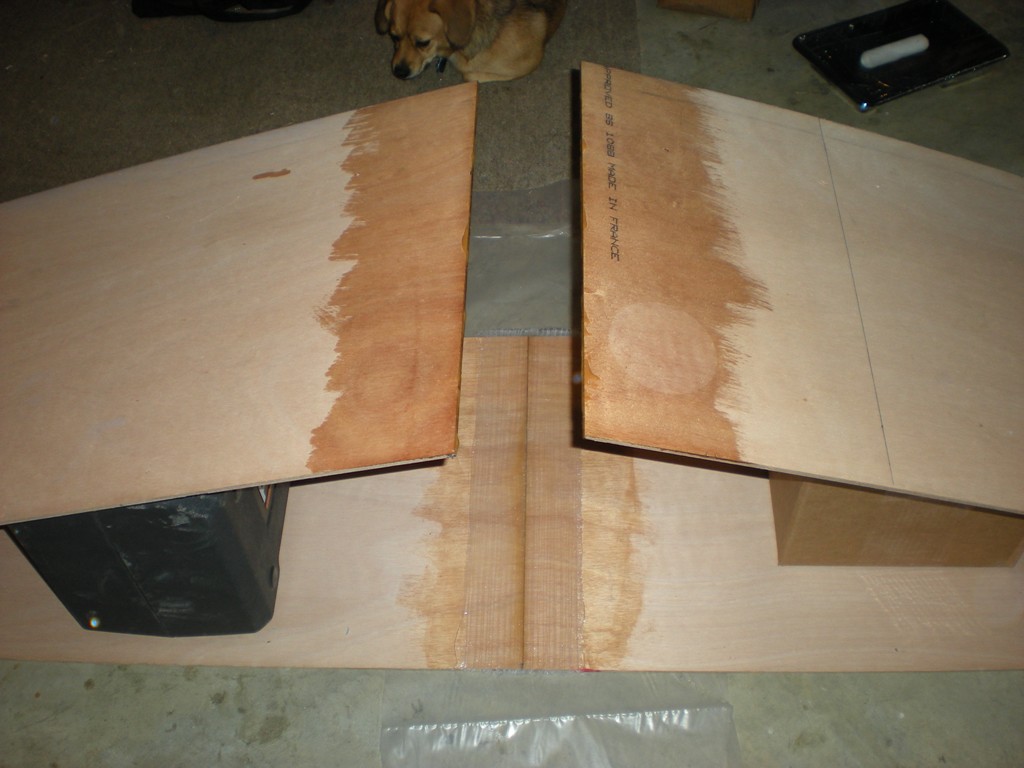
I butted both sheets to draw out the bottom panel.... then secured them to a piece of luan to cut them out.
Plaining to my lines really has been enjoyable and it makes it very easy to get a nice line... not necessary, but hopefully the time I'm taking will show through to the finished product... we'll see.
I used a full piece of luan to secure the two bottom panels so they wouldn't move during the first splice(the panels are loosely screwed to the edges of the luan, about 4 feet from the splice). I proped them up, wet out the edges and faces, applied glue to the edges, lowered the panels and used a spreader to force more glue into the seam. I wet out the tape and applied weight to the seem for curing. I'll post pics after taping the other side.
What do you think so far?
Posted: Wed Oct 29, 2008 1:45 pm
by tech_support
looking good.
Posted: Wed Oct 29, 2008 4:28 pm
by steve292
Nice work. I enjoyed the panel laying out.I understand why people will buy the kits, but to me this bit is a big part of building your own, as you stand or fall on your own.
good luck,
Steve
Posted: Wed Oct 29, 2008 4:53 pm
by Cracker Larry
I also enjoy laying out the panels and cutting them. I'm a lot better at that than I am painting
Gives you better bragging rights if you can say you built it from scratch
Looks good Murray.
...I had them screwed together while plaining them.....
I know it's too late for this tip, but when making duplicate parts like side panels, if you screw both panels together and cut them out simultaneously as one, they will be exact duplicates without needing to plane. This also allows you to only have to mark one panel, reducing chances of mistakes in measuring and marking.
I do love to plane nice wood though
My favorite tool, and much friendlier than the sander
Posted: Wed Oct 29, 2008 7:10 pm
by PastorBob
Every thing moves so fast at that stage.... Enjoy the instant gratification it is only temporary then comes sanding....
Posted: Fri Oct 31, 2008 12:27 pm
by Murry
looking good.
Thanks Joel. I'm having alot of fun. I've been wanting to do this for about
two years.
I understand why people will buy the kits, but to me this bit is a big part of building your own, as you stand or fall on your own.
I almost purchased the kit Steve and I'm so glad I didn't. You miss the opportunity to turn a envelop of well designed plans and some plywood into a boat.
I do love to plane nice wood though My favorite tool, and much friendlier than the sander
This is the first time I've used a plane and man I love it. What a tool.
Enjoy the instant gratification it is only temporary then comes sanding....
Shhhhhh. I'm not thinking about that right now.
A little progress.
the bottom is done..pictures soon.
I started to attach the side panels to the frames lastnight. That's tough.
Especially without a jig. I may build one yet. Regardless, I'll have every frame and transom in place secured by screws with equal gaps so I can check the bottom for flatness and the boat for square before I put an ounce of glue on anything. I presanded all precoated glue locations before assembly.
I'll post pictures of the dry assembly after a couple of adjustments. I'll be honest I'm having a blast seeing this thing come together. I can't think of anything I'd rather build. Boat building is awesome.
Thanks for checking in and responding.
Daniel
Posted: Sat Nov 01, 2008 9:20 pm
by Murry
I surrender
Alright guys a jig it is. Actually I've already built it, but I have some questions.
But on thing first. Larry and Bernd please remind of this post next time you give me advice.

Let me tell what I have so far incase you have any ideas.
I have both midseat frames, the rear seat frame and rear transom temporarly screwed to the side panels. I don't have the forward frame installed or the front transom but I have a strap pulling the front of the side panels together leaving a gap about the width of the front transom.
I installed the frames mentioned above making sure that the bottom edge is completely flush with the bottom of the side panels.
My issue is ofcourse with the bottom:
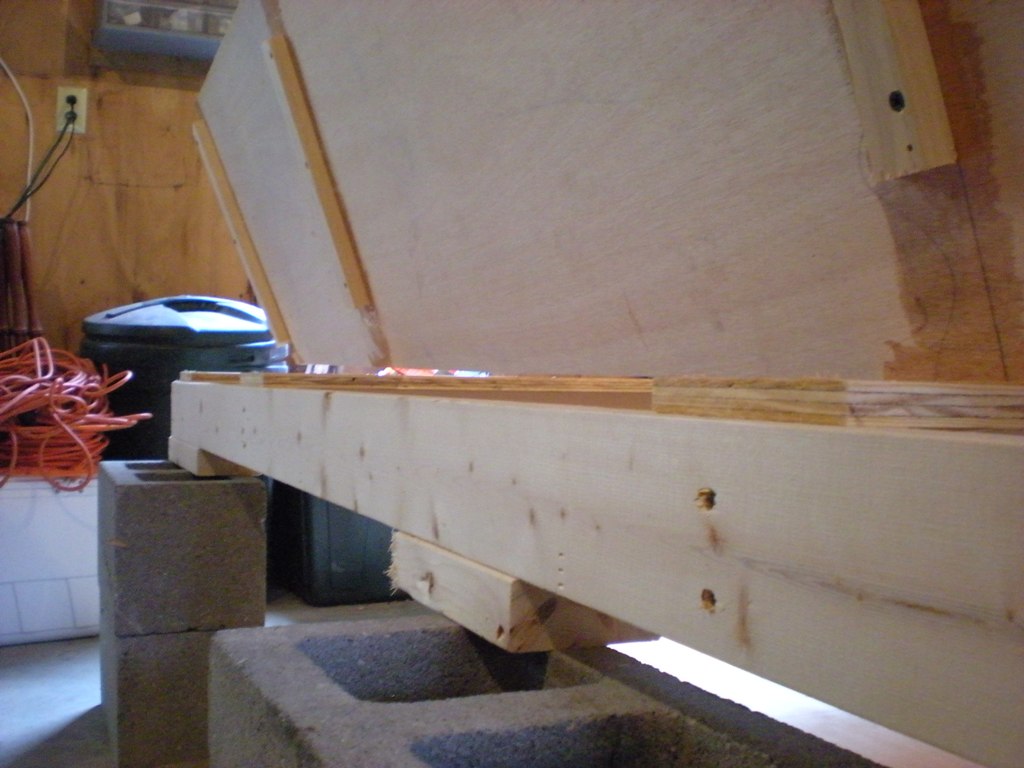
O.K. fastforward I've built a jig/strongback. 10 feet long and five feet wide and it's level. I haven't taken the boat back apart yet but I have placed it on the jig and rechecked my bottoom for flattness.
This is what I have:
When both midseat frames are flat on the jig the rear seat frame is one 1/4 of an inch off the jig and the rear transom is about a 1/2 to 3/4 of an inch off the jig.
When I force the rear seat frame to the jig by pushing down on the rear transom the front midseat frame raises of the jig about one 1/4 inch and
the rear transom remains off the jig about one 1/4 inch as well.
Is this a problem?
What has me confused is that the frames are indeed flush with the bottom of the side panels so it would seem that the bending of the side panels are causing the bottom to raise up in the rear. I'm not sure I can control that. What I mean is that if I have the frames fastenedd flat on the jig and let's say I start with fastening the side panel to the rear midseat frame wont the side panels naturally raise up as I bend them to the profile of the rear seat frame and transom.
Any advice or input would be greatly appreciated and I bet I'll listen.
Thanks-- Have a great weekend
Daniel
Posted: Sun Nov 02, 2008 3:53 pm
by ks8
Murry wrote:This is the first time I've used a plane and man I love it. What a tool.
Enjoy the instant gratification it is only temporary then comes sanding....
Shhhhhh. I'm not thinking about that right now.
...
Daniel
You are a wise man. Enjoy getting to where you begin the sanding, and let that fuel the sanding. You see what all that sanding did for CL's OD18, with glossy paint, and if I remember right, also stickstuff's XF20. Sanding isn't to be feared... it's what gets you finished.
Posted: Wed Nov 05, 2008 1:56 am
by Murry
ks8 I'll admit, I had been thinking about how glossy my gf will eventually be over the last couple of weeks as I've watched Larry's final touches, but that vision is beginning fade.
The vision isn't completely gone, but it's back where it belongs. I'm really stuck on putting the gf together at this moment.
Let me explain everyone:
I had put the boat together per the plans flat on the floor starting in the middle working to the transoms.
It's my understanding that the bottom is to be flat from the front mid seat frame to the transom. Well, I wasn't able to achieve that by my method of construction.
So I built a jig flat and level. I took the boat back apart (thankful It was a dry construction) and secured all three seat frames to the jig at 90 degrees. I then installed the sides keeping them flat on the jig. So all three seat frames and the bottom edges of the sides are flat on my jig, I'm getting excited now, I've fixed my problem.
Oh Yeah. Life is Good.
So.............then I put the transom into position. The transom is quite abit more narrow than the last seat frame and when I pull the sides into the rear transom they come right off the jig about 1/2 of an inch. WHICH MAKES IT NOT FLAT


.
Am I making to big a deal out of how flat the bottom should be from the front mid seat frame to the transom? I really hope the answer is yes.
If I widen the transom about 3/4 of an inch on each side It will remain flat but I feel like that's a large design change.
Posted: Wed Nov 05, 2008 10:02 am
by D2Maine
nm
Posted: Wed Nov 05, 2008 10:08 am
by jacquesmm
Please do not cross post.
I answered your question in the "power Boats" section.
Posted: Wed Nov 05, 2008 11:15 am
by Murry
Please do not cross post.
Sorry Jacquesmm it won't happen again, my intention was to only get more folks to veiw it, not waist anyones time.
After I posted it on my build thread I decided to also post in the power boat section because I knew that it would most likely be seen there.
Thanks for the encouragement guys, and don't worry I won't be giving up over a small issue.
I'll get some pics. up and keep you posted.
Daniel
Posted: Wed Nov 05, 2008 12:36 pm
by D2Maine
nm
Posted: Wed Nov 05, 2008 9:49 pm
by Murry
No worries D2Maine, that was definately my mistake.
I'm in boat building mode, I was trying to get as much coverage as I could.
Daniel
Posted: Sun Nov 09, 2008 1:16 am
by Murry
Alright, it's time for an update.
I attempted Round #3 on Thursday night and it was a success
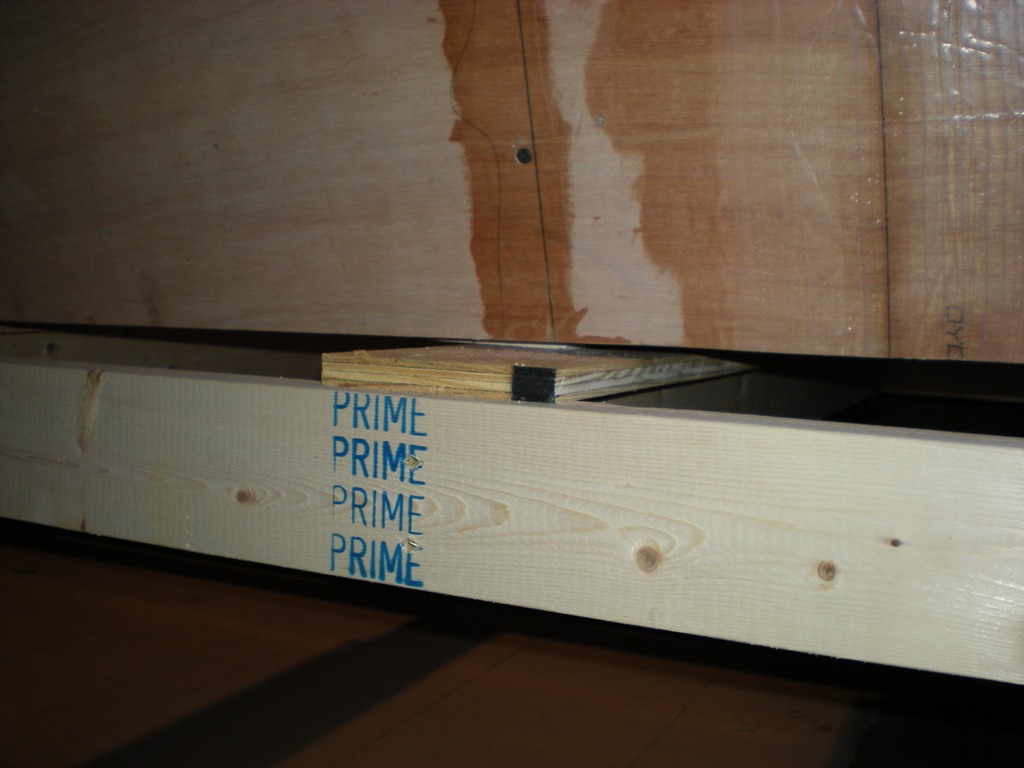
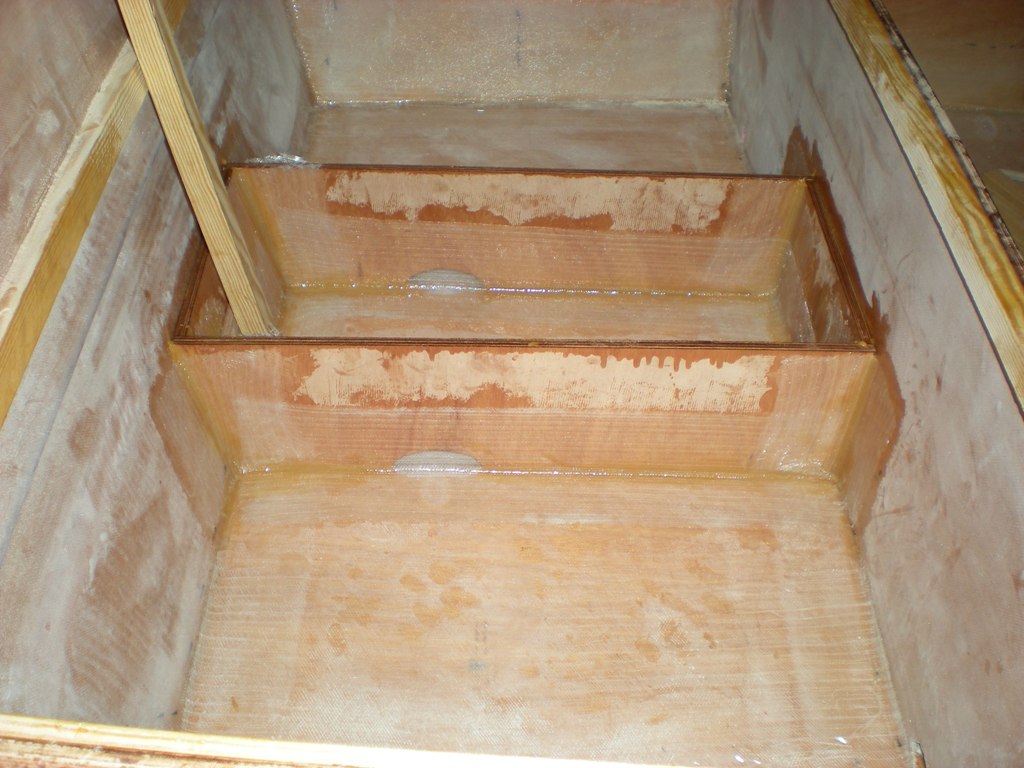
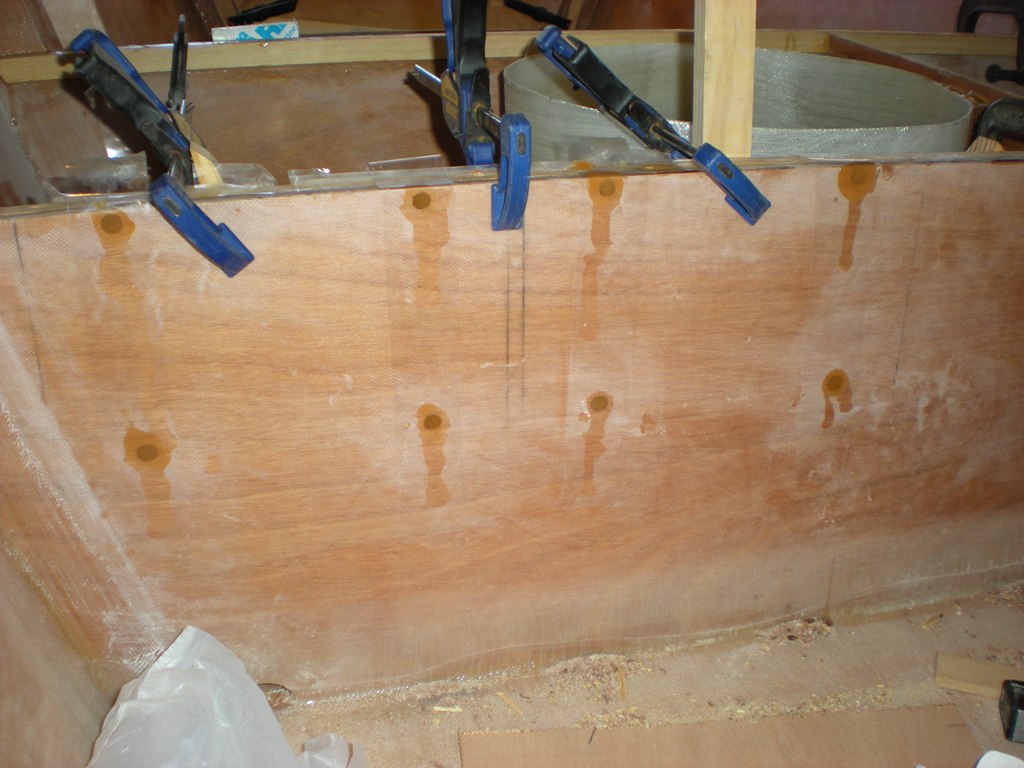
Here are a couple of pictures to help explain, the first picture was taken after Round #2.
On the right side of this photo you can just see the rear midseat frame location(the picture is taken of the side panel) . Notice that it's flat on the jig, but following the picture to the left moving aft, you'll notice the frames progressively rising off the jig. The transom ends up about 1 inch high.......Not Good.
We got it right after Round #3.
The next picture is the same as above, but with the last three frames flush on jig. Much better.
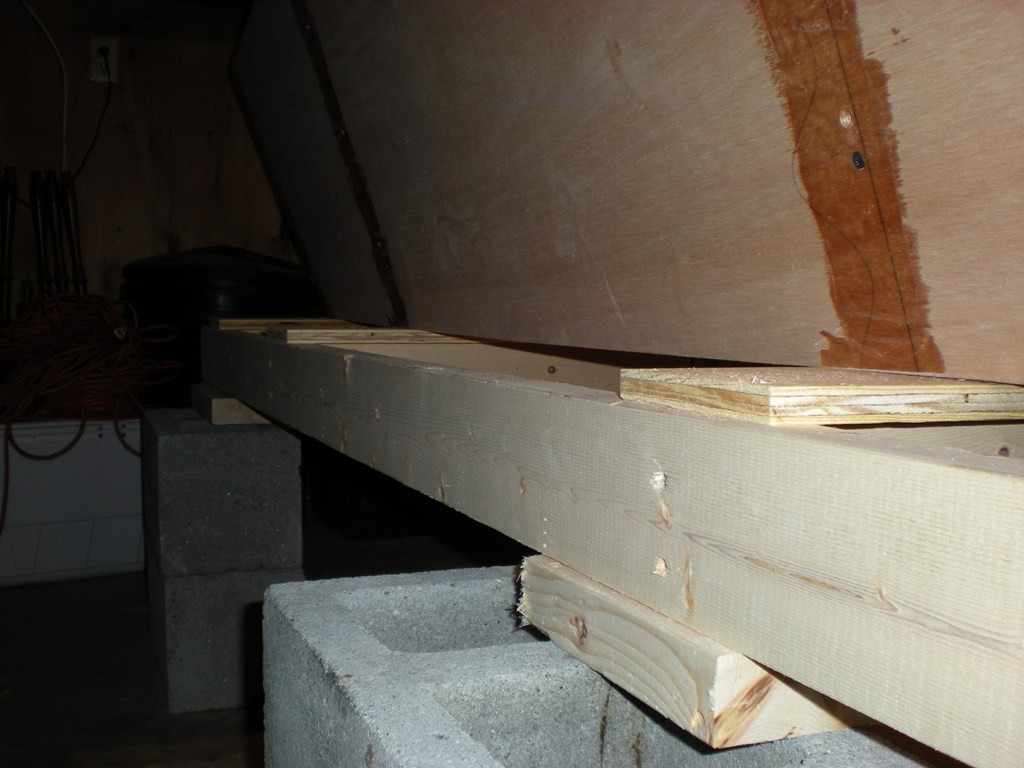
This next picture is the forward midseat frame, it's about 3/8 of an inch off the jig.....I can live with that. Thanks Larry.
Next, I measured my diaganols (left rear of transom to right side of bow/right rear of transom to left side of bow) I was 5mm out so I mounted a couple of braces to hold the bow to within 1.5mm. Good enough.
Here are the braces.
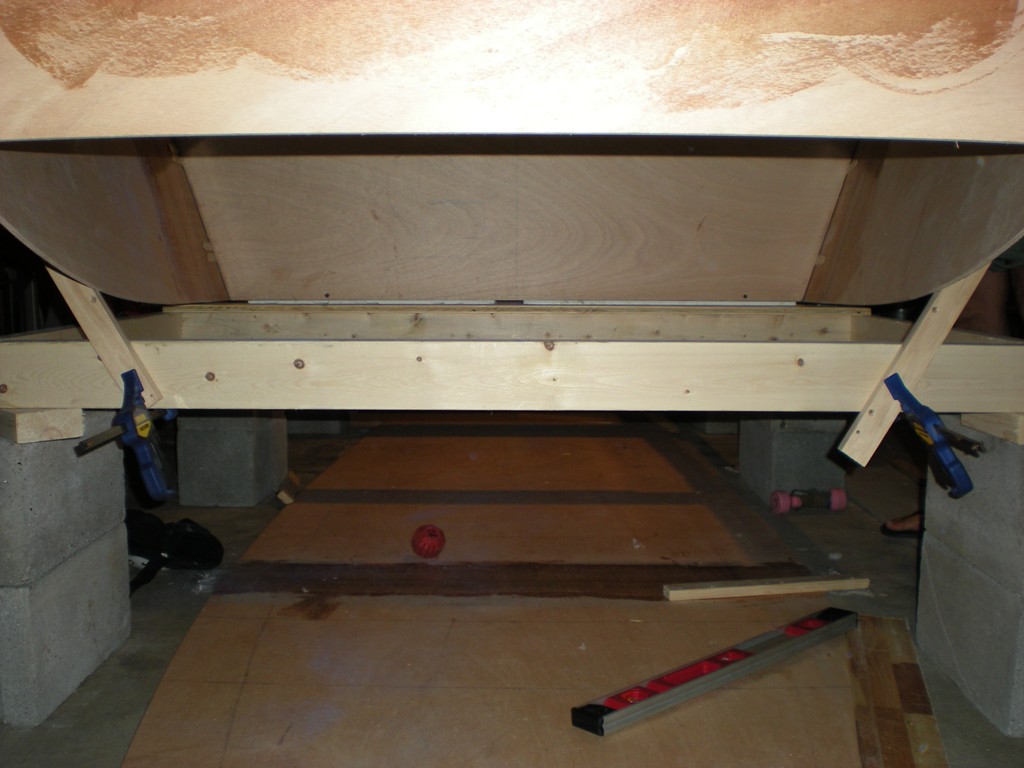
I wanted to dry fit all panels and then glue the hull without having to take anything apart, so I used stiring sticks as spaceres to accomplish that.
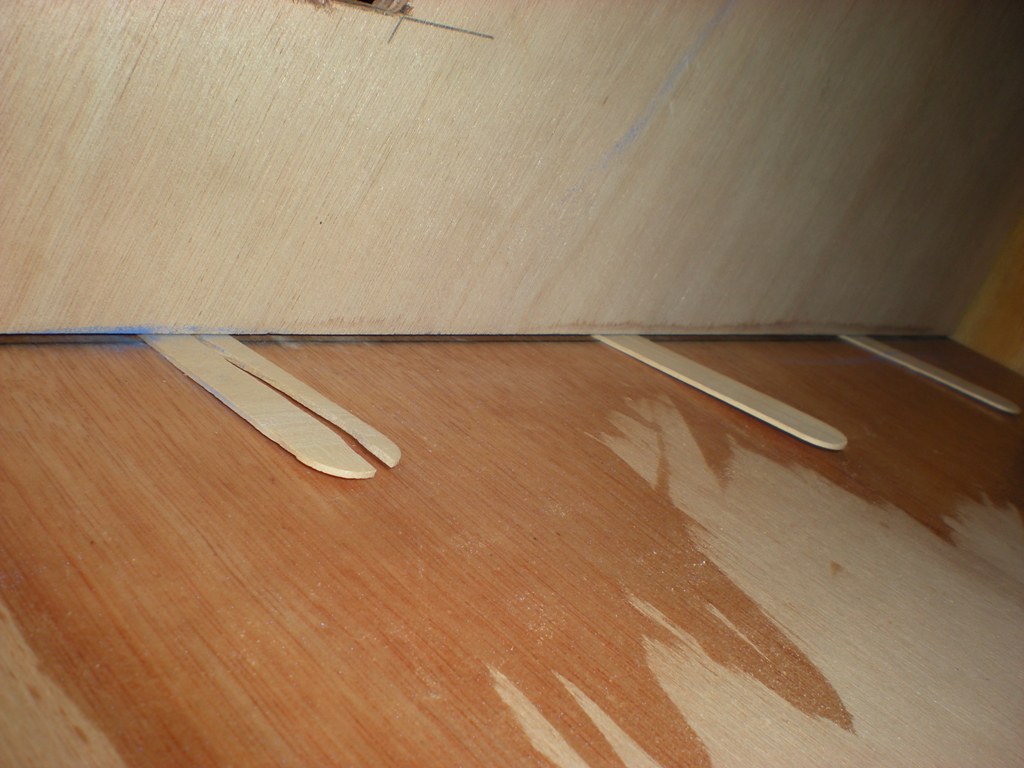
I then taped oneside of the gap with tape.
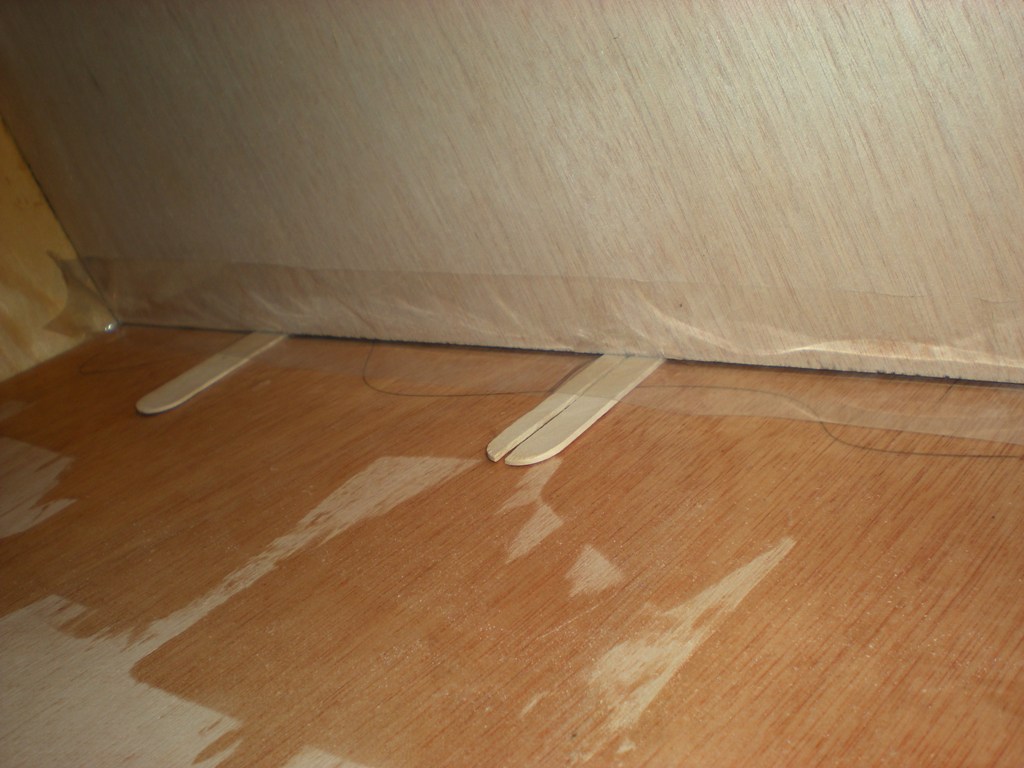
and then forced glue from the other side all the way to the tape.
There you have it.
I'll be working on the rubrails tomorrow after church and I'm attempting all three layers of the lamination in one session. We'll see how it goes.
Thanks for the advice with the bottom issues guys and thanks for visiting this thread.
Daniel
Posted: Sun Nov 09, 2008 6:02 am
by bernd1
Daniel -Great !!!!!!
Your bottom is more flat as mine - I learned it the hard way (with problems).
But I solved it a little different.
I'm sure your boat will plane perfect !
Bye
Bernd
(If you work the next time with this speed you will overtake me
)
Posted: Sun Nov 09, 2008 9:03 am
by Cracker Larry
Perfect
Posted: Sun Nov 09, 2008 9:44 pm
by Murry
Thanks guys.
Things came up this afternoon and I wasn't able to work on the rubrial today. It'll have to be my Tuesday night project.
Bernd, if my gf looks half as good yours, I'll be proud. You're doing a beautiful job and Larry, your direction was more helpful than you know.
Until Tuesday,
Daniel
Posted: Wed Nov 12, 2008 7:25 am
by bernd1
Hi Daniel,
during my building I got some ideas and changes in my building -easier and with less effort and less time for it.
The changes I would made are:
- one hatch in the middle of the rear seat and mid seat
- I would buy a hatch - wide enough to put a fuel tank through the opening
- I would install my pump box in a corner of the rear - never in the middle - because of space
If you follow these hints you save a lot of time - my hatches ......a waste of time
(...every day we learn more and more).
Bye
Bernd
Posted: Wed Nov 12, 2008 8:10 am
by Murry
You have inspired some thought with that post, Bernd.
I have been planning to do much more that that, but I will consider your advice.
Bernd, were you planning tomake your gf unsinkable? I've been thinking of ways to do that with my build, but it does require alot of extra work.
Daniel
Posted: Wed Nov 12, 2008 10:13 am
by Cracker Larry
Daniel, I'd make it unsinkable. It's not much extra work for what you gain. And if you ever intend to sell it in the future it needs to meet USCG standards, which require it to be unsinkable.
I divided each seat compartment into 2 sections with plywood dividers, then filled the starboard section of the rear seat, the port section of the center seat and the forward section of the casting deck with foam. It might add 1 days work and $100. Worth it to save a life or the boat IMO.
Posted: Wed Nov 12, 2008 12:00 pm
by Murry
Thanks Larry,
I wasn't aware of the USCG standard. I just figured it would be an option for a small boat. You know what they say about assumptions.
I like your method that you described in your earlier post. I had been thinking about filling the rear and midseat areas up about 6-8inches and then adding ply to raise the floor over them and then do what you did up front. Not sure if that would be enough flotation, though.
It seems like my method would make it impossible to trim the excess foam since I'd be working down inbetween the frames.
The further I get with my build I thinking more and more simple. At my rate of design change I'll end up with oar locks and a natural work boat finish.
I think for now, I'll just concentrate on getting all interior glass done and then decide my layout.
Thanks for the idea and the USCG tip,
Daniel
Posted: Wed Nov 12, 2008 1:48 pm
by bernd1
Murry wrote:You have inspired some thought with that post, Bernd.
I have been planning to do much more that that, but I will consider your advice.
Bernd, were you planning tomake your gf unsinkable? I've been thinking of ways to do that with my build, but it does require alot of extra work.
Daniel
About to have a unsinkable boat.......I thought about that , but I fighted with myself because of lost storage space.
On the other side there are the rules in the US with the USCG and in Germany an equal one......but I loose storage space.
My idea is to have a moving floatation device which I put into the seat when I don't need so much storage space. I remove some parts if I need more storage space.
At the moment there is now floatation device in.
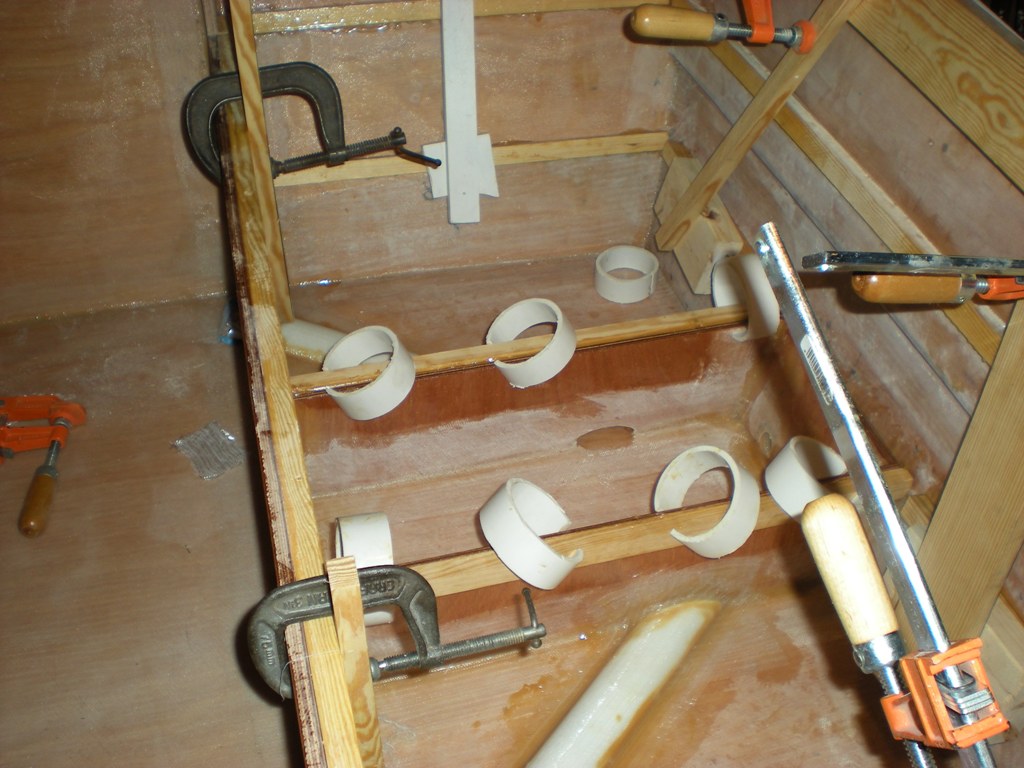
Daniel, by the way don't forget to cut your frames to have an access for your drain pipes through your seats.
In my GF there are PVC-pipes in - diameter 32mm , but for a new GF
I would use half pipes - diameter 50mm - half pipes are much easier to fasten.
You just stick it to the glassed bottom with a piece of cloth/tape - in other word just glass over them .
Don't forget to roughen the PVC for a good bond. I used sanding paper with 60 grit.
Have fun
Bye
Bernd
Posted: Wed Nov 12, 2008 2:12 pm
by Murry
Already bought the 2in./50mm pipe for the drains.
Posted: Thu Nov 20, 2008 9:49 pm
by Murry
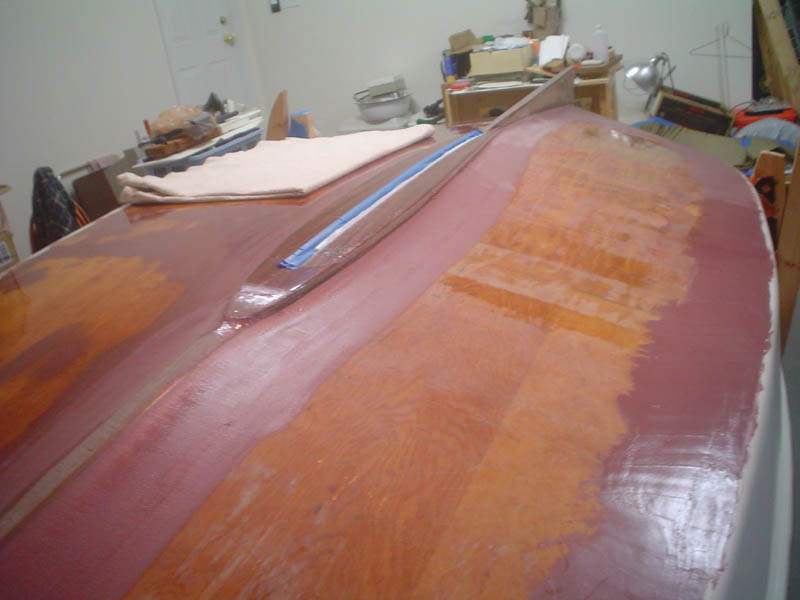
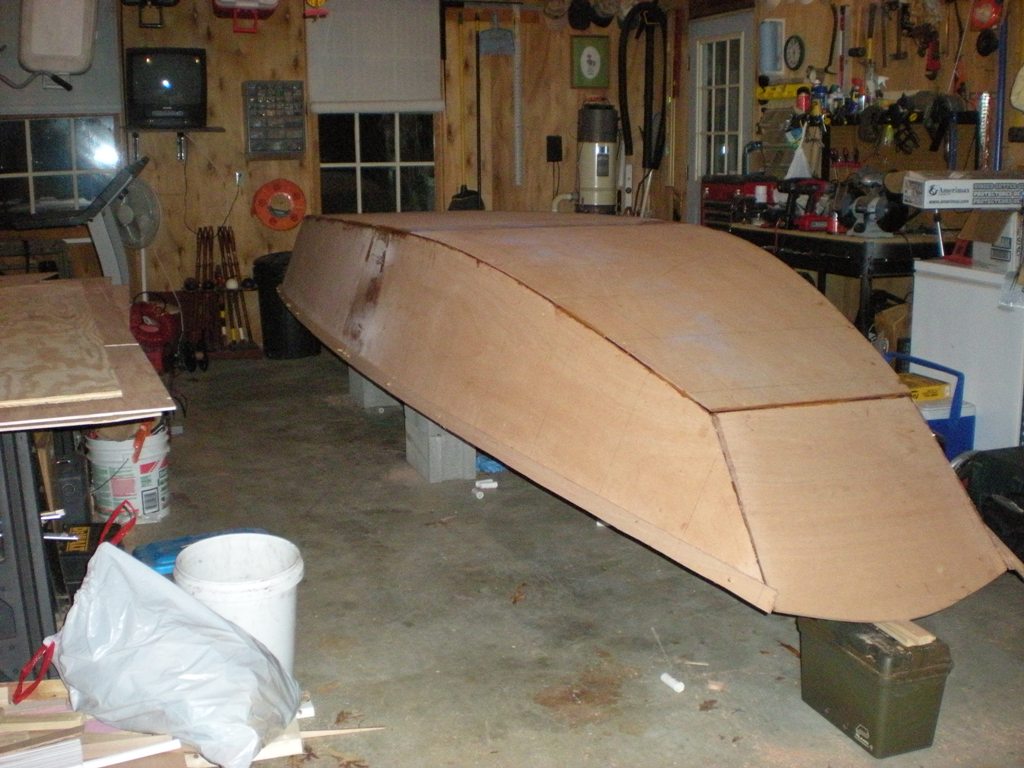
Making progress.
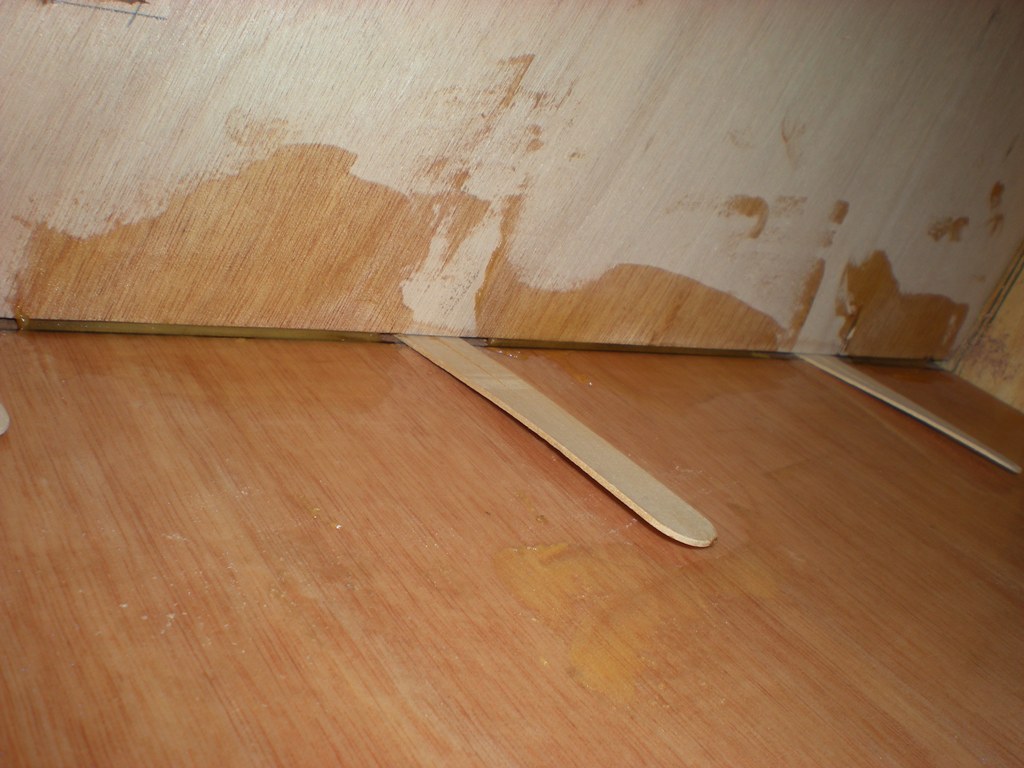
I've glued on the rudrail and installed the bottom using tongue depressors like I did for the sides. It really worked well, allowing me to glue the bottom in place before flipping boat. I removed all temporary screws and plactic ties tonight and things really turned out nice. The bottom is nice and flat and the chines look identical to one another.
Thanks Jacques for designing such I good looking boat.
I guess I'm ready to tape the seams, flip and start glassing the interior. I'm planning to do each section (between frames) wet on wet.
Well see how it goes,
Daniel
Posted: Thu Nov 20, 2008 10:38 pm
by robbiro
Daniel,
Check out another build in this directory by timoub007 called "Just getting started on my gf16" I think? He did some serious customization on the rear of his 16, but he had some neat ideas on how to put foam in an area under seats and then putting flooring over the foam so he did not lose all of the storage space. Real neat ideas. Your build is going great, she looks gopopd and the work is real clean.
Keep on Buildin'
Robbie
Posted: Mon Dec 01, 2008 12:29 pm
by Murry
Thanks Robbie,
I'll be needing some good ideas when I get to the foam stage. I was planning on doing something like that under my rear seat.
progress update...
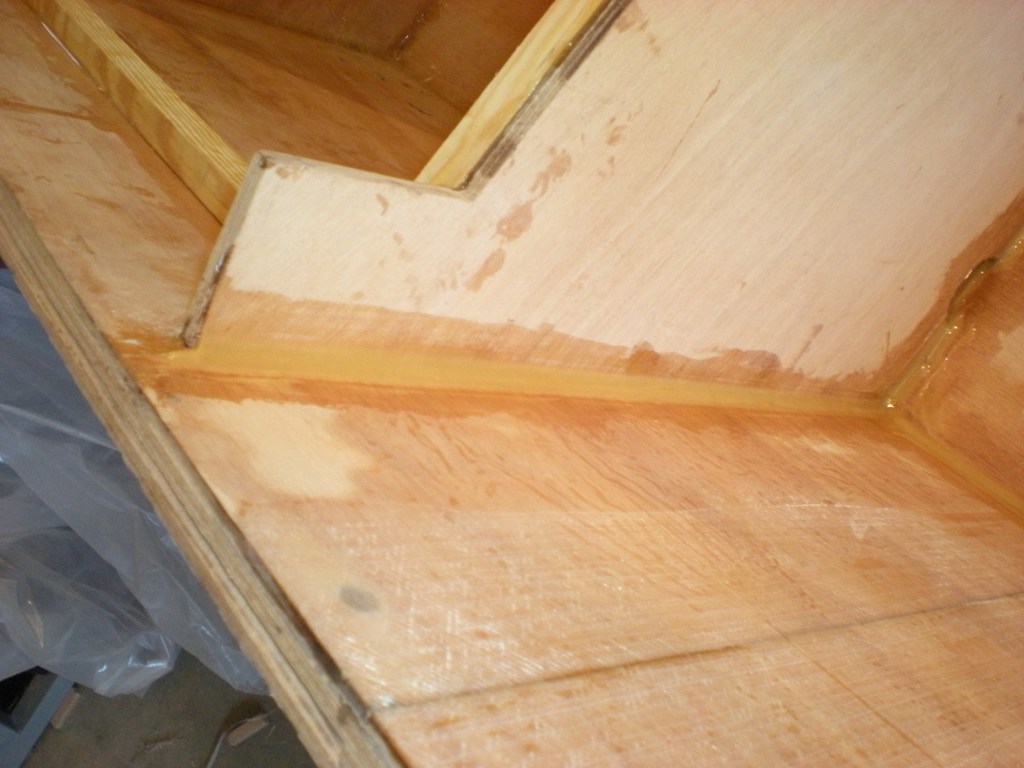
Picture of the bottom glued before flipping.

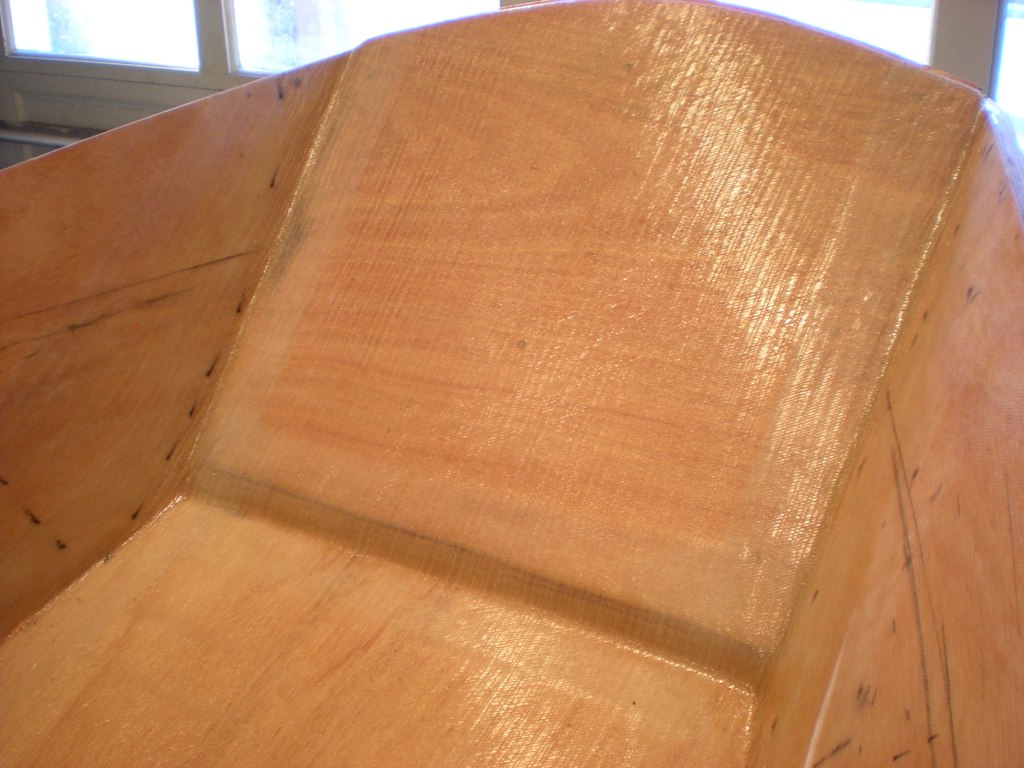
I completed my first major tape and fabric job. I picked the middle seat
area for my first, since it won't be visable.
I thought it went pretty good.
I precut my tape and cloth before starting, precoated all wood using a spreader, used a stirring stick to lay all filets, installed tape at every seam (8 pieces) and wet out, layed precut 12 oz. biax on bottom and wet out, layed 9 oz. woven on frame and hull sides (4 pieces) and wet out.
I used a spreader to wet out all glass and a 1/2 lamination roller on the glass over the fillets.
Below are before and after pictures.

What do you think?
Daniel
Posted: Mon Dec 01, 2008 12:31 pm
by Murry
hull picture didn't work above.
Posted: Mon Dec 01, 2008 3:00 pm
by bernd1
...it looks good !!!!
By the way -which temperature do you have at the moment - in Germany it is "game over" - 7°C.
Bye
Bernd
Posted: Mon Dec 01, 2008 4:29 pm
by mecreature
Looking good... I sure can see one of those in my garage.
Posted: Mon Dec 01, 2008 6:26 pm
by chicagoross
Your first try looks pretty close to professional to me! How are you going to improve that when you get to the experienced level?
Posted: Mon Dec 01, 2008 7:24 pm
by Murry
Thanks for the compliments, but I'm sure a closer look would yield different responses.
Bernd the highs here are around 50F but we may see 60F in the middle of the week.
Can't you use fast hardener with those temps? I used medium Sunday envening and by this afternoon my work area had hardened, with lows around 32F and highs at 50F.
Posted: Tue Dec 02, 2008 10:52 am
by Murry
Correction
I used 6oz. on the hull sides and frames not 9oz.. Sorry.
Posted: Thu Dec 04, 2008 7:56 am
by bernd1
Daniel,
do you know there to install the battery/ battery box? If yes, I recommend to glue at this place a additional piece of plywood to have enough depth to screw the battery holders - I bought mine a few days ago .......yesterday I had to glue this piece...
- my battery rests in the mid seat.
Bye
Bernd
Posted: Thu Dec 04, 2008 8:58 am
by Murry
Thanks Bernd,
I'll be using a 300amp lawn mower battery for the engine and a few accesories, mine will be going in the middle seat as well.
As far as gluing mounting plates, cutting hatches and rigging, I'm planning to wait until all hull glassing is finished.
After I finish the interior glassing I'm going to glue the cleats and temporarly fasten my seat tops with screws to keep the hull square.
I'll then flip, glass the outside wet on wet (hopefully), install strakes,
install spray rail, square up my chines, and transom edges.
basically everything except fairing.
I'll then flip the boat back over, fine tune my accessory list and go shopping.
That's the plan anyway,
Am I mssing anything?
Posted: Thu Dec 04, 2008 12:10 pm
by bernd1
Daniel,
what's about primer and paint inside the box?
About the steps.....I did it in this way:
- glassing the whole inside
- installing all backing plates
- creating my seat tops and the foredeck
- glassing the undersides of the seat tops
- glassing all hatches / both sides
after this ......here is my plan
-......primer and paint all inside of the boxes ( the next weeks)
-......primer and paint to the underside of the seat tops
-......glueing seat tops......taping, glassing, sanding
-......glassing light cloth over the rubrail...sanding
-......primer, paint all inside
-.....flipping the boat
-.....doing all outside work
-....flipping back, install elektric, rod holders....
-....time for changes at my trailer....I have to adapt the trailer to the boat because my existing boat has a deep V-hull and there are rolls for the keel installed......I have to think about a new construction.....I want to use rolls for easy slipping.....let us see.
By the way Daniel, I would first go shopping and buy all hardware. In this way you have all measure at every time you need. Think about the size of backing plates. I did it not unfortunately I had to wait sometimes to have the right measure for my backing plates.
Bye
Bernd
Posted: Thu Dec 04, 2008 12:33 pm
by Murry
Bernd, that sounds like a good plan to me.
I did forget all painting, huh.
I'm kidding.
I just didn't have time to type every detail.
Bernd, I'm planning to use pigmented epoxy in all boxes that won't see the sun instead of paint, but I will be doing that after all other glassing and backing plates are installed. Just before I glue the seat tops in place.
Seat top Mods--
I will draw out my hatch locations with the seat tops temporarly screwed inplace. Then I'll remove and glass the tops and then cut my hatch lines that I drew when they were installed on the boat.
I'm cutting my seat tops large so that I can plain/sand them to the frames and then just round the corners at the edges. I'll be doing this step when they are temporarely screwed in place.
Does that make sense?
Daniel
Posted: Thu Dec 04, 2008 12:48 pm
by Murry
Off topic
What size bow eye are folks using for the gf.
Posted: Thu Dec 04, 2008 1:07 pm
by bernd1
Murry wrote:Bernd, that sounds like a good plan to me.
I did forget all painting, huh.
I'm kidding.
I just didn't have time to type every detail.
Bernd, I'm planning to use pigmented epoxy in all boxes that won't see the sun instead of paint, but I will be doing that after all other glassing and backing plates are installed. Just before I glue the seat tops in place.
Seat top Mods--
I will draw out my hatch locations with the seat tops temporarly screwed inplace. Then I'll remove and glass the tops and then cut my hatch lines that I drew when they were installed on the boat.
I'm cutting my seat tops large so that I can plain/sand them to the frames and then just round the corners at the edges. I'll be doing this step when they are temporarely screwed in place.
Does that make sense?
Daniel
I will round the edges of my seat tops then they are glued to the frames - not earlier. About glassing seat tops.....I did it a little different....glassing the whole seat top underside (light cloth) and then I cut the openings. The topside has no epoxy and no cloth at the moment. I glass and glue it then they are glued to the frames. Next step I glue/glass/tape/ it to the side panels and tape it to the frames -believe me that's very strong ......I want to have a save boat.
Please buy your hatches before cutting anything - check the size .....and then cut. Buying hatches has a lot of advantages......you don't have to mention about the hinges and you have waterproofed one. Believe me for a further building I don't spend so much time with this. Boring work.
Bow Eye......I bought mine in Kuwait then I visited my friend....I have no idea about the size. Feel free and buy what you want......for me bigger is better as too small. I glue 2 backing plates in......you know German...
Bye
Bernd
Posted: Mon Dec 08, 2008 12:03 pm
by Murry
Please buy your hatches before cutting anything
Thanks for the advice Bernd and yes I was planning to gather all accessories before making any cuts or drilling any holes.
Progress report--
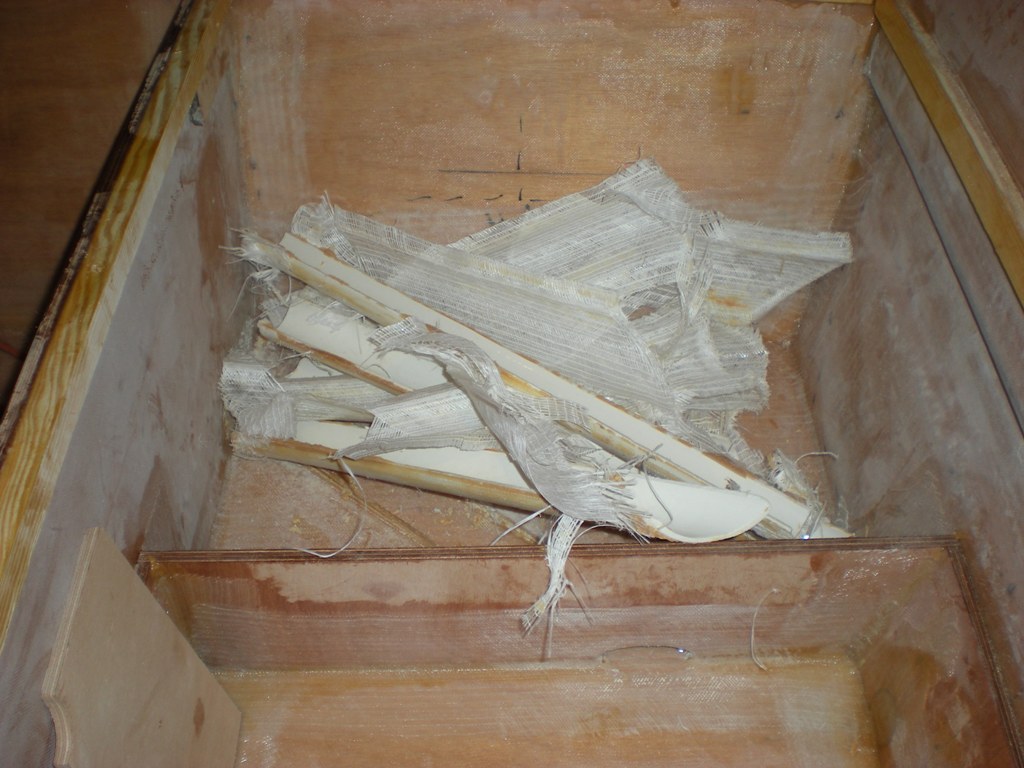
I glassed between the transom and rear seat frame on Friday night using the same method as before with the midseat.... it didn't go as smoothly and I didn't know the school of "Hard Knocks" offered classes on Friday nights.
Bellow are the two areas that I struggled with.
1-Taping the bottom of clamping board horizontaliy across the transom (not required in plans)
I had a difficult time wetting that tape out on the bottom of the clamping board (working upside down)
--
lesson learned-- should have prewet that section of tape and difficult sections in the future.
2-Problem with the 6oz. cloth I'm using for abrasion protection developing air pockets.
(also not required in plans)
I had worked the 6oz. on smaller areas up until this point but the transom was to big (for this newbie anyway) to just place a precut piece of cloth over the wet wood with the intention of pulling the wrinkles out. I ended up with areas where the weave was to tight causing the glass to left up before cured. (atleast I think that's what happened-- I'm very new at this).
--
lesson learned-- roll light woven cloth over the work area.
I guess I'll just grind the air out, and since it's not a structural area of glass, I'll just fair the low spot out starting with fillet mix on the next fillet I put down.
Does anyone have any further advice for this new builder?
Thanks,
Daniel
I'll have a handle on it before I get to the visable areas, I just know it.
Posted: Mon Dec 08, 2008 12:11 pm
by gk108
For those areas of the 6 oz cloth that won't cooperate, there's nothing wrong with using a utility knife to make some cuts in the cloth after you wet it out. These odd shapes won't always allow the cloth to lay flat, but a few carefully placed cuts can relieve the cloth and allow it to lay down without a bubble.
Posted: Mon Dec 08, 2008 3:55 pm
by Murry
Thanks GK,
I'll have a knife handy on my next attempt if I have trouble.
Posted: Mon Dec 08, 2008 5:02 pm
by Cracker Larry
Also, if you use a metal or hard plastic roller is easier to press the air out than with a brush or foam roller. The woven cloth tends to float on the resin and it needs to be rolled down hard.
Posted: Mon Dec 08, 2008 5:57 pm
by Murry
O.K. Larry. Yeah, I've been using a spreader mostly up to this point but it was pulling the glass away from the fillet that I laid at the clamping board to transom seam so I couldn't use it with firm pressure. The harder roller would have worked great for that. Thanks for the tip.
I have a quick question concerning you midseat arrangement on your gf.
Based on the pictures of your boat it looks like you had pedistal mounts on both you mid and rear seats over you foamed compartments. How did you keep the mounts from draining into your compartments?
I'm planning to take your advice and section off the midseat and fill the side that will be used for seating, but I wanted to have some type of removable seating in that area.
The rear seat compartment will have 6-8 inches of foam on either side of a tool storage area and bilge area, so that compartment will be completley open across the entire beam.
Let me know if my question needs more explanation.
Thanks
Posted: Mon Dec 08, 2008 6:02 pm
by Cracker Larry
How did you keep the mounts from draining into your compartments?
The mounts are sealed. Water can sit in them but can't run through. I thought it was a good idea but I never used a seat in the boat. Maybe someone will one day
Posted: Mon Dec 08, 2008 11:03 pm
by Fonda@kauai
A lesson I learned whilst taping the inside seams of my console: cut a 6" strip of visqueen, and after you've rolled the cloth down with a laminating roller, place the visqueen over the lamination and smooth with another roller. A little more work now, but a LOT less work later filling in the weave and sanding. It makes a super clean and super smooth lamination that's very easy to sand and or fair.
Posted: Tue Dec 09, 2008 5:50 am
by bernd1
I think everybody learned the first time a lot -and had problems
.
While I use medium harder, I learned a lot how to handle the mixed resin. Sometimes you have to hurry when the resin starts to gel.
If I have to glass something I first wet the wood - wait a few minutes until the wood soaks the resin in . After that I wait until the resin is sticky - the advantage --> the tape or fabric doesn't move and you can easy wet out.
If you glass large areas twice (two layers) , you better do it with 2 persons - but the same prodcedur as before.
When I lay tape and fillet, I sature the plywood and wait until it is sticky, during this time I mix resin with woodflour for the fillets.
Next step, the mix into plastic bags - lay the fillet - wait until it is sticky - laying the tape (careful) wet out.
Bye
Bernd
Posted: Fri Jan 02, 2009 1:18 pm
by Murry
I hope everyone had a great Holiday.
I want to throw out a thank you to the entire board. I wouldn't beable to list all the names of folks that have helped me to this point, but I've learn so much by reading and following the builds and questions about builds that were generated from them. One builder even let me come to his home to give me some pointers. Thanks You.
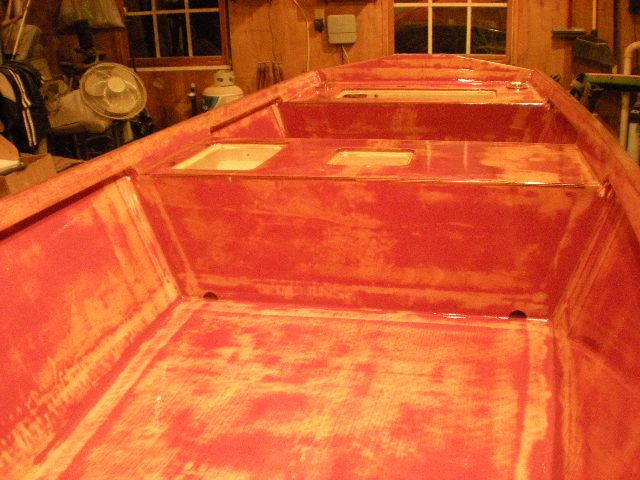
I've finished the interior hull and framing glass work, so next I'll be drawing hatches and making some decisions of hardware placement and such.
I wanted to post a couple of pictures detailing how it went for me.
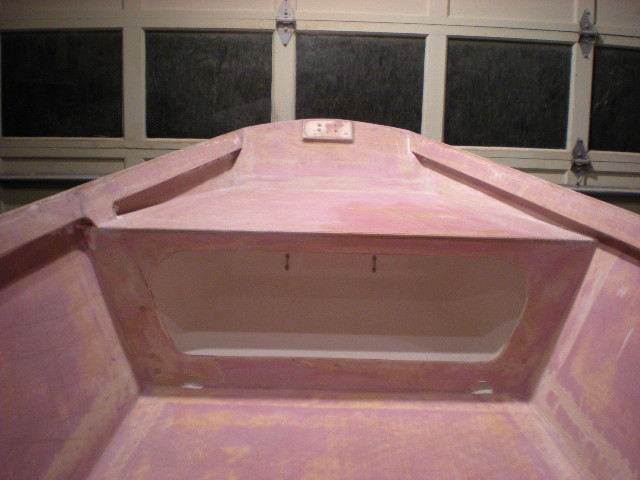
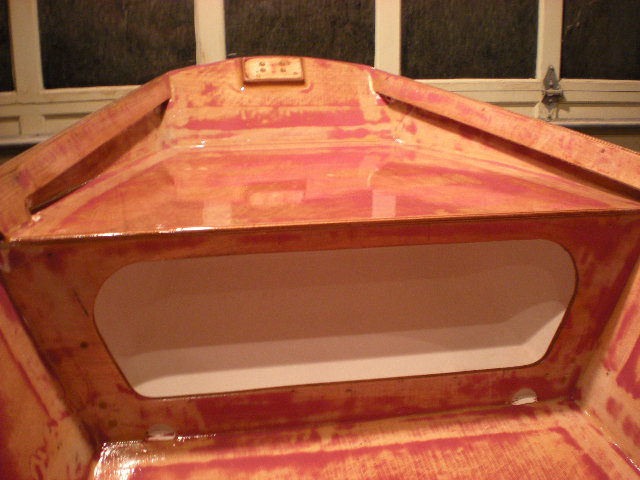
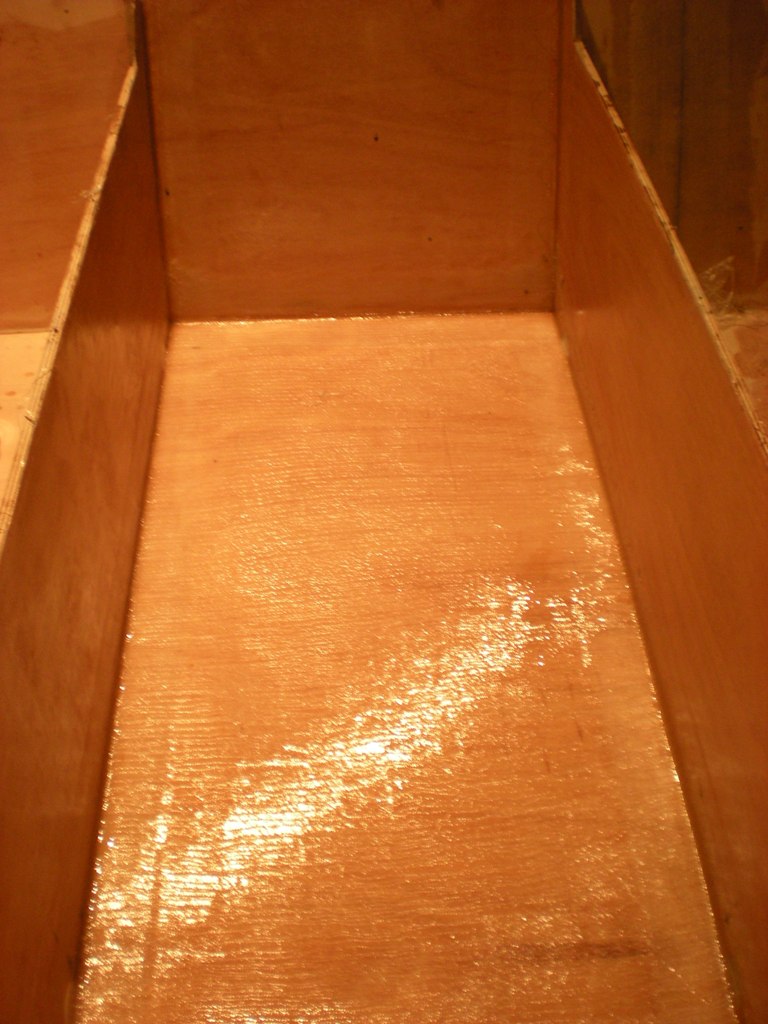
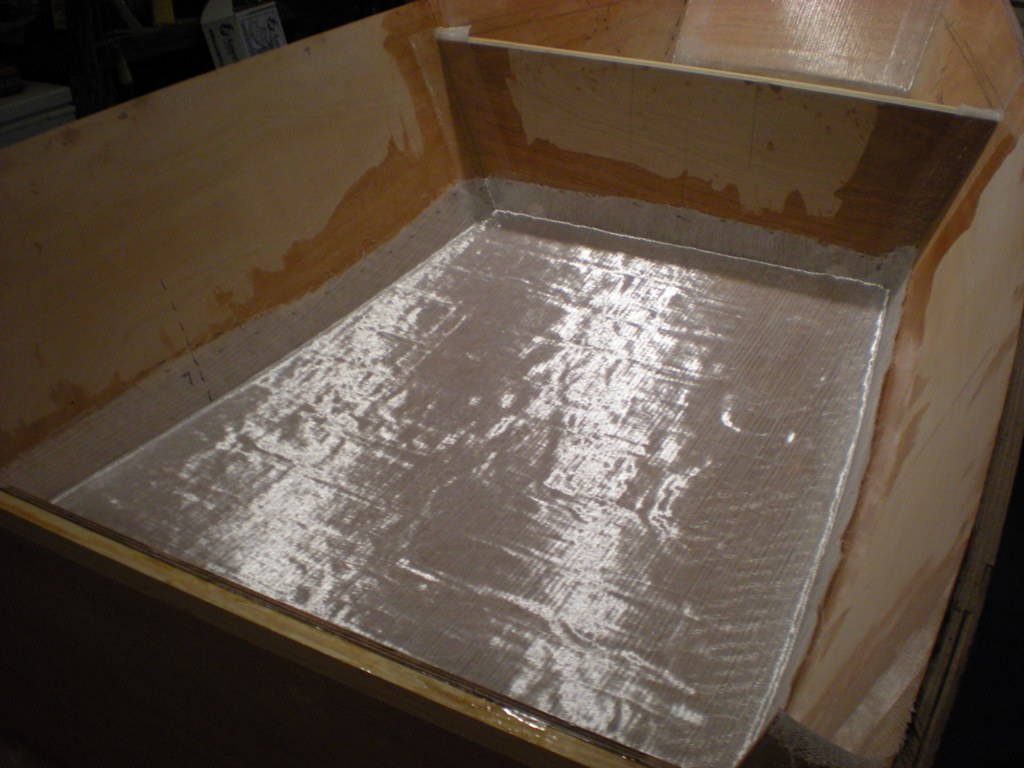
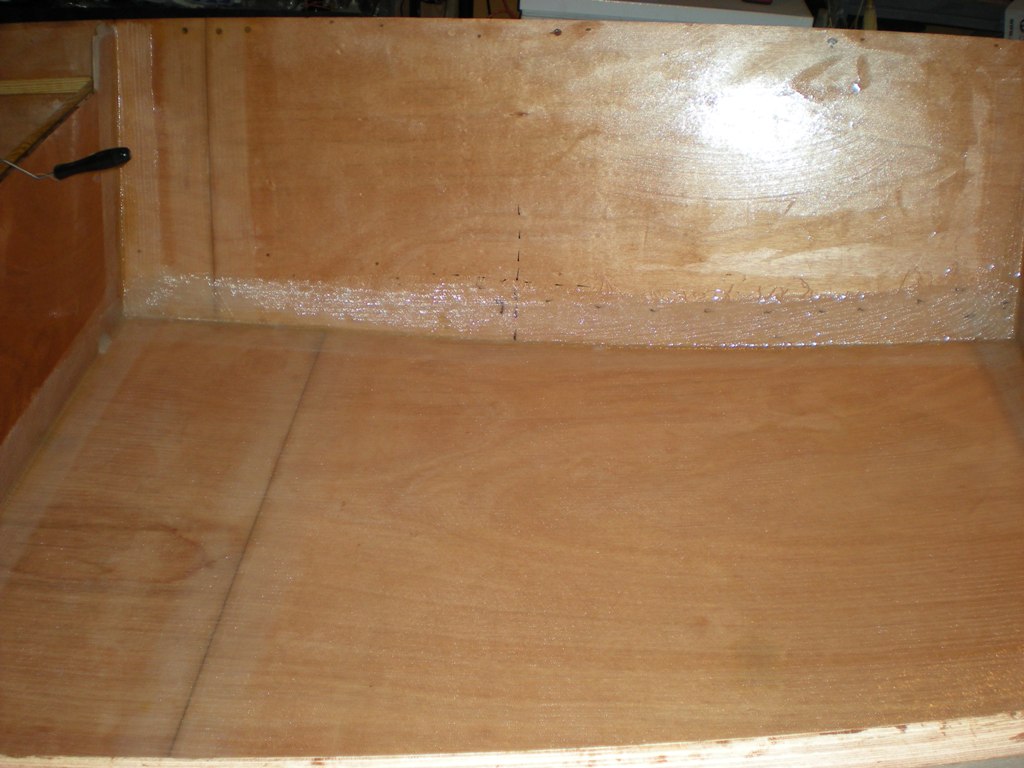
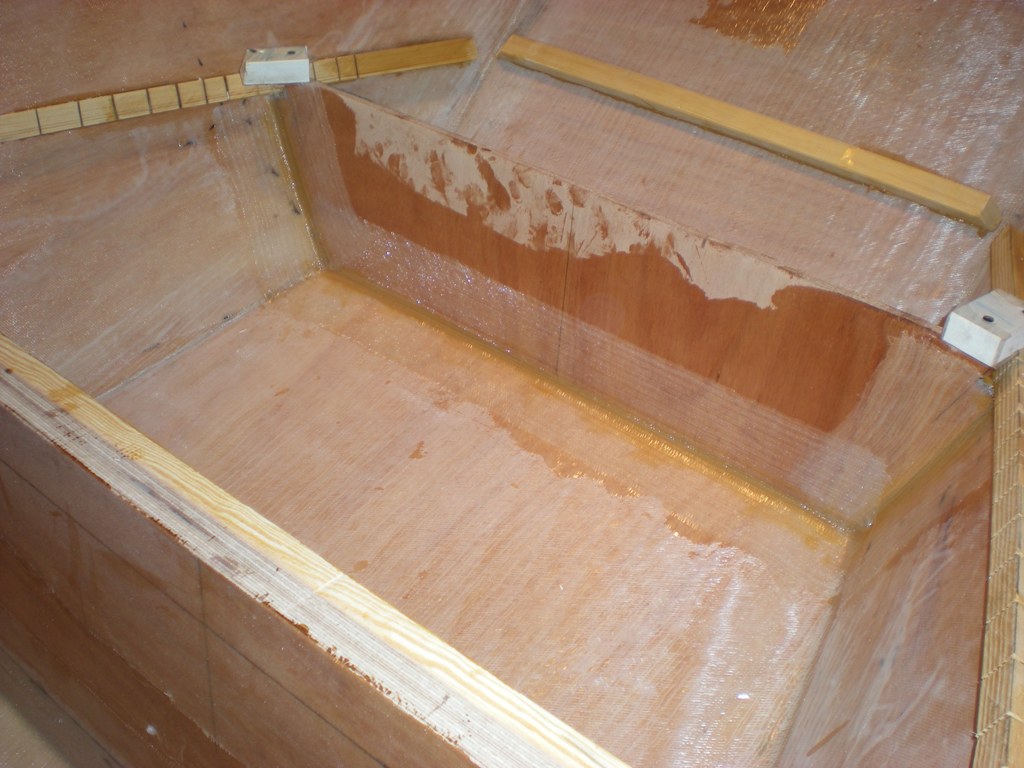
First up is the bow compartment (under the casting deck)
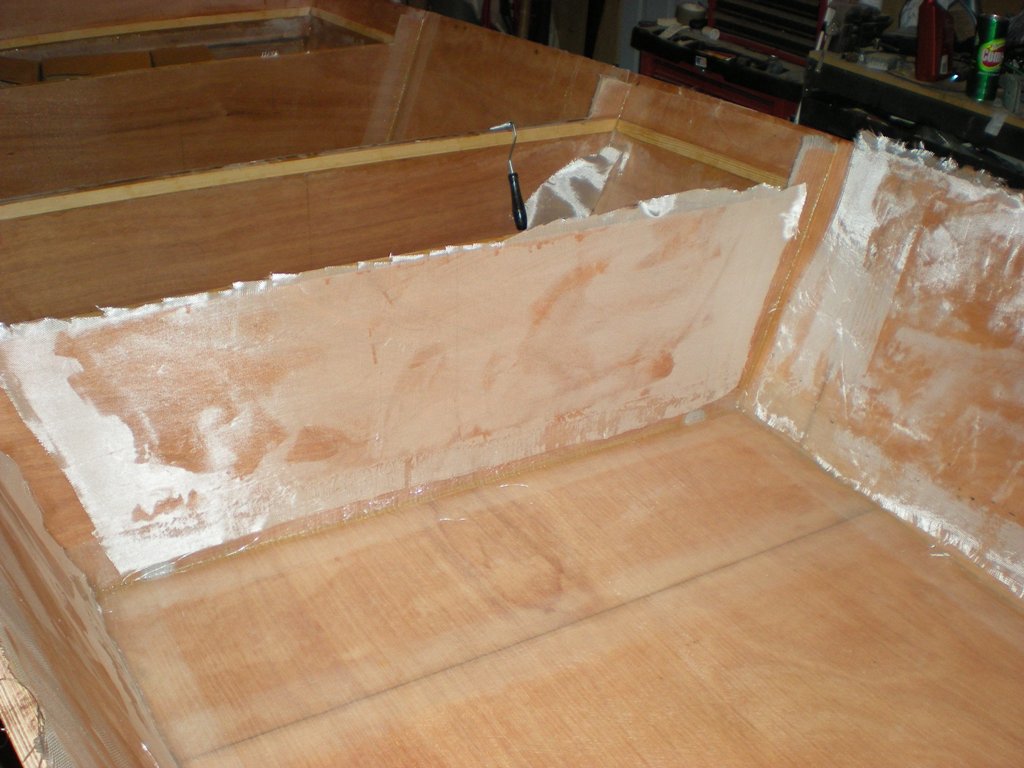
 The next group of pictures where taken last night as I finished the section inbetween the casting deck and midseat.
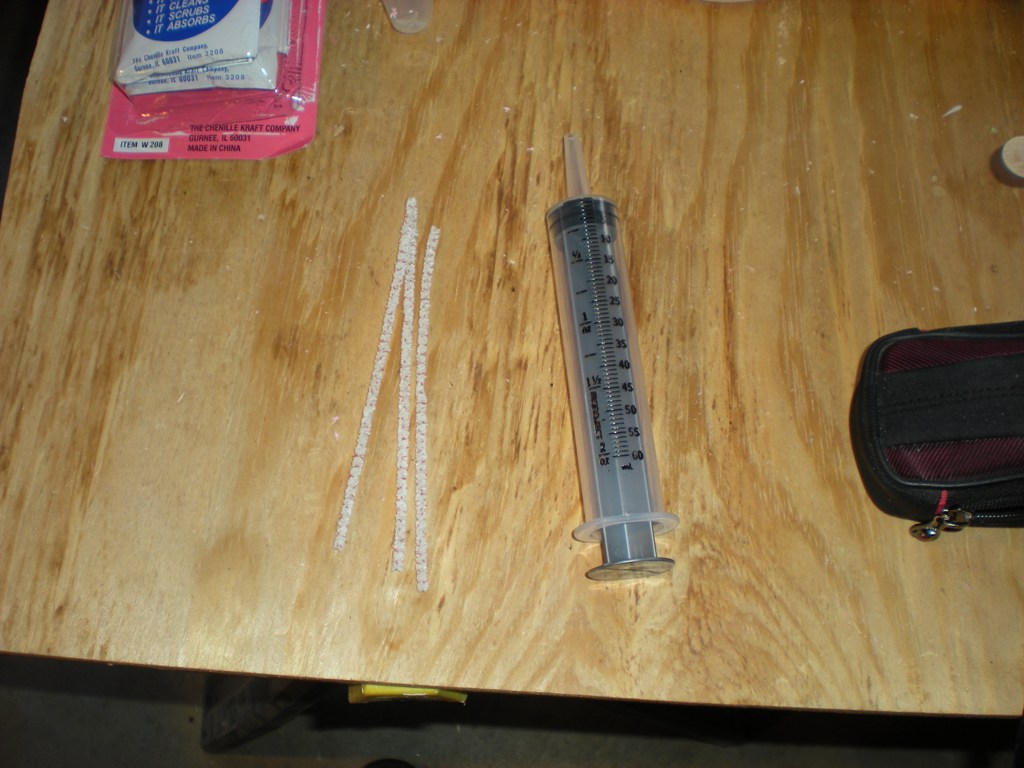
All glass gets precut. the roll of cloth is the 6oz. I'm using for abbrasion resistance and the folded section is the 12oz. biax for the sole.
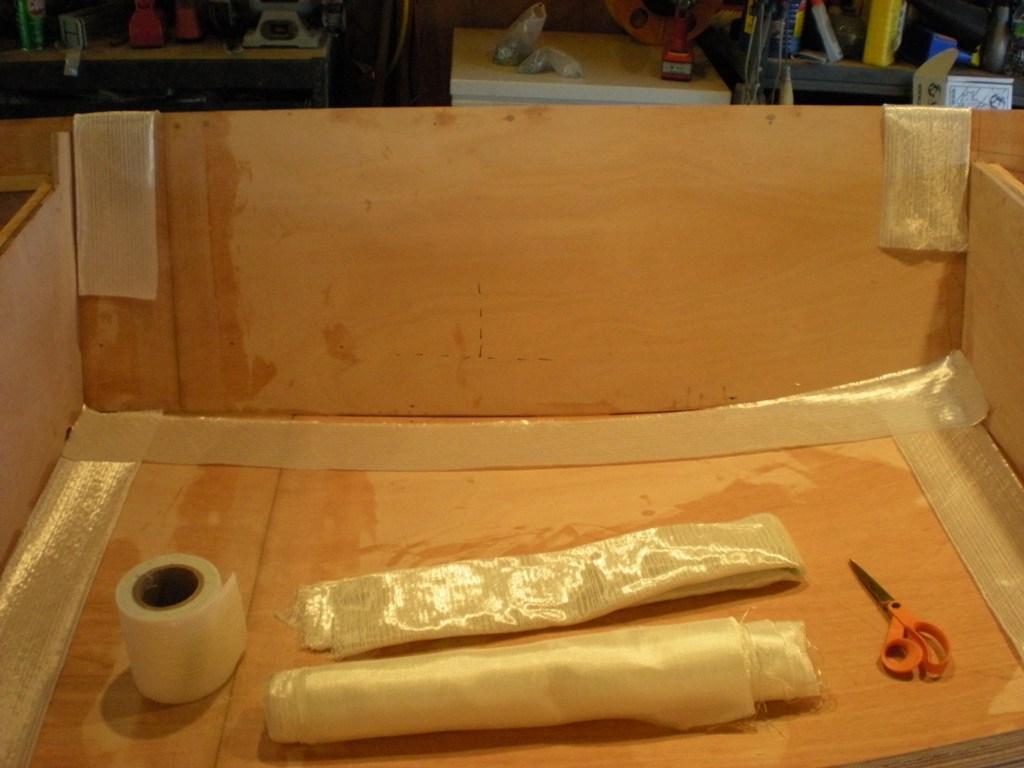
I start by just wetting the corners of the wood where all gluing will take place, for fillets, holes from construction, ect..
I found that If I wet a larger area than just the seams before laying the fillet, the extra epoxy makes a mess when trying to make the fillet pretty.
So I wet out just enough area for the fillet.
I then build the fillet at all prewet seams with tongue depressor and fill all construction holes in the section that I'm working in.
I made this to prewet my tape, which I prefer. I use less epoxy and when working wet on wet there's less change of gougeing the fillet you just worked so hard on trying to the wet the tape on the boat.
Oh Yeah, if you make one of these.......don't make it white..
kind of hard to tell when the tape is wet if it can't change colors.
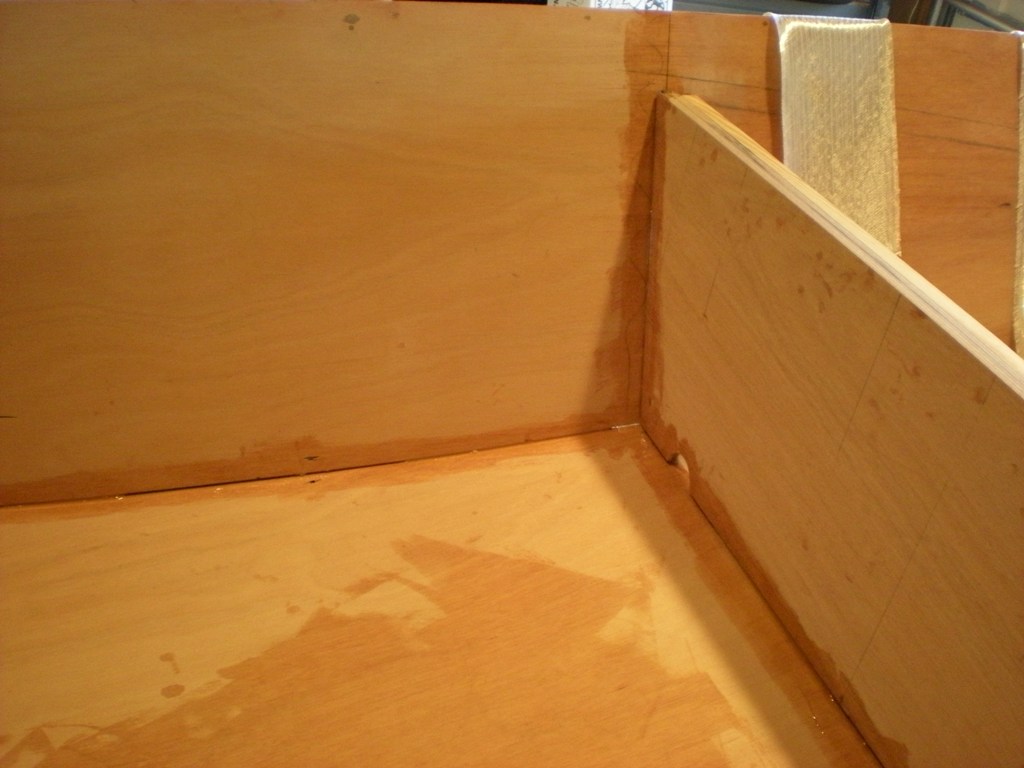
Using a 1/2 inch lamination roller, I then install the prewet tape.
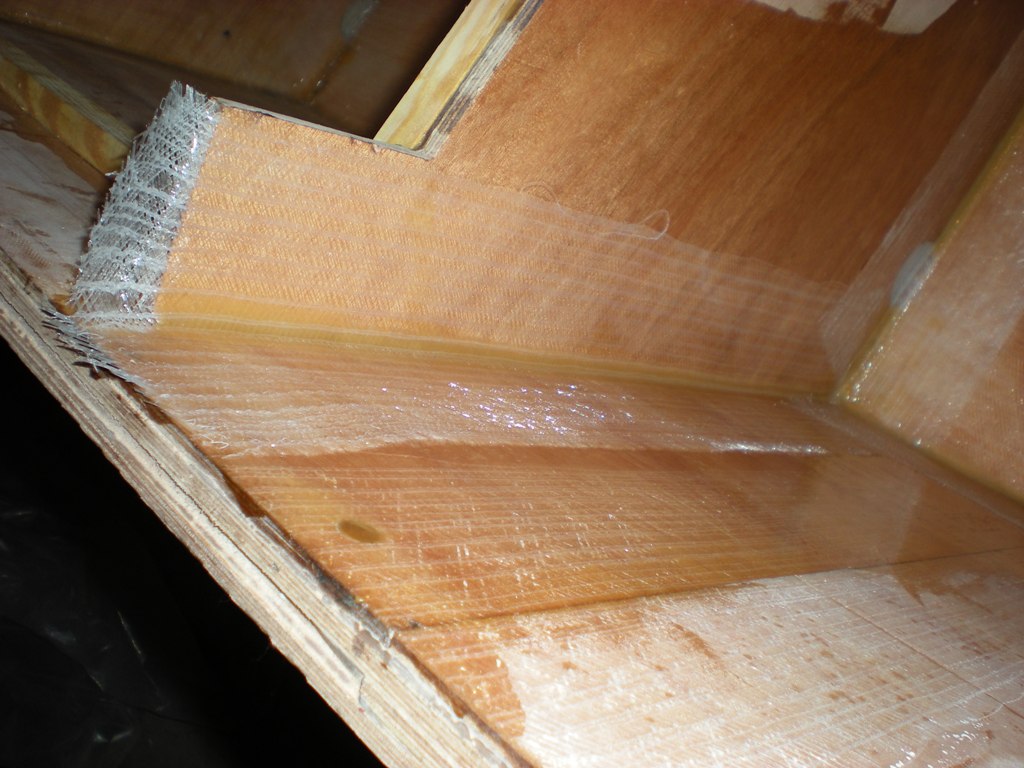

Next, after using left over epoxy to prewet the sole I lay the 12oz. cloth down, starting in the middle and roll it out to the sides. I roll it up like a scroll with alignment marks on the hull and cloth as a starting point and simply roll it out towards each frame.
then wet it out.
Next I roll out the 6oz. cloth. I found it much easier to use a roll of cloth when installing this much lighter cloth. I just precut a section wide enough and long enough to cover the work area and then trim it after it's down.
And there you have it.
I didn't get any good pictures after I wet out the 6oz. , but I think I've worn out my picture welcome anyway.
You know, pictures are worth a thousand words and with my current typing speed I'd say two thousand atleast.
How's this thing looking guys? Will it float......
Daniel
Posted: Fri Jan 02, 2009 1:31 pm
by topwater
Murry youre glass work looks very good to me.
Never to many pic's, i've learned alot from looking
at all the build pic's.
Posted: Fri Jan 02, 2009 1:35 pm
by ks8
Nice. Your german is showing again.
The alignment marks I used when glassing the long bench seat tops kept those pretrimmed edges *on the mark*. Glad you did the same and spared yourself some frustration.
If I build a glassing tray for the next build, I'll try to remember to paint it to help see when the tape is fully wet out. I think Joel just rolls it up and dips it in epoxy for some laminations, without using a tray, but my memory may be criss crossing a few threads.
Enjoy planning the hardware.
Posted: Fri Jan 02, 2009 1:55 pm
by colonialc19
Daniel,
Like others have posted, the glass work looks great
Keep up the good work!
D
Posted: Fri Jan 02, 2009 5:03 pm
by BassMunn
You fibreglassing is top notch, good example of how it can be done.
Looking forward to seeing the rest of your work.
And bring the pictures on, the more you post the more ideas we can steal from you
Posted: Fri Jan 02, 2009 7:41 pm
by steve292
I agree with the others, very nice glass work. Keep posting pictures, we all like pictures
Steve
Posted: Sat Jan 03, 2009 3:46 am
by bernd1
Clean work - please slow down with buildung speed -otherwise you will overtake me
.....
Daniel, which harder did you use? slow, medium? Which temperature do you have in your garage today?
Outside I have about -5°C and inside about 0°C - the heaters power is to less now - unfortunately.
Bye
Bernd
Posted: Sun Jan 04, 2009 7:20 pm
by Murry
Thanks for the compliments everyone, It's good to know that my glass work is looking O.K. and I'll try to keep the pictures coming.
I think Joel just rolls it up and dips it in epoxy for some laminations,
That sounds like a quick method.
And bring the pictures on, the more you post the more ideas we can steal from you
That's O.K. with me, If you see something worth stealing off my build, I'm sure It's been stolen from someone elses.
I've been following your phantom build and it's looking great.
Daniel, which harder did you use? slow, medium? Which temperature do you have in your garage today?
Bernd, I'm using medium hardener on most projects and I'm using medium mixed with fast when the project allows for a short pot life.
I'm working in temps. rangeing from 25-35F at night and 40-50F during the day.
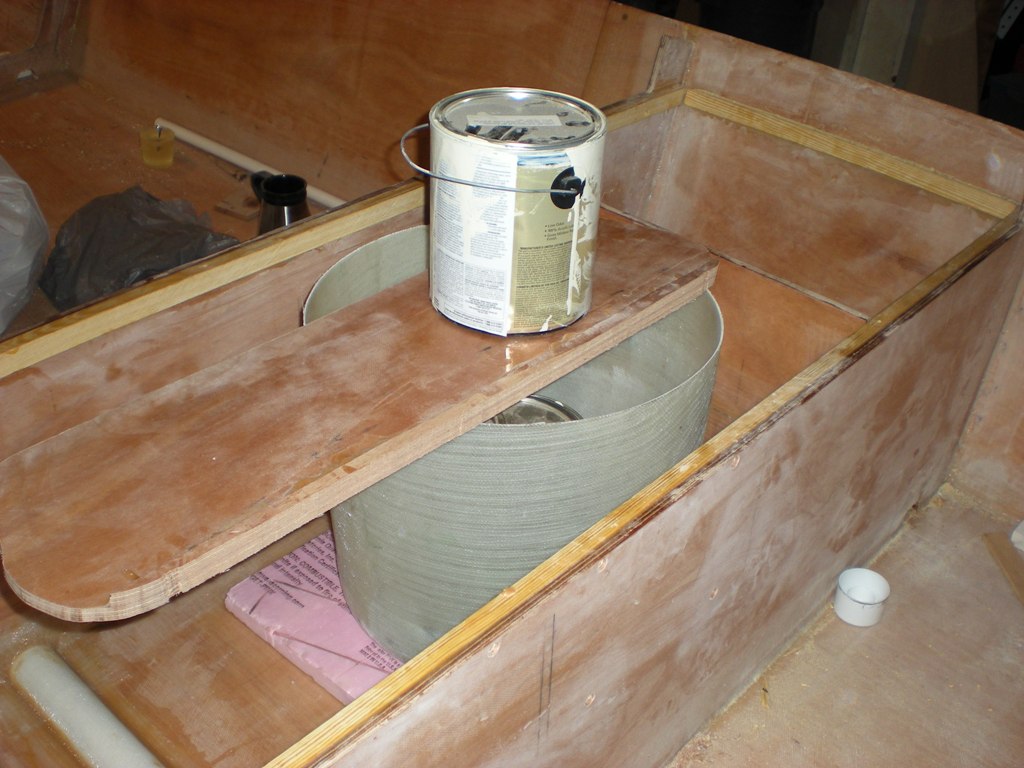
A bit more progress below.
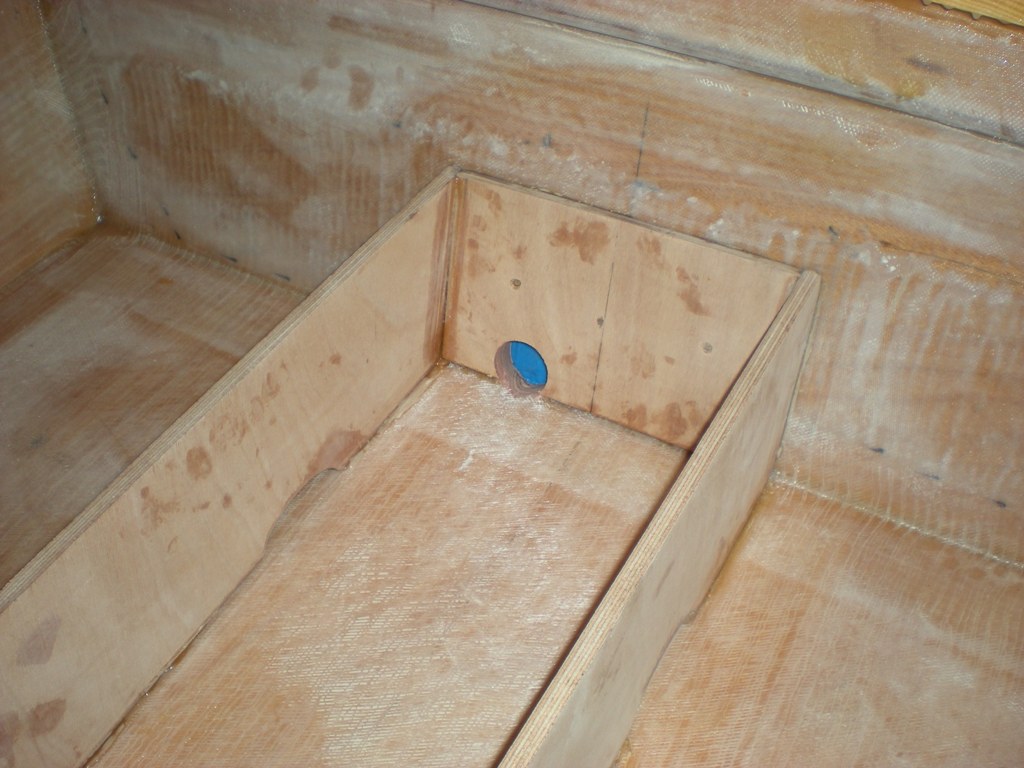
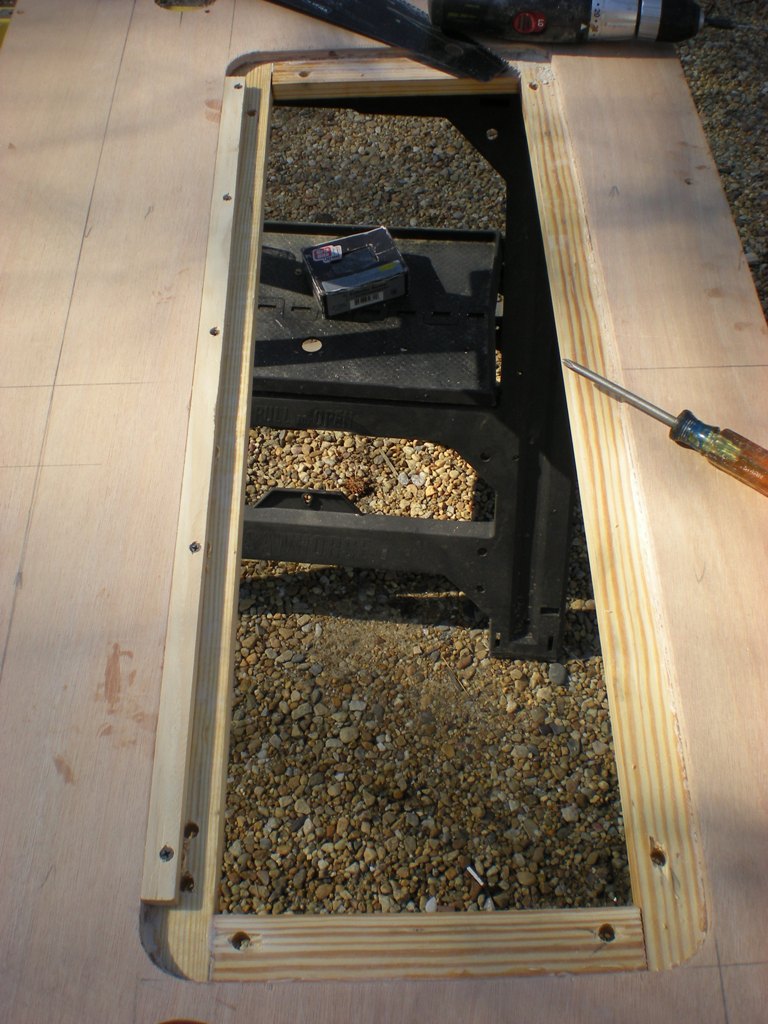
This is will be my bilge/tool compartment.
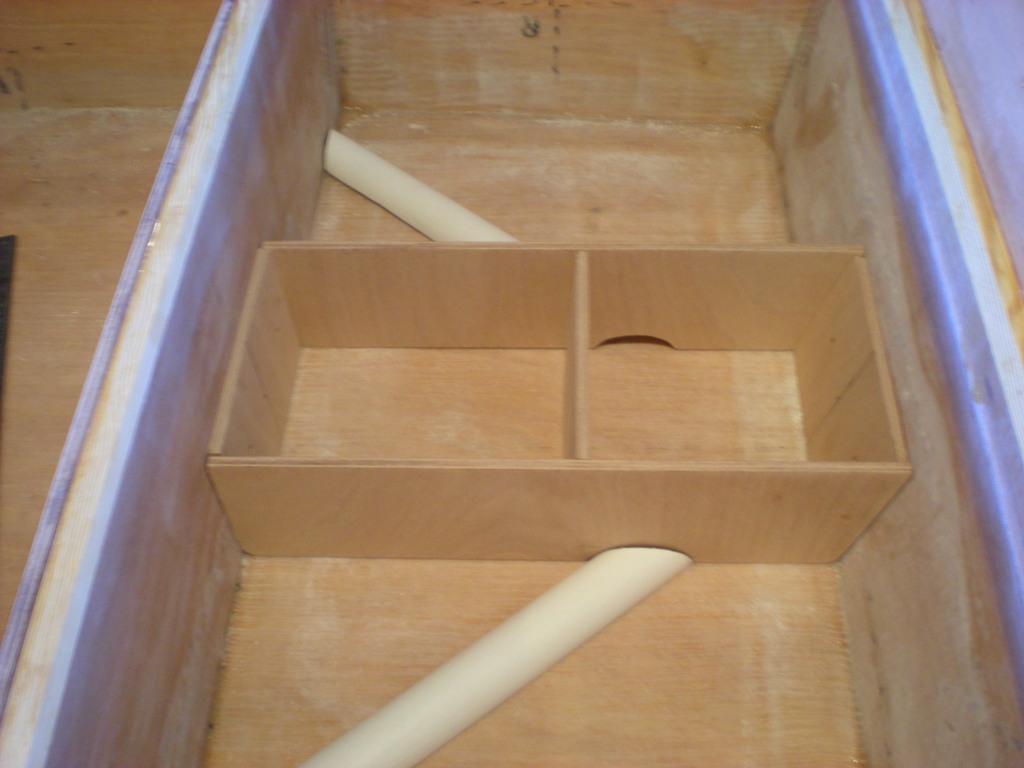
There will be foam on either side of the bilge/tool compartment with 1/4 ply over the foam. I'll have a removable lid over the bilge/tool compartment so that I can use the entire area for storage.
Daniel
Posted: Sun Jan 04, 2009 8:20 pm
by colonialc19
Daniel,
I thats a neat way to run the drains to the transom
edit: I hope thats what the pvc is for, (I assumed)
D
Posted: Mon Jan 05, 2009 5:21 am
by bernd1
Nice idea,
I found out that my bilge compartment is a little bit small -next time I would do it in the same way as yours.
Every time I learn a little more
Posted: Mon Jan 05, 2009 11:02 am
by tech_support
I really like that angles half of PVC

It will drain very easy. great idea
Posted: Mon Jan 05, 2009 11:53 am
by Murry
I hope thats what the pvc is for, (I assumed)
You're correct Daniel, I'm glad you like it.
Thanks Bernd!
I really like that angles half of PVC It will drain very easy. great idea
Thanks Joel, I'm sure I read about doing that on this site at some point, I just can't remember which build.
About glassing over the pvc:
I was planning to only use one piece of 12oz. tape down the length of pipe over fillets, which would give me and inch to inch 1/2 of glass contact on both sides to the sole.
Is that enough? Or would you use two pieces overlaping across the pvc.
Thanks,
Daniel
Posted: Mon Jan 05, 2009 4:09 pm
by mecreature
really looks good Murry,,, I sure like the gf16
Posted: Mon Jan 05, 2009 4:26 pm
by TomW
One peice is fine over the pipe. Make sure you rough up the ends with 40 or 60 grit sandpaper or and heat treat the ends so that a filet will hold to the pipe. Then put another peice of fiberglass at each end. This will give you a good seal and keep water from escaping around the filet.
Tom
Posted: Mon Jan 05, 2009 5:05 pm
by Murry
Thank You mecreature, I like it more and more each day.
heat treat the ends
Thanks for the reply, Tom. How hot do I need to get the pvc? I'll probably heat all edges then, basically every place there will be glue/fillet.
Daniel
Posted: Mon Jan 05, 2009 5:22 pm
by TomW
Not very just so you see a change in the wall structure. I use a wide tip instead of a narrow tip so that I don't cook one area while another is to cool.
Tom
Posted: Tue Jan 06, 2009 7:11 am
by Murry
I use a wide tip instead of a narrow tip so that I don't cook one area while another is to cool.
propane torch

Posted: Tue Jan 06, 2009 8:09 am
by Cracker Larry
Yes, or a heat gun.
Posted: Tue Jan 06, 2009 8:31 am
by Murry
Thanks.
Posted: Fri Jan 09, 2009 12:24 pm
by Murry
I haven't set my drains on fire yet
, but I made some more progress.
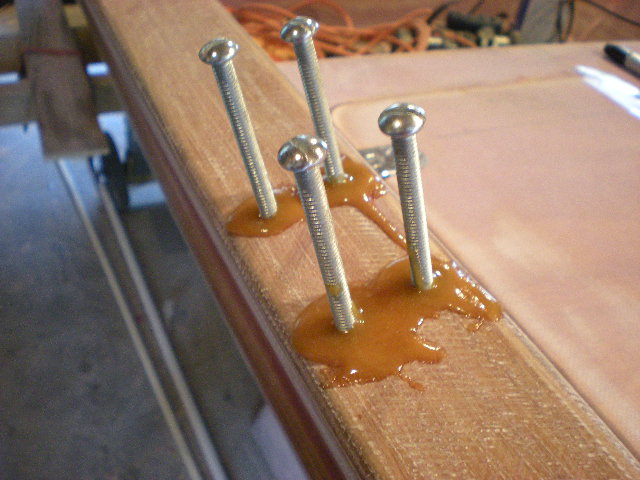
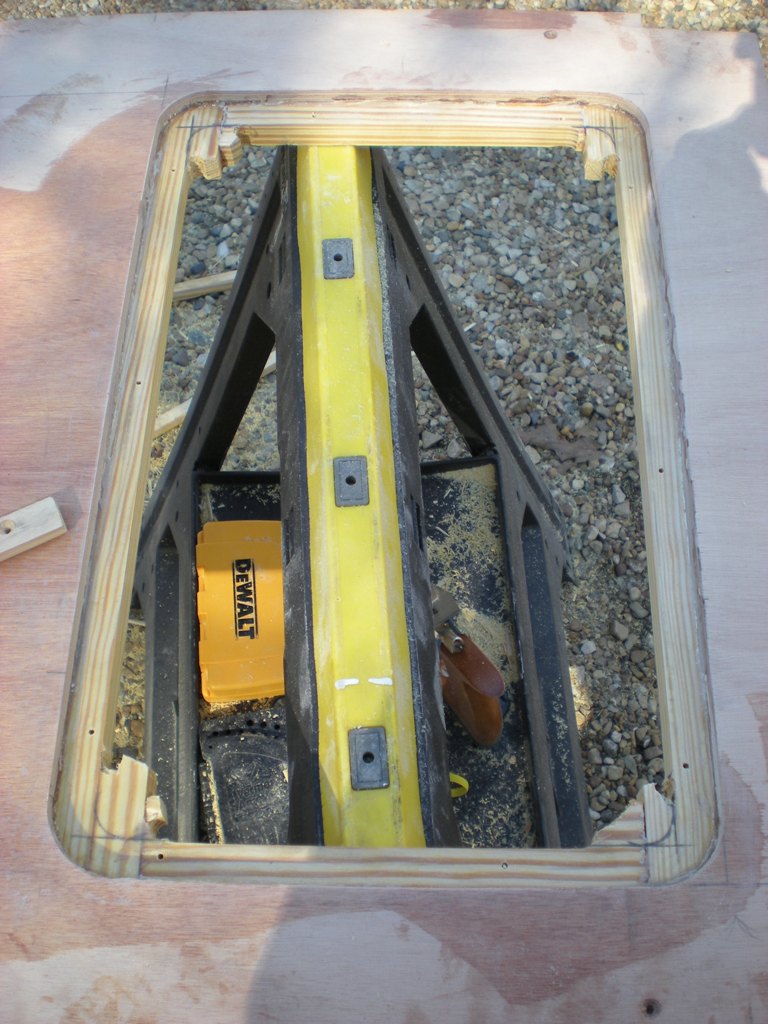
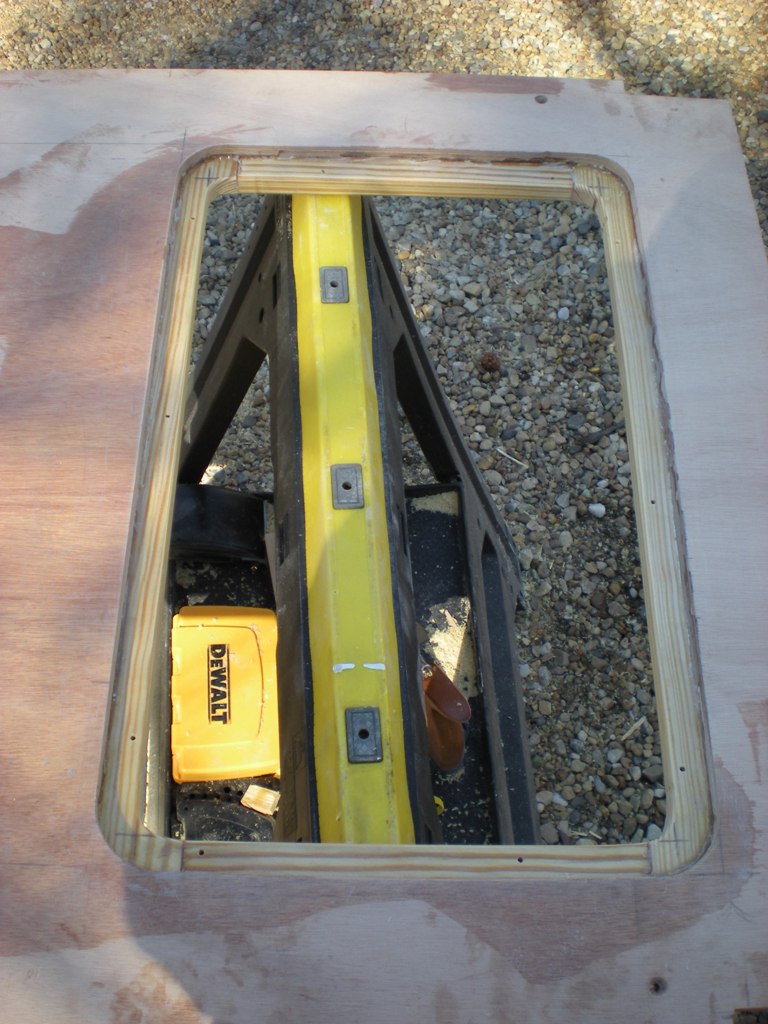
At first I was going to glass the bilge compartment and the drains in one session, but I decided that it would be better if I had a layer of glass over the wood before glassing the drains in place, so I'm doing them at seperate times.
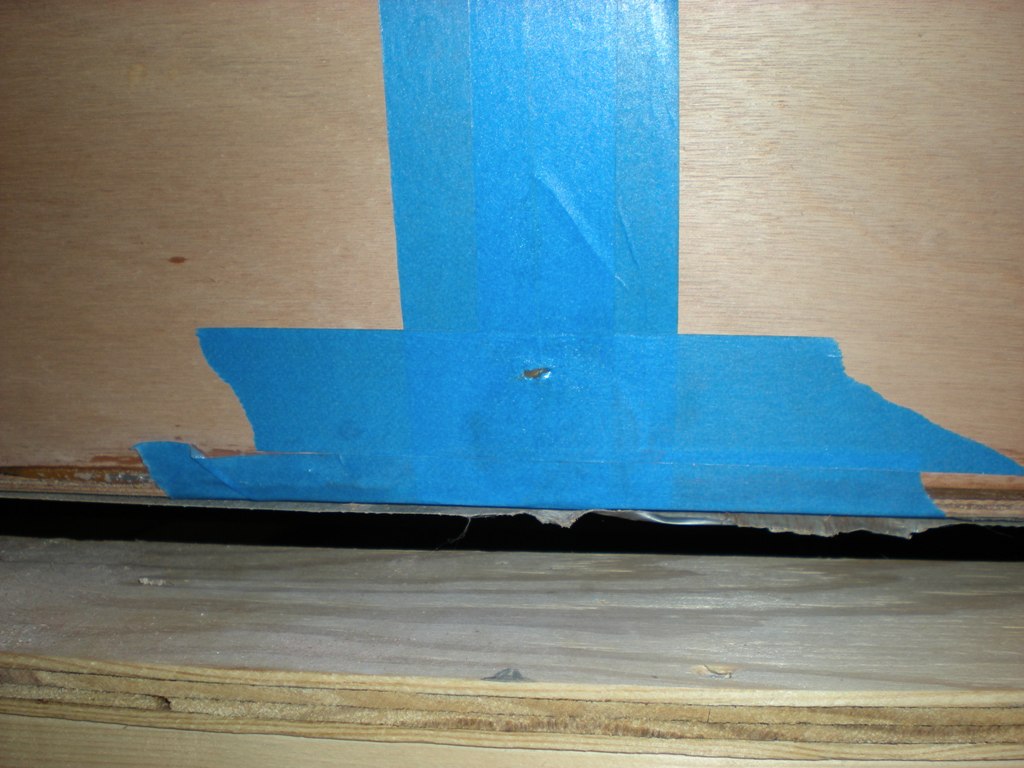
I drilled my oversize drain hole before glassing, attempting to fill and glass in the same session so when I drill the correct hole for the insert I'll have complete glass coverage.
I decided to clamp a board over the fill area so that it would cure flush to the transom. (hopefully it will work O.K.)
Since the hole was over filled, (much better than not enough) I cut a smalll relief hole in the top of the tape for the glue to escape from as I applied the clamp from inside the boat.
(If you haven't figured it out yet, this is my first boat and my first project working with epoxy
. So go easy on me.
)
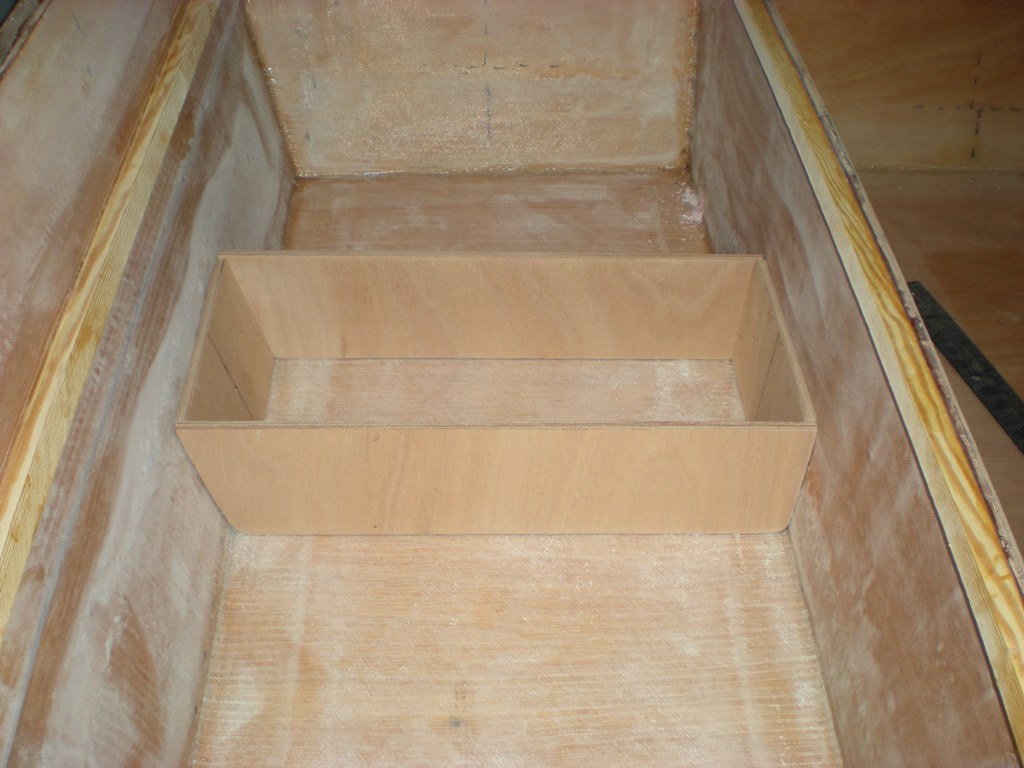
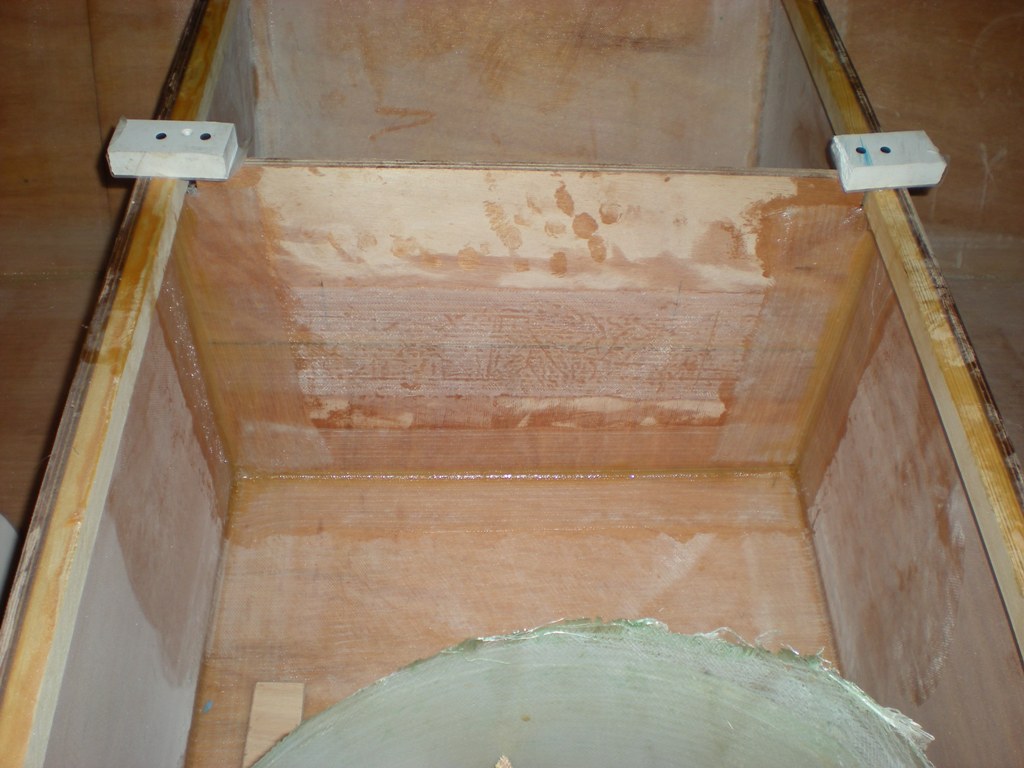
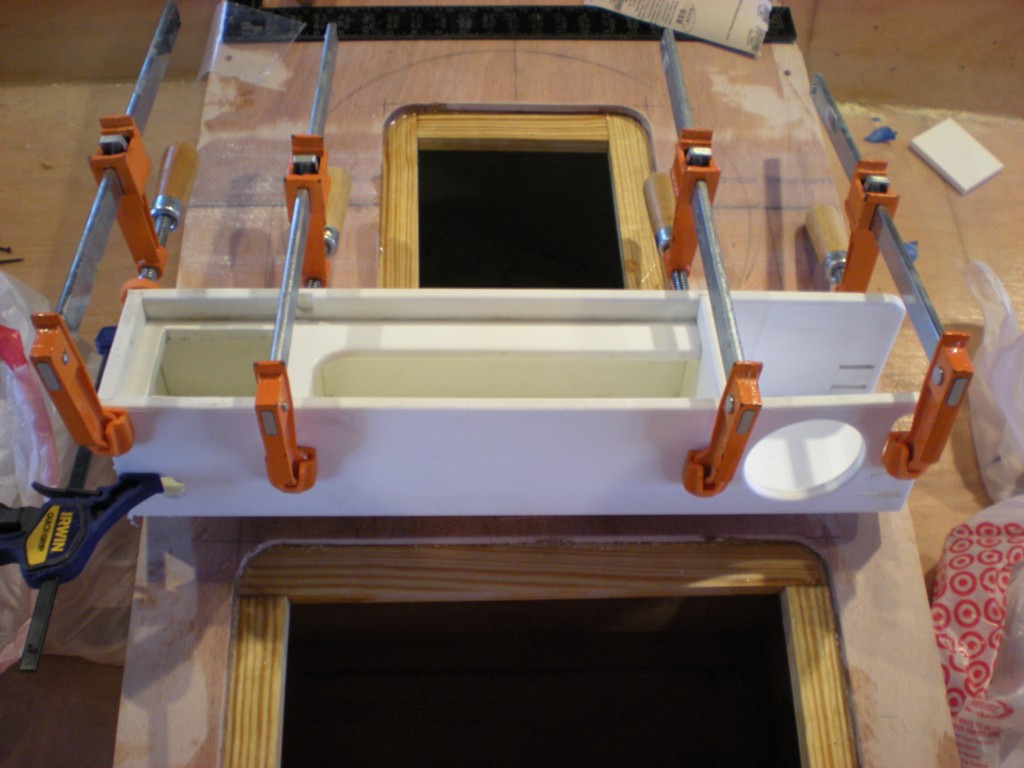
I glassed in the mid seat divider.
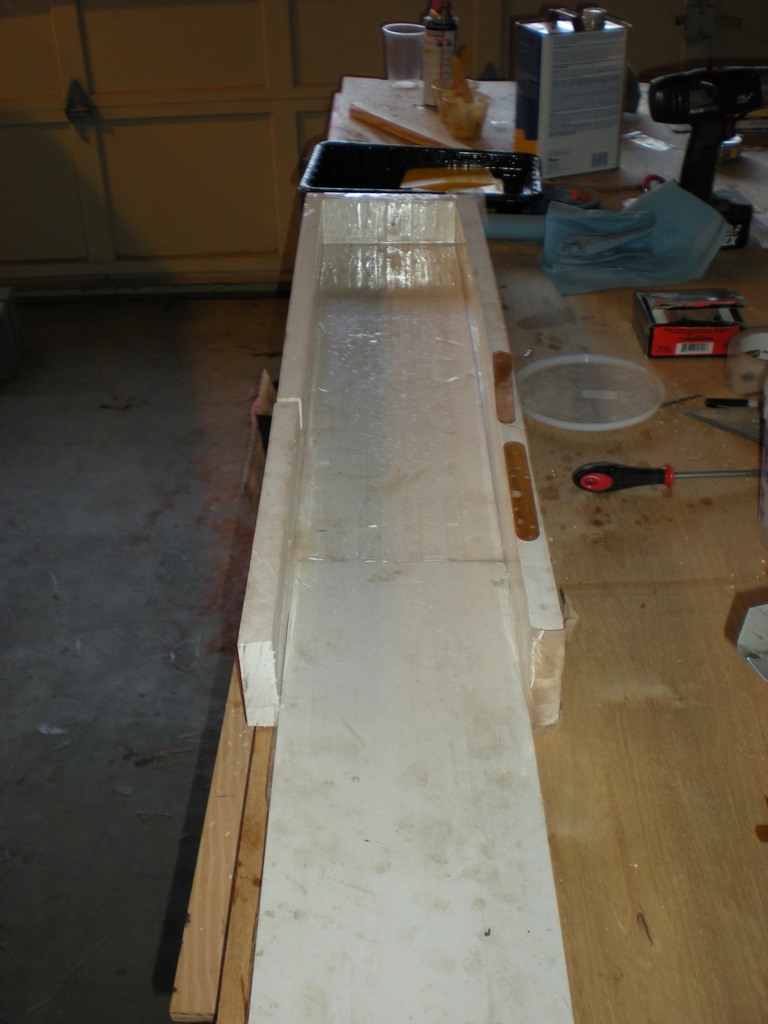
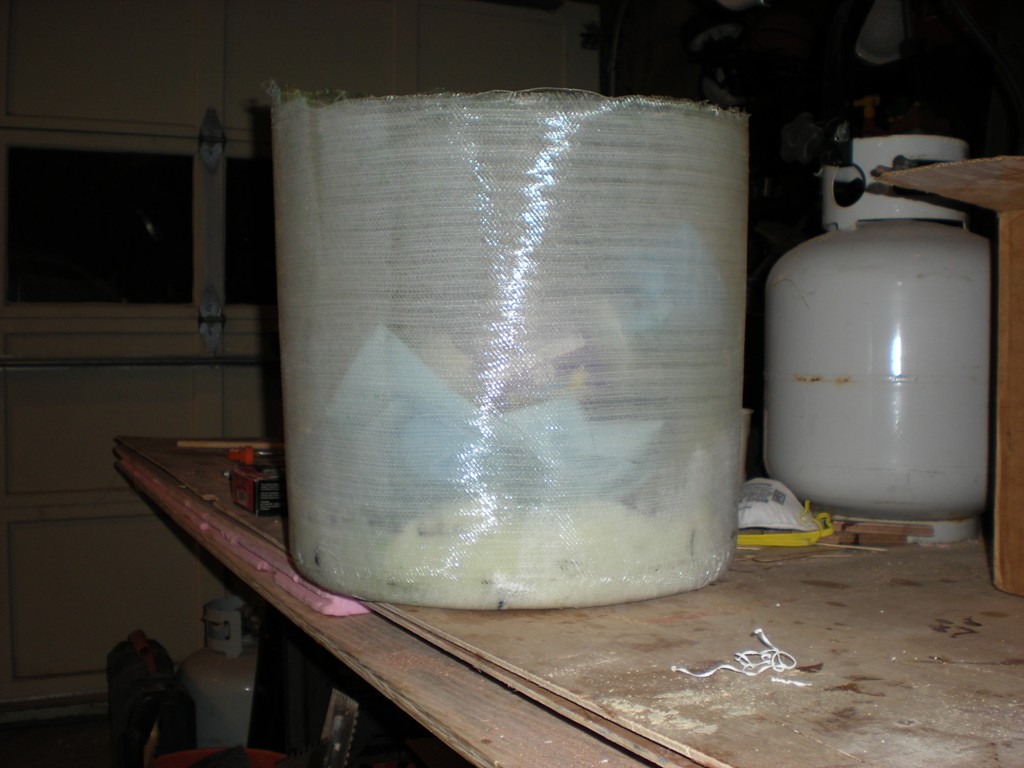
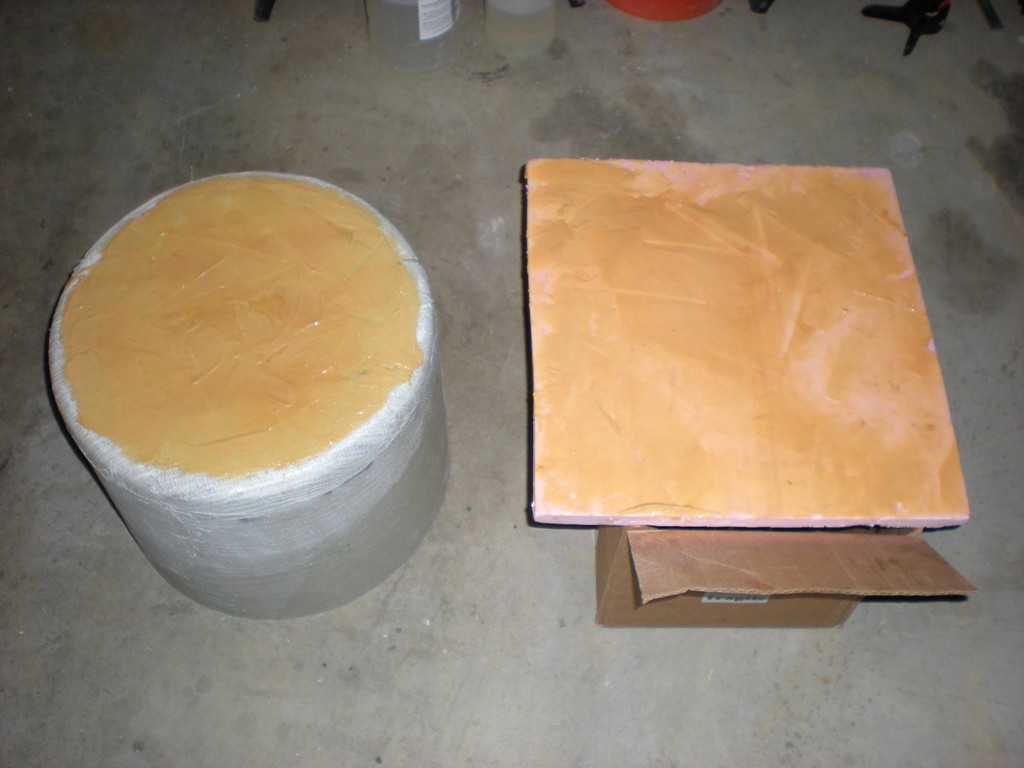
And this is the baitwell,cooler, that will go in beside it. I used a 20 gallon brute trach can for the mold.
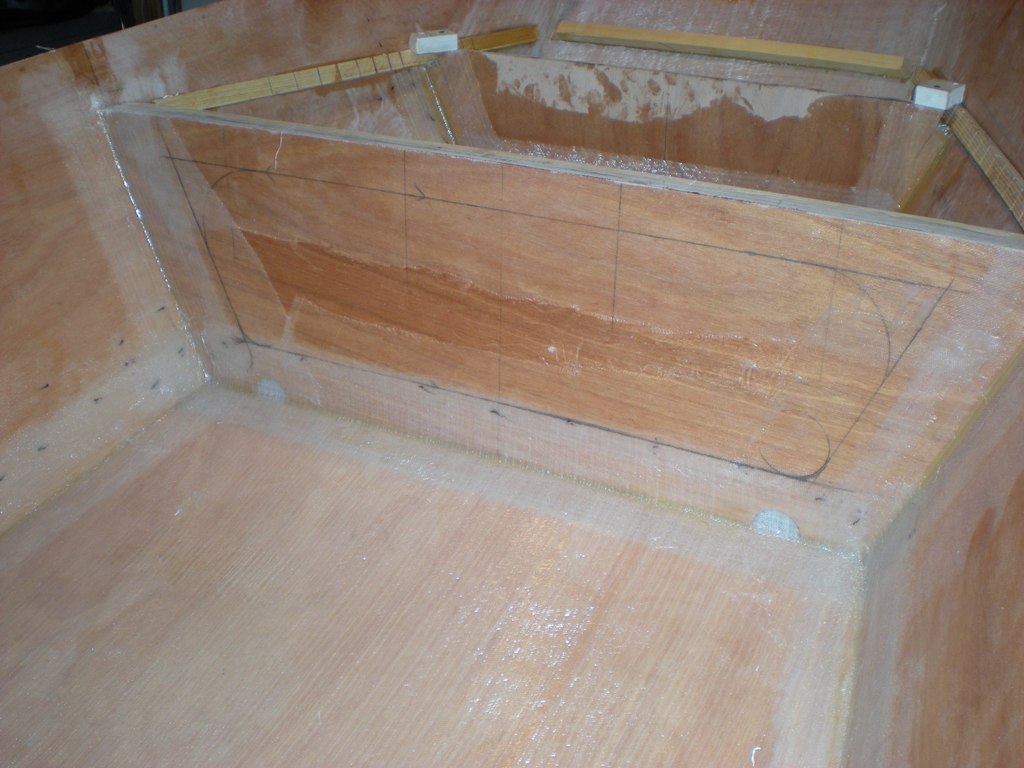
This is the divider under the casting deck to seperate storage from a foam compartment.
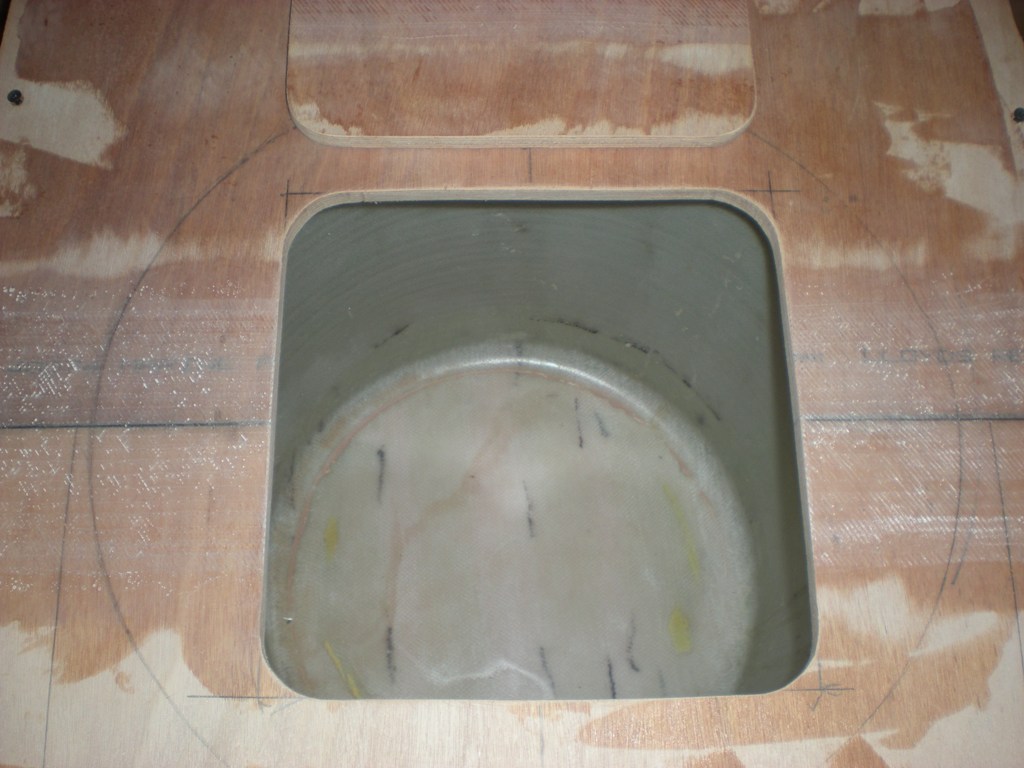
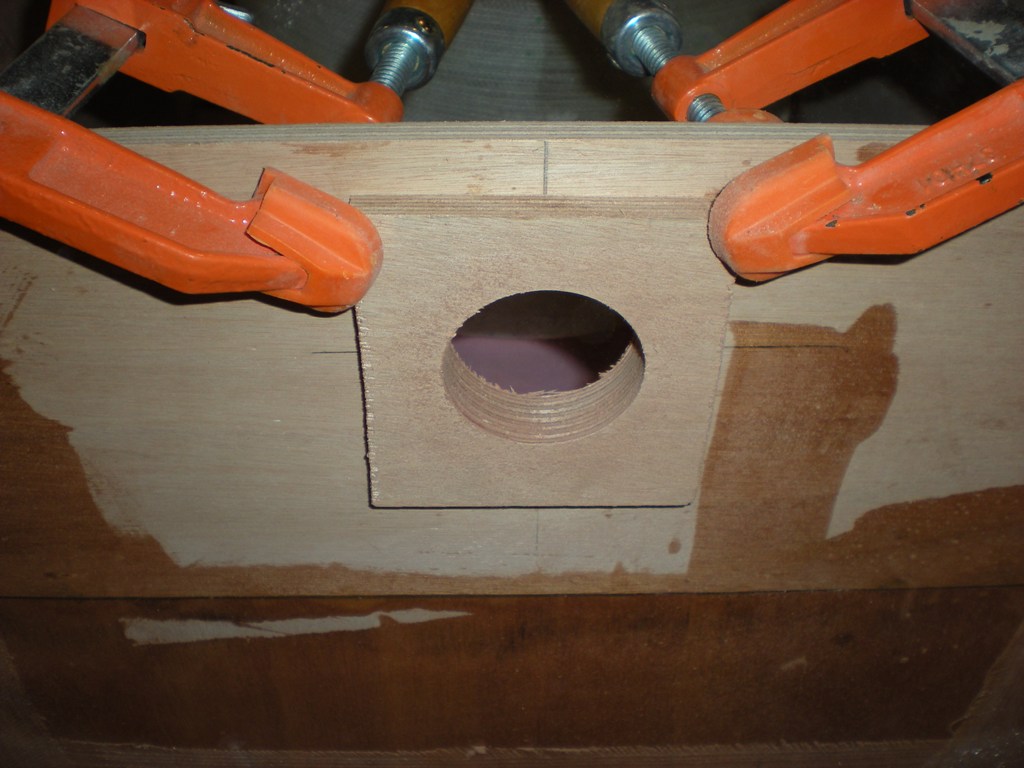
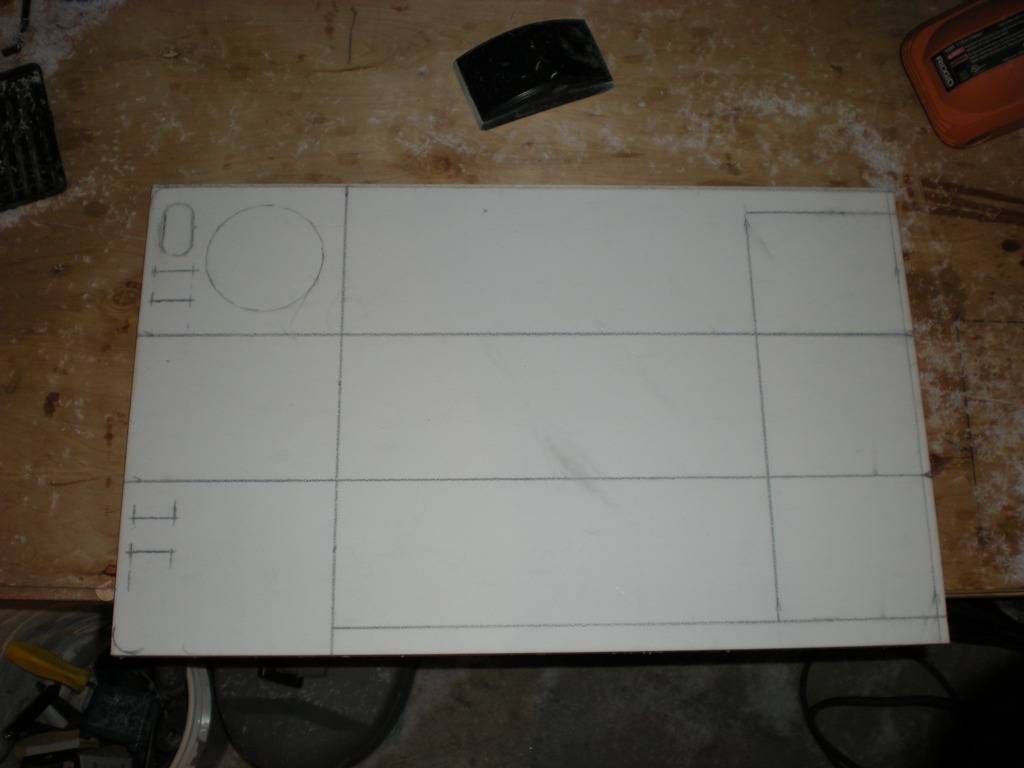
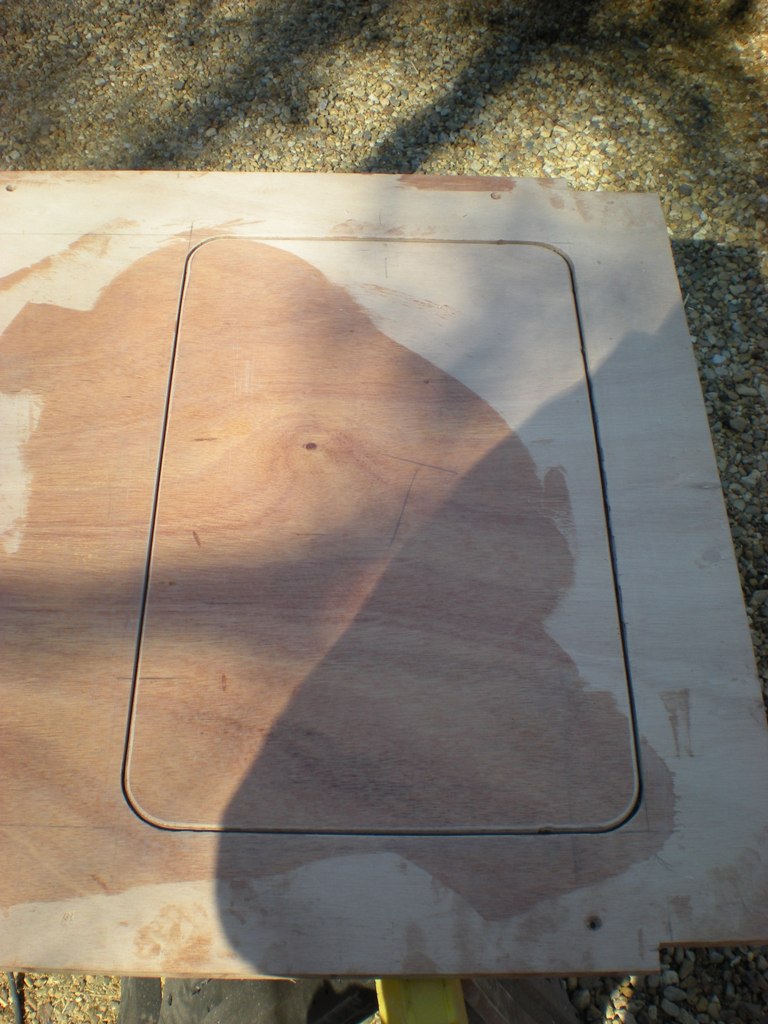
I wanted to show you what my access hole is supposed to look like before I break out the saw.
I had to much coffee in me to make this cut last night.
Thanks for checking out my progress folks,
Daniel
Posted: Fri Jan 09, 2009 12:31 pm
by Cracker Larry
(If you haven't figured it out yet, this is my first boat and my first project working with epoxy . So go easy on me. )
Wouldn't know it to look at it
Very nice work. I like the baitwell idea. Pour some foam around it and it will be great. Remember that 20 gallons of salt water weighs about 160 lbs. As much as a person.
Posted: Fri Jan 09, 2009 1:53 pm
by donk
I'm a long way from a pro but it looks good from here. I'm limping along with my first and, due to a severe epoxy allergy, probably my last build. I really wanted to build the new tug!
Maybe we'll get a chance to check out each other's build someday
don
Posted: Fri Jan 09, 2009 3:44 pm
by Murry
Thanks guys, I'm having alot fun building, that's for sure.
Remember that 20 gallons of salt water weighs about 160 lbs.
Wow
, that's heavy. Fortunately the capacity won't be 20 gallons,
it will only be 15 inches tall. I'm thinking it will have a capacity of 6-7 gallons or so.
As much as a person.
I wish.
I'm limping along with my first and, due to a severe epoxy allergy, probably my last build.
Sorry to hear that Donk. I wish you the best.
Maybe we'll get a chance to check out each other's build someday
I've got to head that way to pickup one more sheet of ply, I'd like to see your build very much.
Daniel
Posted: Fri Jan 09, 2009 3:55 pm
by colonialc19
Daniel,
Your progress looks great!
I just found something you may or may not be interested in, but thought I'd let you know,
Southeastern Marine is advertising a new '08 25hp yamaha for $2199, thats cheaper than Ed's.
Keep building
The other Daniel
edit: Thats a 2stroke
Posted: Fri Jan 09, 2009 9:19 pm
by Murry
Thanks Daniel,
That's a good deal for the 25hp. I have an electric start 15hp that I'm going to try first, but I'm sure I'll be selling it to buy a 25hp
I should probably go ahead and sell my 15hp now so that I can get the 25hp before I finish.
Maybe I will. Thanks again
Do you still need wood for your build?
Posted: Sat Jan 10, 2009 10:14 am
by Dougster
That sure is nice work, all of it. It sure is cleaner than my work. I especially appreciate the pics of the bait well, since I will have to figure something out like that if I don't find some prefab one that happens to fit well. Compared to me, your flying on this build.
In the slow lane but still movin' Dougster
Posted: Sat Jan 10, 2009 3:37 pm
by colonialc19
Daniel,
I'll still need a few sheets, but I'm not in any rush.
The more I think about it the more I like that baitwell, cool
, I thought about one combined into a leaning post, but I think its a little too much for my lil 17.
Hey Dougster, you have plenty of company in the slow lane.
Posted: Sat Jan 10, 2009 10:01 pm
by Murry
Thank you Dougster, I've enjoyed following your LB build and thanks for the lessons on the graphite. I'll be continuing that battle on the gf when the time comes. I'm looking forward to seeing your LB fliped, if I was closer I'd be there to help.
I'm glad yall like the baitwell, I'm proud of it, as it was my first fiberglass project besides my experiment with the trail kit. I made the baitwell before I even had wood for the boat
. I was able to cut it down to size today and it fits nicely in the midseat. I also layed out and cut my hatches, they turned out pretty good but I left my camera at the house. Oh well, I'll take a couple of pictures next time I'm building.
Compared to me, your flying on this build.
Hey Dougster, you have plenty of company in the slow lane.
I don't know about that guys, the gf is a much smaller boat that is easier to build. I wouldn't be anywhere near this stage if I was building one of yalls
Posted: Mon Jan 12, 2009 11:36 am
by donk
Daniel, you're welcome anytime, just give me a heads up. E-mail me at dcknapkeatlocalnetdotcom, see what we can work out.
don
Posted: Mon Jan 12, 2009 11:37 am
by Murry
more progress:
Shot of the overfilled drain area that I attempted to do wet on wet with the glass work inside the bilge area.
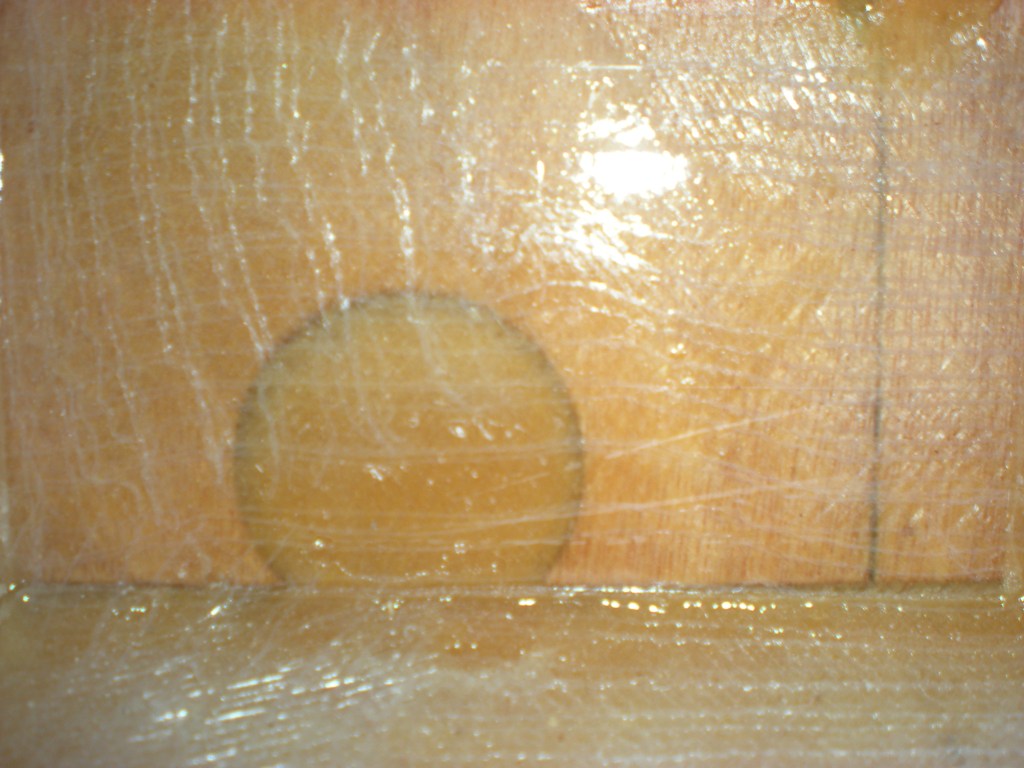
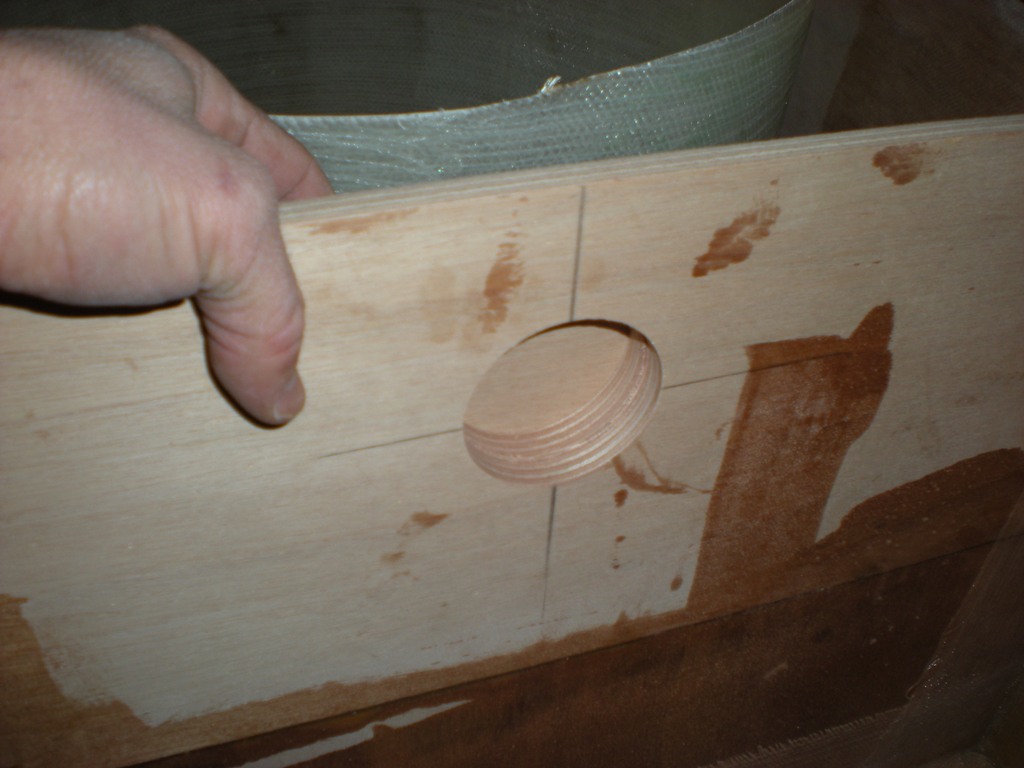
One of the limber holes cleaned up with a dremel and some quarter round wraped in 60 grit paper. It should fair up nicely and once I put some glue on the low spot in the middle, leveling it with the glass, wood should be protected from the water moving through these areas just fine.
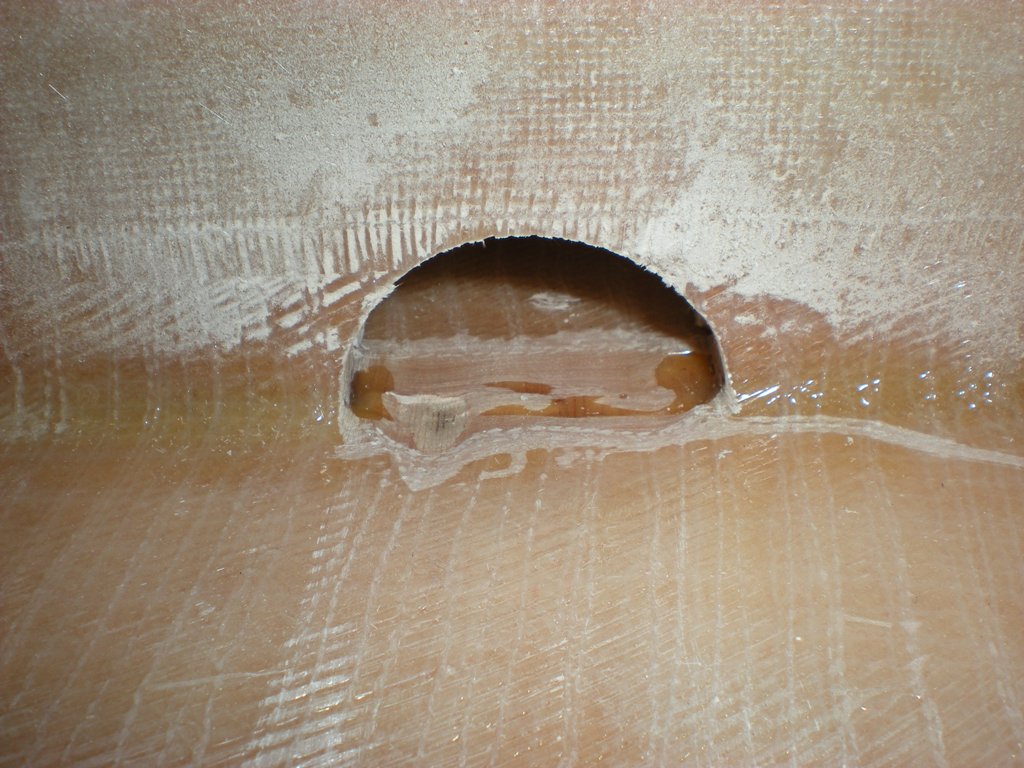
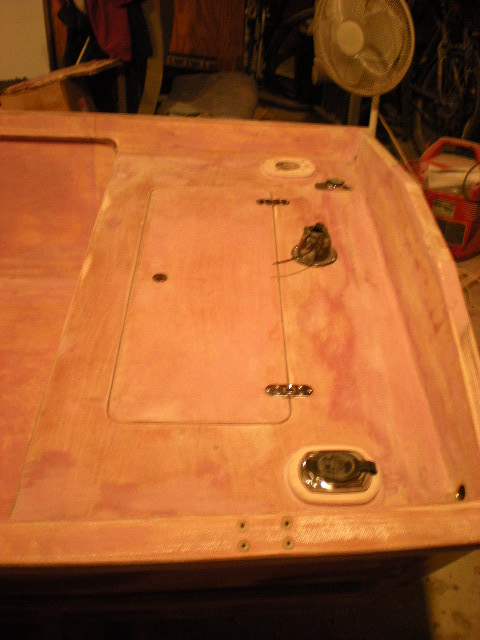
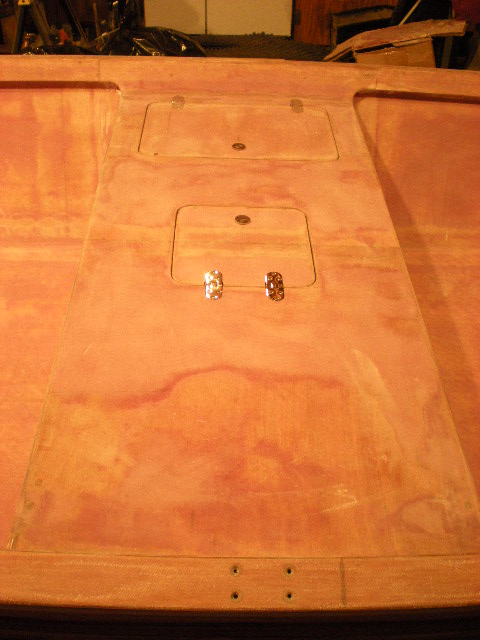
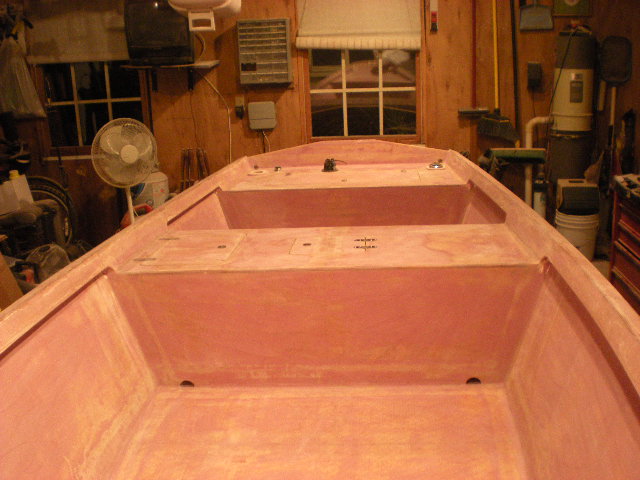
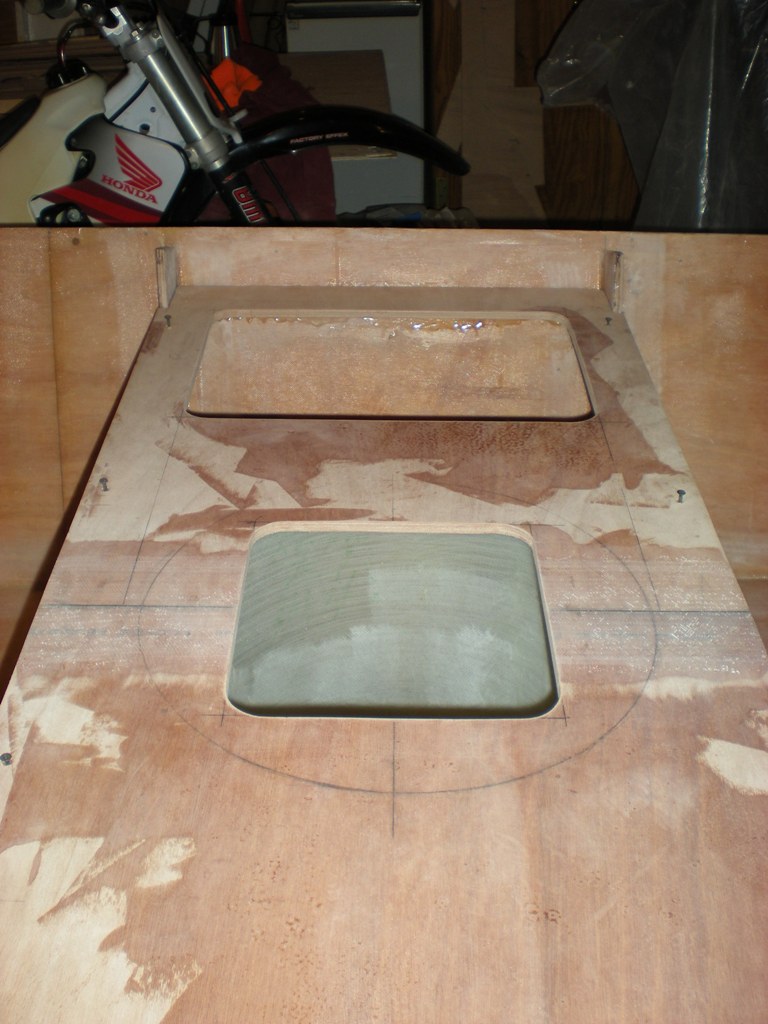
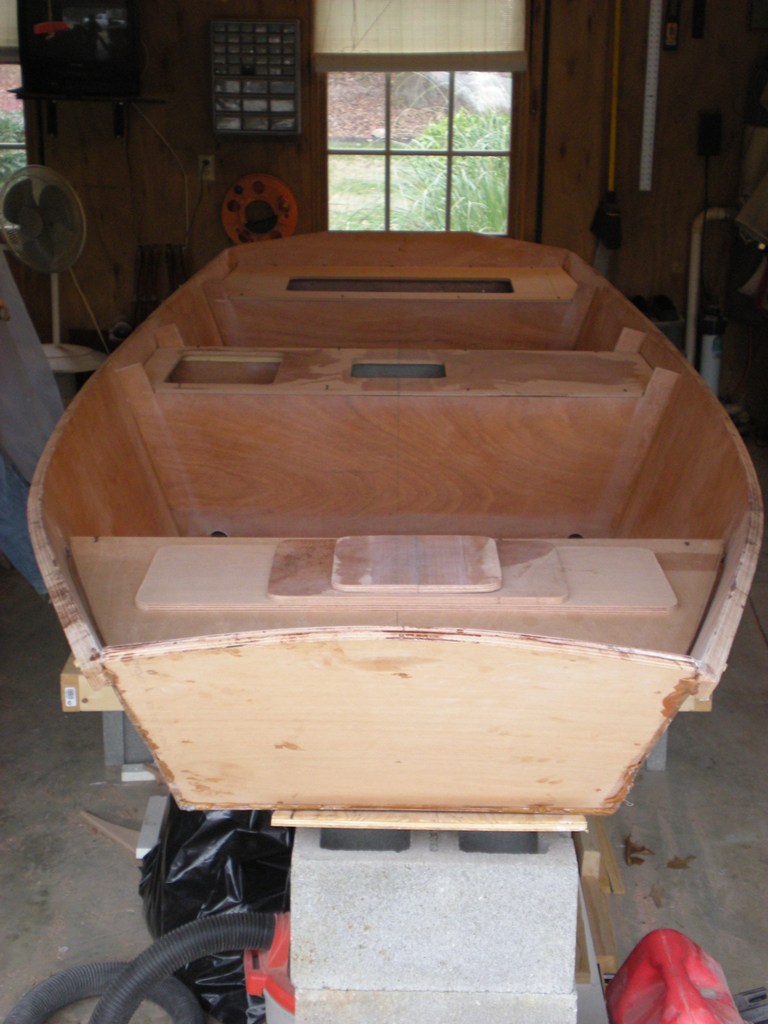
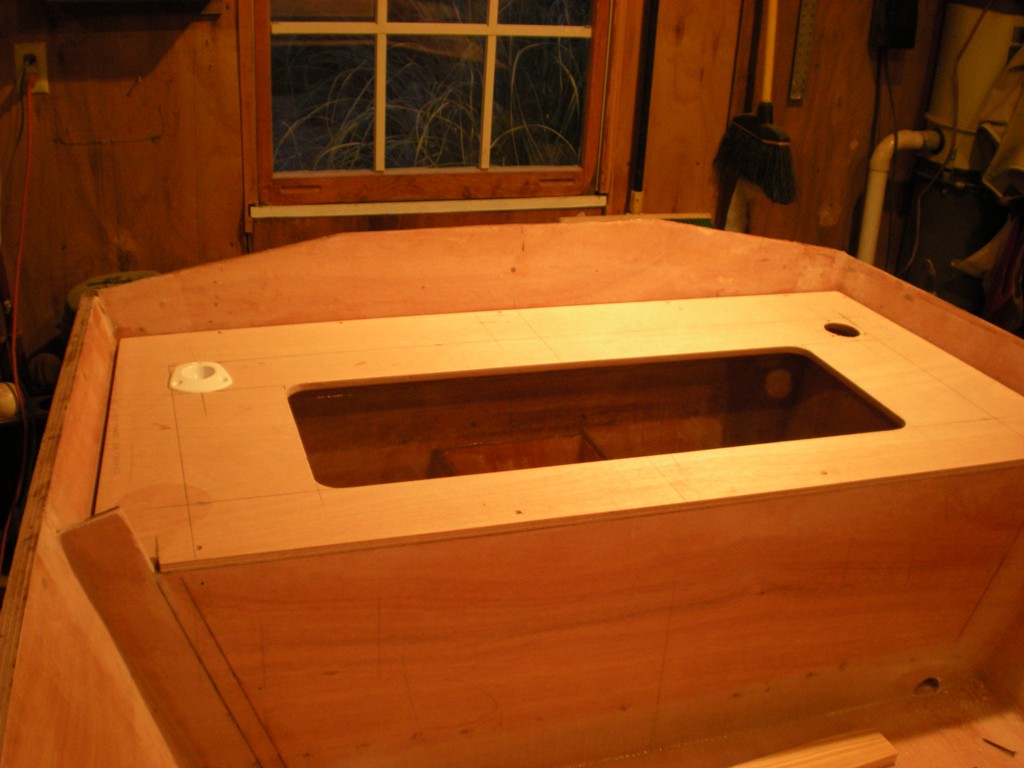
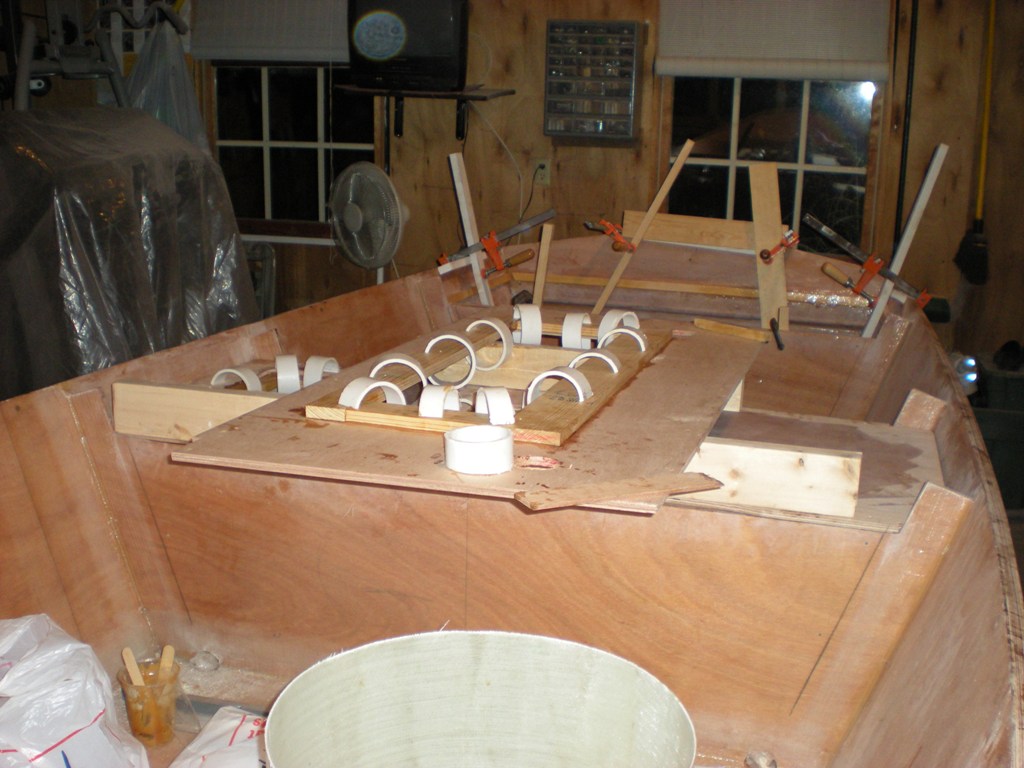
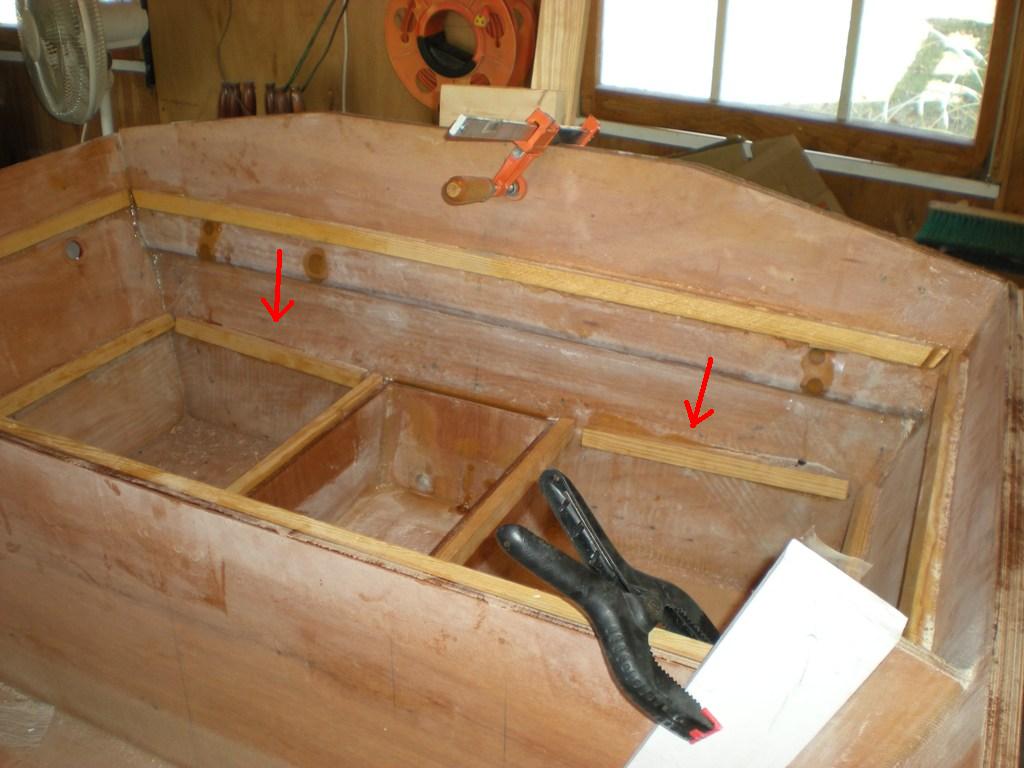
I'm going with three hatches on the boat along with the opening cut into the forward frame per the plans. The front opening will remain open without a hatch. The rear seat compartment hatch will be used for light storage and will give me access to the bilge, the mid seat will have two hatches. One for the baitwell and the other will be for the starting battery (300 amp lawn mower battery), fuse panel,.ect...
havn't finished shaping opening, just cut and took picture.
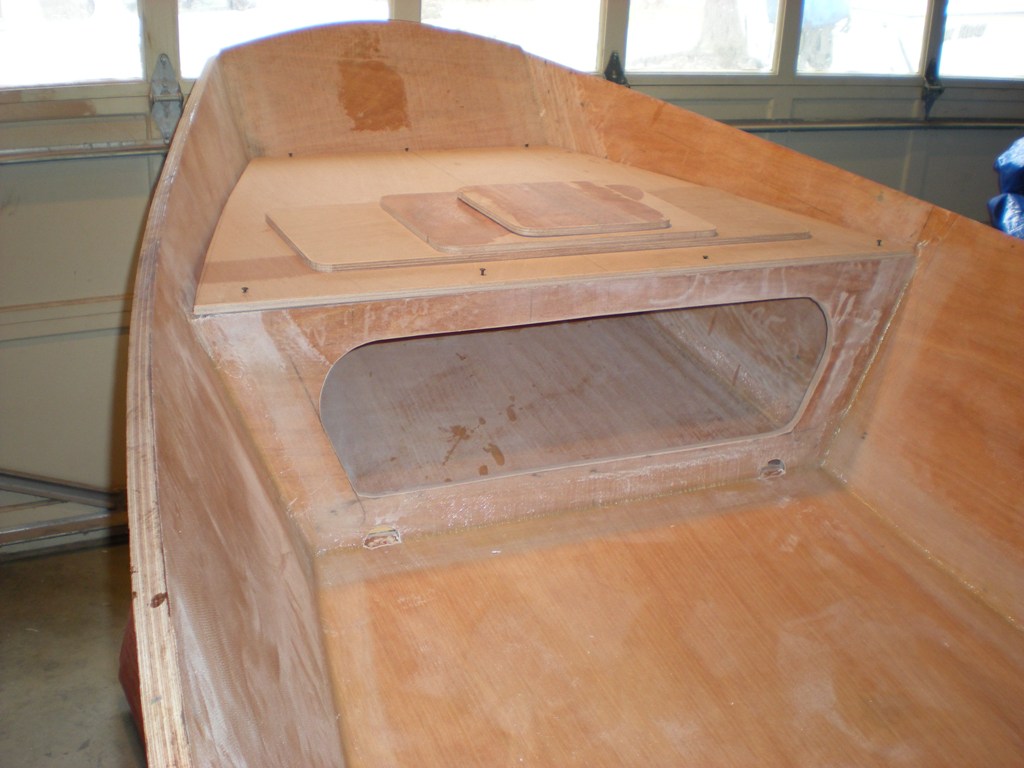
rear seat compartment/hatch
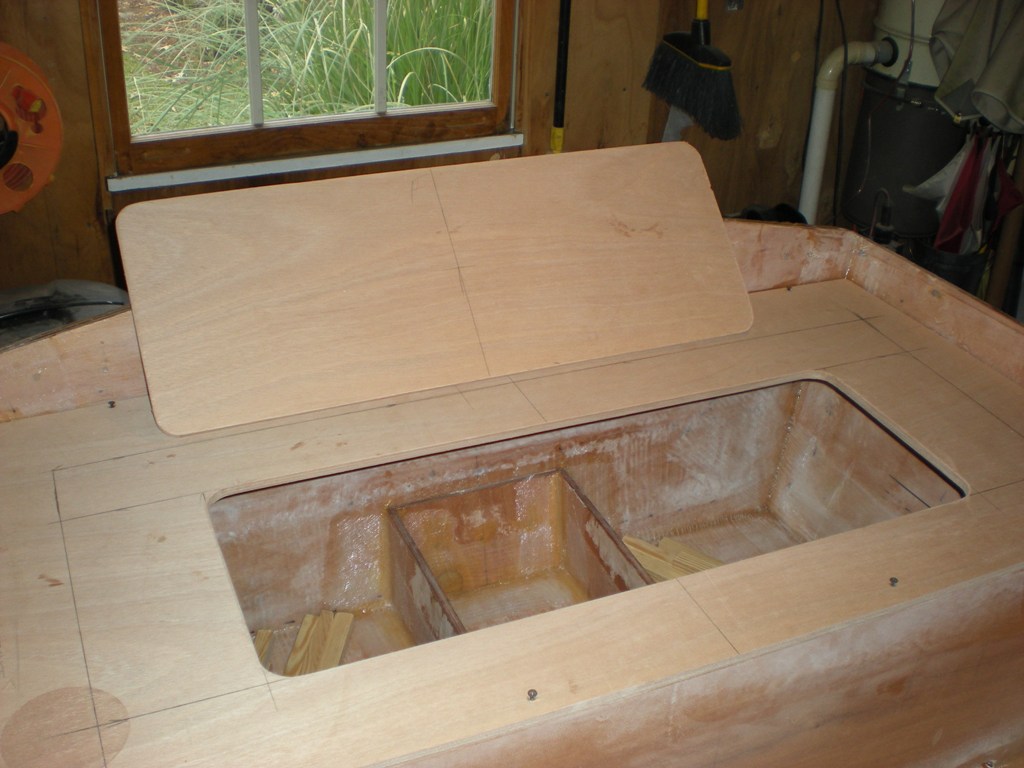
midseat compartment/hatches

boat from the front showing better layout of hatch placement.
until next time,
Daniel
Posted: Mon Jan 12, 2009 12:06 pm
by topwater
Murry nice job on the hatch cut outs.
nice and straight and smooth corners.
what saw did you use and what blade?
Posted: Mon Jan 12, 2009 12:22 pm
by Murry
Jig saw with the thinnnest bosch blades I could find for the corners.
I can't remember what tooth the blades were and I only used the thin blades for the corners. I made the sraight cuts with standard blades.
I'll repost the tooth count later this week if you'd like.
Daniel
Posted: Mon Jan 12, 2009 12:34 pm
by BassMunn
Murry you're just flying along aren't you!
Your hatch layout looks nice, nice clean cut lines. Your work in general is very neat.
I better watch out, if I don't flip my hull soon you're gonna beat me
Posted: Mon Jan 12, 2009 1:14 pm
by bernd1
Daniel the high-speed builder
Bye
Bernd
Posted: Mon Jan 12, 2009 3:50 pm
by Murry
Thanks for the compliments BassMunn, but I didn't know we were racing.
Daniel the high-speed builder
Bernd, it's just these warm temps, compared to where you live.
My joints wouldn't even move in your conditions, much less work well enough to craft that fine boat you're building.
Posted: Mon Jan 12, 2009 4:16 pm
by BassMunn
Murry wrote:Thanks for the compliments BassMunn, but I didn't know we were racing.
Definately not
Besides I've got about 200 hatches to build
Posted: Mon Jan 12, 2009 10:05 pm
by colonialc19
Daniel,
Like topwater said, nice smooth clean cuts, you must have steady hands.
Keep on building, those sheepshead will be in trouble this year
,
The other Daniel
Posted: Tue Jan 13, 2009 5:21 am
by bernd1
Murry wrote:Thanks for the compliments BassMunn, but I didn't know we were racing.
Daniel the high-speed builder
Bernd, it's just these warm temps, compared to where you live.
My joints wouldn't even move in your conditions, much less work well enough to craft that fine boat you're building.
Thanks too,
my aim is to have all finished (trailer, boat.....) in may ore june - I hope...
Please pray for me and higer tmperatures...
Posted: Tue Jan 13, 2009 6:53 am
by Murry
those sheepshead will be in trouble this year
Now you're talking. I like it.
my aim is to have all finished (trailer, boat.....) in may ore june - I hope...
You set a date
You are a brave man.
Posted: Tue Jan 13, 2009 11:48 am
by mecreature
Great job murry....
My jigsaw cuts look like I used a chainsaw...
good luck bernd1
Posted: Tue Jan 13, 2009 12:00 pm
by Murry
Thanks mecreature. I'm enjoying seeing her take shape.
My jigsaw cuts look like I used a chainsaw...
I friend who happens to be a carpenter told his simple trick of keeping a thumb planted beside the guide plate while cutting. It really helps to steady the saw when you can apply slight pressure to your thumb which is serving as an anchor. Ofcourse placing your thumb closer to the business end of the saw may not be a good idea.
, but it does help to get a straight cut. A good straight piece of lumber works well too and it's alot safer.
Posted: Tue Jan 13, 2009 12:24 pm
by mecreature
You are at the sweet spot Murry.. You got enough done to have fun and even though you know what's in front of you.. this is when the disease really festers.
Posted: Sat Jan 17, 2009 9:04 pm
by Murry
this is when the disease really festers.
It's been festering for over two years.. it started the day I walked through a North Carolina boat shop and building this boat had been the only medicine that touches it.
It's was way to cold to work with epoxy today, so I took some time to
ponder and cut some wood.
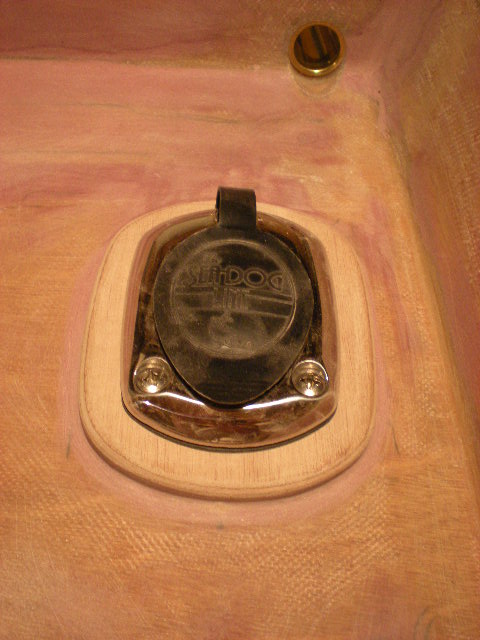
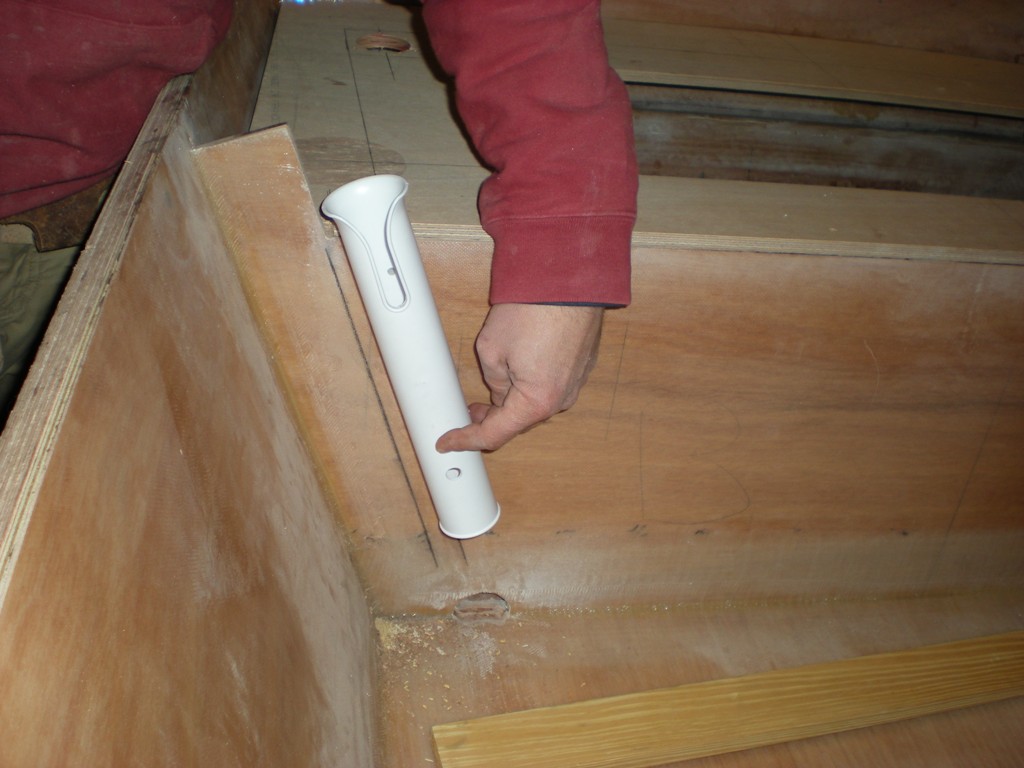
I started the day with figuring out how to plumb the baitwell. I wasn't able to find a nozzle with long enough threads to reach through the foam between the well and frame, so I had to come up with something. I could have made something with p.v.c, but I like the ones you can buy.
This is what I was dealing with.
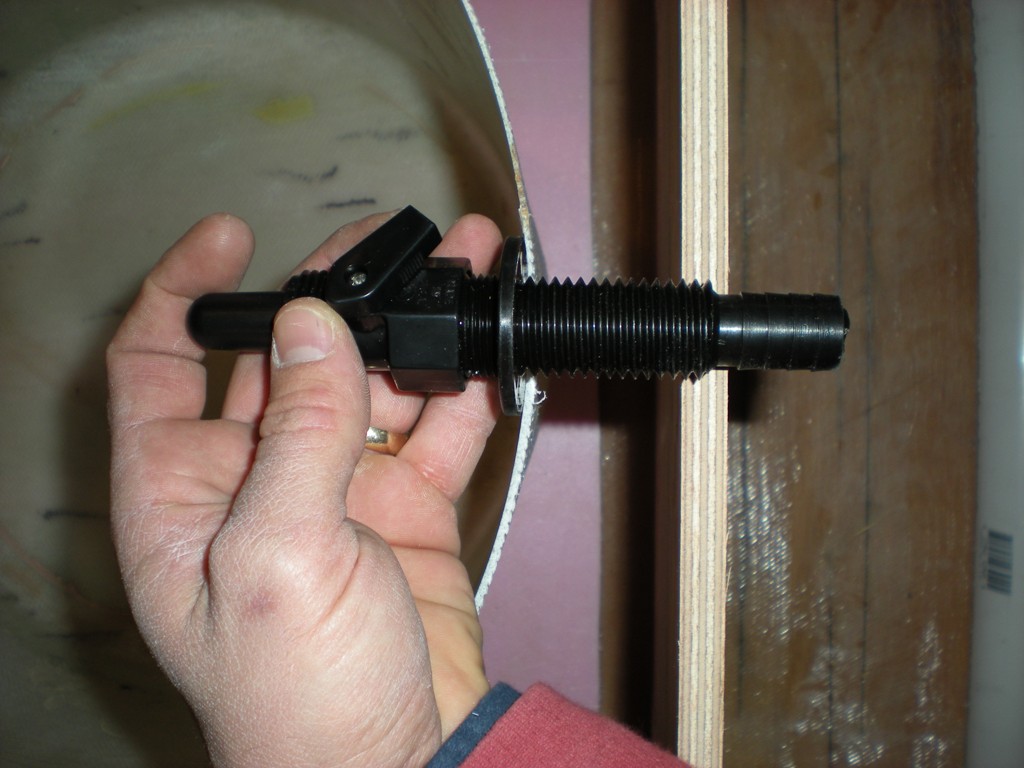
I wanted this much gap for insulation because I'm planing for this baitwell to double as a cooler some days, so I decided to move the nozzle an inch closer to the baitwell using two pieces of plywood.
like this...
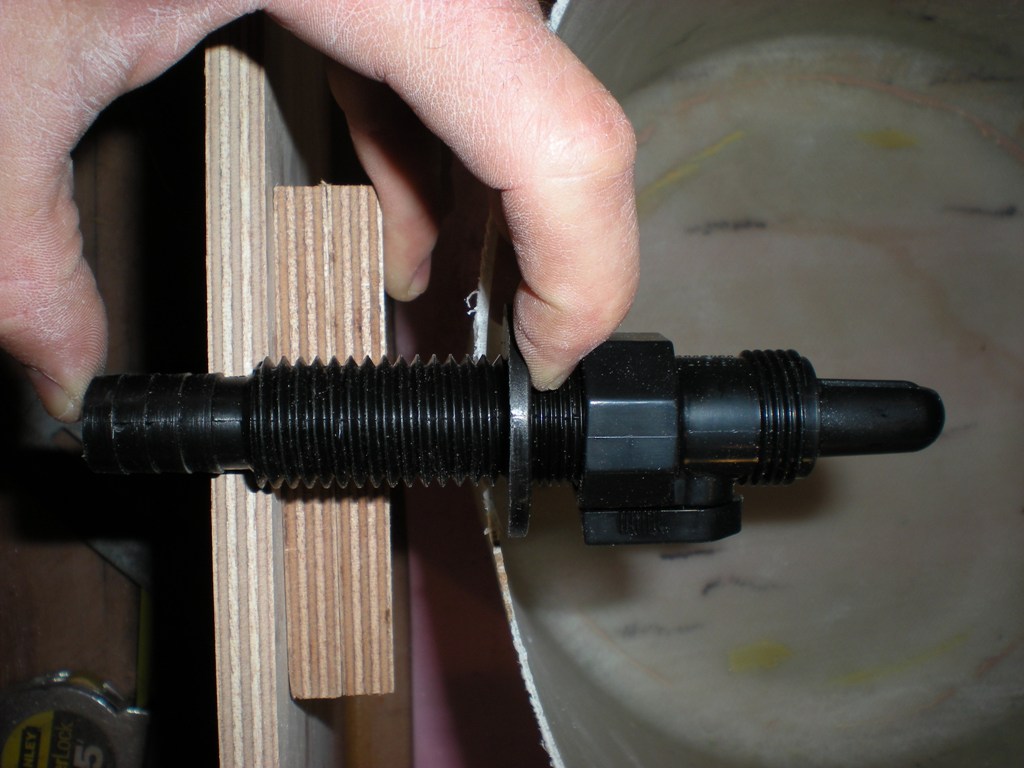
I then drilled through the frame and one of the blocks...
After I fill the baitwell compartment with foam I'll over drill and fill this new mounting area for the nozzle. It doesn't look the best but it should work just fine.
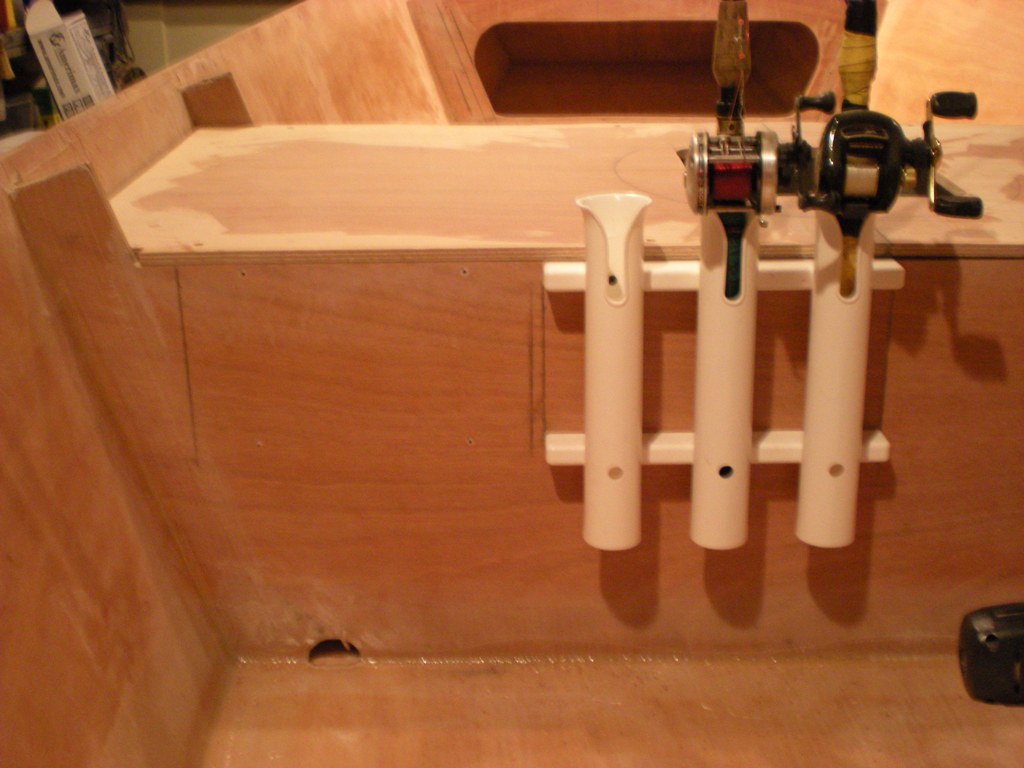
I also settled on my rod holder style and location. I was going to mount some removable rod holders but I couldn't settle on a style or location and after discussing ideas with Bernd, I went with a more conventional style. I also wanted them to stand off the frames a bit for reel clearance so I went with this style instead of the ones that have strap mounts. Man they look cheap, because they are.

I'm installing two at the transom as well.
and I cut all remaining cleats for the interior, hatch stops and a few more backing plates for various things.
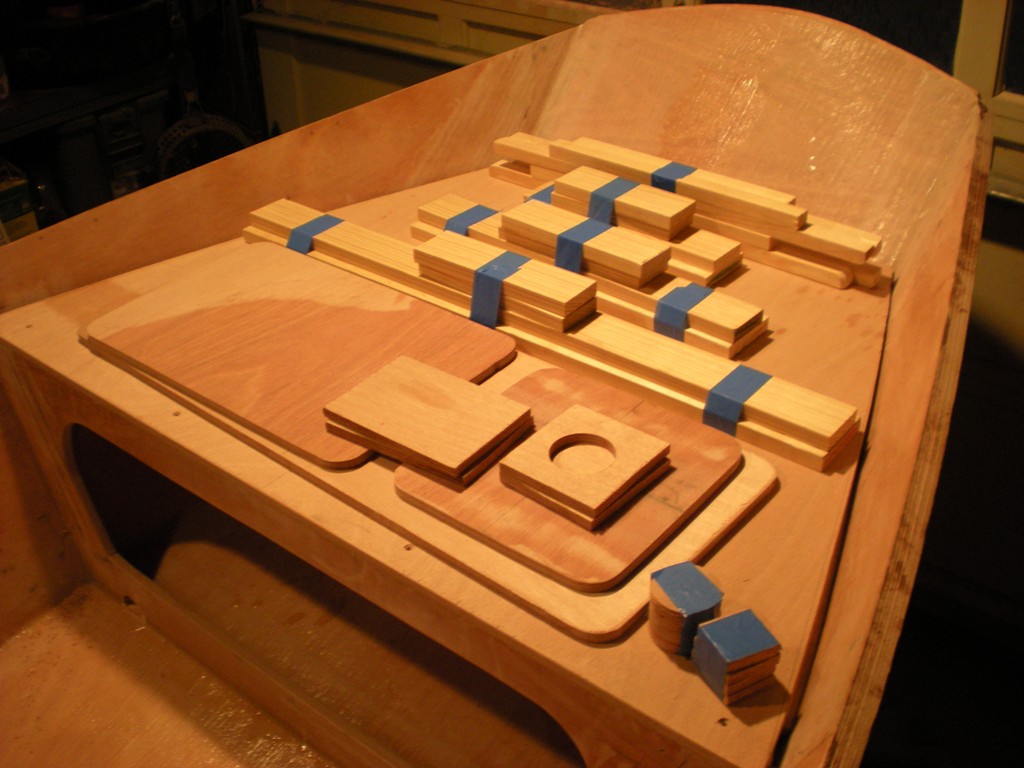
The weather really fouled up my big plans today, Oh well, atleast I'm ready to glue some stuff.
Happy building folks, and thanks for checking out my progress.
Daniel
Posted: Sat Jan 17, 2009 10:32 pm
by ks8
That's one of the things weather like this is perfect for. I made my oarlock mounts and my battery box junction boxes in similar weather. And I'm finishing up my tiller now. Soon to make the actual battery boxes, all things that can be done indoors in the warm room. What you did with recessing the nozzle mount for the bait well is very similar to my battery connector boxes. The battery leads get stowed away waterproof when batts are removed. (I'll post a picture some day on my thread). What you did is a perfectly workable solution.
For maintenance/replacement, just make sure that you can get on the nut easily with whatever you plan to use to tighten and loosen it. Since I wanted to be able to use my hand if necessary, the *big* hole on the first *plate* is almost 4 inches. Lots of *clumsy cold fingers* room in the recessed area.
Looking forward to more pictures as you finalize foam install, etc. I like the idea of getting double duty as a cooler.
Posted: Sun Jan 18, 2009 1:31 pm
by bernd1
.......nice clean work
Keep on building
Bye
Bernd
Posted: Sun Jan 18, 2009 4:10 pm
by Murry
Soon to make the actual battery boxes
I'd like to see those when you finish. I've been thinking about how to design the layout of my electrical hatch, but I can't find a small battery box designed for lawnmower batteries. I'll figure something out.
.......nice clean work
Thanks Bernd, how did the underside of your seat tops turn out?
Posted: Tue Jan 20, 2009 12:01 am
by Murry
but I can't find a small battery box designed for lawnmower batteries.
Scratch that, I found one on-line last night that will work great.
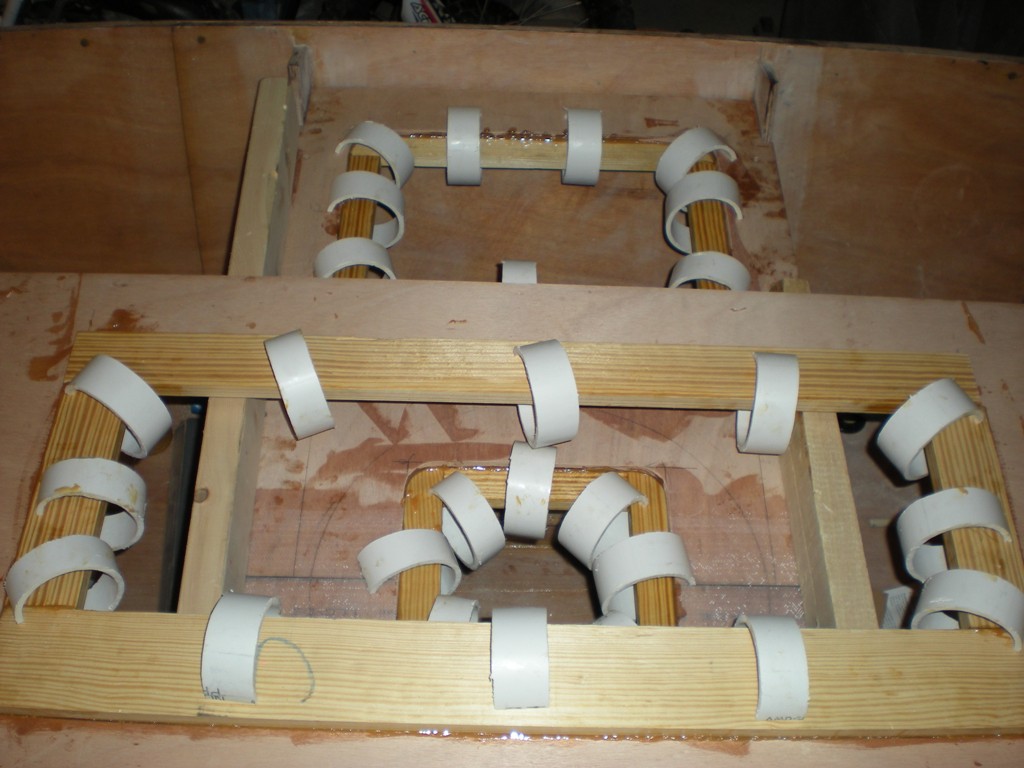
I was able to get a bit of work done this evening, but I'd I like to know if my drains will be strong enough. Check it out below and let me know what you think. Thanks
First.... I will be installing two of these for rod storage.
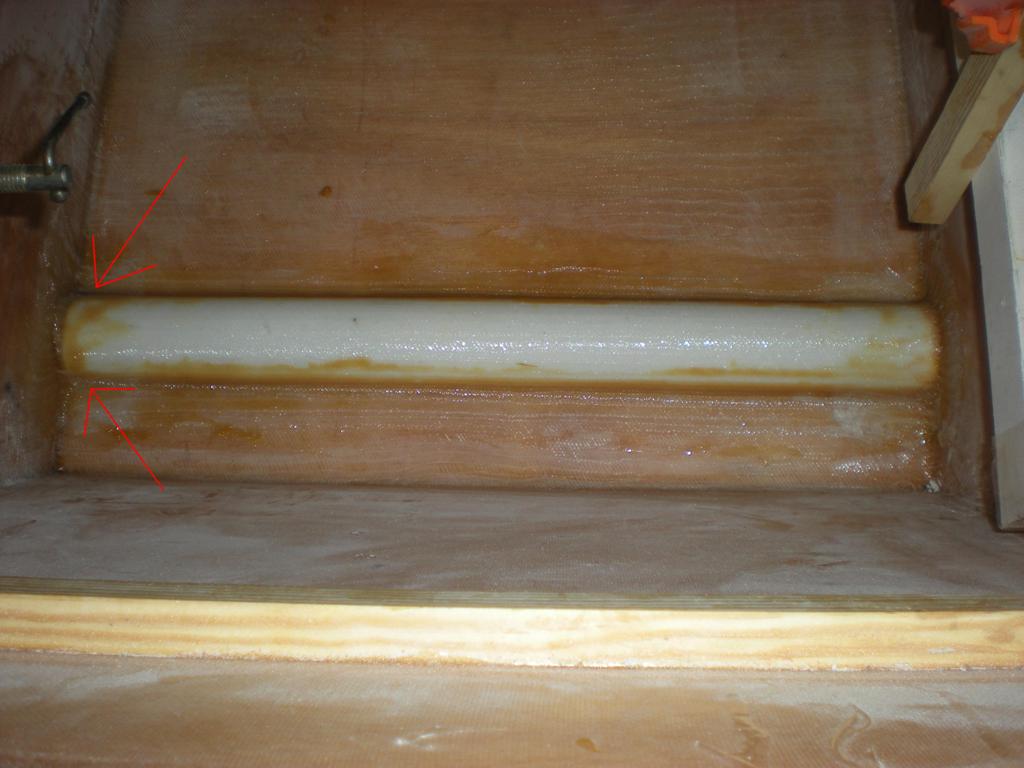
O.K. and now for the drain details.
I started be sanding the drain area and the drain, then I cleaned all surfaces with acetone.
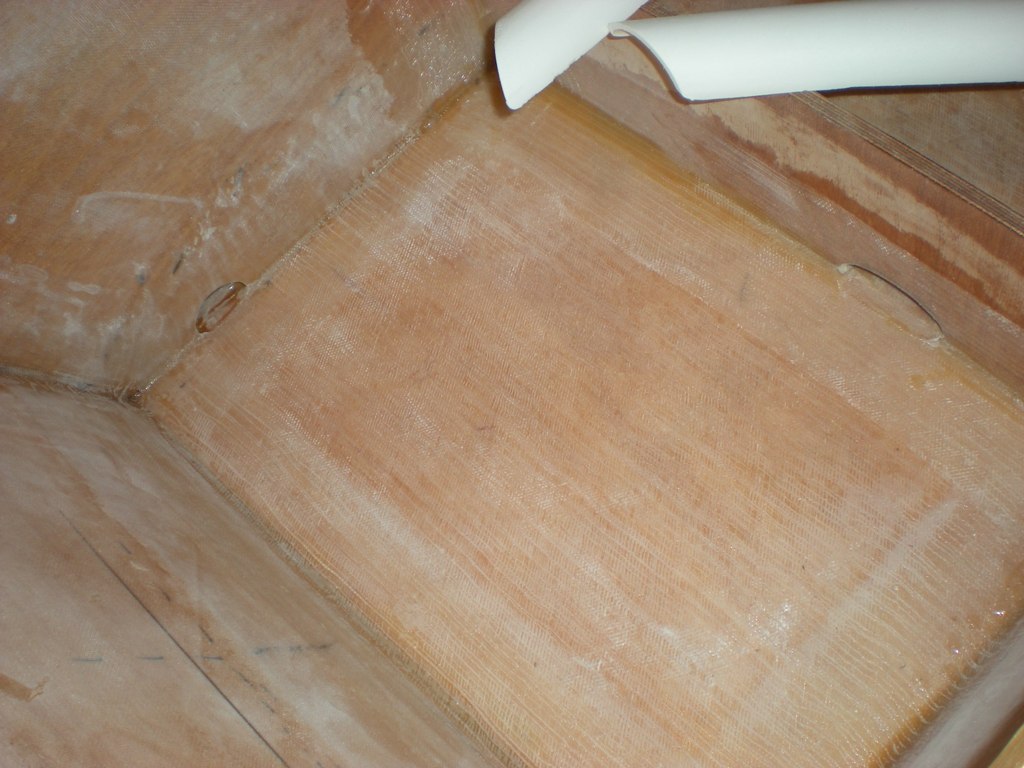
Next I used a chip brush to wet things out and I then layed the fillet.
(it's a little messy, but it turned out fine.)
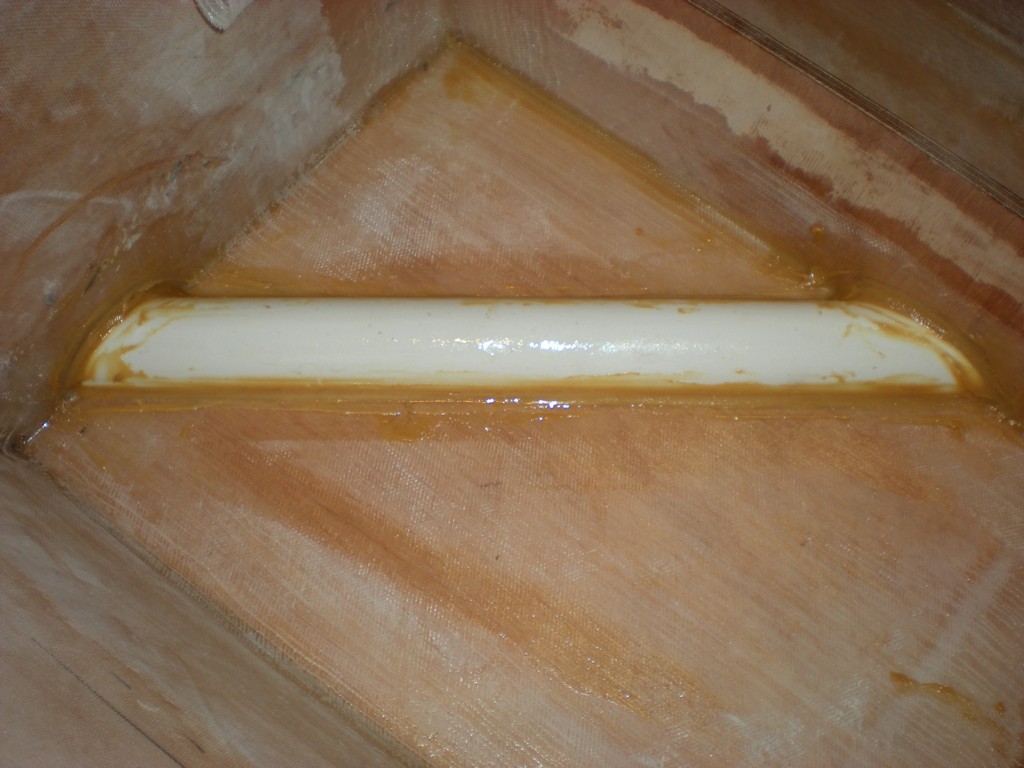
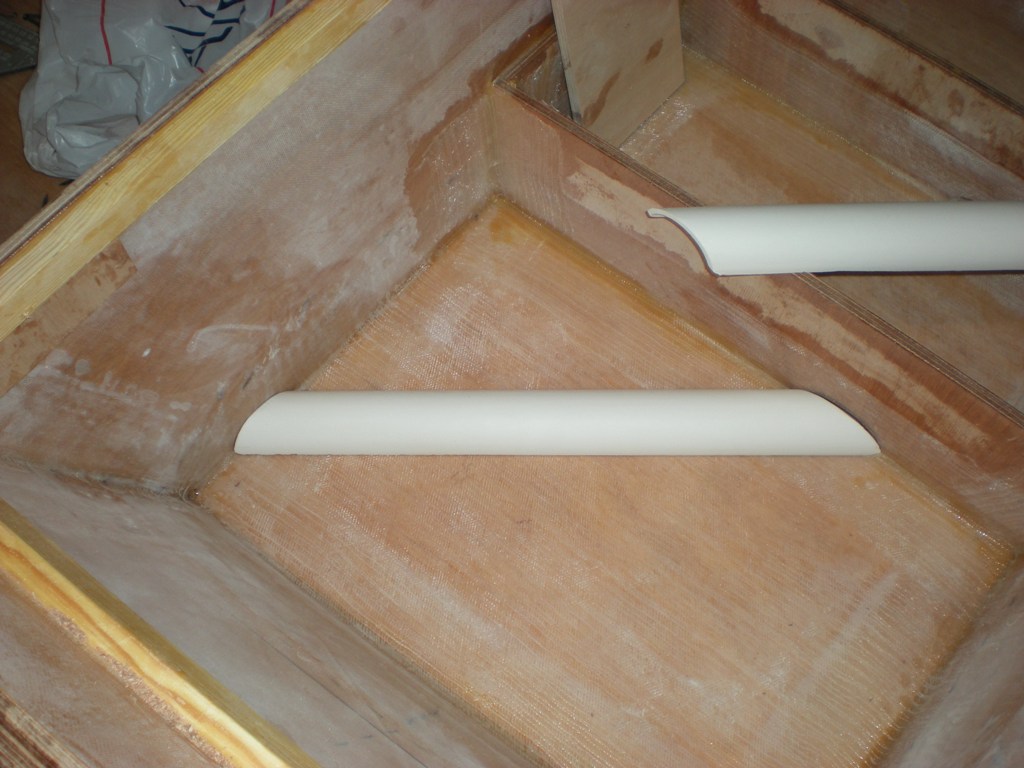
I then placed to small pieces at the ends. (prewet)
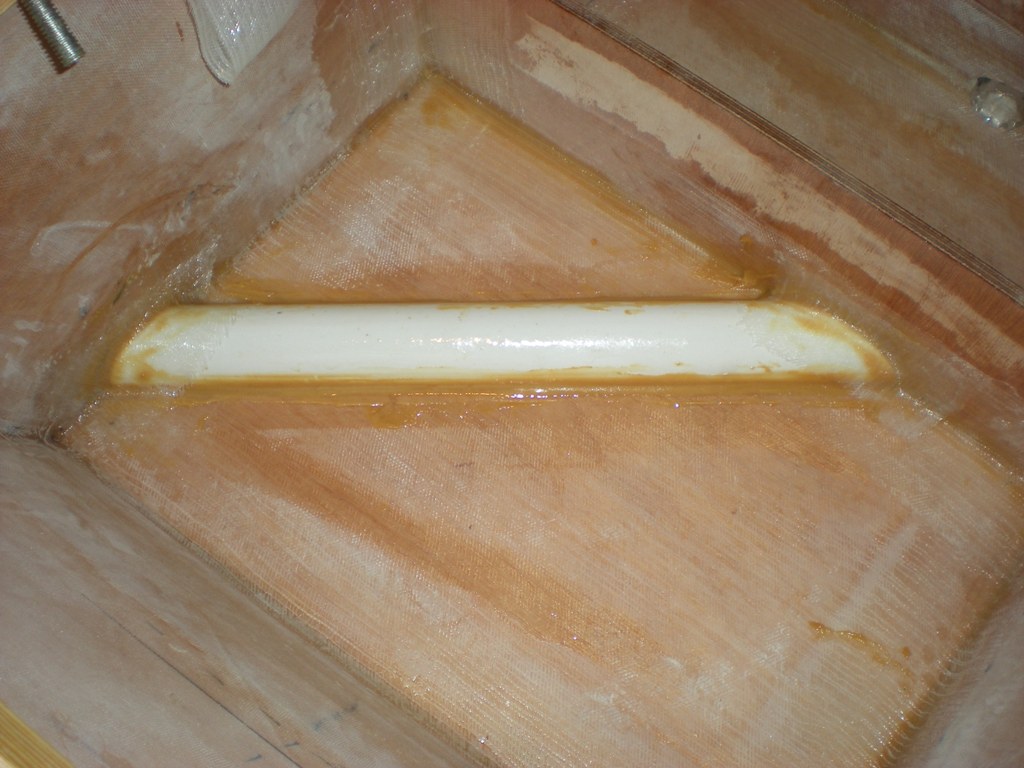
Next I placed prewet tape along the entire length of the drain.
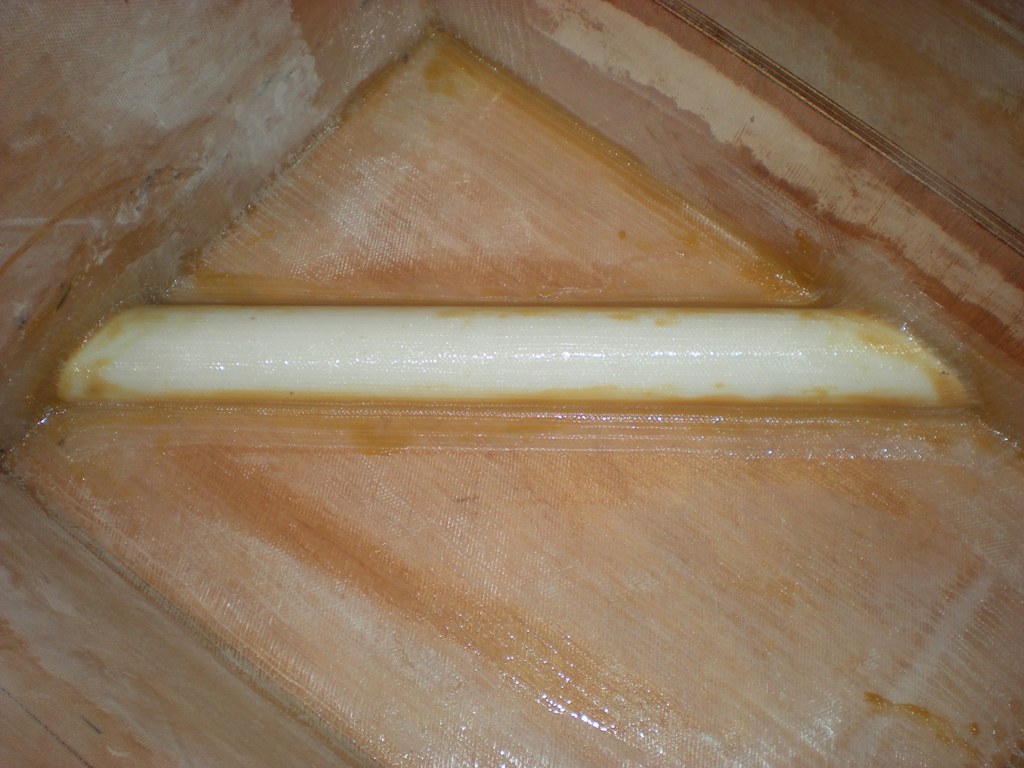
shot of midseat drain.
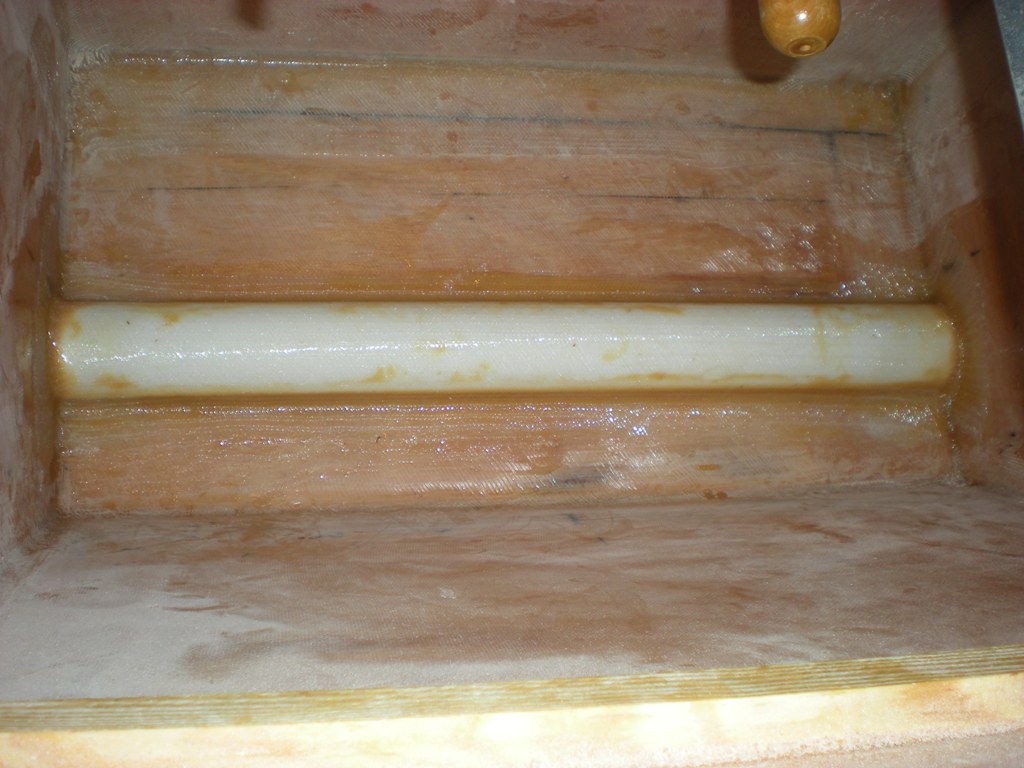
I only used one piece of tape thinking it would be enough but I ended up only haveing about an inch and a half of tape actually touching the sole.
Is that enough?
Thanks for the advice,
Daniel
Posted: Tue Jan 20, 2009 12:45 am
by Fonda@kauai
Sure seems like enough. Very clean work
Posted: Tue Jan 20, 2009 12:59 am
by chicagoross
I think it's enough - they're not a structural part of the hull; they only need to be strong enough to stand on; the pvc itself should be strong enough for that.
Posted: Tue Jan 20, 2009 7:19 am
by Murry
Thanks for the replys folks.
I didn't word my concern correctly, I wanted to make sure that I would have a strong enough bond to the sole with an inch 1/2 surface area.
Thanks.
Three out of four of them will covered with foam never to be seen again and my greatest fear would be to have on of the pipes break away from the hull seeping water into one of the foam compartments and I would never know it.
Daniel
Posted: Tue Jan 20, 2009 9:18 am
by Cracker Larry
I think it's strong enough, the hull doesn't do much flexing in that location. But what the heck, if you have any concerns at all that will keep you awake at night slap another layer or 2 on her. Just a couple of feet of tape, 20 minutes, no more worries
Posted: Tue Jan 20, 2009 9:23 am
by bernd1
Daniel,
you told something about aceton - be careful of use - you shouldn't use it to clean the surface of epoxy.
Look here
http://www.systemthree.com/members/lite ... y_Book.pdf
you can download the epoxy book from System three....a lot of information ....i like it to read.
.....I think you become a proffesional builder..
Bye
Bernd
Posted: Tue Jan 20, 2009 10:14 am
by donk
Murray, I had the same concerns prior to installation of my drains under the seat of my FS-14. So, I took a piece of pvc pipe that I had cut in half and glued it to a 2 X 4 with E-Z Fillet. After it set up I took a hammer to it and it's still there. I added a piece of tape over mine too. I honestly don't think you have much to worry about, but I'm a long way from a pro.
donk
Posted: Tue Jan 20, 2009 2:45 pm
by Murry
Just a couple of feet of tape, 20 minutes, no more worries
Exactly.. The day I glue my hatch stops up I'll probably slap some extra tape on them.
you told something about aceton - be careful of use - you shouldn't use it to clean the surface of epoxy.
Thanks. I hope mine isn't recycled. I'll check.
After it set up I took a hammer to it and it's still there.
Sounds like a good test to me. I had some glue fall on the edge of my tape machine which is made from pvc lumber and I couldn't ge that off either.
Posted: Wed Jan 21, 2009 11:21 am
by Murry
Well, I made a mistake with my drain installation. I forgot to roll a seal coat on the bottom under the drain area to ensure that the wood was encapsulated. One thing is for sure I don't want to have any doubt that every piece of wood is protected so that it will remain a strong core and not become a sponge.
I was working the day after I installed those drains and it hit me like a ton of bricks. I was planning to apply a final seal coat before setting the drian in place but i didn't.
Hoping that the one layer of 12oz. would be enough protection I posted the question in the power boat section and Shine got me back on track.
Thanks. I'm just glad I hadn't foamed the areas in.
Oh well, here's my demo. work list night. I caught it before it was fully cured, which made it a little easier.
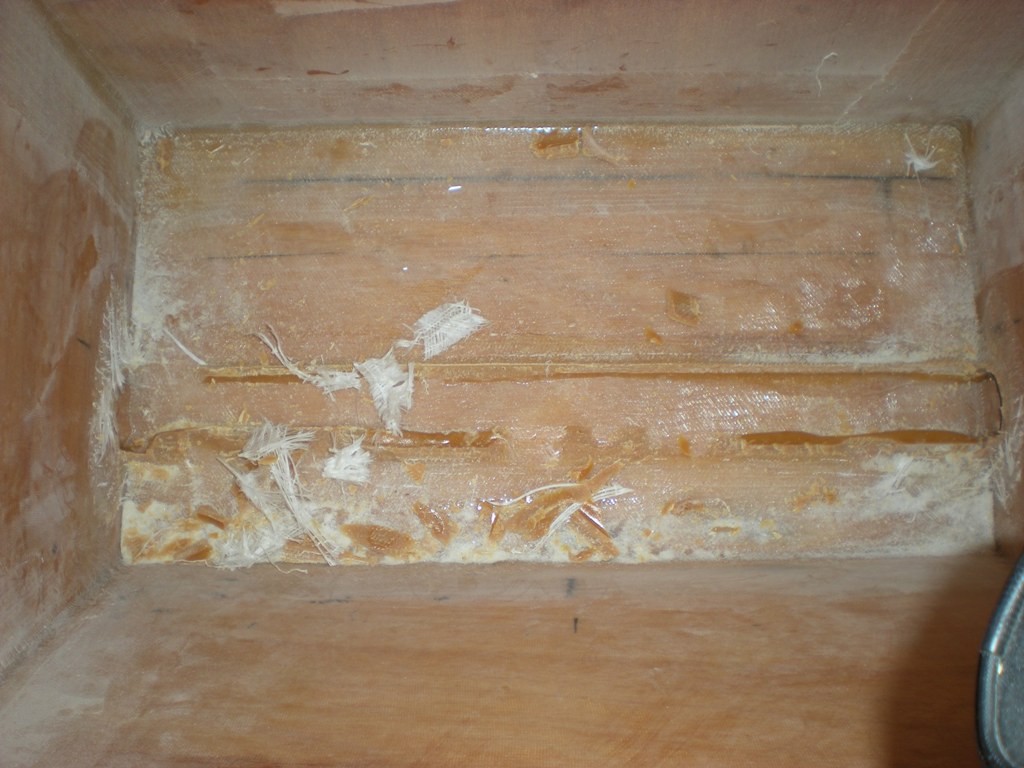
Atleast now I wan't have any doubt about whether it's sealed well enough after Round Number 2 this weekend.
Pease learn from my mistake. 2-3 coats for encapsulation means 2-3 coats and areas that will be wet areas on my boat will see 4 coats.
Daniel
Posted: Wed Jan 21, 2009 2:24 pm
by bernd1
.....I'm a little bit confused......
Does this mean that I have to give to all glassed areas 2-3 coats of epoxy before I'm fairing or painting.
In other words.....if I glass for example the bottom inside the seats , sand the high spots and then just want to paint it without fairing that this doesn't work?
Question:
If I glass the inside of my boat, sand the high spots and then use fairing compound without giving 2-3 coats of epoxy that this is wrong?
OR
does it mean that only these areas should have 2-3 coats after glassing which get no fairing compound or paint?
BTW:
Is it recommended to give a coat of epoxy onto the glassed surface just before I put the fairing compound on it?
At the moment I very confused and unsafe
Could please somebody give me/us these information
Bye
Bernd
Posted: Wed Jan 21, 2009 3:14 pm
by Murry
.....I'm a little bit confused......
I feel your pain friend. I was confused yesterday after I posted my original concern. Let me see If I can help based on what I learned from Shine through my drain mishap.
Does this mean that I have to give to all glassed areas 2-3 coats of epoxy before I'm fairing or painting.
No
In other words.....if I glass for example the bottom inside the seats , sand the high spots and then just want to paint it without fairing that this doesn't work?
I think that depends on what your using for paint. In this case I would apply one more seal coat of unthickened epoxy. I'm planning to use pigmented epoxy inside my hatches, so I will be sealing as I paint.
Question:
If I glass the inside of my boat, sand the high spots and then use fairing compound without giving 2-3 coats of epoxy that this is wrong?
OR
does it mean that only these areas should have 2-3 coats after glassing which get no fairing compound or paint?
No the first statement isn't wrong, I will be fairing after sanding down the cotton threads and high spots as well but I'm planning to apply a final seal coat of unthickened epoxy before primer. Keep in mind that the primer will also be sealing the surface.
I believe the second part of the above question is the safest option. If youir not planning to fair I would finish with a seal coat or two to ensure encapulation of all surfaces.
The reason I pulled up my drains is because I couldn't coat the wood under the drain after I covered it and I didn't apply the final seal coar or two before installing the drain. So it could have been unprotected.
I thing it my help, if you go to the power boat section and read over the thread "rookie mistake maybe". This is where Shine helped me with my drain issue.
Does this help?
I'm sure someone else will post to help explain things to both of us better if my information above is incorrect.
Posted: Wed Jan 21, 2009 3:15 pm
by tech_support
bernd1 wrote:
Does this mean that I have to give to all glassed areas 2-3 coats of epoxy before I'm fairing or painting.
No, that would be way overkill. The glassing layer counts as one, and so would the primer.
bernd1 wrote:.
Question:
If I glass the inside of my boat, sand the high spots and then use fairing compound without giving 2-3 coats of epoxy that this is wrong?
no its fine as long as you have sanded down too much epoxy.
bernd1 wrote:.
does it mean that only these areas should have 2-3 coats after glassing which get no fairing compound or paint?
Yes, if you are encapsulating wood (with no other coating), you should have 2 coats
bernd1 wrote:.
BTW:Is it recommended to give a coat of epoxy onto the glassed surface just before I put the fairing compound on it?
Not needed
There is no reason to be concerned.

Posted: Wed Jan 21, 2009 4:04 pm
by Murry
Yeah, what he said.
Posted: Wed Jan 21, 2009 5:10 pm
by colonialc19
Posted: Thu Jan 22, 2009 2:28 am
by bernd1
.....I'm happy not to be a horse

Thanks Shine ....

Thanks Daniel.....

...once a day I know the most of this building technique

Bye
Bernd
Posted: Sun Jan 25, 2009 3:36 pm
by Murry
I had to recover from my drain mess up so I decided to put a good full day in on Saturday, attempting to make up the lost time.
I ended up haveing the most productive day yet.
I actually got everything done that I intended to do. That never happens to me. My to do list are usually a bit over ambitous to say the least, so actually reaching a daily goal is rare for me and I'm excited about it.
Since my wife has heard enough about this boat too last a life time
, I'll have to share the details with you folks. Sorry.
I put in a full 12 hours yesterday and this is what I got done.
-Sanded and ground down the fillets from the drain mishap. (If you have any experience with a grinder, put down the DA and grab the grinder. It makes short work of glue mounds, but be careful, you don't want to damage the cloth underneath. I finished the cleanup with my DA but the grinder gave me head start.
)
-Cut and shape new pvc drains
-Drilled out my epoxy plug for my drain tube insert.
-Cut pieces and drilled a recess mount for a baitwell light (just like the baitwell nozzle from earlier post)
-Cut and routed a piece of starboard for a mutipurpose shelf on the back of the midseat. (for switch panel,cup holder, depth finder, ect..)
-Glassed in the four new drains-
wetting underneath first
-Glued the hatch stops for all three hatches
-Glued cleats under the rear seat for raised sole that will be over the foam on either side of the bilge area. (eight pieces)
-Glued mounting blocks for baitwell light.
The moral of this story for me is to make a list a stick to it. My boat work days usually look like this- build a little and ponder a lot. The list kept me focused and I got alot done. For me anyway.
Daniel
A couple pics of the controlled chaos.
Posted: Mon Jan 26, 2009 8:08 am
by colonialc19
Daniel,
Everything looks good, makin' progress is always great
The wife has tried the "list" thing with me before with undesired results (undesired for her
) maybe I'll try making my own list
D
Posted: Mon Jan 26, 2009 10:13 am
by mecreature
Looks good. The wife will come back around.. LOL
Nothing like getting a lot done in one session..
I have a rental house I have been working on. I do understand the List.
Posted: Mon Feb 02, 2009 12:20 pm
by Murry
The wife has tried the "list" thing with me before with undesired results (undesired for her ) maybe I'll try making my own list
My wife taught me the list method.
Thanks mecreature.
Wy wife and I are in the planning stages for an overseas trip for this summer so I had to slow down to one evening during the week and Saturdays when available. I'll get her done but my progress will have to slow down a bit.
I've gotten a coulple of things done and I have a new question.
Since my bow eye stems will be sealed in a foamed compartment, I need to get it installed before gluing down my casting deck, but I wanted to glue it down before I've finished the outside painting.
Would it be O.K. to install the bow eye after fairing with blended filler in that area so that I can continue with the interior work. I was planning to seal it with 5200 and then just fair/paint around the taped bow eye.
What do you think?
Some progress....
I wanted to make some sort of console shelf for electronics and small personal storage. So here it goes. A came up with this using starboard.
layed out design..
cut out design...
used a v groove bit for the areas to be heated and bent
used a 1/2 straight for the supports and dividers
used hole saws for cup holder, tool holder, and wire harness locations. (Got to have my coffee with me.)
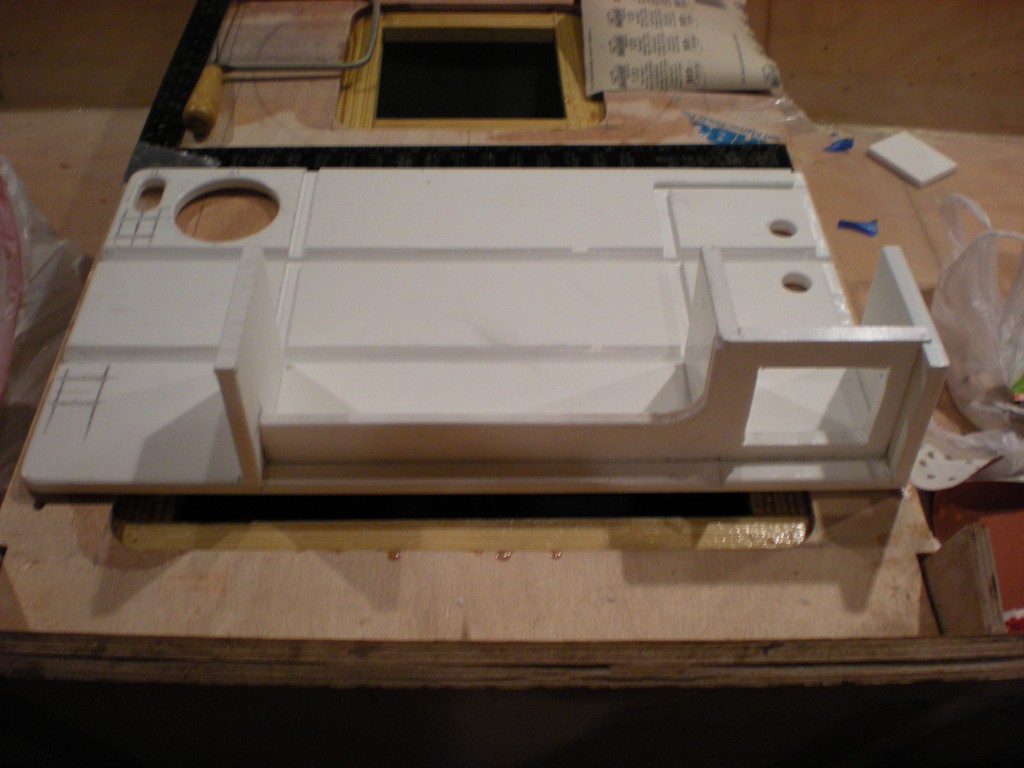
switch panel location...

clamped after heating, bending and gluing...it's upside down in this picture.
I got this idea from Larry's gf and it will be mounted in the same location,
on the back of the midseat to the starboard side. I'll install the electronics on top and route the wires down into the switch panel compartment to come out into the midseat for a clean look.. hopefully.
I also finished drilling the hardware locations and I glued in the live well so that I can drill its through hull fitting in hopes to fill them all with thickened epoxy next week in prepartion of flipping and glassing the oustside of the boat.
 Please let me know if you see any potential problems or forgotten steps.
 I welcome and would greatly appreciate any corrections that need to be made and thanks for checking out my build.
Daniel
Posted: Mon Feb 02, 2009 12:31 pm
by Cracker Larry
Great work. That's going to be a very nice GF
Would it be O.K. to install the bow eye after fairing with blended filler in that area so that I can continue with the interior work. I was planning to seal it with 5200 and then just fair/paint around the taped bow eye.
What do you think?
That's the best option I think. It is somewhat of a pain to mask and paint around it, but if the foam and deck is to get placed before the final outside painting, you really have no choice. I had to do that on my GF too, and with a transom eye on the OD because of baitwell foam.
Posted: Mon Feb 02, 2009 3:59 pm
by TomW
Daniel, Larry said it best, that is going to be one very nice GF. Your doing an excellent job.
Tom
Posted: Mon Feb 02, 2009 4:03 pm
by BassMunn
Very nice Murry. I think I need to get me a router
Posted: Mon Feb 02, 2009 10:12 pm
by Murry
Thanks alot Larry, Tom and Shannon.
Sounds good on the bow eye Larry.
I think I need to get me a router
Indeed Shannon. They're a great tool.
Posted: Tue Feb 03, 2009 2:07 am
by ks8
Keep the pictures coming. I'm starting to see it.
Posted: Tue Feb 03, 2009 9:56 am
by colonialc19
Daniel,
Your rolling right along, I like your shelf
, I also noticed it a while back on Larry's GF
Daniel
Posted: Sun Feb 08, 2009 12:46 am
by Murry
I also noticed it a while back on Larry's GF
If something looks good on my boat, It probably came from someone else.
Some progress....
I was able to glue some hardware holes (34 to be exact,
I had no idea). I also had time to start finishing my hatch stops.
I used these tools below to wet out and fill my holes.
I built my hatch stops using 1x3's and 1x4's from SYP. I left plenty of wood in the opening to allow for cutting the radius' in the corners.
like this.... (this is the only picture I have of the stops from the top side viewpoint)
I then installed a temporary guide for my router using a sraight bit. (the large holes are from a previous method I was going to use to cut the stops that I decided not go with)
I then drew out my corners using an 18mm socket as a guide. It just looked right to me.
Next, I cut the corners with my jig saw, cleaned things up with a DA and then rounded the topside of the stops with an 1/8 th round over bit.
I rounded the bottom of the stops with a 3/8 bit.

Finally, I used an 1/8th to finish up the edge of the hatch cover.
I'll need to seal and fair everything, but it should turn out O.K.
I won't install the hinges until all final fairing and shaping are done to ensure a good centered installation.
Thanks for checking out my boat,
Daniel
Posted: Sun Feb 08, 2009 3:49 am
by BassMunn
Nice clean work again Daniel.
How are you going to seal those hatch lids to prevent water intrusion into the hatches. I still haven't quite figured this part out yet
Posted: Sun Feb 08, 2009 11:04 am
by bernd1
....clean work Daniel.
BTW BassMunn,
I will stick a window gasket on the underside of the hatch - look here:

I think that works enough good for me.
Bye
Bernd
Other ideas?
Posted: Sun Feb 08, 2009 2:30 pm
by peter-curacao
Murry wrote:Thanks for checking out my boat,
Daniel
Thanks for showing us very nice
Posted: Sun Feb 08, 2009 2:34 pm
by peter-curacao
bernd1 wrote:I will stick a window gasket on the underside of the hatch
Bye
Bernd
Other ideas?
Why not simply stick to marine gaskets made for this purpose?
Posted: Tue Feb 10, 2009 11:12 pm
by Murry
How are you going to seal those hatch lids to prevent water intrusion into the hatches.
Good question.
My hatch decision was one of the hardest planning decisions I've had to make so far with this build. I did alot of pondering about hatches.
I waffled back and forth about installing prefab hatches or making my own and after I settled on making my own. Then it was to drain or not to drain and that decision made me start to consider the prefab hatches again, until one day it hit me.
IT'S A JOHN BOAT MAN..... , but your boat aint a john boat Shannon. The luxury of building a john boat is, well, it can be more simple. Your boat is more complex than my gf and I wouldn't think cutting in hatches on a phantom that weren't water proof would make much sense. As you probably would agree, based on the quality of your build so far and reading about you rod storage ideas.
The day I remembered what I was building was the day I decided not to worry about water proof hatches. I went with cutting in my own instead of buying for a couple of reasons though.
1. I like the way the look
2. I will be sitting on top of them (more comfortable)
3. I liked the idea of making my own
4. Did I mention that I like the way the look.
5. I could be more flexible with size (baitwell specifically)
It's fairly common to hear folks that have made them, say that given the chance, they would buy hatches in the future instead . You don't save much if any money and they take alot of time. Mine are more simple without the drains, so I may not be the best to ask, but I'd build them again. Keep in mind, my design only requires three.
I'm not to worried about water getting in my hatches. The electrics will be installed in such a way, that water falling from above won't get anything wet and the drain tube running through the electrical compartment will have drain holes drilled to allow water out of that hatch.
right here....
The rear hatch will drain straight to the bilge and will be used for light wait storage. If I'm fishing with a chance of rain, things that I want to keep dry will be kept in water proof storage bags anyway and when the boat isn't being used It'll be stored under a cover with the compartments empty. To be on the safe side I designed the rear hatch area to drain into the bilge quickly by creating a slight grade towards the bilge area given the freak chance I ever have water come over the transom.
In the picture below you can see the angle of the cleats along the transom, how they fall to the bilge box. The cleats on the rear seat frame mirror those.
Alot of drain moldings have been designed by some good builders on this site. Capeman has designed some nice looking moldings out of ply and Joel made some out of glass for his Aquasport rebuild that are worth looking at as well, just to mention a few. (there are alot more)
I was going to make mine out of 5/4's lumber before I trashed the idea.
like this....
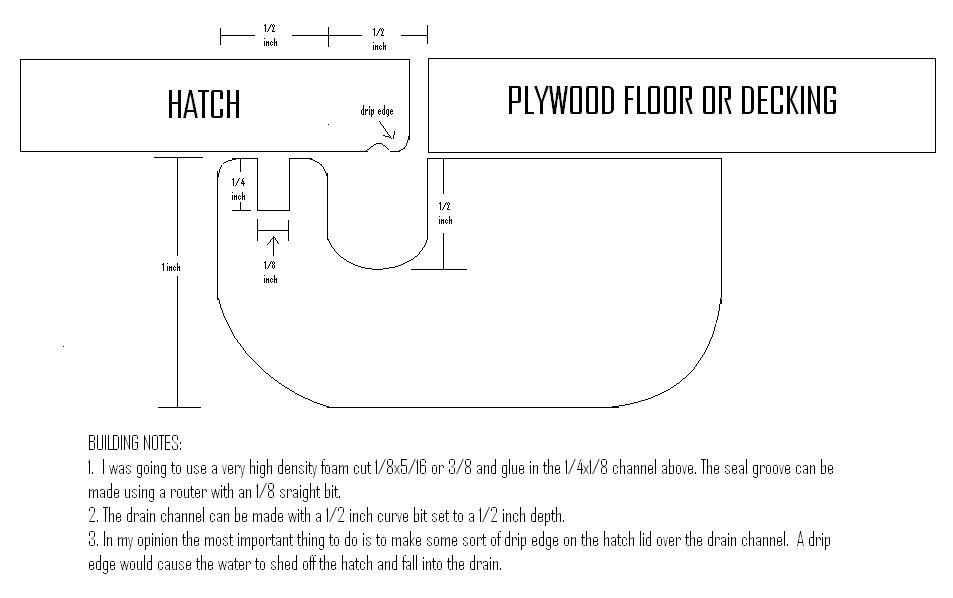
Take it for what's worth Shannon, but this is what I was planning to do for drain moldings. Perhaps it will help you make your decision.
Daniel
Posted: Wed Feb 11, 2009 7:32 pm
by BassMunn
Daniel thanks for taking the time to post those details, I like the drawing you posted and I hadn't even thought about the drip edge - very nice idea.
I looked at the pre-made hatch lids but I don't like the fact that they are not flush with the deck and they cost a fortune here. I can buy 2 full sheets of 3/8 ply for the price of one hatch lid
I have 11 hatch lids to make
so need to make sure I get this right, my old bass boat had a problem with leaking hatches and I swore that I would never have to sit and hand dry over a 100 crankbaits ever again

Thanks for the ideas
Posted: Wed Feb 11, 2009 10:49 pm
by Murry
Your Welcome and good luck.
I'm sure what ever you decide to do will turn out great.
Posted: Mon Feb 16, 2009 12:18 pm
by Murry
Made more progress Sunday afternoon.
I'm planning to glass the exterior of the hull next weekend so I used Sunday afternoon to prepare the hull the big day.
I have a couple of pregame and post game shots of the sanding party for you.
before the fun began....
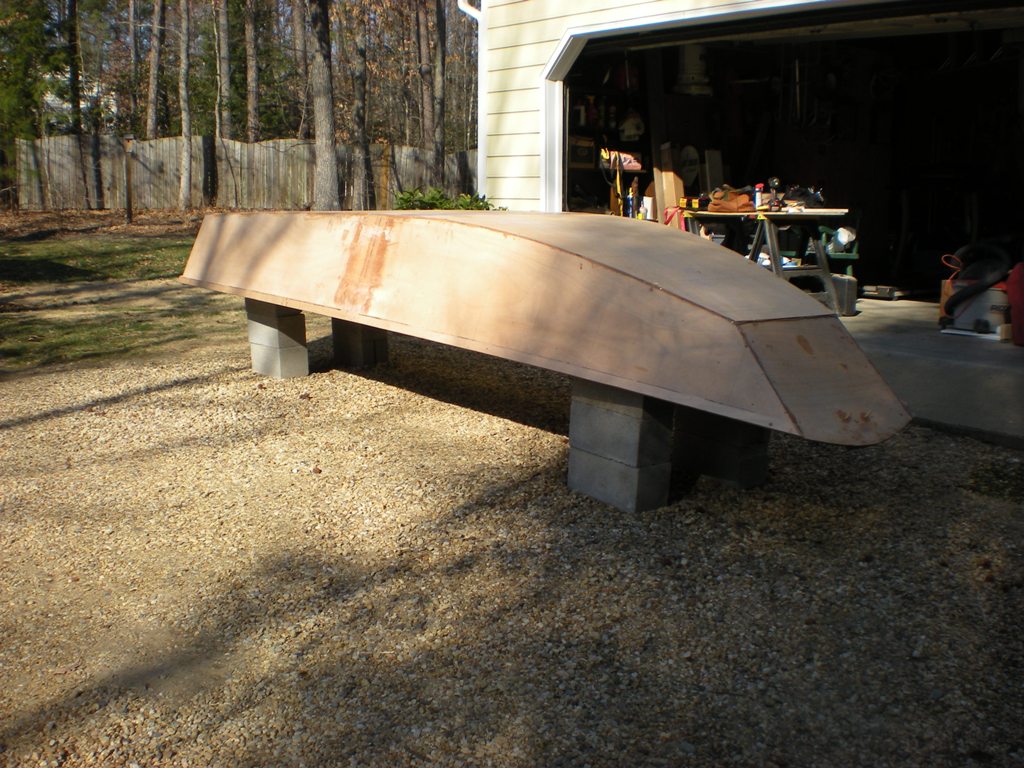
after..
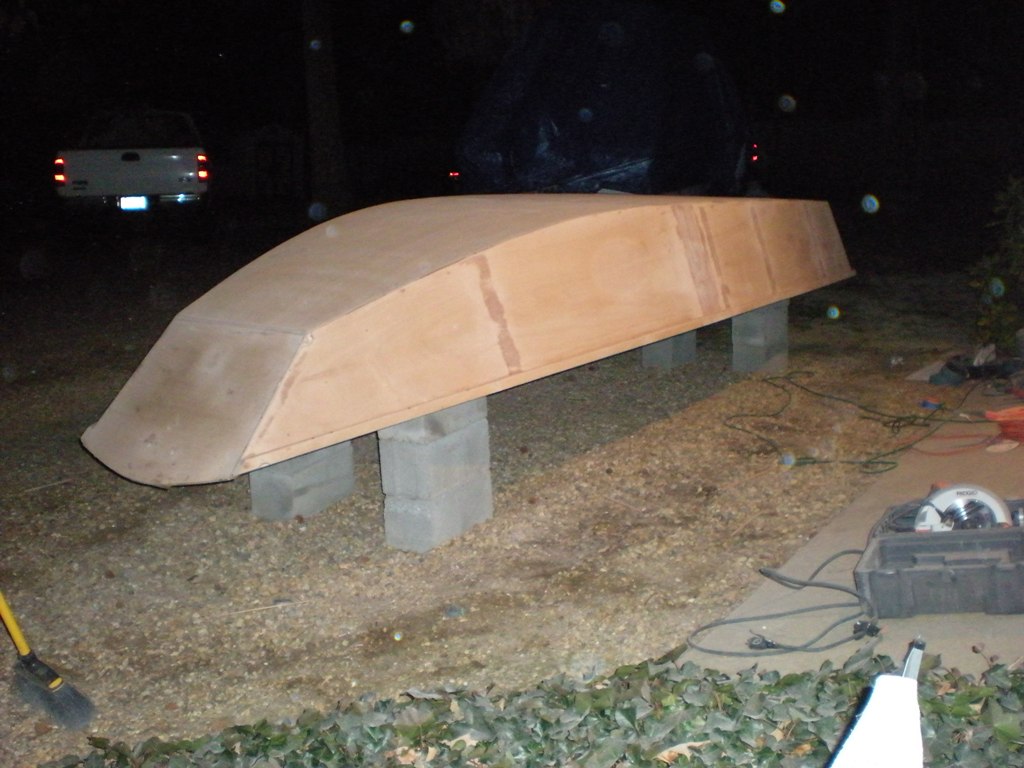
pregame shot of the bow..
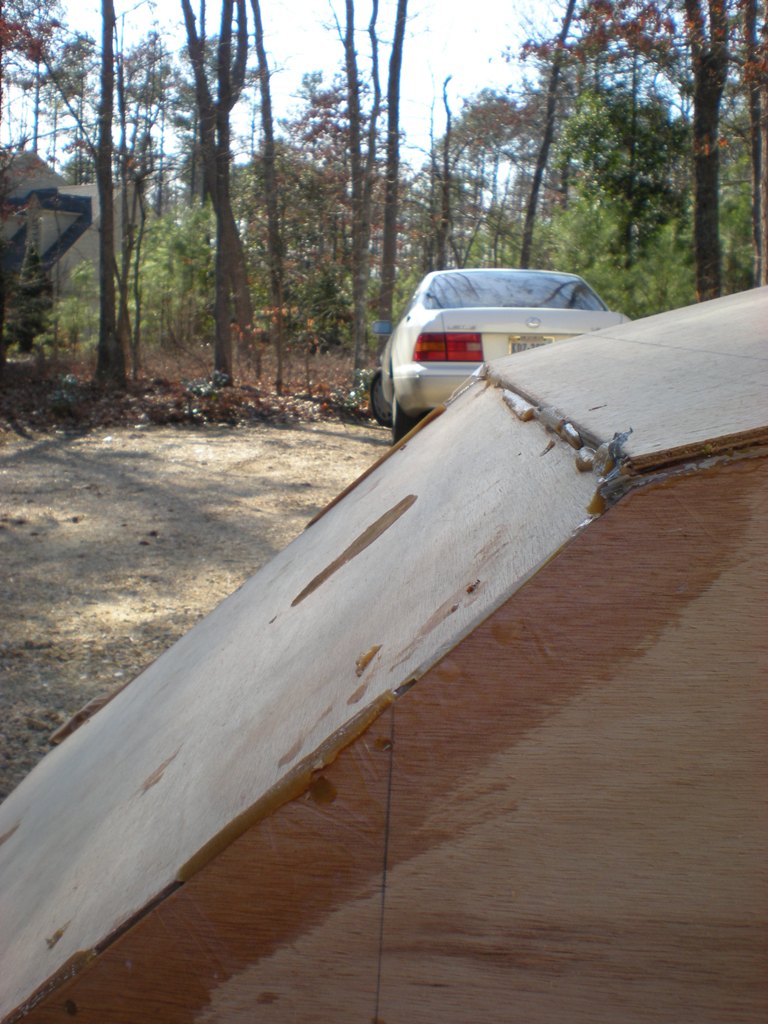
and after...
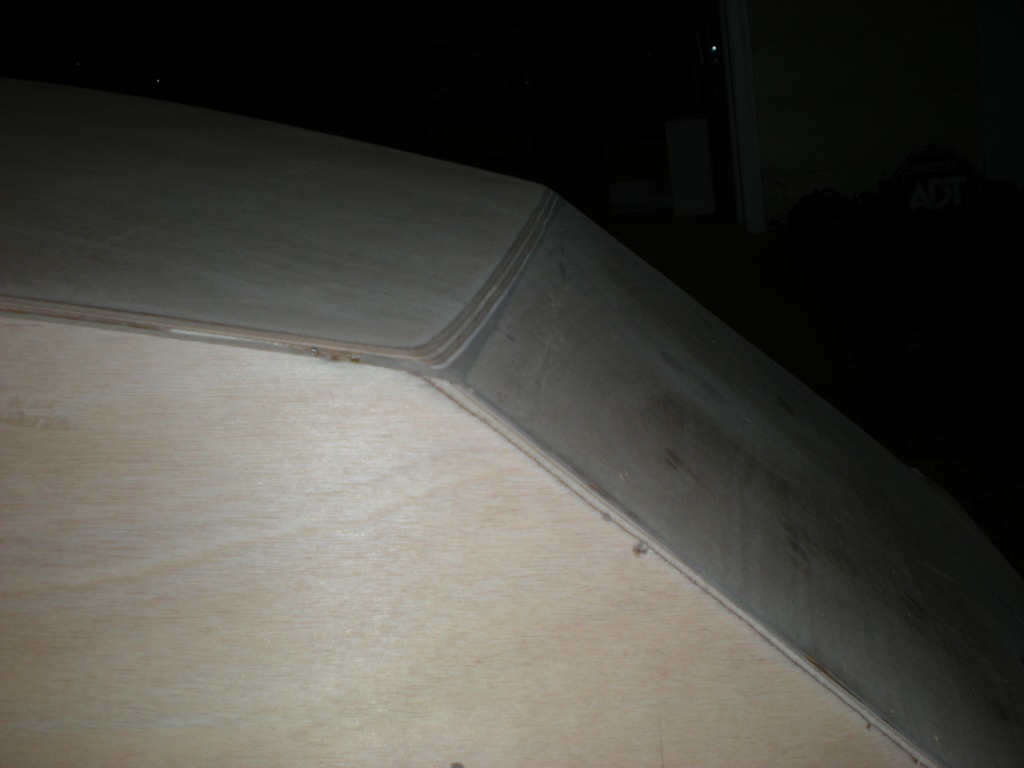
rubrail detail...
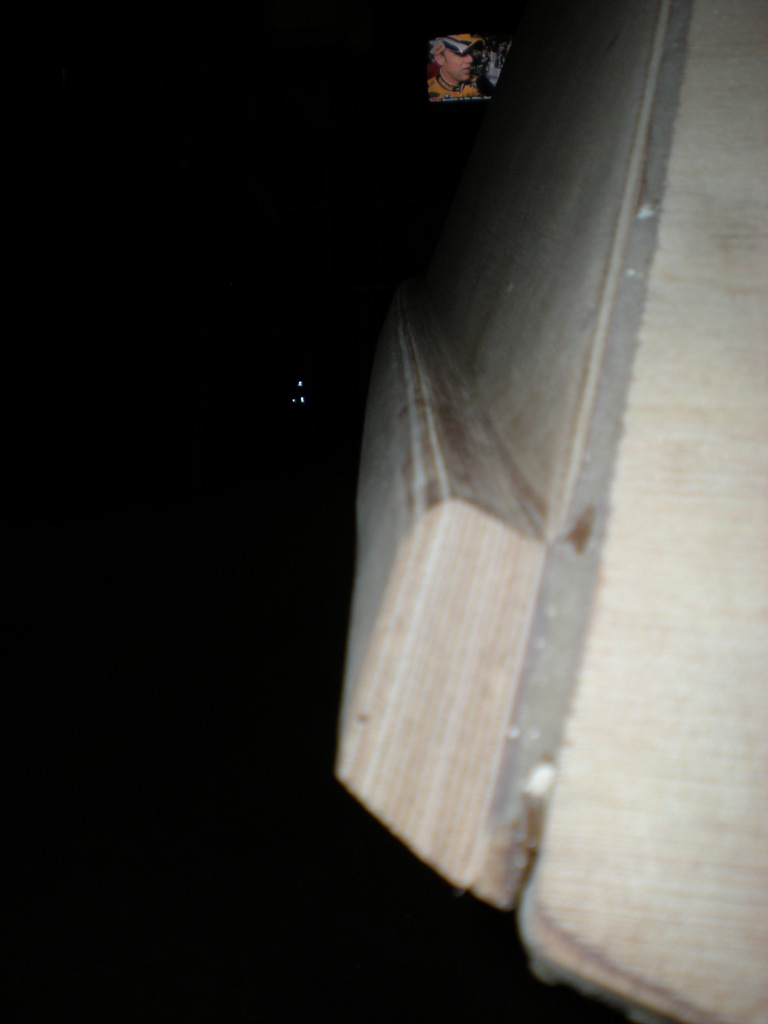
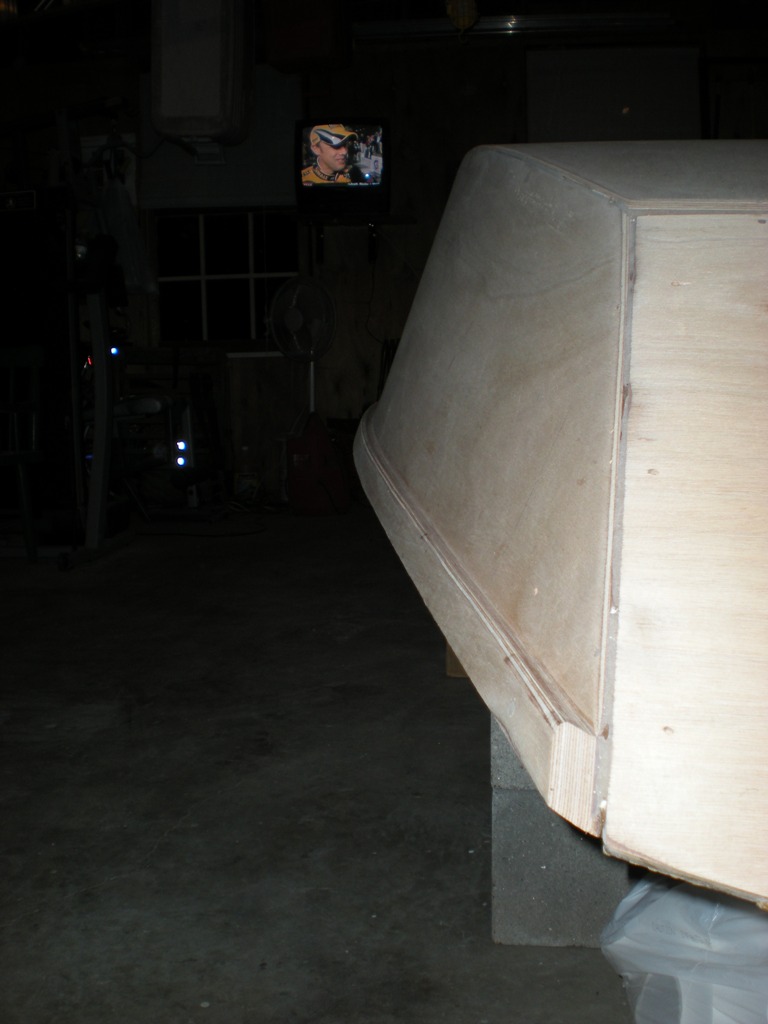
You should have seen this rubrail before the shaping..
I don't own a table saw and I didnt think I would be good enough with a fence to make perfect 38mm strips with my circular saw, So I cut the wood fat intending to shape it useing a belt sander. It wasn't sure how it was going to turn out but I'm happy with it...
This is what I started with....
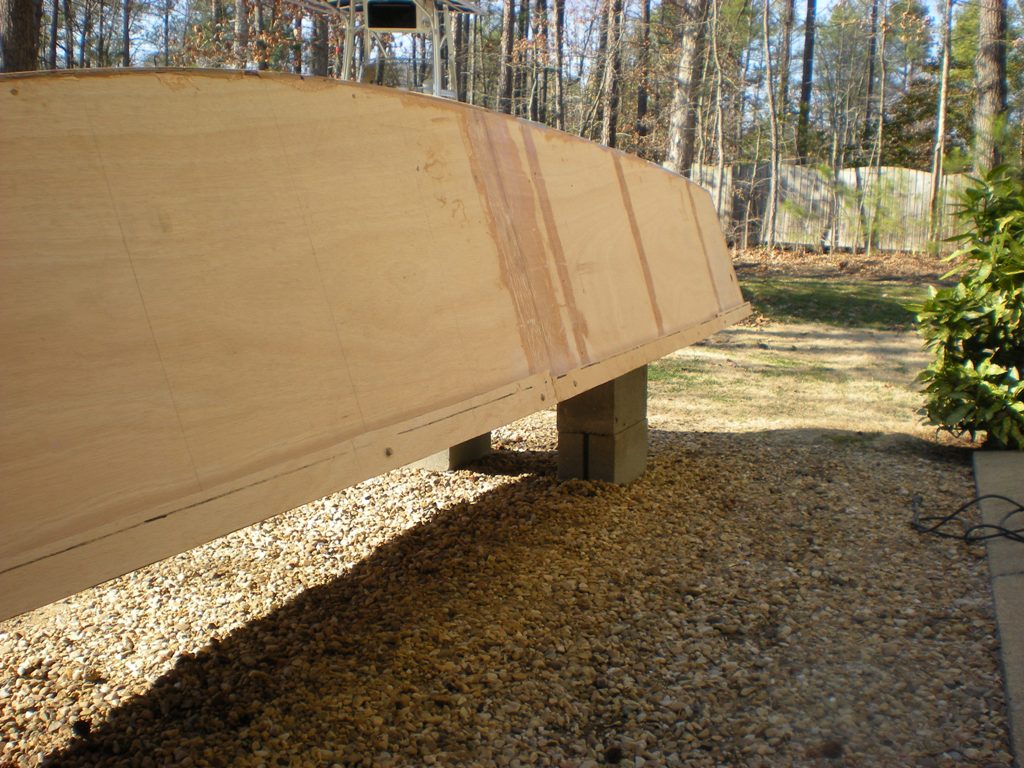
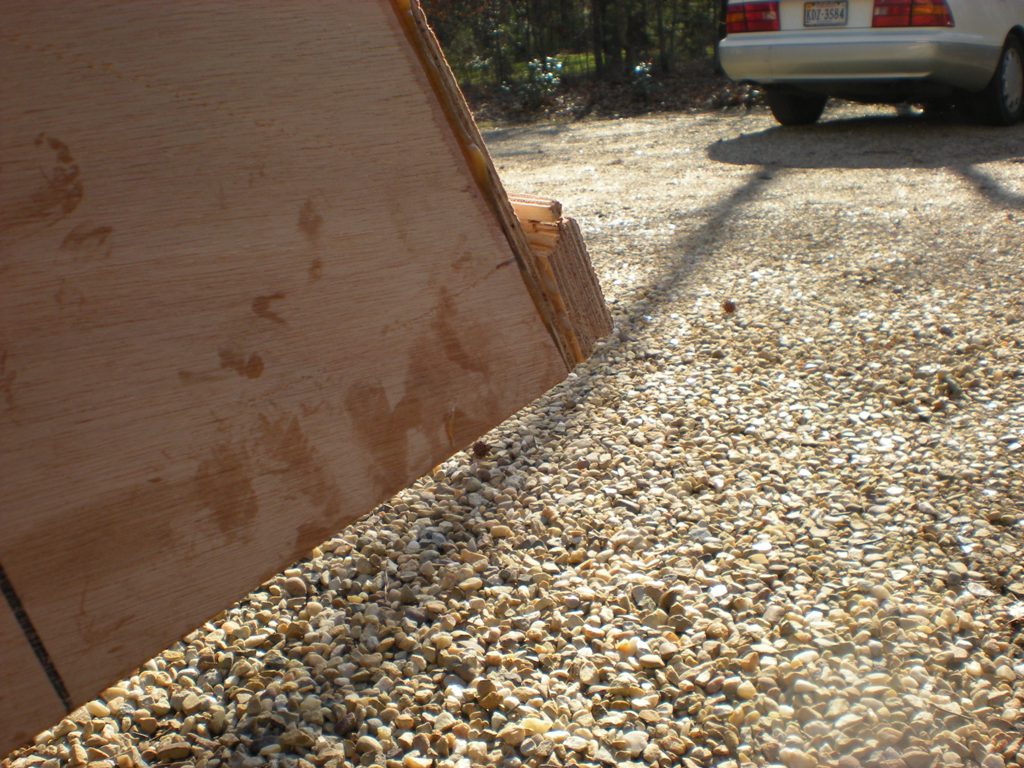
all ready for the glass work next weekend..
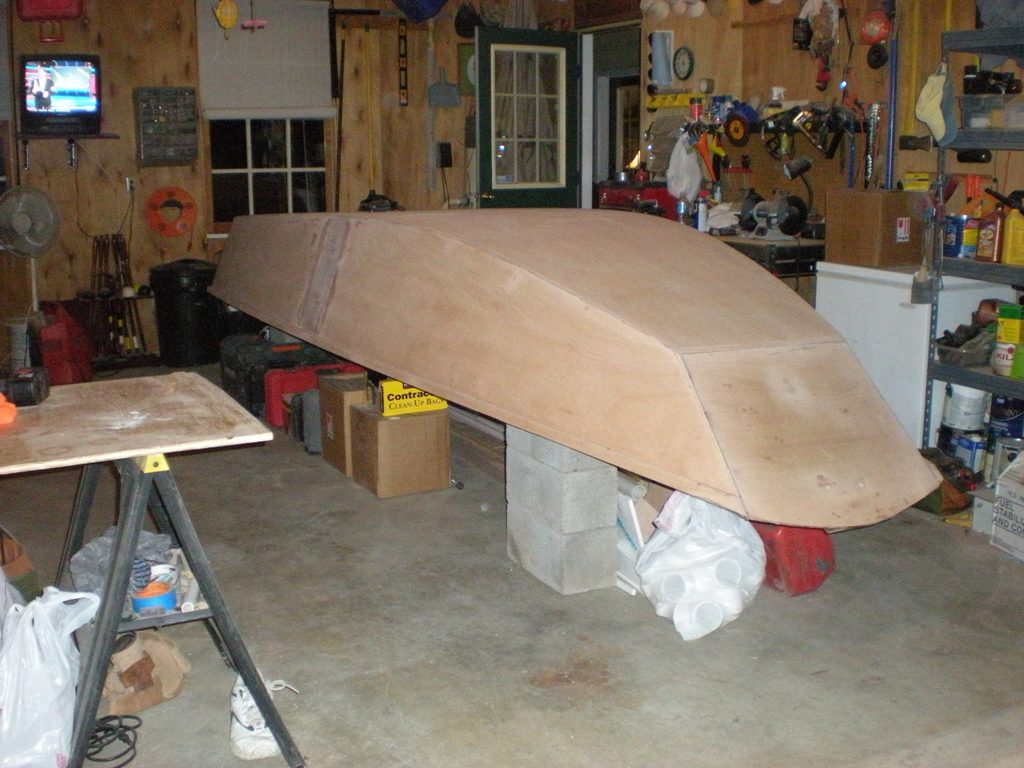
Posted: Mon Feb 16, 2009 12:32 pm
by Dog Fish
Looks good Murry, best of luck with glassing
Posted: Mon Feb 16, 2009 10:24 pm
by colonialc19
Your rockin' right along,
if need anything with the glassing let me know, but looking at your work I'd say you could show me a few things.
D
Posted: Tue Feb 17, 2009 7:01 am
by Murry
but looking at your work I'd say you could show me a few things.
Your to kind Daniel. Did you see the pregame pictures of the rudrail?
If I had the skills that you speak of, it wouldn't have required as much work to make it pretty.
By the way, don't forget that I've seen your work.
I have a friend with a table saw and I'll be visiting him when I cut the strakes and splash rails.
Posted: Tue Feb 17, 2009 1:25 pm
by bernd1
Daniel,
do you need some hands to help glassing? I will visit you if I get a invitation..........
.....damned I checked the distance a few minutes ago in google earth ....you are 4207,30 miles away
sorry too far
Bye
Bernd
Posted: Tue Feb 17, 2009 1:31 pm
by peter-curacao
Jeez bernd your a tease
Posted: Tue Feb 17, 2009 1:51 pm
by bernd1
peter-curacao wrote:Jeez bernd your a tease
Peter, I never helped glassing the outside of a CS23
......let me see....
....google earth....enter.....measure.....Curacao.......who the hell what a big number......
Why do you all live so far away - I have no chance to help others with glassing.....what a bad luck
Have fun while mixing epoxy.......
Bye
Bernd
Posted: Tue Feb 17, 2009 10:27 pm
by Murry
I will visit you if I get a invitation..........
You're invited.
You can work on mine since it's to cold to work on yours...
Posted: Wed Feb 18, 2009 9:05 am
by mecreature
Looks great... That sanding works..
Glassing that beast will be a breeze.
Posted: Sat Feb 21, 2009 10:43 pm
by Murry
Thanks mecreature. Yeah, the sanding made a big difference.
Alright, it's official, this gf16 will now float.
I was able to finish the exterior of the hull today
. I won't lie, it was long day.
Pictures of the tape. Both transoms and the chine.
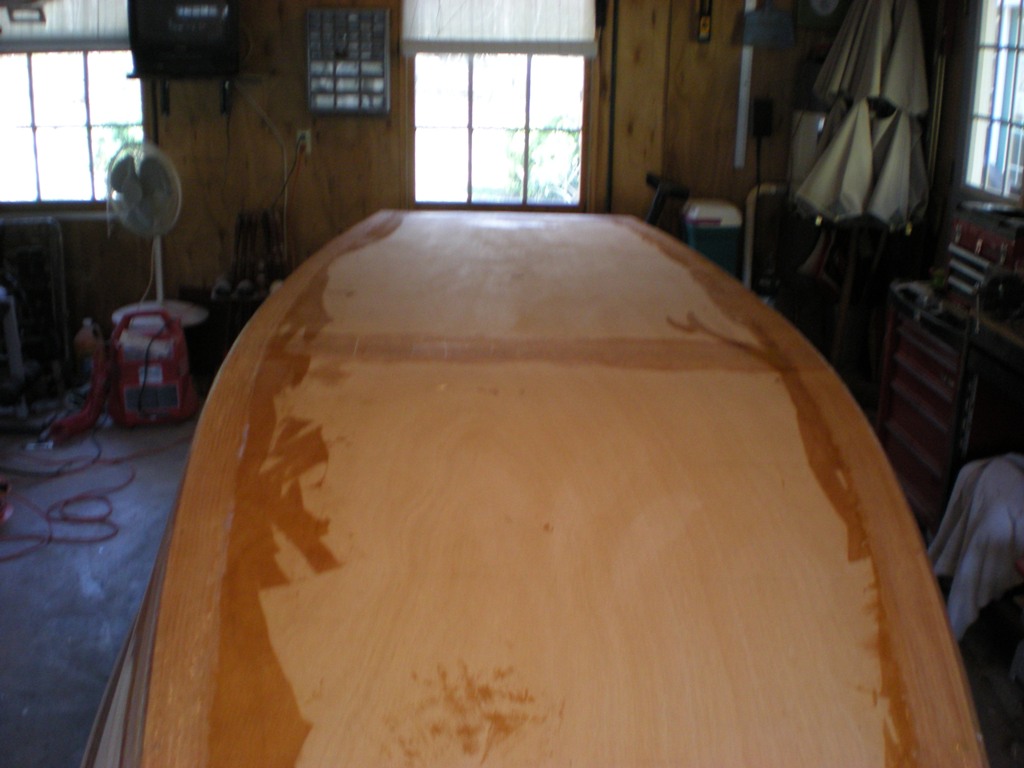
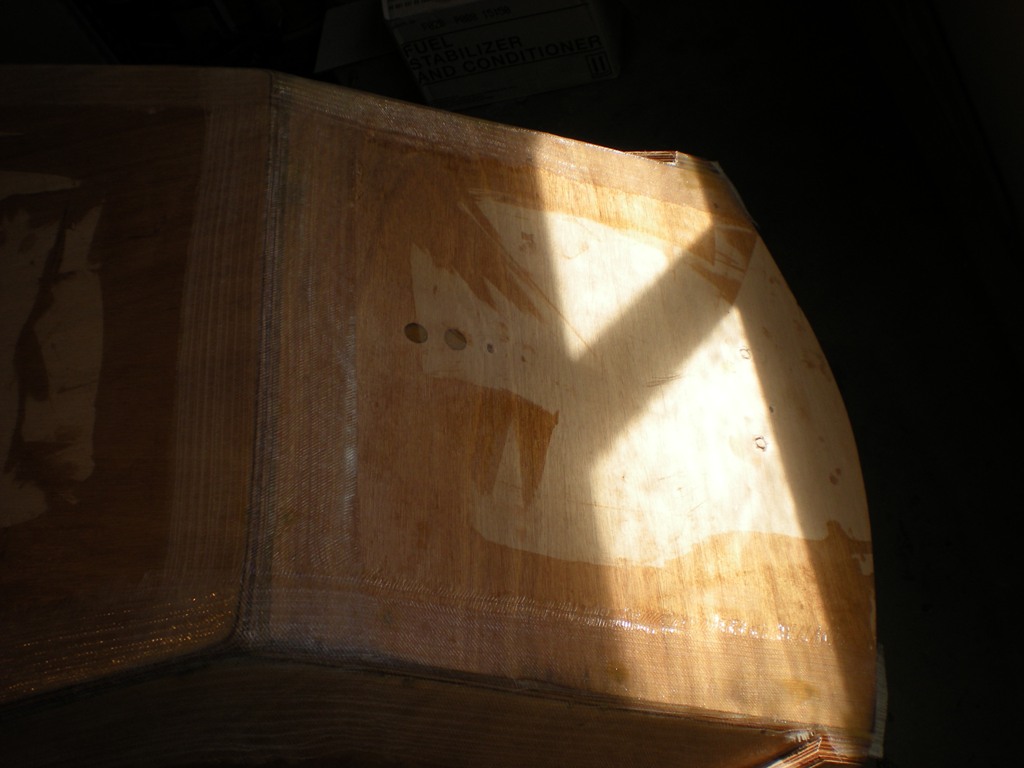
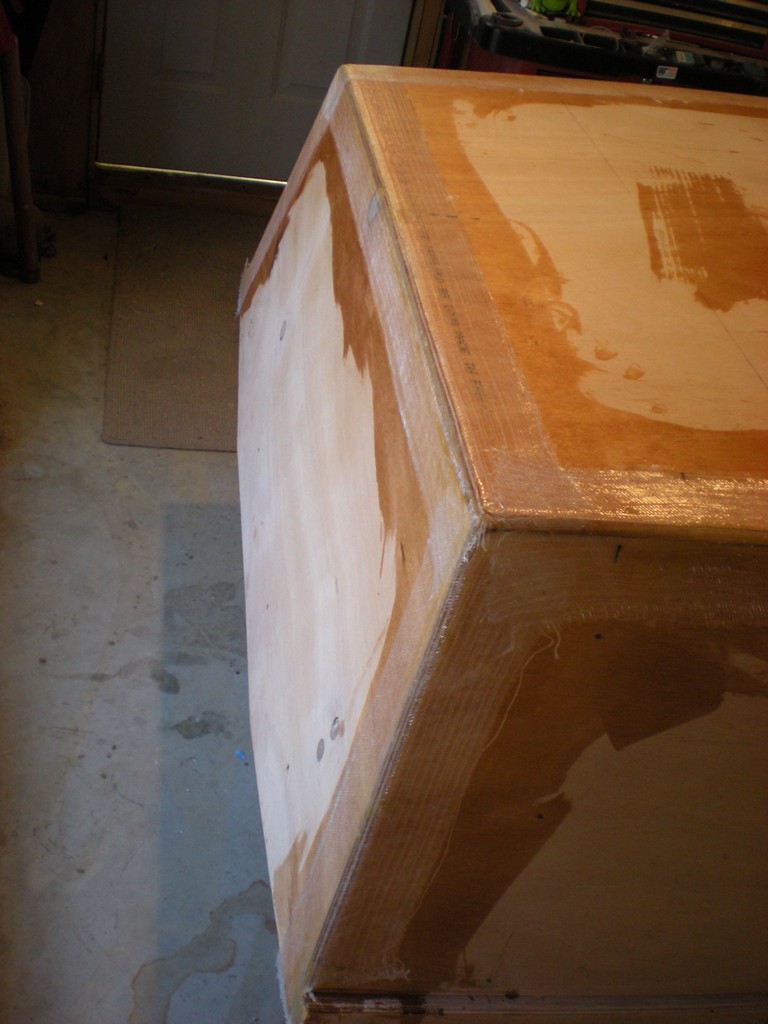
After the taping I installed the first layer of 12oz. cloth on the bottom, by rolling it out inbetween the tape. I then installed 6oz. woven on the sides.
(picture of the first layer of 12 oz. after wet out and first side of 6oz. before it was trimmed and wet out)
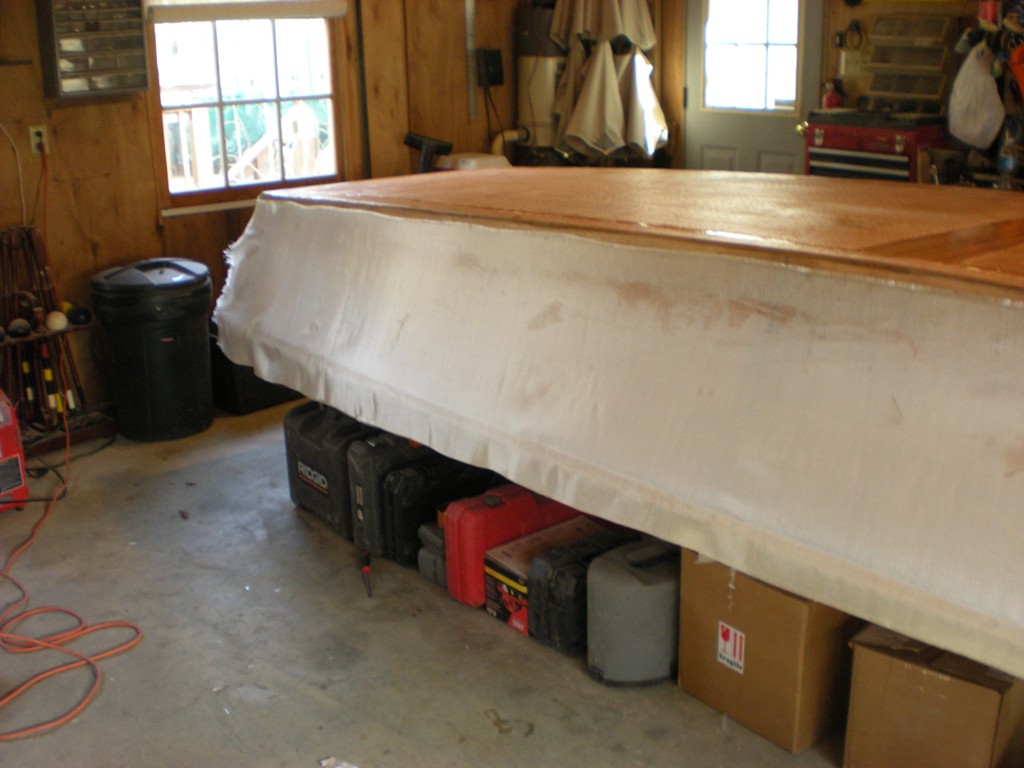
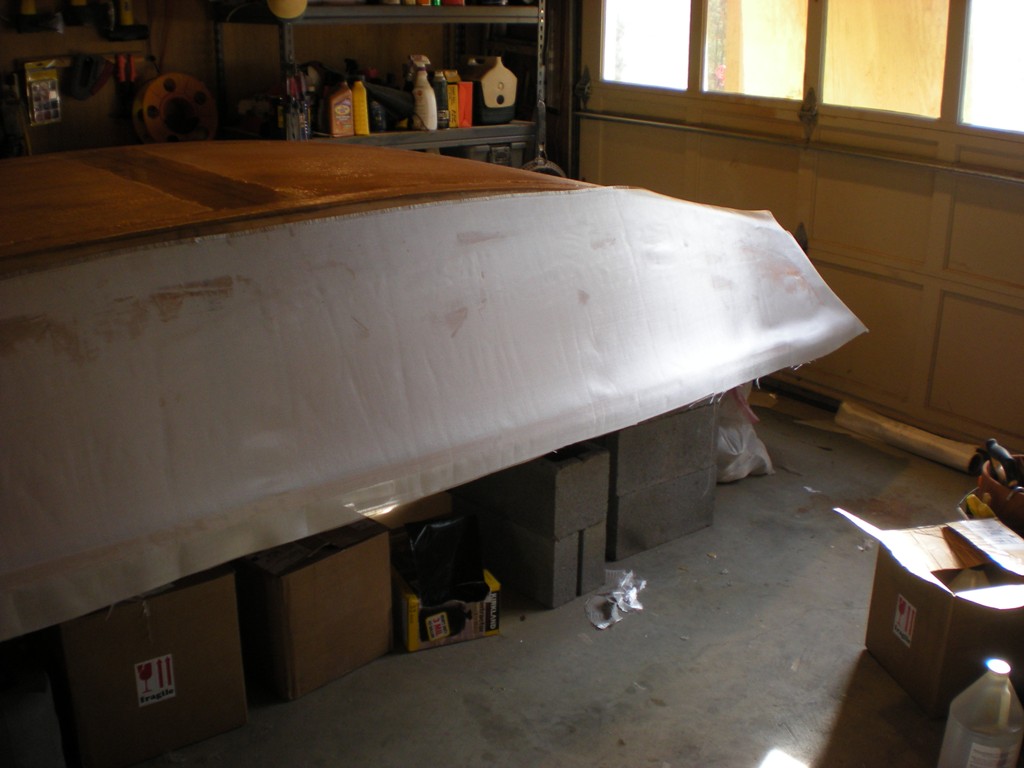
After I wet out the side cloth I rolled the final layer of bottom cloth, covering both transoms also.
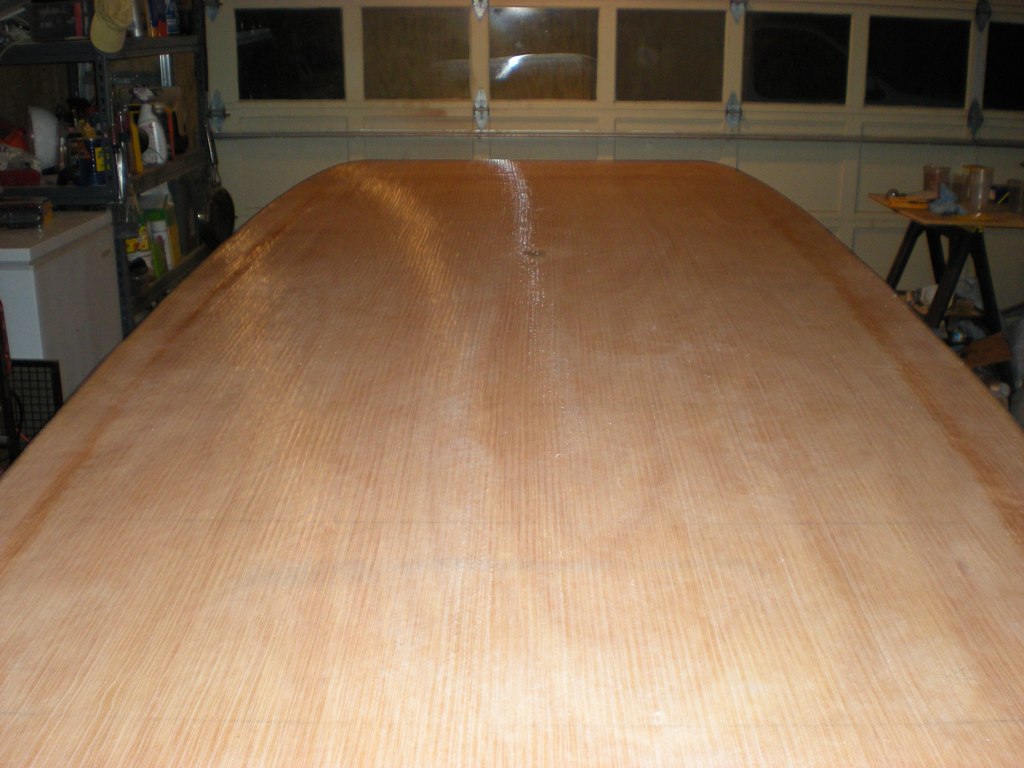
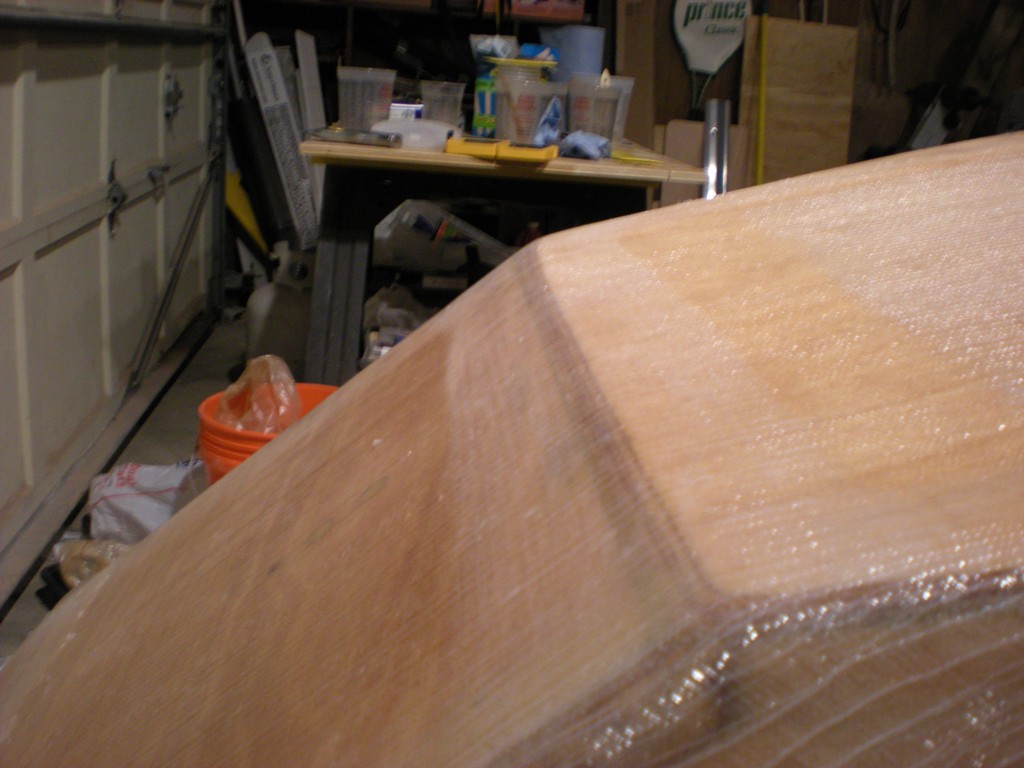
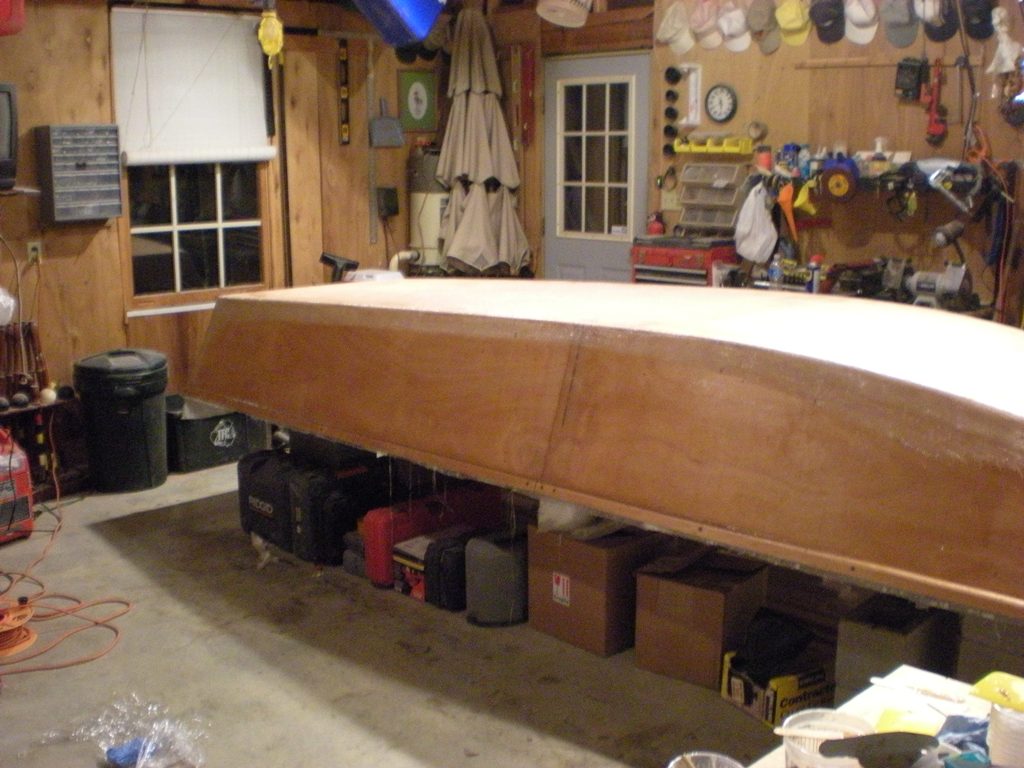

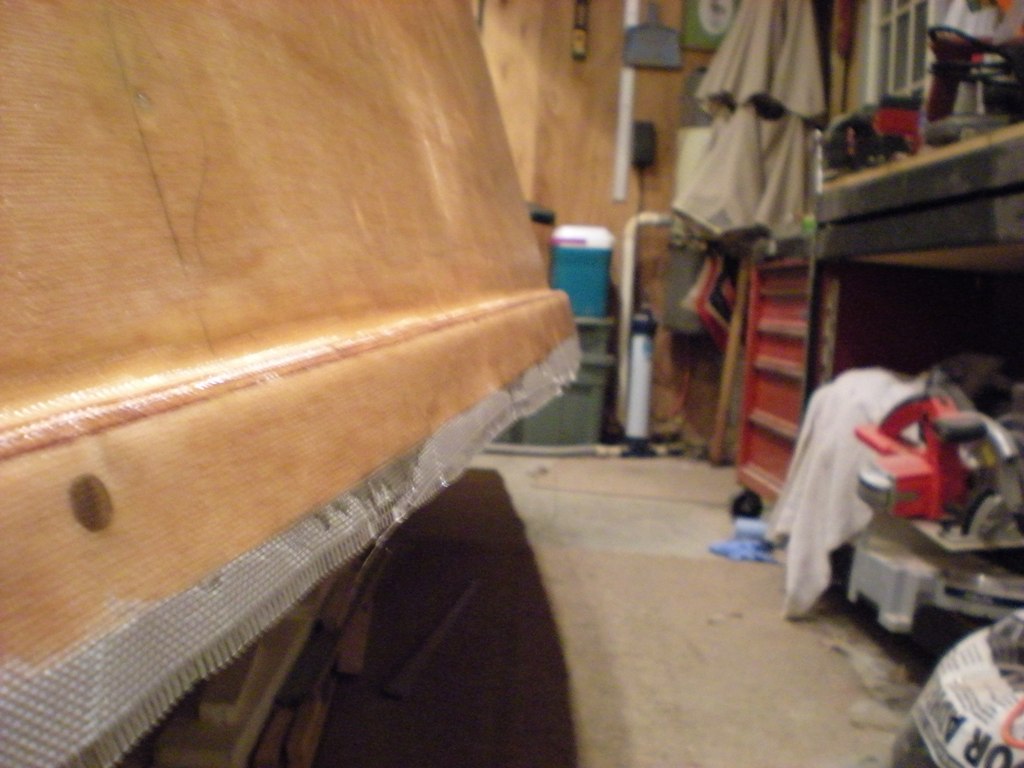
Next, I'll start to lay out the strakes and rubrails.
Spring's a comin'
Daniel
Posted: Sun Feb 22, 2009 1:06 am
by robbiro
CLEAN WOW did you ever make that gf really look good. Keep after it,
Keep on Buildin'
Robbie
Posted: Sun Feb 22, 2009 1:16 pm
by topwater
real nice job
Posted: Sun Feb 22, 2009 10:03 pm
by Murry
Thanks for the kind words Robbie and Topwater.
It's really cool to see the wood covered in cloth, it makes me want to do a bright finish project one day.
I didn't get to document the process along the way like I wanted to, the clock was ticking and I was trying to keep moving, but one thing I did that I thought was worth mentioning was the way I prewet the long sections of tape.
Each piece was about 16 feet long, so after I premeasured and cut them, I then rolled each piece seperately onto short sections of empty fiberglass rolls. (fishing rod shiping tubes work great) As I wet out 4 feet sections at a time, (that's how long my tape wetting machine is) I tranfered it to another tube until the whole piece was wet and then I just rolled the wet tape onto the boat. Worked like a charm.
I prefer to prewet my tape so that I don't deform my fillets while trying to wet out the tape. The method above worked like a charm, for me anyways.
Thanks again for the compliments above guys.
I'm having a blast
Daniel
Posted: Sun Feb 22, 2009 10:19 pm
by ks8
Congrats on the milestone!
Now, as Yoda might say....
Fairing now, do you must.
Posted: Tue Feb 24, 2009 7:05 am
by Murry
Now, as Yoda might say....
Fairing now, do you must.
I can put it off a little bit longer.
I was able to get my strakes cut and glued up last night.
After I cut them at my friends house I roughly marked their location so that I could sand and wipe down with acetone (non-recycled). After the wipe down I marked my center line and then maked the inside line of their location off the center line.
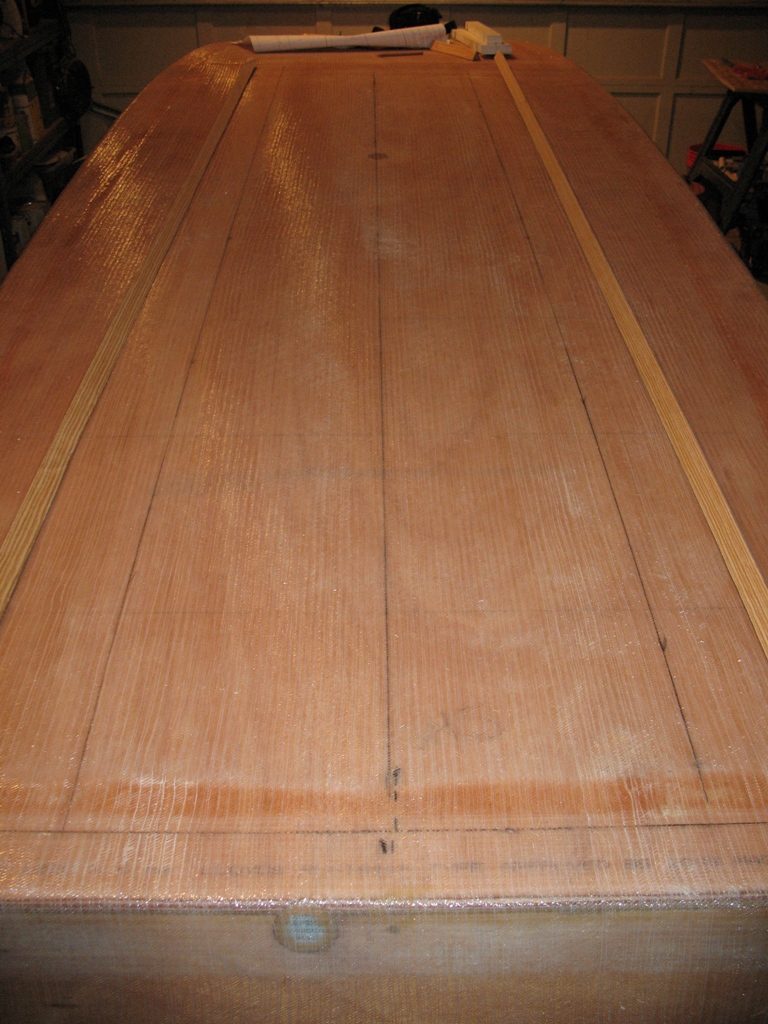
I then cut some braceing to hold the strakes in place as the glue dried and after prewetting the wood with unthickened epoxy I just glued them up.

Since the hull wasn't completley level, I taped this brace in place along the backside of the hull to keep them from sliding until the glue set. (it was cold so it might be awhile)
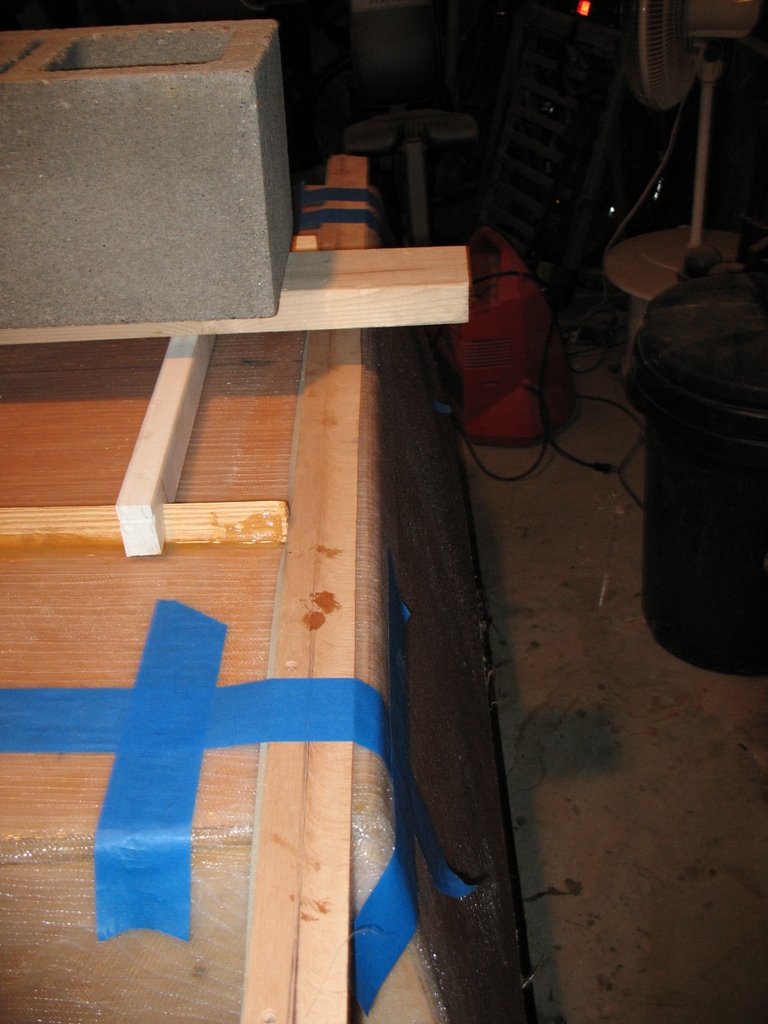
There we have it, it wasn't to bad. I'm planning to do some final shaping after there set.
Posted: Tue Feb 24, 2009 8:04 am
by Cracker Larry
Looks great Daniel! Runners look real good. Are you going to cover them with tape?
Posted: Tue Feb 24, 2009 8:35 am
by Murry
Looks great Daniel! Runners look real good. Are you going to cover them with tape?
Thanks Larry, and yes, I am planning to cover them up with tape after shaping.
I haven't decided on whether or not to just cover the strakes
only for abrasion protection, or to tape them to the hull for extra strength as well.
If I only cover the strakes, that would leave my bottom much easier to fair, but I don't want my strakes coming off either. I keep picturing the strakes coming off that phantom 22.
(I can't remember the builders name, I belive he's out of Warenton, VA) He had to go back and tape them to the hull and I don't think it was builder error based on the quality of his work.
If I tape them to the hull that kindof defeats the purpose of laying the cloth inbetween the tape like I did, because I'll end up with a highspot at the strakes form the extra tape anyway.
What do you think I should do? I'm not scared of faring, but I would rather not create the extra work for myself unless I needed it.
Thanks in advance for your input
Posted: Tue Feb 24, 2009 9:08 am
by Cracker Larry
I'd tape them to the hull. One strip of 6" tape will cover and secure them. It's no problem to feather the edges of the tape to fair it in.
The bottom does some flexing, I'd want them well attached.
Posted: Tue Feb 24, 2009 9:15 am
by peter-curacao
On the other hand I did read stories here from strakes that where laminated with tape and after the wear of time did delaminate, so what’s the best thing to do? I didn't tape my (hardwood) strakes
Posted: Tue Feb 24, 2009 9:22 am
by Cracker Larry
I taped mine and they are still well attached after 4 years.
Posted: Tue Feb 24, 2009 12:37 pm
by Murry
Thanks for the input gentlemen. I think I'll tape them in for the extra strength.
Peter, I used Southern Yellow Pine for my lumber.
Posted: Tue Feb 24, 2009 2:08 pm
by colonialc19
Daniel,
The boat is lookin' real good, I like the lil' jig you made to keep your strakes straight while gluen'
cool.
I think you've made up your mind, but yeah I'd tape them down, if you sand that edge good it shouldnt be too bad to fair.
kinda chilly in the shop last night wasn't it, brrrrrrr
I can't wait for summer,
The other Daniel
Posted: Tue Feb 24, 2009 2:30 pm
by ks8
Posted: Tue Feb 24, 2009 5:29 pm
by peter-curacao
First sorry for the little hijack, but I’m confused when I asked Jacques how to do my strakes he told me hardwood no tape, now everybody is telling tape them
Posted: Tue Feb 24, 2009 6:23 pm
by Murry
First sorry for the little hijack
No hijack here, Quite frankly, you and anyone else can jump in this thread when ever you feel the need. I mean, that's what it's about, right. I need the help most times, always appreciate the help whether needed or not and try to help when I can. When conversations bring out questions, concerns or cunfusion in general, they need to be brought to light so that we can all learn or atleast iron it out.
In my opinion there isn't a better place to talk about a particular question, concern or confusion in general, than where it started.
Which in this case, is right here.
As far as this topic and question. I haven't the first clue.
Based on what I've read and learned thus far, there are alot of different opinions on this matter. Like ks8 wrote. some builders consider strakes, runners, ect... sacrificial. After the different responses, I called and asked my brother what type of lumber is used for the runners on the boats he has worked on (Carolina built sport fishers, a large part of being a mate is boat work) and he said juniper or teak.
I understand Juniper to be very soft, but it's very flexible, very resistant to moisture and splintering. Teak on the otherhand is very hard and some builders perfer that species. (atleast I think that's correct about those species) When I asked him if they are glassed or not, he said sometimes. So basically, after our converation it's as clear as mud to me.
when I asked Jacques how to do my strakes he told me hardwood no tape
If Jacques reccomended that to you, I'm sure it will be just fine.
Daniel
Posted: Tue Feb 24, 2009 6:43 pm
by peter-curacao
Okay thanks for that I’m reassured now
Concerning the jump in this thread and your opinion about that, I feel the same way about my thread everybody can jump in
Posted: Tue Feb 24, 2009 7:19 pm
by Cracker Larry
Like ks8 wrote. some builders consider strakes, runners, ect... sacrificial.
I prefer to consider every part of the boat permanent. Zincs are sacrificial, skegs and runners are not, IMO.
Posted: Tue Feb 24, 2009 7:31 pm
by Aripeka Angler
I spent some time tonight enjoying the latest details of your build. Nice work! The glass work looks very clean and nice attention to detail. Continued good luck on your build....
Richard
Posted: Tue Feb 24, 2009 9:29 pm
by Murry
The boat is lookin' real good, I like the lil' jig you made to keep your strakes straight while gluen'
cool.
Thanks Daniel, I'm sure I saw that used during one of my late night training sessions here on Bateau2. If I could remember who, I'd give them the credit. Yeah, it was cold for sure.
Like lots of these little sorts of things, you'll be glad you did afterwards,
For sure Ks8, I want to know that she's been built right, not wondering if it will hold up. I'll be taping those strakes in, maybe not three layers though.
I prefer to consider every part of the boat permanent.
I totally agree Larry. I don't know much, but that makes sense me.
I spent some time tonight enjoying the latest details of your build. Nice work!
Thank You very much for your kind words Richard. I'm haveing alot of fun and I'm trying to make it as nice as I can. My goal is to have it shine as well as it functions. It wasn't designed to be built ugly.
Daniel
Posted: Thu Feb 26, 2009 1:25 pm
by bernd1
...clean work Daniel,
the only thing that made me ruminative was the glassing work at your side panels.
If I looked right, I saw at the pictures that you didn't overlap the chine with the cloth of the side panels - I think you should overlap a few inch....look point 10 on the drawing.
What's about your floating foam - did you install it?
If yes, in which parts and how much did you install?
Keep on working.......
Bye
Bernd
Posted: Thu Feb 26, 2009 5:42 pm
by Murry
If I looked right, I saw at the pictures that you didn't overlap the chine with the cloth of the side panels - I think you should overlap a few inch....look point 10 on the drawing.
Thanks for being concerned enough about my boat to speak up Bernd1, but I think I'm O.K.
This is the lamination schedule that I went with. I have everything the plans call for, but I added the 6 oz. side cloth and the 12 oz. in between the tape. I didn't see a need in bringing the 6 oz cloth around the chine.
Am I correct?
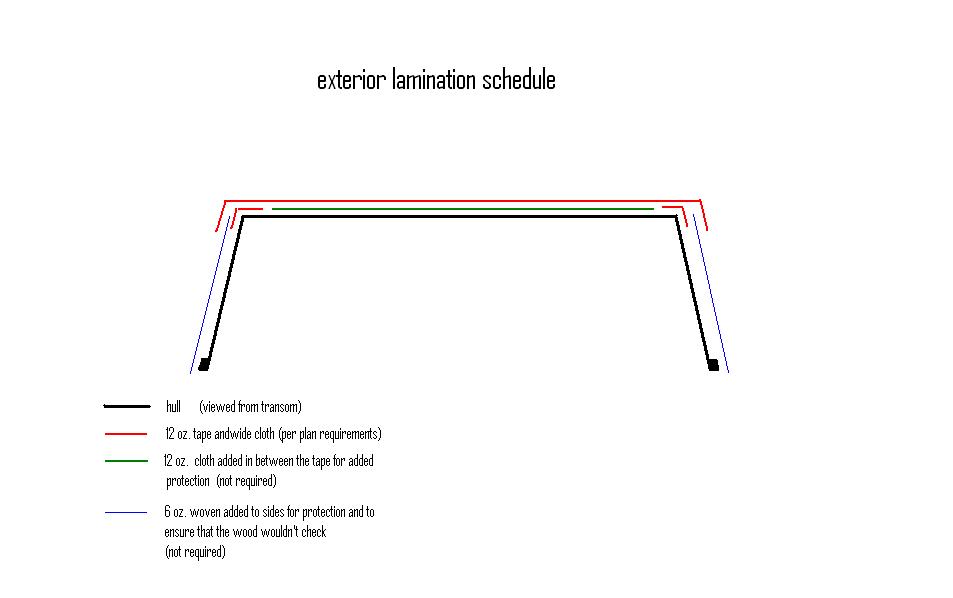
Posted: Thu Feb 26, 2009 5:51 pm
by Murry
After I posted that Bernd, I realized what you were refering to.
In the picture you're refering to, the main bottom cloth overlaps the tapeing by a couple of inches. If this is what you're talking about?
I don't think that it's possible to have that kind of overlap using one piece of cloth which is what's intended to be used on this bottom. (if you calculate the amount of cloth to be used)
You would have to use two pieces of wide cloth overlaping in middle of the bottom to achieve that much overlap.
Hopefully the designer will see this post and respond. I don't want to make that kind of mistake. Hopefull that much overlap was suggested to ease fairing.
Is that what you're refering to?
Daniel
Posted: Fri Feb 27, 2009 6:08 am
by bernd1
Yes, Daniel
thats what I mean - probably you have to overlapp two pieces in the middle to have enough cloth for the side panels.
Larry told me a long time ago that he butted two pieces in the middle to have enough for the side panels to overlap. Then he covered the bottom additional with one piece an only a few inch to overlap the chine.
Let us see what Jaques says.....
Well, I think the way you did is strong enough....
Bye
Bernd
Posted: Fri Feb 27, 2009 7:08 am
by Murry
Well, I think the way you did is strong enough....
I hope so.
Posted: Fri Feb 27, 2009 8:36 am
by tech_support
Murry wrote:
I hope so.
It is.
Save the "hope" for Obama, build your boat with what we
know works.
Posted: Fri Feb 27, 2009 8:39 am
by Murry
Excellent.
Thanks Joel.
I'm moving on then.
Posted: Fri Feb 27, 2009 9:08 am
by Cracker Larry
Posted: Fri Feb 27, 2009 5:12 pm
by Murry
What's about your floating foam - did you install it?
If yes, in which parts and how much did you install?
Sorry Bernd, I forgot to answer this.
No, I haven't done the foam yet. It should arrive on Monday and I hope to be ready to pour in a week or two.
Posted: Fri Feb 27, 2009 7:58 pm
by colonialc19
Posted: Fri Feb 27, 2009 10:13 pm
by ks8
True hope ought to be a good thing. There is always the hope that those who hope to speak so highly of hope will begin hoping in true hope, hopefully.
I've always seen it as essential, and it is, but hope has no legs... it can't stand on its own.
Uh-oh... I doed a bad ting... sorry...
Do we get to see a picture of the strakes taped?
Posted: Fri Feb 27, 2009 11:36 pm
by Murry
There is always the hope that those who hope to speak so highly of hope will begin hoping in true hope, hopefully.
Well said... In other words. Pray for the leaders of this nation. I like it..
Do we get to see a picture of the strakes taped?
Ofcourse, I just haven't had time to do boat work all week and I'll be out of town this weekend. Although, I've prepared my lovely bride for two week nights and a full Saturday next week.
We'll see how that works out.
Have a great weekend.
Posted: Mon Mar 02, 2009 10:10 pm
by Murry
I had a chance to shape my strakes this afternoon and as soon as it warms up I'll cover them with 12 oz. tape.
I wanted to post some pictures to make sure the front and rear profiles would function O.K.. I'm happy with their shape but please let me know if I need to change them in anyway. Thanks
Picture of front view....
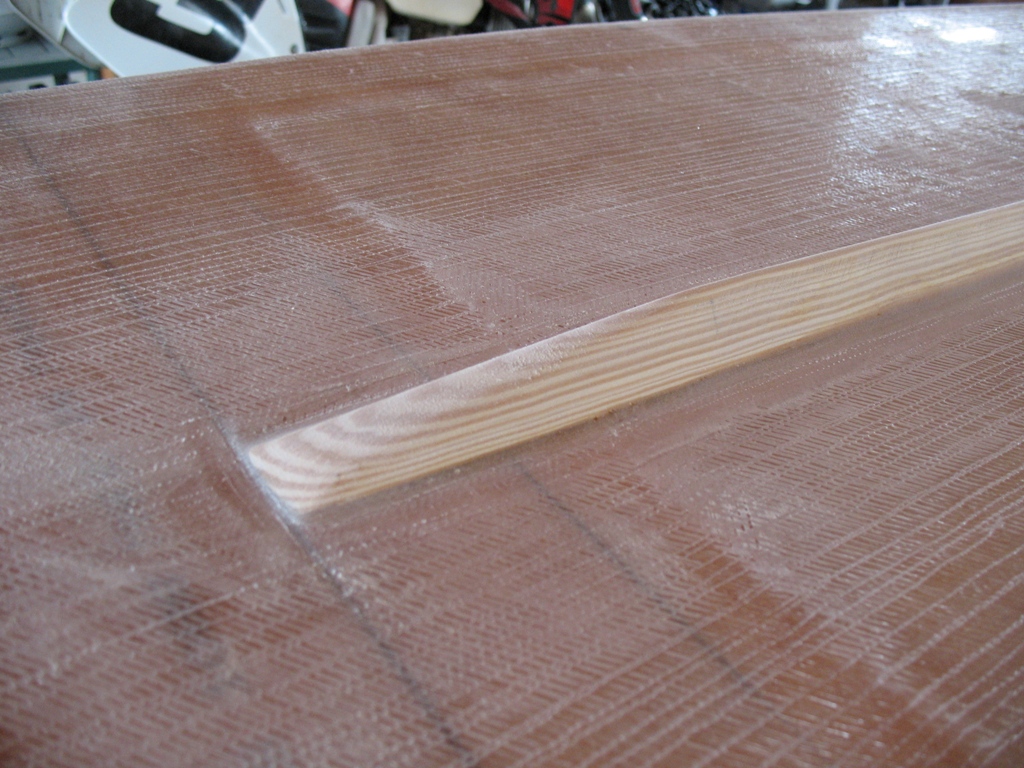
rear view....
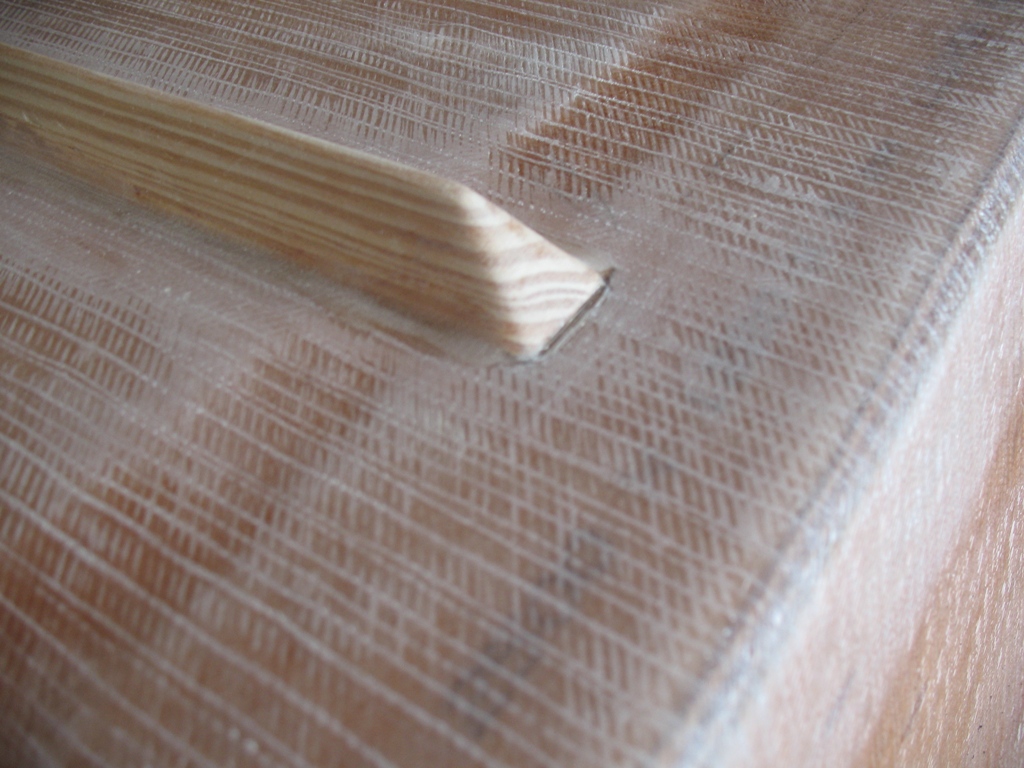
and one from the transom...
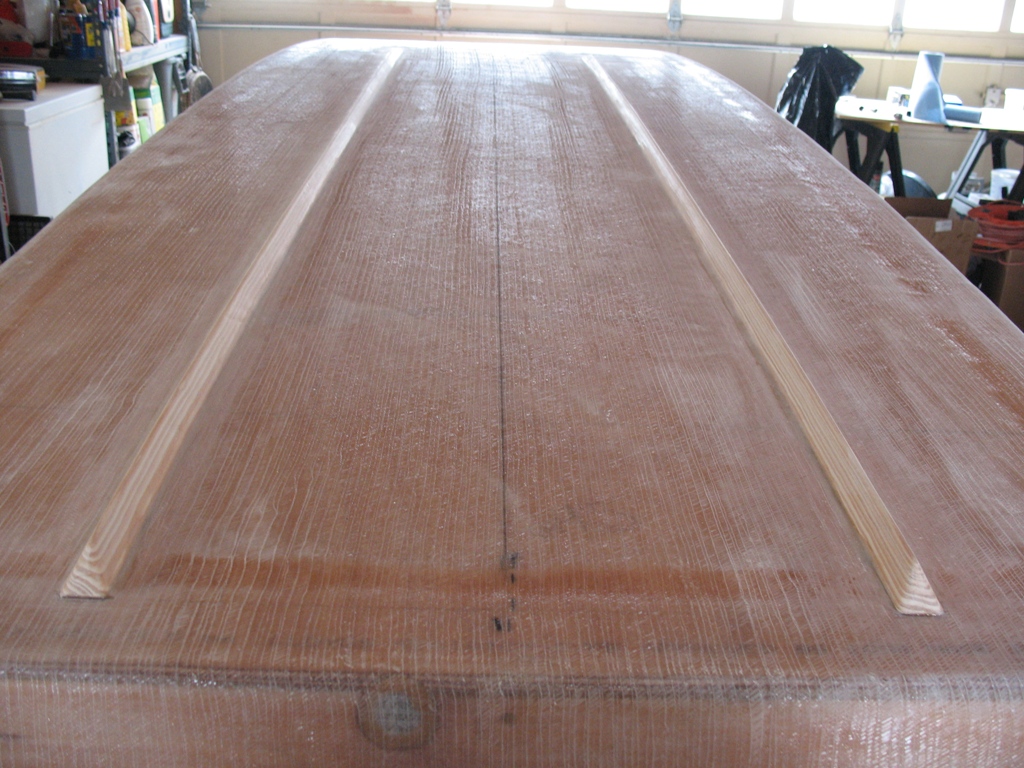
What do you think?
Do you think the shape from the front will be O.K.?
Later this week I'll get some glass on those strakes and put some thickened epoxy around the chines and rear transom to sharpen them up.
Thanks again for ckecking out my progress.
If you have any advice for me, don't hesitate to respond and If you have any questions, I'll do my best.
Posted: Mon Mar 02, 2009 10:37 pm
by Fonda@kauai
Very nice work Murry. Very clean. The flow in at the front and back looks good. From what I know about surfboard fin design, the smoother the curve, the easier water flows around it and there's less chance of turbulence. I think they'll work great! And I agree about covering with glass. Make em solid
Posted: Tue Mar 03, 2009 7:38 am
by colonialc19
I like em', the shape looks good,
just make sure you have enough radius on em' so the tape lays good, and rock on'
Daniel
Posted: Tue Mar 03, 2009 7:45 am
by bernd1
Looks good.......
I wish I could work at my boat.......damned temperatures outside...
Bye
Bernd
Posted: Tue Mar 03, 2009 4:08 pm
by mecreature
I like um too. Kept them out of the middle and you will get twice the bite..
should track great at idle speed too. I bet it doesn't slip one bit in turns..
again I sure like these boats.
Posted: Tue Mar 03, 2009 6:23 pm
by peter-curacao
Good job and that the first time I remember having a bit of trouble with mine, at the end I did change them a bit because I didn’t like them, yours look great imo

Posted: Tue Mar 03, 2009 8:04 pm
by Murry
Thanks for the compliments guys.
I was real happy with the way they turned out, but I want them to work as good as they look and since I didn't get any objections on their function, I'll move forward with the glass coverage.
And I agree about covering with glass. Make em solid
That's the plan Fonda.
just make sure you have enough radius on em' so the tape lays good, and rock on'
Daniel, they aren't as sharp as they look in the picture, so hopefully the cloth will lay flat without any problems. We'll see how it goes.
I wish I could work at my boat.......
You will be building before you know it Bernd, and when you do, I know your work will be inspiring as it has been.
again I sure like these boats.
You need to build one already
at the end I did change them a bit because I didn’t like them
Mine aren't finished yet.
Posted: Thu Mar 05, 2009 4:54 pm
by Murry
Last night didn't go so well.
I tried glassing my strakes and they were to sharp.
You were right Daniel.
I'm not sure how much air I'll need to grind out, but I'll post the details after working on them Saturday. (it would have been nice to have two pieces of angle iron tape with packageing tape to place over them while curing. I didn't think of that until this morning.) After working with the wet tape for about an hour last night I gave up.
I was able to install a damn across the transom and down the chines the length of the strakes and get that filled, though. I'll square those edges this weekend.
I also had my first bout with the blended filler. I mixed and applied a slurry on the bow as I need to get my bow eye permantly installed before I can foam and glue down my seat panels and casting deck.
The blended filler really goes on nice. I like it
I'll post some pictures this weekend.
Posted: Thu Mar 05, 2009 5:40 pm
by peter-curacao
I'm sorry to hear that but same as I and others you find a solution and that night is behind you before you know! After that you be a happy boat builder again

Posted: Thu Mar 05, 2009 8:57 pm
by Daddy
Murry wrote:
The blended filler really goes on nice. I like it
Me too, have had great luck with it, fairly easy to sand or trim with a paint scraper, thicken more and it wont sag on the verticals. Don't forget to seal again after fairing with unthickened epoxy
Daddy
Posted: Thu Mar 05, 2009 9:06 pm
by Murry
Don't forget to seal again after fairing with unthickened epoxy
Thanks for the help Daddy. Primer is fine to use over blended filler, right? Or were you suggesting the need of using unthickened epoxy over blended filler and quick fair before primer?
Daniel
Posted: Fri Mar 06, 2009 1:57 am
by steve292
if the primer is epoxy based,like the S3 yacht primer,it counts as a seal coat,otherwise you will need to seal coat the fairing with epoxy.
Steve
Posted: Fri Mar 06, 2009 7:43 am
by Daddy
What Steve said, that's what I did on my last build
Posted: Fri Mar 06, 2009 4:04 pm
by chicagoross
If you graphite the bottom, that counts as the seal coat as well.
Posted: Sun Mar 08, 2009 9:29 pm
by Murry
That's what I was thinking. Thanks to all of you for helping to clear that one up for me. It doesn't take much to upset the sea's of my shallow pool of boat knowledge.
A couple of pics of the process to sharpen the chines and transom. I'm going to start sharpening the chines right around where the strakes start.
I know this process may be bit of an overkill for a boat like the gf, but I want to do as much and learn as much as I can on this build, incase I need to do it again oneday
. Besides the end result may end up helping the performance of my hull at planeing speeds.
Right
I used epoxy thickened with woodflour and chopped glass.
Picture of damn set up around the boat to do it all in one shot.

Damn removed from transom after the cure
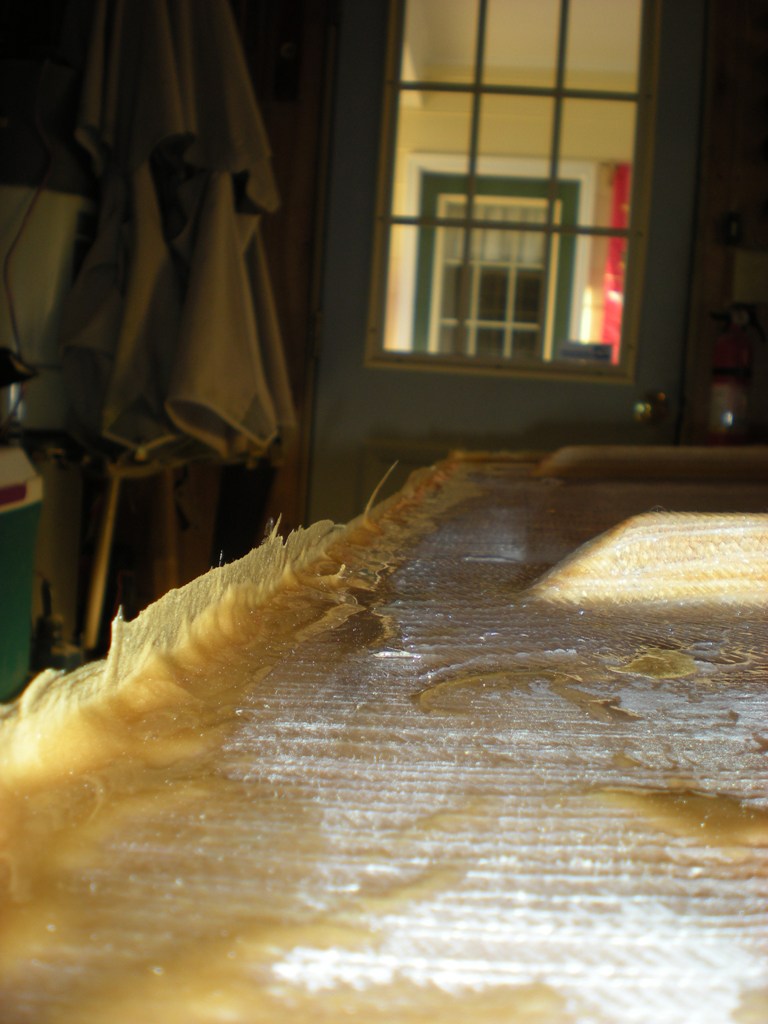
Picture after I trimmed down the transom with plane.
I still have alot of fairing to do, but It'll be nice when I'm done.
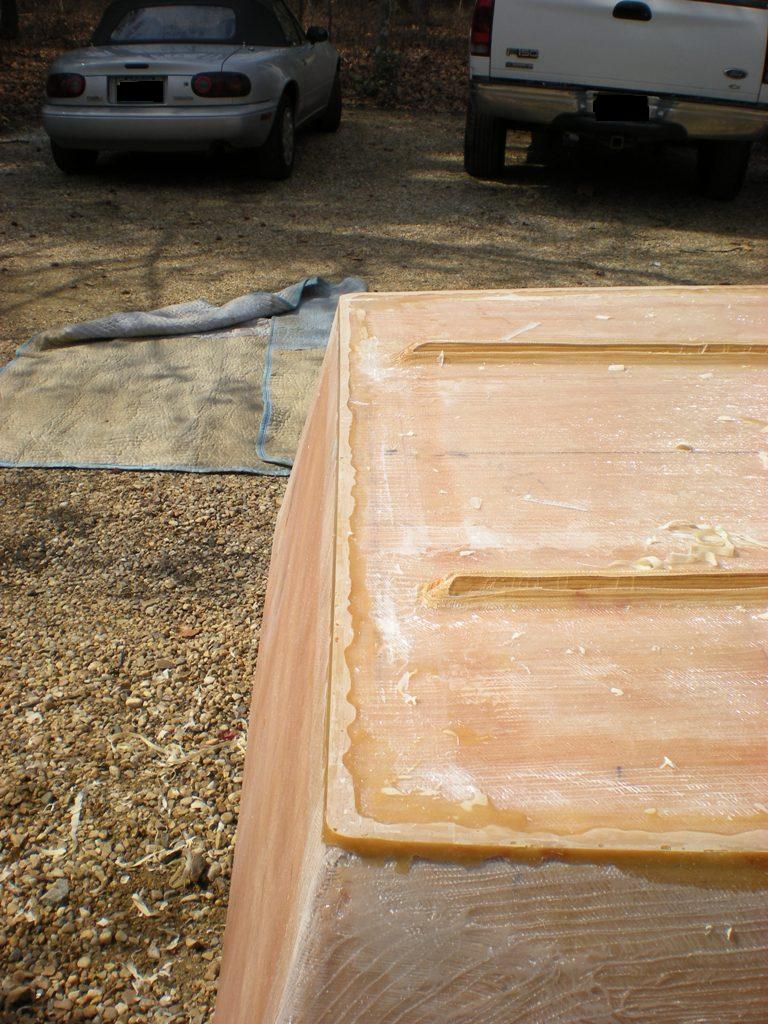
Back to my strake issue.
Just like I feared, I had air all the way down the strakes. I guess they'll be getting two layers after all.
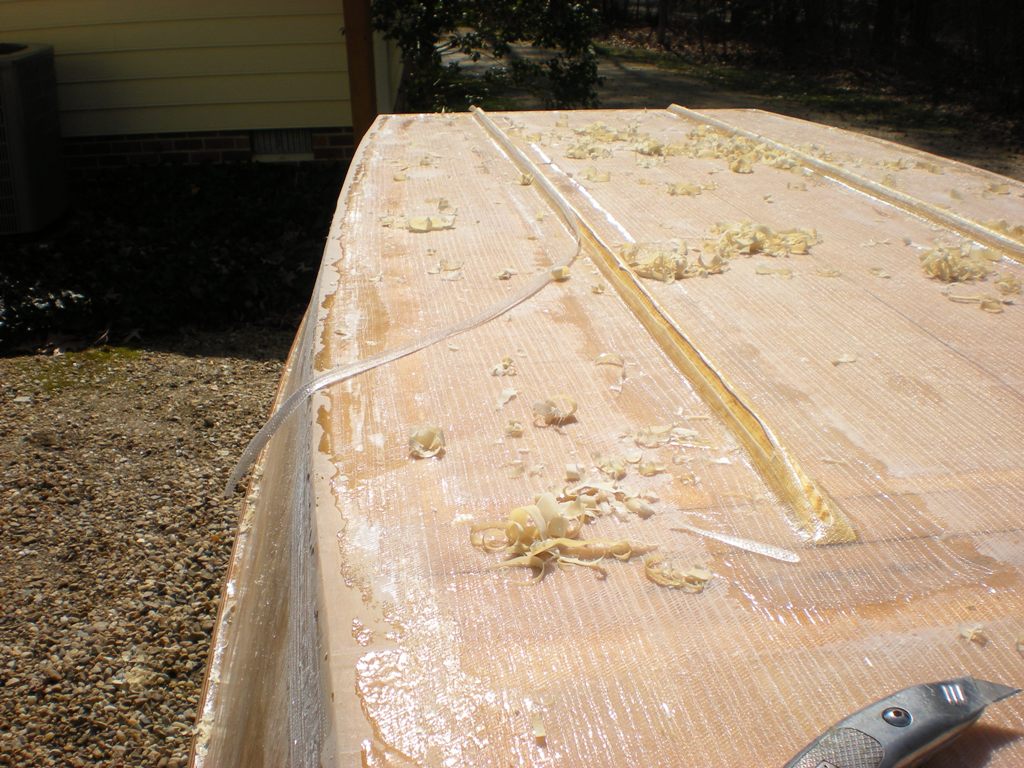
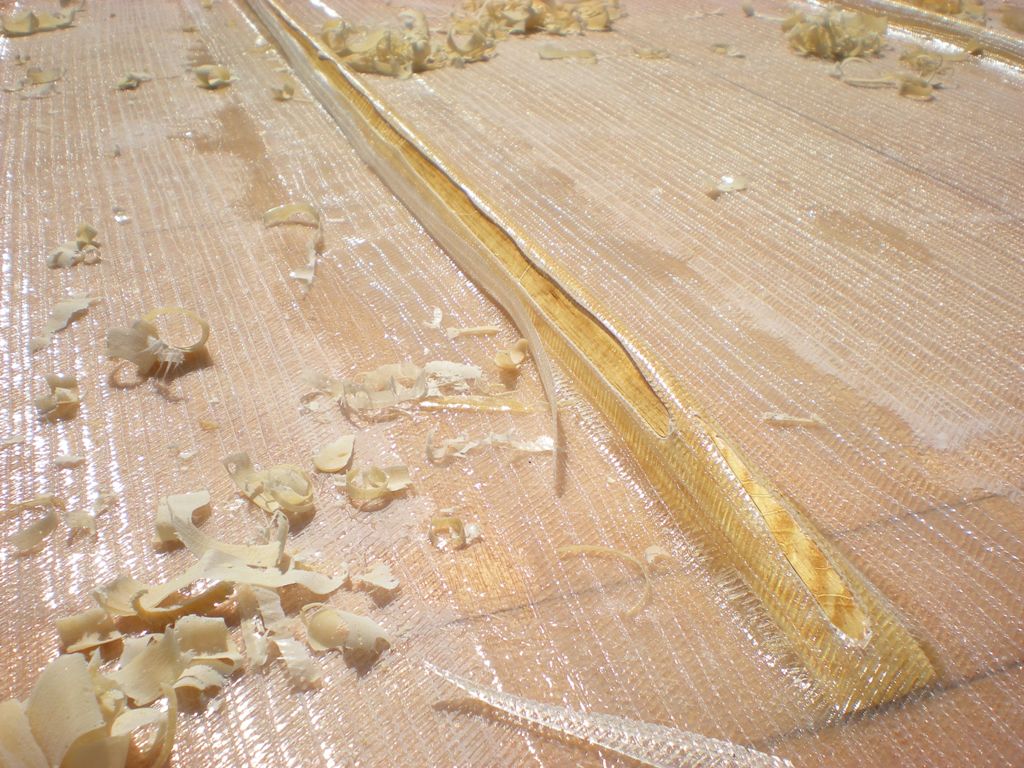
I'm not giving up on glassing the profile that I like and I don't want to dull them down so the glass will lay flat just to build them back up again.
I'm going to use a piece of outside corner finishing nail strip with foam and packageing tape on the inside to maintain pressure on the glass until the cure.
I'll let you know how it goes.
Daniel
Posted: Sun Mar 08, 2009 9:50 pm
by Cracker Larry
The sharp transom and chines will make a big difference, you'll be glad you did that. Looks good!
Posted: Wed Mar 11, 2009 10:15 pm
by Murry
The sharp transom and chines will make a big difference, you'll be glad you did that.
That's good to hear. I wasn't sure if it would make much of a difference on small boats.
I was able to bust into the foam this week and man was that cool.
I started by drilling out my epoxy plugs and mounting my bow eye, once the 5200 cures I'll get the front compartment foamed as well.
In the picture below you'll notice a slight gap in between the bow eye and the bow. Since, I've decided to get all my construction done before fairing the boat I did this to allow for fairing and paint build up.
To deterimine how much gap I needed, I layed a sraight edge across the high spots to deteremine how much gap I had at the bow eye location. I had about a 1/32 of an inch so I used one washer per stud as a spacer. That should be plenty.
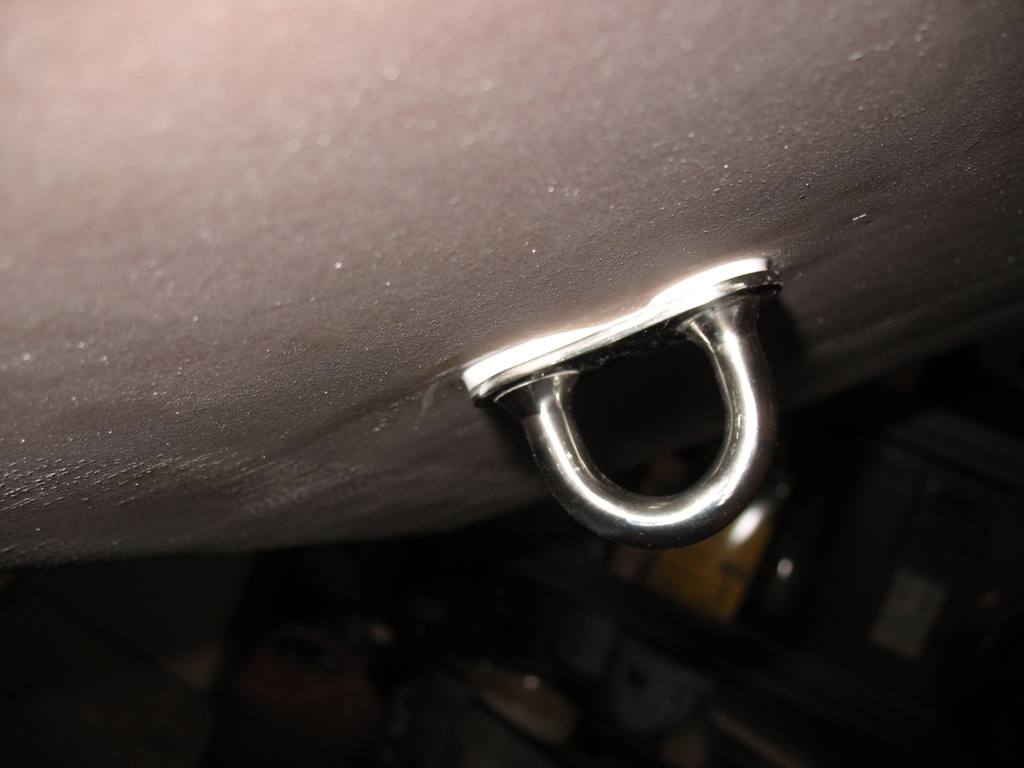
It's not going anywhere, I used a 1/4 piece of aluminum for a backing plate bolted through a one inch thick front transom. (I doubled the bow up)
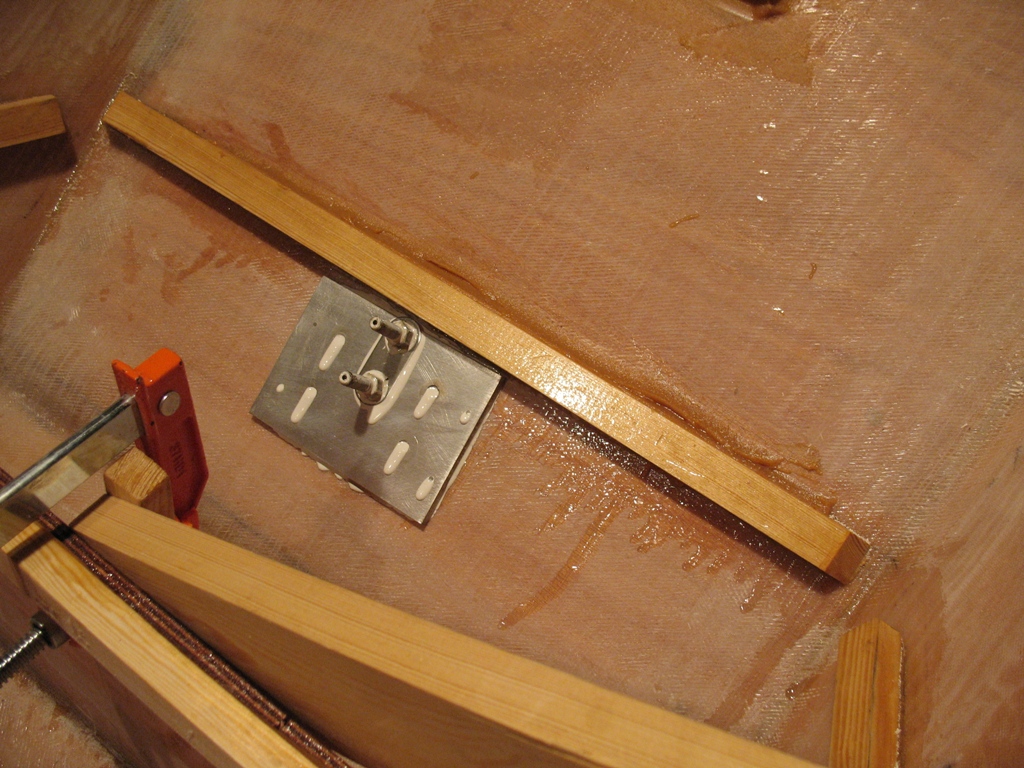
And the foam!
I installed the trashcan (the one I used for the livewell mold) back into the livewell to support it while the foam expanded. The trash bag was to keep the foam from sticking to the trashcan.
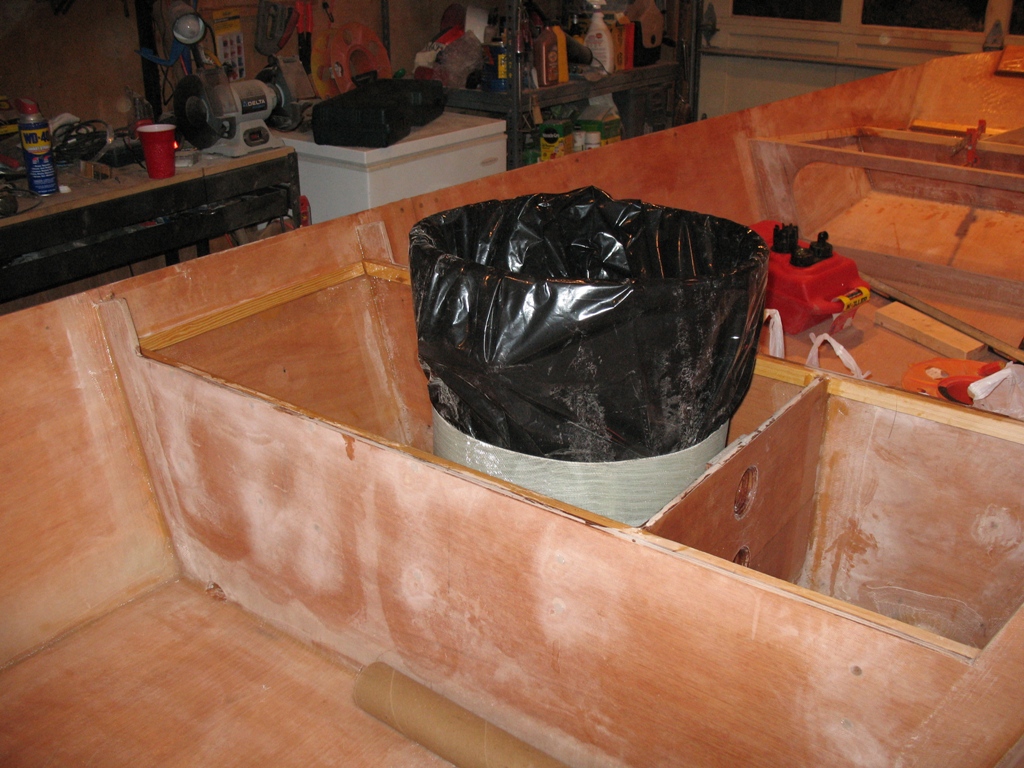
Well she won't sink, I ran out of foam!
I ate up a two gallon kit and I haven't even started to fill the bow area. I wish you guys could feel how solid this baitwell is. I like it
The foam really firms up nice when cured. I'm going to glass a piece of 12 oz. tape aroud the top to make a lip to glue the seat top to.
It'll be sealed tighter than a drum.
I'll post a picture or two to better explain it after I've done it.
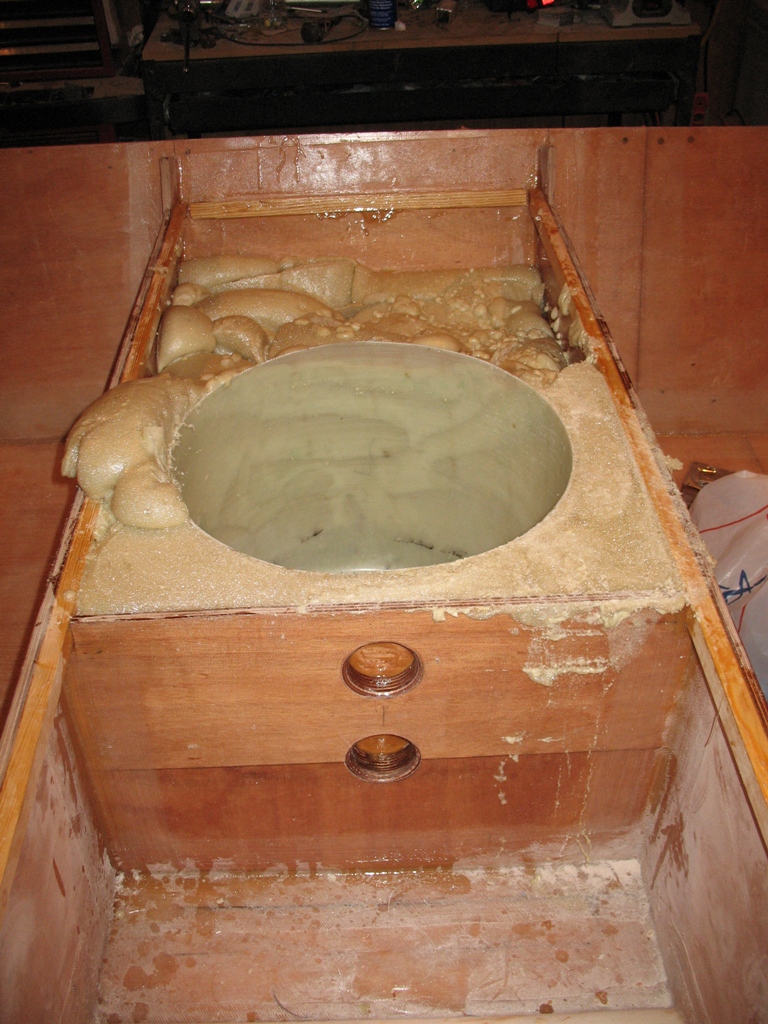
I'm happy with my layout here, but I've wasted some space with the size of my foam compartment in the middle seat.
 If I could do it over I would have another storage compartment on the port side of the baitwell that mirrored the starboard.
Oh well, it is what it is. Maybe someone will learn form my oversight here.
Here's how the rear seat area turned out.
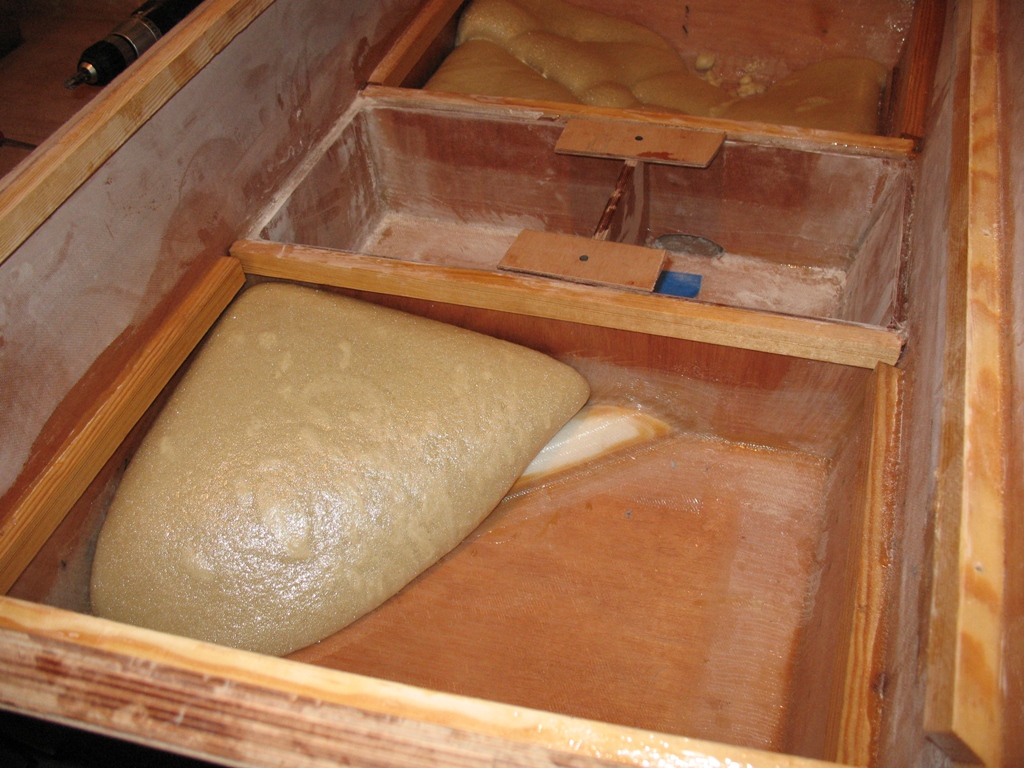
and with it trimmed up after a couple more pours.
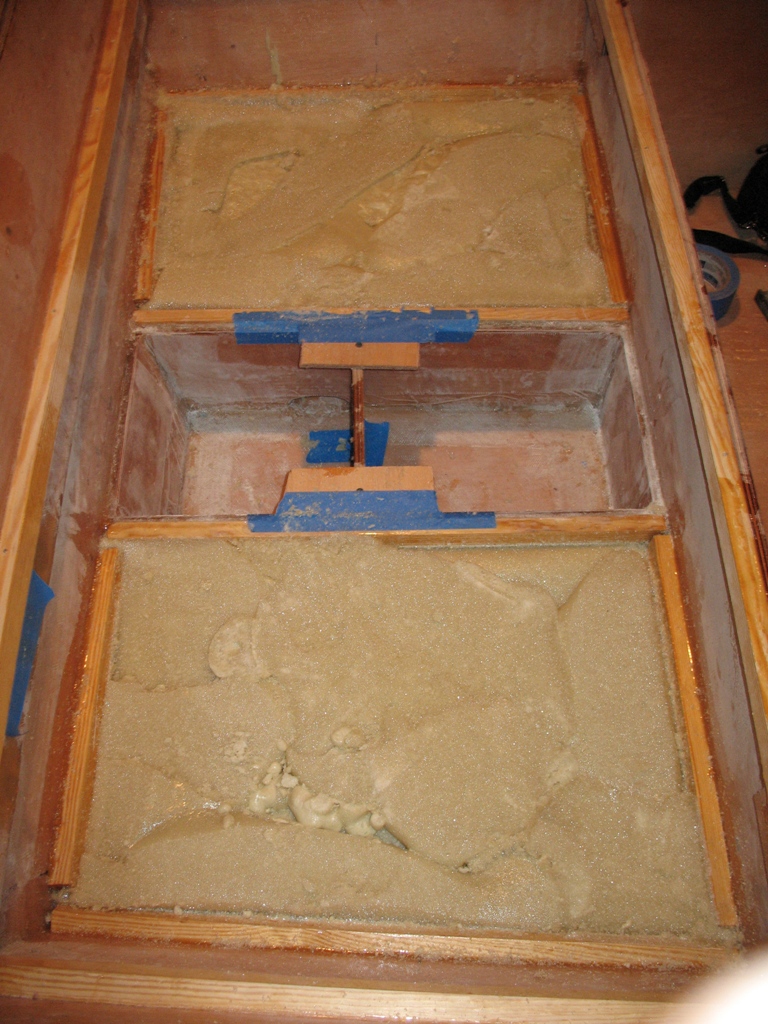
I purchased a two quart kit locally to try and finish it up tomorrow night.
We'll see how it goes.
Daniel
Posted: Thu Mar 12, 2009 11:57 pm
by Murry
Well poured a 2 quart kit tonight and still not finished.
Did I mention that this boat will never sink. I was hoping to be able to sink it, if it was to ugly to look at, Oh well
Another 2 quart foam kit and I'll have it done.
I was able to drill and dryfit my baitwell accesories this evening so I thought I'd share it with you folks. I should be able to angle the nozzle slightly to creat a nice circular water flow.
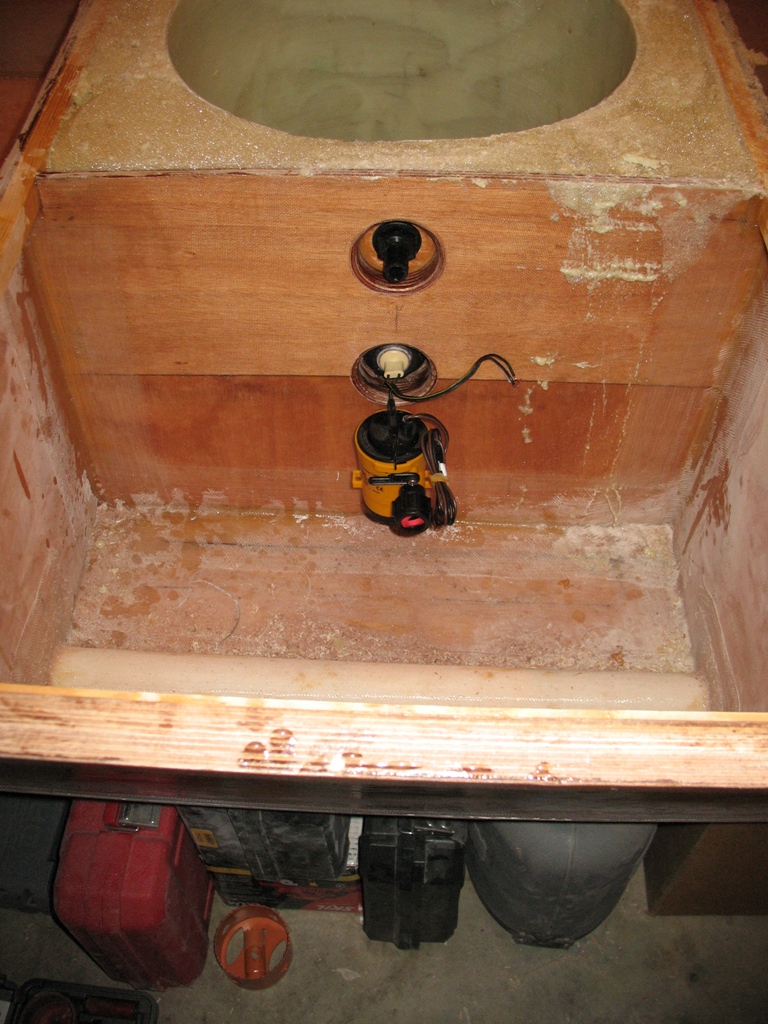
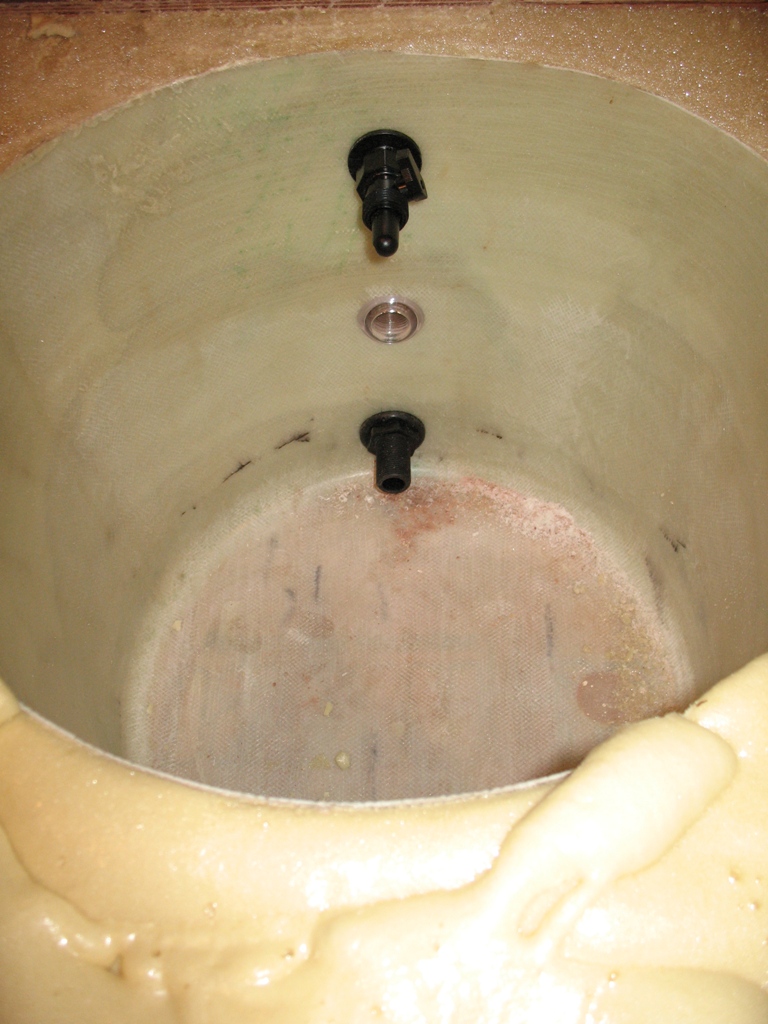
I also finished glassing my bilge/tool storage divider in place. The rear portion of this compartment will be soley for the bilge pump which will be mounted on a bracket allowing it to sit just off the bottom(this boat doesn't have a sump so I'm trying to get the pump as low as possible), the front will be for tools, spark plugs ect. I'll probably seal them up with my "foodsaver" te keep them dry. There will be a removable lid over this compartment to create a nice wide flat storage area for life vest, throw cushions, paddle, anchor light, and what ever else and can fit. I'll try keep the things in this compartment lower weight items.
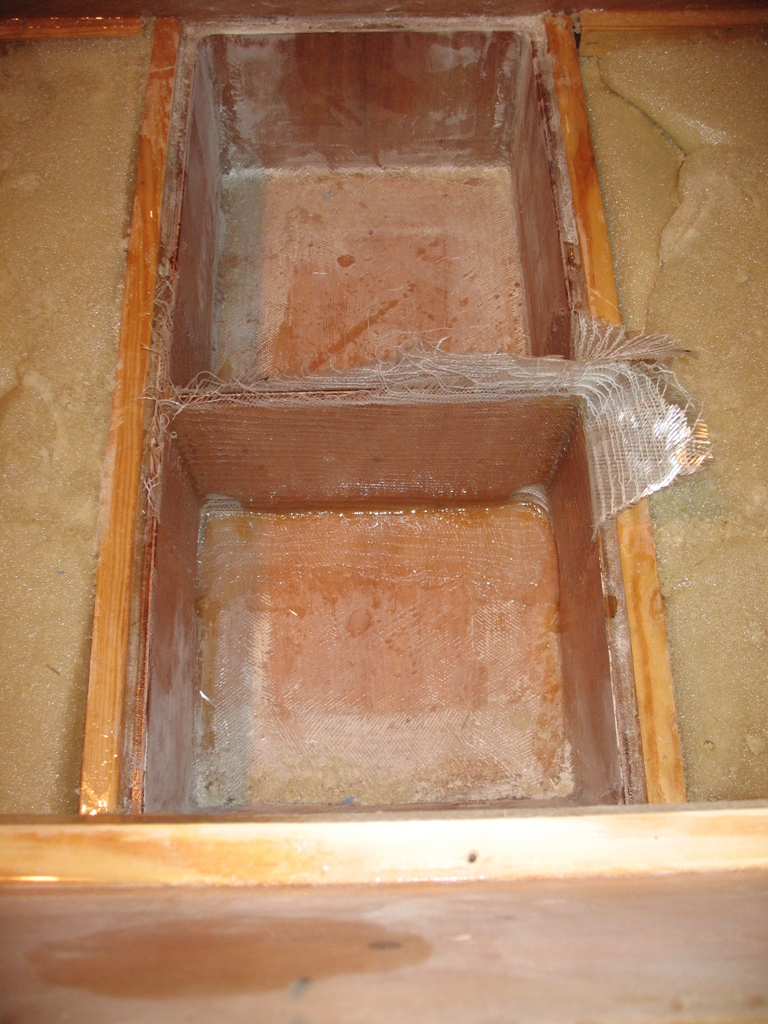
A couple more odds and ends and I'll be ready to coat my compartments with pigmented epoxy.
Good luck with your own build or planning your first one,
Daniel
Posted: Fri Mar 13, 2009 9:30 am
by Dog Fish
Murry, looking good. Your bait well is coming out nice. I don't see a drain to empty it out and get all the scales and crud out. Your making great progress and that extra foam is a good thing, make her nice and solid and quit.
Posted: Fri Mar 13, 2009 11:21 am
by Murry
Thanks You Dog,
There's an epoxy plug through the bottom that will be drilled for the baitwell drain.
here it is before I filled it...
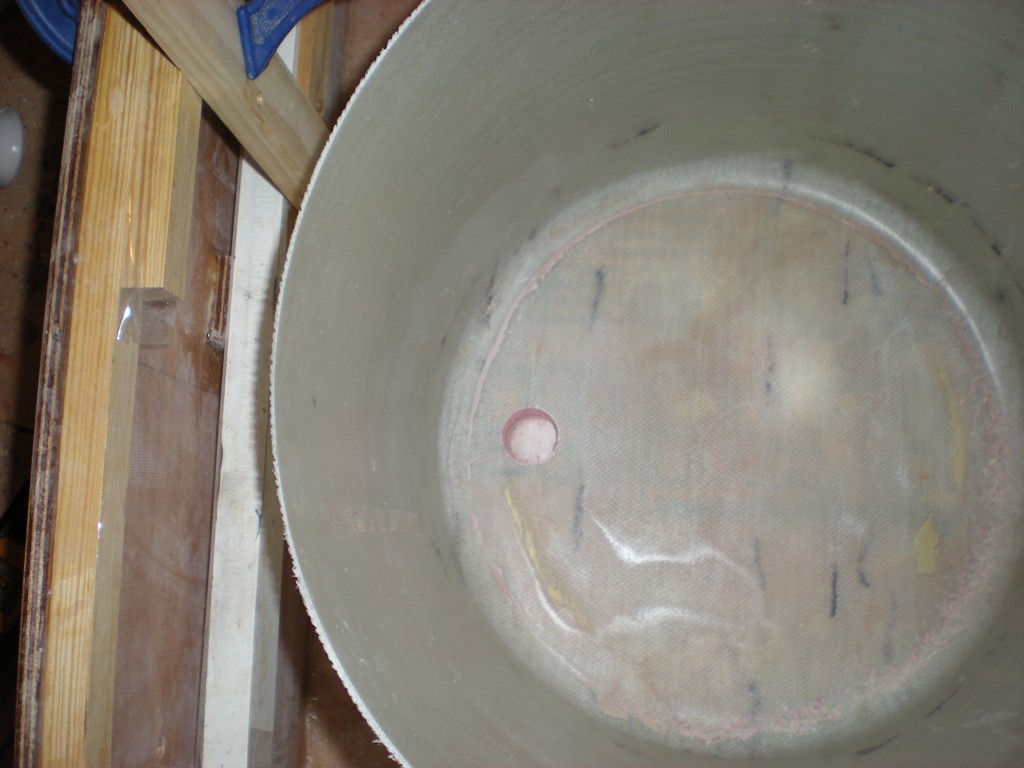
Posted: Fri Mar 13, 2009 11:24 am
by Cracker Larry
Looks real good. I assume this will be a closed, recirculating system? Or does it have a fresh water pickup?
Posted: Fri Mar 13, 2009 11:31 am
by Murry
Thanks Larry,
Yes, I'm keeping it closed for now. I'm planning to fill it with a bucket (I always carry a cast net and bucket when I fish anyway) and I'll use a stand pipe to maintain water level.
I may plumb a fill line later out the starboard side that I could use at rest but I'll probably leave it alone.
Posted: Fri Mar 13, 2009 12:29 pm
by Dog Fish
I got ya there Murry, I just didn't see it in the pic. The foam should keep your water cooler in summer. Good job
Posted: Fri Mar 13, 2009 2:30 pm
by Murry
The foam should keep your water cooler in summer. Good job
Thanks DogFish, That's what I'm going for. Mix in some ice every so often with a fresh bucket of water and I shouldn't have to many problems keeping things alive.
Posted: Fri Mar 13, 2009 3:44 pm
by mecreature
looking sweet.
that foam is cool stuff.
Posted: Fri Mar 13, 2009 8:16 pm
by BassMunn
Looking premium Daniel.
That foam really stiffens things up nicely.
Question - what is that little "thing" in the middle cut-out in your livewell? A light perhaps? Never seen anything like it so just curious.
Posted: Fri Mar 13, 2009 8:40 pm
by Dog Fish
BassMan wrote:Looking premium Daniel.
That foam really stiffens things up nicely.
Question - what is that little "thing" in the middle cut-out in your livewell? A light perhaps? Never seen anything like it so just curious.
Yea, its a light. They work very good and are cheep like 13 bucks at Cabela's and last about 100.000 hrs. There are a few other manufacturers that make them also.
Posted: Mon Mar 16, 2009 7:39 am
by colonialc19
Looks great Daniel, very nice work
Posted: Mon Mar 23, 2009 12:16 pm
by Murry
Thanks Daniel,
We need to get together and go check out that Down Easter.
Making some progress and wanted show everyone how it's going!
This group of photos will be of the rear seat compartment. I was able to get the tops glued/glassed over the foam sections.
before the tops....
I cut and glued down the pieces next. I filled the gap leveling the thickened epoxy with the top, with the intention of building a radius fillet while taping the seems after this has cured.
(port side in photo....)
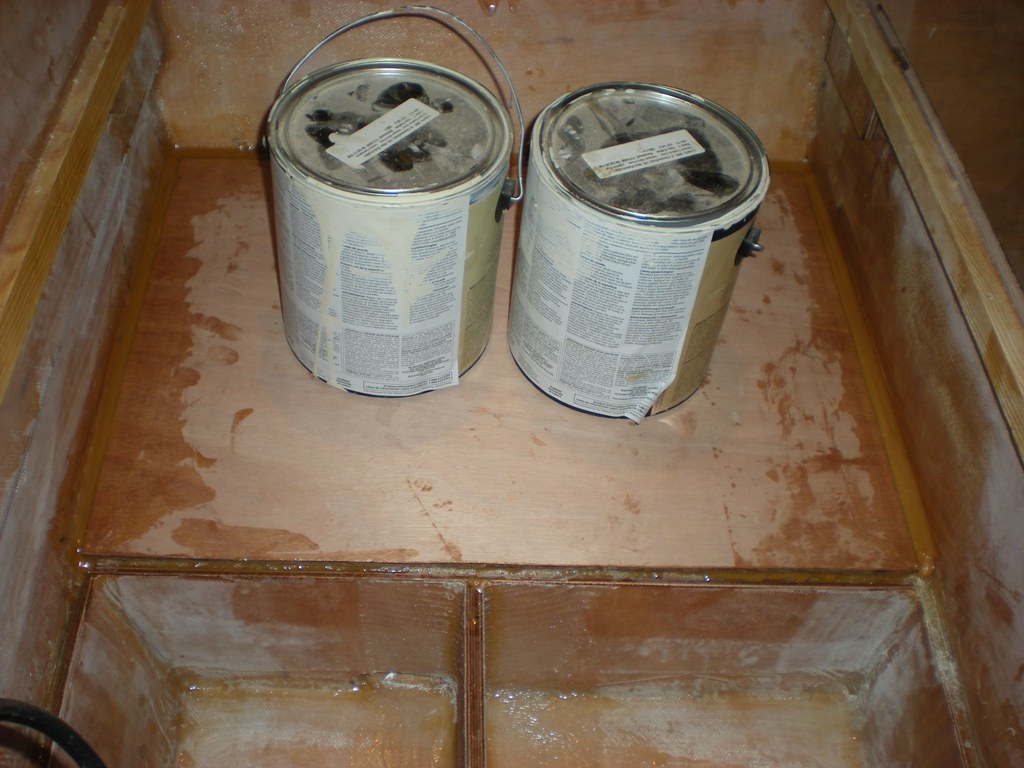
I then sanded and shaped the edges at the bilge/tool compartments before glassing.
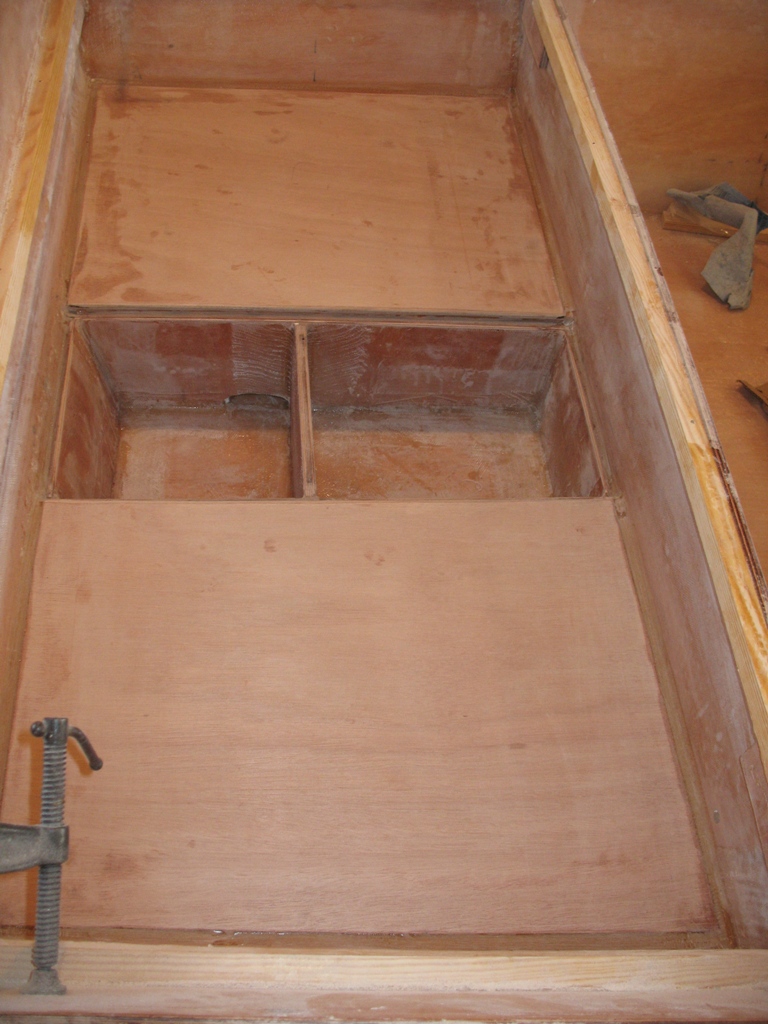
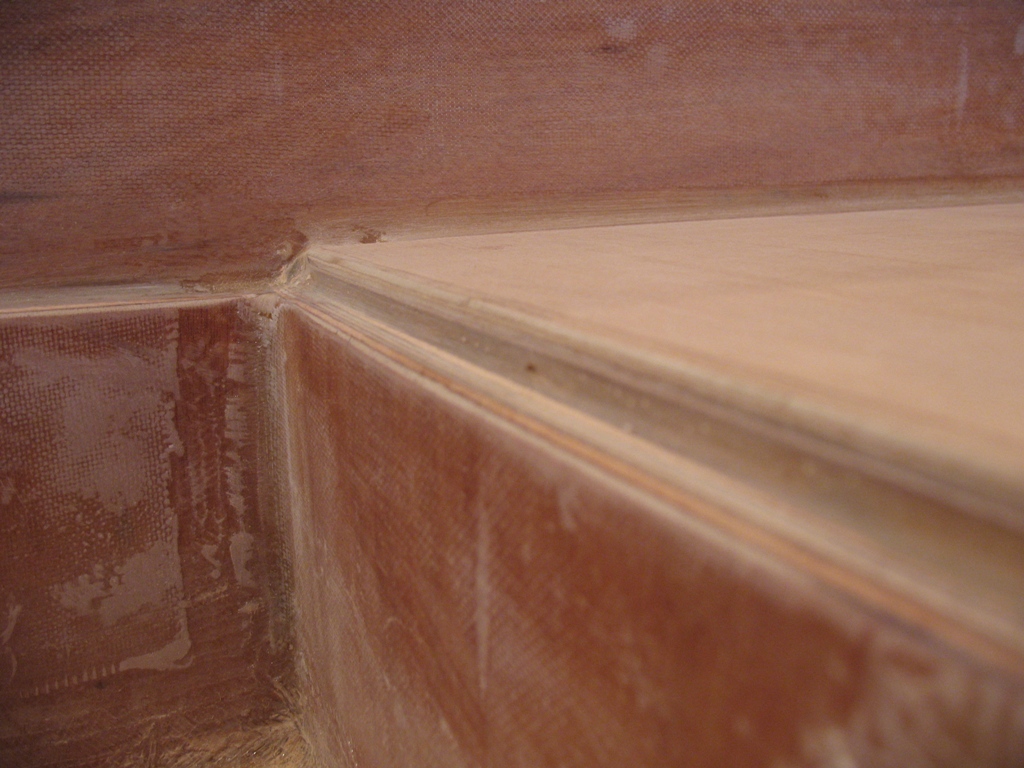
I then precut all glass (12oz. biax. for seams, 6oz. woven to have complete coverage) I cleaned the surface,precoated area that needed filling and fillets, filled all lows, formed final fillets, precoated the dry wood, taped seams, and then layed the 6 oz. cloth.
and the results...
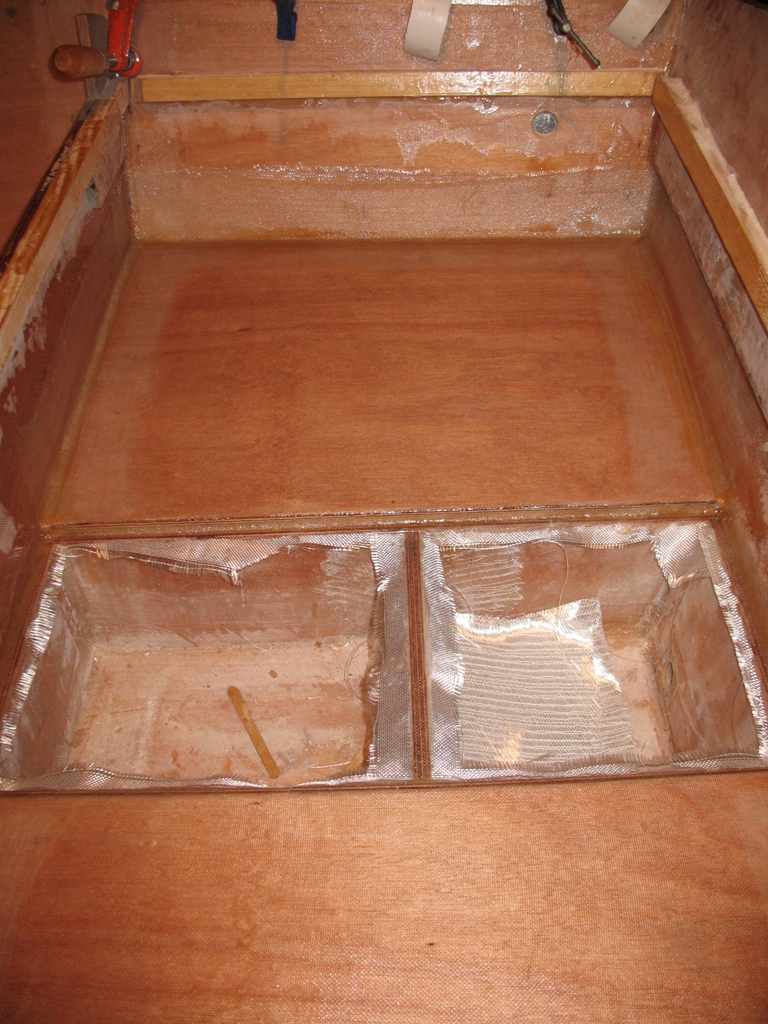
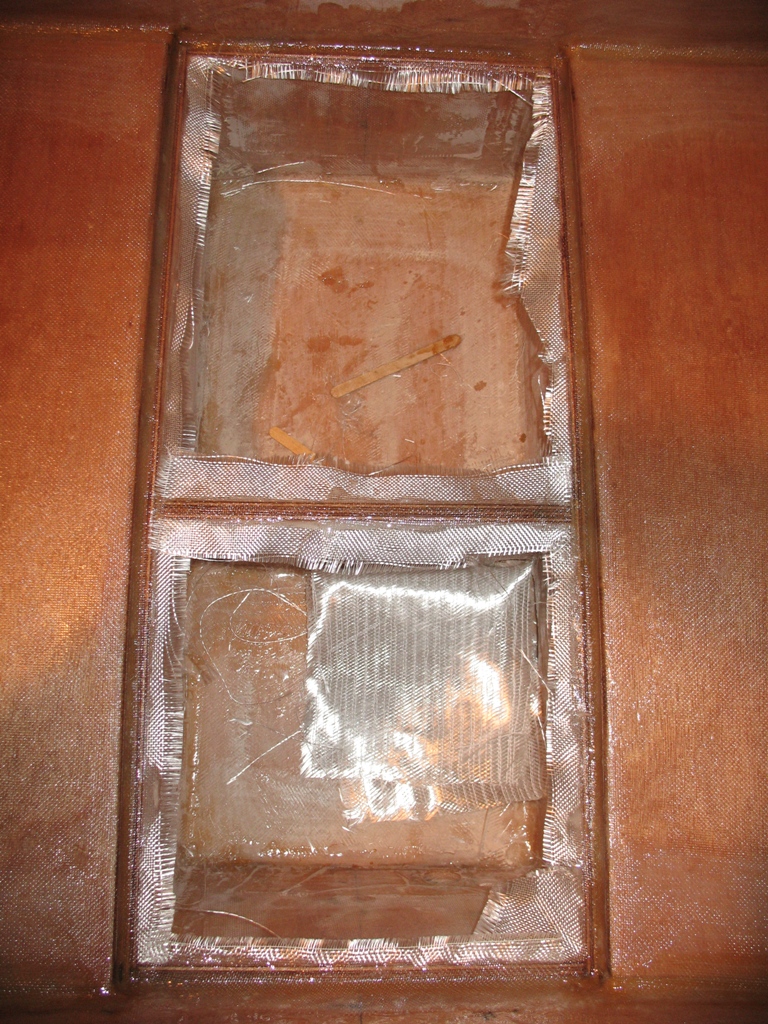 Spray rail details.
I decided to install a laminated spray rail...
Precut 84 feet of 1 3/4 inch strips (the spray rail is on the right side of this picture)
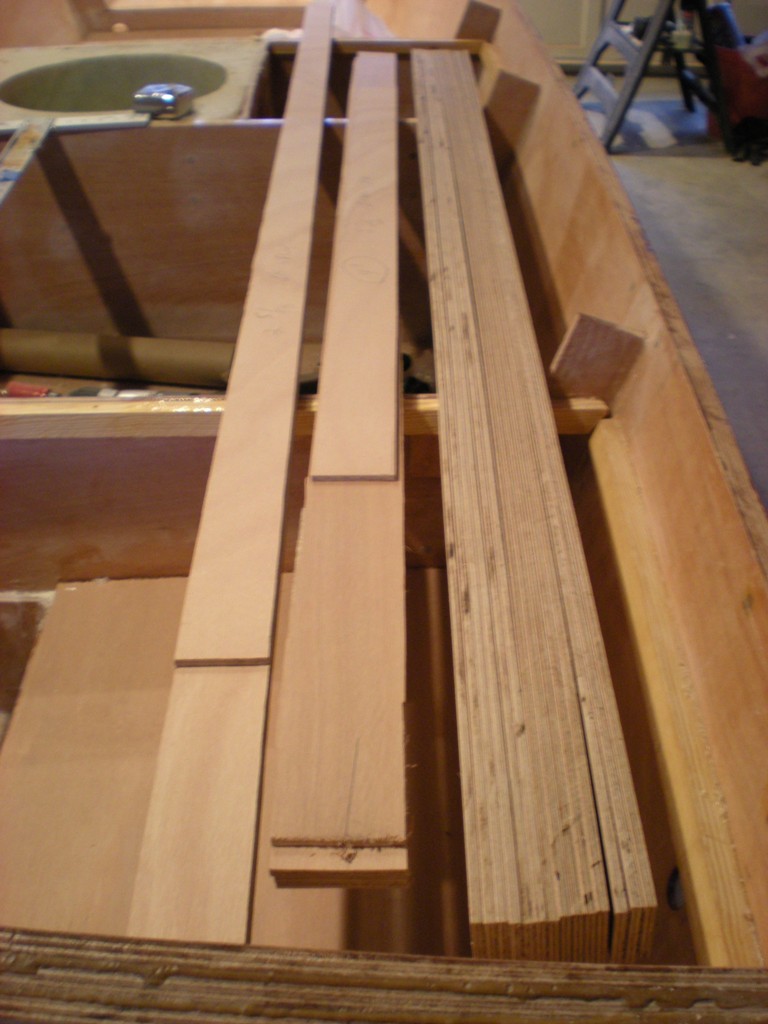
Marked location, cleaned and sanded hull, remarked location, dry fitted the rail.
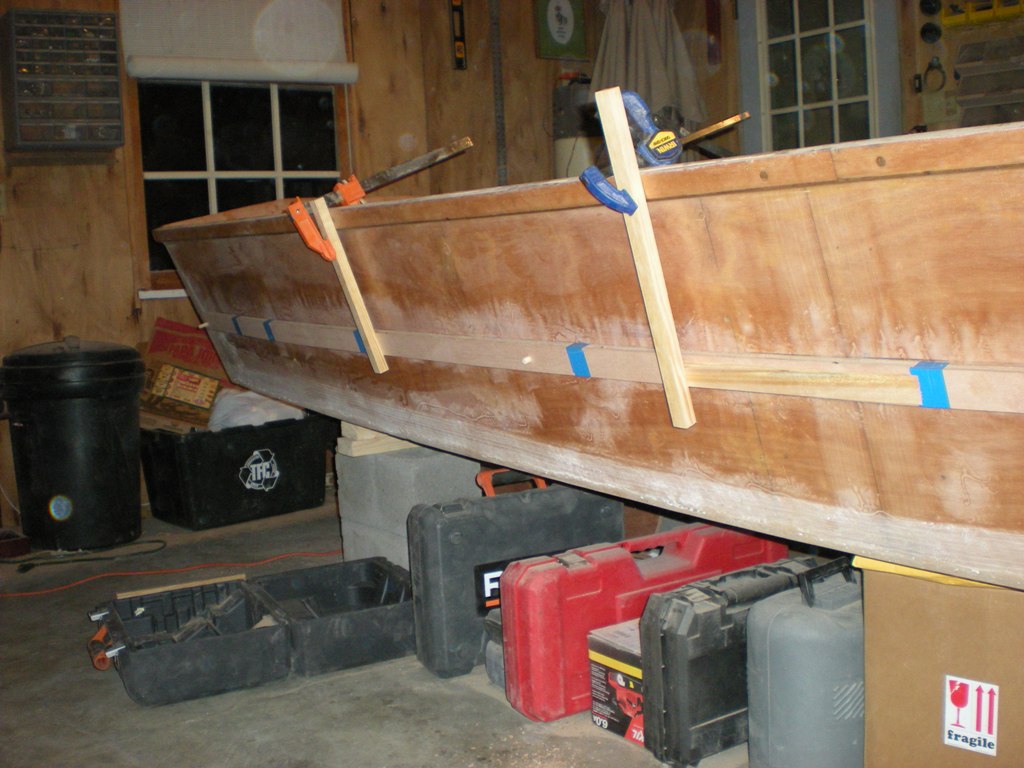
Layed out rails for gluing...

And here it is..... I'll do the final shaping later on with the router.

I know... sorry for all those pictures, but someone has to look at them besides me.....
Thanks again for keeping up with my progress,
Daniel
Posted: Mon Mar 23, 2009 12:27 pm
by Dog Fish
Daniel, you can't post to many pics everyone likes looking at pics. Yea you have make some good progress. Your doing a good job, nice
Posted: Mon Mar 23, 2009 3:20 pm
by peter-curacao
Dog Fish wrote:Daniel, you can't post to many pics everyone likes looking at pics.
Your totally right on that one, Are you in turbo drive at the moment Daniel? You’re boat is really coming along
Posted: Mon Mar 23, 2009 5:42 pm
by Murry
Daniel, you can't post to many pics everyone likes looking at pics.
You asked for it.
Are you in turbo drive at the moment Daniel?
I wish Peter, I'd like to work on her more than I do, but my schedule won't allow it.
Posted: Mon Mar 23, 2009 5:50 pm
by topwater
Keep posting the pix's....its boat porn
Posted: Mon Mar 23, 2009 5:54 pm
by peter-curacao
Re: Murry's gf16
Posted: Fri Mar 27, 2009 8:24 am
by Murry
Last night I grinded/sanded my compartment areas and I think they are ready for a couple coats of pigmented epoxy.
I'm not to concerned with the fairness of these areas, just want them to be strong and uniform in color.
I'm going to try to get all coats on without haveing to do any sanding inbetween. (looks like I need to take a day off
)
I figured out my gas tank tie down arrangement as well, which I'll explain with pictures after I get those areas coated.
Side note* I purchased a small curved surform last night and it has to be the most effective tool I've used thus far for
knocking down glue and fillet buildup in hard to reach areas. The handle is away from the work area allowing it to be used at all sorts of angles. What a time and sand paper saver
My list of things to get done before launch is slowly but surely, getting smaller.
Re: Murry's gf16
Posted: Fri Mar 27, 2009 8:51 am
by Murry
Re: Murry's gf16
Posted: Fri Mar 27, 2009 9:36 am
by Dog Fish
The link only went to the Home Depot
Re: Murry's gf16
Posted: Fri Mar 27, 2009 9:43 am
by Murry
Thanks Dog, I just tried it and it worked for me.
It should take you to the surform product page.
Re: Murry's gf16
Posted: Fri Mar 27, 2009 9:45 am
by peter-curacao
Nope doesn't work for me either I get this from the Home Depot "The product you are trying to view is not currently available."
Re: Murry's gf16
Posted: Fri Mar 27, 2009 9:55 am
by Murry
O.K., Sorry guys.
I've saved a picture of it on my computer and as soon as the gallery as back up I'll post the picture.
Thanks for the heads up.
Re: Murry's gf16
Posted: Fri Mar 27, 2009 10:00 am
by TomW
Murry I got the same note as Peter. Thanks for the try though. I think this is the one you are talking about.
http://www.stanleytools.com/default.asp ... %3B+Shaver
Tom
Re: Murry's gf16
Posted: Fri Mar 27, 2009 10:52 am
by Murry
Yes Sir, that's the one.
Thanks for your help Tom.
Re: Murry's gf16
Posted: Sun Mar 29, 2009 4:44 pm
by BassMunn
Yip that's the same one I've got, used it to shape my transom edge and the points of my strakes. It's an awesome tool.
I snapped the blade on mine and have been waiting for 6 weeks for the local timber shop to find me new ones, got 2 of them on Friday
Just in time for deck shaping.
Daniel boats looking good and you're flying, wish I could spend more time on my boat at the moment.
Re: Murry's gf16
Posted: Fri Apr 03, 2009 10:02 am
by bernd1
Any new pictures availible ?
Re: Murry's gf16
Posted: Sat Apr 04, 2009 12:29 pm
by Murry
Any new pictures availible
The gallery will probably have hundreds of photos uploaded the first day it's back on-line.
I do have a building question that will require me to pull a photo from a previous post up. I tried but I can't, Oh well.
Let me fill you in on the details before I ask that question.
If you've been following my build (wich I appreciate), you know that I've made a baitwell/cooler that will be permanently installed in the middle seat area. Well, If I don't have a good permanent seal here I could have water sloshing and leaking into a sealed compartment and I wouldn't even know it
. Of'course all the wood in that compartent is glassed and sealed with at least two coats and the closed cell foam is bonded to the baitwell and the entire compartment, but the thought of water leaking into the top of the compartment freaks me out.
So, I made a lip to seal my baittwell to the seat top out of two layers of 12.oz biax.
I basically rounded the upper edge of the baitwell and foam to about a 3/8 to 1/2 inch radius and then layed two pieces of prewet tape around the edge. The first one is about 2 1/2 inches wide and the second is about 4 1/2 inches wide.
I've ended up with about a 2 1/4 inch lip protruding out over the foam all the way around the baitwell. I wanted a solid and permanent glue surface to glue top of the baitwell to the seat top.
Basically it needs to last forever. .
First off, will this idea work/last forever? A little late for that question
, but you know I'll fix it if the pros. say,
WHAT!!!! and give we one of these.
.
Secondly, if this plan is a go.
What should I use to glue the baitwell to the seat top? At the most I'll end up with a 1/4 inch gap in some areas so I was thinking about epoxy thickened with woodflour but adding some chopped glass (translation- extra galss that I've cut up with scissors
) to ensure that the glue wouldn't crack. I've also considered laying a beed of 5200 around the outer most portion of the lip as extra security incase the glue joint cracked, (would you do that) but the only problem is that the epoxy and 5200 would surely touch and I'm not sure if that would cause either one not to cure.
This is not the place for a science project.
I know, a bit longwinded, but you know what they say about pictures.
Daniel.
Re: Murry's gf16
Posted: Sat Apr 04, 2009 1:18 pm
by Dog Fish
Daniel, how true that is about the pics. You would have only needed 2 or 3 sentences and pics and been good to go. I am still not sure,but if I understand you correctly than I don't see why the 5200 wouldn't do the trick.
Re: Murry's gf16
Posted: Sat Apr 04, 2009 1:25 pm
by TomW
Murry does it go down tight inside the seat so that it won't move around. I'll assume it does. If so all you need is your goop you described or you can use the 5200 by itself, weight it down same as for epoxy and let it set for a week, after that it won't move.
Tom
Re: Murry's gf16
Posted: Sun Apr 05, 2009 7:56 pm
by Murry
I don't see why the 5200 wouldn't do the trick.
Thanks Brian, I may end up just using the 5200 for the flexibility.
Murry does it go down tight inside the seat so that it won't move around.
Yes it does Tom. The baitwell is glued to the bottom of the boat and it is encapsulated in two part foam. The top of the baitwell is 1/4 inch shy or less of being flush with the midseat frames. So when I glue the midseat top down I will also need to glue the seat top to lip of the baitwell that a described on my last post to permanently seal it. The baitwell is a permanent structure on this boat and when I glue the seat top down I won't beable to see the sealing area because the baitwell hatch stops are very close to the inside edge of the baitwell. So I won't be able to check the seal and wouldn't ever know if it was leaking.
I basically need to glue it and forget it.
I don't have any long term experience with 5200, but if it's permanent I would prefer to use that because I'd be concerned that an epoxy glue could crack from the seat top flexing over time.
Does that help?
I just had this thought, It might be a good idea to drill a small air releif hole in the seat top to keep the air from blowing a hole in my baitwell joint as I set it in place and weight it down. I'll juts fill it when I glass the top. Anyone ever done that?
Re: Murry's gf16
Posted: Sun Apr 05, 2009 8:47 pm
by Dog Fish
Good thinking with drilling a air relief hole, that will really help. I have used a lot of 5200 over the years and used it in a few places where I shouldn't have, very hard if not impossible to remove in some applications. There is no doubt in my mind if you slopped a bunch of 5200 on the roof of a VW and stuck it under a bridge it would stay there.
Re: Murry's gf16
Posted: Sun Apr 05, 2009 10:16 pm
by TomW
I agree with MD for this application go with the 5200 and I'd go with the white as it won't heat up as much as the black. I'd drill more than 1 hole also.
Tom
Re: Murry's gf16
Posted: Sun Apr 05, 2009 10:43 pm
by Murry
There is no doubt in my mind if you slopped a bunch of 5200 on the roof of a VW and stuck it under a bridge it would stay there.
That says alot.
I'd go with the white as it won't heat up as much as the black.
I'll go with the white, although in this case it won't see the sun because the baitwell lip is under the seat top.
I wish I could post a picture.
I'd drill more than 1 hole also.
Will do.
Thanks guys
Re: Murry's gf16
Posted: Mon Apr 06, 2009 11:10 pm
by Murry
The gallery isn't up yet, but the pictures are back on my thread so I thought I would post this old baitwell picture incase there's any confusion about my glue question. I have since made a lip around the top of the well extending over the foam (it now looks like an upside down top hat)
I'm planning to permanently glue the the lip of the well with
5200(lip not in picture) to the bottom of the seat top when I glue the seat top to the frames and cleats with epoxy glue.
Hope the old picture helps to explain my plan a bit more. Anyone see any problems with this plan?
Thanks for the help
Re: Murry's gf16
Posted: Tue Apr 07, 2009 9:34 am
by Dog Fish
Murry
Whats the lip look like, some kind of glass ring or
The 5200 will be on top and squeeze around to fill voids and than have a bead around inside of well and top. Is that right. If so, than I don't see any reason why it won't work . 5200 is very forgiving.
Re: Murry's gf16
Posted: Mon Apr 13, 2009 12:04 am
by Murry
Building has been a bit slow for me, but since the gallery has been down for a couple of days these pictures will make it look like I've been very busy.
I don't want anyone to miss anything, nor do I want a mistake to go unoticed before it's to late.
So here you go.
baitwell lip and foam rounded before laying glass to form glueing surface.
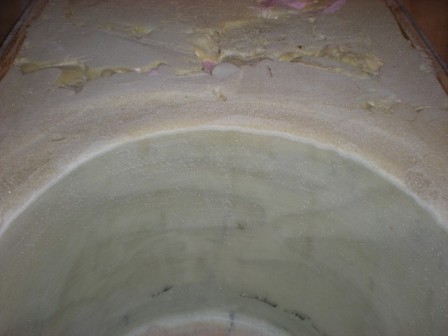
after laying down two layers of 12 oz. The brown areas are thickened epoxy used to fill some lows before laying cloth.
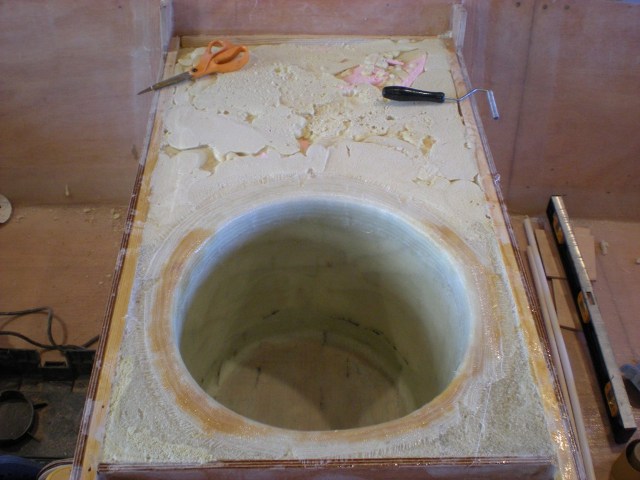
After that cured I began to coat my compartment areas with pigmented epoxy.
I used alot more epoxy than I needed to because I wasn't adding enough pigment at first. It took a couple of coats before I achieved the uniform covering that I was looking for. If/when I do this again it will go much better. Alot of pigment and several light coats to avoid runs, but hey, we're talking bilges and compartments here, right?
I was discouraged with the finish, but then I helped my Dad install a battery switch on the transom of his Seahunt. My bilge doesn't look so bad afterall.
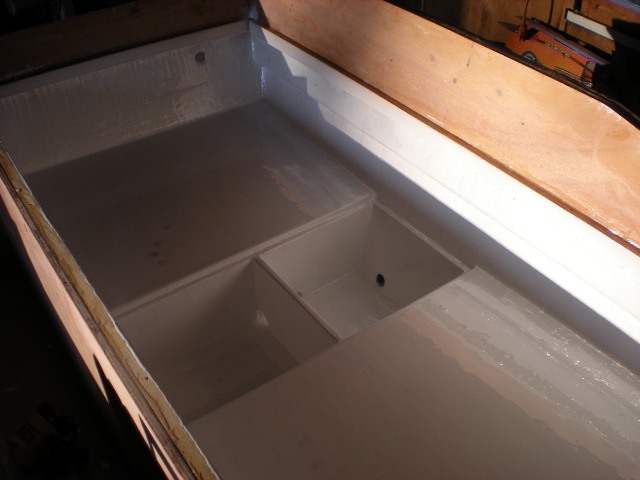
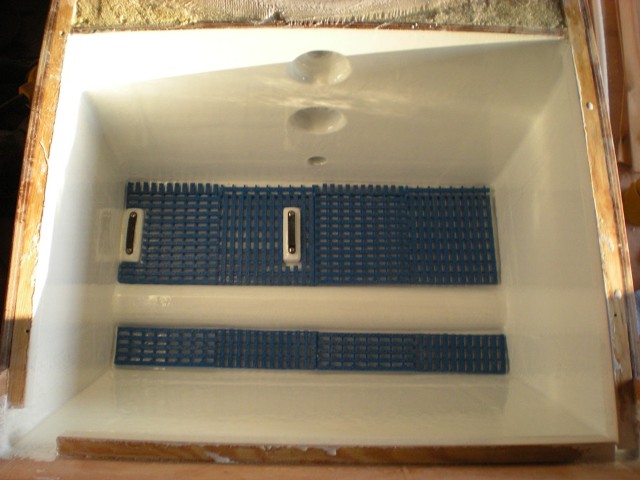
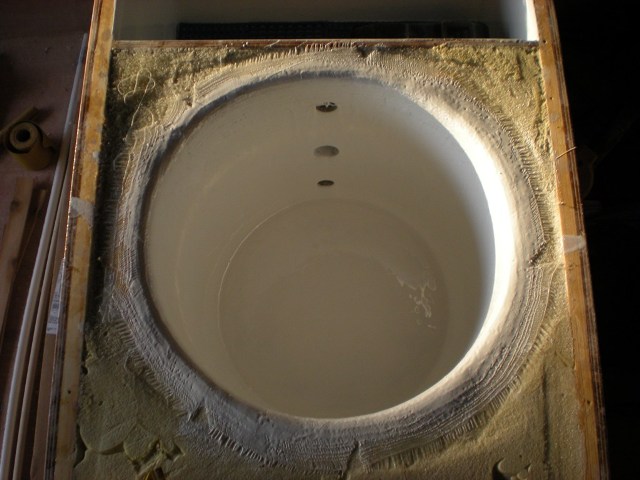
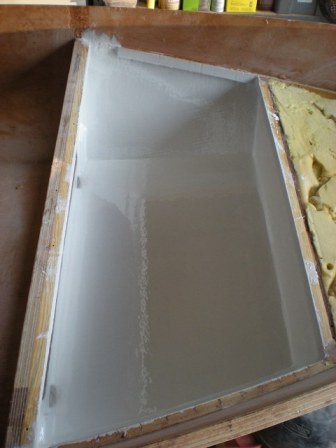
I thought it would be easier to fit out some of the components before gluing down the seat tops, so I worked on some of the rigging next.
rear compartment-- I'm using an electric start engine so I decided to install two high amp lugs in the rear for easy engine harness removal.
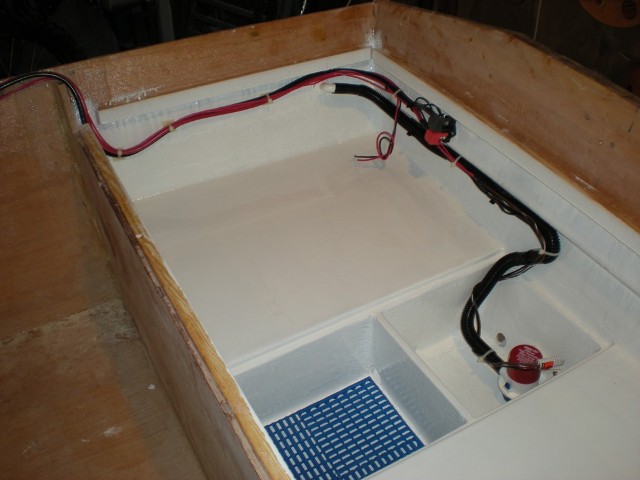
starboard side of midseat- I'll be using a high amp lawn mower battery (300 amps) for cranking.
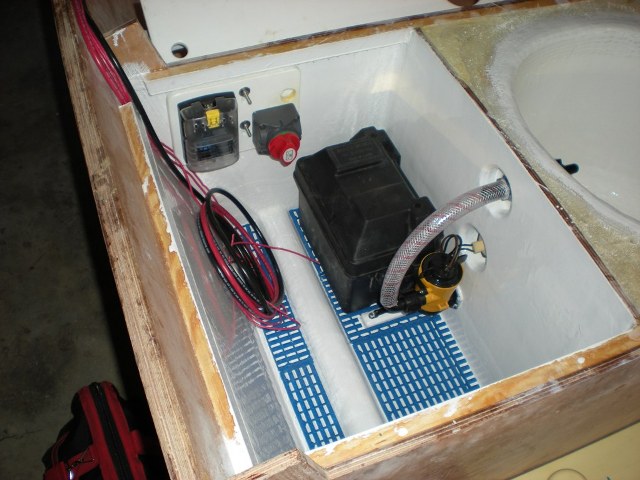
Baitwell-- I'm using 4200 for all of the hardware and fittings that may need to be removed in the future.
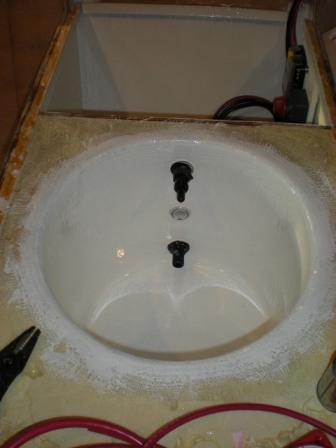
This will be my casting deck storage layout-- I will be running two 3 gallon gastanks one on either side of the anchor.
I wasn't able to get a 6 gallon tank to fit through my opening so I came up this. I actually like how the anchor fits in between the
tanks for easy removal and the tanks can be removed without moving the anchor. The bungee cord holding the tank is just for the picture. I haven't found the straps that I'll be using to tie down the tanks yet.
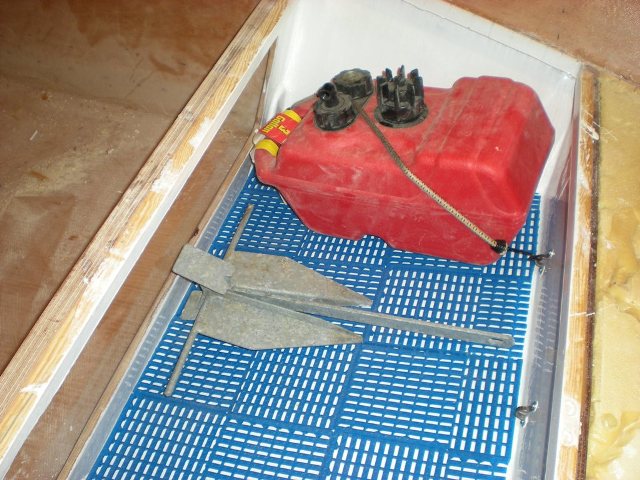
This picture shows the tie down locations.
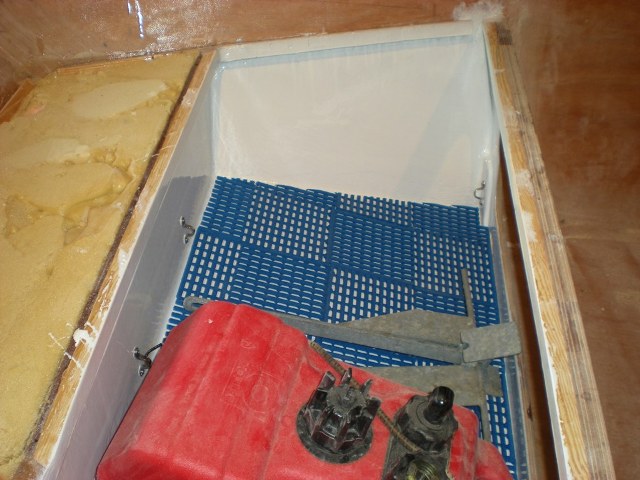
There you have it. I won't beable to work on the boat for a week or so, but I'll be gluing down my seat tops next chance I get
.
Exciting news for me.
I bought a used yamaha 25hp with very low hours. It's a short shaft pull start only , but for parts I purchased a long shaft electric start with bent propshaft.
I'll just convert the short shaft into a long shaft electric start.
I'll let you know how it goes.
Check this baby out. I couldn't believe how clean it was. It's a 95 model
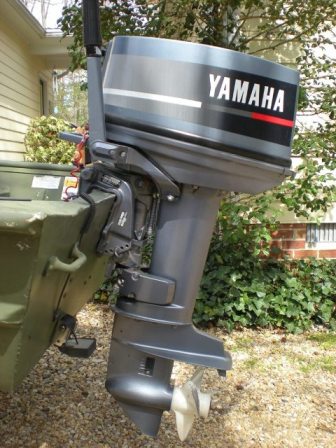
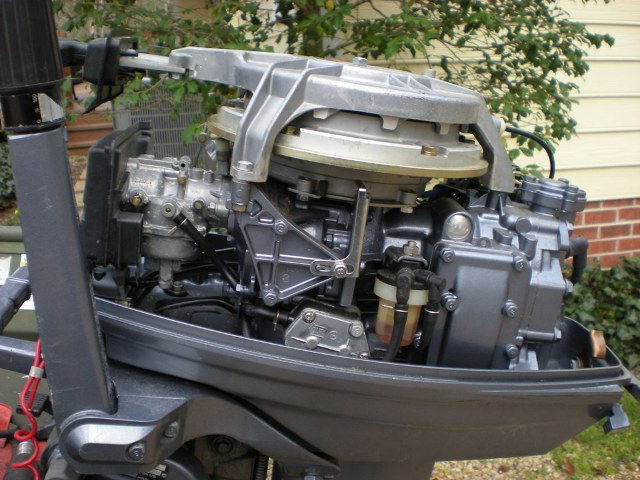
Let me know if you see any problems. Thanks.
Re: Murry's gf16
Posted: Mon Apr 13, 2009 9:18 am
by Dog Fish
Daniel, it looks like good progress to me. For the bait well and seat top I would just seal with the 5200 like you said, it will be perfect for that application. The Yamaha looks great, that is what I am looking for also a Yam 25hp 2 smoke. If you don't mind me asking how much ya had to give for it, to give me an idea. I have been looking on Craigslist but most have been in rough shape, I can find lots of 15hp. Your boat is looking good and you are starting to get to the fun stuff. Good job.
Brian
Re: Murry's gf16
Posted: Mon Apr 13, 2009 9:34 am
by wegcagle
You've made me a believer in the pigmented epoxy for the storage areas
That looks incredible
Re: Murry's gf16
Posted: Mon Apr 13, 2009 10:12 am
by peter-curacao
Very high Wow factor, I admire your courage with the motor project good luck with that.
Re: Murry's gf16
Posted: Mon Apr 13, 2009 10:17 am
by Cracker Larry
Beautiful
She is really coming together. I need to get some of that rubber mat
Let me know if you see any problems.
Unscrew that fuel filter and clean out that old orange varnish that's pretending to be gasoline
Re: Murry's gf16
Posted: Mon Apr 13, 2009 12:30 pm
by Murry
Thanks for kind words gentlemen.
If you don't mind me asking how much ya had to give for it, to give me an idea.
Not at all Brian. I had to buy the whole boat to get this engine. I paid 1800.00 for the whole rig and sold the boat and trailer two days later for 700.00. So I've got 1100.00 in this engine. Wich is a good price for an engine in this condition for this area. It only has 10-20 hours of use in fresh water.
(rare find good luch finding yours buddy) The longshaft 25 doner cost me 225.00 but it included a new propshaft wich retails for just under 200.00. I'm may try to sell the rest of the hardparts on ebay when I finish
, but I'll keep the CDI and coil for spares. I'm trying to sell my electric start Mariner for 1100.00 to recouple the 25 hp cost minus the engine for parts, hoping to break even.
The parts engine has been abused but the longshaft parts that I need to make the conversion are in fine condition. The manual start even has a lighting coil, it's just not used. Well, not yet anyway.
You've made me a believer in the pigmented epoxy for the storage areas
Thanks Will, I think I could get it close to perfect next time.
1.
Mix in atleast 25% pigment by volume. I started out way to thin on pigment and I used alot more epoxy than I needed to. Let's just say that my compartments, are incapsulated for sure.
2. I was to worried about getting it done in as few as coats as possible and as a result I had alot of runs. I think it would be difficult to do it completely run free because epoxy stays wet for so long, but my coats were way to thick. Mainly because of not using enough pigment. (I was trying to get uniform coverage way to early with the amount of pigment that I was using)
3. Thin coats. Thin coats. I cut in the corners, cleats, ect. with a chip brush and pulled the excess away from those areas with what ever I was using to cover the field areas and poured more in the field areas when needed.
Hope this helps.
I admire your courage with the motor project good luck with that.
Peter, that's the only area I don't need help with.
Beautiful She is really coming together. I need to get some of that rubber mat
Thanks Larry, I really like it too. I first saw that stuff used in between the stringers (engine room) of the boat my brother fishes on. It looks sharp and really protects the finish.
Oh yeah, I'll take care of that varnish, I probably shouldn't trust that 14 year old dry water pump either.
Re: Murry's gf16
Posted: Mon Apr 13, 2009 1:32 pm
by Dog Fish
Daniel, thanks for your reply. That was a great deal on the yam, especially a fresh water low hour and very clean motor. I would not have thought twice about that deal, and then get the money for the trailer and boat to boot. Good find. Some of the people on craigslist where I have been looking are out of there dam minds with the prices they are asking. I am in no hurry, I will keep looking and the right deal will come along.
Re: Murry's gf16
Posted: Mon Apr 13, 2009 5:48 pm
by BassMunn
Daniel boat is looking awesome! The pigment coated hatches look really good, when I did my inner hull the pigment looked all transparent and well pretty ugly. I was actually going to paint after my last coat of epoxy to get that finish, but seeing yours gives me other ideas.
That motor looks like it is in good shape, I had one exactly like that recently, but it was way more beat up.
Re: Murry's gf16
Posted: Mon Apr 13, 2009 6:21 pm
by Murry
Thank You Shannon,
Congradulations on that stringer of fish the other day.
7 lbs. That's a pound from citation here in Virginia, U.S.A.
Yeah, You probably didn't use enough pigment. Shine really convinced me to stick with the epoxy, because it's high solvent resistance and I don't regret it.
Re: Murry's gf16
Posted: Mon Apr 13, 2009 6:30 pm
by peter-curacao
Murry wrote: Shine really convinced me to stick with the epoxy, because it's high solvent resistance and I don't regret it.
did you just rolled it on if so what kind of roller ? thanks in advance
Re: Murry's gf16
Posted: Mon Apr 13, 2009 11:06 pm
by Murry
peter-curacao wrote:did you just rolled it on if so what kind of roller ? thanks in advance
Peter, I used a chip brush for all the hard to reach areas and I tried several things for the large areas. My favorite tool for applying unthickened epoxy has been a plastice spreader so far. I really don't like rolling epoxy that much. I've found that the foam rollers absord alot of epoxy wich causes the epoxy in the roller to kick off before completeing the job sometimes. I tried the West Systen 800 series roller this time, which has a very thin nap (1/8) but the foam seperated from the liner in a matter of minutes.
I thought they were epoxy compatable.
My favorite tool for applying the pigmented epoxy in the field areas ended being "shur-line edger refills". They're sold in pairs for a little over 2 dolars at your local big box store. I liked them, becuase I could use them just like a spreader, but they allowed me to put down a more uniform slightly thicker coat. I used the refil by itslef holding it like a spreader. They have a lot of flex to them and the 3/16" deep nylon strands don't waste to much epoxy. I'll probably use them to apply and smooth out my graphite coat on my bottom. Give'em a try.
Hopefully other folks will chime in about their experiences. I know we can all learn a thing or two with the help of various methods explained.
Re: Murry's gf16
Posted: Tue Apr 14, 2009 7:03 pm
by BassMunn
Thanks Murry, that 7 pounder was nice, it was my 4th biggest, my biggest to date is just over 10, got it last year, but they don't come by too often.
I need to check with my local supplier for epoxy, I seem to remember them saying that I couldn't use more than 10% pigment in my epoxy, I'll check again because it saves me an extra process and it looks nice and as you say it is more solvent resistant.
Have to agree on the foam rollers, I get 1 pint on with the roller no problem but on the second mix it starts to disintegrate (normally the tip pops off
)
I'll scratch around to see what else I can find, your idea sounds nice.
Re: Murry's gf16
Posted: Tue Apr 14, 2009 10:51 pm
by Murry
Yeah, everywhere I look I read of different ratios used with the pigment.
I had to order may last 4 ozs. locally and the bottle said to mix 1 oz. per quart of mixed epoxy, which is roughly a 3% mix if my math is right. I didn't follow the directions.
I think you'd get decent coverage at 10%. Just keep applying thin coats until you're happy with the coverage.
Lucky Louis used Interlux Bilge Kote for his compartments and was happy with the product. Might be worth looking into, especially if you're trying to avoid runs at all costs.
About those edger refills, their texture is similar to a mohair roller, if that helps.
Over 10.
. Nice fish. I've caught a couple over 8, but I fish farm ponds and that's cheating.
Re: Murry's gf16
Posted: Fri Apr 17, 2009 4:07 am
by cape man
Had not visited your build for a while. You're making great progress! Love the baitwell and the motor you snagged. She will haul butt.
Re: Murry's gf16
Posted: Sun Apr 19, 2009 10:20 pm
by Murry
Thanks alot capeman, I'm enjoying watching your OD come together as well.
Unfortunately, I will need to take a 3 month break from my boat starting in May. My goal is to have the construction completed by then so I can jump on the fairing in August. Thought I would save the fun part for the hottest time of the year.
I still have alot to do since I'm building an inwell, but I've gotten premission from the Mrs. to work steady for the next two weeks.
Wish me luck.
I was able to finish my engine conversion last week and it went very well. I had a bit of a scare, because the parts engine (long shaft) wasn't the year it was advertised as, but the parts I needed were correct so I now have a longshaft electric start with very low hours.
I'll post a picture of the engine with longer legs tomorrow.
Re: Murry's gf16
Posted: Mon Apr 20, 2009 7:44 am
by Murry
Engine pix's
More evidence that the engine has little use and fresh water only (or atleast flushed properly). It's nice dealing with honest sellers. I've been burned before.
The yellow outlines the water jacket.
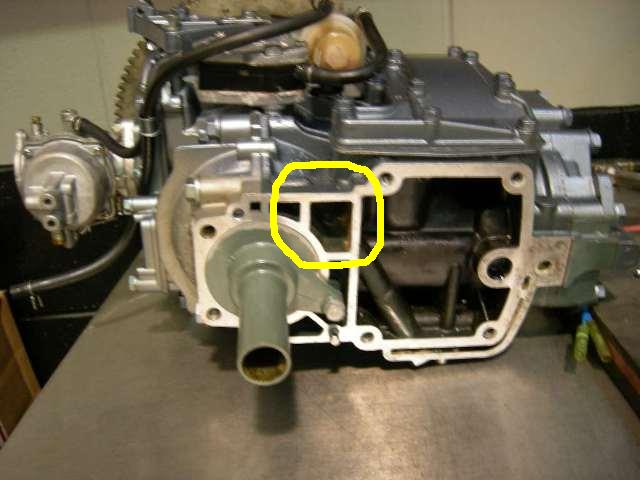
After transfering the longshaft housing and drive shaft. You can see the color from painting the housing
.
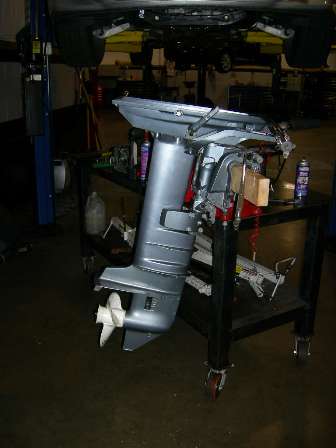
And it's complete. My favorite part is the battery cables spilling out of the front.
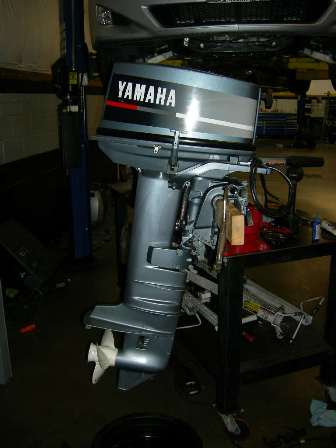
Re: Murry's gf16
Posted: Mon Apr 20, 2009 8:08 am
by bernd1
Hi Daniel,
I think our GF's move very fast with these engines - 25HP it seems to be enough.
BTW, how heavy is your boat at the moment ? What do you think? It would be nice to know how much the weight is.
I think close to 200pounds/ 100kg.
Bye
Bernd
....I have to round my outside edges at the bottom to tape them ......bye.
Re: Murry's gf16
Posted: Mon Apr 20, 2009 8:38 am
by Murry
I'm scared to weigh mine Bernd.
I don't have a clue. I worried mine is pushing over 300 lbs. I need to find a scale once I'm done.
Re: Murry's gf16
Posted: Mon Apr 20, 2009 10:16 am
by mecreature
sweet job murry.
Re: Murry's gf16
Posted: Mon Apr 20, 2009 10:20 am
by BassMunn
Motor looks sweet Daniel, you can see it's done very few hours, should have seen what mine looked like when I removed the block
Re: Murry's gf16
Posted: Mon Apr 20, 2009 10:51 am
by Murry
Thanks alot guys,
I'm very exicted about the way things turned out.
I would've had to raise my transom to make my 15hp (mariner with 22.5 inch shaft) be perfect and I couldn't spring for a new 25hp (2700.00 for a longshaft electric start). Who would have thought that these two engines would come up forsale on craigslist one day apart.
I like it!
Re: Murry's gf16
Posted: Mon Apr 20, 2009 7:54 pm
by ks8
Murry wrote: I worried mine is pushing over 300 lbs.
I'm afraid to ask the trailer dealer to weigh my CV16 while fitting her to the trailer. Maybe I should have the (2) batteries and the 83 lb engine mounted when he weighs it, so everyone here can get a laugh out of it.
And then SDS can post *told you so...*
300 lbs? 16 foot with that beam and roominess? 300 lbs? That's nothing, even if its more than 200!
Just call her *Linebacker*...
After the line goes out, you do want it back, right?
Re: Murry's gf16
Posted: Tue Apr 21, 2009 8:07 am
by Murry
Just call her *Linebacker*...
After the line goes out, you do want it back, right?
I like your logic.
I glued my seattops down last night (pixs to follow). I noticed the other day that my midseat frames had bowed inward towards to the foam areas.
Maybe the heat from the foam caused them to warp, I don't know. Hind sight is always 20/20. I would have installed a brace there had I known.
Let me tell you how I tried to fix it. I used lag screws and two pieces of angle iron 2x2 1/8 of an inch thick 3 feet long. Stronger than wood right
I placed the steel across the midseat frames from port to starboard and spaced them away from the frames with half inch ply on the ends. I then used lag screws to pull the wood to the steel.
Yeah right.
The frames didn't move but the steel did
. I gave up and glued my seat tops down.
The midseat will just have to have an hour glass shape.
Anyone ever have this happen?
Re: Murry's gf16
Posted: Tue Apr 21, 2009 10:26 am
by Daddy
Hey, an hour glass shape is what made Marilyn Monroe a star, and your boat is a she right?
Daddy
Re: Murry's gf16
Posted: Wed Apr 22, 2009 11:54 am
by Murry
Daddy wrote:Hey, an hour glass shape is what made Marilyn Monroe a star, and your boat is a she right?
Daddy
The steel worked better than I thought, after pulling them out a bit and routeing the seat tops you can hardly see it. Turned out much better than I thought it would.
Have I said how much I like using a router lately
. The seat tops turned out very nice. I haven't had time to update with pix's but they will be on here soon enough.
Hope everyone eleses progress is going smoothly,
Daniel
Who's taking pictures this weekend, I'm unable to come but I sure would like to see those boats.
Just don't take a picture of the food, I don't think I can take missing the grub.
Re: Murry's gf16
Posted: Mon Apr 27, 2009 12:22 am
by Murry
It's to late for alot of words tonight, but I want to get these pictures on here so I'm not trying to do it before work tomorrow.
Trying to sraighten the midseat frames. It actually worked nicley, after I glued and routed the top it's hardly noticeable.
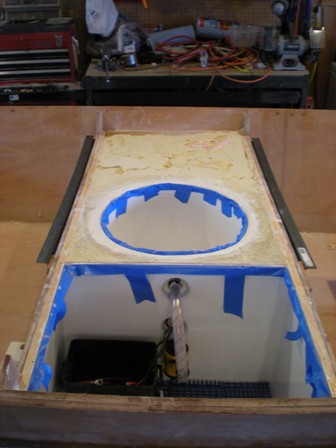
Next four pix's are of seat top to frame joints and view's from the bow and stern.
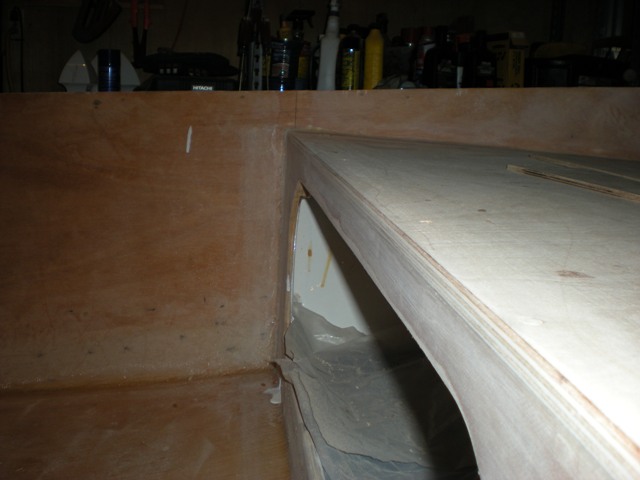
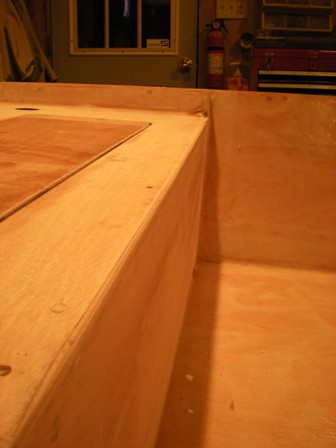
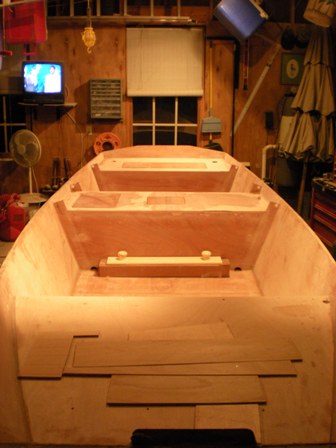
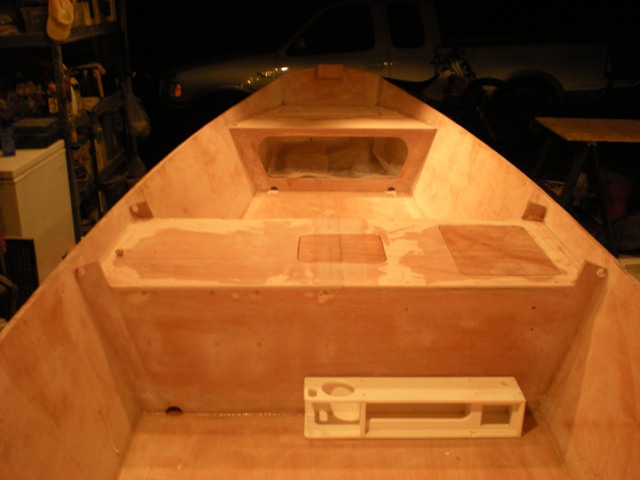
I know that brick glued on the tip of the front transom really stands out in the last pic, but don't worry, I'm not finished with that yet.
I'm adding an inwell to hide my wiring and fuel line on this boat and this is how I'm building it. Don't be to hard on me here, this is my first boat and deffinately my first inwell.
I just decided to go for it.
Be sure to tell me what you think, even if it isn't good.
I decided to glue in pvc inserts after precating my holes with two coats of epoxy. I did this because I didn't want to just rely on the epoxy coated wood, I feared that the wires could eventually wear through the epoxy coating exposing the wood after several years of use and I thought gluing these inserts in would save the epoxy wasted from filling and drilling large holes.
Again, after precoating the holes with two coats I cut and installed the inserts like so. The tape is to keep the glue from running into the insert while it cured.
close up before gluing..
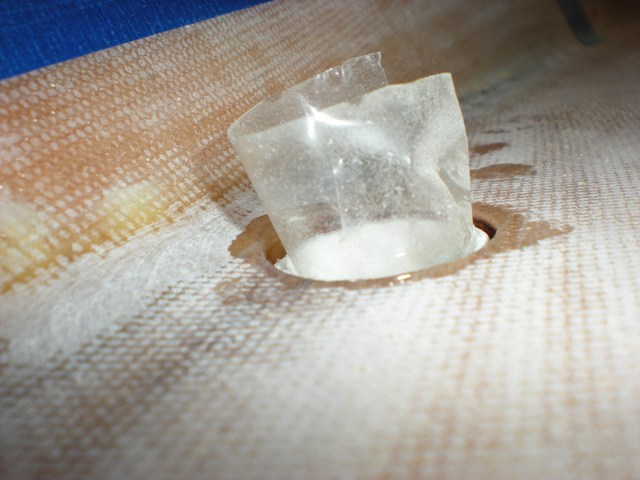
after...not the same insert but you get the idea.

I just removed the tape and cleaned the edges with my dremel. I made sure to round the sharp epoxy edges so they wouldn't cut into the wires insulation when rigging.
In the next picture you can see how I'm running the wires from the midseat to the rear. On the port side the fuel line will run from the rear seat to the bow compartment.

Excuse the messy pictures, I clean up when I'm finished, and I wasn't finished.
Next are pictures of the side section that will be glued up this week.
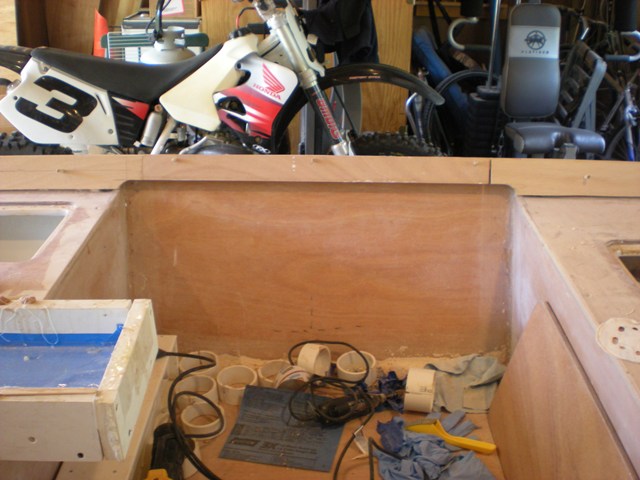
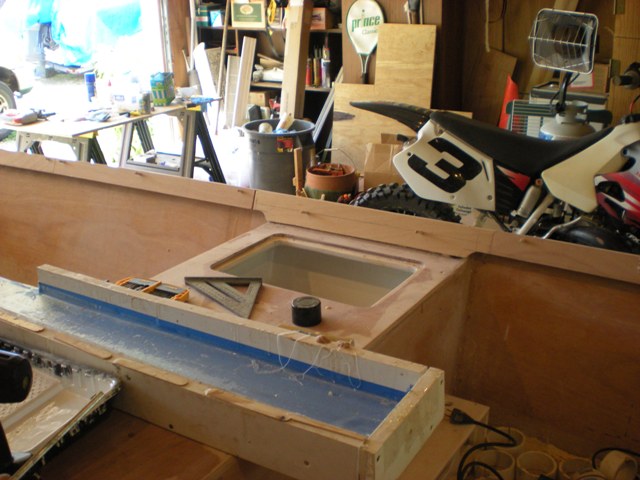
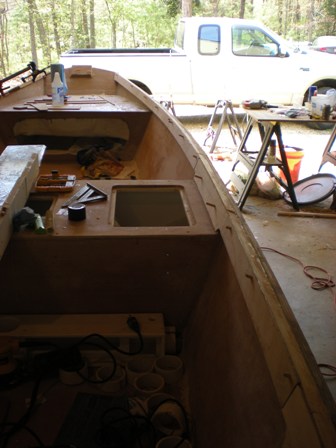
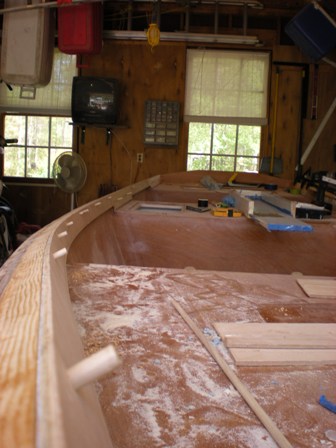
This evening I put my last of two seal coats using pigmented epoxy on the back side of the side sections and all other exposed areas of the inwell that won't get any sunlight. I'll fair prime and paint as far as I can into the inwell, but I didn't want to have any areas that looked unfinished. That's why I used the pigment.
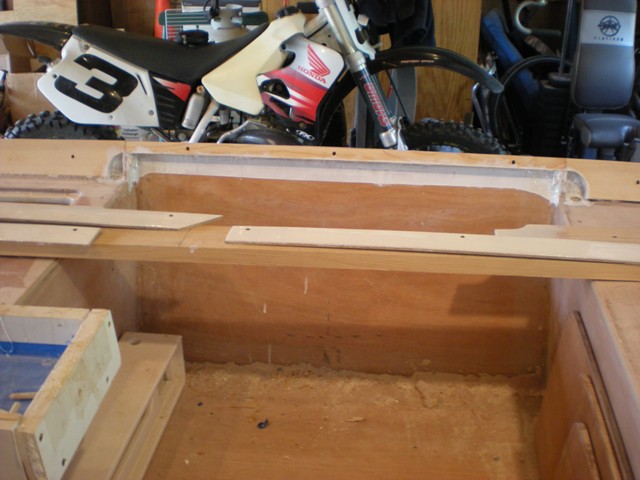
Next I'll glue on the sides, glue up the cap, shape them with a router and glass them when I glass the mid and rear seattops to tie everything together.
What do you think?
Does it look O.K.?
Almost forgot.
This picture will help explain the construction of the inwell.
If posted it before, not trying to be redundant but I thought it would help.

Re: Murry's gf16
Posted: Mon Apr 27, 2009 10:13 am
by ks8
Just one thought, based on the drawing...
Since there is no bottom on the inwale, you could either add one that is screwed on (removeable), or realize that the cabling might sag down below the the bottom edge and *show*. You could also just add another ring, (or some other suitable support), midway for more cable support. I like the idea of a removeable cover, to make inspection and cable replacement much easier, and keep buggers from hiding out up in there. Ah, the joys of having a wasp crawl out just as you grab the rail... don't ask. A cover would need to fit well and be rattle proof, but ultimately is not necessary... just a thought. You could make the inwale so it has a bottom on it already and make that whole section of inwale removeable with flathead countersunk screws holding it on. Several approaches, though it would probably look better bonded and seamless.
That span might be exagerated in my head and you may never have a sag problem at all. The pictures are showing nice progress.
Re: Murry's gf16
Posted: Mon Apr 27, 2009 10:43 am
by mecreature
you have been jammin.. looks great..
I got a couple sags.
Re: Murry's gf16
Posted: Mon Apr 27, 2009 12:03 pm
by Murry
ks8 wrote:Just one thought, based on the drawing...
Since there is no bottom on the inwale, you could either add one that is screwed on (removeable), or realize that the cabling might sag down below the the bottom edge and *show*. You could also just add another ring, (or some other suitable support), midway for more cable support. I like the idea of a removeable cover, to make inspection and cable replacement much easier, and keep buggers from hiding out up in there. Ah, the joys of having a wasp crawl out just as you grab the rail... don't ask. A cover would need to fit well and be rattle proof, but ultimately is not necessary... just a thought. You could make the inwale so it has a bottom on it already and make that whole section of inwale removeable with flathead countersunk screws holding it on. Several approaches, though it would probably look better bonded and seamless.
That span might be exagerated in my head and you may never have a sag problem at all. The pictures are showing nice progress.
Thanks for reply ks and the great ideas.
I almost didn't post list night because I didn't have the time (past my bed time) to explain my plan in detail. Oh well.
I will have sag issues for sure if I don't install some type of support. I have it spaced out (1-1/8) to allow for sections of pvc pipe to be used to support the wiring (starboard) and fuel line (port) to keep it hidden. I'm not going to run a continous piece of pipe because I could never pull the wire through that length of pipe given the diameter I'm chosing to use to keep the inwell as slinder as possible. I'm using 3/4 inch pipe wich has an outside diameter just under 1-1/8. For rigging I'm planning to run the wire from the rear seat, then put the wire through three pieces of pipe 6 inches in length. I'll then run the wire into the mid seat pull it tight and glue the pvc sections in place under the inwell with 4200 so that they can be removed for service if needed. Seems like a difficult process but I was trying to avoid using larger pvc to keep the inwell from looking to bulky on a small boat.
I didn't want to have a gf with a gunnel.
The inwell will not be removable, (I had to use scraps to make it, that's why it's so choppy) it will be completely seamless from bow to stern and seamless at the seat tops as well. It should come out looking clean and be easy enough to fair, hopefully.
mecreature wrote:you have been jammin.. looks great..
I got a couple sags.
Thanks mecreature. I only have another week to work until haveing to take a break until August. I'll be working every evening this week starting tomorrow night to get it done. I'm to excited about seeing it come together to have to stare at the unfinished construction for a couple of months.
Re: Murry's gf16
Posted: Mon Apr 27, 2009 6:39 pm
by topwater
Murry you do real nice wood work
Re: Murry's gf16
Posted: Mon Apr 27, 2009 10:13 pm
by Murry
Thanks for that compliment topwater. I'm in unchartered waters for myself with building this inwell and I wasn't sure how it was going to turn out at firts, but I think it's taking a nice shape. I'm planning to glue the sides and cap on tomorrow night and I'll hopefully have it fully shaped on Wednesday night.
We'll see how it turns out.
Thanks again,
Daniel
Re: Murry's gf16
Posted: Fri May 01, 2009 8:21 am
by colonialc19
Daniel,
I like that inwhale, great idea for hiding those wires, that pigmented epoxy in your bilges/compartments looks great too, wont be long now, oh and those pics a few pages back, I didn't see a Lexus emblem anywhere on that lil' motor, looked more like a Yamaha somebody was workin' over on their lunch break
The GF looks great!
Daniel
Re: Murry's gf16
Posted: Fri May 01, 2009 10:16 am
by Dog Fish
Daniel, I think your gf16 is coming out great, that's got to be hard knowing you will have to take such a long break from building especially at this stage of your build. You have come up with some real good ideas along the way. Very nice
Brian
Re: Murry's gf16
Posted: Fri May 01, 2009 12:29 pm
by Murry
Thanks alot Daniel and Brian.
I didn't see a Lexus emblem anywhere on that lil' motor, looked more like a Yamaha somebody was workin' over on their lunch break
I wish I could've had it finished over my lunch break.
That was a couple of envenings, half a Saturday and envolved repainting a long housing and breaking apart an old beat up lower unit to retrieve a shift shaft and drive shaft. Not to mention that I dissassembled the doner in my poorly lit tool shed with out the right tools. I always seem to leave something behind that I need
but who wants to see pictures of all that stuff.
that's got to be hard knowing you will have to take such a long break from building especially at this stage of your build.
Bitter/sweet Brian. I'm excited about focusing on planning a trip overseas with my church and If I don't put the boat to the side the trip planing won't get my best. Unfortanetly my mind is about as one track as you can get. Besides, that will give me plenty of time to visualize the faring process and decide on paint colors. I should be able to save enough to buy good paint and the remaining accessories that I'll need to complete her this fall.
Don't worry you'll see a progress report the second or third week of August.
Speaking of progress. I'm making some progress towards haveing the interior construction done this weekend.
I've finished gluing the inwell up and I gave them some life last night. Here are the pix's of the inwells before detail fillling, fillets and fiberglass work.
after gluing all the pieces....
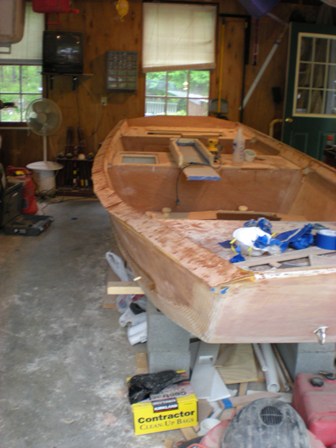
after giving them some shape....
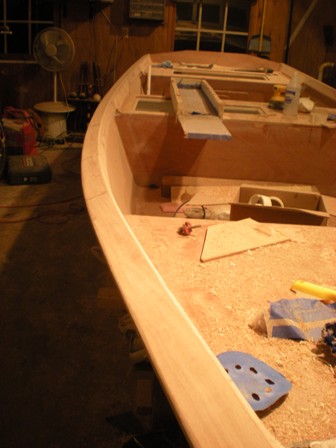
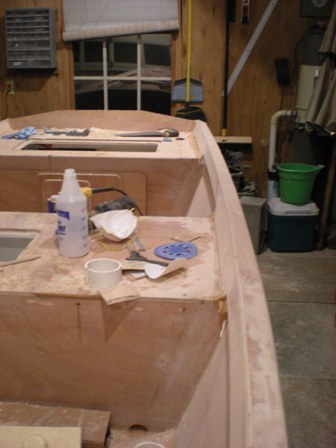
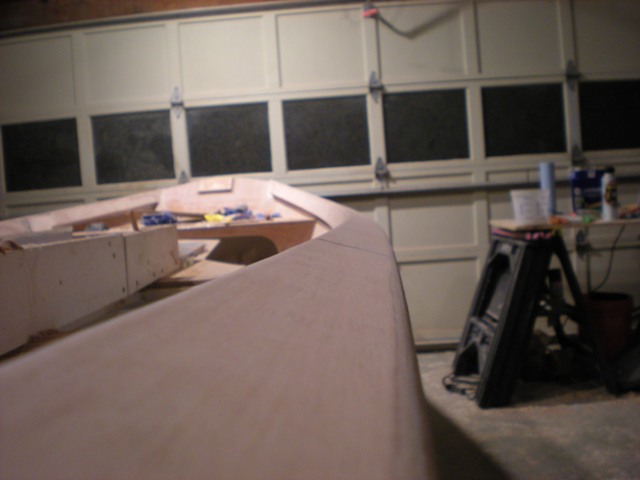
It's a little to tight to get good pictures of the whole boat, but I should be able to give her some fresh air when I give the garage a good cleaning in a few weeks and I'll be sure to take some better pictures when I do that.
Re: Murry's gf16
Posted: Fri May 01, 2009 12:40 pm
by Cracker Larry
Very well done
I've never seen a GF with inwales, looks real good
Re: Murry's gf16
Posted: Fri May 01, 2009 1:31 pm
by Dog Fish
Daniel, I hear what ya are saying, the boat will still be there waiting for your attention when you are ready. I like those pics it really shows how nice the in wales are going to be. nice
Re: Murry's gf16
Posted: Fri May 01, 2009 2:09 pm
by bernd1
Nice,clean work.
An other kind of a GF16 with the inwales - looks good.
Any choice taken about the colour of your GF? A light black
.
Next week - I hope- I planed to glass the bottom and to glue the runners, sprayrail.
Good luck with your further work!
Bye
Bernd
Re: Murry's gf16
Posted: Mon May 04, 2009 12:35 pm
by Murry
Sorry for the late reponse guys, I haven't been on line all weekend. I've been busy again.
Thanks alot Larry, Brian and Bernd, I thought they looked good, but I'm a bit partial.
It's good to know that I'm not alone on that one. I don't want to build an ugly boat.
I'd appreciate some opinions/advice in the following as well. Before covering the inwhale in 12 oz, I had to build up and shape the front and rear transoms where they meet the inwhales. I started by building damns at both rear corners and across the bow to build up the areas with glue.
Like so...
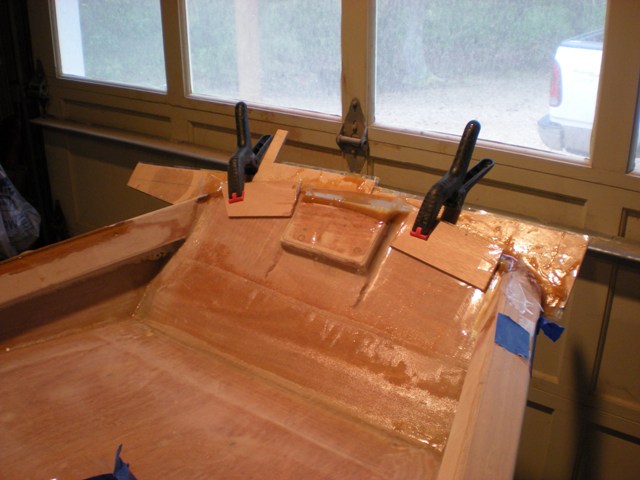

I then used a grinder, sureform and DA to bring them down to a shape that I thought looked right.
After rough shaping.
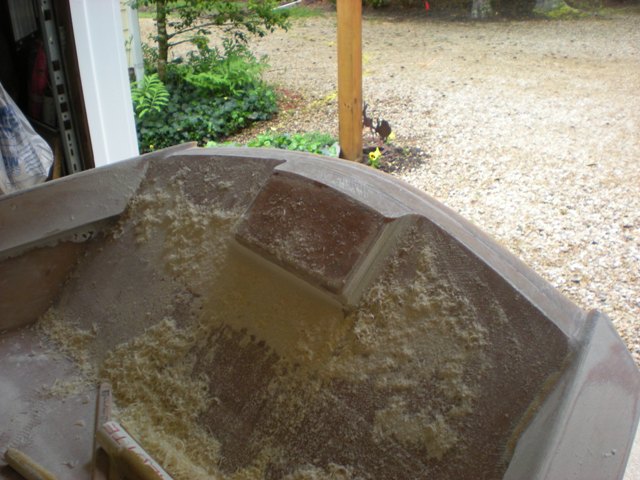
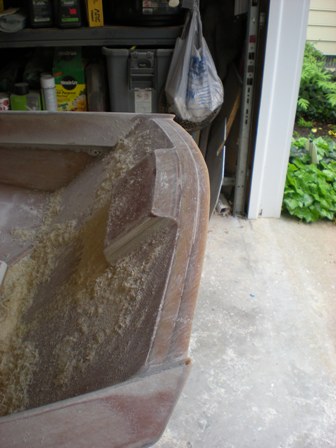
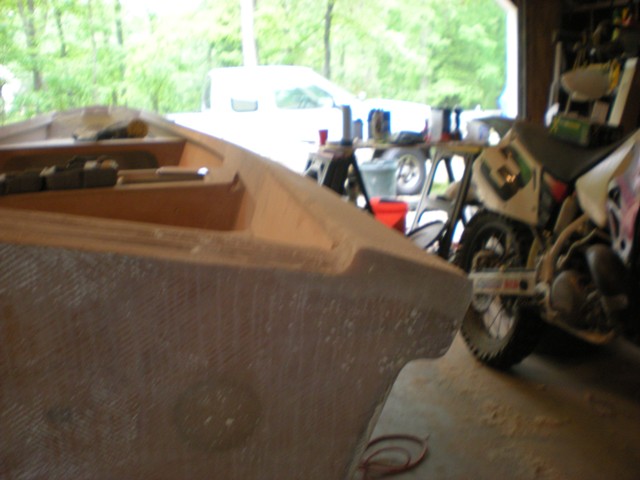
I like the rear transom but I'm unsure about the bow.
I just wanted to get them both knocked down so that I could get the inwhales and seat tops covered in glass over the weekend and as far as shaping I can fine tune everything before I start fairing her out in August.
The two things I don't like about the bow are:
1. It's to sharp, which makes it fragile.
2. I don't like the sharp points the tips of the inwhale create. I guess i can just equally dull everythink down until it seems to look right to me.
Any thoughts?
I decided to go through the transom for my rear seat drains.

I wanted the bottom of the drain to be below the seat top. That's why I took a bit of seat top whith the hole saw before filling.
A couple of pix's after glassing the inwhales and the seat tops. The plastic over the inwhales is helping to keep the glass down while they cure. I'll probably end up with a couple of air pockets which I'll grind out and probably just fill before fairing. (I'm not reccomending that you do that on your build but these areas I'm speaking of aren't structural and it won't affect the strength of the boat. For example I would never grind air out of the structural tape along the chine and just fill with glue. The proper technique there would be to glass over the area with proper overlap after removing the old glass.)
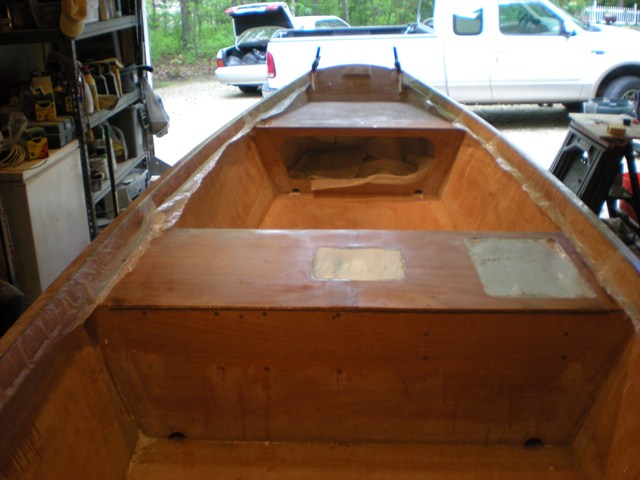

Well guys, I'm done for a little while. I wasn't able to completely finish my buiding phase, but I came close.
I still need to shape and glass my spray rails, reglass my strakes and make some spacers for my rear rod holders, but those things shouldn't take to long when I get back to it. Thanks again for checking out my build. Good Luck with your build or your future build.
Don't worry, if you're hangin' around this sight and haven't started one yet, you will.
Looking forward to watching everyones progress,
Daniel
I'll take some better pictures as soon as I can get her out of the garge.
Re: Murry's gf16
Posted: Mon May 04, 2009 1:15 pm
by Dog Fish
Hi Daniel
I agree with you at the bow, It looks like something is missing. My thoughts for a fix would be to put a piece of good looking wood and leave it unpainted. Some trim, a cap. The transom corners look great, good job. There is no way this will be a ugly boat.
It makes me want to build a GF16.
Brian
Re: Murry's gf16
Posted: Mon May 04, 2009 1:23 pm
by BassMunn
Geez you work quickly or I suppose you just put the extra long time in.
Boats looking really nice.
I actually like your bow area, but a cap like Dog Fish suggests might finish it off better.
Good luck on not working on your boat for the next 3 months, it would drive me nuts knowing it was sitting there just waiting for some attention
Re: Murry's gf16
Posted: Mon May 04, 2009 4:01 pm
by Murry
Dog Fish wrote:Hi Daniel
I agree with you at the bow, It looks like something is missing. My thoughts for a fix would be to put a piece of good looking wood and leave it unpainted. Some trim, a cap. The transom corners look great, good job. There is no way this will be a ugly boat.
It makes me want to build a GF16.
Brian
Thanks Brian,
I'm not sure why I hadn't thought of gluing up a piece of teak and leaving it natural. It would also protect the paint finish when I'm tied up at the bow. That will give me something to chew on. Thanks for the compliment as well. I've already made up my mind, I'm going for a yacht finish on this little boat.
That may change when I start fairing though.
Geez you work quickly or I suppose you just put the extra long time in.
I think the latter is true Shannon.
I feel like I work slowly, but I put alot of time in.
I'm glad you like the bow, but I do like the idea of having some wood serving double duty for the anchor line to rest on.
I'm sure I'll end up staring at it for awhile until I ponder up a final decision.
Re: Murry's gf16
Posted: Fri May 08, 2009 11:05 pm
by Murry
For the next three months I'm going to be slowly collecting the last things I'll need to finish the build. I thought I'd occasionally post some of those things here to keep my thread current, I don't want you guys to forget who I am.
Besides I've got a good thing going here. You know.. I ask the questions and you guys provide the answers.
I like it.
I was encouraged by more experienced folks on the forum to revisit how I was planning to rig my baitwell. So I did. Originally I was planning to manually fill the well and just recirculate the water with a 500 gph pump. I have since decided to pump fresh water (new water) in while using a stand pipe to maintain the desired water level. The benefit: the fresh water system will keep the bait alive much longer than a stand alone recirculating system.
To get this done I've decided to install a through hull scoop strainer (per Larry's suggestion) with a dual inlet baitwell pump to keep the bait happy. The auxillary inlet will be fed from the bottom of the baitwell so that I can still have the recirculating option.
This is a shot of what I was originally going to do...
and this is what I'll be going with, minus a couple of fittings and hoses...
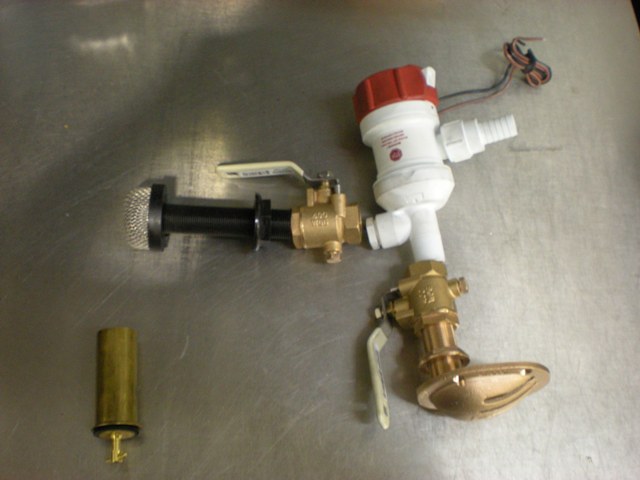
To make this happen I'll be gluing some scrap 1/2 ply down to beef up the bottom for the through hull.
That's plan so far. Anyone see any problems?
Re: Murry's gf16
Posted: Sun May 10, 2009 7:35 am
by cape man
Now we're talking! That will be one sweet bait well. Good choice on redoing it now.
Re: Murry's gf16
Posted: Sun May 10, 2009 7:49 am
by gk108
Check the valve and/or handle orientation on the strainer. As assembled in the picture, the handle won't let you open the valve all the way. Other than that, it looks good.
Re: Murry's gf16
Posted: Sun May 10, 2009 11:09 am
by Murry
Thanks guys
gk108 wrote:Check the valve and/or handle orientation on the strainer. As assembled in the picture, the handle won't let you open the valve all the way. Other than that, it looks good.
Yeah, I just slapped it together to take a quick picture. Thanks for looking out.
Re: Murry's gf16
Posted: Sun May 10, 2009 11:27 am
by bushmaster
Hi Murry
Your boat is looking beautiful. I was not following along, just trying to keep up with my build and staying hwalthy.
I love the bait well idea. I must admit I don't know a darn about bait well, so please give some details about how to go about building one and installing all the components. Pictures will be helpful.
Keep up the good work
Thanks
Bushmaster
Re: Murry's gf16
Posted: Sun May 10, 2009 11:59 am
by Murry
bushmaster wrote:Hi Murry
Your boat is looking beautiful. I was not following along, just trying to keep up with my build and staying hwalthy.
I love the bait well idea. I must admit I don't know a darn about bait well, so please give some details about how to go about building one and installing all the components. Pictures will be helpful.
Keep up the good work
Thanks
Bushmaster
Dogfish posted this link Friday, it really helps to explain the different plumbing options for baitwells and there operation.
Let me know if you have ant further questions, and I'll try to help.
As far as building the actual well. That really depends on what capacity you want and where it's located. As your building an FS17, some of those builds with baitwells would be a great place to get some ideas, as far as construction and location.
The main thing to keep in mind if you choose to build the well, is to design it with rounded corners or even better no corners at all. (keeps bait from running into corners when escaping the net)
If you go through my thread you'll find my baitwell as I was gluing it in place. I used a trash can for a mold to make it.
Thanks for complimets on my build BM, hope everythings good with you.
Daniel
Re: Murry's gf16
Posted: Sun May 10, 2009 12:21 pm
by Dog Fish
gk 108 wrote:Check the valve and/or handle orientation on the strainer. As assembled in the picture, the handle won't let you open the valve all the way. Other than that, it looks good.
A 90 will fix that and get the pump lower.
Good deal Daniel, that's all going to work out great. Nothing like Happy baits, it makes for a happy fisherman.
Re: Murry's gf16
Posted: Sun May 10, 2009 12:57 pm
by bushmaster
Thanks Daniel
Your reply was very quick and courteous. I will look at all the sites for bait well construction. I would like to see the hook up for through the hull intake, for i am afraid to drill holes in the bottom of my boat.
I will keep following your build from now on.
Thanks once again and happy build.
Bushmaster
Re: Murry's gf16
Posted: Sun May 10, 2009 1:31 pm
by Murry
Good deal Daniel, that's all going to work out great. Nothing like Happy baits, it makes for a happy fisherman.
Thanks Dogfish, I wish I could install it all today.
I'll be patient. I'm excited about being able to fill the well by the flip of a switch.
bushmaster wrote:Thanks Daniel
Your reply was very quick and courteous. I will look at all the sites for bait well construction. I would like to see the hook up for through the hull intake, for i am afraid to drill holes in the bottom of my boat.
I will keep following your build from now on.
Thanks once again and happy build.
Bushmaster
I hear you there Bushmaster. In August I'll post pictures of how it will be installed. The bottom will be atleast 3/4 of inch thick not including fiberglass thickness and all holes will be the ususal overdrill/fill/drill to protect the wood from any possible exposure to water.
I'll try to be as detailed as possible on it's install.
Good luck with your build
Re: Murry's gf16
Posted: Mon May 18, 2009 11:51 pm
by Murry
I haven't been able to find a standpipe that would work well with the 1-1/4 drain insert that I'm going with for my baitwell so I decided to tinker on my lunch breaks until I came up with something. I wanted to have a stand pipe that would drain well so I decided to go with a 1 inch I.D. pvc pipe but that wouldn't fit in the drain so I had to modify it.
This is how I made it.
I first turned down a piece of p.v.c to fit inside the drain insert using an old ammco drum lathe (automotive brake lathe).
The inside diameter of the drain is 1.186 so I cut the pipe down to 1.176. I then cut two o-ring grooves to keep the standpipe form leaking.
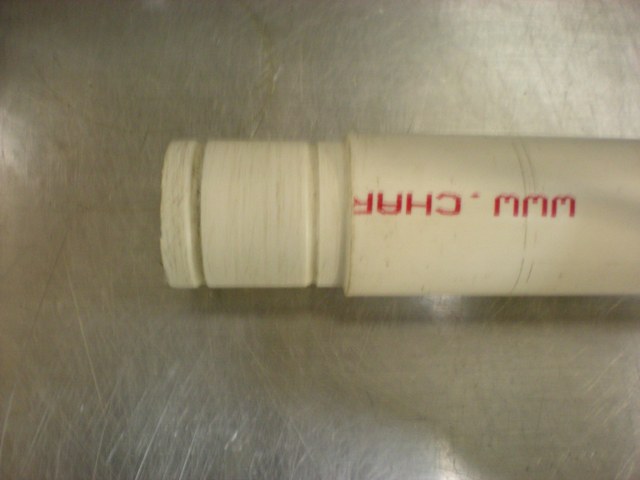
I then cut and cleaned the insert before gluing it into the pv.c. expansion joint. (thanks Cracker Larry)
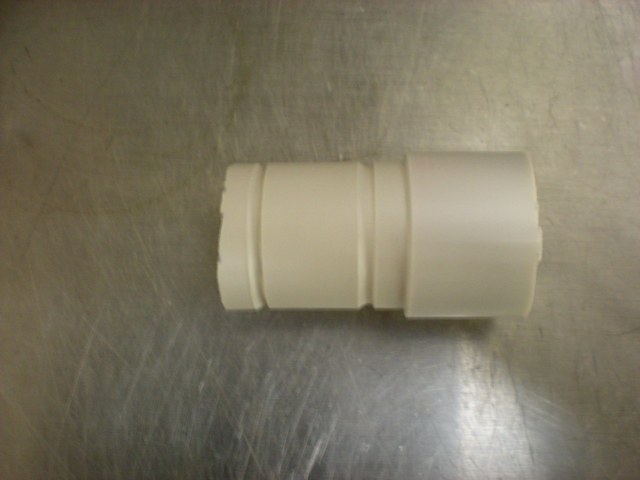
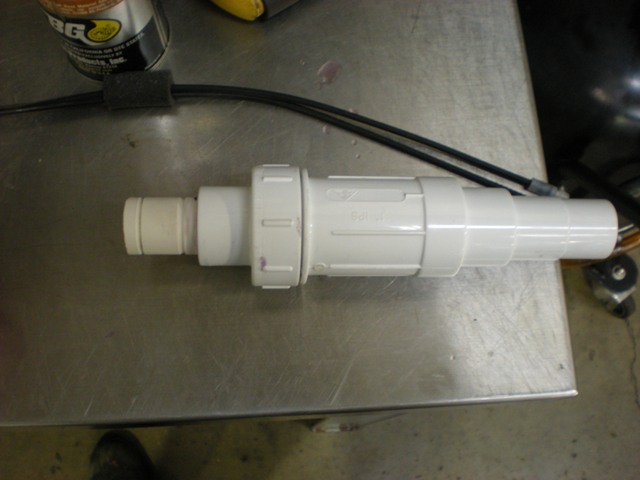
Orings installed and how the stand pipe will fit the drain.
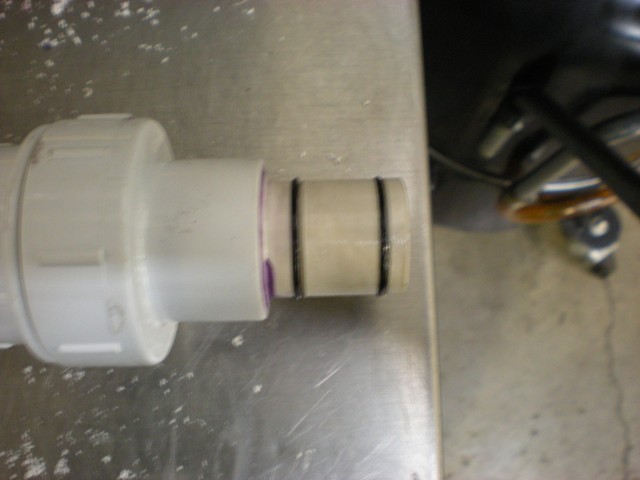

I then added an extension and capped off the expansion joint.
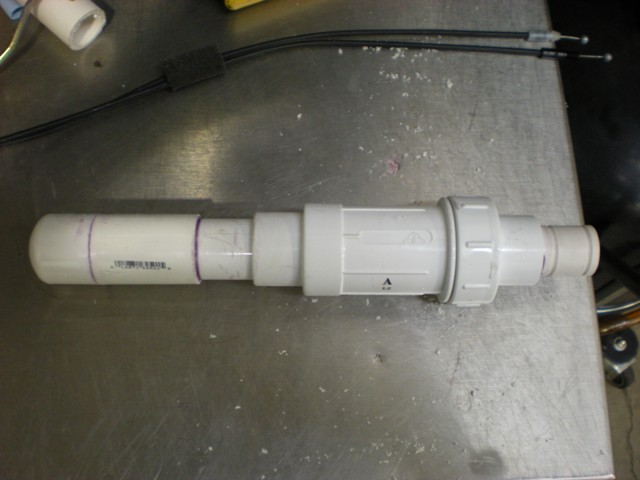
The purpose of using the exspansion joint is to be able to adjust the baitwell level.
Picture of it fully extended.
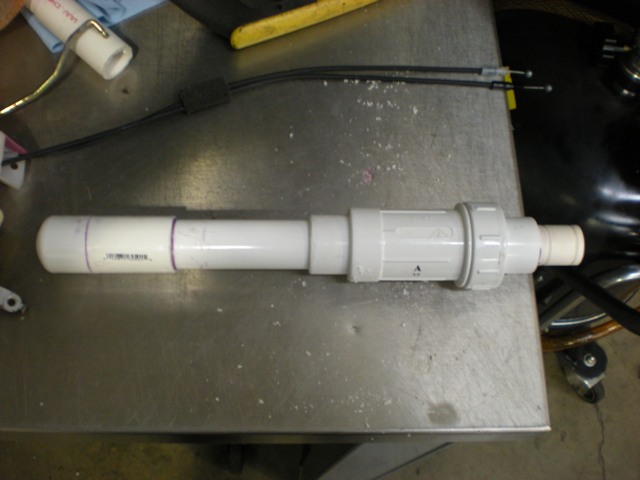
Tinkering on lunch breaks doesn't count as boat work does it?
Re: Murry's gf16
Posted: Tue May 19, 2009 9:02 am
by Cracker Larry
Perfect solution
Re: Murry's gf16
Posted: Tue May 19, 2009 4:35 pm
by BassMunn
Murry wrote:
Tinkering on lunch breaks doesn't count as boat work does it?
We don't beleive you Daniel, we can see the Force is too strong
Call it your R & R time, I know it is mine.
Clever idea on the stand pipe.
Re: Murry's gf16
Posted: Tue May 19, 2009 10:28 pm
by Murry
Cracker Larry wrote:Perfect solution
Thanks to your suggestion.
BassMunn wrote:Murry wrote:
Tinkering on lunch breaks doesn't count as boat work does it?
We don't beleive you Daniel, we can see the Force is too strong
Call it your R & R time, I know it is mine.
Clever idea on the stand pipe.
I can't think of anything else I can do on lunch breaks.
Next, I'll be decideing on my colors so that I can order the supplies for this fall, so I'll be bouncing paint schemes off you guys in the coming weeks.
s far as colors I thinking cream sides, what ever white I go with every where else and burgandy stripe with burgandy lettering. I just can't decide if I want the stripe to mirror the shear and rubrail or the waterline.
Anyone have any sugestions on the stripe?
Re: Murry's gf16
Posted: Sat Jun 06, 2009 12:08 am
by Murry
I broke down and ordered a new trailer last week.
I gave up on craiglist and ordered a Road King.
To be honest I didn't like the idea of my new boat sitting on an old trailer
, I thought I'd spoil her early.
I'll post some pictures as soon as I get it. I never thought I'd be so excited about getting a trailer.

Re: Murry's gf16
Posted: Sat Jun 06, 2009 12:14 am
by Bowmovement
Excellent! Almost there.
Re: Murry's gf16
Posted: Sat Jun 06, 2009 8:48 pm
by cape man
Nice job on the standpipe. Love those lunch time tinkering events.
Re: Murry's gf16
Posted: Mon Jun 22, 2009 5:34 pm
by Murry
Thanks capeman, I had fun doing it.
Well guys, I never would have guessed I'd be excited enough about a trailer to take a picture of it, but I am
, here it is.
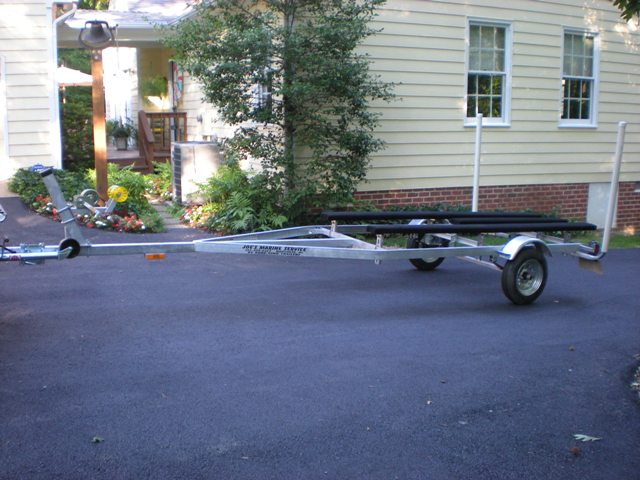
I just couldn't come to terms with putting my new boat on a used tailer.
Re: Murry's gf16
Posted: Mon Jun 22, 2009 7:24 pm
by BassMunn
Daniel, you know if any normal (non BBV sufferer) looked at your post, they would think that strange. But we all understand
I know I'll definately post a pic of mine as well.
Trailer looks good.
Re: Murry's gf16
Posted: Fri Jun 26, 2009 8:20 am
by cape man
Trailer looks sweet! I am using my used trailer as it is still in great shape. Needs the bunks redone, and will put a new axle and springs on. I am jealous of the new trailers and agree these boats deserve them...just can't afford one now. Congrats!
Re: Murry's gf16
Posted: Fri Jun 26, 2009 2:46 pm
by tobolamr
Now THAT was an awesome tutorial on how to build your own stand-pipe overflow. Well done! I'm almost jealous that I didn't think of it!
Re: Murry's gf16
Posted: Sat Jun 27, 2009 12:39 am
by Fonda@kauai
Au'ryte
That's a happy day.
Re: Murry's gf16
Posted: Sat Aug 08, 2009 9:54 pm
by Murry
Thanks guys.
It's been long enough
Time to finish her up.
I used her new trailer to bring her home from storage and they got along just fine.
I haven't been able to take any pictures outside of the garge yet so I took the opportunity today.
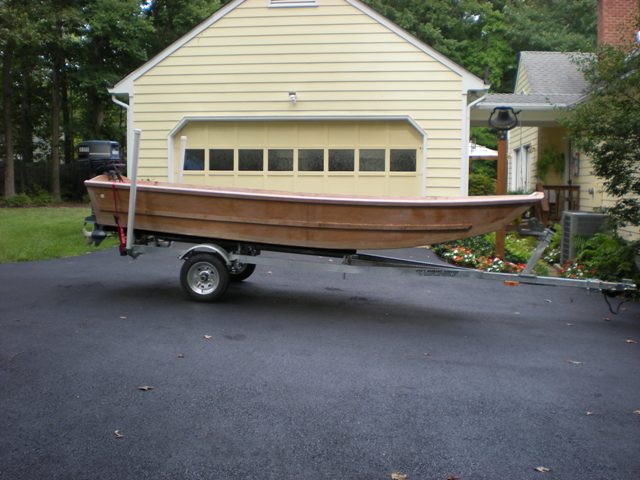
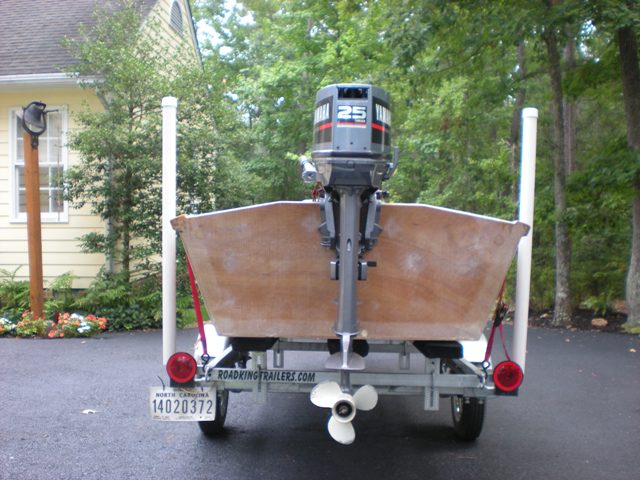
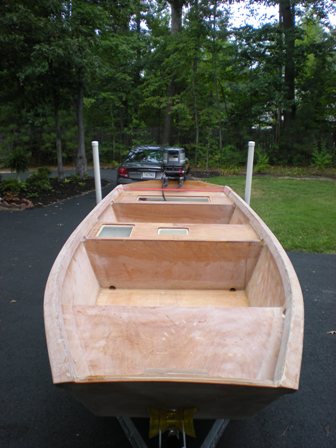
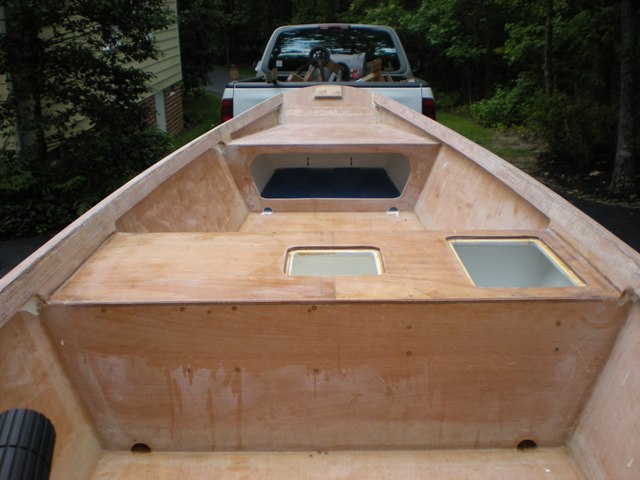
Alright let the fun begin.
Before I can start fairing I need to shape my spray rails, re-glass the strakes and touch up the chines a bit.
Re: Murry's gf16
Posted: Sat Aug 08, 2009 10:27 pm
by Cracker Larry
She looks great
I like the inwales, and leaving off the frame ears. Hmm..
You'll be real happy with that engine
Re: Murry's gf16
Posted: Sun Aug 09, 2009 9:23 am
by Murry
Cracker Larry wrote:She looks great
I like the inwales, and leaving off the frame ears. Hmm..
You'll be real happy with that engine
Thanks Larry.
I'm happy with the inwales as well. There are a handfull of things I'd do differently, but I'm very happy overall.
Thanks for all the help you've given me.
I've decided to leave the baitwell as is for now.
I don't want glue pipe to the sides of the boat and half of the hose will
protrude from the bottom of the inwale. Not to mention the elbows for plumbing through the frames. Those pretty valves and water pickup will have to wait for the next boat.
Besides, my salt water minnows of choice are mudminnows (for flounder) which can survive in wet napkin.
I can always add it later with out messing up any topside paint.
Daniel
Re: Murry's gf16
Posted: Sun Aug 09, 2009 1:58 pm
by Bowmovement
Murry,
Welcome back
What type of things would you do different. I am getting ready to start a GF16 build. Should start ordering supplies within a month.
I was going to steal your inwales idea so I can run chase tubes.
Re: Murry's gf16
Posted: Sun Aug 09, 2009 5:05 pm
by BassMunn
And you're back (it's about time
).
You've done some real nice work on your boat, it looks really good standing outside on it's new wheels
Re: Murry's gf16
Posted: Sun Aug 09, 2009 5:43 pm
by colonialc19
Daniel,
Hope the mission trip went well, The boat looks great!
Glad to have you back,
D
Re: Murry's gf16
Posted: Sun Aug 09, 2009 10:38 pm
by Murry
Thanks alot guys.
It's good to be tinkering/building again.
You've done some real nice work on your boat,
Thanks for the kind words Shannon and back at you. Your console and toe rail really set you phantom off. Great work
What type of things would you do different.
Bowmovement, give me until tomorrow to answer that brother. I don't want to rush that answer. I can tell you the inwales isn't one of them.
Hope the mission trip went well
It was amazing Daniel
I'll fill you in next time I talk to you. Thanks for asking.
I was happy to read on your thread, that your boat building fund has seen some recent activity. I had missed seeing your progress.
Re: Murry's gf16
Posted: Sun Aug 09, 2009 10:58 pm
by cape man
Too sweet! Gotta feel good to put her on the trailer.
which can survive in wet napkin.
You wet the napkins?
Re: Murry's gf16
Posted: Sun Aug 09, 2009 11:09 pm
by Murry
cape man wrote:
You wet the napkins?
I was trying to make em' last a week.
Re: Murry's gf16
Posted: Mon Aug 10, 2009 10:15 am
by gk108
Looking good. At this point, I'd have to give in to temptation and sneak down to the water and splash that boat.
Re: Murry's gf16
Posted: Mon Aug 10, 2009 11:34 am
by Bowmovement
gk108 wrote:Looking good. At this point, I'd have to give in to temptation and sneak down to the water and splash that boat.
I know that's right!
Re: Murry's gf16
Posted: Mon Aug 10, 2009 11:41 pm
by Bowmovement
Murry,
Was wondering about your jig. Trying to come up with a good layout for mine. Was thinking 10' long by 4' wide. I need it to be on casters to roll in and out of the garage. I thought I may use 4x4s but I think 2x4s will probably work.
Thanks,
Matt
Re: Murry's gf16
Posted: Tue Aug 11, 2009 10:40 pm
by Murry
Bowmovement wrote:Murry,
Welcome back
What type of things would you do different. I am getting ready to start a GF16 build. Should start ordering supplies within a month.
I was going to steal your inwales idea so I can run chase tubes.
Sorry it's taken so long to get back to you Matt.
I've been thinking about what I would do differently as far as layout is concerned. Keep in mind I haven't fished out of this boat yet.
1. Given the chance I would rethink my storage/foam areas to allow for a third storage area to the left of my baitwell.
2. I also wish I would have made some provisions for running lights as well.
I love the inwales but it's extra work, weight epoxy and wood. Besure to put alot of thought into electrical needs, ect. before you build them and make them as light as you can get away with.
This is what I did.
Murry,
Was wondering about your jig. Trying to come up with a good layout for mine. Was thinking 10' long by 4' wide. I need it to be on casters to roll in and out of the garage. I thought I may use 4x4s but I think 2x4s will probably work.
If I were doing it again Matt, I'd go with 4x4's. I got a little flex out of my 2x4 frame.
gk108 wrote:Looking good. At this point, I'd have to give in to temptation and sneak down to the water and splash that boat.
Don't think I didn't want to.
I have a couple of exposed areas on my strakes forceing me to keep her dry.
Re: Murry's gf16
Posted: Wed Aug 12, 2009 12:09 am
by Bowmovement
Murry wrote:Bowmovement wrote:Murry,
Welcome back
What type of things would you do different. I am getting ready to start a GF16 build. Should start ordering supplies within a month.
I was going to steal your inwales idea so I can run chase tubes.
Sorry it's taken so long to get back to you Matt.
I've been thinking about what I would do differently as far as layout is concerned. Keep in mind I haven't fished out of this boat yet.
1. Given the chance I would rethink my storage/foam areas to allow for a third storage area to the left of my baitwell.
2. I also wish I would have made some provisions for running lights as well.
I love the inwales but it's extra work, weight epoxy and wood. Besure to put alot of thought into electrical needs, ect. before you build them and make them as light as you can get away with.
This is what I did.
Murry,
Was wondering about your jig. Trying to come up with a good layout for mine. Was thinking 10' long by 4' wide. I need it to be on casters to roll in and out of the garage. I thought I may use 4x4s but I think 2x4s will probably work.
If I were doing it again Matt, I'd go with 4x4's. I got a little flex out of my 2x4 frame.
gk108 wrote:Looking good. At this point, I'd have to give in to temptation and sneak down to the water and splash that boat.
Don't think I didn't want to.
I have a couple of exposed areas on my strakes forceing me to keep her dry.
Murry,
Thanks for the info and no need to be in a rush for me. I think I have everything pretty thought out. I am planning a baitwell in mid seat as you did but with storage on each side. I figured with foam surrounding the baitwell and the port and starboard sides of the rear seat along with a foam comparment up front should be plenty.
I am still pondering the nav lights on the bow aand where to mount them.
How wide are your inwales? I was thinking of bringing them in the width of the frame ears and down to the seats. I hope that will be enough to run the necessary chase tubes for what I need. Electrical, gas, hose for baitwell.
4x4 it is
Matt
Re: Murry's gf16
Posted: Wed Aug 12, 2009 12:10 am
by Bowmovement
Double Post.....?
So did you hear why the parents wouldnt let the little kid go to the pirate movie
It was rated Arrrrrrrrr!
I know, cheesy but didnt want to waste the space.
Re: Murry's gf16
Posted: Fri Aug 14, 2009 9:25 am
by mecreature
Looks great. Should be a breeze to fair.
What is the game plan on painting?
Re: Murry's gf16
Posted: Fri Aug 14, 2009 9:40 am
by cape man
I am still pondering the nav lights on the bow aand where to mount them.
Just my $0.02 but...after the first time I road in a small boat with the nav lights on the outside of the bow, below the deck, I swore I would have them someday. They are a little more expensive, but not a lot more. The HUGE advantage for me is they don't ruin your night vision while underway. If you do use a top of the bow mount, try and put them as far forward as possible and keep them from lighting up the deck if possible.
Re: Murry's gf16
Posted: Fri Aug 14, 2009 9:58 am
by Cracker Larry
I agree, the individual side lights are the way to go. Should be easy on the GF.
Re: Murry's gf16
Posted: Fri Aug 14, 2009 10:52 am
by cape man
Here's a current auction...
http://cgi.ebay.com/ebaymotors/Side-Lig ... iesQ5fGear
There is almost always one going on, but you can also pick them up at a marine store for not too much more than this (with the shipping).
Re: Murry's gf16
Posted: Fri Aug 14, 2009 11:39 am
by Bowmovement
I thought about mounting on the side like you suggest but I think I read somewhere about having to be at a certain angle and have to appear to be together from a certain distance. I may be wrong but if I am not would that work on the GF?
Re: Murry's gf16
Posted: Fri Aug 14, 2009 12:12 pm
by cape man
Here's the USCG def...
Rule 21 - Definitions
"Sidelights" means a green light on the starboard side and a red light on the port side each showing an unbroken light over an arc of the horizon of 112.5 degrees and so fixed as to show the light from right ahead to 22.5 degrees abaft the beam on its respective side. In a vessel of less than 20 meters in length the sidelights may be combined in one lantern carried on the fore and aft centerline of the vessel, except that on a vessel of less than 12 meters in length the sidelights when combined in one lantern shall be placed as nearly as practicable to the fore and aft centerline of the vessel. [Inld]
You can do the math!
Re: Murry's gf16
Posted: Wed Aug 19, 2009 12:36 pm
by Murry
mecreature wrote:Looks great. Should be a breeze to fair.
What is the game plan on painting?
Sorry I missed you there mecreature.
As far as paint, I'm going with Awlgrip. I'd be using Sterling to support E-Boat, but I get to good of a discount
through work for the Awlgrip.
For colors I'm leaning towards "Sandstone" for the exterior. I think that's the correct name, I don't have my color chart handy.
It's kind of a greyish cream color. For the interior, I'm going whit an off white that has a similar tone as the exterior color. I just can't remember its name. I'll be adding nonskid to that same color for the seat tops and bottom of the boat.
I'm leaning towards burgandy lettering and a burgandy style (not paint, just wide tape) line that will follow the sheer profile just above the water line.
That's what I'm thinking so far.
I've reglassed the strakes and have begun fairing at this point.
Re: Murry's gf16
Posted: Thu Aug 20, 2009 12:26 am
by Murry
Back at it.
I had to get two things done before I could start faring this thing.
For my spray rail I went with 3 layers 1/4 ply glued to the boat. Wich left some glue build up to tend with. When I glued them up I used dowls and glued them all wet on wet, but with of the clamps in the way it was impossible to clean the glue or form fillets with the left over.
So the other day I clamped a 1x3 to the boat to serve as a guide for the rotor and trimmed her up with a flush cut bit.
Took a little time getting the fence set up, but they cleaned up nice. After I cleaned them up I put an 1/8 profile on the bottom of the spray rail (thinking the sharper the better for am effective spray rail
) and a 3/8 on the top to match the rubrail.

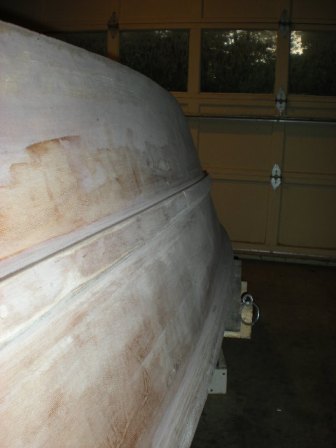
After I finished those I reglassed my strakes.
My first attempt a couple of months ago left me with alot air pockets that needed to be ground out ,
My strakes were way to sharp for the 12 oz. causing the cloth to lift off the wood but I like their profile so I'm leaving them sharp.
This is what I did on the second attempt.
This is a pic after the first attempt. If you look closely you can see the air on the side of the strake down its entire length. I only had contact on the tip of the strake and the bottom of the fillet, the rest was basically air.
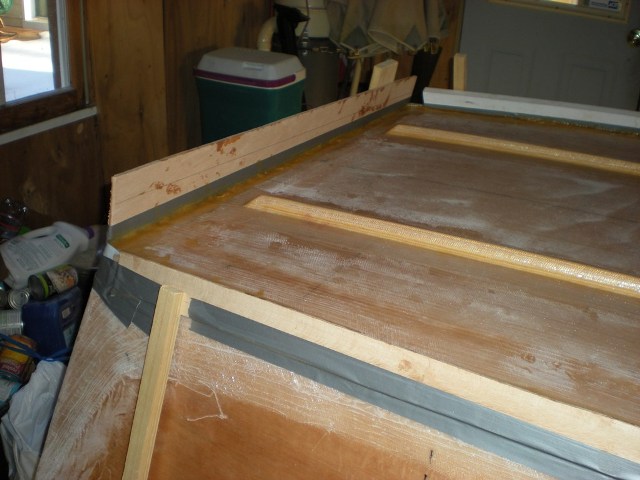
I cut and ground away the air preparing to reglass them.
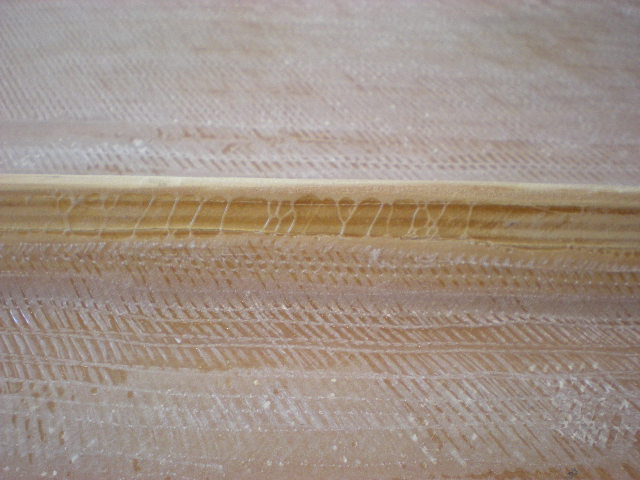
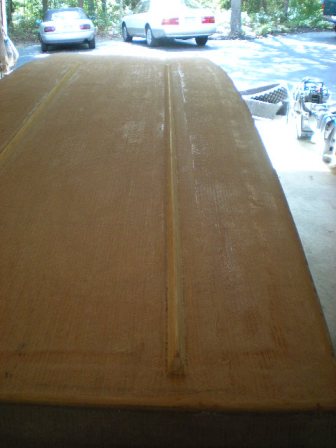
I then prewet the strakes, filled any major lows along the strakes with thickened epoxy, prewet my new pieces of 12 oz. tape , covered the strakes with the wet tape and then I covered them with plastic.
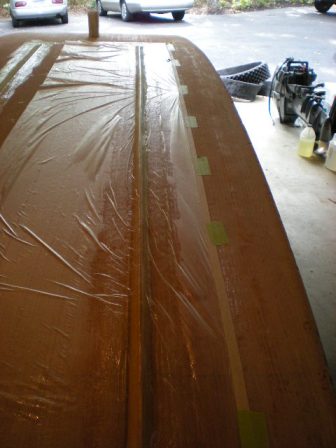
I then placed a very low density open cell foam over the strake. (very easy to compress)
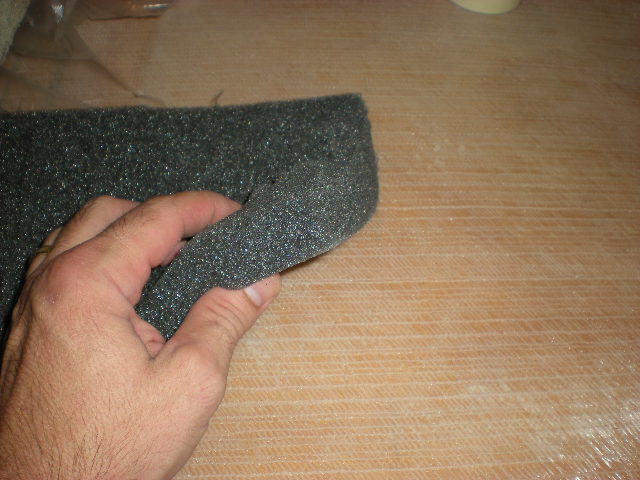
Next I layed a piece of corner molding over each strake and weighted them both down with concrete blocks until it cured.
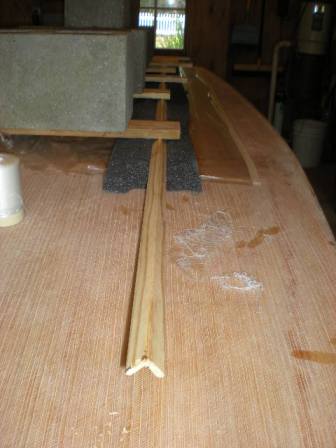
And here they are now.
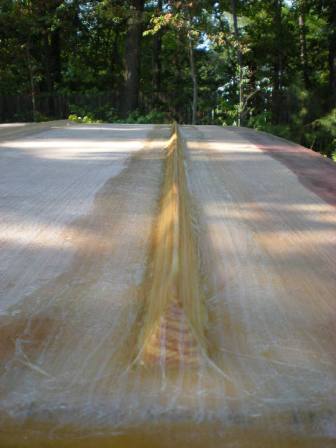
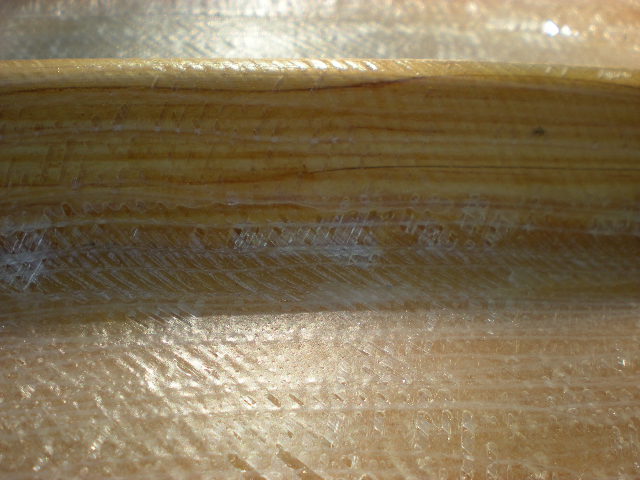
In the second picture you can see that I still had a couple of small air pockets at the base of the strakes, but I'll just grind those out and fill in the lows when I fair the bottom.
If I had one more try I think I could make them perfect but I'm moving on.
It's time to get to know the fairing boards.
Re: Murry's gf16
Posted: Thu Aug 20, 2009 7:31 am
by Bowmovement
Looking good Murry!
Re: Murry's gf16
Posted: Thu Aug 20, 2009 9:13 am
by tech_support
inventive technique
I would not bother grinding out those air pockets, they are open enough that you can squeegee or "mash" in some epoxy putty. I would use a silica/wood flour mix and press it into the pocket.
Re: Murry's gf16
Posted: Thu Aug 20, 2009 10:51 am
by gk108
If I ever build a boat that needs strakes on the bottom, I think I'll use that method.
Like Joel says, fill those bubbles where you can. I usually use a small syringe filled with slightly thickened epoxy to force the filler in the bubble. If trapped air pushes it back out, I punch a hole in the other end of the bubble and push epoxy in until it comes out of that vent.
Re: Murry's gf16
Posted: Thu Aug 20, 2009 3:39 pm
by BassMunn
That's a good way to cover the strakes, wish I had thought of that when I did mine.
Nice to see you back at it
Re: Murry's gf16
Posted: Thu Aug 20, 2009 6:23 pm
by cape man
Great fix! I like the crazy ideas we all come up with...Mother of Invention stuff all the way.
Re: Murry's gf16
Posted: Thu Aug 20, 2009 9:40 pm
by Murry
Thanks alot guys!
I'm fairing the exterior now. Getting the hang of it slowly but surely.
shine wrote:inventive technique
I would not bother grinding out those air pockets, they are open enough that you can squeegee or "mash" in some epoxy putty. I would use a silica/wood flour mix and press it into the pocket.
To late, not sure why I didn't do that, as I used that method along my chine in a few spots. I guess since it wasn't a structural issue it never crossed my mind. Thanks anyway.
After I get the exterior painted she's getting wet before I fair the interior.
I'm getting close.
Re: Murry's gf16
Posted: Thu Aug 20, 2009 10:16 pm
by ks8
Nice! When you've got time to work it out, some great techniques are born.
When I glassed my CB case slot cap, and the glass wouldn't stay put on the sides, after it was all wet with epoxy, I had a bit of a panic. Fortunately, I had an inner cardboard tube from a roll of paper towels I had just used up, some clear wrap to wrap it with, a box of BBs laying close by, a clamp I could jam the tube with... and voila! (If I was MacGyver, I guess I would have also used the paper clip, the duct tape, and the rubber band, and of course, the Swiss Army knife.) So much easier when it is all planned first... usually...
The quarter round stock worked great. Got those pictures saved and filed away now.
Re: Murry's gf16
Posted: Sun Aug 30, 2009 10:44 pm
by Murry
Fairing......
Fairing......
Fairing......
Fairing takes alot of patience
, and this is a little boat.
The novelty of owning a nice handy dandy flexible fairing board wore off in about 5 seconds.
Not pretty enough for pictures yet. I'll wait until I have the first seal coat on her.
Re: Murry's gf16
Posted: Sun Aug 30, 2009 10:53 pm
by peter-curacao
Fairing......

Re: Murry's gf16
Posted: Mon Aug 31, 2009 9:59 am
by mecreature
Murry wrote:Fairing......
Fairing......
Fairing......
Fairing takes alot of patience
, and this is a little boat.
The novelty of owning a nice handy dandy flexible fairing board wore off in about 5 seconds.
Not pretty enough for pictures yet. I'll wait until I have the first seal coat on her.
Fairing, its fun stuff.
...just watching from the sidelines.
Re: Murry's gf16
Posted: Sun Sep 13, 2009 11:07 pm
by Murry
mecreature wrote:Murry wrote:Fairing......
Fairing......
Fairing......
Fairing takes alot of patience
, and this is a little boat.
The novelty of owning a nice handy dandy flexible fairing board wore off in about 5 seconds.
Not pretty enough for pictures yet. I'll wait until I have the first seal coat on her.
Fairing, its fun stuff.
...just watching from the sidelines.
You're right there mecreature, a spectator
only sport for sure.
Well, it took me a month, but the exterior is ready for a couple of thin coats of epoxy to seal her up.
I went through enough fairing compounds to finish a boat three times her size.
, but I'm pleased with the results.
I won't know for sure until I get a couple coats of primer on her, but she looks and feels fair to me.
I won't break out the primer until I have the interior fair.
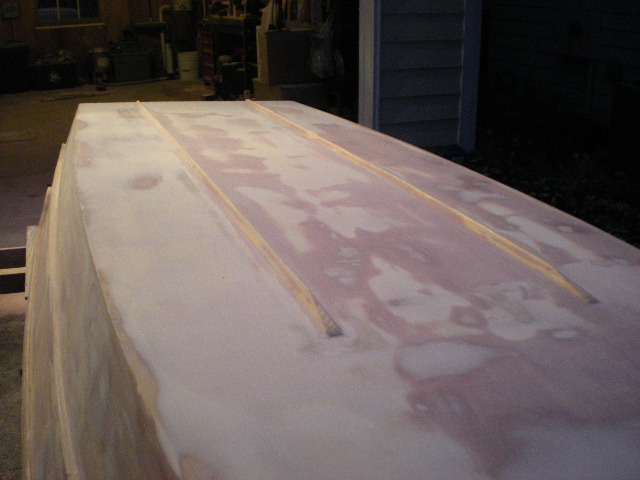
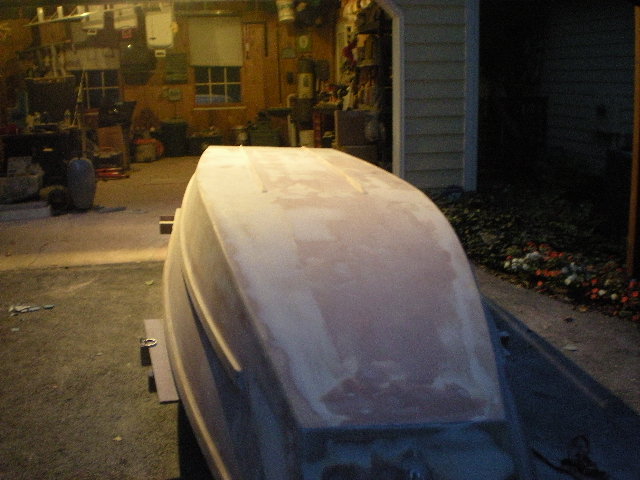
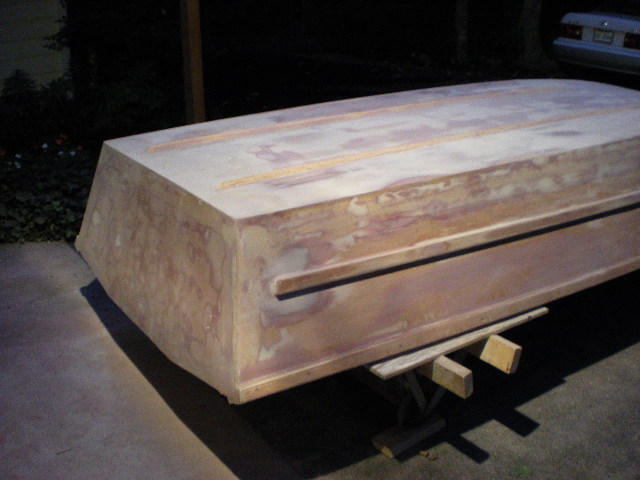
About those seal coats. I was planning to scuff up the first before rolling on the second, thinking it would be alot easier to see the coverage to get a uniform and thin second coat without runs.
Any thoughts on that?
Daniel
Re: Murry's gf16
Posted: Sun Sep 13, 2009 11:20 pm
by cape man
Daniel,
I would put them on within 24 hours of each other to avoid having to sand it. Put them on thin and trust your fairing job. It looks great from here. Would be easier to prime and paint the outside now as well, although she may be light enough to easily flip after you build finish the interior. I waited to paint the outside and wish I had done it while the boat was upside down.
Looks great!
Re: Murry's gf16
Posted: Sun Sep 13, 2009 11:26 pm
by Cracker Larry
Any thoughts on that?
Looks great!. I always scuff up one coat before putting on the next, no matter if it needs it or not. Can't hurt, only makes it stick better
Re: Murry's gf16
Posted: Mon Sep 14, 2009 7:53 am
by Murry
Thanks for the input guys.
What's a little more sanding?
Capeman I was more concerned about being able to see the second coat to get even coverage. I heavy run would make my fair
surface unfair in a hurry.
I'll post some pictures after I get the first coat on.
Re: Murry's gf16
Posted: Mon Sep 14, 2009 8:39 am
by tech_support
I would do both coats the same day, no sanding. If you make them thin coats with a roller, there should not be any drips. The I would lightly sand the epoxy, wipe it down with solvent, then put on the primer
Re: Murry's gf16
Posted: Mon Sep 14, 2009 8:47 am
by steve292
I would put on some primer before you flip, it will show any pinholes in the epoxy/glass,& any other major flaws not easily seen before priming.
Steve
Re: Murry's gf16
Posted: Tue Sep 15, 2009 6:56 am
by Murry
Thanks for the advice folks.
I ended up applying the second coat within 8 hours of the first this morning, so I didn't sand.
It wasn't as difficult to see the second coat going on as I had thought it would.
I took alot of pictures from different angles after the second this morning.
Let's start from the stern..

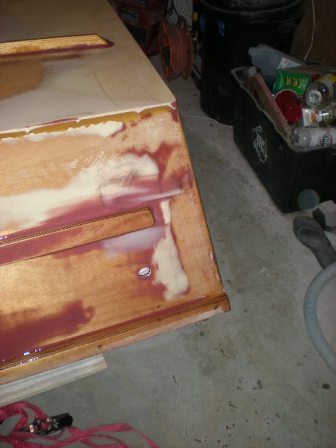
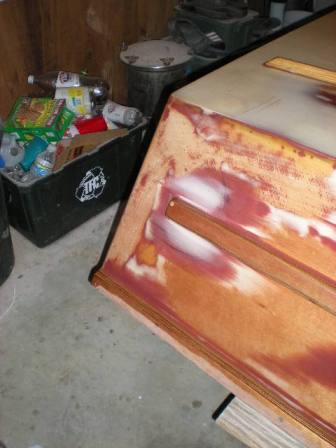
A couple up the sides of the boat..
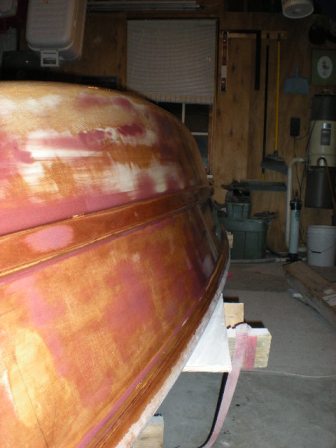
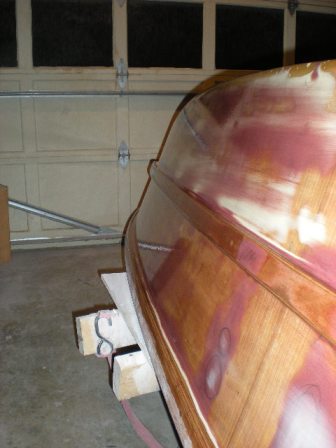
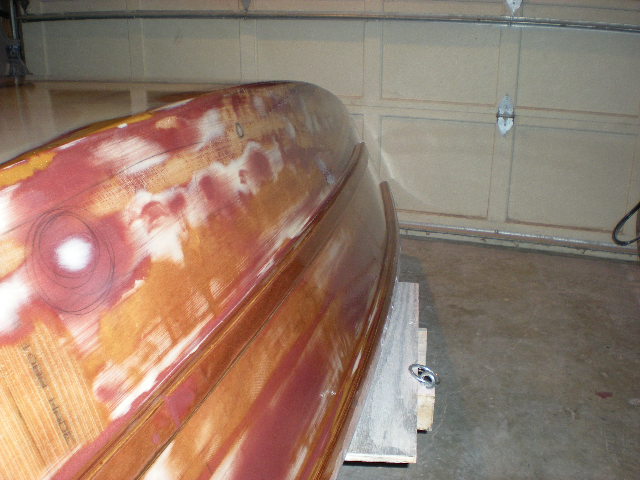
and of the bow..
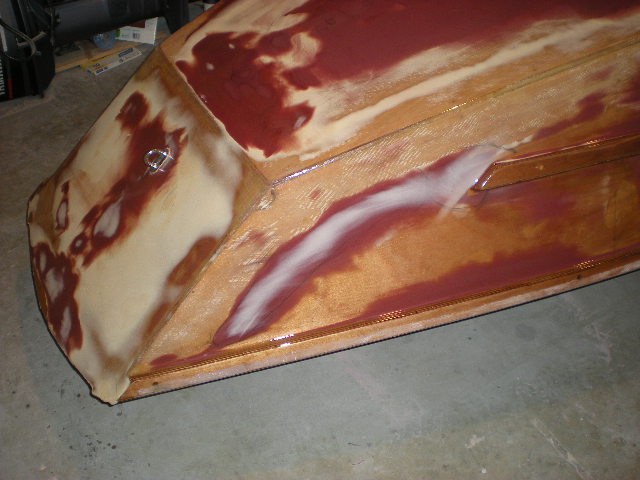
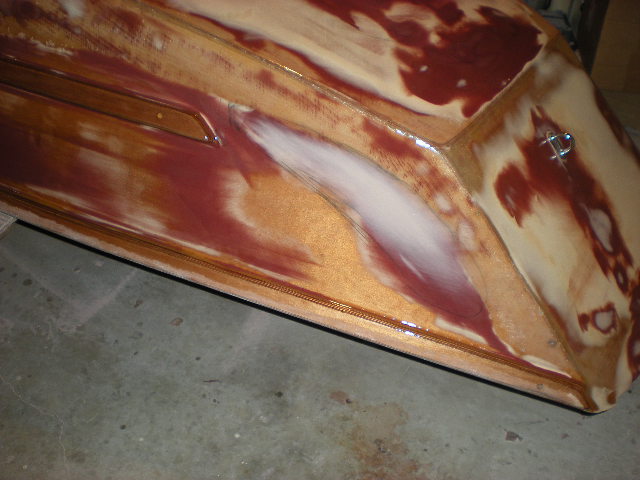
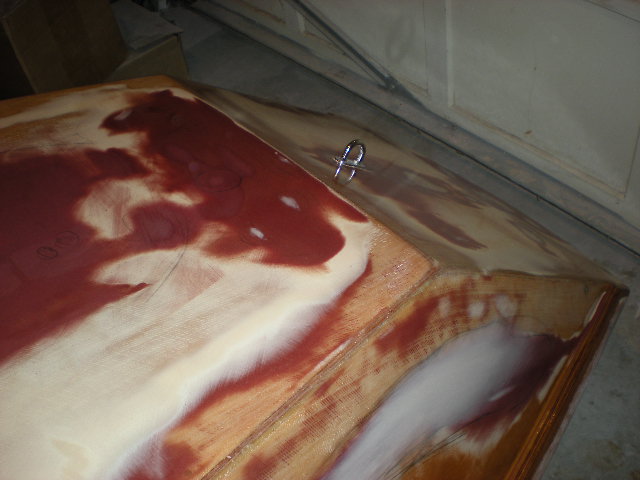
and the bottom..
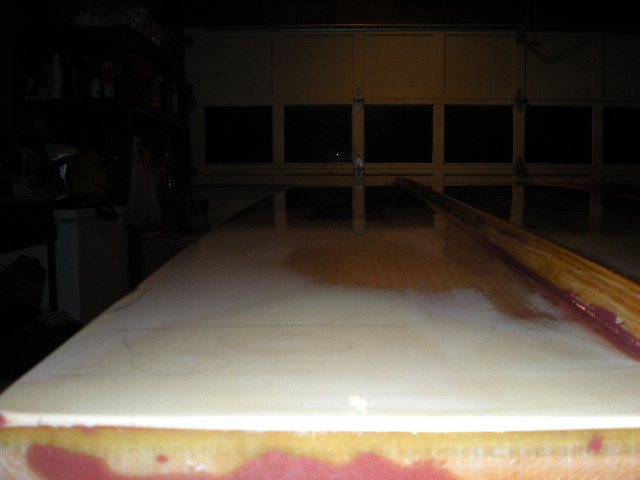
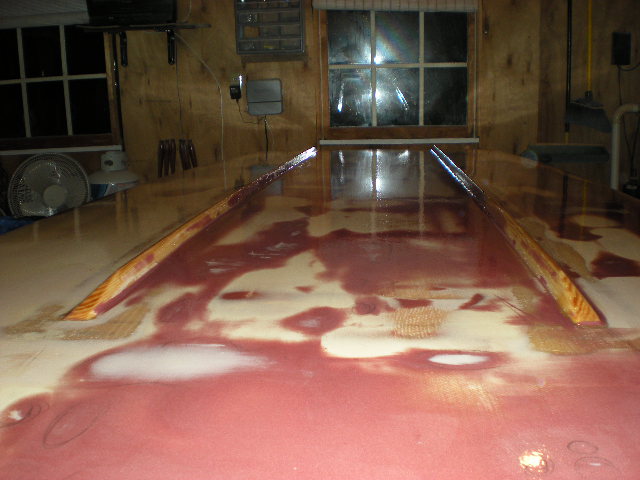
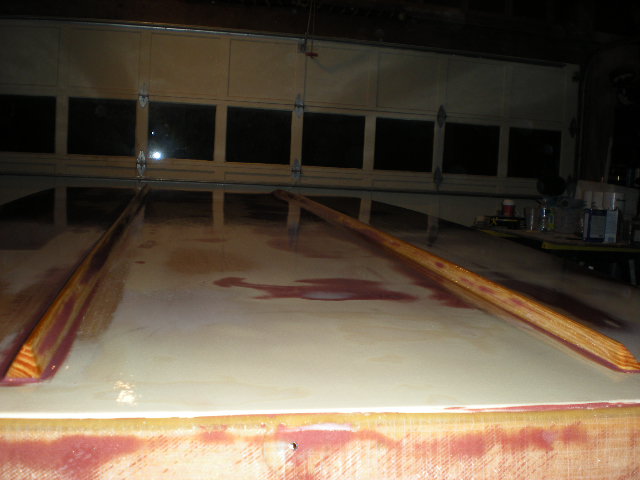
I'll let that sit a couple of days before I flip her to the fair the interior.
Since this boat is very easy to flip I'm holding off on the primer for now. I'll be gluing a piece of teak on the bow and that will require some additional shaping at the bow. I thought it would be best to wait and prime once all shaping, fairing and sealing is done.
I will completely finish the interior including top coat before completeing the bottom.
Thanks for checking out the progress,
Daniel
Re: Murry's gf16
Posted: Tue Sep 15, 2009 8:15 am
by cape man
Daniel,
Awesome man! That will be one slick ride! I wish I had spent more time fairing the outside of my boat before the primer. Once on it really showed every valley and ridge. You can be proud of the labor!
Re: Murry's gf16
Posted: Tue Sep 15, 2009 10:52 am
by Murry
Thanks alot Craig!
I'm looking forward to the day I can get some color on it.
Re: Murry's gf16
Posted: Tue Sep 15, 2009 1:04 pm
by Arm&Hammer
That looks great! I hope I have the patience to get my GF12 that fair.
A little after the fact here - but did you consider using tinted epoxy on the last two thin coats? I've never used it - I am only asking out of curiosity. I wonder if it would give a primed appearance to help you see how fair you are before actually priming...
Re: Murry's gf16
Posted: Tue Sep 15, 2009 1:33 pm
by Murry
Arm&Hammer wrote:That looks great! I hope I have the patience to get my GF12 that fair.
A little after the fact here - but did you consider using tinted epoxy on the last two thin coats? I've never used it - I am only asking out of curiosity. I wonder if it would give a primed appearance to help you see how fair you are before actually priming...
Thank You Sir,
That's a good question. I think tinting it would have made it easier to get good coverage with the second coat making it more visible, but I don't think the color would have been uniform enough to help see the fairness. It takes a couple of heavy coats with a high percentage of tint to hide well. I think primer would be the better choice.
As far as the seal coat. I chose to use epoxy first because I had some exposed wood around the spray and rub rails after shaping, but I could have skiped the epoxy and gone ahead with primer. You can apply the S3 yacht primer directly to wood.
,
and it would have sealed up the fairing compound just fine.
As far as your boat, based on what I've seen from your questions and progress, I think you'll end up just fine.
Daniel
Re: Murry's gf16
Posted: Tue Sep 15, 2009 6:53 pm
by BassMunn
Looking good Daniel, from the reflections that I see it looks like you got your fairing perfect
Re: Murry's gf16
Posted: Wed Sep 16, 2009 12:27 pm
by Murry
BassMunn wrote:Looking good Daniel, from the reflections that I see it looks like you got your fairing perfect
Thanks Shannon.
, but nothing I build is perfect.
I am proud of it so far though, but I'm sure that will change when apply the first coat of primer.
Re: Murry's gf16
Posted: Wed Sep 16, 2009 12:52 pm
by ks8
Re: Murry's gf16
Posted: Wed Sep 16, 2009 1:05 pm
by Murry
Here's a good definition!
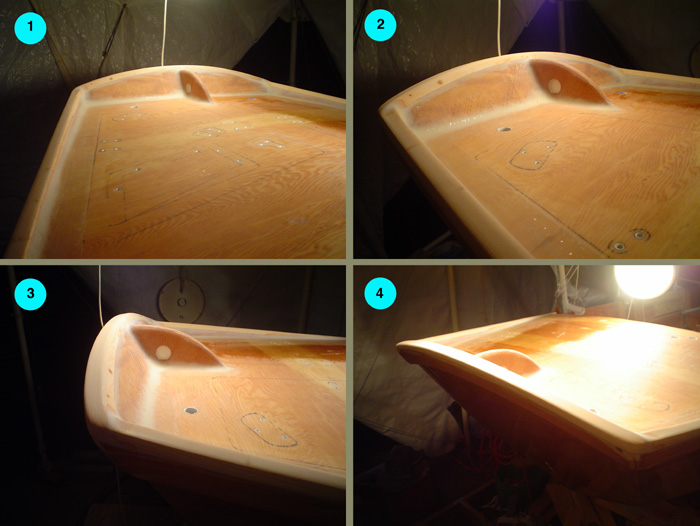
Re: Murry's gf16
Posted: Sun Sep 20, 2009 9:02 am
by Murry
Took a couple more pictures after getting her rolled out of the garage.
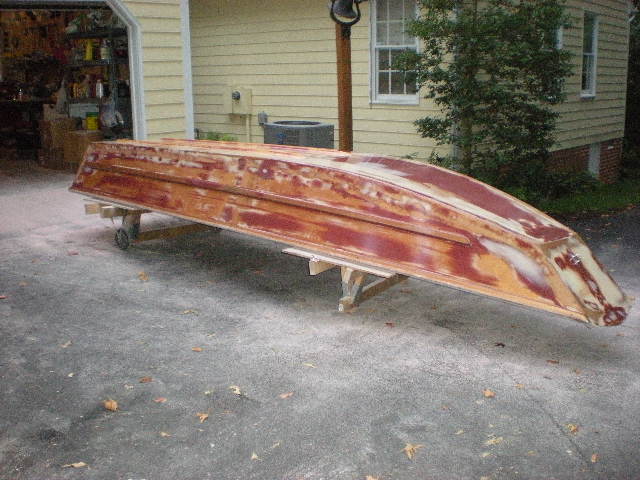
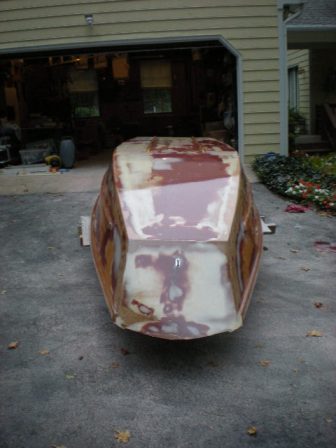
Originally I was planning to get her wet after sealing the bottom, but I decided to keep going.
I want to have her ready for top coat by mid October.
Applied faring compound to all the flat areas and the hatch frames.
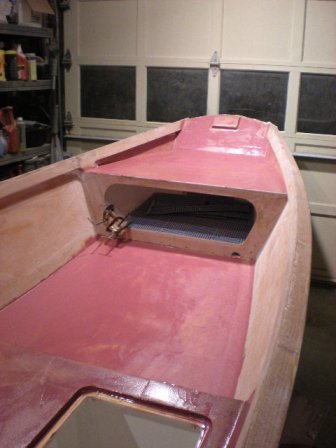
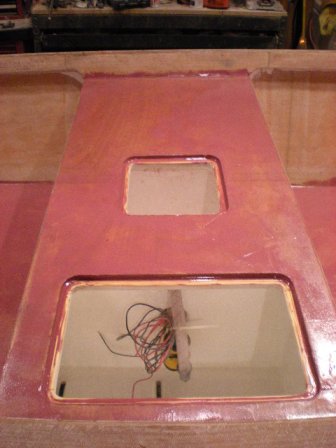
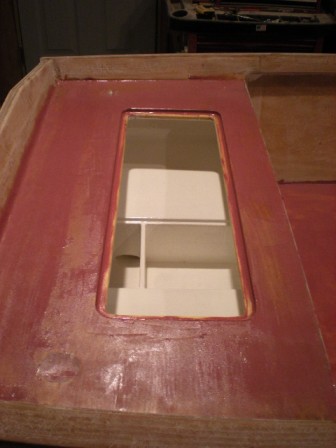
and the sanding continues.....
Re: Murry's gf16
Posted: Sun Sep 20, 2009 10:59 am
by Cracker Larry
She looks great Daniel
I really like the inwales.
How are you keeping the fairing compound out of those finished lockers so neatly? I'd have it splattered everywhere.
Re: Murry's gf16
Posted: Sun Sep 20, 2009 1:34 pm
by Murry
Cracker Larry wrote:She looks great Daniel
I really like the inwales.
How are you keeping the fairing compound out of those finished lockers so neatly? I'd have it splattered everywhere.
Thanks Larry.
The pvc fits under them like a glove. I small bead of 4200 should keep them stationary and quiet.
You're right, I started mixing before I put something down to keep them clean. I did have to clean a couple of drips up.
They'll be covered next time.
I prefer my batches fairly thick. Very close to peanut butter. (doesn't splatter much) I've found that an area I've just smoothed out doesn't gouge as bad if I accidently contacted with my speader, it won't sag on a vertical surface and it's easier to sand. I've used both size wall paper knives the shorty and long, but I like the standard 4 inch speaders that are sold here the best.
Re: Murry's gf16
Posted: Sun Sep 20, 2009 10:56 pm
by Murry
It's official
I just became a member of the "good nuff" club.
I started to sand my interior today and I got a little discouraged about how long it was going to take to get the same finish as the exterior and then I got over it. It doesn't have to be perfect.
I'm going with a DA finish for the interior except for the inwales. They'll get the boards.
After all it is a John Boat.
It really was a tough decision for me.
When I have a place of my own to build, I'll be able to take as long as I want, but my folks have been extremely gracious in letting me build in their garage and it's time they get it back.
"DA finish" Basically everything will still get fairing compound, but I'll smooth sand it with the DA after it cures. To get as good a finish as possible I'll keep the sander flat while sanding and refill lows when revealed by the sander. It won't be as pretty as the boards but it shouldn't be horrible.
Daniel
Re: Murry's gf16
Posted: Sun Sep 20, 2009 11:31 pm
by cape man
Daniel you will be surprised how good a job you can do with a sander. I used a palm sander on every bit of my boat including the gunwales. I hand sanded the last step before putting clear coat on, but not to fair, just assuring a good smooth surface for the clearcoat to adhere to. It does not look perfect, but it looks good.
But by the way...it may be a "jon boat" -like hull design, but that aint no jon boat you are building!
Re: Murry's gf16
Posted: Mon Sep 21, 2009 2:48 pm
by bernd1
.....it seems to be good. Sanding !?! I feel with you . I'am still sanding the inside but I have to finish the boat too - my wife wanted to park her new car into the garage
.
I promised her that she can do it in october......fortunately I did not say which year
.
Keep on Daniel !
Bye
Bernd
Re: Murry's gf16
Posted: Mon Sep 21, 2009 10:06 pm
by Bowmovement
I promised her that she can do it in october......fortunately I did not say which year
Prime example of CYA.
Good on ya.
Matt
Re: Murry's gf16
Posted: Tue Sep 22, 2009 3:38 pm
by mecreature
You will be surprised how good that will look. Are you using a non skid on the inside anywhere? That knocks the edge off some of the imperfections. It also creates lines that draw the eye to it and not that big blob over in the corner.. LOL
Re: Murry's gf16
Posted: Tue Sep 22, 2009 6:54 pm
by Murry
Thanks for the encourageing words guys.
Since I've started this build I've been looking forward to not being able to see any fiberglass transitions on the boat, both inside and out. Like I said I've gotten over that, atleast for the interior.
Once I get primer on the interior I'll know what the end result will be and can always touch up the ridiculous areas with Quick Fair. You're right though, you can achieve a decent finish with a DA, as long as you keep it flat on the surface. It's when you rock it to one side or the other to reach a low area when you get into trouble.
cape man wrote:
But by the way...it may be a "jon boat" -like hull design, but that aint no jon boat you are building!
You're right about that Craig.
bernd1 wrote:
I promised her that she can do it in october......fortunately I did not say which year
.
Keep on Daniel !
Bye
Bernd
Smart man
mecreature wrote: Are you using a non skid on the inside anywhere?
Yes, I am. I'll be using Grip Tex with the Awl-Grip paint I'm using it on all the flat areas. I got a great deal on the Awl-Grip and couldn't pass it up. I decided on fighting lady yellow on the exterior and off-white for the interior and rub rail. Sunglasses will be a requirement for all passengers and spectators.
Speaking of spending money, I purchased my last 1.5 gallon kit of epoxy today and I won't come close to using it all, but I couldn't make it on what I had. Atleast I've got some supplies for the next one.
BTW- I stopped counting the amount of epoxy I've purchased along time ago.

I bet you could fill a gallon jug with the residue from all the mixing cups used. That might be a stretch, but I've been through a lot of cups and mixing sticks/fillet tools.
Who knows were all goes? I didn't waste much by leaving it the cup to cure, but here are couple of areas where I did. I sure did sand alot off when faring and I used a ton trying to make my compartmnets opaque while not having enough pigment mixed in the batch, not to mention the amount I used to saturate the two layers of 17oz. to make the baitwell. the inwale took alot of extra of glue, glass and epoxy. Oh Yeah, I glassed all the bare wood with 6 oz. cloth, can't forget the original drains that I had to rip out because I wasn't confident that I had the hull underneath the drains encapsulated.
I doubled up my front transom, which took extra glue, ect., ect... Good times huh.
Re: Murry's gf16
Posted: Wed Sep 23, 2009 6:46 am
by cape man
Re: Murry's gf16
Posted: Fri Oct 02, 2009 7:56 pm
by tobolamr
Don't tell any Klingons about your tribble troubles! The Tribbles are sworn enemies of the Empire! Could be some battle damage to the boat if they beam in to clean things up. Or they may just take your boat barn out with an orbital strike, instead...
(Reference: Star Trek, Deep Space Nine, Season 5, Episode 6 "Trials and Tribble-ations")
Re: Murry's gf16
Posted: Thu Oct 08, 2009 11:39 pm
by Murry
Sorry guys, I can't add much there, never was a huge Star Trek fan.
I'm almost finished with fairing the interior and I thought I'd share a couple of photo's of the progress.
I'll start with the bow. I was planning to glue a piece of teak up front, but I decided to leave the unfinished wood off this
boat. I'll save that pretty teak for a future project.
so I had to fill in the bow where the teak was going to go with epoxy.
this is what I started with before filling...
and this is after filling and shaping...
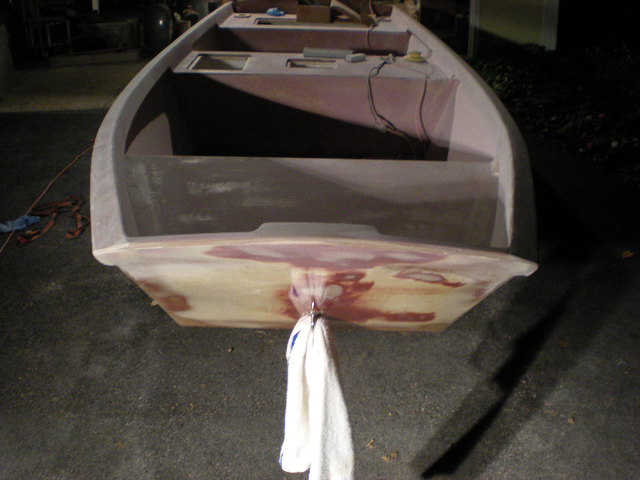
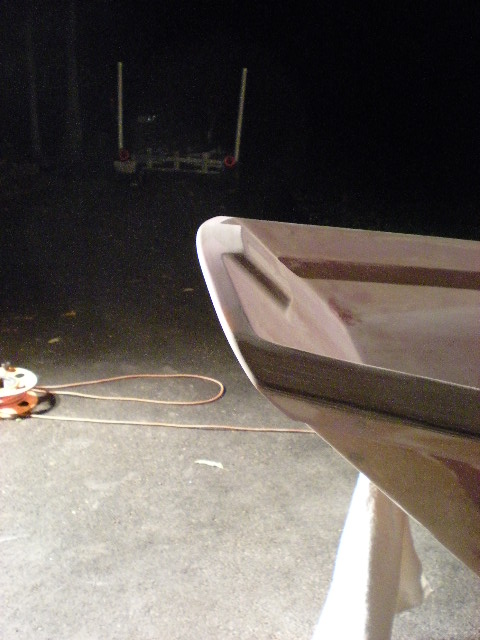
hatch opening and frame faired...
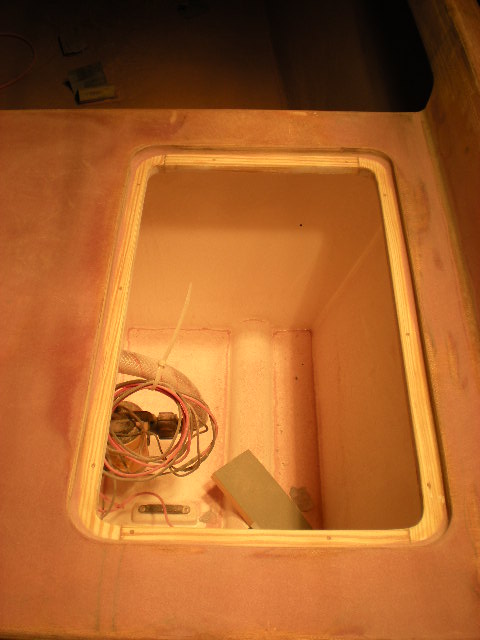
inwales faired....
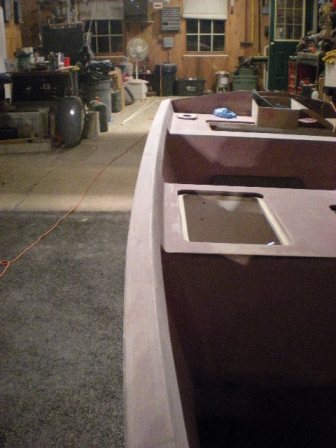
I added two rod holder spacers on the rear seat top. I thought they would look nice slightly raised.
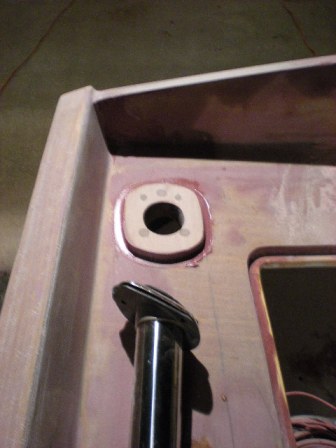
and lastly I needed to raise my transom a bit. I raised it 2 inches by gluing up to strips of half inch ply. This picture is after
fairing.
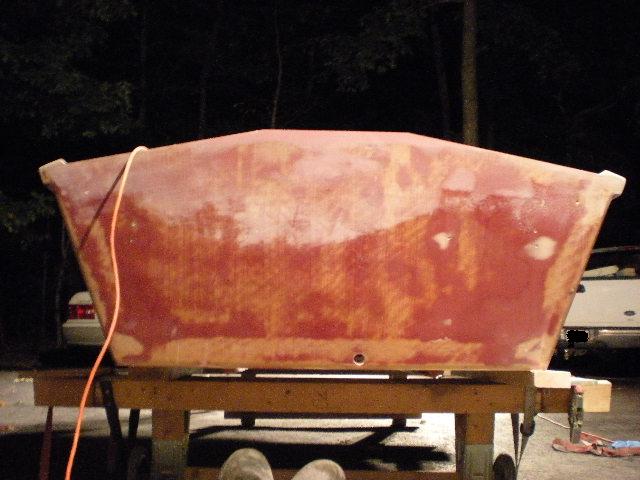
I hope to finshed fairing on Saturday. I'll work on final hardware preparation (hinges, cleats, ect,) next week before sealing the interior with a couple coats of epoxy. After that, she's getting wet.
Re: Murry's gf16
Posted: Fri Oct 09, 2009 1:07 am
by PastorBob
It is official you have passed me! looks good!
Re: Murry's gf16
Posted: Fri Oct 09, 2009 7:21 am
by Murry
PastorBob wrote:It is official you have passed me! looks good!
Thanks PastorBob,
How many kids do you have again?
My wife and I haven't started down that road yet, so I may have a wee bit more time on my hands.
Hey, aren't you finishing up a P21 as well.
big boat.
Re: Murry's gf16
Posted: Fri Oct 09, 2009 2:02 pm
by Fonda@kauai
Looks good, very clean and smooth. Is that a backing plate for the bow eye? If so that's gonna be solid
Re: Murry's gf16
Posted: Fri Oct 09, 2009 2:32 pm
by Murry
Fonda@kauai wrote:Looks good, very clean and smooth. Is that a backing plate for the bow eye? If so that's gonna be solid
Thanks Fonda.
No, that's where I'll be mounting the forward cleat.
The bow eye backing plate is burried in foam never to be seen again, atleast I hope.
right here....
Re: Murry's gf16
Posted: Fri Oct 09, 2009 5:42 pm
by Fonda@kauai
ahhh..that makes more sense. Good idea to make that cleat solid
Re: Murry's gf16
Posted: Fri Oct 09, 2009 6:08 pm
by stickystuff
Do you now the difference between the Starship Enterprise and a roll of toilet paper?
............
They both circle Euraneous looking for Clingons.
Sorry, Couldn't help myself.
Re: Murry's gf16
Posted: Fri Oct 09, 2009 8:17 pm
by PastorBob
How many kids do you have again?
4 with 2 more coming Monday, and a 17 yo Norwegian exchange student (long story)... I guess that adds a little perspective... However I could be finished in 20 hours but I have no motor.... so no reason to hurry...
Re: Murry's gf16
Posted: Fri Oct 09, 2009 8:57 pm
by Cracker Larry
Give each of those younguns a paddle
Re: Murry's gf16
Posted: Fri Oct 09, 2009 9:01 pm
by Murry
stickystuff wrote:Do you now the difference between the Starship Enterprise and a roll of toilet paper?
............
They both circle Euraneous looking for Clingons.
Sorry, Couldn't help myself.
PastorBob wrote:
4 with 2 more coming Monday,
Twins
Congradulations
PastorBob wrote:However I could be finished in 20 hours but I have no motor.... so no reason to hurry...
Yeah, I hate to paddle.
Re: Murry's gf16
Posted: Fri Oct 16, 2009 12:32 am
by Murry
Thought I’d post some details of my final hardware installation.
Let’s start with the rear seat top drains. I decided to drain any water that gets on the rear seat through the transom on both sides of the boat.
I started be drilling and filling this area before I glassed the rear seat with 6oz. woven.
This picture was taken a couple of months ago….
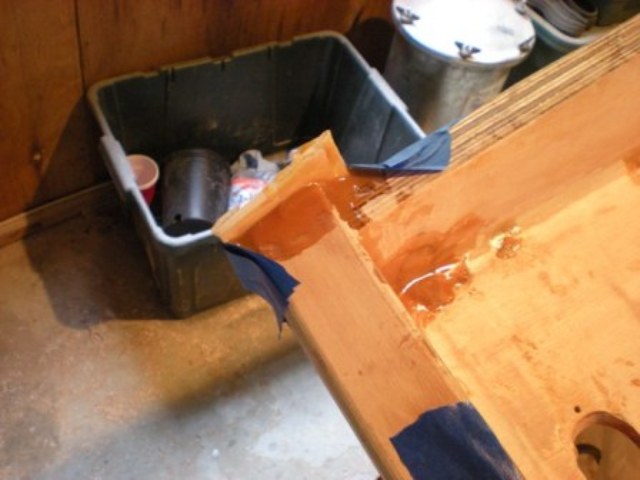
This past week I drilled out the epoxy to make room for the insert….

And after a little cleaning with my dremel tool, this is the dry fitment of the insert…
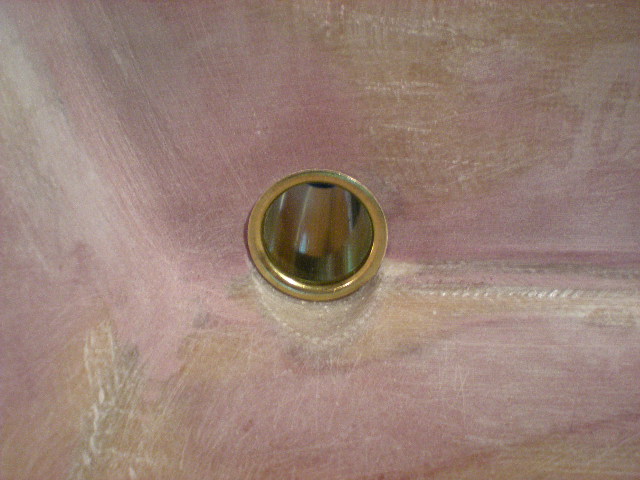
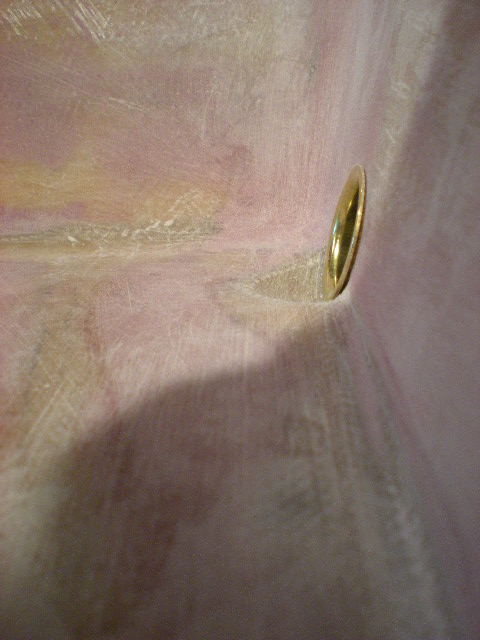
Moving on to hatch hardware, I’m going with two hinges per hatch with a simple flush mount hatch pull. I wanted the hatches to stay closed when closed so I decided to use magnets to make this happen.
Hinge locations marked…
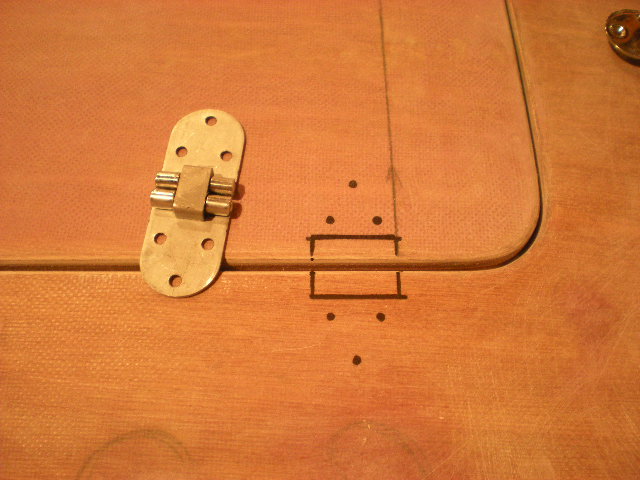
Oversize holes for hinges, pulls and magnets drilled on all hatches
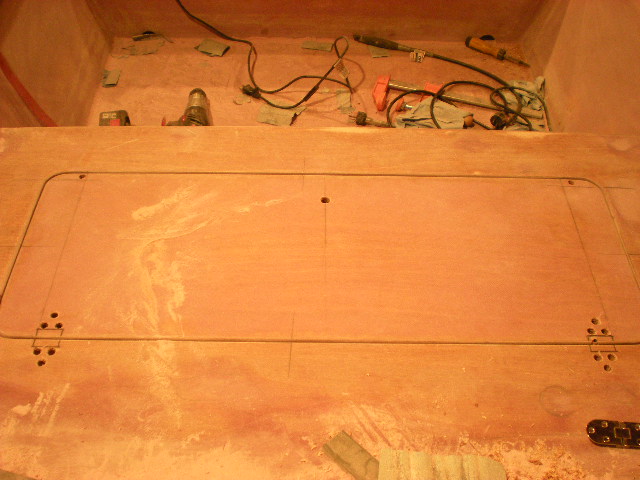
Magnet detail:
There will be four magnets installed for each hatch. Two in the frames and two in hatches
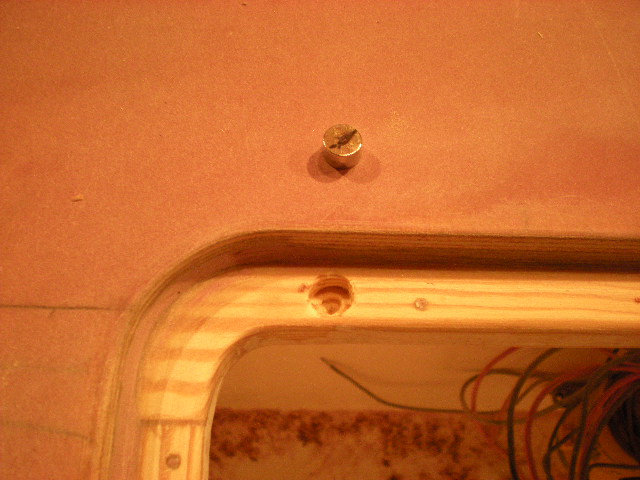
Hatch frame

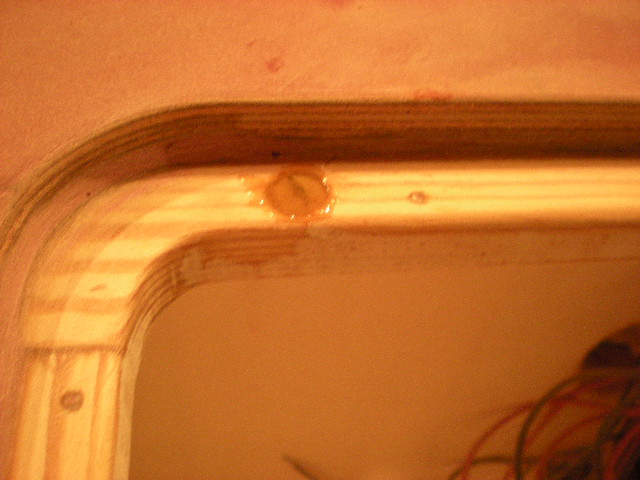
hatch
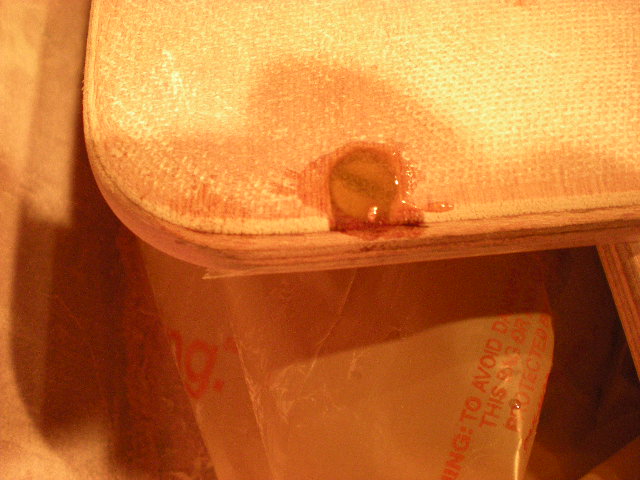
Cleat installation:
Holes drilled to 1-1/4. To make things a little stronger I used a dremel to widen the oversized holes at the base so the epoxy plug would be a little wider at the bottom.
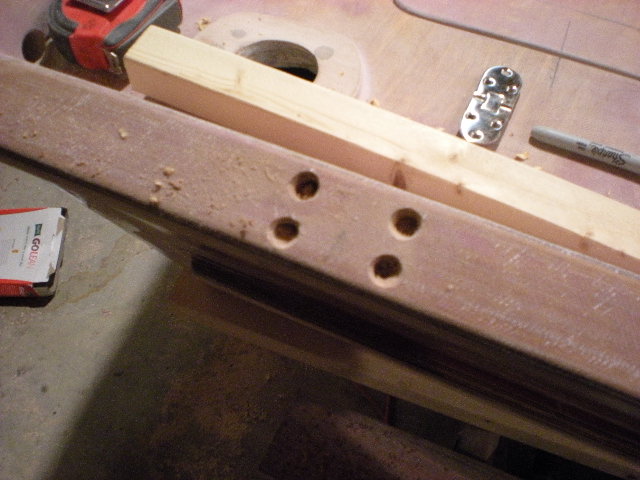
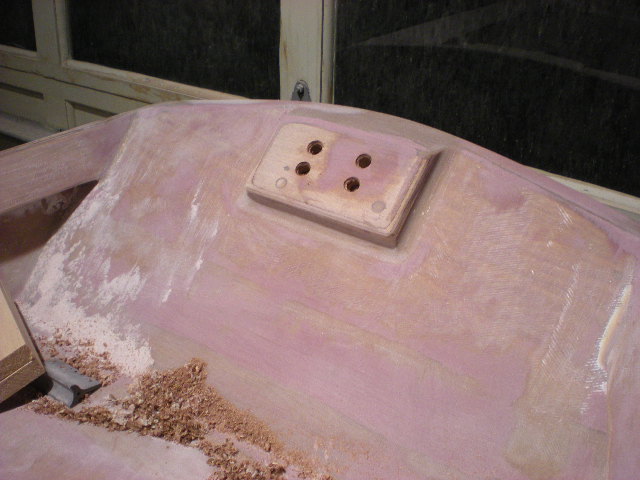
I can't through bolt my cleats due to their locations so I made some jigs to form some threads in the epoxy plugs so they’d be nice and strong. I decided to go ahead and bury some stainless nuts in the plugs as well.
I wanted the holes to be nice and straight, so I used a drill press to make all five jigs.
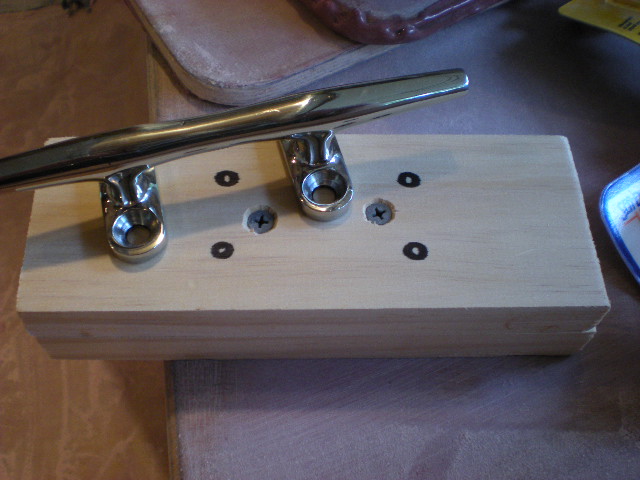
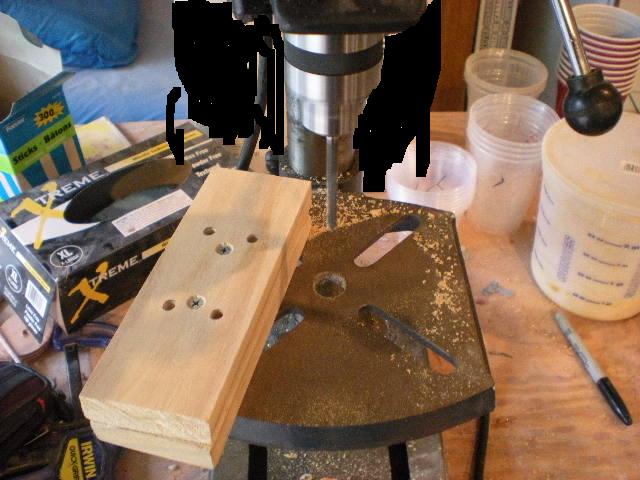
Then I installed T-nuts in the jigs to keep things straight and at the right depth while the epoxy cured.
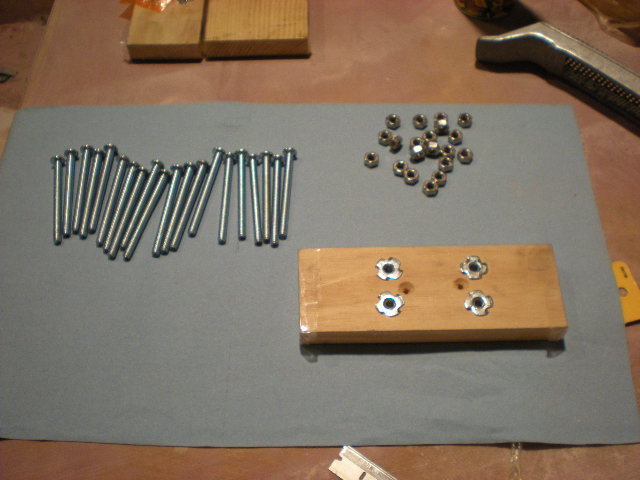
Bolts set to 1-1/8 depth to keep the bolts off the wood at the bottom the hole.
I then coated the threads with cooking spray to keep the epoxy from bonding to the bolts and installed the stainless nuts after roughing them up with 60 grit to get a better bond.
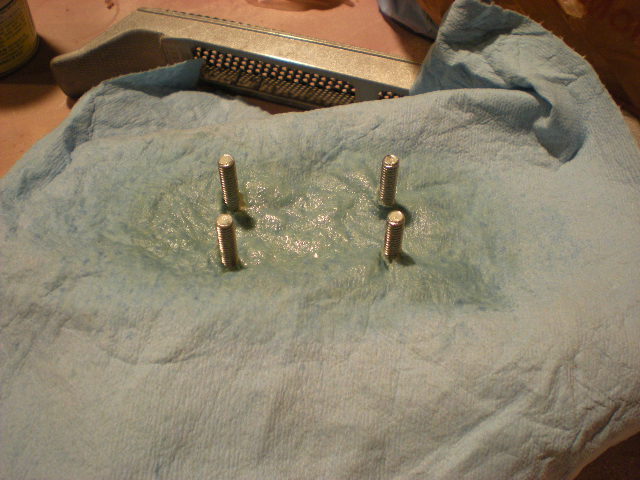
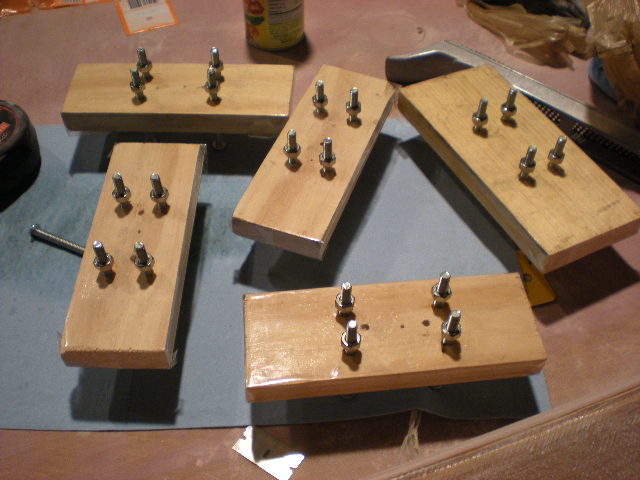
Filled all the holes and set the jigs.

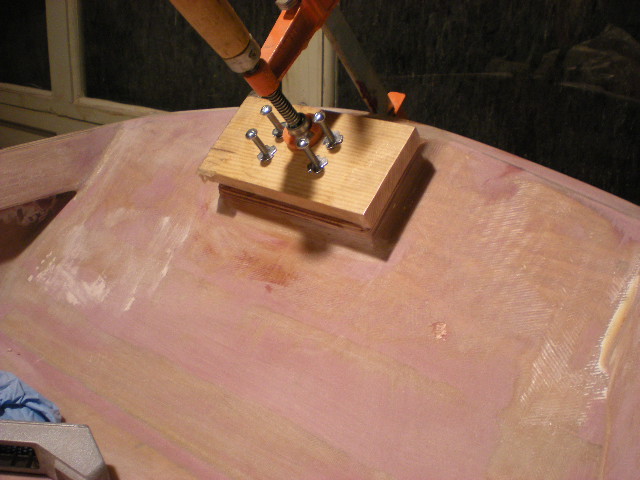
After the cure I removed the bolts and the jig. The epoxy hadn’t cured enough to sand so it’s a rough finish, but you get the idea.
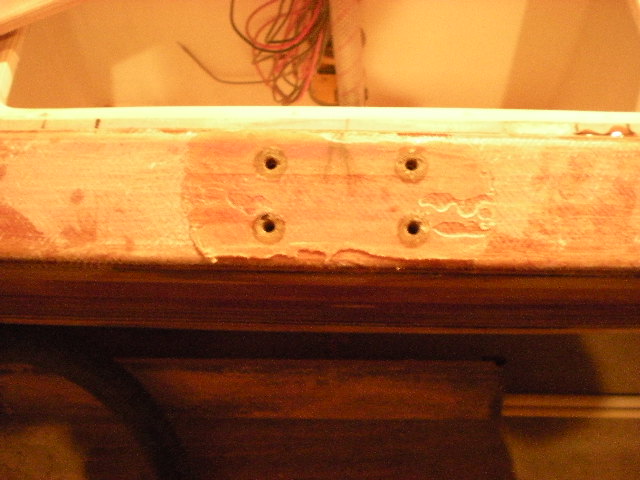
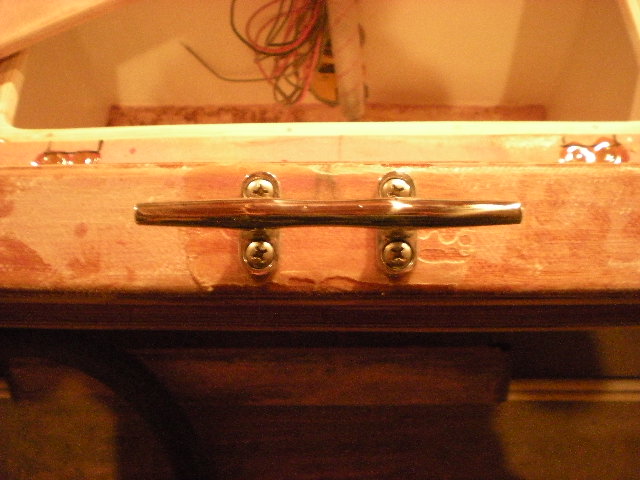
I’ll clean everything up this weekend and hopefully be sealing up the interior next week with a couple of thin epoxy coats.
Hoping to get her wet soon and thanks for keeping up with my progress.
Daniel
Re: Murry's gf16
Posted: Fri Oct 16, 2009 7:54 am
by cape man
Daniel,
Fantastic detail and great pics. I like it! Those babies should be there for ever!
Re: Murry's gf16
Posted: Fri Oct 16, 2009 9:06 am
by Murry
cape man wrote:Daniel,
Fantastic detail and great pics. I like it! Those babies should be there for ever!
Thanks Craig.
I tell you though, gluing twenty 3 inch long bolts in my boat made me a little nervous, but the cooking spray worked like a charm.
Re: Murry's gf16
Posted: Fri Oct 16, 2009 9:18 am
by Dougster
Thanks for the detail in those pics. They make a fine tutorial. I hadn't even thought of the magnet idea. Seems like you get good use the Dremel too. I've been looking at them longingly for a bit now and work as neat as yours makes me hear that siren song
'Course I know tools don't make neat work, folks do, and whatever's in my hand, I'm still me. The seat drain is very nice and I have been thinking of something along those lines for the rear bench seat in Nina.
Trying not to think about that Dremel Dougster
Re: Murry's gf16
Posted: Fri Oct 16, 2009 9:34 am
by mecreature
Great job Murry.
Some great ideas passed on too.
Re: Murry's gf16
Posted: Fri Oct 16, 2009 11:32 am
by Murry
Thank You Gentleman.
I couldn't do any of it without the knowledge gained by the great folks here as you know.
I've been looking at them longingly for a bit now
Yeah Dougster, the dremel is a very versatile tool. I have to route the reliefs for my recessed hinges this weekend and there's
two of them that are very close to the inwale (to tight for even a palm router). Wouldn't you know it, I found a 1/4 router bit for my dremel at Home Depot yesterday that will work perfectly.
Re: Murry's gf16
Posted: Fri Oct 16, 2009 8:08 pm
by Cracker Larry
Great looking work Daniel
I love my Dremel
Re: Murry's gf16
Posted: Fri Oct 16, 2009 10:38 pm
by Murry
Thank You Sir,
Hopefully that epoxy will be hard enough to sand tomorrow morning. It got cold in a hurry and all I have is slow hardener.
38 degrees in the morning.
Re: Murry's gf16
Posted: Sat Oct 17, 2009 12:25 pm
by ks8
With (1) 100 watt bulb in a cheap reflector, aimed at a small work area, my slow hardener cured in about 12 hours, good enough for sanding. You could put a thermometer within 10 inches of the lit area to get an idea how well the bulb is warming it, and use a 150 watt if not so close to set things on fire. I've got six of those lamps from the winter tent building, though that was medium and fast hardener, but sometimes way below freezing. Once it gets down to freezing, you do not want the uncured resin to be exposed to that. Need those lights and cheapie thermometers. Hoping it works out for you.
Re: Murry's gf16
Posted: Sat Oct 17, 2009 1:24 pm
by bernd1
....unfortunately the winter comes......yesterday we had snow. To use the epoxy based primer to give the first paint to my boat failed - too cold. Well, I just wait until spring 2010.
Daniel, I hope you have the right temperatures to finish the boat the next days.
By the way, I saw a few pictures of your trailer and I'm interested about the construction of the long bars where the boat sits on it.
The reason is that I have to modify my trailer for the GF16.
Could you please make some photos of these bars? Are these bars made of wood and covered with a special carpet? ...and could you measure how thick and wide they are?
It would help me a lot ....and saving time.....and I could use the winter time for senseful work for boating.
Thanks!
Bye
Bernd
Re: Murry's gf16
Posted: Sun Oct 18, 2009 9:46 pm
by Murry
ks8 wrote:With (1) 100 watt bulb in a cheap reflector, aimed at a small work area, my slow hardener cured in about 12 hours, good enough for sanding. You could put a thermometer within 10 inches of the lit area to get an idea how well the bulb is warming it, and use a 150 watt if not so close to set things on fire. I've got six of those lamps from the winter tent building, though that was medium and fast hardener, but sometimes way below freezing. Once it gets down to freezing, you do not want the uncured resin to be exposed to that. Need those lights and cheapie thermometers. Hoping it works out for you.
Thanks for those tips ks8. Good news is that it was sandable Saturday morning.
bernd1 wrote:....unfortunately the winter comes......yesterday we had snow. To use the epoxy based primer to give the first paint to my boat failed - too cold. Well, I just wait until spring 2010.
Daniel, I hope you have the right temperatures to finish the boat the next days.
By the way, I saw a few pictures of your trailer and I'm interested about the construction of the long bars where the boat sits on it.
The reason is that I have to modify my trailer for the GF16.
Could you please make some photos of these bars? Are these bars made of wood and covered with a special carpet? ...and could you measure how thick and wide they are?
It would help me a lot ....and saving time.....and I could use the winter time for senseful work for boating.
Thanks!
Bye
Bernd
Sorry to hear about your weather Bernd, but good decision on waiting. You'd probably get in a hurry and end up a poor finish and regretting it.
Sure thing on the trailer. I get some detailed pictures of the bunks for you early this week.
For now, they're made with 2x6 pressure treated pine cut 9 feet long and they're covered with outdoor carpet.
Re: Murry's gf16
Posted: Sun Oct 18, 2009 10:07 pm
by Murry
Re: Murry's gf16
Posted: Mon Oct 19, 2009 8:30 am
by topwater
Murry you do real nice work
Re: Murry's gf16
Posted: Mon Oct 19, 2009 9:23 am
by mecreature
Yeah he does! Looks great.
Re: Murry's gf16
Posted: Tue Oct 20, 2009 7:13 am
by Murry
Re: Murry's gf16
Posted: Tue Oct 20, 2009 10:23 am
by bernd1
Daniel,
the boat looks good - I'm interesting how fast the GF16 will go......a big surprise - maybe. My idea is to make a movie of a GF16 with different speeds and different loads/ weights in the boat. Additional with or without a tiller extension. A help for other builder to have a look in their future and for motivation .
Today I received a epoxy system from a german manufacturer with 15min working time and for temp. 5°C. - to seal/coat my rubrail - but the weather hit me again -today -2°C.
Keep on building.....I want to see a GF16 in motion....
Bye
Bernd
Re: Murry's gf16
Posted: Tue Oct 20, 2009 10:29 am
by Cracker Larry
That looks great Daniel! You've done a fine job. Good luck with the splash.
.....I want to see a GF16 in motion....
32 mph, 500 pounds of people and gear..

Re: Murry's gf16
Posted: Tue Oct 20, 2009 12:42 pm
by bernd1
Hi Larry,
......a movie of a GF16 in motion
- but thanks, I know the picture.....
Bye
Bernd
Re: Murry's gf16
Posted: Fri Oct 23, 2009 4:00 pm
by Murry
Thanks for the complimets guys.
Well it got wet and it didn't sink.
no pictures unfortuanelty.
Bernd, a good friend of mine made a small video on the water ,but I'm not exactly sure how to make it visable on line.
The boat did fine, but I will need to experiment with the motor hieght a little more. With the motor set level to the bottom the cavitation plate was under the water and I had a fair amount of porpoiseing at full speed. While porpoiseing I managed 29 m.p.h at full throttle.
She should be over thirty after I get her smoothed out a bit. I was able to trim her way down to stabilize the ride but I had a lot boat in the water at planing speeds which slowed her down quite a bit.
There's only one thing that I wasn't overly excited about. I wasn't prepared for the amount of bottom flex (oil caning) I experienced at planning speeds. I'm sure its normal especially since I used the most flexable ply and I went with short runners leaving most of the bottom in front of the middle seat without their support, but even the rear portion of the bottom flexed quite a bit (bottom between the rear and middle seat).
Is there anything to worry about here?
I guess the high level of flexability probably makes it sronger since it'll flex instead of break, but I'm concerned about years done the road.
Will excessive flexing eventually lead to hull failure?
Daniel
Re: Murry's gf16
Posted: Fri Oct 23, 2009 4:05 pm
by peter-curacao
Murry wrote:Bernd, a good friend of mine made a small video on the water ,but I'm not exactly sure how to make it visable on line.
Just do an upload on you tube and place that link here, otherwise sent it to my email and I will do it for you if you want. good luck
Edit: also congratulations on the splash !!! sorry
I forgot that in the first place must be the excitement
or green rum
Re: Murry's gf16
Posted: Fri Oct 23, 2009 5:48 pm
by BassMunn
Hey congrats on the Splash Daniel!!!!!
I won't even attempt to answer your question about the flex, I haven't got the foggiest notion, sorry
Re: Murry's gf16
Posted: Fri Oct 23, 2009 6:08 pm
by wegcagle
congrats on the splash Murry. Get some pics to us ASAP
If moving the motor up doesn't help, sometimes the stabilizer fins work really well. As far as the flex in the hull is concerned. C.L. will probably be able to give you some light on it since he had one for a while.
Will
Re: Murry's gf16
Posted: Fri Oct 23, 2009 8:02 pm
by Cracker Larry
All right, another test splash this week
Congratulations
You'll work the bugs out.
With the motor set level to the bottom the cavitation plate was under the water and I had a fair amount of porpoiseing at full speed.
What were the water conditions, any chop, swell, ripple?
This boat is very sensitive to weight distribution. She's light on her nose and needs some weight forward if you're going to run her wide open by yourself. Remember, this boat is only rated for 15 hp. You've increased it 60%. I kept my fuel tank in the bow, cooler in the bow, and when by myself I put a 100 pound piece of railroad track in the bow compartment. With a passenger you won't need that.
A hydrofoil of some type is a necessity, it will really help hold the bow down and keep it from bouncing, and to keep the wind from getting under it. I used a Doel Fin, haven't tried any of the others. It will make a big difference, worth the 50 bucks. Also make sure your trim limit pin is as low as it will go.
There's only one thing that I wasn't overly excited about. I wasn't prepared for the amount of bottom flex (oil caning) I experienced at planning speeds. I'm sure its normal especially since I used the most flexable ply
Hmmm... mine didn't flex much at all. None in smooth water. Not much in rough water, but you slow down for rough water.
I went with short runners leaving most of the bottom in front of the middle seat without their support, but even the rear portion of the bottom flexed quite a bit (bottom between the rear and middle seat).
Those runners might not be quite adequate, especially at that HP. Didn't you use a triangular cross section also? On the GF16, the runners are specified structural and they need to extend past that big bow section. That's what supports it. I used solid 1X2s and they extend a few inches forward of the bow frame, supporting the entire bottom.
At this point, I know you don't want to rebuild your runners, but if it's flexing a lot in smooth water, maybe consider adding a skeg that will span from the rear frame to the bow frame. A little flexing is normal, more than a little is not.
Re: Murry's gf16
Posted: Sat Oct 24, 2009 6:48 am
by bernd1
Daniel, congratulation to your first ride.
I'm happy to hear that you made a movie of the first ride - but a little bit sad about the flexing bottom.
If mine would flex so much I would glue two bars of douglas fir inside the boat onto the bottom to stifften it.
It doesn't look go, but that would be the way I do if mine is also flexing.
I would glue it from the front frame of the mid seat until to the front deck frame - all inside !And the same at the rear part.
Well, if you do it so you haven't to work on the outside.
Maybe other builders have other solutions.
Daniel, I'm looking forward to the movie
Bye
Bernd
BTW: Today 12°C outside....I prime the inside of the boat.....
Re: Murry's gf16
Posted: Sun Oct 25, 2009 11:18 am
by Murry
Thanks guys, but as you can tell it was a little bitter sweet.
I'm not sure if it was a little or a lot of flex Larry. I have zero reference, but probably unable to get a second opinion.
I need to take her back out and take better notes. It wasn't flexing on flat water, just while porpoiseing and hitting my own wake after making turns.
Construction:
I did triangulate them, but I made my length decision based on what looked good to me and the picture in the building notes.
The strakes in the picture of the notes don't even come close to the front frame leaving the front part of the bottom with out their support and they're built from 1x1's. I made sure I carried them past the bottom panel seam to strengthen that joint.
I also built this boat with Okoume which is more flexable than meranti. Not sure how much though.
I won't hesitate to srengthen the boat, I just want to make sure I need to before I do, she's already heavy.
Larry I had a doel fin in the tool shed that I never used on my old boat. Dry fit her on Friday night and it fits nicely. Thanks.

Bernd, I like your idea by building up the interior, but not sure if I want to give up the flat bottom.
What about laminating another layer of 1/4 inch in the inside.
Probably add to much weight.
If I went with a skeg what should the deminsions be?
Saturday morning I made a frame for a tarp to keep the sun off for a few weeks. After she's finished (may be a little longer than originally thought
) I'll modify this support and buy a nice fitted cover, but this will do for now.
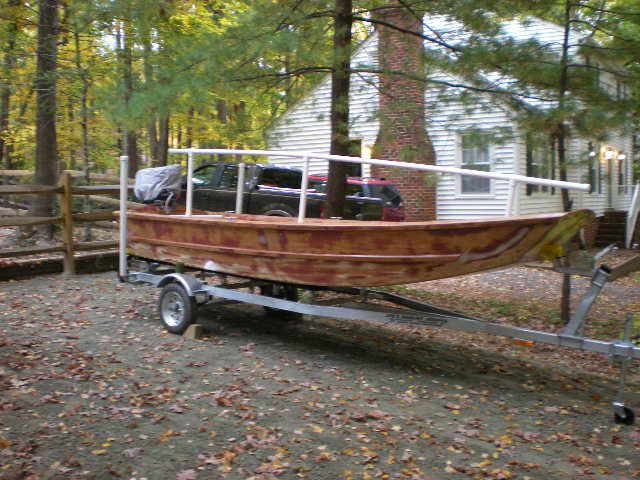
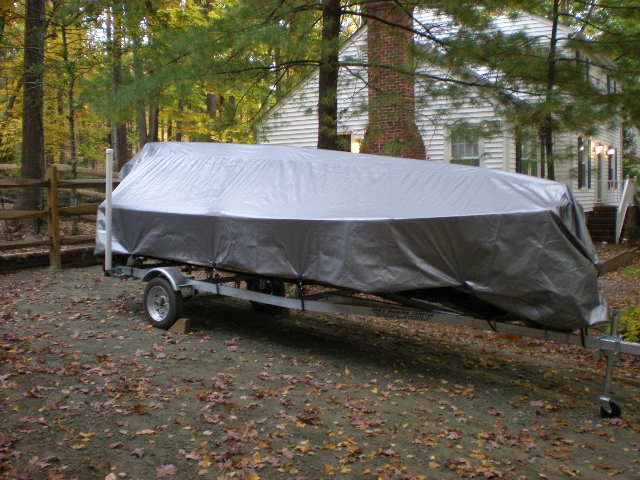
Pondering,
Daniel
Re: Murry's gf16
Posted: Sun Oct 25, 2009 2:32 pm
by TomW
Daniel don't want to be the bearer of bad news but that PVC frame will collapse under a heavy snow. I know have used PVC on some of my nursery shelters. More than about an 1-2" will start putting stress on it and you'll have to go out and knock it off. We'll just hope for the best that you don't get any snow till you get back to it.
Tom
Re: Murry's gf16
Posted: Sun Oct 25, 2009 3:10 pm
by rjezuit
This time of year in the northern hemisphere, I wouldn't worry about a couple of weeks of sun exposure. Probably won't even get it warm, and the UV is way down from summer. Rick
Re: Murry's gf16
Posted: Sun Oct 25, 2009 9:32 pm
by Murry
TomW wrote:Daniel don't want to be the bearer of bad news but that PVC frame will collapse under a heavy snow. I know have used PVC on some of my nursery shelters. More than about an 1-2" will start putting stress on it and you'll have to go out and knock it off. We'll just hope for the best that you don't get any snow till you get back to it.
Tom
Thanks Tom,
I'm sure you get a lot more snow than we do. I'll keep her cleaned off.
Thanks Rick, I was going on better safe than sorry.
Cracker Larry wrote:At this point, I know you don't want to rebuild your runners, but if it's flexing a lot in smooth water, maybe consider adding a skeg that will span from the rear frame to the bow frame. A little flexing is normal, more than a little is not.
I had to take a several hour road trip this evening which gave me the needed time to ponder.
The center skeg won't work in my case because of the baitwell drain which is dead center through the hull at the middle seat.
I'm entertaining the following two options:
1.Remove my strakes and install longer and stronger ones.
2.Laminate a layer of 1/4 inch ply to the front section of the bottom.
Comments and other suggestions are welcome ofcourse.
Re: Murry's gf16
Posted: Sun Oct 25, 2009 9:52 pm
by TomW
Daniel I would cut off and add longer and stronger runners than add the extra weight of another peice of plywood. Also did you fiberglass both sides of the bottom with biax. I seem to remember you did. When I rode in Larry's there was little if any oil canning in wave approaching white cap size.
Tom
Re: Murry's gf16
Posted: Sun Oct 25, 2009 10:07 pm
by Murry
TomW wrote:Daniel I would cut off and add longer and stronger runners than add the extra weight of another peice of plywood. Also did you fiberglass both sides of the bottom with biax. I seem to remember you did
Tom
Yep, Two layers on the outside and one on the inside.
I sure wish someone could ride in this thing and tell me if it's O.K. or not.
I don't want to exagerate myself into extra uneeded work. Who wants to come to Virginia.
I'm only kidding.
I double checked the the picture of the side profile on the building notes today and the strakes are drawn real close to were I stopped mine.
I'm not completely convinced I've done anything wrong, but I know that I didn't like how much the bottom moved.
Thanks for your input Tom, and to think, I worked hard on those strakes to make them look so good.(to me anyway) I even glassed them twice.
I think they need more look before you guys convience me to hack them off.
Looks like I was wrong about taking them past the bottom seam. They stop right at it.
Re: Murry's gf16
Posted: Sun Oct 25, 2009 10:20 pm
by Murry
peter-curacao wrote:Murry wrote:Bernd, a good friend of mine made a small video on the water ,but I'm not exactly sure how to make it visable on line.
Just do an upload on you tube and place that link here, otherwise sent it to my email and I will do it for you if you want. good luck
Edit: also congratulations on the splash !!! sorry
I forgot that in the first place must be the excitement
or green rum
Thanks for the offer Peter. I stated an account this evening. It wasn't as bad as I thought.
The video is a bit rough guys, but it's all I have at the moment. My good budy did the best he could, but I didn't give him much to work with. There will be more, I'm sure of it.
http://www.youtube.com/watch?v=j4fzB6BvpMI
Re: Murry's gf16
Posted: Mon Oct 26, 2009 1:38 am
by TomW
Daniel with the 3 layers of fiberglass and those runners you shouldn't have much oilcanning. What size runners are they, look like 1 1/2 x 2 or so. Looked at Larry's and his were like 2 x 2. The way you shaped them took some strength from them of course, but not sure how much, certainly not 50%.
Tom
Re: Murry's gf16
Posted: Mon Oct 26, 2009 7:19 am
by Murry
TomW wrote:Daniel with the 3 layers of fiberglass and those runners you shouldn't have much oilcanning. What size runners are they, look like 1 1/2 x 2 or so. Looked at Larry's and his were like 2 x 2. The way you shaped them took some strength from them of course, but not sure how much, certainly not 50%.
Tom
Tom there finished sizes are 1x1x1 triangles. I think the length of the strake is the main issue, not necessarly their shape and I'm fairly sure that Larry used 1x2
. Mine don't really extend far enough forward to support the floor/bottom in front of the
middle seat.
Is that video working? I was to worried about the Game Warden showing up to ham up the camera, but it'll have to do.
Re: Murry's gf16
Posted: Mon Oct 26, 2009 8:44 am
by Cracker Larry
Daniel, you really need to span that splice point with the runners. That's why the runners are structural, to support that splice and the forward hull section. That's going to cause the hull to flex more, right at the splice. The splice is almost at the center of the bottom.
My runners were 12' long and extend forward of the splice almost 4 feet.
How about another pair of runners, 12' long, halfway between the existing ones and the centerline? That would fix it and not interfere with the baitwell.
Re: Murry's gf16
Posted: Mon Oct 26, 2009 10:43 am
by Murry
Cracker Larry wrote:Daniel, you really need to span that splice point with the runners. That's why the runners are structural, to support that splice and the forward hull section. That's going to cause the hull to flex more, right at the splice. The splice is almost at the center of the bottom.
My runners were 12' long and extend forward of the splice almost 4 feet.
How about another pair of runners, 12' long, halfway between the existing ones and the centerline? That would fix it and not interfere with the baitwell.
I reviewed the building notes again this morning and it's written very clear that the strakes should be 10 feet long which would
span the joint by two feet, which means at the very minimum I'm two feet short.
I've messed up, but it can be fixed. I'm glad I took her out before paint.
I think I'm going to cut and grind my strakes off and install new ones. I like the idea of adding two more Larry and appreicate the suggestion, but it may look two much like an after thought, which I want to stay away from. I don't mind doing the extra work to fix her right. She deserves it
I guess my question now is for all gf builders and passengers. I'd appreciate your help in decideing an a final size, shape and length.
Basically if your were building another gf 16 what type of runners would you glue up. Thanks for the help. (trying not to do it three times
)
Re: Murry's gf16
Posted: Mon Oct 26, 2009 11:52 am
by TomW
Daniel while the triangles are hydrodynamic and would be fine as strakes you need the wood as a structural support. I would use a minimum 1x2 as that will bend on the forward part okay then give the edge a 1/4" round with the router. Really I agree with Larry, two new runners half way in towards the centerline 12' long would not look bad and would save you a lot of work. Just make them like your current runners.
Tom
Re: Murry's gf16
Posted: Mon Oct 26, 2009 1:45 pm
by bernd1
Daniel thanks for the video.
About the runners....
I would do it in this way:
1. Cut another runner for each side.....as long until they meet the front deck frame...or a little bit longer.
2. Cut a triangle out of these new rectangle runners as long as the old ones are.
3. Glue these runners with the peak downside to get a rectangle runner (the lengh of the old one).....this means you have to glue the new ones to the side of the existing runners. You extend in this way your old one with less work.
4. Glass over the whole work 2 times
If you do it in this way, you don't have to remove the old one runners - the disadvantage is to have rectangle runners.
This is my idea to have less work. Maybe a solution for you - good luck!
Bye
Bernd
Re: Murry's gf16
Posted: Mon Oct 26, 2009 10:25 pm
by Bobg
That was a fine video showin what that boat will do, and why a hydrafoil is needed on a 25 hp engine. After watching the film, it looks like it would take plenty of weight to slow that boat down
I've read everything I could find on the building of the GF 16 from all you folks, and only hope mine will be a good representation of that fine design. After reading all I could, I went through over 24000 pics in the gallery, looking at the bulding techniques.
I know I won't have the good weather to finish a boat, but I might get started and finish in the Spring.
Bernd1, you caught my attention when you mentioned you were from Stuttgart. I was stationed there at the Army airfield, across the runway from Stuttgart International airport, from Feb 64' until August 66'.
Thanks to everyone for your input.
Bob
Re: Murry's gf16
Posted: Tue Oct 27, 2009 12:13 am
by Murry
Thanks guys,
I called Joel today and discussed the different options with him a bit and he liked the idea of removeing and installing new ones.
If I glue two runnners in between the old ones their span of support in front of the midseat and at the bottom splice would only be eight inches wide instead of the reccomended 16 inches. I know it requires the most work, but I'm planning to remove the old and install new ones.
Bernd, that's a good idea on saveing the old ones, but I'm afraid I'm not that good.
I don't own a table saw and I would probably spend more time cutting and glueing to match both sides up to get the same shape, I could have removed 10 runners.
Good Luck with your build Bob
You'll get plenty of help from the folks here and I bet your runners will be nice and strong the first time.
Thanks for all the suggestions guys. I think I've settled on 12 foot long Douglas Fir or S.Y.P 1x2's with a layer of biax running down each side ovelapping in the center of each runner.
Larry I really appreciate you quickly sharing with me about the normal amount of flex, so that I could fix this mistake properly. This will be a fine boat thanks to many folks like yourself.
Since this work won't affect the inside of the boat, I'll completely finish the interior before flipping, rebuilding and finishing the exterior.
It'll be a couple of weeks though, I need to get my house on the market first.
Daniel
Re: Murry's gf16
Posted: Tue Oct 27, 2009 8:26 am
by Cracker Larry
Good decisions Daniel
The best solutions are seldom the easiest.
How do you plan to cut the runners off? I'm thinking a sawzall with a long blade will zip them right off, like filleting a fish.
Re: Murry's gf16
Posted: Tue Oct 27, 2009 10:16 am
by Murry
Cracker Larry wrote:Good decisions Daniel
The best solutions are seldom the easiest.
How do you plan to cut the runners off? I'm thinking a sawzall with a long blade will zip them right off, like filleting a fish.
That should work nicely. I'll leave them a bit proud and finish them off with a grinder and DA. I'll also mask an area large enough to allow for taping the new strakes. I'll just take the masked area down to the layers of glass under the fairing compound for a good bond.
I'm excited about making the improvement.
My next boat will probably go a bit smoother.
Re: Murry's gf16
Posted: Tue Oct 27, 2009 1:42 pm
by bernd1
Bobg wrote:That was a fine video showin what that boat will do, and why a hydrafoil is needed on a 25 hp engine. After watching the film, it looks like it would take plenty of weight to slow that boat down
I've read everything I could find on the building of the GF 16 from all you folks, and only hope mine will be a good representation of that fine design. After reading all I could, I went through over 24000 pics in the gallery, looking at the bulding techniques.
I know I won't have the good weather to finish a boat, but I might get started and finish in the Spring.
Bernd1, you caught my attention when you mentioned you were from Stuttgart. I was stationed there at the Army airfield, across the runway from Stuttgart International airport, from Feb 64' until August 66'.
Thanks to everyone for your input.
Bob
Hi Bob,
thanks for your email - I read that you also want to build a GF16 - true?
Therefore I would have an eye to the followed things:
1. Build a jig to have a flat bottom - no hook no rocker - very important
2. Do not cut two openings through the seat tops (like I did) - If I would do it again, just one opening for a seat top - and that opening covered with a bought hatch - less work easier to handle.
3. Cut the opening at the foredeck frame smaller as I did - If too wide , your tackle always jumps out when opening the hatch.
4. Floatation - I did until yet no buoyancy foam in- that was a big mistake (additional work in future) - please put foam in the boat. I would divide the rear seat , the mid seat into 3 parts and would put the foam into the right and left part. The middle part would be my storage space. After that glueing the seat tops.
5. Routing fuel line and wires - like Daniel did - a gunwahale .
These were my points for a second GF build.
Have fun during building !
Bye
Bernd
Re: Murry's gf16
Posted: Tue Oct 27, 2009 2:37 pm
by Bobg
Bob[/quote]
Hi Bob,
thanks for your email - I read that you also want to build a GF16 - true?
Therefore I would have an eye to the followed things:
1. Build a jig to have a flat bottom - no hook no rocker - very important
2. Do not cut two openings through the seat tops (like I did) - If I would do it again, just one opening for a seat top - and that opening covered with a bought hatch - less work easier to handle.
3. Cut the opening at the foredeck frame smaller as I did - If too wide , your tackle always jumps out when opening the hatch.
4. Floatation - I did until yet no buoyancy foam in- that was a big mistake (additional work in future) - please put foam in the boat. I would divide the rear seat , the mid seat into 3 parts and would put the foam into the right and left part. The middle part would be my storage space. After that glueing the seat tops.
5. Routing fuel line and wires - like Daniel did - a gunwahale .
These were my points for a second GF build.
Have fun during building !
Bye
Bernd[/quote]
Yes the gf 16 will be my boat of the future. I've already got the plans
I've also got some 2x6's, scrounged from a remodel job out of a dumpster for the jig.
My storage hatches will be in the frames and totally removable, nothing in the seat tops.
I've got other ideas about the interior layout also, Things I'll try, before gluing in place.
Murry, when I first saw your strake design, I imediately thought of the strakes in an aluminum jon boat. They're put there as a design feature/flex, and at least 4 stamped bends/strakes in the hull, for strength. I wished they would've worked out for you, but I had my doubts when done in wood, and only two. They did look great though.
I read in a post where Jaques made a suggestion of running a 1x4 done through the middle on the inside of the hull, stern to bow, along with the strakes added to the bottom. After seeing that boat under power with a 25 hp, I know it can handle the extra weight for strength. I even concidered foaming or laying foam in the bottom and sealing it in with a second deck over it, maybe not.
I've been doing some oyster harvesting here in S/E NC, Holden Beach area, and decided that this needs to be a tough hull. I see aluminum runners on my strakes, and graphite in my apoxy.
Bob
Re: Murry's gf16
Posted: Tue Oct 27, 2009 3:12 pm
by mecreature
Knock off the old ones and build new.. I can see how the bigger ones would add a ton of support to the bottom..
Looking good.
just lacks finishing up. tweak here and there.
Re: Murry's gf16
Posted: Tue Oct 27, 2009 11:04 pm
by Murry
Lookng forward to seeing your ideas there Bob. Yeah I guess I'll have to wait and install those triangulated strakes on a boat where there not structural.
I think the main issue with my install was their length. I don't think the reccomended 1x1's would be much stronger than the ones I had glued up, but they needed to be longer for sure. Haveing said that, knowing what I know now they would have been 1x2's to start with.
These boats move pretty good with 25's pushing them.
There will still be some bottom flex after the fix, but I won't worry about it. She'll be plenty strong.
Yeah mecreature, that's the plan.
I've been getting close for quite some time now.
Re: Murry's gf16
Posted: Wed Oct 28, 2009 2:36 pm
by cape man
Sounds like a good plan. Always sucks to take a step back, but in the end you can go fishing without any worries. You'll get there!
Re: Murry's gf16
Posted: Thu Oct 29, 2009 6:59 pm
by Bobg
Bernd, did you raise your motor up yet? Your Mariner being built like the Mercury 25 is an odd length, like CL found out, and so did I
If not, this is what I built a few years ago on an aluminum jon boat.
http://www.catfish1.com/forums/showthread.php?t=38827
Re: Murry's gf16
Posted: Thu Oct 29, 2009 9:35 pm
by Arm&Hammer
Bobg - nice work on the homemade jackplate.
Murry and Bernd, I didn't realize that you both had height issues with your transoms. I mentioned that in my GF12 thread. I made the newbie mistake of assuming that a 15" shaft was a 15" shaft. Not so, atleast per all of the research that I did. Vertical distance (transom height), for almost every "short shaft" that I could find on line was from 16.5" to the low 17"s. Same thing for the long shaft, ie 20". They are all around 22". I don't know if they use a generic 15" or 20" shaft length assuming a v-bottom, but I have yet to find one that is a true 15", or 20". I will probably wait until next spring to water test mine, but I imagine that I will either build up my transom approx. 2", or buy something like the "minijacker" (a fixed small jackplate that only sets back 3-4" from the transom, designed for up to 35hp).
If you have found different specs, where a 15" is a true 15" of vertical transom height, I would appreciate seeing it!
Re: Murry's gf16
Posted: Sun Nov 01, 2009 9:36 am
by Murry
Arm&Hammer wrote:Bobg - nice work on the homemade jackplate.
Murry and Bernd, I didn't realize that you both had height issues with your transoms. I mentioned that in my GF12 thread. I made the newbie mistake of assuming that a 15" shaft was a 15" shaft. Not so, atleast per all of the research that I did. Vertical distance (transom height), for almost every "short shaft" that I could find on line was from 16.5" to the low 17"s. Same thing for the long shaft, ie 20". They are all around 22". I don't know if they use a generic 15" or 20" shaft length assuming a v-bottom, but I have yet to find one that is a true 15", or 20". I will probably wait until next spring to water test mine, but I imagine that I will either build up my transom approx. 2", or buy something like the "minijacker" (a fixed small jackplate that only sets back 3-4" from the transom, designed for up to 35hp).
If you have found different specs, where a 15" is a true 15" of vertical transom height, I would appreciate seeing it!
Yeah, I think it's best to wait and finalize your transom height later on in the build when using small clampable outboards. I attempted to do that with mine by cutting it to 21 inches during the build. That wasn't enough.
I had to add another inch to it. I think you're right they're all a little long, some more than others. Maybe for the fact that it's a lot easier to raise the engine than to shorten a transom.
I had a hard time letting the boat sit after installing the doel fin, so I put her back in the water this weekend.
I also wanted to get a picture of the boat sitting in the water as well as get a few photo's of the trailer for Bernd.
I took a break from house work to do this, so I told my bride that it was Bernd's fault. I hope you don't mind buddy.
The doel fin made a huge difference. I was able to get on plane and run wide open with just myself in the boat while sitting on the rear seat with out porpoiseing. Of'course I had the bow trimmed all the way down with the adjustment pin, but I'm sure with a little weight towards to the bow, I'll be able to trim her up a bit. I was pleased with the results over all.
Now to fix the runners.... it'll be several weeks before I can get back on it.
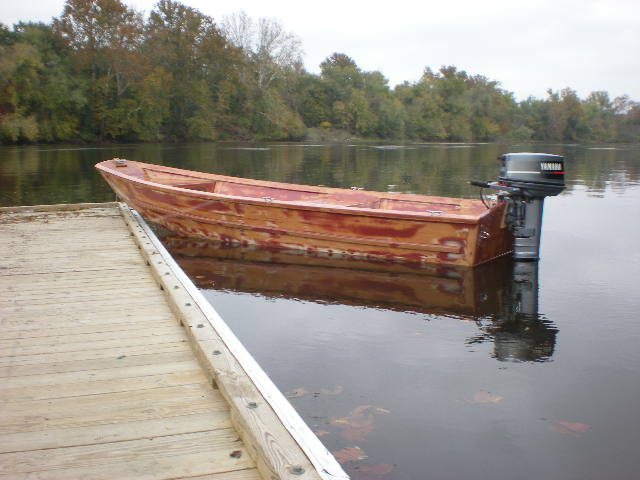
and the boats real owner... my friend has a Beagle who lived beside a family that owned a pomeranian....Pomeranian got loose... and now we have Maggie.
)

Re: Murry's gf16
Posted: Sun Nov 01, 2009 10:30 am
by cape man
Looks like the beagle genes won that one! Thank God! Nice pooch.
Re: Murry's gf16
Posted: Sun Nov 01, 2009 12:07 pm
by Murry
cape man wrote:Looks like the beagle genes won that one! Thank God! Nice pooch.
You couldn't be more right Craig and I agree.
Re: Murry's gf16
Posted: Sun Nov 01, 2009 12:28 pm
by peter-curacao
Murry wrote:Of'course I had the bow trimmed all the way down with the adjustment pin, but I'm sure with a little weight towards to the bow,
Now that's a handsome bow trim weight

Re: Murry's gf16
Posted: Sun Nov 01, 2009 4:10 pm
by bernd1
Hi Daniel,
nice to hear that you are satisfied with ride of the GF while using the doel fin - hope to say the same if it ride mine the first time......in spring 2010
.
Bye
Bernd
BTW:......just tell your bride that it was my fault to stop working at the house -no problem...a few flowers and you can keep on working on your runners
Re: Murry's gf16
Posted: Wed Dec 30, 2009 7:22 am
by Murry
I hope everyone had a Merry Christmas, I sure did.
I also wanted to share some great news with everyone, afterall as much time as we spend writing and reading posts, we're pratically family.
My first deck hand is on way.
Due 5/20/2010

Re: Murry's gf16
Posted: Wed Dec 30, 2009 8:26 am
by cape man
Let me be the first to congratulate you and your wife. Fantastic times are now with you both. I had my daughter in the boat in a back pack (with a life preserver lashed to it).
Re: Murry's gf16
Posted: Wed Dec 30, 2009 8:50 am
by Murry
Thank You very much capeman. We are very excited to say the least....... and a bit nervous.
Re: Murry's gf16
Posted: Wed Dec 30, 2009 9:03 am
by Larry B
Murry, congrats on the new addition. They are alot of work and alot of fun but the most enjoyable thing you will ever have in life.
Your not far behind me now, I've got 4 grand kids, 2 boys, and 2 girls oldest boy is 12, Had 2 daughters to start with.
Just enjoy them as much as you can because time really flies when your having fun. And it seems to fly faster when you get older.
Re: Murry's gf16
Posted: Wed Dec 30, 2009 9:15 am
by Murry
Larry B wrote:
Your not far behind me now, I've got 4 grand kids, 2 boys, and 2 girls oldest boy is 12, Had 2 daughters to start with.
I think you got me beat Larry.
I'll see what I can do.
Re: Murry's gf16
Posted: Wed Dec 30, 2009 12:16 pm
by Cracker Larry
Congrats to you and your wife Daniel. I don't envy you a bit though. My son turns 21 tomorrow
Re: Murry's gf16
Posted: Wed Dec 30, 2009 12:43 pm
by Murry
Cracker Larry wrote:Congrats to you and your wife Daniel. I don't envy you a bit though. My son turns 21 tomorrow
I feel you pain there Larry.
I've got 21 years and a couple of months before I get to worry about that. I guess I'll start by taking it a day at time with a lot of prayers in between.
Re: Murry's gf16
Posted: Wed Dec 30, 2009 1:27 pm
by TomW
Daniel congrats hope all goes well and your new deck hand is healthy and hearty.
Tom
Re: Murry's gf16
Posted: Wed Dec 30, 2009 8:33 pm
by wegcagle
Congrats Murry,
Don't let them scare you too much. My little girl is now 7months. She's done way more growin' than the boat has in that time.
She's the greatest gift I've ever received. The first couple of months are hard, but then one day you walk in the door from a hard day at work to see a huge toothless grin light up on her face. Then you're putty in their hands
Something like this....

Lookin' forward to headin' up your way. Once we get settled, you and I will have to get together for a day or 2 of fishing. We can drop the women and children off together (but make sure we get the credit cards
)
Congrats again,
Will
Re: Murry's gf16
Posted: Thu Dec 31, 2009 3:53 am
by colonialc19
Daniel, thats great news! Congatulations
D
Re: Murry's gf16
Posted: Thu Dec 31, 2009 7:12 am
by Murry
Thanks alot guys.
We're headed to the doc this morning to find out the gender
I'm looking forward to that toothless grin someday soon. She's precious Will. My boat should be done before May 20. I'm close.
and the future fishing trip sounds like
a great plan.
Re: Murry's gf16
Posted: Thu Dec 31, 2009 1:18 pm
by Murry
It's a BOY
, Momma and baby are doing great.
Thanks again go all the well wishes gentlemen. I'd appreciate your prayers as well.
Daniel
Re: Murry's gf16
Posted: Thu Dec 31, 2009 3:39 pm
by wegcagle
Great news Daniel. Glad momma and the baby are doing well.
Will
Re: Murry's gf16
Posted: Thu Dec 31, 2009 5:17 pm
by TomW
That's great Daniel, let's see born in May 2010, that means a teenager in 2023. Only 13 1/2 years to go.
Tom
Re: Murry's gf16
Posted: Thu Dec 31, 2009 7:24 pm
by BassMunn
Congrats Daniel, that's wonderful news. My boy is now 5 and my little girl is 2 and Dad is like putty in their hands
It's the most amazing blessing you could ever receive. (And also the most expensive and scary
)
Re: Murry's gf16
Posted: Thu Dec 31, 2009 8:40 pm
by chicagoross
Congrats! Mine are almost 6 and 7 now. Wouldn't trade the experience for anything!
It's the most amazing blessing you could ever receive. (And also the most expensive and scary )
That's for sure! During the early years there are so many milestones for a parent to celebrate, they far exceed glassing the hull or closing the sole! First tooth, first steps, first words! But you have to wait a few years for the real biggy: Last run to the store for more Enfamil and Pampers! Until you finish with the diapers and formula, the epoxy budget is going to be severely depleted!
Re: Murry's gf16
Posted: Fri Jan 01, 2010 3:41 am
by steve292
Congratulations Daniel. I've got 2 girls, nearly 5 & 2, both in febuary.
It's the most amazing blessing you could ever receive. (And also the most expensive and scary )
Until you finish with the diapers and formula, the epoxy budget is going to be severely depleted!
Wouldn't trade the experience for anything!
All the above is true
Steve
Re: Murry's gf16
Posted: Fri Jan 01, 2010 7:35 am
by Bobg
And just when you think it's all said and done, grandchildren come along.
Congats on your new adventure.
Re: Murry's gf16
Posted: Mon Jan 25, 2010 12:35 pm
by Murry
Thanks guys, Momma and and baby are doing great.
Honey dues are done (house is on the market), so I've got until May 20 to get this boat finished up.
I was able to bring it to work and piddle a bit until things warm up, so I thought I'd bring my build up to speed.
The first thing I needed to do before primeing this thing was to double check my baitwell to middle seat top seal. I had purposely left a hole in the top of the middle seat over foam filled compartment that my baitwell sits in to check this seal.
(if it leaks I'd fill the top of that sealed compartment with baitwell slosh and I'd never know it or be able to get it out.
Well I checked it and the results weren't good.
I used a piece of automotive diagnostic equipment (evap machine/smoke machine) and I found several leaks around the surface. I attempted to caulk the area but it was a tight fit and I didn't like the idea of not knowing how well I sealed it for fear of future leaks. Beccause of its location I'd never know it was leaking and I'd end up with batiwell water sloshing over into my sealed foam compartment.
So I made a permanent repair.
I first routed an area directly over the baitwell lip. There was plenty of glue on both sides of the gap ensureing that the baitwell hatch area wouldn't move. (but I did find several areas where the glue had never contacted the seat top.)
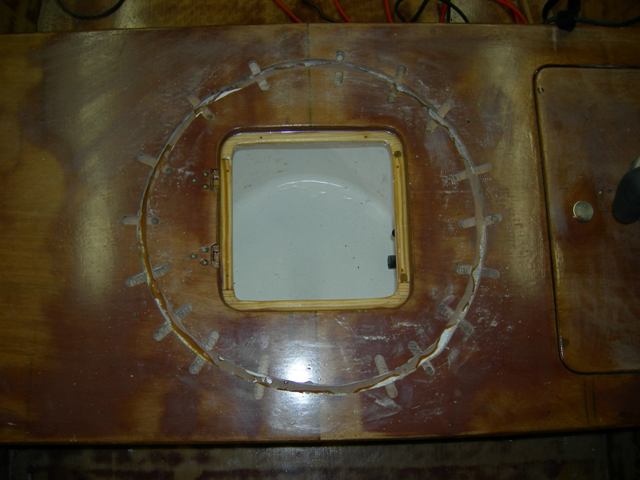
after sanding the gap real good with a dremel tool, I poured the thickened epoxy in the gap and installed oak dowles across the gap to tie both pieces back together. After it cured I sanded it down and recessed the area to make it easier to fair after applying the fiberglass over the joint.
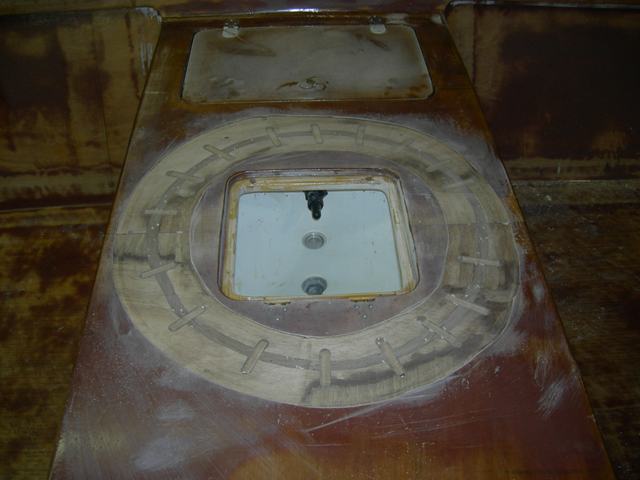
...and then I taped over the repair.
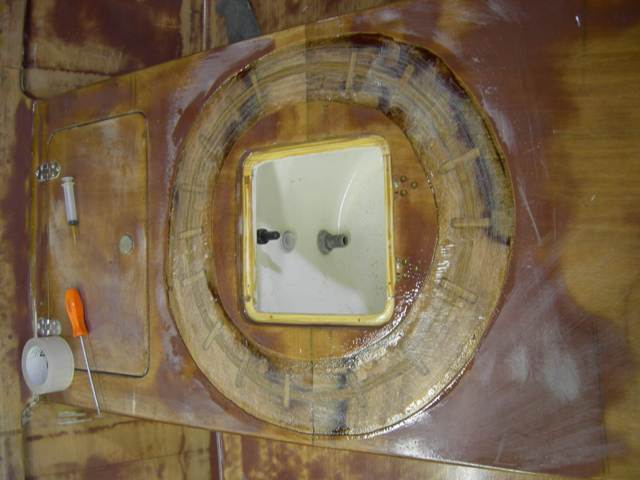
and after fairing.
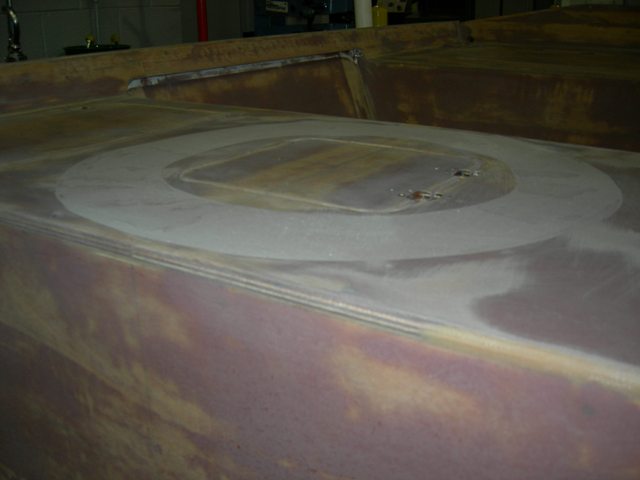
I let that cure in the shop for several days and then I put on three coats of primer over the weekend.
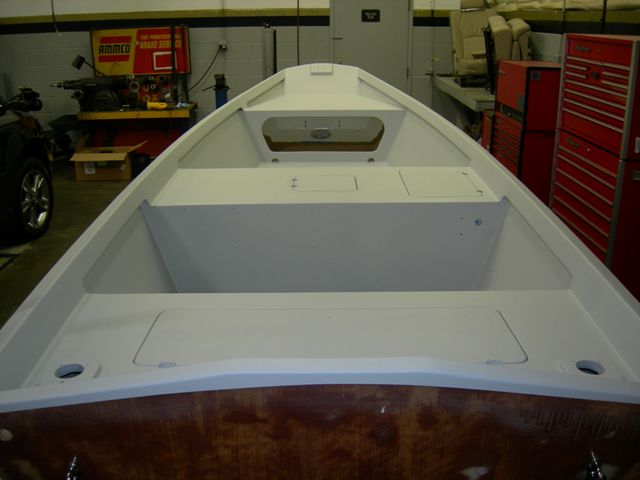
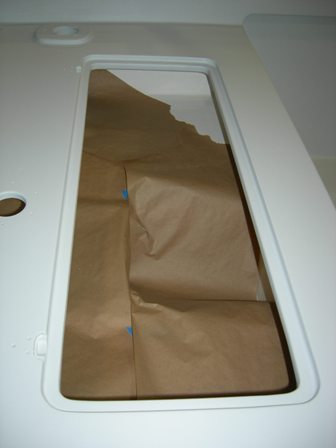
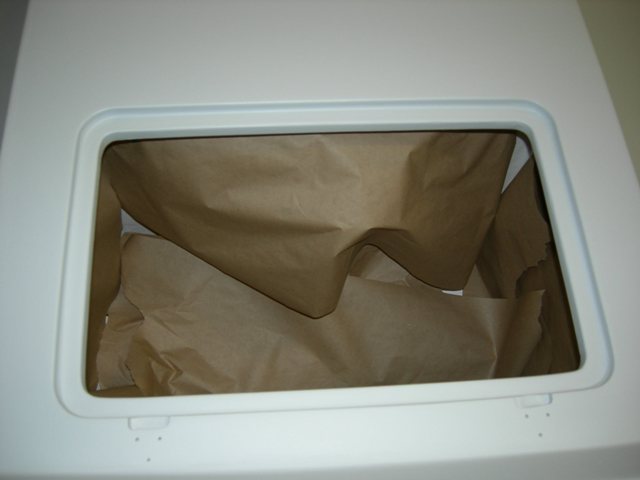
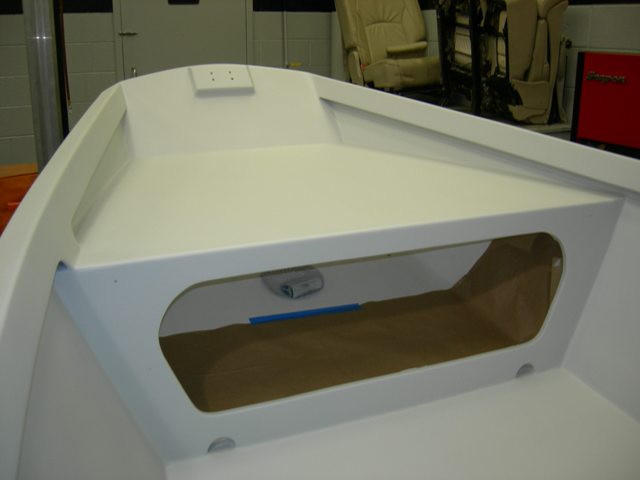
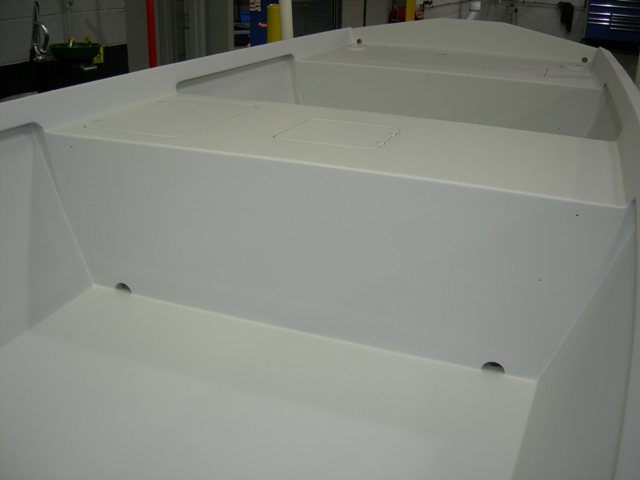
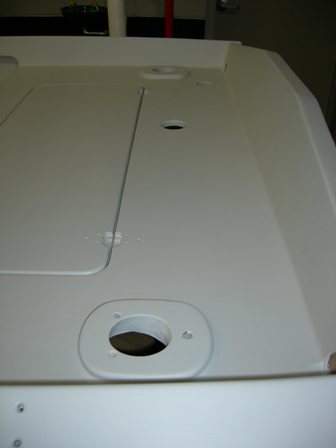
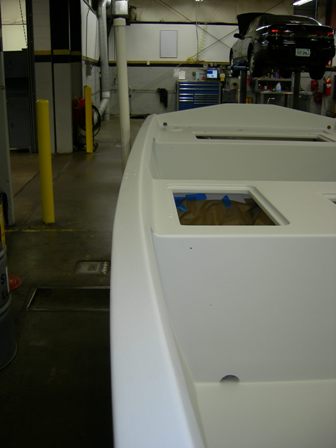
Getting closer.
Daniel
Re: Murry's gf16
Posted: Mon Jan 25, 2010 1:08 pm
by peter-curacao
That's beautiful

Re: Murry's gf16
Posted: Mon Jan 25, 2010 1:14 pm
by steve292
Nice work! very impressive
Steve
Re: Murry's gf16
Posted: Mon Jan 25, 2010 7:44 pm
by Cracker Larry
Re: Murry's gf16
Posted: Tue Jan 26, 2010 7:19 am
by Murry
Thanks guys!
I'll be filling a couple of spots today with quickfair at lunch in preparation to sand her again this evening.
I'm planning to hit it again with 120, apply to more coats of primer and final sand with 320. I'll then rework my strakes and then
prime the exterior.
My painter at work has offered to give me hand and teach me how to spray, so we'll be painting her in the booth here at work.
Daniel
Re: Murry's gf16
Posted: Tue Jan 26, 2010 7:42 am
by cottontop
Great work, Murry. Your daughters are going to love being in the boat with you. My daughter loves fishing. I started her and my son out at about 3 yrs. old. From the beginning, I made them bait their own hooks and remove their own fish. She's 30 now and still doesn't like the baiting and fish removal but does it. Your kids will grow up so fast. Enjoy them as much as possible. I have a 3 year old grandson now and he's learning to fish and loves it. Your friends won't believe she home built. Keep up the good work. John
Re: Murry's gf16
Posted: Tue Jan 26, 2010 8:07 am
by Murry
Thank You John.
I'm really looking forward to the day I get to start taking my family fishing and I appreciate the compliments on the boat as well.
Re: Murry's gf16
Posted: Tue Jan 26, 2010 9:19 am
by cape man
Lookin' Good!!!!
Re: Murry's gf16
Posted: Wed Jan 27, 2010 7:58 pm
by colonialc19
Looks Great Daniel, can't wait to see final paint
Re: Murry's gf16
Posted: Wed Jan 27, 2010 10:57 pm
by ks8
Nice and clean.
I like the grip you can get on that inwale with your thumb(s). Done that more than once wobbling over a huge wake.
Re: Murry's gf16
Posted: Sun Apr 18, 2010 12:12 am
by Murry
Shaking the dust off this thread is way overdue.
Been busy selling my house and moving and my bride has started to nest fairly hot and heavy. You know what they say, When momma's happy.................. So I've been doing everything she asks.
Over the past couple of weeks I was able to find some time to redo my strakes though.
I removed the small ones then glued, glassed and faired these made from 5/4x6 ripped to actual 2 inches out of Douglas Fir.
I carried them far enough to overlap the casting deck frame a few inches to stiffen up the bottom.
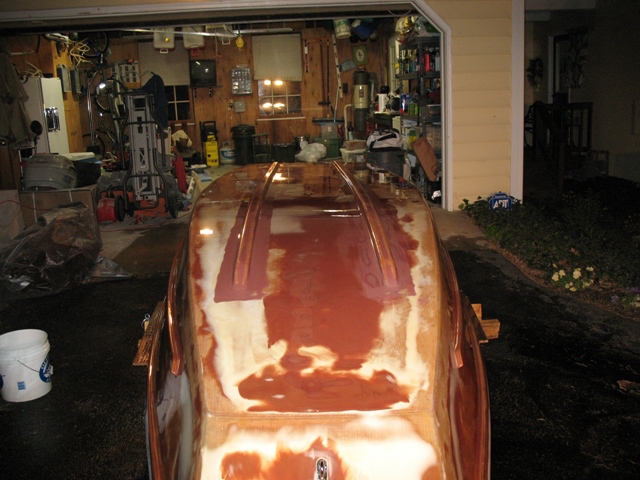
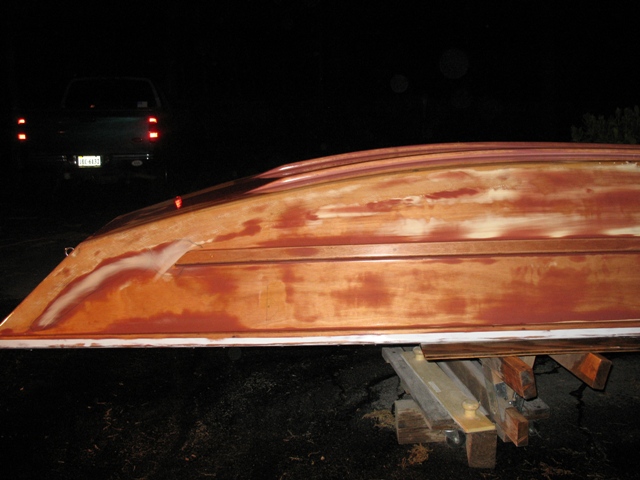
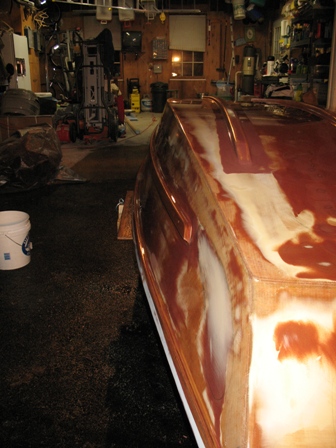
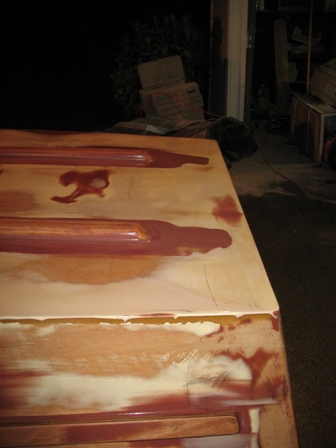
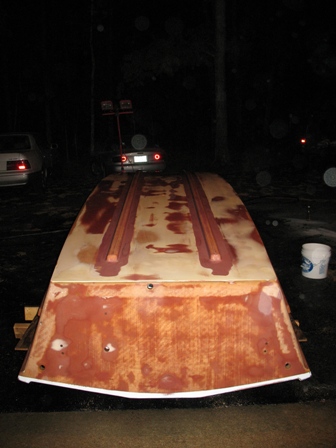
I hope to put on some primer this week.
Daniel
Re: Murry's gf16
Posted: Sun Apr 18, 2010 12:15 am
by Fonda@kauai
Very clean Murry
Did you glass over the runners? It would be a shame to hit something and take a chunk out of those beauties.
Re: Murry's gf16
Posted: Sun Apr 18, 2010 1:11 am
by gstanfield
Hmm, I know nothing about boat design and how effective those will be curving up at the front, but man I love the way they look
I can see how it would stifen the boat and save the hull when beaching too.
George
Re: Murry's gf16
Posted: Sun Apr 18, 2010 8:09 am
by Murry
Thanks guys.
Yeah Fonda, I glassed them with 12oz. biax. Only one layer though. I was running low on supplies.
gstanfield wrote:Hmm, I know nothing about boat design and how effective those will be curving up at the front, but man I love the way they look
I can see how it would stifen the boat and save the hull when beaching too.
George
Neither do I George. That's why this is the second set of strakes I've put on this boat.
The first ones were to short and I wasn't going to make the same mistake.
Re: Murry's gf16
Posted: Sun Apr 18, 2010 10:23 am
by Dog Fish
Good job Daniel, first keeping mama happy ( most important ) and second the boat, but taking 2 or 3 month breaks don't cut it...................just messing with ya. The final paint is getting close, I bet you can't wait to get her wet
Sooooooooooooo close
Nice
Brian
Re: Murry's gf16
Posted: Sun Apr 18, 2010 5:26 pm
by Murry
Thanks Brian!
Yeah, I'm real exicted about getting some paint on her.
Re: Murry's gf16
Posted: Wed Apr 21, 2010 4:57 pm
by mecreature
Looking good. She will look sweet with some paint on her.
Re: Murry's gf16
Posted: Wed Apr 21, 2010 5:14 pm
by wegcagle
She's looking beautiful Daniel
. Where are you moving? I thought we were going to destroy some striper and ducks up there.
Next comes the primer. This is the part where SWMBO gets excited about the build
Will
Re: Murry's gf16
Posted: Wed Apr 21, 2010 11:15 pm
by Murry
mecreature wrote:Looking good. She will look sweet with some paint on her.
Thanks mecreature! I've got my fingers crossed.
wegcagle wrote:She's looking beautiful Daniel
. Where are you moving?
Thanks Will! I'm just moving about 20 minutes from my old house. My wife and I bought a piece a land and hope to be moving into our new house in Novmeber or December. Good news, is that I'll have my own place to build my next boat.
I'm looking forward to fishing with you and I'd love to give duck hunting a try. When are you guys moving to D.C.?
Daniel
Re: Murry's gf16
Posted: Thu Apr 22, 2010 7:40 am
by wegcagle
We just rented our place about a week ago. We will be officially moved in on July 1st. My place is less than 1/2 the size of my current house, and I'll be paying more than double a month in rent
I can tell I ain't in GA no more
Good luck with the move. I've always thought that moving to more land was always the better move
Boats coming along nicely. Keep up the good work.
If you need some help on that new boat I would love to volunteer. I'm a good sander and occasionally I get a mix of epoxy right as well
BBVs got me, so I gotta keep my skills up over the next 3 years, because my personal boat want list is climbing
Will
Re: Murry's gf16
Posted: Thu Apr 22, 2010 8:59 am
by RickW
Hey Will, I thought WE were fishing and hunting ducks together, what's this?!!
Just kidding...Daniel the boat looks great! I'm following both of your-all's builds, and switching between which I'm ordering the plans for. I think it's gonna be the gf because of the overall lower cost and quicker build time. (ask me again in 5 minutes)
Will, what area did you get your place in? Northern Va somewhere?
Re: Murry's gf16
Posted: Thu Apr 22, 2010 11:59 am
by wegcagle
Rick, what can I say. For a good boat building, duck hunting, striper fishing expedition I'll just about whore myself out to anyone
Seriously, I'm looking forward to moving up near you guys and we can't wait to experience a new town, state, and part of the country.
We rented a place on Capital Hill. It's really close to the Red line which puts me about 20-30 minutes from work. I DON'T do long commutes. If we can get a couple of these boats done and on the water, hell we can all get together. My little GV15 will hold 3 people easily and 4 a little tighter, so there's room for all.
Will
Re: Murry's gf16
Posted: Thu Apr 22, 2010 11:51 pm
by Murry
Thanks Rick.
Will,
Room for three sounds good to me.
Do you guys have any family or friends to help move you guys into your new pad?
If not, Let me know if you need a hand with anything.
Re: Murry's gf16
Posted: Thu May 13, 2010 11:17 pm
by Murry
My wife's water just broke.
The next picture I post won't be of my boat.
For those of you who pray, we sure would appreciate it.
Soon to be a daddy,
Daniel
Re: Murry's gf16
Posted: Thu May 13, 2010 11:23 pm
by TomW
Good luck to mother and baby, Daniel a little prayer has been said.
Can't wait for pictures of the newest boat builder!
Tom
Re: Murry's gf16
Posted: Thu May 13, 2010 11:49 pm
by Cracker Larry
Put a lot of towels in the truck for the ride. Don't ask me how I know. Don't leave the truck windows rolled up in the hot sun in the hospital parking lot with those towels in them for 2 days either
Don't ask me how I know
And I just gotta ask, when she gave you that news, was your first reaction to share it with us
God bless......
Re: Murry's gf16
Posted: Fri May 14, 2010 6:13 am
by wegcagle
Good luck Daniel. My prayers go out to our wife and soon to be newest addition
As cool as boat building is.....making babies are way more fun
Will
Re: Murry's gf16
Posted: Fri May 14, 2010 8:02 am
by colonialc19
Hey Daniel,
Congratulations
, exciting times for sure, praying for you and your family
.
Re: Murry's gf16
Posted: Fri May 14, 2010 11:03 am
by Murry
Thanks a lot guys. It's just a waiting game at this point. Don't have a clue how long labor's going to take, but momma and baby are doing great. Sarah's asleep, so I'm taking a second to give updates to family and friends.
I appreciate the prayers.
Cracker Larry wrote: Put a lot of towels in the truck for the ride. Don't ask me how I know. Don't leave the truck windows rolled up in the hot sun in the hospital parking lot with those towels in them for 2 days either
Don't ask me how I know
Thanks for the tip. I can't even imagine how wonderful that was.
Cracker Larry wrote:
And I just gotta ask, when she gave you that news, was your first reaction to share it with us
God bless......
My first reaction was to tell everyone that I new and to have as many people praying for a safe delivery as possibe and
I wanted to share that news with family and friends. You guys weren't the first people I told, but you did make my list.
Re: Murry's gf16
Posted: Fri May 14, 2010 1:08 pm
by ks8
Of all the lists I've been on in the past, this sounds like a good one.
Gladly joining with the praying...
Re: Murry's gf16
Posted: Fri May 14, 2010 2:24 pm
by Cracker Larry
Hope all is going well.
Re: Murry's gf16
Posted: Fri May 14, 2010 10:52 pm
by Aripeka Angler
Best of luck Daniel and also to your wife
Give us an update when you can. Hope all is going well as well...
Richard
Re: Murry's gf16
Posted: Fri May 14, 2010 11:43 pm
by Murry
Thanks for all the prayers well wishes.
Sarah did great. Micah Daniel DeJarnette was born around 7p.m. via. C-section after laboring for 20 hours with very little progression. He's doing great and should be fishing in no time.

Re: Murry's gf16
Posted: Sat May 15, 2010 12:12 am
by ks8
Congratulations all around!
Re: Murry's gf16
Posted: Sat May 15, 2010 12:26 am
by TomW
Congratulations to Mom and Dad!
May you soon have a fishing buddy.
Tom
Re: Murry's gf16
Posted: Sat May 15, 2010 1:30 am
by colonialc19
Daniel,
Glad to hear all went well, Congratulations
Re: Murry's gf16
Posted: Sat May 15, 2010 8:59 am
by topwater
Great picture
concrats.
Re: Murry's gf16
Posted: Sat May 15, 2010 9:08 am
by Boater45
Congratulations on the new addition!! Thank you for sharing!!

Re: Murry's gf16
Posted: Sat May 15, 2010 9:50 am
by steve292
Congratulations
.........now you start living
Steve
Re: Murry's gf16
Posted: Sun May 16, 2010 6:48 pm
by wegcagle
That's one proud papa there
. I hope little-man and mama are doing well, and recovers quickly.
Your gonna have to baby that wife of yours of a little while. After my wife had her c-section she had to use a step stool just to get in and out of bed
Oh, and they don't appreciate our normally witty remarks. Apparently EVERYTHING makes the cut hurt....including laughing
Again congrats and enjoy the new addition. They're amazing
Will
Re: Murry's gf16
Posted: Sun May 16, 2010 7:10 pm
by majorgator
Re: Murry's gf16
Posted: Sun May 16, 2010 7:24 pm
by BassMunn
Daniel congrats to you and your wife on a beautiful little baby.
Re: Murry's gf16
Posted: Thu May 20, 2010 7:37 am
by Murry
wegcagle wrote:
Your gonna have to baby that wife of yours of a little while. After my wife had her c-section she had to use a step stool just to get in and out of bed
Oh, and they don't appreciate our normally witty remarks. Apparently EVERYTHING makes the cut hurt....including laughing
Will
You couldn't be more right Will. Lucky for her, I'm not that funny.
Thanks guys. We appreciate all the kind remarks.
Well, we've been home for over 48 hours and he's still making noise so I'd say we're doing O.K.
Changeing diapers is another story all together. I say building a boat is easier, because it's not moving when your working on it.
Re: Murry's gf16
Posted: Thu May 20, 2010 12:13 pm
by TomW
Changeing diapers is another story all together. I say building a boat is easier, because it's not moving when your working on it.
And it doesn't stink half as bad
Re: Murry's gf16
Posted: Fri May 21, 2010 9:33 am
by Joe H
And it doesn't stink half as bad
I'll take the smell of epoxy over dirty diapers anytime!
Congratulations Murry, life speeds up now, hang on!
Joe H
Re: Murry's gf16
Posted: Fri May 21, 2010 12:03 pm
by tech_support
congrats on your baby's birth. Mine is 2 year old today, and I remember the "phantom" poop diaper smells very well.
I got borderline nausea from the poopy diapers, it became so bad that my brain would react to any strong smell by giving the sense of poopy diapers. If I smelled anything strong, my brain interpreted is a poop diaper and I would gag. I call it "phantom dirty diaper"
Re: Murry's gf16
Posted: Mon May 24, 2010 4:56 pm
by mecreature
Congrats.
And Joe is right on things speeding up. Just take the time to enjoy things the best you can.
Re: Murry's gf16
Posted: Sat Jun 26, 2010 5:09 pm
by Murry
shine wrote:congrats on your baby's birth. Mine is 2 year old today, and I remember the "phantom" poop diaper smells very well.
I got borderline nausea from the poopy diapers, it became so bad that my brain would react to any strong smell by giving the sense of poopy diapers. If I smelled anything strong, my brain interpreted is a poop diaper and I would gag. I call it "phantom dirty diaper"
Thanks Joel.
I think we're just starting to hit that nasty diaper phase you were speaking of Joel. They weren't that bad at first but my little man is putin' a hurtin' on those diapers now. (and my nose)
I've never been so busy in my life and my boat progress is moving very slow, but it's still moving.
We got some more primer on her, I asked a budy of mine to spray it on for me.
I went with a heavy coat of grey to provide a visual aid to keep from sanding through this time.
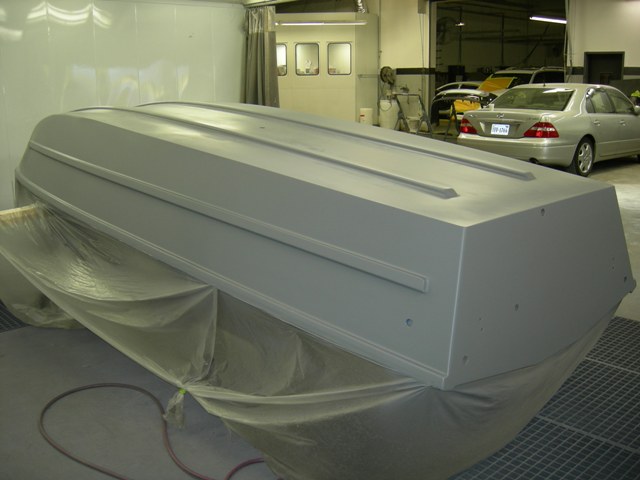
Then we sprayed on two more coats of white to finish her up.
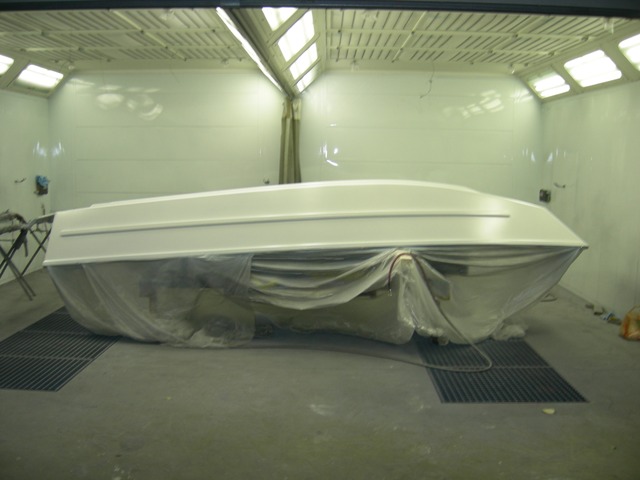
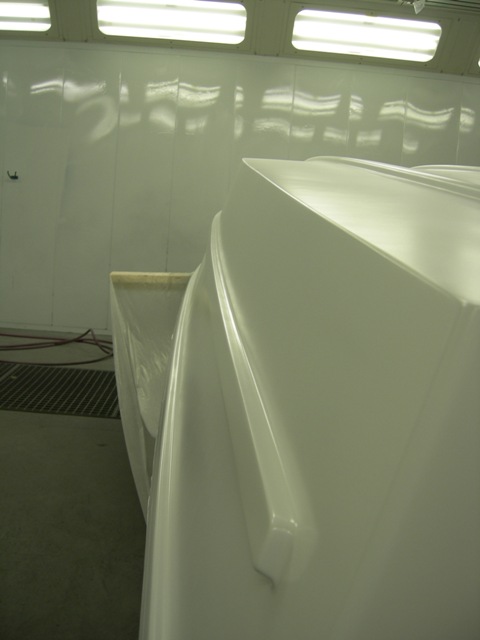
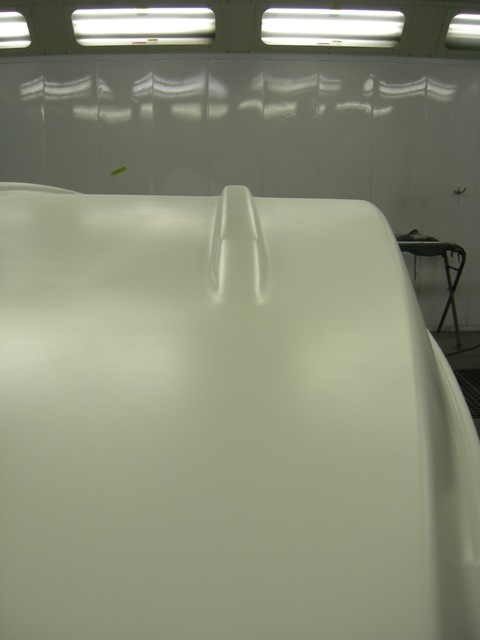
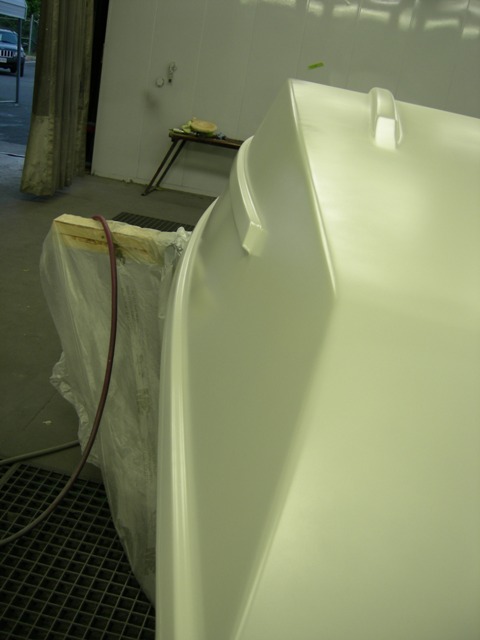
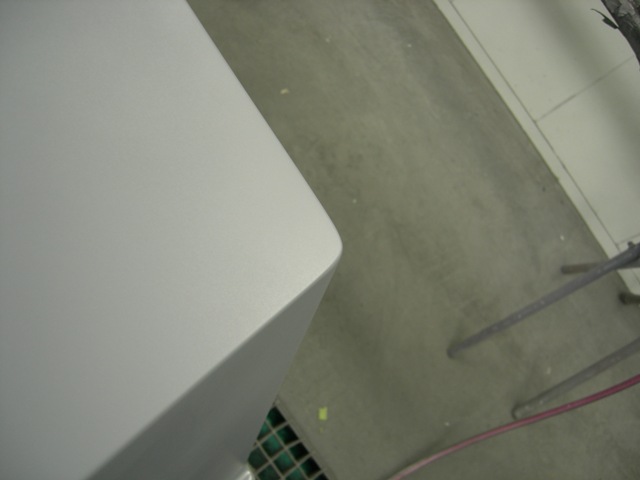
and now some more sanding....
I actually enjoy sanding primer. I think the finish is very rewarding and it get's me excited knowing I'm getting close to seeing the top coat.
I've already sanded the boat since these pics. and will be doing the same on the interior before applying the topcoat.
Getting close,
Daniel
and thanks for checking out my progress.
Re: Murry's gf16
Posted: Sat Jun 26, 2010 6:35 pm
by Cracker Larry
Getting close,
Daniel
I'll say
Very nice
If the primer looks that good, the top coat should be fantastic. The first scratch is really gonna hurt
PS: I hate to break this to you now, but poopy diapers are easy, compared to teenagers
Re: Murry's gf16
Posted: Sun Jun 27, 2010 10:49 am
by Murry
Cracker Larry wrote:
I'll say
Very nice
If the primer looks that good, the top coat should be fantastic. The first scratch is really gonna hurt
PS: I hate to break this to you now, but poopy diapers are easy, compared to teenagers
Your right Larry that first scratch will hurt, but it won't keep me from using it.
The finish will probably be a bit much for a john boat, but I wanted to make sure that I could build something that looked good before moving on to a larger build one day. Those diapers aren't that bad.
Re: Murry's gf16
Posted: Sun Jun 27, 2010 3:34 pm
by sideslippa
I actually enjoy sanding primer. I think the finish is very rewarding and it get's me excited knowing I'm getting close to seeing the top coat.
Looking nice and fair Danial
Funny thing...I enjoy sanding primer too, most people hate it. I enjoy the results of a good preperation. You will too. What are you rubbing back with? Do you use guide coat? If you use a guide coat and rub back with block and water you will get a nice pure ripple free /straight finish. I know it is a bit over the top for a boat but if you want a showy finish.....
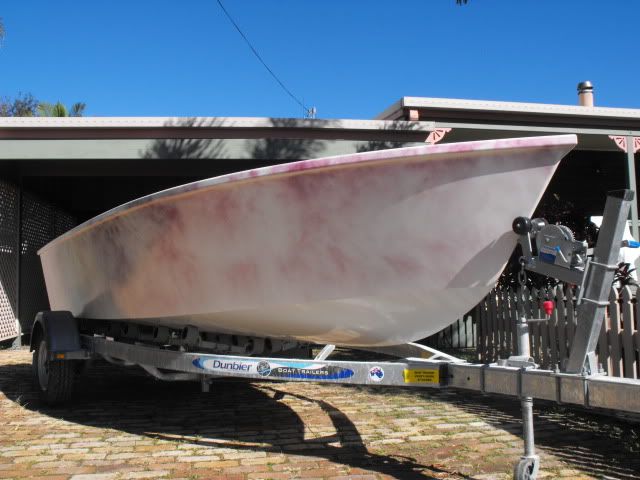
White primer over green then a spray of guide coat.
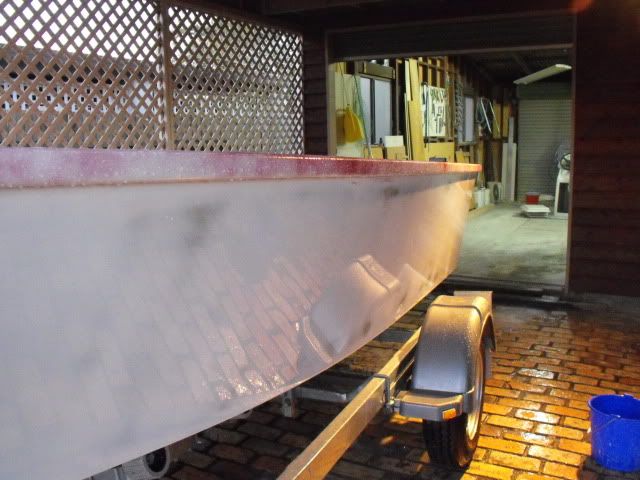
A view after rubbing back with water and block. 240 grit followed by 400 grit. Ready for top coat.
Steve.
Re: Murry's gf16
Posted: Sun Jun 27, 2010 4:27 pm
by colonialc19
Looks Great Daniel, the final finish will look very nice
, hope you have some a/c where your sanding. I like warm weather, but its down right hot
around here lately .
D
Re: Murry's gf16
Posted: Sun Jun 27, 2010 9:28 pm
by Murry
sideslippa wrote:I actually enjoy sanding primer. I think the finish is very rewarding and it get's me excited knowing I'm getting close to seeing the top coat.
Looking nice and fair Danial
Funny thing...I enjoy sanding primer too, most people hate it. I enjoy the results of a good preperation. You will too. What are you rubbing back with? Do you use guide coat? If you use a guide coat and rub back with block and water you will get a nice pure ripple free /straight finish. I know it is a bit over the top for a boat but if you want a showy finish.....
White primer over green then a spray of guide coat.
A view after rubbing back with water and block. 240 grit followed by 400 grit. Ready for top coat.
Steve.
You really have done a great job on your boat Steve.
Thanks for the sanding tips. I used a light coat of spray paint and 3m guide coat powder. I liked using the spray to help keep me from sanding areas that I'd already sanded and I like the powder because I think it covers the area a little better to ensue a texture free surface after sanding. However, after using the spary paint it covered (filled in) the lows better than I thought it would. So the 3m probably wasn't needed, but it didn't hurt.
like this..
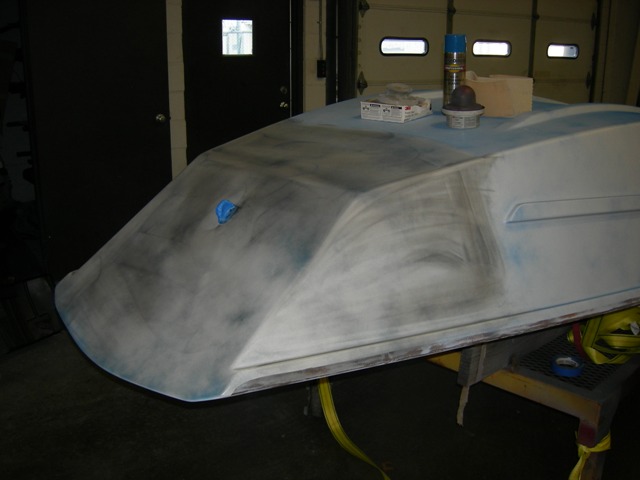
I sanded to a 320 finish Steve. Awlgrip reccomends 280-400 before top coat. I chose a happy medium for fear the top coat won't bond to a finish that was to slick. However, a couple of areas around the spray rail look a little scrachy that I'll hit with a scotch brite pad before painting. What paint did you use? It looks like you sprayed both the top coat and the primer. Is that correct?
colonialc19 wrote:Looks Great Daniel, the final finish will look very nice
, hope you have some a/c where your sanding. I like warm weather, but its down right hot
around here lately .
D
No a/c Daniel, but I've been able to use the body shop at work in evenings to do all the prep in, so it's not to bad. It is hot though. Thanks for compliments. How is your project moving along?
Re: Murry's gf16
Posted: Sun Jun 27, 2010 10:16 pm
by colonialc19
Daniel, my project is coming along sloooooowly, the kids baseball, and soccer are over till fall, so now I have a lil time between swim practice/meets, and o.t. @ work, hope to post some progress soon. I'm working on the gunwales now.
D
Re: Murry's gf16
Posted: Mon Jun 28, 2010 4:56 pm
by sideslippa
Murry wrote:What paint did you use? It looks like you sprayed both the top coat and the primer. Is that correct?
The paint I used is a two pack polyurathane marine/industrial product. Protec Barrier AU625 over a two pack epoxy high build primer. Seems to be good stuff but very hard to sand. It claims to be abrasion resistant...too right about that!
It is mostly just applied with a roller.
The light spray of paint you put over your primer is what we call "guide coat" here in Oz.
For the bottom of my boat I used the same as you, just the 3m stuff and dry sanded with 220 and sprayed the finish, job done. But for the tops and sides I have gone to alot more trouble, fairing till ok, then the primer, dry sand then reprime. Filled and smoothed low areas, then wet sand, reprime again, wet sand again, applied the top coats x4 then sanded/denibbed 400 grit/800grit/1500grit, then buffed. Phew.
Crazy I know....But it's bonza
Se ya Mate.
Re: Murry's gf16
Posted: Mon Jun 28, 2010 6:11 pm
by Joe H
Man that is crazy but it sure looks great!
Excellent, attractive, pleasing, bonza!
Joe
Re: Murry's gf16
Posted: Mon Jun 28, 2010 6:49 pm
by Aripeka Angler
Man that is looking sweet
Your primer looks better than my topcoat
Good luck with the new addition to your family!
Re: Murry's gf16
Posted: Mon Jun 28, 2010 7:49 pm
by BassMunn
Wow Daniel your boat is looking really hot. Can see you got that fairing thing just right, nice job
Re: Murry's gf16
Posted: Mon Jun 28, 2010 10:30 pm
by wegcagle
She's looking pretty great Daniel, but don't make it too nice I'd hate to scratch a piece of art lugging a 30lb striper over the side
Will
By the way I leave on Wednesday morning heading your way
Re: Murry's gf16
Posted: Tue Jun 29, 2010 7:40 am
by cape man
Your primer looks better than my topcoat
Exactly what I was thinking!
Re: Murry's gf16
Posted: Mon Aug 02, 2010 9:42 am
by colonialc19
Someone has been busy,
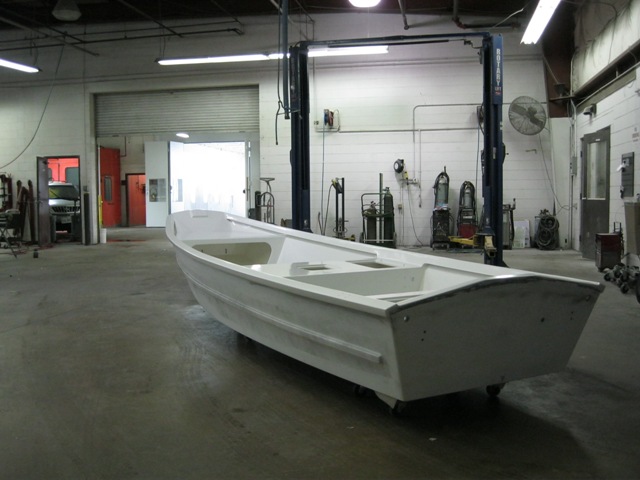
Looks Great Daniel
, can't wait to see the outside top coated
Re: Murry's gf16
Posted: Mon Aug 02, 2010 9:59 am
by chopperman
Nice progress. Primer looks great!
Re: Murry's gf16
Posted: Mon Aug 02, 2010 12:23 pm
by Murry
I appreciate all the nice comments guys. We're getting real close now.
Here she is after priming the interior.
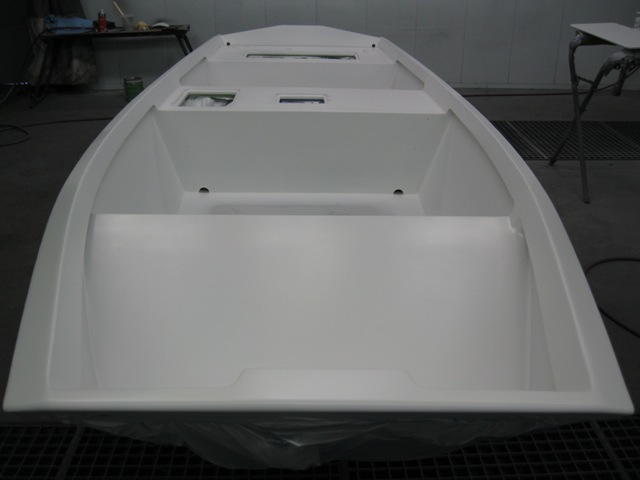
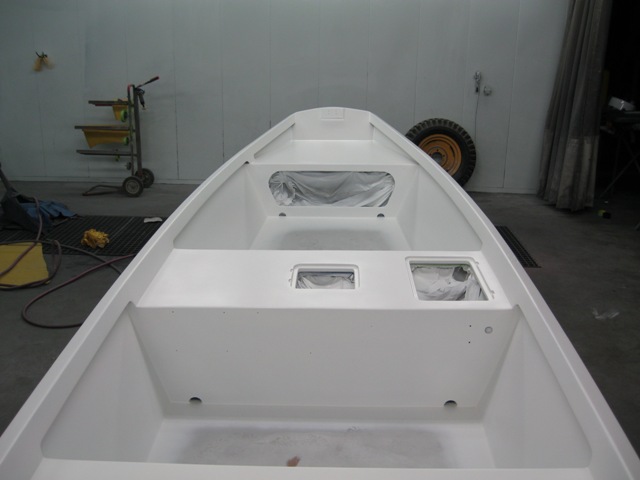
A buddy of mine sprayed the topcoat on the interior this past Saturday morning for me.
I used a flatening agent to tone down the paint a bit to cut down on glare and to help hide the less than perfect fairing on the
inside of the boat. I didn't fair the inside with boards I only used a DA and alot of hand work in the corners.
However, the exterior will be full gloss and after seeing the interior I'm now hopeful it will turn out nice. I spent a lot more time fairing the exterior.
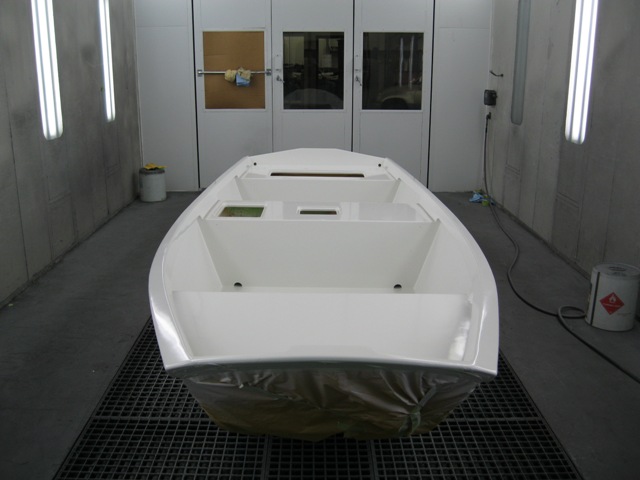
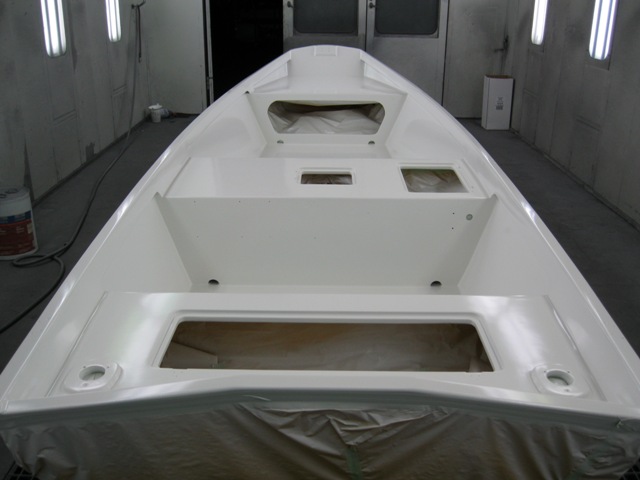
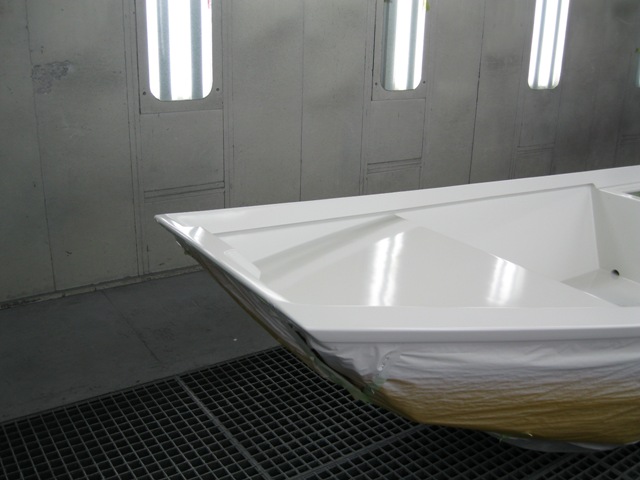
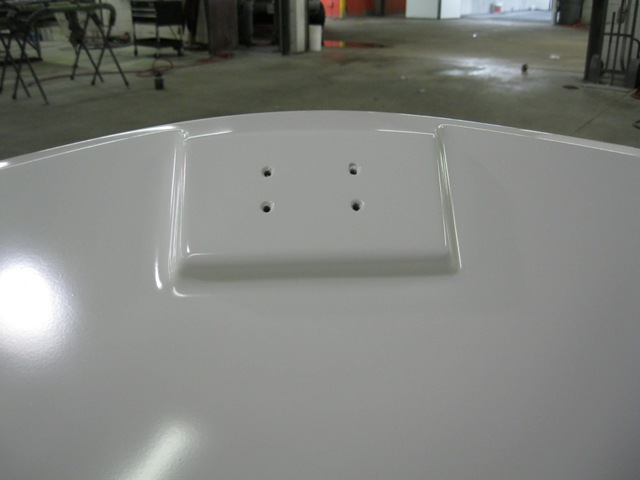
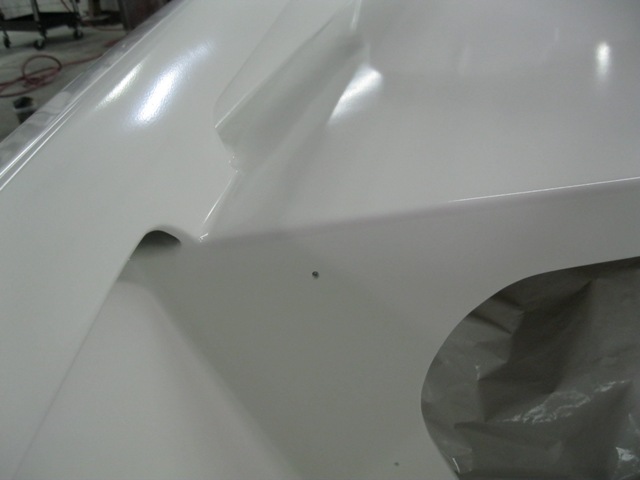
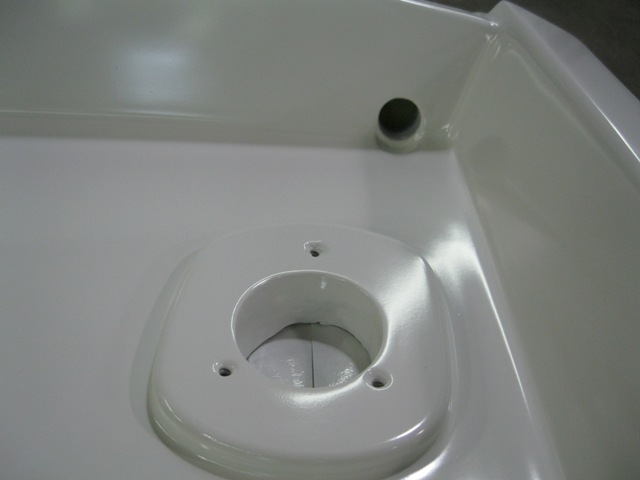
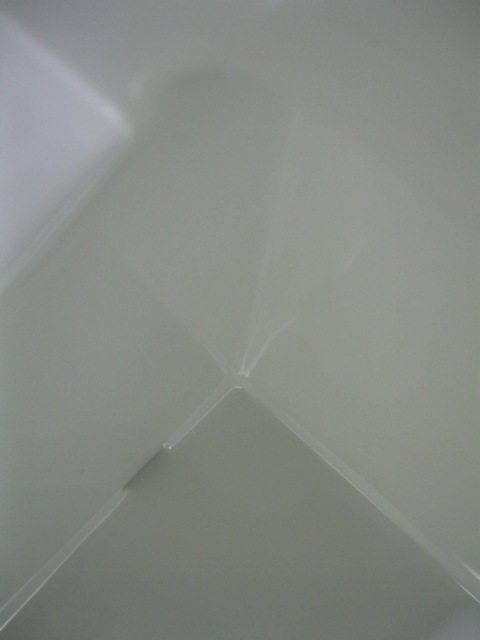
I can't tell you how exciting it is to stand back and look at what many guys on this website have helped me create.
I really appreciate your help and thanks for checking on my progress up to this point.
I brought my wife over Saturday night to check it out and I quote.
"It's beautiful baby, I really do hope you get to build the 25' oneday".
I feels good to impress the one you care most about.
I'll let her sit a couple of days before flipping her to finish prepping the exterior.
Daniel
Re: Murry's gf16
Posted: Mon Aug 02, 2010 1:12 pm
by ksm330
!!!WOW!!!
Re: Murry's gf16
Posted: Mon Aug 02, 2010 4:54 pm
by sideslippa
Very impressive...I like it, your hard work and good preperation is rewarding you.
Steve.
Re: Murry's gf16
Posted: Mon Aug 02, 2010 5:31 pm
by wegcagle
Absolutely beautiful Daniel
Let me know if you need some help splashing her
Will
Re: Murry's gf16
Posted: Mon Aug 02, 2010 5:54 pm
by cape man
I brought my wife over Saturday night to check it out and I quote.
"It's beautiful baby, I really do hope you get to build the 25' oneday". I feels good to impress the one you care most about.
I'll let her sit a couple of days before flipping her to finish prepping the exterior.
Why wait? Flip your wife today!!!!
Daniel, the boat is just gorgeous! The paint job shows how much you put into fairing and building the custom aspects of her. Very nice, very.
Re: Murry's gf16
Posted: Mon Aug 02, 2010 6:08 pm
by TomW
Daniel you sure have put a lot of work into that boat and it shows. Take pride in what you have accomplished and take care of that lady you have, for her to say something like that means something!
Can't wait for the hull and the splash!
Tom
Re: Murry's gf16
Posted: Tue Aug 03, 2010 8:58 am
by Cracker Larry
That's beautiful Daniel
I'm glad my GF16 didn't have to sit side by side with it. Very good work. I'm wanting to see it at the next builders meet
Re: Murry's gf16
Posted: Wed Aug 04, 2010 7:34 am
by Murry
cape man wrote:
Man guys, I appreciate all the nice comments and support. I haven't had enough time to flip the boat yet and begin prepping,
but hopefully I'll be able get make some pregress this weekend. I've never been so busy. We're half way through construction
on our new house and between that and our son time is tight. The boat is on the back burner for sure, but the problem is the stove has ten burners.
. It'll get done though, and it's been worth every second I've put in it.
One of the exciting things about the new house is that we just had the location cleared for the shop, so I'll be able to build my big boat right behind the house.
Cracker Larry wrote:I'm glad my GF16 didn't have to sit side by side with it.
I don't know Larry, your GF has been an inspiration to many GF builders, including myself. As far as finish, using a yacht finish paint on this type of boat seems a bit silly to me sometimes,(becuase of the cost) but the intent of this whole project was to learn how to the use products in prepartion to buld a larger boat. In other words if I couldn't build a pretty small boat , I wouldn't attempt to build a bigger one.
Thanks again,
Daniel
Re: Murry's gf16
Posted: Wed Aug 04, 2010 9:30 am
by colonialc19
You won't have any problem with a larger boat
, I' looking forward to watching, I'll even come and help if you need any
.
The Garvey is very nice, top notch all the way
Re: Murry's gf16
Posted: Wed Aug 04, 2010 9:46 am
by topwater
Very nice boat
Re: Murry's gf16
Posted: Wed Aug 04, 2010 6:21 pm
by tobolamr
Awesome job!
What was your spray setup?
Re: Murry's gf16
Posted: Thu Aug 12, 2010 4:00 pm
by Murry
tobolamr wrote:Awesome job!
What was your spray setup?
Oops, I meant to answer this the other day.
Satajet HVLP gravity fed gun using a 1.3 mm tip.
Re: Murry's gf16
Posted: Wed Aug 25, 2010 11:43 pm
by Murry
Well I finally got the time to finish preping the hull for top coat.
Here's goes nothing.
A couple of shots from the bow.
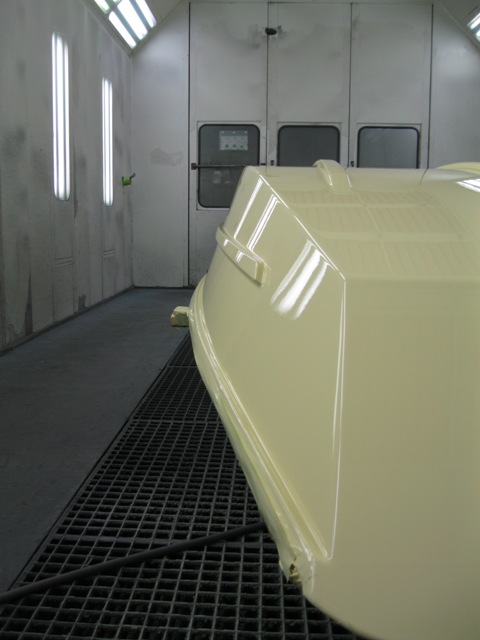
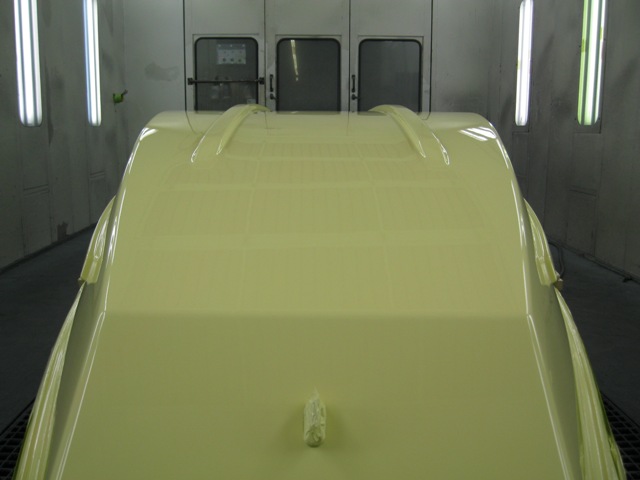
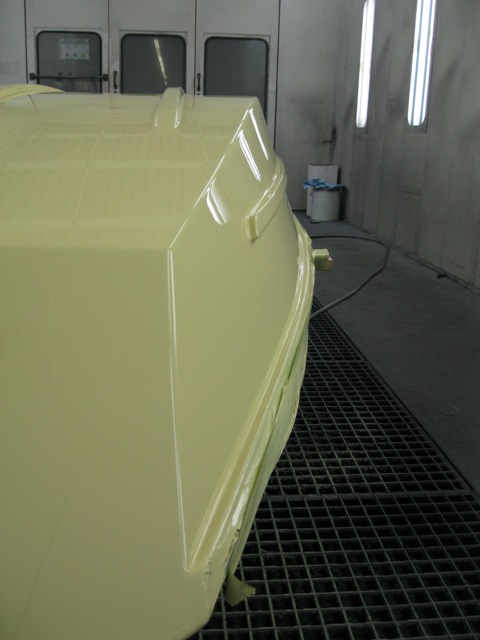
And from the stern.
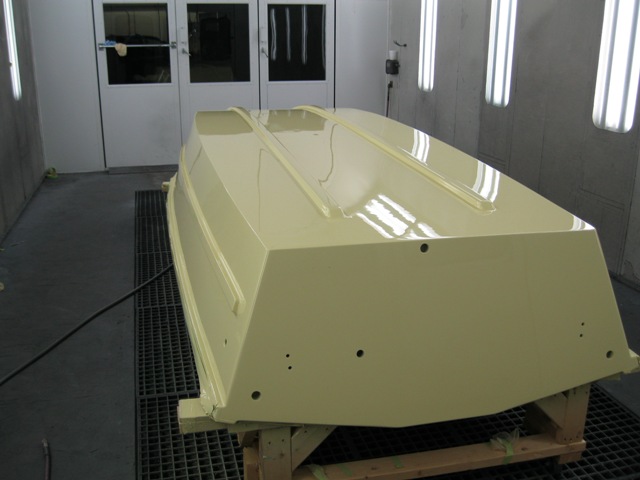
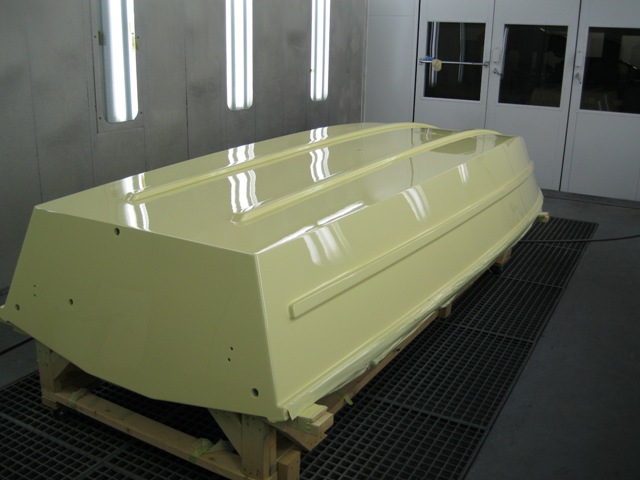
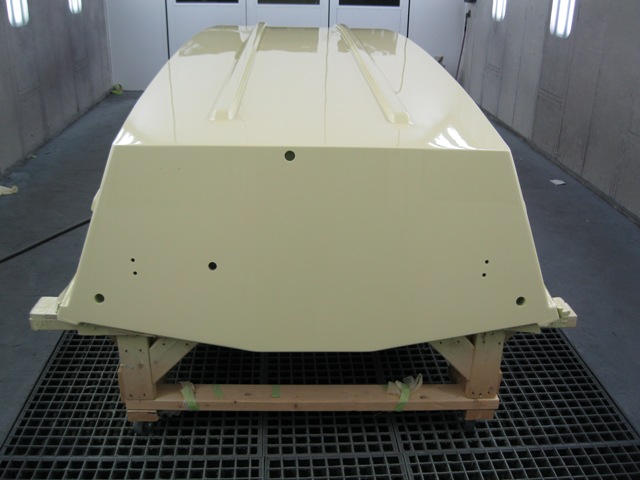
and why not a few more.
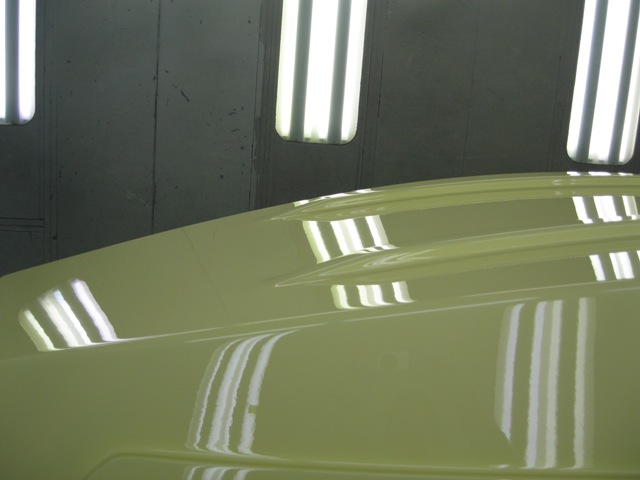
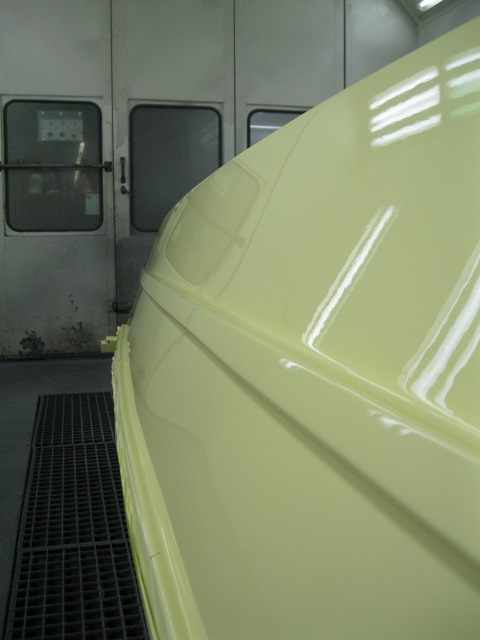
Richard the sanding sponges really helped me on all the corners
I can't thank you enough.
I'll let her sit and cure for a week or so and then I'll get her rigged up and apply some non skid.
I can't decide between the cream or light grey kiwi grip. Any suggestions
Thanks,
Daniel
Re: Murry's gf16
Posted: Thu Aug 26, 2010 3:12 am
by Fonda@kauai
Holy crap Murry, nice job
That looks like sterling perhaps? What color? I'm debating between white or cream kiwi myself, I'd be interested to see what the cream looks like against that color if you go that route
Re: Murry's gf16
Posted: Thu Aug 26, 2010 4:31 am
by sideslippa
Very very nice ... all that prep has paid off that is a top shelf paint job...congrats
Slippa
Re: Murry's gf16
Posted: Thu Aug 26, 2010 7:14 am
by cottontop
Beautiful job, Murry! That is one fine boat. John
Re: Murry's gf16
Posted: Thu Aug 26, 2010 7:31 am
by wegcagle
Amazing job Murry. That's gotta make you alittle excited huh
Will
Re: Murry's gf16
Posted: Thu Aug 26, 2010 8:47 am
by Cracker Larry
That's awesome Daniel
Every shop needs a paint booth
Re: Murry's gf16
Posted: Thu Aug 26, 2010 10:14 pm
by Murry
Fonda@kauai wrote:Holy crap Murry, nice job
That looks like sterling perhaps? What color? I'm debating between white or cream kiwi myself, I'd be interested to see what the cream looks like against that color if you go that route
Thanks Fonda, the paint is Awlgrip in Fighting Lady Yellow and I'm happy with how it turned out. All the complimets from the paint and body guys at work really meant something. If anyone knows how important prep work is, they do.
I think I've decided on cream for the kiwigrip.
wegcagle wrote:Amazing job Murry. That's gotta make you alittle excited huh
Will
Yeah Will, it's good to see the top coat go on. That's for sure
How's D.C. going for you? I'm sure your busy.
Cracker Larry wrote:That's awesome Daniel
Every shop needs a paint booth
You got that right Larry. The paint booth didn't hurt.
Thanks John and Slippa. I appreciate you taken the time to voice your approvals.
BTW- I've finally named this little boat. " Knot Quite" It basically answers most questions you throw at it.
Like... Is she finshed yet?.....Will that be your last boat build?.....Is it pretty enough for you?.....and so on.
Daniel
Re: Murry's gf16
Posted: Fri Aug 27, 2010 12:09 pm
by ks8
Nice!
Planning any trim colors? Man, I wouldn't be able to leave that alone. Even a nice slightly darker color on the splash rails thingies... Ignore me!
Go fishing! Hand out sunglasses.
Re: Murry's gf16
Posted: Fri Aug 27, 2010 1:34 pm
by TomW
Outstanding job Murray!
She sure is a beauty. Some nice white Kiwi Grip inside would really set her off! Can't wait till you flip and finish her.
Tom
Re: Murry's gf16
Posted: Fri Aug 27, 2010 2:46 pm
by Aripeka Angler
Richard the sanding sponges really helped me on all the corners
I can't thank you enough.
You're welcome
Glad they worked out for you
Daniel, that is one sweet paint job! I look forward to the launch photos
Re: Murry's gf16
Posted: Fri Aug 27, 2010 9:06 pm
by colonialc19
Re: Murry's gf16
Posted: Mon Aug 30, 2010 6:51 pm
by BassMunn
Daniel congrats on an awesome looking boat, paint finish looks brilliant.
Re: Murry's gf16
Posted: Fri May 20, 2011 11:18 am
by tech_support
pictures in the gallery look fantastic
Re: Murry's gf16
Posted: Fri May 20, 2011 12:43 pm
by Murry
Thanks Joel! That really means a lot.
Wow, it’s been along time. Ha Ha, I remember thinking that this little project was
Going to be done in 6 months. All jokes a side I probably have a year in it for those who care to know, but had to take a lot of long breaks throughout the build. Who knew that my first child and a move would take so much time.
I want to thank all of the helpful folks on this forum and the great the folks at e-boat. Customer service there is par to none really. Thanks, and thank you to Jaque for creating such a pretty boat.
Here she is… “Little Lady”
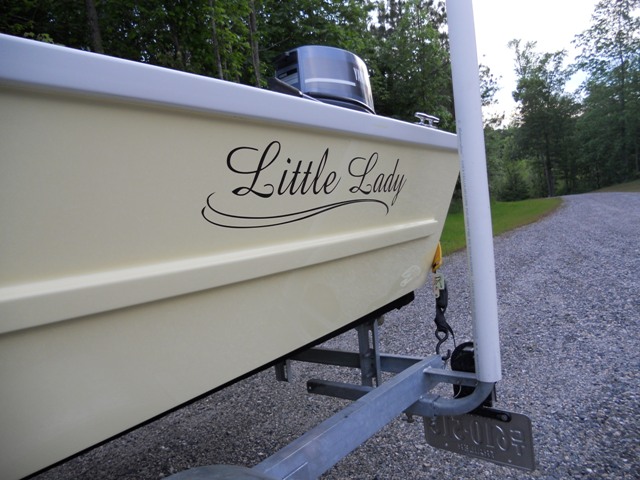
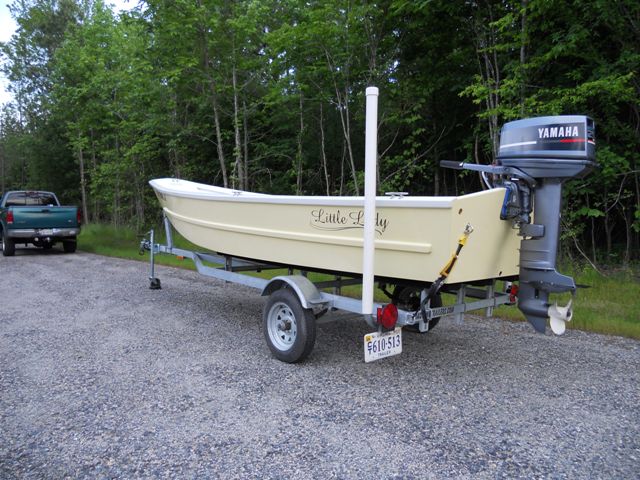
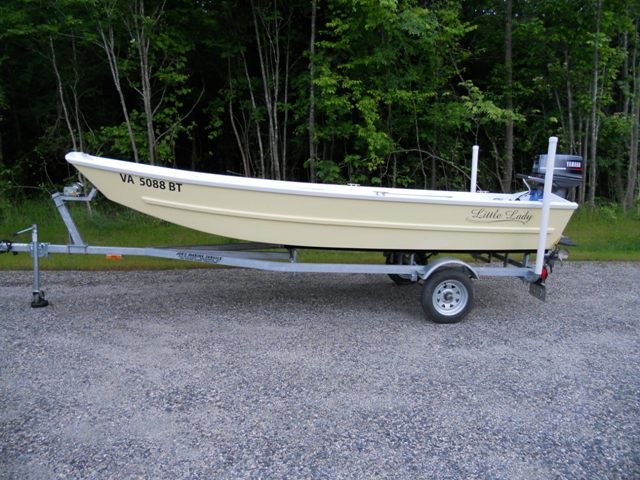
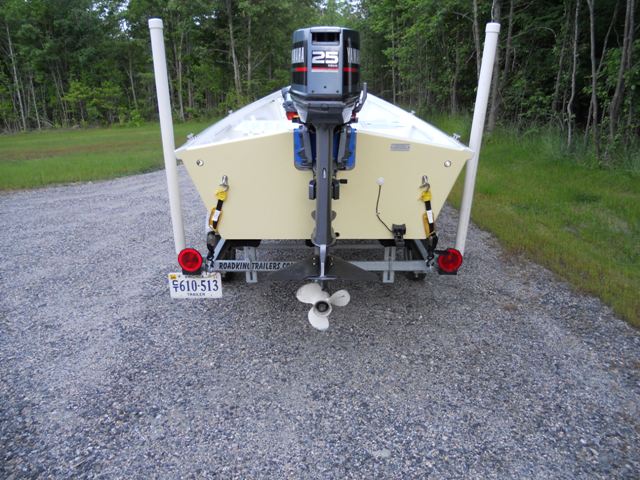
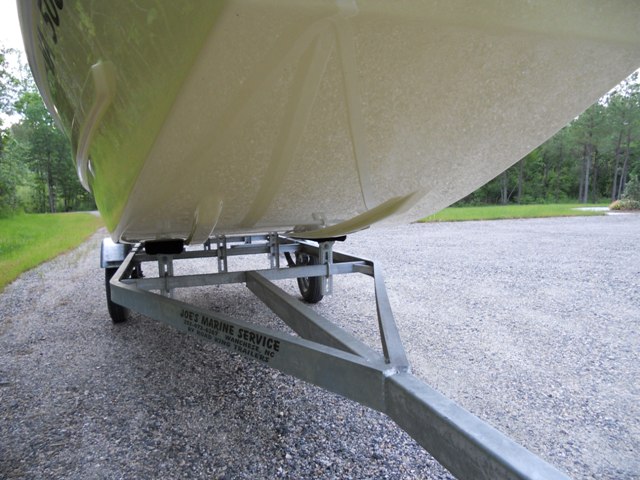
And some shots of the finished interior. I ended up going with the same paint for the non-skid because I couldn’t settle on grey or cream Kiwi. I’m real happy with the finish. Taping up the non-skid areas took longer than cutting all the wood for the boat though.
The finished product was well worth it though.
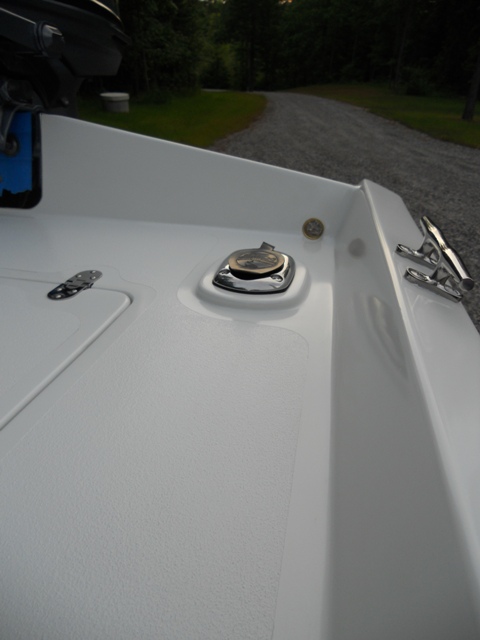

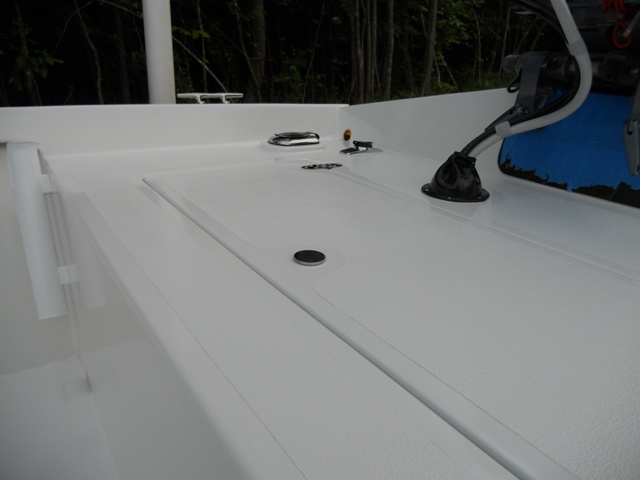
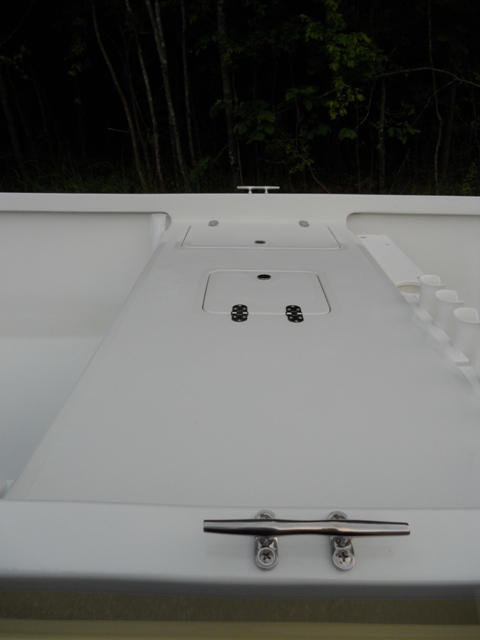
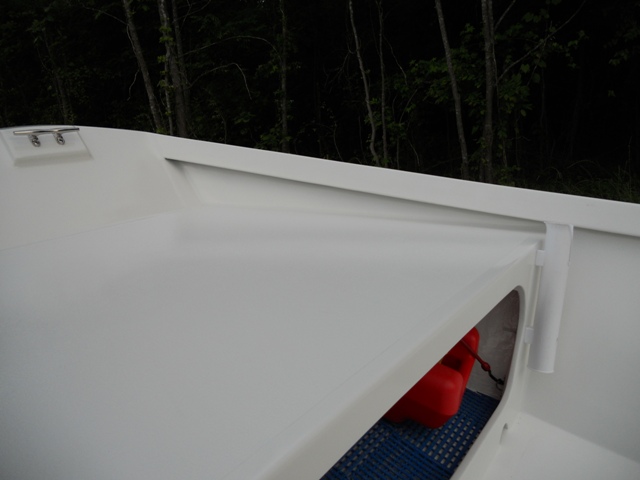
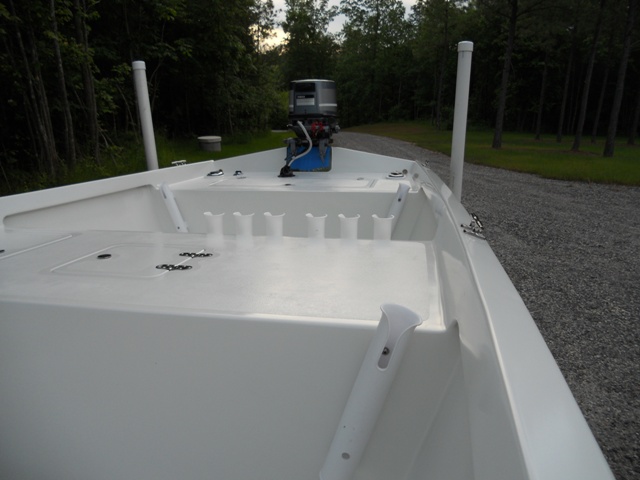
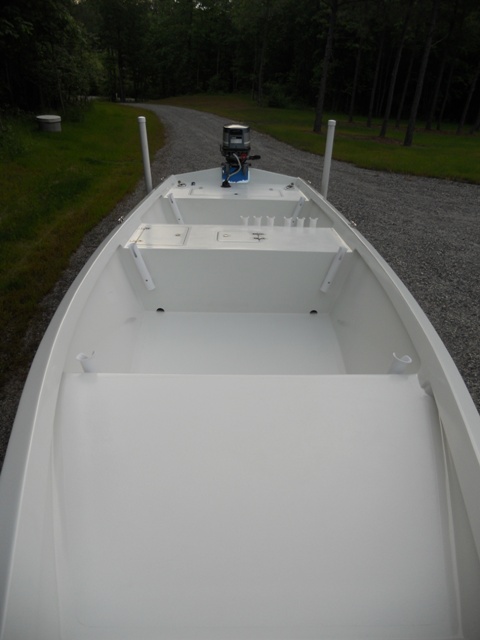
No need to over due the picture upload.
Haven’t had an official launch yet, but I’ll post those pictures as soon as I do.
Daniel
Re: Murry's gf16
Posted: Fri May 20, 2011 1:13 pm
by gstanfield
She is a lovely lady that's for sure
Is that a 25" extra long shaft outboard? It looks nice and long, you won't have to worry about swamping it over the transom that's for sure
Re: Murry's gf16
Posted: Fri May 20, 2011 2:34 pm
by Prarie Dog
Awesome GF16
, don't think I've ever seen a prettier one.
Re: Murry's gf16
Posted: Fri May 20, 2011 2:52 pm
by Cracker Larry
That's a first class job there Daniel. Very nice! I really like the way you did the gunwales, that looks great
I've been following this build for years, glad to see you got her done in fine style
Re: Murry's gf16
Posted: Fri May 20, 2011 2:53 pm
by Steven
Beautiful. Wouild you mind sharing the technique you used for the non skid. It looks great.
Re: Murry's gf16
Posted: Fri May 20, 2011 3:08 pm
by PastorBob
WOW... I don't think I can post any more pics of my GF-16 after seeing this.... Infact I don't know that I can look at it anymore.... I may have to burn it now... That boat is incredible!
Re: Murry's gf16
Posted: Fri May 20, 2011 3:11 pm
by Cracker Larry
Hi Bob
Good to hear from you too. You doing OK out there I hope?
Re: Murry's gf16
Posted: Fri May 20, 2011 3:27 pm
by PastorBob
Cracker we are doing well... Bought 6 acres on a mountain in TN... Have my own mini-lake about 1.5 acers... guess I should update my build... It has been a big transition but we love our new place! we are in GA right now.. you going out next week
. Sorry for the Thread jack Murry but I want to bury the pictures of that boat behind pages of senselessness! I will never look at my boat again without thinking how I could make it look like yours!
Re: Murry's gf16
Posted: Fri May 20, 2011 5:42 pm
by Cracker Larry
we are in GA right now.. you going out next week
At least you're back on the right side of the Mississippi! I can go fishing anytime you want to, Bob
If you are close, the cobia and redfish are biting good. I'd be happy to see you again and we can sure go fishing
Dang, I'd hate to miss an opportunity to spend another day sanding on this Sea Ox, but I can sure walk away from it to go fishing right now! Let me know, I'm good any day next week.
Re: Murry's gf16
Posted: Fri May 20, 2011 5:52 pm
by gstanfield
I just noticed that you have 14 rod holders if I'm counting right. 12 of the plastic and 2 of the Stainless flush mount ones
I like that as it means she's not just another pretty face, she was built to fish as well
Re: Murry's gf16
Posted: Fri May 20, 2011 7:46 pm
by Hope2float
Wow! she looks beautiful, what a clean job on all the finishes. I guess that just prolonged the long boarding on mine.
Good luck with her.
Dave
Re: Murry's gf16
Posted: Sat May 21, 2011 11:44 am
by wegcagle
Great job Daniel,
She's a looker for sure.
Are you still planing on coming to the Chesapeake Bay meet in October? If you are maybe we can get some blood on that pretty interior
Will
Re: Murry's gf16
Posted: Tue May 24, 2011 11:24 am
by mecreature
she is beautiful. Lets see some action.
Re: Murry's gf16
Posted: Tue May 24, 2011 2:00 pm
by BassinVt
wow thats a purty boat you got there. NICE JOB, hope mine comes out that well.
Re: Murry's gf16
Posted: Tue May 24, 2011 4:36 pm
by robbiro
Daniel, The Little Lady is most gorgeous. Many hard hours and fine hands went into that greatly done project. I think that I am trying for the longevity award in building a GF-16. I will not even say how long, but it was started about the time my almost sixth grader was finishing the first grade...
. I enjoy seeing how a great boat is finished and you have done great. Keep up to date on anything that you would do different, and how she performs.
Keep on Buildin'
Robbie
Re: Murry's gf16
Posted: Tue May 24, 2011 11:04 pm
by Murry
Wow
Thank You all for the generous coments. There sure have been a lot of beautiful boats cataloged on this site since its inception, in which mine wouldn't have been built at all had it not been for the time the builders put into posting their progress and mishaps
(I've had several of those) So thanks to anyone who has ever posted a question or comment, because I've learned from both
It's been so much fun that in fact, my boat building journey's have just begun I'm afraid.
I'm not sure what my next project will be yet, but I'll be cutting, gluing and sanding something soon enough.
I was able to launch over the weekend and what a pleasure that was. Accompanied by my bride and son, we set out for a short ride on a near by lake. As soon as I locate my misplaced camera a post a few pictures. I wasn't able to get many of the actual
launch because of the business at the ramp, but I'lll be getting a few of those soon enough.
As far as the boat is concerned, I couldn't be more pleased. The bottom flex (oil canning) was deminished by a long shot after
reworking my strakes. ( As I mentioned above, I had a couple of
situations) I was able to mess around with my motor height and she seems to like it around 3/4" to 1" above the bottom. I'll dail that in better next time I get her out.
The most special part of the day wasn't that it was "Little Lady's" fist ride, but I was my son Micah's first boat ride
You should have seen him. He was standing right next to me hanging onto the gunwhale taking it all in. The pictures will tell that story
better as soon as I can find that camera.
Thanks again guys,
Daniel
Re: Murry's gf16
Posted: Tue May 24, 2011 11:06 pm
by Murry
gstanfield wrote:She is a lovely lady that's for sure
Is that a 25" extra long shaft outboard? It looks nice and long, you won't have to worry about swamping it over the transom that's for sure
You to kind George.
I don't think it's 25, but I'll measure it and let you know.
Re: Murry's gf16
Posted: Tue May 24, 2011 11:09 pm
by Murry
Prarie Dog wrote:Awesome GF16
, don't think I've ever seen a prettier one.
Wow! That's mighty kind. I'm sure if you put mine beside all the GF's built, I doubt she'd come in first.
I appreciate the honorable mention anyway.
Re: Murry's gf16
Posted: Tue May 24, 2011 11:15 pm
by Murry
Cracker Larry wrote:That's a first class job there Daniel. Very nice! I really like the way you did the gunwales, that looks great
I've been following this build for years, glad to see you got her done in fine style
That means a lot Larry. I've appreciated your advice throughout this build, both on the site and phone more than you know.
BTW- As you know I used a lot of your ideas on my boat. Running Rod holder location, floor drain style and location, ect....
Shoot, I could go on for along time.
Thanks for all the help Larry.
Re: Murry's gf16
Posted: Tue May 24, 2011 11:34 pm
by Murry
Steven wrote:Beautiful. Wouild you mind sharing the technique you used for the non skid. It looks great.
Thanks Steven, I'd be glad to.
I used an additive with the paint to give it some texture. Not sure what paint your going with, but a lot paint manufactures sell additives for their paint to get a textured surface. The paint I went with offered two different grits. Fine and Coarse. I used fine.
After mixing per instructions, I rolled on the paint and additive(no need to tip the paint, the brush has adverse affects on the textured surface, I just rolled it out nice and then), then after it dried (no need to type out those details but as you know all paints have reccomended cure times before recoating- I followed those reccomendations) I brushed on a seal coat using paint only. One reccomendation, any more than one seal coat and the surface starts to get to slick in my opinion, so if working over primer, I would roll on as many lights coats of paint with additive to get compete hide before seal coating.
I pulled the tape after the paint cured for 24 hours. I wouldn't wait to long to pull the tape, if you have any bleed through, you can usually scrape that up from an unsanded surface (glossy surface that was taped before sanding) within a day or so. I guess that depends on what kind of paint your going with. I found that to be true in my case.
Or you could always spread and roll some Kiwigrip.
That would probably be easier.
Hope that helps,
Daniel
Re: Murry's gf16
Posted: Fri May 27, 2011 12:31 pm
by Murry
PastorBob wrote:WOW... I don't think I can post any more pics of my GF-16 after seeing this.... Infact I don't know that I can look at it anymore.... I may have to burn it now... That boat is incredible!
Ha Ha, It's not that pretty is it. Thanks for compliment Bob and I appreciate the help thoughout the builb as well.
If my son had been helping me throughout the build, I don't think it would have turned out as nice.
I always admired you for letting your kids get in there and get dirty with you on your boat projects. I'm looking forward to that
one day if he's interested in helping.
About that highjack, are kidding? I'm glad you guys got ketch up.
Thank again
Hope2float wrote:Wow! she looks beautiful, what a clean job on all the finishes. I guess that just prolonged the long boarding on mine.
Good luck with her.
Dave
That's funny, I deffinately don't consider this little boat to be in the bar raiser category, but I know you what mean. Those slick boat pictures cause us to sand way to much.
wegcagle wrote:Great job Daniel,
She's a looker for sure.
Are you still planing on coming to the Chesapeake Bay meet in October? If you are maybe we can get some blood on that pretty interior
Will
Thanks Will,
Yeah, I'm still planning to come. As far as what boat to bring, I'm undecided. If we plan on fishing in the bay it would make more sense to bring my Dad's center console, unless there will be enough larger boats for people to fish on. However, it seem silly to attend a Bateau boat meet while leaving my bateau boat at home. I guess we'll talk more about that as we iron out the
plans.
How's the big city treating you?
mecreature wrote:she is beautiful. Lets see some action.
soon enough
BassinVt wrote:wow thats a purty boat you got there. NICE JOB, hope mine comes out that well.
Thanks Bassin,
I've been following your progress thus far. Exciting isn't it? I'm sure your boat will turn out just fine. Looking forward to seeing you progress.
About you gunwhale question. Have you gone through my build to see how mine were built. It may give you some ideas. Or not
I had to make some slight changes to the frames to make it work, because I didn't want them to wide, but it's strong.
The designer may not approve with I did, so I would ask before doing anything your not ready to live with.
robbiro wrote:Daniel, The Little Lady is most gorgeous. Many hard hours and fine hands went into that greatly done project. I think that I am trying for the longevity award in building a GF-16. I will not even say how long, but it was started about the time my almost sixth grader was finishing the first grade...
. I enjoy seeing how a great boat is finished and you have done great. Keep up to date on anything that you would do different, and how she performs.
Keep on Buildin'
Robbie
Who cares about time Robbie. It will be done when it's done.
Thanks again.
Re: Murry's gf16
Posted: Fri May 27, 2011 12:34 pm
by Murry
This one is worth well over a thousand words to me.

I won't lie, I'm a proud Daddy.
Re: Murry's gf16
Posted: Fri May 27, 2011 1:34 pm
by gstanfield
You should be proud.
Re: Murry's gf16
Posted: Fri May 27, 2011 1:56 pm
by Cracker Larry
First class
Time for some fish blood in the boat next.
Re: Murry's gf16
Posted: Fri May 27, 2011 2:23 pm
by cape man
Great Picture! That is what it's all about right there!
Re: Murry's gf16
Posted: Sat May 28, 2011 8:07 am
by wegcagle
Awesome picture Daniel.
That's the one I'm still looking forward to. How long until he claims it for his own?
Re: Murry's gf16
Posted: Sat May 28, 2011 10:23 am
by msujmccorm
Two great things to be proud of. Nice boat and boy! Hang on to these days they'll be gone before you know it
Re: Murry's gf16
Posted: Sat May 28, 2011 11:08 am
by ks8
Congrats on both!
Re: Murry's gf16
Posted: Sat May 28, 2011 4:17 pm
by robbiro
You did good twice at least!!!
Robbie
Re: Murry's gf16
Posted: Thu Jun 02, 2011 9:02 pm
by colonialc19
Congratulations Daniel, the boat is first rate, Glad to see you got your lil' un out with you too
.
That lake looks very familar
, no sheepshead there though
Thanks for the update looking forward to more.
D
Re: Murry's gf16
Posted: Fri Jun 10, 2011 12:27 pm
by Murry
Thanks for the kind words everyone.
Yeah, that was a great day and looking forward to a whole lot more in the future.
Hey Daniel! Good to hear from you, How's your boat coming along? Give me shout if you need an extra set of hands for anyhing.
Re: Murry's gf16
Posted: Fri Jun 10, 2011 12:33 pm
by Murry
Speaking of good days.
I actually had time to take the boat fishing for the first time.
Dad and I went for a relaxing afternoon of croaker
fishing last weekend and it sure was really using the boat for the first time.
I figured I'd make this launch official with pictures as well.
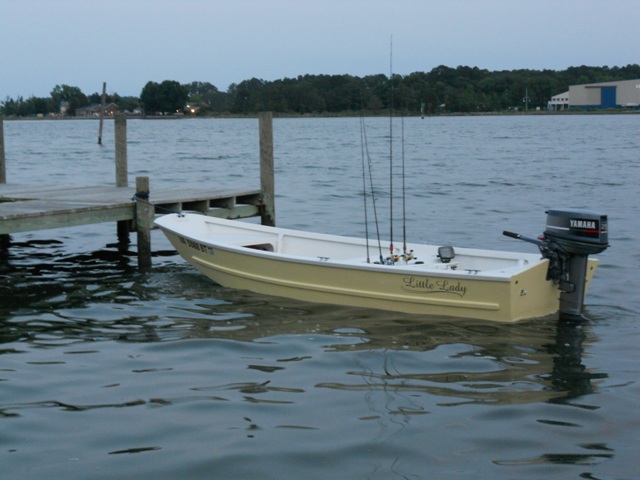
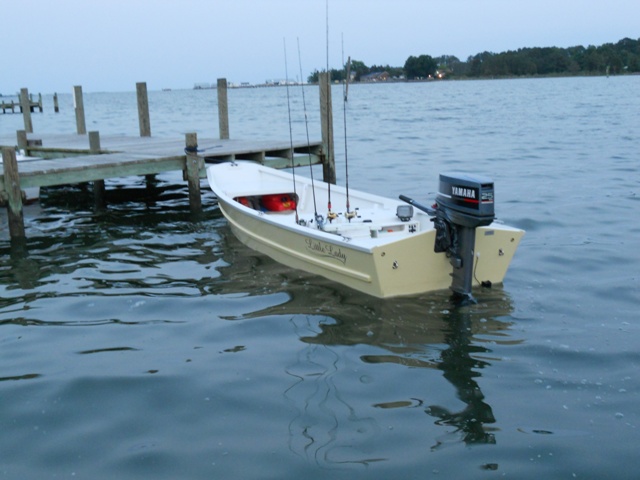
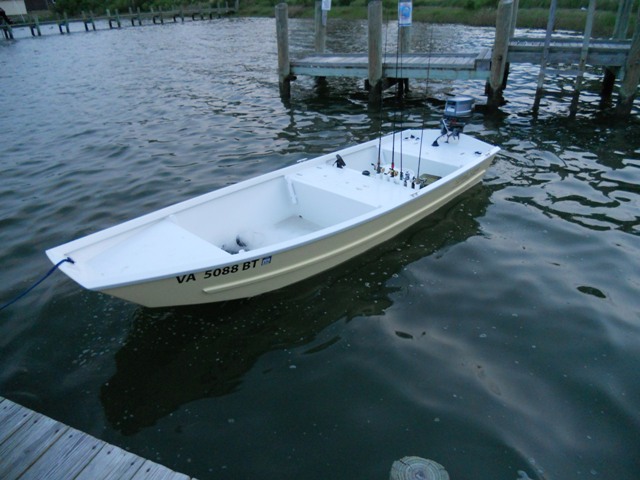
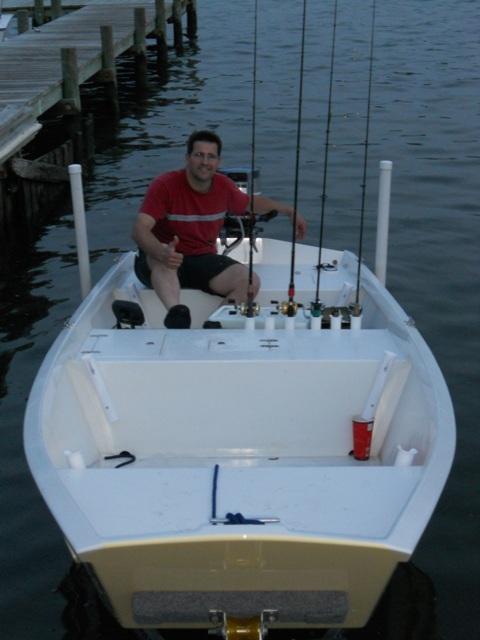
Alright, She's launched
Re: Murry's gf16
Posted: Fri Jun 10, 2011 12:53 pm
by peter-curacao

On the launch!! she looks hot !
Re: Murry's gf16
Posted: Fri Jun 10, 2011 1:31 pm
by Aripeka Angler
Daniel, your boat looks awesome
Congratulations are in order!!! Nice work
Re: Murry's gf16
Posted: Fri Jun 10, 2011 3:14 pm
by Cracker Larry
Very nice! Those GFs sure look good in the water.
Re: Murry's gf16
Posted: Fri Jun 10, 2011 4:28 pm
by BassMunn
Daniel that is one fine looking boat, Congrats man!!!!
Re: Murry's gf16
Posted: Fri Jun 10, 2011 4:59 pm
by wegcagle
Congrats Daniel
She's a looker for sure
Re: Murry's gf16
Posted: Fri Jun 10, 2011 5:09 pm
by tobolamr
Congratulations! Looks fantastic!
Re: Murry's gf16
Posted: Thu Jun 16, 2011 4:22 pm
by mecreature
looks great. Do those spray rails do a good job?
Re: Murry's gf16
Posted: Thu Jun 16, 2011 10:00 pm
by Prarie Dog
Great work Murry, I really like the way you did the inwales.
Re: Murry's gf16
Posted: Fri Jun 17, 2011 10:57 am
by Uncle D
Beautiful work and so shinny too. No such thing as too many rod holders.
Re: Murry's gf16
Posted: Sat Jun 18, 2011 7:07 am
by bernd1
Welcome to the proud GF16 drivers club!
Murry you did a great job -it's a beautiful boat - the painter did a good job....the builder too
Enjoy boating!
Bye
Bernd
Re: Murry's gf16
Posted: Sun Jun 19, 2011 7:23 pm
by timoub007
Nice job Murry. Congrats and enjoy.