Page 1 of 1
Ollie's CX25 (Modified)
Posted: Mon Feb 16, 2009 4:26 pm
by OllieK
Well, here goes nothing! After sitting on the plans for a few weeks, and reading them till they were at risk of falling apart, I started drawing out some of the plans onto ply.
I made a start late Dec, but due to a number of personal reasons the progress was delayed some what until the last week or so.
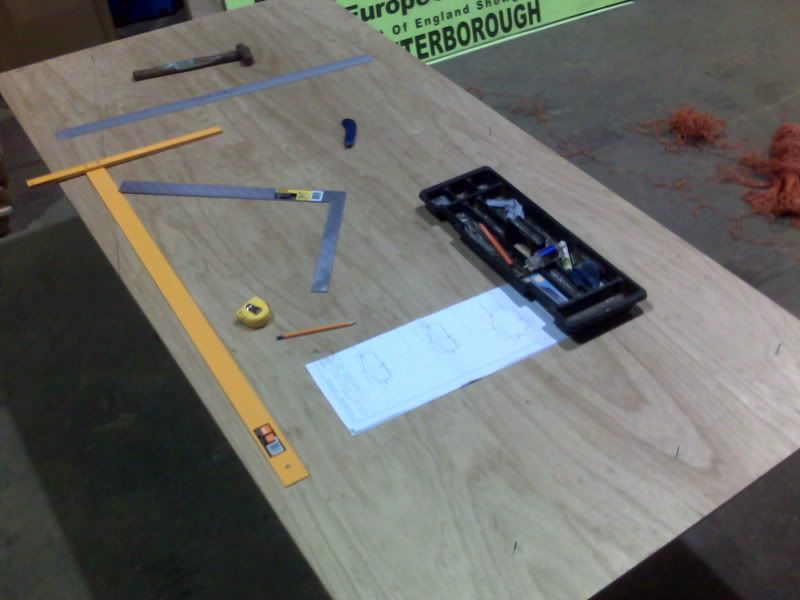
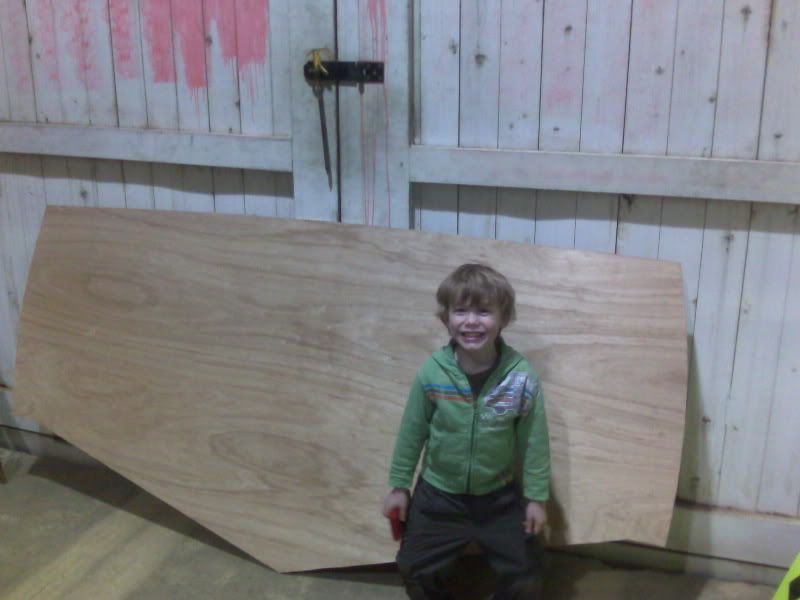
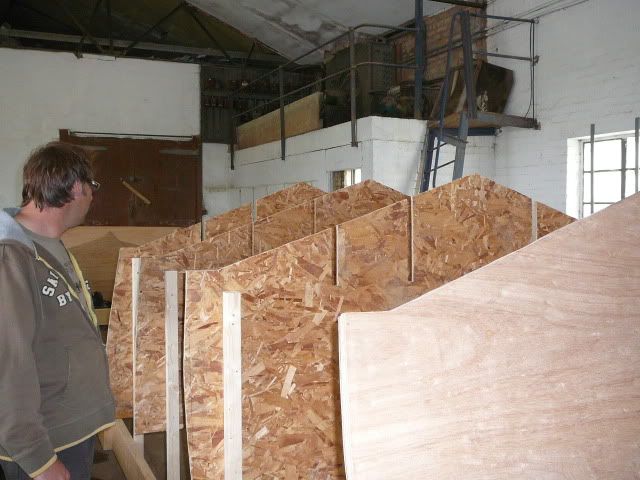
I had already managed to mark out the 3 x sheets for the transom, station A and station I. I started on these as they fit onto full sheets, and will go on to use them as the frames (I hope this is correct) All the other stations will be drawn onto and cut from chipboard (you guys call partical board, right?) I had already cut out the 3 x transom and station A, so this weekend I spent a couple of hours with my son (who is nearly 5) as he is soooo keen to help!
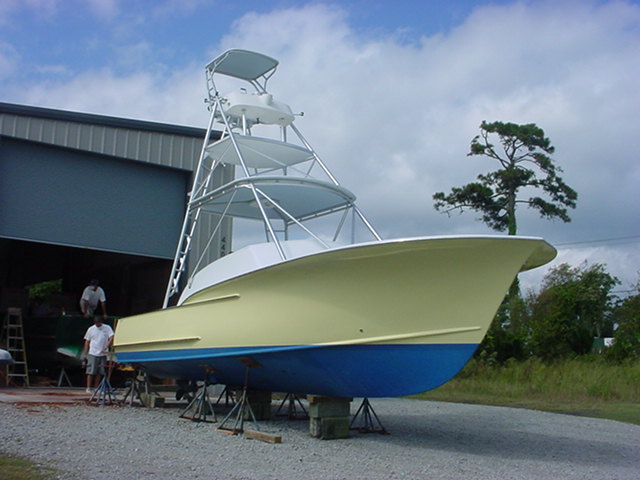
I am making some quite drastic modifications to the boats overall look, it was good to know that these modifications got the thumbs up from Jacques, and he has offered to help with a couple of drawings once the hull is built and flipped over! Below is a rendering of how I hope she will look when finished, working name is "Five O'Clock Somewhere"

Transom drawn out
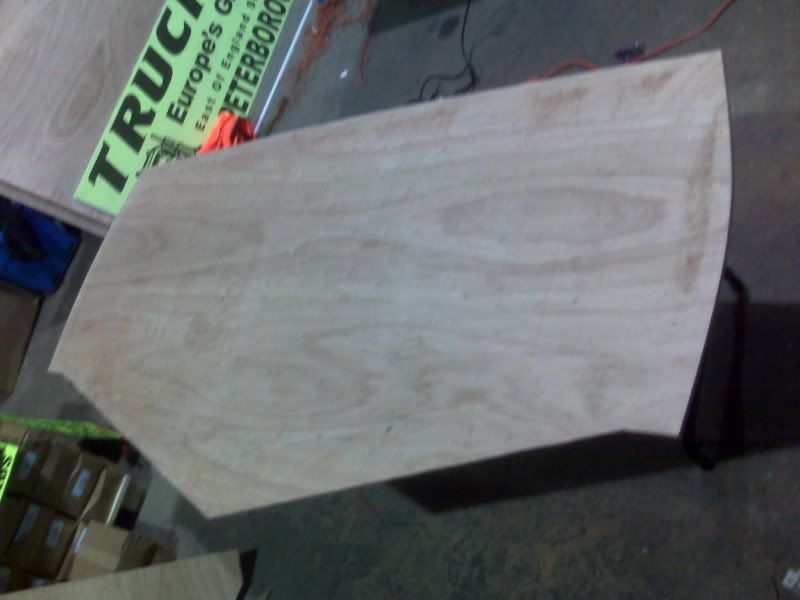
Marked out with string so I could see the shape before i marked the cambers in

And the first piece cut!
Robs, my helper was more interested in his nintendo !
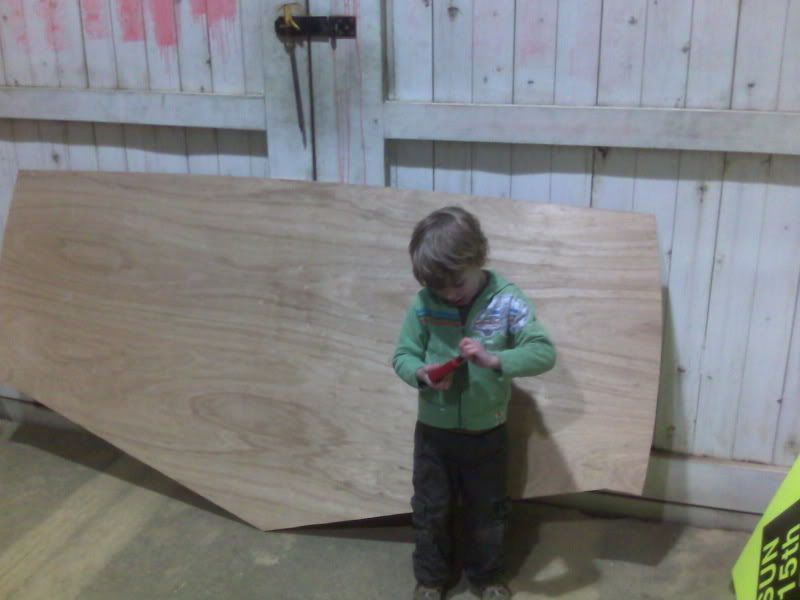
Station / Frame I cut and Robs looking a little more helpful!
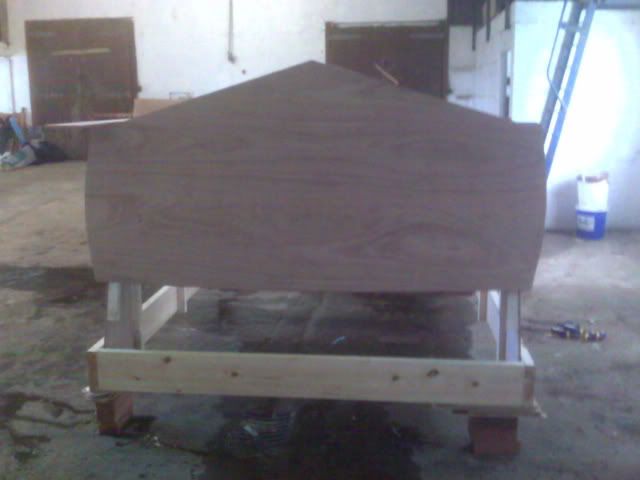
I also managed to get some heat into the building this weekend, so got the chance to laminate the 3 x transom pieces. Hopefuly the weather will hold as I dont know how much longer I can keep the heat on down there!
A good start I hope. Its a mid term break this week for my son, so I am taking 2 full days off work later in the week. I hope he stays enthusiastic enough to put in a couple of 8-10 hour days with his Dad!
Ollie
Posted: Mon Feb 16, 2009 4:35 pm
by peter-curacao
Good luck on your build Ollie! maybe you can learn from my mistakes

Posted: Mon Feb 16, 2009 5:02 pm
by OllieK
peter-curacao wrote:Good luck on your build Ollie! maybe you can learn from my mistakes
Peter, many thanks. Your build has been to me, as I am sure others, an inspiration to go out there and do it!
Didn't mention it above, but I am building using marine grade ply to BS 1088 from Montague L Mayer. All there ply come in a minimum of BB quality that meets the 1088 standard, or B quality that exceeds the 1088 standard, I have gone for the B standard and must say it is great stuff! We have a bussines account with a local hardware and timber yard, and they gave me a GREAT price on it. All I will say is that they aren't making a lot on it! For the epoxy, I will be using "West System" it is quite widely available here in the UK, and I have a dealer just down the road from me. I rang a number of dealers to get the best price and the local guy came back and beat the best price which was from a guy 150 miles away! At least with him being just down the road I can save on shipping costs!
I had planned on using Awlgrip paint products. I know a couple of guys down in Madeira who have used this on there boats with outstanding results.
Ollie
Posted: Mon Feb 16, 2009 6:02 pm
by Murry
Great start Ollie!
By the way, the tower configuration you ended up with looks perfect.
Good Luck,
Daniel
Posted: Mon Feb 16, 2009 6:29 pm
by TomW
Great start Ollie welcome to the group and glad to see the pictures. Awlgrip is a very good paint and you should be pleased with it. West system epoxy's are okay just be sure and make the mixes exactly as called for. They require 4:1 and are not very forgiving. Just be precise and you'll be fine, no problem. Others have used them and built great boats.
Tom
Posted: Mon Feb 16, 2009 7:09 pm
by Spokaloo
I can't wait to watch this boat develop. Her lines are achingly sexy, and should be quite the standout in the UK.
I used to use WEST products, they have their perks and their quirks. Make sure you don't let the amine blush get the best of you, and their manual on using their own products from Gougeon is well worth having.
Can't wait to hear you shout bollocks the first time something goes sideways, that will make it all the more rewarding when you are done and its perfect.
E
Posted: Tue Feb 17, 2009 3:04 am
by Bowmovement
Love the look of that rendering. Very excited to follow this build. The CX25 is something that I want to build in a couple years when the time is right.
Posted: Tue Feb 17, 2009 1:48 pm
by peter-curacao
Posted: Tue Feb 17, 2009 2:17 pm
by jacquesmm
Yes, check that: it's 5 layers for the transom.
From the building notes.
[quote]Note that the full transom is made of the transom 1-1/2â€
Posted: Tue Feb 17, 2009 2:45 pm
by bernd1
Ollie,
have fun with building, and enjoy it. I'm happy to see that a further European boat building project is in progress.
BTW, have you got + temperatures outside? Here in Germany you have no chance to heat up the garage without a good insulation - at the moment it is too cold.
Bye
Bernd
(location ......right hand...Stuttgart...where the best cars of the world are designed)
Posted: Tue Feb 17, 2009 3:30 pm
by peter-curacao
bernd1 wrote:
(location ......right hand...Stuttgart...where the best cars of the world are designed)
Italy jou mean

Posted: Tue Feb 17, 2009 3:37 pm
by Bowmovement
From the rendering it looks like you may end up with something like this, just a little smaller.
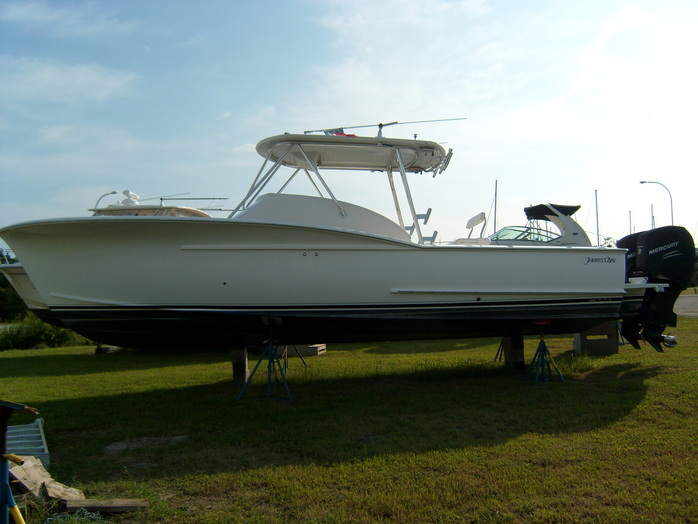
Its a 32' Jarrett Bay.
Here is the link to the home page for thier 32' hull for some ideas.
http://www.jarrettbay.com/construction/ ... s.php?id=6#
Its a walk-around, not sure what plans you have for that.
Posted: Tue Feb 17, 2009 4:45 pm
by OllieK
I saw the remarks about the transom. I have made comment in the power boats section of the forum.
That Jarrett Bay boat is nice. It was the Jersey Cape "Devil" that got my blood flowing for those lines!
Ollie
Posted: Wed Feb 18, 2009 3:32 pm
by ddbiiz
OllieK,
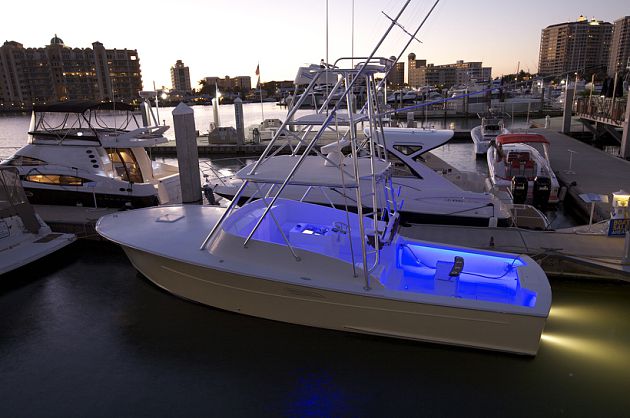
I thought you might like this picture, I also have the CS25 plans. Thanks to your drawings I've got new plans thanks!!
 http://gallery.bateau2.com/displayimage.php?pos=23544
if it dosen't come up it's in the galleries.
Don
OD18
Posted: Wed Feb 18, 2009 3:35 pm
by PastorBob
[/img]
Posted: Wed Feb 18, 2009 3:39 pm
by ddbiiz
Thanks PastorBob,
I was trying to figure it out it's been a long time since posting a pic
Don
Posted: Wed Feb 18, 2009 4:32 pm
by OllieK
Don, thats a sweet ride, I like the way they have her all lit up with the blue LED bulbs.
I went down to the shed tonight to take a look at the transom that we laminated on the weekend, I thought that 4 days should be enough. Looks like it stuck together OK, but boy even with just 3 sheets of ply it was some heavy. I am glad I didn't have to add the extra 2 sheets or I would have needed help to pick it up off the floor!
Think I am going to mark out the 2 x berth pieces next, that way I can see how much shut eye space I have!
For the record, I am planning on marking out all plywood parts for the boat before I construct the jig to build her on. That way I hope to be able to get on with construction without having to mark and cut parts.
Ollie
Posted: Wed Feb 18, 2009 6:03 pm
by peter-curacao
OllieK wrote:For the record, I am planning on marking out all plywood parts for the boat before I construct the jig to build her on.
I should wait with the deck, sole and interior parts like berths if I where you
Posted: Wed Feb 18, 2009 6:27 pm
by jacquesmm
peter-curacao wrote:I should wait with the deck, sole and interior parts like berths if I where you
I agree. It is safer to wait for parts like deck and sole.
Mark them on the plywood sheets but do not cut.
Posted: Wed Feb 18, 2009 6:29 pm
by chicagoross
What Peter said! If you want, mark out the pieces to try to preserve the nesting intent, but don't cut them yet. When you are ready for the interior pieces, double check, template, etc. before cutting. You will find that each boat is a little different when you get to cutting those pieces. Cutting them to fit will keep you from needing extra epoxy and filler to fill gaps. In particular, a number of us found that the decks could use an extra inch or so to overlap the sides and railing. The ability to cut to fit, by the way, is a big advantage of cutting your own versus buying the plywood kit.
Posted: Wed Feb 18, 2009 6:44 pm
by OllieK
I understand what you are saying, but....
I work away from home for about 20 weeks from april through september. It was my intention, as time is going to be rare, to have everything cut now while I have time on my hands (If only for another few weeks) While most builders can epoxy out a boat and maybe then spend time cutting there next part, I will not have that time on my side. i am thinking that if I get one evening a week I am going to be lucky. I hear what you are saying though, so will do as you say, you guys have a heep on me as far as doing things the right way!
Regards
Ollie
Posted: Fri Feb 27, 2009 5:38 pm
by peter-curacao
Ollie, maybe an idea?
idea click 31 diesel
After seeing it I'm in doubt what to do!
Posted: Fri Feb 27, 2009 8:13 pm
by dustin1
Posted: Sat Feb 28, 2009 10:40 am
by peter-curacao
Posted: Sat Feb 28, 2009 10:48 am
by OllieK
peter-curacao wrote:Ollie, maybe an idea?
idea click 31 diesel
After seeing it I'm in doubt what to do!
Peter, already given it thought....I also asked the question last year i think about a stern drive with mid boat mounted engine with a jack shaft. I think if I remember correct that Jacques said it could be done, but I would need an enginering company to make the shaft long enough.
Since then however my thoughts have changed. I am going to power the boat as designed, with bracket mounted outboads. I met a guy in Madeira this year who runs a boat in Mozambique - a 31 footer with outboards on the back - and he reguarly encounters Blue and Black Marlin upto grander class. They HAVE to run outboard boats there, as they have a sand bar to get over in order to get to the grounds. He deals with winds and seas that I will rarely, if ever see in the mid atlantic islands, as we fish in the lee off the south side of the islands, out of the trades that blow from the N.E. during the Marlin season.
Time is not on my side, as I said before, I work away for about 20 odd weeks of the summer so it's going to be about 8 months or so before I think I can get to flip over stage. I don't realy want to be messing around trying to get the info needed to put a single inboard in her (even though I would love to!) and making the changes to the hull in order to do so. Thinking of things like stringer size and spacing, thats something that would be best done at the start rather than trying to add / beef up stringers to mount an engine on.
However, if someone is up to putting this into practice, then who knows what the future holds.........

and just to put a spanner in the works, have you looked at the Carolina Classic 25 with inboard????
Ollie
PS, Dustin can hang on to the big girls when he needs to. We had him yanking on a 700+ fish for an hour a couple of years ago. I got her to the boat in a little over 15 mins and she would NOT let me keep more than a few feet of the wind-on leader on the reel. Backwards and forwards, to and throw. He did a great job, but his back sure played up for a while after

Posted: Sat Feb 28, 2009 11:00 am
by peter-curacao
OllieK wrote:However, if someone is up to putting this into practice, then who knows what the future holds.........
and just to put a spanner in the works, have you looked at the Carolina Classic 25 with inboard????
Did you missed Deedaddy? I was trying to found his photo tread with no success maybe someone else?
Posted: Sat Feb 28, 2009 4:39 pm
by OllieK
peter-curacao wrote:OllieK wrote:However, if someone is up to putting this into practice, then who knows what the future holds.........
and just to put a spanner in the works, have you looked at the Carolina Classic 25 with inboard????
Did you missed Deedaddy? I was trying to found his photo tread with no success maybe someone else?
Peter, yes I haave seen Deedaddy's boat. I think he had a rear mounted engine into a stern drive. That set up eats into your cockpit space though, and kind of puts me off, thats why I asked about mid mounting the engine and running a jackshaft, that way you don't loose half of the cockpit to an engine box. Mid mounting the engine , i thought, would be a way of making the engine cover / box into a driving position???
Both the boats above are running an inboard with shaft and props, thus avoiding all the "junk in the truck" so to speak. I would be interested in if that configuration could be done in a CS/ CX 25, after all the Carolina Classic 25 does it rather well, but would want someone to do it first as I dont have the time to work things out / change plans ect. That said, if I wanted a boat with out said "junk" I could have gone for the LB26, but those Carolina lines are way to sexy to ignore so I am willing to make the sacrifice. Maybe in days to come a CS / CX 31 with 12 foot beam and twin inboards may make it onto the drafting table

if so then

Ollie
Posted: Sat Feb 28, 2009 7:45 pm
by dustin1
Peter, the point I was trying to make in putting up the photos of the Shearline 25 is that the express configuration in Ollie's pic is going to have to be incorporated within the dimensions of a 25 foot hull. The tower would need to be shorter than it is on that 31 for instance. What does look a little tight to me, looking at the Shearline 25, is the cockpit. The chair would need to be carefully selected and I can see the angler having to brace his feet against the covering boards because a footrest may take up too much space. (I guess that's one situation where the gunwale height being where it is might come in useful - the other being hauling a 200 lb bigeye over the side
)
Posted: Wed Mar 04, 2009 6:12 pm
by OllieK
dustin1 wrote:Peter, the point I was trying to make in putting up the photos of the Shearline 25 is that the express configuration in Ollie's pic is going to have to be incorporated within the dimensions of a 25 foot hull. The tower would need to be shorter than it is on that 31 for instance. What does look a little tight to me, looking at the Shearline 25, is the cockpit. The chair would need to be carefully selected and I can see the angler having to brace his feet against the covering boards because a footrest may take up too much space. (I guess that's one situation where the gunwale height being where it is might come in useful - the other being hauling a 200 lb bigeye over the side
)
Dustin see pic below

As I am taking out the existing driving position and doing away with the head and galley in favour of a more forward central driving station there's 10'10" of cockpit to play with almost. The "Balancal" only has a 7 foot-ish cockpit, so we are going to have more room, don't worry! As for the gunwale hight, think what it is like on the "Cabo" - lock yer knees in under the covering board and hang on!
Any how, down to building news.
The unit were were due to move into a couple of weeks ago was no use. Once the owner had cleared it out, we noticed that the floor was nothing more than dirt at best, and very uneven. So we asked for another unit but the guy had moved all the stuff from one into the other so we have had to wait a couple of weeks for him to move everything back! I have in the mean time been drawing and cutting at my work unit (big enough but not allowed to use)
Well yesterday I got the keys to the new unit, it is way bigger than the one we were due to move into but the price is the same, I have room for 3 GS28X's in there!!! We are due to build the strongback this weekend, and then I have a week booked of work in 3 weeks time to build the hull?????
so will report back then
Regard
Ollie
Posted: Wed Mar 04, 2009 6:58 pm
by Spokaloo
Thats exactly the layout I was thinking of as well.
Do show some drawings if you get a chance.
E
Posted: Wed Mar 04, 2009 8:36 pm
by Joe H
bernd1 wrote:
(location ......right hand...Stuttgart...where the best cars of the world are designed)
Italy jou mean
We all know it's Detroit!
Can't wait to see this one come together Ollie!
Joe
Posted: Thu Mar 05, 2009 8:07 am
by dustin1
Ollie,
What might influence chair installation as significantly as cockpit length (I agree the helm station could be positioned a couple of feet further forward than on that Shearline 25) could be the amount of beam you have to work with. You will probably have around 8 feet of effective beam - probably close to four feet narrower than the effective beam of a Lochin 333 - and your chair is going to need to be carefully measured to fit that space. Don't forget to allow some clearance for the wireman to squeeze between the footrest and gunwale.
The gunwale height doesn't worry me as much as having an outboard hanging off the back. You'll remember how close the line and leader came to the edge of the swim platform on the Balancal on those two fish, especially the second one - and the way that one did those switchbacks kiting from left to right across the transom while trying to dig deeper against the pull of the wire at the same time. I think these issues can be managed from an outboard vessel, but the skipper will need to be careful to keep the fish off to the side whichever way it goes, as the wireman won't be able to walk a deep fish across the transom with the outboard(s) in the way - so the skipper will need to follow the switchbacks, pinwheels etc more closely. The whole process of wiring a fish and the associated boat handling is going to be a little different from what we are both used to, but it will be fun working things out. If I get to wire any fish this year I'll try working off the sides as much as possible for practice!
cheers dustin
Posted: Sat Mar 07, 2009 8:35 pm
by ben2go
Any updates on this build?Just curious.I am looking to start building soon.I'm narrowing my choices and getting ready to place an order.
Posted: Sun Mar 08, 2009 7:22 pm
by OllieK
Well everyone said that you can never set times and deadlines in boat building and stick to them. I had planned to get the strongback built today and mount the stations on it but that didn't happen.
What I got done was move all the stuff from my work unit to the new shop, stopped for lunch, wife rang and said that Robs wanted to help. went to pick him up, shot across to the work yard to pick the trailer up to go to the DIY store to collect wood that was ordered in week. That was at 1.30pm. DIY store shuts at 1.00pm on a Sunday. Can't moan at myself though, as I was due to collect yesterday on my return into town from a training course I was on in the morning, but went to see Dad who got taken into hospital on Friday night. He's OK and thats all that matters.
What I did get done though was some more cutting, and I finished off station H with the missing measurement that Jacques posted the other week. Thankfully I have an internet phone so I could look up that figure, as I did not write it on the plan!
So this is whats done to date.
Stations A through I
Frame A and I
Transom x 3, all laminated together
Motorwell x 2
I guess about 15hours work over 4 days. I have as yet to put in a full day, that will come though! Only took 1 pick today and that was of my new home for the next couple of years!
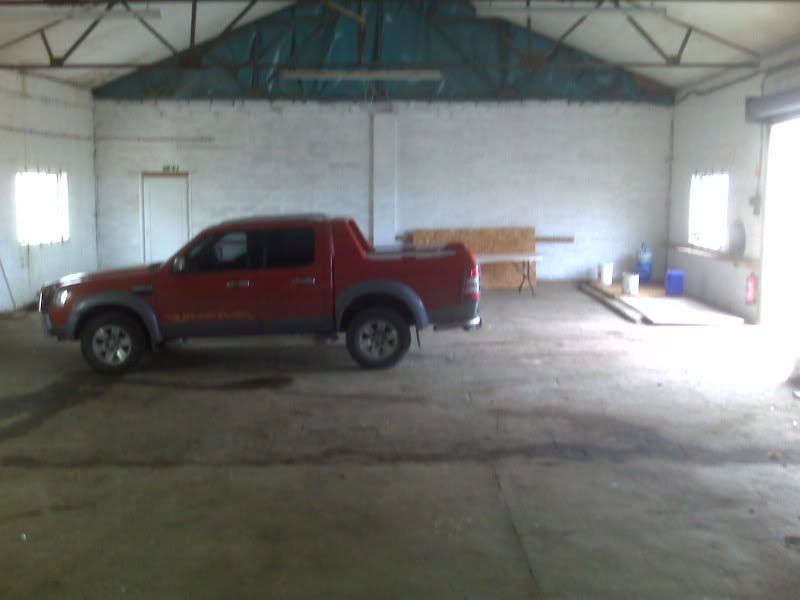
Truck is a Ford Ranger, thats a big shed I got there! There is enough room the far side of the truck to build the boat plus work bench.
Regards
Ollie
Posted: Sun Mar 08, 2009 8:00 pm
by chicagoross
OK Ollie, you've made all of us tent and carport builders jealous.
Posted: Sun Mar 08, 2009 8:49 pm
by Cracker Larry
Wow, that's a serious sized shop

The 25 is a serious boat too! I really like those. Hmmm, I need something to build next. It's probably a good thing that I don't have a shop that big
Posted: Sun Mar 08, 2009 8:53 pm
by Murry
Very nice
I hope to be seeing alot of pictures with that shop in the background
Posted: Mon Mar 09, 2009 1:22 am
by ben2go
Nice shop.Good to hear your father's ok.I love those Rangers.Wish we got those in the US.I have a silver 2001 short cab with a step side bed and chrome package This is my second small Ranger.It's good to know you haven't given up on the build.
Posted: Wed Mar 18, 2009 9:41 am
by Doc_Dyer
a week and a half, since you got your new shop.....
any pics of progress yet?
Bradley
Posted: Sun Mar 22, 2009 7:05 pm
by OllieK
Doc_Dyer wrote:a week and a half, since you got your new shop.....
any pics of progress yet?
Bradley
Bradley, I work away from home quite a bit, not to bad now, but come May-Sept it's nearly every weekend! Was away last weekend with work, and this weekend was "Mothers Sunday" in the UK so went away with the family for the night. Wife got the whole spa treatment, I got to look after the kids!
Got Tuesday thru Friday off work this next week, so should break the back of things all been well!
wait for then and there should be loads to tell
Regards
Ollie
Re: Ollie's CX25 (Modified)
Posted: Wed Mar 25, 2009 5:39 pm
by OllieK
Made some good progress the last 2 days. Yesterday I went hardware shopping, got me some new clamps, 33ft tape, boxes of screws etc and that sort of stuff, Also brought a compound mitre saw and a bench grinder just because I could, you know, men and there tools and what not! Had an hour and a half chat with my landlord at the shop, so was lunch time before I started. Only managed to get the strong back built and level and square before it was time to go home and say goodnight to the kids.
Today was a fun day, take what must be the best part of 3 12mm, 1220x2440 sheets of ply and try mount them on your own! nearly killed me I tell you! But managed anyhow, along with station I, H and G. It wasn't until I got station I in place in realised I had not cut the stringer notches out!, well I left it in place and put H and G in as I think it would be wise to take out I and put in once flipped.
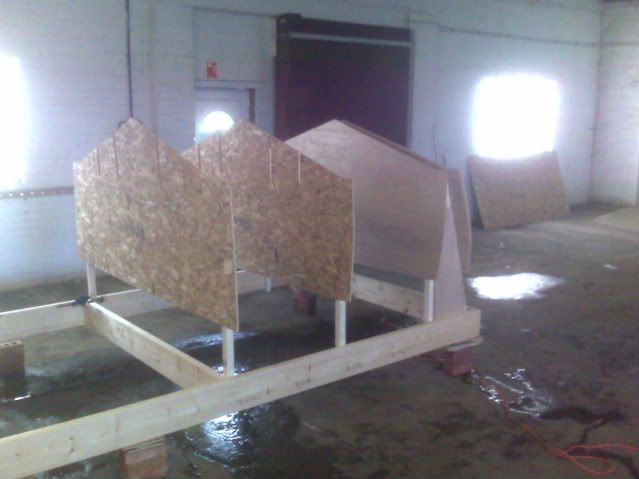
Anyone see anything wrong please shout. Not doing anymore now until Saturday as work is calling me!
Ollie
Re: Ollie's CX25 (Modified)
Posted: Thu Mar 26, 2009 10:10 am
by peter-curacao
I wouldn't put in frame I right now, just my

Also I think (not sure) you’re gonne get some trouble (nothing dramatic)at the bow with a jig that wide,I think my frames where almost at the same height as yours, as you can see I had to cut frame A (see pic)
I made my notches in my frames not deep enough but I think yours are to deep the complete height of the stringers if I see it correctly ?

Re: Ollie's CX25 (Modified)
Posted: Mon Jun 01, 2009 12:56 pm
by peter-curacao
Just curious anybody knows how this build is going?
Re: Ollie's CX25 (Modified)
Posted: Thu Jun 04, 2009 1:17 pm
by OllieK
Peter, Building slow due to work, but should have some good pics after this weekend. Dustin is coming up on Saturday to help.
Ollie
Re: Ollie's CX25 (Modified)
Posted: Sat Jun 06, 2009 6:58 pm
by dustin1
My first experience of boat building! Around 8 hours working with Oliver in the workshop cutting out hull shapes and stations, taping and setting up the next hull station in line.
Some stuff that needed cutting out and joining to start with - Ollie will know what bits of boat these are.
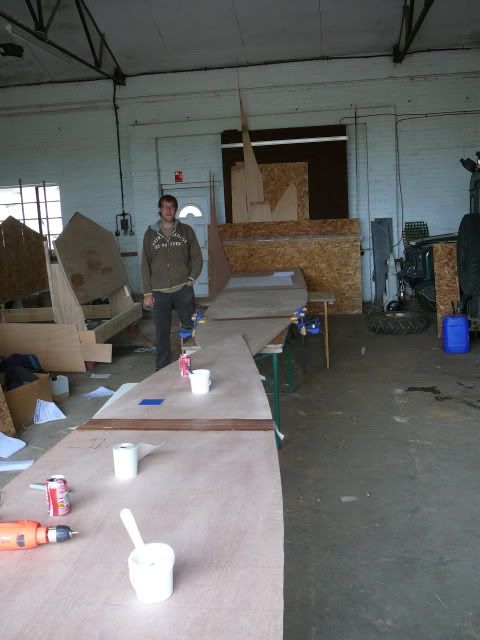
We had planned to modify the side of the house to more of an Express style configuration. This would be a significant (at least in terms of appearance) departure from the plans and resulted in some involved discussion as to what line we should take and the exact curving sweep that would look the sexiest. I liked the narrower sleeker line of a Tides whilst Oliver seemed to prefer a more dramatic curve like a Buddy Davis. This is what we ended up with:
The express style house sides joined up:

Next job was cutting the notches for the stringers in the next station down the line (E?), followed by mounting it on the jig.
Oliver looks over the newly set up station
We finished cutting out the station after that but could not get it set up on the strongback before it was time to go.
Ollie will fill in the more technical aspects later I'm sure.
In the meantime, here's something to keep all of us motivated. I just love this pretty little custom express - not least the surgically white, minimal maintenance exterior finish. It's a long road to go yet and guys like Peter will get there long before us. But this is the carrot that leads us all on.
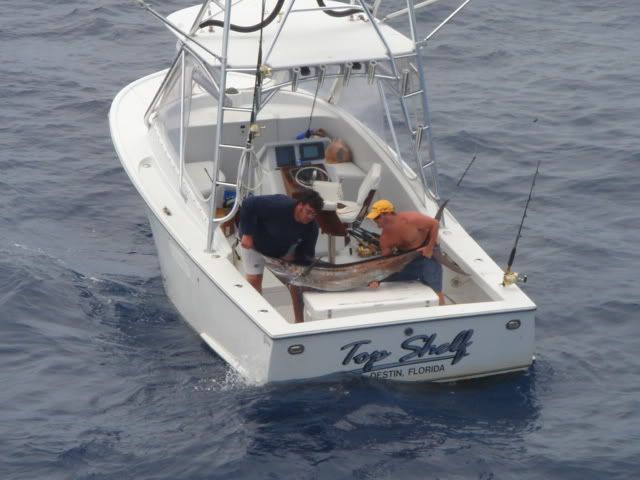
Incidentally the blue marlin in our fishing area, unlike that tiddler, often will comfortably exceed the beam of Ollie's CC25.
Re: Ollie's CX25 (Modified)
Posted: Sat Jun 06, 2009 7:34 pm
by Cracker Larry
Great progress! Beautiful boat above. I didn't know you could catch marlin in the UK
Sweet! That just shows I don't get out enough.
Nice work Dustin.
That is a small Blue, isn't it
But by golly it's a marlin!
Re: Ollie's CX25 (Modified)
Posted: Sun Jun 07, 2009 5:24 pm
by OllieK
Hello all.
First I would like to say a big thank you to Dustin for taking the time out to join me yesterday, having that extra pair of hand sure did help!
As far as the build goes...
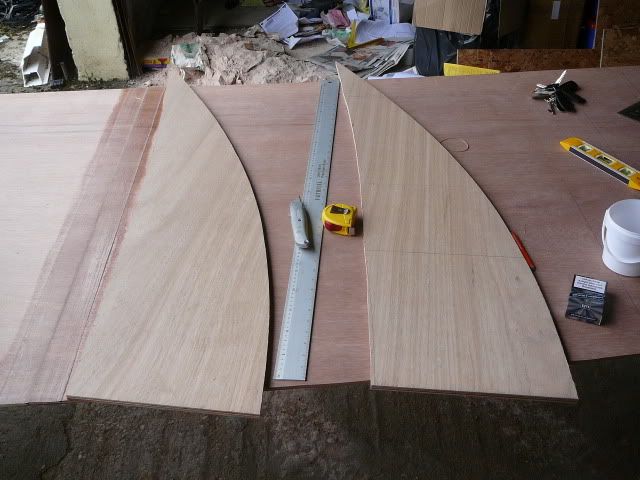
Messed up stations C, D and E, so I have to redraw and recut them! Doh! As a result, things are moving a little slower than planned. What we were able to do yesterday though was mark out and cut the last sheet of ply to make up both of the ends of the bottom, and get them taped up. I now have the whole of the bottom finished. As Dustin mentioned, we also cut the stringer notched in station F and got that mounted and redrew station E and got that cut. As we were waiting for things to cure, we also played around with the combing that will give the boat those sexy lines I am after, and we ended up marking out, cutting and joining them together. All in all, a great days work!
After a call from a friend who runs a charter boat in Madeira today, I found myself running down to the shop to do another few hours work. Station B is all but ready to mount, so just C and D left to go before I can start mounting all the panels on the jig! The thought of 900lb Blue Marlin sure does fire up ones inspiration!
Larry, there are no blues of the UK, although one did get washed up here last year. I do know of someone that is going to spend time looking for them of the most south westerly point of the UK - the scilly isles - after reports over the last couple of years that flying fish have been seen there, who knows???
I will be keeping the boat in Madeira, that's where I do all my fishing, the idea is to catch a blue on a boat that I built with lures that I made with good friends and family... lets wait and see!!
Re: Ollie's CX25 (Modified)
Posted: Wed Aug 26, 2009 7:33 am
by a_Adel
can not wait to see her forming
good luck Ollie
any recent update, pics?