Page 1 of 1
Hagar's OD18
Posted: Sat Feb 06, 2010 2:37 pm
by hagar
Well, took a couple of years off from doing this build, getting back to it. The advantage of that is that I have been able to look at Cracker Larry's and Larry B's progress, I am so grateful that you guys take the time to post pics and comments. I won't be able to keep up with those excellent examples, but will try to post any helpful comments if I have any that you guys have not already posted, although those will probably be few and far between.
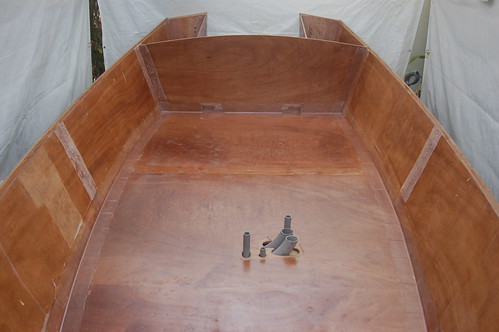
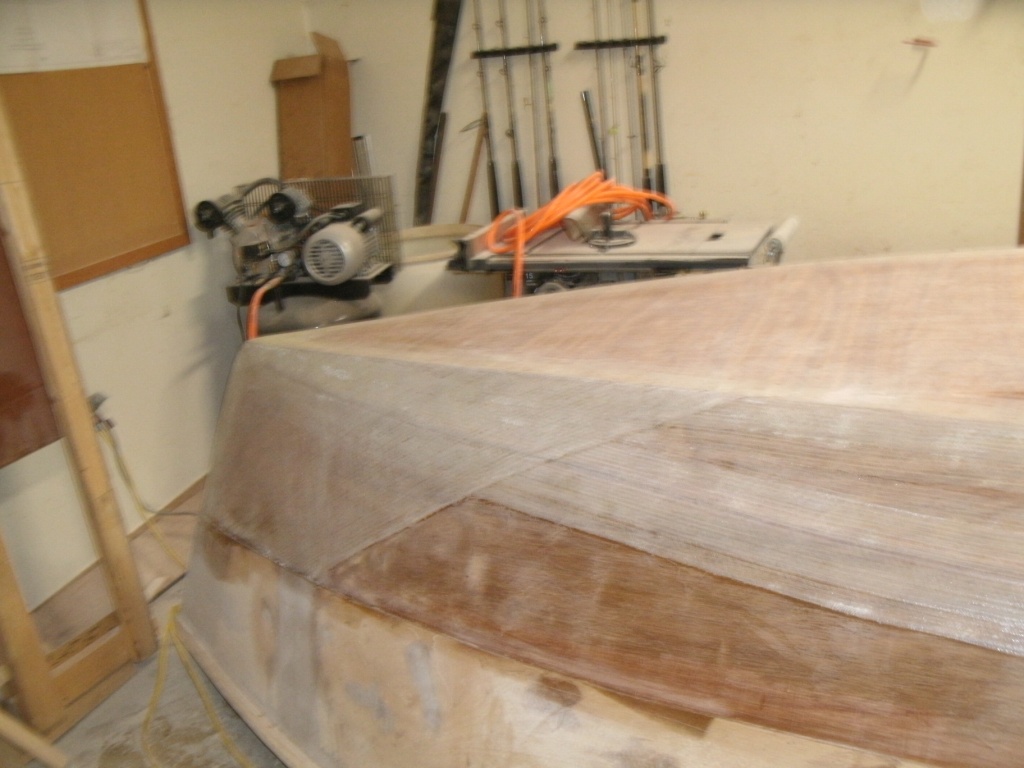
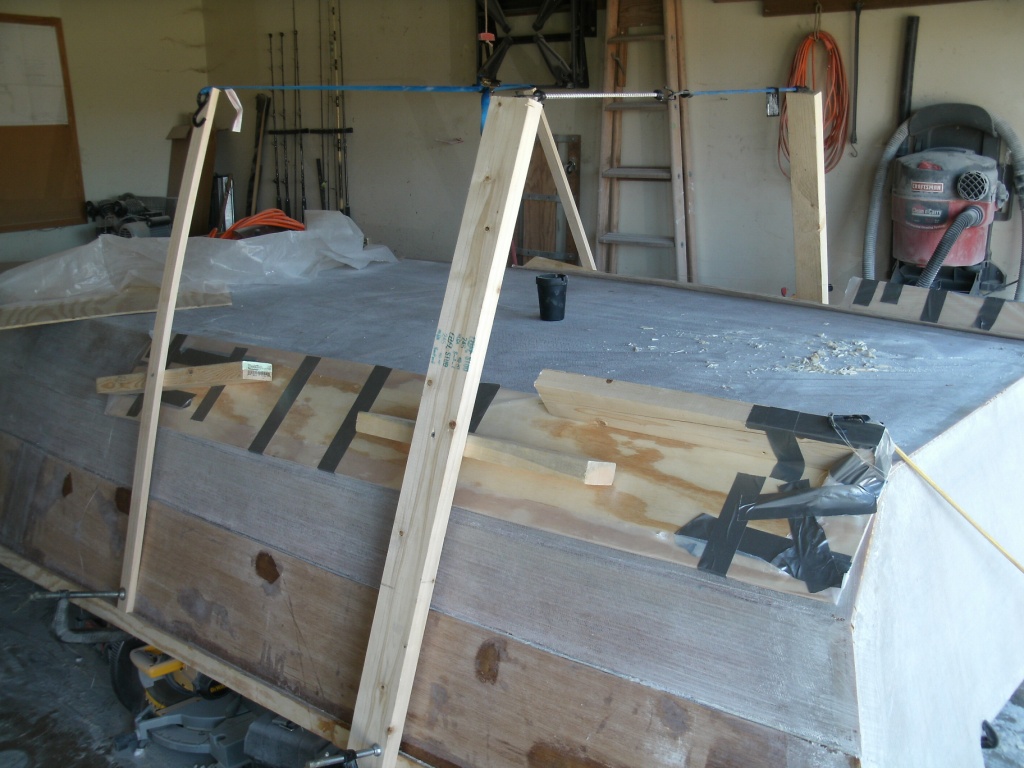
I have gotten to the point of putting the hull together, puttying the inside fillets, flipping the boat and have so far taped the transom and bow. I have faired out the two side panel seams that need taping and have coated with epoxy, now waiting for that to get dry enough to tape. I have attempted to read as many posts and how-to files as possible so that I don't ask too many newby questions but, inevitably, I still need help. My thanks in advance to any who do so. Here is the first salvo of questions.
1) Restudying the plans, they call for a 2x6 for the stringers. I chose to laminate mine out of 1/2 inch ply of three layers, leaving them 1 inch higher than plans for the drainage issue. I did not see where the stringers were to be tabbed onto the keel panels, but CL did his so should I do mine? Also, I see CL used a thicker lamination, I only did mine to the 1-1/2 inch to match the dimensional lumber thickness. If I do need to tab them in, what cloth, the biax or will the tape work? Totally encaplulated or just tabbed in at the bottom corners?
2) I seem to be using a buttload of epoxy which, according to this website is to be expected from a newby. I am definitely guilty of making large fillets on the inide seems which is where some is wasted, but, I seem to use a ton when wetting out the biax tape. My past experience with poly resins is to wet out the area that the tape is going to be applied (not talking about the initial layer of epoxy used to soak the wood, already have that done and dried and sanded or still slightly tacky when working wet on wet), then laying the tape on the wet surface, then wetting out further with a foam roller. Is that proper, or should I be laying tape on the dry seam and wetting out from the top?
3) I see that acetone is the preffered chemical for wiping down surfaces before putting epoxy on. I am using MEK, will that cause any issues?
I posted some picks in my gallery and will try to keep doing so. Hagar's OD18. Maybe as time goes on I will get smart enough to include that url in the post...
Thanks for any input,
Hagar
Re: Hagar's OD18
Posted: Sat Feb 06, 2010 5:15 pm
by Cracker Larry
Welcome back! Here's a link to your gallery..
http://gallery.bateau2.com/thumbnails.php?album=1138
I did not see where the stringers were to be tabbed onto the keel panels, but CL did his so should I do mine? Also, I see CL used a thicker lamination,
The plans don't say that, but Jacques told me I should tape them down. I asked him.
Also, I see CL used a thicker lamination, I only did mine to the 1-1/2 inch to match the dimensional lumber thickness.
No, I used 2 layers of 3/4 ply, same net of 1 1/2".
If I do need to tab them in, what cloth, the biax or will the tape work? Totally encaplulated or just tabbed in at the bottom corners?
You do. 6", 12 ounce biax tape, both sides. Totally encapsulated with epoxy, but not with tape.
I prefer denatured alcohol to MEK or acetone, it's not quite as bad for you.
I seem to be using a buttload of epoxy
Yep, so do most of us

Your layup method sounds fine. 12 oz biax should take about an ounce a foot for a 50/50 ratio so that's how I judge how much to mix and spread.
Re: Hagar's OD18
Posted: Sat Feb 06, 2010 8:49 pm
by Larry B
Hager,
What Cracker Larry said

I copied most of his build so far. And yes the denatured alcohol is what I use also.
Dang, didn't know someone was watching me build

I better start doing a better job
As far as epoxy is concerned, I don't even measure like CL does, (although that would be the proper way) I just keep mixing until I'm satisfied
It take's what it takes
Are you doing a graphite bottom? I wish I could tell you how a splash rail works but it will be many months for that answer

Don't forget to look at Cape Mans too. I've got some very good ideas from him also. In fact my boat is just a replica of CL's and Cape Mans
with a few minor mods.
Larry B
Re: Hagar's OD18
Posted: Sat Feb 06, 2010 9:32 pm
by hagar
Thanks a ton guys, that should get me through the night anyway!!
Re: Hagar's OD18
Posted: Sat Feb 06, 2010 10:30 pm
by Cracker Larry
Let me clarify something, you asked if the stringers get tabbed and I said yes, which isn't quite right. Tabbed indicates spaced pieces of cloth. The stringers get taped end to end, full length, continuous on both sides, not tabbed. They are glued, filleted and taped to the bottom.

Re: Hagar's OD18
Posted: Sat Feb 06, 2010 10:36 pm
by rjezuit
There are probably few and far between of us that would use the amount of epoxy as specified on the plans. In my estimation, it is WAY under estimated. Maybe a professional could do it as the plans state, but not an amateur, and definitely not a first time amateur. Rick
Re: Hagar's OD18
Posted: Sun Feb 07, 2010 12:15 am
by hagar
CL,
I used the wrong terminology there. I'm good with the full length issue, what I was trying to ask was if cloth had to be added to the top of the stringer to overlap to the tape on the sides which would "totally encapsulate" the stringer. I see that I don't as yours is just in the transition corners from bottom to stringer, thanks for the pic. I did the bottom panel to chine panel seams since my last post, you were spot on with the 1oz./ft. of tape. That translates to 2oz./square foot which will help me when I get to the large areas too. That's it for me tonight, will continue with the side panel to chine panel seams in the morning. I will then have to wait for an epoxy delivery!
Larry B.,
The graphite bottom is on the build agenda but it will be a budget thing and I don't want it to slow the build. I'll see when the time comes. As far as a spray rail, definitely, I hate getting wet on a boat ride and have been known to be the only trailer at the boat ramp when the weather is bad. I'll get wet if I have to and many times it won't matter if there were a foot wide spray rail, but the drier the ride, the less sailor language.
One idea I did have while gluing up the rubrails was fishing line. Due to the bends required, I couldn't get the rails to stay where I wanted while clamping so I stuck a piece of 60lb. test in the glue joint everywhere I had a clamp. I figure that it would keep a small gap in the glue joint and still allow me to clamp them down tight enough to keep them from moving. I just left them in the joint thinking that they are plyable enough to not cause any stresses in the joint. Hope I'm right as I plan on using that technique when I get around to gluing the sole onto the stringers, just lay down a piece of mono on top of the stringer so I don't have to worry about having hard spots. See any issue with that?
Thanks Again,
Hagar
Re: Hagar's OD18
Posted: Sun Feb 07, 2010 10:02 am
by Cracker Larry
CL,
I used the wrong terminology there. I'm good with the full length issue,

I just wanted to make sure I was clear.
The graphite bottom is on the build agenda but it will be a budget thing and I don't want it to slow the build
Graphite is by far the least expensive coating you can put on the bottom

It's only about $7 for enough to cover 2 OD18s
There are probably few and far between of us that would use the amount of epoxy as specified on the plans. In my estimation, it is WAY under estimated. Maybe a professional could do it as the plans state, but not an amateur, and definitely not a first time amateur.
Yep, I've built 4 boats with this method and still haven't come close to the specified amount
It takes what it takes
My OD18 took 21 gallons, if this gives you an idea

Re: Hagar's OD18
Posted: Sun Feb 07, 2010 10:26 am
by Larry B
Re: Hagar's OD18
Posted: Sun Feb 07, 2010 5:50 pm
by hagar
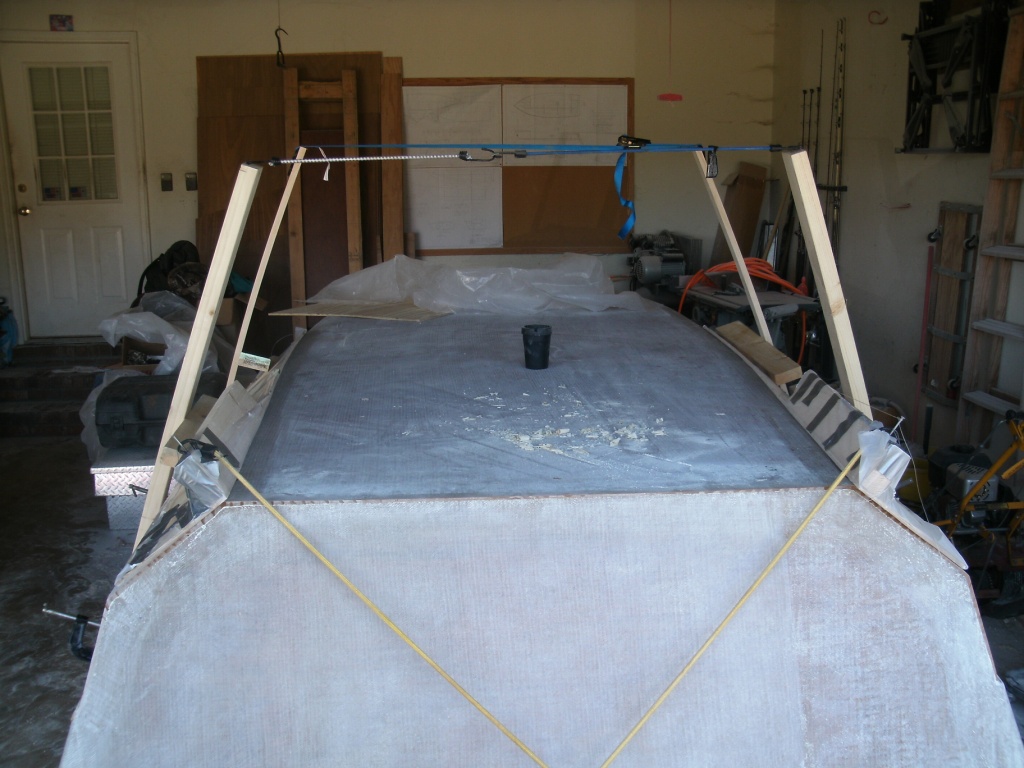
Ok, all outside seams are taped now. I think I will be able to ram a submarine with the bow and not hurt a thing, lots of tape coming together there! Graphite bottom option firmly in place, thanks Cracker.
When I mixed the last batch of epoxy on the last seam, I was left with less than an ounce of hardener, talk about cuttin' it close!
Cracker, I have a four legged buddy too. Posted his pic for Sam, maybe they are kinfolk. He's a realatively new addition, one year old last month. If he stops digging up the wife's flowers, we may not have to move out this sping! His name is Rogue.
Thanks again guys,
Hagar
Re: Hagar's OD18
Posted: Sun Feb 07, 2010 6:51 pm
by Cracker Larry
I have a four legged buddy too. Posted his pic for Sam, maybe they are kinfolk. He's a realatively new addition, one year old last month. If he stops digging up the wife's flowers, we may not have to move out this sping! His name is Rogue.
He's a handsome fella for sure
Beautiful. Just ask him not to do that, they respond well to your wishes
Sam recently turned 10 years old, and his b@tch Delilah is almost 12. Getting old is tough

Let's put a picture of Rogue here, that's a fine specimen of a boat dog


Re: Hagar's OD18
Posted: Sun Feb 07, 2010 9:31 pm
by cape man
21 gallons of epoxy in my OD18. Don't even think about it is my advice. Use what you have to get good fillets and fully wetted cloth.
Re: Hagar's OD18
Posted: Sun Feb 07, 2010 9:56 pm
by Larry B
cape man wrote:21 gallons of epoxy in my OD18. Don't even think about it is my advice. Use what you have to get good fillets and fully wetted cloth.
Craig, you don't happen to remember about where you were at on your boat with 15 to 16 gallons into it? Just wondering how close I'll come to that 21 gallon mark
Re: Hagar's OD18
Posted: Mon Feb 08, 2010 7:10 am
by cape man
Re: Hagar's OD18
Posted: Mon Mar 08, 2010 10:37 pm
by hagar
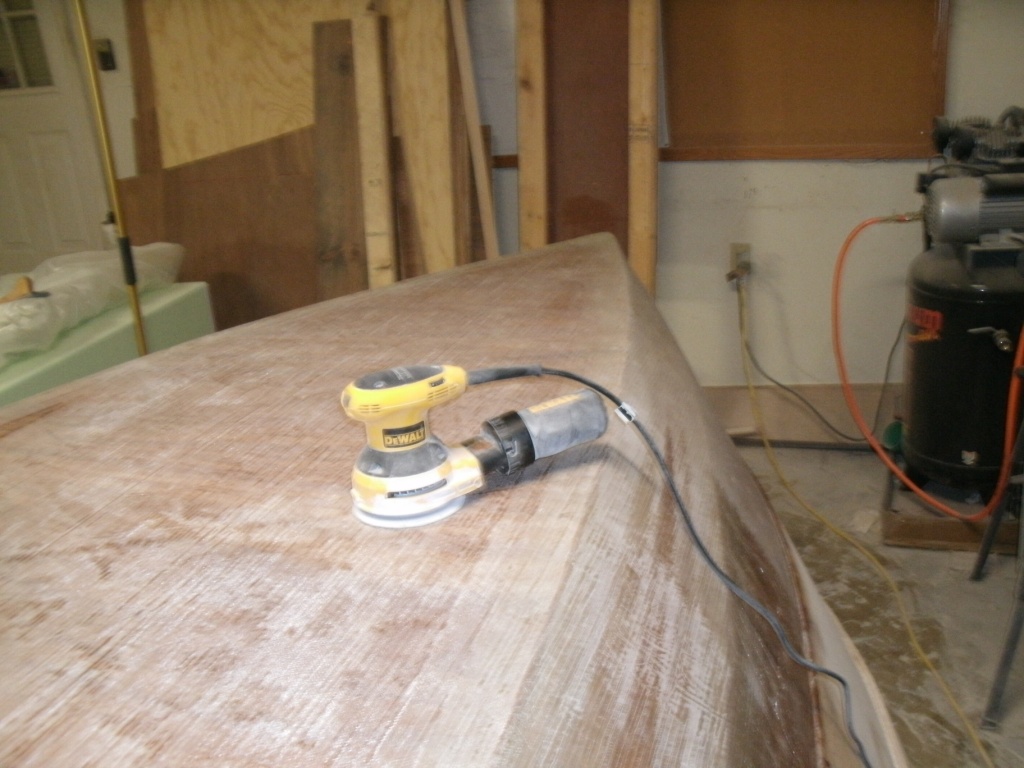
Need recomendations on a sander and sandpaper type/brand. I am currently using a 1/4 sheet finishing sander and Gator Red Resin paper from Lowe's. Buying full sheets and cutting for the 1/4 sheet. The sander is a Black & Decker Firestorm and although it is not one of the best brands, it is one of the fastest and has lasted so far. Only problem is, it is taking forever to sand and I am changing paper every 20 square feet or so, the stuff just quits cutting. Using 50 grit and it is not clogging, just dulling. I have a belt sander, but I seem to be able to gouge the heck out of something on occasion and don't want to do that. I used to have a pretty good touch with the 6 inch angle grinder and sandapaper pad, but, that was some years ago. I am thinking of investing in a good electric dual action. Any suggestions that may help on paper type/brand and if the da is the way to go?
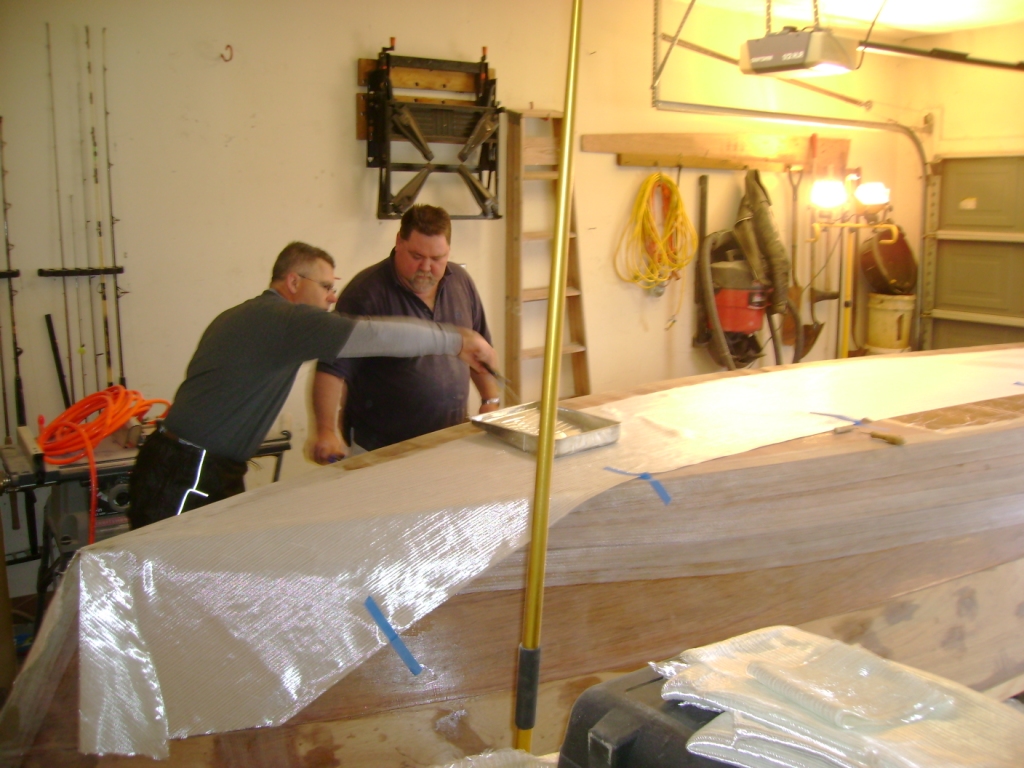
On another note, I am sanded and ready to put the biax cloth to the hull, just lining up some help for mixing as I go, want to work wet-on-wet any time I can. In fact, that is my new goal, wet-on-wet unless absolutely undoable!
Hagar
Re: Hagar's OD18
Posted: Tue Mar 09, 2010 9:32 am
by cape man
Hagar,
I found the Norton sand paper to hold up MUCH longer than the Gator brand. I too bought full sheets and tore them down to 1/4 sheets. I used 60 grit for the rough stuff and could get twice the work done than with the red stuff.
I used a belt sander on the outside and paid the price. Looked really nice until I started the fairing process and then all the gouging and dips showed up. Spent lots of extra time and materials trying to fix it and I can still show you some places where it shows today. One of the things I wished I'd never done. Sanding sucks, but it is just a thing that takes some time to do right. There's a place for a belt sander, but you really need to be careful if the end result is a nice smooth surface.
Re: Hagar's OD18
Posted: Tue Mar 09, 2010 9:52 am
by TomW
Switch to the black Gator brand, which is made by Norton by the way. If you want to get a good sander get a random orbital one. Either Porter-Cable or DeWalt make good ones. They have dust ports and can be hooked to shop vacs making them even better at removing dust. 6" remove more faster do to there size than the 5" size but are more expensive. Get a hook and loop one. You can buy sanding discs in bulk pacs of 50 at Lowe's starting at 50 grit in the Black grit.
Tom
Re: Hagar's OD18
Posted: Tue Mar 09, 2010 9:56 am
by Larry B
Have to agree with Tom on the Hook and Loop, I use PSA and it's ok if I keep my pad clean, but sometimes lose a good piece of sandpaper do to it not sticking
I then have to clean my pad with acetone and then I'm good to go. I use a R/O air sander with a dust port, it's quieter than my electric, but then my compressor kicks on and it's noisy
Either way you go it's all about the sanding which I love to do
Re: Hagar's OD18
Posted: Tue Mar 09, 2010 10:40 am
by Cracker Larry
I also agree, random orbital, hook and loop, black Gator disks. I wore out a porter cable on 2 boats, got a Dewalt, it's got 2 boats behind it now. I did wear out the sanding pad, wore the hooks off, but was able to buy a replacement pad at Lowes for about $15.
If you've got the extra $, Festool is probably the best, but you could buy 4 Dewalts for the price of one Festool
Re: Hagar's OD18
Posted: Tue Mar 09, 2010 11:03 am
by Dog Fish
I have the Dewalt sander also, and its been through a lot and still is working fine. I have there screw gun and two drills too with no complaints .

Brian

Re: Hagar's OD18
Posted: Tue Mar 09, 2010 11:33 am
by Larry B
Hagar, ya got any pictures yet???? We love pictures,
Re: Hagar's OD18
Posted: Tue Mar 09, 2010 11:33 pm
by hagar
That Festool looks like a quality sander, but kinda pricey! Will probably go with Dewalt, seams that Porter Cable is slipping in quality in last several years. Hook and loop too, sure would be easier to change pads without the glue deal. Thanks for all the input. Oh, and some of that black Norton stuff too!
Don't want you guys to think I am a cheapie when it comes to tools, most of mine are quality stuff. I have been kinda' out of touch with what's good these days is why I asked. I absolutely can't stand to be working along and have a tool fail, drives me insane....plus I know how to abuse them very well.
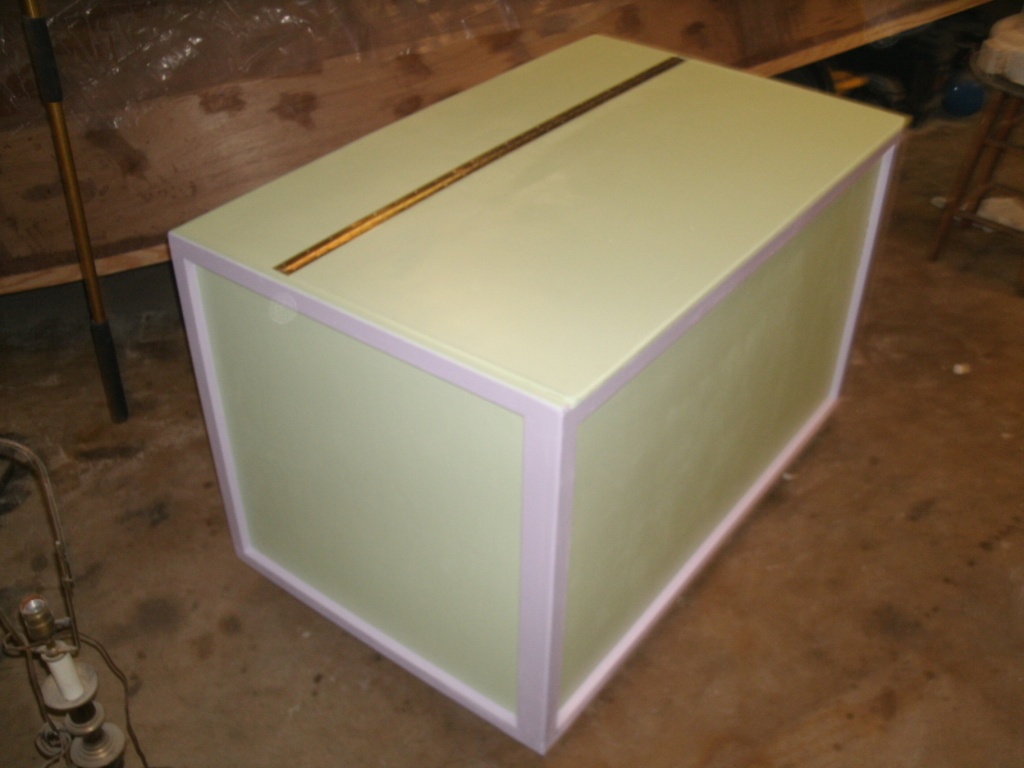
Pictures? Will post once I get a little more done, am basically not much further along than last pictures. I could send you a picture of the toy box I built for my buddy's daughter as that is what has cost me a weekend! It did give me a chance to try out the Quick Fair compund, nice stuff. Hope to have the outside glassed this weekend and maybe even work on splash rail and skegs.
Cape Man, I hear 'ya on the belt sander, I was never one to get any good finish with one of those. sooner or later it seams to catch an edge, throw me off and viola, big gouge.
Hagar
Re: Hagar's OD18
Posted: Wed Mar 10, 2010 6:18 am
by cape man
I could send you a picture of the toy box I built for my buddy's daughter as that is what has cost me a weekend
Hope to have the outside glassed this weekend and maybe even work on splash rail and skegs.
That's going to be a cool toy box!
Re: Hagar's OD18
Posted: Wed Mar 10, 2010 7:20 am
by Larry B
Re: Hagar's OD18
Posted: Sat Mar 13, 2010 11:11 pm
by hagar
cape man wrote:Yea, and I want to see PICTURES, I'm serious, I'd like to see pictures of the toy box, might just build one for my grandaughters
posted a pic of the toybox for you in my gallery, nothin' fancy as it is made from common plywood, but servicable.
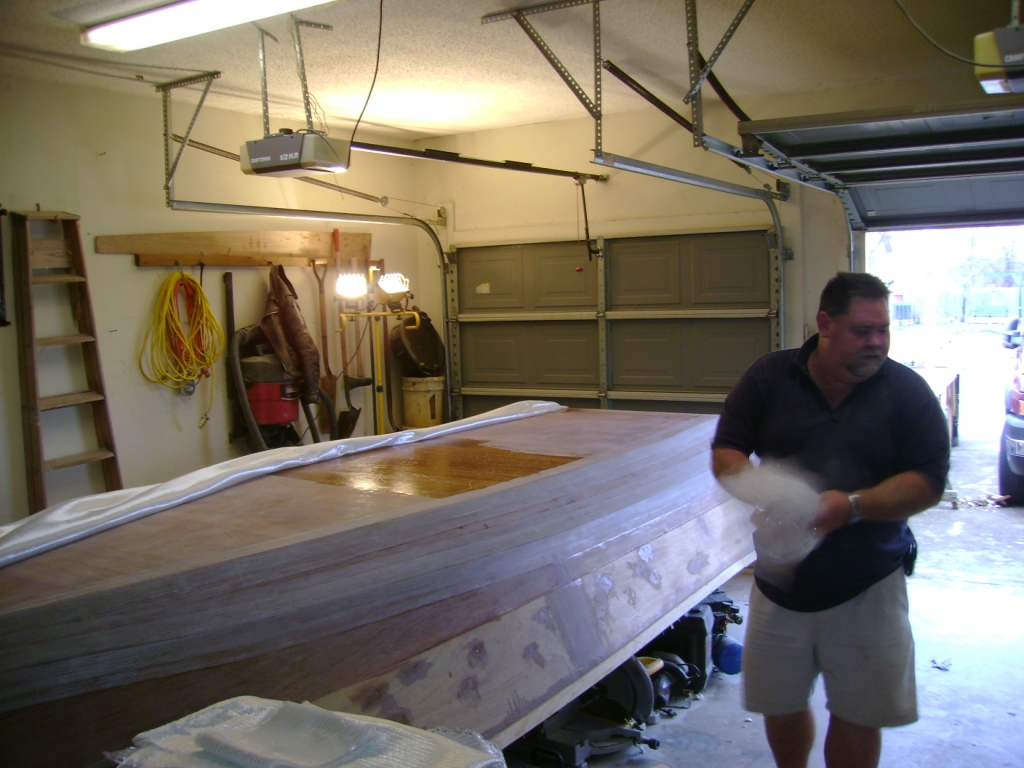
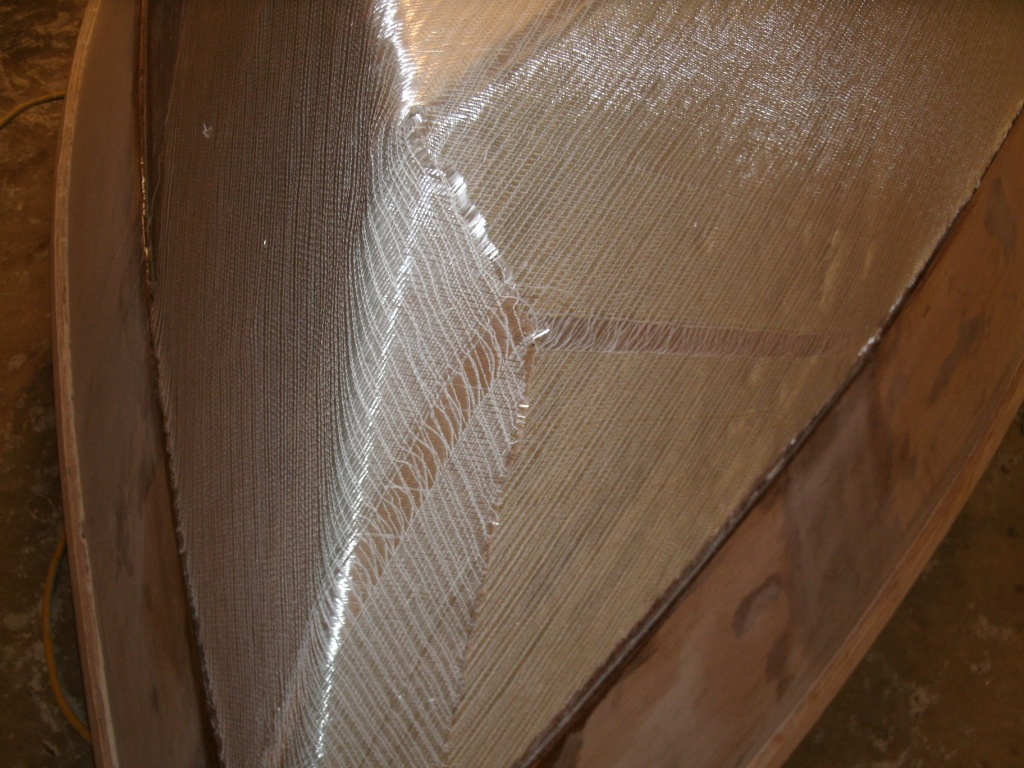
Got the transom and one side of the boat glassed today, will get the other side glassed in the morning. Used about one gallon of epoxy for that task.
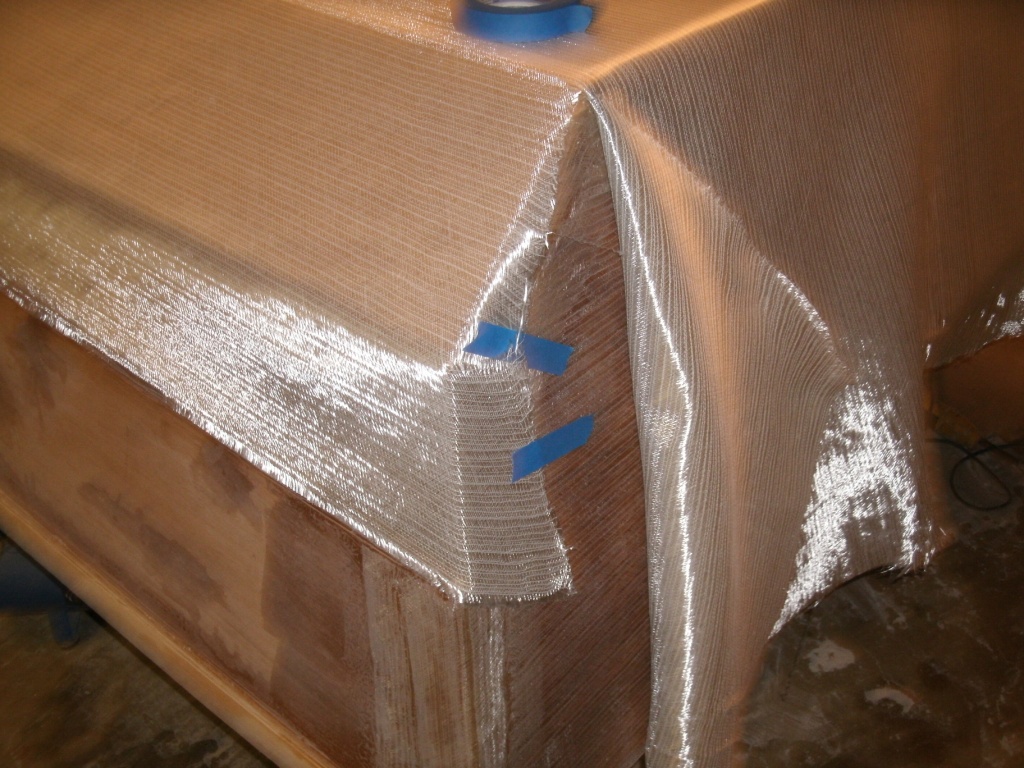
I have a small issue with the sheet of biax, it has a section about an inch wide that is "monoaxial", i.e., it has one set of 45° fibers but is missing the other. CL, I think I noticed in your gallery that you had the same issue, how did you address it? I tried every way I could to move the cuts around to eliminate it but it was in a place that just would not let that happen and retain a full sheet. I am planning on just using it and maybe pulling some fibers from a piece of scrap to lay in there. maybe just use it and not worry about it as it is not so much structural since the seems are double taped?
Also, how do you guys do your wetting out, do you put the biax down dry and wet it out from the top, or put down a coat of epoxy, then put the biax down and wet out the top? I ask because once I cut it to fit the way I wanted, I rolled the sides up, wet out the sides, then rolled the biac back over it and wet it out. Once that was done, rolled back the bottom and wet it out, then rolled the sheet back over to wet it out. That's where the problems started, it just didn't want to go back where if was in the first place, had to fight bulges and slack. Got it done, but would have been a lot smoother job if wet out from the top while it was in place.
Check out my pics in the gallery, I am not too good at getting that peel ply down very well, are all those bubbles the norm or is it important to get them all out? Guess I will know tomorrow!
I deviated from advice and picked up a 6" pneumatic da as I thought that it would be better than an electric. Bad move unless I get a real two stage compressor. the guys at the local auto paint store said it needed 4cfm but my compressor runs at 6.5cfm @90psi and no way would it come close to running that thing for more than 15 seconds at proper speed. They were kind enough to let me return it so back to the sander search. I can not locate an electric da of the 90° type in the area where I live, may have to go with the 5" random orbital Dewalt from Lowe's, palm type and see what kind of job that will do.
Thanks again for all the help, will study up on how to put pics in the post for the future, sorry 'bout that.
Hagar
Re: Hagar's OD18
Posted: Sun Mar 14, 2010 8:45 am
by cape man
Where's the skeg?

I wet my cloth out from above. On the big pieces I always start at the middle and work my way out to the edges. The only places where I prewet was small pieces of tape inside the console.
Where is the area where the cloth is defective?
On posting pics. Open up the galleries in a separate tab online. Open your picture to enlarge it and right click on it . Highlight the properties by double clicking, and then right click and select "copy". Go back to your post on the other tab. Click on "Img " in the tool bar. This will give you something like this...[img][img]. Put your curser in the middle of that and hit paste. Voila!
Re: Hagar's OD18
Posted: Sun Mar 14, 2010 10:27 am
by Larry B
Hagar, nice looking toy box, I like the rub rail look
Maybe but a handle on the lid that looks like a skeg to make Craig happy
Hagar, I also wet my biax from the top. I roll on a wet coat, lay my glass so it will stick to the coat I just rolled and then just wet it out from the top.
I use a air sander and yes it needs Alot of air. I've got a large 2 stage that will keep up with it so it works good. Only wish I would have got the hook and loop.
Looking like your makeing progress, keep up the good work and any questions just post them and someone will answer.
Keep the pictures coming
Re: Hagar's OD18
Posted: Sun Mar 14, 2010 12:41 pm
by hagar
Forget my question on the peel ply, it is a disaster. Made a couple of errors here, one is waiting until the whole side and stern were wet out, should probably put this on once done with a section. Two, I used the heavier thickness (4 mil) poly as I thought it would be easier to keep the wrinkles out, but it was more difficult to lay down because of the creases from being folded up. I am thinking thinner stuff, apply sooner and take more care in the roll out of it. I will now have to wait for that epoxy to cure well enough to sand without clogging the paper and create another ton of dust. That puts me another weekend behind as I can't get to it today as it is my son's birthday..
Hagar
Re: Hagar's OD18
Posted: Sun Mar 14, 2010 1:46 pm
by Cracker Larry
That's the same results I always get when I try using plastic for peel ply

I gave up on it, I can do a much smoother job with a roller and plastic squeegee, and with a lot less sanding. Some folks seem to get good results, but I never have.
Re: Hagar's OD18
Posted: Sun Mar 14, 2010 1:54 pm
by steve292
I agree with Larry, the one time I tried it it did that as well. I can do a better job with a 4" foam roller & a squegee.
If I build again I may buy some proper peel ply, but it is MHO, that the plastic is more hassle than it's worth.
Nice looking build
Steve
Re: Hagar's OD18
Posted: Sun Mar 14, 2010 2:20 pm
by Fonda@kauai
Peel ply has always worked really well for me
I usually put it on when the epoxy is still very thin. Don't worry about doing it in sections, just overlap by an inch or so. The trick is to lay a section of plastic down, then work the plastic with a clean squeegee or putty knife to work out ALL the air bubbles. Every single one. The epoxy is sticky enough that once all the bubbles are out, it kind of creates a vaccum and the plastic won't lift and let more air in. As you squeegee the plastic, try to move in one direction, moving the excess resin that you squeeze out (there'll be alot) to the area you're gonna wet out next, thus getting a little more mileage out of your epoxy
There might be a seam or two from the plastic in the lamination, but a few of those should be much easier to fill than filling the whole weave, and there shouldn't be any rough or jagged areas. In this pic, I used peel ply on the biax tape where the sole meets the sides-
I worked in five foot increments, wetting out then putting on the plastic and sgueegeeing it, pushing excess epoxy in the direction I was working. There's a few small seams from the plastic, but in the end less work. Just tyring to make another convert
Re: Hagar's OD18
Posted: Mon Mar 15, 2010 12:00 am
by TomW
If your going to use plastic as your moc peel-ply instead of the real stuff it needs to be 2mil. any less it may stick to the epoxy and any more you get what you got and you may anyway if your not careful. You can buy the real peelply here in Boat Building Supplies if you want to use it. I never had any real luck with the plastic either and just use the roller, spreader and laminating roller
Tom
Re: Hagar's OD18
Posted: Sun Mar 21, 2010 2:09 am
by hagar
Made
some progress today between soccer games, looking for new vehicles with the wife and band recitals! Got the peel ply disaster sanded down and will be applying the starboard side fabric on the bottom tomorrow. I finally pinned down my sander dilemma and settled on the 5" DeWalt, couldn't find a 6" anywhere in town, and definately could not find the larger 90° type electric da, got the ro palm one. I believe the same as you use CL (saw it in one of your pics), although yours may be a 6".
As far as the peel ply, it is off my list of things to continue for now! Appreciate the input Fonda, yours looks great, but I think you have more patience than me. I will continue to sand and complain about it for now!
The one issue that is really nagging at me now is the fact that I did not plan for the thru-hull (shoot through the hull, not install through the hul) transducer. I should have figured where that was going to be and done it like Cracker. I'll just have to do it from the top later and patch it in as I am not sure at this point exatly where it will be located.
I have been pondering the runners and have decided to use two of them set outside of the stringers in such a fashion as it will center the boat on the trailer and center the stringers over the bunks. I am also pondering pouring them in place after fairing. I would do this by routing just down to the cloth, building up a form and "pouring" in place. Since we aren't supposed to put them on after final fairing, it seems there would be an advantage by not having to fair around them. On the other hand, if they wear and need replacing, it may make it more difficult. Just a thought at this point.
Will try to update after tomoorrow's progress.
BTW, CL, saw some pics of your motorized flying kite, you just ain't right man! I have a buddy that hang glides, I tell him the same thing.
Hagar
Re: Hagar's OD18
Posted: Sun Mar 21, 2010 8:24 am
by Cracker Larry
BTW, CL, saw some pics of your motorized flying kite, you just ain't right man! I have a buddy that hang glides, I tell him the same thing.
Most who know me would agree, but I have more fun than them
Your boat is looking great!
Re: Hagar's OD18
Posted: Sun Mar 21, 2010 9:01 am
by Larry B
Hagar, your boat is looking great. Looks like your doing a nice job on her
To save some sanding, try your best to work wet on wet. Like on the bottom you could have saved some sanding
Like you I pondered the transducer
I also didn't know the exact location
I did some searching and found that there are alot of transducers out there of all different types. This is the one I decided on:
Garmin B117 Bronze Thru-Hull Transducer with Depth and Temp (0-8 Degree) - 010-10182-01, $146.00

I agree, CL ain't Right
But I'm sure we've all been told that sometime in our life
Re: Hagar's OD18
Posted: Sun Mar 21, 2010 1:37 pm
by hagar
Larry B wrote:Hagar, your boat is looking great. Looks like your doing a nice job on her To save some sanding, try your best to work wet on wet. Like on the bottom you could have saved some sanding
Like you I pondered the transducer I also didn't know the exact location I did some searching and found that there are alot of transducers out there of all different types. This is the one I decided on:
Garmin B117 Bronze Thru-Hull Transducer with Depth and Temp (0-8 Degree) - 010-10182-01, $146.00
Thanks for the encouragement. I agree on the working wet-on-wet, that was my plan, but the peel-ply thing got in the way. I was going to put the stbd side cloth on the morning following the port side, but just couldn't bring myself to put it over the uneaven places, had to wait and sand again
. The transducer looks great and I may end up going that way but could have saved myself some $$ if planned ahead!
Cracker Larry wrote:Most who know me would agree, but I have more fun than them
Your boat is looking great!
Yeah, I know what you mean, if life can't be fun and adventurous, might as well become a monk. I guess you figured out I stated that with hidden envy! I plan on getting better at using those smiley face gadgets to help imply the intended meaning of words that can sometimes look out of context. BTW, I am a pilot also, but just don't have the mountain oysters to fly with bedsheet wings................yet.
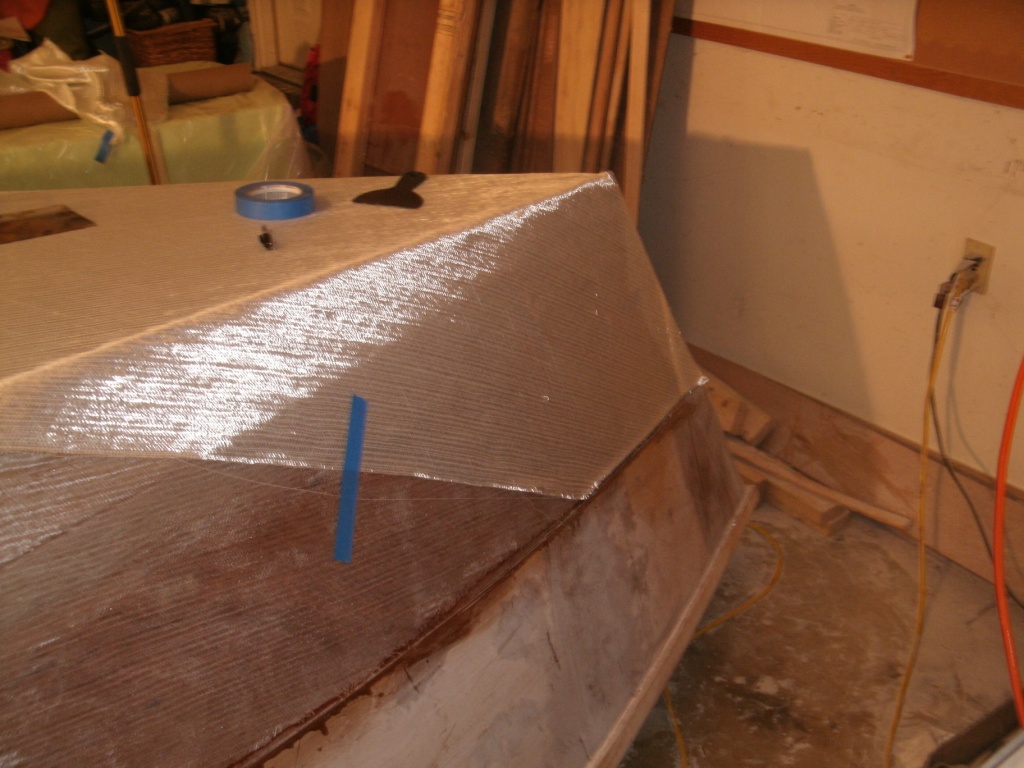
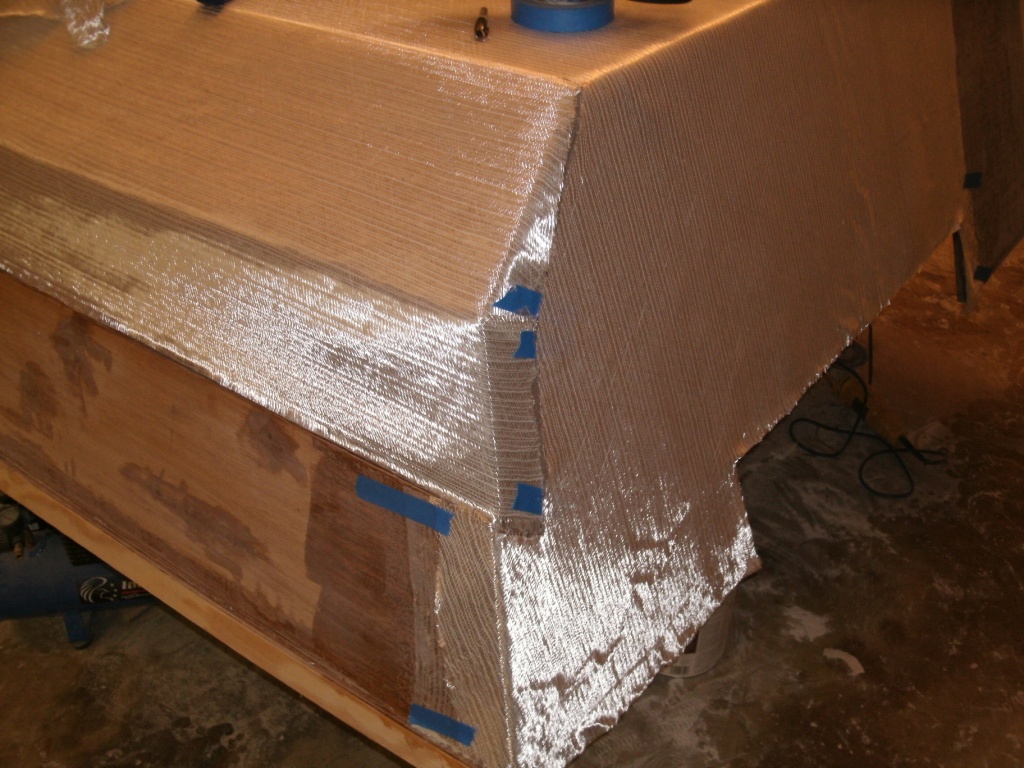
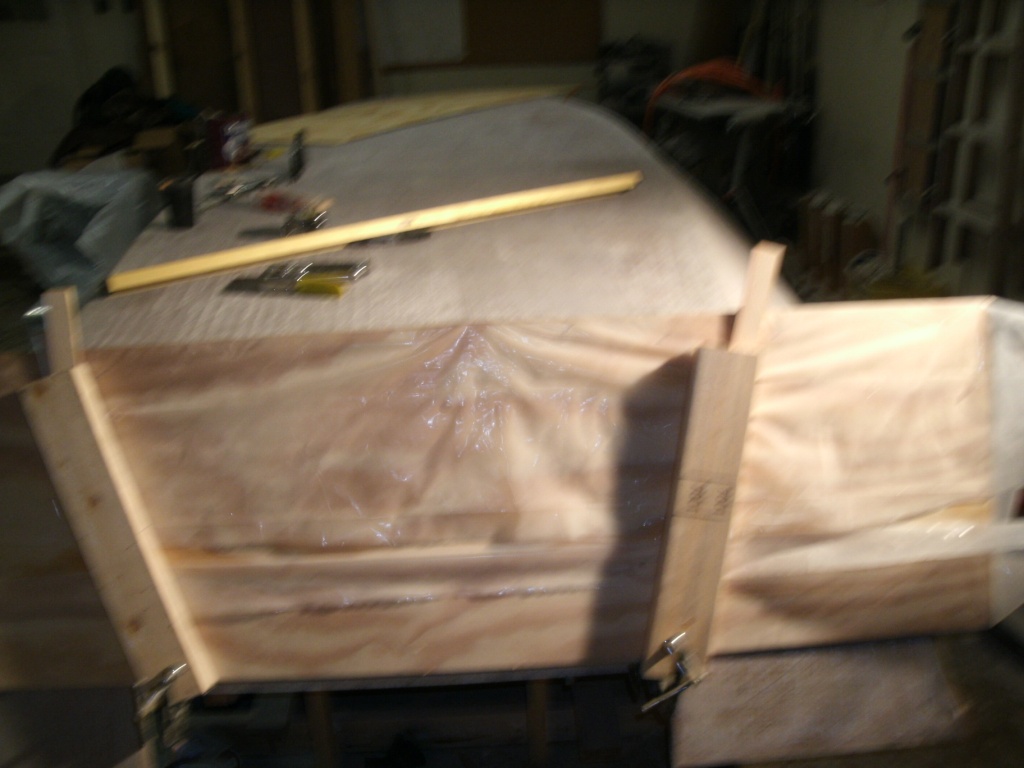
Got a late start this morning but did get the cloth fit and am about to go wet it out, Yee-Haw!! Pics below of the fitted cloth. The "monaxial" section of cloth will be a non-factor as I did get it on top of the wrap-around of the port cloth.
Re: Hagar's OD18
Posted: Sun Mar 21, 2010 2:25 pm
by cape man
I could never get the peel to work for me either. Sanding is fun. Sanding is fun. JUst keep saying that....
Re: Hagar's OD18
Posted: Sun Mar 21, 2010 2:46 pm
by hagar
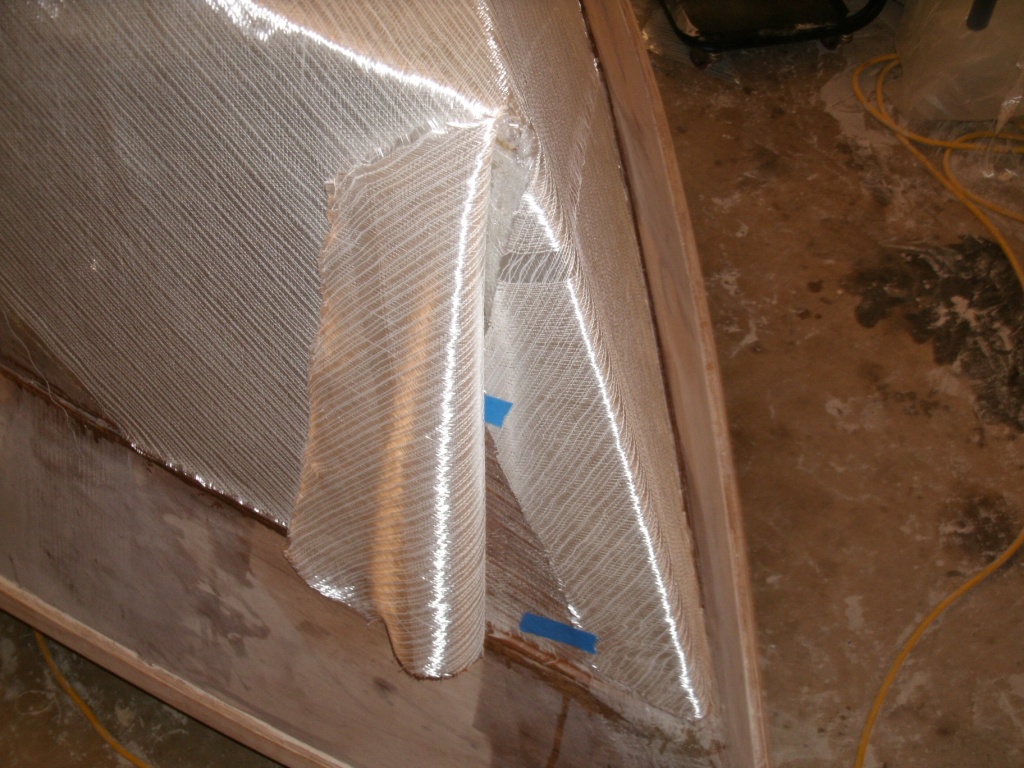
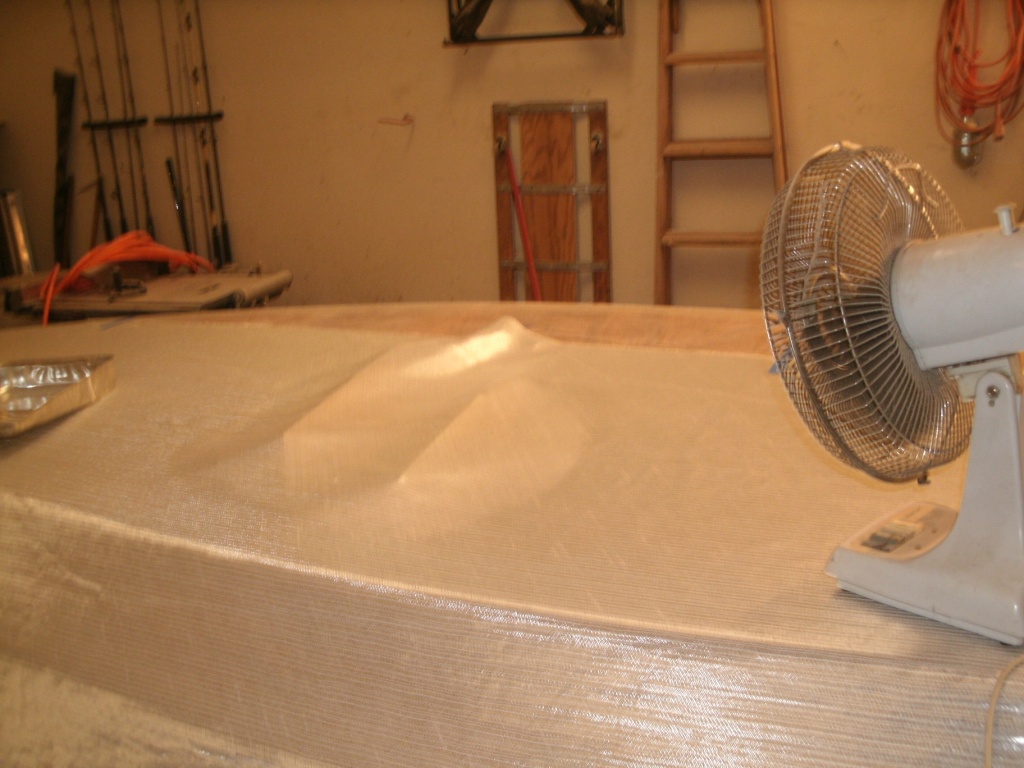
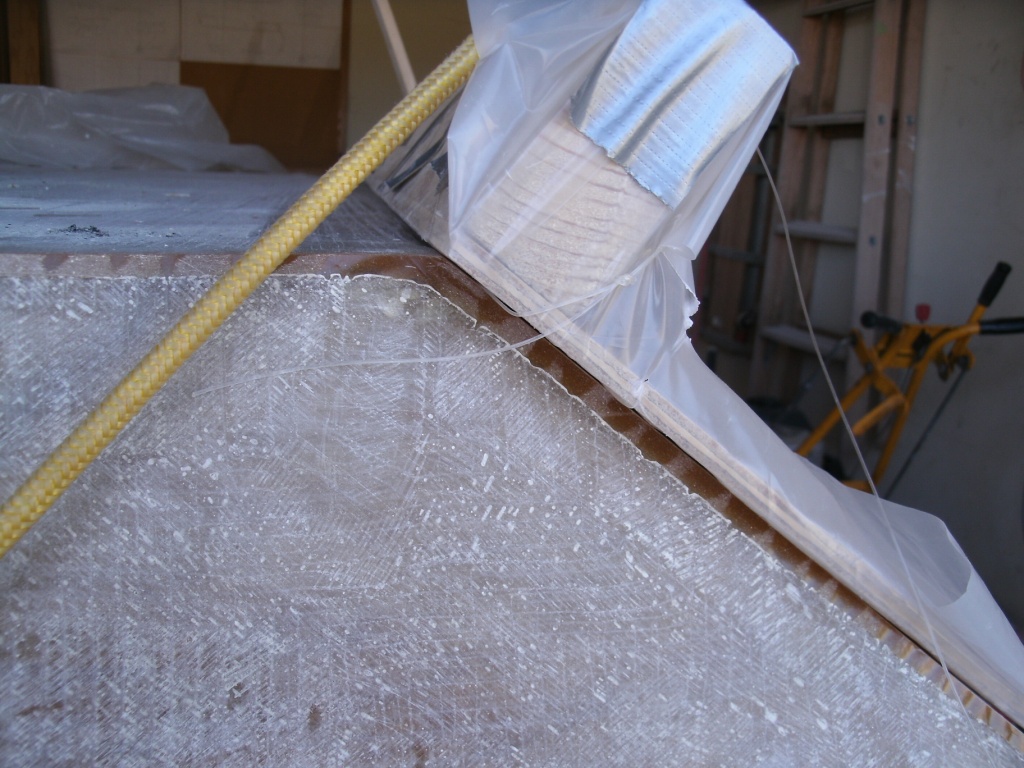
CraaaaaaaaaaaaaaaaaaaaaP. After my last post, I had a bite of lunch and went out to get started wetting out. I noticed a strange looking spot on the fabric.
Looking closer, it had a spot right in the middle that the cloth fibers had moved around a little.

What the heck? Put my hand on it and found it to be wet. Really confused now... It's raining like heck outside, but, hey, I'm in the garage, right? Looked up and saw this:
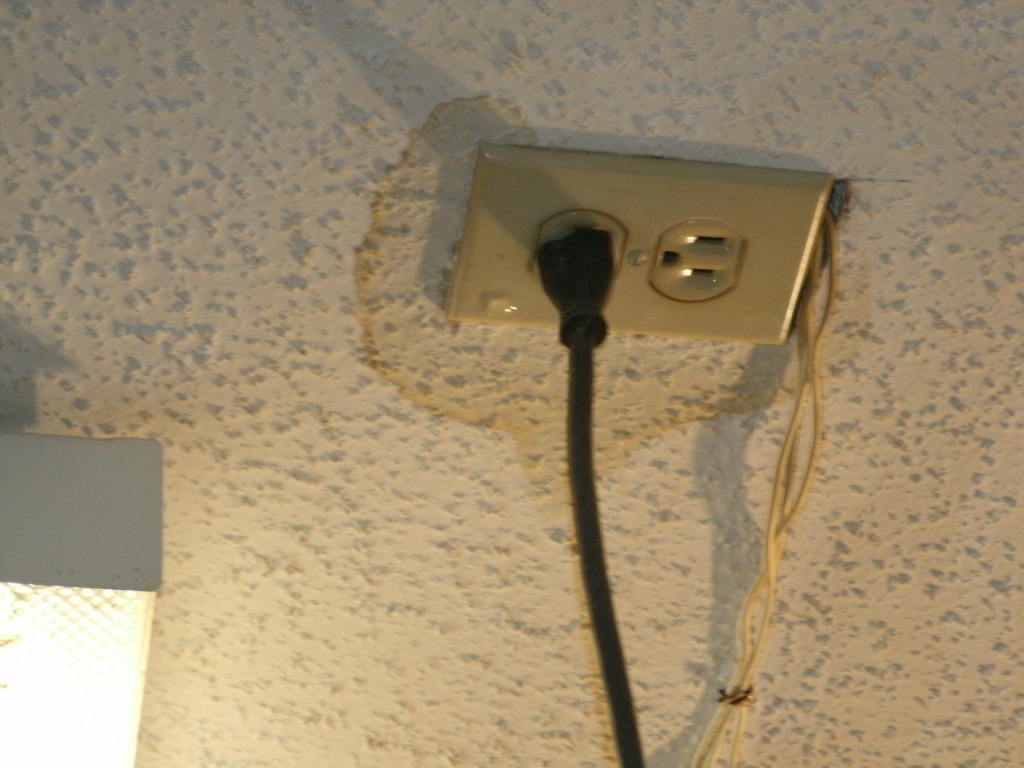
A leak in the roof right about smack dab middle of the boat!

I immediately got up in the attic and found the leak, it is about 8 feet to the side of the boat, but the water travelled across the sheet rock to the outlet right over the boat. I put some sticks under the cloth and put a fan on it. I hope that the consensus is that this will dry everything and I can continue after that? The wood is sealed already with epoxy so I know it will be alright, what can possibly happen to the fabric that will ruin it after drying out?
Re: Hagar's OD18
Posted: Sun Mar 21, 2010 2:50 pm
by cape man
That sucks. Like something that would happen to me! Make sure you completely dry the cloth before trying to use it, but it will be fine. I would take it off the boat (Gently!!!) and concentrate on the area where it is wet with some warm air. That way you can also dry the boat real well.
Re: Hagar's OD18
Posted: Sun Mar 21, 2010 3:05 pm
by ks8
Yep. You want that wood to be thoroughly dry too before thinking about mixing epoxy.
All will be well again.
Re: Hagar's OD18
Posted: Sun Mar 21, 2010 3:44 pm
by hagar
cape man wrote:I would take it off the boat (Gently!!!) and concentrate on the area where it is wet with some warm air. That way you can also dry the boat real well.
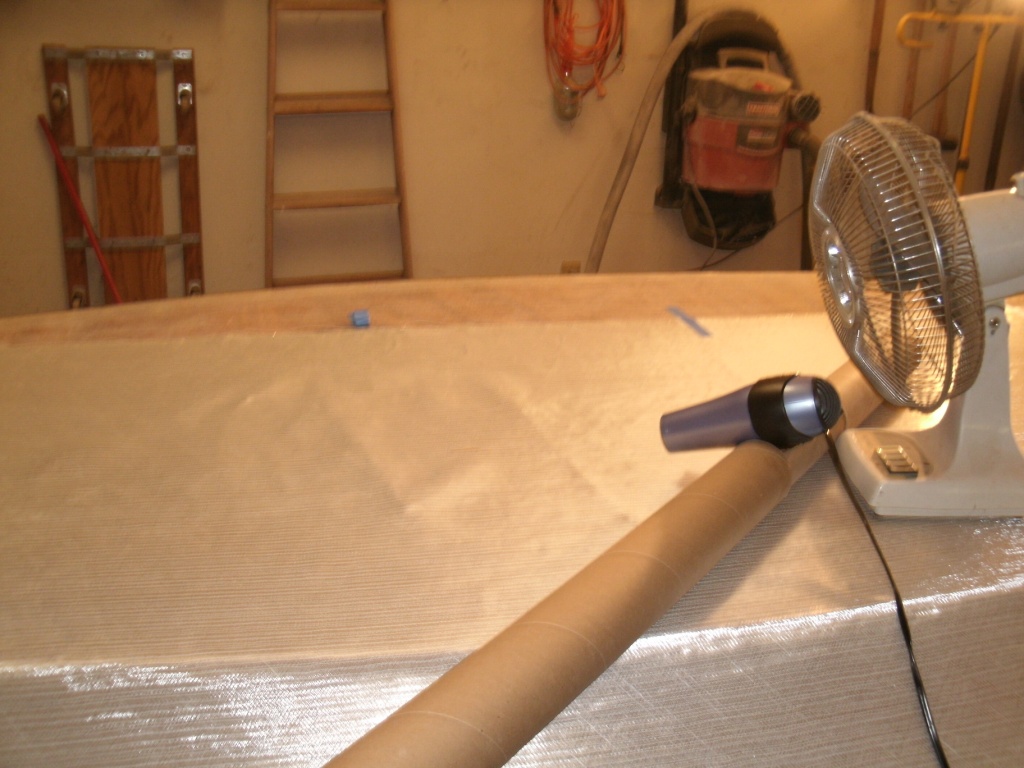
I was thinking that also, but as I thought further, the spot is not too large and I can get it lifted in the wet area without disturbing the placement too much. I am going to lift it up and give the wife's blow dryer a workout. She went shopping, with any luck I can get it dried out and the hair dryer back in it's proper place before her return! I don't think I can get the cloth placed as well as it is now if I remove it....
Thanks to both of you for the helpful replies, that's what makes this site a wonder.
Hagar
Re: Hagar's OD18
Posted: Sun Mar 21, 2010 4:02 pm
by cape man
Any moisture in the cloth will interfere with it laminating to the boat (ask me how I know

), so even if you have to borrow the hair dryer for long enough that she busts you when she gets home, make sure it is dry.
Re: Hagar's OD18
Posted: Sun Mar 21, 2010 4:25 pm
by Larry B
Re: Hagar's OD18
Posted: Sun Mar 21, 2010 8:12 pm
by hagar
Got away with borrowing the cloth demoisturing device without incident. Set it in it's special hands fee directional base and left it running while I went to secure some of those plastic spreaders at the local auto parts place. It was still blowing hot when I got back so I don't think I trashed it.
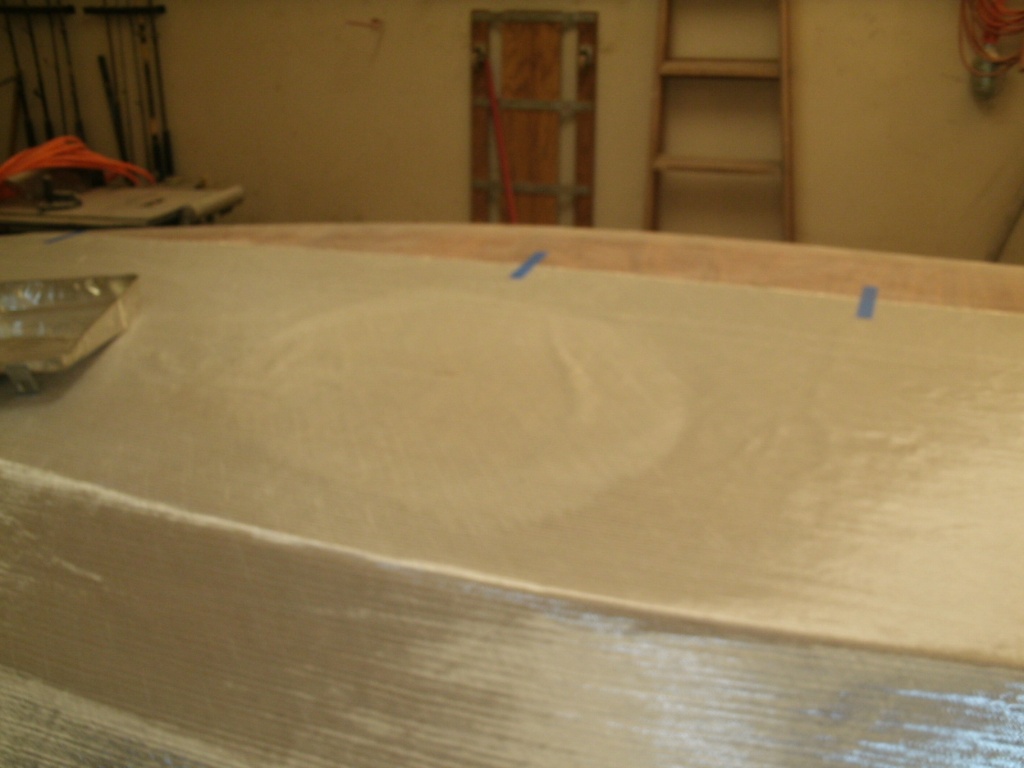
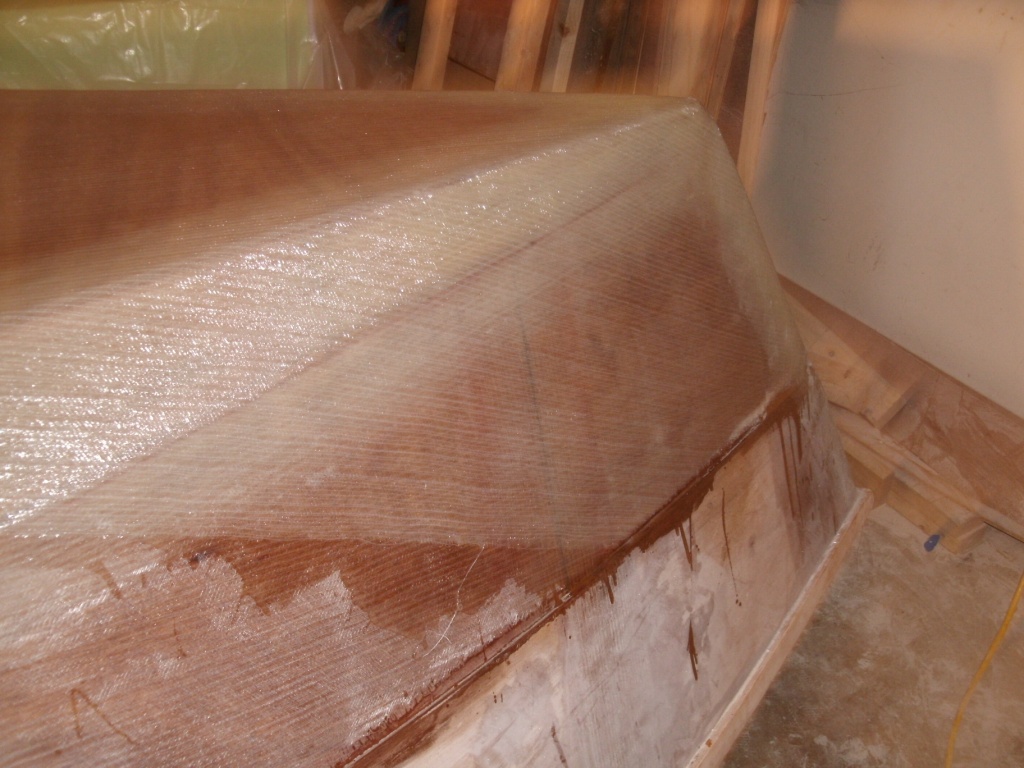
The cloth is on and I think much better than the previous side. Will know for sure tomorrow.
Planned next steps:
0.5) Almost forgot, need more epoxy before doing anything, only have a couple of ounces of hardener left, imagine that!
1) Sharpen up corners with wood flour putty (after sanding of course!).
2) Fair bottom with microballoon and silica slurry (after sanding of course!).
3) Install skegs.
4) Install splash rail (still not sure what I will use here, have to give it some thought).
5) Final fair with qf.
6) graphite/epoxy bottom with 1" wrap up the sides.
7) Prime
Flip over to start the real work......
The above sound right to you guys?
pics below:
demoisturizing device.
Only the stearn left, almost there!
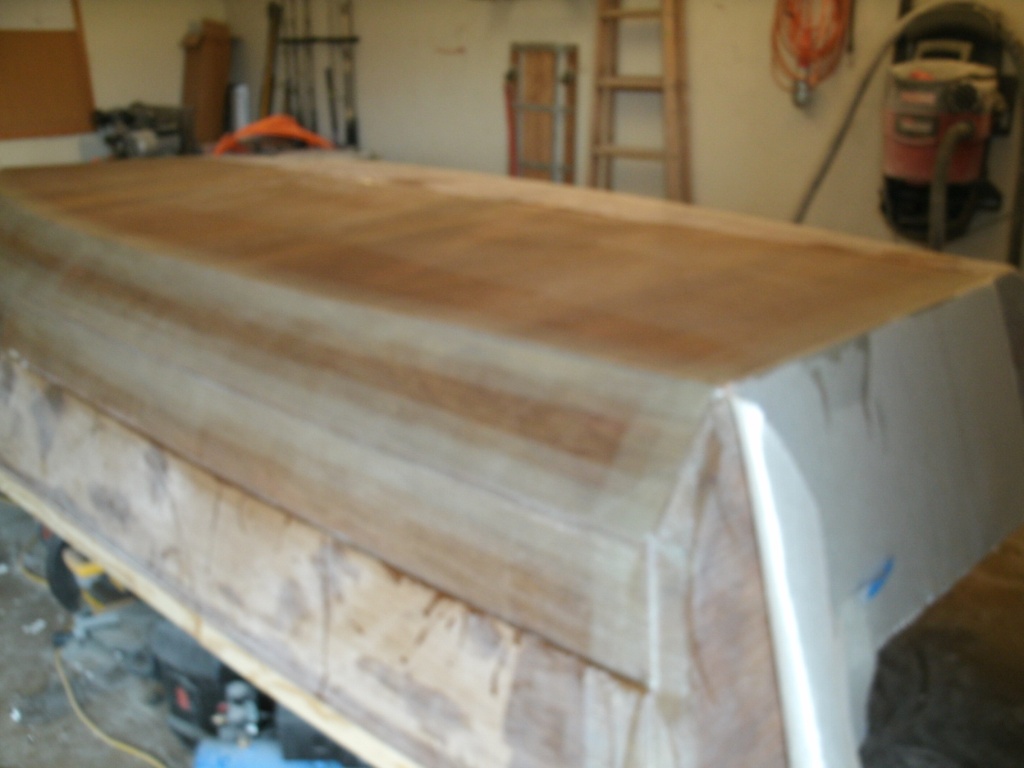
done stearn shot
done bow shot
Thanks again for all the help and input,
Hagar
Re: Hagar's OD18
Posted: Sun Mar 21, 2010 8:19 pm
by hagar
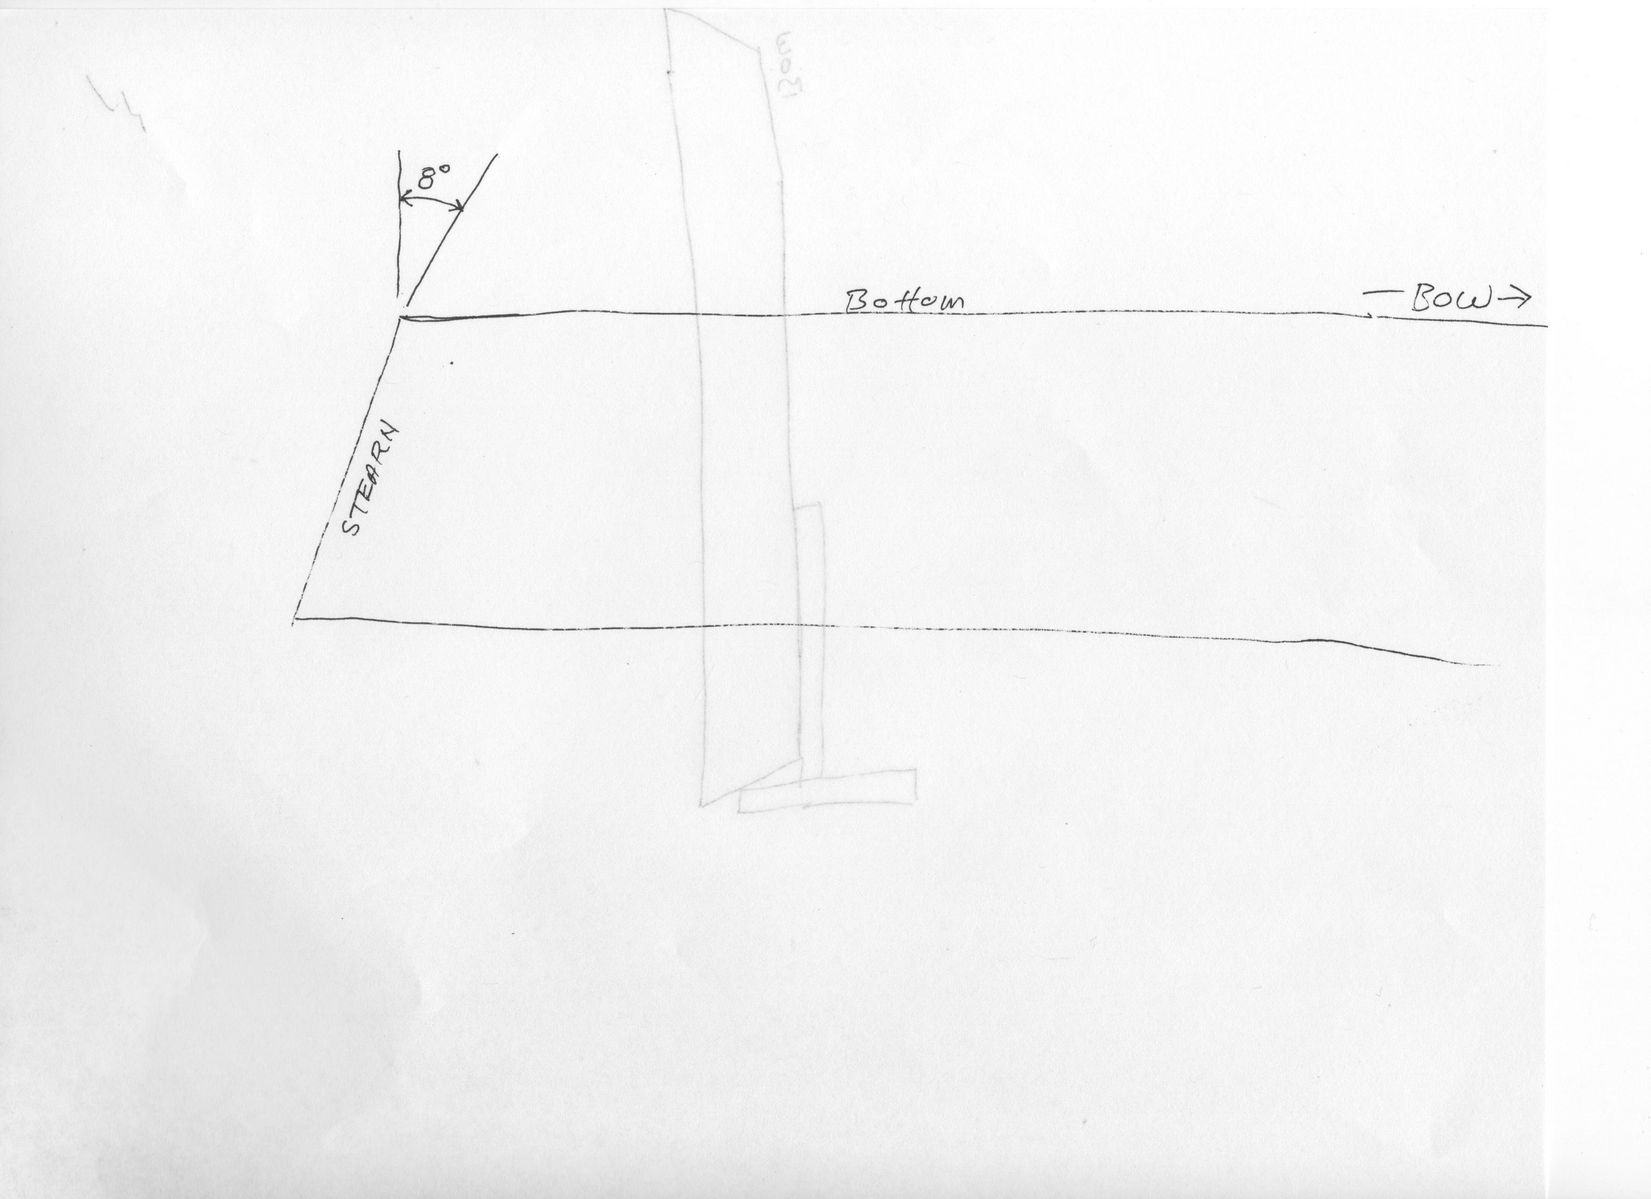
Larry B wrote:Hager, got a question? What is angle in degrees of your transom?? Sorry guys this just bugs me
Sorry Larry, meant to reply to this in my last post but got ahead of myself. And please don't be sorry for asking, I should have (and actually meant to) chime in on whatever post I saw this on, but CRS disease is setting in these days. I don't know if I will be able to find a protractor, maybe the kids might have one. If not, I may be able to take some measurements and trig it out. Either way will try to do it after dinner tonight when the epoxy gets skinned over.
Hjalmar
Re: Hagar's OD18
Posted: Sun Mar 21, 2010 8:29 pm
by cape man
The lamination looks good and your plan of attack sounds about right. Getting there!
Re: Hagar's OD18
Posted: Sun Mar 21, 2010 8:48 pm
by Cracker Larry
The glass work looks real good. I've had water intrusion problems a couple of times myself, building under a shed roof that is open on 3 sides. Not to worry, dry it out and carry on. Your plan sounds just right.
Hager, got a question? What is angle in degrees of your transom??
Sorry guys this just bugs me
LarryB, are you still worried about the 1.5 degrees your transom is off

Re: Hagar's OD18
Posted: Sun Mar 21, 2010 9:02 pm
by Larry B
Re: Hagar's OD18
Posted: Sun Mar 21, 2010 11:29 pm
by hagar
Larry B wrote:Hager, got a question? What is angle in degrees of your transom?? Sorry guys this just bugs me
I couldn't find a protractor, but, using a drywall square with the long leg paralell to the bottom and the short leg (14") touching the transom the intersection appeared to be at the 4-9/16 mark. Using the math I came out with 8° from the 90° vertical. Said all that to note that accuracy is to the 1/16".
Crap, just noticed I have been spelling stern with an a (stearn) all day. Not that I profess to be a good speller, but ...must be the epoxy fumes.
Hagar
Re: Hagar's OD18
Posted: Sun Mar 21, 2010 11:52 pm
by Fonda@kauai
Nice clean lamination
Re: Hagar's OD18
Posted: Mon Mar 22, 2010 6:03 am
by cape man
No, I'm worried about the 1.5 degrees that yours and craigs is off
Only thing I measured was my stake out pole bracket
I was counting on you guys to give me a number and it was two against one for the 17 degrees, and one of those came from the designer...
Hagar I think your math is messed up. 8 degrees is awful steep....
Re: Hagar's OD18
Posted: Mon Mar 22, 2010 8:45 am
by Larry B
hagar wrote:Larry B wrote:Hager, got a question? What is angle in degrees of your transom?? Sorry guys this just bugs me
I couldn't find a protractor, but, using a drywall square with the long leg paralell to the bottom and the short leg (14") touching the transom the intersection appeared to be at the 4-9/16 mark. Using the math I came out with 8° from the 90° vertical. Said all that to note that accuracy is to the 1/16".
Crap, just noticed I have been spelling stern with an a (stearn) all day. Not that I profess to be a good speller, but ...must be the epoxy fumes.
Hagar
Hagar, going by those measurements and using a protractor it looks like you have a 19 degree transom
Which would mean that you did it correct
Don't worry about the spelling, you got your transom correct
Re: Hagar's OD18
Posted: Mon Mar 22, 2010 1:29 pm
by hagar
Actually the math was ok, it was the transription thereof. It is 18 degrees, not 8.
Re: Hagar's OD18
Posted: Mon Mar 22, 2010 6:21 pm
by hagar
Sorry about all that confusion....I laid it out on cad at work today just to make sure I wan't confused again. It is 18.05 degrees with the numbers I used...the cad don't lie! Tried to find the thread about the transom angle and couldn't, what is it supposed to be?
Hagar
Re: Hagar's OD18
Posted: Mon Mar 22, 2010 6:57 pm
by Cracker Larry
18.05 sounds good to me.
Thread is here
http://forums.bateau2.com/viewtopic.php ... 3&start=80 bottom of page and next 2.
Re: Hagar's OD18
Posted: Mon Mar 22, 2010 7:03 pm
by Larry B
hagar wrote:Sorry about all that confusion....I laid it out on cad at work today just to make sure I wan't confused again. It is 18.05 degrees with the numbers I used...the cad don't lie! Tried to find the thread about the transom angle and couldn't, what is it supposed to be?
Hagar
Hagar, It was in the Stake Out Sticks thread. I had come up with 18.825 Degrees using the measurements of the transom brace from the plans, which should be the same as the stringer on the plans also. This really isn't bothering anyone except me
But if you get a chanch take the plan measurements and put them on the cad program and see what you come up with?
Thanks for your help on this
It's not really important as everyones will be a bit different, but like I said I'm just curious.
Larry B
Re: Hagar's OD18
Posted: Tue Mar 23, 2010 12:35 am
by hagar
Looks like the average between the two is 18.798°! Taking into account that the measurements for these cuts are taken from the model to 1/16" accuracy, my guess is that the transom angle is actual at 19°. 19° with a tolerance of ±2° gets us all in the good zone! After all, it ain't a piano.
angle from transom brace
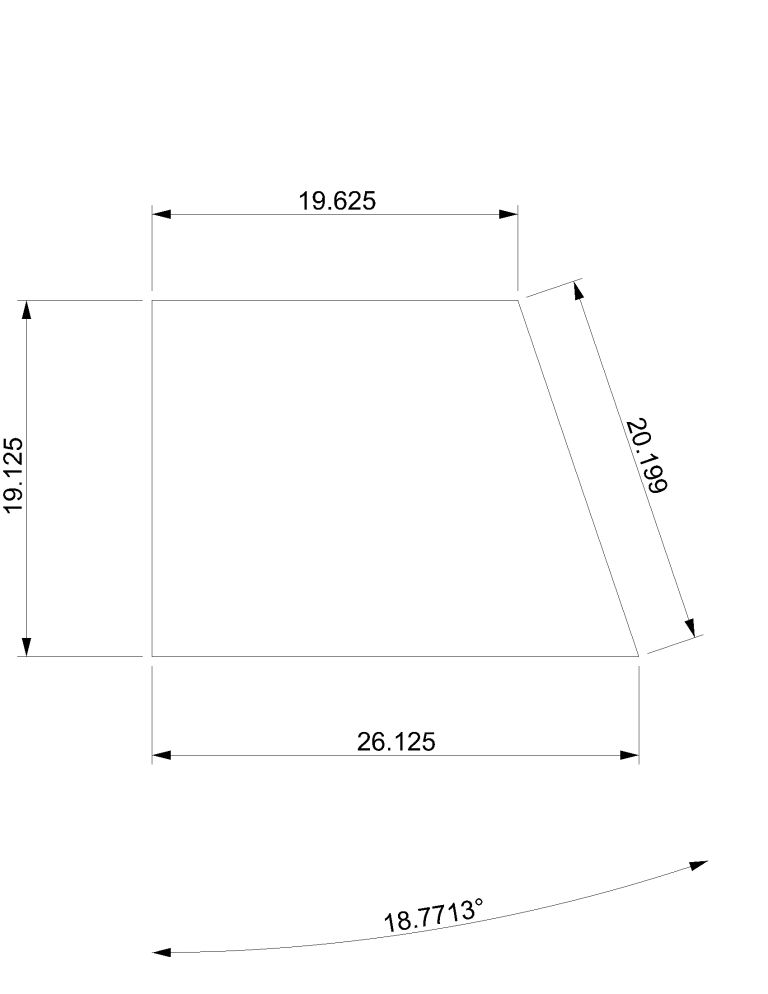
angle from stringer
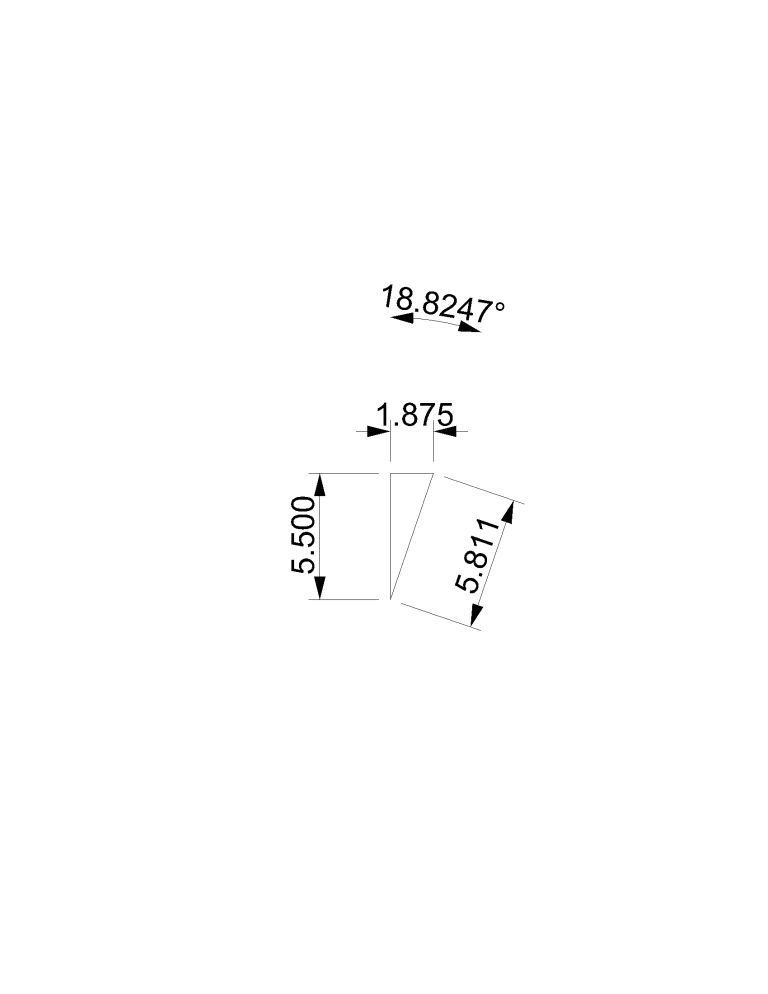
Hagar
Re: Hagar's OD18
Posted: Tue Mar 23, 2010 12:42 am
by Larry B
Thank You Much Hagar
Now I can sleep at night
OK guys now I'll leave this alone and continue building my boat
You know how it is when something just bugs you and you have a need to know
and now I know the rest of the story and I'm a happy camper
Re: Hagar's OD18
Posted: Tue Mar 23, 2010 1:34 am
by Cracker Larry
It's all good.
Re: Hagar's OD18
Posted: Tue Mar 23, 2010 5:30 am
by cape man
Re: Hagar's OD18
Posted: Mon Apr 05, 2010 10:49 pm
by hagar
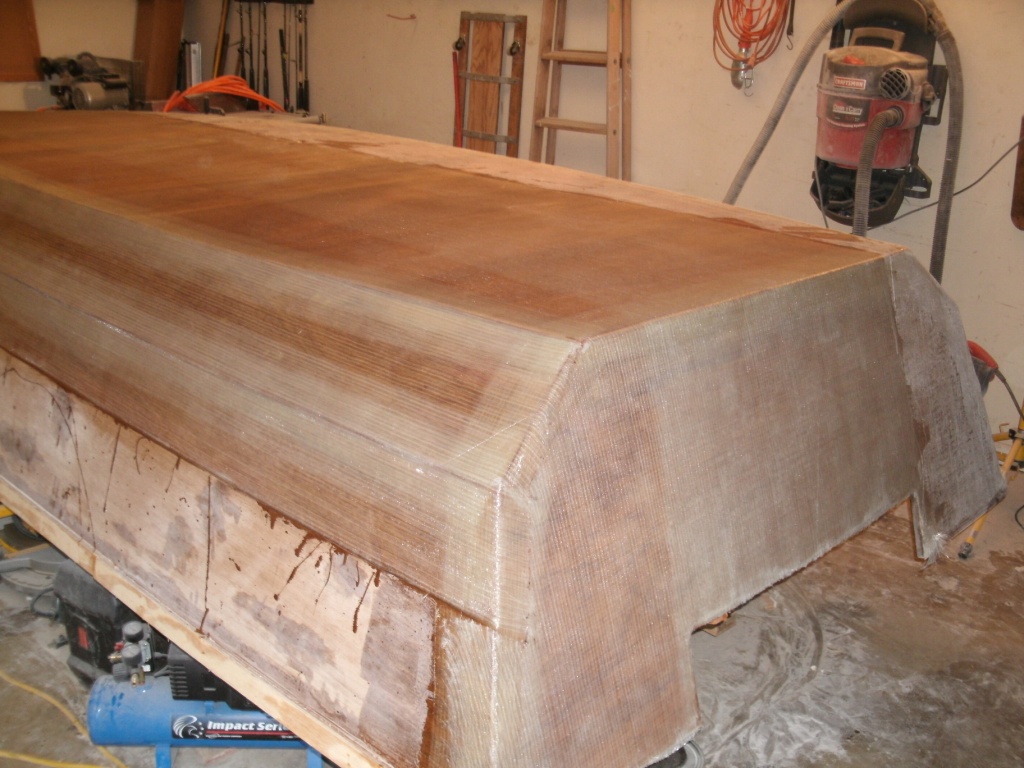
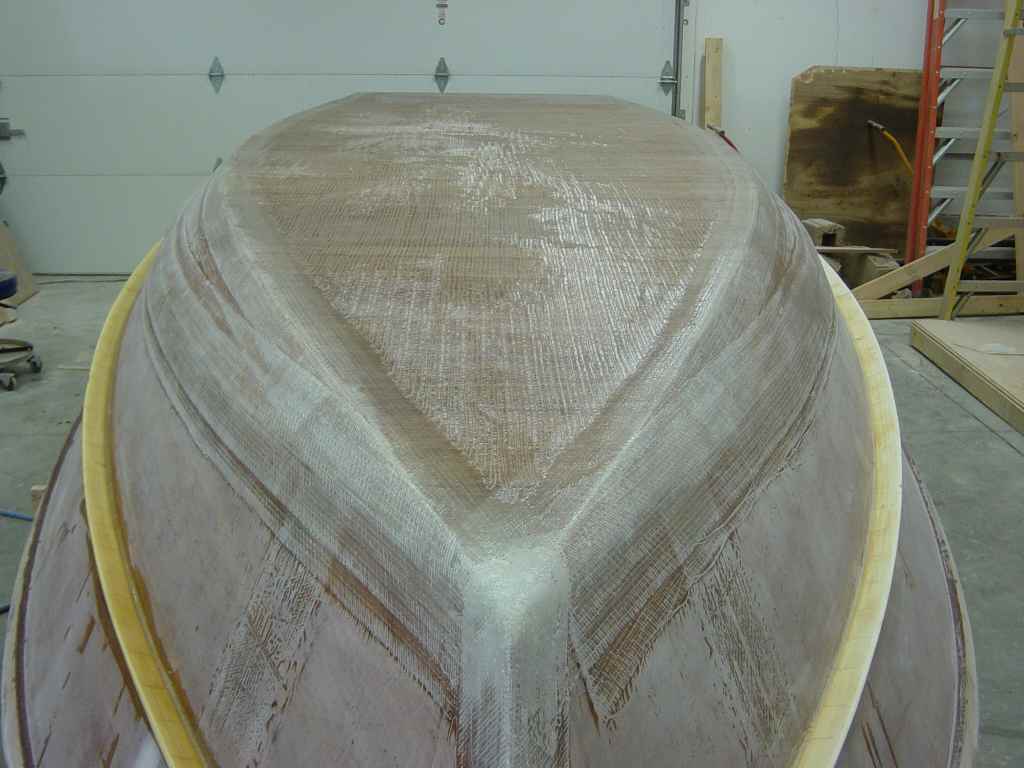
Finally got the hull sanded after the cloth. Even got a chance tonight to build the transom dam and started sharpening the corners, progress at last! I am pleased with the job on the cloth, using a straight edge, the bottom is pretty darn straight side to side. There is a slight bit of hook from the stern going forward, but nothing I can't get out with a little fairing.
Need a rational check on the sharp corner thing. The plan is to sharpen the corners at the stern except on the top panel. I will also sharpen the bottom-to-chine panel and chine-to-lower panel corners, but only plan on doing them about half way forward. The thought process is that the rounded corners are much less likely to "chip" from bumping things, and the clean water break is not necessary that far forward. Anyone see any issues that I am missing with that plan?
Hagar
Re: Hagar's OD18
Posted: Tue Apr 06, 2010 9:59 am
by Larry B
Hagar, I just did the transom edge to the chine below the style line, and did the bottom chine about 10'-12' forward.
Your boat is looking great. Looks like your doing a nice job on the laminations
Re: Hagar's OD18
Posted: Tue Apr 06, 2010 11:12 am
by Lower
I love the nice edge the transom dam gives. Looking good.
Re: Hagar's OD18
Posted: Tue Apr 06, 2010 10:24 pm
by hagar
Larry B wrote:Hagar, I just did the transom edge to the chine below the style line, and did the bottom chine about 10'-12' forward.
Your boat is looking great. Looks like your doing a nice job on the laminations
Lower wrote:I love the nice edge the transom dam gives. Looking good.
Thanks for the replies and the compliments, keeps me enthused!
Got the corners pds (pretty darn sharp) but will have to fill the stern side a little as the board was apparently too tight to the transom. I will space it off at the corners next time with a couple of pieces of fishing line so the putty will overextend just a fuzz.

Hagar
Re: Hagar's OD18
Posted: Wed Apr 07, 2010 7:17 am
by cape man
Looks good.
Re: Hagar's OD18
Posted: Sat Apr 10, 2010 1:16 pm
by hagar
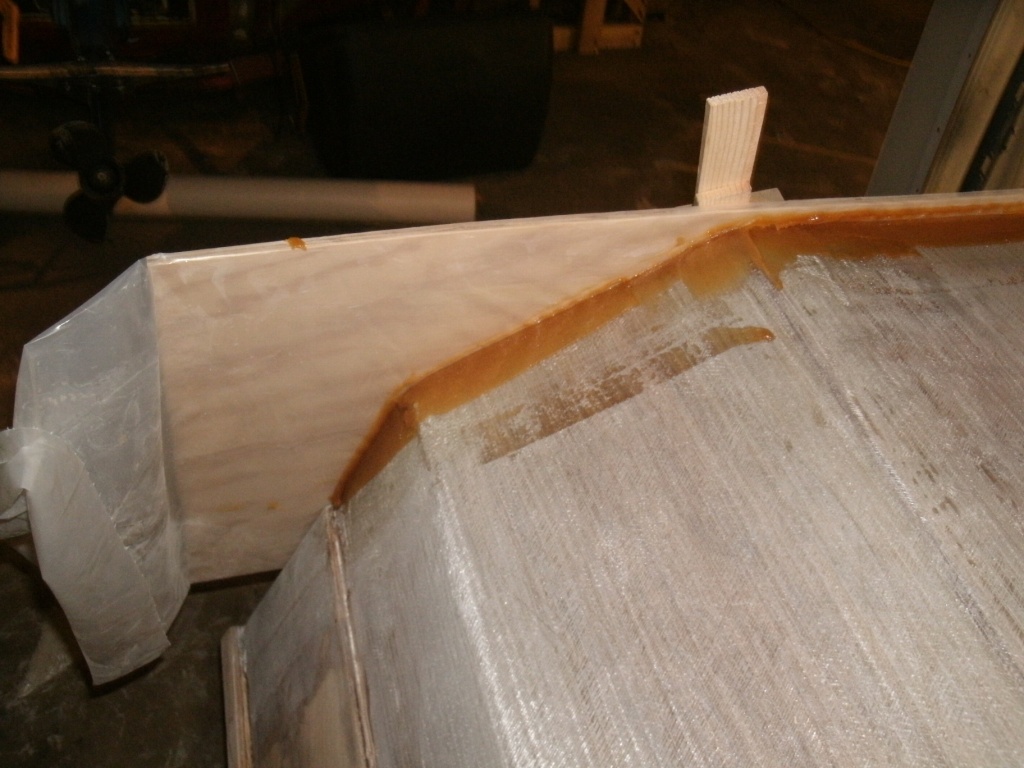
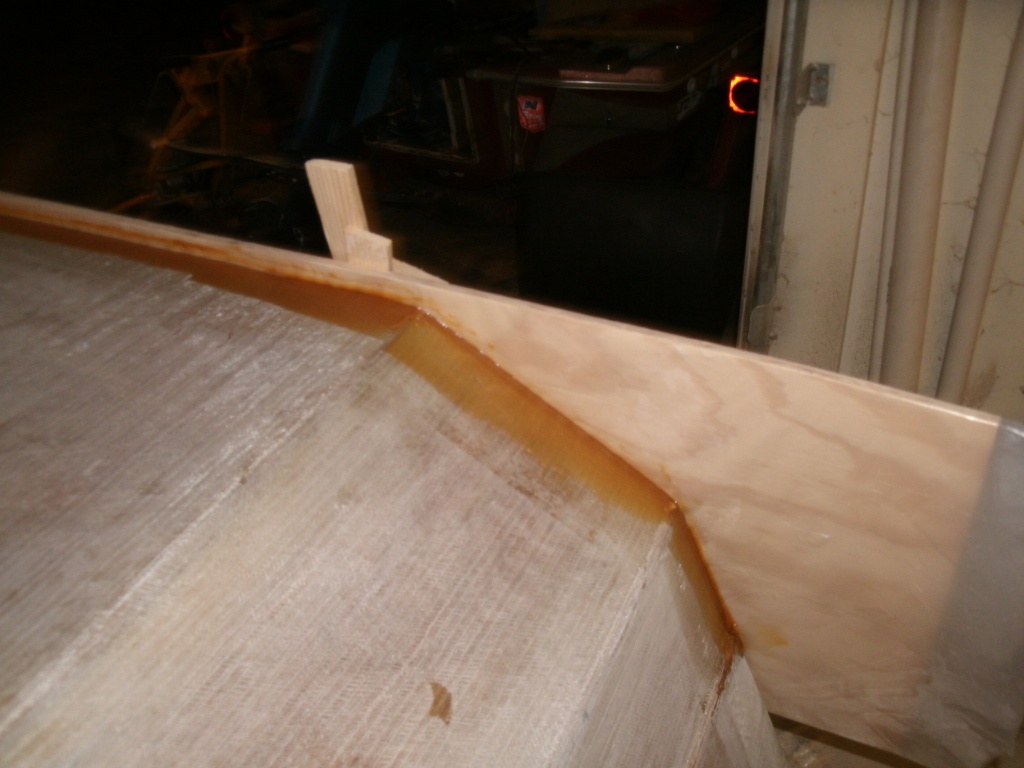
Moving forward with the corner sharpening. Rube Goldberg would be proud of the corner dam apparatus! Used everything I could find except screws. This time I put a piece of 60lb test mono under the dam so that the corner would overextend slightly, hope to save more filling on the corner afterwards.
Note the 2x4 on the rear corners. When I stitched the panels together, the chine panel overlapped the bottom somewhat. It was a choice between having the chine panel tight to the transom or the bottom panel, the latter of which would have left quite a gap at the transom/chine panel seam. I chose the former. Once grinding the slight overhang of the bottom to the chine panel intersection was done, the last 12 inches or so of the seam "dipped" towards the centerline. I wanted to straighten that out while I did the corners which is why I attached the 2x4, as a straight edge of sorts. It should remove the hook of the seam and chine panel. The gap that was filled with the putty is only about 1/16", so should be easy to fair from the chine panel/bottom/corner forward and toward the upper chine panel seam to eliminate the hook created in that area. At least I hope, we will see once it is dry and the apparatus is removed!
Hagar
Re: Hagar's OD18
Posted: Sat Apr 10, 2010 4:08 pm
by Larry B
Hagar, that looks good how you did that.
Because it was such a small area I just used thickened epoxy (woodflour) and run it down the edge without a dam. worked Ok also.
Re: Hagar's OD18
Posted: Sat Apr 10, 2010 10:51 pm
by hagar
Larry B wrote:Because it was such a small area I just used thickened epoxy (woodflour) and run it down the edge without a dam. worked Ok also.
Yeah, I think you did it the right way. I just couldn't let go of the little area in the last foot or so of the chine panel. Had I not been trying to fix a previous snafu, I think I would have done just as you suggest. I took the dam off last thing tonight and it looks like I dipped the angle of the knife a little into the corner anyway and will have to do some touch up, or maybe just work it out on the silica mix fairing coat. I will know once I start grinding it off tomorrow. On the plus side, I think it is going to work out for the little hook area I was anal about. At least that's my story and I'm stickin' to it!
Hagar
Re: Hagar's OD18
Posted: Sun Apr 11, 2010 3:56 pm
by tech_support
that is some creative clamping. I may start a thread called "creative clamping" where people can share pictures like that, you cant imagine how it helps future builders
Be careful not to sand too much glass off
Re: Hagar's OD18
Posted: Sat Apr 24, 2010 2:32 pm
by hagar
How much hook is too much? I'm all set to fair in the outside with the fairing mix, but..... using an 8 foot straight edge, I have some hook from the transome 8' forward. It isn't much, about 1/8" total and a gradual curve with the deepest part about 4'. If I move the straight edge inside of the tape from the transom seam, all is well. I am thinking of filling the whole area with woodflour and epoxy before the fairing mix as I want it to be very solid and dead straight. Am I gettin' anal here? Seems I read in some threads that a little hook is actually introduced on purpose at times to help stability, got that from the Tracking problem on Macs thread. As I type, I am thinking another option is to just fair it very flat 4' forward or so and taper it in from there. Now I wish I didn't have an 8 foot straight edge!
Hagar
Re: Hagar's OD18
Posted: Sat Apr 24, 2010 5:41 pm
by Cracker Larry
I think I'd ignore it, not enough to bother with and could actually help the trim a little. Pretend like you don't have an 8' straight edge
1/8 will not matter.
Re: Hagar's OD18
Posted: Sat Apr 24, 2010 7:18 pm
by hagar
Thanks CL. I have been talking myself out of it all day, your reply is what I needed to push me over the edge! I'm actually going to fair it out a little on the stb. side and let the port side go except for general fairing, might take the place of a shinge on the port side to counteract the engine rotation.
Ignorin' it,
Hagar
Re: Hagar's OD18
Posted: Sat Apr 24, 2010 10:53 pm
by Murry
Hagar I just read through your build and wanted to commend your glass work.
Very nice work indeed and thanks for shareing your build.
Daniel
Re: Hagar's OD18
Posted: Mon Apr 26, 2010 9:16 am
by tech_support
you should only sand the stitching off, a little bit of glass is OK if you cant help it. You make it smooth by sanding filler, not glass
Re: Hagar's OD18
Posted: Mon Apr 26, 2010 11:03 pm
by hagar
Murry wrote:Hagar I just read through your build and wanted to commend your glass work.
Very nice work indeed and thanks for shareing your build
Thanks for the kind words, it keeps me positively encouraged! No need to thank me for sharing, it is actually a privilege to share so others can learn from my mistakes just as I have done from those before me. This is a great board community, glad it is here.
shine wrote:you should only sand the stitching off, a little bit of glass is OK if you cant help it. You make it smooth by sanding filler, not glass
Ok Joel, this is the second time you have chimed in here so I'm thinking you have seen my pics and are concerned with the amount of sanding I've done and have conderns. I tried to stay on the river (da' Nile) the first time, but guess I now need to come ashore!
I did get into the first side of the biax, although I didn't intend to get far into it and hope I have not gone too far. From my days of fiberglass work, a very long time ago btw, there was always a rule of thumb about how much surface needed "roughing up" to recieve the next layer. If I remember correctly, we would shoot for 80% abrasion before the next layer so that there would be a good "key" for it. What drove me to sand as much as I did was not from the standpoint of smoothness as I understand the filling/fairing process, but more from the standpoint of making sure that there was sufficient "key" for the fairing compound. In other words, I was trying to remove most of the "shiny" surface as, to my way of thinking, the fairing compound would not adhere to the shiny unsanded epoxy as well as needed. So now I am thinking that this is not necessary and I have screwed the pooch? Not sure how good my pics are, but I still have about 25% "shiny" between the first set of biax strands.
So now I have to ask another question. Is it acceptable to put fairing compound or more epoxy layer over non-keyed areas? If so, it must be sufficient to wipe/wash with mek or denatured alcahol and keep going? I know the preference would be to just work wet-on-wet, but sometimes it hasn't worked out to have the time to do so. Sorry for the newby question, but my understanding from this board is, either wet-on-wet or sand it. Rest assured, I would love to hear that a good cleaning between coats is all that is necessary for the next layer to bond!
Hagar
Re: Hagar's OD18
Posted: Tue Apr 27, 2010 9:27 am
by tech_support
If you have only taken down 25% of the most outside layer. On corners you will have around 4 layers of 12 oz biax when you count the tabbing tape and the wide cloth overlaps, I dont have the lam schedule in front of me so there could be more for the OD.
With epoxy, you only need to roughen up the surface, you dont need to remove glass. "Bite" is not an issue, epoxy bonds are far superior to polyester resin.
Re: Hagar's OD18
Posted: Tue Apr 27, 2010 10:27 pm
by hagar
shine wrote:With epoxy, you only need to roughen up the surface, you dont need to remove glass. "Bite" is not an issue, epoxy bonds are far superior to polyester resin.
Therein lies my analism. How would one roughen up the surface if it is below the fiberglass strands? If I sand the stitching down, there is still a great deal of surface lying between the biax strands that would not get roughened unless I sand into those strands a little, right? Forgive me if I seem argumentitive or stupid, not trying to argue, just trying to make sure I get it through my thick skull correctly. So........
Going forward:
Knock the stitching down, don't worry about the areas between the biax strands that don't get roughed up, just wipe down with solvent and move on to the fairing filler? The epoxy will bond to the non-rough areas, no worries?
I get that epoxy is far superior, that's why I'm using this method. I am convinced that these plans, method and the support on this site are the best!
Respectfully,
Hagar
Re: Hagar's OD18
Posted: Wed Apr 28, 2010 9:28 am
by tech_support
you do not have to sand to bare glass
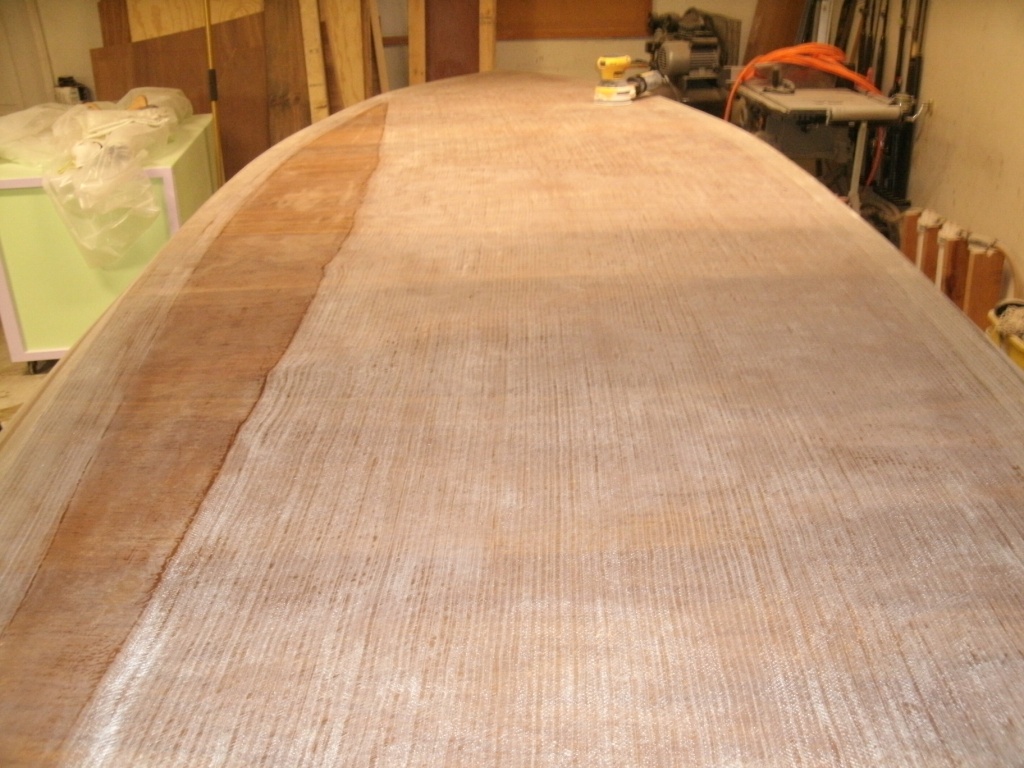
since its the same boat, here is Cracker Larry's OD for an example of how far to sand, more than this is not needed at all...

Re: Hagar's OD18
Posted: Wed Apr 28, 2010 9:37 am
by Larry B
Hagar, Shine,
Here is mine, looks similar to CL's
Re: Hagar's OD18
Posted: Wed Apr 28, 2010 10:33 am
by tech_support
that looks just perfect, no problem.
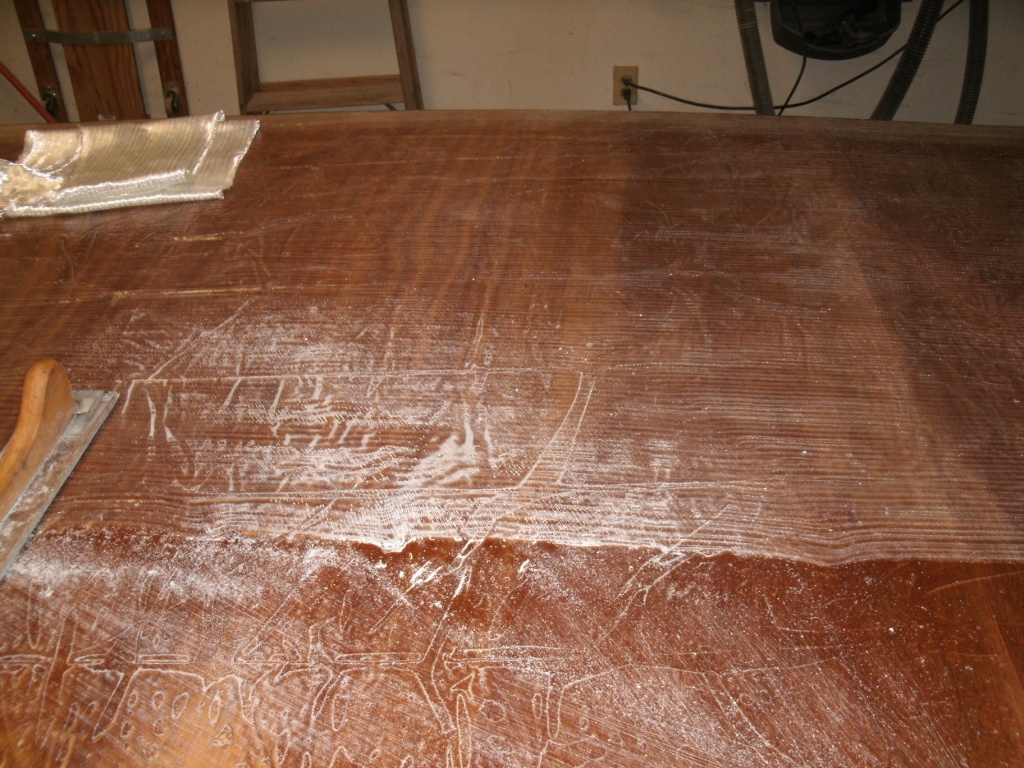
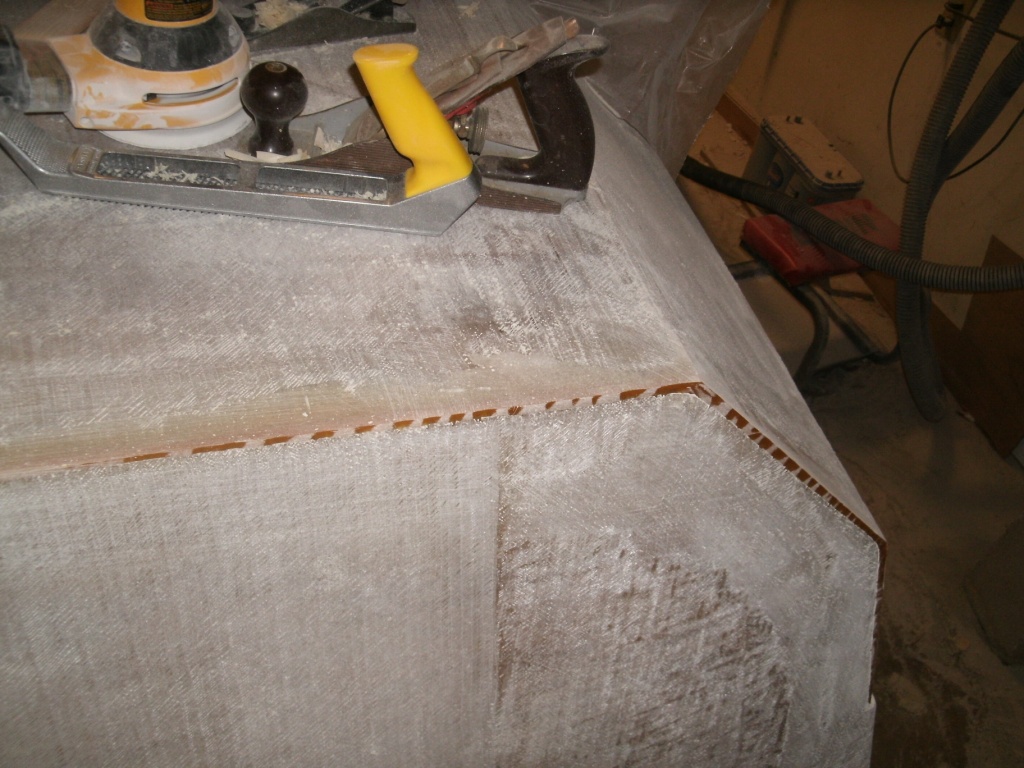
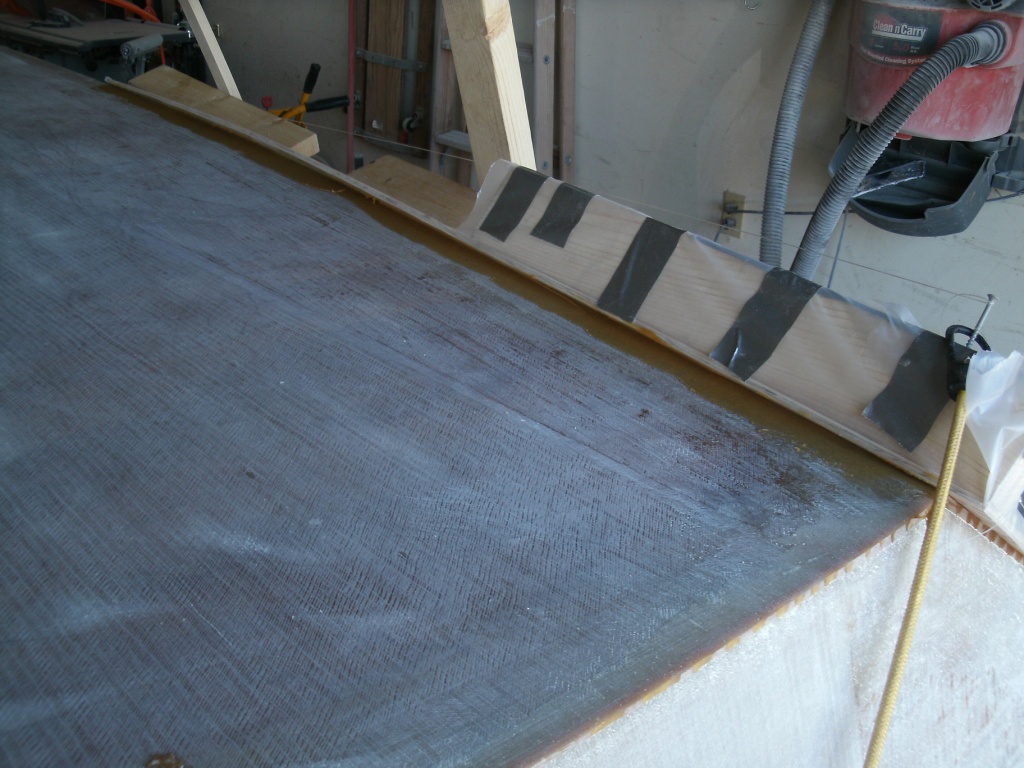
The picture that made me mention this is below, it looks like you have gone through a layer or two. Still no big deal to go through a little in that place (there is a LOT of glass with the overlaps in that spot). I just wanted to make the point
Re: Hagar's OD18
Posted: Wed Apr 28, 2010 1:16 pm
by hagar
Great, I think I will be ok! Joel, in the area that concered you I have 7 layers in those corners as I overlap everything around the corner, i.e., transom seam tape (3), longintudinal seam tape (2), transom sheet (1), and full sheet (1). I knew I could grind down a little there to fair the transitions. I will also lighten up a little on the large flat areas, gladly as the sanding time will be greatly reduced! Thanks to all of ya'.
Hagar
Re: Hagar's OD18
Posted: Mon May 31, 2010 12:10 pm
by hagar
Ok, need a logic check again!
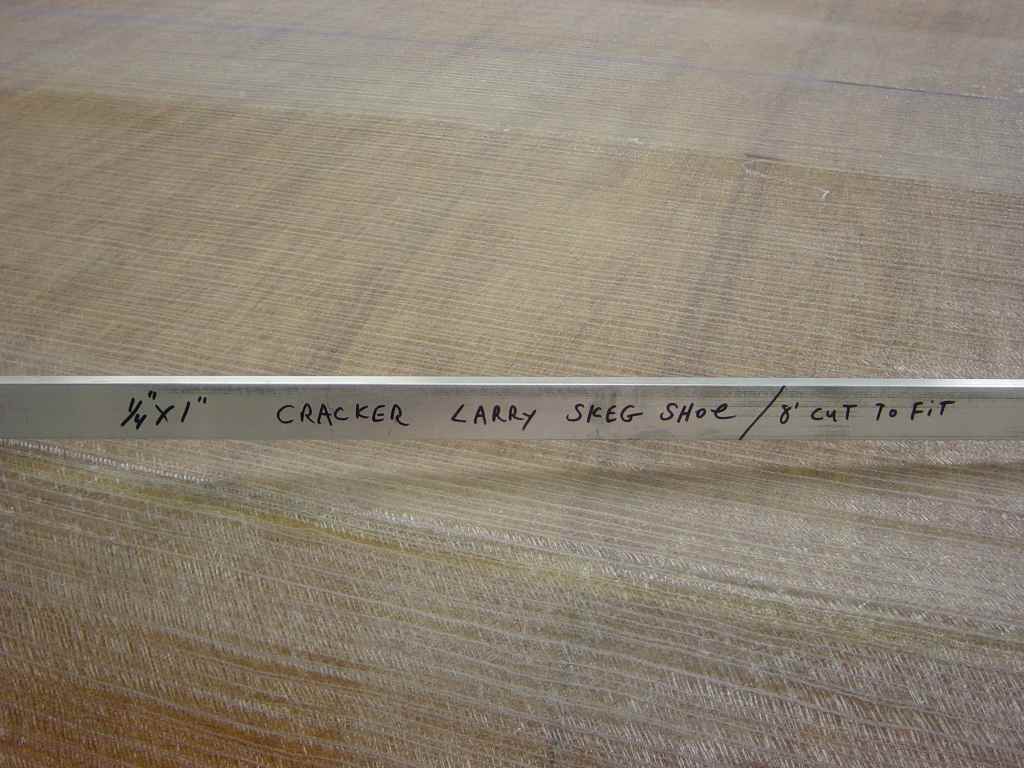
I am working on the skegs, I plan on using two. The plans call for a single 2"x2" skeg, but I plan on using 1"x2" as I could not find any 2"x2" at the big box store yesterday. So, I will have two skegs that are 7/8" tall (3/4" from the wood and another 1/8" from the aluminum runner I will use) instead of one skeg that is 1-5/8" tall. My logic says that there is still plenty of vertical surface to provide tracking, anyone see any issues with this? The lumber is poplar by the way, assumed that was ok also?
Oh, and happy Memorial Day to all.
Hagar
Re: Hagar's OD18
Posted: Mon May 31, 2010 1:13 pm
by Cracker Larry
I plan on using two. The plans call for a single 2"x2" skeg, but I plan on using 1"x2" as I could not find any 2"x2" at the big box store yesterday.
No offense, but why would you do that
The designer really does know what he's doing and the boat needs a good skeg to track properly. Mine tracks like its on rails. If you can't find the lumber size you need, laminate a few pieces together, that will make it stronger anyway. You can laminate plywood, solid lumber or both. I wouldn't use poplar, you should be able to get good pine in Alabama? I made mine with 2 layers of 1X4 yellow pine, sandwiching 1 layer of 1/4 ply.


Then cut that to a taper and shape it up.


Glue it, fillet it, 2 layers of biax, then an aluminum shoe. This works. I don't think your small runners will.


Happy Memorial Day to you
It's pouring rain here
Re: Hagar's OD18
Posted: Mon May 31, 2010 8:03 pm
by Larry B
Yep agree with CL on the skeg. I went to my big box store and went to the Cracker isle, found this right next to the steering cables
Had to look hard as it was the last one. They were having a sale on them that weekend
Had to tweak it a bit for it to fit perfect, but it's on now and looking good.
Re: Hagar's OD18
Posted: Mon May 31, 2010 10:30 pm
by hagar
Cracker Larry wrote:No offense, but why would you do that The designer really does know what he's doing and the boat needs a good skeg to track properly.
No intent on questioning the designer, much respect there. I did see in another post at one point where Jaques supported having two skegs so wanted to go that route as I will beach the boat a lot and drag it over sandbars when floundering. Wanted it to kinda' "sit level" and not wear so much as on a single point. Guess I better make them taller though.
As far as the poplar, I mostly chose that because what pine they did have at the big box store was low grade. Full of knots, bent, skewed, etc. the poplar they had was pretty nice grain and straight. Is the poplar realy a big problem? I am not so concerned for the skeg, easy fix there, just go get the pine, but...I have already cut my spray rail stack-up from poplar also. Same issue, the pine looked like crap at the bbs. Is the poplar such a low grade of hardwood that I need to go with pine?
Ok, thanks for keeping me straight here!
Hagar
Re: Hagar's OD18
Posted: Tue Jun 01, 2010 8:32 am
by cape man
I used poplar on my gunwales and plan on using it for the spray rail. It is not considered a really hard wood, but if you are protecting the skeg with an alluminum shoe (I would if you truly plan on beaching it a lot), I think it will work there as well.
Re: Hagar's OD18
Posted: Tue Jun 01, 2010 9:37 am
by Larry B
I used pine for my spray rails with 12oz biax over it. I'm sure it will still ding pretty easy, but such is life
I'm going to use it and if it gets a few dings so be it. After the first ding then you can really start using your boat and not worry about it anymore
Re: Hagar's OD18
Posted: Tue Jun 01, 2010 9:41 am
by Cracker Larry
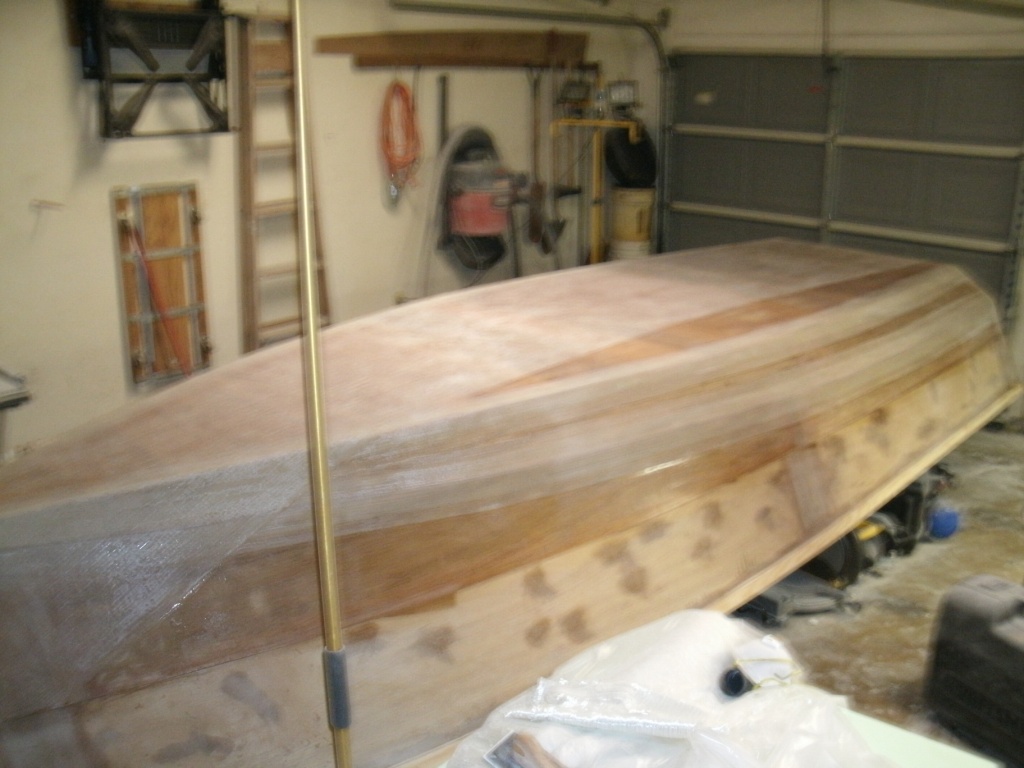
Sure it "will work" it's just not the best choice. Craig, your poplar is 100 year old, old growth, heirloom wood, much different from the kiln dried stuff in the big box stores, and you are using it above the water line in a mostly cosmetic manner. And it is beautiful
Here's a pic you haven't seen of her

But a skeg needs to be the toughest thing on the boat, it will get the most abuse. Poplar is noted for it's low strength and very low rot resistance, which makes it a poor choice for a skeg. If you use it, glass the heck out of it.
As far as the poplar, I mostly chose that because what pine they did have at the big box store was low grade
Why limit yourself to what they have at the big box stores? There must be some good lumber yards in your area that carry clear YP or douglas fir. If not, take a ride, or mail order? You only want to build that skeg once
My opinion anyway, you did ask
Your boat, your choice
Re: Hagar's OD18
Posted: Tue Jun 01, 2010 10:22 am
by Larry B
Hagar, I used laminated marine ply. Can't remember what I used? 4 pieces of 3/8" or 2 pieces of 3/4" or a combination there of
Then glassed it on and used the aluminum flat bar on it, I did it a bit different than CL, I used aluminum 1/4"x 20 screws tapped into the drilled and refilled holes. That way I didn't have two different metals and I didn't use a Anode. All these ways will work, just use what will make you happy and make a strong skeg.
Re: Hagar's OD18
Posted: Tue Jun 01, 2010 2:24 pm
by steve292
I made mine out of 2 layers of I/2 ply, much easier(not to say cheaper) than trying to find good dimensional stock 7ft long

Steve
Re: Hagar's OD18
Posted: Tue Jun 01, 2010 8:14 pm
by hagar
Cracker Larry wrote:But a skeg needs to be the toughest thing on the boat, it will get the most abuse. Poplar is noted for it's low strength and very low rot resistance, which makes it a poor choice for a skeg. If you use it, glass the heck out of it.
Ok, I'll get the pine and get some damn good stuff to boot. Guess I'll move from the 1/16 to the 1/4 thick aluminum plate also. might try to run a shallow dovetail in the bottom of the skeg so the epoxy will get a very good grip also. Couldn't find a 1/4 inch piece in town.....same sin as below.
Cracker Larry wrote:Why limit yourself to what they have at the big box stores? There must be some good lumber yards in your area that carry clear YP or douglas fir. If not, take a ride, or mail order? You only want to build that skeg once My opinion anyway, you did ask Your boat, your choice
Well, 'cause I was being lazy, that's why. There
are some decent lumber yards around, but in the Muscle Shoals area of Alabama, they roll the sidewalks up at 5:00 pm. I'm not kidding, It amazes me that just about every retail store in this area closes at 5:00 pm on weekdays and they don't open on Saturday. Seems like they could sell a ton of stuff if they would only stay open to at least 6:00. So, a little laziness mixed with some aggravation of not wanting to wait another several days until the stores open, plus some anxiety of wanting to move forward with this project, and maybe a slight touch of not planning ahead enough, caused me to compromise my "best practice" attitude... "Bless me father for I have sinned............".
Still plan on using the poplar for the sprayrail as it will be capped with 1/4 ply and double taped anyway, and like mentioned, will be above the waterline... Hope I'm right. And yeah, I did ask and appreciate the frank replies/opinions, that's why I asked.
Cape Man, Larry's right about the old growth stuff vs. the fast production stuff these days. Yours looks great, kudos on those gun'l's.
Re: Hagar's OD18
Posted: Tue Jun 01, 2010 9:09 pm
by Cracker Larry
in the Muscle Shoals area of Alabama, they roll the sidewalks up at 5:00 pm. I'm not kidding,
It sure can't be worse than Clyo, GA
We don't even have a traffic light
I'm 25 miles from a Walmart or Lowes, and 30 miles from a liquor store

Close to some sawmills though. Try to resist the urge to cut corners for convenience, especially on the important stuff, just to save a day or 2, you'll appreciate it in the long run. 2 years from now, an extra week and an extra $50 won't mean a thing
Re: Hagar's OD18
Posted: Tue Oct 27, 2015 12:18 am
by hagar
Its been a long time since visiting or posting here, hope all of you are doing well.. I can't believe that I have not worked on my od18 or posted in over 4 years! Sadly, I am finally at a point where I realize that I will not finish this boat, for many reasons which include health issues since starting, energy level and financial issues of having a couple of kids in college, etc. I have made many attempts to get life arranged to make this build a priority again, but it seams as if I was thrown a priority curve every time I got close. It upsets me because I have so much time invested, money invested and mostly because it is hard for me to quit on anything.....but I have decided to sell the project if I can. I spoke with Jacques a few weeks ago and have his blessing to post this for sale. What is included:
OD18 plans.
Hull completed (deck sole not installed, one can still see the entire construction), needs spray rail, skeg, fairing, painting (you get to design your own interior)!
Okume plywood to complete the boat and center console
tub of quickfair
couple of bags of wood flour
graphite for bottom
couple of rolls of biax for seams-may need additional to finish but not much.
I have pics of every step of the build which closely followed Cracker Larry's advice and others' od18's, I can get those to anyone interested.
Stringers are made 1" higher for drainage.
While I do not build boats professionally, I grew up working in boatyards doing fiberglass repair, rigging, etc. This is a good build.
I will deliver up to 400 miles or maybe further depending on which direction from northwest Alabama.
To buy the materials that are in this boat and the materials that come with it would cost $2776.00 not including the extra epoxy you will use. I am asking $3990.00 obo.
Sadly,
Hagar
Re: Hagar's OD18
Posted: Wed Nov 11, 2015 9:11 pm
by hagar
Would a price reduction to $3200.00 help? Anyone care to make an offer?
Re: Hagar's OD18
Posted: Wed Nov 11, 2015 10:50 pm
by Fuzz
Man if I lived 4000 miles closer I would be running to your place to be first in line. I wish you the best of luck with the sale. Sorry to see anyone have to let go but hey life happens.
Fuzz
Re: Hagar's OD18
Posted: Tue Jun 21, 2016 10:35 am
by hagar
this is still for sale if any interest.
Re: Hagar's OD18
Posted: Fri Jul 22, 2016 1:14 am
by hagar
Just bumping up!
Re: Hagar's OD18
Posted: Wed Oct 19, 2016 12:21 am
by hagar
$2700.00?
Re: Hagar's OD18
Posted: Sun Feb 05, 2017 12:01 am
by hagar
still for sale if any interest.
Re: Hagar's OD18
Posted: Sat May 26, 2018 11:40 pm
by hagar
Still trying to sell this complete hull OD18. I am asking less than thde materials would cost for this build with the hull already done. It has never been out of the garage so in perfect condition.....k Still pains me to sell but my loss could be someone's gain. 256-483-6259.
Much of the build is viewable on the thread below and I can send pics of all stages of construction if interested.
viewtopic.php?f=12&t=22558
Hagar
Re: Hagar's OD18
Posted: Mon May 28, 2018 3:51 am
by fallguy1000
This thread needs to get moved to for sale. I saw it when you posted new, but then had to hunt the forums to comment.
And put a pic of the current hull.
And if you were gonna travel it 400 miles.
How? Trailer included?
Kind regards. I'd buy it if it wouldn't result in my wife filing!
Re: Hagar's OD18
Posted: Mon May 28, 2018 12:12 pm
by TomW1
Hagar, I agree move this up to Anything else and for sale: more people will see it. Is the trailer and or motor included. Give as much detail as possible and pictures also.
Tom
Re: Hagar's OD18
Posted: Thu Jun 21, 2018 1:08 am
by AdamG
Hagar,
I've had a long hiatus from building, and the OD18 was one of the hull plans I'd been eyeing for a while. Do you have any current pictures of the hull, and info on the materials used? 1088 or 6566? Okume or Meranti? I've got the skill to finish out a boat, but maybe not the budget quite yet. I'd still be curious to take a closer look at it.
Re: Hagar's OD18
Posted: Thu Jun 21, 2018 10:42 am
by hagar
I certainly have all of that information. I am out of town for work but should be home tomorrow. I can get that to you then. Thanks for the inquiry.
Re: Hagar's OD18
Posted: Tue Nov 27, 2018 9:20 am
by tcason
Is boat still for sale??
Re: Hagar's OD18
Posted: Wed Feb 20, 2019 7:40 am
by hagar
Yes it is. I assume too late now, must have overlooked notification of your post....
Re: Hagar's OD18
Posted: Tue Jun 18, 2019 11:05 pm
by fishgitr
Is this still for sale?
Re: Hagar's OD18
Posted: Sat Aug 17, 2019 9:15 pm
by hagar
Yes, this is still for sale. Sorry, must not have gotten post notification! would really like to sell it mostly to see it get finished! I still any interest, my phone is 256-483-6259.
Re: Hagar's OD18
Posted: Thu Jan 16, 2020 11:52 pm
by hagar
Ok, who's got any Christmas bonus left to spend?
Happy New Year to all!
Re: Hagar's OD18
Posted: Fri Jan 24, 2020 8:13 am
by hagar
sent pm to RiggsWNC, hope it went through. It said sent but it is sitting in my "outbox" not my "sent" folder?
Re: Hagar's OD18
Posted: Fri Jan 24, 2020 9:26 am
by Jaysen
hagar wrote: ↑Fri Jan 24, 2020 8:13 am
sent pm to RiggsWNC, hope it went through. It said sent but it is sitting in my "outbox" not my "sent" folder?
That means it has not been read. Once it is read if moves to sent. The internal message queue for PHPBB is a bit different than the SMTP (email) we normally use for messaging.
Re: Hagar's OD18
Posted: Fri Jan 24, 2020 9:39 pm
by hagar
Ah, ok. Thanks for the info.
Re: Hagar's OD18
Posted: Sat Feb 08, 2020 12:13 am
by fallguy1000
Join plywood boat building forum on facebook and list it over there.
I can help point if you need.