Page 1 of 1
texasrds OD18 build mid-coast Texas
Posted: Tue Aug 17, 2010 5:36 pm
by texasrds
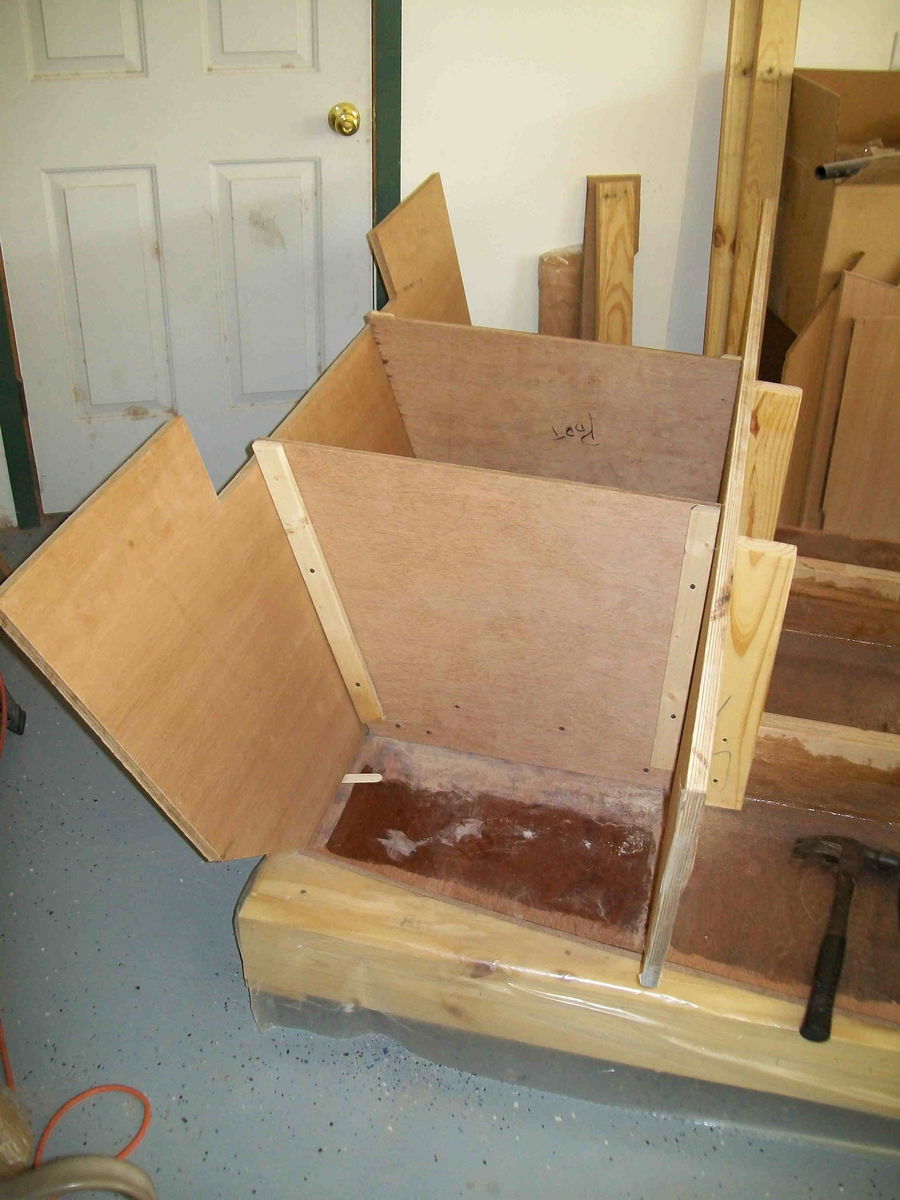
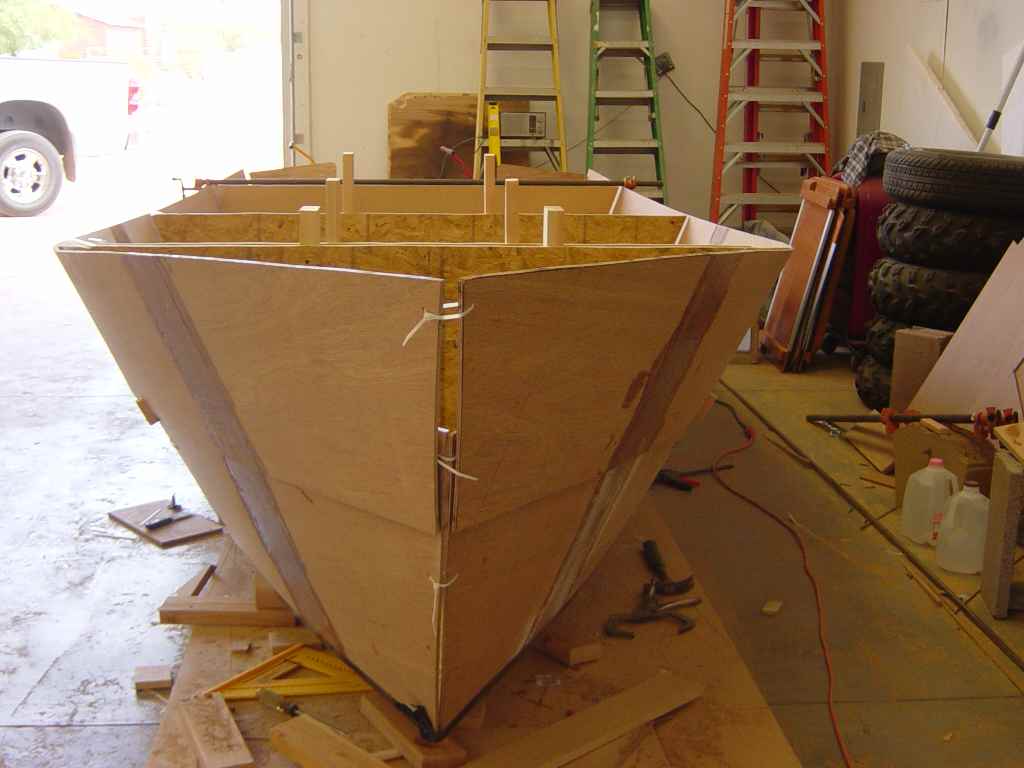
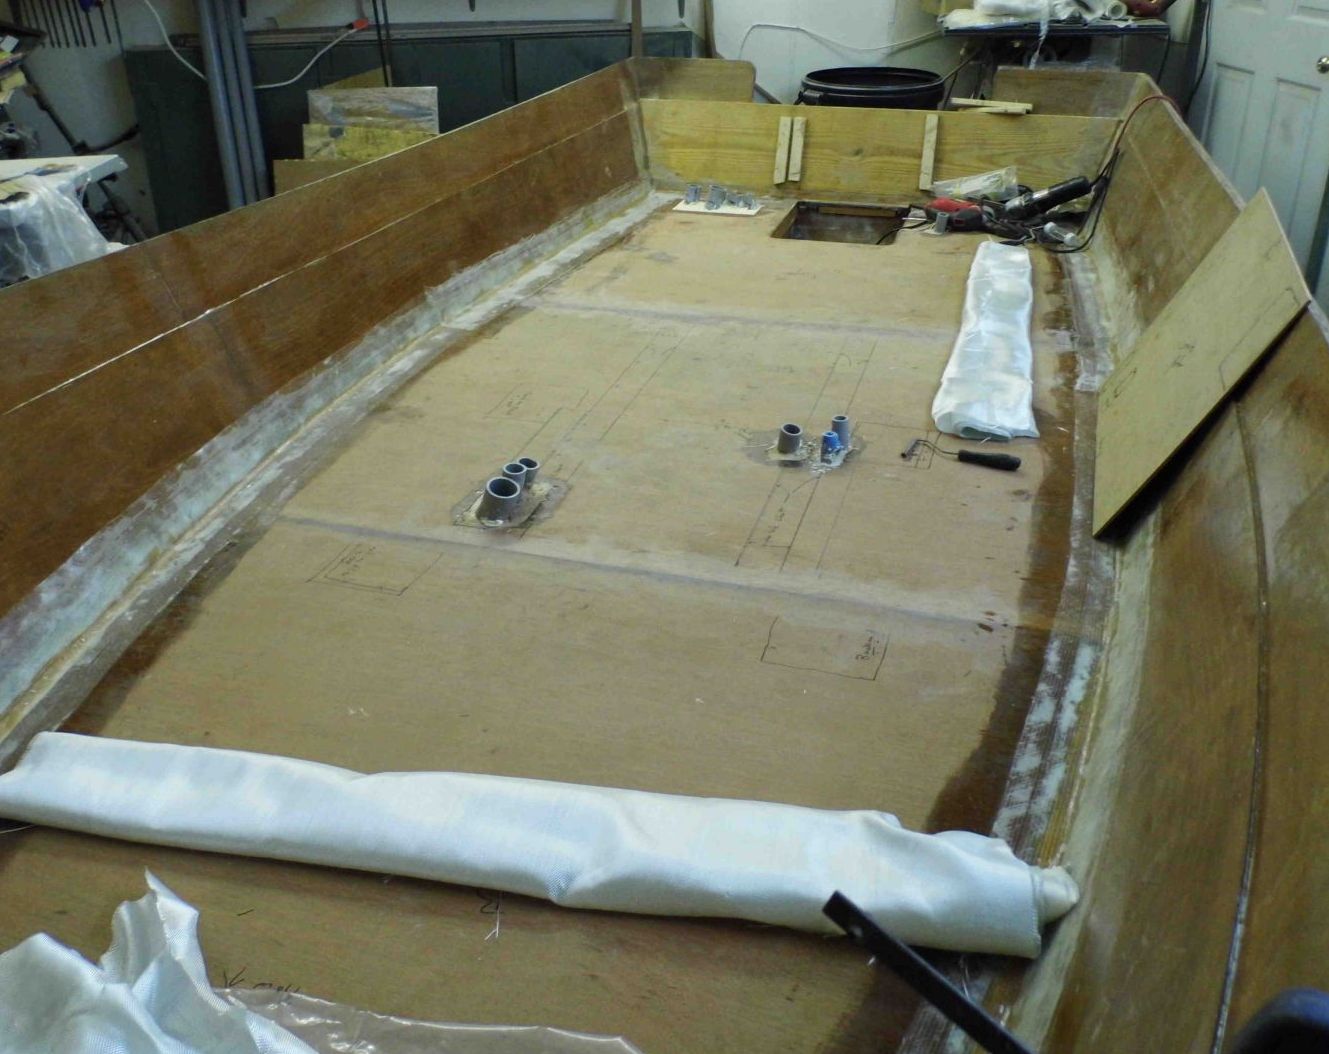
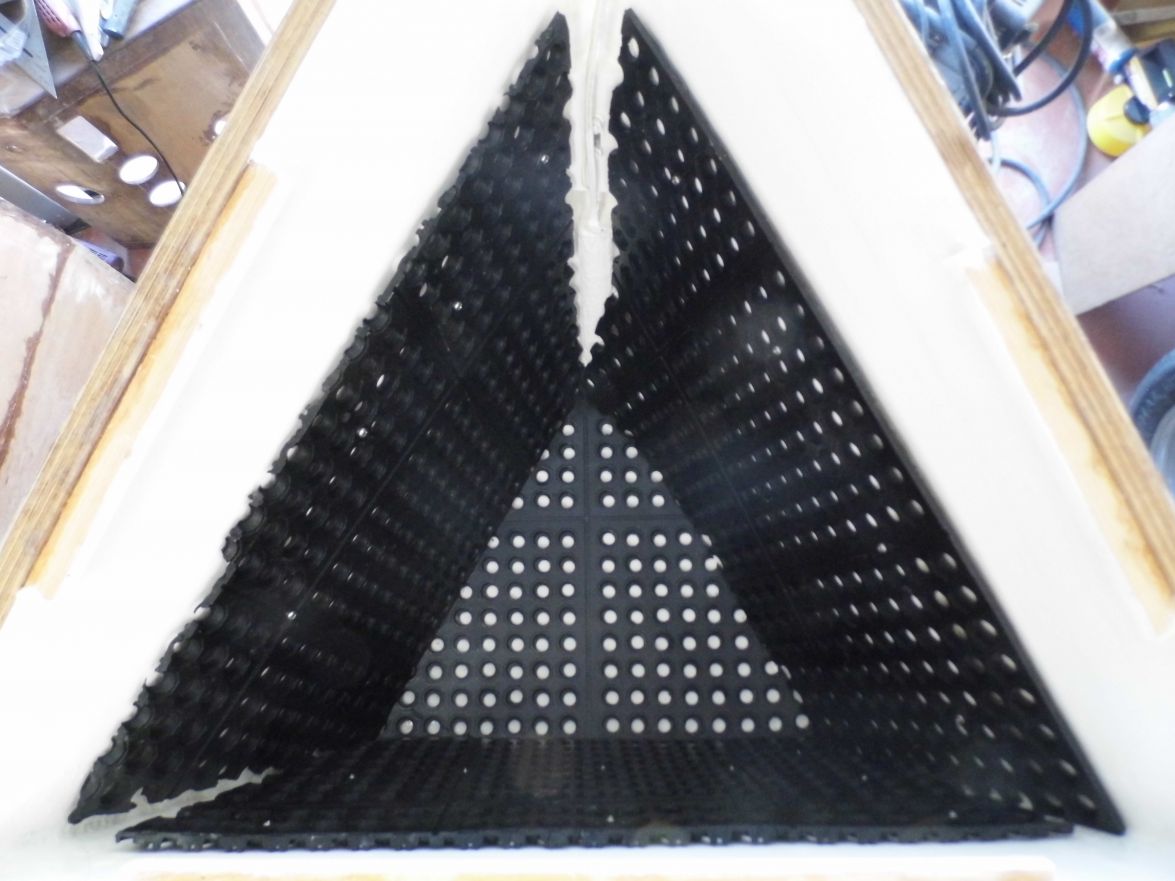
Well, I've started my OD18 build (actually a month or so ago) and figured it was time to try and get this post started. Plans are for this OD18 to be used as a bay boat around here as I've got six or so bay systems to work from. It is slow going but I'm making progress even in spite of myself and a few mistakes already. Learning how to work with the epoxy / hardener is interesting and after cooking off a batch or two ended up getting an air conditioner for the work space to help with the mid to upper 90's and 90 % or better humidity here. It has also been recommended that chilling the epoxy will help slow the process down so I will be doing that as well. Here are a few pictures of what has been done to date. Taping the stringers and working on the transom and molds are next. Let the fun continue.......
Making sawdust with the BBDs
Bottom panels and butt blocks
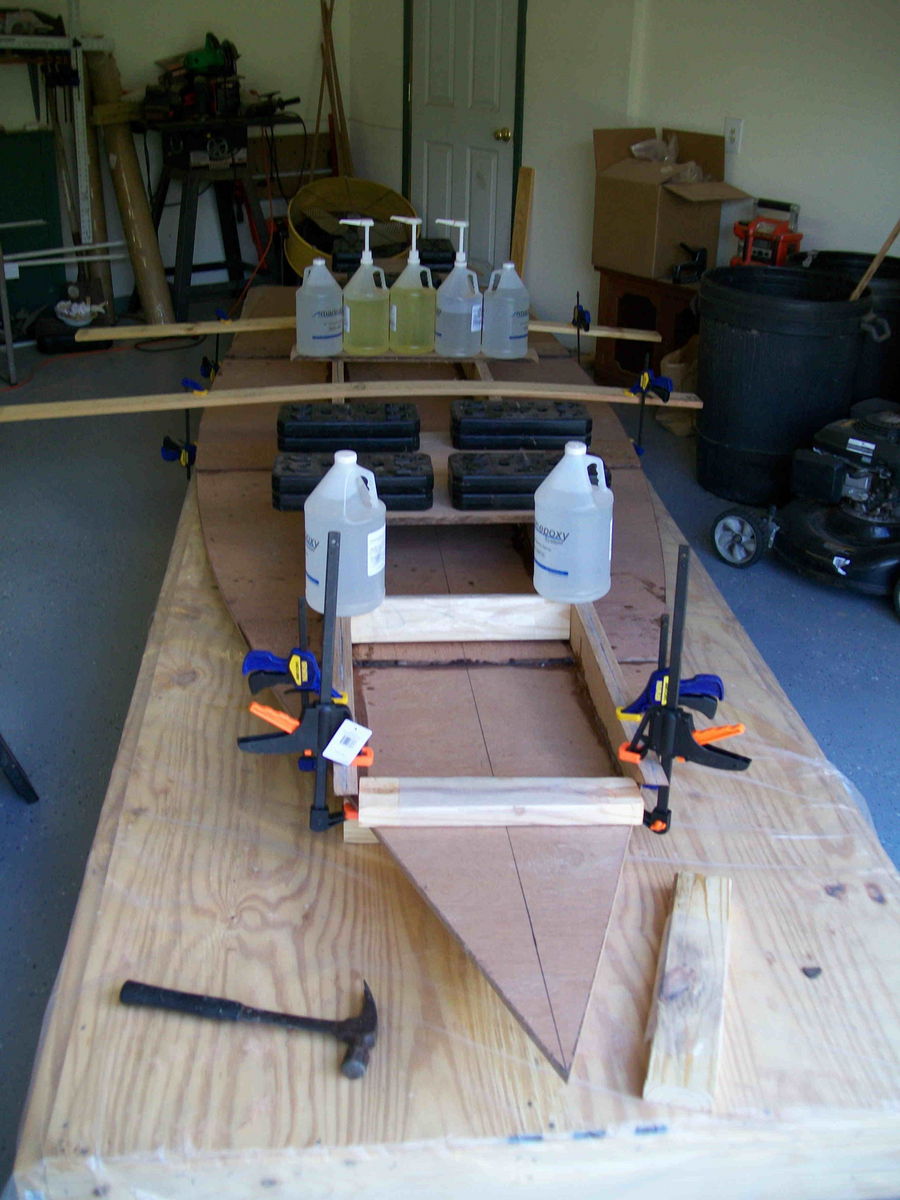
Stringers glued and clamped
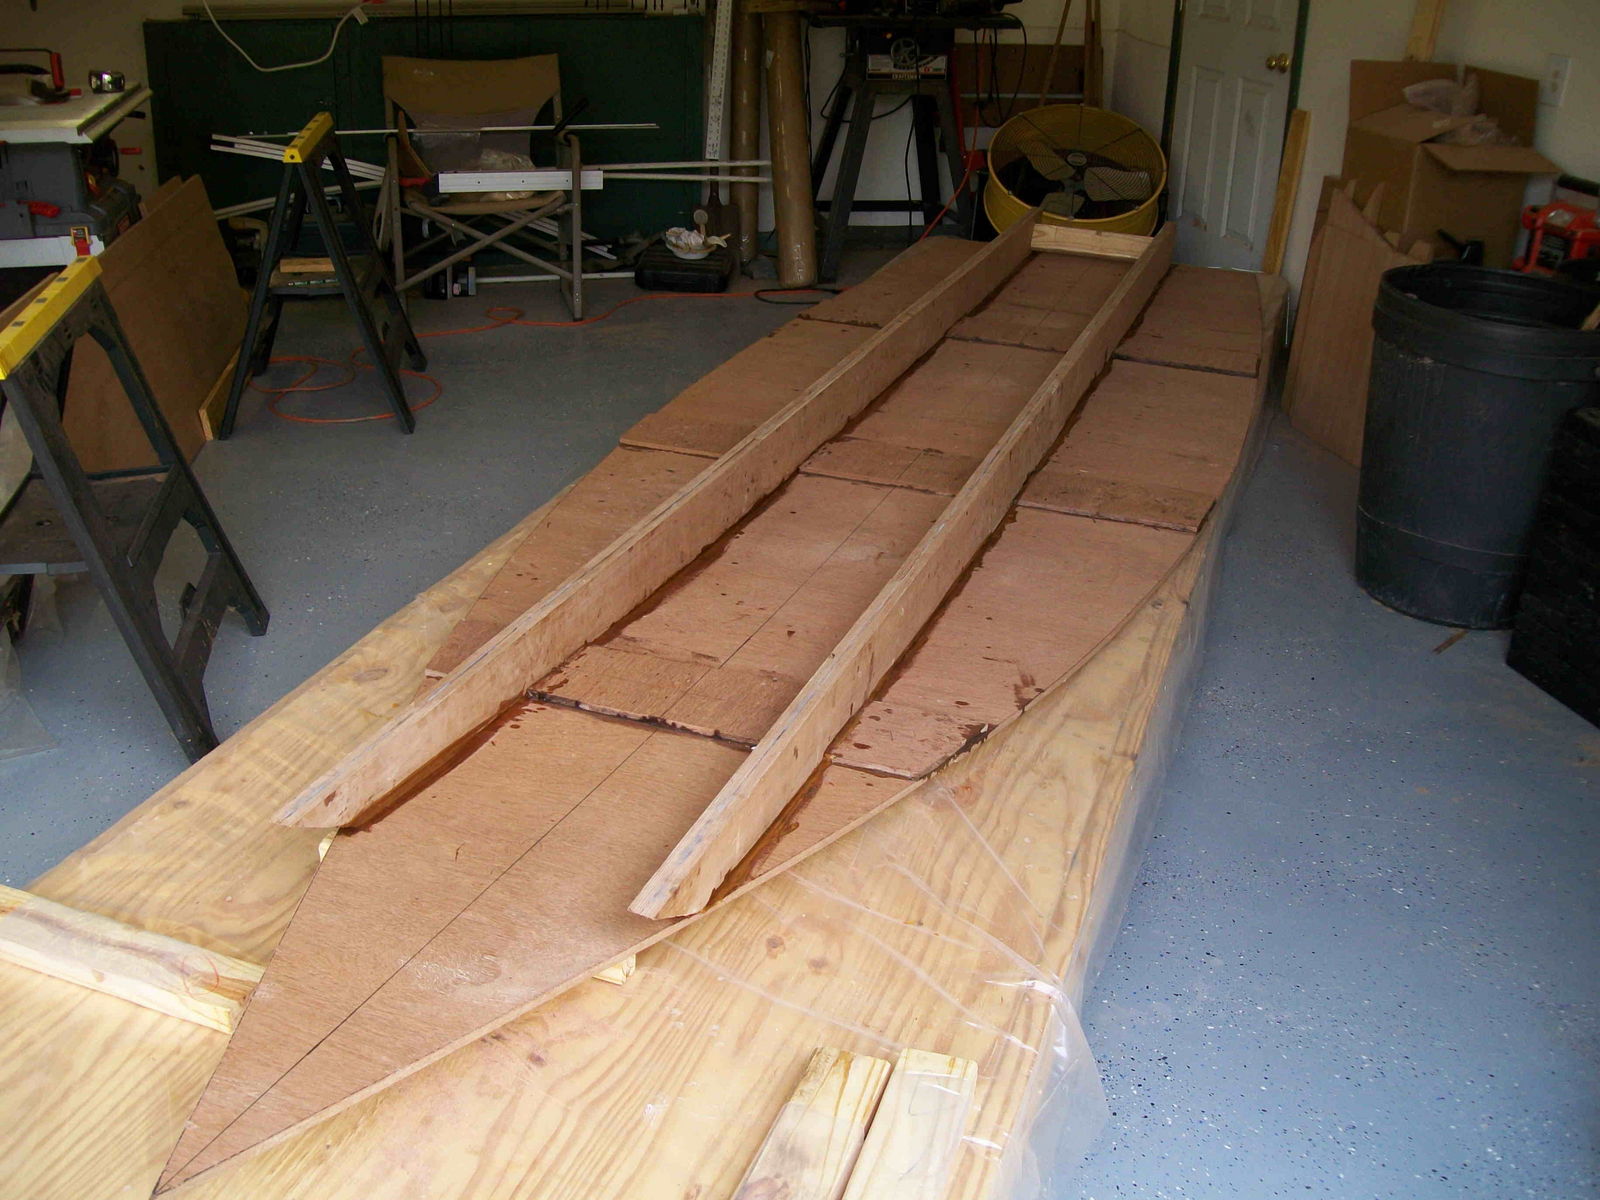
Stringers in place
Randy.
Re: texasrds OD18 build mid-coast Texas
Posted: Tue Aug 17, 2010 5:40 pm
by Cracker Larry
Off to a fine start

The lab mix dog looks like he has glue on his foot already

Re: texasrds OD18 build mid-coast Texas
Posted: Wed Aug 18, 2010 1:18 pm
by bernd1
Enjoy the building...have fun !
Bernd
Re: texasrds OD18 build mid-coast Texas
Posted: Wed Aug 18, 2010 3:18 pm
by Hope2float
nice start looks good keep it rolling.
Re: texasrds OD18 build mid-coast Texas
Posted: Fri Aug 20, 2010 11:41 am
by texasrds
I don't know what Stacy (the lab mix looking dog in pic - she is actually a Texas Blue Lacy) was doing but yeah it does look like she stepped in some glue.

And Klaus of course is a minature dachsund who unfortunately passed away two weeks ago since the pic was taken. Good dogs.
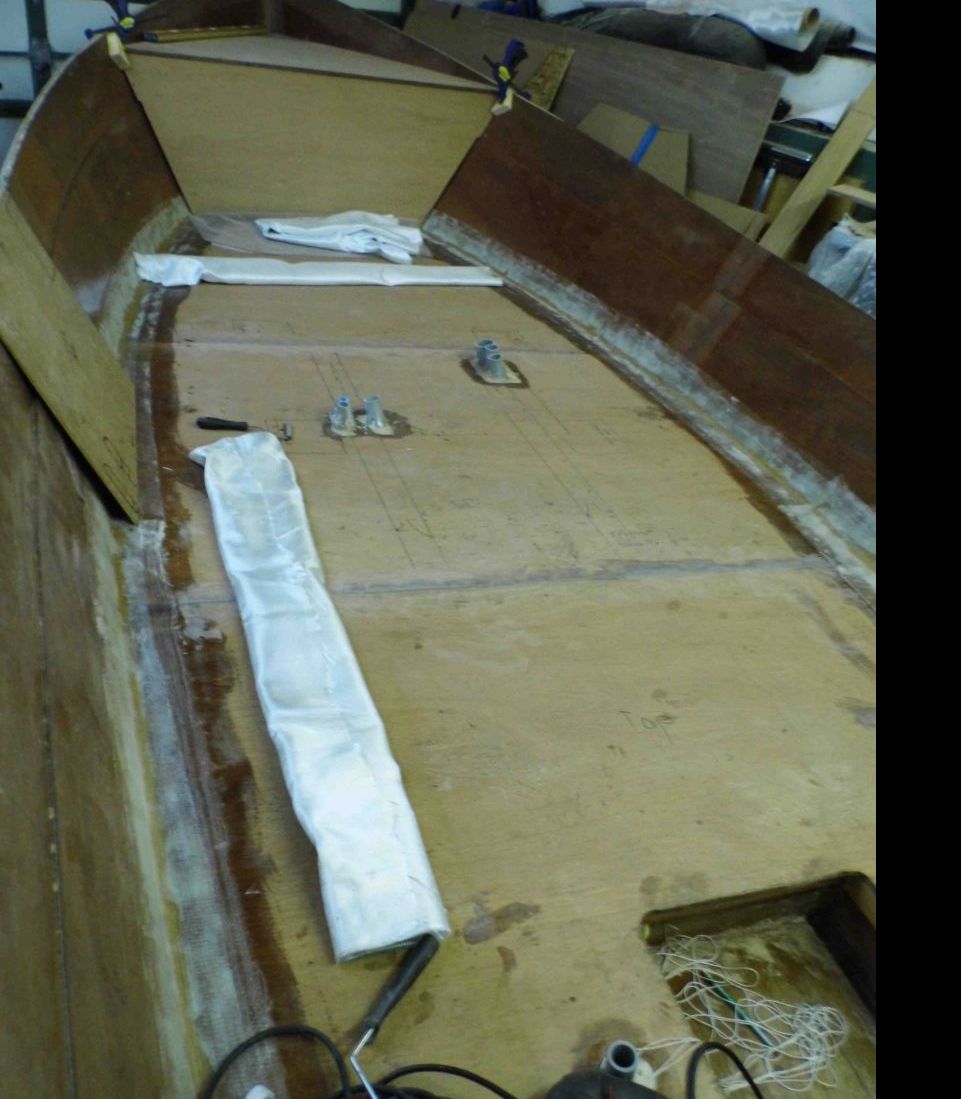
Well - last night managed to cut out mold E and mold D and drew out mold C and the transom braces so I'm moving along. Shooting to have the molds all cut and hopefully in place and braced by next weekend as I'm away this whole weekend. Later...
Re: texasrds OD18 build mid-coast Texas
Posted: Tue Aug 31, 2010 4:55 pm
by texasrds
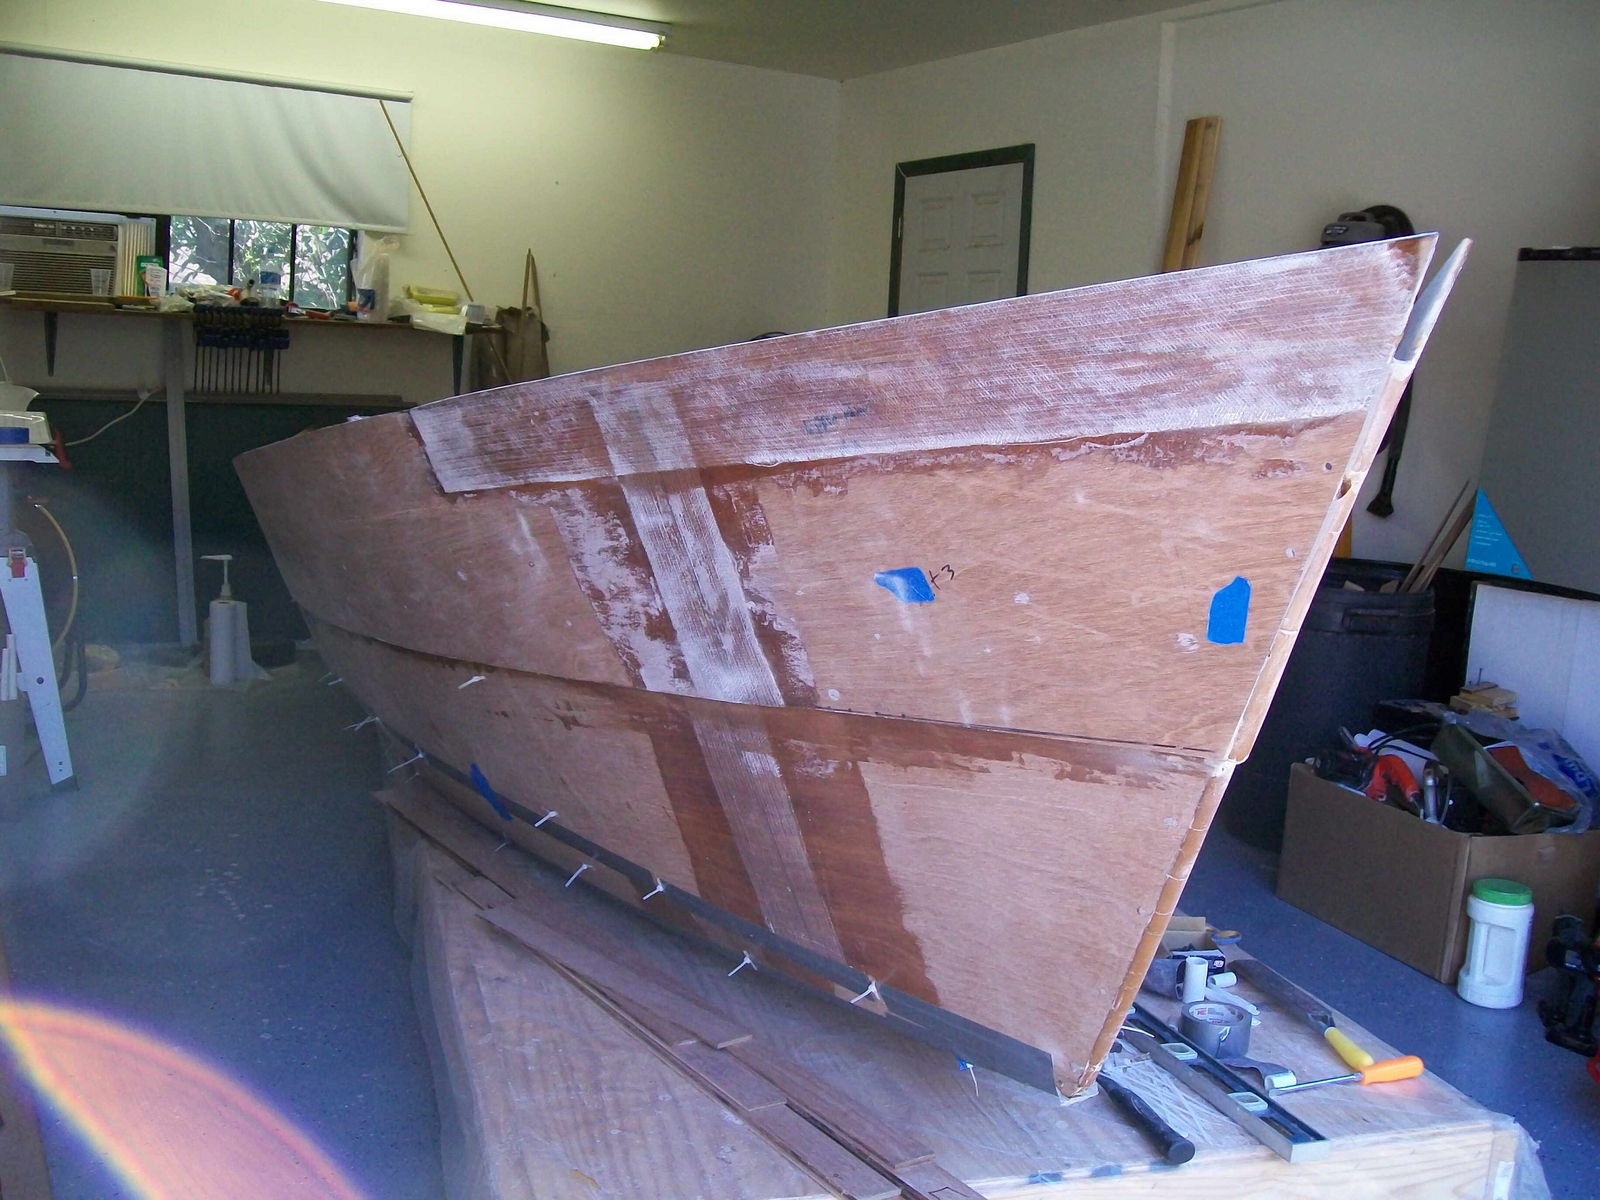
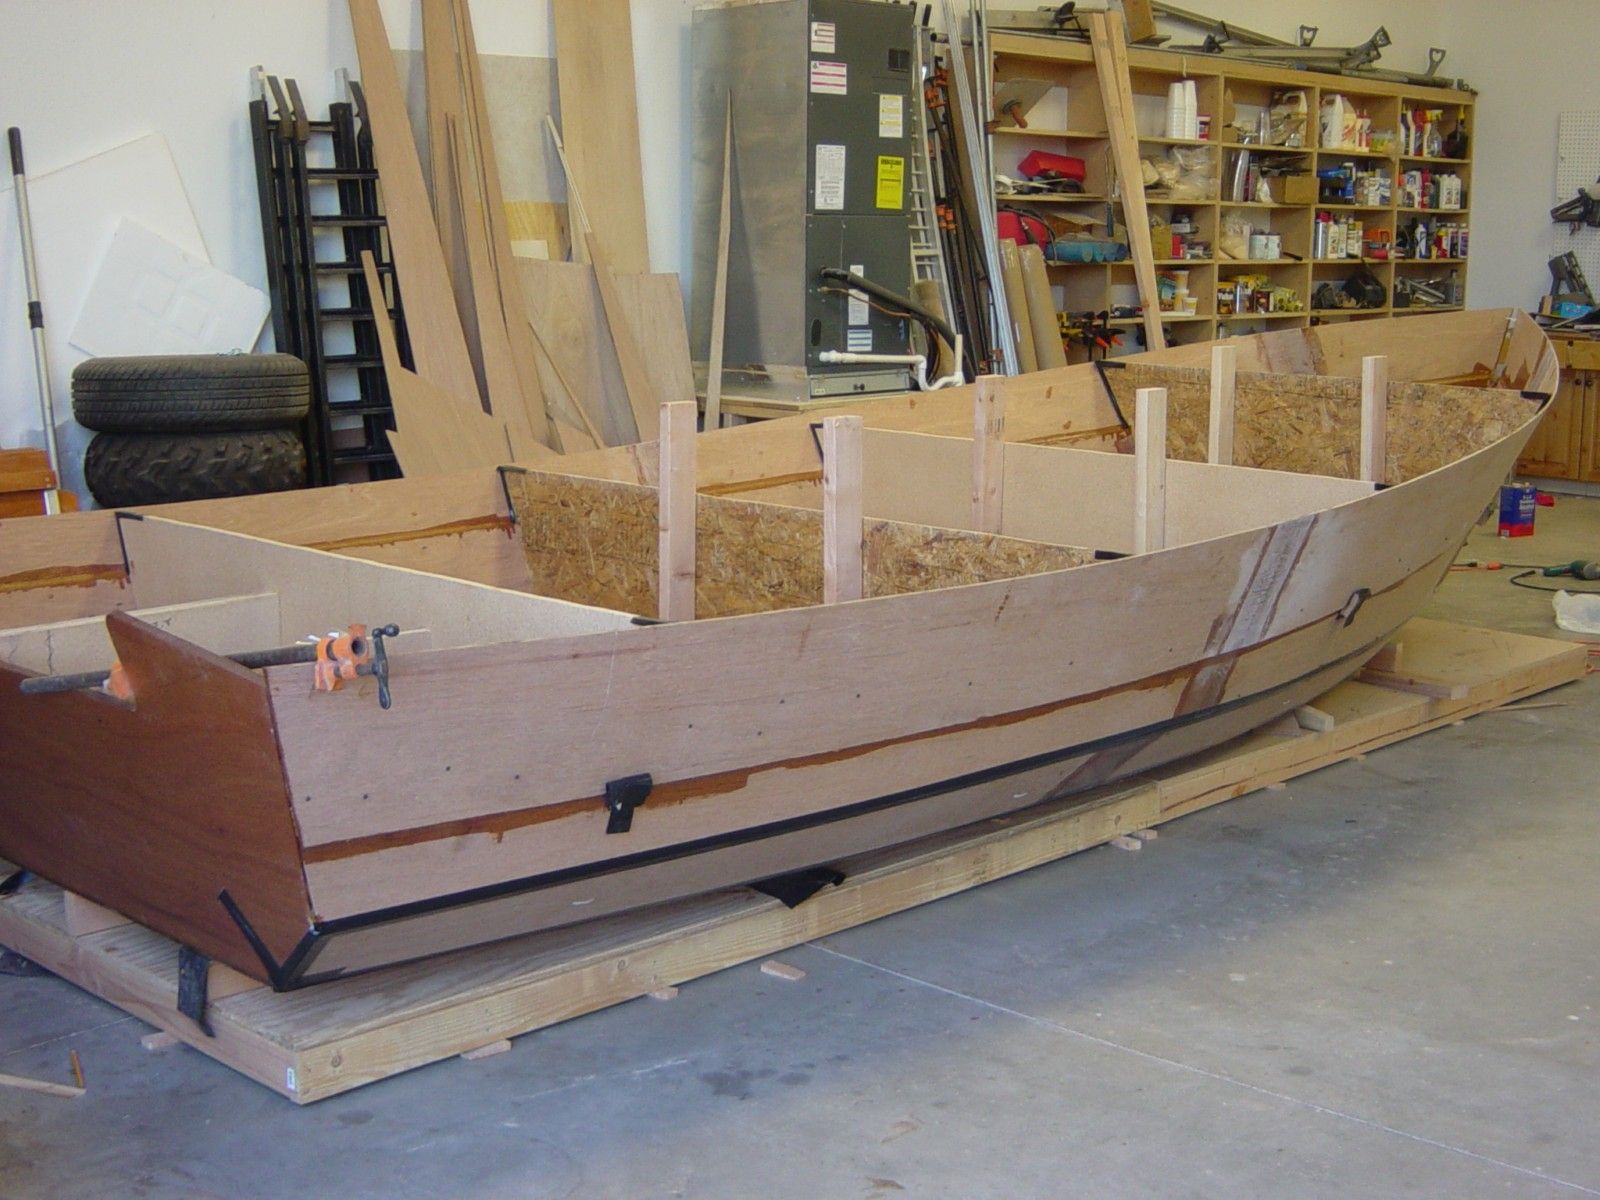
Made a bit of progress this past week getting the molds all cut and installed as well as the transom tacked into place and ready for glue. I figured out that I had gotten a bit ahead of myself while glassing in the stringers in the area of the transom braces as they wouldn't fit flush with the stringers so I ended up having to grind out the glass and epoxy glue I had put down there. Talk about a fine white powder (epoxy and fiberglass
) that just sticks to you and of course itches (or at least in my mind it does).
Next on the agenda is gluing the bottom of the transom, laying out and cutting the chine and lower and upper panels as well as glassing them together and then start the task of fitting the chine pieces.
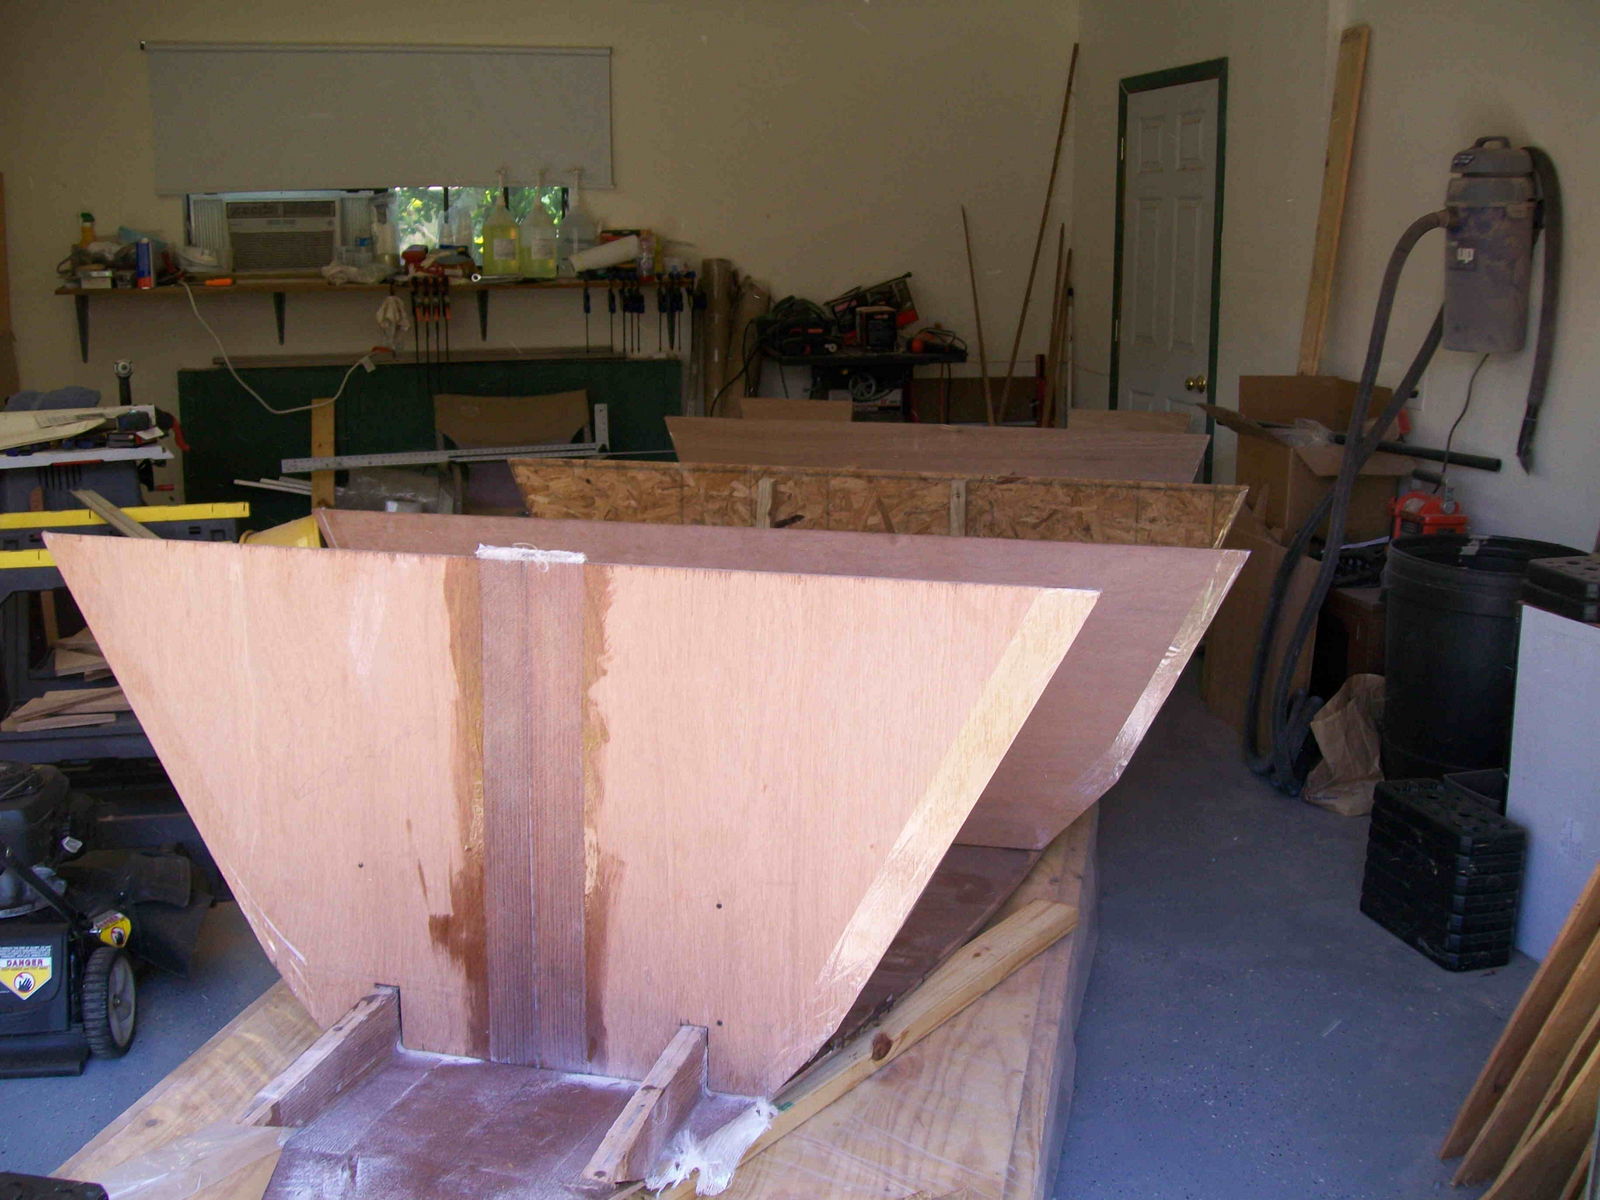
A shot from the front of the molds in place.
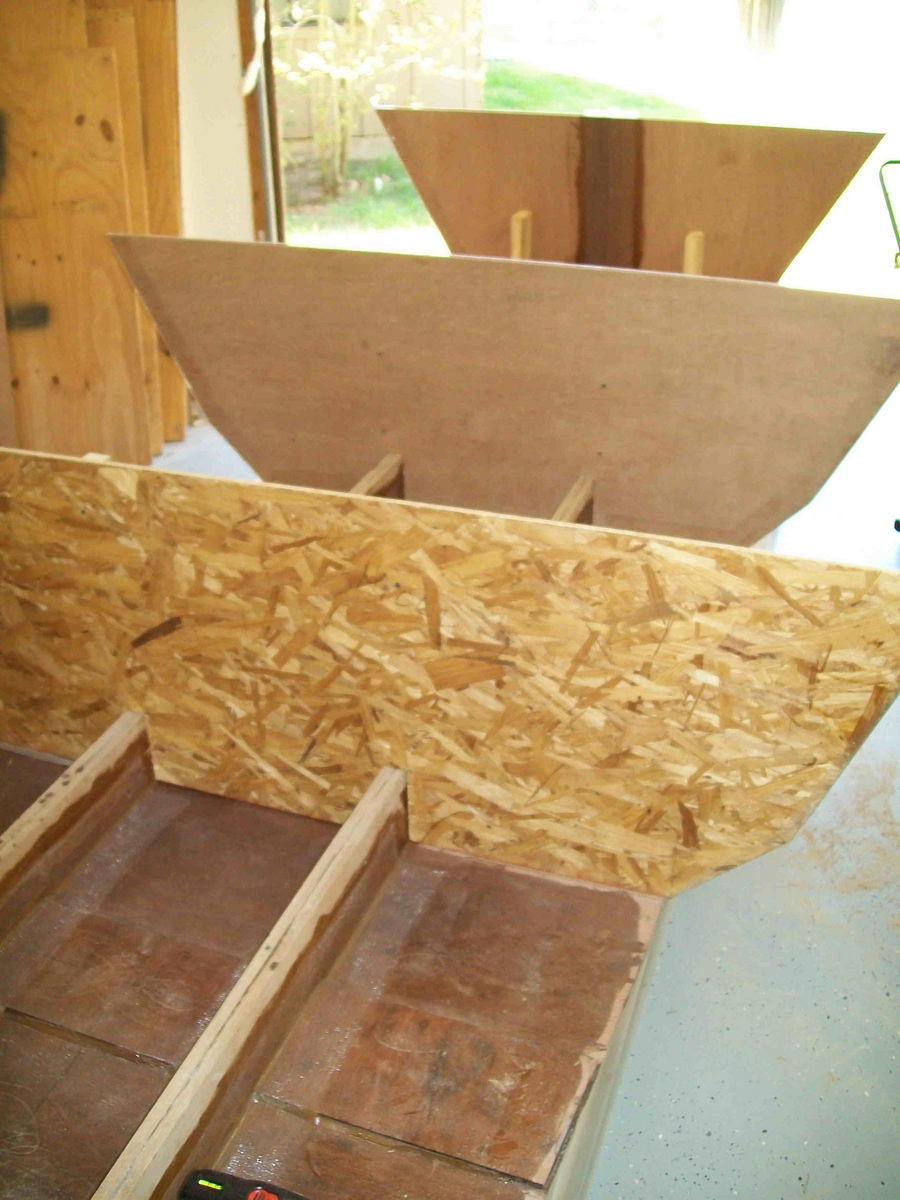
Molds D - C - B looking forward
Transom tacked in place
Randy.
Re: texasrds OD18 build mid-coast Texas
Posted: Tue Aug 31, 2010 6:13 pm
by Cracker Larry
Is the transom glued on yet? If not, I'd like to make a suggestion, well, I'm going to make it either way I reckon
Where your transom is cut out for the motor, it has very sharp angles on the inside and outside corners. You'll want to be glassing over these later, and a radius would take the epoxy, glass, and even paint, better than a sharp edge. Radius curves are also stronger than angles, and help eliminate stress points. They are a lot easier to cut with the transom on a saw horse than it is glued to the boat. Use a soup can or similar to mark all the curves, if it's not too late.

Plus, to my eye curves just look better
Re: texasrds OD18 build mid-coast Texas
Posted: Tue Aug 31, 2010 8:19 pm
by TomW
Yes please make those sharp angles curves they should with plywood be minimun 2" and all the plans I have say 3". You missed something somewhere. With a sharp angle like that they will eventually crack frome the torque of the motor on them.
Re: texasrds OD18 build mid-coast Texas
Posted: Wed Sep 01, 2010 3:34 am
by texasrds
Thanks for the suggestion there on the radius's for the transom CL. I haven't glued yet so I can take it off and fix that right up with no problems. I've got all kinds of radius material to work with around here. I spent two hours tonight just laying out one of the chine, lower and upper panel sheets. Only four more to go. The overlap of dimensions (1/4") on the tail end of the upper and lower panels on what I call plywood sheet five (nesting schematic) had me stumped. I kept measuring and re-measuring but kept coming up with the same overlap. I seem to recall someone commenting on the same thing in another string up here on the forum but can't find it yet. Yep TomW, I guess I did miss something in the plethora of detailed instructions that I received with my plans and epoxy kit to help me on my way here. Yes, I know the measurements are there if you can decipher them and in my opinion you have to extrapolate what the designer means in some instances but come on, the "instructions" are thin particularly for those of us that are new to this and it is the first time we've attempted something of this scale and materials.
Anyhow - appreciate it.
Randy.
Re: texasrds OD18 build mid-coast Texas
Posted: Wed Sep 01, 2010 3:10 pm
by texasrds
I am at the stage of planning and picturing how the setup and install of the chine, lower and upper panels will go. I've been through the plans and see where we fit the chine, then the lower panel and then the upper panel (along with CL's nifty homemade panel scribe). I recall reading on the forum here that someone had said if he had to do it over again he would have glued the lower and upper panel together first on a flat surface and then mounted them as one piece. Anyone recall this? Is this feasable/advisable or should I just stick to the one piece at a time method shown as I am by myself on this foray (with the exception of ya'll and this forum) and Stacy my BBD is not nearly as much help as CL's BBDs are.
Thanks, Randy.
Re: texasrds OD18 build mid-coast Texas
Posted: Wed Sep 01, 2010 3:34 pm
by JamesT
Let me say, that i havent built this boat, so i may be full of BS...But i would think if you glued them to gether flat on the floor, you wouldnt get the proper bend when you put them on the jig. As in the upper panel wouldn't be able to slide on top of the lower as the curve was being made? hope that makes sense. Again, i could be feeding you a line, but at least the physics of it sound right.

Re: texasrds OD18 build mid-coast Texas
Posted: Wed Sep 01, 2010 4:05 pm
by tech_support
JamesT wrote:Let me say, that i havent built this boat, so i may be full of BS...
you may be full of BS, Im not sure, but your answer is right on

.......
JamesT wrote:But i would think if you glued them to gether flat on the floor, you wouldnt get the proper bend when you put them on the jig. As in the upper panel wouldn't be able to slide on top of the lower as the curve was being made? h
Re: texasrds OD18 build mid-coast Texas
Posted: Wed Sep 01, 2010 4:40 pm
by Cracker Larry
Yep, I gave it some thought, myself as I was cussing them, but they won't bend right.
Re: texasrds OD18 build mid-coast Texas
Posted: Wed Sep 01, 2010 6:11 pm
by texasrds
Well that settles that rouge thought.
It does make sense after ya'lls input so it's one piece at a time then. I'm off to radius my transom

and continue drawing and cutting out all the chine, lower and upper panel pieces.
I appreciate it, Randy.
Re: texasrds OD18 build mid-coast Texas
Posted: Wed Sep 01, 2010 6:14 pm
by JamesT
you may be full of BS
I am from Texas....lol.

Re: texasrds OD18 build mid-coast Texas
Posted: Wed Sep 22, 2010 12:31 pm
by texasrds
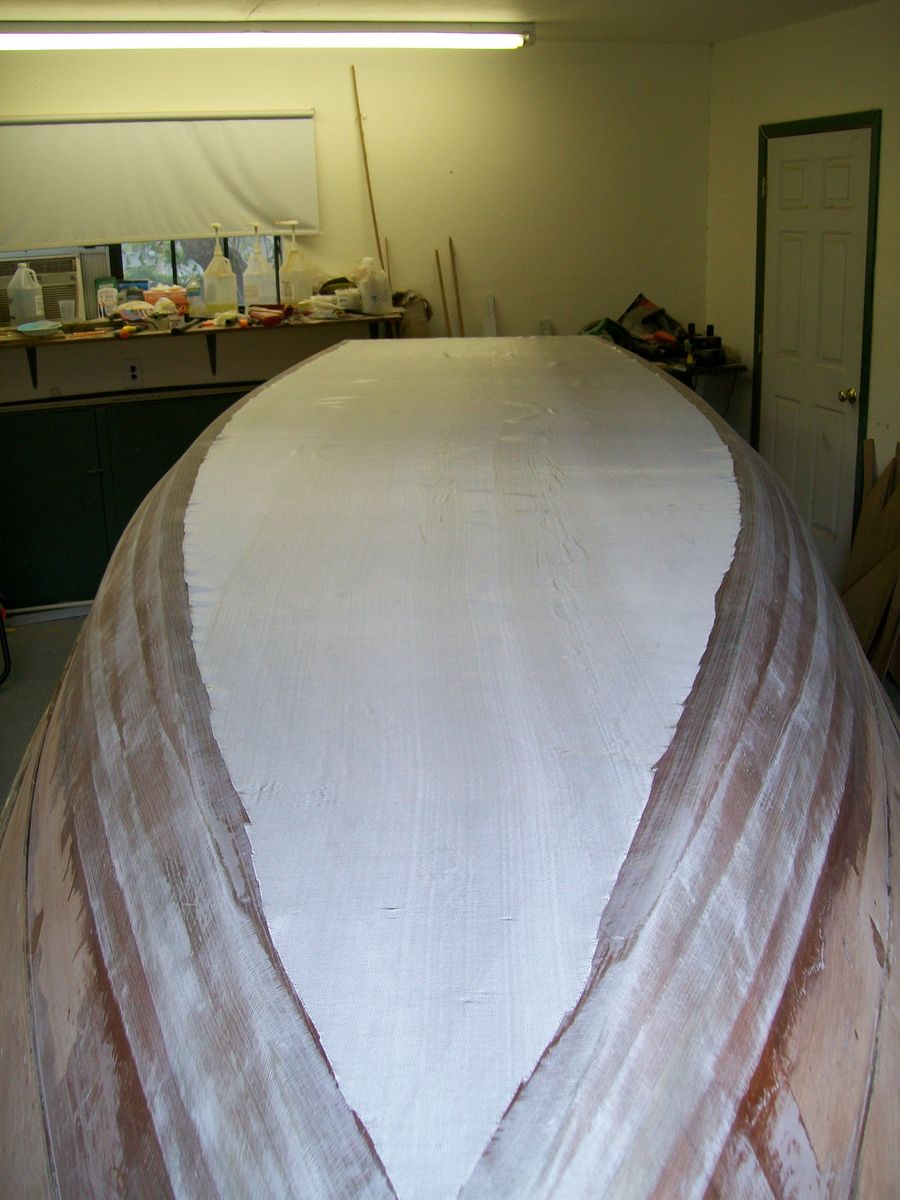
Update: Continuing to work on getting all the side panels (chine, lower and upper) glued together. This is taking forever as I only have enough clear floor space to do a couple at a time and then wait to cure and then flip and do it again. Down to my last three pieces to complete putting them together and then its time for a trial fit of the chine panels. It has been raining now for the past six days here and dropped over 17" which is crazy so I can't even roll anything outside to make more room so its a couple of pieces at a time. Every little bit is progress forward tho!
Re: texasrds OD18 build mid-coast Texas
Posted: Fri Sep 24, 2010 10:46 pm
by Steve
Hey Randy,
I haven't checked out the forum for a while, so just noticed you're building the OD 18. I will have my OD 18 at Port Aransas for most of the month of October. If you want to check it out or take a ride, just let me know. Mine is about 4 years old now, and I have really enjoyed it. I know you wil like yours too.
Steve T
OD 18
Nacogdoches, TX
Re: texasrds OD18 build mid-coast Texas
Posted: Mon Sep 27, 2010 1:47 am
by texasrds
Hi Steve,
Thanks for the offer. It would be great to see your boat and if everything permits get a chance for a ride if you have the time. A quick ferry boat ride over (now that summer is over) and I'm there!
It will be cool to see an OD18 in person versus pictures, plans and the pieces I have "attempting" to put one together. I look forward to it.
Thanks again,
Randy.
rdstexas at yahoo dot com
Re: texasrds OD18 build mid-coast Texas
Posted: Tue Sep 28, 2010 11:15 am
by Steve
Sounds good. I'll contact you directly, and we'll take her for a spin. I'll warn you though, mine is just a fishing tool, not a work of craftmenship like Cracker Larry's, and some of the others I've seen!
Steve T
Re: texasrds OD18 build mid-coast Texas
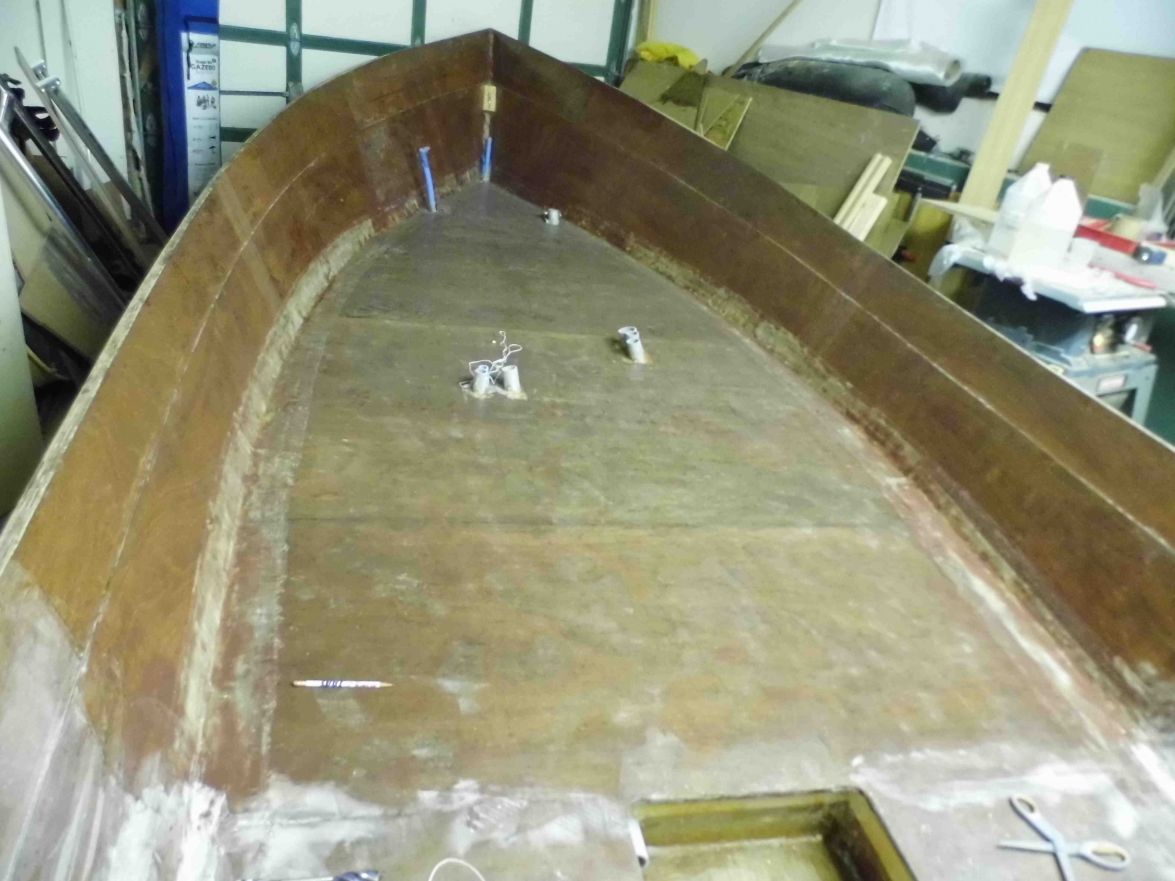
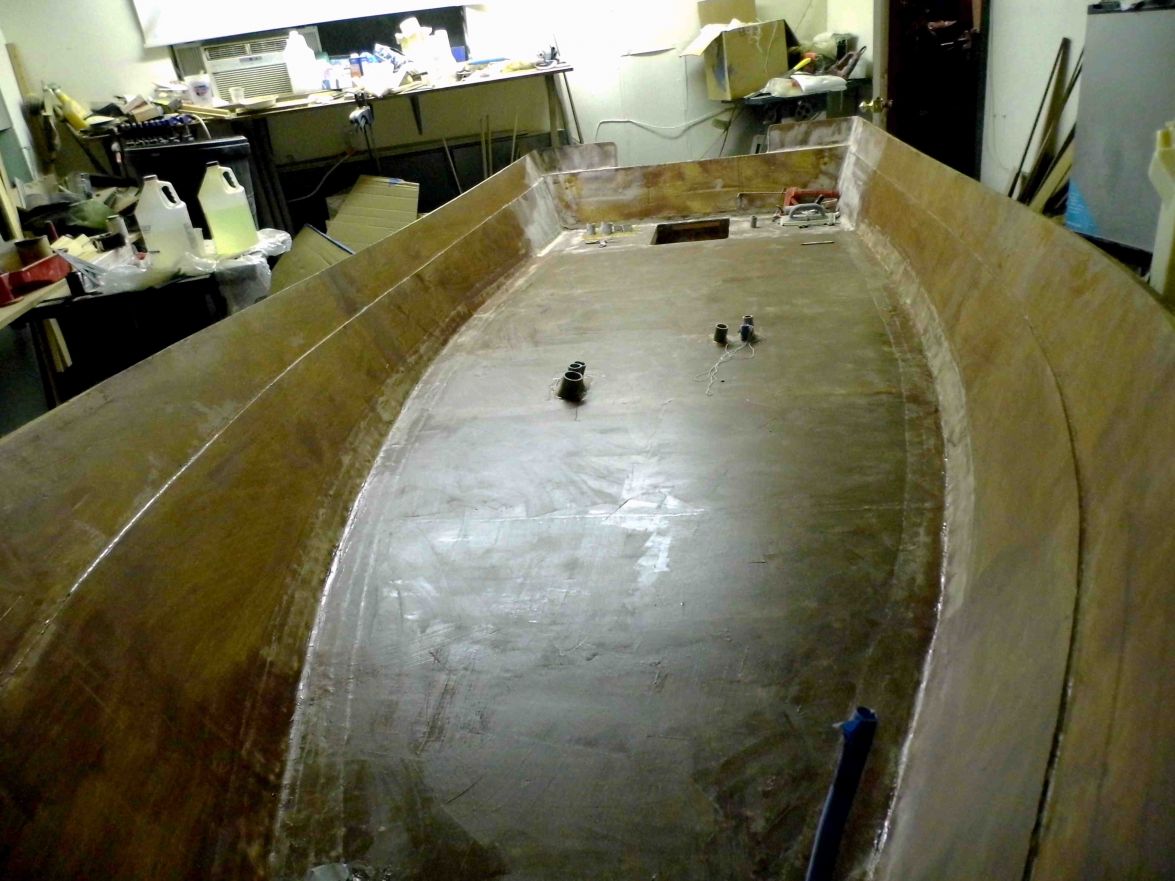
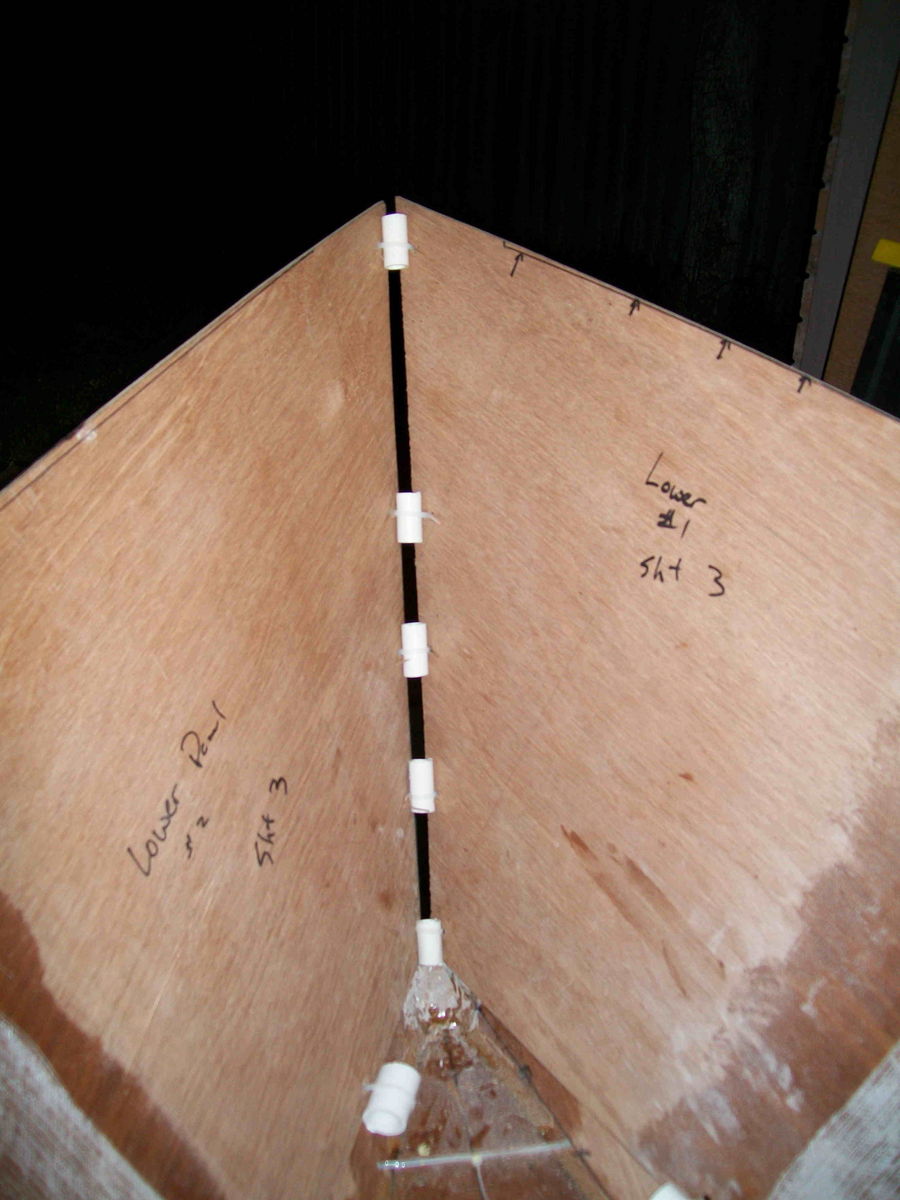
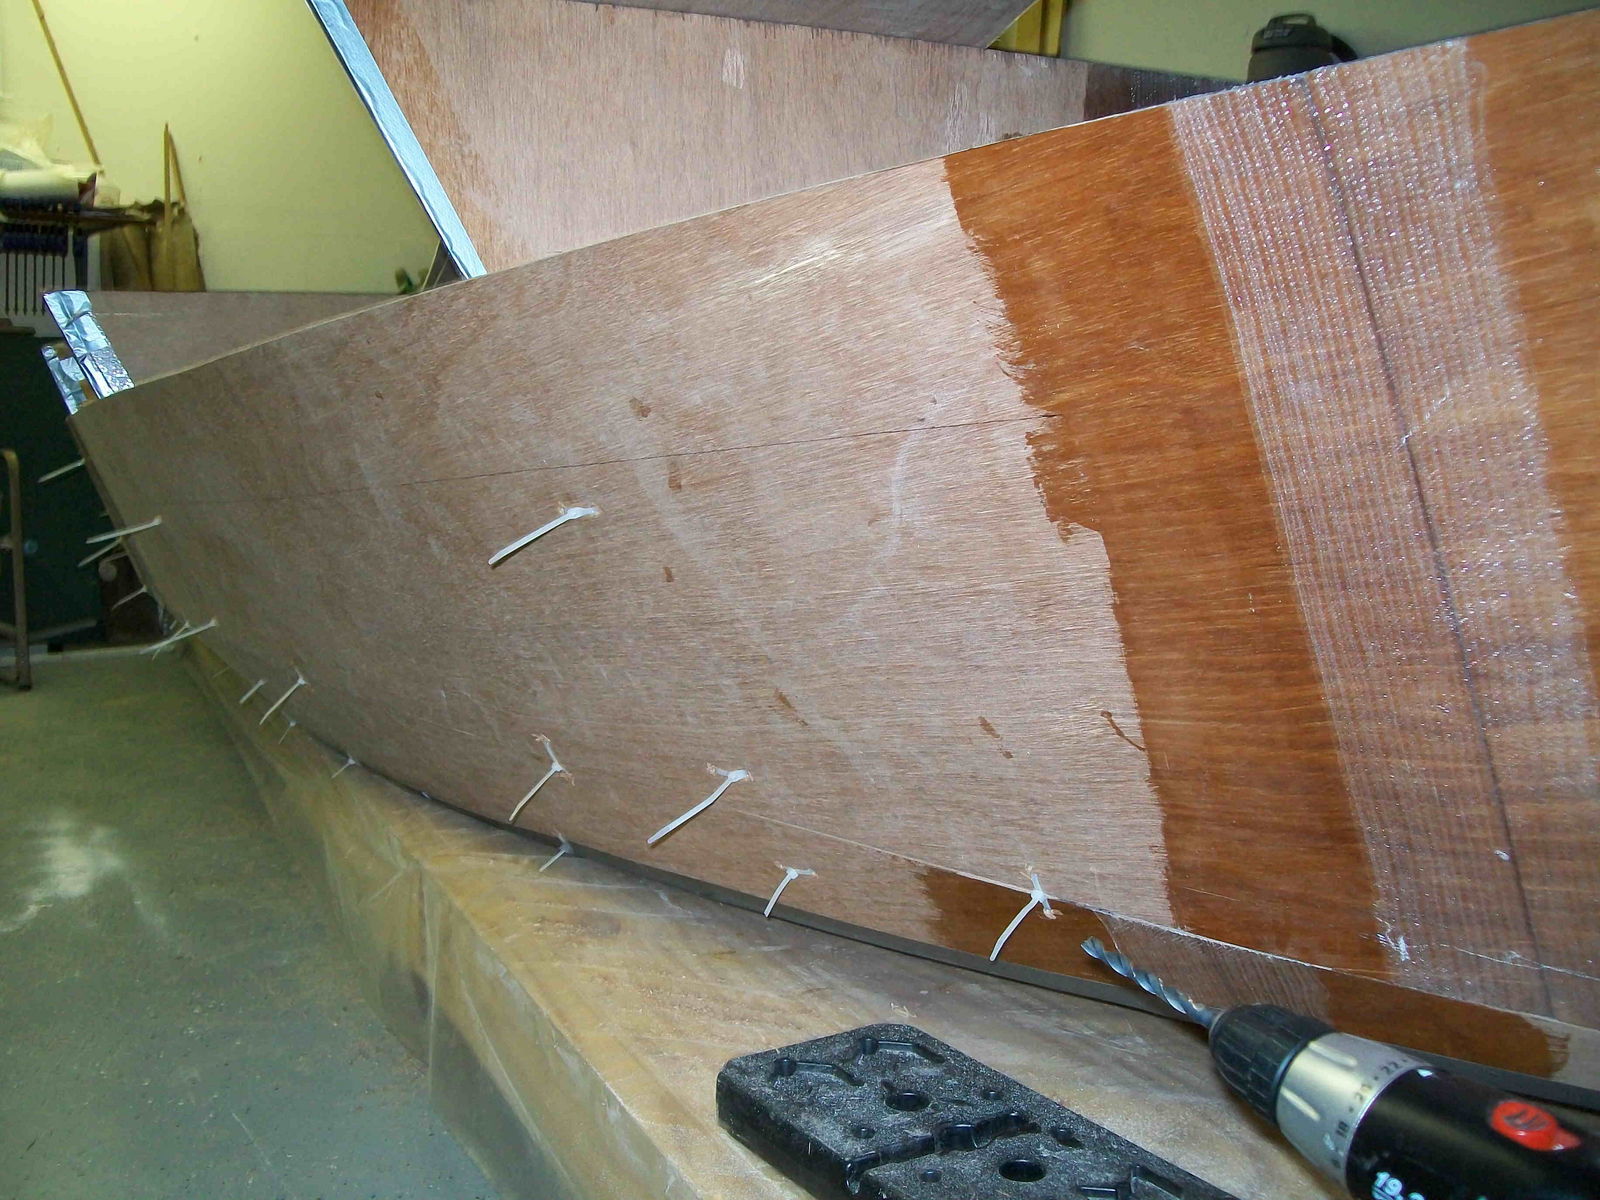
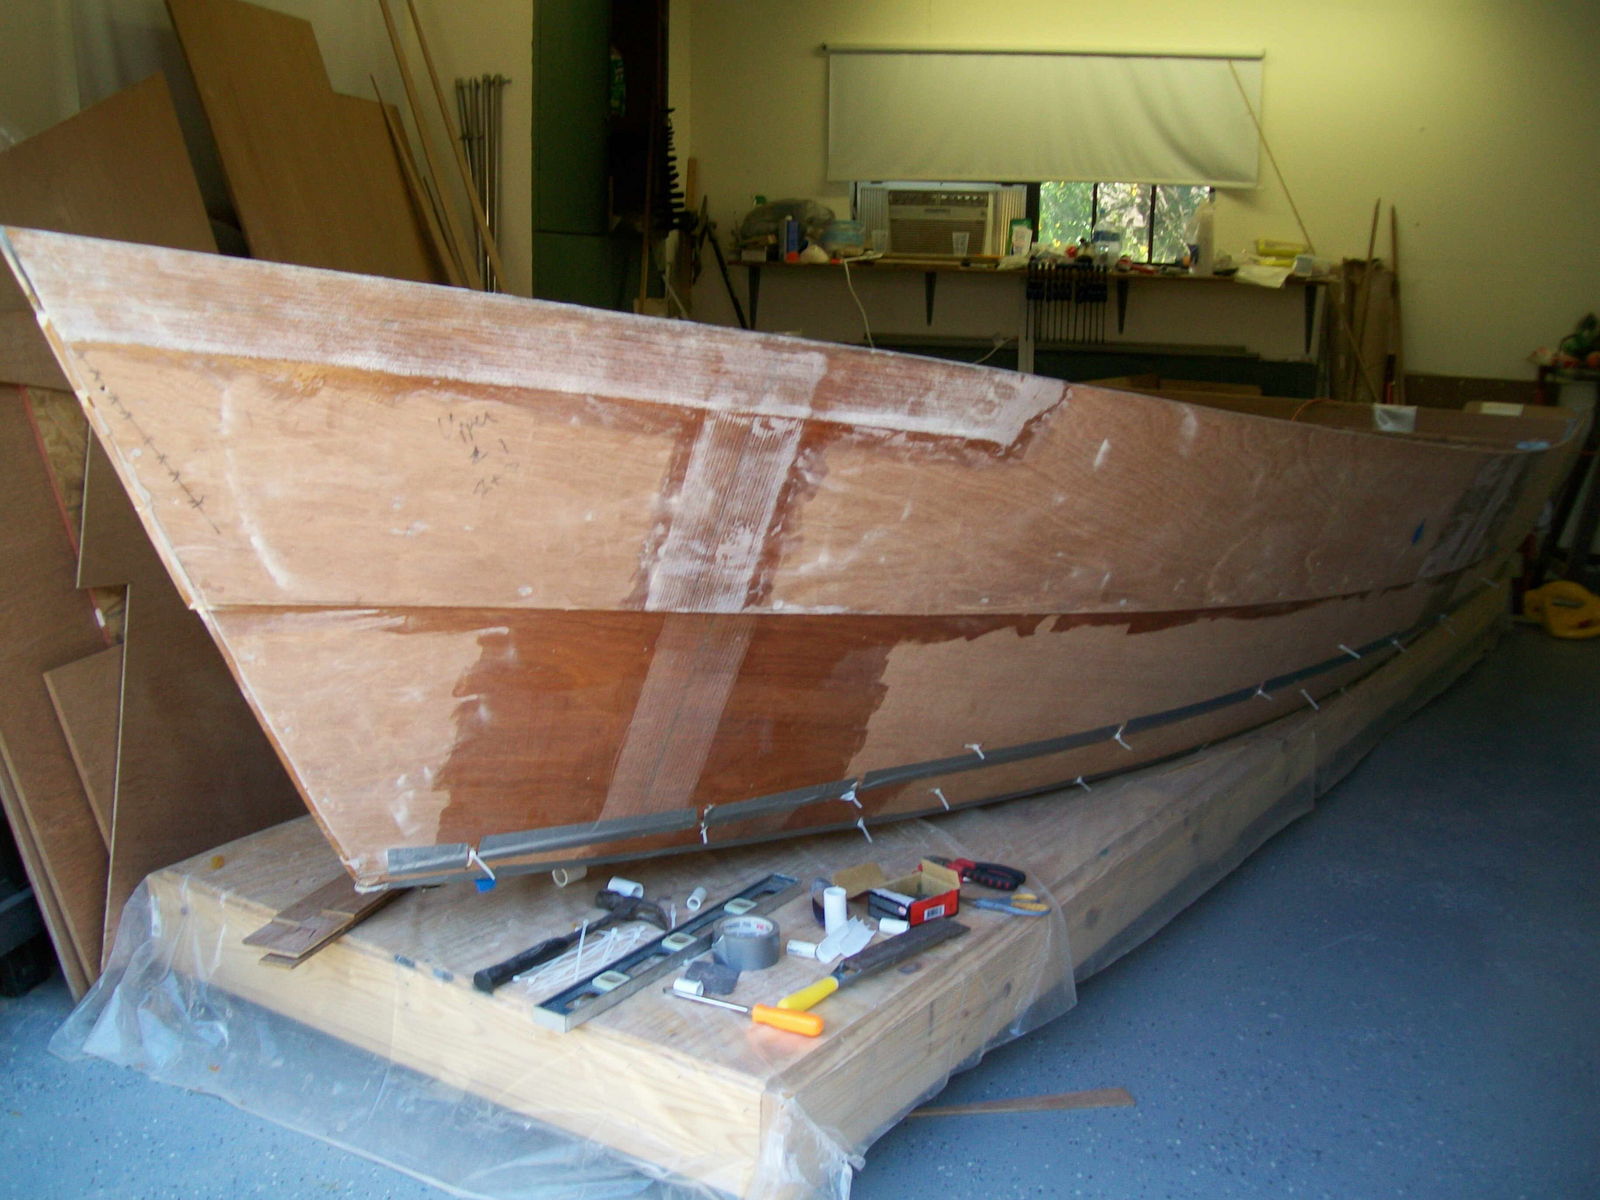
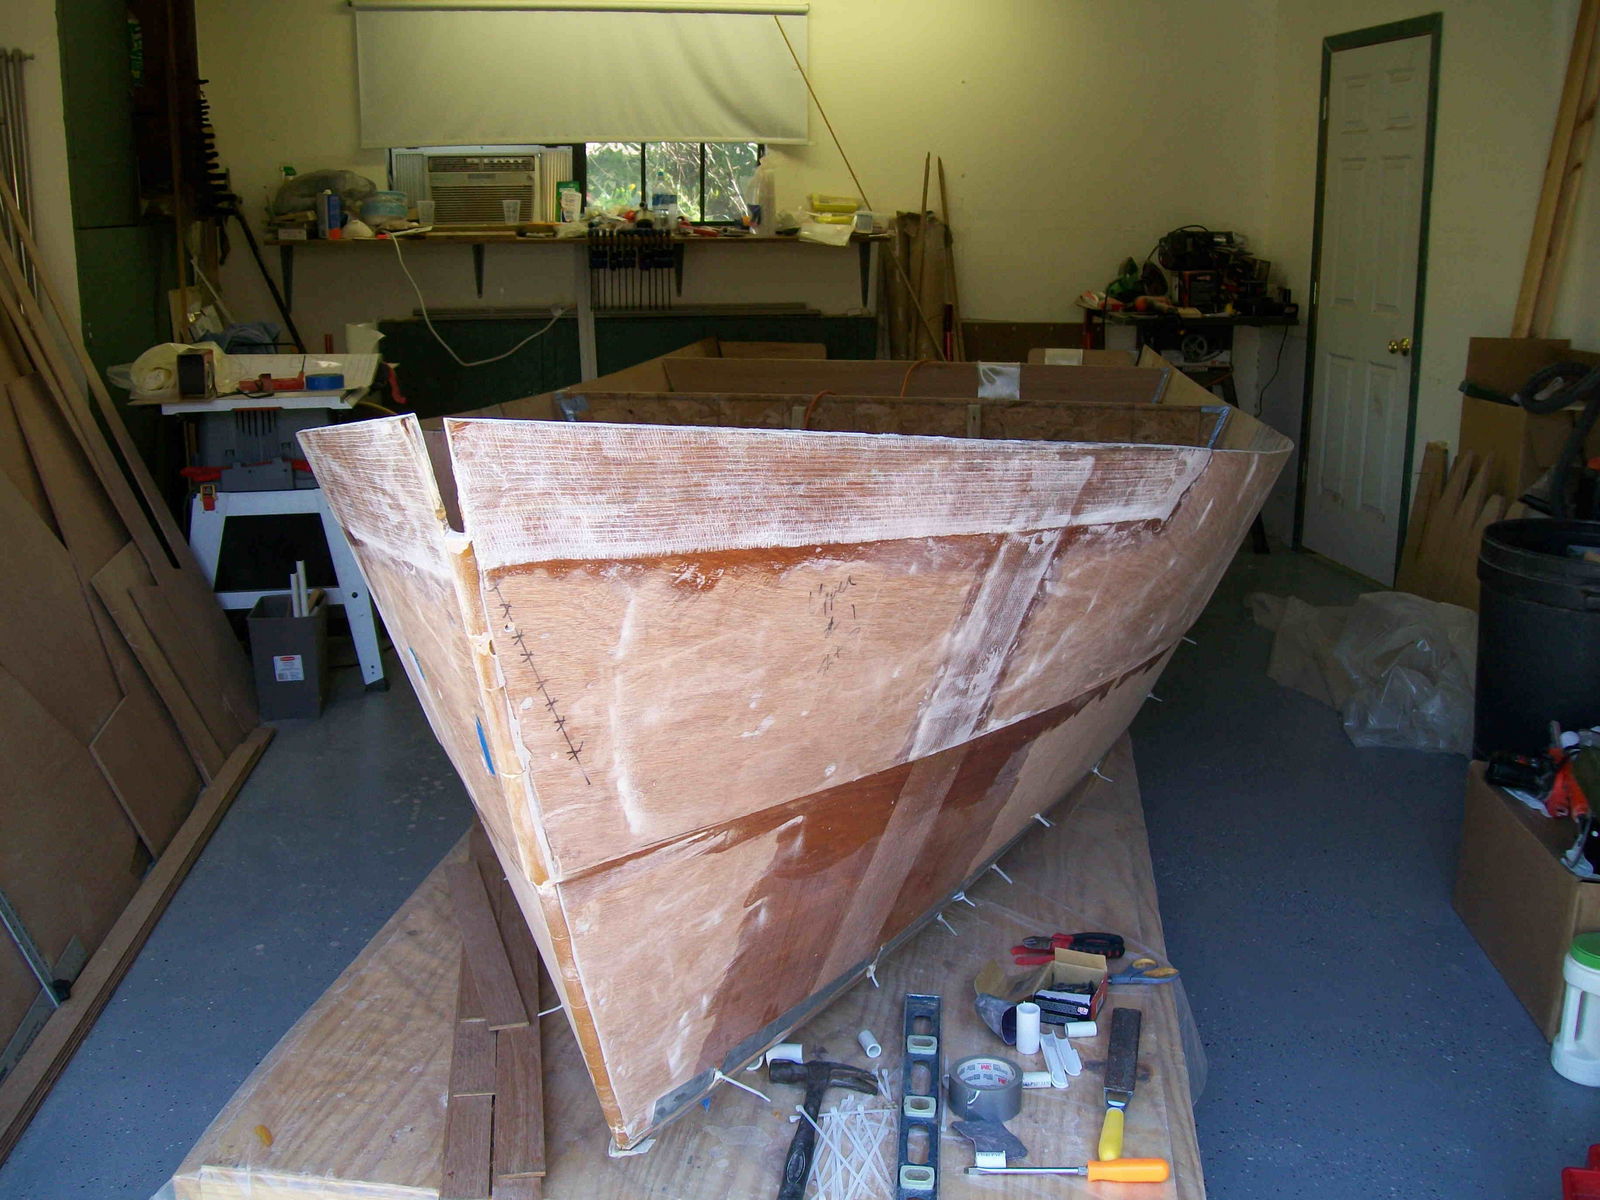
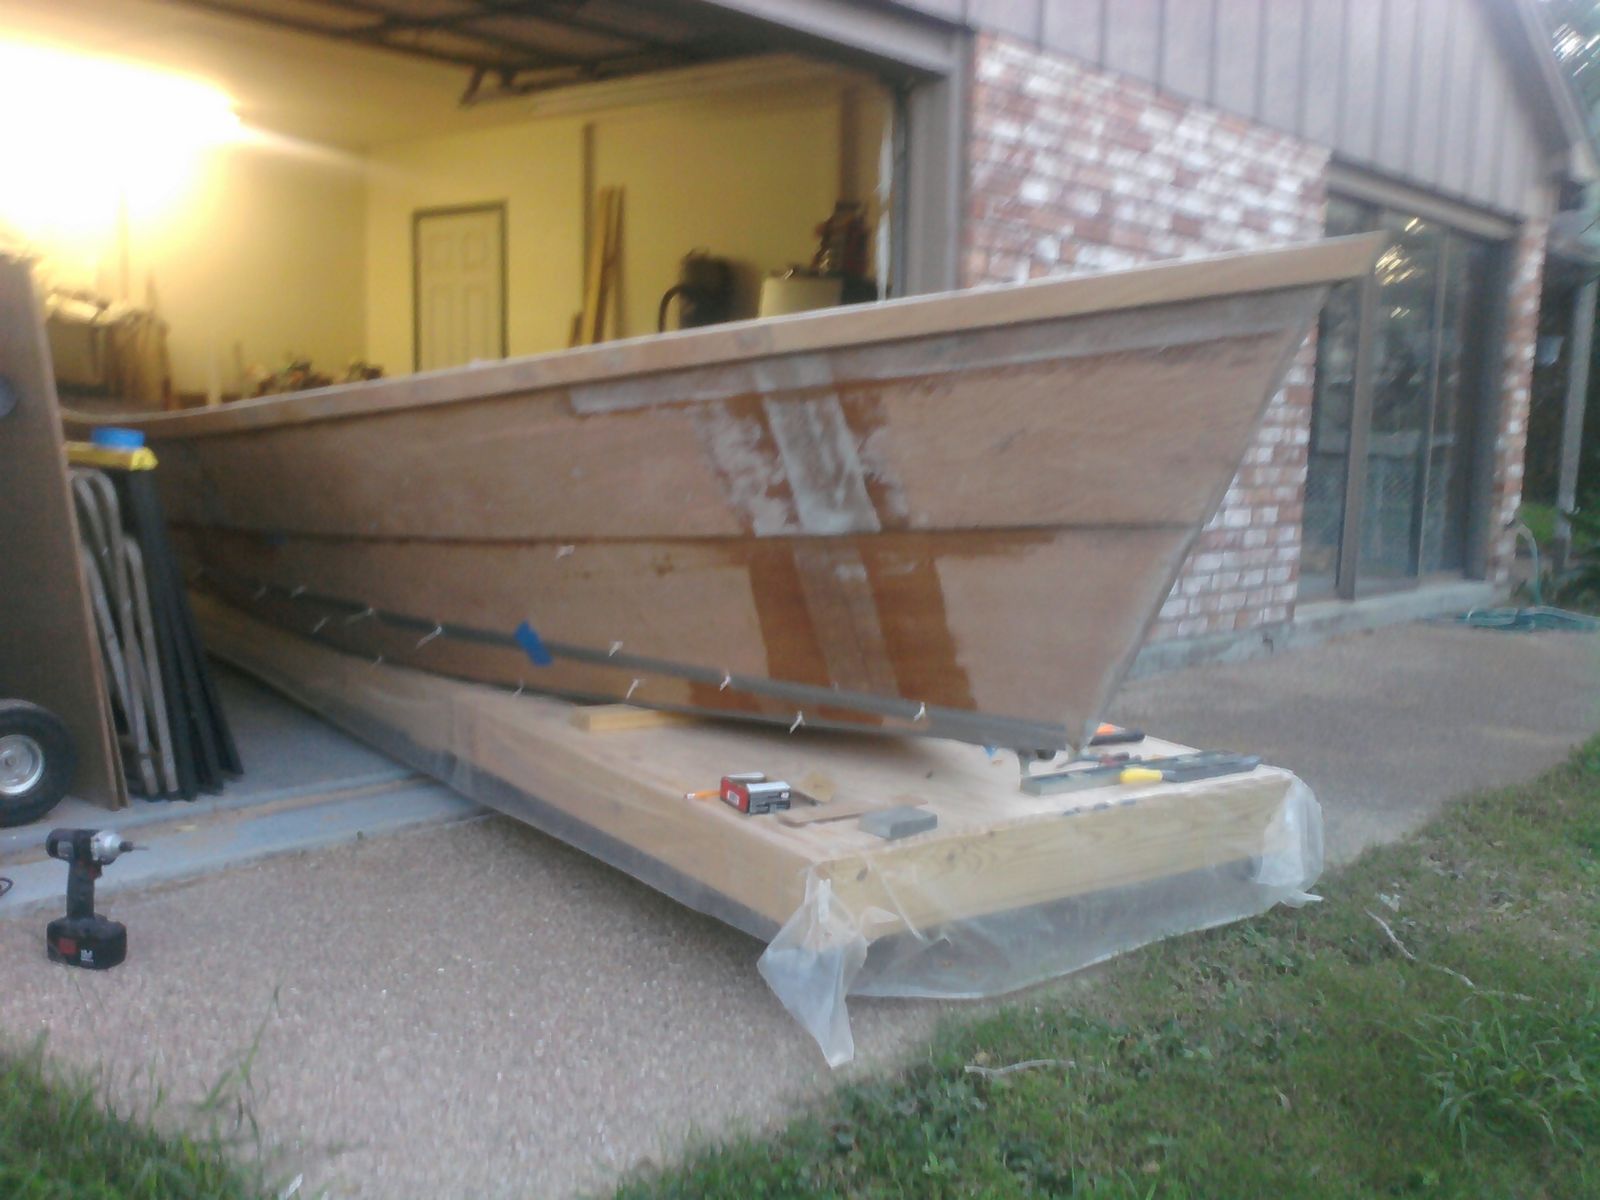
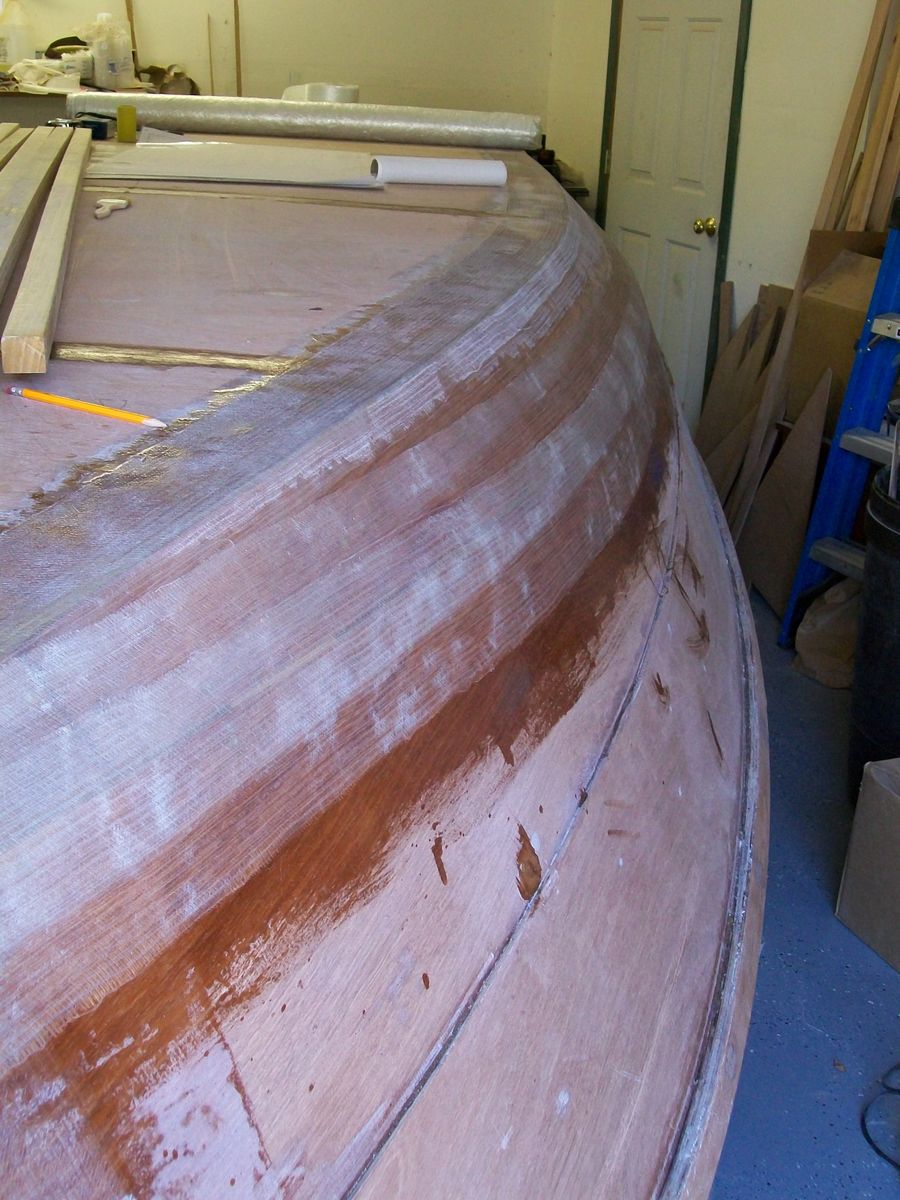
Posted: Tue Oct 05, 2010 1:27 am
by texasrds
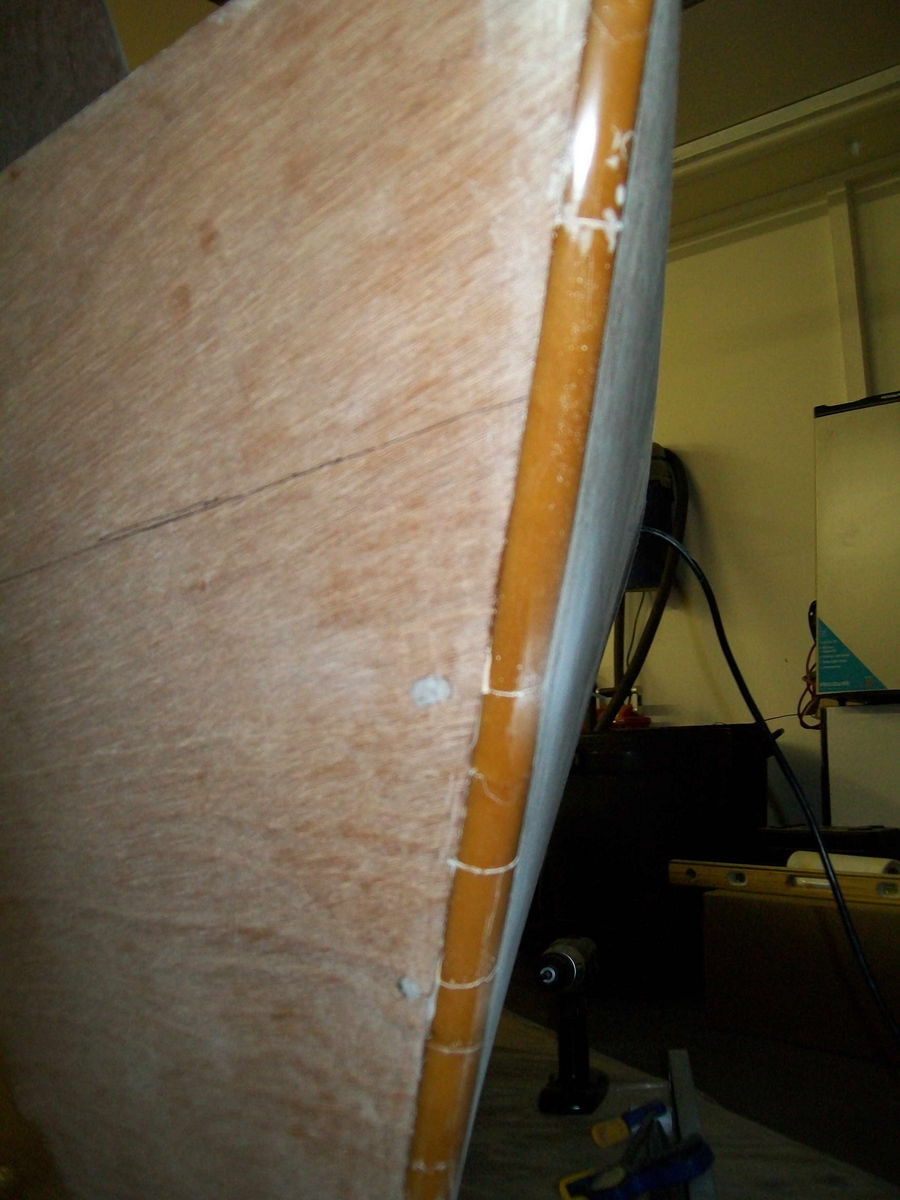
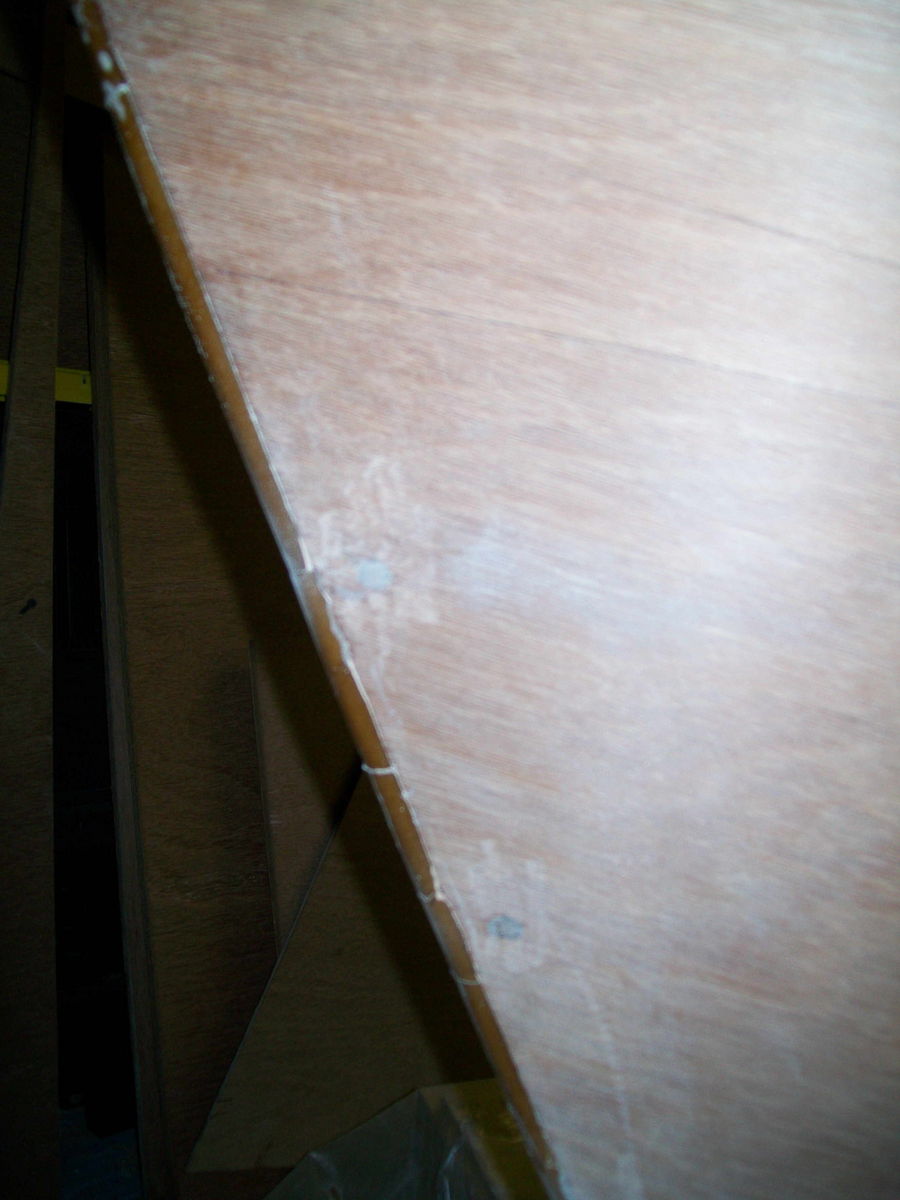
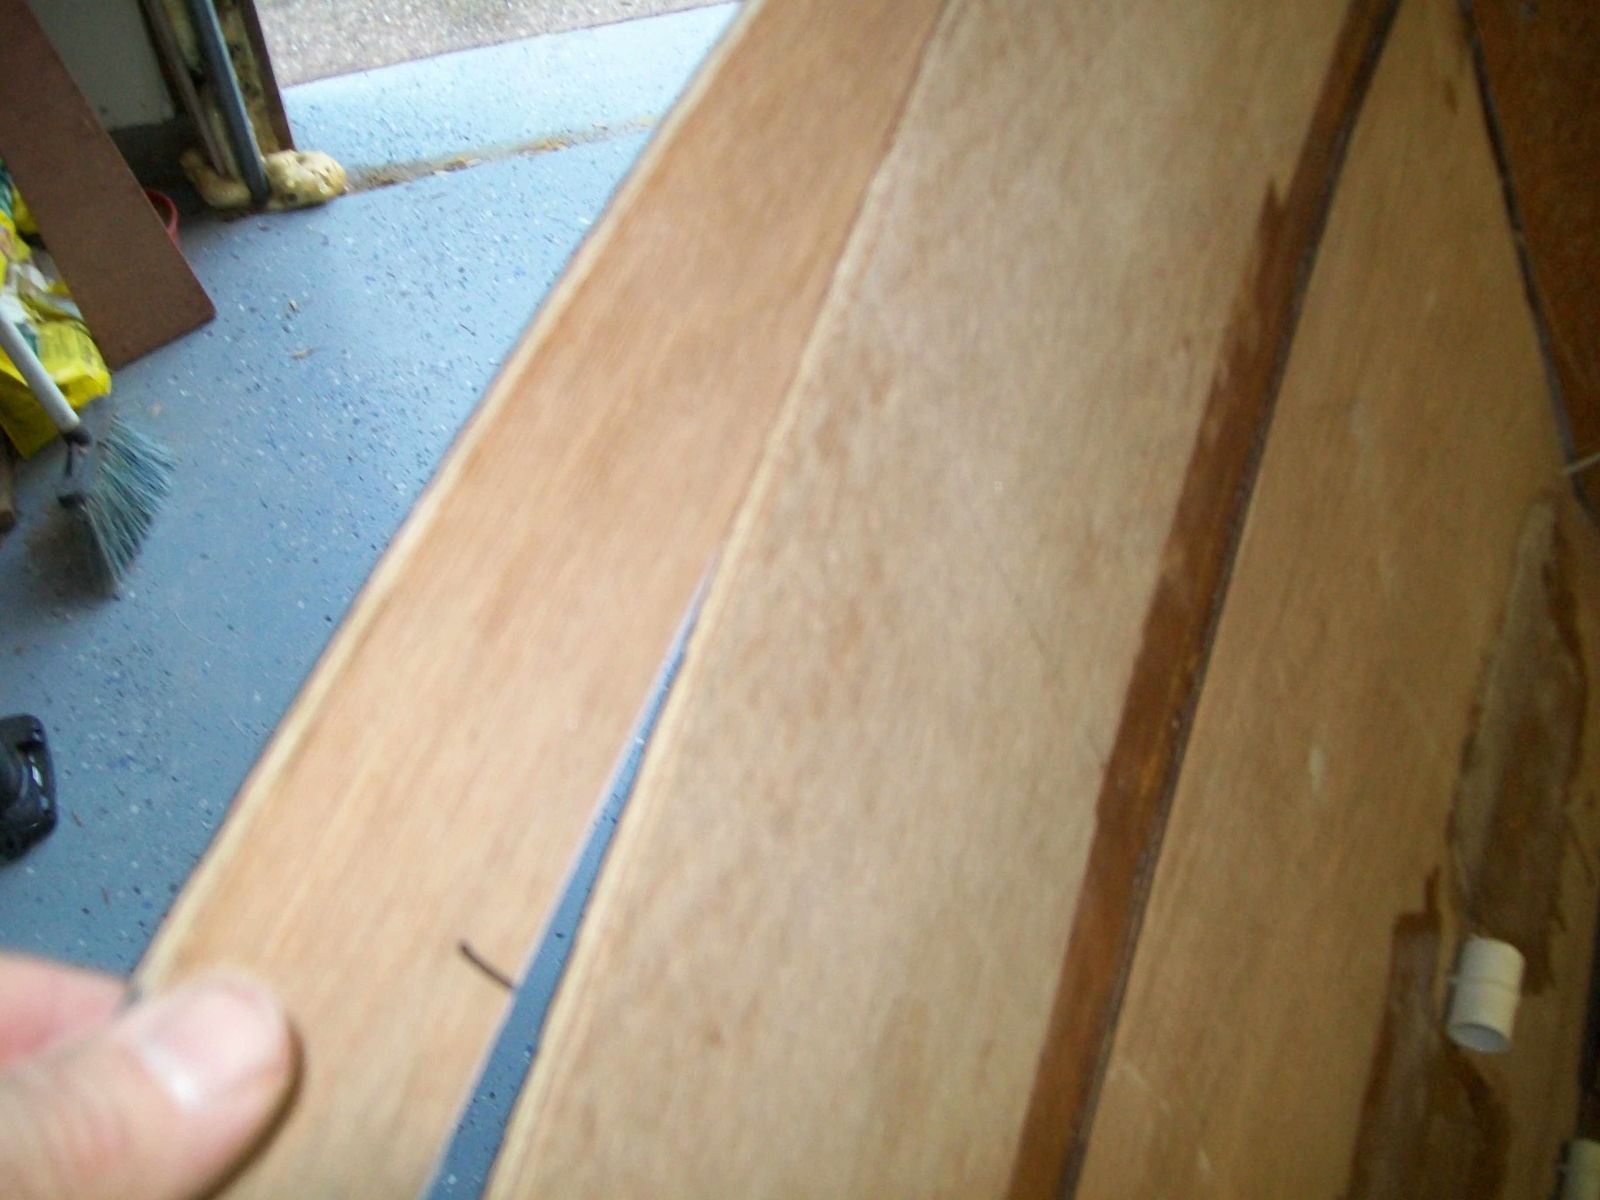
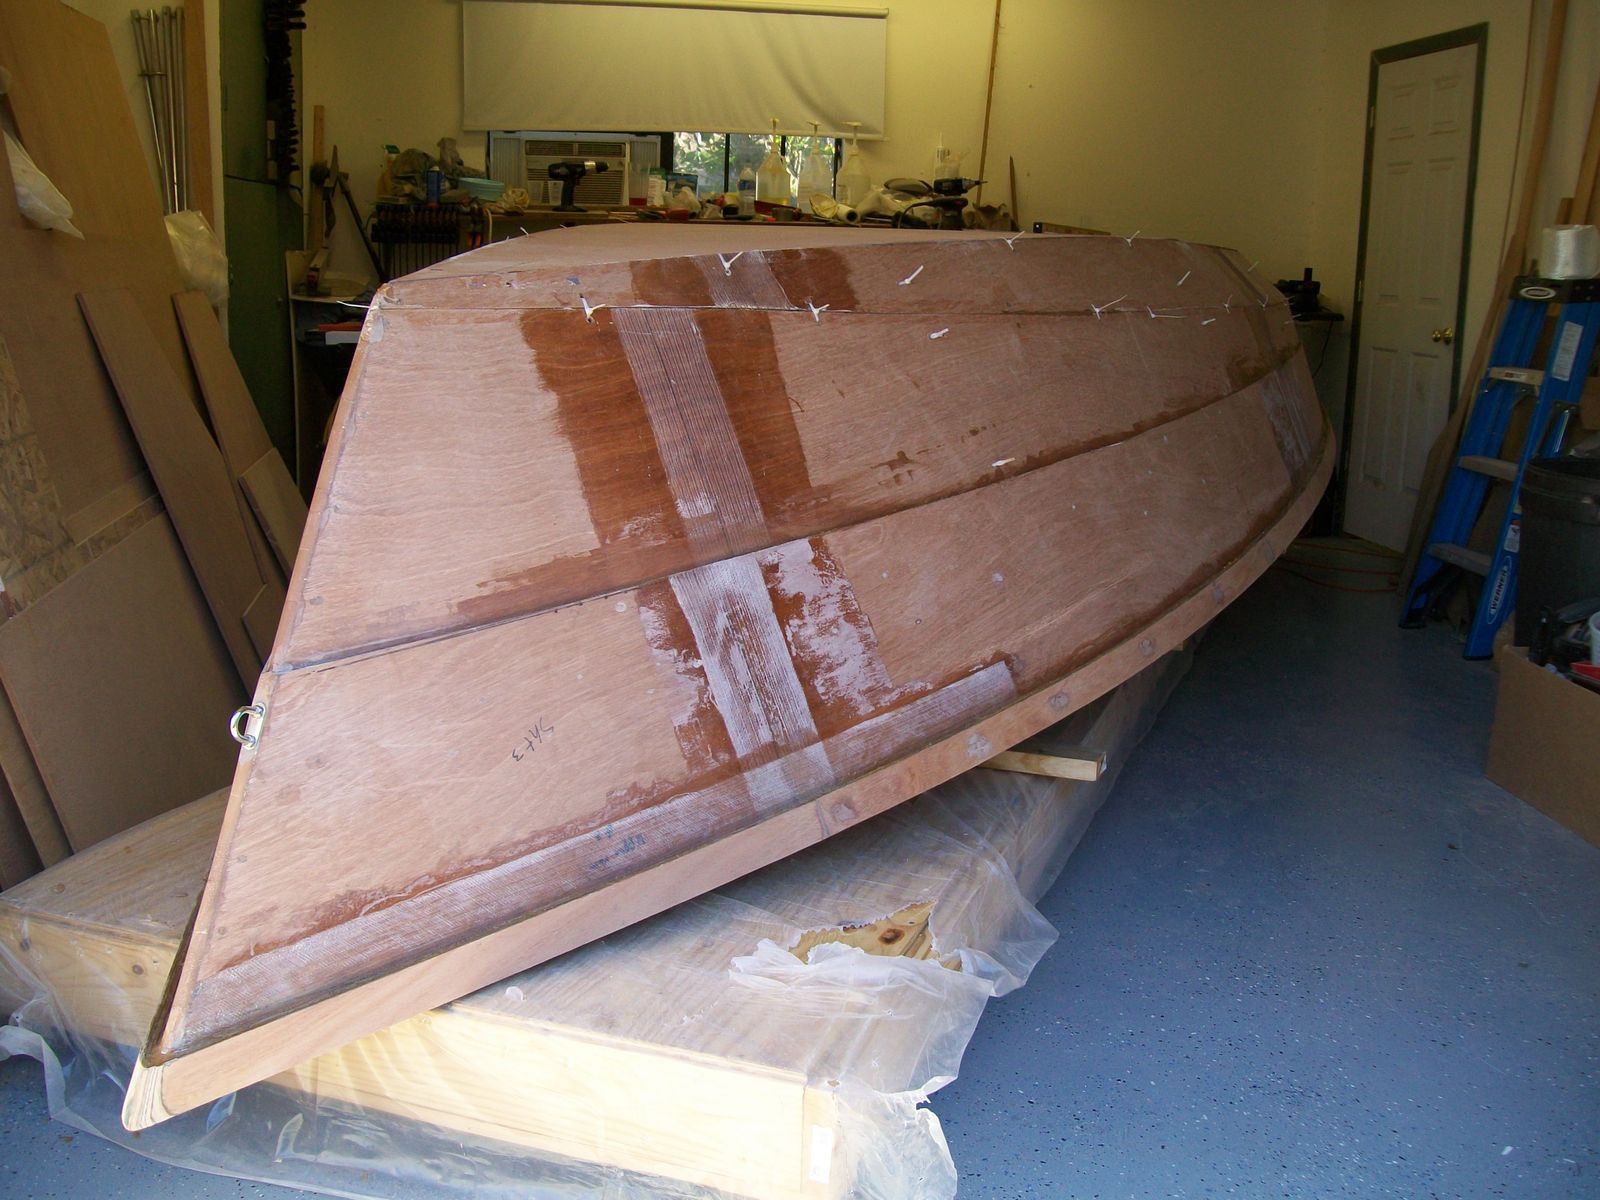
I completed getting all the panels together and have now got the chine and lower panels zip tied in place. I ended up with what I think are decent fitting panels (no apparant bows outward or inward on any of the panels so far down the sides) but I did end up with a pretty consistent vertical 1/2" gap at the bow where the lower panels come together. I tried compressing the lower panel ends a bit more but it pushes the bottom and chine panel ends out of alignment.
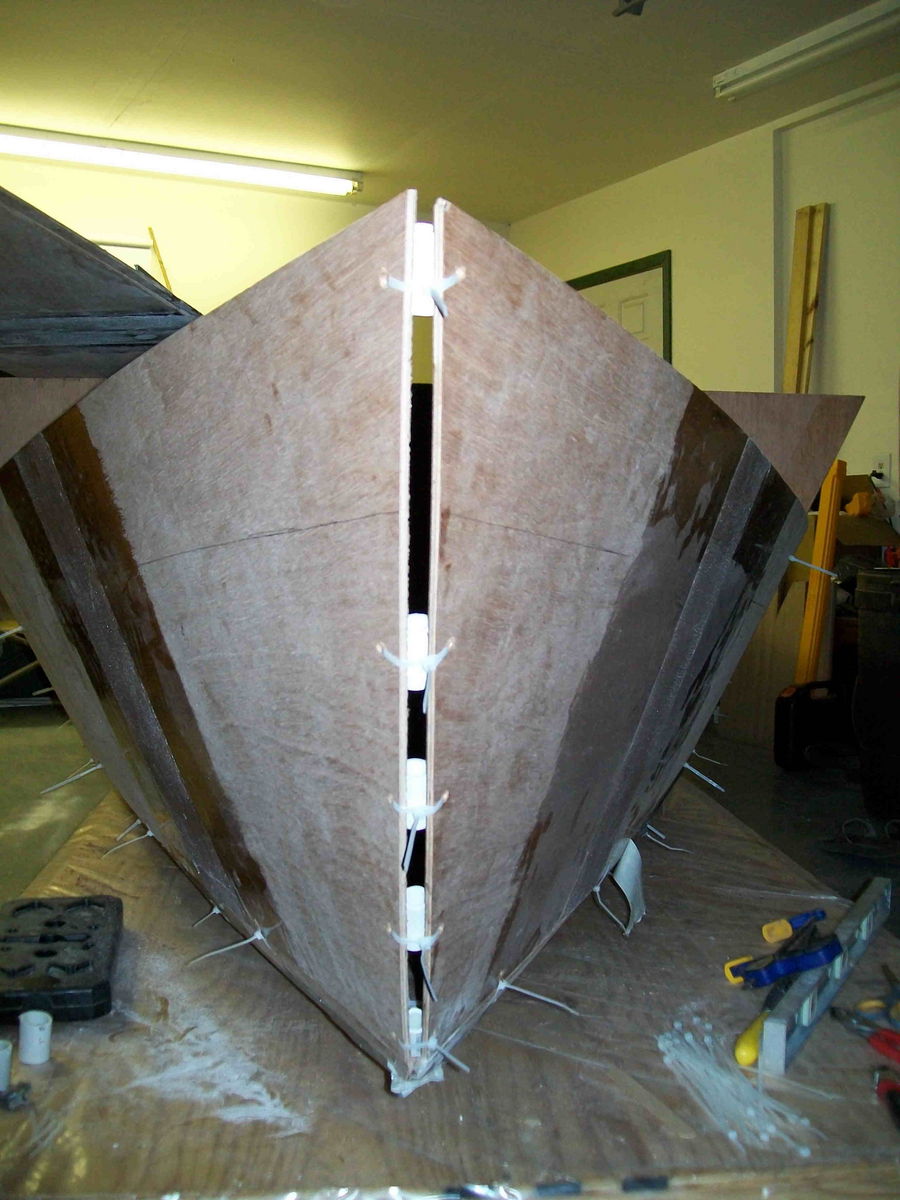
Inside shot of the bow gap -
Is this workable as it is and I should look at either a piece of hardwood filler or use an epoxy/wood flour mix to fill the gap (that would be a pretty good amount of glue for that kind of gap and don't know if that is even appropriate/feasible).
Here are a couple of shots of the starboard and port sides.
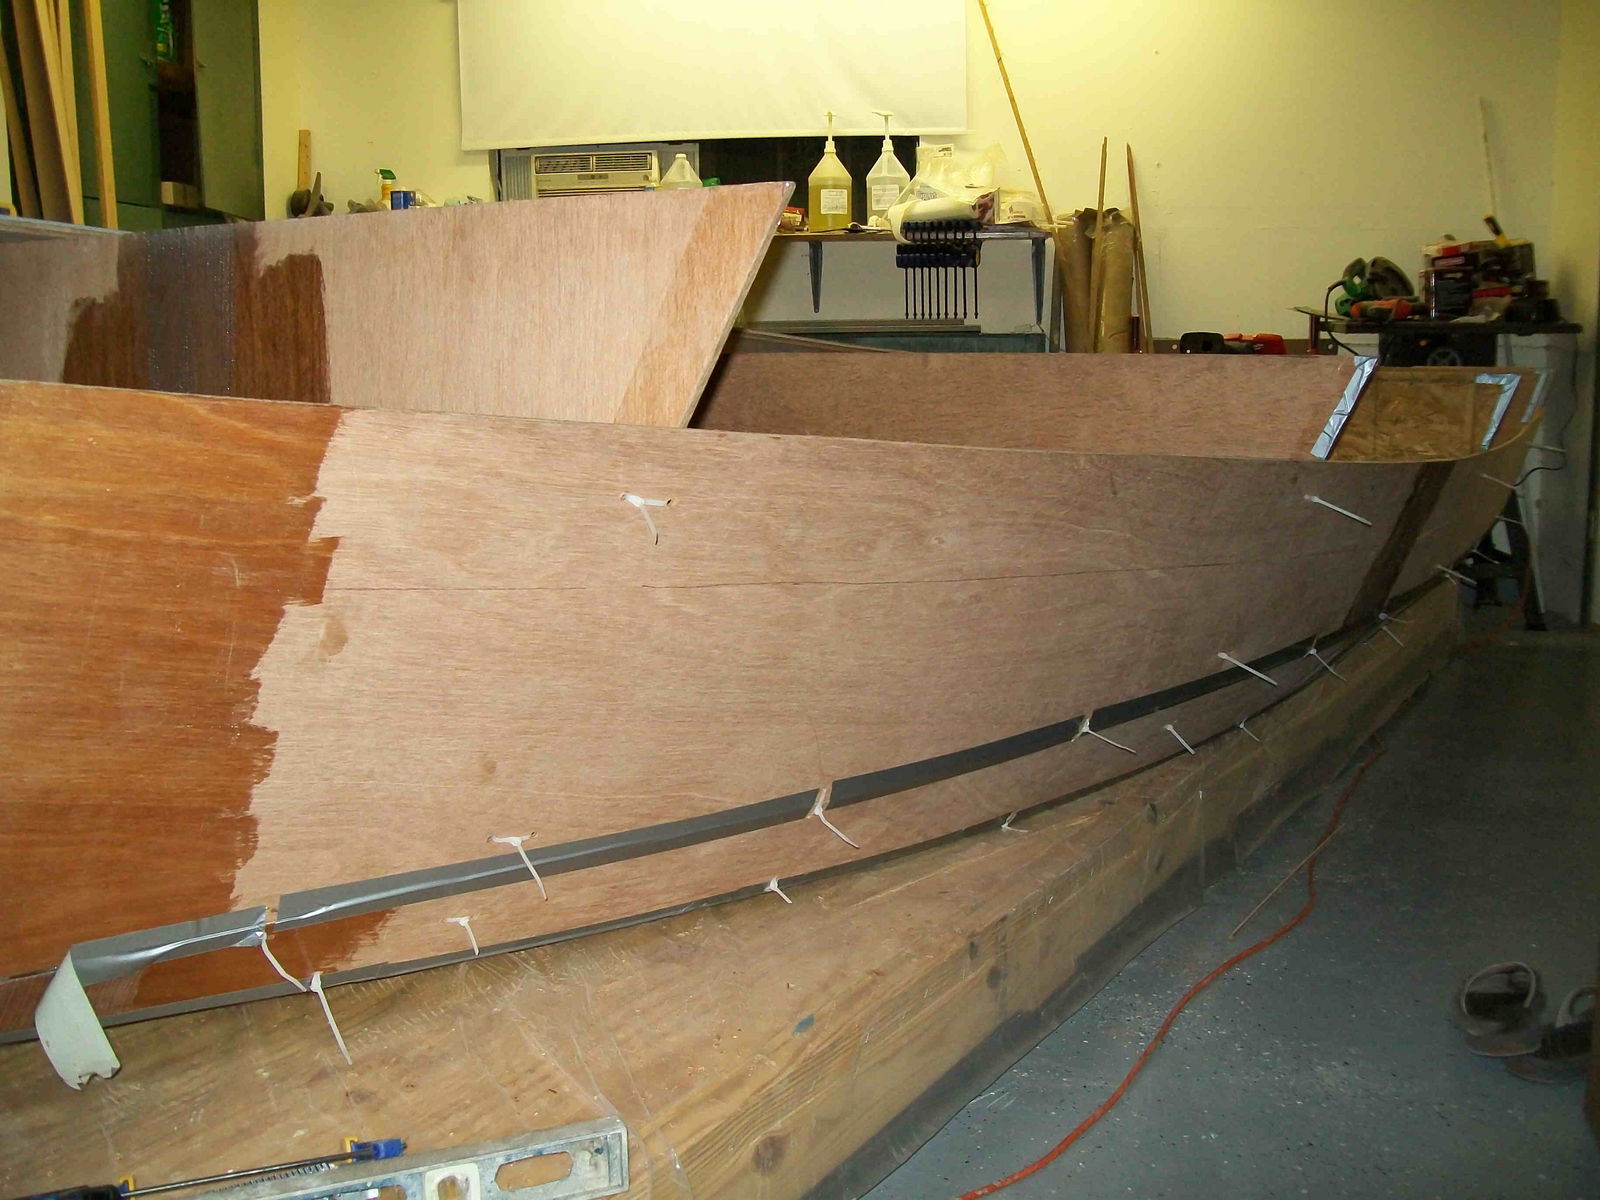
Next up is figuring out the best way to fit the upper panels (after the bow gap of course) and make some type of "holders" for the panels to rest in. I've seen two or three different styles up here so I need to work on that.
On a slightly different subject - I am planning on using the rigid rubrail/flexible insert sold here at BBC and the question is should I go ahead and do the full laminated rubrail per the plans (1/4" ply in 3 layers) or would that possibly change due to using the commerical rub rail sold here on BBC? One or two layers instead of three or something entirely different to support that system. I know the rubrails are structural so that is why I'm asking.
Randy.
Re: texasrds OD18 build mid-coast Texas
Posted: Tue Oct 05, 2010 9:33 am
by tech_support
Looking good. That gap is no problem, put some tape on the outside, make a nice big fillet on the inside, lay in your tape (edges offset). Its actuallay ideal in composite sandwich to go to single skin (no core) in areas like the keel/bow/chine. After all the overlaps your going to have well over 3/8" off glass there.
texasrds wrote:
On a slightly different subject - I am planning on using the rigid rubrail/flexible insert sold here at BBC and the question is should I go ahead and do the full laminated rubrail per the plans (1/4" ply in 3 layers) or would that possibly change due to using the commerical rub rail sold here on BBC? One or two layers instead of three or something entirely different to support that system. I know the rubrails are structural so that is why I'm asking.
.
You need to still use the laminated plywood per the plans, it is structural. The plastic rubrail is not structural, it will not stiffen up the boat, so you need the laminated wood one, and you can add the plastic for protection and looks
Re: texasrds OD18 build mid-coast Texas
Posted: Tue Oct 05, 2010 10:54 am
by Cracker Larry
The gap in mine was about the same. I'd show you a pic but I can't find it right now
Technical difficulties..
Anyway, from the outside I put a piece of plastic over the gap and covered and secured it with duct tape. I left a little slack in the plastic to form the continuation of the bow shape. Then from the inside I made a big fillet as Joel said, then built that up with layers of tape.
Finally found a pic


Re: texasrds OD18 build mid-coast Texas
Posted: Tue Oct 05, 2010 2:28 pm
by texasrds
Thanks for your comments Shine and CL. I'm in better shape than I thought with the bow then (that's scary). Speaking of scary, drilling that first hole into the plywood to start stitching was tough (putting a hole in perfectly good wood for a boat) but now after at least 50 3/8" holes drilled in the boat it's like well that's just another one to fill. Feels like I will be filling holes for a week. lol.
I will work on getting the bow shaped with plastic and tape and filled as ya'll recommended, get the upper panels positioned and zipped in place and then go from there. Also noted as per Shine I will do the rubrails as per the plans and then add the BBC rubrail over that when the time comes.
Appreciate it! Randy.
Re: texasrds OD18 build mid-coast Texas
Posted: Thu Oct 14, 2010 10:44 am
by texasrds
I got the 1/2" bow gap filled this week so far. I took some light gauge pvc and ripped it to fit over the outside of the gap in the bow and then duct taped it in place. Mixed some glue and used a fillable caulking tube and gun to apply. I think it came out pretty dang good with a very nice smooth surface that makes a great bullnose and came out flush at the sides. Since I had zip tied small lengths of pvc on the inside of the bow stem I had to do this in small sections and not one continuous fill and stagger the timing but it all came together. I have also made up the blocks to help in securing the upper panels in place and will start the installation process on those here this weekend.
Front shot
Side shot
Ripped pvc acting as a form
Re: texasrds OD18 build mid-coast Texas
Posted: Thu Oct 14, 2010 11:29 am
by gstanfield
Cool, looks like it worked good to me
Re: texasrds OD18 build mid-coast Texas
Posted: Thu Oct 14, 2010 11:35 am
by Larry B
Yes, I had the same deal with mine.
Re: texasrds OD18 build mid-coast Texas
Posted: Wed Oct 20, 2010 3:52 am
by texasrds
I saw your pic there Larry B of the gap and will have to contend with that myself. I also after trial fitting my upper panels again ended up the same as yours with what seems to be a slight bow droop. I find it interesting that we ended up with what I would say is an identical issue with the way the very front of the upper panels fit and give that slightly droopy look. I will most likely be doing something like you did to even out both panels "bow line" to give it that upward sweep. Thanks for your posting.
Randy.
Re: texasrds OD18 build mid-coast Texas
Posted: Mon Nov 01, 2010 12:38 pm
by texasrds
Well it has been a couple of weeks or so since my last post. I have finally gotten the upper panels glued in place (what a pita when by yourself!). Particulary when two of your alignment blocks strip out and pop off when bending the first panel in place with the glue on. Good Grief. Needless to say I redid all the alignment blocks on the other side before attempting the next one. During the fitting of the panels prior to the installation I decided that I would address the "bow" droop and did as Larry B had done and added a piece to each of the upper panels to bring a more positive upswing to the front of the sheer line. Thanks Larry B for posting those screen shots in your builders section as they were a great help.
Starboard side upper panel
Port side upper panel
Bow shot with upper panels in place and showing extended sheer line
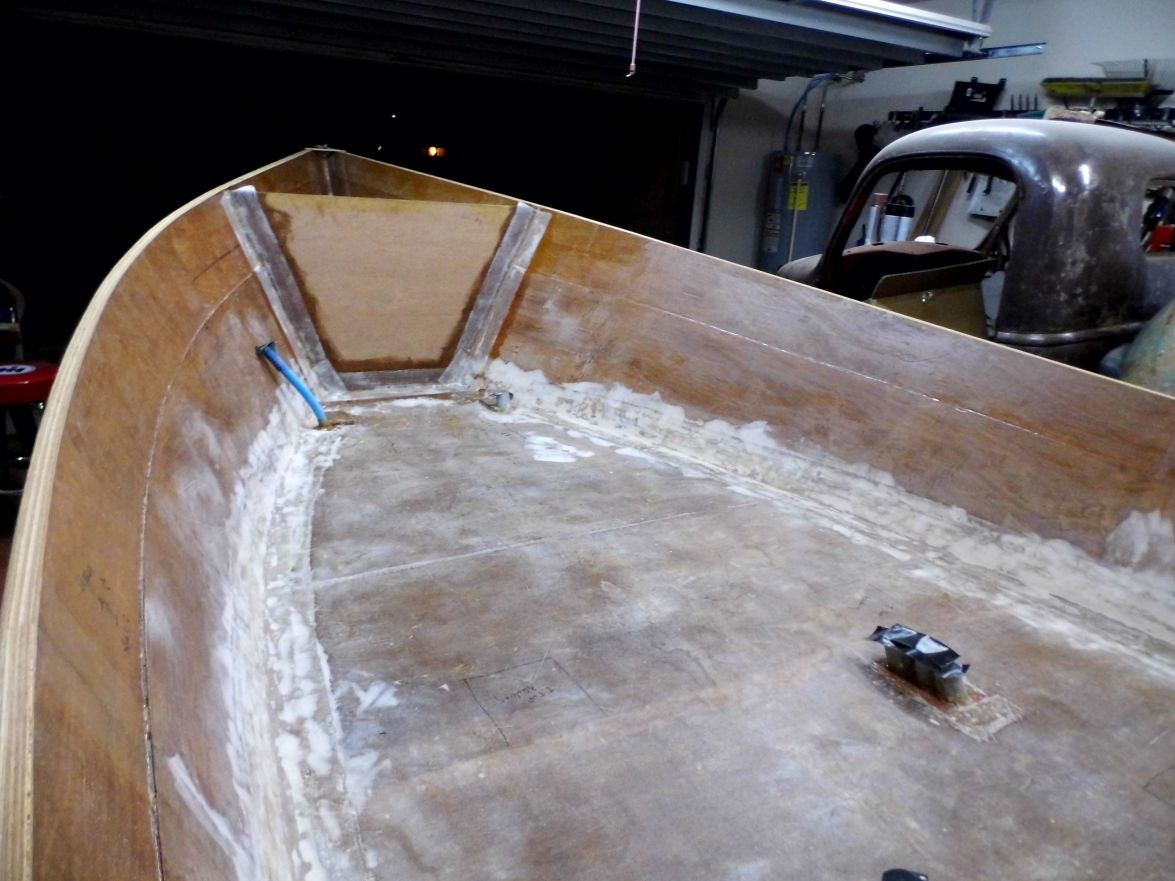
I have also been tabbing the inside joints and bulkheads/forms in place to support the flip here in the near future. Continuing on................
Randy.
Re: texasrds OD18 build mid-coast Texas
Posted: Mon Nov 01, 2010 3:34 pm
by Uncle D
Looking good!! Glad to hear your back at it, Randy. If you need an extra pair of hands to flip give me a ring. I was in Port A this past weekend sticking flatties and shootin' quackers.
Picked up some silica and milled fibers from my buddy's shop off Saratoga today. Going to start gluing on mine this week.
Later, Don
Re: texasrds OD18 build mid-coast Texas
Posted: Wed Nov 03, 2010 12:09 pm
by texasrds
Thanks Don. I just might end up taking you up on your offer for an extra pair of hands. The flip is one thing even I won't be able to manage on my own. Same here as well since we are just a few miles apart and your back at it again with your boat. I saw numerous boats out this weekend with their lights on making their way along the shorelines in the back bays between Aransas Pass and Port A. Assumed it was flatties.
As far as the boat goes, still tabbing the inside joints in prep for the flip and need to figure out what kind of frame/bracing to build to support the boat once its flipped. Hope to have it ready to flip in the next couple of weeks or so.
Randy.
Re: texasrds OD18 build mid-coast Texas
Posted: Wed Nov 03, 2010 2:00 pm
by Larry B
Looking good Randy, Glad I was able to help a fellow builder, lord knows a lot of people here have helped me with my questions. I'm glad I raised the stem, I was planning on doing it when cutting the pieces but forgot and so had to add a piece in, but it worked fine.
Larry
Re: texasrds OD18 build mid-coast Texas
Posted: Wed Nov 03, 2010 4:37 pm
by Cracker Larry
Since all of our OD18s ended up with this gap at the bow, maybe we should start recommending that future OD18 builders cut their side panels 1" longer at the bow end

need to figure out what kind of frame/bracing to build to support the boat once its flipped.
Maybe this will help

I extended the 2X4s supporting the frames, then built cross pieces to act as legs and feet.

Re: texasrds OD18 build mid-coast Texas
Posted: Wed Nov 03, 2010 5:33 pm
by gstanfield
I still think that Sam is the builder and you're just his photographer and publicist

Re: texasrds OD18 build mid-coast Texas
Posted: Fri Nov 12, 2010 6:15 pm
by texasrds
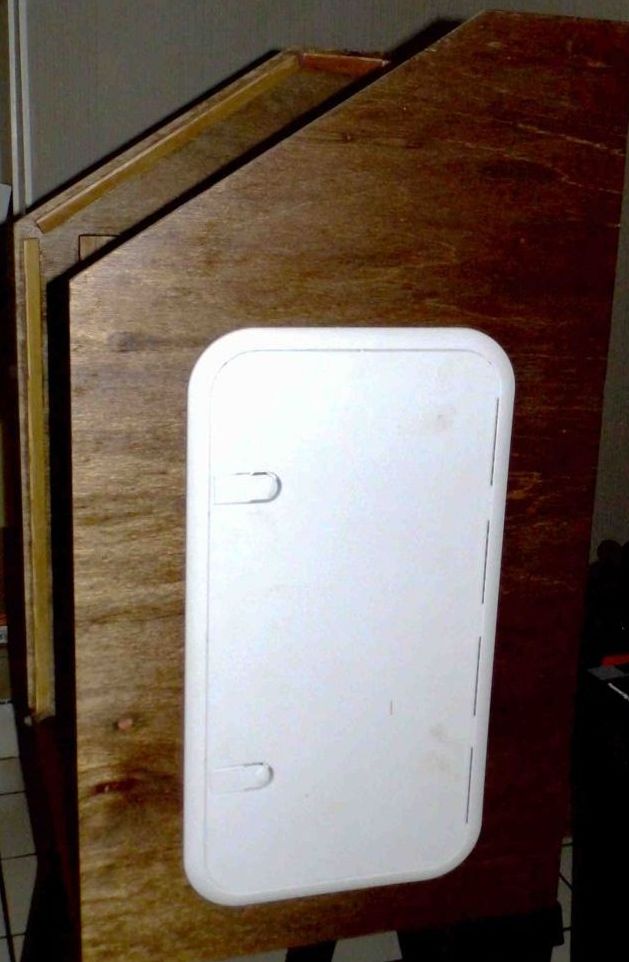
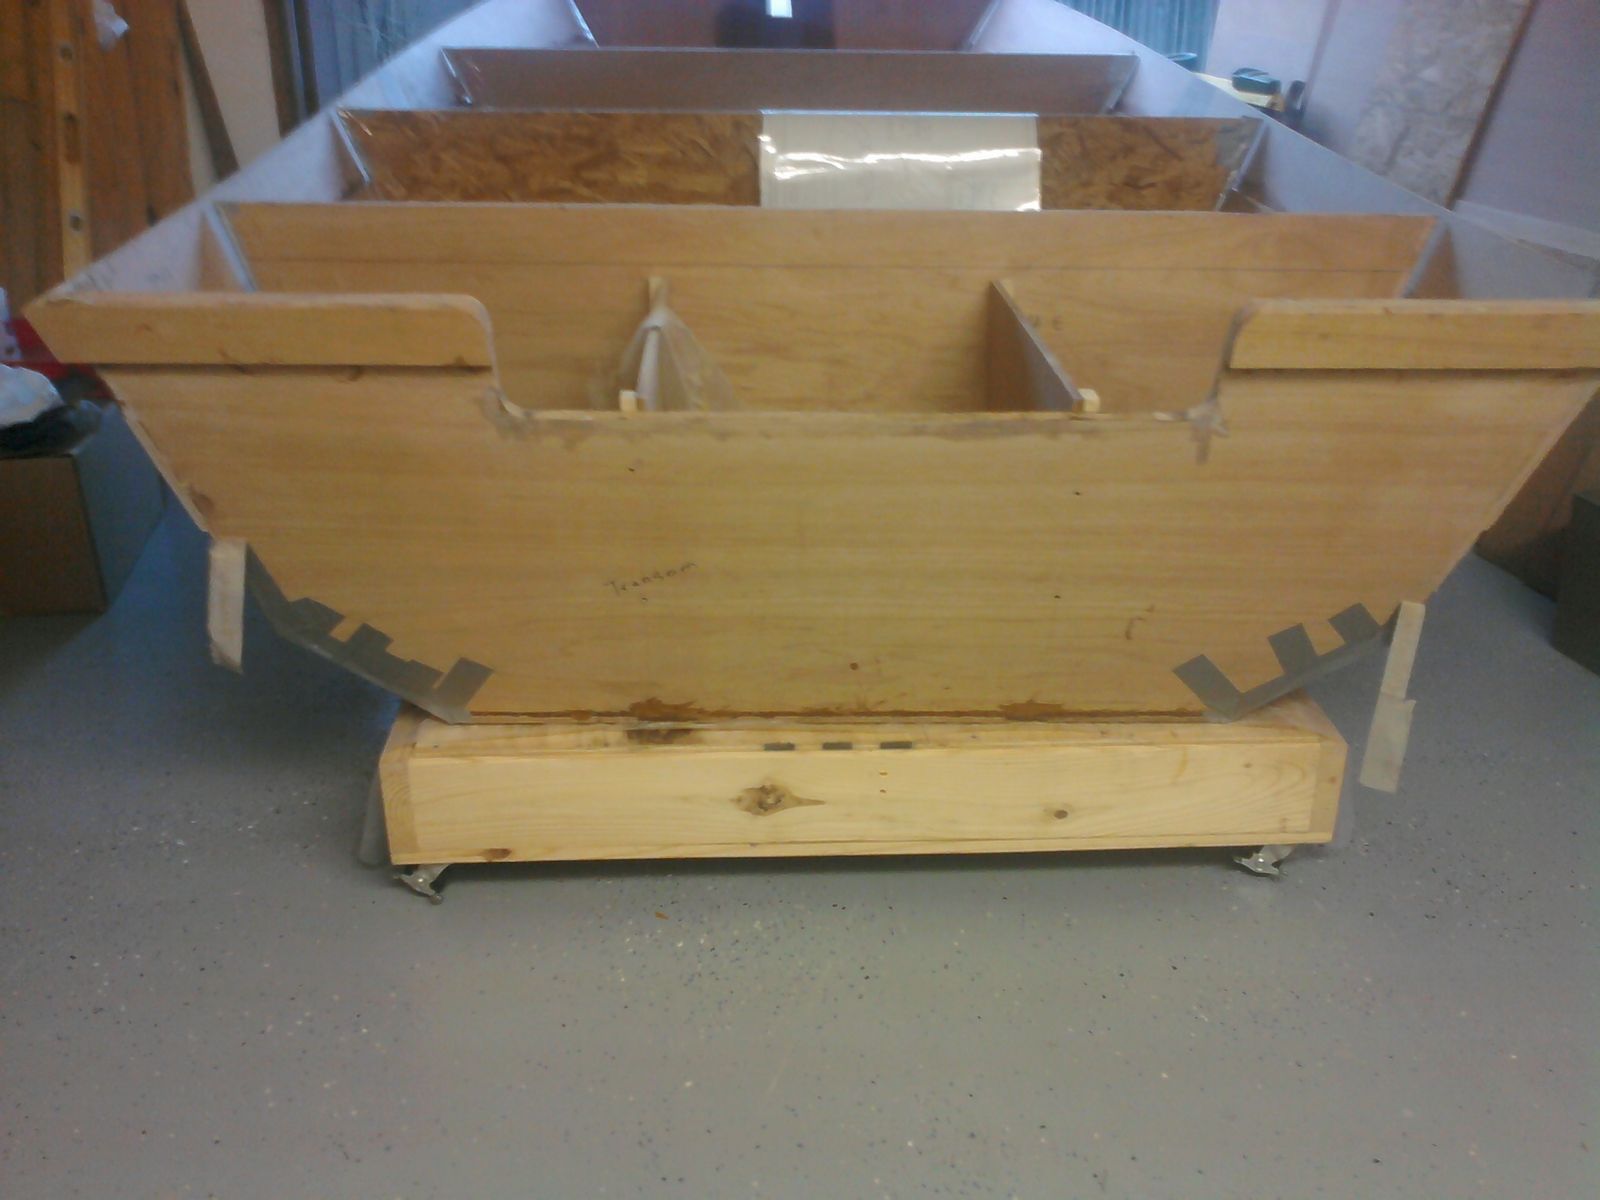
Hi! I have finished tabbing the interior of the boat and was starting to test fit some 1/4" ply rub rail material that I have cut out and don't seem to be doing this right or don't understand how to "make" this fit. I've included pictures below but I start off pretty well flush with the upper panel but as I progress down the upper panel I get way off and I can't bend the plywood as it is the wrong axis to try and bend. I have tried starting bow to stern and then stern to bow and at some point end up with the same issue. Comments/thoughts on what I'm doing wrong and not understanding. I'm sure I'm being really slow here. Also, I've included pictures of the 1 3/8" "alignment" issue with my upper panels at the transom on both the starboard and port sides. At least I was consistent with both sides as they ended up both the same amount higher than the top of the transom.
I swear I have gone back and measured the transom like four times and it is to plan. Should I look at cutting out some 3/4" ply and adding it to raise up the upper parts of the transom to meet the upper panels? Comments / thoughts on this as well. I appreciate it.
Rub Rail fitting:

And then the upper panel and transom alignment pics:
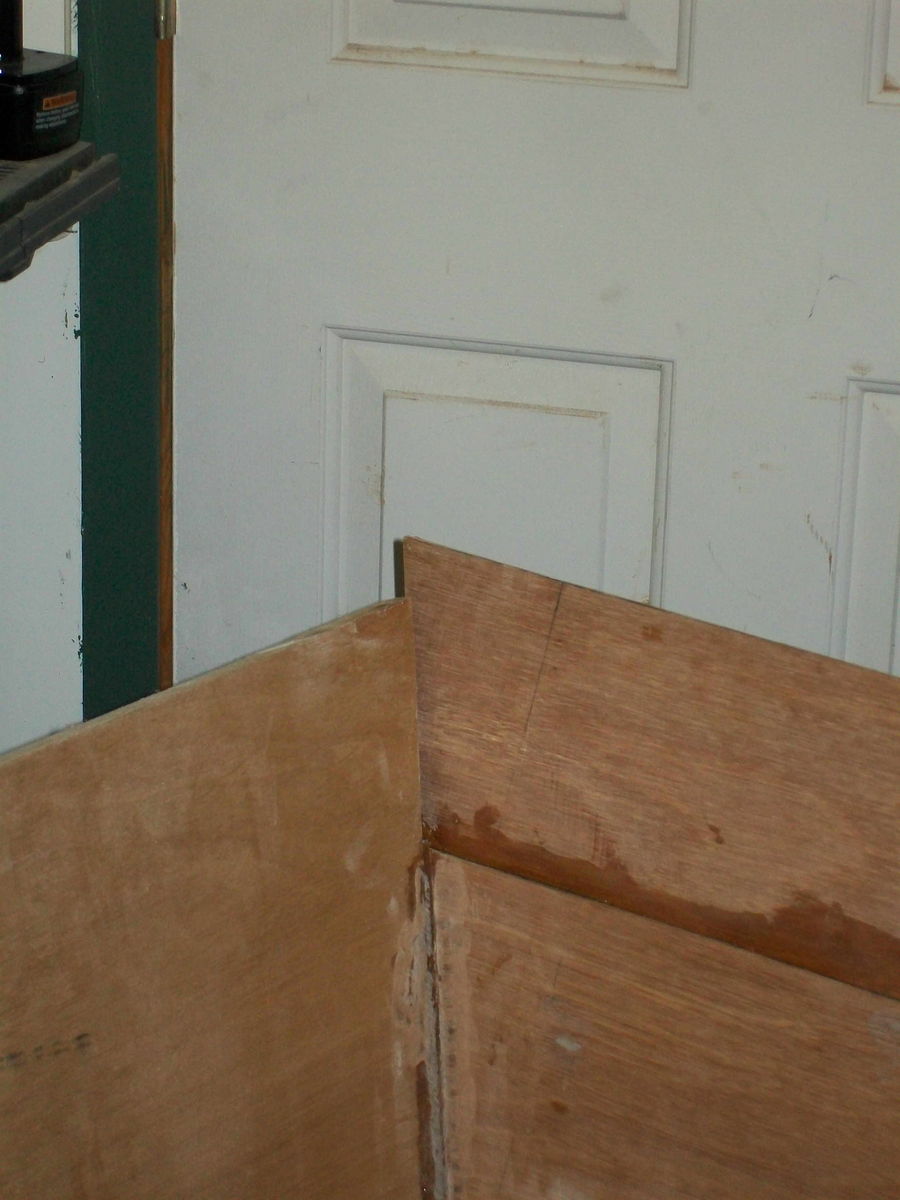
Thanks a lot, Randy.
Re: texasrds OD18 build mid-coast Texas
Posted: Fri Nov 12, 2010 6:29 pm
by Cracker Larry
Randy, there is some kind of glitch in the plans with the panel and transom alignment. Mine came out the same as yours and I lowered the side panels to meet the transom top.

Looks like it might be too late for that solution. Cape Man's was the same and he built up his transom to to match the sides, probably the better idea. He's got pics in his gallery of that. I think LarryB had that issue too.
As to the rub rail, start amidships and work both ways. You're going to need more clamps, it takes persuasion and a clamp every couple of inches.


Re: texasrds OD18 build mid-coast Texas
Posted: Fri Nov 12, 2010 9:52 pm
by Larry B
Yep, mine were the same. I built up the transom like Craig did. Rubrails are like Cracker Larry said, lot's and lots of clamps, but I think I cheated a bit (couldn't find a picture) but I think I cut a kerf in the areas that were real hard to bend just to make it easy.
Re: texasrds OD18 build mid-coast Texas
Posted: Sat Nov 13, 2010 1:01 pm
by texasrds
Thanks for the responses CL and Larry B. I will go ahead and build the transom up to be level with the upper panels like Larry B and Cape Man did. And I will start the rub rail process from amidships, work outward and use lots of clamps. Went out last night and bought another twenty clamps so we'll see what kind of progress I make. Off to go do some cuttin' and gluein'.
Randy.
Re: texasrds OD18 build mid-coast Texas
Posted: Sat Nov 13, 2010 2:10 pm
by Cracker Larry
A temporary drywall screw once in a while won't hurt either. Neither will some wood dowels glued in permanently
Also use long lengths if you can. Notice in my pic how they run long at the bow, this gives you more leverage to apply bending pressure.
Re: texasrds OD18 build mid-coast Texas
Posted: Sat Nov 13, 2010 2:22 pm
by Steven
Using screws for the rubrails is much easier then clamping. Screw a layer on first. Predrill so you don't split the wood. Take off, epoxy up after prewetting the gluing surface with straight epoxy and then screw back on. You will not use near as many screws as clamps. I fill the holes with a medicine suringe. Fill it with putty from a ziplock with the corner cut off. I use a pipe cleaner to coat inside the holes with straight epoxy. I filed the rubrail holes on my OB19 last weekend. Took 15 minutes. Much better than fighting with clamps, which I tried with my GV11 build.
Re: texasrds OD18 build mid-coast Texas
Posted: Mon Nov 15, 2010 12:49 pm
by Uncle D
I used both screws and clamps. Clamps where there was a straight run and screws and clamps where I had to bow the rub rail.
Last weekend in Oct. we were in Port A to stick fish and do a little duck hunting. Didn't Know how to contact you to stop by to see your boat. I'll be back in the area Dec. 1 thru 4. Hope to see ya then.
Don
Re: texasrds OD18 build mid-coast Texas
Posted: Mon Nov 15, 2010 2:31 pm
by tech_support
If you want a better fit, you can cut your rub rail pieces to match the upper side panel (at sheer line), then when you bend it around it will match the the shape perfectly. The downside is it makes for a good amount of waste vs cutting straight strips.
I like temporary screws for clamps
Re: texasrds OD18 build mid-coast Texas
Posted: Thu Dec 09, 2010 4:16 am
by texasrds
Here are a few pics of the plywood rub rail install. Finally got those done after coming up about 40 linear feet short of 1/4" Aquatek for the rub rail strips. Nothing that an eight hour round trip for more ply to Houston didn't cure but..... I did end up using temporary screws for clamps in the hard to bend areas so thanks for the tip guys. Oh btw - I'm sure it has been mentioned here on the forum numerous times but Tractor Supply carries a wide range of sizes of syringes (in the animal / vet med section) that can be used to fill those left over screw holes with glue. Definitely work well and they are inexpensive. Starboard and Port side rub rails are three layers of 1/4" ply while on the transom I just used some of my 3/4" ply scrap since it was a nice easy straight run. This weekend is the weekend to flip her for the first time so I can get to work glassing the bottom.
Starboard side
Port side

Transom shot
Randy.
Re: texasrds OD18 build mid-coast Texas
Posted: Thu Dec 09, 2010 6:55 am
by Larry B
Looking good
Re: texasrds OD18 build mid-coast Texas
Posted: Thu Dec 09, 2010 9:18 am
by Cracker Larry
She looks great Randy
Re: texasrds OD18 build mid-coast Texas
Posted: Thu Dec 09, 2010 9:27 am
by tech_support
very clean rubrail, nice work
Re: texasrds OD18 build mid-coast Texas
Posted: Thu Dec 09, 2010 10:49 am
by Uncle D
Nice job Randy. Also before you have to go to Houston, give me a buzz. I might be able to help out. Anyway looking good.
Don
Re: texasrds OD18 build mid-coast Texas
Posted: Mon Dec 13, 2010 12:49 am
by texasrds
Thanks guys. She is now officially flipped (for the first time) and its time to get back to gluing and glassing. Ho, ho , ho!
Randy.
Re: texasrds OD18 build mid-coast Texas
Posted: Mon Dec 13, 2010 7:00 pm
by Prarie Dog
Really nice clean looking work Randy. Very good job filling the gap at the bow. The amazing thing about this type of construction is how you can adjust and make an adjustment look like it was planned. Good Job.
Paul
Re: texasrds OD18 build mid-coast Texas
Posted: Thu Dec 16, 2010 1:47 pm
by texasrds
Thanks Paul. One of the reasons I decided I could jump in and build something like this is the type of construction used. I can work with wood and learn to work with epoxy and fiberglass (which I am but not making any claims as to how well

). Well, I just had a 4 oz batch of thickened epoxy kick off on me yesterday as I was filling some of the exterior seams so I'm still apparantly learning! It was around 80 here yesterday and I did'nt refrigerate my resin like I usually do plus putting it into a one of those fillable caulking tubes didn't help. Second batch worked better. Oh well, just more sanding and clean up. Hopefully by the weekend I'll have the first of the seams taped on the outside so making some progress. My brother and sister in law came over for the first time this past weekend since I started this project and they both took one look and said holy cow it's big and really does look like a boat. lol. Later.
Re: texasrds OD18 build mid-coast Texas
Posted: Fri Dec 17, 2010 11:36 am
by Uncle D
Randy, work does look good. Gonna have to make a road trip one of these days.
Don
Re: texasrds OD18 build mid-coast Texas
Posted: Fri Dec 17, 2010 11:44 am
by Prarie Dog
Come on Uncle D. Thirty miles never used to be called a "road trip" down there.
Paul
Re: texasrds OD18 build mid-coast Texas
Posted: Fri Dec 17, 2010 12:46 pm
by Cracker Larry
I have to drive that far just to go to the store
Re: texasrds OD18 build mid-coast Texas
Posted: Fri Dec 17, 2010 7:01 pm
by gstanfield
Me too
Re: texasrds OD18 build mid-coast Texas
Posted: Mon Dec 20, 2010 12:22 pm
by Uncle D
Prarie Dog wrote:Come on Uncle D. Thirty miles never used to be called a "road trip" down there.
Paul
Your right of course, we get a break at work between Christmas and New Years. I'll call to come out. Not promising cause I haven't made it by the last 2 times in Port A, But I do want to come out.
Merry Christmas, Don
Re: texasrds OD18 build mid-coast Texas
Posted: Wed Dec 22, 2010 11:21 pm
by Mad Dog
Hey Randy, just wanted to add my kudos to your build. Looking real fine sir. Aren't you glad for the previous builds? When those pieces don't fit together in reality like they do in the drawings it's nice to know the other guys had the same issues.
The next couple of months you should be able to get a lot gluing done without losing much epoxy to the heat. Yeah!
MD
Re: texasrds OD18 build mid-coast Texas
Posted: Sun Jan 02, 2011 2:34 am
by texasrds
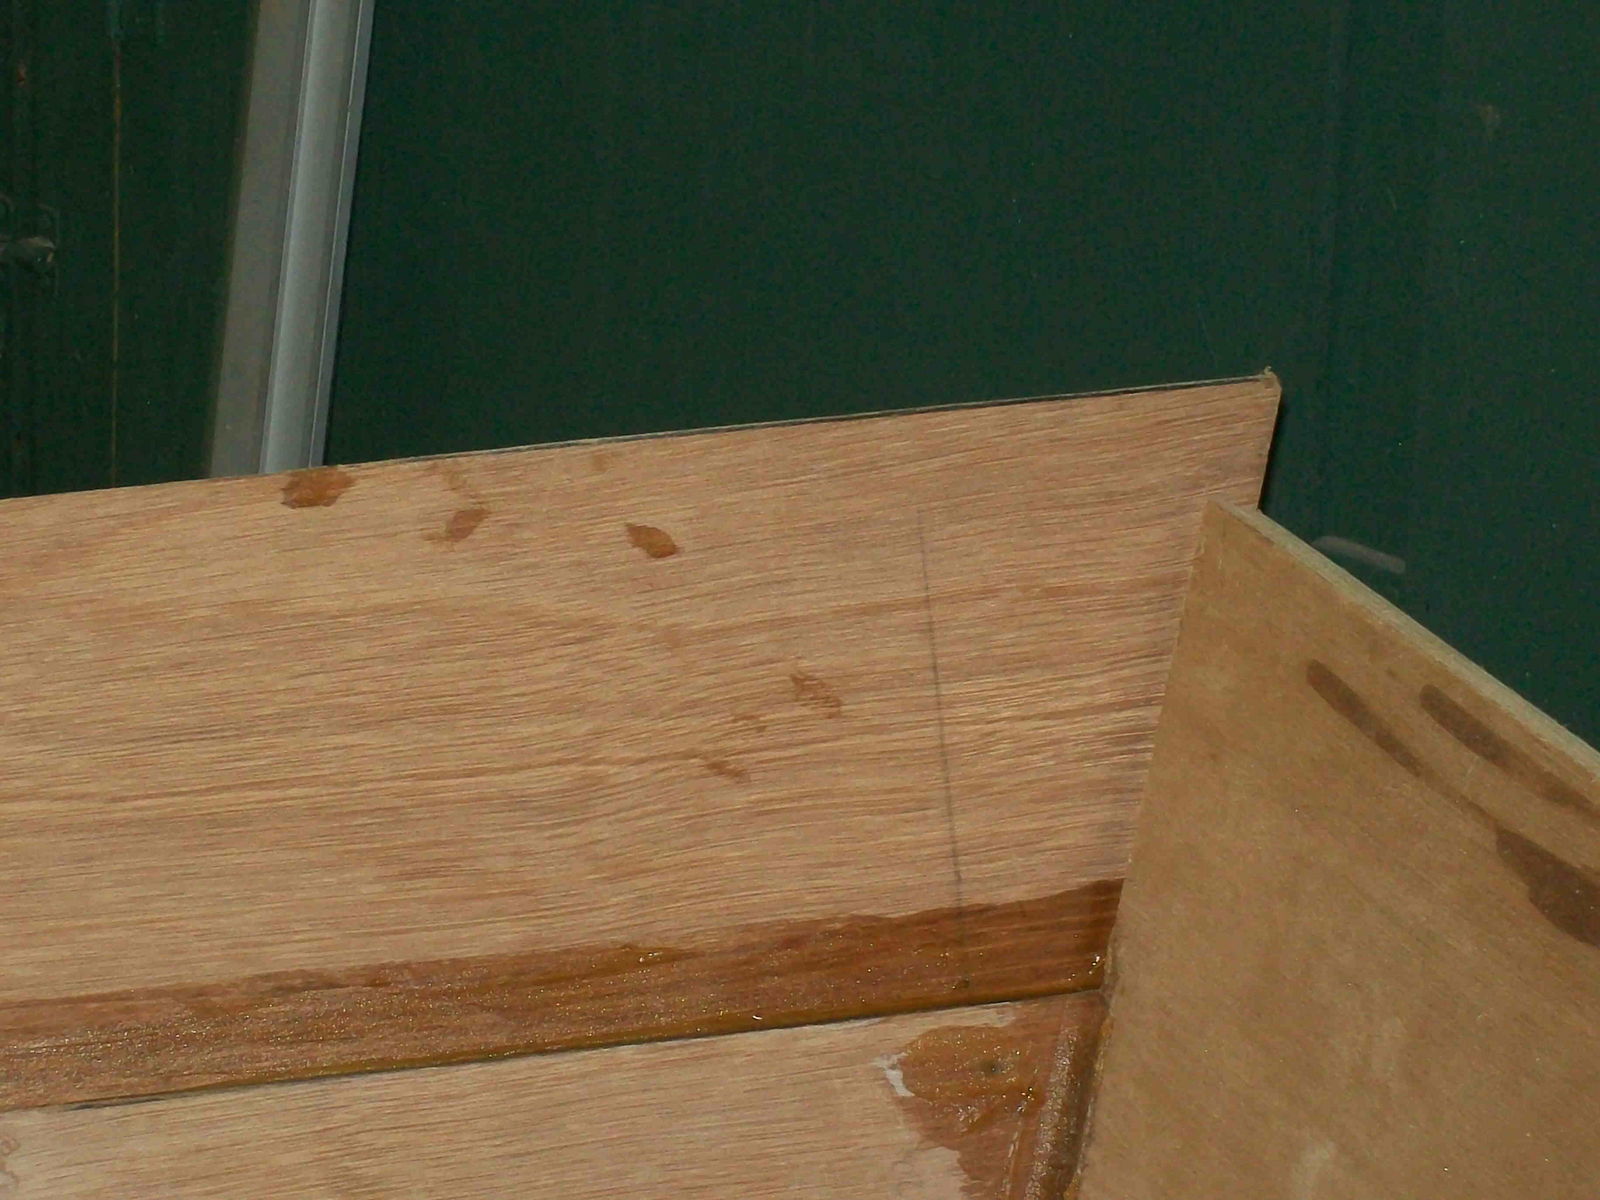
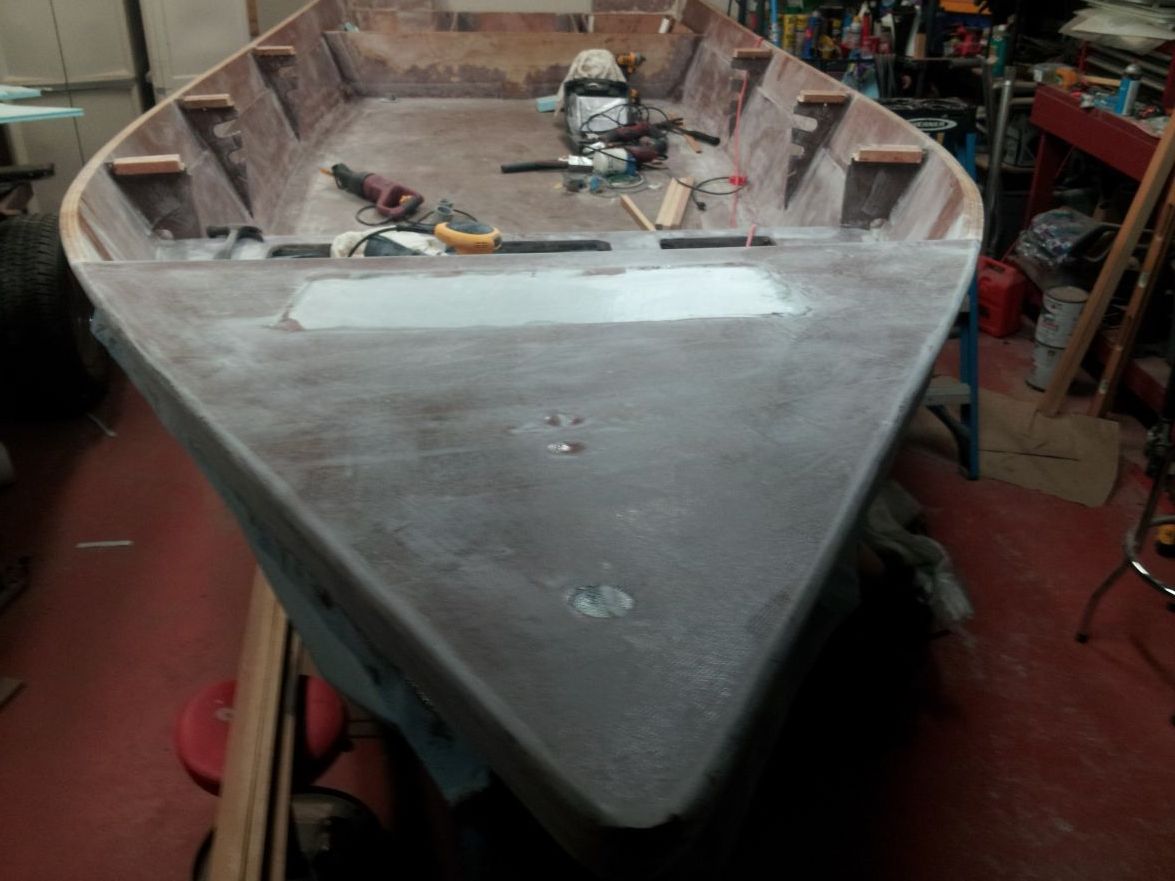
So far the last couple of weeks or so I managed to get a little bit done on the boat. The seams at the bottom, chine and style line have been glassed and along the transom as well. I need to do the bow tomorrow and then I can sand the bottom of the boat and put the first layer of glass down which will be a "filler" layer on the bottom between the taped seams. The "full" coverage (bottom to style line) will then come next.
Small pic of glassed seams
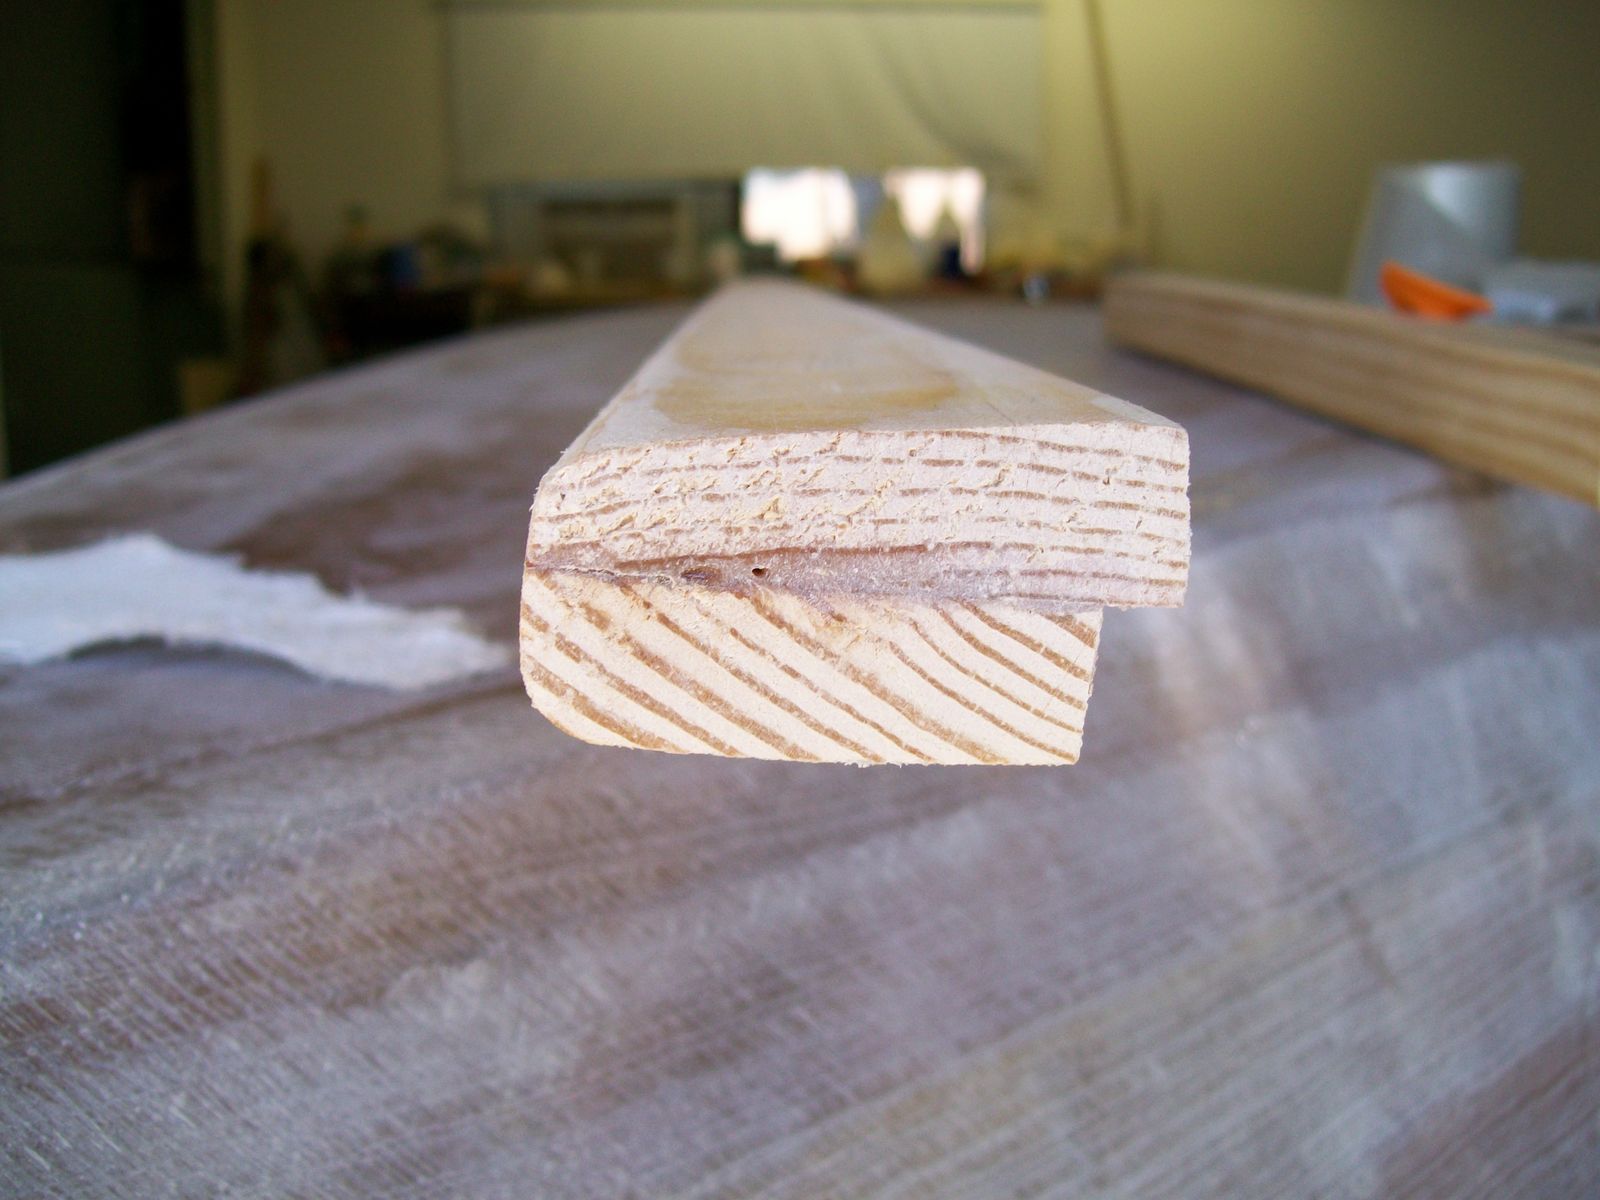
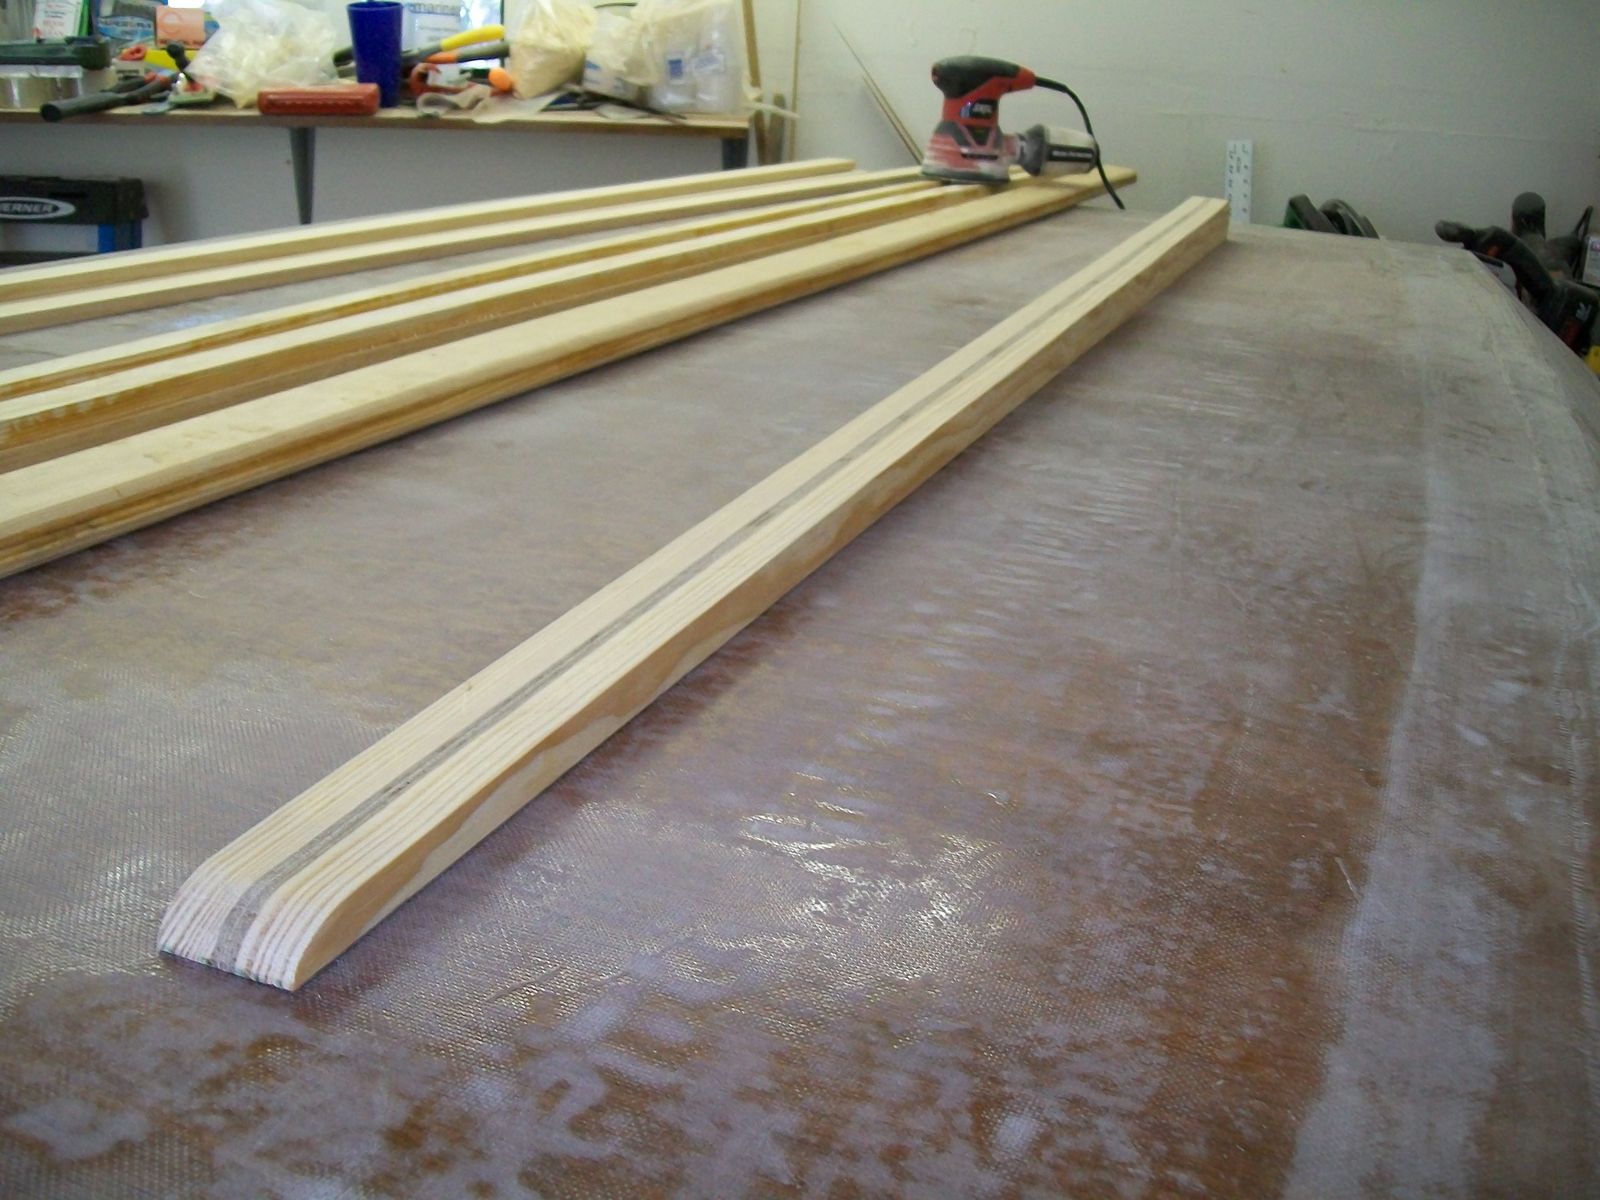
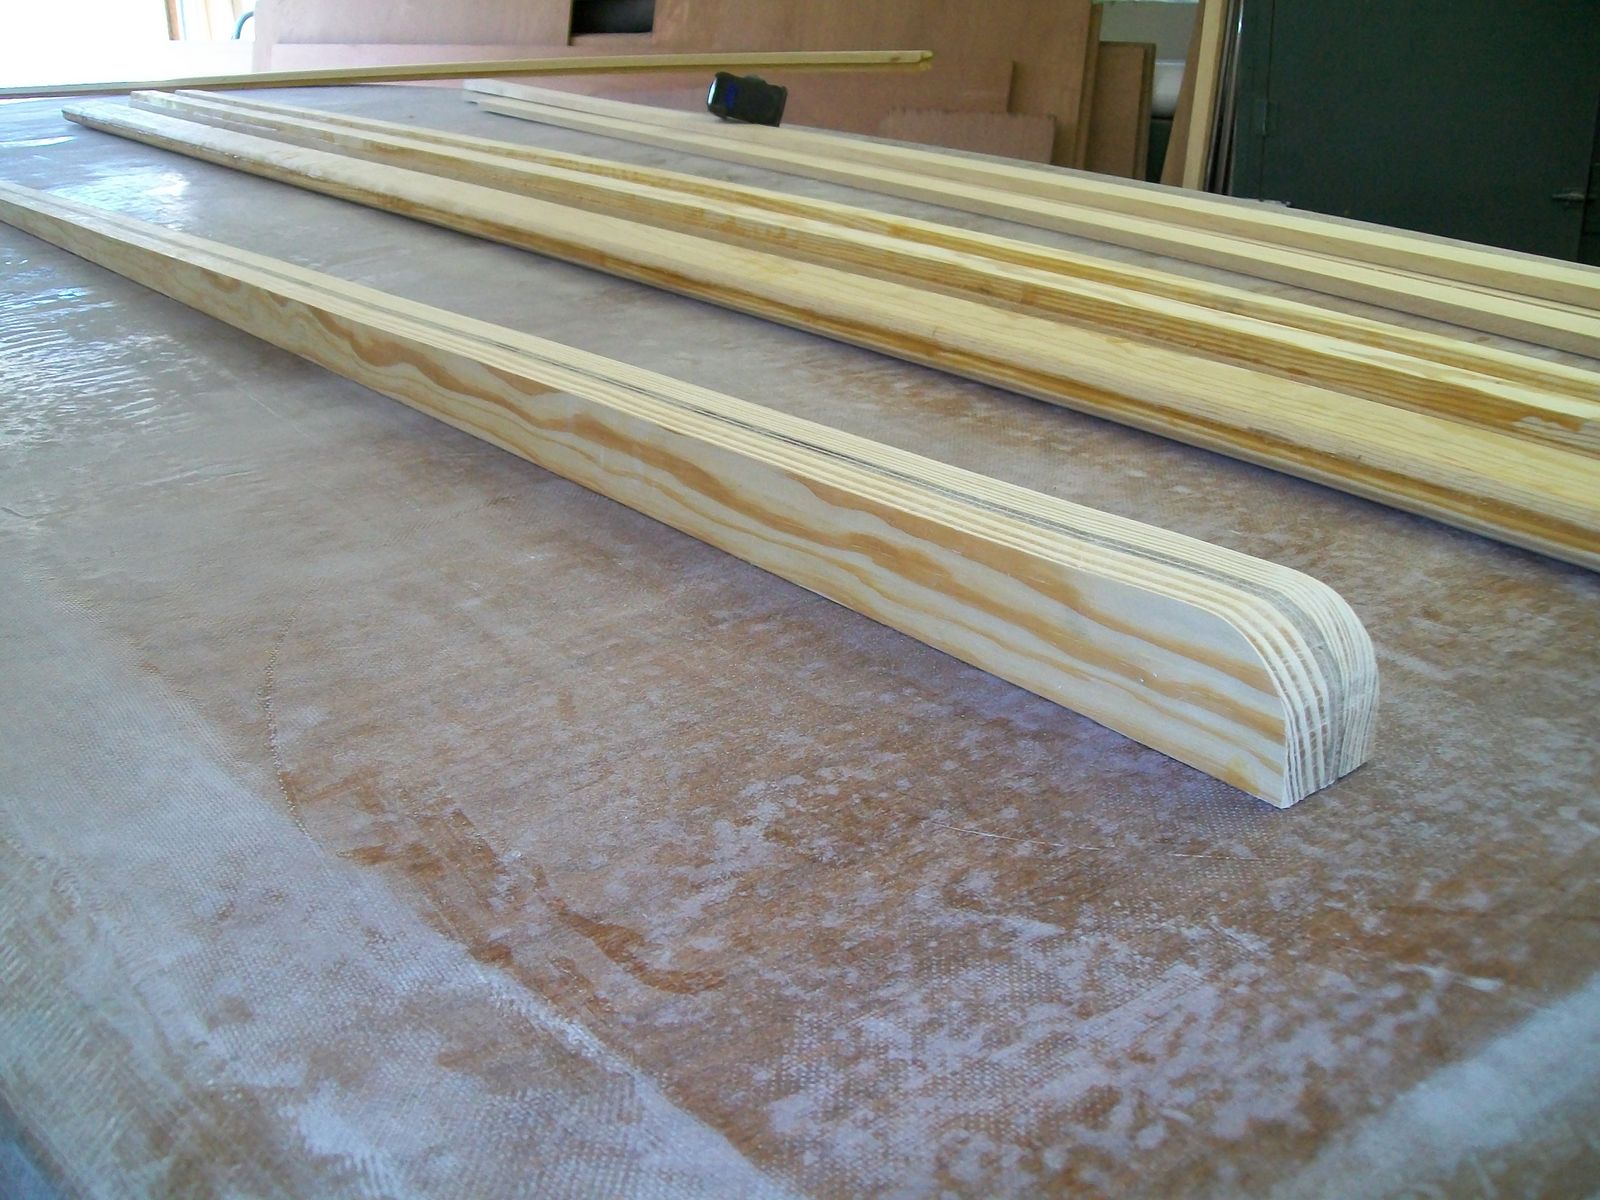
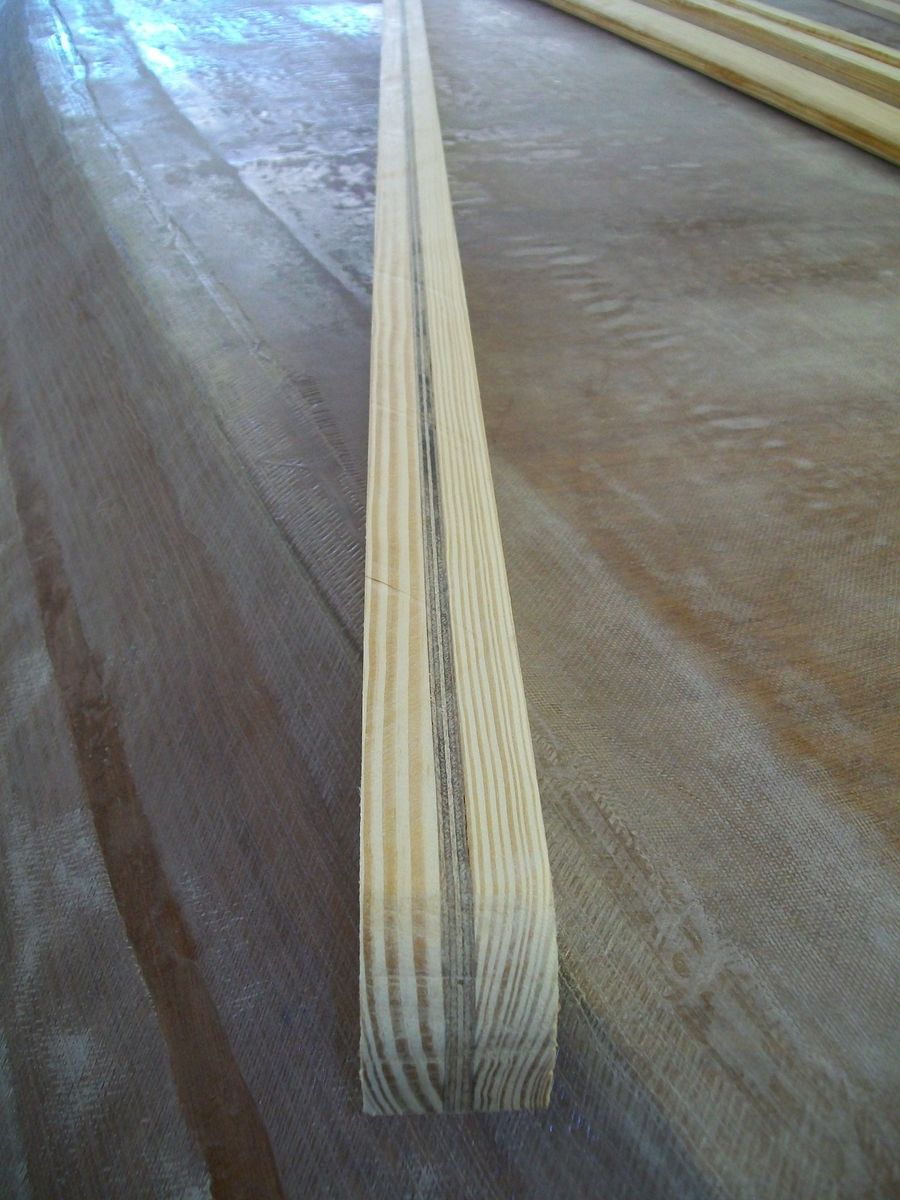
On another note I have attempted to make a spray rail this weekend. Not sure how this will work out but I thought I would try since I found a kiln dried 2 x 10 SYP that had no knots at all and ripped it into 1 1/2" x 1 1/2" widths. Below are pictures of a pattern that I found of a custom moulding that I liked as well as the ripped stock and my attempt at duplicating albiet a little smaller version of that moulding. My intention was to have the flat side down (facing the water) and the slanted side up but of course in my little world of design, measuring and cutting etc... I ended up cutting the notching (to fit at the style line where the upper and lower panels meet) on the wrong side so now at this point the slanted side is facing the water and the flat side will be pointing up.
I plan on rounding out the nose like the moulding pic to facilitate putting glass over it once its glued to the boat. I will most likely have to kerf the back sides to get them to fit the curves on the boat.
Picture of custom moulding design
Beginnings of Spray Rail???? Ripped 2 x 10
End shot of spray rail cut out
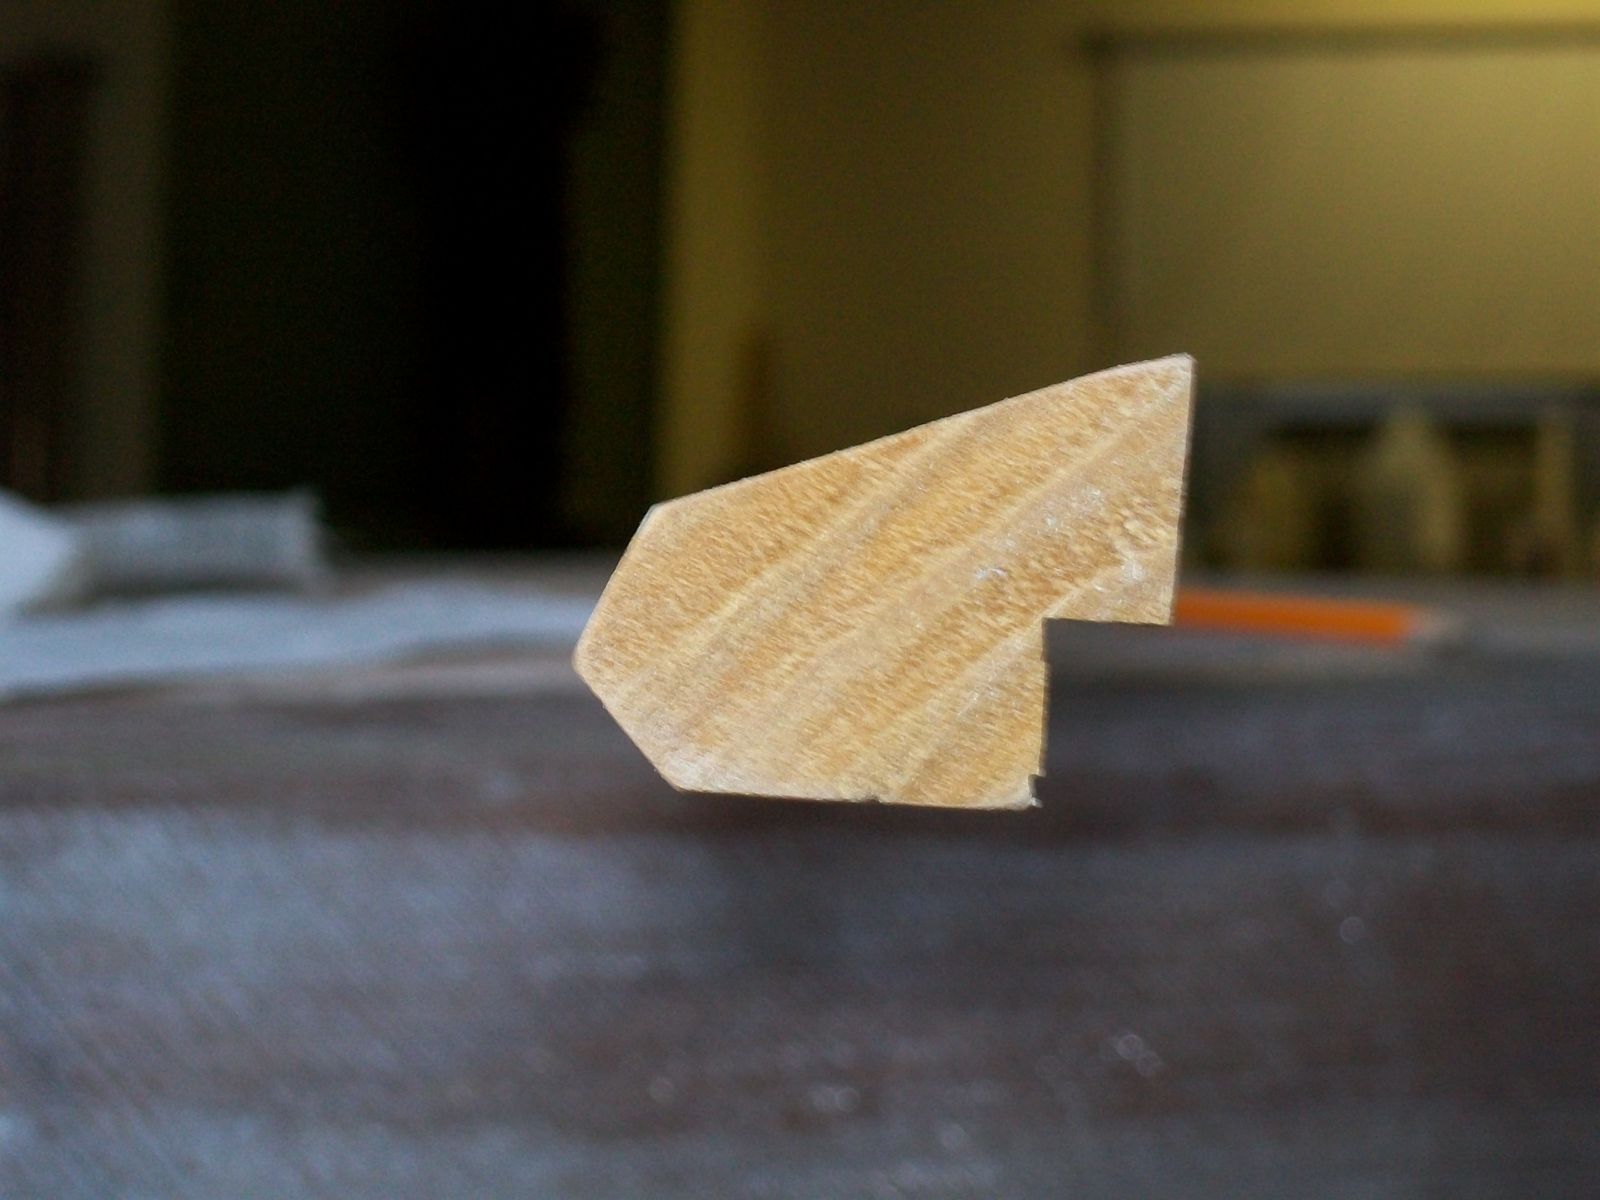
Orientation when installed on boat
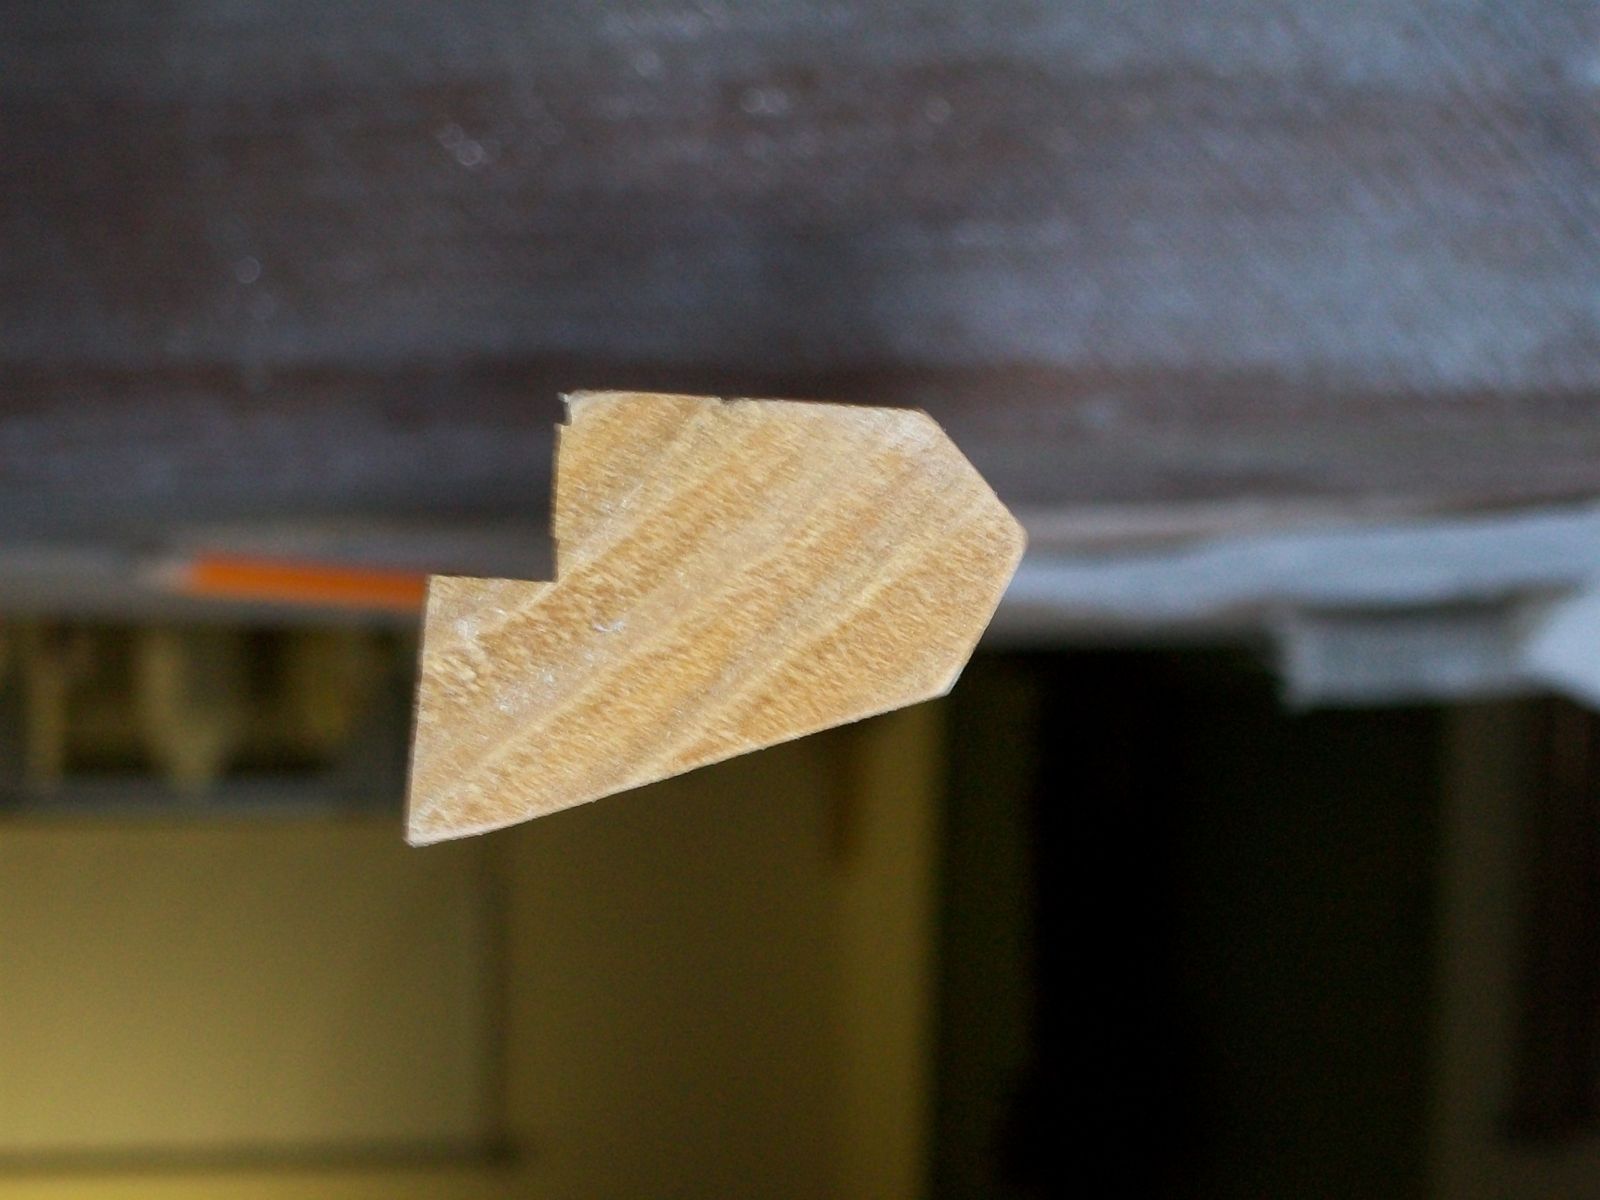
Like I said earlier, thought I would give this particular spray rail design a try and see how it works out.
Re: texasrds OD18 build mid-coast Texas
Posted: Sun Jan 02, 2011 3:23 am
by gstanfield
I'm particularly impressed that you had your plans laminated
The boat is looking good, looks like some good craftsmanship is going into this one with a lot of thought as to the final product.
Re: texasrds OD18 build mid-coast Texas
Posted: Sun Jan 02, 2011 11:42 am
by Steven
The spray rail should angle down to knock the spray down. It looks like your's is angled up?? Or will the flair of the sides have it angled down?
Re: texasrds OD18 build mid-coast Texas
Posted: Sun Jan 02, 2011 1:44 pm
by texasrds
Well Steven, the plan was to have the bottom of the spray rail flat and at a 90 degree to the boat as the others have done on the OD18 but the best laid plans and the ability to think before cutting the notch on the right side on ALL the pieces eluded me.

The angle in my mind would still help to push the water out and away but I may just start over again. The 2 x 10 was 6 bucks and about hour or so of my time on the table saw so...... It does look pretty good set in place on the boat though.
Yeah George, I figured that I would be keeping the plans out in the shop and they would take some abuse so I decided to lamintate them. Of course it cost me more to laminate the set of plans than the plans actually cost me!

Re: texasrds OD18 build mid-coast Texas
Posted: Mon Jan 03, 2011 10:44 am
by Steven
Assuming you have a tablesaw, just rip a new angle.

Re: texasrds OD18 build mid-coast Texas
Posted: Thu Jan 06, 2011 6:58 pm
by texasrds
Thanks for the suggestion Steven. That is what is great about this forum. Someone else can help with my lack of thinking.
Will cut the angle on the spray rail and see how things lay out.
I cut out some of the 6 oz fabric I had ordered to fill in the bottom between the seams as folks like CL and Larry B have done hopefully to reduce the amount of fairing in the end. Here are a couple of pics of that.
Cloth insert cut out
Glass cloth insert wetted out

I like hot weather but it is certainly nice having it a bit cooler down here as the extra time with the resin is really nice. Didn't feel rushed in getting everything down this weekend.
Re: texasrds OD18 build mid-coast Texas
Posted: Thu Jan 06, 2011 8:33 pm
by JamesT
Nice work...but remember it is Texas! Supposed to be the coldest days so far first part of next week.

Re: texasrds OD18 build mid-coast Texas
Posted: Fri Jan 07, 2011 11:11 am
by Uncle D
Looks great Randy. It is nice to have the cool weather, even worry that it may be too cool to work on a boat in So. Tx.
I did the same and used extra 6oz cloth in-between bottom seams. I mainly did it cause you know how many times the hull gets it with bars and oyster shells. Hope you have heat in your shop from what I hear the weathers is going to do.
Don
Re: texasrds OD18 build mid-coast Texas
Posted: Tue Apr 05, 2011 5:42 pm
by texasrds
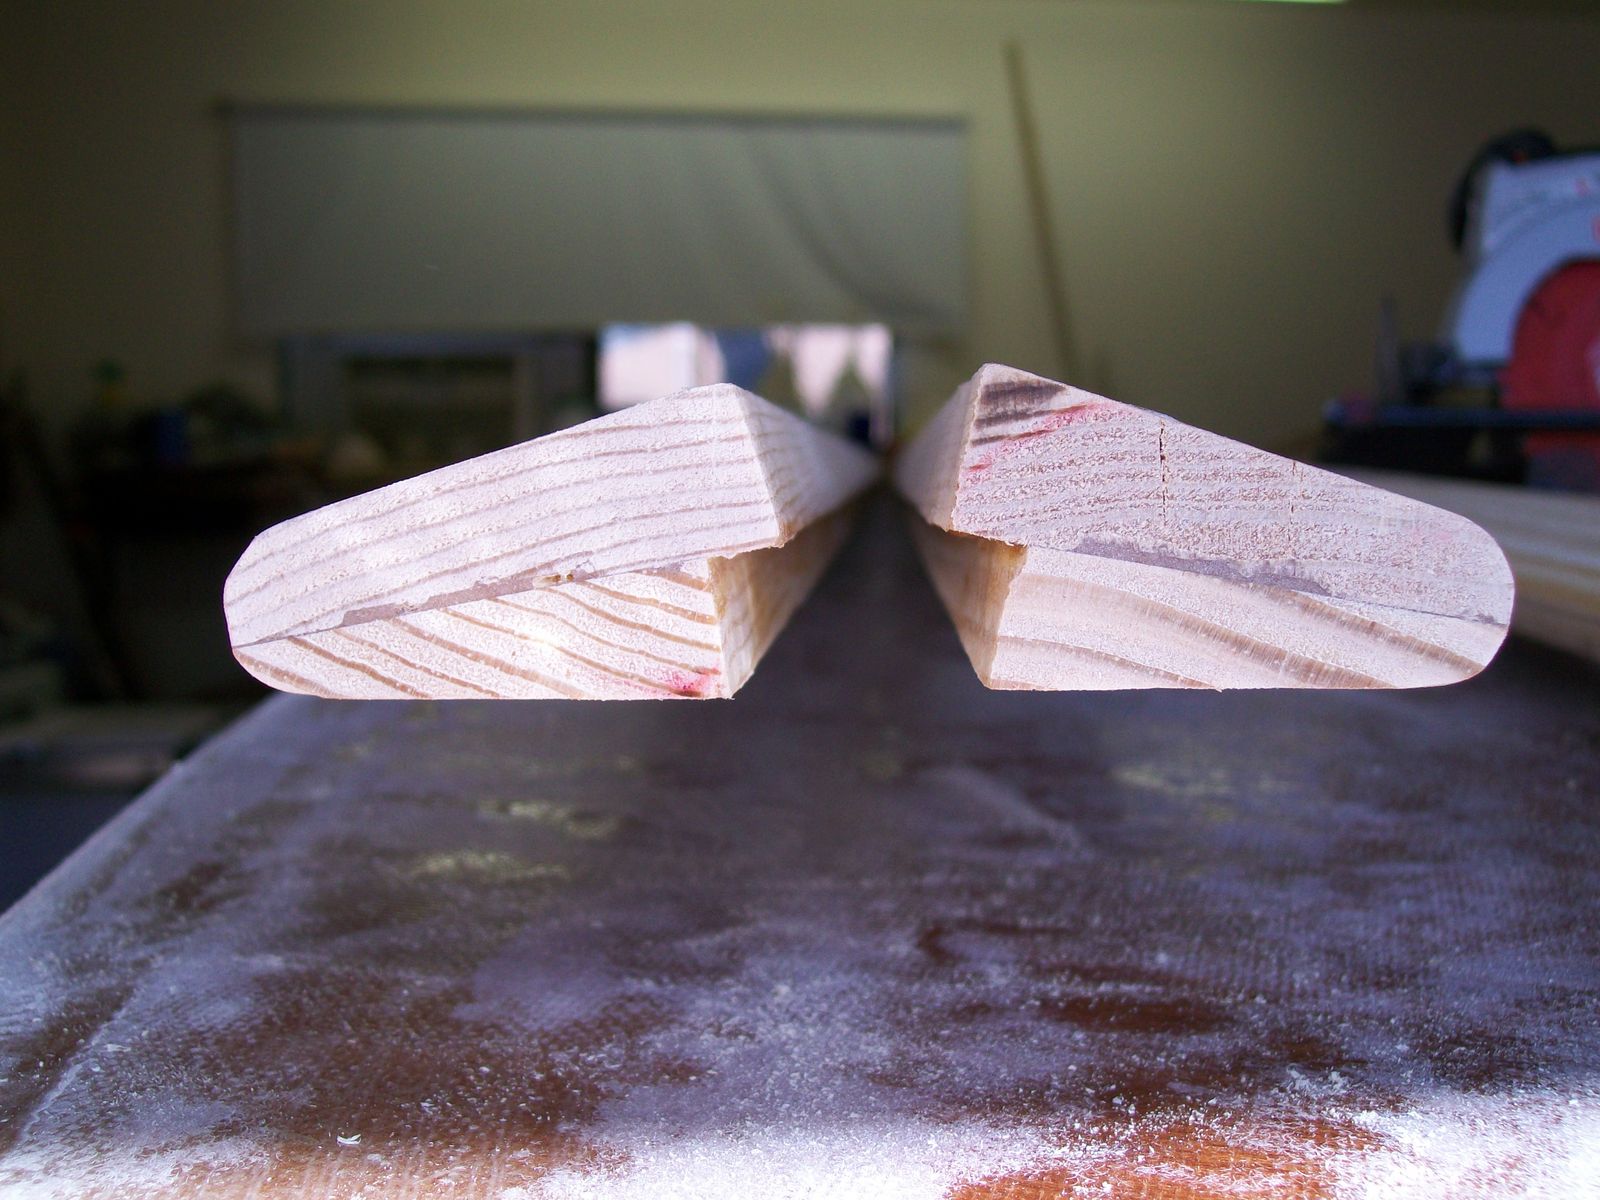
Well back again after a short hiatus. Here is a spray rail that I put together last week that will go along the "style line' where the upper and lower panels come together. The notch is where the panels overlap and provides for a nice edge for alignment and connecting it to the boat. I will be kerfing the back side of each section to be able to get it to bend around. I do want to ask opinions here - the spray rail is right at 2" wide as it currently sits. Is that to wide for the spray rail? It would protrude out some but would not come close to extending past the rub rails above. I can certainly cut it back some if it is to wide and re-route the edges again to round them over. I also left it reasonably thick so there shouldn't be any flexing of the rail either. Thoughts?
Spray Rail Profile 1
Spray Rail Profile 2

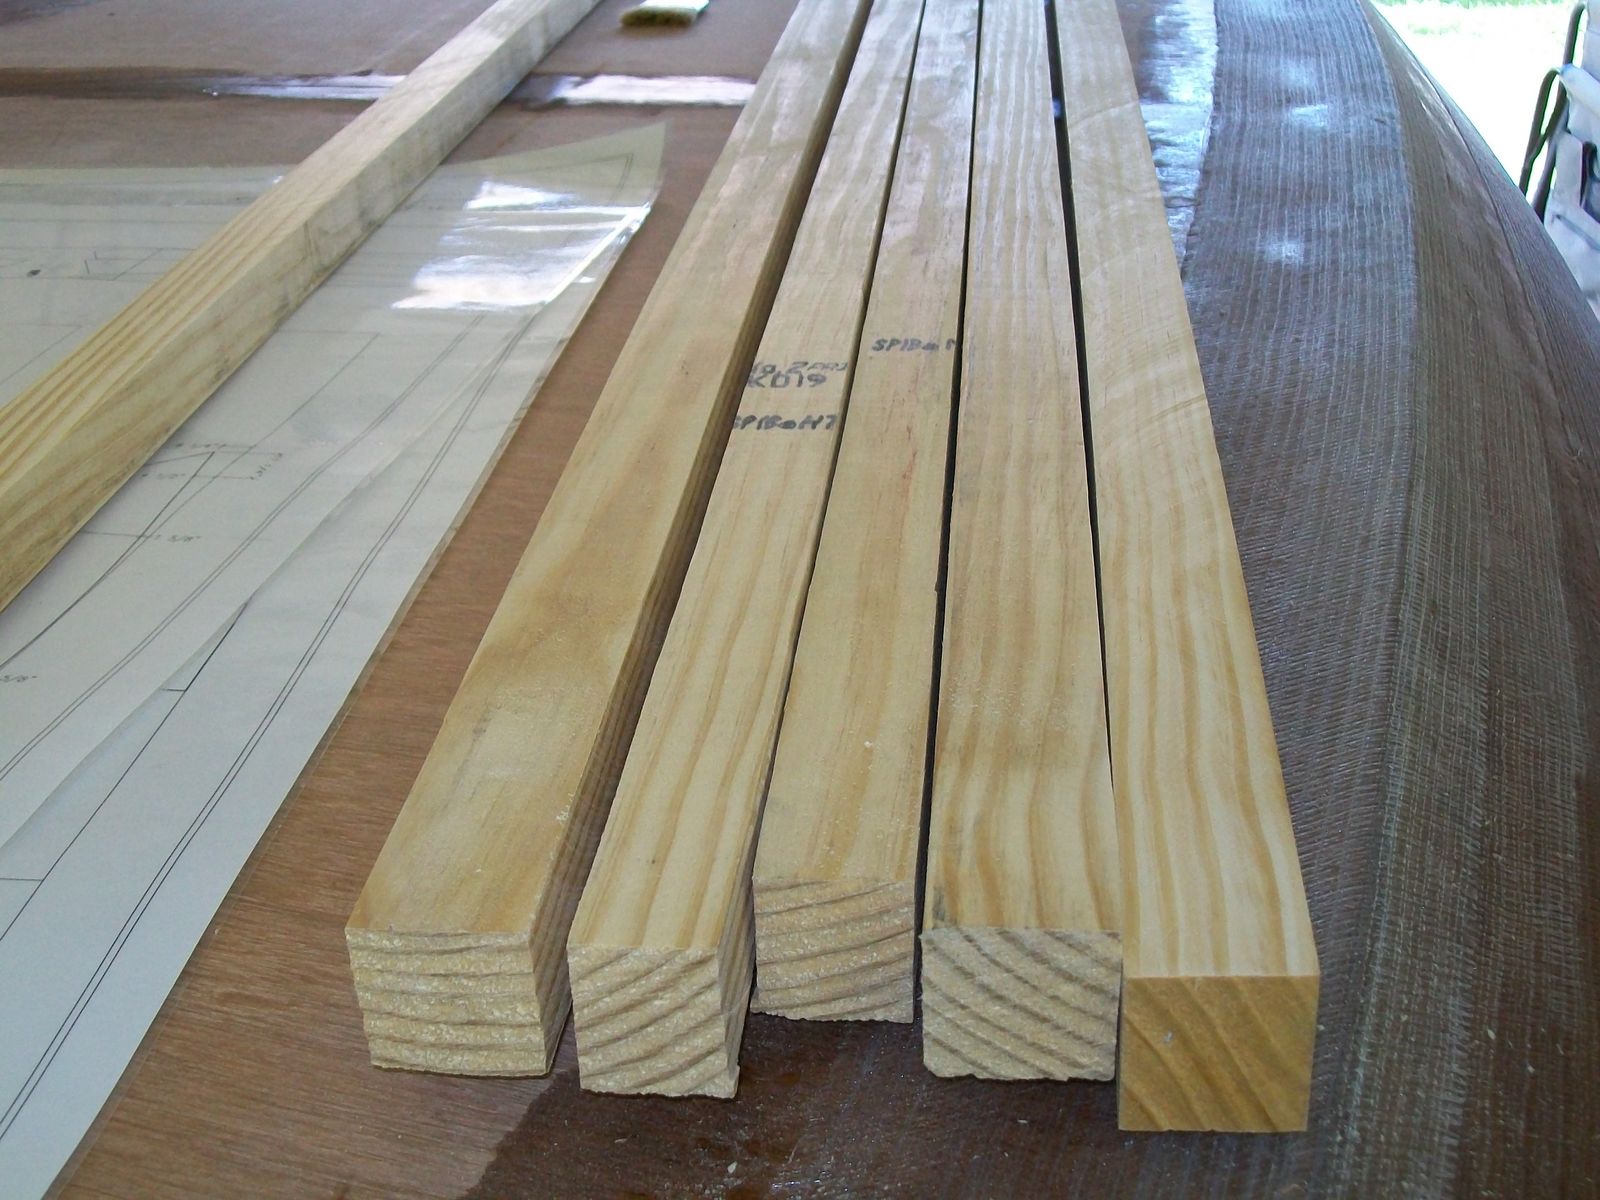
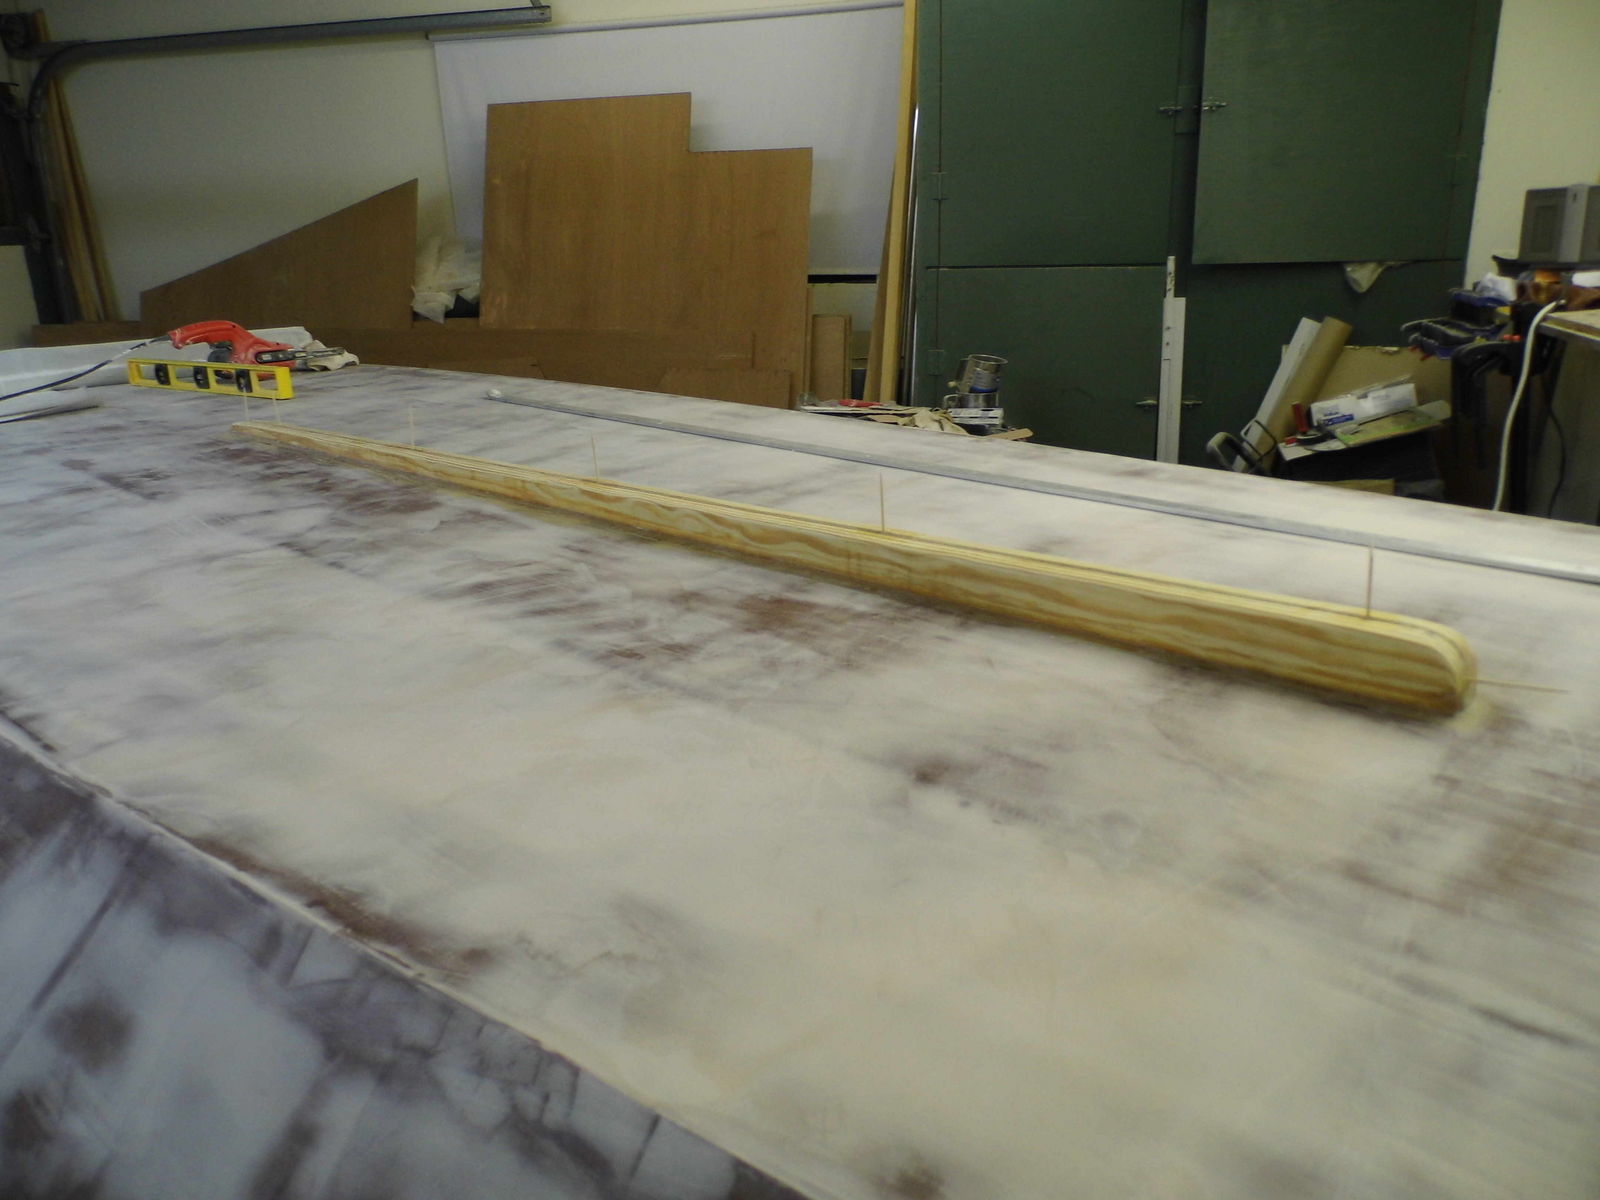
I also last week put together the Skeg out of 2 1x6 SYP with a piece of 1/4" marine ply sandwiched in between similar to CLs.
Skeg pic 1
Skeg pic 2
Skeg pic 3
Next will be finishing up the spray rails and working on getting them attached. After that I will be putting the "final" glass on the bottom of the boat once I get more hardner from Bateau and then covering the spray rails in glass as well.
Randy.
Re: texasrds OD18 build mid-coast Texas
Posted: Tue Apr 05, 2011 6:06 pm
by Cracker Larry
Looking good Randy
Glad to see you back at it. Not sure what advice to give about the spray rail, other than I wished I had built them on mine
I did like this profile
Did you decide to change that to the new model?
Re: texasrds OD18 build mid-coast Texas
Posted: Tue Apr 05, 2011 7:07 pm
by texasrds
New model -
Yes I did. Two reasons - first those pieces I originally cut out of 2x2 SYP warped so bad after just a week in the shop they looked almost like pretzels and secondly when I tried to round the long edges with the router (to better wrap glass over them later) I basically destroyed the pieces that I had done. Trying to figure a better way and reduce the amount of warpage I decided to take two seperate pieces (10ft door moulding with a piece of 1 x 1 3/4 SYP (ripped from a 10ft 1 x 6)) and glue them together. A little bit of massaging on the table saw and a new router/table combo (and some practice with the router) I managed to round the edges without much of a mishap. That is about it so far. Randy.
Re: texasrds OD18 build mid-coast Texas
Posted: Wed Apr 06, 2011 7:28 am
by cottontop
I love your build. You are going to love the OD 18. I put sprayrails on mine and would do it again in a heartbeat. They won't be too wide. I would suggest you round over the edges. It will help when you add cloth. I wish I had added cloth over these. I learned the hard way (boat dock and heavy wave action) what can happen when no cloth is added. The wood gets busted out! But with epoxy and wood flour, anything can be fixed. John
Re: texasrds OD18 build mid-coast Texas
Posted: Wed Apr 06, 2011 6:45 pm
by texasrds
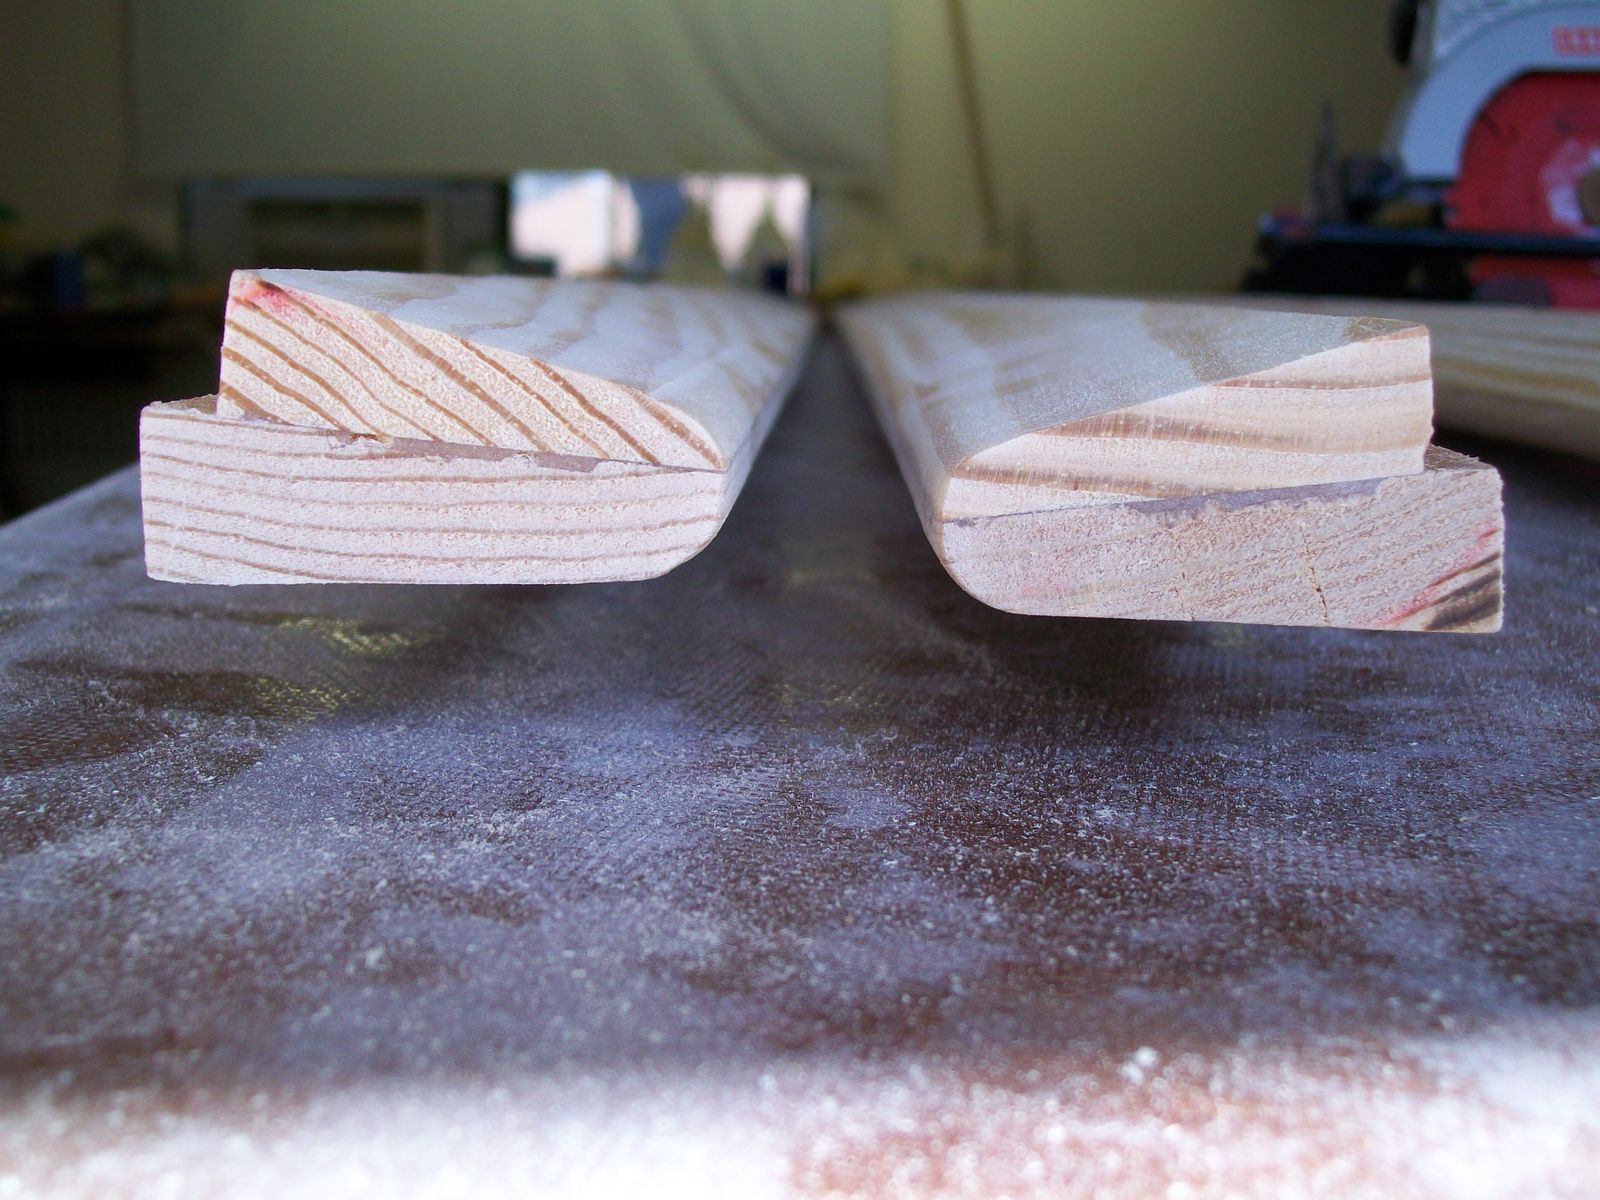
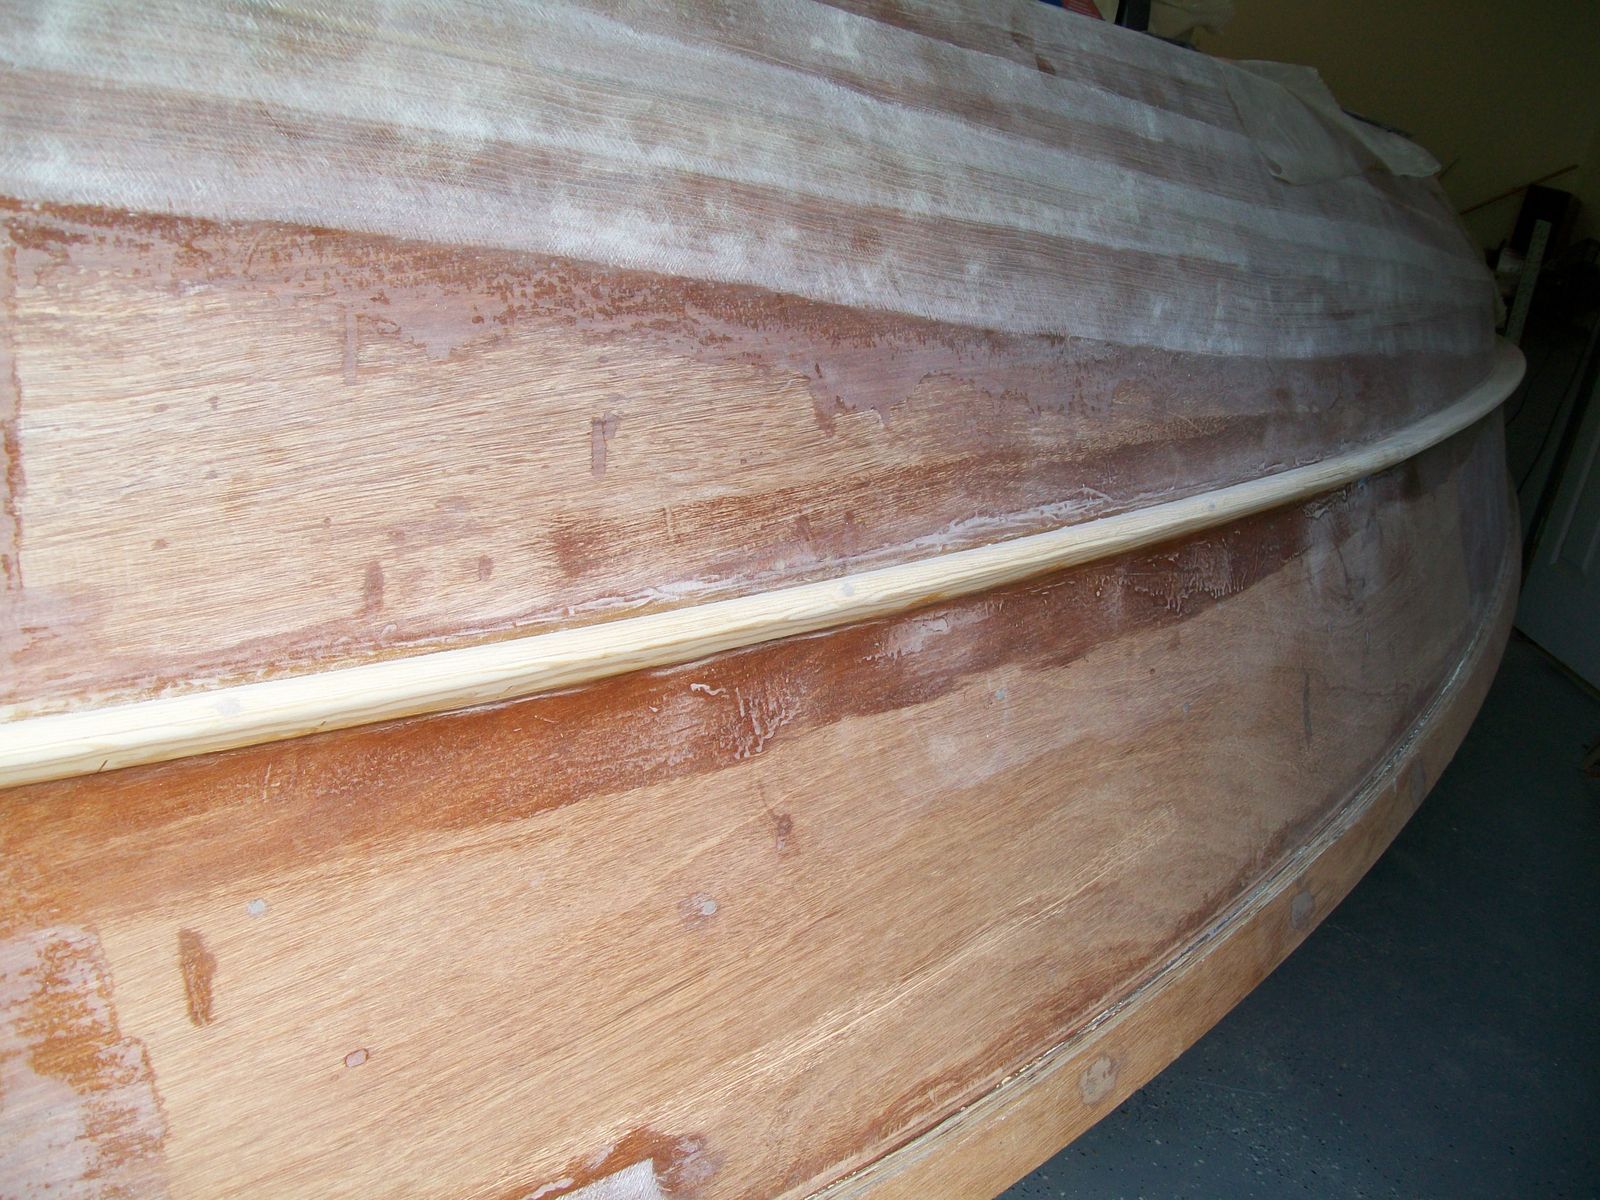
Thanks cottontop and cracker larry. Well here is the final revision (#238 I think) of the spray rail. Bottom will be flat, top angled down a little bit, nose is rounded. Just some sanding and kerfing, fitting, more fitting and probably more fitting to go but I put the fork in it today and am calling it done. Here are a couple of pics of the "final" shape for the spray rail I'm going with.
Final Spray Rail 1
Final Spray Rail 2
Later guys. Randy.
Re: texasrds OD18 build mid-coast Texas
Posted: Wed Apr 06, 2011 7:57 pm
by Cracker Larry
I like that
Re: texasrds OD18 build mid-coast Texas
Posted: Thu Apr 07, 2011 7:18 am
by cottontop
That's really fine. Looking forward to seeing it mounted. John
Re: texasrds OD18 build mid-coast Texas
Posted: Thu Apr 07, 2011 2:19 pm
by Uncle D
Glad to see your back at it Randy. I'm to that point now on mine. Thinking of molding, we'll see.
Re: texasrds OD18 build mid-coast Texas
Posted: Mon Apr 11, 2011 10:14 pm
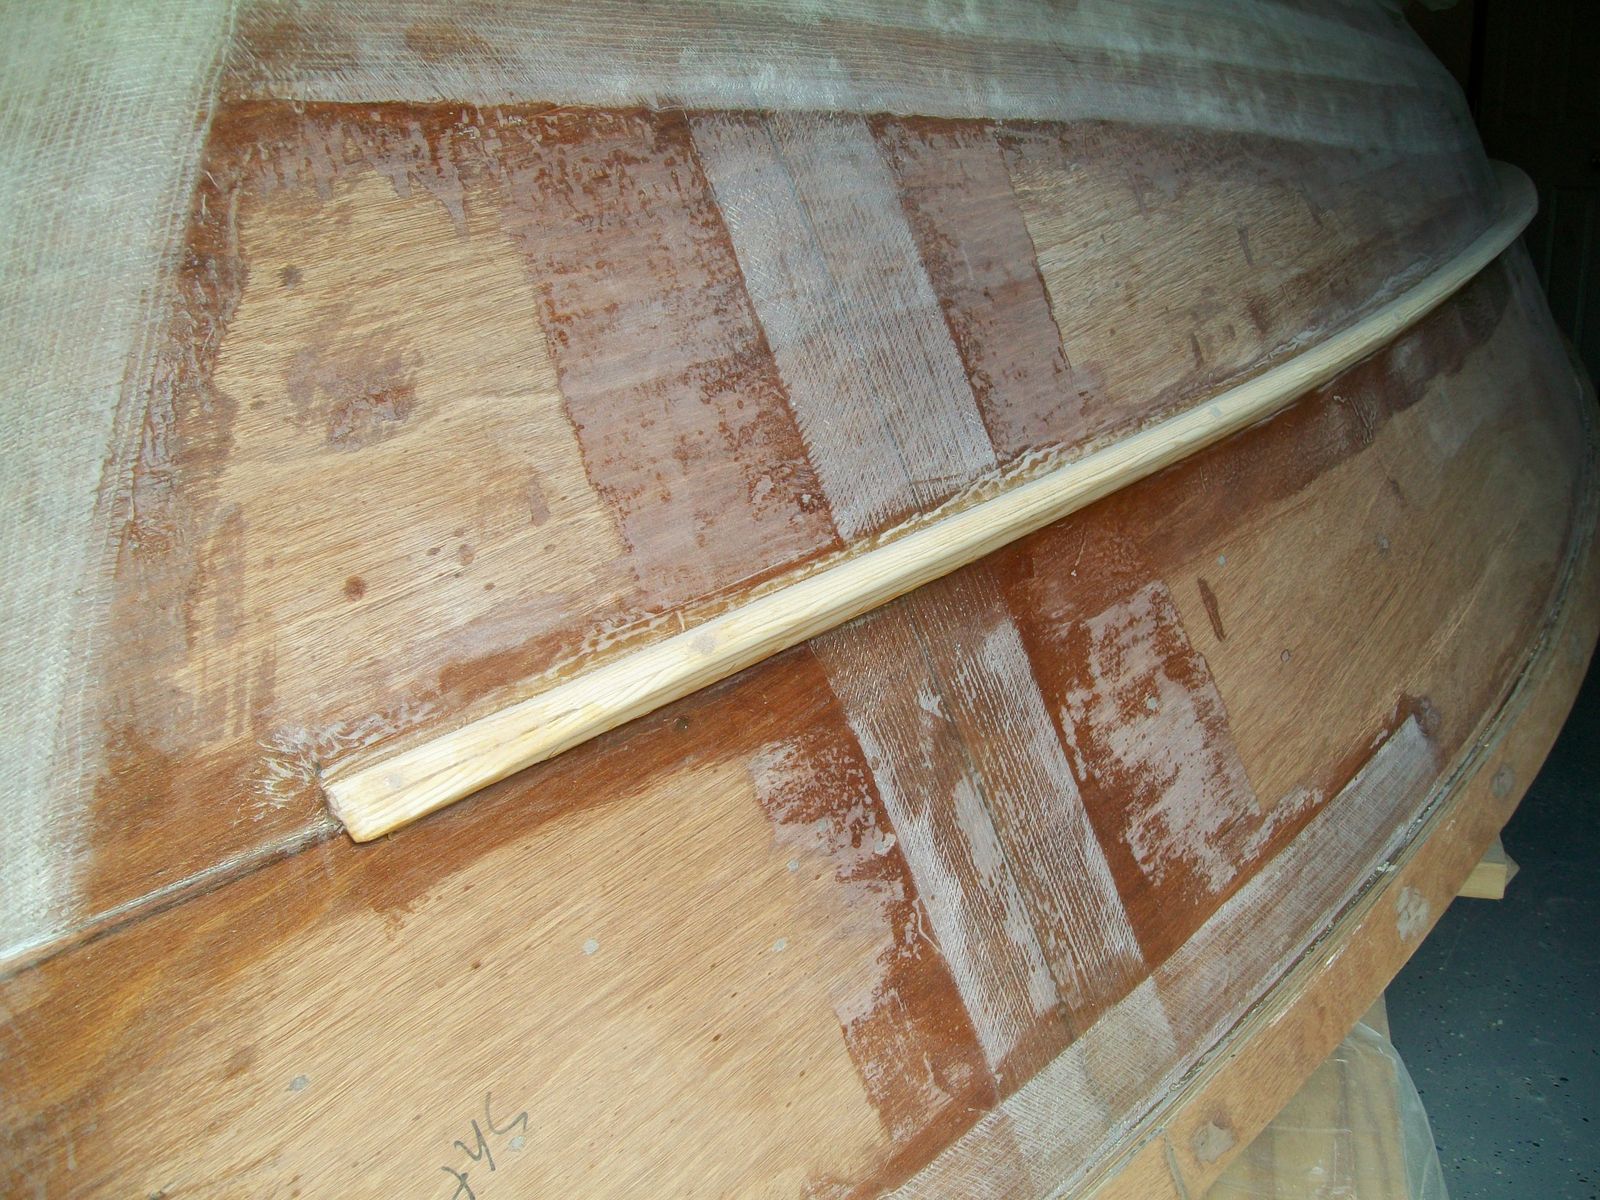
by texasrds
Yeah I looked at moulding from various different places and didn't find anything really close to what I had in mind for the spray rail except for "custom" pieces. And with the $ 80 to $ 95 setup fee plus a per linear foot cost it was cheaper to put together and then cut, route and sand what I had in mind. Good to see that your coming along as well Uncle D.
Randy.
Re: texasrds OD18 build mid-coast Texas
Posted: Mon Apr 11, 2011 10:59 pm
by Larry B
My spray rail is right at 1 7/8" and it works great. 2" will just work better
Re: texasrds OD18 build mid-coast Texas
Posted: Wed Apr 20, 2011 5:29 pm
by texasrds
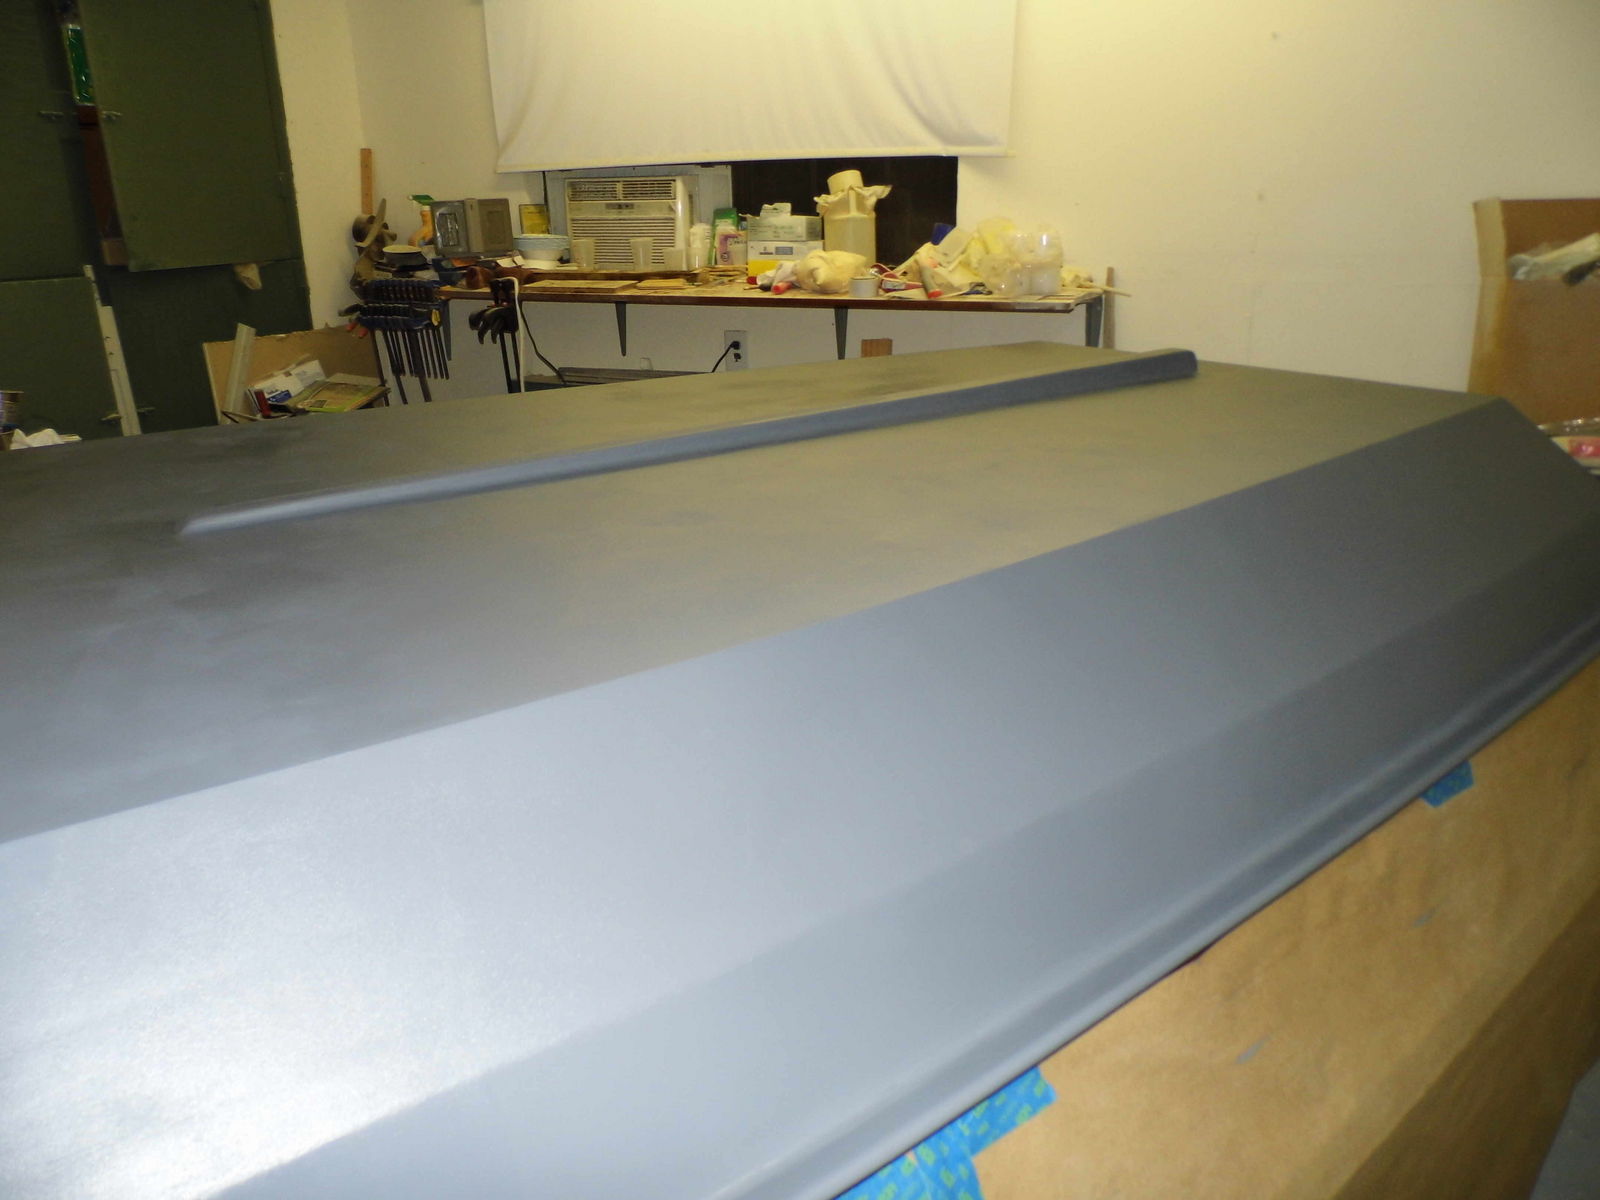
I got the spray rails installed this past weekend and filled the temporary screw holes in place yesterday with wood glue. Two things I would have done in hindsight before applying glue - where there is a tighter curve and you get the helix affect I would have made more kerf cuts to alieve pressure (I did every four inches) and secondly I would have scarfed the two boards together before installing on the boat. The butt joints gave way within 20 seconds of trying to bend. Oh well. They are on and not going anywhere. Once they are covered in glass (and maybe some graphite) they will be rock solid. Oh - I started the spray rail beginning 12" from bow centerline and ended them 6" from the stern.
Spray rail installed 1
Spray rail installed 2
Spray rail installed 3
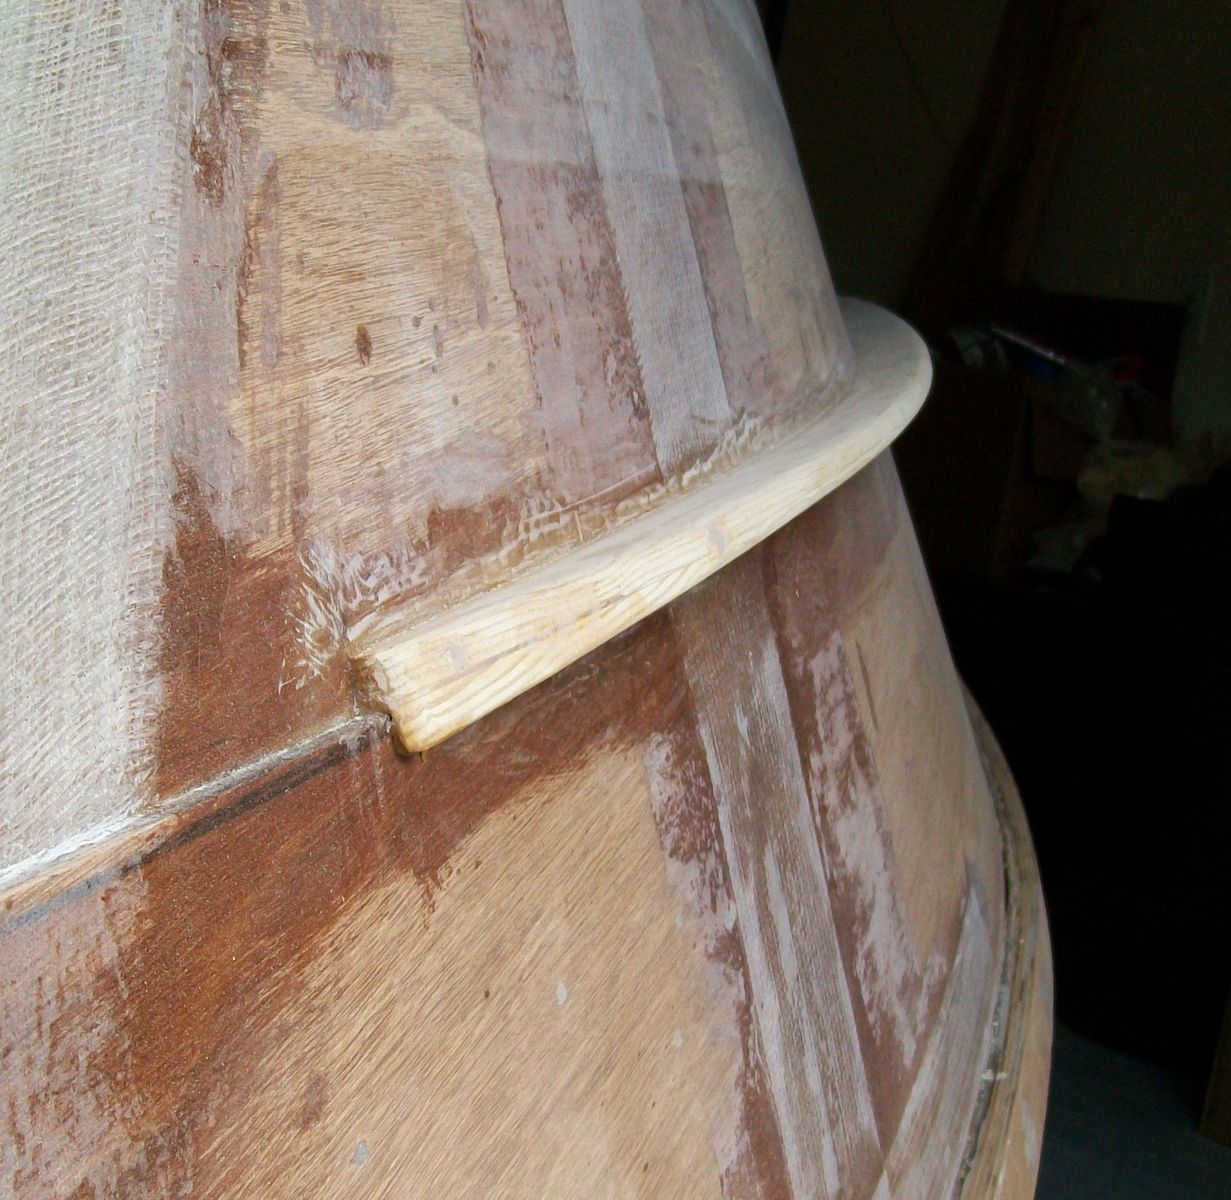
Spary rail installed 4
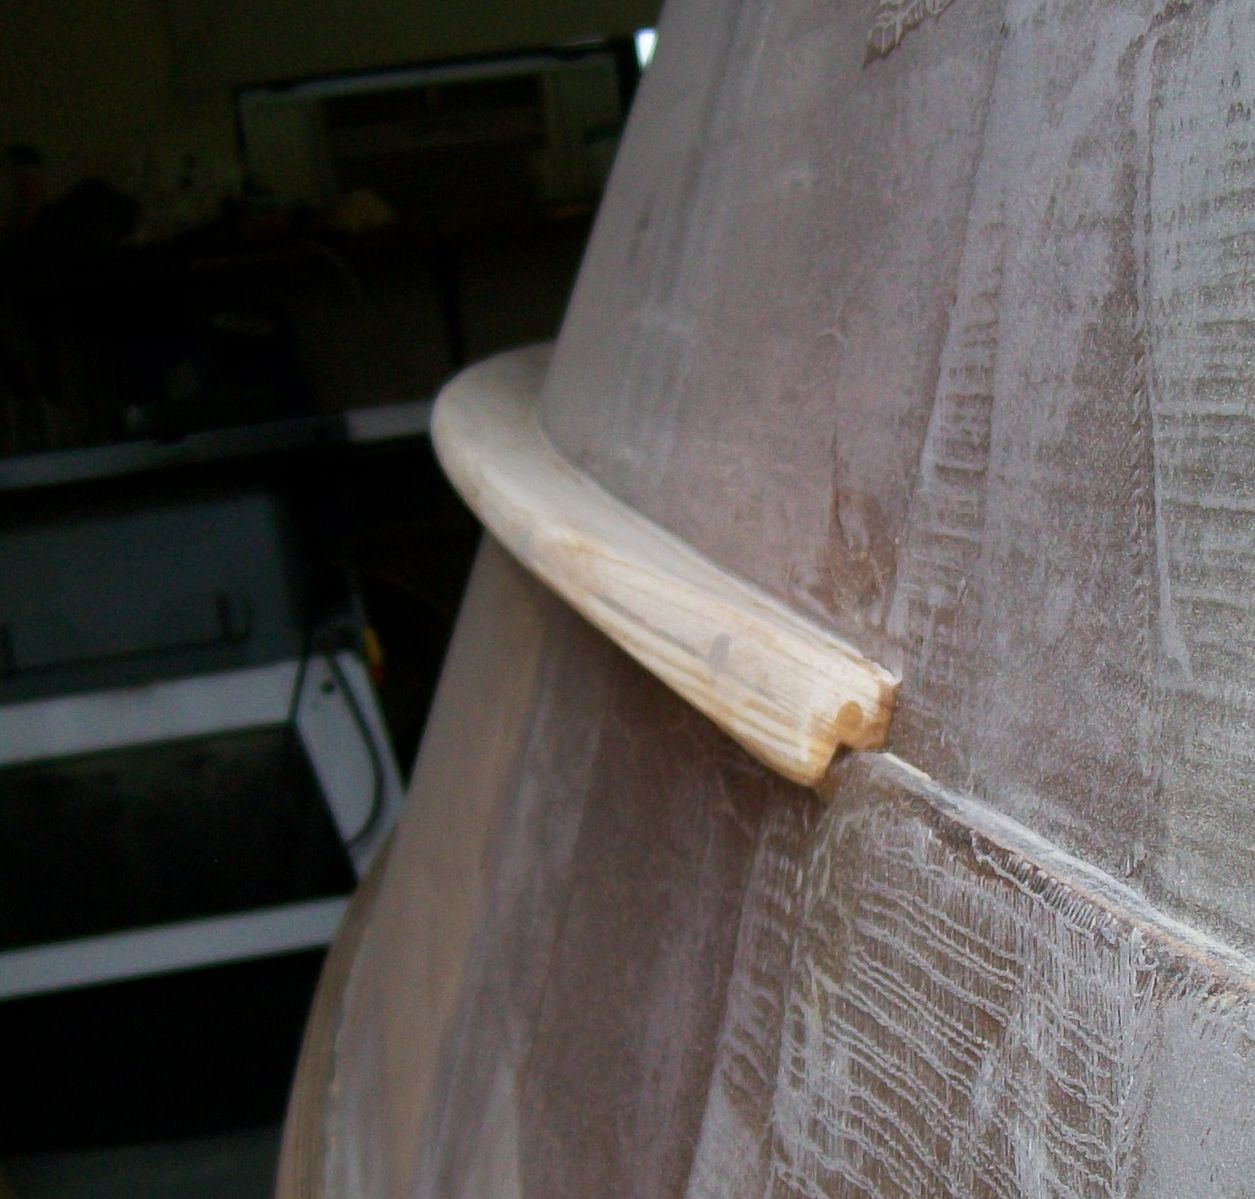
Spray rail installed 5

Randy.
Re: texasrds OD18 build mid-coast Texas
Posted: Wed Apr 20, 2011 5:33 pm
by wegcagle
AWESOME
Those will work like a champ.
Will
Re: texasrds OD18 build mid-coast Texas
Posted: Thu Apr 21, 2011 7:17 am
by cottontop
Those are beautiful. You will be very pleased with them. Mine are just a piece of 1x2 cypress and have held up real well. In hindsight with more knowledge, I would have built mine like yours. John
Re: texasrds OD18 build mid-coast Texas
Posted: Thu Apr 21, 2011 7:23 am
by TomW
Those are great should give you a lot of service. Really nicely done!
Re: texasrds OD18 build mid-coast Texas
Posted: Thu Apr 21, 2011 12:10 pm
by BassinVt
definately a mitty fine looking build going on here!!
Re: texasrds OD18 build mid-coast Texas
Posted: Thu Aug 18, 2011 12:15 am
by texasrds
I'm back at it again (where have we heard that before)

Just too stinkin' hot. Anyhow got a question - what are the white chunks in the blended filler mix? They don't want to "dissolve" or mix very well together with the resin. I have even sifted the whole bag (since I had mini-icebergs sticking up on the boat after the first try) and I still get settling of the white whatever they are in the bottom of the tray as I'm putting it on the boat. I'm not sure if I'm getting the results I should with the blended filler - I've gone through 44 oz of resin and about 5 oz of blended filler (two coats) and really can't tell if it is doing any good. The glass still feels rough. I may just go ahead and move on to the Quick Fair I have and be done with it.
Randy.
Re: texasrds OD18 build mid-coast Texas
Posted: Thu Aug 18, 2011 7:55 am
by topwater
They mite be clumps of silica " used to thicken the filler". I just keep mixing they mix in sooner or later.
Re: texasrds OD18 build mid-coast Texas
Posted: Thu Aug 18, 2011 9:45 am
by Larry B
Randy, don't know how I missed your sprayrail pictures before??
Must have been fishin
Anyway they look almost identical to mine. You will have a very dry ride. I've got to be in very rough water with the wind blowing hard to even think about getting wet. You will love the sprayrails
Re: texasrds OD18 build mid-coast Texas
Posted: Thu Aug 18, 2011 2:17 pm
by Uncle D
Glad your back at it Randy. I also believe that's chunks of silica. I think I'd sand the rough spots and hit the quick fair. Won't be long, you'll be tired of the quick fair too. At least I know I am. But that's because I think I'm finally learning how to apply it right. Joel told me that most builders (me too even though I said I would know better
)sand off as nearly much as they apply. Got to get to AP one of these days. Later Don
Re: texasrds OD18 build mid-coast Texas
Posted: Thu Aug 18, 2011 2:23 pm
by texasrds
Well I did happen upon your build thread a time or two Larry.
As well as many others. The spray rails definitely took a lot more time and work than I had planned (and lots of screwed up ripped 2 bys of SYP) and have been a bit of a pain what with covering them in a layer of fiberglass and now sanding and filling their seams upside down. I've got primer and graphite sitting here so I'm chomping at the bit now to get this thing faired so the first layer of Quick Fair will be going on this weekend.
Randy.
Re: texasrds OD18 build mid-coast Texas
Posted: Thu Aug 18, 2011 2:50 pm
by Larry B
Randy, just be sure to fair the bottom of the spray rail before flipping
Also fair everything you can before flipping, it will be much easier. I faired everything except for the top of the spray rail which I faired after flipping because it made it easier.
Your build is really looking great.
Re: texasrds OD18 build mid-coast Texas
Posted: Fri Aug 19, 2011 1:15 am
by texasrds
Wished I had read the post about using a plastic squeegee earlier to apply the blended filler. Couldn't figure out why mine wasn't looking right. The two coats I had done were with a foam roller so that is why I wasn't really getting anything down into the weave and I guess pretty much wasted 40+ oz of resin and half a bag of blended filler. Oh well. The blended filler went on very well tonight with the squeegee (bondo applicator), now it looks similar to others applications and of course now I'm out of blended filler to do a second coat properly.

Randy.
Re: texasrds OD18 build mid-coast Texas
Posted: Fri Aug 19, 2011 11:11 am
by Uncle D
Randy, I think I have some at the house. If you need it I'll double check after work. I could meet you somewhere around Portland. Let me know 361-nine60-274three
Don
left the phone at home but will check messages when get there.
Re: texasrds OD18 build mid-coast Texas
Posted: Sun Aug 21, 2011 4:16 pm
by texasrds
Hi Don, thanks for the offer on the blended filler. Gave you a ring this weekend but number says incorrect number. I see how this works.
I probably translated wrong. Anyhow, appreciate it.
Randy.
Re: texasrds OD18 build mid-coast Texas
Posted: Tue Jan 17, 2012 5:54 pm
by texasrds
Well - finally back at it. Since the last time I posted I have managed to fair the bottom and sides of the boat up to the splash rail, installed the skeg and as of last night put on three coats of primer. Primering wasn't as bad as I had anticipated (i.e. - put off) and found that the short napped rollers labeled for epoxy at Lowes worked quite well. I'm going to let that set a little bit and then mask off and graphite the bottom which hopefully will be by this weekend.
Skeg glued in place
Second coat of primer view 1
Second coat of primer view 2

Feels good to be back at it!! Whoohoo!!
Re: texasrds OD18 build mid-coast Texas
Posted: Tue Jan 17, 2012 6:25 pm
by Prarie Dog
Looks good Randy, I'm looking forward to a ride on that bad boy in late July at the builders meet.
Re: texasrds OD18 build mid-coast Texas
Posted: Wed Jan 18, 2012 9:48 am
by Uncle D
Glad to see your back at it. Looks great!!
Re: texasrds OD18 build mid-coast Texas
Posted: Wed Mar 21, 2012 4:26 pm
by texasrds
I am getting ready to flip. Whoohoo! Just have to figure out how. lol Finished up the bottom epoxy/graphite and applied the paint to the lower section of the boat including under the splash rails last week and this past weekend. Three coats of Kirby paint (alkyd enamel) in semi-gloss with sanding between each coat. Will see how the paint will hold up over time.
Bow shot

Side shot
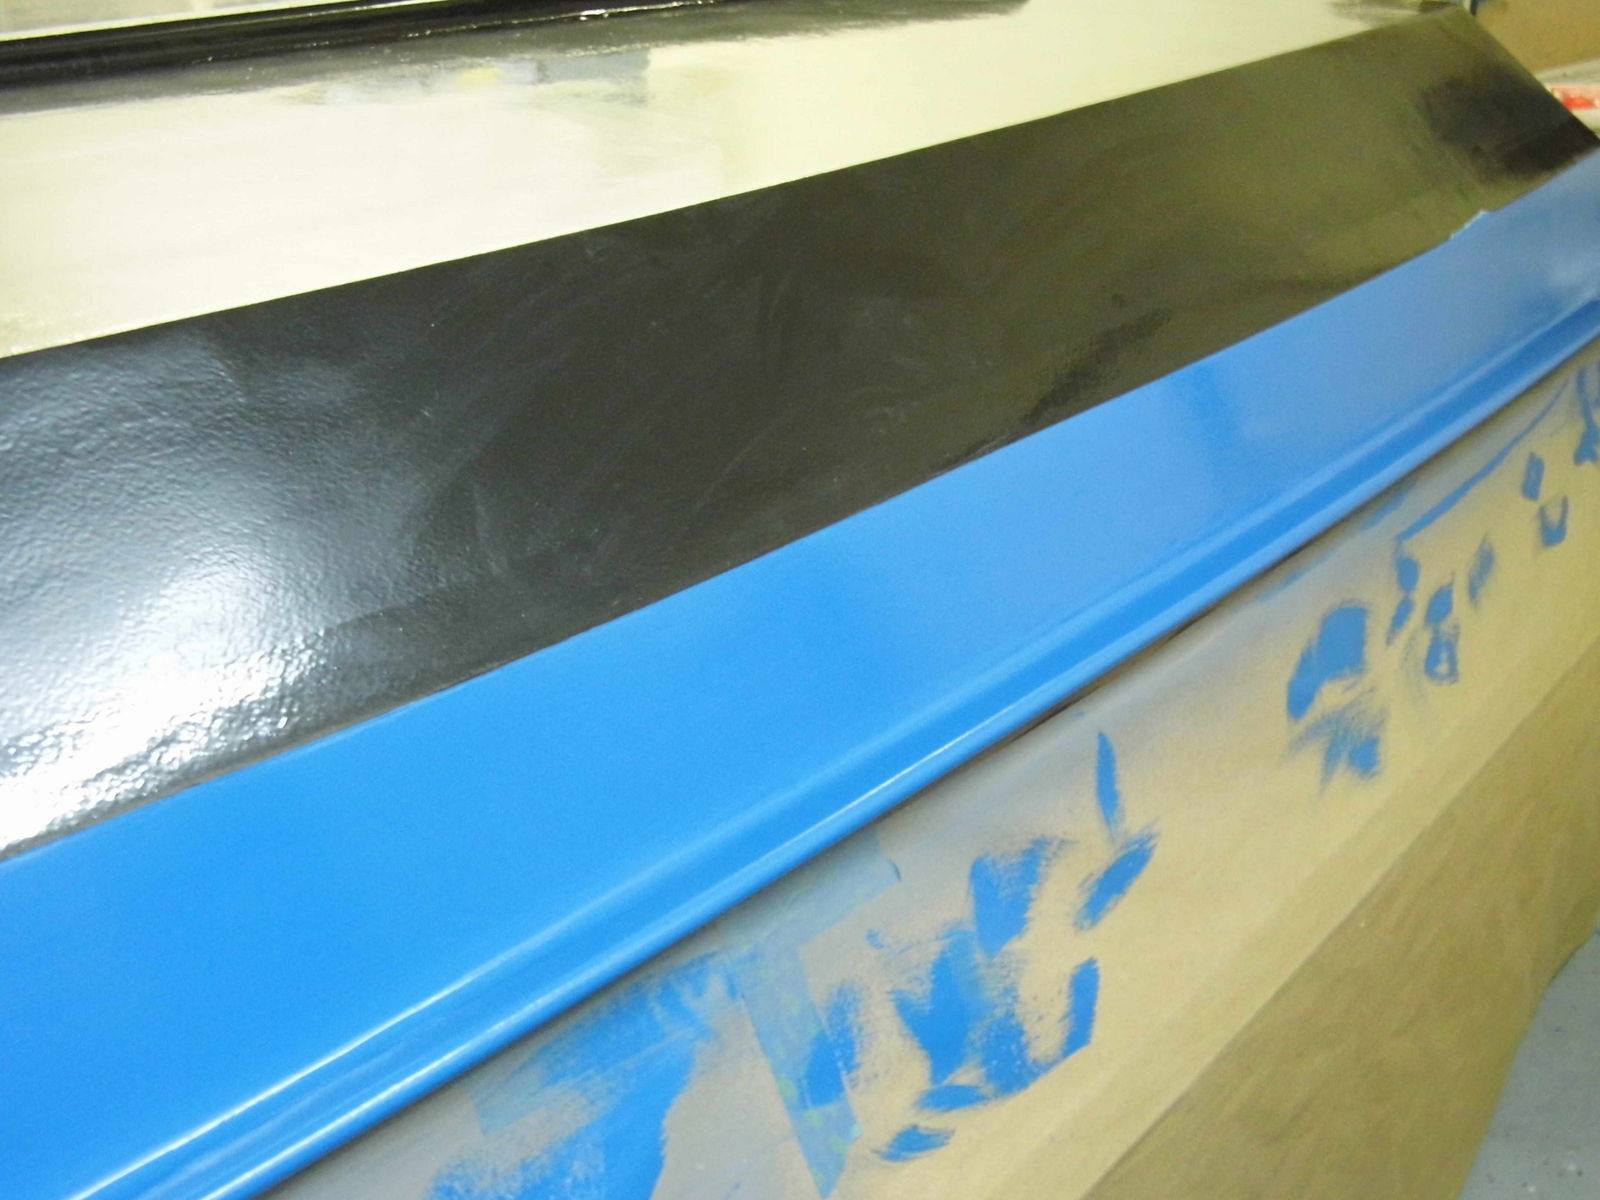
Bow shot 2
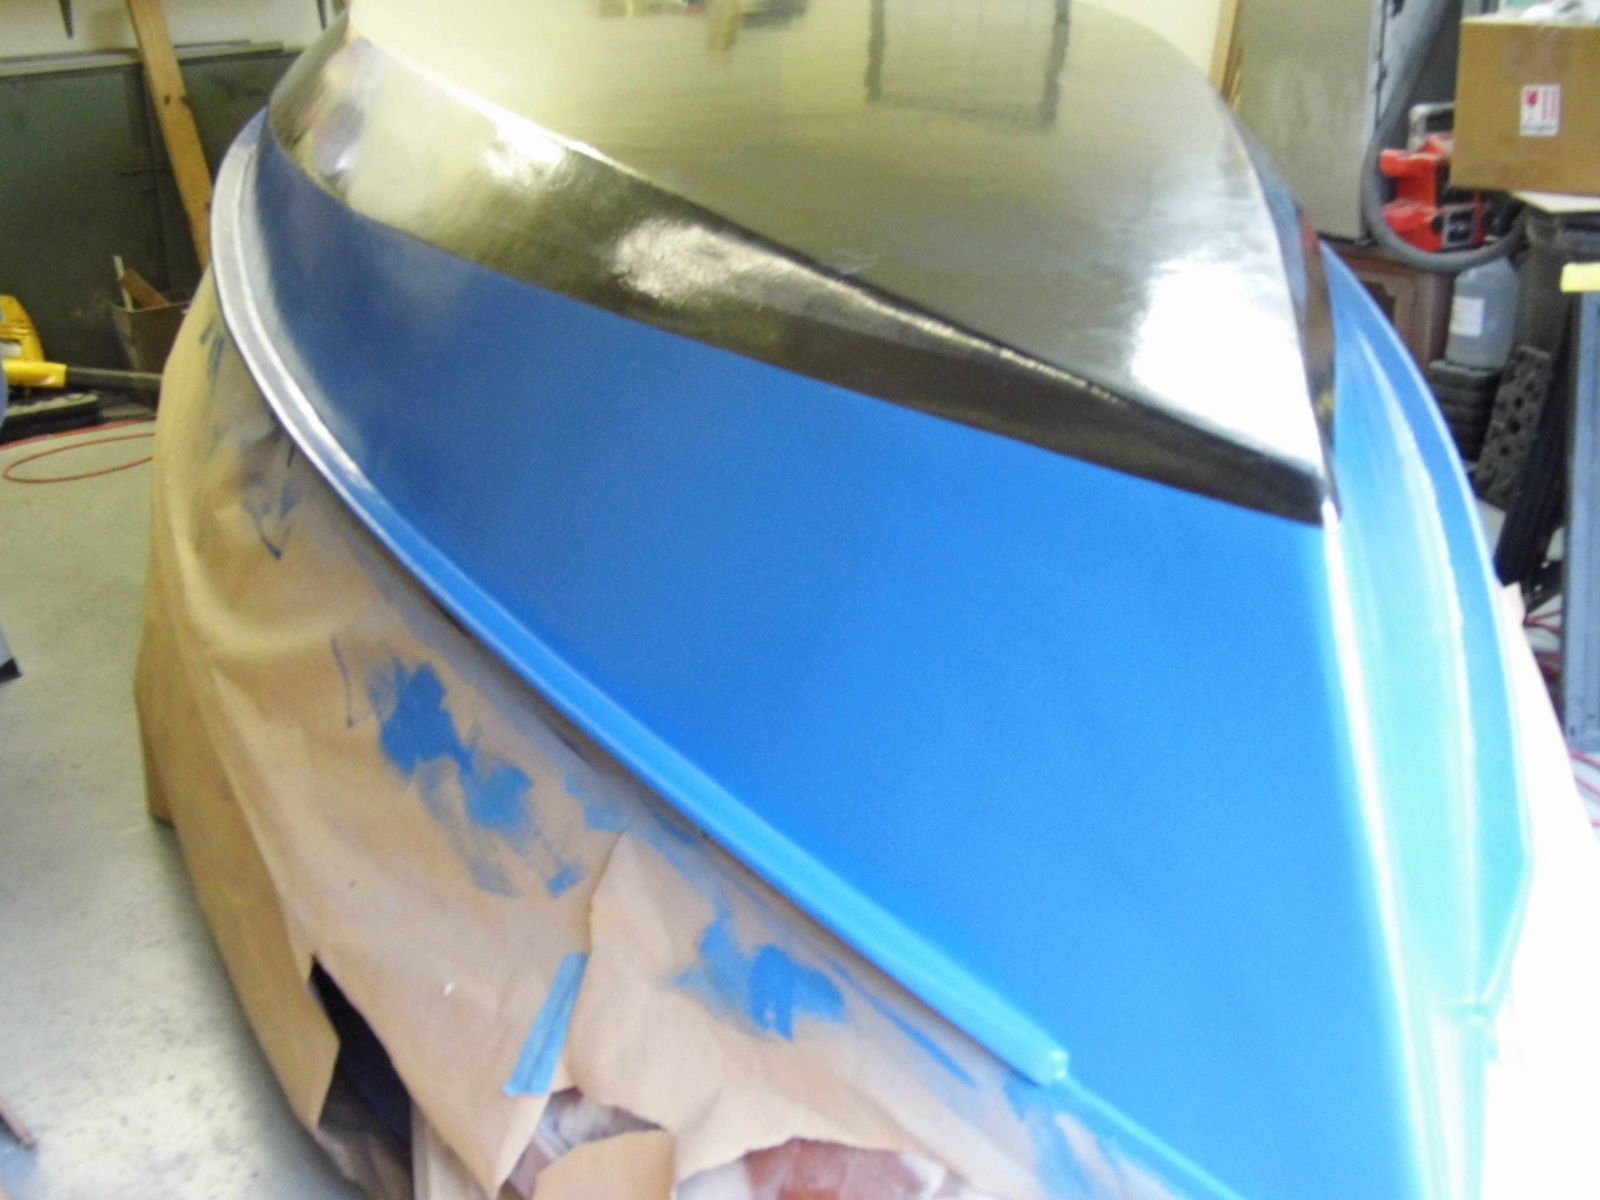
Bow shot 3 - this probably reflects the best actual color
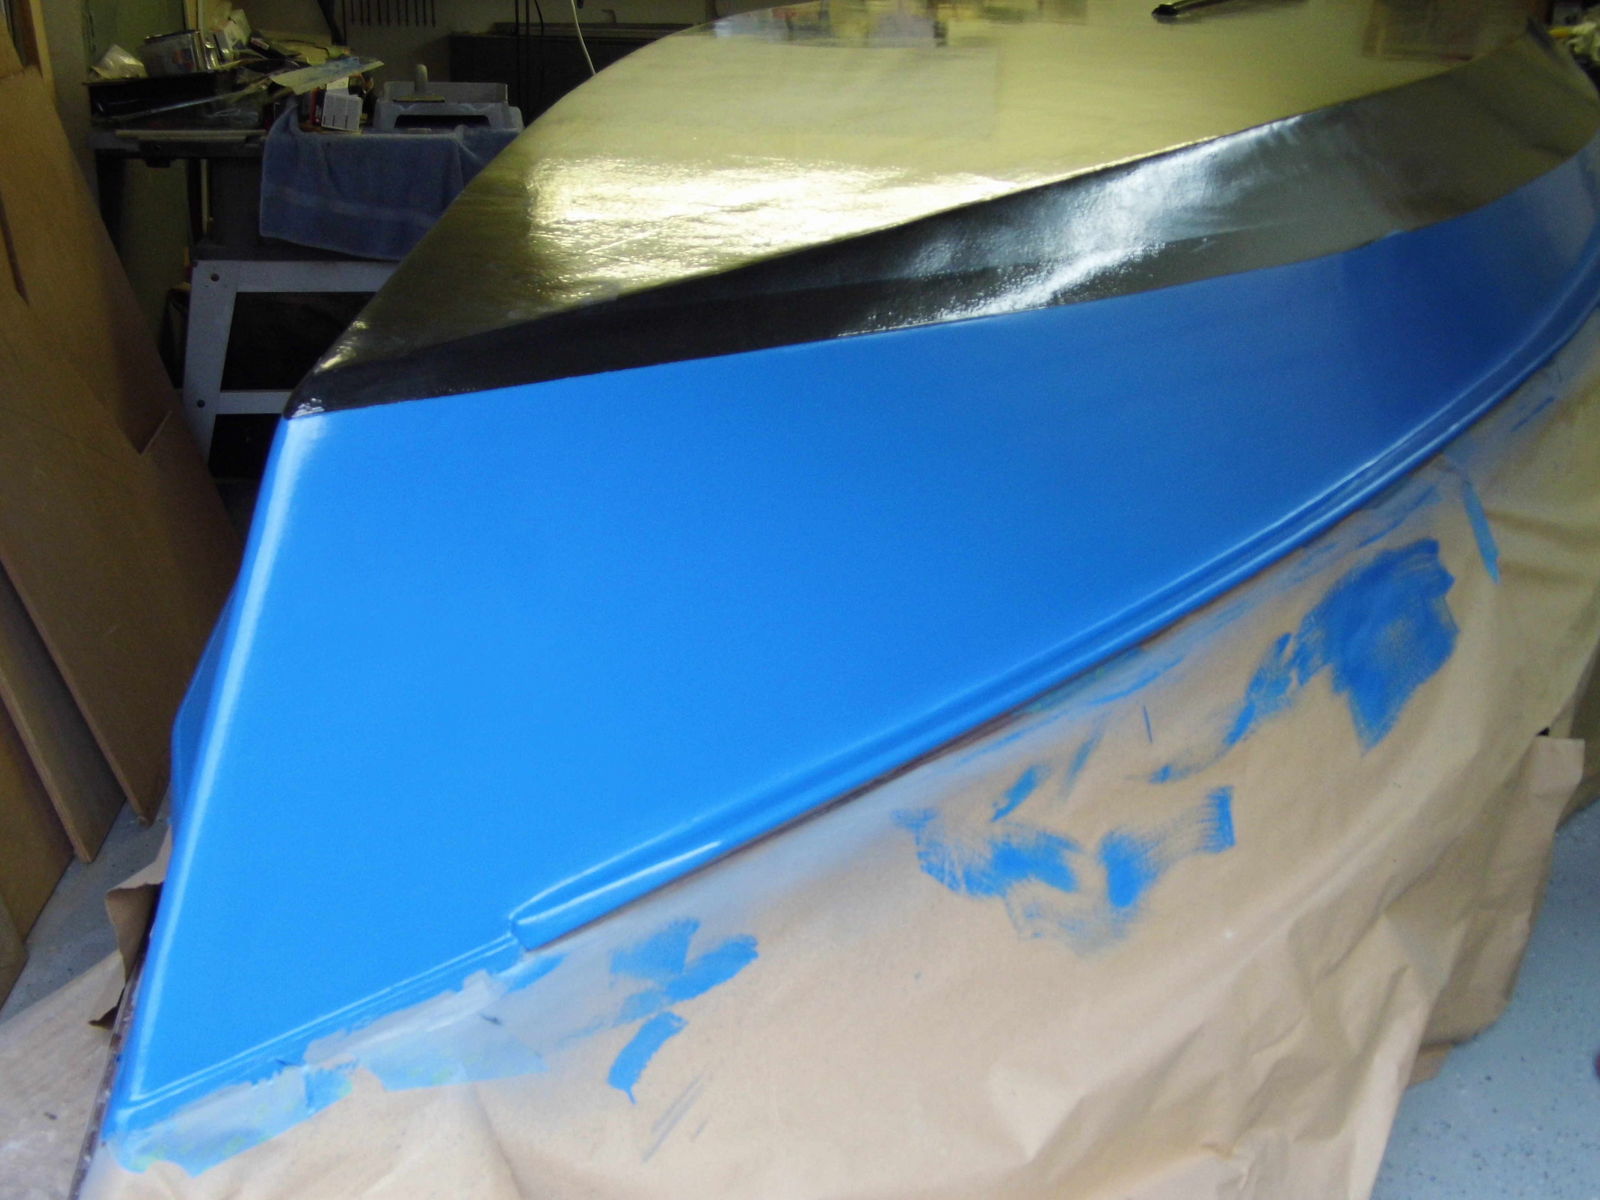
Transom snap shot
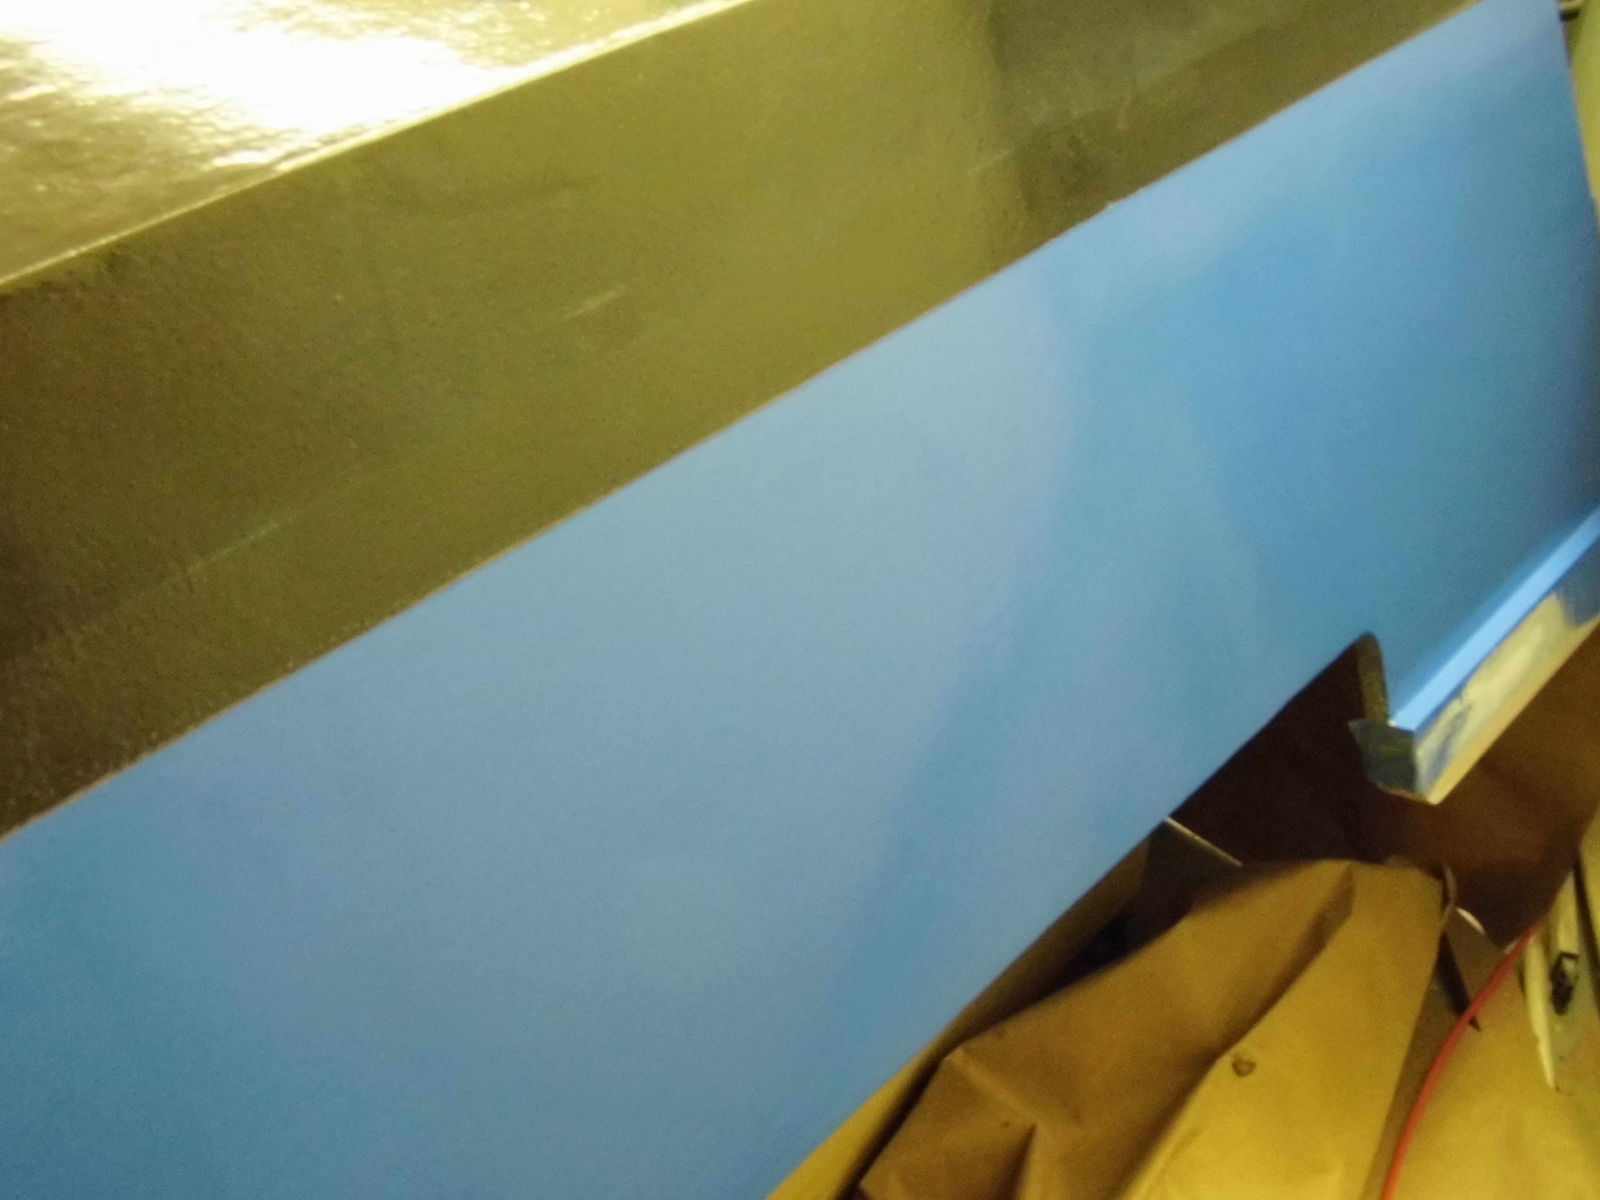
Randy
Re: texasrds OD18 build mid-coast Texas
Posted: Wed Mar 21, 2012 7:22 pm
by cottontop
Looking good. Now comes some real fun.John
Re: texasrds OD18 build mid-coast Texas
Posted: Thu Mar 22, 2012 10:00 am
by Uncle D
Wonderin' where you been, Randy. Looks great!! You going to have it ready for the "meet". Don
Re: texasrds OD18 build mid-coast Texas
Posted: Fri Mar 23, 2012 1:38 am
by texasrds
Your definitely right John. Once the boat is flipped its back to having fun with the actual building part of things again. Sanding, fairing, sanding, primering, sanding and painting are not high up on the list of my fun things to do. Not sure about the being ready for the meet around here Don but will certainly be working with that in mind.
Randy.
Re: texasrds OD18 build mid-coast Texas
Posted: Sat Mar 24, 2012 1:14 pm
by Fuzz
Randy, keep up the good work. I am building an OD-18 myself and you are just ahead of me. I get to use you as a guide
I have mine flipped and doing the glassing at this point. I will be using your spray rails as they look great!
Fuzz
Re: texasrds OD18 build mid-coast Texas
Posted: Thu Mar 29, 2012 3:41 pm
by texasrds
Careful who you use as a guide Fuzz -
I have used Capeman, Cracker Larry and Larry B to name a few as my guides and you can't go wrong with those guys. They know what they are doing by looking at the boats they have turned out, their willingness to help others and guide us "novices" and answer our questions. As far as the spray rails go, yeah, they managed to side tracked me for quite a while. Couldn't just do a simple 1 x 2 or something and then I was also following what Larry B did with his spray rails and so I patterned mine after his. I did end up using drywall screws to help hold in place with the bends and then removing and filling with wood flour. Also, if I had to do it again I would figure a way to I think the word is scarf the long pieces together. Butt joints on the spray rails did not work out well (particularly when your bending them to fit on the boat) and I ended up having to fill and shape the butt joints on the curves. Okay for straight lines bad for these compound curves we're bending to (just like the rubrails).
Randy
Re: texasrds OD18 build mid-coast Texas
Posted: Fri Mar 30, 2012 12:10 am
by Fuzz
You have a point there Randy but from what I see your boat is going to be just fine! Those guys you named built works of art, it is not that I do not love them it is I know I do not have the skills to do that quality of work. It is neat to see a boat going together just a few steps ahead of me. My glassing is almost done on the outside and then the fairing starts
I know from other boats this is the part I hate

I normally work at it a while and then call it good enough. I am not sure I will be able to hang with it long enough to make it look like yours and the others do. I see you used a different kind of paint, how do you like it? How does the cost compare?
Fuzz
Re: texasrds OD18 build mid-coast Texas
Posted: Fri Mar 30, 2012 9:45 am
by Larry B
Those spray rails look very nice, they will certainly keep you dry
Re: texasrds OD18 build mid-coast Texas
Posted: Tue Apr 03, 2012 12:37 am
by texasrds
Thanks Larry. Had a great example to follow with those spray rails. One of these days I will actually get to try them out.
Fuzz, I used Kirby paint in a semi-gloss and its an alkyd enamel. Paid $ 90 for the gallon and they mixed a couple of different blues for me to come up with a reasonable royal blue I was looking for. Nice and easy to use, just pour from the can and paint. Rolled and tipped and I think it came out fine and it seems to flow out well. Just not a "hard" paint like a two part would be but I've tried to peel off a spot of the paint where it shouldn't have been and it took work. It would have been really nice if I could have done a better job of the fairing because of course the paint shows every little nook, cranny, dink, etc... even in a semi-gloss. I'm just not very good at this finishing stuff. Wasn't on a car, not a boat either. Don't seem to have the talent nor the experience. Ten foot view and it looks nice and smooth. lol. I used two different brushes for the tipping and I do have to say the better quality the brush is the better the tipping goes.
Randy.
Re: texasrds OD18 build mid-coast Texas
Posted: Tue Apr 03, 2012 12:46 am
by Fuzz
Randy,
If my dory turns out half as nice as yours looks I will be well pleased! I know for a fact we are always our own worse critic. I would have to believe my boat was perfect to spend $500 on paint just to have it show my every little screw up. Keep up the good work.
Fuzz
Re: texasrds OD18 build mid-coast Texas
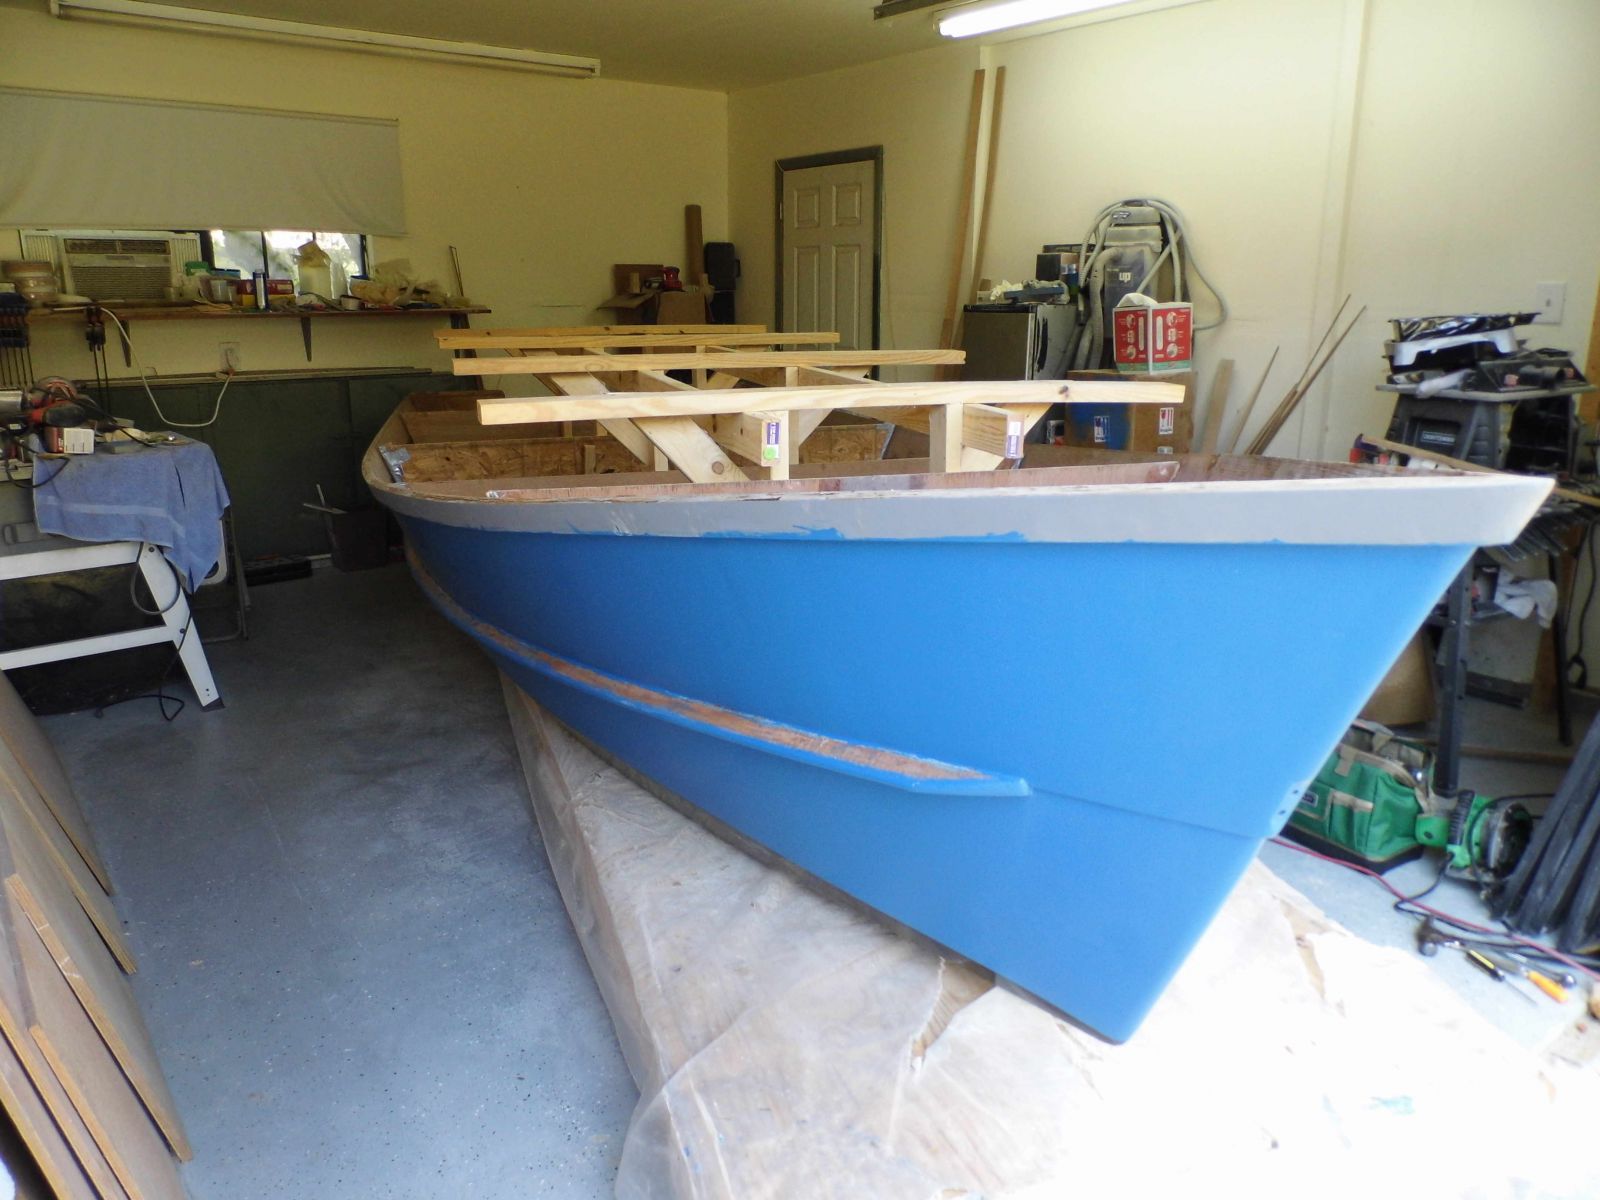
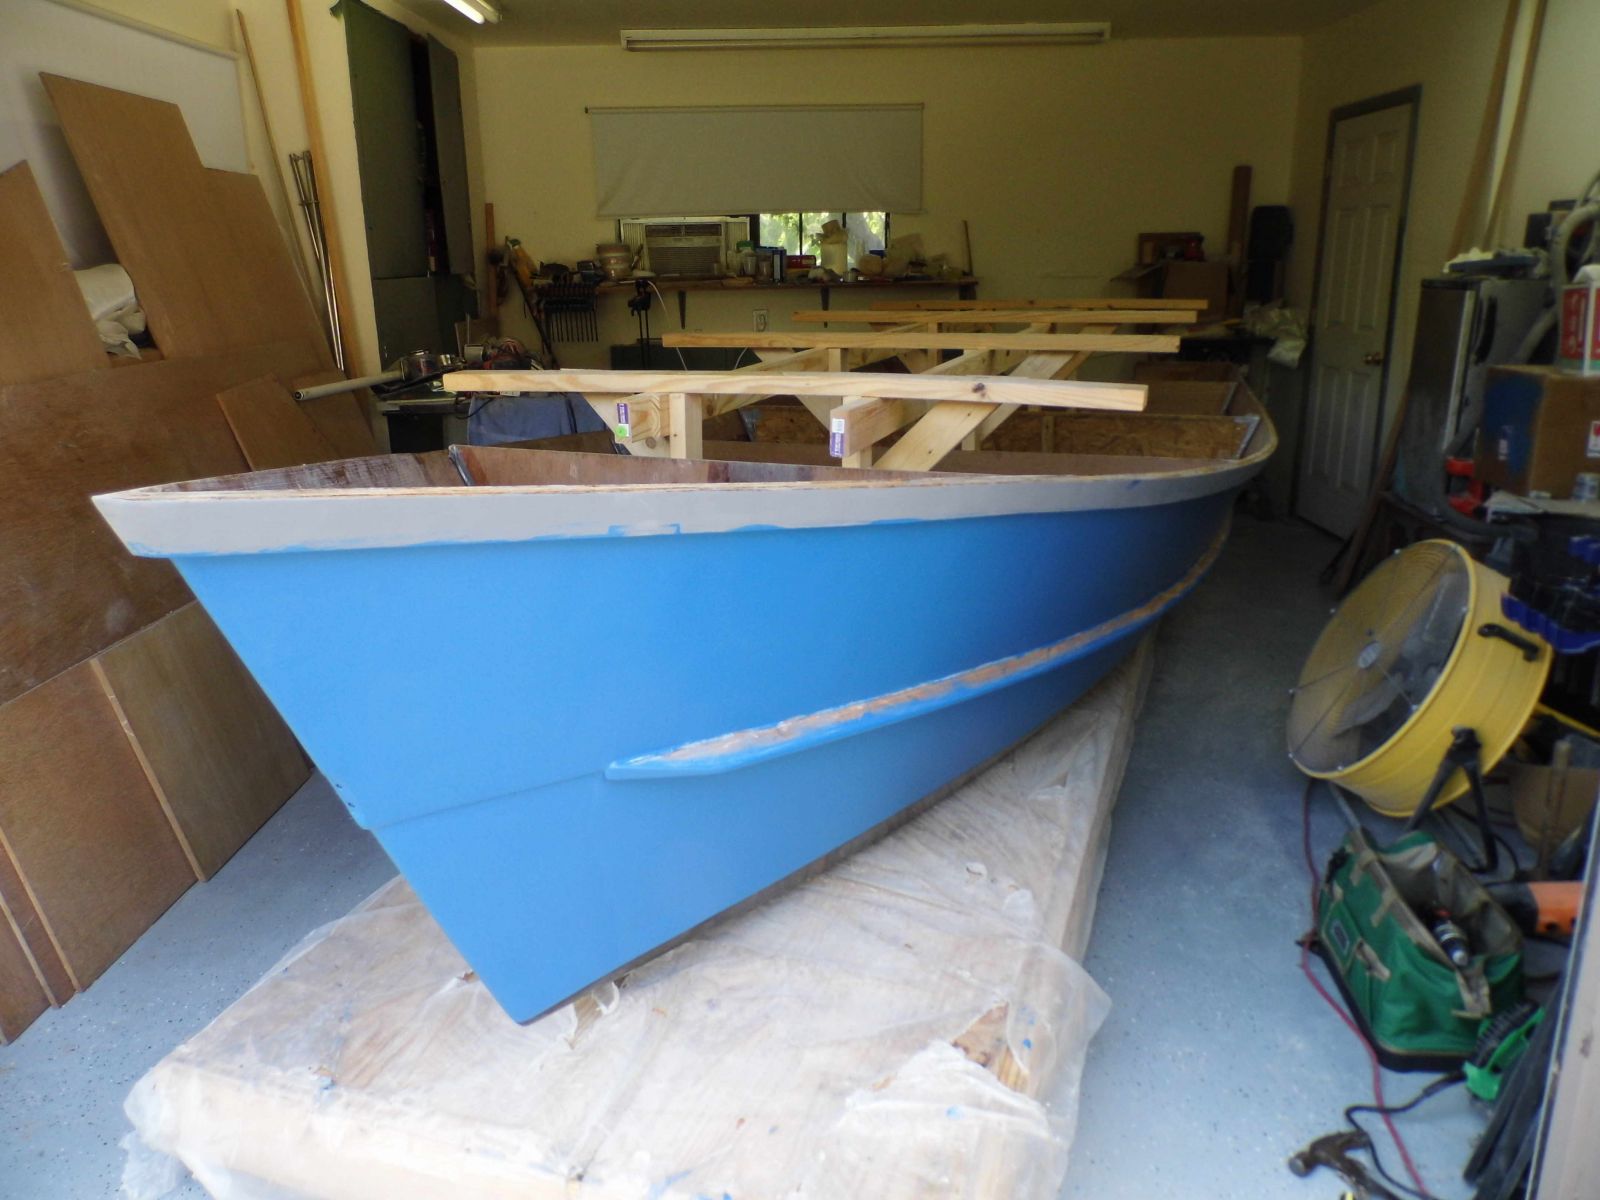
Posted: Tue May 15, 2012 10:53 pm
by texasrds
Finally, finally got this beast flipped today. Now the fun starts again.
Re: texasrds OD18 build mid-coast Texas
Posted: Tue May 15, 2012 10:56 pm
by Mad Dog
Congrats Randy. Half way home.
MD
Re: texasrds OD18 build mid-coast Texas
Posted: Wed May 16, 2012 11:22 am
by Uncle D
Nice Randy, glad to see her right side up.
Don
Re: texasrds OD18 build mid-coast Texas
Posted: Wed May 16, 2012 12:24 pm
by gstanfield
Congrats on the flip, nice color
Re: texasrds OD18 build mid-coast Texas
Posted: Wed May 16, 2012 2:22 pm
by Prarie Dog
Looking good Randy. Really like the spray rails.
Re: texasrds OD18 build mid-coast Texas
Posted: Tue May 22, 2012 12:00 am
by texasrds
Thanks a lot guys. It does change ones' perspective again and now the interior work starts filling the head. Unfortunately, I caught a seriously sore throat Friday and haven't been out to work on it since the flip - aaaarrrrrrgggghhhhh! I was paranoid about the spray rails and flipping in the yard (I could just see snapping part of one off as it goes over) so I ended up framing the outside of the boat with a big rectangle of 2x4s to protect the sides of the boat (plus probably another 60 lbs of wood). It did that fine, it was just a struggle with three of us but we took our time and just worked it inch by inch.
Re: texasrds OD18 build mid-coast Texas
Posted: Tue May 22, 2012 7:47 am
by cottontop
You've done a really fine job so far. i love your rub rails and the color. A lot of blue boats being built right now. Othere than a lot of thinking about what you want the inside to look like, your on your way to the finish line now. Your going to love this boat. Ask me an Larry and all the others how we know.
John
Re: texasrds OD18 build mid-coast Texas
Posted: Wed Jul 11, 2012 11:19 pm
by texasrds
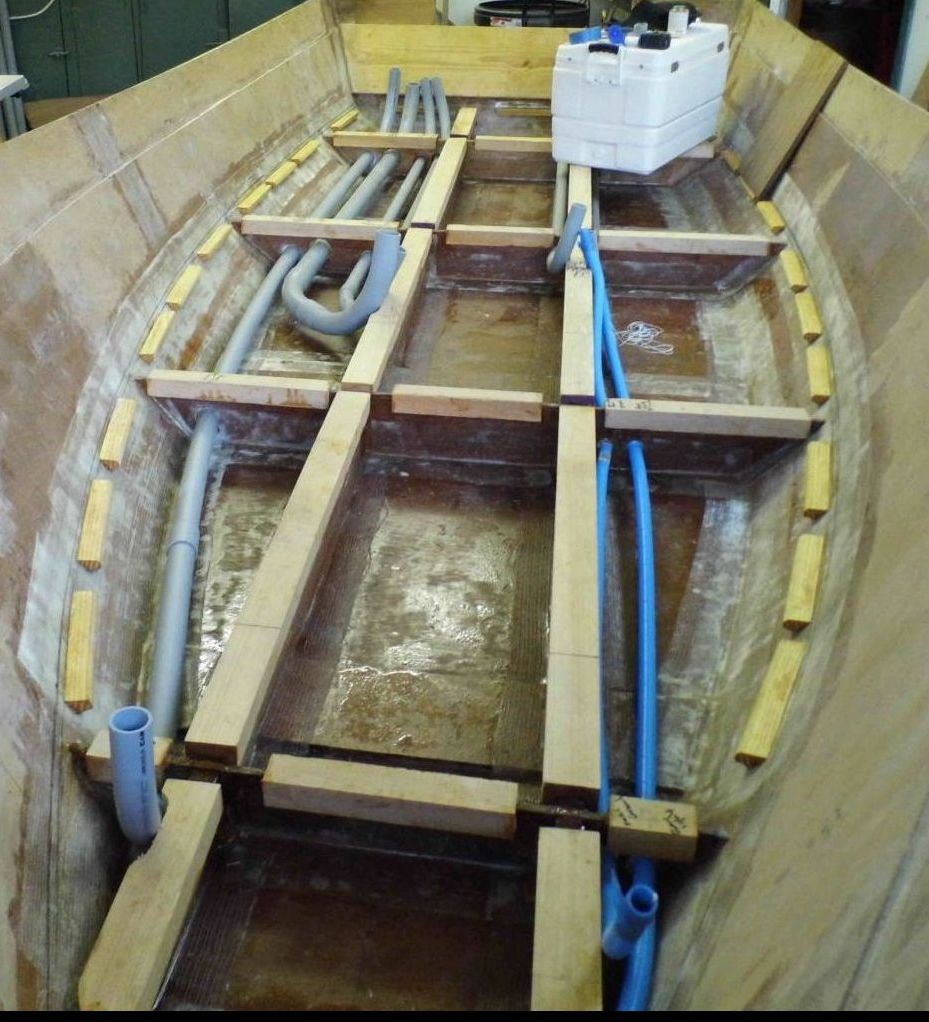
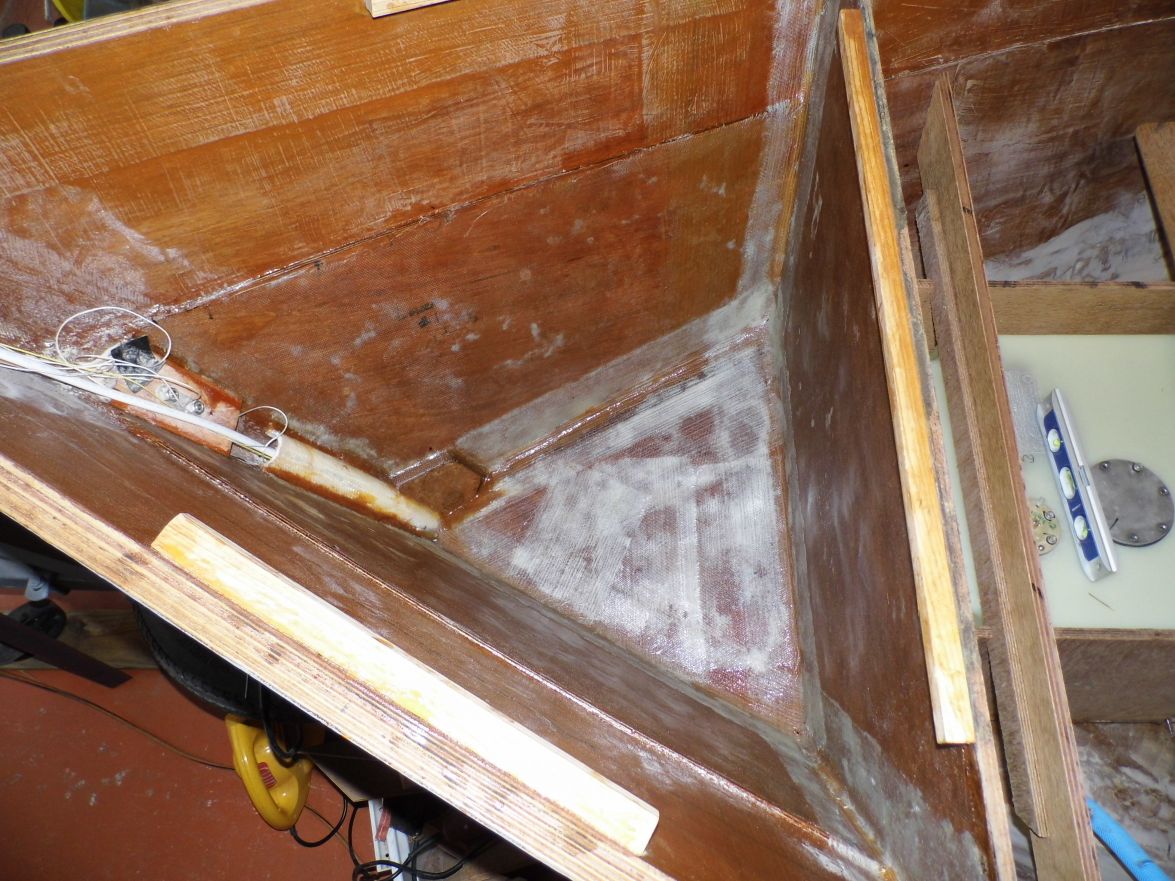
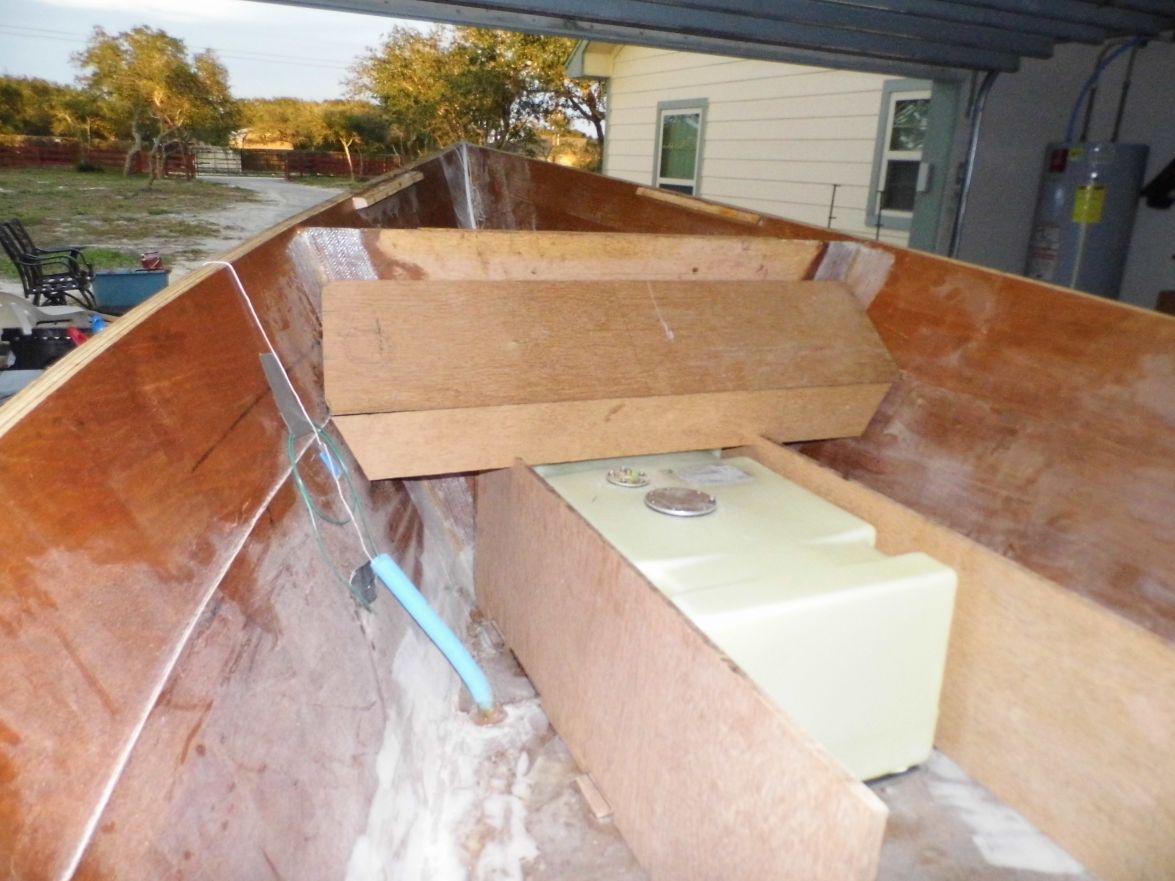
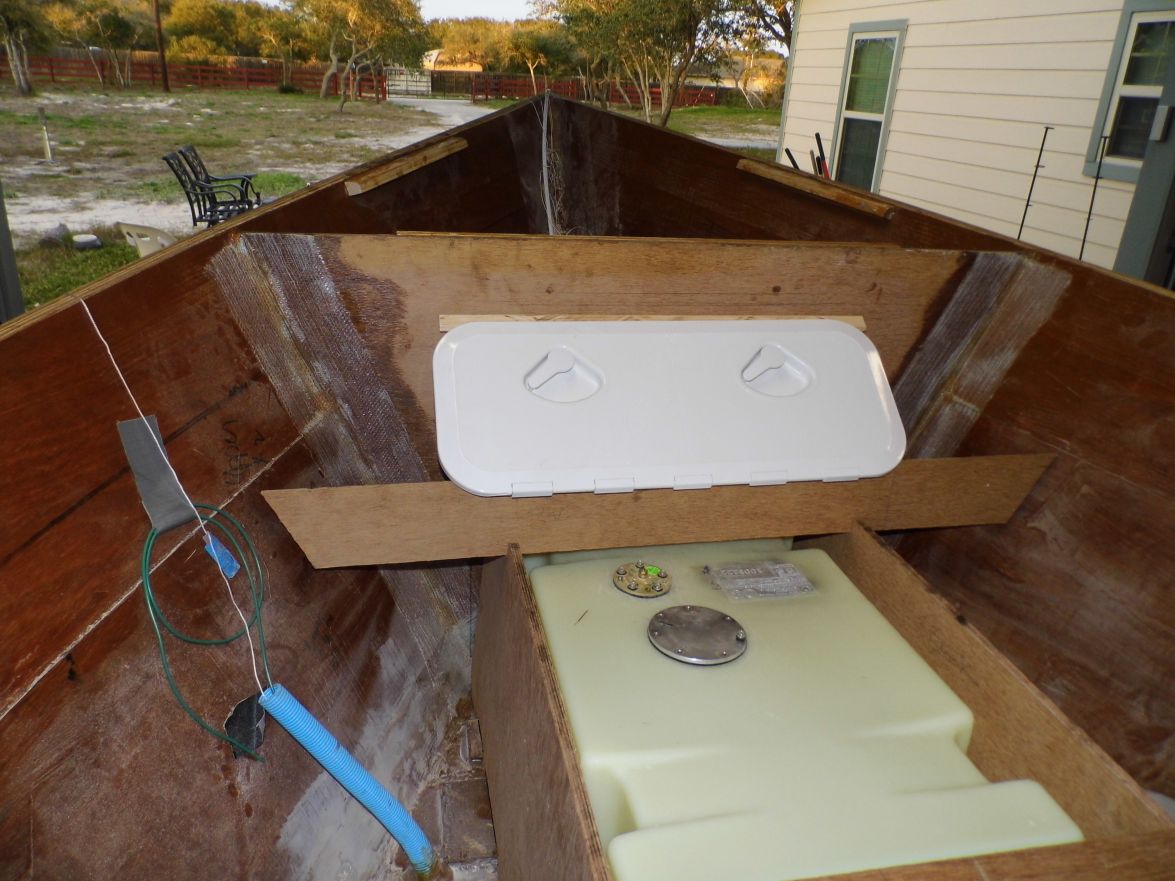
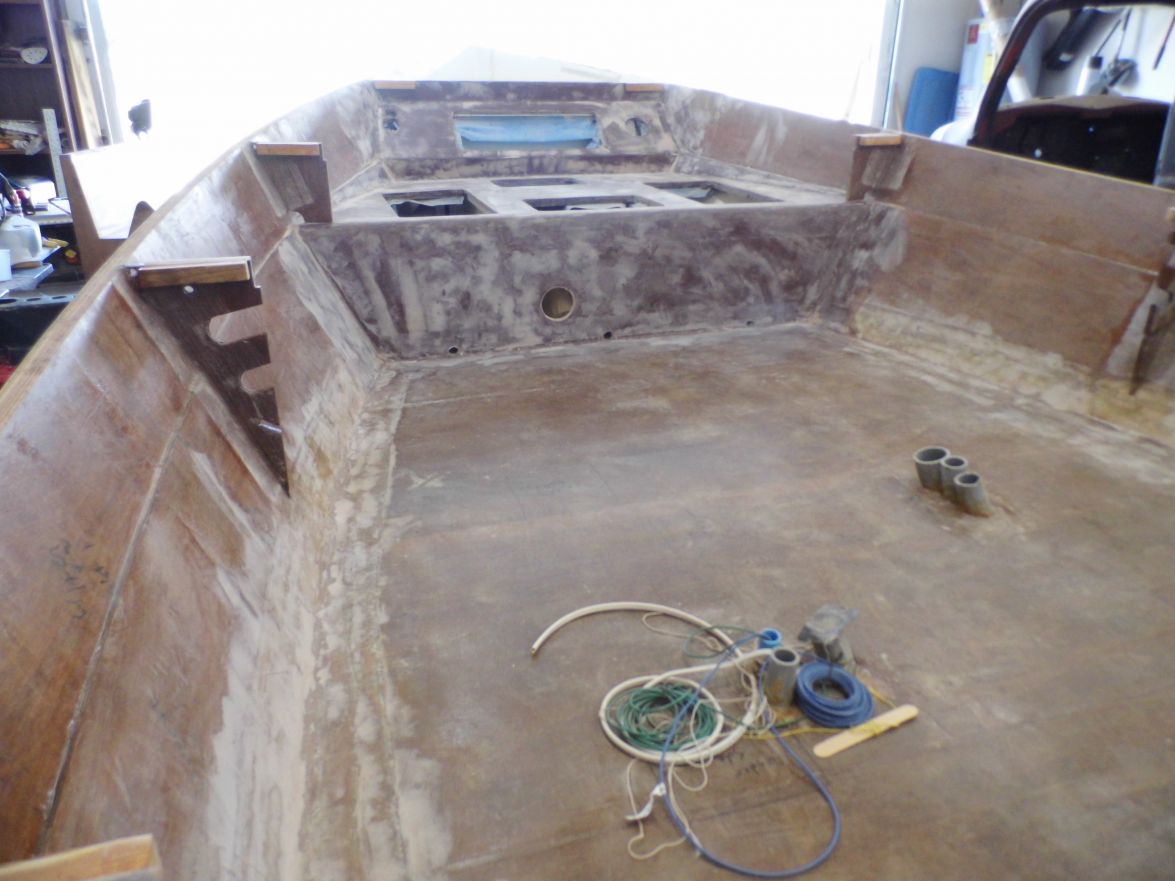
Making some progress here on the OD18. Got the transom board glued down, "bottom" sole supports done (need sole side wall supports to go), laying out and test fitting plumbing, cut out sole pieces and test fitting those and also got a new fuel tank so pondering location, mounting etc....
Plumbing shot
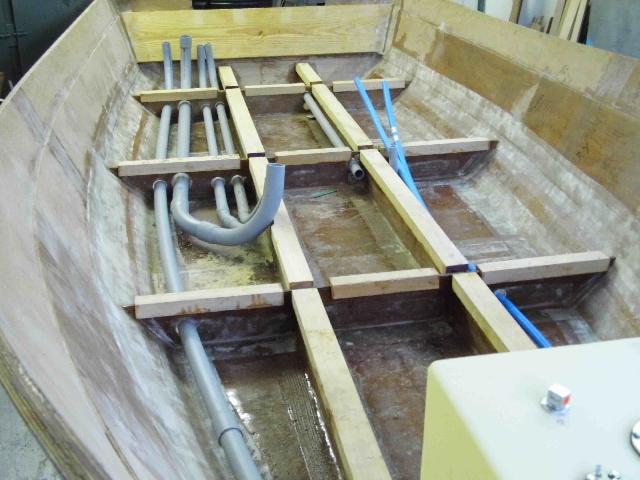
Pondering Fuel Tank
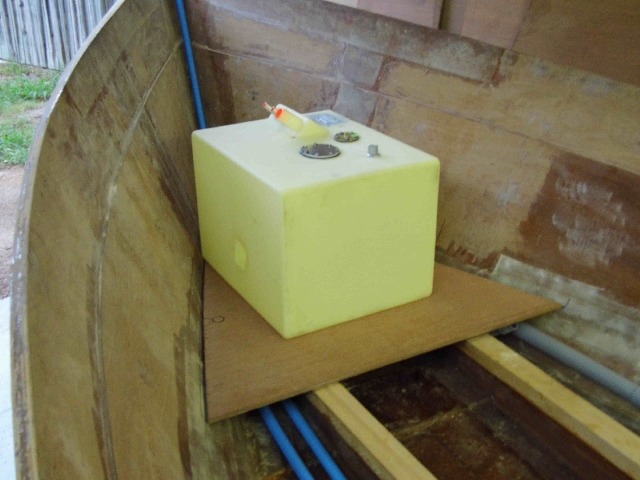
Randy.
Re: texasrds OD18 build mid-coast Texas
Posted: Thu Jul 12, 2012 9:06 am
by Mad Dog
Looking good Randy. Looks like the guys from the builder's meet are going to have to drop by for a beer and check out the progress in person.
I'll bet you'll get a lot of input on the fuel tank then.
MD
Re: texasrds OD18 build mid-coast Texas
Posted: Thu Jul 12, 2012 9:37 am
by tech_support
cograts on the flip. Im sorry if you covered this but I read back a page or two and did not see how you made your cleats?
Did you route a notch in the wood so it slipped overtop the stringer/frame?
Re: texasrds OD18 build mid-coast Texas
Posted: Thu Jul 12, 2012 9:52 am
by peter-curacao
shine wrote:cograts on the flip. Im sorry if you covered this but I read back a page or two and did not see how you made your cleats?
Did you route a notch in the wood so it slipped overtop the stringer/frame?
I saw that too I think it's a great idea, wish I would have thought about that, much easier as a 100.000 pipe clamps
Re: texasrds OD18 build mid-coast Texas
Posted: Thu Jul 12, 2012 1:52 pm
by texasrds
Thanks guys. Yes Mad Dog, that would be cool since I'm about 10 minutes plus the ferry ride from Port A. I'll just have to stock up on some beer.
I hadn't covered the cleats in any previous post yet but I purchased some Cypress dimensional lumber and used a dado blade on my table saw to cut out the width of the stringers and the bulkhead pieces. My dado depth left me with a planned 3/4" raised sole like several others have done here on the forum. I then buttered up both the stringers and the cleats (sides and bottom of the channel) with wood flour, slipped them on and weighted them down a little bit. Haven't come up with a plan yet on the side cleats but have quite a bit of Cypress left over so I may just rip some pieces and start gluing after I figure out where to place them exactly (after test fitting the sole pieces).
Randy.
Re: texasrds OD18 build mid-coast Texas
Posted: Thu Jul 12, 2012 4:28 pm
by Uncle D
This is something to remember next time around
On my side cleats I have a long straight edge to mark my reference from the stringer cleats, then used the bar clamps from HF that you can reverse the foot, then pushed from stringer to sheer cleats. They actually tried to push themselves upwards but a piece of scrap clamped to the rubrail keep them from riding up. Anyways, that worked well for me.
Re: texasrds OD18 build mid-coast Texas
Posted: Thu Jul 12, 2012 5:12 pm
by peter-curacao
Uncle D wrote:They actually tried to push themselves upwards
I had the same problem, they were riding everywhere but the place I wanted them to be, in the end I got them right but it was a bit of a hassle, that's why I liked Randy's idea so much.
Re: texasrds OD18 build mid-coast Texas
Posted: Thu Jul 12, 2012 5:59 pm
by Fuzz
Randy,
I did the stringers on my OD-18 the same way for the same reason. Only thing different is I just used a full 2x4. A little more weight but it gives a lot of glueing surface for the sole. I spilt a 2x4 in half and used that for the bulkheads and ribs. Lets those of us with bad wood cutting skills get a flat surface easily. I love the blue and wanted that color but my girl wants a green boat so thats what it will be.
Fuzz
Re: texasrds OD18 build mid-coast Texas
Posted: Thu Jul 12, 2012 6:04 pm
by Cracker Larry
They sure do squirm like a worm. I use dowels to solve that. Dry fit them, clamp them, then drill a few holes and put in some dowels for alignment. This works for cleats, transoms, rub rails and anything else that doesn't want to stay put. After you glue them, cut the dowels off flush.
Re: texasrds OD18 build mid-coast Texas
Posted: Thu Jul 12, 2012 6:18 pm
by Fuzz
Yet another great Idea but just a little late
Re: texasrds OD18 build mid-coast Texas
Posted: Thu Jul 12, 2012 7:19 pm
by peter-curacao
Fuzz wrote:Yet another great Idea but just a little late
Ahh all that waste of electrons!
Re: texasrds OD18 build mid-coast Texas
Posted: Fri Jul 13, 2012 10:45 am
by Uncle D
peter-curacao wrote:Uncle D wrote:They actually tried to push themselves upwards
I had the same problem, they were riding everywhere but the place I wanted them to be, in the end I got them right but it was a bit of a hassle, that's why I liked Randy's idea so much.
I only had problems on the sheer and transom where you'd have an angle to deal with. that's where the scrap clamped to rubrails/top of sheer keep the cleat from riding up. I really like Larry's solution too. He always had good ideas.
Re: texasrds OD18 build mid-coast Texas
Posted: Fri Jul 13, 2012 6:00 pm
by texasrds
That he most certainly does to all our benefit!
Re: texasrds OD18 build mid-coast Texas
Posted: Fri Aug 03, 2012 2:53 pm
by texasrds
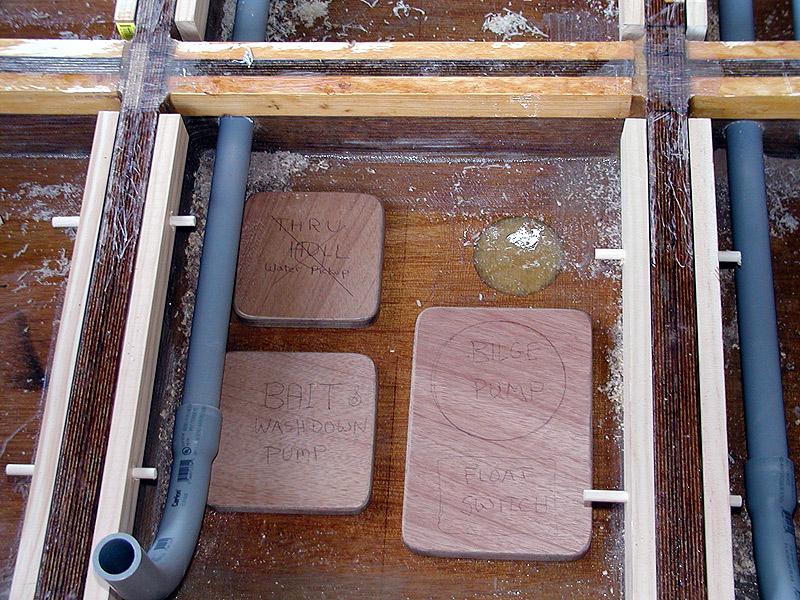
Cleated and Plumbed
Re: texasrds OD18 build mid-coast Texas
Posted: Fri Aug 03, 2012 5:46 pm
by Cracker Larry
Looking really good there
One thing I want to mention and I hope I'm not too late. When you raise the sole like that it will be wider than the plans dimensions, due to the hull flare. If you cut it to the plan dimensions, the sole will be too narrow. Better to wait and cut it to fit the boat. If you've already cut it to plans, the best way to fix it is to split it down the middle and add a spacer piece a few inches wide running full length down the middle.
Re: texasrds OD18 build mid-coast Texas
Posted: Thu Aug 23, 2012 2:39 am
by texasrds
Thanks CL for the heads up on the sole. Unfortunately I was to late (or early if you figure I cut out the sole pieces early on) in the modifying of the sole department. Oh well, filled the gaps and have glued down the sole and taped the sides and sole. Foaming the spaces was fun but took longer than I anticipated it would take (and more foam too
). Now starting to lay out and cut to fit fiberglass for the top of the sole. I am also playing with the placement of the forward panels where the fuel tank is and have cut out all the pieces of plywood for the motor well area.
Sole installed pic 1
Sole installed pic 2
Re: texasrds OD18 build mid-coast Texas
Posted: Thu Aug 23, 2012 7:27 am
by cottontop
Great work. As much as I follow these threads, this is the 1st time I've actually seen someone post how they raised their sole. What a great idea. John
Re: texasrds OD18 build mid-coast Texas
Posted: Thu Aug 23, 2012 10:10 am
by Uncle D
Looks good Randy, glad your still at it. I bet you did what I did on the foam. Probably used too much. Talked to Joel and that's how I knew I went overboard with it. I still need another Kit.
Don
Re: texasrds OD18 build mid-coast Texas
Posted: Fri Jan 18, 2013 8:27 pm
by tipitina
I'm bringing this one back from the depths.... How's the progress? Anyone else around the Aransas Pass area willing to let me look at the process, and of course lend a helping hand?
Starting to get interested in partaking in one of these projects and would like to get some first hand insight.
Re: texasrds OD18 build mid-coast Texas
Posted: Mon Jan 21, 2013 12:04 pm
by Uncle D
tipitina wrote:I'm bringing this one back from the depths.... How's the progress? Anyone else around the Aransas Pass area willing to let me look at the process, and of course lend a helping hand?
Starting to get interested in partaking in one of these projects and would like to get some first hand insight.
I'm in NW corpus. D
Re: texasrds OD18 build mid-coast Texas
Posted: Sat Jan 26, 2013 3:11 am
by TomTom
Nice to see another OD coming together - and a blue one at that!! I think you made a wise decision to raise the sole. I know that mine is a little heavy and I think it has water under the front portion of the sole (so its even heavier); but I think there are very few OD's out there that are built light to plans, and 3/4" should make the difference between your scuppers being scuppers, or your scuppers being intake pipes! Well done on the build...
Re: texasrds OD18 build mid-coast Texas
Posted: Thu Jan 31, 2013 6:34 pm
by AtTheBrink
tipitina wrote:I'm bringing this one back from the depths.... How's the progress? Anyone else around the Aransas Pass area willing to let me look at the process, and of course lend a helping hand?
Starting to get interested in partaking in one of these projects and would like to get some first hand insight.
I am located in Ingleside. I will offer a guided tour if you bring the beer, I'll supply the sandpaper
Re: texasrds OD18 build mid-coast Texas
Posted: Fri Feb 01, 2013 10:50 am
by Uncle D
AtTheBrink wrote:tipitina wrote:I'm bringing this one back from the depths.... How's the progress? Anyone else around the Aransas Pass area willing to let me look at the process, and of course lend a helping hand?
Starting to get interested in partaking in one of these projects and would like to get some first hand insight.
I am located in Ingleside. I will offer a guided tour if you bring the beer, I'll supply the sandpaper
You guys want to do the sanding, I'll supply the beer.
Re: texasrds OD18 build mid-coast Texas
Posted: Thu Feb 07, 2013 3:02 am
by texasrds
Re: texasrds OD18 build mid-coast Texas
Posted: Thu Feb 07, 2013 4:17 pm
by AtTheBrink
Looking good! I would like to swing by and see your boat one of these days. I am sure we are going to cross each other out on the water too. What are your plans for a the motor?
Re: texasrds OD18 build mid-coast Texas
Posted: Tue Feb 12, 2013 1:48 pm
by texasrds
Thanks for the comments. Your welcome to swing by and take a gander and talk. I will email you my phone number and address. As far as motors go I am thinking in the area of a 60/70/75 hp four stroke and at the moment not tied to any particular brand. I'm in the process of starting to build a house here in AP and so the motor purchase will have to wait until I'm done with that and well I'm not exactly at that stage just yet in the build other than consideration for motor controls on the console layout / build.
Randy.
Re: texasrds OD18 build mid-coast Texas
Posted: Tue Feb 12, 2013 3:05 pm
by AtTheBrink
Who do you have building your new home? I am a builder and know quite a few in the area.
As far as engines go, have you checked out the new Yamaha 70HP 4-stroke? From what I have heard it is a mean little machine!
Re: texasrds OD18 build mid-coast Texas
Posted: Fri Feb 20, 2015 12:53 am
by texasrds
Well after a very long hiatus I'm back at the build. Geez it has been quite a while. Think I have some serious re-learning to do. Started on the anchor locker bulkhead the last couple of days and got that glassed tonight. Next is to build the floor in the anchor locker with a small slope and angle to a drain that will be installed out the side of the boat and then start the process of the fuel tank layout and install. Speaking of some serious re-learning, first time to glue again yesterday and managed to glue part of the cinder block I was using to prop the bulkhead in place nice and solid to the sole.
Oh well, some chiseling and clean up were in order. Have to remember to put some tape on it so it won't stick.....
One view of installed bulkhead
Another view of the installed bulkhead

Noticed the other day when I got back on the forum that I missed the Port Aransas Plywooden Boat Festival back in October. Dang it - I'm only ten minutes from Port A and missed the chance to visit with some of you and Jacques. That's what I get for being gone so long from here. Anyhow, this time it is to the finish!!
Re: texasrds OD18 build mid-coast Texas
Posted: Fri Feb 20, 2015 8:10 am
by Cracker Larry
Welcome back
Re: texasrds OD18 build mid-coast Texas
Posted: Sun Feb 22, 2015 10:56 pm
by texasrds
Thanks Larry. It is good to be back at it. Was able to get the floor of the anchor locker sized and cut, coated with epoxy underside and ready to install as well as cutting out plywood to form up the fuel tank and deck platform. Plan to install the anchor locker floor, drain blocked out and drilled and get all of that area glassed and maybe faired this week. Does feel good.
Re: texasrds OD18 build mid-coast Texas
Posted: Fri Mar 06, 2015 9:02 pm
by texasrds
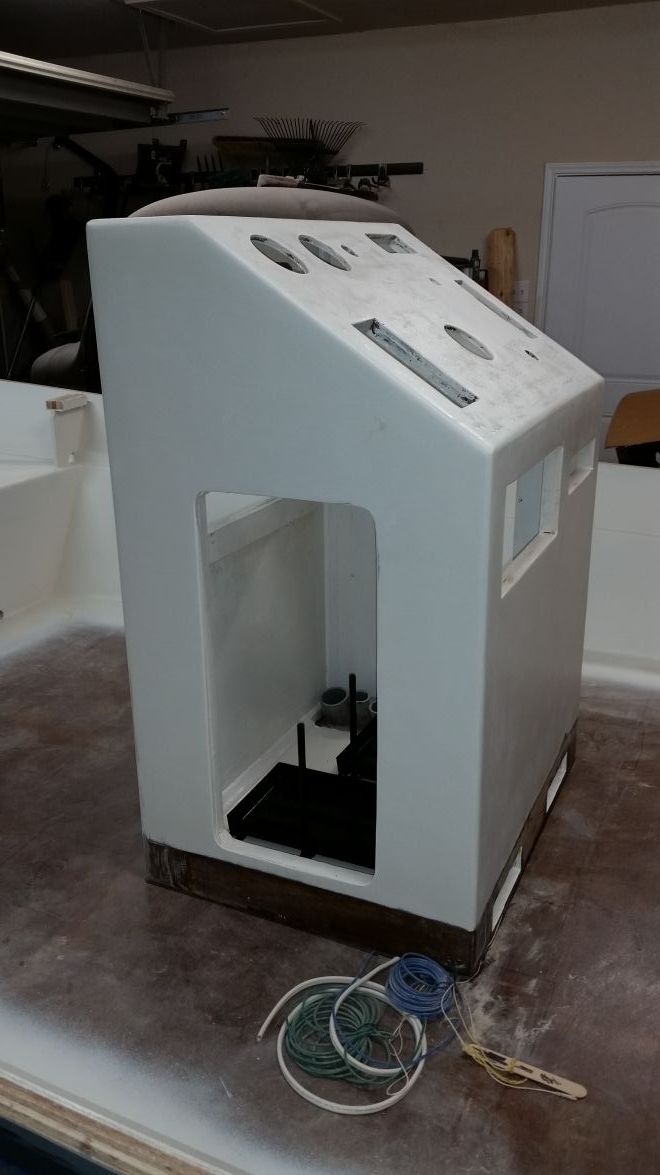
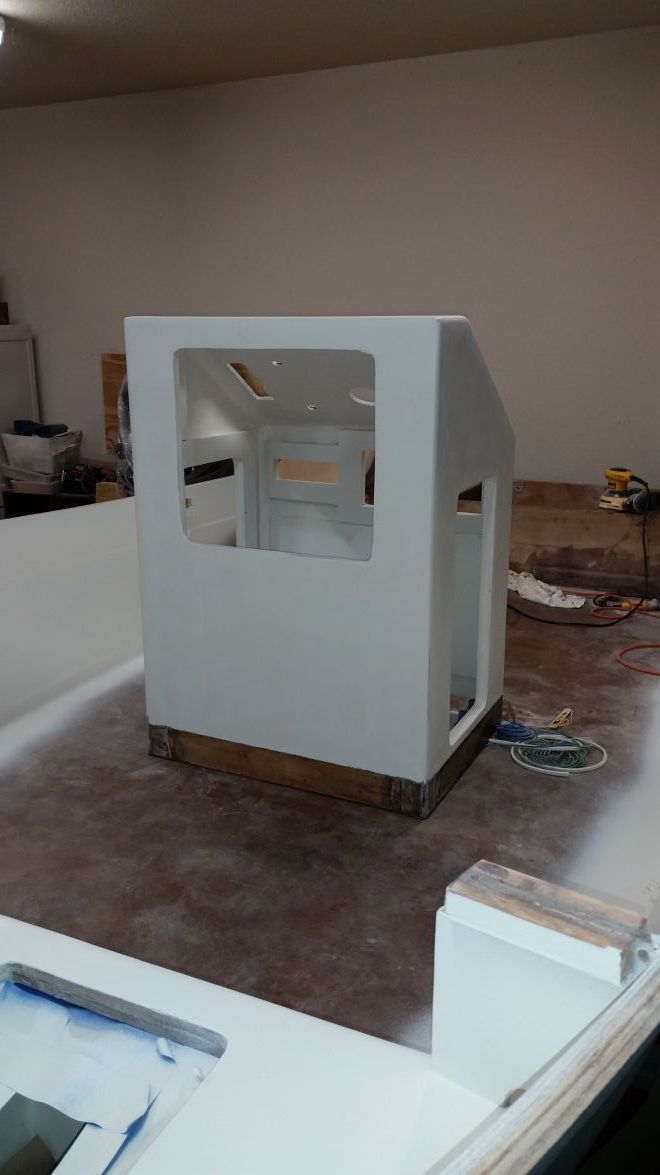
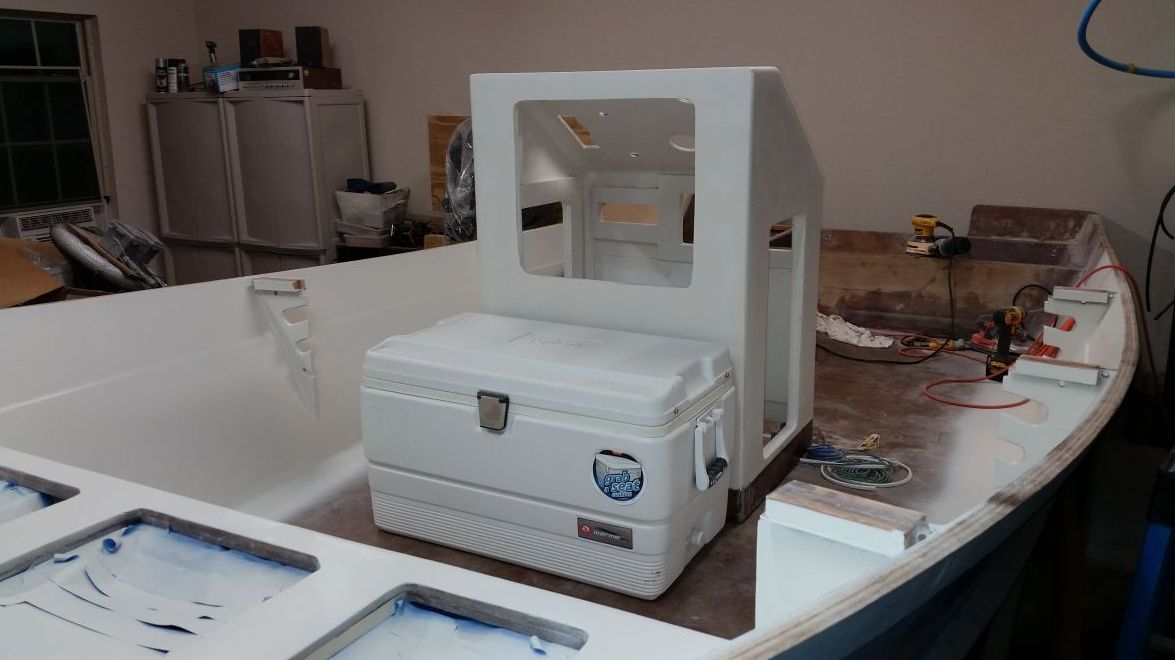
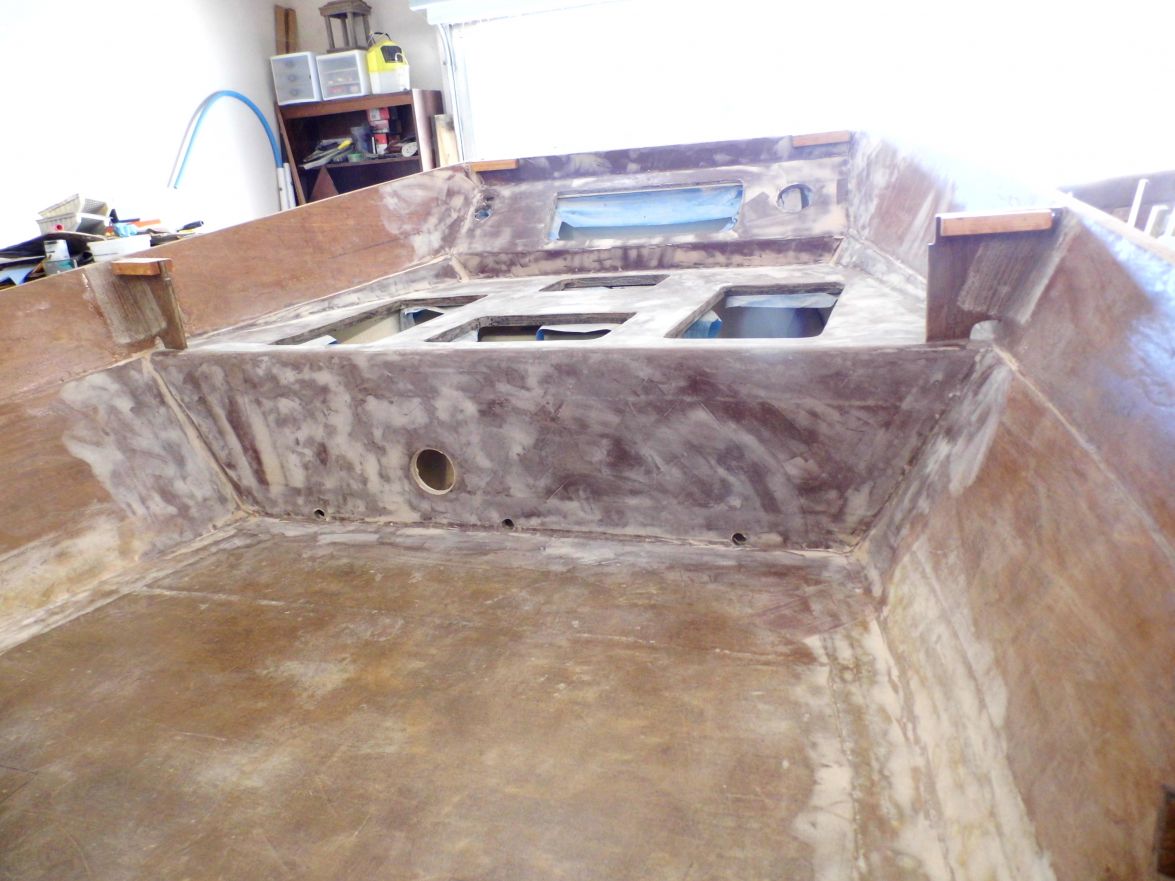
FYI - for the front office -
Re: texasrds OD18 build mid-coast Texas
Posted: Thu Mar 12, 2015 9:03 pm
by texasrds
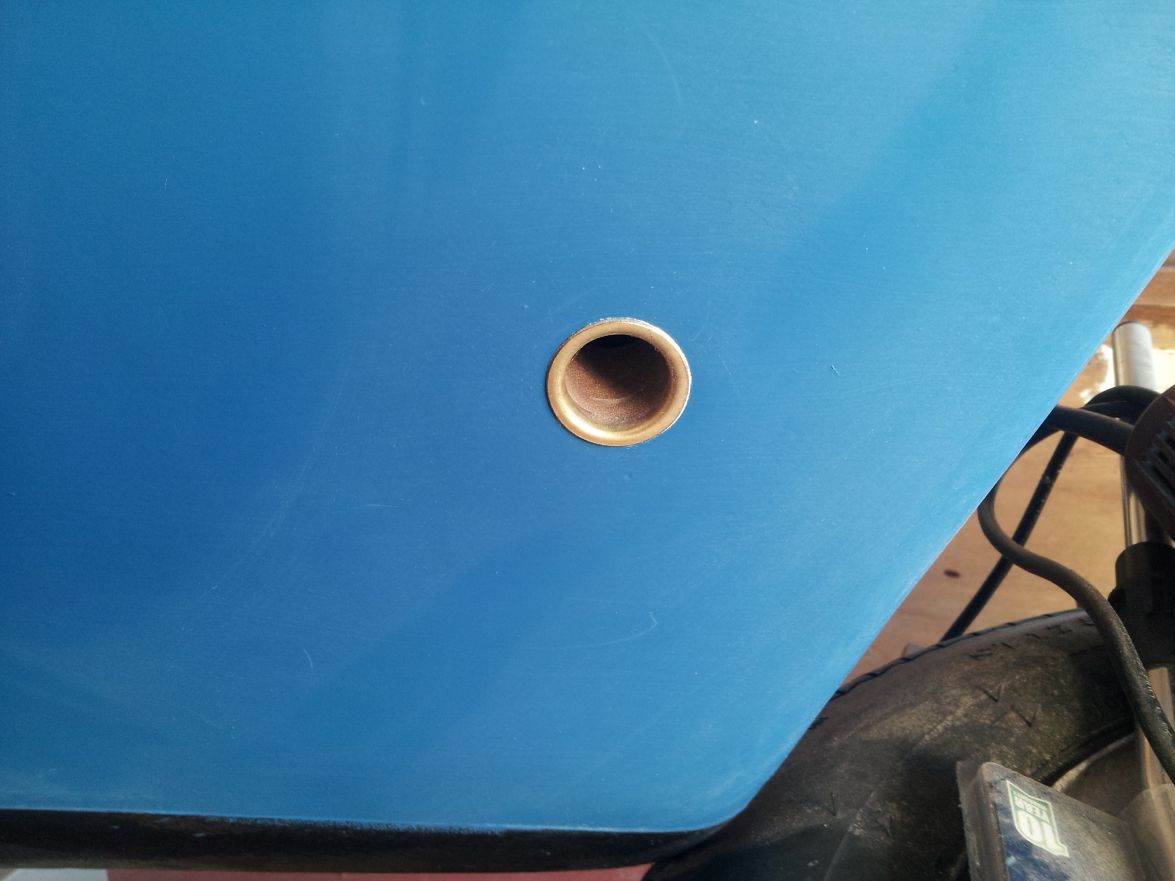
Alrighty, Anchor locker glassed in and ready to fill weave with microballon/epoxy mix. Drain block installed, hole overdrilled, filled and ready to drill again for brass tube.
Didn't do a very good job of taping and blocking the exterior of the hole for filling and had some epoxy leakage which will now required some sanding and repainting. ugh.
Have also been "mocking up" the installation of the fuel tank. Have 5200'd neoprene strips on the bottom of the tank, located the bracket locations for the tank, installed pads on the sole for the mounting screws and drilled and filled the 12 screw holes for the brackets. I have also roughed out an angled access panel for access to the filler neck, vent and fuel pickup hoses on the tank. It seems to have plenty of room to access the fittings when necessary and I get three or four more inches added to my deck platform by angling and not having it flat.
Shot with access hatch laying in place
Re: texasrds OD18 build mid-coast Texas
Posted: Fri Mar 13, 2015 7:51 am
by osotexan
There are quite a few of us here on the Texas gulf coast. I'd love to see your's and over builds. We need to all get together.
The build looks awesome. I love the OD18.
Matt
Re: texasrds OD18 build mid-coast Texas
Posted: Mon Sep 07, 2015 5:55 pm
by texasrds
Here are some of the latest pics on my build. Got the anchor locker completed and covered up, first brass thru-hull done which was an adventure (flaring tool ended up needing a spacer added to be able to tighten up and flare brass and I still think I have 5200 somewhere in my hair), casting deck along with fuel tank installed and such pretty much done except for some more sanding. Gunnel supports in and waiting on more fiberglass filler and more sanding. Started the baitwell, drains, drilled and filled motor mount bolt holes (don't know about drilling holes in a perfectly good solid transom
) and will need to drill more for stake out sticks (going to do two I think), ladder and so on.
Anchor locker before sealing up
Anchor locker sealed up and ready for a final coat of Quick Fair
Brass drain done for Anchor locker
View of casting deck 1
View of casting deck 2
View of inside of boat showing gunnel supports glassed in

Re: texasrds OD18 build mid-coast Texas
Posted: Sat Sep 26, 2015 6:25 pm
by texasrds
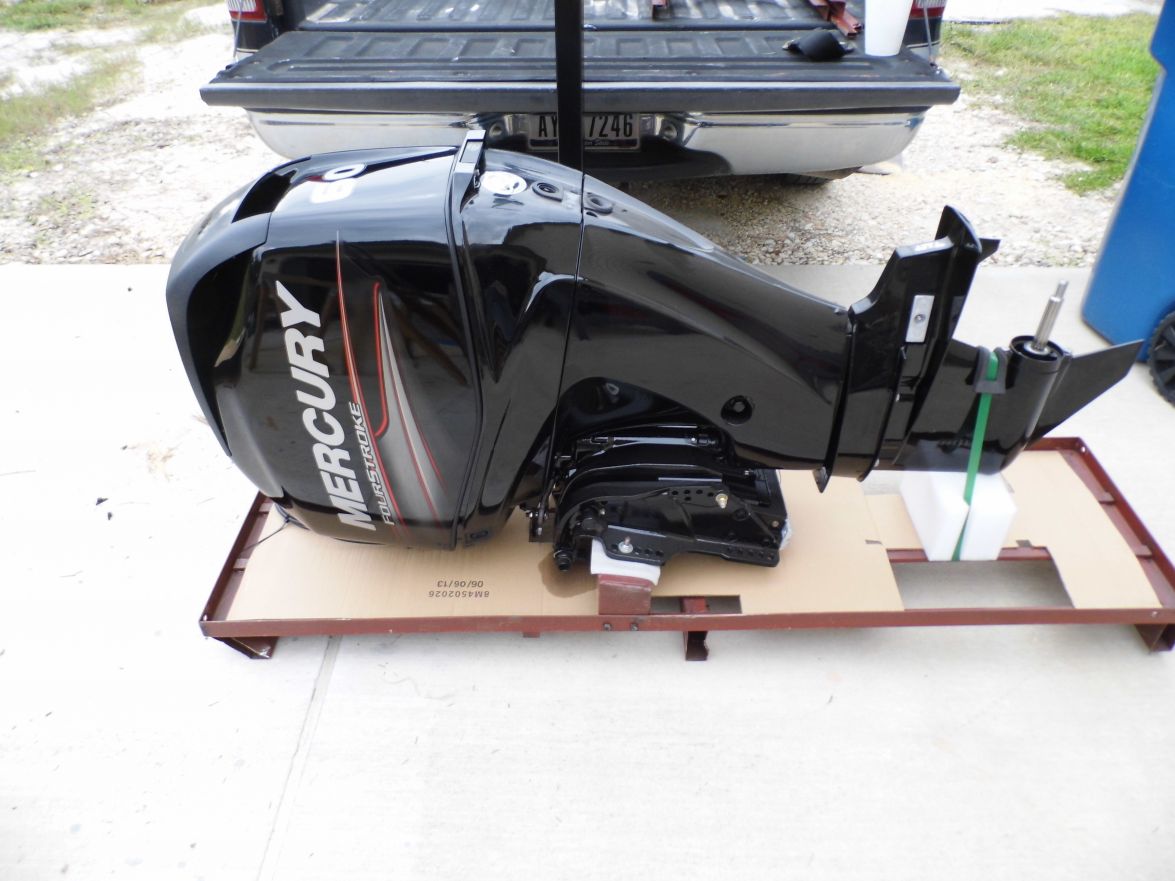
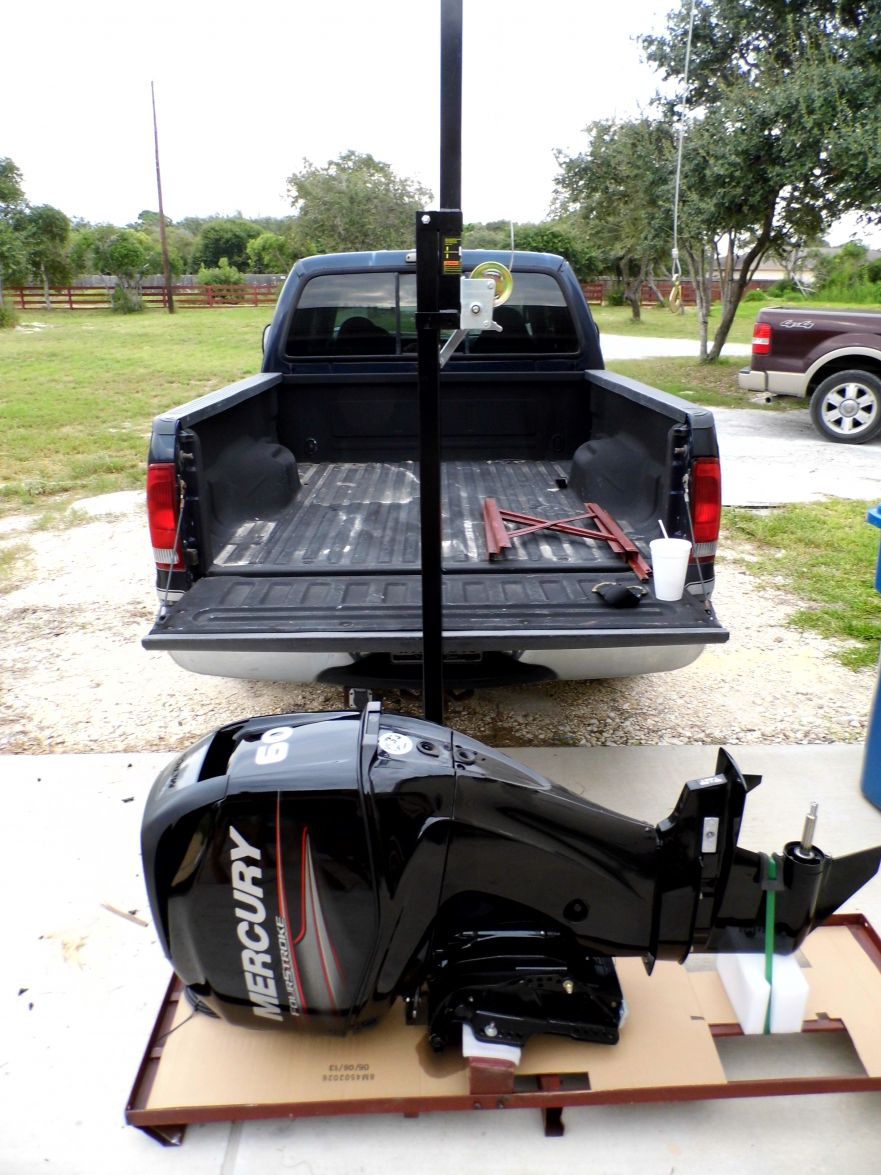
Motor has arrived. Been looking although boat not quite ready yet but found this one new (2013 year model) at a good price I believe so went ahead and pulled the plug. Mercury 60elpt EFI Four stroke.
Almost completely uncrated
Same pic of motor with receiver mounted winch used to move from truck to the ground
Now I really need to get in gear and get this thing finished.
Re: texasrds OD18 build mid-coast Texas
Posted: Sat Sep 26, 2015 6:48 pm
by TomW1
Nice! Looking good. If you want some help with a prop let me know. An OD18 should with a Merc 60 start with about a 14/15 pitch.
Re: texasrds OD18 build mid-coast Texas
Posted: Sat Sep 26, 2015 8:53 pm
by Cracker Larry
Looking great!
FWIW my 70 Yamaha 2 stroke works best with a 15" stainless Yamaha prop on my OD18. Nice looking Mercury
Re: texasrds OD18 build mid-coast Texas
Posted: Sun Sep 27, 2015 9:57 am
by Larry B
Boats looking great
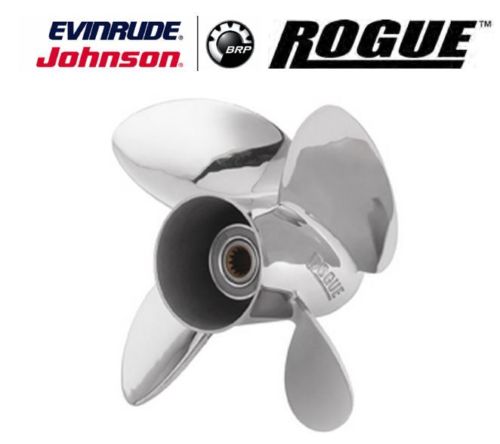
I'll chime in here also on props. I've tried quite a few different ones. Any 3 blade prop I used I needed a whale tail to keep from porpoising.
I finially went to a Rogue 4 Blade Prop Propeller 13" x 21" and now boat does not porpoise and no whale tail
, I did lose some top end speed but hole shot is good.
I know you have a different motor, but thought I'd just let you know.
Re: texasrds OD18 build mid-coast Texas
Posted: Mon Sep 28, 2015 1:36 am
by texasrds
Thanks for your comments guys. Got the motor up and on its newly built engine dolly and rolled it into the garage with no hickups. Appreciate the info on the props and your offer Tom. Will be looking shortly and am toying with the idea of a four blade (motor specs state 5500-6000 full throttle rpm) for it. Got the last piece of fiberglass down on the leaning post tonight with two more pieces to go on the center console and then it is more microballons, quick fair and all of that wonderful sanding in between. Plan too order the wiring/rigging harness between the motor and console , the top mount control and throttle/shift cables this coming week.
Re: texasrds OD18 build mid-coast Texas
Posted: Thu Mar 03, 2016 8:55 pm
by texasrds
Re: texasrds OD18 build mid-coast Texas
Posted: Sat Mar 05, 2016 10:22 pm
by jorgepease
coming along nice!!!
Re: texasrds OD18 build mid-coast Texas
Posted: Tue Mar 08, 2016 10:35 am
by osotexan
You are really moving along nicely now. I'd love to come take a look at your boat and talk shop as I have the plans, fiberglass and epoxy on hand for my od18 build. Seeing your pictures really has me itching to get started.......
Only problem is that I stumbled into a Boston Whaler renovation. Hopefully I can have that boat finished and sold by September maybe.
Build on she is looking really nice.
Re: texasrds OD18 build mid-coast Texas
Posted: Sun Mar 13, 2016 12:17 am
by texasrds
Thanks guys. I feeling that it is finally coming together and if you will I'm starting to see the light at the end of the tunnel. Still a ways to go but feeling that I can get this done. osotexas - you are welcome over anytime. I work from home so I'm around quite a bit.
Randy.
Re: texasrds OD18 build mid-coast Texas
Posted: Sun Mar 13, 2016 1:04 am
by texasrds
Quick question for anyone on the cable boot they have used. There are two different sizes I find - 3" and 4.5" for the control cables, fuel line and battery cables to pass through - what size do you recommend? I will be using the NFB steering cables, non-hydraulic, standard marine fuel hose, control cables and the two awg 2 battery cables. 4.5" is such a big hole back there but I can see where the 3" might get tight.
Re: texasrds OD18 build mid-coast Texas
Posted: Sun Mar 13, 2016 6:56 am
by Cracker Larry
The 3" should be plenty large enough. That's what I used on mine.
Re: texasrds OD18 build mid-coast Texas
Posted: Sun Mar 13, 2016 11:43 am
by TomW1
Don't forget you'll need to run a separate one for the fuel hose. An 1 1/2 works well for it.
Re: texasrds OD18 build mid-coast Texas
Posted: Mon Mar 14, 2016 11:28 am
by texasrds
Alrighty, thanks for the info. Exactly what I needed.
Re: texasrds OD18 build mid-coast Texas
Posted: Mon Mar 14, 2016 2:26 pm
by Fuzz
Texards,
Nice looking boat. I think you made a good choice with the motor. I have 50hp on mine and wish for a little more at times.
I am looking for some of those boots also. Can you tell me where you found the 3 inch ones? All I am finding are the bigger ones.
Thanks, Fuzz
Re: texasrds OD18 build mid-coast Texas
Posted: Tue Mar 15, 2016 3:43 pm
by texasrds
Hey Fuzz,
I am getting the TH Marine 3" Cable Boot with Ring from the local ACE Hardware store which happens to have a decent size marine dept. here. They had to order but it takes a whole two days to get them. Believe you're in Alaska so Amazon definitely has them (just checked), West Marine online has them also. TH or T H Marine is the brand and part# CB-1 is for the boot alone while CBK-1-DP is for both the boot and the reinforcing plastic ring. Hope this helps.
Randy.
Re: texasrds OD18 build mid-coast Texas
Posted: Tue Mar 15, 2016 5:40 pm
by jorgepease
SIM Yamaha also carries those boots with the extra hole for the fuel line
http://www.simyamaha.com/category_s/1813.htm
Re: texasrds OD18 build mid-coast Texas
Posted: Fri Apr 15, 2016 6:54 pm
by texasrds
Have been working on the motorwell area and have gotten the baitwell done (with pump installed), bilge pumps installed (one automatic with sensor and one manual) and the "other compartment" where the fuel filter, bilge outputs and the chase tubes are for all of the controls, transducer cable, fuel line etc...
Bilge area (still working on the wiring and routing):
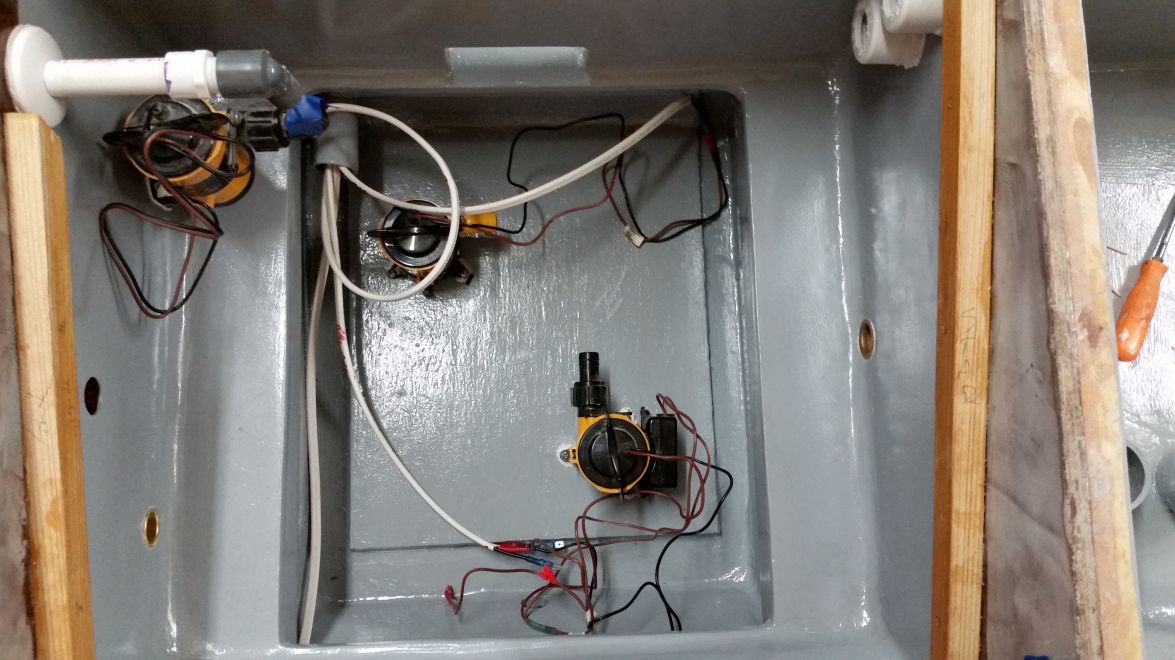
Bilge area and "control" compartment:
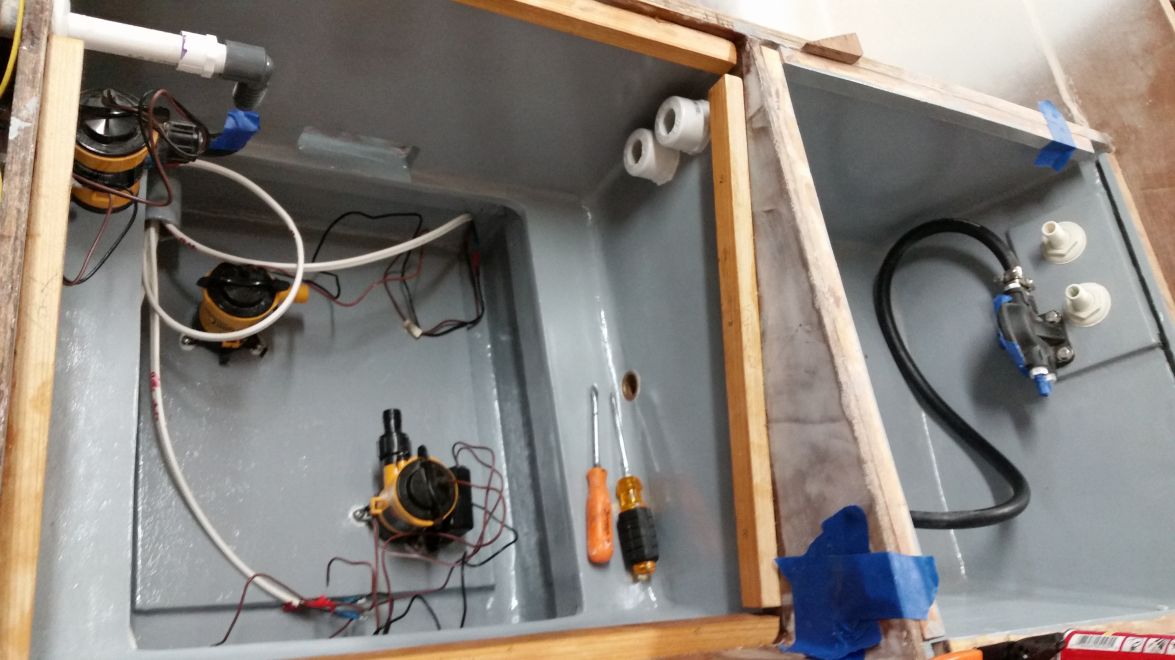
"Control" compartment:
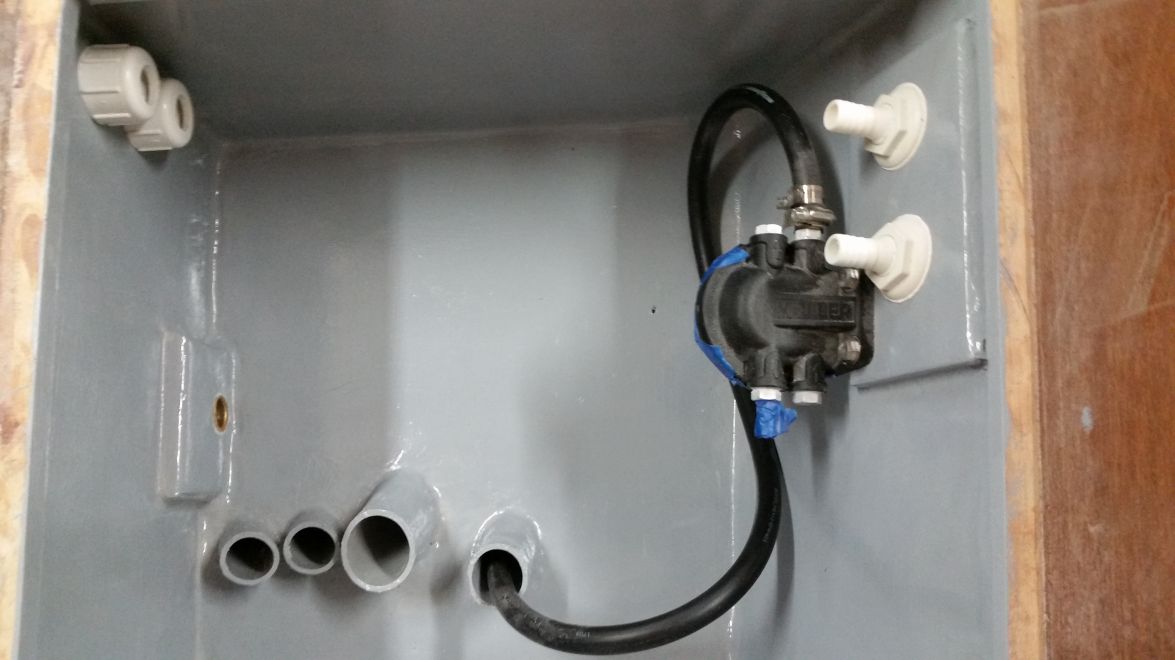
Baitwell area with spray bar:
Next up is getting the tops completed and glued down in that complete area. I have the hatch areas cut out so it is just a few coats of epoxy on the undersides and then ready to glue.
Randy.
Re: texasrds OD18 build mid-coast Texas
Posted: Thu Aug 11, 2016 11:02 pm
by texasrds
Say, I'm getting ready to mark out the screw locations for my T-Top on the sole and do what some have done here and "drill" out an area of the foam and place a sacrificial bolt with nut down in the hole encased in epoxy. I've seen noted to use a release agent on the bolt. My question is what is the release agent that ya'll have used to coat the bolt so that I can get it out? Appreciate it.
Randy.
Re: texasrds OD18 build mid-coast Texas
Posted: Mon Oct 17, 2016 3:32 pm
by RCost
Hi there,
I know this post was a while ago but I was wondering what the material was you use to line your anchor locker.
Thanks
Re: texasrds OD18 build mid-coast Texas
Posted: Wed Dec 21, 2016 3:14 pm
by texasrds
Hey, I have been away for a couple of months and just saw your question but the material I used to line my anchor locker was a rubber floor mat that I got at Lowes. I believe it was over in the flooring department. I made a template of the three sides from butcher paper. cut the mats to shape and then attached with stainless screws.
Randy.
Re: texasrds OD18 build mid-coast Texas
Posted: Wed Dec 21, 2016 3:54 pm
by Jeff
texasrds, can you take the time to send us a couple of photos of the finished product?? Happy holidays, Jeff
Re: texasrds OD18 build mid-coast Texas
Posted: Sat Feb 25, 2017 2:15 am
by texasrds
Hey Jeff,
I would love to send some pictures of the finished boat but at the moment it isn't finished yet. In the process of spraying primer on the back half of the boat (topside), getting ready to start on laying out, cutting and installing the gunnels (fitting, gluing, fiberglassing etc...). Then paint, wiring, instruments, steering, T-top and so on. List of things to do doesn't seem to get shorter so still have a ways to go. I will post some pics as I'm putting together the gunnels which is the next construction step for me.
Randy.
Re: texasrds OD18 build mid-coast Texas
Posted: Sat Feb 25, 2017 2:48 am
by Fuzz
Good to see you back at it. I was afraid this one had stalled.
Re: texasrds OD18 build mid-coast Texas
Posted: Sat Feb 25, 2017 8:40 am
by Jeff
texasrds, no problem on not finished!!! Just send us some "update" photos!! Jeff
Re: texasrds OD18 build mid-coast Texas
Posted: Tue Apr 11, 2017 2:00 pm
by texasrds
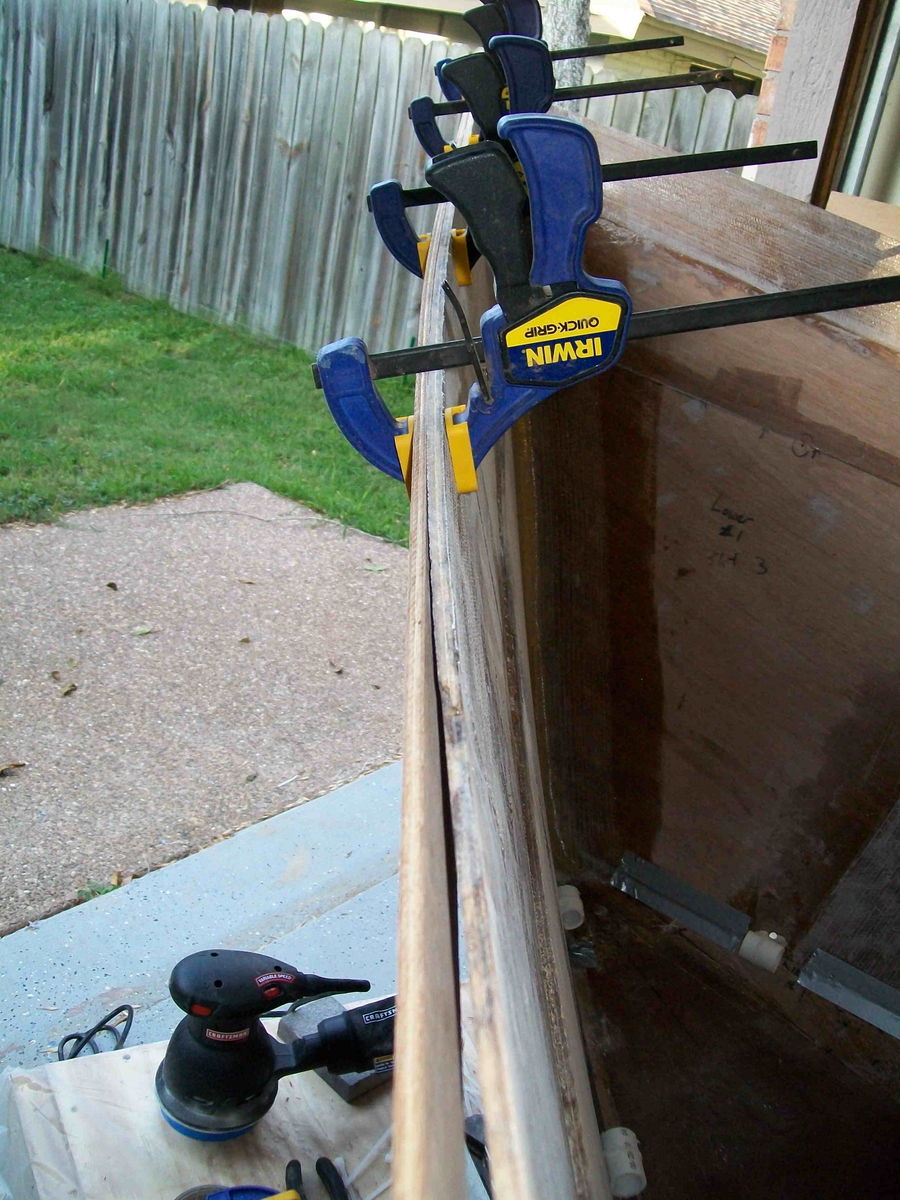
Well it has been awhile but am moving on the build again. I got the back end of the boat finished up and in primer (bilge, motorwell, bait well etc...) and it was off and running with the gunnels. Did the framing out of the gunnel and inwale supports with some Cypress I still have (unfortunately the pics of that are stuck on another device I can't get to at this time). The pics below show the test fitting of the panels and then the gluing in place. I think I did a little different sequence that others before me as I glued the inwale in place first since I had support notches cut into the side supports and then glued on the top gunnel panels. Was a little worried about the strength of the gunnels (from a flexing perspective when stepping on) but after they were glued they are very solid and I'm sure when the glass is put on it will get that much stronger.
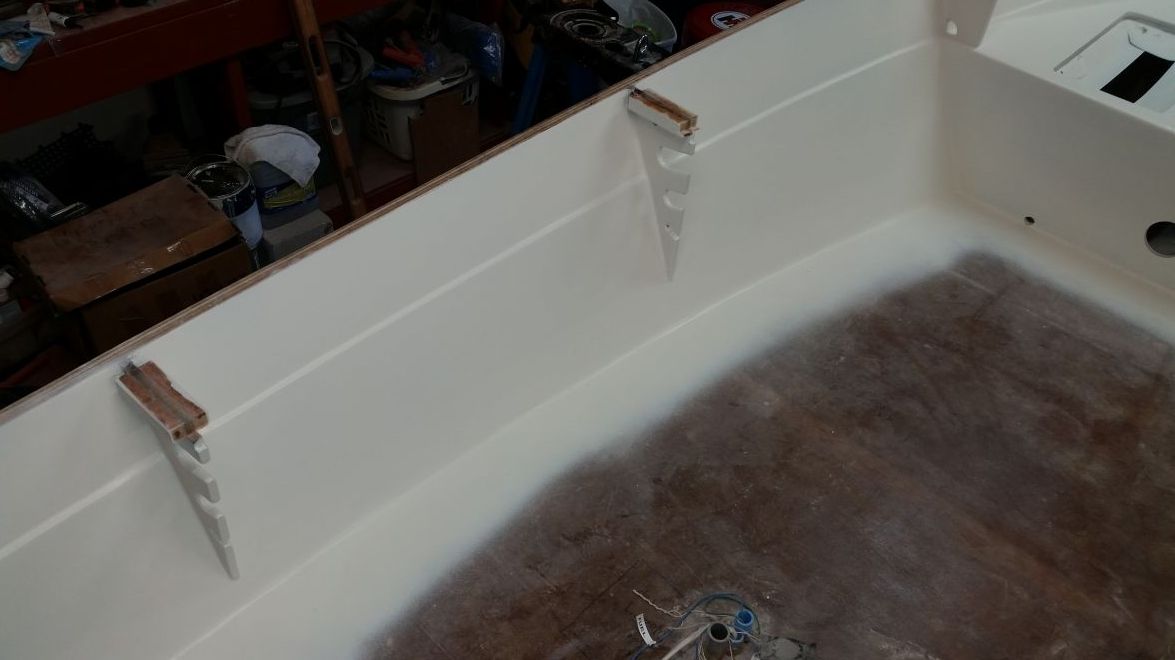
Test Fit
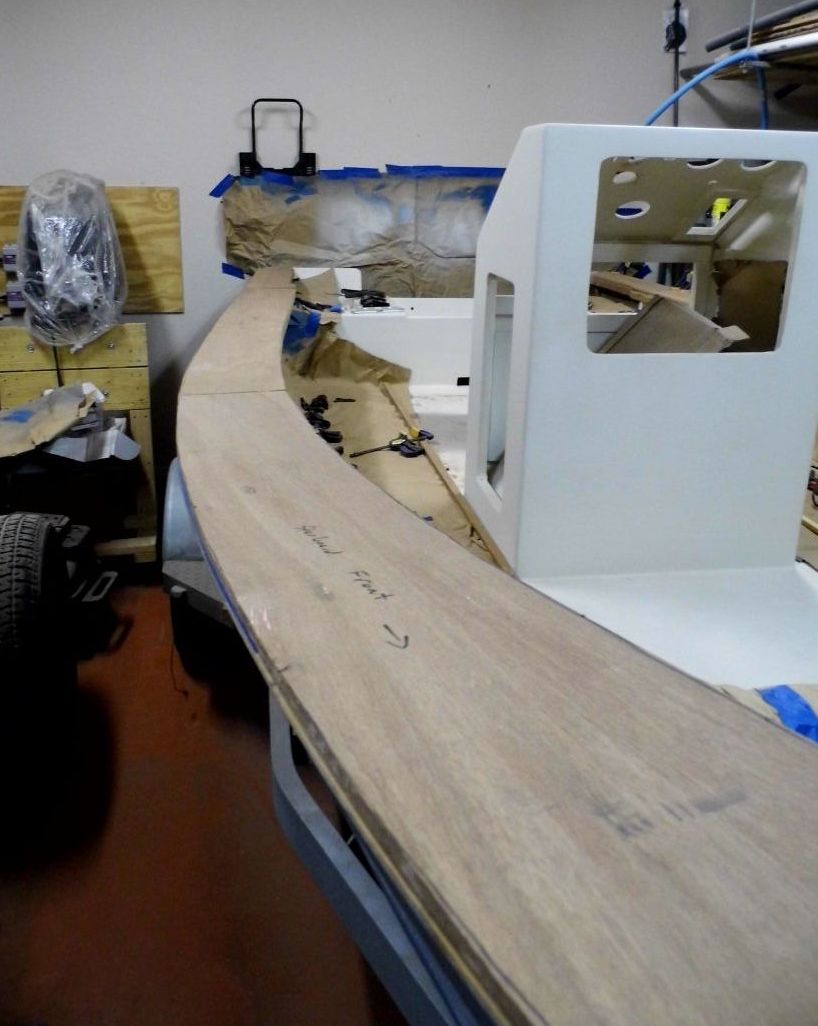
Test Fit

Glued - oh so many clamps and could still have used more!
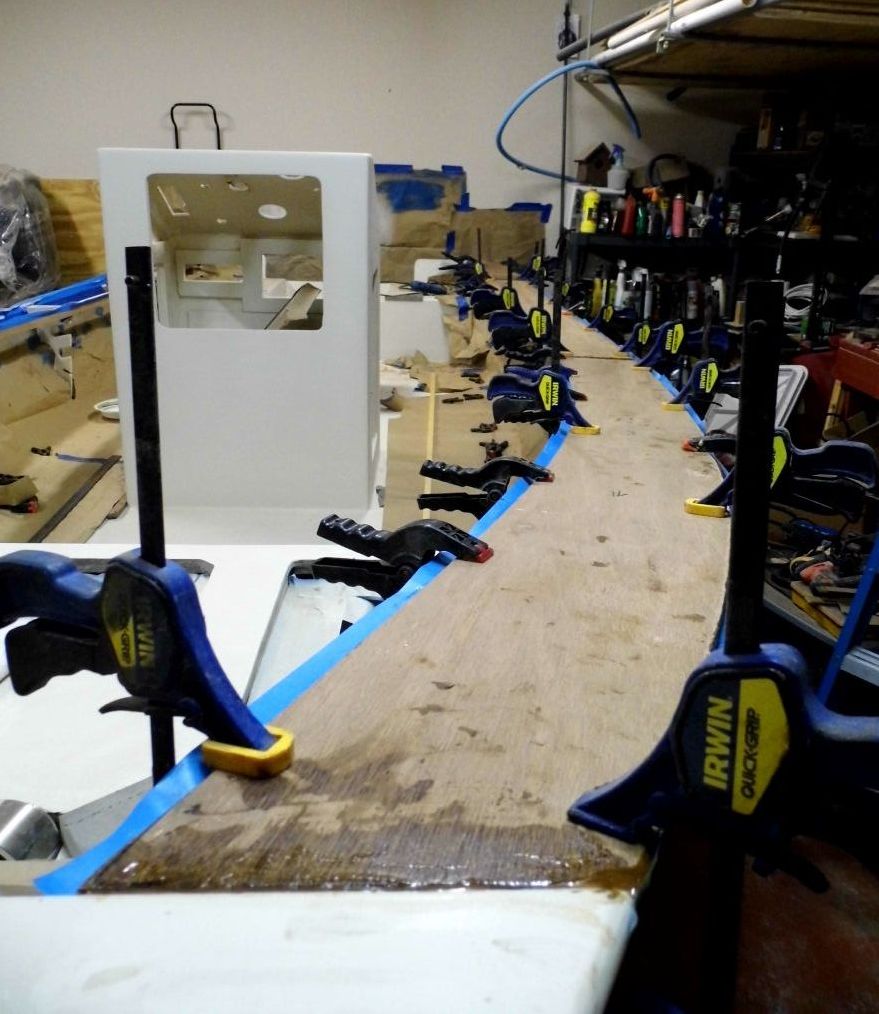
Side view of inwale and gunnel in place
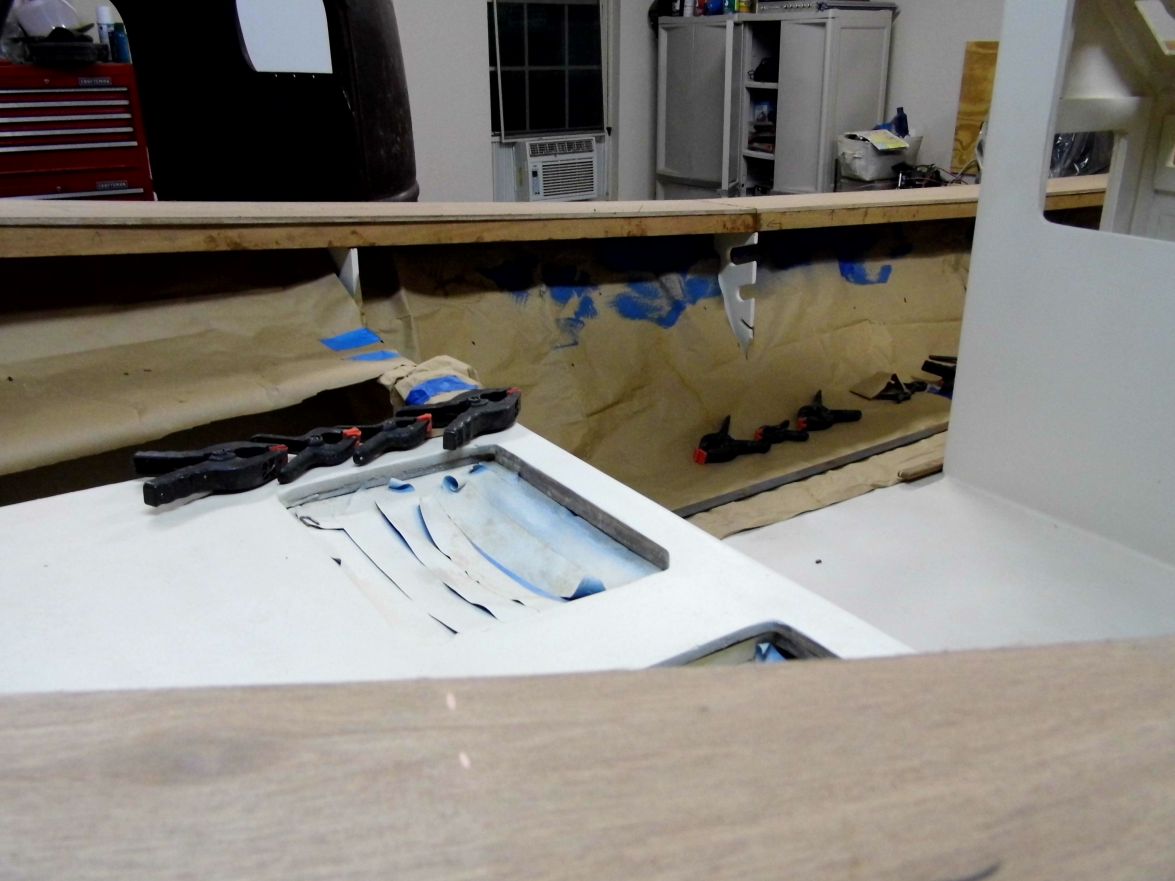
Another side view of inwale and gunnel
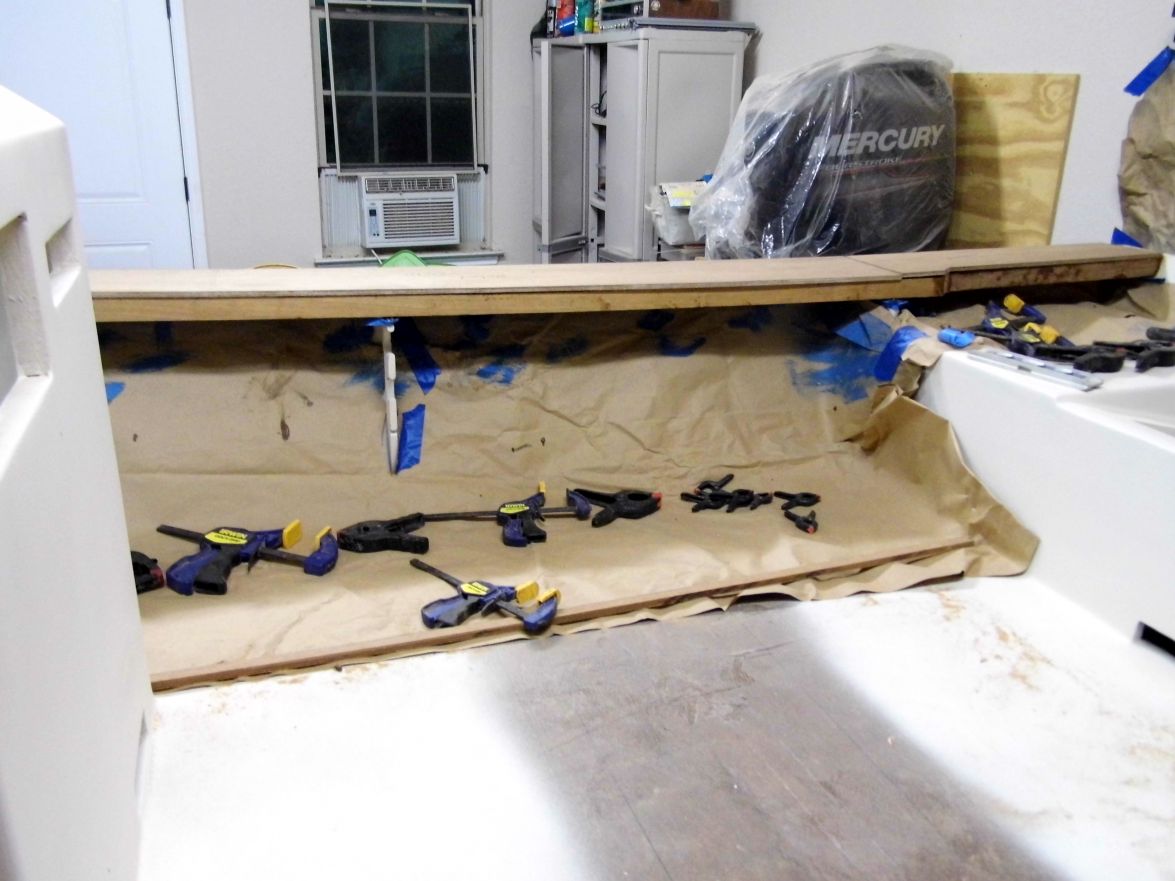
Glued in place

Glued in place
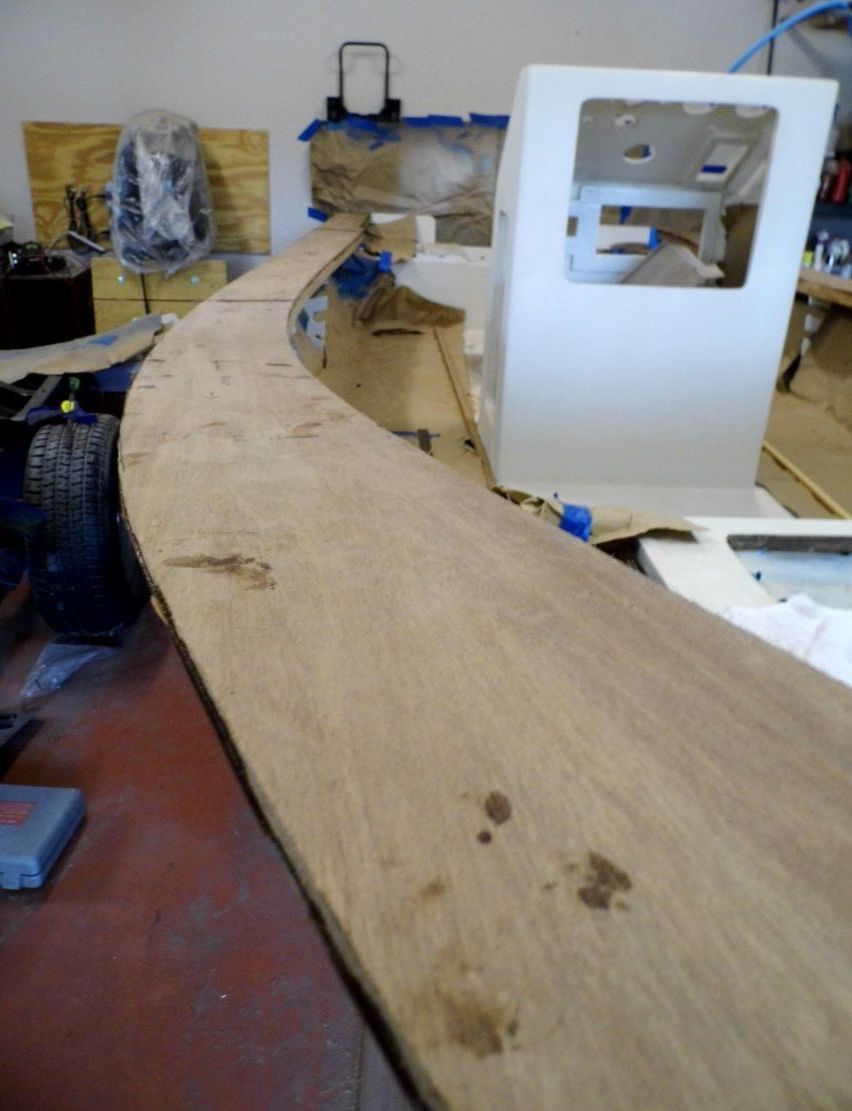
Next is to get all the inwale and gunnels cleaned up and get the fiberglass cut. Oh and route the gunnel edges both inboard and outboard - that ought to be fun as routers and I don't get along well. Particularly when I'm holding them and not using a stand.
Randy.
Re: texasrds OD18 build mid-coast Texas
Posted: Tue Apr 11, 2017 4:40 pm
by Jeff
Texasrds, Nice to hear from you and the boat looks good!! Glad you are back on it!! Jeff
Re: texasrds OD18 build mid-coast Texas
Posted: Tue Apr 11, 2017 4:45 pm
by cape man
Nice wide gunwales! You will like them! Go slow with the router....
Re: texasrds OD18 build mid-coast Texas
Posted: Tue Apr 11, 2017 10:13 pm
by TomW1
You'll really like those, especially if your doing any trolling. I can set out 8 lines on mine.
Re: texasrds OD18 build mid-coast Texas
Posted: Wed Apr 12, 2017 6:03 am
by cape man
Not to mention the 36 feet of seating
Re: texasrds OD18 build mid-coast Texas
Posted: Fri Apr 14, 2017 12:44 pm
by texasrds
Hadn't thought about the additional seating. And 36' feet of it - party boat! lol. Will definitely be trying to go slow with that dang router this weekend. We just don't get along to well.
Randy.
Re: texasrds OD18 build mid-coast Texas
Posted: Fri Apr 21, 2017 1:47 pm
by texasrds
Well I got the edges of the gunnels routed without any incidents or blood so that is a plus! Just as Capeman recommended, take it slow. Here are a few pics of the glassed in gunnels.
Port gunnel glassed in
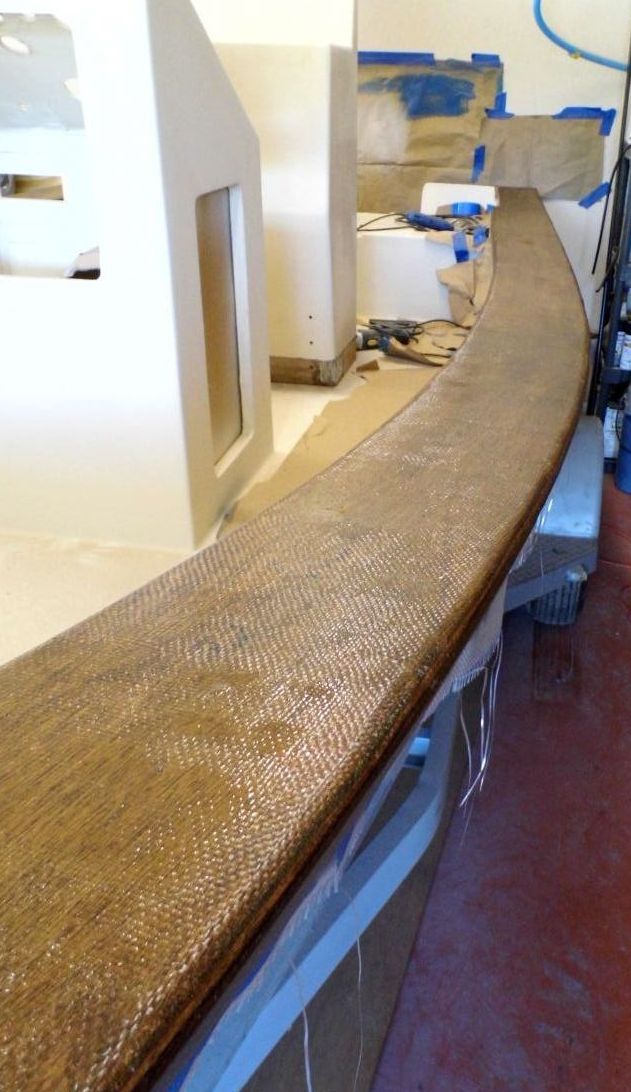
Starboard gunnel glassed in
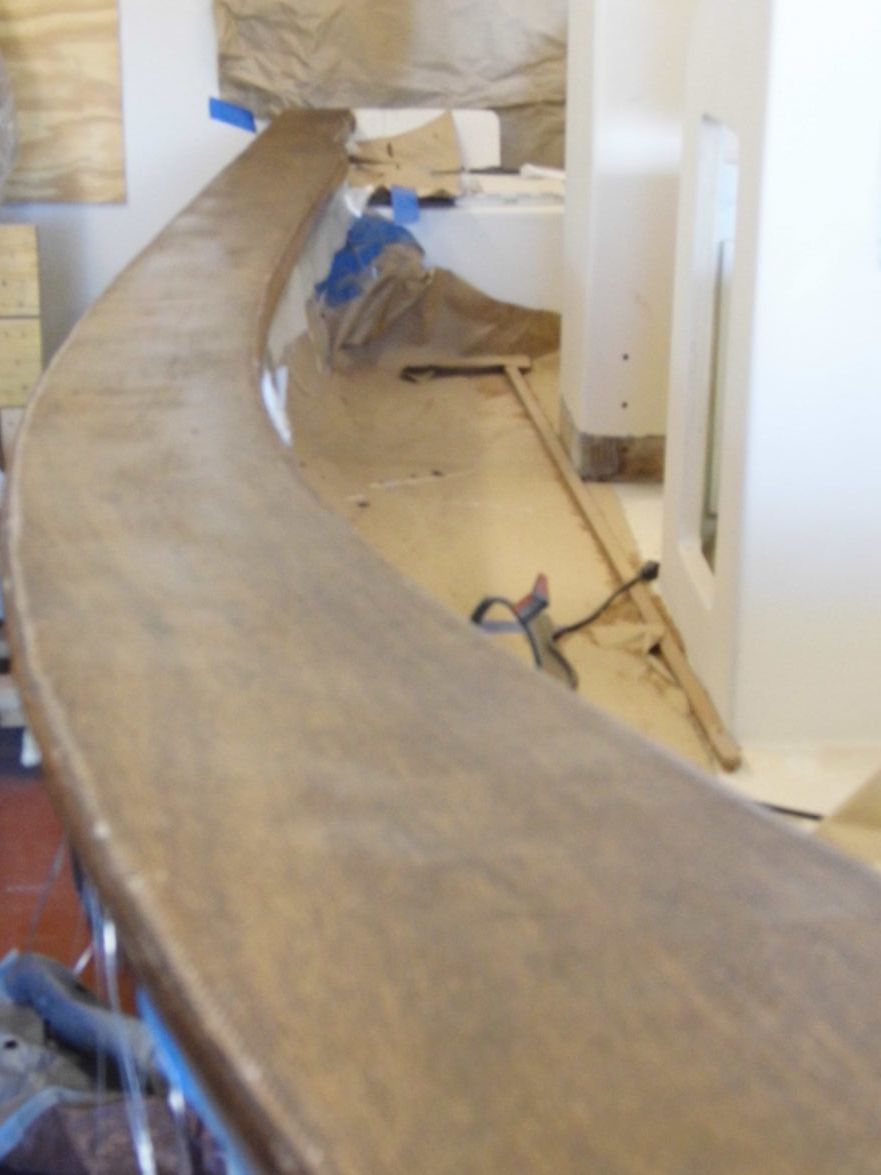
View of aft gunnel "notch"
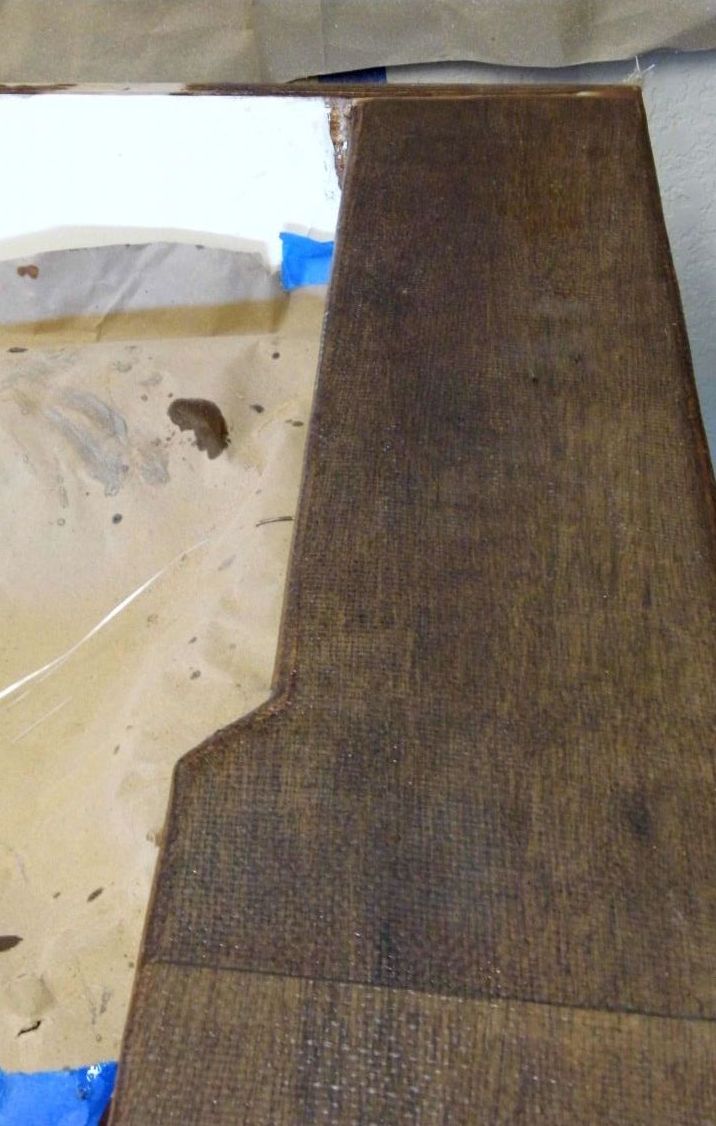
Side view of inwale / gunnel
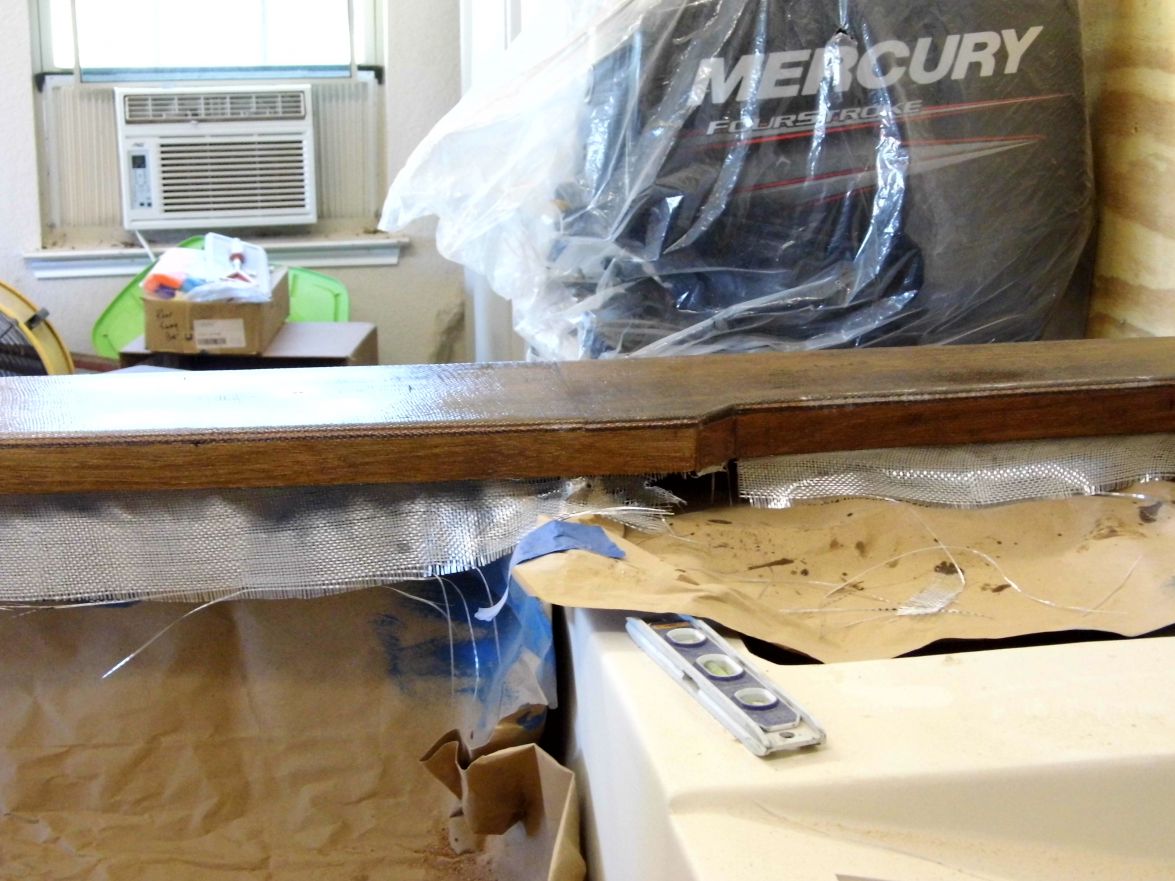
Tossed in Leaning Post to see what it looks like and what kind of room I'm looking at

Now it's time to mix up a batch of microballon slury and unfortunately more sanding.
Randy.
Re: texasrds OD18 build mid-coast Texas
Posted: Fri Apr 21, 2017 2:34 pm
by cape man
That came out nice! Will really add a lot to the boat, including making it stiff as heck in a chop. Good work with the router (I hate them/love them too).
Re: texasrds OD18 build mid-coast Texas
Posted: Sat Apr 22, 2017 10:21 am
by Dougster
Love the gunnels and feel the same way about routers. Dang thing scares me to death and eats wood. Still, when the moon is right the gods have at times given me a good result. Hope to see you at the Port A boat show this Oct.
Dougster
Re: texasrds OD18 build mid-coast Texas
Posted: Sat Apr 22, 2017 2:00 pm
by TomW1
Lovely work with the router
. They can be dangerous as hell.
I have used a PC multi-speed for years and love it. I also take it very slow on projects like yours.
Re: texasrds OD18 build mid-coast Texas
Posted: Sun Apr 23, 2017 9:04 am
by Larry B
The router was one of the tools I used frequently on my build. They can be dangerous but as long as you understand it and use sharp bits and go in the right direction they are pretty safe, OH and use the proper bit for what you are doing
I used it for many things, first was for the stringers:
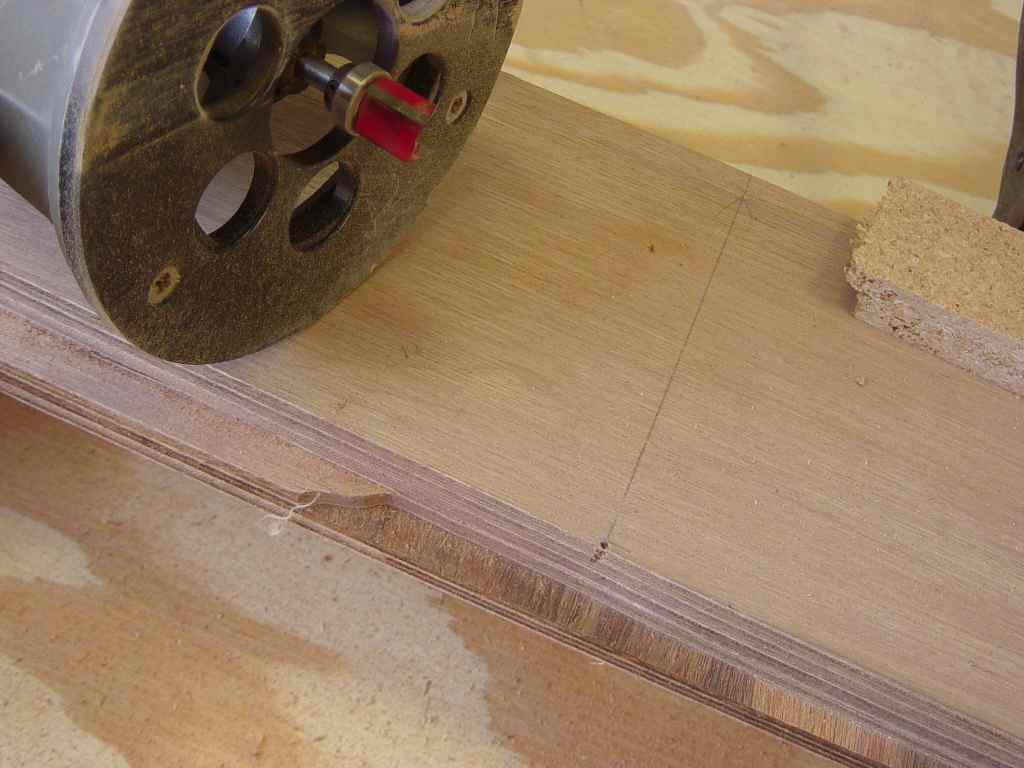
Re: texasrds OD18 build mid-coast Texas
Posted: Sun Apr 23, 2017 9:19 am
by Jaysen
A healthy fear of routers is not a "bad thing". The keys to safety (in my opinion) are:
1. WEAR A FACE SHIELD! when something hits your face the reaction is to protect yourself with your hands. take your hands off the router and your face will be the lest of your concerns.
2. Buy better bits than you think you need. Cheap bits dull and chip FAST. once that happens you have to struggle to control the router. Freud are the good compromise for me.
3. Start small. Both project and tool. A small trim router (1/2hp or less) will do nearly everything a bigger one will do. You just need to be patient and go slow. On the project front, don't just start cutting on the project. Test your setup on a smaller piece of stock clamped in a similar position. KNOW what you are doing before you endanger you or the project.
4. Use the right base. Fixed bases and plunge bases have their own "best use" area. Don't use a plunge when what you need is a fixed. Don't even think about a fixed base when you should be using a plunge. Just don't do it.
5. Clear your surroundings. 50% of the WTF moments for me have been sloppiness on my part. A cable on the floor, a tool in the path of travel, etc. Make sure there is NOTHING in the surrounding that will distract you from giving the tool and cut your fuel attention. This includes kids, pets, and spouses.
Practice makes perfect. Right? after 15yrs of wood working I still take practice cuts. I still get a bit nervous. I still wear all the safety gear with routers. I will admit to running every other tool with guard removed, no glasses, no gloves. But not that router. That said, it is still one of the tools that I see as an enabler of complex designs. It was one of two tools I refused to sell when we moved (the other is my Mikita 10" sliding compound miter saw).
Re: texasrds OD18 build mid-coast Texas
Posted: Sun Apr 23, 2017 3:40 pm
by texasrds
Thanks guys. I'm putting on the second coat of the microballon slury (not sure what else to call it) this afternoon and after sanding the first coat last night.
Yeah, the routing ended up coming out pretty good as the glass went over it well and I didn't have any voids under the curve anywhere. I ended up a couple of years ago getting a small trim router as Jaysen mentioned and use it when I have to do something directly on the boat (like 60 ft of gunnel!). I leave the full size router bolted up in the router table. And I learned the hard way about having something in the path like a power cord and running into the boat trailer as I'm walking down the line which I then end up making a gouge in the work. But things worked out and everything came out pretty well.
So now off to do more filling and sanding, filling and sanding and gluing the leaning post in place.
Randy.
Re: texasrds OD18 build mid-coast Texas
Posted: Sun Apr 23, 2017 6:10 pm
by TomW1
Jaysen wrote: ↑Sun Apr 23, 2017 9:19 am
A healthy fear of routers is not a "bad thing". The keys to safety (in my opinion) are:
1. WEAR A FACE SHIELD! when something hits your face the reaction is to protect yourself with your hands. take your hands off the router and your face will be the lest of your concerns.
2. Buy better bits than you think you need. Cheap bits dull and chip FAST. once that happens you have to struggle to control the router. Freud are the good compromise for me.
3. Start small. Both project and tool. A small trim router (1/2hp or less) will do nearly everything a bigger one will do. You just need to be patient and go slow. On the project front, don't just start cutting on the project. Test your setup on a smaller piece of stock clamped in a similar position. KNOW what you are doing before you endanger you or the project.
4. Use the right base. Fixed bases and plunge bases have their own "best use" area. Don't use a plunge when what you need is a fixed. Don't even think about a fixed base when you should be using a plunge. Just don't do it.
5. Clear your surroundings. 50% of the WTF moments for me have been sloppiness on my part. A cable on the floor, a tool in the path of travel, etc. Make sure there is NOTHING in the surrounding that will distract you from giving the tool and cut your fuel attention. This includes kids, pets, and spouses.
Practice makes perfect. Right? after 15yrs of wood working I still take practice cuts. I still get a bit nervous. I still wear all the safety gear with routers. I will admit to running every other tool with guard removed, no glasses, no gloves. But not that router. That said, it is still one of the tools that I see as an enabler of complex designs. It was one of two tools I refused to sell when we moved (the other is my Mikita 10" sliding compound miter saw).
All good things Jaysen. I will add do not try to make big cuts in one pass. Do large cuts in two or even three passes. Buy the best bits you can my dad who was a well known woodworker and built display cabinets for museums used this company which I do now.
https://www.mlcswoodworking.com/ All bits are carbide tip and they sell a higher end Katana brand. The only bit he had fail was a Porter Cable, but any bit can throw the carbide tip, so always wear eye protection. A piece of carbide coming off at 18,000 rpm's generates an enormous amount of force.
Safe routering to every one!
Re: texasrds OD18 build mid-coast Texas
Posted: Mon Jul 31, 2017 9:21 pm
by texasrds
At the point of starting the wiring on the boat now that the gunnels are done, leaning post glued and glassed in and everything is faired and primered. Adding my attempt of a wiring diagram for what I've got planned. I know absolutely nothing about boat wiring but this is what I've been able to put together after reading, reading and looking at sample diagrams from alot of resources including ones from CL, LarryB, Steven and the Dougster I believe. Thanks to everyone that has posted wiring diagrams here!! Have a Blue Sea Dual circuit battery switch with a Blue Sea ACR as well as a Blue Sea ST Fuse/Distribution box with both a negative and positive bus builtin. Have not gotten started on laying out the gauge wiring nor the ignition wiring at this point. All I have run so far are the two primary Positive and Negative from the back of the boat to the center console through the conduit.
Randy
Re: texasrds OD18 build mid-coast Texas
Posted: Tue Aug 01, 2017 7:41 am
by blueflood
Hi Randy,
Checking out the site and your build popped up
Great going !
Marc
Re: texasrds OD18 build mid-coast Texas
Posted: Tue Aug 01, 2017 10:27 am
by cape man
Can't see anything at all wrong with your diagram.
Re: texasrds OD18 build mid-coast Texas
Posted: Wed Aug 02, 2017 2:28 pm
by texasrds
Thanks Marc. Cape Man, appreciate you looking over the diagram and commenting. Have been trying to get to painting the interior of all the boat but it has been anywhere from 96 to 100 degrees here last week and this week with more to come and the paint I have has a recommended max application temperature of 90 degrees. The primer I put on last week was pushing it and was drying extremely fast so I'm hesitant to jump in and paint the interior at the moment. Trying to get the boat done by the time the Port Aransas Plywood boat show comes around in October but the temperatures aren't helping right now.
Randy.
Re: texasrds OD18 build mid-coast Texas
Posted: Wed Aug 02, 2017 7:47 pm
by Jeff
texasrds, please stay in touch as both Jacques and I plans to attend the Port A Show this year!!! Just hope for no hurricanes for FL this year!! Jeff
Re: texasrds OD18 build mid-coast Texas
Posted: Sun Aug 13, 2017 11:43 pm
by texasrds
Re: texasrds OD18 build mid-coast Texas
Posted: Mon Aug 14, 2017 2:34 am
by TomW1
The boats looking better every time I see it.
Tom
Re: texasrds OD18 build mid-coast Texas
Posted: Mon Aug 14, 2017 7:41 am
by Jeff
Really nice work Randy!!! Jeff
Re: texasrds OD18 build mid-coast Texas
Posted: Mon Aug 14, 2017 9:28 am
by Dougster
It does look great. I look forward to seeing it at the Port A boat show and will bring my little SK14 along. It's great to hear that Jacques and Jeff will be there.
Dougster
Re: texasrds OD18 build mid-coast Texas
Posted: Mon Aug 14, 2017 9:37 am
by Fair WX Pilot
Hi,
The boat looks great and with everything removed for painting the inside looks enormous.
Re: texasrds OD18 build mid-coast Texas
Posted: Fri Nov 24, 2017 6:46 pm
by texasrds
It is time to put the motor on the boat and get it all connected. Tom - I'm in need of a prop and wanted to check and get your thoughts on a place to start. I know you mentioned earlier in my thread something in a 14/15 pitch. The motor is a Mercury 60 elpt four stroke with standard rotation weighing in at 268 pounds and will be attached via a 5" Bobs Jack plate. The OD18 is setup pretty much like yours with T-Top. I am going to guess that it is definitely heavier than the one Cracker Larry built from a build perspective as well as figuring on me (300 pounds), 19 gallons of fuel and maybe 200 more overall. I will be bay fishing so getting up and out is more important to me than speed. I see three and four blade props advertised as well as aluminum vs. Stainless. And anything from 10 1/4" to 12" in diameter. Thoughts?
Thanks, Randy.
Re: texasrds OD18 build mid-coast Texas
Posted: Sat Nov 25, 2017 3:17 pm
by TomW1
Okay Randy let me do some research and I will be getting back to you. Will you normally be fishing by your self or with some one else. We should plan for your normal load.
Tom
Re: texasrds OD18 build mid-coast Texas
Posted: Sun Nov 26, 2017 12:26 am
by texasrds
Thanks Tom. The majority of the time it will be just myself.
Randy.
Re: texasrds OD18 build mid-coast Texas
Posted: Mon Nov 27, 2017 6:09 pm
by TomW1
Randy have some numbers and a recommendation for you. Based on the numbers you gave me all in your OD18 with you and gear in it comes out at 1700lbs. This will give you a speed between 33 and 36 mph. I like to use PowerTech props for you guys in the south. They have a good selection and work well with the customer.
The prop you should get is the SCB4 10.375 x 12. You can go to ptprop.com to check it out. It is under the stainless steel, Class C, 4 blade props. It is specifically designed for flat bottom boats and has some other advantages.
With a jack plate a 4 blade prop is much preferable as it hangs onto water longer and allows you to raise it higher. It also helps to maintain straight line steering, and helps hold water when the seas get rougher, plus a few other smaller things.
When you set it up raise it as high as you can without ventilation on a sharp turn.
Let me know if you have any questions.
Tom
Re: texasrds OD18 build mid-coast Texas
Posted: Tue Nov 28, 2017 2:15 pm
by Fuzz
Dang 1700 is a flyweight if that is with you, 300 lbs, in it. My dory weighs 1740 in fishing trim with no one in it. Normal moveable ballast ,ie people, is around 700lbs. 50 hp gets me mid 20's.
Re: texasrds OD18 build mid-coast Texas
Posted: Tue Nov 28, 2017 3:02 pm
by OrangeQuest
texasrds wrote: ↑Mon Jul 31, 2017 9:21 pm
At the point of starting the wiring on the boat now that the gunnels are done, leaning post glued and glassed in and everything is faired and primered. Adding my attempt of a wiring diagram for what I've got planned. I know absolutely nothing about boat wiring but this is what I've been able to put together after reading, reading and looking at sample diagrams from alot of resources including ones from CL, LarryB, Steven and the Dougster I believe. Thanks to everyone that has posted wiring diagrams here!! Have a Blue Sea Dual circuit battery switch with a Blue Sea ACR as well as a Blue Sea ST Fuse/Distribution box with both a negative and positive bus builtin. Have not gotten started on laying out the gauge wiring nor the ignition wiring at this point. All I have run so far are the two primary Positive and Negative from the back of the boat to the center console through the conduit.
Randy
Sorry for such a late post after you posted your diagram. Was just looking it over and see that you are connecting your house battery to engine ground. Then the starter battery to your ground buss along with the house battery. The starter battery has a few more connections to go through (more places to lose connection and reasons for "Won't turn over") than the straight run the house battery does. Just wondering if that is still the way you wired it or will be wiring it? And if so, why?
Ken J
Re: texasrds OD18 build mid-coast Texas
Posted: Tue Nov 28, 2017 5:50 pm
by TomW1
Fuzz wrote: ↑Tue Nov 28, 2017 2:15 pm
Dang 1700 is a flyweight if that is with you, 300 lbs, in it. My dory weighs 1740 in fishing trim with no one in it. Normal moveable ballast ,ie people, is around 700lbs. 50 hp gets me mid 20's.
Hi Fuzz yea his people weight is only 300lb vs your 700lb and with the extra 10HP increases his speed over your OD. I calulated that he built it heavy. A 150lbs over study plan weight.
Tom
Re: texasrds OD18 build mid-coast Texas
Posted: Wed Nov 29, 2017 12:07 am
by texasrds
Hey Tom, thanks for taking the time to put together the information on the prop. It really helped and I appreciate it! I will be talking to PowerTech shortly. The price is a little scary compared to many others but I'll give them a shout and see what they can do. A newbie in the shallows with oyster beds - not a good combination.
All I can say at the moment about the weight on the boat is that most of my build is patterned after what Cracker Larry, Cape Man and Larry B did with their boats and then figure I definitely used more epoxy and glass than they did. I probably sanded more Quick Fair off than everybody else but then I turned right around and put more on.
Oh and the addition of the Spray Rails.
Ken, as far as the To Engine Ground box on my diagram showing it going to the House Battery, I'm not sure what my thought process was as to why I even put that there after looking back at it now as I don't have a separate Engine Ground coming into the center console. I have the Engine Harness and the Positive and Negative runs from the Motorwell coming into the center console. And the To Engine Starter box I have in the middle left going to the Battery Switch really should say Engine Positive as actually it is the Positive cable that comes from the Motorwell. Hopefully that is clearer than mud.
Randy.
Re: texasrds OD18 build mid-coast Texas
Posted: Wed Nov 29, 2017 5:51 am
by OrangeQuest
Very good Randy!
I spent years working on new vehicles and chasing down electrical problems. Fewer connections for the critical things like the motor starting and running the better. Add salt water and air to the mix can make things even more complex.
I may see you and your boat out in the Gulf area bays some day!
Ken J
Re: texasrds OD18 build mid-coast Texas
Posted: Thu Nov 30, 2017 5:54 pm
by TomW1
Randy yep a good SS prop is expensive but it will last a long time. I have Cracker Larrys OD18 and it still has the same 3 blade PowerTech prop that I calculated for it 8 years ago. Despite all the oyster bars he ran up on. He was not sold on 4 blades at the time, but we have put 4 blades on every boat he built after that. There are just to many advantages when running in shallow water or even in open water.
Take care and look forward to your launch.
Tom
Re: texasrds OD18 build mid-coast Texas
Posted: Thu Nov 30, 2017 10:46 pm
by Newt
In the long run a SS prop will pay for itself. It's more efficient and repairable. If you fish shallow water it will need repair.
Newt
Re: texasrds OD18 build mid-coast Texas
Posted: Mon Dec 04, 2017 5:34 pm
by texasrds
Alright guys. I'll be ordering the stainless steel PowerTech prop this week. Drilled 16 holes in a perfectly good sole of the boat this weekend and got the T-Top lower legs installed. Now I have to move the boat out of the garage to finish installing the T-Top and install the motor.
Randy.
Re: texasrds OD18 build mid-coast Texas
Posted: Mon Dec 04, 2017 7:46 pm
by OrangeQuest
texasrds wrote: ↑Mon Dec 04, 2017 5:34 pm
Alright guys. I'll be ordering the stainless steel PowerTech prop this week. Drilled 16 holes in a perfectly good sole of the boat this weekend and got the T-Top lower legs installed. Now I have to move the boat out of the garage to finish installing the T-Top and install the motor.
Randy.
So will it be getting wet before 2018?
Re: texasrds OD18 build mid-coast Texas
Posted: Mon Dec 04, 2017 11:17 pm
by texasrds
Yes, I'm am trying to get it splashed by the end of the year!
Re: texasrds OD18 build mid-coast Texas
Posted: Tue Dec 05, 2017 4:34 am
by Fair WX Pilot
Do you have any pictures of your T-Top installation? It would be very interesting to see. Thanks.
Re: texasrds OD18 build mid-coast Texas
Posted: Fri Dec 08, 2017 7:33 pm
by texasrds
Well, I'll give a try at describing what I did for getting the T-Top legs installed. I must have had way to much coffee when I took my limited pics as most came out blurry but here the best of them.
I have gone through a variety of ways of mounting the T-Top including the manufacturers recommendation of simply mounting with 1/4" by 2" stainless screws while bedding the foot of each leg in 5200, Cracker Larry's method of drilling and filling the space created under the floor with epoxy with a sacrificial 1/4" bolt and several other methods. I'll mention here that I did when installing the sole originally add additional backing plates (3/4" marine ply) where the feet of the T-Top would eventually go. For better or for worse I ended up using a different kind of mechanical attachment for my T-Top as you'll see below.
I used the legs of course to setup, measure and locate where I wanted them to sit in relation to the center console and marked all sixteen hole locations. In addition, the legs have a connection point on the center console wherein I drilled the needed 3/8" horizontal hole in the leg cross bars and then a corresponding hole in the center console. I drilled the holes (in a perfectly good solid, flat and hole-less sole I might add) and then used a drill with a allen wrench inserted using the short leg inserted into the hole to clear out some of the foam from beneath the hole in the sole.
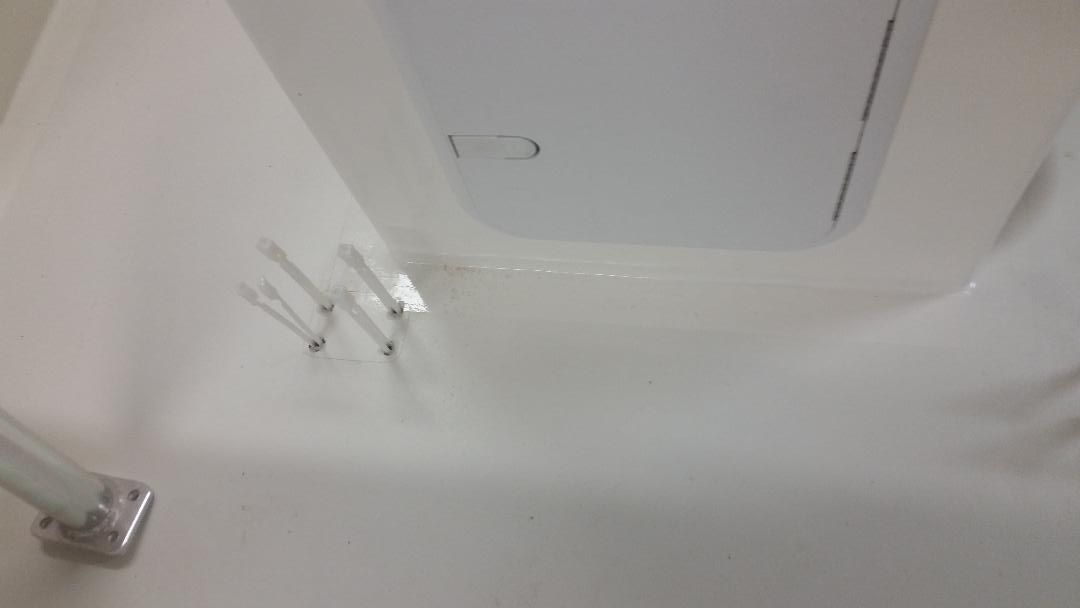
I then inserted into each of the holes a 1/4" heavy duty toggle bolt and then filled the cavity and the hole with 5200 (I used a caulking gun and the tubes of 3M 5200). Here is a pic of what is called a Toggler. Each individual toggle should with the wood be rated in the 700 to 1000 lb range for strength. Each of the Togglers basically has zip ties built into it and you "zip" the center piece down all the way to the hole and it holds the Toggle centered in place. You then snap off the protruding zips and it is pretty close to flush.
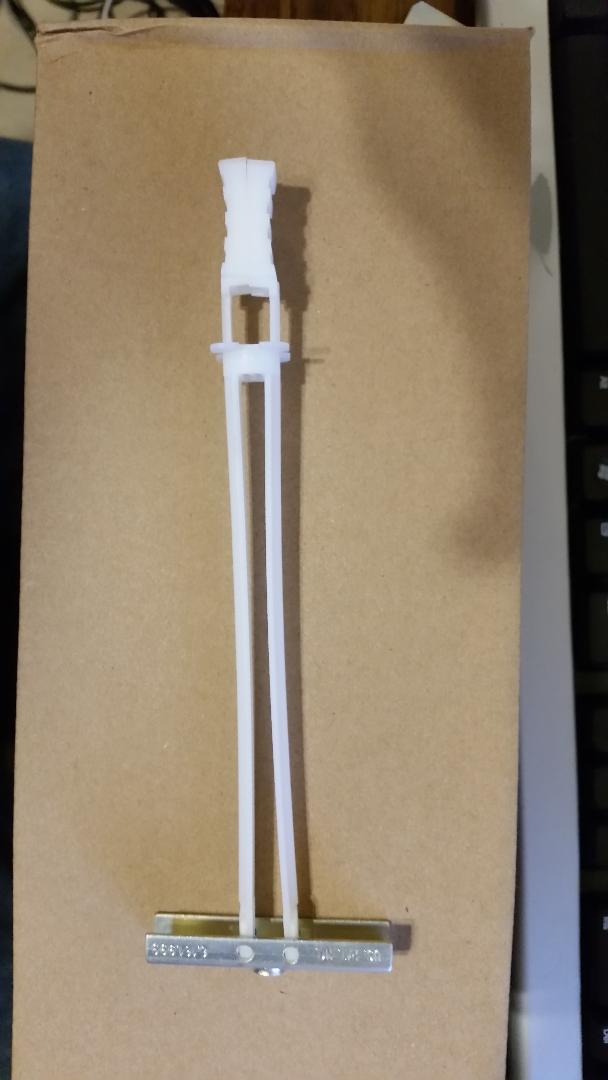
Here again, I filled as much of the cavity and the hole with 5200, laid down a layer of 5200 covering the entire foot of each leg as recommended by the T-Top manufacture, I then inserted a 1/4" x 3" bolt into each of the feet to hold the leg in place and moved up to the center console connection and installed it completely. Once that was done I then moved back down to the feet and inserted the rest of the bolts and tightened them all down.
I'll go back a take a few better pics showing the final look of the install.
Hopefully this is a little clearer than mud. They do seem to be very solid as I have tugged and pulled and see and feel no flex whatsoever.
Randy.
Re: texasrds OD18 build mid-coast Texas
Posted: Sat Dec 09, 2017 1:58 pm
by Fair WX Pilot
Hi Randy, thanks for posting. I hadn’t ever considered using toggle bolts but that seems like a very good idea. I love how your boat is turning out, great job mate.
Re: texasrds OD18 build mid-coast Texas
Posted: Thu Dec 14, 2017 7:17 pm
by TomW1
Hi Randy did you get your prop and if so how did it perform.
Tom
Re: texasrds OD18 build mid-coast Texas
Posted: Wed Dec 20, 2017 1:08 am
by texasrds
Hey Tom,
I just ordered the prop today. I've been sick the last week or so and haven't gotten outside to finish anything up. Will post pics of completed boat here shortly and try and get it in the water before the end of the year and will update on the performance.
Randy.