Page 1 of 1
OB15 Downunder
Posted: Sat Oct 09, 2010 11:18 pm
by AussieBoater
I've just purchased the ply, glass and resin.
I'm in the middle of clearing enough space in my shed to build.
My other half is not as enthusiastic as I am, I think I will have to entice her in by appointing her "official photogragher".
This will be my first timber boat build, I'm really looking forward to it.

Re: OB15 Downunder
Posted: Sun Oct 10, 2010 8:04 am
by gstanfield
welcome to the forum and welcome to the disease. Your other half will come around, most do in time. Be sure she takes lots of pictures for us as we like pictures here.

George
Re: OB15 Downunder
Posted: Sun Oct 10, 2010 8:26 am
by sideslippa
Good on ya mate! There has been alot of OB15 boats built. Enjoy your build and post plenty of photos.
Best regards Slippa.
Re: OB15 Downunder
Posted: Mon Oct 11, 2010 12:42 am
by AussieBoater
Thanks George and Slippa, there will be plenty of photos, she loves wasting the film in the digital camera...
Slippa,
I watched the last parts of your build and your launch, I was still deciding what I wanted to use my boat for and then which design to build. You have created a great looking boat anyone would be proud to own... I just hope i can hold up the standard
Re: OB15 Downunder
Posted: Wed Oct 13, 2010 4:55 am
by emmanuell65
Sorry for my bad english I am writing from Greece and I use the automatic translator from Google.
I hope to do it easily and smoothly the construction of your boat.
God gives you strength and courage.
I also have ordered the ob 15 and expect the plans, I think it is a great boat.
Many greetings from Greece.
Emmanuel
Re: OB15 Downunder
Posted: Wed Oct 13, 2010 6:06 am
by AussieBoater
Hi Emmanuel,
That's great you have ordered plans as well. We will be able to build our boats together, that may help each of us.
I'm a painter by trade, worked in a luxury yacht (motor yachts) building yard for about 10 years. These were Alloy boats, 80' to 130' in length. We used Awlgrip and Sterling paints on the outsides, all sprayed.
I just hope i can achieve the same level of finish on my little boat. I'm a novice at working with wood and resins, can't wait to get to a more comfortable stage in the build.
Paul
Re: OB15 Downunder
Posted: Wed Oct 13, 2010 7:16 am
by TomW
Welcome Paul and Emmuel, it is great to have the two of you building the same boat half way around the globe. It just goes to show how this forum brings us all together. Please feel free to ask any questions that you might have on your boats. The OB15 is probably one of the most popular boats built. You can probably find lots of help in the forum by doing a search for the OB15. And also in the Gallery for the same.
Have fun with your builds and don't be afraid to ask questions. Again welcome to the group.
Tom
Re: OB15 Downunder
Posted: Wed Oct 13, 2010 8:13 am
by macs
Welcome and good luck. Please post lots of pictures, everyone will learn things from your build.
Macs
Re: OB15 Downunder
Posted: Mon Oct 18, 2010 3:00 am
by AussieBoater
The first lot of supplies have arrived, now I need more space and free time to start on my adventure.

Re: OB15 Downunder
Posted: Mon Oct 18, 2010 7:56 am
by sideslippa
All you got to do now is rearrange the stuff on that pallet so that it resemmbles a boat

Enjoy
slippa
Re: OB15 Downunder
Posted: Sat Oct 23, 2010 4:45 pm
by AussieBoater
I've finally had time to clean up and make a space to build... you'd think that would be easy since I have over 1500 sq ft of floor area...
As we are coming into summer, well it's spring I guess, my work is very busy and is cutting into my boat build time. We are going to purchase the materials for the strong back and associated supports today, hopefully get a start on buiding that up and cutting some moulds.
Let the adventure begin...
Paul
Re: OB15 Downunder
Posted: Sun Oct 24, 2010 5:13 am
by AussieBoater
Finally started building something. I've made the strong back, put casters on it with brakes. I hope they work ok.
I've been doing lots of this

trying to figure out the molds and frames...
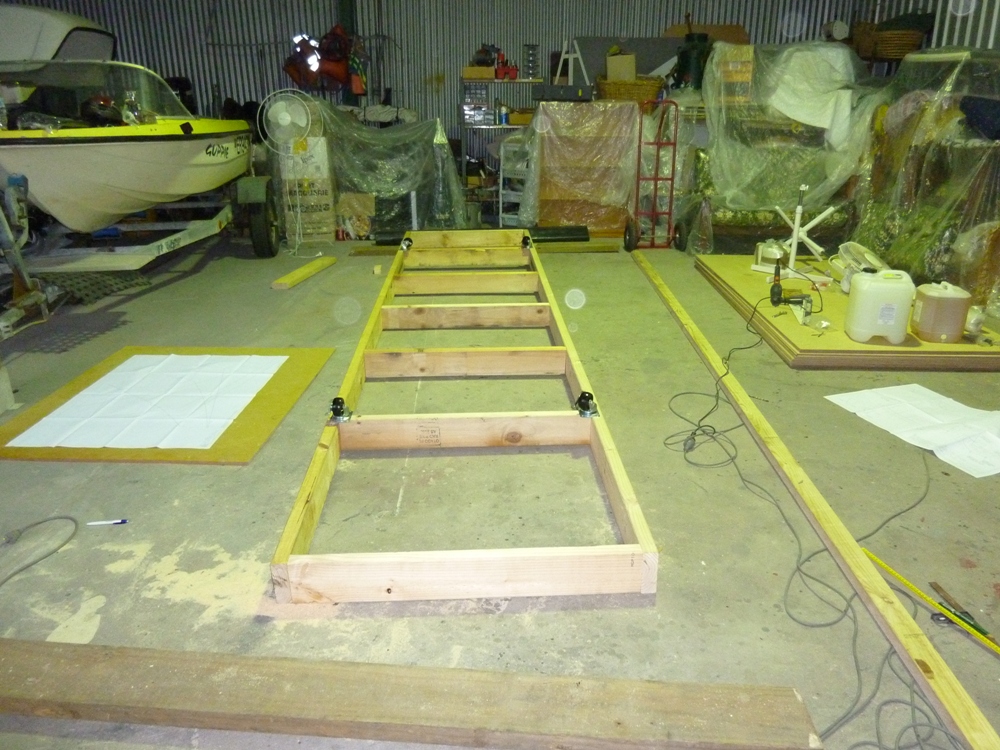
Even though it is upside down at the moment.
Re: OB15 Downunder
Posted: Sun Oct 24, 2010 6:46 am
by chicagoross
Well, that's how it starts!
lots of this
You still got plenty of that coming.
Keep the pictures coming!
Re: OB15 Downunder
Posted: Mon Oct 25, 2010 3:35 am
by AussieBoater
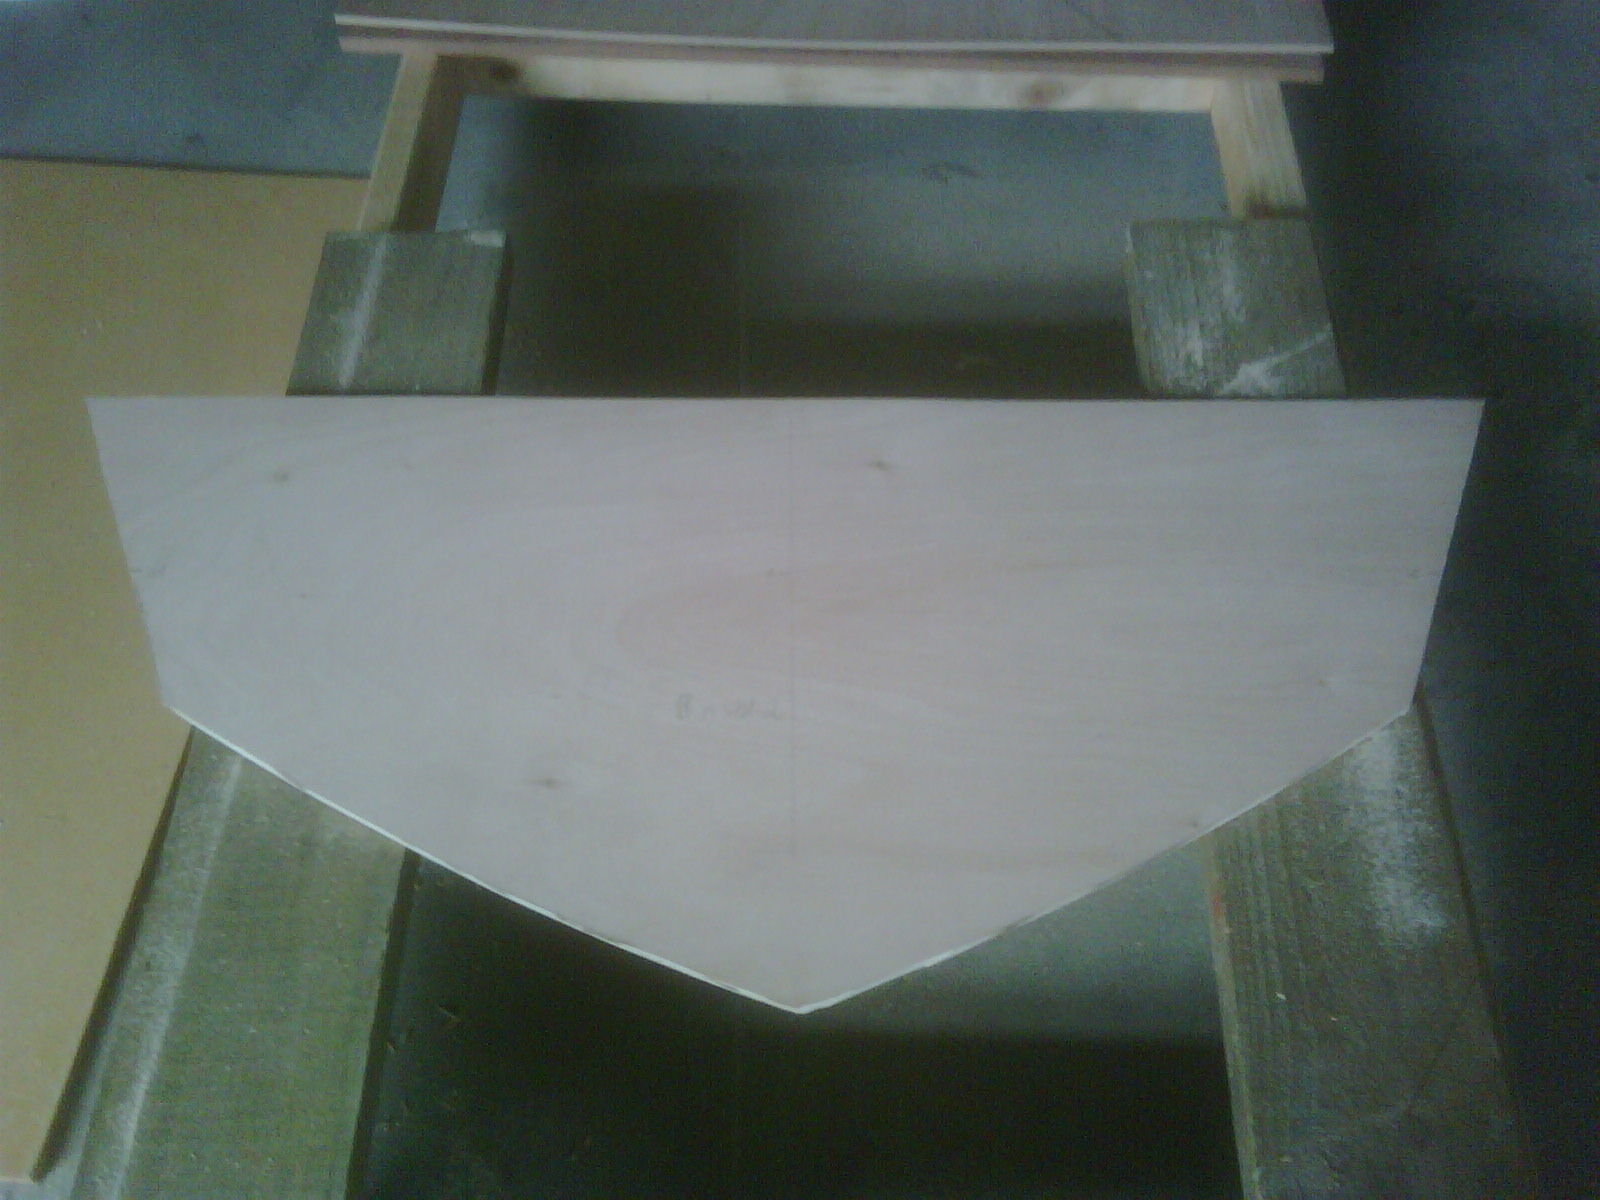
I cut all of the moulds today, and the transom and clamping board.

I made half patterns for each mould. Then traced around them to draw the moulds onto the ply.
This is the first mould (frame) I've ever cut... a big milestone for me.
All the moulds cut now...
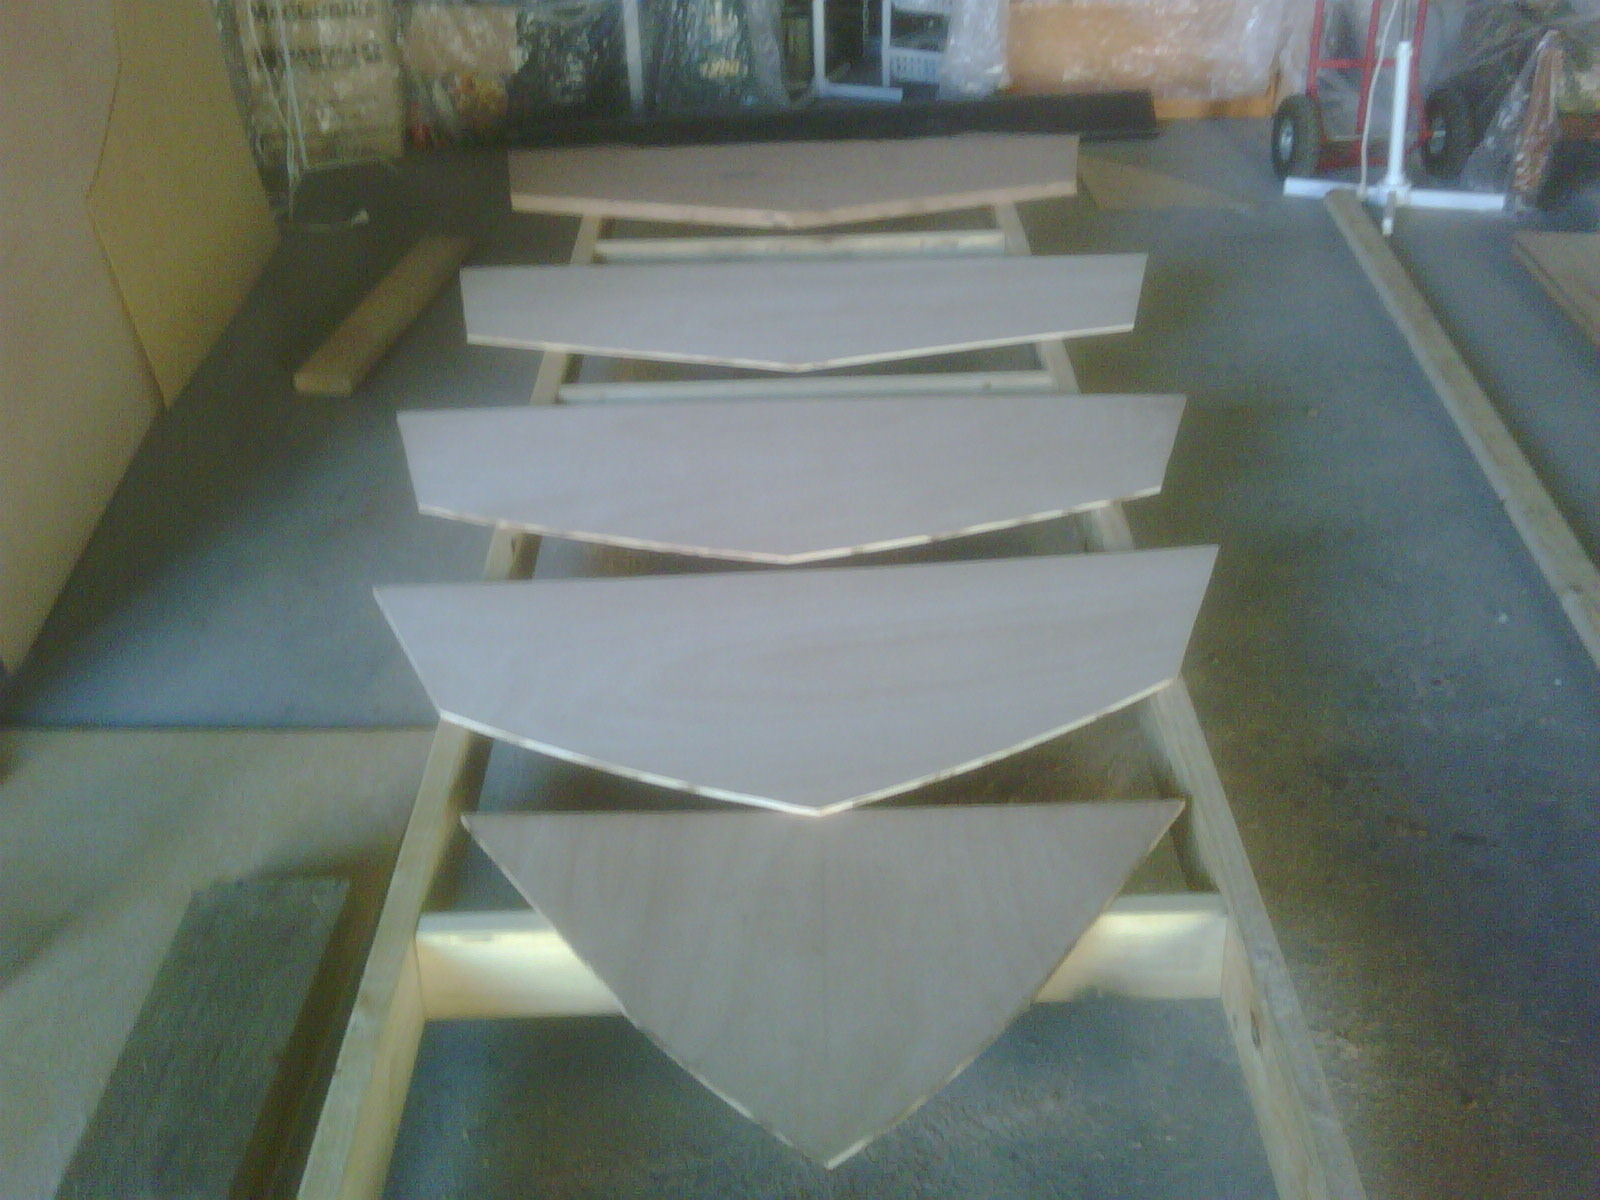
I cut the transom and clamping board out of a 3/4" sheet of ply.
I'm gathering the next step is to laminate the transom and clamping board together and then set up the moulds...
I guess my excitement shows!
Re: OB15 Downunder
Posted: Mon Oct 25, 2010 3:59 am
by sitandfish
AussieBoater wrote:...I guess my excitement shows!
I can already see a boat laying there.

Re: OB15 Downunder
Posted: Mon Oct 25, 2010 5:05 am
by gstanfield
Looking good so far. I'll be watching this one as for some reason the OB15/18 series boats really catch my eye. I think it's just the traditional open boat styling that reminds of when I was a kid.
George
Re: OB15 Downunder
Posted: Mon Oct 25, 2010 5:48 am
by AussieBoater
gstanfield wrote:Looking good so far. I'll be watching this one as for some reason the OB15/18 series boats really catch my eye. I think it's just the traditional open boat styling that reminds of when I was a kid.
George
Now that is putting the pressure on me... George keeping his eye on my build...

Re: OB15 Downunder
Posted: Mon Oct 25, 2010 6:03 am
by gstanfield
That's right, you better get it right or else I'll.....ummm...... well I guess there's nothing I can do
Then again, George has no life so I'm pretty much watching every build on this site
I do have a special liking for those OB15/18's though and think there's not nearly enough of them being built

Did you decide what you'll be using for power yet?
George
Re: OB15 Downunder
Posted: Mon Oct 25, 2010 6:33 am
by AussieBoater
Yes George,
The little boat just to the side in some pics has a 25hp Merc 2 stroke on it. I'm going to use that. I picked the OB15 to go with that motor. I have a good 18 hp Evinrude that came with the boat to put back on it... I'll sell that boat once this one floats.
Paul
Re: OB15 Downunder
Posted: Mon Oct 25, 2010 6:53 am
by gstanfield
Nice, that should make for a really nice combo.
Re: OB15 Downunder
Posted: Mon Oct 25, 2010 7:03 am
by AussieBoater
I hope so George. I hope to wet this boat before our winter... so hopefully in April 2011.
Re: OB15 Downunder
Posted: Mon Oct 25, 2010 7:15 am
by gstanfield
Careful with setting splash dates, it's considered bad luck (if you believe in that sorta stuff)
I think you can do it by then. Are you going with a tiller or a remote and console?
Re: OB15 Downunder
Posted: Mon Oct 25, 2010 7:20 am
by AussieBoater
No dates George, just before things get too cold to enjoy it.
It is a remote, elect start. I'm still looking at layout options, ATM I'm thinking about a side console. We'll see what happens when the time comes.
Re: OB15 Downunder
Posted: Mon Oct 25, 2010 7:38 am
by gstanfield
I think the side console would be better suited to the size boat, but then again there's at least one FS14 with a center console...
Oh well, break time's over I better get back to work.
Re: OB15 Downunder
Posted: Sat Oct 30, 2010 5:56 am
by AussieBoater
Today, I have stood all the moulds and the transom, ready now for the fun bit...
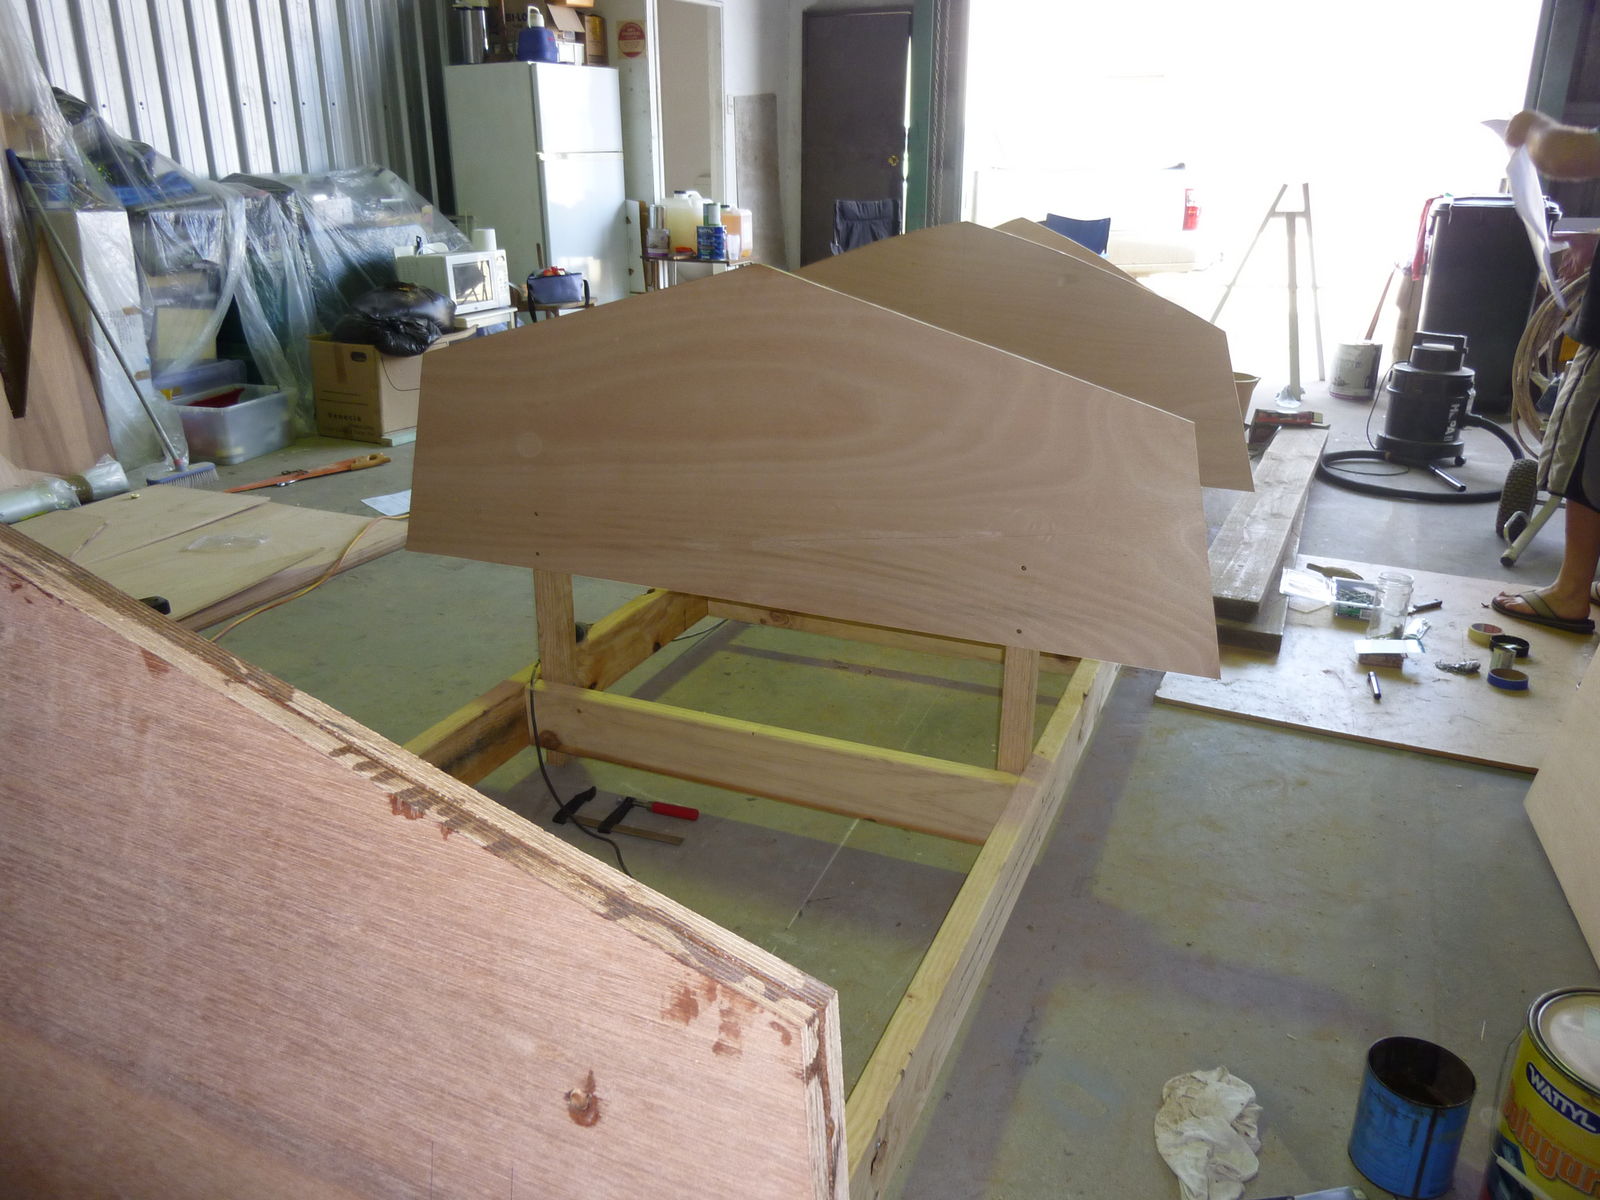
I have also drawn the side panel and bottom panel out on the ply... ready to cut them out.
Tomorrow, I'll glue the pieces together and be ready to start stitching next weekend.
I'm really pleased with myself, I've never built anything in my life before... I'm really enjoying this (and getting into trouble for the time I'm spending on it). I know I'm not the first to build a boat, or anything else, I just can't believe how well this is working out.
I've found the plans easy to follow, even after panicking about them for a month. Like it says, DON'T over think them...
Re: OB15 Downunder
Posted: Sat Oct 30, 2010 7:13 am
by sitandfish
AussieBoater wrote:...I'm really pleased with myself, I've never built anything in my life before... I'm really enjoying this (and getting into trouble for the time I'm spending on it). I know I'm not the first to build a boat, or anything else, I just can't believe how well this is working out.
I've found the plans easy to follow, even after panicking about them for a month. Like it says, DON'T over think them...
They really are great boats to build. And remember, IF something goes a little wrong, it is just as easy to put it back right. I was knocking on wood as I typed this so, noting should go wrong.
Really just agreeing that you don't need to over-think things.
Re: OB15 Downunder
Posted: Sun Oct 31, 2010 4:09 am
by AussieBoater
Cut out the side and bottom panels... I wish my skills cutting out were as good as my marking out.
I've glued the panels together with the butt blocks. Tomorrow I'll turn them over and glass the other side of the join. I'm hoping to have sometrhing that looks like a boat next weekend. I'm so looking forward to the fairing...
Re: OB15 Downunder
Posted: Wed Nov 03, 2010 12:21 pm
by AussieBoater
I've had fun getting the bottom panels and sides all lined up and stitched together. I missed getting a photo after this stage, sticky fingers not good for the camera.
Well that's what SWMBO tells me...
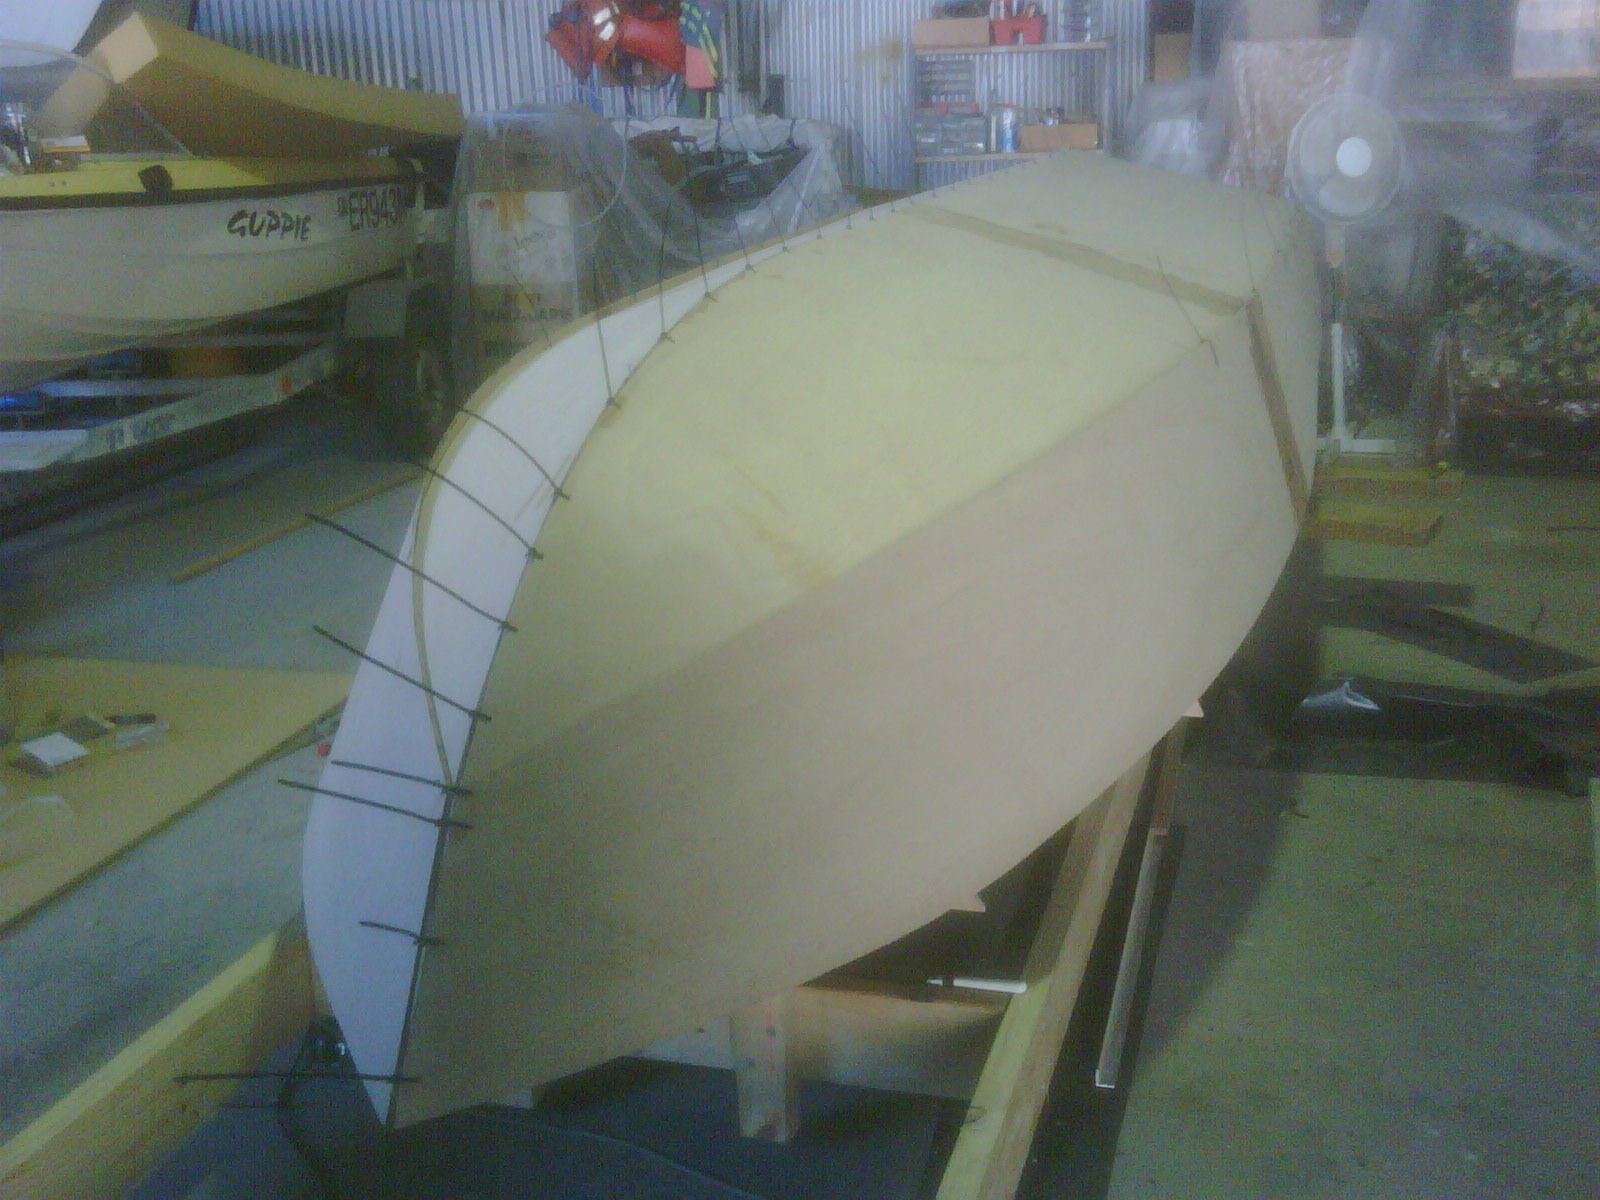
It is all stitched up and I've glued all the seams. Tomorrow evening I may get a chance to remove the stitches and fill all the gaps and holes.
Re: OB15 Downunder
Posted: Wed Nov 03, 2010 6:24 pm
by TomW
That looks great! Nice and neat.
Re: OB15 Downunder
Posted: Thu Nov 04, 2010 5:27 am
by AussieBoater
Thanks Tom...
I'm enjoying the build... I'm suffering from the disease
Re: OB15 Downunder
Posted: Thu Nov 04, 2010 5:47 am
by AussieBoater
All stitches removed, holes filled...
Now to fill in the chines.
Re: OB15 Downunder
Posted: Thu Nov 04, 2010 5:54 am
by sitandfish
I suspect that you are taking an interesting and 'different' approach to joining the chine panels to the bottom panels? They are not butted together, are they?
Re: OB15 Downunder
Posted: Thu Nov 04, 2010 6:07 am
by AussieBoater
No, they don't butt up on an OB15. The sides go past the bottom panels, they are then filled level to create the reverse chine effect...
Re: OB15 Downunder
Posted: Thu Nov 04, 2010 6:23 am
by sitandfish
AussieBoater wrote:No, they don't butt up on an OB15. The sides go past the bottom panels, they are then filled level to create the reverse chine effect...
Fascinating. I never noticed that before about the OB15, until now. Certainly makes the reverse chine easier to make. Looking really nice. And clean (lines).
Re: OB15 Downunder
Posted: Thu Nov 04, 2010 7:21 pm
by TomW
Sit&fish the OB15 is Jacques little trick on the reverse chine. It's a neat little design!
Re: OB15 Downunder
Posted: Sat Nov 06, 2010 3:14 am
by AussieBoater
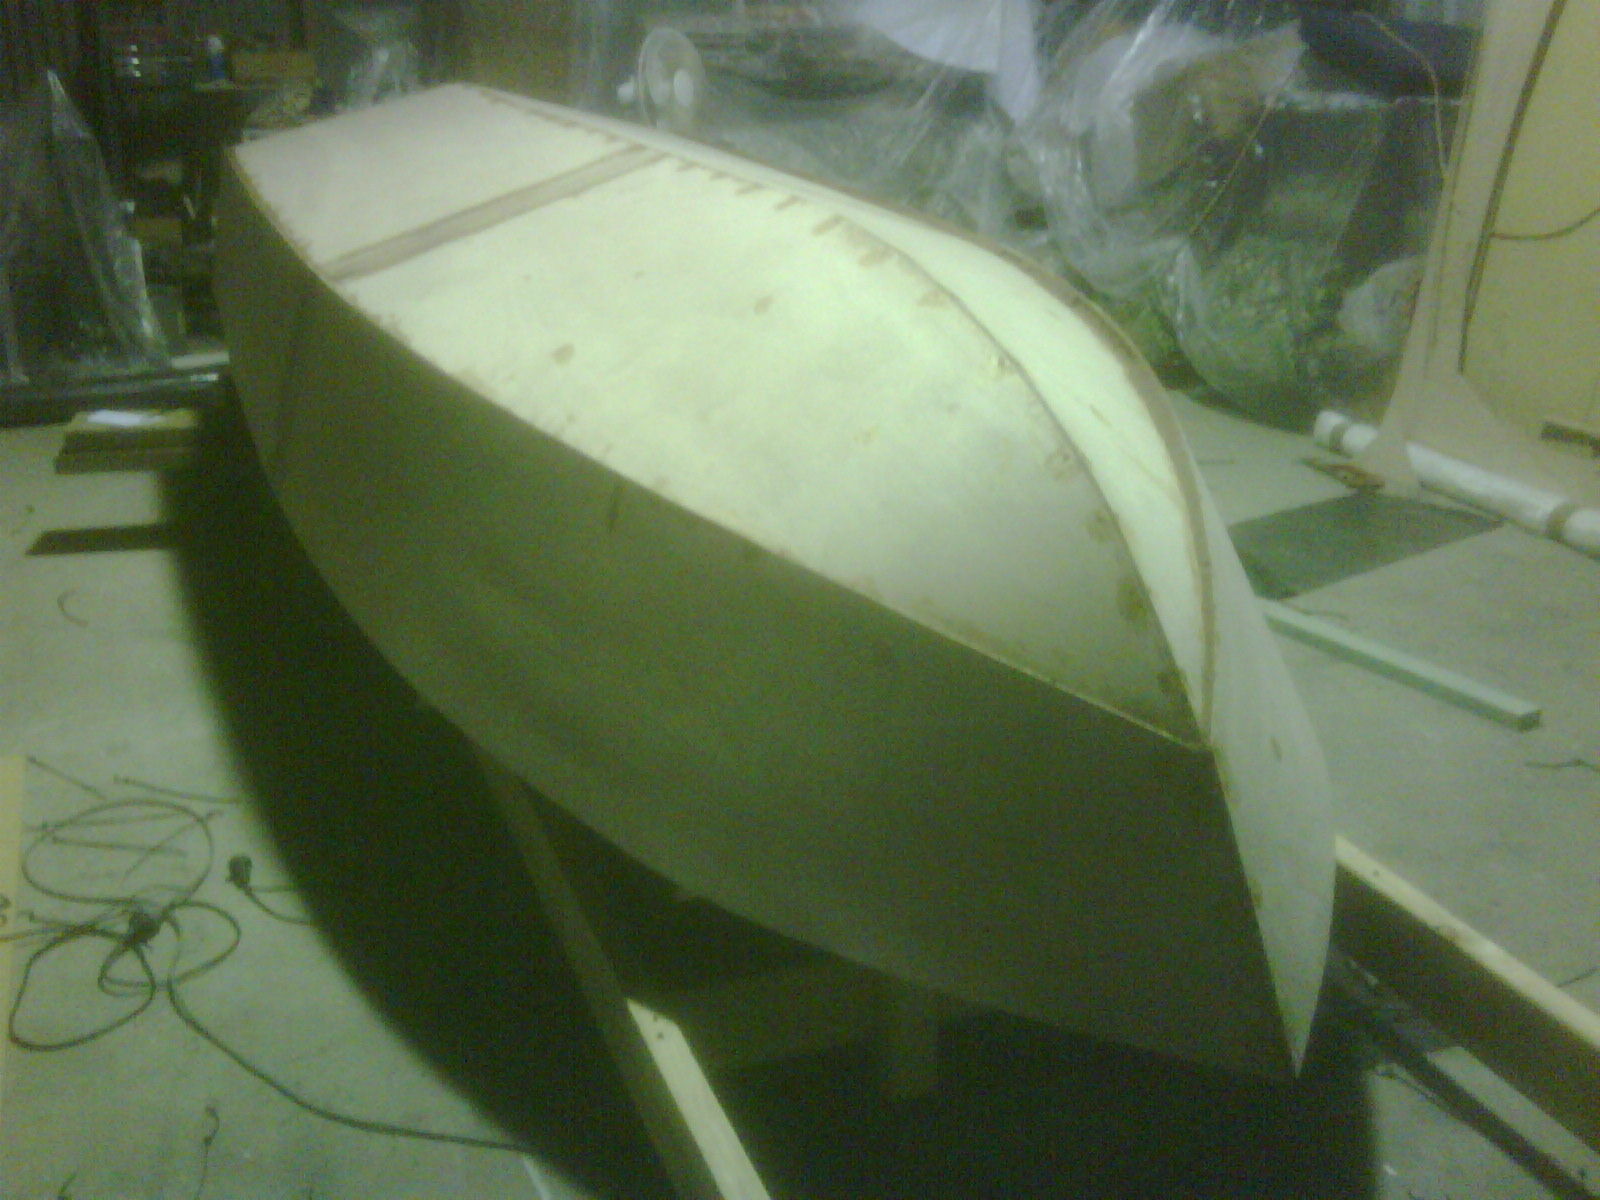
spent the day filling in the reverse chine...
it was raining and cool, so I needed some heat to get things moving
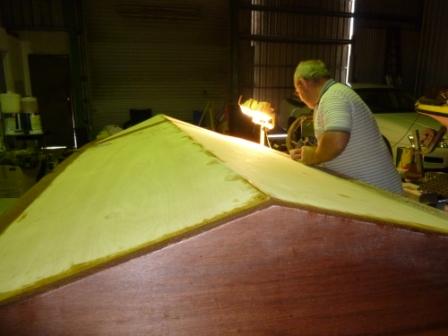
now just some sanding, round off the edges and I can tape the joints and apply the glass on the outside tomorrow...
Re: OB15 Downunder
Posted: Sun Nov 07, 2010 10:56 pm
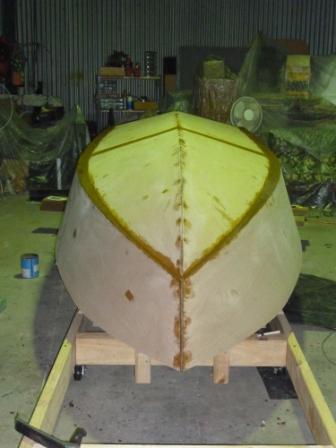
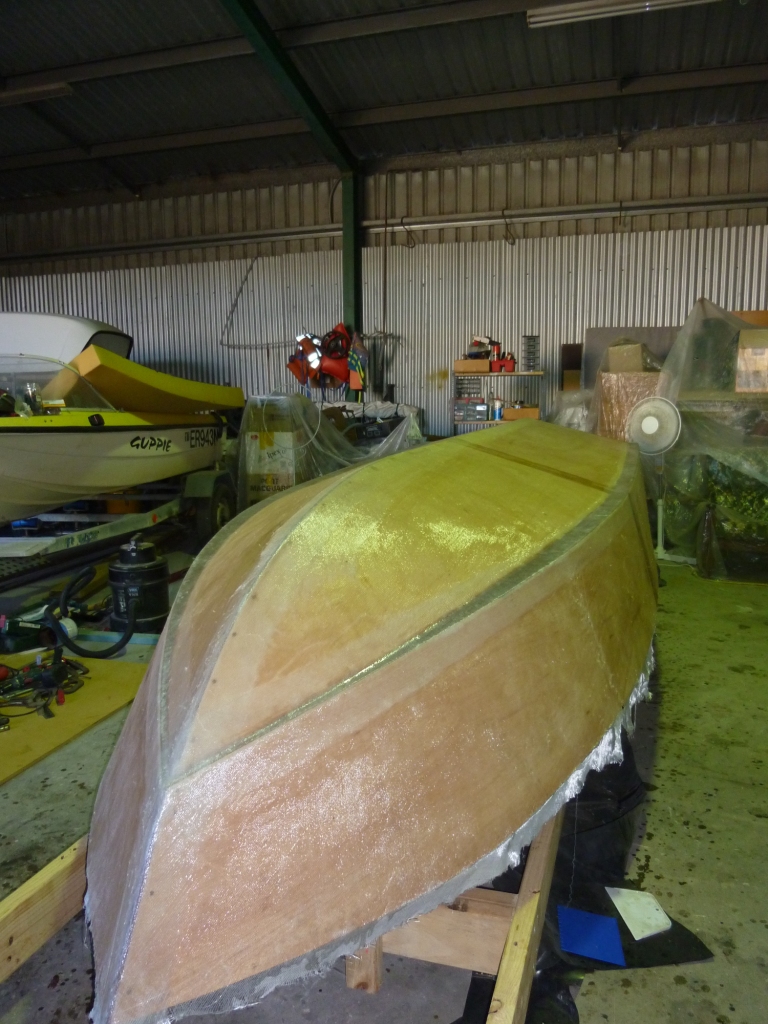
by AussieBoater
At last, the glassing is finished on the outside...
I have to say that taping the joints was easy enough and happened without incident. Laying the cloth was not so easy or enjoyable
Having faired many a boat hull, I think I'd say laying the glass mat was and will be the most unenjoyable (new word) part of the build.
I had the photographer mixing for me, I only have admiration for any person who does this by themselves.
The best part??? It's done
Re: OB15 Downunder
Posted: Mon Nov 08, 2010 7:42 am
by topwater
Nice job

Re: OB15 Downunder
Posted: Mon Nov 08, 2010 2:56 pm
by tobolamr
Beautifully done!
Re: OB15 Downunder
Posted: Mon Nov 08, 2010 11:32 pm
by AussieBoater
Thank you, I found the glassing to be a very stressful job...
I've ordered fairing compound (powder) and high build primer. So the next few weeks are bound to be fun.
Re: OB15 Downunder
Posted: Tue Nov 09, 2010 12:20 am
by chicagoross
I found the glassing to be a very stressful job
Yeah, but it sure feels good when you finish!
Re: OB15 Downunder
Posted: Tue Nov 09, 2010 12:27 am
by AussieBoater
chicagoross wrote:I found the glassing to be a very stressful job
Yeah, but it sure feels good when you finish!
Yes, it did, and now when I look at it, I think... "I did that..."
Re: OB15 Downunder
Posted: Tue Nov 09, 2010 8:43 am
by sideslippa
G'day Mate, well it looks pretty good to me. Great looking boat, I like the shape and the chines are excellent. I have very similar chine flats on my boat (OB17) and they really work! It has excellent manners and throws the spray downwards. I'll be watching this one closely
keep up the good work
Regards, Slippa.
Re: OB15 Downunder
Posted: Wed Nov 10, 2010 2:18 am
by AussieBoater
Thanks Slippa...
I received my fairing powder today, along with some high build epoxy primer... So this weekend is the start of the dreaded fairing game!
Re: OB15 Downunder
Posted: Thu Nov 11, 2010 4:46 am
by sideslippa
AussieBoater wrote:Thanks Slippa...
I received my fairing powder today, along with some high build epoxy primer... So this weekend is the start of the dreaded fairing game!
I might be a bit weird but I don't mind fairing
I call it "quality time"....The more time spent fairing with a fairing board the higher the qaulity of finish you will have. Plus it is really good exercise.
You mentioned that the glassing was a bit stressfull, I was wondering why, cause that should be fairly easy and enjoyable. Sand and prep the area to be glassed and blow off the dust, lay the glass over or on the area and smooth it out, do not put any epoxy on first, put the glass on dry. Hold it in place with pieces of masking tape if required, you can even trim it to fairly close if you like. When you are happy with it, mix up your epoxy and apply it onto the glass, wet out the glass well and roll it with a metal roller tool to work out any air and push the glass and resin onto and into the wood, then sqeegee any excess out of the glass with a plastic applicator. Excess resin is just unwanted weight and does not make your layup any stronger.
Well thats how I do it...unless I am doing a wet on wet layup.
Once your work has started to go off/cure but still plyable and plastic, trim any excess with a sharp knife.
I hope I am not being too nosey here.
Best regards Slippa.
Re: OB15 Downunder
Posted: Thu Nov 11, 2010 5:00 am
by AussieBoater
Slippa,
I tried doing it wet on wet. I taped the seams, then layed out the glass mat and it stuck on the seams and pulled out of shape. the threads holding the glass together pulled out, threads pulled and sat up... I started to stress...
It turned out ok, the temps down here were in the low 20's (about 64 to 70 F), so I had reasonable working time with the resin. I have standard hardener.
I missed the bit on your thread about trimming off the excess with a knife. I've now done that with a hacksaw blade. I'm about to start filling and fairing. this part I'm familiar with.
No, your not nosey, I'd call it helpful and friendly.
Thanks
Paul
Re: OB15 Downunder
Posted: Thu Nov 11, 2010 8:45 am
by sideslippa
AussieBoater wrote:I tried doing it wet on wet. I taped the seams, then layed out the glass mat and it stuck on the seams and pulled out of shape.
Yep, That is precisely why I prefer to put it on dry when working larger areas. much easier. As long as you give any previous cured glass work a nice rough up and blow off, you won't have any problems. Regardless your build is looking very good, look foward to the next batch of photos Paul.
cheers, slippa.
Re: OB15 Downunder
Posted: Thu Nov 11, 2010 7:21 pm
by chicagoross
I work mainly alone; each bit of glass is usually my 2 hour project for the day. Trying to do wet on wet, solo, would be very stressful. Since I'm in a tropical climate, wet on wet is usually not possible (except for something like double taping a chine or transom seam) because the poxy kicks too fast. Typically I only work 3 or 6 oz at a time. On the plus side, the next day you're ready to go back with the next layer after a quick hit with the flapper disk on the grinder.
At any rate, even two hours a day gets the job done faster than you think!
Re: OB15 Downunder
Posted: Thu Nov 11, 2010 9:13 pm
by sideslippa
chicagoross wrote:I work mainly alone; each bit of glass is usually my 2 hour project for the day. Trying to do wet on wet, solo, would be very stressful. Since I'm in a tropical climate, wet on wet is usually not possible (except for something like double taping a chine or transom seam) because the poxy kicks too fast. Typically I only work 3 or 6 oz at a time. On the plus side, the next day you're ready to go back with the next layer after a quick hit with the flapper disk on the grinder.
At any rate, even two hours a day gets the job done faster than you think!
Sounds like a good system there Ross, and you are right as long as you keep chipping away at it, the finish line will appear.
slippa
Re: OB15 Downunder
Posted: Sat Nov 13, 2010 3:12 pm
by AussieBoater
I've created this graphic to go on the boat... gotta have a brand label...

Re: OB15 Downunder
Posted: Sun Nov 14, 2010 5:48 am
by AussieBoater
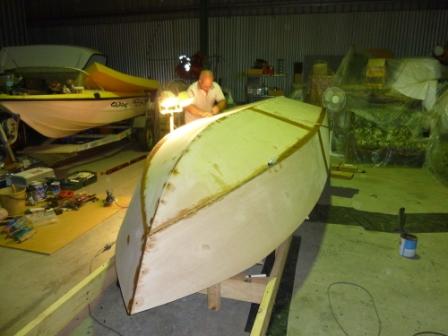
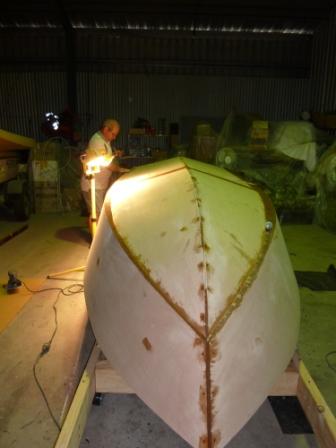
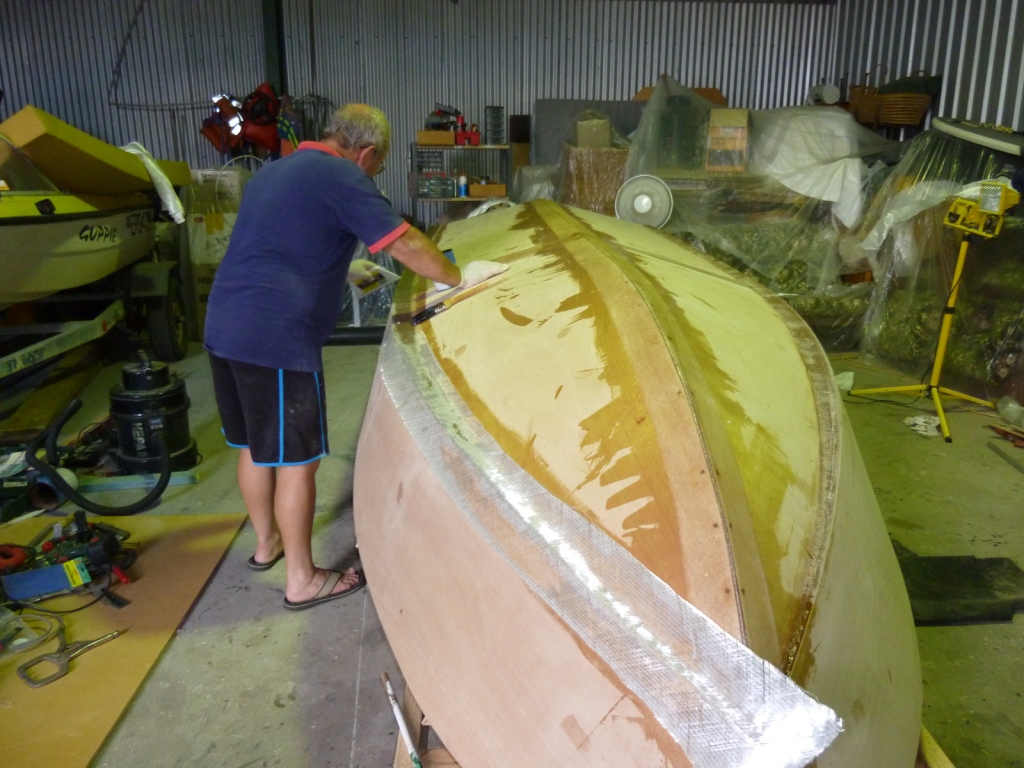
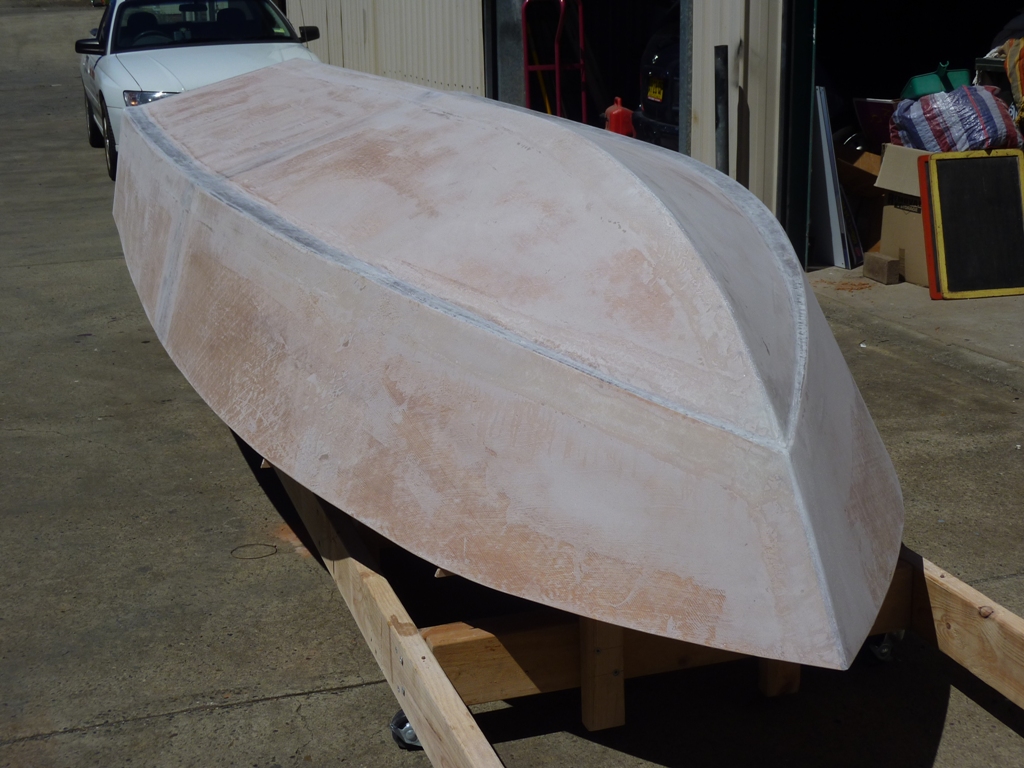
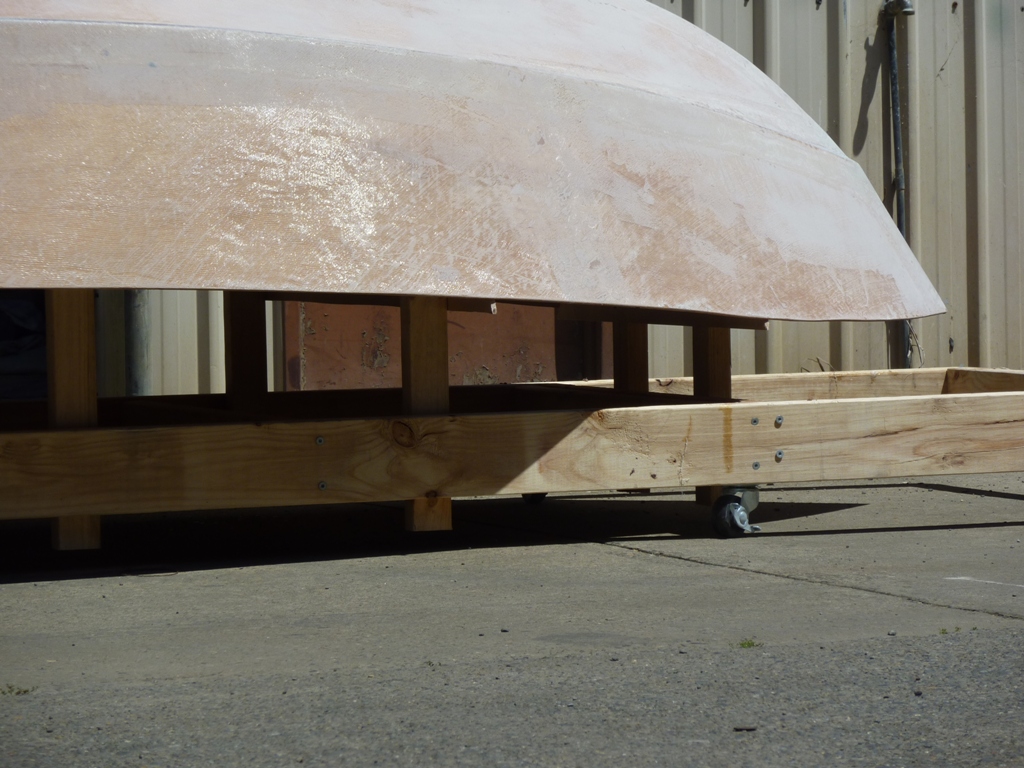
ok, the fairing has started...
filled all the overlaps... and sanded them... still a few holes and lows to fill... long boards are gunna be my friends the next few weeks...
Re: OB15 Downunder
Posted: Sun Nov 14, 2010 6:14 am
by AussieBoater
This is also the first time the boat has seen day light.
Re: OB15 Downunder
Posted: Sun Nov 14, 2010 6:28 am
by sideslippa
What a great looking hull, nice work there Paul...Enjoy that fairing now won't ya
Slippa
Re: OB15 Downunder
Posted: Sun Nov 14, 2010 6:31 am
by AussieBoater
sideslippa wrote:What a great looking hull, nice work there Paul...Enjoy that fairing now won't ya
Slippa
Thanks Slippa, I'd ask you to join me... only the distance would make the commuting a pain...
Where did you get the long lengths of Balsa for forming the chine edges?
Re: OB15 Downunder
Posted: Sun Nov 14, 2010 6:35 am
by AussieBoater
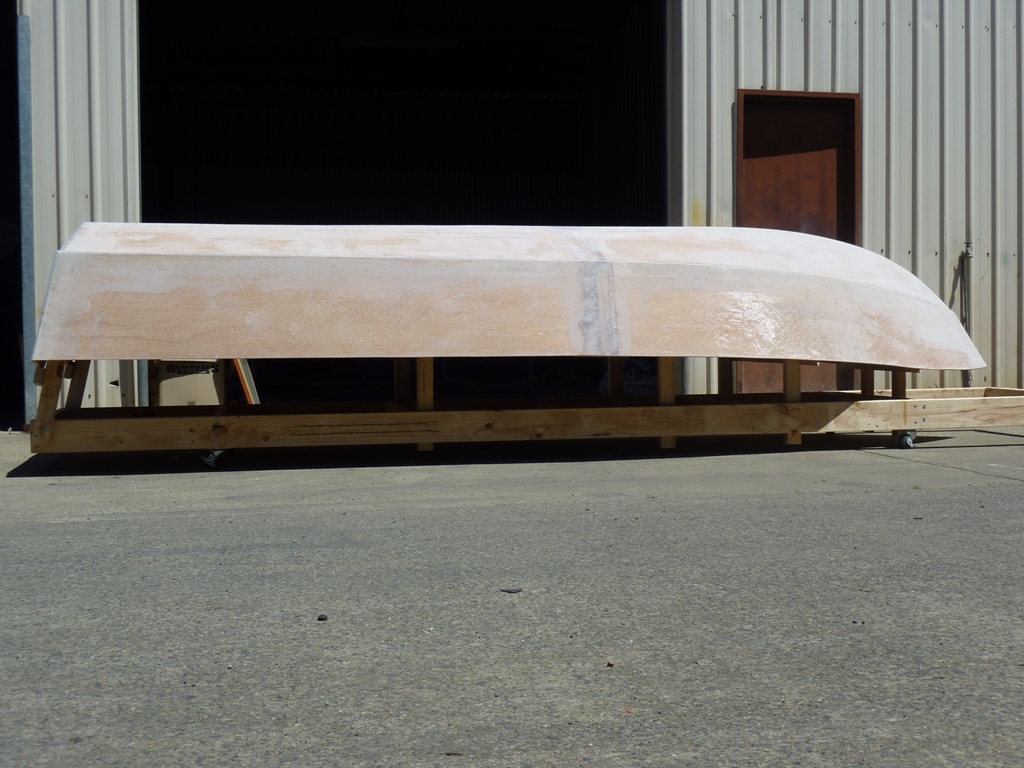
I was sitting back a distance looking at the boat and noticed the sheer is not exactly straight. It has a kick in it. Is this normal?
You'll have to view the whole picture to see the wave...
Re: OB15 Downunder
Posted: Sun Nov 14, 2010 3:39 pm
by sideslippa
AussieBoater wrote:Thanks Slippa, I'd ask you to join me... only the distance would make the commuting a pain...
Where did you get the long lengths of Balsa for forming the chine edges?
Plenty of balsa laying around from some model planes I was building. I mostly used stiff card board for my chine dams...worked well.
AussieBoater wrote:I was sitting back a distance looking at the boat and noticed the sheer is not exactly straight.
Yeah the OB15 has a slightly upswept sheerline. I can see that you have a little droopy nose syndrome. You may consider to add some material before you install sheerclamps and rubrail. It is a good idea to turn a photo upside down to see the way your boat looks.
Slippa.
Re: OB15 Downunder
Posted: Sun Nov 14, 2010 8:25 pm
by chicagoross
AussieBoater, looks like a good start on the fairing after the first pass. That's about how far I got.
Slippa is the one to follow if you wan't the mirror finish!
Re: OB15 Downunder
Posted: Fri Nov 19, 2010 6:50 am
by sideslippa
G'day AussieBoater, I noticed you made half mold templates, what a good idea

gaurantees symetry. What thickness MDF did you use, I would like to do exactly the same thing. Also looks like you panels fit was very good, hardly any ties at all toward the pointy end. Hope I have the same result.
I start mine mid next week. can't wait!
Slippa.
Re: OB15 Downunder
Posted: Fri Nov 19, 2010 7:50 am
by AussieBoater
Slippa,
I did not read my plans enough, just the generic instructions on this site. The OB15s molds are not the frames, I did not order any MDF to make the molds, I cut mine out of 9 mm ply, I'll recut the molds into frames when the time comes. I used the 3mm MDF I purchased as a protective sheet for shipping my ply. I drew and cut a half mold pattern in 3mm MDF and then transfered this to the ply.
Paul
I hope you can follow that... lol
Re: OB15 Downunder
Posted: Fri Nov 19, 2010 7:57 am
by AussieBoater
Slippa,
With the panels, I screwed 2 sheets of ply together, one on top of the other, and cut the panels out. That way I had exact matching pairs.
I don't think I have a photo of this...
I used 6mm ply for the hull. I'll fit it out with 9mm. My transom is 2 pieces of 18mm ply.
I purchased 4 sheets of 6 mm, 5 sheets of 9mm, 1 sheet of 12 mm (sole) and 1 sheet of 18 mm.
Re: OB15 Downunder
Posted: Fri Nov 19, 2010 3:52 pm
by sideslippa
AussieBoater wrote:With the panels, I screwed 2 sheets of ply together, one on top of the other, and cut the panels out. That way I had exact matching pairs.
Yeah I did similar with the 17. good idea I rekon.
Thanks, Re. Slippa.
Re: OB15 Downunder
Posted: Mon Nov 22, 2010 5:15 pm
by Uncle D
Just want to chime in and say that are rockin' and rollin' on your build. Great shop too. Lots of space. Keep up the great work.
When I did my big sheets of glass, I precut and layed it all out dry. then rolled each end to the middle. I wet the front half, unrolled and wet out then did the back half the same way. It make for light work by my self. I used a roller but made sure I applied the resin thin as not to use too much.
Looks good, Don
Re: OB15 Downunder
Posted: Sun Nov 28, 2010 6:31 am
by AussieBoater
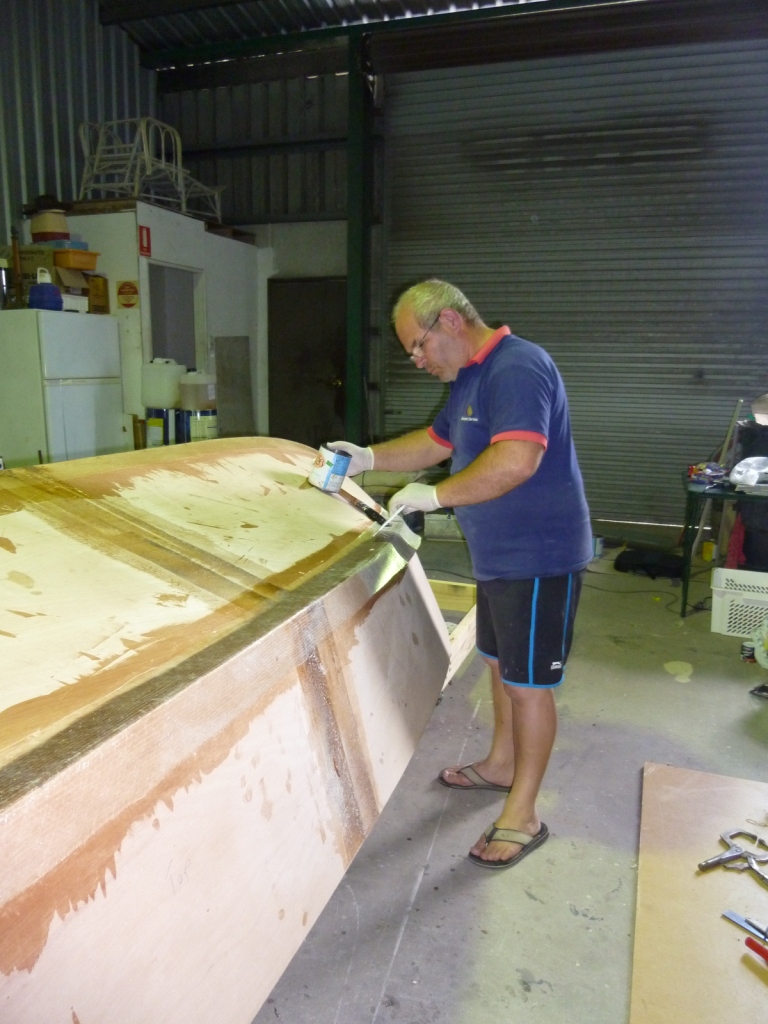
Thanks Don... the build is progressing slowly at this point... fairing and sanding. Everytime I think a section is ready to finish, i find more bits to sand. Then I've sanded some more... and more.
The bottom is just one more sanding with a block and then undercoat and finish. I'm glueing on the gunwales so I can finish fairing the sides. I'm going to paint it all white, so hopefully I can turn it over before Christmas.
I'll have to post questions about my internal layout to Jacques on another thread...
Re: OB15 Downunder
Posted: Sun Nov 28, 2010 8:48 am
by Larry B
Paul, your moving right along. Less than two months to this point
Boat is looking very nice and at this pace I'm pretty sure you'll be flipping by Christmas, but don't hurry the process it takes what it takes
Re: OB15 Downunder
Posted: Sat Dec 04, 2010 6:44 pm
by AussieBoater
I'm still fairing and sanding... or I should say, fairing and sanding, fairing and sanding... I'm nearly there... still hoping to turn before Christmas. This may be my first mile stone missed
It's all fun... pictures soon
Re: OB15 Downunder
Posted: Sat Jan 01, 2011 12:13 am
by AussieBoater
ok, so no pictures... they are on the computer at home.
I am just about finished fairing, I'm putting a fillet under my gunwale to blend it into the side of the boat. THEN I hope to undercoat.
I've been searching for the posts on the installation of the gunwale rubber. I know I read it here somewhere
put it in boiling water, while it is still hot, start at the bow and stretch and fix it. My question is... what is the minimum radius this rubber will conform to? I have the 2 piece stuff, main strip and an insert over the screws.
With my gunwale on now, the radius is probably only 1 1/4", I was thinking if I plane most of the gunwale off at the bow, I can build up thickness in the inwale, giving me the same amount of wood, just a flatter, broader front deck. Am I on the right track or will the rubber conforn to the tight bend at the bow?
Thanks.
Re: OB15 Downunder
Posted: Sat Jan 01, 2011 8:31 am
by Cracker Larry
I had to cut mine on a miter at the bow, no way was it going to make that bend. I'm guessing the angle was about 40 degrees. It was a compound miter which complicated the bend.


At the transom corners I had to cut a little relief on the underside to keep it from puckering at the bend. The angle there is about 90 degrees.

Re: OB15 Downunder
Posted: Sat Jan 01, 2011 12:45 pm
by fishingdan
Very nice!
Re: OB15 Downunder
Posted: Sat Jan 01, 2011 3:40 pm
by AussieBoater
Thank you CL, I have extra length, so I can make a practice run at the bow miter. It will be a while before I need to do this now.
Re: OB15 Downunder
Posted: Sat Jan 01, 2011 5:02 pm
by Cracker Larry
That's what I did. It came in a 50' length so I had about 8 spare feet to practice with.
Re: OB15 Downunder
Posted: Tue Mar 29, 2011 11:53 am
by JimboFisher
any chance that white car in the background is a Holden Ute?
Nice build so far too.
Re: OB15 Downunder
Posted: Tue Mar 29, 2011 3:08 pm
by AussieBoater
Yes, that car is a Holden ute... It has gone now though...

Many months ago, I said I'd like to be finished building the boat soon... The build has sat idol for more months than I've worked on it... 2 reasons, My work became so busy I did not have time to touch the boat and then since Christmas, with work still booming, my health prevented me from doing anything. Most of the outside fairing is done. "Most" I'm playing with the rub rail. Hopefully, if these 2 factors allow, I'll actually flip it by my original finish date.
Re: OB15 Downunder
Posted: Tue Mar 29, 2011 5:36 pm
by JimboFisher
Sweet I love those cars. I drive a Holden (Pontiac) Monaro.
2 Questions about the build: 1) What was the advantage of making half molds for the frames?
2) What kind of ply is the transom cut from? The reason I ask is I have some walnut ply left over from a furniture build, and I was wondering if it would be suitable for the transom, I mean after it's glassed does it matter if it is marine grade wood?
Re: OB15 Downunder
Posted: Wed Mar 30, 2011 6:11 am
by AussieBoater
I made the half mold patterns out of 3 mm MDF, it was easy to cut and shape up... using half patterns I could trace it and then flip it over and end up with a symmetrical mold. I only had to measure one side.
My transom is made out of Maple marine grade ply, 3/4", 2 layers. I'd only use marine ply in the transom, seems to be the most likely spot to get moisture in.
Re: OB15 Downunder
Posted: Sat May 19, 2012 2:55 pm
by NBB
how is the beast coming along? when you reach the point of stringers bulkheads and deck can you please take lots of pictures. i am considering building one of these or the 0b18 its bigger brother, were is wauchop? nsw?