Page 1 of 1
FS17 build in Maryland
Posted: Wed Jan 12, 2011 4:42 pm
by aquaboogie
Hello Everyone,
Me and my old man (AKA fishing buddy) have always wanted to build a boat. We have been looking around on this site for a little while and last year before thanksgiving of last year I pulled the trigger and ordered the plans for the FS17. I meant to sart a build thread once we got the wood but we're weekend worriors and I never got around to it. We have been working on the boat at least one day a week since November 2010, not sure how we are doing as far as progress goes. I will sart posting pictures by this weekend. Wish us luck as this will be our first boat build. We just hope that our boat comes out somewhat close to what we have seen on this site.
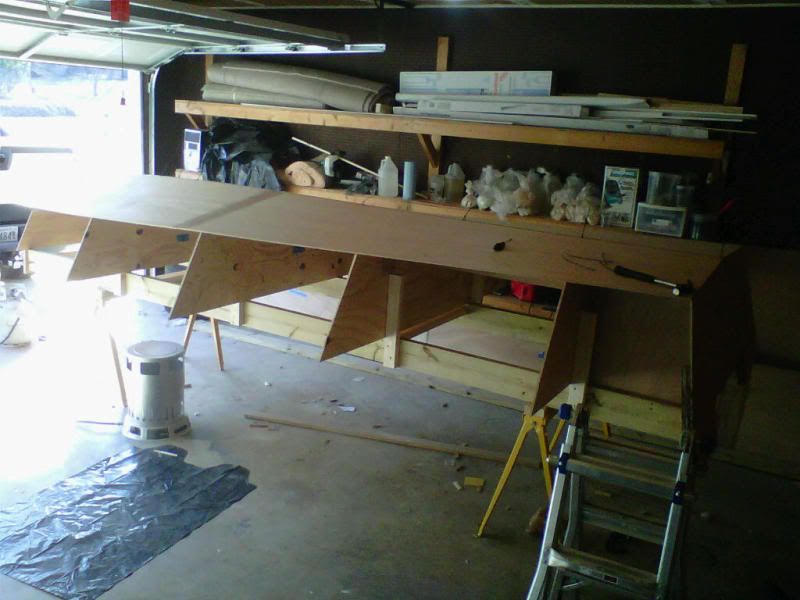
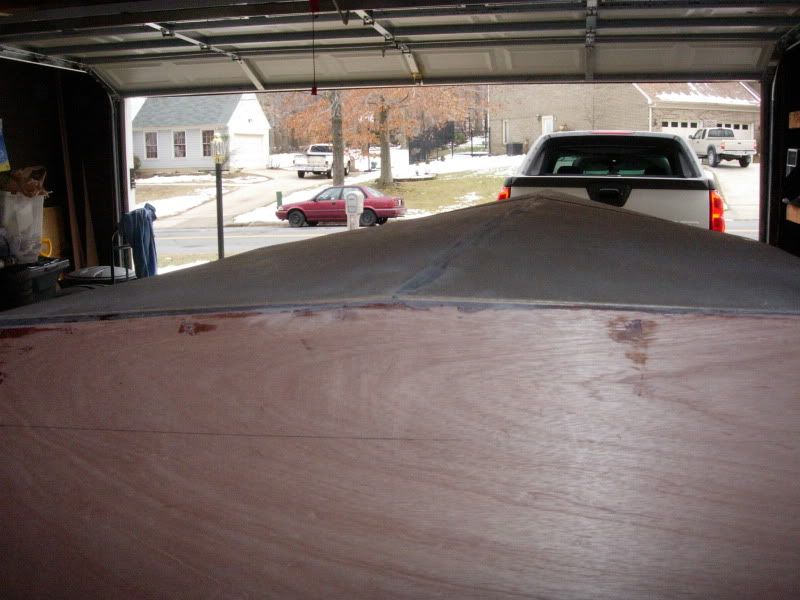
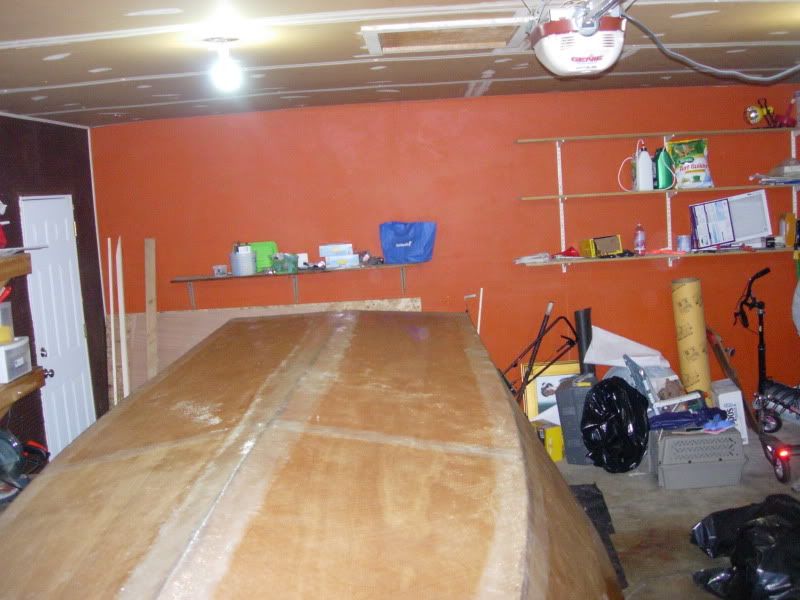
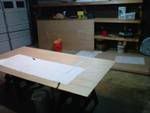
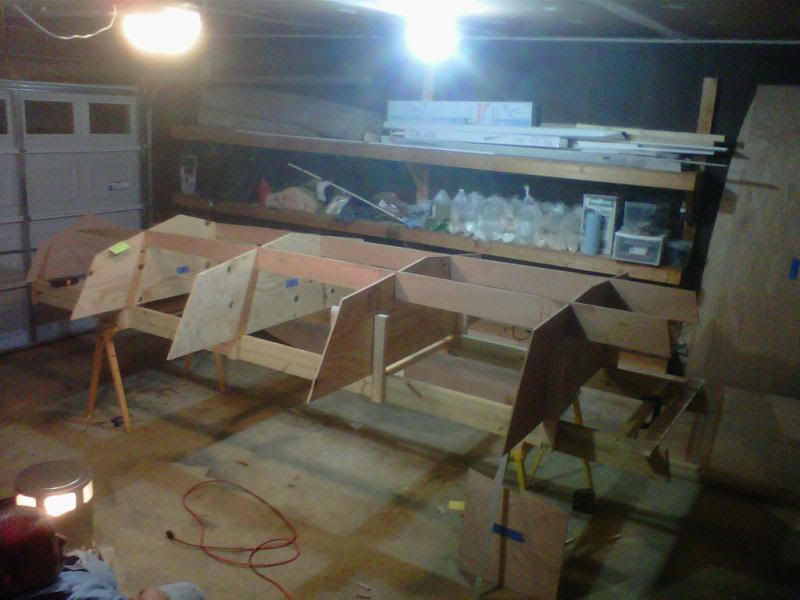
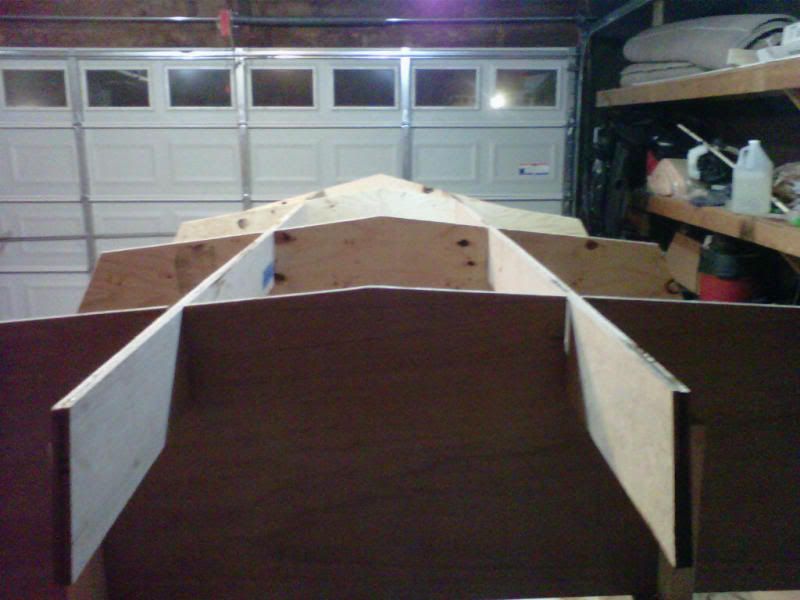
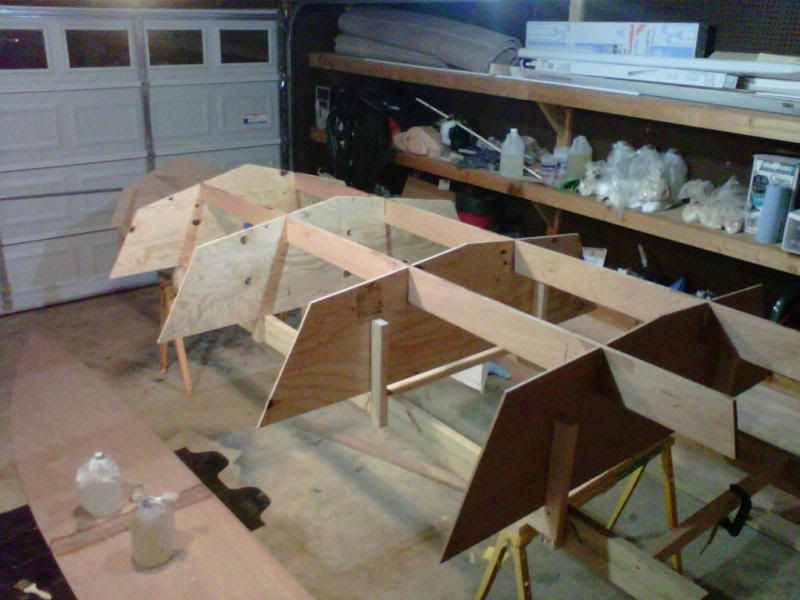
A quick updare on what has gone down so far
*picked up required Marine ply, epoxy, glass and safety gear
*cut all pieces listed on nestings
*cut frames from cheep home depot ply
*glued the transom
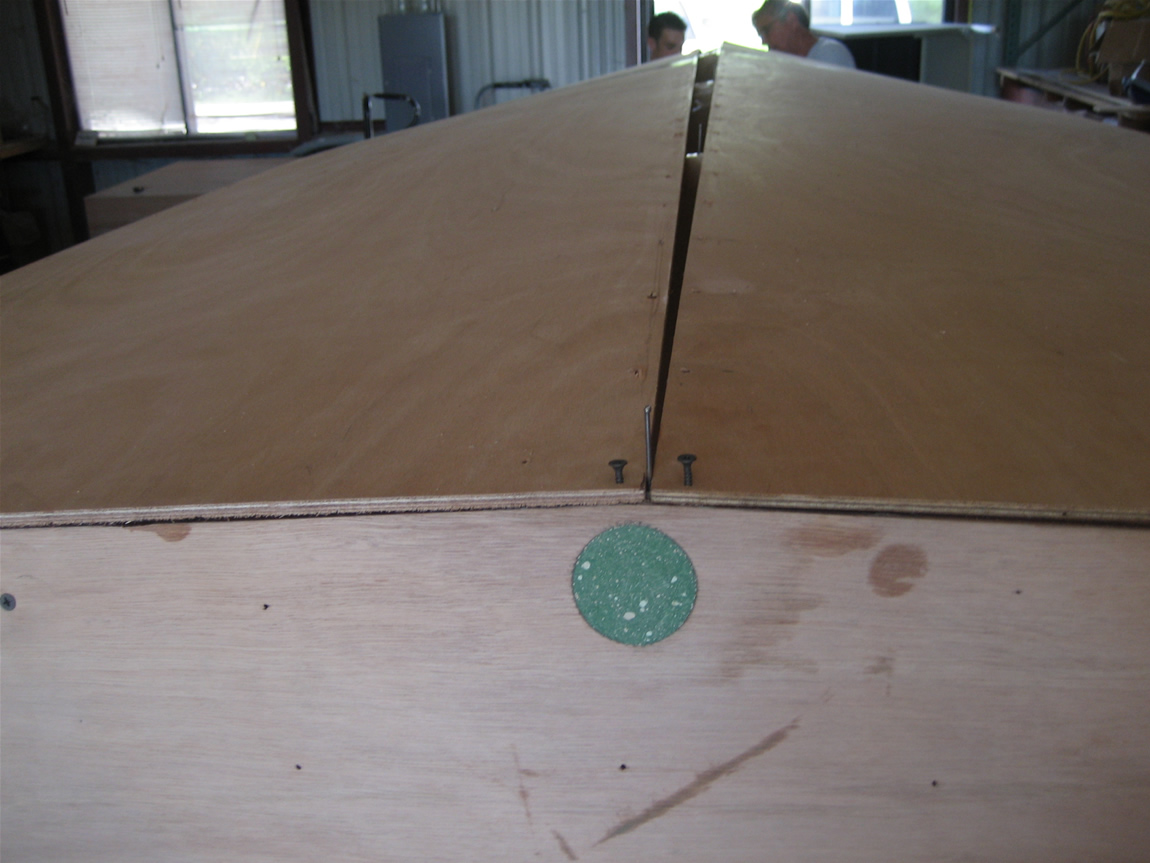
*glued the stringers
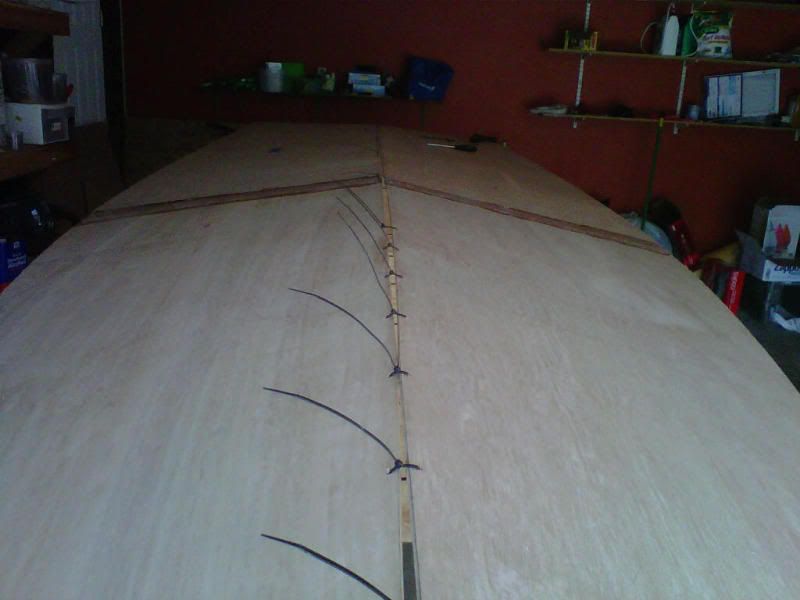
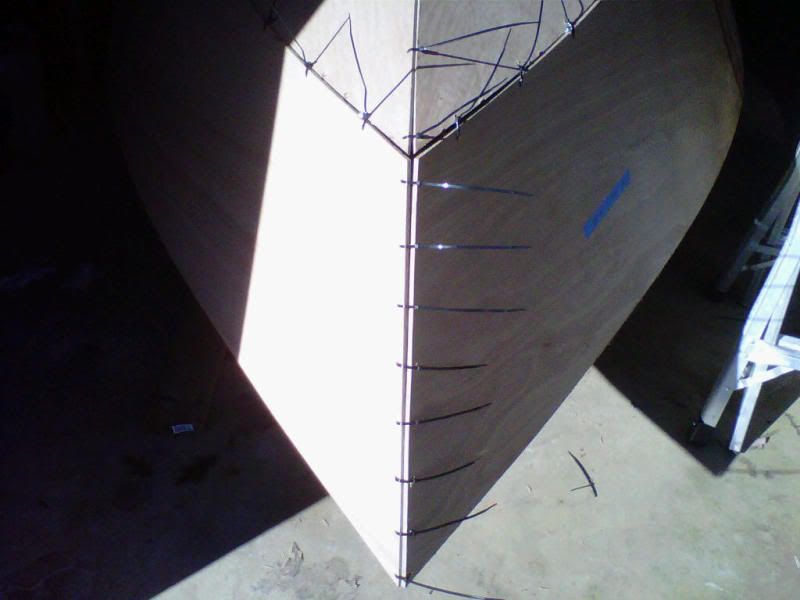
*taped side panels together with 12oz biaxial
*taped bottom panels together with 12oz biaxial
*setup strong backs on saw horses
*atached frames to strongbacks
*notched frames and stringers
*Installed stringers on frames
One day this week we will attempt to mount the motorwell sides and transom. I posted a question on how this should be done in the power boats section under the transom alignment thred.
Re: FS17 build in Maryland
Posted: Wed Jan 12, 2011 8:16 pm
by chicagoross
Welcome and good start! You're going to see a large boat-shaped object in short order!
Re: FS17 build in Maryland
Posted: Thu Jan 13, 2011 6:04 am
by BassMunn
Welcome to the board. The FS17 seems to be getting pretty popular lately, I'm close to ordering plans for mine too, just gotta finish the PH16 first (almost done)

Good luck and keep sending us pics, we need our fix.
Re: FS17 build in Maryland
Posted: Wed Jan 19, 2011 9:23 pm
by aquaboogie
Re: FS17 build in Maryland
Posted: Wed Jan 19, 2011 9:40 pm
by Brettitt41
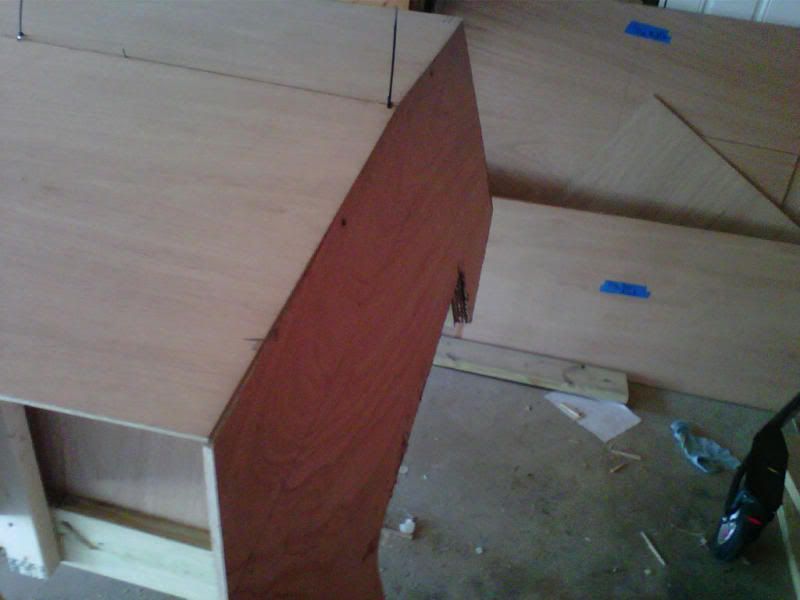
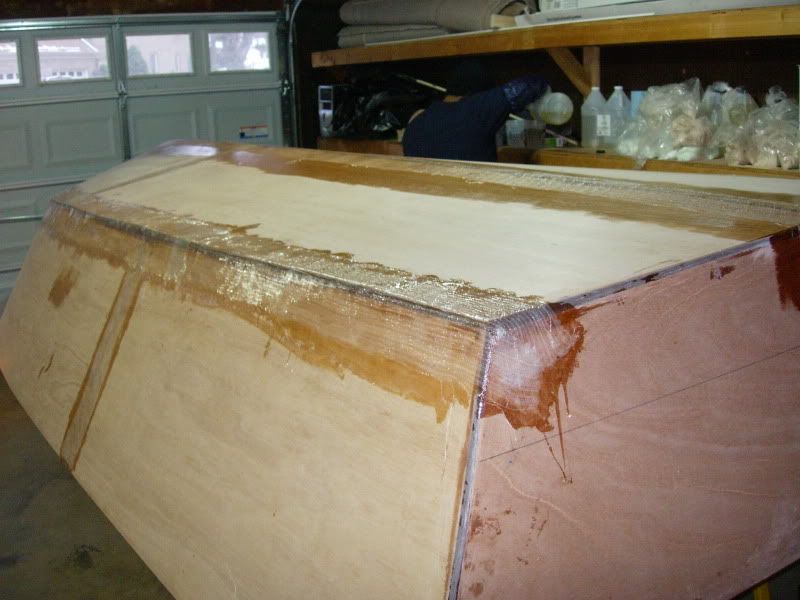
aquaboogie wrote:I have some questions. How do you attach the side and bottom panels to the transom before tack welding the seams? Do i zip tie the panels to the transom, screw them or just adjust panels till the gap is right? Do the sides and bottom panels fit flush to the back edge or front edge of the transom?
You can attach the sides any way you have suggested. Zip ties, temp screws, nails most anything that will hold it in place until you can tab it in. The transom fits inside the panels or back edge as you put it.
Re: FS17 build in Maryland
Posted: Thu Jan 20, 2011 12:04 pm
by tech_support
use as few screws as possible, you want the panels to be able to move as you zip them up.
On my fs17, used only a few screws.
Re: FS17 build in Maryland
Posted: Fri Jan 21, 2011 9:54 pm
by whosmatt
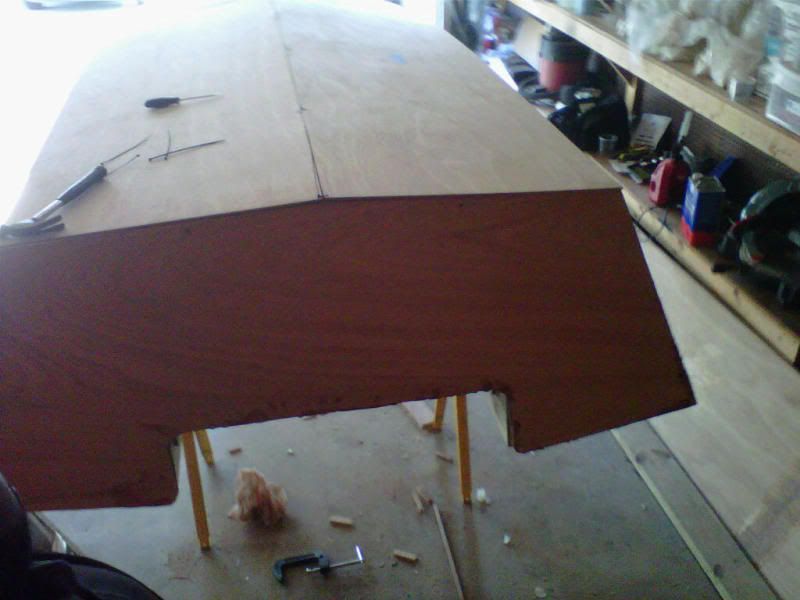
aquaboogie wrote:I have some questions. How do you attach the side and bottom panels to the transom before tack welding the seams? Do i zip tie the panels to the transom, screw them or just adjust panels till the gap is right? Do the sides and bottom panels fit flush to the back edge or front edge of the transom?
Mine fit flush with the back edge. I used a couple of finishing nails to temporarily hold the panels in place while I was zipping, then removed the nails and adjusted the whole assembly until it was reasonably flush with the transom. You can tell when it's sitting right by watching beneath the hull; you want it sitting on the frames and especially the stringers as tight as possible without attaching it to any of them. I think I used a couple finishing nails at the upper (lower when it's upside down) corners once I had everything in place just to keep the sides from moving while I applied the "spot welds" but nothing that held them tight to anything.
If you need to *create* a little gap between the transom edge and the panels, a couple of finishing nails work great just inserted in there. Just make sure not to glue them in.
Hope this helps, and keep up the good work.
-Matt
Re: FS17 build in Maryland
Posted: Sat Jan 22, 2011 1:15 am
by aquaboogie
whosmatt wrote:aquaboogie wrote:I have some questions. How do you attach the side and bottom panels to the transom before tack welding the seams? Do i zip tie the panels to the transom, screw them or just adjust panels till the gap is right? Do the sides and bottom panels fit flush to the back edge or front edge of the transom?
Mine fit flush with the back edge. I used a couple of finishing nails to temporarily hold the panels in place while I was zipping, then removed the nails and adjusted the whole assembly until it was reasonably flush with the transom. You can tell when it's sitting right by watching beneath the hull; you want it sitting on the frames and especially the stringers as tight as possible without attaching it to any of them. I think I used a couple finishing nails at the upper (lower when it's upside down) corners once I had everything in place just to keep the sides from moving while I applied the "spot welds" but nothing that held them tight to anything.
If you need to *create* a little gap between the transom edge and the panels, a couple of finishing nails work great just inserted in there. Just make sure not to glue them in.
Hope this helps, and keep up the good work.
-Matt
Thanks Matt, those are some great tips.
Almost ready to start tacking!
Re: FS17 build in Maryland
Posted: Sat Jan 22, 2011 9:06 am
by remedy32
Looks good!
One thing you can do now and maybe save some sweat later is to run a strait edge along the bottom panels looking for hollows or high areas. If you look at the building notes JM talks about rocker and hog or hollows. It took too much time and fairing mud to fill for my taste and I wish I had fiddled with the panels before getting itchy to start gluing. Just take a 6-8' straight edge, hold it along the centerline and move it to each side (chine) of the hull. You're looking for a straight line in the area of the hull that the boat planes on. A bit of fiddling with the andle and spacing of the panels now may save you a lot of labor later in the game.
Leveling these 2 areas added hours to my build.
Bill
FS17
Re: FS17 build in Maryland
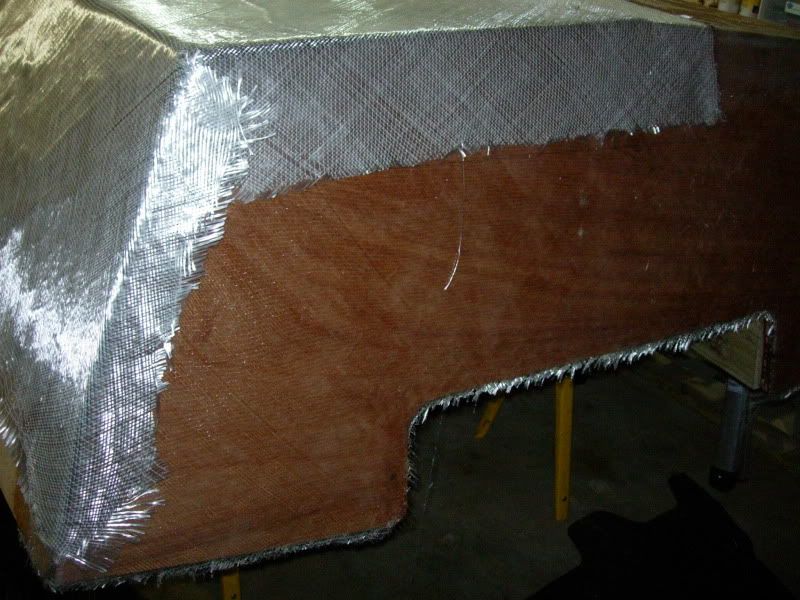
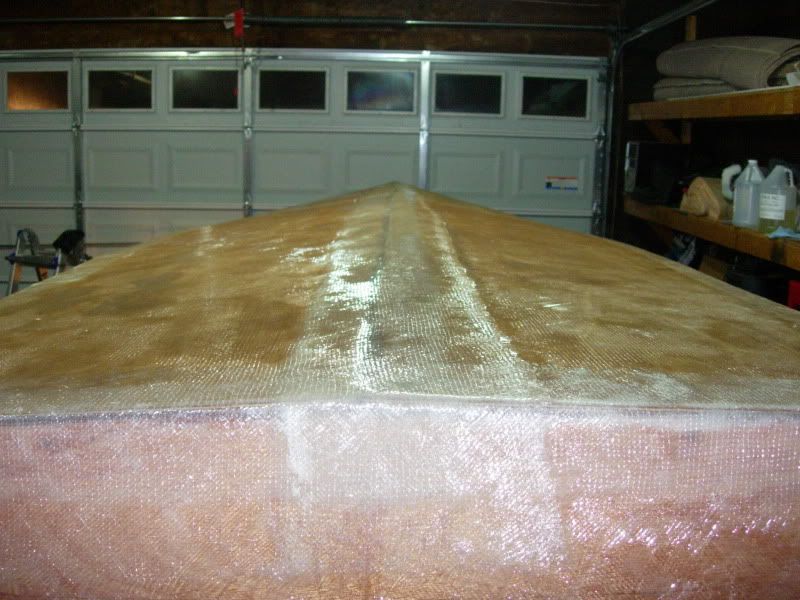
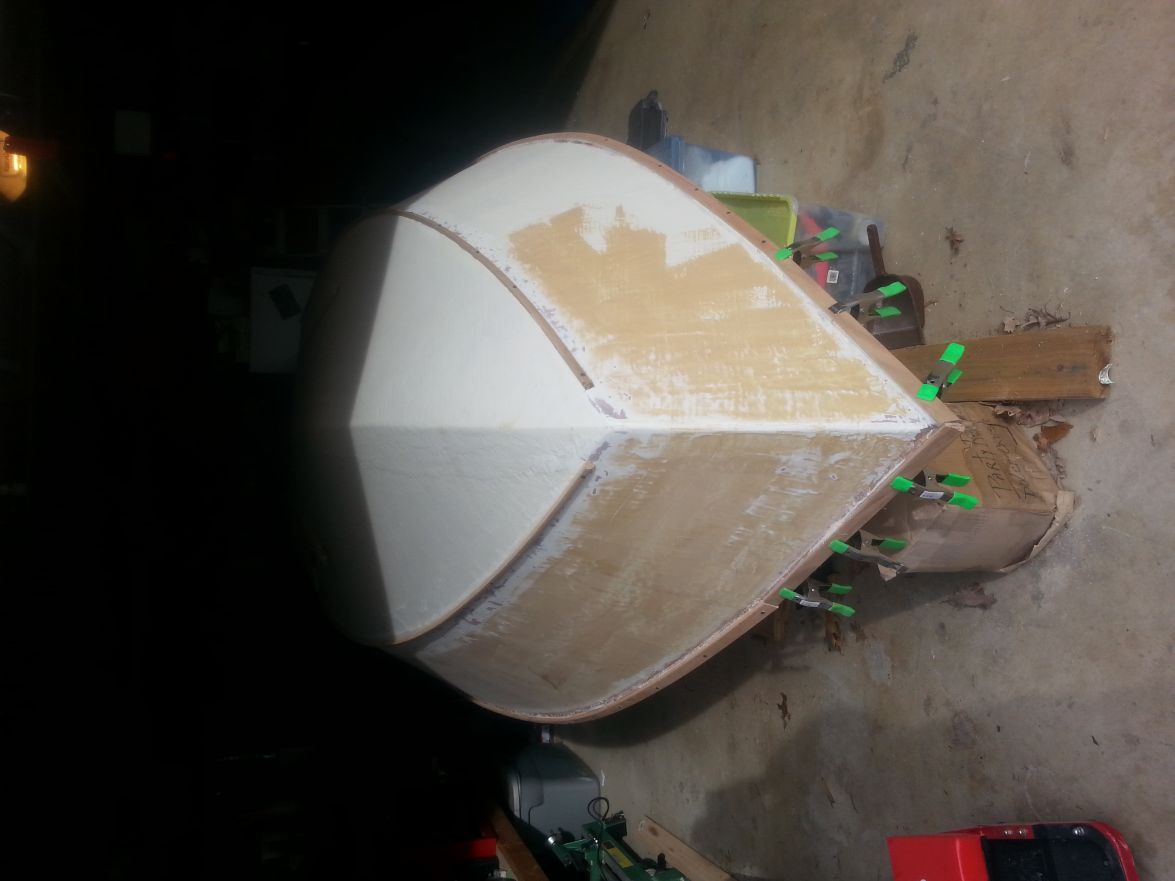
Posted: Tue Feb 08, 2011 12:27 am
by aquaboogie
Re: FS17 build in Maryland
Posted: Tue Feb 08, 2011 9:32 am
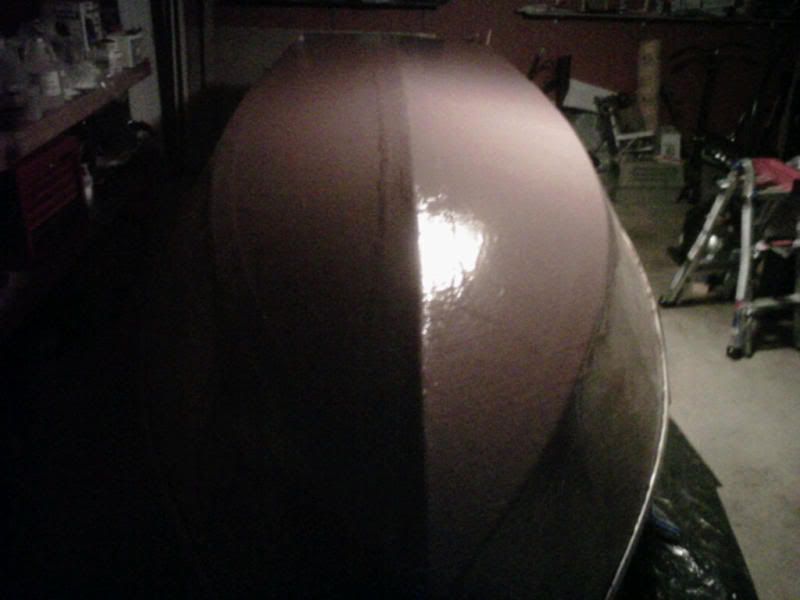
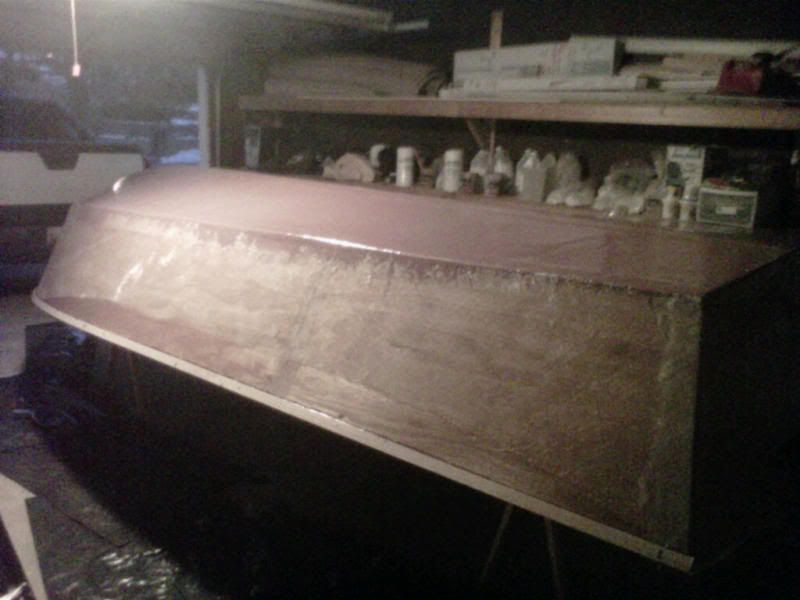
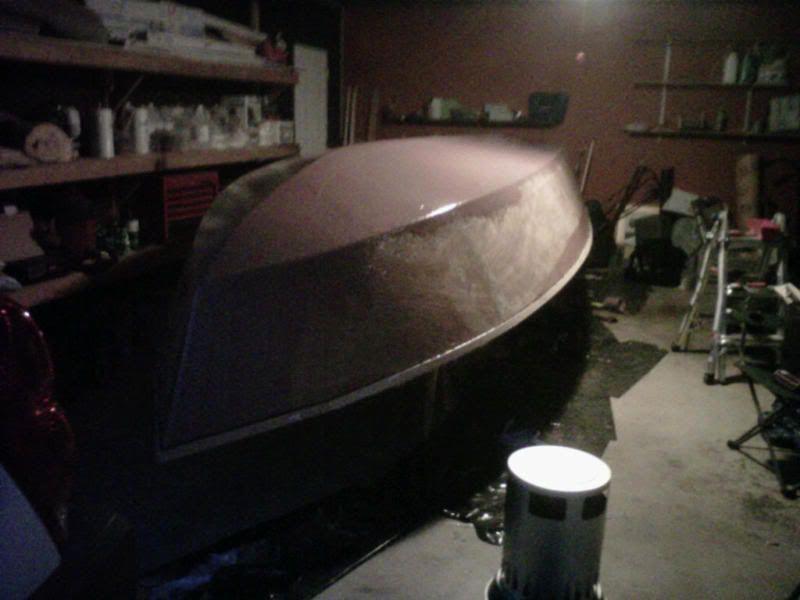
by tech_support
I can tell by the pictures that the epoxy was cold when you used it to wet out the glass. You should really try to warm it up so that it thins out. This will help A LOT in wetting out the glass, it also will result in you using less of the epoxy, and you go faster

The laminations look very good though, despite the cod epoxy. I dont see any air bubbles -
Re: FS17 build in Maryland
Posted: Tue Feb 08, 2011 9:40 am
by wegcagle
Nice Work

by the way if you warm the epoxy do it by placing it in a luke-warm water bath; NOT the microwave


(although I think shine warmed some of his in the microwave recently and it did okay)
Or better yet. I used to put my epoxy in my mud room that was the same temp as inside the house in the winter, and I would put the hardener in the fridge in the summer (to lengthen the hardening time)
Will
Re: FS17 build in Maryland
Posted: Tue Feb 08, 2011 11:13 am
by tech_support
no microwave, please

Re: FS17 build in Maryland
Posted: Tue Feb 08, 2011 3:25 pm
by aquaboogie
Thanks for the help everyone. When i flip her and get ready to glass the inside i will definitly warm the epoxy first. I work on the boat at night and right now it's cold in Maryland.
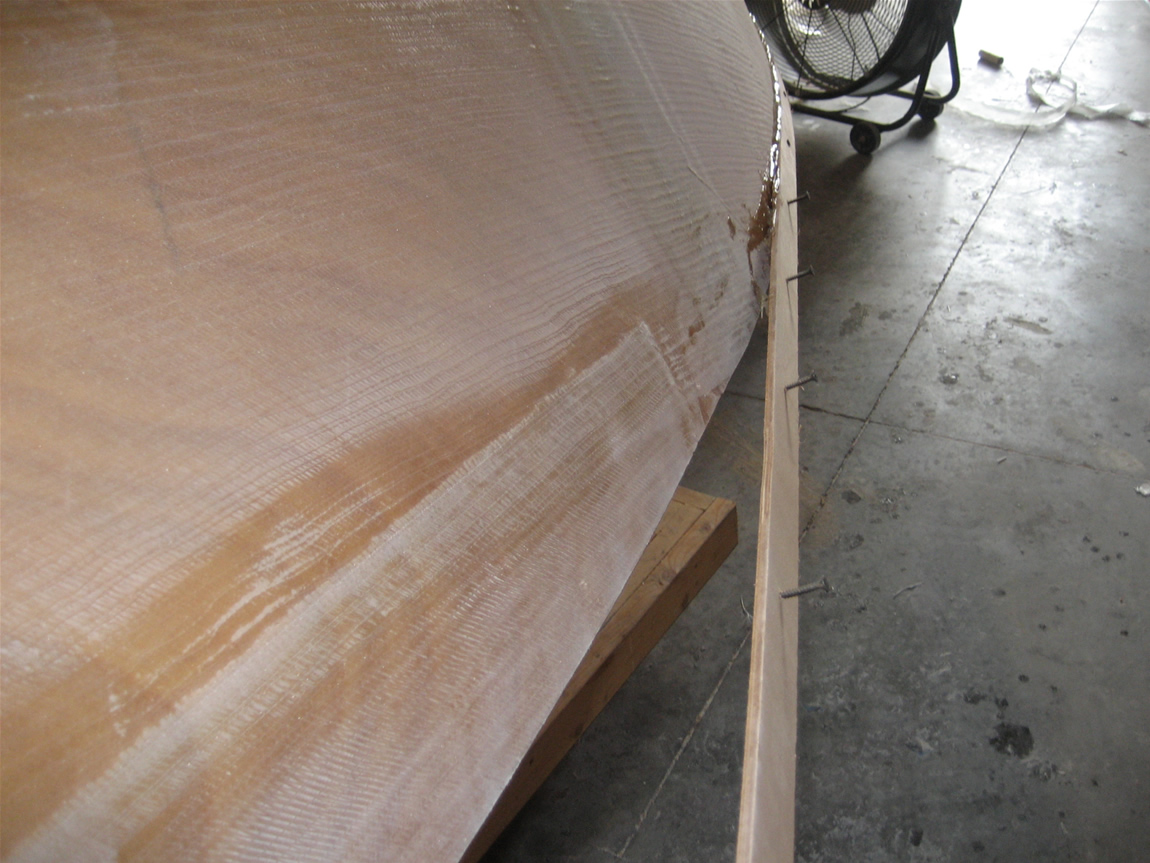
Tonight's plan ist to buy, cut and maybe install rub rail. Can anyone help with how thich and wide the wood should be?
Re: FS17 build in Maryland
Posted: Tue Feb 08, 2011 4:35 pm
by tech_support
use multiple layers of 1/4" or 3/8", I like 1.5" tall for this size baot. Any taller and it will not bend.
Re: FS17 build in Maryland
Posted: Tue Feb 08, 2011 9:22 pm
by Steven
A small ceramic heater about 1 foot from the epoxy bottles will keep them nice and warm.
Re: FS17 build in Maryland
Posted: Tue Feb 08, 2011 11:08 pm
by whosmatt
aquaboogie wrote:Thanks for the help everyone. When i flip her and get ready to glass the inside i will definitly warm the epoxy first. I work on the boat at night and right now it's cold in Maryland.
Tonight's plan ist to buy, cut and maybe install rub rail. Can anyone help with how thich and wide the wood should be?
I was able to get 6mm (1/4") Meranti to bend without kerfs, though it took a lot of clamps and some screws. Any thicker would be really difficult, I think. At the bow it has to bend AND twist significantly. Mine is 1 3/4" wide.
-Matt
Re: FS17 build in Maryland
Posted: Wed Feb 09, 2011 9:09 am
by remedy32
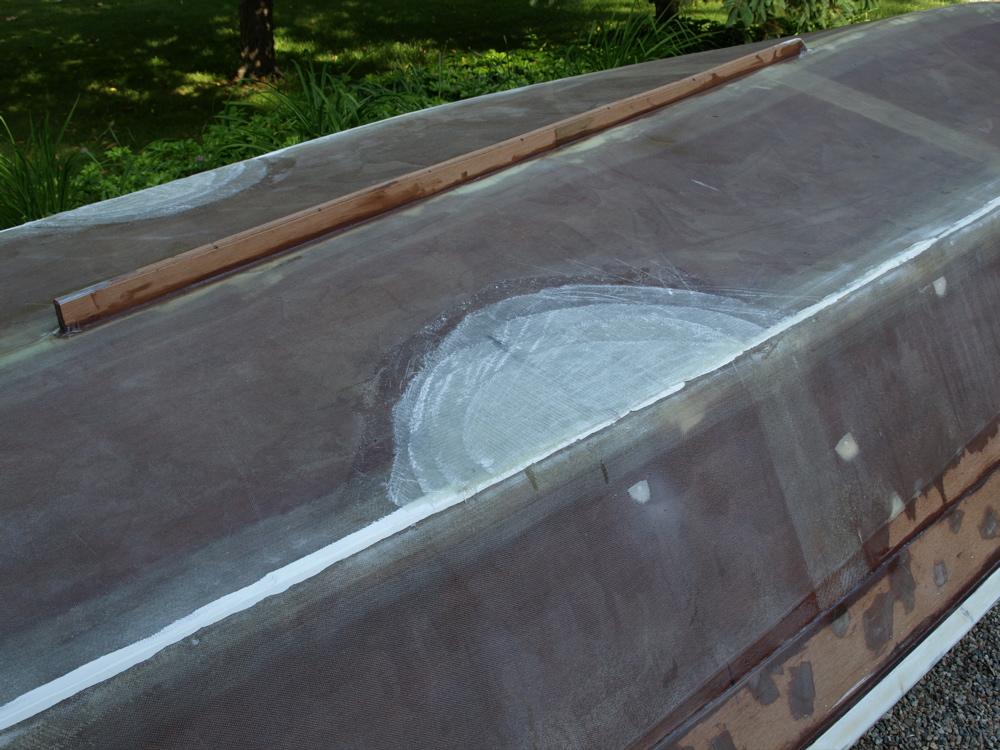
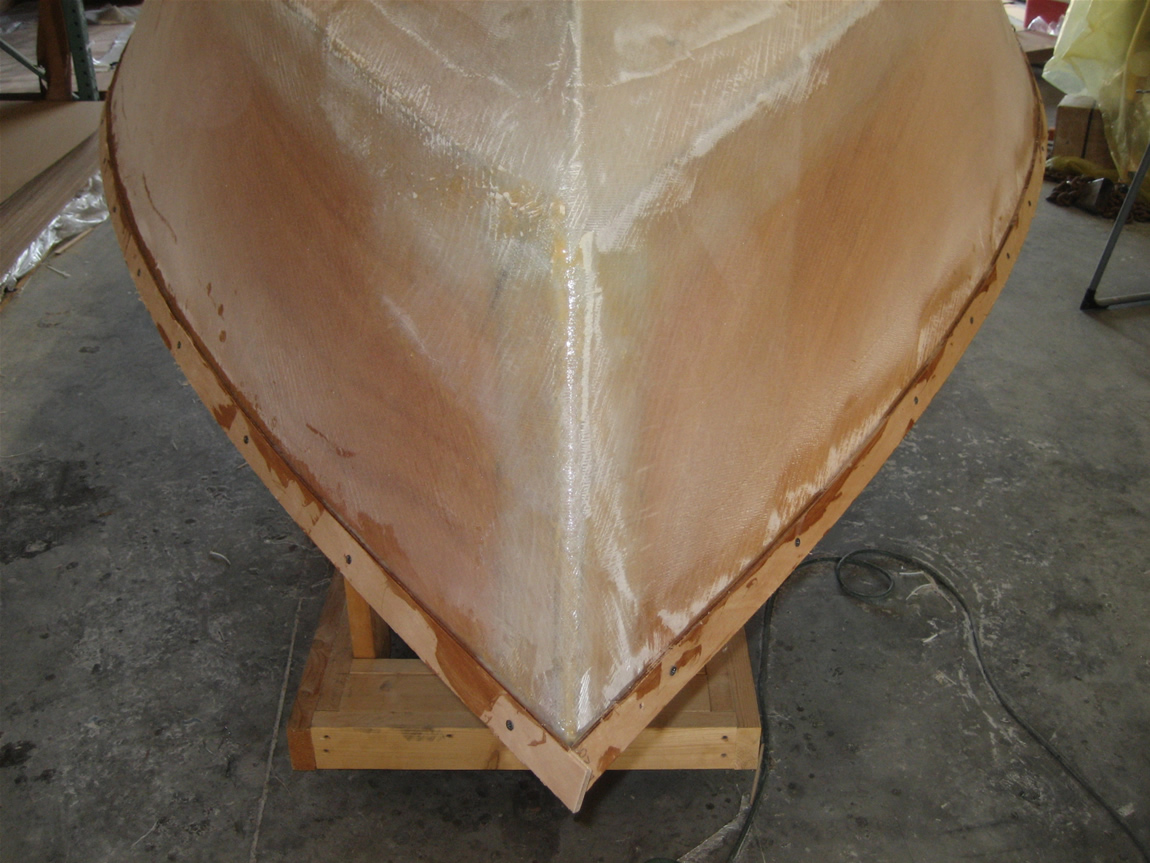
Like Matt I did my rubrail with 6mm Meranti; 2 layers in my case. I was not happy with how much effort it took to twist and bend it to shape so I ripped lengths @1-3/4" wide and made many(!!) vertical kerfs on the lower side to get it to follow the bow profile. Think I did this from about frame B to the bow. Was a PITA to fill but came out great.
Here's a picture.
Bill
Re: FS17 build in Maryland
Posted: Wed Feb 09, 2011 9:38 am
by tech_support
I use only screws when doing the rubrail
keeps the wood from slipping. With epoxy you need to glue in the joint, do not squeeze it out. To keep the wood in place with clamps requires A LOT of pressure, which forces out a lot of glue

I normally work alone, like everyone else here, so I can do a length of rubrail by myself with screws .....
dry fit the piece to the boat, screwing it to the hull without glue. Next back out the screws for 2/3 (or so) of the length of the piece, apply glue to both the piece and the hull, then tighen the crews back down. teh scews should go back in to their original holes resulting in a perfect match to the dry run. Then you back off the other 1/3 and repeat. Its super fast, super accurate, and very clean - you could almost do it with gloves.
You can do one on each side, in fact you really should do a layer each side or alternate so you avoid pulling one side of the boat out of whack (technical term)
Re: FS17 build in Maryland
Posted: Wed Feb 09, 2011 5:26 pm
by Daddy
I used 18 guage brads in my finish nailer to hold the rails in place where the twist and bend was the worst and installed all three layers at the same time that way, then added some pvc clamps where necessary. Next morning pulled the nails through to the inside with vice grips (nails have almost no heads so they pull through really easy) and puttied up the small holes on the outside and inside. Worked like a dream and only takes two hands to do.
Daddy
Re: FS17 build in Maryland
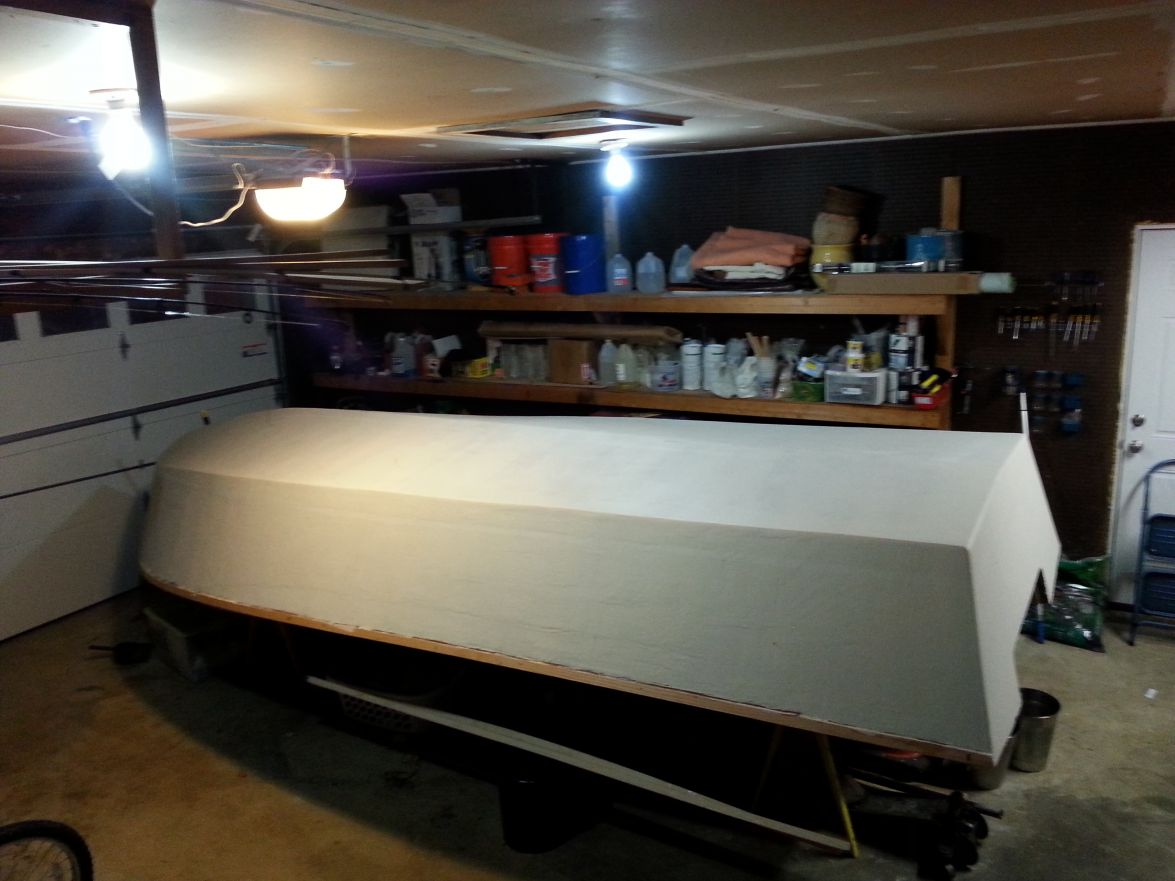
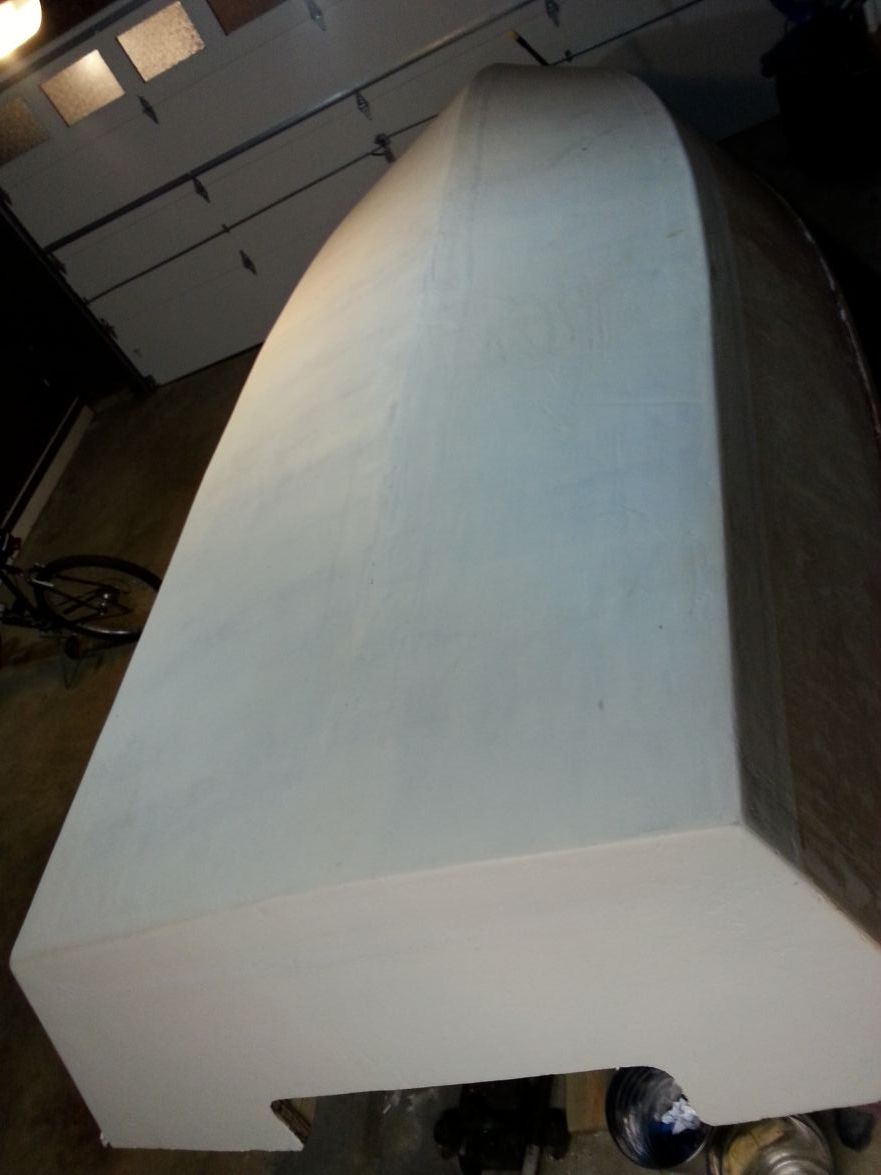
Posted: Sat Feb 12, 2011 12:13 am
by aquaboogie
Re: FS17 build in Maryland
Posted: Sat Feb 12, 2011 12:42 am
by gstanfield
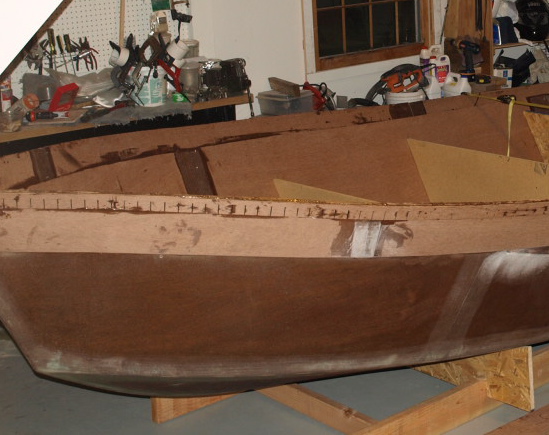
She's getting there, now the fun part of sand, sand, sand then you can paint, flip and start over
Re: FS17 build in Maryland
Posted: Tue Feb 15, 2011 11:29 am
by aquaboogie
While I fair and sand was going to order some suplies for the boat. I was wondering if anyone who has built this boat can help. I am building the center console version and have a couple questions.
1) I want a permanent gas tank. What size/shape and where should it be located?
2) I plan on pouring foam under the deck. Is it posible to put foam under the gunwles? How much foam do i need for this boat?
3) Should I build the console that came in the plans? has anyone found it to be to Big/Small?
Re: FS17 build in Maryland
Posted: Tue Aug 23, 2011 10:21 am
by aquaboogie
I have not worked on the boat in months. Been busy working in, on and around the house. Also fishing every weekend all summer long with the old man. The boat has been sitting in the garage collecting dust and everything else i put on top of her.
Looking for the motivation to get back out there and finish her up. If you had a stall in your bulid and got back on track and finished your build I would be glad to know how you did it!
Re: FS17 build in Maryland
Posted: Tue Aug 23, 2011 10:46 am
by Daddy
Take the junk off of it, dust it off and maybe you will be inspired, try to remember why you started it in the first place
Daddy
Re: FS17 build in Maryland
Posted: Tue Aug 23, 2011 11:20 am
by sitandfish
aquaboogie wrote:..Looking for the motivation to get back out there and finish her up...
Instead on looking for a finished boat maybe, you can set an intermediate goal. Shoot for painting (or graphite) the bottom. Then set the next goat. Maybe flipping the boat? Just saying to yourself that "I need to finish the boat" can be too big a goal for now. Just a thought. Boat is looking great, by the way. Love the FS17 design.
Re: FS17 build in Maryland
Posted: Tue Aug 23, 2011 1:13 pm
by Mad Dog
aquaboogie wrote:Also fishing every weekend all summer long with the old man.
If I had the chance to fish with my dad every weekend I doubt I could have finished my project either. To say what S&F said a bit differently, work out a list of small milestones and tackle them one at a time. Trying to wrap your motivation around the finished boat may be too much. I have that problem. When the end seems so far away I get discouraged. When the objective is an acheivable bite, I get those boosts of gratification that keep me going. First thing to do is get the stuff off the hull and back on the shelf so you can see what you have accomplished so far.
MD
Re: FS17 build in Maryland
Posted: Tue Aug 23, 2011 2:49 pm
by Uncle D
I laid off mine for about a year. Bad azz meds. When I finally felt like I could get at it again, I did a little at a time. Tried to review notes in the plans, take stock of supplies and such. I got back on the forum, looking at all the fine builds and all various progresses and just motivated myself to start again. Main thing I think, is to just start. BTW I have friends that want to fish almost every weekend. Some times you just have to say NO.

Re: FS17 build in Maryland
Posted: Tue Aug 23, 2011 2:58 pm
by Daddy
Looks like it is right there at home. That is fantastic because you can do as little as a half hour here and there and still keep other commitments. One build I did was so big that i could not do it at home and had to work in a converted greenhouse about 15 minutes from home. It was just too much trouble to get in the car if I knew I only had a short while to work. Do a little every day and Bob's yer uncle.
Daddy
Re: FS17 build in Maryland
Posted: Tue Aug 23, 2011 3:10 pm
by Prarie Dog
Aquaboogie, I'm very familiar with two builds. My brothers TX18 was started in early 08, he progressed very rapidly to possibly half finished then ran out of steam. It sat for two years, he then got going again by riding on my boat that we had just finished. The motivation for him to completely finish was furnished by the Texas Builders Meet. He got her finished thinking about taking her to the meet. Turned out very well, it's a very nice build.
I had a lot of help on my boat and a GF18 is a simple boat. After watching David loose momentum and struggle with getting going again, I turned my boat into a project like one at work. I had two guys helping me the whole way and two ladies mixing epoxy and paint. Lotsa help allowed me to finish in a little over two months, the approach on the next build will be just like the last one. I don't know if I could get restarted after getting cold on one of these builds, it's a lot of work for one man to do alone, to many builders that's what they want. To me, I want to get finished then go fishing.
Have you thought about taking your brand spanking new--beautiful FS17 to the "Keys Builders Meet"? You would have a ball.
Re: FS17 build in Maryland
Posted: Tue Aug 23, 2011 10:37 pm
by wegcagle
I've taken about a year off mine. Now I've got a whoppin' 3-4 days on her before another 6-7months goes by
Ain't life grand.
By the way, I apologize for not getting back in touch with you about meeting up a few months back.

I got called into the hospital last minute to cover an overnight shift, because one of my partners had an emergency. I ended up working over 30 hours straight. When I got home I died for about 12 hours. After that I just completely blanked. I really am sorry; I should've at least had the common decency to call or email you.
Lookin' forward to seeing some more progress.
Will
Re: FS17 build in Maryland
Posted: Wed Aug 24, 2011 2:21 pm
by aquaboogie
Thanks guys for the help. This weekend i will take the junk off the boat and clean out the garage. There is enough in there to keep me busy all weekend. After she's cleaned out i will make a list of things that need to be done before i flip her and take it one step at a time.
Wegcagle: it's ok i understand. hopefully i can get my but back in gear and give more progress updates with pics.
Re: FS17 build in Maryland
Posted: Wed Aug 24, 2011 4:21 pm
by Lower
Don't feel bad. Someone brought my thread to life and I realized it had been a year since I posted! My build has also taken much longer than I planned. I also went through some long periods of not working on it. With that said, however, when I did get back to it, it was quite fun. You might also get a new burst of excitment when you start on the inside. It's fun as you get to start to think about how you want to lay it out. It's also nice to have a new view...the bottom gets old after awhile! Good luck!!!
Re: FS17 build in Maryland
Posted: Thu Oct 27, 2011 4:23 pm
by Baitcaster
Hey Aquaboogie! Any progress on this build?
Re: FS17 build in Maryland
Posted: Sat Jan 31, 2015 9:45 pm
by aquaboogie
Finally! Back at it again. I know it's been a while and I know you probably know why (LIFE). I'll give you the real short story of what has happened between the last time I touched the boat and now
.
-Married
-New job (longer commute)
-Home renovations
-Working on the golf swing
-First baby (9 months old)
-Fishing
-Been turning my own lures on my lathe / pouring my own jig heads
-Building rods (Dam you Mud-Hole)
-And my never ending honey do list
For 2015 my two main goals are
1) Improving my health and getting in better shape
2) Get back to boat building
Re: FS17 build in Maryland
Posted: Sat Jan 31, 2015 10:02 pm
by aquaboogie
Cleaned out the shed and garage. Cleaned off the boat and dusted her off. Been a while since I've seen her

I puled all my plans out and can't find my plans for the console. I have been thinking about buying a CNC console kit. Either the (C19) or the ( OB15). Which console do you guys think would work best with the FS17?
Re: FS17 build in Maryland
Posted: Mon Feb 02, 2015 10:48 am
by tech_support
smaller would be better, you don't want to walk around a wide console
Re: FS17 build in Maryland
Posted: Fri Feb 06, 2015 12:48 pm
by aquaboogie
shine wrote:smaller would be better, you don't want to walk around a wide console
Thanks. what size was your console? I still have not been able to find my console plans. Who should i contact to get another copy?
Re: FS17 build in Maryland
Posted: Fri Feb 06, 2015 1:43 pm
by aquaboogie
I have been working on the final layer of rub rail and will install it this weekend. I have also built two strakes that are 7 1/2 ft long. I plan on installing them 18in from the transom and 15in off center. I would like to install splash rails since I plan on using the boat around the Chesapeake bay and glass calm days are few and far in between. I am not sure how to approach building splash rails. Has anyone built them for there boat?
Re: FS17 build in Maryland
Posted: Fri Feb 06, 2015 2:29 pm
by Steven
On both my GV11 and OB19 I used 3/4" quarter round from home depot. I install it along the chine and it effectively acts like a reverse chine. It knocks the spray down and both boats are very dry. I installed it when the boat was still upside down on the cradle. Just started at stern and screwed it on as needed to the bow. Then took of and reinstalled with epoxy. Filled the holes after removing the screws.


Re: FS17 build in Maryland
Posted: Tue Feb 10, 2015 10:20 pm
by aquaboogie
Steven wrote:On both my GV11 and OB19 I used 3/4" quarter round from home depot. I install it along the chine and it effectively acts like a reverse chine. It knocks the spray down and both boats are very dry. I installed it when the boat was still upside down on the cradle. Just started at stern and screwed it on as needed to the bow. Then took of and reinstalled with epoxy. Filled the holes after removing the screws.
Steven: I like the way yours looks so I went to the store and got some 3/4 quarter round. Thank you for the help. Haven't had the chance to install the final layer of rub rail and strakes but they are ready to on.
Re: FS17 build in Maryland
Posted: Wed Feb 11, 2015 2:58 pm
by Steven
That will knock down the spray nicely. One thing I didn't do was glass over mine because I didn't want to round over the edge and then try to build it back up again. After the flip, and after the outside was faired and primed with Graphite on the bottom, I bought some light weight cloth to go over a few tight bends inside the boat. After using it, I wished I had it when I glued on the spray rails. It's the 3.25 oz cloth sold here. It will nearly take a 90 degree turn and would cover the rail no problem. It also disappears in epoxy and leaves very little to fair. A couple coats of neat epoxy is enough to fair it out. On my next build I will cut some 4" and 6" strips from it and cover rail. Two layers will give 6 1/2 oz. of protective covering for bump and ding protection. Mines held up fine, but It's one of the very few things on the boat I would do differently just for peace of mind.
Re: FS17 build in Maryland
Posted: Wed Feb 18, 2015 1:28 pm
by aquaboogie
I have the last layer of rub rail and and spray rails glued. I also ordered the OB15 console CNC kit. Still have not installed the strakes/runners yet. I am not sure if i should go with the two i have built or the single strake down the middle like the plans show. Not sure if one is better than the other. Does anyone have ideas to what the difference is between the two options?
Re: FS17 build in Maryland
Posted: Wed Jan 20, 2016 3:44 pm
by Batedunie
Hey aquaboogie,
I just wanted to know if you had any updates on the boat. I'm up in Cecil County trying to wrap up my OB 19. Maybe we could motivate each other to get finished soon!
Mike
Re: FS17 build in Maryland
Posted: Fri Oct 14, 2016 8:17 pm
by aquaboogie
WOW I actually remember my login info! Well I know it's been a while but decided to get back to some boat work after a verrryyy long break

. I still visit the site from time to time to see everyone building and moving along.
over the past few weeks I have
-built a boat stand (on wheels)
-flipped boat
-glassed inside of hull
-installed and glassed stringers
-cut drain plug hole
-started building console
Re: FS17 build in Maryland
Posted: Fri Oct 14, 2016 8:28 pm
by aquaboogie