Page 1 of 1
Tom's FS14
Posted: Mon May 30, 2011 5:13 pm
by thb
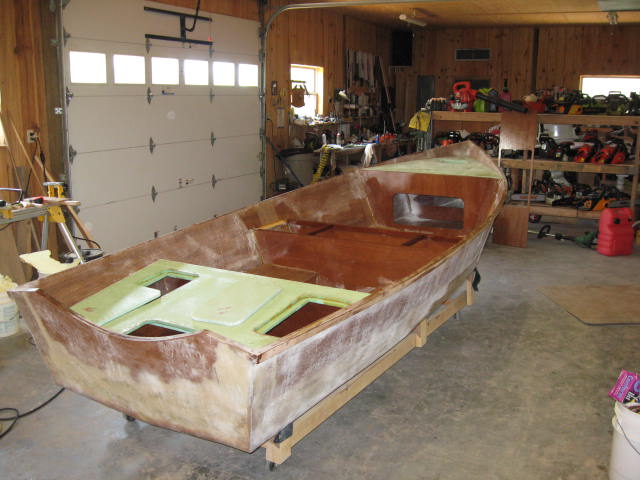
I have made several posts relative to this FS14. Thought I should start a builders thread with some photos as I have progressed.
I started building this baby about 7 or 8 months ago but like most of us got sidetracked with other jobs around the homestead for most of the winter time. Well summer is upon us in Steinhatchee with a vengence so I am trying to work inside my air conditioned shop in the afternoons after sweating up a storm outside in the mornings.
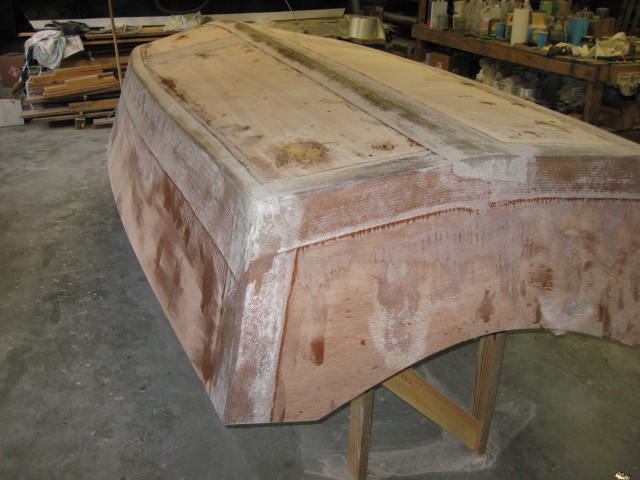
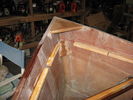
Recently flipped the boat over and set her in her cradle I made with home sawn pine lumber. If anyone needs any special sawn lumber let me know as my small woodmizer will do the job.
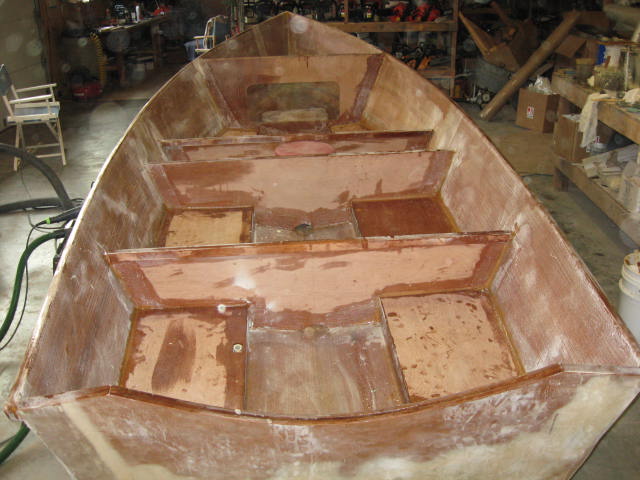
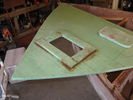
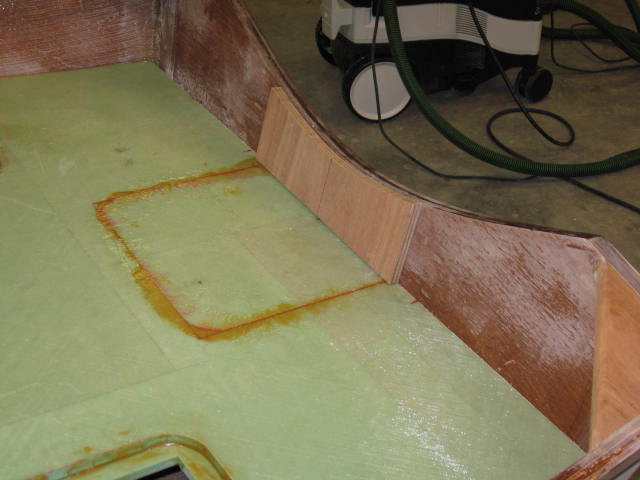
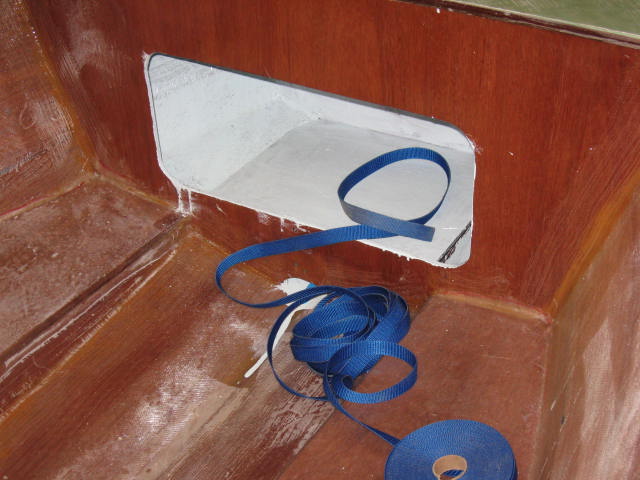
The inside is all glassed with 6 oz biaial tape and 12 oz biaxial cloth in accordance with the build layup schedule. Settled on leaving the seat frames where the plans call for them after kicking around a lot of different variations. Full sole ruled out due to weight considerations. Partial sole from stringers outboard decided upon to keep from tripping on the stringers. Have built a little platform up under the front deck for a 6 gallon fuel tank and have run a pvc line as a fuel hose conduit.
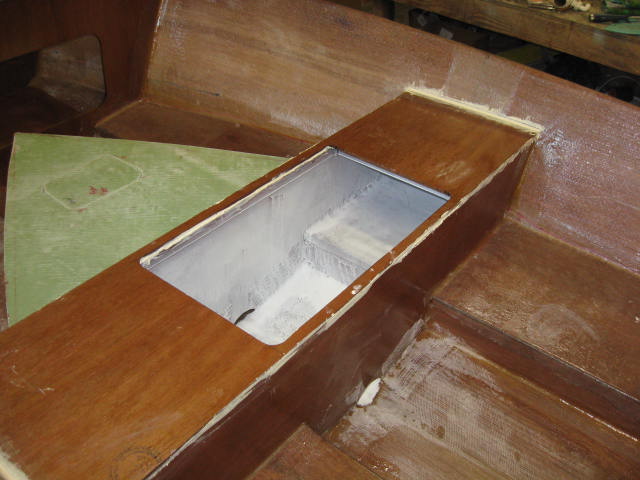
I am buidling this boat for a 2003 9.9 Johnson 2 stroke which I picked up off craigslist in Tallahassee. It is a short shaft so I cut my transom down to 17 inches which is what motor measured. Wonder now if I did the right thing with reports of stern wave overtaking the boat when coming quickly off plane. Maybe I will build a self draining motor well with a hatch in it to access the drain plug. Maybe install an external drain plug like what is in my other two factory boats and then I don't have to mess with a small hatch.
Any ideas on where to put my tackle box and ice chest? Am planning to build simple live well in the center of the middle seat to hold live shrimp. Will fill it up with sea water from a small bucket and run small battery powered aerater with drain overflow pipe dumping into the bilge. Will need small battery if I install a small bilge pump at the back. Trying to keep it simple and light.
Here are some photos from my builder gallery.
Tom in Steinhatchee

Re: Tom's FS14
Posted: Mon May 30, 2011 5:27 pm
by mechdave
Looks real nice. You are gotta love having an air conditioned shop.
Re: Tom's FS14
Posted: Mon May 30, 2011 7:25 pm
by thb
Hi Dave,
Yeh when we were building this place a good deal came up on a Byrd 3 ton wall heat pump A/C so I jumped at it. Best investment I have ever made as any shop in Fla is too hot for about 9 months of the year. It really makes your shop space enjoyable to spend time in and do things all year round.
Tom in Steinhatchee
Re: Tom's FS14
Posted: Mon May 30, 2011 7:36 pm
by peter-curacao
I 'm jealous (in a good way) overhere power is just to expensive to cool down complete houses let alone work shop's. There are the happy few what have a complete air conditioned house, but most people here only cooling there bedrooms. When I think about it it's not so bad we have that cooling trade wind most of the time. I like your build btw looks very clean!
Re: Tom's FS14
Posted: Mon May 30, 2011 8:01 pm
by thb
Peter,
Admired a lot of your builds.
The power consumption in my shop is typically higher than my log cabin but I am cheating on the house. We have a 24 panel solar PV array which supplies about 25 to 35 KWH per day feeding the house. Also I only run the shop air when I am in there and it gets turned off at night. 3 or 4 hours a day typically so the bill is not too bad.
Regards and thanks,
Tom in Steinhatchee
Re: Tom's FS14
Posted: Tue May 31, 2011 4:45 am
by dave555
Hi
Well Ive got the opposite problem, living at the bottom of the South Island, New Zealand. The temperature at nights gets down to -2 to + 8 degrees Celcius ( thats 35-36 degrees for you Farenheit guys) It does warm up a bit during the day. Im waiting 3 days for epoxy to cure hard enough for sanding.
Im also building an FS14 and have the same ideas as you. Partial sole,Fuel tank up front, pvc conduit for the fuel line. Im going to put in a bilge pump to run off a battery, will also power a depth sounder. Im fairing the outside of the hull and looking forward to turning it over and getting on with the interior. I will be powering mine with a 15hp 2 stroke.
Have you decided what type of paint you are going to use? 2pot? 1pot? epoxy?
Good luck with your build
David
Re: Tom's FS14
Posted: Tue May 31, 2011 7:51 am
by thb
Hi David,
Yeh it sounds like your temps are a little too cold for boat building with youall going into winter. I am very familiar with deg C after living in Johannesburg, South Africa for 7 years and before that 7 years in Hong Kong. Have been to Oz a number of times but never had the pleasure of visiting New Zealand. My best friend lives in Maloolahbah, Queensland and he did a flying tour of NZ several years ago but we could not get away to come along. One of these days before I get too old. My Dad was there during WW2 for recooperation from a broken back.
I have not decided on what to paint the boat with. One thing for certain, it will not be black in color like the rest of my boats. Yesterday had to sand off all the black paint on the sides of my FL12 after less than one year sitting in the sun as the south facing side started to crack and blister anywhere it was not covered with fiberglass cloth. Boat was pulled up on side of my lake pointing East and the starboard side ( which faced south ) was trashed. I had used Blue Water Mega Gloss gold Black on top of Blue Water grey primer. I am going to lay down some 4 oz or 6 oz cloth on the sides from the chine to the rub rail and then repaint in a light color.
I am not good at painting and fear this part the most. I have tried several different types of paint, have sprayed HVLP, brushed, roller and tipped and I am not good at any of it. The cheap porch and deck paint is holding up very well in the sun and wear and tear on the floors. Water sitting in corners on the floor have not even affected it. Have not tried the Sterling paint which BBC sells. Lots of inputs on the forum on paints.
I may just leave the bottom with the black color from the epoxy graphite coatings and then do something light in color on the sides and interior. I am going to use this little boat up some of the local creeks with oyster beds, rocks and mud. Will also fish the grass flats so it will run thru some chop from time to time. All Salt water operation.
Regards
Tom In Steinhatchee
Scallop season opens in less than one month.
Re: Tom's FS14
Posted: Wed Jun 01, 2011 6:56 pm
by thb
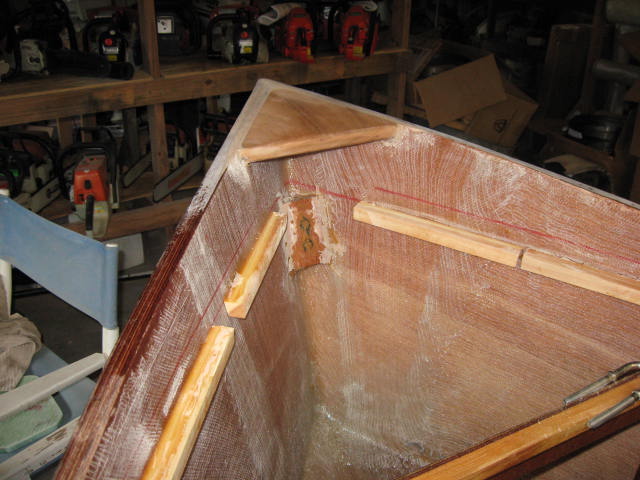
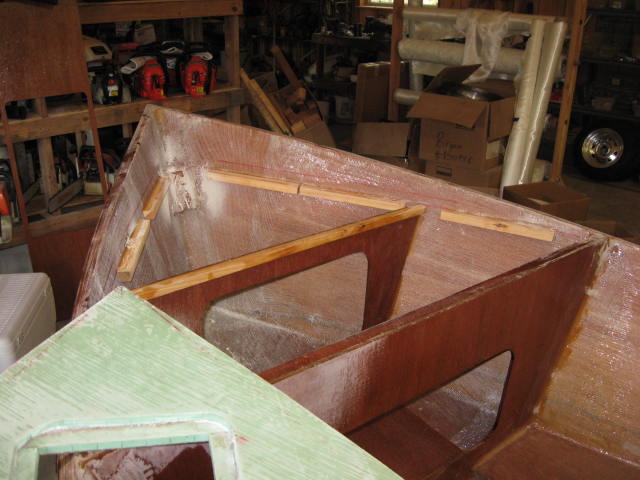
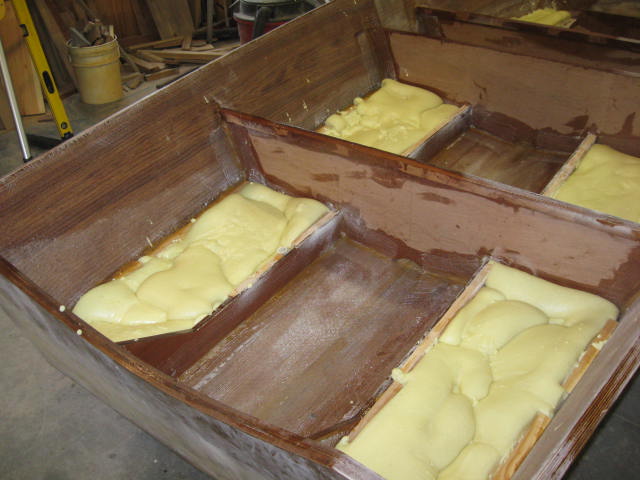
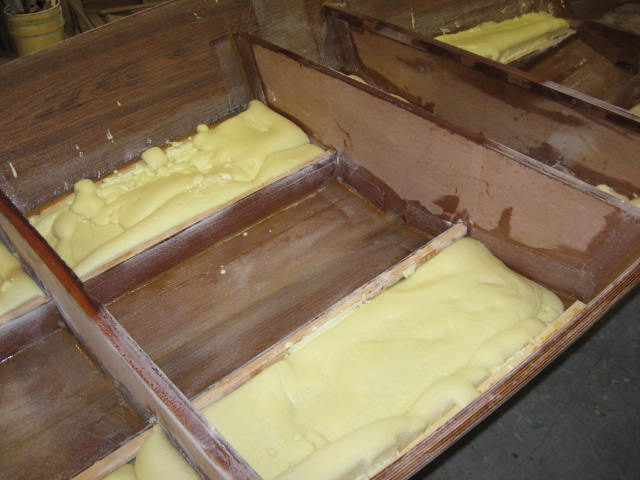
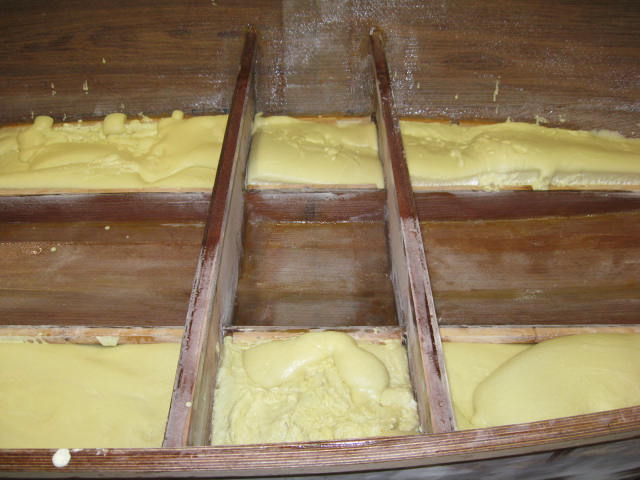
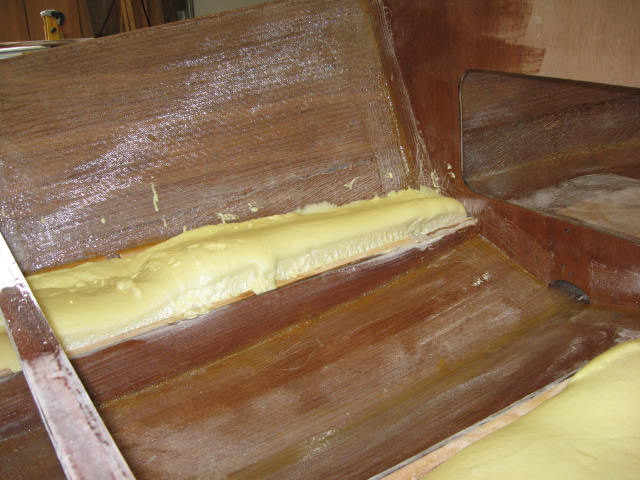
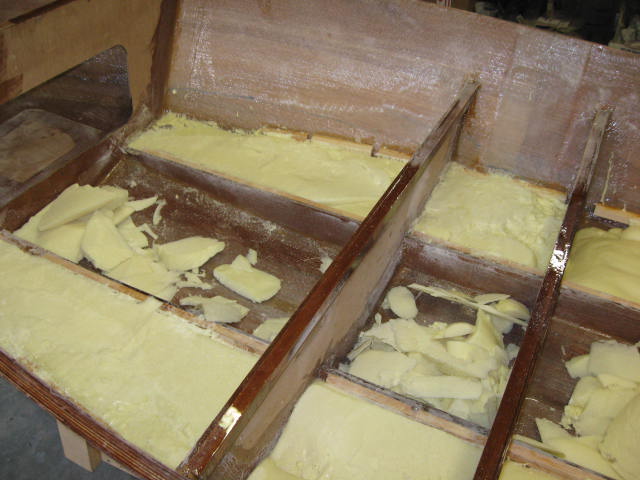
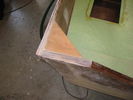
A little bit of progress in the past few days. Cypress cleats glued on to the sides and the outboard section of the stringers.
I did something a little different when gluing the cleats onto the sides. Rather than trying to get the cleat to stay in place with masking tape or other tape while the wood flour glue set up, I used a dab of hot glue on each end of the cleat and that held it in place while the glue had a chance to set up. Worked pretty good but you only have 10-15 seconds before the hot glue starts to set up.
The foam mixing and pouring worked pretty well by doing it in 8 oz of A and 8 oz of B at a time and mixing in a third container. Used almost all of the two gallon kit to fill the outboard sections of the floor. The stuff is a lot stiffer than I thought it would be. Trimming it was a bit of a pain but the japanese cut off hand saw worked ok.
Here are some more photos.
Tom in Steinhatchee
Re: Tom's FS14
Posted: Wed Jun 01, 2011 7:12 pm
by peter-curacao
Hi Tom,
Looking good! thanks for the pics, I 'm with you although a lot of builders love this part, (the foam pouring) I didn't like it that much either, to much mess

Re: Tom's FS14
Posted: Wed Jun 01, 2011 7:14 pm
by gstanfield
that should keep her afloat should anything bad happen

Re: Tom's FS14
Posted: Thu Jun 02, 2011 7:35 am
by thb
ONly bad thing that I can see happening is IF:
1. I let the 3 grandsons use it in the gulf and they decide to run where they should not. These teenagers today have good computer sense but zero comman sense or water sense.

2. I get swamped being out there when I should not have been or get caught in a summer storm or water spout.

3. some idiot scalloper puts their wake over the side of my boat. Gets pretty crazy around here with the scallop season.

Anyway, I will rest easier knowing she should not sink.
Tom in Steinhatchee
Re: Tom's FS14
Posted: Mon Jun 06, 2011 9:06 am
by thb
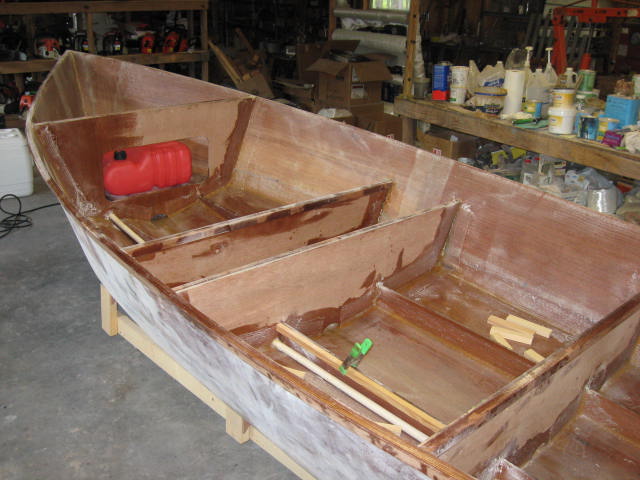
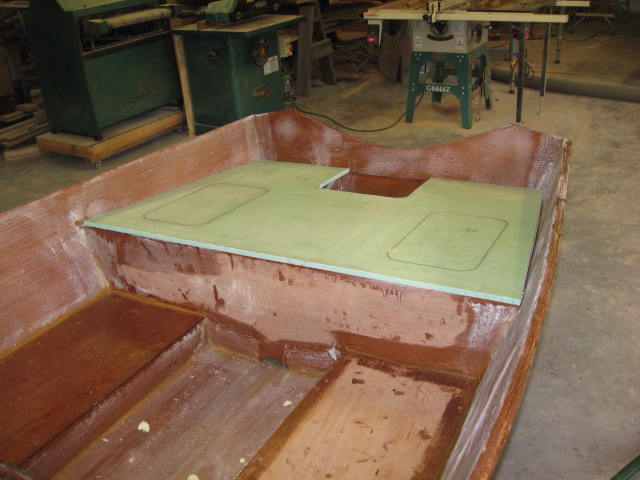
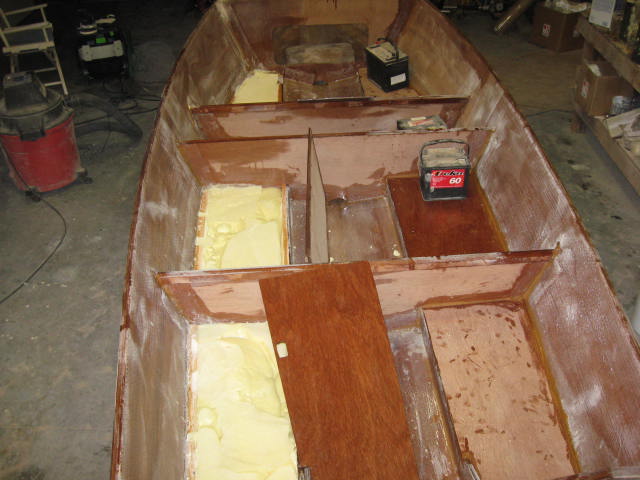
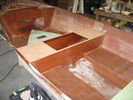
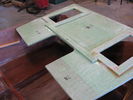
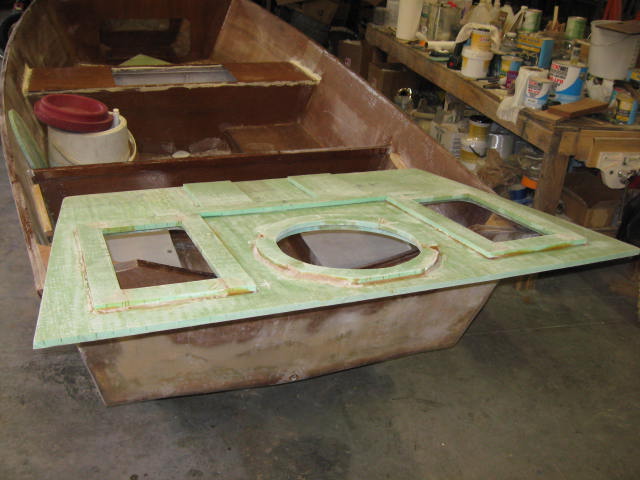
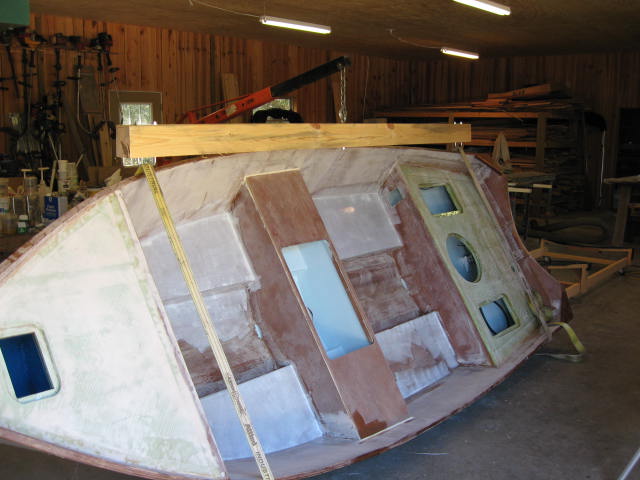
While you guys were having fun in Boca this weekend, I got a little more done her this weekend. The meranti 1/4 ply sole pieces have been added over all the foamed in sections. Used wood flour mix on battons, top of foam and perimter and it seems like real solid. No give at all to the ply. Will cover with some 6 oz cloth today.
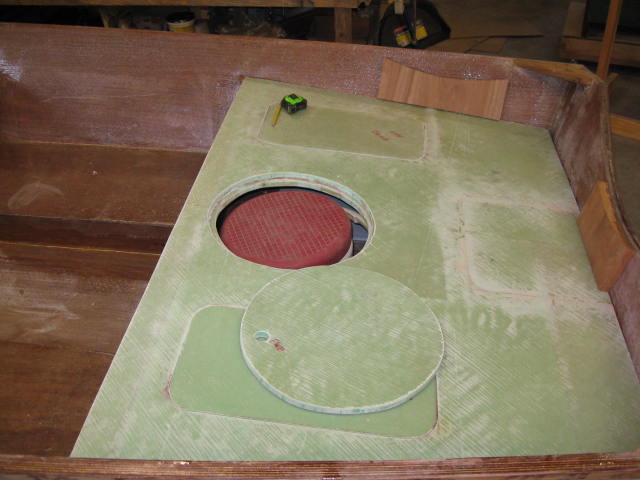
The 1/2 inch foam board for the rear seat has been cut out and possible outboard hatch locations sketched out. Still thinking about what size to make them as I have them now at 10" x 18". The storage space back there outboard of each stringer is about 36 inches long so big hatches seem to be in order. Was thinking I would use the cut out sections as the actual hatches themselves and use battons underneath to form the typical bateau hingeless hatch. Might have to use some velcrow to keep them from flying off when trailering the boat. any other ideas?
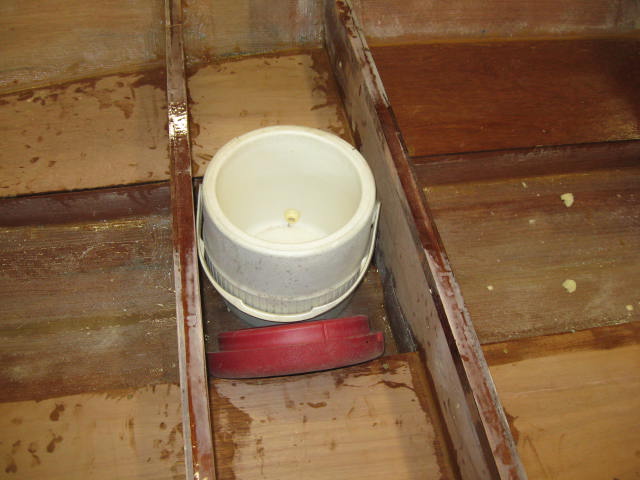
Was also thinking about using a round igloo cooler I have as my removeable bait well. Run a simple aerator and top it off with sea water every so often. Fits very nicely below the center seat level with the cooler top on or off. Not having it built in will result in a simpler and lighter boat. What do youall think??
Tom in Steinhatchee
Re: Tom's FS14
Posted: Sun Jun 26, 2011 9:07 am
by thb
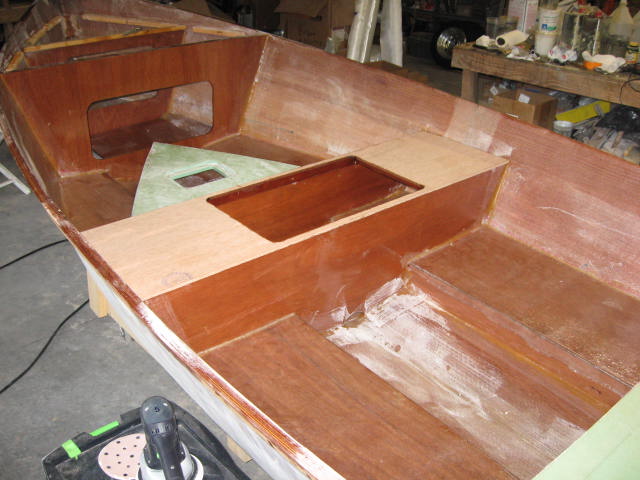
Update on my progress over the past several weeks. I seem to be slowing down some but that is the way it seems to go with boat building.
Have gotten all the sole pieces bonded down and covered with one layer of 6 oz cloth.
Hatches have been cut in the stern seat and structure added underneath them to support them.
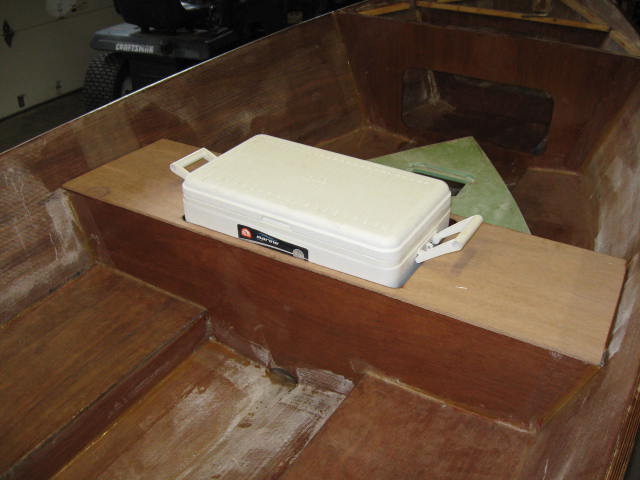
Have figured out what to do about a bait well. It will be a removeable 48 qt igloo marine cooler which I had already and use in my current 18 ft flats boat. It will either be used as an ice chest or a bait well. It fits down thru the center seat but had to trim the cleats about 3/8 inch on each side of the fwd and aft frames to allow it slide in. It sits on the outboard sole sections and stringers.
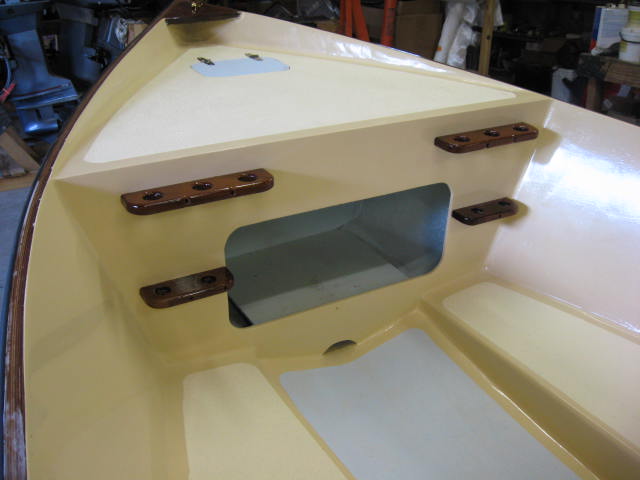
A new bulkhead was added in the bow area to separate the anchor locker from the fuel tank area. Big access hole will allow you to stick your head in thru the fuel tank compartment and clean it out if ever required.
Have drilled the bilge drain hole and bow eye holes and backfilled with wood flour mix. Bow eye backup structure is three layers of 3/8 meranti rounded to fit nicely in the bow.
Breast hook and rear cleat pieces added out of some Honduran mahogany I had laying around.


Not sure how these photos are going to turn out as they seem to be thumnails on the preview.
Tom in Steinhatchee
Re: Tom's FS14
Posted: Sun Jun 26, 2011 12:22 pm
by thb
Re: Tom's FS14
Posted: Mon Jun 27, 2011 7:41 pm
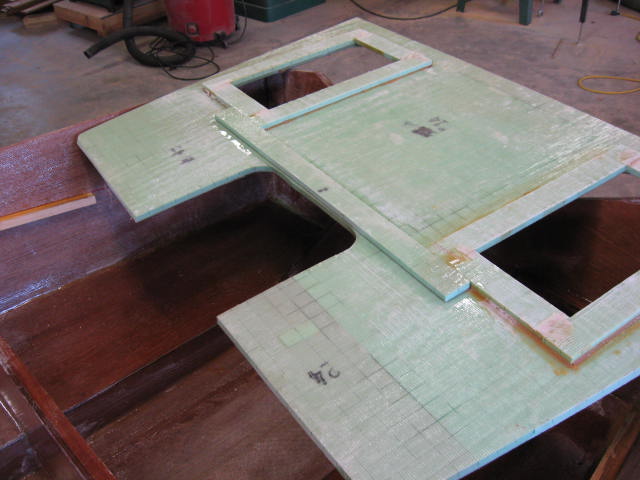
by thb
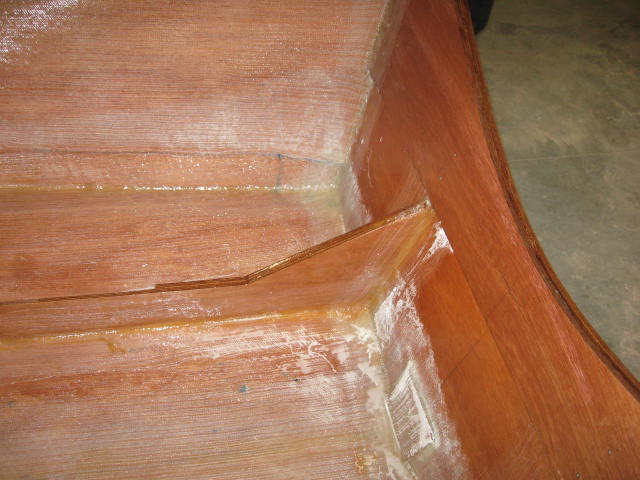
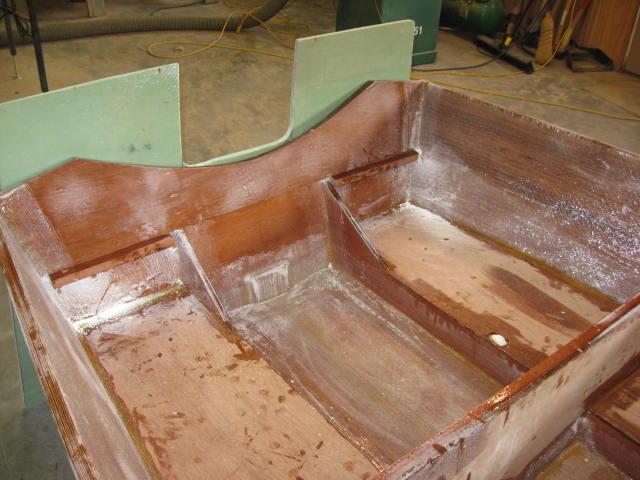
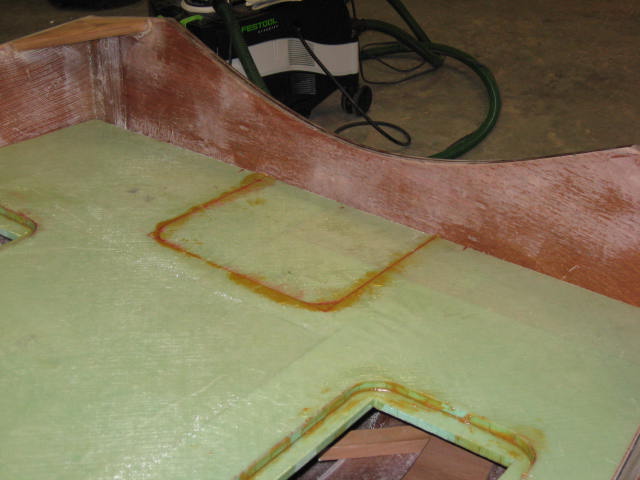
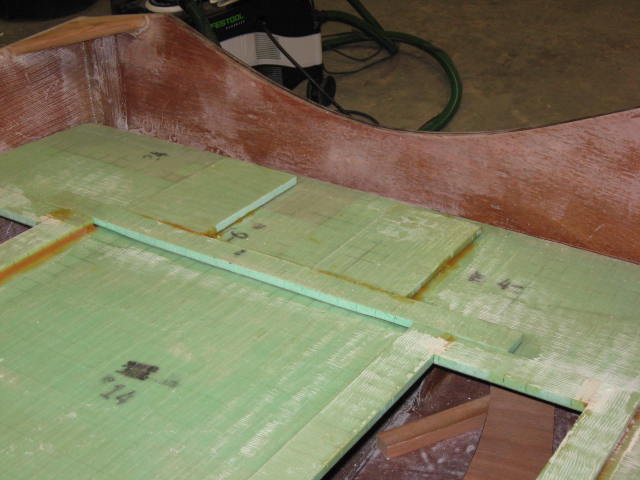
Decided the cutout in the rear seat for the engine clamping and fuel line did not need to be there. Why have an engine well below seat level as this ads complexity to things. Took the cut out section of foam board and rebonded it to the rear seat. Made some 5 inch wide gussets underneath the fore and aft seams and glued it all up with wood flour and epoxy. Will add another batton underneath this section at the transom and then cover the top joint with some scrap pieces of S Glass. Will take some pictures later as its all clamped up right now.
If any water want to come over the transom when coming off plane or backing down, then it will be on top of the rear seat and not straight into the bilge. I will add some drain holes in the transom for the rear seat surface.
The fuel line can come thru another small hole to be added later.
I put my engine on the transom and I have clearance for the engine mount upper screw clamps. At 1-1/8 inch thick the transom screw clamps won't tighten up so I cut some 3/4 inch BS1088 Meranti to be a clamping board. Will wait until rear seat is glassed in and attached to the transom before I add the clamping board.
Progress is slow but I am in no big hurry as living in mainland China taught me patience.
Does anyone have some suggestions on a small battery to drive the bilge pump and bait well pump. Definately dont want something as big as a car battery. My motor has no charging circuity and is manual start so I will have to charge the battery from time to time. Not sure where to put the small battery. Any ideas?
thanks in advance for any inputs.
Tom in Steinhatchee
Re: Tom's FS14
Posted: Wed Jun 29, 2011 7:36 am
by FryFly
Nice Boat Tom, We are slowly getting to the end of our little boat project too, it's great to see more FS14 being created. I look forward to seeing her splashed. I Will be interested in the reply's on the battery.
Re: Tom's FS14
Posted: Wed Jun 29, 2011 10:10 am
by thb
Yes thanks. I have been watching your build come together. Yours should be neat when finished.
I don't know why it is, we smaller boat guys get so few responses sometimes to our questions. I am thinking motorcycle or riding lawnmower size battery myself. We wait to see if anyone has some suggestions.
A few pictures this morning of my rear seat deck after filling in the cutout which showed on the plans. Also the 3/4 inch meranti clampling board.

Also another question. Does anyone have recommendations on how much oversize to make holes when going thru the hull for filling with woodflour epoxy mix??? It seems like redrilling with the correct smaller size is difficult to get centered unless you have a jig or drill guide. How do expert builder guys get this done?? My calibrated eyeballs seem to work most of the time.
Tom in Steinhatchee
Re: Tom's FS14
Posted: Wed Jun 29, 2011 10:24 am
by Uncle D
I haven't got to that point yet but I would think 1/4 to 1/3 larger than needed for larger holes and 1/2 bigger on small holes. Just guessing here guys. If you miss I guess you would redrill and fill again.
Re: Tom's FS14
Posted: Wed Jun 29, 2011 10:54 am
by Cracker Larry
I almost always drill the hole 1/2" larger than the final size. This gives you a 1/4" epoxy collar, no matter the hole size.
I usually make a drill guide with a thick board. Drill a straight hole on the drill press through the board, then hold it against the hull to keep the bit straight.
Re: Tom's FS14
Posted: Wed Jun 29, 2011 3:02 pm
by thb
Thanks Larry. I will try this on a few of the remaining holes on this boat. I think I need some new forester bits to replace the couple I have which are worn out. This will allow me a greater choice to make 1/2 inch dia larger holes. Appreciate the input.
Any advice on battery size for this small boat?
Thanks again,
Tom in Steinhatchee
Re: Tom's FS14
Posted: Fri Jul 01, 2011 10:18 am
by Uncle D
thb wrote: I think I need some new forester bits to replace the couple I have which are worn out.
You can take a good flat file and sharpen your bits. I did it all the time to mine. I've drilled thousands of holes for deadbolts and knob locks in door and have always used only the two original bits I started out with. D.
Re: Tom's FS14
Posted: Fri Jul 01, 2011 10:39 am
by gk108
Tom, since your motor won't charge your battery, you might be better off considering a larger battery for the extra capacity. How many amps does the baitwell pump draw and how many hours will you run it between charges?
Re: Tom's FS14
Posted: Fri Jul 01, 2011 6:00 pm
by thb
Hi GK,
Thanks for the input. My occasional bait well pump is basically a Rule 360 gph bilge pump which draws 2.1 amp at 12 v according to rule's web site. It is a clip on wiring arrangement with suction feet on the bottom so you put it in your bucket or baitwell and run it a little every 15 or 20 minutes. Good enough to keep live shrimp for several hours until the fish have eaten up your supply. I generally keep a little bucket handy and add some fresh water every hour or so.
I also plan on hard wiring up a bilge pump and float switch so when I keep the boat in the water for a few days at a time, the rainwater will be taken care of. Will probably also use a rule 360 gph for this bilge pump as the current draw is low. I have a little 12v solar charger which I could hook up when leaving the boat in the water. So I am thinking 300 to 400 amp hour little battery might give me plenty of power.
Was thinking about putting battery in outboard area of mid seat. So now I need to figure out how to run wiring back to rear seat bilge area for the bilge pump and switch. Of course I could always make the bilge pump and switch sit on a moveable platform which I place in the bilge area between the mid and rear seats when needed and boat left in the water.
Trying to keep this boat super simple so that the weight is kept low and not complicate it with systems, such as lights, horn, gps, vhf.
What you think?
Regards
Tom in Steinhatchee
Re: Tom's FS14
Posted: Sat Jul 02, 2011 10:17 am
by gk108
The U1 battery size typically used for riding mowers will run that baitwell pump for 10 - 12 hours.

Re: Tom's FS14
Posted: Sat Jul 02, 2011 5:49 pm
by Cracker Larry
The U1 battery size typically used for riding mowers will run that baitwell pump for 10 - 12 hours.
That's what I used in the GF16 and it would actually run the same bait pump that Tom has for a lot longer than that. The boat had a small Humminbird color fish finder/gps combo unit, a bilge pump and a bait pump. In normal use it could run for days on a riding mower battery. It has run as long as 4 days without recharging. One days use, no problem.
Re: Tom's FS14
Posted: Wed Jul 06, 2011 8:59 am
by thb
Yeh CL that makes more sense as AH rating of 300 AH lawn mower battery should give you over 100 hours between charges when drawing 2.5 amps continuously. I will not use bait pump continuously but intermittently over a 4 or 5 hour period. Bilge pump may run continuously during a heavy rain storm but they never last for more than several hours. I ordered a rule 360 gph bilge pump and switch the other day off e-bay.
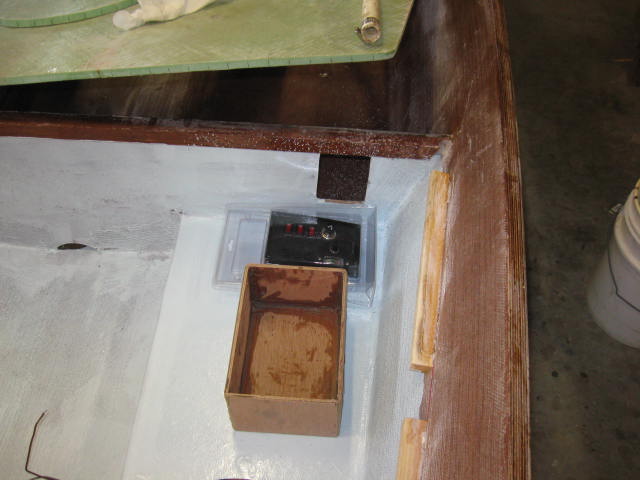
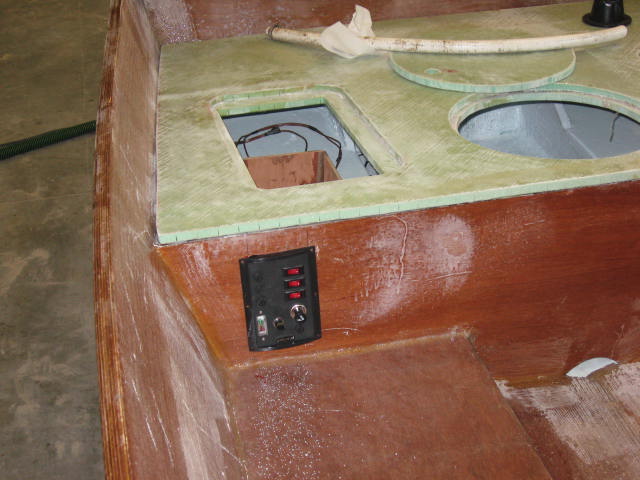
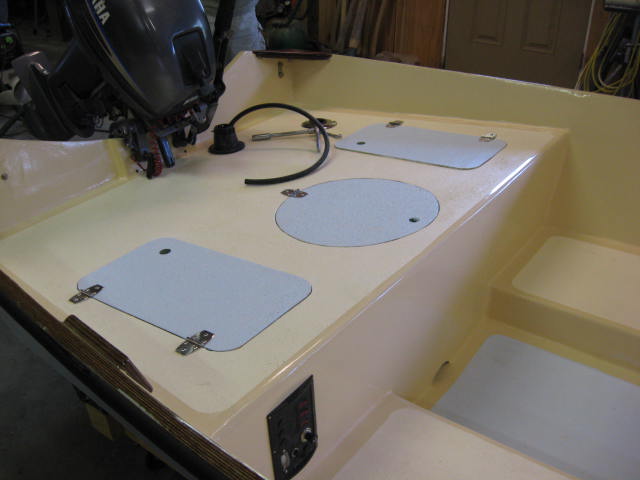
I also decided to add a round hatch and opening at the forward center part of the aft seat for the round igloo cooler I have had for 25 years. Mrs B said she wanted it as well. It can serve as the live well. The center seat cooler will keep drinks, lunch and fish. Having the bait well back there means wiring issues are simplified as bilge pump and switch will be back there and battery will put of starboard side platform near the seat bulkhead. Gee could even add some switches and fuse panel on the bulkhead to cover these two items and any other future electronic items. Some photos to prove I have been doing something on the build.

The two port and starboard hatches will be hinged at their outboard sides with some recently acquired SS hinges. Have not yet decided if I need to hinge this round hatch or just have it as a lift out.
At this stage of the build things seem to go slowly as you try to figure out the little details as you go. I did drill out the eye bolts holes much larger and filled with wood flour/ epoxy to give me more edge margin with final hole size. I also coated the center seat insides with a layer of white tinted epoxy and then glued down the center seat top.
All for now
Tom in Steinhatchee
Re: Tom's FS14
Posted: Wed Aug 03, 2011 7:21 am
by gstanfield
Any progress Tom?
Re: Tom's FS14
Posted: Wed Aug 03, 2011 10:03 am
by thb
George,
Not much progress to report lately. I have been working kind of sporatically on it. Built a little battery box the other day and still have to put several coats of epoxy on it. Got a small electrical switch panel from the great folks at Duckworks along with some nice 5 inch brass cleats. The OWMBO said the 3 inch brass cleats looked too small for the stern locations. Cut a hole in the rear seat forward bulkhead ( frame ) for the electrical switch panel close to where the lawnmower battery will be located.
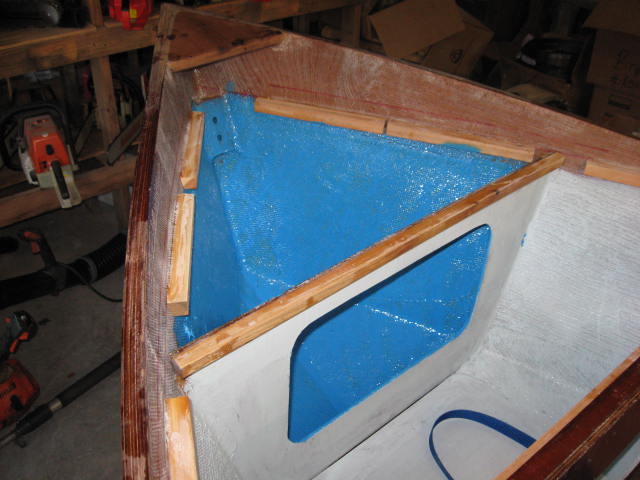
Decided the anchor well needed some internal protection from the anchor banging around so decided to put a layer of kevlar inside on the hull sides and bottom sides. Then I mixed up some dark blue epoxy tint with some white tint and made a lighter blue exopy color and coated the kevlar with a second coat. Have the nylon strapping which I will use to hold down the fuel tank. Need to drill and fill the hole locations for the ss screws to hold down the nylon strapping. Once this is done, I can epoxy the front deck onto the boat and put biaxial tape all around.
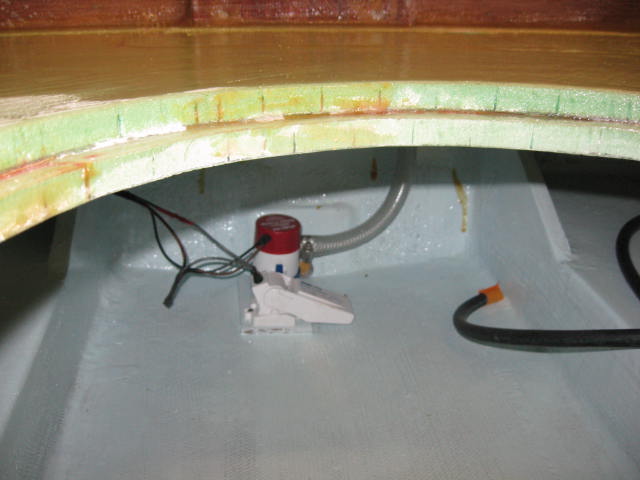
Made a plywood pad to mount the bilge pump and float switch ( rule 360 gph ). Need to drill and fill the screw mounting holes in this pad for these two items and run the wiring back to the electrical panel. Need to figure out the bilge pump discharge hose routing and discharge point. Was thinking a 3/4" thru hull somewhere below the deck level.
When all this is in place, I can go ahead and epoxy the rear deck and put biaxial tape all around.
Then I will be onto some fairing and sanding of the insides which I do not relish. Then I need to flip again and cover the sides with 6 oz cloth and fair again and then paint.
Oh, Biggie is I ordered a new Magic Tilt trailer for her after deciding that the trailer I bought for $100 and fixed up was too small for her. Sold that trailer last week to a guy down near St pete who drove up here for 3 hours to pick it up. Should get the new trailer before the end of this week. Getting a MTV16W-1250 with extra keel rollers on the cross members.
Now lets see if I can download a few more pictures.
Oh, I got another project dumped on me the other day in the form of 5 each late 60's early 70's Johnson/evinrude 4 hp motors. Get 2 of them running and the rest for parts. Chance to make a little extra money as the chainsaw business has been kind of slow lately,

Not much gets done around Steinhatchee during scalloping season.
Regards
Tom in Steinhatchee
Re: Tom's FS14
Posted: Wed Aug 03, 2011 11:10 am
by gstanfield
Still looks like progress
Those old outboards should be pretty simple to spruce up and turn a fwe bucks on them. If I weren't saving every penny for the move I'd probably be real interested in one.
Re: Tom's FS14
Posted: Thu Aug 04, 2011 8:09 am
by thb
George,
Where are you moving to and when do you plan on moving? I have a great running 1968 evinrude 3 hp which I could make you a heck of a deal on. I also have two 1965 evinrude 3 hp duck twins which both run but not as well as the 1968. I have another 1963 3 hp rude but haven't got it running right yet. It seems like I am collecting these things as I also have a 1961 sea king 5 hp and a 1961 johnson 10 hp.
Regards
Tom in Steinhatchee
Re: Tom's FS14
Posted: Thu Aug 04, 2011 8:17 am
by gstanfield
Tom, the plan is to make the move by October or possibly sooner if things go smoothly. I'll be leaving Wyoming and heading back home to the northeast Georgia mountains where I belong
When the house sells (and the market here is real good) I'll give you a shout and see what you have, might buy myself a housewarming present

Re: Tom's FS14
Posted: Thu Aug 04, 2011 8:20 am
by gstanfield
Another question; do you happen to have a carb that'll work on a 1959 sportwin 10hp? I was given this motor and it's in terrific shape except somewhere along the line somebody managed to crack the carb where the linkage goes in. It would still work, but the shaft is slightly bent and I'd rather put a new carb on it than rebuild a broken carb
Re: Tom's FS14
Posted: Fri Aug 05, 2011 9:37 am
by thb
Dont have a carb for a 1959 10 hp but I do have a complete 1961 johnson 10 hp which I have poured a ton of money into. I will look around to see if I can find a carb at some of the places in town that mess with outboards. I will also be on lookout at the local dump where old stuff like this sometimes appears. The local dump managers have my phone number.
Good luck on your upcoming move. At least you will be only 6 or 7 hours from the gulf in northern Georgia.
Regards
Tom in Steinhatchee
Re: Tom's FS14
Posted: Mon Oct 10, 2011 6:33 pm
by thb
It has been about 2 months since I did any updates for my build. Not a lot of progress but some.
Yesterday got the composite rear deck glued down with wood flour/epoxy and then put 6 oz biaxial tape around the perimeter doing it all wet on wet.

Also drilled and filled 4 holes for the outboard mounting bolts and glued up a 3/4 inch thick mahogany clamping board and drilled and filled the same 4 holes for the bolts
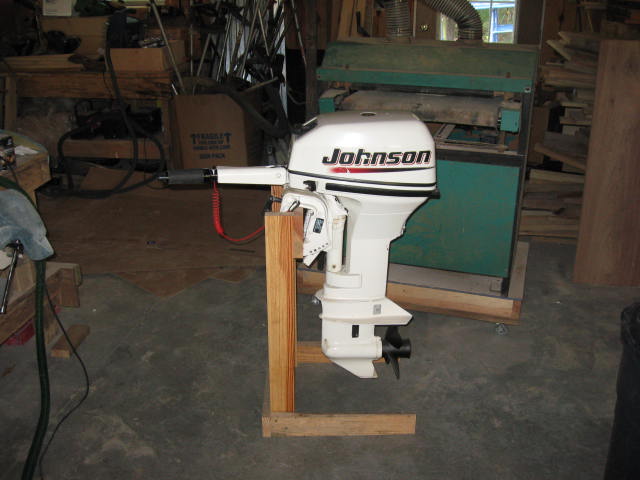
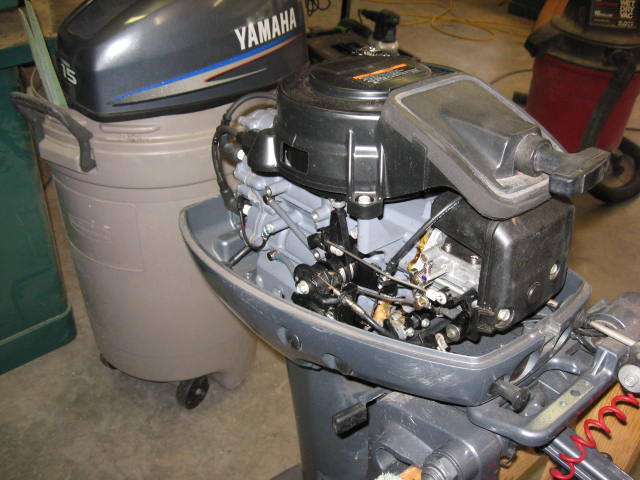
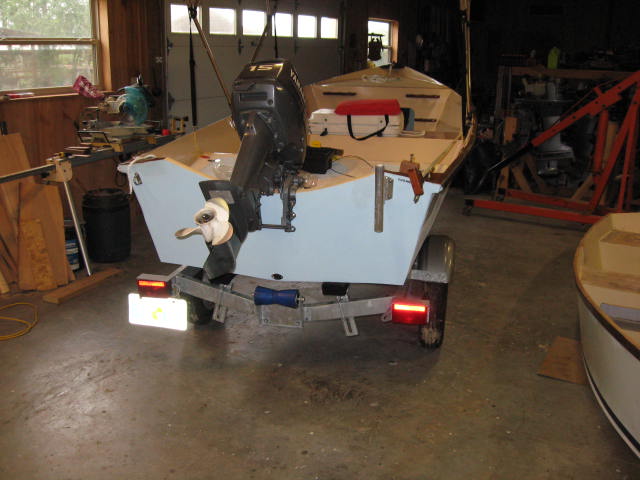
Got a 15 hp 2 stroke 2005 yamaha to replace the 2003 9.9 johnson which I sold to a good friend. Found the Yami on craigslist over in Alachua. The yami looks like very low time motor as well so having a few extra hp will come in handy. Funny how things work out as I built the FS14 especially for the 9.9. Now I will have to wonder how it would have performed with that motor.


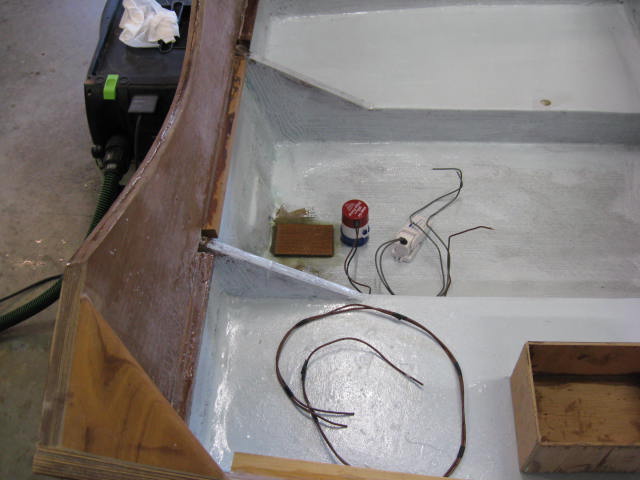
Got the bilge pump and switch mounted and plumbed up before putting on the rear deck.
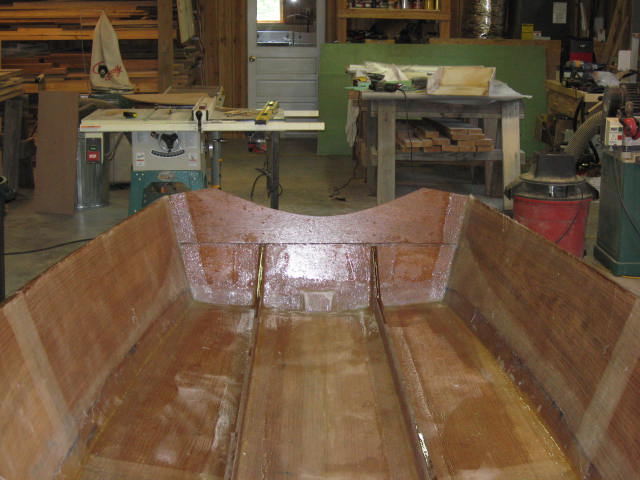
A view looking back with all seat decks in place. Some quick fair on and sanded on the sides to cover up the weave of the 12 oz biaxial cloth. Boy that stuff takes some filling and sanding and sanding and sanding.
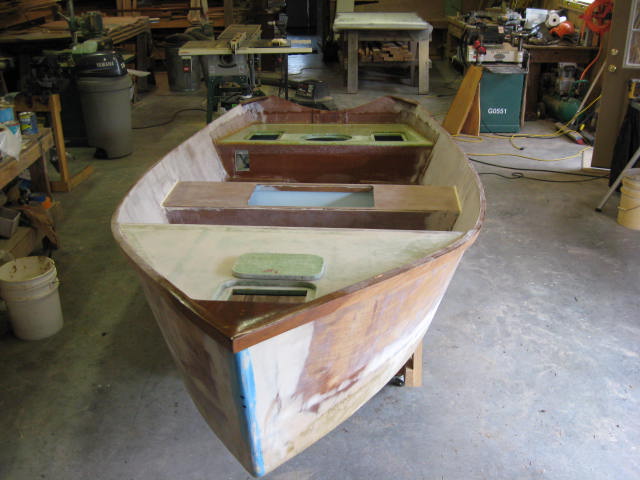
Got holes drilled and filled in the mahogany breast hook where I will mount brass cleat.
In the background of img 687 you can see the 3 cylinder Kubota 927 cc diesel engine mounted in its stand with temporary radiator. Found out some of the history of the this engine the other day. Had not run in over 22 years when previous owner bought it for some piece of lawn equipment. He died and my friend inherited it and all the rest of the junk on this porperty over in Branford, Fla.
Anyway, good news is that after freeing up some of the valves and adjusting them, starting getting some compression. Got a new 12 volt battery and finally got her fired up last week. At first she was leaking some oil and the front crankshaft seal but that seems to have gone away. Still need to rig up a temporary muffler and run her every so often before thinking about doing the marinization for the ST21.
regards
Tom in Steinhatchee
Re: Tom's FS14
Posted: Mon Oct 10, 2011 10:47 pm
by gstanfield
Great news on the little diesel and you're FS is looking good too
Re: Tom's FS14
Posted: Wed Oct 12, 2011 8:38 am
by thb
George,
thanks for the kind words on the fs14 build.
Are you still on track to move to Ga in Oct?
regards
Tom in Steinhatchee
Re: Tom's FS14
Posted: Wed Oct 12, 2011 12:21 pm
by gstanfield
Tom, at this point we are just waiting on the house to sell so it may be sooner, or it may be later. The market is real good out here now, although it has slowed a little due to winter setting in. I guess we'll just wait and see what happens. (insert impatient tapping noise here)
Re: Tom's FS14
Posted: Thu Oct 20, 2011 7:49 pm
by thb
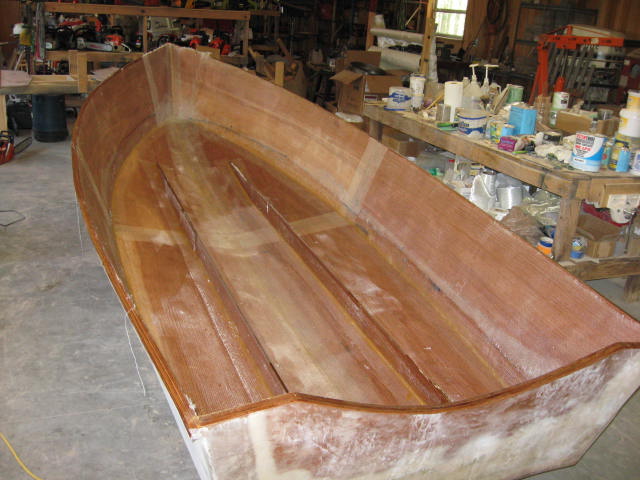
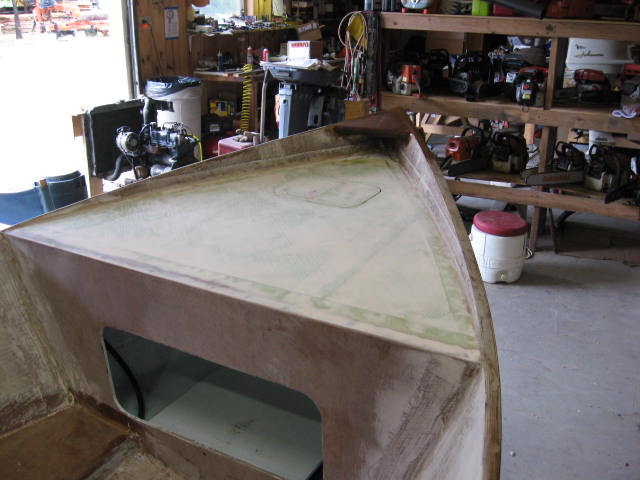
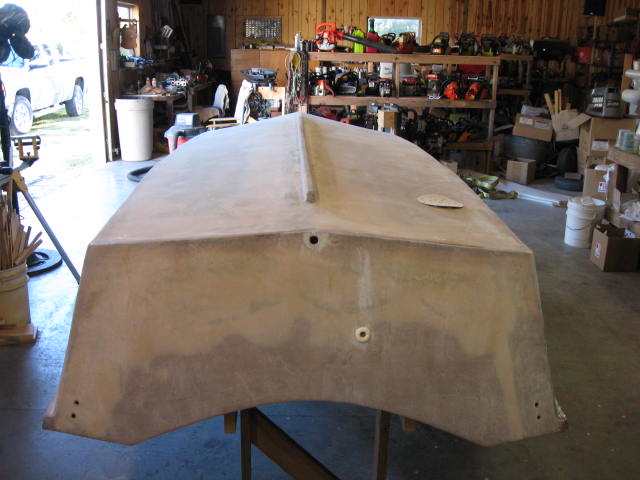
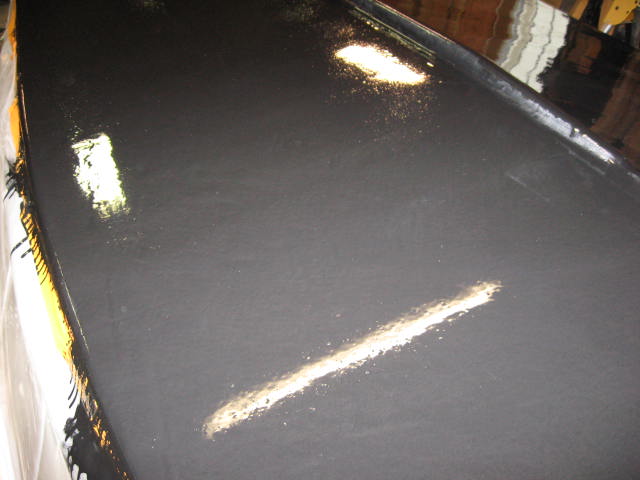
Got some work on her done this week. On tuesday put 6 oz cloth and two coats of epoxy on the hull sides so that now all the exposed ply on the hull is covered.
I did this as my FL12 did not last 1 year in the Florida sun without some paint blistering where there was no glass on the ply. 6 oz cloth and 24 oz of epoxy is a small price to pay to get a hull where it will survive well in the sun and not have any paint blistering. Of course the fl12 had black gloss paint on the sides so it got a beating from the sun. All my boats from now on will be light colored.
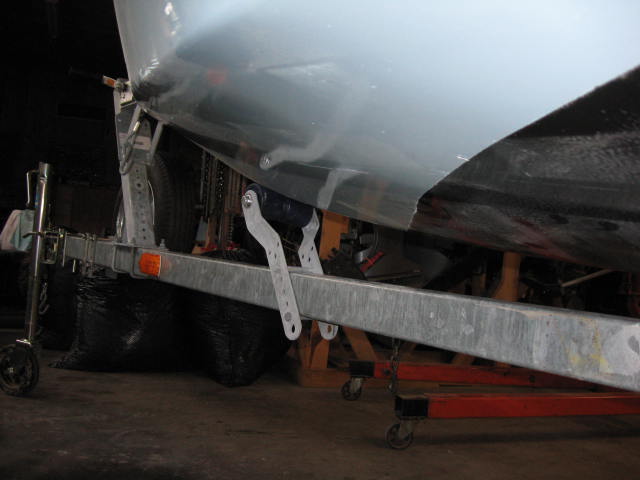
Today I made up a lifting beam out of some home sawn Southern Yellow pine, 4 inch by 5 inch with lift ring at the center and u-bolts at the ends.
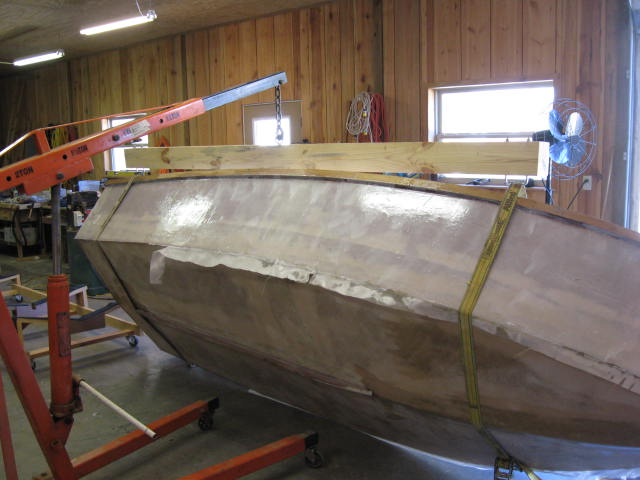
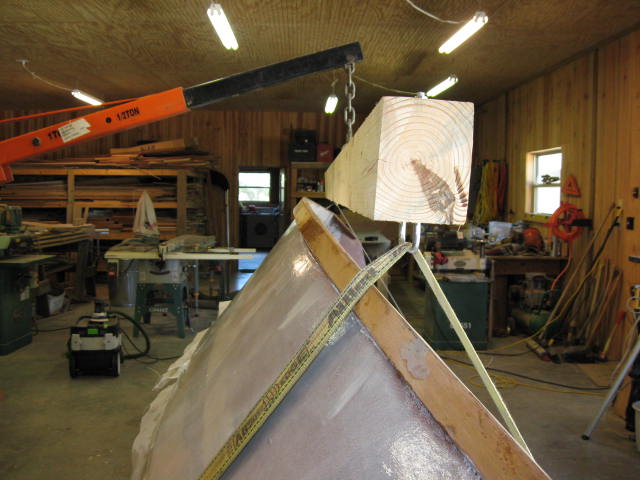

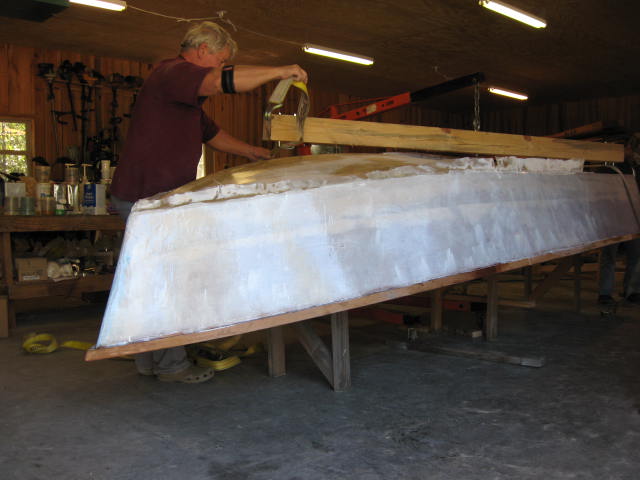
Used big nylon winching straps thru the u-bolts. Engine hoist to support and jack up the entire arrangement. Then the hard part of getting the straps to slip thru the u-bolts while the hull was flipped. Could not do it by myself which was the whole idea in the first place. But a friend stopped by and with him and my wife we managed to get her turned over in the lifting beam and then set on top of the original built jig.
I wanted to go ahead and primer the sides after sanding and fairing. The bottom will get several layers of graphite so who cares how nice it looks before hand. Don't think I will even try to do much more fairing on it or any primer. Just sand down fairly smooth and go with the graphite and epoxy.
Who is going to look underneath the hull to see how smooth it is???? I hate sanding and fairing so much, I will save that effort for the sides. Itching so much tonight from 2 hours of sanding that the bottom will be what it is.
One thing I will note is that this hull is strong as all get out. Sitting on its side on the two straps and I didn't see any give. She seems heavier than the 185 lb design weight. I would guess 250 lbs as she sits. Need a scale to mount in the lift arrangement to find weight. Any ideas on where to find a 400 or 500 lb scale which I can mount to my lift chain.
Regards
Tom in Steinhatchee
Re: Tom's FS14
Posted: Thu Oct 20, 2011 8:45 pm
by Steven
You just want to make sure the planing surface is flat.
Re: Tom's FS14
Posted: Fri Oct 21, 2011 8:50 am
by thb
Steven,
Appreciate the input. It is flat with no hook or rocker.
What I am talking about is getting a mirror like finish on the bottom when no one is going to look under your boat to inspect the surface and give you de-merits for not spending hours on fairing and sanding. All they are going to see is epoxy/graphite black. I am not going to paint over the bottom on this one.
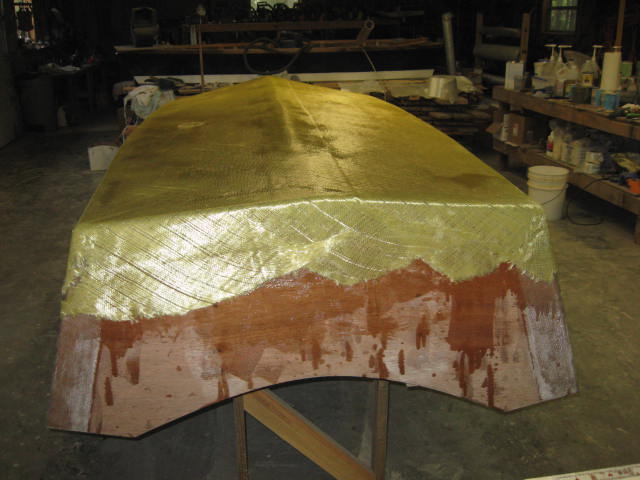
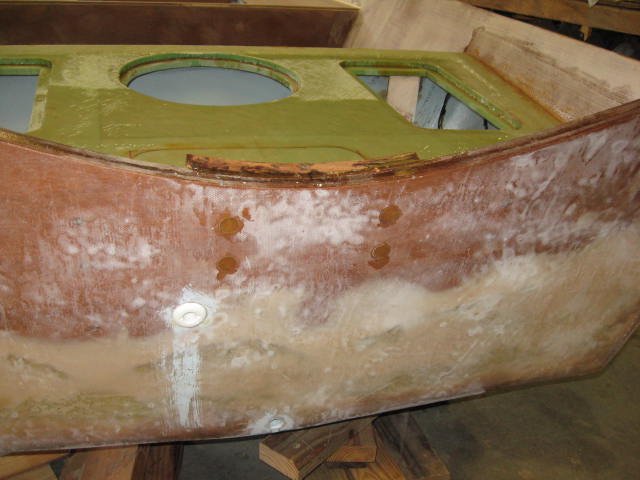
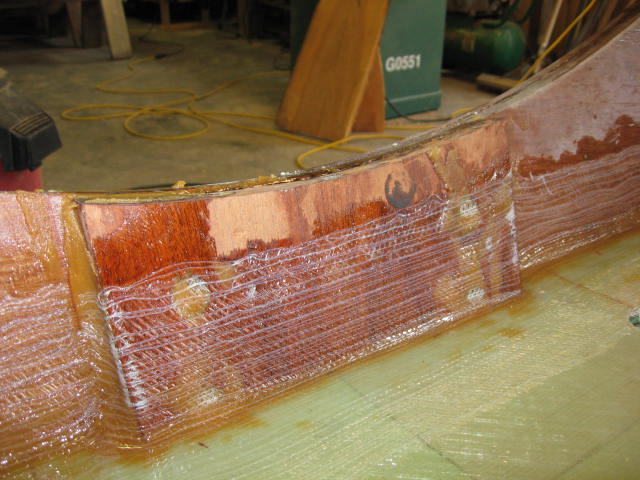
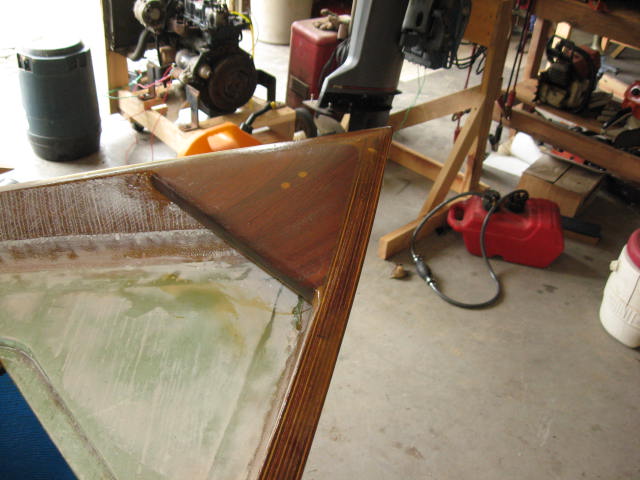
I have spent plenty of time on fairing and sanding already as you can see the quick fair thru the 6 oz glass weave on the bottom. The Kevlar biaxial cloth is covered with 6 oz cloth to provide a sealing coat for the kevlar.
Regards
Tom in Steinhatchee
Re: Tom's FS14
Posted: Fri Oct 21, 2011 9:10 am
by thb
Here is picture from many months ago when fairing and sanding.
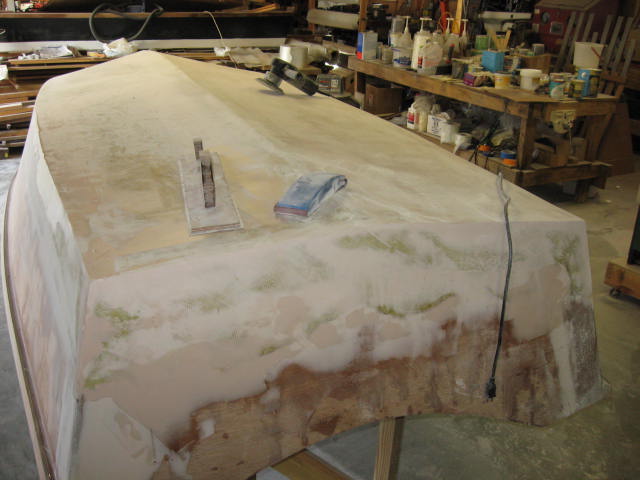
This was taken before 6 oz cloth was put on top to seal off the kevlar.
Regards
Tom in Steinhatchee
Re: Tom's FS14
Posted: Fri Oct 21, 2011 9:44 am
by gstanfield
She's looking good Tom. I'd suggest getting the bottom pretty nice, but no need for perfect. Get it smooth, with sharp corners and let the graphite do the rest
Re: Tom's FS14
Posted: Fri Oct 21, 2011 10:22 am
by thb
George,
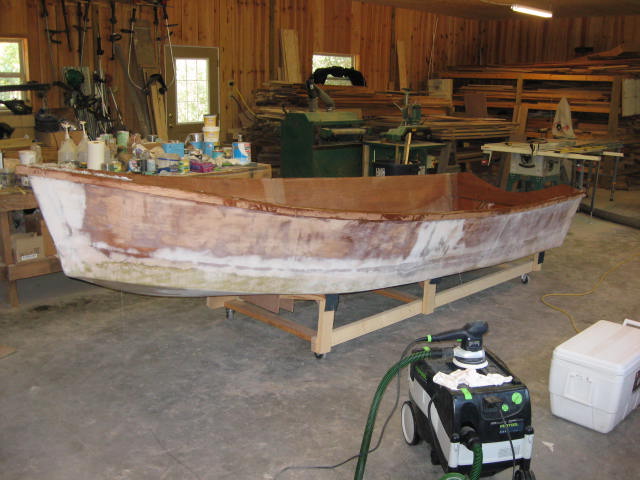
Here are a few pictures after yesterday's sanding. Alot more to do on the sides where I used tinted white epoxy for the second coat over the 6 oz cloth.
Bottom is pretty much good nuff.
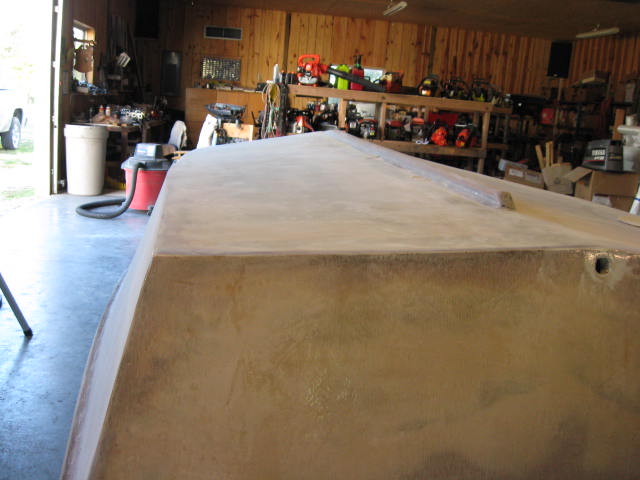
In several of these pictures you can see the sharpened chines for the aft 4-1/2 ft which is the planing surface, I guessed.

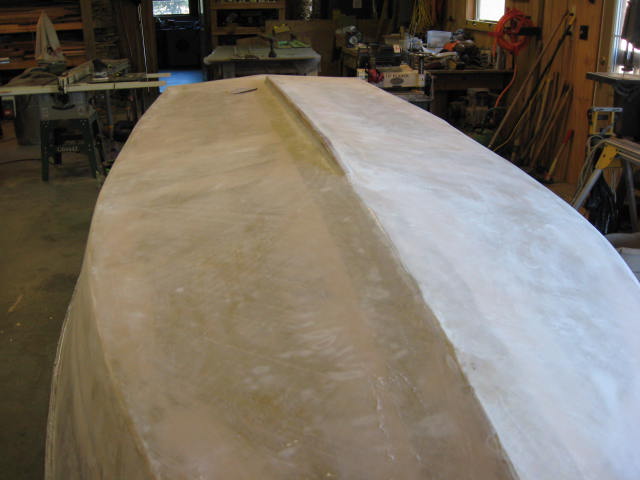
Getting a lot closer though and will be ready for primer on the sides after a few more hours.
Regards
Tom in Steinhatchee
Re: Tom's FS14
Posted: Fri Oct 21, 2011 11:11 am
by gstanfield
Looks good to me, at least from what I can tell. It's aweful hard to do any final finish work without a coat of primer on it so you can see everything in the same color. I'd go ahead and primer it, spray a very light guide coat on it and sand from there. You may see it and declare it good enough or it may bug you enough that you sand some more
Re: Tom's FS14
Posted: Fri Oct 21, 2011 11:43 am
by thb
George,
Maybe your right. Go ahead and put primer on the bottom and see how she looks then. I have the system 3 two part high build primer so the epoxy/graphite will be ok over it, right???
Regards
Tom in Steinhatchee
Re: Tom's FS14
Posted: Fri Oct 21, 2011 12:17 pm
by gstanfield
I see no reason why the epoxy/graphite would cause issue when used on top of an epoxy primer. I had asked that question about two years ago and was told that as long as it was a two part epoxy primer there was no reason for it to be of concern.
Re: Tom's FS14
Posted: Fri Oct 21, 2011 12:50 pm
by Uncle D
Tom, very good on your lift set-up. I wonder if you could have used washers or such as rollers on the U-bolts to make that strap slide better. Just thinking out loud.
"I see no reason why the epoxy/graphite would cause issue when used on top of an epoxy primer. I had asked that question about two years ago and was told that as long as it was a two part epoxy primer there was no reason for it to be of concern."
Just got off the phone with Joel on that very subject. Go for it.
Don
Re: Tom's FS14
Posted: Fri Oct 21, 2011 5:23 pm
by thb
Don and George,
Thanks for the inputs. That is what I like about this forum. Great inputs and ideas.
I really like the washer idea on the u-bolts. Can put 10 to 20 washers on each u-bolt with some molly grease and she should rotate nicely. Will try it out in several weeks when flip back time arrives and post results.
I thought I had read somewhere that it was OK to put epoxy/graphite on top of 2 part epoxy primer. I just can not remember some details like I could 20 years ago, so thanks to you both for the input.
Time for more sanding, OH BOY
and then some primer on sides and bottom.
Regards
Tom in Steinhatchee
Re: Tom's FS14
Posted: Wed Oct 26, 2011 8:51 am
by thb
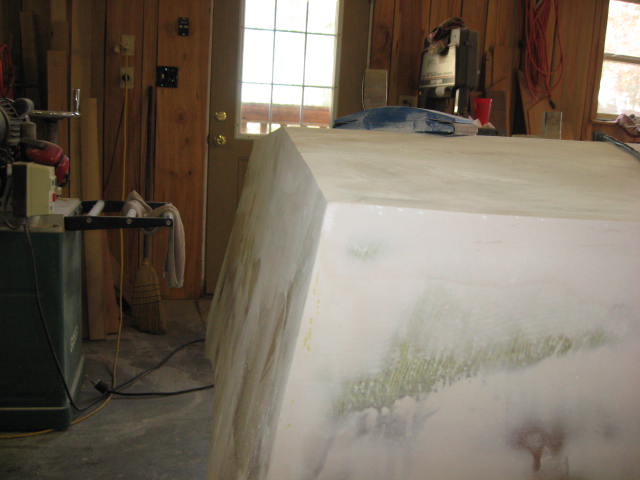
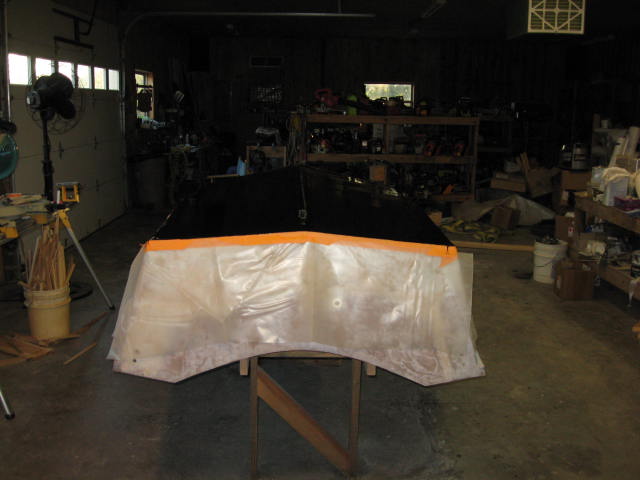
Put down one thick layer of system 3 high build primer on the bottom and down over the chines by 6 inches or so on the weekend. Did a lot more sanding of the sides after the 6oz cloth was laid down with 2 coats of epoxy on top.
Primer was good and dry after 2 days so sanded the bottom and sides some more. Was satisfied with the fair and smoothness of the bottom so yesterday went to work with the epoxy/graphite. Mixed up 24 oz of epoxy with about 6 oz of graphite. Mixed the graphite in to the liquid in three stages. Rolled the mixture on with a west system foam roller. Did the area around the keel with a chip brush.
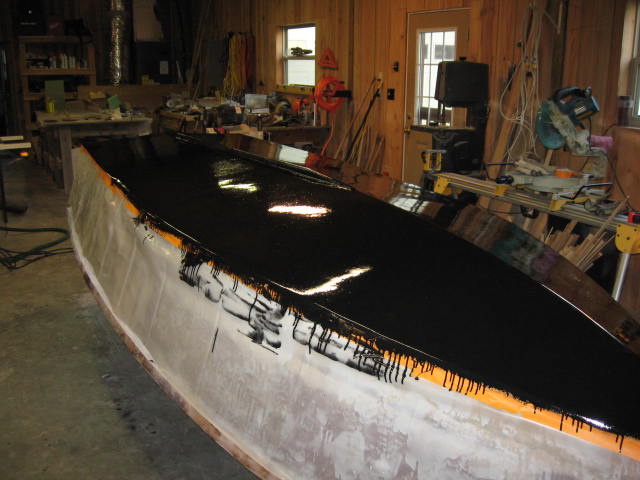
Got lots of little air bubbles/ bumps on the area which was rolled on. You can see this in the above photos. Of course I did not sift the graphite thru a flour sifter as I can't remember it doing this previously.
Will hit it a lick with the sander to knock down the spots and go for second coat this afternoon. Will use the vacuum festool sander for this job as that black dust is a pain.
Will do at least 2 coats and maybe three. What is everyone's preference, 2 or 3 coats???
The first coat was laid down pretty thick as I used all of the 24 oz of epoxy. Was thinking of using 18 oz for the next coat so it will be thinner.
Regards
Tom in Steinhatchee
Re: Tom's FS14
Posted: Wed Oct 26, 2011 9:16 am
by Mad Dog
Most of the guys applying graphite have at least three coats. I got similar results as you on the first coat. I managed to talk SWMBO into tipping behind me as I rolled on the second and third coat. The results were much better. Definitely use the vacuum sander. The graphite dust is a pain to clean up.
MD
Re: Tom's FS14
Posted: Wed Oct 26, 2011 10:27 am
by Cracker Larry
I put on 4 coats before I was happy with mine. To ease your mind, I put it on over System3 primer, it's been 4 years and holding up just fine.
As to the sanding, that stuff is a mess
I'd would wet sand if it were me, keeps the dust down completely
Re: Tom's FS14
Posted: Thu Nov 17, 2011 2:34 pm
by Noles309
What king of foam are you using for your decks? What weight glass etc... did you use? Is it appreciably lighter that ply? Thanks
Re: Tom's FS14
Posted: Fri Nov 18, 2011 8:38 am
by thb
Hi Noles,
The foam board I made up from a 1/2 inch thick deck kit from a 26.5 ft CC edgewater. The deck kit I got from my friends at Ugly Boat in Perry. It contained all the precut pieces from Diab which are seared in 1 inch squares. I got a big 4 by 8 sheet of formica faced particle board, put 3 mil plastic sheeting over it. Then put together a bunch of the foam pieces with hot glue to fill out the 4 by 8 sheet. Then layed down 1708 fiberglass on one side with epoxy. Close to a gallon required to saturate cloth and foam. The next day turned the 4 x8 sheet over and put a layer to S glass biaxial ( about 17 oz ) over the other side with about another gallon on epoxy. So in total about 2 gallons of epoxy ( 17 lbs ), foam board ( guessing 2 lbs ), fiberglass cloth ( approx 10 lbs ), so the entire sheet was about 30 lbs. Compared to 3/8 specified in the plans which weights 37 lbs for Meranti or 50 lbs for 1/2 meranti, my foam board came in pretty light.
It is an expensive affair with the amount of epoxy I used. If I had used 12 oz biaxial on both sides, I could have done it with a gallon of epoxy. I was conservative with my build up as I wanted a strong deck and aft seat so using the heavier cloth gave me a stronger stucture.
There is still enough Diab foam pieces in the kit to make up another 4 x 8 sheet. I may try to make another smaller sheet with lighter cloth and see how strong that is.
Other thing is my foam board eats up jig saw blades quickly when making cuts for hatches, etc.
It was an experiment but really not worth the small weight saving for the large cost. Using okoume ply for weight saving is the way to go.
Regards
Tom in Steinhatchee
Re: Tom's FS14
Posted: Fri Nov 18, 2011 8:50 am
by Noles309
Thanks for the info.....Love that part of the state by the way. Most of my family is in Tally and we cruise up 27 a few times a year. Love that part of the drive....hate the rest of it.
Re: Tom's FS14
Posted: Fri Nov 18, 2011 7:21 pm
by thb
You are welcome to stop by on one of your trips to Tally. E-mail me at
tnbryan@bellsouth.net and I will give you my phone number. Hope to start on my XF20 before the end of the year.
Regards
Tom in Steinhatchee
Re: Tom's FS14
Posted: Tue Feb 28, 2012 12:14 am
by Tropic.AL
That looks like a very clean build. I am taking notes for mine in the future. One question for you all: Instead of using graphite and epoxy, has anyone just put a few coats of epoxy on the bottom, and then paint it with anti-foul bottom paint? Seems like it would be less of a mess and offer decent protection.
Re: Tom's FS14
Posted: Tue Feb 28, 2012 1:14 pm
by Lon
"Instead of using graphite and epoxy ....."
I believe the preferred alternative is an extra layer of glass and epoxy.
Re: Tom's FS14
Posted: Wed Feb 29, 2012 8:04 am
by thb
I would still use epoxy and graphite underneath the bottom anti-fouling paint ( if leaving it in the water ). I hate using anti-fouling paint as it slows down your boat and requires periodic repainting. Sure with big boat that you leave in the water, it is the only option.
Epoxy Graphite is unique coating and great for scuff resistance over sand and osyter bars.
Try it your like it.
Regards
Tom in Steinhatchee
Re: Tom's FS14
Posted: Thu Jul 05, 2012 9:00 pm
by thb
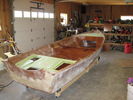
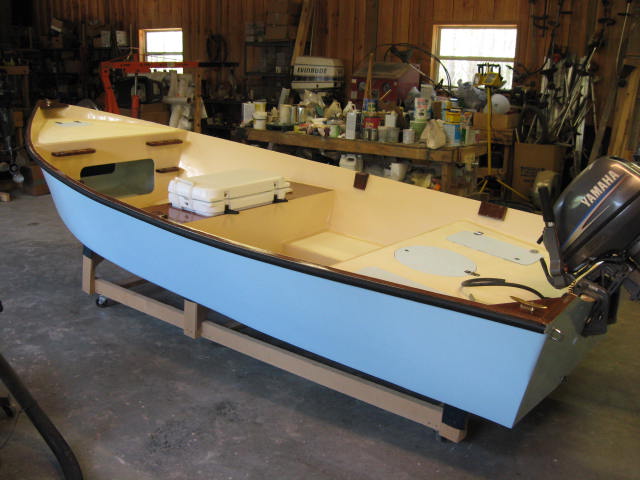
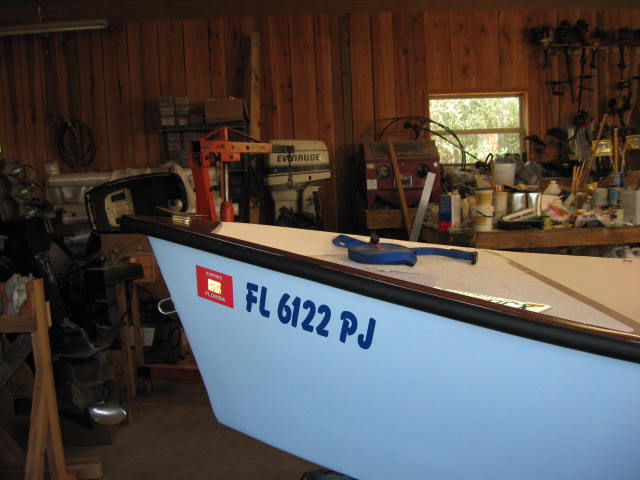
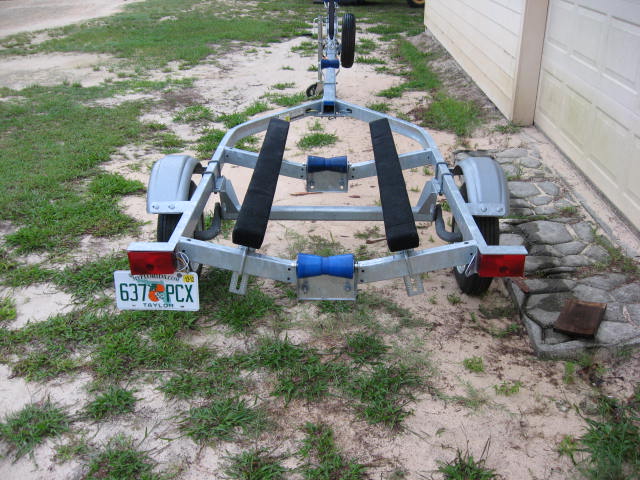
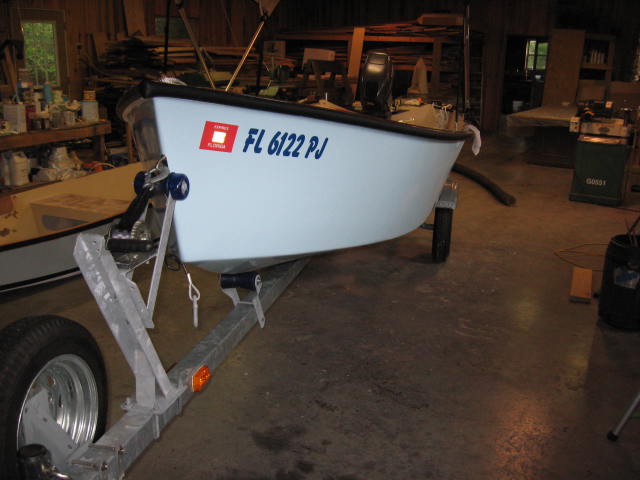
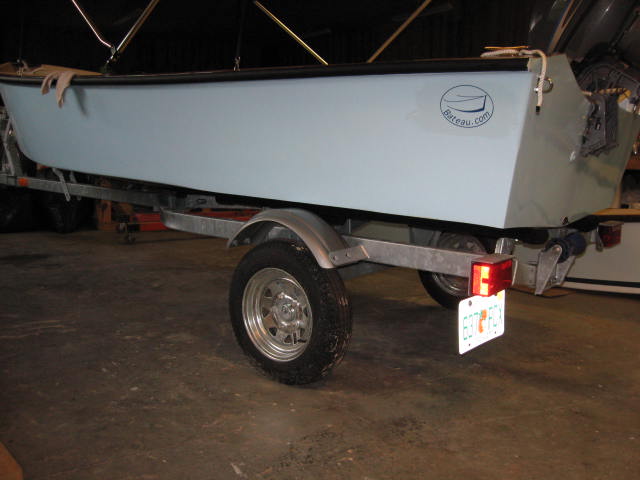
A few photos of recent progress. getting ready to put on trailer but need to modify the trailer a little.
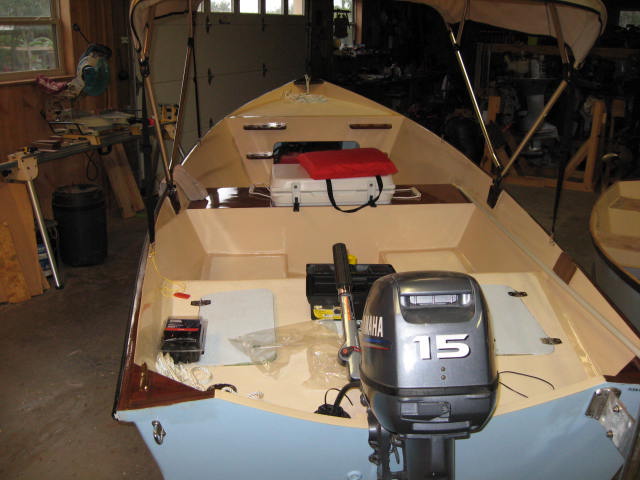
Overall view
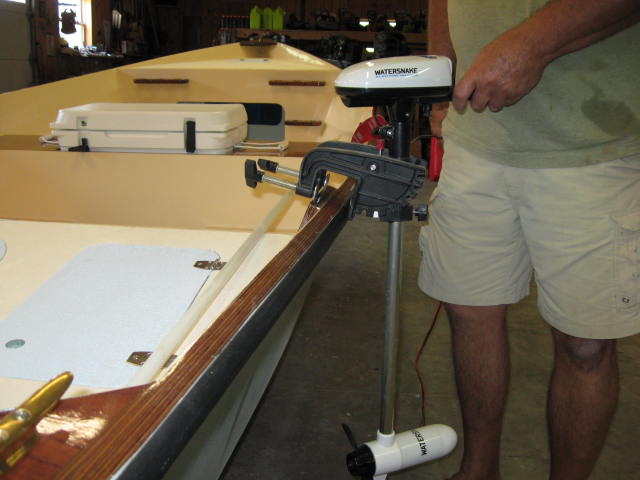
Bracket for little trolling motor need to thin out bracket due to rub rail thickness
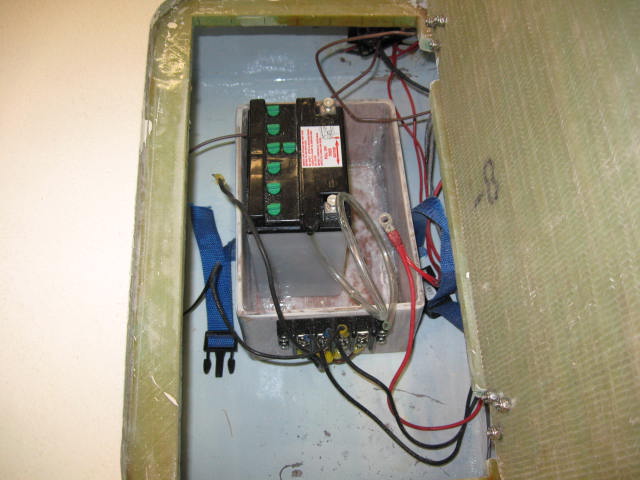
Some electrical details with motor cycle battery to power bilge pump, bait well pump and trolling motor
Stake out bracket and pole from boat builder central

Engel cooler in middle seat
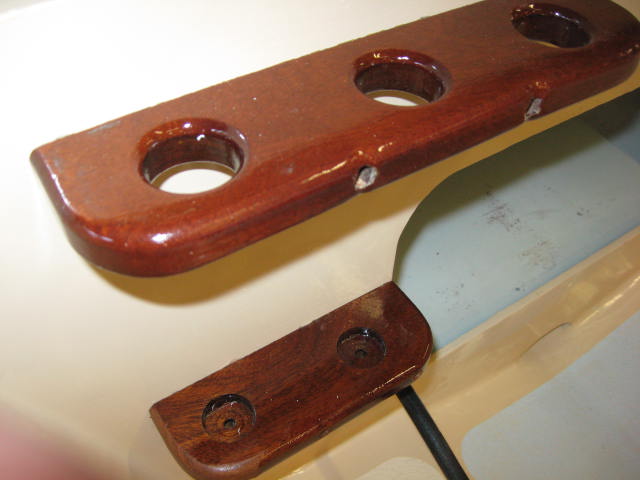
mahogany rod holders and two tone paint scheme with quik grip
close to going to licensing dept to get her registered.
Regards
Tom in Steinhatchee
Re: Tom's FS14
Posted: Thu Jul 05, 2012 9:53 pm
by Seadation
Hello Tom,
Your FS14 looks great! Is the center seat mahogany? I really like your rod holders they are elegant.
From where did you get the rub rail?
/david
Re: Tom's FS14
Posted: Fri Jul 06, 2012 7:45 am
by topwater
Very nice

Re: Tom's FS14
Posted: Fri Jul 06, 2012 8:17 am
by thb
Hi David,
The center seat is just Meranti BS6566 3/8 ply with mahogany cleats. Followed your lead and did 4 or 5 coats of epoxy on all the brightwork with sanding in between then 6 or 7 coats of System 3 clear LPU sanded several times with 320 girt.
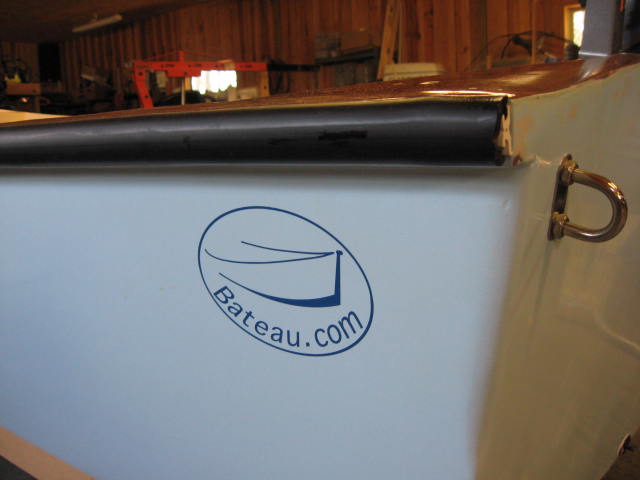
The rubrails is Italian made Tessilmare flexible rubrail from JD. It looks pretty good and once you figure out that the insert needs heating up with a hand held air gun heater and bent back at 90 degrees, it goes on pretty nicely. It comes as 44 ft kit so I had about 14 ft left over after doing the FS14.
I followed your advise and painted the outside before I flipped the hull back over again to its normal position. I used Brightsides and it worked pretty good for me, ( world's worst painter ). Found that just using a 6 inch foam roller and not trying to tip with a brush was the way to go. Kind of tip it with the roller to get the air bubbles out.
I also have the Taco flexible rubrail which I got from BBC but will use that on the XF20. I have accumulated almost all the hardware and material for the XF20 so that build will start soon, couple of months.
Regards and thanks for the compliments,
Tom in Steinhatchee
Re: Tom's FS14
Posted: Fri Jul 06, 2012 1:55 pm
by gstanfield
Very nice job Tom
Re: Tom's FS14
Posted: Fri Jul 06, 2012 7:28 pm
by BradleyD
Beautiful Boat! I may have missed it somewhere in the thread but is that a livewell in the center of the rear deck?
Re: Tom's FS14
Posted: Fri Jul 06, 2012 8:31 pm
by tobolamr
Looking good!
Re: Tom's FS14
Posted: Fri Jul 06, 2012 9:23 pm
by Prarie Dog
Looks real nice Tom, really like your rod holders!!
Re: Tom's FS14
Posted: Fri Jul 06, 2012 10:17 pm
by FOSTER
Nice looking boat!!!
Re: Tom's FS14
Posted: Sat Jul 07, 2012 7:40 am
by thb
Thanks all for the inputs.
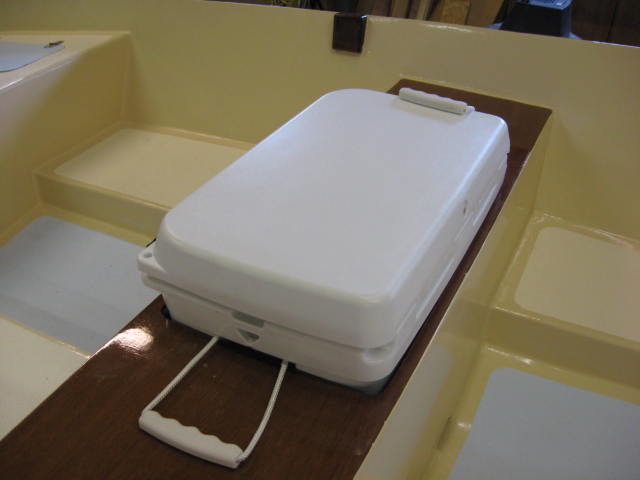
Bradley O,
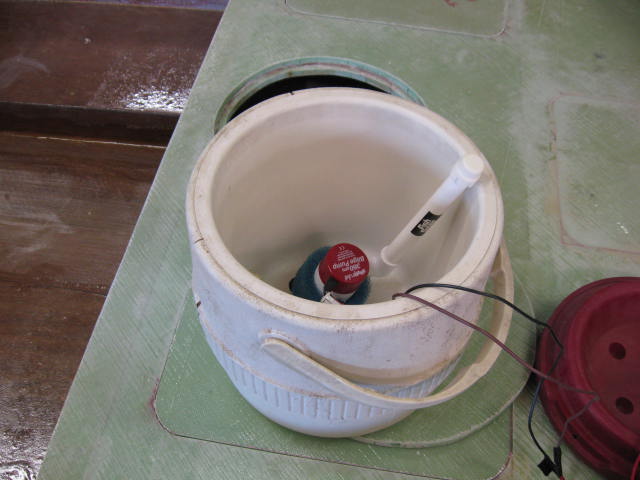
The round hatch in the rear seat is for a removable igloo drink cooler which I have had for 25 years. It will serve as my livewell with drop in rule bait well aerator pump. Will be nice and simple and work for 3 or 4 dozen live shrimp which is all the live bait I ever use. Lets see if I can find picture of the arrangement.
Originally I was going to put this round cooler in the center seat but decided to have bigger cooler for that area and the OWMBO came up with the great idea to put it underneath the rear seat. Will serve as her removable porta potti when not being used as bait well. The depth of the area underneath that rear seat allows the red top to be on so it could also serve as drink cooler if the big cooler is full of fish and slime. She comes up with lots of good ideas.
Regards
Tom in Steinhatchee
Re: Tom's FS14
Posted: Fri Jul 13, 2012 7:54 am
by thb
Well the big day in the history of this boat took place yesterday. Went thru 3 years worth of receipts and figured out which ones applied to the FS14. Then made a list and took everything including some pictures up to the licencing department and in 10 minutes or so I was registered, had boat vin number, registration number and title. Went ahead and licenced my trailer as well. The licensing Department is the county tax collectors office and they wanted to make copy of all those receipts from e-boats which showed tax was paid on the material purchased. So don't throw out those receipts folks, you might need them later. The process was painless and what a pleasure to deal with these folks in that office. The boat registration portion was only 30 some odd dollars so not expensive.
I then went to the sign place in Perry that has made up my previous name and registration numbers stickers and they made up a nice set of registration decals for me. $25 seemed a lot more than I paid previously but what the hell.
Now I am waiting on trailer parts to modify the trailer to fit the boat and then final finish up and off for launching next week probably.
Gettin close now folks.
Thanks to everyone for the advise and help during this build and positive comments.
Regards
Tom in Steinhatchee

Re: Tom's FS14
Posted: Fri Jul 13, 2012 9:26 am
by jacquesmm
Very nice looking boat, congratulations.
The big day is when you launch the boat.
Re: Tom's FS14
Posted: Fri Jul 13, 2012 10:55 am
by peter-curacao
Very very nice you have some more porn for us?
Re: Tom's FS14
Posted: Fri Jul 13, 2012 11:20 am
by TRC886
That boat is too elegant to get bloody and slimy
Congrats on a fantastic build
Re: Tom's FS14
Posted: Fri Jul 13, 2012 12:03 pm
by Uncle D
Great looking!! You do very nice work.
BTW, Tom. I looked at the rub rails you use. I do have a question. On your bow, the pic has cut off the rub rail, so is yours so sharp of an angle that you cut the rub rail or make the turn continuous. My bow is very sharp and I don't know how this rail would look cut. I don't think I would ever be able to make that sharp of a bend even using a heat gun as suggested by the people at JD.
Thanks,
Don
Re: Tom's FS14
Posted: Sat Jul 14, 2012 9:13 am
by thb
Don,
I didn't cut the rubrail at the bow and it looks a little spread out due to the sharp bend but I can live with it. Will try and take some pictures so you can see how it looks and make another posting then.
I might pull it all apart and replace the oval headed #8 screws with flat headed #8 screws. The oval headed ones make for little bumps in the black rubber. Haven't decided on this yet. Also should I drill and fill all these holes or just leave them be as it won't be left out in the weather for extended periods of time. I could coat the screws with 5200 to seal the holes?
Regards
Tom in Steinhatchee
Re: Tom's FS14
Posted: Sat Jul 14, 2012 9:44 am
by thb
Here are some more photos.
First several photos of how the rubrail bends around a sharp pointed bow.

These two photos of what the ends look like without using the crap caps they put in the kit. I can live with that.

Now just some more detail photos
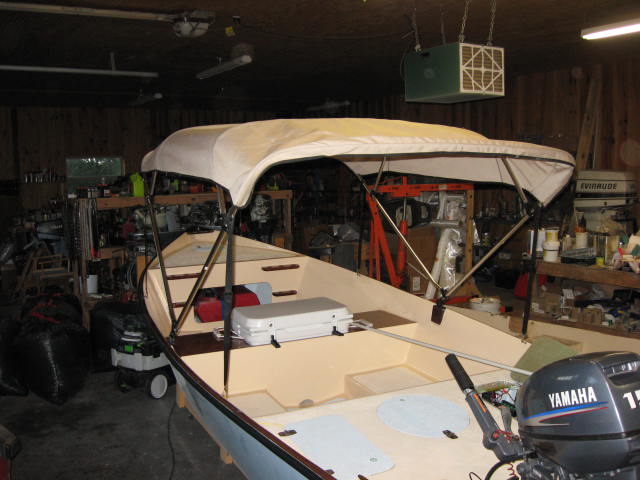
These are pads I built for the bimini top to mount to. Also placed the rod holders on forward bulkhead so the rods would not interfere with the bimini top.
Re: Tom's FS14
Posted: Sat Jul 14, 2012 9:48 am
by thb
TRC,
She aint that great and I will have no problem getting it slimmy and bloody ( not with my blood for a change ).
thanks for the compliment.
Regards
Tom in Steinhatchee
Re: Tom's FS14
Posted: Sat Jul 14, 2012 10:05 am
by TRC886
Re: Tom's FS14
Posted: Sat Jul 14, 2012 1:31 pm
by Seadation
Hello Tom,
Once again, outstanding build and very well thought out.
Where did you get your bimini top? What size did you buy?
Thanks,
/david
Re: Tom's FS14
Posted: Sat Jul 14, 2012 2:13 pm
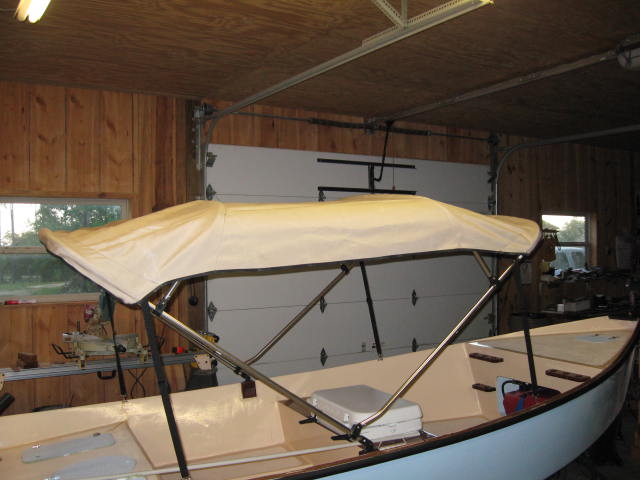
by thb
David,
I got the bimini top back in Dec thru i-boats as a special sale price of $89 including shipping. It is Westland 7-1/2 ft long by 5 ft wide and tan in color. Frame and mounting hardware was all included along with a boot. It is made of sunbrella fabric as well.
I went back to their web site a month or so ago and the same top now sells for $410 or so with sunbrella fabric, about 250 with cheaper fabric.
Either way, the deal I got was too good to pass up and rediculously cheap so I jumped on it at the time.
I will take some pictures of the boat with the top up once I get her outside and on the trailer. Need some protection from the sun down here as it seems to be getting hotter every year.
Regards
Tom in Steinhatchee
Re: Tom's FS14
Posted: Sun Jul 15, 2012 4:52 pm
by Seadation
thb wrote:David,
I got the bimini top back in Dec thru i-boats as a special sale price of $89 including shipping. It is Westland 7-1/2 ft long by 5 ft wide and tan in color. Frame and mounting hardware was all included along with a boot. It is made of sunbrella fabric as well.
I went back to their web site a month or so ago and the same top now sells for $410 or so with sunbrella fabric, about 250 with cheaper fabric.
Either way, the deal I got was too good to pass up and rediculously cheap so I jumped on it at the time.
I will take some pictures of the boat with the top up once I get her outside and on the trailer. Need some protection from the sun down here as it seems to be getting hotter every year.
Regards
Tom in Steinhatchee
WOW Tom, that was a STEAL! How TALL is the bimini frame? When I've looked online there is the L x W dimensions but also a height. I'm not sure what would work comfortably on our FS14s. Your's sounds great.
Once again, nice boat!
/david
Re: Tom's FS14
Posted: Mon Jul 16, 2012 7:27 am
by thb
David,
Yeh it was a steal.
The bimini is only about 40 inches tall so I have to bend over when walking around underneath it as there is only 5 ft of headroom. On the plus side of a lower height is you get more sun protection except at high noon. Other thing is front and rear seats can be fished from without interference from the top. Actually you could sit in middle seat and still fish the front and sides of the boat as I tried to get my strap clips as far back as possible so they are almost vertical rather than sloping forward and back.
Some photos
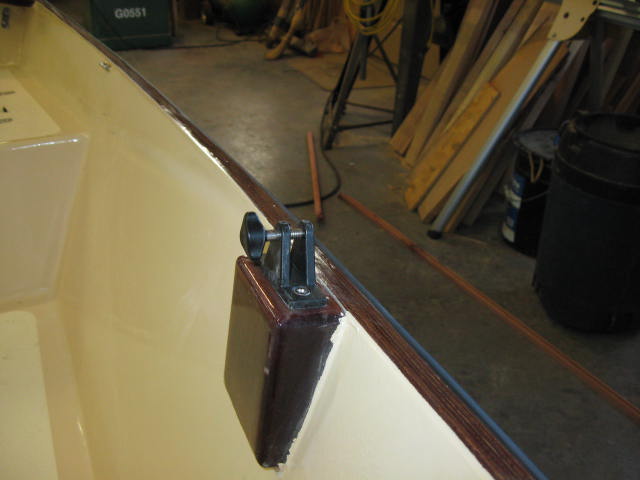
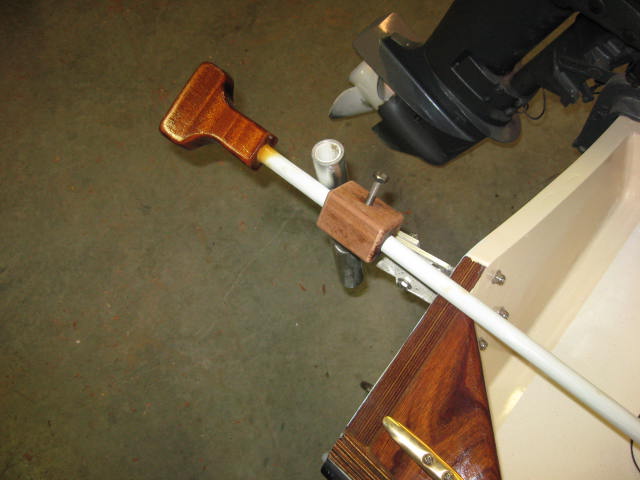
Here is a picture of my stick pin handle. Hope it meets with the approval of the stick pin anchor POLICE.
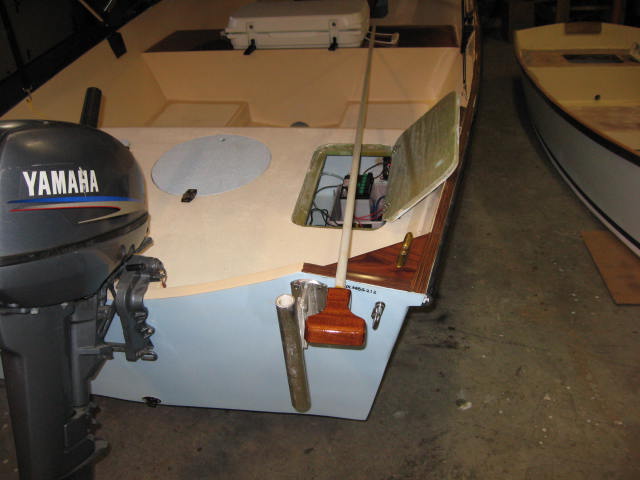
Note I got my Hull ID number engraved into the hull with my dremel via free hand method.
Waiting on my trailer parts to get her loaded on her trailer. The outfit was holding up the shipping for a week due to no stock of SS ubolts so I told them ship everything and I would get the ubolts elsewhere. IDIOTS. Why don't these websites alert buyers to zero stock and give you choices before you place your order???
Launch should happen this week sometime assuming I get her fitted nicely to the trailer.
Regards
Tom in Steinhatchee
Re: Tom's FS14
Posted: Mon Jul 16, 2012 10:42 am
by Heloman78
thb wrote:David,
I got the bimini top back in Dec thru i-boats as a special sale price of $89 including shipping. It is Westland 7-1/2 ft long by 5 ft wide and tan in color. Frame and mounting hardware was all included along with a boot. It is made of sunbrella fabric as well.
I went back to their web site a month or so ago and the same top now sells for $410 or so with sunbrella fabric, about 250 with cheaper fabric.
Either way, the deal I got was too good to pass up and rediculously cheap so I jumped on it at the time.
I will take some pictures of the boat with the top up once I get her outside and on the trailer. Need some protection from the sun down here as it seems to be getting hotter every year.
Regards
Tom in Steinhatchee
Wow! That's a great deal, I recently tried my hand at making a replacement Bimini top for my floating condo, and I can tell you I don’t think you could find all the materials that cheap if you were to make it yourself. Great job on the boat! I often think I should become a “builder,” by starting with an FS 14. I really like your colors and use of bright work!
Re: Tom's FS14
Posted: Mon Jul 16, 2012 10:55 am
by Uncle D
Tom, thanks for the info. I'm a ways off before the rub rail. Looks like a 5 or 6 inch radius is what's needed to make proper bends.
Don
Re: Tom's FS14
Posted: Mon Jul 16, 2012 11:12 am
by Seadation
Hello Tom,
The bimini looks good. Lower height is fine...less wind resistance...it's really just for a little shade so yours works fine. And it is about right front/back so you can still fish.
The stick anchor looks good too. Mine (sto bought from Cabelas) came with a little sliding collar clamp with a thumb screw such that you can leave your stick in the bracket at the back of the boat and raise it up to a safe level, lock the collar, then move the boat without pulling the stick all the way out of the bracket and storing/laying it someplace in the boat so you can trip over it. I tried to find a place to store my stick anchor under the gunnel...NO GO...on 14' boats like ours there is no place without significant curve...so, for my 8' anchor, it has to basically lye out there 'in the way' if not stowed in it's bracket on the stern.
You could make a gizmo like i'm talking about by cutting a piece of sch40 pvc 3/4 dia about 1-1 1/2 inches long. Tap it for a .25" SS thumb screw. Then, you can slide it onto your anchor and lock it anywhere you want along it's length but mostly lets you leave it safely in its stern bracket whilst the boat is moving. Larger boats may not need it since they may have more places to lay the stick when not needed.
Fair winds.
/david
Re: Tom's FS14
Posted: Mon Jul 16, 2012 3:36 pm
by thb
Thanks David, I will try to make a locking thingy as I like the idea of leaving it in the bracket as where else do you put it.
Heloman, the FS14 is a great little boat to start with. go for it. thanks for the compliment.
Regards
Tom in Steinhatchee
Re: Tom's FS14
Posted: Thu Jul 19, 2012 7:47 am
by thb
David,
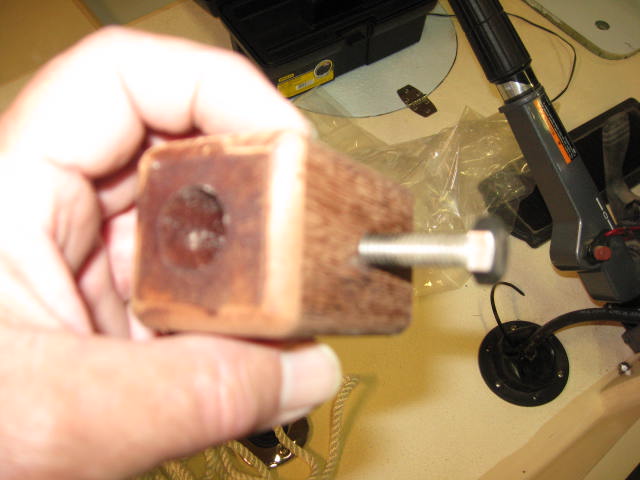
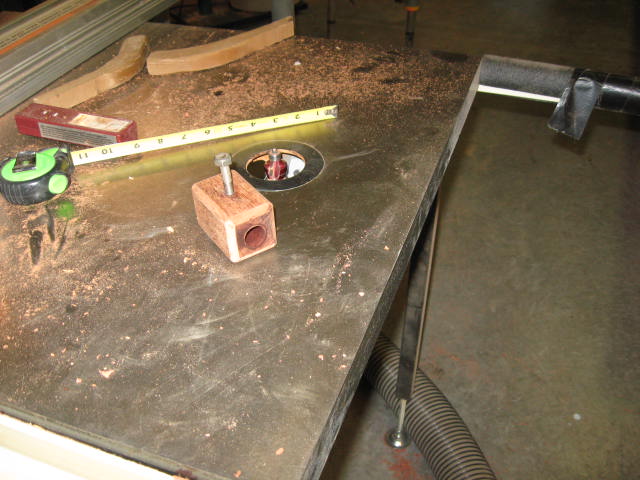
I tried a piece of sch 40 but the ID was a little too sloppy for my 3/4 inch pole from BBC. I took a 3 inch long 2x2 hunk of scrap mahogany and drilled a 3/4 inch hole in it with a forester bit on the drill press. Then drilled and tapped a hole for a 5/16 x18 course thread SS bolt. Then coated inside of threads with super glue. Rounded off the edges with a round over bit and wo la.
Will need to carry a 1/2 inch wrench to tighten down the bolt. Was wondering if I should put a flat on the fiberglass rod so the bolt hits it in the retracted up position????
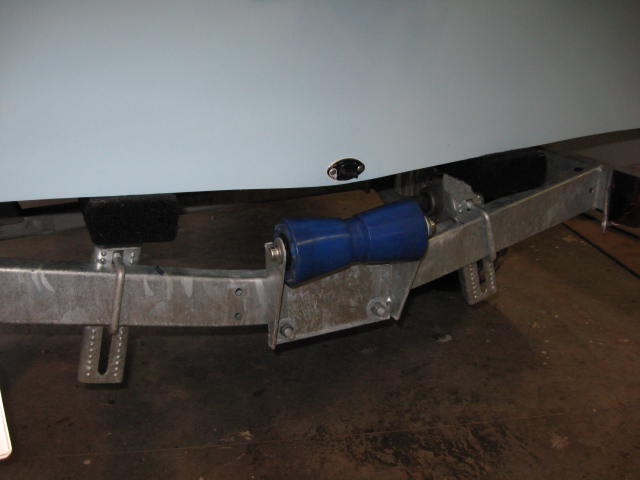
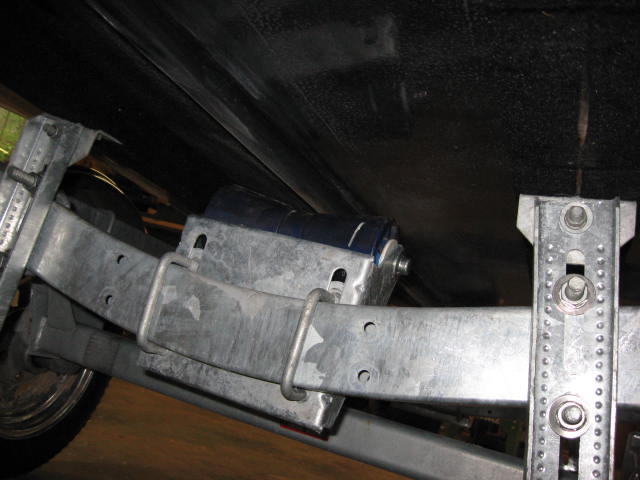
Got the trailer parts the other day and installed them yesterday. I screwed up and should have ordered the split type of roller support brackets rather than the continuous type. I could have used existing bolts and holes in the cross frames rather than having to do it with u-bolts. Now I had to go out and get some more galv u-bolts. Will try loading the boat today. I have the bunks positioned just outside the stringers. When I get some more u-bolts I can add another set of bunks near the chine.
Ready to load on trailer. got dock lines and tool box
trailer as modified with adjustable center rollers and lowered bunks
various pictures of the stick pin lock block
Regards
Tom in Steinhatchee
Re: Tom's FS14
Posted: Thu Jul 19, 2012 9:38 am
by Seadation
Hello Tom,
That locking block is elegant! I may make one from wood too. It'll float so be harder to loose. Could you use a thumbscrew? Using a wrench will be unhandy. I might drill a recessed hole in the side of the block and epoxy a nut in there rather than tape threads. Your wood version definitely wins the award! Good thinking.
My boat is supported fine with 2 bunks and 3 keel rollers. It's set up now so I can back the trailer just to the water's edge, then stand on the trailer tongue next to the winch, lift the bow a little, give a mighty push and roll the boat off the trailer into the water. My trailer is basically set so that the keel rollers carry some of the boats weigh and the bunks are for side-to-side balance.
I was out fishing with my teenage daughter Tuesday in Apalach bay...we weren't out there 20 minutes when the FL DNR cops showed up. I've been fishing down here 11 years and that is the FIRST time I've ever been approached by those guys. They were nice...I think they were mostly making sure we had PFDs and cushions. And they probably wanted a closer look at my daughter's bikini. Come to think of it, the bikini is the ONLY difference in the fishing trips over the past years...YIKES! My little girl is grown up! So, I guess I better make sure I'm in full "compliance" when she comes with me...
I'll be interested to hear your performance numbers out of that Yami 15.
/david
Re: Tom's FS14
Posted: Thu Jul 19, 2012 3:12 pm
by thb
David,
I decided to change out the center roller brackets yet again as I still can not get the rollers to contact the keel with the boat on the trailer. I ordered two sets of the split type of roller brackets so maybe I can also use the existing holes to mount them. I think they will give me more vertical adjustment capability.
I do not want all the weight being taken up on the bunks and your setup seems ideal for ease of launching. The forward roller touches and has plenty of adjustment capability as it moves forward and aft on the straight center section.
Been raining and storming here all day so no launch until I get this trailer sorted out. Probably be next week at this stage.
I could have used a SS thumbscrew but I didn't have one on hand but I did have the 5/16-18 SS bolt. Need a SS wrench with a lanyard to the stick pin bracket. Maybe make me one of those this weekend. What size do you need for the wood locking block as I have another piece of scrap mahogany waiting with you name on it. 3/4 in bore and 1/4-20 thread????
Funny story about getting boarded by fdnr. You are probably right about the bikini being the reason.
Here are some photos with her on the trailer.
[imghttp://gallery.bateau2.com/albums/userpics/23003/IMG_0923.JPG][/img]
Regards
Tom in Steinhatchee
Re: Tom's FS14
Posted: Thu Jul 19, 2012 3:14 pm
by thb
missed one photo
Re: Tom's FS14
Posted: Thu Jul 19, 2012 3:37 pm
by Seadation
Looking good Tom.
Could you lower your bunks to let the rollers come into contact with the keel? I can see at least an inch of room to lower the bunks in the "missed" photo...or, will that conflict with the wheel fenders?
I don't mean to be a SmartA**, but I believe the bow eye should be rigged to fit UNDER the bow stop/roller assembly at the winch stand. Then the winch strap/cable goes UNDER the stop/roller too. For safety reasons, in a panic stop, the bow-stop will act to hold the bow of the boat down rather than allowing it to ride over and sit up in your lap. Again, with your engineering background you where probably going to do that.
The 3/4" bore piece would be great, thanks!
/david
Re: Tom's FS14
Posted: Thu Jul 19, 2012 6:49 pm
by thb
Hi David,
The u-bolts are bottomed out on the bunk brackets at the back and still can not get the rollers to contact. The missed photo
at the forward bunk attachment has some downward adjustment capability but it still was not enough to allow that roller to contact the keel. I had those bunk brackets as low as they would go and the bunks were not hitting the hull up front but the keel was hitting the rubber bumper on the frame between the mid roller and forward roller. Hitting it real hard so I jacked up the bunks and got bunks to fit nicely on the hull and that gave me clearance on the rubber bumper.
If I got rid of the u-bolts and drilled holes and thru bolted the roller brackets, I could probably get them higher. Also same thing with the bunk brackets if attached with thru bolts then they could come down a little bit but then fender clearance might be an issue.
What you said makes sense on the winch attachment. However, the winch really needs to be moved even higher to get a better straight pull on the boat. As it sits now the bow strap is still angled upward from the winch which makes the boat pull down when tightened up rather than making the boat pull forward. I already raised the winch about 4 or 5 inches to try to improve this but still not ideal.
My bow eye is too high and the bow shape of the fs14 make for some wierd geometry. I sure aint going to move the bow eye so I will have to live with what I have. I am sure I can improve things as I get all these trailer adjustments made.
Send me an e-mail with your address and I will mail you a stop bracket. 1/4-20 thread??
Regards
Tom in Steinhatchee
Re: Tom's FS14
Posted: Thu Jul 19, 2012 10:02 pm
by Seadation
Hello Tom,
Well, you obviously know what your doing. I didn't notice the pic I was referring to was the bow...oops

As usual, my advise is off-topic and not much use. My boat must have 'settled' some in the past month cuz I had to push reallllly hard to get it to glide off the trailer. So, I raised the rear keel roller the last little bit it would go up. It was a really rainy day here in Apalach bay probably like over in Steinhatchee.
The stop bracket that came with my store-bought stake out anchor does NOT have a 'flat' for the screw to engage. But that is a good idea. Now that I've thought more about it, you want the thing held up there only to keep it from touching the bottom while running the boat...so marking the stick with a small 'flat' or dab of paint would be a good idea. Once you put the anchor down the clamp thingy stays loose and slides around. It can't fall off at that point because it is trapped on the stick between the bracket and the handle.
Email sent.
/david
Re: Tom's FS14
Posted: Fri Jul 20, 2012 7:55 am
by JCordray
Your boat looks great!
Other than that, I've got no suggestions for you.
Sorry!
Re: Tom's FS14
Posted: Fri Jul 20, 2012 8:41 am
by thb
Hi David,
Please don't be embarrassed for offering me advice. I appreciated all your inputs and they make me think of other ways to skin this cat. I went ahead and raised the bow winch bracket last night about 6 more inches and wo la, I now have a straight pull on the bow eye. The winch strap runs underneath the winch stop roller also.
Your problem of hard to get off the trailer is why I am not a fan of bunk carpet. I have 4 bunks on my flats boat and it was a real bear to push off the trailer due to adhesion to the carpet. I put white nylon ( or whatever plastic ) bunk glides on all 4 bunk boards several years ago. Now even on unimproved low sloping boat ramp I can push her off. On good slope concrete ramp, I can back her off with the motor or easily push her off. Better have a bow rope on her when you unhook the trailer strap as they can slide off on their own with these bunk glides.
I am going to try this boat with only the carpet and getting the rollers to contact and roll and then decide if I need glides. With 4 or 5 coats of epoxy graphite on the bottom, I am not worried about the glides damaging anything. If you need another set of bunks let me know as I have good supply of home sawn 2x6 cypress right now. A few more cypress logs to saw so I can make any size board you need.
Regards
Tom in Steinhatchee
Re: Tom's FS14
Posted: Fri Jul 20, 2012 1:23 pm
by Seadation
Thanks Tom. If I ever get some time, I 'll drag my cargo trailer down your way and BUY some cypress lumber from you. I like to use it for building adirondack chairs, etc. My last 500 bf batch has been used up. Then the boat project took over. I would like to build SOMETHING next...the SUP is looking like the likely candidate at the moment. I'd like to commit to building the ST21 but space for that build is the major issue. I'm looking for some cheap, close-by, warehouse space where I could have a 'boat building shop.' ANd, things at work are such that I shouldn't commit to any 1-2 year projects until they stabilize.
Raining here at SGI.
/david
Re: Tom's FS14
Posted: Fri Jul 20, 2012 8:22 pm
by thb
Hi David,
SGI sounds like neat place and I have never been there. Are you scalloping up there or just fishing.
I bought the ST21 plans when they first came out and have a older Kubota 3 cyc diesel which needs to be marinized. My next build however is the XF20. I am the third owner of this precut kit and am committed to doing this boat which should be perfect for up here. I will sell all my factory built boats when I get the xf20 done.
500 BF is a lot of lumber. Dont think I have that much in the logs I have left. We did a saw job this week of 2x4 and 4x4 in cypress and it was 2 really nice logs to yield about 200 bf. I do have 2 short logs of 6 to 7 ft which I could cut into 1 by material if those lengths work for you. 16 inch and 12 in diameter logs so they are nice ones.
The stop block is in the mail.
Got the trailer tweaked some more today by drilling 4 new holes in each of the two cross members and mounted the center mid roller high enough to take some weight off the bunks. The aft roller still does not contact as the boat is too far forward on the trailer and there is no skeg back near the transom. The skeg should contact this roller once she starts coming back on the trailer during launch.
Interesting was fact that magic tilt did not spray the holes they drilled for the two center rollers when they added the rollers for my requirements. I would have thought they would have sprayed the holes with some galvanizing paint before they mounted these two rollers. Cutting corners I guess but I am going to let my dealer know so they can pass along to majic tilt.
Ready for launch early next week.
Regards
Tom in Steinhatchee
Re: Tom's FS14
Posted: Fri Feb 06, 2015 2:35 pm
by SeeRockCity
Hey Tom,
Beautiful work. I realize it's a couple years old, but I really just wanted to thank you for this thread.
As a newbie who has just received a set of FS14 plans, this thread is really helpful, particularly in topside layout, because of the care you've taken to detail your steps and take pictures of the process. While there are several fantastic FS14 build threads here, yours was particularly helpful and it's easy to see that you've had a lot of time to think about what kinds of practical features make the biggest difference when spending a day on a small boat.
Thanks Tom. My boat might be a carbon copy of yours.