Page 1 of 7
Seadation's FS14 Build - Splashed 12 May 2012
Posted: Sun Dec 11, 2011 9:42 pm
by Seadation
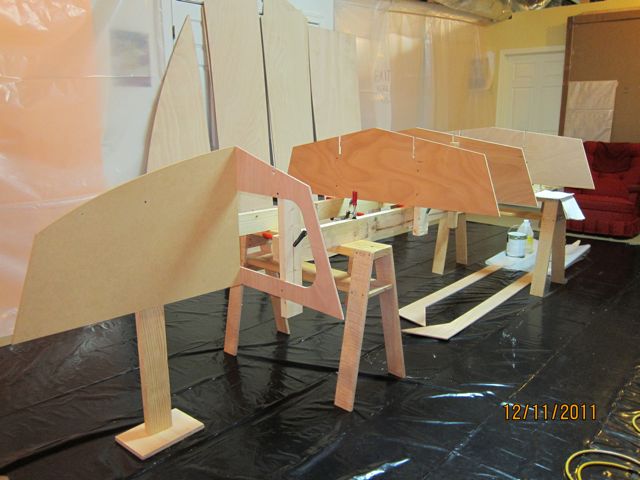
It has begun. I have started building the FS14. I am using the CNC plywood kit. Today I mounted the frames on the strongback. My dogs watched...

I glued the stringers together with butt blocks.
I have a Tohatsu motor...it is a 'long' shaft as specified in the plans. When I put the pre-cut transom piece in position
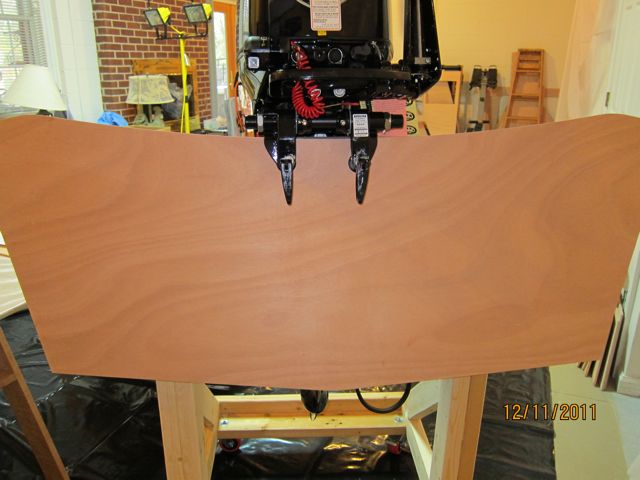
,
the cavitation plate is 3-3 1/2 inches BELOW the bottom of the transom
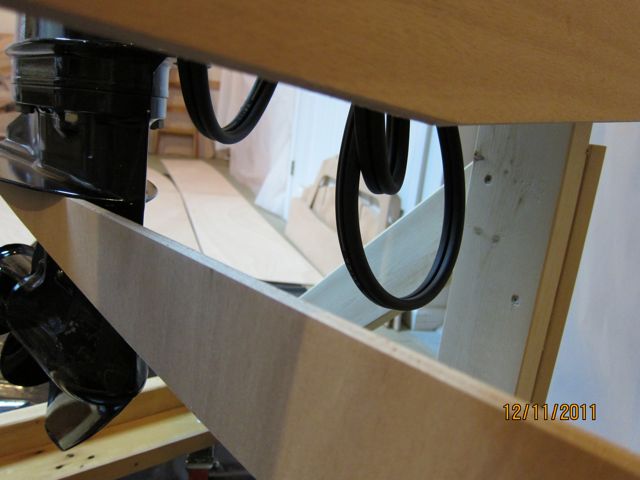
.
How should I "raise" the level of my transom? Is it as simple as adding approx 3 inches of ply on top?
Thanks,
/david
Re: Seadation's FS14 Build
Posted: Mon Dec 12, 2011 10:58 am
by tech_support
yes, your going to need to raise the transom. Its actually probably closer to 4.5" too low when you set the transom to an angle.
Im trying to think of a way to keep the existing pieces of wood so you can mount the motor directly on the transom.
a small jack plate would solve the problem
Re: Seadation's FS14 Build
Posted: Tue Dec 13, 2011 1:40 pm
by Seadation
shine wrote:yes, your going to need to raise the transom. Its actually probably closer to 4.5" too low when you set the transom to an angle.
Im trying to think of a way to keep the existing pieces of wood so you can mount the motor directly on the transom.
a small jack plate would solve the problem
Hello Joel,
Could I glass on more 3/8" plywood onto the top edge of the transom piece...butt jointed? I have enough additional 3/8" to make solid (one piece) clamping boards to go on top of the transom as shown in the plans.
I also have some 8/4 mahogany I could use to reinforce the top of the transom if you thought that might work.
What are your thoughts?
Thanks,
David
Re: Seadation's FS14 Build
Posted: Tue Dec 13, 2011 2:34 pm
by tech_support
Hi David,
Let see what Jacques says as he has final word on his deigns, but this will probably work...
scab a "key" piece into the full transom piece. It might look somethign like this....

next would be a couple layers of clamping board that fit the new profile and completely cover the scabbed in "key" piece. You will need to make these from scrap or some other wood you may have access to, could be some exterior fir as it will get covered with glass anyway. Cover with the 12 oz biax inside an out.
Re: Seadation's FS14 Build
Posted: Tue Dec 13, 2011 4:28 pm
by Seadation
Hello Joel,
Thanks...that look like it would work.
Searching the forum lead me to this (
http://www.theonlinefisherman.com/forum ... -jackplate) idea for a home made jackplate. I had discounted your suggestion of a jackplate because I I thought they co$t hundred$....
The boat budget doesn't support a fancy jackplate but I could make one from 1/4" x 3 x 3 aluminum angle cheaply, so that is a possibility too.
Thanks again,
David
Re: Seadation's FS14 Build
Posted: Wed Dec 14, 2011 9:54 am
by tech_support
Thats right, the jack-plates are pretty simple. Its an easy fix, your up to the top of the max travel of those smaller ones.
You can cheat a little and bring the transom up higher by adding some wood to the bottom of the transom (butt block in a couple inches oaf extra material from the inside. The transom piece will stick up a little proud of the side panels, so would just need to redraw the curve on the op so it made a nice transition. This might get you 3" higher, then get the rest with a jackplate
If you use the butt block, it needs to be pretty stout. I would use at least 3" over lap. So a 3" extension to the bottom of the transom piece, and a 6" butt block that goes 3" above the scabbed in piece - make sense ?
Re: Seadation's FS14 Build
Posted: Wed Dec 14, 2011 4:51 pm
by Seadation
shine wrote:
If you use the butt block, it needs to be pretty stout. I would use at least 3" over lap. So a 3" extension to the bottom of the transom piece, and a 6" butt block that goes 3" above the scabbed in piece - make sense ?
Hello Joel,
I think I understand that. That sounds easiest of the options thus far. I think I'll try it.
Thank you!
/david
Re: Seadation's FS14 Build
Posted: Wed Dec 14, 2011 5:04 pm
by Seadation
I finished prepping the strongback/frames...
Next, I stitched and positioned the bottom panels with help from a friend
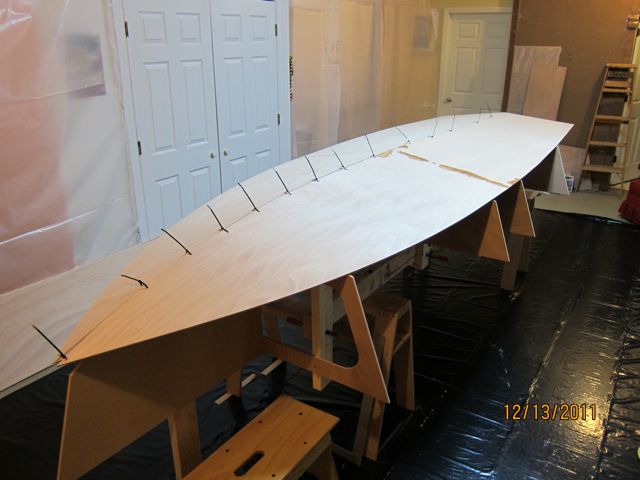

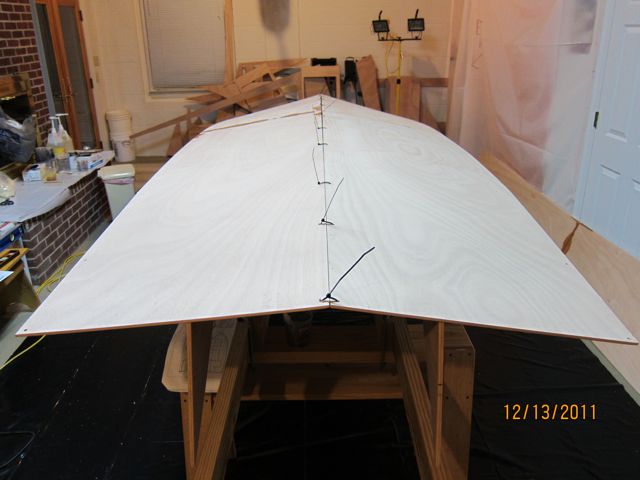
Then we stitched the sides...hey, this is fun!
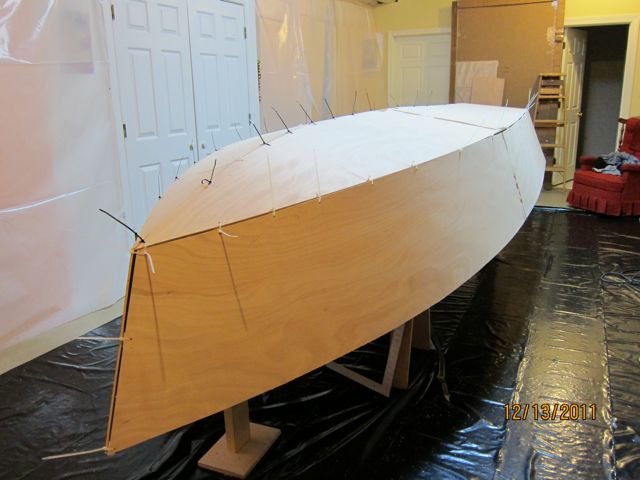


The panels all seem fairly close to the frames. The curves looked "fair" to my untrained eye.
That's about all for now. I welcome your comments and tips.
/david
Re: Seadation's FS14 Build
Posted: Wed Dec 14, 2011 5:37 pm
by thb
David,
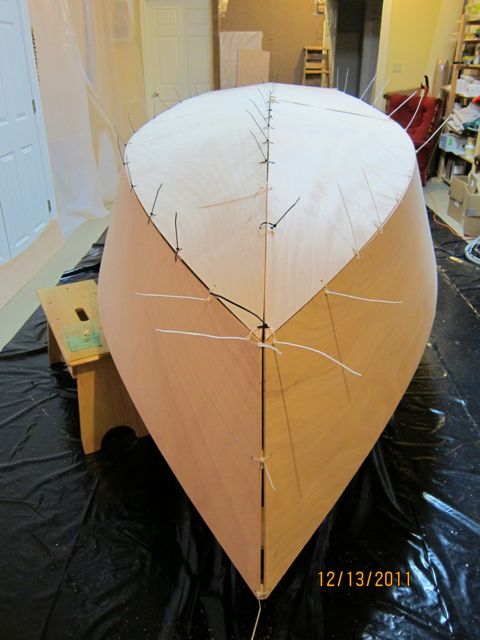
The last few pictures look good and gaps look good. How does transom sit on the panels??
It looks like you are ready for some wood flour and epoxy glue on all those panels. You can sort out the transom height issue after the hull is turned over or do the scab job now to extend the transom height.
Looking good. Build on.

Regards
Tom in Steinhatchee

Re: Seadation's FS14 Build
Posted: Wed Dec 14, 2011 7:25 pm
by Seadation
thb wrote:David,
The last few pictures look good and gaps look good. How does transom sit on the panels??
It looks like you are ready for some wood flour and epoxy glue on all those panels. You can sort out the transom height issue after the hull is turned over or do the scab job now to extend the transom height.
Looking good. Build on.
Regards
Tom in Steinhatchee
Hello Tom,
Thanks for the kind words.
The transom piece sits/fits well. I just need to push in the tops of the sides to meet the corners of the transom.
As far as scabbing a piece along the bottom of the transom to gain more height...well, that is a NO GO. It sounded good until I tried it. The FS14 transom is wider at the top than at the bottom. Sort of a 'wedge.' So, as you 'raise' the transom to bring its top edge higher, it brings the narrower part of the transom higher such that ever-larger gaps along the sides are created. If the transom where square or rectangular, then simply raising it with an extra piece would work.
I am planning to scab an extension into the current transom like Joel suggested the first time in his sketch of the transom piece on the motor stand.
I'm itching to start gluing the panels together. You betcha!!
/david