Page 1 of 1
FS14 Lowered Sheer
Posted: Tue Jan 17, 2012 9:16 pm
by BradleyD
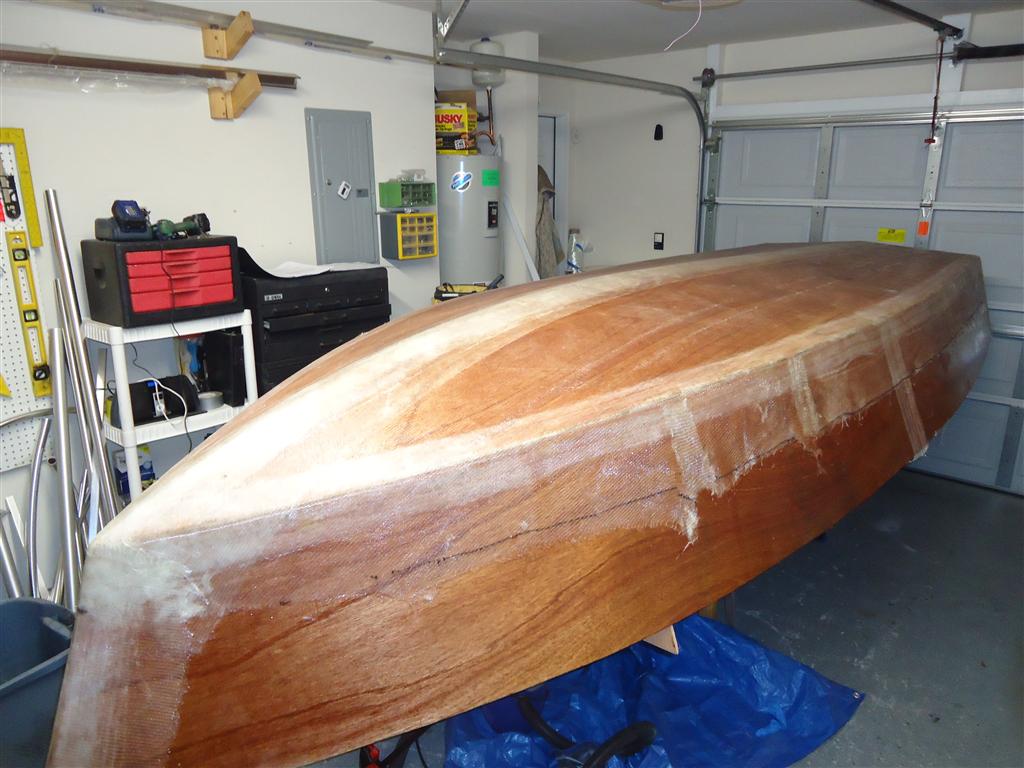
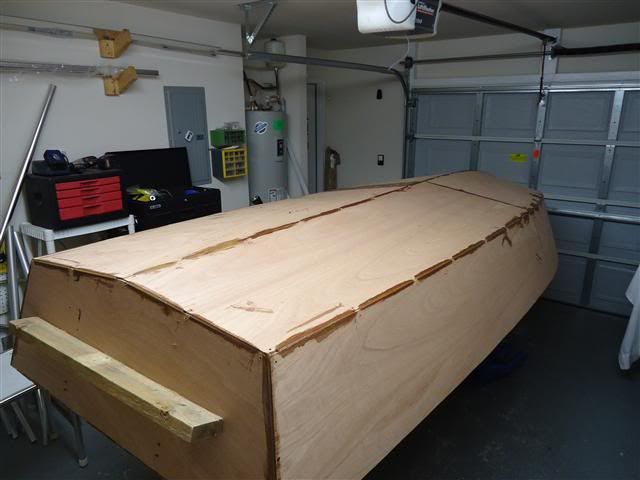
In my search for a small, capable backwater skiff (also inspired by Joel's FS17) I am building a low sheer FS14. Should be a good fit for the 9.9 four stroke and trailer I already have and a big upgrade from the far from stable aluminum V-hull I'm currently using.The idea will be to keep it a simple, lightweight boat with the only deviations from the original design being dropping the sheer 3", removing the mid seat top (keeping the frames cut down to 4"), and using the mid seat top material to extend the front deck. I should be able to get close to 60" of front deck without using any more total materials than original. Don't want to over do things with a sole, gunnels, etc. but will have a couple aluminum goodies to add. So far I have the hull panels tacked together and hope to be glassing the outside this weekend. I only have a picture of it's current state and not of any of the previous work though. Everything went together pretty nice except for my first boo boo gluing the starboard hull panel together with the rear section flipped upside down

Luckily I caught it before the epoxy was fully cured and was able to use an oscillating scraper to cut through the semi soft glue. A little sanding and a new butt block and was back in business.
Re: FS14 Lowered Sheer
Posted: Wed Jan 18, 2012 9:44 am
by Uncle D
We'll be looking for more pics Bradley. If that is your only mistake your probably ahead of most of us.
Re: FS14 Lowered Sheer
Posted: Sun Jan 22, 2012 6:51 pm
by BradleyD
Re: FS14 Lowered Sheer
Posted: Fri Jan 27, 2012 8:24 pm
by BradleyD
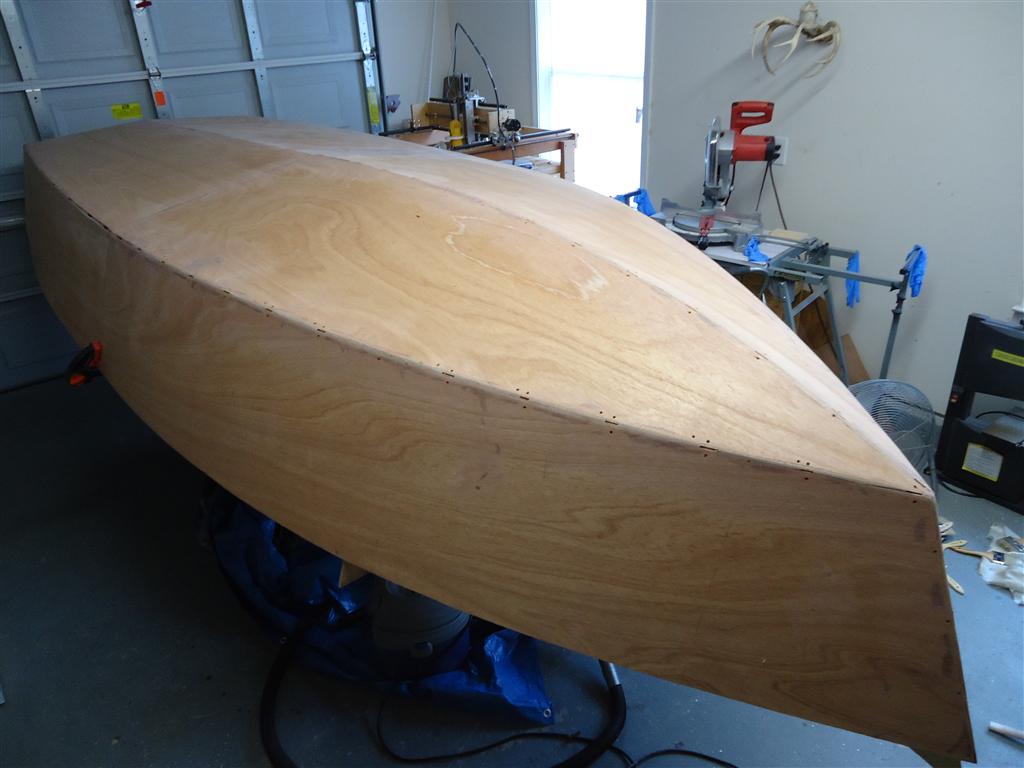
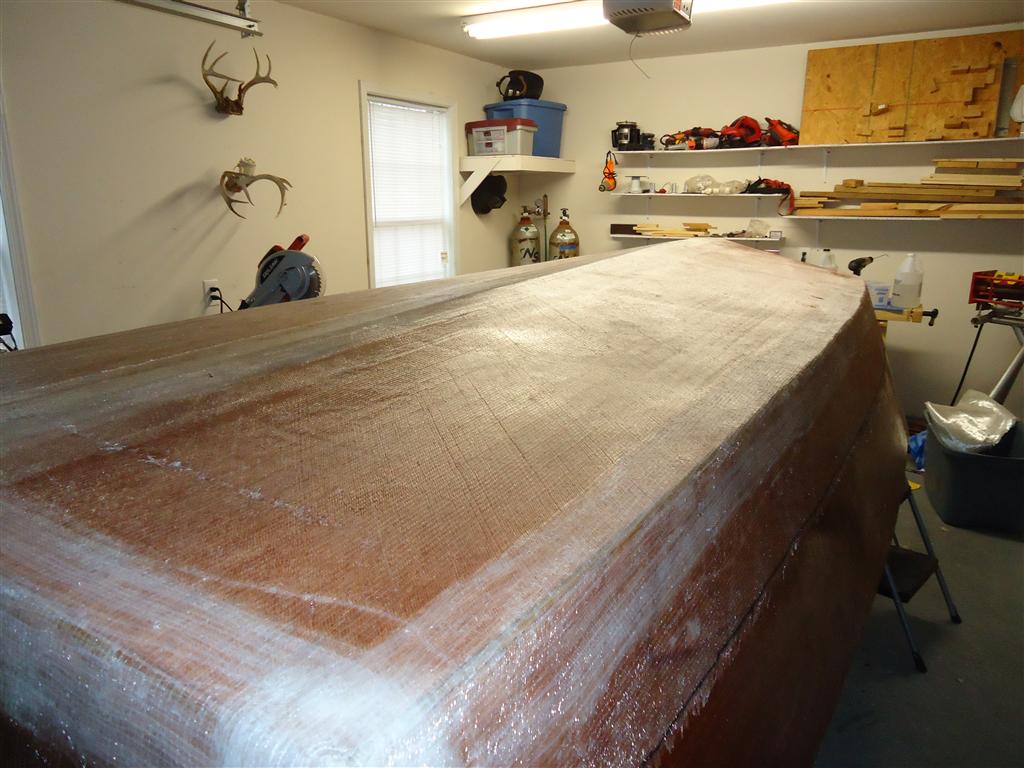
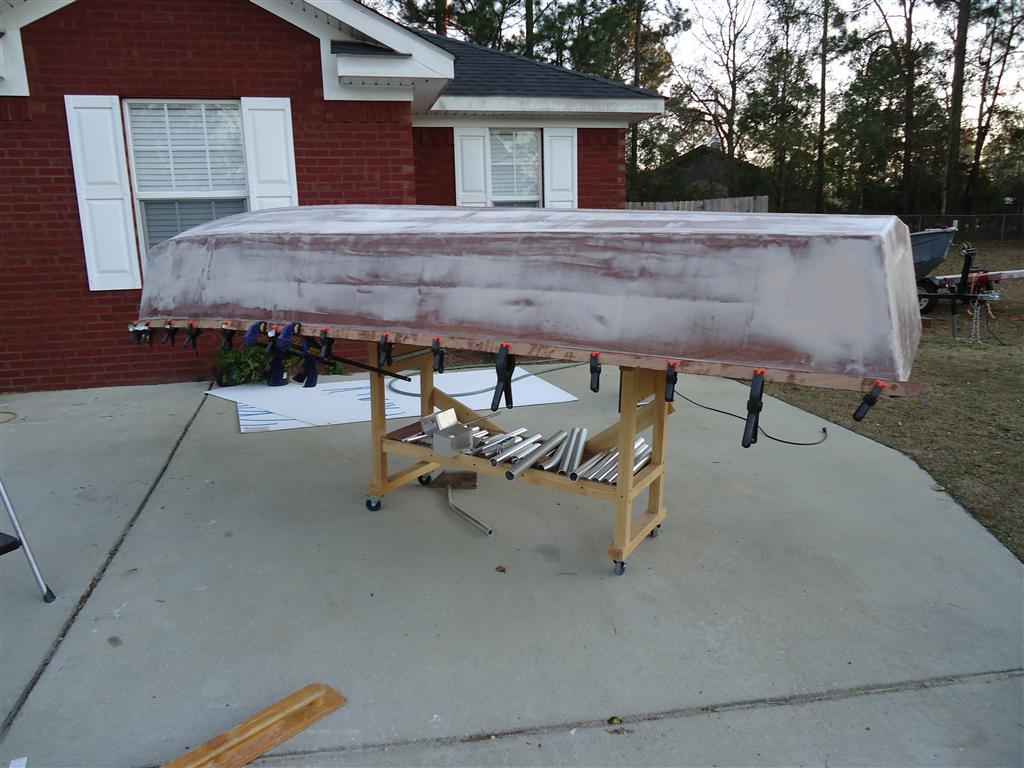
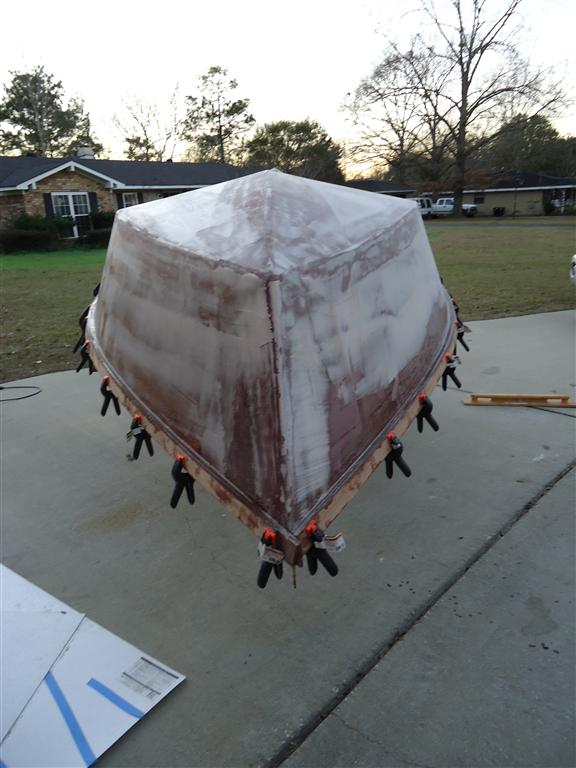
Between yesterday evening and today I was able to get my first coats of fairing compounds on and was in the process of sanding the first coat of QuickFair with the long board when it started getting a little too dark to see well. Also got the rub rail installed today too. I did have a little panic moment when I looked at the front view picture below and it looks like the tip of the bow is an inch or two to one side

I started breaking out the squares, levels, tapes, string, etc. and everything says it's withing a 1/4". The only think I can figure is the way the QuickFair is spread on the bow and the untrimmed rub rail is causing it to look that way when looking at it straight on

I even started drawing lines in Microsoft paint and comparing them with my center marks I made on the boat and all seems well. We're supposed to have great weather this weekend so hopefully I can get a lot of sanding done over the next couple days.
Re: FS14 Lowered Sheer
Posted: Sat Jan 28, 2012 7:35 am
by thb
Pictures can be deceiving but boy it sure looks crooked in that view from the bow looking aft. eyeballing the keel line and projecting that to the bow is what gave me that impression. I don't think it will matter any at the end of the day as the boat will track based on the keel and skeg and bow will be out of the water on plane.
I put some light weight 6 oz cloth on the sides of my FS14 to protect against checking of the plywood. The sun down here caused my fl12 sides to check anywhere there was no cloth on it. The ply was BS1088 Meranti and it still checked. I am convinced that all exposed surfaces need a light layer of cloth for protection.
I look forward to watching your build on the low shear version and seeing what is looks like when flipped.
Regards
Tom in Steinhatchee

Re: FS14 Lowered Sheer
Posted: Sat Jan 28, 2012 8:10 am
by BradleyD
Tom I agree...it looks crooked as can be in the picture but both the bow tip and lower bow all measure square, holding a straight edge down the keel line and dropping a plumb bob, and a sqaure from the bow frame centerline shows it being straight to the point where the 1/4" ply meet behind the rub rail.
I put some light weight 6 oz cloth on the sides of my FS14 to protect against checking of the plywood. The sun down here caused my fl12 sides to check anywhere there was no cloth on it. The ply was BS1088 Meranti and it still checked. I am convinced that all exposed surfaces need a light layer of cloth for protection.
That's not cool...that's why I bought good ply
Did yours check on the exterior of the hull where it doesn't get as much direct sunlight? I think I have enough 6oz to piece together a layer on the exterior but would hate to have to add the weight and take a step backwards.
Thanks,
Brad
Re: FS14 Lowered Sheer
Posted: Sat Jan 28, 2012 1:50 pm
by thb
Bradley,
On the FL12, it only checked on the south facing side which saw sun all year long. Boat was pulled up on the bank of my lake facing east. It only checked where there was no fiberglass cloth. No checked where the side panels were joined on near the chine or transom where cloth and epoxy were. At least one coat of epoxy then primer and paint but she checked. The hull was painted black at the time and I am sure this contributed to the situation due to the black absorbing radiant energy. It is now coverd with 6 oz cloth which is really not very heavy. Painted an ice blue color now.
On my FS14 I also laid down 6 oz woven cloth on the sides to overlap the biaxial cloth at the chine. Also did the interior sides but not the frames. This light weight cloth will weigh 6 oz per square yard and epoxy will add another 6-12 oz per yard so all in all with a 10 yard roll of 50 inch wide fabric you will only end up adding 83 oz of cloth and the same weight of extra epoxy resin for grand total of 10 lbs. If you use 12 oz resin per square yard of fabric, then an extra 15 lbs.
i.e. , an extra bag of ice.
It was worth it to me to have the piece of mind that I would not have to deal with refinishing in a year or two due to checking.
Regards
Tom in Steinhatchee
Re: FS14 Lowered Sheer
Posted: Sat Jan 28, 2012 5:51 pm
by BradleyD
Tom, thanks for the first hand info. I was under the impression the Meranti BS1088 did not check...hence one of the reasons for using it. I have wrestled in my mind today over what to do and think at this point it will not be any more work IF it does check in a year or two vs sanding what I have on there now. I'm hoping my saving grace will be that the boat is going to be painted white and the filler I spread over the epoxy coated/no cloth areas I mixed a little heavy in silica for an extra rigid coating instead of straight epoxy coating then Quick Fair.
And the bow definitely looks straigter after triming the rub rail and sanding some on the bow

Re: FS14 Lowered Sheer
Posted: Sun Jan 29, 2012 8:05 am
by thb
Brad,
You will probably be fine between what you put on the outside and the light colored paint. I would not attempt to sand any of the existing stuff off, I would put 6 oz right on top of what you have already. A little more quick fair and then prime.
The OWMBO and I are passing thru Mobile today en-route to Biloxi for a little comic relief with the slot machines.
Whoop eeeeee.

Regards
Tom in Steinhatchee
Re: FS14 Lowered Sheer
Posted: Sun Jan 29, 2012 9:24 am
by BradleyD
The best of luck to you two. It seems every time I've been to Biloxi lately all I do is help pay the light bill.
Re: FS14 Lowered Sheer
Posted: Sun Jan 29, 2012 12:04 pm
by Noles309
What is the LOA after lowering the sheer 3"? Very interested in your build as I have thought of doing the same I just can't decide on a boat. Great job so far.
Re: FS14 Lowered Sheer
Posted: Sun Jan 29, 2012 6:23 pm
by BradleyD
What is the LOA after lowering the sheer 3"? Very interested in your build as I have thought of doing the same I just can't decide on a boat. Great job so far.
I believe it took around 2" from the total length. Thanks for the compliment. I'm pleased with the progress I've made but realize I have a lot to learn after looking at other builds on the site.
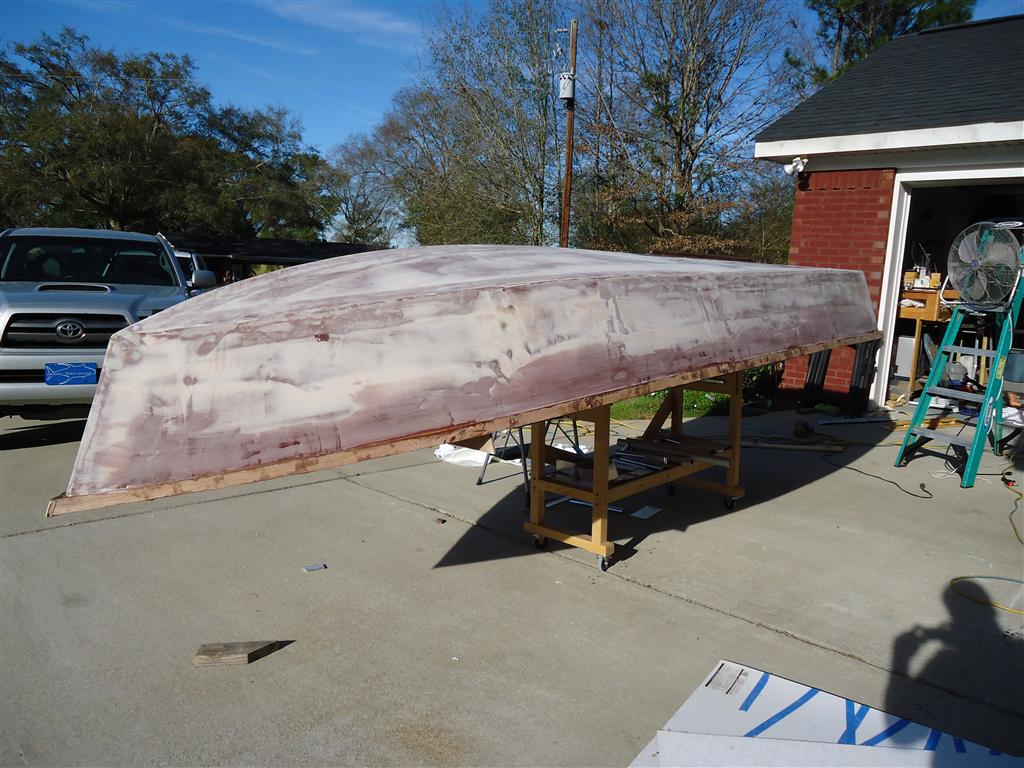
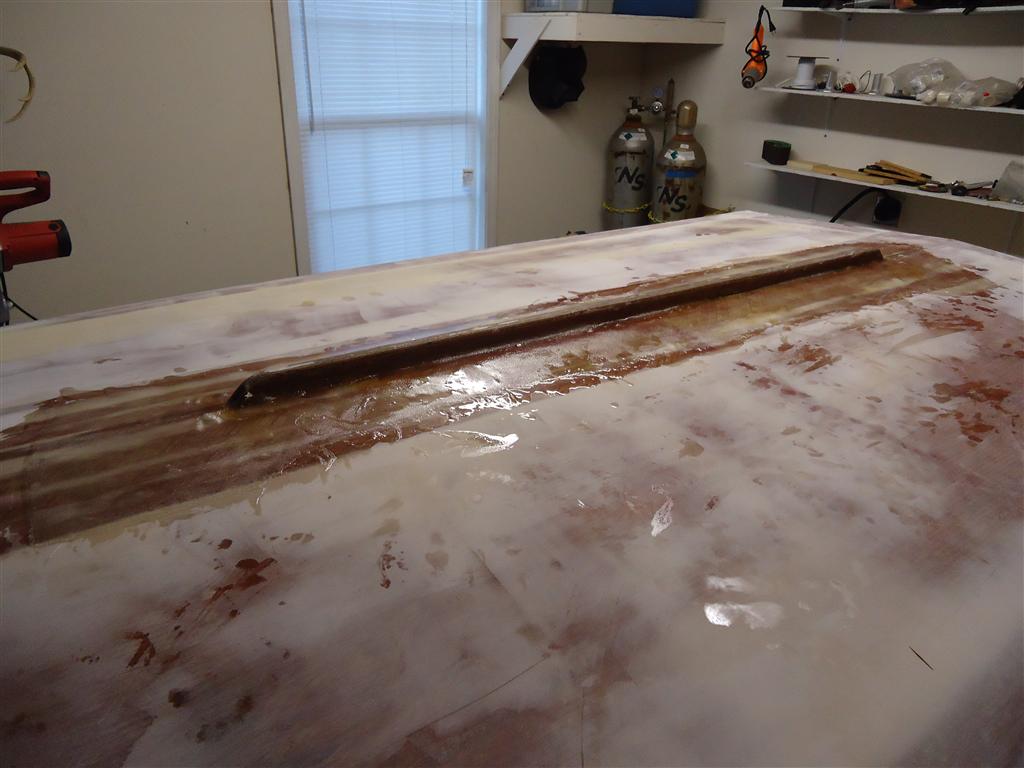
Got the skeg glued on today and the highs/lows are getting closer and closer together. I found the skeg to be a little more of a pain that I had intended. Ran a router over the edge and a nice fillte but still had a hard time getting the air out of the relatively narrow piece of glass. Ended up acceptable in the end. Hopefully in a couple more rounds of QuickFair I will be ready for a coat of primer.
Re: FS14 Lowered Sheer
Posted: Fri Mar 30, 2012 8:17 pm
by BradleyD
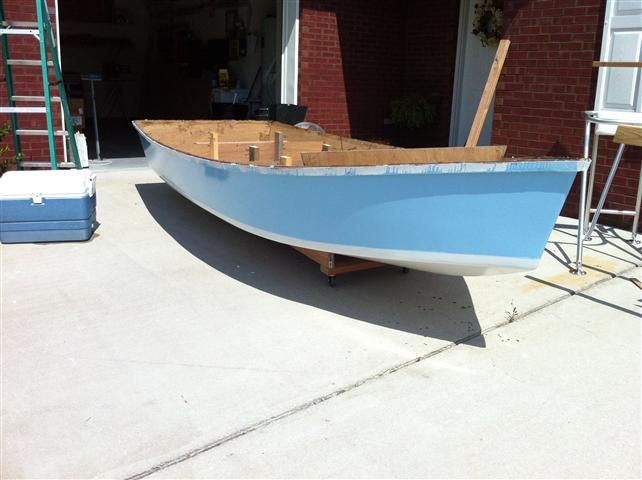
After work piled up on me quick I finally made some progress this week. Finished fairing and got the second coat of primer on this evening. I'm pretty pleased with the fairing job...but the paint job could have been better. I'm using BLP's Mopoxy primer and Mothane paint which I've used in the past but always sprayed. Tried to roll and tip the primer and it just did not level out as well as I wanted it to. If all goes well should have paint on this weekend. I'm ready to flip this thing and start on the inside!
Re: FS14 Lowered Sheer
Posted: Fri Mar 30, 2012 8:50 pm
by Prarie Dog
Looks real nice Bradley

Do you know where a guy could get a look at a color chart for BLP paints. Been looking at their website and don't see one.
Thanks, Paul
Re: FS14 Lowered Sheer
Posted: Sat Mar 31, 2012 8:29 am
by BradleyD
Paul,
I got my color chart from a local dealer. I can scan and send you a copy if you would like but on a computer the colors may not show as they truely are. I'm pretty sure they can custom match colors as well.
Re: FS14 Lowered Sheer
Posted: Sat Mar 31, 2012 9:02 am
by Prarie Dog
Thanks Bradley
Do you use the two part Polyurethane and if so do you think it can be applied with a brush? Also, do you think they can ting that same paint. My son wants a Mopar Color called sublime green, I have the codes etc.. What I don't have is access to a marine paint that can be rolled and tipped that is a high quality two part paint. I found a swatch online for Lime at one of their paintstores but thought it was a decorator color.
Thanks, Paul
Looks like you've done a nice job on fairing your skiff.
Re: FS14 Lowered Sheer
Posted: Sat Mar 31, 2012 1:20 pm
by BradleyD
Paul,
Thanks for the compliment. Yes, the paint will be the two part polyurethane and the primer is their two part epoxy. The only time I've brushed it was using a roller on a floor with nonskid so it was hard to tell how well the polyurethane would have looked. The primer did not lay down as well as I had liked but think if I had thinned it a little it would have been better...or if I was a better painter
I'm going to sand on this second coat and get the little imperfection out hopefully today. I'm going to try to roll and tip the first coat of paint and see how well it works and let you know. If it doesn't do well I'll sand and spray the remaining coats. The color chart I have only has about 30 pretty standard colors and says they do custom colors. I would think if you have the color code they shouldn't have a problem matching it.
Re: FS14 Lowered Sheer
Posted: Sat Mar 31, 2012 1:33 pm
by Prarie Dog
Thanks Bradley, do you have the name of the store you use or should I just pick one off the list.
Thanks, Paul
Re: FS14 Lowered Sheer
Posted: Tue Apr 03, 2012 8:13 am
by BradleyD
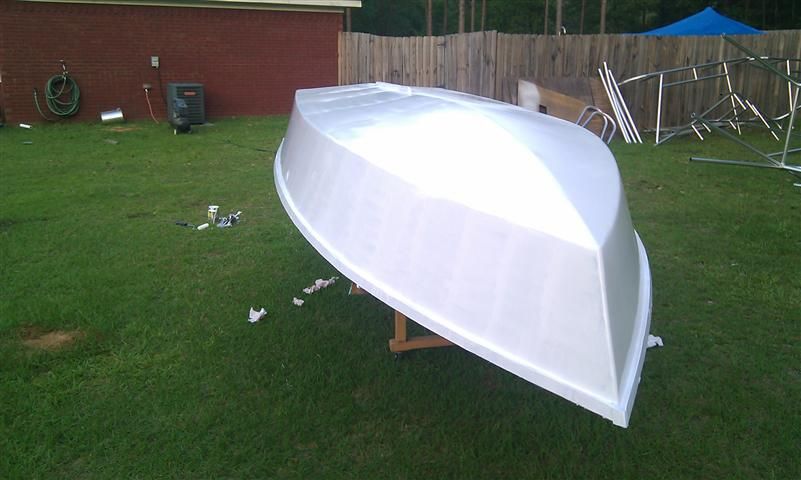
Sunday evening was perfect weather to put on the first coat of paint. I did decide I would just go ahead and spray it instead so got everything set up and a little over half way through my compressor locks up

I'm not that surprised because it has been used well beyond its means over the past few years but I could think of 100 different activities that I would have rather it stop working on instead of spraying my boat. As a result I also get to buy a new gun since I could not properly clean mine with no air. But I did get a chance to try and roll and tip the paint on one side of the boat but did not turn out so well. Probably due to operator error more than anything...I just don't seem to have to knack to get good results from it. On the bright side it is nice to see the boat white! A little (more) sanding and she'll be ready for a second coat but will probably be a couple weeks.
Brad
Sprayed Side
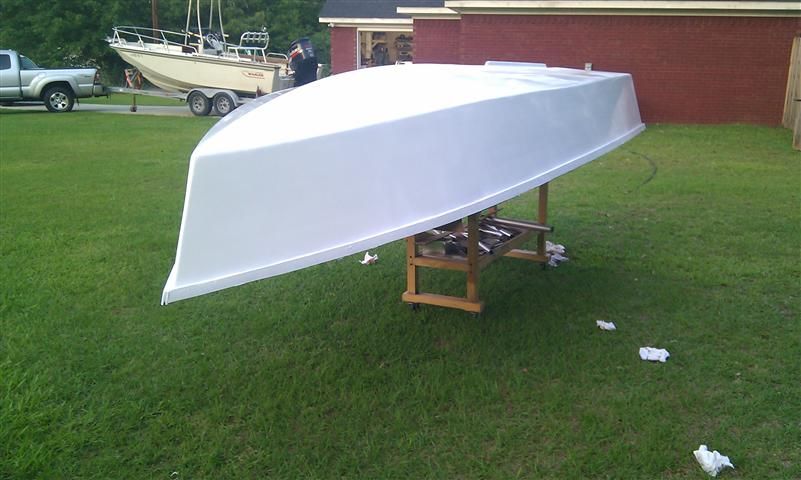
Brushed Side
Re: FS14 Lowered Sheer
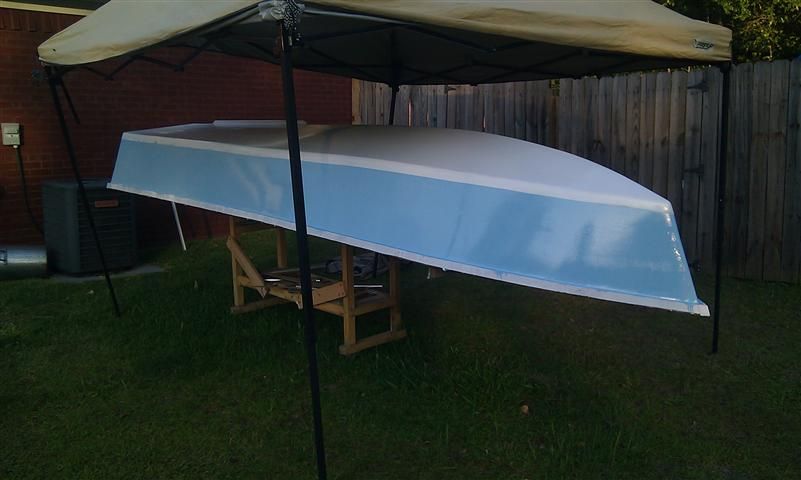
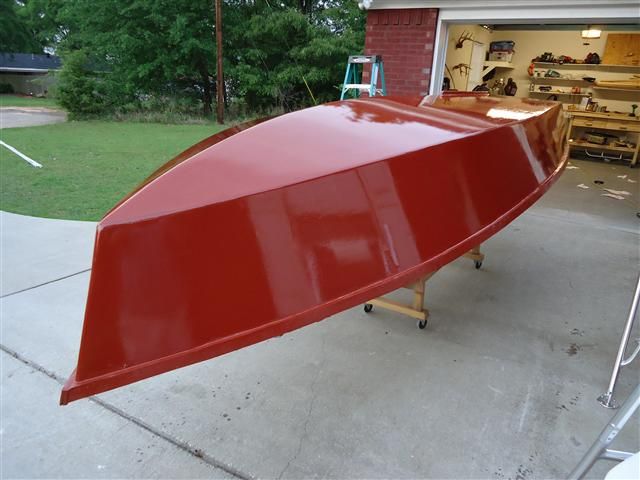
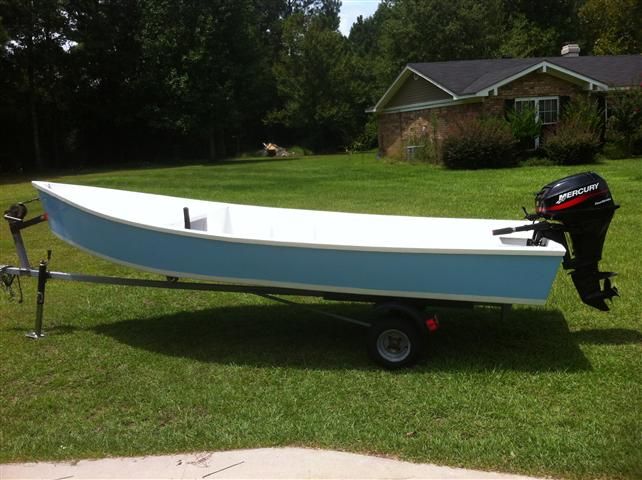
Posted: Sat Jun 09, 2012 6:57 pm
by BradleyD
Re: FS14 Lowered Sheer
Posted: Sun Jun 10, 2012 7:35 am
by thb
Brad,
I like your paint scheme with the blue and white. The lowered sheer does not look much different than the normal version. Great progress and keep up the good work.
Regards
Tom in Steinhatchee
Re: FS14 Lowered Sheer
Posted: Sun Jun 10, 2012 10:19 am
by Noles309
Looking good man. Hurry up and finish that thing
, I'm really anxious to see the final result and resulting performance. I'm strongly considering a similar build.
Re: FS14 Lowered Sheer
Posted: Mon Jun 18, 2012 8:39 am
by BradleyD
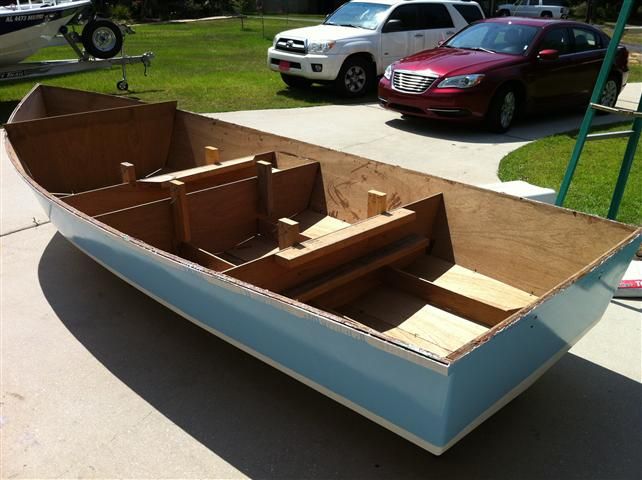
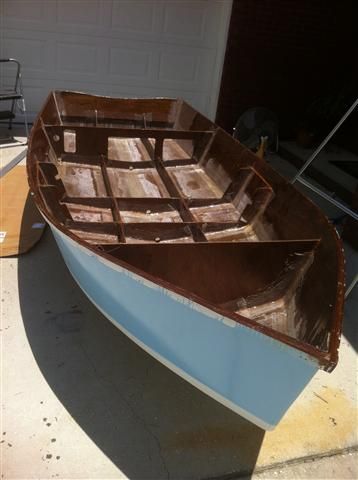
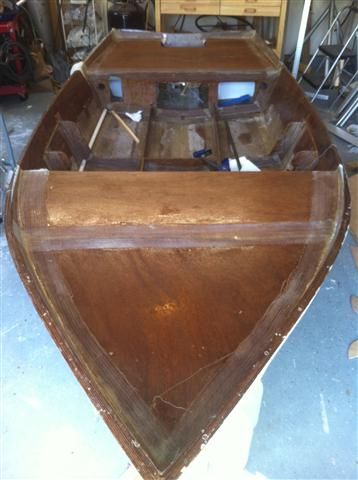
Thanks guys. Frames are cut down and all (that I know of at this point) access holes, drains, etc. have been cut and all exposed ply has a first seal coat of epoxy on it now. Next on the list...paint the compartments under the front/rear deck and build some spaces to pour the flotation foam.
Re: FS14 Lowered Sheer
Posted: Wed Jun 20, 2012 9:21 pm
by BradleyD
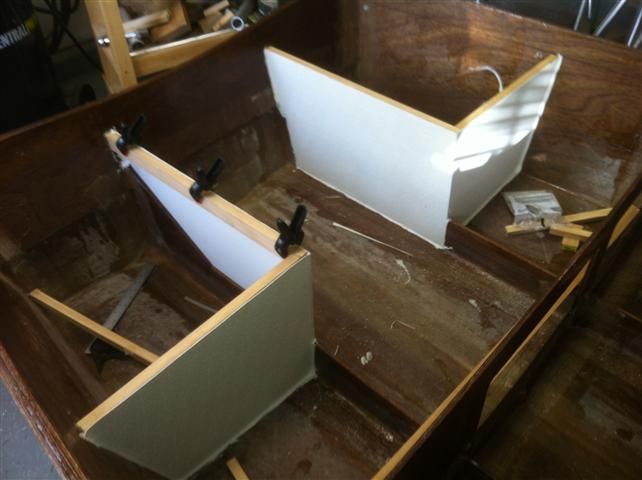
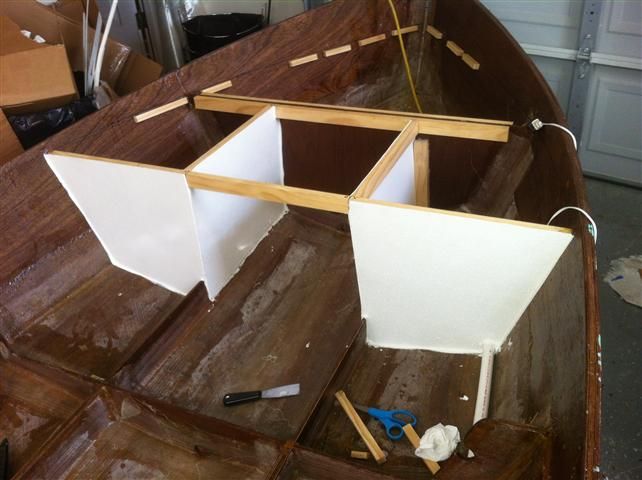
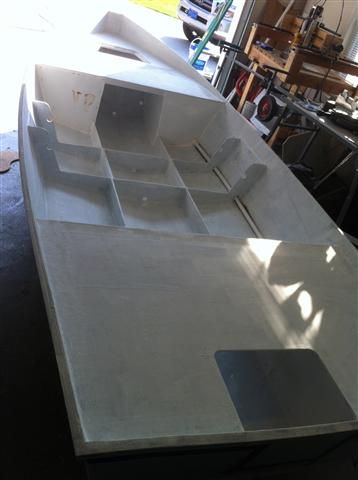
Today I got the compartments built to hold the foltation foam. Two on each side in the bow and two on each side in the stern. Had some FRP leftover from another project and thought it looked good to enlose the compartments. Should get to pour the foam tomorrow and...if all goes well install the decks.
Re: FS14 Lowered Sheer
Posted: Wed Jun 20, 2012 9:37 pm
by wegcagle
Great work Bradley. This is one cool boat

Will
Re: FS14 Lowered Sheer
Posted: Fri Jun 29, 2012 1:17 pm
by BradleyD
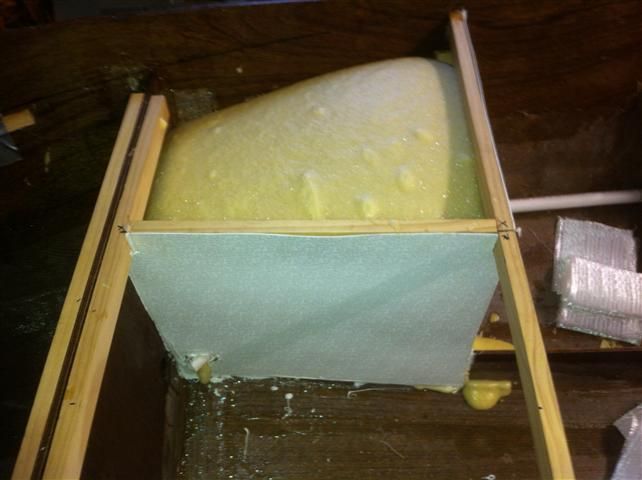
Thanks Will! So last week I poured the foam in the compartments and all looked great with the amounts I calculated for the spaces...BUT the foam in one of the compartments decided it was going to do some serious contracting. It started after the foam was fairly hard (I could poke it with my finger and it wasn't tacky or didn't move) and had already begun its death grip on the FRP so it sucked the panels right in
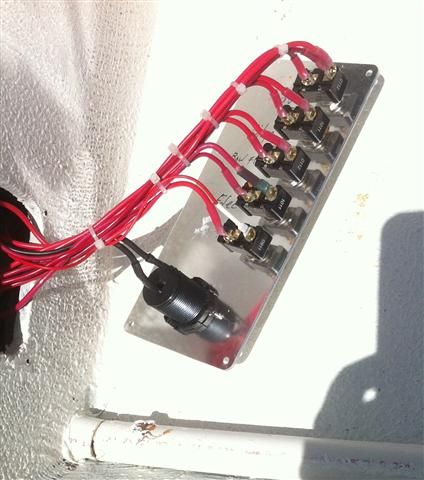
It was the second compartment I poured and none of the others did this. I've already pulled the panels off and will just have to reinstall them in the near future. Also got the decks installed! The last of the epoxy in the kit was used up with gluing down the decks and the fillets so I had some West that I wet out the tape and sealed the decks, which makes me feel pretty good that I haven't abused my epoxy usage. Started with some of the small finishing touches like the switch panel with a piece of polished anodized flat bar.
The inboard side of the compartment looking forward
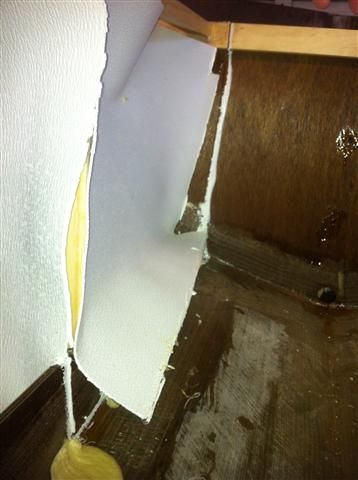
Looking down on the compartment
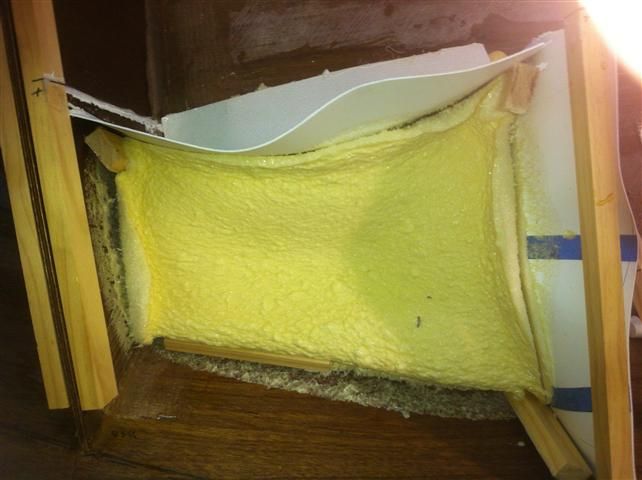
The adjacent compartment...perfectly fine
Not sure what I was thinking when I only ordered four switch boots but another one is on the way

Re: FS14 Lowered Sheer
Posted: Fri Jul 06, 2012 7:26 pm
by BradleyD
Today I got a coat of primer on the inside. I bought a gallon of the Kiwi-Grip non-skid from the Bateau site and the plan is to coat the entire inside with it making a "uniform", unfinished texture throughout. I'm thinking this will for the most part hide the weave and edges of the glass. Then next step...rigging and some aluminum goodies
Re: FS14 Lowered Sheer
Posted: Sun Jul 08, 2012 5:44 pm
by BradleyD
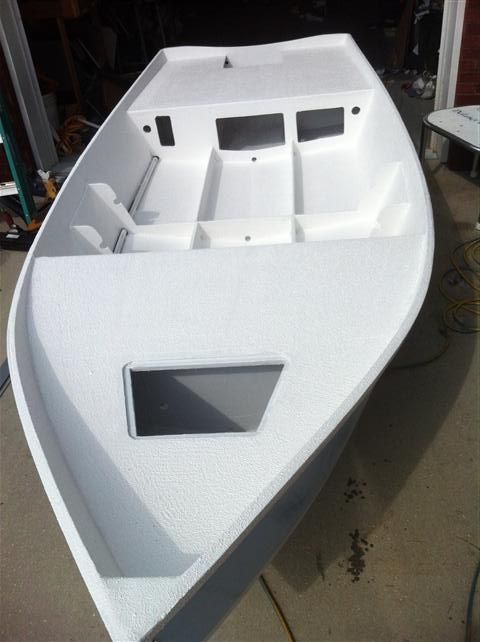
Got the Kiwi-Grip rolled on today and it looks far better than I was actually expecting. The textured surface hides the unfinished areas of glass beautifully and is all one uniform texture! I need to make a few trailer modfiications first but I'm hoping to make a trial run one evening this week before I get to rigging
Re: FS14 Lowered Sheer
Posted: Sun Aug 05, 2012 4:06 pm
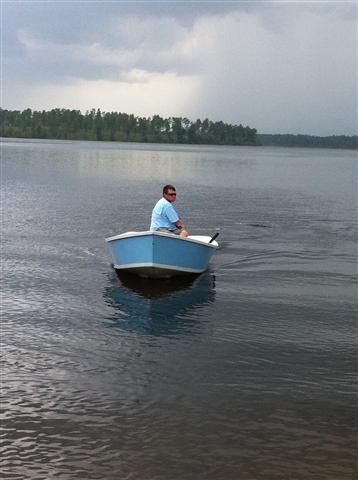
by BradleyD
Last week I got the trailer fit to the boat and couldn't stand it...I had to put her in the water. I took it to the lake just down the road and was very pleased with the boat. Top speed was around 20mph with myself, 3gal fuel, battery, and minimal gear but still need to play with the motor height a little. I didn't have much time to play due to the storms rolling in but was pacified to see her float! I was curious how much it weighed compared to the bare hull weight listed on the plans so I weighed the trailer before and after setting the boat on and came up with 230lbs. Sounds about right to me compared to the 185lbs listed on the plans after the weight of paint, hardware, nonskid, foam, etc.

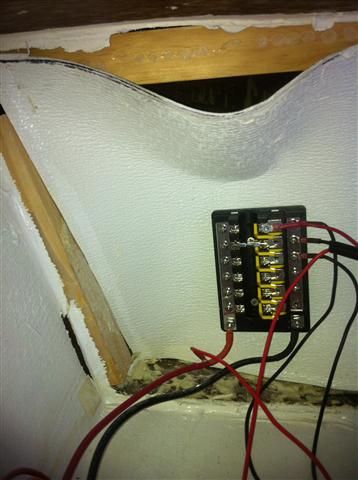
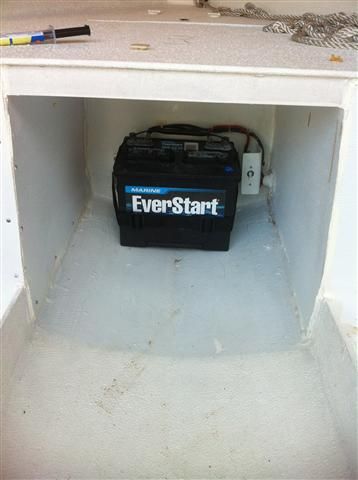
And I just don't know what's the deal with this flotation foam. The aft, stbd compartment contracted similar to the forward. Although not as much, it was weeks after I had poured the foam. I pulled the old piece of FRP away from the foam and replaced it with a new piece. Hopefully this winter when things get cold the whole boat will not impload! ;D The rigging would pretty much be complete if not for this but the fuse block was attached to the imploaded piece so it had to be temporarily removed. I mounted the battery in the space underneath the front deck with a 25 amp breaker that will also act as a battery switchaswell. Next on the list will be a grab bar with a space to mount some minimal electronics. I'm also thinking of a small, removable jump seat in front of the grab bar for a second passenger or for myself when alone but I want to run the boat some more to see where my weight needs to be distributed.
This is looking aft through the switch panel cutout