Snookiehunter's gf18 w/ tunnel

To help other builders, please list the boat you are building in the Thread Subject -- and to conserve space, please limit your posting to one thread per boat.

Please feel free to use the gallery to display multiple images of your progress.
snookiehunter
Frequent Poster
Frequent Poster
Posts: 164
Joined: Tue Feb 07, 2012 10:19 pm
Location: Hernando Beach FL

Re: Snookiehunter's gf18 w/ tunnel

Post by snookiehunter »

I have my table built, flat, and true.
Image
16' long, 4' wide. and 24' tall. It may be a little low. I thought that I'd be able to reach the center, but time will tell.

AtTheBrink
* Bateau Builder *
* Bateau Builder *
Posts: 1557
Joined: Mon Nov 07, 2011 8:51 am
Location: Ingleside, TX
Location: Texas Coastal Bend

Re: Snookiehunter's gf18 w/ tunnel

Post by AtTheBrink »

From my experience while building my boat....

24 inches high is where I started with my strong back. I am building the FS18, which is a much smaller boat. It seemed like a good height at the beginning but once I was trying to align the bottom panels down the keel I realized I should have made.it shorter. The FS18 is much narrower than the GF18 and I am 6' tall. The reaching to stitch, glue, tape and sand was killer on my back. I ended up cutting mine down to 12 inches and it has been much more comfortable to work. Just my 2¢. Good luck, your going to love boat building!
Mike

"Come, follow me and I will make you fishers of men."
Matthew 4:19

snookiehunter
Frequent Poster
Frequent Poster
Posts: 164
Joined: Tue Feb 07, 2012 10:19 pm
Location: Hernando Beach FL

Re: Snookiehunter's gf18 w/ tunnel

Post by snookiehunter »

DAY 1:
Ok, I couldn't wait anymore. I drove up to Homosassa, and picked up some Okume BS1088 at Triton Lumber. He only had 5 pcs. of 6mm, and no 9, or 12mm. Good people, and fair prices. (sorry Joel) I hope this is the right stuff. He claimed it is Lloyd approved BS1088. It is a little warped, he had it standing on edge, but no big deal.
ImageImage
I laid out the side panels, and cut my temporary, A, B, and C molds. I'll say one last time, that the plans are very easy to follow, and lay out. It felt so good to cut into that first piece. Not much too look at, but a big day for me.
Image

User avatar
tech_support
Very Active Poster
Very Active Poster
Posts: 12318
Joined: Wed Dec 31, 1969 7:00 pm
Location: Vero Beach, FL
Contact:

Re: Snookiehunter's gf18 w/ tunnel

Post by tech_support »

(sorry Joel) I hope this is the right stuff. He claimed it is Lloyd approved BS1088.
Im sorry too, but what you have does not meet BS1088 standard on at least one criteria that I can confirm by picture: face veneer thickness. If it is Lloyds certified then it will have a Lloyds mark and mill ID# on it

Here is a cross section of the hole I cut out of the jetabout, its BS1088 with a Lloyds stamp. You can see all five veneers are the same thickness (face veneers are sanded).

Image

snookiehunter
Frequent Poster
Frequent Poster
Posts: 164
Joined: Tue Feb 07, 2012 10:19 pm
Location: Hernando Beach FL

Re: Snookiehunter's gf18 w/ tunnel

Post by snookiehunter »

All right, that was a practice run. I'll be on the East Coast next week, so I'll stop in to meet Joel, and get the good stuff. I'll have to get ahold of the guys at Triton lumber, and see what they're willing to do, as far as their return policy. I have two sheets that are marked on, with a few screw holes, and two sheets that have been cut.

User avatar
Cracker Larry
* Bateau Builder - Expert *
Posts: 22491
Joined: Fri Mar 11, 2005 3:39 pm
Location: Savannah, GA

Re: Snookiehunter's gf18 w/ tunnel

Post by Cracker Larry »

You can use the cut pieces for patterns, and maybe for temporary molds for the center frames.

I going to be starting a GF18 in a couple of weeks, so I'll be following right behind you :D
Completed GF12 X 2, GF16, OD18, FS18, GF5, GF18, CL6
"Ships are the nearest things to dreams that hands have ever made." -Robert N. Rose

snookiehunter
Frequent Poster
Frequent Poster
Posts: 164
Joined: Tue Feb 07, 2012 10:19 pm
Location: Hernando Beach FL

Re: Snookiehunter's gf18 w/ tunnel

Post by snookiehunter »

I have some expensive templates! Yeah, I talked to them, and am confident that we can come to a fair conclusion. They really are some good guys up there, and I'd like to do more business with them. They just don't have what I need.
Larry, I look forward to following your build. I can't wait to see the outcome. Be sure to post details for us newbies.

snookiehunter
Frequent Poster
Frequent Poster
Posts: 164
Joined: Tue Feb 07, 2012 10:19 pm
Location: Hernando Beach FL

Re: Snookiehunter's gf18 w/ tunnel

Post by snookiehunter »

Okay, guys. I finally was able to stop by the shop, and meet Joel, and Jacques. I picked up the plywood, and gf18 fiberglass/ epoxy kit. I was a little woried about the trip home, but all arrived well with no rain issues. Its nice to know that I am starting off on the right foot, with the right material
Image
Image
Image
I went to work, and now have the side panels laid out
Image
I aim to get all of the panels laid out, cut, and spliced this weekend. And, if all goes well, begin stitching!!!

snookiehunter
Frequent Poster
Frequent Poster
Posts: 164
Joined: Tue Feb 07, 2012 10:19 pm
Location: Hernando Beach FL

Re: Snookiehunter's gf18 w/ tunnel

Post by snookiehunter »

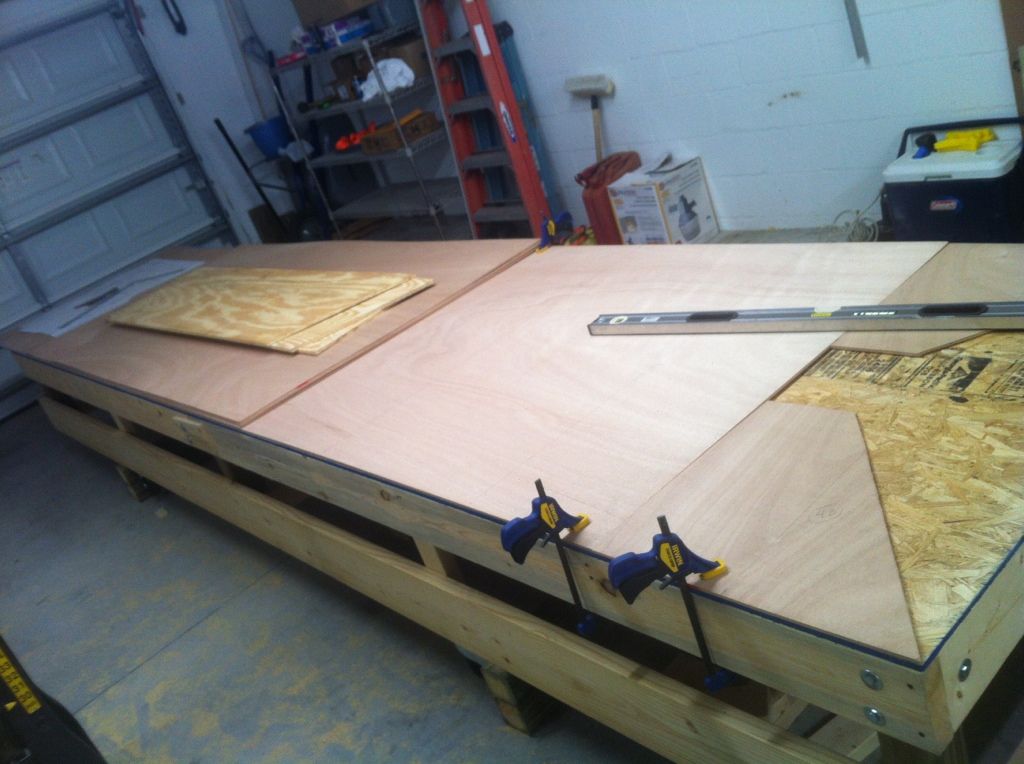
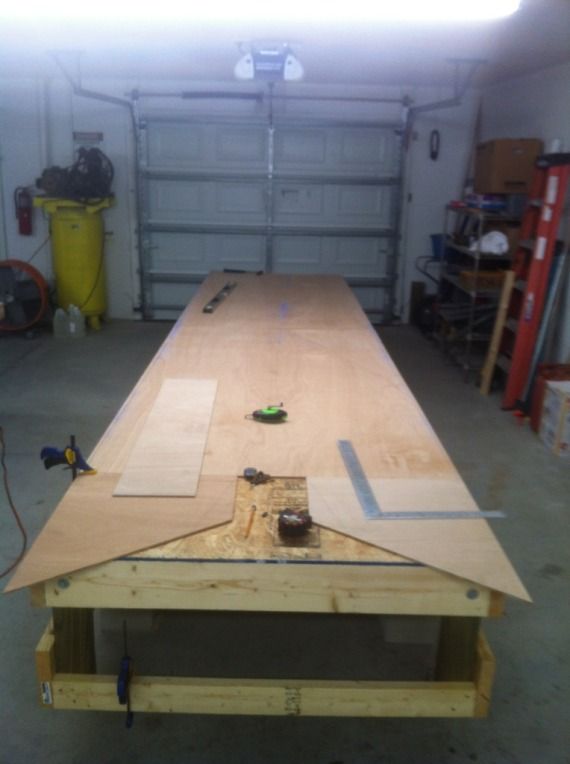
I've been hard at it today. I laid out, and cut all of the hull panels. Then I took the plunge, and mixed my first epoxy batch! I think it went well.
Image
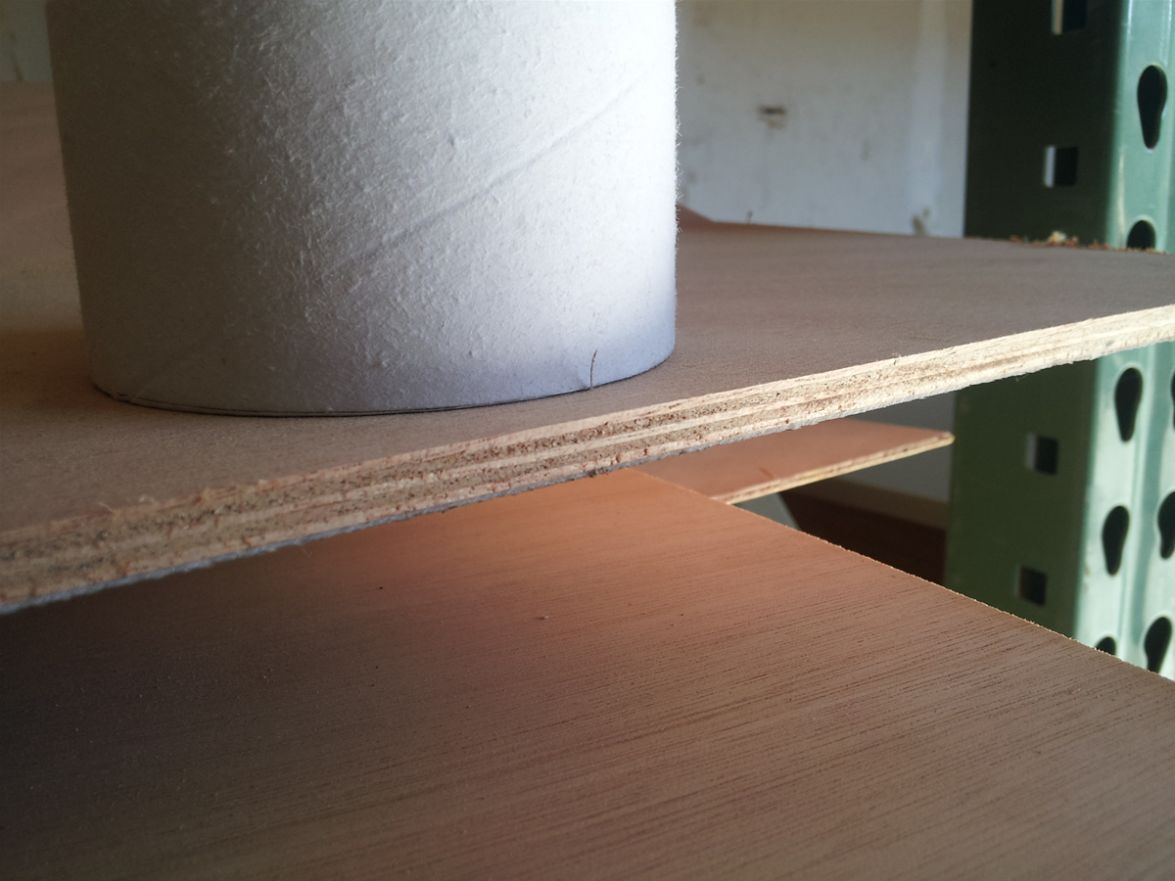
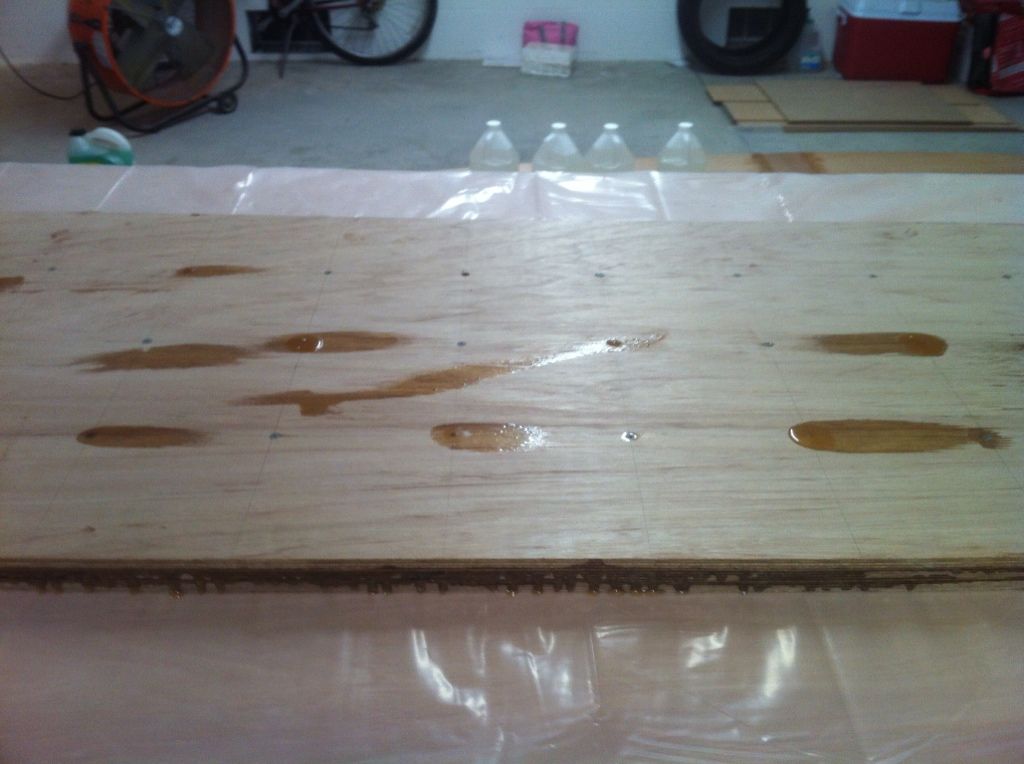
I had to weigh the bottom panel down flat in a few areas, due to the floor not being flat. After I took the picture, I noticed a few more spots that needed attention, so I changed things around a bit.
Image
Image
Image


You can see the uneven panels here. They are flat now.
Image
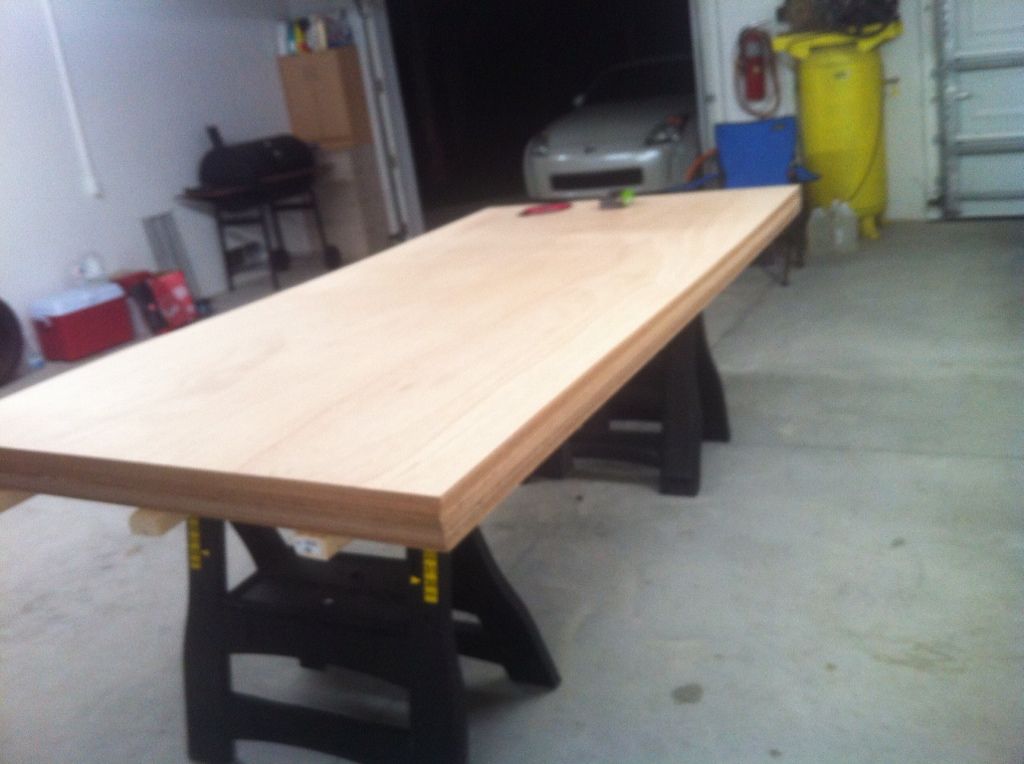
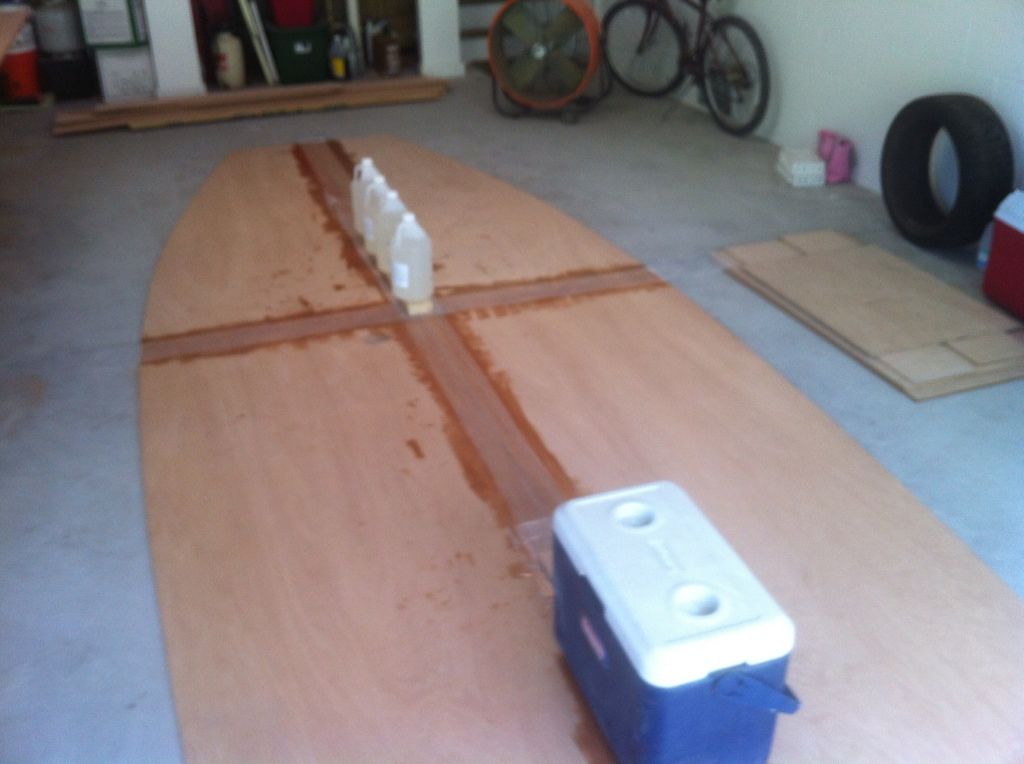
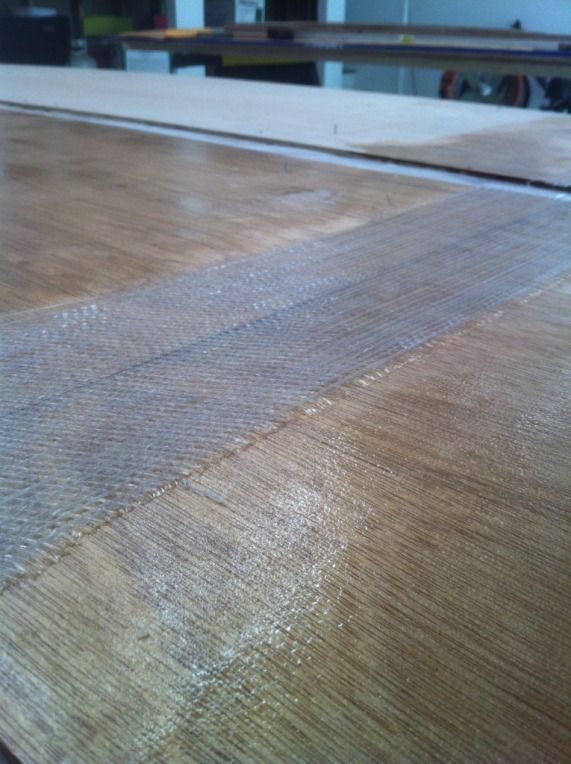
Overall, the glass work was fairly simple. Jena, my wife, jumped right in, and started wetting the tape. She did a very good job, I might add. I painted the seams, laid the glass, brushed on epoxy, all while pulling the excess epoxy forward with a squeegee. I think I used a total of 42 oz of epoxy. The last batch, I had a lot left over, so I painted most of the side panel. I was afraid to mix a very small batch.
I also got the transom peices, bow transom, and stringers cut out. I allready had my temporary molds.
It looks like I have to go into work tomorrow. So depending on how long that takes, I'm not sure if I'll get the splices finished this weekend, or the transom, and stringers glued. I'm thinking about using the screw method on the transom, just hate to have to fill all of those holes! Not sure how to do the stringers yet. My concern here is getting the straight side , straight. I think I'll stand them up on egde, and clamp. Any advice here would be welcomed. Thanks.

snookiehunter
Frequent Poster
Frequent Poster
Posts: 164
Joined: Tue Feb 07, 2012 10:19 pm
Location: Hernando Beach FL

Re: Snookiehunter's gf18 w/ tunnel

Post by snookiehunter »

Okay, after dinner, we ran downstairs, and glued up the transom. I sure hope I'm able to back out the screws. So, now tomorrow, I hope to flip the panels, and splice the other side.
Next weekend, we'll have a hull! I still need to figure out how I'm gonna glue up the stringers.
Image

Post Reply

Who is online

Users browsing this forum: Yandex [Bot] and 14 guests