
Thanks for your reply to my question.
This is my 1st stitch and glue build so I may have made a few errors that others wouldn't.
Error #1 - The plans call for using 50" biax 6" up from the chine. My plan was to glass all the way to the shear.
I assumed the same material should be used (Wrong). Wetting out 50" biax vertically was a mess.
Error #2 - The bottom glass was applied 1st and I immediatly applied the side glass in the spirit of wet on wet.
I probably should have waited for the bottom to set up a bit before applying the sides. The end result was that in attempting to wet out the side fabric I was creating in bubbles on the chine in the under layer of bottom glass.
I'm sure this was all aggravated because the biax fabric was way to heavy for the sides.
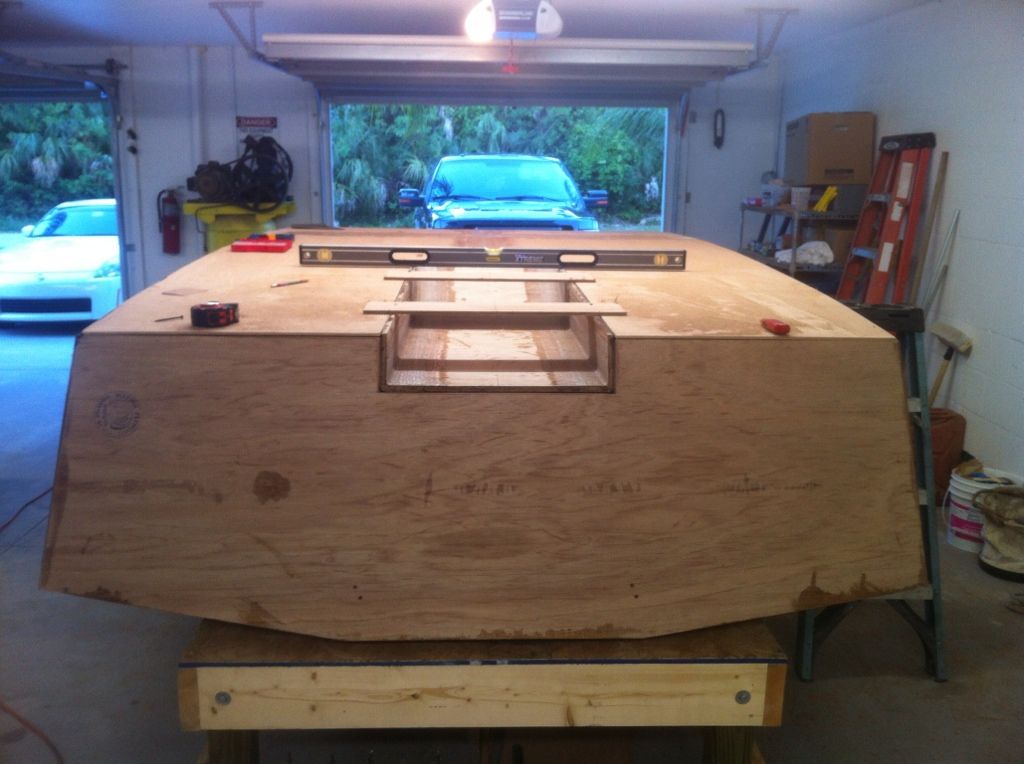
Error #3 - I spent to much time fairing and painting the transom. Ther 1.5" transom top is currently not wrapped in glass.
The transom looks great with 2 coats of system 3 top coat. I will have to tape over the edge fair again and paint.
Error #4 - Got a little to aggressive with the grinder or verticall sander before primimg. I tried to get the surface as smooth as possible before priming. What you see is not always what you get. After priming I noticed horizontal grooves all over the sides caused by holding the sander on a slight bias. Gotta love quickfair.
So far everything has been fixed and it all looks great. Hope this helps. Please keep in mind that I'm not the best source for advice this have just been some of my experiences.
Snookiehunter's gf18 w/ tunnel
-
snookiehunter
- Frequent Poster

- Posts: 164
- Joined: Tue Feb 07, 2012 10:19 pm
- Location: Hernando Beach FL
Re: Snookiehunter's gf18 w/ tunnel
Hey, Gary. It looks like we are literally in the same boat! This is my first build, also. It seems to be going fairly well. I have been following this board for a long time, and have been building a boat in my head for nearly as long. You are right about the overlapping layers, during wet on wet application. It really sucks trying to get all the bubbles worked out. I learned that my hand, is the best tool here. Also, to begin working at the corner, and work outward, toward the end of the glass in both directions.
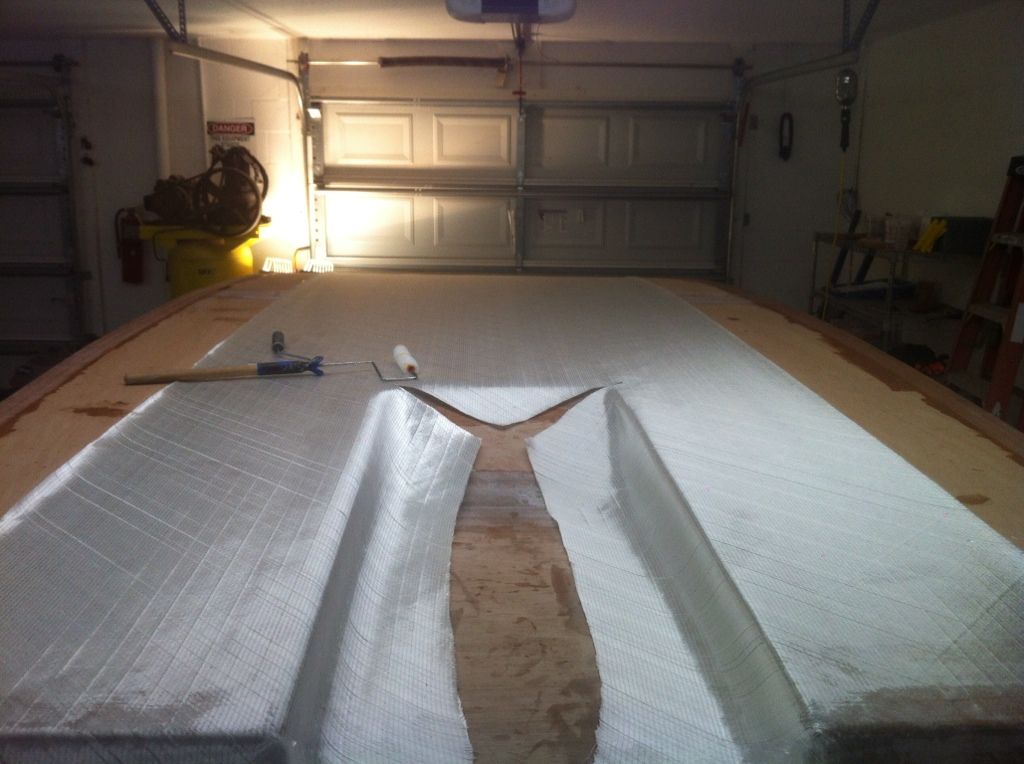
We now have a boat, that'll float. We layed all of the glass on saturday. It took a tatol of 7.5 hours for us to tape the seems, and lay the fabric, all wet on wet. The fabric is a real pain in the corners/ edges, but we figured it out, thanks to good advice from a few of you guys. The aluminum laminating rollor is a must.
Friday night, I installed the tunnel. I glued it in (filets), and by sat morning, it was solid enough that we could stand on it, with no flex, at all! I am very impressed with the strength of the epoxy welds. Sat. morning, I finished the tunnel filets, and radii. I used red cedar filler strips, and thickened epoxy.
The tunnel glass was very, very stuborn, but luckily, so am I. There are a few air bubbles in the corner radii, due to little humps, and bumps that I failed to remove. Overall, I am happy with the results.
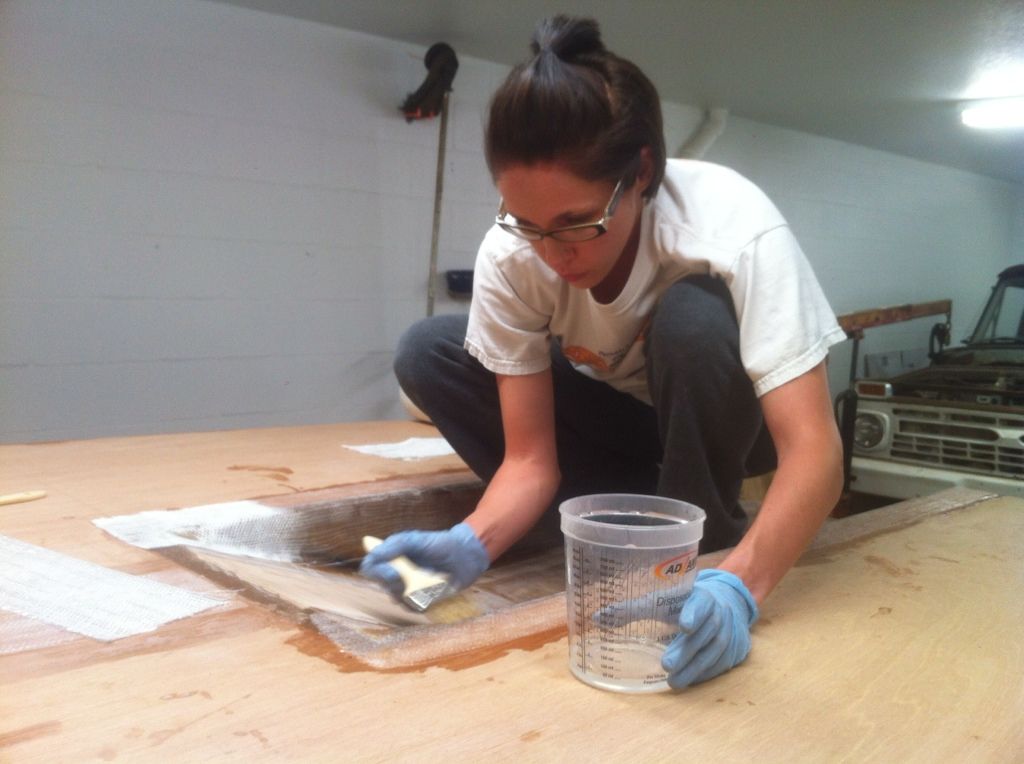
Jena hard at work, taping the tunnel.
If I were to do this process over again, I would have taped the seems. Let that cure. Sanded smooth. Filled the splice weave with thickened epoxy, and feather edges. Sand smooth. Then, I would lay the fabric. Is the wet on wet bond, worth the air bubbles that form, due to the little voids that the splices, and threads, and every tiny imperfection causes? Or, will experience prevent the imperfections, to start with?
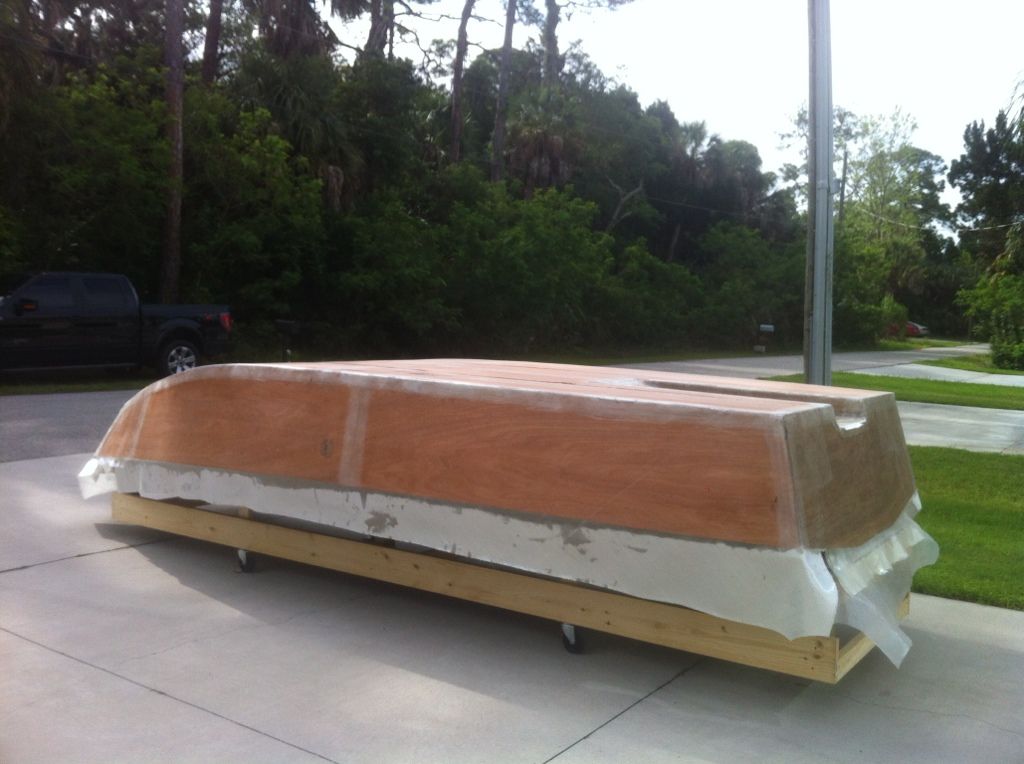
Now, I'm not sure what I want to next. I think I want to flip, and finish the inside framing, before I fair. I have an issue with a small hook on the stern bottom, that I'll post in the power boats section.
We now have a boat, that'll float. We layed all of the glass on saturday. It took a tatol of 7.5 hours for us to tape the seems, and lay the fabric, all wet on wet. The fabric is a real pain in the corners/ edges, but we figured it out, thanks to good advice from a few of you guys. The aluminum laminating rollor is a must.
Friday night, I installed the tunnel. I glued it in (filets), and by sat morning, it was solid enough that we could stand on it, with no flex, at all! I am very impressed with the strength of the epoxy welds. Sat. morning, I finished the tunnel filets, and radii. I used red cedar filler strips, and thickened epoxy.

The tunnel glass was very, very stuborn, but luckily, so am I. There are a few air bubbles in the corner radii, due to little humps, and bumps that I failed to remove. Overall, I am happy with the results.
Jena hard at work, taping the tunnel.


If I were to do this process over again, I would have taped the seems. Let that cure. Sanded smooth. Filled the splice weave with thickened epoxy, and feather edges. Sand smooth. Then, I would lay the fabric. Is the wet on wet bond, worth the air bubbles that form, due to the little voids that the splices, and threads, and every tiny imperfection causes? Or, will experience prevent the imperfections, to start with?
Now, I'm not sure what I want to next. I think I want to flip, and finish the inside framing, before I fair. I have an issue with a small hook on the stern bottom, that I'll post in the power boats section.
-
snookiehunter
- Frequent Poster
- Posts: 164
- Joined: Tue Feb 07, 2012 10:19 pm
- Location: Hernando Beach FL
Re: Snookiehunter's gf18 w/ tunnel
I also wanted to add that Ive used right at 5 gals of epoxy, up to this point. Does that sound right? (for a newbie, of course)
-
Cracker Larry

- * Bateau Builder - Expert *

- Posts: 22491
- Joined: Fri Mar 11, 2005 3:39 pm
- Location: Savannah, GA
Re: Snookiehunter's gf18 w/ tunnel
Not bad at all, sounds about right to me.I also wanted to add that Ive used right at 5 gals of epoxy, up to this point. Does that sound right? (for a newbie, of course)
I like the picture of Jena standing in the tunnel and taping
Completed GF12 X 2, GF16, OD18, FS18, GF5, GF18, CL6
"Ships are the nearest things to dreams that hands have ever made." -Robert N. Rose
-
snookiehunter
- Frequent Poster
- Posts: 164
- Joined: Tue Feb 07, 2012 10:19 pm
- Location: Hernando Beach FL
Re: Snookiehunter's gf18 w/ tunnel
Yeah, she seems to enjoy the build. She is very enthusiastic about helping. Hum.... how can I make fairing sound fun?
Re: Snookiehunter's gf18 w/ tunnel
Looking good to me.  And yes it is possible for SWMBO's to work and have some fun on these projects.
  Not sure about the fairing though.
-
Prarie Dog
- * Bateau Builder *

- Posts: 2330
- Joined: Tue Mar 23, 2010 2:52 pm
- Location: Penrose, CO
Re: Snookiehunter's gf18 w/ tunnel
For the record, she was AWOL when a sander was going. 
Re: Snookiehunter's gf18 w/ tunnel
Well, somebody had to fix meals, do laundry and haul T to sports...
-
Cracker Larry
- * Bateau Builder - Expert *
- Posts: 22491
- Joined: Fri Mar 11, 2005 3:39 pm
- Location: Savannah, GA
Re: Snookiehunter's gf18 w/ tunnel
So Alicia, what boat are you going to get Paul to help you build next 
Completed GF12 X 2, GF16, OD18, FS18, GF5, GF18, CL6
"Ships are the nearest things to dreams that hands have ever made." -Robert N. Rose
Re: Snookiehunter's gf18 w/ tunnel
Oh no you don't Larry. My hobby room next, then a boat.  The boys are still needing to put the tune-up touches on T's Muncher so they can get their BBV fix there. Although a boat for long cruises along the IC is interesting.
  After all T graduates in 3 years.
Who is online
Users browsing this forum: No registered users and 19 guests