Re: Wouter's PH18 Namibia
Posted: Tue Mar 26, 2019 3:57 am
Made some progress over the last few weeks.
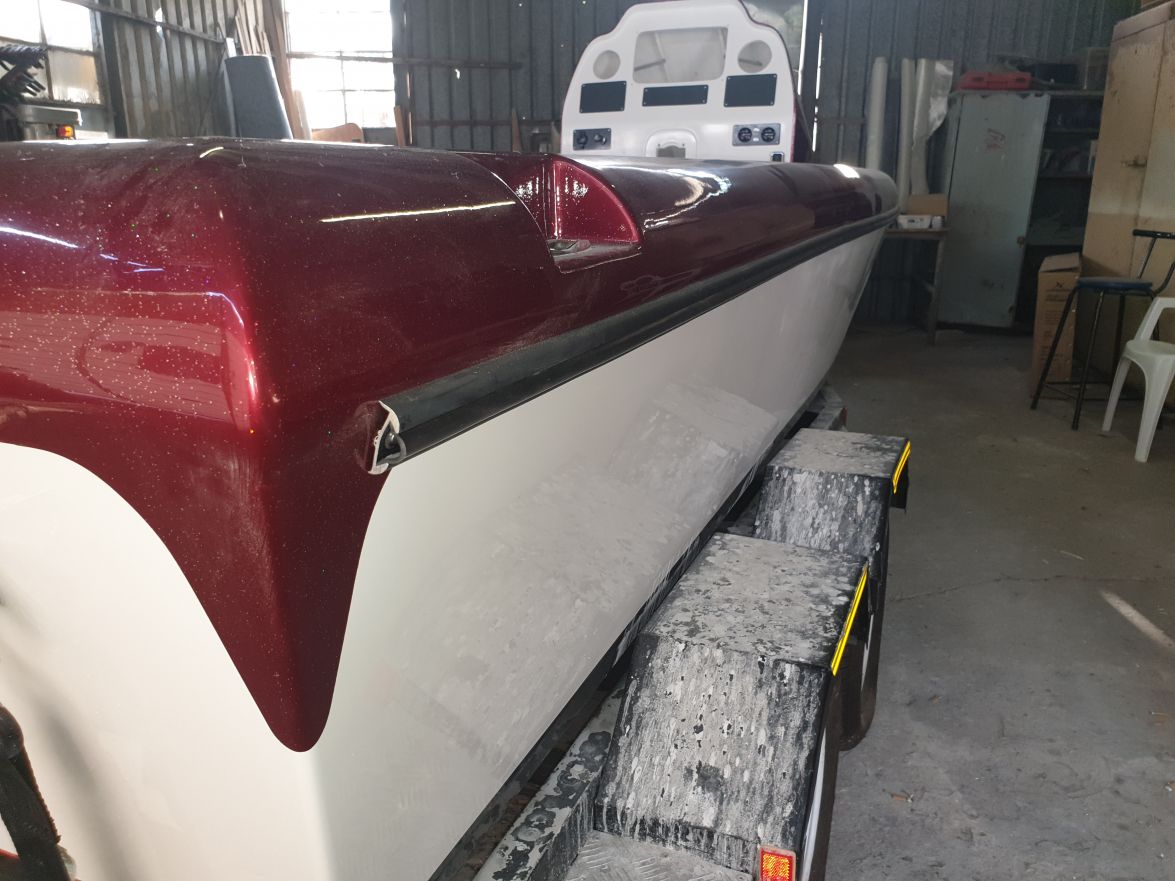
Finished wet sanding the gunnel and polished it, went around three times, looks pretty good! Had some issues while sanding, it turned out that some of the flakes actually came loose and would end up under the sanding paper and before you know it, would cause a scratch. I probably should have given it another clear coat after wet sanding, but I ended up sanding out the scratches and polished over it. Still looks pretty good!
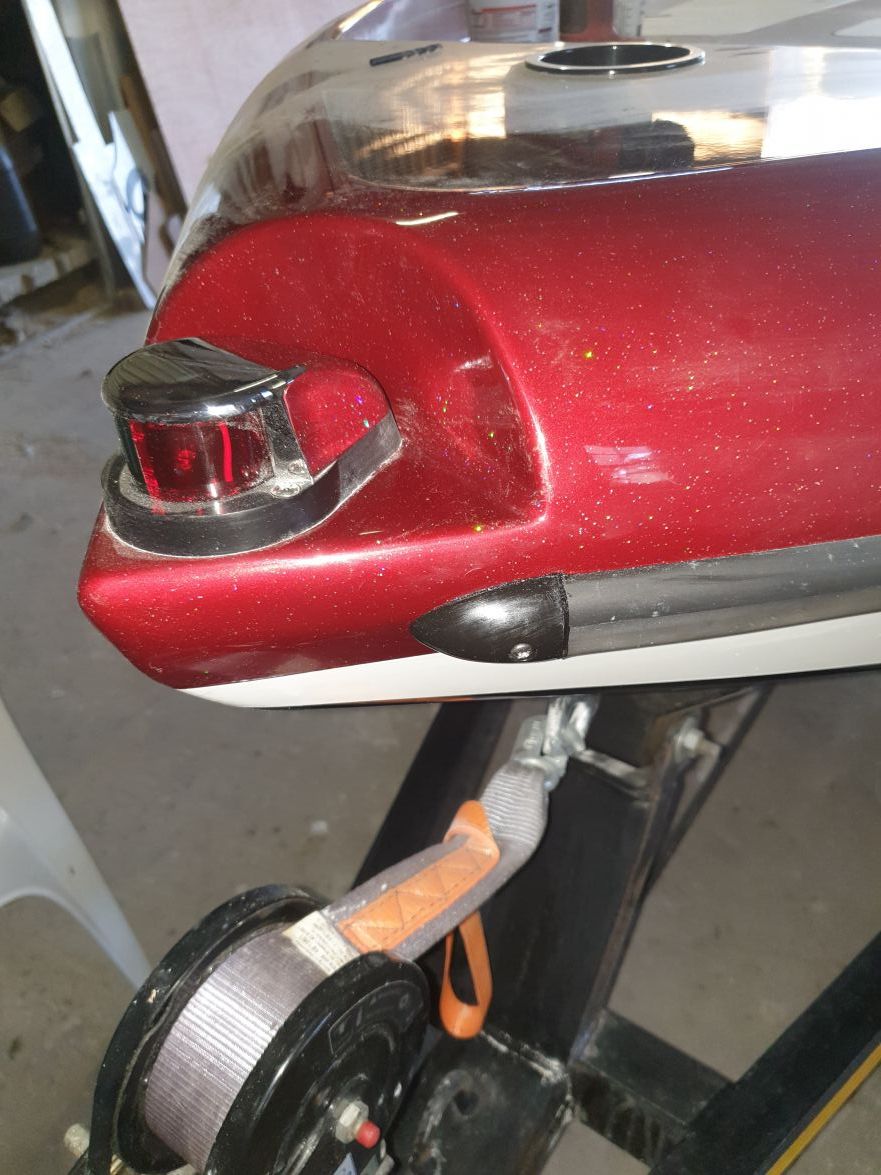
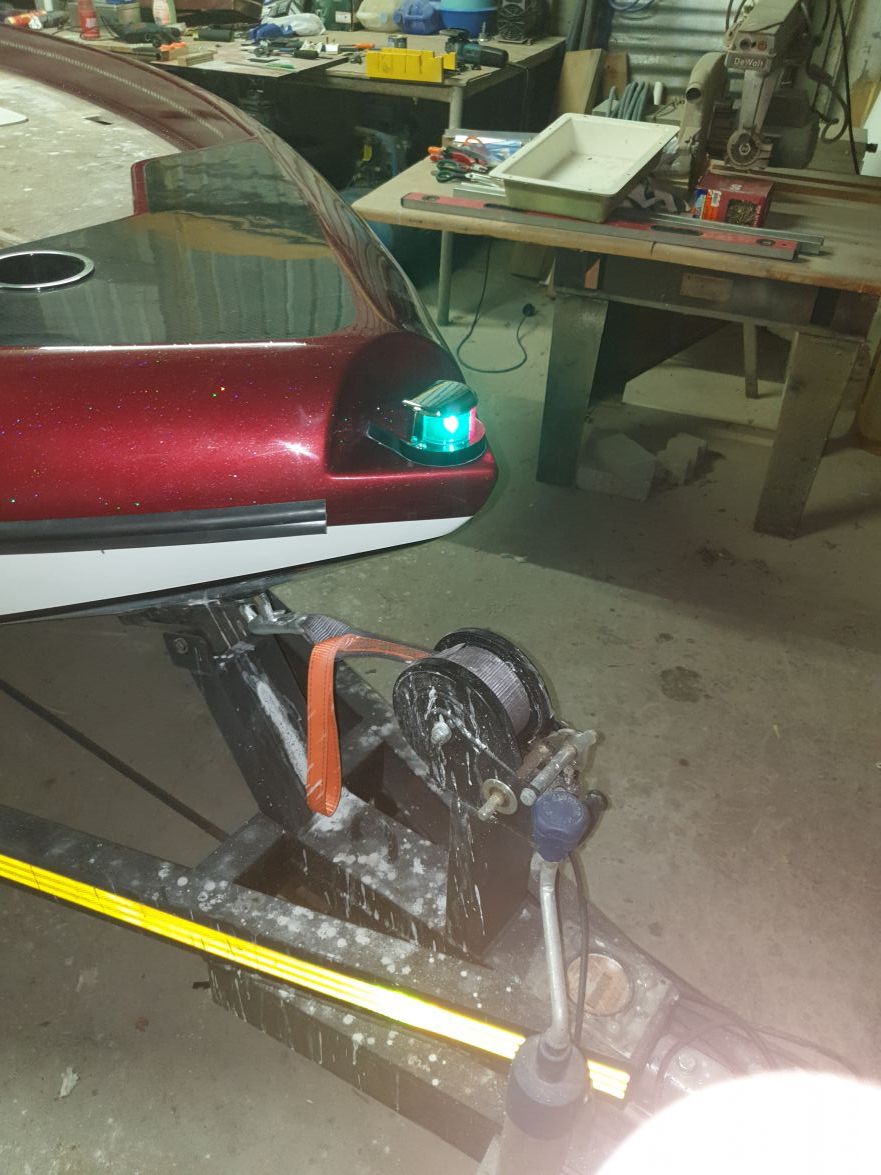
Fitted the bow mounted NAV light.

And tested the Wiring, WORKS
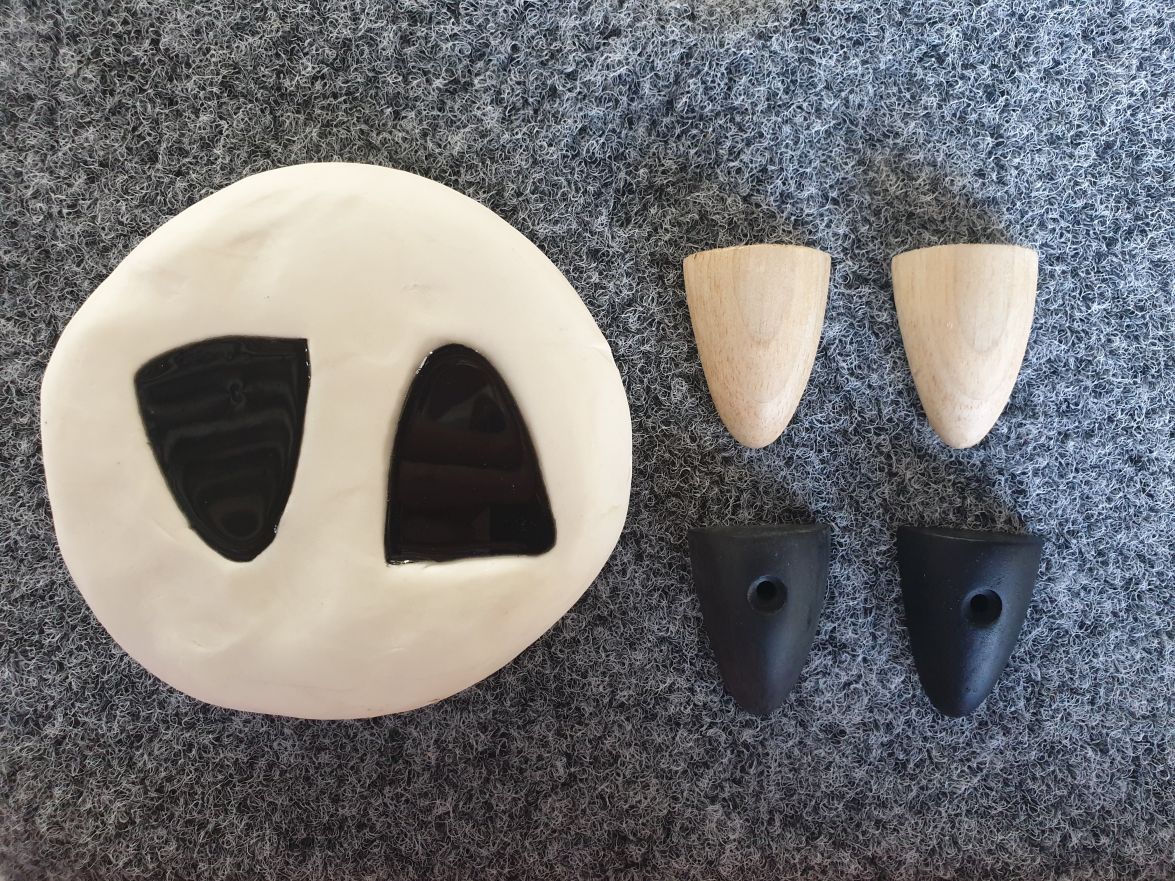
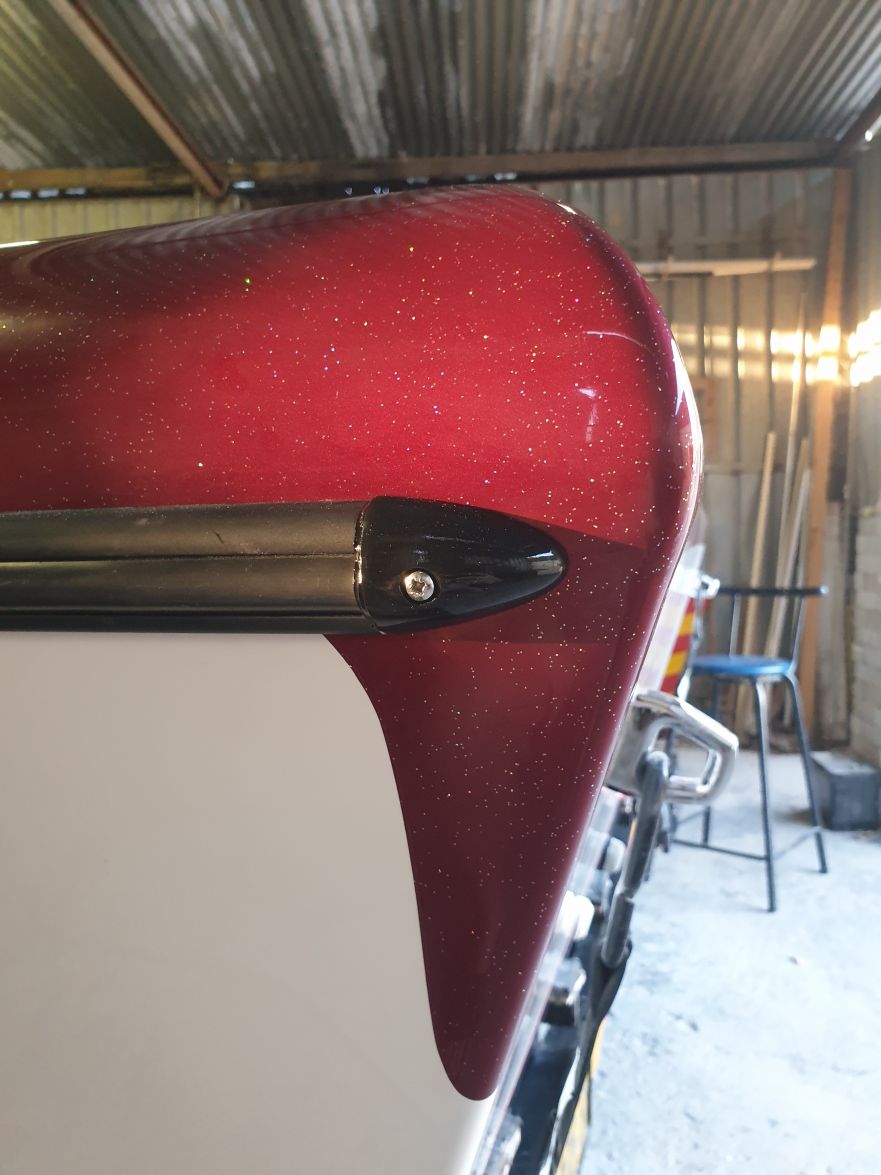
Rub rail is fitted, both sides, finishes the sides off nicely. Struggled to get end pieces for this rub rail, so I made some wood pieces that I have now made a silicone casting of and plan on making some resin casting to go on the ends of the rub rail to give a clean finish.
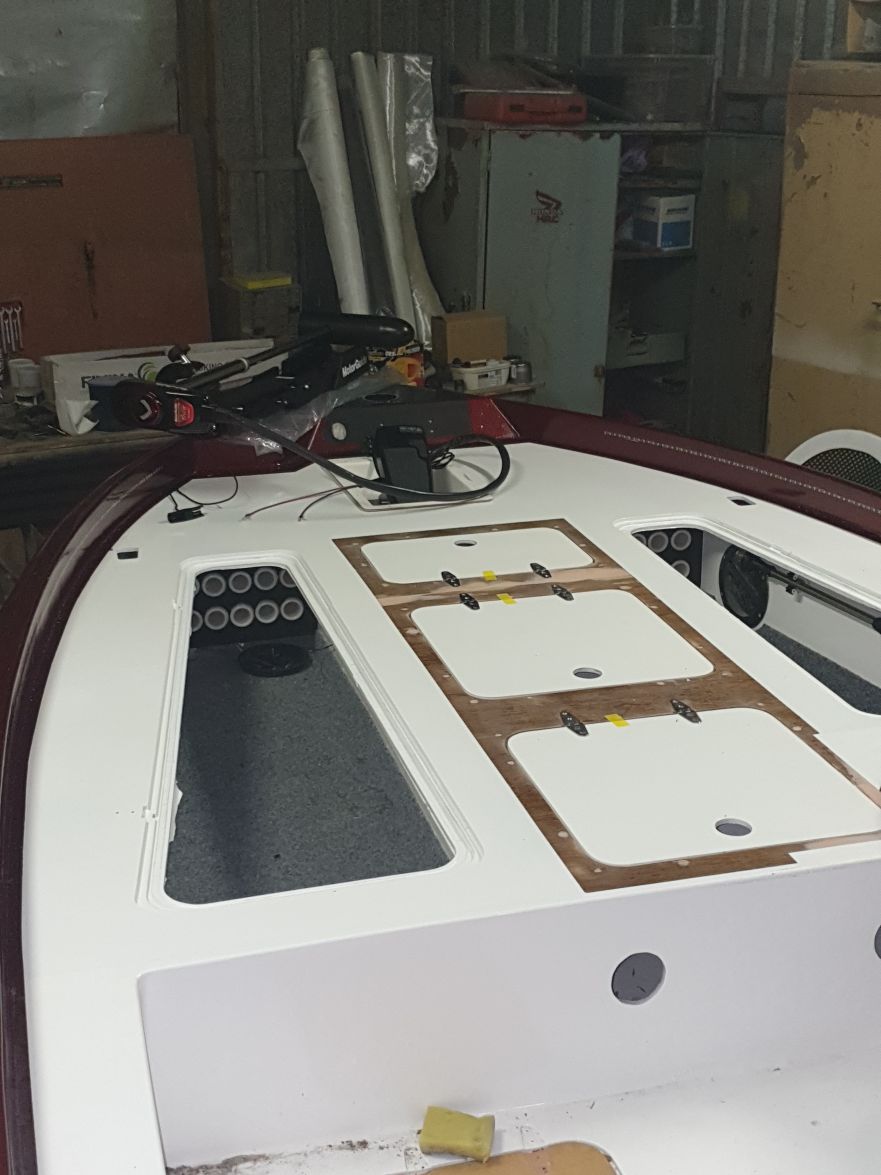
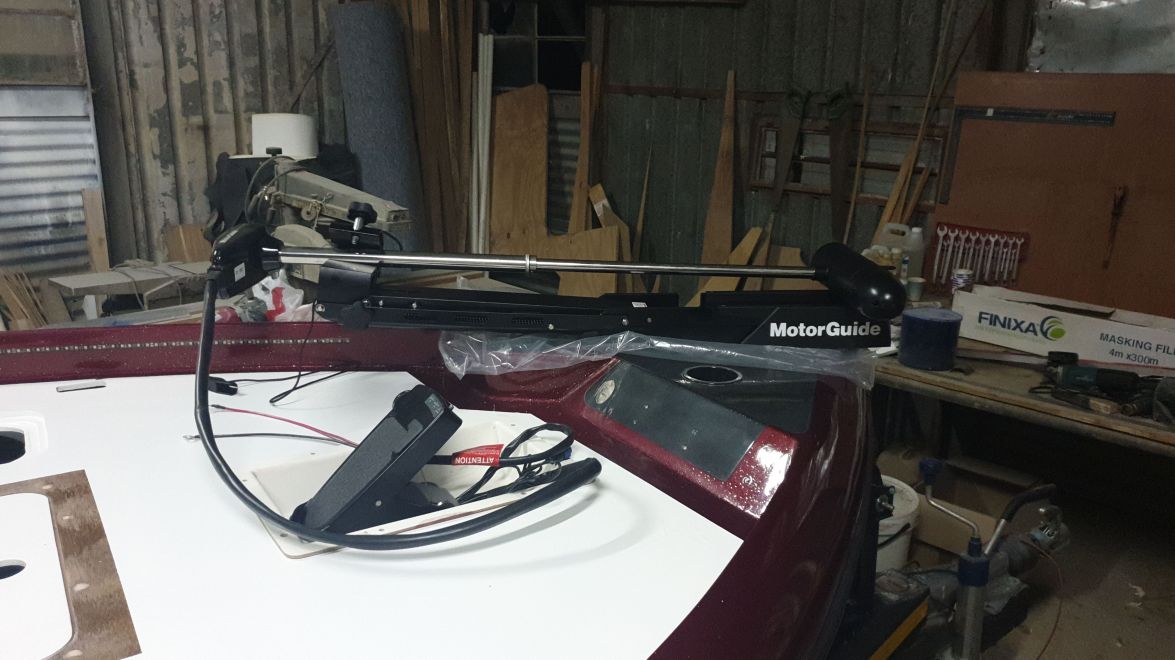
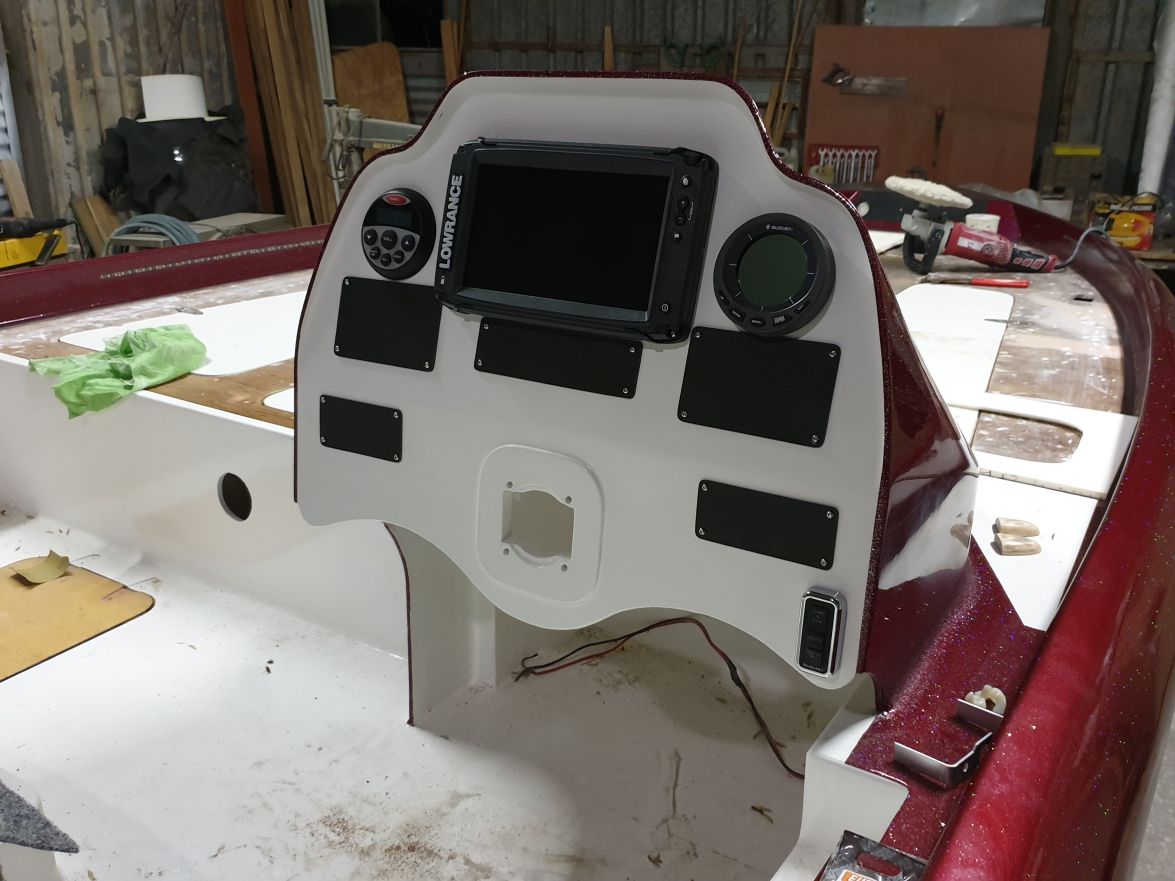
Finished the switch plates and test fitted all the console goodies, everything seems to be fitting well and I think the layout will work well. The left side upper plate gets 5 switches for the pumps, the middle one gets the switches for all the instruments, and the right one - switches for all the lights.
Bottom left will house a 12v socket and a 12v lighter plug. The right bottom will house 2 digital volt meters so I can check the voltage of the house and trolling motor batteries.
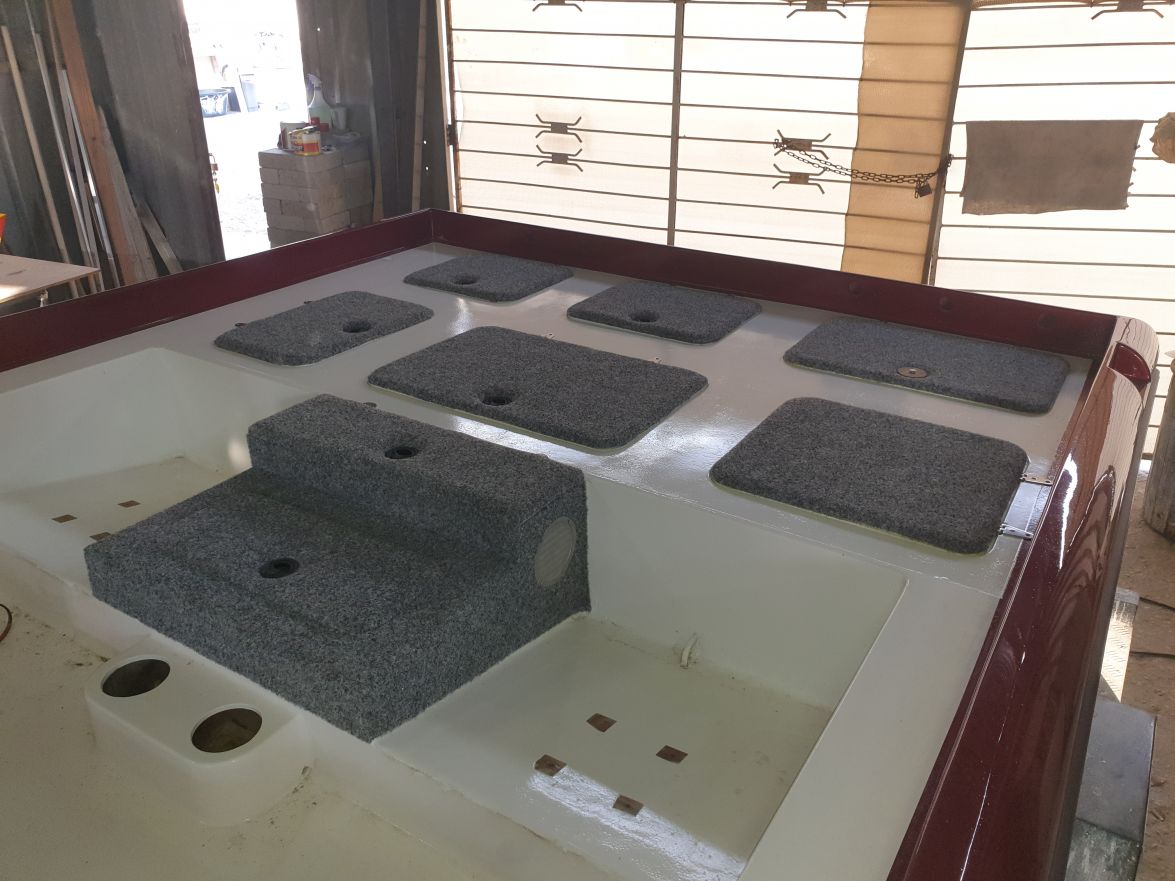
Also started with the carpeting, after I painted the rear deck. Carpeting is a slow going process and takes some time to get right
Finished wet sanding the gunnel and polished it, went around three times, looks pretty good! Had some issues while sanding, it turned out that some of the flakes actually came loose and would end up under the sanding paper and before you know it, would cause a scratch. I probably should have given it another clear coat after wet sanding, but I ended up sanding out the scratches and polished over it. Still looks pretty good!
Fitted the bow mounted NAV light.
And tested the Wiring, WORKS
Rub rail is fitted, both sides, finishes the sides off nicely. Struggled to get end pieces for this rub rail, so I made some wood pieces that I have now made a silicone casting of and plan on making some resin casting to go on the ends of the rub rail to give a clean finish.
Finished the switch plates and test fitted all the console goodies, everything seems to be fitting well and I think the layout will work well. The left side upper plate gets 5 switches for the pumps, the middle one gets the switches for all the instruments, and the right one - switches for all the lights.
Bottom left will house a 12v socket and a 12v lighter plug. The right bottom will house 2 digital volt meters so I can check the voltage of the house and trolling motor batteries.
Also started with the carpeting, after I painted the rear deck. Carpeting is a slow going process and takes some time to get right