Page 1 of 1
FS14 -2 week (+11 month build).... Done and spashed
Posted: Sat Jun 06, 2015 4:56 pm
by deuce_454
Hey all..
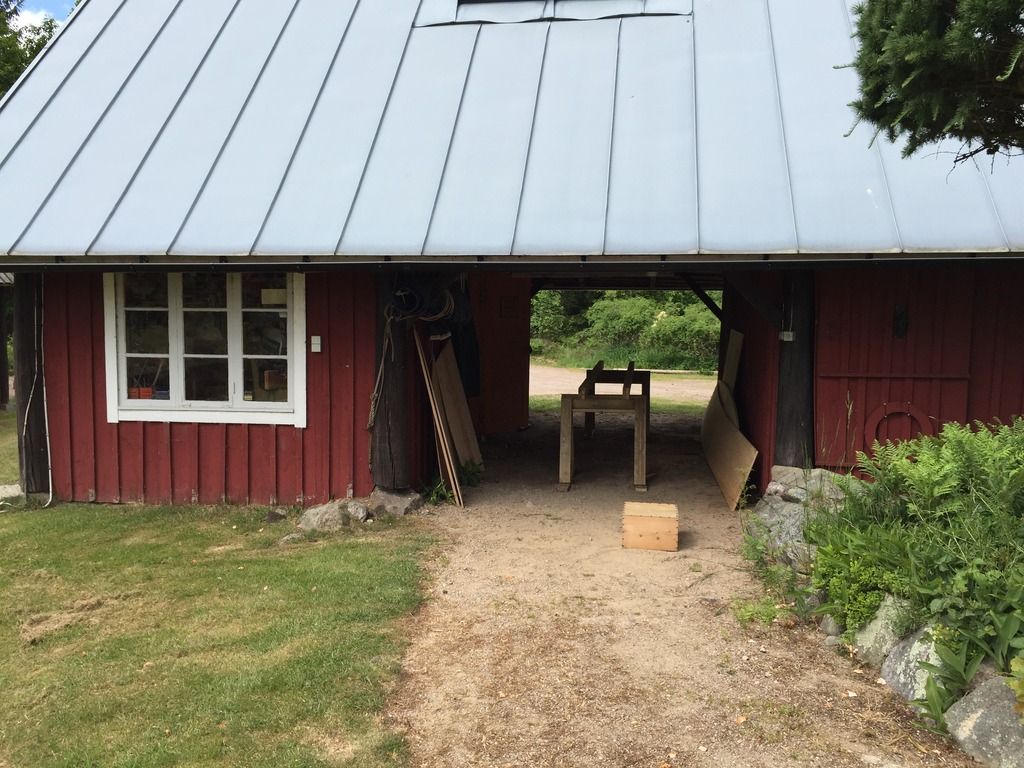
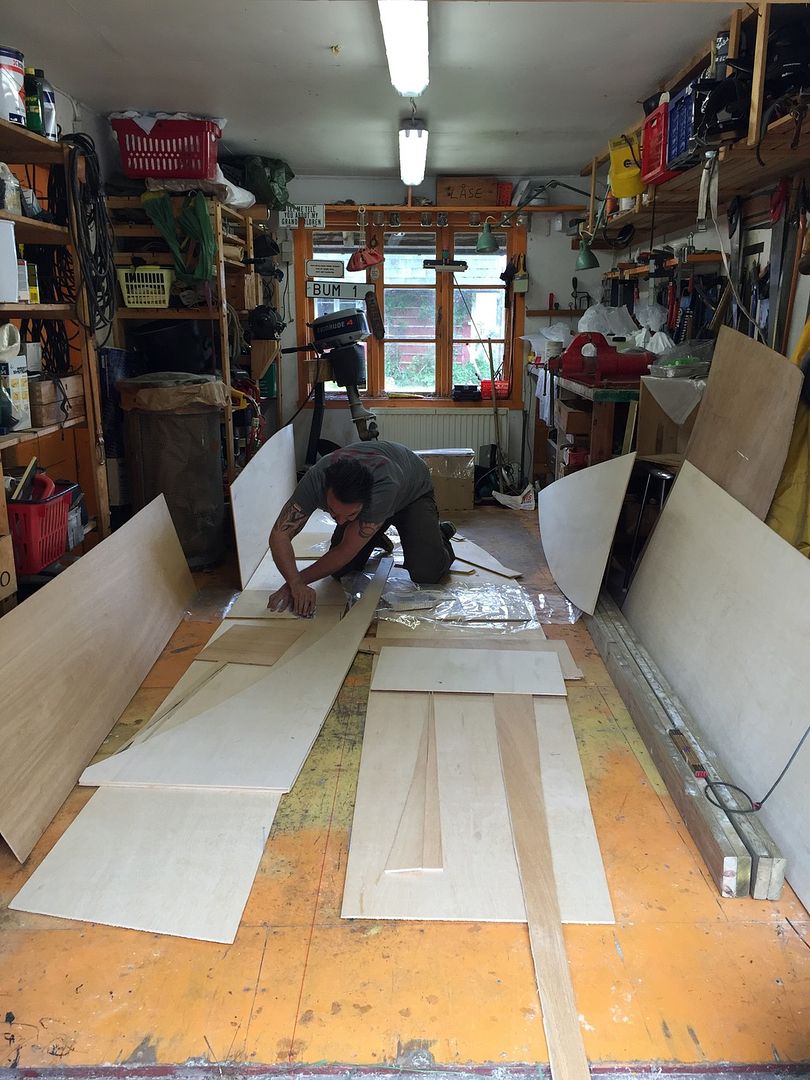
having built a pair of GF14's and lurking and planning.. I've decided to build the GF14 replacement before diving into a bigger build... i have given my self 2 weeks time to do some R&R and build the boat... i know its wildly optimistic, but im aiming for a relatively complete boat without a cracker finish.... just want a fair running surface and ok work/fish/play like finish....
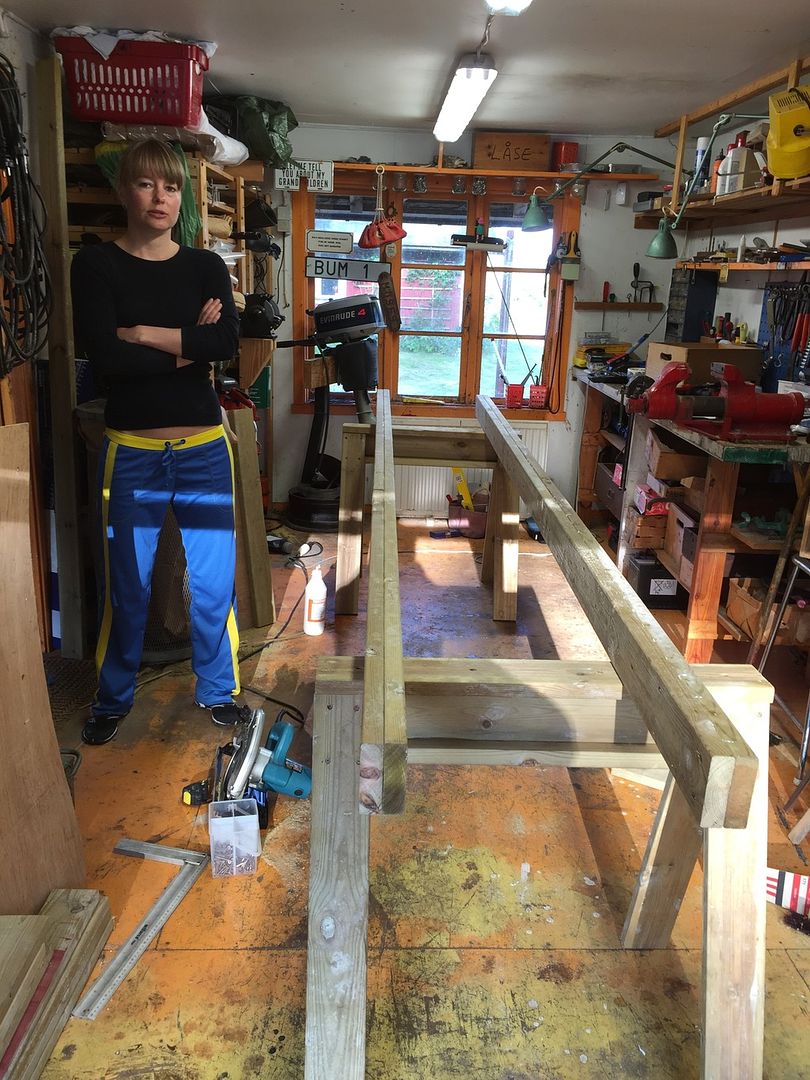
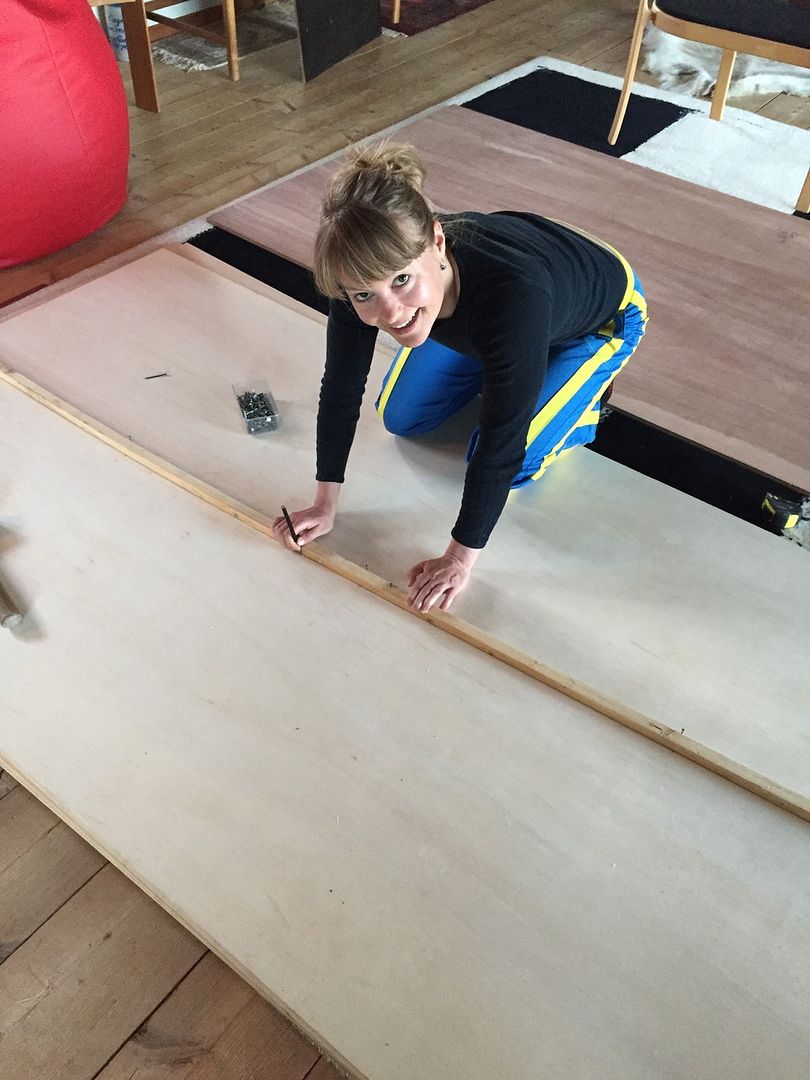
i have a lovely assistant who have decided that it would be fun to build it together... so the female in the pics is my girlfriend ...
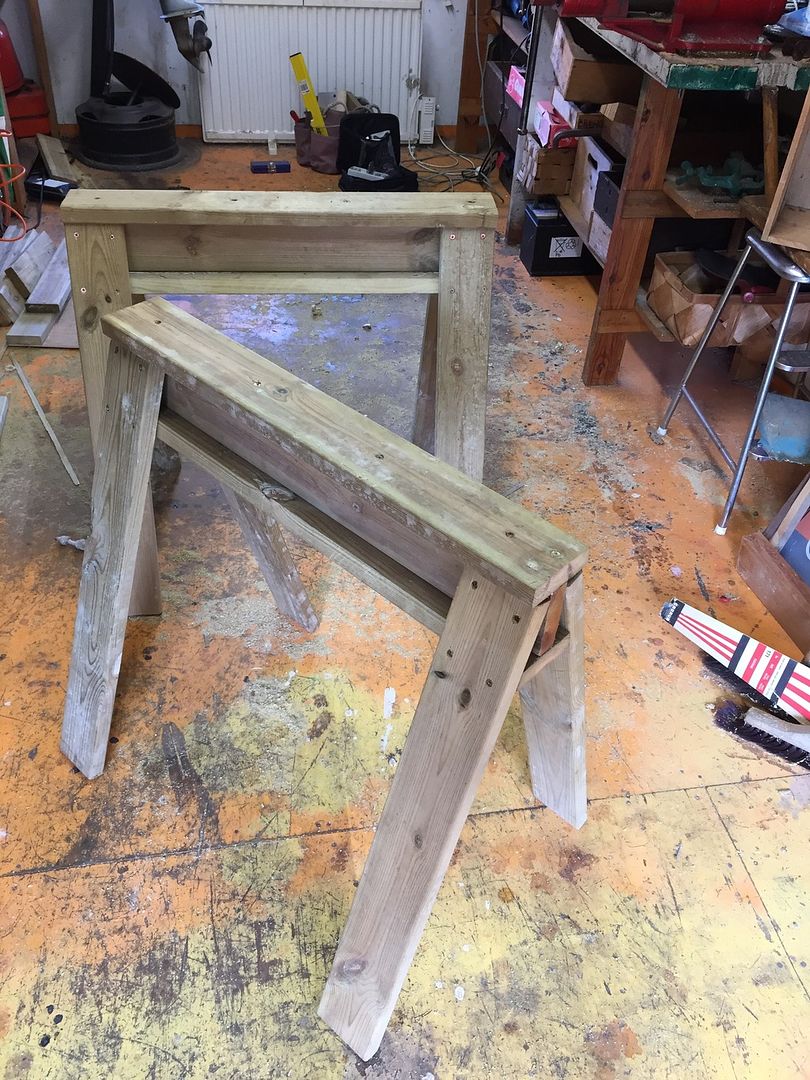
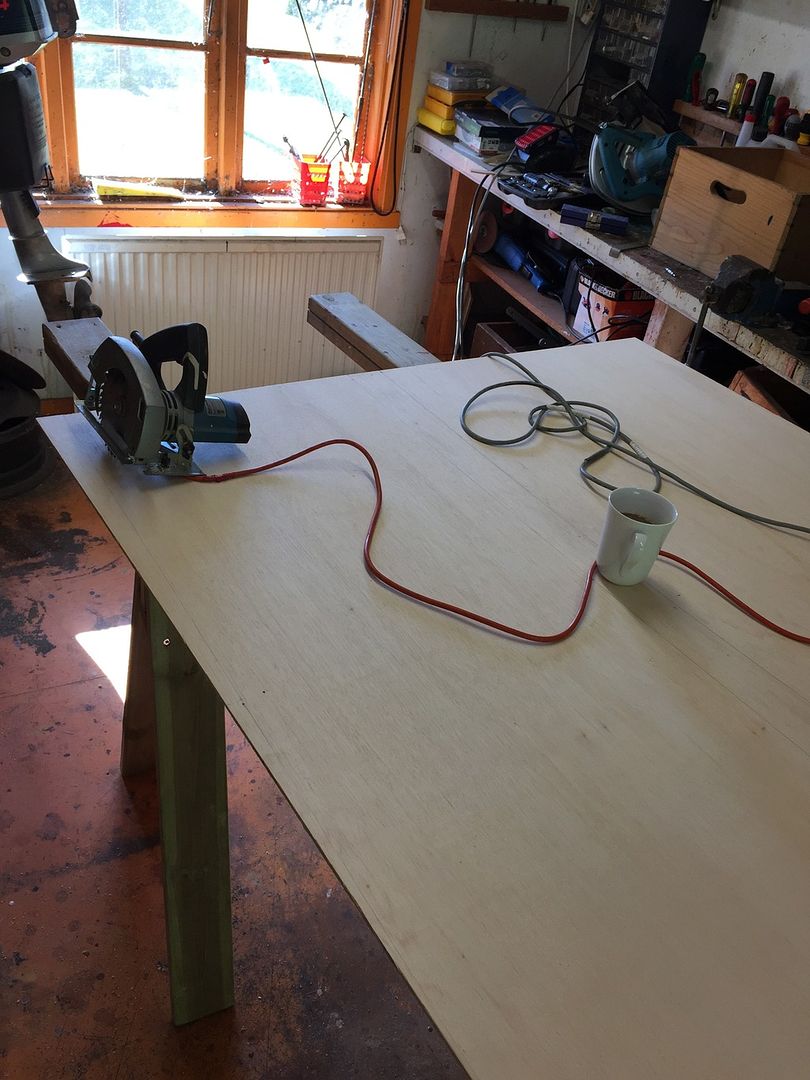
day 1 started in the afternoon, with building a pair of saw horses ... didn't have to be pretty and they didn't turn out that way either... threw a set of strongbacks together and marked the first lines on the 1/4 inch PW ... on to cutting gluing sides and cutting the rest of the plywood tomorrow... stay tuned (will post pics as soon as photo bucket starts cooperating)
Re: FS14 2 week build
Posted: Sat Jun 06, 2015 5:02 pm
by deuce_454
Re: FS14 2 week build
Posted: Sat Jun 06, 2015 6:43 pm
by jacquesmm
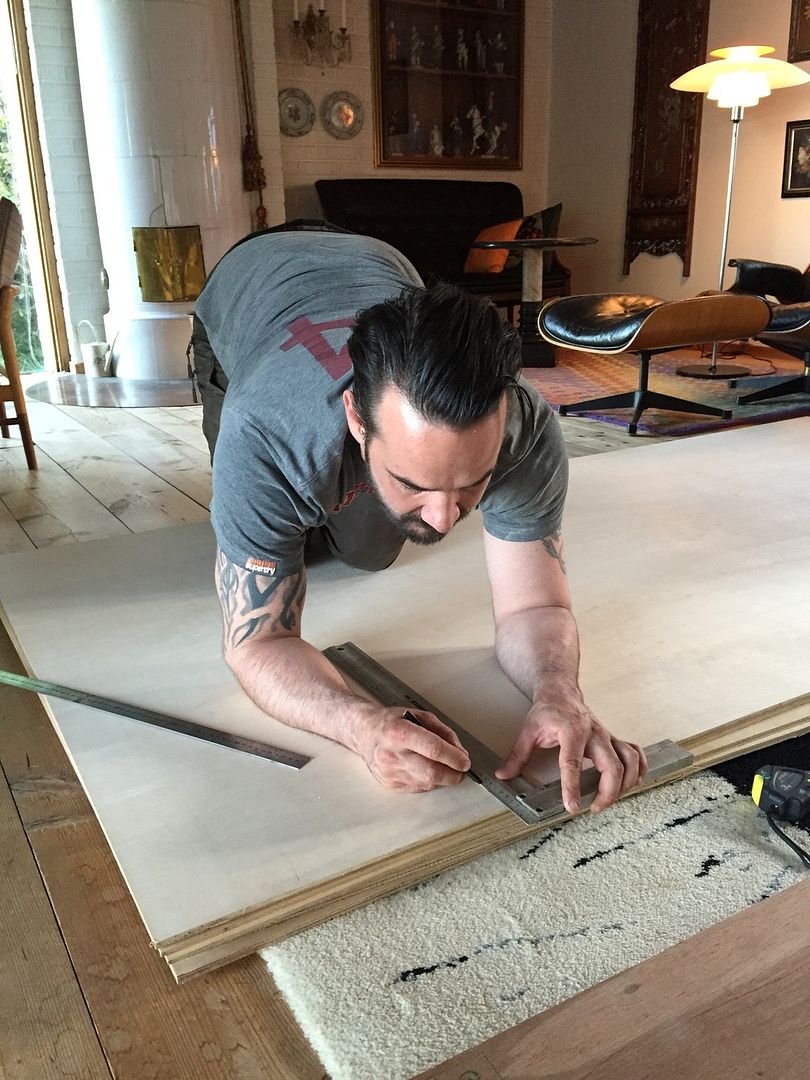
In the living room and your wife smiles! That is great, you are a lucky man.
Re: FS14 2 week build
Posted: Sat Jun 06, 2015 6:52 pm
by Noles309
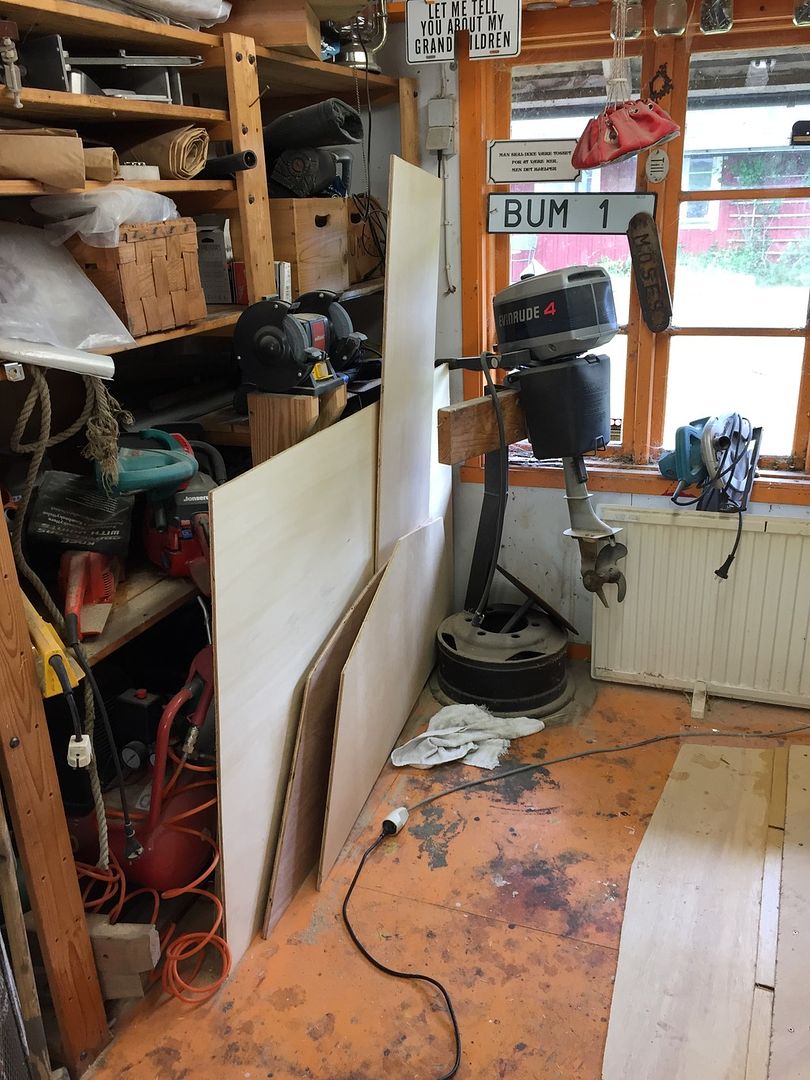
Thats awesome! Cozy little shop you have there to.

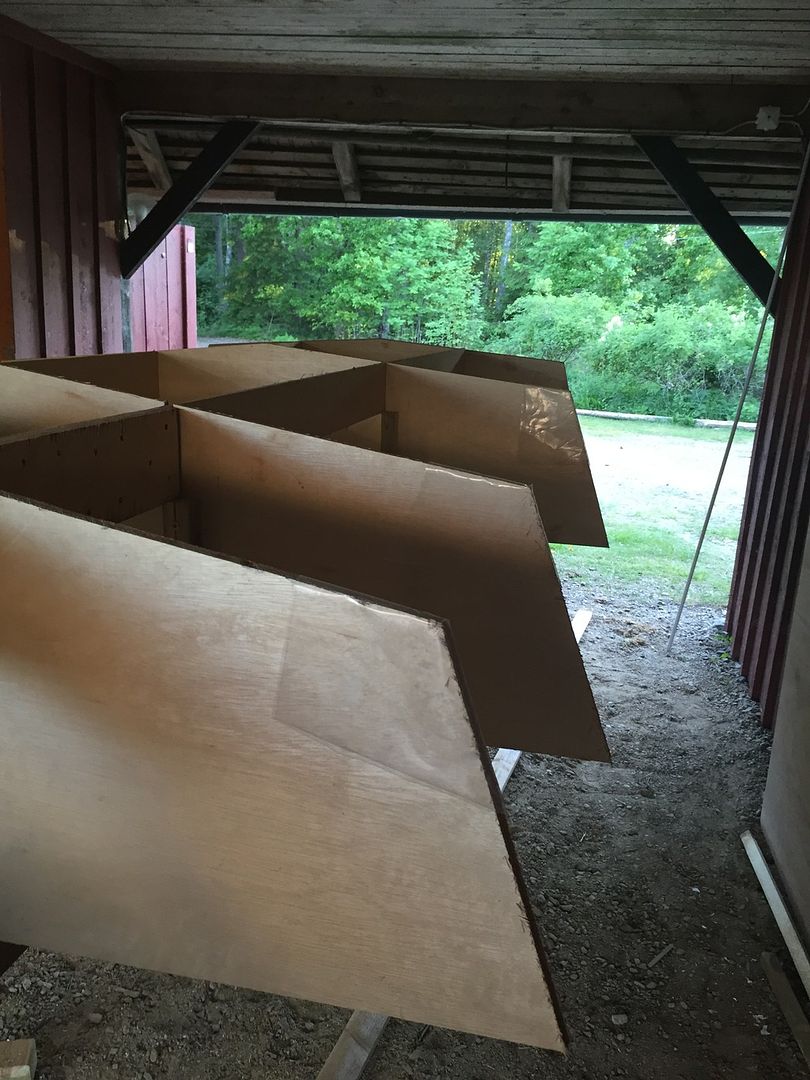
Noon of day 2
Posted: Sun Jun 07, 2015 5:26 am
by deuce_454
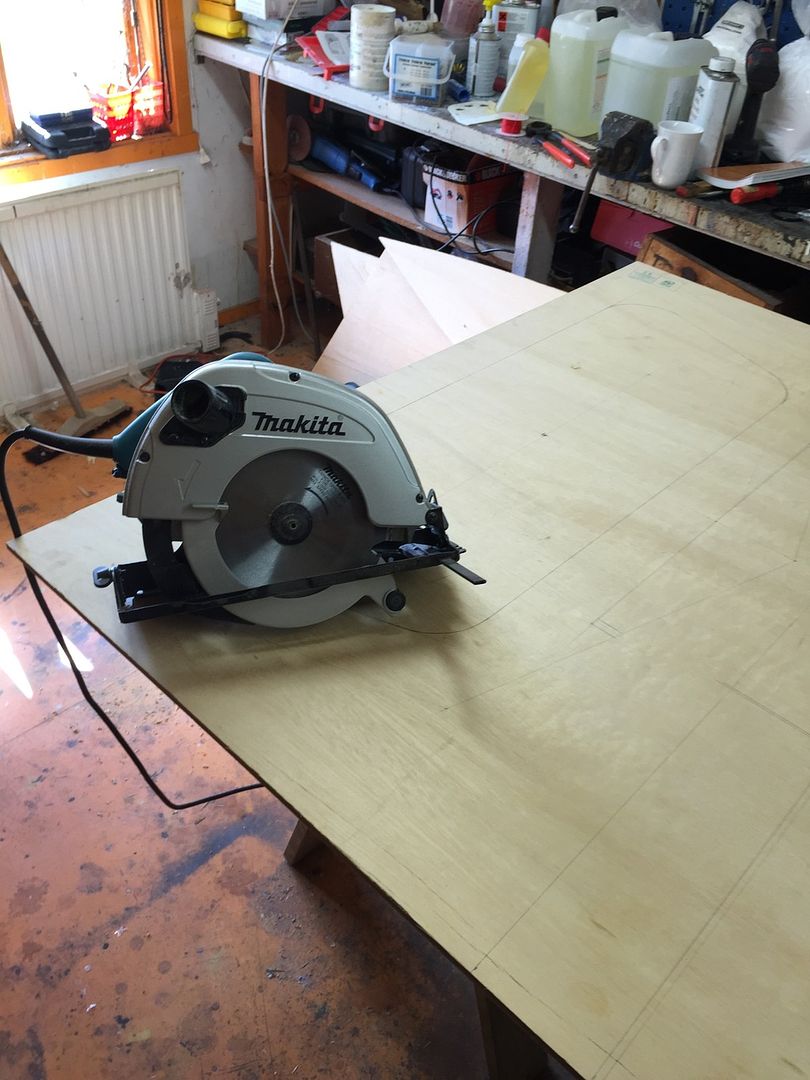
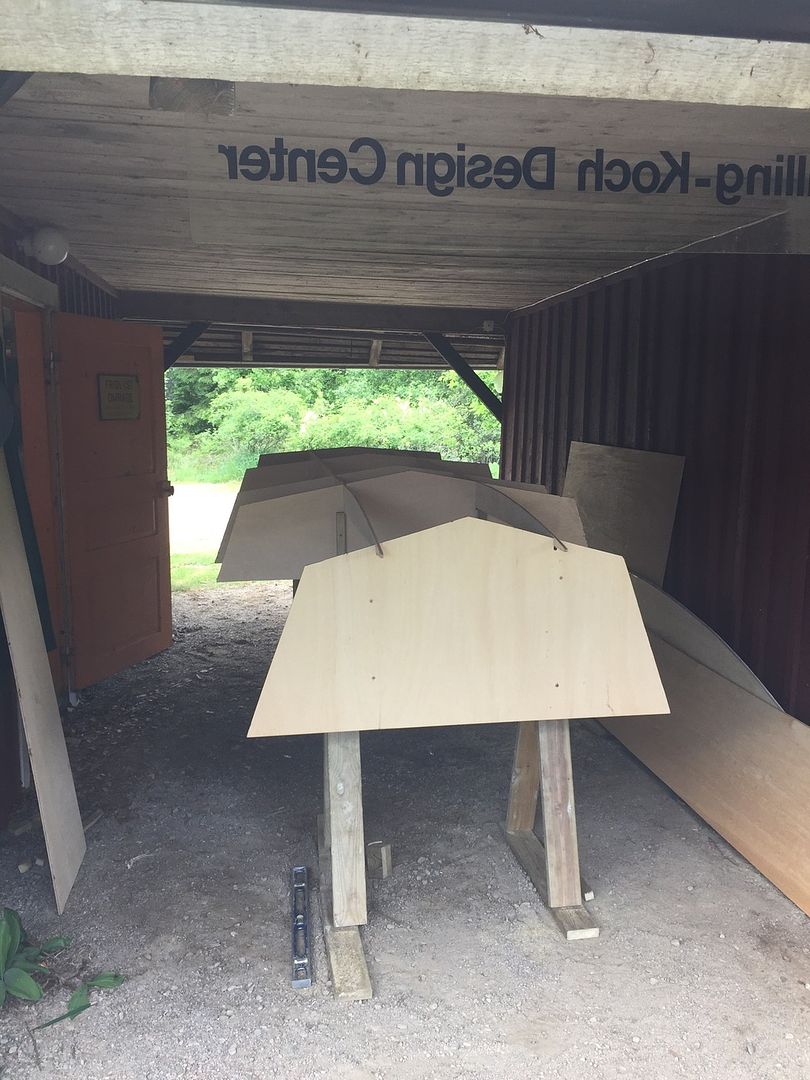
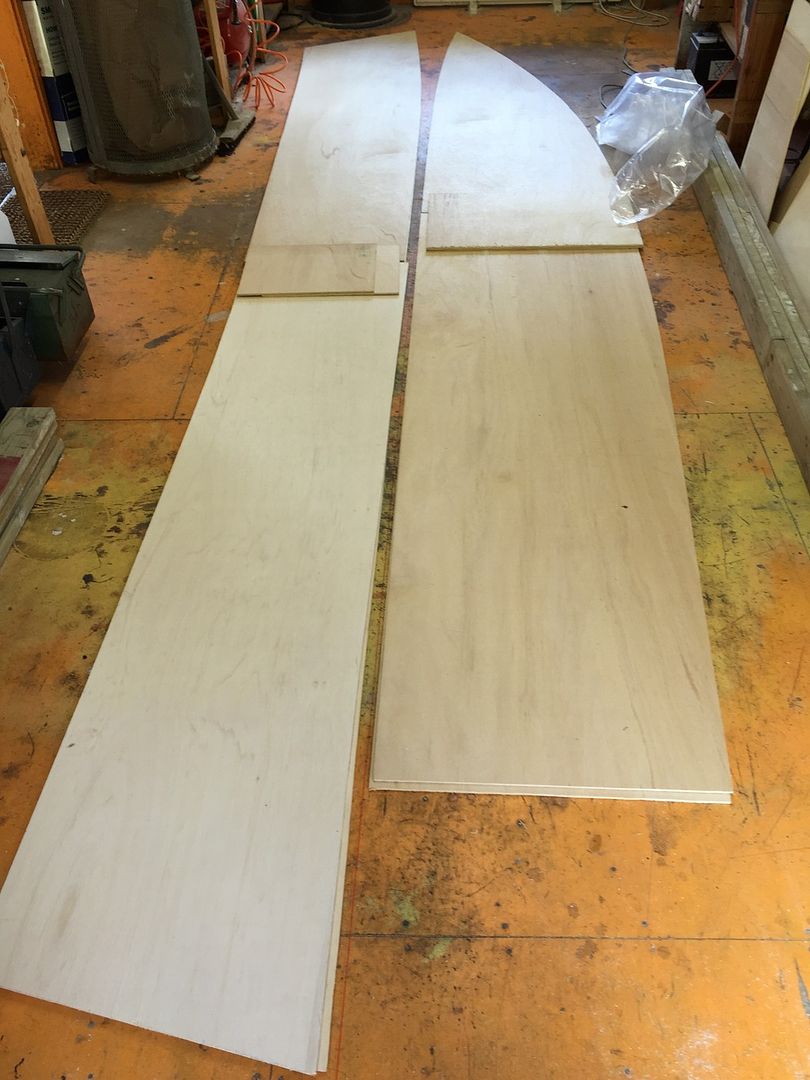
My small circular saw, an almost antiquated Black and Decker with a 5 inch blade made quick work of turning the lines into a couple of cubic feet of meranti BS 6565 sawdust... time for lunch and glueing... i have strung a piece fo masons string down the length of the small shop to give some reference to the measurements in the plans...
Re: FS14 2 week build
Posted: Sun Jun 07, 2015 8:43 am
by jacquesmm
Yes, we can't repeat it enough: the circular saw produces smooth curves.
Much better than a jig saw.
day 2 after lunch...
Posted: Sun Jun 07, 2015 9:19 am
by deuce_454
jacques.. it was on your advice i used it and it was quite easy to steer and equipped with the finest carbide blade i could find it still cut about 1/2 foot per second, ..
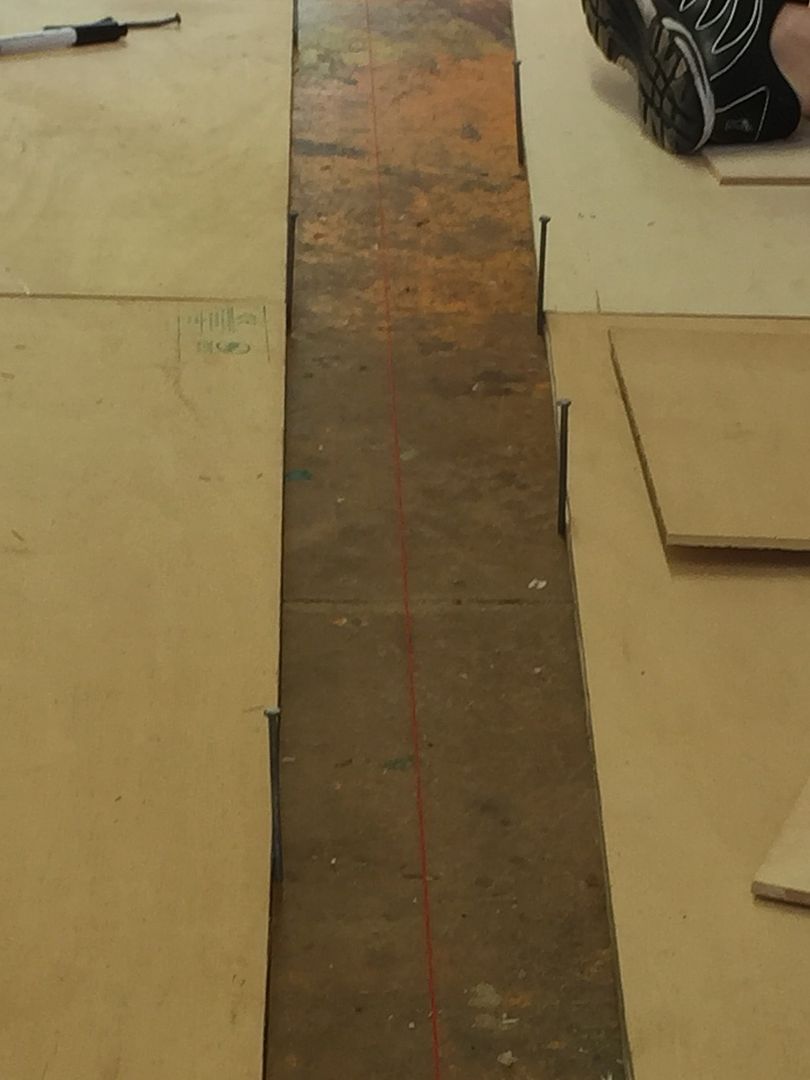
as noted above i marked string a piece of masons string the length of the floor to lay out the distances to the reference line and glue them straight.. if nothing else just to right any possible sawing errors i might have made..
mixed the glue from low viscosity epoxy, aerosil (thickening agent) and cottonfibres... wetted both surfaces and played out a layer with a toothed blade...
have screwed thru all layers into the floor to keep it from shifting on me during the night...
will cut stations and stringers tonight as i wait for the epoxy to cure

stay tuned

Re: FS14 2 week build
Posted: Sun Jun 07, 2015 9:48 am
by Cracker Larry
Wow, 2 weeks on a FS14? Maybe so, yall are moving fast

Beautiful smile on that lady, awesome picture
Re: FS14 2 week build
Posted: Sun Jun 07, 2015 10:32 am
by terrulian
Two weeks seemed like wishful thinking, as I've been working on a V10 for a year now and I'm still a ways off.
On the other hand, you seem to know what you're doing, which gives you an unfair advantage.

PS Jacques' skillsaw tip worked for me, too. Before building this boat I wouldn't have thought of trying it.
Noon of day 3
Posted: Mon Jun 08, 2015 7:24 am
by deuce_454
Re: FS14 2 week build
Posted: Mon Jun 08, 2015 7:32 am
by deuce_454
Damnit

.... i just noticed looking at the pictures i put the butt block on the stringer on the wrong side... ie.. i made 2 left ones... that is a mistake im willing to live with.... and it should have no influence at all... other than annoying my sense of perfection ... but as it will be permanently enclosed in the middle seat and covered with epoxy and biax... the torment of knowing its in there is negligible compared to scraping the semiset epoxy off.. and doing it over...
Re: FS14 2 week build
Posted: Mon Jun 08, 2015 9:14 am
by jacquesmm
It doesn't matter.
I like symmetry but it does not affect the strength of the boat to have stringer copies instead of mirror image.
Re: FS14 2 week build
Posted: Mon Jun 08, 2015 9:32 am
by Cracker Larry
I like symmetry
Me too. I'm also anal. I'd glue matching butt blocks on the opposite side of each. Symmetry
Re: FS14 2 week build
Posted: Mon Jun 08, 2015 9:45 am
by jacquesmm
Cracker Larry wrote:I like symmetry
Me too. I'm also anal. I'd glue matching butt blocks on the opposite side of each. Symmetry

Great idea.
Posted: Mon Jun 08, 2015 12:23 pm
by deuce_454
I think that is exactly what ill do... i know in my head that it makes no difference, but i have had a really hard time not fixing that mistake already... installing extra symmetry enhancing butt-blocks will make me sleep better.. they will get a pair of "cracker Larry tribute - stringer doubler" before finally being glassed in..
measurements doesn't add up
Posted: Mon Jun 08, 2015 2:07 pm
by deuce_454
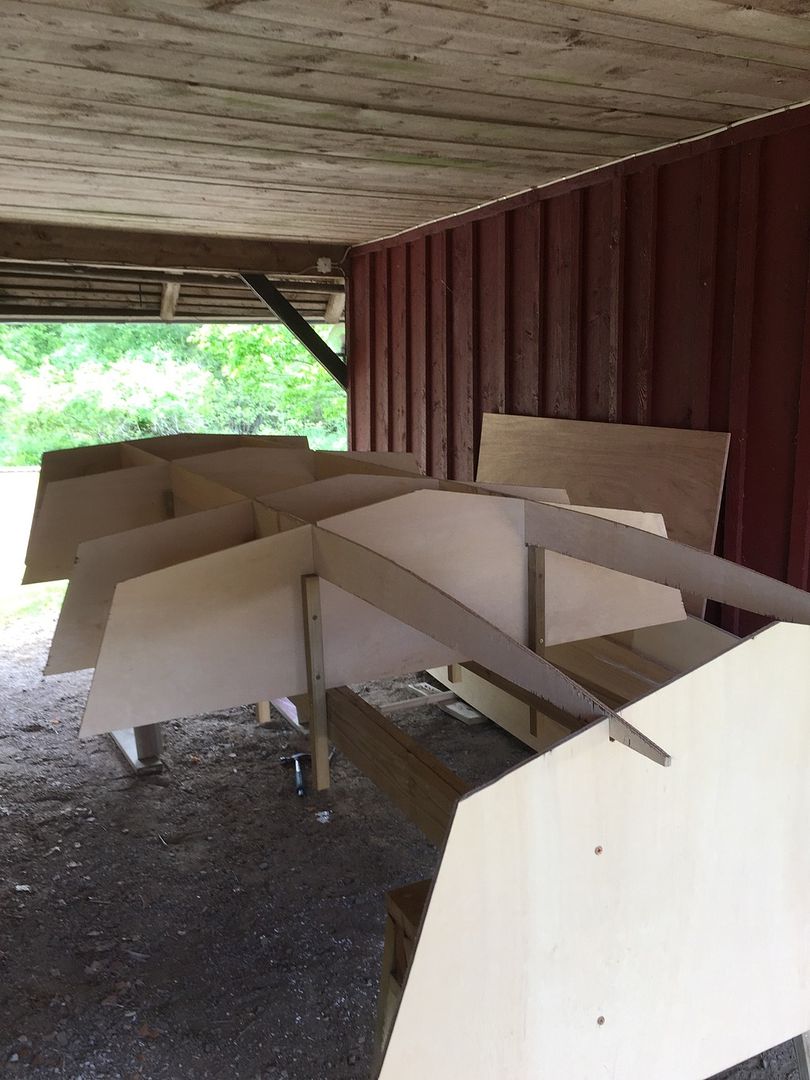
im in the process of mounting the frames to the strongbacks and the height from "seat top lower face" to stringer top is not consistent its 248mm om the rear and mit seat, but on the bow seat frame its not .. (348-97 = 251) 3mm off
going backwards (592-97-245)=250 (thats bow frame height - stringer pocket depth - seat level lower face) its still 2 mm off... im wondering if the bulge that people seem to get on the FS14 isn't a result of the bow frame sitting a bit high??
if it were 254mm i could deduce witch one was off... but neither 248, 250 or 251 are intuitively obvious right or wrong...
im thinking i should treat the stringer top as the correct datum line.. but that leaves me with the problem at the transom as the stringer top isn't marked?? i take it that its the "seat level, lower face" on the transom 57mm above the clamping board lower face thats the setup line?
but i just want to be 101% sure

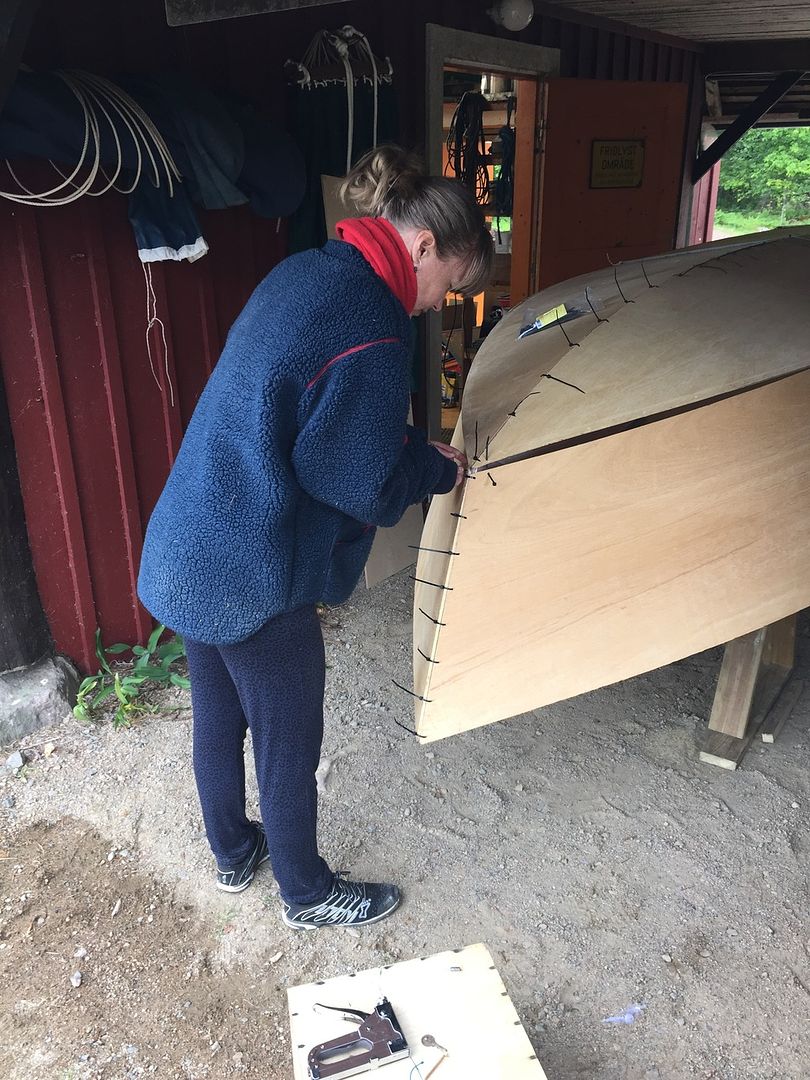
evening day 4...
Posted: Tue Jun 09, 2015 3:01 pm
by deuce_454
Re: FS14 2 week build
Posted: Tue Jun 09, 2015 3:05 pm
by deuce_454
Re: FS14 2 week build
Posted: Tue Jun 09, 2015 3:14 pm
by terrulian
Beautiful, precise.
Hey, have you left any time in your very tight schedule for epoxy that doesn't kick, holidays, bubbles in the glass, glitches that get worse when you try to make them better, and fits of crying?
Re: FS14 2 week build
Posted: Tue Jun 09, 2015 3:29 pm
by jacquesmm
Nice and fair.
Is that Okume plywood?
Re: FS14 2 week build
Posted: Tue Jun 09, 2015 3:33 pm
by jacquesmm
Deuce, I just saw your question. Sorry if I did not reply, I do not always have the time to visit the building story section.
In the future, if you have any technical question, please post it in the technical section, the one at the top of the forum.
It looks like you are over that hurdle anyway.
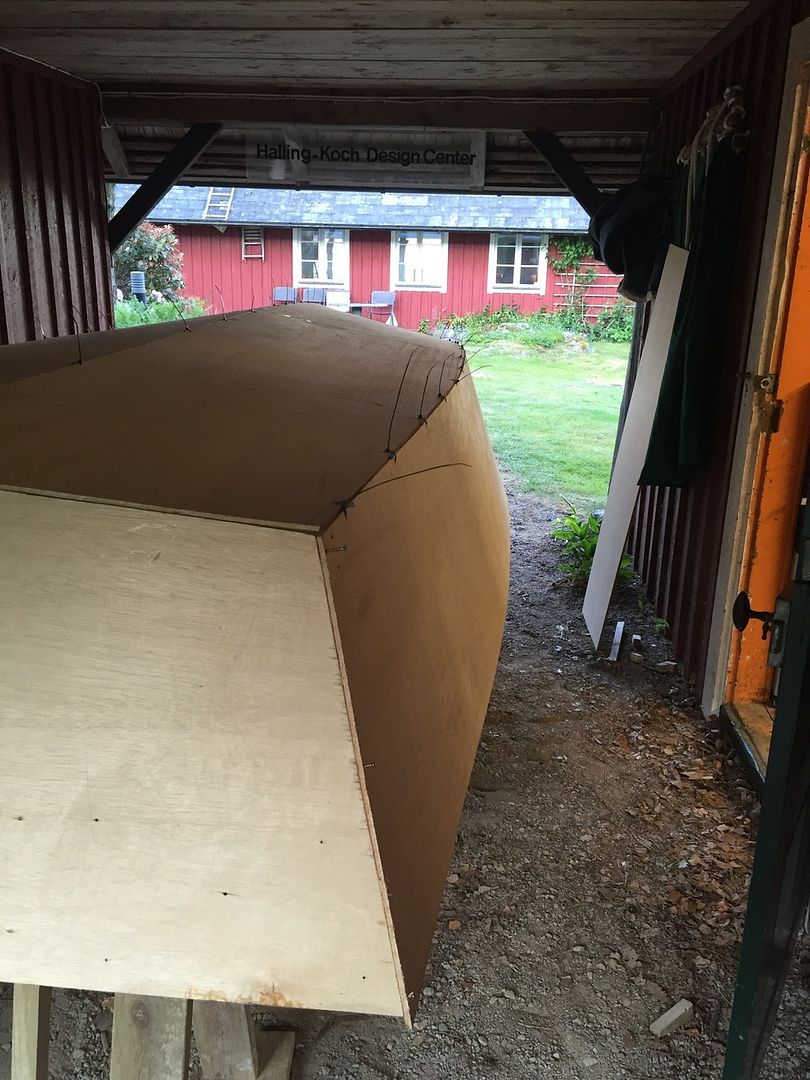
end of day 4
Posted: Tue Jun 09, 2015 4:06 pm
by deuce_454
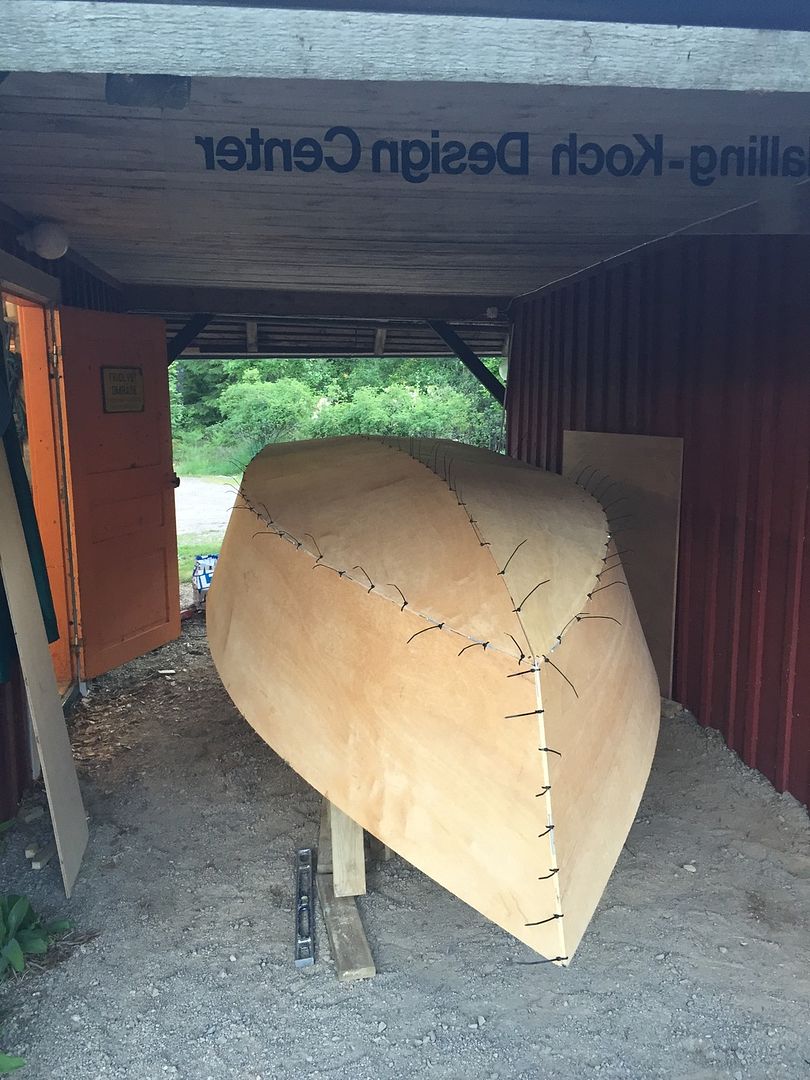
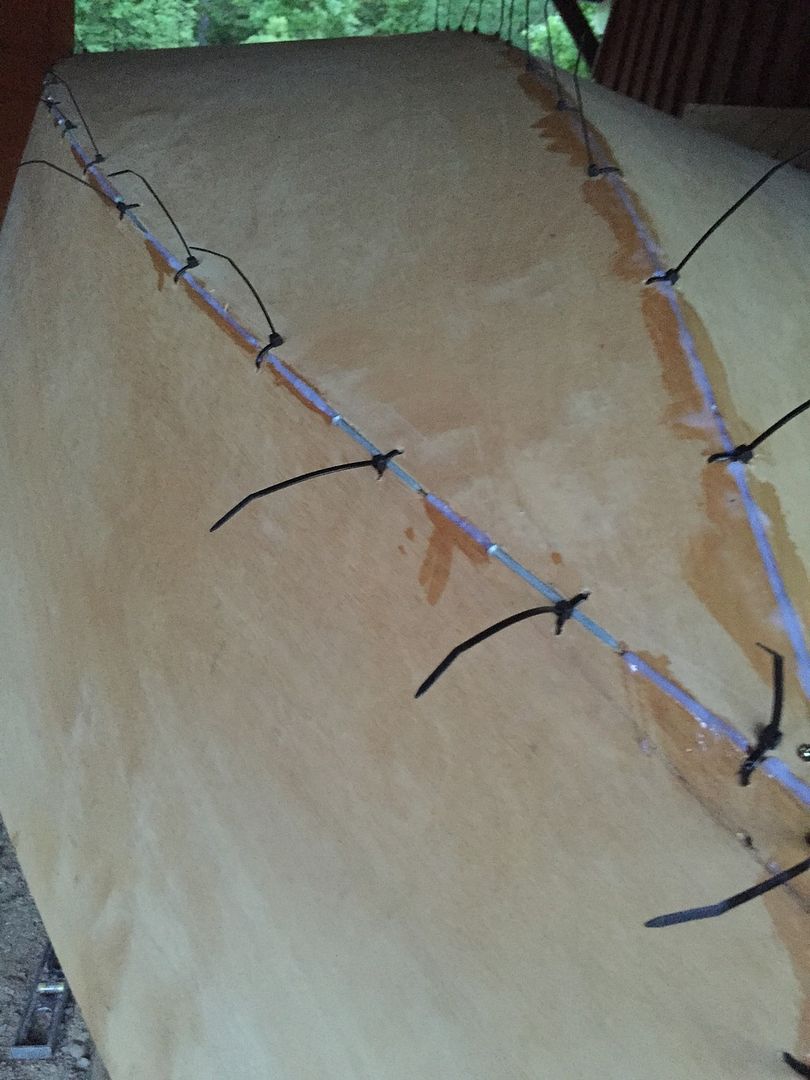
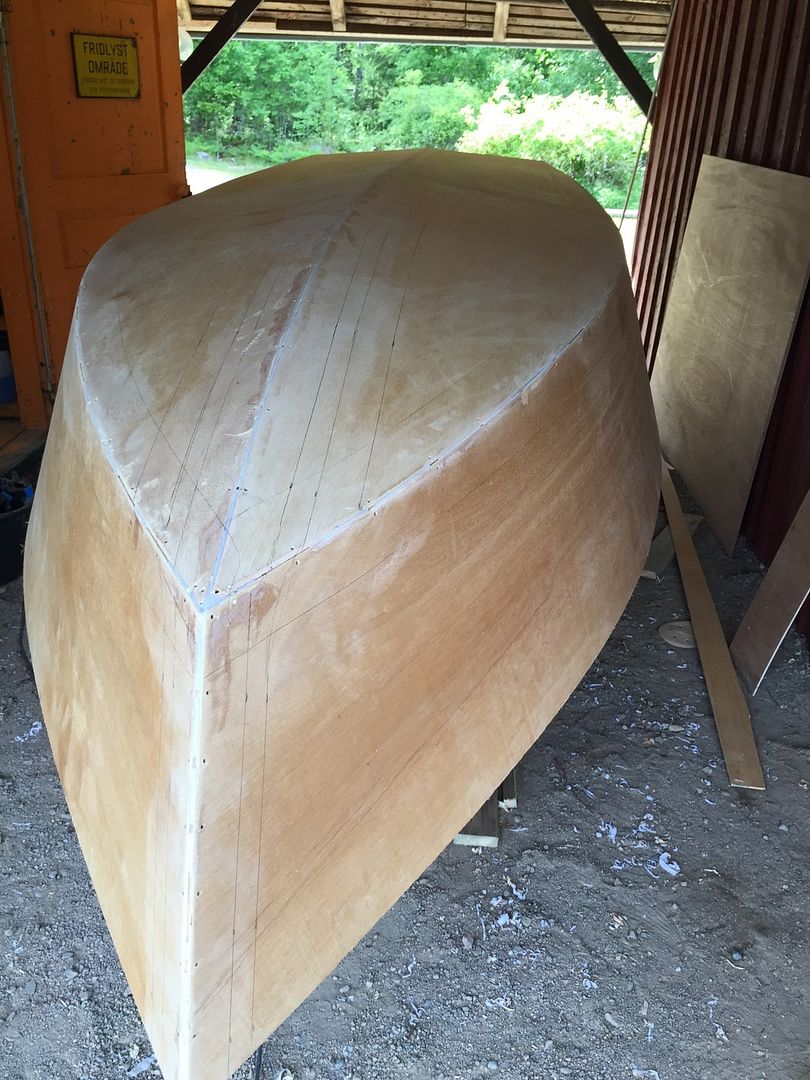
afternoon day 5
Posted: Wed Jun 10, 2015 10:09 am
by deuce_454
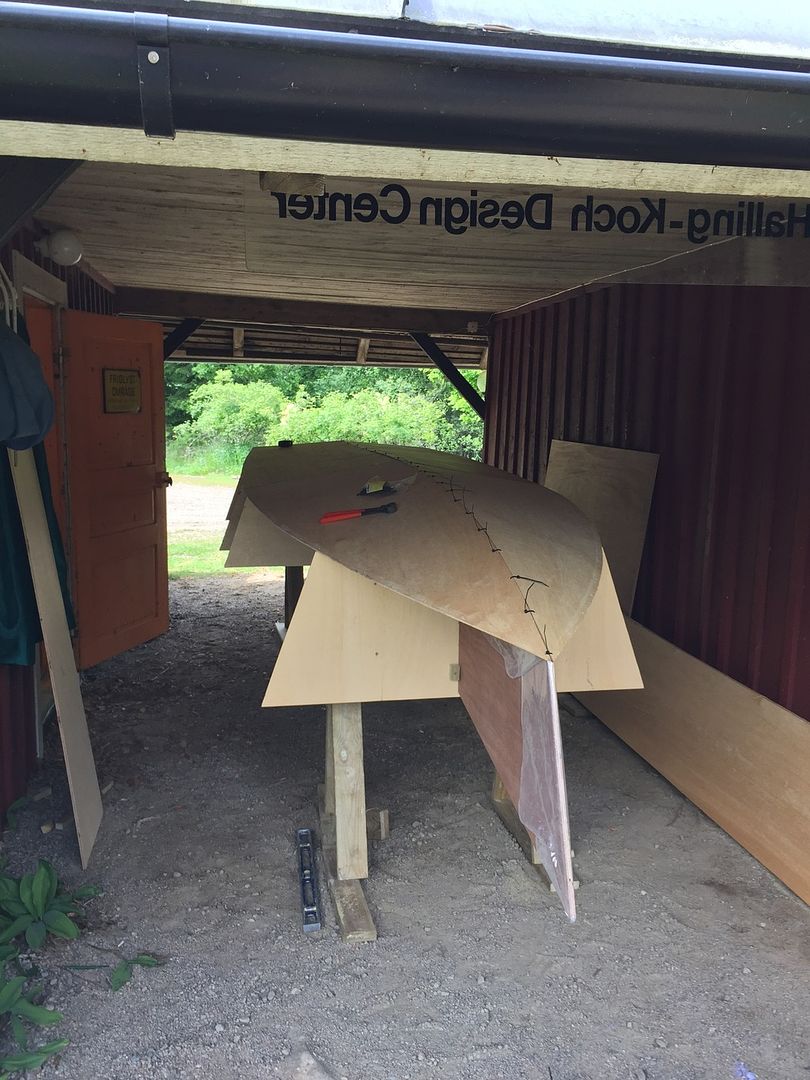
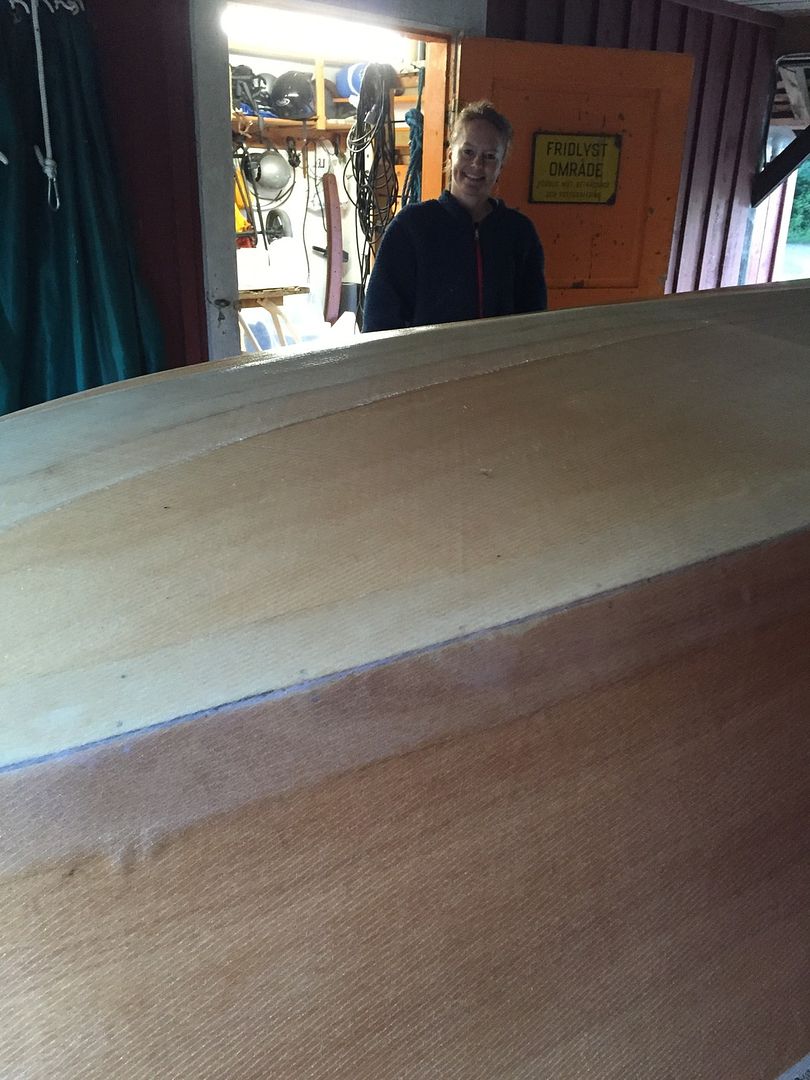
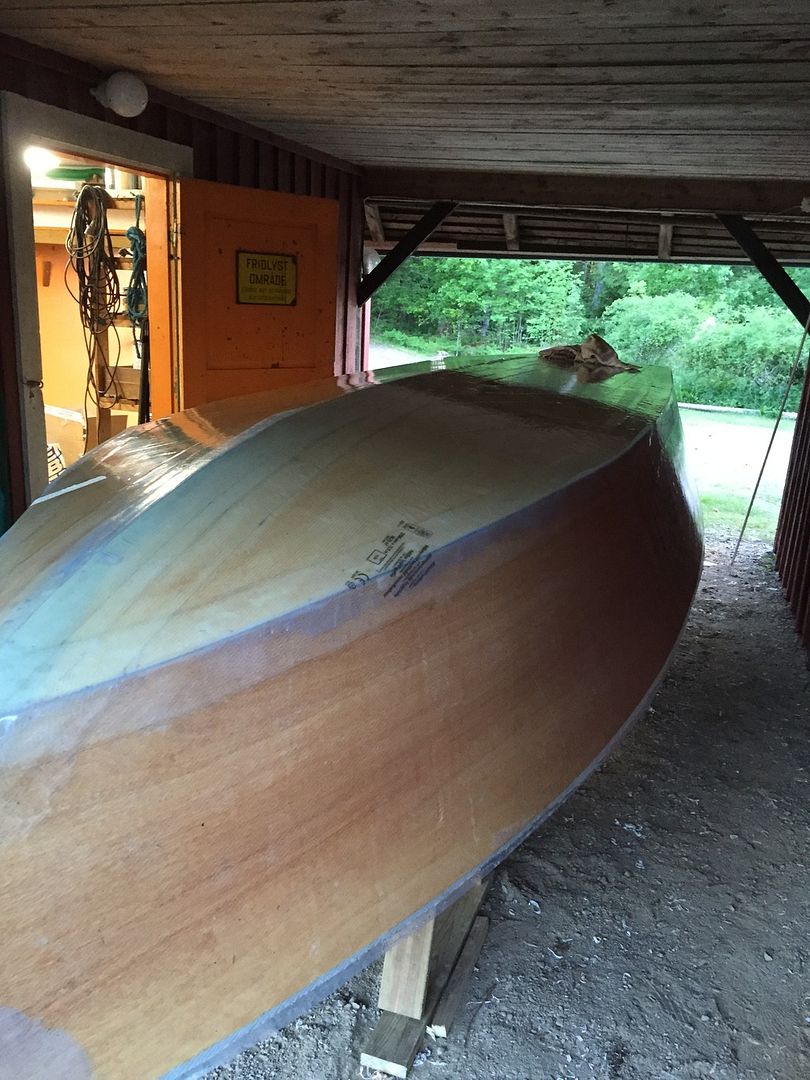
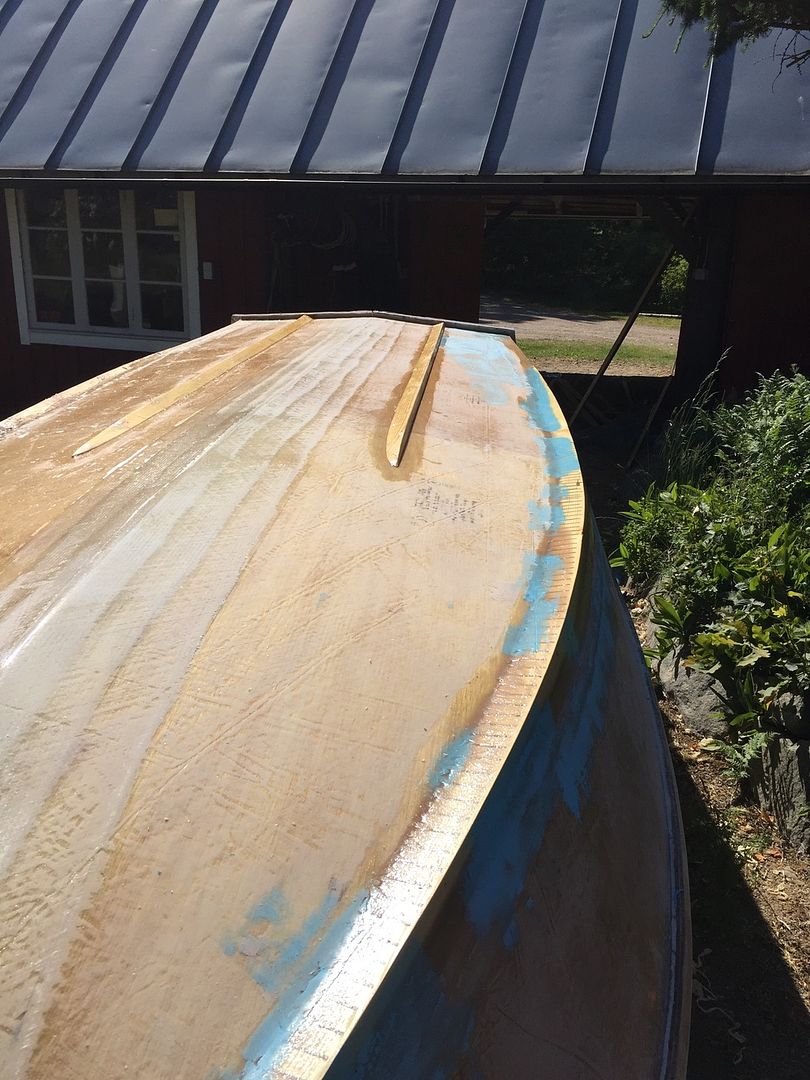
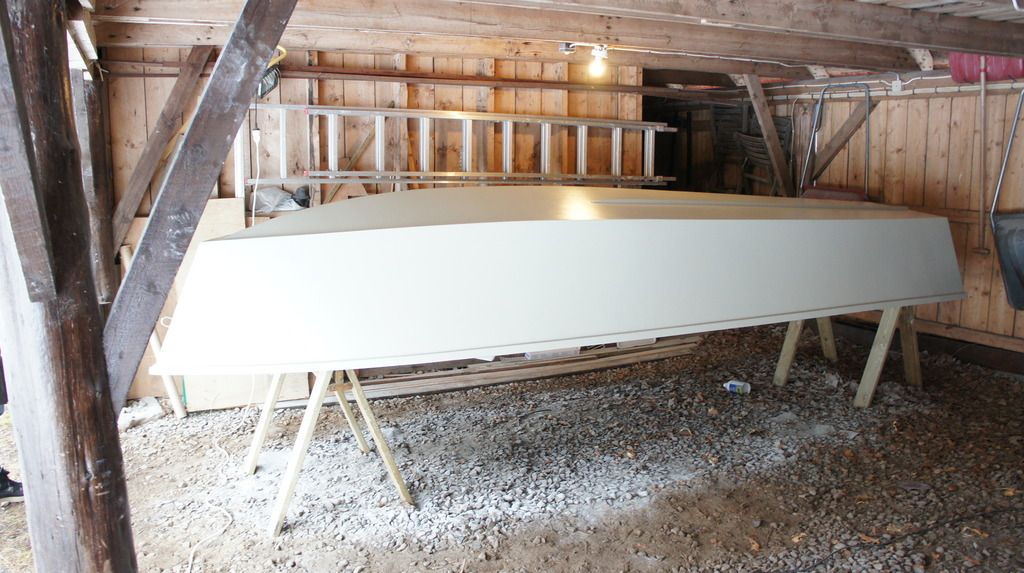
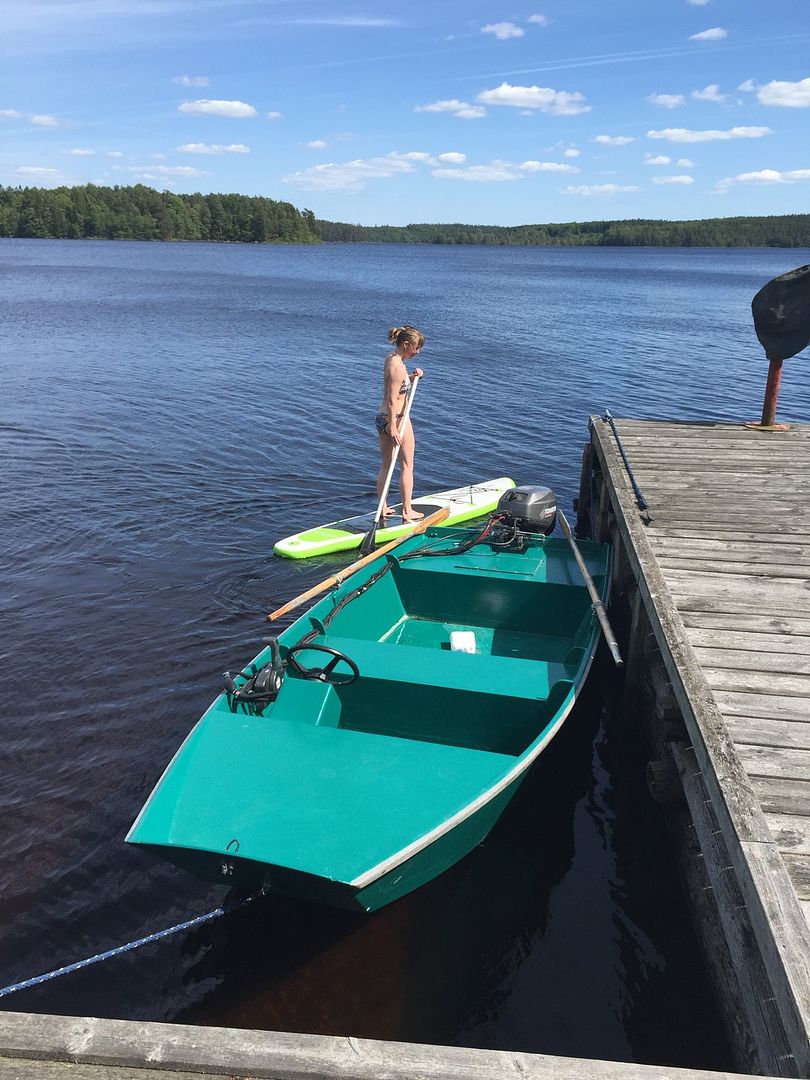
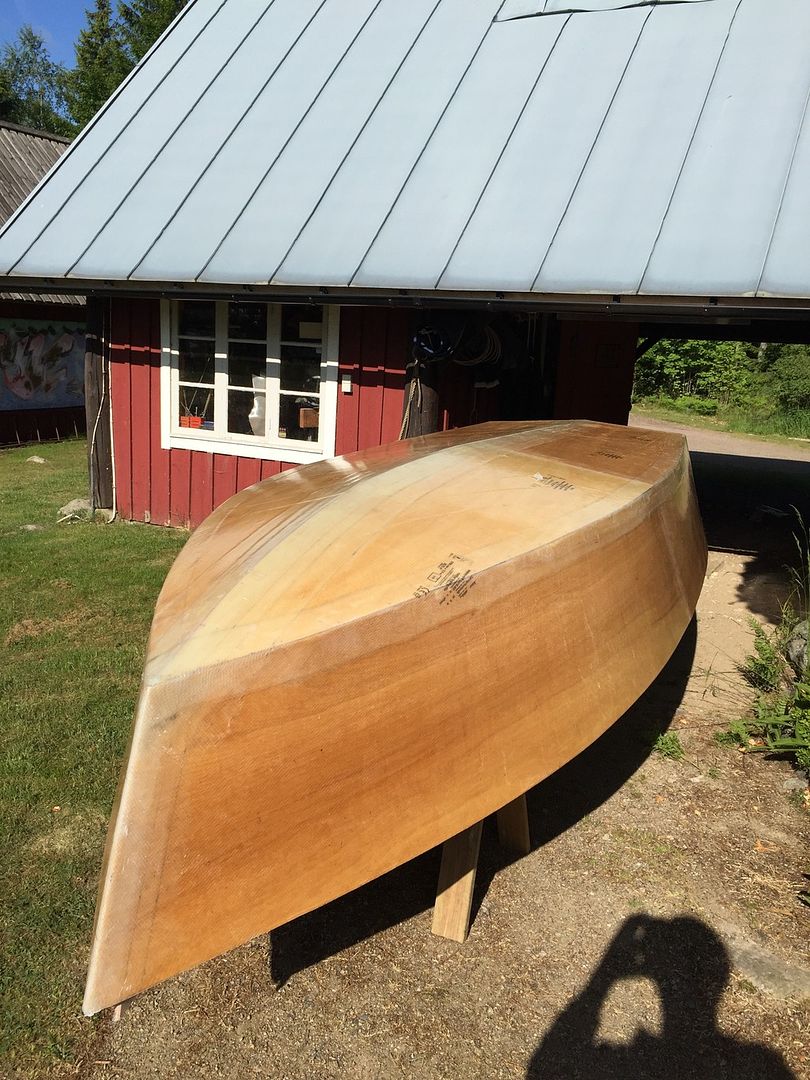
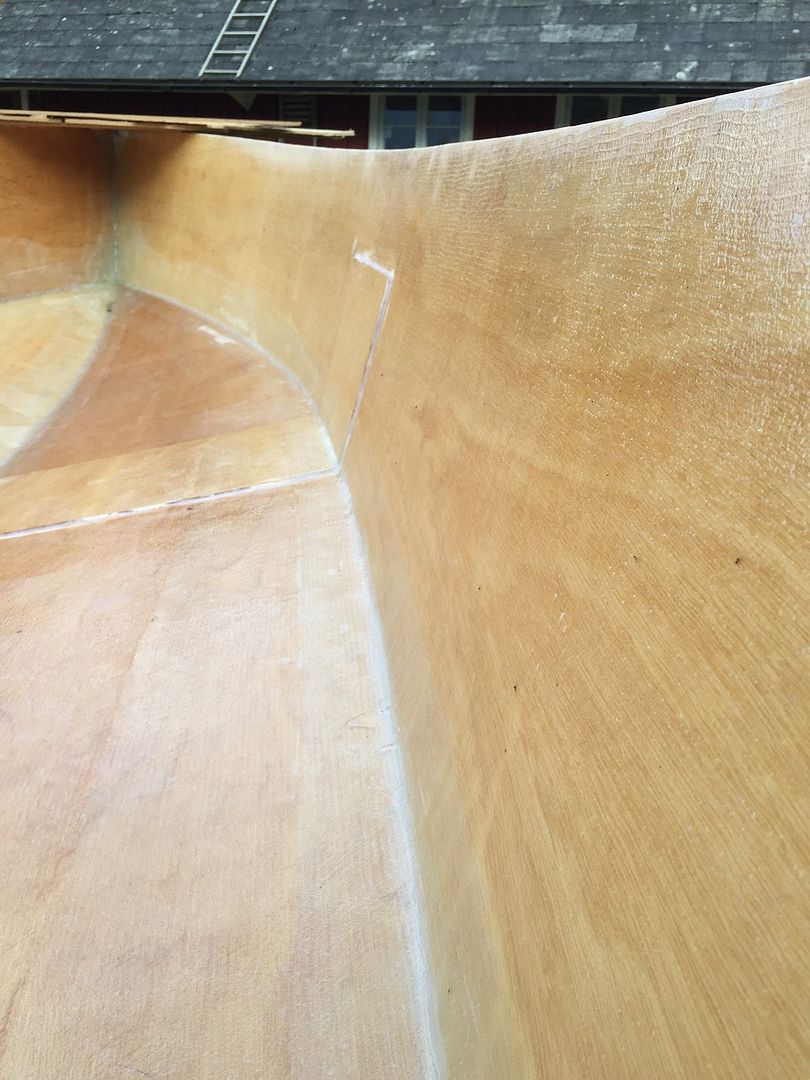
the strips are removed, the epoxy spot welds have been knocked flush and rounded with a handplane and the boat has been sanded with 120 grit to knock all radii down to 1/2 inch.. the assistant have fled the sanding and boatbuilding site for some time on the water herself (caught a shot of her on the SUP with the GF14 in the foreground)
the lines for the biax have been marked up so once the assistant is back from her escapades we will fill the seams, and cover the boat in biax and epoxy.. wet in wet, and try to cover it with some polyethylene sheeting (poor mans peel-ply) to get it little smoother for sanding later ...
Re: FS14 2 week build
Posted: Wed Jun 10, 2015 10:19 am
by jacquesmm
Now that I see the picture, I remember that GF14 with the steering all the way forward. How does that work for you? Does it get on plane easily?
Re: FS14 2 week build
Posted: Wed Jun 10, 2015 10:44 am
by deuce_454
it works perfect... jumps on a plane... and there is plenty of room to row it just by turning 180 deg on the seat... it really isn't in the way .. right now the tohatsu sputters a bit, thinks it wants a good carb cleaning and a pair of plugs so i can't upload a video just now.. but it works so well im planning to duplucate the setup on the FS14
Re: FS14 2 week build
Posted: Wed Jun 10, 2015 12:52 pm
by tcason
How many HP on the GF 14?
Would you want more?
GF questions
Posted: Wed Jun 10, 2015 3:33 pm
by deuce_454
its an 18 horse tohatsu 4 stroke.. the bottom o the hull has a slight rocker, and i had to retro-modify the floor of the boat to take the speed.... so yes and no.. with a stiffer bottom from the get go... and no rocker, i guess you could put a 25 on it.... but it is a flat-bottomed boat, so 4 inch chop feels like a lot at 25 mph... 10 isn't enough though (tried it and hated it)
if i had to build it again and have my choice of any engine... id probably get an evinrude etec 25, but we are building the FS14 as its replacement, and im guessing the tohatsu will feel right at home on her
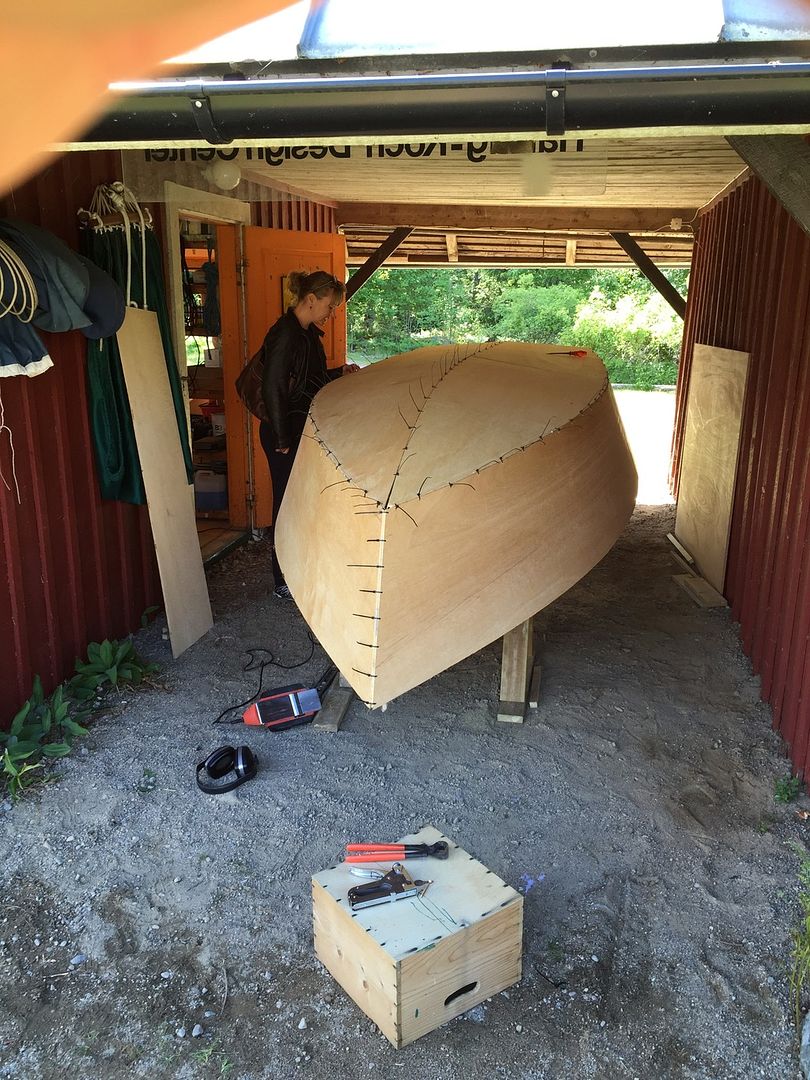
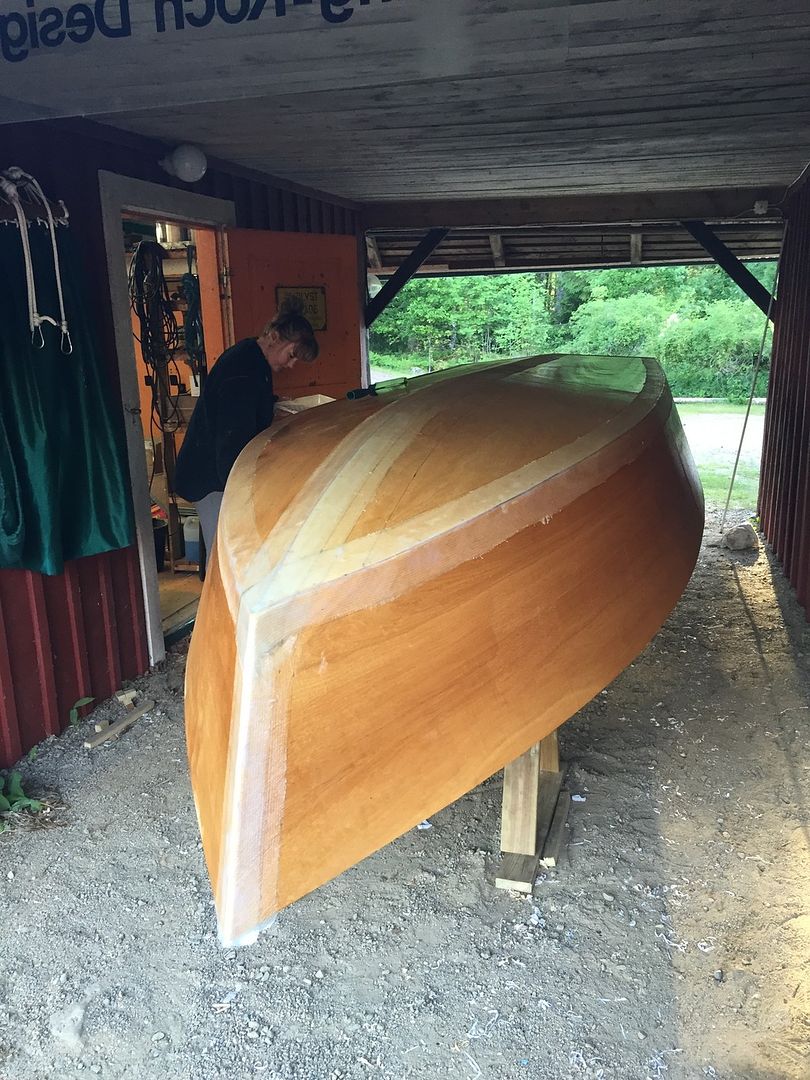
evening of day 5... it looks like a boat
Posted: Wed Jun 10, 2015 3:42 pm
by deuce_454
Re: FS14 2 week build
Posted: Wed Jun 10, 2015 3:44 pm
by deuce_454
Re: FS14 2 week build
Posted: Wed Jun 10, 2015 4:15 pm
by terrulian
What was the thickness of the plastic sheeting?
sheeting
Posted: Wed Jun 10, 2015 4:28 pm
by deuce_454
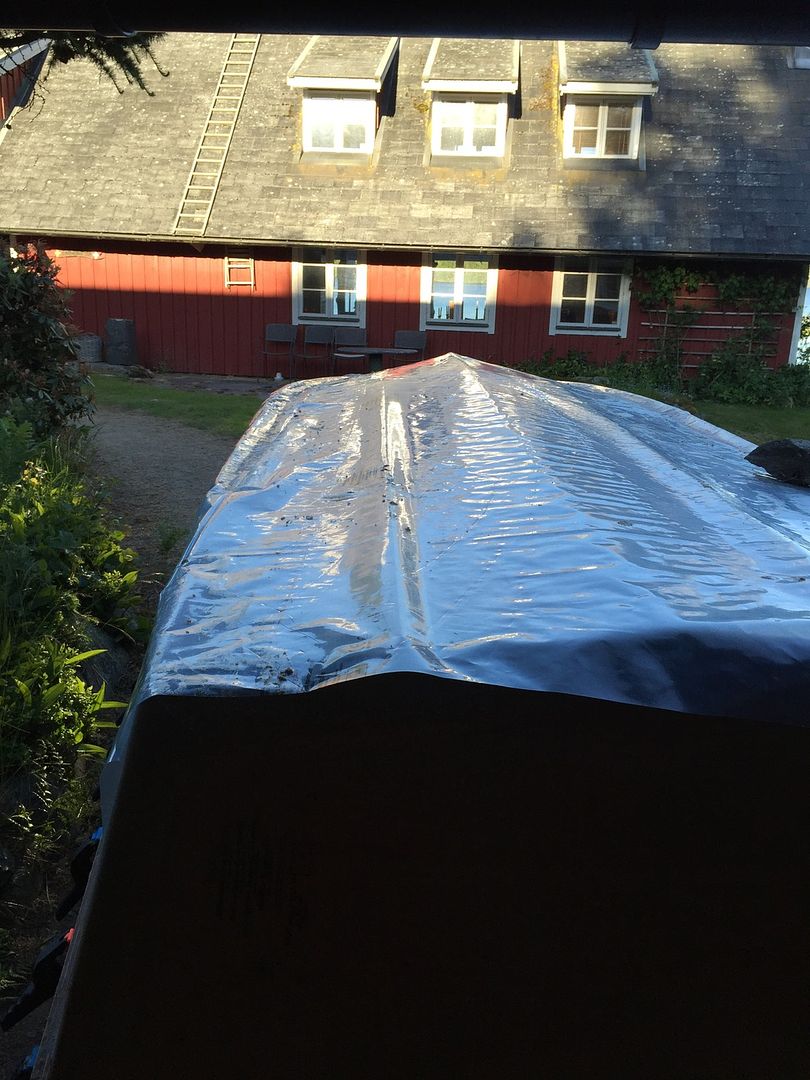
its pretty thick.. about 0.1mm (something like 4/1000'') its that PE-LD sheeting used as a vapour barrier in house construction....
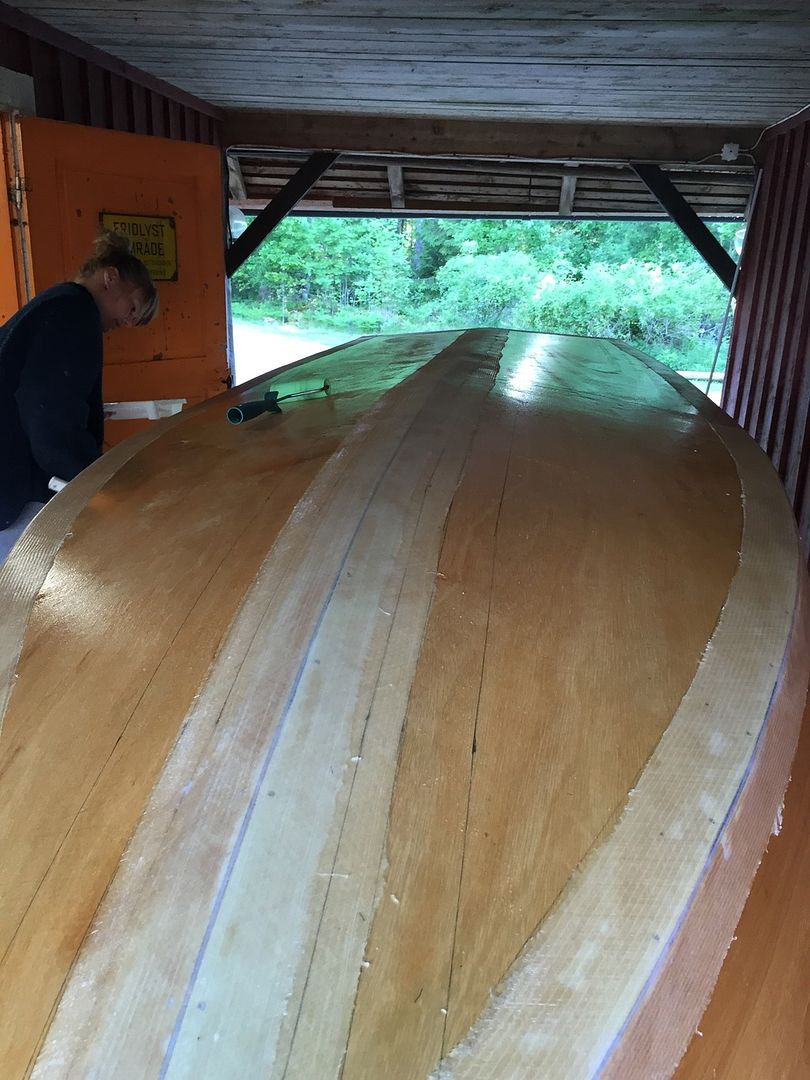
End of day 5!!
Posted: Thu Jun 11, 2015 2:02 pm
by deuce_454
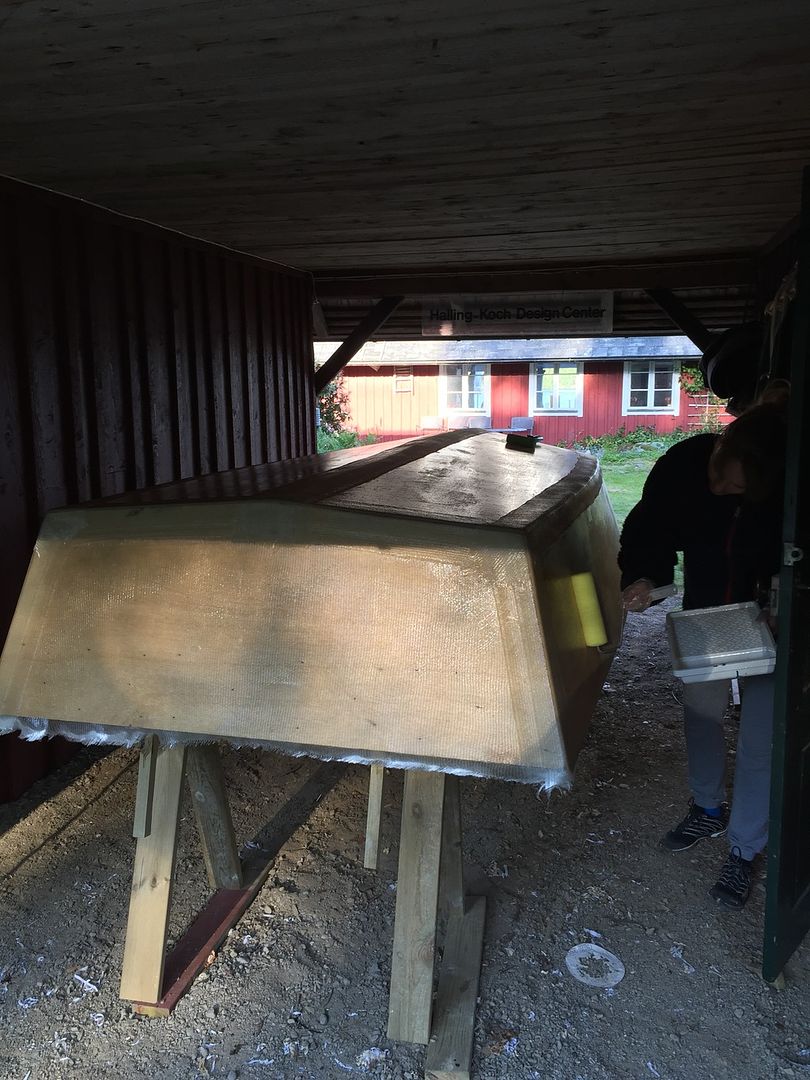
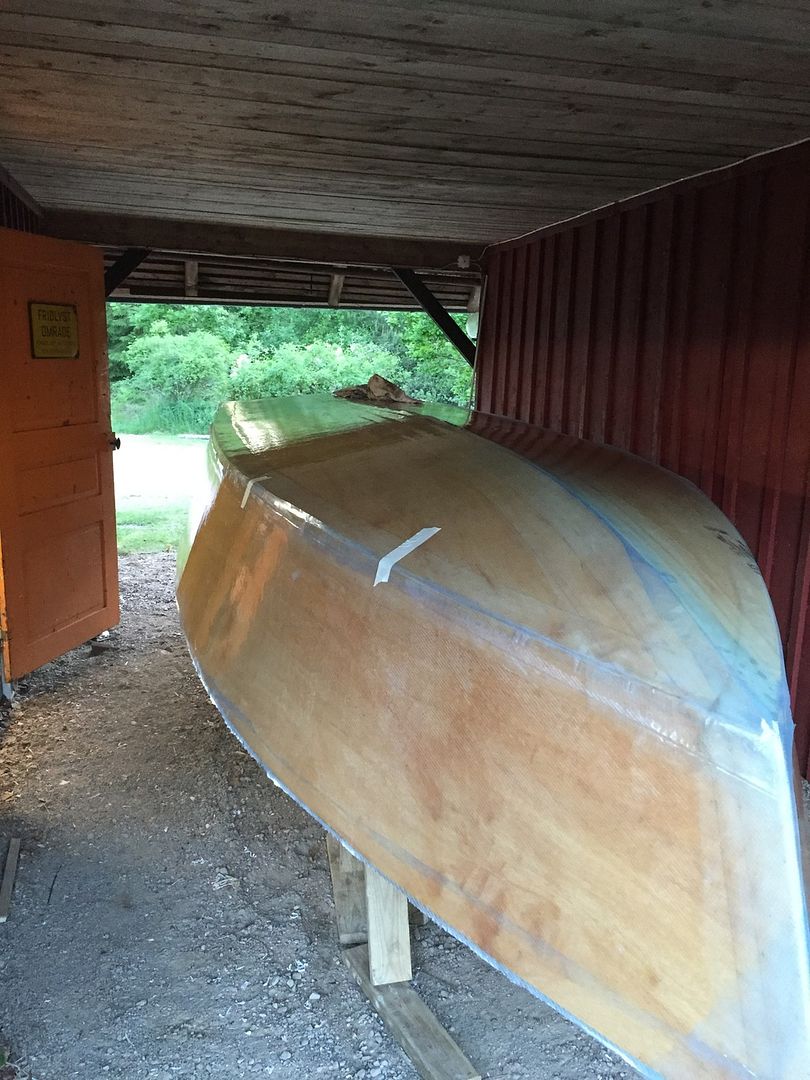
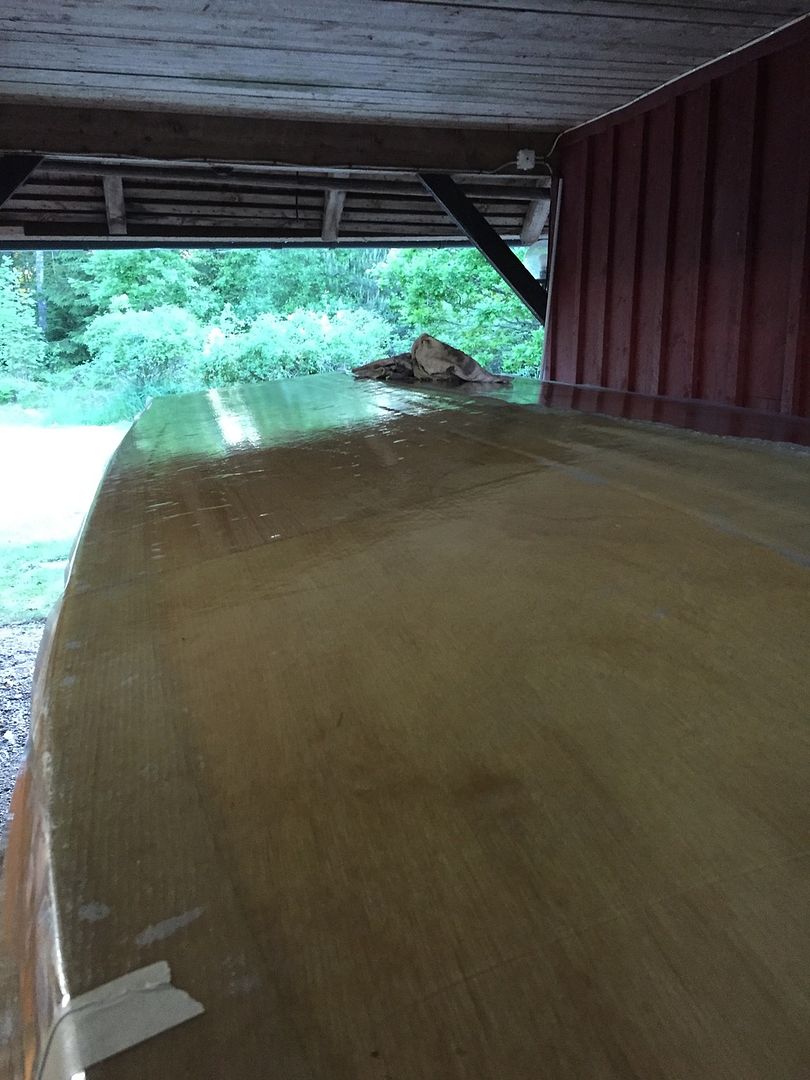
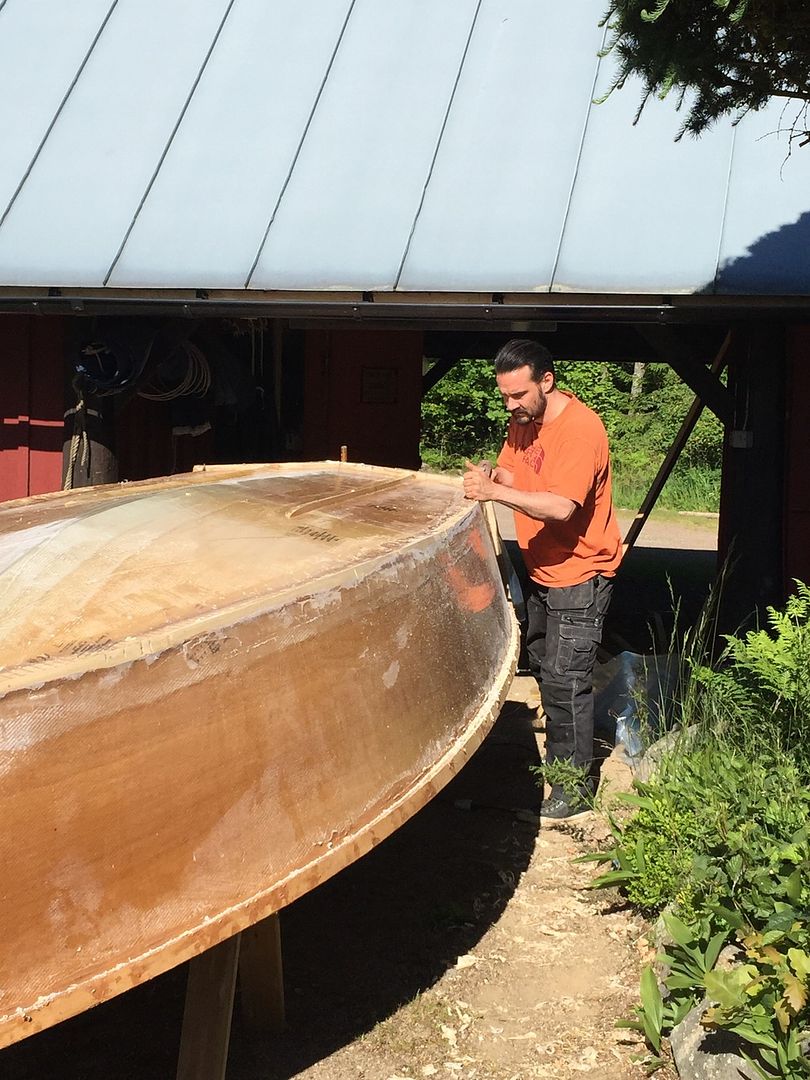
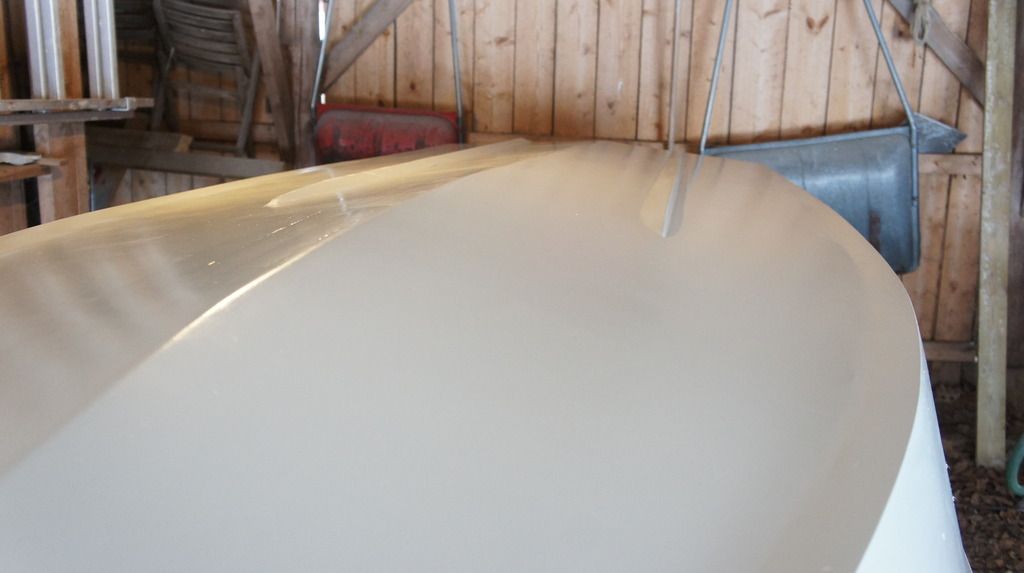
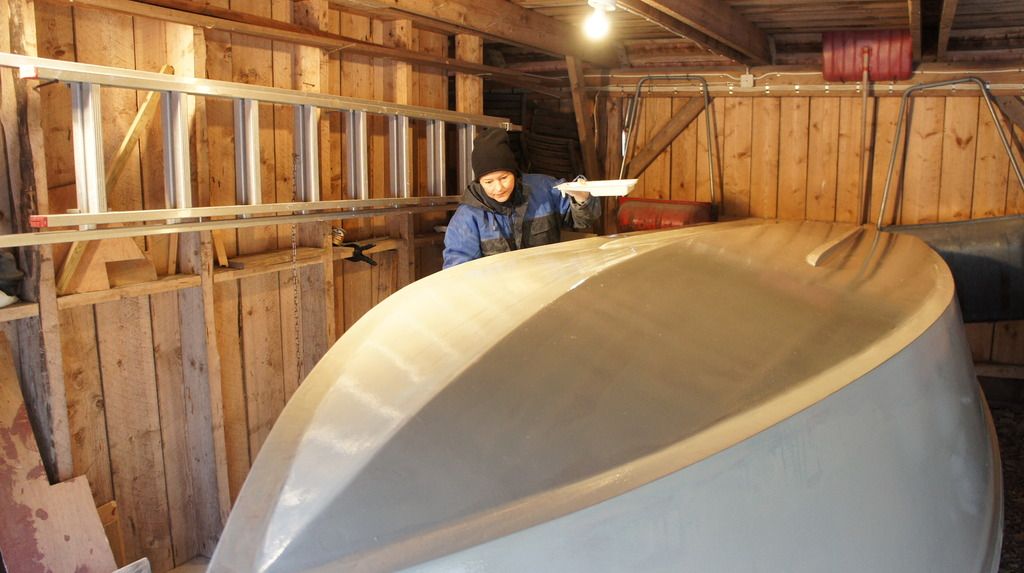
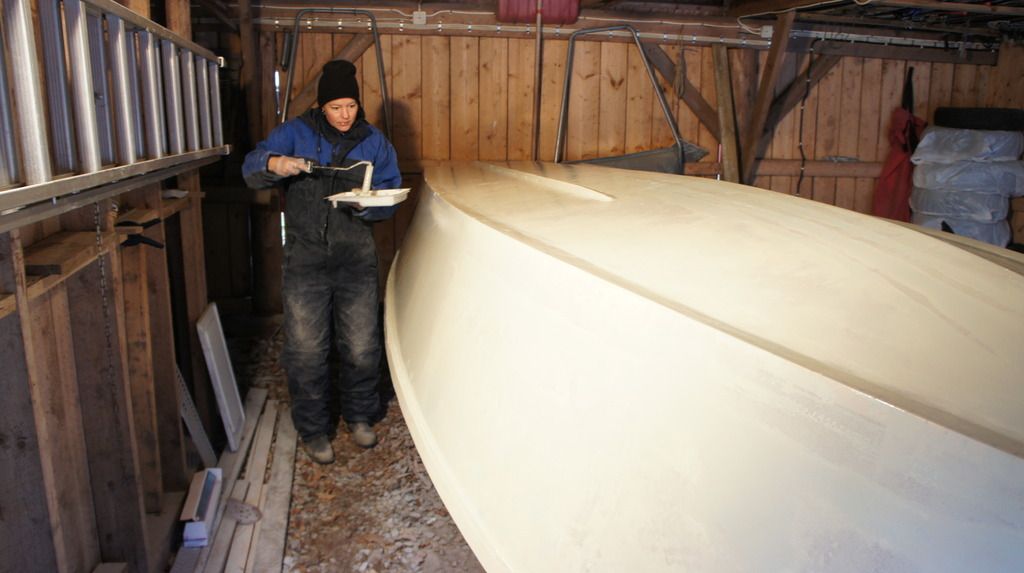
got a lot done today... but im probably not going to have time to do any fairing of my time schedule is to hold even little... uncovered the lamination and it turned out better than expected with the 4 thou sheating...
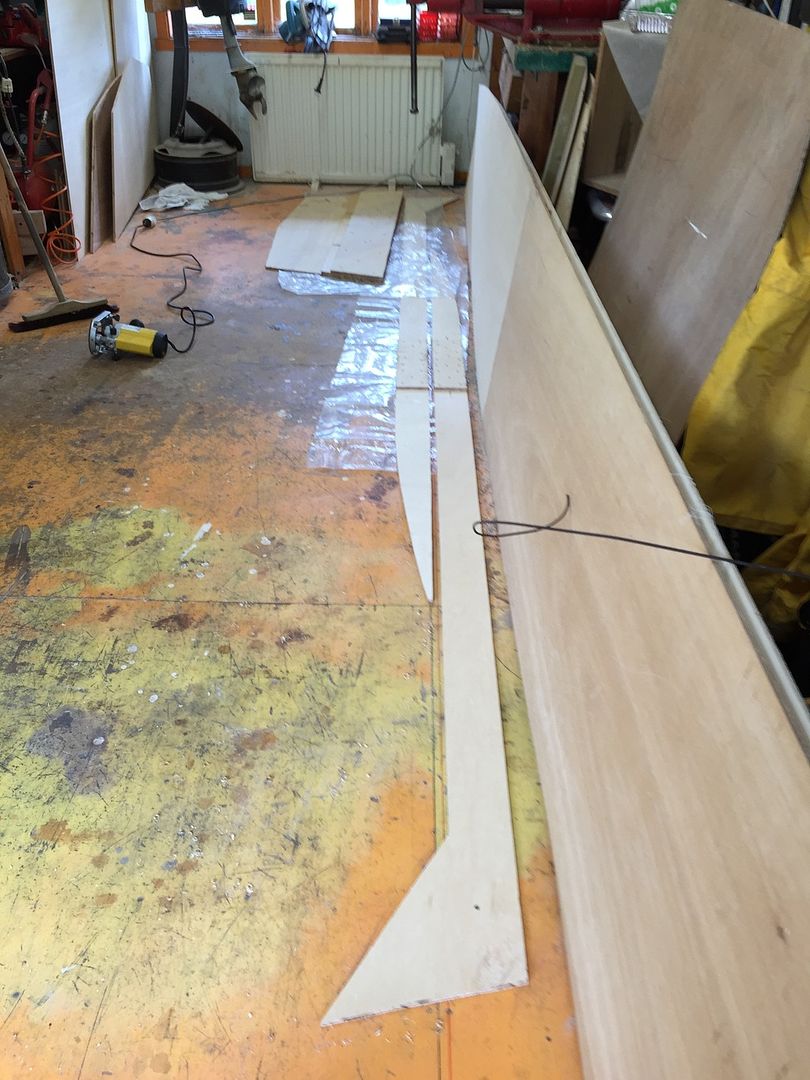
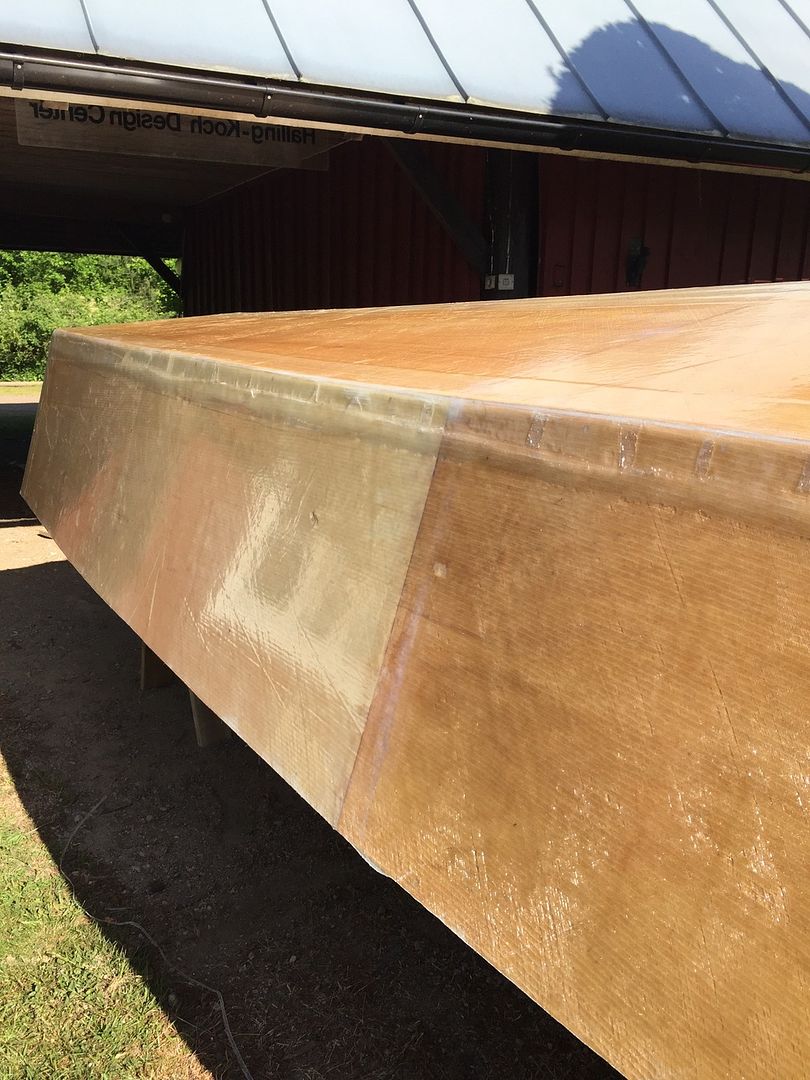
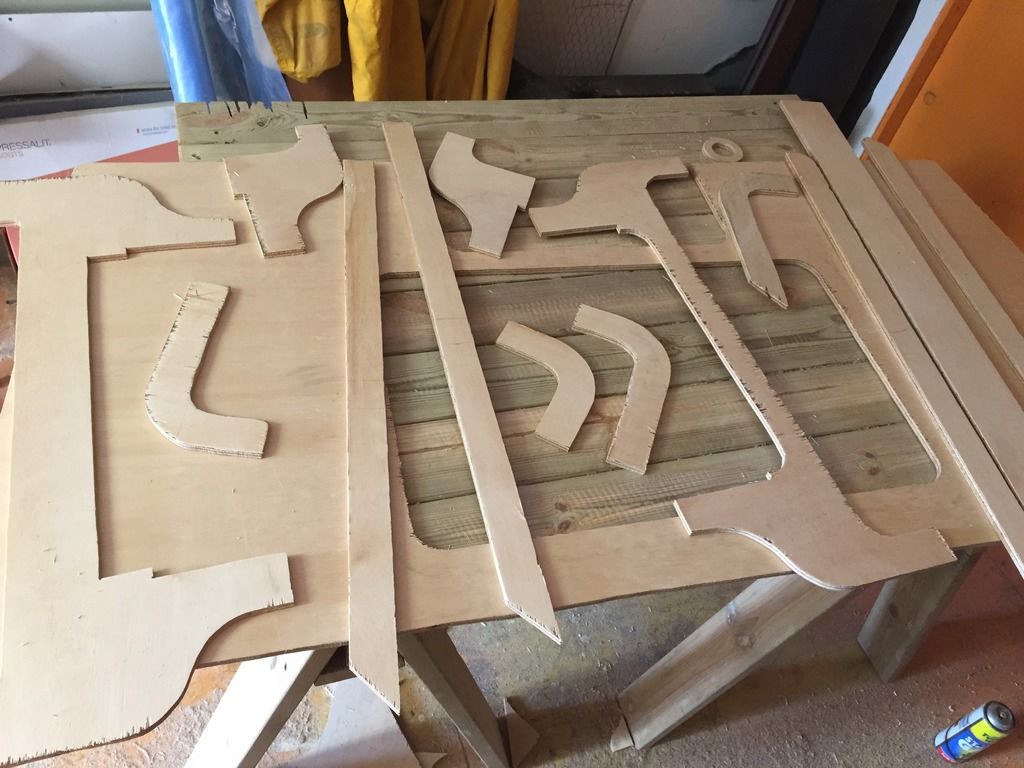
embarked on the mammoth task of cutting all the pieces than make up the rub rail lamination.... then as one could expect i got sidetracked for a few hours.... decided to install strakes and a reverse chine instead of the spray rail... just looks better imho..
i decided against letting the reverse chine extent all the way back as i confabulated an unfounded theory that as it narrows towards the stern it introduces a degree of hook... Jacques ?? anyway, the strakes are placed 10 inches from the CL as are the stringers inside the boat... the reverse chine tapers off behind the widest point so it is in effect parallell to the strakes..
it will be more apparent what im rambling about once the PE comes off tomorrow
I got a good deal on the clamps, about 1.30 a piece for some quality clamps so i went for 40....
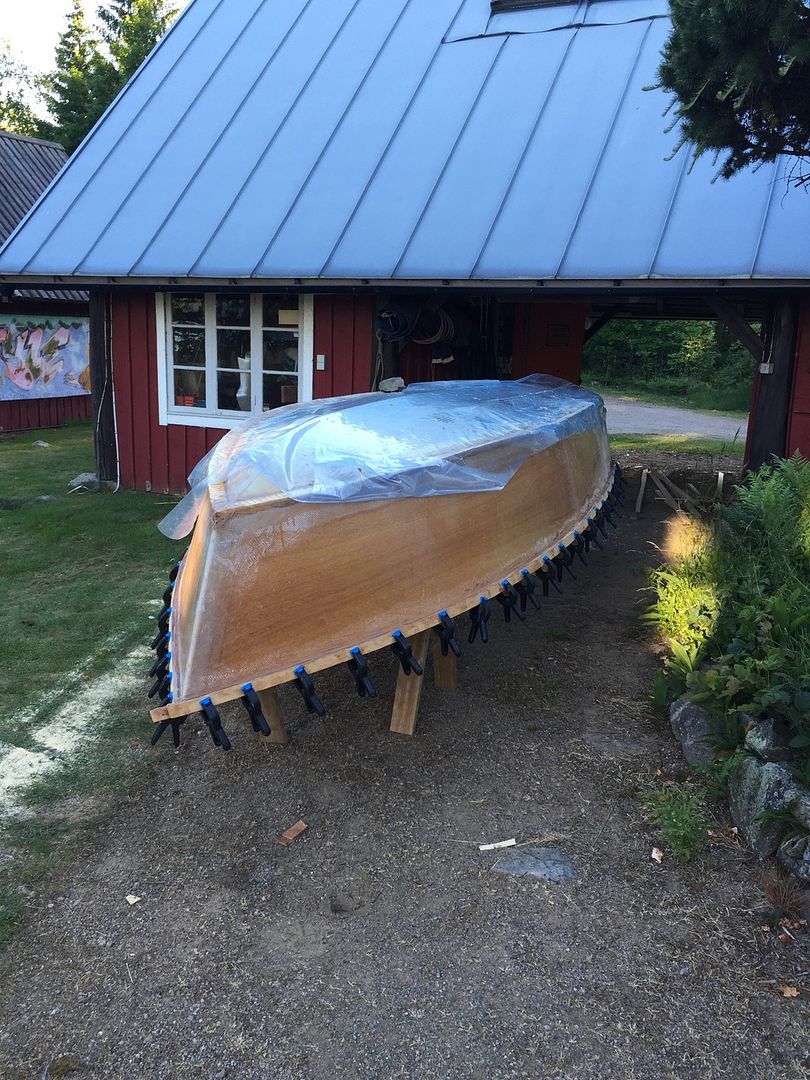
some rough fairing tomorrow and a flip... 1 day behind schedule....

late noon day 7....
Posted: Fri Jun 12, 2015 10:12 am
by deuce_454
Re: FS14 2 week build
Posted: Fri Jun 12, 2015 10:28 am
by ks8
go go go !

Re: FS14 2 week build
Posted: Fri Jun 12, 2015 11:05 am
by MarkOrge
Wow nice - I have been working on my Phantom for 3 years....
in all fairness
Posted: Fri Jun 12, 2015 11:43 am
by deuce_454
MarkOrge wrote:Wow nice - I have been working on my Phantom for 3 years....
it might be day 6 but i have been putting in a least 10 hours of solid work for the last 6 days.. and the epoxy has almost all been laid wet in wet... thats 60+ hours and counting and i dont have to clean up every time... this devided into 3-5 hour work weekends and evenings, puts me at what equates to week 10
Re: in all fairness
Posted: Fri Jun 12, 2015 12:12 pm
by deuce_454
deuce_454 wrote:MarkOrge wrote:Wow nice - I have been working on my Phantom for 3 years....
it might be day 6 but i have been putting in a least 10 hours of solid work for the last 6 days.. and the epoxy has almost all been laid wet in wet... thats 60+ hours and counting and i dont have to clean up every time... this devided into 3-5 hour work weekends and evenings, puts me at what equates to week 10
Add to that the hours of my lovely assistant (wonderfull girlfriend) and thats an additional 10 hours... anyway.. the flip is coming up, stay tuned..
Re: FS14 2 week build
Posted: Fri Jun 12, 2015 1:05 pm
by peter-curacao
70+ hours, it shows
looking great from here, good job
Re: FS14 2 week build
Posted: Fri Jun 12, 2015 1:46 pm
by deuce_454
peter-curacao wrote:70+ hours, it shows
looking great from here, good job
coming from you thats a big compliment
im a big fan of yours and CL´s builds...
Re: FS14 2 week build
Posted: Fri Jun 12, 2015 2:08 pm
by Corto Maltese
Can you slow down a little bit, please. We cannot read so fast
FLIP !!! yaiii
Posted: Sat Jun 13, 2015 7:39 am
by deuce_454
fiddeling..
Posted: Sat Jun 13, 2015 11:40 am
by deuce_454
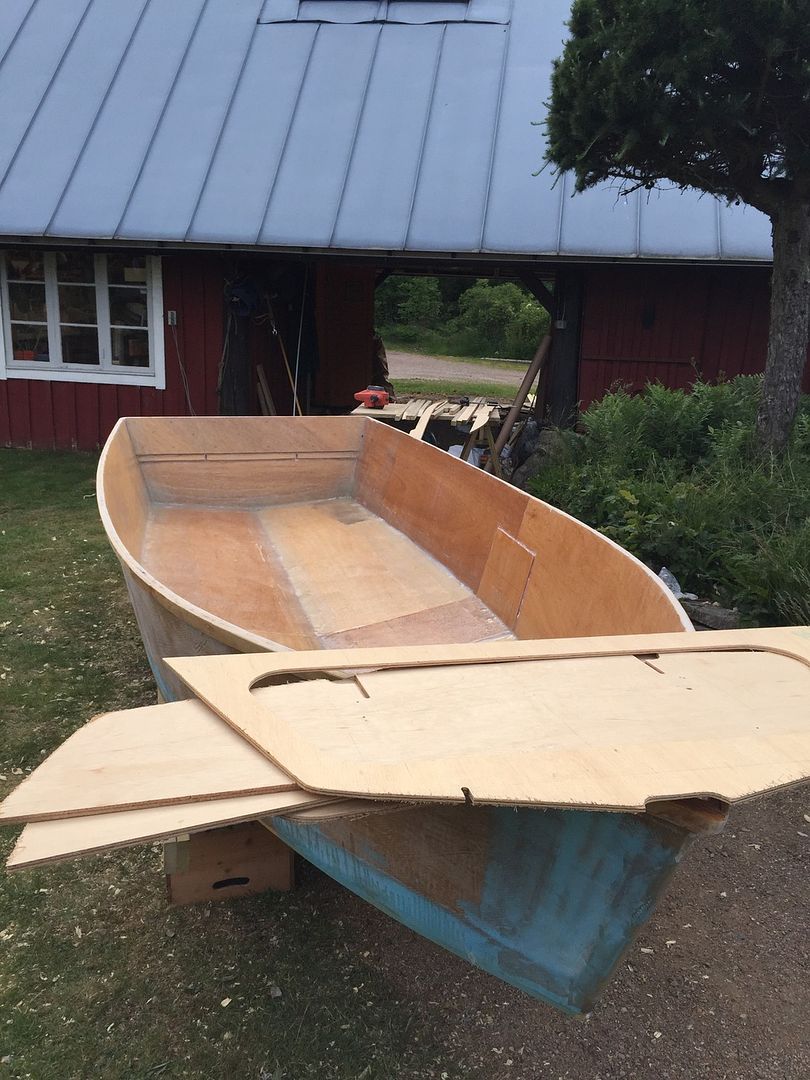
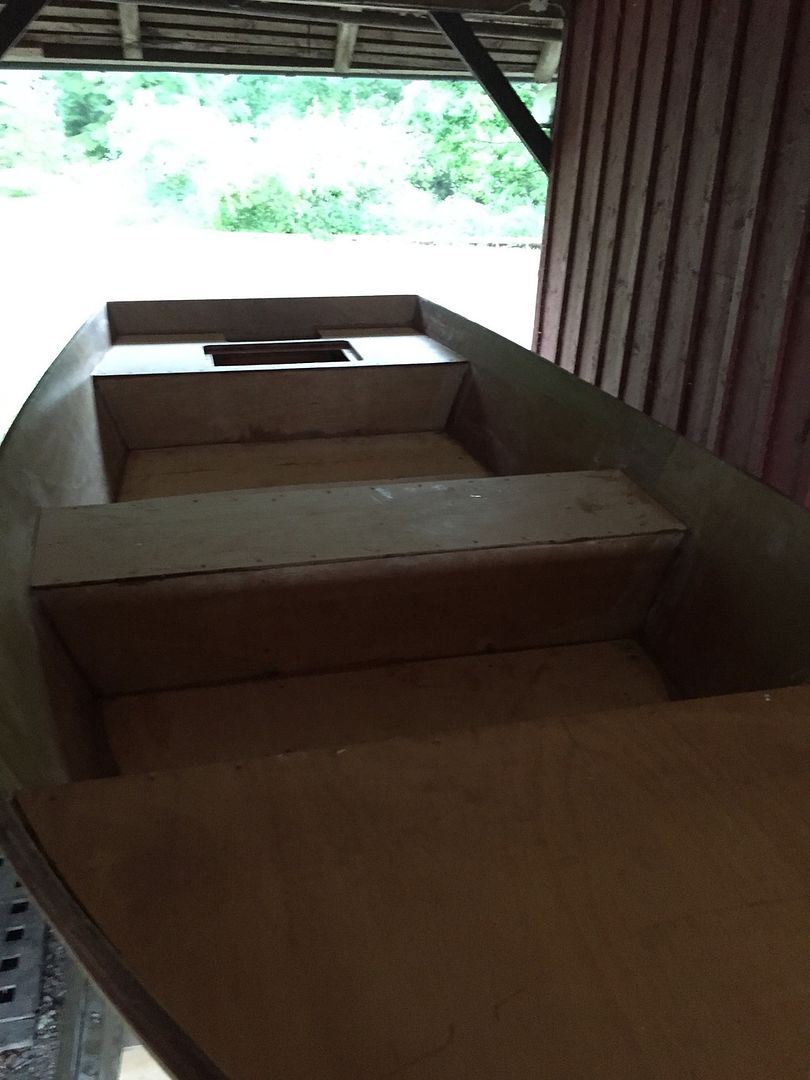
we measured out the stations locations... decided to modify the seating positions.. since I'm replicating the forward steering from the green GF14 there really isn't a need for the rear platform to be that big.... we spaced it rearward to give 4 foot (122 cm) of room between the mid and rear seat.. coincidentally the with of the plywood we will be installing as flat floor...
im contemplating lowering the stringers by 1 to 1 1/3 inch since the cleats and floor will make up for the lost stability... jacques chime in please..

anyway.. on with the inside glassing... pictures will follow
fillets :-)
Posted: Sat Jun 13, 2015 1:09 pm
by deuce_454
so close to burning it !!
Posted: Sat Jun 13, 2015 4:01 pm
by deuce_454
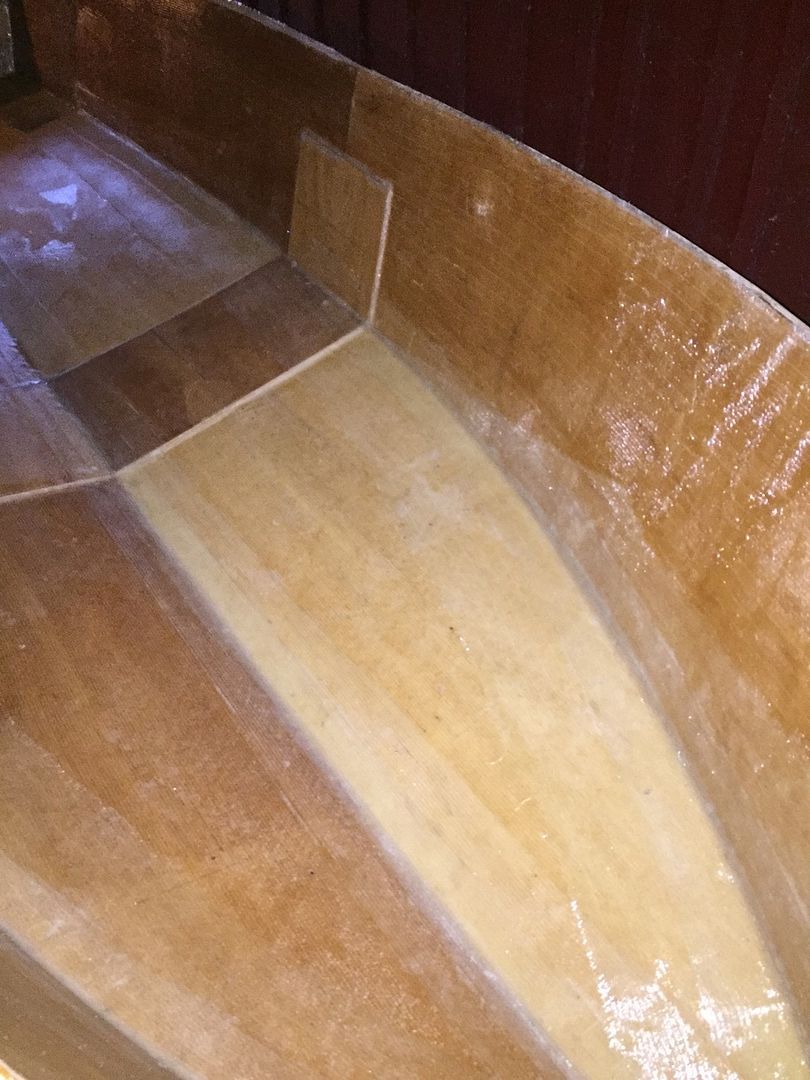
inside fibreglassed ! i won't even go into details of the irritating little things that went wrong.. but after much screaming, crying and grinding of teeth... we prevailed and were able to coat the inside. lay all the 6 inch biax tape and cover the bottom and sides with biax.... wet in wet
and apart from discovering that mosquitos are attracted to epoxy and sweating boat builders it all turned out well in the end
tomorrow, seat frames / stations, stringers and floor fitting... and if tempers allow a console build

Re: FS14 2 week build
Posted: Sun Jun 14, 2015 6:44 am
by Cracker Larry
I can't believe how much work you've got done in a short period of time. Nice looking work too
Good job to you and your girlfriend
Thank you CL for the kind words
Posted: Sun Jun 14, 2015 1:21 pm
by deuce_454
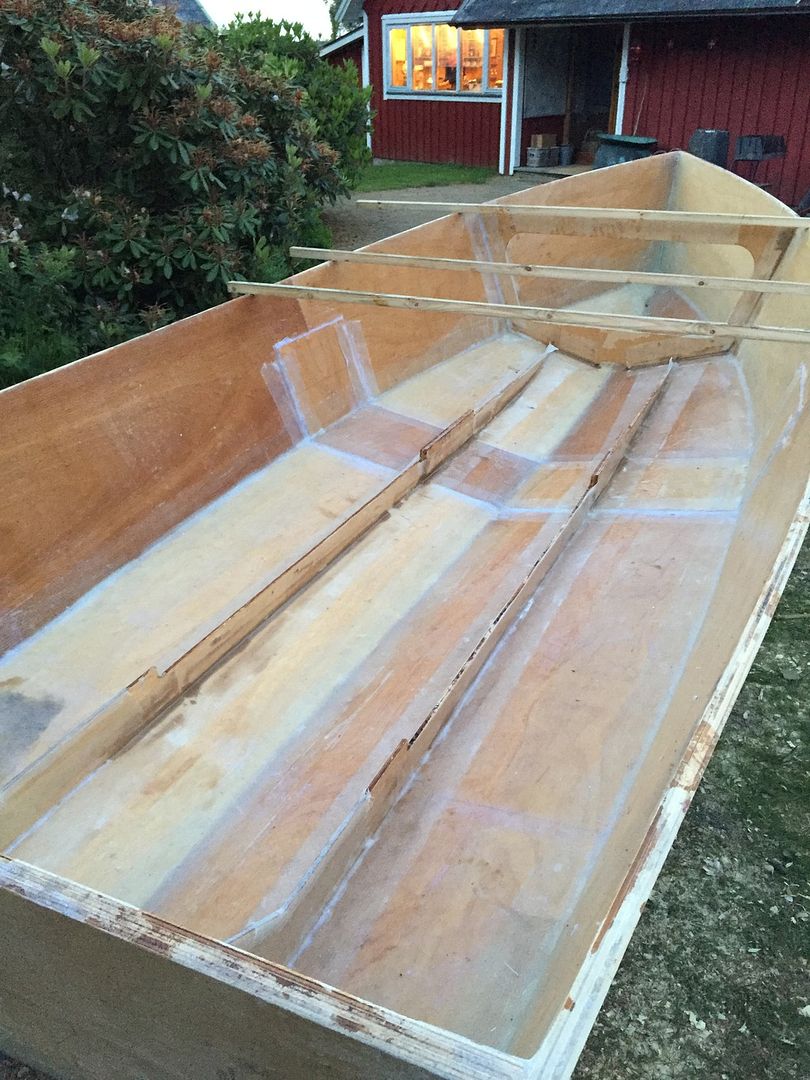
Thank you CL.. it mean a lot comming from you... progress if slow today... had to get some supplies, also sanded the inside and gave it a sealer coat of epoxy.. and fix a couple of air pockets... the stations have been trimmed and are ready to go in.. i have decided to lower the floor so the stringers have been accordingly lowered... the strakes underneath the boat are equally high.. and with the added strength of the cleats that will sandwich the stringers i have decited that ill be fine... a couple of calculations prove that the MOI of the stringer with the "beefed up" flange is stiffer and stronger than the full height stringer....
some before pics:
Re: so close to burning it !!
Posted: Sun Jun 14, 2015 1:26 pm
by peter-curacao
deuce_454 wrote: i won't even go into details of the irritating little things that went wrong.. but after much screaming, crying and grinding of teeth...
The better it feels later when you two "driving" her around on the water, believe me, don't ask me how I know
Boat keeps on looking better and better serious!
stringers
Posted: Sun Jun 14, 2015 4:14 pm
by deuce_454
its official.. i hate fillets
but the stringers and front station is in... fillets, glass and gritted teeth...

but its done just before end of dusk
the lowered deck, and resulting lower stringers do now not quite reach the front frame... it sits at the end of the intersection of the deck and the bottom.. or will do so tomorrow
Re: FS14 2 week build
Posted: Sun Jun 14, 2015 6:13 pm
by peter-curacao
Looks very good IMHO
progress....
Posted: Mon Jun 15, 2015 9:15 am
by deuce_454
Re: FS14 2 week build
Posted: Mon Jun 15, 2015 12:36 pm
by ks8
evening day 9.. progress
Posted: Mon Jun 15, 2015 1:38 pm
by deuce_454
Re: FS14 2 week build
Posted: Mon Jun 15, 2015 9:23 pm
by peter-curacao
This build is so cool to follow, thx for sharing
Btw all looks great
Re: FS14 2 week build
Posted: Tue Jun 16, 2015 1:42 am
by wegcagle
Awesome. You're tearing through this build. Wow
Will
Re: FS14 2 week build
Posted: Tue Jun 16, 2015 3:21 am
by deuce_454
thank you both... its a good motivation factor to have to keep the build going here too... only have a few days left until i have to pack it up and wait till august for some weekends to fair and paint.... probably won't be all done before next spring ..
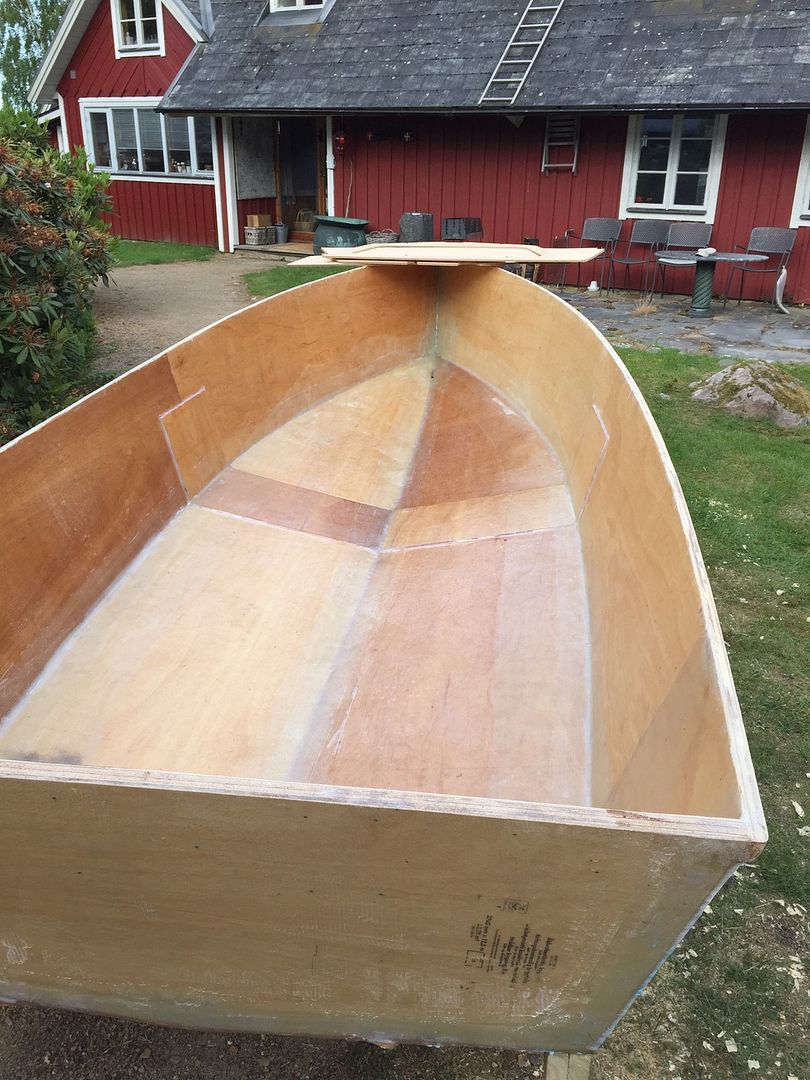
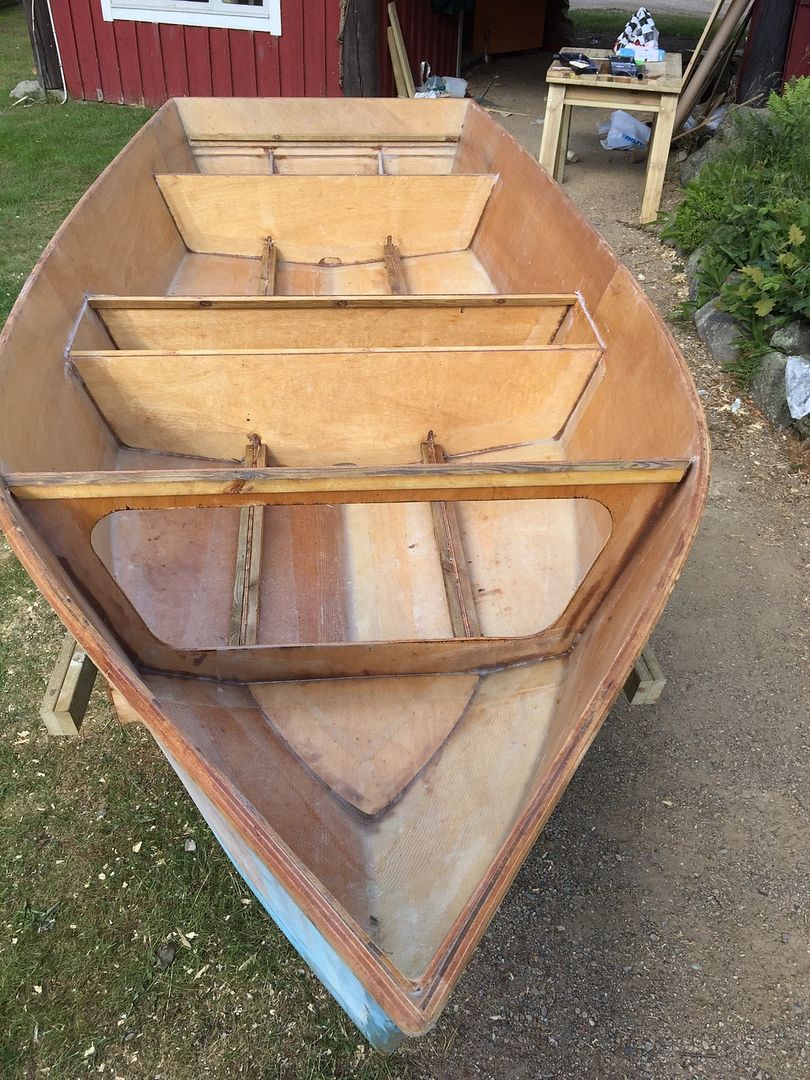
janyway just woke, had some coffee up and removed the clamps, and thought id share a few pics without the clutter

Re: FS14 2 week build
Posted: Tue Jun 16, 2015 8:00 am
by icelikkilinc
Jacques should really sponsor you as you have been the only builder that matches the study plan timing.
I thought that I was fast but man you are on a sprint, good job
Re: FS14 2 week build
Posted: Tue Jun 16, 2015 8:19 am
by peter-curacao
icelikkilinc wrote:Jacques should really sponsor you as you have been the only builder that matches the study plan timing.
I thought that I was fast but man you are on a sprint, good job
Hahaha that's what I was thinking, if not sponsoring he certainly should mention this build in the plans I think, just to show it is possible
sloooow
Posted: Tue Jun 16, 2015 2:45 pm
by deuce_454
feels like i didn't get anything done today..... spent a good few hours cleaning up a mess left from 10 days of building thrash.... I then found out we had run out of epoxy and didn't have enough Polyurethane foam to fill the middle seat and under the floors....
so as they say: necessity is the mother of invention... and we first assured us that there was no place within a 5 hour roundtrip drive that had ANY poly foam....

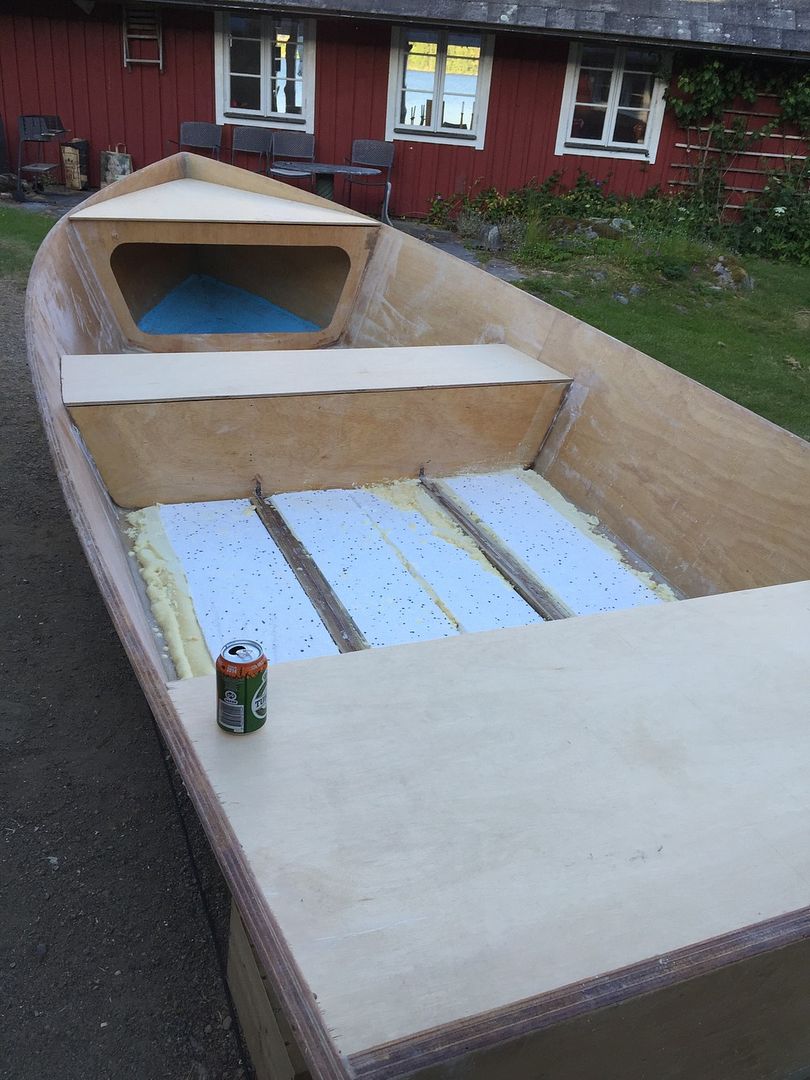
.. i then decided to venture into uncharted territory... and I'm sure there is a good reason nobody does it this way... but how to fill 310 litres of void with 80 litres of foam?? fill some of the void! so we found some polystyrene insulation, sawed and filed it to fit with a 1 inch gap
(and produced a sinful mess in the progress, I'm sure i will be disinherited once the family sees the lawn) but i digress....
we mixed the foam .. poured it onto the sanded hull and set the Polystyrene into the expanding foam and screwed down some transverse battens to keep it at deck level.. that way there will be some measure of bond between the Polyurethane foam and the polystyrene to keep it from disintegrating ... it was a mess, and polystyrene doesn't belong in a boat as I'm sure someone will tell me why in a reply post.. the sanding and filing afterwards produced even more of a mess .... but i now have 600 lbs of buoyancy
and after some extensive cleaning, raking and sewearing... I'm done for today... tomorrow its the final installation of plywood, and the seats and bottom will be permanently glue into place
right now I'm designing a console and a hatch... with is proving difficult (the plans specify "hatch to suit owners preference" which isn't much to go on jacques!)
anyway... a pic is in order (it looks the same under the mid seat)
Re: sloooow
Posted: Tue Jun 16, 2015 2:54 pm
by jacquesmm
deuce_454 wrote:
right now I'm designing a console and a hatch... with is proving difficult (the plans specify "hatch to suit owners preference" which isn't much to go on jacques!)
I love to use that TBP mark: To Builder's Preference . . .
but the plans should have included a letter size drawing sheet showing a typical hatch with the minimum 75 mm offset and cleats to frame.
Many builders will find a plastic hatch somewhere and cut the hole to fit.
Re: sloooow
Posted: Tue Jun 16, 2015 3:04 pm
by deuce_454
jacquesmm wrote:deuce_454 wrote:
right now I'm designing a console and a hatch... with is proving difficult (the plans specify "hatch to suit owners preference" which isn't much to go on jacques!)
I love to use that TBP mark: To Builder's Preference . . .
but the plans should have included a letter size drawing sheet showing a typical hatch with the minimum 75 mm offset and cleats to frame.
Many builders will find a plastic hatch somewhere and cut the hole to fit.
i might be overcomplicating things but I'm trying to design something that will be keeping some if not all of the rainwater out as the boat will be moored outside all summer... and its a pain to bail a compartment devided by stringers thru a hatch opening ... also it like it to be flush as people will sit and walk on it
Re: FS14 2 week build
Posted: Tue Jun 16, 2015 4:51 pm
by jacquesmm
You go for the most sophisticated hatch type!
I am certain that you have the skills but don't underestimate the difficulty.
Where is going to drain? maybe to the cockpit through a groove in the deck? Or with a drain tube?
Flush deck is another challenge.
My son has an FS12 and we had an old Bomar plastic hatch laying in the garage. It is almost flush deck. We simply cut the opening "et voila", we had an hatch.
Re: FS14 2 week build
Posted: Tue Jun 16, 2015 5:05 pm
by pee wee
The stringer height inside the compartment is higher than the sole is going to be isn't it? If you put a bottom in the compartment then a simple drain hole out to the sole, wouldn't that work? Yes, that is more materials and another step, but it might make things simpler and easier in the long run.
Re: FS14 2 week build
Posted: Tue Jun 16, 2015 7:25 pm
by peter-curacao
Building good hatches what result in dry compartments is difficult, I tried and next time I haul her out of the water I have to rebuild them, I can safely say I failed in my bench hatches , gutters are to narrow and on top of that the drains are to small, some dust,sand and debris and they are cluttered.
Since you are somewhat on a time frame I agree with Jacques, don't try to invent the wheel again, just buy the nicest standard hatches you can find out there and drop them in. Of course it's your boat so you have to decide, it's just a suggestion

If I'm not mistaken there's a master boat builder wandering around this site who came to this conclusion long time ago,I believe his slogan is, buy them,drop them in and don't look back, or something like that
Re: FS14 2 week build
Posted: Wed Jun 17, 2015 3:29 am
by deuce_454
peter-curacao wrote:don't try to invent the wheel again
words of wisdom.... However.. i was unable to comply...
in the words of Rita Mae Brown " good desicions comes from experience, experience however comes from bad desicions" so since i haven't tried to build a flush, waterproof hatch... i also haven't failed yet
.. this prompted me to give it a go... actually it was more the aversion towards sitting og a hatch that wasn't flush... and if the hatch turns out to not to be able to keep the water out... it will at least be flush...
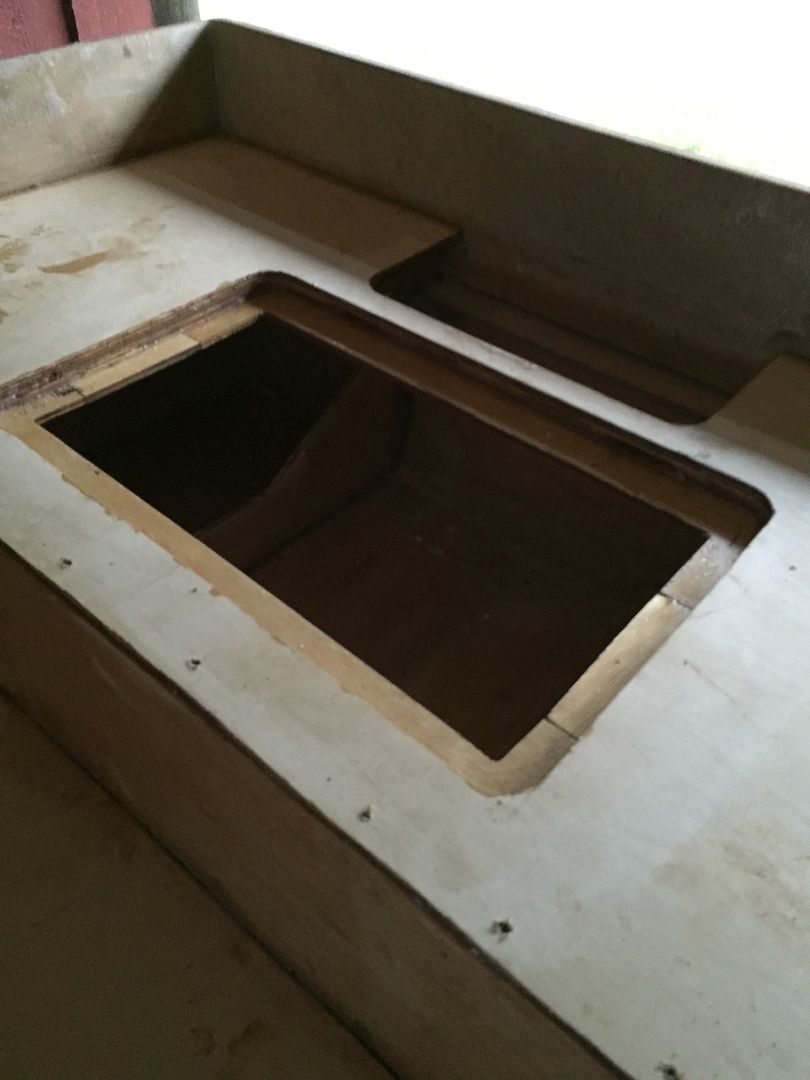
the drains are 3/8 x 2 inches and drain into the cut out for the outboard (its 15 inch shaft so it will need to be quite low)
i figured it would move around alittle when i glued it.. so its cut little over size and will be filled and filed once the 20 min epoxy is cured... there will be a small lip towards the inside of the lower lip of the seat... and a corresponding one on the lid that fits into- and protrudes half way into the gutter.... make any sense??
Re: FS14 2 week build
Posted: Wed Jun 17, 2015 9:30 am
by terrulian
make any sense??
Not to me but I'm not a good measure. I hope as you continue the construction of the hatch it will become clearer.
But I must say, this level of complexity is just not conceivable in a two-week build. What is going on here is a bit of time compression, or expansion, that must have been mastered from watching Star Trek.
Re: FS14 2 week build
Posted: Wed Jun 17, 2015 10:08 am
by Cracker Larry
I think this isn't their first rodeo
Re: FS14 2 week build
Posted: Wed Jun 17, 2015 1:56 pm
by ks8
Flush mounted hatch gutters, reasonably sized, are always going to be overwhelmed in any strong rain or shipping of a sea, until they finally drain. Test by dumping a bucket of water over them. So the attempt to waterproof the hatch will fail or succeed based on the effectiveness of the flexible plasticized (rubber?) gasket used to keep water out even when the gutters are swamped. But gutters can realistically be sized to keep up with a light rain. But I doubt that is what most builder's expect as their limit. So when scratch building/designing, do give attention to the gutter size and drainage, but also give a lot of thought to a good sealing gasket and how it will function.
Re: FS14 2 week build
Posted: Wed Jun 17, 2015 2:20 pm
by deuce_454
ks8 wrote:Flush mounted hatch gutters, reasonably sized, are always going to be overwhelmed, until they finally drain. So the attempt to waterproof the hatch will fail or succeed based on the effectiveness of the flexible plasticized (rubber?) gasket used to keep water out even when the gutters are swamped.
Looking at the drains I've built it is painfully obvious that you are right
i will put in a nice rubber gasket on the inner lip and and cross my fingers

anyway... some progress today
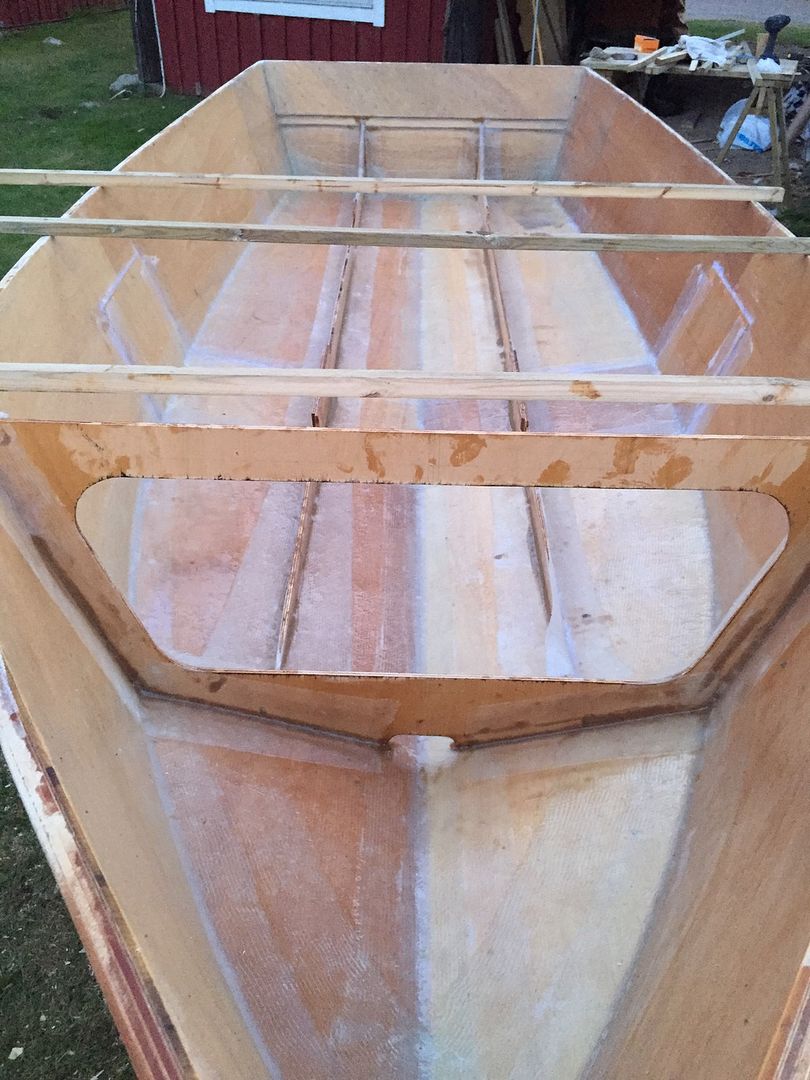
fitted the floors and glued them in... to is my experience that trying to lay fillets and tape wet in wet requires that the fillet can't escape underneath the floorboards or whatever is being glued, so in order to get a decent result i screwed the floorboards to the stringers and seats to cleats.... and laid bead of filled epoxy around the perimeter of the floorboards.. tomorrow when we radius the seats in preparation for tape, we will lay a nice filet and tape on top of it... that way it doesn't get squeezed underneath the floorboards when we wet the tape...
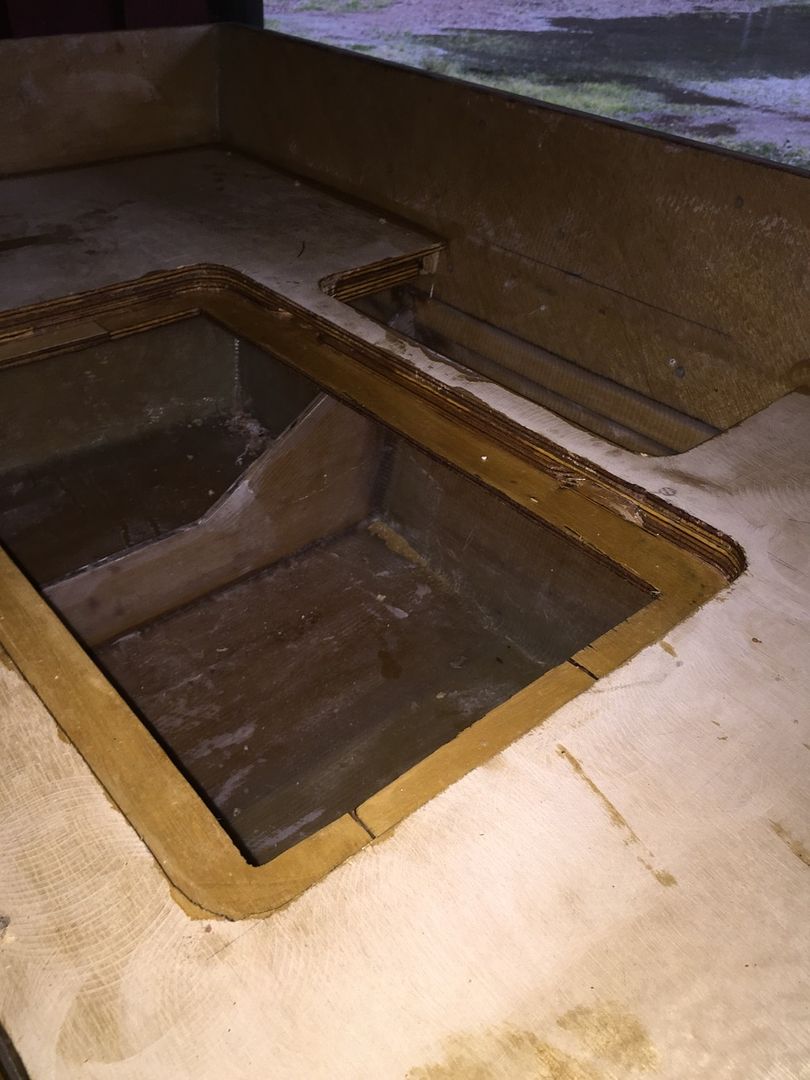
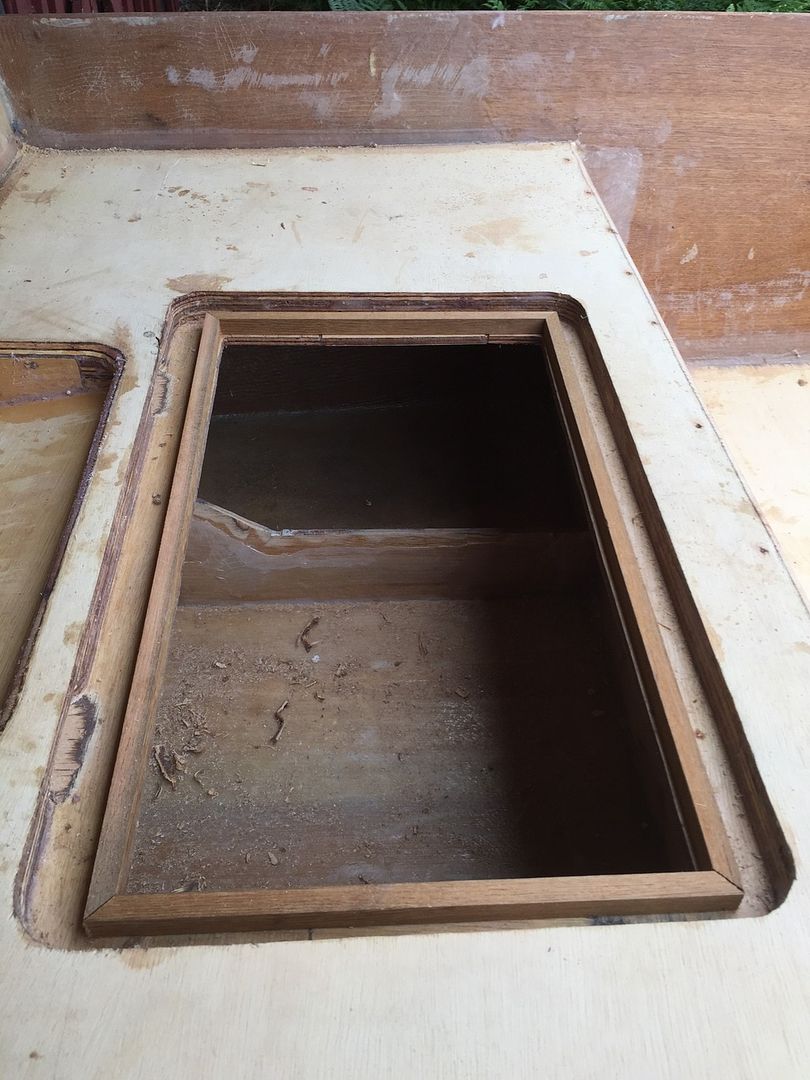
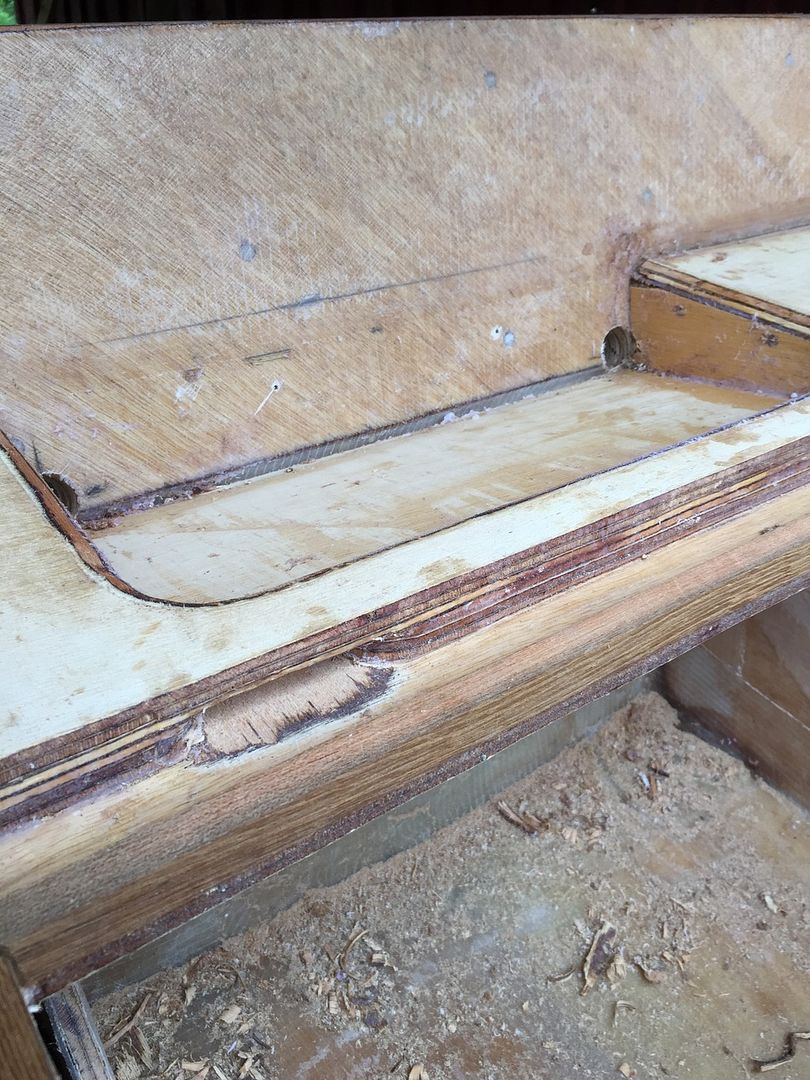
the well for the hatch is cleaned up 50% and the drains should show in the pics.... there will be a lip extending 3/4 inches up.. on the inner edge of the flat part in the centre.. forming a gutter drat will hopefully drain into the motor well (that is yet to be constructed)
the lid or hatch will have a lip that hangs into the gutter to let water drip into the gutter and not run into the compartment... (hopefully)
Re: FS14 2 week build
Posted: Wed Jun 17, 2015 2:32 pm
by ks8
THis simple hatch of mine, without gutters, is not watertight at all. It drains (or leaks!) into a wet stowage area that drains to the cockpit, so I kept it simple, and might even actually paint it some day.
The impromptu steering works well enough for now when I am alone and spotting at the bow, until I get official stick steering rigged up front.
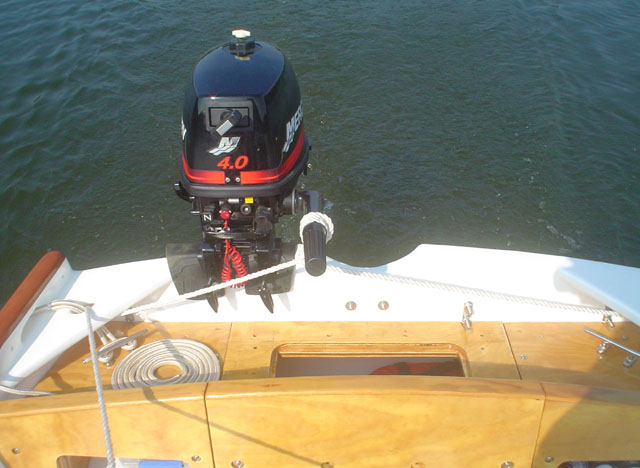
8379
Wet lockers have the easiest solutions for hatches.
Looks like you have enough real estate there to get a good inner lip for a gasket in there.
Remember to subtract the thickness of the gasket (after it compresses) from the final height of the finished (painted) inner lip. I mention that for others following the thread. I suspect you are way ahead of me on that sort of detail.
Re: FS14 2 week build
Posted: Wed Jun 17, 2015 3:01 pm
by deuce_454
ks8 wrote:THis simple hatch of mine, without gutters, is not watertight at all. It drains (or leaks!) into a wet stowage area that drains to the cockpit, so I kept it simple, and might even actually paint it some day.
The impromptu steering works well enough for now when I am alone and spotting at the bow, until I get official stick steering rigged up front.
8379
Wet lockers have the easiest solutions for hatches.
Looks like you have enough real estate there to get a good inner lip for a gasket in there.
Remember to subtract the thickness of the gasket (after it compresses) from the final height of the finished (painted) inner lip. I mention that for others following the thread. I suspect you are way ahead of me on that sort of detail.
love your steering setup
it was the plan to allow for the thickness of the compressed gasket in the distance from the inner lip to the closed hatch lid... i also gave myself some extra wide gutter in the back where the hinges go so i won't break the outer lip when opening the lid
Re: FS14 2 week build
Posted: Wed Jun 17, 2015 3:16 pm
by ks8
nearing the end
Posted: Thu Jun 18, 2015 6:48 am
by deuce_454
Re: FS14 2 week build
Posted: Thu Jun 18, 2015 9:57 am
by terrulian
now we wait 4.6 weeks for the epoxy to cure completely
Is this a joke or a monumental mistake I made?
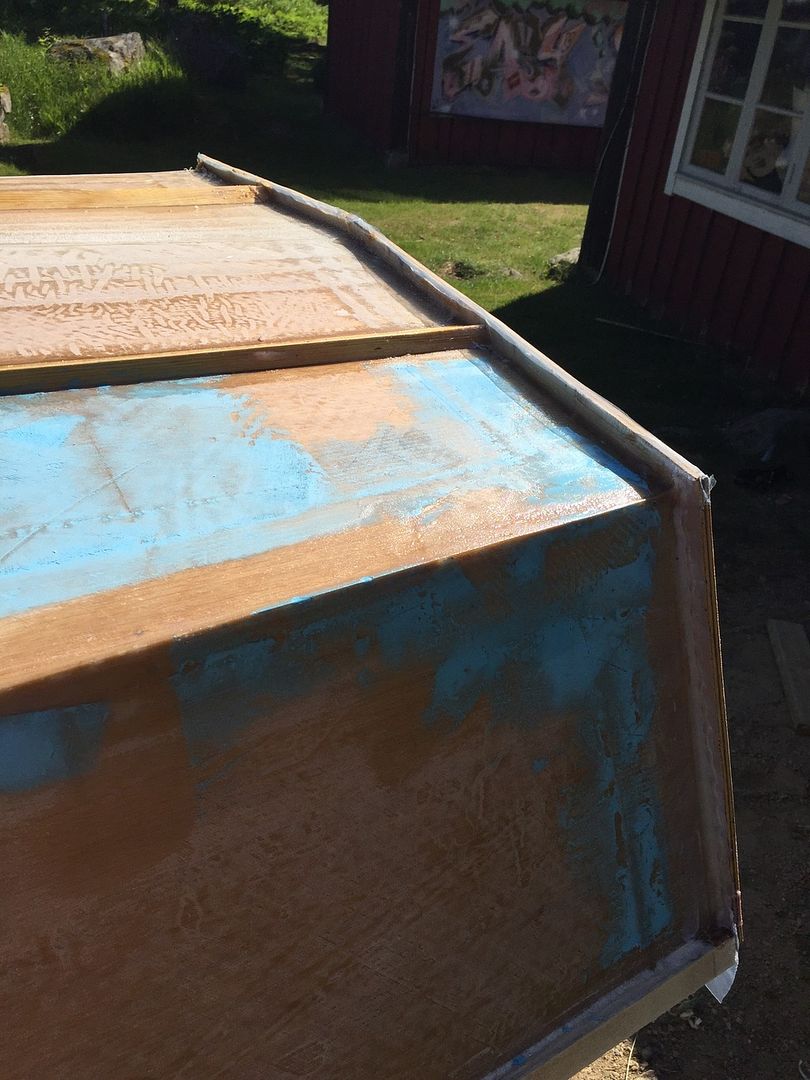
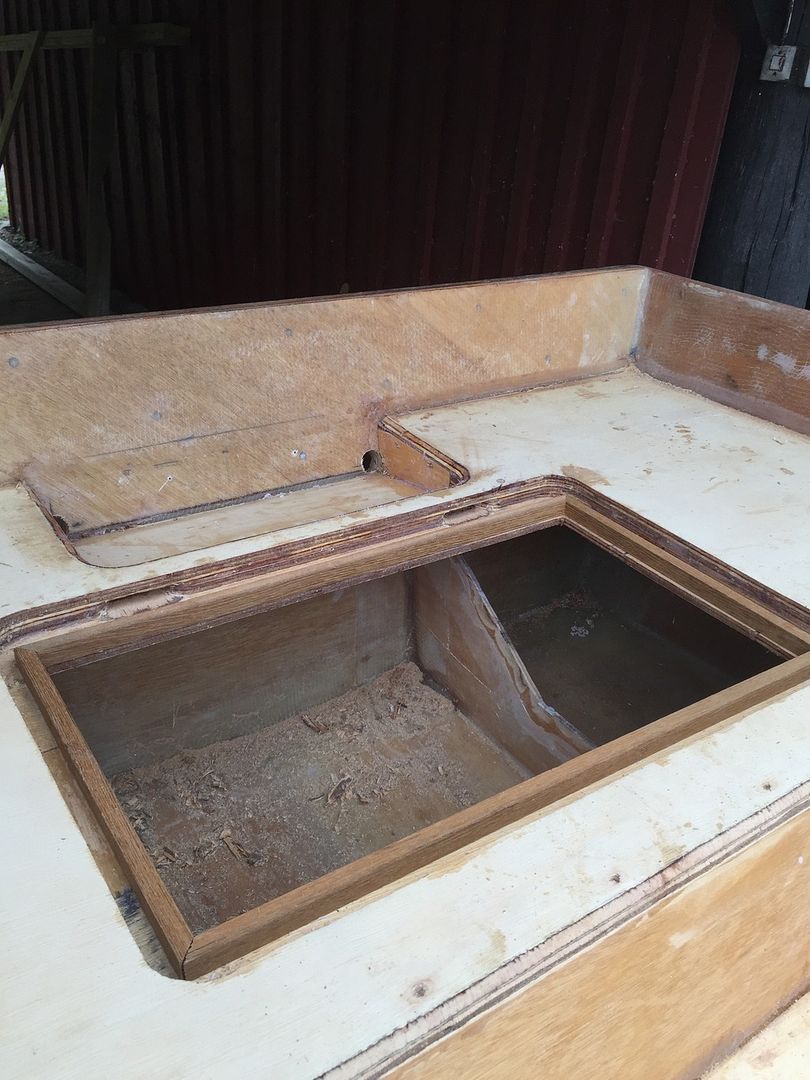
Also, now I see how the hatch drain works, maybe. Does the gasket fit just around the edge of the opening, leaving a channel on the exterior of the recess through which water can migrate to the two openings (one indicated by the wrench) and thence to the....??? Where does it go from there? Right now, it just appears to dump into another opening. It seems like that arrangement would work, but only if there was a slope or gradient directing the water aft, and only if the hatch cover was securely pressed against the gasket. I'm sure the plan will reveal itself as construction proceeds.
Re: FS14 2 week build
Posted: Thu Jun 18, 2015 11:07 am
by jacquesmm
Nice hatch drain system, quite simple.
Epoxy fully cures in 2 or 3 days at 70F.
It can be cut, trimmed, grind etc. after 12 hours, 24 is better.
Re: FS14 2 week build
Posted: Thu Jun 18, 2015 11:48 am
by deuce_454
the cure time is just my epoxy primer that sais "allow new hulls 4 weeks to cure before painting" that might refer to polyester resin hulls... though...
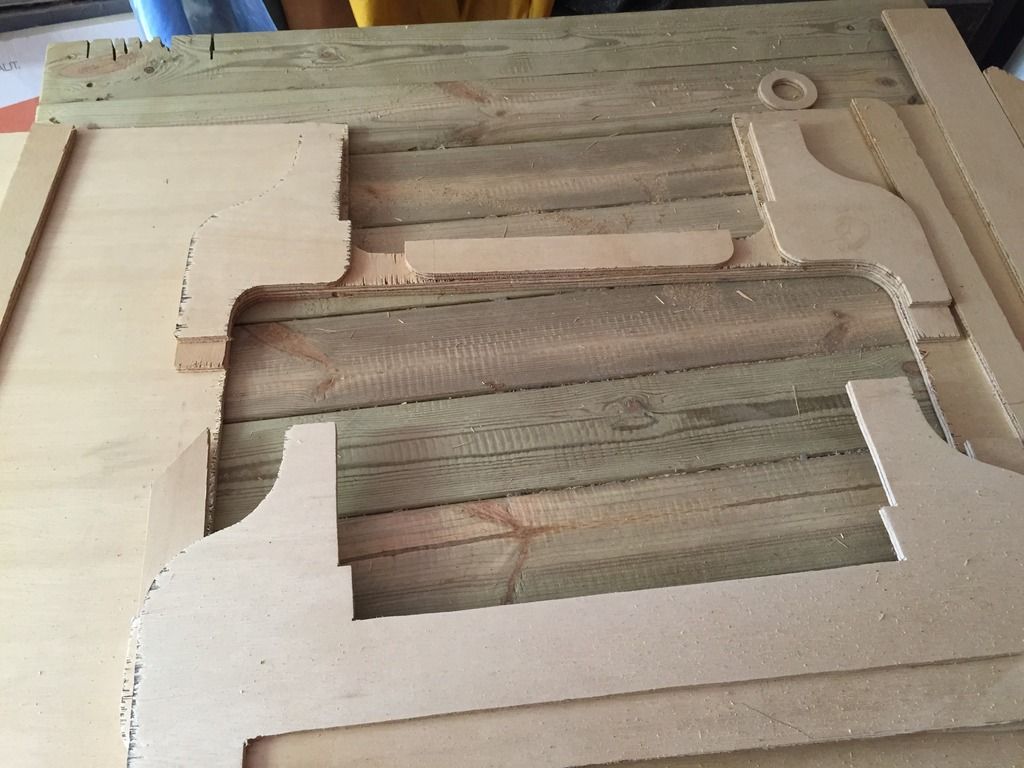
the drain is coming along nicely ..and i hope the next couple of pics will explain the concept... please excuse the mess, also, the inside lip of the plywood needs to be trimmed to be flush with the teak rail... and so on.. but i guess it makes little more sense now
Re: FS14 2 week build
Posted: Thu Jun 18, 2015 11:54 am
by peter-curacao
Nice that will work I think, gutters and drains seems wide enough, just at some neoprene or something like it on the hatch or teak as a seal.
Re: FS14 2 week build
Posted: Thu Jun 18, 2015 12:04 pm
by deuce_454
jacquesmm wrote:Nice hatch drain system, quite simple.
Epoxy fully cures in 2 or 3 days at 70F.
It can be cut, trimmed, grind etc. after 12 hours, 24 is better.
wow thanks for that compliment
I'm willing to relinquish the intellectual property of that system .. and my console...
in return for a set of JA/RB18 plans
and I'm sorry to have propagated that 4 week mistake btw
Re: FS14 2 week build
Posted: Thu Jun 18, 2015 12:14 pm
by deuce_454
peter-curacao wrote:Nice that will work I think, gutters and drains seems wide enough, just at some neoprene or something like it on the hatch or teak as a seal.
thanks... i tried to find your hatches in your build thread.. i have a vague recollection of seeing in there.. but i couldn't find them.. and since this boat only really see water from above in the form of scandinavian rain.. and not waves in the Dutch Antilles breaking over the bow.. i took a chance and went for this system...
i was going to pit the seal on the teak, but you are of course right, it needs to go in the lid so it doesn't get damaged when the fuel tank or other stuff gets taken it or out... or heaven forbid ... when bailing the compartment

Re: FS14 2 week build
Posted: Thu Jun 18, 2015 12:17 pm
by terrulian
Excellent job, it's clear now and I'm sure that will work well. You have a system for dogging down the hatch?
Re: FS14 2 week build
Posted: Thu Jun 18, 2015 12:24 pm
by deuce_454
terrulian wrote:Excellent job, it's clear now and I'm sure that will work well. You have a system for dogging down the hatch?
i have given that plenty of thought.. but it will probably end up being a hook on the underside of the hatch and a bungee between the two stringers that can be pulled up over the hook to keep it shut.. but allow the lid to be opened enough to unhook the bungee...
Re: FS14 2 week build
Posted: Thu Jun 18, 2015 12:40 pm
by jacquesmm
Velcro buttons work well on small boat hatches.
Re: FS14 2 week build
Posted: Thu Jun 18, 2015 1:25 pm
by deuce_454
hmmm velcro.. will give that a try
Re: FS14 2 week build
Posted: Thu Jun 18, 2015 1:28 pm
by peter-curacao
deuce_454 wrote:peter-curacao wrote:Nice that will work I think, gutters and drains seems wide enough, just at some neoprene or something like it on the hatch or teak as a seal.
thanks... i tried to find your hatches in your build thread.. i have a vague recollection of seeing in there.. but i couldn't find them.. and since this boat only really see water from above in the form of scandinavian rain.. and not waves in the Dutch Antilles breaking over the bow.. i took a chance and went for this system...
i was going to pit the seal on the teak, but you are of course right, it needs to go in the lid so it doesn't get damaged when the fuel tank or other stuff gets taken it or out... or heaven forbid ... when bailing the compartment
Here you go, as you can see you did exactly right what I did wrong, you have nice wide gutters and drains, especially in perspective of the hatch size.
Re: FS14 2 week build
Posted: Thu Jun 18, 2015 1:38 pm
by peter-curacao
deuce_454 wrote:terrulian wrote:Excellent job, it's clear now and I'm sure that will work well. You have a system for dogging down the hatch?
i have given that plenty of thought.. but it will probably end up being a hook on the underside of the hatch and a bungee between the two stringers that can be pulled up over the hook to keep it shut.. but allow the lid to be opened enough to unhook the bungee...
Why not using SS hardware a lock and 2 recessed hinges ?
I used a latch like this, works fine for me just "slam" the hath and it's "locked"
http://greatlakesskipper.com/southco-m1 ... atch-latch

Re: FS14 2 week build
Posted: Thu Jun 18, 2015 2:00 pm
by terrulian
I was thinking not just in terms of keeping the hatch in place, but securing the seal. Over time, the gasket will get hard and/or uneven. If you really want to seal it it will need to have some pressure. If, on the other hand, a drip or two now and again is not a problem (I don't know what is going to be stowed here), and, as others have noted, you're primarily protecting against rain and not taking a wave in the boat, I would think velcro or a latch like the one in the link would be plenty adequate.
Re: FS14 2 week build
Posted: Thu Jun 18, 2015 2:12 pm
by peter-curacao
terrulian wrote:If you really want to seal it it will need to have some pressure.
The seal would provide the pressure once the hatch is pushed into it's latch
Re: FS14 2 week build
Posted: Thu Jun 18, 2015 2:45 pm
by deuce_454
hmmm i like the latch or bungee method to provide the seal with the pressure.. and the latch will close it to the exact right height.... i will look into what one to get during my building break .... (working)
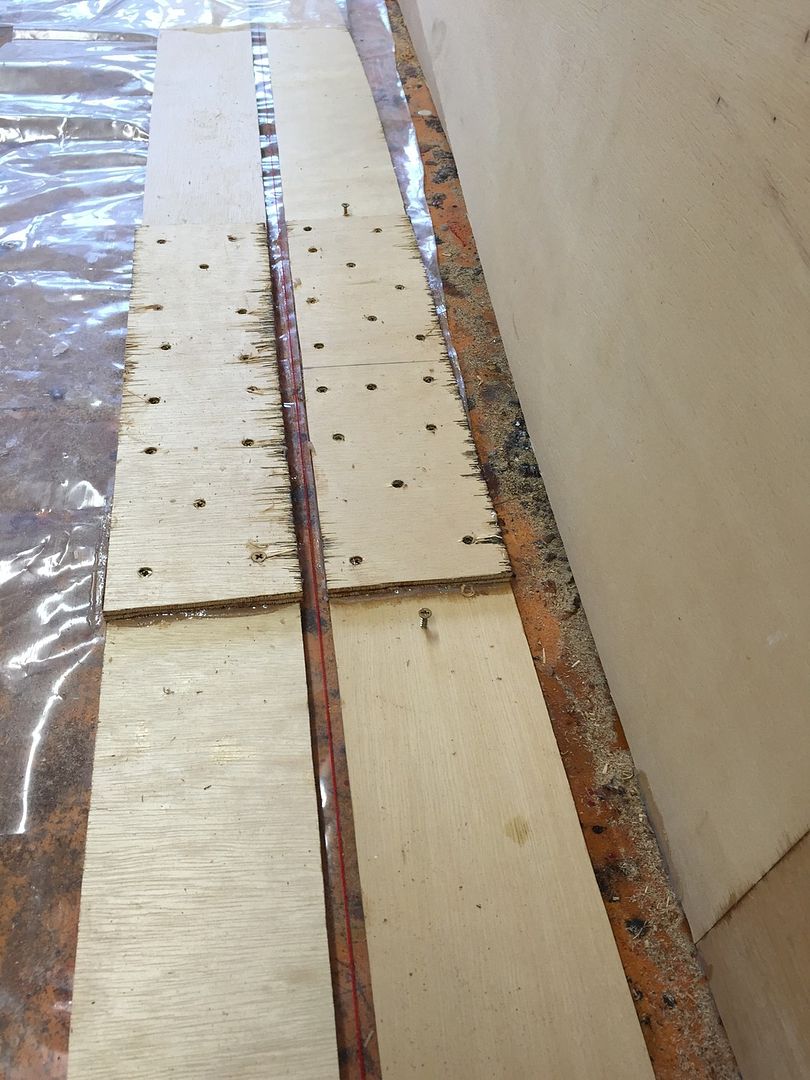
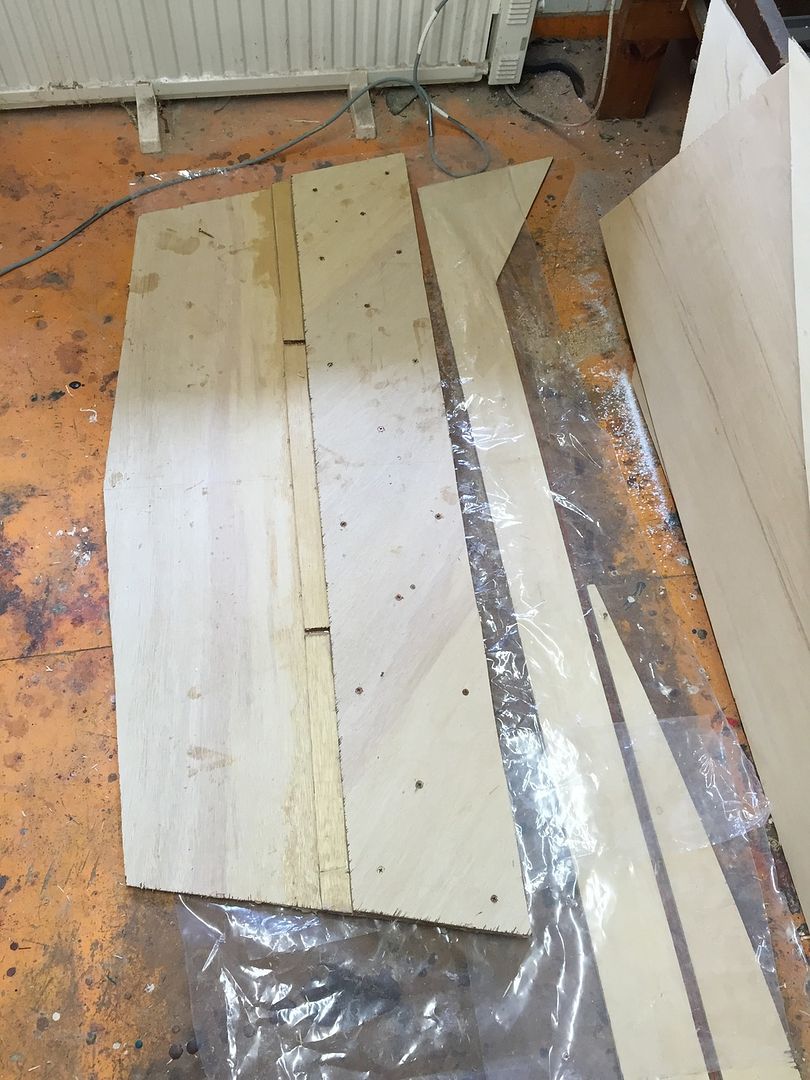
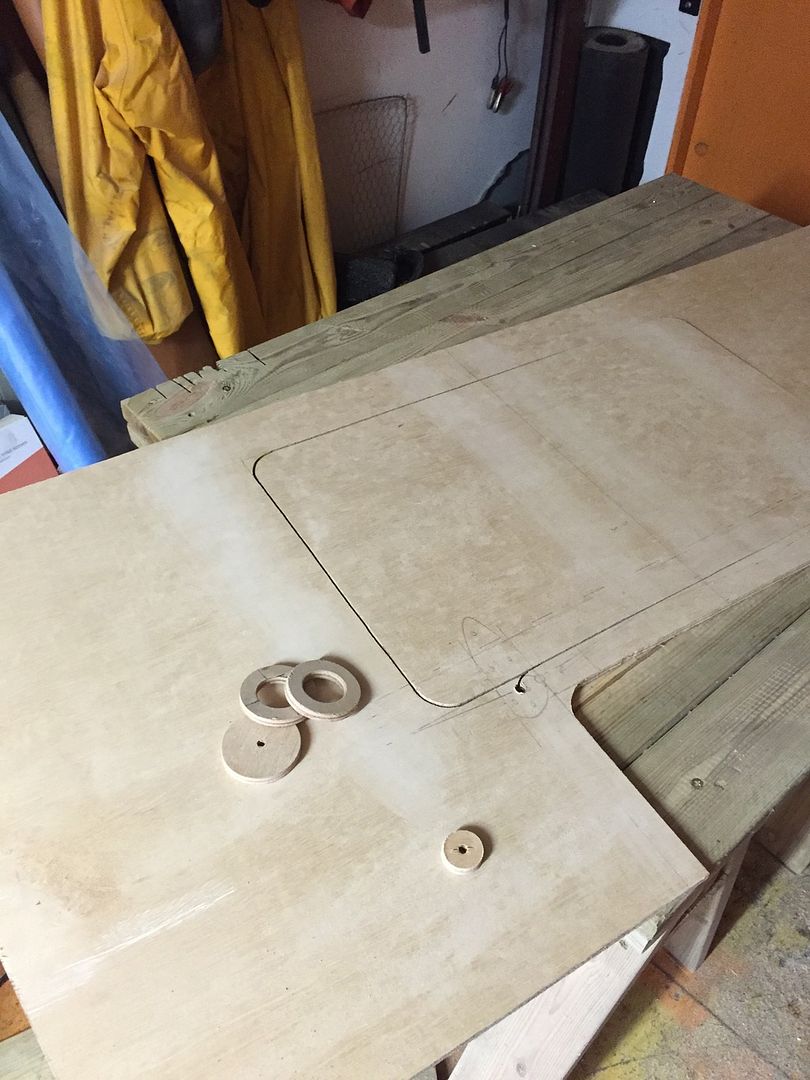
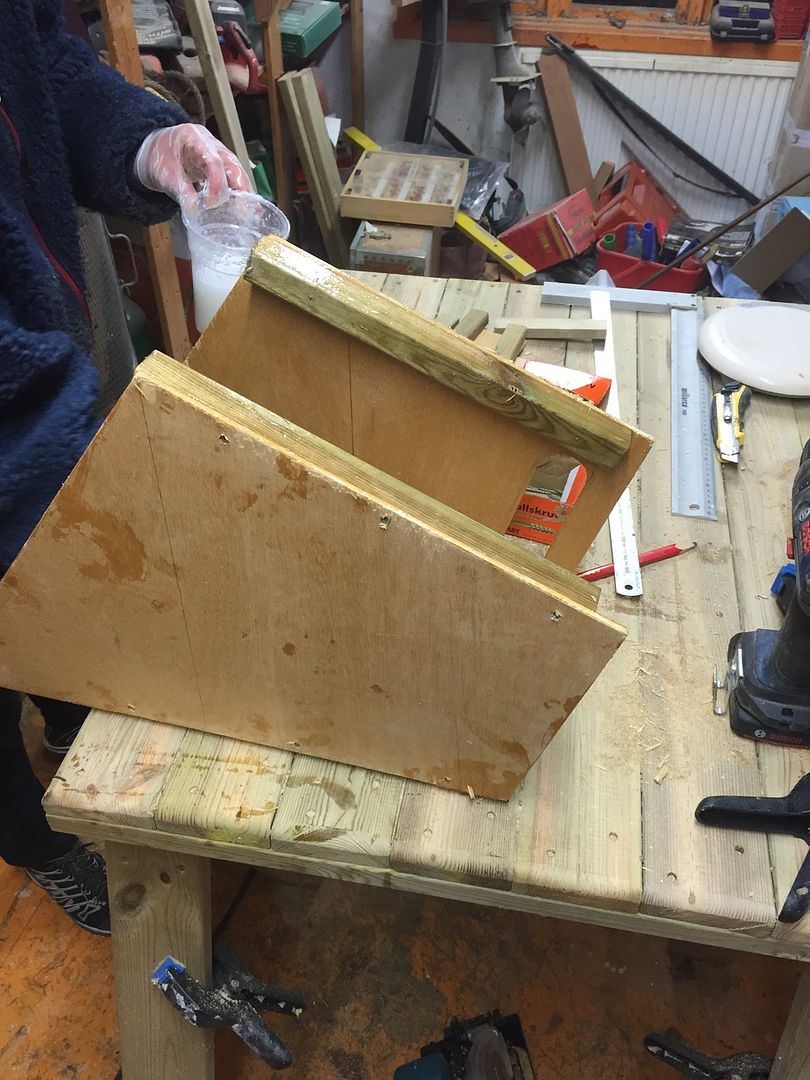
here is a shot of the underside of the hatch, not as elaborate as yours peter... but it shows the drip rail on the underside of the hatch (and an explanation to the wooden donuts in the first jig saw picture i posted
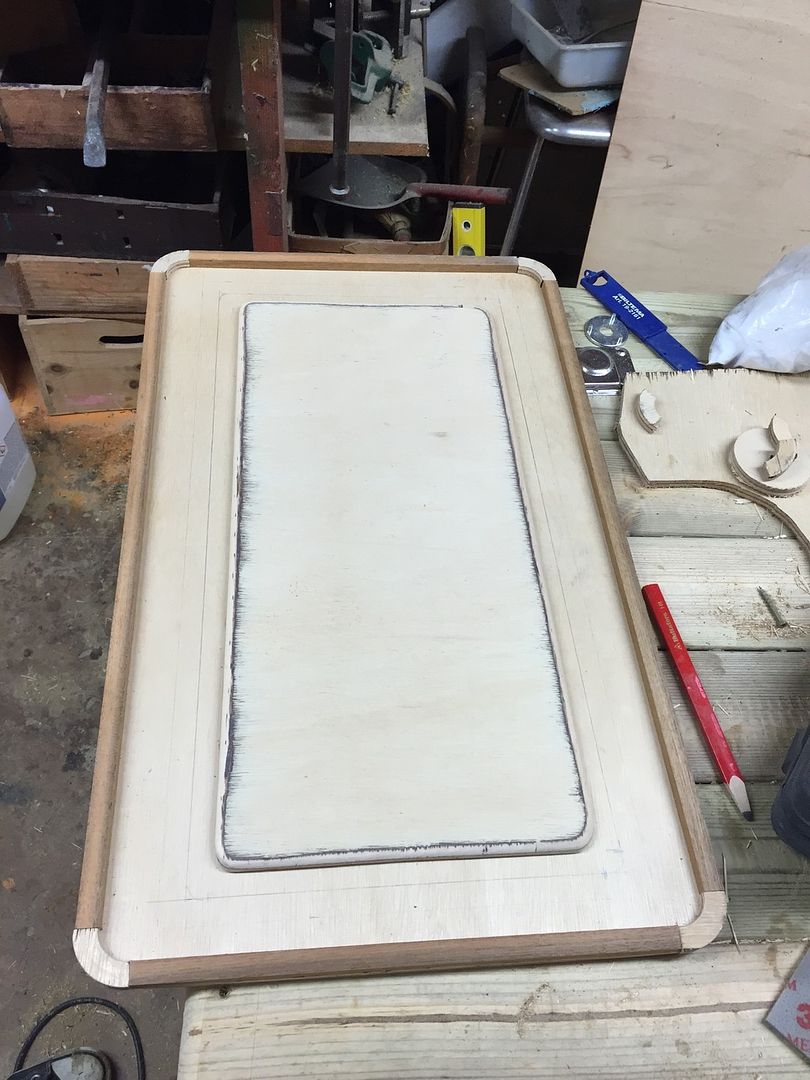
its here below for good measure (the donuts are made with 2 consecutive cuts with a hole saw) and the drilled - saw entry hole in the rear seat (is filled with a plug) will be covered with a hinge
Re: FS14 2 week build
Posted: Thu Jun 18, 2015 3:34 pm
by terrulian
Clever and cool work.
Re: FS14 2 week build
Posted: Thu Jun 18, 2015 4:37 pm
by ks8
Re: FS14 2 week build
Posted: Thu Jun 18, 2015 5:57 pm
by deuce_454
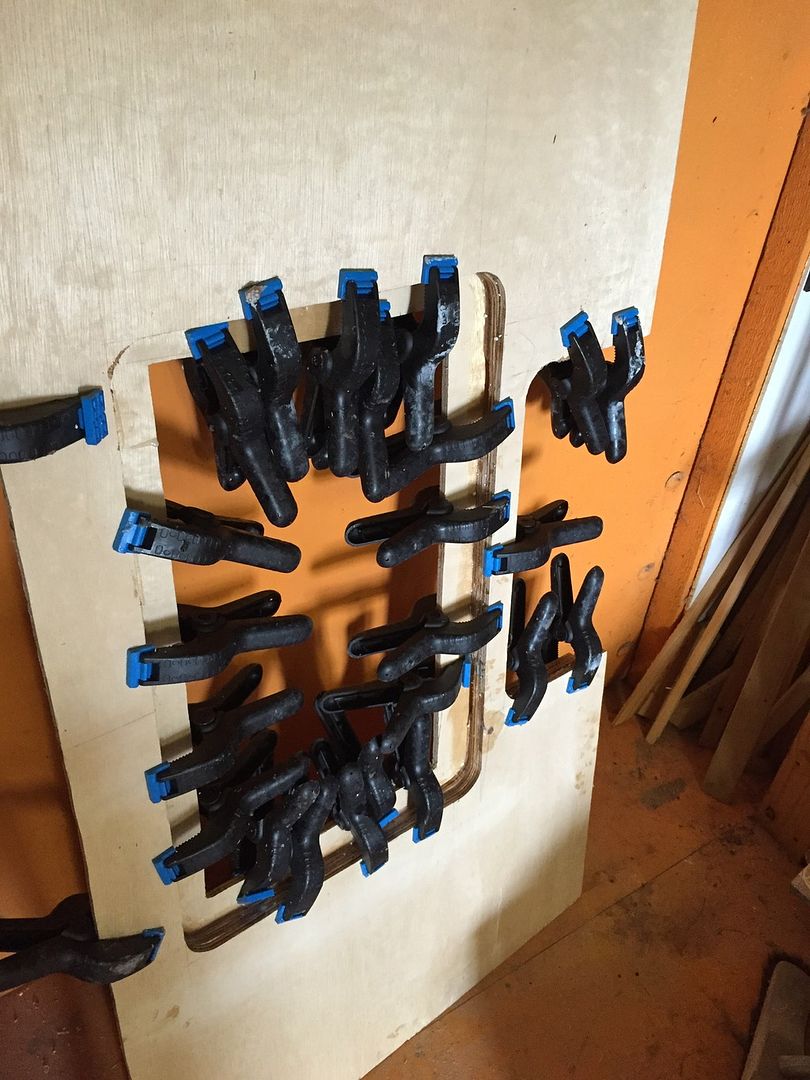
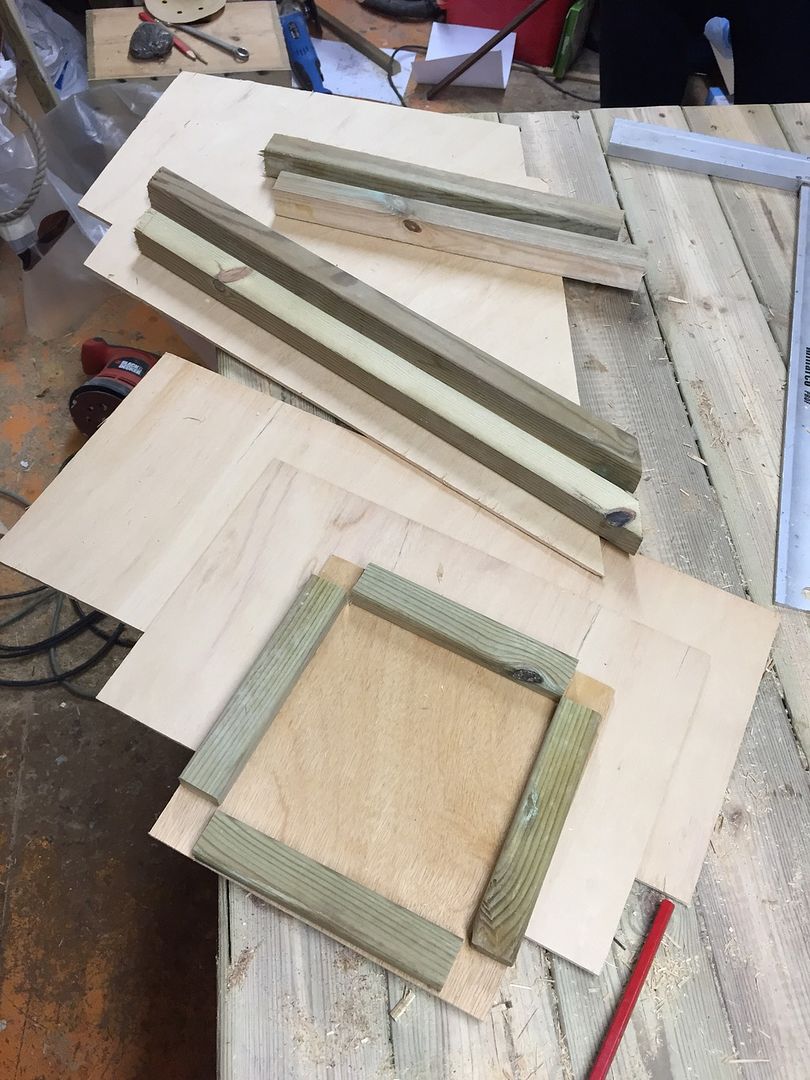
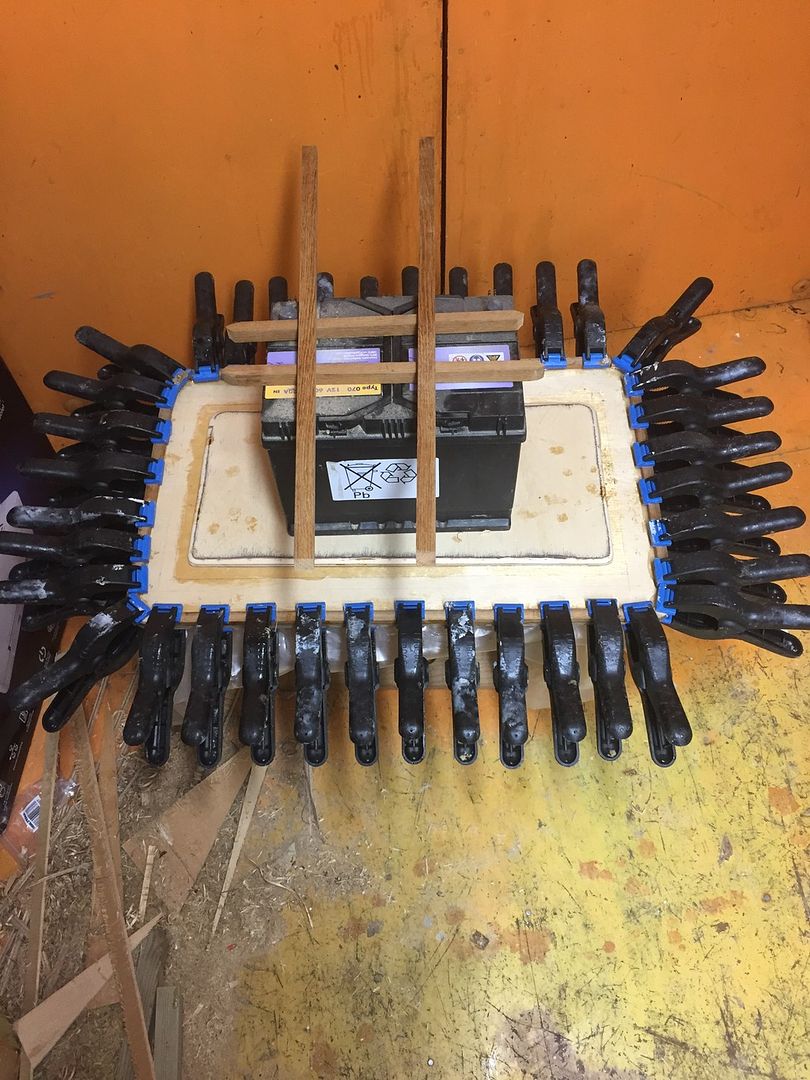
a little glueing and cutting ... will do the final glueing and taping tomorrow morning (in 8 hours)
we glued the drip rail to the hatch (no i couldn't fit any more clamps on that thing
)
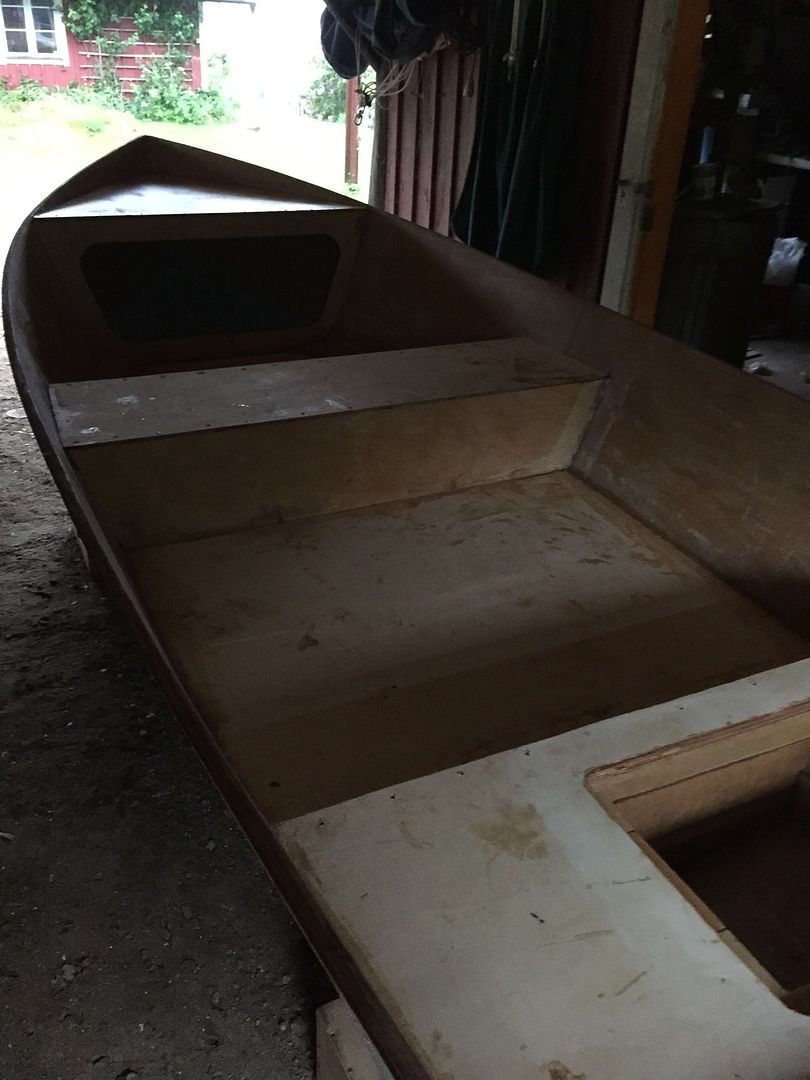
and we started on the console ... it will sit on the bow frame just like the one on the green GF14 a few pages ago.. its 1/4 inch ply screwed to some battens.. tomorrow we will remove the screws and hit it with the router and a 1/2 inch round over bit.. then it will be taped on along with the finishing glasswork...
Re: FS14 2 week build
Posted: Thu Jun 18, 2015 8:39 pm
by jacquesmm
A clamps porcupine!
last day
Posted: Fri Jun 19, 2015 7:33 am
by deuce_454
Re: FS14 2 week build
Posted: Fri Jun 19, 2015 9:36 am
by terrulian
This is a fun build to watch, no waiting.
It's kind of how I visualized my build. Until I started.
Re: FS14 2 week build
Posted: Fri Jun 19, 2015 12:39 pm
by deuce_454
terrulian wrote:This is a fun build to watch, no waiting.
It's kind of how I visualized my build. Until I started.
thats funny
I'm glad you enjoyed it.. we have packed up the boat and boat building stuff to spend the last week of out 3 week vacation under a southern sun.... no more boatbuilding before august

and no more progress pictures either...
Re: FS14 2 week build
Posted: Fri Jun 19, 2015 1:11 pm
by peter-curacao
terrulian wrote:This is a fun build to watch, no waiting.
It's kind of how I visualized my build. Until I started.
Hahaha
I hear you, same here!
Re: FS14 2 week build
Posted: Fri Jun 19, 2015 1:16 pm
by terrulian
Well, have fun and we'll look forward to your return. Meanwhile, others will have to step in to fill the gap.
Re: FS14 2 week build
Posted: Fri Jun 19, 2015 1:30 pm
by pee wee
Yes, thanks for sharing your build, it's inspirational. It also shows how much having previous building experience helps; less time pondering and backing up to do things over.
Re: FS14 2 week build
Posted: Fri Jun 19, 2015 2:05 pm
by deuce_454
pee wee wrote:Yes, thanks for sharing your build, it's inspirational. It also shows how much having previous building experience helps; less time pondering and backing up to do things over.
thank you... i have built 1 GF14 before.. actually we were two buddies who built 2 side by side... so lets call it 2.. but I'm by no means a master boatbuilder, i have a bachelors degree in mechanical engineering and after much studying a medical degree.. i work as a surgeon and build cars as a hobby (my screen name is from when all my time money and effort went into a big block 32 ford that i regrettably sold
) so with planning and purpose i think most of you guys could replicate this with some 12 hour days in close succession
although i am kinda proud of my hatch system....
but having built one before.. its amazing how much i learned just by looking at other peoples build threads and a lot of the time i saved on this one was from laying wet in wet and having the next day in mind when planning the build....
and I'm glad fi it inspires someone to get going too ... boat belong on the water .. not in the shop
Re: FS14 2 week build
Posted: Fri Jun 19, 2015 4:46 pm
by Cracker Larry
Well done, both of you
Re: FS14 2 week build
Posted: Fri Jun 19, 2015 4:48 pm
by remedy32
but having built one before.. its amazing how much i learned just by looking at other peoples build threads and a lot of the time i saved on this one was from laying wet in wet and having the next day in mind when planning the build....
Your quote says a lot. There are countless "how long" posts on this BB. You're showing what a combination of preparation, motivation and process planning allow one to do. Agree wholeheartedly that so much is learned the first time around that the second boat can be an entirely different experience.
All that said, I think you two are doing an amazing job!
Bill
CT USA
Re: FS14 2 week build
Posted: Fri Jun 19, 2015 7:39 pm
by TomW1
Great build can't wait till you get back to it.
Tom
Re: FS14 2 week build
Posted: Sat Jun 20, 2015 10:11 pm
by ks8
Cracker Larry wrote:Well done, both of you
I second that! Looking forward to see how you finish fairing and painting it in three days, when you get back to it.
Re: FS14 2 week build
Posted: Sun Jun 21, 2015 5:11 am
by deuce_454
ks8 wrote:Cracker Larry wrote:Well done, both of you
I second that! Looking forward to see how you finish fairing and painting it in three days, when you get back to it.
to do that in 3 days i think we will need that startrek temporal displacement field device mentioned earlier in this thread...
Re: FS14 2 week build
Posted: Sun Jun 21, 2015 10:27 am
by terrulian
I would estimate that 90% of my time has been spent in the fairing process. The only similar experience I've had was using bondo on cars, but we're talking minor dents no more than, say, a foot square. Even that took forever. A boat's a lot bigger. I'm also slow, so I've no doubt this will also go quickly for you.
Re: FS14 2 week build
Posted: Sun Jun 21, 2015 11:28 am
by gonandkarl
Hi,
The speed with which you built your boat sofar is incredible, I really like seeing this boat coming together. My boat building is also coming along ( slowly ) even that I got all the tips for speed by Salvatore ( from downunder ) I wont ever be fast. You gave the answer how to progress so fast by putting in long hours everyday. I tend to work for two or three hours and then admire my achievement for the rest of the day and compare similar stages of other boats in the forum. You naturally have overtaken me in just 2 weeks and like our friend in Laibach Slowenia said we cant read your thread fast enough the way you build and to perfection on top of it. I wish you a nice time in the sun and I am looking forward to see your beautiful boat building pictures when you start building again in August.
Greetings from Karl ( Austria )
Re: FS14 2 week build
Posted: Mon Jun 22, 2015 10:27 am
by ks8
Re: FS14 2 week build
Posted: Wed Jun 24, 2015 5:27 pm
by deuce_454
Re: FS14 2 week build
Posted: Wed Jun 24, 2015 5:42 pm
by peter-curacao
That Riva

Re: FS14 2 week build
Posted: Thu Jun 25, 2015 8:23 am
by topwater
That Riva
Image
Peter you crack me up..
Re: FS14 2 week build
Posted: Thu Jun 25, 2015 10:35 am
by Rogerdog
Hey Larry, if somebody was starting a new boat build, they could get a lot of ideas from that Riva!
Re: FS14 2 week build
Posted: Thu Jun 25, 2015 12:01 pm
by Cracker Larry
They better call somebody besides me to build it
Re: FS14 2 week build
Posted: Thu Jun 25, 2015 12:05 pm
by terrulian
Re: FS14 2 week build
Posted: Thu Jun 25, 2015 4:49 pm
by deuce_454
terrulian wrote:
why the sad face ... if i promise to add a bigger engine .. will that help little??
https://youtu.be/_5aKcpAhTOk
Re: FS14 2 week build
Posted: Thu Jun 25, 2015 5:11 pm
by terrulian
It was for Larry's statement that he won't be building this boat...and, we suppose, anything like it soon. I assume this is because of his allergy; but for whatever reason, it's nothing to celebrate.
Nothing sad about your build.
Re: FS14 2 week build
Posted: Thu Jun 25, 2015 5:29 pm
by Cracker Larry
I really don't think my carpenter or painting skills are up to the task of building that boat. Nor do I think I have the patience and stamina, or the years it would take to do it. Nope, not me. I don't even like it

Don't see any rod holders, no practical use whatsoever to me, other than to look cool. That's a lot of work and money just to look cool IMO, but to each their own
I'm not sure, but I'd speculate that boat was built by a team of professionals in every trade. Not a one man show trying to be a professional at every trade involved.
Re: FS14 2 week build
Posted: Thu Jun 25, 2015 7:21 pm
by peter-curacao
Cracker Larry wrote:Nope, not me. I don't even like it
no practical use whatsoever to me,
That's probably because you missed the glass and (rum)bottle holders in the center I heard some models even come with an ice cube dispenser, cheers mate

Re: FS14 2 week build
Posted: Thu Jun 25, 2015 9:05 pm
by Cracker Larry
But my boat has outriggers and 17 rod holders, and rum bottle and cup holders too, and a Yeti cooler for ice cubes (thanks to Prarie Dog
) And I don't have to worry about scratching it, or getting fish blood and mud on it. Not to mention it's already built and does about everything that we want to do. I'll be watching, but not building it. If anybody can do it alone, Peter can. Cheers back at you
Re: FS14 2 week build
Posted: Sun Jul 26, 2015 3:32 pm
by deuce_454
Re: FS14 2 week build
Posted: Sun Jul 26, 2015 5:07 pm
by kcinnick
I am curious about this sander. I was planning an upgrade from a 5" to a 6" RO sander, I was going to get a Dewalt 6" RO but I have a 21' boat I am going to be looking at soon... If you have time for some detailed thoughts.
Boat build is great, I love watching them come together.
Re: FS14 2 week build
Posted: Mon Jul 27, 2015 12:57 am
by deuce_454
the festool rotex 150 is pretty unique, although i think bosch and makita have come out with a similar product last year im not sure if dewalt does one also. it has two gears.. in "low gear" it acts more or less as a regular 6 inch DA sander. in "high gear" or corse it locks the sanding disc to a gear that in effect converts it to a rotational sander. it still does the 1/4 inch oscillations but it also does forced rotations at 1500 rpm and the effect is awesome.
the sanding discs has a little more holes in them but when the vac is connected there is almost no dust and the discs lasts way longer. so in my book its well worth the extra expence..
Re: FS14 2 week build
Posted: Mon Jul 27, 2015 1:19 am
by kcinnick
Well, looks like I see a Bosch in my future. I have had good luck with their corded power tools. No doubt that Festool is a beast, however I can get the Bosch for $300 plus cheaper!!! That is a lot of sanding discs!
Re: FS14 2 week build
Posted: Mon Jul 27, 2015 11:55 am
by Fuzz
Great info on the sander! One question, do you use one of their vacs or will a regular shop vac work just as well? Buying the sander if it really helps is one thing but dang they are proud of their vac systems.
Fuzz
Re: FS14 2 week build
Posted: Mon Jul 27, 2015 1:18 pm
by pee wee
There's a group of similar vacs, Festool, Mirka, Fein all have premium vacs. They are powerful and relatively quiet, you can use a HEPA filter (not all come standard with them), many are variable speed, and they have a power actuated outlet so the vac starts when the sander does, powers down a few seconds after the sander stops. If you don't like spending $$ you can use a regular vac, but without a good filter the fine dust blows right back in the air. I bought the Fein because it was a little less money, and have been happy with it. If you're only going to use it for one boat build, use a cheap vac and wear a dust mask.
Re: FS14 2 week build
Posted: Tue Jul 28, 2015 9:20 am
by deuce_454
im with pee wee, any shop vac will work.. a house vac will die in hours though, the cooling for the motor on a shop vac is seperated .. on a home vac the fine dust will get into the motor bearings and they will die a noisy death (sak me how i know) but a craftsman or simmilar will be fine..i do like that it turns on and off with the grinder
Re: FS14 2 week build
Posted: Tue Jul 28, 2015 12:38 pm
by Fuzz
This great info. I think rather than totally hijacking this thread I will start a new one.
thanks for the info.
fuzz
Re: FS14 2 week build
Posted: Tue Jul 28, 2015 7:18 pm
by BarraMan
kcinnick wrote:Well, looks like I see a Bosch in my future. I have had good luck with their corded power tools. No doubt that Festool is a beast, however I can get the Bosch for $300 plus cheaper!!! That is a lot of sanding discs!
I have worn out 3 x Bosch RO sanders on my build to date!
Re: FS14 2 week build
Posted: Wed Jul 29, 2015 4:08 pm
by deuce_454
BarraMan wrote:kcinnick wrote:Well, looks like I see a Bosch in my future. I have had good luck with their corded power tools. No doubt that Festool is a beast, however I can get the Bosch for $300 plus cheaper!!! That is a lot of sanding discs!
I have worn out 3 x Bosch RO sanders on my build to date!
its always cheaper to do it right the first time, even if the initial investment is greater.... thats why i after bosch, black and decker and several el-cheapos have taken the plunge... and its just way faster and way worth it
Re: FS14 2 week build
Posted: Sun Aug 16, 2015 12:25 pm
by deuce_454
Re: FS14 2 week build
Posted: Sun Aug 16, 2015 2:02 pm
by Fuzz
Deuce,
Nice looking boat and fast build.
Must be a lot of fun to build with your GF helping. Getting help is tough but you have the best of both worlds. You might want to buy a shotgun, move where no one knows, and marry her or every boat builder in the world will be stopping by.
I cant even get the boss to come look most of the time.
Fuzz
Re: FS14 2 week build
Posted: Sun Aug 16, 2015 2:28 pm
by terrulian
My wife is a terrifically good sport about it. After begging and pleading, flowers and chocolate, there are times when she will actually consent to look at the boat. Can't complain about that!
Re: FS14 2 week build
Posted: Mon Aug 17, 2015 2:28 pm
by Joe H
Hello Deuce,
First off 2 weeks was pretty ambitious
but you and the GF have made some great progress, very nice build!
I have inherited a FS14, I seen a good deal on craigslist for a 20 hp electric start outboard with all the controls and like the console you put on yours for a set-up, did you move the seat forward or is everything as designed? You don’t think that will be too far forward? I’m worried about my rather large frame, well maybe not that large, sitting that far forward, this boat will be for my Grandkids and that position should be perfect for them.
Thanks
Joe H
Re: FS14 2 week build
Posted: Mon Aug 17, 2015 4:46 pm
by deuce_454
the front and mid seat are in the stock location... i shortened the rear one to allow more room.. but had to add the flat floor to retain rigidity.. and i have used that very same console design with my previous build (a GF14)
https://youtu.be/LSw2HtjUBgk
Re: FS14 2 week build
Posted: Tue Aug 18, 2015 7:48 am
by Joe H
Thanks deuce_454
(my screen name is from when all my time money and effort went into a big block 32 ford that i regrettably sold
I should have guessed, I’m an ME for Ford here in Detroit (actually Dearborn) Michigan, we just had the Dream Cruise here last week and I’m sure there was a Fastback Mustang with a built 454 in her! (or maybe that was a Chevelle!
)
I looked back an seen your GF14, I’ll have to do some modifications but that’s the fun part of building these boats!
Watching your progress.
Joe H
Re: FS14 2 week build
Posted: Mon Aug 24, 2015 10:38 am
by PMac62
Hello Deuce - I too am a builder of big blocks / rats... Anyway - I really like your console set up. Questions:
- What is the legroom like up front? I'm 5'11" and 220lbs.
I've seen Pat4's console build and his console is aft. I just wanted to get an Idea how much room was up front and what if any weight distribution issues there may be. I did see Jacques reply to you on this question (1 person up front + one in back = put battery up front) and he thought you'd be OK.
Thoughts?
Patrick
Re: FS14 2 week build
Posted: Wed Aug 26, 2015 12:32 pm
by deuce_454
the legroom is just fine im 6 foot and i sit relaxed with near straight legs... the console attaches to the vertical station so it really doesn't take up any room near the floor of the boat
Re: FS14 2 week build
Posted: Sat Sep 05, 2015 1:12 pm
by deuce_454
Re: FS14 not so 2 week build anymore
Posted: Sun Sep 06, 2015 3:04 pm
by Corto Maltese
"we couldn't find any kiwi grip for sale"
I found it in Italy, Croatia, Slovenia. Sometimes it is good to look at south of EU and you can get stuff even cheaper. For instance I was researching for Python drive and found it is much cheaper here than in Netherlands, where it is produced, even though they have 5% lower VAT.
I like your 2 week+ approach. Good job done!
Cheers,
Dario
Re: FS14 not so 2 week build anymore
Posted: Mon Sep 07, 2015 11:17 am
by ks8
Re: FS14 not so 2 week build anymore
Posted: Tue Sep 22, 2015 9:26 am
by PMac62
A question from the uninitiated here. It looks like there is no drainage under the sole and that the sole itself would have to be bailed should water enter. Do I have this design right or am I missing something? I have the FS14 plans and I like deuce_454's sole layout but I'd like to have the water drain to a single spot. I suppose that limber holes could be drilled through the mid-seat and tubed to the rear - and likewise for the rear sole and rear seat. Is this needed or am I over engineering when not needed?
Thanks!
Re: FS14 not so 2 week build anymore
Posted: Tue Sep 22, 2015 10:09 am
by jacquesmm
As designed, the space under the sole is a sealed compartment. It is considered buoyancy volume by the USCG. You can go one step further and fill it with foam juts in case you puncture the bottom but the bottom panel is strong, it is not necessary.
You can have drainage above the sole with simple limber holes in the frames. The plans don't show those holes, they are an option. If that is what you want, cut a hole in teh corner of each frame, let's 2" radius and another hole in the transom. That's all.
It's your choice if you want to keep some compartments under the seats dry or not.
Re: FS14 not so 2 week build anymore
Posted: Fri Sep 25, 2015 12:15 pm
by deuce_454
i have foam under the sole, and have moved the rear frame rearwards to allow 4 foot of room between the mid and rear seat. and i would have loved to have installed a pair of tubes to allow the water to drain from the front to rear footwell.. the rear compartment has a (hopefully) watertight hatch so it shouldn't need too frequent bailing.
but i would have loved to have run some chase tubes to mount the battery and fuel tank in the front compartment with hidden wires/hoses . also a chase tube that snakes from the upper right corner of the front-mid frame to to somewhere clever on urge rear deck to run the engine controls hidden would have been a wort while mod since i was already overcomplicating things
.. the flat floor is a warm recommendation though, the boat feels larger than it is, and the floor super sturdy with the foam underneath
Re: FS14 not so 2 week build anymore
Posted: Fri Sep 25, 2015 1:34 pm
by PMac62
I really like your modifications (stringer mods, floor, etc) and they seem well thought out. I will plan for drainage and chase tubes. I hope to start my build in a month. I'm going to hold off on the chase tubes until a have a motor in hand. I'm looking for Yamaha power. If I could get some decent specs I think I might be able to run the tubes. Front wont be an issue but as for the rear, I have no idea on exit angle, distance from motor, arc, length, etc. Until then I'll keep searching the site.
Patrick
Re: FS14 not so 2 week build anymore
Posted: Wed Nov 25, 2015 1:14 pm
by deuce_454
Re: FS14 not so 2 week build anymore
Posted: Wed Nov 25, 2015 1:17 pm
by deuce_454
Re: FS14 not so 2 week build anymore
Posted: Wed Nov 25, 2015 1:49 pm
by Cracker Larry
The boat looks great! How cold is it in your shop? Your girlfriend looks to be dressed for arctic conditions. A lady of many talents
Is that a snow shovel on the wall? I know I don't want to live there
Re: FS14 not so 2 week build anymore
Posted: Wed Nov 25, 2015 2:36 pm
by terrulian
I know I don't want to live there
What he said.
Re: FS14 not so 2 week build anymore
Posted: Wed Nov 25, 2015 3:06 pm
by deuce_454
yeah those are indeed snow shovels, and the thermo boiler suit was a must have item .... as the ice in my cup of previously hot beverage clearly shows

Re: FS14 not so 2 week build anymore
Posted: Wed Nov 25, 2015 3:09 pm
by deuce_454
thanks for the kind words btw... im really really glad the inside is ready for paint too.... it will make it feel like a true sprint to the finish once we break out the polyurethane
Re: FS14 not so 2 week build anymore
Posted: Thu Nov 26, 2015 1:06 am
by TomW1
Cracker Larry wrote:The boat looks great! How cold is it in your shop? Your girlfriend looks to be dressed for arctic conditions. A lady of many talents
Is that a snow shovel on the wall? I know I don't want to live there
Larry no it is well above the Mason Dixon line. As I recall from my Navy days it is about equal to Nova Scotia. But the one time we put in there it was one of the more beautiful cities I visited.
Regards Tom
Re: FS14 not so 2 week build anymore
Posted: Mon Feb 08, 2016 6:49 am
by boat_AUS
Its great, love the console, im putting one in my FS14 but a little differently. Its still very helpful see I ng the set out on yours
Re: FS14 not so 2 week build anymore
Posted: Mon Feb 08, 2016 1:46 pm
by MarkOrge
Beautiful reverse chine !
Re: FS14 not so 2 week build anymore
Posted: Thu Mar 17, 2016 3:02 pm
by deuce_454
thank you all.... its getting little warmer and i am itching to get back to the boat.....
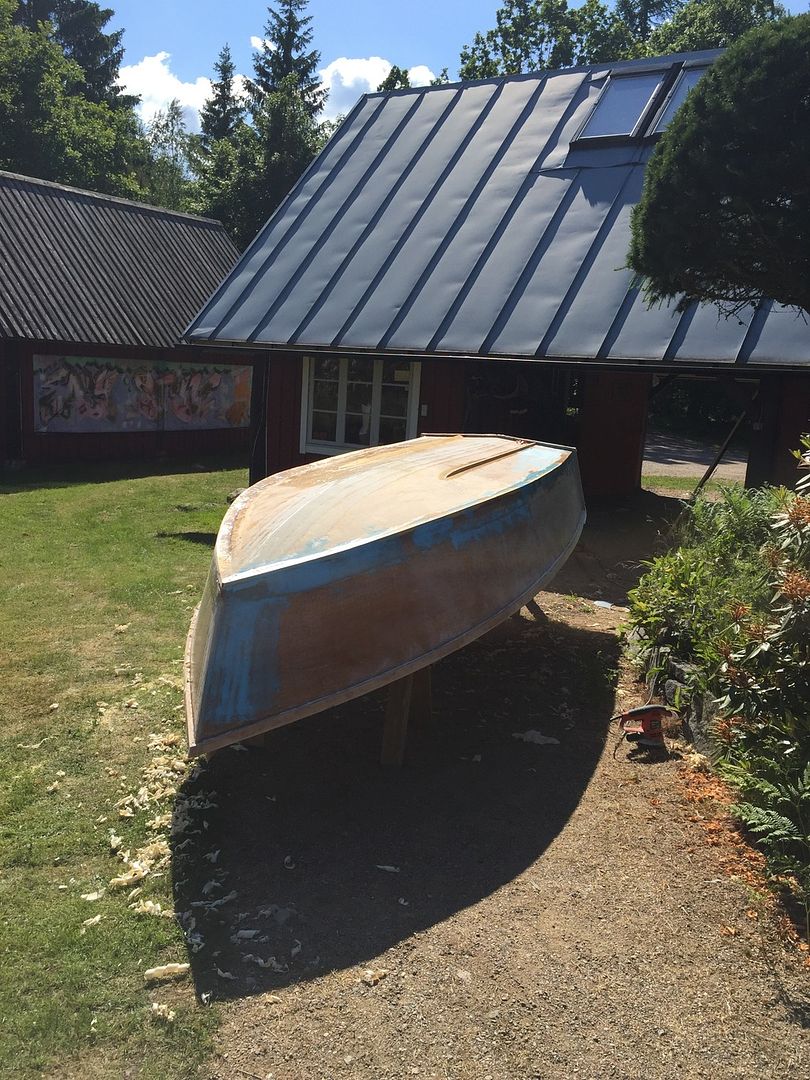
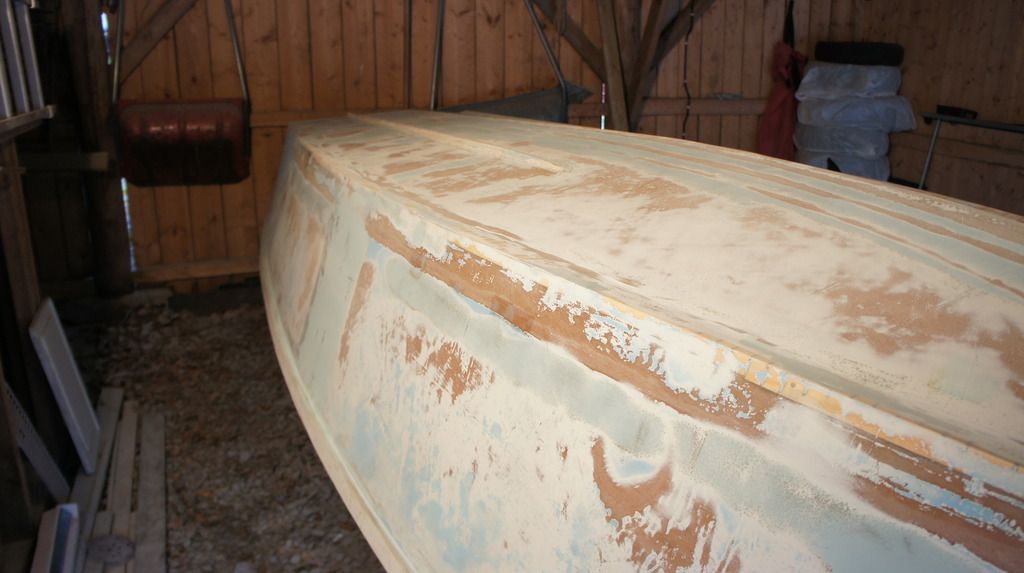
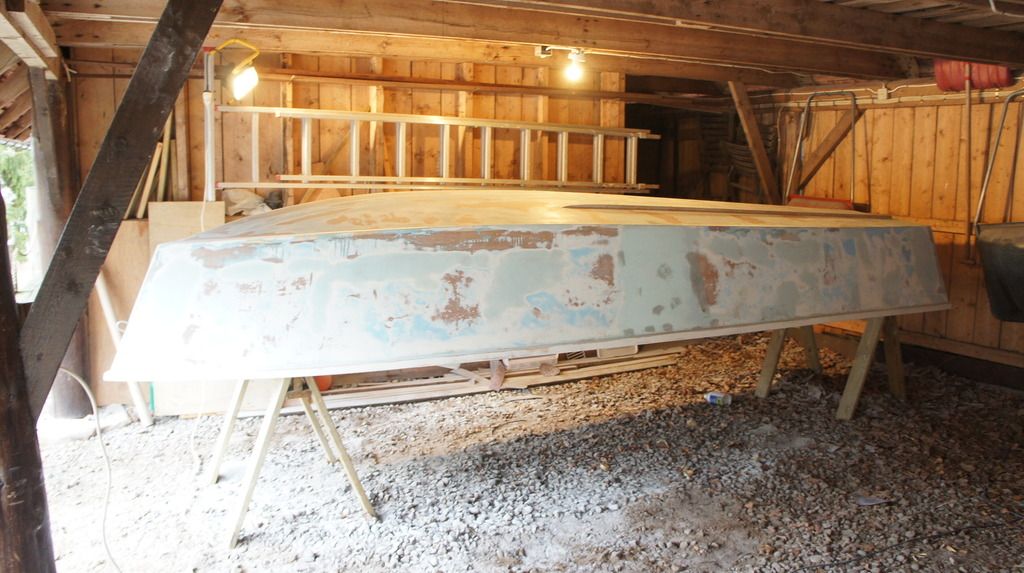
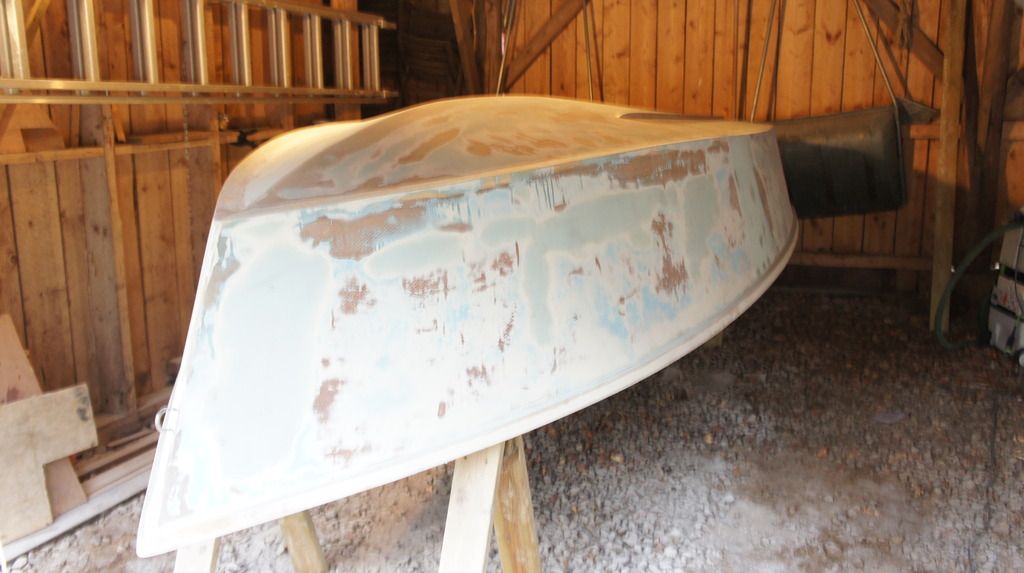
there are a couple of things that need fixing or re-doing... the fairing is 98% ... im not settling for that.. so more filler and sanding in sight....
and the anti-skid treatment turned out to be like 16 grit razor sharp abrasive ... so thats gotta go (that will be fun to remove for sure) and ill paint it with some less than lethal anti skid coating.... im sure that whats on there now will strip the skin of a rino in seconds....
Re: FS14 not so 2 week build anymore
Posted: Thu Mar 17, 2016 3:02 pm
by deuce_454
thank you all.... its getting little warmer and i am itching to get back to the boat.....
there are a couple of things that need fixing or re-doing... the fairing is 98% ... im not settling for that.. so more filler and sanding in sight....
and the anti-skid treatment turned out to be like 16 grit razor sharp abrasive ... so thats gotta go (that will be fun to remove for sure) and ill paint it with some less than lethal anti skid coating.... im sure that whats on there now will strip the skin of a rino in seconds....
Re: FS14 not so 2 week build anymore
Posted: Fri Mar 18, 2016 11:15 am
by bateau-webmaster
Which nonskid did you use? If it is Kiwigrip you can lightly sand the peaks off if it is too aggressive. (120 does fine)
Re: FS14 -11 month build.... Done and spashed
Posted: Sun May 15, 2016 12:19 pm
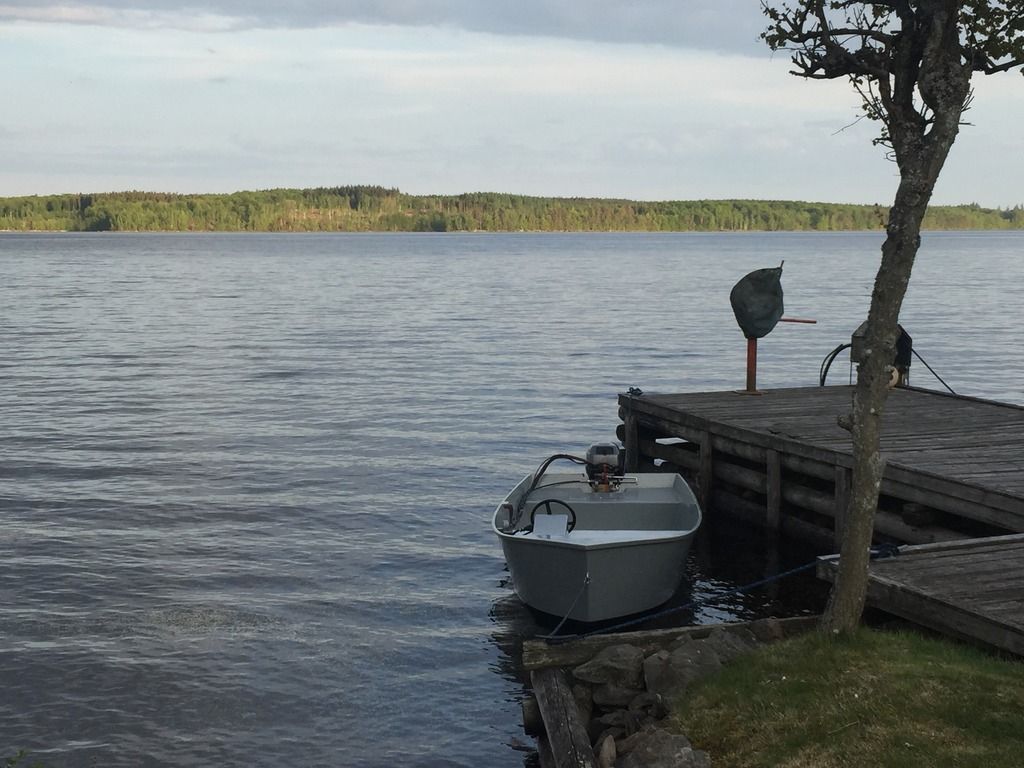
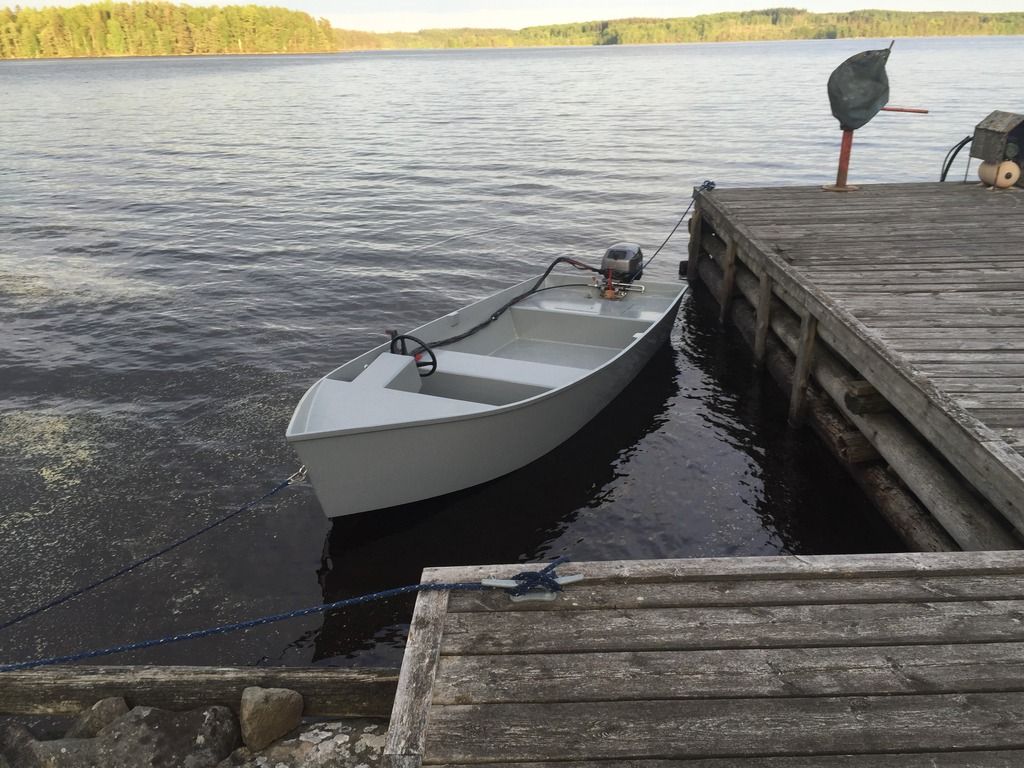
by deuce_454
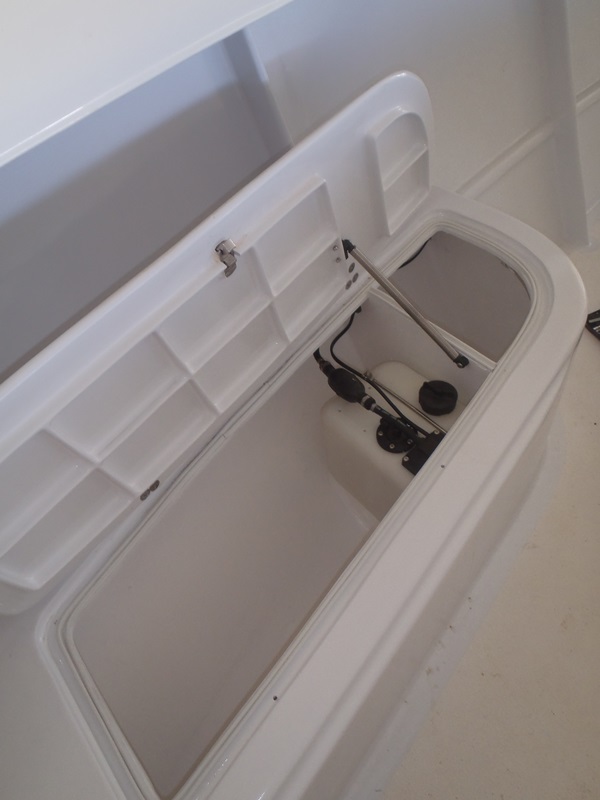
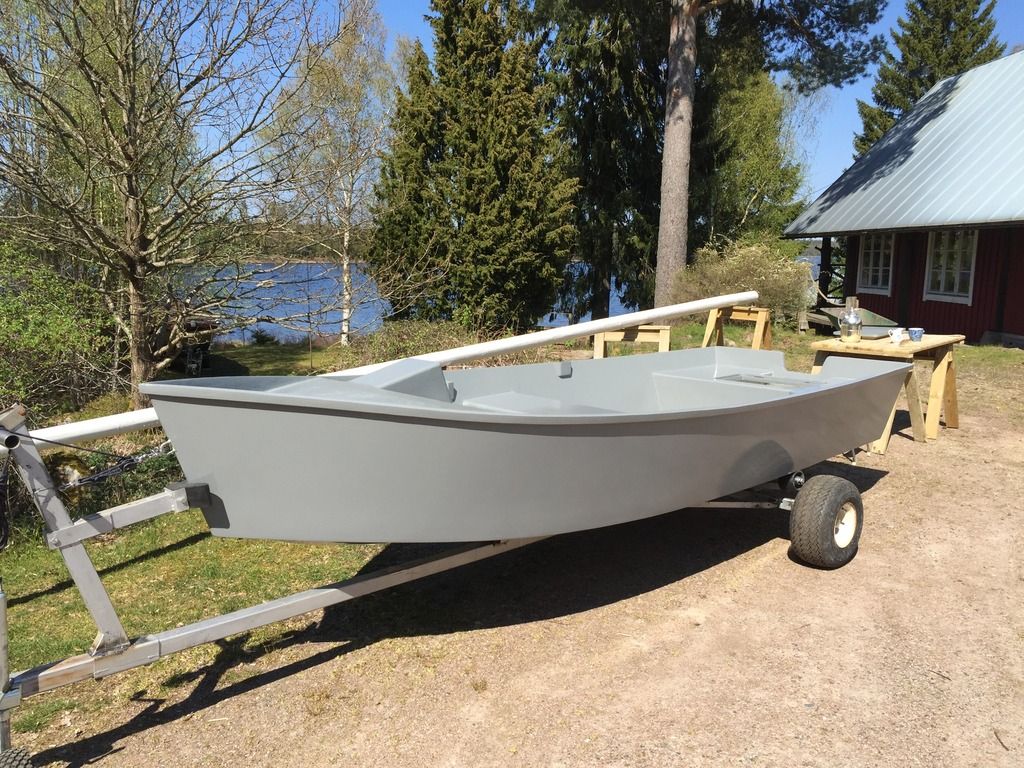
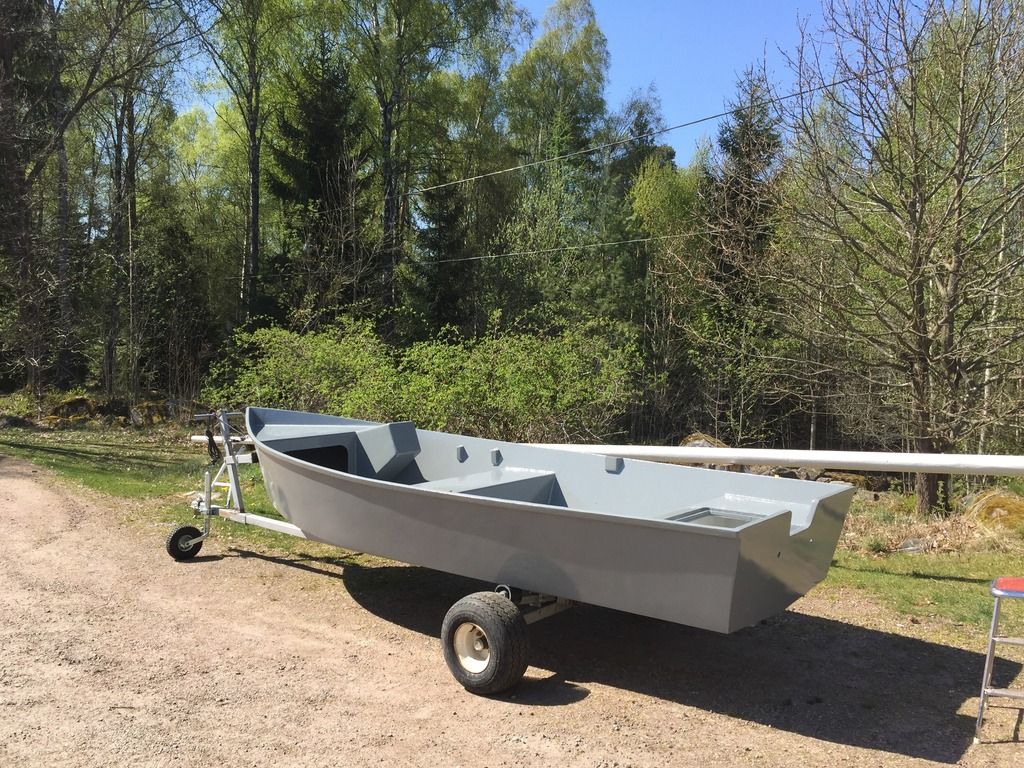
painted the hull and welded a trailer... flipped it and painted the inside
Re: FS14 -11 month build.... Done and spashed
Posted: Sun May 15, 2016 12:24 pm
by deuce_454
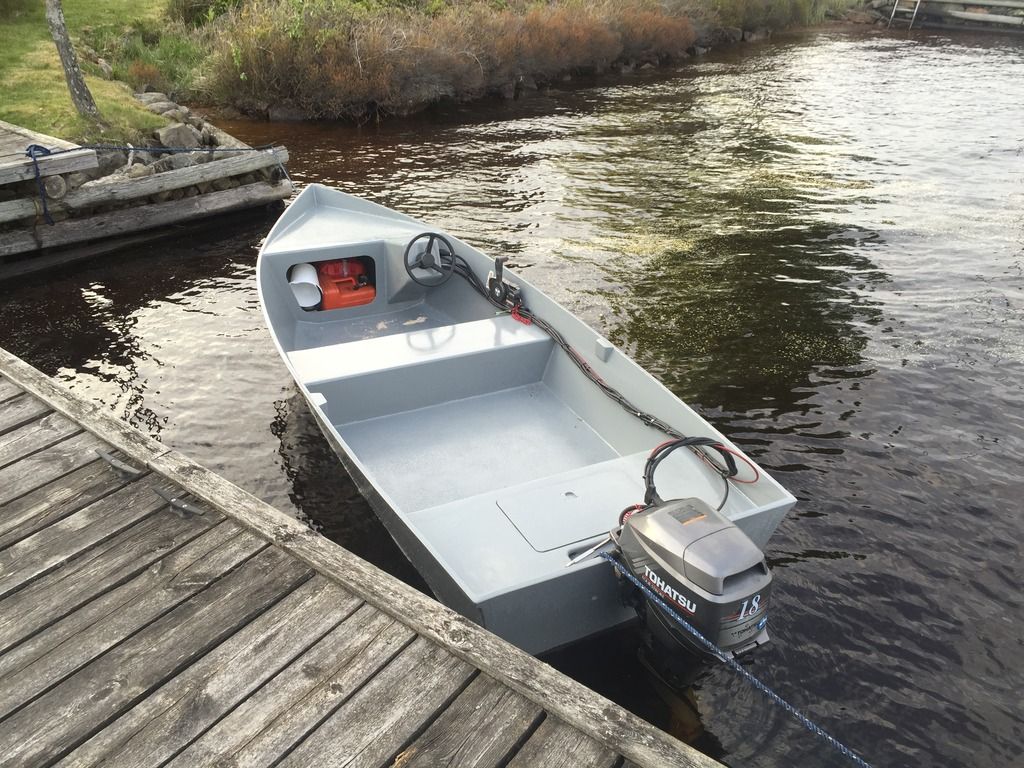
installed the tohatsu, fuel tank and battery in the front compartment... i still hit myself for not installing a chase tube or two...
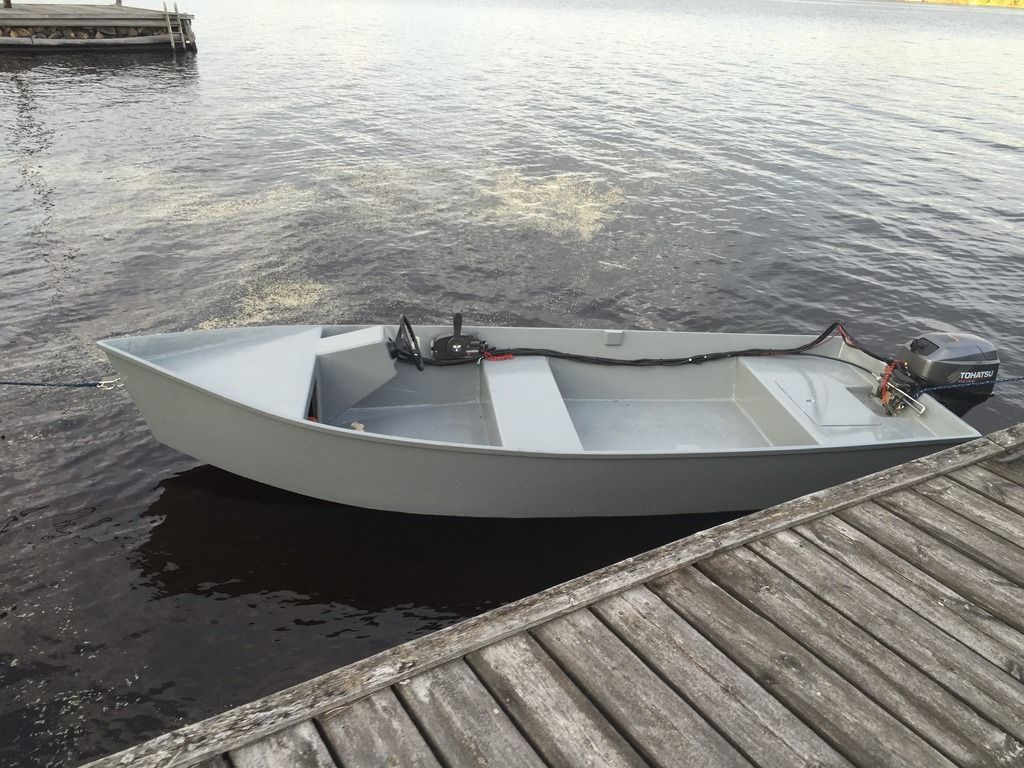
To recap the modifications
lowered the stringers to 3 inches, dual cleats and a flat floor to regain lost strength.. foam under sole and in mid seat. console, and the rear seat is shortened to enlarge the floor to 4 feet between mid and rear seat.... nice and roomy...
Re: FS14 -11 month build.... Done and spashed
Posted: Sun May 15, 2016 12:26 pm
by deuce_454
will put a grey cable sleeve over the cable bundle.. to protect the fuel hose from UV ...
Re: FS14 -11 month build.... Done and spashed
Posted: Sun May 15, 2016 1:14 pm
by pee wee
Very nice- looks like just the right boat for those waters.
Re: FS14 -2 week (+11 month build).... Done and spashed
Posted: Tue Aug 30, 2016 4:13 am
by BogdanFerariu
Hello deuce_454
I want to build a fs14 with a small console, just like yours.
The cables can be placed betwen the bottom and the sole? I never had distance controled engines, there are any restrictions about bending those cables?
Re: FS14 -2 week (+11 month build).... Done and spashed
Posted: Tue Aug 30, 2016 6:29 am
by Jeff
deuce_454, your boat looks nice!! Boats always look better once they are in the water. Nice build!! Jeff
Re: FS14 -2 week (+11 month build).... Done and spashed
Posted: Tue Aug 30, 2016 5:04 pm
by TomW1
Deuce your boat looks great. Copenhagen is a beautiful city visited it when I was in our Navy in the late 1977's. Enjoy your FS14.
Re: FS14 -2 week (+11 month build).... Done and spashed
Posted: Sun Sep 04, 2016 5:46 am
by deuce_454
thank you for the kind words
the boat is really a joy to handle.. much smoother ride than the FS14 it replaced. The engine threw a rod out thru the crankcase a week ago so ill be installing a new 20 horse tohatsu (the tohatsu 20 and mercury 20 is the same engine) next week, once I've figured out how to prop it ill post a video of it sailing and what performance i got ... but somewhere in the 30 mph range (it got 27 mph with the 18 hp and a prop that was under pitched ... probably how i broke a rod
)
Re: FS14 -2 week (+11 month build).... Done and spashed
Posted: Tue Sep 06, 2016 2:49 pm
by deuce_454
Jeff wrote:deuce_454, your boat looks nice!! Boats always look better once they are in the water. Nice build!! Jeff
unfortunately i didn't run chase tubes so the cables all run in that bundle you see next to the railing... the cables dont bend very easily.. minimum radius seems to be 30cm...
Re: FS14 -2 week (+11 month build).... Done and spashed
Posted: Tue Sep 06, 2016 11:01 pm
by TomW1
Deuce, as I recall the Tohatsu 20 comes with a standard prop. If not I'd be glad to help you prop your boat and motor. I'll need a few numbers from you to do so if you want my help. Let me know. If you do it yourself please make sure you have a tachometer. Without one it is impossible to make sure your engine is running in the proper rev range. If you over rev you can throw a rod, if you under rev and lug the engine you are making it work to hard and causing excess wear reducing its life span.
Take care, Tom
Re: FS14 -2 week (+11 month build).... Done and spashed
Posted: Wed Sep 07, 2016 7:00 am
by deuce_454
im picking the motor up today, and have bought a tach for that very reason... (not wanting to throw another rod
) the std prop is 10 inch pitch and im thinking ill need one in the 13-14 inch range
Re: FS14 -2 week (+11 month build).... Done and spashed
Posted: Wed Sep 07, 2016 5:53 pm
by TomW1
Okay, I'd go ahead and try the 10 pitch before buying another prop. The study plans list displacement at 585 lbs. I used this plus the Tohatsu numbers of 6100 rpms max and 2.15 gear ratio plus a few other numbers to come up with a prop pitch to start pitch for you if it is much different than the 10 pitch.
The numbers came out with the 10 pitch working well. Speed varied based on load but got a high of 36 mph with the 585 load and a low of 28 with 950 lbs. You want to be running close to 6100 rpms say 5800 and up.
I would get the tach on and working properly and then take her out with a normal load, 1 or 2 passengers, fishing gear, cooler, etc, however you normally use her. That will be the real test.
Let us know how it goes.
Tom