Page 1 of 1
Building an RB18
Posted: Wed Aug 05, 2015 6:54 pm
by pjb0949
Hi all,
Everyone on the forum likes to follow builds, so I decided to start a thread for my RB18 build. Ordered the plans a couple weeks ago and started cutting plywood today. Will keep this thread updated as I progress. My grandson Brendan (14) will be helping me with the boat. It will be a good project for him to help with and he will love using it as well.
How do I post pictures.
Re: Building an RB18
Posted: Wed Aug 05, 2015 7:15 pm
by terrulian
Welcome. I'm sure a lot of us will be watching. I know I will, so please post photos.
You're lucky to have a helper!
Re: Building an RB18
Posted: Wed Aug 05, 2015 7:28 pm
by pjb0949
Thanks.
Bear with me as I learn how this is done. It may take a few attempts to get a picture on here.
Re: Building an RB18
Posted: Wed Aug 05, 2015 7:34 pm
by pjb0949
I'm amazed, it actually worked.
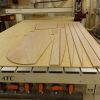
This is a picture of the first sheet of 9mm Meranti cut on my CNC. Tomorrow I will have most of the bulkheads, stringers and frames cut. Cutting the frames in 1/2" MDF.
I drew all the parts in Autocad and nested them on the sheets. Cut with a 3/8 compression bit which cuts beautifully leaving perfect cuts top and bottom. No tearout at all.
Re: Building an RB18
Posted: Wed Aug 05, 2015 7:41 pm
by terrulian
Nice work.
When you post the URL for the picture, get it from the large picture (accessed by clicking on the smaller one)--not the thumbnail.
Like this:
Re: Building an RB18
Posted: Wed Aug 05, 2015 7:53 pm
by pjb0949
Thanks again,
I was wondering why it was so small!
Is there a way to post mpeg4 video.
Re: Building an RB18
Posted: Thu Aug 06, 2015 9:13 am
by terrulian
You can upload it to YouTube and then post a link here by clicking on URL.
Re: Building an RB18
Posted: Thu Aug 06, 2015 12:13 pm
by pjb0949
Thanks,
Here's a try at posting a video of cutting bulkheads on the CNC
http://youtu.be/C9TtyuZo3r0
Re: Building an RB18
Posted: Thu Aug 06, 2015 7:36 pm
by Walkers Run
I need one of those

Re: Building an RB18
Posted: Thu Aug 06, 2015 8:08 pm
by pjb0949
Walkers Run wrote:I need one of those
I thought everyone building a boat had one!
I am very fortunate. My company uses it to build Solid surface counter tops and MDF cabinet doors.
I cut 5 sheets of MDF for mold parts and 5 sheets of plywood for frames, stringers and transom in 1.5 hours today. By hand that would probably take 10 times that. Of course it takes a bit of time to draw the parts in autocad, but even that's much faster than drawing them by hand on the plywood.
Re: Building an RB18
Posted: Sat Aug 08, 2015 8:31 am
by PrometheusNL
That CNC machine is bigger then my whole shop. It is as they say a Sexy Beast.
Re: Building an RB18
Posted: Sat Aug 08, 2015 10:56 am
by pjb0949
PrometheusNL wrote:That CNC machine is bigger then my whole shop. It is as they say a Sexy Beast.
Yes it is. Eats up a lot of space in the shop, but couldn't do without it. It can cut a 5'x12' sheet.
It's also a great layout and assembly table. Perfectly level and flat surface to work on.
The company that builds them has done machines 12' wide and 100' long. They are made in modules and final assembled on site.
If anybody within reasonable distance of me needs cutting done for their build I'd be happy to help. No charge for friendly builders on this forum. Just a way of saying thanks for all the info I've gotten from others on the forum about boat building.
Re: Building an RB18
Posted: Sat Aug 08, 2015 11:32 am
by jorgepease
pjb0949 wrote:PrometheusNL wrote:That CNC machine is bigger then my whole shop. It is as they say a Sexy Beast.
Yes it is. Eats up a lot of space in the shop, but couldn't do without it. It can cut a 5'x12' sheet.
It's also a great layout and assembly table. Perfectly level and flat surface to work on.
The company that builds them has done machines 12' wide and 100' long. They are made in modules and final assembled on site.
If anybody within reasonable distance of me needs cutting done for their build I'd be happy to help. No charge for friendly builders on this forum. Just a way of saying thanks for all the info I've gotten from others on the forum about boat building.
I'd get at least the 16 foot capability so you could but splice sheets of ply for long panels!! Talk about productivity ... Dreaming ))
Re: Building an RB18
Posted: Sat Aug 08, 2015 1:41 pm
by peter-curacao
pjb0949 wrote:Hi all,
Everyone on the forum likes to follow builds, so I decided to start a thread for my RB18 build. Ordered the plans a couple weeks ago and started cutting plywood today. Will keep this thread updated as I progress. My grandson Brendan (14) will be helping me with the boat. It will be a good project for him to help with and he will love using it as well.
How do I post pictures.
Cool and welcome, I will follow this one for sure

Re: Building an RB18
Posted: Sun Oct 04, 2015 9:05 pm
by pjb0949
It's been a few weeks since I posted anything, so here's an update.
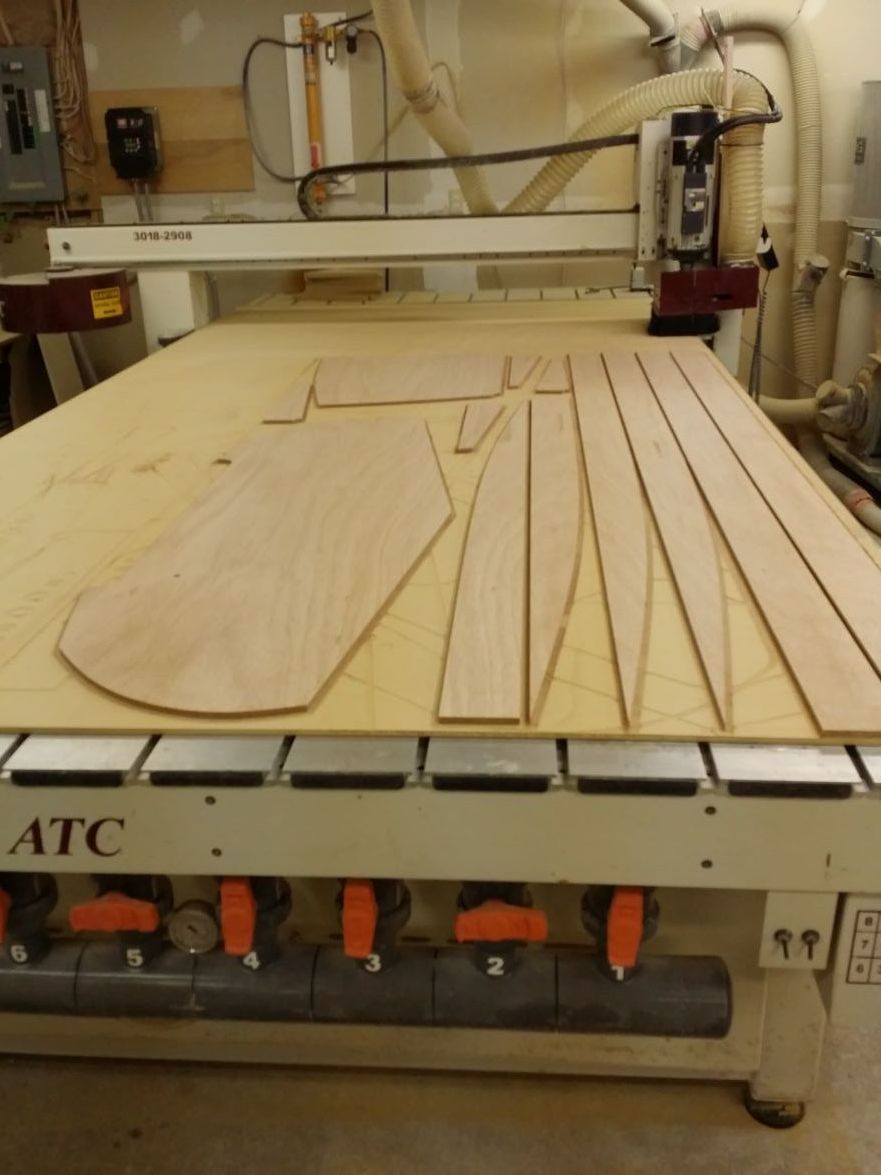
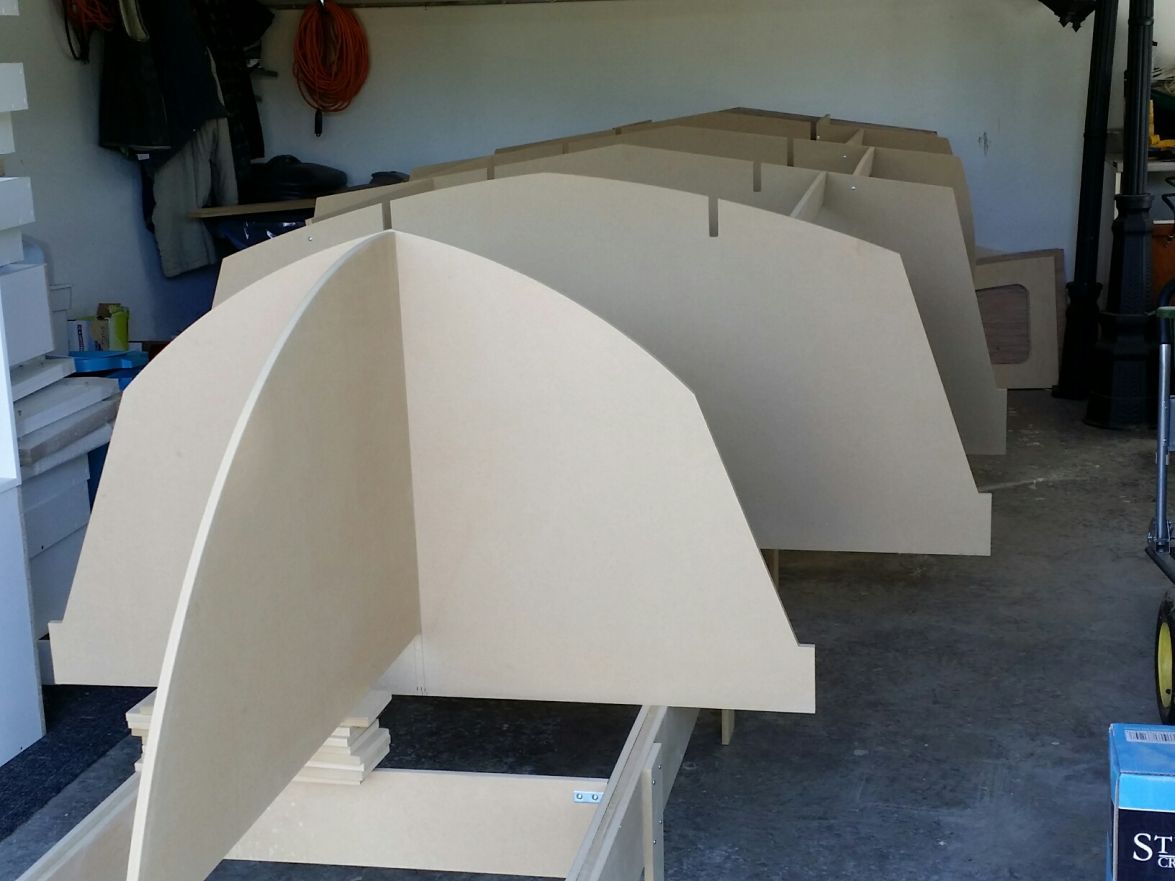
Managed to finish cutting assembly frames, plywood bulkheads, stringers and transom parts on the CNC and got them moved to my home garage. It's a bit tight building an 18' boat in a 21' garage, but it's workable. If my wife would let me use her side as well things would be a little easier. The stringers and transom are laminated. I used Flox instead of wood flour mostly because it's what I used when I built an airplane 20 years ago and a couple of kayaks 10 years ago. Started to assemble the forms today, and got everything roughly in place. It still needs 2 or 3 hours to get things into final alignment. Hope to get the plywoods panels cut on the CNC this week and on the frames next weekend.
Re: Building an RB18
Posted: Wed Oct 07, 2015 5:47 pm
by pjb0949
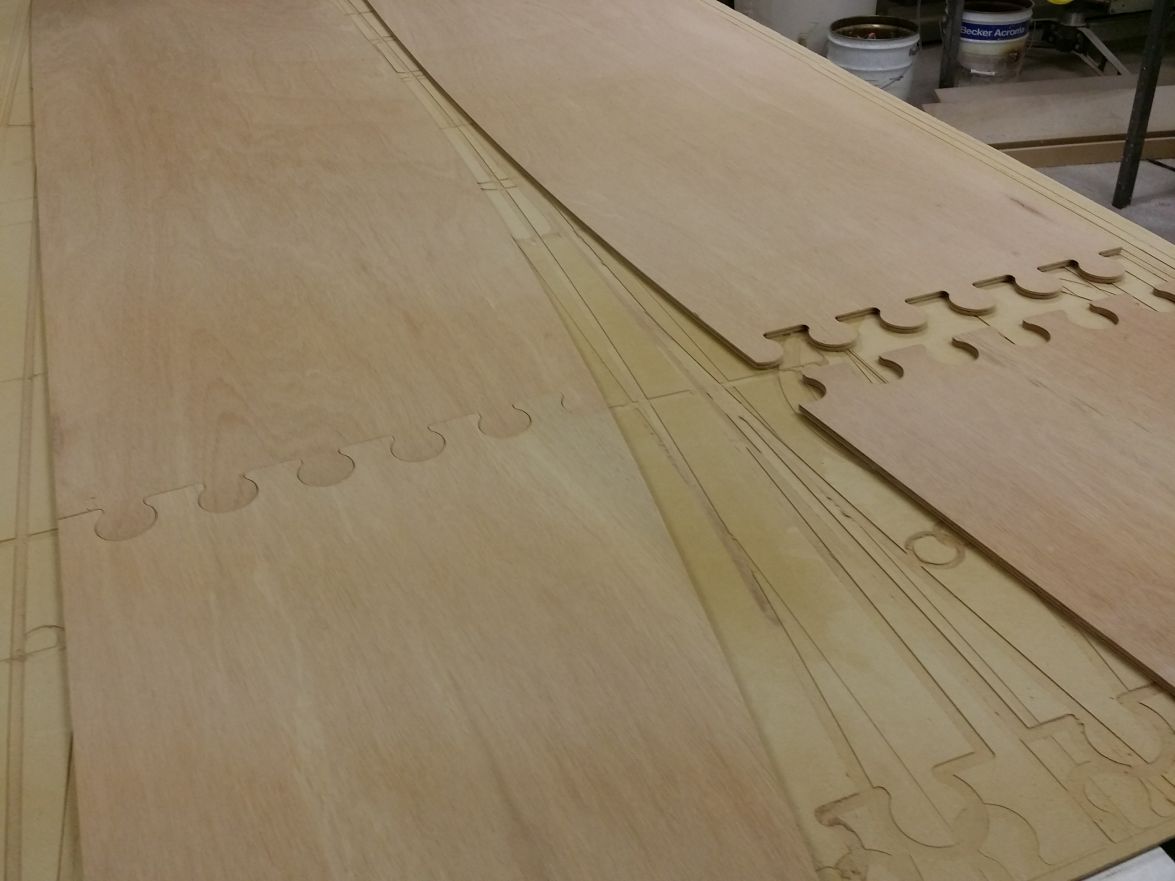
Got a little time at the shop this afternoon to cut the hull panels on the CNC. Decided to incorporate puzzle joints to save the extra fairing required with butt joints covered in fiberglass.
Here's a short video of the joints being cut. It took a little head scratching to figure out the geometry and allowing for some glue space in the joint, but I got her done. They fit perfectly. Should save time and fairing materials.
https://www.youtube.com/watch?v=4zGLNr6q_ZQ
Picture showing joint assembled and unassembled
Re: Building an RB18
Posted: Wed Oct 07, 2015 6:13 pm
by jorgepease
Sweet!!
Re: Building an RB18
Posted: Mon Oct 12, 2015 6:43 am
by pjb0949
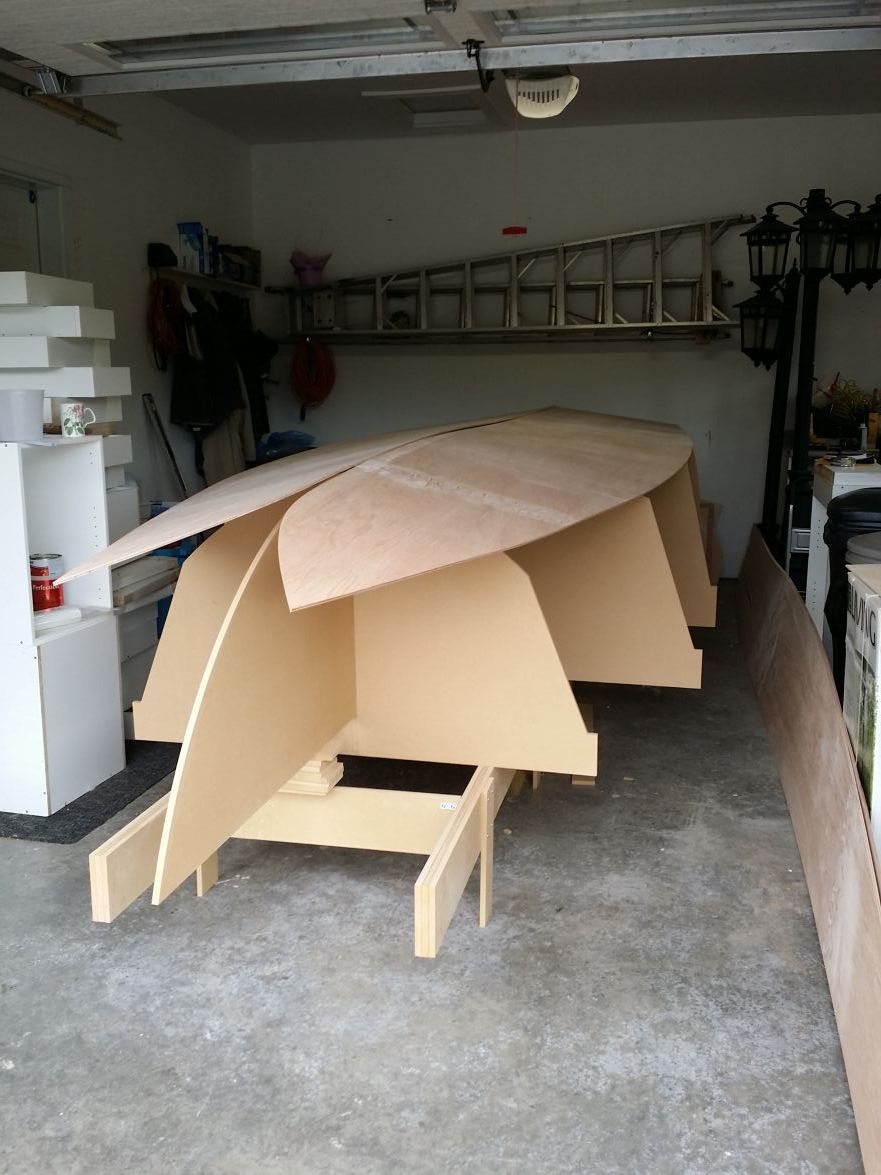
Getting ready to try putting panels on frames. Seems a little more intimidating than I thought it would be. So far it all seems to fit OK. Still have to finalize bow frame before starting to stitch.
Re: Building an RB18
Posted: Mon Oct 12, 2015 9:40 am
by jacquesmm
This thread will help you with hull panels installation:
http://forums.bateau2.com/viewtopic.php ... 6&start=30
Re: Building an RB18
Posted: Sat Oct 17, 2015 7:03 pm
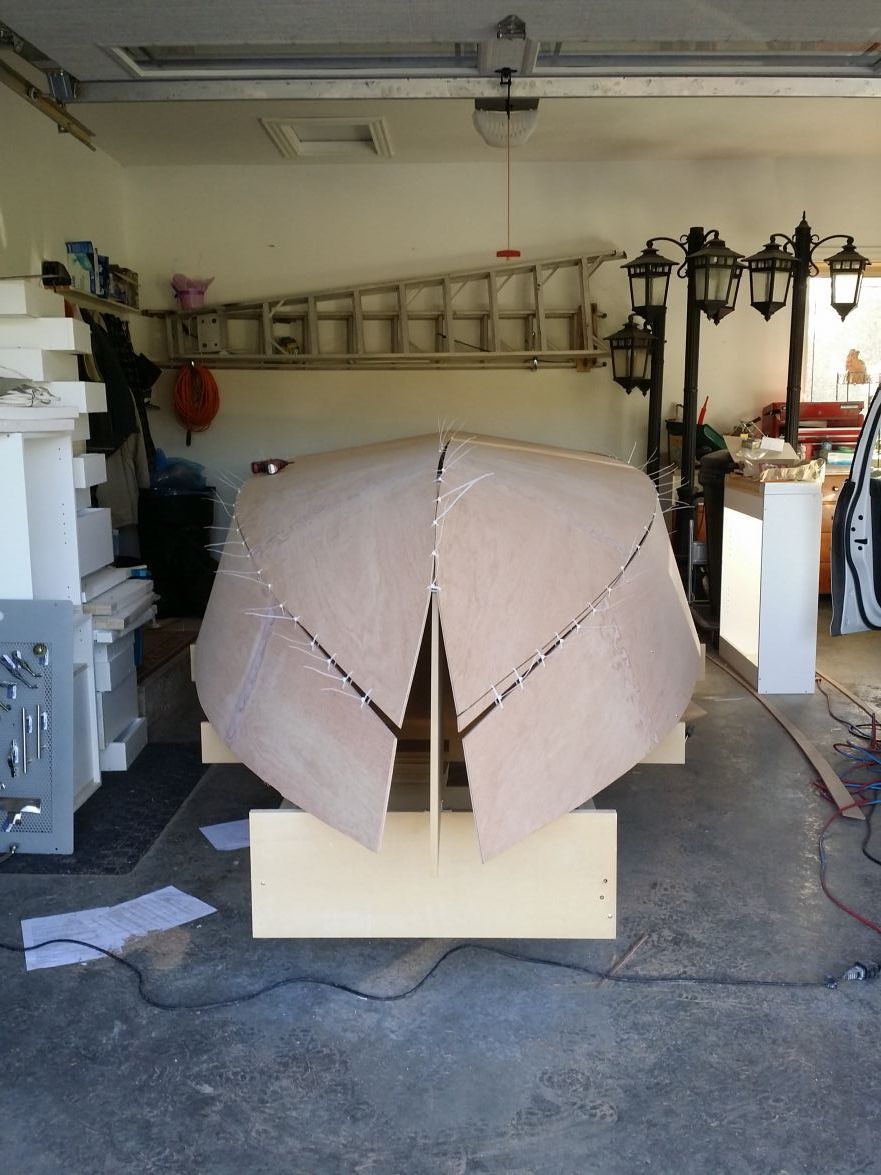
by pjb0949
Had a good day today. Managed to get the panels stitched together without too much problem. Had to do a little adjusting here and there. 1/4 Meranti is a little stiff and this boat has lots of curves to deal with, but I got the bow together with my wife's help.
Started to glue the panels together
Almost all glue up.

Tomorrow I should be able to get the the seams sanded and holes filled, ready for tape.
Re: Building an RB18
Posted: Mon Oct 19, 2015 10:29 am
by pjb0949
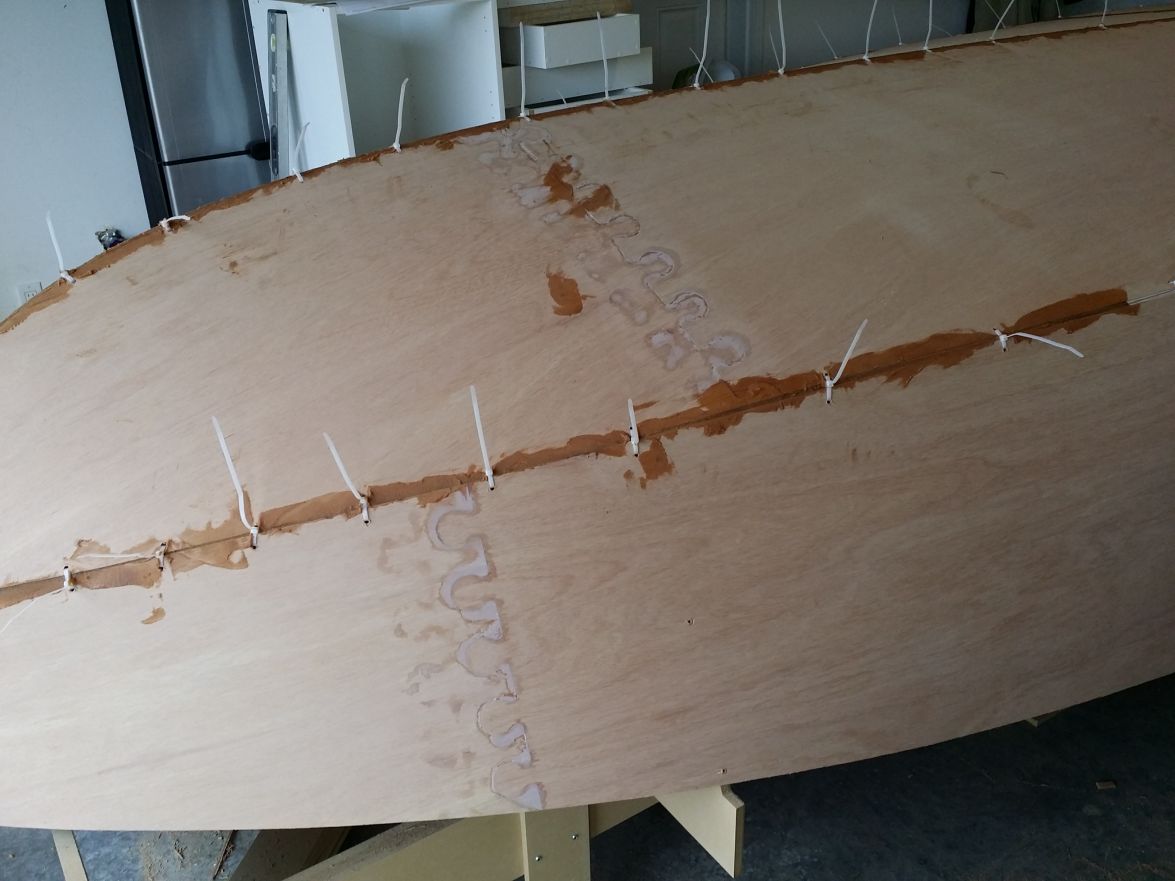
Sunday was a good day. Got ties off and holes filled. Initial sanding to begin shaping tumblehome and application of epoxy putty to prepare tumblehome for glassing. Still need to sand tumblehome. Got about half the seams glassed.
Hope to be ready to glass the outside of the hull this coming weekend.
Re: Building an RB18
Posted: Mon Oct 19, 2015 2:26 pm
by osotexan
I love the puzzle joints. Everything looks nice and clean. Great progress.
Re: Building an RB18
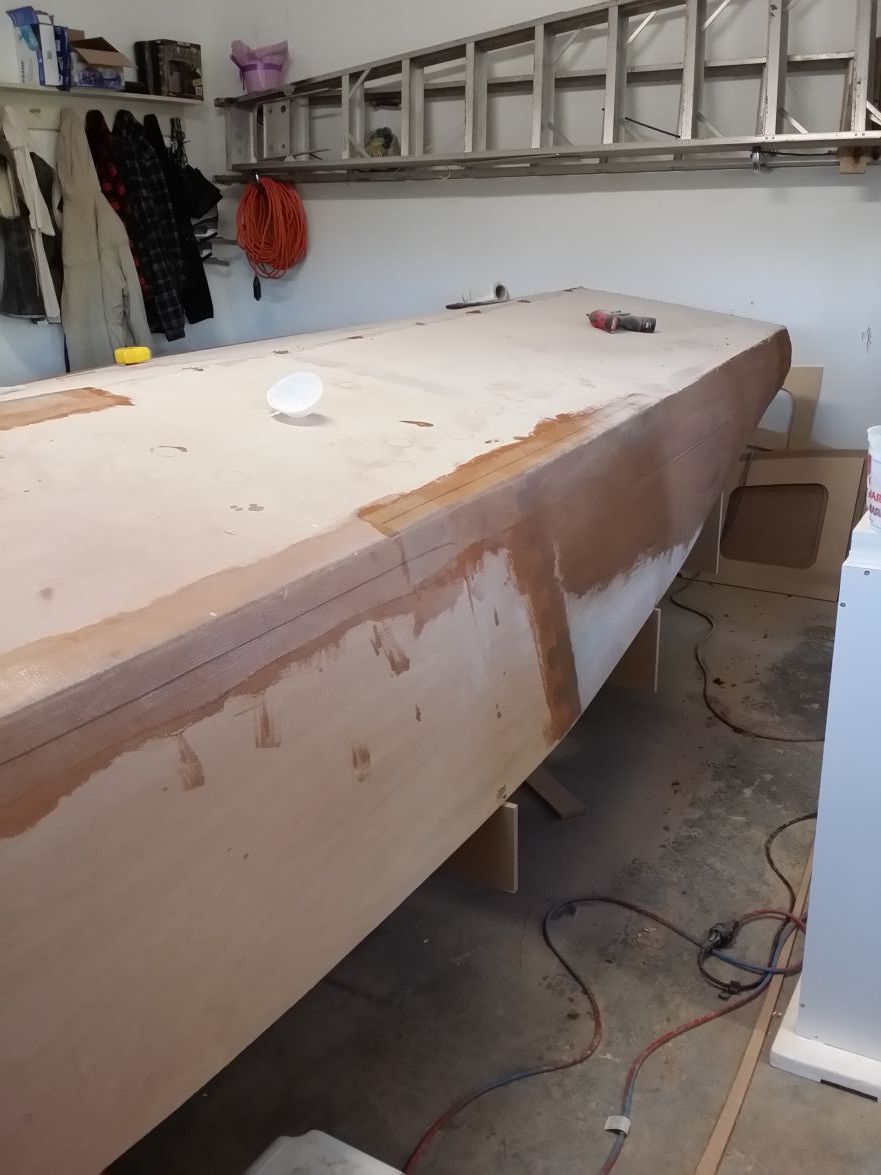
Posted: Sat Nov 28, 2015 4:04 pm
by pjb0949
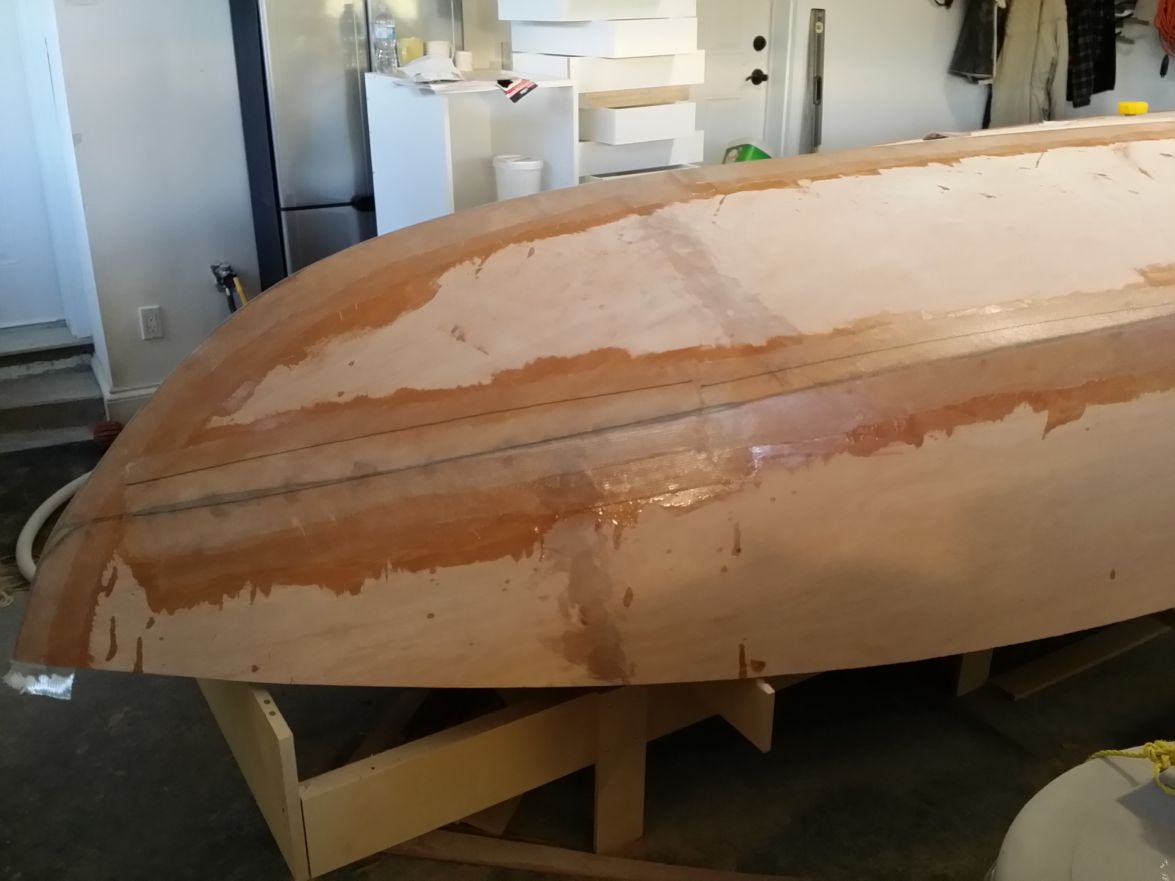
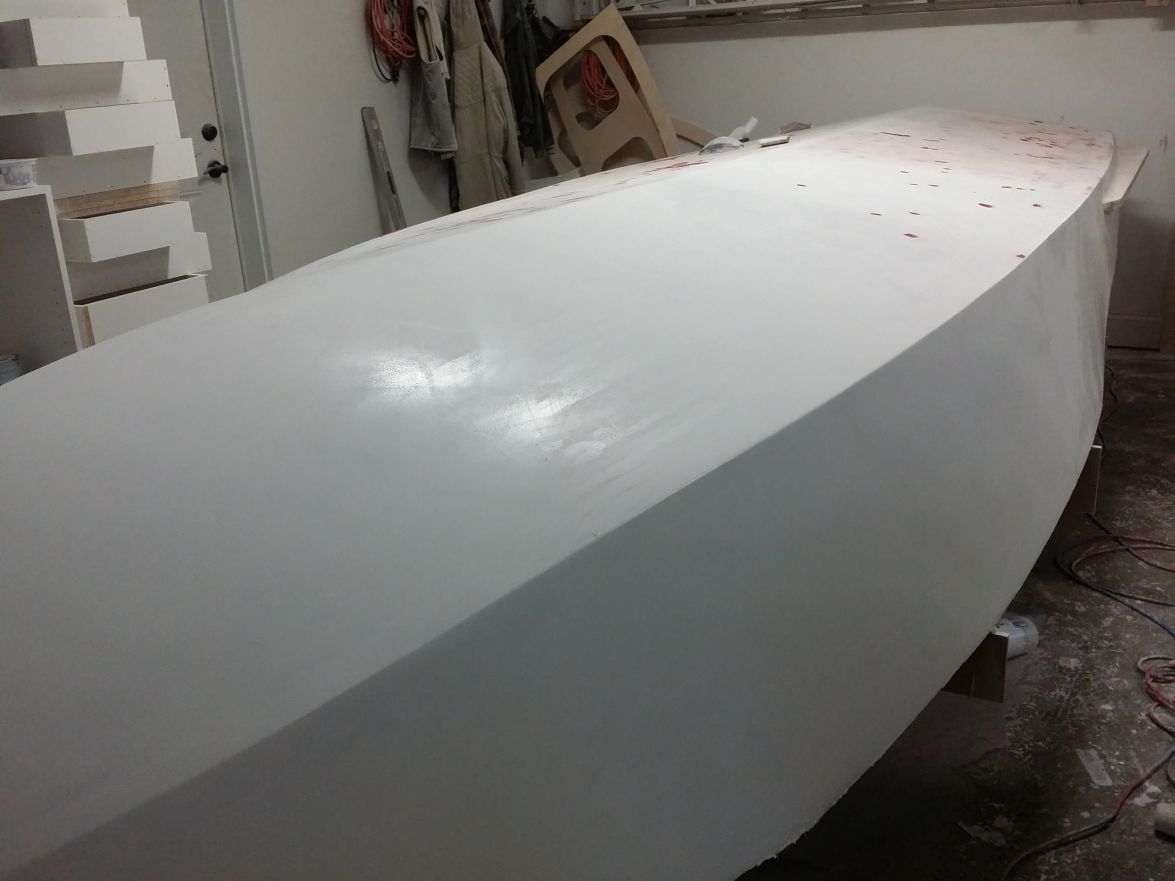
It's been more than a month since I had time to take pictures and post them. Most of my time has been spent on glassing the hull and fairing. I want a nice finish, so I have spent considerable time and materials on getting a good, smooth finish. Used a homemade fairing board and RA sander and then a rubber sanding block. Came out quite nice. My wife hasn't been too keen on all the dust on and around her car. I had to clean it a few times to keep peace.
I started applying primer in sections with a roller. It's an Italian two part poly sanding primer. Had a little problem with bubbles appearing 2 or 3 minutes after application. Go over it again with the roller to flatten out and a couple of minutes later bubbles again. Have to roll it three or 4 times to get it to go smooth. Fortunately the tech rep for the paint company was in town last week and came out to see what the problem was. It required a faster reducer to get the reducer out of the paint before it starts to gel over, trapping the reducer in the primer creating bubbles.
Front part of the boat has four coats and the stern hasn't got any yet. Sanded between coats and spot puttied to fill any small pinholes, etc.
Hoping to paint bottom next weekend and turn over by 10 Dec.
Re: Building an RB18
Posted: Mon Dec 28, 2015 10:21 am
by pjb0949
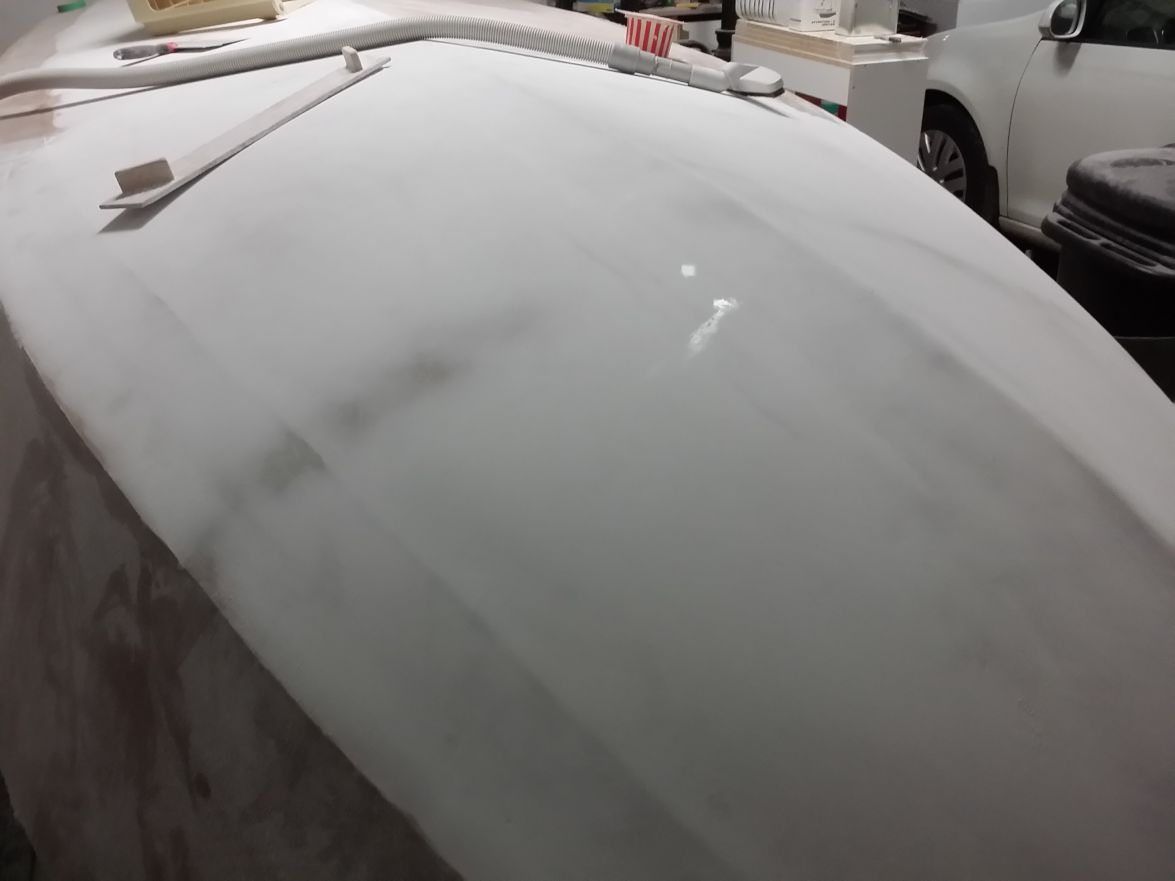
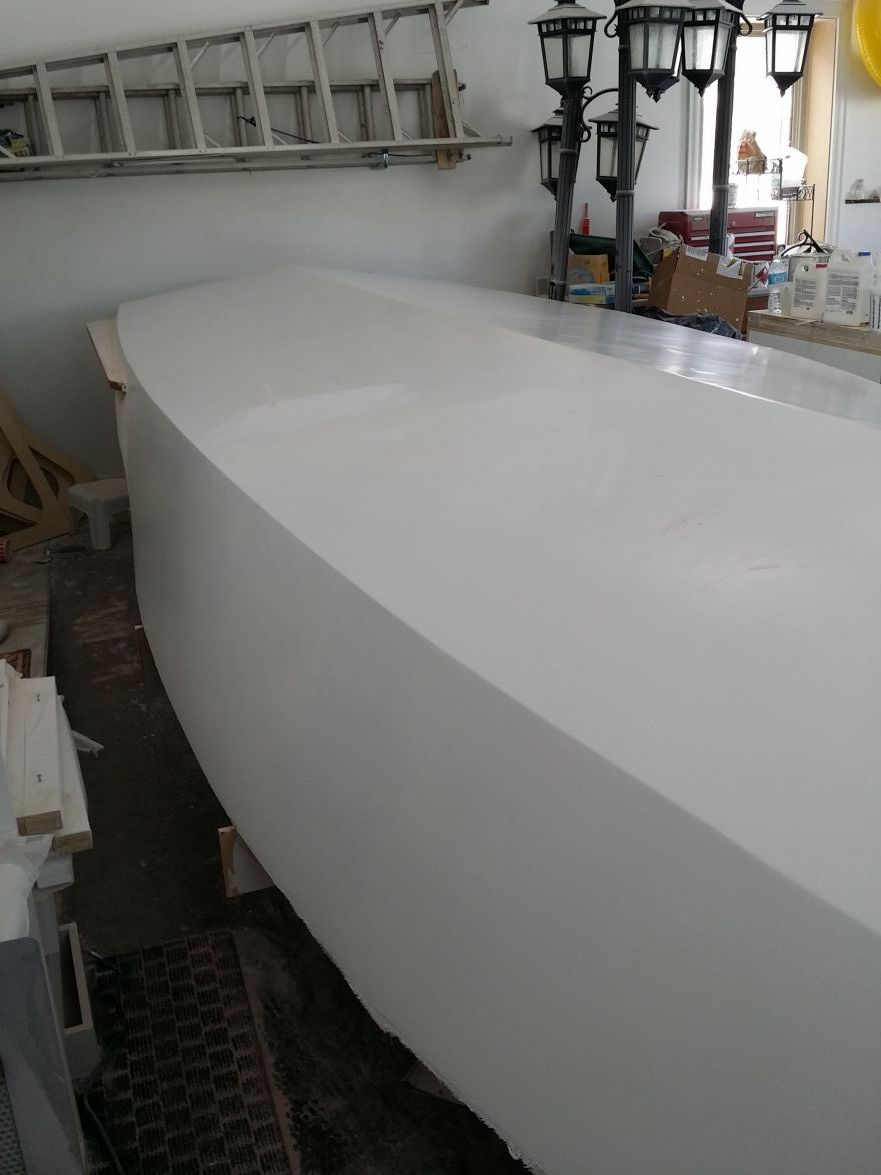
Getting the hull faired and primed has been a longer task than I had imagined. There are still a couple little spots to be touched up before painting the bottom, but I am so sick of sanding that I had to prime it and be able to see something that looked like progress. Still have to finish fairing and priming the tumblehome area, but that will be a lot easier when the hull it flipped over.
Managed to get the last 5 or 6 feet at the stern within 1mm (1/25") of flat. Probably could have made it better with another application of fairing compound but I couldn't bear the thought of any more sanding. Besides when it's flipped gravity will probably change things on the bottom a little anyway.
Re: Building an RB18
Posted: Mon Dec 28, 2015 10:49 am
by jacquesmm
It looks good from here.

Re: Building an RB18
Posted: Mon Dec 28, 2015 7:16 pm
by willg
Nice!
Re: Building an RB18
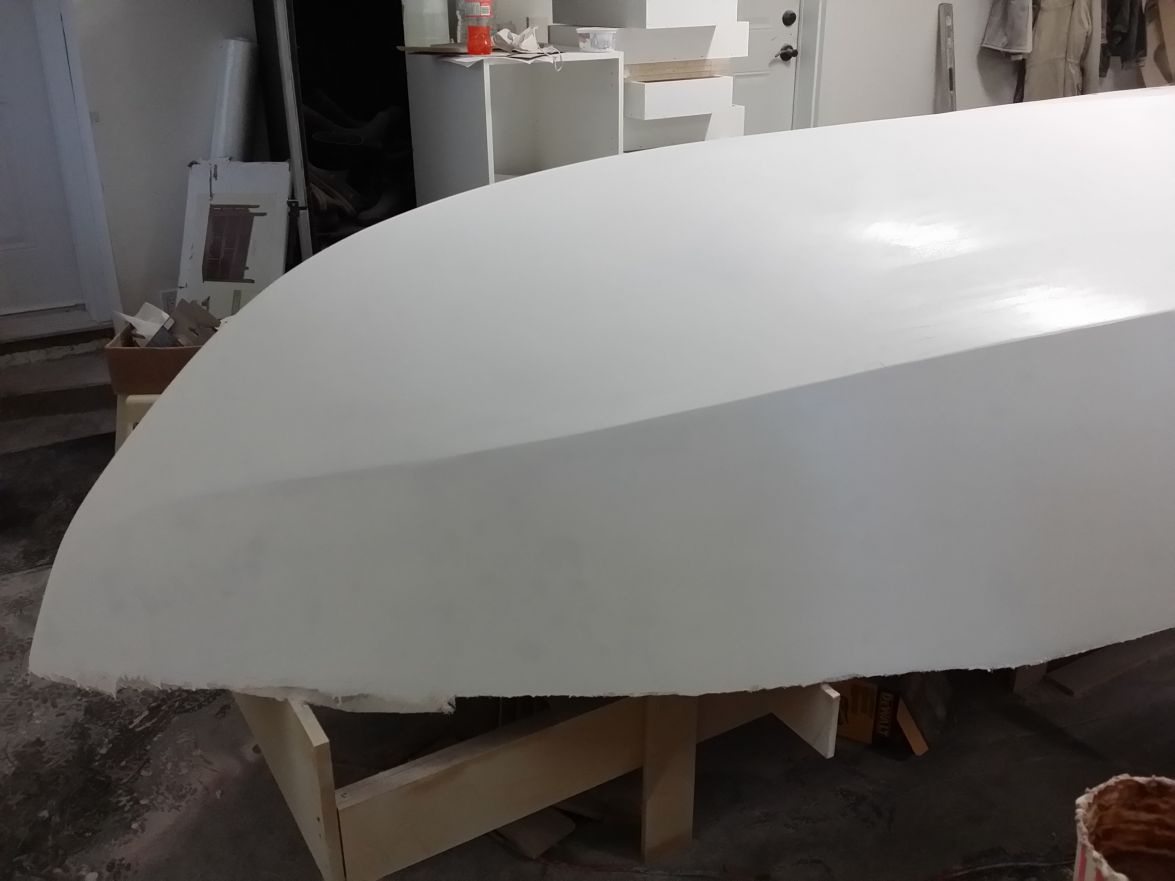
Posted: Mon Jan 11, 2016 8:45 pm
by pjb0949
My grandson Brendan dropped by this evening to help. The more he helps the more he gets to drive it when it's launched!
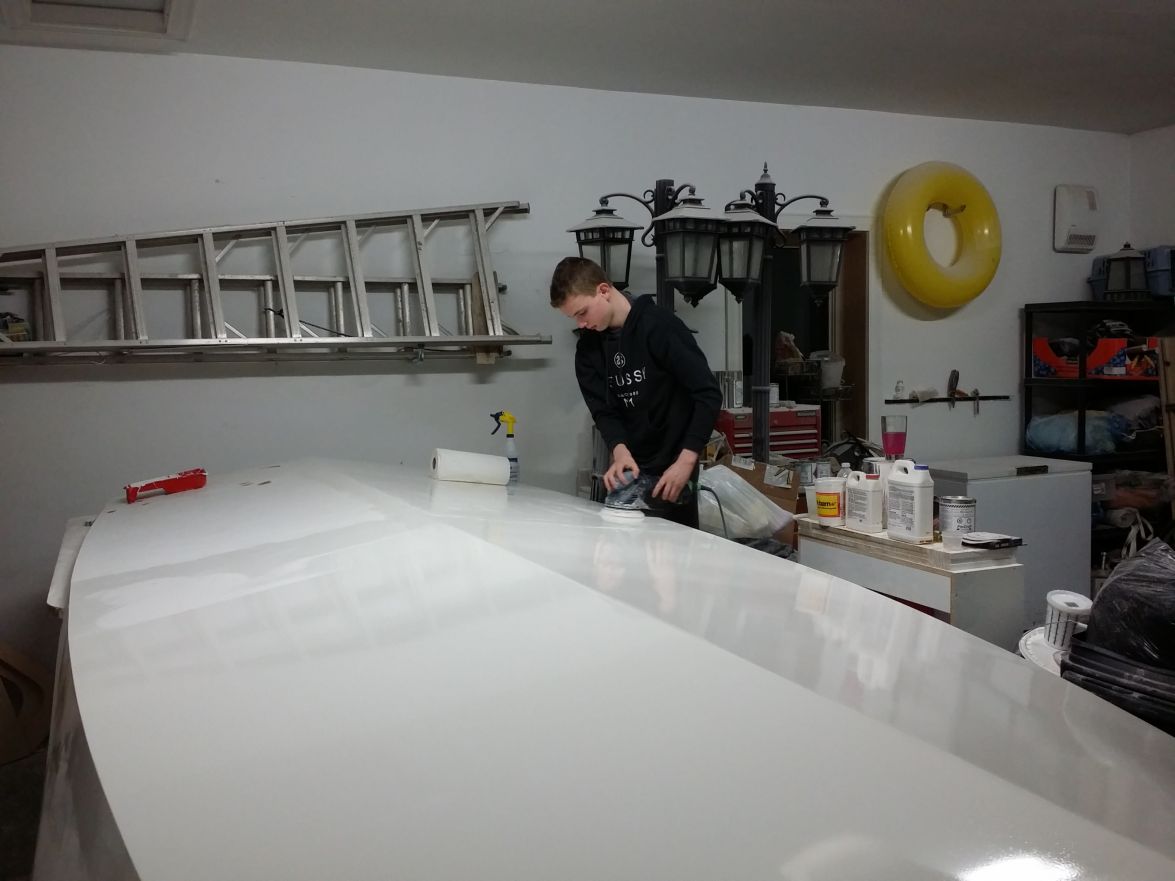
He's wet sanding the third coat of two part poly paint. Just two more to go.
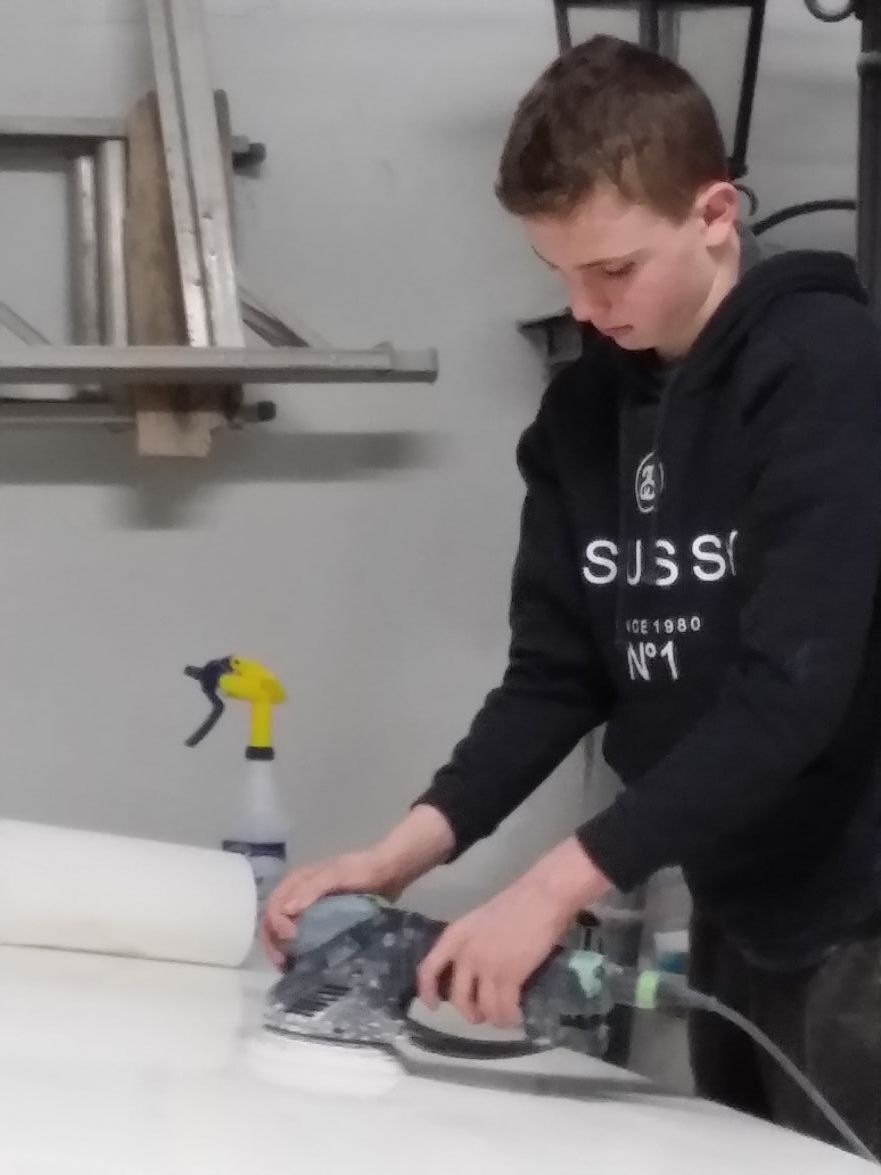
800 grit wet quickly flattens the paint ready for the next coat.
The 5th coat will get wet sanded to 1000 grit and polished with abrasive on a wool pad to give a mirror finish.