Page 1 of 1
GV11. And so it begins...
Posted: Tue Oct 06, 2015 5:26 pm
by Mhopper
Re: GV11. And so it begins...
Posted: Tue Oct 06, 2015 6:11 pm
by terrulian
OK, we'll be on your case but undoubtedly in a nice way.
You can cut graceful curves with a skill saw. I learned that on my build from Jacques, and it works great. Also, since you are going to fillet all the joints and tape them, the cuts don't have to be perfect. Even if you have a bit of tear-out, which probably won't be much, you will be filling it with wood flour and epoxy.
Good luck and send pictures.

Re: GV11. And so it begins...
Posted: Tue Oct 06, 2015 9:37 pm
by Cracker Larry
Get a fine tooth blade and set it 1/16 inch deeper than the wood thickness and you can cut a smooth curve with no problem. For duplicate bottom or side panels, stack them together, clamp them and cut them as one for uniformity.
Re: GV11. And so it begins...
Posted: Wed Oct 07, 2015 8:02 pm
by Mhopper
No progress today. Sick 8 year old.
Re: GV11. And so it begins...
Posted: Fri Oct 09, 2015 2:38 pm
by Mhopper
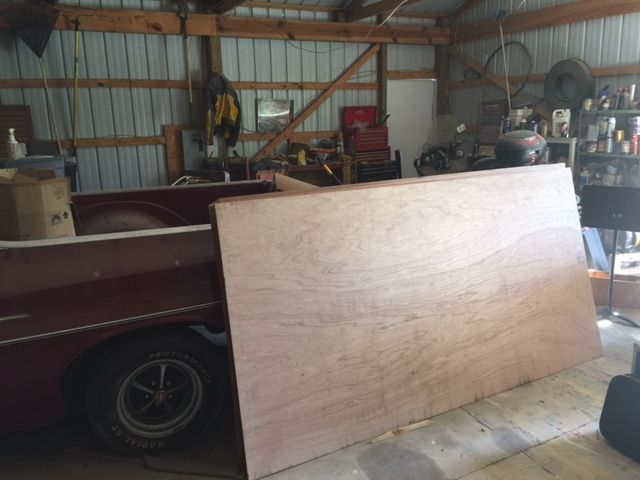
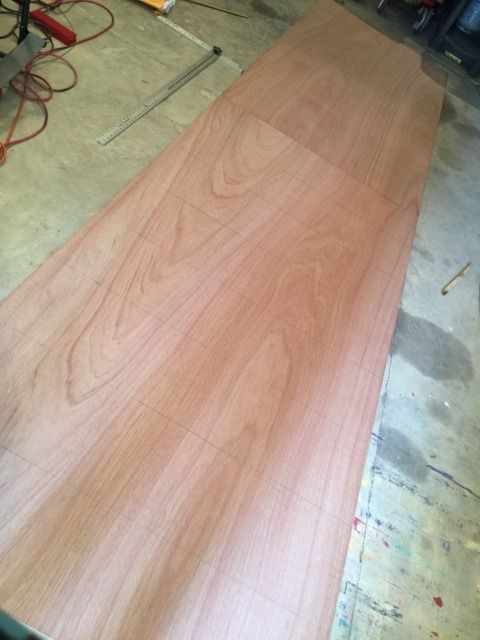
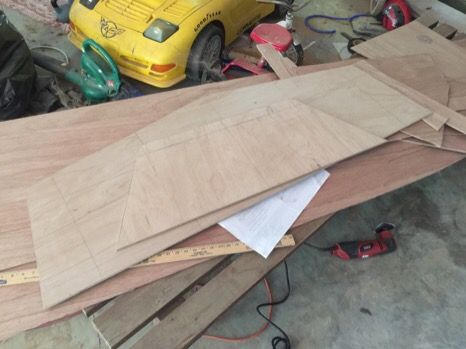
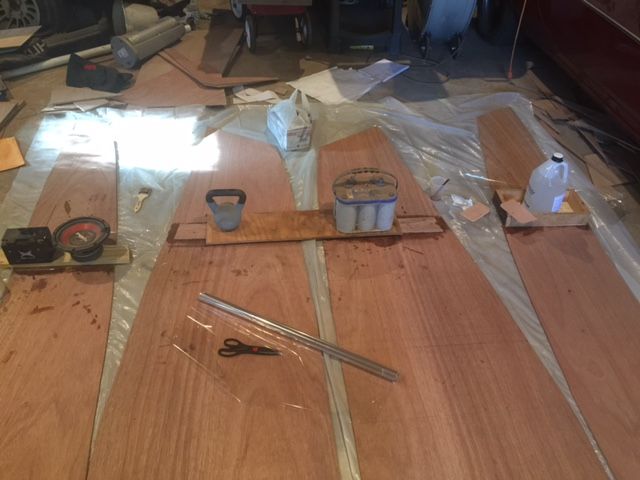
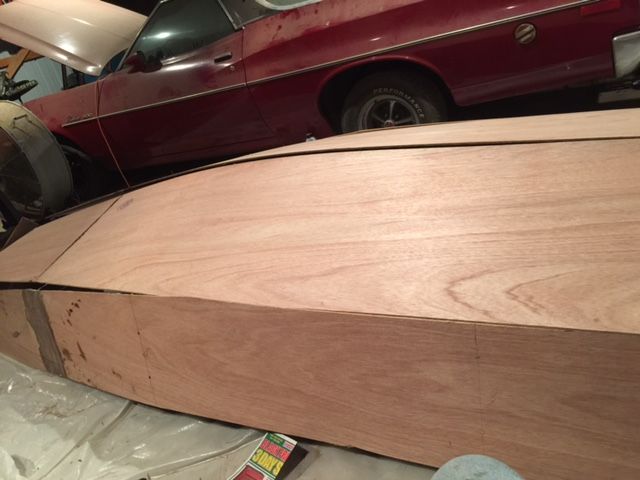
The kid is finally well enough for me to go to the shop a little while. New circular saw blade. My circular saw is now my new best friend! Cuts like butter. I was beginning to question my choice of the gv11. I was thinking maybe it wasn't going to be big enough. Now I'm getting some wood cut and I'm starting to see the true size. This is one fat little boat!
Re: GV11. And so it begins...
Posted: Fri Oct 09, 2015 5:18 pm
by Mhopper
Progress...
Re: GV11. And so it begins...
Posted: Fri Oct 09, 2015 8:18 pm
by Steven
It is a big little boat and extremely stable. I'm 225# and can fish from the front deck. It does lift the stern out of the water a little.
Re: GV11. And so it begins...
Posted: Fri Oct 09, 2015 9:00 pm
by Mhopper
That's good to know! I'm 260.
Re: GV11. And so it begins...
Posted: Sat Oct 10, 2015 1:43 am
by Fuzz
Good to see someone else is full grown

Fuzz
Re: GV11. And so it begins...
Posted: Sat Oct 10, 2015 10:16 am
by Mhopper
Fuzz, you are in Alaska. You need the insulation. I am in the south. I have no excuses!
Re: GV11. And so it begins...
Posted: Sun Oct 11, 2015 3:09 pm
by Heimfried
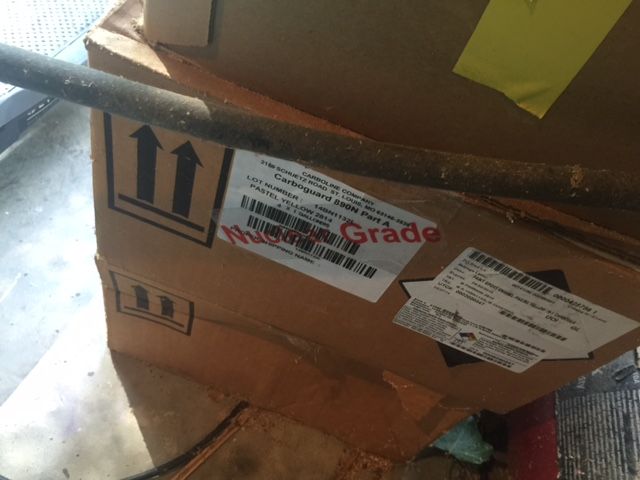
Be carefull with that plywood. The shown stamp did I see a few days ago in a discussion about plywood of inferior quality, which not at all meets the BS1088 Standard.
I don't know anything about this ply myself, but may be it is better to check the quality before you put lots and lots of working hours in it.
http://forum.woodenboat.com/showthread. ... nd-plywood
Re: GV11. And so it begins...
Posted: Sun Oct 11, 2015 8:06 pm
by Mhopper
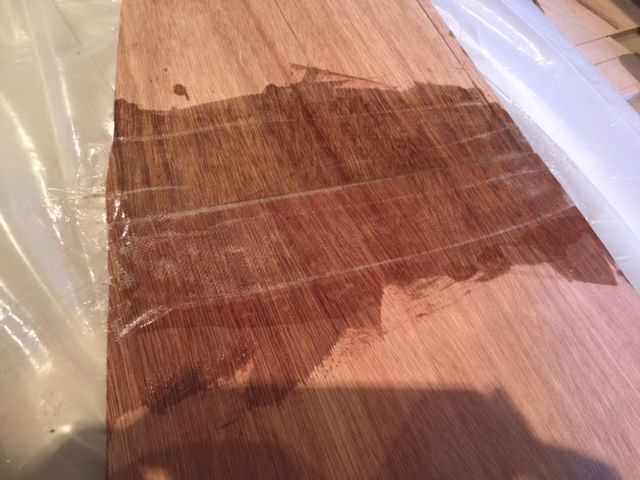
Not sure about durability yet. Only time will tell... But it sure looks good and cuts good!
Re: GV11. And so it begins...
Posted: Sun Oct 11, 2015 9:02 pm
by Cracker Larry
It's good.
Re: GV11. And so it begins...
Posted: Mon Oct 12, 2015 1:04 pm
by Mhopper

. Missed by an inch.. Oh well. Most of it will be covered by rub rail. I'm gonna fill and patch it and move on...a monument to my stupidity. I'm glad I noticed when I did. Could have been much worse. Should I hack the other side too so it will be symmetrical? LoL
Re: GV11. And so it begins...
Posted: Tue Oct 13, 2015 8:01 pm
by Mhopper
All 4 mm cut!
Re: GV11. And so it begins...
Posted: Wed Oct 14, 2015 9:43 pm
by Mhopper
So I told my 9 year old that I was going to make a lid for the boat we are building. That way
When I die you can just put me in the boat and shut the lid. You will not have to pay for a coffin.
His response..."you're not taking MY boat with you!" It's still just a pile of wood and he
Is already laying claim to it.
Re: GV11. And so it begins...
Posted: Wed Oct 21, 2015 3:09 pm
by Mhopper
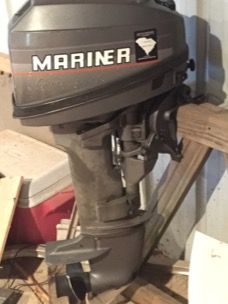
Motor purchased!!!!! I picked up a long shaft Mercury mariner 1993 15hp for 340$. It has a brand new carb, new plugs and wires and looks brand new. It fired up on the first pull without even choking it. It only weighs 71 pounds. So I know I'm gonna have to beef up the transom knees and matt/glass the hull. Should I matt/glass the interior also?
Re: GV11. And so it begins...
Posted: Wed Oct 21, 2015 6:06 pm
by Mhopper
Parts pile is getting thicker!
Re: GV11. And so it begins...
Posted: Fri Oct 23, 2015 12:58 pm
by grundasaurus
Hi, as a fellow GV11 builder, for bracing I would suggest making the transom knees the length from the side of the boat to the motor mounting bracket and something like 6-8 inches long. They really stiffen up the transom and can be used as rod holders/ cup holders as well. As for internal fibreglass I have a full epoxy coat and two layers of 6 and sometimes 8oz tape overlapped over the seams. I don't think you should worry about inside matting, but I would suggest covering the hull with glass for abrasion resistance and a bit more strength.
Re: GV11. And so it begins...
Posted: Fri Oct 23, 2015 9:10 pm
by Mhopper
Thanks for your reply! I already have a plan to beef up the transom knees. I was worrying about the flex of the bottom at speed. I will layer it up.. Not a lot of chop on the lakes I am on. But in the summer the water levels sometimes get dangerously low. So that will help with the issue of barely submerged islands and sandbars as well! Thanks again.
Re: GV11. And so it begins...
Posted: Fri Oct 23, 2015 11:22 pm
by Steven
A layer of 6" cloth on the bottom is sufficient. I run a 15 hp 4 storke that's 126# on mine and that's what the designer recommended. Here's how I did my transom knees. Be sure to glass all the intersecting joints. I didn't glass the inner 1x2 at the ends where it meets the sides and the inner frame and had some cosmetic cracking in the fairing. Was an easy fix, but unnecessary if done right the first time.
Re: GV11. And so it begins...
Posted: Sat Oct 24, 2015 5:23 pm
by Mhopper
I like the look of that! I have a small piece of 1" exterior from the early 1970's that I am thinking about using for the transom knees. My motor is extremely light for a 15 hp. Even though, it can still do some damaged to the transom while being trailered. The guy I bought the motor from had broken transome Knees from towing his boat on bumpy roads. It looked like someone had taken a saw and cleanly sliced right through the knee. And that was on an aluminum boat!
Re: GV11. And so it begins...
Posted: Sat Oct 24, 2015 6:24 pm
by Steven
Use a transom brace when trailering and you won't hurt the transom.
Re: GV11. And so it begins...
Posted: Thu Oct 29, 2015 11:08 am
by Mhopper
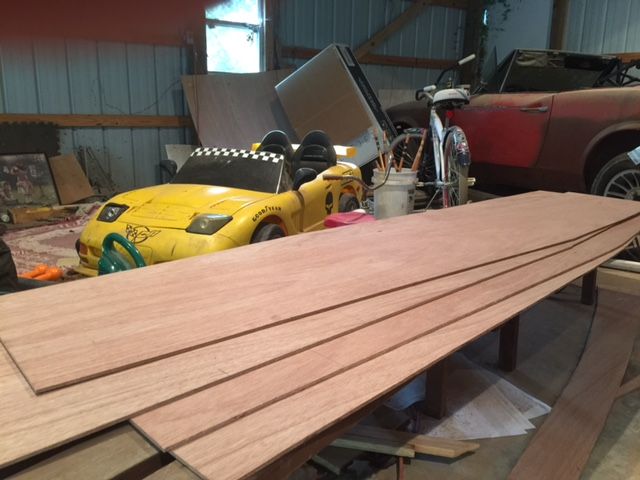
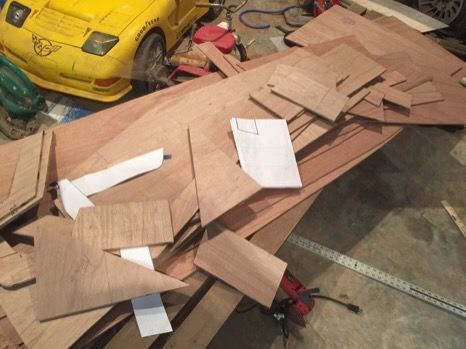
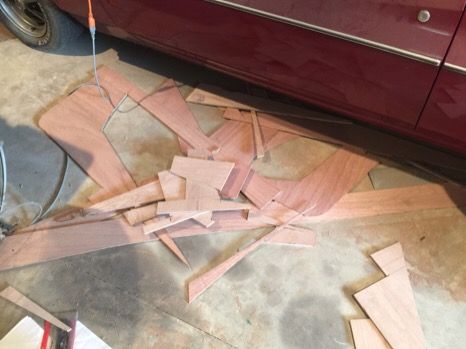
Two pictures here. The first is a complete unassembled gv11. All that from four sheets! The second picture is all that is left from four sheets. Talk about efficiency!
Re: GV11. And so it begins...
Posted: Thu Oct 29, 2015 11:15 am
by terrulian
Don't throw it away.
I couldn't have done what you've done because some of the parts, like the seats, couldn't be cut until I had the hull built to measure from. Otherwise I'm sure they wouldn't have fit.

Re: GV11. And so it begins...
Posted: Thu Oct 29, 2015 2:09 pm
by Mhopper
I never throw things away! For what that wood costs I might even sweep up the saw dust!
Re: GV11. And so it begins...
Posted: Thu Oct 29, 2015 2:25 pm
by jacquesmm
We spend a lot of time on the nesting drawing!
Re: GV11. And so it begins...
Posted: Tue Nov 10, 2015 3:27 pm
by Mhopper
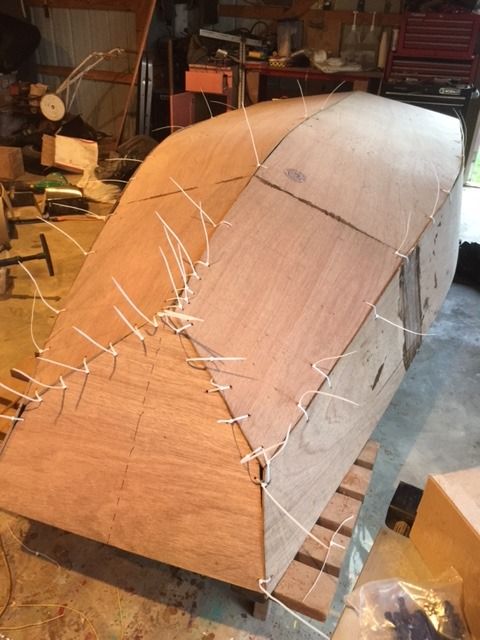
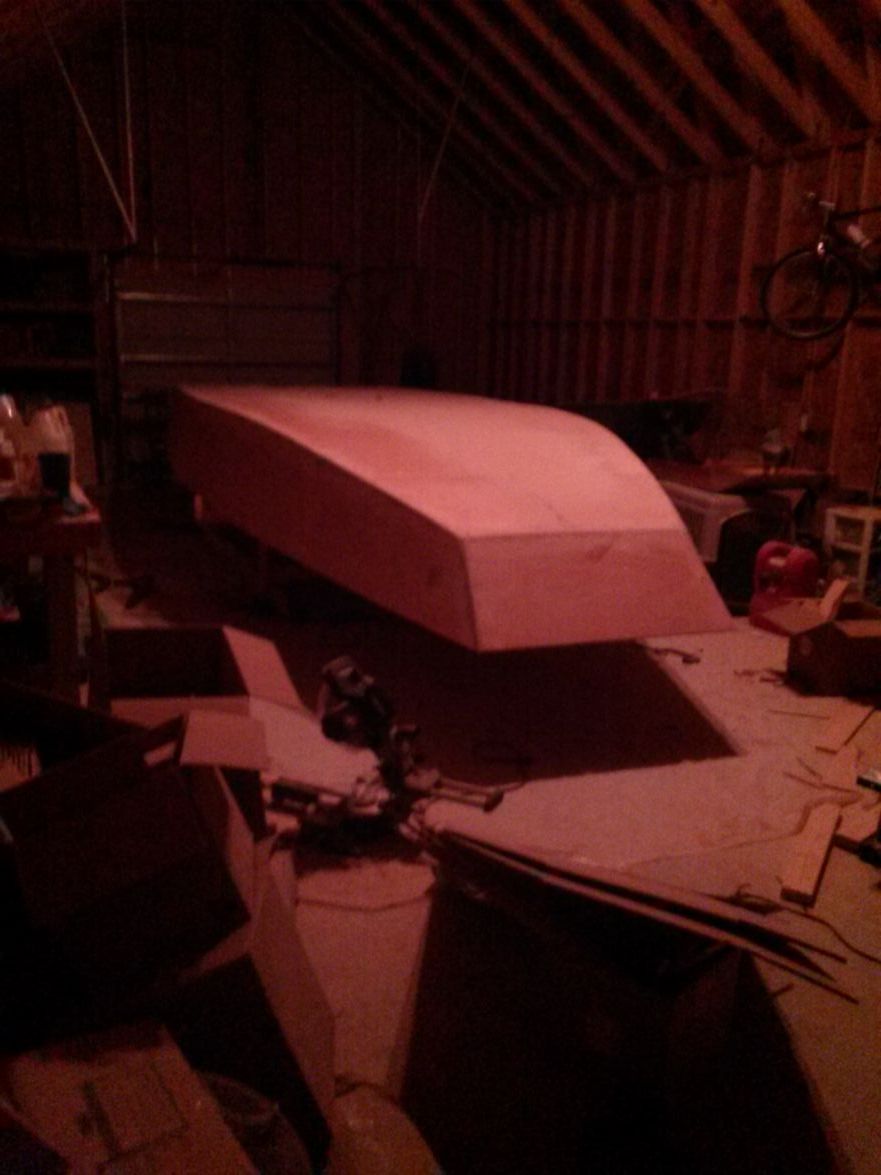
I'm getting pretty self conscious about posting pics on here. I see the INCREDIBLE work that you guys post and it fosters a real inferiority complex. There are some beautiful boats on here! Anyway, finally some good weather here. So here is a little more progress.
Re: GV11. And so it begins...
Posted: Tue Nov 10, 2015 11:25 pm
by Fuzz
If it makes you feel any better you are not the only one who feels like their work is not in the same class.
I am almost to the point of saying "work boat is good enough". Not quite there yet but getting close
Fuzz
Re: GV11. And so it begins...
Posted: Wed Nov 11, 2015 6:41 am
by Jaysen
I'm pretty sure my build, once started, will make you all feel better. I'm expecting gnats and sand in the paint. A fairing that makes a wadded up plastic bag seem smooth, and a tape job that looks like a toddler got into the toilet paper. I'm building a boat that I only expect to last 2 years so there isn't much point in killing myself on the details. Second build... yes. But until then... GET ME IN THE WATER!

Re: GV11. And so it begins...
Posted: Wed Nov 11, 2015 10:28 am
by terrulian
The V10 was completely easy to build to the point where you could have put in in the water, and all the rest is eyeliner and rouge. I have recently been daydreaming making the same boat again (it really is a disease) and doing the absolute bare minimum just to see how much it weighs. It would not be pretty. But I'd have to get my hands on some okoume rather than meranti, and they don't sell it around here.
Even Larry makes mistakes and some of the best builders are generous enough to show pictures of things gone sideways. You'll find a level of finish that suits you and whatever you decide, my guess is you'll be pretty excited with the result. So don't be reluctant to share stuff with your fellow builders. I never yet have looked at a photo and said, "what an idiot!." More like, "I'm sure glad I saw that cuz that is just what I was going to try."
Re: GV11. And so it begins...
Posted: Wed Nov 11, 2015 1:05 pm
by Mhopper
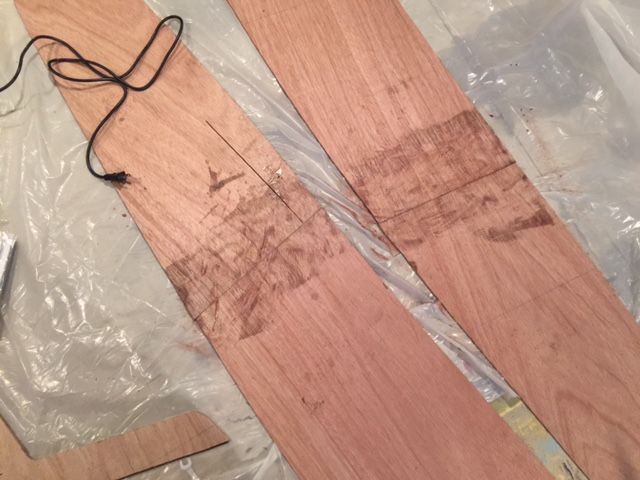
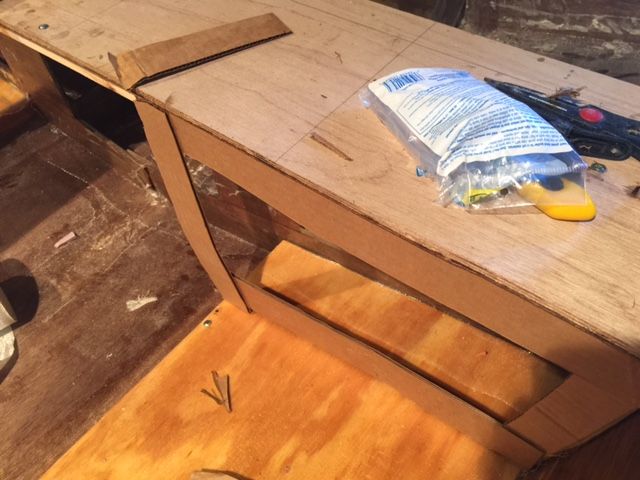
One thing I do like is the sense of community on this forum. Thanks for the encouragement. I guess everybody starts somewhere. That being said, here is my first endeavor into epoxy. My first splice...
Re: GV11. And so it begins...
Posted: Wed Nov 11, 2015 1:34 pm
by terrulian
You did the splice with glass, which CL and others recommend. As long as the pieces are pretty flush with one another and aligned longitudinally, which it looks like they are from the previous photo, all you need is a bit of fairing and sanding.
I did it with a block for the splice, which is easier for beginners, but still managed to bung it up by making the blocks too wide. This made the splice less flexible and created a flat spot on the hull which I addressed with some annoying fairing later on.
Re: GV11. And so it begins...
Posted: Wed Nov 11, 2015 2:29 pm
by Mhopper
One the sides I spliced with three inch tape overlapped by about an inch to an inch and a half. I used butt blocks on the bottom pieces. They are much simpler and seem to be very strong! " I like butt blocks and I cannot lie..." Ok. Sorry for that.

Re: GV11. And so it begins...
Posted: Thu Nov 12, 2015 5:30 am
by gonandkarl
Hi,
Your splice looks perfect and I see you have got enough plastic underneath so it cant get glued to anything.
( One of my first small mistakes, one square inch but ages to get it of the workbench )
I made all my splices with biax tape and the last one I made was much better than the first one due to practice.
In the end I put a piece of peelply over it and pushed any bubble away with a plastic squeegy. The result is that one sands once by hand and the splice is perfect. On my oncoming parallel project FS13 I will splice the complete panels so confident made me the splicing practice on my AD14.
Have furtheron lots of fun on Your build and I will read your posts from now on. And dont forget always to upload the newest pictures. This forum lives on pictures where we all can see a lot of detail and therfore learn everyday from from eachother.
Greetings from Karl ( Austria )
Re: GV11. And so it begins...
Posted: Thu Nov 12, 2015 1:41 pm
by Steven
It's hard to tell from the picture, but it looks white along some of the joint. Ensure they tape is adhered with no air pockets. It should look translucent.
Re: GV11. And so it begins...
Posted: Thu Nov 12, 2015 2:04 pm
by terrulian
It's hard to tell from the picture, but it looks white along some of the joint. Ensure they tape is adhered with no air pockets. It should look translucent.
Actually, I take back what I said, Steven is right. If there is any air there it would be a structural problem but the fix is pretty easy. Clean the surface with water and a Scotch Guard pad, grind down to a flat surface, sand everything, then apply another layer of glass that overlaps that one by 2-3" on each side. Flip it over; the other side may have the same problem and if so, treat the same way. There will be just a little more fairing but in the grand scheme of things, not very much.
Re: GV11. And so it begins...
Posted: Thu Nov 12, 2015 2:23 pm
by Cracker Larry
Did you put glue in the joint before taping it? I always smear some glue between the panels before I butt them together.
Re: GV11. And so it begins...
Posted: Thu Nov 12, 2015 2:57 pm
by Fred in Wisc
I've ended up with a little air gap (typically very narrow like 1/16" or less and a couple inches long) between panels at times. It seems like the plywood edge absorbs extra resin. Just drill a couple tiny holes in the void and inject some mixed epoxy resin into the air gap. Quick and easy.
Re: GV11. And so it begins...
Posted: Thu Nov 12, 2015 3:08 pm
by Mhopper
I did wet it down with a coat first. And I did paint the seam. I also smoothed it with a layer of Mylar peel and with a squeegee. One problem is that there is a seam on the sides of my tape. That's what the long lines are. Should I snip those seams off next time?
Re: GV11. And so it begins...
Posted: Thu Nov 12, 2015 5:58 pm
by Mhopper
I succumbed to boat builder peer pressure. I ground it all off and redid it. I'm glad I did . It is going to be better this time
Re: GV11. And so it begins...
Posted: Thu Nov 12, 2015 6:15 pm
by Cracker Larry

It doesn't matter how many times you have to do it to make it right. It's worth it and the learning curve is pretty short for most of what you have to do. When in doubt, test on a couple of scrap pieces before committing to the boat itself. And ask questions.
Don't worry about the tape edges, you will sand those off and feather them out.
Re: GV11. And so it begins...
Posted: Thu Nov 12, 2015 8:08 pm
by Mhopper
At the beginning of this project I was going to build a plywood unfinfinished boat shaped object. Thanks to you guys, my standards have risen. I thank you. My wallet, not so much.
thanks for all the input!
Re: GV11. And so it begins...
Posted: Thu Nov 12, 2015 9:14 pm
by Steven
If you put some weight to just outside the tape area, it will help hold the joint flat. I actually glue the panels together with a little putty first and then glass. Most don't do that, but I find I get a better result. I can put weight right up to the joint and ensure it's nice and flat. If you glue early in the day, the glue is usually tight enough to glass over in the afternoon. Just don't try to move the panel. It's a little more time, but very little compared to the overall build time. And your not building a boat shaped object. You're building a boat.
Hard to explain how cool it feels when you launch it.
Re: GV11. And so it begins...
Posted: Thu Nov 12, 2015 9:41 pm
by Mhopper
The joints on the other side were ok. I did weight them. I didn't do it on this side. That's a great idea to glue the joints before before glassing. It might take a few more hours. But it might make the boat last a few more years! Seat frames are next I'm definitely taking your advice on those! Come to think of it, it wouldn't have taken much longer. If it was glued I wouldn't have done the splices individually. It would have been rigid enough to flip without the worry of breaking.
Re: GV11. And so it begins...
Posted: Fri Nov 13, 2015 11:01 am
by tcason
Make sure your epoxy is warm it will wet out much better and be thinner - easier to work.
Took me a while to learn this.
I like my epoxy at 75 to 80 degrees - I just set a space heater in front of the bottles when working in cold weather or take inside house . Not sure how safe this is but.............
Just don't mix too big of a batch or it will kick over before you use it all.
Have FUN!!
Re: GV11. And so it begins...
Posted: Mon Nov 16, 2015 9:54 pm
by Steven
You can flip the panels with just the joint glued if you are very careful, but I'd suggest just doing one side at a time. You'd have to flip them with without letting the panel flex at all to keep from disturbing the fresh tape. Use fast hardener and you can probably flip in 3 hours if it's not real cold. Set a ceramic heater blowing across it works to speed things along. I also heated up my jugs with the electric heater when it was real cold. Just don't get carried away or it will kick off before you use it.
Re: GV11. And so it begins...
Posted: Tue Nov 17, 2015 12:19 am
by BarraMan
Hmmmmm, I like my epoxy at around 25 degrees C.
Sometimes I have to put it in the fridge to get it down to that!
I am a long way from home today - on the opposite side of the country to where I live. The temperature here in Broome is 32 C = 90 F!
I noticed at Perth airport yesterday that the temp at Paraburdoo (in the middle of Western Australia) was 44 C = 111 F !!!!!!!!!
Yikes!
Re: GV11. And so it begins...
Posted: Tue Nov 17, 2015 12:57 am
by woylie
Been over 40C since 0800 Plus humidity 85% Apparent temperature 50C/122F seems to be making the crocodiles mad.Got attacked twice in the last month.......Waiting for the seabreeze and having my third beer.

Re: GV11. And so it begins...
Posted: Wed Nov 18, 2015 1:38 am
by woylie
Oops! Sorry to butt into your thread mhopper.Enjoy watching your build.
Cheers!
woylie
Re: GV11. And so it begins...
Posted: Wed Nov 18, 2015 9:48 am
by Mhopper
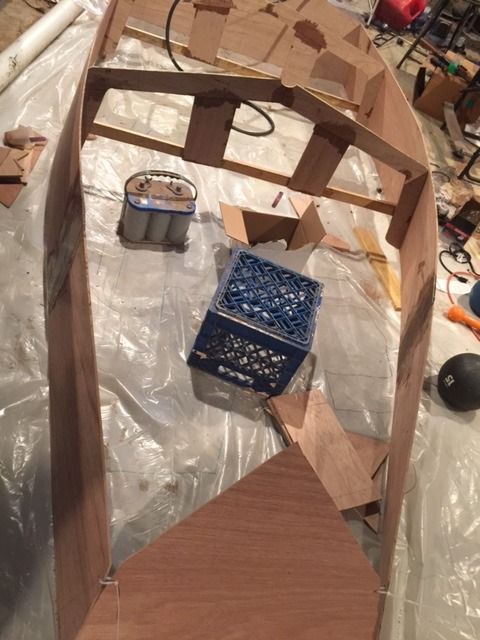
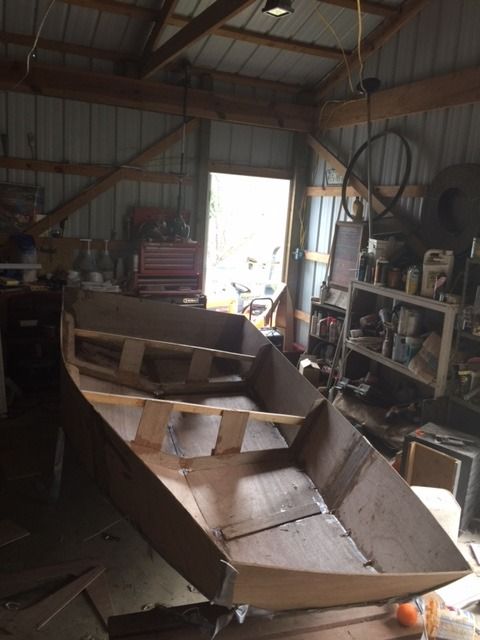
Thanks guys! It hasn't been cold here yet. This is sunny South Carolina where Mother Nature shows signs of bi-polar disorder. In the winter here one day is sunny and 70 degrees Fahrenheit and the next day it is below freezing with ice falling. Frames are all built. I'm going to start attaching panels soon. This pile of wood will be looking like a boat soon. I'm haeading to harbor freignt to get some chip brushes. At lowes they are a buck ten each. Harbor freight has 50 for 8 bucks. And as I was told at the beginning of this build, never underestimate the number of brushes you will need!
Re: GV11. And so it begins...
Posted: Fri Nov 20, 2015 5:27 pm
by Mhopper
Today my wife said, "that thing in the barn is starting to look like a boat." I will count that as a compliment.
Re: GV11. And so it begins...
Posted: Fri Nov 20, 2015 5:52 pm
by Cracker Larry
Looking good! They take shape pretty fast, it's making them pretty that seems to take forever.
Where are you in SC?
Re: GV11. And so it begins...
Posted: Fri Nov 20, 2015 8:45 pm
by Mhopper
I'm in York, about 45 minutes from Charlotte. My problem is confidence, or lack thereof. I study and think about what comes next for a couple of days. Then I do that step. It really takes some time when you have to study and think on something for three days before you can do 15 minutes worth of work. It's a lot of fun to do! Glassing starts soon! I want it to look good but I'm not going for perfection because I already have my eye on the next build. I'm looking at that ob15. That is a sweet boat!
Re: GV11. And so it begins...
Posted: Fri Nov 20, 2015 9:36 pm
by BarraMan
I have posted here somewhere that I spend about 3 hrs thinking for every 1 hr of building. I suspect that's pretty normal for a first build.
I also spent maybe 2 yrs reading on here and elsewhere before starting on my build. I am striving for a very high quality build - and so far I am meeting my expectations.
Build on!
Cheers
Lee
Re: GV11. And so it begins...
Posted: Fri Nov 27, 2015 12:15 pm
by Mhopper
Ugh! One of my transom measurements was off by just enough to make me unhappy with it. Transom has been fixed. Now to put it back together!
Re: GV11. And so it begins...
Posted: Fri Nov 27, 2015 8:26 pm
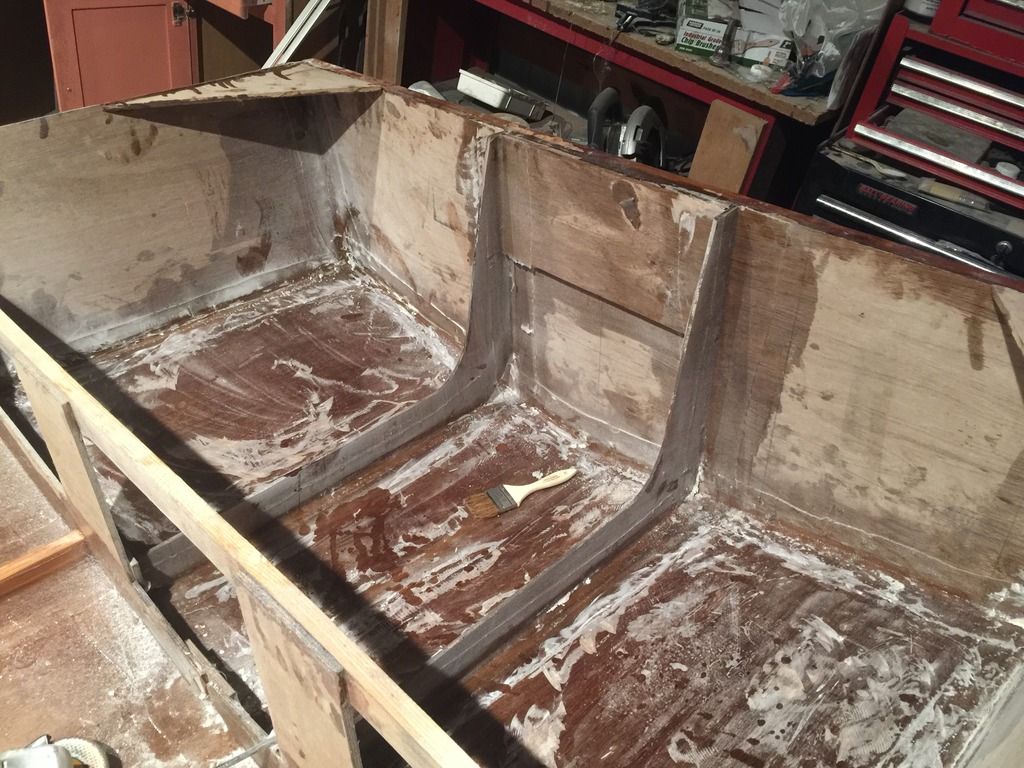
by Mhopper
Starting on the bottom
Re: GV11. And so it begins...
Posted: Sat Dec 05, 2015 5:31 pm
by Mhopper
Distractions and things beyond our control...for the first time in a long time the shop got cool enough to need heat. So, I went to fire up the heater and.....nothing. So, Today i got to work on the heater instead of the boat. Bummer! But I have heat now so maybe I will finally be able to get some glue on this thing soon.
Re: GV11. And so it begins...
Posted: Sat Dec 05, 2015 9:44 pm
by Cracker Larry
There is a fire burning in my fireplace too. Anything less than 60 needs some heat IMO. Especially me
Re: GV11. And so it begins...
Posted: Sun Dec 06, 2015 9:09 pm
by Mhopper
Cracker Larry wrote:There is a fire burning in my fireplace too. Anything less than 60 needs some heat IMO. Especially me
I am one of those true southerners. I would much rather be hot than cold. We are in that weird weather pattern here where it is in the 20's in the morning and 60's in the afternoon. And when you get old and CRS kicks in, you lose a lot of jackets, coats, and sweaters this time of year. You lay em down when it warms up and forget about where you left em. (CRS--can't remember s#*t, for those who didn't already know.)
Re: GV11. And so it begins...
Posted: Mon Dec 07, 2015 6:43 pm
by Steven
I built my GV11 on a pair of saw horses. Much easier on the back.
Re: GV11. And so it begins...
Posted: Mon Dec 07, 2015 9:28 pm
by Mhopper
Steven wrote:I built my GV11 on a pair of saw horses. Much easier on the back.
interesting you should say that. I put mine on a couple of stands today!
Re: GV11. And so it begins...
Posted: Wed Dec 16, 2015 6:14 am
by Mhopper
Under "power boats" "plans and building" section, look at my post about templates.

Re: GV11. And so it begins...
Posted: Sun Dec 27, 2015 5:05 pm
by Mhopper
Miscalculation corrected. Back on track.
Re: GV11. And so it begins...
Posted: Fri Jan 08, 2016 5:47 pm
by Mhopper
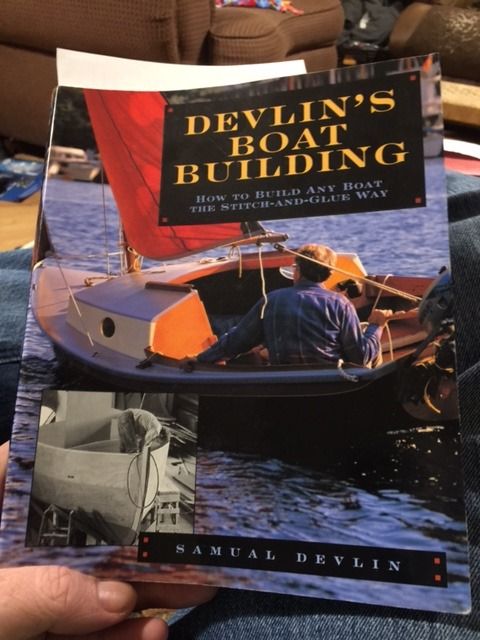
Goodwill find!!!
Re: GV11. And so it begins...
Posted: Fri Jan 08, 2016 6:39 pm
by TomW1
Be aware that Devlin's book has many of the same construction details that Jacques uses but always use Jacques construction detail first.
Tom
Re: GV11. And so it begins...
Posted: Fri Jan 08, 2016 9:39 pm
by Mhopper
Dumb newbie question. What's the name of Jacques book??
Re: GV11. And so it begins...
Posted: Fri Jan 08, 2016 11:35 pm
by cazuza
Jacques book is this web site, it is a real time updated source of information.
Re: GV11. And so it begins...
Posted: Sat Jan 09, 2016 1:25 am
by Lon
Re: GV11. And so it begins...
Posted: Fri Mar 11, 2016 11:47 am
by Mhopper
Nice warm weather, temps in the low 70's...inspiration to get back at it. One thing has changed. My desire for a picture perfect, show room finish is gone..Is it Because you guys posting your awesome pictures that have made me question my abilities? No. Because I've gotten even more fat and lazy in the off season? Not that either. The real reason is that now that this object is actuallystarting to look like a boat, my nine year old has decided to help.. He begged me to help fill gaps yesterday. His work really isn't that bad, but it's far from perfect. But I'm leaving it. In a few years his less an perfect work will serve as a reminder of the fun we are having doing this together. Here is the current state...
Re: GV11. And so it begins...
Posted: Fri Mar 11, 2016 12:37 pm
by Fred in Wisc
That is a GREAT reason for a less than perfect finish. Building kids with all the details right is way more important than building boats with all the details right!
Re: GV11. And so it begins...
Posted: Fri Mar 11, 2016 1:18 pm
by glossieblack
Re: GV11. And so it begins...
Posted: Thu Mar 24, 2016 8:11 pm
by Mhopper
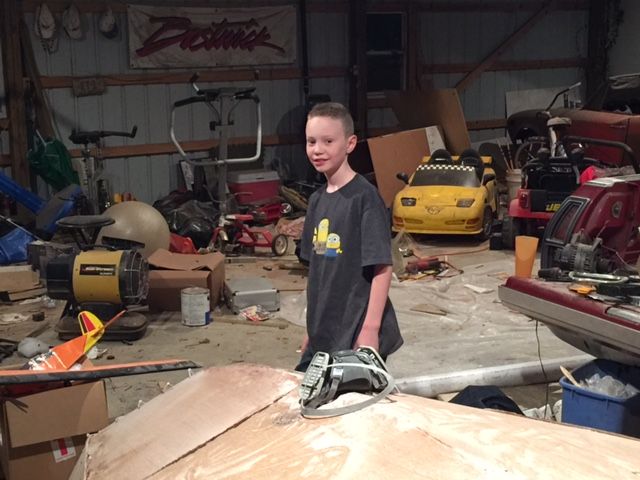
My assistant.
Re: GV11. And so it begins...
Posted: Sat Mar 26, 2016 5:21 pm
by Mhopper
I thought I would share this. This el cheapo tool has become indispensable! To all you aqua newbies like me out there, this is a great deal And works well. Harbor Freight special this week...

Re: GV11. And so it begins...
Posted: Sun Mar 27, 2016 6:19 am
by topwater
I know a lot of guys use them to rebuild boats but i never could figure out where i would use one building
a new boat.I have two of them in my garage and never fired them up once on my NV 23.
Re: GV11. And so it begins...
Posted: Sun Mar 27, 2016 11:16 am
by Mhopper
With a lite touch it is awesome for sanding!
Re: GV11. And so it begins...
Posted: Mon Mar 28, 2016 3:15 pm
by Mhopper
Re: GV11. And so it begins...
Posted: Mon Mar 28, 2016 3:33 pm
by jacquesmm
It looks like a real boat.
Yes, those little grinders are great. Either you buy a good one and because of the dust, you will replace the brushes every 6 months or you buy the cheap ones and throw them away after a while. At $ 25.00 a piece, I use the cheap ones to grind glass.
Re: GV11. And so it begins...
Posted: Mon Mar 28, 2016 5:12 pm
by Fuzz
With those little grinders turning high RPM what do you use to sand with?
Thanks, Fuzz
Re: GV11. And so it begins...
Posted: Mon Mar 28, 2016 6:59 pm
by jacquesmm
40 or 80 grit metallic backed disks.
Re: GV11. And so it begins...
Posted: Mon Mar 28, 2016 7:34 pm
by Mhopper
[url=http://s204.photo%20bucket.com/user/fhorndog/media/Mobile%20Uploads/IMG_0617_zps9q7828hd.jpg.html]
[/url]
Re: GV11. And so it begins...
Posted: Mon Mar 28, 2016 8:27 pm
by Mhopper
Re: GV11. And so it begins...
Posted: Mon Mar 28, 2016 8:29 pm
by Mhopper
Got tons done today. Temp in the low 80's. I had to readjust my production speed to match the quicker drying caused by the warmer temperatures!
Re: GV11. And so it begins...
Posted: Tue Mar 29, 2016 8:25 pm
by ks8
Looks good
Re: GV11. And so it begins...
Posted: Tue Apr 05, 2016 7:43 pm
by Mhopper
Several of my posts disappeared. So I will at least catch the pictures up.
Re: GV11. And so it begins...
Posted: Tue Apr 05, 2016 7:45 pm
by Mhopper
Re: GV11. And so it begins...
Posted: Wed Apr 06, 2016 8:45 am
by Mhopper
I'm at about the midpoint in my first build. Here's some things I have learned that may help other newbies.
1. When you choose your plan, upsize. I'm not finished but I'm already wishing for a boat a tad bigger.
2. Don't scrimp on materials. Buy good stuff. It's easy to work with.
3. Don't buy stuff until you need it. I bought extra resin, tape, etc..The kit you buy will include enough materials. You won't need extra.
4. Buy the pumps for your resin and hardner bottles. Makes things easy.
5.Dont waste your time overthinking. It's easier than you think. The process is very forgiving. Mistakes are fixable.
6. The smoother your cuts and fillets are, the easier your tape will be. Even a small bump creates a bubble under your tae joint
More as I go.
Re: GV11. And so it begins...
Posted: Wed Apr 06, 2016 9:19 am
by jacquesmm
Thanks, all good points especially about boat size, over thinking and quality materials.
I don't use pumps but I admit they are cleaner. Use pumps to deliver but measure in cups.
Re: GV11. And so it begins...
Posted: Wed Apr 06, 2016 3:33 pm
by Mhopper
Jacques: good point on using cups to measure! I used the pumps many times with no problem. But ONE time the hardner pump had some air in it and the mix wasn't exactly right. I learned my lesson quick!
Re: GV11. And so it begins...
Posted: Wed Apr 06, 2016 4:36 pm
by jacquesmm
Punch a hole in the top of the jug when using pumps. Otherwise, if you pump too fast, a vacuum appears and the stroke volume may not be right.
Pumps and graduated cups are a belt and suspender solution but if you ever once had to remove uncured epoxy, you"ll be careful with measuring.
Re: GV11. And so it begins...
Posted: Wed Apr 06, 2016 9:21 pm
by Mhopper
Hole in the top! Great idea! That has been the best part of the experience...the experts are only a mouse click away. I can't imagine building my first one with plans from anywhere else!
Re: GV11. And so it begins...
Posted: Mon Apr 18, 2016 8:33 pm
by Mhopper
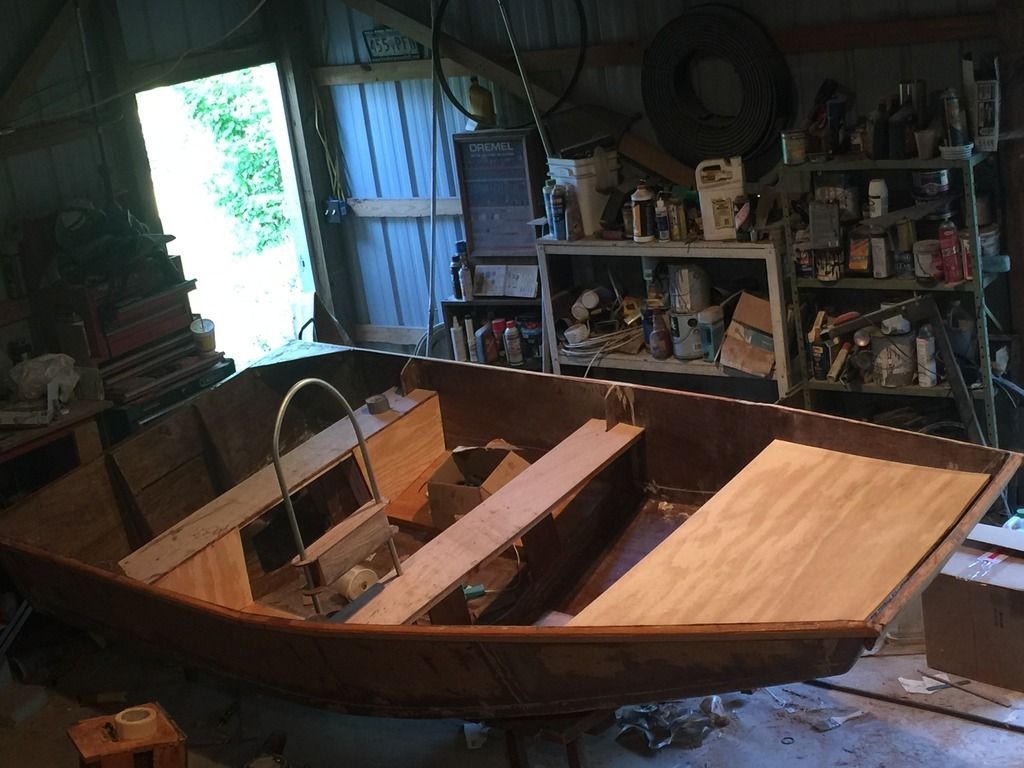
Status report...
Re: GV11. And so it begins...
Posted: Mon Apr 18, 2016 8:39 pm
by Mhopper
Re: GV11. And so it begins...
Posted: Mon Apr 18, 2016 8:44 pm
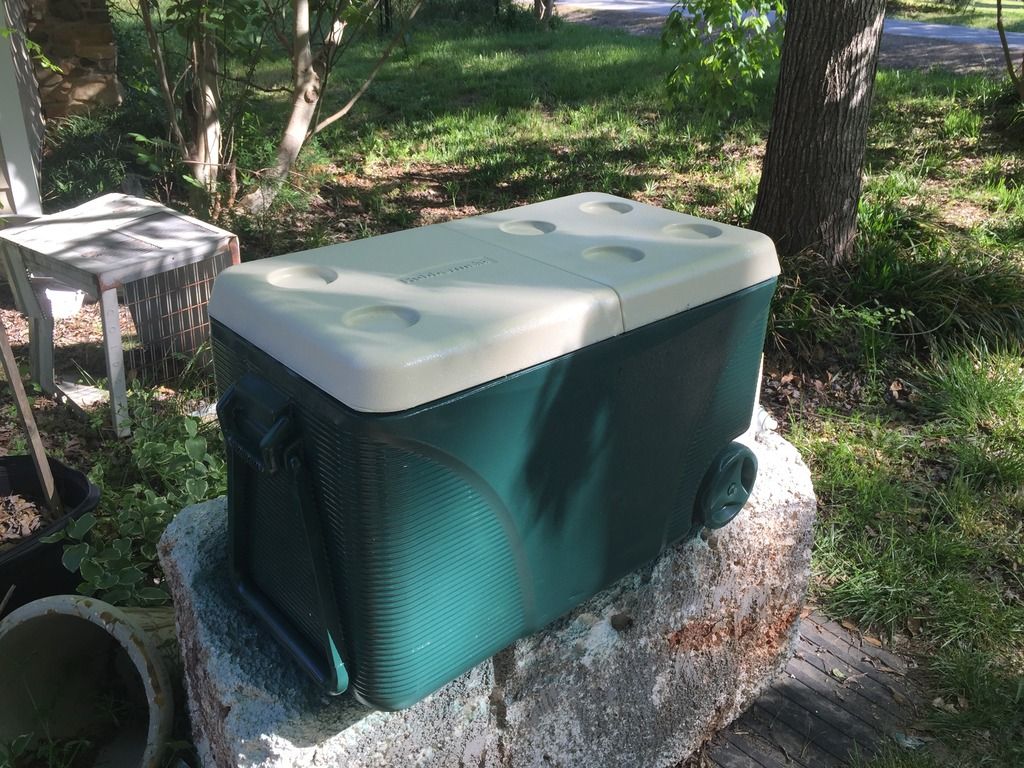
by Mhopper
I wanted to make sure of my color selection. I picked up a cooler that was in great shape at a yard sale for four bucks. The only problem....it was baby blue with a teal lid. I painted it to match what the boat is going to be. Hunter green, ivory.
Re: GV11. And so it begins...
Posted: Tue Apr 19, 2016 6:45 pm
by grundasaurus
Mhopper, your boat looks good, are planning on adding foam to the seat frames? also looking at your previous photo, I would suggest making a small platform across the motor bracing supports, looks better, and is a good spot for a fuel tank, cooler etc. Another good mod is a small front locker built underneath the bow seat, good spot to keep towels etc dry or a small anchor/rope for day trips.
Re: GV11. And so it begins...
Posted: Wed Apr 20, 2016 8:39 am
by Mhopper
I'm going box the seats in and put foam under them...but only about half way down. I want to be able to lay rods under the seats while traveling. I'm not sure if this will work out or not. I'm going to build a front locker big enough to sit a cooler on . That'll give my son a raised platform to fish from and the weight of the cooler will help balance the weight out a little bit . As for the motor.. That's a great idea! Gonna think on that.... Thanks!!!
Re: GV11. And so it begins...
Posted: Wed Apr 20, 2016 11:01 am
by grundasaurus
I wouldn't suggest meddling with that foam, for us at least just filling the whole thing was awful, I can't imagine trying to shape the stuff in any way, what I would do if you're looking for rod storage is either use a hole saw and cut into the very top of the seat frames to make one rod holder per side, or depending on how big your transom knees are, put a couple rod holders into your knees
Re: GV11. And so it begins...
Posted: Wed Apr 20, 2016 9:52 pm
by Mhopper
I'm not using liquid foam. I'm using mold proof one inch closed cell sheets.
Re: GV11. And so it begins...
Posted: Wed Apr 20, 2016 10:28 pm
by grundasaurus
That's what we did as well, if the foam doesn't get enough epoxy, it forms a brittle top layer which splinters whenever we tried to shape it
Re: GV11. And so it begins...
Posted: Sat Apr 23, 2016 8:59 pm
by Mhopper
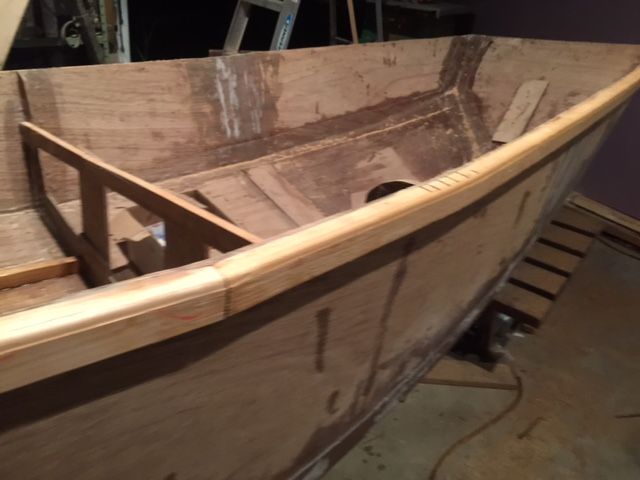
Rails glued up and rounded with trim router.
Re: GV11. And so it begins...
Posted: Tue May 03, 2016 8:53 pm
by Mhopper
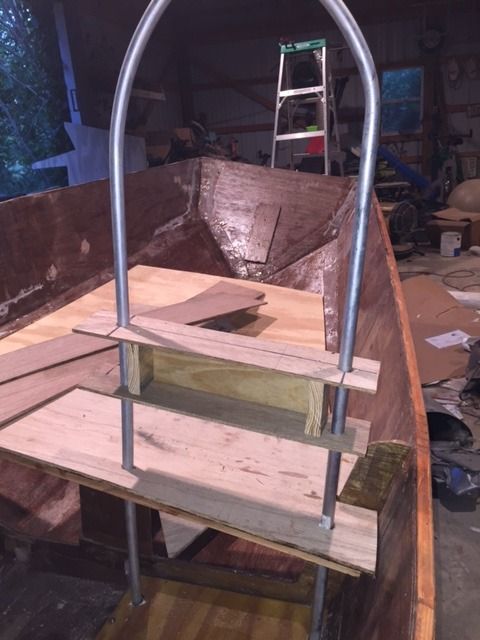
Template for seats...
Re: GV11. And so it begins...
Posted: Tue May 03, 2016 9:03 pm
by Mhopper
Foam cut...

Re: GV11. And so it begins...
Posted: Tue May 03, 2016 9:05 pm
by Mhopper
Re: GV11. And so it begins...
Posted: Tue May 03, 2016 9:08 pm
by Mhopper
Re: GV11. And so it begins...
Posted: Tue May 03, 2016 9:14 pm
by Mhopper
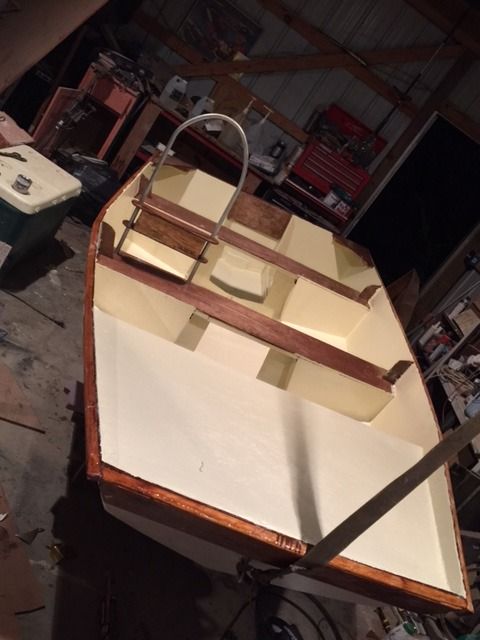
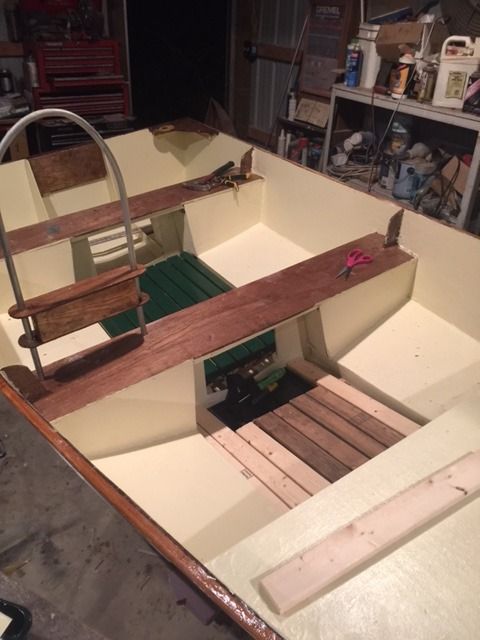
I hate that I'm having to use exterior ply for the finish work. But it's all flat pieces. I'll coat the heck out of it. I'm leaving the center of the seat frames open to lay fishing rods, oar, etc... in the bottom of the boat. The ends where the foam is visible will be covered too. Only seven more foam blocks and covers to make!!!
Re: GV11. And so it begins...
Posted: Tue May 03, 2016 9:18 pm
by Mhopper
That's going to give me 3 1/2 cubic feet of foam under the seats. How much more so I need to add elsewhere? Motor is 87 lbs. if that matters.
Re: GV11. And so it begins...
Posted: Tue May 03, 2016 9:25 pm
by Cracker Larry
Depending on the density of the foam, but 2 pound foam supports 60 pounds per cubic foot. So if your foam is that light you have enough flotation to support 210 pounds. I'd add a little more.
Re: GV11. And so it begins...
Posted: Tue May 03, 2016 9:44 pm
by Mhopper
Thanks for the quick response, Larry. That's kind of what I was thinking. I have an idea to get some in the bow as well.
Re: GV11. And so it begins...
Posted: Sat May 07, 2016 5:15 pm
by Mhopper
Re: GV11. And so it begins...
Posted: Sat May 07, 2016 5:16 pm
by Mhopper
Re: GV11. And so it begins...
Posted: Sat May 07, 2016 8:34 pm
by Mhopper
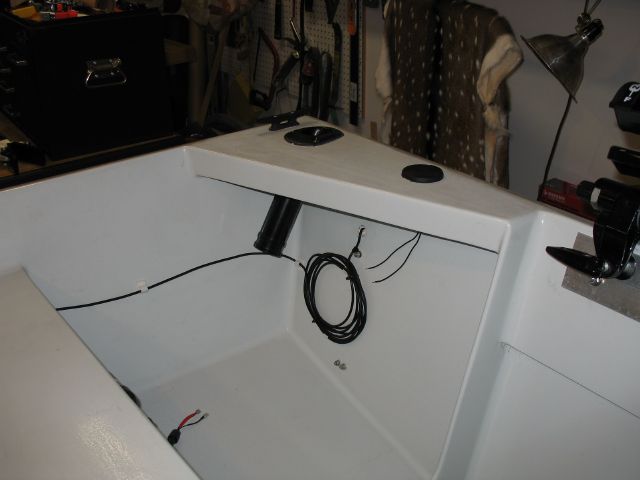
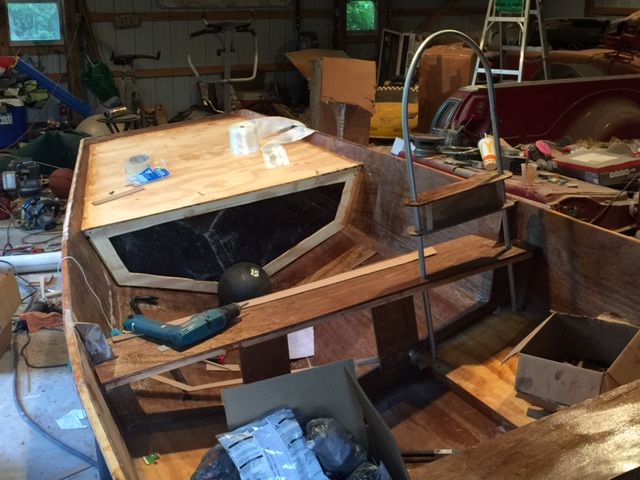
Console for electric switches (lights, etc..,)
Re: GV11. And so it begins...
Posted: Sun May 08, 2016 7:03 pm
by Mhopper
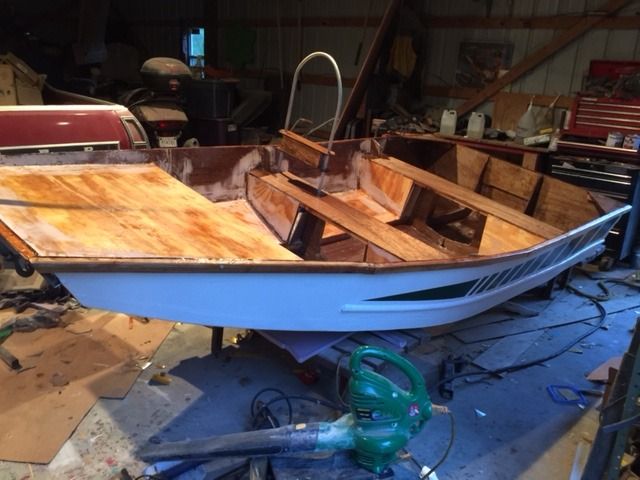
Current status:
Re: GV11. And so it begins...
Posted: Tue May 10, 2016 7:46 am
by Mhopper
Another to add to my list of tips for beginners...
PLYWOOD SUCKS! Buy an extra sheet of marine wood or two. There will be things you are going to want to add. I'm using plywood to build some non structural things and I'm really hating that I'm having to use plywood. It's a good grade exterior wood. But it is still inferior. It warps and splinters. The resin doesn't apply as evenly. Next time I will build the perfect boat...
Re: GV11. And so it begins...
Posted: Tue May 10, 2016 11:09 am
by jacquesmm
We ship quality ply to your area but I agree that for a small boats, the kind that uses only a couple of sheets, shipping cost is high.
We should set up a system in which builders form a certain area order their plywood together.
It cost the same to ship one sheet than 12 sheets.
Re: GV11. And so it begins...
Posted: Tue May 10, 2016 9:24 pm
by Mhopper
It's still going to be a great little boat. I can't imagine anyone building an entire boat from plywood. That would be a losing proposition!
Re: GV11. And so it begins...
Posted: Thu May 12, 2016 7:10 pm
by Mhopper
Work on front compartment underway...
Re: GV11. And so it begins...
Posted: Thu Jun 02, 2016 10:17 pm
by Mhopper
I'm at a dangerous stage of the build ....it's the "screw it! I wanna get on the water!" Stage.
Re: GV11. And so it begins...
Posted: Fri Jun 10, 2016 9:21 pm
by MrPaul
Awsome! You're shop is just like mine. I feel bad because most of the guys on here have a really clean organized shop. I'd much rather build a boat than clean my shop.
The boat looks great!
Re: GV11. And so it begins...
Posted: Fri Jun 10, 2016 10:17 pm
by Mhopper
Thanks, Mr Paul! I love using my shop. Cleaning it, not so much. I give it a good cleaning about twice a year. I figure
There's not much of a point until I finish this boat. Ive got a couple of more seams to tape on the seats. Then I'm gonna flip it one more time And lay one more layer of 6oz on the bottom and transom. I'm going to be running a 15hp and in the summer lake levels get low around here. It's easy to run aground. Then it's finishing time! I can't wait!
Re: GV11. And so it begins...
Posted: Sat Jun 11, 2016 1:48 am
by MrPaul
Here's my cluttered shop. As Gump would say, "That's ma boat". I've had the shop for about a year and cleaned it once. Guess I'm due for another cleaning. I'm not near as far along as you are on my boat. Looks like you're going to have a blast soon. I wish I was going to have mine done by this summer but I'm shooting for October when the redfish hit the rivers.
Re: GV11. And so it begins...
Posted: Sun Jun 12, 2016 12:30 am
by Mhopper
I was actually shooting for May. Oh well. I've ended up building a better boat than I had originally planned. So no biggy.
We have an old above ground pool. I want to take the tractor and push it over and be done with it. My 9 year old wouldn't hear of it! The ladder was rusted and unusable. I passed a junk/salvage store and there was a pool ladder beside the building so I stopped. Sitting right beside the ladder--- a four winns boat trailer for a 12-14 foot boat! It's a little long. But I can make it work. It's in great shape and I got it for 200 bucks!!!!
Re: GV11. And so it begins...
Posted: Sun Jun 12, 2016 4:23 am
by MrPaul
Congrats on the trailer! Sounds like tou got a super sweet deal. I've been looking for one on craigslist, but most of them come with a "free boat".
Re: GV11. And so it begins...
Posted: Sun Jun 12, 2016 11:12 pm
by Mhopper
"Comes with free boat " is a common one here. Also, "could use paint" is a common one too.
That translated means "rusty piece of garbage".
Re: GV11. And so it begins...
Posted: Thu Jun 16, 2016 9:57 pm
by Mhopper
I have a friend donating a couple of gallons of epoxy marine paint. Here's the interesting thing. He works at a nuclear power plant. This paint is nuclear grade marine paint. He says they painted the boats and other things at the plant with it, it's the same as regular two part marine plus it has an additive that keeps radiation from penetrating and degrading it. So I guess if I decide to go fishing at Chernobyl, Fukushima, or Three Mile Island I wouldn't have to worry about my paint!
Re: GV11. And so it begins...
Posted: Fri Jun 17, 2016 9:54 am
by terrulian
Unless it is already radioactive.
Re: GV11. And so it begins...
Posted: Fri Jul 08, 2016 6:23 pm
by Mhopper
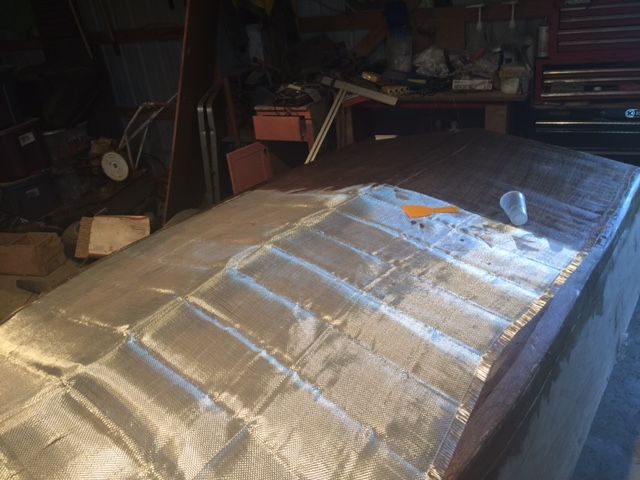
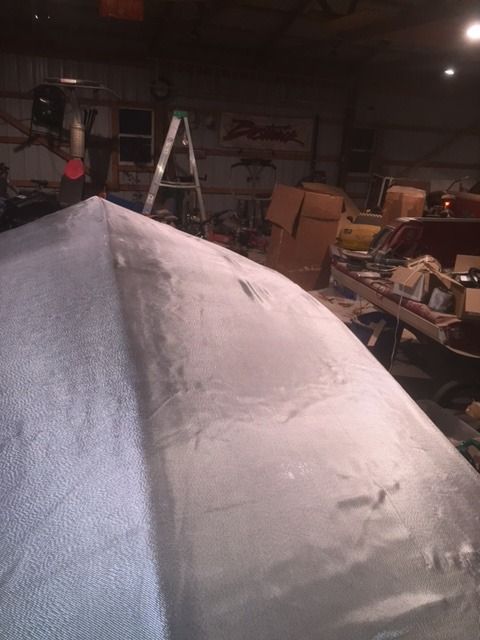
Update... Boat is upside down. Second layer of biaxial is on. Fairing process is underway. Pics and details coming soon.
Re: GV11. And so it begins...
Posted: Sat Jul 09, 2016 9:56 am
by Mhopper
Second layer of cloth...to quote the late Marvin Gaye, "Let's get it on!
Re: GV11. And so it begins...
Posted: Sat Jul 09, 2016 10:05 am
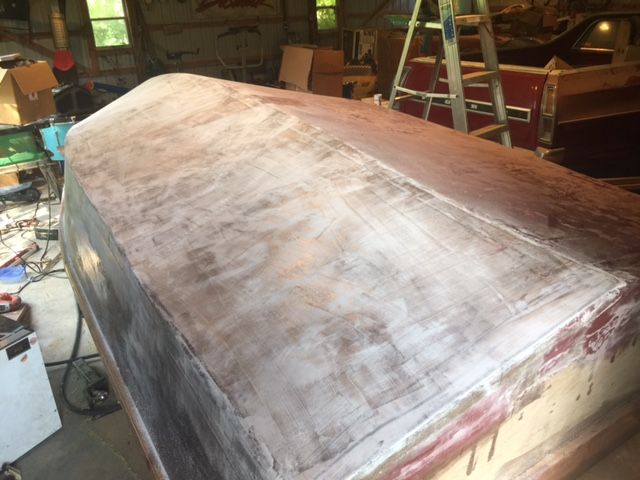
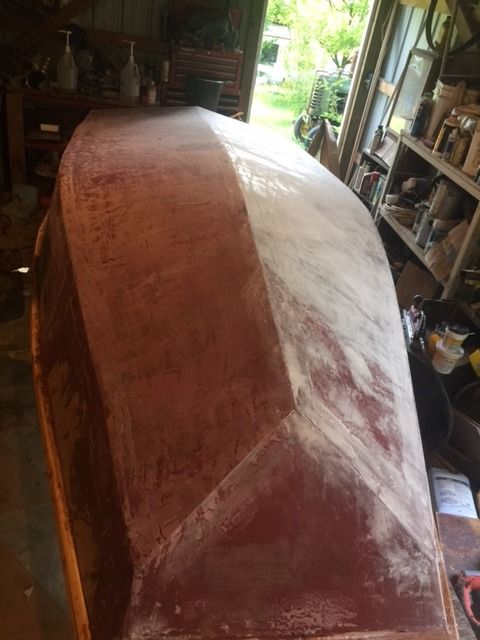
by Mhopper
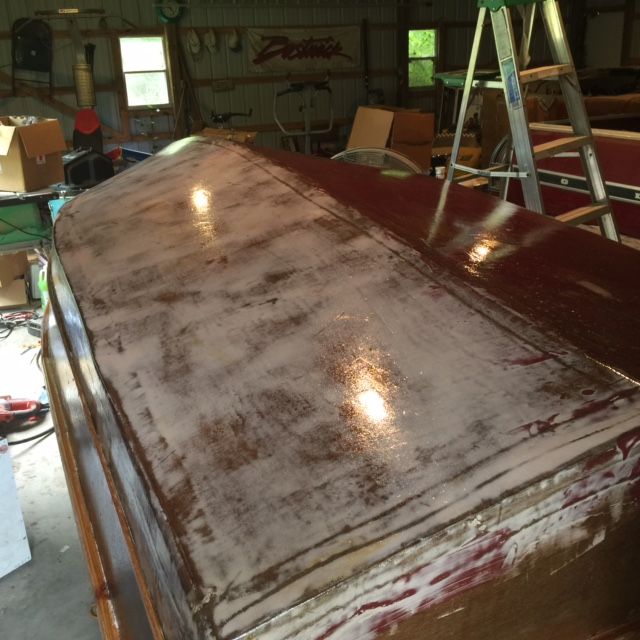
Fairing time. Being a newbie, I am trying to learn all I can on this one.
So I decided to try micro balloons and quick fair.
I will say that micro balloons are of the devil. They are messy and more importantly,
The mix is not consistent. Quick fair mixes easily and consistently. It goes on much more
Smoothly than micro balloons and sands much easier! I'm sold.
Re: GV11. And so it begins...
Posted: Sat Jul 09, 2016 10:10 am
by Mhopper
8 gallons of two part nuclear grade marine. 4 gallons of buttercream. 4 gallons of battleship gray. He offered me five gallons of purple. I respectfully declined. Not sure what I'm gonna do with that much paint but it's free. I guess I will build several gray and yellow boats.
Re: GV11. And so it begins...
Posted: Thu Jul 14, 2016 4:11 pm
by Mhopper
Almost ready for paint. Another coat of resin in place. It ain't perfect but neither am I !
Re: GV11. And so it begins...
Posted: Sat Jul 16, 2016 8:06 pm
by Mhopper
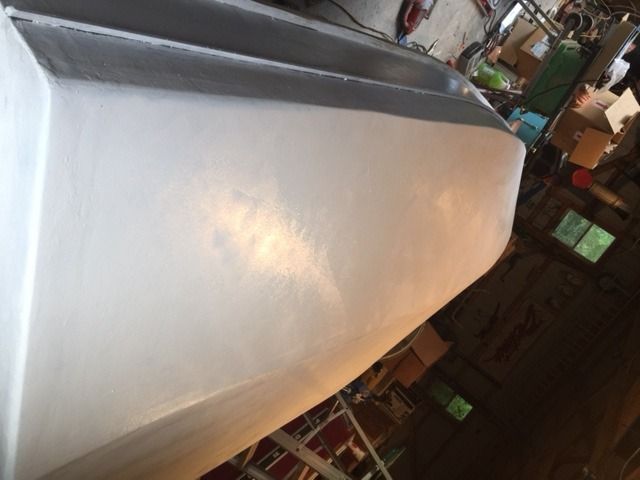
Primer on.
Re: GV11. And so it begins...
Posted: Tue Jul 19, 2016 11:53 am
by Mhopper
Two coats of paint on the outside are on. I went with white---the most forgiving tint. I didn't use the nuclear paint. I talked with a painter friend that has used it. He said that it is extremely abrasive. But that also makes it brittle. He said that it wouldn't scratch but if hit it would fall off in chunks. Good to know before I got too far in.
Re: GV11. And so it begins...
Posted: Tue Jul 19, 2016 3:00 pm
by MrPaul
Looks good. I think you made a good choice steering clear of the purple paint. Grey and yellow will look sharp. Purple and yellow would have been hideous.
Re: GV11. And so it begins...
Posted: Tue Jul 19, 2016 8:22 pm
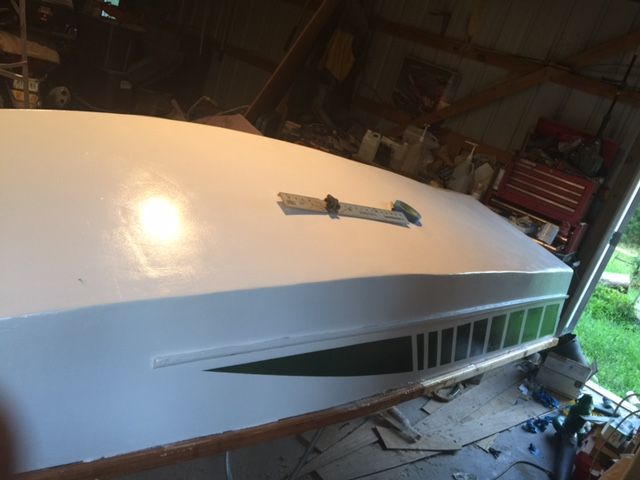
by Mhopper
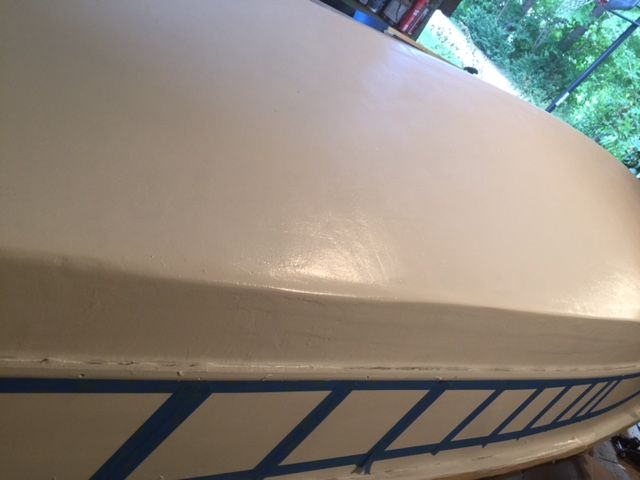
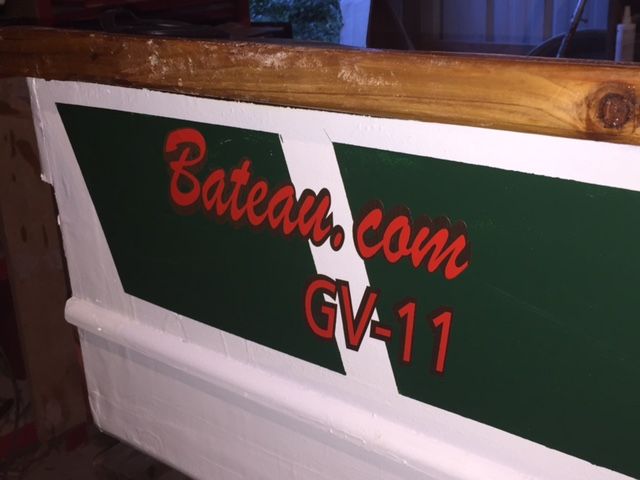
Two coats of semi gloss seagloss are on. Graphics are taped off.
Re: GV11. And so it begins...
Posted: Tue Jul 19, 2016 8:28 pm
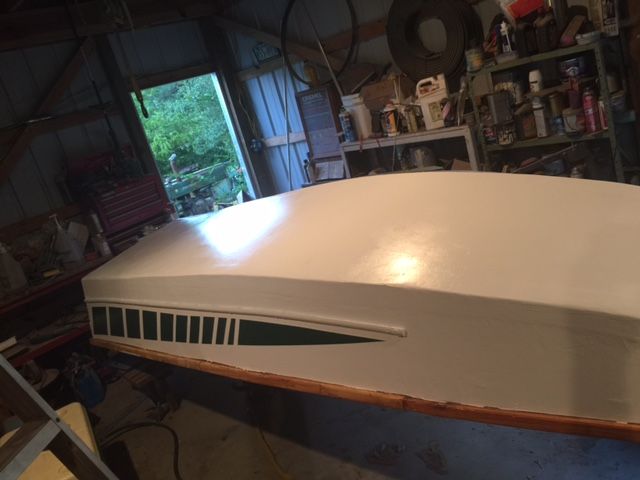
by Mhopper
Graphics painted.
Re: GV11. And so it begins...
Posted: Tue Jul 26, 2016 5:51 pm
by Mhopper
Trying to get some work done. Looks like I'm gonna be switching to third shift on this thing. It's so hot that my resin is setting up before I can use it. 112f in the shop at lunchtime. So close to splash....
Re: GV11. And so it begins...
Posted: Tue Jul 26, 2016 6:02 pm
by Cracker Larry
Yes sir, it's one hot SOB in the south right now!
Re: GV11. And so it begins...
Posted: Tue Jul 26, 2016 6:45 pm
by MrPaul
I've been doing as much resin work as possible 3rd shift. Got about 7 to 10 minutes pot life with slow hardner in the daytime. It's looking good!
Re: GV11. And so it begins...
Posted: Wed Jul 27, 2016 9:40 am
by wegcagle
Looking great so far!
A little trick that I've learned to extend pot life is that I keep my slow hardener in the fridge and store the resin inside as well when I'm not using them. If I'm going to be working outside for multiple hours (like fiberglassing day) I'll put both of them in a cooler with a couple of frozen packs to put just to keep them alittle colder. I doubt it adds more than a few minutes to the pot life, but sometimes you just need those last few moments

.
Will
Re: GV11. And so it begins...
Posted: Wed Jul 27, 2016 7:32 pm
by Mhopper
It's 7:30 pm. The temperature is finally down to 90, I'm gonna hit the shop and see what happens. If this doesn't work my wife is gonna be helping me make a little fridge space.
Re: GV11. And so it begins...
Posted: Wed Jul 27, 2016 8:52 pm
by Cracker Larry
It's 7:30 pm. The temperature is finally down to 90,
I hear you! In Clyo ,GA, 9pm now, full dark, and still 92 on my front porch. Hard to work with paint or epoxy in this heat. Or do much of anything else. Like Will said, refrigerate the hardener and keep the resin at inside temperature. Use a cooler for them outside. And get it out of the mixing cup ASAP and into something with a lot of surface area.
Re: GV11. And so it begins...
Posted: Wed Jul 27, 2016 10:13 pm
by Mhopper
Very good advice from all! Especially the larger surface area. I bought some cheap roller pans at Wallyworld for 97 cents. They helped tons. This thing is screaming to be on the water. Getting closer!!!!
Re: GV11. And so it begins...
Posted: Sat Jul 30, 2016 9:57 pm
by Mhopper
Progress.....two coats of butter cream.
Re: GV11. And so it begins...
Posted: Sat Jul 30, 2016 10:40 pm
by Mhopper
Question for the gurus: the parts that are wood are gonna be wood. They have 3 coats of resin. Should I put anything else on them?
Re: GV11. And so it begins...
Posted: Sat Jul 30, 2016 10:45 pm
by Cracker Larry
They need something for UV protection. Epoxy has none. A good clear coat or marine varnish. I'd go with the clear coat.
Re: GV11. And so it begins...
Posted: Sun Jul 31, 2016 4:10 am
by glossieblack
Cream paint with varnished wood trim always look good. Very Nice.
Re: GV11. And so it begins...
Posted: Tue Aug 02, 2016 10:11 pm
by Mhopper
Floor grates made. One painted. Battery tray installed under front seat.
Re: GV11. And so it begins...
Posted: Tue Aug 02, 2016 10:45 pm
by MrPaul
Nice! Looks like its going to be time to start your launched thread soon!
Re: GV11. And so it begins...
Posted: Sat Aug 06, 2016 1:23 pm
by Mhopper
HOT!!!!work thirty minutes. Come into the AC and drink a quart of water. Repeat....
Re: GV11. And so it begins...
Posted: Sat Aug 06, 2016 1:48 pm
by Jeff
Your boat is really looking nice!! Stay hydrated in that heat!!! Jeff
Re: GV11. And so it begins...
Posted: Mon Aug 08, 2016 7:02 pm
by Mhopper
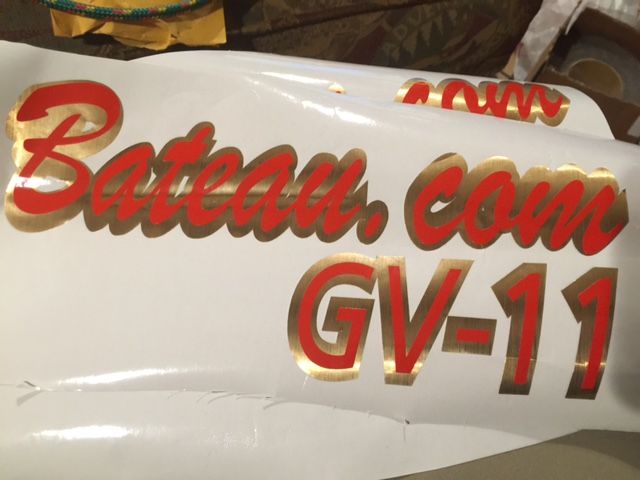
I made my decals today. It's not the bateau font. It's the fender guitar font. Lol.
Re: GV11. And so it begins...
Posted: Mon Aug 08, 2016 7:14 pm
by Jeff
Nice, Jacques will really enjoy!! Jeff
Re: GV11. And so it begins...
Posted: Mon Aug 08, 2016 7:35 pm
by Mhopper
I will post some pics when I finish everything up and get em on the boat. I still have navi lights, interior lights, and switches. Nothing left after that but DNR paperwork!
Re: GV11. And so it begins...
Posted: Mon Aug 08, 2016 8:12 pm
by Mhopper
Ok. Couldn't resist. I went ahead with it.
Re: GV11. And so it begins...
Posted: Tue Aug 09, 2016 8:46 am
by wegcagle
Nice
Will
Re: GV11. And so it begins...
Posted: Tue Aug 09, 2016 9:31 am
by cape man
Too cool!
Re: GV11. And so it begins...
Posted: Mon Aug 15, 2016 9:04 pm
by Mhopper
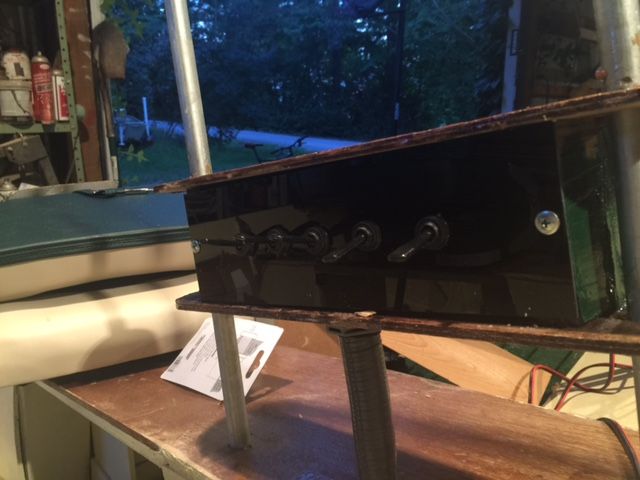
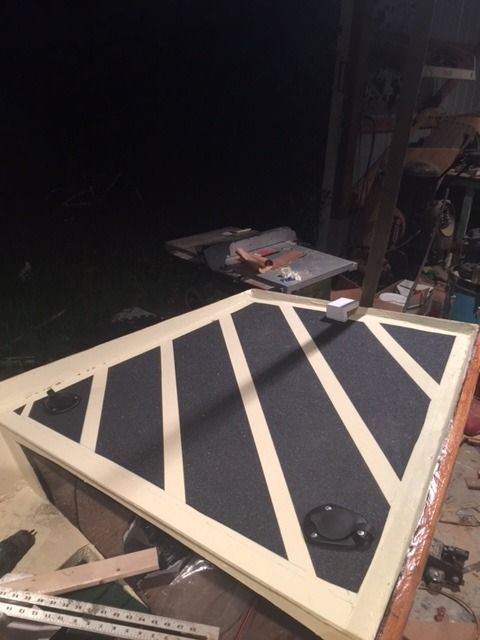
Switch panel made from black acrylic. Not a good pic. I'll get one in the daylight.
Re: GV11. And so it begins...
Posted: Mon Aug 15, 2016 9:07 pm
by Mhopper
Deck tape and rod holders.
Re: GV11. And so it begins...
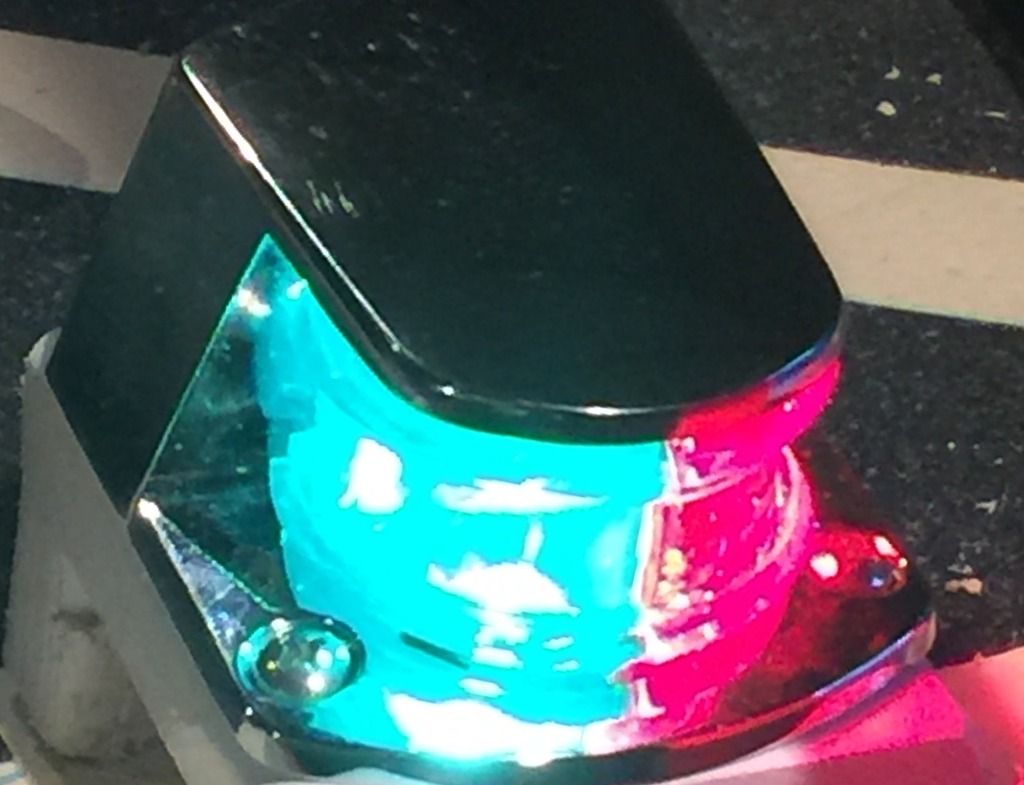
Posted: Tue Aug 23, 2016 8:20 pm
by Mhopper
I Recently retired from almost three decades of teaching. Everyone kept asking me what I was going to do when I retire. One day I was in a Kmart store and I saw this light hanging on a peg under a sale sign. I had an old johnboat at the time and thought maybe for the cheap price I could rig it up some way. Well, I took the light home and my wife asked me why In the world I had bought it. My answer, half joking, was " when I retire I'm going to build a boat." There was a nail where a picture had hung in the hallway and just sort of as a joke I hung this light in its packaging on that nail. ( It hung there for almost two years until today.) one day Later on, I walked by that thing and thought that maybe I would build a boat. I did the research and found the bateau website and the rest is history. I started not to use this light as it doesn't really fit the style of the boat. But after thinking about it, it is only fitting. A friend recently told me that I needed to decided if I was a fisherman or a boat builder, insinuating that I should be one or the other because of the time involved in boat building. Soon I will be fishing on the vessel I built!
Re: GV11. And so it begins...
Posted: Tue Aug 23, 2016 8:55 pm
by Jeff
Mhopper, how about being a "boat building fisherman"? There are quite a few worse titles!! Have a nice evening, Jeff
Re: GV11. And so it begins...
Posted: Tue Aug 23, 2016 9:28 pm
by Cracker Larry
Great story
Re: GV11. And so it begins...
Posted: Tue Aug 23, 2016 11:04 pm
by MrPaul
I can't think of anything better to do with retirement than fishing in a boat you built with your own 2 hands. I hope to be doing the same thing in about 25 years!
.
I'm ready for the launch thread!
Re: GV11. And so it begins...
Posted: Wed Aug 24, 2016 11:07 am
by wegcagle
Great story Mhopper
Looks like the perfect bow light to me
Congrats!!
Will
Re: GV11. And so it begins...
Posted: Wed Oct 12, 2016 4:59 pm
by Mhopper
long time no post. Still waiting on the DNR. I was turned down the first time I tried because they said my pictures were not good enough. It is like waiting on glaciers to move...
Re: GV11. And so it begins...
Posted: Fri Nov 04, 2016 10:26 pm
by Mhopper

STILL Waiting on the DNR.....
Re: GV11. And so it begins...
Posted: Fri Nov 25, 2016 8:59 pm
by Mhopper
I sent everything to the DNR on October 10. Today I get a letter saying my registration request was denied because I didn't tell who built the vessel. Well....the application doesn't ask that question!!! There is a box to check for homemade, which i checked... this is ridiculous. I guess i could turn it into a planter. The best part----I went to the local DNR office and the Clerk at the office filled out my application and there's still mistakes. Monday I will mail it the THIRD time.
Re: GV11. And so it begins...
Posted: Fri Nov 25, 2016 10:37 pm
by Fuzz
That would make me NUTS! I would probably just take it out and dare them to cite me.
Sure glad it is different here. took me 15 minutes start to finish. When talking boat building not many nice things doing it here but that is one of them.
Re: GV11. And so it begins...
Posted: Sat Nov 26, 2016 12:37 pm
by Mhopper
i told my wife i was going to just chainsaw and use it for firewood. she began quoting scripture about the rewards of persistence and patience...
Re: GV11. And so it begins...
Posted: Mon Dec 26, 2016 8:49 pm
by Mhopper
Today marks three months since i applied for a boat registration. Its 67 degrees today in sunny SC. the insanity continues...
Re: GV11. And so it begins...
Posted: Mon Dec 26, 2016 9:04 pm
by Jaysen
Hmmm... I may be dealing with that soon. Is the problem DNR or unstated requirements for paper work?
I've been trying to figure out what is required and it is as clear as a marsh creek during low tide.
Re: GV11. And so it begins...
Posted: Mon Dec 26, 2016 10:23 pm
by Mhopper
]I actually went to a local DNR office and an employee filled out the application for me and told me what to send. First, my application was sent back because my pictures were not good enough. The pictures have to clearly show that there are no signs of tampering and no signs the boat has ever been numbered. So i went back and had 8x10 shots made so that you could see them.
Next, the DNR employee told me i did not have to send receipts. I just had to have them available if they were requested. This information was incorrect! Make sure you send copies of your receipts!!! My application has been turned over to the DNR Marine Theft Investigation Division where i am having to prove that I actually built the boat because I did not send the receipts to begin with. its a real pain!!!
The problem...they don't have very many homebuilt crafts being registered so THEY don't even know what is going on! If i had it to do over I'd hook the thing to the truck and take it to Columbia in person.

Re: GV11. And so it begins...
Posted: Mon Dec 26, 2016 10:31 pm
by Dutch1
Man, don't lay down and take that. I would be at my county commissioners office tomorrow morning and if they didn't help I would be at my senators office. They just don't realize that it's there problem too! Make it so! That's BS!! Take everything with you when you go.
Re: GV11. And so it begins...
Posted: Mon Dec 26, 2016 10:56 pm
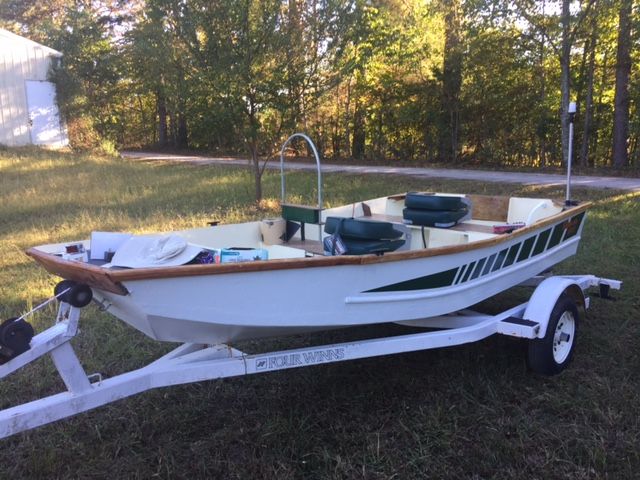
by Mhopper
Begging to get wet...
Re: GV11. And so it begins...
Posted: Tue Dec 27, 2016 8:17 am
by Jeff
Mhopper, she looks great!! Send me some photos once she is in the water!! Congrats and great build!! Jeff
Re: GV11. And so it begins...
Posted: Wed Dec 28, 2016 10:47 am
by 94'325is
Oh man I feel for you, it's got to be a killer just looking at the boat and not being able to use it. Came out great!!
Re: GV11. And so it begins...
Posted: Wed Dec 28, 2016 11:07 am
by terrulian
Yes, great work, can't wait to see photos on the water.
It is amazing how much bigger that boat is than my V10 even though it is only one foot longer.
Re: GV11. And so it begins...
Posted: Fri Apr 14, 2017 10:46 am
by Mhopper
Many road blocks and hiccups and snags...looks like today might finally be the day! Fingers crossed....
Re: GV11. And so it begins...
Posted: Fri Apr 14, 2017 11:12 am
by terrulian
Re: GV11. And so it begins...
Posted: Fri Apr 14, 2017 11:00 pm
by Mhopper
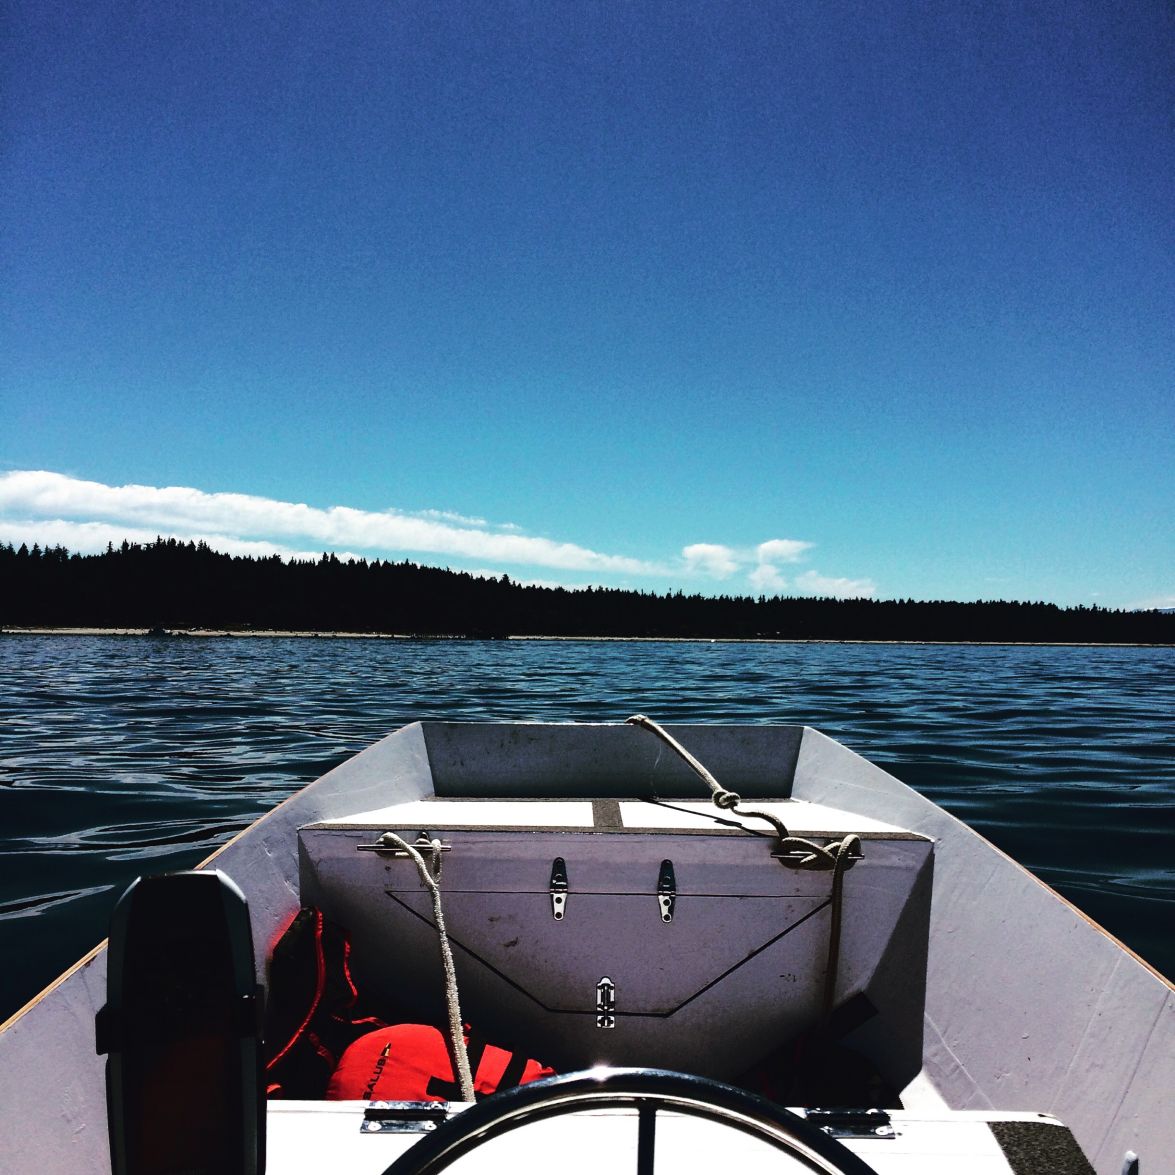
I did put the boat on the water. It didn't go well. Should have built the angled transom option. I'm going to have to get a transom wedge to get a better angle on the motor. We stilll had fun. We took our radio controlled boats and had a blast. As soon as the boat hit the water I was getting questions and compliments. That part was fun. I'll do a splash thread when I get the motor right complete with video.
Re: GV11. And so it begins...
Posted: Fri Apr 14, 2017 11:16 pm
by Fuzz
Nothing but a thang. That is what sea trials are for. And you had fun so that is what counts. Glad to see you finally got to put the boat in the water.
Re: GV11. And so it begins...
Posted: Sat Apr 15, 2017 3:22 pm
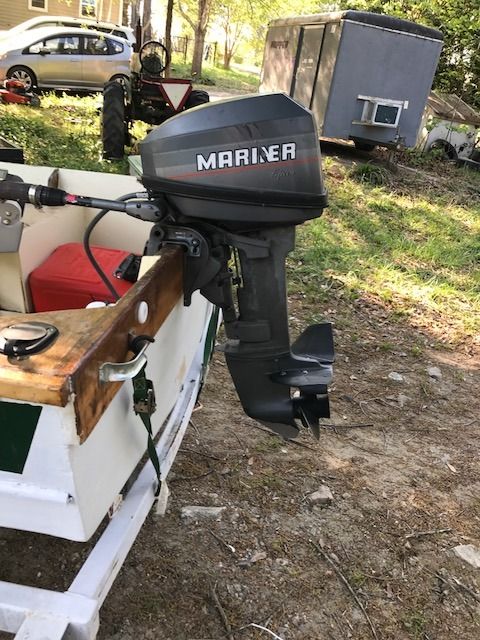
by Mhopper
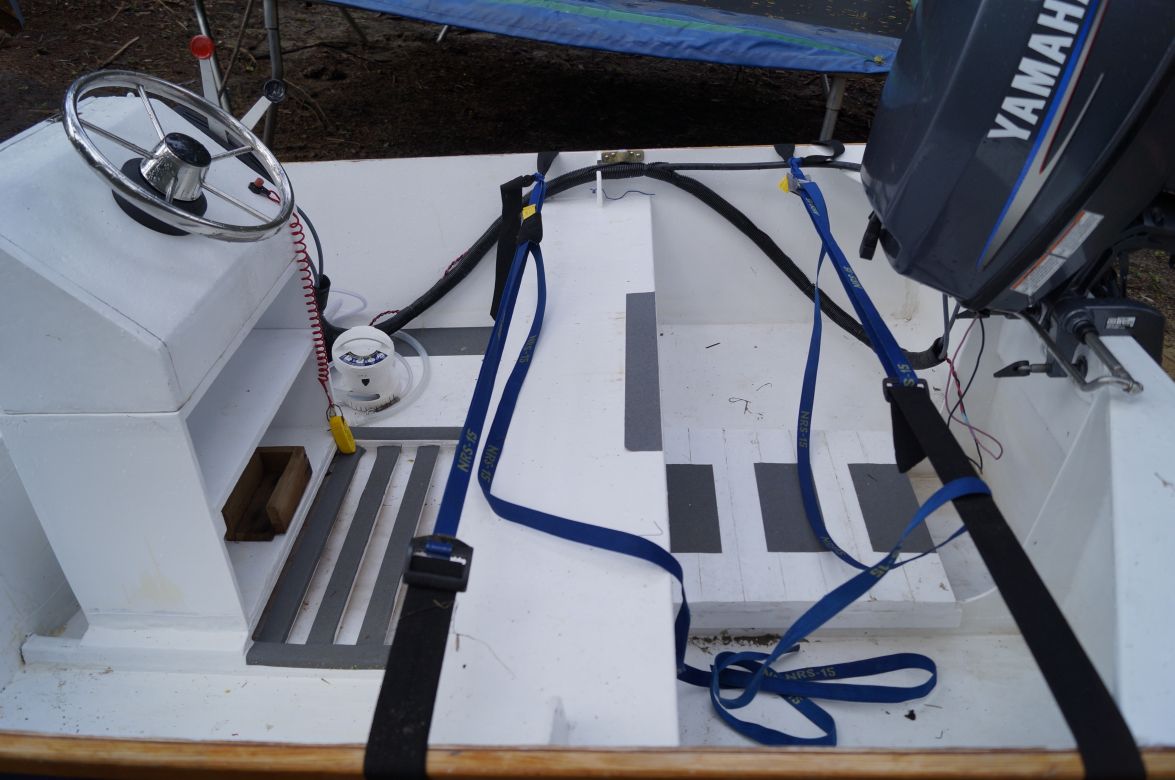
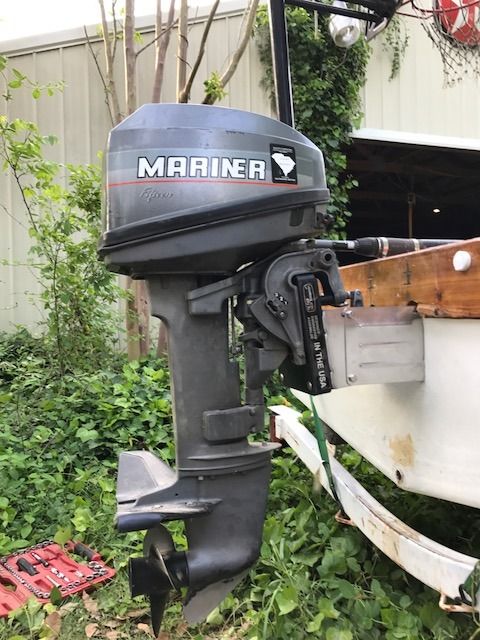
Advice suggestions solicitation: Here is a pic of my transom and motor. As you can see, it is pretty straight up and that is is as far down as the motor will go. At this angle the boat and motor are nowhere near their potential. i'm new to the whole boat building scene, but i'm thinking a transom wedge might help. What do the experts think???? Is there another or better solution??
Re: GV11. And so it begins...
Posted: Sat Apr 15, 2017 5:03 pm
by Fuzz
You are going to need a bunch of wedge in there. The motor needs to be able to tuck under at least a little when it is in the lowest setting. As it is now I bet the boat wants to point her nose to the sky when you give it the gas.
Re: GV11. And so it begins...
Posted: Tue Apr 18, 2017 8:10 pm
by Mhopper
Got some studying to do... the motor is at an improper angle. Transom is thick , which is going to make it hard to get enough wedge to get the right angle. And it's about an inch and a half too high.
Re: GV11. And so it begins...
Posted: Tue Apr 18, 2017 8:10 pm
by Mhopper
Got some studying to do... the motor is at an improper angle. Transom is thick , which is going to make it hard to get enough wedge to get the right angle. And it's about an inch and a half too high.
Re: GV11. And so it begins...
Posted: Sat Apr 22, 2017 6:24 pm
by Mhopper
Fixed. Didn't want to use a bracket. But it made more sense than mangling the transom.
Re: GV11. And so it begins...
Posted: Sat Apr 22, 2017 6:26 pm
by Mhopper
one more decal...
Re: GV11. And so it begins...
Posted: Sat Apr 22, 2017 8:20 pm
by Jeff
Nice decal!! Jeff