
Steve,
How is your build coming along. Did you get the wiring sorted out?
I finally had my console lifted into the boat yesterday so my wiring and other hookups can proceed. You are welcome to have a look anytime you are down this way.
Regards
Tom in Steinhatchee
Steve's FS18

Re: Steve's FS18
Hey Tom,
Sorry, I just saw your post. If I would have seen it I would have come on down this week to check out your build. I guess I need to turn on post notifications for my build.
I've gotten a lot done the last two weeks even though to look at it doesn't show much progress. That's a tough time to get through. I'm getting ready to paint my console one more time before I wire the boat. I finally have everything I need to finish and am looking forward to using this thing. It's exactly what I want for where I fish. I'll paint the console tomorrow or one night this week and then start wiring as soon as it's dry. I may run wires that don't go to the console first.
I did set up a small test bed for the wiring to figure out how I wanted everything configured. That was time well spent. Now, I'm just looking for a good label for the wires that doesn't fall off later.
Tell you what, let's see who can get their wiring done first. What do you say?
Re: Steve's FS18
Hi Steve,
I bought one of those labeling machines which uses labels which you can stick on wiring. It is a Rhino 5200. You can buy different width labels and even heat shrink material to print on. I have a bunch more labels to print out and have yet to try the heat shrink tubing labels. So far the stick on ones have stayed in place.
Wiring is a PITA but to make it look neat is an art which I need to master. Other issue I have is my switch panel has in line fuses built in for every two switches. I really don't need these fuses as everything will be run thru the Blue Seas fuse panel. Have yet to figure all this out so talking about it helps. I am in no rush. Grouping and clamping wires inside the console is going to take some thought.
Regards
Tom
Re: Steve's FS18
Tom,
I ended up using the blue sea fuse panel too. Thanks for the info on the labeler. I'll check it out. I'm definitely going to try and do a neat job of wiring. I could sling some wires together and call it good enough like I've seen done plenty of times but I want it right.
More to come
Steve
I ended up using the blue sea fuse panel too. Thanks for the info on the labeler. I'll check it out. I'm definitely going to try and do a neat job of wiring. I could sling some wires together and call it good enough like I've seen done plenty of times but I want it right.
More to come
Steve
-
OrangeQuest

- Very Active Poster

- Posts: 3946
- Joined: Tue Aug 28, 2018 1:14 pm
- Location: Houston, Texas
Re: Steve's FS18
A good idea would be to draw out your wiring in diagram style so years from now if something starts acting up you don't have to remember what went where. Little foot notes with brand and type of switches, fuses, terminal blocks and on and on. If you note everything from wire size to connectors then will make quick look up to upgrade or repair.
"that it isn't just an ordinary sort of boat. Sometimes it's a Boat, and sometimes it's more of an Accident. It all depends." "Depends on what?" "On whether I'm on the top of it or underneath it."
A. A. Milne
A. A. Milne
Re: Steve's FS18
That's a great idea. I drew one up originally but a detailed one would be nice to have around even for my simple boat. I'd just have to remember where I put the dang thing if I ever needed it!!! I have that problem too....OrangeQuest wrote: ↑Mon Jul 15, 2019 5:28 am A good idea would be to draw out your wiring in diagram style so years from now if something starts acting up you don't have to remember what went where. Little foot notes with brand and type of switches, fuses, terminal blocks and on and on. If you note everything from wire size to connectors then will make quick look up to upgrade or repair.
-
OrangeQuest
- Very Active Poster
- Posts: 3946
- Joined: Tue Aug 28, 2018 1:14 pm
- Location: Houston, Texas
Re: Steve's FS18
Every boat needs a place for the registration papers an cell phones that keeps thing dry, no matter what, but handy. I put a 6" piece of PVC pipe it is capped at one end and has a screw off deck plate on the other that the motor tool kit, a few spare things and the proof of registration. Doesn't take much to laminate a diagram and roll it up and put it on the boat with a few spare things.
"that it isn't just an ordinary sort of boat. Sometimes it's a Boat, and sometimes it's more of an Accident. It all depends." "Depends on what?" "On whether I'm on the top of it or underneath it."
A. A. Milne
A. A. Milne
Re: Steve's FS18
Another good tip. Thanks!
Re: Steve's FS18
Time for some updates and pics...
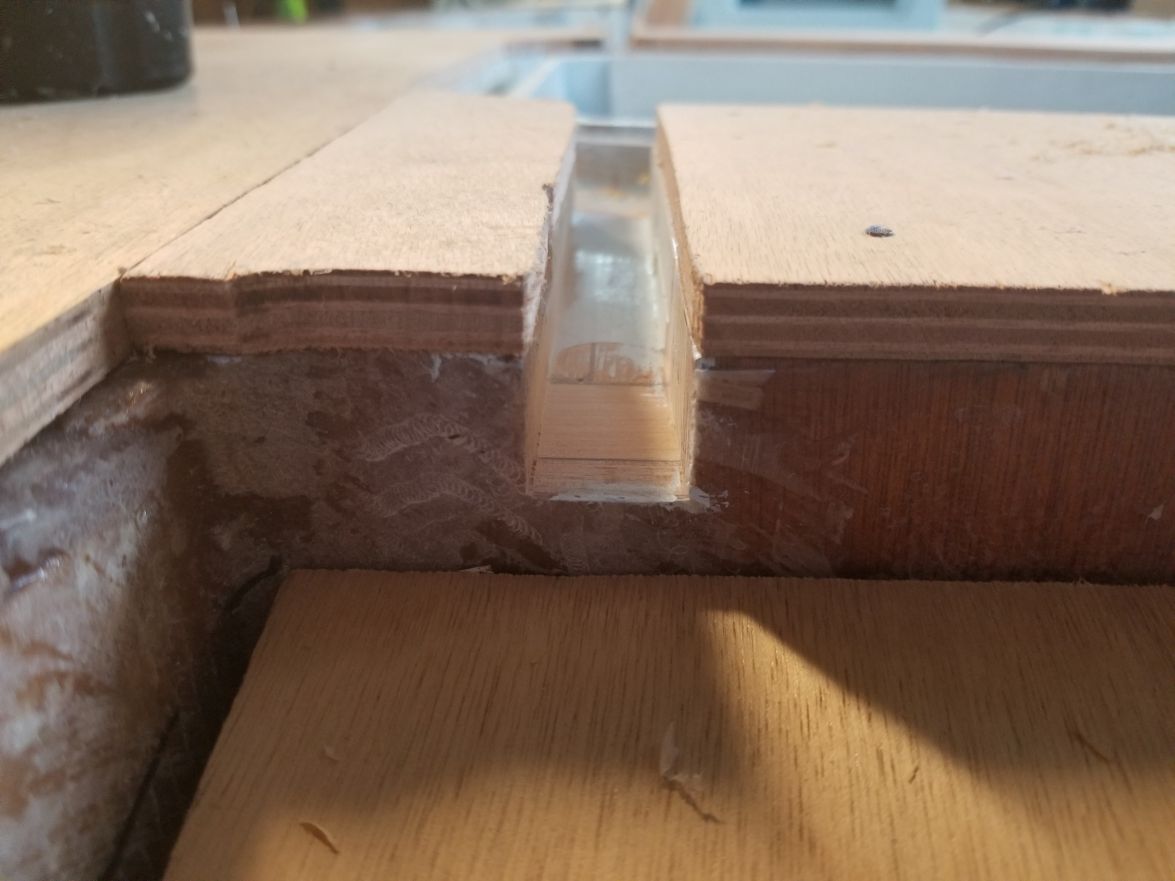
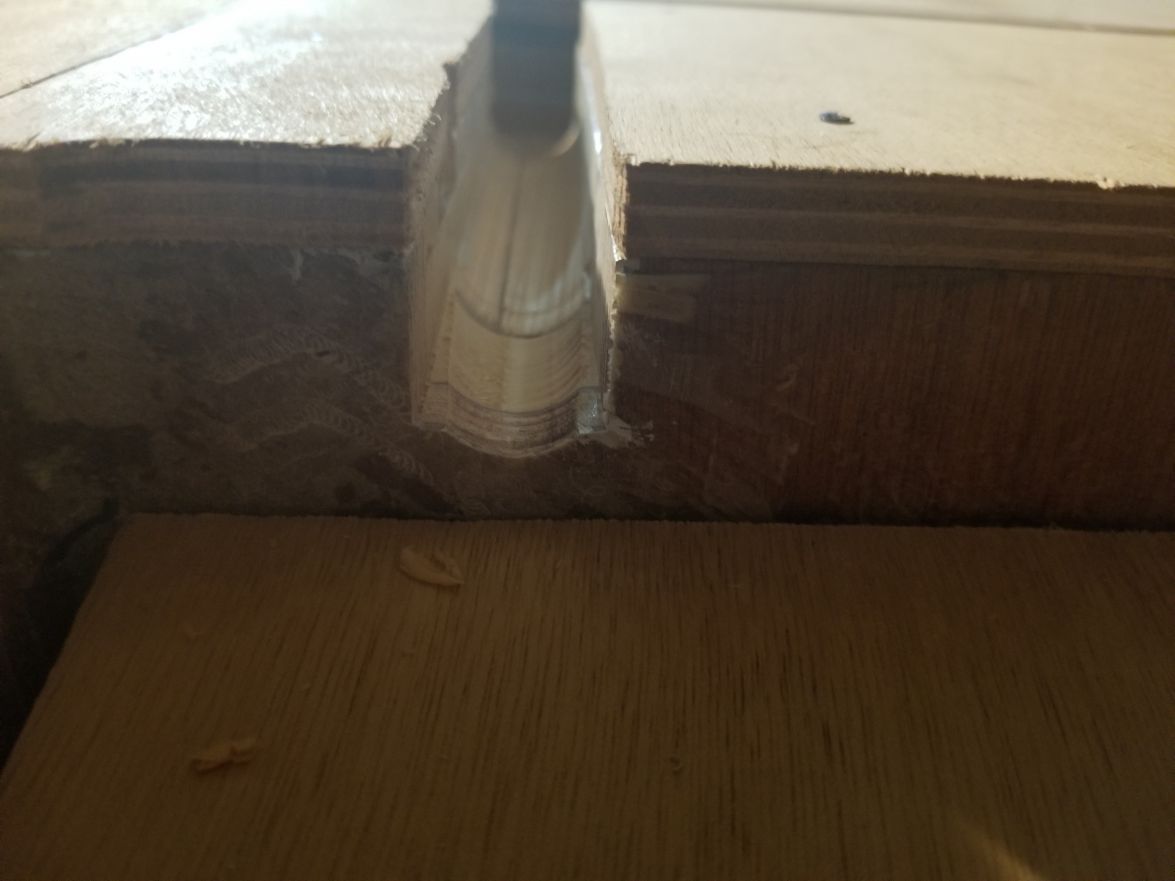
This is the transition I came up with to get the wiring from the grab bar to inside the console. The only thing I would change is I would have flipped it so the bolts go through all layers of plywood instead of in between. It would have been stronger that way but if it breaks, I know how to make another one that works fine.
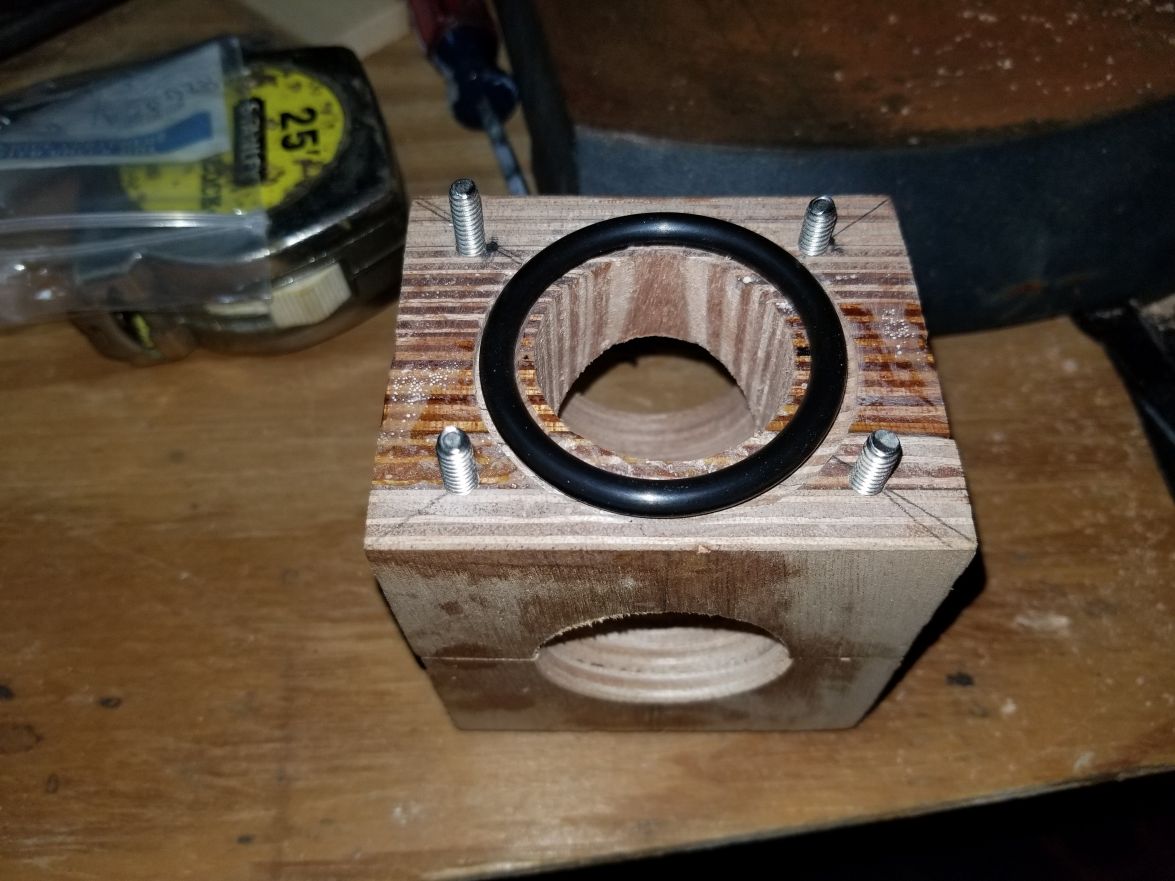
This is the transition I came up with to get the wiring from the grab bar to inside the console. The only thing I would change is I would have flipped it so the bolts go through all layers of plywood instead of in between. It would have been stronger that way but if it breaks, I know how to make another one that works fine.
Re: Steve's FS18
I took some good advice from this forum and bought a rounded bit so I could round out the bottom of the channels for the hatches. I went a little lower to get rid of that lip after the pics but you get the before and after.
Before:
After:
Before:
After:
Who is online
Users browsing this forum: Ahrefs [Bot], Bing [Bot], Google [Bot] and 12 guests