Steve's FS18

To help other builders, please list the boat you are building in the Thread Subject -- and to conserve space, please limit your posting to one thread per boat.

Please feel free to use the gallery to display multiple images of your progress.
Dutch1
Active Poster
Active Poster
Posts: 417
Joined: Sun Mar 06, 2016 2:08 am
Location: Tallahassee, FL

Re: Steve's FS18

Post by Dutch1 »

Time for some wiring...I've been both looking forward to and dreading this for a while. . .I didn't know if I could get it through and into the grab bar and into the console. Here goes.

It's about this big with a tranducer cable, nmea cable, power and ground for 5 switches, and phone charger.

Image

Dutch1
Active Poster
Active Poster
Posts: 417
Joined: Sun Mar 06, 2016 2:08 am
Location: Tallahassee, FL

Re: Steve's FS18

Post by Dutch1 »

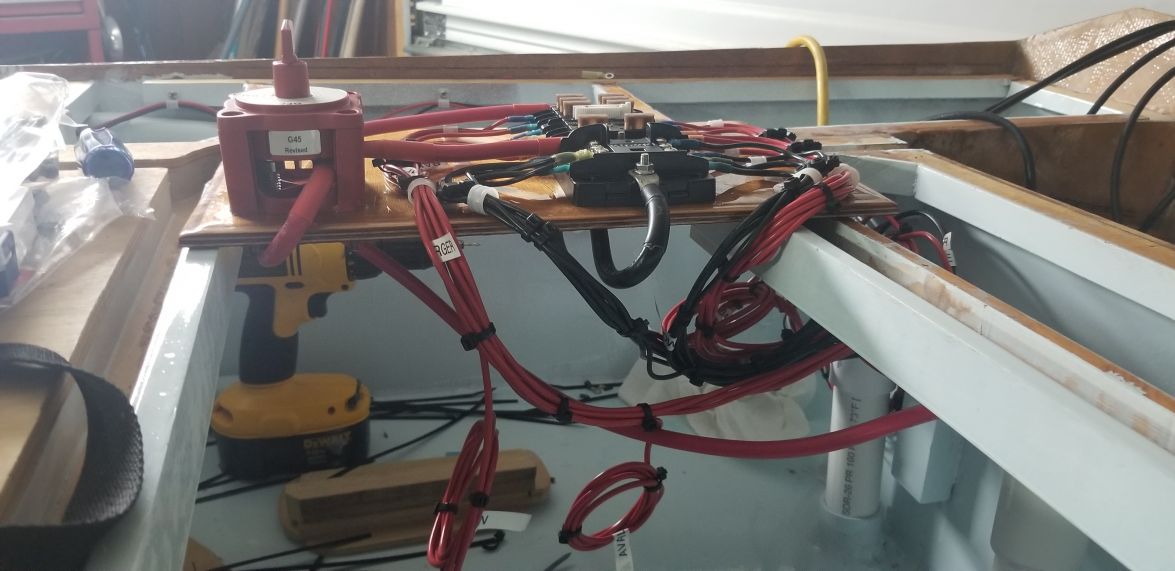
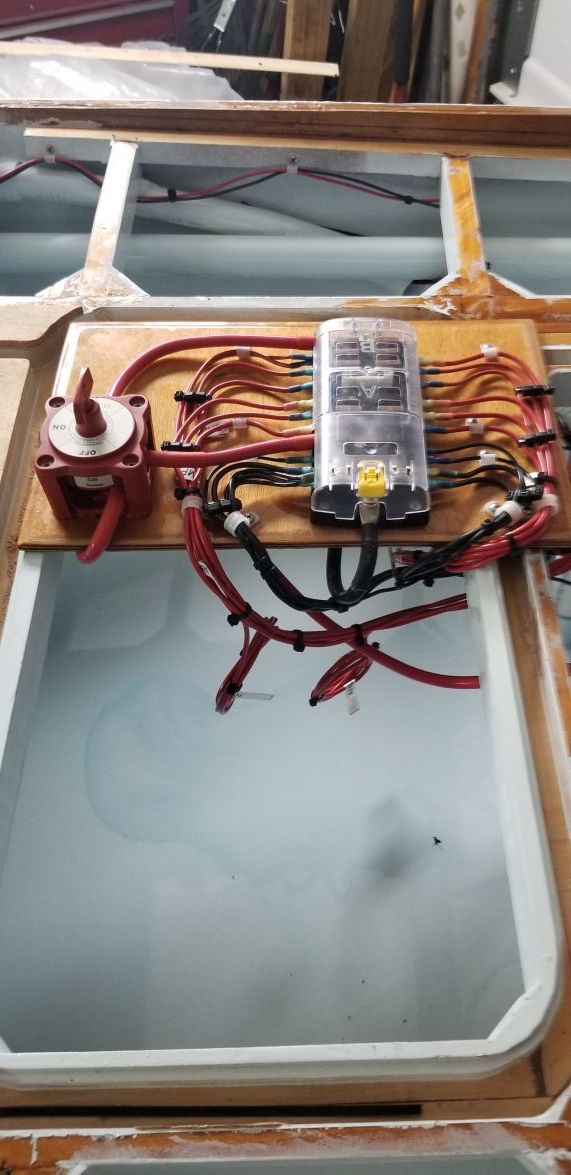
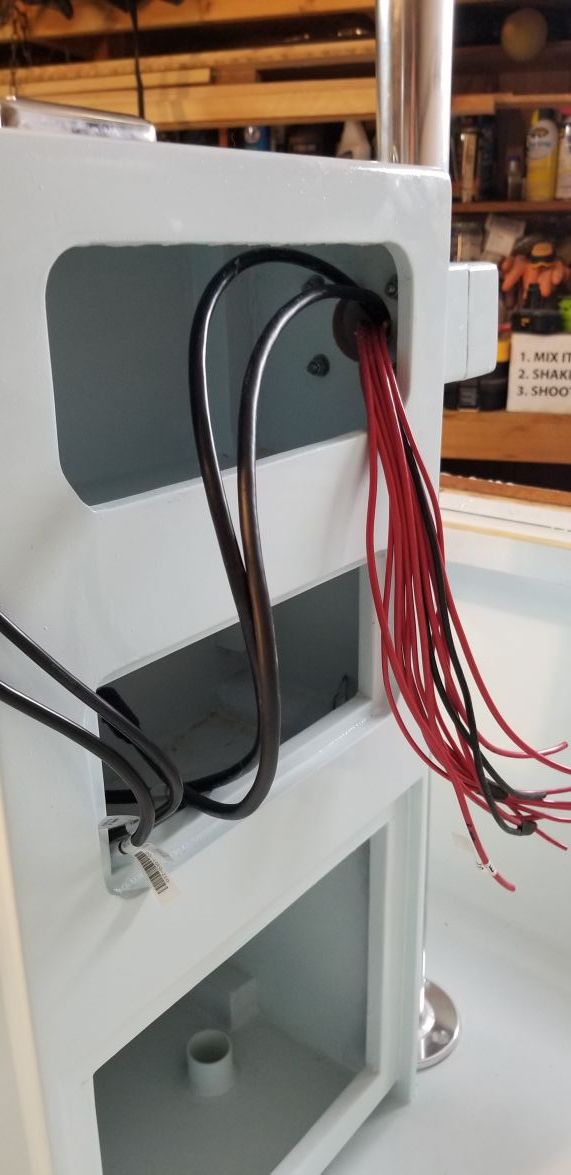
All that dreading and planning for nothing. It wasn't as hard as I thought it would be. I pulled it through to the sole, then through the grab bar, then into the console and pulled it all tight. I even realized I forgot wires for the charger and got the fish tape through with no problem and pulled two more wires.

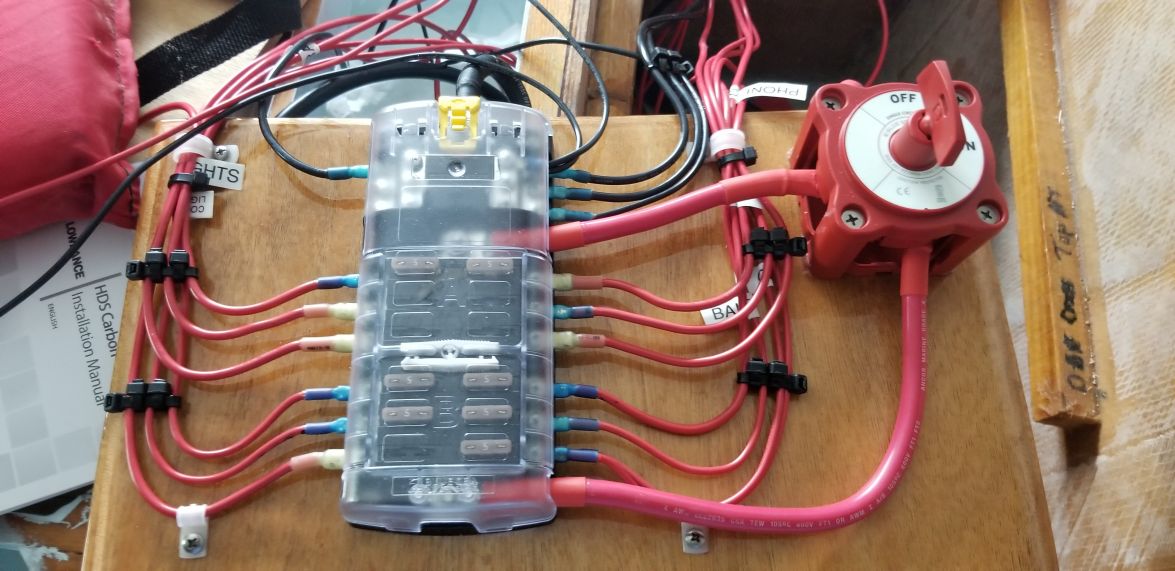
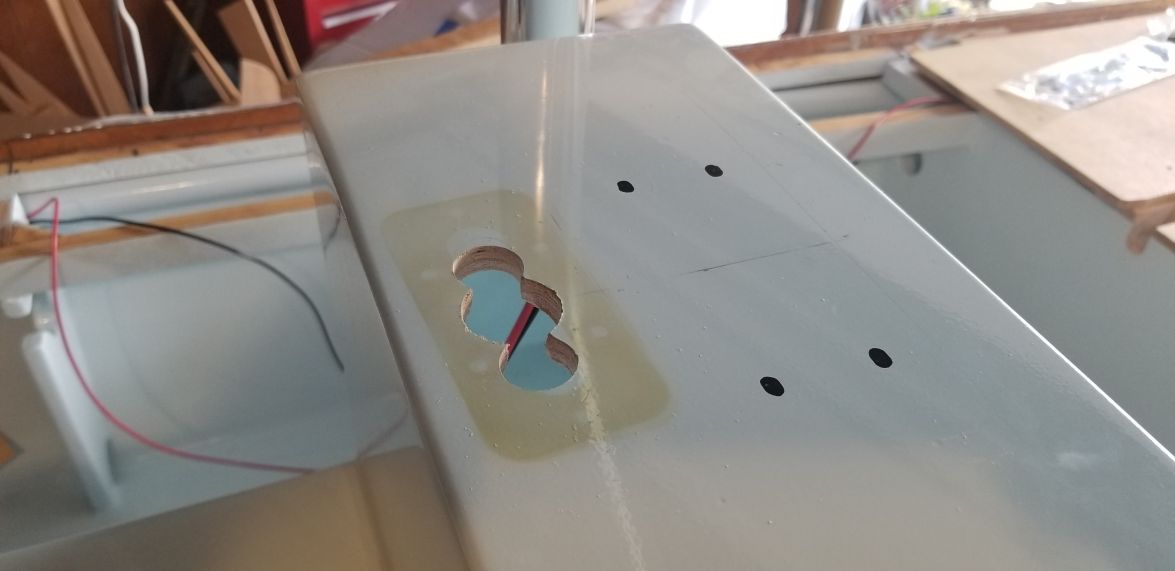
Here's half of the piece I built all painted up and ready for installation. You can see the wiring harness coming up through the sole in the background.
Image

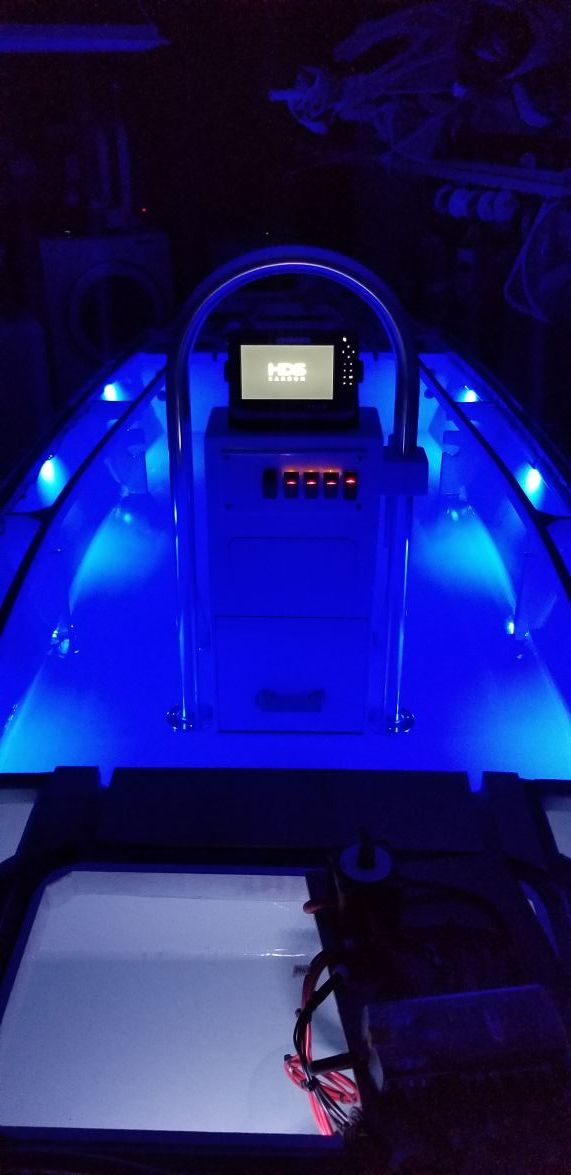
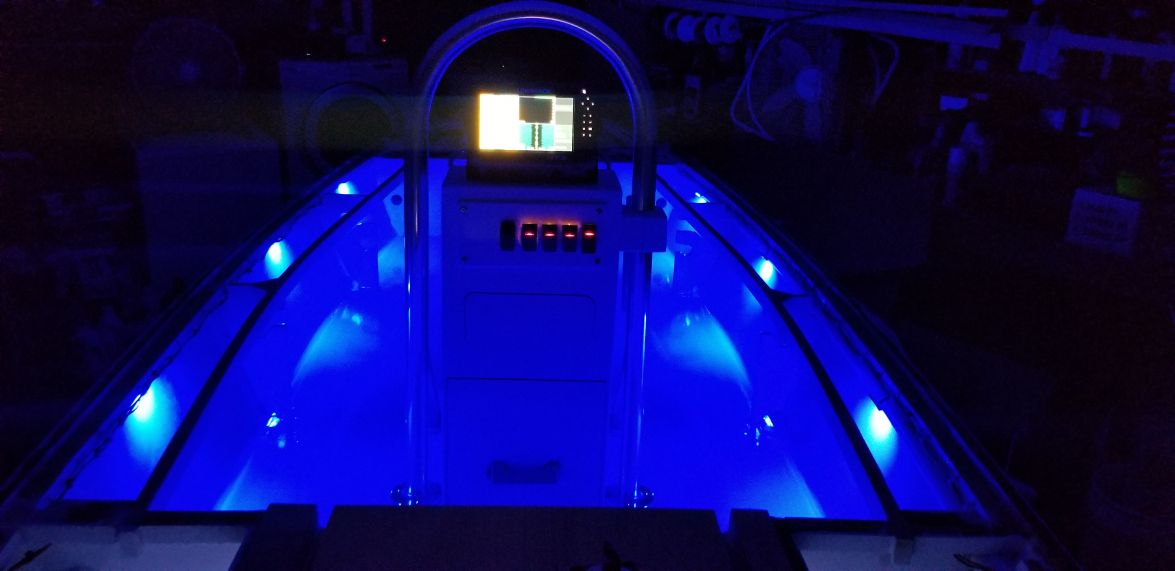
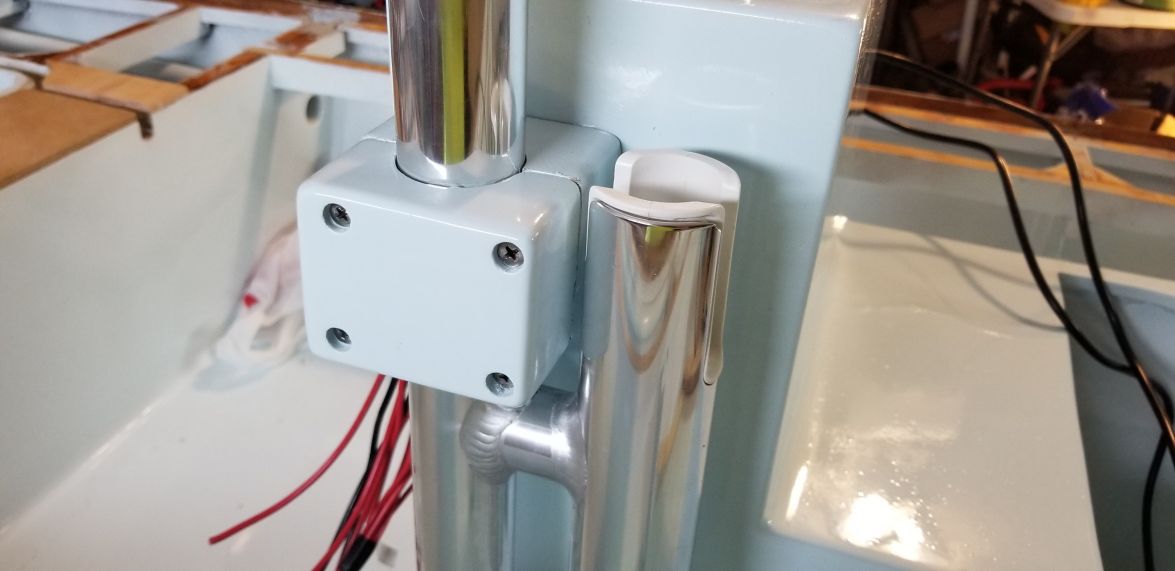
All together and a HUGE sigh of relief!!!
Image

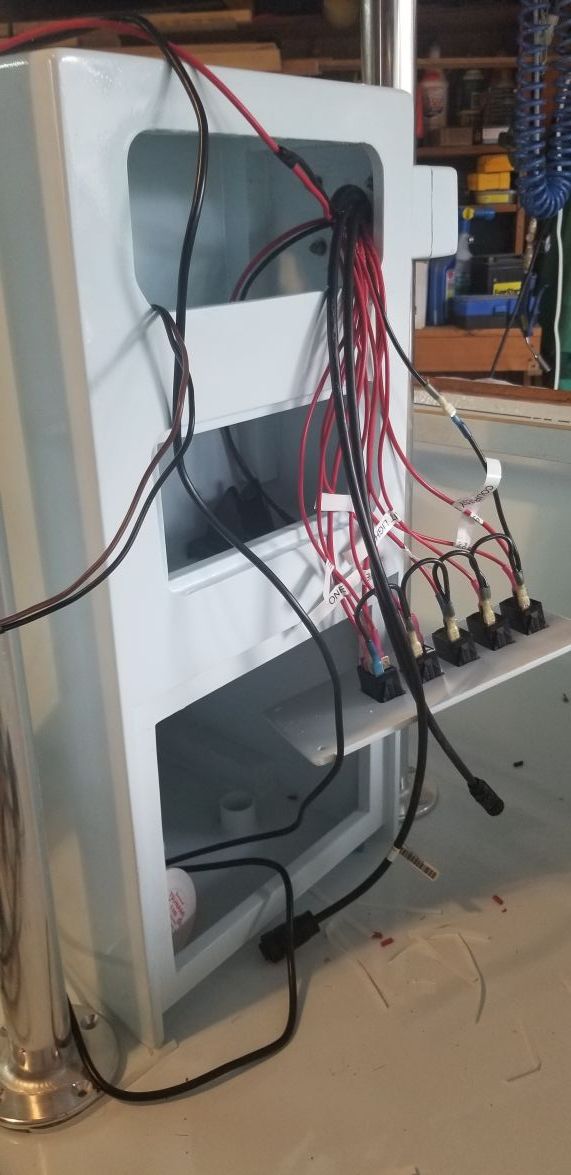
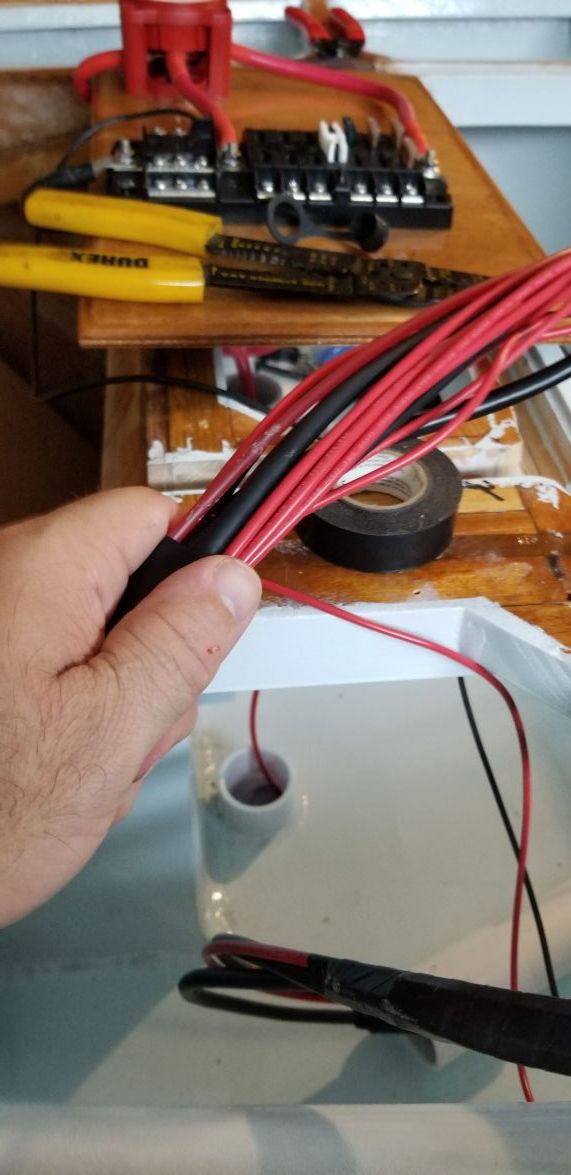
I didn't know if labels would make it through the process of pulling them through the conduit so I listed out my switches on a piece of paper and gave them dots for which one it was. Then used a sharpie to put that number of dots on the wire so I knew which one was which once it was into the console.
Image

Switches and labels installed. I just used a regular label maker and bent them back over onto themselves. It was not easy to separate when I tried. Who knows, I may open the cover to loose labels in there in the future. I just didn't want to spend $100 on a label maker for wiring. I don't do this enough to merit that expense. But, they are nice!! I pulled most of the excess wiring back through but left enough where I could get the cover off and work on it comfortably if I had to.
Image

Dutch1
Active Poster
Active Poster
Posts: 417
Joined: Sun Mar 06, 2016 2:08 am
Location: Tallahassee, FL

Re: Steve's FS18

Post by Dutch1 »

Here's the bait well setup. It went it ok. It was a little tricky with silicone one the ends to make sure it was still there and get everything tightened up. I'm pleased with it and it will be nice to have a small 3 gallon bait well when I want one. It will serve as a small cooler when bait isn't needed.

Image

Dutch1
Active Poster
Active Poster
Posts: 417
Joined: Sun Mar 06, 2016 2:08 am
Location: Tallahassee, FL

Re: Steve's FS18

Post by Dutch1 »

Here's a few more pics of the fuse panel setup.

I tried to give each line a drip edge so water would drip instead of go all the way to the connection. Still running a few wires to the panel in this pic.
Image

Tidying up everything with zip ties.
Image

Final result. It will have two holes in the panel and fits over two bolts mounted inside the hatch. I have wing nuts (with lock washers) on them holding it on. If needed at some point in the future, I can pull it up and onto the deck to make working with it easier instead of crawling around upside down inside the hatch.
Image

Fuzz
* Bateau Builder - Expert *
Posts: 8939
Joined: Tue Aug 02, 2011 4:23 am
Location: Kasilof, Alaska

Re: Steve's FS18

Post by Fuzz »

Being able to pull the wiring out to get to it is a smart move. you will thank yourself many times over. :wink:

Dutch1
Active Poster
Active Poster
Posts: 417
Joined: Sun Mar 06, 2016 2:08 am
Location: Tallahassee, FL

Re: Steve's FS18

Post by Dutch1 »

Here's my gas tank install. I built a place for the lip of the tank to slide into when I completed that area.

Showing how the lip of the tank goes under the space allowed.
Image

Tucked in as planned.
Image

Temporarily installed but I had to use several washers because I can't get my hands on 1" stainless bolts. I'll change it out once I get the right size bolts. I used rubber washers to lift it in the front and hold it snug in the back.
Image

Dutch1
Active Poster
Active Poster
Posts: 417
Joined: Sun Mar 06, 2016 2:08 am
Location: Tallahassee, FL

Re: Steve's FS18

Post by Dutch1 »

Fuzz wrote: Sun Sep 15, 2019 5:39 pm Being able to pull the wiring out to get to it is a smart move. you will thank yourself many times over. :wink:
Thanks Fuzz. I also wanted to be able to show people (by looking in through the hatch) what that beautiful wood looks like without paint all over it.

Dutch1
Active Poster
Active Poster
Posts: 417
Joined: Sun Mar 06, 2016 2:08 am
Location: Tallahassee, FL

Re: Steve's FS18

Post by Dutch1 »

All the wiring for what I have now is completed. I have to run the nmea backbone when it comes in Wednesday. I bought the starter kit but picked the wrong one without a backbone. Kind of need that... Once I purchase the trolling motor I"ll install it but it will have it's own dedicated battery up front by the other one. And I'll plug it into the nmea backbone that will be sitting there waiting for a connection.

I installed oznium cool white led lights in the compartments with reed switches. When you open a hatch, the light comes on and back off when closed. I moved the reed switch to the underside of the channel for the hatch and had to use some strong magnets to get it to work. After a few tries, I got the right combination and it works perfect. You can see the compartment light in the bottom of the pic below.
Image

Here's a pic of the interior courtesy lights. They are also oznium lights and I'm pleased with them. They'll look better with the decks installed.
Image

I'm going out now to start taping up to get ready to start gluing down the decks. More to come...

Steve

Dutch1
Active Poster
Active Poster
Posts: 417
Joined: Sun Mar 06, 2016 2:08 am
Location: Tallahassee, FL

Re: Steve's FS18

Post by Dutch1 »

OH, and THB how's your wiring coming along? Who won?

Dutch1
Active Poster
Active Poster
Posts: 417
Joined: Sun Mar 06, 2016 2:08 am
Location: Tallahassee, FL

Re: Steve's FS18

Post by Dutch1 »

One more thing. Be sure NOT to lay a cable clam on paint when it's still curing. It had been a day or two after painting when I placed mine on top of the console and it looked like this when I picked it up a week later. The only thing I can think of is the paint was still curing and the rubber base reacted somehow. I couldn't get it to come off and it's a good thing it was very close to where I wanted it or I would have sanded and touched it up with paint. I also had to grind away on the cover a little to get the transducer plug to go through. I forgot how hard stainless is..

Image

Installed and everything checks out.The middle compartment will get some kind of latch and hinge. I just haven't found the right combination I liked yet. And, I have to paint the bottom panel that comes off to access the bait well area one more time. It's still just primed in this pic.

Image

Post Reply

Who is online

Users browsing this forum: Amazon [Bot] and 21 guests