
[/quote]I like it as clear as possible also, but maybe for silentneko a drop of brown pigment in the container of hardener is an idea? Or can you only mix pigment after you mix hardener and resin?
[/quote]
It would have to be a translucent tint which is harder to find, but really it's not a big deal. I just like the honey tone it gives to cedar. I'll try the resin on some scrap cedar I have, if it doesn't darken it enough I'll use some left over FGCI resin I have. Thanks.
The Plytanic 2.0 - FS17 Build
-
silentneko
- * Bateau Builder *

- Posts: 1403
- Joined: Sat Nov 06, 2010 7:10 pm
- Location: Lakeland
Re: The Plytanic 2.0 - FS17 Build
Built: 15ft Skiff, 16ft Skiff, Modified Cheap Canoe, and an FS17.
-
silentneko
- * Bateau Builder *
- Posts: 1403
- Joined: Sat Nov 06, 2010 7:10 pm
- Location: Lakeland
Re: The Plytanic 2.0 - FS17 Build
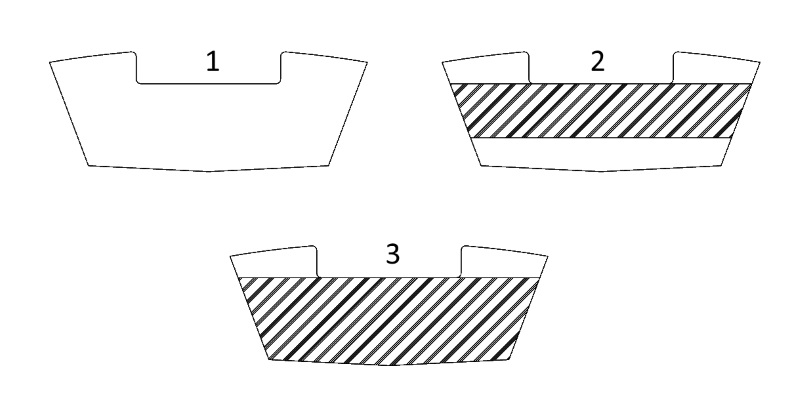
Jaques, I don't want to get into a debate on the build thread, but the plans are in conflict with your description of the clamping board. The plans state to use the transom as a guide to trace out the CB layers, and the nesting diagram shows the layers going all the way up to the top of the full transom layer.jacquesmm wrote: ↑Tue Dec 05, 2017 4:52 pm Here is a drawing of the transom and clamping board (no perspective):
Number 1 is the transom outline, the outside layer, only one layer.
#2 is the designed clamping board, the one shown on the nesting. It has two horizontal straight edges spaced (in this case) 12". You had enough ply for 3 layers like that.
#3 is the the clamping board we discussed, the one that goes all the way to the bottom.
The upper edge of 2 and 3 is the edge of the motorwell, it does not go all the way to the top of the transom.
Now, some builders cut it as #2 and # 3 and go all the way to the top. I don't find it necessary, it's heavy and may cost more in plywood but tecnically, there is nothing wrong with it.
You can proceed with what you have.
From the pictures, it looks like you have at least 12" below the upper edge of the motorwell.
Maybe I misunderstood your description: is it possible that you decided to have 2 transom layers and 2 clamping board layers for a total of 4? The design calls for 1 plus 3, total 4 but it perfectly valid to do 2+2.
In that case, you will have to cut a 3/8" slice off the motorwell sides but that is easy.
I did cut the top edge straight instead of adding a 2" radius. That's because I want my deck flush back there to accommodate a boarding ladder, or power pole micro, I might add. Thanks for the help, the transom is together now and I think it will work out well.
Built: 15ft Skiff, 16ft Skiff, Modified Cheap Canoe, and an FS17.

Re: The Plytanic 2.0 - FS17 Build
You are correct, the plans show the clamping board going all the way up to the top of the transom.
Probably 100 boats were built that way.
Many use a small bracket and in that case, builders have simply built the transom from 4 layers, no clamping board layers.
We built a prototype here in the shop and I have to go back to check on how that clamping board was cut.
Either way is good. For larger boats, 50HP and up, I usually show a thick transom made from all the layers. For smaller boats, if the nesting is tight, only the clamping board has multiple layers and the shape of those clamping boards varies.
In this case, I was wrong about the shape.
To build it as you do, like the plans, allows for for boarding ladders, big U bolts and other fittings,
I will correct my previous posts and sorry for all the confusion.
Jacques Mertens - Designer
http://boatbuildercentral.com
http://boatbuildercentral.com
-
silentneko
- * Bateau Builder *
- Posts: 1403
- Joined: Sat Nov 06, 2010 7:10 pm
- Location: Lakeland
Re: The Plytanic 2.0 - FS17 Build
It's all good. I think it's all worked out in the end now.
Here is the transom all laminated together. It's pretty stout and once the glass is added I'm sure this thing could handle any power I toss at it.
Here it is clamped in place. I can't imagine getting it more lined up, so I'm happy with it.

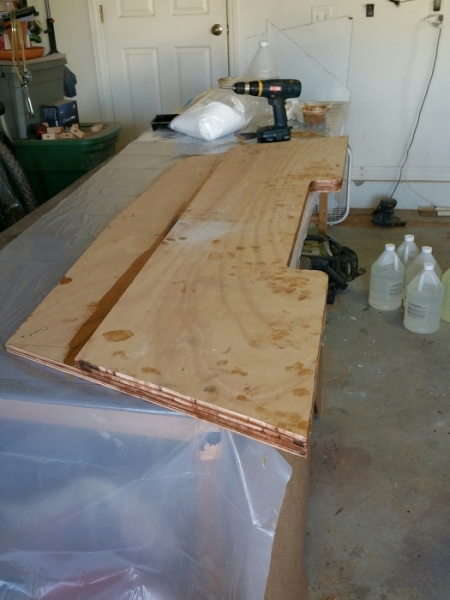
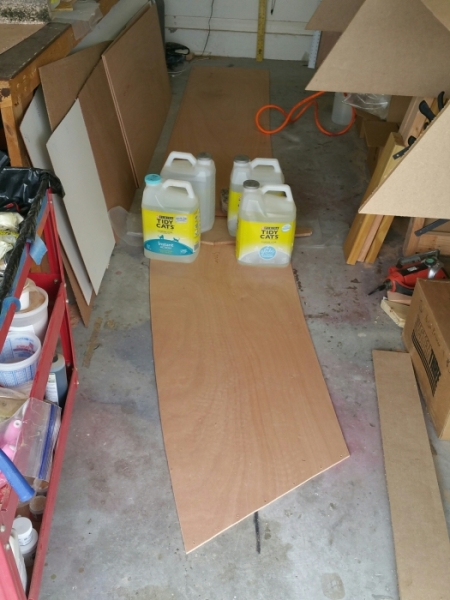
I then got the bottom panels cut out. Unfortunately I ran into a snag here, the plywood warped a bit. I couldn't line up the panel ends well, the best I could do is wet out the Biaxial cloth and weigh it down with a piece of MDF. It worked ok, but I'm not super happy with the results. It will allow me to do the other side well, then I may revisit it.
Here is the transom all laminated together. It's pretty stout and once the glass is added I'm sure this thing could handle any power I toss at it.
Here it is clamped in place. I can't imagine getting it more lined up, so I'm happy with it.
I then got the bottom panels cut out. Unfortunately I ran into a snag here, the plywood warped a bit. I couldn't line up the panel ends well, the best I could do is wet out the Biaxial cloth and weigh it down with a piece of MDF. It worked ok, but I'm not super happy with the results. It will allow me to do the other side well, then I may revisit it.
Built: 15ft Skiff, 16ft Skiff, Modified Cheap Canoe, and an FS17.
-
cape man

- * Bateau Builder - Expert *

- Posts: 8278
- Joined: Sun Jan 20, 2008 12:02 pm
- Location: Lithia, Florida
Re: The Plytanic 2.0 - FS17 Build
Bet it will be fine when you flip it over.
The world always seems brighter when you've just made something that wasn't there before - Neil Gaiman
-
silentneko
- * Bateau Builder *
- Posts: 1403
- Joined: Sat Nov 06, 2010 7:10 pm
- Location: Lakeland
Re: The Plytanic 2.0 - FS17 Build
We will see when I get a hard cure. It's flipped, I'm glassing the other side now.
Built: 15ft Skiff, 16ft Skiff, Modified Cheap Canoe, and an FS17.
-
silentneko
- * Bateau Builder *
- Posts: 1403
- Joined: Sat Nov 06, 2010 7:10 pm
- Location: Lakeland
Re: The Plytanic 2.0 - FS17 Build
Well you can account for many things, but you can't stop mother nature. It's a wet cool day, but I'm gonna try and push on, just can't work outside of the garage.
I tossed the bottom panels up. Finally get to start seeing what will be. I've got a pinch point in the keel, I'll just need to smooth is out a little before final stitching.

The first side of glass didn't come out awesome, but it's not the worse either. I'll do an overcoat of neat epoxy to see it it can fill in a few small voids in the weave, if not I'll grind them out later.
I'm starting to bond the side panels together. I'll have to do it in multiple laminations because of the weather and space available.
I'm going to work on a few small projects just to get ready soon, like the drain tube and rounded live well ends in the next few days.
I tossed the bottom panels up. Finally get to start seeing what will be. I've got a pinch point in the keel, I'll just need to smooth is out a little before final stitching.
The first side of glass didn't come out awesome, but it's not the worse either. I'll do an overcoat of neat epoxy to see it it can fill in a few small voids in the weave, if not I'll grind them out later.
I'm starting to bond the side panels together. I'll have to do it in multiple laminations because of the weather and space available.
I'm going to work on a few small projects just to get ready soon, like the drain tube and rounded live well ends in the next few days.
Built: 15ft Skiff, 16ft Skiff, Modified Cheap Canoe, and an FS17.
-
silentneko
- * Bateau Builder *
- Posts: 1403
- Joined: Sat Nov 06, 2010 7:10 pm
- Location: Lakeland
Re: The Plytanic 2.0 - FS17 Build
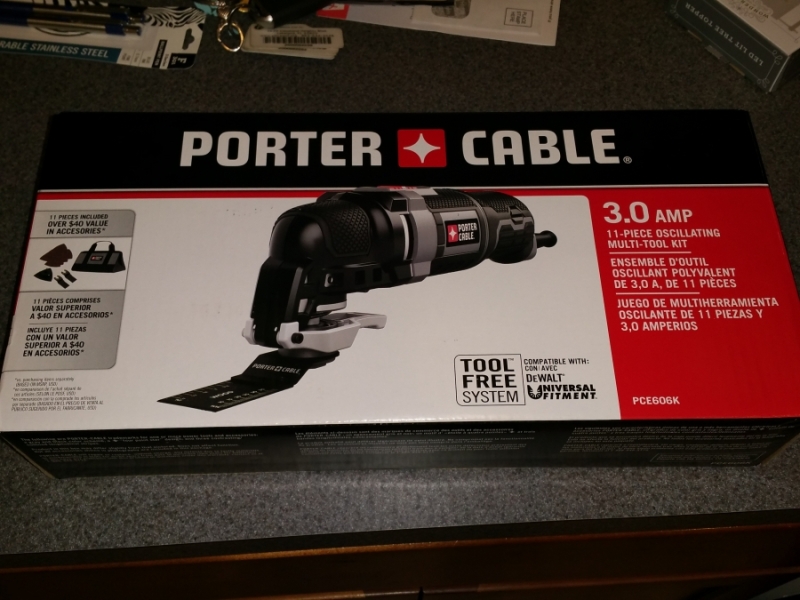
I ran out soon after my last post because I got a email about a sale at Lowes. A little while later I ended up with a new toy for $49
This resin is much slower then I figured so I have to wait a bit longer. I got the medium hardener, it gives me about 12-15 minutes work time, but takes about 6-7 hours to harden. It's been between 72-81 degrees this week so far. I'm glad I didn't option for the slow hardener, but I think the fast might have to little work time so the medium will work out fine.
Since I have some extra time between the resin drying I tackled a small project. Let me start by saying I hate brass drain tubes. I had one on my old gheenoe and it always leaked. I get why they exist, but since we put so much time into our boats why not make a better drain tube? I've done this on my last few boats and it works out great with no chance of leaking around the tube.
I start with a 1" dowel, then sand about 1\16" off so the plug fits well, and because wrapping it in plastic adds thickness back.
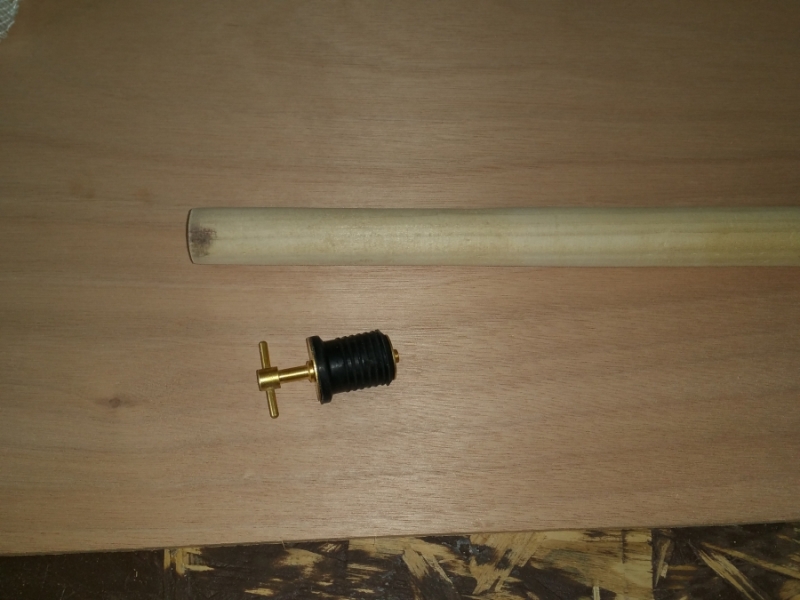
Wrapped in plastic, I only need about a 1.5" section so I make one 4" long with room to trim.
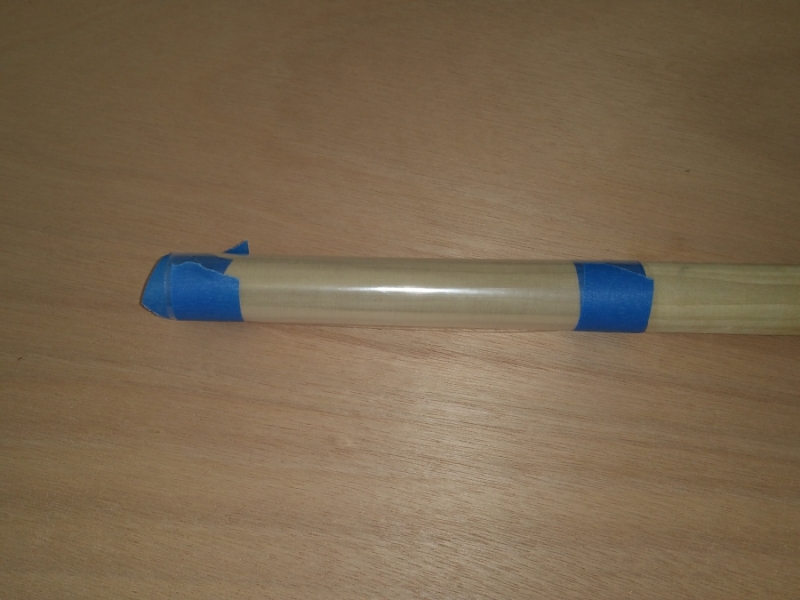
I wrapped the glass around and secured with some tape. I used scraps I had around. I think I ended up with 2 layers of veil cloth, and 3 layers of 9oz cloth.
I wet it out with tinted resin. Since my boat will be ice blue I tried to match it using white and blue tint. Make sure to apply the resin and roll it out the same direction you wrapped it.
Once it's cured and I'm ready for it I will drill an oversize hole and bed it with thickened epoxy. I'll leave at least 1/8" hanging out and sand it flush once cured.
This resin is much slower then I figured so I have to wait a bit longer. I got the medium hardener, it gives me about 12-15 minutes work time, but takes about 6-7 hours to harden. It's been between 72-81 degrees this week so far. I'm glad I didn't option for the slow hardener, but I think the fast might have to little work time so the medium will work out fine.
Since I have some extra time between the resin drying I tackled a small project. Let me start by saying I hate brass drain tubes. I had one on my old gheenoe and it always leaked. I get why they exist, but since we put so much time into our boats why not make a better drain tube? I've done this on my last few boats and it works out great with no chance of leaking around the tube.
I start with a 1" dowel, then sand about 1\16" off so the plug fits well, and because wrapping it in plastic adds thickness back.
Wrapped in plastic, I only need about a 1.5" section so I make one 4" long with room to trim.
I wrapped the glass around and secured with some tape. I used scraps I had around. I think I ended up with 2 layers of veil cloth, and 3 layers of 9oz cloth.
I wet it out with tinted resin. Since my boat will be ice blue I tried to match it using white and blue tint. Make sure to apply the resin and roll it out the same direction you wrapped it.
Once it's cured and I'm ready for it I will drill an oversize hole and bed it with thickened epoxy. I'll leave at least 1/8" hanging out and sand it flush once cured.
Built: 15ft Skiff, 16ft Skiff, Modified Cheap Canoe, and an FS17.
-
silentneko
- * Bateau Builder *
- Posts: 1403
- Joined: Sat Nov 06, 2010 7:10 pm
- Location: Lakeland
Re: The Plytanic 2.0 - FS17 Build
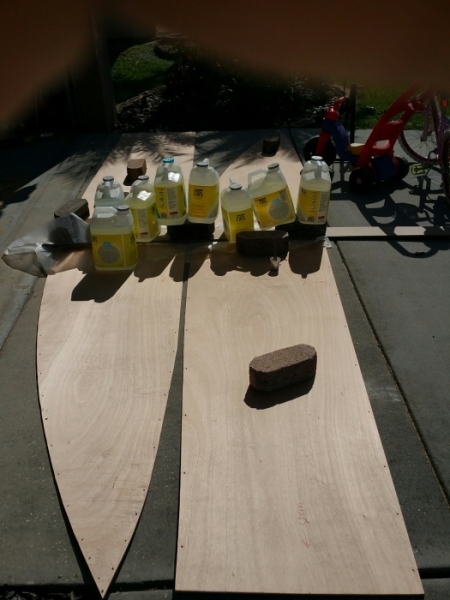
While working on the panels I took some left over resin and applied it to me test pieces. Eventually these may become rod holders and the structure for the leaning post and platform. My concerns about the resin not adding enough depth of color are not as bad as I thought. The curved beam I wish was a bit darker though, but I might just go with it and use some golden varnish on top. I'm not sure if you can tell, but the beam is made of 4 layers, the final product will be at least twice as thick.
Built: 15ft Skiff, 16ft Skiff, Modified Cheap Canoe, and an FS17.
-
silentneko
- * Bateau Builder *
- Posts: 1403
- Joined: Sat Nov 06, 2010 7:10 pm
- Location: Lakeland
Re: The Plytanic 2.0 - FS17 Build
So a moment of triumph has been replaced with.... sometjing else? lol.
I was finishing up bonding the side panels together and noticed things looked a little askew. I pushed on cause it looked close enough. Then I decoded to stitch the hull bottom together as a test fit. Heres where I'm at.
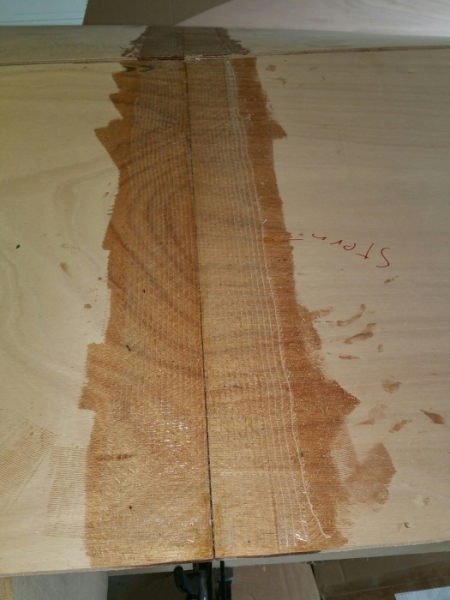
As you can see it's not even close,and this is after I took down the sharp edge that was binding. I rechecked the measurements and everything seems right, But the panels hand off the transom at an angle. I checked the transom and it's square to the frames. I restitched 3 times leaving them loose as can be, even using dowels under the ties to align them. Then I checked out the boards and here is where I found the issue, the sheets of plywood are not square. I checked out some of my remaining sheets and they are slightly off square, and the 8ft side has a dip in it about 1/8". This could be from sitting around my garage while I compiled my errors on the strong back, but they should still be square I would think. Not sure where to go now, knowing the side panels will be off too.
I was finishing up bonding the side panels together and noticed things looked a little askew. I pushed on cause it looked close enough. Then I decoded to stitch the hull bottom together as a test fit. Heres where I'm at.
As you can see it's not even close,and this is after I took down the sharp edge that was binding. I rechecked the measurements and everything seems right, But the panels hand off the transom at an angle. I checked the transom and it's square to the frames. I restitched 3 times leaving them loose as can be, even using dowels under the ties to align them. Then I checked out the boards and here is where I found the issue, the sheets of plywood are not square. I checked out some of my remaining sheets and they are slightly off square, and the 8ft side has a dip in it about 1/8". This could be from sitting around my garage while I compiled my errors on the strong back, but they should still be square I would think. Not sure where to go now, knowing the side panels will be off too.
Built: 15ft Skiff, 16ft Skiff, Modified Cheap Canoe, and an FS17.
Who is online
Users browsing this forum: Ahrefs [Bot], Knottybuoyz and 9 guests