Page 1 of 1
The Plytanic 2.0 - FS17 Build
Posted: Tue Nov 21, 2017 11:47 am
by silentneko
FS17 build, Take 2, lol. As some of you guys know I ran into some trouble building my last strong back and frames. I had something off to where I couldn't line up the stringers correctly. This could be because I tried to modify the stringer height, or transom thickness. Either way it bothered me enough to where I just wanted to start over. I'm going to build the shell to plans then make some modifications after the hull is flipped over.
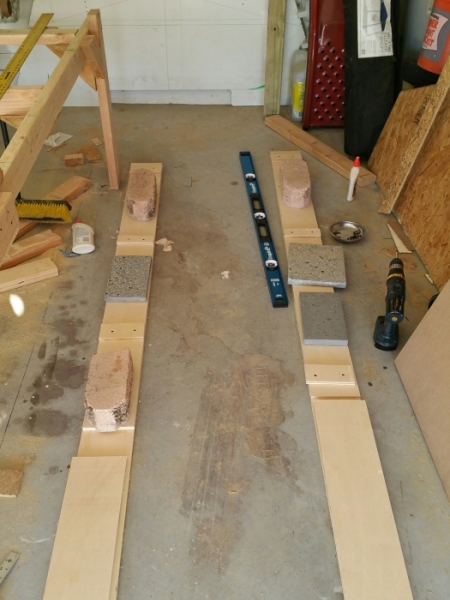
So the last strong back I tried using 2x4x8's as they were the best thing I could find. Even though I leveled and straightened them as best as I could I can't be sure the issue wasn't there. I'm not willing to try that again so I decided to build my own strong back runners.
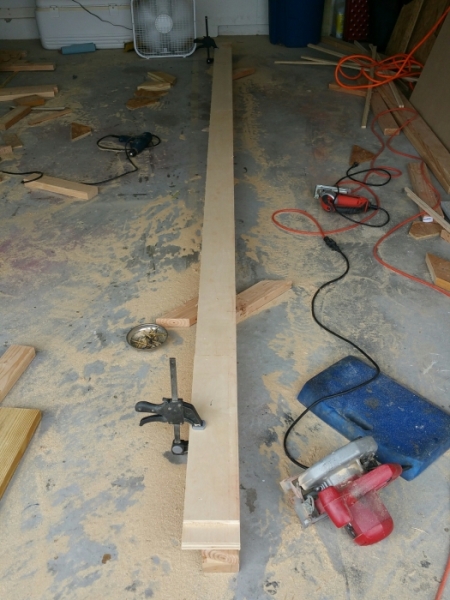
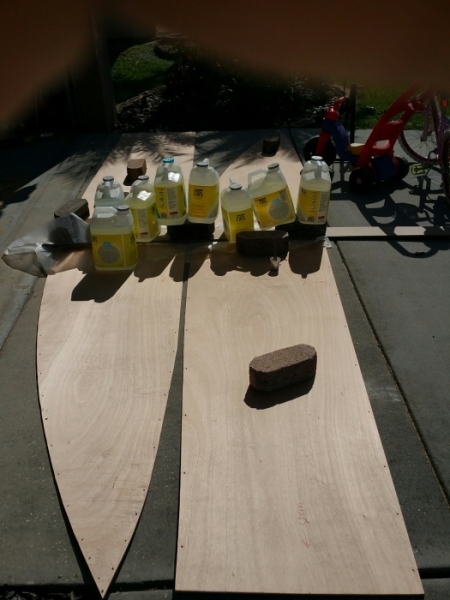
I got a piece of Sanded ply. Cut it into 6" strips and laminated it together.
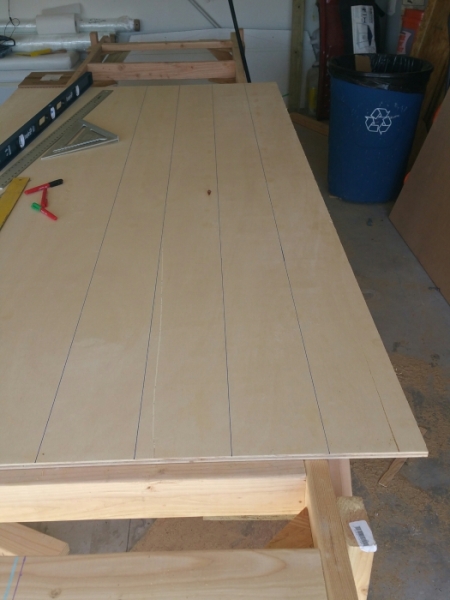
Even after all that I wasn't 100% happy, so I snapped a chalk line and cut them down to 5.5". This is as straight as I can possibly get it!
A couple of notes here. I was amazed how many screws I used building the previous strong back. If you think you have enough, double it.
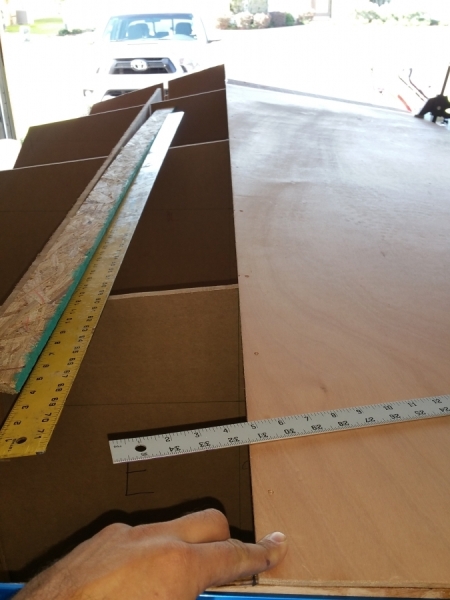
Also I went to go buy one of those big nice drywall squares to cut my new frames with. Well they are pinned together parts to make the 90 degrees, which I don't like, I wanted a one piece tool. I decided to check them prior to buying, and by the time you are 48" out they were at least 3/16" off! I guess drywall doesn't need to be that accurate, but I'll stick to a t-square and ruler.
Re: The Plytanic 2.0 - FS17 Build
Posted: Tue Nov 21, 2017 2:29 pm
by Fuzz
Good move, now you will not have something bugging you in the back of your mind for the whole build. The base for your frames is like the foundation of your house, if it ain't right nothing is right.
Re: The Plytanic 2.0 - FS17 Build
Posted: Tue Nov 21, 2017 3:10 pm
by TomW1
Like all things dry wall squares depend on the pride of the manufacturer. My builder would never allow 3/8" difference over 4' nor would I. There are squares out there that are dead on but you pay for them. When I was laying out my C17 which I never finished I double checked it for square and it was right on, but it cost me $$.
Tom
Re: The Plytanic 2.0 - FS17 Build
Posted: Tue Nov 21, 2017 3:18 pm
by Jaysen
All edges on drywall are covered. And mud covers just able every possible error. So yeah... no need for square.
Re: The Plytanic 2.0 - FS17 Build
Posted: Tue Nov 21, 2017 4:20 pm
by silentneko
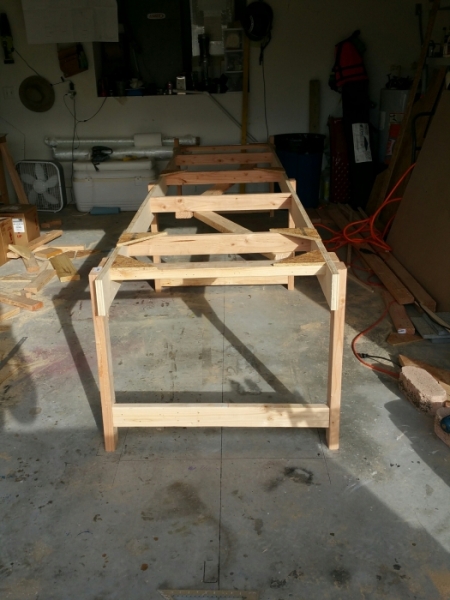
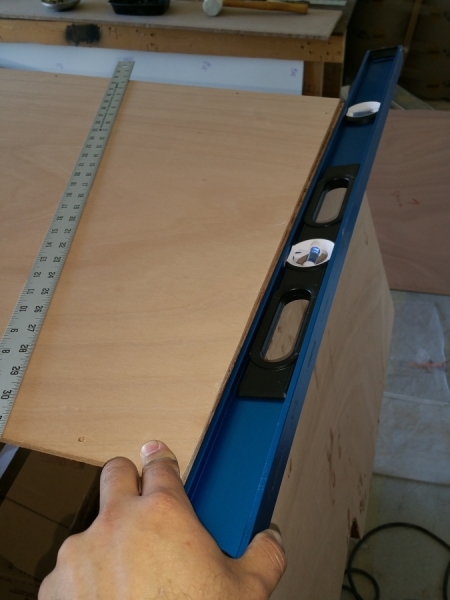
I was hoping to get a lot done today, but the kids are off of school. I did manage to get the strong back finished.
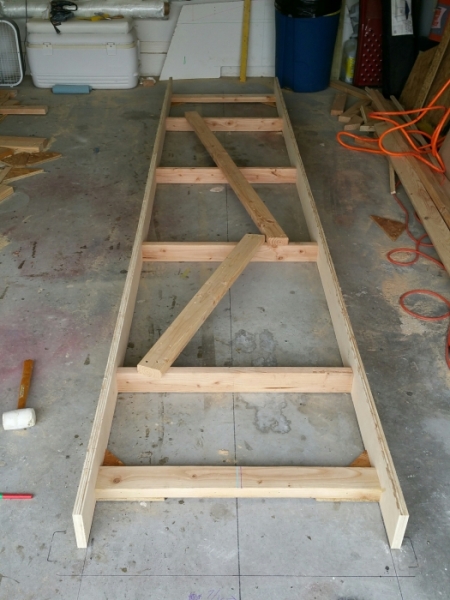
It is square to withing 1/16", and level across 6 fields length wise and 4 across the beam. I don't think I can get it any closer.
Re: The Plytanic 2.0 - FS17 Build
Posted: Tue Nov 21, 2017 4:22 pm
by Jeff
Good work silentneko!!! Jeff
Re: The Plytanic 2.0 - FS17 Build
Posted: Wed Nov 22, 2017 2:56 am
by OneWayTraffic
There’s a trick for right angles on this website. Use a full sheet of ply. Line it up and slide it across the other sheet.
Re: The Plytanic 2.0 - FS17 Build
Posted: Wed Nov 22, 2017 6:56 am
by silentneko
I was trying to do something similar ealier, but I'm out of room. My garage inventory has grown over the years, tools, rolling tool chest, standing saw, work bench..... I under estimated the amount of room the FS17 needed to be built. Not a big deal, I can make it work, but I'm suckling in my gut to get around some places, lol.
Re: The Plytanic 2.0 - FS17 Build
Posted: Wed Nov 22, 2017 8:52 am
by Marshall Moser
You can also use trigonometry as a "square".
A 3"x4"x5" triangle is a right triangle.
Any multiple of this holds true, 6x8x10, 9x12x15, 12x16x20.
Re: The Plytanic 2.0 - FS17 Build
Posted: Wed Nov 22, 2017 9:40 am
by silentneko
I did that to double check my last frames. Mostly I'm using a large framing square (big metal triangle) and a thick ruler, which work out very accurate. I saw a drywall T recommend on one of the old tutorials here so figured I'd try.
Re: The Plytanic 2.0 - FS17 Build
Posted: Wed Nov 22, 2017 2:54 pm
by joe2700
For getting the frames level and aligned on your strongback I find a laser level the best tool. Not sure if you used that the first time or not. There are some perfectly good ones for less than $40. I like the hammerhead on amazon myself. If's a good sanity check that all your measurements are right, because it makes it very obvious when something isn't in line.
Re: The Plytanic 2.0 - FS17 Build
Posted: Wed Nov 22, 2017 6:53 pm
by silentneko
I wish you posted up a bit earlier on. I went looking for a laser level like that, but only found expensive ones so I didn't buy. I used a regular level, plumb bob, and 72" ruller to level everything. I'm fairly certain the frames being out of level wasn't the issue.
Re: The Plytanic 2.0 - FS17 Build
Posted: Sun Nov 26, 2017 1:25 pm
by silentneko
Well a few days ago I decided to stop for the holidays. Originally i was going to work every little chance i could find, but being so I had tume to order that laser level. We will see how it works out. Thanks.
Re: The Plytanic 2.0 - FS17 Build
Posted: Sun Nov 26, 2017 9:42 pm
by silentneko
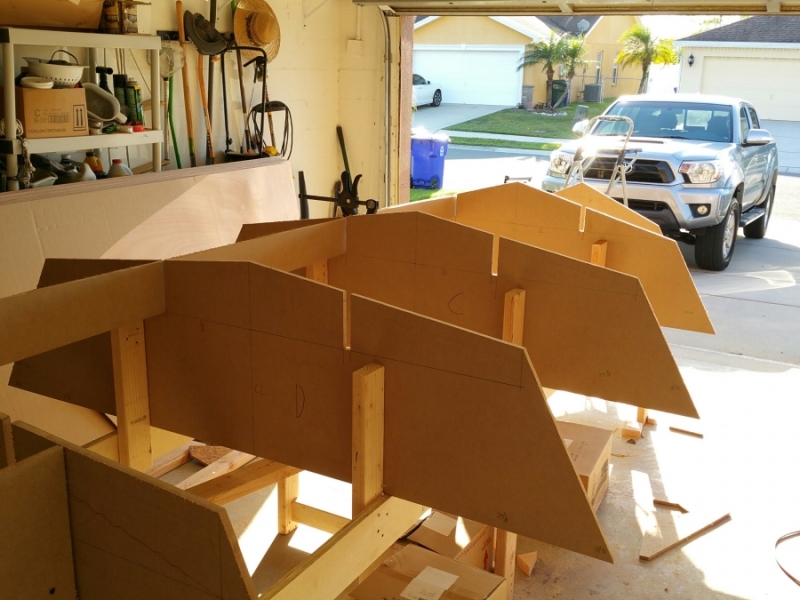
I was able to sneak out to the garage for a bit. I was able to finish cutting out the frames. I forgot how much heavier MDF is then plywood or OSB, and it cuts slower, but it's done.
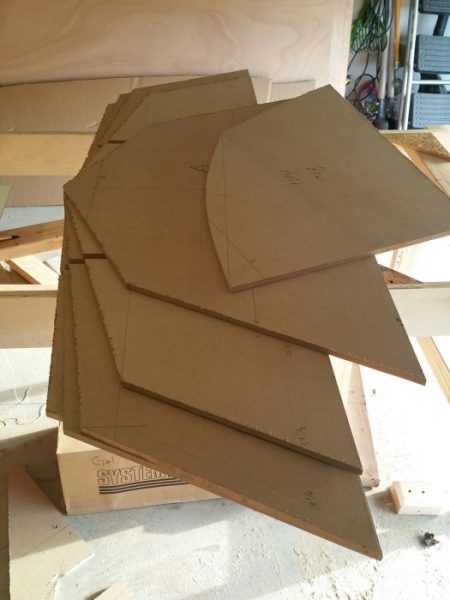
Everything lines up well, like last time
I also cut out the new test stringer. I put the laser level to good use. I know this one is straight and to plans.

I'll be gone the next few days, but hopefully I'll get the frames up by weeks end.
Re: The Plytanic 2.0 - FS17 Build
Posted: Mon Nov 27, 2017 9:24 am
by pee wee
Here's hoping it goes together right this time. Those lasers may not be magic, but they sure make life easier when it comes to alignment and leveling.
Re: The Plytanic 2.0 - FS17 Build
Posted: Mon Nov 27, 2017 9:47 am
by silentneko
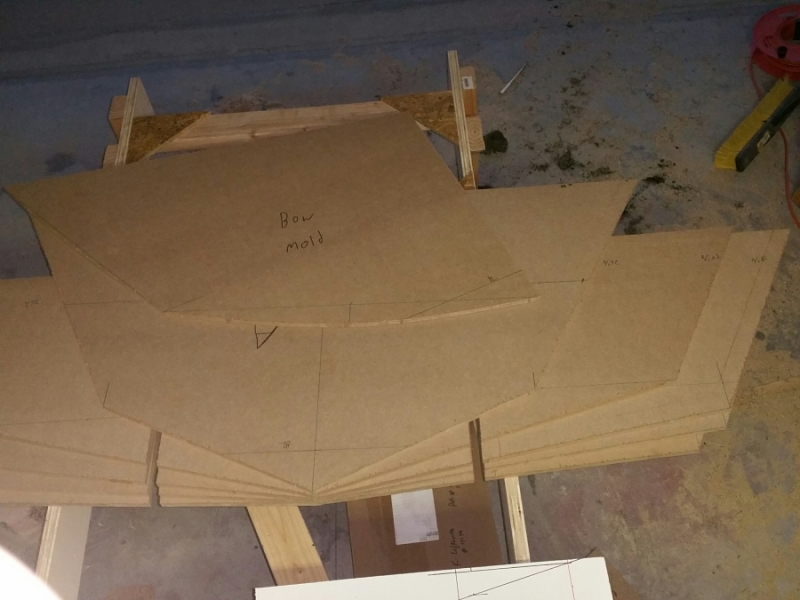
I have to cut out the the motor well sides, then I'll use the laser to realign the strong back, and attach the frames. I already attached the bow mold to frame A so it should go quickly.
Re: The Plytanic 2.0 - FS17 Build
Posted: Mon Nov 27, 2017 10:45 am
by jacquesmm
silentneko wrote: ↑Wed Nov 22, 2017 6:53 pm
I wish you posted up a bit earlier on. I went looking for a laser level like that, but only found expensive ones so I didn't buy. I used a regular level, plumb bob, and 72" ruller to level everything. I'm fairly certain the frames being out of level wasn't the issue.
See this for a very cheap but very accurate waterlevel:
http://bateau2.com/howto/foam3.php
I also use a cheap laser level but the one with the water hose is more accurate and easier to use.
You fasten one of the tubes somewhere (on the wall?) and move around with the other end.
Re: The Plytanic 2.0 - FS17 Build
Posted: Mon Nov 27, 2017 2:47 pm
by cape man
I learned about using a hose level like that during pond construction training as a Peace Corps volunteer . You can level anything as big as the hose will reach. Should have seen the eyes on some of my employees here a few years back when I pulled the trick out of the hat while building a large tank system. Today...I use a laser!

Re: The Plytanic 2.0 - FS17 Build
Posted: Wed Nov 29, 2017 8:45 pm
by silentneko
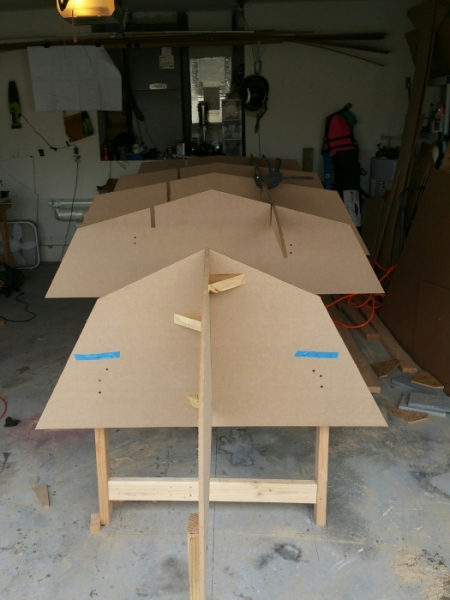
Well I'm basically back to where I was before I started over. I used the laser level to line everything up. I'm not sure if it really made anything easier as it took a while to setup.
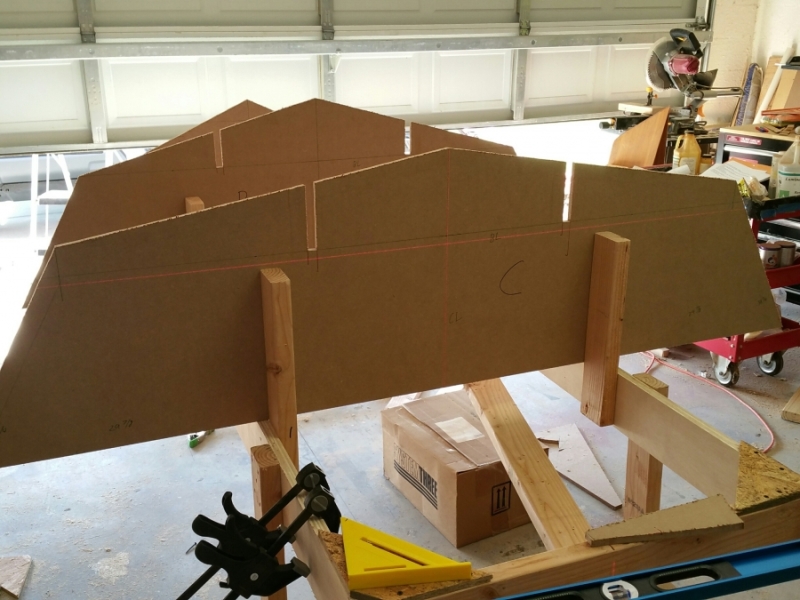
Everything is all lined up and ready for the next step.
Stringers are a little off still, but close enough.
Re: The Plytanic 2.0 - FS17 Build
Posted: Wed Nov 29, 2017 11:34 pm
by TomW1
It looks good from here. Carry on!
Re: The Plytanic 2.0 - FS17 Build
Posted: Sun Dec 03, 2017 2:42 pm
by silentneko
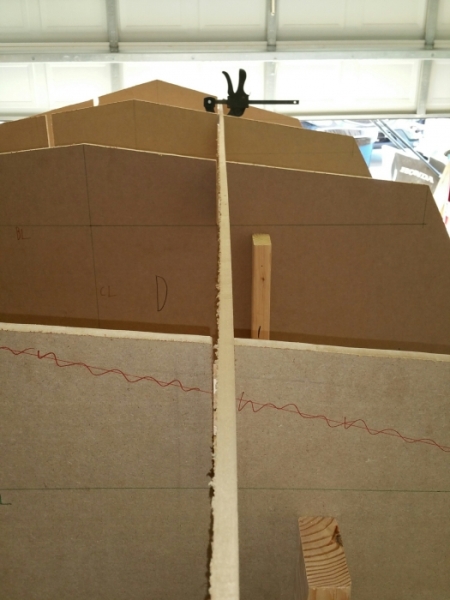
Not to much to report just yet. I cut out the first layer of the transom, but came into some question regarding the size of the clamping board. After some chatting back and forth I determined the best course of action is to go back to my original plan of extending one of the layers to full length, and then making sure the clamping board extends down a few more inches. This should give me more then a big enough clamping board to do what I need and increase the strength of the transom quite a bit.
As far as the stringers are concerned, I'm going to keep them the same for now. I figure moving them up 3/8" will not effect the height much. If it changes the height by 1/64" I would be surprised. I have some days off coming up, it's time to get moving on this.
Re: The Plytanic 2.0 - FS17 Build
Posted: Sun Dec 03, 2017 6:09 pm
by Fuzz
Good move with the stringers. If you really want to raise the deck you can do the dado a 2x thing when you get ready to install cleats. See AA's build where he installs his cleats.
Re: The Plytanic 2.0 - FS17 Build
Posted: Sun Dec 03, 2017 7:31 pm
by silentneko
I'm still planning on stretching them an inch, but I'll build the final stringers after I get the hull flipped and make sure they fit right. For now they are close enough.
Re: The Plytanic 2.0 - FS17 Build
Posted: Tue Dec 05, 2017 3:46 pm
by silentneko
Not to much progress as I slowed down a bit to finish the transom. Unfortunately I'm working in tighter quarters because my garage is loaded down so I have to hurry up and wait for the resin.
Yesterday I cut out the second layer of the transom and the 2 layers for the clamping board using a router so they match closely. Today I am working on laminating everything. I always start with a thin coat of neat epoxy that I let set for at least 20 minutes. I see a lot of guys skip this step and have issues later because the wood soaks up so much and can rob epoxy from glass and other things.
I loaded on the thickened epoxy, spread with a notched trowel and weighed down the clamping boards. I used a mix of wood flour, milled fibers, and silica for the mix. I'll need to do 3 separate bondings to make sure it comes out well. Transom panel to transom panel, clamping board to clamping board, then clamping board to transom. The first two are setting up now.
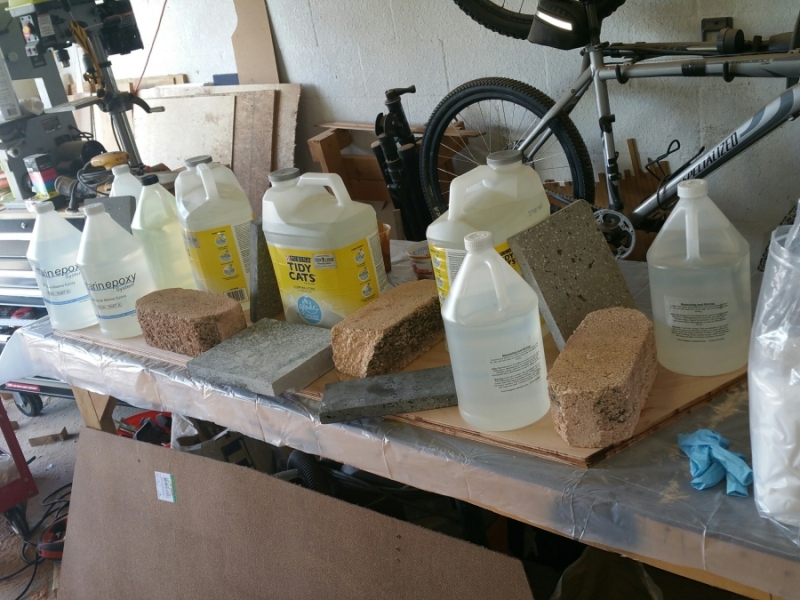
I've never used MarineEpoxy before but seems to work well. My only complaint, and it's minor, is the color of the resin, or lack there of. Both the hardener and base are nearly clear, so when rushing you still really need to pay attention. I'm used to the hardener being honey colored, so I might need to switch back for any bright work I do to get the look I want.
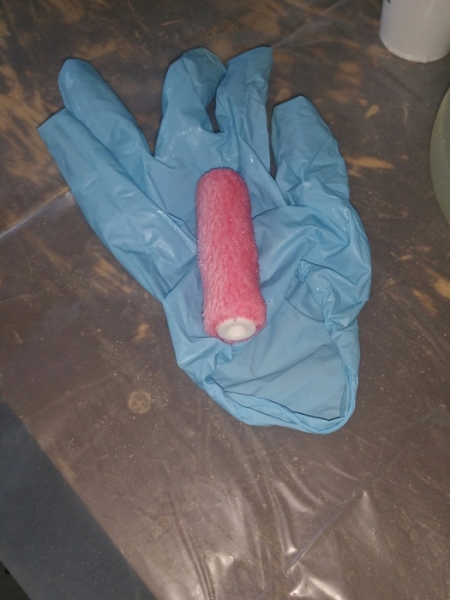
Here's a tip I learned. Always keep your roller or brush until everything is cured. It's a great indicator that everything is going right and lets you quickly see what stage everything is in without putting finger marks in your glass. I just keep mine in the glove I take off, when it's rock solid it goes in the trash.
Re: The Plytanic 2.0 - FS17 Build
Posted: Tue Dec 05, 2017 3:56 pm
by Jeff
Off to a strong start!!!! Happy holidays, Jeff
Re: The Plytanic 2.0 - FS17 Build
Posted: Tue Dec 05, 2017 4:35 pm
by jacquesmm
Corrected: I was wrong when I wrote the comments below. I must have been thinking of another one of my designs.
Silentko is on the right track.
If the pictures show the whole transom, all is fine.
If it is the clamping board, at the top, the clamping board is supposed to be straight across, not follow the shape of the upper part of the transom.
What you did does not hurt but now I understand more about our previous discussion.
I will draw a picture of the clamping board and transom in perspective, that should make it clear.
I need about one hour that.
In the mean time, no worries, you can build the transom the way you did it.
Re: The Plytanic 2.0 - FS17 Build
Posted: Tue Dec 05, 2017 4:52 pm
by jacquesmm
Corrected, see my other posts. The FS17 is designed with a clamp that goes all the way up to the top of the transom.
Here is a drawing of the transom and clamping board (no perspective):
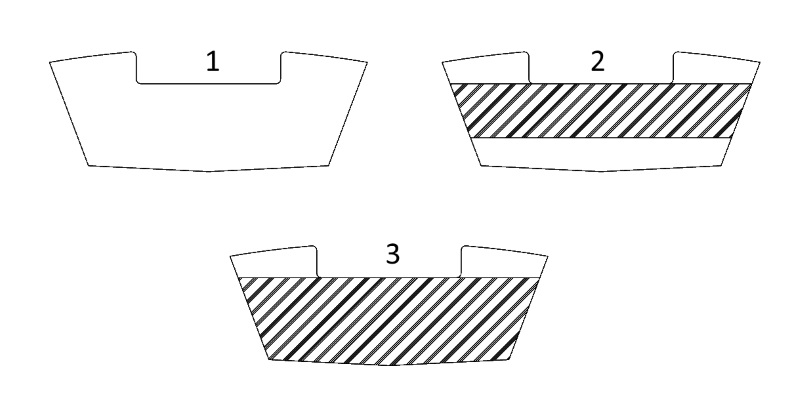
Number 1 is the transom outline, the outside layer, only one layer.
#2 is the designed clamping board, the one shown on the nesting. It has two horizontal straight edges spaced (in this case) 12". You had enough ply for 3 layers like that.
#3 is the the clamping board we discussed, the one that goes all the way to the bottom.
The upper edge of 2 and 3 is the edge of the motorwell, it does not go all the way to the top of the transom.
Now, some builders cut it as #2 and # 3 and go all the way to the top. I don't find it necessary, it's heavy and may cost more in plywood but tecnically, there is nothing wrong with it.
You can proceed with what you have.
From the pictures, it looks like you have at least 12" below the upper edge of the motorwell.
Maybe I misunderstood your description: is it possible that you decided to have 2 transom layers and 2 clamping board layers for a total of 4? The design calls for 1 plus 3, total 4 but it perfectly valid to do 2+2.
In that case, you will have to cut a 3/8" slice off the motorwell sides but that is easy.
Re: The Plytanic 2.0 - FS17 Build
Posted: Tue Dec 05, 2017 4:59 pm
by jacquesmm
About MarinEpoxy, many builders prefer a resin as clear as possible. When you mix, at first the mix will become opaque, after 60 seconds of mixing, it will become clear. Scrape the sides and bottom and be certain to mix enough. No opaque patches should be left in the mix.
Re: The Plytanic 2.0 - FS17 Build
Posted: Tue Dec 05, 2017 5:10 pm
by peter-curacao
jacquesmm wrote: ↑Tue Dec 05, 2017 4:59 pm
About MarinEpoxy, many builders prefer a resin as clear as possible. When you mix, at first the mix will become opaque, after 60 seconds of mixing, it will become clear. Scrape the sides and bottom and be certain to mix enough. No opaque patches should be left in the mix.
I like it as clear as possible also, but maybe for silentneko a drop of brown pigment in the container of hardener is an idea? Or can you only mix pigment after you mix hardener and resin?
Re: The Plytanic 2.0 - FS17 Build
Posted: Tue Dec 05, 2017 5:47 pm
by jacquesmm
You can do that, good suggestion, thank you Peter.
Re: The Plytanic 2.0 - FS17 Build
Posted: Wed Dec 06, 2017 7:49 am
by silentneko
[/quote]I like it as clear as possible also, but maybe for silentneko a drop of brown pigment in the container of hardener is an idea? Or can you only mix pigment after you mix hardener and resin?
[/quote]
It would have to be a translucent tint which is harder to find, but really it's not a big deal. I just like the honey tone it gives to cedar. I'll try the resin on some scrap cedar I have, if it doesn't darken it enough I'll use some left over FGCI resin I have. Thanks.
Re: The Plytanic 2.0 - FS17 Build
Posted: Wed Dec 06, 2017 7:59 am
by silentneko
jacquesmm wrote: ↑Tue Dec 05, 2017 4:52 pm
Here is a drawing of the transom and clamping board (no perspective):
Number 1 is the transom outline, the outside layer, only one layer.
#2 is the designed clamping board, the one shown on the nesting. It has two horizontal straight edges spaced (in this case) 12". You had enough ply for 3 layers like that.
#3 is the the clamping board we discussed, the one that goes all the way to the bottom.
The upper edge of 2 and 3 is the edge of the motorwell, it does not go all the way to the top of the transom.
Now, some builders cut it as #2 and # 3 and go all the way to the top. I don't find it necessary, it's heavy and may cost more in plywood but tecnically, there is nothing wrong with it.
You can proceed with what you have.
From the pictures, it looks like you have at least 12" below the upper edge of the motorwell.
Maybe I misunderstood your description: is it possible that you decided to have 2 transom layers and 2 clamping board layers for a total of 4? The design calls for 1 plus 3, total 4 but it perfectly valid to do 2+2.
In that case, you will have to cut a 3/8" slice off the motorwell sides but that is easy.
Jaques, I don't want to get into a debate on the build thread, but the plans are in conflict with your description of the clamping board. The plans state to use the transom as a guide to trace out the CB layers, and the nesting diagram shows the layers going all the way up to the top of the full transom layer.
You are right, I am doing 2 layers of the full transom, and 2 layers of the clamping board. I feel this made for a much stronger transom, while only adding about 5lbs or so.
I did cut the top edge straight instead of adding a 2" radius. That's because I want my deck flush back there to accommodate a boarding ladder, or power pole micro, I might add. Thanks for the help, the transom is together now and I think it will work out well.
Re: The Plytanic 2.0 - FS17 Build
Posted: Wed Dec 06, 2017 9:38 am
by jacquesmm
You are correct, the plans show the clamping board going all the way up to the top of the transom.
Probably 100 boats were built that way.
Many use a small bracket and in that case, builders have simply built the transom from 4 layers, no clamping board layers.
We built a prototype here in the shop and I have to go back to check on how that clamping board was cut.
Either way is good. For larger boats, 50HP and up, I usually show a thick transom made from all the layers. For smaller boats, if the nesting is tight, only the clamping board has multiple layers and the shape of those clamping boards varies.
In this case, I was wrong about the shape.
To build it as you do, like the plans, allows for for boarding ladders, big U bolts and other fittings,
I will correct my previous posts and sorry for all the confusion.
Re: The Plytanic 2.0 - FS17 Build
Posted: Wed Dec 06, 2017 5:10 pm
by silentneko
It's all good. I think it's all worked out in the end now.
Here is the transom all laminated together. It's pretty stout and once the glass is added I'm sure this thing could handle any power I toss at it.
Here it is clamped in place. I can't imagine getting it more lined up, so I'm happy with it.

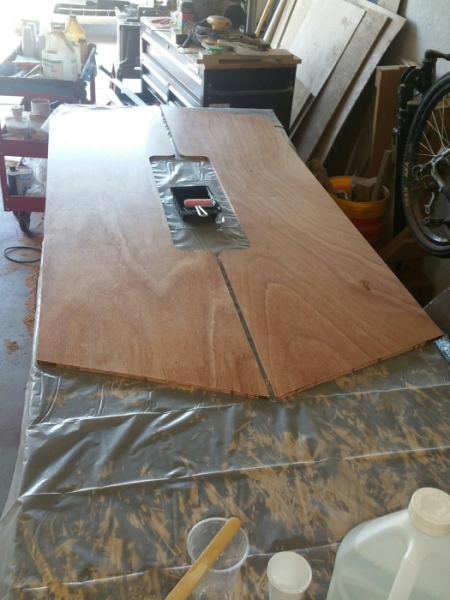
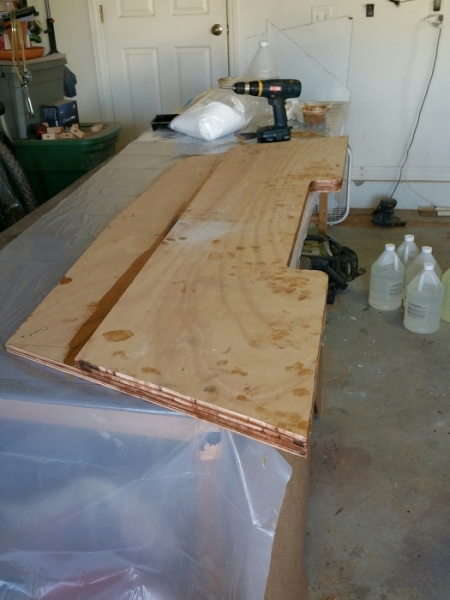
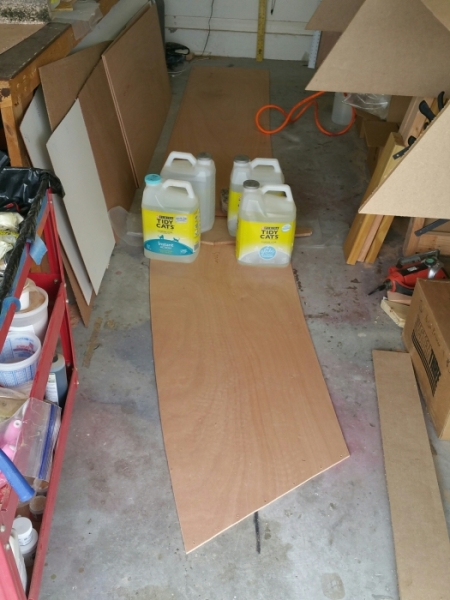
I then got the bottom panels cut out. Unfortunately I ran into a snag here, the plywood warped a bit. I couldn't line up the panel ends well, the best I could do is wet out the Biaxial cloth and weigh it down with a piece of MDF. It worked ok, but I'm not super happy with the results. It will allow me to do the other side well, then I may revisit it.
Re: The Plytanic 2.0 - FS17 Build
Posted: Wed Dec 06, 2017 5:28 pm
by cape man
Bet it will be fine when you flip it over.
Re: The Plytanic 2.0 - FS17 Build
Posted: Wed Dec 06, 2017 6:07 pm
by silentneko
We will see when I get a hard cure. It's flipped, I'm glassing the other side now.
Re: The Plytanic 2.0 - FS17 Build
Posted: Thu Dec 07, 2017 11:00 am
by silentneko
Well you can account for many things, but you can't stop mother nature. It's a wet cool day, but I'm gonna try and push on, just can't work outside of the garage.
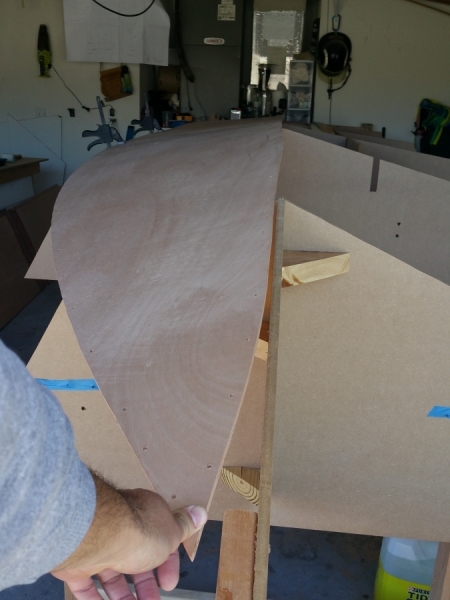
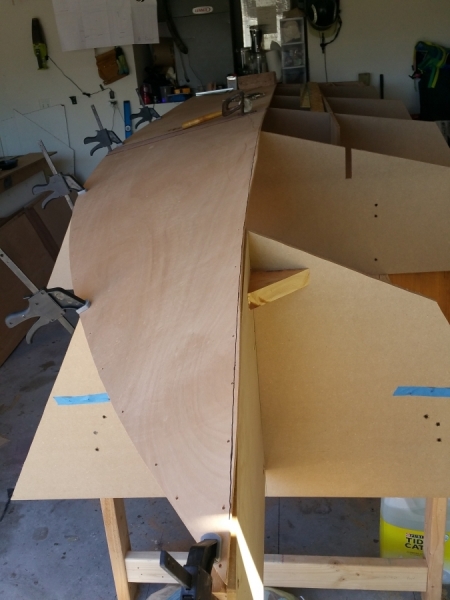
I tossed the bottom panels up. Finally get to start seeing what will be. I've got a pinch point in the keel, I'll just need to smooth is out a little before final stitching.

The first side of glass didn't come out awesome, but it's not the worse either. I'll do an overcoat of neat epoxy to see it it can fill in a few small voids in the weave, if not I'll grind them out later.
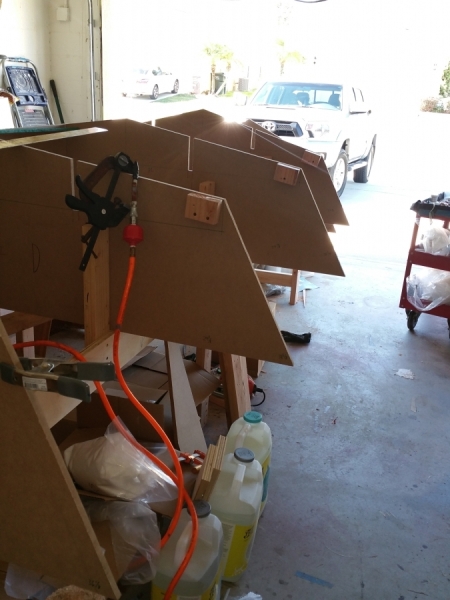
I'm starting to bond the side panels together. I'll have to do it in multiple laminations because of the weather and space available.
I'm going to work on a few small projects just to get ready soon, like the drain tube and rounded live well ends in the next few days.
Re: The Plytanic 2.0 - FS17 Build
Posted: Thu Dec 07, 2017 3:22 pm
by silentneko
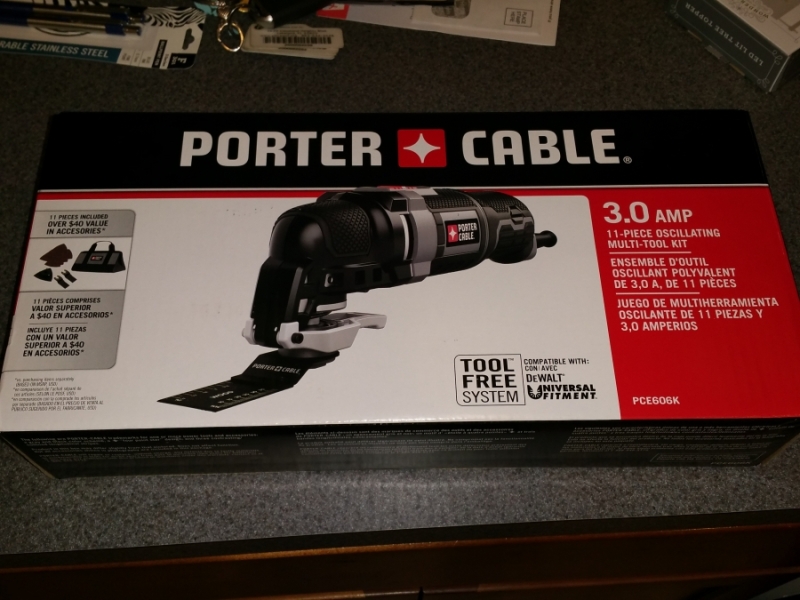
I ran out soon after my last post because I got a email about a sale at Lowes. A little while later I ended up with a new toy for $49
This resin is much slower then I figured so I have to wait a bit longer. I got the medium hardener, it gives me about 12-15 minutes work time, but takes about 6-7 hours to harden. It's been between 72-81 degrees this week so far. I'm glad I didn't option for the slow hardener, but I think the fast might have to little work time so the medium will work out fine.
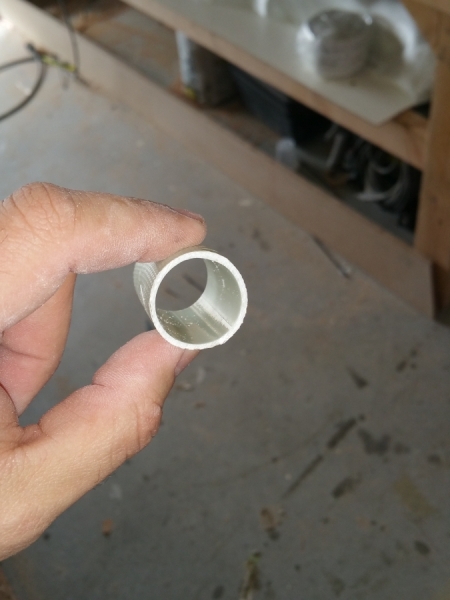
Since I have some extra time between the resin drying I tackled a small project. Let me start by saying I hate brass drain tubes. I had one on my old gheenoe and it always leaked. I get why they exist, but since we put so much time into our boats why not make a better drain tube? I've done this on my last few boats and it works out great with no chance of leaking around the tube.
I start with a 1" dowel, then sand about 1\16" off so the plug fits well, and because wrapping it in plastic adds thickness back.
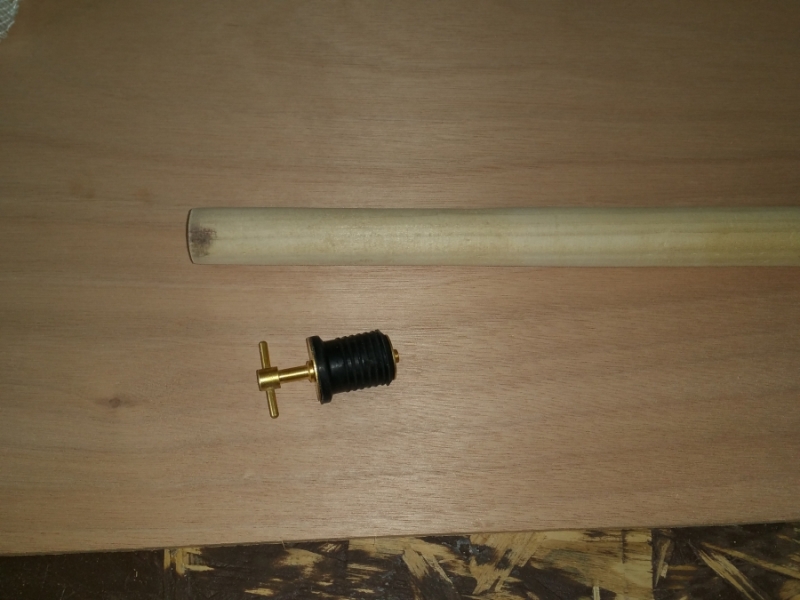
Wrapped in plastic, I only need about a 1.5" section so I make one 4" long with room to trim.
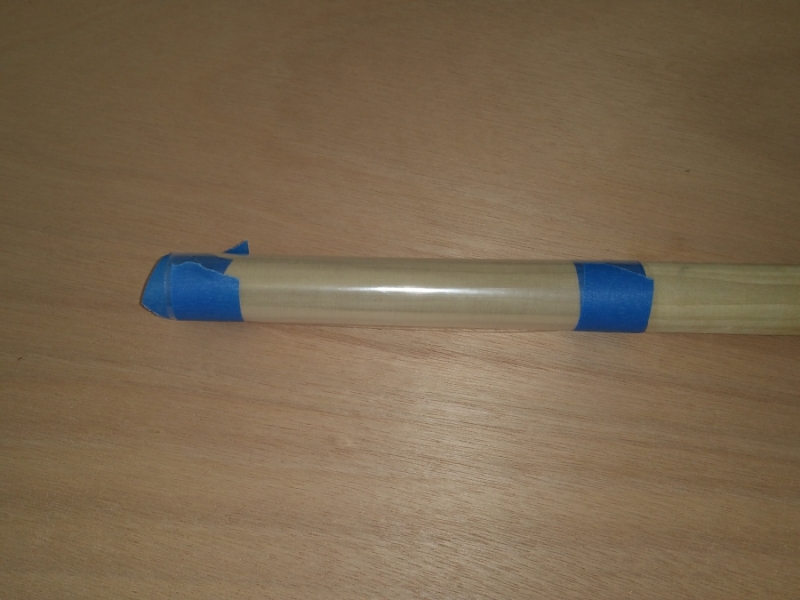
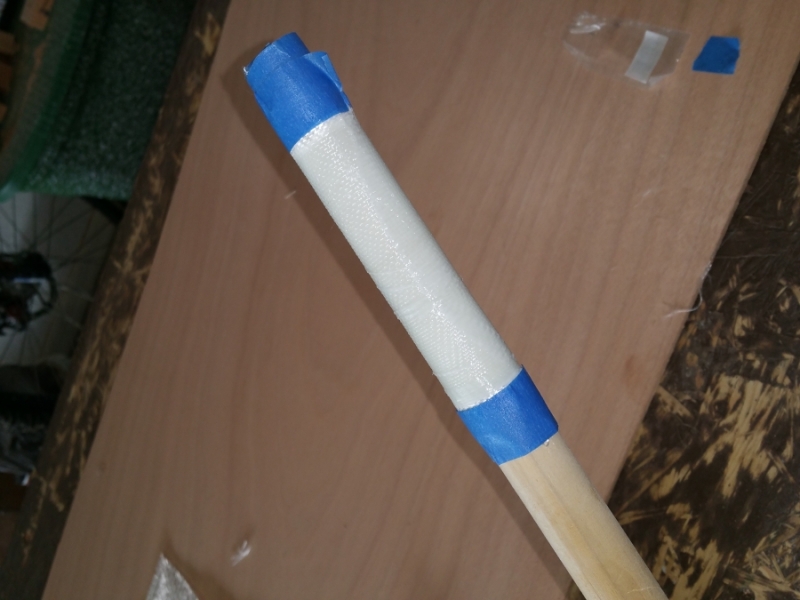
I wrapped the glass around and secured with some tape. I used scraps I had around. I think I ended up with 2 layers of veil cloth, and 3 layers of 9oz cloth.
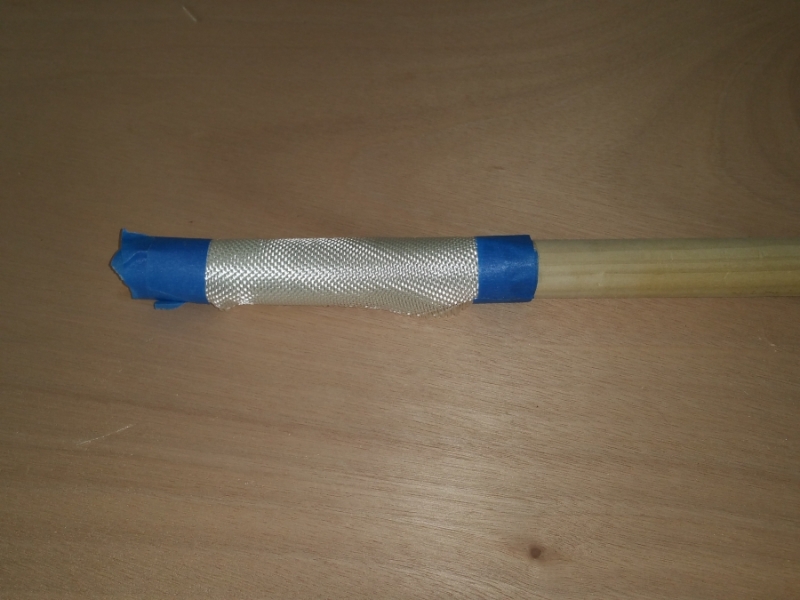
I wet it out with tinted resin. Since my boat will be ice blue I tried to match it using white and blue tint. Make sure to apply the resin and roll it out the same direction you wrapped it.
Once it's cured and I'm ready for it I will drill an oversize hole and bed it with thickened epoxy. I'll leave at least 1/8" hanging out and sand it flush once cured.
Re: The Plytanic 2.0 - FS17 Build
Posted: Fri Dec 08, 2017 1:20 pm
by silentneko
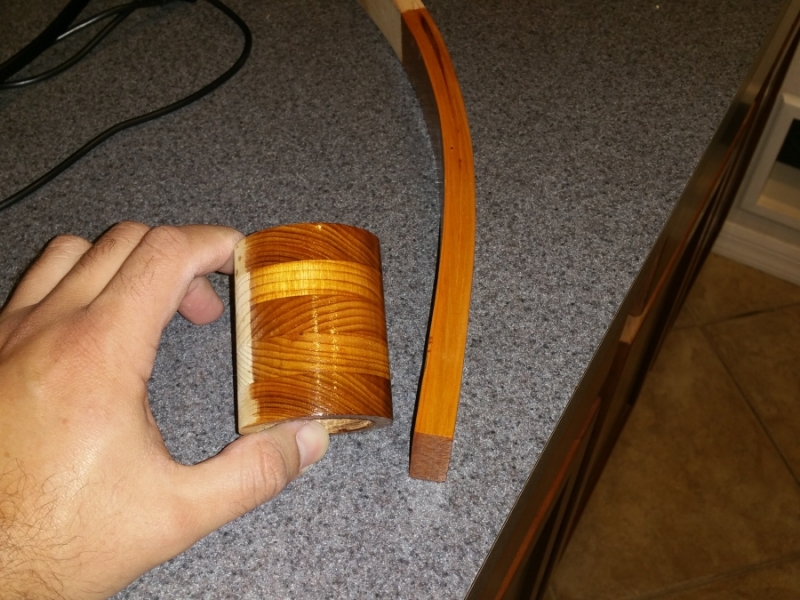
While working on the panels I took some left over resin and applied it to me test pieces. Eventually these may become rod holders and the structure for the leaning post and platform. My concerns about the resin not adding enough depth of color are not as bad as I thought. The curved beam I wish was a bit darker though, but I might just go with it and use some golden varnish on top. I'm not sure if you can tell, but the beam is made of 4 layers, the final product will be at least twice as thick.
Re: The Plytanic 2.0 - FS17 Build
Posted: Fri Dec 08, 2017 2:58 pm
by silentneko
So a moment of triumph has been replaced with.... sometjing else? lol.
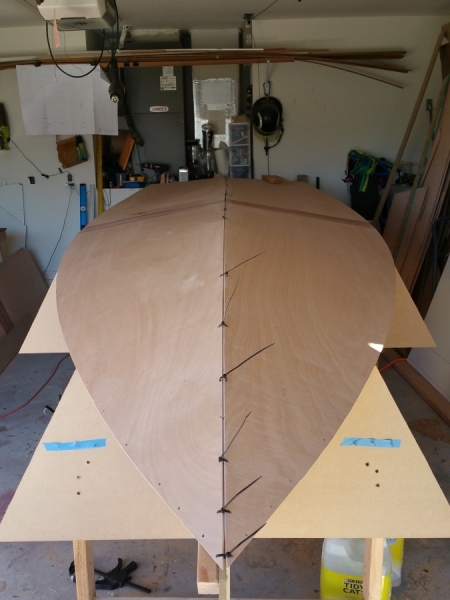
I was finishing up bonding the side panels together and noticed things looked a little askew. I pushed on cause it looked close enough. Then I decoded to stitch the hull bottom together as a test fit. Heres where I'm at.
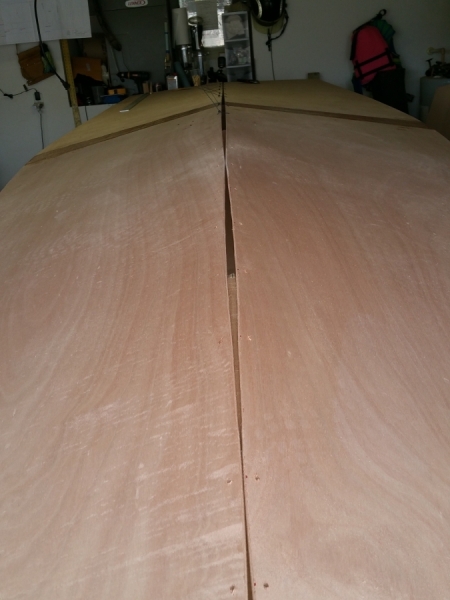
As you can see it's not even close,and this is after I took down the sharp edge that was binding. I rechecked the measurements and everything seems right, But the panels hand off the transom at an angle. I checked the transom and it's square to the frames. I restitched 3 times leaving them loose as can be, even using dowels under the ties to align them. Then I checked out the boards and here is where I found the issue, the sheets of plywood are not square. I checked out some of my remaining sheets and they are slightly off square, and the 8ft side has a dip in it about 1/8". This could be from sitting around my garage while I compiled my errors on the strong back, but they should still be square I would think. Not sure where to go now, knowing the side panels will be off too.
Re: The Plytanic 2.0 - FS17 Build
Posted: Fri Dec 08, 2017 3:47 pm
by narfi
Your panels look symmetrical....
Can you hang your side panels on and see how it looks?
I would think if they look good, then you could grind a little down on the points touching and fill a little extra in the gaps without any real issues?
Re: The Plytanic 2.0 - FS17 Build
Posted: Fri Dec 08, 2017 3:57 pm
by silentneko
They are symmetrical, but the butted joints are just a bit off square. So I squeeze one end and it's way off on the other. Upwards of 3/4". I can reshape them by hand, but then they won't match the framing cause I'll have to grind away a lot. I guess I can just fill it all in with thickened epoxy? Not thrilled about that option though.
Re: The Plytanic 2.0 - FS17 Build
Posted: Fri Dec 08, 2017 4:23 pm
by jacquesmm
Looking at your previous picture with the panels flat on the ground, the picture with the jugs on the tape splice, I see a flat line along the keel side curve.
That is probably a large part of the gap.
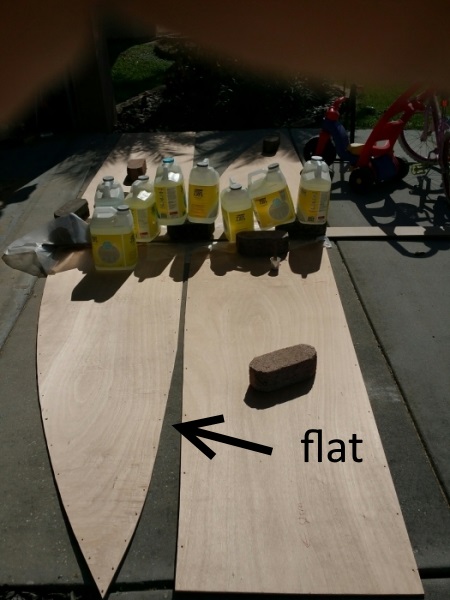
IMHO this is an acceptable gap. I would keep going.
Do not worry about the panels fitting perfectly on the frames. That will happen especially close to the bow. The frames will support the panel but at this point we car mostly about fairness.
Another point to pay attention to is the droopy bow. Pull the tip of the bow back with a line or use a bow mold.
I think I see a bow mold, not certain.
Re: The Plytanic 2.0 - FS17 Build
Posted: Fri Dec 08, 2017 4:35 pm
by Jeff
Build on Silentneko!!!! Jeff
Re: The Plytanic 2.0 - FS17 Build
Posted: Fri Dec 08, 2017 4:36 pm
by silentneko
It looks flat, but it's a subtle curve there. The issue starts further back at the joint of the 2 panels. I can knock down the point a bit more and fit it better. Is it OK to fill in a large gap with epoxy thickened with wood flour and milled fibers? Or will it create an issue later on?
Re: The Plytanic 2.0 - FS17 Build
Posted: Fri Dec 08, 2017 4:58 pm
by Jaysen
I may be slower than a box of rocks covered in molasses sitting on Fuzz’s door step, but I don’t see the problem there. Is it the gap?
Re: The Plytanic 2.0 - FS17 Build
Posted: Fri Dec 08, 2017 5:13 pm
by silentneko
Yes, it's quite a bit more then the 1/4" typically deemed acceptable. It also goes down most of the keel. I can make it work, but it's going to take a significant more amount of resin and filler. I'll have to get some backing under it so it doesn't just fall through. I'm formulating a plan here, lol.
Re: The Plytanic 2.0 - FS17 Build
Posted: Fri Dec 08, 2017 7:28 pm
by Jaysen
Packing tape. Stitch it all together and use some tape on one side to prevent fall out. Use wood scraps to fill really wide spots and then thickened epoxy like normal.
If that didn’t work, quite a number of these boats wouldn’t be floating.

Re: The Plytanic 2.0 - FS17 Build
Posted: Sat Dec 09, 2017 11:12 am
by jacquesmm
Yes it is more than most gaps but it is not a big deal.
If you think that you can solve the problem by trimming the spots where the panels push against each other, do it.
If not, later when you fiberglass the inside, add a layer or two of biaxial tape along that seam, over the gap.
Also, things may even out when you add the side panel.
Re: The Plytanic 2.0 - FS17 Build
Posted: Sat Dec 09, 2017 2:23 pm
by silentneko
I think I'll end up doing both. Reshape a bit, and add some extra cloth on the inside. This is the major hump, once I get past this basic shaping the rest of the build I know will be more fun. I'm even looking forward to fairing to a good work boat finish.
Re: The Plytanic 2.0 - FS17 Build
Posted: Sun Dec 10, 2017 4:32 pm
by silentneko
I was working on the bottom panels, trying to figure out how to correct the issues and realized I have a decent amount of rocker in the transom. Well over 1/8", I can't use the stringers for help because they sit near 3/16" proud on top of that. I tried using a straight edge, but somehow ended up back the same.
I've got a plan to realign the center, but can't proceed until I get this solved. If not my hull bottom will end up being more filler and fairing compound then wood. I haven't even tried the side panels yet as I know they are out of square too. I don't have the stringers in the jig because they are so far off they won't let the bottom panels lay fair. Lol I just need one thing to go right before I snap.
Re: The Plytanic 2.0 - FS17 Build
Posted: Sun Dec 10, 2017 4:59 pm
by jacquesmm
Rocker on the transom? Rocker is longitudinal, I suppose you mean rocker as I show in some of my HowTo files.
1/8 may not be enough.
In the PH16 and PH18, designed 25 tears ago, I put 1/2" of rocker in the plywood.
I don't discuss it often but have said it a couple of times over the years. I put a tiny little bit of rocker in the plywood close to the transom because you will be piling up layer of glass there with the transom fiberglass overlaps, at least 1/8". If it was flat, you would create a hog, the opposite of rocker,
To have a little of rocker there is perfect, it is intentional.
What I did not expect is for people to worry about that 1/8" at the plywood stage.
It is fine, keep going.
Re: The Plytanic 2.0 - FS17 Build
Posted: Mon Dec 11, 2017 6:35 am
by silentneko
Lol, bet you didn't expect to sell a lot of plans to guys with a touch of OCD. Ok, I'll keep going.
Re: The Plytanic 2.0 - FS17 Build
Posted: Mon Dec 11, 2017 11:23 am
by jacquesmm
I am the opposite: very optimistic about gaps. I always think in terms of fiberglass boatbuilding.
The plywood is nice core that provides stiffness and add strength but in a large boat, most of the strength comes from the glass,
Re: The Plytanic 2.0 - FS17 Build
Posted: Mon Dec 11, 2017 12:32 pm
by silentneko
I don't mind if it was a slightly bigger gap in just one area, but the more I dig in the worse it's getting. I've never had so much trouble with any of my previous builds. I bundled up and spent 3 hours freezing this morning trying to figure this out. I installed blocks to secure it in place so I can re scribe the panel, well actually seeing the panel curved showed it was worse then thought.
The major issue isn't what I did, it's that the factory edge on the 1/4" sheet is off nearly a degree. It might be hard to see but here is the gap at the transom. I might have no choice, but to live with. This is with the centerline factory edge lined up, and yes it is symmetrical on both panels.
It's so far off that the bow mold isn't even touching anymore. If I cut it back further so it fits up front the gaps along all the other edges and centerline become more severe. again the problem is the factory edge is off, so If I line up one side of the splice the other is way off. The only solution I can even think of at this point would be to cut the splice apart and reangle it, but I can see that ending up in disaster.
I feel like I've done a lot of complaining thus far and it bothers me because this isn't typical for me. My 3 other builds have been very positive and I apologize to the members here for that, but I'm not sure how to proceed mentally from here after so many hours with no progress.
Re: The Plytanic 2.0 - FS17 Build
Posted: Mon Dec 11, 2017 12:50 pm
by narfi
I think I might see the problem....

- fs17_panels.jpg (304.19 KiB) Viewed 1425 times
The plans show the center-line straight from the transom to where the curve starts.
Perhaps it is a trick of the camera, but both of those pictures show a 'lump' sticking out which I could see causing the issues you are having.
Re: The Plytanic 2.0 - FS17 Build
Posted: Mon Dec 11, 2017 2:50 pm
by silentneko
The panels were supposed to be straight like you discribed, the point is where my curve originated and needed to be smoothed out. Since the panels weren't quite square they curved back towards the center.
I'm working it out. Ready to bang my head against the wall some more, but getting somewhere, maybe. The scary part is I haven't been able to even see how far off the side panels are yet.
So I come in cussing a bit and try telling my wife what's up. She says "you have a good budget, why don't you just go buy a boat and fix it up instead?".......... My response "Damned it Lisa! That's not the point!"
Come Hell or Low water I gotta find a way to make this thing float.
Re: The Plytanic 2.0 - FS17 Build
Posted: Mon Dec 11, 2017 5:06 pm
by Jaysen
silentneko wrote: ↑Mon Dec 11, 2017 2:50 pm
I gotta find a way to make this thing float.
Water will float it.
Don't stress about creating gaps. Just about everything you describe (unless I'm missing something, and I usually am) can be "cut and stretched" with the S&G method used to build these boats. Seriously. If gaps were an issue, Lil Bit would have sunk the first time she got wet. The entire bow is epoxy and filler.
I'd recommend doing what JM said. Loose stitches and get to the point of putting the sides on. Don't worry about transom yet. See how it lines up and determine the action that will get you back on track.
Zip ties are cheap
Re: The Plytanic 2.0 - FS17 Build
Posted: Mon Dec 11, 2017 5:45 pm
by silentneko
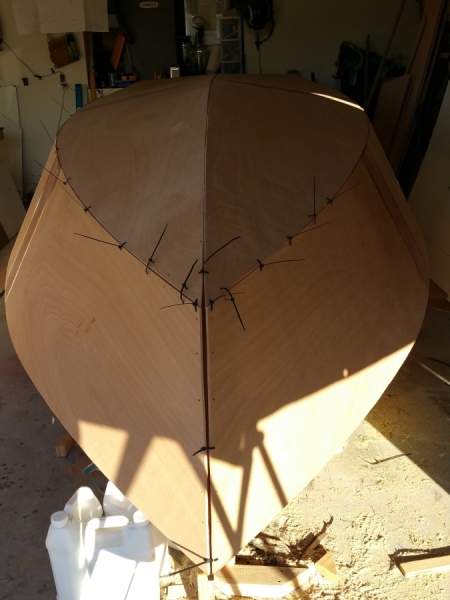
Well it's a Holiday season miracle! I think I actually figured something out here.
After 8+ hours of measuring, screwing, unscrewing, zip tying, cutting zip ties, measuring again, leveling, setting up laser, stitching panels again, scribing, cutting, trimming, sanding, sweating, and bleeding, I think I have it mostly resolved.
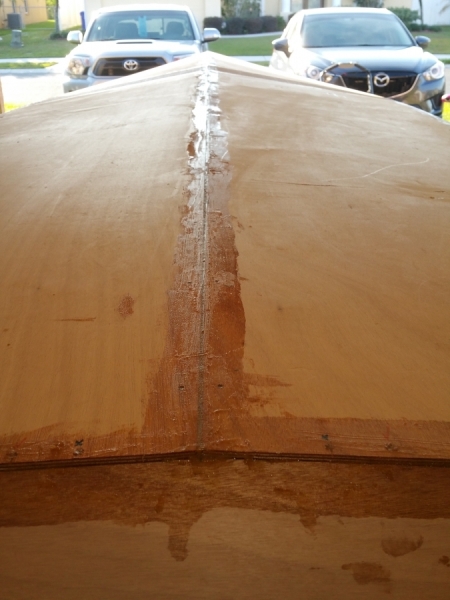
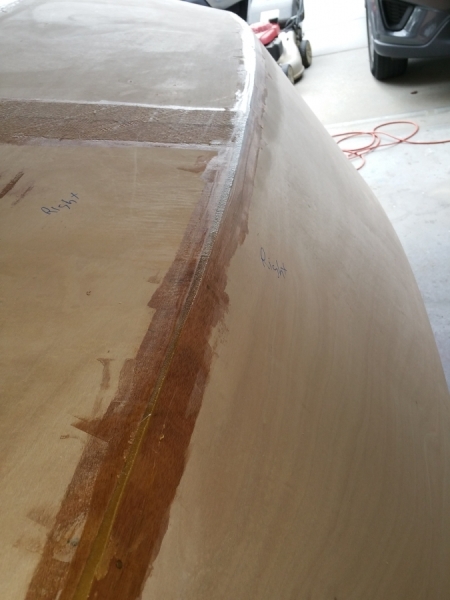
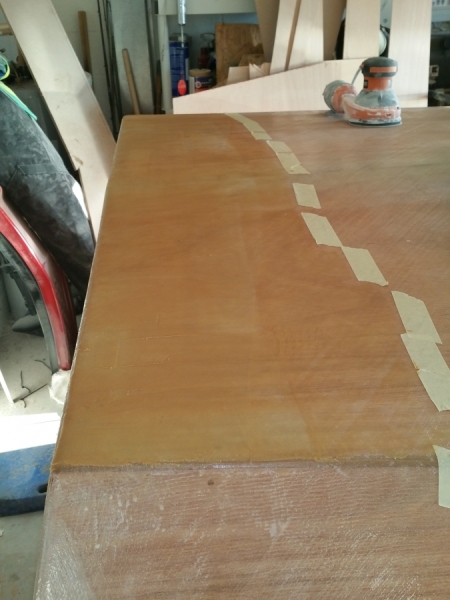
I re mounted the transom where I'm happy with it. Then I took one of the panels and blocked/clamped it in place. Well as close to its place as I could get. I took the laser and set it up on the center line of the jig. The sharpie lines you see are where the laser hit, and go all the way almost to the transom. Reason being I decided I would rather have the gaps on the chine then the keel.
I trimmed and sanded the panels and stitched them back together. They fit well enough, but need some more sanding due to rubbing on the edges. I'll have gaps to fill on the chines and transom edge. It's a good thing I doubled the transom thickness, or part of the bottom panel would be floating in the air.

Re: The Plytanic 2.0 - FS17 Build
Posted: Mon Dec 11, 2017 6:00 pm
by narfi
That looks great!
I am glad you figured it out.
Re: The Plytanic 2.0 - FS17 Build
Posted: Mon Dec 11, 2017 7:46 pm
by Jeff
Mice work Sikentneko!!! Looks really good!! Jeff
Re: The Plytanic 2.0 - FS17 Build
Posted: Mon Dec 11, 2017 8:18 pm
by silentneko
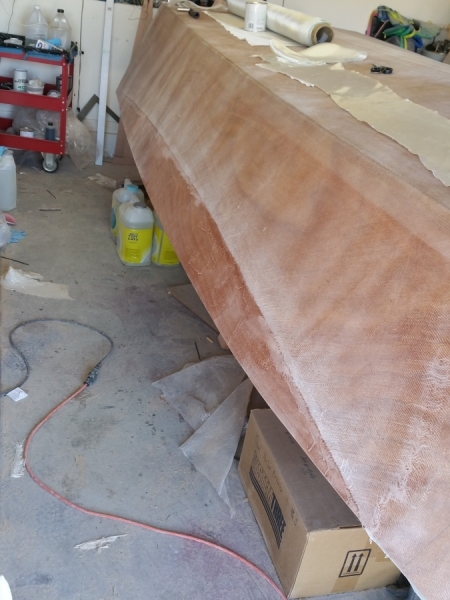
Thanks guys. I tossed on the side panels. I lucked out a bit here because I turned the panels around, the edge that was off kinda canceled out. The sides don't fit to bad, I'll need to make some adjustments though. The boat is a lot bigger now, lol.
Re: The Plytanic 2.0 - FS17 Build
Posted: Mon Dec 11, 2017 10:40 pm
by TomW1
Loosen up your ties at the bow between the bottom and the side, you don't have much gap there. This will let the sides drop down a little and you can reduce the gap between the sides where there is a larger gap near the bottom.
Tom
Re: The Plytanic 2.0 - FS17 Build
Posted: Mon Dec 11, 2017 11:25 pm
by Fuzz
I am sure there is a little fine tuning you can do but it looks good from here. After all the fight you have had I think you are just about ready to glass that puppy

Re: The Plytanic 2.0 - FS17 Build
Posted: Tue Dec 12, 2017 6:13 am
by silentneko
The way it's stitched together is just to see how it lined up and if the sides needed to be cut back. I'm going to take it all apart again and do just a little fine tuning before I finalize it and start bonding everything. It's been a unusually long road to this point, but once over this humpage things will smooth out I think.
Re: The Plytanic 2.0 - FS17 Build
Posted: Tue Dec 12, 2017 7:44 am
by Jeff
Good stuff Silentneko!! You are now on your way!! Jeff
Re: The Plytanic 2.0 - FS17 Build
Posted: Tue Dec 12, 2017 11:59 am
by jacquesmm
It looks really good, keep going.
Re: The Plytanic 2.0 - FS17 Build
Posted: Sun Dec 17, 2017 12:17 pm
by silentneko
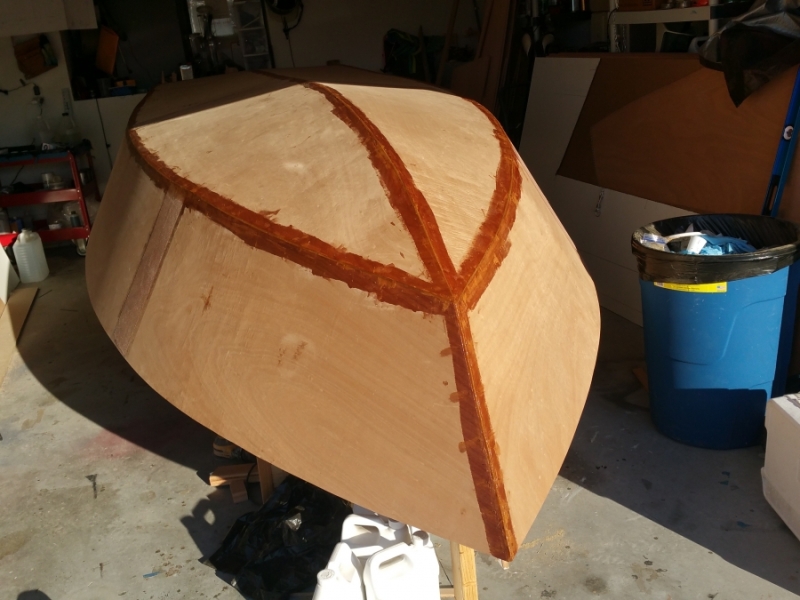
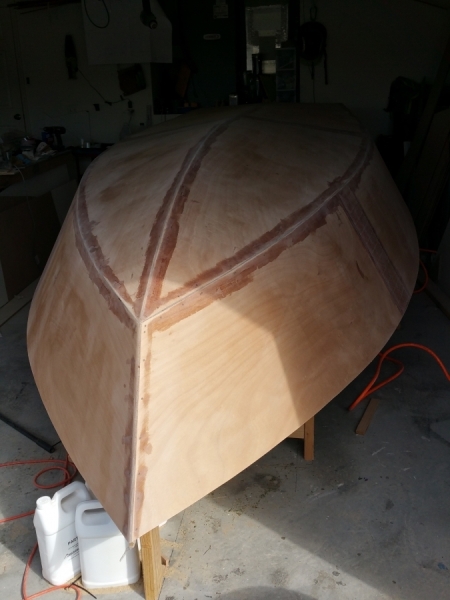
Spent a few days here and there trying to line up the panels a bit better. I've got gaps and some spots that bind a bit, but I decided it's good enough.
I bonded the transom in then I spot welded/epoxied the joints. I started removing zip ties and it began shifting a bit, so I went back and added some more spot welds.

Re: The Plytanic 2.0 - FS17 Build
Posted: Sun Dec 17, 2017 12:29 pm
by cape man
Looking good!
Re: The Plytanic 2.0 - FS17 Build
Posted: Sun Dec 17, 2017 2:46 pm
by jacquesmm
Yes, it looks very fair and smooth.
Re: The Plytanic 2.0 - FS17 Build
Posted: Sun Dec 17, 2017 3:56 pm
by TomW1
You can't get much better than what you have so build on.
Tom
Re: The Plytanic 2.0 - FS17 Build
Posted: Wed Dec 20, 2017 4:39 pm
by silentneko
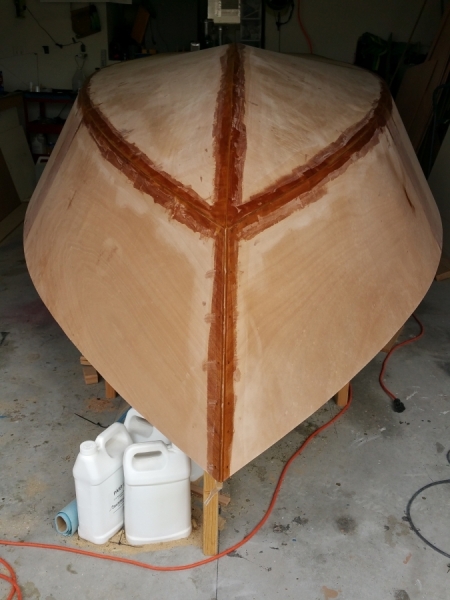
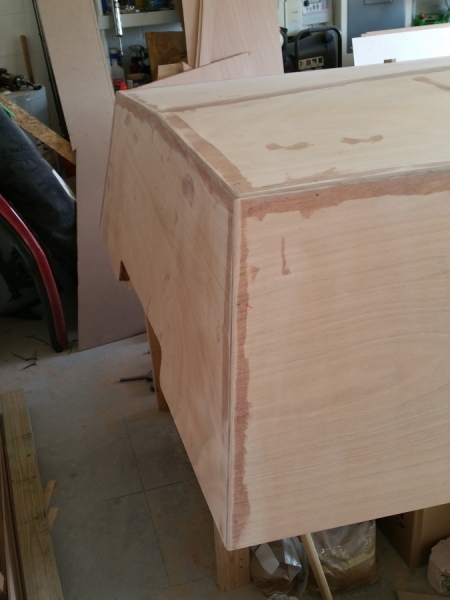
Everything is stable and bonded, so I removed the zip ties and prepared to lay down a bunch of thickened epoxy. You can see how there is a gap in the edge of the transom, I'll have to fill this in along with all the gaps on the sides.
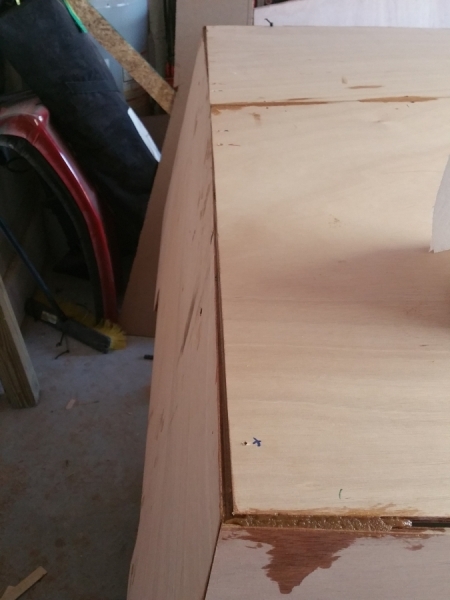
I sanded the hardened spots lightly cause I was over the 72 hour window. Then did 2 passes with thickened epoxy, first just to get a base to build on, and will likely do a third after I sand it to see how even it came out. I also filled the zip tie holes.
Now I know some will say not to bother filling the edges in as much as I am, but I really had to. Because of the alignment issues I had earlier my gaps were uneven to the point that without this step it would be hard to find a registration point to make it all have an even radius.
Re: The Plytanic 2.0 - FS17 Build
Posted: Wed Dec 20, 2017 7:04 pm
by Jeff
Silentneko, looking really good!! Nice progressand happy holidays!! Jeff
Re: The Plytanic 2.0 - FS17 Build
Posted: Thu Dec 21, 2017 5:20 am
by cape man
Good call on getting it so your radius is true. Looks great.
Re: The Plytanic 2.0 - FS17 Build
Posted: Tue Dec 26, 2017 4:41 pm
by silentneko
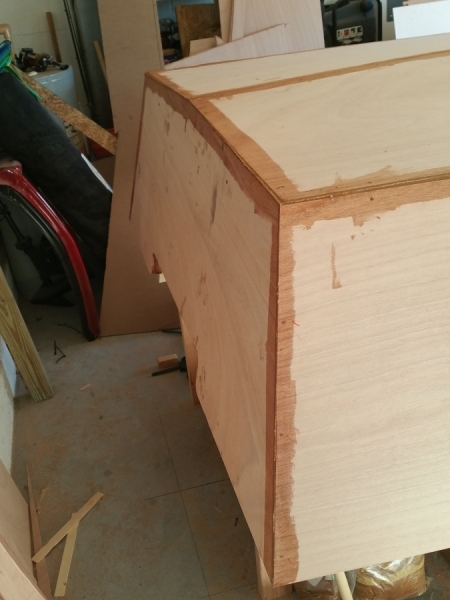
Nothing dramatic to share due to the holidays. I did get out and continue squaring up the corners. It should be ready for shaping when it's cured.
A quick sanding to knock down the high points and then more thickened epoxy applied.
Here you can see I really had to bridge some wide and uneven gaps, but I think the end result is pretty well fared.
Re: The Plytanic 2.0 - FS17 Build
Posted: Tue Dec 26, 2017 6:58 pm
by Jeff
Good progress Silentneko!!! Happy holidays, Jeff
Re: The Plytanic 2.0 - FS17 Build
Posted: Wed Dec 27, 2017 1:51 am
by Fuzz
That is some good looking work. And those gaps are nothing, remember gaps are good.
Re: The Plytanic 2.0 - FS17 Build
Posted: Wed Dec 27, 2017 2:26 am
by narfi
I understand filling the gaps beyond what is needed to sand down to the radius for taping, but what is the benefit of squaring it off first?
How do you plan on doing the radius? Freehand sanding or something fancier?
Re: The Plytanic 2.0 - FS17 Build
Posted: Wed Dec 27, 2017 10:17 am
by jacquesmm
narfi wrote: ↑Wed Dec 27, 2017 2:26 am
I understand filling the gaps beyond what is needed to sand down to the radius for taping, but what is the benefit of squaring it off first?
How do you plan on doing the radius? Freehand sanding or something fancier?
At this point of the building, the edges should be round with a radius of about 3/8".
The reason is that you can't fiberglass over a sharp corener without creating air bubbles, that edge must be round.
Some builders like to make it straight first then grind the edge down. They do that to ensure a nice fair chine.
Later, after the fiberglass, the builder can rebuild a sharp edge but I would not bother. It is only important at high speed. Look at the edges of production boats, they are not sharper than about 1/4" radius.
Re: The Plytanic 2.0 - FS17 Build
Posted: Wed Dec 27, 2017 11:14 am
by silentneko
narfi wrote: ↑Wed Dec 27, 2017 2:26 am
I understand filling the gaps beyond what is needed to sand down to the radius for taping, but what is the benefit of squaring it off first?
How do you plan on doing the radius? Freehand sanding or something fancier?
Thanks guys.
Jacques pretty much summed it up. Because my gaps were uneven I took the time to square up all the edges. If I didn't do this step I would have a wavy chine edge that would require a lot of fairing work on the back end. This way it's straight and strong.
I'll be knocking it all down to a 3/8-1/2" radius. I think the only way to do it is really free hand, because the angle of the edge changes with each inch, especially towards the bow. I might make a little guide piece to check the radiscussion every so often, but you should be able to feel and eyeball it most of the way.
Re: The Plytanic 2.0 - FS17 Build
Posted: Wed Dec 27, 2017 12:50 pm
by poleposition
[/quote]
ll be knocking it all down to a 3/8-1/2" radius. I think the only way to do it is really free hand, because the angle of the edge changes with each inch, especially towards the bow. I might make a little guide piece to check the radiscussion every so often, but you should be able to feel and eyeball it most of the way.
[/quote]
I know several builders have used a brick jointer to form their radii, like this one @ Amazon:
https://www.amazon.com/MARSHALLTOWN-Pre ... GKSJYX2ZMA
Re: The Plytanic 2.0 - FS17 Build
Posted: Wed Dec 27, 2017 1:04 pm
by silentneko
I can see that useful for inside corner fillets, but how would you use it as a Guage on an outside edge?
Re: The Plytanic 2.0 - FS17 Build
Posted: Thu Dec 28, 2017 2:54 pm
by TomW1
After you rebuild your edges up take time to round them over just a little 1/32 to 1/16 so that paint will adhere. Paint doesn't like to adhere to a sharp edge.
Tom
Re: The Plytanic 2.0 - FS17 Build
Posted: Thu Dec 28, 2017 4:16 pm
by silentneko
Tom the sharpened edge isn't for painting, it will be radiused. I gave a better explanation a few posts ago.
I got a few hours in today rounding the edges and fixing a few small things.
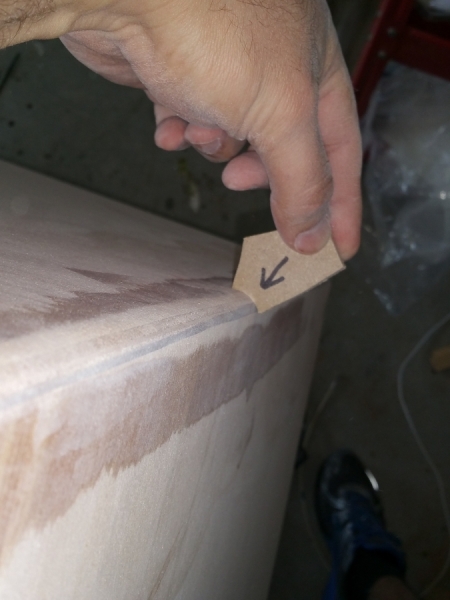
Someone asked how I planned to make the radius. I made a small guide by boring a hole in a scrap of MDF, then made some slices so the are different sizes to use on different angles along the chine.
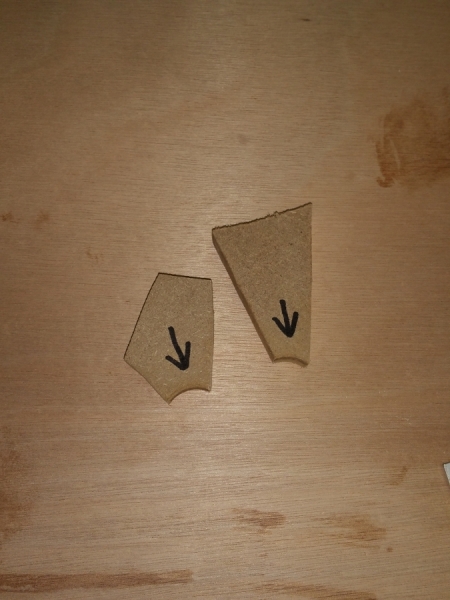
Sand a bit and slide it along the edge to see if you need to sand more in a spot. Don't be super aggressive, I used 80 grit and took my time.
She's about ready for some glass. This is the same radius I on my last boat, but used it with heavier 17oz biaxial. I filled in some pin holes and gouges in the wood, so it's as good as it gets.
Re: The Plytanic 2.0 - FS17 Build
Posted: Thu Dec 28, 2017 4:33 pm
by Jeff
silentneko, Looking really good!! Jeff
Re: The Plytanic 2.0 - FS17 Build
Posted: Thu Dec 28, 2017 5:23 pm
by OrangeQuest
Very well though out and inventive too. Looking good.
Re: The Plytanic 2.0 - FS17 Build
Posted: Fri Dec 29, 2017 6:38 am
by topwater
Looks good glass it

Re: The Plytanic 2.0 - FS17 Build
Posted: Sat Dec 30, 2017 9:31 am
by silentneko
Well we have a house full of sickness, but I managed to get out and do some work. The temps only got up to the low 60's.
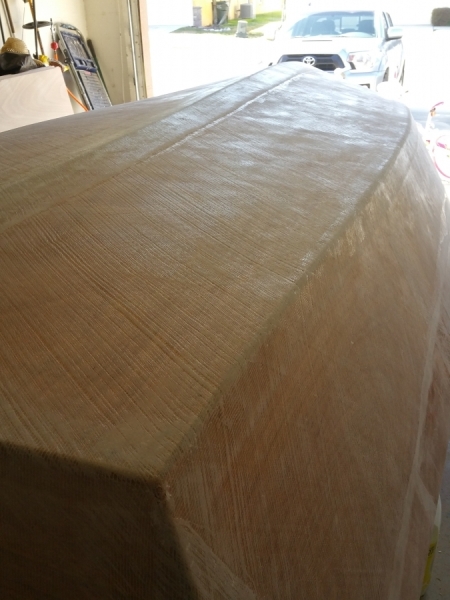
Biaxial tape cut and staged.

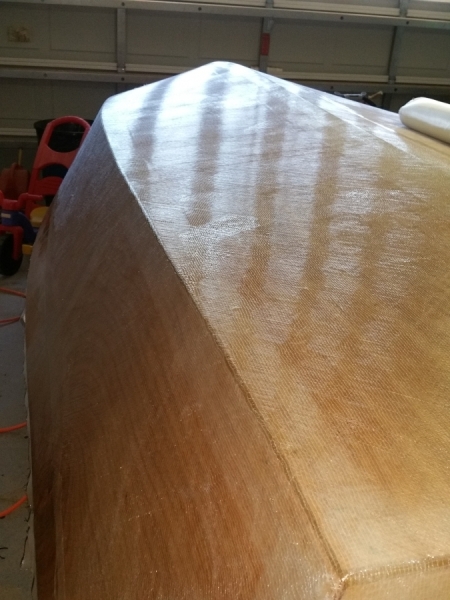
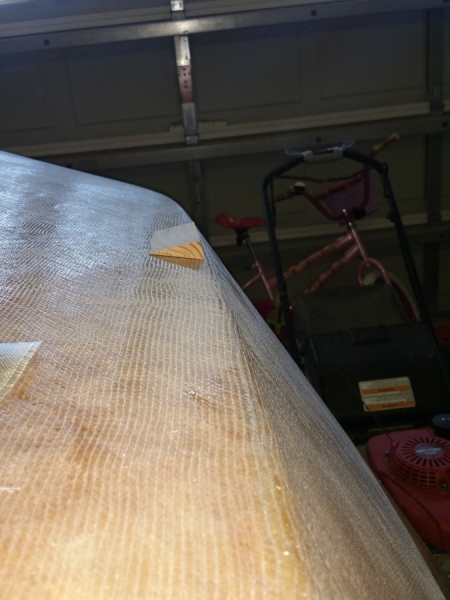
Then glassed.
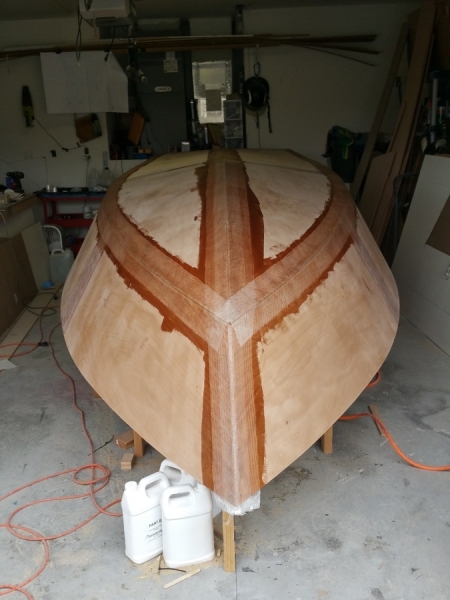
if you noticed I have a heat gun hanging from the garage door opener. This is essentially my ghetto heater. I suspended it away from everything and plugged it into a gfi outlet. I just use the low setting, but that's enough to keep the garage at 70-71 degrees with the door closed. Not a perfect solution, but it's safe and keeps me from buying another one time use item.
Re: The Plytanic 2.0 - FS17 Build
Posted: Sat Dec 30, 2017 10:16 am
by OrangeQuest
Your build is looking great!!
Heat gun....love tools that multi-task!
Re: The Plytanic 2.0 - FS17 Build
Posted: Sat Dec 30, 2017 11:44 am
by Jeff
Nice clean tape work!! Like the idea of using your heat gun to keep warm stable temp!! Hope the family gets better!! Happy New Year!! Jeff
Re: The Plytanic 2.0 - FS17 Build
Posted: Sat Dec 30, 2017 6:48 pm
by Aripeka Angler
That's a nice looking job on your taping.
Re: The Plytanic 2.0 - FS17 Build
Posted: Wed Jan 03, 2018 10:33 am
by silentneko
Thanks guys.
Not much to report, still a bit sick, but it's wet and cold as you all know so I'm not going to open the garage door just yet.
I did however get around to ordering some HBN (white graphite) to do the epoxy graphite coating later on. It's pricy stuff, and even though I still had some black graphite left I didn't feel it would look right on this build.
Re: The Plytanic 2.0 - FS17 Build
Posted: Wed Jan 10, 2018 4:17 pm
by silentneko
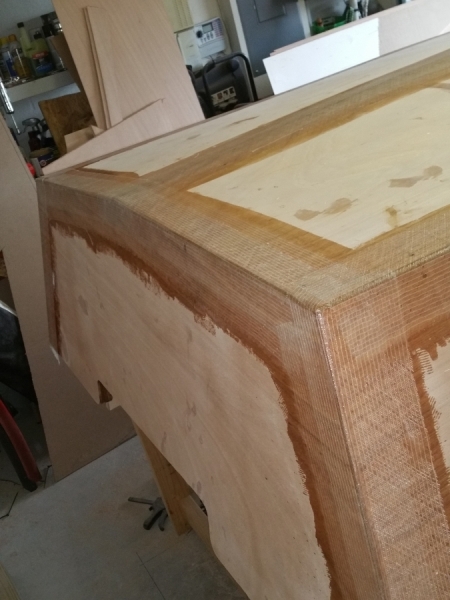
Not much to report. The weather has been pretty bad, just wet and cold, so not much has been done. The problem with building in a small garage is I have to open the door to access the front of the hull. I did get around to sanding the tape down, it's ready for the rest of the fiberglass.
After sanding I applied some neat epoxy over everything. I know it's not needed but I like to fill as many of the small voids as possible. The biaxial has a very wide pattern compared to woven cloth, this will held bonding to the next layer of glass. I'll give it a quick sanding before applying the final biaxial in a few days.
It was cool out today, so after applying the resin I used my happy little heat gun to warm up the garage. Went from 70 degrees up to 81 in about 20 minutes.
Re: The Plytanic 2.0 - FS17 Build
Posted: Wed Jan 10, 2018 4:19 pm
by Jeff
Looks really good!! Jeff
Re: The Plytanic 2.0 - FS17 Build
Posted: Wed Jan 10, 2018 4:42 pm
by TomW1
Looking good guy. Tom
Re: The Plytanic 2.0 - FS17 Build
Posted: Fri Jan 12, 2018 4:21 pm
by silentneko
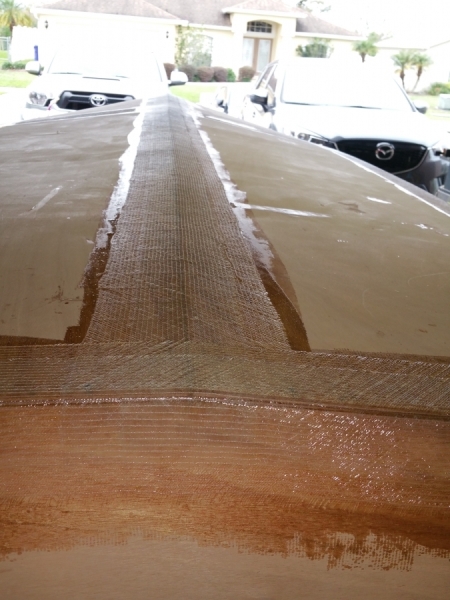
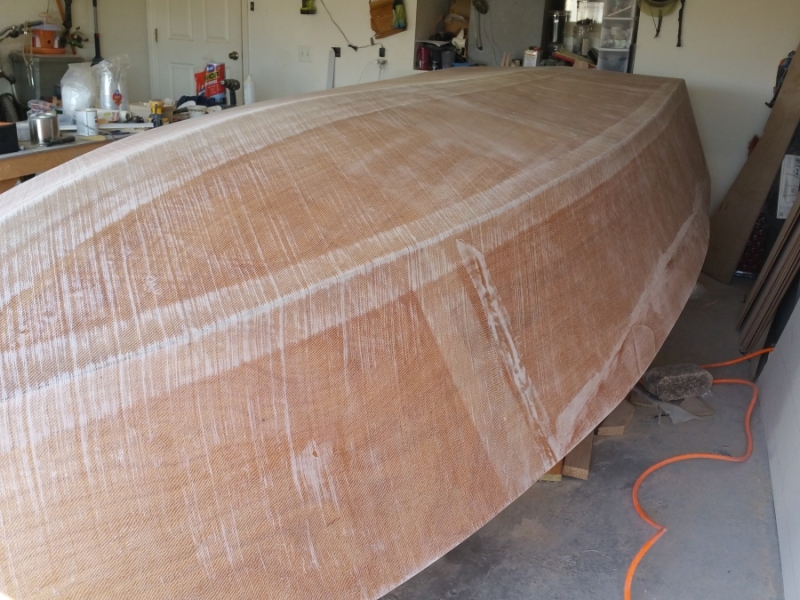
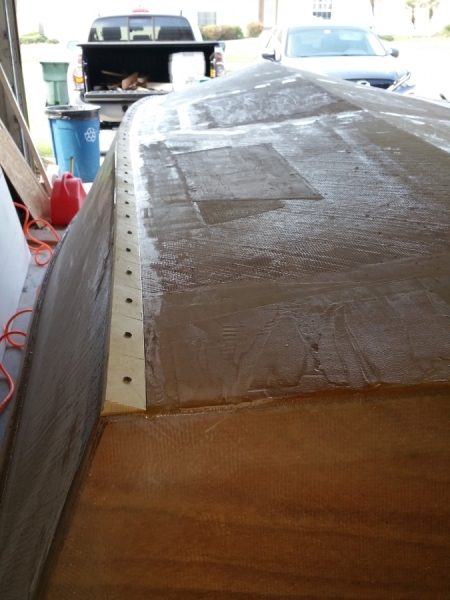
The weather has been crappy lately, but I'm pushing on. I gotta say, biaxial adds some challenges, it's just not as fun to glass as woven and a pain to fair, but I understand it's purpose. That being said it seems to take longer to wet out then cloth does, so I was only able to do half the hull today. I hope to find some time tomorrow to finish, but I'll have to sand the edges again.
Half primed
Half glassed
Re: The Plytanic 2.0 - FS17 Build
Posted: Fri Jan 12, 2018 4:32 pm
by Fuzz
Fine looking half glass job

Re: The Plytanic 2.0 - FS17 Build
Posted: Fri Jan 12, 2018 4:47 pm
by silentneko
To be honest, it's not my best work.
So I have a tip for those of you ordering a large quantity of glass. Either have a helper available when rolling and folding the glass for measuring, or maybe have them split the roll into 2 to make it manageable. The roll of glass is 50 inches wide and weighed like 30+lbs, so it's very awkward for a guy running solo in a cramped garage to move around. I ended up with a bunch of pulls and snags. Not a big deal, but it means some more sanding and touching up later on.
Re: The Plytanic 2.0 - FS17 Build
Posted: Fri Jan 12, 2018 7:41 pm
by Jeff
Maybe so Silentneko, but still nice job!!! Jeff
Re: The Plytanic 2.0 - FS17 Build
Posted: Sat Jan 13, 2018 8:50 am
by topwater
Glass job looks good. How are you putting the epoxy on the glass

Just pour it out and move it around with a spreader and a
roller.
Re: The Plytanic 2.0 - FS17 Build
Posted: Sat Jan 13, 2018 10:18 am
by silentneko
Thanks. I prefer to roll it on a little at a time. I find its wastes less epoxy and I end up with less bubbles. It does take longer this way. Then I roll over it with a glass roller to get rid of as many bubbles as possible. Your still going to have some as biaxial is course and wide compared to woven. Never been a fan of brushes or squeegees.
Re: The Plytanic 2.0 - FS17 Build
Posted: Sat Jan 13, 2018 10:40 am
by Bogieman
She is coming along nice. Your glass work looks really clean.
Bogie
Re: The Plytanic 2.0 - FS17 Build
Posted: Sat Jan 13, 2018 11:17 am
by silentneko
Thanks, I'm trying to only show the good stuff right now, lol.
Re: The Plytanic 2.0 - FS17 Build
Posted: Mon Jan 15, 2018 1:45 pm
by silentneko
Ok so I'll show a little of the not so pretty stuff. Enough pictures of perfectly laid glass, here's some patch jobs I'm doing. According to the plans I only need glass 6" up the sides, well I don't agree with that cause just resin coating can lead to having the wood check later on so I prefer a light cloth to stabilize it. Nearly every inch of my boat will be glassed. That being said, you can see where the biaxial laid after glassing leaving a few areas that have no glass.
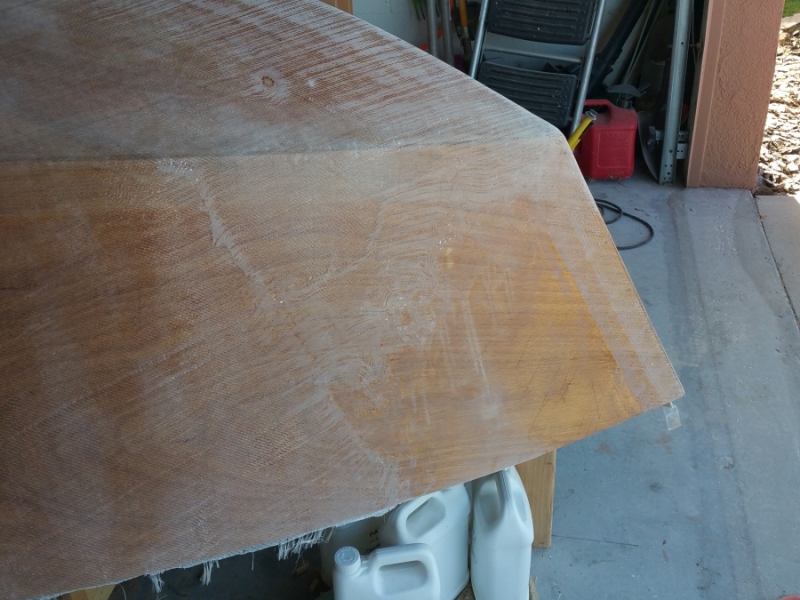
I sanded the edges to everything, then used some scrap 6oz glass cloth I have to cover the remaining areas.
After finished I epoxy primed the other side of the hull. I'll let it set up for a few hours then go put the rest of the biaxial on.
Re: The Plytanic 2.0 - FS17 Build
Posted: Mon Jan 15, 2018 2:13 pm
by jacquesmm
Checking happens with cheap plywood, not with Okume or Meranti, Epoxy coating is sufficient but maybe half the builders prefer to cover the whole outside with glass and I don't see any problem with it.
For larger boats I specify outside glass all the way up the sheer.
Re: The Plytanic 2.0 - FS17 Build
Posted: Mon Jan 15, 2018 2:26 pm
by silentneko
Jacques, the Okoume I got from here is already showing minor signs of checking, and the meranti I got last time checked in a few spots too. Maybe I just have bad luck.
Re: The Plytanic 2.0 - FS17 Build
Posted: Mon Jan 15, 2018 2:37 pm
by jacquesmm
It's difficult to tell from a picture but it's OK to fiberglass all the way up to the sheer. It will also offer some protection against scratches.
Re: The Plytanic 2.0 - FS17 Build
Posted: Mon Jan 15, 2018 4:34 pm
by narfi
silentneko wrote: ↑Mon Jan 15, 2018 2:26 pm
Jacques, the Okoume I got from here is already showing minor signs of checking
I see that on some of mine as well, but I think Jacques is right that epoxy would be enough to stop that, however I also plan to finish up the sides with 6oz.
Re: The Plytanic 2.0 - FS17 Build
Posted: Mon Jan 15, 2018 4:39 pm
by silentneko
That's a gamble I'm not willing to make. If you just seal it in epoxy and it still checks that means you now have to grind off all the paint, primer, fairing material, and then reglass it all so it doesn't happen again. All to save $30-50 in material. Plus with my luck and as much trouble as I'm having with this build, that's exactly what would happen.
Re: The Plytanic 2.0 - FS17 Build
Posted: Mon Jan 15, 2018 6:59 pm
by Aripeka Angler
Nice looking glass and epoxy work Neko! I like your plan to fully glass the hull.

Re: The Plytanic 2.0 - FS17 Build
Posted: Mon Jan 15, 2018 9:10 pm
by Fuzz
I too would glass it all the way to the top. I do not like scabbing a piece in so the next boat I build will have one piece of glass over the whole side. This will leave extra glass but I would carry it over the chine about 6 inches or so. I would end up with an extra layer over the chine but that being a high wear spot makes it a good thing to me.
Re: The Plytanic 2.0 - FS17 Build
Posted: Tue Jan 16, 2018 9:39 am
by silentneko
Hindsight being 20/20 I think I'd sheet the whole bottom and sides in a layer of 6oz. It would cut fairing time in half and not add to much weight.
I thought I ruined a run of biaxial by having to roll and unroll it several times, but I think it will work still. I spent over an hour unrolling and straightening the cloth out. Next build I'll have several extra cardboard tube around to roll up glass after measuring it out.
I'm waiting for it to warm up a bit until I go and wet it out.
Re: The Plytanic 2.0 - FS17 Build
Posted: Tue Jan 16, 2018 11:29 am
by jacquesmm
Do you mean adding a layer of 6 oz. over the biaxial? That is OK but you can't substitute the biaxial with 6 oz.
Professionals use what we call a veil over biaxial: a thin layer of woven cloth like our 3.25 oz, fine weave, to cover the pattern of the biaxial.
Re: The Plytanic 2.0 - FS17 Build
Posted: Tue Jan 16, 2018 2:39 pm
by silentneko
Yes, I mean over coating the biaxial with 6oz woven. I'm not going to do the math, but I bet adding a layer of 4 or 6oz glass then fairing would weigh close to adding all the fairing compound needed to smooth out biaxial.
Re: The Plytanic 2.0 - FS17 Build
Posted: Tue Jan 16, 2018 4:49 pm
by remedy32
When I built my FS17 I had the same issue with just how rough biax comes out, especially the stitches. After doing the chines, keel line and all bulkhead bonding with 12oz biax, I decided to do the bottom itself with 2 layers of 7.5oz woven; one layer fore-aft and the other at a 45deg bias. It's held up just fine and did not require too much fairing material to get it smooth. I ran a single layer to the plan sheerline. I did not glass the 8" sheer bulwark extension and I wish I had. It's Hydrotek Meranti BS1088, epoxy coated, primed and finished in 2 part urethane. It's the only area of the boat with any checking; just fine lines and purely cosmetic but irritating. Boat is going to get a well earned 9 year cosmetic rehab this spring so that will probably be on my list.
I'll glass all the plywood in future like others have said.
Bill
CT
Re: The Plytanic 2.0 - FS17 Build
Posted: Wed Jan 17, 2018 4:55 pm
by silentneko
I'm glad I did it, 6oz glass barely weighs more then a few neat coats so its worth it to me.
Ok so I finished glassing the outside, but if anyone is following the gel issues thread you know I'm having a bubble issue. I'll work that out with the help of a Drexel soon.
Now I have some choices to make on the reverse chines. I need to decide when to bond them and the strakes. I don't like the idea of them bonded to fairing compound, but fairing first is easier since they aren't in the way. If I bond them now it will be stronger, but later will be easier...... decisions....
Re: The Plytanic 2.0 - FS17 Build
Posted: Wed Jan 17, 2018 5:39 pm
by narfi
My thought was do an initial sanding to get knock the lumps and thread off the glass then install the chines and strakes. Fairing will be a little more difficult, but it will be a strong bond this way, and the fairing is more important on the sides than the bottom where no one sees and is covered by thick coats of graphite/epoxy.
I am open to having my mind changed though
Re: The Plytanic 2.0 - FS17 Build
Posted: Wed Jan 17, 2018 9:31 pm
by silentneko
No need from my end, as that's the direction I'll most likely be going.
Re: The Plytanic 2.0 - FS17 Build
Posted: Thu Jan 18, 2018 5:51 pm
by silentneko
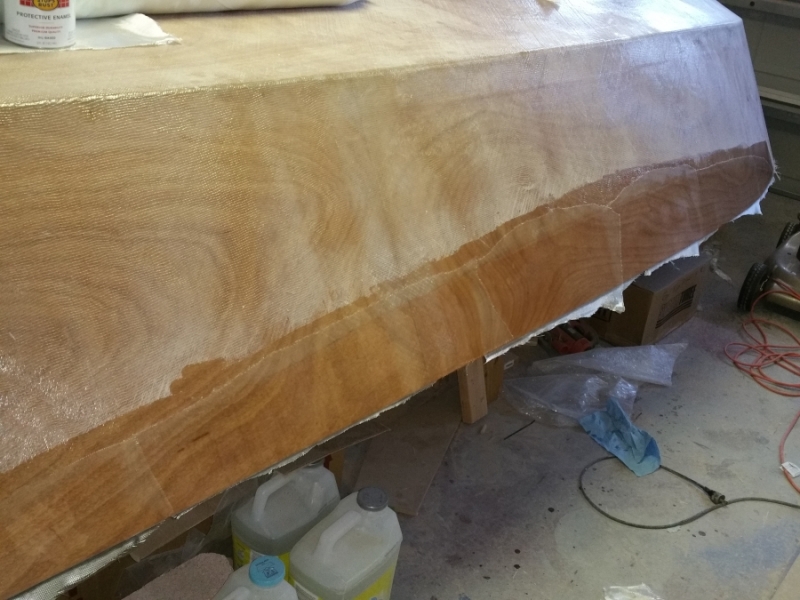
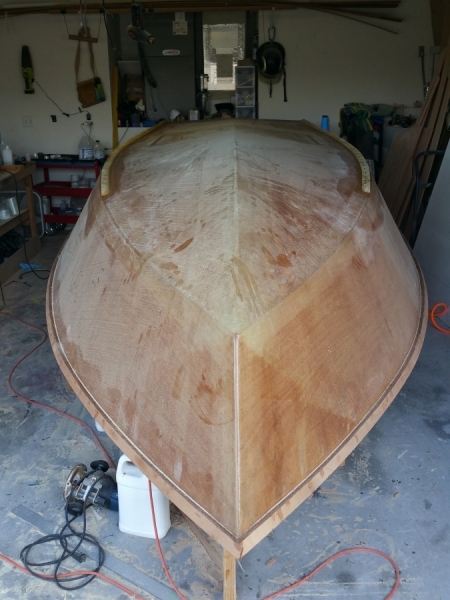
So I'm done glassing the bottom, I have a few spots to fix but nothing major. I do have a little bit of a droopy transom, I'll check it over in the next few days and I may need to add a small layer towards the back foot or so to bring it up a bit. Not a big deal.
So I'm working on figuring out my reverse chine shapes and angles. The biggest issue is the changing angle at the chines. I think I have it figured out though. I'll mount them, then use a small amount of fillet material to fill the gap so the hull side angle is consistent. Here were the first few I tried. 1" tall and 3/4" tall x 1.5" wide. Not bad but, I don't think they fit right.
I then tried 3/4" tall by 2" wide, and I think this looks much better. I believe this would be plenty to deflect any spray under normal runs, anything nasty enough to get past these I'm probably getting wet anyways right, lol.
I plan to start then a few feet back from the bow and run them to the rear. I need to decide what wood to build them out of. It needs to be flexible enough to make the curve, and also solid enough to not crack when I drill holes to keep it in place. I'd rather stay away from pine, and hard woods won't make the curve easy, so I'm thinking I'll just use some cedar.
Re: The Plytanic 2.0 - FS17 Build
Posted: Thu Jan 18, 2018 5:57 pm
by Fuzz
I agree the last shape looks much better. Might even want to try one a little flatter and see how you like that.
Re: The Plytanic 2.0 - FS17 Build
Posted: Thu Jan 18, 2018 6:07 pm
by silentneko
Once I round over the top it will look more pleasing to the eye I think.
Re: The Plytanic 2.0 - FS17 Build
Posted: Thu Jan 18, 2018 7:01 pm
by narfi
How does it look with the square corner against the chine?
Re: The Plytanic 2.0 - FS17 Build
Posted: Thu Jan 18, 2018 8:43 pm
by silentneko
Not as good, and I'd end up shaving off a lot of the height to get it smooth with the sides.
Re: The Plytanic 2.0 - FS17 Build
Posted: Fri Jan 19, 2018 4:56 pm
by silentneko
It's getting time to start a ton of sanding, and I'm already itchy. I have an old shop vac, and an old orbital sander......why not duct tape them together? Well Gorilla tape at least and a few zip ties.
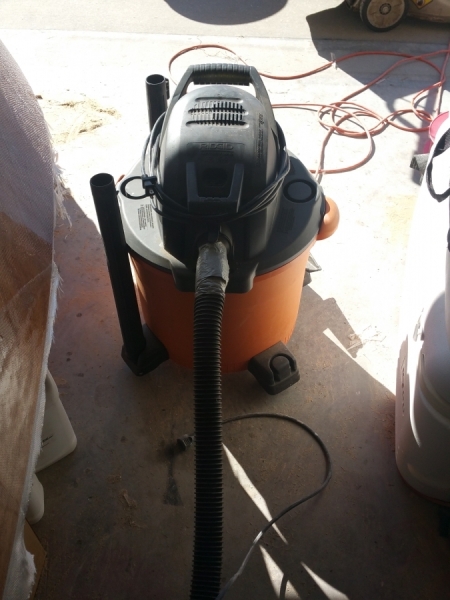
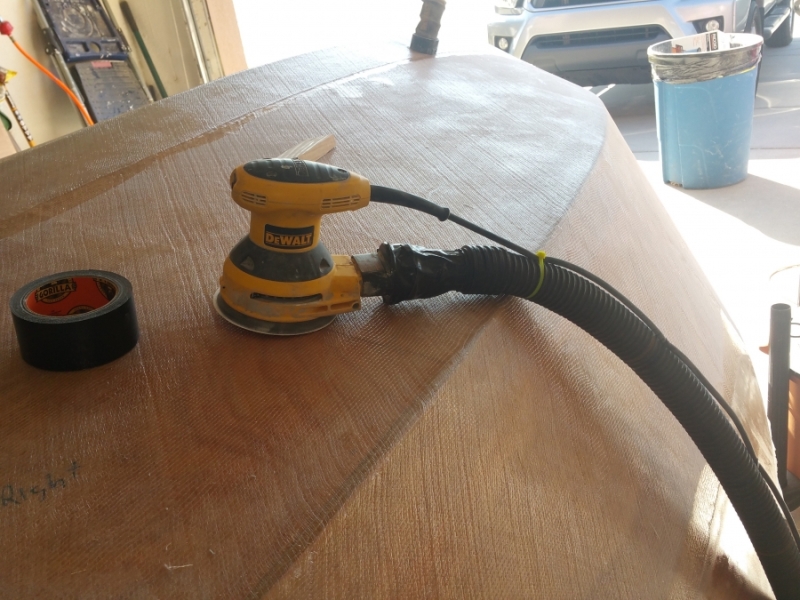
Seems to work pretty good and should greatly cut down on the dust.
I also fixed up most of the air bubbles I had. I ground them out with a dremel bit, then went over them with a mix of epoxy and milled fibers.
Re: The Plytanic 2.0 - FS17 Build
Posted: Sat Jan 20, 2018 1:12 am
by Fuzz
Not sure how flexible your hose is but there is an orange hose for that vac that is pretty flexible. It might make things work a little easier for you. Anything you do to catch the dust from the start will be a big help.
Re: The Plytanic 2.0 - FS17 Build
Posted: Sat Jan 20, 2018 7:33 am
by Browndog
My sanders just blow dust everywhere. I do a lot of vacuuming after the fact. Every so often, I open the garage door and use the leaf blower to blow it away on to the gravel driveway. Sanding is my least favorite part of boat building. Have at it. Use whatever you can that makes dust reduction/collection easier. Always use a mask or respirator if you got one.
Re: The Plytanic 2.0 - FS17 Build
Posted: Sat Jan 20, 2018 8:18 am
by Noles309
silentneko wrote: ↑Fri Jan 19, 2018 4:56 pm
It's getting time to start a ton of sanding, and I'm already itchy. I have an old shop vac, and an old orbital sander......why not duct tape them together? Well Gorilla tape at least and a few zip ties.
Seems to work pretty good and should greatly cut down on the dust.
I did the same exact thing. It really makes a huge difference.
Re: The Plytanic 2.0 - FS17 Build
Posted: Mon Jan 22, 2018 8:55 pm
by silentneko
So the good news is duct taping the shop vac to the sander seems to work really well. I sanded for section tonight and there was barely any dust. I would say it reduced the dust by at least 2/3's. Bad news is my sander is on it's last leg, I'll need to replace it before the marathon of sanding ahead.
I was able to get out today and get some more resin so I should be good to go this week. After sanding I'll need to build up the last foot or so near the transom to get rid of the slight rocker it has.
Re: The Plytanic 2.0 - FS17 Build
Posted: Tue Jan 23, 2018 3:30 pm
by silentneko
The 5" orbital sander of my dreams....
Was going to get another dewalt, but looked into it and went with the ridgid. 3 amps, variable speed, connection ready for the shop vac, and a Lifetime warranty! (As long as it's registered, and it is). It was the same price as the basic dewalt, $59.
Re: The Plytanic 2.0 - FS17 Build
Posted: Tue Jan 23, 2018 5:03 pm
by Pat4
Sanding time

The most essential and the same time worst thing of boatbuilding
Re: The Plytanic 2.0 - FS17 Build
Posted: Tue Jan 23, 2018 6:06 pm
by silentneko
No doubt. That's why I like the term "work boat finish". I might just fair the bottom with the orbital, and hand block the sides a bit. I'll be covering the bottom with Epoxy/HBN anyway so it doesn't need to be perfect.
Re: The Plytanic 2.0 - FS17 Build
Posted: Tue Jan 23, 2018 8:06 pm
by Jaysen
I like Fuzz's view on finishes...
Fuzz wrote:30 feet at 30mph
That's my new motto.
Re: The Plytanic 2.0 - FS17 Build
Posted: Tue Jan 23, 2018 8:34 pm
by Fuzz
I have to like a 30-30 finish, that is the best my talent level will produce

I am just amazed at the finish some of these guys can do.
Re: The Plytanic 2.0 - FS17 Build
Posted: Wed Jan 24, 2018 2:34 pm
by silentneko
Some of them are really nice, some are internet magic. What looks good in pictures might not be that perfect up close, so don't doubt yourself, side by side I'm sure your work will stand up to most.
So, sanding.......yep! I spent about 3 hours today doing the first pass of sanding. I also trimmed the excess glass that was hanging off the sides with a multi tool. I decided not to be to aggressive, I've seen some guys sand until the whole boat is milky white. Problem is they are cutting into the structural glass, I just wanted to take down the high spots and some stitches.
Once I was done with sanding the hull, I blew off all the dust carefully to see what I had. Because of the bubble issue from before I had a lot of little spots that I needed to check. I took an awl and a stainless wire brush, and I pushed on every single spot I could find that didn't look perfect. If it moved I chipped it out and cleaned it up with the brush. This worked great and took about 30 minutes. None of it was structural, but could have given me issues later on when fairing and painting.
I think I'm going to do a thin overcoat of neat epoxy to seal any edges I exposed and get ready for chines, rubrails, and fairing.
Re: The Plytanic 2.0 - FS17 Build
Posted: Wed Jan 24, 2018 4:40 pm
by Jeff
Really nice silentneko!!! Jeff
Re: The Plytanic 2.0 - FS17 Build
Posted: Wed Jan 24, 2018 5:08 pm
by Browndog
Looking good!
Re: The Plytanic 2.0 - FS17 Build
Posted: Wed Jan 24, 2018 5:40 pm
by silentneko
Thanks guys.
I bought a new table saw so I can do the reverse chines. It's funny cause in the thread I started on them the guys are trying to get me to go bigger, but on another forum I'm on the guys with experience are telling me to go smaller. One recently finished building a strip boat that's not to far off from this one. He sent me a video of his reverse chines working decent, so I'll play a bit more and try a few more profiles. I do hope to at least start them or the rub rails within a week, cause I'll have to take a few days off coming up.
Re: The Plytanic 2.0 - FS17 Build
Posted: Wed Jan 24, 2018 5:53 pm
by Fuzz
Glass job looks really good.
As for the chines my thought is there are lots of opinions out there. If it were me I would give the most weight to any who have built and/or running a FS-17. There have been a number of them built so hopefully some of those guys will weigh in here.
Re: The Plytanic 2.0 - FS17 Build
Posted: Wed Jan 24, 2018 8:29 pm
by jacquesmm
Fuzz wrote: ↑Wed Jan 24, 2018 5:53 pm
Glass job looks really good.
As for the chines my thought is there are lots of opinions out there. If it were me I would give the most weight to any who have built and/or running a FS-17. There have been a number of them built so hopefully some of those guys will weigh in here.
Good answer, thank you. Many FS17 were built, many without any spray rail. It is an option but is it worth the extra work? You decide.
Re: The Plytanic 2.0 - FS17 Build
Posted: Thu Jan 25, 2018 8:33 am
by silentneko
There in lies the issue, I don't think anyone has done this type set up on a FS17. I've seen spray rails on them and the FS14, but I don't think I've seen a reverse chine. Well think about it this way, weather it works or fails, I'll be able to pass the data along to the next guy, lol.
I over coated with neat epoxy last night to fill in some weave and stabilize the pockets I opened up with the awl. I have to say I'm pretty happy now. All my major areas of concern seem to be dealt with. Today I need to lay a little glass to deal with 2 areas I have some rocker in. Not a huge deal, but I'd rather do this then just fill it in completely with fairing compound.
Re: The Plytanic 2.0 - FS17 Build
Posted: Thu Jan 25, 2018 12:43 pm
by silentneko
Re: The Plytanic 2.0 - FS17 Build
Posted: Sun Jan 28, 2018 4:01 pm
by silentneko
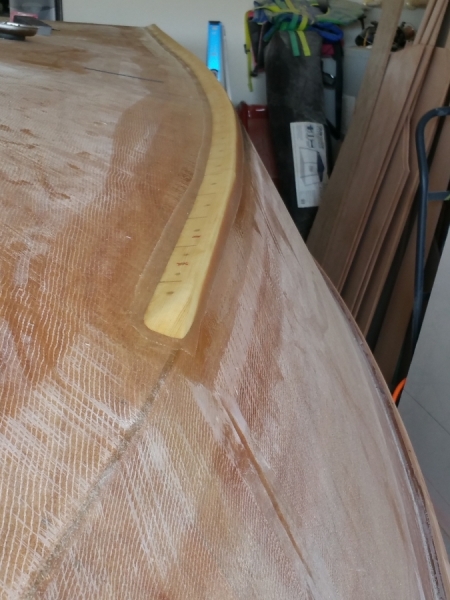
Still haven't decided what to do on the chines/strakes... So I decided to go ahead with the rub rails.
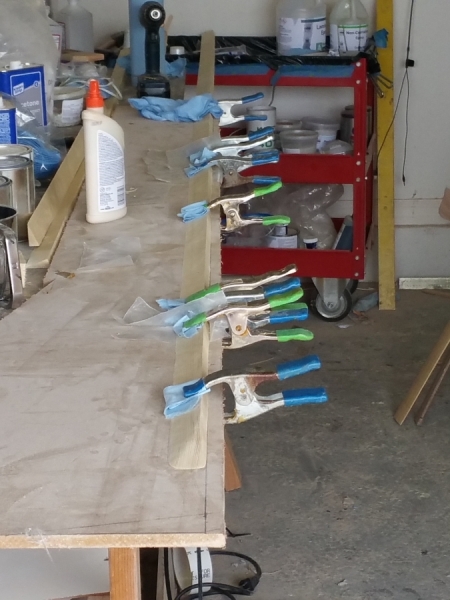
1/4" leftover okoume cut to 1.5". I also make a few pvc clamps cause I was worried I would not have enough.
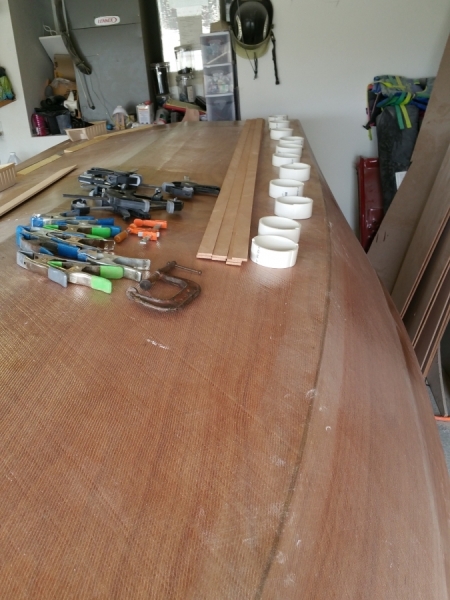
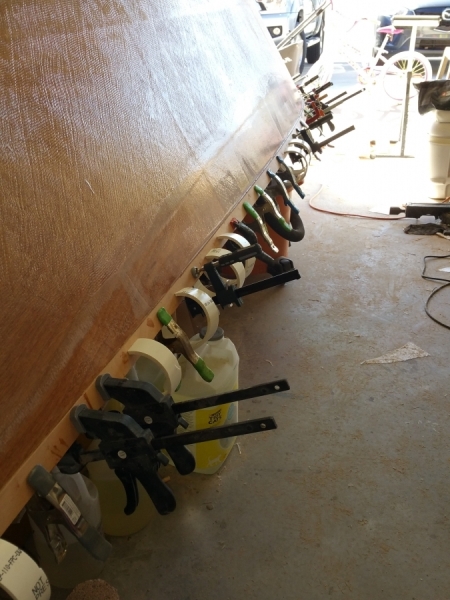
So I got the first section of the rub rail on. Now everyone repeat after me! YOU CAN NEVER HAVE ENOUGH CLAMPS! Even though I made some extra clamps them and the spring clamps I had really weren't strong enough to keep the ply in place because of the way the hull twists and curves. Not a huge deal as I have other clamps to use, then I used the spring clamps in between just to add pressure.
I think I'm going back to harbor freight tomorrow to get a few more clamps. So far I have found small 3" c-clamps to be great, and also the quick release clamps like these are probably the most useful and user friendly:
https://www.harborfreight.com/6-in-quic ... 62239.html
Re: The Plytanic 2.0 - FS17 Build
Posted: Sun Jan 28, 2018 5:21 pm
by OrangeQuest
silentneko wrote: ↑Sun Jan 28, 2018 4:01 pm
Still haven't decided what to do on the chines/strakes... So I decided to go ahead with the rub rails.
I was kind of liking the 2" ones you did on the new table saw a few days ago. I like you posting all your options and samples on the hull. I was thinking I may do something on my FS14 when I flip it again.
Re: The Plytanic 2.0 - FS17 Build
Posted: Tue Jan 30, 2018 4:24 pm
by silentneko
Yeah I think I'm going with the 2" x 0.5" for the chines. I'm waiting on a feather board for the table saw to come then I'll cut some more out.
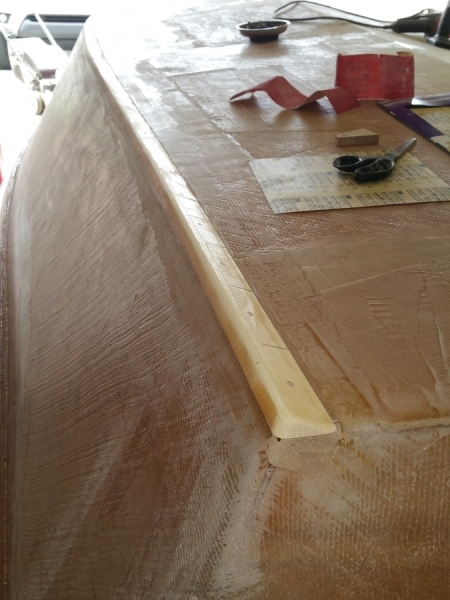
I got around to putting on the first layer of the rub rail on the port side.
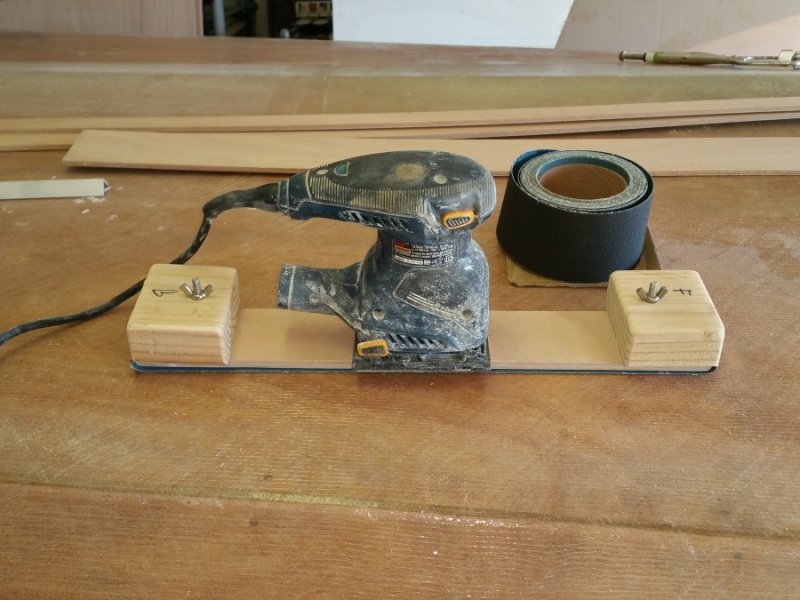
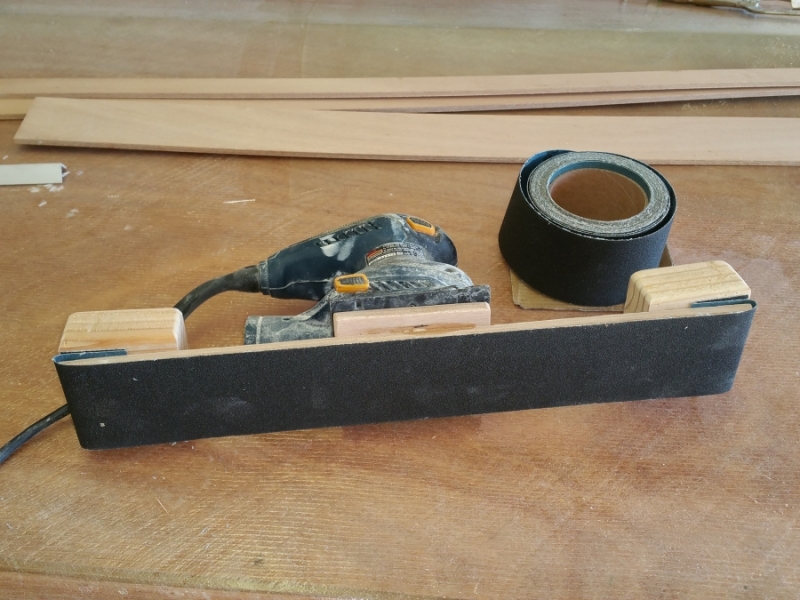
After that I decided to start getting ready for fairing. I talked about converting an old sander to a power fairing board on another thread. well here you go. Simple, crude, and effective. I bought a cheap roll of 2.75" x 25' 80 grit, and built the board 18" long. I stapled some small chunks of sand paper under the blocks so the paper wont slip out. This should make fairing go a bit faster.
Re: The Plytanic 2.0 - FS17 Build
Posted: Tue Jan 30, 2018 4:49 pm
by OrangeQuest
Interesting sander. very good idea!
I have the switch going out in mine and I want to replace it. Once I get another one I may pull the old pad off and see how a board can be mounted to make use of the cam. I can hard wire the switch on and just use the foot switch for my die grinder motor. I am just getting to the fun sanding parts!
Re: The Plytanic 2.0 - FS17 Build
Posted: Wed Jan 31, 2018 10:04 am
by Bogieman
Looking great!
Re: The Plytanic 2.0 - FS17 Build
Posted: Mon Feb 05, 2018 2:36 pm
by silentneko
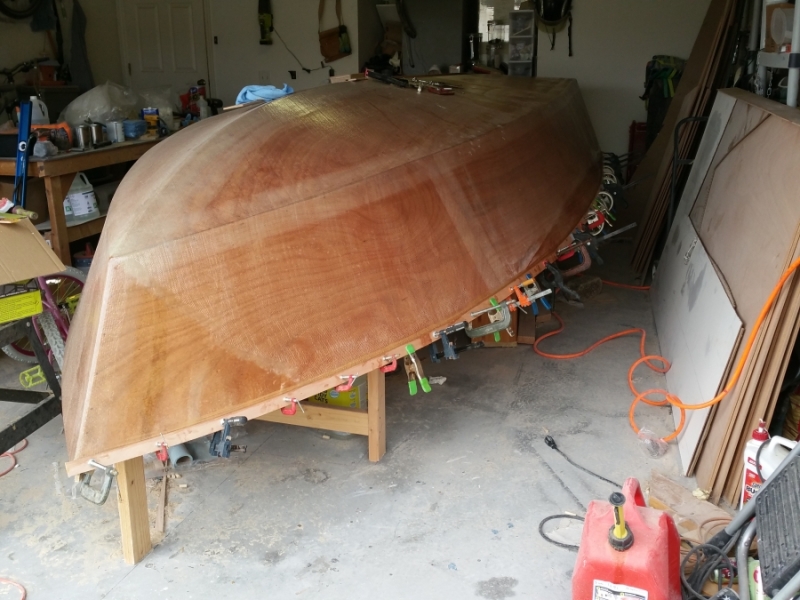
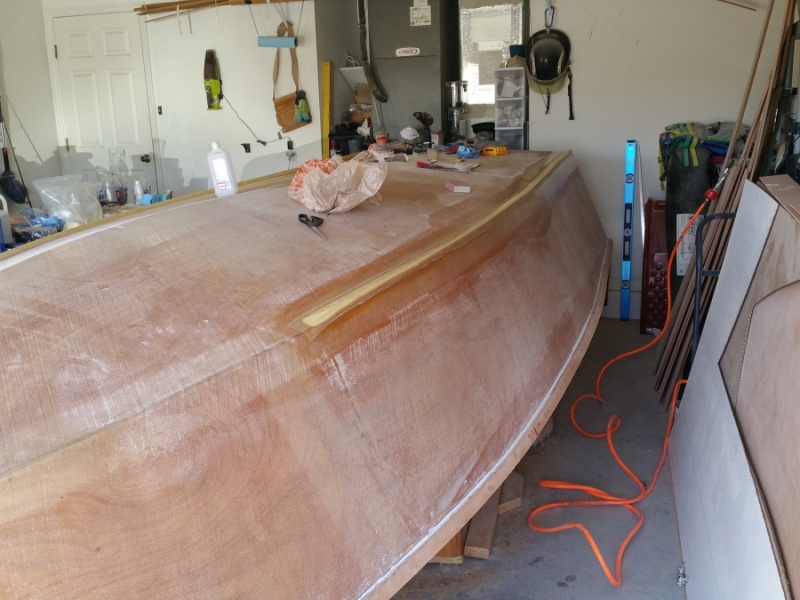
I got the last layer of the rub rail on today. I'm not sure why, but this is always the point in my builds that I feel the hull goes from plywood to boat.
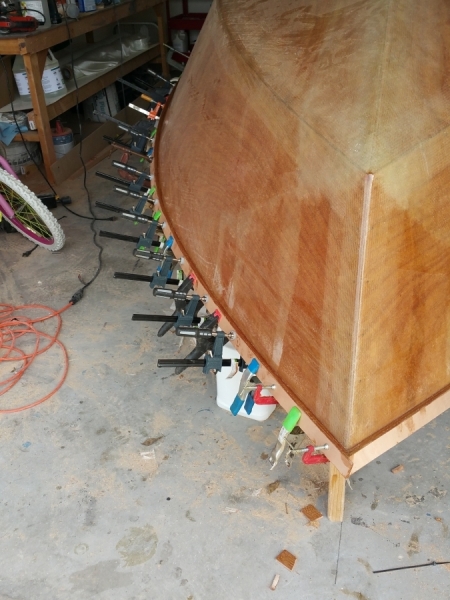
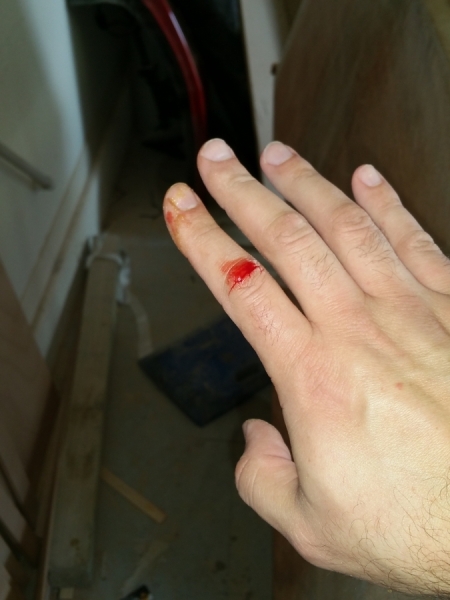
Every single one of my builds has had blood sweat and tears put into them, literally. Just a drop soaked into the plywood this time.
I can no longer stall any decisions on what I'm going to do about the reverse chines. I have some leveling of a few low spots to fix, but after that I'll do the chines and get ready to fair.
Re: The Plytanic 2.0 - FS17 Build
Posted: Mon Feb 05, 2018 3:18 pm
by narfi
A blood sacrifice to the builders/maintenance gods.
This is a good sign.
Your boat will serve you well!
Re: The Plytanic 2.0 - FS17 Build
Posted: Mon Feb 05, 2018 10:58 pm
by Browndog
I agree with Narfi. A little blood is a good sacrifice.
Re: The Plytanic 2.0 - FS17 Build
Posted: Tue Feb 06, 2018 7:12 pm
by silentneko
I didn't have much time today after running around and an anniversary lunch with the wifey. I decided to redo the drain plug tube I made before, the old one would have worked, but it was a little loser then I wanted.
After that, I started to level the hull before fairing. I had those 2 spots I added glass to before, but they still needed more work. I used a mix of milled fibers, wood flour and fumed silica to skim coat it, similar to my bonding adhesive. The next layers will be fairing compound, but after I put the chines on.
Re: The Plytanic 2.0 - FS17 Build
Posted: Fri Feb 09, 2018 8:06 am
by pee wee
Sounds like you're dealing with it, not really a set back as much as being thorough takes more time than you anticipated. Your photo shows the level placed perpendicular to the keel, I assume you've also checked for flatness fore and aft, as that is more important.
Looking good, build on.
Re: The Plytanic 2.0 - FS17 Build
Posted: Fri Feb 09, 2018 9:15 am
by silentneko
That's just where I set the level down so it wouldn't slide off. Every correction I'm working on is based on fore to aft leveling. Part of this is the stringer issue, because they didn't match the top of the frames they don't really support anything under it, hence the sagging between the frames along the keel. The sags on the outside are more due to the corrections I needed to make with the ply being out of square.
This is my first time using okoume, I've used meranti in the past. I went with the more expensive ply because of the weight savings. However one characteristic is it's more flexible then the meranti, great for making the bends, but with the frames being set 36" apart it doesn't have the rigidity to stay flat as well.
Re: The Plytanic 2.0 - FS17 Build
Posted: Fri Feb 09, 2018 10:14 am
by Browndog
You are right about the okoume. It is nice and flexible which I agree makes for nice bends but can cause some”ripples” when unsupported as you describe.
Some of that seamed to disappear when the boat I am building was flipped and the stringers and frames and gravity helped to stretch everything a little bit. Then once the inside seams got taped everything stiffened up. Then the inside fiberglass cloth made it even better. Once the stringers got glassed in it got very strong.
I have come to appreciate that this building technique makes for a very solid boat since every time something is added it gets taped in and the boat gets progressively stronger and stiffer. I remember Fishgtr recently comparing his fs18’s performance to a Hell’s bay boat and him commenting on the differences being readily apparent from less vibration and rattling.
Your build is looking really good. Keep it up!
Re: The Plytanic 2.0 - FS17 Build
Posted: Fri Feb 09, 2018 10:22 am
by silentneko
The monocoque structure adds tons of strength no doubt. Thing is the rippling needs to be dealt with prior to flipping, or you can't really fair the hull before painting. If I had the resources and room I would flip.it, install the stringers, then flip it back and then fair, but that's not practical.
I think it might not be a bad idea given the materials to decrease the frame spacing to 24". I would have gladly cut another frame or 2 over having to do filling.
Re: The Plytanic 2.0 - FS17 Build
Posted: Fri Feb 09, 2018 12:43 pm
by pee wee
I recall reading that some builders have screwed in a temporary 2x4 to flatten out the planing portion of the hull until it gets glassed. You'd have to crawl under there to install it, but is that a possibility?
Re: The Plytanic 2.0 - FS17 Build
Posted: Fri Feb 09, 2018 1:15 pm
by silentneko
It would have been prior to glassing. Or even prior to hull panel assembly. I've already done my glassing, and most of the filling, so it's to late for me.
Re: The Plytanic 2.0 - FS17 Build
Posted: Fri Feb 09, 2018 10:56 pm
by narfi
I took a 6ft straight edge to the back of my boat now that the glass is on and cured.
I had ~1/8" hook give or take all the way across.
I re-read the plans and up to 1/4" is acceptable.
I went back and looked at your pictures and it looks from the marks on your tape that is about what you had as well.
I am just figuring it out as I go, but if I read your marks right and I read the plans correctly I think we are in good shape and no need to sweat the small variations?
Re: The Plytanic 2.0 - FS17 Build
Posted: Sat Feb 10, 2018 12:16 am
by Fuzz
I think Narfi called this one correct. I recall JM stating he knows there will be a little hook with all the tape build up at the transom. I think he even stated he counts on it for running trim. Just my memory here and I could be mistaken.
Re: The Plytanic 2.0 - FS17 Build
Posted: Mon Feb 19, 2018 1:28 pm
by narfi
Any progress on your chines?
I was hoping to start cutting some trial triangles this weekend but wasn't able to make the time.(energy)
Re: The Plytanic 2.0 - FS17 Build
Posted: Tue Mar 13, 2018 12:03 pm
by silentneko
Fuzz wrote: ↑Sat Feb 10, 2018 12:16 am
I think Narfi called this one correct. I recall JM stating he knows there will be a little hook with all the tape build up at the transom. I think he even stated he counts on it for running trim. Just my memory here and I could be mistaken.
If that were the case I'd leave it, but I don't have hook, I have rocker. Even with the tape built up the transom drops about 1/8", so to make it more level I filled it. It looks fairly level now.
Re: The Plytanic 2.0 - FS17 Build
Posted: Tue Mar 13, 2018 12:04 pm
by silentneko
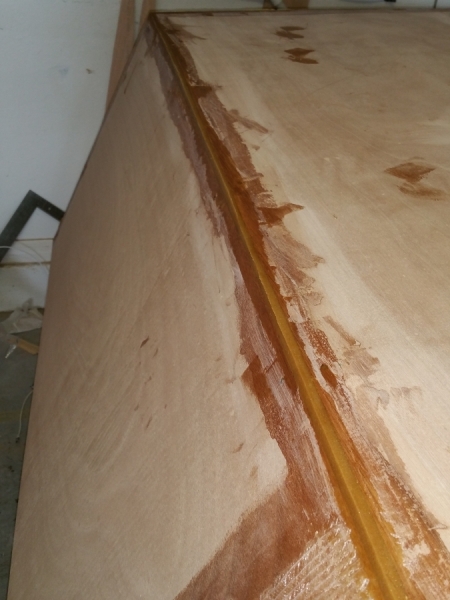
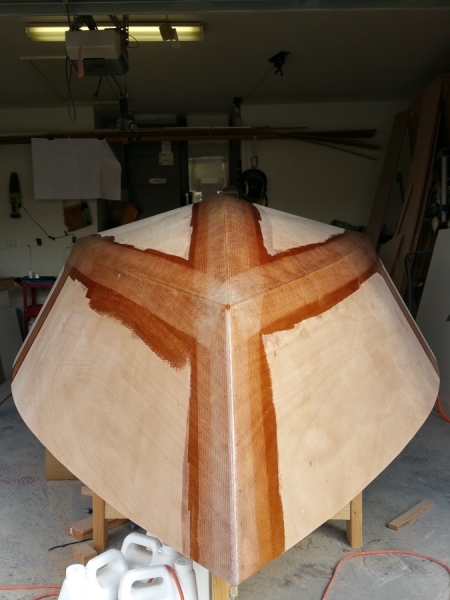
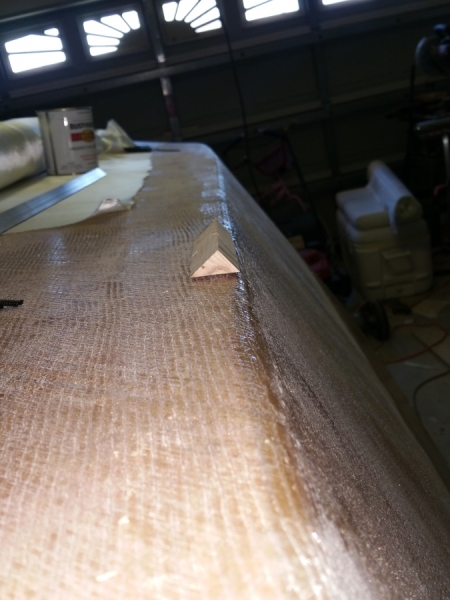
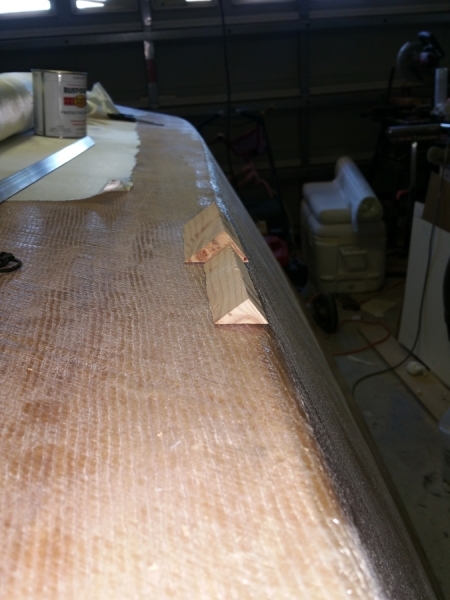
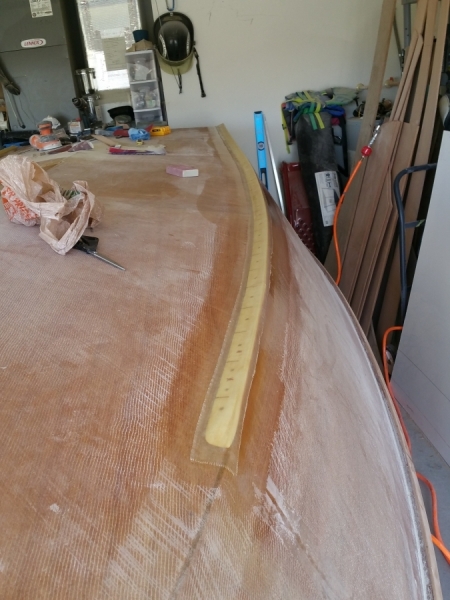
I made some progress, but it took a while to get sorted. I tried to just butt join parts as I went along, but it made an odd angle along the curves. The same thing happened when I tried to just kerf cut the areas that needed the most bending. So I ended up splicing 3 sections using 45 degree angles, the forward sections were tapered the last few inches. I shortened them a little from my original plans after some thinking to 140". So it all bent evenly I kerf cut them every 4 inches.
Splicing
Attached
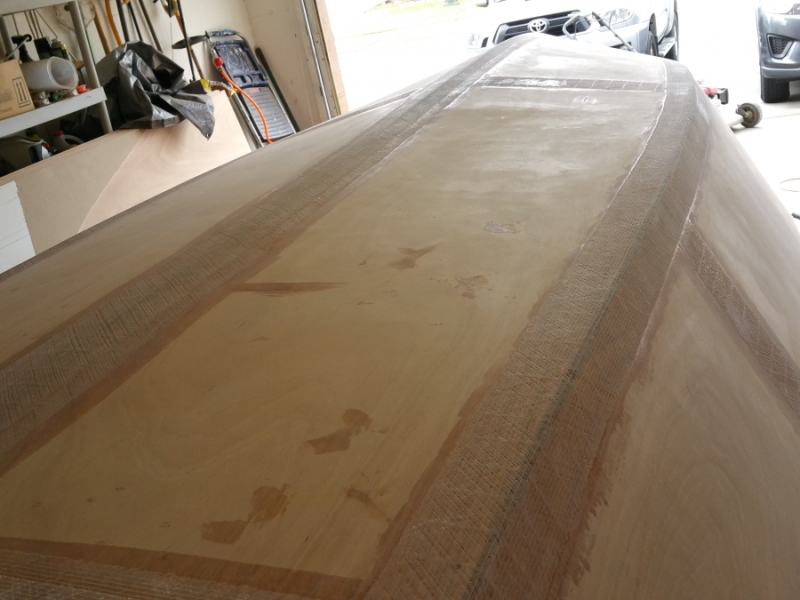
They are about 5/8" high and 1.5" wide.
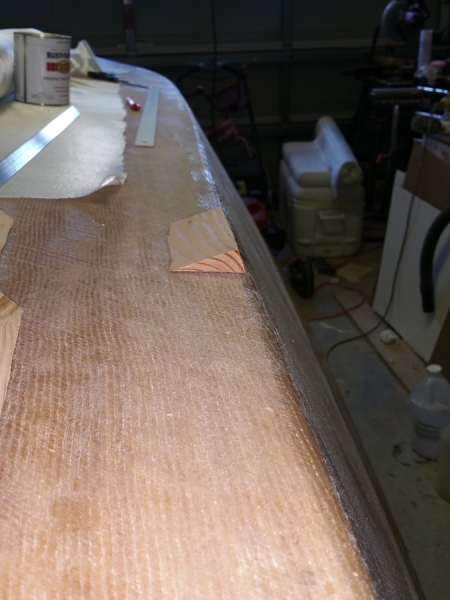
Shaped and filled
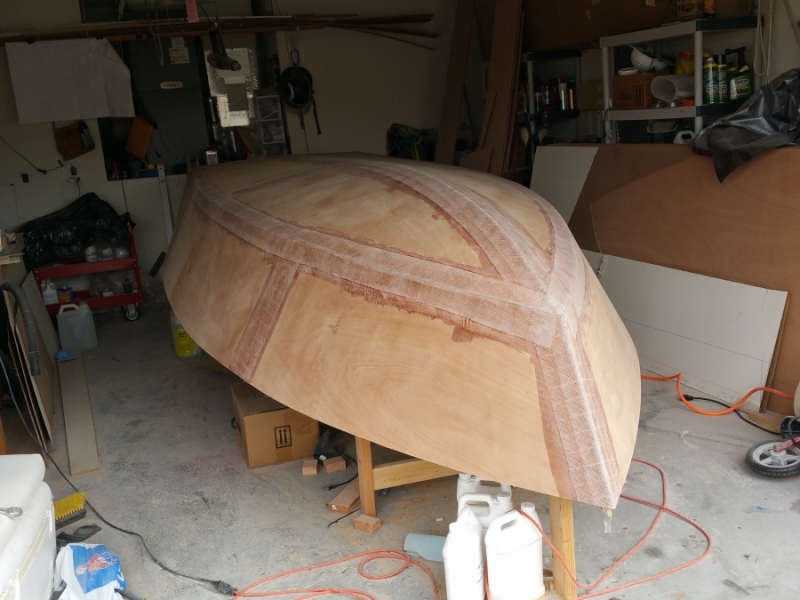
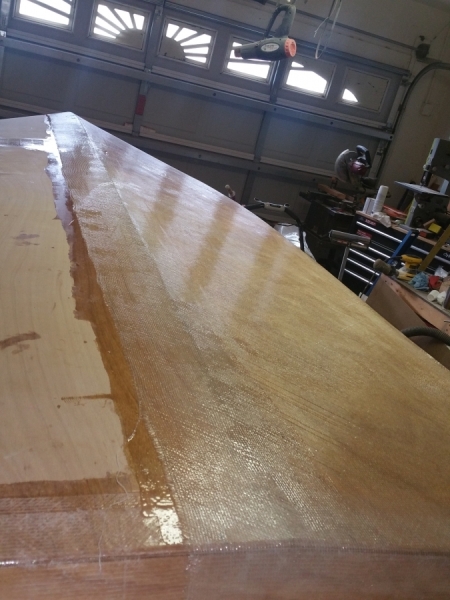
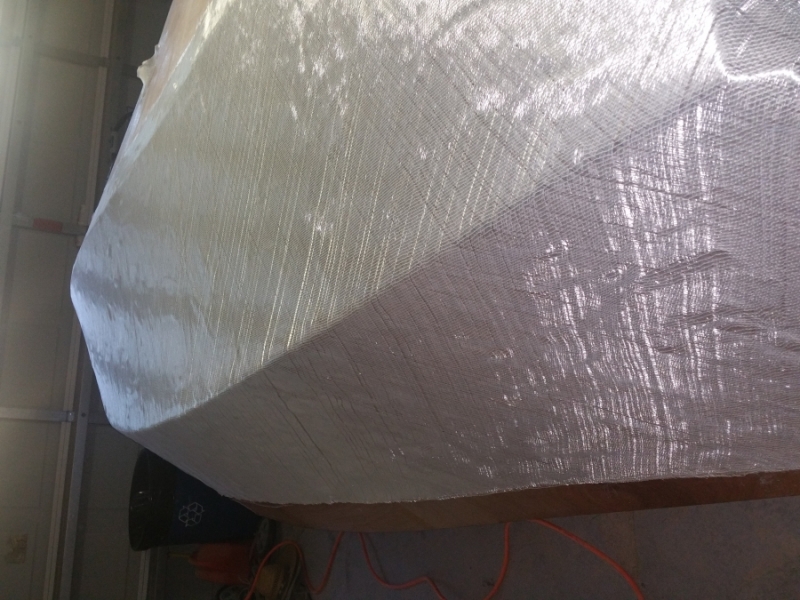
Glassed
I'm fairly happy with the outcome. In the pics it looks a little uneven because of the shading of the wood and filler, but once it gets faired and painted on color it will look pretty good.
Re: The Plytanic 2.0 - FS17 Build
Posted: Wed Mar 14, 2018 2:55 pm
by silentneko
I'm pretty much done with glass work now on the outside. I decided to add a second layer of glass to the chines since they are made of wood this will give them plenty of protection. If a strike happens hard enough to damage them they will be easy enough to repair, but they will act as a sacrificial part to keep the damage away from the hull. They will get coated in HBN/Epoxy too.
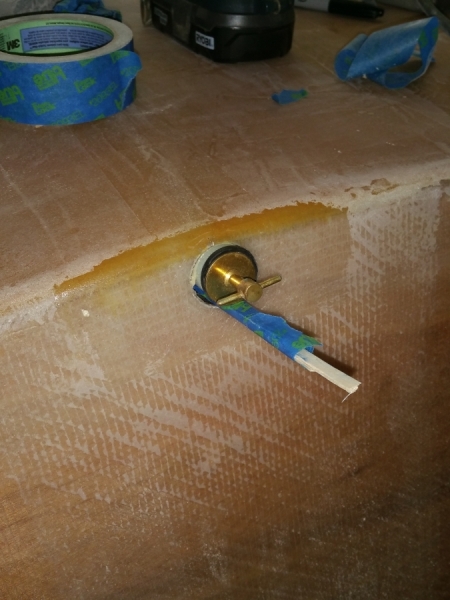
Next I turned my attention to the drain plug tube I made earlier. I'm glassing it in now so I can fair it smooth along with that whole area.
I think I marked it straight? LOL, it's kind of hard to tell after applying thickened epoxy to level the hull. It might be 1/16" off which is good enough.
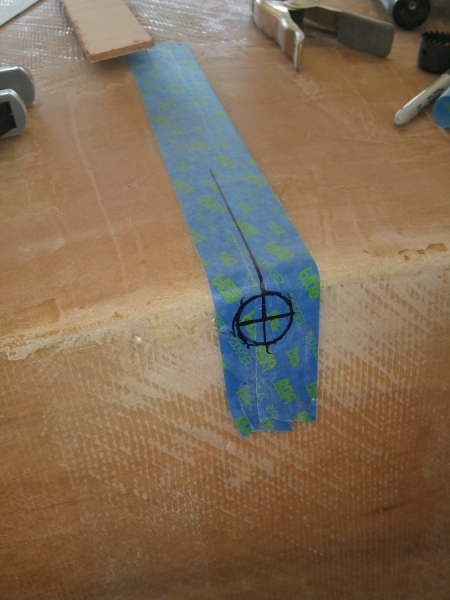
I am just gluing it in on the top right now, I'll go back later and fill the area around it. This turned out to be the best way to keep it in place. I left it proud by about 1/4" this was I can fair all around it, then grind it level when done.
Re: The Plytanic 2.0 - FS17 Build
Posted: Fri Mar 16, 2018 8:46 pm
by silentneko
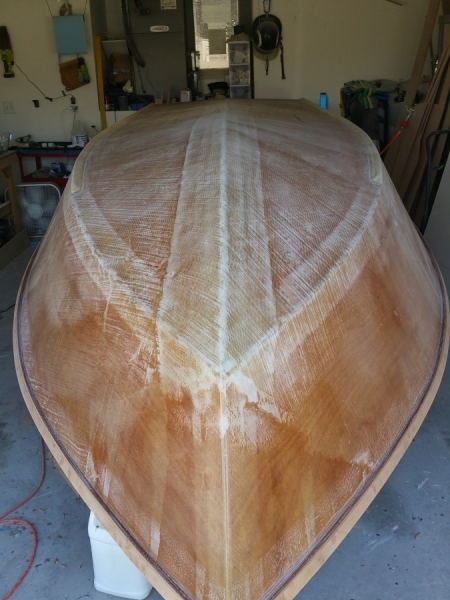
Time to itch. Sanded the bottom to get it ready for the first coat of fairing compound.
Re: The Plytanic 2.0 - FS17 Build
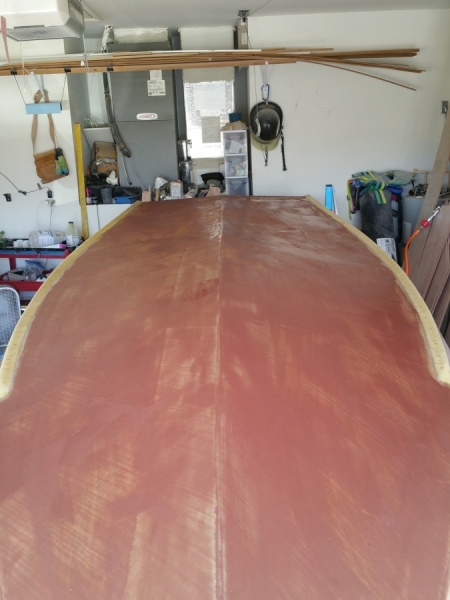
Posted: Sun Mar 18, 2018 5:04 pm
by silentneko
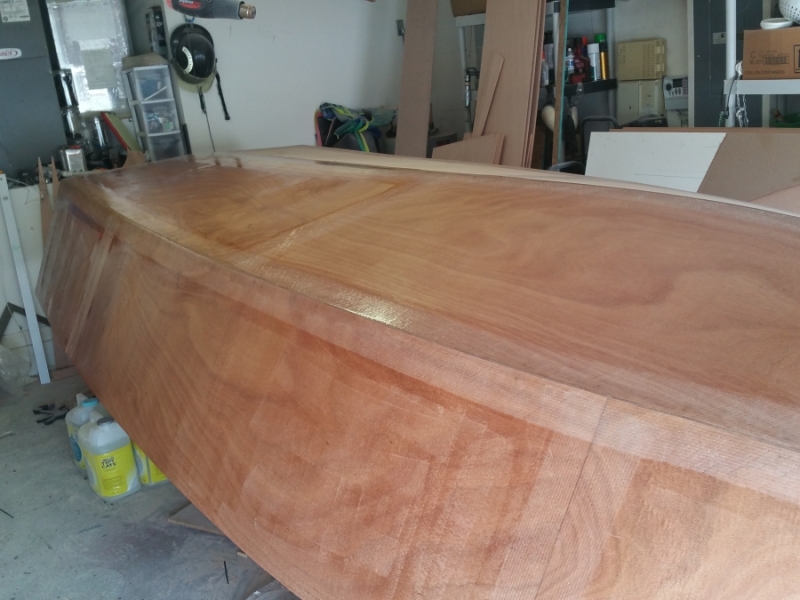
I got a bit of fairing compound spread out, just a skim coat to start. I think I'm mixing it to thick, I went through about 1/3 my mix just to do this. I have some left over west systems fairing mix and some glass microspheres I can use once I run out. Hopefully it will be enough, if not I'll order some more soon.
I think I'm going to roll on a neat coat or two to the sides to get them closer prior to fairing them. I do have a wave on each side toward the stern where I tried to fix some gaps, nothing major, but I need to decide if I will fix it or not.
Re: The Plytanic 2.0 - FS17 Build
Posted: Sun Mar 18, 2018 7:12 pm
by Jeff
Nice initial fairing work Silentneko!!! Jeff
Re: The Plytanic 2.0 - FS17 Build
Posted: Sun Mar 18, 2018 9:13 pm
by Bogieman
Looking good, Silentneko! BTW, always curious about clever"handles". Care to to enlighten on it?? I also wanted to mention that the FS17 is one of my favorite powerboat designs and I actually bought the FS17 plans one year ago. I studied the FS17 plans for several months before making the decision to go with the AD16 sailboat. Anyway, the hull is looking great and I'll be following your build along the way.
Bogie
Re: The Plytanic 2.0 - FS17 Build
Posted: Mon Mar 19, 2018 10:03 am
by silentneko
Nothing to clever about my handle really. Neko is cat in Japanese. I'm a big guy, but in my youth I walked soft and was fairly quiet. I'm more of a bull in a China shop now, lol. Being around friends who were all into martial arts I got the nickname Neko.
I love the look of the FS series. Even though it may not be the best design for my needs, I still decided to move forward with some mods. Hope it all works how I plan, lol. Thanks.
Re: The Plytanic 2.0 - FS17 Build
Posted: Mon Mar 19, 2018 6:26 pm
by silentneko
Fairing is fun....right?
I sanded the bottom with the 5" orbital sander, it really did smooth it out a lot, but I wouldn't call it faired.
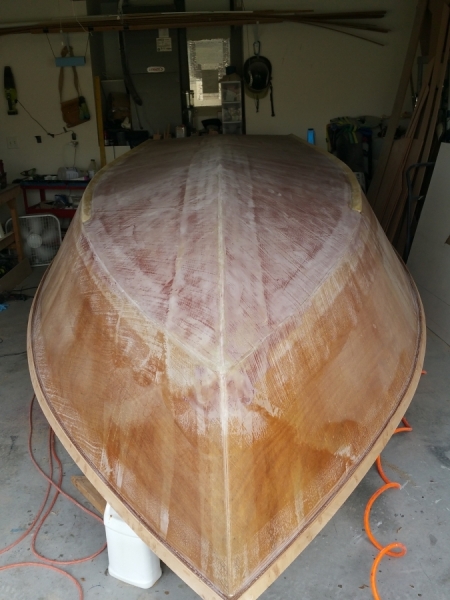
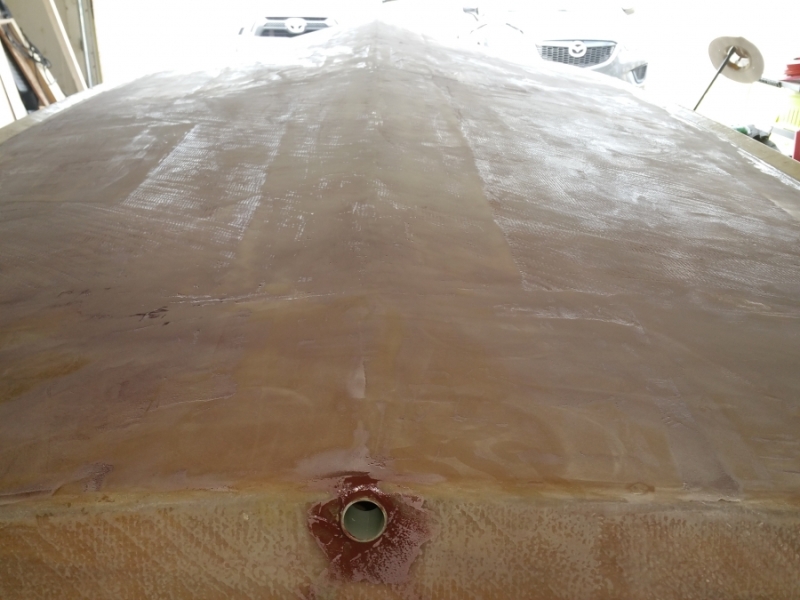
I applied a second, slightly thicker, coat of fairing mix. Here it is applied to the port side.
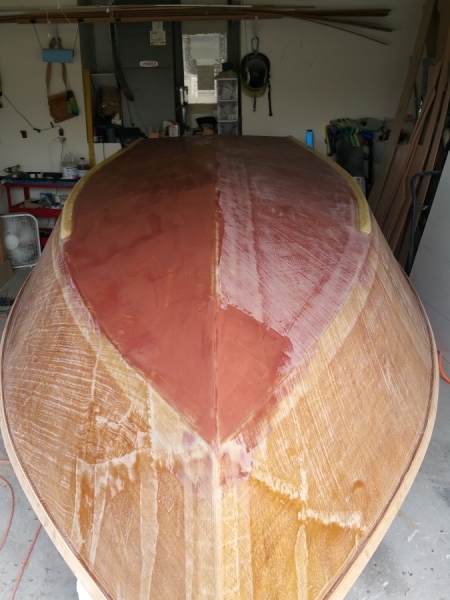
I also decided to fix a few spots on the sides. Hopefully it all works out.
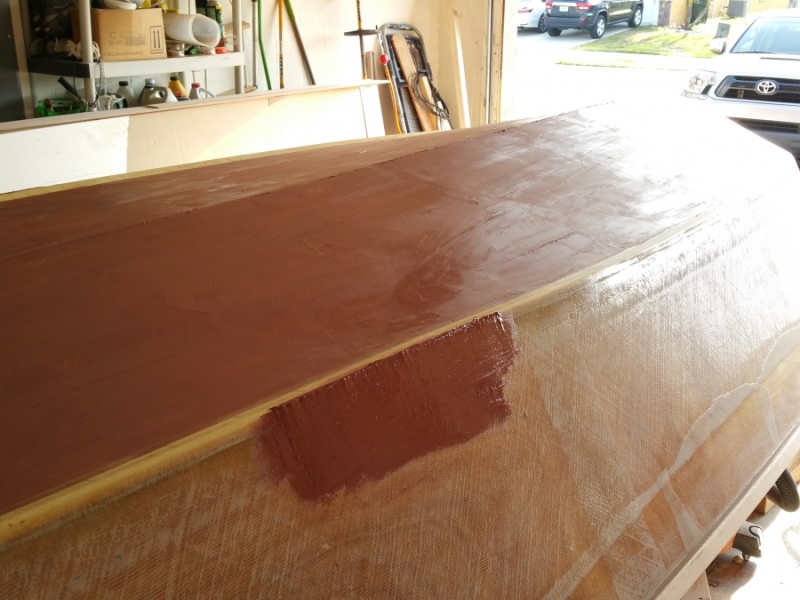
Re: The Plytanic 2.0 - FS17 Build
Posted: Mon Mar 19, 2018 7:05 pm
by Bogieman
silentneko wrote: ↑Mon Mar 19, 2018 10:03 am
Nothing to clever about my handle really. Neko is cat in Japanese. I'm a big guy, but in my youth I walked soft and was fairly quiet. I'm more of a bull in a China shop now, lol. Being around friends who were all into martial arts I got the nickname Neko...
Re: The Plytanic 2.0 - FS17 Build
Posted: Tue Mar 20, 2018 9:01 am
by pee wee
silentneko wrote: ↑Mon Mar 19, 2018 6:26 pm
Fairing is fun....right?
I sanded the bottom with the 5" orbital sander, it really did smooth it out a lot, but I wouldn't call it faired.
Fairing is even less fun if you use a longboard, but you know it's going to do a better job . . .
Re: The Plytanic 2.0 - FS17 Build
Posted: Tue Mar 20, 2018 5:18 pm
by silentneko
I started using a long board today, and quickly abandoned it. I used less of the fairing mix this go around which helped it lay out smoother, but it was much harder to sand. I also realized that the bottom needs to be somewhat fair, since it will be coated in HBN/Epoxy later on.
On a side note 2 gadgets I rigged up ended up not working out. Hooking up the shop vac to the orbital sander had an odd effect, it worked, but it slowed the rotation down a lot so I took it off. Also the long power board I made turned out to be to powerful oddly enough. it was hard to control and wore my hands out. I'll use just the board to smooth out a few spots, but for the bulk I'll just used the orbital sander.
Here's the second coat of fairing compound sanded down.
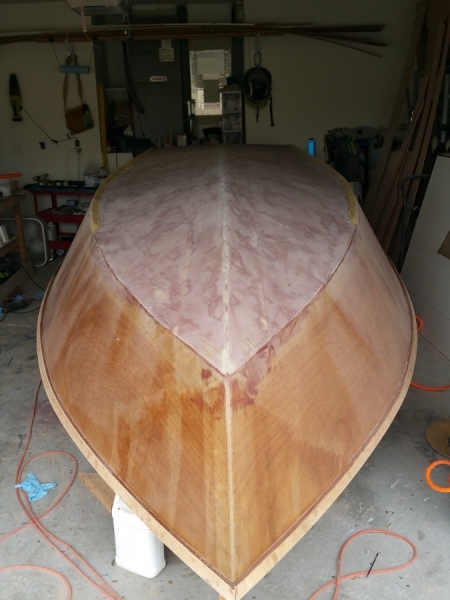
I then started working on the transom. I didn't go all the way to the top of the transom because I'll need to wrap glass over the edge later on.
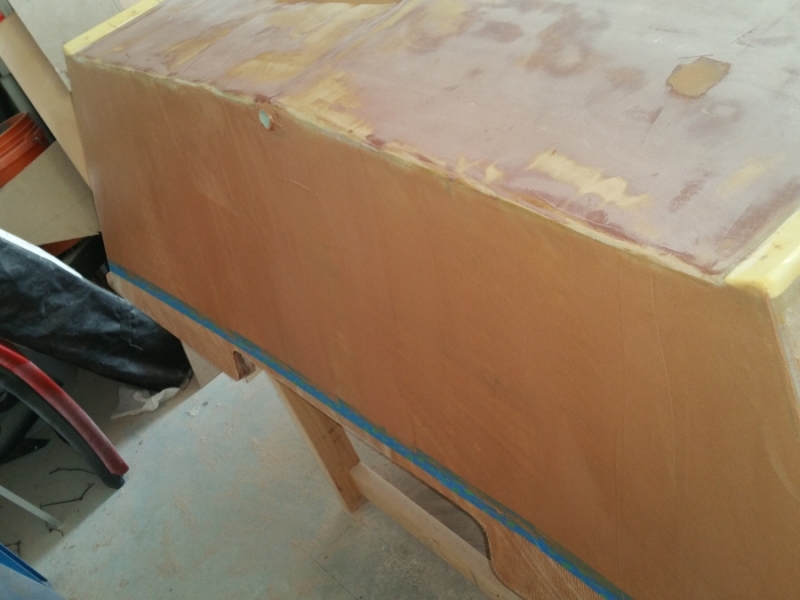
I also spot filled a few last spots, after this the bottom is ready for priming, but I'll wait until I'm done with the sides.

Re: The Plytanic 2.0 - FS17 Build
Posted: Mon Mar 26, 2018 9:49 am
by silentneko
I decided this is the best location for the bow eye.
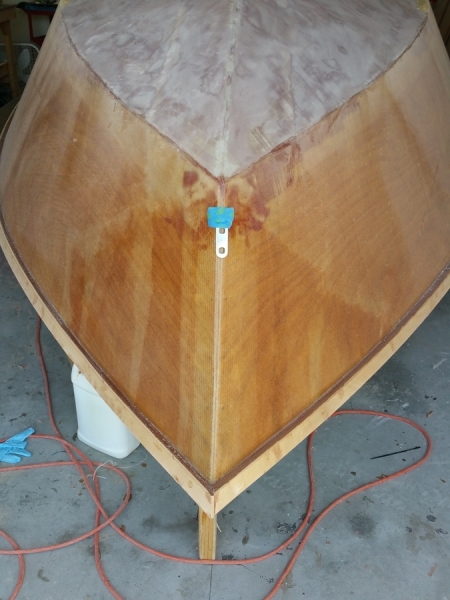
I flattened out a spot for it, I'm not trying to embed it into the hull, just keep the plate from rocking, the gaps left on the sides will be filled with 5200 after. I didn't do this on my last hull, and the bow eye was a pain to install and slightly crooked.
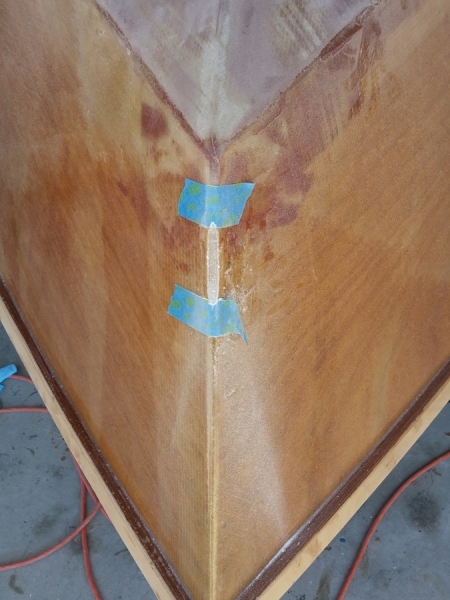
The hull bottom is about ready for high build primer. I'm still working on the sides and transom.
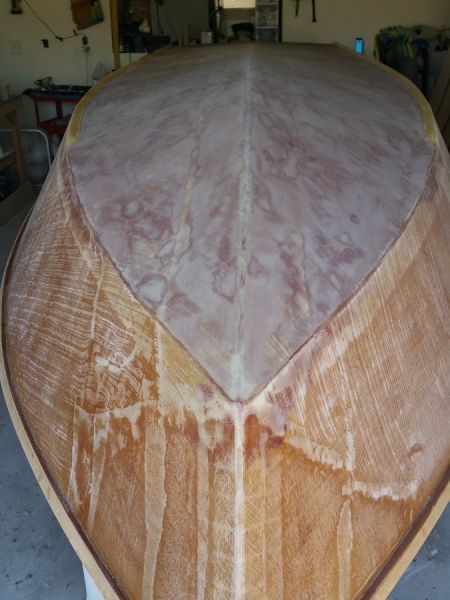
So I thought this was interesting. Here is the plug I cut out to install the drain plug tube. I brushed some left over resin on it so you can see it better. You can see the 2 layers of 3/8" ply, the grayish line in between them is the thickened epoxy, and then they 4 overlapping layers of biaxial equaling about 1/8".
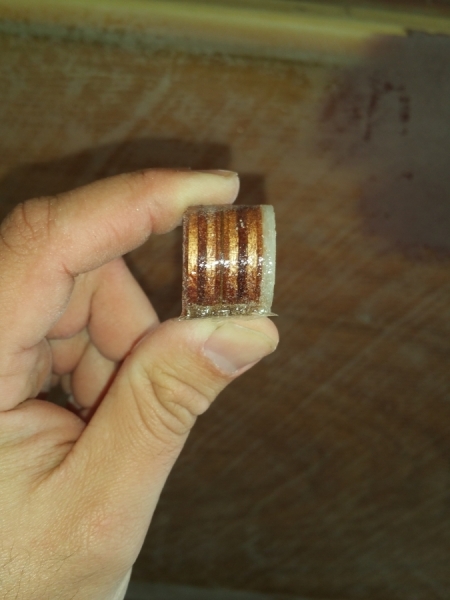
I'm still working on fairing. It has been a slower process then I hoped. The biaxial takes a lot more to fill and smooth then the cloth I've used in the past. I've ran out of microballoons, and am now using glass microspheres. Part of the slow down is me, I have a bit of carpel tunnel syndrome and the mixing, spreading, and sanding all take a toll so I'm having to do smaller areas as a time. It also limits my ability to use the fairing board so I'm making due with the orbital sander as best I can. Between that and my work schedule, and the kids, the project is slowing more then I'd like. I think it will speed back up once I get to the high build primer stage.
Re: The Plytanic 2.0 - FS17 Build
Posted: Mon Mar 26, 2018 10:00 am
by OrangeQuest
Good to see no gaps or dry tape too! My new hole saw kit came in last week and I need to start planning on where and how big of holes I need to cut.
Everything is looking really good.
Hope your hand/wrists start feeling better.
Re: The Plytanic 2.0 - FS17 Build
Posted: Mon Mar 26, 2018 10:11 am
by silentneko
Thanks, my hands are fine most of the time, except when doing repetitive work, but it's been that way since I was 20.
I just picked the hole saw closest to what I needed, it left about a 3/16" gap around it I filled with thickened epoxy.
Re: The Plytanic 2.0 - FS17 Build
Posted: Wed Mar 28, 2018 9:49 am
by Bogieman
Looking good Silentneko!
Re: The Plytanic 2.0 - FS17 Build
Posted: Wed Mar 28, 2018 10:37 am
by silentneko
Here's some more boring fairing pics, lol. I am now using microspheres instead of microballoons. They are white and somewhat translucent versus clay colored and opaque.
a thin coat of Phenolic Microballoon mix applied.
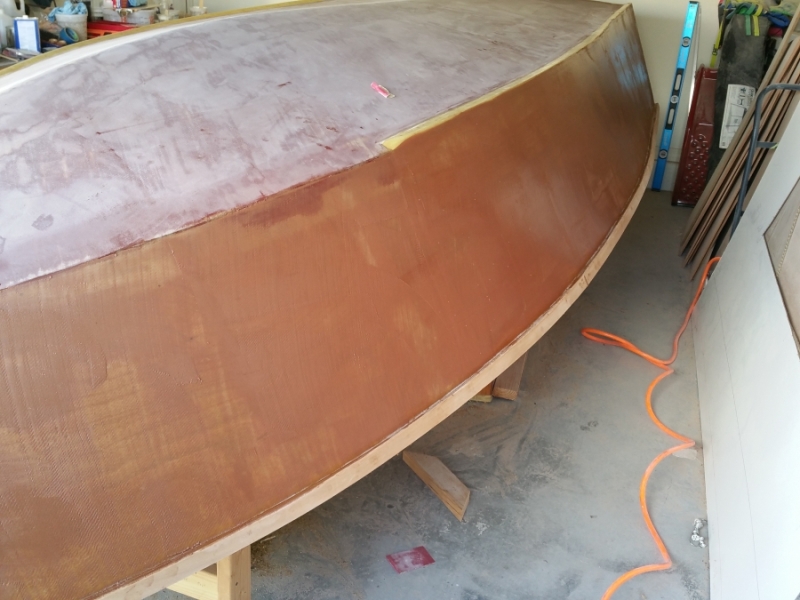
Sanded down

A thin coat of glass microsphere mix applied.
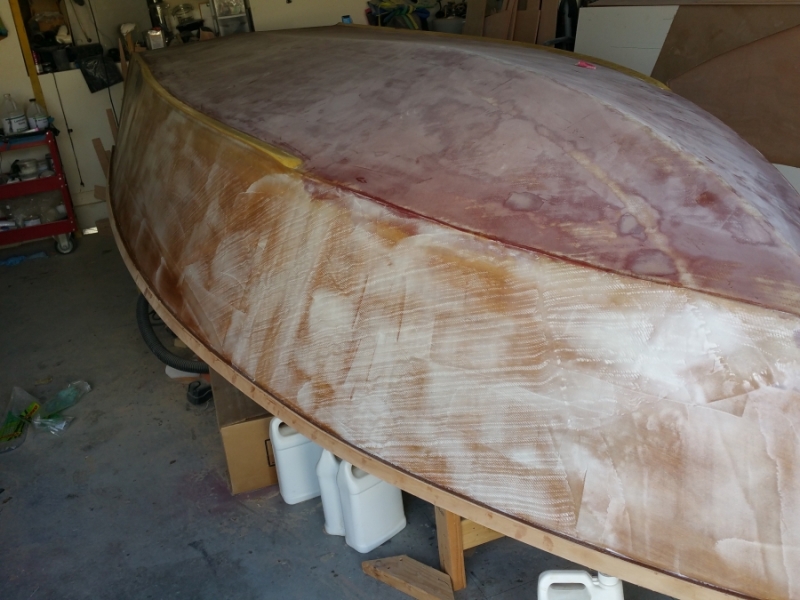
Sanded down

Those were just the first weave filling coats. Now comes the thicker coats prior to the primer phase.

I smoothed out the transom too and leveled the drain tube. it needs some touching up, but it's not far off.
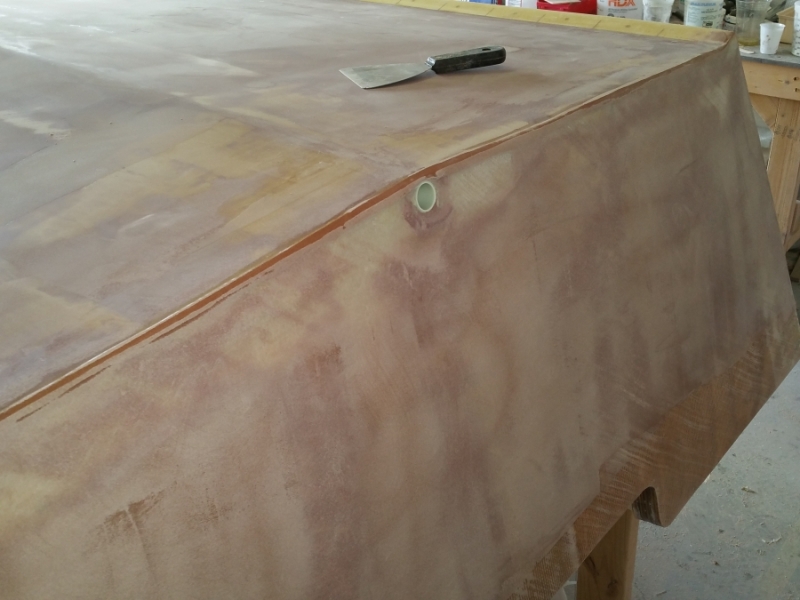
Re: The Plytanic 2.0 - FS17 Build
Posted: Wed Mar 28, 2018 11:12 am
by terrulian
Good progress, especially considering the pain.
I love that you kept the plug. I used to have something like that from my big boat but don't know what's become of it. It is a great souvenir for the mantel or knick knack shelf, right beside a photo of you in the boat with a fish.
Re: The Plytanic 2.0 - FS17 Build
Posted: Wed Mar 28, 2018 12:07 pm
by Jeff
silentneko, really nice progress!! Jeff
Re: The Plytanic 2.0 - FS17 Build
Posted: Tue Apr 03, 2018 3:29 pm
by silentneko
It's been a busy week with the holidays and spring break and all. After some more fairing I had a few more spots that needed attention.
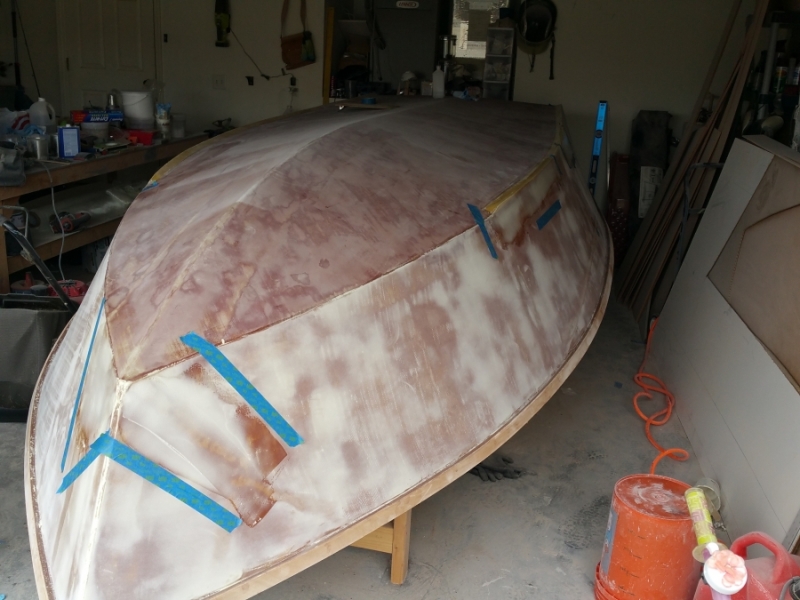
After that I had to take a break for a few days. It was time to play with the kids. We went out to Ft. DeSoto Park, cruised around, did some fishing, hit the sand bar, and got lunch at Billy's stone crab. For you guys who have never been to the park it's a great place to take a trip to. It has the biggest boat ramp I've ever seen! You can literally launch 25+ boats at a time.
My sons first fish! He's 2.5yrs old.
The kids playing at the sand bar.
Today I got back to work. I did the final rough fairing. It's time for primer now.
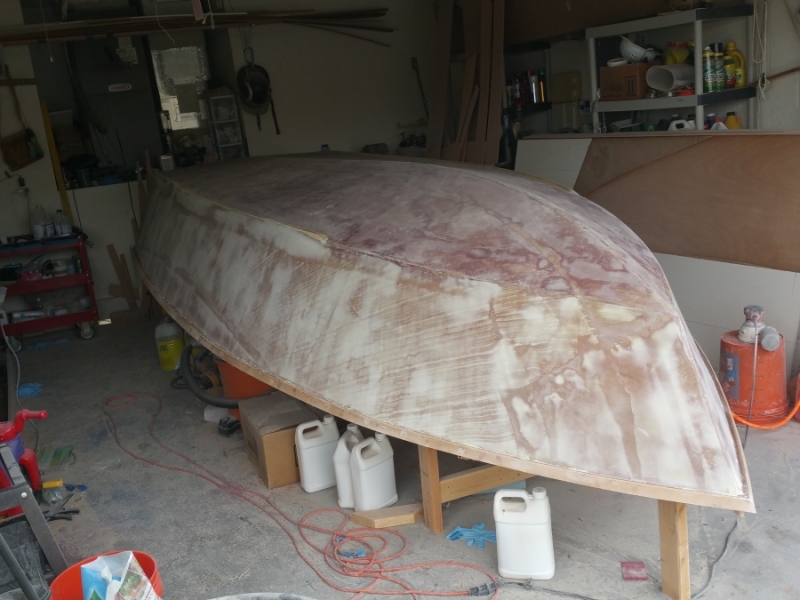
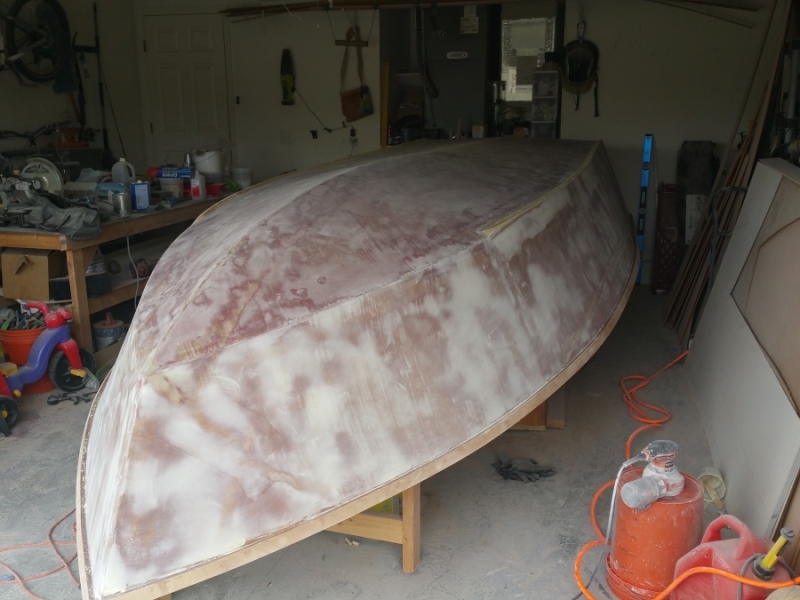
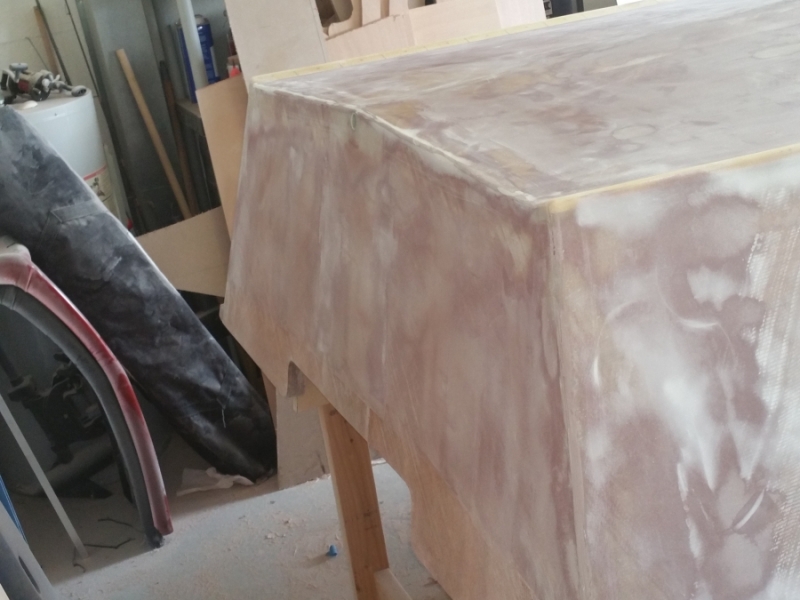
The dog is sick, so the primer might have to wait until tomorrow, but I'm getting closer.
Re: The Plytanic 2.0 - FS17 Build
Posted: Tue Apr 03, 2018 7:17 pm
by Jeff
Great first fish for your son!!! Hope the pup gets well!! Jeff
Re: The Plytanic 2.0 - FS17 Build
Posted: Tue Apr 03, 2018 9:02 pm
by TomW1
Silentneko have you done a guide coat yet. If not go ahead and put on your first coat of primer and then using either graphite or guide coat paint or a fast drying paint like Krylon primer spot the primer and sand it lightly. This will show all the lows and highs that you have that do not show up by eye. You can do this again after the second coat of primer also depending how fine you want the final finish to be.
The good builders do this to get a fine finish on there boats like Eric and his C21
.
Tom
Re: The Plytanic 2.0 - FS17 Build
Posted: Tue Apr 03, 2018 9:29 pm
by silentneko
No guide coat yet, I wouldn't be able to make much out now. I'll do it on either the first or second primer coat depending on how thick it actually rolls on. I'm not going for perfection here, I beat up my boats typically so a good 10ft job is all I need. Plus since I'm doing the HBN/epoxy on the bottom it doesn't need to be perfect. I'm also not finishing the sides just yet since I'll be wrapping glass over the rails to secure the decks and transom top later on.
Re: The Plytanic 2.0 - FS17 Build
Posted: Wed Apr 04, 2018 6:04 pm
by silentneko
Well the primer did not go on as thick as I hoped. It rolls on smooth and I really like the water clean up, but it's not really what I would call high build compared to ones I've used in the past.
Here it is after the first coat.
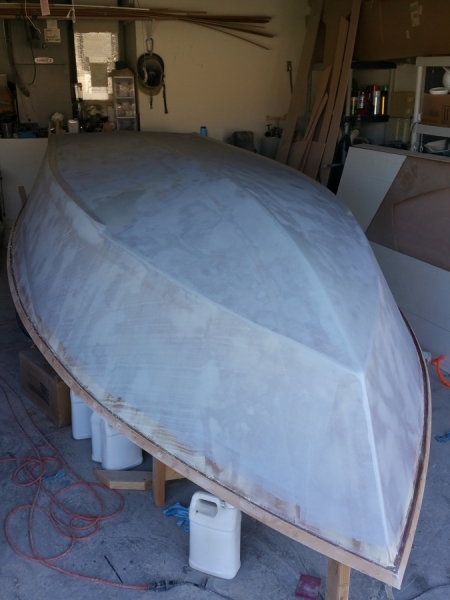
And the second coat. I added a little bit of microspheres and it worked better, I'll do the same on the future coats.
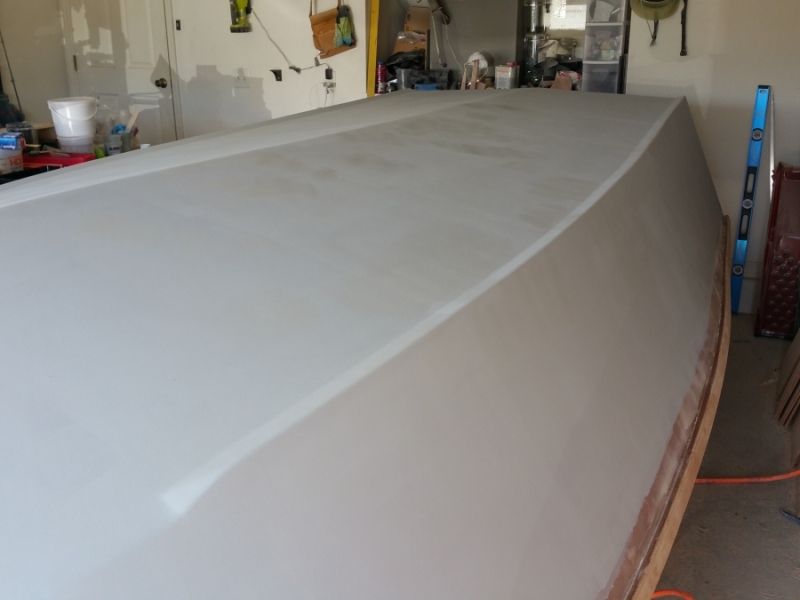
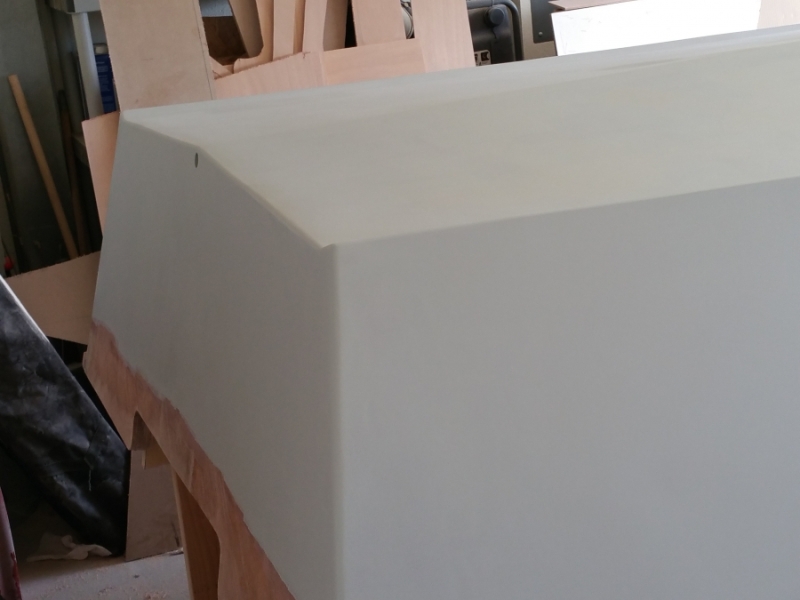
So now it's time to think about the paint. I may just paint the bottom few inches prior to flipping her, I did this on the last boat and it made my life way easier cause it would be hard to cleanly tape the bottom edge after the flip.
So I'm using a semi custom paint, kinda. I wanted to use interlux perfection cause I'm familiar with their products, but their color selection kinda stinks. I was looking for an ice blue, so I will have to make my own. I did a test a while back by adding phthalo blue pigment to some a qt of white paint. I liked the results so that's what I'll be going with.
It's hard to tell the difference, but adding 2cc's made it what I like, and it's easily reproducible.
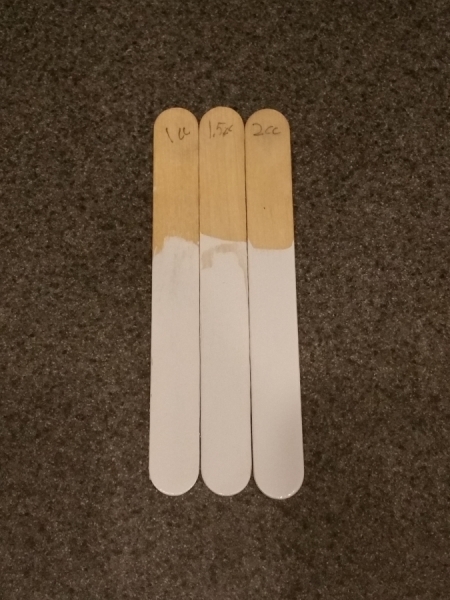
Re: The Plytanic 2.0 - FS17 Build
Posted: Thu Apr 05, 2018 8:25 am
by topwater
Wow that first coat is translucent
I don't remember it going on that thin when i did my hull. I did try the the EMC high
build primer and didnt like it so switched back to System 3 . I wonder what changed

Re: The Plytanic 2.0 - FS17 Build
Posted: Thu Apr 05, 2018 9:37 am
by Bogieman
That looks really good Silentneko.
Re: The Plytanic 2.0 - FS17 Build
Posted: Thu Apr 05, 2018 2:58 pm
by silentneko
topwater wrote: ↑Thu Apr 05, 2018 8:25 am
Wow that first coat is translucent
I don't remember it going on that thin when i did my hull. I did try the the EMC high
build primer and didnt like it so switched back to System 3 . I wonder what changed
I was surprised, and I kept enough on the roller to keep a wet edge. I used 42oz to do the 2 coats, so I might need to order some more later on. It's not a huge deal, it just means I'll need a few more coats then I figured.
Re: The Plytanic 2.0 - FS17 Build
Posted: Fri Apr 06, 2018 7:40 am
by topwater
Did you use a foam roller or a nap roller ? I think i used a 3/8 mohair nap roller when i did mine.
Re: The Plytanic 2.0 - FS17 Build
Posted: Fri Apr 06, 2018 9:27 am
by silentneko
Both, first coat with a short nap, admittedly because I couldn't find the foam rollers. The second was with foam. The only difference is the foam doesnt leave as bad of a hard edge, but the coverage was about the same.
Re: The Plytanic 2.0 - FS17 Build
Posted: Sun Apr 08, 2018 7:54 pm
by silentneko
I did a guide coat after a second coat and hand sanded the whole boat. There were quite a few issues I found so I went and fixed then up a bit. Again I'm not going for perfection here as I plan to coat the bottom with HBN/epoxy, which isn't as smooth as paint and can hide a lot.
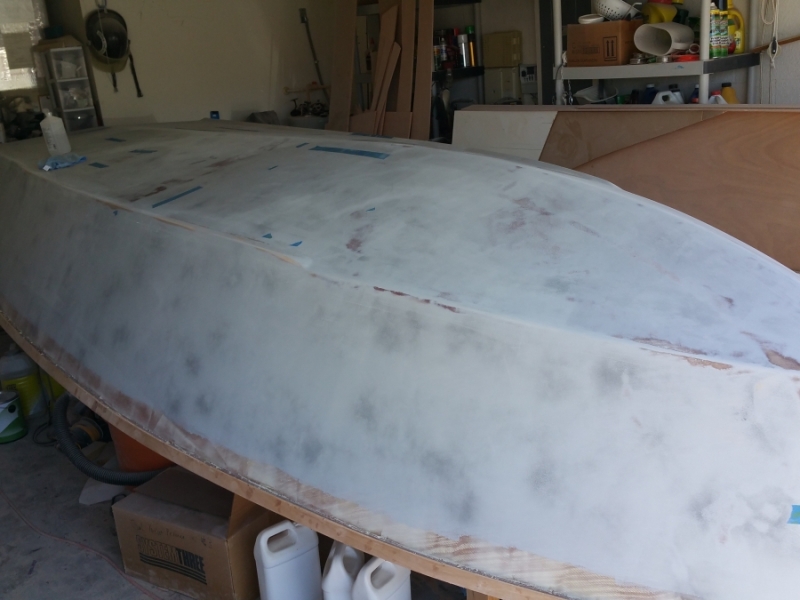
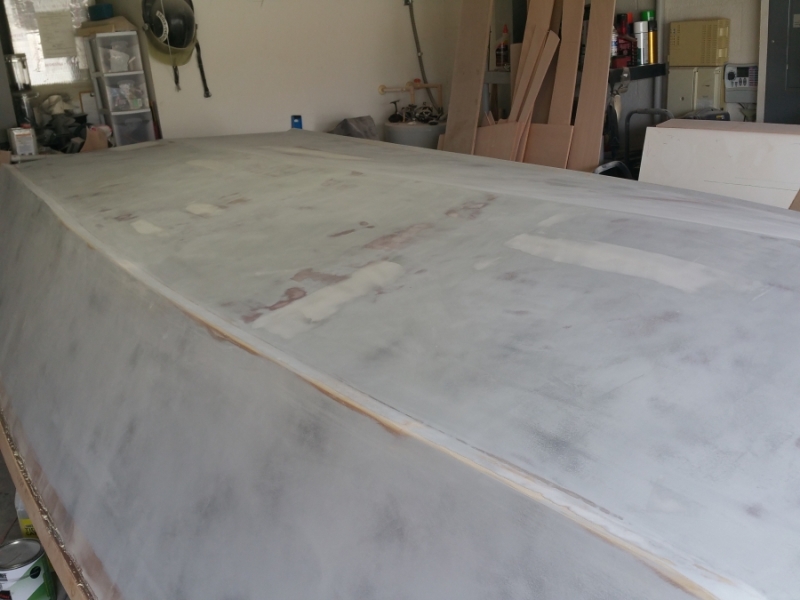
After 2 more coats of primer. I had some pinholes left after so I made some spot putty with the leftover primer and microspheres. it seems to have worked well. I've used more then 80oz of primer to get to this point so I think I'll need to order more to finish the boat.
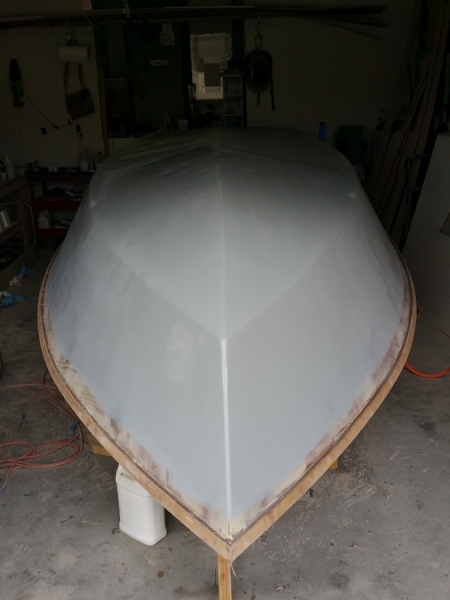
I hope to start coating the bottom in the next few days.
Re: The Plytanic 2.0 - FS17 Build
Posted: Tue Apr 10, 2018 12:21 pm
by silentneko
Well if you ever want to see all your imperfections just slap on a coat of something shiny, lol. It's good enough and it's the bottom that no one ever sees.
I did the first coat of HBN/epoxy right before the rain and hail moved in. Well it doesn't coat near as well as graphite, but I kinda figured it wouldn't. It's more like a neat coat with a milky tint, even after adding a bit of white pigment. I used about a 30% mix of the HBN. It's a finer grind then the graphite and mixed easily after sifting. I'll add more pigment on the next round.
If it doesn't improve I might mix the HBN and graphite to do a light gray. I just didn't want another black bottom.
Re: The Plytanic 2.0 - FS17 Build
Posted: Tue Apr 10, 2018 12:47 pm
by Bogieman
Looks like it's getting there
Re: The Plytanic 2.0 - FS17 Build
Posted: Thu Apr 12, 2018 6:39 pm
by silentneko
Slowly!
I'm basically doing 2 steps forward, and 1 step back, but still forward overall. I called system three and they confirmed the primer should not be used as a high build. Which explains why even sanding with 220 grit I was burning right through it after a few coats. I decided I just needed to move on so I tried to apply the HBN/Epoxy.
After 2 coats with white pigment added it was still very much transparent. The picture doesn't show a lot because the garage is closed, but trust me you see everything under it, including the gray tint of the primer.
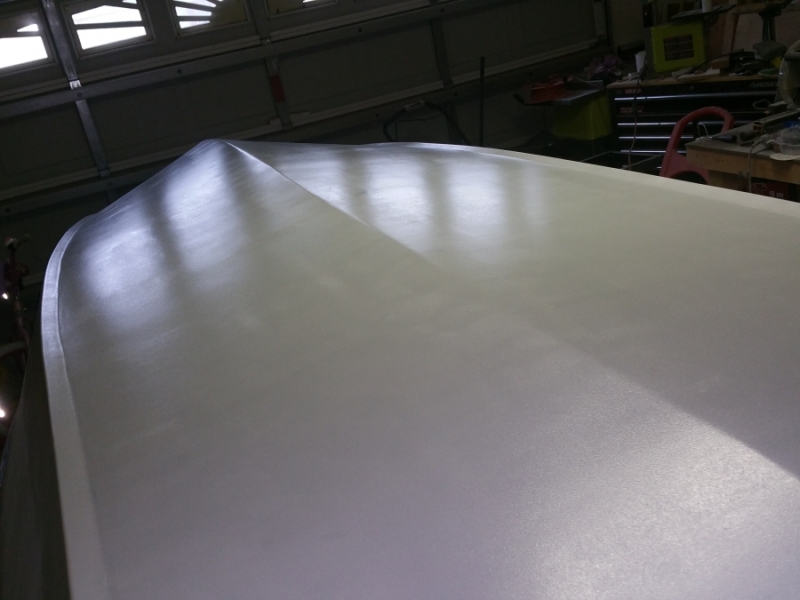
So what to do now? Do I put on another 2 coats to be disappointed again, or do I change course? I change course and come up with a new plan. I sanded down the coating, not completely, but I probably took down 2/3rds of it in many spots.
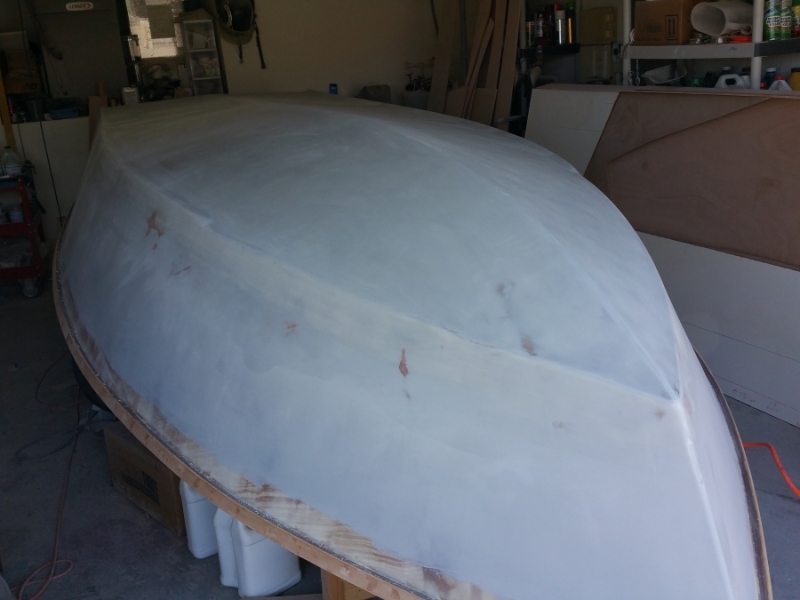
I didn't want to do a black bottom again cause I didn't think it would go well with my color scheme. I thought the offwhite of the HBN would be great, but it doesn't really tint the epoxy like the graphite does. Soooooo, I have leftover graphite from the last boat, I also have blue and white pigment. After some consideration and input from the wife I came up with an idea.
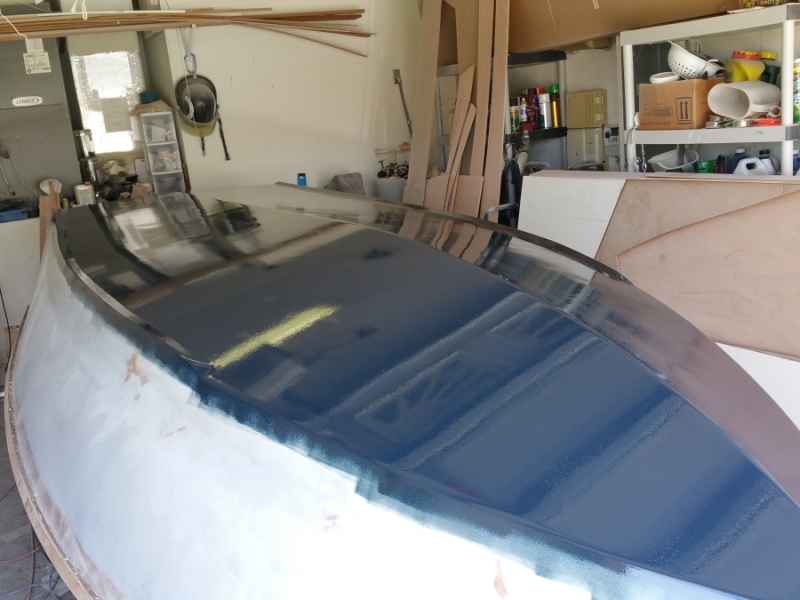
It covered well, and I dig the color. I used old tylenol syringes I stole from my kids medicine cabinet so I could be uniform and accurate. 9oz of epoxy 7cc's of phenol blue, and 4cc's of white pigment. It needs another coat, but I'll be able to move on soon.
Re: The Plytanic 2.0 - FS17 Build
Posted: Thu Apr 12, 2018 8:43 pm
by narfi
Looks nice!
Re: The Plytanic 2.0 - FS17 Build
Posted: Fri Apr 13, 2018 3:44 am
by glossieblack
Good solution.
Re: The Plytanic 2.0 - FS17 Build
Posted: Fri Apr 13, 2018 7:33 am
by Jeff
Looks good!! Jeff
Re: The Plytanic 2.0 - FS17 Build
Posted: Fri Apr 13, 2018 8:01 am
by silentneko
Thanks guys, I'm digging the color. I think it will look better with the ice blue.
Re: The Plytanic 2.0 - FS17 Build
Posted: Fri Apr 13, 2018 9:16 am
by OrangeQuest
That really does look good. And I think it will make the ice blue look bluer.
Re: The Plytanic 2.0 - FS17 Build
Posted: Fri Apr 13, 2018 2:46 pm
by silentneko
Lol, you guys ever have a project that the more you touch, the more you seem to damage?
I was rolling on the second coat and saw some spots afterwards, due to a poorly lit garage, that needed touch ups. Well a smart man would say I'll just wait and do a touch up coat in a few hours. An impatient man says I have left over epoxy still in the pan so let's fix it now. I ended up introducing a tone of bubbles, and trying to fix them I made it worse. We'll see how it looks in a few hours, but I think wet sanding and recoating some areas might be in my future.
Re: The Plytanic 2.0 - FS17 Build
Posted: Fri Apr 13, 2018 6:55 pm
by TomW1
Sorry you gave up on the HBN maybe if you had tinted it? To me HBN is the ideal coating much better than graphite as it does not absorb UV rays and keeps the bottom cooler while providing the same amount of protection over oyster bars and other nasty's.
Tom
Re: The Plytanic 2.0 - FS17 Build
Posted: Fri Apr 13, 2018 7:40 pm
by silentneko
I wish it worked out, but I put a fair amount of white pigment in and it was still to transparent. Knowing everything I do now, I think I can make it work on the next boat, so I'll keep it around. I'll need a solid primer base under it so it's uniform.
I just checked the bottom, I have some orange peel in the bottom and some fish eyes again. I suspect it was the foam roller breaking down. So as a last fix, I'm going to sand just the flat areas with the orbital and 220grit. Then I'll use a trusty short nap instead of the foam, and maybe tip it with a 4" brush. If it isn't good after that, I'm still moving on.
Next I plan to tape off the sides and paint just the bottom 6-8". It will be hard to get this right after it's flipped, and I'll be able to see if I really like the color. I did this on my last boat and it made things easier later on.
Re: The Plytanic 2.0 - FS17 Build
Posted: Sat Apr 14, 2018 6:35 am
by OrangeQuest
silentneko wrote: ↑Fri Apr 13, 2018 2:46 pm
Lol, you guys ever have a project that the more you touch, the more you seem to damage?
I was rolling on the second coat and saw some spots afterwards, due to a poorly lit garage, that needed touch ups. Well a smart man would say I'll just wait and do a touch up coat in a few hours. An impatient man says I have left over epoxy still in the pan so let's fix it now. I ended up introducing a tone of bubbles, and trying to fix them I made it worse. We'll see how it looks in a few hours, but I think wet sanding and recoating some areas might be in my future.
I call those moments the time I need to go get a beer and think about it. But I always seem to touch it!
Re: The Plytanic 2.0 - FS17 Build
Posted: Sat Apr 14, 2018 10:00 am
by Bogieman
Re: The Plytanic 2.0 - FS17 Build
Posted: Sat Apr 14, 2018 12:30 pm
by silentneko
I just can't help it! It's like a paint chip on a door, you gotta pick at it!
Re: The Plytanic 2.0 - FS17 Build
Posted: Sat Apr 14, 2018 8:37 pm
by Bogieman
Re: The Plytanic 2.0 - FS17 Build
Posted: Thu Apr 19, 2018 11:29 am
by silentneko
I'm in project hell right now fighting this bottom. Turned out the high quality foam rollers I bought were leaving fisheyes. Then the high quality lint free rollers were, surprise, leaving tons of lint. And in between all this I'm getting a weird occasional tiger stripe effect where the blue is different shades in some areas. It's all very odd.
I'm going to give it one more effort with a different roller setup. At this point I had to tell the wife the boat won't be done in time for the vacations we built around it. She is not happy understandably.
Re: The Plytanic 2.0 - FS17 Build
Posted: Thu Apr 19, 2018 11:31 am
by Jaysen
Just because I'm the guy that would miss something like this (and may have done so when working on his car)... is it possible that the tiger striping is a light effect thanks to tube lighting?
Re: The Plytanic 2.0 - FS17 Build
Posted: Thu Apr 19, 2018 1:25 pm
by silentneko
I wish, but I'm in natural light mostly and it follows the roller marks. It seems to be an odd effect of using both the pigment and graphite to make the blue. As the graphite settles in the pan, and as the resin starts to gel a bit (like the edge where I have to mix a new batch) it creates different shades as you roll it out.
I got some new rollers, gonna give it one more shot and see what happens. Ultimately I might have to go with just a black graphite bottom, but I don't like the look.
Re: The Plytanic 2.0 - FS17 Build
Posted: Thu Apr 19, 2018 1:30 pm
by Jaysen
I'll get shot for this...
you can paint over the graphite if you want.
This assumes that you are using the graphite as a slightly harder protection surface. Paint will get scraped off, but at least the color will be what you want.
Re: The Plytanic 2.0 - FS17 Build
Posted: Thu Apr 19, 2018 1:40 pm
by silentneko
No one's shooting, and yes I could, but it would get rubbed off quickly when beaching. It's not ideal, but possible.
Re: The Plytanic 2.0 - FS17 Build
Posted: Thu Apr 19, 2018 2:02 pm
by Jaysen
As a person that's very very very hard on the bottom of his boat, I can tell you that paint won't last long. BUT if you really really really hate the black, then having just a bit of black as the paint rubs off might just do it for you. Might. Likely not, but hey, you never know.
There are 2 part paints that are very hard. I'll see if someone in my sphere of absurdity knows of anything that might take the beating and be marine friendly. Most of the idiots I hang out with keep cans of paint near at hand and just touch up post clean up. But, as I alluded to earlier, we are absurdly stupid. Normal people don't need to paint things after each use.
Re: The Plytanic 2.0 - FS17 Build
Posted: Thu Apr 19, 2018 2:39 pm
by narfi
If the paint is somewhat the same color as the anti-abrasion mix you are laying down now..... the paint would make it look uniform (who really cares on the bottom of the boat?) without streaks, while not showing scratches through the paint nearly as much.....
Re: The Plytanic 2.0 - FS17 Build
Posted: Thu Apr 19, 2018 2:46 pm
by silentneko
Before we get to far down the rabbit hole, let's see if I can fix it. I'll have to wait until the night time to sand and recoat. I picked up some new 4" short nap rollers to try. I'm ok if it has a slight texture, as long as it's fairly uniform.
Re: The Plytanic 2.0 - FS17 Build
Posted: Thu Apr 19, 2018 3:32 pm
by Bogieman
Good luck Silentneko! Hope it all works out. I love how fast Jaysen and Narfi showed up to help. Got to love this forum.
Bogie
Re: The Plytanic 2.0 - FS17 Build
Posted: Thu Apr 19, 2018 3:59 pm
by silentneko
Lol, my builds a headache, but the forum is always fun.
Re: The Plytanic 2.0 - FS17 Build
Posted: Thu Apr 19, 2018 6:49 pm
by TomW1
Hey Silentneko it's just a thing as Cracker Larry used to say.
Just get some epoxy proof rollers. Order them from here if you have to..
Tom
Re: The Plytanic 2.0 - FS17 Build
Posted: Sun Apr 22, 2018 1:36 pm
by silentneko
Funny enough the last rollers I was using were the solvent resistant ones. Epoxy shouldn't have been an issue and they didn't break down when using them. They just left fisheyes. It's just my luck, lol. Speaking of that....
I thought I had the epoxy graphite done. Went out to look at it this morning and while far from perfect it was livable. Until I realized for some reason while the bottom was fairly smooth, the edges and sides all came out really rough. This wouldn't be an issue, but that's where I planned the tape line to go. I just put down another coat, I think it will be the last one. Fingers crossed!
Re: The Plytanic 2.0 - FS17 Build
Posted: Sun Apr 22, 2018 6:07 pm
by silentneko
Well, as per usual I screwed it up worse trying to fix it. I put on some more mix, rolled and tipped it out. It was looking nice. Checked on it 2 hours later after it gelled, still looks nice. 4 hours later and all of a sudden it developed drip marks, which is a worse situation then if I left it.
The definition of insanity.......
The kicker is, if I just kept on with the HBN and did 5-6 coats maybe I would have been long done by now. My wife is ready to kill me, im near 50% over budget, and our summer vacation plans are ruined thanks to all these delays. If I can't get it to flipping stage by next week my wife wants me to cut bait.
Re: The Plytanic 2.0 - FS17 Build
Posted: Sun Apr 29, 2018 2:53 pm
by silentneko
It's been a bit since my last post, and I've been hard at work trying to sort it all out. Some nights as late as 3am. I didn't want to post again until I made progress one way or the other. So on my last post I said I Developed drip marks on my edges. Well some were quite severe and I can't tell you why it happened. 2 hours after application everything looked ok and it was still tacky but gelled. 4 hours later drip marks? I mixed this batch consistent with all the others, but I must have done something wrong.
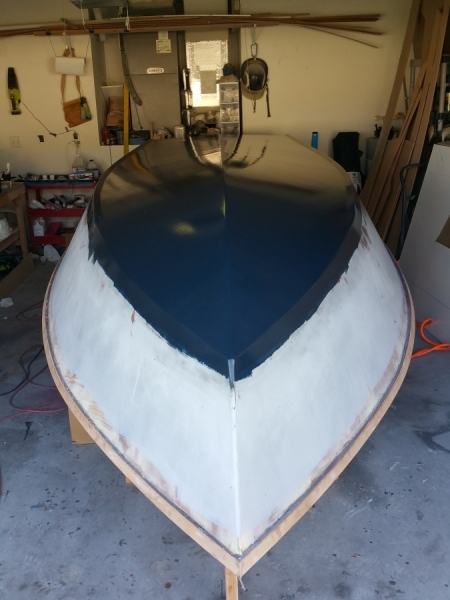
So now what to do? I had to grind back the drips, problem is grinding hard epoxy drips on top of softer primer and fairing material doesn't go so well. I ended up ruining all the fairing work I did along that area.
I had to make a choice here. Either I needed to back track weeks and start the whole process over again, or just move on and live with the massive amount of imperfections. I chose to move on. I established my tape line and reprimed.
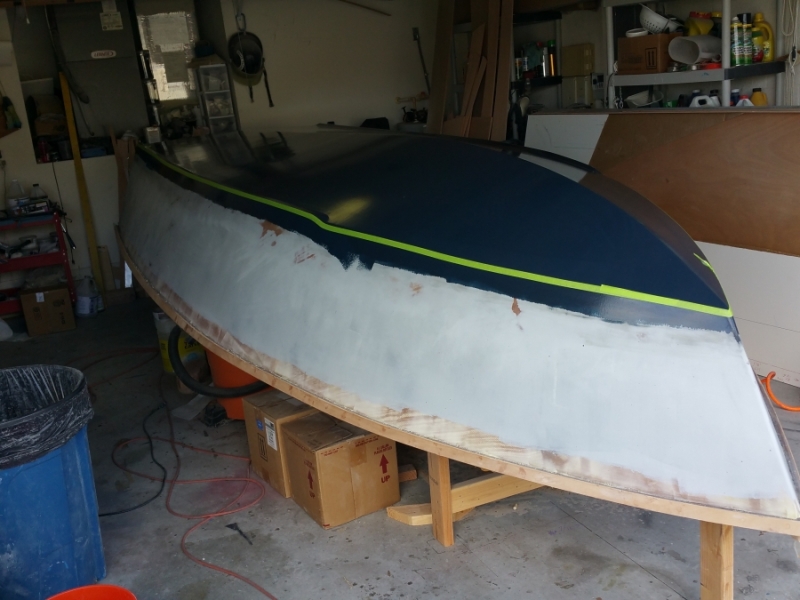
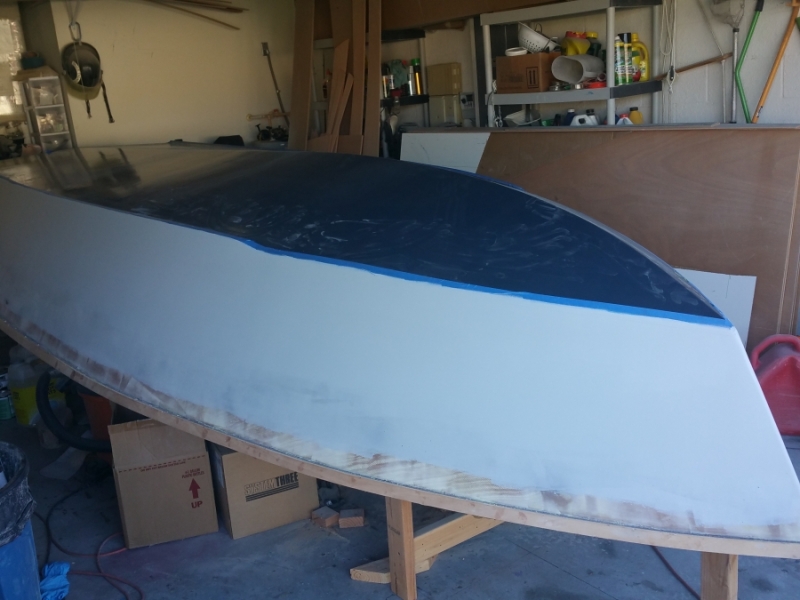
After sanding it and applying the first coat of paint I decided to sand again. Funny enough the Interlux Perfection acted better as a high build primer then the System Three. I was able to work out some issues, but many of the imperfections remained. I rolled and tipped a few more coats on. I got plenty of dust in it as well, but the end result is more or less livable. One thing that came out nice was the tape line. I used the best 3m automotive masking tape I could find and it shows.
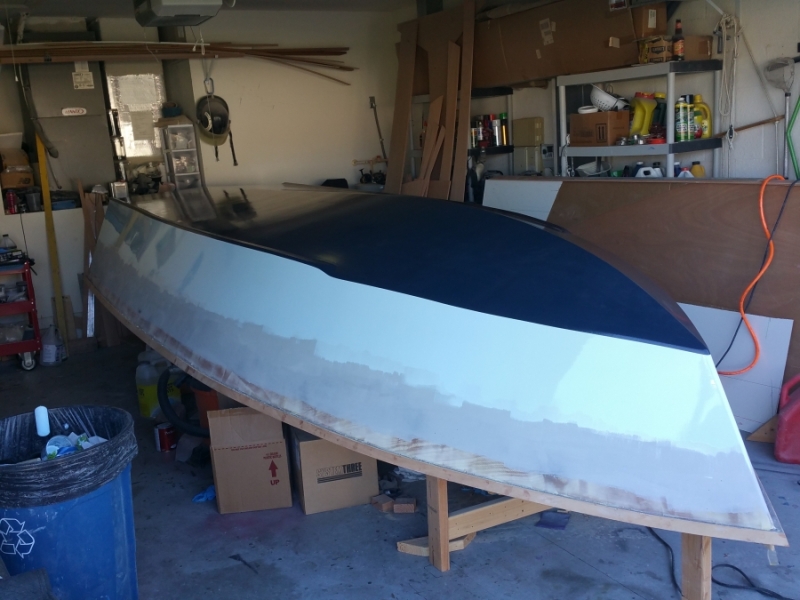
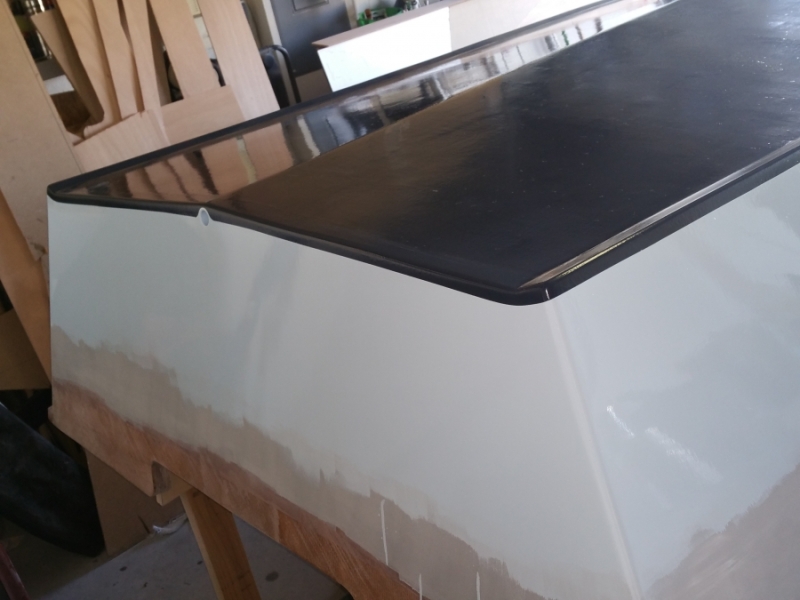
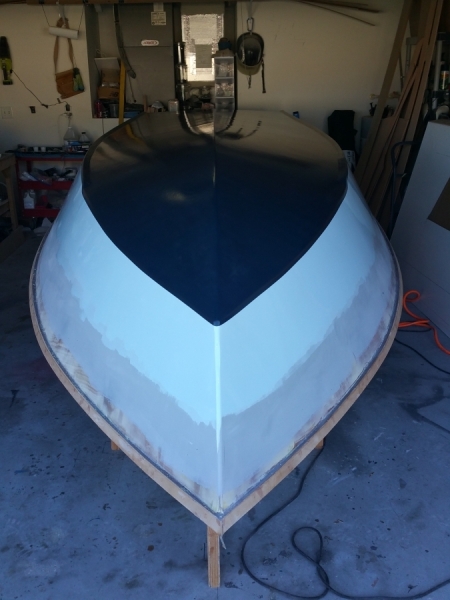
I also like how the color came out. I ended up mixing 2.5cc's of the blue pigment into the interlux perfection and it's just a hair darker then ice blue. it goes nicely with the navy blue bottom.
The boat is more or less ready to flip. It will have to wait though, as I am about to leave on a slightly bigger boat, give or take 800ft, for a few days.
Re: The Plytanic 2.0 - FS17 Build
Posted: Sun Apr 29, 2018 3:40 pm
by narfi
Looks great.
Enjoy your cruise!!!!
Looks like we are on about the same schedule.
Our cruise is in 2weeks and I'm hoping to be where you are now when we leave.
Re: The Plytanic 2.0 - FS17 Build
Posted: Mon Apr 30, 2018 1:42 pm
by glossieblack
Good rescue.
Re: The Plytanic 2.0 - FS17 Build
Posted: Mon Apr 30, 2018 2:26 pm
by Jeff
silentneko, very nice work!! Jeff
Re: The Plytanic 2.0 - FS17 Build
Posted: Mon Apr 30, 2018 8:30 pm
by Bogieman
Glad you're back on track. Looks really good!
Re: The Plytanic 2.0 - FS17 Build
Posted: Mon Apr 30, 2018 9:34 pm
by Eric1
Good Save!
Re: The Plytanic 2.0 - FS17 Build
Posted: Thu May 10, 2018 5:48 pm
by silentneko
It's time to flip!
So I have to say even with the massive amount of issues I've ran into this build, I still love the overall design of the skiff. At this stage you really can't get an appreciation for it from looking at the bottom. I crawled under the boat to unscrew the transom and mark the frame locations to make it easier after the flip. While under there I sat for a minute looking around. First, whoever thinks this is a smallish 17footer may not have been on many skiffs in this class recently. At a 7ft(84") beam the hull looks much wider then most I've seen. Most production skiffs in this class are between 60-74". Now at the waterline she is narrow, but no more narrow then any other skiff I've looked at.
One issue I noticed, well got a closer look at at least, is the rubrail/gunnel edge issue. It is more wavy then I thought. I'm not sure how I'm going to fix it just yet. I have some friends coming over Saturday morning to help me flip the boat onto the cradle.
I bought 10 2x4's and that was barely enough because I figured out my original plan was not going to support the hull how I wanted. Another issue I didn't account for is the reverse chine makes it impossible to support the hull all the way to the chine like I planned. So this is what I ended up with.
I topped the supports with carpet, not really for scratches, but more as a gap filler on any uneven areas between the wood and hull.
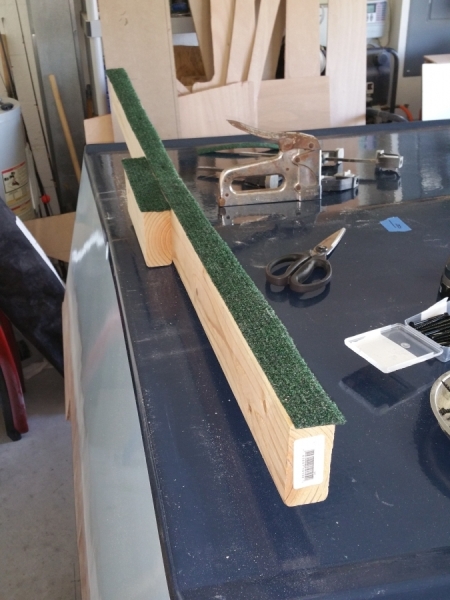
I ended up putting a support to mirror the frames for now. Up to frame B, and also longitudinal supports along where the stingers will be set. I used all the 2x4's to do this and about 80 screws. I added 7 ball bearing rollers to it also. I build a support to go under frame A if needed, but it's a more simple brace.
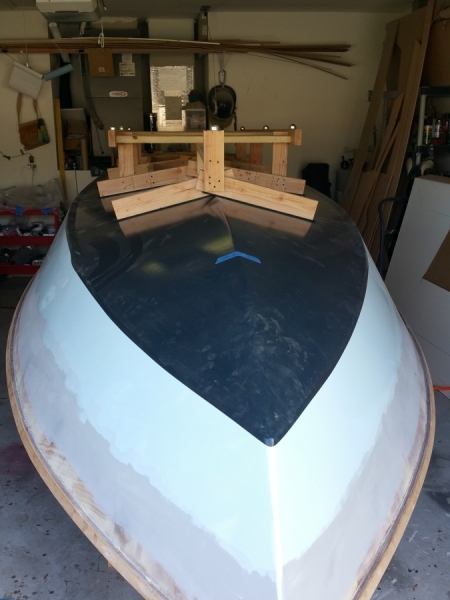
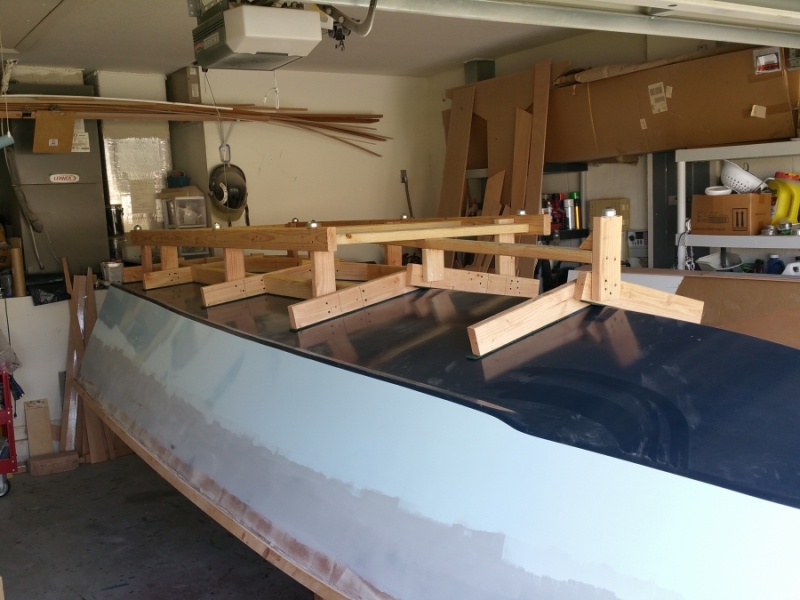
Re: The Plytanic 2.0 - FS17 Build
Posted: Thu May 10, 2018 6:17 pm
by narfi
Hope you had a good trip, I almost caught you while you were gone.......
Ill be back in 10 days or so and ready to flip as well.
Hoping for some good pictures and ideas from you when I get back

Re: The Plytanic 2.0 - FS17 Build
Posted: Thu May 10, 2018 6:37 pm
by Jaysen
Define “wavy”. If you mean the pretty edge of the ply does not line up with the pretty edge of the rail then you have two tasks AFTER you determine the line you want.
1. Use a trim bit to cut down the high spots.
2. Fill the lows with thickened epoxy.
At that point sand and smile.
Let us know if the problem is different than I’m assuming.
Re: The Plytanic 2.0 - FS17 Build
Posted: Thu May 10, 2018 6:45 pm
by TomW1
I think you have her well supported sir. I'll see you on Saturday.
Tom
Re: The Plytanic 2.0 - FS17 Build
Posted: Thu May 17, 2018 6:09 pm
by silentneko
I've got a few high spots with the rub rails, but since I ran both sides in the same manner they are symmetrical. It's not a big deal, but I can't address it until I'm putting the decks on later.
So I had a few friends come over last Saturday and we got the boat flipped. I dragged the whole rig out of the garage and the 4 of us including my wife picked it up and flipped it onto the cradle. It was easy to do except I had to use every bit of my 6'3" frame to clear the front of the strong back.
So I'm not sure if this is a good sign or not, but when we opened the garage to do everything we were met with this.
We got his out of the way before we flipped the hull. Everything look ok on the inside, just a bit of cleanup to do.
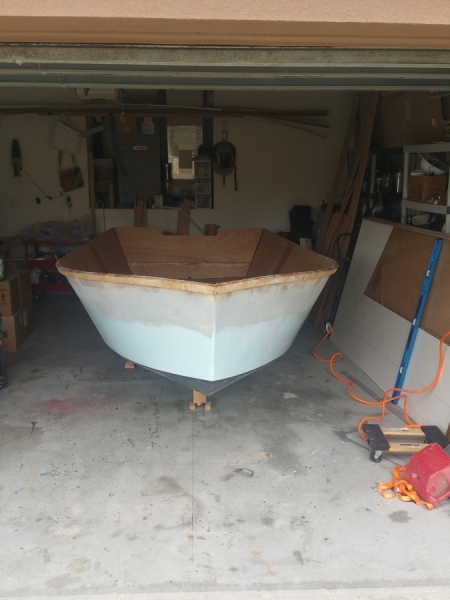
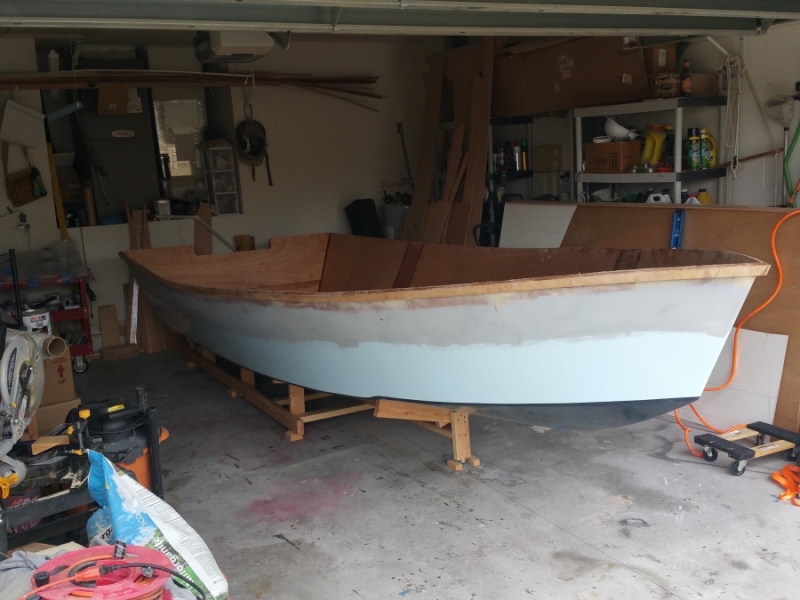
I added some additional support to the front after this pic. I also put it up on blocks until the stringers are it.
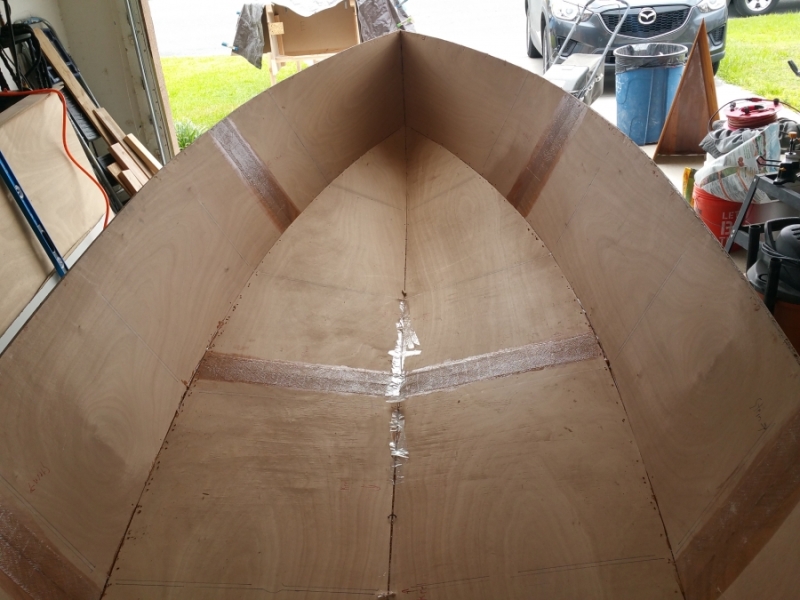
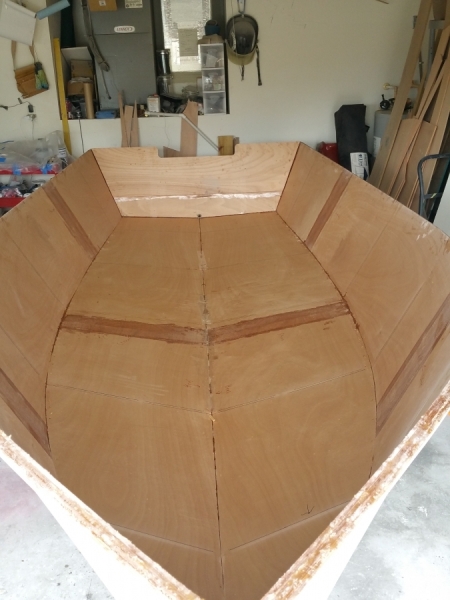
Unfortunately I had to leave the morning after the flip due to a family issue, but I'm back now. I spent a little time today filling the holes and the large gaps around the edges and transom. I'll come back in a day or 2 to lay the fillets, and maybe tape the seams.
Re: The Plytanic 2.0 - FS17 Build
Posted: Thu May 17, 2018 6:24 pm
by poleposition
I know at times you've thought this project has been snake-bit, but damn----you dont need to turn it in to a reality show. Assuming that's a copperhead, that is a good-sized one and likely to be more around.
Re: The Plytanic 2.0 - FS17 Build
Posted: Thu May 17, 2018 6:38 pm
by Fuzz
Good flip! The inside looks nice and neat.
Dang I am glad I don't live where there are lots of sneaky biting things
Re: The Plytanic 2.0 - FS17 Build
Posted: Thu May 17, 2018 9:57 pm
by silentneko
Lol, guys it's just a corn snake, he was released unharmed.
The insides not to bad, I'm working out a few issues, but hope to glass soon.
Re: The Plytanic 2.0 - FS17 Build
Posted: Fri May 18, 2018 6:52 am
by topwater
[quote]Dang I am glad I don't live where there are lots of sneaky biting things /[quote]
Fuzz you're kidding right
You just live where big assed bears run 35 mph and laugh at 44 mags
Re: The Plytanic 2.0 - FS17 Build
Posted: Fri May 18, 2018 10:39 am
by Eric1
Congratulations on the flip!!! The boat is looking great!
Re: The Plytanic 2.0 - FS17 Build
Posted: Fri May 18, 2018 1:05 pm
by Jeff
Nice flip!! Jeff
Re: The Plytanic 2.0 - FS17 Build
Posted: Tue May 22, 2018 8:51 pm
by silentneko
Started working on the interior. I hate having to crawl inside it right now, but it's the only way to reach the middle. I needed to use one strap to pull the hull in about 1/2" or so to meet the frame, other then that it seemed pretty fair to the rest.
I filleted all the seams a few nights ago.
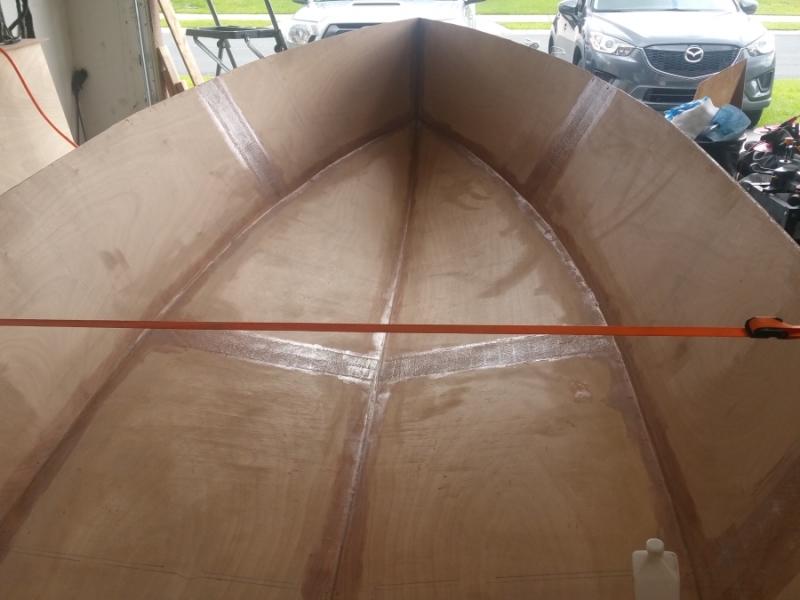
I then taped just the bow, because I wanted to try out some peel ply I have. It worked ok, but the weave is so open in the biaxial tape that it couldn't make it smooth. Also peel ply seems to work much better on outside edges, on the inside it slides around a lot.
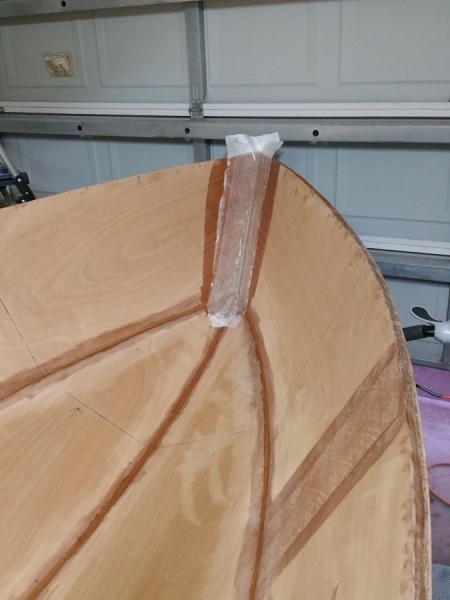
Today I cleaned up some fillets and then taped the inside seams.
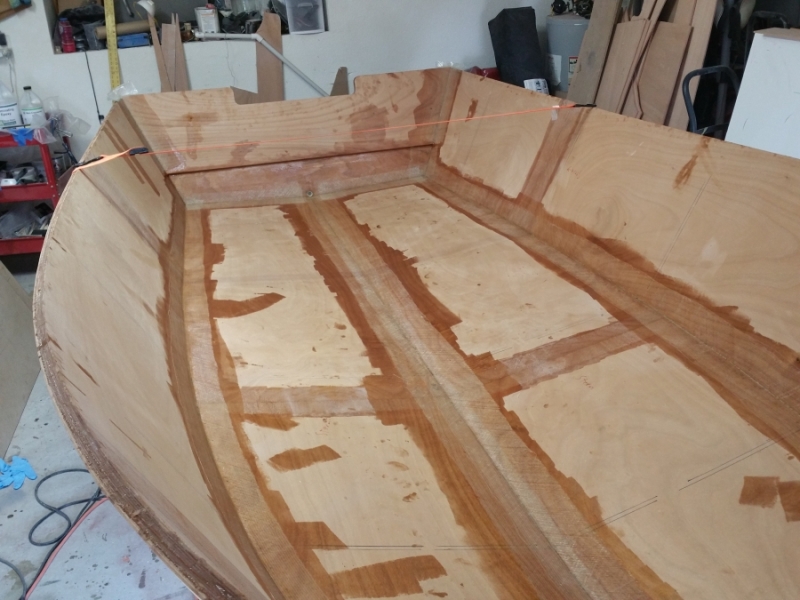
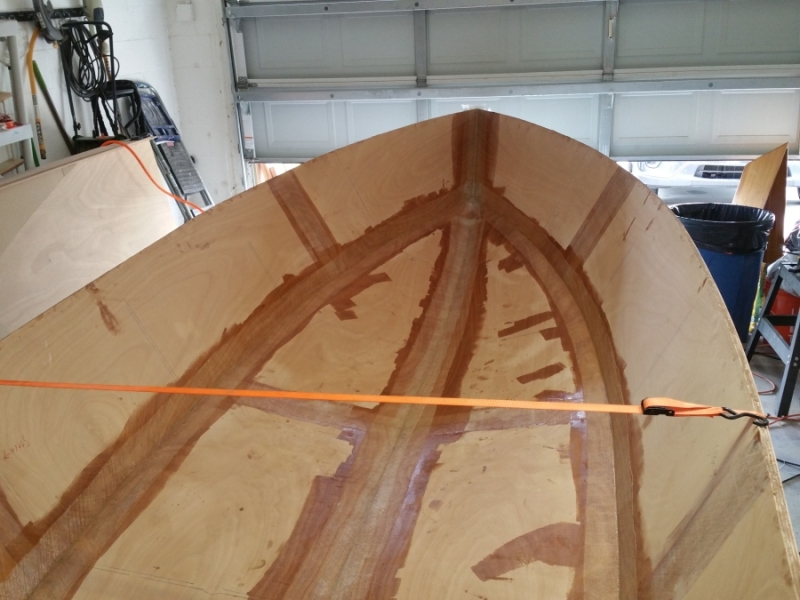
I will hopefully try to get the inside glassed this week. Then I'll need to work on building the stringers.
Re: The Plytanic 2.0 - FS17 Build
Posted: Tue May 22, 2018 10:07 pm
by OrangeQuest
Looking good!
Re: The Plytanic 2.0 - FS17 Build
Posted: Wed May 23, 2018 7:09 am
by Jeff
Nice work and progress silentneko!! Jeff
Re: The Plytanic 2.0 - FS17 Build
Posted: Sat May 26, 2018 3:22 pm
by silentneko
I sanded down the tape and rolled on a slurry coat to help fill in the weave prior to bottom glass. I had ambitious plans, but they didn't quite work out. I was going to glass then whole bottom, however it is much more difficult then the exterior and took more time then I expected. So I could only finish one half.
I laid out the glass then rolled up one side. As mentioned earlier this is really a 2 person job, so it didn't go as planned. The half I rolled up is pretty distorted now. I hope it can still be used, but the biaxial is harder to straighten out then woven. Here is the half I glassed yesterday.
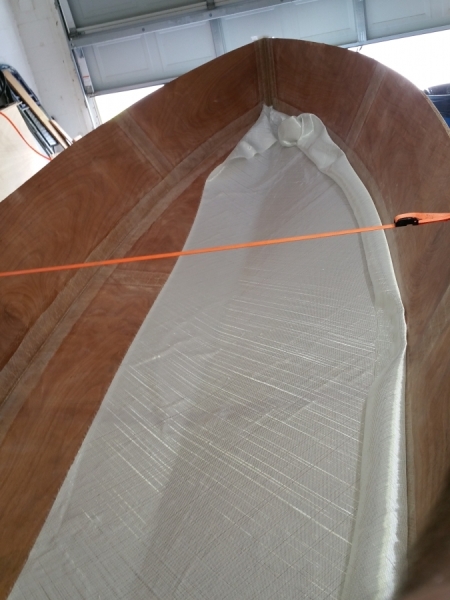
I took longer then expected to wet out, I was using a roller to push around resin then a glass roller to smooth it down which worked great, but is a little slow. I used some scrap pieces as fillers up front.
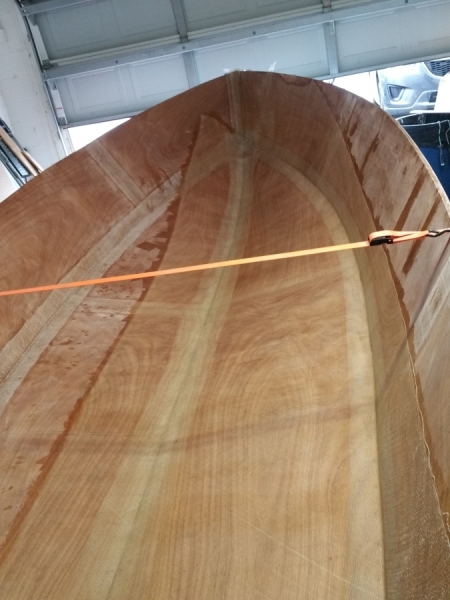
I'll fill in the sides with 6oz woven after the floor is in. Good thing about the distortion is because it's under the sole no one will see it.
Re: The Plytanic 2.0 - FS17 Build
Posted: Sun May 27, 2018 9:27 am
by Dougster
I think the inside glassing is harder too, but that looks fine to me. Next is the other side and then Bob's your uncle! I don't even see any sign of bubbles or dry sections but the odd little bubble is easily dealt with.
Dougster
Re: The Plytanic 2.0 - FS17 Build
Posted: Sun May 27, 2018 10:09 am
by silentneko
There are only small air pockets where the rough weave hits, nothing that will bother anything. The next section will be the worst part as it's heavily distorted already, but I'll make it work.
Re: The Plytanic 2.0 - FS17 Build
Posted: Mon May 28, 2018 11:40 am
by Bogieman
silentneko wrote: ↑Sun May 27, 2018 10:09 am
There are only small air pockets where the rough weave hits, nothing that will bother anything. The next section will be the worst part as it's heavily distorted already, but I'll make it work.
That looks perfect to me.Really nice. Makes me a little embarrassed when compared to my inside glass job.
Re: The Plytanic 2.0 - FS17 Build
Posted: Mon May 28, 2018 11:58 am
by silentneko
Just wait for the other side to be done. I have 2 choices, lay severely distorted glass that will be ugly, have a few extra air pockets, and be uneven. OR I could toss it all out and waste 16ft of biaxial. I hate to waste glass, so lets see how this goes, lol.
Re: The Plytanic 2.0 - FS17 Build
Posted: Mon May 28, 2018 8:27 pm
by silentneko
Well the glass was heavily distorted from rolling and unrolling it, but I got it done. I spent about an hour straitening the glass as best as I could. I had to cut a few areas and overlap them, but all in all it wasn't too bad.
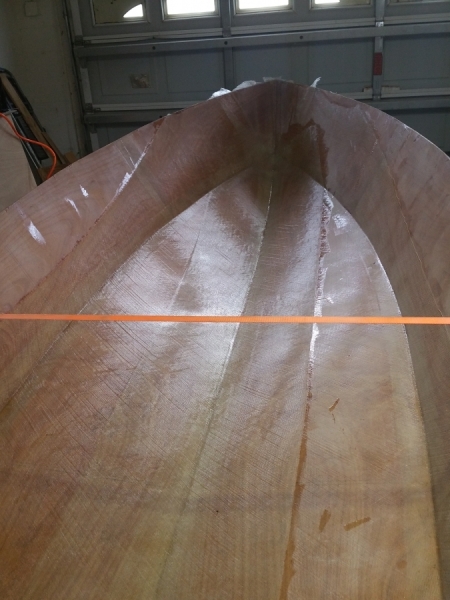
I glassed the transom as well, but here is where it got more interesting. I had to splice a few areas to get it all done, no big deal. However, it took every last drop of resin I had. I even had to turn over a bottle and hit it like a heinz 57 bottle. I made it, but I'll have to make a run Wednesday to get more resin.
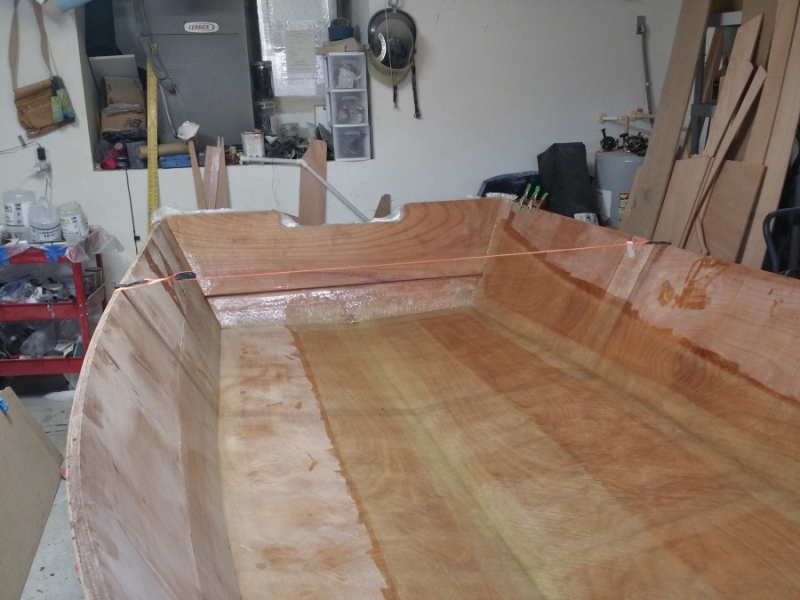
Re: The Plytanic 2.0 - FS17 Build
Posted: Mon May 28, 2018 8:55 pm
by narfi
It looks good to me.
As long as its sealed well, very little of that will be visible when done, so I think you are good.
I originaly bought 15gal of epoxy for the HC14 and the FS17, I am ready to flip and have used most of the 15gal now and bought an additional 6 gal which I am hoping will get me to the end..... I did use a lot more learning on the canoe than I should have, but still think I have probably used more on the FS17 than called for as well.....
Re: The Plytanic 2.0 - FS17 Build
Posted: Tue May 29, 2018 3:38 am
by Fuzz
I know it can be done,or JM would not have it in the plans, but I am still waiting for somebody to only use what the plans call for. I am thinking a guy should start out with double what the plans call for. And if you have a bunch left over it would be a good reason to build something else
Re: The Plytanic 2.0 - FS17 Build
Posted: Fri Jun 01, 2018 3:51 pm
by silentneko
I just bought another 4.5 gallons of resin, the last 1.5 is for a different project though. But keep in mind I didn't use most of the original batch I bought, so I think I'm about 8.5 gallon in the hull now. I also had to use a bunch when leveling and fairing the hull. Hindsight being 20/20 if I had corrected the sags in the hull panels prior to glassing, and used peel ply effectively on just the exterior of the hull, I think I could have saved as much as a 1.5 gallons.
Re: The Plytanic 2.0 - FS17 Build
Posted: Sat Jun 02, 2018 11:06 pm
by silentneko
I'm working on sorting out the stringers now. I went back and redid the stringers based on frame measurements, and the cad measurements I got in the other thread. The result is the back 8ft of the stringers fit perfect, then the front starts to float a bit, but that's ok and easily filled in.
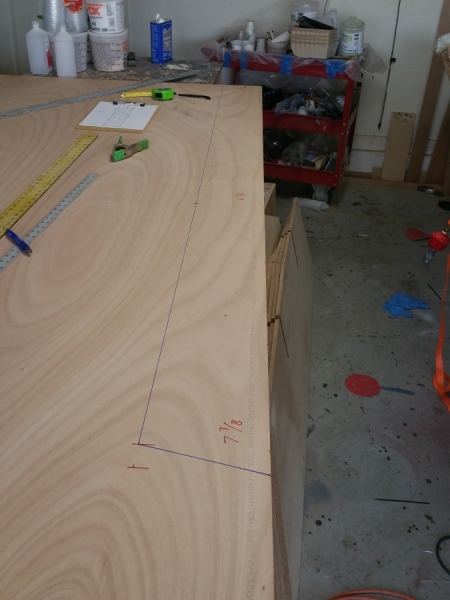
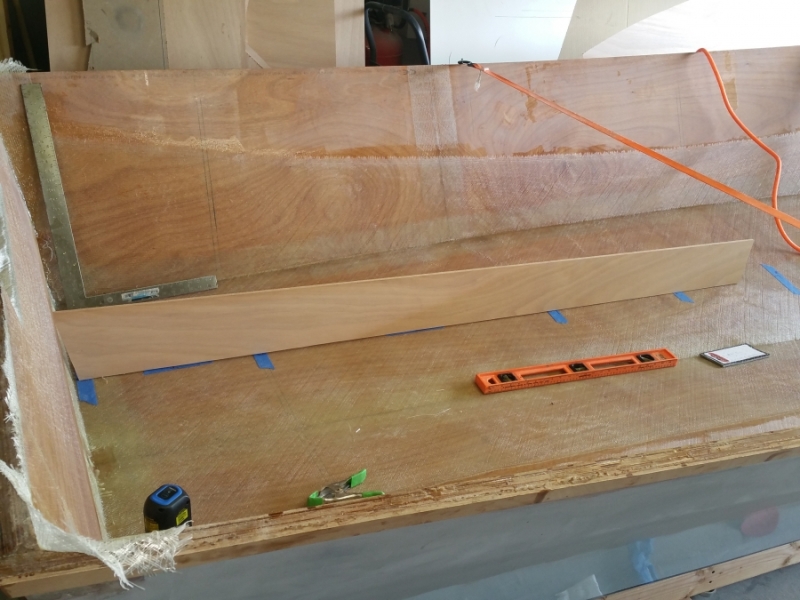
So what I decided to do was cut out the first 2 parts and use them as patterns for the rest. I was routing them out with a straight bit, it was getting dull but still did the job. Then all of a sudden I see sparks and a bit of flame. The roller on the bit failed. I had to run out and get another one.
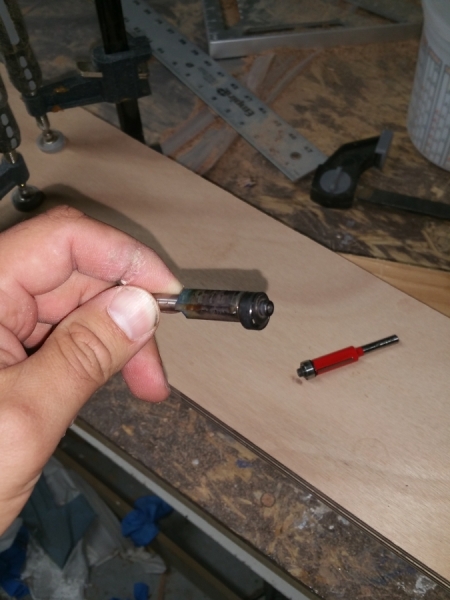
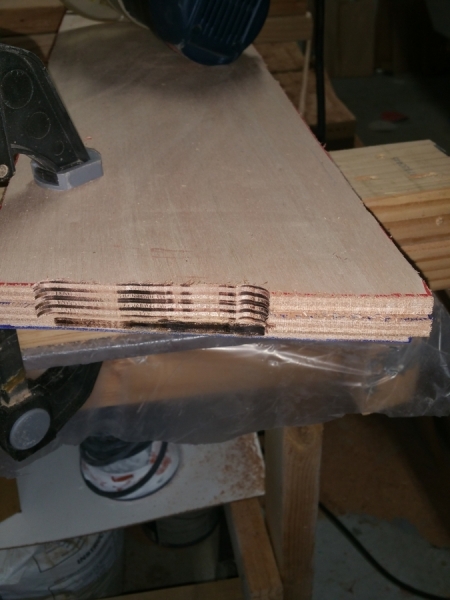
I got the stringers all glued up today, I built them 1" taller then the plans, that also made them a few inches longer, but I cut ends off to finish them a bit nicer in the forward compartment.
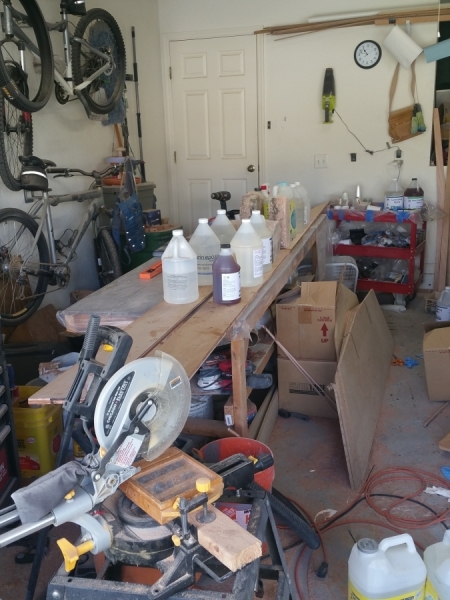
I made some quick support blocks to keep them lined up.
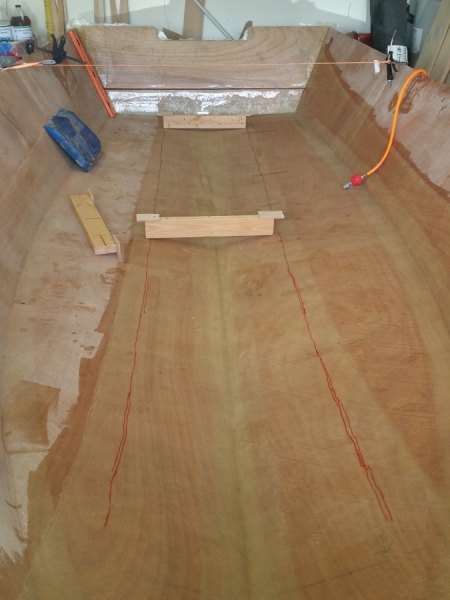
I'll drop them in within the next few days, then I can finally determine the layout.
Re: The Plytanic 2.0 - FS17 Build
Posted: Tue Jun 05, 2018 9:40 am
by Bogieman
Your build is looking really good. Impressive job on that inside glass too.
Re: The Plytanic 2.0 - FS17 Build
Posted: Thu Jun 07, 2018 7:28 pm
by silentneko
Thanks, I wish the stringers were going better. I had such a large gap towards the front I've had to fill it in several passes. It cupped a bit after laying the glass on soft fillet material, so I think I'm going to back fill it and lay another bit of glass to make it stronger.
I think I've finally made a decision on layout, so I can move forward with bulkheads and frames.
Re: The Plytanic 2.0 - FS17 Build
Posted: Thu Jun 07, 2018 11:39 pm
by Fuzz
Heck just remember adding a little extra glass to the stringer area is not a bad thing
Re: The Plytanic 2.0 - FS17 Build
Posted: Mon Jun 11, 2018 3:31 pm
by silentneko
Extra glass it is.
Here are the stringers tacked in place. The blue tape are marking from me trying to figure out some measurements and layouts.
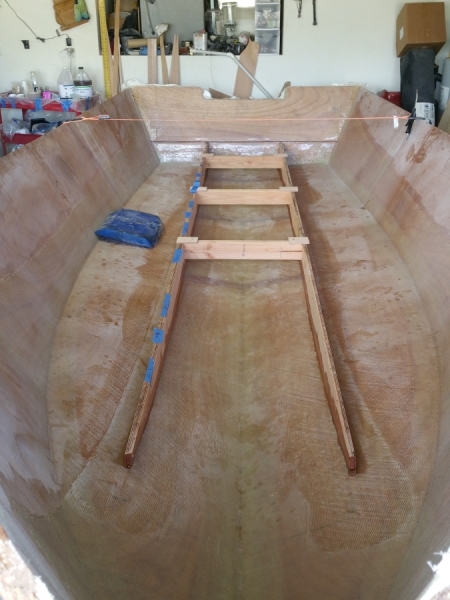
I realized something that I feel is pretty cool. I can fit a 5 gallon bucket under the front deck. This is not normal for a small boat, but presents a great opportunity for storing cast nets and anchors.
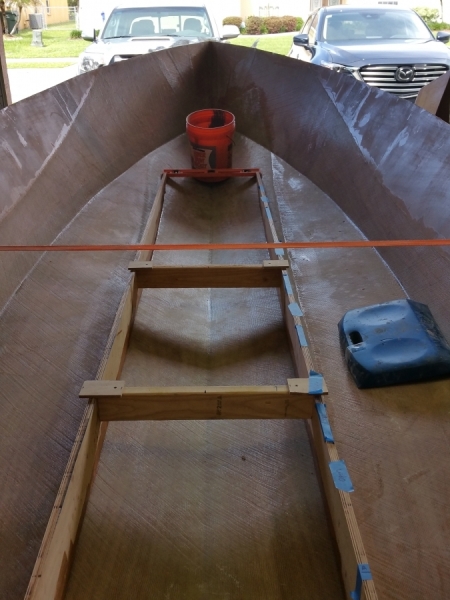
Here you can see the filling I had to do under the stringers. I've leveled it all out and can finish glassing now
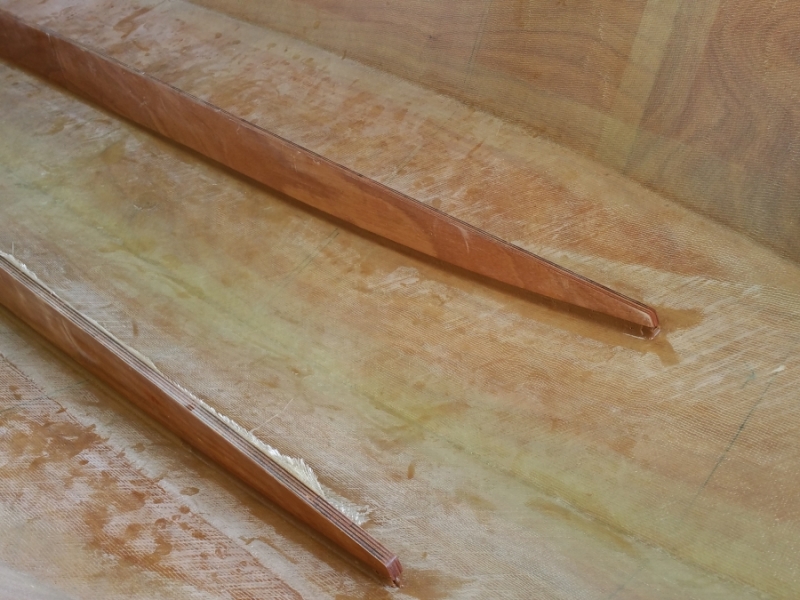
Re: The Plytanic 2.0 - FS17 Build
Posted: Mon Jun 11, 2018 4:09 pm
by Jeff
Very nice, clean work silentneko!!! Jeff
Re: The Plytanic 2.0 - FS17 Build
Posted: Tue Jun 12, 2018 12:25 am
by Fuzz
Just like Jeff said nice clean work
Re: The Plytanic 2.0 - FS17 Build
Posted: Mon Jun 18, 2018 5:27 pm
by silentneko
Not to much progress has been made. I had to bow out for a few days with family issues and a back injury, but I'm back at it. It is ridiculously hot out, so much so I went and bought a portable AC system for the garage. Well It sucks, it's only 8000 btu's which isn't enough to chill it out, but I didn't need it to be cold, I'd be happy if it could lower it to around 80. Well it was only able to lower it by about 2 degrees from outside, not enough for me to care so I'm returning it.
The only thing I've really done is finished glassing the stringers. They are glassed and tabbed into the transom. I went the extra mile and used 6oz woven to cover the areas of the stringers that weren't covered by the tape. I hate the idea of any exposed wood (resin coated only) in an area that will be exposed to moisture often.
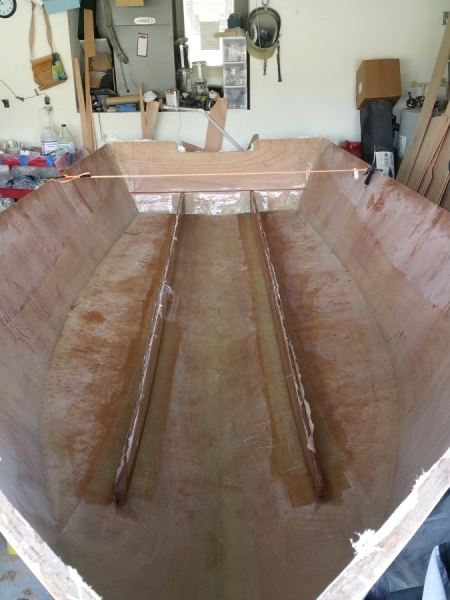
So here we go back to the stringer issues. I looked over many build threads and I can see a lot of people have had the same issue and just rolled with it. Some have had issues with the floor sloping forward and collecting water at rest. Well Because I went back to the drawing board and redid my stringers I think I'll be good. You can see in the previous post how much I had to fill the areas towards the bow. This is because I corrected the stern portion to be level with the baseline instead of sloping towards the bow. Long story short, it was more work, but I know it will work well and should drain no problem.
So now I HAVE to make layout decisions. I am finishing up some design work now and will start on the bulkheads in the next few days.
Re: The Plytanic 2.0 - FS17 Build
Posted: Mon Jun 18, 2018 7:57 pm
by narfi
silentneko wrote: ↑Mon Jun 18, 2018 5:27 pm
So here we go back to the stringer issues. I looked over many build threads and I can see a lot of people have had the same issue and just rolled with it. Some have had issues with the floor sloping forward and collecting water at rest.
I have pondered on this as well. But decided for me it won't be much of a concern for my use.
1. Not a concern when moving.
2. Not a concern if pulled up on the beach with the bow higher than natural. (I wont be tied up to docks for any length of time)
3. Not a concern if attention is paid to angle when parking the trailer.
In the water I think it really comes down to balance which you and I have both worried about more than the designer would like...... If it is only a concern when at rest and unattended, the motor in back with no people to counter towards the front should have the nose a little high anyways right? Or am I completely confused about the entire thing?
Re: The Plytanic 2.0 - FS17 Build
Posted: Mon Jun 18, 2018 8:25 pm
by silentneko
I thought as you did, but the thread I linked to in the layout thread, and Rookies post, had me thinking other wise again. My boat will be tied up to a dock on vacations, I will have a heavy bow mounted trolling motor, and I'll have 2 batteries in the console along with 12 gallons of fuel. The stringers are now level instead of pitched downward so it should drain well.
Draining out while underway isn't an issue, and while at stand still I can plug the scuppers, but while tied at the dock for a week..... On one of our trips it rained heavy for 2 days straight, luckily my current boat has an automatic bilge pump.
Re: The Plytanic 2.0 - FS17 Build
Posted: Mon Jun 18, 2018 8:57 pm
by OrangeQuest
I thought about this when considering the angle of my sole. It will be parallel with the hull and if it runs a little bow heavy then water coming into the sole will run forwards. Putting small drains on each side of the console, as far forward as possible, and then the drain tube runs at an angle downward so the water hopefully goes down the tube and still finds it's way to the bilge.
Re: The Plytanic 2.0 - FS17 Build
Posted: Mon Jun 18, 2018 10:12 pm
by silentneko
Water flow in my last few boats I've noticed first tends to go to the sides and then follow the sides to the stern. I would put a drain on the forward bulkhead if you want it to get to the bilge. Me I don't want a drop in the bilge. The pump in there is only for catastrophic emergencies.
Re: The Plytanic 2.0 - FS17 Build
Posted: Tue Jun 19, 2018 9:23 am
by Bogieman
Your boat is looking great! Impressive classwork too.
Re: The Plytanic 2.0 - FS17 Build
Posted: Tue Jun 19, 2018 9:46 am
by OrangeQuest
silentneko wrote: ↑Mon Jun 18, 2018 10:12 pm
Water flow in my last few boats I've noticed first tends to go to the sides and then follow the sides to the stern. I would put a drain on the forward bulkhead if you want it to get to the bilge. Me I don't want a drop in the bilge. The pump in there is only for catastrophic emergencies.
Yeah, even if it doesn't go straight to the sides it will sooner than later. I will not have any center drains, just don't know if 3" or 4" would be enough on each side in the stern.

When I say each side of the console I meant where the chine and the sole meet. When water meets the sole I want it to get in the bilge and keep off the sole.
Re: The Plytanic 2.0 - FS17 Build
Posted: Tue Jun 19, 2018 10:27 am
by colonialc19
Oops I double posted
Re: The Plytanic 2.0 - FS17 Build
Posted: Tue Jun 19, 2018 10:30 am
by colonialc19
Hello, very nice work on your build, about drainage for the sole, just throwing out what I did, it may or may not be something you'd do, but I have a drain hole on each side of the boat just forward of the aft bulkhead, I also have a drain hole through the rear bulk head on the center line that drains to the bilge. When I'm out fishing i have the drain to the bilge open and plug the side holes they take a normal ol john boat style plug. I use the bilge pump then to get rid of water. When the nobody is in the boat it will self bail, so when I leave her at the dock I plug the bilge drain and open the side drains/scupper holes. It has worked fine for me so far. Oh and this wasn't my idea, I copied it from someone else, but can't remember who.
Re: The Plytanic 2.0 - FS17 Build
Posted: Tue Jun 19, 2018 5:24 pm
by Bogieman
colonialc19 wrote: ↑Tue Jun 19, 2018 10:30 am
Hello, very nice work on your build, about drainage for the sole, just throwing out what I did, it may or may not be something you'd do, but I have a drain hole on each side of the boat just forward of the aft bulkhead, I also have a drain hole through the rear bulk head on the center line that drains to the bilge. When I'm out fishing i have the drain to the bilge open and plug the side holes they take a normal ol john boat style plug. I use the bilge pump then to get rid of water. When the nobody is in the boat it will self bail, so when I leave her at the dock I plug the bilge drain and open the side drains/scupper holes. It has worked fine for me so far. Oh and this wasn't my idea, I copied it from someone else, but can't remember who.
Good to see you on the forum again. That's one pretty boat you built! You should post more pics of her in action.
Bogie
Re: The Plytanic 2.0 - FS17 Build
Posted: Wed Jun 20, 2018 9:56 am
by silentneko
Thanks Coloniac, I actually had that in one of my mock ups before. I'm not going to do it at first, but if I find it would be beneficial down the road I can easily add the drain later on I think.
I posted this in the layout thread, but I figure I might as well add it here for future reference:
So I think I've finally landed on what I'm going to do. Just in time to start cutting bulkheads. You'll notice I did not include a cooler in these mock ups. Reason is I can put a 50-70qt in 4 different locations. Under the leaning post, against the rear bulkhead, against the front bulkhead, or on the front deck, all depending on where I need the load once she is on the water.
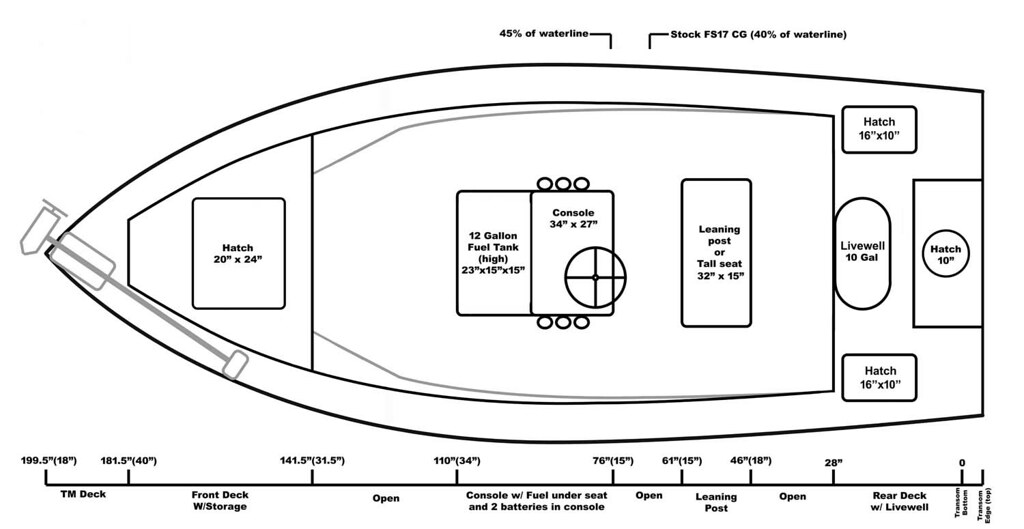 FS17 Final 1
 , on Flickr
I mocked up a side view just to see how things layout. I'm pretty happy with it, I think it will work ok. The console isn't 100%, I just put the basic widths to show the location.
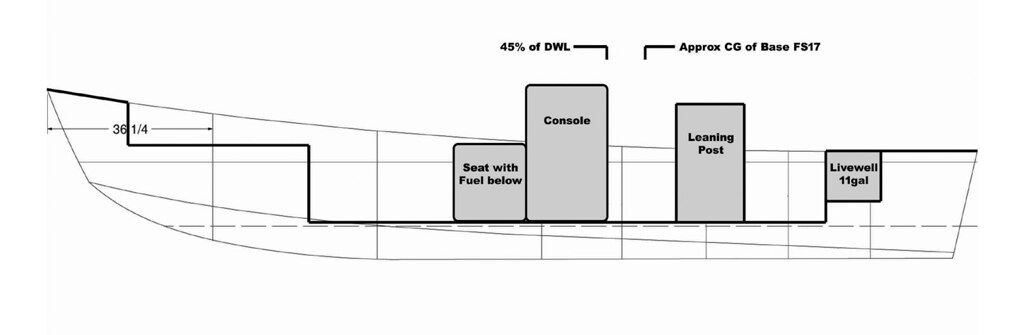 FS17 side
 , on Flickr
Re: The Plytanic 2.0 - FS17 Build
Posted: Wed Jun 20, 2018 11:09 pm
by TomW1
Looks good guy. Tom
Re: The Plytanic 2.0 - FS17 Build
Posted: Fri Jun 22, 2018 4:09 pm
by silentneko
Started on the bulkheads yesterday in between rain storms. After trying to measure for an hour I realized the only way to do this right is to level the hull (adjust so the stringer tops are level on 2 axis). I spent about another hour with a car jack and different sized shims to get it close. After that it was much easier to measure.
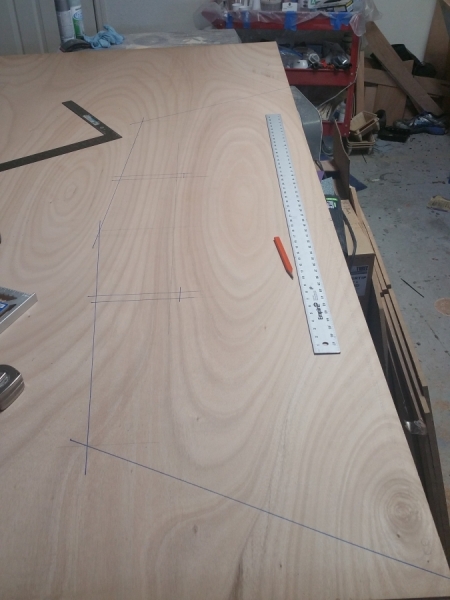
So a quick tip. When measuring with a ruler, make sure you are reading the right side (head smack!) I misread 16" for 20" on the forward bulkhead, luckily it's small enough I could use scrap to make it. The cut out is to access the bow lights, and trolling motor stuff. It's set low to make clearance for the front deck.
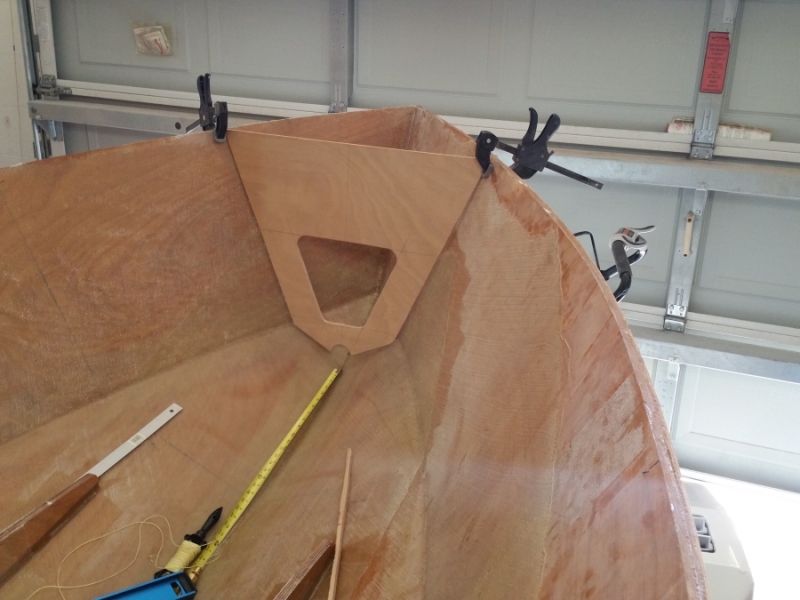
The rear bulkhead is what I was really shooting for. This allows me a solid point to measure everything off of going forward (console, livewell, lockers....
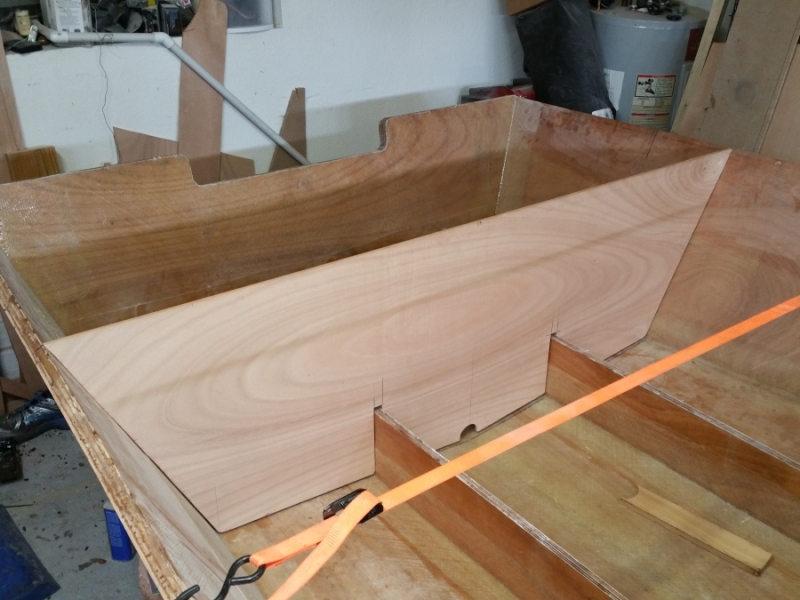
I tacked them in in a few spots with thickened epoxy. I'll finish filleting and taping them in a few days then keep going. I'll be able to start foaming soon.
Re: The Plytanic 2.0 - FS17 Build
Posted: Wed Jun 27, 2018 10:45 pm
by silentneko
Everything I'm doing now is a modification of the design, so the plans are pretty much out the window. I'm having to measure and build each part, and with that can come some challenges.
So the tip of the day is to NEVER toss out your scraps! Save every extra piece of scrap plywood no matter how oddly shaped. A weird edge can be cut straight and used again. That said when I started this build I was going to order a few extra sheets of plywood just in case. Several guys advised I might be over ordering so I cut it back. Well I think it's going to be tighter then I would like once I'm done with the floor and decks. So lesson learned, you can never have to much supplies! With some creative drawing I was able to use scraps from my pile of toss aways for most of the floor frames. I still needed to cut into one of my remaining full sheets, but not to much.
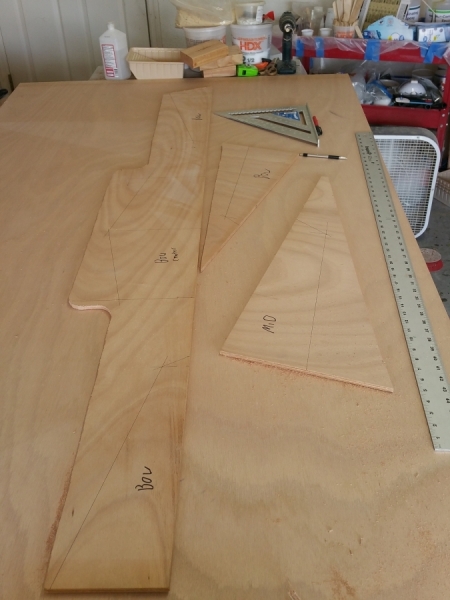
Here are frames being test fitted
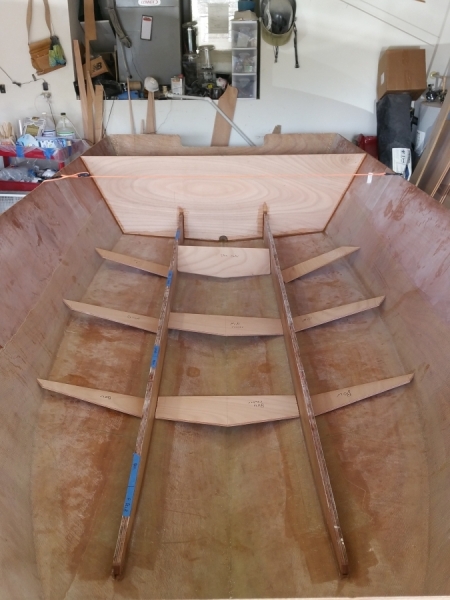
Here they are after final sanding and fitting them. I also cut the Front deck bulkhead and fitted it. everything will be tacked in and glassed in a few days.
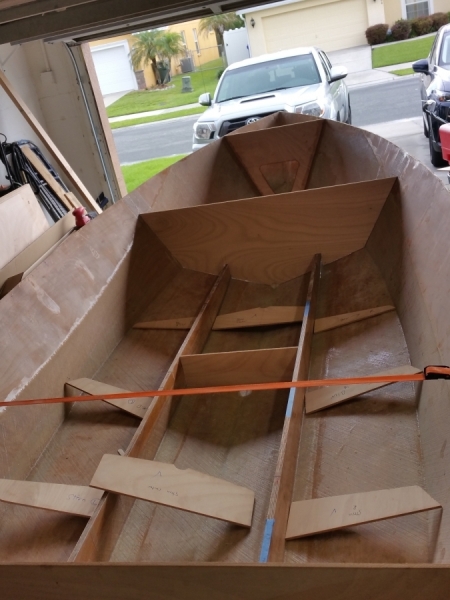
So I realized I goofed a little when making the frames. I forgot about under the console. Remember I raised the sole 1", and decided to use a portable 12 gallon tank instead of a below deck one. I'm also going with 2 batteries in the console for extended trolling motor ops. Between the tank and batteries that is a lot of weight on deck, So I decided to recess the batteries into the floor below the console. I have more then enough room to lower them 4" or more if I choose. That's 100lbs or so of static weight sitting at least 3" lower then the stock design, which will off set a little of the weight I've added or be similar to if the gas tank was below deck. The middle frame ran right through the area I needed, so I decided to stagger that frame so the center section is moved up to become the back of the shelf. I'll add a smaller support for the other end later.
Re: The Plytanic 2.0 - FS17 Build
Posted: Thu Jun 28, 2018 1:48 am
by Fuzz
Only down side, or upside if you look at it right, to ordering way too much supplies is what happens when the boat is done
Well of course you just have to make use of all that nice stuff and so boat number two begins
Your boat is looking very nice. I am enjoying seeing it come together.
Re: The Plytanic 2.0 - FS17 Build
Posted: Thu Jun 28, 2018 5:58 am
by OrangeQuest
I agree on not throwing scrap away, even long narrow pieces. Also, if you take a marker and draw an arrow on your ruler in the direction the numbers are going up it will help.
Your build is coming along nicely.
Re: The Plytanic 2.0 - FS17 Build
Posted: Thu Jun 28, 2018 6:09 am
by silentneko
Thanks guys. If I had any major supplies left over they would be used on my next project, a little power boat for my kids. I already have a trolling motor with a cracked head to use for power.
Re: The Plytanic 2.0 - FS17 Build
Posted: Fri Jun 29, 2018 12:00 pm
by Bogieman
Very nice- and clean- looking build.
Re: The Plytanic 2.0 - FS17 Build
Posted: Tue Jul 03, 2018 4:26 pm
by silentneko
Thanks, I can hide a lot with creative camera angles, lol.
So progress has been slow, but steady. I tacked in the front deck bulkhead and floor frames. Then I had to do a few passes getting them filleted due to a few goof ups and gaps I needed to fix. The largest was due to measuring the stringer slots an inch off on the bulkhead, no big deal, a little thickened resin cures all.
Tacked in place.
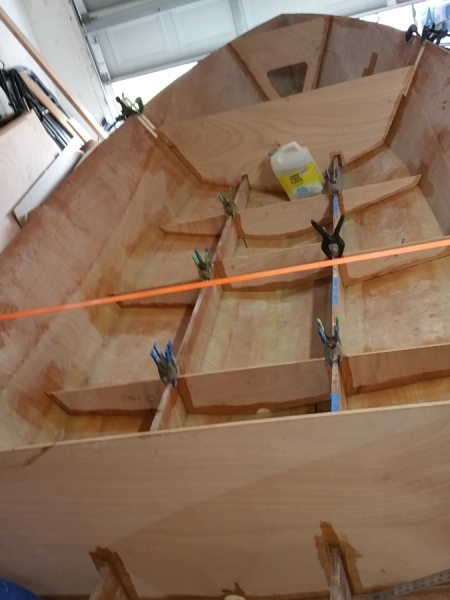
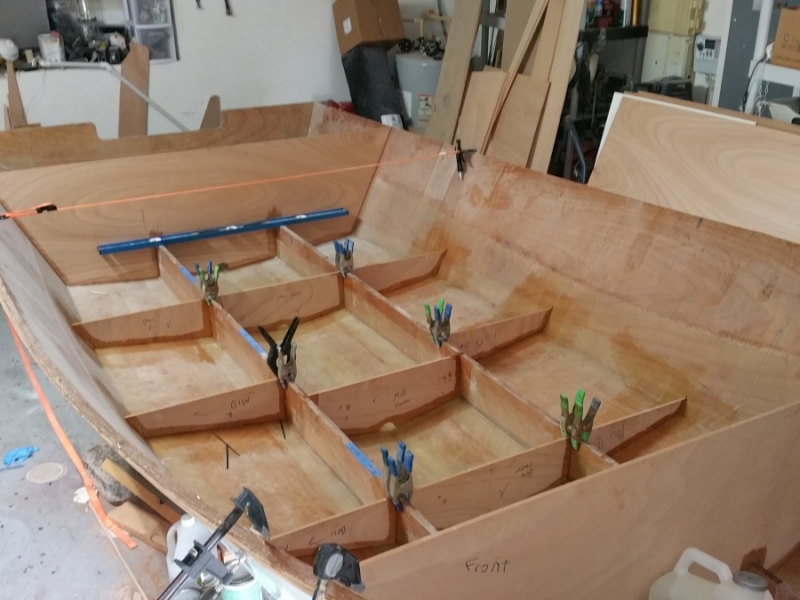
Filleted. You can see how I offset the middle frame so I can sink the batteries. I'll tape them in in the next few days.
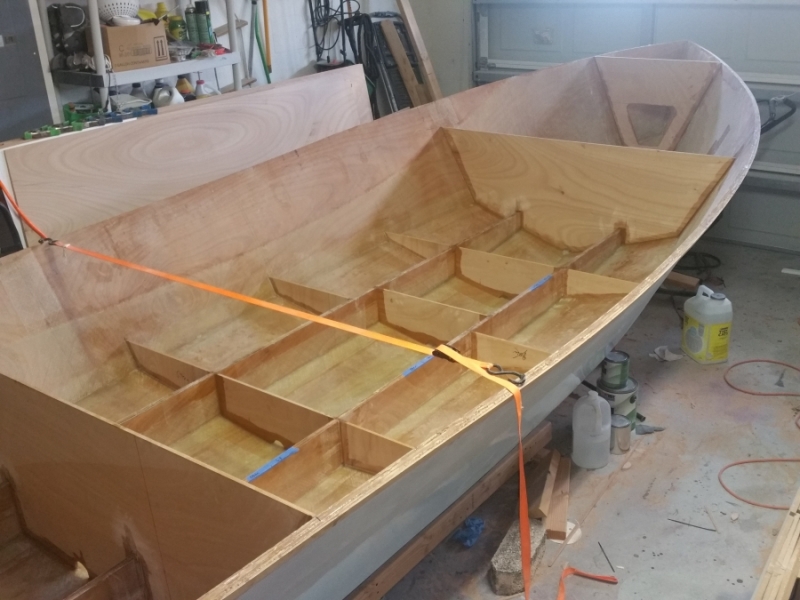
I also picked up 1x2's for the floor supports. Once the outside stringers are done I can start pouring foam.
Re: The Plytanic 2.0 - FS17 Build
Posted: Tue Jul 03, 2018 4:37 pm
by OrangeQuest
Looking good!
Re: The Plytanic 2.0 - FS17 Build
Posted: Tue Jul 03, 2018 4:45 pm
by Jeff
Nice progress Silentneko!! Jeff
Re: The Plytanic 2.0 - FS17 Build
Posted: Thu Jul 05, 2018 2:30 pm
by silentneko
I was out at home depot looking at pvc pipes for chase tubes today. Here are the 1.5" electrical sweeps, I have large hands and you can see by comparison the sweeps are HUGE and the 2" are even bigger. They will work if need be, but I think they are heavy and the radius doesn't need to be so big. I think instead of using them I'm going to make my own sweeps from thin walled PVC. This way I can save weight and get it more compact.

I got a package in the mail today. No that's not grey PVC, those are fiberglass tubes that were suggested to me in another thread. They are a bit rough on the inside, but will work very nicely as scupper tubes.
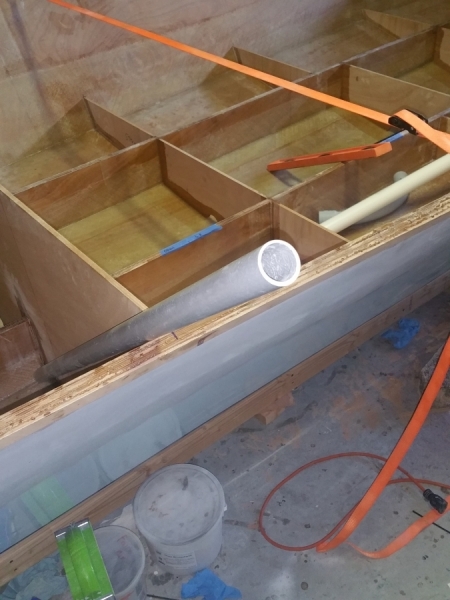
I also decided I can't finish designing the console until I have the helm. So I ordered a rotary no feed back steering kit, and a SS steering wheel to go with it. I used an extension cord to measure out the cable size as best I could. Came out to 12.5' so I rounded up.
Re: The Plytanic 2.0 - FS17 Build
Posted: Thu Jul 05, 2018 6:34 pm
by Bogieman
Your boat is looking great !
Re: The Plytanic 2.0 - FS17 Build
Posted: Thu Jul 19, 2018 3:13 pm
by silentneko
I haven't been able to work much on it these last few weeks. Life and all. I'm now down to all the detailed stuff. All the big jumps forward in progress seem to be done.
All the small glass staged for the frames and bulkheads
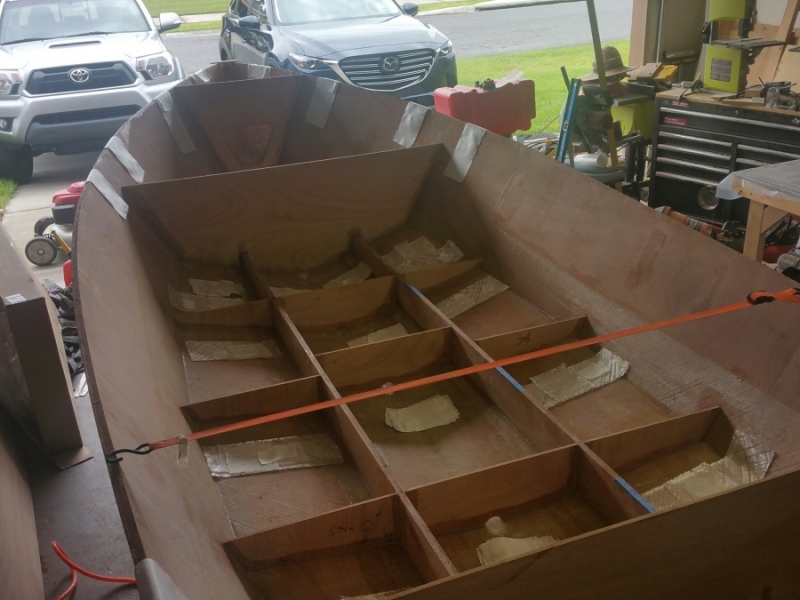
Glassed
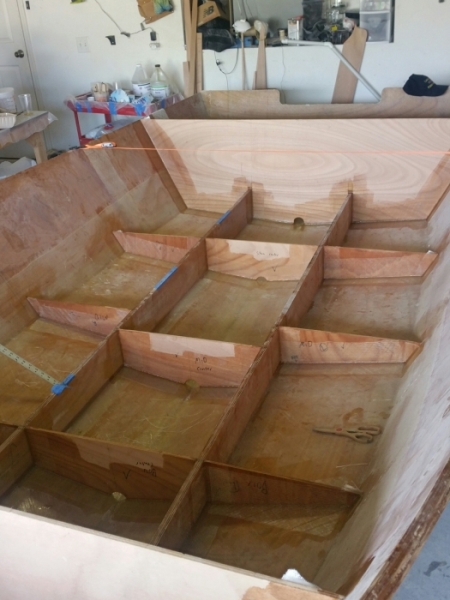
I then turned my attention to installing some cleats. I'm not going crazy as the floor will be supported by foam in the outside compartments.
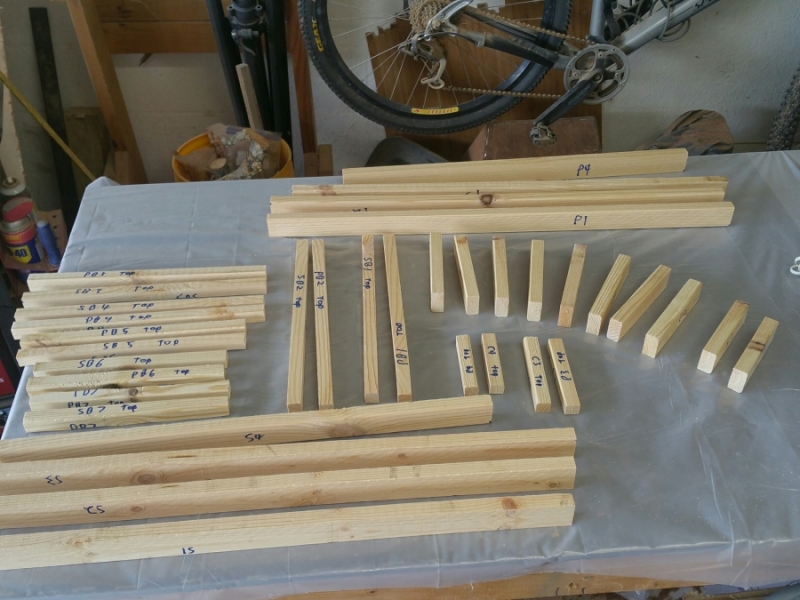
So I decided to use the "hot glue" technique to hold everything in place. I was concerned that the small gaps might weaken the cleats some how. Well I can tell you even the small ones are rock solid, I can put my body weight on them with no issue. I'm going to add a few more smaller cleats in the corners. I haven't done the center compartments yet cause I'm still working on the layout a bit.
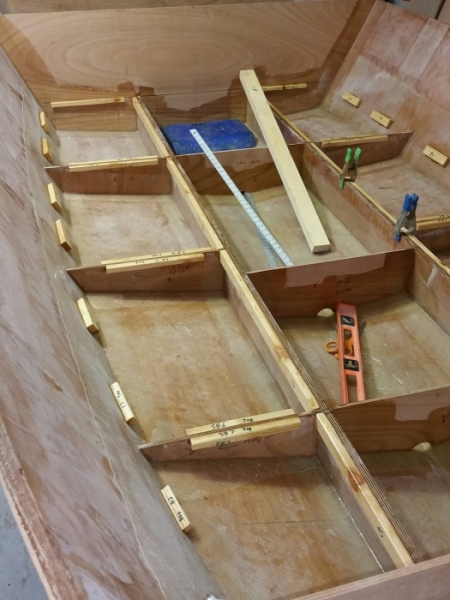
I'm going to finish this part, and the battery shelf then foam the outsides prior to working on the floor.
Re: The Plytanic 2.0 - FS17 Build
Posted: Sat Jul 21, 2018 9:41 am
by Bogieman
Re: The Plytanic 2.0 - FS17 Build
Posted: Tue Jul 24, 2018 4:24 pm
by silentneko
I'm still slowly chipping away. I spend equal times looking as I do working. I finally decided on what I'm going to do with the battery tray. After measuring I figured out I can drop it 5", which is more then I thought. So that's 100+lbs located 5" lower in the hull. To me that is equivalent to having a below deck tank. Now I did raise the sole 1" so it's still 4" lower then stock. I could have lowered it another inch, but in case any water accumulated down there I wanted some space to make sure they stay dry.
Here is the support, and the rest of the cleats.
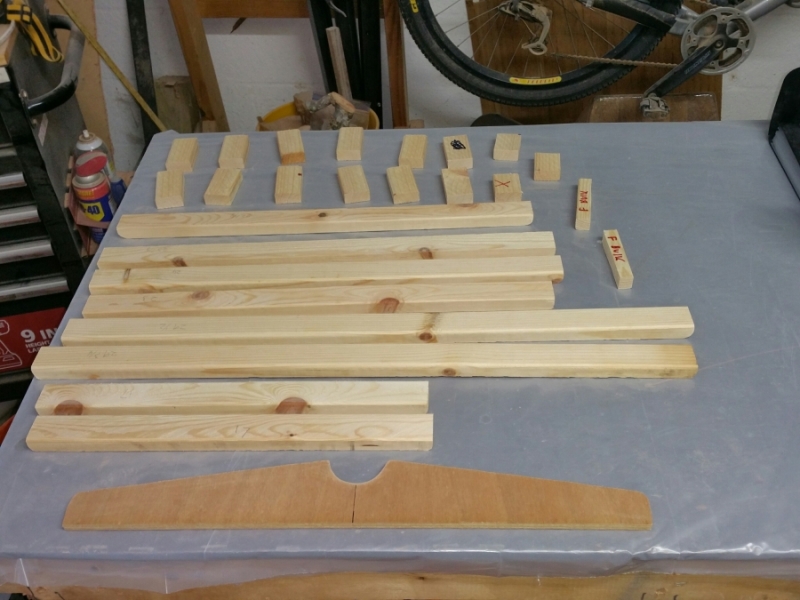
The cleats in place, and the battery shelf support being tacked in.
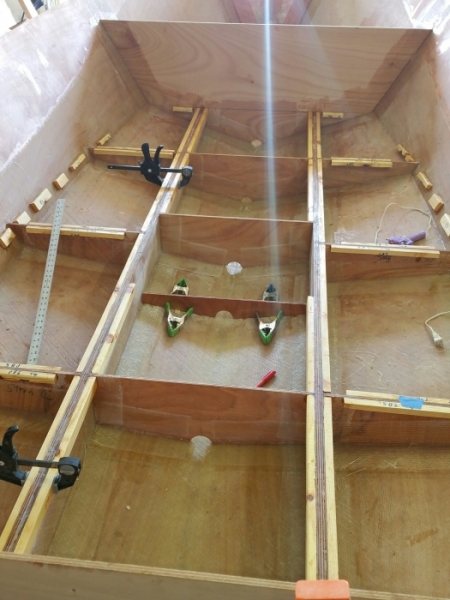
I also started pouring foam in the outside chambers. I have to do multiple pours because I only have 16oz cups. So I'm doing 10oz pours. And yes you need that extra room in the cup cause this stuff starts expanding fast.
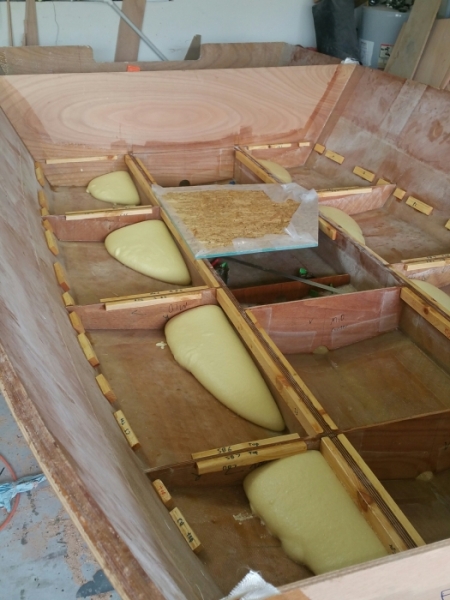
I'll install the cross cleats later on once I figure some stuff out.
Now here is where I may differ from some on the foam. I will not be filling the center chambers, just the outsides. I don't care how closed cell any pourable foam is supposed to be, most of them will eventually take on water. So because of this I don't want any chases, limber holes, plumping, screws.....going through any chamber that has foam in it. The outside chambers will be filled up, and completely sealed, the center chambers have large drain holes and will be where all my rigging and such goes through. The outside chambers I believe have more then enough volume to float the whole boat.
Re: The Plytanic 2.0 - FS17 Build
Posted: Wed Jul 25, 2018 8:13 am
by topwater
That should be more than enough .
Re: The Plytanic 2.0 - FS17 Build
Posted: Wed Jul 25, 2018 11:25 am
by narfi
Looking very nice.
You are providing me with some good motivation
Re: The Plytanic 2.0 - FS17 Build
Posted: Sat Aug 11, 2018 1:20 pm
by silentneko
I've been gone for a while and not much has gotten done. Between work, weather, kids, and a vacation in Marco Island (that this build should have been ready for!) nothing has been done in a few weeks. I started working on the foam again today. I gotta say I regret doing it the way I have been. I am doing so many little pours and not getting even consistent results. If I were to do it again I would install the floor first, cut 2 holes in the top of each chamber, calculate and pour the exact amount needed, and then seal the holes. I'm aware of the possible pitfalls doing it this way
I'm not sure the 4 gallons I have will be enough to fill the chambers totally. I'm going to just make sure the center majority reaches all the way to the floor for added support, which really won't be needed, but why not. I'll have a few smaller air pockets, but since these are sealed chambers it won't matter.
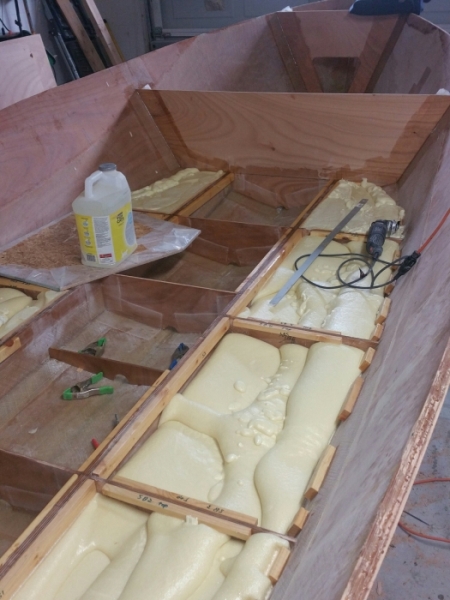
There are so many little tasks I have to do before moving on now. If I get time I'll we working on the motor well sides and livewell curves soon.
Re: The Plytanic 2.0 - FS17 Build
Posted: Sat Aug 11, 2018 1:40 pm
by narfi
silentneko wrote: ↑Sat Aug 11, 2018 1:20 pm
I'm not sure the 4 gallons I have will be enough to fill the chambers totally.
I am getting close to pouring foam and was thinking about this. I had 4 gallons (2x of the 2gal kits) but after reading up on it ordered another 2 gallons.
BBC's 2lb ft3 provides 480lbs of buoyancy for its 2 gallon kit.
The FS17 built to plans is 1475lbs displacement at the DWL which is the same location as the sole (if built to plans).
I ordered another kit and have 6gal now, but expect it will not completely fill everywhere, so I am just going to do the rectangle compartments and not mess with the shallow angled ones towards the bow.
My sole will be raised roughly 1/4", but if i remember right yours is even higher.... Keep posting, I want to know how it stretches for you and what temperatures you are pouring at
How are you cutting flush at the top?
Re: The Plytanic 2.0 - FS17 Build
Posted: Sat Aug 11, 2018 2:12 pm
by silentneko
narfi wrote: ↑Sat Aug 11, 2018 1:40 pm
I am getting close to pouring foam and was thinking about this. I had 4 gallons (2x of the 2gal kits) but after reading up on it ordered another 2 gallons.
BBC's 2lb ft3 provides 480lbs of buoyancy for its 2 gallon kit.
The FS17 built to plans is 1475lbs displacement at the DWL which is the same location as the sole (if built to plans).
I ordered another kit and have 6gal now, but expect it will not completely fill everywhere, so I am just going to do the rectangle compartments and not mess with the shallow angled ones towards the bow.
My sole will be raised roughly 1/4", but if i remember right yours is even higher.... Keep posting, I want to know how it stretches for you and what temperatures you are pouring at
How are you cutting flush at the top?
The design is 1475lbs at DWL. That includes all gear and passengers. The foam is there to offset in case of a catastrophic situation, but remember it's not he only thing helping you to float. You have trapped air, a wood cored boat, and coolers and life vests around. So 960lbs of buoyancy should really be over kill. From what I've seen lately that's more foam then they put in a lot of the smaller whalers.
Keep in mind my sole is raised a full inch, and I also corrected them to be level with the hull, so The front half of my stringers probably sit an additional 3/4" higher as well. If you fill it in like I am I think 4 gallons should get you there. I'm toying with just ordering another kit, since I'll use it for the custom cooler and toy boat for my kids.
The foam is not tough at all, a sander, multitool, or even a hand saw quickly takes it down. I haven't commented on the other foam threads going on, but make sure to coat any exposed edge with epoxy! It's 85+ degrees here even in the mornings.
Re: The Plytanic 2.0 - FS17 Build
Posted: Sat Aug 11, 2018 2:25 pm
by narfi
silentneko wrote: ↑Sat Aug 11, 2018 2:12 pm
make sure to coat any exposed edge with epoxy! It's 85+ degrees here even in the mornings.
That was my plan, however Jacques said that was not necessary with the new foam formulas they use. I bought their foam, and am using his plans, so I will accept his advice and save money on the epoxy.
Re: The Plytanic 2.0 - FS17 Build
Posted: Sat Aug 11, 2018 2:29 pm
by jacquesmm
narfi wrote: ↑Sat Aug 11, 2018 2:25 pm
silentneko wrote: ↑Sat Aug 11, 2018 2:12 pm
make sure to coat any exposed edge with epoxy! It's 85+ degrees here even in the mornings.
That was my plan, however Jacques said that was not necessary with the new foam formulas they use. I bought their foam, and am using his plans, so I will accept his advice and save money on the epoxy.
That must be a misunderstanding. All surfaces should be epoxy coated.
If I wrote that somewhere, please post the link and I will correct it.
Now, if you foamed a compartment without epoxy and the walls are made from marine ply, there should be no problem but I prefer to see all surfaces epoxy coated.
Re: The Plytanic 2.0 - FS17 Build
Posted: Sat Aug 11, 2018 2:48 pm
by OrangeQuest
When I was thinking how much foam I needed to keep my motor from going under I used that each cubic foot of foam gave me 60 pounds of floatation or displace the weight of a cubic foot of water minus the weight of the foam. If my motor weighs 173 I round it to 180 to come up with 3 cubic foot of foam or 3 quarts as a liquid. When I roughly calculated what was under the tank wells was 2.6 or 2.7 cubic feet. But once the wells are in I have space to fill on the port side that is more than what I need and under my aft anchor locker I will pour more foam. That covers the weight of the motor and then some. Then I will fill under my sole with foam and if swamped it should float level.
Since I started typing this a few more posts were added:
When I trimmed the top of my foam I poured under the wells I used a chip brush to add neat epoxy over everything that was sanded and then some. Where it was sanded the epoxy seemed to soak in like a sponge so it got me thinking....Testing time!
I cut my first playing around piece of the foam in half and soaked it in water. It did not soak up the water but it did hold a little of the water where the two halves had been cut. Weighed it before and after the soaking. started at 51 grams and after soaking it weighed 60 grams. The soak time was about 4 hours. Let it dry for less than an hour and back to 51 grams.
Re: The Plytanic 2.0 - FS17 Build
Posted: Sat Aug 11, 2018 3:16 pm
by silentneko
A quick test like that means little as water might be trapped next to foam for months. Even foam cores, that are much higher density and quality, will absorb some water after being in contact for a while.
I don't want to get into the great foam debate as there are 2 separate threads currently running on this topic. I will say this however:
It is urethane foam! and like all urethane products it is listed as "Water resistant", not water proof like epoxy. it will resist water for a time, that is the nature of a closed cell foam, but will eventually break down in it's presence. No where in a boat should water be allowed to come into direct contact with it, outside of a catastrophic emergency. The skin it forms is the most/only durable part, if it is breached it needs to be repaired with resin or much of the integrity is lost.
I'll repost this in a bit on one of the other threads. Seriously guys think about it, we use epoxy to build because the polyester resins will eventually lead to rotted wood, and poly resin FRP is much more durable/water resistant then a light foam. Use it wisely.
Re: The Plytanic 2.0 - FS17 Build
Posted: Sat Aug 11, 2018 3:27 pm
by narfi
jacquesmm wrote: ↑Sat Aug 11, 2018 2:29 pm
That must be a misunderstanding. All surfaces should be epoxy coated.
If I wrote that somewhere, please post the link and I will correct it.
Now, if you foamed a compartment without epoxy and the walls are made from marine ply, there should be no problem but I prefer to see all surfaces epoxy coated.
Perhaps the miss-understanding was mine. Yes I coated all wood with epoxy, but I understood you to say that cut foam did not need to be?
Here is your quote,
jacquesmm wrote: ↑Thu Aug 09, 2018 1:18 pm
Correct. Even if you leave the "cells open", it will not make any difference.
Re: The Plytanic 2.0 - FS17 Build
Posted: Sun Aug 19, 2018 3:02 pm
by silentneko
Slowly chipping way.
My decks will be top mounted like my other boats, so I needed to level out the transom edge. I used a flap wheel and made quick work of it.

Done, and the front edge rounded off with a router.
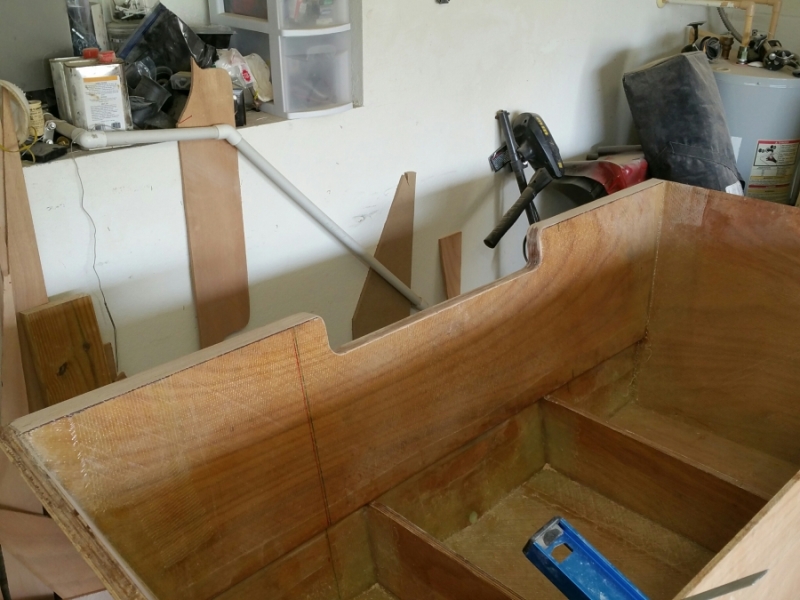
I installed a small backing plate for the bow eye.
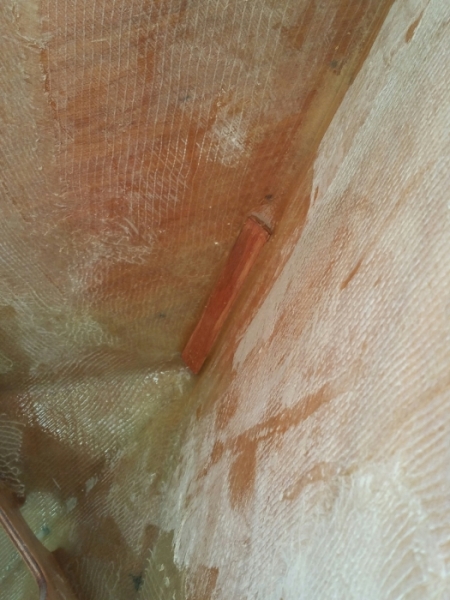
Finally made some decisions on the motor well. I needed to cut a window for the steering, controls, fuel line.... to run through. then round it off.
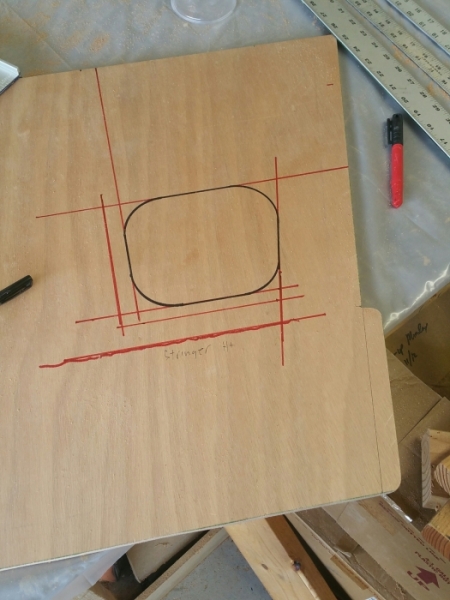
Motorwell sides tacked in place.
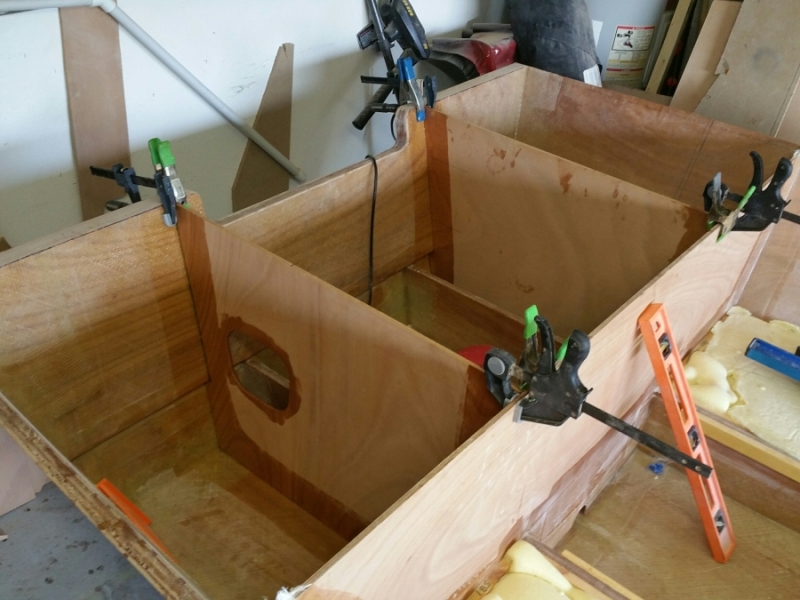
Re: The Plytanic 2.0 - FS17 Build
Posted: Mon Aug 20, 2018 7:59 am
by Eric1
Nice work!
Re: The Plytanic 2.0 - FS17 Build
Posted: Mon Aug 20, 2018 6:15 pm
by TomW1
Silentneko I feel you are very pessimistic on the 2 part US Coast Guard approved foam sold here by Bateau. First it is oil and water proof unless they are cut. So when they are cut on top they are protected by the sole. I don't know about you but most people coat both sides of the sole to protect it from water infiltration. There is really not a problem when the foam is not disturbed. It forms a tough outside shell that is basically impenetrable.
Tom
Re: The Plytanic 2.0 - FS17 Build
Posted: Mon Aug 20, 2018 6:26 pm
by silentneko
Thanks Eric.
Not to much more done today. I'm working on filleting the motor well sides and a few small things like the battery support.
I used the laser level to help mark where the front deck will be going. Now before anyone says it, no the deck is not actually leveled, it has a one inch rise going forward for drainage. I just used the laser in the non leveling mode to scribe where the support blocks need to be.
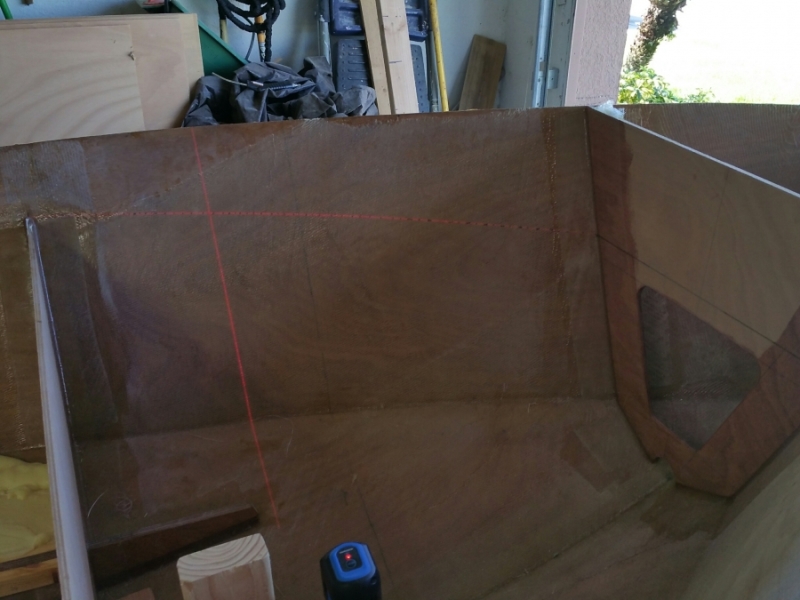
So here is a bit of a odd part of the plans. The stringers and motor well are absolutely needed, but they set 4" or so apart in the bilge. I more or less understand why it was done this way, but I wish they were butted together.
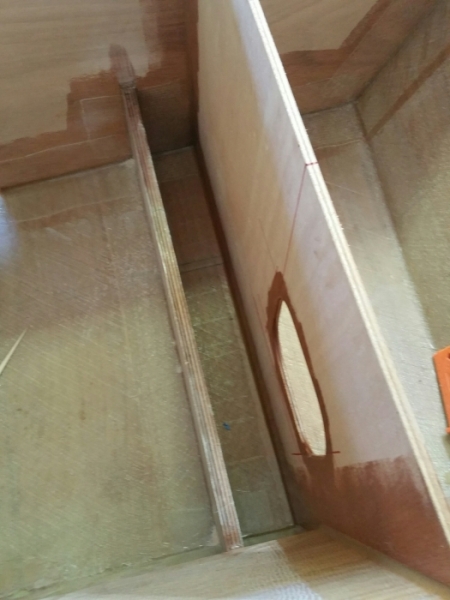
I plan to fill this void in with foam. I measured it and it will add another 0.76 cu ft of flotation. I'll probably just glass over the top of it after it's leveled off.
So I've said several times that I don't believe any piece of ply should be left without some kind of glass on it so it doesn't check. Well there are a lot of areas that are either really hard to glass, like the limber channels, or honestly it's just more work then it seems needed after taping a small part. I still don't want any unsupported areas, so I decided to mix up some "Liquid Fiberglass". I mixed milled fibers into the resin, and left it a bit loose so I could still roll it on well. It's not as good as actually laying glass, but the fibers will keep everything protected better then just neat epoxy.
Re: The Plytanic 2.0 - FS17 Build
Posted: Mon Aug 20, 2018 7:32 pm
by silentneko
TomW1 wrote: ↑Mon Aug 20, 2018 6:15 pm
Silentneko I feel you are very pessimistic on the 2 part US Coast Guard approved foam sold here by Bateau. First it is oil and water proof unless they are cut. So when they are cut on top they are protected by the sole. I don't know about you but most people coat both sides of the sole to protect it from water infiltration. There is really not a problem when the foam is not disturbed. It forms a tough outside shell that is basically impenetrable.
Tom
Tom I am not pessimistic, I am a realist. I believe it is a decent product, and that's why I just ordered more of it for a total of 6 gallons. I fully understand the properties of it, but what is listed on paper is not a representation of the true reality over time imho, just a snap shot of the foam when it is near virgin. The foam sold here is the same basic closed cell CG approved formula used industry wide for the last few decades. I've used it before. It's foam, made of tiny very thin air chambers that can be easily breached, it's water resistant, not proof, and subject to vibration and wear over time. The 2lbs foam has a stiff shell, but you can easily push a finger into it. I think you mean impermeable, which I can see if the original skin is intact, but pretty much no ones is after leveling.
Funny enough on Ship Shape Tv yesterday they were covering this very subject. They are redoing an old boston whaler at Metan classic. They are putting the new foam in and after leveling it out they make a point of telling you that even though it's closed cell it needs to be protected once breached. They used a putty to smooth the surface, and then fully fiberglassed the exposed foam. This is under a sealed floor that should not be exposed to water.
I know the product, I am aware of it's chemical properties, and I have experience with it and foam failures several times before. You can believe me or not, but I'd prefer to not get into the great foam debate any further on my build thread. There is another thread going for that.
Re: The Plytanic 2.0 - FS17 Build
Posted: Tue Aug 21, 2018 7:54 am
by thb
I am trying to understand where you put the liquid fiberglass. I like the concept and I even have some milled fibers so I could use some if I understood where you put it.
Regards
Tom on Steinhatchee
Re: The Plytanic 2.0 - FS17 Build
Posted: Tue Aug 21, 2018 2:09 pm
by silentneko
thb wrote: ↑Tue Aug 21, 2018 7:54 am
I am trying to understand where you put the liquid fiberglass. I like the concept and I even have some milled fibers so I could use some if I understood where you put it.
Regards
Tom on Steinhatchee
So every so often there will be a small area that doesn't need glass, but I want to protect better. Here's a pic of my floor frames.
You can see after I install the 1x2 cleats along the tops there will be a small area not covered in glass that you can still see. Also the limber/water holes at the bottom have an edge that I want to make sure is protected as it will be subjected to water often.
Here is a little illustration I made, obviously not to scale, to show where I'm rolling it on. I'll use it in other areas, but you get the idea.
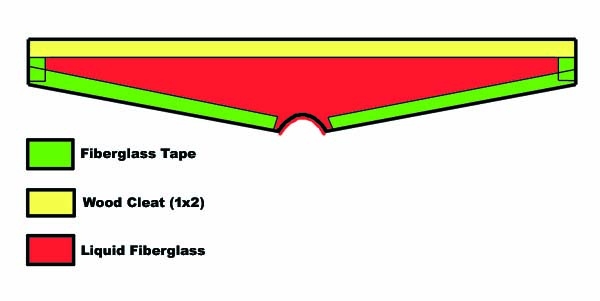
Re: The Plytanic 2.0 - FS17 Build
Posted: Tue Aug 21, 2018 8:54 pm
by OrangeQuest
To make sure my frames and stringers were sealed before installing them I cut most of the holes and then laid them side by side on my work bench and covered them with a sheet of glass. After curing I flipped and done the other side before cutting them loose. When I cut them loose I also rough sand everything and made sure everything was sealed. Easier to see when you can rotate them 360 degrees.
Re: The Plytanic 2.0 - FS17 Build
Posted: Tue Aug 21, 2018 10:41 pm
by silentneko
I considered doing it a few different ways, but I settled on putting in the frames this way just to move the progress along. The glass isn't really adding any strength here so I'm ok doing it this way. Really I'm not so concerned with the face of the plywood, as I am with the limber hole. An exposed edge can quickly get small cracks in it and take in moisture. This will stop that.
Re: The Plytanic 2.0 - FS17 Build
Posted: Wed Aug 22, 2018 1:04 am
by joe2700
OrangeQuest wrote: ↑Tue Aug 21, 2018 8:54 pm
To make sure my frames and stringers were sealed before installing them I cut most of the holes and then laid them side by side on my work bench and covered them with a sheet of glass. After curing I flipped and done the other side before cutting them loose. When I cut them loose I also rough sand everything and made sure everything was sealed. Easier to see when you can rotate them 360 degrees.
That's exactly what I plan to do with my frames and stringers. Glad to hear someone has already had luck with it.
Re: The Plytanic 2.0 - FS17 Build
Posted: Sat Aug 25, 2018 8:50 am
by Bogieman
So impressed with your glass work inside that hull.
Bogie
Re: The Plytanic 2.0 - FS17 Build
Posted: Tue Aug 28, 2018 1:35 pm
by silentneko
I don't think it's far off from your build Bogieman.
I flattened out and leveled the foam. It was like Xmas in the summer cause it was snowing everywhere.
I used a flap wheel on an angle grinder to make quick work of the bulky stuff.
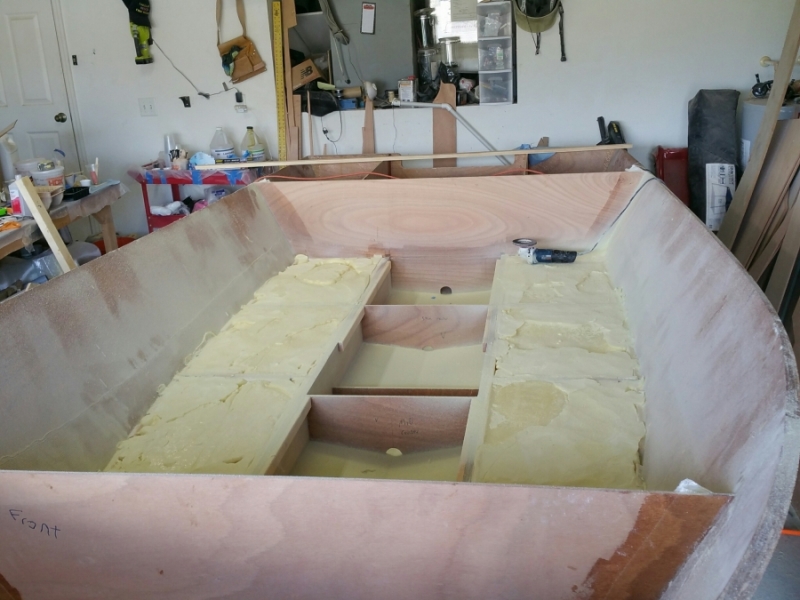
Then a combo of orbital sander, palm sander, and razors to clean up and level the rest. I've got a few gaps here and there, but nothing I think really warrants a repour. I'm glassing the bottom of my sole so it will be plenty strong. I'll add additional glass in the centers where there is no support from the foam.
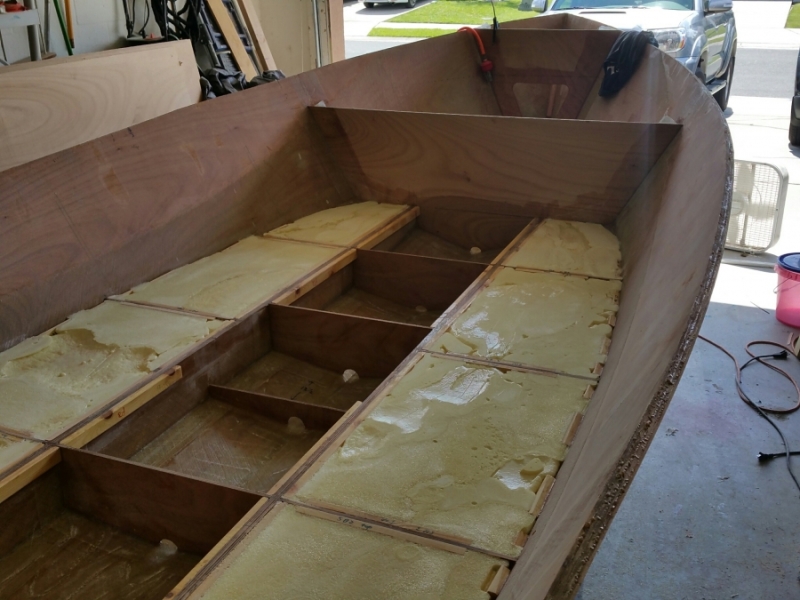
I'm working on installing the center floor cleats and supports, and working on the battery tray. it will get installed in the next few days.
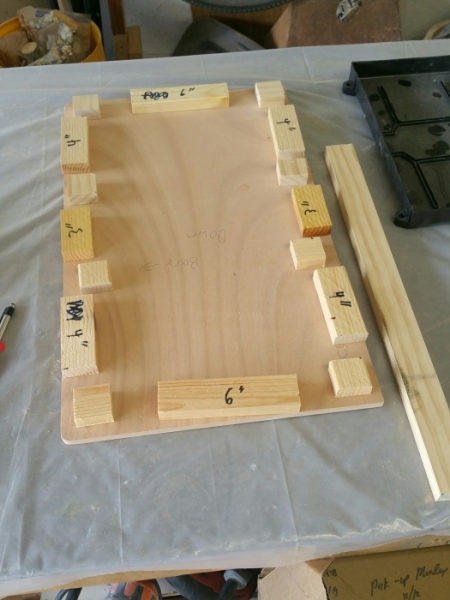
So I'm trying to figure out the best way to secure a 5 gallon bucket in the front hatch. I've got to build something out that can take the bucket filled with the anchor bouncing around. What do you guys think about if I built a shelf, and then cut a 5 gallon bucket down to 1/3 then screwed it down. The 5 gallon would then slip in the cut down bucket.
Re: The Plytanic 2.0 - FS17 Build
Posted: Tue Aug 28, 2018 1:58 pm
by OrangeQuest
You could use the bucket to make a mold then glass it to make something that will last longer. I have cut a few buckets and they don't last long after that.
Re: The Plytanic 2.0 - FS17 Build
Posted: Tue Aug 28, 2018 2:02 pm
by silentneko
That's true. I'll have to think on it a bit.
Re: The Plytanic 2.0 - FS17 Build
Posted: Wed Aug 29, 2018 1:15 am
by Fuzz
Glassing the bottom of the sole plywood is a smart thing to do. Glass on the bottom will add many times more stiffness than it would on the top.
Re: The Plytanic 2.0 - FS17 Build
Posted: Fri Aug 31, 2018 9:08 pm
by silentneko
I added 1x blocks under the battery tray. I'll do a drill-fill-drill so I can use decent length screws to hold down the trays. I'll most likely install it tomorrow if I get the time.
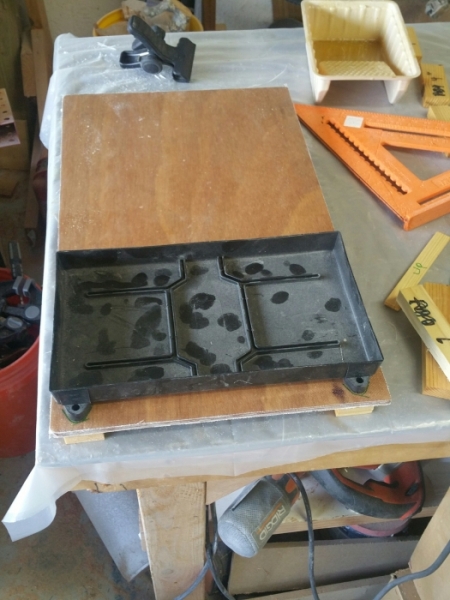
So now I move onto something that has been vexing me for a bit. How I want to make the livewell. I finally settled on it. My last well I used a 4" pipe as a mold and cut it into 4's for the corners. This worked well, but I feel the flow wasn't as good as it could have been and on rare occasion I would end up with some red nosed bait. I was going to use a concrete form tube I have to make the ends of the well, but I hesitated because I felt it was just a little to wide. Then I found this, A 6.5 gallon bucket.
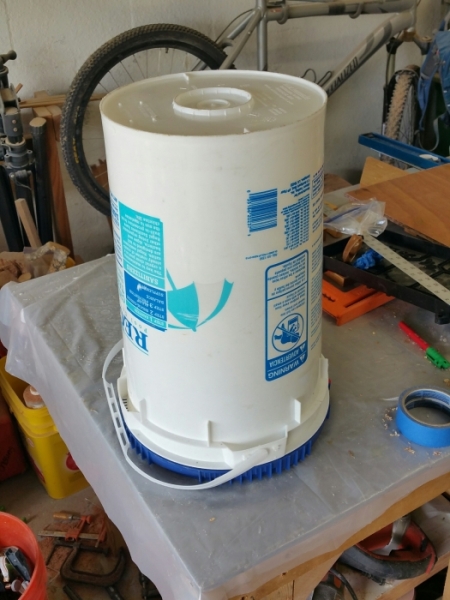
It's just over 10" wide which is about perfect. I'm going to use half of it as a mold, as I found out in the past a round mold is difficult to get right and gravity always helps. So I set it on it's side and I'll do 2 pulls. There was a ridge and some other imperfections near the bottom so I sanded it down with 120, then 220 grit. Now I don't know what kind of plastic this is, but it's soft, so getting a smooth surface is hard. Also the dust itched worse then fiberglass.

Because the surface was not perfectly smooth I was worried about the glass releasing well. So I coated it in a few layers of PVA mold release. I'll lay up the first side tomorrow.
Re: The Plytanic 2.0 - FS17 Build
Posted: Sat Sep 01, 2018 8:51 pm
by Dutch1
Good luck man. It works. I did this for my baitwell. I would say to watch the bend at the bottom of the bucket. The glass will want to open up and make a hole as you make the bend. Just use enough layers. BTW, I'm very pleased with my bait well. I used milled glass and epoxy on the inside to smooth things up.
Steve
Re: The Plytanic 2.0 - FS17 Build
Posted: Tue Sep 04, 2018 12:35 pm
by silentneko
It worked out well. I laid it up with a layer of csm, and 2 layers of 6oz glass. It's light and flexible, but that is no issue. Once it's bonded in place it will be back filled with 2 part foam making it more then solid.

Trimmed down a bit.
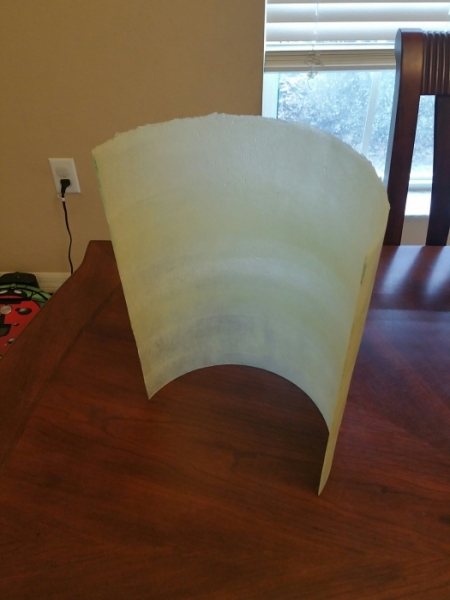
I haven't decided how tall the livewell will be just yet. So I left enough meat on top to trim. The part came out near perfect, it's got a few imperfections on the inside that a little thickened epoxy will fix up.
I just pulled off the second half and it came out almost as well. I used only one coating of PVA this time and it made it much harder to pull the part off. If I do this again I'll use at least 3 layers.
Re: The Plytanic 2.0 - FS17 Build
Posted: Tue Sep 04, 2018 12:57 pm
by OrangeQuest
That looks so much easier than the way I did mine. I was so ask backwards than your method and looks like you will get a lot better results.
You could do your anchor locker the same way.
Re: The Plytanic 2.0 - FS17 Build
Posted: Tue Sep 04, 2018 1:05 pm
by Jeff
nice work Silentneko!! Jeff
Re: The Plytanic 2.0 - FS17 Build
Posted: Tue Sep 04, 2018 5:25 pm
by TomW1
That looks great. You can make your tanks about any size you want. Use a blue tinted interior epoxy and silica mix to smooth the interior. Blue calms the bait. When I propped Kurt's FS17 he had two bait wells on either side of the motor well of about 11 gallons.
Tom
Re: The Plytanic 2.0 - FS17 Build
Posted: Sun Sep 09, 2018 8:04 pm
by silentneko
I'll be painting it with the interlux perfection, but I'll tint it a darker shade of blue. It will be a little over 10 gallons if memory serves, and I just ordered a 500gph johnson spx pump.
Side note: On Project: Dreamboat they recently redid a small center console. The guide who owned it requested the 2 livewells be painted different colors. One was blue for when they use white bait, or pinfish. The other was painted brown for when they are using shrimp. Apparently the shrimp adapt to the well color and are more effective when they hit the water.
Before I can work on the well I need to finish up a few things. I finished up the battery shelf. It will have 2 trays on it, but I can run with one battery if needed.
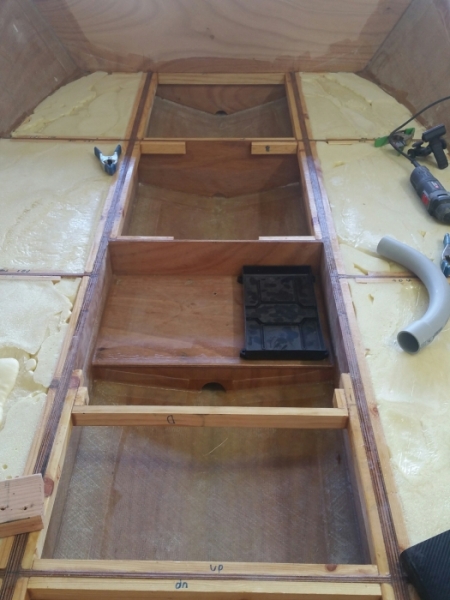
Time for chase tubes. I'll use a 2" for rigging, 1.5" for electric, 1.5" for the transducer, and a 1" for the fuel line. Eventually I'll add a small chase to the front for the trolling motor and nav lights.
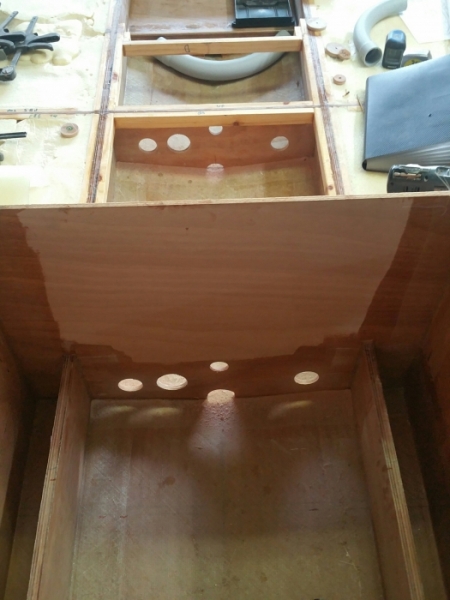
Re: The Plytanic 2.0 - FS17 Build
Posted: Wed Sep 12, 2018 10:15 pm
by silentneko
I'm making some headway now, and think I've figured out my plans for the rest of it all.
I test fit the chase tubes, I wish I planned them out a bit better. They will work great, but I had to make some adjustments because after the battery shelf was built I was only left with 4.5" under the console if I stayed with my design. As I said I'm using a 1" pipe for the gas line. It will run up to and through the front of the console to the seat where the gas tank is. I'll seal it off well with 5200 to make sure no fumes can get passed it into the console.
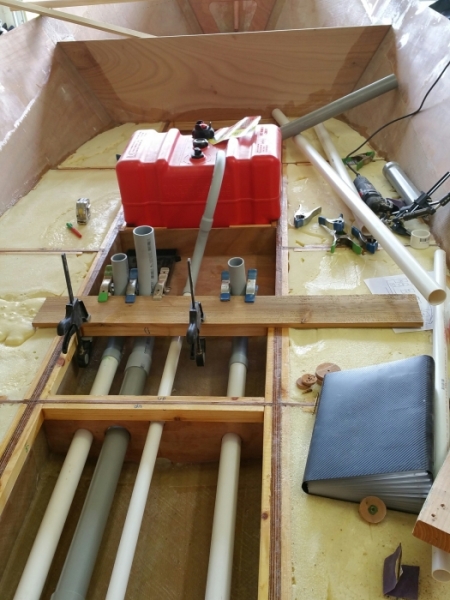
This is possibly the sloppiest 5200 job I've ever done, lol. But it wasn't worth cleaning up because it will all be hidden. One think I'm not crazy about is the tubes, while secure, could use more support where the sweeps are. I've got a plan though, we will see if it works out.
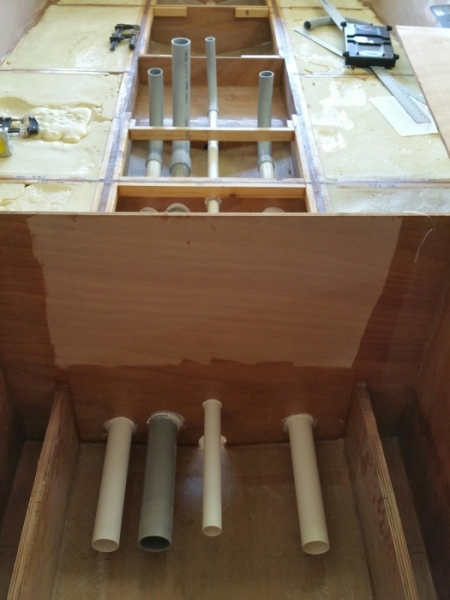
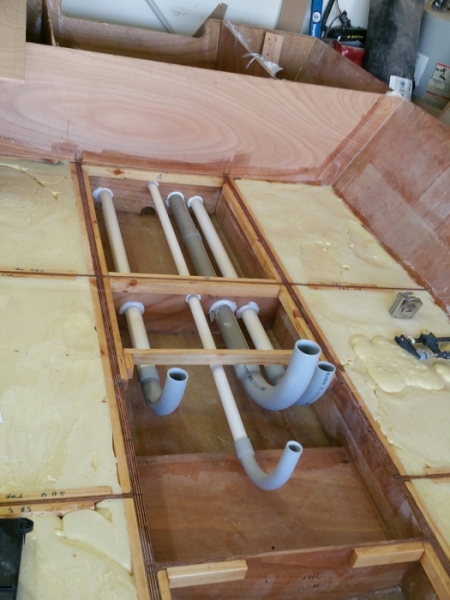
So now I can finally move on to the floor. I need to put in the rear section so I can install the scupper tubes. I decided to go super simple with it. The tubes will just be at floor level, no dished out areas or anything. Some cardboard and hot glue make a great template.
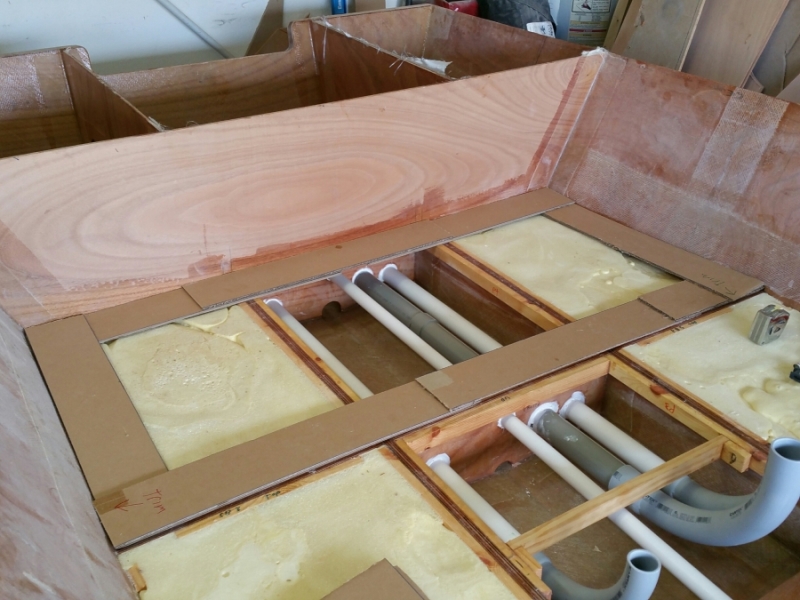
I like to glass the bottoms of my sole. I added some scrap glass pieces to the middle where the floor needs the most support. Should be nice and stiff
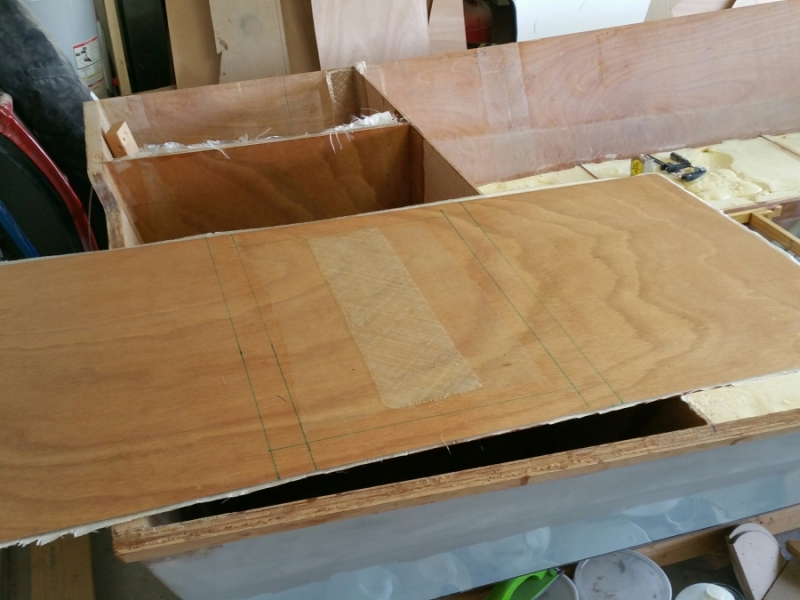
Parts are starting to trickle in. No more Attwood pumps, but the spray heads have served me well.
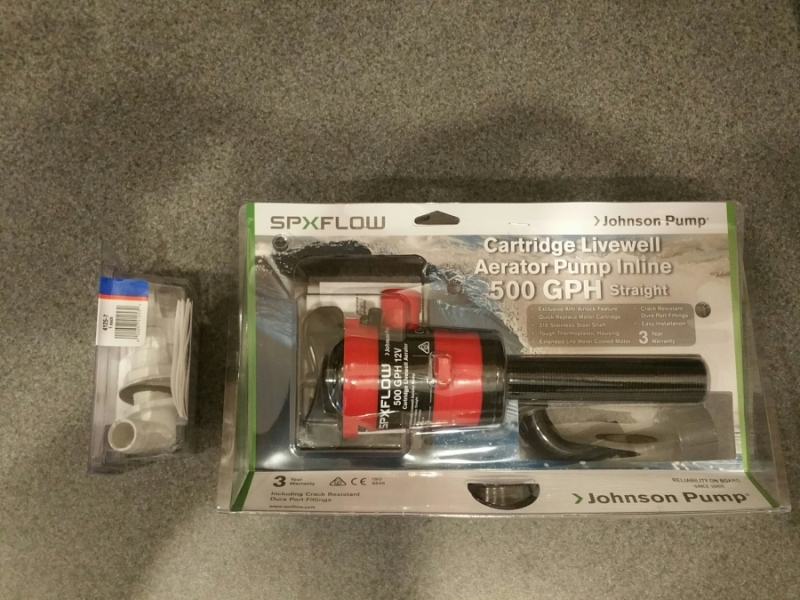
Re: The Plytanic 2.0 - FS17 Build
Posted: Thu Sep 13, 2018 8:16 am
by Jeff
silentneko, nice work!! Boat is really looking good now!! Jeff
Re: The Plytanic 2.0 - FS17 Build
Posted: Sun Sep 30, 2018 5:39 pm
by silentneko
Life is getting busy, and it's hard to find enough computer time to write posts, so this will be a bit longer then the norm.
First I installed the floor section I cut out. Well I'm a bit disappointed. Even with all the supports, glassing the bottom, and adding 3 additional layers to the center area, there is still a lot of flex. As I mentioned previously the okoume plywood I think is great for curves, but I like the mechanical properties of meranti much more. I've never had plywood flex at this stage. My hope is it stiffens up quite a bit with the top layer of glass. if not I'll have to add a second layer. Because of this I decided to add additional supports to the other floor sections. Hopefully this takes care of it.
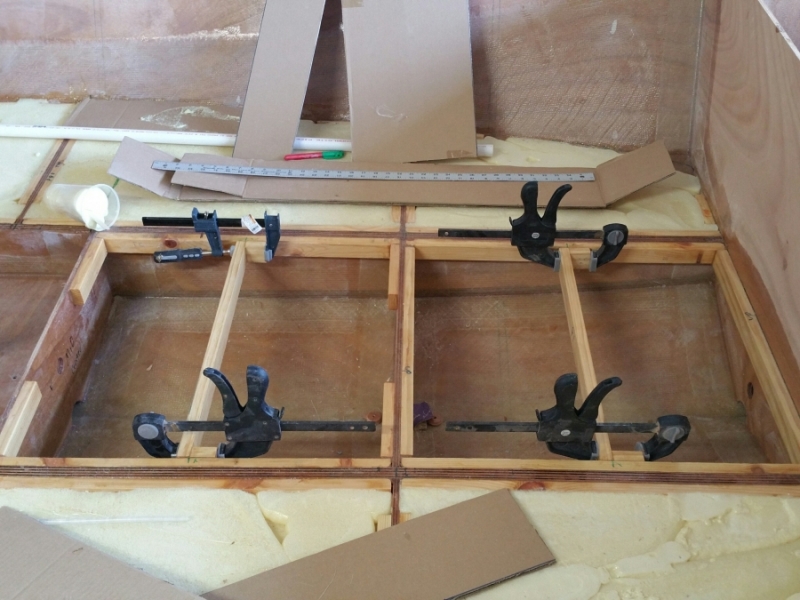
With that settled I decided to just go ahead and install the fiberglass scupper tubes I bought. I bonded them in with thickened epoxy
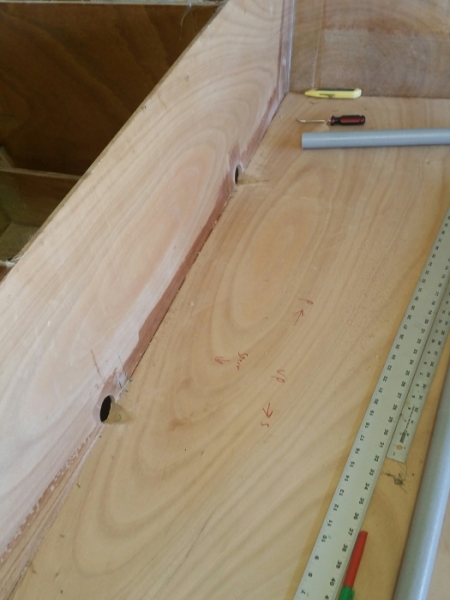
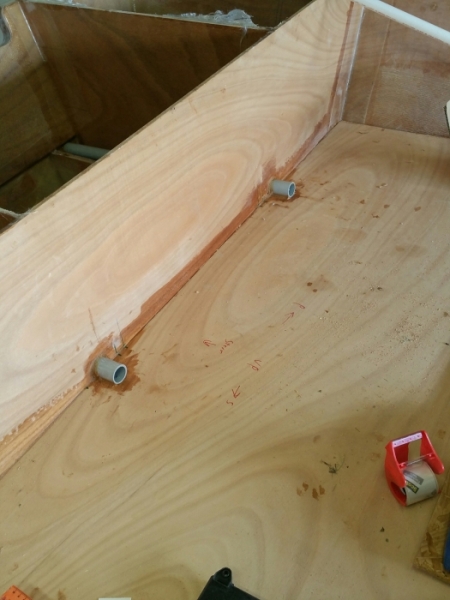
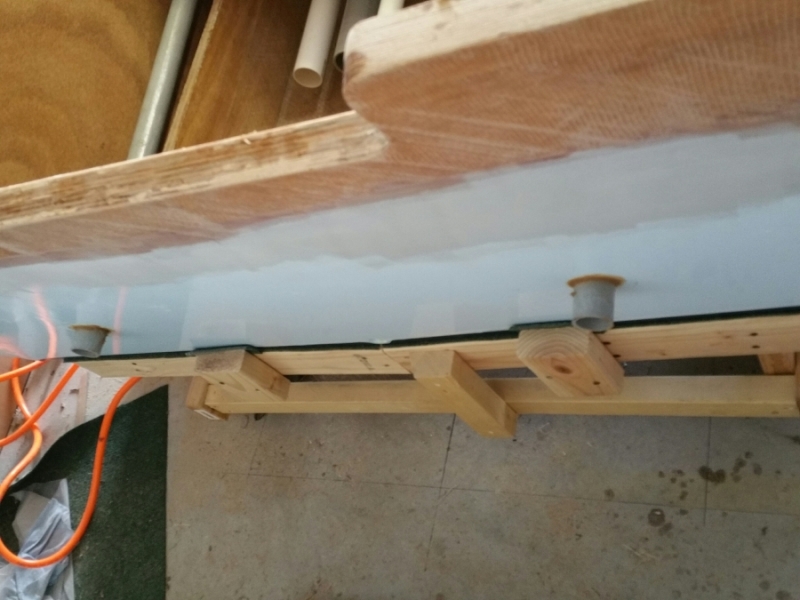
The tubes run in the wasted gap between the stringers and the motorwell sides. I am foaming in the area around them and will top with glass adding additional flotation where it's probably most needed.

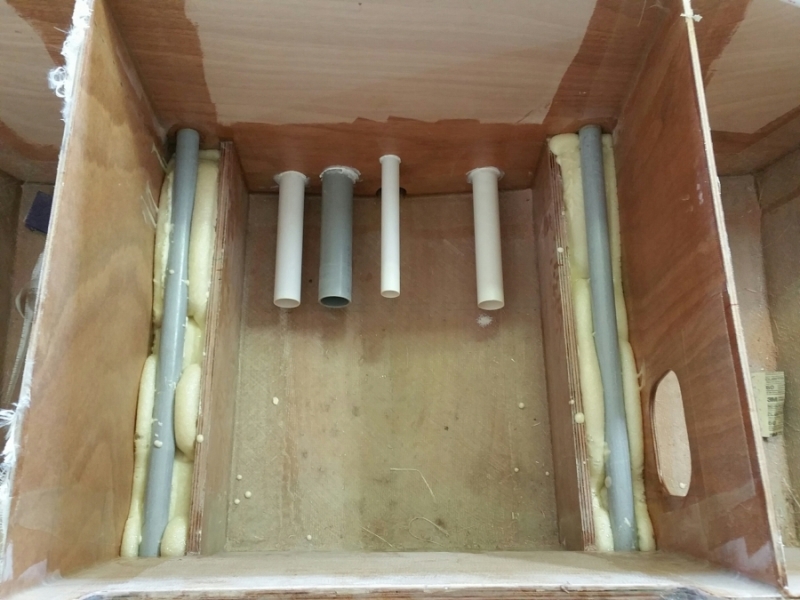
I installed the forward wire chase. It will house the trolling motor, nav lights, and hatch LED's if I choose to go that route.
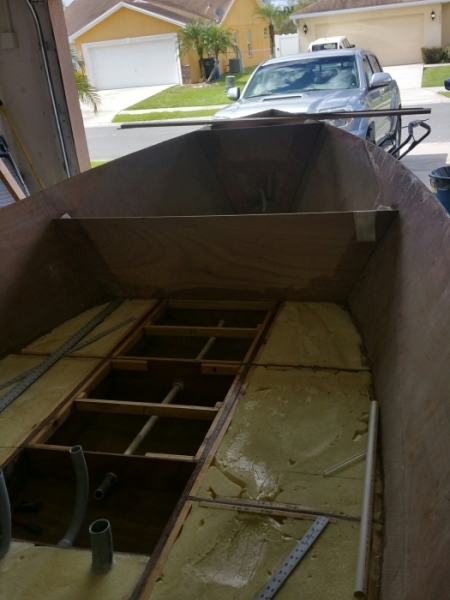
So after installing the rear chases I felt I needed a better way to stabilize them going into the console. I had plenty of foam so I figured why not.
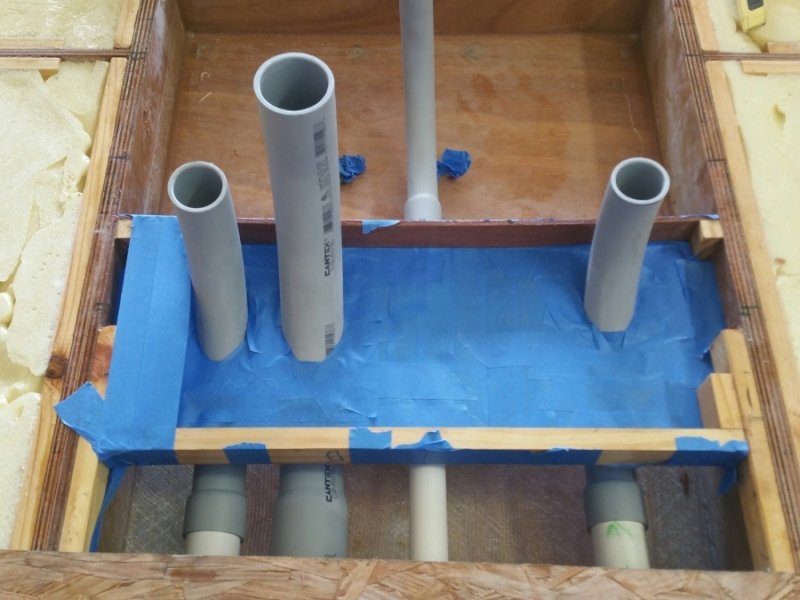

I know it looks a bit ugly, but it did clean up ok.
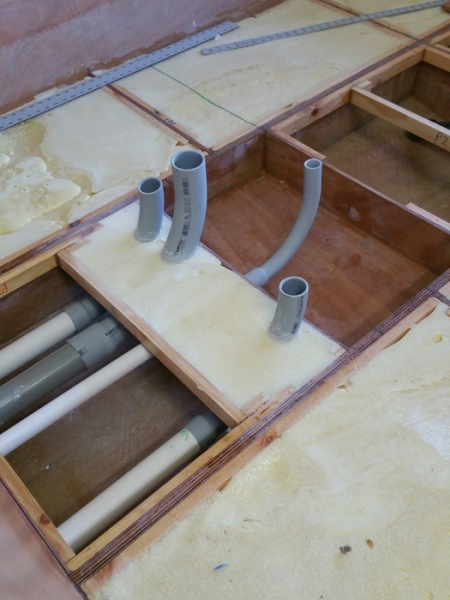
Now for the last project. I was trying to find a way to secure a bucket or 2 in the front hatch.
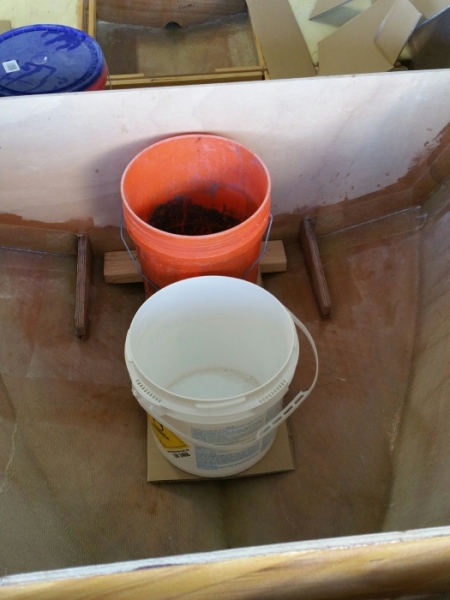
But ultimately I settled on a shelf that can hold two 3.5 gallon buckets.
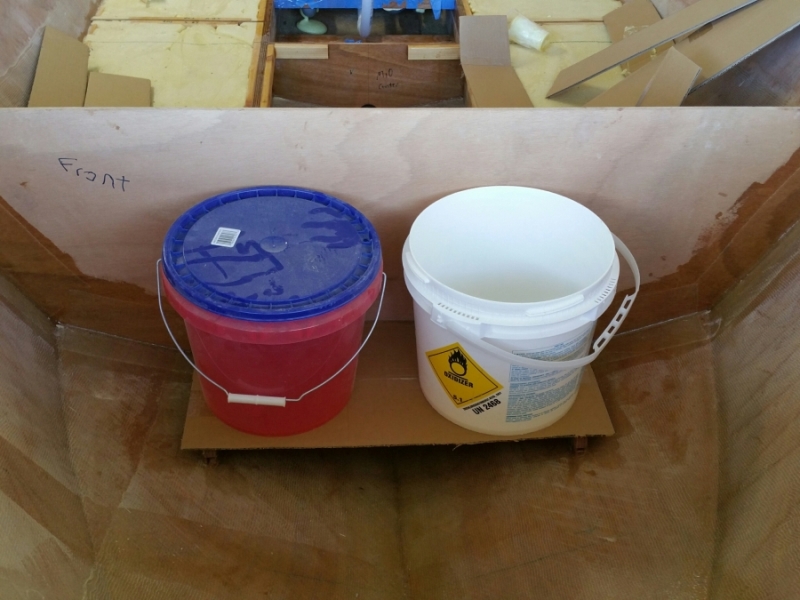
I glassed and installed the shelf. I'm not sure if I will go with one or 2 buckets, probably 2. One for the anchor, and one for the castnet. I use a 2 gallon for the net now and its tight so this will be an upgrade.
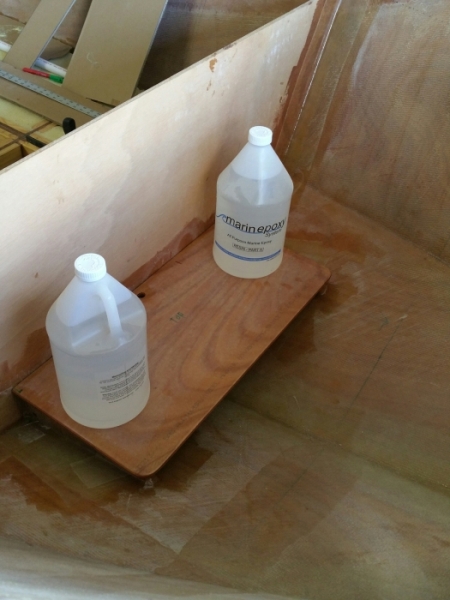
Ok I think that's all I got for now.
Re: The Plytanic 2.0 - FS17 Build
Posted: Sun Sep 30, 2018 6:21 pm
by narfi
Looks good to me!
Re: The Plytanic 2.0 - FS17 Build
Posted: Sun Sep 30, 2018 6:49 pm
by piperdown
Lovin' how the boat is coming together!
Looks great and well thought out.
Re: The Plytanic 2.0 - FS17 Build
Posted: Wed Oct 03, 2018 7:04 pm
by silentneko
Thanks gents,
So a little more progress, and I'm pretty happy with this one.
I filled in the foam around the scuppers some more until the tubes were covered. Then I began to shape them. The port side is just sloped to drain well. On the starboard side I did the same, but made a little ramp to better support the cables and wires that will go through the hole to the locker.
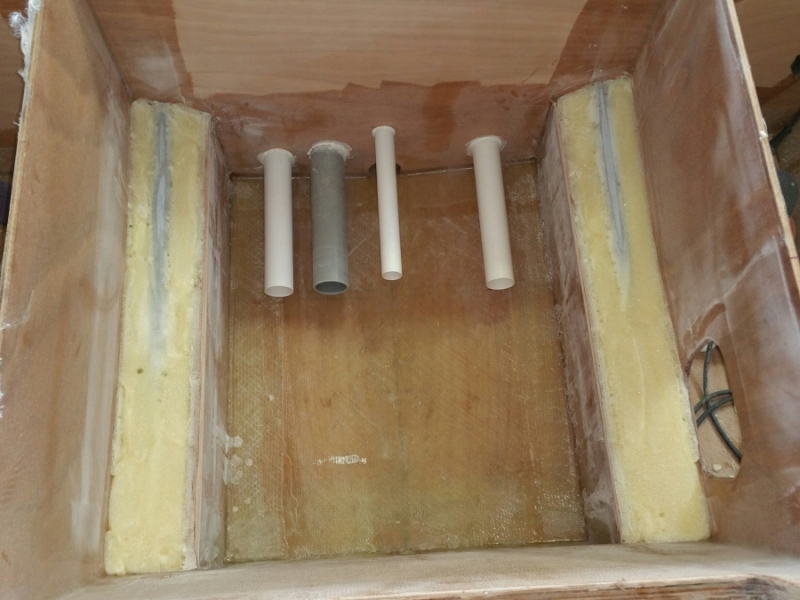
After shaping I used some light thickened epoxy to fill in the holes in the surface of the foam and then covered it all in layers of 6oz glass.
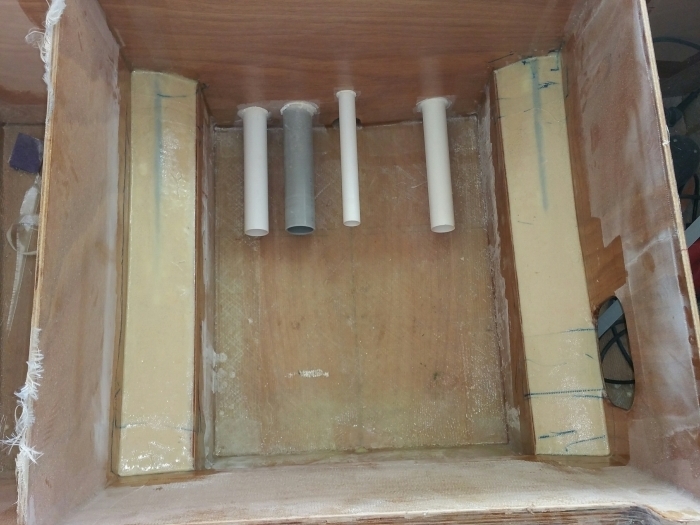
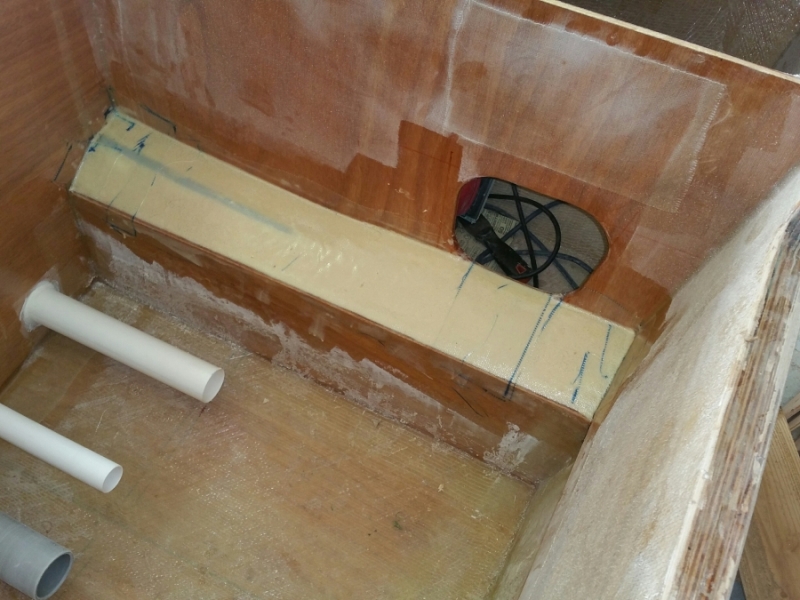
Not only does this area now serve a purpose, but I think it looks much more finished.
I also mocked up the rest of the sole. I'll splice the panels together with glass and install it as one part. Hindsight being 20/20 I wish I did the whole sole like this.
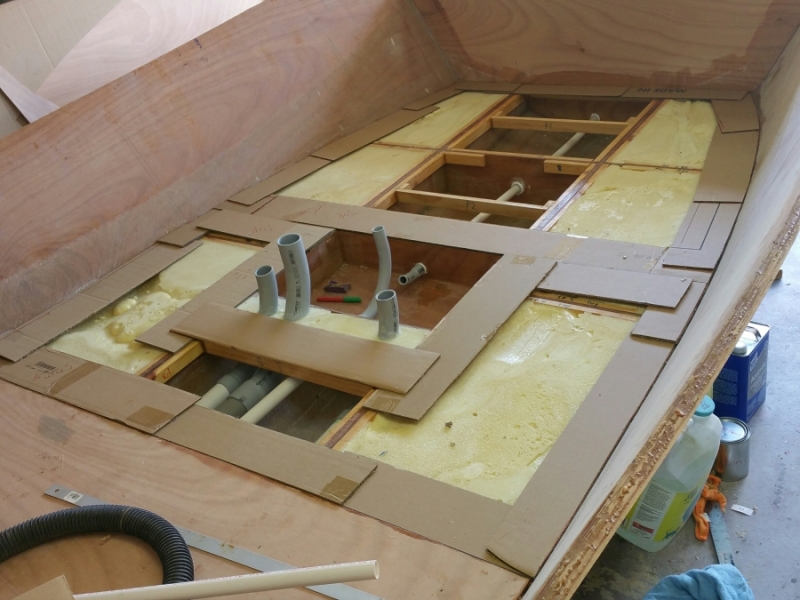
Re: The Plytanic 2.0 - FS17 Build
Posted: Thu Oct 04, 2018 10:52 pm
by piperdown
Looking good!
I see so many creative ideas with foam it's mind boggling
Re: The Plytanic 2.0 - FS17 Build
Posted: Fri Oct 05, 2018 2:21 am
by TomW1
Nice Silentneko.
Tom
Re: The Plytanic 2.0 - FS17 Build
Posted: Fri Oct 05, 2018 8:52 am
by Jeff
Really nice work Silentneko!! Jeff
Re: The Plytanic 2.0 - FS17 Build
Posted: Fri Oct 05, 2018 9:13 am
by OrangeQuest
Very nice use of cardboard! Ever run out or do you just take apart and reuse?
Re: The Plytanic 2.0 - FS17 Build
Posted: Fri Oct 05, 2018 9:31 am
by silentneko
OrangeQuest wrote: ↑Fri Oct 05, 2018 9:13 am
Very nice use of cardboard! Ever run out or do you just take apart and reuse?
I just toss it when I'm done. Othewise it gets a bunch of creases in it. A single cardboard box is easy to cut into a bunch of strips. They could also be thinner if need be, but don't skimp on the hot glue.
Re: The Plytanic 2.0 - FS17 Build
Posted: Sat Oct 06, 2018 10:30 am
by Bogieman
Very nice
Re: The Plytanic 2.0 - FS17 Build
Posted: Sun Oct 07, 2018 9:28 pm
by TomW1
Silentneko I have been on vacation for the last 3 weeks and am finally home and am going back on some of the posts. One that caught my eye right away is your red 12G fuel tank you are encasing below deck. That is an absolute no go. Those red tanks are for above deck tanks with no enclosure of any type. If you want to enclose your tank use one of these,
http://moellermarine.com/moeller-marine ... nk-032612/ These below deck tanks or tanks made for enclosures have a different lesser permeability than the red tanks for above deck tanks and are safer.
While this is not good news for you it is the rules by the ABYC and USCG and for safety sakes. For anyone else looking for tanks take this into account.
Tom
Re: The Plytanic 2.0 - FS17 Build
Posted: Mon Oct 08, 2018 6:20 am
by silentneko
Tom, you might want to read over my thread again. It's not going below the deck, it's going to slide in under the seat in front of the console. I've made sure this complies with all standards, including the size of the cut out needed to vent for the cu ft of the compartment. Thanks though.
Re: The Plytanic 2.0 - FS17 Build
Posted: Thu Oct 11, 2018 7:10 am
by cape man
I bought a bimini for my OD18 and decided not to use it. I'm about 30 minutes from you in Lithia. Paid $169 but will let you have it for any offer, including 0 if you want it. It is all put together and the box it came in is gone. Easier to unload to a fellow Bateau builder than trying to return. The canvas is tan.
Re: The Plytanic 2.0 - FS17 Build
Posted: Thu Oct 11, 2018 8:55 am
by cape man
Re: The Plytanic 2.0 - FS17 Build
Posted: Fri Oct 12, 2018 10:57 am
by silentneko
That's a mighty fine offer, and the color would work too. What width is it? Is it the 73-78" on the link?
Re: The Plytanic 2.0 - FS17 Build
Posted: Fri Oct 12, 2018 1:39 pm
by cape man
It is the 73-78". Sending you a PM with my cell if you want to come get it.
Re: The Plytanic 2.0 - FS17 Build
Posted: Fri Oct 12, 2018 6:45 pm
by silentneko
Double post.
Re: The Plytanic 2.0 - FS17 Build
Posted: Fri Oct 12, 2018 6:45 pm
by silentneko
Like we were chatting about in thb's thread here's a bit on lights. I think I'll make a separate post so guys can reference it if need be.
So I got a package in the mail from Oznium.com the other day and I’m pretty excited about it. I used their 4-chip LED’s in the past and loved them, so I decided to try out their other products. In my new boat I’ll be using their navigation lights, a bunch of the 4-chips, and a few of their 3w underwater flood lights on the transom. This post is mostly about the flood lights.
So this is my last/current boat, The Plytanic. I installed just a single 4-chip LED on either side of the console. They are pretty bright.
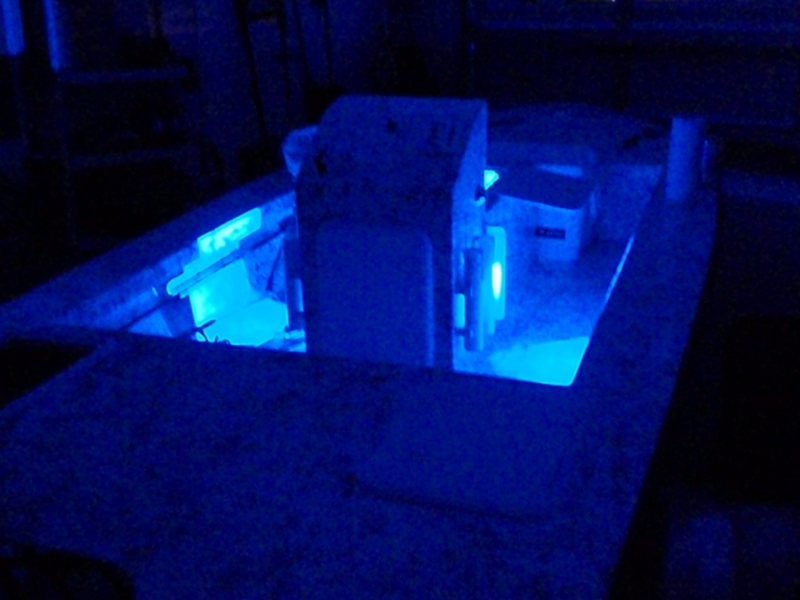
I’m switching to red on the new boat. Below is a comparison picture of the floods(left), and the 4-chip(right). The AA battery is just for size perspective.
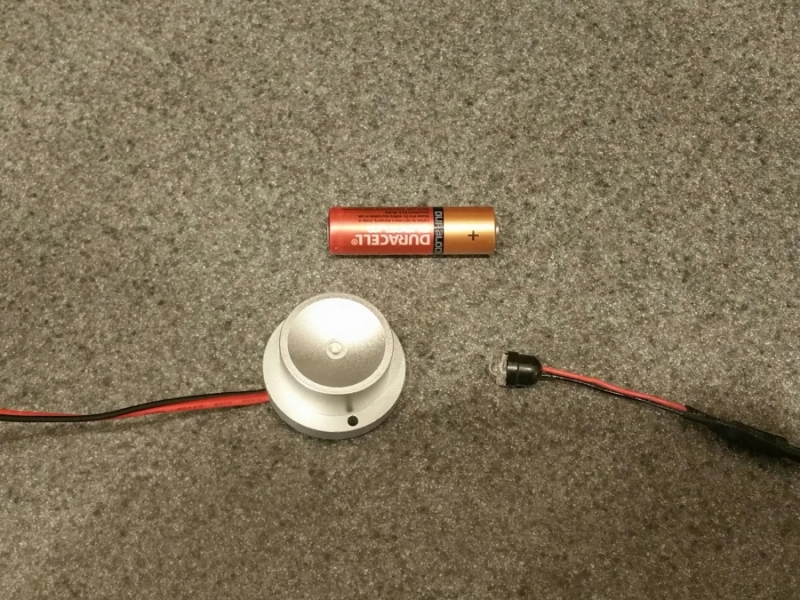
The floods come in a nice aluminum housing. I thought they would be plastic when I ordered so it was a nice surprise. The Navigation lights are of similar high quality.
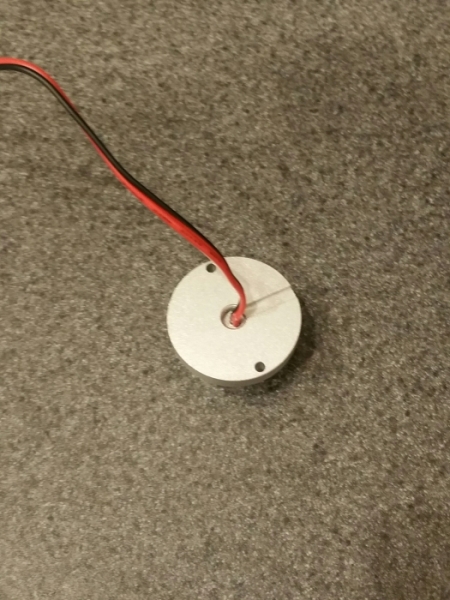
Here is where you can really tell the difference, when we apply power to them.
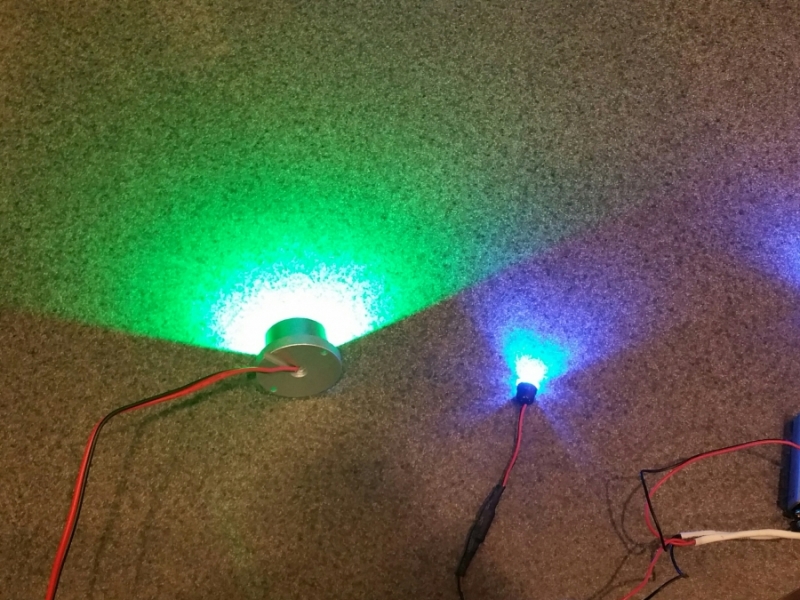
The floods are many times brighter then the 4-chips! The pics don’t do them justice. Here are some other comparison pics. Again the pics don’t do them justice, but if you can imagine it’s about the difference between looking at a streetlight vs starring at the sun!

Underwater
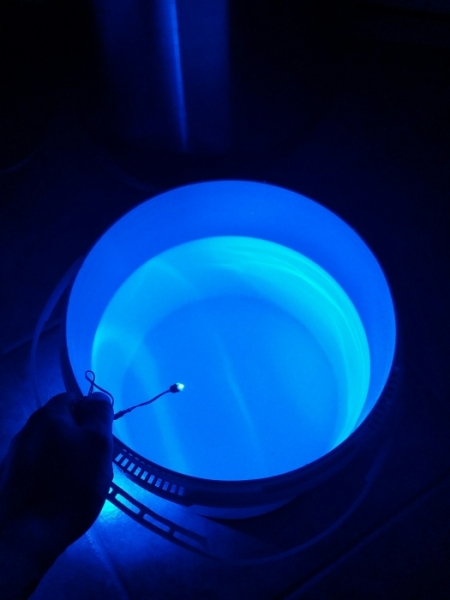
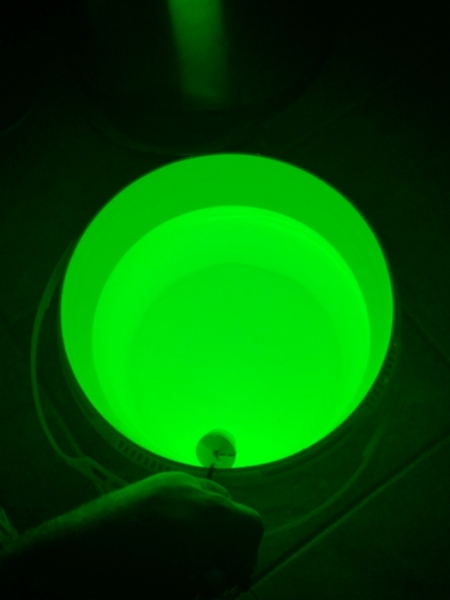
I haven’t wired up the red 4-chips yet, but I imagine they won’t be quite as bright as the blue.
Cheers!
Re: The Plytanic 2.0 - FS17 Build
Posted: Fri Oct 12, 2018 7:03 pm
by silentneko
cape man wrote: ↑Fri Oct 12, 2018 1:39 pm
It is the 73-78". Sending you a PM with my cell if you want to come get it.
Cool, not sure if it will be quite wide enough, but I'll give it a shot if you can't use it.
Re: The Plytanic 2.0 - FS17 Build
Posted: Fri Oct 12, 2018 7:15 pm
by Jeff
Very cool lighting Silentneko!! Jeff
Re: The Plytanic 2.0 - FS17 Build
Posted: Sat Oct 13, 2018 6:00 am
by cape man
Did you get an email from me?
Re: The Plytanic 2.0 - FS17 Build
Posted: Sat Oct 13, 2018 6:52 am
by silentneko
Sorry, but I did not. If you want to send it direct to my email it's
Silentneko@hotmail.com.
Re: The Plytanic 2.0 - FS17 Build
Posted: Sat Oct 13, 2018 8:14 am
by cape man
Now?
Re: The Plytanic 2.0 - FS17 Build
Posted: Sat Oct 13, 2018 9:33 am
by cape man
Check your email now. Earlier one got hung up.
Re: The Plytanic 2.0 - FS17 Build
Posted: Tue Oct 16, 2018 10:21 pm
by silentneko
Sorry for the lack of a call, and I also was hoping to make a post with some progress. However everything is on hold now.
My USAR team is sending a second deployment to Mexico Beach, to assist with rescue efforts from Hurricane Michael. I'll hopefully be back in a week or so. Stay safe guys.
Re: The Plytanic 2.0 - FS17 Build
Posted: Wed Oct 17, 2018 6:12 am
by cape man
No worries. It has been here since March. Be safe!
Re: The Plytanic 2.0 - FS17 Build
Posted: Wed Oct 17, 2018 7:41 am
by Jeff
silentneko, you be safe up there and thank you for your service!! Give us an update when you have time!! Jeff
Re: The Plytanic 2.0 - FS17 Build
Posted: Sun Oct 28, 2018 8:59 am
by silentneko
Back to work. I have some stuff I did before deployment I never got to post and a little work since.
I bonded down the rest of the floor. I did this part different, I joined the panels together then installed it as a single unit. In my opinion this was way easier then installing a floor in multiple parts and I wish I did it with the whole sole. I think it would be stronger too.

I am working on building the livewell. It will be just over 10 gallons when done. I recessed the drain, and a spray head will go offset on top.

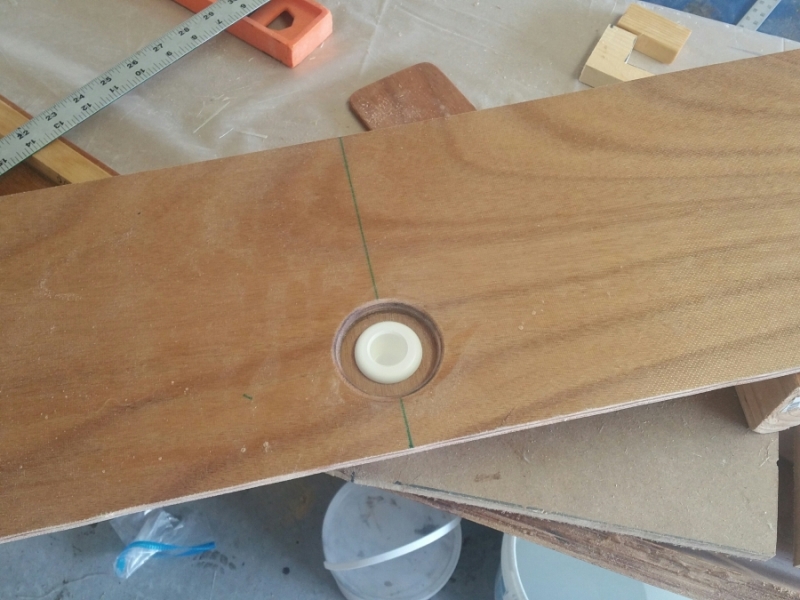
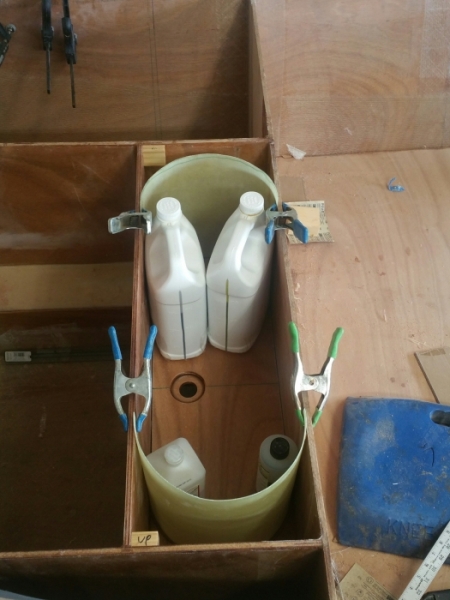
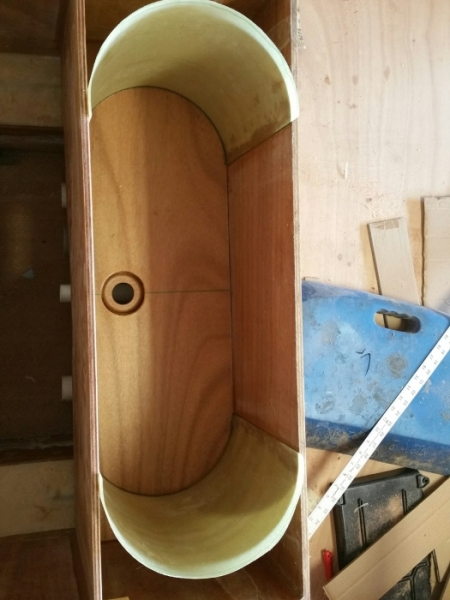
I'm working on filling and filleting the floor edges. I like to do larger gaps like this in 2 stages to avoid sagging issues in the final product. The first thickened epoxy I put down is heavily mixed with milled fibers for additional structural strength. I use a putty knife to flatten it down and make sure it fills the void well. Then I'll go back over it with my normal fillet mix and make the radius.
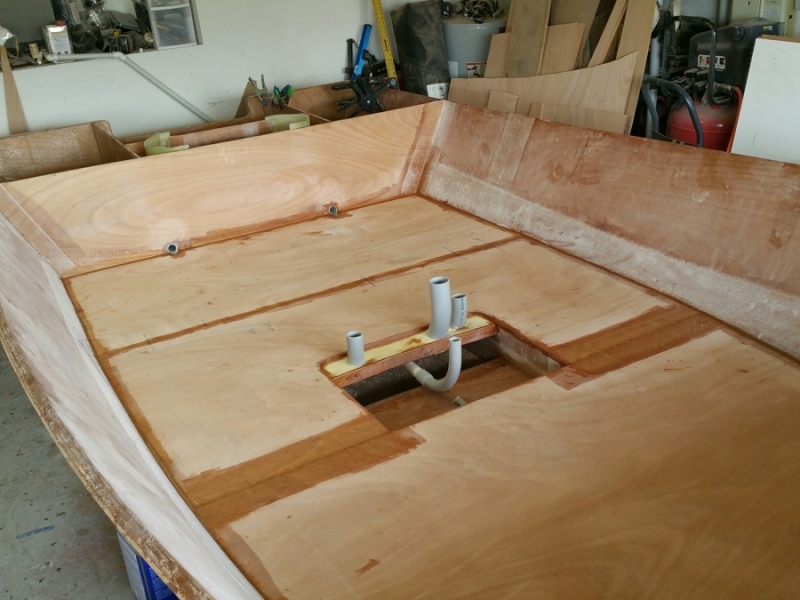
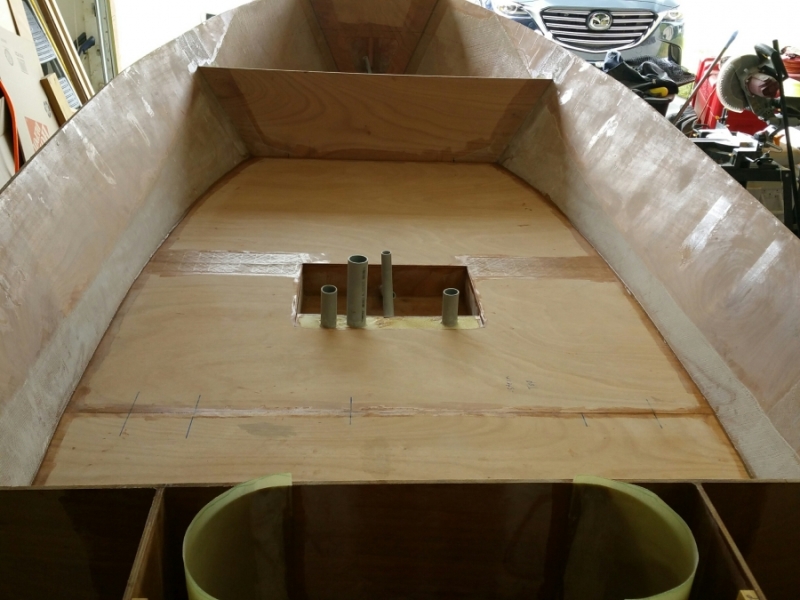
I did some other small things like flush and round the edge around the battery tray opening. I'll cut down the chase tubes once I'm all done glassing the area.
Re: The Plytanic 2.0 - FS17 Build
Posted: Sun Oct 28, 2018 7:06 pm
by Jeff
Nice Silentneko!!! Jeff
Re: The Plytanic 2.0 - FS17 Build
Posted: Tue Oct 30, 2018 9:56 pm
by Aripeka Angler
Very nice work. Love the livewell.
Re: The Plytanic 2.0 - FS17 Build
Posted: Tue Oct 30, 2018 10:55 pm
by silentneko
Thanks. I'm trying to decide how I will mount the spray head. I'm thinking offset to the side and slightly tilted so it's more directional into the corner. My thinking is this will help circulate the water by moving it counter clockwise as well as spray downward.
Re: The Plytanic 2.0 - FS17 Build
Posted: Wed Oct 31, 2018 6:36 am
by cape man
Spray the water as far along the surface as you can as the water/air interface is where gas exchange occurs.
Re: The Plytanic 2.0 - FS17 Build
Posted: Wed Oct 31, 2018 7:23 pm
by TomW1
It is going to depend on the system you decide on. There are several systems by Keep Alive and others. There are systems that add air into the stream of water. So do your home work and make a decision on what bait your going to be using.
Tom
Re: The Plytanic 2.0 - FS17 Build
Posted: Wed Nov 07, 2018 4:52 pm
by silentneko
I'm just using a typical spray head, it's been effective for shrimp and green backs. My thought is that it sprays down at a roughly 30 degree angle, so if I tilt it slightly it will spray directly down and also into the side of the tank away from the overflow.
I'm still playing catch up from being gone on a lot of things, and I'm running down a punch list before getting to the decks and console.
Here's a closer look at the scupper tubes. They dish out just a little below the level of the deck so they should keep it clear of any standing water.
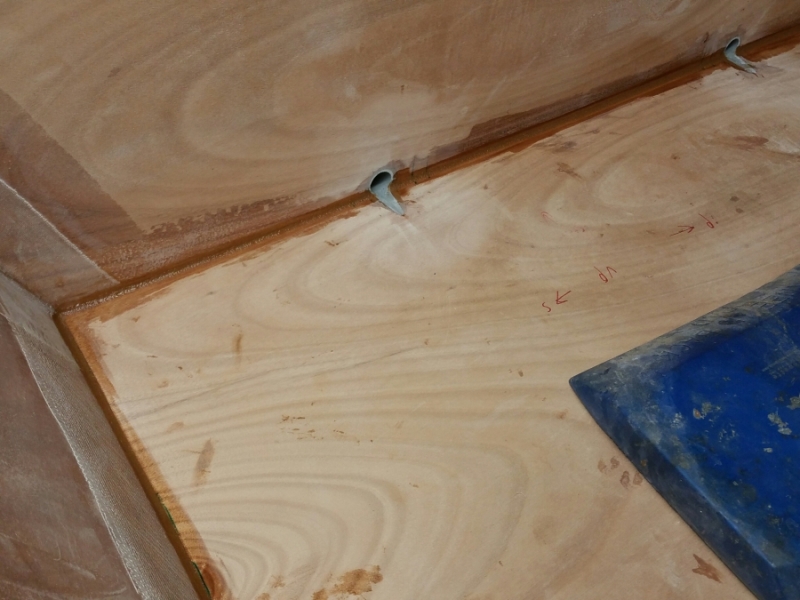
I foamed the voids behind the livewell sides, they are rock solid. I also filleted and glassed the sides in, and added a backing plate for the sprayhead.
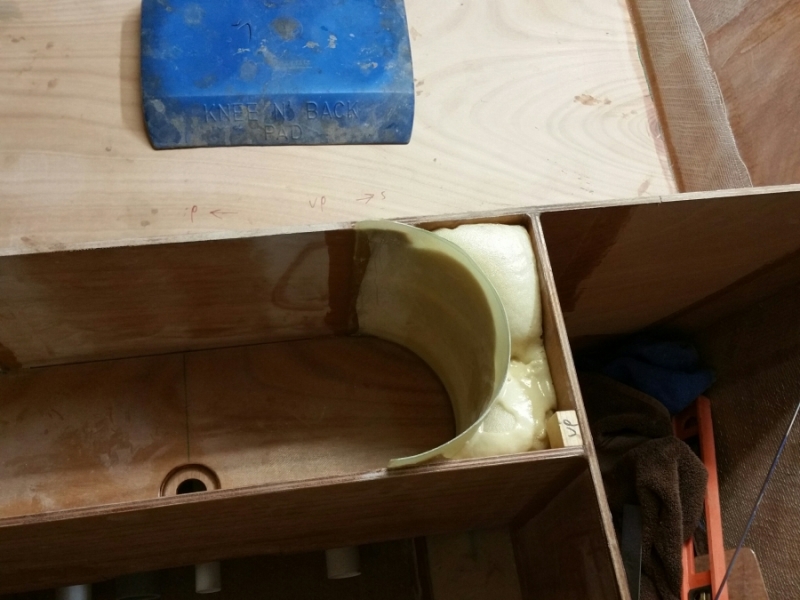
The floor was filleted and then I laid out my glass.

So I glassed the floor, and it came out well. Mostly.
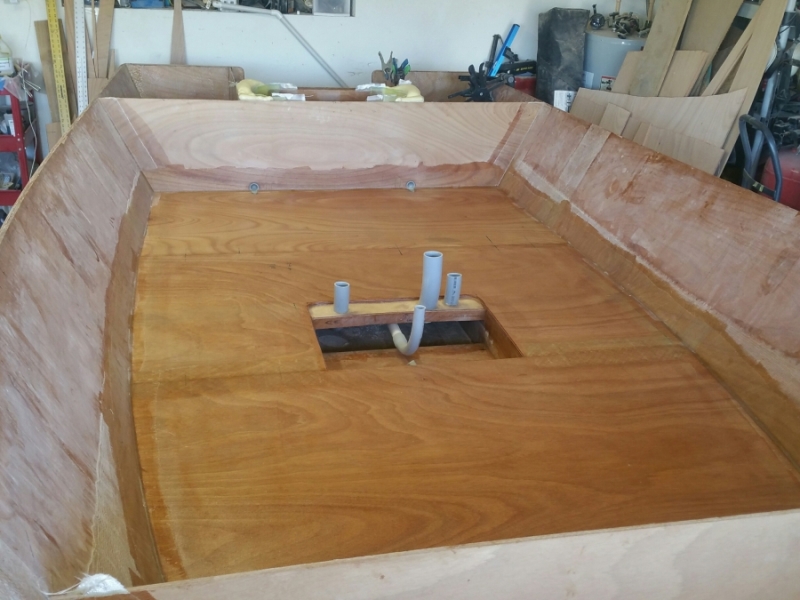
I ran into an issue that I keep coming back to. The okoume is not rigid enough for some applications. The floor in the rear, even with 6oz glass bottom and top still has some flex. I fixed this issue up front with additional supports, but all I can do to the rear is add glass. I added another layer overlapping the area with flex, but it still has a little left. I think ill do one more smaller layer in the middle.
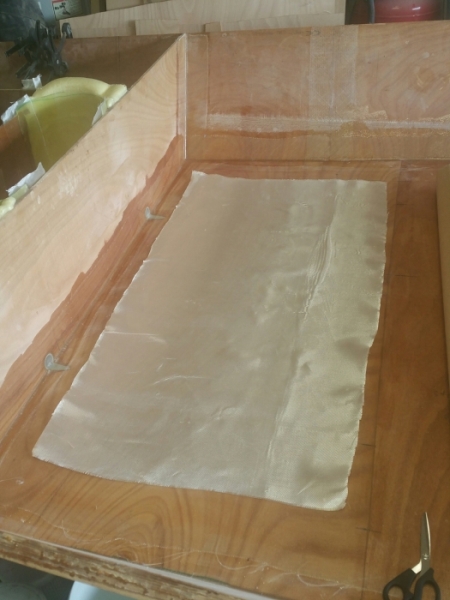
The last thing I did was correct an issue I've had for a while. This stems back to the off square problem I had with the plywood early on and the corrections I tried to make. Some worked out better then others. Basically my gunnel had a hump in it from where I reshaped them. I used a piece of composite molding to scribe a better line and then ground it down. My rub rail has a concave hump, I'll use the same piece of molding to create a dam to fill and make it more level.
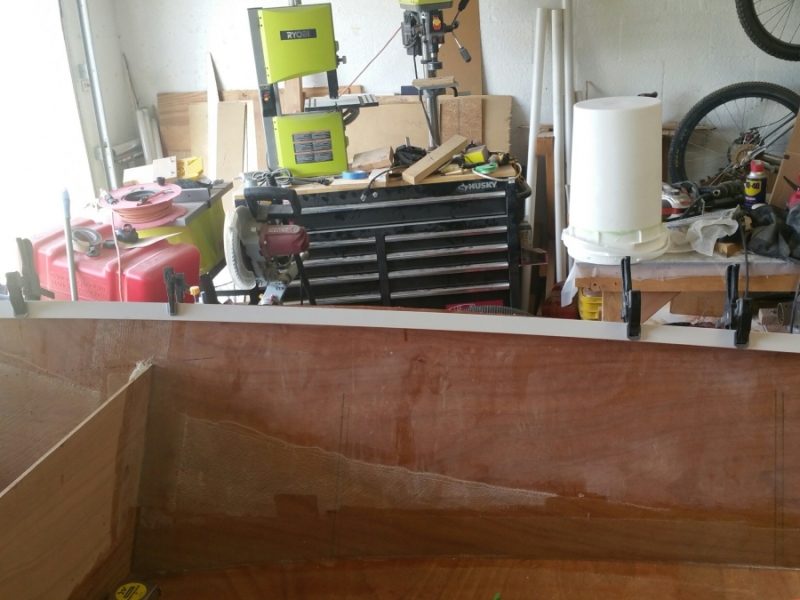
That's all for now.
Re: The Plytanic 2.0 - FS17 Build
Posted: Wed Nov 07, 2018 6:17 pm
by Jeff
Again, nice progress!! Jeff
Re: The Plytanic 2.0 - FS17 Build
Posted: Wed Nov 07, 2018 6:29 pm
by OrangeQuest
Everything is looking good!
Re: The Plytanic 2.0 - FS17 Build
Posted: Wed Nov 07, 2018 11:14 pm
by Fuzz
I know it is a little late to say this but to stiffen decks the glass on the underside of a core is what does most of the work. Most of us add glass on top for wear and puncture resistance but it is only a small help for stiffening.
Re: The Plytanic 2.0 - FS17 Build
Posted: Thu Nov 08, 2018 2:32 am
by TomW1
Looking good guy. Keep the good work.
Tom
Re: The Plytanic 2.0 - FS17 Build
Posted: Thu Nov 08, 2018 6:54 am
by silentneko
Fuzz wrote: ↑Wed Nov 07, 2018 11:14 pm
I know it is a little late to say this but to stiffen decks the glass on the underside of a core is what does most of the work. Most of us add glass on top for wear and puncture resistance but it is only a small help for stiffening.
You are correct sir, but if memory serves the plans don't call for any glass covering the sole, top or bottom, just resin coating. I always do the bottom because I've seen floors rot from the bottom up and I wanted more stiffness as well.
The rear section I installed first was supported as the plans called for it, actually better as the rear bulkhead and frame in front of it were closer. But even after glassing top and bottom with cloth it still had about 1/4" of movement when I stepped on it (240lbs). With the second layer it cut it down to about 1/8", not dramatic, but still noticable. One more layer should hopefully eliminate it all.
Re: The Plytanic 2.0 - FS17 Build
Posted: Thu Nov 08, 2018 7:57 am
by thb
Silentneko,
You are making good progress. Really neat and nice work.
Regards
Tom
Re: The Plytanic 2.0 - FS17 Build
Posted: Thu Nov 08, 2018 10:44 am
by jacquesmm
silentneko wrote: ↑Thu Nov 08, 2018 6:54 am
You are correct sir, but if memory serves the plans don't call for any glass covering the sole, top or bottom, just resin coating. I always do the bottom because I've seen floors rot from the bottom up and I wanted more stiffness as well.
The plans specify a fiberglassed bottom, in and out, up to the waterline.
The sole is an option: use one layer of thin glass (4 or 6 oz.) on top only.
Re: The Plytanic 2.0 - FS17 Build
Posted: Thu Nov 08, 2018 12:37 pm
by silentneko
I get it's an option, but with what ply spec? I'm using 9mm okoume BS1088 I purchased here. With 6oz woven glass, on bottom and top, the floor still flexes a lot in the areas I didn't reinforce way more then the plans stated. I have some left over 4mm meranti I bought here about 7 years ago, and it is almost as rigid as the 9mm okoume. Just my opinion, but I maintain the okoume doesn't have the rigidity needed for certain applications like this. The weight I saved buying the okoume has been easily lost having to use additional reinforcements and additional glass to stiffen it.
Re: The Plytanic 2.0 - FS17 Build
Posted: Thu Nov 08, 2018 2:27 pm
by narfi
I wonder what we did differently.
I used 3/8" okoume from bbc (I think same plywood as the 9mm?)
I foamed all the bays but the center ones were not filled 100% to the top so the foam does not offer full support in the center 'isle'.
I did have wider supports on the tops of all the stringers and bulkheads, maybe that made a difference? (1x4 along the top of both stringers and split 1x4 to make 1x2 along the tops of all bulkheads)
I did not glass the bottom of my sole(only coated it with epoxy), I did lay 6oz woven over the top of the entire sole after it had been tabbed in though.
It has very little flex at all, most of what I feel when jumping my 240lb body on it is hard to tell if its the sole flexing at all or just moving the entire boat on the stands i have it resting on.
my raised forward deck is a lot larger span than any of the sole and I was concerned with flexing with it, so I reinforced it with 1.5"x1.5 "angles (cut from 2x4s) on the underside and glassed the entire underside with 12oz, now even without tabbing it in yet, just sitting there it is plenty sturdy.
Re: The Plytanic 2.0 - FS17 Build
Posted: Thu Nov 08, 2018 4:13 pm
by jacquesmm
Let's not confuse the bottom face of the sole with the bottom of the boat.
Glass on the lower face of the sole is overkill.
Re: The Plytanic 2.0 - FS17 Build
Posted: Thu Nov 08, 2018 4:16 pm
by narfi
jacquesmm wrote: ↑Thu Nov 08, 2018 4:13 pm
Let's not confuse the bottom face of the sole with the bottom of the boat.
Glass on the lower face of the sole is overkill.
It is the sole he is having issues with flex on. (unless I completely misunderstood....)
Re: The Plytanic 2.0 - FS17 Build
Posted: Fri Nov 09, 2018 9:30 am
by Bogieman
Re: The Plytanic 2.0 - FS17 Build
Posted: Sun Nov 25, 2018 11:17 am
by silentneko
narfi wrote: ↑Thu Nov 08, 2018 2:27 pm
I wonder what we did differently.....
It has very little flex at all, most of what I feel when jumping my 240lb body on it is hard to tell if its the sole flexing at all or just moving the entire boat on the stands i have it resting on.
my raised forward deck is a lot larger span than any of the sole and I was concerned with flexing with it, so I reinforced it with 1.5"x1.5 "angles (cut from 2x4s) on the underside and glassed the entire underside with 12oz, now even without tabbing it in yet, just sitting there it is plenty sturdy.
There should really be no flex at all. I solved the issue in the other areas towards the bow by just adding a 1x2 in between the stringers. For maybe 1/2 a pound and $3 I solved the problem, but I can't do that for the rear area because it was glued down before realizing this. It's ok I'll work it out.
Re: The Plytanic 2.0 - FS17 Build
Posted: Sun Nov 25, 2018 11:30 am
by silentneko
The slow paced work continues. Work and the kids have been slowing me down further, it's just the busy time of year.
With the sheer line corrected I glassed the rest of the interior with 6oz cloth. This isn't required, but I want everything protected and strengthened as much as possible.
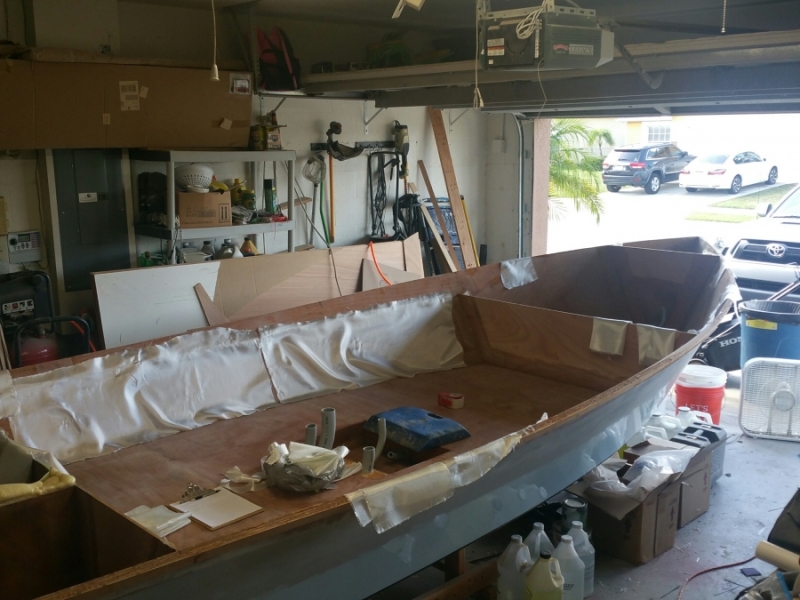
Glassing helped stiffen up the sides a bit too. before I could push in the gunnels about an inch or so, now it's maybe less then 1/2 an inch. The stiffeners will take care of the rest.
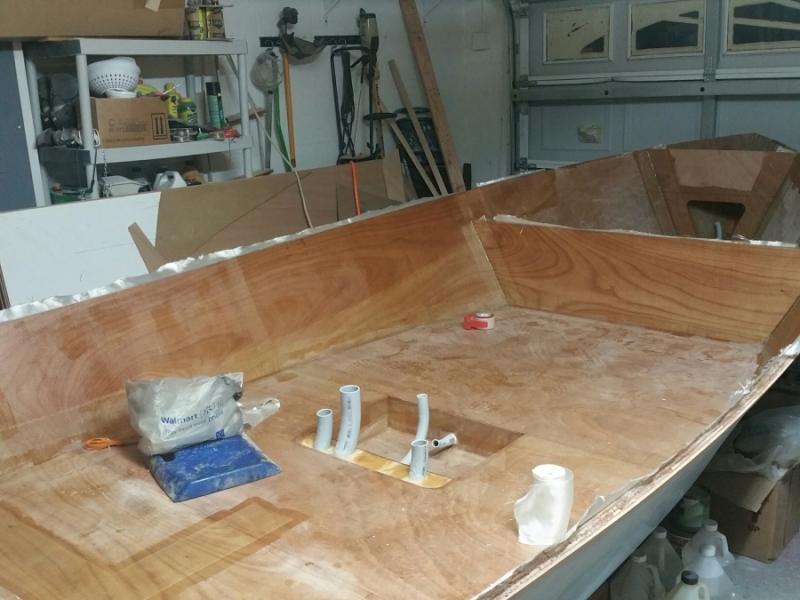
I still have some flex on the rear floor, not much, but it bothers me. I added a couple of strips of 6" tape to retie it in to the sides and frames. It helped a bit, but there is still a slight amount of flex. I'll decide if I'm gonna go any further with that later as most of that area will be covered by a cooler/seat arrangement.
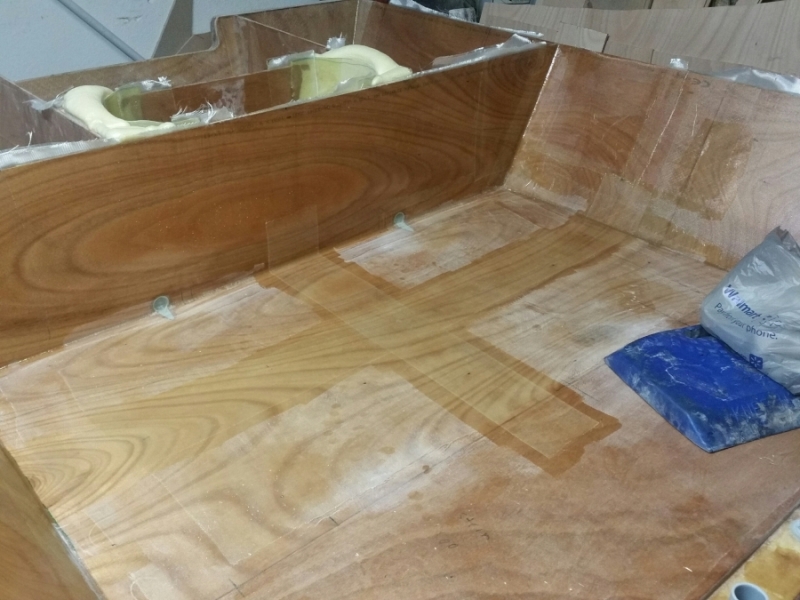
So here is where I'm a little embarrassed to share. I literally spent 2 days figuring out how I wanted to do the side supports/rod holders. Measure, draw, erase, measure, draw, erase.....about 200 times!
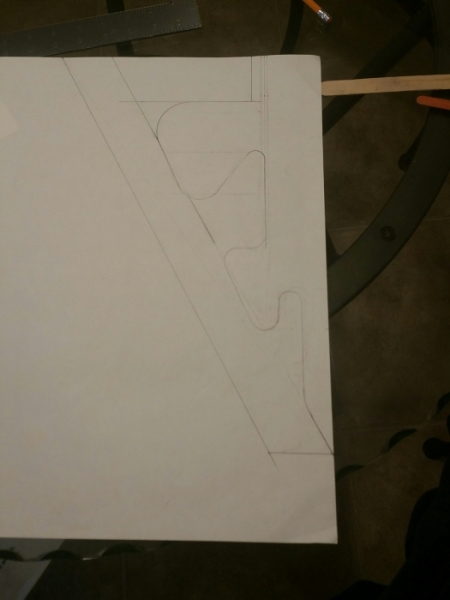
I wanted them to be aesthetically pleasing, somewhat, and functional. The problem is how much the hull curves. The spacing needed to be correct so it supports the hull sides well, and allows me to hang a long rod. I don't fly fish so my goal was to be able to hang a 7.5' rod without having to cut holes in the bulkhead. I can do 8' if needed with this arrangement.
So from left to right is the bow, middle, and stern supports. I decided the most functional type was a simple hole, but if I needed to hold a longer rod where the reel was behind the support instead of in front the hole doesn't work. So the front gets the hole, and the rear gets a slide in design. the rear is made so if I need to add a bungee strap later on it's not a problem. The top can fit 2 larger diameter rods, and the bottom will hold either a smaller rod, gaff if I ever need, or most likely my stake out rod. The gunnel caps will end up being about 8.5" total. and there will be a cap edge of about 5/8" x 2.5" so the top rods will be tucked under well. The supports themselves I want a little thicker this time, so they will be either 3/4" or 1" thick.
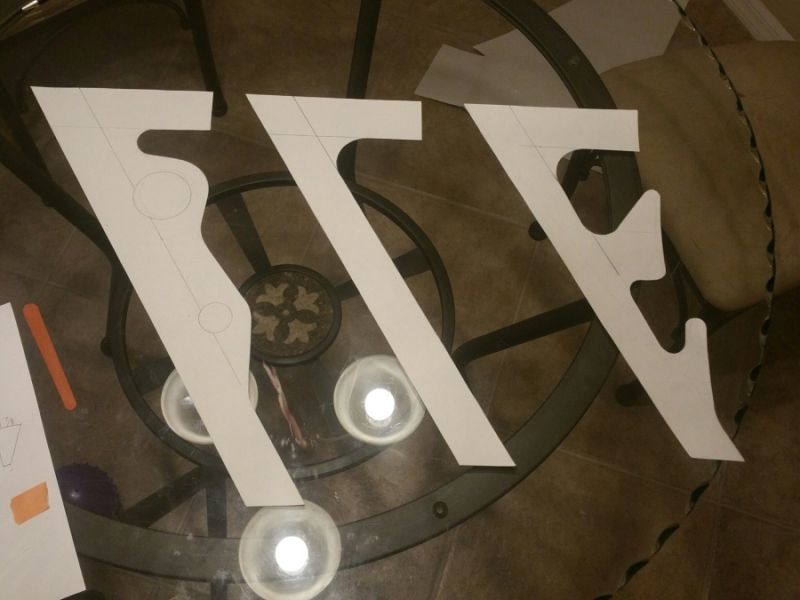
To be cont....
Re: The Plytanic 2.0 - FS17 Build
Posted: Sun Nov 25, 2018 12:00 pm
by silentneko
......Still working on the supports.
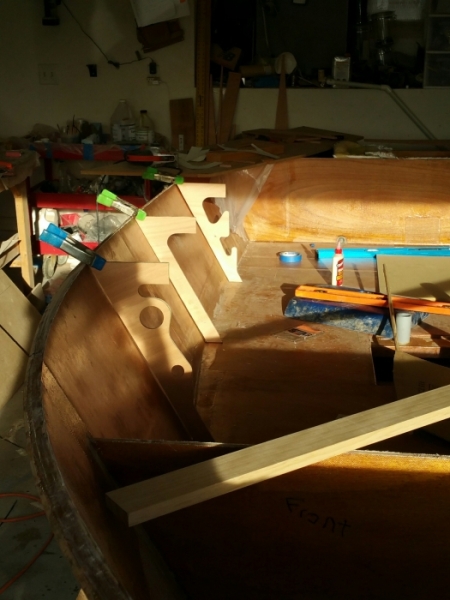
I used the router to duplicate each part. I'll bond the other parts to them and then use the router again to finish cutting it out, then again to round the edges.
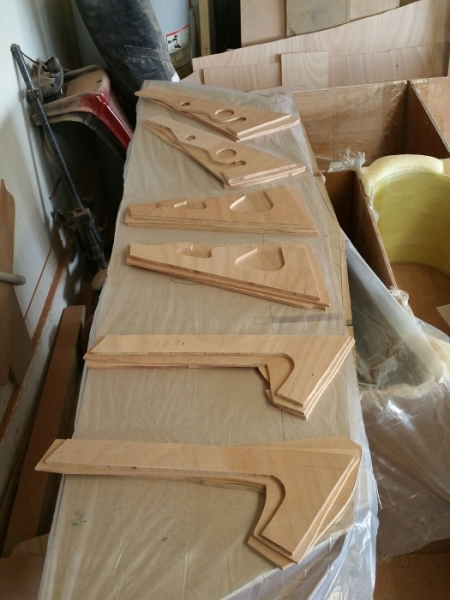
I was able to make the parts from scrap I had saved. They will be 1" thick.
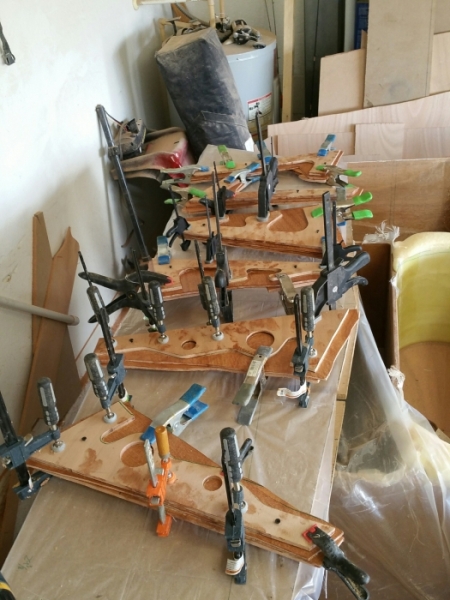
Once I'm done glassing them I'll use a roundover bit, then add glass to the faces and wear areas.
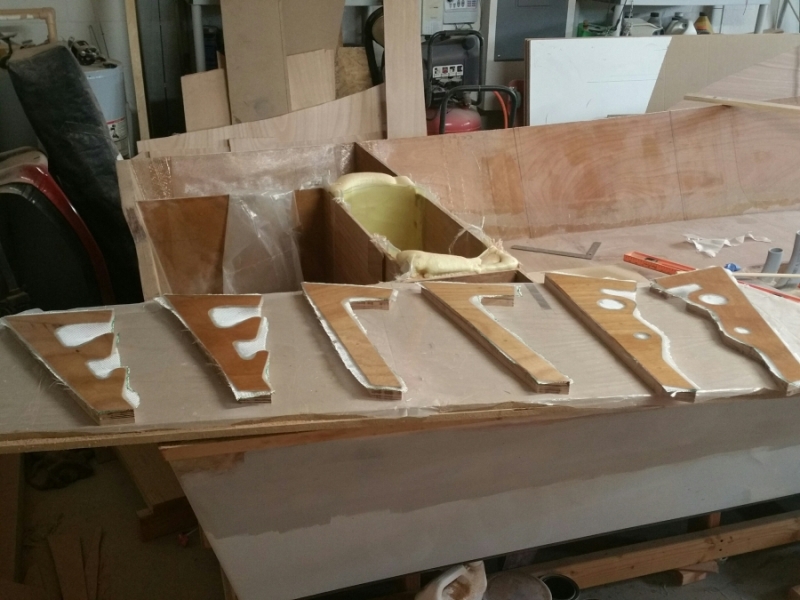
Some more pieces to the puzzle. I got online and waited 45 minutes in front of bass pro Wednesday to grab a new GPS/FF. I originally was looking at a 5-7" display, and narrowed it down to the Lowrance elite ti series. This 9" was cheaper then the 7" on sale. I'll also be able to get all the engine data on it, bluetooth it to a radio, and maybe hook it into the GPS trolling motor, as well as get down scan and side scan capabilities. basically a bunch of stuff I'll probably never need, lol. It came with both C-maps, and Navionics+ so I'll need to figure out which one is best for my area.
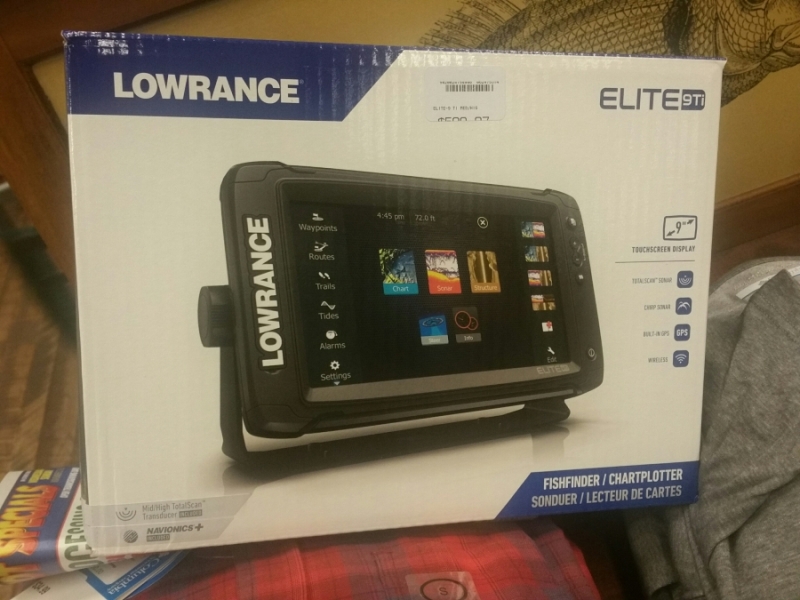
One last stop after Bass Pro. I went and met up with Cape Man at his property, which is pretty cool, got to look at Clara too. He helped me out with a bimini top he wasn't going to need on his OD, but should work well on my FS. I forget to take a pic, but it's a tan 4 bow set up. Even got to chat up him and his grad student about aquaculture biology and such. Good times, Thanks again!
Re: The Plytanic 2.0 - FS17 Build
Posted: Sun Nov 25, 2018 12:50 pm
by Aripeka Angler
The rod holders are very nice!!
Re: The Plytanic 2.0 - FS17 Build
Posted: Sun Nov 25, 2018 1:52 pm
by Jeff
Yes, really well done on the rod holders!!! Jeff
Re: The Plytanic 2.0 - FS17 Build
Posted: Mon Nov 26, 2018 9:49 am
by Dougster
i like 'em to. Didn't do that on my LB22 and regret it. Nice buy on the lowrance. I forget which troll motor supports it. Motorguide or Minn Kota. I have the Minn Kota with anchor lock/gps and love it.
Dougster
Re: The Plytanic 2.0 - FS17 Build
Posted: Mon Nov 26, 2018 11:47 am
by cape man
Was great to meet another boat builder. Sorry we didn't spend more time but had a pretty full plate once our grad student showed up. Sure hope the Bimini works for you, and like I said just pay it forward. This group here is all about helping each other out whenever we can. The list of "things", both tangible and not, that I have gotten from folks here is too long to document.
The boat is looking great!
Re: The Plytanic 2.0 - FS17 Build
Posted: Mon Nov 26, 2018 11:56 am
by OrangeQuest
Wow! That is some clever puzzle piece making there!
Re: The Plytanic 2.0 - FS17 Build
Posted: Wed Nov 28, 2018 6:50 am
by Bogieman
Very Nice as always
Re: The Plytanic 2.0 - FS17 Build
Posted: Mon Dec 03, 2018 9:41 am
by silentneko
Some more slow progress, but progress none the less.
So I've had hatches on all my skiffs. The first ones I built out of just plywood, and they worked well, but did not have any kind of seals. On my current skiff I went out and bought commercial plastic hatches, I hate them, lol. Ok hate is a strong word. I feel they look a bit cheesy and while they do seal when they are kept closed, as soon as you open them they drip all the water held in the gutters into the compartment. So I'm going to take a blind stab at making a better hatch.
Here I'm drawing out what I envision the gutters to look like. 2 of the corners are wider so I can install 1/2" drains. I'm going with just 1/2" to make it a bit easier and since these are the rear hatches they just need to be able to clear some spray or rain. The front hatch will be a different setup.
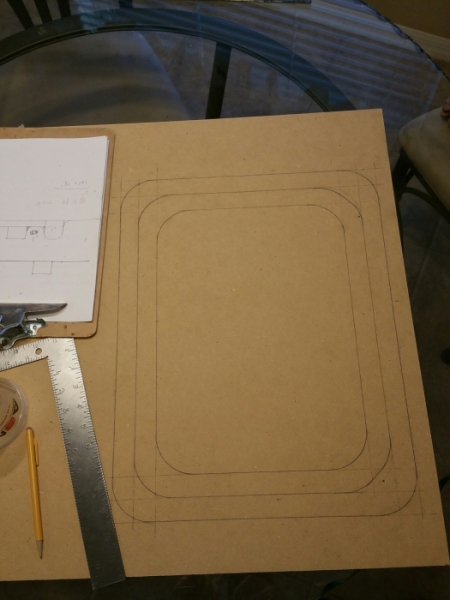
After cutting them out I laminated the parts to scrap pieces of 3/8" ply. This gives the proper spacing so the hatch that will be cored with 3/8" will be able to sit down flush. OR at least I hope so.

Routed, mounted to the backing board, edge routed, and filleted. it's not perfect, but I think it's not to bad.
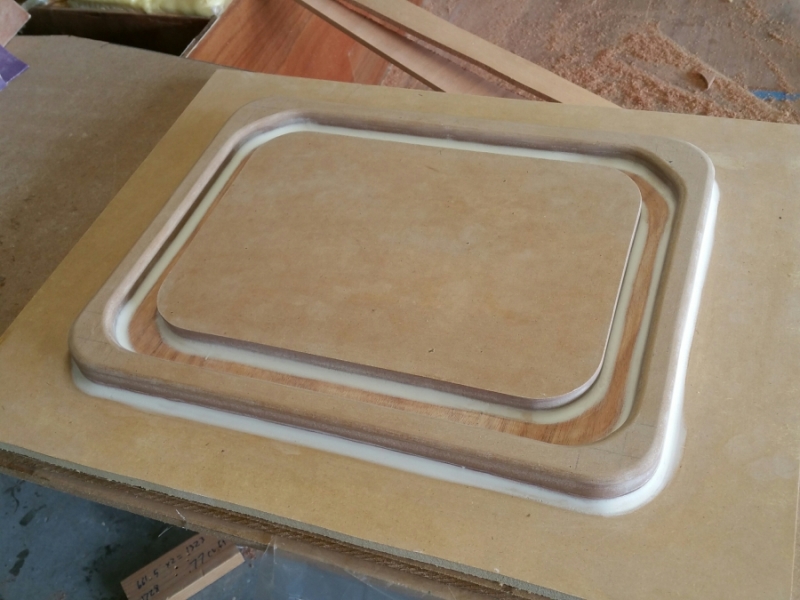
I edge routed and glassed the side supports. and rolled a coat of epoxy onto the gutter mold too.
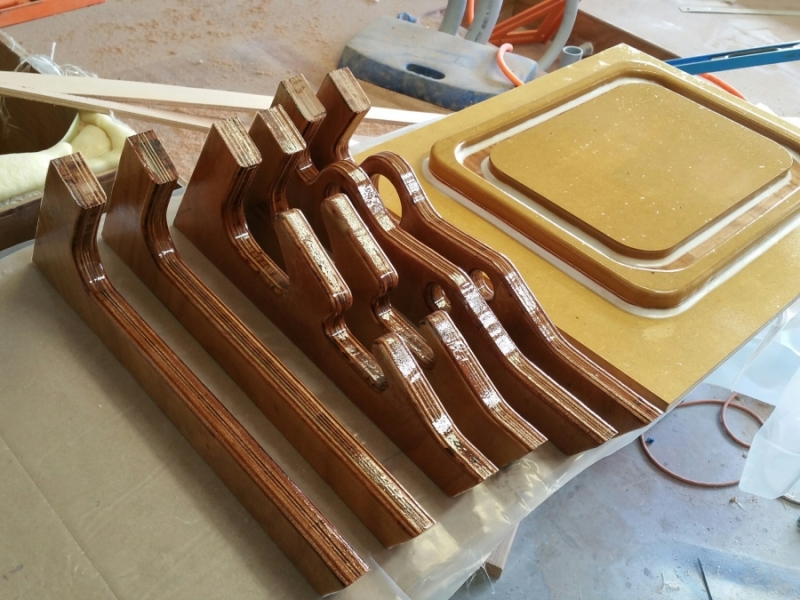
The hatches will have about a 3/8" gap around the sides that will allow them to open without binding, and give enough room for the hinges I'll be using. They are Gemlux flush mounts I snagged on clearance.
Re: The Plytanic 2.0 - FS17 Build
Posted: Mon Dec 03, 2018 10:05 am
by OrangeQuest
Interesting, very interesting. You will use the mold for more than a single hatch?
I know what you mean on the plastic hatches. I do not like the look of the 4 little hatches I bought and the bigger hatch I could not stand on it without it flexing so I reinforced it with foam and glass. As I improve my skills I may come back and make all the hatches.
Your inwale ribs look fantastic, are you going to leave them bright?
Re: The Plytanic 2.0 - FS17 Build
Posted: Mon Dec 03, 2018 10:10 am
by Jeff
Really well done silentneko!! Jeff
Re: The Plytanic 2.0 - FS17 Build
Posted: Mon Dec 03, 2018 12:13 pm
by silentneko
OrangeQuest wrote: ↑Mon Dec 03, 2018 10:05 am
Interesting, very interesting. You will use the mold for more than a single hatch?
I know what you mean on the plastic hatches. I do not like the look of the 4 little hatches I bought and the bigger hatch I could not stand on it without it flexing so I reinforced it with foam and glass. As I improve my skills I may come back and make all the hatches.
Your inwale ribs look fantastic, are you going to leave them bright?
Thanks guys.
I need to pull 2 parts from this mold. It should stand up to it ok with the resin coating I'm doing. I wouldn't expect to get more then 5 parts before the mold is toast. I appreciate what it takes to make a mold from scratch like this, but still don't see why a hatch similar would cost $300+ each. I'm to cheap to pay that, so here we are.
As far as the side supports go, I'll be painting them. I'm to far behind now to really slow down to do the finishes I wanted. I might do just a touch of bright work on the console, and might make a platform out of cedar strips later on. For now, I just need this boat done because we might be selling the house and we can't until this is finished.
Re: The Plytanic 2.0 - FS17 Build
Posted: Fri Jan 11, 2019 2:42 pm
by silentneko
Wow, I did not realize how long it's been since I made a post, and how little work I got done, lol. Dang holidays!
Ok so some things have happened. I decided to abandon the hatch idea. I realized a few things when I went to start putting glass down. First Where I wanted to run my drain tubes would not work, at least not well enough for me. Then I realized after deciding to play with the mold anyway, that I did not have the right glass rollers to smooth out all the tighter corners. Since I did not want to build another mold I decided to just junk it and move on. I'll just build them out of wood, more on that later on. I did get the side supports/rod holders in place and like how they came out. I didn't realize I hadn't posted that so I'll take a pic later.
I got around to working on the shelf again. I cut down 2 5 gallon buckets and mounted them with a 1/4" bolt. I have some of those closed cell kids play area pads that are round and fit under the buckets, and may use them as sort of a compression shock absorber of sorts. I'll be using 3.5 gallon buckets, one for my cast net, and one for the anchor and rode.

The next idea I came up with I stole from the kayak crowd. So I am looking for all sorts of better way to store things on this small boat. My last one had really one usable semi dry hatch because of the life jackets taking up room, and everything else remained on deck or under the rear deck. So I laminated some parts and got to work on a few solutions.
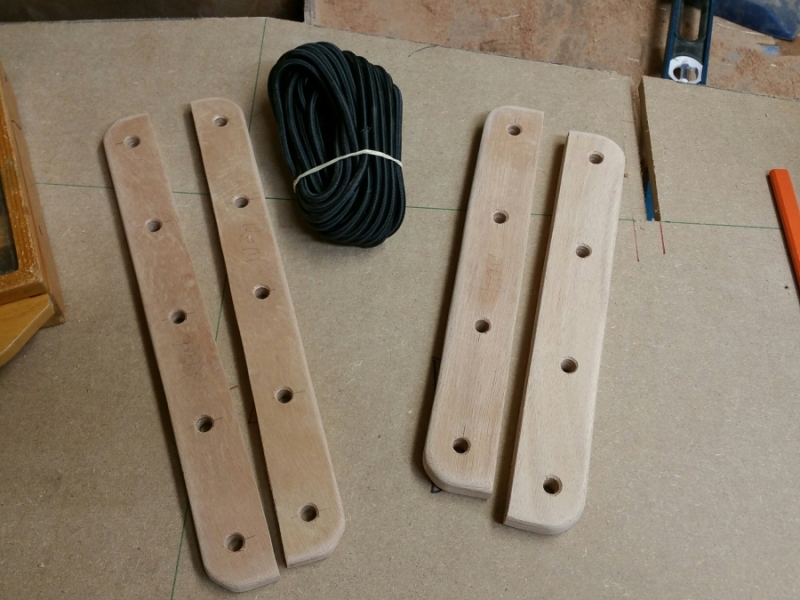
The pic above is not rope, it's 1/4" marine bungee cord. I'll use it in a shoe string pattern of sorts to store the life jackets in front of the bucket shelf. This area is generally wasted space because of the hull curve, but the jackets don't care. The bungee cord will allow quick easy access in case they are needed.
Bungee Brackets installed

I also did this on the rear compartment that the rigging runs through. Typically guys might wall this off and add a deck plate, but that seems unnecessary. This will allow me to store things and keep them away from the rigging, and give me really good access to anything I might need to do back there.

More to come later.
Re: The Plytanic 2.0 - FS17 Build
Posted: Fri Jan 11, 2019 4:13 pm
by Bogieman
Looking really good!
Re: The Plytanic 2.0 - FS17 Build
Posted: Fri Jan 11, 2019 7:10 pm
by Aripeka Angler
Nice work!!
Re: The Plytanic 2.0 - FS17 Build
Posted: Fri Jan 11, 2019 8:54 pm
by OrangeQuest
Good planning! Looks good too.
Re: The Plytanic 2.0 - FS17 Build
Posted: Sat Jan 12, 2019 1:03 pm
by Dougster
I like the bungee cord storage deal. Nice looking and handy.
Dougster
Re: The Plytanic 2.0 - FS17 Build
Posted: Mon Jan 14, 2019 3:44 pm
by eagle24
I've run through your build thread at work today. I really like what you are doing and your skiff is looking great! I'll check this out more thoroughly tonight.
Re: The Plytanic 2.0 - FS17 Build
Posted: Wed Jan 16, 2019 5:36 pm
by silentneko
I started smoothing out the live well. I ground the top of the foam flush, then used a knife to dig out a wedge around the edges, this will be filled with thickened epoxy to create a good bond with the deck. You can see some left over fillet material I laid in there. I have a few pin holes to seal up and then I'll be ready to prime.
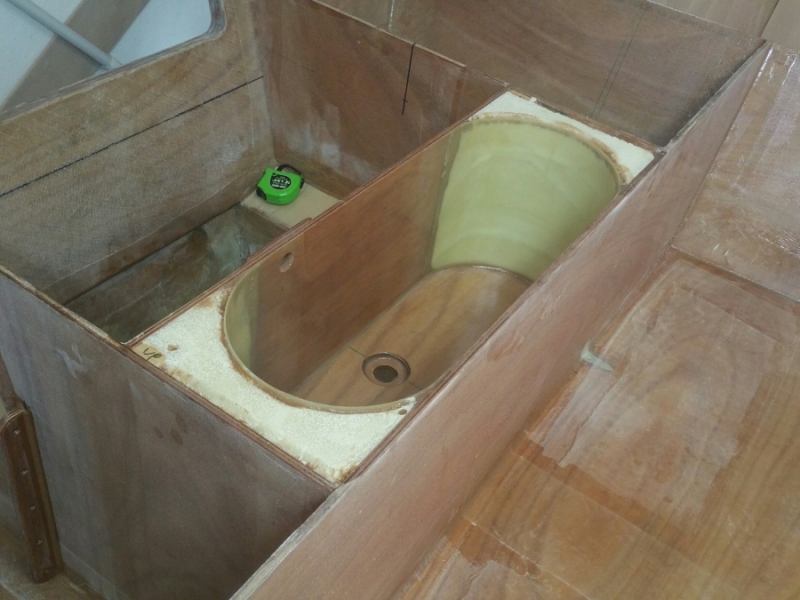
The side supports/rod holders had been more or less leveled, filleted, and glass tabbed in.
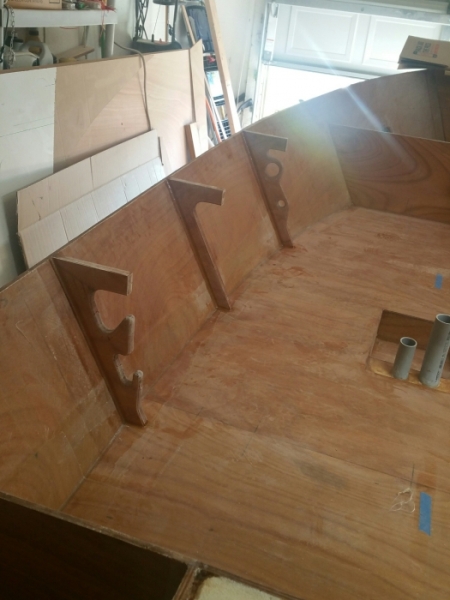
I filleted in the bungee cord racks. Then started playing with how I'll string it up. Not quite sure how it will end up, but something like this maybe?
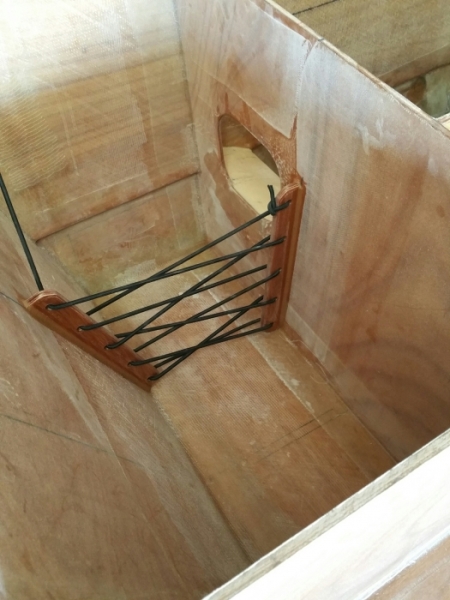
Re: The Plytanic 2.0 - FS17 Build
Posted: Wed Jan 16, 2019 5:46 pm
by OrangeQuest
Your work is really good. Every time I see your live well I get jealous! Did you put a backer plate on the spray nozzle hole?
The bungee idea is nice!
Re: The Plytanic 2.0 - FS17 Build
Posted: Wed Jan 16, 2019 6:11 pm
by silentneko
Thank you Sir. I put a 1/4" cleat for the spray nozzle, it's a little hard to see in the pics.
I'm loving the bungee cord deal. Honestly if I thought about it before I might have built the rear deck differently. It's an easy lightweight way to separate areas, kinda like a truck bed divider.
Re: The Plytanic 2.0 - FS17 Build
Posted: Wed Jan 16, 2019 6:11 pm
by Browndog
Looking good!
Re: The Plytanic 2.0 - FS17 Build
Posted: Wed Jan 16, 2019 6:13 pm
by Fair WX Pilot
The whole build looks fantastic. Love the bungee cord design.
Re: The Plytanic 2.0 - FS17 Build
Posted: Sat Jan 19, 2019 12:58 pm
by Bogieman
Very cool, Silentneko.
Re: The Plytanic 2.0 - FS17 Build
Posted: Sat Jan 19, 2019 4:49 pm
by Jeff
Nice Silentneko, very nice work!! Jeff
Re: The Plytanic 2.0 - FS17 Build
Posted: Sun Jan 20, 2019 1:23 pm
by eagle24
Really nice work. Do you know what you are going to do about a trailer?
Re: The Plytanic 2.0 - FS17 Build
Posted: Tue Jan 22, 2019 5:13 pm
by silentneko
Thanks guys.
I have a basic idea of which trailer I'll go with, and I've looked at a few. The issue is I need to fit it in a 19'6" garage, so I need it to have a swing tongue. I'd like an aluminum trailer this time, but it needs to be the "cheaper" style where the rails come together while still under the hull and a galvanized tongue extends the rest of the way. I was just going to get another galvanized trailer, but there is only maybe a $300 difference these days.
So I've been in analysis paralysis for a few days over the console. I finally decided on a semi direction and made a cardboard mock up real quick.
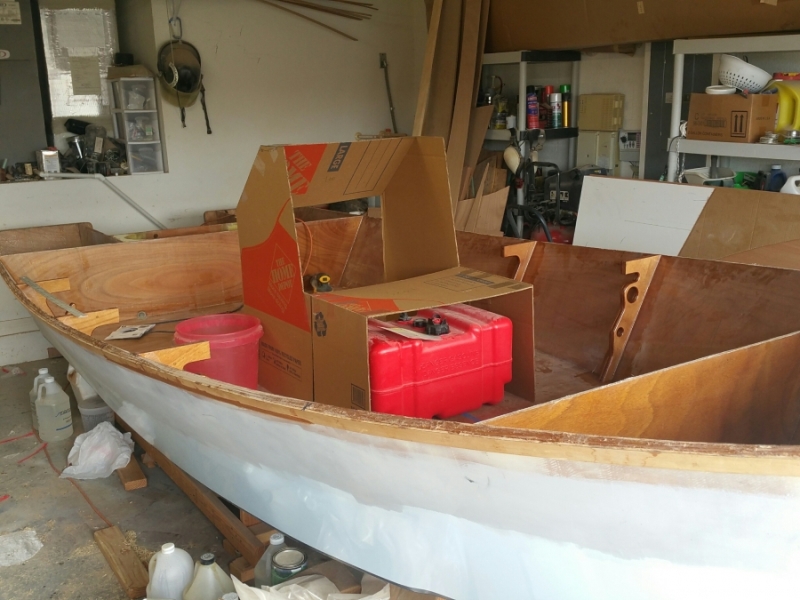
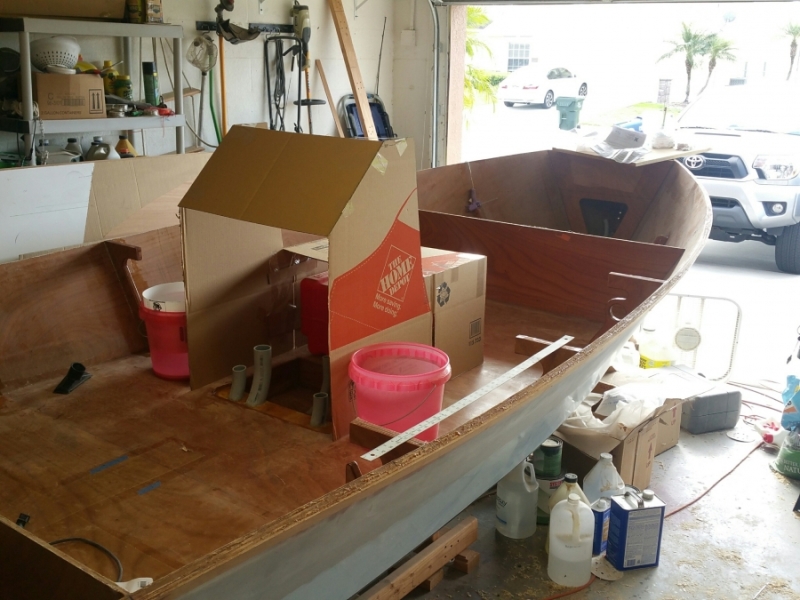
I'm trying to make a sit stand console. I stand most of the time while operating, but sit on long runs. I'll have a tall cooler as a seat. I'm 6'3" so it's gotta be tall enough, but I don't want it to be overpowering for the boat. So here we are. It's 26" wide and hides lots of stuff under her. I think it looks big, but it's hard to tell without all the decks and such installed. I looked at other boats about this size and some have consoles just as big, some are half the size. I'm hoping to cut plywood tomorrow, so I gotta figure it out.
Re: The Plytanic 2.0 - FS17 Build
Posted: Tue Jan 22, 2019 6:00 pm
by cape man
See you used the 5 gallon bucket clearance rule
looks great to me
Re: The Plytanic 2.0 - FS17 Build
Posted: Tue Jan 22, 2019 6:24 pm
by OrangeQuest
cape man wrote: ↑Tue Jan 22, 2019 6:00 pm
See you used the 5 gallon bucket clearance rule
looks great to me
Huh? There are rules that use buckets!?
That explains the bucket the yard stick left on the ribs.
Re: The Plytanic 2.0 - FS17 Build
Posted: Tue Jan 22, 2019 7:28 pm
by silentneko
It's a technical formula.
1/2 bucket R x 3.14 / Shoe size
Ok actually the buckets are just holding the cardboard up, it's kinda flimsy. I have so many yard sticks, t-squares, measuring tapes...... but I can never find one when I need it. I opened a drawer today and found 5 tapes.
Re: The Plytanic 2.0 - FS17 Build
Posted: Thu Jan 24, 2019 3:56 pm
by silentneko
A little bit more. So I abandoned the hatch molds in favor of a simpler plan after realizing the drains wouldn't work. Using 1x stock laminated together to make gutters. It's working out pretty well so far.
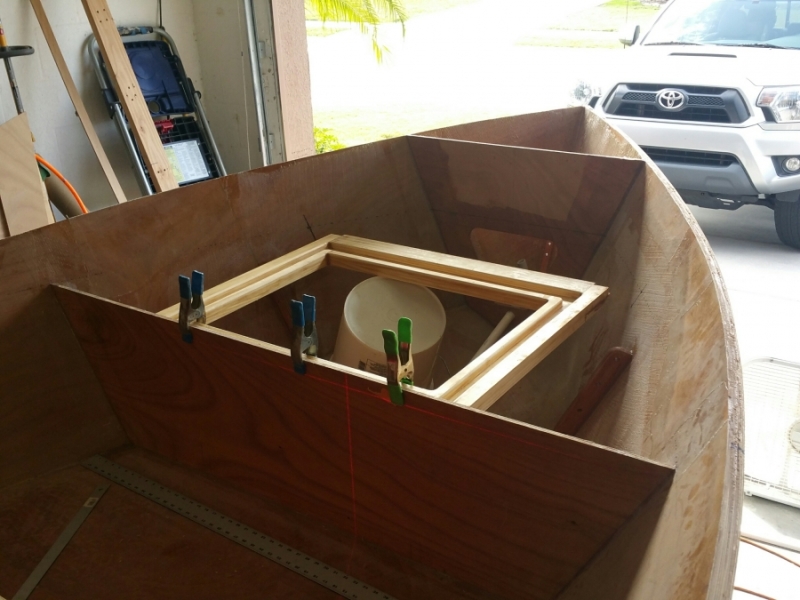
I decided on how I'll run the rigging to the motor well too. I bought a 3" boot which tapers down to about 2", but found out that suzuki uses a 2" rigging tube. So That doesn't leave much room for the steering or fuel line. I went out and bought a 4.5" rigging boot which is the next size up, but it is massive and I don't like the way it looks. So I decided to go with 2 of the 3" boots instead. The motor well is not used for anything else, so I figured why not.
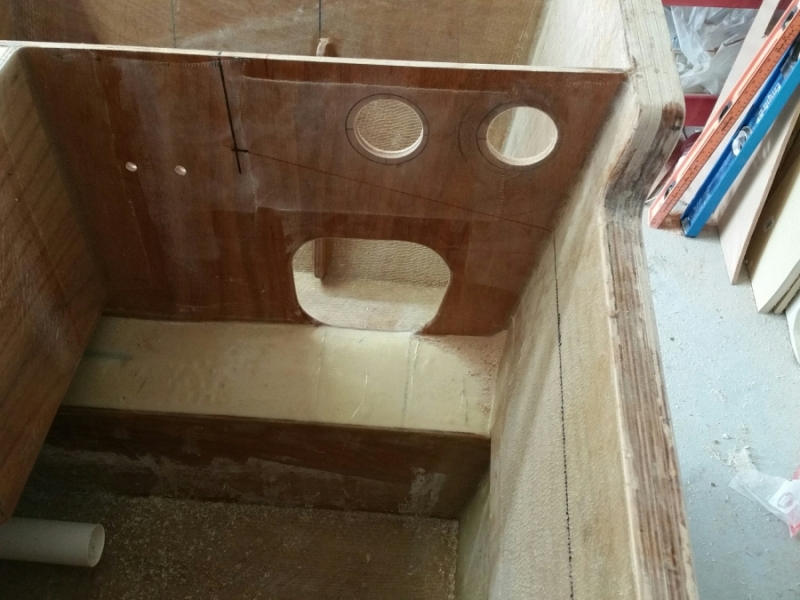
Re: The Plytanic 2.0 - FS17 Build
Posted: Thu Jan 24, 2019 3:59 pm
by Jeff
Nice hatches silentneko!!! Jeff
Re: The Plytanic 2.0 - FS17 Build
Posted: Thu Jan 24, 2019 6:54 pm
by Browndog
Those gutters look awesome!
Re: The Plytanic 2.0 - FS17 Build
Posted: Thu Jan 24, 2019 8:02 pm
by Aripeka Angler
Gutters look great!
Re: The Plytanic 2.0 - FS17 Build
Posted: Fri Jan 25, 2019 1:11 pm
by Bogieman
Very nice as always.
Re: The Plytanic 2.0 - FS17 Build
Posted: Fri Feb 15, 2019 5:39 pm
by silentneko
Thanks Gents.
So after a vacation and some bad weather I got back at it. I started sanding down the forward 2 compartments, but quickly realized there was little point to fairing it all. I sanded down all the sharp edges and rolled on a coat of epoxy and milled fibers to help smooth it out a bit. It worked out well enough and is now ready for prime and paint. The rear 2 compartments I plan to fair better because they will be used often.
I bonded in the gutter today. I ran a 1x3 across the back of it for additional support. I'll add a few more support bits once it's cured. I'm not sure if I mentioned it before, but I recessed the gutter lip 1/16" to allow for glass and a gasket.
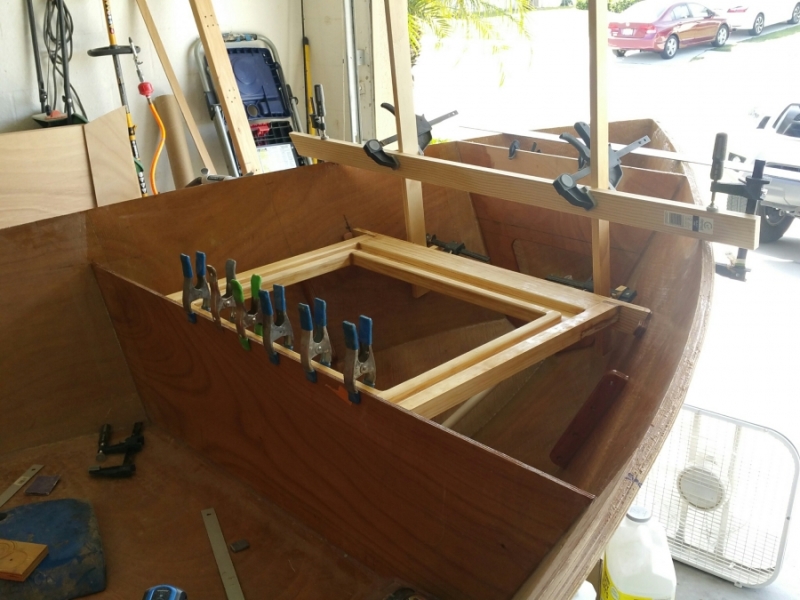
I'm still working on the console design, I'm leaning towards a more horizontal wheel setup like this. Cardboard to follow.
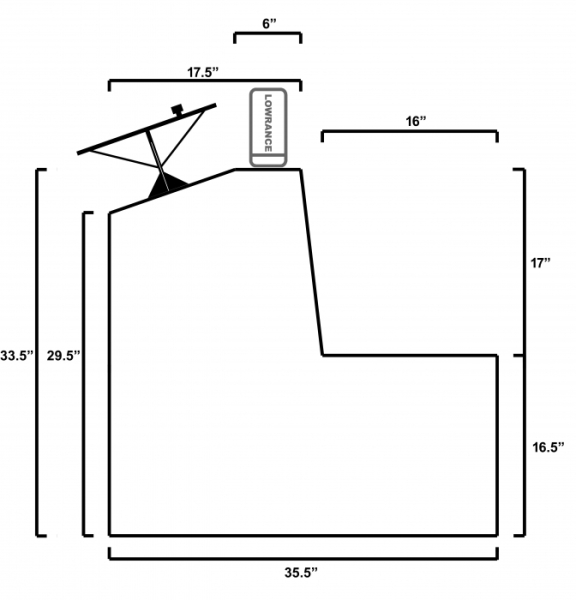
Re: The Plytanic 2.0 - FS17 Build
Posted: Fri Feb 15, 2019 6:01 pm
by OrangeQuest
Hope you enjoyed your vacation time. It all look very good and well thought out. Really like the small foredeck.
If I remember correctly you mentioned you stand at slower speeds but sit when cruising longer? I can see the flatter angle working well when standing but will you have knee clearance and comfortable reach to the wheel when sitting? What are your thoughts on that?
Re: The Plytanic 2.0 - FS17 Build
Posted: Fri Feb 15, 2019 6:22 pm
by silentneko
It's all a trade off at this point. I mostly stand when operating, and only sit when slow cruising or making long runs in deep calm waters. Knee clearance shouldn't be an issue, as the console is pretty tall still and I'll be using a cooler without a backrest. The cooler I'm planning on building taller then normal, maybe 22-24" or so. It will be taller then a typical chair or cooler, but shorter then a leaning console. I did a lot of mocking up to get to this point. See below.
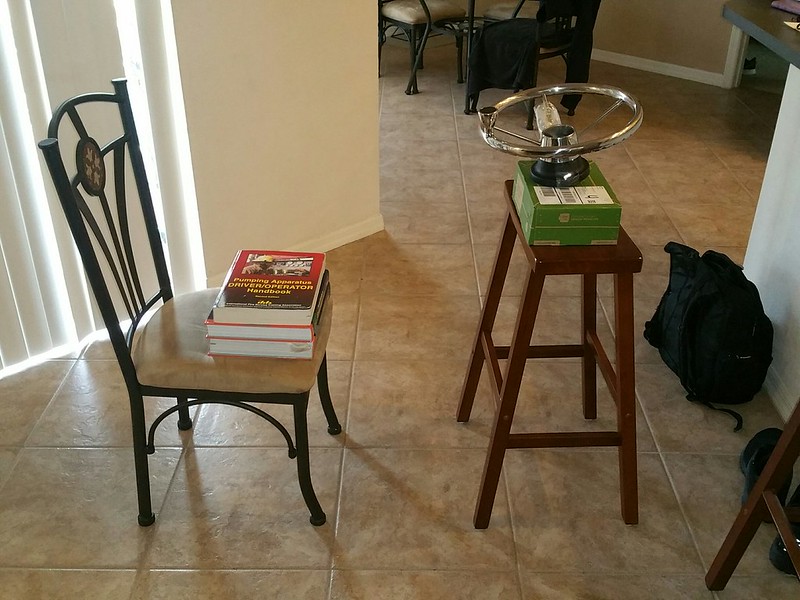 20190123_093519_resized
 , on Flickr
Re: The Plytanic 2.0 - FS17 Build
Posted: Fri Feb 15, 2019 7:05 pm
by OrangeQuest
I figured you had a plan.
Ahhh yes, the mock up props! I know them well.
Re: The Plytanic 2.0 - FS17 Build
Posted: Sat Feb 16, 2019 1:05 pm
by BassMunn
That looks familiar, remember spending hours trying to figure out mine as well in a very similar fashion, fell off mine a few times too
Re: The Plytanic 2.0 - FS17 Build
Posted: Wed Feb 20, 2019 9:38 am
by Capt UB
silentneko wrote: ↑Thu Apr 12, 2018 6:39 pm
Slowly!
I'm basically doing 2 steps forward, and 1 step back, but still forward overall. I called system three and they confirmed the primer should not be used as a high build. Which explains why even sanding with 220 grit I was burning right through it after a few coats. I decided I just needed to move on so I tried to apply the HBN/Epoxy.
After 2 coats with white pigment added it was still very much transparent. The picture doesn't show a lot because the garage is closed, but trust me you see everything under it, including the gray tint of the primer.
So what to do now? Do I put on another 2 coats to be disappointed again, or do I change course? I change course and come up with a new plan. I sanded down the coating, not completely, but I probably took down 2/3rds of it in many spots.
I didn't want to do a black bottom again cause I didn't think it would go well with my color scheme. I thought the offwhite of the HBN would be great, but it doesn't really tint the epoxy like the graphite does. Soooooo, I have leftover graphite from the last boat, I also have blue and white pigment. After some consideration and input from the wife I came up with an idea.
It covered well, and I dig the color. I used old tylenol syringes I stole from my kids medicine cabinet so I could be uniform and accurate. 9oz of epoxy 7cc's of phenol blue, and 4cc's of white pigment. It needs another coat, but I'll be able to move on soon.
You got me thinking....
I think I'm going to try some color tint instead of white. I want the hull sides lite powder yellow, so the bottom color??????
Re: The Plytanic 2.0 - FS17 Build
Posted: Wed Feb 20, 2019 3:20 pm
by silentneko
The blue came out ok, but maybe a mix of graphite and HBN to make a steel grey instead?
Re: The Plytanic 2.0 - FS17 Build
Posted: Sat Feb 23, 2019 10:42 pm
by silentneko
I think I finally decided on a direction for the console. It's more of a horizontal wheel position and should work out well. It's a bit hard to tell, but here's the mock up.
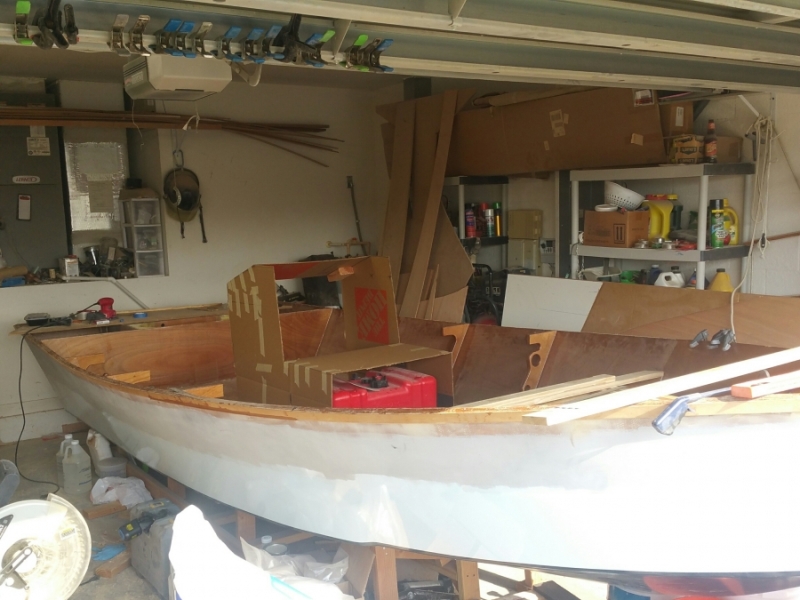
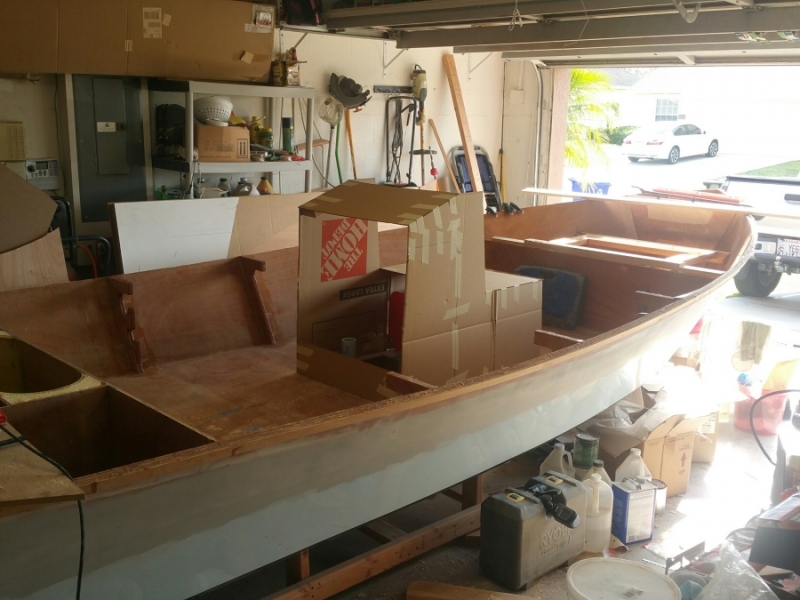
I added some supports for the front deck to set on, there will also be a few 1x2 braces going in before the deck goes down.
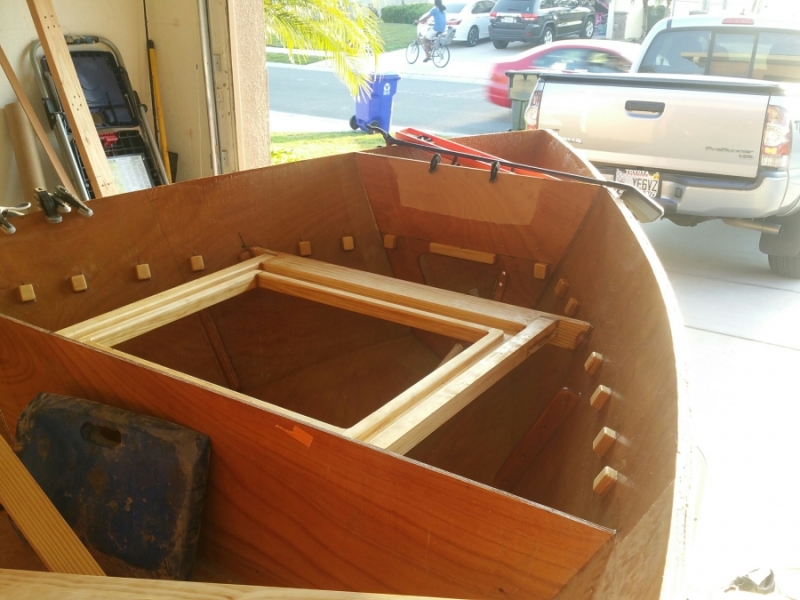
I have a plan in place for the rear hatches, I just need time to make it happen.
Re: The Plytanic 2.0 - FS17 Build
Posted: Sun Feb 24, 2019 6:03 am
by OrangeQuest
Everything seems to be falling into place and looking good.
I like the small cleats you are putting in. The front hatch gutters, I don't remember seeing drains when you were building them, do they drain down below the sole via tube or you still need to cut the frame to drain down to the sole?
Re: The Plytanic 2.0 - FS17 Build
Posted: Sun Feb 24, 2019 9:51 am
by silentneko
I just haven't routed the bulkhead yet, but the gutters will drain right to the sole. The rear hatches will now drain to the motorwell, then out the motorwell drains. It will make more sense soon.
On my next build I think I'll spend an entire day making 1.5" x 1.5" cleats. Cut them, sand them, and coat them so they are ready to go anytime I need them. I can easily see using 100 on this build.
Re: The Plytanic 2.0 - FS17 Build
Posted: Sun Feb 24, 2019 10:09 am
by Fair WX Pilot
The boat looks great. The small cleats look like a good idea. How did you clamp them in place while they cured?
Re: The Plytanic 2.0 - FS17 Build
Posted: Sun Feb 24, 2019 10:58 am
by silentneko
I run thickened epoxy around the perimeter, and just a drop of hot glue in the center to hold it in place while it cures. Seems to work well so far.
Re: The Plytanic 2.0 - FS17 Build
Posted: Sun Feb 24, 2019 2:26 pm
by OrangeQuest
silentneko wrote: ↑Sun Feb 24, 2019 9:51 am
On my next build I think I'll spend an entire day making 1.5" x 1.5" cleats. Cut them, sand them, and coat them so they are ready to go anytime I need them. I can easily see using 100 on this build.
If you have a table saw it will make quick work of it.
Re: The Plytanic 2.0 - FS17 Build
Posted: Sun Feb 24, 2019 3:13 pm
by silentneko
I do, and a band saw, and a sliding mitre saw. Cutting the bits takes only a few minutes. It's sanding the edges round and coating (heating and coating) that takes a bit of time for me. But I feel I end up with a more solid and useful product this way.
Re: The Plytanic 2.0 - FS17 Build
Posted: Mon Feb 25, 2019 2:11 pm
by Bogieman
Very nice Silentneko
Re: The Plytanic 2.0 - FS17 Build
Posted: Wed Feb 27, 2019 4:41 pm
by silentneko
Slow and unsteady wins the race, lol.
I decided on a final adjustment on the console design and push on.
Scribing parts to cut.
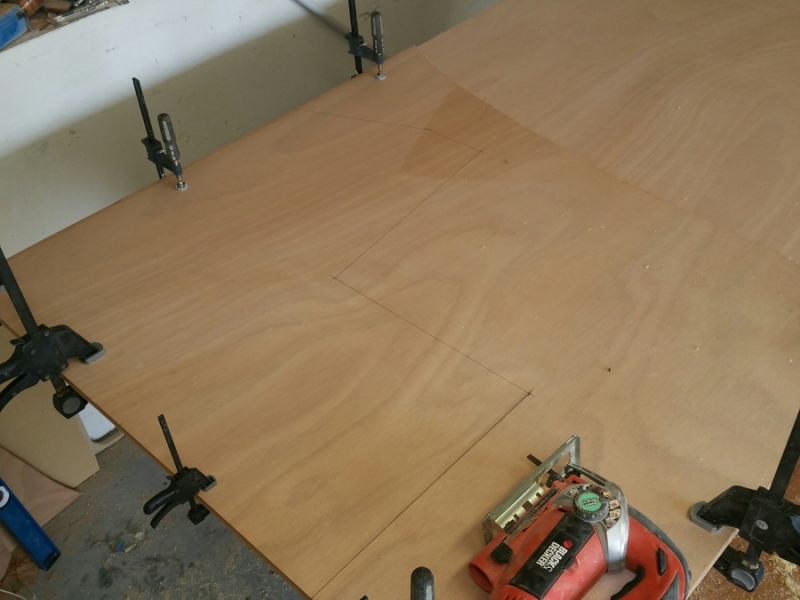
Sides, back, and middle panel cut and screwed together to see how it fits.
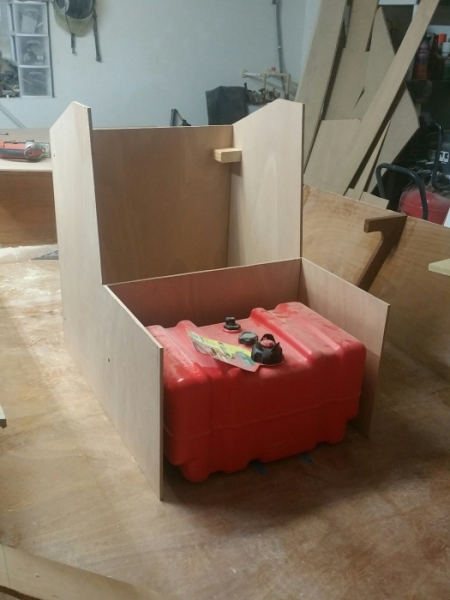
I'm laminating a few scrap pieces to make the front open access for the tank. Should be done in a few days. I need to sand and prime under the console area before I put it in or it will be a pain. I'm also trying to decide how I will mount some of the electric bits under the console. I might add some spacers and make a board to screw into them to mount stuff on.
Re: The Plytanic 2.0 - FS17 Build
Posted: Wed Feb 27, 2019 4:52 pm
by Bogieman
Nice!
Re: The Plytanic 2.0 - FS17 Build
Posted: Sun Mar 03, 2019 3:56 pm
by silentneko
Here is the front of the console cut out. I'll just slide it forward 6 inches to expose the fill each time. Simple as it gets. The tank will slide a few inches further back then it is now once the blocks behind it are removed.
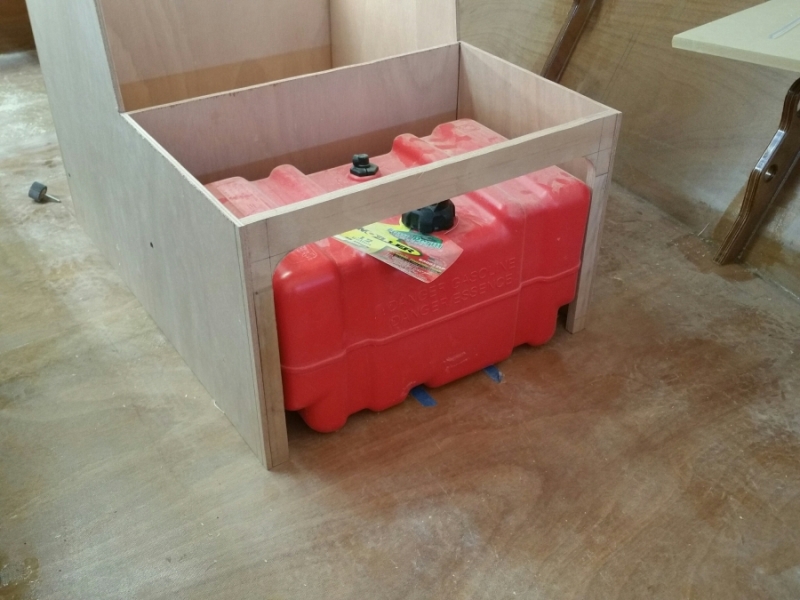
Not much else to show right now. I'm tacking the console together and put the last supports on the front gutters. Next is to make the deck for it.
Re: The Plytanic 2.0 - FS17 Build
Posted: Sun Mar 03, 2019 4:46 pm
by TomW1
Where is the fuel hose to the motor going. It should from this compartment to below the deck to the motor. That keeps the fuel away from all electricals.
Re: The Plytanic 2.0 - FS17 Build
Posted: Sun Mar 03, 2019 6:59 pm
by silentneko
The fuel run you can't see yet, but will make sense later. It will run in a chase through the back wall of the seat area, that is sealed, down and back to the bilge area where the fuel/water seperator is mounted. This will keep it well isolated from any exposed electronics/batteries.
Re: The Plytanic 2.0 - FS17 Build
Posted: Mon Mar 04, 2019 6:08 am
by cape man
Nice looking console!
Re: The Plytanic 2.0 - FS17 Build
Posted: Mon Mar 04, 2019 6:52 am
by OrangeQuest
silentneko wrote: ↑Sun Mar 03, 2019 6:59 pm
The fuel run you can't see yet, but will make sense later. It will run in a chase through the back wall of the seat area, that is sealed, down and back to the bilge area where the fuel/water seperator is mounted. This will keep it well isolated from any exposed electronics/batteries.
The really large opening where the tank slides in and out should also provide more than enough air flow to keep fumes from becoming a problem.
What have you came up with to keep the tank from sliding/bouncing around?
I want to mount my fuel tank under the console similar to the way you are doing yours but can't see a way to keep it in place. I am also concerned with seeing the fuel gauge.
Re: The Plytanic 2.0 - FS17 Build
Posted: Mon Mar 04, 2019 8:26 am
by Bogieman
Re: The Plytanic 2.0 - FS17 Build
Posted: Mon Mar 04, 2019 9:15 am
by Fair WX Pilot
Great looking console. Looks like you will still have plenty of room to move around it. Nice fuel tank location as well.
Re: The Plytanic 2.0 - FS17 Build
Posted: Mon Mar 04, 2019 9:20 am
by Capt UB
silentneko you have me thinking about a console for a seat and fuel tank... I'm going with a tiller, but would need something to hold onto and keep the GPS and cell (music) close at hand... I had thought just a grab bar and cooler seat.
Re: The Plytanic 2.0 - FS17 Build
Posted: Mon Mar 04, 2019 4:40 pm
by silentneko
Thanks guys. So let me try to answer some of this while I have a second.
USCG regs say for a portable tank in a compartment you must have 15 square inches open to atmosphere for every cubic foot of compartment space. The front face of the seat will have a 24"x 14.5" opening, or 348 Sq inch opening. The volume is roughly 3.8 cu ft under the seat, and is sealed off from the rest of the console where the batteries are. So I'm more then good I think.
For securing it in place I have 2 things. First I put seadek pads on my cooler and last tank. They last a few years, keep them from scratching the floor much, and stop a lot of sliding. A small pad at each corner is all you need.
Second I bought a 1.5" webbing kit. I'll make some brackets to run the straps through that will mount to the floor and back wall. I have a similar setup on my current skiff.
https://www.amazon.com/gp/aw/d/B07FZGHD ... asin_image
The console is 26" wide. So with rod holders mounted I think I'll still have atleast 13" of room on the sides. Enough to pass with ease.
Capt UB, look up grab bar consoles, Ankona has a nice one on their boats, so do some bevertails. My current boat has a similar arrangement with a livewell as an extended seat. It makes a bare boat more useful imho.
Re: The Plytanic 2.0 - FS17 Build
Posted: Mon Mar 04, 2019 6:23 pm
by Capt UB
silentneko wrote: ↑Mon Mar 04, 2019 4:40 pm
Thanks guys. So let me try to answer some of this while I have a second.
USCG regs say for a portable tank in a compartment you must have 15 square inches open to atmosphere for every cubic foot of compartment space. The front face of the seat will have a 24"x 14.5" opening, or 348 Sq inch opening. The volume is roughly 3.8 cu ft under the seat, and is sealed off from the rest of the console where the batteries are. So I'm more then good I think.
For securing it in place I have 2 things. First I put seadek pads on my cooler and last tank. They last a few years, keep them from scratching the floor much, and stop a lot of sliding. A small pad at each corner is all you need.
Second I bought a 1.5" webbing kit. I'll make some brackets to run the straps through that will mount to the floor and back wall. I have a similar setup on my current skiff.
https://www.amazon.com/gp/aw/d/B07FZGHD ... asin_image
The console is 26" wide. So with rod holders mounted I think I'll still have atleast 13" of room on the sides. Enough to pass with ease.
Capt UB, look up grab bar consoles, Ankona has a nice one on their boats, so do some bevertails. My current boat has a similar arrangement with a livewell as an extended seat. It makes a bare boat more useful imho.
Thank you!
I was thinking this evening about a center box with grab rail. No upper console. Just like you said. I going now to look up Ankona now.
Re: The Plytanic 2.0 - FS17 Build
Posted: Mon Mar 04, 2019 7:20 pm
by Capt UB
This is on a Scout 14.1 Sport. There is a center box, add a grab bar..
.

- 2019-03-04-19-09-03--1522106380~2.jpg (12.37 KiB) Viewed 1777 times
Re: The Plytanic 2.0 - FS17 Build
Posted: Mon Mar 04, 2019 7:36 pm
by silentneko
Re: The Plytanic 2.0 - FS17 Build
Posted: Fri Mar 08, 2019 7:29 pm
by silentneko
Working on some small things now. I filleted the inside of the console and will glass it soon.
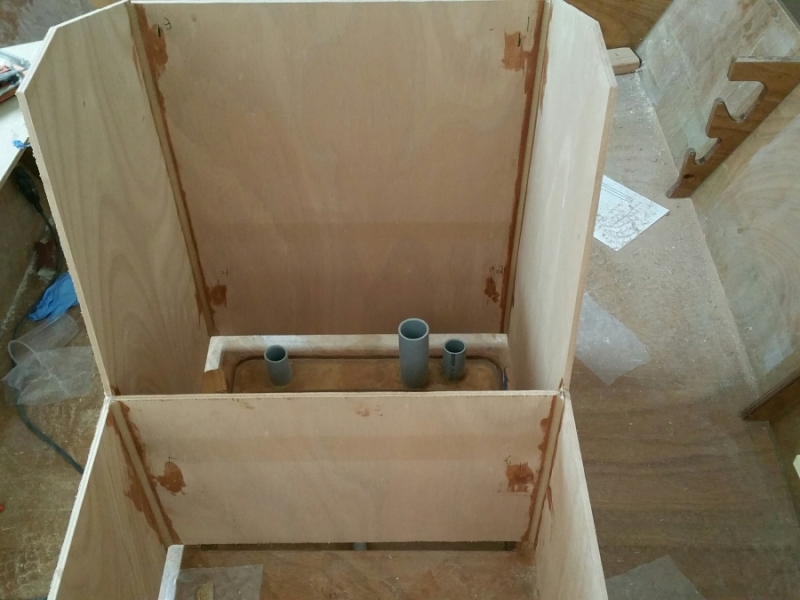
Now I'm working on sanding and some mild fairing of the various compartments. I'm not going nuts here since you won't see most of this often, but I do want to smooth some things out to make cleaning easier and get rid of any super rough surfaces to avoid getting snagged on. Also I wanted to smooth out any surface that might have something mounted or bolted through it.
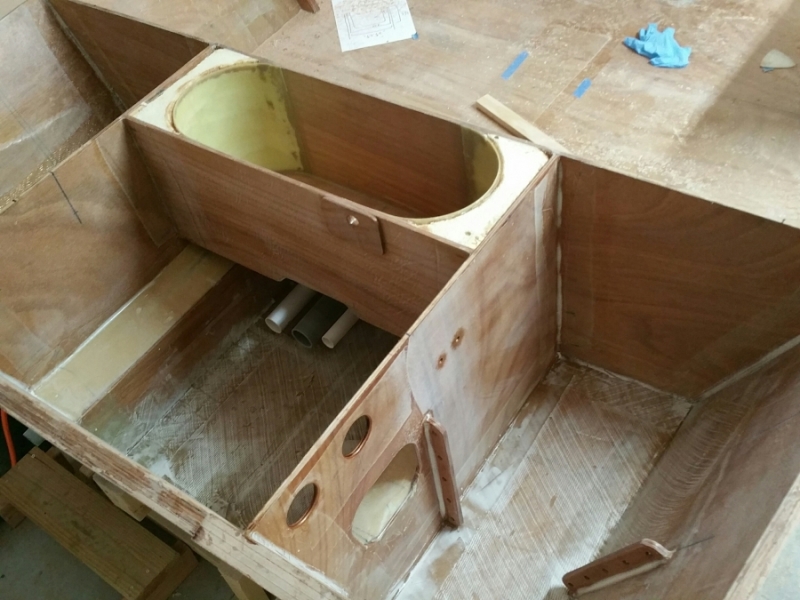
Re: The Plytanic 2.0 - FS17 Build
Posted: Fri Mar 29, 2019 5:06 pm
by silentneko
Someone a while back asked me how my hatched will drain. Well here you go, simple as can be right.
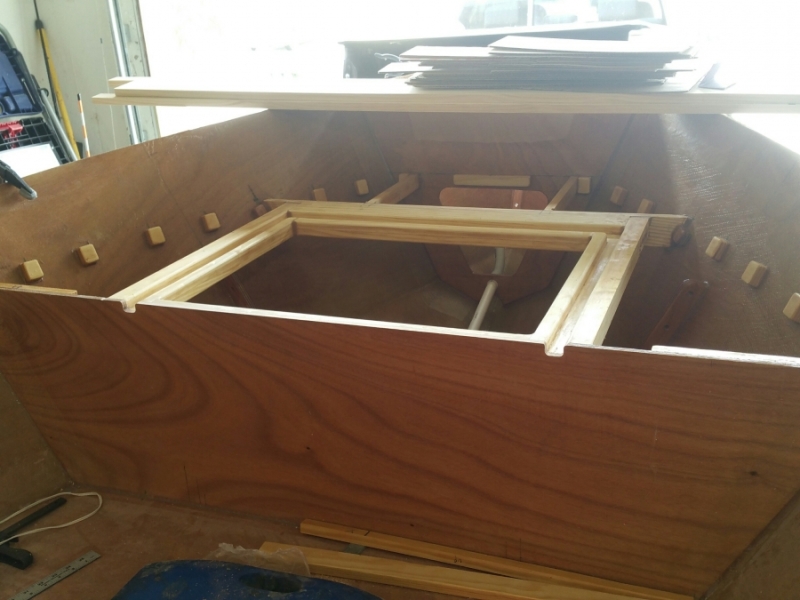
I made a template for the front deck and bow and cut it out. The hatch still needs to be cut down for clearance.
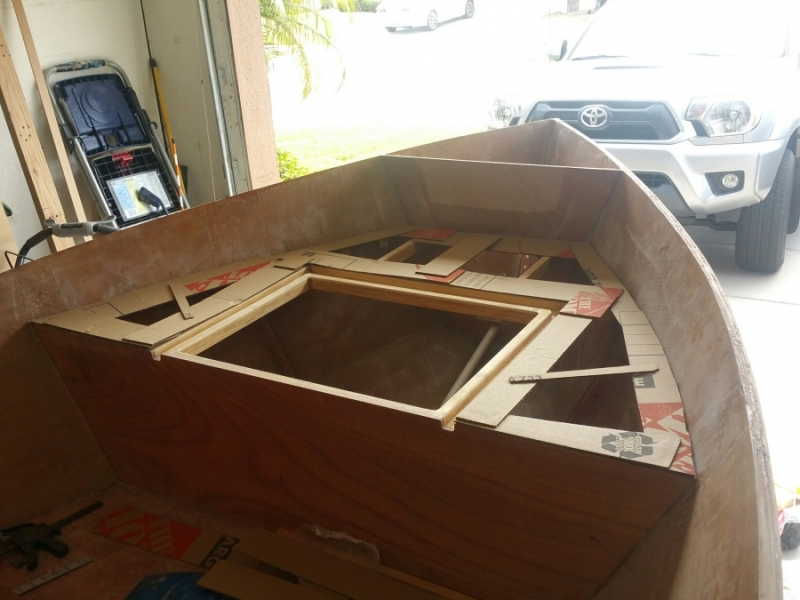
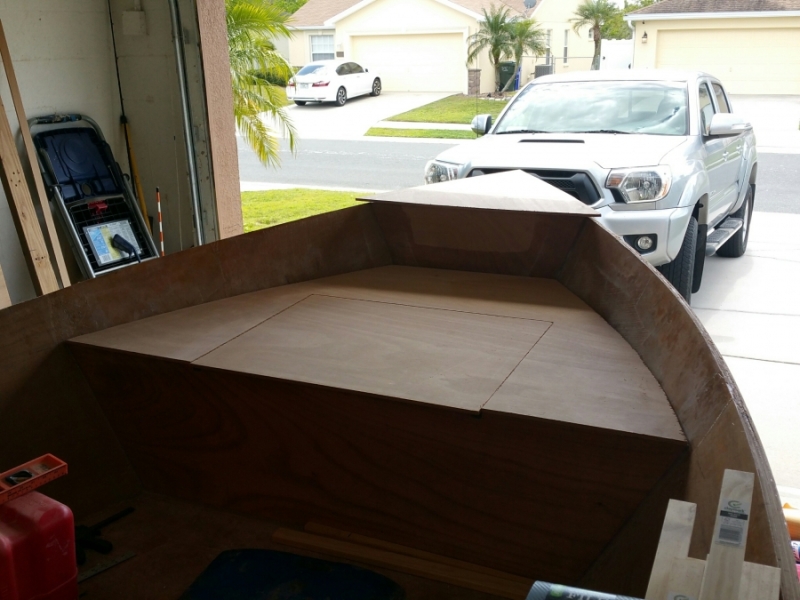
I think OQ asked me about how I'm securing the gas tank. I have 1.5" webbing and buckles similar to what I've used in the past. However I could not find the little plastic brackets I used last time, so I'll need to make my own.
I made a simple open mold using popsicle sticks stacked up and covered in packing tape.
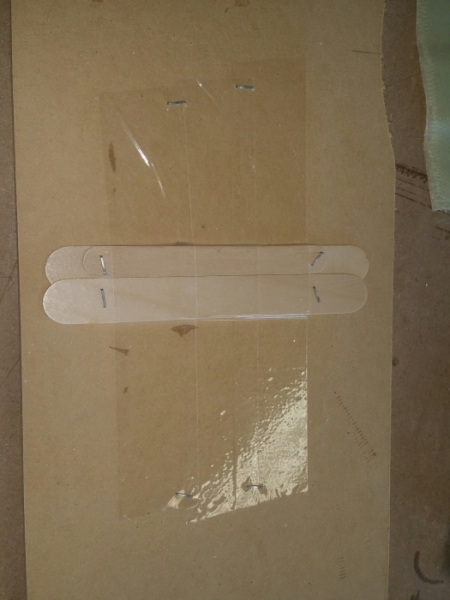
I did a test and it came out well, but wasn't beefy enough. So I'm laminating 8 layers of scrap cloth with a layer of biaxial tossed in the middle for good measure. When it's done I'll cut them into maybe 5/8" strips and bond them down. I added some white pigment to the resin, reason is the brackets on the floor will have the tank sliding over them. So this way if they get scratched it will hardly be noticeable.
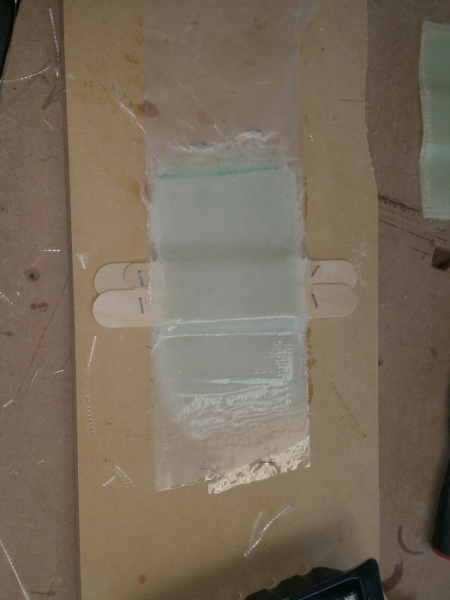
Re: The Plytanic 2.0 - FS17 Build
Posted: Fri Mar 29, 2019 5:21 pm
by Capt UB
That was me on how they will drain. Thanks for the photo. She is looking great.
Re: The Plytanic 2.0 - FS17 Build
Posted: Sat Mar 30, 2019 6:23 pm
by silentneko
Thanks.
I popped the brackets from the mold and I'm pretty happy with them. They feel stout, and are nice and low profile. I cut them into roughly 3/4" strips. I just need to sand them a little and then bond them down.
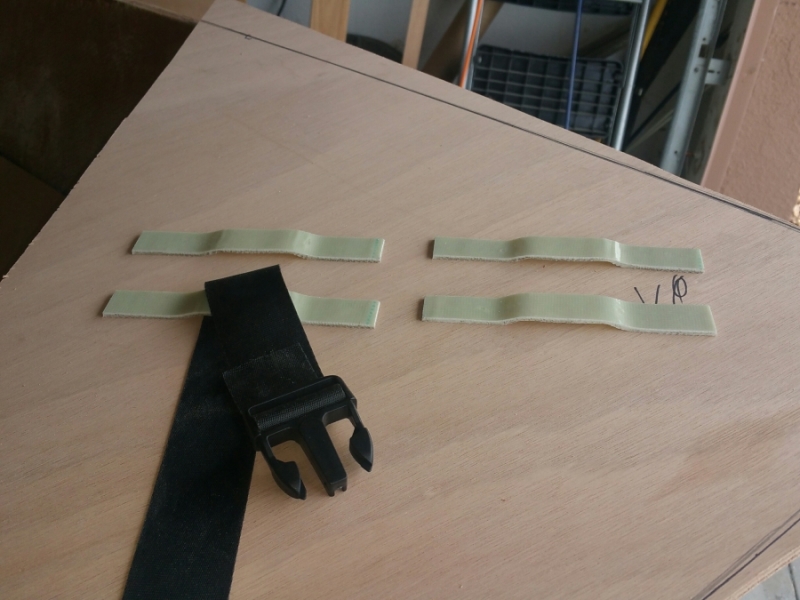
Re: The Plytanic 2.0 - FS17 Build
Posted: Sat Mar 30, 2019 8:22 pm
by BB Sig
That's awesome! Great job.
Re: The Plytanic 2.0 - FS17 Build
Posted: Sat Mar 30, 2019 9:50 pm
by OrangeQuest
They do look great!
Re: The Plytanic 2.0 - FS17 Build
Posted: Sun Mar 31, 2019 6:50 am
by cape man
Nice touch!
Re: The Plytanic 2.0 - FS17 Build
Posted: Tue Apr 02, 2019 4:18 pm
by silentneko
Thanks guys,
I tacked down the console yesterday and I'm working on adding supports and filleting/taping it in place.
So a question came up about how I'm running my fuel lines. I have a 1" chase running from the front of the console where the tank is, to the rear bilge area where the water separator is located. It goes through the dividing wall, and will be sealed with 5200 so the tank will be completely isolated from the batteries and components.
Here it is dry fitted. I cut 1/4" pvc spacers to use to lock it into place where it goes through the wall.
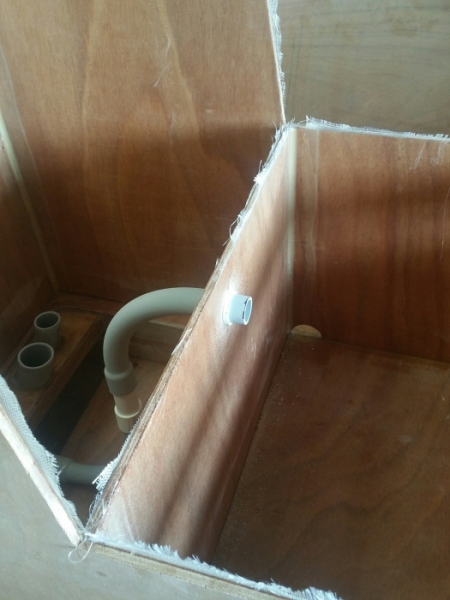
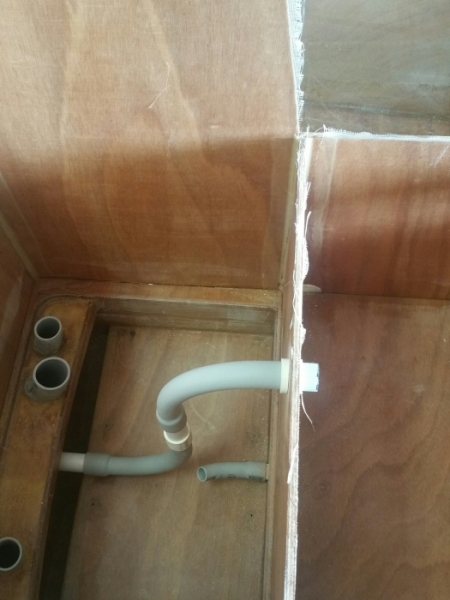
Re: The Plytanic 2.0 - FS17 Build
Posted: Wed Apr 03, 2019 5:41 am
by OrangeQuest
The routing of the fuel line and sealing the fuel compartment sounds like you thought it out very well.
Your skills on making molds is very impressive!
Re: The Plytanic 2.0 - FS17 Build
Posted: Wed Apr 03, 2019 6:09 am
by silentneko
Thanks. Trust me, there is nothing complicated about the mold I made. Wasn't sure it was going to work out, but it did thankfully.
Re: The Plytanic 2.0 - FS17 Build
Posted: Wed Apr 03, 2019 8:21 am
by Jeff
Really nice work silentneko!! Jeff
Re: The Plytanic 2.0 - FS17 Build
Posted: Wed Apr 03, 2019 9:27 am
by pee wee
Have you checked to see if the fuel line will take that route? One inch diameter plus that S-curve may be a challenge to pull the line through.
Re: The Plytanic 2.0 - FS17 Build
Posted: Wed Apr 03, 2019 3:57 pm
by silentneko
The 3/8" line I had had a ton of wiggle room in the 1" tube. I was going to go with 3/4" which did fit even through the bends, but was snug. So I stepped it up.
Re: The Plytanic 2.0 - FS17 Build
Posted: Wed Apr 03, 2019 4:33 pm
by cape man
Soap helps if it gets tough.
Re: The Plytanic 2.0 - FS17 Build
Posted: Thu Apr 11, 2019 8:41 pm
by silentneko
I was about to work on gluing down the casting deck, but realized it would be really hard to paint certain areas once I did it. So I primed the front compartments, and will paint in a few days.
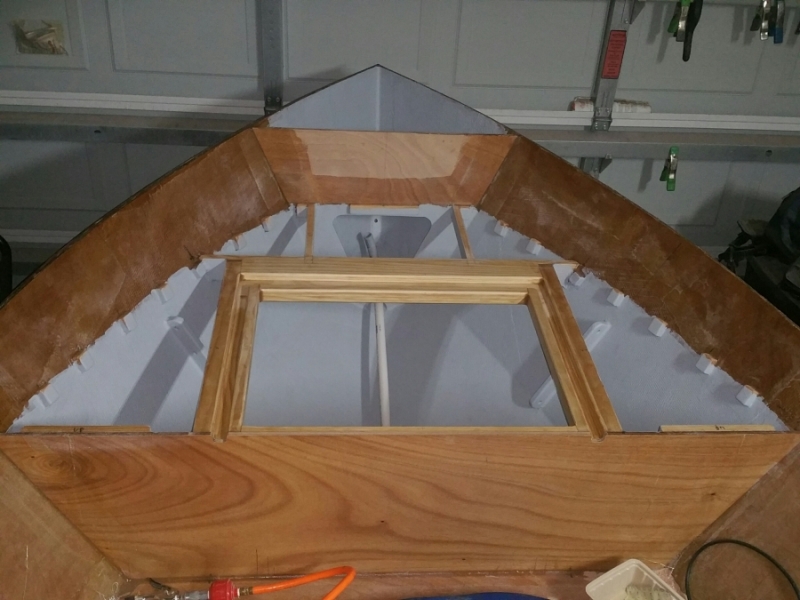
I'm also working on the console. I added a few supports, and sanded then mounted my brackets for the fuel tank.
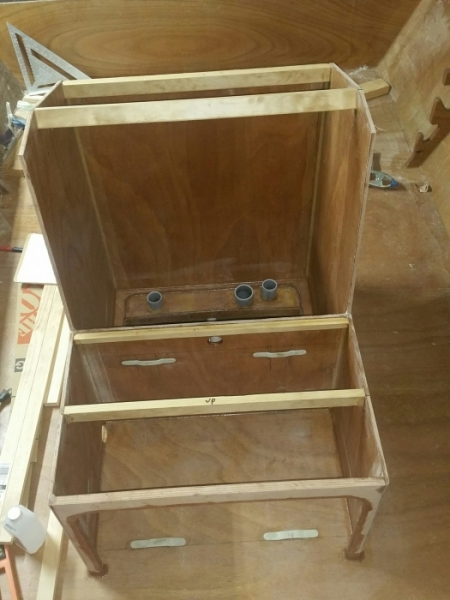
Here's how the tank will fit. I'm pretty satisfied with the brackets, they seem to be very secure.
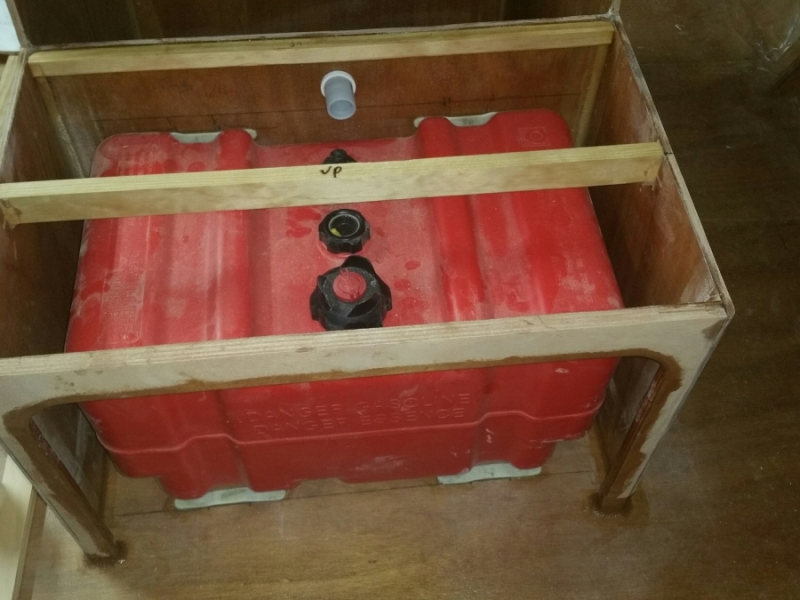
Re: The Plytanic 2.0 - FS17 Build
Posted: Thu Apr 11, 2019 9:01 pm
by OrangeQuest
Everything looks like it is coming along nicely.
Re: The Plytanic 2.0 - FS17 Build
Posted: Thu Apr 11, 2019 9:16 pm
by silentneko
It's coming together ok, but sill slowly. I didn't fair the front compartments, just sanded them a bit. I figure it will be just holding life jackets, cast nets, and anchors, so it doesn't need to be pretty. I'll smooth out the rear compartments a bit more, because we will be in and out of them more often.
Re: The Plytanic 2.0 - FS17 Build
Posted: Fri Apr 12, 2019 5:46 am
by Capt UB
I think I'm on the same page as you are, prime and paint lockers before deck goes on and fuel tank in console.
Are you going to paint inside the console?
Looking good, soon you will be cleaning fish blood off the deck!
Re: The Plytanic 2.0 - FS17 Build
Posted: Fri Apr 12, 2019 5:54 am
by silentneko
I hope so, she needs to be on the water by summer.
I'll definitely paint the inside of the console. I like the clean look, and I'm making a dry storage pouch on the back of the hatch door, so we will be in and out of it often.
Re: The Plytanic 2.0 - FS17 Build
Posted: Fri Apr 12, 2019 6:06 am
by Capt UB
[quote=silentneko post_id=443309 time=1550979777 user_id=28890]
I think I finally decided on a direction for the console. It's more of a horizontal wheel position and should work out well. It's a bit hard to tell, but here's the mock up.

- 20190219_154521_resized~2.jpg (13.3 KiB) Viewed 1633 times
How are you going to fill the tank?
I'm going with a 6 gal portable strapped in.
Re: The Plytanic 2.0 - FS17 Build
Posted: Fri Apr 12, 2019 8:39 am
by OrangeQuest
Me too! Me too!!
Silentneko, I like the way you have used the brackets to hold the straps for your fuel tank. The big buckles you are using are what comes on all our Ocean Kayak ® brand kayaks. We don't use them so I just take them off but keep them on hand. I may have to copy your method of securing the fuel tank on my build, if you don't plan on patenting it!
I can see using the custom made brackets in other areas of the boat. I have tons of the different size snap buckles from seats and different PFDs over the years. But I also have straps that use Velcro to keep things snug.
Again, your build is coming along nicely.
Re: The Plytanic 2.0 - FS17 Build
Posted: Fri Apr 12, 2019 11:39 am
by silentneko
Capt UB wrote: ↑Fri Apr 12, 2019 6:06 am
silentneko wrote: ↑Sat Feb 23, 2019 10:42 pm
I think I finally decided on a direction for the console. It's more of a horizontal wheel position and should work out well. It's a bit hard to tell, but here's the mock up.
20190219_154521_resized~2.jpg
How are you going to fill the tank?
I'm going with a 6 gal portable strapped in.
0316191409~2.jpg
Capt. I will fill the tank by just sliding it forward 6-8" to clear the console. Then slid it back and secure the buckles. The way it is situated the buckles will be right up front.
Re: The Plytanic 2.0 - FS17 Build
Posted: Fri Apr 12, 2019 11:42 am
by silentneko
OrangeQuest wrote: ↑Fri Apr 12, 2019 8:39 am
Me too! Me too!!
Silentneko, I like the way you have used the brackets to hold the straps for your fuel tank. The big buckles you are using are what comes on all our Ocean Kayak ® brand kayaks. We don't use them so I just take them off but keep them on hand. I may have to copy your method of securing the fuel tank on my build, if you don't plan on patenting it!
I can see using the custom made brackets in other areas of the boat. I have tons of the different size snap buckles from seats and different PFDs over the years. But I also have straps that use Velcro to keep things snug.
Again, your build is coming along nicely.
Thank you Sir. Please feel free to copy anything you want. I'm just figuring some of this stuff out, and there are many things I haven't posted because they failed. The buckles and webbing I ordered off amazon. Pretty cheap, and very useful.
Re: The Plytanic 2.0 - FS17 Build
Posted: Sun Apr 14, 2019 4:14 pm
by silentneko
I moved on to painting the primed compartments. I went to use the interlux perfection I mixed up before, but the catalyst had completely gelled even though it was in a sealed container. I opened the second kit I had, which is brand new, and the catalyst was thicker then I remembered but usable. Even after thinning it the paint was thicker then the last time I used it. Because of this it did not self level much so I have a lot of tiny bubbles. Luckily since it's in this area no one will really notice. I'll have to order more, and hope it is a fresh batch.
I custom mixed his color to match the rest of he hull. Since perfection doesn't come in light blue.
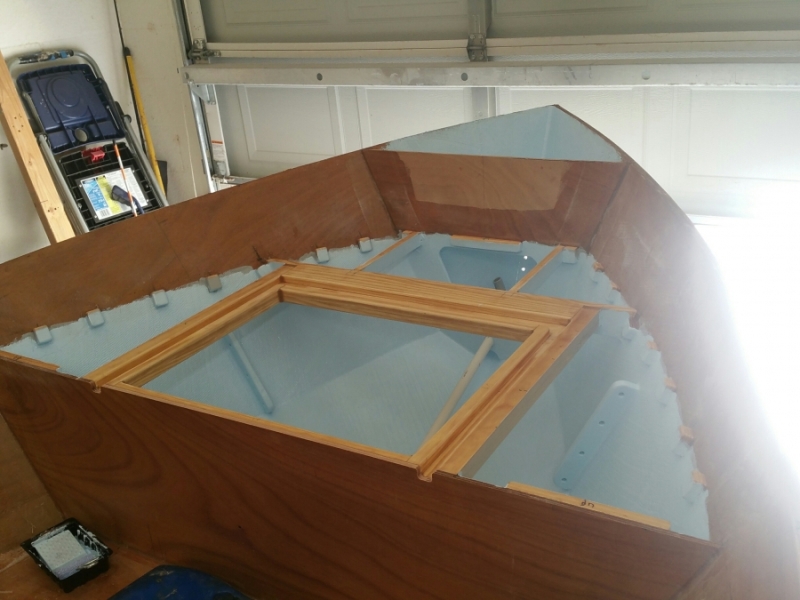
I glassed the underside of the front deck, and I'll bond it down in a few hours. I added extra glass in the void areas to ensure I won't have a flexing issue again.
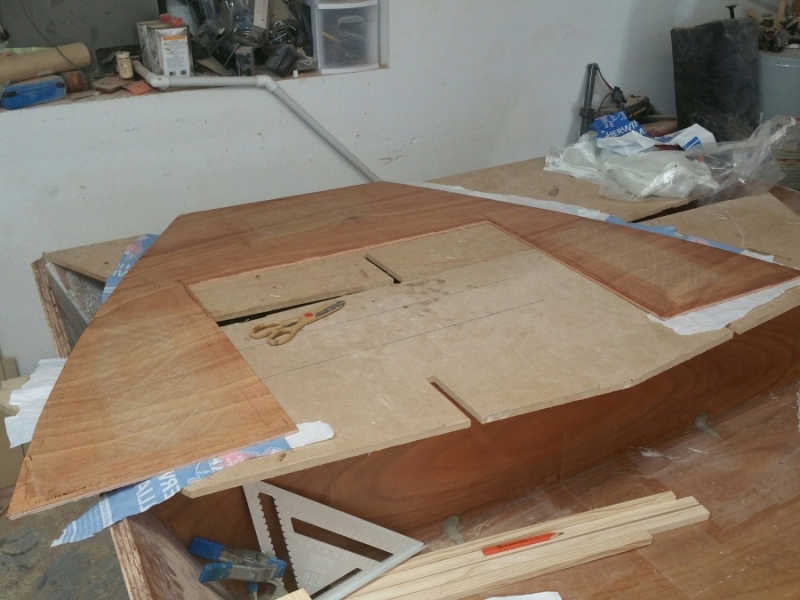
Re: The Plytanic 2.0 - FS17 Build
Posted: Sun Apr 14, 2019 4:54 pm
by Bogieman
Man, that things is so clean it's almost crazy! Don't know how you do it but she's looking beautiful
Re: The Plytanic 2.0 - FS17 Build
Posted: Sun Apr 14, 2019 5:10 pm
by silentneko
Pics are deceiving my friend. The inside of the compartments up front are literally biaxial glass that was hit with 80 grit for a few seconds to get rid of the snags and sharp edges. No real fairing. It's really rough, but since it will just house the life jackets, and 2 buckets (anchor in one, cast net in the other) I figure it doesn't need to be that pretty.
Re: The Plytanic 2.0 - FS17 Build
Posted: Sun Apr 14, 2019 7:46 pm
by OrangeQuest
I do like the color you have been using. I agree with Bogie, very clean and beautiful.
I am not a big fan of stowing life jackets in a less than well vented compartment. They have a habit of growing mold and with a cast net bucket next to them that should be an interesting smell!
Re: The Plytanic 2.0 - FS17 Build
Posted: Fri Apr 19, 2019 3:34 pm
by silentneko
Since my boat is stored in a garage, and I open my hatches to let everything dry out after each trip, it has not been an issue so far. If it was a bigger boat I'd find a way to stow them overhead, but I'm limited here with only 17ft.
I bonded down the front deck while it was still green. This is my preferred method. In the past I would let it fully cure, then set it in place. That works, but if you don't glass it on a very flat surface you might end up fighting a bow. Setting it in place to be bonded while it's dry to the touch, but still not fully cured, lets the glass cure in the exact shape of the deck.
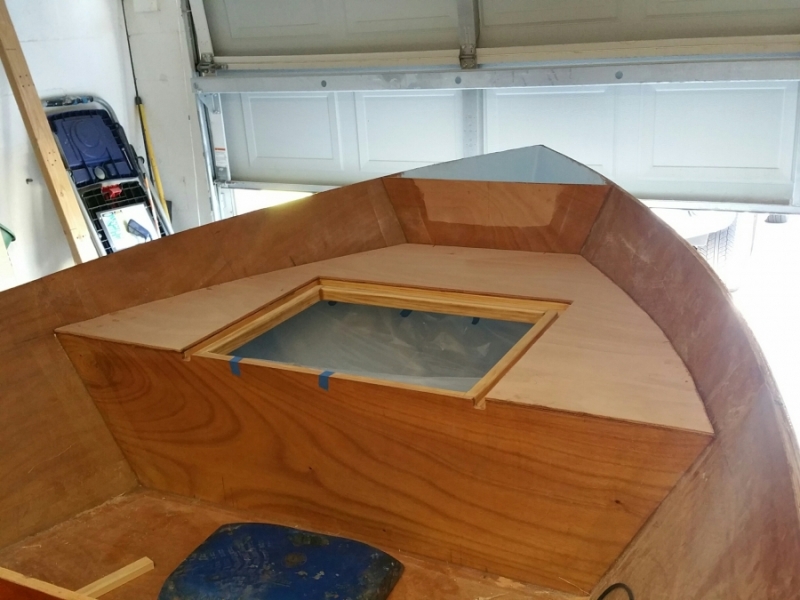
So I got overly ambitious with the router a while back and did the whole edge, forgetting I had a deck to install. So I had to fill that small gap. Then I rounded the top edge and bulkhead. It needs a bit of sanding, like where the router couldn't get on the far ends of the bulkhead, but I think it came out pretty well.
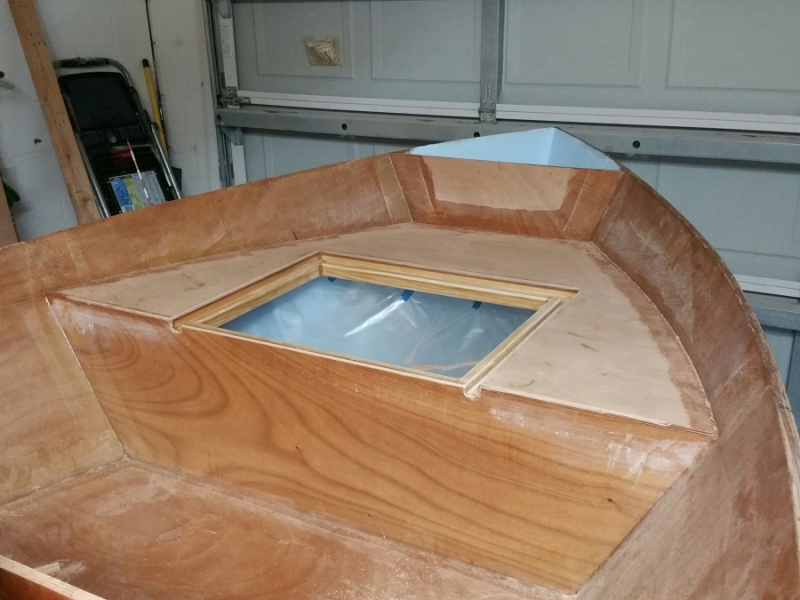
I then turned my attention to building the rear hatch gutters. I ended up buying a router table to make my life easier, and it is great. I'll finish these up and get them installed this week sometime.
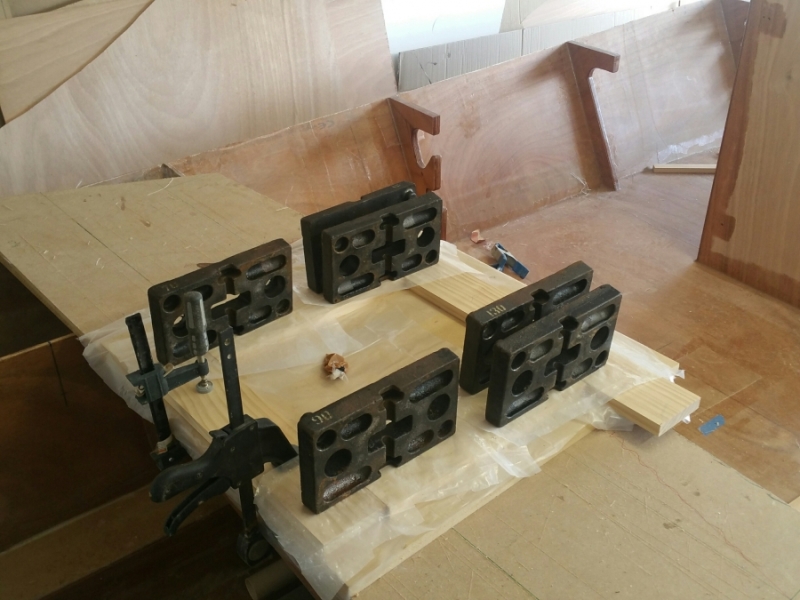
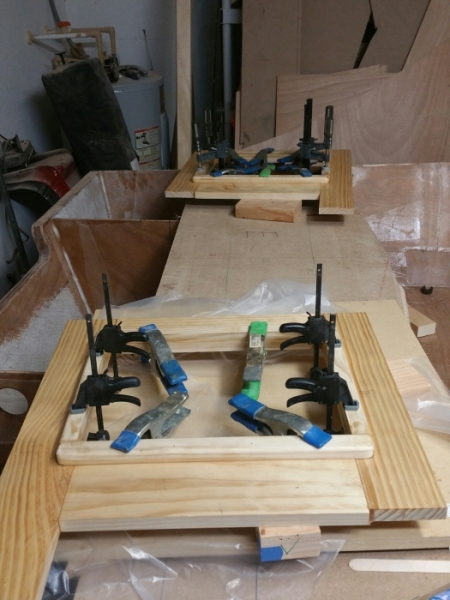
Re: The Plytanic 2.0 - FS17 Build
Posted: Fri Apr 19, 2019 5:27 pm
by OrangeQuest
The deck at the bow is looking great! So are you saying you laid the glass on the underside of the deck and when it was still green you flipped it and glued it down? That does make sense and makes for a better bond too. Your tape seems to just disappear so hard to tell if you already taped it. Really good work.
Re: The Plytanic 2.0 - FS17 Build
Posted: Fri Apr 19, 2019 6:20 pm
by silentneko
Thanks. No fillet or tape yet. I'll that soon.
Yes on the flipping when green. I glassed the bottom including the reinforced areas, then waited 4 hours or so. Laid my thickened epoxy down, flipped her over and weighted it down.
This way is extremely good for doing hatch lids. If you are off just an 1/8" they may not sit right. So I'll glass them, wait a few hours, lay plastic around the hatch lip, set the hatch in place and weigh it down. This way you are guaranteed it will match the lip. I goofed up years ago and had to redo 3 hatches because I did them on a flat surface, but the hatch lips had some camber to them.
Re: The Plytanic 2.0 - FS17 Build
Posted: Tue Apr 23, 2019 2:24 pm
by silentneko
I finished building the rear gutter structures and installed them. I cut a slot in the bulkhead you can't see in the pics for the gunnel edge to sit in when I install it later. If memory serves the opening is 14"x10.5". I made them so they were 1" bigger each way then my plastic hatches on my other boat. They work well, but I always said I wouldn't mind if they were a hair bigger.
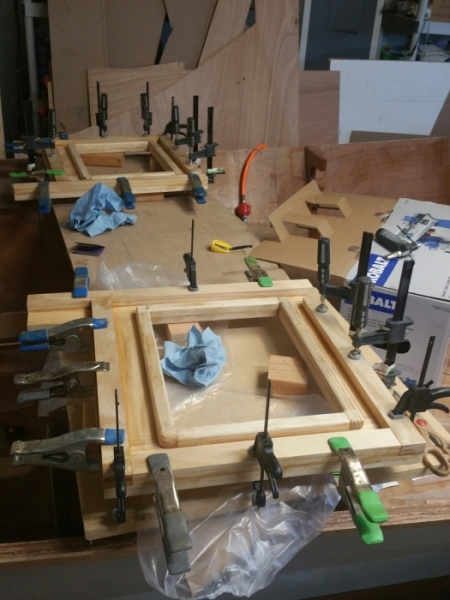
installed
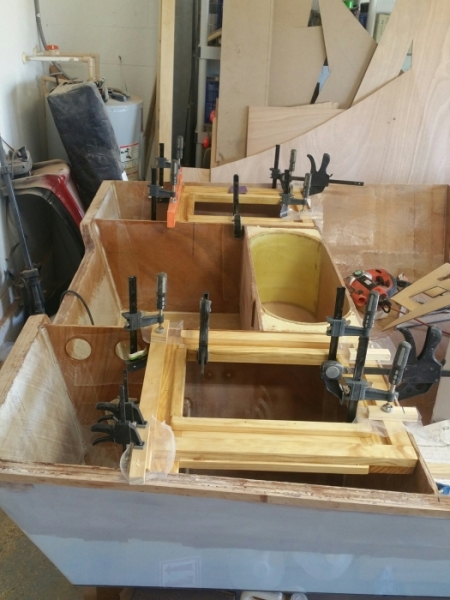
I ordered this clear shrink tubing kit off amazon a bit ago. I want to label some of my stuff since I don't exactly follow ABYC colors. I'm just testing it out here, I cut up a flyer I had near by, so the wording is just coincidental. I'll use actual printed labels on the boat.
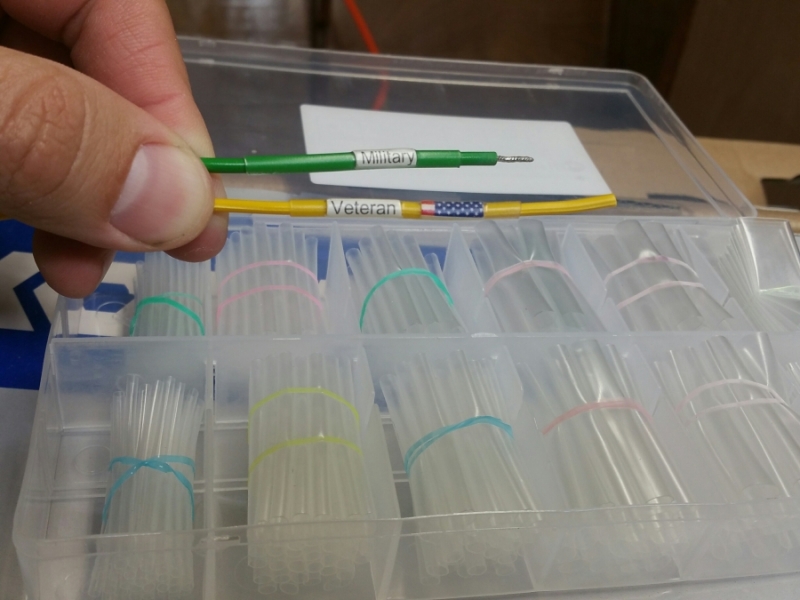
Re: The Plytanic 2.0 - FS17 Build
Posted: Tue Apr 23, 2019 3:18 pm
by OrangeQuest
Nice!
Re: The Plytanic 2.0 - FS17 Build
Posted: Thu Apr 25, 2019 7:13 pm
by silentneko
The rear gutters are bonded in place and nice and stout. I sanded a bit, then routed the opening where the water will be channeled into the motor well cover, before being drained out the rear.
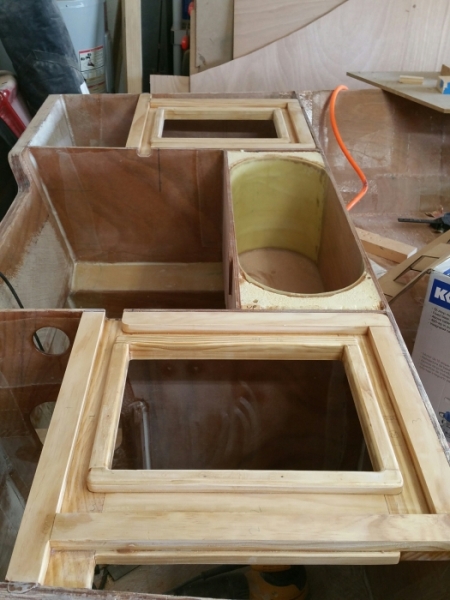
I can't move on much more until I get the gunnels sorted out. The side supports/rod holders have been done for a while, but I had a 75" span to the front of the casting deck. I am adding 2 more supports there, but they will be floating to hopefully keep with the aesthetics of what I'm looking for. If I see a need I can add more supports later on.
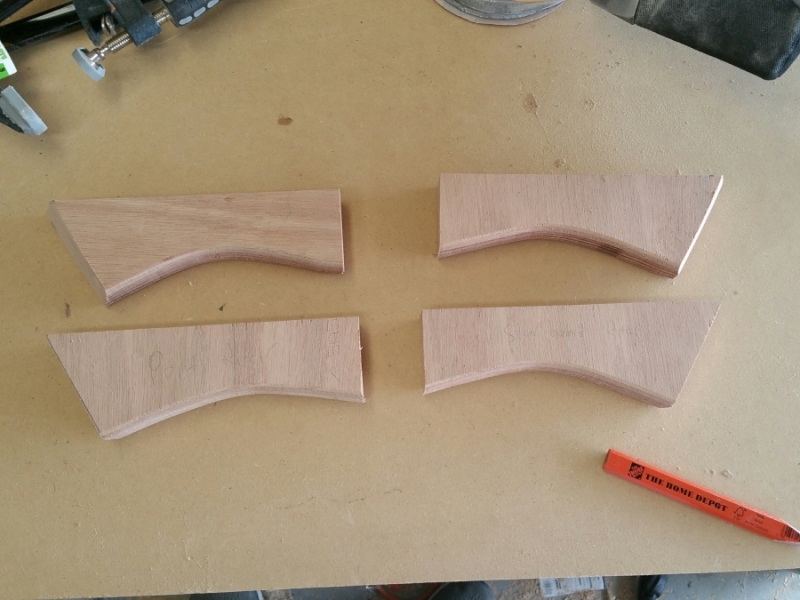
Being bonded in place
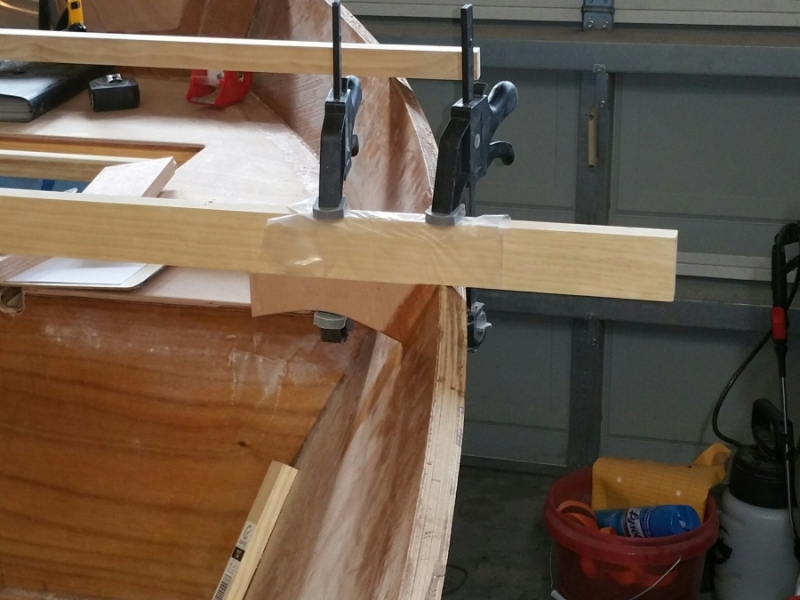
I was going to do just a single layer of 3/8" for the gunnel lip, then decided to cap it off with some 1/4" I have left over, but now I decided to go with a double layer of 3/8" for added stiffness. it will be 2.5" tall. The actual gunnel will be 9" wide.
Re: The Plytanic 2.0 - FS17 Build
Posted: Thu Apr 25, 2019 7:52 pm
by cape man
Looking good.
Re: The Plytanic 2.0 - FS17 Build
Posted: Fri Apr 26, 2019 8:13 am
by Jeff
Nice work!!!! Jeff
Re: The Plytanic 2.0 - FS17 Build
Posted: Mon Apr 29, 2019 3:37 pm
by narfi
silentneko wrote: ↑Sat Mar 30, 2019 6:23 pm
Thanks.
I popped the brackets from the mold and I'm pretty happy with them. They feel stout, and are nice and low profile. I cut them into roughly 3/4" strips. I just need to sand them a little and then bond them down.
I am stealing this idea!
Re: The Plytanic 2.0 - FS17 Build
Posted: Tue Apr 30, 2019 8:24 pm
by silentneko
Please do!
Re: The Plytanic 2.0 - FS17 Build
Posted: Thu May 02, 2019 12:59 pm
by silentneko
Kinda jumping ahead on different projects, but they all intertwine so I need to do certain parts at different times. That being said I'm working on the gunnel rail now.
I made a little jig so I could use the router to level and shorten the supports. I cut them down to 8.25" so after the rail and cap is on they will be roughly 9" wide.
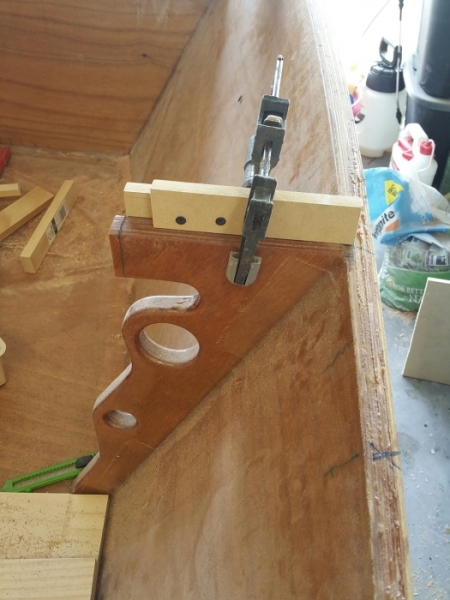
Cut and leveled. And slots cut in the bulkheads.
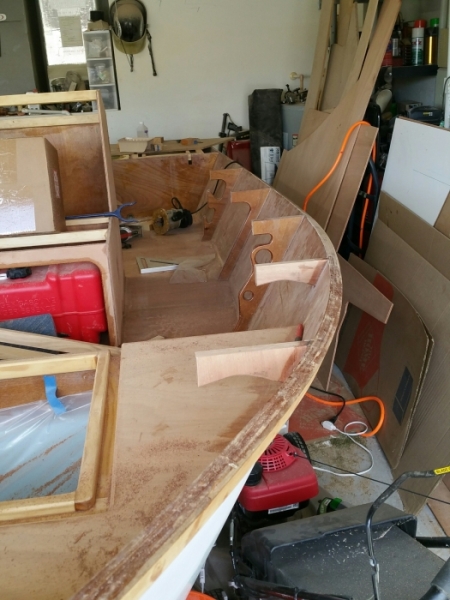
I had to clear off the work table so I could make a jig to cut the 2.5" rails. Then I routed the edge, and bonded 2 of the 8ft sections together.
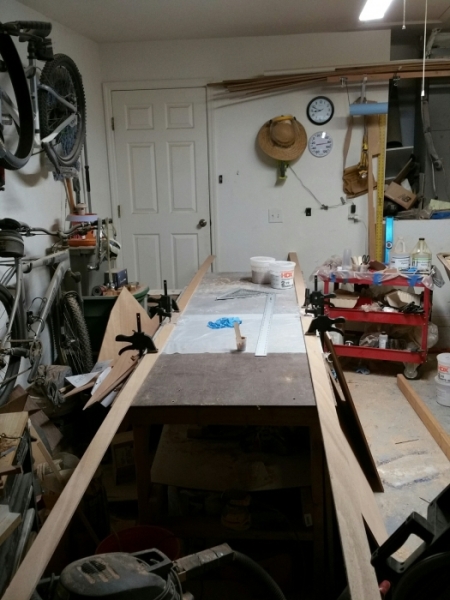
Had to make a run to the store, cause the clamps I was going to use were just too short. So now I'm bonding the first of 2 layers of 3/8". I had to adjust the pressure on the clamps so I limited the flat spots. I think it's coming out well. Excuse the mess, that's all the crap from my packed work table.
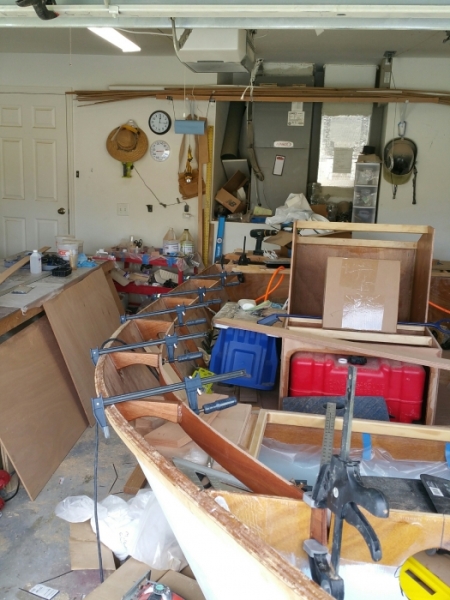
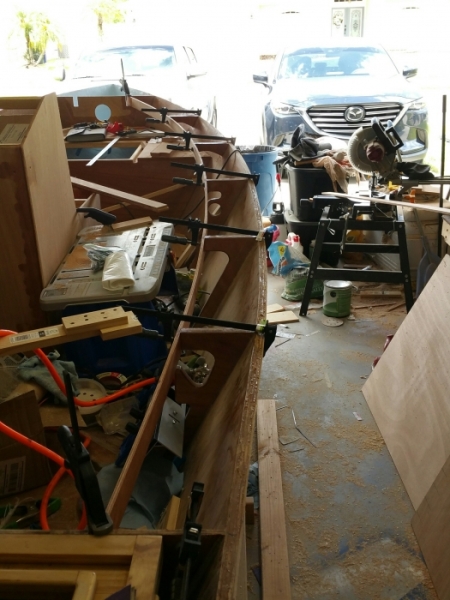
Re: The Plytanic 2.0 - FS17 Build
Posted: Thu May 02, 2019 2:20 pm
by cape man
That's going to be awesome.
Re: The Plytanic 2.0 - FS17 Build
Posted: Thu May 02, 2019 4:16 pm
by Jeff
Really well done!! Jeff
Re: The Plytanic 2.0 - FS17 Build
Posted: Thu May 02, 2019 6:52 pm
by Rtorres2411
You’re building a nice boat with great details.
I saw that you painted the forward compartment with Interlux perfection in a custom color you mixed yourself. I really like the durability of perfection and was thinking of mixing a light blue color myself,
Did you mix blue and white perfection to get your color? And aside from the few bubbles did you like the results?
I want to use the perfection custom blue for the topsides.
Ruben
Re: The Plytanic 2.0 - FS17 Build
Posted: Thu May 02, 2019 8:56 pm
by silentneko
Rtorres2411 wrote: ↑Thu May 02, 2019 6:52 pm
You’re building a nice boat with great details.
I saw that you painted the forward compartment with Interlux perfection in a custom color you mixed yourself. I really like the durability of perfection and was thinking of mixing a light blue color myself,
Did you mix blue and white perfection to get your color? And aside from the few bubbles did you like the results?
I want to use the perfection custom blue for the topsides.
Ruben
Thanks. I like the perfection, it dried nice and hard and despite being on a rough surface with some bubbles it is plenty shiny. As for the blue, after a bit of research and advise I decided to use resin pigment. I ordered some phthalo blue online and added 2.5ml's to the quart prior to mixing in the hardener. It's a nice blue, but it's more like sky blue and I was hoping for a little lighter like an ice blue. I'm gonna stick with it though, but if I build another boat like this I'll go with maybe 1.5ml's.
Re: The Plytanic 2.0 - FS17 Build
Posted: Thu May 23, 2019 3:06 pm
by silentneko
So not to much done recently as I've been out of state on vacation. I did get to add the second layer on the gunnel rails.
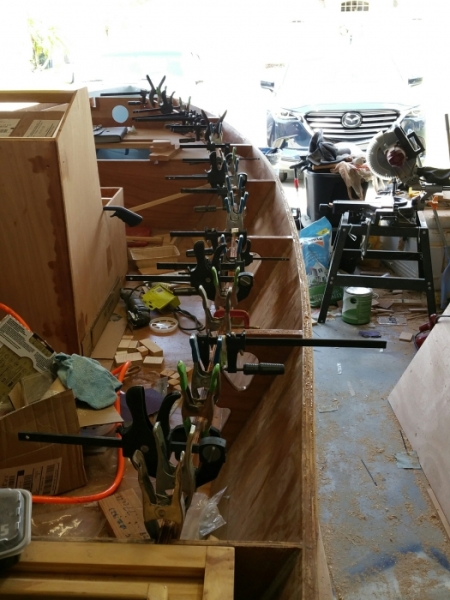
It was harder to do this then the rub rails as it's a concave curve, but luckily I had enough clamps. They came out somewhat close, well close enough for me, lol.
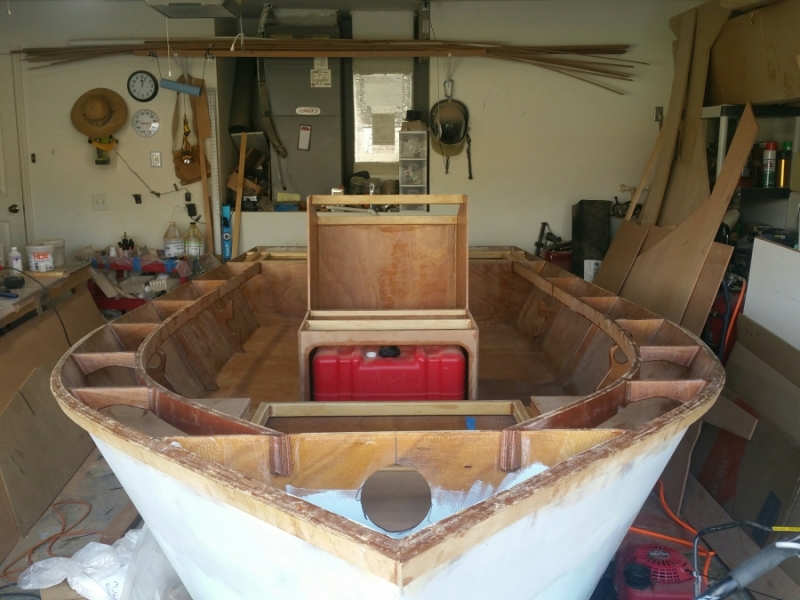
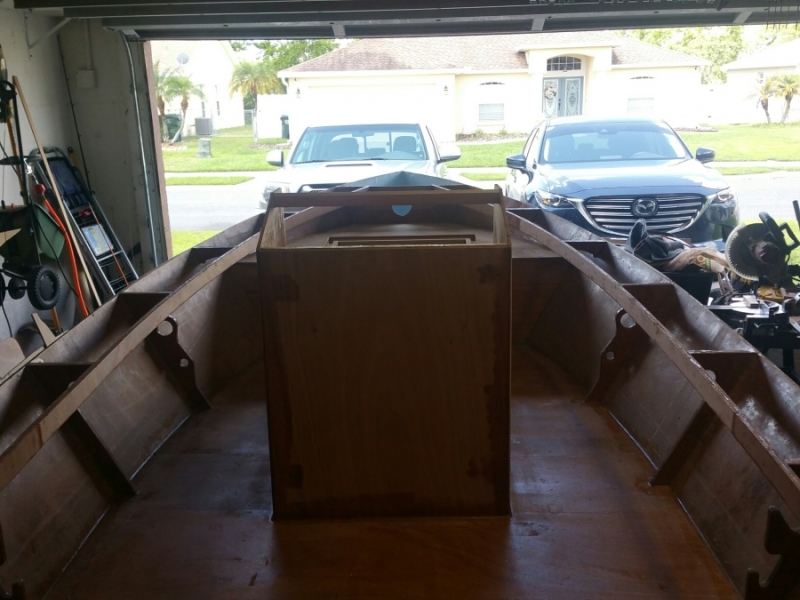
I'm working on a bunch of small stuff now.
Re: The Plytanic 2.0 - FS17 Build
Posted: Thu May 23, 2019 3:10 pm
by Jeff
Nice progress!!! Jeff
Re: The Plytanic 2.0 - FS17 Build
Posted: Thu May 23, 2019 3:13 pm
by OrangeQuest
Got to love the bunch of small stuff....to many to list!!
Everything is really looking good. Hope you had a great vacation.
Re: The Plytanic 2.0 - FS17 Build
Posted: Thu May 23, 2019 3:56 pm
by narfi
silentneko wrote: ↑Thu May 23, 2019 3:06 pm
add the second layer on the gunnel rails.
I was only planning on one inner layer, but a bit taller than you have. Do you think I will have issues with that?
Re: The Plytanic 2.0 - FS17 Build
Posted: Thu May 23, 2019 4:02 pm
by silentneko
Thanks gents.
I'm working on a bunch of filling and fillets now. There are a lot of areas where I may not technically need it, but I like things to be somewhat finished ok. My fillets are structural, with milled fibers mixed in in various concentrations, so they help tighten things a bit. I'm going to work on glassing the front deck and the accessories in the console soon.
Re: The Plytanic 2.0 - FS17 Build
Posted: Wed May 29, 2019 6:10 pm
by silentneko
Plugging away. I'm working on adding more cleats, and the console now. I Laminated the top and face where the controls will go. The top is 5/8" thick, and control surface is 7/8" thick.
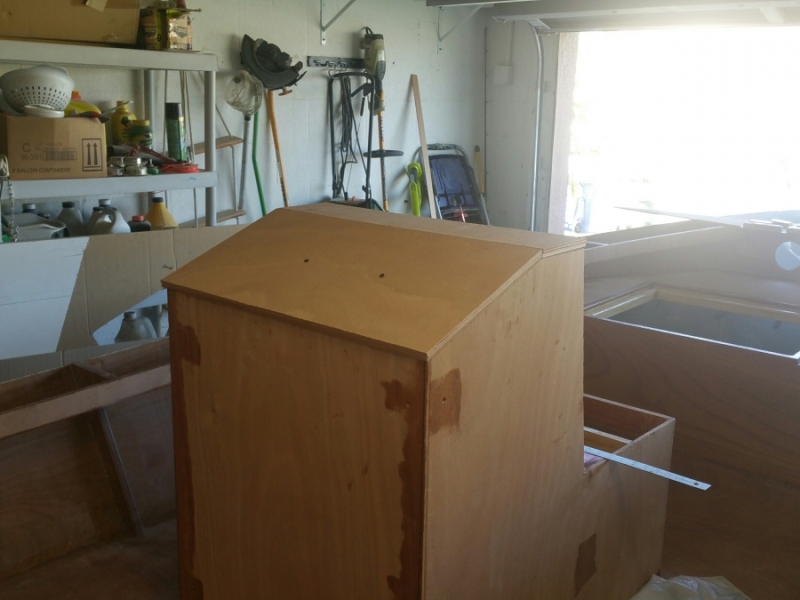
I see a lot of consoles that have bolt heads peppered across the sides. To avoid this I made a board to mount my electronics and such to.
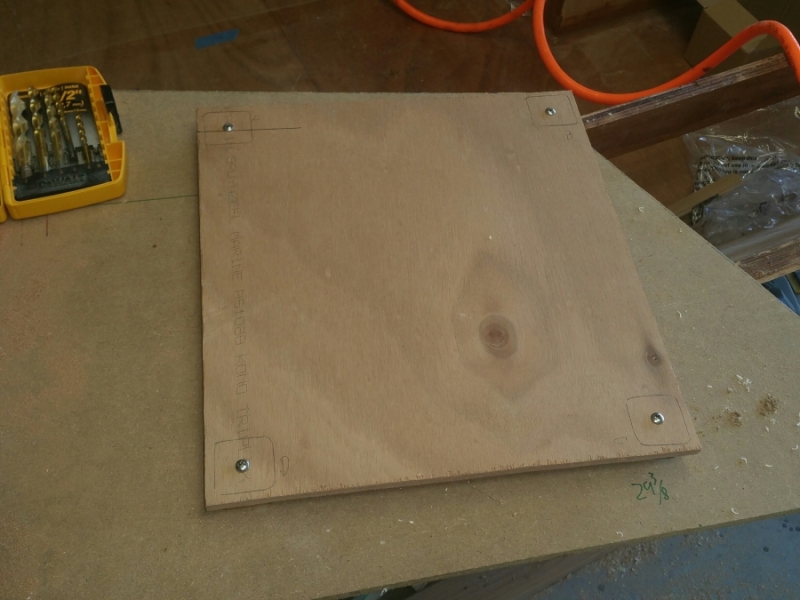
It will sit off of the side and be attached with screws to 4 blocks. Below you can see the blocks on the left side. The 2 other blocks on the right side are for mounting the clips to hold the anchor light. I figured it's pretty much wasted space so might as well use it for something.
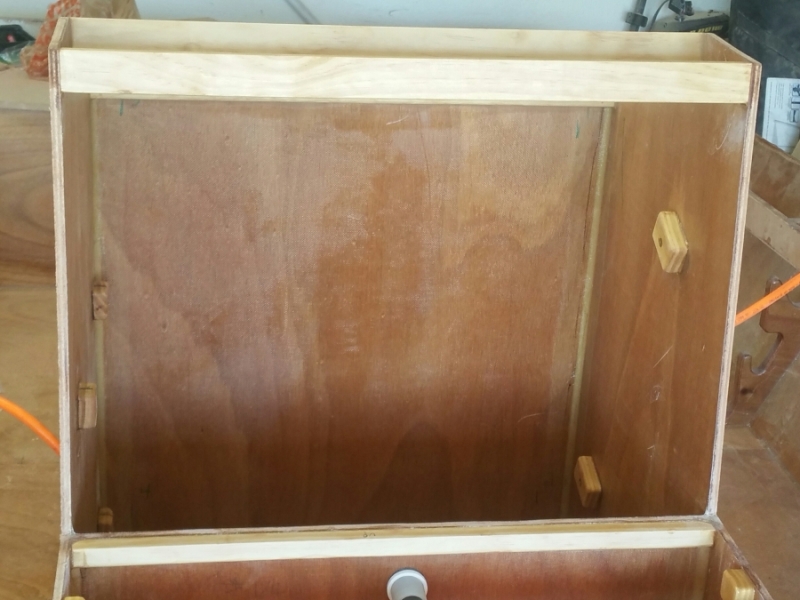
Re: The Plytanic 2.0 - FS17 Build
Posted: Thu May 30, 2019 7:26 am
by Capt UB
Very nice looking console.
I'm going with a smaller and lighter one, but will rethink the top of the console where things are mounted, thicker dashboard/mounting board. Plans call for 3/8" which is fine, but a 1/2" board will be better in the long run. This will be on a LM18 tiller.
Thanks for posting your console.
Re: The Plytanic 2.0 - FS17 Build
Posted: Thu May 30, 2019 8:12 am
by Jeff
Nice console!!! Jeff
Re: The Plytanic 2.0 - FS17 Build
Posted: Thu May 30, 2019 8:47 am
by silentneko
I think if it's just holding a fishfinder, switches, or cup holders then 3/8" would be ok. I do not think 3/8", especially in okoume, is rigid enough to handle a steering system or engine controls. 7/8" is plenty sturdy. I laminated a layer of 3/8" and 2 layers of scrap 1/4". The bottom was cut smaller to rest inside the supports and sides of the console. I'll fill the gaps from the inside later making it bulletproof.
Re: The Plytanic 2.0 - FS17 Build
Posted: Tue Jun 04, 2019 8:43 am
by OrangeQuest
silentneko wrote: ↑Thu May 30, 2019 8:47 am
I think if it's just holding a fishfinder, switches, or cup holders then 3/8" would be ok. I do not think 3/8", especially in okoume, is rigid enough to handle a steering system or engine controls. 7/8" is plenty sturdy. I laminated a layer of 3/8" and 2 layers of scrap 1/4". The bottom was cut smaller to rest inside the supports and sides of the console. I'll fill the gaps from the inside later making it bulletproof.
Not to change the subject but I noticed on another post of how many boats you built. I thought after at least the number you have built your "status" would be labeled "expert".
I think that status is far over due.
Re: The Plytanic 2.0 - FS17 Build
Posted: Tue Jun 04, 2019 9:43 am
by silentneko
I appreciate the vote, lol. However this is the first official Bateau.com build I have done. The others were of my own design, although they did use some materials from here.
Re: The Plytanic 2.0 - FS17 Build
Posted: Tue Jun 04, 2019 6:38 pm
by OrangeQuest
Oh, ok.
Re: The Plytanic 2.0 - FS17 Build
Posted: Fri Jun 07, 2019 6:29 pm
by silentneko
Well kind of a wasted week. I actually took a vacation day to try and get some stuff done, but I came up short on my plans. The weather rolling in this week did not help. With it raining outside and the garage door shut most of the way, temps inside hit 105. Not ideal for priming or general survival, lol.
Alas, some progress is better then none right? So I did down and dirty fairing job on the rear storage, and live well. Then primed them as well as the inside of the console.
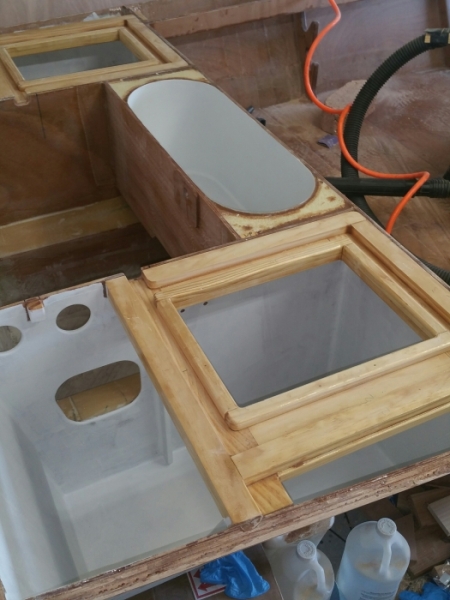
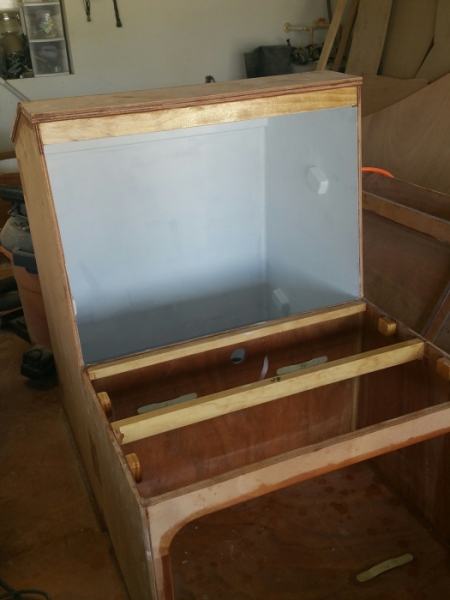
After priming I noticed a bunch of pinholes still in the sides of the live well so I made a loose mix of fairing compound and squeegeed it in. This should finish up the inside prior to painting. I drilled the hole for the LED light too.
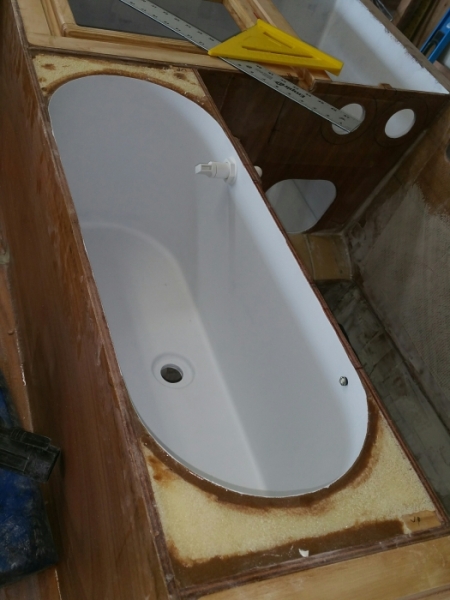
The last structural part that really needed to be installed was the forward motor well support. I glassed it and added a cleat that will run the top and add support for the rear of the casing deck.
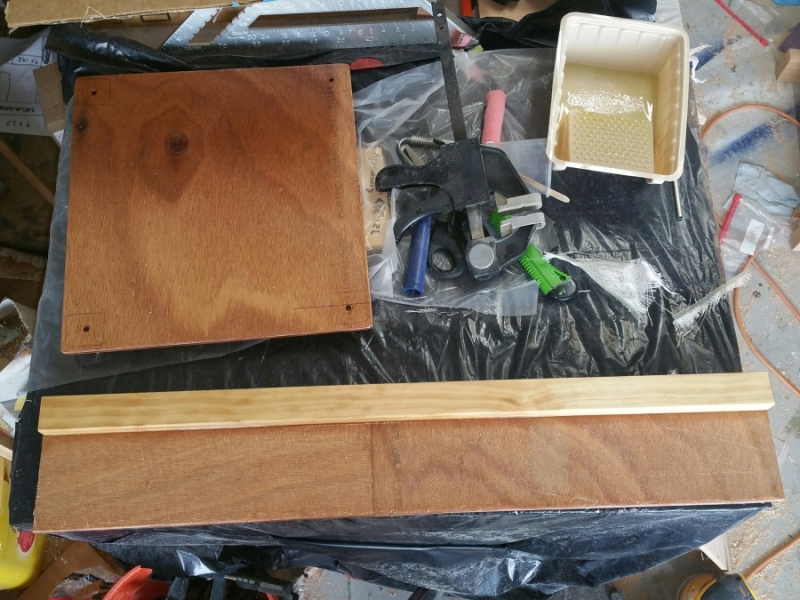
Soooo, Paint...... I went to go paint the primed areas and to my disappointment when I opened the catalyst for the Interlux Perfection, it was solid gel. The same thing that happened to the first kit I had. My guess is even after resealing it once it has been exposed it has a short shelf life in a hot garage. It's a bit annoying cause now I have to order more, and it has cost me about $150 to paint just the front compartments. I'll have to plan my painting out better and maybe keep the leftovers in the house.
Re: The Plytanic 2.0 - FS17 Build
Posted: Fri Jun 07, 2019 7:08 pm
by seaslug
I've posted pretty often about how much I like Awlgrip for a variety of reasons, one reason being it's the only high dollar epoxy type paint I've ever used. But one of the main reasons is I always have partial cans of paint left, as well as the other components; reducer's and catalyst's. What I love about the pain tis that it never goes bad, dries up, hardens, etc. despite being in my garage year round, with the temperature ranging from below freezing to well over 100 degrees. I have one rusty quart can with a badly banged up lid that has been on the shelf for 24 years with about 3/8" of paint in the bottom that is still liquid and viable. It's a dark green, and on occasion I use a little to mix a custom color. I've never seen or used another paint, polyurethane, or varnish, that holds up like this. Besides, I'm too cheap to discard my leftovers to try another paint. Mike
Re: The Plytanic 2.0 - FS17 Build
Posted: Fri Jun 07, 2019 7:39 pm
by silentneko
This is the first time I have used the Perfection, and so far I do like it, but this issue is a pain. I'm to far down the rabbit hole to switch products now. I'll just keep it in he AC from now on.
Re: The Plytanic 2.0 - FS17 Build
Posted: Sat Jun 08, 2019 6:36 am
by cape man
Call one of their tech people. It may be a product that once exposed to air and humidity has a very short half life. Keeping it in the refrigerator may not help much if that's the case.
Feel your pain...
Re: The Plytanic 2.0 - FS17 Build
Posted: Sat Jun 08, 2019 3:38 pm
by silentneko
Not a bad idea. I'll give them a shot.
Re: The Plytanic 2.0 - FS17 Build
Posted: Sun Jun 09, 2019 3:41 pm
by silentneko
Here is the last support bonded and filleted in place. The top of it will help support the back of the rear casting deck, and the bottom will support the motor well cover.
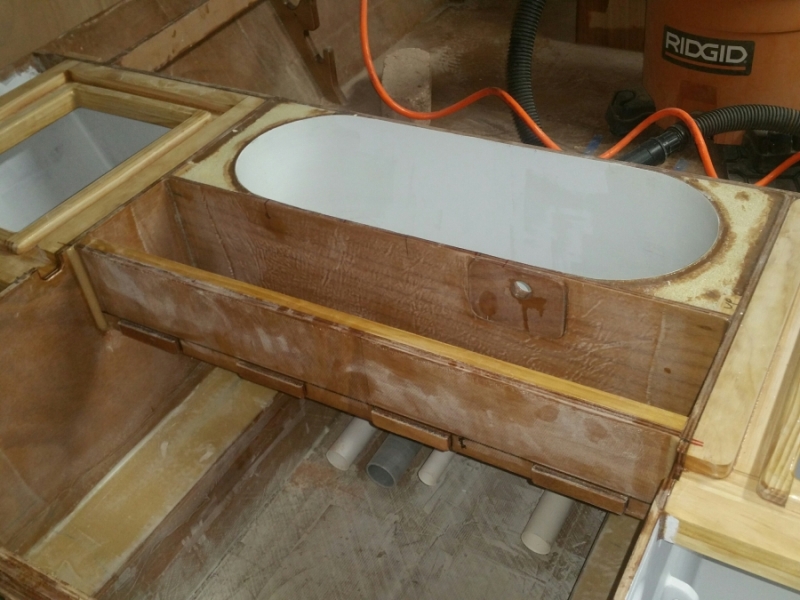
As far as the paint goes, I've been reading up on the Interlux Perfection. There is a warning on the supplemental information, NOT the can, about using it quickly after opening it. I've also read many complaints online about it, and they will not sell the hardener separately. Soooo I'll have to make a choice here. I can choose to go another route, it will cost me a day or 2 of sanding and taping I think. Or I can continue on knowing that I'll only have 2-3 weeks after opening each kit, and for every touch up I'll need to buy a new $75 kit.
I like the primer I'm using and I believe I can use nearly any top coat system over it, so I just need to pick one.
Re: The Plytanic 2.0 - FS17 Build
Posted: Sun Jun 09, 2019 4:29 pm
by narfi
Awlgrip has my vote.
It's been over a year and a half since I painted Landons canoe. The white awlgrip and hardener opened then worked just fine this week when I painted in a couple of my fs17 compartments. If you have seen the canoe you can see the white and the red both provided a very nice high gloss finish. (The red took more coats than I expected because it was so translucent)
I also used the system 3 yacht primer opened at the same time and it is also still good.
I think fuzz has some very old awlgrip (~20yr+) that he said is still good.(I think it was fuzz maybe someone else)
Re: The Plytanic 2.0 - FS17 Build
Posted: Sun Jun 09, 2019 4:48 pm
by silentneko
I'm leaning that way, either awlgrip or awlcraft, but it's a hard pill to swallow at $400+ to once again replace a pricey product that I thought was an upgrade from what i used last time.
Re: The Plytanic 2.0 - FS17 Build
Posted: Sun Jun 09, 2019 6:03 pm
by Fuzz
My boats never look good enough for the high dollar paint

On the other hand Seaslug uses the Algrip and likes it very much. He says the old paint lasts forever. And it is worth it on the works of art he builds.
Re: The Plytanic 2.0 - FS17 Build
Posted: Sun Jun 09, 2019 8:37 pm
by Capt UB
I'm not setup to spray, so can these paints be rolled and tipped? I have never tried the high end paints. We always used sinlge part Brightside and ext. house paint ($25 gal.) I really would like to paint the LM18 with close to the best paint.
Re: The Plytanic 2.0 - FS17 Build
Posted: Sun Jun 09, 2019 9:46 pm
by narfi
I'm not sure about the other brands, but when ordering awlgrip you can select the converter/hardener for either spraying or brushing.
Re: The Plytanic 2.0 - FS17 Build
Posted: Sun Jun 09, 2019 10:19 pm
by Fuzz
Hope SeaSlug chimes in. He is a real expert with Allgrip. I seem to remember that unless you have professional quality PPE you should not try to spray it.
Re: The Plytanic 2.0 - FS17 Build
Posted: Mon Jun 10, 2019 1:17 pm
by joe2700
Awlgrip is polyester based and very durable, and it can be rolled and tipped. The other main paint form them is awlcraft which acrylic based and is less durable but more repairable(can be sanded/buffed). Awlcraft can only be sprayed.
Re: The Plytanic 2.0 - FS17 Build
Posted: Wed Jun 12, 2019 3:08 pm
by silentneko
I'm still contemplating my paint choices. Awlgrip is great and can be rolled and tipped, but it's not repairable, or buffable. Meaning if you goof up the job, or smack a crusty dock (which I have), your out of luck. Awlgrip is buffable, but I'm not set up well for spraying. So I am leaning towards going with EMC/Quantum. It is well suited to rolling, and is buffable/repairable. I'm still looking into it, but the guys on THT seem to like it so far.
Outside of that, and as a cost savings measure, I decided to just use rustoleum again for the bilge, inside of console, and rear compartments. I already have some tinted a light blue, it doesn't match, but it's close enough. It held up well enough on my last boat so I'm not worried.
The hull, interior, deck, and live well will get the good stuff, however I think to save some money I'll just make it all one color, instead of a cream non skid.
I am doing some small things to set up for the bigger stuff. Right now I'm just gluing some extra cleats/tabs to help me bond things. Not really needed, but why not.

One last thing. I may have jumped the gun on priming the live well. I realized the hatch design I had in mind won't work with the hinges I have. Not a huge deal, but I need to grind a little at the top, so I'll be repriming it.
Re: The Plytanic 2.0 - FS17 Build
Posted: Fri Jun 14, 2019 8:03 pm
by silentneko
I finally decided on a path forward with the remaining hatches. I scribed everything out and will finish cutting it out later on.
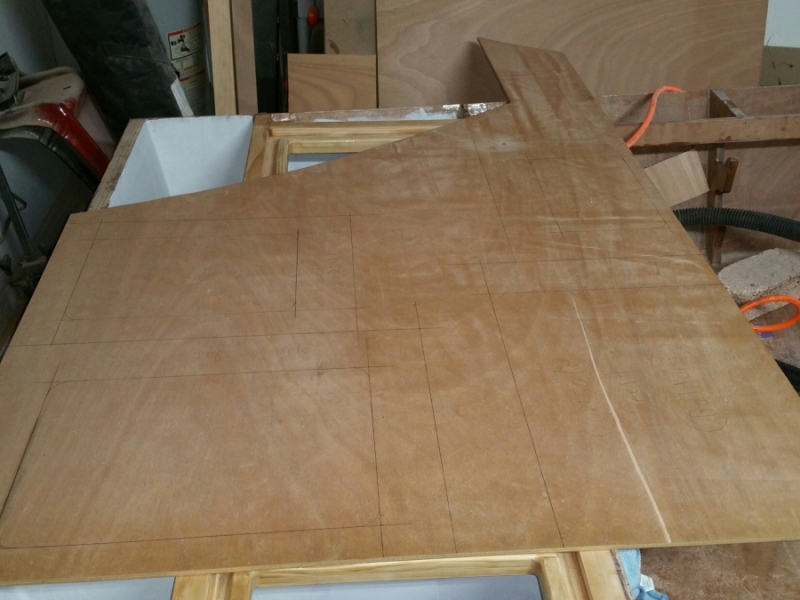
I moved forward with the first coat of paint for the storage, bilge, and under console. I was playing with it by adding pigment before, and it came out a much darker blue then I anticipated. I'm not a fan, so my next coat will be a much lighter blue. it is nice to see things all one color, even if it is just coated rough glass.
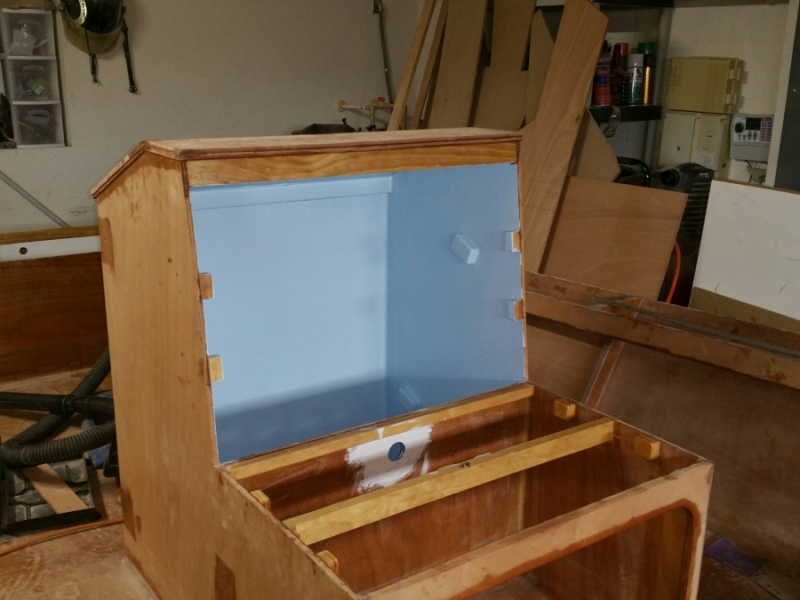
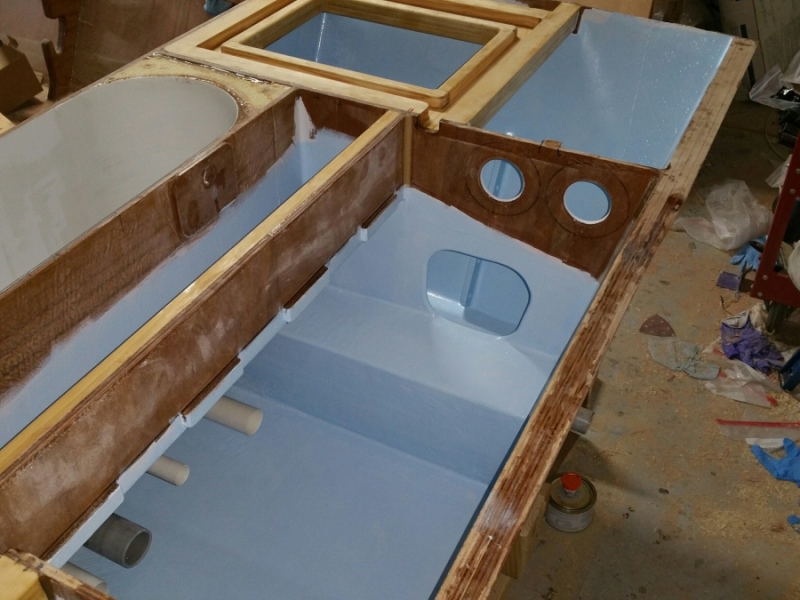
Re: The Plytanic 2.0 - FS17 Build
Posted: Sat Jun 22, 2019 9:17 am
by silentneko
So I'm done painting the rear compartments, bilge, and inside of the console. The lighter blue is much better. I also secured the fuel chase.
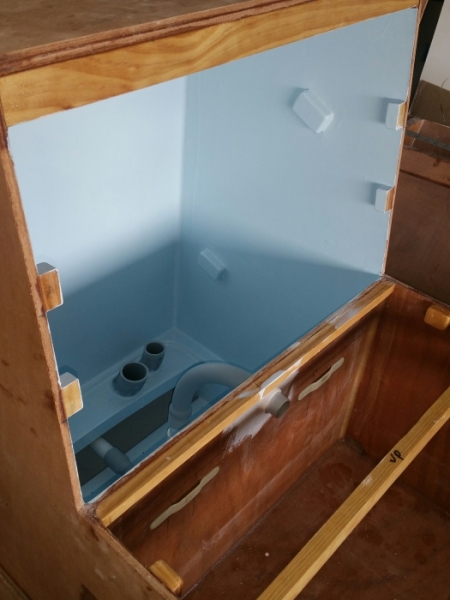
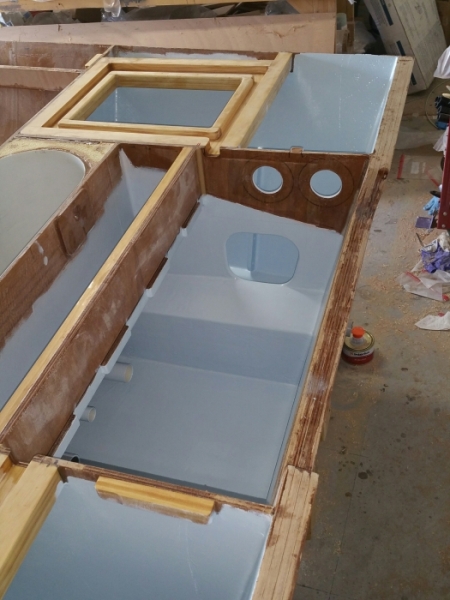
I'm cutting out the parts I laid out before. Admittedly my biggest issue is motivation right now, but I'm still doing at least some small stuff each week. I think I'm going to pull the trigger on the quantum paint, The Awlgrip's lack of repairability has me worried.
Re: The Plytanic 2.0 - FS17 Build
Posted: Sat Jun 22, 2019 11:04 am
by Bogieman
Very nice!
Re: The Plytanic 2.0 - FS17 Build
Posted: Sun Jun 23, 2019 7:10 am
by thb
Motivation is something I suffered from for the past 6 months but I am back in the groove and excited to get my FS17 finished. You are not that far off either so when the mood strikes, hit it hard and get her done. You have a lot more complexity in your build but it should be real good for you when finished.
Regards
Tom
Re: The Plytanic 2.0 - FS17 Build
Posted: Sun Jun 23, 2019 3:13 pm
by Salty F17
Very nice indeed
Re: The Plytanic 2.0 - FS17 Build
Posted: Sun Jun 23, 2019 3:52 pm
by silentneko
Thanks guys. Even fairly rough glass looks decent once it's all one color.
I'm working on the motivation thing, lol. That being said my summer allergies kicked in this last week so I'm fighting sneezing while trying to work too. It's all good though as I did get some work done.
I finalized a plan for the live well hatch and console hatch. These don't need drains, but did provide a challenge because the gutters provided a recess for the nuts and washers on the backside of the hinge. I think I worked it out.
Live well

Live well edge routed
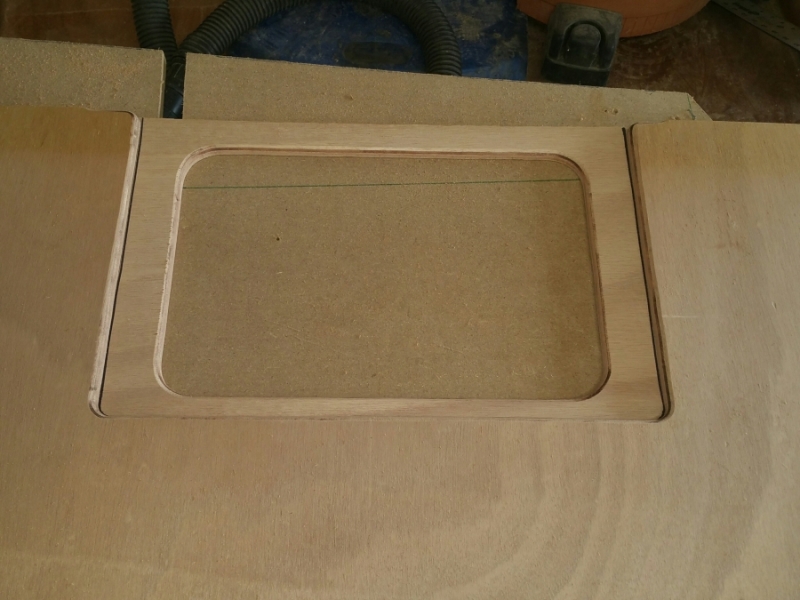
The console door. The right side, hinge side obviously, is deeper for a reason.
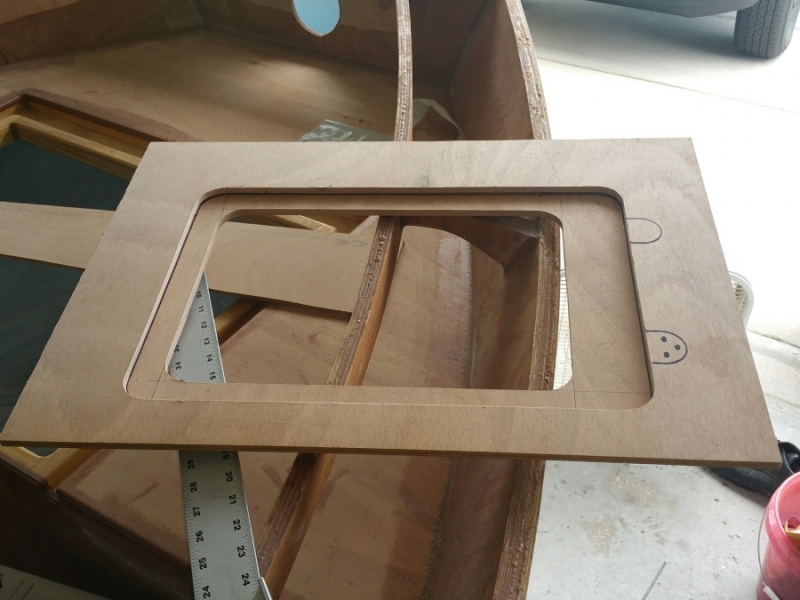
I decided I wanted to add a gasket to this hatch to keep any small amounts of water out during rain or washings. The hinges were the issue. I cut 2 holes for a recess for the nuts on the backside. I'll bond filler parts on the backside. You can see the holes in the picture below of the parts being bonded.
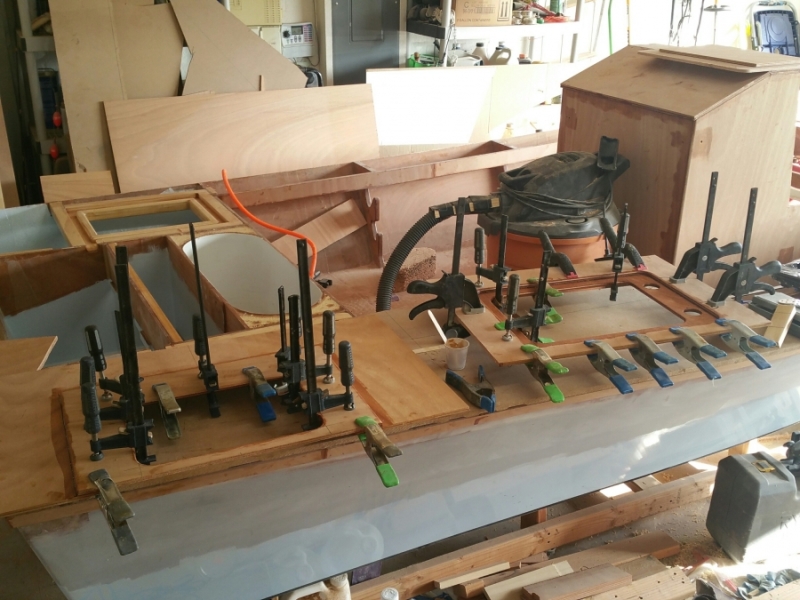
I also glassed the bottom side of the console seat so I can bond it down soon.
Re: The Plytanic 2.0 - FS17 Build
Posted: Sun Jun 23, 2019 10:25 pm
by Bogieman
Very nice work. Silentneko!
Re: The Plytanic 2.0 - FS17 Build
Posted: Mon Jun 24, 2019 6:46 am
by OrangeQuest
Very nice indeed! I like the way you explain issues you encounter and your solutions to over come them so we all can learn from them.
Re: The Plytanic 2.0 - FS17 Build
Posted: Mon Jun 24, 2019 9:54 am
by Jeff
Agreed, very well done!!! Jeff
Re: The Plytanic 2.0 - FS17 Build
Posted: Wed Jun 26, 2019 4:40 pm
by silentneko
Thank you Gents. Any issues I find I try to show. I think we talked about this a ways back in this thread. I've read tons of builds, and they mostly jump over the technical stuff and challenges. Yes they always show the typical stuff, set ups, glassing..... but there is a lot of grey areas that we all run into.
I got the seat top bonded down.
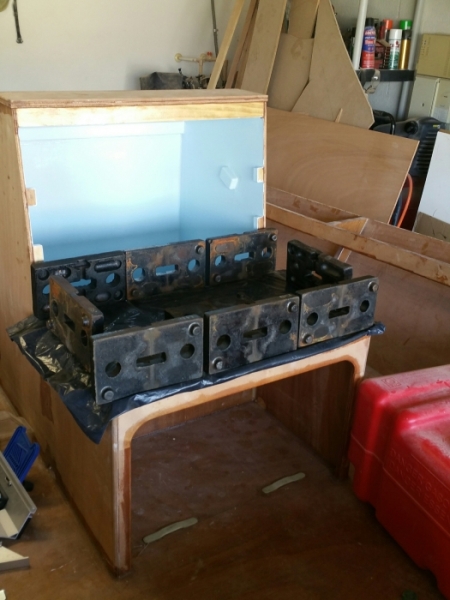
Then turned my attention back to the console door. I cut out 2 circles that will be the backings for the recesses. and then bonded them in place. So the back may look less then smooth. Reason is I was trying to work out a warp by adding glass and weighting it down. It took some of it out, but not fully. It's ok I have another idea to correct it later on.
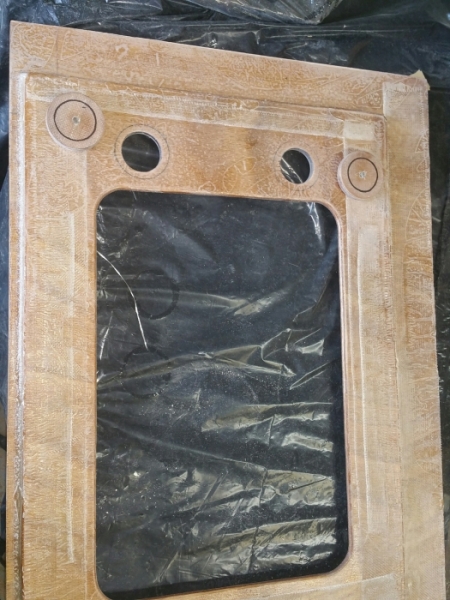
Here are the recesses almost finished. Kinda looks like an old tv.
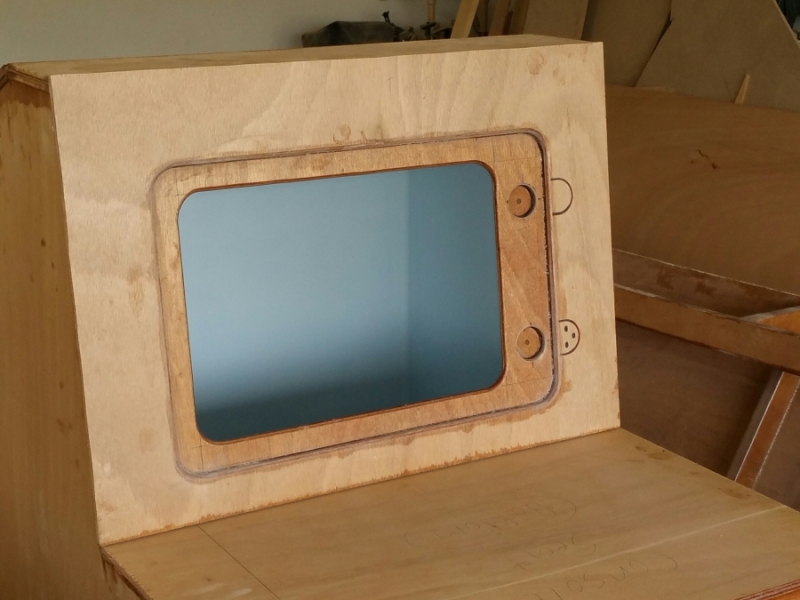
So I realized that the hatch lip for the live well needed a recessed cut to fit right. This was a hindsight 20/20 situation. I made a guide using a 1x2 and a few scraps of 3/8" plywood to get a perfect cut in the middle. Then used the router in the middle as far as I could, the rest I cut slightly deeper with a multitool. Reason being that I will weight the middle while bonding so it is perfect and then fill the small gaps if they exist towards the sides later. Here's the live well cut down.
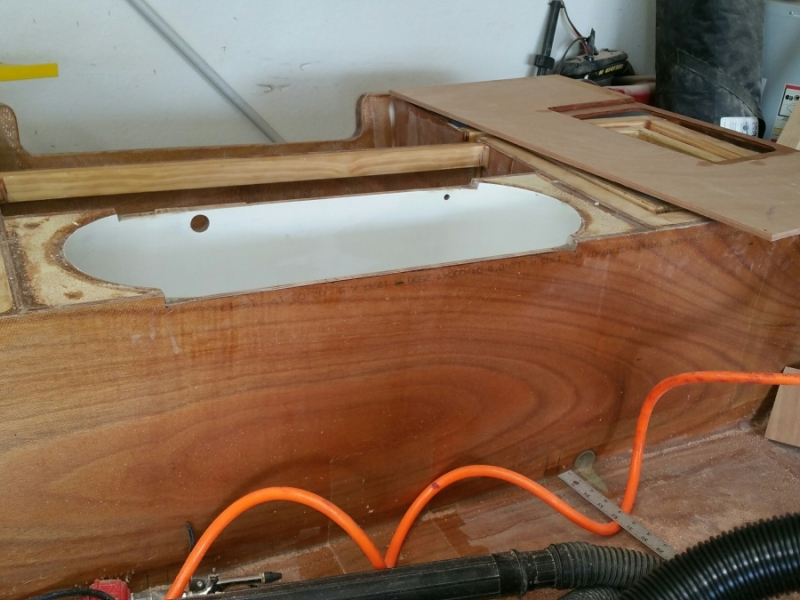
The hatch cover/lip set in place. The panel is over sized a little so I can route it later to create a perfect edge.
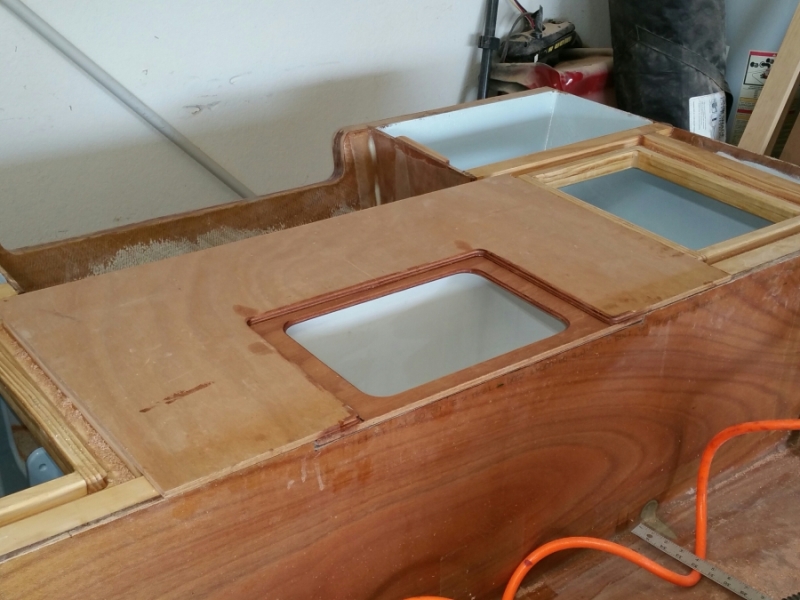
More to come soon.
Re: The Plytanic 2.0 - FS17 Build
Posted: Thu Jun 27, 2019 8:57 am
by Bogieman
Very nice!
Re: The Plytanic 2.0 - FS17 Build
Posted: Thu Jun 27, 2019 12:16 pm
by BassMunn
Very nice work, I always found the hatch lids, gutters and fittings for the hatches the most difficult part in my builds, you've got some nice ideas
Re: The Plytanic 2.0 - FS17 Build
Posted: Fri Jun 28, 2019 1:59 pm
by silentneko
Thanks, but I should have stuck with my first idea and continued making the molds. Then cast the lids and add them later on.
I've been trying to figure out how to bond the plastic tabs I got to clean up some wiring. They came with foam tape, which will fail after a few months near the water, so I peeled it off which was a PITA! I decided to test a few. I cleaned them up and gave a quick sanding to the backs. Then I Fame treated 2 of them as recommended before. I only had 4200 on hand so that's what I used. Only one of the small tabs came loose after a few hard tugs, it was not flame treated so maybe that is the reason, or maybe it was just chance. Either was it took maybe 15-20lbs of pressure on several pulls for it to fail. It shouldn't get near that on the boat. The others aren't coming lose no matter how hard I pull, The plastic will break before the bond.
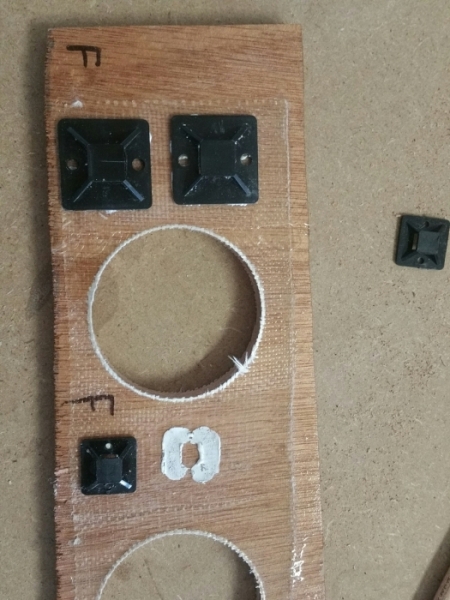
I figured out the depth on the console door was not going to allow the latch for the door to grab. So I added a block. I'm using a Gemlux compression latch there that is lockable.
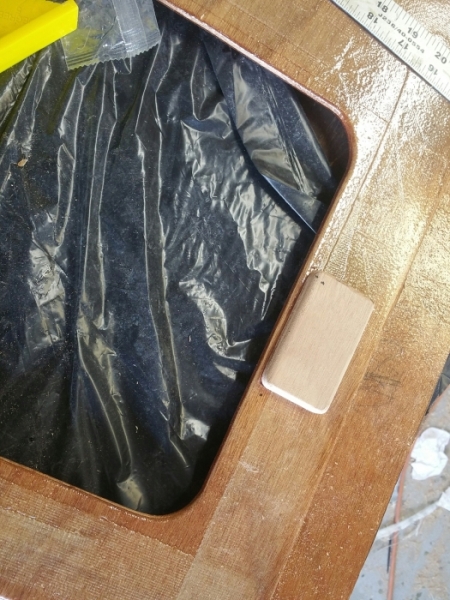
So this is what I needed to do to get the panel to sit somewhat flat. I'll have to tweak the door when I make the later on too.
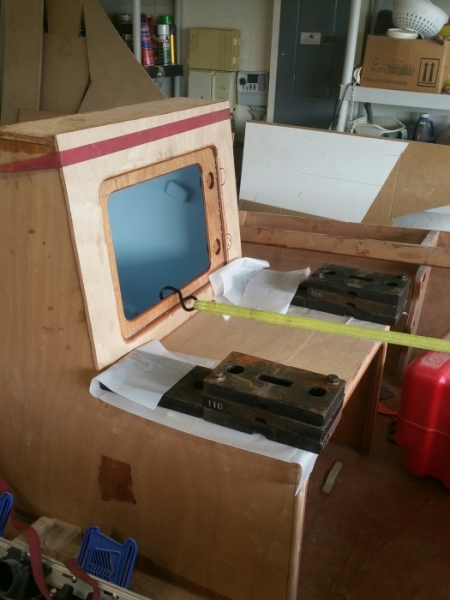
And the console hatch panel somewhat smoothed out. I can now start grinding on the rest of the console to smooth and glass.
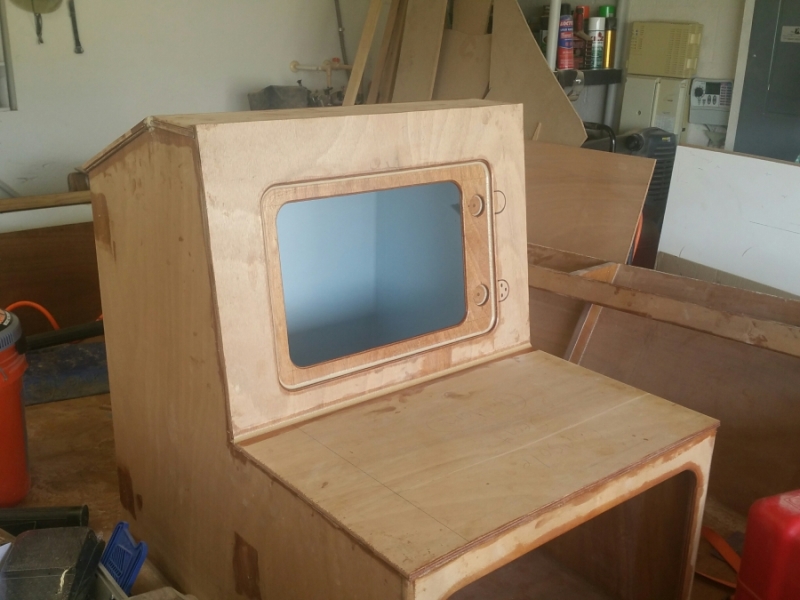
Re: The Plytanic 2.0 - FS17 Build
Posted: Sat Jul 06, 2019 4:25 pm
by silentneko
So as I'm getting to the end of this build and looking to start the rigging I'm realizing more and more some of the ideas I set in motion long ago to make things easier won't work out. Some of it is wiring, some other things. Nothing that can't be worked out thankfully.
This is where I originally intended to mount the fuel/water separator/filter, but realized the bus bars and posts would be mounted closer then I feel comfortable with.
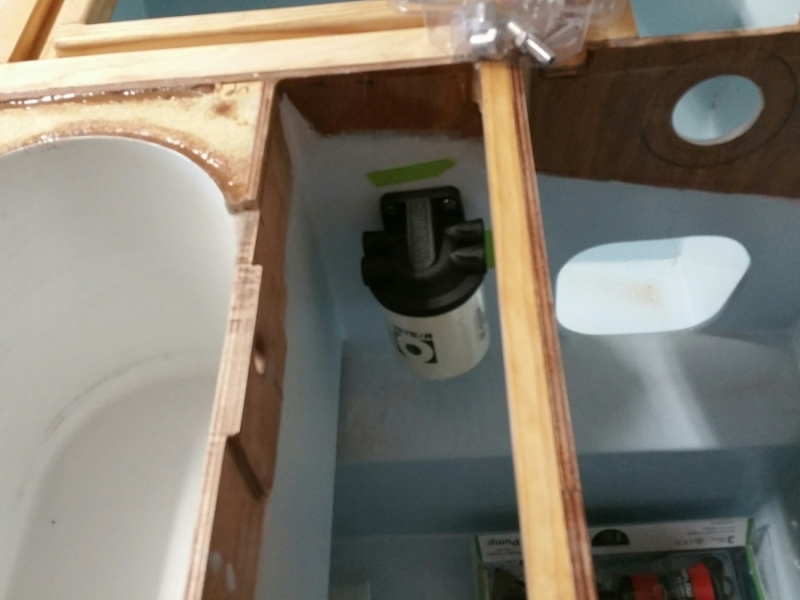
Luckily the mounting holes are drilled in the wall that separates the storage compartment. So I can just switch it to the otherside. This actually works out well, it gives easier access to the filter, and doesn't interfere with any of the storage area.
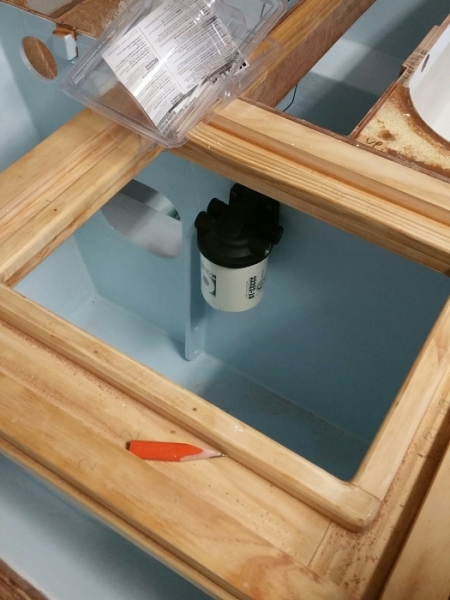
So it was time to shape up the console. using a sander, router, and grinder with a flap wheel I rounded off the edges. I think it looks pretty good and fits the boat well. I'll glass it soon.
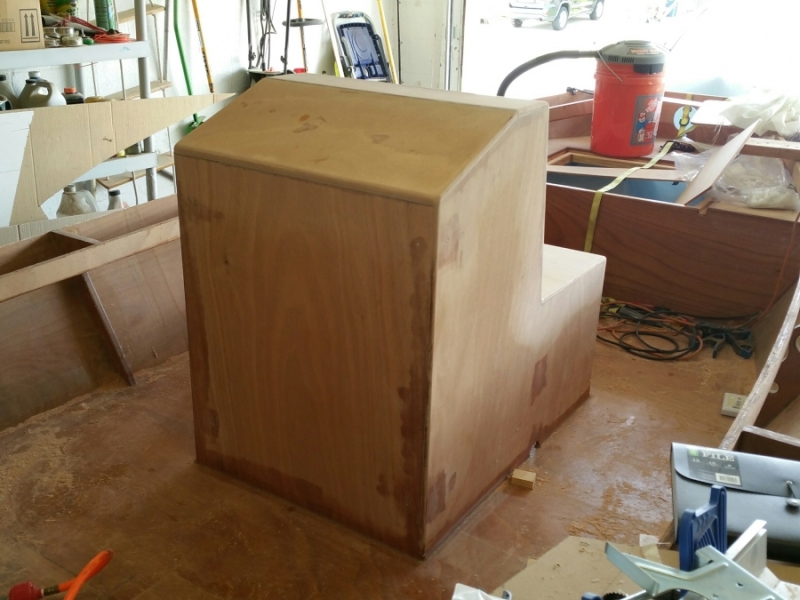

Re: The Plytanic 2.0 - FS17 Build
Posted: Sat Jul 06, 2019 5:58 pm
by Bogieman
Very nice!
Re: The Plytanic 2.0 - FS17 Build
Posted: Sun Jul 07, 2019 7:50 am
by Browndog
Looks great. I agree with Bassmun, the hatches, gutters and all the other stuff related to them was definitely the most painstaking part of the builds I’ve done.
Re: The Plytanic 2.0 - FS17 Build
Posted: Mon Jul 15, 2019 8:28 pm
by silentneko
Had I stuck with the original plan for the hatches, I would have been done months ago. live and learn.
I'm working on a few things now. Mostly trying to figure out some of the wiring before I get to far down the rabbit hole and can't reach places easily. I haphazardly drilled the holes for the cockpit lights, and one that will live in the bilge. So in case I need to check the bilge at night all I have to do is open the hatch. I have 2 holes, one for the LED you can see there, and one to pass the wires to the next support. These are Oznium superlux 4 chip LED's, very bright for the size.
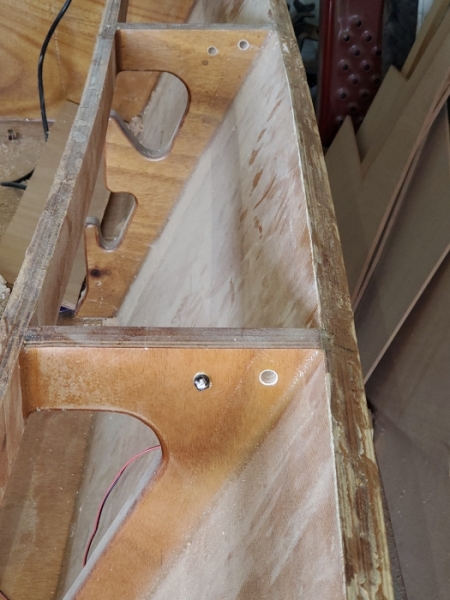
The battery trays are installed under the console.
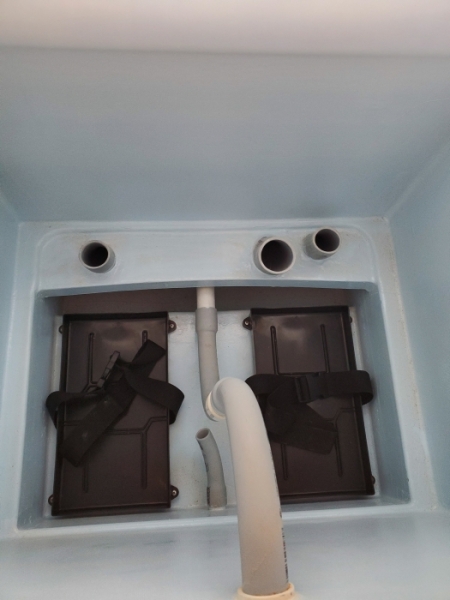
I had to go load up on some stainless steel. $30 down about $100 more to go, lol.
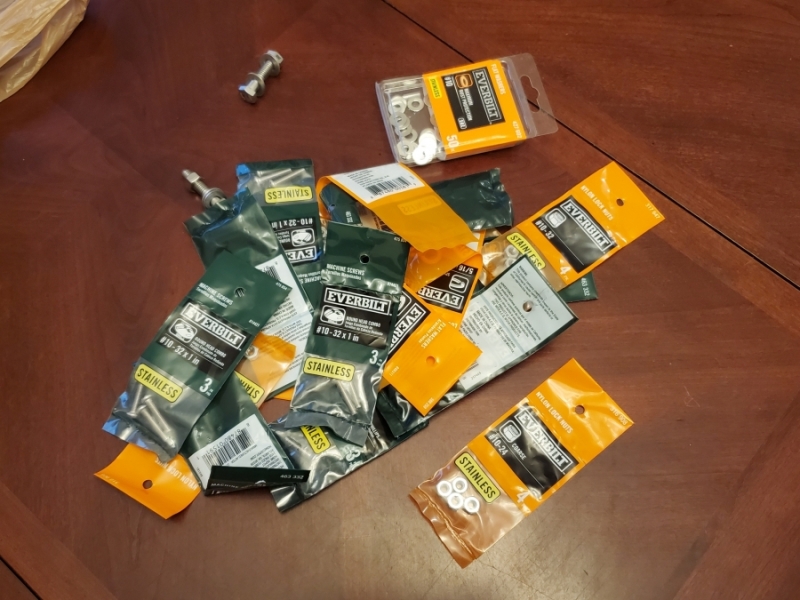
I'm starting to mock up the electric. After I flipped the water filter around I drilled holes for the 2 power posts and a negative bus bar.
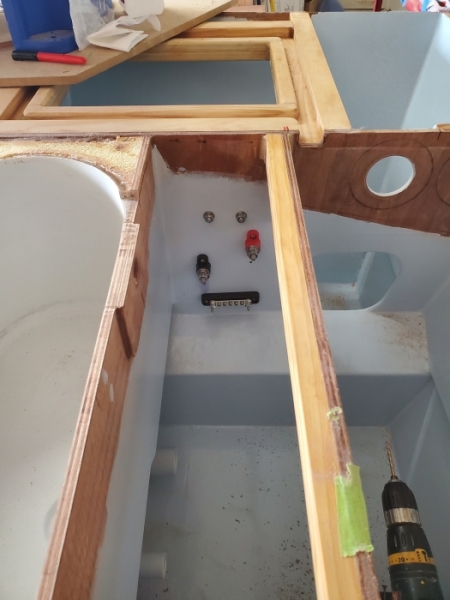
Then I started lining up what will go under the console. This was the mounting board I made out of 3/8" plywood. My switch panel has an integrated fuse block so I can keep things simple. So just the battery switch, ACR, and a positive and negative bus bar.
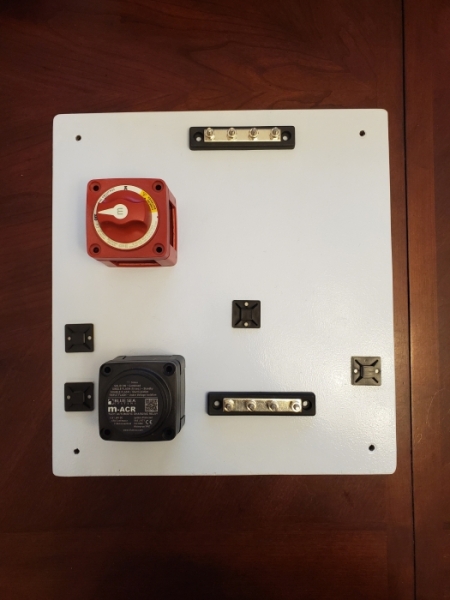
More to come soon.
Re: The Plytanic 2.0 - FS17 Build
Posted: Tue Jul 16, 2019 5:55 am
by cape man
Slow and steady.
Re: The Plytanic 2.0 - FS17 Build
Posted: Tue Jul 16, 2019 7:52 am
by Jeff
Really nice work!!! Jeff
Re: The Plytanic 2.0 - FS17 Build
Posted: Tue Jul 16, 2019 8:28 pm
by silentneko
Slower then steady, lol.
I started the wiring for the LED's. So I'll have green in the cockpit, blue in the livewell, and a white one in the bilge for emergencies. I might add another white one to the forward compartments where the life jackets are. I had to do this here because it would have been a bit more difficult to make all the splices once the rear deck is on. I'm not a fan of having multiple splices in a run, but this was the best way. I spoke with Oznium and they suggested I run them parallel for best performance, instead of in series.
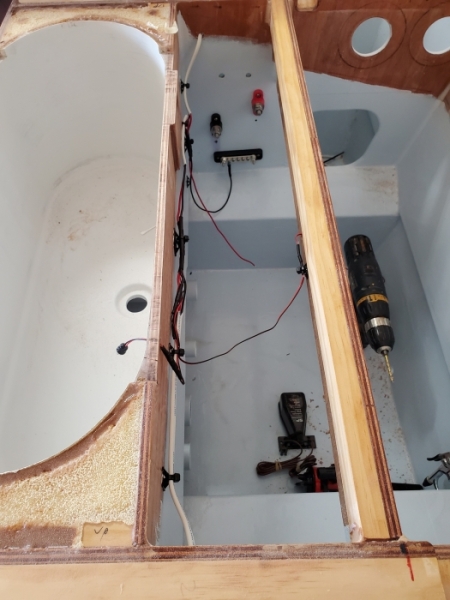
Then I bonded down the rear deck/livewell hatch. I'll do the rest of the rear deck later this week if I have time.
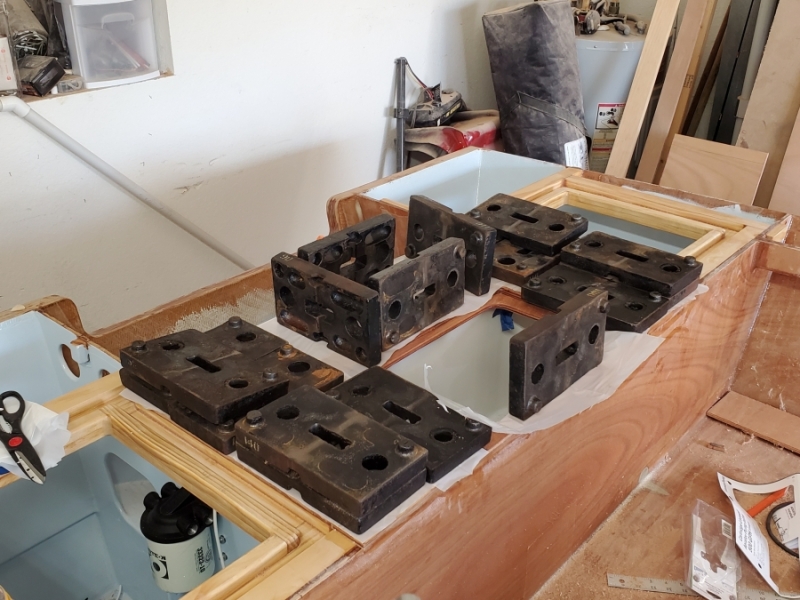
Re: The Plytanic 2.0 - FS17 Build
Posted: Tue Jul 16, 2019 8:35 pm
by narfi
Looking good!
Re: The Plytanic 2.0 - FS17 Build
Posted: Tue Jul 16, 2019 10:01 pm
by OrangeQuest
When you hook them up in series it drops the voltage from the resistance of each light and one break they all go out.
I used their lights based off your "lab" tests and love them! Can't see spending the bucks on their nav light but I have not found anything else I like.
Re: The Plytanic 2.0 - FS17 Build
Posted: Sat Aug 03, 2019 8:47 pm
by silentneko
I have the nav lights, but don't remember them being any more expensive then the others I looked at. At least these are made from aluminum, the rest of them I looked at were just chromed plastic.
I finished bonding down the rear deck parts and the gunnels. I had to do it in multiple parts for a few reasons. The main one was I'm pretty much out of large sheets of plywood so I'm down to using scraps. I was advised I would not need the extra sheets of ply when I started, and while I'll be ok, I'm having to do certain parts like these in ways I did not intend.
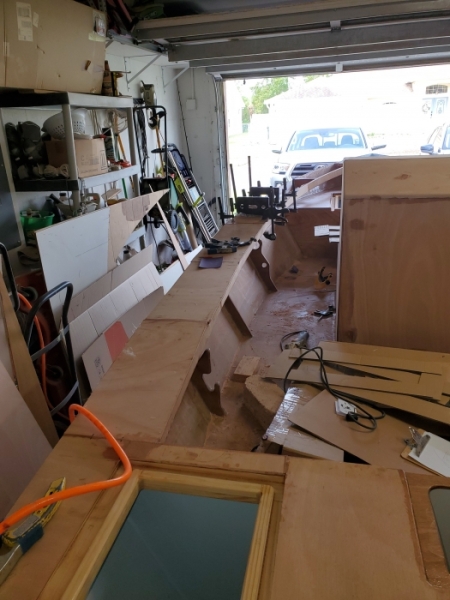
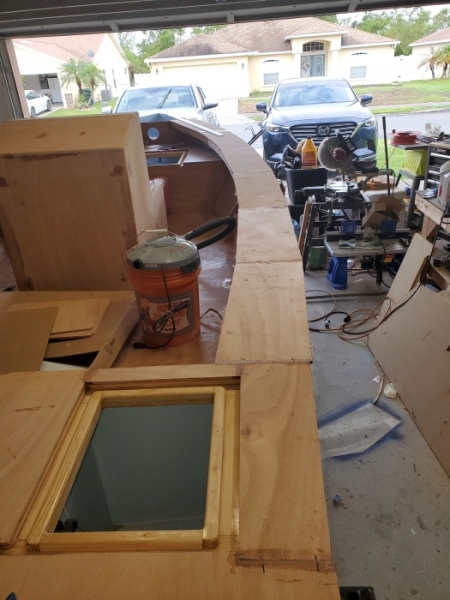
I sanded and then straight routed the rear deck, gutters, and inside of the gunnels. I'll round them over later on.
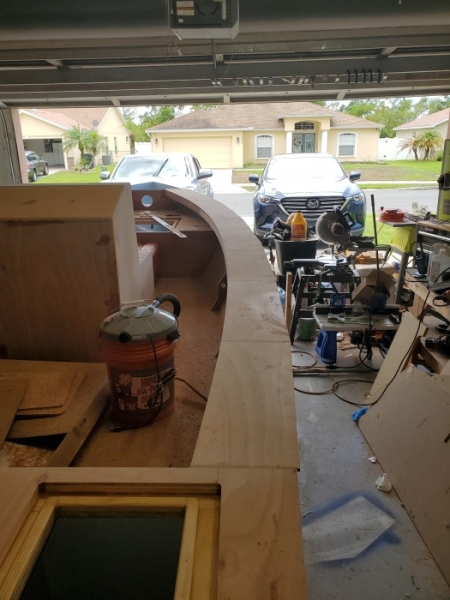
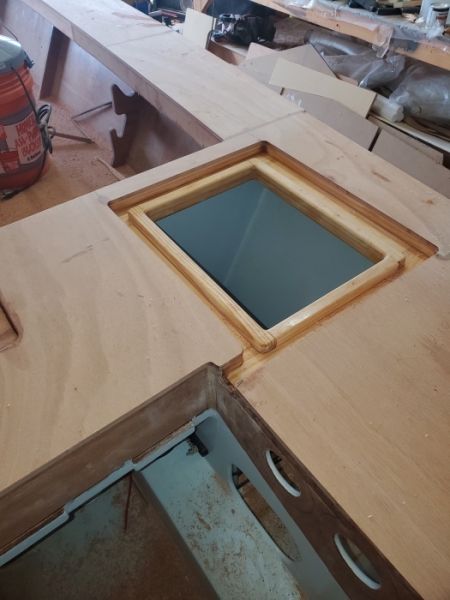
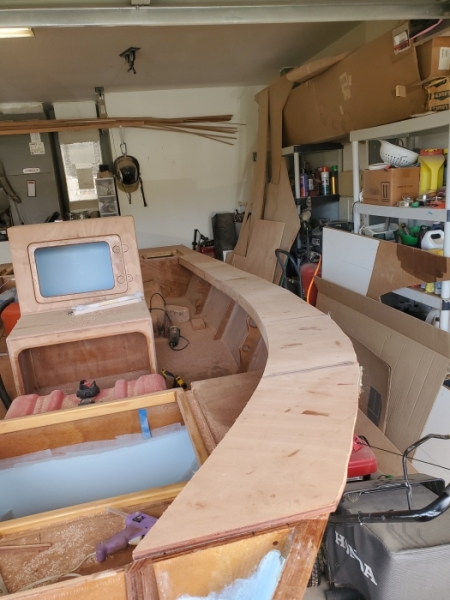
I didn't finish the outside edge because I need to fill the gap between the rub rail and decks. So I didn't want to use my good resin for the gap filling, and I had gallons of the Marine epoxy around so I decided to try it again. It did not go well. I had all the same issues, I would mix up 3oz batches, the first was 4.5oz and cooked off so fast I couldn't use it. With the 3oz batches I got about 3-5 minutes of work time. I had issues with bubbling again as well. I ended up making more of a headache for myself as I'll have to grind a bunch of it away. Live and learn.
Re: The Plytanic 2.0 - FS17 Build
Posted: Sat Aug 03, 2019 9:42 pm
by narfi
That sucks with your epoxy kicking too fast.....
You are mixing wood flour with it as filler?
When I mix in wood flour I spread it our thin on a board to use, I think the wood flour somehow insulates or something making it hear faster and once that heats faster chemical reacts faster heats faster reacts faster cycle starts you dont have much time, spreading it out thin let's it dump heat and slows that "snowballing" effect down.
The gunwales look nice, I had to peice mine together as well and I think it will work out ok. You have each peice ending on a bulkhead and set of cleats?
Re: The Plytanic 2.0 - FS17 Build
Posted: Sat Aug 03, 2019 9:53 pm
by silentneko
I use a mix of wood flour. Milled fibers, and silica, with the occasional microspheres tossed in. I've never had this issue with other systems, this stuff heats up so much the first batch melted the bag to my glove. I use bags to pipe it into gaps and corners.
I cut the gunnels so each part splits the difference of the side supports, which are 1 inch wide. I may add a structural filler on the underside, but it seems pretty solid now.
Re: The Plytanic 2.0 - FS17 Build
Posted: Sun Aug 04, 2019 7:04 am
by cape man
I've used about 25 gallons of Marine Epoxy and never had it kick that fast. Have to ask...you are mixing it 2 to 1 (resin/hardner)? That's weird even at our temperature.
Re: The Plytanic 2.0 - FS17 Build
Posted: Sun Aug 04, 2019 3:20 pm
by silentneko
Yes Sir, 2 to 1 like all the other resins I have used, except one that was 4 to 1. I have had the same issues with 2 different runs of resin and hardener. Weird issue as I've never seen an epoxy heat up so much it would smoke. Maybe it was just a bad run, but I'm moving on.
Re: The Plytanic 2.0 - FS17 Build
Posted: Sun Aug 04, 2019 6:21 pm
by cape man
10-4. Build on.
Re: The Plytanic 2.0 - FS17 Build
Posted: Thu Aug 08, 2019 3:28 pm
by silentneko
I decided to tuck the trolling motor plug under the gunnel to give it a bit more protection. Cut out and fitted.
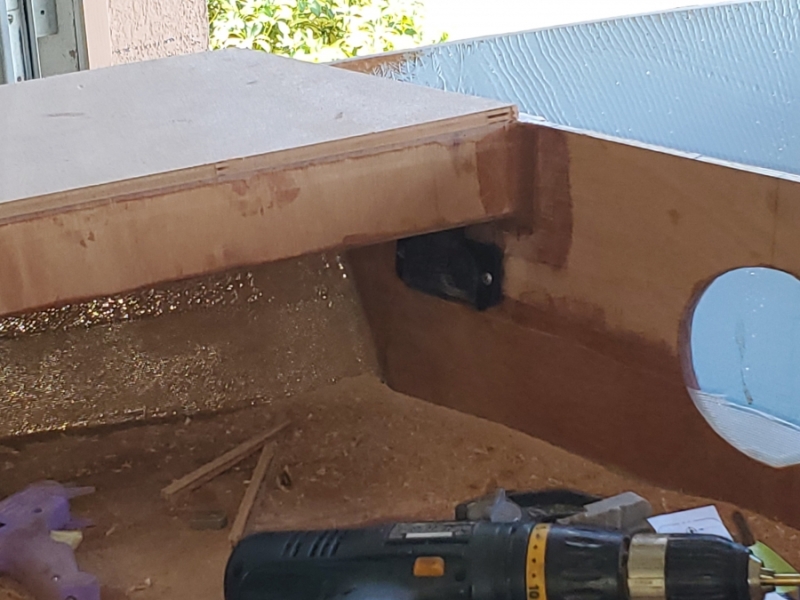
Then I made the nose piece. It's 3/8", with a 1/4" backing plate, and then a 1/4" cleat for the trolling motor.
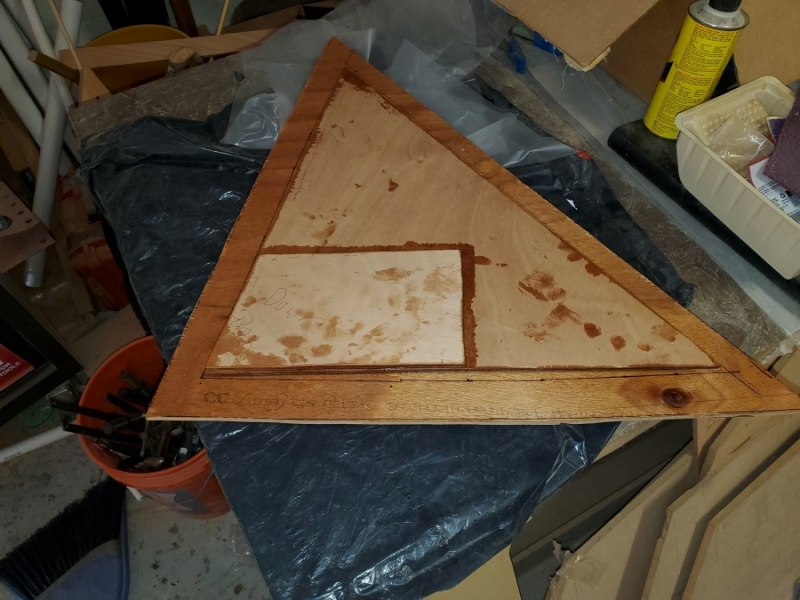
So I goofed up. I misread my own marks and glued down the cleat for a right sided TM when I want it on the left. So I scabbed in another Piece to make up the difference.
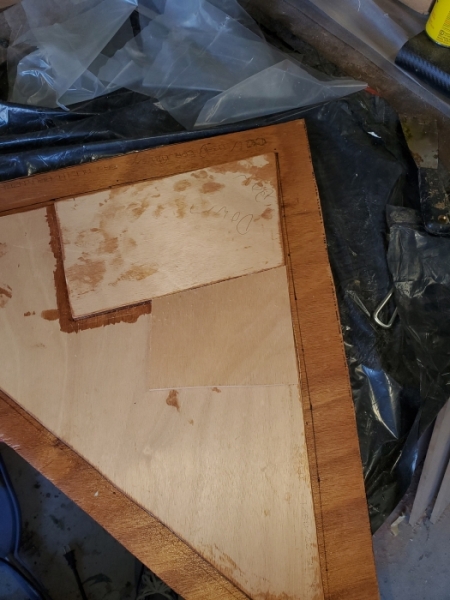
I prewired for the Trolling motor and Nav lights. I went with #8 for the trolling motor. Might be over kill, but why not.

So my boat, like most FS17's, got the droopy nose syndrome. It's not a big deal and doesn't look bad, but if I clamped it tight it would curve the bow gunnel and effect the trolling motor. So I clamped the back, but let the front hang naturally, I'll fill the gap later on.
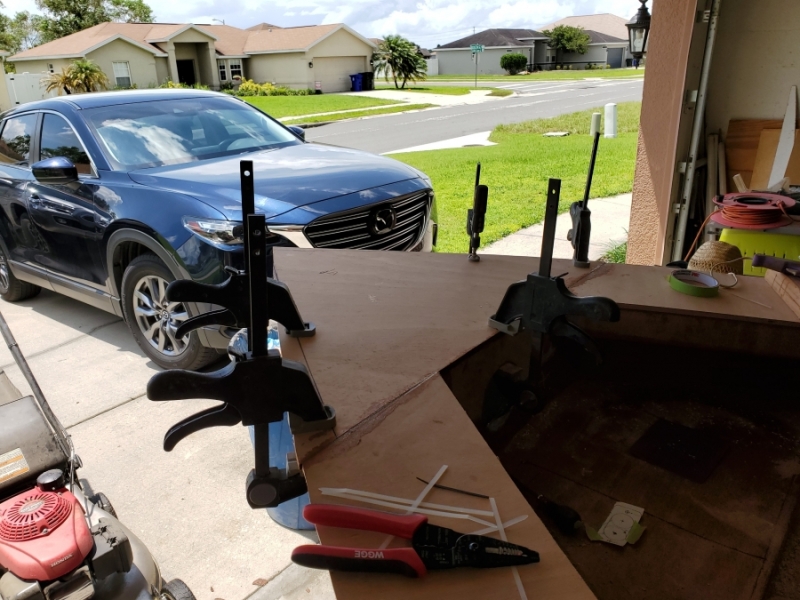
Re: The Plytanic 2.0 - FS17 Build
Posted: Thu Aug 08, 2019 7:29 pm
by OrangeQuest
That (droopy nose) is what I thought I could see in my FS14 build and that is why I added the camber on the foredeck.
Re: The Plytanic 2.0 - FS17 Build
Posted: Sat Aug 10, 2019 11:38 am
by silentneko
Honestly it didn't bother me from an aesthetics standpoint, but it wouldn't function well with the trolling motor.
Bonded down.
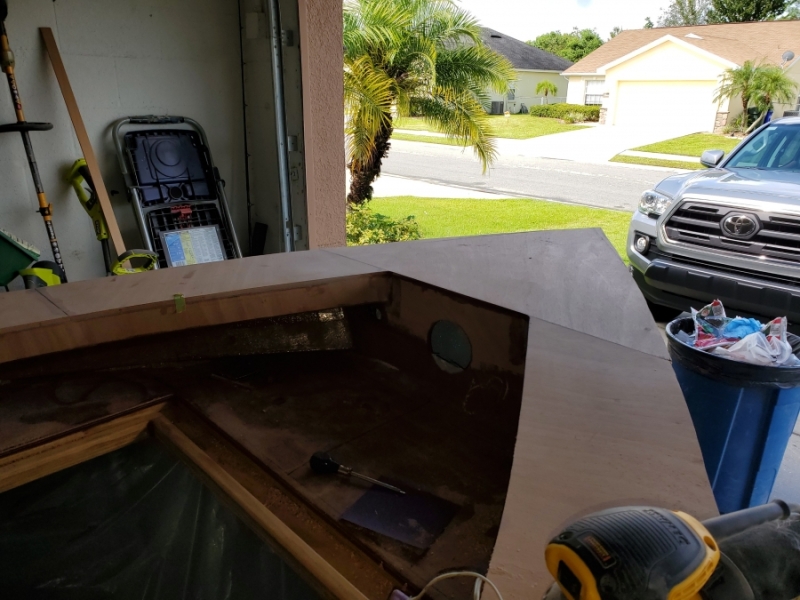
I'm starting the rest of the wiring now. It will be a fairly simple arrangement. I'm not super OCD on the routing, but I want it fairly clean and serviceable. No fuse block as each switch is fused, and the GPS and bilge pump will have their own fuse holders.
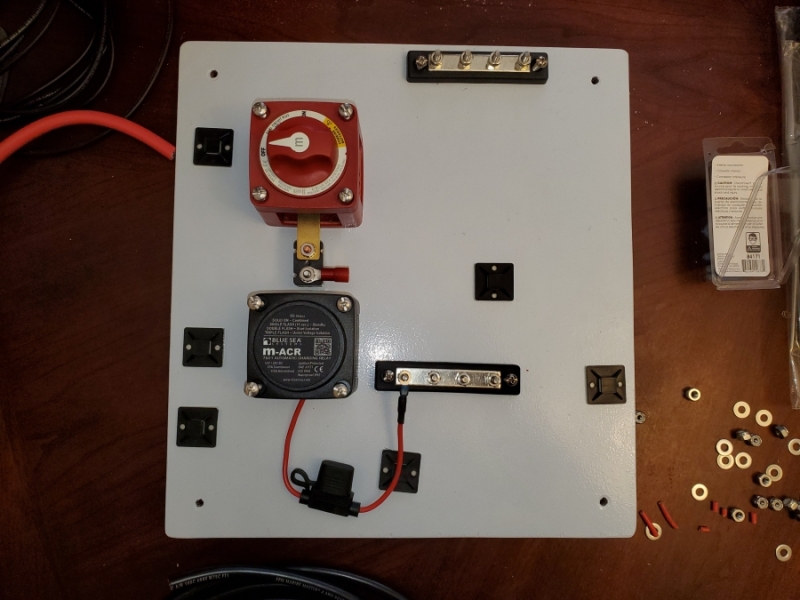
I'm looking at seating position as well. I took my old cooler and put it in the boat to make sure I have enough foot room. At 13.5" of space between the cooler and console I have enough room for even my size 15's. There is still over 16" of room behind the cooler too. I really wanted elevated seating, and wanted to build a nice cedar sided cooler, but I don't want to stall out building something else right now. What I might just do is, well nothing for now. I might just add seadek feet to the cooler I have to keep it from sliding, and not even bolt it down, then revisit it once I get it in the water.
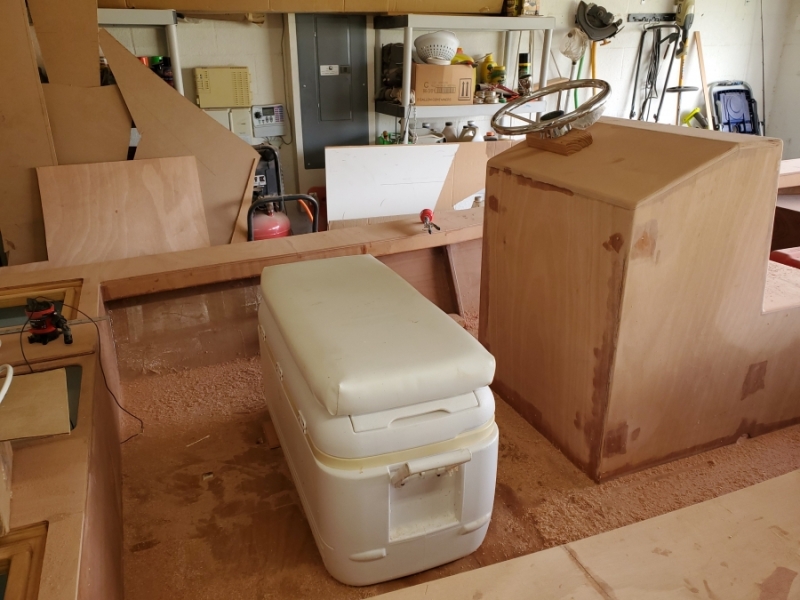
Re: The Plytanic 2.0 - FS17 Build
Posted: Fri Aug 16, 2019 1:30 pm
by silentneko
This damn weather is stalling me out. Where is our typical summer cycle? I'll take afternoon showers over mid day and morning squalls!
Anyway, I've been trying to finish up prepping the cap for glass. I'm filling the outside edges. I would have ground the top of the rub rails flat, but because of the correction I needed to make a while back I had to leave it angled and just fill the gap with thickened epoxy. I used a chunky mix of milled glass and wood four for the bulk of it to add strength, then a final smoother mix of milled glass, microspheres and silica. I should be able to sand it quickly and round it over with the router.
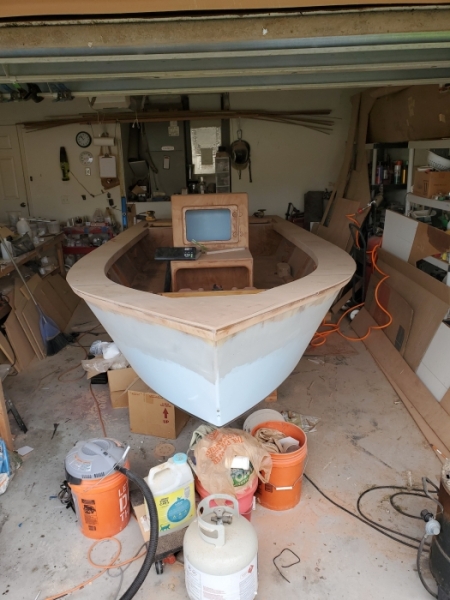
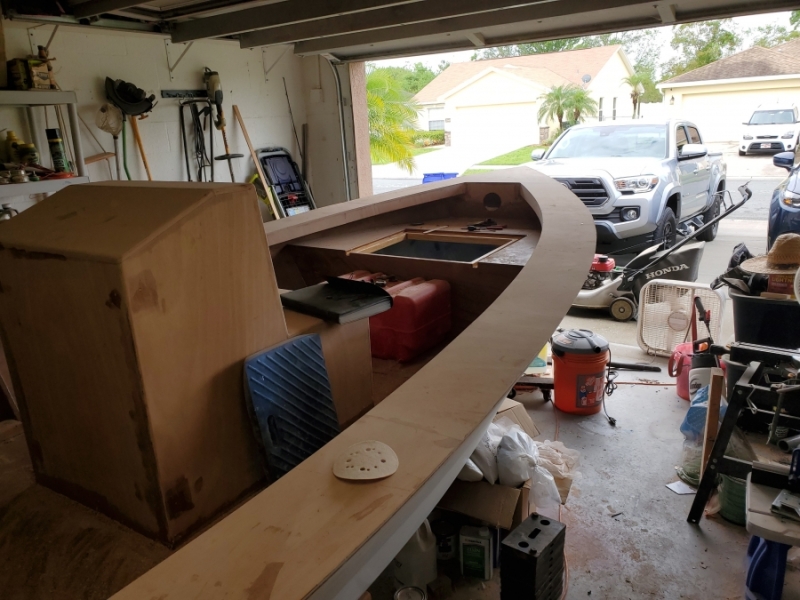
Re: The Plytanic 2.0 - FS17 Build
Posted: Fri Aug 16, 2019 1:36 pm
by Jeff
Nice progress & I agree, we have had way too much rain!!!! Jeff
Re: The Plytanic 2.0 - FS17 Build
Posted: Fri Aug 16, 2019 1:48 pm
by narfi
It is looking nice!
Re: The Plytanic 2.0 - FS17 Build
Posted: Fri Aug 16, 2019 2:05 pm
by lelandtampa
Picture of the bow almost looks like Shines old aquasport flatback rebuild. Good looking boat.
Re: The Plytanic 2.0 - FS17 Build
Posted: Fri Aug 16, 2019 2:14 pm
by cape man
WAY TOO MUCH RAIN!

- litf1_hg.png (18.13 KiB) Viewed 7268 times
Boat is looking great!
Re: The Plytanic 2.0 - FS17 Build
Posted: Fri Aug 16, 2019 2:23 pm
by jacquesmm
Time to go kayaking on that river! I did it a few times from a State park that is upstream but can't remember the name.
Re: The Plytanic 2.0 - FS17 Build
Posted: Fri Aug 16, 2019 4:05 pm
by silentneko
Thanks guys, finally getting somewhere. Cape Man, your house is still above water right?
Do you mean Lithia Springs Park, or Alifia State Park?
Re: The Plytanic 2.0 - FS17 Build
Posted: Fri Aug 16, 2019 4:09 pm
by lelandtampa
Alderman's Ford park.
Re: The Plytanic 2.0 - FS17 Build
Posted: Sat Aug 17, 2019 6:20 am
by cape man
It's a Hillsborough county park, 4 miles as the crow flies from me. You would have fun in a kayak today!

We dodged the bullet. Second time this year it almost crested the bank here.
Re: The Plytanic 2.0 - FS17 Build
Posted: Sun Aug 25, 2019 3:13 pm
by silentneko
Plugging along. I glassed the gunnels, rear deck, and bow. It came out pretty good. Even starting at 7pm didn't help much as it was 92 degrees still.
Rubrail edge and hatch gutters routed.
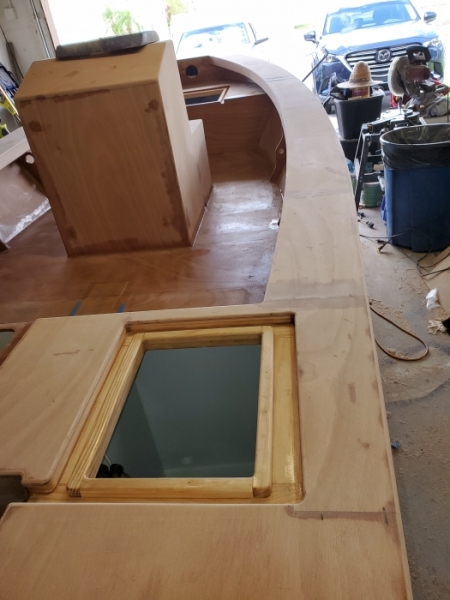
Primed

Glass laid out.
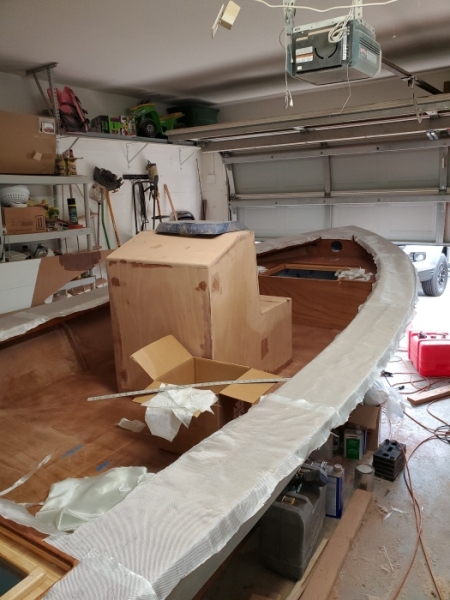
Done.
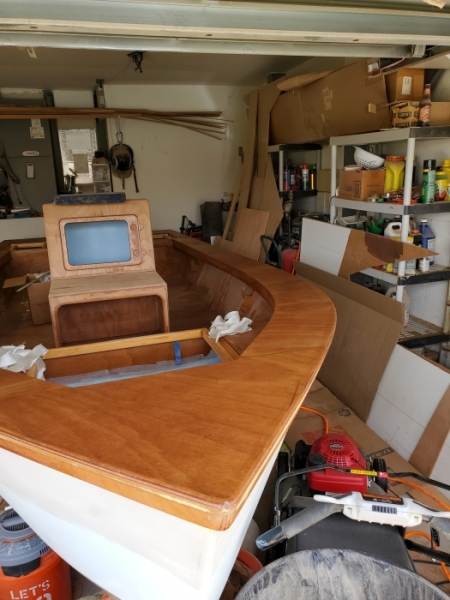
I have a few more spots that need some glass, and then the console. After I'll work on the hatch gutters, and smoothing everything out.
Re: The Plytanic 2.0 - FS17 Build
Posted: Sun Aug 25, 2019 3:37 pm
by cape man
Nice work!
Re: The Plytanic 2.0 - FS17 Build
Posted: Sun Aug 25, 2019 11:25 pm
by narfi
Looking nice!
Re: The Plytanic 2.0 - FS17 Build
Posted: Mon Aug 26, 2019 8:54 am
by Jeff
Yes, really nice work!! Jeff
Re: The Plytanic 2.0 - FS17 Build
Posted: Mon Aug 26, 2019 9:34 am
by piperdown
That is gorgeous work!
Re: The Plytanic 2.0 - FS17 Build
Posted: Mon Aug 26, 2019 9:48 am
by Salty F17
Very nice
Re: The Plytanic 2.0 - FS17 Build
Posted: Mon Aug 26, 2019 11:00 am
by OrangeQuest
I have really enjoyed following your build. You have some very good ideas and the craftsmanship really comes through. Very nice build.
Re: The Plytanic 2.0 - FS17 Build
Posted: Tue Sep 03, 2019 12:58 pm
by silentneko
Thank you guys. I didn't have much time this week but got a few things done.
I glassed the console. She is rock solid to the floor and will work well.
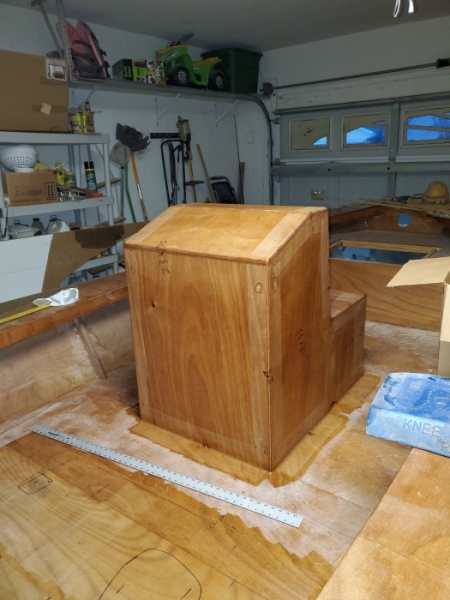
So I've had an ongoing saga with the floor flexing towards the rear bulkhead. every other area is either reinforced with foam or extra supports. I'm using 3/8" okoume, with 6oz glass bottom and top. The okoume is so flexible that it took an additional 4 layers of glass to get it to stiffen up. so 30oz total in that area. It's finally stiff enough to move on, it created some high spots I'll need to smooth out, but not a big deal.
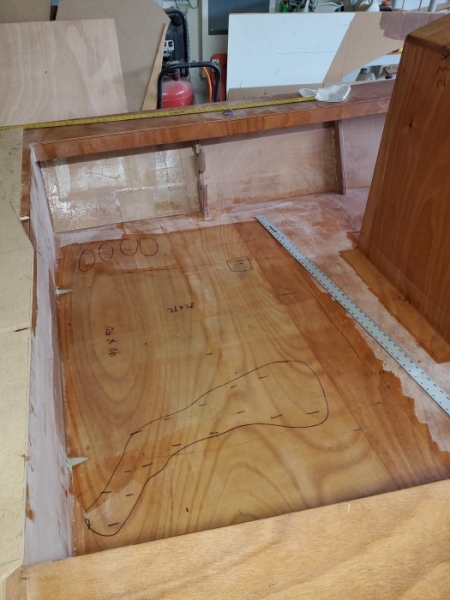
Last thing I got to do was fillet inside of the hatch gutters. I'm using a mix of milled fibers, microshperes, and silica now. I don't think I'll go back to wood flour, unless I need bulk when gluing something in place.
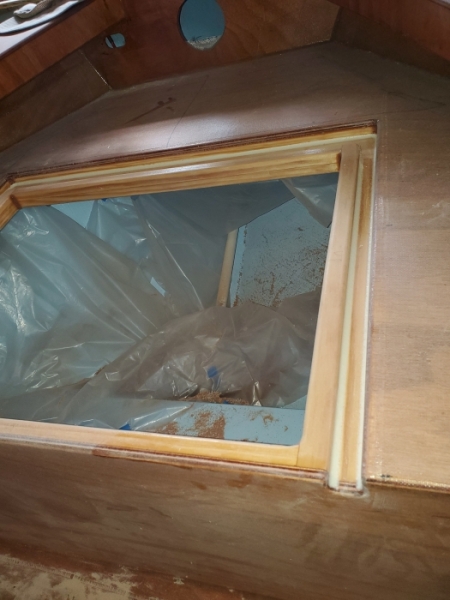
Pretty much all the glassing is done now. I have some filling and smoothing to do, then fairing.
Re: The Plytanic 2.0 - FS17 Build
Posted: Tue Sep 03, 2019 8:21 pm
by Bogieman
Very nice work
Re: The Plytanic 2.0 - FS17 Build
Posted: Wed Sep 04, 2019 12:51 pm
by Jeff
I agree, very mive work!!! Jeff
Re: The Plytanic 2.0 - FS17 Build
Posted: Fri Sep 06, 2019 4:15 pm
by silentneko
Here's some sloppier stuff. I am starting to do some fairing. I'm not going nuts with it as a perfect finish is not needed. I'm just trying to hide the major stuff. The high build primer I switched to will hide the rest.
First coat on the console.
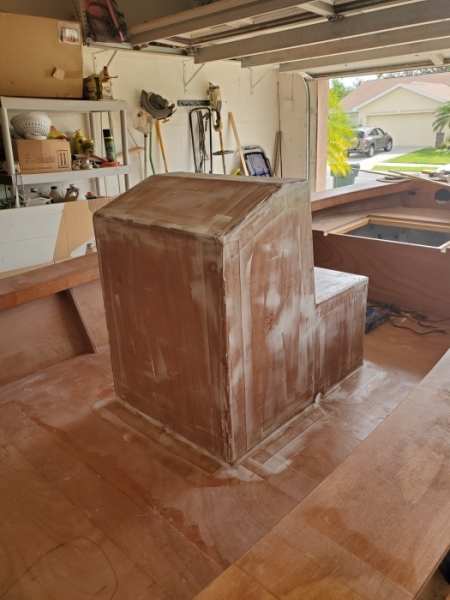
Re: The Plytanic 2.0 - FS17 Build
Posted: Fri Sep 06, 2019 10:06 pm
by Dan_Smullen
The bow looks awesome! The whole thing does actually, but that bow tho...
Re: The Plytanic 2.0 - FS17 Build
Posted: Thu Sep 12, 2019 2:56 pm
by silentneko
Thanks, I was worried about how it would come out, but I think it will work well. I'll be able to tuck a nice large cushion up there to for family days.
So after sanding down the fairing mix on the console I pretty much decided, well, I hate fairing. I'm just not into it, lol. Realizing that a lot of the areas really will not benefit from it, I'm choosing to go ghetto. After the initial fairing of the console and sanding of the gunnel tops and comings, I mixed up a slightly thickened batch of epoxy. I rolled it on to fill in the majority of the weave on the gunnels, and pin holes on the console, and it worked well. The primer I'm using now will take care of the rest.
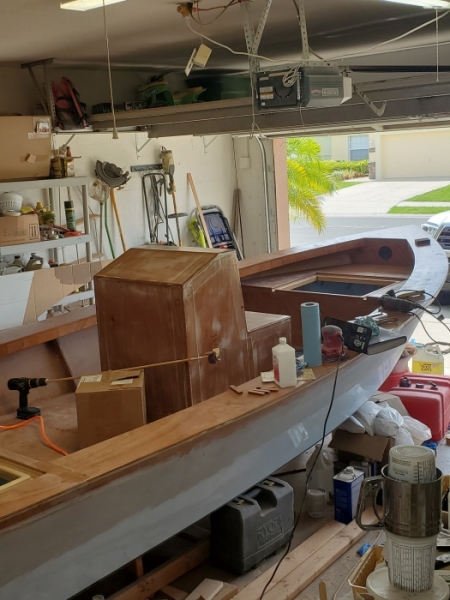
So I am getting down to the detail stuff like the scupper tubes. If you recall I used glass tubes I bought after someone recommended them. Hindsight I would have rather built my own. They are polyester fiberglass tubes that are extruded and fairly lower quality. As such they have a lot of pock marks and dimples that worry me. I coated them with epoxy on the outside prior to installing them, but really wanted to take care of the insides.
First I made a cheap flap wheel using a 3/8" dowel and 60 grit paper. It worked well when attached to the drill.
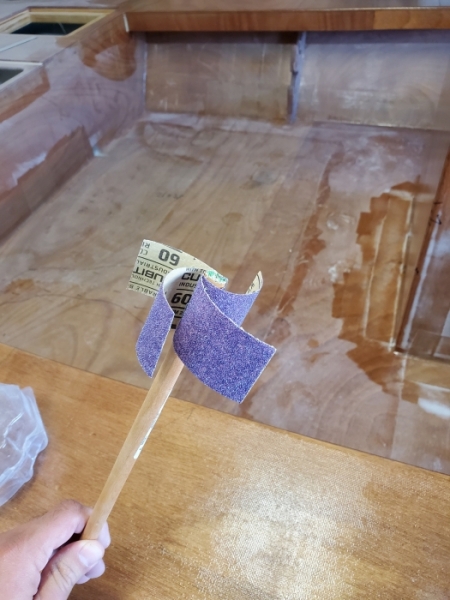
Then I made a giant double sided q-tip out of a 1" dowel. One side for an alcohol wipe, and one for epoxy.
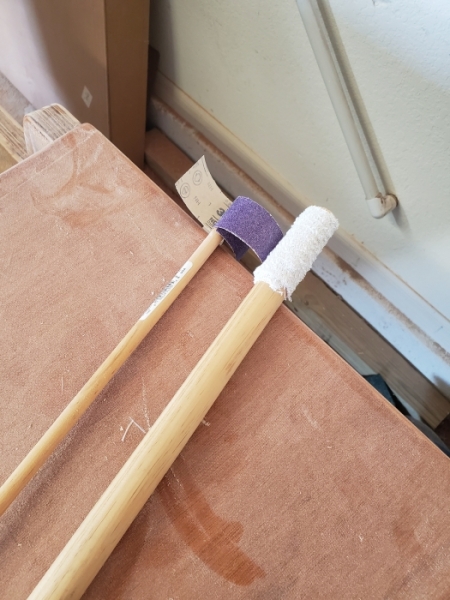
It again worked out well. I used the q-tip to push and swirl epoxy around the whole inside. While the mix was to thin to fill the holes, I'm confident a coating is pretty uniform. Any excess dripped out the back. I still have about an inch coming out the rear I haven't cut off yet, So I zip tied some bags on to catch the extra resin.
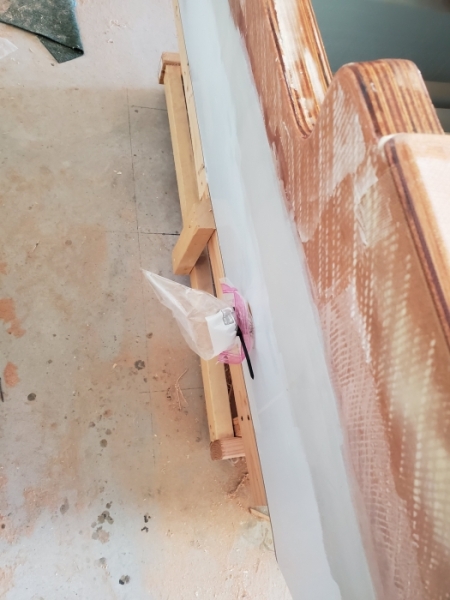
I worked on smoothing out the hatch gutters, and a few other things. I have to glass the top of the transom and build the lid for the motorwell. Also do some more preliminary wiring. Hopefully I'll be priming the interior in a few week.
Re: The Plytanic 2.0 - FS17 Build
Posted: Sun Sep 15, 2019 2:20 pm
by silentneko
I sanded the inside of the tubes again, this time with a flap wheel of 120 grit, just to knock off any burs or snags. After that I glassed the transom cap, I'm not sure why I didn't do this before. The only component left is the motor well cover, and of coarse the hatch lids.
Right now I'm trying to work on the electrical. There are some things that will be easier if done now since the motor well cover will have just a 10" hatch.
I bought a lug crimping tool a while back, and I'm glad I did. It's way easier to make my own battery and power cables then to try and order the closest size with different lugs. Main power cables, and positive cables for the ACR.
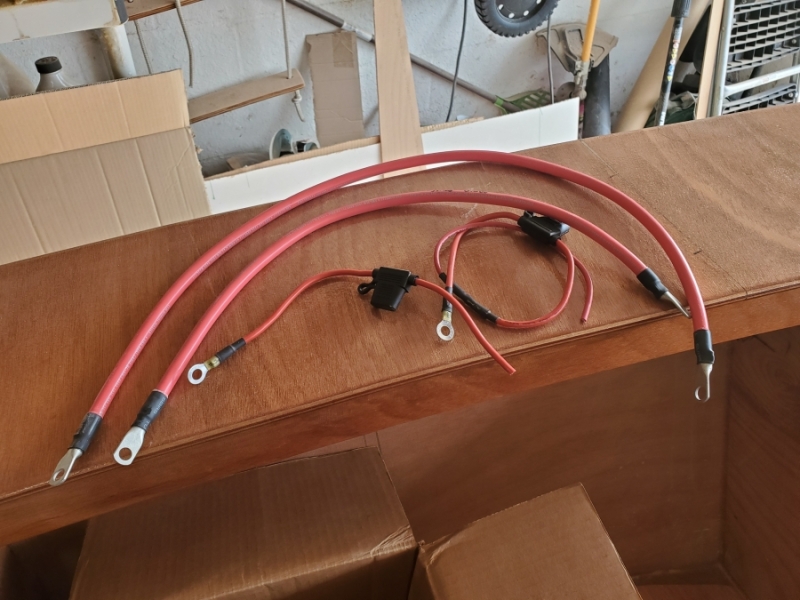
Mounting up all the goodies. The breaker coming out of the bottom of the battery switch will go to the trolling motor.
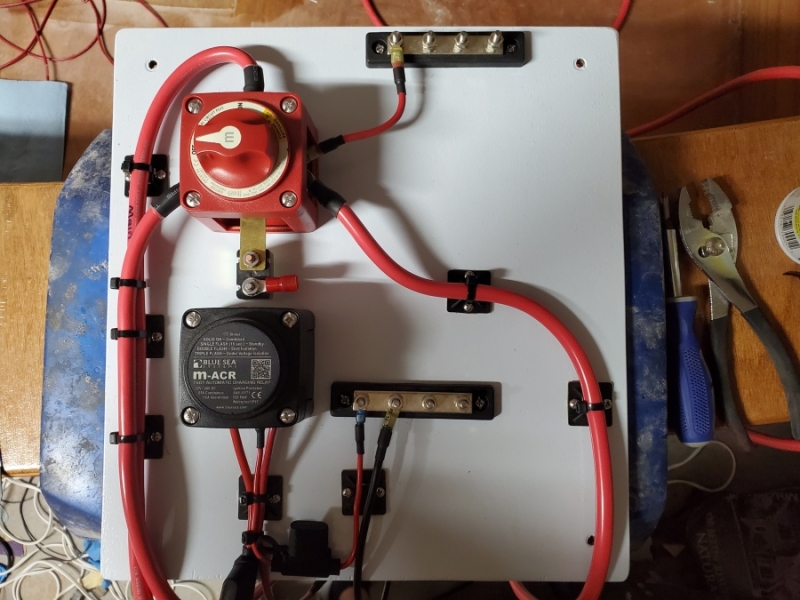
I made the mistake of buying a lot of duplex wire, but really just needed primary. So I had to split it. Not a huge issue, just a little waste. I should be able to mount the power panel now and then run the rest of the wires as a bundle bound every foot or so with electric tape. Hopefully this leaves enough room in the 1.5" chase to snake the wiring harness through.
Re: The Plytanic 2.0 - FS17 Build
Posted: Mon Sep 16, 2019 11:23 am
by Jeff
Nice clean work!!! Jeff
Re: The Plytanic 2.0 - FS17 Build
Posted: Mon Sep 16, 2019 12:55 pm
by narfi
Looking good. Looks like you will be finishing before me. Will be fun to see you in the water.
Re: The Plytanic 2.0 - FS17 Build
Posted: Tue Sep 24, 2019 7:51 pm
by silentneko
Thanks. I'm hoping to have it done soon, but man my time is thin these days.
So more electrical rigging. I bound the main power leads, and positive leads for the live well, LED lights, underwater lights, bilge pump and anchor light, with tape so it would slide through easily. And so I would have room to pass the wire harness through for the outboard later.
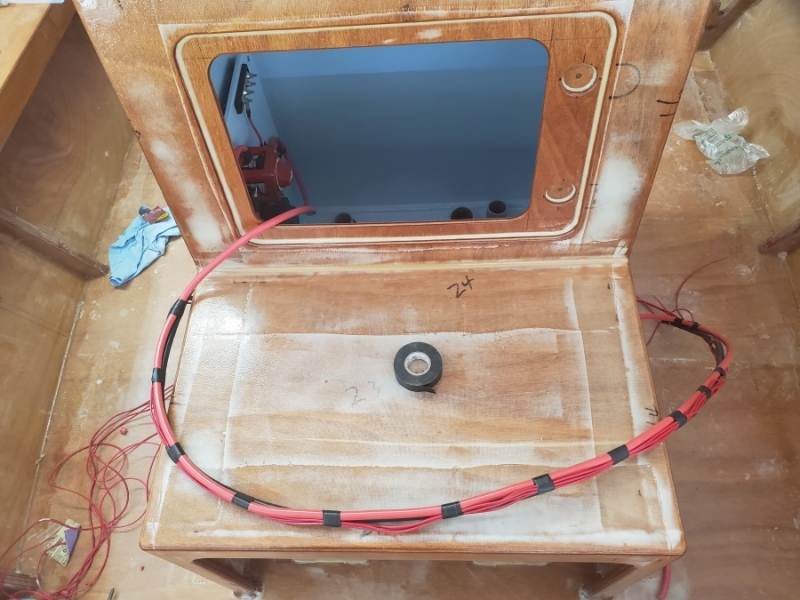
Panel mounted. It will be cleaned up and more secured later on.
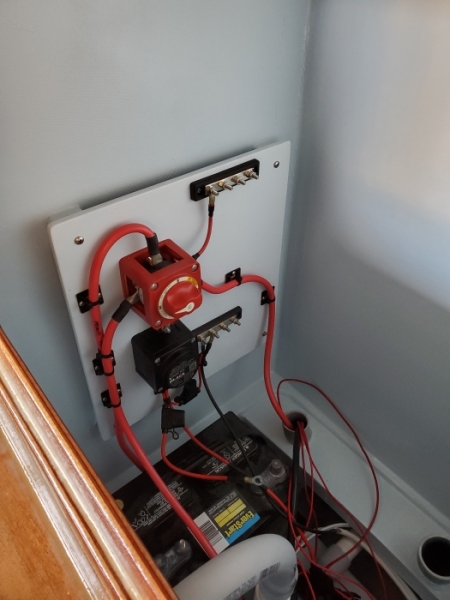
The bilge will be getting crowded soon, but hopefully very serviceable.
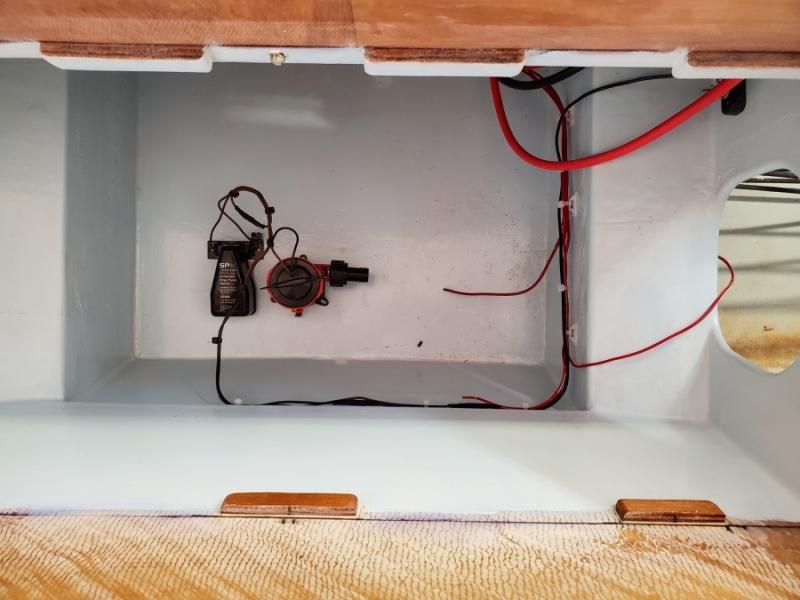
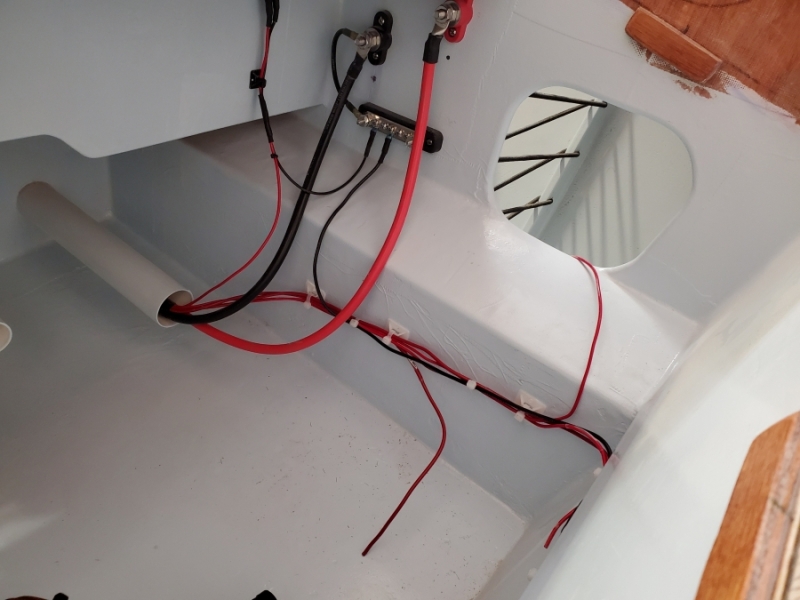
I mounted the clip to hold the anchor light inside the console.
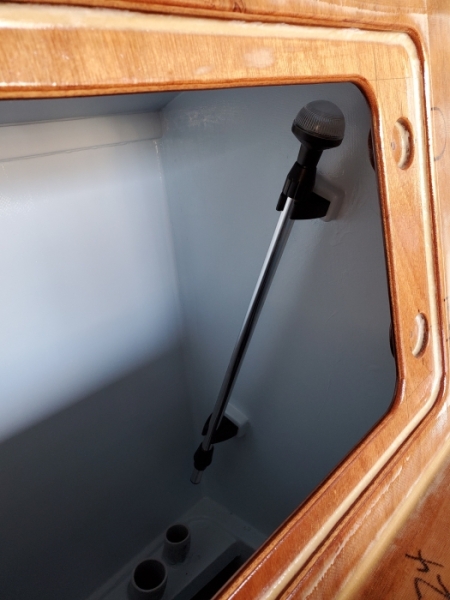
Last thing I got to was the motor well lid. A few layers of glass on the bottom and one on top.
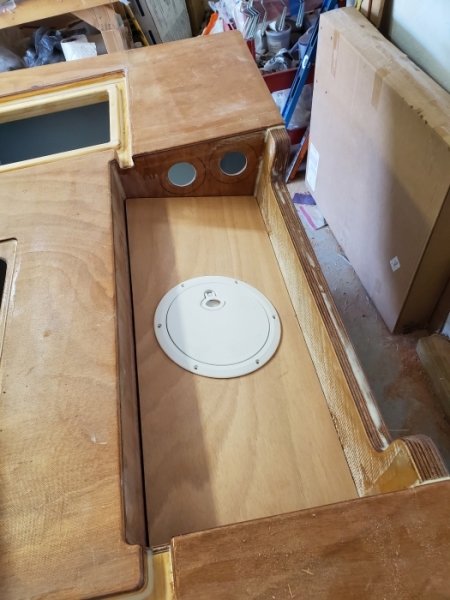
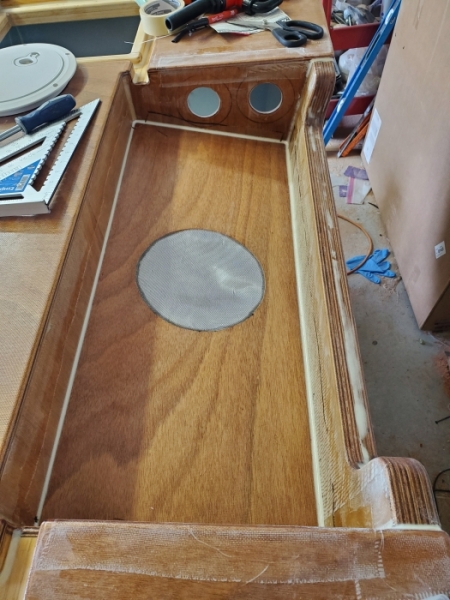
More to come.
Re: The Plytanic 2.0 - FS17 Build
Posted: Wed Sep 25, 2019 7:55 am
by Jeff
Nice progress!!!! Jeff
Re: The Plytanic 2.0 - FS17 Build
Posted: Wed Sep 25, 2019 1:23 pm
by Coach
Silentneko...you just gave me some ideas for my future electrical work while looking at these pics. Thank you for posting them!
Re: The Plytanic 2.0 - FS17 Build
Posted: Sat Sep 28, 2019 9:24 am
by Dan_Smullen
I enjoyed making my way through your build. Everything is looking great!
I was especially interested in how you did your scuppers. These have been one of the many things I’ve been trying to wrap my head around myself. Thanks for the detailed view.
How did you determine the location for the thru hull fitting at the end of the scupper tube?
Re: The Plytanic 2.0 - FS17 Build
Posted: Sat Sep 28, 2019 9:43 am
by silentneko
Thanks guys. I'll keep trying to detail the little stuff.
As far as the scupper tubes go, if memory serves I just went from floor level down an inch or so. So the top of the tube lines up with the top of the stringers . My floor is raised an inch, so at full designed displacement the floor should still be high and dry. I also wanted them designed so if water is still getting onto the deck through them I could add flaps, or ping pong scuppers outside. Another option on heavy load days, either camping or family sand bar hopping, is to just plug them from the inside.
Re: The Plytanic 2.0 - FS17 Build
Posted: Sun Sep 29, 2019 3:58 pm
by Pstrizzle
Pretty much just read your entire build. Looks awesome.
Re: The Plytanic 2.0 - FS17 Build
Posted: Sun Oct 06, 2019 1:03 pm
by silentneko
Thanks again. Not much has been done the last few weeks. Work and other obligations are getting in the way now.
I did manage about an hour yesterday. I was able to install the drain tubes for the motor well. They were made from a tube I made a while back, but can't remember what it was for. They are about a 1/2" and should be more then enough.
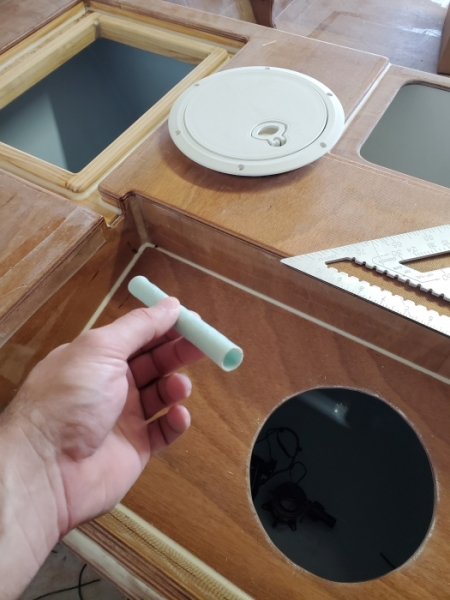
I'll grind them back later on
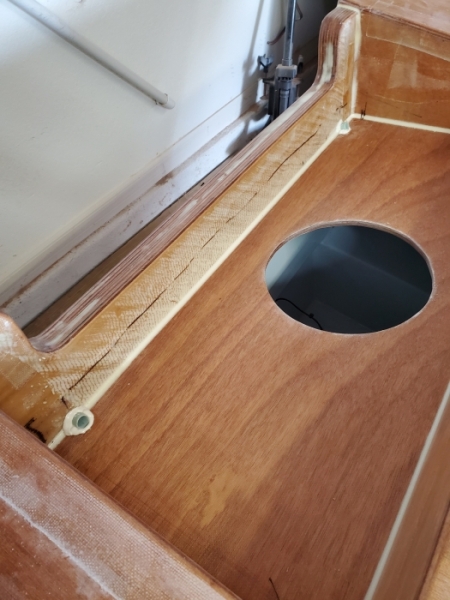
I also bought a new cooler. It's a 94qt igloo which is just about the perfect size for everything. It even has preinstalled snaps for a cushion. Thing is I really want it elevated. I was thinking about a leaning post first, but figure I would rather stand or sit comfortably, and most leaning posts I've dealt with have an awkward reach. So after some play with wood, I think I'm going to create a box to elevate it up about 7" or so. I'll probably use some scrap sanded plywood I have laying around. I'll make large cutouts to keep it relatively light weight.
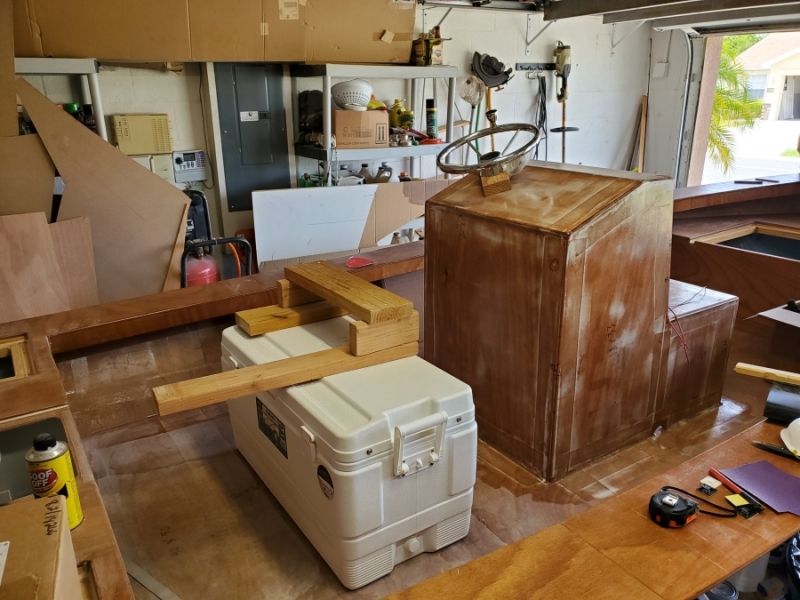
Re: The Plytanic 2.0 - FS17 Build
Posted: Sun Oct 06, 2019 6:24 pm
by Dan_Smullen
The elevated cooler could be slick.
Seems like an apron around the bottom appropriately sized would make it look like they both grew there!
Re: The Plytanic 2.0 - FS17 Build
Posted: Sun Oct 06, 2019 6:29 pm
by silentneko
I've got a plan in my head. A big part of doing this is to also reinforce the floor in that area, cause even with multiple layers of glass is has a little bounce. While an aluminum fixture would be nice, I'd rather go this route. It will also leave room later If i want to add a backrest.
Re: The Plytanic 2.0 - FS17 Build
Posted: Mon Oct 07, 2019 4:57 pm
by Bogieman
Re: The Plytanic 2.0 - FS17 Build
Posted: Fri Oct 11, 2019 10:31 am
by silentneko
After playing around for a bit, I settled on a design for the cooler base.. I think. So using it to help reinforce the floor isn't going to work out well if I want the area under it to be accessible. This is what I came up with. It raises the cooler 7.5" making it very comfortable to me being I'm 6'3". As a bonus it allows my heel to go under the cooler making the standing position better. This might now be a concern to smaller guys, but with a size 15 2E shoe it helps me. This design allows me to store things under it with ease. The main item I was looking to do was put our flippers under it for when we go scalloping.
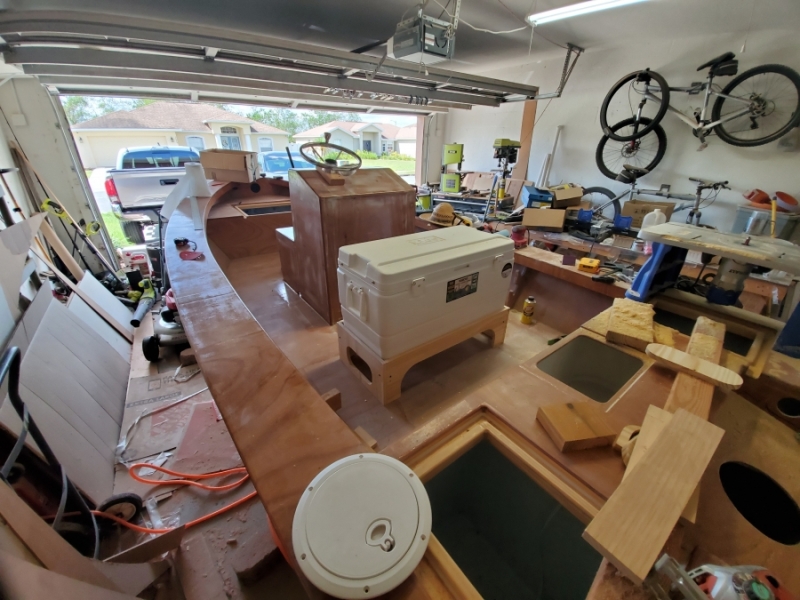
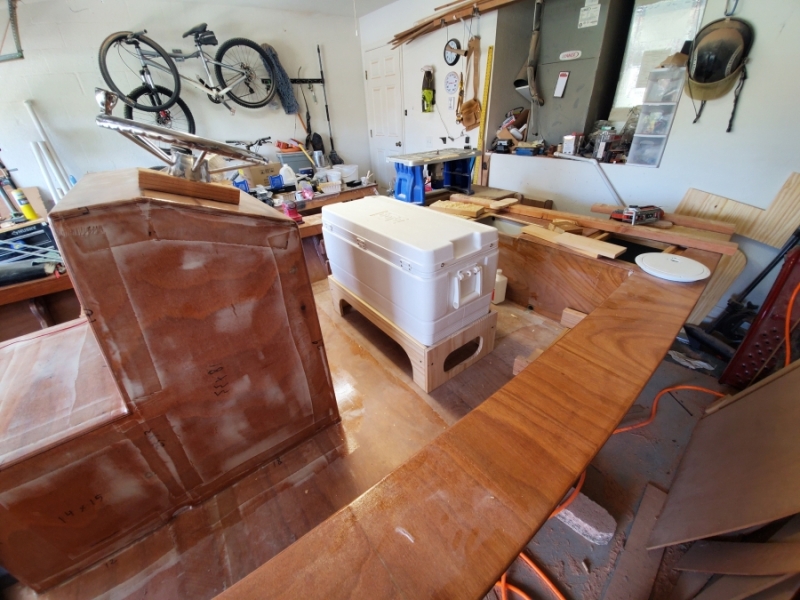
These pics are before I routed the edges, so it looks a bit boxy. I went back and forth on what material to use for it, and spent a while at home depot looking for something suitable. The best thing I could find was a laminated pine project panel. It was advertised as 3/4", but turned out to only be 5/8". I'm not sure if I'm going to use it or not. I don't have a ton of ply left so this seemed like the best option.
So, opinions?
Re: The Plytanic 2.0 - FS17 Build
Posted: Fri Oct 11, 2019 10:58 am
by narfi
Looks nice, I imagine even nicer once you round the edges.
How is the cooler attached?
Re: The Plytanic 2.0 - FS17 Build
Posted: Fri Oct 11, 2019 4:42 pm
by silentneko
Thanks, the cooler sets in the top about 1.5" down. I'll use a few cam buckles on the sides to keep her from jumping around.
Re: The Plytanic 2.0 - FS17 Build
Posted: Fri Oct 11, 2019 6:10 pm
by Rtorres2411
Looking real nice
.
Re: The Plytanic 2.0 - FS17 Build
Posted: Fri Oct 11, 2019 7:20 pm
by Bogieman
Your work is always so clean it's like you're building furniture. I really like your cooler / leaning post set up.
Re: The Plytanic 2.0 - FS17 Build
Posted: Fri Oct 11, 2019 9:28 pm
by Dan_Smullen
Very nice! The best details are functional and look good. Like the toe kick.
Where you able to seal the end grain of the ply where it meets the deck? Seems like even with fillets all the way around, there’s still be potential for the base to wick moisture.
Re: The Plytanic 2.0 - FS17 Build
Posted: Mon Oct 28, 2019 4:22 pm
by silentneko
Thanks, you guys are to kind. Sealing end grain is not an issue, resin soaks into it readily, and I've never had a failure from it in all these years.
So I can't believe it's been 2 weeks since I had a chance to touch the boat. Well not much has changed. I am still working on the cooler stand, I wasn't quite happy with it, and wanted to change it just a little. I did route it just to see what it would look like, and I think it's nice.
On the choice of materials, I did decide to change. I was in lowes, and found they carry 3/4" Luan panels. It's of similar weight and density to the okoume I'm using, and what I built my first boat out of. I think it will do better then the pine panel and it's actually 3/4" instead of 5/8".
I was working on cutting out and matching the parts using the flush bit on my router, when disaster struck again. The bearing seized again and ruined both parts. It's not a huge deal, or expense, but I'll need to get another panel tomorrow to finish. This is the 3rd bit I've burnt up on this build, at $40 each it's starting to hurt, lol.
Re: The Plytanic 2.0 - FS17 Build
Posted: Wed Oct 30, 2019 2:03 pm
by Eric1
The boat looks incredible! Sorry about the burnt brg. Nothing lasts anymore.
Re: The Plytanic 2.0 - FS17 Build
Posted: Sat Nov 23, 2019 7:58 pm
by silentneko
So the saga of the cooler rack/stand, lol.
I first made it out of a project panel and decided I wanted to change it a bit. So I rebuilt it out of luan. Well I had the router bit bearing failure that ruined it, So I bought a new panel. I recut everything, got it all routed and glued together, went to test fit and realized I'm a dumbass! The project panel I originally made it from was 5/8", but the luan is 3/4", so I lost a 1/4". This made it to tight on the edge of the cooler and while it would fit, it would rub and take off any finish I put on. Sooooo I rebuild it a 4th time and made it 3/8" wider.
So now that that's over let me explain how I came to my design. I actually looked at the cooler. So here is a pic of a typical aluminum cooler rack. You'll notice the cooler is only supported by the 2 bars going across the bottom. So for the entire cooler it only has 4 points of contact maybe 1" wide.
Here is the bottom of the cooler, it looks like it's molded so it has reinforcement around the outer edges.
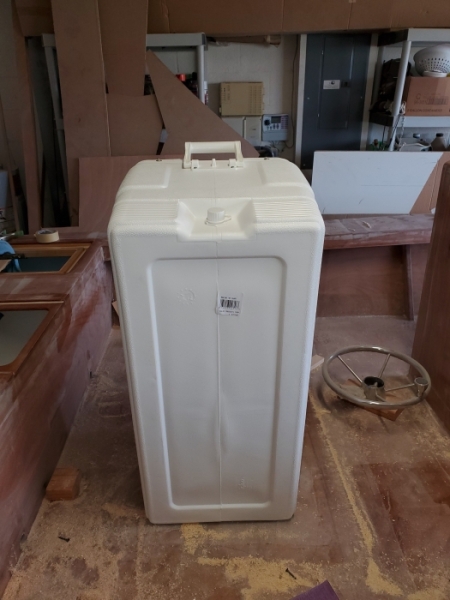
I decided to support the ends and have 3 more 2" wide supports in the middle. The white filled circles towards the bottom are for the bungee cord, just a single one about 1.5" high to keep flippers from sliding out. The end supports have a cutout to feed the strap through to hold the cooler.
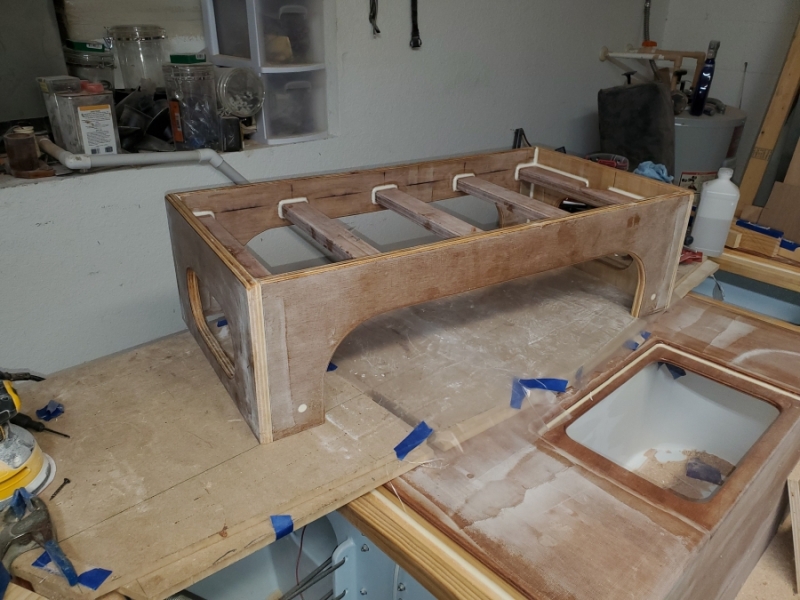
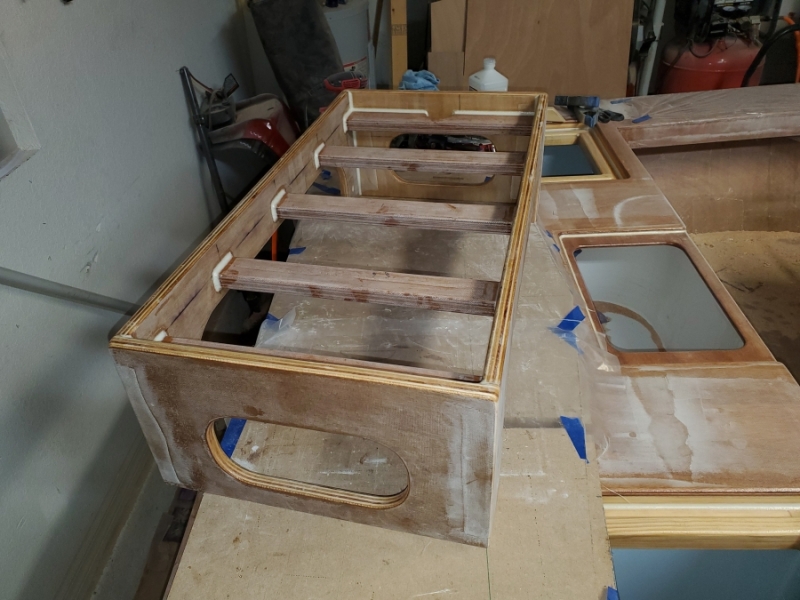
Re: The Plytanic 2.0 - FS17 Build
Posted: Tue Dec 17, 2019 7:41 pm
by silentneko
Slowly plugging away in between holiday stuff. I smoothed out the floor under the cooler stand then got my measurements.
Looking at the pics, it looks tight, but not so. I decided to put the cooler 13.75 inches back from the console, this is more then enough room for my size 15's.
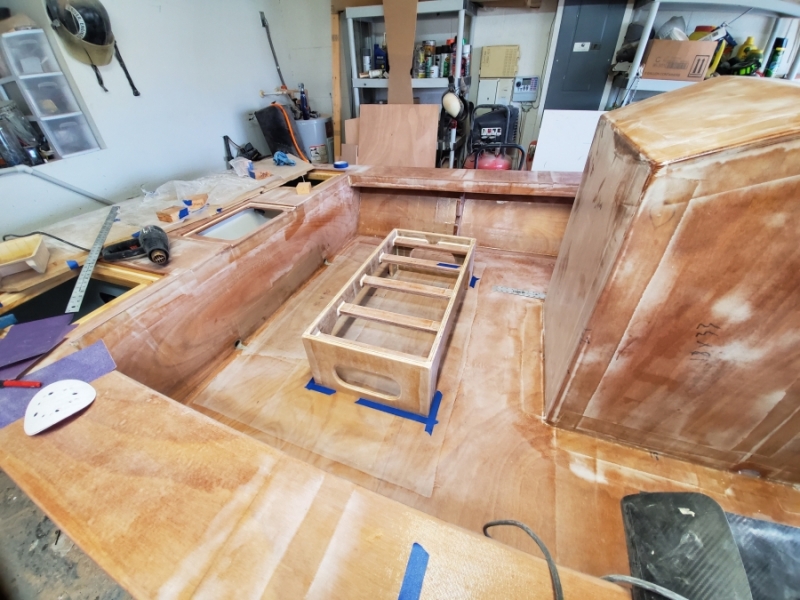
There is also more then 16" of room behind the cooler stand. Plenty to walk around.
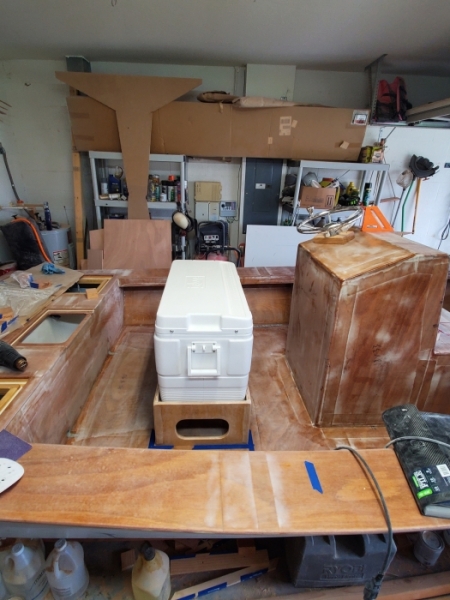
It's now bonded and filleted down, I'll tab it in soon.
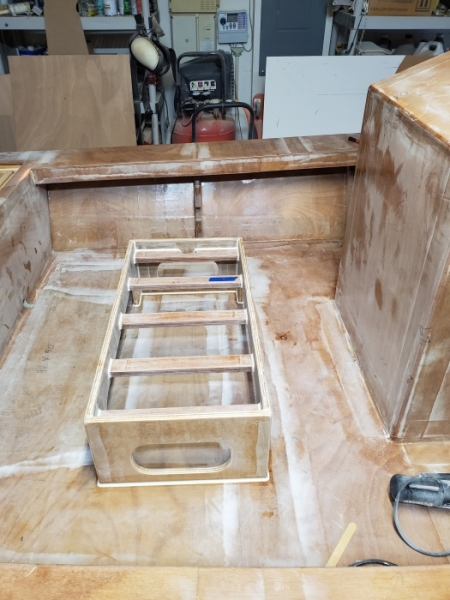
Re: The Plytanic 2.0 - FS17 Build
Posted: Tue Dec 17, 2019 7:51 pm
by cape man
Getting there! Looks good.
Re: The Plytanic 2.0 - FS17 Build
Posted: Wed Dec 18, 2019 7:47 am
by Jeff
Nice work!!! Jeff
Re: The Plytanic 2.0 - FS17 Build
Posted: Wed Dec 18, 2019 9:02 am
by OrangeQuest
Everything still seems to look great!
Re: The Plytanic 2.0 - FS17 Build
Posted: Fri Dec 20, 2019 5:01 am
by jw01
Silentneko ….. I cannot express what this thread has done for my mindset. I have never built a boat yet has been on the "bucket" list. Anyhow, after pondering for several weeks as to "should I" and "which boat", I decided to go with the FS 17 and purchased the plans a couple weeks ago. I dabble to some extent with 3D software ( Sketchup Pro) as I deal with Architects and Engineers more than I care to.
Anyhow …. after looking at the hard copies, I decided to plot it out for a couple reasons, 1. So that the dimensioning is laid out in a format that suits me. Heck …. I've screwed up a few dims on just point and click …. my wife would have my head if she saw sheets of 100.00+ plywood scraps. 2. So that I could actually lay out the deck and save a lot of guessing and second guessing later on down the road.
With that all being said, your layout is exactly what I want. I just want to make sure you're ok with it and don't think I am "hijacking" your layout design.
Your craftsmanship is exceptional.
Re: The Plytanic 2.0 - FS17 Build
Posted: Fri Dec 20, 2019 6:56 am
by silentneko
Thank you gents, always appreciated!
Jw01, thank you for the kind words, and you are more then welcome to borrow any ideas I may have tried. Hopefully they all function like I hope.
Re: The Plytanic 2.0 - FS17 Build
Posted: Fri Dec 20, 2019 10:06 am
by Dougster
I've been following your thread too. It's a terrific build and I love your cooler stand. Great idea and one I sure wish I'd used on my SK14. In fact I toy with retro fitting it. Thanks for sharing.
Dougster
Re: The Plytanic 2.0 - FS17 Build
Posted: Thu Dec 26, 2019 2:46 pm
by silentneko
Thanks for tuning in guys. I'm gearing up for the final push soon. I've been cleaning out some clutter in the garage to make room for the trailer.
Next step it to derig the outboard and TnT from my old boat, sell it off so that money can go to the new trolling motor. After that I have to get rid of the hull so I can use the trailer for the new skiff. Hopefully that will all be done by February.
Re: The Plytanic 2.0 - FS17 Build
Posted: Tue Feb 04, 2020 6:35 pm
by silentneko
As one door closes another opens. The Plytanic is off to her new home. We dropped her in the water and transferred her to my friends trailer. Now it's time to finish up the 2.0
 20200130_110048_resized
 , on Flickr
I brought the trailer back and started really looking it over. Overall not bad for a trailer that was used near exclusively in salt for the last 9 years.
 20200130_120301_resized
 , on Flickr
After removing one of the bunks I discovered the tail edge was starting to develop some rot. Also some of the hardware was rusted.
 20200130_124518_resized
 , on Flickr
Well I decided anything worth doing, might as well be done right. Or at least the best I could do that evening. I pulled off the brackets and cleaned them up. Only the rear brackets had any real rust on them, So I rotated them to the front.
 20200130_155910_resized
 , on Flickr
A little cold galvanizing compound and they should last many more years.
 20200130_175059_resized
 , on Flickr
So I bought some new 2x4's and decided to make them a little longer and angle the rears. I used indoor/outdoor carpet cause that was all I could get on such short notice. Here's the crazy part, my typical luck strikes again! I bought a new staple gun, a power shot, figuring my old one was a little weak. It worked great, until it didn't, which was half of a bunk. Back to HD and I buy the most expensive dewalt stapler they have! After another 1/2 bunk it starts jamming every 3rd staple! I made it work. I think they came out well.
 20200130_160342_resized
 , on Flickr
 20200130_184625_resized
 , on Flickr
I relocated the winch to in front of the hinge, just to pull the boat onto the trailer. you can see here the current folding tongue setup obviously will not work with the 17ft boat. I'm planning on modifying it to a full removable tongue so the winch comes off.
 20200130_203656_resized
 , on Flickr
She looks good on the trailer though. To me this is how I want it to fit. Yes it rides a little higher, but the boats beam is just a little wider then the trailer. This means no wasted space in my garage! All the new trailers I looked at were 98" to 105" wide, which seems excessive to me.
 20200201_172038_resized
 , on Flickr
I plan on doing a mod and make it a removable tongue, while retaining the tilt ability. Not sure how it's going to look, but I think it will be just fine. Here is the chunk of steel I got to make a sleeve. It's 2.5 x 3.5 x 3/16 thick, and 20" long. It might be overkill, but I'm good with that.
 20200201_173918_resized
 , on Flickr
I drilled 4 holes in it. 2 will bolt to the trailer side, and the other 2 will have pins connecting the tongue/winch side.
 20200204_090517_resized
 , on Flickr
With the boat on the trailer I can finally move it out of the garage so I can clean and organize!
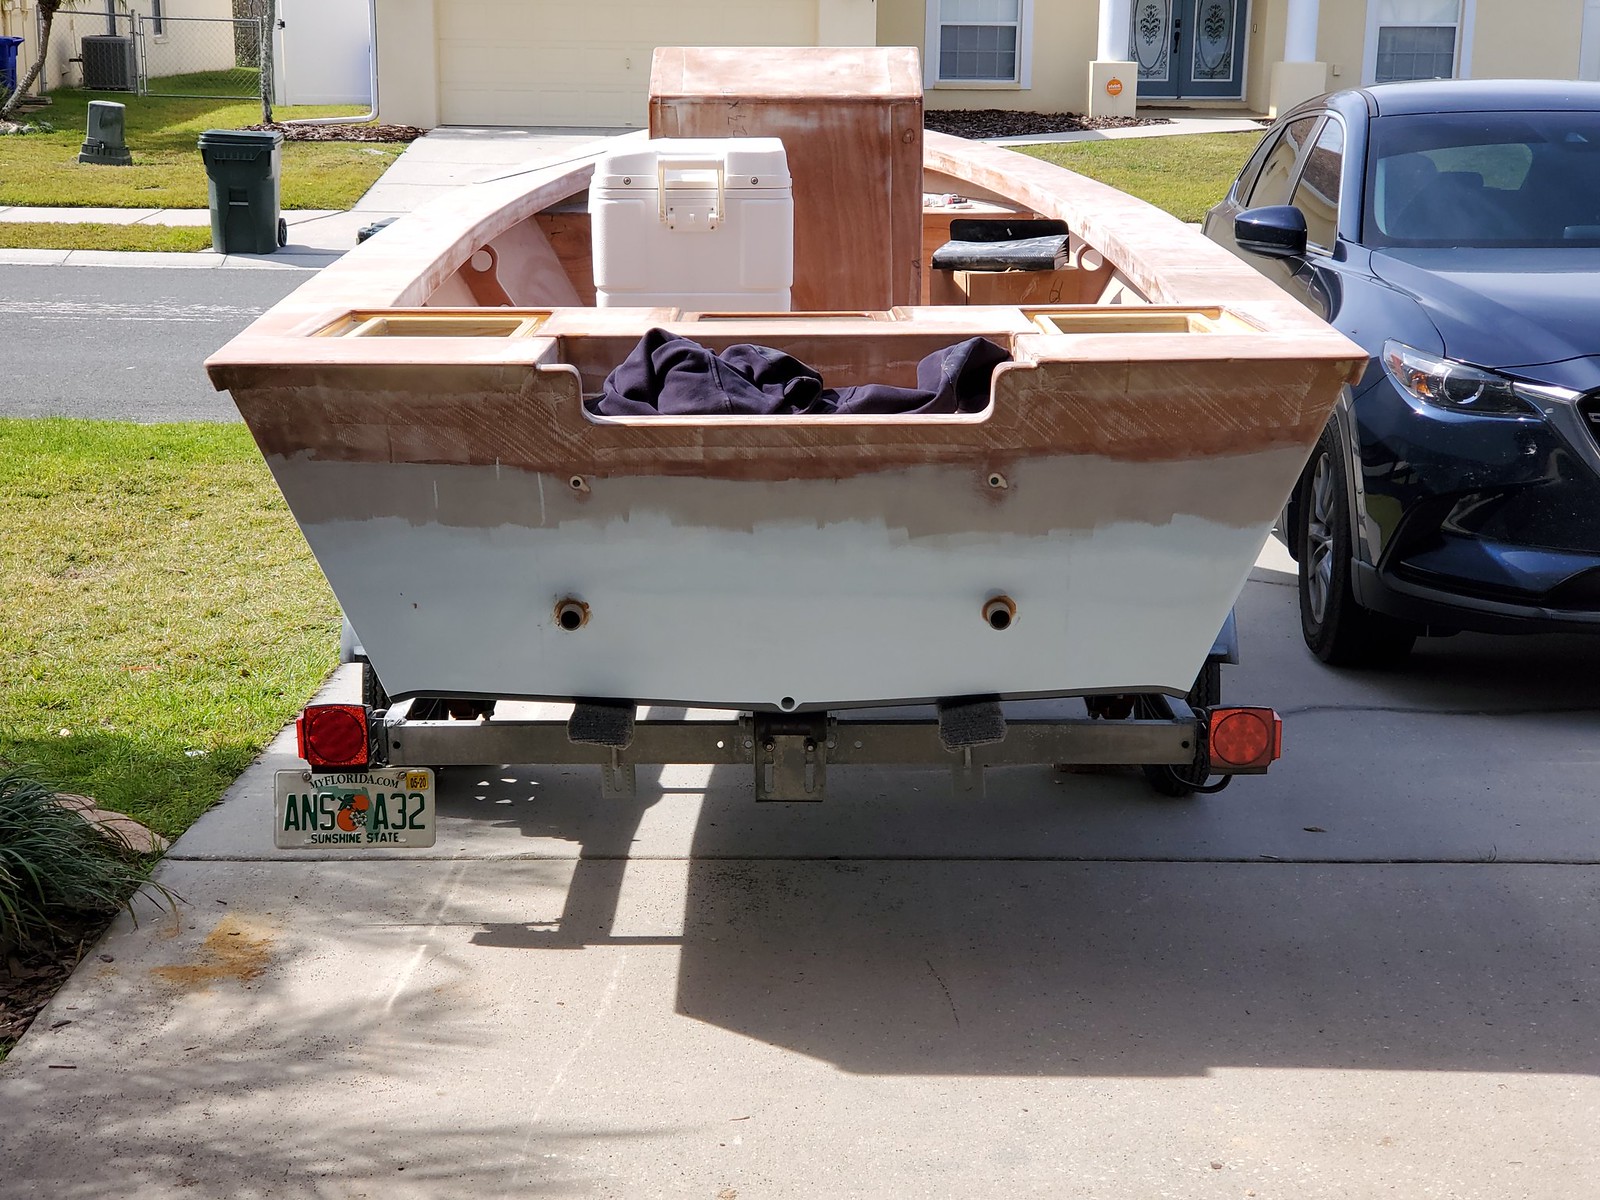 20200204_123051_resized
 , on Flickr
More to come in the next few weeks.
Re: The Plytanic 2.0 - FS17 Build
Posted: Tue Feb 04, 2020 7:25 pm
by cape man
Progress! Build on!
Re: The Plytanic 2.0 - FS17 Build
Posted: Wed Feb 05, 2020 9:16 am
by piperdown
Looking good!
How much more room will the removable tongue get you in the garage?
Re: The Plytanic 2.0 - FS17 Build
Posted: Wed Feb 05, 2020 11:21 am
by Jeff
Really nice progress!!!! Jeff
Re: The Plytanic 2.0 - FS17 Build
Posted: Wed Feb 05, 2020 11:34 am
by silentneko
piperdown wrote: ↑Wed Feb 05, 2020 9:16 am
Looking good!
How much more room will the removable tongue get you in the garage?
Thanks guys.
So with the hull pushed back to the wall there is about 23" of room left from the tip of the hull to the garage door. Once I add the motor I'm guessing I might have maybe a few inches. The removable tongue will also remove the winch stand, so the furthest thing sticking out should be the tip of the bow.
Re: The Plytanic 2.0 - FS17 Build
Posted: Tue Feb 11, 2020 8:06 pm
by silentneko
They say desperation is the mother of invention. Well I had to grind out the ridge left over from welding the sleeve I bought. But how do you grind something in a tube 2" wide and reach 10+" into it. Well this was my solution. I put a dremel on a stick.
 20200210_150635_resized
 , on Flickr
It worked good enough.
 20200210_150531_resized
 , on Flickr
On to the next issue. The folding tongue section was only 23" long. I could make it work, but it would not be adjustable. Also while it would tow ok, it would be so close I couldn't open my tailgate. Which we use a lot. This pic is before I cut back the longer section.
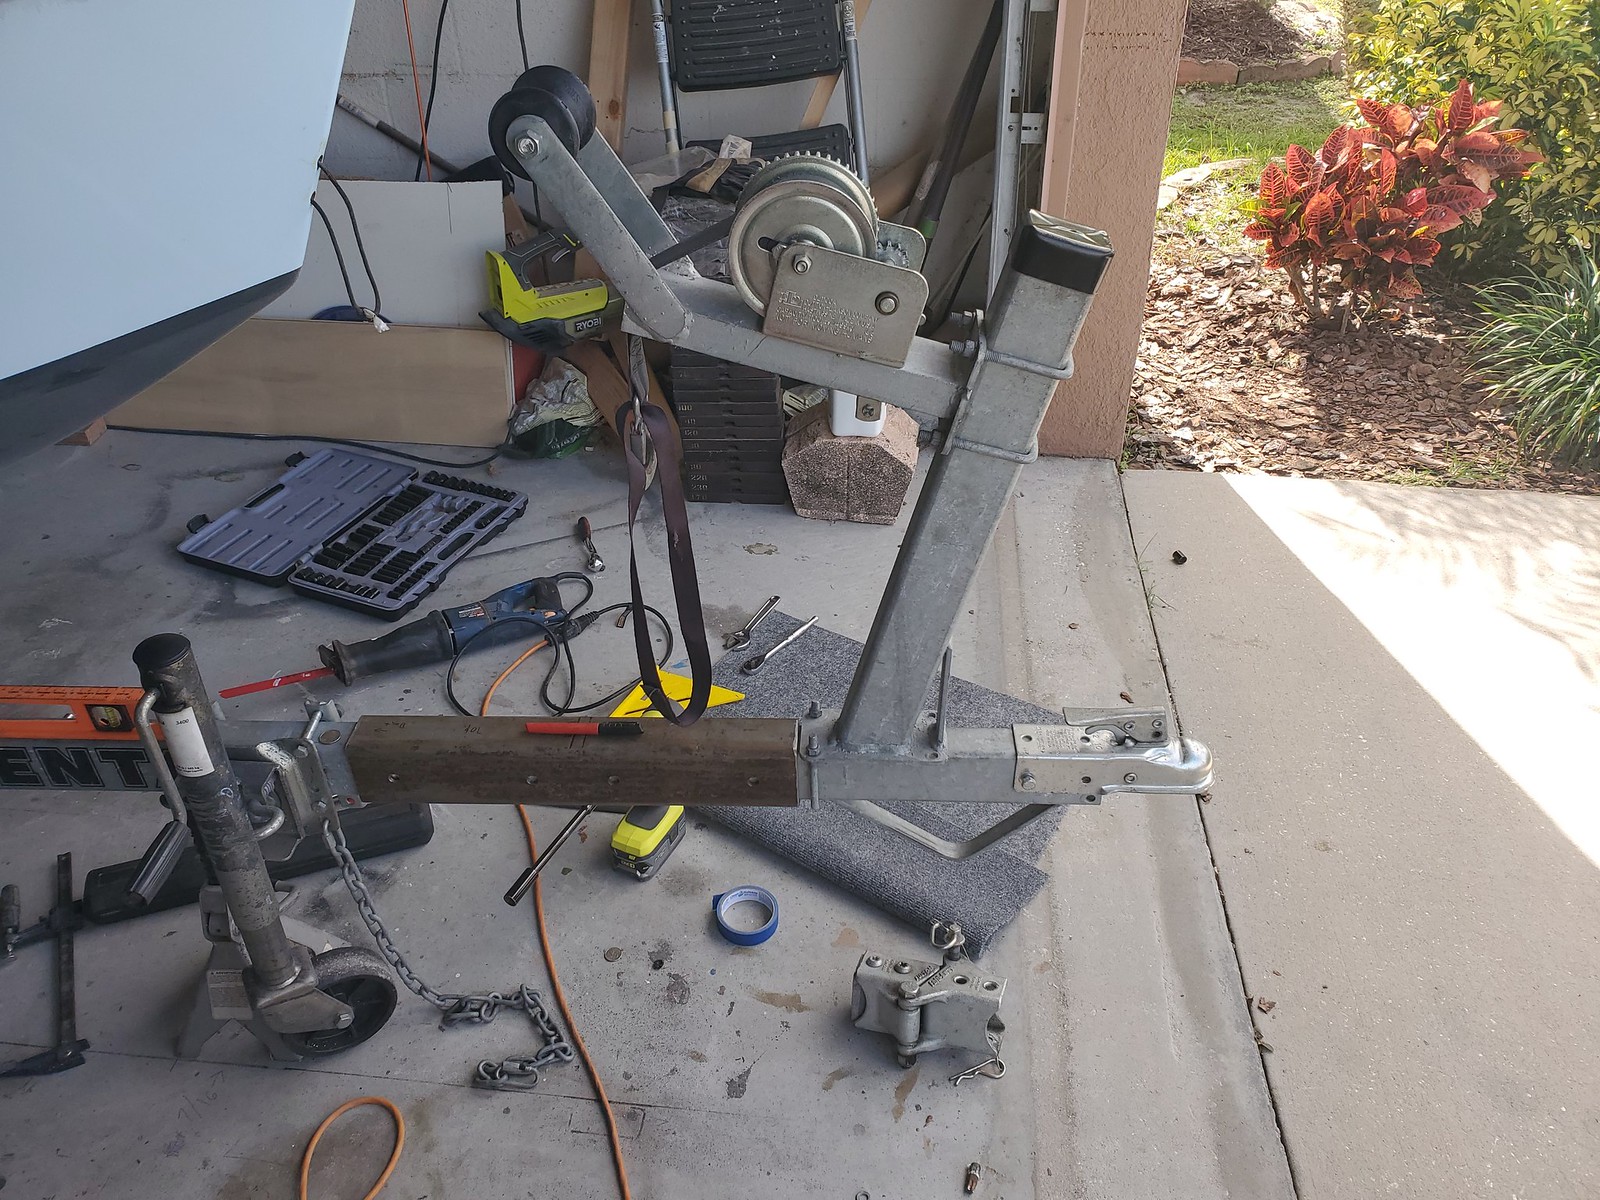 20200211_105646_resized
 , on Flickr
So I decided to do it right, and replace the whole front part of the tongue. I looked around for a short piece of 3x2x 1/8", but no place would sell it. I ended up buying a whole 24ft section, but it was actually cheaper then buying a smaller one and having it shipped. With being cut to 8ft sections cost me $87. I'll have a few projects coming up to use it on, plus use part for more welding practice.
 20200211_123402_resized
 , on Flickr
Sawzall made quick work of the tongue. I shortened it by 8" on the boat side.
 20200211_134705_resized
 , on Flickr
Here is how it will sit. It's hard to tell, but the bow actually sticks out past the sleeve on the tongue by 1.5+ inches.
 20200211_135630_resized
 , on Flickr
The old tongue was 23" the new one has been extended to 32". This gives me a few inches for fine adjustment of the winch stand and enough to clear my tailgate on my truck.
 20200211_144245_resized
 , on Flickr
I'll button it up in the next few days. Still trying to decide on how I'll run the wiring harness. I have the connectors, but I'm deciding if I want to go on the interior or exterior, or a mix.
Once I finish and make sure it works well I'll do a "how-to" post.
Re: The Plytanic 2.0 - FS17 Build
Posted: Wed Feb 19, 2020 7:02 pm
by silentneko
I'm just about done now with the removable tongue. After fighting it, and learning how to stick weld again, I think it came out pretty good. It's not super pretty, but it works good, and is super solid.
I welded on the 16ga spacer plates. This will get ground down and fitted so the tongue slides into the sleeve.
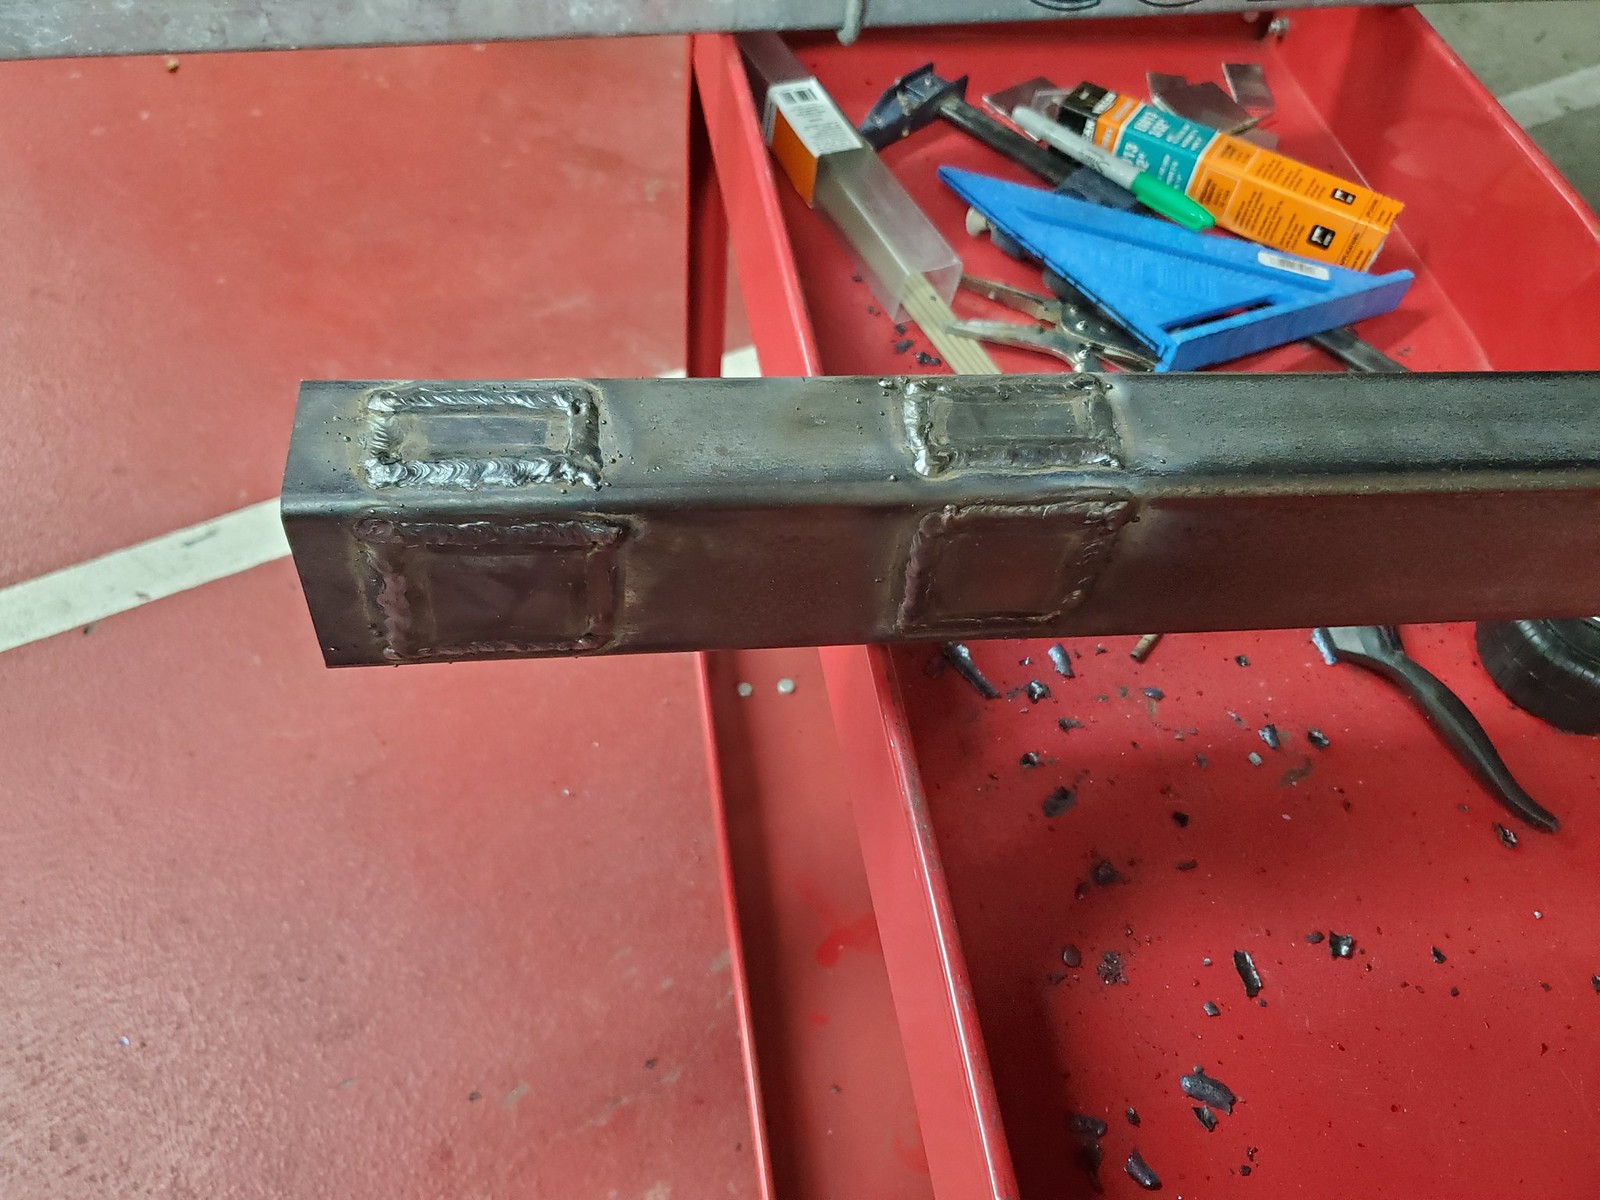 20200212_193213_resized
 , on Flickr
I ground the plates down a little at a time with a flap wheel until it slid into the sleeve, but not so much that there was a lot of play.
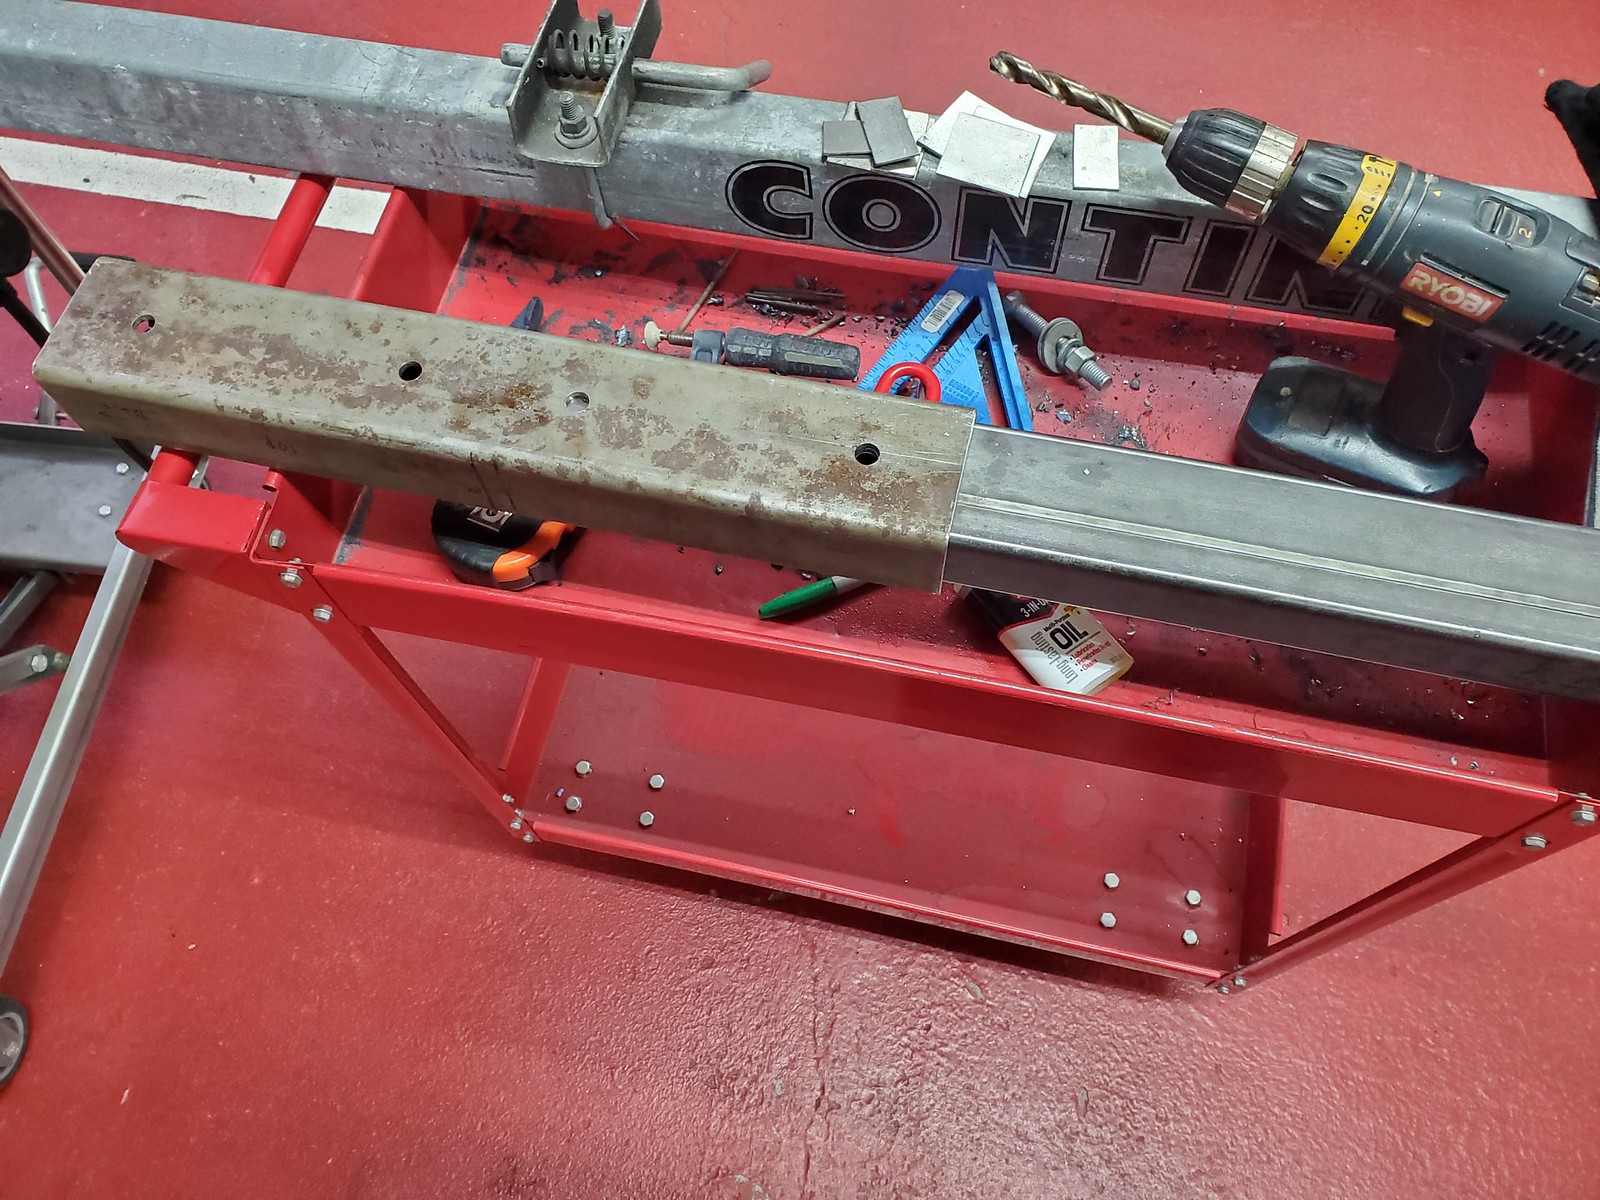 20200213_070530_resized
 , on Flickr
With it in the sleeve I began drilling the holes to match.
 20200213_070558_resized
 , on Flickr
I repeated the process on the boat side of the tongue that will be bolted on. I just welded 2 sides since it won't ever be removed. After that I cut off and rewelded the safety loop from my old tongue. This is a pretty important safety feature I feel.
 20200215_142831_resized
 , on Flickr
I used some cold galvanizing compound on the bare steel parts.
 20200216_152106_resized
 , on Flickr
I decided to add a plug so I could disconnect the tongue section. In hindsight it might have been easier to just run it along the outside and just use a velcro strap or something. I can redo it later if I decide to change, it's just wiring.
 20200218_120037_resized
 , on Flickr
I decided I wasn't thrilled with how the CGC looked, so I used some hammer coat to make it look better.
 20200219_090807_resized
 , on Flickr
Here it is. I need to tighten some things up, but I think it came out pretty good, and is super functional.
 20200219_101359_resized
 , on Flickr
With the tongue removed. The pic is deceiving, but the bow sticks out past the end of the sleeve by an inch or 2.
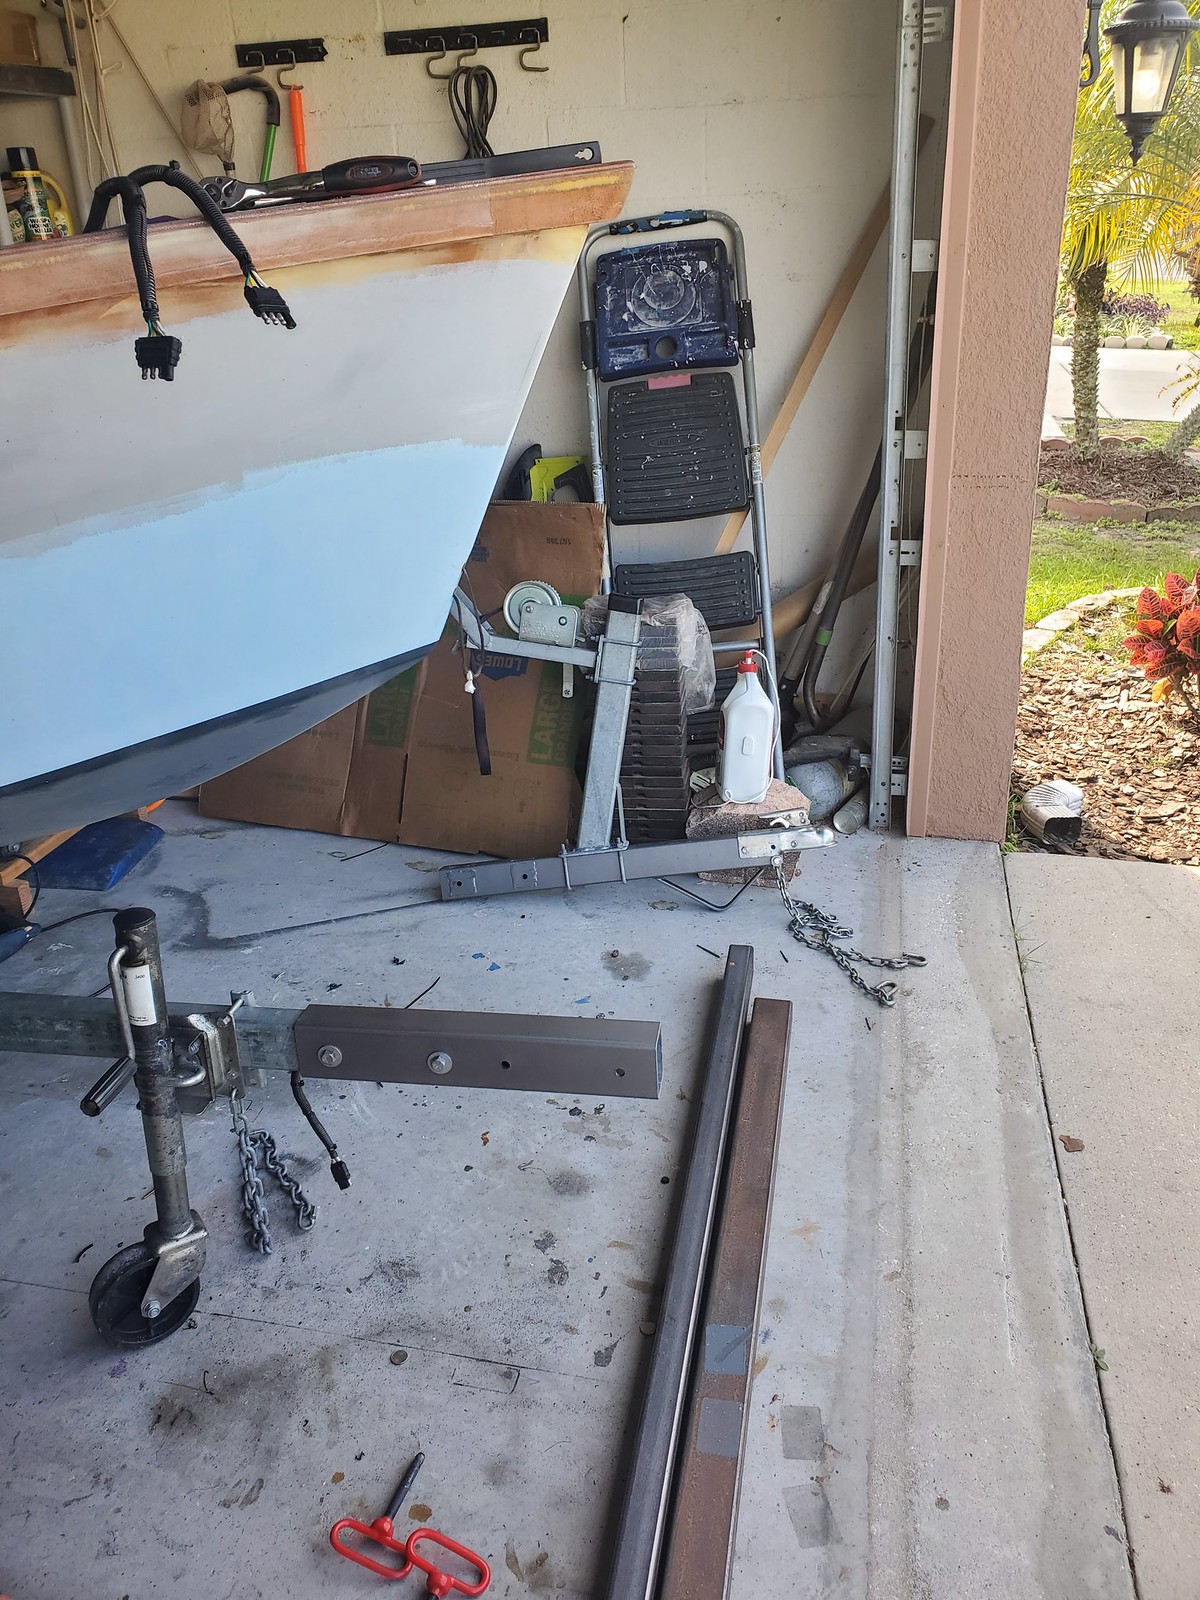 20200219_101505_resized
 , on Flickr
Here is the front of the wiring harness. It makes no sense to run it inside the tongue as it would need to come back out a ft later. So I think I'll just zip tie it on the outside. Not the best looking option, but I'm a function over form kinda guy. I added a few new grounding points, both here and on the other side of the sleeve, just in case.
 20200217_145648
 , on Flickr
 20200217_151401
 , on Flickr
I'll have to remeasure it, but the tongue is 32" and is 10" inside the sleeve. Add in the coupler and I think this modification knocks about 27" off the front of the trailer. Like I said I'm going to do a separate how-to in a bit.
Re: The Plytanic 2.0 - FS17 Build
Posted: Sat Mar 07, 2020 1:25 pm
by silentneko
Now that the trailer is all buttoned up I’m trying to get moving on fairing.
The rub rail needed some filling, especially there it joined at the bow.
 20200226_110429_resized
 , on Flickr
I shaped it flat-ish.
 20200303_131546_resized
 , on Flickr
I made a little sanding jig from a block of wood that I wrapped with 120 grit to round off the lower edge.
 20200303_145249_resized
 , on Flickr
 20200303_145302_resized
 , on Flickr
Then I started to slather on fairing compound. I’m not going for perfection here, just make it look better then raw glass.
 20200226_141034_resized
 , on Flickr
 20200302_153953_resized
 , on Flickr
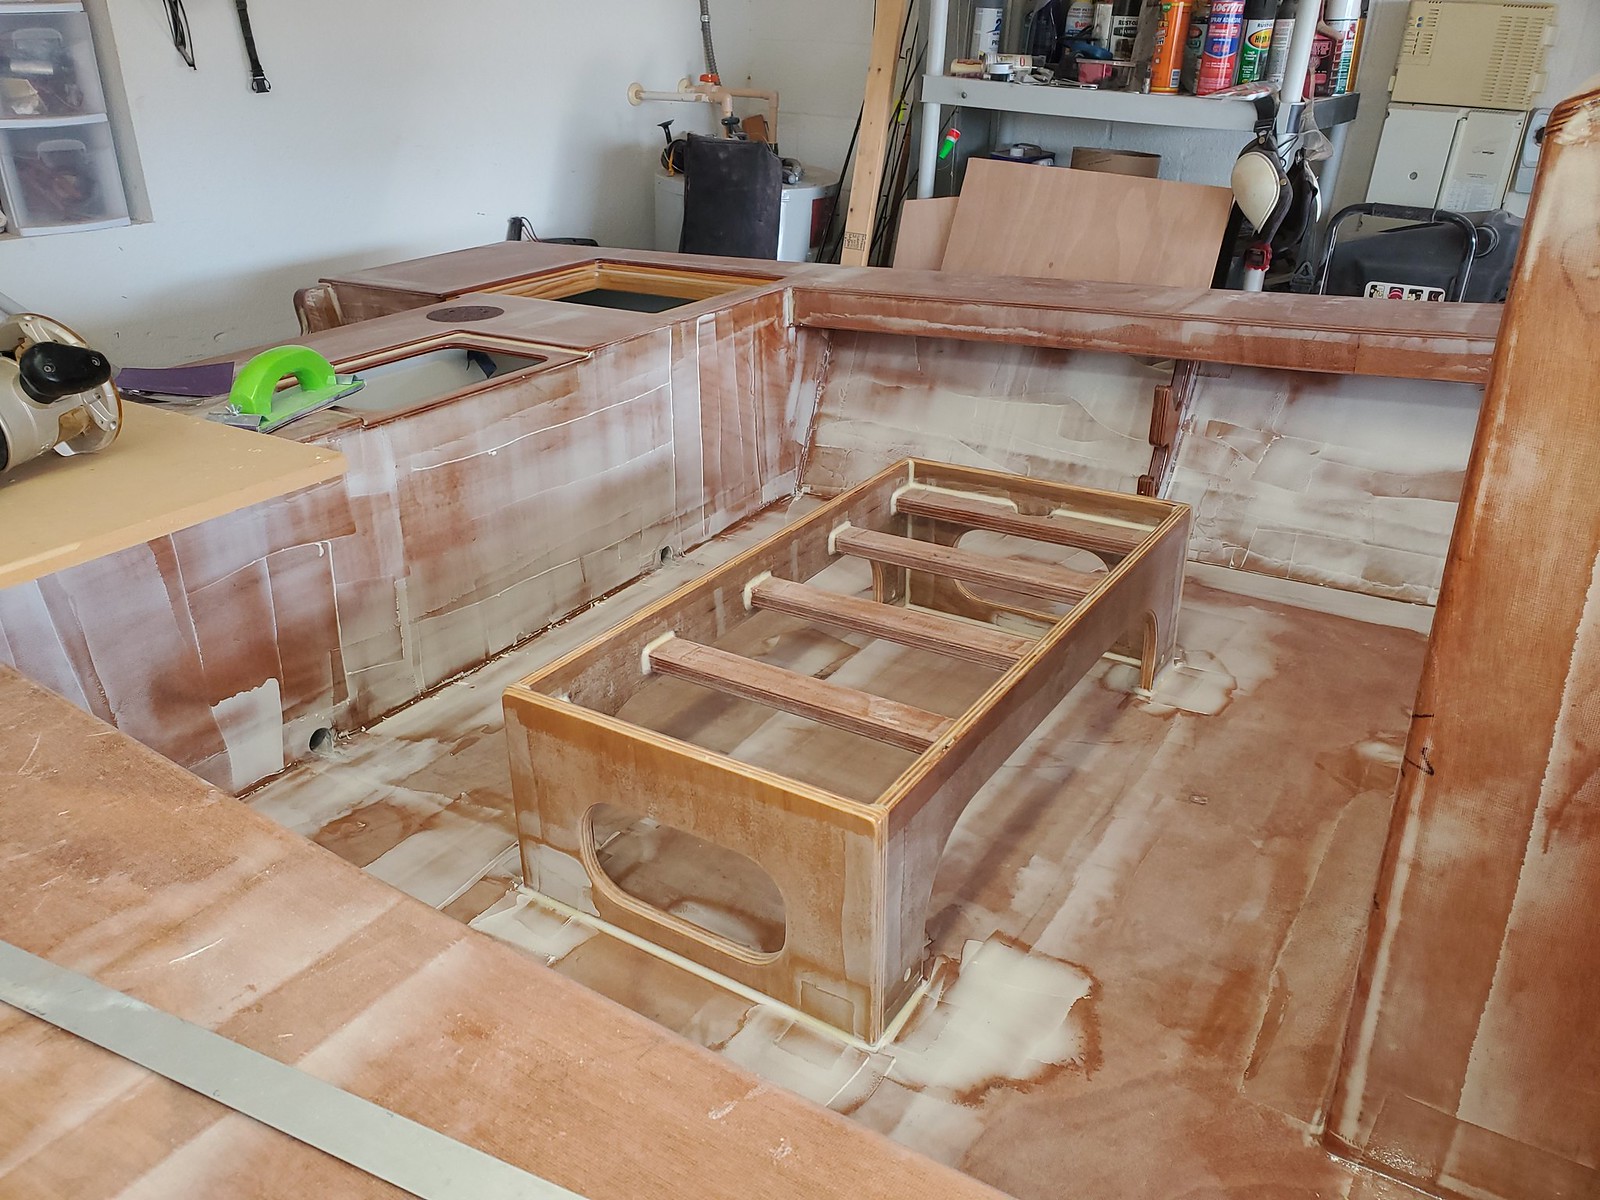 20200303_144458_resized
 , on Flickr
Gotta just finish it up so I can get on the water.
Re: The Plytanic 2.0 - FS17 Build
Posted: Sun Mar 08, 2020 7:22 am
by OrangeQuest
Looking pretty good!
Re: The Plytanic 2.0 - FS17 Build
Posted: Sat Mar 21, 2020 4:27 pm
by silentneko
I got some goodies in the mail from Gemlux.
First is a ball valve to adjust the intake volume from the livewell pump. The smallest you can find these days is a 500gph, which is way overkill for a 10 gallon tank. Really a 150gph would be plenty to turnover the tank. So I got one of their nice nylon valves with a 90 degree adapter.
 20200318_092702_resized
 , on Flickr
I also decided on my cleats and rod holders. The new cutting edge design they have only drops 2.5" below the surface, so they should work out just fine. Also theses to not need drains. The rod holders are just your normal SS fair. I didn't realize you can't remove the caps, so I might just cut them off as I don't need them.
 20200318_093105_resized
 , on Flickr
So when I said I only did some minor fairing, I really meant it. A lot of it is pretty wavy and rough still, but I'm moving on. Not being on the water is bothering me way more then a little wave in the paint ever will.
 20200318_115818_resized
 , on Flickr
First coat of primer. This is the Totalprotect epoxy primer. It is a barrier coat and high build. I dig it, but didn't realize how many nooks and crannies my interior had.
 20200318_172543_resized
 , on Flickr
Second coat on. The floor and decks will be covered with ground pumice so they don't need to be smooth. The rest I will get as close as I can without continued fairing and live with it.
 20200320_171416_resized
 , on Flickr
So the reason I primed is not really cause it's ready for paint, but so I could see what I really had. I will now do all the rest of the holes I need (livewell pump, bilge discharge, nav lights, hinges....) before any final priming and painting. It's nice to see it all one color.
Re: The Plytanic 2.0 - FS17 Build
Posted: Sat Mar 21, 2020 5:45 pm
by OrangeQuest
silentneko wrote: ↑Sat Mar 21, 2020 4:27 pm
It's nice to see it all one color.
Yes it is! SWEET!!
Look even better with the bling!
What do you mean the cleats don't need drains? Where does water go that get in the holes they drop down into? And do the rod tubes have drains in them? Why would you cut the covers off? You don't like covers?
Re: The Plytanic 2.0 - FS17 Build
Posted: Sat Mar 21, 2020 6:51 pm
by silentneko
The cleats have seals so the water doesn't go down the tubes like other companies models. I think it's a gemlux exclusive and there stuff is top rated. The rod holders are just open on the bottom. They will be installed on the gunnels and drain to the floor so I have no need for the covers, and can imagine them getting in the way.
Re: The Plytanic 2.0 - FS17 Build
Posted: Sat Mar 21, 2020 8:33 pm
by Aripeka Angler
That’s the finest hatch drain engineering that I’ve ever seen on this forum.
Re: The Plytanic 2.0 - FS17 Build
Posted: Tue Mar 31, 2020 3:31 pm
by silentneko
Thank you AA, That's very kind, but I'm not sure if it will work any better then the other great hatch gutters we have seen here. I tried to post this the other day, but the forum was down:
Working on a lot of the small stuff until it is ready for paint.
Making backing plates to be bonded in under the cleats, rod holders, and nav light.
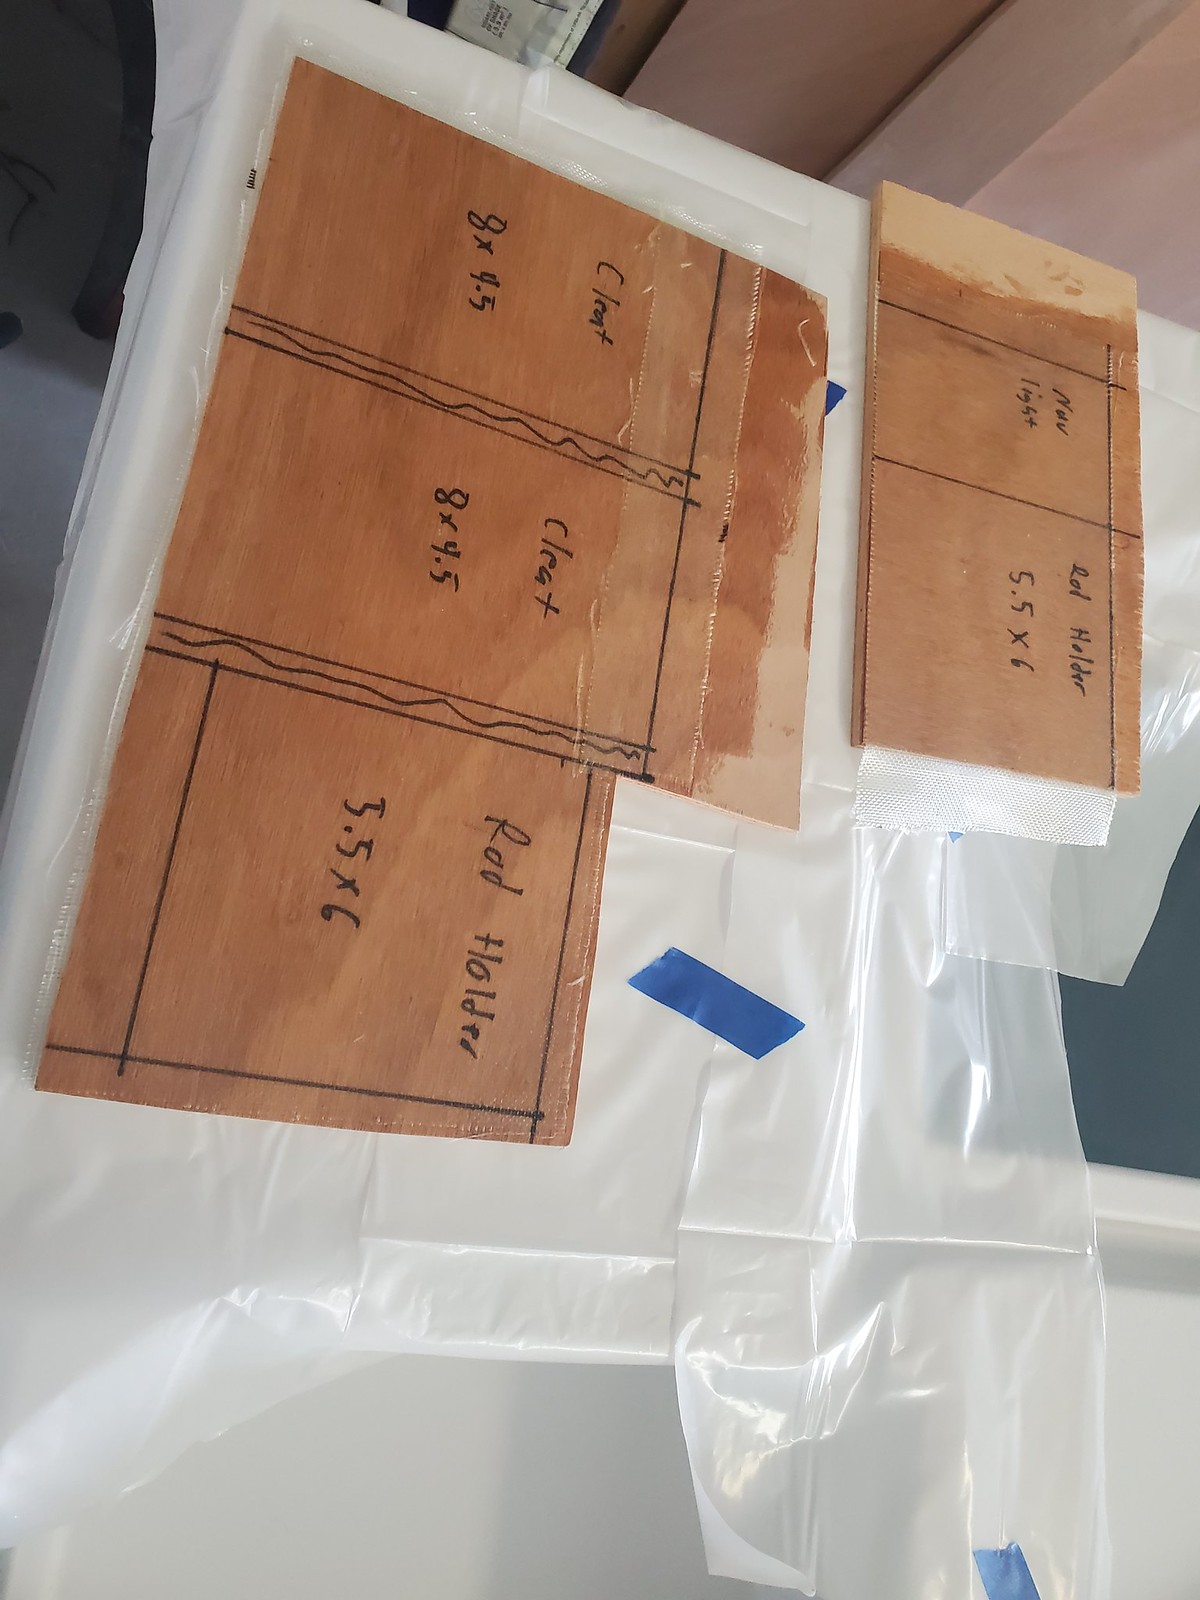 20200323_121745_resized_2
 , on Flickr
The cleats came with a handy installation diagram.
 20200323_142902_resized_2
 , on Flickr
I am installing 4 cleats. 2 upfront a few feet back from the bow, and 2 in the rear.
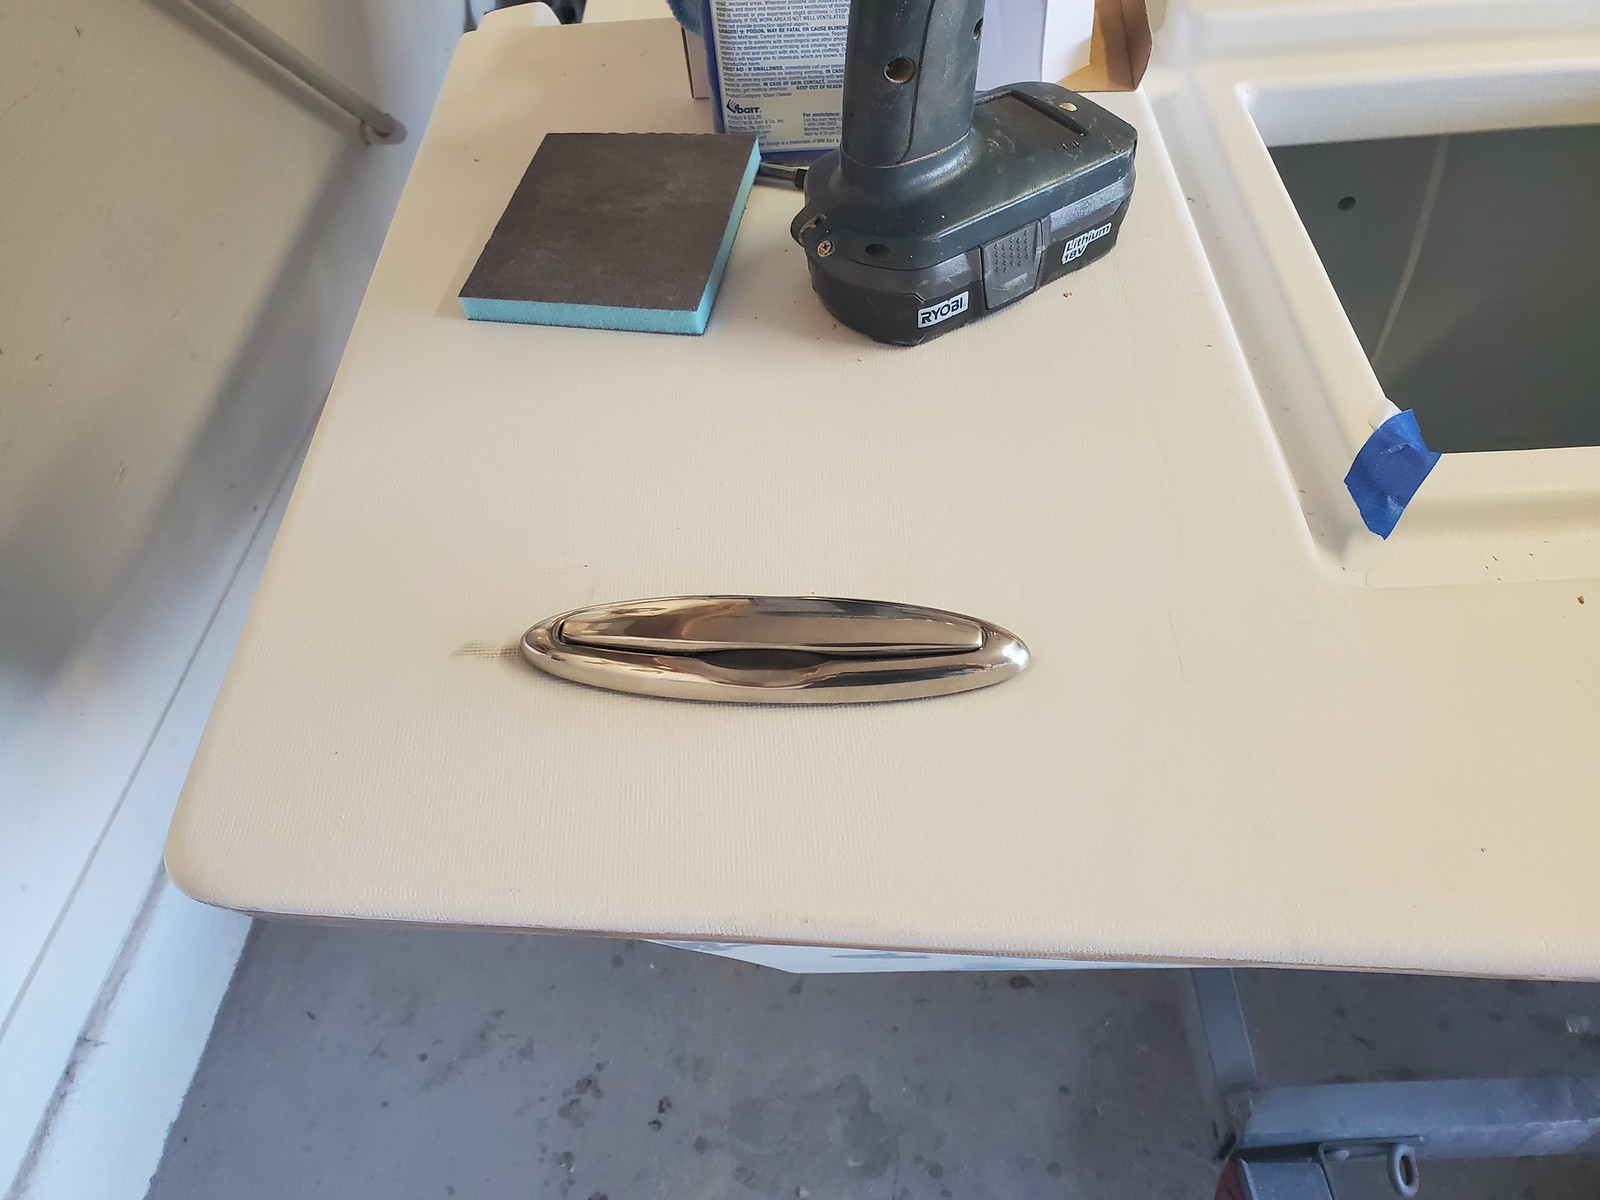 20200324_085706_resized_2
 , on Flickr
Rod holders did not come with any installation instructions, and since I was installing on an odd angle they took some work with a dremel to get right.
 20200326_105203_resized
 , on Flickr
And I did cut the caps off of them, they were just annoying and provided no benefit.
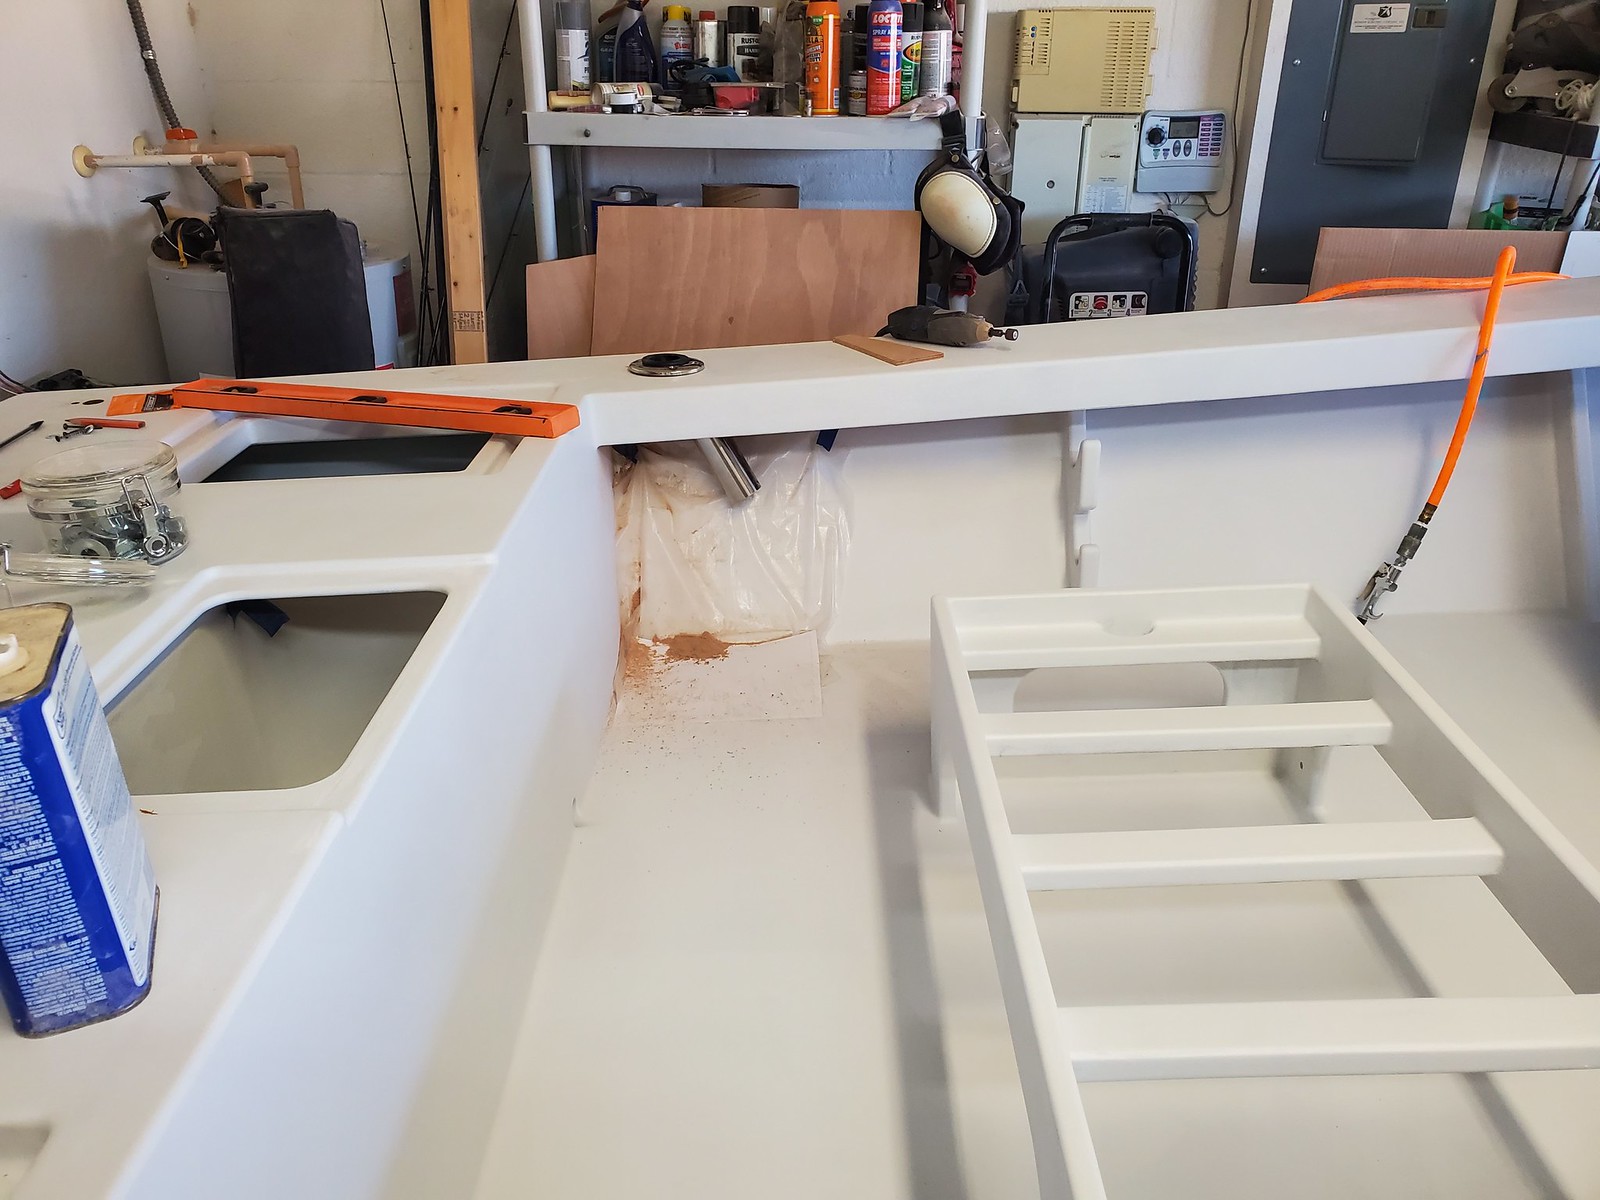 20200326_105213_resized
 , on Flickr
I also cut out the steering hole.
 20200327_102018_resized
 , on Flickr
I have a lid cut out for each hatch, I need to work the shape a bit, and figure out how I want to glass them so they match the gutters and supports. The horizontal hatches won't be an issue, but the console hatch will need some extra attention.
 20200327_134943_resized
 , on Flickr
Re: The Plytanic 2.0 - FS17 Build
Posted: Tue Mar 31, 2020 4:11 pm
by silentneko
Working more on the hatch lids. I have them all rough cut out. After the glass is on I'll trim them down more for final fitting.
 20200330_110449_resized
 , on Flickr
Here is where many guys, including me, go wrong with hatches. The lids must match the gutters/lips, not be made flat. If you glass them on a flat surface and the lip or gutter is even 1/32" off then it will never close quite right. I'm trying to avoid this by shaping the lids to the lips.
I glassed the bottoms of the lids, then let them set up for over an hour. They were tacky and soft still. I then weighed them down on the lips of the hatch so they will cure and hold the shape well.
 20200330_154602_resized
 , on Flickr
 20200330_154608_resized
 , on Flickr
Weights work find for horizontal lids, but for vertical ones you need to get creative. I used a ratched strap and 2 cam lock straps to apply pressure to some wood chunks. I think it will work out well.
 20200330_154619_resized
 , on Flickr
Re: The Plytanic 2.0 - FS17 Build
Posted: Tue Mar 31, 2020 4:26 pm
by OrangeQuest
Very interesting. Nice work!
Re: The Plytanic 2.0 - FS17 Build
Posted: Tue Mar 31, 2020 9:29 pm
by Jeff
Beautiful work!!! Jeff
Re: The Plytanic 2.0 - FS17 Build
Posted: Thu Apr 16, 2020 6:09 pm
by silentneko
Now that the lids are cutout and formed I needed to add backing plates. I could have gotten away without them, but I like the added weight and rigidity.
 20200407_152121_resized
 , on Flickr
Since the plywood was warped I strategically drilled holes and used blocks and screws to draw them up, then weighed them down on the hatch gutters again to make sure they stayed where I need them.
 20200410_094033_resized
 , on Flickr
The Gemlux hinges I'm using need a 3/8" gap since they are swagged down. I was going to use an equal gap all the way around, but decided to just use a 1/8" +/- I think it looks a bit neater. This is just a test fit before I did the old drill fill drill on the lids.
 20200411_105625_resized
 , on Flickr
I think they turned out well.
 20200411_105636_resized
 , on Flickr
Bottoms glassed and holes drilled and filled. I added a block to the large hatch that's not shown. It's for the spring support I'll install later.
 20200413_140654_resized
 , on Flickr
Re: The Plytanic 2.0 - FS17 Build
Posted: Fri Apr 17, 2020 6:23 am
by cape man
Those hatches and drains are amazing. Great work! I am going to copy that when we get on the LM 18. I kick myself everytime I am sponging out water from my lockers for not spending more time and thought to hatch lids and drains. They aren't horrible but just a cup of water left in a hatch causes issues quickly.
You're getting close! Still going to use the Bimini?
Re: The Plytanic 2.0 - FS17 Build
Posted: Fri Apr 17, 2020 7:29 am
by Jeff
Nice work!!! Jeff
Re: The Plytanic 2.0 - FS17 Build
Posted: Fri Apr 17, 2020 9:13 am
by silentneko
Thanks guys.
Cape, I hope the gutters work well, and hope they hold up, lol. The largest one up front I can stand and jump on with no real notable flex. I am going to add an adhesive backed gasket/weather stripping to the top of the gutter lip when I'm done. Thats mostly for when I am hosing it off. The lids are pretty basic. I left the bottom edge fairly sharp to act as a bit of a drip edge, but there is enough overhang that it would be OK either way.
I plan on adding the Bimini after I get it on the water and work out the kinks. I'm not sure it's gonna work out though without modification as I'm 6'3". If it doesn't I will pay it forward, unless you want it back. Thank you again, and good luck finishing the LM18.
Re: The Plytanic 2.0 - FS17 Build
Posted: Fri Apr 17, 2020 10:03 am
by OrangeQuest
I may scrap my plastic hatches all together and go with more simple, sturdier ones like your lids, no gutters. Will wait till it's on the water.
It has been real enlightening following your build and the way you do things. Very talented. Hope you are thinking of the "next" project.
Re: The Plytanic 2.0 - FS17 Build
Posted: Fri Apr 17, 2020 8:15 pm
by cape man
Hope it works, but paying it forward is also good for me. I went with a patio umbrella. Redneck for sure, but you can walk a big fish around the boat and it comes down quick and essy.
Re: The Plytanic 2.0 - FS17 Build
Posted: Wed May 06, 2020 2:46 pm
by silentneko
Progress. I cut out a hole for the latch and drilled some holes for pulls. I'm not sure the pulls were needed, but I had them so I figured why not. The compression latch is a gemlux and lockable. This is for the console door. I wanted to be able to lock it so when docked I can turn off the battery switch, just an extra guard against thievery.
 20200428_120349_resized
 , on Flickr
I fitted up the hatches for a last time before priming.
 20200501_104103_resized
 , on Flickr
I must have mixed up the starboard and port sides as the gaps are a bit off. They still work fine and most will not notice. I'm not putting latches or pulls on yet as I'm not sure if I want to secure these or not.
 20200501_111443_resized
 , on Flickr
The front hatch got a hatch spring, and it works great.
 20200501_133857_resized
 , on Flickr
 20200501_133910_resized
 , on Flickr
The console door came out pretty well too.
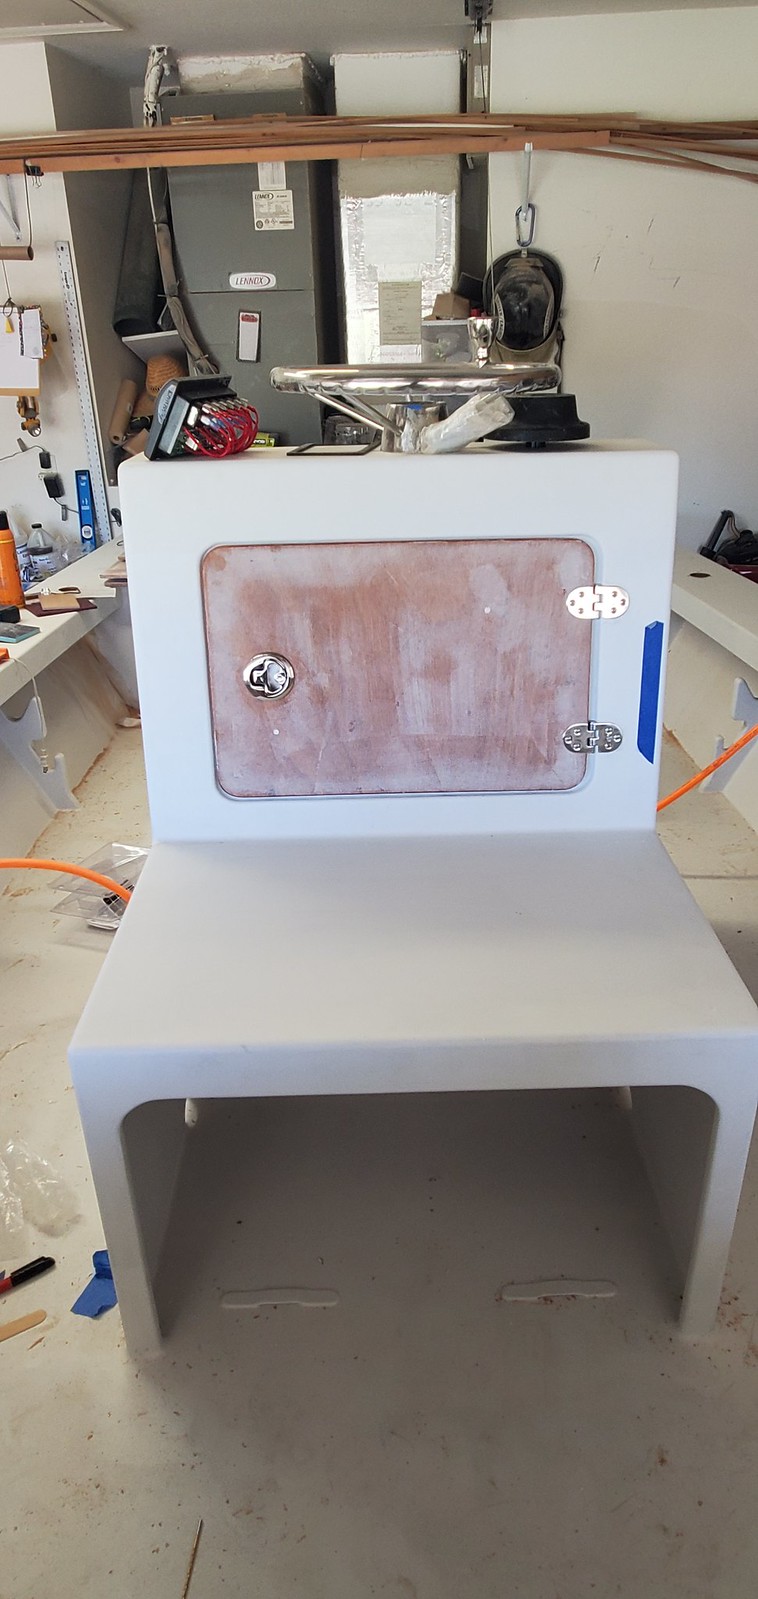 20200501_142155_resized
 , on Flickr
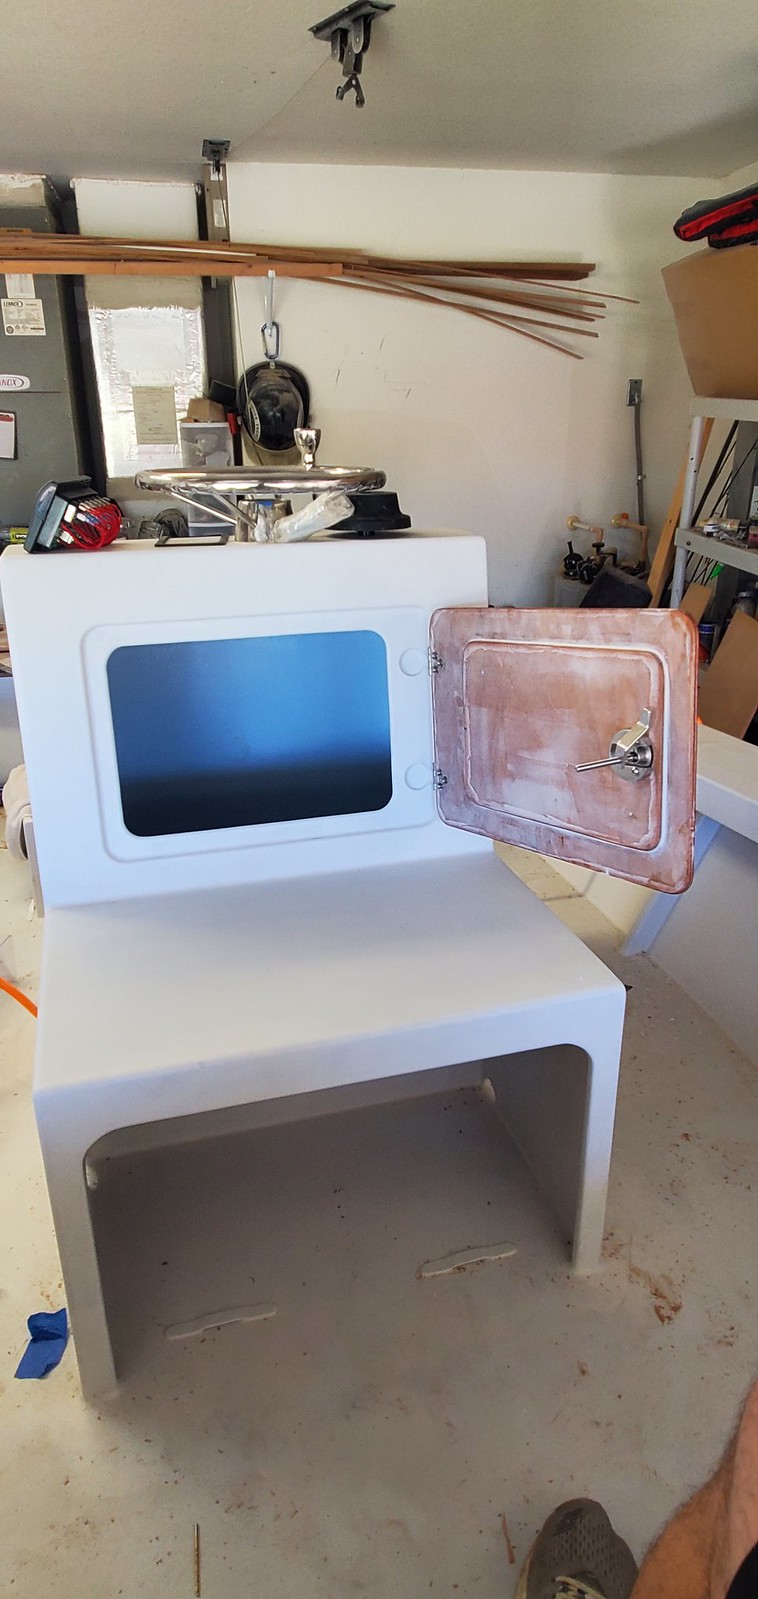 20200501_142227_resized
 , on Flickr
Re: The Plytanic 2.0 - FS17 Build
Posted: Wed May 06, 2020 3:45 pm
by cape man
Oh hell yes!
Re: The Plytanic 2.0 - FS17 Build
Posted: Wed May 06, 2020 3:47 pm
by Jeff
Very nice!!! Jeff
Re: The Plytanic 2.0 - FS17 Build
Posted: Wed May 06, 2020 5:14 pm
by OrangeQuest
Very nice! Opps! I didn't see your post Jeff, Very Very nice!!
Re: The Plytanic 2.0 - FS17 Build
Posted: Fri May 08, 2020 6:20 pm
by silentneko
Thanks Boys.
Time for some finishing touches before the last bits of primer and paint.
I made a drill guide for the outboard. It's just a few pieces of MDF measured and drilled on my drill press. It won't last but a few drills, but it will keep the bits more or less straight and accurate. No places locat would let me borrow theirs.
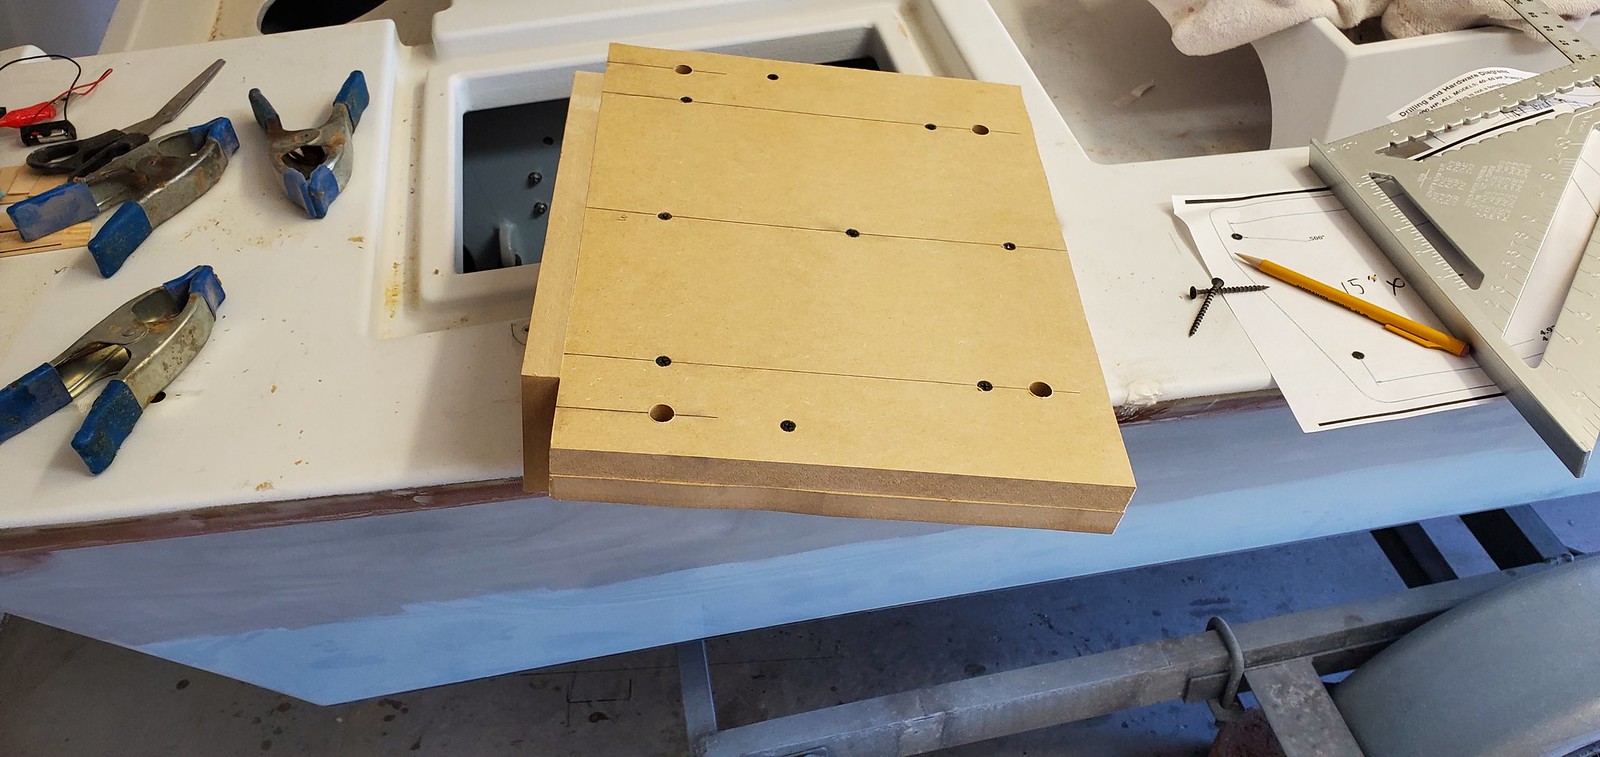 20200505_143601_resized
 , on Flickr
Something finally went right, lol. I measured the center line out, and it lined up right in the middle of the drain plug.
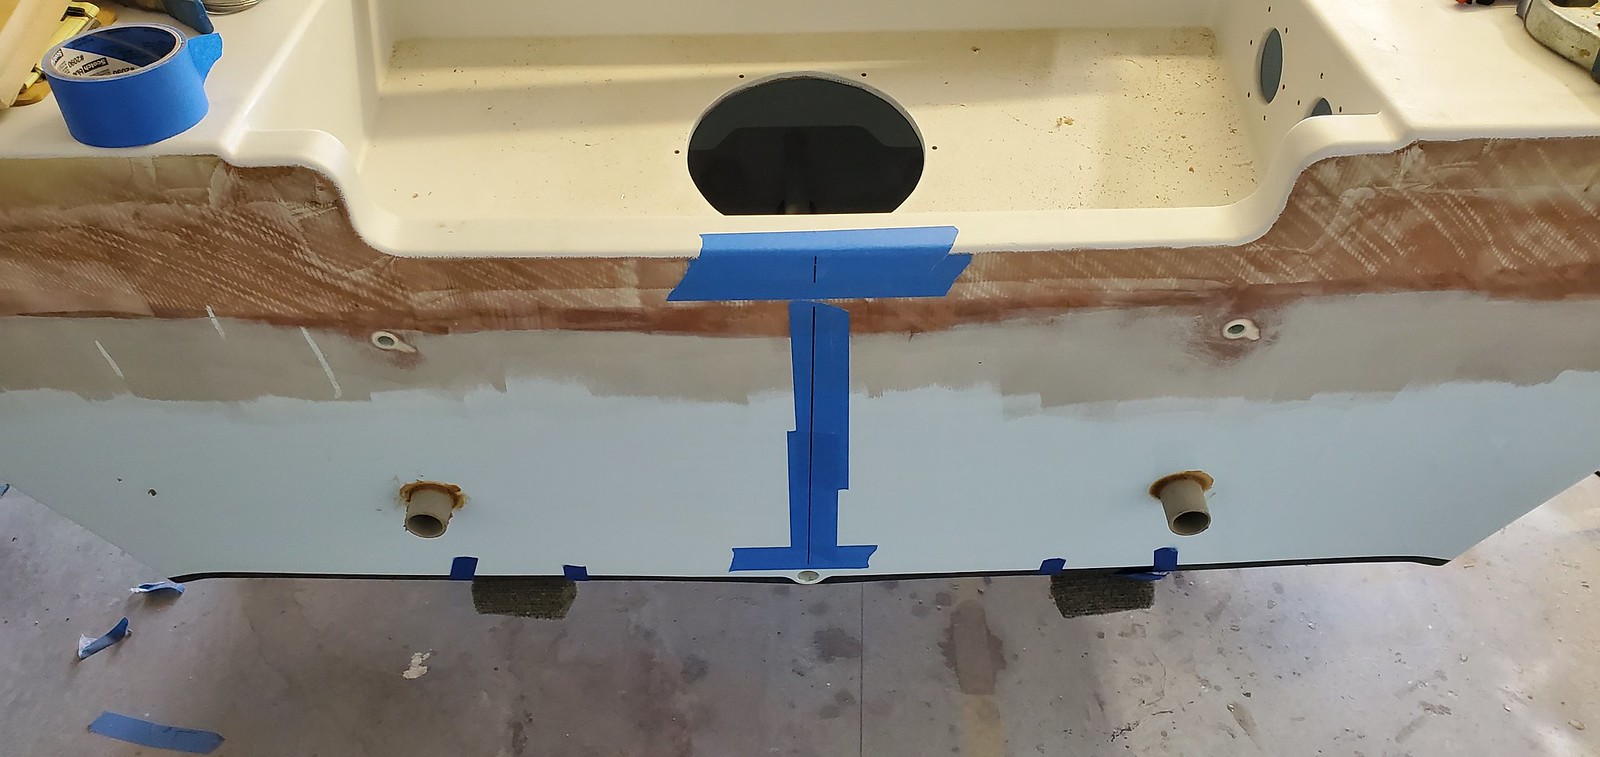 20200505_145639_resized
 , on Flickr
 20200505_150858_resized
 , on Flickr
Holy Swiss Cheese Batman!!!
Here are all the holes so far. I'll install the transducer later on, maybe on a puck. Still gotta do the drill-fill-drill for some of the holes.
 20200507_154944_resized
 , on Flickr
Here's what it all does.
 TRANSOM LAYOUT
 , on Flickr
Nav Lights drilled too.
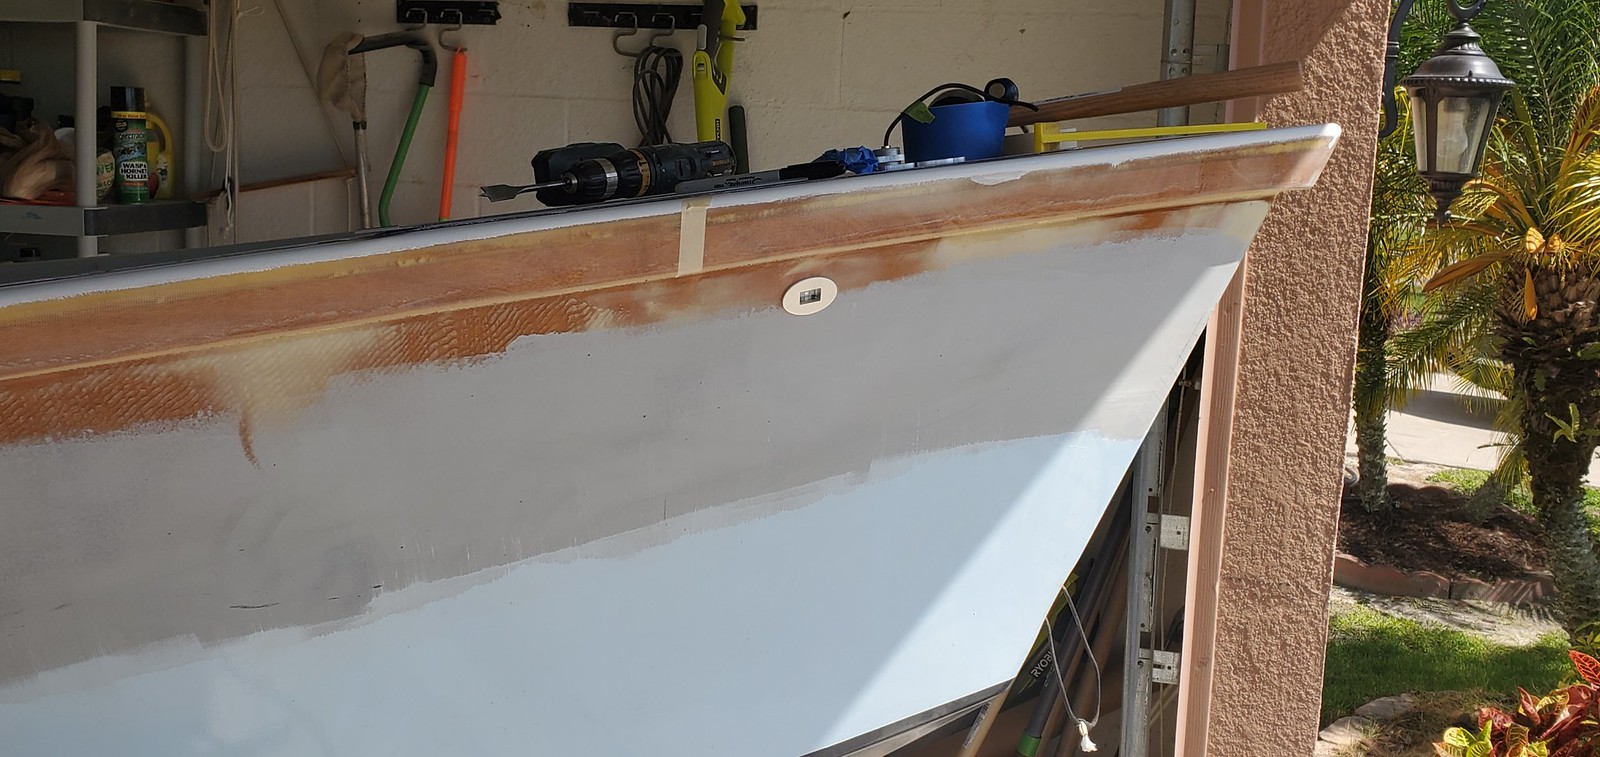 20200507_155047_resized
 , on Flickr
So now I need some help. I need to figure out where I'm going to mount my switch panel. Originally it was going on the console face next to the controls, and it may still, but I'm not sold. I have 3 options basically.
First. Next to the controls. The tachometer and key switch would need to be fitted to the left of switch panel.
 20200508_155813_resized
 , on Flickr
Second option. Still next to the controls, but turned and moved up. The tach and key switch would be located below the panel.
 20200508_155849_resized
 , on Flickr
Last option. I'm leaning this way unless someone sees an issue. The switch panel would be mounted below the controls on the face of the console. Since the switches are inset and protected a bit you shouldn't be able to bump them with you leg or anything. The tach and key switch would then be stacked next to the controls.
 20200508_155937_resized
 , on Flickr
Thoughts?
PS: ya'll like my controls mockup?
Re: The Plytanic 2.0 - FS17 Build
Posted: Fri May 08, 2020 6:55 pm
by OrangeQuest
Are the switches lit up? If so will they effect vision at night driving. I like the last option but you could have a hard time seeing them? Maybe a little bit of an angle? But if not to bright I like #1. Can we see all 3 mounted then decide? LOL
I don't remember how you mounted the transom lights? They look inlayed! Did I miss that part or am I getting to old to remember things?
Re: The Plytanic 2.0 - FS17 Build
Posted: Fri May 08, 2020 7:00 pm
by silentneko
The switch labels are lit, but not bright. Even if they weren't I could go on feel as there aren't many of them.
The LED lights are small fixtures from Oznium. There are 3 holes for each. The 2 outer ones are for screws, the one in the middle is for the wires to be passed through the transome.
Re: The Plytanic 2.0 - FS17 Build
Posted: Sat May 09, 2020 10:48 am
by Tom S.
Control mock up is great.
#1 looks good to me unobstructed. Can you mock up the tach above the switches and the keys to the left ?
Re: The Plytanic 2.0 - FS17 Build
Posted: Sat May 09, 2020 11:07 am
by Rtorres2411
You’re doing a mighty fine job on your boat. On the third option, the binnacle control could interfere with the switch panel when it comes with space between the two.
Ruben
Re: The Plytanic 2.0 - FS17 Build
Posted: Sat May 09, 2020 12:50 pm
by silentneko
I can mock up a bit more later on. I'm not sure of the dimensions of the tach or key switch, but I can find them. I'm just worried #1 or #2 would look cluttered a bit. I don't think the controls will interfere with #3, in reverse it shouldn't go past the horizon and i wouldn't need to operate the switches then.
Re: The Plytanic 2.0 - FS17 Build
Posted: Sat May 09, 2020 4:29 pm
by cape man
If number 3 is below the binnacle I vote for that.
Re: The Plytanic 2.0 - FS17 Build
Posted: Mon May 25, 2020 3:17 pm
by silentneko
Think #3 has won me over. I like the more uncluttered look.
Not much done this week. Family and work got a bit in the way.
I applied fairing compound to the area under the rub rail and top of transom. After I sand it in a few days I'll apply 2-3 coats of primer, sand and paint. I also need to sand the interior, then reapply a coat or 2 of primer, resand that then pain the interior.
 20200522_161515
 , on Flickr
Re: The Plytanic 2.0 - FS17 Build
Posted: Mon Jun 01, 2020 2:59 pm
by silentneko
I got the word back from FWC they are good to inspect again. I just gotta get the paint on.
Jeff or Reid, I tried emailing you guys, but not sure if it went through. Can you send me a copy of the invoice for my original plywood and glass order. I think it was November of 2017. Thanks.
Re: The Plytanic 2.0 - FS17 Build
Posted: Tue Jun 02, 2020 8:24 am
by Jeff
silentneko, I sent you two paid invoices last week. Check your SPAM folder and if you don't have it, I will resend today. Jeff
Re: The Plytanic 2.0 - FS17 Build
Posted: Tue Jun 02, 2020 9:38 am
by silentneko
Sorry Jeff. I don't see them. Maybe try to send them to the alternative email I have.
Firecat1981@hotmail.com
Thanks.
Re: The Plytanic 2.0 - FS17 Build
Posted: Tue Jun 02, 2020 10:50 am
by Jeff
OK, I will resend in the next 10 minutes to the revised email address. Jeff
Re: The Plytanic 2.0 - FS17 Build
Posted: Tue Jun 02, 2020 1:21 pm
by silentneko
Got it. Thank you very much.
I'm still working on sanding to primer, which has turned into more of a thin fairing coat. 2 more coats of primer inside and out and its time to paint.
Re: The Plytanic 2.0 - FS17 Build
Posted: Tue Jun 02, 2020 1:29 pm
by Jeff
Nice progress!!! Jeff
Re: The Plytanic 2.0 - FS17 Build
Posted: Tue Jun 02, 2020 2:32 pm
by cape man
Nice to have the receipts for when you title it (shows you already paid sales tax), but if the same guy from Lakeland comes out to inspect it, I doubt he will give the receipts more than a glance. They just want to make sure it isn't someone else's boat that you stripped and repainted and that it isn't an absolute death trap.
Re: The Plytanic 2.0 - FS17 Build
Posted: Tue Jun 02, 2020 3:16 pm
by silentneko
I've got receipts and pics of the build for him. I'm trying to have everything lined up, he said he will scan it all in on site and send it to the state, but still warned they might be backed up a bit.
Crazy how much more difficult it is to register the boat being just a foot longer then my previous build.
Re: The Plytanic 2.0 - FS17 Build
Posted: Mon Jun 08, 2020 6:31 pm
by silentneko
The interior and exterior are mostly prepped now for another coat or 3 of primer. Then sanding with 220 and painting. It won't be perfect, I'm not going to block it all down, just hit it with the random orbit and some hand sanding. A decent 20/20 paint job is all I need, it just needs to get on the water already.
 20200604_092525
 , on Flickr
Re: The Plytanic 2.0 - FS17 Build
Posted: Wed Jun 10, 2020 9:52 pm
by silentneko
Slow progress. I taped off the bottom and finished sanding the sides.
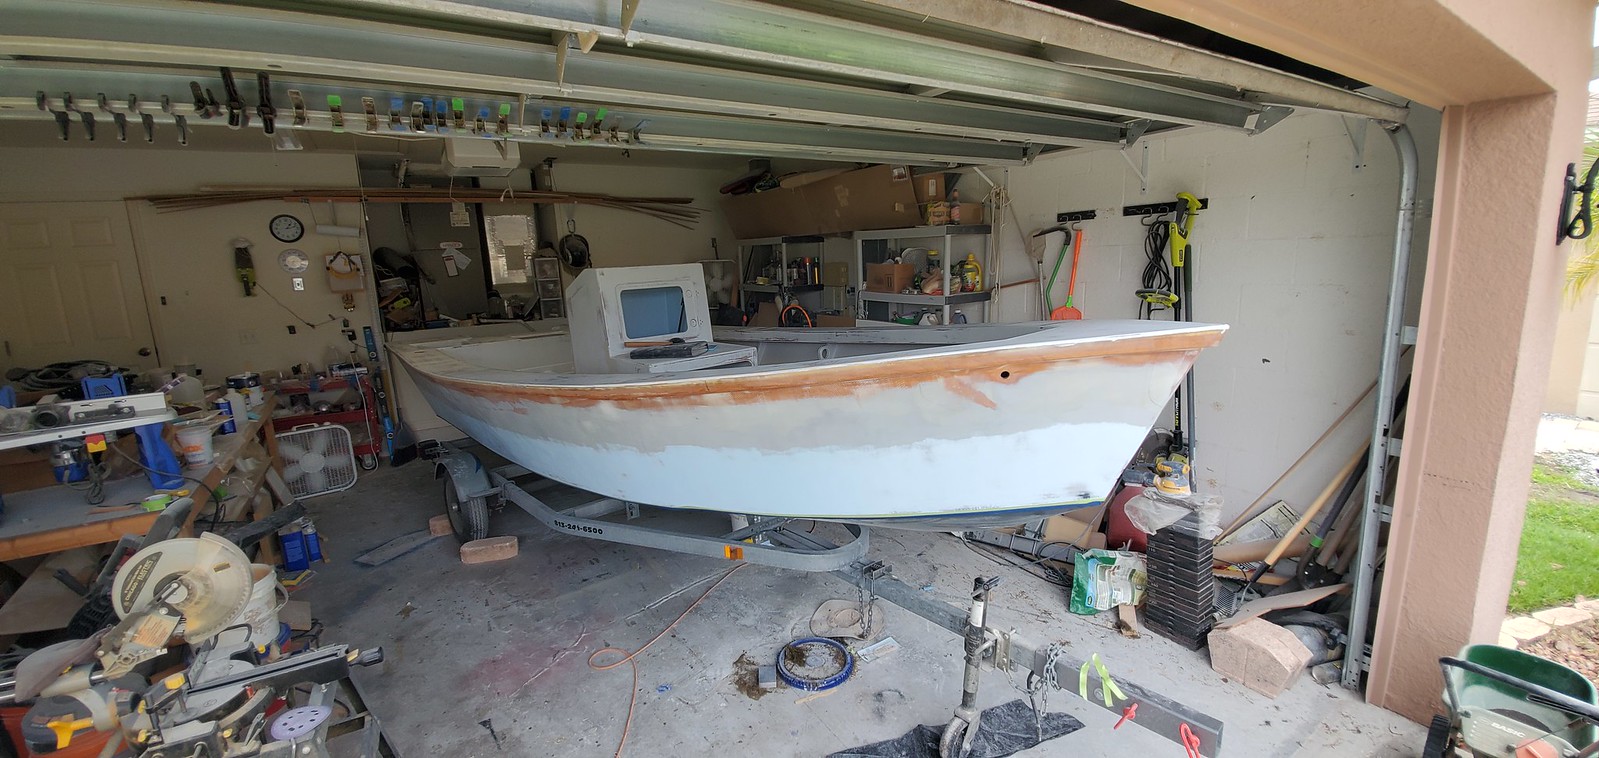 20200609_131533
 , on Flickr
A few coats later
 20200610_124812
 , on Flickr
I got 2 coats on the sides transom, and cap including the rear hatches and splash well.
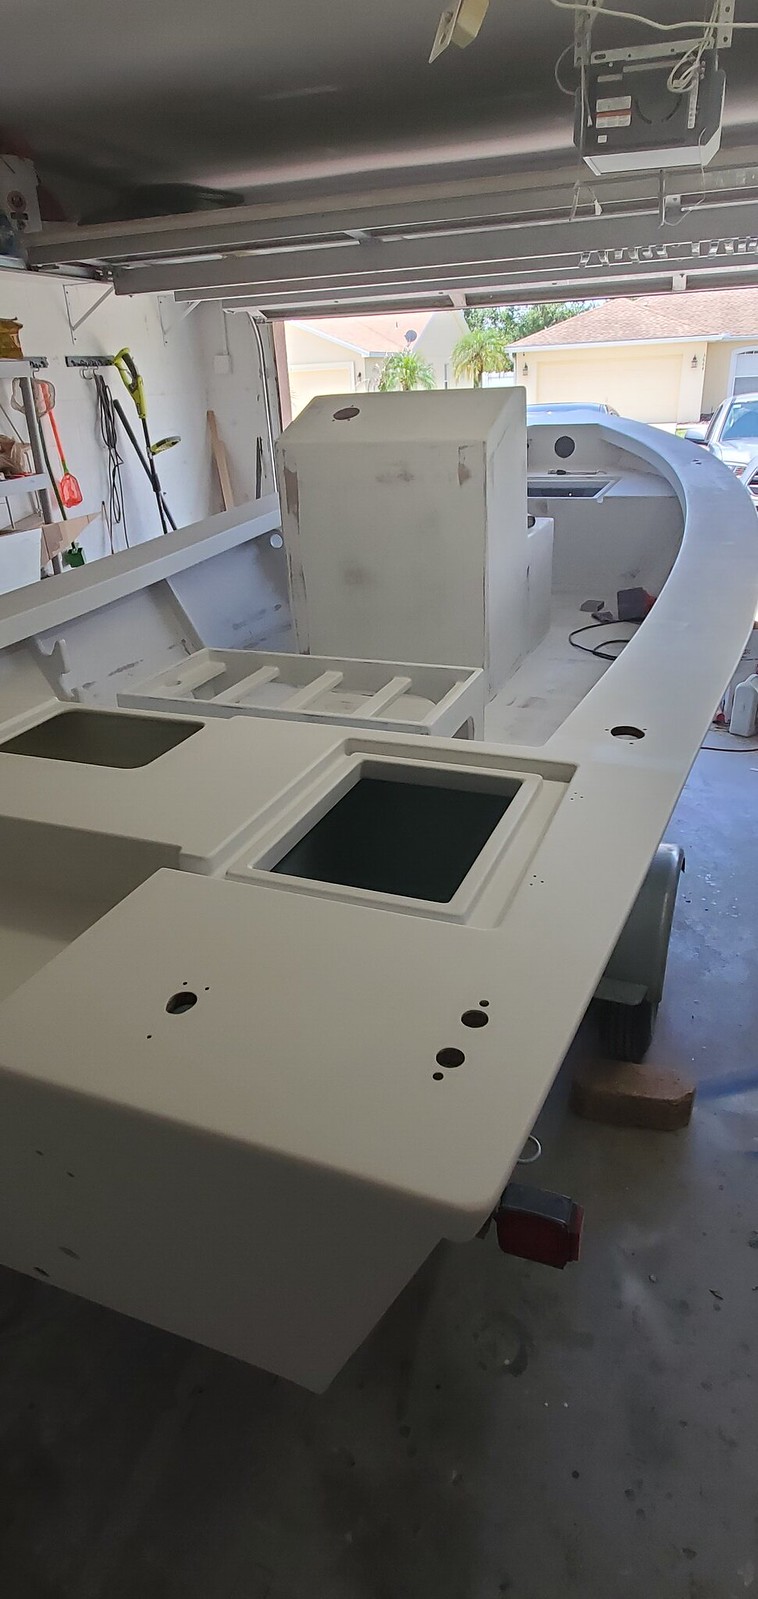 20200610_124836
 , on Flickr
Par for the course, as I do more work I discover more issues. I found a bunch of pinholes in the sides. I made an epoxy slurry with microspheres to try and fill them. Hopefully it works out good enough.
Re: The Plytanic 2.0 - FS17 Build
Posted: Fri Jun 12, 2020 4:28 pm
by silentneko
An other day, an other disappointment.
I actually took time off of work to try and move this damn boat along. I sanded down the primer, which let me know my fairing job was worse then I thought. I ended up burning through some spots. No big deal I thought, but more on that later.
I blew out the garage live 5 times a day for the past few. No matter how much I blew out there was always more. I decided to try and set up a ghetto negative pressure ventilation system. Using 2 box fans and a small air filter. It worked very well for the fumes as there were barely any and the bugs, but the dust was still around.
 20200612_083501
 , on Flickr
So I'm using this EMC Quantum paint. I've read all these reviews and watched videos..... It seemed like a great product for what I am doing. They say it is for DIY guys, but I really don't believe that. I mixed it as directed, and applied as suggested. This stuff is so thin that it's near impossible for me to avoid drips and sags, and they don't flow out as expected. It's also so thin that it barely covers anything.
I originally saw this stuff on ShipshapeTV. They did a color change with it, no primer or anything, just scuff and apply a few coats with a roller, done, looks perfect. So I figured if they can do a color change then a little burn through on the primer should be no issue. Wrong again.
This is after the second coat.
 20200612_155603
 , on Flickr
Now the majority of the dark spots you see were not burned completely through they were still milky with a thin coat of primer over them. Even the areas that had perfect primer on them are still very uneven as far as the color goes. They suggest 2-3 coats, but I'm think I'll need 4 at a minimum. The interlux I used before would cover these areas on almost the first coat and had a smoother appearance IMO. I also went out and bought the more expensive wooster foam rollers thinking they would hold up. Well they started falling apart half way through the hull side leading to a mess I can't fix unless I want to wet sand later. problem is this stuff is so thin I'm not sure I trust it will hold up to a good cut and buff. I don't know what to do now, I can't really go back, but requiring so many coats of paint I might need to buy more. I don't want to spend another $200+ on this stuff. Why didn't I just use rustoleum again, lol!
This all seems par for the course on this build. It seems every time I deviate from my norm and try to upgrade to more expensive products I greatly regret it.
Re: The Plytanic 2.0 - FS17 Build
Posted: Fri Jun 12, 2020 5:19 pm
by Jaysen
I used emc with success. I chose to use LESS brushing reducer to get thicker coats. That helped with the flow and reduced my temptation to lay on coats too heavy.
Cape Man follows the can but used 5+ coats. It goes on thin. For guys like me (and maybe you) we try to cover so over apply thin paint.
The emc is worth it. Give it another try.
Re: The Plytanic 2.0 - FS17 Build
Posted: Fri Jun 12, 2020 5:31 pm
by narfi
silentneko wrote: ↑Fri Jun 12, 2020 4:28 pm
I figured if they can do a color change then a little burn through on the primer should be no issue. Wrong again.
This is after the second coat.
I learned this lesson when building Landon's canoe. I had just a couple of spots sanded through the primer cleaning it up, and I figured with bright red I would have no problem painting over it without priming again..... I was able to do it, but took several coats and a lot of headache and heartburn. When I get to it on the FS17 I wont start spraying color until I am happy with the primer.
Re: The Plytanic 2.0 - FS17 Build
Posted: Fri Jun 12, 2020 5:50 pm
by silentneko
I'm going to try switching from a foam roller to a 1/4" nap and see if it helps any. I'll also cut down the reducer to half. Looking over it right now I'm not sure how to proceed. It has so many waves, dust, and drips that it really needs to be sanded, but if I do that I won't have enough paint to finish it and will have to buy more.
With so much reducer you would think it would lay down well, but it hasn't. That was the biggest complaint by the boat works today guy, the orange peel remaining.
I'll have to make sure the primer on the interior is intact. Even if it's not super smooth. I really don't care what it looks like anymore, I just need it on the water! It's been over a year since our last good trip and I don't have my other boat anymore.
Re: The Plytanic 2.0 - FS17 Build
Posted: Sat Jun 13, 2020 7:58 am
by silentneko
Well, it kind of went from bad to worse. I got some 1/4" nap rollers and reduced the reducer to .5 parts instead of 1. The results were the work time was reduced. It did go on thicker, but it did not flow out well at all, and I ended up with a lot of air bubbles towards the end. The good news is the air bubbles were all on the deck edge I was painting so it will be easier to sand then the hull sides. Bad news is I really need to sand everything back down smooth and apply a few more coats.
I'm to far in to stop, but don't have enough to finish out the interior. Meaning I'll have to waste some more money. This is now going to be a $1000+ paint job I'm ultimately not happy with. I could have prepped it and had it shot with auto paint for less. Lesson learned.
Re: The Plytanic 2.0 - FS17 Build
Posted: Sat Jun 13, 2020 10:36 am
by joe2700
silentneko wrote: ↑Sat Jun 13, 2020 7:58 am
Well, it kind of went from bad to worse. I got some 1/4" nap rollers and reduced the reducer to .5 parts instead of 1. The results were the work time was reduced. It did go on thicker, but it did not flow out well at all, and I ended up with a lot of air bubbles towards the end. The good news is the air bubbles were all on the deck edge I was painting so it will be easier to sand then the hull sides. Bad news is I really need to sand everything back down smooth and apply a few more coats.
I'm to far in to stop, but don't have enough to finish out the interior. Meaning I'll have to waste some more money. This is now going to be a $1000+ paint job I'm ultimately not happy with. I could have prepped it and had it shot with auto paint for less. Lesson learned.
Sorry you're having those issues. I think it highlights how important it is to do some test panels when painting. Make sure your process, environment, and materials all working well before committing.
I used some bilge paint without testing and put it on too thick so the top cured trapping solvent underneath. It was soft for months and really hard to sand because it was still gummy.
I was helping paint a friends boat with a person who has painted multi million dollar racing yachts before. Using the same awlgrip process they always used we wiped down with awlprep then shot the first dusting layer of paint. Looked a tiny bit off. Did the second layer and could tell the paint was beading. There was contamination somehow. We had to wipe the paint off the whole boat before it cured. Then did it again using fresh rags and different solvent. Worked fine the second time, and we still aren't sure what was contaminated the first time. Shooting a test panel we prepped the same way would have saved a lot of time.
In your case I'd do some testing of the ratio of thinner you like and making sure that your rollers hold up to that without dissolving before you put more paint on the hull. I'm sure you don't want to take more time at this point but layer you have to sand off will take a lot longer than a test.
Re: The Plytanic 2.0 - FS17 Build
Posted: Sat Jun 13, 2020 7:55 pm
by silentneko
Live and learn. I thought about testing it out, but it was a bit cost prohibitive to me. I think I have several things working against me.
First, unfamiliarity with the product. On my past few projects I've used products from interlux, rustoleum, petit, and totalboat. All of these were very forgiving and user friendly. I don't think the quantum is really a DIY kinda paint, it has a sharp learning curve and its to thin to be tipped so any mistakes you do your stuck with after 45 seconds. I think it would do well if you could spray it.
Next, I'm working against the Florida summer. It says this paint can be used in anything under 95 degrees, and I have the high temp reducer too. I think anything over 85 with moderate humidity is a killer for most paints.
Finally, this ties into the other 2, reducer flash. The further I went the worse it got. I think the reducer evaporated quickly in the heat, and reducing it on the 3rd coat made it worse.
Going forward I'll mix smaller amounts, keeping it covered in the mixing cup, and add small amounts to the pan as I go. Maybe add some reducer towards the end. I'm going to swing by Sherwin Williams and see about getting some good mohair rollers too.
As for now I tried to sand a spot and its still to soft, I'll let it sit till Monday and start sanding with 220, then 320. Not looking forward to it, but it's my only path forward right?
Re: The Plytanic 2.0 - FS17 Build
Posted: Sun Jun 14, 2020 9:17 am
by cape man
The other path - the one I took - is to accept we are not professional painters and move on. I ended up with similar results and said screw it. Dare you to tell me my boat is ugly!
Re: The Plytanic 2.0 - FS17 Build
Posted: Sun Jun 14, 2020 3:14 pm
by silentneko
I am fully accepting that I am not a pro doing this in a paint booth. I fully expect a good 20/20 job (looks good from 20 ft away, or going 20mph). What I have now is less then that, to the point I don't think it will give the glass under it much protection. I have made some peace with what happened, and I'm moving forward. I plan to do just one coat per day, only in the morning. I'll have to abrade the paint after each coat, but I think a scotch brite pad will work ok.
Re: The Plytanic 2.0 - FS17 Build
Posted: Sun Jun 14, 2020 3:36 pm
by joe2700
Yea final paint is tough. Every other part of the build you can fix imperfections by sanding, but not the top coat it has to go on right the first time or you do it again. It's the only part of my build I plan to pay someone else to do. I know I'd pay more in equipment and materials to learn to do it myself and probably still not equal a pro. That's for spray though, I do see that some people get impressive results rolling, I'm sure you will get a result you're happy with in the end.
Re: The Plytanic 2.0 - FS17 Build
Posted: Mon Jun 15, 2020 12:46 pm
by silentneko
Well I don't think I'll be happy, but it will be something I can live with, lol. I want the exterior to be ok, the interior can be rough, I don't really care. No matter what I'm gonna beat the hell out of the boat and redo it in 5-10 years anyway if I still have it. I build boats to use.
So I decided how to move forward. I think I'll have just enough paint to do the hull sides cap, and boarder of the interior. Maybe. For the nonskid I am going back to interlux perfection. Reason is for the salt shaker method I'm using I don't think the quantum, being so thin, will have enough body to adhere the pumice. Or recoat it.
So now since I'm not doing ice blue non skid, what should I use? I think cream is to dark, and I don't want snow white as it's to bright. Mediterranean white? Oyster white? Matterhorn white? off white?
 OIP
OIP , on Flickr
Re: The Plytanic 2.0 - FS17 Build
Posted: Mon Jun 15, 2020 2:06 pm
by Capt UB
What a beautiful boat!!!
How soon do you think you will be able to get her wet?
Re: The Plytanic 2.0 - FS17 Build
Posted: Mon Jun 15, 2020 2:33 pm
by silentneko
If everything I hope works going forward, I might be able to get it inspected the first few weeks of July. That said I have 2 small vacations lined up so who knows.
Re: The Plytanic 2.0 - FS17 Build
Posted: Tue Jun 16, 2020 7:35 pm
by silentneko
Well I don't know what else to say at this point besides screw this boat! So I had a plan, I was even upbeat about it talking to my friends today. No big deal I told them, live and lean, I'll have it redone by next week. I keep having challenges, but have kept moving forward. I've spent more then 35 hours this week and wasted a vacation day working on the paint. We will cirle around to this....
I started sanding it back down. Just enough to get rid of the air bubbles and orange peel. This paint is not nearly as tough as the interlux perfection. It burned through in many areas with just 320 grit and no real pressue. No big deal I though, I'll keep going cause I figured on needing at least 3 more coats of this paint.
 20200616_165734_resized
 , on Flickr
So I'm sanding along the sides and thought I might as well pull the tape since I'll want fresh tape after sanding on it. Freaking disaster! I bought what I thought was the best masking tape I could find. 3M automotive. The green kind for sharp lines that is solvent resistant. I've used it before with good results. Not this time, it bled pretty bad the whole way around the hull. I tried to use some solvent and acetone, but it is eating away the grafite epoxy more then the paint.
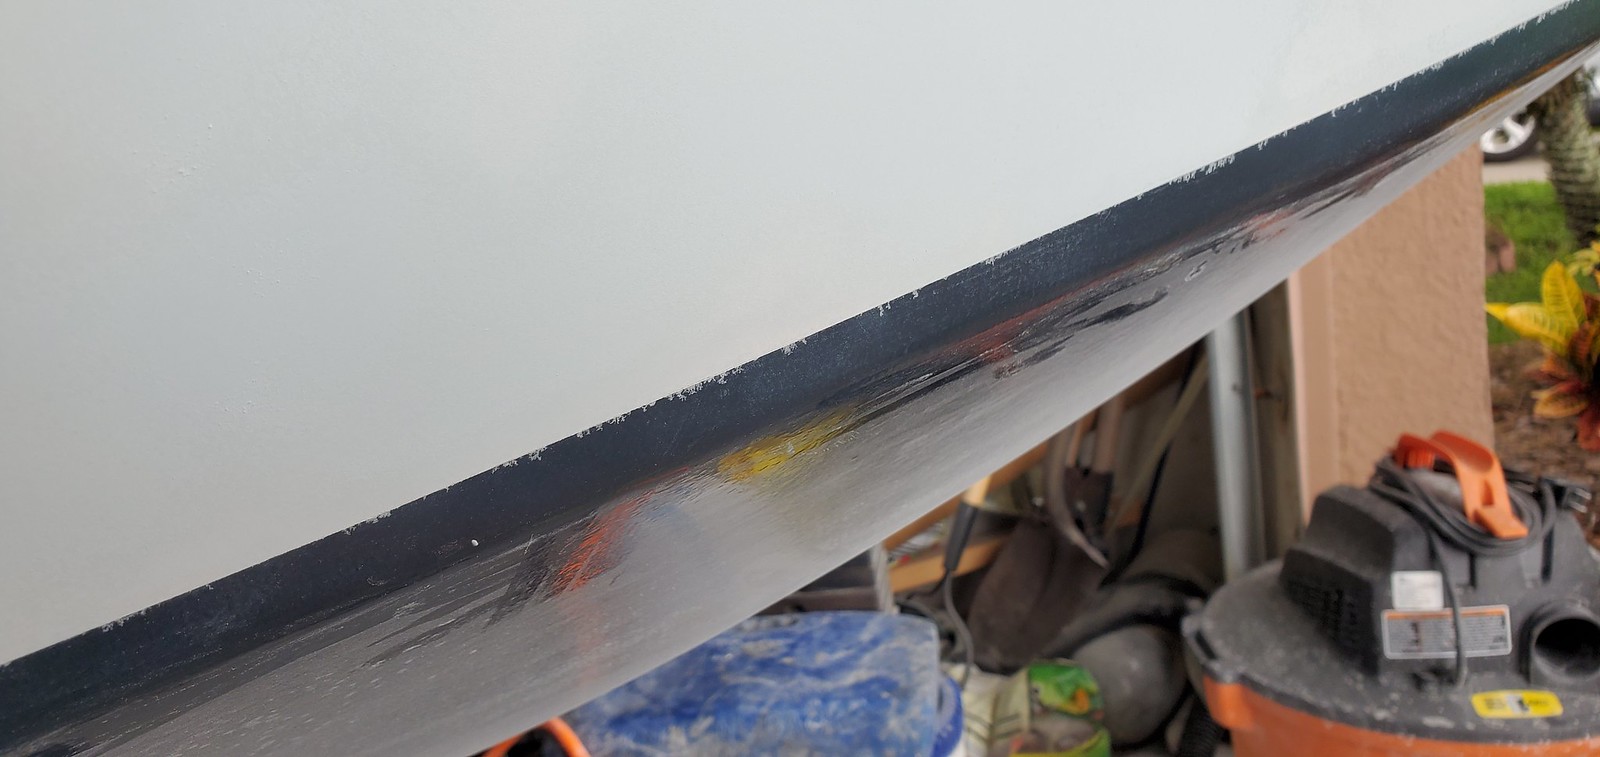 20200616_174959_resized
 , on Flickr
Now for the worst issue. The damn paint didn't adhere to itself!!! I was well within the recoat window. I was sanding a few spots and hit it with the airgun to get the dust off. The paint started chipping away. Hoping it was just one spot I tried a few others on the deck and they all were the same. The first 2 coats were intact and hard under the 3rd, it was just floating on top. So now ALL the paint must come off down to the glass pretty much and I'll have to reprime and start over from scratch! Meaning I need to buy new paint and primer again!
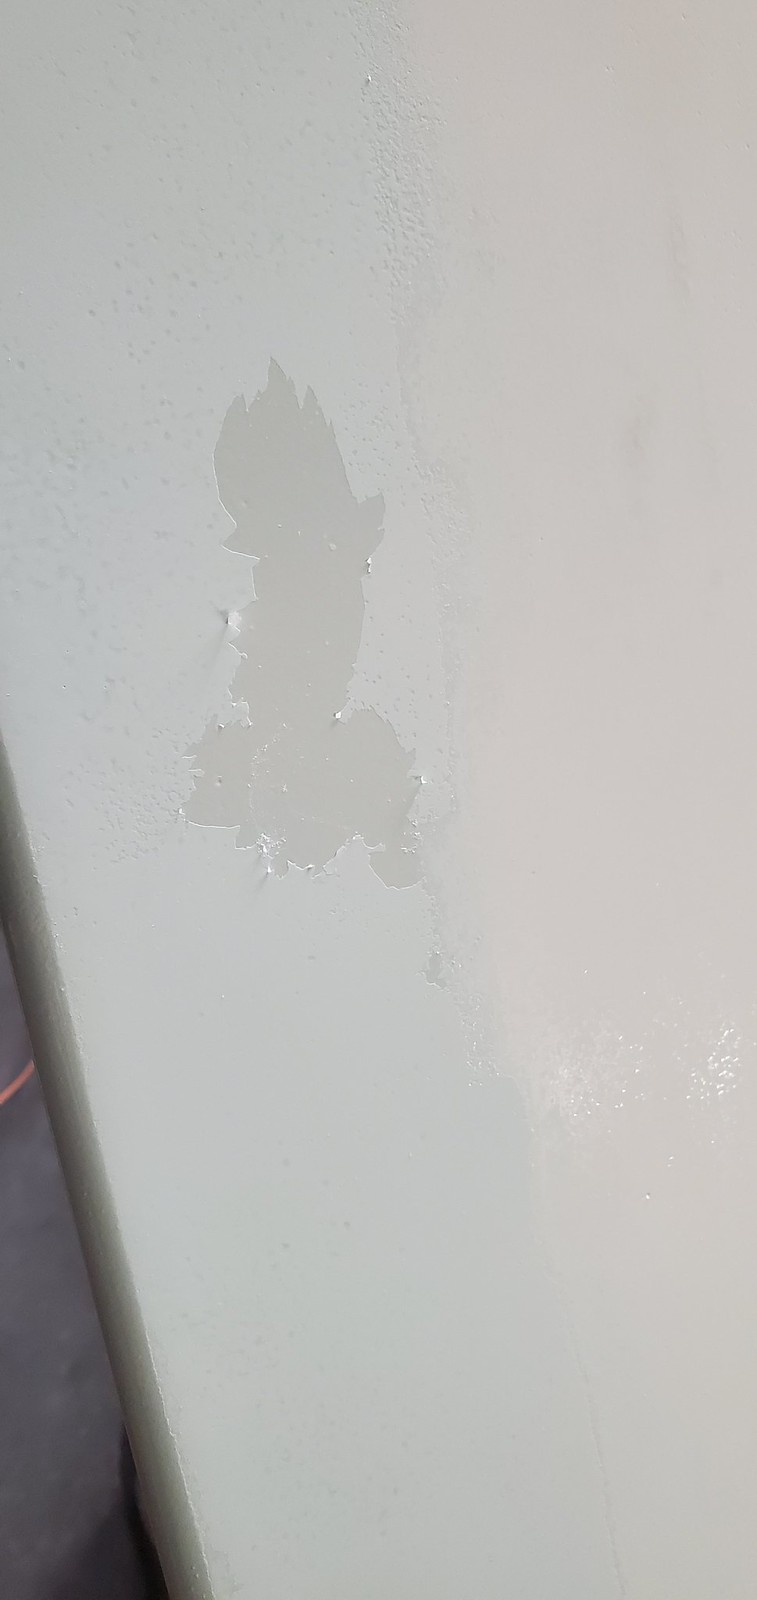 20200616_185217_resized
 , on Flickr
I am pretty disapointed with this EMC paint. Another waste of $600! This will be by far the most expensive FS17 ever built.
I really don't know how to move forward, you can only kick a dog so many times. My wife is trying to talk me off the cliff, but even she thinks it's questionable to spent money on a motor for it now.
Re: The Plytanic 2.0 - FS17 Build
Posted: Wed Jun 17, 2020 1:13 pm
by Dougster
Wow, so sorry to see that. I used EMC on the little SK14 and had such a different experience. Makes me wonder what's goin on with the stuff. I know I'd take a week off at least to re-group. It's cosmetic and fixable for sure, the cost being time and/or money. At my stage in life I'd give thought to dragging it down to my local body shop guy, who I know could make things right in no time. That'd be the "money will fix it" approach. The other approach is of course to get mad, sand it down yourself and do it over. Either way, it'll end up fine and once finished you'll sure have a fine boat. Don't blame you for feeling like poor old testament Job right now though.
Dougster
Re: The Plytanic 2.0 - FS17 Build
Posted: Wed Jun 17, 2020 2:33 pm
by silentneko
I'm trying to laugh about it all, but it's hard. If I take any more time off I'll end up missing my 3rd scallop season. I'm trying to figure out my path forward. Basically it's coming down to my paint choice. Obviously I'm not going with anymore EMC.
I think I have 2 choices. Try the interlux perfection again, or go with another single stage like rustoleum or brightsides. I'm leaning towards single stage to save money and just get on the water, but perfection would be better.
Looking through one of the old threads I see I was going to scrap the project 4/19/2018, but pushed on because of the money spent already. Lol, well that bit me in the butt huh.
Re: The Plytanic 2.0 - FS17 Build
Posted: Wed Jun 17, 2020 9:48 pm
by seaslug
I've been following your build from the beginning both on this forum and Microskiff. You've done an amazing job so far and it's a real bummer you're having paint problems. It's probably too late for this boat, unless you do sand it all the way down, but why have you not used Awlgrip? It's a bit pricey, but do it one time and never have to paint it again. I know you can't buff out Awlgrip to do touch ups, but it's so damn hard the only think that scratches it is metal or sharp Oysters. No worries dragging or poling through tree branches etc., they just don't phase it at all. 12 years in the Florida sun on my ketch and it still had a shine, and that's just 2 coats rolled and tipped over sanded gel coat, no primer. In 25 years using it I've never had it bubble, chip, peel, or any other negative effects, even painting in the blazing sun on a day over 90. The last boat I built I used the System 3 primer instead of the Awlgrip 545, and I'll never use the 545 again, the System 3 is excellent, especially if sprayed. I hope you don't have to go so far as to sand it all off. Good luck, We all look forward to seeing the splash. Mike
Re: The Plytanic 2.0 - FS17 Build
Posted: Thu Jun 18, 2020 8:58 am
by silentneko
Well it really is all a live and learn situation now. I was talked out of Awlgrip as guys say its a pro paint, and because of the VOC's and not having a supplied air respirator. Knowing what I know now, and having a vapor rated filter mask I may have reconsidered. For the next build I will do a bit of testing on multiple panels before I even start the build. unfortunately it looks like I'll have to sand all the way back down, and do 2 to 3 coats of primer again.
I was not super happy with the system 3 primer, it was listed here as a high build at the time, but it definitely is not. If I were spraying it would be ok. I switched to totalboat, its a high build barrier coat epoxy primer, and seems pretty tough when sanding it. I'll be sticking with it.
After talking more and more with my wife I think I'll end up using brightsides again. Its a step down from perfection, but a step up from the rustoleum marine. I'm familiar with it, and it held up on my skiff without waxing for 9 years ok. Only think is they don't have the exact color i want, so I'll mix it myself to get that ice blue.
Re: The Plytanic 2.0 - FS17 Build
Posted: Tue Jun 30, 2020 1:16 pm
by silentneko
So..... I hate this boat, lol. The more I sand the worse its looking. Some of the quantum is coming off in big chunks, some seems more soft like house paint, and some of it is hard. So I'm having to sand deeper and more aggressively to get through it all and down to primer or glass in most spots. This is ruining most of the final smoothing I did. So I get to sand and repaint a boat for the third time before it hits the water. It's a bit frustrating.
I took a week or so off already, went and played on the beach. Now I'm back and the new paint, Brightsides, should be here soon.
As far as what went wrong, who knows. I mixed it correctly, this I know. I allowed induction time. I was well within the recoat window and temp range. Even if the thinner all evaporated it should still stick, just not smooth out. Maybe its a humidity issue, but the instructions never stated a range and being solvent heavy you'd think it wouldn't effect adhesion. All I can do is chock it up to live and learn.
I'm so over it that I'm just gonna do what I can as quickly as I can to smooth it out with the orbital, then paint and move on with my life.
Re: The Plytanic 2.0 - FS17 Build
Posted: Tue Jun 30, 2020 1:28 pm
by Fuzz
Seems like this build has fought back from the very beginning
Did you kill a black cat at the start of the build
Re: The Plytanic 2.0 - FS17 Build
Posted: Tue Jun 30, 2020 1:42 pm
by narfi
I see a lot of different levels of finish here on the forum, and its easy to see you hold yourself to a higher standard. (all weave and tape lines are faired to invisible, the seams are faired to invisible, everything is glass smooth.
You are suffering setbacks, but your attention to detail now even with the issues is going to give you a very nice boat, in time the memory of frustration will likely fade and your pride in a job well done will remain.
We started around the same time, had similar goals and expectations in terms of time and looks, we have stayed pretty much neck in neck the whole way with our delays, we are near the end now, don't let it get you down
Re: The Plytanic 2.0 - FS17 Build
Posted: Wed Jul 01, 2020 7:01 am
by Browndog
Sorry to hear about your setbacks.
I’ve built five boats and during each build there was something that didn’t go according to plan. Mostly everything took longer than intended, something didn’t cure correctly, sometimes things cured too fast. Paint adhesion issues. You name it. Even after the boats were built there were sometimes things to modify, fix or replace.
Every time I talk to my brother after he uses the FS19 I am relieved when he says that the boat is running great.
It is particularly hard when you get to the sand, fair, prime and paint stage because it so time consuming and there doesn’t seem to be a whole lot of forward progress despite the large amount of effort expended.
I feel your pain.
Despite all of the setbacks, it does not diminish the excellent work that you have done and the years of enjoyment that you will get from your completed boat. It feels especially good when someone stops you at the gas station or boat ramp and compliments you on the boat that you built. Be prepared, sometimes it can be time consuming to answer the questions that people have about the finished boat.
Keep up the good work and know that you are not alone. My guess is that most of the builders on the forum have experienced a few setbacks along the way. Some admit to them, but a few might be too embarrassed to air their mistakes in public. I applaud you for sharing your troubles as you may have just warned a future builder that the particular paint you’ve been using requires unusual care in its use.
It may seem far off but sometime in the future you will get a laugh about it.
Until then, best wishes for continued success.
Re: The Plytanic 2.0 - FS17 Build
Posted: Wed Jul 01, 2020 3:44 pm
by cape man
I can't paint. I'm good with it. Your boat is gorgeous.
Re: The Plytanic 2.0 - FS17 Build
Posted: Sun Jul 05, 2020 6:33 pm
by silentneko
Fuzz, I had a black cat for all my other builds. We had to put him down a few years back and now shit went sideways, lol. I really can't figure out why so much went wrong this time, but I'll figure it out before the next build.
Nafari, the pics are a bit deceptive, I still have plenty of waves and a few tape lines here and there. That said, as this is my 4th build I did have high expectations of the finish. I spent a considerable amount of time and money, but as Fuzz noted there seems to be a black cloud following me. Your boat will be nicer then mine from what I've seen, and I hope you get it on the water soon. I'll keep plugging along, it's all I can do right, lol.
Browndog, as an experienced builder, like you said, I expected a few setback. This build just feels like a huge cluster of them. The other 3 boats I built, at least in my mind, seemed to go along much easier. Even the first that I counted as a learning experience. I do agree getting stopped at the ramp or at a gas station is a good feeling. My last boat that I designed, The Plytanic, got questions constantly. I even got a few offers to build a copy for decent money. I have talked to many guys on the side, and you are right, they don't want to post their failures. I think I'm a pretty honest guy, so if I mess up I admit to it cause you never know who it might help. I hope the future is not very far off, I just got a coat of primer down on the exterior again. Thanks.
Cape man, apparently I can't paint either, lol. I will say on my next project I will set up to spray everything. no more roll and tip jobs I think.
Re: The Plytanic 2.0 - FS17 Build
Posted: Sun Jul 05, 2020 6:58 pm
by OrangeQuest
I can NOT cut a straight line nor can I follow a line. Even with a guide I find a way to screw it up. That's why I like working with epoxy, easy to hide everything. That said, my line cutting skills are pretty good when you compare them to how I paint.
silentneko, you have came up with a lot of great ways to do things and I for one have learned a lot just following your build. You explain things so even a simpleton such as myself can understand them, even though I still ask a lot of questions. You overcome where others would have given up, this too, you will beat. I just hope once you get her splashed you have another project in the works!
Re: The Plytanic 2.0 - FS17 Build
Posted: Sun Jul 12, 2020 9:13 pm
by OneWayTraffic
What’s that old saying? It’s not the boat you’ve built until you have bleed on it sworn at it and threatened to take it out the back and burn it.
Try a regular oil paint? Easy to touch up and Foolproof.
Re: The Plytanic 2.0 - FS17 Build
Posted: Wed Jul 15, 2020 5:22 pm
by silentneko
Thanks OQ. I am a simpleton so I just write instructions for me to refer back on, lol. I do have a few more ideas for future builds, but this will be my last wood core build.
OWT, she has a bit of blood, and some

. Hind sight being 20/20 rustoleum marine would have been my choice, but i goofed up and bought brightsides.
I've put in some hours this week sanding, priming, sanding, and priming, and sanding..... definition of insanity! I don't think it's getting much better. The only thing I plan to use the epoxy primer on now are the hatch lids.
So while planning to paint this week I realized that rolling and tipping, even at 5am and 76 degrees, will be hard by myself to do the whole outside. So I'm gonna break it up a bit. If everything works out I'll put the first coat on the cap in the morning. Once it sets I'll continue sanding the sides, they will be painted in a few days.
That's the plan, I'm sure it will go sideways. Next project I will just spray it all at once.
Re: The Plytanic 2.0 - FS17 Build
Posted: Thu Jul 16, 2020 10:33 am
by silentneko
Work time was what I thought, dry to touch though hasn't happened yet. I woke up at 5am and went to work, done with the cap by 7am. Even though it was 74 outside, my garage retains heat so it was near 80. At 75 degrees it should dry to the touch in 2 hours. Here we are 3 hours later and its still wet. And its getting a ton of dust, and a few bugs. I was hoping it would be dry to the touch by now so I could start working on the sides, but with it wet I need to stay away.
It will be good enough, but truth be told I'm kind of regretting my purchase, again. Seeing how much dust it's getting, because it's to big to set up a makeshift paintbrush that works right, I wish I went with rustoleum. No its not a better paint, but it is polishable so I'd be able to deal more with dust. Oh well, moving on.
Re: The Plytanic 2.0 - FS17 Build
Posted: Thu Jul 16, 2020 10:51 am
by narfi
I have no experience with rolling and tipping at all, so maybe this is a stupid question.....
The cure times must depend on application thickness right? Is it possible that rolling lays it on heavier and therefor takes longer to cure than advertised? Just a thought anyways.....
Re: The Plytanic 2.0 - FS17 Build
Posted: Thu Jul 16, 2020 10:59 am
by silentneko
It is typically a little thicker, but the paints usually have drying times for both roll and spray. The 2 hours was for both. Its a single stage paint so a lot more effects it. It will dry eventually.
I'll figure out a way to spray in the future. Way more prep, but its just easier on the application side.
Re: The Plytanic 2.0 - FS17 Build
Posted: Thu Jul 16, 2020 11:28 am
by narfi
Easier to screw up too :p
But its all about compromises.
Re: The Plytanic 2.0 - FS17 Build
Posted: Thu Jul 16, 2020 11:55 am
by silentneko
I'd say the screw ups are equal but different. With spraying, once you get your gun set right, you run the risks of of sags mostly. With roll and tip you have drips and brush marks.
Spraying is easier on a big project to me cause blending light coats is simple and no air bubbles. Rolling and tipping you run into issues blending cause its drying as you are trying to knock down the air bubbles.
I've sprayed in the past, but the last time was when I repainted my jeep 6 years ago. I dont have any of the equipment anymore, and this boat barely fits in the garage making maneuvering with a gun near impossible.
Re: The Plytanic 2.0 - FS17 Build
Posted: Thu Jul 16, 2020 4:37 pm
by VT_Jeff
Total respect for your willingness/ability to push on despite the myriad obstacles and setbacks. Inspiring!
Re: The Plytanic 2.0 - FS17 Build
Posted: Sun Jul 19, 2020 9:23 pm
by silentneko
Thanks, but it keeps pushing back. Each time getting worse it seems.
I tried to apply a second coat of brightsides. I started around 8am, and ended around 11am, but it did not go any better. It actually tacked over faster and made painting much harder no matter how much brushing thinner I used. It's just way to hot to be doing this now. The days are to hot and the nights and early mornings are to humid.
I have 2 options. #1 the smart thing to do is shelve it for a few months until cooler weather comes around. #2 just slap some paint on it to get it done so I can fish already. Obviously I'm not going with option #1.
Outside of not applying well I ran into another issue. The paint is very streaky like it is rejecting the pigment. The tint I pigment I used is the same that I have used before on resins, and other paints (rustoleum, perfection, and a trial with an old can of brightsides). Never had any issues until now.
Those white streaks in the middle are not glare. So FML, lol.
It sucks, but I gotta move on. I have one more play, and that is the Rustoleum marine. I think I might just go buy a cheap spray gun, and give it a go. It can't be any worse right? I don't think I'll be able to roll and tip in this weather.
Re: The Plytanic 2.0 - FS17 Build
Posted: Mon Jul 20, 2020 10:26 am
by narfi
There are a couple small blemishes, but honestly that looks fine to me.... are you sure you arent being too hard on yourself?
How much would it cost to pull into a paint shop if you have done all the prep and they just need to spray? They have the equipment and the proper environment for it, and you don't have to learn a new skill at the last minute.
Just a thought, but honestly, if it all looks as good as your last picture, you should probably just be happy with it and go with it
Re: The Plytanic 2.0 - FS17 Build
Posted: Mon Jul 20, 2020 11:56 am
by cape man
My first coat I didn't wait for the induction before adding the reducer. Orange peel and gummy by the end. Second coat and a storm came through before it was dry and blew dust from outside the tent. 4th coat the roller went to hell on the last part of the console. At that point I said so what. No one has said she's ugly, in fact just the opposite. Go fishing!
Seriously, accept it and move on. Your boat will be gorgeous! I spent $1000 and 4 weeks plus prepping and repainting and didn't get what I hoped for, but I've been fishing and boating half a dozen times in the past two months. Everytime at the ramp, going or coming I get compliments and nothing about the less than perfect paint. Once you get the non-skid and all the hardware on she will look fine.
Re: The Plytanic 2.0 - FS17 Build
Posted: Mon Jul 20, 2020 2:08 pm
by silentneko
I can deal with the dust and blemishes, but the picture doesn't tell the whole story. You gotta see it, its tiger striped in blue and white and looks very obvious. If all I were doing is the top cap I'd move on and say screw it, but the sides will look like crap too. Being this boat took 6 times longer then my last did, and I didn't have to design this one, I'm honestly embarrassed at how its coming out.
I figure my disappointment in this boat should come at some benefit, so why not practice spraying? I've done it before, its just been a while. This way when I start building her replacement, sooner rather then later, I'll be good to go.
Re: The Plytanic 2.0 - FS17 Build
Posted: Tue Jul 21, 2020 9:25 am
by Coach
Pictures do not always tell the entire story, however based on that last one you sent over, I would move on.
I said to myself multiple times, it's mine and its ok. If I was building for someone else and didn't have a deadline...I would fix the issues I see on my build. I have drips and dust spots too. I also struggled a bit with the Awlgrip not covering previous coats, but ultimately I want to go fishing too as Capeman said. I too noticed streaking with the Awlgrip. Especially the blue. First coat mixed by hand and could see swirls of base whites and dye blues as I stirred. Second coat I used a paint paddle on a cordless drill. Didn't really help...and I had major issues with my coat #2 but I think that was surface prep more. My coat #3 was hand stirred. Same swirls. As the coats layered...much of that translucent appearance faded.
Just sharing some thoughts of what I went through. Based on what I see in that picture as an example ...it will look great! Good luck!
Re: The Plytanic 2.0 - FS17 Build
Posted: Tue Jul 21, 2020 9:34 am
by silentneko
I appreciate it. The issue is actually getting worse as I put more coats on. I guess this pigment is not fully compatible with the polyurethane, which is weird cause I used it before with success. There are entire sections of my rub rail and gunnels that almost appear white, while others have streaks of darker blue. It's ok, I'm not mad cause it's most likely my fault. I just gotta move on.
Re: The Plytanic 2.0 - FS17 Build
Posted: Tue Jul 21, 2020 8:47 pm
by Rollbar1
Very nice!
Approximately how much do you have in the boat?
Wife saw your build and asked me.
Thanks,
JB
Re: The Plytanic 2.0 - FS17 Build
Posted: Tue Jul 28, 2020 5:00 pm
by silentneko
I don't even try to keep track anymore. If I had to guess I have at lease $8,000, and over 600 hours of labor.
So it’s been a bit since I posted and I’ve been running down some ideas and issues. The paint has been a pain in my butt obviously, but I’m looking at this as an opportunity so try some stuff out. I’m setting up as best I can to spray. Yes, there will be some dust in it and no, it won’t look professional. That’s ok, I don’t really care anymore. So last we spoke I messed up by adding the wrong pigment to my paint. At least that’s what I’m going with although it worked previously. So I’m shelving that and moving on.
So I thought if I’m spraying then maybe I will try to get the EMC quantum to work. I tried calling their tech line, but they don’t have one, emails only. After days of waiting for answers I called FGCI where I bought it to ask some questions. They told me they stopped selling it shortly after I bought mine. After a bunch of customer complaints and in house trials they pulled it off the shelf.
Tech support from EMC finally got back to me after a week. I asked about the adhesion issue. The tech insisted I missed the recoat window which is up to 12 hours, and I think I painted about 7. She gave me some other BS about heat, but I reminded her their speced temp range is up to 95 degrees. Then she said it must be humidity, but I reminded her they do not spec a humidity range. Anyway, I wanted to know if I could adjust the ratio to spray instead of rolling, but the tech said I would need to buy a different activator. At this point I’m really just giving up on it, I might use it on something non essential later on.
Crazy thing to me is this paint is completely bonded to the plastic tray liner I used, I can fold it and it won’t even crack, but it wouldn’t bond to itself for some reason?
 20200701_115633_resized
 , on Flickr
So moving on. I used the last of the total protect primer on the hatches. These did not need to be perfect as the bottoms I don’t care about, and the tops will mostly be covered with nonskid. With the exception of the console hatch.
 20200717_065233_resized
 , on Flickr
I decided to just go with Rustoleum paint with enamel hardener added. I did this on my last boat and it held up better than expected for 9 years. Also no more pigments. I bought a can of blue and used just 15cc’s to tint white to a dark ice blue. I’m doing the hatches first as a test and to figure out the spray gun. The first coat was orange peel city, lol, but not horrible.
 20200725_123229_resized
 by
kevin lefkowitz, on Flickr
The second coat went on much better and smoothed things out. Not to bad I think.
 20200727_132903_resized
 , on Flickr
This is the gun rig I made to fill and hang it. They didn’t have one at the store so I made a temp rig out of old wire hangers. It works for now. I had to get creative with the adapters I had to get everything to work and be maneuverable. I’ll swap them out once I get to the store again.
 20200728_105045_resized
 , on Flickr
So this brings me to my latest issue. Not a huge one and it will work out. I went to set up the gun and all of a sudden I couldn’t get more then 20psi at the gun. After an hour plus of trouble shooting I found the issue. I installed a dryer/filter a few days ago, and it failed already. I wanted to push on so I removed it as I had a ball filter on also.
 20200728_144708_resized
 , on Flickr
So even with the ball filter on, apparently the Florida humidity got to me today. I rained yesterday, and we didn’t have a ton of sun today. Well live and learn, I need a better drier/water separator. So the more I sprayed the worse it got. Not a huge deal, but the one I needed to come out the best happened to be the last one I shot, lol. I will sand and reshoot with better equipment.
 20200728_143705_resized
 , on Flickr
So far I’m happier with the rustoleum, we will see it that continues.
Re: The Plytanic 2.0 - FS17 Build
Posted: Tue Jul 28, 2020 5:20 pm
by cape man
Build on!
Re: The Plytanic 2.0 - FS17 Build
Posted: Tue Jul 28, 2020 6:40 pm
by narfi
A couple of thoughts....
I like to use a ~6ft 'whip' hose to the gun with the regulator before it instead of right on the gun, the gun and paint cup is heavy enough for larger projects without having to be holding the regulator steady as well. (I know lots of people mount it directly to the gun though, and it may even be the standard, i dont know)
We use a huge desiccant filter thats like 10" tall by 4" across.... but we also live in a very dry environment for as much as it rains (people often get nose bleeds moving here).
I don't think I used a water filter at all when painting Landon's canoe in the tent, but cant remember for sure.
I wonder about getting a slightly larger filter, but one you can bake(dry out) the beads out of, so its easy for you to change out without any real extra cost. Those beads are the same material in diapers, and can buy for kids science projects in different colors for swelling up, or powdered for making 'snow'. (you are not supposed to put it down your septic system!) You can also see them in false spark plugs for putting in engines during extended storage periods.
Re: The Plytanic 2.0 - FS17 Build
Posted: Thu Jul 30, 2020 11:00 am
by silentneko
It was suggested to me to keep the regulator on the gun for more precision, but I don't think moving it a few feet is an issue either. Many of the guns come with it installed this way. Honestly though, its not very heavy even loaded with paint. I'm keeping the 90 degree elbow at the base though, that gave me like 6 inches more room when trying to get into tight places.
I couldn't find any large desiccant filters locally. I did buy another water trap. So I'm going to rig everything in series and see if it helps. First the larger water separator, followed by the mini water filter, then an inline desiccant filter, and a small ball filter by the end. Hopefully this does something better.
Re: The Plytanic 2.0 - FS17 Build
Posted: Thu Jul 30, 2020 11:10 am
by OrangeQuest
I am hoping soon you will have some good news to post. It has to be very upsetting that this paint job is fighting you the whole way.
Re: The Plytanic 2.0 - FS17 Build
Posted: Thu Jul 30, 2020 11:17 am
by narfi
also another thought, you have probably already done this, but I often miss the most obvious when I am frustrated with something..... Have you drained the valve on the bottom of your compressor tank?
Re: The Plytanic 2.0 - FS17 Build
Posted: Thu Jul 30, 2020 11:32 am
by silentneko
Oh yes, but I'm working in 90% humidity here. Actually the extension off the bottom of the gun was a new remote drane kit I bought, but had to temporarily repurpose it when I needed another 90.
Re: The Plytanic 2.0 - FS17 Build
Posted: Fri Jul 31, 2020 3:19 pm
by silentneko
I went at it again today, with mixed results, but not to bad. I bought another water separator for my compressor. So I had a full size seperator, backed up by a second mini separator. Then a short 3ft hose that had an inline desiccant filter and a ball filter before the second regulator and gun. Crap that's a lot of stuff huh, lol. I also attached the new remote drain valve kit.
Well the desiccant filter failed again. I couldn't get more then 25psi out of it so I had to quickly disconnect it and start spraying. I had just one hiccup. A water spot in the last hatch, but it's were the nonskid is going. I ordered a new mounted desiccant filter with the reusable beads as it was recommended. This should take care of the rest of the water issues.
Outside of that I think I'm going to switch back to mineral spirits for thinning. I know guys like acetone for spraying rustoleum because it dries faster, but at 90 degrees it's not an issue, and I think it will benefit from additional flow out. Assuming I finish the last coat on the hatches this weekend, I will sand and prep next week to do the bulk of the remaining painting.
Re: The Plytanic 2.0 - FS17 Build
Posted: Fri Jul 31, 2020 3:24 pm
by narfi
Sounds like you are working out the kinks, thats good!
Re: The Plytanic 2.0 - FS17 Build
Posted: Fri Jul 31, 2020 3:46 pm
by silentneko
I'm trying. I've spent more on compressor accessories this week then the compressor cost. Just got a new intake filter too. I tried setting up fans on it today to cool the incoming air, no change.
Outside of putting it inside my house with the A/C (wife already said no) not sure what else I can do.
Re: The Plytanic 2.0 - FS17 Build
Posted: Thu Aug 20, 2020 11:38 am
by silentneko
I got the water issue handled. The added dessicant filter combined with drafting air from inside the house via a hose worked well.
That's the good news. The bad news is the boat looks like shit. I had to sand off the primer I applied because it was rough and hardened like cement. Normally the hardening is a good thing, but the texture from the roller made me have to grind past it in some spots. This exposed the EMC under it which was softer, leading to some burn through. In the end I had to grind down most of the sides and transom again. This in turn made them pretty wavy and exposed a tone of pin holes i previously covered up.
I decided to go ahead and do a coat of rustoleum just to see what happens. Well I was fighting the compressor dropping in pressure. The tube I had running to the inside was getting pinched at the filter. I removed it and it worked better, but I still didn't get a smooth coat.
It's pretty horrible. Embarrassing really. I'm going to do another coat, sand with 320, and do one more and call it for the exterior.
Re: The Plytanic 2.0 - FS17 Build
Posted: Thu Aug 20, 2020 11:41 am
by silentneko
With that said, I am really starting to struggle with the financial aspect of this build. I'm not happy with the boat at all, and I'm sure I am north of 10k already. Looking over her today I can see there is not a straight edge or panel in the boat thanks to the early issues, and the floor still has a tone of flex despite being reinforced.
Since I'm not happy, does it make sense to drop another 7k on a motor? I have no alternatives here since you can't find a decent used one these days, and if you do they want near new prices.
So my choices are dump 7k into this boat, or say I speny 3 years of my life and move on to a different project. I appreciate everyone's words of encouragement over the years, but I really need to find a path forward as my kids are growing quick.
Re: The Plytanic 2.0 - FS17 Build
Posted: Thu Aug 20, 2020 12:17 pm
by narfi
I spent a lot of time and effort into making mine look as good as I could and while I am happy with the result, there are lots of flaws there still.
After each of the first two trips out I pulled it into the back yard and rinsed it off really well. Since then we haven't.... It is full of sand and bark and spilled coffee and a punctured soda can...... hauling Landons Kayak and canoe around has scratched spots, etc......
Once you are on the water, you wont care about the looks, your kids wont care about the looks, you will just be enjoying life. And to be honest, it will look good, just not the art project we each pictured during our hours of sanding.
I forget where you live, but perhaps wait another month when people start selling their summer toys in preparation for buying winter toys and see if you can find a good deal?
Alternatively buy a good new motor now you know will give you no issues and go have fun.
For a bit of perspective, I see two extremes on this forum,
I have seen many boats launched here where the weave on the tape for all seams is still visible. - they ended up with a structurally sound boat they could take out and have fun with as quickly as they could and were happy with it.
I have seen many boats launched here with meticulous fairing, priming, sanding, priming, sanding, priming, sanding to 300+, painting, sanding, painting, sanding, painting till it was show quality. they were also happy with their boats.
I never sanded finer than 120 before painting mine and it came out glossy and fine. (other than the very fine my wife used to polish some scrapes i put on the consoles moving them before cured)
Everyone has been encouraging because we want you to succede, it is obvious how much work you have put into it, and we want you to be as happy with your boat as we are with ours.... nearly all of that is perspective though..... Pictures always look pretty and don't show the flaws, people taking pictures (usually) try to show the good side of their projects, even when I try to show the flaws and mistakes I made doing mine, the pictures ended up looking nice...... Recognize that when forming your expectations for yourself..... It isnt going to be as nice as the pictures you see here, but it will be as nice or nicer than the reality of the subjects of the pictures here.....
Bottom line, stop your **** get a motor and take your kids out for some well deserved fun.
Re: The Plytanic 2.0 - FS17 Build
Posted: Thu Aug 20, 2020 12:26 pm
by silentneko
Thanks Narfi, I needed that, lol.
I think the part that is most disappointing to me is this isn't my first build. This is my 4th and by far the worst fit and finish I've managed imho.
A consideration to keep going is what happens in 2-3 years. I'm already planning a replacement, but the 60hp might not be enough for it. My family just wants me to join a boat club, I'm not there just yet.
Re: The Plytanic 2.0 - FS17 Build
Posted: Fri Aug 21, 2020 6:57 am
by cape man
Throw some paint on, buy an engine, finish the wiring and hardware and take the kids out. My orange peel, drips, chunks of dirt in the paint don't bother me anymore, nor does the wonky lines on the chine that I never fixed., and the hatches that don't seal like i wanted, or the.....
Seriously. You are being too hard on yourself and have too much time and money in it to walk away.
Re: The Plytanic 2.0 - FS17 Build
Posted: Fri Aug 21, 2020 12:30 pm
by silentneko
I'm just trying to justify 3 years of my life. I don't even care about the money much, but I can't get the time back and I feel it was wasted mostly.
My paint drama continues. I just messed up this coat so bad I'll need to grind it off again. Drip city. It was my fault this time as I tried to get the tight edge under the rub rail. I'm switching back to rollers. Not even going to tip it, just sand it down, roll on a coat and move on with my life. I was just talking with my wife about how much work is left before I can even get it inspected. Lots.
Re: The Plytanic 2.0 - FS17 Build
Posted: Fri Aug 21, 2020 4:25 pm
by OneWayTraffic
SilentNiko, have you considered a vinyl boat wrap? Cost would be comparable to a good paint job if done professionally and you could get one with a loud design. Would cover and break up the fairing issues.
https://www.fishing.net.nz/fishing-advi ... oat-wraps/
Re: The Plytanic 2.0 - FS17 Build
Posted: Fri Aug 21, 2020 4:42 pm
by joe2700
silentneko wrote: ↑Fri Aug 21, 2020 12:30 pm
I'm just trying to justify 3 years of my life. I don't even care about the money much, but I can't get the time back and I feel it was wasted mostly.
My paint drama continues. I just messed up this coat so bad I'll need to grind it off again. Drip city. It was my fault this time as I tried to get the tight edge under the rub rail. I'm switching back to rollers. Not even going to tip it, just sand it down, roll on a coat and move on with my life. I was just talking with my wife about how much work is left before I can even get it inspected. Lots.
I was going to suggest you just roll paint or pay someone to spray it and get on the water. If you like the boat you can make the paint better a few years down the road, but for right now you aren't enjoying the process, especially spraying, so get it done and out on the water as soon as you can.
You may not love the aesthetics for the time you've put in but you are most of the way towards a capable boat, so at least get that out of it. Just my 2 cents, hope you are able to find a way forward that works for you. There are a ton of wonderful boats without a perfect finish that people get years of enjoyment from.
Re: The Plytanic 2.0 - FS17 Build
Posted: Fri Aug 21, 2020 5:01 pm
by silentneko
Wraps cost to much and a pro paint job is more then this hull is worth. If something doesn't go well soon I might just camo it to hide everything. I'm going to finish it because I don't know what else to do. How long I actually keep it before building a better hull I don't know.
It's just a head game now. I've built 3 other boats, several cars, a few motorcycles, and quite a few houses in my youth, but never had a cursed project before.
Re: The Plytanic 2.0 - FS17 Build
Posted: Fri Aug 21, 2020 7:50 pm
by Fuzz
While some of the guys build works of art not all of us do. And the ones with a few warts get enjoyed just as much or more. There is such a thing as having one that is too nice to enjoy using
Have a good buddy with a million dollar sport fisher. Dang thing has white leather furniture. How the heck do you catch fish on something like that
Only thing it is good for is rounding up bikinis that will fit in a shot glass
Re: The Plytanic 2.0 - FS17 Build
Posted: Fri Aug 21, 2020 11:31 pm
by Bogieman
I say build on! She might not be perfect in your eyes but for those of us who followed your build we know she’s built well. For what it’s worth I spent a lot of time on tipsy‘s paint job but after having her out a dozen times she’s already dinged up and no longer looks new -now I question whether or not it was worth putting that much time and effort in to begin with. In the end ( I think) the most important is the quality of construction


Re: The Plytanic 2.0 - FS17 Build
Posted: Wed Oct 21, 2020 3:31 pm
by silentneko
Well it’s been a bit since I posted. Progress has been made. I rolled on some rustoleum on the exterior. She has some roller marks, brush marks, orange peel, drips, and a few bugs, but it looks good enough from 20ft away so good enough. I also rolled some satin white on the cap with similar results, but much of it will be covered up by non skid.
With that done I am able to work on some other things before painting the interior. I started the rub rail. So Tessilmare likes to brag that their rub rail can make it around a tight corner, well I’m calling BS on their definition. The videos they post show you how to go around a maybe 3” radius which is tight on a 40ft yatch, but not on a skiff. I’ve found personal youtube videos, but none that show a great bit of detail. The track will NOT bend around a sharp corner, as soon as I tried it folded over and warped. So I had to just cut the track and I’ll work out the rubber later.
 20201020_112317_resized
 , on Flickr
You can see how the rubber distorts, but I’m hoping I can clean it up later with a heat gun. It’s a bit worse around the bow.
 20201020_112303_resized
 , on Flickr
So back to the track. It’s a bitch to install! It comes in a coil and it is ridged plastic. I tried to straighten it but it resists a lot. I ended up just muscling it for the starboard half, and it took nearly 2 hours. For the port side my wife was able to help, and with her just managing the coil I had it drilled and screwed in about 20 minutes. I need to add a few more screws still. My plan is to let it relax for a week or 2 while I work on other things, then I’ll remove the track squirt some epoxy in the screw holes, let it cure, then dab them with some 4200 and reinstall everything.
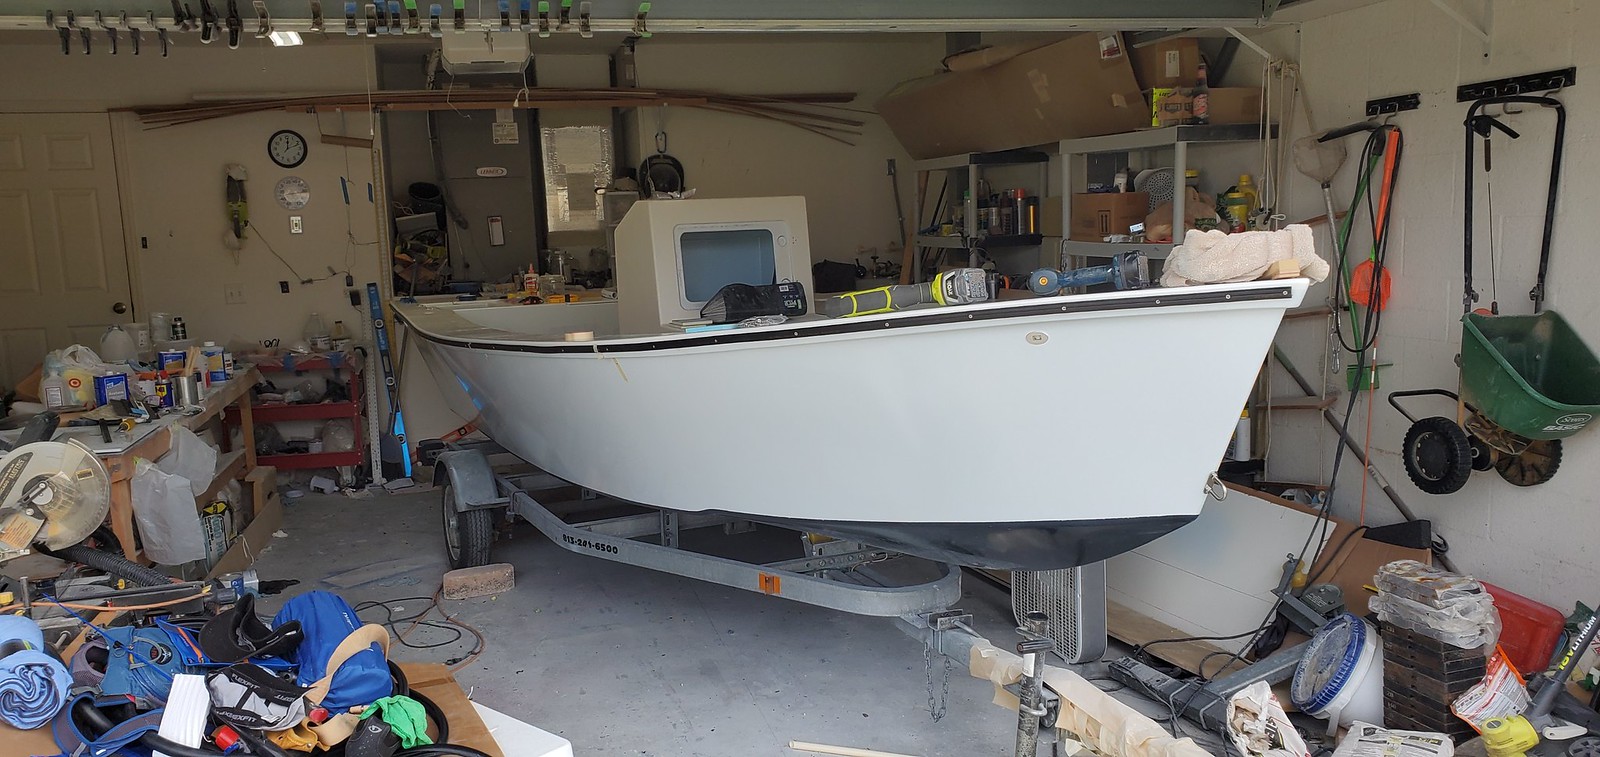 20201020_121954_resized
 , on Flickr
Among some other small items I was able to install the navigation lights I got from Oznium. They are barely noticeable in person, unlike the giant sharkeyes I was going to use.
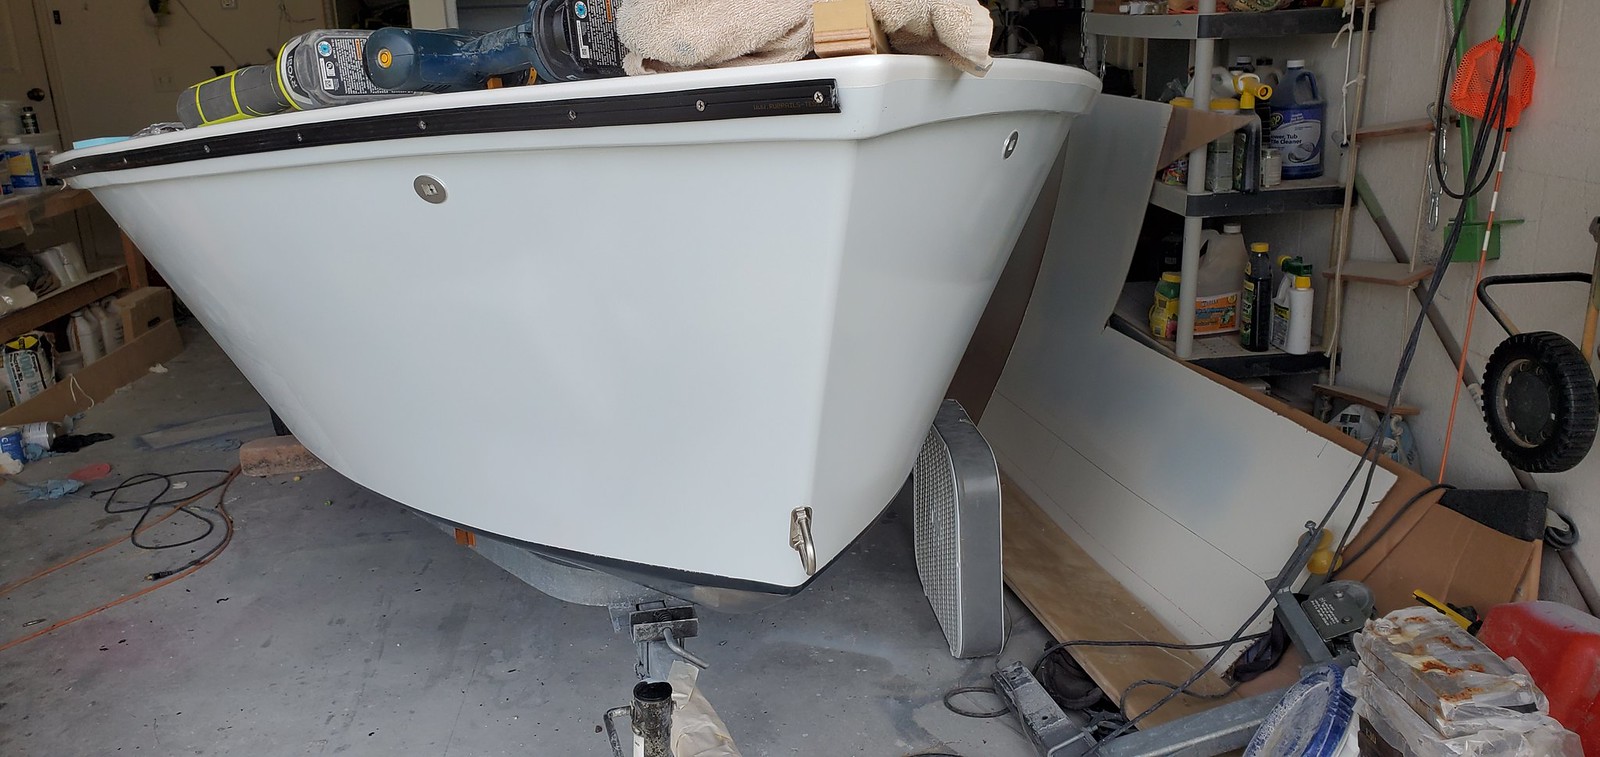 20201020_122015_resized
 , on Flickr
Installed the rear cleats, hinges, and stern light.
 20201020_122041_resized
 , on Flickr
Also did the fittings for the livewell, bilge pump, livewell pump (still have to intall the scoop), stern and bow eyes, and the underwater LED’s.
 20201020_122050_resized
 , on Flickr
I finished up most of the rear wiring. Working through that tiny inspection hatch is a pain, so I might need to change it out for a bigger hatch.
 20201021_135124_resized
 , on Flickr
 20201021_135047_resized
 , on Flickr
More to come.
Re: The Plytanic 2.0 - FS17 Build
Posted: Wed Oct 21, 2020 4:15 pm
by narfi
good to see you back at it!!!!
Good looking progress too.
Re: The Plytanic 2.0 - FS17 Build
Posted: Wed Oct 21, 2020 5:53 pm
by Bogieman
Re: The Plytanic 2.0 - FS17 Build
Posted: Wed Oct 21, 2020 6:44 pm
by Jeff
Nice progress!!!! Jeff
Re: The Plytanic 2.0 - FS17 Build
Posted: Wed Oct 21, 2020 9:40 pm
by Fuzz
I had a heck of a time with the track myself. I am told if it is hot outside and you can lay it out you can get it to lay flat. I do not know if it works as it was below zero when I installed it.
Your boat is coming along nicely.
Re: The Plytanic 2.0 - FS17 Build
Posted: Thu Oct 22, 2020 2:50 am
by OrangeQuest
Good to see you at it again! Boat seams to be coming along nicely.
Re: The Plytanic 2.0 - FS17 Build
Posted: Tue Oct 27, 2020 6:01 pm
by silentneko
I tried setting it in the sun, it never got hot enough to help. Neither did a heat gun help with uncoiling it.
I'm slapping paint on when I can, and while waiting for it to dry I'm doing some small things. Some minor electrical, some more plumbing... And now I'm playing with the non-skid. I'm cutting it all out with a razor so it won't be perfect, but nothing else is so it will match, lol. I'm using a 1:2 mix of medium and fine pumice.
 20201027_141940_resized
 , on Flickr
I may have gone a bit heavier then needed on this first try.
 20201027_144101_resized
 , on Flickr
Re: The Plytanic 2.0 - FS17 Build
Posted: Thu Oct 29, 2020 8:51 pm
by silentneko
Well I think it came out pretty good.
 20201029_105748_resized
 , on Flickr
Not the straightest of cuts, but not to shabby. The ice blue against the white is subtle but nice I think.
 20201029_105756_resized
 , on Flickr
With the test area done I moved on to doing the rest of the cap. I left areas in the back without it because it's either a place no one will ever stand, or a place I might put more equipment. I can always add more later.
 20201029_163004_resized
 , on Flickr
 20201029_174550_resized
 , on Flickr
So I think the medium mixed with the fine pumice is bit rougher then I'd like. However it wasn't worth grinding the cap down and redoing everything, so I'm using the same 1:2 mix on the rest of the cap. Moving on the floor and front hatch will get just fine ground pumice.
Re: The Plytanic 2.0 - FS17 Build
Posted: Thu Nov 05, 2020 8:48 am
by Bogieman
Very nice!
Re: The Plytanic 2.0 - FS17 Build
Posted: Thu Nov 05, 2020 10:33 am
by Jeff
Looks good!!! Jeff
Re: The Plytanic 2.0 - FS17 Build
Posted: Thu Nov 12, 2020 2:18 pm
by silentneko
This will be a longer post the usual. Because I couldn’t get onto the forum due to the migration I missed a post or 2, so let me catch up. I’ve been rushing a bit due to going in for shoulder surgery soon, and I wanted to get the boat as finished as possible before. So….
I installed the console hatch door and latch.
 20201104_165253_resized \
, on Flickr
With the caps non-skid pretty much done it was time to work on the interior. I decided to incorporate a fish ruler into the front hatch. It’s 24” long.
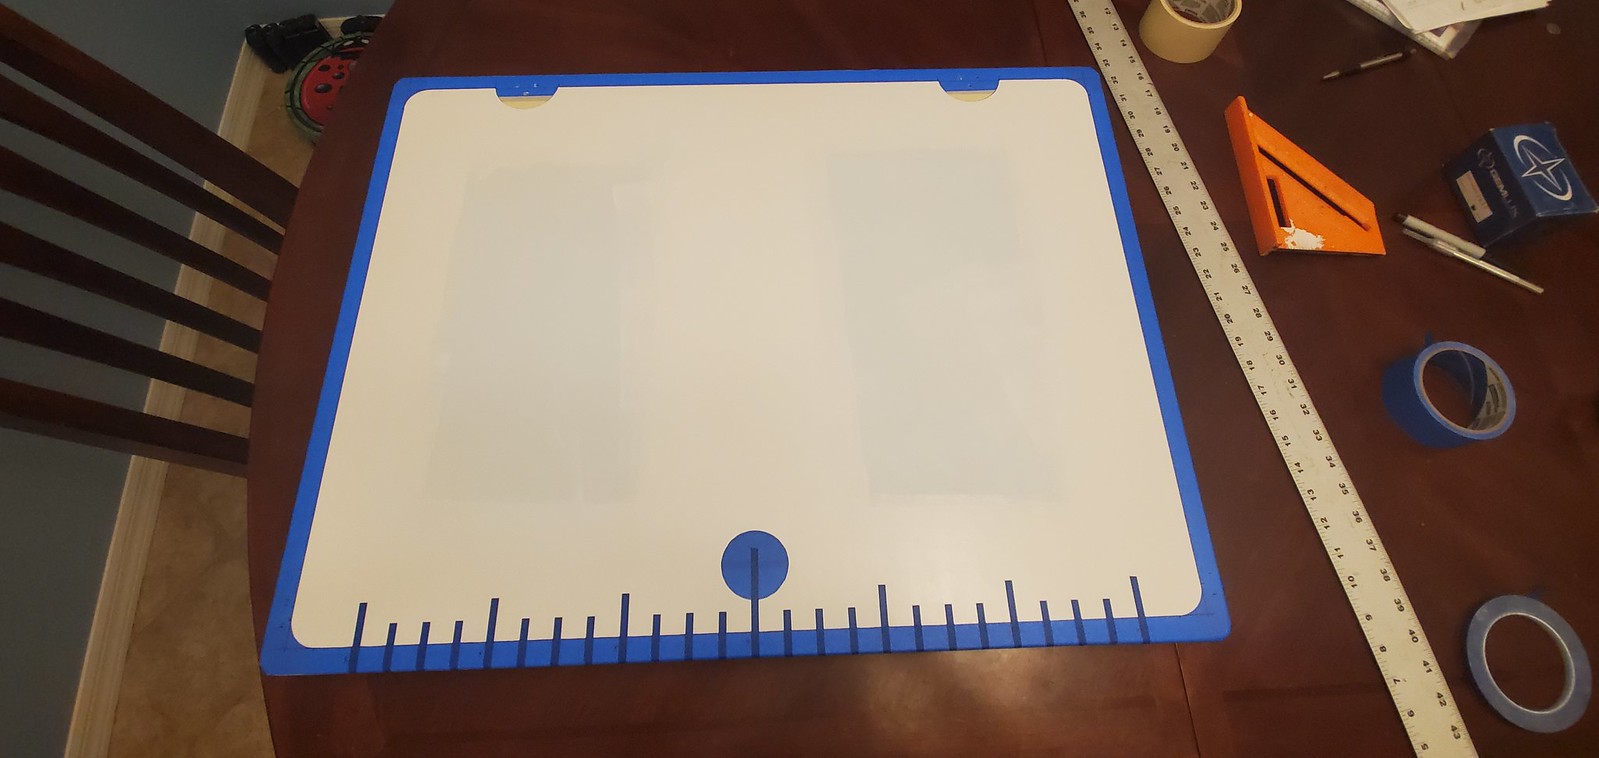 20201105_215128_resized
 , on Flickr
I wired up the switch panel and bought a new group 24 deep cycle to run the engine and onboard systems. I will buy a group 27/29 later on for the trolling motor. With the battery I was now able to inspect my handy work. Everything works as it should. The Oznium navigation lights are nice and bright, brighter then the attwood LED’s I used last time.
 20201111_171747_resized - Copy
 , on Flickr
Here are the underwater LED lights. This is in the daytime, cloudy outside, with the garage lights turned off. For the money and low power consumption they put out a good amount of light.
 20201111_171708_resized
 , on Flickr
So I spent the week finishing up most of the little things. I installed inspection plates, hatch spring, bungee cords, helm, tank, fuel lines……
This morning she was inspected by the FWC! I’ll have to wait a month or more for the FL numbers and HIN, but I’ll be down with the surgery anyway. I’ll arrange to buy and hang the motor in late January or February. This is how she sits this morning. Everything is basically done, except for the rubrail, which is ready to go back on.
 20201112_112349_resized
 , on Flickr
 20201112_112324_resized
 , on Flickr
 20201112_112306_resized - Copy
 , on Flickr
 20201112_112249_resized
 , on Flickr
Here is a close up of the fish ruler.
 20201112_112258_resized - Copy
 , on Flickr
 20201112_112232_resized - Copy
 , on Flickr
 20201112_112224_resized - Copy
 , on Flickr
 20201112_112440_resized
 , on Flickr
The life vests will be stored behind the bungee cords.
 20201112_112434_resized - Copy
 , on Flickr
I’ll get more pics once the motor and rubrail are done.
Re: The Plytanic 2.0 - FS17 Build
Posted: Thu Nov 12, 2020 2:38 pm
by Jeff
Very nice!!! Jeff
Re: The Plytanic 2.0 - FS17 Build
Posted: Thu Nov 12, 2020 3:01 pm
by Jaysen
quiet cat, let me know if you are still having issue. Mobile is still making me angry, but nearly everything else should be working.
Re: The Plytanic 2.0 - FS17 Build
Posted: Thu Nov 12, 2020 3:59 pm
by silentneko
Some of the tabs still look a bit off, but everything seems to be working ok.
Re: The Plytanic 2.0 - FS17 Build
Posted: Thu Nov 12, 2020 4:22 pm
by Jaysen
silentneko wrote: ↑Thu Nov 12, 2020 3:59 pm
Some of the tabs still look a bit off, but everything seems to be working ok.
Assuming mobile... I'm hating mobile anything right now....
Re: The Plytanic 2.0 - FS17 Build
Posted: Thu Nov 12, 2020 5:15 pm
by narfi
It is looking really nice!
Re: The Plytanic 2.0 - FS17 Build
Posted: Fri Nov 13, 2020 4:47 am
by cape man
Looks great from here. Good luck with the shoulder!
Re: The Plytanic 2.0 - FS17 Build
Posted: Wed Nov 18, 2020 7:20 pm
by Bogieman
Looks great!
Re: The Plytanic 2.0 - FS17 Build
Posted: Mon Dec 21, 2020 2:17 pm
by silentneko
Well finally some good news. I got her titled and registered today.
A story of pure bureaucracy:
FWC refused to come look at my boat until it was 100% water ready except for the outboard being mounted. I tried to get it done when it was mostly through the paint process so I could get the outboard mounted before I went out for shoulder surgery, but no dice. So I got them to finally come a few days before I went out.
I had receipts proving I paid taxes on the materials, and pictures of the build waiting. The FWC officer looked over the boat for a few seconds and got her laptop out to take some info. It was a simple form that along with the pics and receipts she was required to send to the state.
More then 5 weeks later I received a package in the mail. It had her simple form, a generic application for title, and a simple affidavit to sign assuring it is a home build. They also returned my pictures for some reason, but not the receipts.
The above is what I'm annoyed about. There was no magic stamp or forms provided by the state. She could have, if allowed, emailed me the forms right there and I could have gone to the tax office an hour later! This was Government red tape on full display.
Well I took the forms to the tax collectors office. 40 minutes later I had a title, registration, and a sticker. They didn't need the pictures since it was inspected by the FWC, but they needed the receipts. Luckily I had copies with me.
I'm good, once my shoulder heals more, to go get the outboard installed, and put on the FL numbers, HIN, and capacity sticker. So she still might not touch water until sometime in February.
Re: The Plytanic 2.0 - FS17 Build
Posted: Mon Dec 21, 2020 2:40 pm
by Jeff
Congrats!!! Jeff
Re: The Plytanic 2.0 - FS17 Build
Posted: Mon Dec 21, 2020 7:41 pm
by silentneko
Now that I gotta wait more I figured I could work on the logo. Originally I was going to do something to incorporate a wood pattern, or the flag from the white star line (Titanics builder). However since I grew to swear it was cursed, I have renamed the boat The Curse of the Plytanic. With that I thought I'd take a spin at the logo from the show The Curse of Oak Island. Let me know what you think.
 OAKISLAND
 , on Flickr
 CURSE WEB
 , on Flickr
Re: The Plytanic 2.0 - FS17 Build
Posted: Tue Dec 22, 2020 6:25 am
by cape man
While I see the humor, not sure I would name a boat anything that includes the word cursed. Your build issues are about to be rewarded with years of boating joy. She looks great!
Re: The Plytanic 2.0 - FS17 Build
Posted: Tue Dec 22, 2020 7:11 am
by silentneko
Everyone warned me not to name my last boat after the Titanic/Britannica, but she survived near a decade of heavy abuse. She has since been passed on to a friend who will use her for many more years hopefully.
She will get tested plenty once on the water, including a week in Marco this summer and a campout in the ten thousand islands.
Re: The Plytanic 2.0 - FS17 Build
Posted: Tue Dec 22, 2020 2:32 pm
by OneWayTraffic
I like it. I've felt like my build has had its share of issues, but yours is looking great.
Re: The Plytanic 2.0 - FS17 Build
Posted: Mon Apr 05, 2021 2:06 pm
by silentneko
So I finally took her out of the garage. She's looking pretty good in the sun. She will never look this good again, lol.
 20210316_140540_resized[6554]
 , on Flickr
So originally I planned on a Suzuki 60hp because it was the lightest at the time. Then came the new Tohatsu and it shaved off another 10lbs or so. Both were available in white so I was happy either way. Well thanks to Covid the manufacturing and shipping has been a mess. I'm looking at maybe late June to get either one. That wouldn't be an issue except I have a really nice house booked for Marco Island in early June and need this boat for it. Wednesday is my last day to cancel and get my money back, so I frantically called every dealer I could in the state. Many said I think we can get you one in a month.... most were honest and told me maybe June or July.
The good news.... I found a 60hp Tohatsu, his last one, at Citrus Marine. The neutral news.... it's not the white I planned on, but it is actually dark blue so it will match the boat. I drop it off on Wednesday for the install.
Re: The Plytanic 2.0 - FS17 Build
Posted: Mon Apr 05, 2021 2:30 pm
by cape man
Very Nice!!!!
Re: The Plytanic 2.0 - FS17 Build
Posted: Mon Apr 05, 2021 2:55 pm
by narfi
I know its been a love hate relationship for you, but that is looking pretty nice, its finally paying off and sounds like the motor will work well also.
Re: The Plytanic 2.0 - FS17 Build
Posted: Mon Apr 05, 2021 2:59 pm
by Jeff
Congrats silentneko!!! It has been a long road for you but you are nearly to the water!!!! Jeff
Re: The Plytanic 2.0 - FS17 Build
Posted: Mon Apr 05, 2021 9:33 pm
by TomW1
Man it has been such a long road for you. Glad your getting a motor and a new house all at once. You deserve it. Marco Island is beautiful.
Tom
Re: The Plytanic 2.0 - FS17 Build
Posted: Wed Apr 21, 2021 9:17 am
by Bogieman
Congratulations ! Very nice
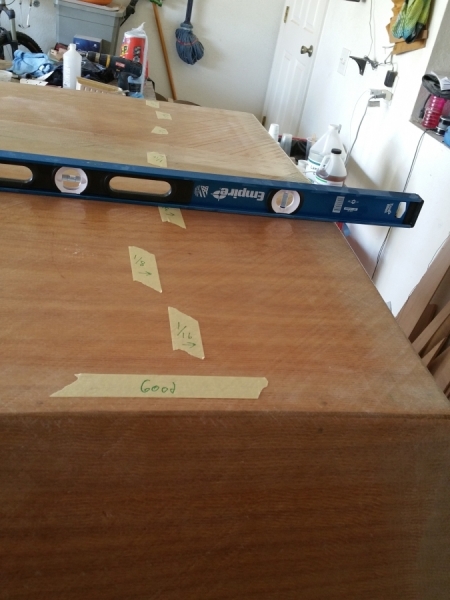
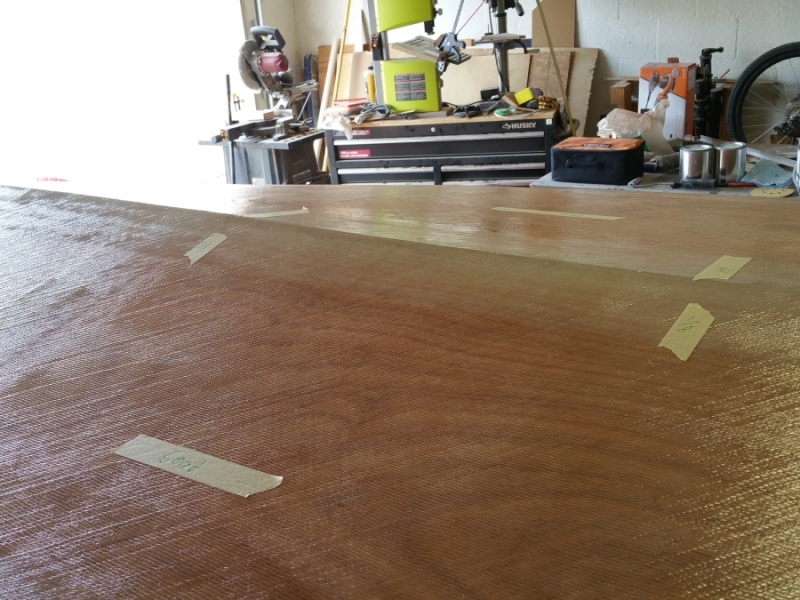
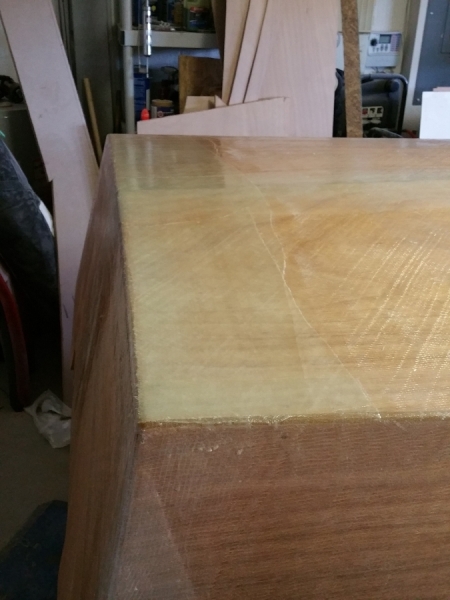
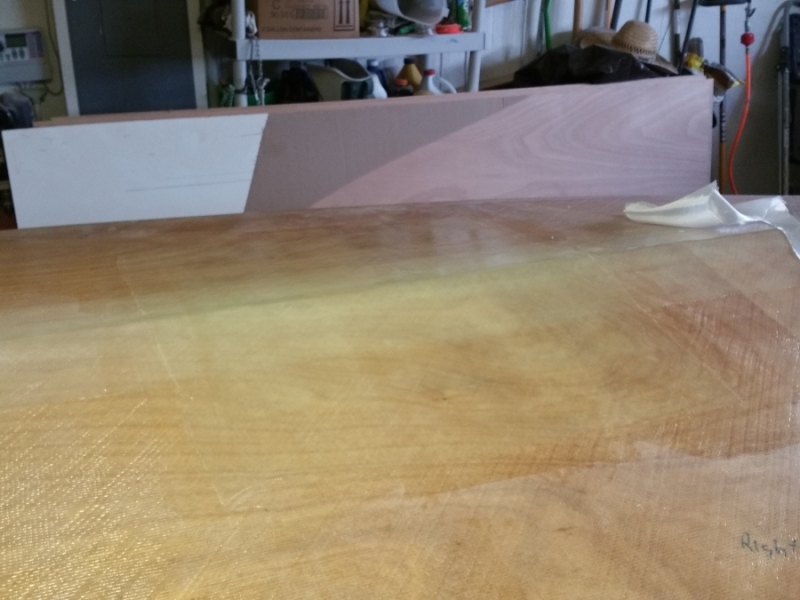
 . Hind sight being 20/20 rustoleum marine would have been my choice, but i goofed up and bought brightsides.
