Page 1 of 1
LM18 Round Chine Low Sheer
Posted: Thu Jun 14, 2018 8:33 pm
by Capt UB
MY BUILD LOG OF MY LM18 RCLS
Posted: Sun Jun 17, 2018 3:00 pm
by Capt UB
Got a great manual Bob's jack plate, 2.5/5 offset.
I now need a trailer and a 30-40 4 stroke OB.
And it will help to build the boat too...
MY BUILD LOG OF MY LM18 RCLS
Posted: Sun Jun 17, 2018 3:08 pm
by Capt UB
Poling platform, the platform top weighs 200 lbs.!! Will rebuild it.

- 00c0c_3x2qtTYhtKh_600x450.jpg (30.25 KiB) Viewed 8516 times

- 00H0H_7AfsDt06Bee_600x450.jpg (29 KiB) Viewed 8516 times
Re: LM18 Wolf's Build
Posted: Sun Jun 17, 2018 6:36 pm
by Fuzz
As they say "some assembly required"

Have fun love to see one of these finished and running.
Re: LM18 Wolf's Build
Posted: Sun Jun 17, 2018 8:13 pm
by OrangeQuest
Some day soon you need to use that trailer to haul a boat to the water!!

While you are building the LM18 you could put the 30HP on the FS14!! To make sure it works!!
Re: LM18 Wolf's Build
Posted: Sun Jun 17, 2018 9:18 pm
by TomW1
Well we will see another LM built in another year, since you have to finish your FS14 first. This will be a fun one to watch.

Tom
MY BUILD LOG OF MY LM18 RCLS
Posted: Sun Jun 17, 2018 9:32 pm
by Capt UB
MY BUILD LOG OF MY LM18 RCLS
Posted: Sun Jun 17, 2018 9:37 pm
by Capt UB
Re: LM18 Wolf's Build
Posted: Mon Jun 18, 2018 6:03 pm
by johnstonjosh
Making me want to build another!
MY BUILD LOG OF MY LM18 RCLS
Posted: Mon Jun 18, 2018 7:15 pm
by Capt UB
Re: LM18 Wolf's Build
Posted: Mon Jun 18, 2018 8:59 pm
by OrangeQuest
But, but, what about the little FS14?

Shouldn't it get in the water first?
MY BUILD LOG OF MY LM18 RCLS
Posted: Mon Jun 18, 2018 10:33 pm
by Capt UB

- BobFS14launch.jpg (94.96 KiB) Viewed 1736 times
Getting the FS14 done. Everyday something get finished. Ya baby!
MY BUILD LOG OF MY LM18 RCLS
Posted: Thu Jun 21, 2018 11:57 am
by Capt UB
Re: LM18 Wolf's Build
Posted: Thu Jun 21, 2018 2:41 pm
by OrangeQuest
Are you thinking of using peel ply on the LM18? It's a little late on the FS14 I thought.
MY BUILD LOG OF MY LM18 RCLS
Posted: Thu Jun 21, 2018 3:20 pm
by Capt UB
I'm going to try heavy plastic sheeting on the NC16 and see how that works. Long sheets cut to the size of the panels. I will have to cleanup the seams.
2/22/2019
I did not use any sheeting. I would have needed 3 or 4 helpers to do it right!

Re: LM18 Wolf's Build
Posted: Thu Jun 21, 2018 3:40 pm
by Marshall Moser
Peter-curacao swears by poly peel ply.
LM18 build in DeLand
Posted: Thu Jun 21, 2018 4:52 pm
by Capt UB
.
Re: LM18 Wolf's Build
Posted: Thu Jun 21, 2018 8:19 pm
by TomW1
Capt UB wrote: ↑Thu Jun 21, 2018 4:52 pm
Marshall Moser wrote: ↑Thu Jun 21, 2018 3:40 pm
Peter-curacao swears by poly peel ply.
Sorry don't know Peter-curacao.
Yep Bob you have not been on the Forum long enough to have followed Peter's CS25 build and his use of it.
Tom
Re: LM18 Wolf's Build
Posted: Thu Jun 21, 2018 11:36 pm
by Fuzz
His build thread is at the top of this power boat section.
Utube video here
https://www.youtube.com/watch?v=3ENfKOC ... e=youtu.be
Spend a little time and watch the video. You may even want to read through his whole build thread.
It is a master class on how to build a boat right

LM18 build in DeLand
Posted: Fri Jun 22, 2018 6:05 am
by Capt UB
Pricing of Peelply.....!
Re: LM18 Wolf's Build
Posted: Fri Jun 22, 2018 7:13 am
by Browndog
To get a smooth finish on the epoxy with “poorman’s peel ply” the plastic has to be thick enough not to wrinkle up like most kitchen plastic wraps do. The plastic wrap is fine for a non stick surface, but the wrinkles are left behind in the epoxy surface when the epoxy hardens and in many cases create a worse finish than if it had not been used. A plastic sheet like Mylar can create an incredible smooth and glossy surface, but care must be taken to remove all of the air under the plastic sheet or it will leave a bubble causing a surface finish defect. How do I know these things? Because I’ve tried them all, because I hate sanding. What I’ve figured out is the best trick to get a smooth surface for a bright finish is usually one extra thin coat of epoxy and then sand until you are beyond sick of sanding. If a bright finish is not required, then the use of fairing compound, sanding, primer, and paint has given the smoothest final finish in my boat projects.
Vacuum bagging seems like it might solve some of the issues with proper preparation of breather films and peel ply. Wish there was someone here that could give a good demonstration or tutorial on it.
LM18 build in DeLand
Posted: Fri Jun 22, 2018 9:10 am
by Capt UB
Browndog
Thanks, I'm going to try some plastic sheeting, on a NC16 I'm going to build. I'll see what I need to do then.
LM18 build in DeLand
Posted: Sat Jun 23, 2018 8:08 am
by Capt UB
.
LM18 build in DeLand
Posted: Sat Jun 23, 2018 10:35 am
by Capt UB
.
LM18 build in DeLand
Posted: Sat Jun 23, 2018 5:59 pm
by Capt UB
.
Re: LM18 Wolf's Build
Posted: Sun Jun 24, 2018 8:24 am
by Eric1
Get'r done!
LM18 build in DeLand
Posted: Sun Jun 24, 2018 12:43 pm
by Capt UB
.
LM18 build in DeLand
Posted: Sun Jun 24, 2018 12:45 pm
by Capt UB
.
Re: LM18 Wolf's Build
Posted: Sun Jun 24, 2018 1:36 pm
by OrangeQuest
That thing looks a little old. Does it run? What is that dark looking stuff leaking from the water inlets? And does the skeg have a chip in it? Guessing that thing is coming apart?
Re: LM18 Wolf's Build
Posted: Sun Jun 24, 2018 4:48 pm
by TomW1
Don't worry about OQ that motor looks in fine shape. A 2 stroke is almost indestructible. I also don't see any thing on the Doel-Fin that will harm it's performance. I have an 1 1/2 inch chip out of mine and it doesn't hurt it at all.
Tom
Re: LM18 Wolf's Build
Posted: Sun Jun 24, 2018 5:42 pm
by OrangeQuest
TomW1 wrote: ↑Sun Jun 24, 2018 4:48 pm
Don't worry about OQ that motor looks in fine shape. A 2 stroke is almost indestructible. I also don't see any thing on the Doel-Fin that will harm it's performance. I have an 1 1/2 inch chip out of mine and it doesn't hurt it at all.
Tom
Sorry Tom being a guy that likes to take things apart I would not think twice about doing a little PM on a used motor I just got. The dark stuff coming out the water intake would make me wonder what it was and I would want to know. First I would smell it and see if it smells like fuel or gear oil. Big chunk of metal missing off the bottom of the motor I would want to know if the shaft is still true or is it bent and if the boot on the prop is still good.
Capt.UB said he is comfortable working on the older 2 strokes, figured he was getting this thing up so he could get a better look at it and see what he needs to do to it. You can see he already got the prop and that whale tail off. Besides I want him to put it on the FS14 and make it fly!!
LM18 build in DeLand
Posted: Sun Jun 24, 2018 6:33 pm
by Capt UB
.
Re: LM18 Wolf's Build
Posted: Sun Jun 24, 2018 7:17 pm
by Fuzz
If your 30 Yamaha is anything like the one I have it will be a great motor. I think them and the Johnson 15hp's are two of the strongest motors ever made pound for pound.
Re: LM18 Wolf's Build
Posted: Sun Jun 24, 2018 8:21 pm
by OrangeQuest
Capt UB wrote: ↑Sun Jun 24, 2018 6:33 pm
As for the Yamaha 30ELG, it has been laying on the wrong side for a week in the back of my SUV. It was a throw in with the LM18 CnC Low Sheer kit and all the fiberglass cloth (he ordered more to cover the hull both sides), tape, MarinEpoxy (slow), fairing mix, wood flour and rollors...etc.
$ 2000.00 for all
And yes Yam 30 runs, I have a lower unit I rebuit a few years ago that is made for that series of OBs. I also have a few props that will work. The motor itself is clean, smoked like hell on fire when I finally got it started. Compression same on all three cylinders, good charge output and does pee very well!
I did not drain the oil tank, so oil got in and all over.... After installing on stand I sparyed the whole outboard down with buster....
Sounds like you did a really good inspection of the motor and seems to be in good working order. Sounds like you got a good deal on everything.
And this confirms it!
Fuzz wrote: ↑Sun Jun 24, 2018 7:17 pm
If your 30 Yamaha is anything like the one I have it will be a great motor. I think them and the Johnson 15hp's are two of the strongest motors ever made pound for pound.
LM18 build in DeLand
Posted: Mon Jun 25, 2018 6:53 am
by Capt UB
.
Re: LM18 Wolf's Build
Posted: Mon Jun 25, 2018 7:36 am
by OrangeQuest
Capt UB wrote: ↑Mon Jun 25, 2018 6:53 am
Learn this now...
Until you run an Outboard on the water or in a test tank at full WOT, you will never know how good it is....
That's why I think to "test out the Yammi" you bolt it to the FS14 to make sure it's a strong motor! While the LM18 is still under construction.
Seriously, I couldn't agree with you more. Even in a test tank may not reveal everything. Had a V8 stern drive that after about 20 minutes of running you could faintly hear a lower end knock. Boat had been setting for more than 8 years. Engine cover collapsed around it. Pulled the engine apart and had a main bear spun and the cylinder walls pitted even though didn't smoke. Lucky was able to have the crank turned and the cylinders bored out 20 over. After that it ran very well. In the long run the teardown and overhaul was a lot cheaper than a replacement. It was my ex-father in-law's boat. I was making fairly good money at the time and wanted to BUY a new boat but the ex wouldn't have it. So I helped him rebuild his. He taught me a lot about bad choices when it comes to rebuilding something. May he rest in peace, we butted heads a lot about it. Finally bought it from him and babied it back to life.
Re: LM18 build in DeLand
Posted: Wed Jul 25, 2018 10:09 am
by Capt UB
The FS14 is setup of a 9.8, I'm not going to try anything that may do damage to the hull. I love the 2 stroke Yam 25's and 30"s (non-oil injected, never had one). It does run, just needs some tlc on the outside.
Re: LM18 build in DeLand
Posted: Fri Aug 10, 2018 9:46 am
by Capt UB
Well the FS14 build is coming to an end. I have lots of notes of what I did wrong and how I fixed it or replaced/removed the problem. And lots of notes on how to do things much better!!
This time going to build like I was coding (writing programming code), one line at a time from a (ladder logic-diagram) style list on a dry erasable board mounted on the carport wall.
Re: LM18 build in DeLand
Posted: Fri Aug 10, 2018 10:16 am
by OrangeQuest
Capt UB wrote: ↑Fri Aug 10, 2018 9:46 am
Well the FS14 build is coming to an end. I have lots of notes of what I did wrong and how I fixed it or replaced/removed the problem. And lots of notes on how to do things much better!!
This time going to build like I was coding (writing programming code), one line at a time from a (ladder logic-diagram) style list on a dry erasable board mounted on the carport wall.
Dang it Capt Bob you are starting to make sense!
But it is really a good idea. We use a dry erase board for problems employees have at events and I correct them when I come in and then erase them.
Re: LM18 build in DeLand
Posted: Fri Aug 10, 2018 8:54 pm
by TomW1
Hey Bob it sounds like you have a plan.

Remember the LS18 is a technical skiff designed for one thing. So build it as designed and then make some changes in the cockpit to accommodate you and your wife on your sight seeing trips. That cockpit is large and gives you a lot of room to make it yours.
Tom
MY BUILD LOG OF MY LM18 RCLS
Posted: Sat Aug 11, 2018 7:10 am
by Capt UB
TomW1 wrote: ↑Fri Aug 10, 2018 8:54 pm
Hey Bob it sounds like you have a plan.
Remember the LS18 is a technical skiff designed for one thing. So build it as designed and then make some changes in the cockpit to accommodate you and your wife on your sight seeing trips. That cockpit is large and gives you a lot of room to make it yours.
Tom
Tom and OQ,
Going to build to plans.
I'm going to use Peel ply on the top panel hull sides, 18'x12". I'm saving now for the Peel Ply.
The bottom will be getting the hard bottom mix. BUT NOT WITH GRAPHITE, but with Hexagonal Boron Nitride, hBn powder, white graphite. Saving up for that Too!
The whole bottom panels with be covered with three coats of hBn/epoxy mix, no need to crazy on fairing these panels.
Going to paint the hull jade green, hunter green, hinckley green, one of these dark greens.
Bob.
Re: LM18 build in DeLand
Posted: Sat Aug 11, 2018 7:41 am
by silentneko
You might want to check my build thread on the HBN. It's completely transparent at a 25% mix, so I abandoned it and went back to graphite. I even tried 5% white pigment mix. If you do go this route you would need to have a perfect white base under it.
MY BUILD LOG OF MY LM18 RCLS
Posted: Sat Aug 11, 2018 9:56 am
by Capt UB
silentneko wrote: ↑Sat Aug 11, 2018 7:41 am
You might want to check my build thread on the HBN. It's completely transparent at a 25% mix, so I abandoned it and went back to graphite. I even tried 5% white pigment mix. If you do go this route you would need to have a perfect white base under it.
silentneko, thanks for the heads up.
What brand or were did you get yours from?
I have read a few threads on hBn in the kayak forums. They seem to like it. I think I did read your post, I did not know much about the stuff at the time.
Bob.
Re: LM18 build in DeLand
Posted: Sat Aug 11, 2018 10:57 am
by silentneko
I'll check on it later, I think I bought a pound and it was like $70. In order for you to get it to where it will look good you need to fair the bottom, and do several coats of an epoxy primer until it is completely smooth and even. Then apply the HBN/epoxy mix.
Kayakers like it because they store the kayaks upside down. The white doesn't heat up as bad as the black graphite. On a trailered boat it's just cosmetic.
MY BUILD LOG OF MY LM18 RCLS
Posted: Tue Aug 14, 2018 7:26 am
by Capt UB
Just going to use the Peel Ply on the black dotted area of the hull, that is just the sides. Bottom will have the BBC graphite/epoxy mix. The hull will be painted Gloss Lite Sand.
MY BUILD LOG OF MY LM18 RCLS
Posted: Sat Aug 18, 2018 1:56 pm
by Capt UB
After a lot of thought, I'm going to use Nautolex Marine Vinyl Flooring - 74" Wide on the deck and sole. Just too much work to fair it out nice. The top part of the hull will get a lot of attention and Peel Ply. Bottom will be BBC graphite/MarinEpoxy.
.
.
This is the color of the non-skid vinyl, Sisal warm.
.
.

- 619 MMlc-FL._AC_SY400_.jpg (51.1 KiB) Viewed 2224 times
MY BUILD LOG OF MY LM18 RCLS
Posted: Tue Aug 28, 2018 9:31 am
by Capt UB
Looking into a teak coaming, the teak molding pieces are off the shelf.

- download.jpg (7.51 KiB) Viewed 2170 times
MY BUILD LOG OF MY LM18 RCLS
Posted: Mon Sep 17, 2018 2:25 pm
by Capt UB
Thanks to wegcagle...
Got the Jack plate, it's a Bob's Convertable MJ5 2.5″ or 5″ setback manual jack plate :200 HP MAX.

- 1-22.jpg (18.17 KiB) Viewed 2096 times
Re: LM18 build in DeLand
Posted: Mon Sep 17, 2018 7:23 pm
by wegcagle
It’s the 5” setback. Hope it’s not too much for her!
Also, I used the jade green paint from interlux perfection. Can’t speak highly enough of it! Looked amazing 5 years later (garage kept when off the water for full disclosure). I’ll use perfection again for sure.
Will
MY BUILD LOG OF MY LM18 RCLS
Posted: Wed Sep 19, 2018 8:20 pm
by Capt UB
wegcagle wrote: ↑Mon Sep 17, 2018 7:23 pm
It’s the 5” setback. Hope it’s not too much for her!
Also, I used the jade green paint from interlux perfection. Can’t speak highly enough of it! Looked amazing 5 years later (garage kept when off the water for full disclosure). I’ll use perfection again for sure.
Will
Will,
Thank you! This JP will be perfect for the Laguna Madre 18. I thought you painted it green! It's the hull you painted.
Thanks again,
Bob.
MY BUILD LOG OF MY LM18 RCLS
Posted: Sat Sep 22, 2018 2:55 pm
by Capt UB
Capt UB wrote: ↑Thu Jun 14, 2018 8:33 pm
Found a great deal on a Poling platform this afternoon...
$ 200 and it will work on the Laguna Madre 18. The legs need to be cut down so platform sits level on aft deck. It's tall and wide. Don't have a motor yet or the boat built yet!
0922181357f.jpg0922181400.jpg
0922181357d.jpg
MY BUILD LOG OF MY LM18 RCLS
Posted: Sun Sep 23, 2018 7:08 pm
by Capt UB
MY BUILD LOG OF MY LM18 RCLS
Posted: Wed Sep 26, 2018 7:15 am
by Capt UB
Some ideas I used on my Gheenoes...
Grab bar mounted to the side with rad holder and junk holder...
Instead of mounting in the middle of the center bench, which you have to move to the right or left of it to go anywhere on the boat... Worked great!!

- 036.jpg (102.67 KiB) Viewed 881 times

- 028.jpg (101.62 KiB) Viewed 881 times
MY BUILD LOG OF MY LM18 RCLS
Posted: Sat Nov 17, 2018 6:35 pm
by Capt UB
I'm looking into building the LM18 for remote steering and controls, but will only have a tiller outboard at first. I will add a console later with the new OB. What should or can I do to be able to switch over later.
I think the Standard Short Console plans would work. I don't need a seat in front.
I will be using a jackplate and a short shaft both times.
Re: LM18 build in DeLand
Posted: Sat Nov 17, 2018 8:34 pm
by Aripeka Angler
Capt UB wrote: ↑Sat Nov 17, 2018 6:35 pm
I'm looking into building the LM18 for remote steering and controls, but will only have a tiller outboard at first. I will add a console later with the new OB. What should or can I do to be able to switch over later.
If it were my boat, I would go ahead and build the console and put in the remote steering chase tubes to the motor and battery compartments.
Run your tiller motor at first and use the console to hang onto.
Much easier this way to convert to remote steering, imho...
Re: LM18 build in DeLand
Posted: Sat Nov 17, 2018 9:07 pm
by OrangeQuest
Capt UB wrote: ↑Sat Nov 17, 2018 6:35 pm
I think the Standard Short Console plans would work. I don't need a seat in front.
If you remember the photo I posted of the mock up console I put on the front of my FS14? That is from the short standard console plans. I decreased the width some but it will give you an idea of it's size. The plans have foot notes that you don't get in the "how to" section.
I am 5'10" and standing "at the helm" is very comfortable.
MY BUILD LOG OF MY LM18 RCLS
Posted: Sun Nov 18, 2018 6:55 am
by Capt UB
OrangeQuest wrote: ↑Sat Nov 17, 2018 9:07 pm
Capt UB wrote: ↑Sat Nov 17, 2018 6:35 pm
I think the Standard Short Console plans would work. I don't need a seat in front.
If you remember the photo I posted of the mock up console I put on the front of my FS14? That is from the short standard console plans. I decreased the width some but it will give you an idea of it's size. The plans have foot notes that you don't get in the "how to" section.
I am 5'10" and standing "at the helm" is very comfortable.
I will go back and look at it. Thanks OQ.
MY BUILD LOG OF MY LM18 RCLS
Posted: Fri Nov 23, 2018 1:54 pm
by Capt UB
Well after a few days of Hell.....
Looks like I maybe (health wise) able to build my strong back this coming week. Atlest get the the 2x8 and start.
MY BUILD LOG OF MY LM18 RCLS
Posted: Thu Dec 13, 2018 9:58 pm
by Capt UB
Just thinking.... A center console tiller OB....
For gauges (fuel, battery and speed) and holding GPS fish/depth finder.... etc.

- images.jpg (5.97 KiB) Viewed 1140 times

- 2018-12-13-21-51-26--247094653.jpg (7.76 KiB) Viewed 1140 times
Re: LM18 build in DeLand
Posted: Fri Dec 14, 2018 5:49 am
by OrangeQuest
Does seem to make sense. Just the idea of having a place for gauges and the grab bar makes perfect sense.
MY BUILD LOG OF MY LM18 RCLS
Posted: Fri Dec 14, 2018 6:14 am
by Capt UB
plus start button and kill switch for safety. lights and stereo bluetooth speakers
MY BUILD LOG OF MY LM18 RCLS
Posted: Mon Dec 31, 2018 6:59 pm
by Capt UB
Still in pain from Shingles... just the left shoulder, 24/7!!
Starting the LM18 Low Sheer Round Chine.
Starting the strongback and roll around deck. 2x8's and screws.....
This LM18 is a long boat! Carport is 10x20....
Re: LM18 build in DeLand
Posted: Thu Jan 03, 2019 6:44 am
by Eric1
Looking forward to your build!
Re: LM18 build in DeLand
Posted: Thu Jan 03, 2019 7:48 am
by Jeff
Glad to see you have started Capt UB!!! Hope you are fully recovered soon!! Jeff
Re: LM18 build in DeLand
Posted: Thu Jan 03, 2019 9:43 am
by OrangeQuest
Nice stack of wood!
Re: LM18 build in DeLand
Posted: Thu Jan 03, 2019 9:47 am
by piperdown
Hope those shingles clear up for you soon!
Looking forward to seeing this build
MY BUILD LOG OF MY LM18 RCLS
Posted: Thu Jan 03, 2019 12:03 pm
by Capt UB
OrangeQuest wrote: ↑Thu Jan 03, 2019 9:43 am
Nice stack of wood!
More on the way..... No help at this Lowes for the one arm old guy!!!
Took me more then one hour to find these straight 2x8x16!!!! I just left the ones I did not want on the floor!!
You guys keep sending us your weather..... Rain this Friday.... FROM TEXAS!!!
MY BUILD LOG OF MY LM18 RCLS
Posted: Thu Jan 03, 2019 12:04 pm
by Capt UB
Eric1 wrote: ↑Thu Jan 03, 2019 6:44 am
Looking forward to your build!
Thanks Eric, glad you are back to working on your boat.
MY BUILD LOG OF MY LM18 RCLS
Posted: Thu Jan 03, 2019 12:08 pm
by Capt UB
Jeff wrote: ↑Thu Jan 03, 2019 7:48 am
Glad to see you have started Capt UB!!! Hope you are fully recovered soon!! Jeff
Thanks Jeff. Today was the first day of no pain on/in the shoulder.... Still feel the GHOST BUGS crawling around my neck, back and shoulder, Damn dead nerves.
MY BUILD LOG OF MY LM18 RCLS
Posted: Thu Jan 03, 2019 12:10 pm
by Capt UB
piperdown wrote: ↑Thu Jan 03, 2019 9:47 am
Hope those shingles clear up for you soon!
Looking forward to seeing this build
Thanks Eric. Like I wrote to Jeff, first day of no pain in my shoulder!!
This is a big boat for a small carport!!
Re: LM18 build in DeLand
Posted: Thu Jan 03, 2019 12:31 pm
by OrangeQuest
Capt UB wrote: ↑Thu Jan 03, 2019 12:03 pm
OrangeQuest wrote: ↑Thu Jan 03, 2019 9:43 am
Nice stack of wood!
More on the way..... No help at this Lowes for the one arm old guy!!!
Took me more then one hour to find these straight 2x8x16!!!! I just left the ones I did not want on the floor!!
You guys keep sending us your weather..... Rain this Friday.... FROM TEXAS!!!
That is why I am happy there is a REAL lumberyard less than a mile from my warehouse.
The weather is coming out of Mexico, we just add more moisture to it and then call it Tex-Mex!
Glad you are feeling better! Did you ever get to test it again after lowering the motor?
MY BUILD LOG OF MY LM18 RCLS
Posted: Thu Jan 03, 2019 2:31 pm
by Capt UB
OrangeQuest wrote: ↑Thu Jan 03, 2019 12:31 pm
Capt UB wrote: ↑Thu Jan 03, 2019 12:03 pm
OrangeQuest wrote: ↑Thu Jan 03, 2019 9:43 am
Nice stack of wood!
Glad you are feeling better! Did you ever get to test it again after lowering the motor?
Thanks, it's good to be able to use the arm again!
It's my left arm, that's hurt. That's also my tiller arm! So I have not taken the boat out for the final lower OB test.. Maybe this Sunday..... Film at 11 !!
MY BUILD LOG OF MY LM18 RCLS
Posted: Fri Jan 04, 2019 7:25 am
by Capt UB
Finally feel up to the build completely...
More 2x8's and plastic sheeting for the carport floor.
Got the wheels last year so I can roll the build out of the carport.
Still lots of sanding on the CnC parts and gluing pieces together.
Not sure if Mc-Fly sold me fast hardener or not. I do like using the slow, but have at times wished I had some fast hardener.
Time to inventory what I have again and maybe a call to BBC for stock....
Re: LM18 build in DeLand
Posted: Fri Jan 04, 2019 8:33 am
by OrangeQuest
I bought fast hardener last winter but by the time I was really using epoxy it had already warmed up enough to use medium. So I would use the fast for small batches like wetting out my frames and added glass before gluing them in the boat. Could do it all in the same day, sand and install the next day. You really have to be fast though if it's to warm outside and you are mixing the wood flour for glues or fillets. That is when I started using Fallguy's method of spreading it out on a large surface to extend the pot time. Doesn't take to many times of the pot cup smoking in your hand to learn what not to do.

Maybe working on the LM18 will take your mind off your back and arm.
MY BUILD LOG OF MY LM18 RCLS
Posted: Fri Jan 04, 2019 6:18 pm
by Capt UB
Re: LM18 build in DeLand
Posted: Fri Jan 04, 2019 10:07 pm
by OrangeQuest
This is a lot cheaper and very effective. This is a small list of the benefits:

MY BUILD LOG OF MY LM18 RCLS
Posted: Sun Jan 06, 2019 3:28 pm
by Capt UB
Strongback ready for wheeled base.
Re: Jan 6, the build begains....LM18
Posted: Sun Jan 06, 2019 4:07 pm
by OrangeQuest
Way to go Capt. UB! Already looking good!
Did the Sand Piper see any water this weekend?
Re: Jan 6, the build begains....LM18
Posted: Sun Jan 06, 2019 5:47 pm
by terrulian
I like the idea of poling a boat. Never done that although I've been on a boat in LA that someone else poled. Pretty cool. Around here I'm going to have to stick to rowing.
MY BUILD LOG OF MY LM18 RCLS
Posted: Sun Jan 06, 2019 6:33 pm
by Capt UB
terrulian wrote: ↑Sun Jan 06, 2019 5:47 pm
I like the idea of poling a boat. Never done that although I've been on a boat in LA that someone else poled. Pretty cool. Around here I'm going to have to stick to rowing.
It's done worldwide.... Poling...
Poled boat race, Tubingen, Germany
The poled boat race on river Neckar Stocherkahnrennen, is a famous event in Tubingen Tuebingen, Germany.
Re: Jan 6, the build begains....LM18
Posted: Mon Jan 07, 2019 5:19 pm
by glossieblack
OK CUB. You're old enough to build an LM18. Happy 60th birthday!
Re: Jan 6, the build begains....LM18
Posted: Mon Jan 07, 2019 6:11 pm
by Jeff
Capt UB, Happy Birthday!!!! Congrats on the start as well!!! Jeff
Re: Jan 6, the build begains....LM18
Posted: Mon Jan 07, 2019 6:47 pm
by OrangeQuest
Happy birthday Capt UB! Hope you made it a 3 day weekend.
MY BUILD LOG OF MY LM18 RCLS
Posted: Tue Jan 08, 2019 9:26 am
by Capt UB
Thanks all, great being an old fart now!
Just a note on this build, don't know how the round chine looks compared to the graphic. Not much freeboard to keep the sharks away, or gators!
Re: Jan 6, the build begains....LM18
Posted: Tue Jan 08, 2019 2:49 pm
by Fuzz
glossieblack wrote: ↑Mon Jan 07, 2019 5:19 pm
OK CUB. You're old enough to build an LM18. Happy 60th birthday!
I do believe when I hit 60 Glossie invited me into the CLOOF club. I had to ask and learned that stands for clapped out old fart

MY BUILD LOG OF MY LM18 RCLS
Posted: Tue Jan 08, 2019 2:55 pm
by Capt UB
Fuzz wrote: ↑Tue Jan 08, 2019 2:49 pm
glossieblack wrote: ↑Mon Jan 07, 2019 5:19 pm
OK CUB. You're old enough to build an LM18. Happy 60th birthday!
I do believe when I hit 60 Glossie invited me into the CLOOF club. I had to ask and learned that stands for clapped out old fart
Thanks Fuzz.
Good to know I can still join a few more clubs!
MY BUILD LOG OF MY LM18 RCLS
Posted: Tue Jan 08, 2019 7:26 pm
by Capt UB
Wanted to see what she would look like.....
Still working on roll a round base.
Re: Jan 6, the build begains....LM18
Posted: Tue Jan 08, 2019 9:32 pm
by Aripeka Angler
Happy birthday a day late captain! I’m not far behind you.
Nice to see you are underway on the boat...
Re: Jan 6, the build begains....LM18
Posted: Wed Jan 09, 2019 8:01 am
by OrangeQuest
Very exciting to see you start your LM18!! It looks like it will fit under the carport but do you have room to work on it? The Sand Piper looks so forgotten in the background.
I bought a flat bottom boat cover from Academy to cover the hull of the FS14 up when we went to Chicago and brought it back. I got the one with all the straps and it held up great. At times my spare driver was hitting 80MPH while I was trying to sleep. Point is you can tighten the straps down enough for the water to roll off it if it rains with no pooling. It was somewhere around < $70.00

I think
Re: Jan 6, the build begains....LM18
Posted: Wed Jan 09, 2019 8:23 am
by Bogieman
Wow CaptUB you are ambitious!
OQ, I could use a form fitting tarp like that too. Early on it was a pain in the but to keep the water from pooling and sinking my tarp into the boat. I've got it figured out now.
MY BUILD LOG OF MY LM18 RCLS
Posted: Wed Jan 09, 2019 9:16 am
by Capt UB
OrangeQuest wrote: ↑Wed Jan 09, 2019 8:01 am
Very exciting to see you start your LM18!! It looks like it will fit under the carport but do you have room to work on it? The Sand Piper looks so forgotten in the background.
I bought a flat bottom boat cover from Academy to cover the hull of the FS14 up when we went to Chicago and brought it back. I got the one with all the straps and it held up great. At times my spare driver was hitting 80MPH while I was trying to sleep. Point is you can tighten the straps down enough for the water to roll off it if it rains with no pooling. It was somewhere around < $70.00
I think
Thanks, will get one. I was going to build a tent with sides in the backyard, but thought better of it.
SandPiper is just fine. She will see water this weekend.
MY BUILD LOG OF MY LM18 RCLS
Posted: Wed Jan 09, 2019 9:17 am
by Capt UB
Bogieman wrote: ↑Wed Jan 09, 2019 8:23 am
Wow CaptUB you are ambitious!
OQ, I could use a form fitting tarp like that too. Early on it was a pain in the but to keep the water from pooling and sinking my tarp into the boat. I've got it figured out now.
Photos on what you did......
Re: Jan 6, the build begains....LM18
Posted: Wed Jan 09, 2019 9:54 am
by Bogieman
Capt UB wrote: ↑Wed Jan 09, 2019 9:17 am
Bogieman wrote: ↑Wed Jan 09, 2019 8:23 am
Wow CaptUB you are ambitious!
OQ, I could use a form fitting tarp like that too. Early on it was a pain in the but to keep the water from pooling and sinking my tarp into the boat. I've got it figured out now.
Photos on what you did......
I inserted a 2x4 vertically into the slot in the keel trunk then put a plastic Tupperware bowl on top of the 2x4 (like a hat) to eliminate the sharp edge, then put the tarp on and strapped her down. Works great and it only cost me $20.
MY BUILD LOG OF MY LM18 RCLS
Posted: Fri Jan 11, 2019 4:31 pm
by Capt UB
Strongback on roll around base done. Ready for stations setup in morning.
Re: Jan 6, the build begains....LM18
Posted: Fri Jan 11, 2019 7:10 pm
by Bogieman
Nice!
MY BUILD LOG OF MY LM18 RCLS
Posted: Fri Jan 11, 2019 7:23 pm
by Capt UB
Bogieman wrote: ↑Fri Jan 11, 2019 7:10 pmNice!
It's heavier then the finished boat!
Re: Jan 6, the build begains....LM18
Posted: Fri Jan 11, 2019 8:13 pm
by Bogieman
Capt UB wrote: ↑Fri Jan 11, 2019 7:23 pm
Bogieman wrote: ↑Fri Jan 11, 2019 7:10 pmNice!
It's heavier then the finished boat!
I bet it is. That thing looks big!
MY BUILD LOG OF MY LM18 RCLS
Posted: Sat Jan 12, 2019 1:26 pm
by Capt UB
Glued up transom pieces. The CnC transom comes with cutouts for the stringer and knees, just the inside piece. The transom outside top edge, was off.... More work for me later. I'll use my router to quickly fix that. Starting to cutout CnC stringer pieces to glue up today.
MY BUILD LOG OF MY LM18 RCLS
Posted: Sat Jan 12, 2019 1:30 pm
by Capt UB
OrangeQuest wrote: ↑Wed Jan 09, 2019 8:01 am
Very exciting to see you start your LM18!! It looks like it will fit under the carport but do you have room to work on it? The Sand Piper looks so forgotten in the background.
I bought a flat bottom boat cover from Academy to cover the hull of the FS14 up when we went to Chicago and brought it back. I got the one with all the straps and it held up great. At times my spare driver was hitting 80MPH while I was trying to sleep. Point is you can tighten the straps down enough for the water to roll off it if it rains with no pooling. It was somewhere around < $70.00
I think
OQ
What model # is your cover for your FS14. I'm going to buy one this weekend, online or at the store.
Thanks, Bob.
Re: Jan 6, the build begains....LM18
Posted: Sat Jan 12, 2019 2:00 pm
by OrangeQuest
Capt UB wrote: ↑Sat Jan 12, 2019 1:30 pm
OrangeQuest wrote: ↑Wed Jan 09, 2019 8:01 am
Very exciting to see you start your LM18!! It looks like it will fit under the carport but do you have room to work on it? The Sand Piper looks so forgotten in the background.
I bought a flat bottom boat cover from Academy to cover the hull of the FS14 up when we went to Chicago and brought it back. I got the one with all the straps and it held up great. At times my spare driver was hitting 80MPH while I was trying to sleep. Point is you can tighten the straps down enough for the water to roll off it if it rains with no pooling. It was somewhere around < $70.00
I think
OQ
What model # is your cover for your FS14. I'm going to buy one this weekend, online or at the store.
Thanks, Bob.
I don't have the box anymore but it says "B" on the cover. I thought I paid close to $70.00 for it but I found it online for less.
https://www.academy.com/shop/pdp/marine ... atid=11182
This one is 150 denier marine-grade fabric but for closer to $80.00 you can get it with 300 denier.
We put the cheap one on before we left Chicago and like I said, at times was going 80mph with it. Once I got it to Houston I didn't see any rips or damage of any kind. I would keep it on the boat in the warehouse due to the inside of the boat was still bare wood and the warehouse would leaks on it when it rains. But since I have the hull (inside) coated with glass I don't put it back on.
I did put some foam on the bow to keep the sharp tip of the bow from poking through it. It has a very stiff bungee that runs through the bottom, I put a carabiner to hold the ends together and then just put it over the boat like a fitted sheet. Then clipped all the straps where they tighten on the same side. I ran the straps under the trailer tongue and bunks because the straps are really long. Once in Houston I cut off the extra and melted the ends so they wouldn't fray.
For keeping the water from pooling I tighten the back straps first and then starting at the front tighten each strap. Crank up the trailer so water runs off the back.
MY BUILD LOG OF MY LM18 RCLS
Posted: Sat Jan 12, 2019 3:57 pm
by Capt UB
Thanks OQ.
MY BUILD LOG OF MY LM18 RCLS
Posted: Sat Jan 12, 2019 3:59 pm
by Capt UB
Got the stringers glued up... Damn things are long!
Re: Jan 6, the build begains....LM18
Posted: Sat Jan 12, 2019 4:00 pm
by piperdown
Seems odd that the cnc cuts would be off like that
MY BUILD LOG OF MY LM18 RCLS
Posted: Sat Jan 12, 2019 4:08 pm
by Capt UB
piperdown wrote: ↑Sat Jan 12, 2019 4:00 pm
Seems odd that the cnc cuts would be off like that
Two are the same, it's the one with cutouts for the stringers/knees that is different. Also, The two do not have the same curve on the top as the one.
No problem, thats what routers are for.. cleanup!
Plus a jackplate is going on the transom.
Re: Jan 6, the build begains....LM18
Posted: Sat Jan 12, 2019 5:13 pm
by piperdown
Capt UB wrote: ↑Sat Jan 12, 2019 4:08 pm
piperdown wrote: ↑Sat Jan 12, 2019 4:00 pm
Seems odd that the cnc cuts would be off like that
Two are the same, it's the one with cutouts for the stringers/knees that is different. Also, The two do not have the same curve on the top as the one.
No problem, thats what routers are for.. cleanup!
Plus a jackplate is going on the transom.
Too true on the router!
I certainly enjoy following along with your builds Capt!
If we could get some warm weather I might be able to get back to my GF16.
MY BUILD LOG OF MY LM18 RCLS
Posted: Sun Jan 13, 2019 5:32 pm
by Capt UB
Ok, got things going... Back on track, no more silly shit!!!
YOU DO NOT PUT A ROUTER BIT ON YOUR BATTERY POWDERED DRILL AND EXPECT IT TO NOT F#!÷K UP THINGS!!!
Frames/molds at stations with stringers in place. Need to cleanup frames and stringers before adding hull panels.
Re: Jan 6, the build begains....LM18
Posted: Sun Jan 13, 2019 5:48 pm
by Jaysen
Capt UB wrote: ↑Sun Jan 13, 2019 5:32 pm
YOU DO NOT PUT A ROUTER BIT ON YOUR BATTERY POWDERED DRILL AND EXPECT IT TO NOT F#!÷K UP THINGS!!!
Please please please tell us there’s video to watch!
MY BUILD LOG OF MY LM18 RCLS
Posted: Tue Jan 15, 2019 2:21 pm
by Capt UB
OrangeQuest wrote: ↑Wed Jan 09, 2019 8:01 am
Very exciting to see you start your LM18!! It looks like it will fit under the carport but do you have room to work on it? The Sand Piper looks so forgotten in the background.
I bought a flat bottom boat cover from Academy to cover the hull of the FS14 up when we went to Chicago and brought it back. I got the one with all the straps and it held up great. At times my spare driver was hitting 80MPH while I was trying to sleep. Point is you can tighten the straps down enough for the water to roll off it if it rains with no pooling. It was somewhere around < $70.00
I think
This is what I ordered from Amazon, MSC Heavy Duty 600D Marine Grade Polyester Canvas Trailerable Waterproof Boat Cover. Model B - Length:14'-16' Beam width: up to 90" (Fit V-hull runabouts (outboards and I/O) and aluminum bass boats with beam width to 90”) This heavy duty boat cover designed for both long-term storage, mooring and highway travel.
Should be here on the 21 of Jan.
MY BUILD LOG OF MY LM18 RCLS
Posted: Tue Jan 15, 2019 2:22 pm
by Capt UB
Jaysen wrote: ↑Sun Jan 13, 2019 5:48 pm
Capt UB wrote: ↑Sun Jan 13, 2019 5:32 pm
YOU DO NOT PUT A ROUTER BIT ON YOUR BATTERY POWDERED DRILL AND EXPECT IT TO NOT F#!÷K UP THINGS!!!
Please please please tell us there’s video to watch!
Sorry no video!
Re: LM18 Low Sheer Round Chine
Posted: Tue Jan 15, 2019 3:34 pm
by OrangeQuest
Wow! That should last you a long time. With it being canvas keep it sprayed down with a UV protectant if it will be exposed to UV a lot.
MY BUILD LOG OF MY LM18 RCLS
Posted: Tue Jan 15, 2019 6:32 pm
by Capt UB
300 wire ties.... small size, but heavy duty. Cutting PVC pipe for the backing.
Re: LM18 Low Sheer Round Chine
Posted: Tue Jan 15, 2019 6:46 pm
by OrangeQuest
Just hope that is enough!
MY BUILD LOG OF MY LM18 RCLS
Posted: Tue Jan 15, 2019 7:04 pm
by Capt UB
OrangeQuest wrote: ↑Tue Jan 15, 2019 6:46 pm
Just hope that is enough!
These are used in space! -80°f to 200°f

Last time so many just broke!
MY BUILD LOG OF MY LM18 RCLS
Posted: Sat Jan 19, 2019 9:12 am
by Capt UB
Weather is holding, letting sun get up and warm the ply and air to 72 plus. Just maybe able to glue up puzzle joints on the hull planels today.
The cutouts for the round chine are not on the same side!

I had on cutting them out after laying hull panels on mold... Just easier, but no problem....
Will adapt.....
MY BUILD LOG OF MY LM18 RCLS
Posted: Sat Jan 19, 2019 1:11 pm
by Capt UB
74° MarinEpoxy's slow hardener doing fine!!!
Little wood flour and MarinEpoxy for glue....
Puzzle joints done.
Re: LM18 Low Sheer Round Chine
Posted: Sat Jan 19, 2019 4:42 pm
by Jeff
Capt UB!! Nice work!! We will get back to you on the question!! Again, nice weather and progress!! Jeff
MY BUILD LOG OF MY LM18 RCLS
Posted: Mon Jan 21, 2019 7:05 am
by Capt UB
Got the Stringers sanded and cleaned up.
Transom sanded and installed on the strongback, it needed to be shaped on the bottom and sides, CnC was off by 3/4"! I'll deal with the top curve when I flip the hull, it to was off by 1/2" (three boards glued together, two the same (they were bigger) and the inside board was cut right.
The slots in the molds and frames for the stringers were not the same! Some were wider apart, router took care of that problem.
Started setup of molds and frames, changed from what was done earlier, 1/2" higher and straighter. Big difference between CnC measurement and non-CnC measurements on plans, mostly Metric vs. Standard. I'm only using metric. Not sure what the programming code for the CnC uses....
More to come....
Re: LM18 Low Sheer Round Chine
Posted: Mon Jan 21, 2019 7:44 am
by OrangeQuest
I am very confused!
Not really understanding what is going on with your build Capt. UB? You seem to have everything lined up nicely but the cuts in the panels flipping back and forth are very confusing. I understand why the cuts are there just not why they are not on the same side.
You seem to be making the most of it so you must have a good game plan. I assume you have to finish cutting the slots out and as you get to the end of one panel have to flip it over to complete the cut? I must be missing something.
MY BUILD LOG OF MY LM18 RCLS
Posted: Mon Jan 21, 2019 9:42 am
by Capt UB
OrangeQuest wrote: ↑Mon Jan 21, 2019 7:44 am
I am very confused!
Not really understanding what is going on with your build Capt. UB? You seem to have everything lined up nicely but the cuts in the panels flipping back and forth are very confusing. I understand why the cuts are there just not why they are not on the same side.
You seem to be making the most of it so you must have a good game plan. I assume you have to finish cutting the slots out and as you get to the end of one panel have to flip it over to complete the cut? I must be missing something.
OQ,
The frames and the two molds were cut by CnC, when I first laid up the frames and molds on the strongback, I just stuck them there. The next day I noticed the stringers were curved, two of the frame's slots for the stringers were not inline with the rest. I had to widen the slots to straighten the stringers. ** If you lay the frames and molds on top of each other the slots will be in the same place.
Sorry just reread your post...
The hull panels, I don't want to cut the round chine slots out until the panels are on the hull/frames. I don't have much room and very little help, so by not cutting the slots, helps keep the integrity of the panels when installing them. ** You would think the slots would be on the same side anyway! Remember these panels (three panels glued together with puzzle joints) are about 18 ft. long and 14 in. tall, very flexible!
Re: LM18 Low Sheer Round Chine
Posted: Mon Jan 21, 2019 11:51 am
by OrangeQuest
Oh, ok! That makes sense as far as not cutting the slots out till you have them supported better and limited help.
You don't seem to be letting a few mishaps slow you down. Like I stated, don't see you going forward without a well thought out game plan.

Any more sea trials of the Sand Piper?
MY BUILD LOG OF MY LM18 RCLS
Posted: Mon Jan 21, 2019 12:45 pm
by Capt UB
OrangeQuest wrote: ↑Mon Jan 21, 2019 11:51 am
Oh, ok! That makes sense as far as not cutting the slots out till you have them supported better and limited help.
You don't seem to be letting a few mishaps slow you down. Like I stated, don't see you going forward without a well thought out game plan.
Any more sea trials of the Sand Piper?
Ran great, lowering the OB 2" did the trick. Steering is better and goes on plane faster. I did not have my GPS with me for speed. But over all she handled so well over waves and chop! I'm not going to do anymore to her other then a Bimini top.
MY BUILD LOG OF MY LM18 RCLS
Posted: Tue Jan 22, 2019 6:16 pm
by Capt UB
Re: LM18 Low Sheer Round Chine
Posted: Tue Jan 22, 2019 6:36 pm
by Jaysen
Maybe I’m missing something because I don’t have the plans... how do you make the chine if you glue up now? Only a partial glue up?
MY BUILD LOG OF MY LM18 RCLS
Posted: Tue Jan 22, 2019 8:24 pm
by Capt UB
Jaysen wrote: ↑Tue Jan 22, 2019 6:36 pm
Maybe I’m missing something because I don’t have the plans... how do you make the chine if you glue up now? Only a partial glue up?
Not gluing up yet, first wire ties then then cut out the chine slots..... then glue.
Bateau did the CnC slots wrong.
Re: LM18 Low Sheer Round Chine
Posted: Tue Jan 22, 2019 8:37 pm
by Jaysen
I saw the slots are flipped. It will be interesting to see you pull that together
MY BUILD LOG OF MY LM18 RCLS
Posted: Wed Jan 23, 2019 5:51 am
by Capt UB
This is only on the CnC kit.
Just thought about the transom slots for the stringers/knees!!!!
They do not work... When you go to tape and add cloth to the inside, the slots will get filled in...
Going to fillin slots and glass the stringers/knees in like other builds.

- file~3.jpg (39.26 KiB) Viewed 827 times
Re: LM18 Low Sheer Round Chine
Posted: Wed Jan 23, 2019 6:17 am
by OrangeQuest
If you glass the transom then while the glass is still green you can cut the slots open again with a razor knife.
MY BUILD LOG OF MY LM18 RCLS
Posted: Wed Jan 23, 2019 7:06 am
by Capt UB
OrangeQuest wrote: ↑Wed Jan 23, 2019 6:17 am
If you glass the transom then while the glass is still green you can cut the slots open again with a razor knife.
WHY?
The slots are not deep enough to add anything and the slots are too wide as is, AND the mess of cutting tape and cloth...WET!!!
There will be one layer of tape and cloth, maybe two of the cloth inside at the joining point of the transom and hull. Easier to do like I did with my FS14.
Re: LM18 Low Sheer Round Chine
Posted: Wed Jan 23, 2019 8:53 am
by OrangeQuest
Capt UB wrote: ↑Wed Jan 23, 2019 7:06 am
OrangeQuest wrote: ↑Wed Jan 23, 2019 6:17 am
If you glass the transom then while the glass is still green you can cut the slots open again with a razor knife.
WHY?
The slots are not deep enough to add anything and the slots are too wide as is, AND the mess of cutting tape and cloth...WET!!!
There will be one layer of tape and cloth, maybe two of the cloth inside at the joining point of the transom and hull. Easier to do like I did with my FS14.
Not trying to tell you how to build, just suggesting if you want to glass before assembly.
To help line up the transom knees for one and even a shallow key is still something more than tape alone. And you can glue, fillet and tape all in one day. adding the glass after it is all glued up, you have to trim around the knees and stringer then?
And you don't try cutting it when wet, when it is still green where the glass is solid enough that it just flexes a little but not brittle hard just yet. Use the edge of the slot as a guide to trim the glass to the edge. That is only if you are planning on adding glass to the inside. 2nd, are the stringers and the knees going to need to be trimmed if you fill in and not use?
MY BUILD LOG OF MY LM18 RCLS
Posted: Wed Jan 23, 2019 9:23 am
by Capt UB
OrangeQuest wrote: ↑Wed Jan 23, 2019 8:53 am
Capt UB wrote: ↑Wed Jan 23, 2019 7:06 am
OrangeQuest wrote: ↑Wed Jan 23, 2019 6:17 am
If you glass the transom then while the glass is still green you can cut the slots open again with a razor knife.
WHY?
The slots are not deep enough to add anything and the slots are too wide as is, AND the mess of cutting tape and cloth...WET!!!
There will be one layer of tape and cloth, maybe two of the cloth inside at the joining point of the transom and hull. Easier to do like I did with my FS14.
Not trying to tell you how to build, just suggesting if you want to glass before assembly.
To help line up the transom knees for one and even a shallow key is still something more than tape alone. And you can glue, fillet and tape all in one day. adding the glass after it is all glued up, you have to trim around the knees and stringer then?
And you don't try cutting it when wet, when it is still green where the glass is solid enough that it just flexes a little but not brittle hard just yet. Use the edge of the slot as a guide to trim the glass to the edge. That is only if you are planning on adding glass to the inside. 2nd, are the stringers and the knees going to need to be trimmed if you fill in and not use?
I'm going the easy way, fill and do as I did with the FS14. I will use battens to keep the stringers/knees at width when taping them in. Easy to do and works great. I do the same with the frames to keep them in place for taping.
MY BUILD LOG OF MY LM18 RCLS
Posted: Fri Jan 25, 2019 11:05 am
by Capt UB
OrangeQuest wrote: ↑Wed Jan 09, 2019 8:01 am
Very exciting to see you start your LM18!! It looks like it will fit under the carport but do you have room to work on it? The Sand Piper looks so forgotten in the background.
I bought a flat bottom boat cover from Academy to cover the hull of the FS14 up when we went to Chicago and brought it back. I got the one with all the straps and it held up great. At times my spare driver was hitting 80MPH while I was trying to sleep. Point is you can tighten the straps down enough for the water to roll off it if it rains with no pooling. It was somewhere around < $70.00
I think
OQ,
This is not the same make, but same thing as you got. Looks great and fits boat and OB too!
Thanks for the information on the right boat cover.
Bob
Re: LM18 Low Sheer Round Chine
Posted: Fri Jan 25, 2019 1:09 pm
by Bogieman
Re: LM18 Low Sheer Round Chine
Posted: Fri Jan 25, 2019 1:31 pm
by OrangeQuest
It does look good. The cheap one I got had like 6 or 8 straps down the sides and two more at transom. But it would not go around the OB.
MY BUILD LOG OF MY LM18 RCLS
Posted: Fri Jan 25, 2019 2:03 pm
by Capt UB
OrangeQuest wrote: ↑Fri Jan 25, 2019 1:31 pm
It does look good. The cheap one I got had like 6 or 8 straps down the sides and two more at transom. But it would not go around the OB.
Amazon
$ 45.99 and free non-prime shipping!
There are three more straps in the bag, just have not setup cover yet. This is the MSC Heavy Duty 300D Marine Grade Polyester Canvas Trailerable Waterproof Boat Cover, Gray, Model A - Length:14'-16' Beam width: up to 68" (Fit V-hull fishing boats with beam width to 68”)
Re: LM18 Low Sheer Round Chine
Posted: Fri Jan 25, 2019 2:53 pm
by OrangeQuest
Oh ok! It is better then than the one I got and like I said, it held up to 80mph speeds at times.
I will let you get back to drilling hundreds of holes!
MY BUILD LOG OF MY LM18 RCLS
Posted: Sat Jan 26, 2019 8:39 am
by Capt UB
MY BUILD LOG OF MY LM18 RCLS
Posted: Wed Jan 30, 2019 9:31 am
by Capt UB
Found this in CL files. I'm going to buy one tonight.
Then using a couple of Stanley Sure Form planes we trimmed off all the excess glue and rounded all the seams in preparation for taping. This is the best tool for the job and I've tried them all. No dust, no noise, so sanding disks expended, no respirator or safety glasses required. It will trim off the drips, smooth the joints and round over the edges better and faster than anything that uses electricity

- Sureform1.jpg (173.92 KiB) Viewed 991 times
Re: LM18 Low Sheer Round Chine
Posted: Wed Jan 30, 2019 10:11 am
by jacquesmm
It works especially well on "green" resin: when it is hard but not completely cured. Autobody shops use the technique all the time.
Re: LM18 Low Sheer Round Chine
Posted: Wed Jan 30, 2019 10:13 am
by Jaysen
I use those things all the time. Get a couple spare grates for them. The epoxy will clog it up (soak in acetone and good as new).
MY BUILD LOG OF MY LM18 RCLS
Posted: Wed Jan 30, 2019 12:34 pm
by Capt UB
jacquesmm wrote: ↑Wed Jan 30, 2019 10:11 am
It works especially well on "green" resin: when it is hard but not completely cured. Autobody shops use the technique all the time.
Thank you JM.
MY BUILD LOG OF MY LM18 RCLS
Posted: Wed Jan 30, 2019 12:35 pm
by Capt UB
Jaysen wrote: ↑Wed Jan 30, 2019 10:13 am
I use those things all the time. Get a couple spare grates for them. The epoxy will clog it up (soak in acetone and good as new).
Thanks for the heads up on get a few and the clog up and cleaning.
Re: LM18 Low Sheer Round Chine
Posted: Wed Jan 30, 2019 1:29 pm
by fallguy1000
I use the sureform on all foam work prior to glassing.
After cure, for all flatwork, I use this:
https://www.woodcraft.com/products/kutz ... 3baa0002e9
Re: LM18 Low Sheer Round Chine
Posted: Thu Jan 31, 2019 11:56 am
by Fair WX Pilot
A sureform is definitely the way to go. This one was my Dad's and predates me by quite some time. He used it on his boat and it still works great now on mine. Not bad for a 60+ year old tool. Loving watching your build.

Re: LM18 Low Sheer Round Chine
Posted: Thu Jan 31, 2019 12:40 pm
by OrangeQuest
I used needle rasps for my R/C boat stuff but are to small for anything big. They are designed to be pulled and are curved to remove a lot of material quickly without much effort.
Capt. UB the rasp you show I have seen them at HD a few times but have yet to pick one up. Seems with the holes and a quick pull they would not clog as easy. Let us know what you think. With all the rounded chines you will be using it a lot!

MY BUILD LOG OF MY LM18 RCLS
Posted: Fri Feb 01, 2019 7:03 am
by Capt UB
Going to pickup some new fairing tools tonight, will not need them for sometime
. Nothing like buying tools!!
Had problems with the round chine slots on this build, all is good now. So the build goes on...
Strongback is built and ready.
Molds/frames are on station.
Panels with round chine slots are cutout.
Relay the panels on the molds/frames.
Wire ties and PVC 1" long tubes (for backing) are ready.
Going to use straps like Jeff did on molds/frames 1 and 2 to help make the round chine easier.
Hopefully, all this will get done before it's starts to rain!!!
MY BUILD LOG OF MY LM18 RCLS
Posted: Fri Feb 01, 2019 5:53 pm
by Capt UB
What a pain in the ass....
The CnC round chine cutouts were not on the same side of the panel!
Had to flip all four panels to cutout round chine slots!! At 18' long and about 14" wide..... I should have asked for help! Got it done!
Used tape on the cut side, then flipped panel.
Did not cutdown through the puzzle joint and ends, this time! I had cut before and things went down hill!
Once I get her layed out (wire tied) on the molds and transom, I'll then cutout the slots at the puzzle joint and ends. Then start the round chine FUN.....
Re: LM18 Low Sheer Round Chine
Posted: Fri Feb 01, 2019 9:59 pm
by Aripeka Angler
Nice work Captain!
Re: LM18 Low Sheer Round Chine
Posted: Fri Feb 01, 2019 10:04 pm
by Rtorres2411
Very nice, looking like a boat already!
Re: LM18 Low Sheer Round Chine
Posted: Fri Feb 01, 2019 10:06 pm
by Jaysen
Looks like you’re winning the war!
Looks great.
Re: LM18 Low Sheer Round Chine
Posted: Sat Feb 02, 2019 5:41 am
by OrangeQuest
Slow and steady Capt. UB, Slow and steady!
I agree with Jaysen, you are winning!
MY BUILD LOG OF MY LM18 RCLS
Posted: Sat Feb 02, 2019 2:15 pm
by Capt UB
MY BUILD LOG OF MY LM18 RCLS
Posted: Sat Feb 02, 2019 2:16 pm
by Capt UB
MY BUILD LOG OF MY LM18 RCLS
Posted: Sat Feb 02, 2019 2:19 pm
by Capt UB
Going to remove straps and see if it ties up better.
Re: LM18 Low Sheer Round Chine
Posted: Sat Feb 02, 2019 3:15 pm
by seaslug
Bob, your boat is coming along nicely, and I'm jealous because I'd really like to build one myself. Someday maybe. I think those nails look really cool, but you should bang them in or your fly line will get hung up. Build on. Mike
MY BUILD LOG OF MY LM18 RCLS
Posted: Sat Feb 02, 2019 3:15 pm
by Capt UB
PVC pipe worked.
What a workout putting wire ties and pvc pipe on this boat!
.
.
.
.
.
.
Now for the other side!!!
MY BUILD LOG OF MY LM18 RCLS
Posted: Sat Feb 02, 2019 3:27 pm
by Capt UB
seaslug wrote: ↑Sat Feb 02, 2019 3:15 pm
Bob, your boat is coming along nicely, and I'm jealous because I'd really like to build one myself. Someday maybe. I think those nails look really cool, but you should bang them in or your fly line will get hung up. Build on. Mike
Nails.... Those are the firing pins, just like Bogart made!
Thanks Mike.
As for my fly line.... I'm still stepping on it!! Someday I'll take a lesson or two!
Re: LM18 Low Sheer Round Chine
Posted: Sat Feb 02, 2019 3:30 pm
by TomW1
Looking good Capt.
Tom
MY BUILD LOG OF MY LM18 RCLS
Posted: Sat Feb 02, 2019 3:36 pm
by Capt UB
TomW1 wrote: ↑Sat Feb 02, 2019 3:30 pm
Looking good Capt.
Tom
Thanks Tom.
MY BUILD LOG OF MY LM18 RCLS
Posted: Sat Feb 02, 2019 3:38 pm
by Capt UB
MY BUILD LOG OF MY LM18 RCLS
Posted: Sat Feb 02, 2019 3:39 pm
by Capt UB
MY BUILD LOG OF MY LM18 RCLS
Posted: Sat Feb 02, 2019 3:40 pm
by Capt UB
OrangeQuest wrote: ↑Thu Jan 31, 2019 12:40 pm
I used needle rasps for my R/C boat stuff but are to small for anything big. They are designed to be pulled and are curved to remove a lot of material quickly without much effort.
Capt. UB the rasp you show I have seen them at HD a few times but have yet to pick one up. Seems with the holes and a quick pull they would not clog as easy. Let us know what you think. With all the rounded chines you will be using it a lot!
Thanks OQ.
Bob
MY BUILD LOG OF MY LM18 RCLS
Posted: Sat Feb 02, 2019 4:57 pm
by Capt UB
And now the other side....
Need more pvc pipe...
.
.
.
.
Maybe glue up slots Sunday before game.
MY BUILD LOG OF MY LM18 RCLS
Posted: Sun Feb 03, 2019 5:24 pm
by Capt UB
Re: LM18 Low Sheer Round Chine
Posted: Sun Feb 03, 2019 5:44 pm
by OrangeQuest
You are moving along great! How is the blood pressure after you finished getting that done?
That had to been stressful, I don't see the first mate in any of the last pictures, there must of been words even a salty sailor doesn't hear very often!
MY BUILD LOG OF MY LM18 RCLS
Posted: Sun Feb 03, 2019 5:57 pm
by Capt UB
OrangeQuest wrote: ↑Sun Feb 03, 2019 5:44 pm
You are moving along great! How is the blood pressure after you finished getting that done?
That had to been stressful, I don't see the first mate in any of the last pictures, there must of been words even a salty sailor doesn't hear very often!
With all the help I had building SandPiper (FS14), I learned more then I realized. It all came into play..... There will be a lot of fairing/shaping before I put down any glass. When Jeff was building the round chine, he did pre-glass fairing/shaping. Seaslug had lots of ideas too on this builds... Just too many people helped in one way or another to list... So, Thanks to the Forum gang.
MY BUILD LOG OF MY LM18 RCLS
Posted: Sun Feb 03, 2019 7:32 pm
by Capt UB
MY BUILD LOG OF MY LM18 RCLS
Posted: Mon Feb 04, 2019 5:53 pm
by Capt UB
Getting down to work. No flapper needed, orbiter sander working great and old cheap belt sander with 50 doing a good job.
Time for new sander....
Re: LM18 lsrc DeLand Fl.
Posted: Mon Feb 04, 2019 8:03 pm
by Bogieman
Looking good CaptUB.
Re: LM18 lsrc DeLand Fl.
Posted: Mon Feb 04, 2019 8:04 pm
by OrangeQuest
looking good Capt UB, looking good!
Re: LM18 lsrc DeLand Fl.
Posted: Mon Feb 04, 2019 8:13 pm
by Rtorres2411
Great job Capt, nice work on the round chine that looks like a lot of work.
Re: LM18 lsrc DeLand Fl.
Posted: Mon Feb 04, 2019 8:17 pm
by Fair WX Pilot
The boat looks great, fantastic job getting through all that sanding so quickly.
Re: LM18 lsrc DeLand Fl.
Posted: Tue Feb 05, 2019 7:23 am
by Jeff
Nice work Capt UB!! Really good progress!! Jeff
Re: LM18 lsrc DeLand Fl.
Posted: Tue Feb 05, 2019 5:44 pm
by TomW1
Looking good Capt.
Tom
MY BUILD LOG OF MY LM18 RCLS
Posted: Tue Feb 05, 2019 8:31 pm
by Capt UB
Got a little done tonight.
MY BUILD LOG OF MY LM18 RCLS
Posted: Wed Feb 06, 2019 6:36 pm
by Capt UB
Well I got one side sanded, not faired completely yet. 40 grit on both the sander and belt sander....
Re: LM18 lsrc DeLand Fl.
Posted: Wed Feb 06, 2019 8:22 pm
by Aripeka Angler
Nice progress! You are winning the battle of the bow.
Re: LM18 lsrc DeLand Fl.
Posted: Wed Feb 06, 2019 8:36 pm
by Fuzz
I just love how you can fix most anything with enough wood flour/ epoxy glue. I use a ton of it, every order I have the guys top off my package with more wood flour
Like AA says you seem to be winning the bow battle.
MY BUILD LOG OF MY LM18 RCLS
Posted: Thu Feb 07, 2019 5:45 am
by Capt UB
Aripeka Angler wrote: ↑Wed Feb 06, 2019 8:22 pm
Nice progress! You are winning the battle of the bow.
Thanks.
I hope I"m going in the right direction.
MY BUILD LOG OF MY LM18 RCLS
Posted: Thu Feb 07, 2019 5:53 am
by Capt UB
Fuzz wrote: ↑Wed Feb 06, 2019 8:36 pm
I just love how you can fix most anything with enough wood flour/ epoxy glue. I use a ton of it, every order I have the guys top off my package with more wood flour
Like AA says you seem to be winning the bow battle.
Thanks Fuzz.
Like I said to AA, not sure if this is the right way... I know the glass layup that JM calls for by it's self is strong, but wondering do I need to lay more glass down. A few have said wood flour and epoxy is brittle, I have not found this to be true... But I have never had to use so much in one area before!
Re: LM18 lsrc DeLand Fl.
Posted: Thu Feb 07, 2019 6:31 am
by icelikkilinc
nothing to worry, you are effectively utilizing epoxy/filler combo ilo core plywood to be able to give the boat shape.
Traditional wooden building would be different but in JM method, this is just the core to build onto.
JM method gets the strength when all pieces of the puzzle come together. you will have the core + glass tape + glass + epoxy + stringers etc all coming together to form a superstructure. Therefore do not get hung up on one point, make sure all those gaps are fully filled and cured, than sand to shape and follow JM laminating schedule. You are defo winning the battle captain.
MY BUILD LOG OF MY LM18 RCLS
Posted: Thu Feb 07, 2019 12:38 pm
by Capt UB
icelikkilinc wrote: ↑Thu Feb 07, 2019 6:31 am
nothing to worry, you are effectively utilizing epoxy/filler combo ilo core plywood to be able to give the boat shape.
Traditional wooden building would be different but in JM method, this is just the core to build onto.
JM method gets the strength when all pieces of the puzzle come together. you will have the core + glass tape + glass + epoxy + stringers etc all coming together to form a superstructure. Therefore do not get hung up on one point, make sure all those gaps are fully filled and cured, than sand to shape and follow JM laminating schedule. You are defo winning the battle captain.
Thanks.
Looks like I may have a bit of a CHINE FENDER or SPRAY RAIL built-in.... I Could not get the chine to pull in, even with straps..
Re: LM18 lsrc DeLand Fl.
Posted: Fri Feb 08, 2019 2:11 am
by TomW1
Capt do not worry about it. That is the nice thing about these boats. Each one is an individually built and can be adjusted as they are being built. I have been on the Forum since the early 2000's. Cracker Larry and I had a great time for a few years and then I goofed up. I went off for a few years and came back with Larry's help because of my knowledge, his words not mine, and have seen many boats built and adjustments made. I have met with Jacques and talked with him so know how he thinks so don't worry about your minor adjustments in your chine line or other lines as you go along. The main thing is to make is to make these hulls fair. If you do that you have done your job.
Tom
MY BUILD LOG OF MY LM18 RCLS
Posted: Sun Feb 10, 2019 4:52 pm
by Capt UB
Got the port side bow done (that's the other side of starboard
). Will grind starboard Monday. Rest of hull is ready for tape and cloth. Hopefully weather wiil be good, if it is could start fairing the hull this weekend!!!!!
Re: LM18 lsrc DeLand Fl.
Posted: Sun Feb 10, 2019 6:41 pm
by OrangeQuest
That is really looking good Capt!
Thanks for clearing up which side was not port!
Wait, is port still on the same side as when it is right side up but it's upside down?
Re: LM18 lsrc DeLand Fl.
Posted: Sun Feb 10, 2019 9:34 pm
by Rtorres2411
Looking great. You are building that boat fast.
MY BUILD LOG OF MY LM18 RCLS
Posted: Mon Feb 11, 2019 12:07 pm
by Capt UB
Just thinking ahead... What to do on bottom, not black!!
just sand bottom panels smooth and coat with 3 layers of Hexagonal Boron Nitride (HBN or "White Graphite") mixed with epoxy. I may need to add some white pigment to the last coat. I did three or four coats of graphite/epoxy wet (1/2 hour between coats I think this is what I waited, 80* plus) on my FS14 SandPiper. HBN should look great, white bottom with Sea foam color on the hull.

- Inked5611619_20160120153312439_1_LARGE_LI.jpg (51.22 KiB) Viewed 971 times
Re: LM18 lsrc DeLand Fl.
Posted: Mon Feb 11, 2019 12:20 pm
by Jaysen
Why not put a couple layers “sacrificial paint” on after all that? Just to keep it out of UV completely.
MY BUILD LOG OF MY LM18 RCLS
Posted: Mon Feb 11, 2019 12:30 pm
by Capt UB
Jaysen wrote: ↑Mon Feb 11, 2019 12:20 pm
Why not put a couple layers “sacrificial paint” on after all that? Just to keep it out of UV completely.
No need, the HBN is just like graphite. UV blocker.
Re: LM18 lsrc DeLand Fl.
Posted: Mon Feb 11, 2019 12:33 pm
by Jaysen
True. I was thinking about the need for tinting the last layer. Thought a coat or two of paint might be quick and simple by comparison
MY BUILD LOG OF MY LM18 RCLS
Posted: Mon Feb 11, 2019 2:08 pm
by Capt UB
Jaysen wrote: ↑Mon Feb 11, 2019 12:33 pm
True. I was thinking about the need for tinting the last layer. Thought a coat or two of paint might be quick and simple by comparison
The white pigment will make it even whiter, I am told.
MY BUILD LOG OF MY LM18 RCLS
Posted: Mon Feb 11, 2019 6:55 pm
by Capt UB
So now both sides are basally shaped/faired and ready for tape and cloth. More fairing after the glass in put down. Tomorrow I'm make the skeg, cut the tape and cloth.
.
.
MY BUILD LOG OF MY LM18 RCLS
Posted: Fri Feb 15, 2019 4:04 pm
by Capt UB
Got tape and cloth cut. Ready for laying up glass. Hope to have done this weekend. Lots of the cloth, one reason I use slow hardener, gives you lots of time to work.
MY BUILD LOG OF MY LM18 RCLS
Posted: Fri Feb 15, 2019 9:10 pm
by Capt UB
Got all the fiberglsss down. That was a big job for one person. Now comes all the sanding and fairing!!!
Re: LM18 lsrc DeLand Fl.
Posted: Fri Feb 15, 2019 9:12 pm
by cvincent
Nice work Capt UB. You are making good progress.
Re: LM18 lsrc DeLand Fl.
Posted: Fri Feb 15, 2019 9:27 pm
by OrangeQuest
Very nice! Someone blinks and they will miss your build.
Re: LM18 lsrc DeLand Fl.
Posted: Fri Feb 15, 2019 10:07 pm
by Bogieman
OrangeQuest wrote: ↑Fri Feb 15, 2019 9:27 pm
Very nice! Someone blinks and they will miss your build.
No kidding! Holy smokes you are flying
MY BUILD LOG OF MY LM18 RCLS
Posted: Sat Feb 16, 2019 7:13 am
by Capt UB
Good morning DeLand!
Well got the fiberglass layed down last night! Looks great and strong. A few air bubbles need some help.
Re: LM18 lsrc Getting it done!
Posted: Sat Feb 16, 2019 7:17 am
by Bogieman
The air bubbles look minimal to me.
MY BUILD LOG OF MY LM18 RCLS
Posted: Sat Feb 16, 2019 7:23 am
by Capt UB
They are, never had problems with the little one. There are a few larger ones I will fix after my third cup of coffee!!
Using BBC's MarinEpoxy with slow hardener makes fixing little problems easy.
Re: LM18 lsrc Getting it done!
Posted: Sat Feb 16, 2019 7:51 am
by topwater
The bow shape looks like a 12 meter Americas cup boat
MY BUILD LOG OF MY LM18 RCLS
Posted: Sat Feb 16, 2019 9:29 am
by Capt UB
topwater wrote: ↑Sat Feb 16, 2019 7:51 am
The bow shape looks like a 12 meter Americas cup boat
That's OK with me! I've sailed on a few old 12 m girls, never race on one.... You are right, did not see that! I think I may have lost my Canvas Soul!
Lionheart – K-18 (did not sail on her), but a good shot of the bow.

- 773a8331be9fda63952690cd9515901d.jpg (54.22 KiB) Viewed 1065 times
MY BUILD LOG OF MY LM18 RCLS
Posted: Sat Feb 16, 2019 11:00 am
by Capt UB
Forgot the skeg! Some trimming and glue with some woven 10 oz 4" tape to cover it. It's not going anywhere.
MY BUILD LOG OF MY LM18 RCLS
Posted: Sat Feb 16, 2019 11:55 am
by Capt UB
Not going to fair the bottom with fairing mix. Why put down something not as hard as HBN/epoxy mix. Since the bottom will be covered with HBN/epoxy mix, I'm going to put down the first coat as a leveling/fairing mix. This will fill in the low spots using a long level edge. Then add the next 3 layers of HBN/epoxy mix.
MY BUILD LOG OF MY LM18 RCLS
Posted: Sat Feb 16, 2019 12:37 pm
by Capt UB
HBN White Graphite
Hexagonal Boron Nitride Powder
Re: LM18 lsrc Getting it done!
Posted: Sat Feb 16, 2019 2:23 pm
by OrangeQuest
You boat is coming along fast but really is looking good. I guess all your pre-planning has really paid off. Seems you have a very well thought out game plan and executing perfectly.
MY BUILD LOG OF MY LM18 RCLS
Posted: Sat Feb 16, 2019 7:58 pm
by Capt UB
Rounded the sharp edges on top, not a lot, just a little and rounded the leading edge. Sanded hull/keel line, cleaned and put down a little neat epoxy. Mixed some wood flour and epoxy for glue, layed that down on keel line and placed skeg down. Covered skeg with some tape.
Skeg ready for some sanding. Then it's ready for some HBM/epoxy mix.
.
.
MY BUILD LOG OF MY LM18 RCLS
Posted: Sun Feb 17, 2019 10:35 am
by Capt UB
MY BUILD LOG OF MY LM18 RCLS
Posted: Mon Feb 18, 2019 5:29 pm
by Capt UB
I keep forgetting something or to do something...
Rubrails!!!
Going to install one 1/4" x 1 1/2" x 15' tonight, then another tomorrow night. Plans call for 3/4" thick, I'm going 1/4" and installing 1/2" shear clamp. I don't want a heavy looking rub rail. I will be installing the black rub rail from BBC, Tessilmare Rub Rail.
.
.
Re: LM18 lsrc Going to use HBN (White Graphite) on bottom
Posted: Tue Feb 19, 2019 7:16 am
by silentneko
Remember the HBN is very transparent, that's why I abandoned it. It doesn't tint the epoxy like graphite, it just makes it really milky, even with a few cc's of white pigment.
If I were to do it all again, I would look into an airboat bottom coating. Same concept as the epoxy/graphite, but they can customize the colors for you.
MY BUILD LOG OF MY LM18 RCLS
Posted: Tue Feb 19, 2019 9:49 am
by Capt UB
silentneko wrote: ↑Tue Feb 19, 2019 7:16 am
Remember the HBN is very transparent, that's why I abandoned it. It doesn't tint the epoxy like graphite, it just makes it really milky, even with a few cc's of white pigment.
If I were to do it all again, I would look into an airboat bottom coating. Same concept as the epoxy/graphite, but they can customize the colors for you.
I talked to a chemist here at work, he came up with a great idea, coat the bottom with a light epoxy and white tint as a base coat. Then ruff up and put down 2 coats with HBN and no tint, then two coats of HBN and white tint. Last coat heavy on the tint. Also, saw a few kayaks with the HBN bottoms, I talked to them, they had no idea other then it was called "White Graphite" and was hard as steel! Damn the kayaks looked good with the white bottoms!
I did talk to a few airboaters about their coatings. Some cool stuff some of them use! I was going to use "Wetlander", on the SandPiper FS14, but went with Graphite. Now that I think about it.... I'll call today and see how much and why I did not use it.
I'll post photos and what I mixed, how I mixed, how the mix worked....
Re: LM18 lsrc Going to use HBN (White Graphite) on bottom
Posted: Tue Feb 19, 2019 12:01 pm
by silentneko
I had 4 coats of the epoxy HBN with white pigment. The issue is to much pigment effects the epoxy. While it looked opaque in the pan as soon as you rolled it on it was very transparent.
As far as "hard as steel" goes. I did some sample scratch tests. It's no better then the graphite, and beaching will wear it down after a bit. It does offer protection, but it's by way of slickness. If you want something much harder then ask your friend about an aluminumpowder hybrid mix maybe. I might go this way in the future, and it's what some of the airboat mixes have along with teflon.
MY BUILD LOG OF MY LM18 RCLS
Posted: Tue Feb 19, 2019 12:27 pm
by Capt UB
silentneko wrote: ↑Tue Feb 19, 2019 12:01 pm
I had 4 coats of the epoxy HBN with white pigment. The issue is to much pigment effects the epoxy. While it looked opaque in the pan as soon as you rolled it on it was very transparent.
As far as "hard as steel" goes. I did some sample scratch tests. It's no better then the graphite, and beaching will wear it down after a bit. It does offer protection, but it's by way of slickness. If you want something much harder then ask your friend about an aluminumpowder hybrid mix maybe. I might go this way in the future, and it's what some of the airboat mixes have along with teflon.
He said too much tint will weaken the epoxy. He also said, don't run up on anything! I am getting the HBN for free, so I can play with it a bit. I'm going to try this; coat the bottom with a light epoxy and white tint as a base coat. Then ruff up and put down 2 coats with HBN and no tint, then two coats of HBN and white tint. Last coat heavy on the tint. If the last coat fails, that will be OK.
Funny, I had an old 13 Gheenoe Low sider (late 70's) that had the fiberglass/polyester keel worn down, 30 plus years it still did not leak!
Re: LM18 lsrc Going to use HBN (White Graphite) on bottom
Posted: Tue Feb 19, 2019 2:46 pm
by silentneko
Funny, I had a 2002 gheenoe that when I bought it used, the front 3ft of the keel was held together with caulk. That's why I always lay extra glass at the front of the keel, cause I'm not going to stop beaching, it's near a necessity with the family on board.
MY BUILD LOG OF MY LM18 RCLS
Posted: Tue Feb 19, 2019 6:41 pm
by Capt UB
Got the other side rub rail glued on. Looking nice, can't wait to paint her. Tonight was the first time in months I had a cup of glue go off.... I forgot how hot epoxy gets!!
.
Feb 19 weather.....
.
.
Re: LM18 lsrc
Posted: Tue Feb 19, 2019 7:02 pm
by Rtorres2411
The LM18 is looking great Capt.
Ruben
MY BUILD LOG OF MY LM18 RCLS
Posted: Tue Feb 19, 2019 7:05 pm
by Capt UB
Rtorres2411 wrote: ↑Tue Feb 19, 2019 7:02 pm
The LM18 is looking great Capt.
Ruben
Thanks. I'm looking forward to the flip.
Re: LM18 lsrc
Posted: Tue Feb 19, 2019 10:07 pm
by TomW1
Capt UB wrote: ↑Tue Feb 19, 2019 6:41 pm
Got the other side rub rail glued on. Looking nice, can't wait to paint her. Tonight was the first time in months I had a cup of glue go off.... I forgot how hot epoxy gets!!
.
Feb 19 weather.....
0219191826~2.jpg
.
.
0219191722~2.jpg0219191819a~2.jpg
Perfect boat building weather high 70's and low humidity.
MY BUILD LOG OF MY LM18 RCLS
Posted: Wed Feb 20, 2019 6:51 am
by Capt UB
MY BUILD LOG OF MY LM18 RCLS
Posted: Wed Feb 20, 2019 6:43 pm
by Capt UB
Got rub rail base done. Now for lots of sanding...
MY BUILD LOG OF MY LM18 RCLS
Posted: Wed Feb 20, 2019 6:52 pm
by Capt UB
Thanks to Flyfishingmonk for the HBN (white graphite) and the hardware for hatches.
Thanks again Casey Short.
Re: LM18 lsrc
Posted: Wed Feb 20, 2019 7:25 pm
by OrangeQuest
Looking good Capt!
MY BUILD LOG OF MY LM18 RCLS
Posted: Thu Feb 21, 2019 2:11 pm
by Capt UB
Just downloaded info sheet on System Three WR-LPU Linear Polyurethane Topcoat that BBC sales.
Just ordered more QuickFair and I have about 3/4 gal of S3 yacht primer left from SandPiper FS14.
So I going to get the WR-LPU in Orcas White for bottom and Sinclair Yellow for the sides of the hull.
ORCAS WHITE AND SINCLAIR YELLOW

- paint chart s3.png (22.79 KiB) Viewed 1028 times
Re: LM18 lsrc
Posted: Fri Feb 22, 2019 1:36 am
by TomW1
Capt quit posting the same info in two different places. It is confusing to those on the forum. Jeff could you delete this post. as it is the same as one above in Power Boats. I replied to your post in the Power Boat section and think you will have a lovely boat. Just keep your posts to one section it becomes confusing to have to go back and forth between them. Also Label your post with one label and stick with it. LM18 LSRC stick with it and don't change it.
MY BUILD LOG OF MY LM18 RCLS
Posted: Fri Feb 22, 2019 6:07 am
by Capt UB
Re: LM18 lsrc
Posted: Fri Feb 22, 2019 6:36 am
by cape man
Re: MY BUILD LOG OF MY LM18 RCLS
Posted: Fri Feb 22, 2019 7:48 am
by Capt UB
Low sheer non round chine, still working on how it should look!
.

- right at you.jpg (17.12 KiB) Viewed 967 times
Stiletto
Posted: Fri Feb 22, 2019 7:50 am
by Capt UB
Re: MY BUILD LOG OF MY LM18 RCLS
Posted: Fri Feb 22, 2019 8:02 am
by OrangeQuest
I thought the same thing as Capt. UB. I thought that you post in one to ask questions about the build and one just to post the progress. It IS in the title!
But at the same time I get confused as to which one I am posting in. Sometimes I post questions in my build thread that is for progress and vice a versa. Then there are the sections to ask about the plans, paints, tools and so on and so on. When I joined it was a little confusing then when to posts what and when. But now I see if I need help on a specific area I can go to that area of threads to seek answers. I still get confused but doesn't seem to bother to many people.
But to help keep from getting confused I look up at the top where it states " Board index and it shows where I am at on the forum. I have came to really like how it is formatted and even though there are areas where things should be but are not it still seems to work for most of us. Is it perfect, NO, but who on here is? Those that know where things need to be asked seem to direct the ones that do not know to the right areas.
OQ
Disclaimer: this is just my opinion on this matter. I may have it all confused so just take at face value.
Re: MY BUILD LOG OF MY LM18 RCLS
Posted: Fri Feb 22, 2019 8:27 am
by Capt UB
This is a good read...
Found this at Glen-L.com....
""Let's demystify some of these boat finishes
Post by Dave Grason » Fri Oct 30, 2015 7:38 am
As a boat building community, we are all vulnerable to the misinformation that seems to permeate the marine paint industry. We often ask other forum members about bottom paints, topside paints, varnishes and so on. But the paint industry changes methodology and chemical formulas virtually every day. What was the “hot” set up just a short time ago, is now yesterday’s news and there is a new kid in town. All the paint manufacturers have so-called experts touting their products. I’ve always felt that whatever these guys say must be taken with a grain of salt because they are on SOME paint company’s payroll. Therefore, I feel (and notice that I say I FEEL only. I’m not a paint expert) that I’m going to make my best informed decision and if it’s the wrong one, I will have learned. If my choice of paints turns out to be a mistake, then I will pass that information along with no other ulterior motives. By the same token, if my decision proves to be an excellent one, then I can also pass that information along.
As a summer project, I recently repainted my car. I used BASF paint in their R-M line. This is not considered the highest quality paint that BASF makes. But it is certainly the finest paint I've ever used in my life and it was pretty darned expensive. A gallon of base, a gallon of the corresponding clear and the proper reducer knocked over $500 out of my checking account. (YIKES!!
) But I feel, and there’s the phrase I FEEL again, that the man who looks at the cheapest paint available and demands the best finish available is only asking for trouble. We put so much time and effort in to our boat projects and then we cheap out on paint. It’s an irony.
Ok SO! How was this expensive paint to work with? Well, I got my money’s worth. It was an absolute DREAM to work with this stuff. It mixed well, flowed well, laid down well and it EVEN smelled good. Crazy – I know. And NO, NO, NO, we don’t roll and tip it. It does require good spray equipment. Once I sprayed the base coat, I waited approximately an hour or so and sprayed on the clear. I never knew that any paint could be top coated that quickly. I sprayed on extra coats of clear because I knew that I was going to wet sand and buff the clear. This was because I was painting in my garage. I don’t have a dedicated spray environment like a pro would have. So I knew ahead of time that I was going to get dust and kamikaze bugs in it. The color sanding process would hopefully get rid of those problems.
I started color sanding with 1500 grit, then I went to 2000 grit. Then I buffed it and it honestly now looks like a paint job that one would see at a custom car show.
I bring this up because, even though I paid a hefty price for the paint, again, I obviously got my money's worth. In the 21 years that I've owned my car, it has NEVER looked so beautiful!
Ok, I know what you’re thinking. I started out talking about marine paint and now, I’m talking about automotive paint. But stay with me here. I asked the guys at the paint store about using this paint on boats. I explained that I wanted to use it, not just on the deck but also on the bottom. The paint store guys said that their BASF R-M line was excellent for boats both above and below the waterline. I replied:
“Yeah sure! You boys just want to sell paint.”
But they gave me a list of marine dealers around the middle Tennessee area that are buying and using this paint. One was Anderson Marine which was not far away.
When I left, I took a quick side trip over to Anderson Marine and walked in to talk to the service manager. I explained why I was there and what I needed to know. He told me that they had been using BASF R-M paint on boats for a number of years. He said that it was worth the little extra money over cheaper brands because they never needed to do repairs. He said that, in the last two years, they had probably painted 70 or 80 boats – some needing crash repair; others needing full recoats – and they had not had a single return. I wanted to specifically know about trailerable boats that might spend a lot of time with the paint getting crushed between the hull and the bunks on the trailer. He said: “No problems.”
I asked about boats that stayed moored in a marina all summer or even year round. He again said that they have seen no problems with this paint above or below the waterlines of the boats that they had painted.
So, I am going to go one step farther. My Zip has not yet been painted in its final coats. I plan to use BASF R-M paint from the very bottom of the keel all the way up to the sheer. Since the boat will be finished bright on the deck, I will coat the mahogany with epoxy and then spray the BASF R-M clear coat that they recommend right on the epoxy. No varnish, no fiberglass cloth and nothing more. I will wet sand the clear and buff it like I did on my car. Finally, I will document the entire process and keep everyone apprised of any problems or successes. If I have a failure of the finish, either above or below the sheer, I will document the failure and document all efforts to correctly identify the cause of the failure. This will take some time but I really feel that we need to address some of these paint mysteries once and for all. At least, this way, I can do my little part. I figure that, if I do my part with automotive paint, someone else may do the same thing for other paint options available to boatbuilders. Soon, WE could be the go to people for solid, verifiable answers. I say this because, I don't know about you, but I always feel a little terrible when a newbie comes on here asking about paints and we really don't have the answers anymore than any other forum.""
This was from Glen-L.com
Re: MY BUILD LOG OF MY LM18 RCLS
Posted: Fri Feb 22, 2019 8:29 am
by Capt UB
Re: MY BUILD LOG OF MY LM18 RCLS
Posted: Fri Feb 22, 2019 9:38 am
by OrangeQuest
Re: MY BUILD LOG OF MY LM18 RCLS
Posted: Fri Feb 22, 2019 10:14 am
by Capt UB
OQ,
I posted in the tech help about the bottom.... This was not about paint at the time, but epoxy bottoms.
"I really did not want a black or gray bottom. I am/was hoping that HBN (white graphite) would work. After talking, texting and Googleing, don't think HBN will work. What else puts a hard bottom and is light in color. Thanks Bob."
.
.
And yes I know there is a place for paint....
OQ, it's getting hot here, you guys still getting cool or cold weather? Does the river ice up or stay warm during the cooler weather months?
MY BUILD LOG OF MY LM18 RCLS
Posted: Fri Feb 22, 2019 10:22 am
by Capt UB
OrangeQuest wrote: ↑Thu Jun 21, 2018 2:41 pm
Are you thinking of using peel ply on the LM18? It's a little late on the FS14 I thought.
2/22/2019
I did not use any sheeting. I would have needed 3 or 4 helpers to do it right!
MY BUILD LOG OF MY LM18 RCLS
Posted: Fri Feb 22, 2019 10:24 am
by Capt UB
Marshall Moser wrote: ↑Thu Jun 21, 2018 3:40 pm
Peter-curacao swears by poly peel ply.
Found out it takes a group to help do it right!
MY BUILD LOG OF MY LM18 RCLS
Posted: Fri Feb 22, 2019 10:31 am
by Capt UB
silentneko wrote: ↑Tue Feb 19, 2019 7:16 am
Remember the HBN is very transparent, that's why I abandoned it. It doesn't tint the epoxy like graphite, it just makes it really milky, even with a few cc's of white pigment.
If I were to do it all again, I would look into an airboat bottom coating. Same concept as the epoxy/graphite, but they can customize the colors for you.
Hay I forgot to ask what your mix was, how much of HBN to epoxy/hardener..
Re: MY BUILD LOG OF MY LM18 RCLS
Posted: Fri Feb 22, 2019 11:04 am
by Capt UB
Re: MY BUILD LOG OF MY LM18 RCLS
Posted: Fri Feb 22, 2019 11:27 am
by OrangeQuest
Capt UB wrote: ↑Fri Feb 22, 2019 10:14 am
OQ, it's getting hot here, you guys still getting cool or cold weather? Does the river ice up or stay warm during the cooler weather months?
The temperatures here are all over the place. And forecasts are like licking your finger and sticking it in the air. They say one thing but the weather does something else. Like yesterday, started out in the low 50s. got up to the high 50s before noon, forecast was a high in the mid 60s. By 3 it was in the low 50s again. We are getting what looks like snow flurries but just moisture dense enough to be seen but it is light enough to float in the air. And doesn't stick to the ground.
In 40 years of being in Houston I have never seen the bayous freeze. Even when the temps get down in the 30s and 40s the water is still kind of warm. most of it is proceeded recycled water from homes and businesses that is discharged into the bayous after treatment. Sometimes there is a very strong smell of bleach. We are getting into spring where plants are starting to grow and turn green. Keep in mind it very seldom gets below the 50s here and when it does it doesn't normally last long.
Re: MY BUILD LOG OF MY LM18 RCLS
Posted: Fri Feb 22, 2019 11:54 am
by silentneko
Capt UB wrote: ↑Fri Feb 22, 2019 10:31 am
Hay I forgot to ask what your mix was, how much of HBN to epoxy/hardener..
I think I was about 25%-30% HBN by volume, well sifted of course. I was told over 30% you can run into issues with rolling it out.
Next time I might try an aluminum and HBN mix.
As far as the peel ply goes, yes it takes several hands to do it right in large sections. I had to abandon it because I was not fast enough, but I will try to use it in the future with a helper, maybe even learn to vaccine bag.
Re: MY BUILD LOG OF MY LM18 RCLS
Posted: Fri Feb 22, 2019 12:20 pm
by Capt UB
OrangeQuest wrote: ↑Fri Feb 22, 2019 11:27 am
Capt UB wrote: ↑Fri Feb 22, 2019 10:14 am
OQ, it's getting hot here, you guys still getting cool or cold weather? Does the river ice up or stay warm during the cooler weather months?
The temperatures here are all over the place. And forecasts are like licking your finger and sticking it in the air. They say one thing but the weather does something else. Like yesterday, started out in the low 50s. got up to the high 50s before noon, forecast was a high in the mid 60s. By 3 it was in the low 50s again. We are getting what looks like snow flurries but just moisture dense enough to be seen but it is light enough to float in the air. And doesn't stick to the ground.
In 40 years of being in Houston I have never seen the bayous freeze. Even when the temps get down in the 30s and 40s the water is still kind of warm. most of it is proceeded recycled water from homes and businesses that is discharged into the bayous after treatment. Sometimes there is a very strong smell of bleach. We are getting into spring where plants are starting to grow and turn green. Keep in mind it very seldom gets below the 50s here and when it does it doesn't normally last long.
I went to school in Tempe, AZ , Ya ASU! Sun devils...
I remember in the AZ desert, summer: 120* plus, spring: 90*, fall: 10-60*, winter: below 0* some days! I know it has changed, you could see snow on Four Peaks and still go swimming in the pool in Tempe! I don't think that happens anymore!
I thought Houston was a warm place, like I thought Tempe was!!
Re: MY BUILD LOG OF MY LM18 RCLS
Posted: Fri Feb 22, 2019 12:31 pm
by Capt UB
Just saw this...
FLAGSTAFF, Ariz. — Schools, public libraries and businesses were expected to be closed for a second day Friday amid a major, record-breaking storm in north-central Arizona.
Re: MY BUILD LOG OF MY LM18 RCLS
Posted: Fri Feb 22, 2019 12:44 pm
by OrangeQuest
We have two seasons. 3 months hot and 9 months considered pleasant. So season one: hot, season two: Not hot
Re: MY BUILD LOG OF MY LM18 RCLS
Posted: Fri Feb 22, 2019 6:15 pm
by Capt UB
$100.00 Trailer with reg.
Maybe not long enough....
$ 100.00....
Re: MY BUILD LOG OF MY LM18 RCLS
Posted: Fri Feb 22, 2019 7:04 pm
by Capt UB
Thanks BBC.... Got my Quickfair and mixing sticks. One step at a time. I'll fair and sand the bottom, then figure out what to do with the bottom.
Re: MY BUILD LOG OF MY LM18 RCLS
Posted: Fri Feb 22, 2019 9:31 pm
by OrangeQuest
How much to short? The winch mount can be moved forward some. Extend the bunks a wee bit?
Re: MY BUILD LOG OF MY LM18 RCLS
Posted: Fri Feb 22, 2019 9:46 pm
by TomW1
Capt UB wrote: ↑Fri Feb 22, 2019 6:07 am
TomW1 wrote: ↑Fri Feb 22, 2019 1:36 am
Capt quit posting the same info in two different places. It is confusing to those on the forum. Jeff could you delete this post. as it is the same as one above in Power Boats. I replied to your post in the Power Boat section and think you will have a lovely boat. Just keep your posts to one section it becomes confusing to have to go back and forth between them. Also Label your post with one label and stick with it. LM18 LSRC stick with it and don't change it.
Tom,
This is MY build thread here,
Builder's Progress and non technical messages. It's the FILE/LOG of this build, IN ONE PLACE.
Nobody needs to leave advice here. I post on Technical help for advice! This is a Boat Builders Forum...... Tom, go build a boat! Just make sure you post it in the right place!
.
0121181615c.jpg
I am sorry you feel that way. All construction should be shown down here and all build questions should be asked above or in the paint section. I know your new but please I have been here since 2005. Don't tell me where to give information.
Re: LM18 lsrc
Posted: Fri Feb 22, 2019 9:57 pm
by Aripeka Angler
TomW1 wrote: ↑Fri Feb 22, 2019 1:36 am
Capt quit posting the same info in two different places. It is confusing to those on the forum. Jeff could you delete this post. as it is the same as one above in Power Boats. I replied to your post in the Power Boat section and think you will have a lovely boat. Just keep your posts to one section it becomes confusing to have to go back and forth between them. Also Label your post with one label and stick with it. LM18 LSRC stick with it and don't change it.
This is the type of post that got you banned three times from here in the past. Once under TomW and twice under fake forum names.
I would recommend that you mind your own business and not play hall monitor on a REAL builder’s thread who is actually building a real boat.
Anyone who reads this and wants an explanation, pm me. I’ll be happy to explain.
Re: MY BUILD LOG OF MY LM18 RCLS
Posted: Sat Feb 23, 2019 12:35 am
by glossieblack
For what it's worth, for Skiinydip's build, I've been posting technical questions in "Power Boats', then once the matter has been resolved, posting a copy of some or all of the Q&A back here in "Builders Power Boats, following an introductory explanation that I want to record all aspects of the build in one place. Seems to work well. Just my 2 cents ......
Re: MY BUILD LOG OF MY LM18 RCLS
Posted: Sat Feb 23, 2019 1:23 am
by BarraMan
Capt UB wrote: ↑Fri Feb 22, 2019 10:24 am
Marshall Moser wrote: ↑Thu Jun 21, 2018 3:40 pm
Peter-curacao swears by poly peel ply.
Found out it takes a group to help do it right!
Capt, I’m not sure what your issue is with peel ply, but it would be unfortunate if others were put off by your experience.
My wife and I “peel plyed” my 22’ boat - no problem! Just takes a bit of Co-ordination and teamwork.
Re: MY BUILD LOG OF MY LM18 RCLS
Posted: Sat Feb 23, 2019 3:04 am
by flyfishingmonk
The boat is looking good!
I post everything all in one thread. I figure it is easier for others to see everything in one place, and I only have to keep up with one thread, so that is nice.
I find myself getting lost among all the other random technical topics when doing research, they always seem to be lacking. Some are questions with few answers, or maybe poor answers. So I look for complete build threads with lots of pages, and then click back or forward a few pages at a time to see how a problem was tackled.
However, technical advice may come slower when all questions are in one build thread, as opposed to a new thread that has an interesting topic that gets some attention. But I remember when I first started building I was coached to use one thread with the boat title and location, I think by Jaques, can't recall. In the end it probably doesn't matter, and is personal choice.
When I finish the Phantom I really hope to build the LM18. Such a cool looking boat.
Casey
P.S. Glad you got your stuff, disregard my email.
Re: LM18 lsrc
Posted: Sat Feb 23, 2019 3:16 am
by TomW1
Aripeka Angler wrote: ↑Fri Feb 22, 2019 9:57 pm
TomW1 wrote: ↑Fri Feb 22, 2019 1:36 am
Capt quit posting the same info in two different places. It is confusing to those on the forum. Jeff could you delete this post. as it is the same as one above in Power Boats. I replied to your post in the Power Boat section and think you will have a lovely boat. Just keep your posts to one section it becomes confusing to have to go back and forth between them. Also Label your post with one label and stick with it. LM18 LSRC stick with it and don't change it.
This is the type of post that got you banned three times from here in the past. Once under TomW and twice under fake forum names.
I would recommend that you mind your own business and not play hall monitor on a REAL builder’s thread who is actually building a real boat.
Anyone who reads this and wants an explanation, pm me. I’ll be happy to explain.
I don't know why yoy bring this up as the topic has nothing to do with any thing in the past. Capt UB posted his different after I asked him to if you will notice. So no big problem
His boat is looking good and I really like the colors.
Tom
Re: MY BUILD LOG OF MY LM18 RCLS
Posted: Sat Feb 23, 2019 6:12 am
by OrangeQuest
I know I get confused on a regular bases when it comes to posting comments or questions and which one I am in on my own two threads. Because my account on here was reset when I changed e-mail accounts I can not edit the title to my threads to make it easier to tell which one I am in. Just like I am new to building full size boats I am fairly new at this forum.
I do understand the different sections for asking questions and just keeping a log and I have both of mine mixed together that makes it hard to keep track of. I can imagine how hard and time consuming it must be for a more experienced builder or a designer trying to help and answer as many questions as possible in the few minutes they have and run across my crossed threads with no questions for pages in the question asking section.
Also just like a lot of new builders I get confused when I have a question, like when I was working out my tank wells, and the question doesn't really have to do with the design of the boat but a add on. Where is the best place to ask? There are no specific section for general electrical, plumbing, fuel systems or hardware threads. Those are all areas that most boat builders come across that could help others even when it's not the same on every boat but the methods are. But this forum is about building the boat and not so much as outfitting it.
I really like following as many of the builders as possible, it helps me learn faster and I get excited for them when they work through something and one day a boat comes out of it all. Because a lot of the builders also post a little window of their personal lives I feel like I am becoming part of a family of builders.
Sorry for all the cross threads, sometimes I identify as a builder other times just an old guy behind a keyboard. Everyone enjoy your weekend.
OQ
AKA
Ken J
Re: MY BUILD LOG OF MY LM18 RCLS
Posted: Sat Feb 23, 2019 6:26 am
by Capt UB
OrangeQuest wrote: ↑Sat Feb 23, 2019 6:12 am
I know I get confused on a regular bases when it comes to posting comments or questions and which one I am in on my own two threads. Because my account on here was reset when I changed e-mail accounts I can not edit the title to my threads to make it easier to tell which one I am in. Just like I am new to building full size boats I am fairly new at this forum.
I do understand the different sections for asking questions and just keeping a log and I have both of mine mixed together that makes it hard to keep track of. I can imagine how hard and time consuming it must be for a more experienced builder or a designer trying to help and answer as many questions as possible in the few minutes they have and run across my crossed threads with no questions for pages in the question asking section.
Also just like a lot of new builders I get confused when I have a question, like when I was working out my tank wells, and the question doesn't really have to do with the design of the boat but a add on. Where is the best place to ask? There are no specific section for general electrical, plumbing, fuel systems or hardware threads. Those are all areas that most boat builders come across that could help others even when it's not the same on every boat but the methods are. But this forum is about building the boat and not so much as outfitting it.
I really like following as many of the builders as possible, it helps me learn faster and I get excited for them when they work through something and one day a boat comes out of it all. Because a lot of the builders also post a little window of their personal lives I feel like I am becoming part of a family of builders.
Sorry for all the cross threads, sometimes I identify as a builder other times just an old guy behind a keyboard. Everyone enjoy your weekend.
OQ
AKA
Ken J
OQ, This is on my cell, so it maybe different on your screen.
If you look at the top of the POST A REPLY...
Right under it has a place for SUBJECT, you can write anything there! Tom does not know what he is talking about! The main thread name stays the same.... Unless you change the first thread subject input!
Like I did!!
No problems finding each others post, same with others..
Re: MY BUILD LOG OF MY LM18 RCLS
Posted: Sat Feb 23, 2019 6:40 am
by Capt UB
glossieblack wrote: ↑Sat Feb 23, 2019 12:35 am
For what it's worth, for Skiinydip's build, I've been posting technical questions in "Power Boats', then once the matter has been resolved, posting a copy of some or all of the Q&A back here in "Builders Power Boats, following an introductory explanation that I want to record all aspects of the build in one place. Seems to work well. Just my 2 cents ......
Makes it easier to follow a type of build, like problems or great ideas on that design! I think what you are and have done is the smartest way to keep a log. It is so hard at times to search for one thing. Stuff is all over! I realize (OQ let me know) I posted in the tech boat help for bottom finishes, when there is a place for epoxy.... What I learned and found will go to my build log in non-tech..
Bob.
Re: MY BUILD LOG OF MY LM18 RCLS
Posted: Sat Feb 23, 2019 6:56 am
by OrangeQuest
Capt UB, all of my original posts when I joined are under my old account which had to be closed, I screwed the account up really bad so it was easier to close it and just start over under the same name but new account. So it is like trying to edit the title bar on someone else's thread. I rush sometimes to post something and don't double check where I am at or which thread it is, question or comment. Both are almost the same name.
You guys still help me and seem to over look my short coming so Thank you! I will try to do better.
Re: MY BUILD LOG OF MY LM18 RCLS
Posted: Sat Feb 23, 2019 7:17 am
by Capt UB

- birdseye view.jpg (52.4 KiB) Viewed 795 times
Re: MY BUILD LOG OF MY LM18 RCLS
Posted: Sat Feb 23, 2019 5:24 pm
by TomW1
Done. I will stay off your posts.
Tom
Re: MY BUILD LOG OF MY LM18 RCLS
Posted: Sat Feb 23, 2019 10:24 pm
by piperdown
All I want to know is where the latest LM18 boat porn pics are!!
Some of us are jonesin over here......
Re: MY BUILD LOG OF MY LM18 RCLS
Posted: Sat Feb 23, 2019 11:00 pm
by fallguy1000
piperdown wrote: ↑Sat Feb 23, 2019 10:24 pm
All I want to know is where the latest LM18 boat porn pics are!!
Some of us are jonesin over here......
Right!
Re: MY BUILD LOG OF MY LM18 RCLS
Posted: Sun Feb 24, 2019 5:49 am
by Capt UB
Looking for good weather, any temp is fine, rain is not good!
Sanding for thr next few years, then some QuickFair. Going to fair the sides of the hull, prime and paint. Then bottom will get done, what I'm going to do, I will have to see.
Did what Jeff did on his FS17, faired before the tape and cloth went on. This really helped the round chine! Bow looks so much better now and will be easier to finish the final fairing with QuickFair. Not the round chine from the plans, but close.
.
Re: MY BUILD LOG OF MY LM18 RCLS
Posted: Sun Feb 24, 2019 5:55 am
by OrangeQuest
Looks real good Capt UB. As far as rain goes, just switch to wet sanding with the long board!
We are coming up on our rainy season, Spring!
Re: MY BUILD LOG OF MY LM18 RCLS
Posted: Sun Feb 24, 2019 9:06 am
by fallguy1000
Capt UB wrote: ↑Sun Feb 24, 2019 5:49 am
Looking for good weather, any temp is fine, rain is not good!
Sanding for thr next few years, then some QuickFair. Going to fair the sides of the hull, prime and paint. Then bottom will get done, what I'm going to do, I will have to see.
Did what Jeff did on his FS17, faired before the tape and cloth went on. This really helped the round chine! Bow looks so much better now and will be easier to finish the final fairing with QuickFair. Not the round chine from the plans, but close.
.
0223190937b.jpg0223190938b.jpg0203191706~3.jpg
Sometimes there is no choice but to fair first or you'll habe air entrapment and eventual delam.
In other words, you did right.
And it looks great.
I am a little confused about the rail. I figured the rail would go over the glass. My hunch is you did not like some waviness? But that will be a huge epoxy drip catcher, so just looking ahead for you. You might need to put a masking tape say 1" on the hull and then the bottom of the rail and on the outside of the rail and then pull them off after wetout and then consolidate. Don't leave any tapes in the cure as they will be harder to remove then sanding a puddle. Anyhow, a bit curious about how you plan to do that..
Re: MY BUILD LOG OF MY LM18 RCLS
Posted: Sun Feb 24, 2019 9:31 am
by Capt UB
fallguy1000 wrote: ↑Sun Feb 24, 2019 9:06 am
Capt UB wrote: ↑Sun Feb 24, 2019 5:49 am
Looking for good weather, any temp is fine, rain is not good!
Sanding for thr next few years, then some QuickFair. Going to fair the sides of the hull, prime and paint. Then bottom will get done, what I'm going to do, I will have to see.
Did what Jeff did on his FS17, faired before the tape and cloth went on. This really helped the round chine! Bow looks so much better now and will be easier to finish the final fairing with QuickFair. Not the round chine from the plans, but close.
.
0223190937b.jpg0223190938b.jpg0203191706~3.jpg
Sometimes there is no choice but to fair first or you'll habe air entrapment and eventual delam.
In other words, you did right.
And it looks great.
I am a little confused about the rail. I figured the rail would go over the glass. My hunch is you did not like some waviness? But that will be a huge epoxy drip catcher, so just looking ahead for you. You might need to put a masking tape say 1" on the hull and then the bottom of the rail and on the outside of the rail and then pull them off after wetout and then consolidate. Don't leave any tapes in the cure as they will be harder to remove then sanding a puddle. Anyhow, a bit curious about how you plan to do that..
Thanks, feeling better about build!
Cloth was put on first, rail on top of glass. Too many photos.... Starting to all look the same!
.
Re: MY BUILD LOG OF MY LM18 RCLS
Posted: Sun Feb 24, 2019 9:44 am
by Capt UB
Got this email from WetLander,
.
My emal to them;
.
Question: Building a wood composite boat. Bateau.com LM18 flats boat. The bottom is fiberglass and epoxy.
Does Wetlander need a faired and finished bottom?
I have in the pasted use Graphite/epoxy mix with great results, but I need a white bottom, not black. I was going to try HBN (White graphite)/epoxy, but finding most have not had the white bottom they were looking for. HBN (Hexagonal Boron Nitride).
The bottom mixes were heavy (thick) and filled in most low spots on the hull.
As I write this.... Thinking..
Can Wetlander white go over a graphite/epoxy bottom?
Sorry for the odd questions, but need to find something like black graphite/epoxy, but in white.
.
Their email back to me;
.
Re: [Wetlander Slick Bottom for Boats] Contact
SH
Scott Hogan
Fri 2/22/2019 2:54 PM
Inbox
To:
robertewolf@hotmail.com;
Hi Bob,
Wetlander should have no problem going over an old epoxy + graphite powder bottom, just make sure you prep it by sanding with 150 grit sandpaper, then wiping all of your sanding dust clean with acetone.
Wetlander is nnot thick and goopy; it feels a lot like a thick latex paint. It is an epoxy, so like all epoxies, "White" may turn a little yellow or chalky over time. It's the nature of the beast.
I hope that answers your questions. Please feel free to ask more. My cell phone number is below in my signature.
Thanks,
Scott Hogan
(518) 469-3612
scott.hogan@wearloncorp.com
Re: MY BUILD LOG OF MY LM18 RCLS
Posted: Sun Feb 24, 2019 10:08 am
by fallguy1000
Oh, good.
That will be tricky to fair...best of luck.
I recommend you use some carbon black powder for guide.
Look up guide powder. After you sand; you lay that out and sand a bit more and black spots appear and those are the places you add fairing compound.
Re: MY BUILD LOG OF MY LM18 RCLS
Posted: Sun Feb 24, 2019 2:35 pm
by OrangeQuest
I don't know why you don't using Capt Wolf for your online name, I like Capt Wolf. Would it be ok If I call you Capt Wolf? Or maybe Capt Jack Wolf, no that sounds to scary. Sounds to much like a pirate name.
It is sunny as all get up here, like no clouds at all sunny! Hope you are having a great weekend!
Re: MY BUILD LOG OF MY LM18 RCLS
Posted: Sun Feb 24, 2019 6:10 pm
by Capt UB
OrangeQuest wrote: ↑Sun Feb 24, 2019 2:35 pm
I don't know why you don't using Capt Wolf for your online name, I like Capt Wolf. Would it be ok If I call you Capt Wolf? Or maybe Capt Jack Wolf, no that sounds to scary. Sounds to much like a pirate name.
It is sunny as all get up here, like no clouds at all sunny! Hope you are having a great weekend!
I was Capt Wolf, I carried a 25 Ton Master w/USCG Auxiliary Sailing Endorsement. That was 12 years ago!
The UB is my nickname my niece started calling me when she was 7 years old. UB=uncle bob.
Re: MY BUILD LOG OF MY LM18 RCLS
Posted: Sun Feb 24, 2019 6:25 pm
by Capt UB
Test tomorrow
HBN 1/2 cup with 12 oz epoxy.
Same mix as my graphite/epoxy I used on SandPiper, just using HBN for graphite.
Re: MY BUILD LOG OF MY LM18 RCLS
Posted: Mon Feb 25, 2019 8:47 am
by Capt UB
Smaller test batch.
So the test will go on today after work. 1/4 cup HBN and 4 oz. resin, 2 oz. slow hardener and no white tint.
HBN will be put though a strainer, just like the graphite was.
Will mix the resin and hardener then add HBN.
Will be putting it on the skeg and 1" to 2" around the skeg, depends on how much I have to work with.
Re: MY BUILD LOG OF MY LM18 RCLS
Posted: Mon Feb 25, 2019 8:53 am
by Capt UB
OrangeQuest wrote: ↑Fri Feb 22, 2019 9:31 pm
How much to short? The winch mount can be moved forward some. Extend the bunks a wee bit?
Will take everything off and see what is what!
And yes I think the bunks could go back a foot or two!?
For a 100 bucks, I may turn it in to a work trailer.
Re: MY BUILD LOG OF MY LM18 RCLS
Posted: Mon Feb 25, 2019 6:02 pm
by Capt UB
Going to sand fair and coat with graphite. Then sand 120 then paint with a two part epoxy white paint.
Re: MY BUILD LOG OF MY LM18 RCLS
Posted: Sat Mar 02, 2019 8:18 am
by Capt UB
Got a new RO sander. Our construction crew at work, have been using the Lowes Craftsman CMEW231 3 AMP RO sander for drywall sanding. They said no problems and they are lasting a lot longer then the DeWalts!
.
.
Starting to sand the bottom and sides for leveling and fairing. Great weather here in Central Florida today and Sunday.
.
.
Re: MY BUILD LOG OF MY LM18 RCLS
Posted: Sat Mar 02, 2019 1:18 pm
by Capt UB
40 grit sanding done.
Sanding dust blown off and vacuumed.
Rubbing alcohol wipe down and cleaned.
Time to fill the weave and level her bottom out.
Bottom first.
Epoxy and fumed silica for filling and leveling bottom.
Will be using a 24" and 12" straight edge for leveling/fairing.
Re: MY BUILD LOG OF MY LM18 RCLS
Posted: Sun Mar 03, 2019 6:27 am
by OrangeQuest
Wow! That is really looking good outside in the sunlight! You are doing a very good job! I missed this post yesterday. I am still recovering from a week with high school age students so wasn't online.
Re: MY BUILD LOG OF MY LM18 RCLS
Posted: Sun Mar 03, 2019 6:55 am
by Capt UB
OrangeQuest wrote: ↑Sun Mar 03, 2019 6:27 am
Wow! That is really looking good outside in the sunlight! You are doing a very good job! I missed this post yesterday. I am still recovering from a week with high school age students so wasn't online.
Thanks.
Hope you had fun.... I like messing with their minds as much as possible!
Re: MY BUILD LOG OF MY LM18 RCLS
Posted: Sun Mar 03, 2019 7:05 am
by OrangeQuest
Capt UB wrote: ↑Sun Mar 03, 2019 6:55 am
OrangeQuest wrote: ↑Sun Mar 03, 2019 6:27 am
Wow! That is really looking good outside in the sunlight! You are doing a very good job! I missed this post yesterday. I am still recovering from a week with high school age students so wasn't online.
Thanks.
Hope you had fun.... I like messing with their minds as much as possible!
I did have a blast! And I too love messing with them, they are a great bunch of young adults and were not afraid of work and love to play even more. Problem is my heart is to weak and damaged to push as hard as I did and now have to slow down to recover. The big race coming up I have assigned employees management positions in hopes I will be less stressed from it all.
Re: MY BUILD LOG OF MY LM18 RCLS
Posted: Sun Mar 03, 2019 8:58 am
by fallguy1000
Epoxy and cabosil is awfully hard to sand.
You ought to use balloons.
Epoxy 1
Balloons 2
Cabosil 1
Or
1
2.5
.5
Re: MY BUILD LOG OF MY LM18 RCLS
Posted: Sun Mar 03, 2019 10:55 am
by Capt UB
fallguy1000 wrote: ↑Sun Mar 03, 2019 8:58 am
Epoxy and cabosil is awfully hard to sand.
You ought to use balloons.
Epoxy 1
Balloons 2
Cabosil 1
Or
1
2.5
.5
Not for the bottom, just hard stuff. Just filling in and leveling. Not to bad.. Got other problem for now to fix!
Re: MY BUILD LOG OF MY LM18 RCLS
Posted: Sun Mar 03, 2019 11:01 am
by Capt UB
Flipped boat over to flatten bottom. Will have to flip her over after inside tape and cloth is done, maybe after frames are glassed in! The low sheer is fine, it's the round chine that once again is causing a problem. It's not the design of the RC, but my lack of working skills.
.
Re: MY BUILD LOG OF MY LM18 RCLS
Posted: Sun Mar 03, 2019 1:25 pm
by Capt UB
Checking the fit of the frames.
.
.
Center molds removed showing cockpit area.
.
Sides working on waterline.
.
Re: MY BUILD LOG OF MY LM18 RCLS
Posted: Sun Mar 03, 2019 7:06 pm
by Capt UB
Good time to measure for fuel tank and a place for the battery. 12" tall x 24" wide.
Re: MY BUILD LOG OF MY LM18 RCLS
Posted: Sun Mar 03, 2019 9:05 pm
by fallguy1000
If you go plastic Moeller, allow 3% expansion in all directions.
Re: MY BUILD LOG OF MY LM18 RCLS
Posted: Mon Mar 04, 2019 7:22 am
by Capt UB
fallguy1000 wrote: ↑Sun Mar 03, 2019 9:05 pm
If you go plastic Moeller, allow 3% expansion in all directions.
Thanks for the heads up on that!
I may need to have it made. I only have 12" tall to work with and that's with the tank sitting on the hull bottom. No problems with width or length. The LM18 Low sheer is 5" shorter from deck to chine.
Re: MY BUILD LOG OF MY LM18 RCLS
Posted: Mon Mar 04, 2019 8:23 am
by Bogieman
Holy cow! You're moving so fast you're leaving a vapor trail. Looks really good too.
Re: MY BUILD LOG OF MY LM18 RCLS
Posted: Mon Mar 04, 2019 8:42 am
by OrangeQuest
Maybe a 3 gallon tank?
The Attwood brand is:
Product height (in.): 7.3
•Amount: 3 gallons
•Manufacturer warranty - general: 2 years
•Product depth (in.): 16.6
•Product width (in.): 11.45
Re: MY BUILD LOG OF MY LM18 RCLS
Posted: Mon Mar 04, 2019 8:44 am
by fallguy1000
Lotsa sizes in plastic.
Buy on Amazon for best prices.
http://moellermarine.com/wp-content/upl ... 5-17-1.pdf
Re: MY BUILD LOG OF MY LM18 RCLS
Posted: Mon Mar 04, 2019 9:05 am
by Capt UB
Bogieman wrote: ↑Mon Mar 04, 2019 8:23 am
Holy cow! You're moving so fast you're leaving a vapor trail. Looks really good too.
Thanks, but I flipped her to fix something, I'll have to flip again to finish the bottom.
But, I'm going to do the glass work before I flip her. And maybe install the frames...
Re: MY BUILD LOG OF MY LM18 RCLS
Posted: Mon Mar 04, 2019 9:11 am
by Capt UB
OrangeQuest wrote: ↑Mon Mar 04, 2019 8:42 am
Maybe a 3 gallon tank?
The Attwood brand is:
Product height (in.):
7.3
•Amount: 3 gallons
•Manufacturer warranty - general: 2 years
•Product depth (in.): 16.6
•Product width (in.): 11.45
Looking for a built in tank, 6 gals or bigger. I may end up with a 25/30 2 stroke, they drink gas! Now if I can come up with the money... 25 4 stroke will be fine with a small tank.
Re: MY BUILD LOG OF MY LM18 RCLS
Posted: Mon Mar 04, 2019 9:12 am
by Capt UB
Thanks, I have check them out. Did not find a tank low enough to fix under the deck.
Re: MY BUILD LOG OF MY LM18 RCLS
Posted: Mon Mar 04, 2019 9:23 am
by Capt UB
silentneko got me thinking of a console with a seat and fuel tank storage... I will be using a tiller, but will still need a grab bar to hold on to. The console would still let me hold on and have the GPS and cell (music) close at hand.
Re: MY BUILD LOG OF MY LM18 RCLS
Posted: Mon Mar 04, 2019 9:57 am
by fallguy1000
Casting deck or foredeck?
Or aftdeck bench?
Re: MY BUILD LOG OF MY LM18 RCLS
Posted: Mon Mar 04, 2019 10:52 am
by OrangeQuest
Again Attwood 6 gallon.
Product height (in.): 9.16
•Amount: 6 gallons
•Manufacturer warranty - general: 2 years
•Product depth (in.): 19.82
•Product width (in.): 13.5
Re: MY BUILD LOG OF MY LM18 RCLS
Posted: Mon Mar 04, 2019 11:41 am
by Capt UB
OrangeQuest wrote: ↑Mon Mar 04, 2019 10:52 am
Again Attwood 6 gallon.
Product height (in.):
9.16
•Amount: 6 gallons
•Manufacturer warranty - general: 2 years
•Product depth (in.): 19.82
•Product width (in.): 13.5
Going for an installed, below deck fuel tank.
Re: MY BUILD LOG OF MY LM18 RCLS
Posted: Mon Mar 04, 2019 11:44 am
by Capt UB
fallguy1000 wrote: ↑Mon Mar 04, 2019 9:57 am
Casting deck or foredeck?
Or aftdeck bench?
silentneko got me thinking of a console with a seat and fuel tank storage... I will be using a tiller, but will still need a grab bar to hold on to. The console would still let me hold on and have the GPS and cell (music) close at hand.
It would be a small console. Maybe a livewell under the seat and fuel tank in back of the console...
Re: MY BUILD LOG OF MY LM18 RCLS
Posted: Mon Mar 04, 2019 11:45 am
by fallguy1000
Gott always remember to allow for filler neck. A 3" allowance is good; perhaps a bit less might work if careful about clamping.
Re: MY BUILD LOG OF MY LM18 RCLS
Posted: Mon Mar 04, 2019 12:12 pm
by Capt UB
fallguy1000 wrote: ↑Mon Mar 04, 2019 11:45 am
Gott always remember to allow for filler neck. A 3" allowance is good; perhaps a bit less might work if careful about clamping.
silentneko got me thinking of a console with a seat and fuel tank storage... I will be using a tiller, but will still need a grab bar to hold on to. The console would still let me hold on and have the GPS and cell (music) close at hand.
It would be a small console. Maybe a livewell under the seat and fuel tank in back of the console...
Re: MY BUILD LOG OF MY LM18 RCLS
Posted: Mon Mar 04, 2019 12:35 pm
by Capt UB
I guess I could build a center console like this one with an open area for a portable 3/6 gal. fuel tank, I have a few of each. Not as wide, 24" wide 36" tall (plus a grab bar) long enough for a small seat with a livewell under it. Battery would go up front.

- 00000_6uOg43d5pxk_600x450.jpg (45.32 KiB) Viewed 1063 times
Re: MY BUILD LOG OF MY LM18 RCLS
Posted: Mon Mar 04, 2019 7:21 pm
by Capt UB

- 2019-03-04-19-09-03--1522106380~2.jpg (12.37 KiB) Viewed 1045 times
Re: MY BUILD LOG OF MY LM18 RCLS
Posted: Thu Mar 07, 2019 3:06 pm
by Capt UB
Found some more photos of things I like to do on the LM
.

- GrabBar1.jpg (53.1 KiB) Viewed 986 times
.
This is a cool idea for a seat using a cooler holder

- cooler Skiff-Grab-Bar.jpg (53.84 KiB) Viewed 986 times
.
nice looking cc for a tiller

- CC Skiff-Grab-Bar.jpg (46.02 KiB) Viewed 986 times
Re: MY BUILD LOG OF MY LM18 RCLS
Posted: Thu Mar 07, 2019 6:46 pm
by OrangeQuest
I like how clean the last one looks but needs a clutter tray!
Re: MY BUILD LOG OF MY LM18 RCLS
Posted: Thu Mar 07, 2019 8:10 pm
by Aripeka Angler
The last console looks nice Bob!
I’m not a fan of the aluminum trip hazard grab bar pictured earlier in the thread.
That thing was the inspiration for our built-in brace free carbon fiber model.
You are doing fine work and congratulations on a great lamination job!
Re: MY BUILD LOG OF MY LM18 RCLS
Posted: Fri Mar 08, 2019 7:00 am
by Capt UB
OrangeQuest wrote: ↑Thu Mar 07, 2019 6:46 pm
I like how clean the last one looks but needs a clutter tray!
True, but does look nice.
Re: MY BUILD LOG OF MY LM18 RCLS
Posted: Fri Mar 08, 2019 7:05 am
by Capt UB
Aripeka Angler wrote: ↑Thu Mar 07, 2019 8:10 pm
The last console looks nice Bob!
I’m not a fan of the aluminum trip hazard grab bar pictured earlier in the thread.
That thing was the inspiration for our built-in brace free carbon fiber model.
You are doing a fine work and congratulations on a great lamination job!
I did not know you worked for them?
It is nice and clean looking, the boat isn't so bad either.
Ya, the grab bars are not my favorite.
Thanks
Bob
Re: MY BUILD LOG OF MY LM18 RCLS
Posted: Fri Mar 08, 2019 7:07 am
by OrangeQuest
Could always add one with a half round molding epoxied into place, paint to match and don't forget little drain gutters. There looks to be enough room to add a voltmeter and/or a radio above the rear hatch. If you build it you can do it the way you want it. I am not a big fan of the clamp on mount either.
Re: MY BUILD LOG OF MY LM18 RCLS
Posted: Fri Mar 08, 2019 12:37 pm
by Coach
I am also interested in a built-in Yeti cooler to use as a seat, etc....hoping you consider it as you are ahead of me on the build timeline. would love to follow you on that idea for my SC-16
Re: MY BUILD LOG OF MY LM18 RCLS
Posted: Fri Mar 08, 2019 5:07 pm
by silentneko
I will say just this. There is a large benefit to a permanently glassed in grab bar console when running in skinny waters. Yes it will hold your GPS and beverage, but the biggest thing is the safety factor. At some point running in shallow water you will scrape bottom. When that happens you will be super glad what ever you are holding onto is solid mounted! I have nice Kennedy cooler tie downs, but no way would I trust them to hold with all my weight applied rapidly.
Re: MY BUILD LOG OF MY LM18 RCLS
Posted: Sat Mar 09, 2019 6:42 am
by Capt UB
Coach wrote: ↑Fri Mar 08, 2019 12:37 pm
I am also interested in a built-in Yeti cooler to use as a seat, etc....hoping you consider it as you are ahead of me on the build timeline. would love to follow you on that idea for my SC-16
Sometimes things look cool and useful, but I don't think cutting a hole in the aft deck for a cooler seat holder is smart. Now if you mount a cooler top with cushion on it, as a lid for storage..... ?
Re: MY BUILD LOG OF MY LM18 RCLS
Posted: Sat Mar 09, 2019 7:14 am
by Capt UB
OrangeQuest wrote: ↑Fri Mar 08, 2019 7:07 am
Could always add one with a half round molding epoxied into place, paint to match and don't forget little drain gutters. There looks to be enough room to add a voltmeter and/or a radio above the rear hatch. If you build it you can do it the way you want it. I am not a big fan of the clamp on mount either.
No radio (VHF is handheld) cell phone (Bluetooth) to waterproof portable speaker. No need to add voltmeter, one less thing to fail/rust. GPS/mapping is a handheld unit. KISS, keep it SAFE and SIMPLE.
Re: MY BUILD LOG OF MY LM18 RCLS
Posted: Sat Mar 09, 2019 7:24 am
by Capt UB
silentneko wrote: ↑Fri Mar 08, 2019 5:07 pm
I will say just this. There is a large benefit to a permanently glassed in grab bar console when running in skinny waters. Yes it will hold your GPS and beverage, but the biggest thing is the safety factor. At some point running in shallow water you will scrape bottom. When that happens you will be super glad what ever you are holding onto is solid mounted! I have nice Kennedy cooler tie downs, but no way would I trust them to hold with all my weight applied rapidly.
On the SandPiper I have the Yeti tie downs, works good. You are right, a well made station is best. Still thinking livewell and battery console with grab bar. Not thinking of glassing it in. Bolts and gasket, just like my Scout boats, never had a problem with leaks.
Re: MY BUILD LOG OF MY LM18 RCLS
Posted: Sat Mar 09, 2019 12:04 pm
by Capt UB
Cleaned and sanded, ready for tape and cloth.
Re: MY BUILD LOG OF MY LM18 RCLS
Posted: Sat Mar 09, 2019 11:13 pm
by piperdown
^^^That is a fair looking boat Capt! Very nicely done
Re: MY BUILD LOG OF MY LM18 RCLS
Posted: Sun Mar 10, 2019 9:28 am
by Capt UB
Tape down ply coated with epoxy last night. Ready for cloth...
Re: MY BUILD LOG OF MY LM18 RCLS
Posted: Sun Mar 10, 2019 9:34 am
by Bogieman
Very nice, CaptUB! Bet that low sheer makes glassing the inside a lot easier.
Re: MY BUILD LOG OF MY LM18 RCLS
Posted: Sun Mar 10, 2019 10:11 am
by Capt UB
Starboard side cloth going in
Re: MY BUILD LOG OF MY LM18 RCLS
Posted: Sun Mar 10, 2019 1:10 pm
by fallguy1000
If you let it lay for a day; it wets out easier, but Inam guessing you are going for it.
Re: MY BUILD LOG OF MY LM18 RCLS
Posted: Sun Mar 10, 2019 2:17 pm
by Capt UB
Glass cloth down. A few air bubbles, fix later today when epoxy gels a bit.
Re: MY BUILD LOG OF MY LM18 RCLS
Posted: Sun Mar 10, 2019 5:07 pm
by Rtorres2411
Wow you did that fast. Nice job.
Ruben
Re: MY BUILD LOG OF MY LM18 RCLS
Posted: Sun Mar 10, 2019 5:43 pm
by Capt UB
Some corners need cuting/sanding to fit without a hard spot.
.
.
I'm removing the depth of the slots from the stringers/knees. I'll glass them in like a normal build.
.
Re: MY BUILD LOG OF MY LM18 RCLS
Posted: Sun Mar 10, 2019 5:48 pm
by Capt UB
Rtorres2411 wrote: ↑Sun Mar 10, 2019 5:07 pm
Wow you did that fast. Nice job.
Ruben
Thank you.
I'm using BBC's MarinEpoxy with slow hardener, still had to move quick....! I have not used fast, medium or the tropical slow hardener so far!
Re: MY BUILD LOG OF MY LM18 RCLS
Posted: Sun Mar 10, 2019 5:53 pm
by Capt UB
fallguy1000 wrote: ↑Sun Mar 10, 2019 1:10 pm
If you let it lay for a day; it wets out easier, but Inam guessing you are going for it.
Weather here is either going to rain, get cold or get hotter!!!
I'm getting good at this by myself.. Had help coming this morning, but fishing weather!! I stayed, they broke down this afternoon were towed back in!! KARMA! !!
Re: MY BUILD LOG OF MY LM18 RCLS
Posted: Sun Mar 10, 2019 5:59 pm
by Capt UB
Bogieman wrote: ↑Sun Mar 10, 2019 9:34 am
Very nice, CaptUB! Bet that low sheer makes glassing the inside a lot easier.
You would think!!!
19 plus ft. of cloth (times 2) to lay and resin up!!
Even tape at 20 ft. by 6" can be a pain!
If I do this again, strongback needs to be a foot shorter. It would not have worked with standard build!
Re: MY BUILD LOG OF MY LM18 RCLS
Posted: Sun Mar 10, 2019 6:00 pm
by Capt UB
piperdown wrote: ↑Sat Mar 09, 2019 11:13 pm
^^^That is a fair looking boat Capt! Very nicely done
Thank you. I did an OK job of hiding things....
Re: MY BUILD LOG OF MY LM18 RCLS
Posted: Mon Mar 11, 2019 5:46 am
by OrangeQuest
Re: MY BUILD LOG OF MY LM18 RCLS
Posted: Mon Mar 11, 2019 12:53 pm
by BB Sig
Looks clean to me!
Keep the secrets to private messages and not the forum!
Re: MY BUILD LOG OF MY LM18 RCLS
Posted: Tue Mar 12, 2019 7:20 am
by OrangeQuest
Capt UB, I seen in another thread you are considering a built in fuel tank and then in even another thread about the balance of the boat and the console. JM noted that he likes to keep the variables close to the LCG. " I place what I call variable weights like fuel close to that LCG if possible."
Maybe the console could also be where the built tank could go?
Re: MY BUILD LOG OF MY LM18 RCLS
Posted: Tue Mar 12, 2019 9:00 am
by Capt UB
OrangeQuest wrote: ↑Tue Mar 12, 2019 7:20 am
Capt UB, I seen in another thread you are considering a built in fuel tank and then in even another thread about the balance of the boat and the console. JM noted that he likes to keep the variables close to the LCG. " I place what I call variable weights like fuel close to that LCG if possible."
Maybe the console could also be where the built tank could go?
OQ,
The low sheer of this boat does not give me the right amount of room for a tank up front, But I can place the battery/ies under the front deck! There is more room in the cockpit then I thought. So the console will work for the fuel tank and maybe a small livewell too. I even at one point thought I may want to be able to add controls and steering, at a later date.
Re: MY BUILD LOG OF MY LM18 RCLS
Posted: Tue Mar 12, 2019 9:17 am
by fallguy1000
Bob. Have you considered leaving the deck open under the console? You could fit a nice sized square tank in there and still keep a bit of space for the console. Then a removable shelf or removable console for access. You would need a sill to avoid ingress is all.
Re: MY BUILD LOG OF MY LM18 RCLS
Posted: Tue Mar 12, 2019 10:47 am
by Capt UB
fallguy1000 wrote: ↑Tue Mar 12, 2019 9:17 am
Bob. Have you considered leaving the deck open under the console? You could fit a nice sized square tank in there and still keep a bit of space for the console. Then a removable shelf or removable console for access. You would need a sill to avoid ingress is all.
I'm thinking of a 6 gal portable, 20" long, 14" wide, 10" tall, have an opening in operator side to slide the tank in. Easy to strap down, vent and remove for filling. Plus the 2" a all around for expansion. Too many rules to follow for an installed tank and hardware. I have a few 6 and 3 gal portable tanks.
I would want to have the console removeable, so later I can add a steering and controls if that comes into play. Would need to run PVC pipe now through the sole frames and stringers (beef them up by doubling the thickness).
Re: MY BUILD LOG OF MY LM18 RCLS
Posted: Wed Mar 13, 2019 10:44 am
by Bogieman
Your build is looking great, CaptUB. Fine work and fast too.
Bogie
Re: MY BUILD LOG OF MY LM18 RCLS
Posted: Wed Mar 13, 2019 12:30 pm
by Capt UB
Bogieman wrote: ↑Wed Mar 13, 2019 10:44 am
Your build is looking great, CaptUB. Fine work and fast too.
Bogie
Thank you Bogie.
Re: MY BUILD LOG OF MY LM18 RCLS
Posted: Thu Mar 14, 2019 7:12 am
by Capt UB
I'm going to take a break on building the LM18.
Have too many problems with the build. I found a few CnC cuts inside the line making frames smaller. Never getting the latest update on the LM18 bow problem till much later. The bow round chine still pisses me off, does not look right. Was trying to keep a positive attitude, that's over! Wish I had just build the C17 like I had planed. No money now to build it, got to buy ply and more epoxy to fix the LM18. I learned a big lesson, never buy plans to a boat that has no history.
I'm going fishing and I have a boat that works great! SandPiper (FS14) to the rescue.....
Re: MY BUILD LOG OF MY LM18 RCLS
Posted: Thu Mar 14, 2019 8:22 am
by fallguy1000
Bob-keep your spirits up.
My build is the first of its kind. It is highly complicated and we have had setbacks.
The first six weeks were trouble and we are still having setbacks even today. yesterday the well went out and the boat barn was flooding until we worked on a flood plan; almost zero boat building
Kindest regards and best of luck
Re: MY BUILD LOG OF MY LM18 RCLS
Posted: Thu Mar 14, 2019 8:26 am
by BB Sig
I don't post all the encouragement I probably should. You're doing great from where I'm sitting. I've been watching with amazement at what you've been able to overcome.
Usually new airplanes learn of problems through loss of life. Our hobby is frustrating at times but at least a little epoxy and wood flour can fix those lessons that you and BBC are learning!
Sometimes a break and fishing can give you time to heal these frustrations. Tight lines!
Re: MY BUILD LOG OF MY LM18 RCLS
Posted: Thu Mar 14, 2019 9:10 am
by Coach
CaptUB..I cannot give you any building advice as I am just starting my first build. What I can tell you is that your LM18 build is the first one I search for when checking into the forum every day! Stepping back from a challenging situation is a good idea. I had many setbacks in my brick-oven build that parallels any building process. It was a 4year ordeal for me but I am amazed even today that I completed it. I hope you pull in some big ones on the Sandpiper and after some time away from the build you look at it with fresh eyes and see the path to completion!
Tight lines!
Coach
Re: MY BUILD LOG OF MY LM18 RCLS
Posted: Thu Mar 14, 2019 9:46 am
by Browndog
Your frustration is not unique. When I built the FS19 it was the first documented build thread of a completed FS19. Which means there wasn’t anyone to learn from after a certain point. There were many issues that had to be overcome because of that and also because of my inexperience with many aspects of the build despite having built three smaller boats previously. Even after the build, once the boat was in use for a while, I had to fix things that weren’t right before feeling comfortable enough to let my brother take it home with him. It made me very sad, because I wanted the boat to be perfect for him. Some issues like water coming up through the scuppers are very hard to resolve at this point.
The forum also provides an opportunity sometime to get advice that at times feels like “Monday Morning Quarterbacking”.
In retrospect, it is not unlike many other new product launches that result in “bugs” needing to be fixed. The issue for us is that we are not mass producing these boats so the issues tend not to get identified as quickly.
In other ways we are so close to the boat and the project that we notice and see every little flaw and to me it feels like a personal affront because I feel in some way responsible.
The Plyak I just finished had a 6 foot finish. It looked great from 6 feet and beyond. From 2 feet you could see some runs in the varnish or other small defects and it bothered me terribly. After one use in the marsh it won’t matter.
My brother’s boat got stains on the non skid and paint just by sitting on my driveway and having leaves and hickory nuts fall in and getting rained on. Made me feel terrible and I worked hard to clean everything up.
I don’t have a solution for you, but just wanted you to know you are not alone in your feelings of frustration.
Re: MY BUILD LOG OF MY LM18 RCLS
Posted: Thu Mar 14, 2019 10:03 am
by OrangeQuest
Capt UB wrote: ↑Thu Mar 14, 2019 7:12 am
I'm going to take a break on building the LM18.
Have too many problems with the build. I found a few CnC cuts inside the line making frames smaller. Never getting the latest update on the LM18 bow problem till much later. The bow round chine still pisses me off, does not look right. Was trying to keep a positive attitude, that's over! Wish I had just build the C17 like I had planed. No money now to build it, got to buy ply and more epoxy to fix the LM18. I learned a big lesson, never buy plans to a boat that has no history.
I'm going fishing and I have a boat that works great! SandPiper (FS14) to the rescue.....
Good luck on getting SandPiper full of fish!
Your LM18 has been looking very good Capt UB. Don't let a few set backs get you down. I know, easy to say, hard to do. Remember "it's just a thang"! You have been pushing yourself very hard on the LM18 build so just relax!
Re: MY BUILD LOG OF MY LM18 RCLS
Posted: Thu Mar 14, 2019 9:01 pm
by OrangeQuest
So, how did the SandPiper do? How was the fishing?
Re: MY BUILD LOG OF MY LM18 RCLS
Posted: Sat Mar 16, 2019 12:07 pm
by Biney777
Capt UB, I hear you. I was just thinking that on the study plans where they mention skill level and hours required they should also mention how high your tolerance level for pain, suffering, and severe mental anguish needs to be!!!
Build on!
PS, can I go fishing with you???
Re: MY BUILD LOG OF MY LM18 RCLS
Posted: Mon Mar 18, 2019 2:40 pm
by Capt UB
Going to see if the console I'm building will work on the Iguana. I had a 4x8 APA marine Fir 1/4 laying around (for the NC16), so I used that. Will have to beef it up or just wait and pickup a sheet of ply from BBC to build it. Don't know when we will be going down to pickup ply and epoxy for the HB16.
.
This size looks nice and does not take up much room.
.

- 0316191347~2.jpg (127.08 KiB) Viewed 863 times
Re: MY BUILD LOG OF MY LM18 RCLS
Posted: Wed Mar 20, 2019 8:39 am
by Bogieman
How's it going CaptUB? Are you still on sabbatical from the build or have you got it worked out?
Re: MY BUILD LOG OF MY LM18 RCLS
Posted: Wed Mar 20, 2019 9:03 am
by Capt UB
Bogieman wrote: ↑Wed Mar 20, 2019 8:39 am
How's it going CaptUB? Are you still on sabbatical from the build or have you got it worked out?
Building a console and "Got that Loving Boat building" thing back.
Building on.....
Re: MY BUILD LOG OF MY LM18 RCLS
Posted: Wed Mar 20, 2019 9:31 am
by BB Sig
Good news. I’ll eventually have to get some console plans based upon your review.
Re: MY BUILD LOG OF MY LM18 RCLS
Posted: Wed Mar 20, 2019 10:27 am
by Bogieman
Capt UB wrote: ↑Wed Mar 20, 2019 9:03 am
Bogieman wrote: ↑Wed Mar 20, 2019 8:39 am
How's it going CaptUB? Are you still on sabbatical from the build or have you got it worked out?
Building a console and "Got that Loving Boat building" thing back.
Building on.....
Ok good. I knew you were working on the console and I'm happy to hear you're back in the groove again.
Re: MY BUILD LOG OF MY LM18 RCLS
Posted: Sat Mar 23, 2019 8:40 am
by Capt UB
Great day in Central Florida to sand and glass in the stringers and frames. In between, I'll finish building the console, I'll fair it later..
.
Re: MY BUILD LOG OF MY LM18 RCLS
Posted: Sat Mar 23, 2019 8:44 am
by fallguy1000
I'm still nervous my boat won't make her lines and will dogwalk down the lake while squeaking horrendously.
Carry on sir.
Re: MY BUILD LOG OF MY LM18 RCLS
Posted: Sat Mar 23, 2019 8:54 am
by Capt UB
fallguy1000 wrote: ↑Sat Mar 23, 2019 8:44 am
I'm still nervous my boat won't make her lines and will dogwalk down the lake while squeaking horrendously.
Carry on sir.
May help keep the blow boaters and Jetskis away!
Re: MY BUILD LOG OF MY LM18 RCLS
Posted: Sat Mar 23, 2019 8:12 pm
by Capt UB
Well got the stringers tabed in. Stringer/transom taped. Tomorrow I'll lay glass on the stringers and see if I can do a bit of work on the console.
Re: MY BUILD LOG OF MY LM18 RCLS
Posted: Sun Mar 24, 2019 5:33 am
by OrangeQuest
Sounds like you are enjoying a nice weekend!
Re: MY BUILD LOG OF MY LM18 RCLS
Posted: Sun Mar 24, 2019 10:52 am
by Capt UB
Laying tape to day on the rest of the stringers. Will add frames later today when stringers setup a bit. Need to grind some air pockets and fill in.
Not sure if I will pour 2 part foam or just lay in noodles under the sole. Will be pouring foam in bow to first station/frame. That's where things are a mess, foam there will not be for flotation, but for my since of security. Under the aft deck will get foam also.
Now that I'm at this point, making the fore deck bigger looks easy. JM said not to move frames, just add one. So between second station/frame and third station/frame (about 36" between frames), I will add a foot or more decking and the new frame.
Re: MY BUILD LOG OF MY LM18 RCLS
Posted: Sun Mar 24, 2019 11:48 am
by BB Sig
Looking good and moving fast!
Just remember that pool noodles absorb water. Do it right the first time...
Re: MY BUILD LOG OF MY LM18 RCLS
Posted: Sun Mar 24, 2019 3:03 pm
by Capt UB
BB Sig wrote: ↑Sun Mar 24, 2019 11:48 am
Looking good and moving fast!
Just remember that pool noodles absorb water. Do it right the first time...
Never had one absorb water... If left in the pool, the sun and chlorine breaks them down. Somewhere I talked about putting them in heavy duty garden bags.
Re: MY BUILD LOG OF MY LM18 RCLS
Posted: Sun Mar 24, 2019 5:46 pm
by BB Sig
Maybe I had some bad noodles. They always seemed heavier after sitting in a pool for a couple of hours. They would leave a wet mark for a day or two after.
Double bag it!
Re: MY BUILD LOG OF MY LM18 RCLS
Posted: Mon Mar 25, 2019 2:51 pm
by Capt UB
My Brother-in law, Bart. (
http://barttau.com/ ) He shoots some cool shows and TV commercials. Works all the time, has know idea what a hobby is or how to sit and drink a beer! Blows his mind that I always was doing something between working and sleeping when I was shooting. He now just can't believe I'm building the boat!! Glassing the stringers in was a bitch! Strongback too tall for even a low sheer boat.
Re: MY BUILD LOG OF MY LM18 RCLS
Posted: Tue Mar 26, 2019 8:45 am
by pee wee
Great series of photos, you don't need captions!
Re: MY BUILD LOG OF MY LM18 RCLS
Posted: Tue Mar 26, 2019 9:27 am
by OrangeQuest
I agree with Pee wee, great shots of you building the boat.
I do think I see a problem with your strong back being to high, it is in a few of the shots. You have the same problem a lot of us boat builders do, there is to much overhang at the sheer line. I use mine all the time when reaching over the side to keep from sliding off if the ladder moves. Even though it is handy at times it prevents us all from reaching fully into the hull. I have found that if I slide my boat off the trailer and onto some 2 X 8 stacked 3 high and moving blankets under it, makes it easier to reach inside.
You also need a hat when you are not under the carport, all that sun has bleached your hair white.
Your boat is coming along nicely and looking good.
OQ
Re: MY BUILD LOG OF MY LM18 RCLS
Posted: Tue Mar 26, 2019 9:35 am
by Capt UB
OrangeQuest wrote: ↑Tue Mar 26, 2019 9:27 am
I agree with Pee wee, great shots of you building the boat.
I do think I see a problem with your strong back being to high, it is in a few of the shots. You have the same problem a lot of us boat builders do, there is to much overhang at the sheer line. I use mine all the time when reaching over the side to keep from sliding off if the ladder moves. Even though it is handy at times it prevents us all from reaching fully into the hull. I have found that if I slide my boat off the trailer and onto some 2 X 8 stacked 3 high and moving blankets under it, makes it easier to reach inside.
You also need a hat when you are not under the carport, all that sun has bleached your hair white.
Your boat is coming along nicely and looking good.
OQ
As my girlfriend's granddaughter has said you have pretty platinum hair UB!
Re: MY BUILD LOG OF MY LM18 RCLS
Posted: Tue Mar 26, 2019 10:17 am
by BB Sig
OrangeQuest wrote: ↑Tue Mar 26, 2019 9:27 am
I agree with Pee wee, great shots of you building the boat.
I do think I see a problem with your strong back being to high, it is in a few of the shots.
Great shots indeed!
Notice, however; that he is standing on a stool to reach the inside... Not the best arraignment.
Re: MY BUILD LOG OF MY LM18 RCLS
Posted: Tue Mar 26, 2019 1:22 pm
by Fuzz
Good catch BB Sig. I can't believe all of you missed to most important question. Why was he sanding and the BIL watching? There was a rare chance for a BIL to be worth something
Re: MY BUILD LOG OF MY LM18 RCLS
Posted: Tue Mar 26, 2019 5:45 pm
by OrangeQuest
BB Sig wrote: ↑Tue Mar 26, 2019 10:17 am
Great shots indeed!
Notice, however; that he is standing on a stool to reach the inside... Not the best arraignment.
The arraignment is a very acceptable practice due to the fact Capt UB is making good use of his sheer over hang (belly) as a safety catch. Like I mentioned it may be something some of us are getting as we age, we all know how to use it when it comes to boat building. You skinny guys just have to take extra measures to keep from falling off the stool or not use them.
Fuzz wrote: ↑Tue Mar 26, 2019 1:22 pm
Good catch BB Sig. I can't believe all of you missed to most important question. Why was he sanding and the BIL watching? There was a rare chance for a BIL to be worth something
Re: MY BUILD LOG OF MY LM18 RCLS
Posted: Tue Mar 26, 2019 6:55 pm
by BB Sig
I lost 30 lbs since Christmas. I also lost my sheer overhang! No safety catch anymore.
Re: MY BUILD LOG OF MY LM18 RCLS
Posted: Wed Mar 27, 2019 7:51 am
by Capt UB
For one thing,
I built that Thing I'm on.... Just for what I'm doing.
I'm filleting the inside of the stringers, would have been a bitch lower still.
I got BIL to mow his MIL lawn, clean her the gutters and pressure wash her roof! All in one day!!!
As for helping with the boat, NFW!!
Close to 40 years of Marriage and two great kids, he is worth keeping as my sister will say, but my sister has a big Life Insurance policy on him..
As for my weight.... White hair... shaved white beard.... It's too cold up north.....
Re: MY BUILD LOG OF MY LM18 RCLS
Posted: Wed Mar 27, 2019 8:01 am
by Jeff
Good update and progress Capt UB!!!!!! Jeff
Re: MY BUILD LOG OF MY LM18 RCLS
Posted: Wed Mar 27, 2019 8:23 am
by OrangeQuest
Sorry Bob, I was just ribbing you.
You always seem to have a great sense of humor, I know you have had me cleaning coffee or beer off my screen a few times! I also have gained a few pounds over the years and my hair is going from very light grey to white. I call it experience.
I
Re: MY BUILD LOG OF MY LM18 RCLS
Posted: Wed Mar 27, 2019 10:08 am
by Capt UB
As for my weight.... White hair... shaved white beard.... It's too cold up north.....
Nobody got that....
Re: MY BUILD LOG OF MY LM18 RCLS
Posted: Wed Mar 27, 2019 10:30 am
by OrangeQuest
All the clues where there, just needed to add the red suit!

Re: MY BUILD LOG OF MY LM18 RCLS
Posted: Wed Mar 27, 2019 12:37 pm
by Capt UB
OrangeQuest wrote: ↑Wed Mar 27, 2019 10:30 am
All the clues where there, just needed to add the red suit!
Now that's funny!! Thanks, keeping that one.
Re: MY BUILD LOG OF MY LM18 RCLS
Posted: Wed Mar 27, 2019 7:01 pm
by Bogieman
Re: MY BUILD LOG OF MY LM18 RCLS
Posted: Wed Mar 27, 2019 9:46 pm
by piperdown
Heck, I'd blow that up, frame it and hang it on a wall
Re: MY BUILD LOG OF MY LM18 RCLS
Posted: Wed Mar 27, 2019 10:14 pm
by fallguy1000
Capt UB wrote: ↑Wed Mar 27, 2019 10:08 am
As for my weight.... White hair... shaved white beard.... It's too cold up north.....
Nobody got that....
Everybody got that.
What's next on the build?
Re: MY BUILD LOG OF MY LM18 RCLS
Posted: Thu Mar 28, 2019 12:40 pm
by Capt UB
fallguy1000 wrote: ↑Wed Mar 27, 2019 10:14 pm
Capt UB wrote: ↑Wed Mar 27, 2019 10:08 am
As for my weight.... White hair... shaved white beard.... It's too cold up north.....
Nobody got that....
Everybody got that.
What's next on the build?
Going to install frames and hopefully finish putting the panels together for the flats boat console.
Plus, need to make a frame for the extra length of the foredeck, from what JM said, all I have to build is the part above the sole. No frame under the sole. Also, JM said not to move the designed frames.
So from frame/station B aft, 18" from there is where the deck will end. I'm thinking of only 3" wide of side deck top.
.

- deck and side.jpg (29.57 KiB) Viewed 1013 times
Re: MY BUILD LOG OF MY LM18 RCLS
Posted: Sun Apr 07, 2019 10:02 am
by Capt UB
Glassing in station/frame A and B today. That will leave station C and D, they are the stations under the sole. And last but not least will be station/frame E. Station/frame E is the aft inside compartment frame and aft frame outside of sole. Adding a frame above the sole between station/frame B and C, 18"-24", this will give more workable fore deck. This can be added later, once every thing else is done, drainage, electric, foam and sole is installed.
Re: MY BUILD LOG OF MY LM18 RCLS
Posted: Sun Apr 07, 2019 5:46 pm
by Capt UB
Took a bit longer then planned. Waiting for fillets to harden a bit before laying tape.
Re: MY BUILD LOG OF MY LM18 RCLS
Posted: Sun Apr 07, 2019 6:58 pm
by OrangeQuest
Those frames are looking really good!!
Looks like a lot of space under the deck there, are you going to make a locker in it?
Re: MY BUILD LOG OF MY LM18 RCLS
Posted: Sun Apr 07, 2019 10:00 pm
by Capt UB
The bow will be filled with 2 part foam, next space will have foam under a floor (glued to stringers) with a small store bought hatch on deck.
Got A and B frames taped in.
Re: MY BUILD LOG OF MY LM18 RCLS
Posted: Mon Apr 08, 2019 10:57 am
by Jeff
Nice work Capt UB!!! Jeff
Re: MY BUILD LOG OF MY LM18 RCLS
Posted: Mon Apr 08, 2019 12:11 pm
by Capt UB
Jeff wrote: ↑Mon Apr 08, 2019 10:57 am
Nice work Capt UB!!! Jeff
Thanks Jeff.
It's getting there, hopefully by summer's end.
Re: MY BUILD LOG OF MY LM18 RCLS
Posted: Fri Apr 12, 2019 10:24 pm
by Jwhitakeriii
Looks great. I remember the stringers on mine too. I thought the glassing on those was never going to end.
Re: MY BUILD LOG OF MY LM18 RCLS
Posted: Sat Apr 13, 2019 2:10 pm
by Capt UB
Today
Got the cleats in both forward compartment glued in.
Poured foam in bow compartment.
Need to drill holes for bow eye, not a permanent install. Will finish it when I'm done fairing and painting hull.
Tomorrow
I'll sand the cleats level with the deck.
Install Frame C, D, E.
.
Re: MY BUILD LOG OF MY LM18 RCLS
Posted: Sat Apr 13, 2019 3:12 pm
by fallguy1000
I am a little jealous of the build pace.
Looking great.
Re: MY BUILD LOG OF MY LM18 RCLS
Posted: Sat Apr 13, 2019 3:20 pm
by OrangeQuest
I am too Fallguy! Capt UB the boat is looking good and moving along quickly.
Re: MY BUILD LOG OF MY LM18 RCLS
Posted: Sat Apr 13, 2019 5:41 pm
by Capt UB
Thanks guys.
Have not installed the cleats from A frame to B frame, I don't know what type of hatch or size yet. Easy to add later.
Going to install 3/8 ply backing for LED shark eyes. They will go just aft of frame A, 1/2" lower then the rub rail. Just pulled them out.... They need a 1.5" x 3" hole! Going with NAV deck light, mounts right on the bow.
.
Found my old Gheenoe NMZ rod holders, I may use these.
.
Re: MY BUILD LOG OF MY LM18 RCLS
Posted: Sat Apr 13, 2019 10:01 pm
by Rtorres2411
Very nice Capt. Good progress.
Ruben
Re: MY BUILD LOG OF MY LM18 RCLS
Posted: Sun Apr 14, 2019 8:44 am
by Bogieman
Man CaptUB do you ever sleep? You are flying along. Looks great too.
Re: MY BUILD LOG OF MY LM18 RCLS
Posted: Tue Apr 16, 2019 10:14 am
by Capt UB
Looks like great weather this week..... I have Thursday-Monday off....
Light sanding/cleaning in frames A/B compartment, then paint with high gloss white oil base paint.
Install frames C, D and E.
Glue cleats to frames and stringers.
Cut drain holes in frames C, D and E in center of bilge.
Cut holes (Starboard side) for NAV bow light and battery at the top of frames A, B and E for PVC pipe run for wiring.
Cut holes for PVC pipe for fuel line off-center in bilge in frames D and E, fuel tank will be in center console.
Epoxy the edge of holes.
Was told to wait 72 hours before painting over epoxy (MarinEpoxy with slow hardener), then sand/clean paint with high gloss white oil base paint.
Going to use pool noodles under sole and under the aft compartment false floor.
Re: MY BUILD LOG OF MY LM18 RCLS
Posted: Tue Apr 16, 2019 3:13 pm
by fallguy1000
Best of luck Bob!
Re: MY BUILD LOG OF MY LM18 RCLS
Posted: Tue Apr 16, 2019 5:16 pm
by OrangeQuest
Capt UB wrote: ↑Tue Apr 16, 2019 10:14 am
Looks like great weather this week..... I have Thursday-Monday off....
Light sanding/cleaning in frames A/B compartment, then paint with high gloss white oil base paint.
Install frames C, D and E.
Glue cleats to frames and stringers.
Cut drain holes in frames C, D and E in center of bilge.
Cut holes (Starboard side) for NAV bow light and battery at the top of frames A, B and E for PVC pipe run for wiring.
Cut holes for PVC pipe for fuel line off-center in bilge in frames D and E, fuel tank will be in center console.
Epoxy the edge of holes.
Was told to wait 72 hours before painting over epoxy (MarinEpoxy with slow hardener), then sand/clean paint with high gloss white oil base paint.
Going to use pool noodles under sole and under the aft compartment false floor.
Hopefully you will pace yourself! That is a long list. I don't see where you listed fishing!
I am starting to favor the pool noodle idea myself. I can put limber holes in and see if water is coming in.
Re: MY BUILD LOG OF MY LM18 RCLS
Posted: Wed Apr 17, 2019 9:17 am
by Capt UB
Tonight
Light sanding/cleaning in frames A/B compartment, then paint with high gloss white oil base paint.
Cut holes (Starboard side) for NAV bow light and battery at the top of frames A, B and E for PVC pipe run for wiring.
Re: MY BUILD LOG OF MY LM18 RCLS
Posted: Thu Apr 18, 2019 12:37 pm
by Capt UB
Re: MY BUILD LOG OF MY LM18 RCLS
Posted: Thu Apr 18, 2019 1:15 pm
by ctbeutel
Wow! That is going to be a sweet boat. I am enjoying your build and can't wait to see the first low sheer version on the water.
Re: MY BUILD LOG OF MY LM18 RCLS
Posted: Thu Apr 18, 2019 2:45 pm
by Capt UB
I painted inside compartment up front. Another coat in the morning should do it. Using Rust-Oleum Professional High Performance Protective Enamel Oil Base Gloss White.
.
Waiting for the fillets to harden a bit before laying tape on frames C,D, and E. I only used spot fillets so I would be able to remove all the clamps and finish complete fillets and tape wet on wet today.
.
So started on the other side of the console. Not as pretty as some other console builds on the forum, but will look great after the shaping, fairing and painting is done.
.
Re: MY BUILD LOG OF MY LM18 RCLS
Posted: Thu Apr 18, 2019 3:08 pm
by Capt UB
ctbeutel wrote: ↑Thu Apr 18, 2019 1:15 pm
Wow! That is going to be a sweet boat. I am enjoying your build and can't wait to see the first low sheer version on the water.
Thanks..
This is a boat for your neck of the wood! Not the low sheer, you got some big boats up in Jack. I maybe wrong..
Re: MY BUILD LOG OF MY LM18 RCLS
Posted: Thu Apr 18, 2019 5:31 pm
by Capt UB
Got to hot!
Taking a break.
I ordered a 3 gals kit of epoxy.. Will need more late next week. I think the round chine cost me a gal of epoxy!
Will be able to finish frames and install cleats on stringers and frames tomorrow. Will be installing cleats for hatch on foredeck, they will also stiffen the deck there too.
Saturday should be able to drill holes for PVC piping. Install bulkheads compartments in aft area under aft deck.
Should have time to glue up the rest of the console Sunday.
I have Monday off, may need to catch some fish....
Re: MY BUILD LOG OF MY LM18 RCLS
Posted: Sat Apr 20, 2019 5:24 am
by Capt UB
I ordered a 3 gal MarinEpoxy with slow hardener kit on Thursday night..... I was thinking later in the week, it's Passover/Good Friday weekend...
It's coming today! And that's after UPS changed the delivery date!
Your scheduled delivery date has changed.
Scheduled Delivery Date: Saturday, 04/20/2019
Thank you guys.
Bob Wolf.
Re: MY BUILD LOG OF MY LM18 RCLS
Posted: Sat Apr 20, 2019 9:15 am
by Capt UB
Beautiful Saturday morning start, about 65* 50% RH.
Got second coat of gloss white in forward compartment, used a sponge type sanding block. Worked great and will use again else where.
Glass tape cut, just need to fillet the rest of the sole frames C,D and frame E. Way too windy and raining to finish filleting yesterday, damn carport!
.
Re: MY BUILD LOG OF MY LM18 RCLS
Posted: Sat Apr 20, 2019 9:26 am
by OrangeQuest
The boat is looking great! The weather sounds like we are having today, even the wind.
Re: MY BUILD LOG OF MY LM18 RCLS
Posted: Sat Apr 20, 2019 10:37 am
by Capt UB
Got to love Florida weather...
10% chance of rain today where I live...
.
.
.
I did get done with the remaining fillets, now waiting for clear skies.....
Re: MY BUILD LOG OF MY LM18 RCLS
Posted: Sat Apr 20, 2019 10:46 am
by OrangeQuest
Sorry for the clouds, maybe you should take a break and dip SandPiper in the water!?
Clear blue skies with no wind now!! And I am sanding!!
Re: MY BUILD LOG OF MY LM18 RCLS
Posted: Sat Apr 20, 2019 5:47 pm
by Capt UB
Frames glassed in.
installing stiffing 1" x 2"'s in front compartment.
.
Re: MY BUILD LOG OF MY LM18 RCLS
Posted: Sat Apr 20, 2019 5:57 pm
by Capt UB
OrangeQuest wrote: ↑Sat Apr 20, 2019 10:46 am
Sorry for the clouds, maybe you should take a break and dip SandPiper in the water!?
Clear blue skies with no wind now!! And I am sanding!!
I try not to go out on holidays, too many AH and jet skis on the St. Johns river and Halifax river (ICW). I miss Lake Lanier (GA) and Caribbean islands, atlest there I knew how to avoid the AH during the Holidays.
Re: MY BUILD LOG OF MY LM18 RCLS
Posted: Sat Apr 20, 2019 6:01 pm
by OrangeQuest
Oh yeah, I forgot that part of holidays. I work holidays so don't get out much.
Re: MY BUILD LOG OF MY LM18 RCLS
Posted: Sat Apr 20, 2019 7:03 pm
by Capt UB
Going to go 24" longer on foredeck.
I have leftover center seat 3/8" plywood from the FS14 I did not use. I'll use it for frame B2 (new frame between frame B and frame C). This will give me more room on the casting deck.
.
Re: MY BUILD LOG OF MY LM18 RCLS
Posted: Sun Apr 21, 2019 6:46 pm
by fallguy1000
More casting deck is always right.
Re: MY BUILD LOG OF MY LM18 RCLS
Posted: Sun Apr 21, 2019 8:20 pm
by Capt UB
I laid the three sole flooring parts in just to see how they fit. Boy is the cockpit shallow, not sure if I should waste my time adding the the foredeck.
.
Re: MY BUILD LOG OF MY LM18 RCLS
Posted: Sun Apr 21, 2019 8:56 pm
by Capt UB
Going to build a battery box in the aft compartment. No need for a heavy duty battery setup, just a group 27 Deep cycle/starting AGM battery. LED NAV lights, LED compartment lights and low draw electronics on console. Cockpit is self bailing and foredeck compartment and aft compartment will be sealed. Port and starbroad side compartments in aft will be filled with two part foam.
Compartments are sealed, that is water can only get in through an open hatch, no other holes or drains in bilge.
One 3/4" PVC pipe for lighting wire run under gunnel from foredeck, 1" PVC pipe for electrical wiring from console all leading to electrical panel in battery box.
1.25" PVC pipe from console for fuel line to aft compartment.
Re: MY BUILD LOG OF MY LM18 RCLS
Posted: Sun Apr 21, 2019 9:02 pm
by Rtorres2411
Very nice
. You are moving fast on the build. Did you prime the interior before painting?
You just gave me the idea of using Rustoleum paint.
Ruben
Re: MY BUILD LOG OF MY LM18 RCLS
Posted: Sun Apr 21, 2019 9:16 pm
by Capt UB
Rtorres2411 wrote: ↑Sun Apr 21, 2019 9:02 pm
Very nice
. You are moving fast on the build. Did you prime the interior before painting?
You just gave me the idea of using Rustoleum paint.
Ruben
I cleaned and used a sponge block 80 to ruff up the compartment, then painted. No primer.
I would use a primer on areas in the open.
Both compartments will have a matt on the floor.
I like oil base paints, old school I guess!!
It was not the Rust Oleum marine paint.
Re: MY BUILD LOG OF MY LM18 RCLS
Posted: Sun Apr 21, 2019 9:45 pm
by OrangeQuest
Boat is really coming along and looking good!
Re: MY BUILD LOG OF MY LM18 RCLS
Posted: Sun Apr 21, 2019 9:50 pm
by fallguy1000
Capt UB wrote: ↑Sun Apr 21, 2019 8:20 pm
I laid the three sole flooring parts in just to see how they fit. Boy is the cockpit shallow, not sure if I should waste my time adding the the foredeck.
.
IMG_20190421_132327181~2.jpgIMG_20190421_132456754~2.jpg
Less steps is ALWAYS better. The only reason for a foredeck is space for stuff under and of course to get up higher to cast, but up already, I'd prefer one level surface.
Re: MY BUILD LOG OF MY LM18 RCLS
Posted: Sun Apr 21, 2019 9:55 pm
by Capt UB
OrangeQuest wrote: ↑Sun Apr 21, 2019 9:45 pm
Boat is really coming along and looking good!
Thanks OQ.
Saturday weather was great! Got a lot of LOOKING AND PLAYING with the boat. Had family things to do after lunch Sunday. I've got Monday off, hope to finish installing battens in the cockpit/sole area. Battery box should be easy to build and install.
Re: MY BUILD LOG OF MY LM18 RCLS
Posted: Sun Apr 21, 2019 10:11 pm
by Capt UB
fallguy1000 wrote: ↑Sun Apr 21, 2019 9:50 pm
Capt UB wrote: ↑Sun Apr 21, 2019 8:20 pm
I laid the three sole flooring parts in just to see how they fit. Boy is the cockpit shallow, not sure if I should waste my time adding the the foredeck.
.
IMG_20190421_132327181~2.jpgIMG_20190421_132456754~2.jpg
Less steps is ALWAYS better. The only reason for a foredeck is space for stuff under and of course to get up higher to cast, but up already, I'd prefer one level surface.
Don't need to carry too much..
Throw cushion 2
Life jackets are worn (inflatable type)
Safety USCG stuff, most will go in console
I don't carry a lot of tackle, Fly and lite spin
A cooler and water jug
I may use the cooler as a seat/casting platform on the foredeck.
The LM18 low sheer is not a bay/coastal boat, skinny water only.
Re: MY BUILD LOG OF MY LM18 RCLS
Posted: Mon Apr 22, 2019 12:21 pm
by Capt UB
OrangeQuest wrote: ↑Tue Apr 16, 2019 5:16 pm
Capt UB wrote: ↑Tue Apr 16, 2019 10:14 am
Looks like great weather this week..... I have Thursday-Monday off....
Light sanding/cleaning in frames A/B compartment, then paint with high gloss white oil base paint.
Install frames C, D and E.
Glue cleats to frames and stringers.
Cut drain holes in frames C, D and E in center of bilge.
Cut holes (Starboard side) for NAV bow light and battery at the top of frames A, B and E for PVC pipe run for wiring.
Cut holes for PVC pipe for fuel line off-center in bilge in frames D and E, fuel tank will be in center console.
Epoxy the edge of holes.
Was told to wait 72 hours before painting over epoxy (MarinEpoxy with slow hardener), then sand/clean paint with high gloss white oil base paint.
Going to use pool noodles under sole and under the aft compartment false floor.
Hopefully you will pace yourself! That is a long list. I don't see where you listed fishing!
I am starting to favor the pool noodle idea myself. I can put limber holes in and see if water is coming in.
Found this about pool noodles, buying in bulk!
http://www.usafoam.com/closedcellfoam/polyethylene.html
Re: MY BUILD LOG OF MY LM18 RCLS
Posted: Mon Apr 22, 2019 12:47 pm
by OrangeQuest
Capt UB did you notice this on their website: "All Items Are Local (Michigan) Pick Up Only"
You know someone in Michigan that will pick the stuff up and mail it?
I was thinking of using the pool noodles to fill the compartments on the outside of the stringers. Cut the pool noodles closest to the stringers to allow for water that gets into the compartments to run down the stringers into the sole bilge.
Re: MY BUILD LOG OF MY LM18 RCLS
Posted: Mon Apr 22, 2019 1:38 pm
by Capt UB
OrangeQuest wrote: ↑Mon Apr 22, 2019 12:47 pm
Capt UB did you notice this on their website: "All Items Are Local (Michigan) Pick Up Only"
You know someone in Michigan that will pick the stuff up and mail it?
I was thinking of using the pool noodles to fill the compartments on the outside of the stringers. Cut the pool noodles closest to the stringers to allow for water that gets into the compartments to run down the stringers into the sole bilge.
Same thing pool noodles are made from.
This is what I wanted you to read...
Polyethylene foam is a strong, resilient closed-cell foam. Ideally suited as the material or part of a material required in products requiring a shock absorbing, vibration dampening, insulation, barrier or buoyancy component, and as a material for cushioning products in packaging applications. Polyethylene foam's excellent buoyancy allows it to be used in flotation equipment, and other nautical products.
Details
Closed cell chemically crosslinked polyethylene foam
Lightweight
Shatter proof
Cost-effective
Easy to fabricate
Non-dusting
Excellent buoyancy
Superb strength, and tear resistance
High shock absorption
Flexibility
Impervious to mildew, mold, rot, and bacteria
Superior chemical and grease resistance
Re: MY BUILD LOG OF MY LM18 RCLS
Posted: Mon Apr 22, 2019 1:46 pm
by OrangeQuest
I read it all, even the part about the EVA foam that I want to use in my anchor locker to line the compartment with. I use 3/8" X24"X24" thick mats that use puzzle joints to line the bottom of my tent so my tender feet don't have to touch pokey grass blades.
Thank you for the link!
Re: MY BUILD LOG OF MY LM18 RCLS
Posted: Mon Apr 22, 2019 4:01 pm
by Capt UB
OrangeQuest wrote: ↑Mon Apr 22, 2019 1:46 pm
I read it all, even the part about the EVA foam that I want to use in my anchor locker to line the compartment with. I use 3/8" X24"X24" thick mats that use puzzle joints to line the bottom of my tent so my tender feet don't have to touch pokey grass blades.
Thank you for the link!
OQ,
These were $ 2.50 each. 3.5" dia. x 4' 6" long. Made in the U.S.A.! You maybe able to get them wholesale because of the business you are in.... water sports!
.
Re: MY BUILD LOG OF MY LM18 RCLS
Posted: Mon Apr 22, 2019 4:08 pm
by OrangeQuest
They have the 2" ones at the dollar store near me but I don't know how much they are.
Re: MY BUILD LOG OF MY LM18 RCLS
Posted: Tue Apr 23, 2019 9:10 am
by pee wee
OrangeQuest wrote: ↑Mon Apr 22, 2019 12:47 pm
Capt UB did you notice this on their website: "All Items Are Local (Michigan) Pick Up Only"
You know someone in Michigan that will pick the stuff up and mail it?
OQ, they do mention a shipping option:
https://www.foambymail.com
Re: MY BUILD LOG OF MY LM18 RCLS
Posted: Tue Apr 23, 2019 9:34 am
by OrangeQuest
pee wee wrote: ↑Tue Apr 23, 2019 9:10 am
OrangeQuest wrote: ↑Mon Apr 22, 2019 12:47 pm
Capt UB did you notice this on their website: "All Items Are Local (Michigan) Pick Up Only"
You know someone in Michigan that will pick the stuff up and mail it?
OQ, they do mention a shipping option:
https://www.foambymail.com
Thanks Pee Wee!
Those prices are so cheap! Need to get an order together so I can get it up to the $75.00 free shipping.
Re: MY BUILD LOG OF MY LM18 RCLS
Posted: Wed Apr 24, 2019 9:26 am
by Capt UB
I picked up the 3/4" x 3/4" for cleats for under the sole. Install them.
Then sand and level of the tops of the frame bottoms and stringers (what the sole glues to).
This weekend I'll fit (sand) the 3 sole panels, then neat coat of epoxy on bottom and edges.
Glue up the tops of the stringers and frame bottom tops, install the sole panels.
Re: MY BUILD LOG OF MY LM18 RCLS
Posted: Wed Apr 24, 2019 10:01 am
by Bogieman
She is looking great!
Re: MY BUILD LOG OF MY LM18 RCLS
Posted: Fri Apr 26, 2019 7:55 pm
by Capt UB
Going to try to build a hatch... Bare Bones FS 18 aft compartment hatch is just the type and look I want.
FS18 Bare Bones
..

- aft deck back.jpg (71.38 KiB) Viewed 987 times

- aft hatch.jpg (38.02 KiB) Viewed 987 times
Re: MY BUILD LOG OF MY LM18 RCLS
Posted: Sat Apr 27, 2019 6:02 pm
by Capt UB
So I think it's time to give my LM18 a real name...
She will have a SOLE by the end of next week

Re: MY BUILD LOG OF MY LM18 RCLS
Posted: Sat Apr 27, 2019 9:47 pm
by Jwhitakeriii
Let's see those pictures of the flush cut transom!
Re: MY BUILD LOG OF MY LM18 RCLS
Posted: Sun Apr 28, 2019 5:03 pm
by Capt UB
Jwhitakeriii wrote: ↑Sat Apr 27, 2019 9:47 pm
Let's see those pictures of the flush cut transom!
Need to finish cockpit first... One project at a time.
Re: MY BUILD LOG OF MY LM18 RCLS
Posted: Mon Apr 29, 2019 10:53 am
by Capt UB
Now with the sole frames and cleats in, I laid down the sole plywood and what a shallow cockpit. Not much there, about 7.75" from sole top to deck top.
Re: MY BUILD LOG OF MY LM18 RCLS
Posted: Mon Apr 29, 2019 8:44 pm
by Bogieman
Capt UB wrote: ↑Sat Apr 27, 2019 6:02 pm
So I think it's time to give my LM18 a real name...
She will have a SOLE by the end of next week
What r u naming her?
Re: MY BUILD LOG OF MY LM18 RCLS
Posted: Tue Apr 30, 2019 7:51 am
by Jeff
Capt UB, get us some updated photos when you have time!!! Jeff
Re: MY BUILD LOG OF MY LM18 RCLS
Posted: Thu May 02, 2019 12:28 pm
by Capt UB
Rain with wind coming into carport.. Had to cover and go inside!
Got a few things otherwise....
.
Re: MY BUILD LOG OF MY LM18 RCLS
Posted: Thu May 02, 2019 2:58 pm
by Capt UB
Re: MY BUILD LOG OF MY LM18 RCLS
Posted: Thu May 02, 2019 4:12 pm
by Jeff
Looking good Captain UB!!! Jeff
Re: MY BUILD LOG OF MY LM18 RCLS
Posted: Thu May 02, 2019 6:44 pm
by Capt UB
Got the cleats in, painted under sole area (nobody will see this area, but I like how the oil base paint seals any small holes). Will coat cleats with epoxy in morning, install noodles and install sole (coating under the plywood with epoxy).
.
Re: MY BUILD LOG OF MY LM18 RCLS
Posted: Thu May 02, 2019 6:56 pm
by Rtorres2411
You’re building that boat fast!
Ruben
Re: MY BUILD LOG OF MY LM18 RCLS
Posted: Thu May 02, 2019 7:09 pm
by Capt UB
Rtorres2411 wrote: ↑Thu May 02, 2019 6:56 pm
You’re building that boat fast!
Ruben
Thanks Ruben.
.
Re: MY BUILD LOG OF MY LM18 RCLS
Posted: Fri May 03, 2019 5:20 pm
by Capt UB
One day setback..
All sole cockpit cleats in, sole flooring ply is shaped and ready for install.
Hopefully this will be done tomorrow:
Cleats for sole get a coat of epoxy
Install Noddles
Sole ply ready for coat of epoxy on bottom
Put epoxy glue on all cleats and frames of sole
Install sole plywood
.
Re: MY BUILD LOG OF MY LM18 RCLS
Posted: Fri May 03, 2019 5:27 pm
by OrangeQuest
Looking really good Capt UB!
How many noodles did it take?
Re: MY BUILD LOG OF MY LM18 RCLS
Posted: Fri May 03, 2019 5:37 pm
by Capt UB
OrangeQuest wrote: ↑Fri May 03, 2019 5:27 pm
Looking really good Capt UB!
How many noodles did it take?
Will know tomorrow when I install them.
Re: MY BUILD LOG OF MY LM18 RCLS
Posted: Fri May 03, 2019 7:48 pm
by Capt UB
Just ordered my 3.5 oz. 60" wide fiber glass cloth to cover the sole. I'll probably use the same on the deck.
This build is coming together....
Re: Build log of LM18 RC LS
Posted: Fri May 03, 2019 8:21 pm
by Capt UB
Forgot...
Need to rebuild the console I started
Going with a 22" wide x 30" long x 33 7/8" tall. Portable 6 gal. fuel tank under it and a grab bar on top.
Re: Build log of LM18 RC LS
Posted: Fri May 03, 2019 8:59 pm
by Bogieman
Very nice, CaptUB!
Re: Build log of LM18 RC LS
Posted: Sat May 04, 2019 4:45 pm
by Capt UB
OK, so like the real world.... I did not finish the sole install . Drilling holes for the drains... put me in a holding pattern?
So I glued the cleats in for the aft compartment... At least moving forward......
.
.
.
Using bigger cleats because of the poling platform.
Re: Build log of LM18 RC LS
Posted: Mon May 06, 2019 2:32 pm
by Capt UB
I will not be pouring foam under the sole. Going to lay in pool noodles.
Going to drill holes tonight for the drains.
Frame A and B will not be drilled, they are sealed, other then the hatch between A and B.
Aft deck/compartment frame E, will get a keel line drain hole that a stopper will fit in from inside the compartment.
Frame C and D under the sole will get keel line drain holes as will each side of the stringers.
A little epoxy in and around the holes to seal the ply.
Still thinking about the battery placement, in compartment A/B is tight (height), I like having my batteries in a box with lid. Don't need much in the way of battery power, LED lights, Handheld; VHF radio and GPS/map (has it's own batteries, but can run off ship's power), Bluetooth music, no built in livewell, will use cooler made into a livewell (will need ship's power). At this point a small battery for starting the OB, if I don't get Richard's 15...
Re: Build log of LM18 RC LS
Posted: Mon May 06, 2019 4:45 pm
by Bogieman
Looking really good, CaptUB
Re: MY BUILD LOG OF MY LM18 RCLS
Posted: Wed May 08, 2019 5:50 pm
by Capt UB
Capt UB wrote: ↑Fri May 03, 2019 7:48 pm
Just ordered my 3.5 oz. 60" wide fiber glass cloth to cover the sole. I'll probably use the same on the deck.
This build is coming together....
Got my cloth in today. Thanks BBC.
Bob
Re: MY BUILD LOG OF MY LM18 RCLS
Posted: Wed May 08, 2019 6:32 pm
by Bogieman
Capt UB wrote: ↑Wed May 08, 2019 5:50 pm
Capt UB wrote: ↑Fri May 03, 2019 7:48 pm
Just ordered my 3.5 oz. 60" wide fiber glass cloth to cover the sole. I'll probably use the same on the deck.
This build is coming together....
Got my cloth in today. Thanks BBC.
Bob
It always feels like Christmas morning
Re: Build log of LM18 RC LS
Posted: Thu May 09, 2019 7:50 am
by Jeff
Capt UB, first time we have sent cloth through USPS, a little cheaper and glad they did a good job!! Jeff
Re: Build log of LM18 RC LS
Posted: Thu May 09, 2019 8:24 am
by Capt UB
Jeff wrote: ↑Thu May 09, 2019 7:50 am
Capt UB, first time we have sent cloth through USPS, a little cheaper and glad they did a good job!! Jeff
Showed up just fine!
I have not opened it, the packaging was great and no problems outside of the tube.
Thanks,
Bob
Re: Build log of LM18 RC LS
Posted: Sat May 11, 2019 2:01 pm
by Capt UB
Got all the drain holes drilled and epoxy coated/sealed. I did not drill a drain hole into frame B or E, keeping fore and aft compartments sealed from the cockpit.
Installed the tops of foam compartments port and starboard sides in aft compartment. Need to angle ply up long the transom knees, both sides to box it in with tops. Will be drilling 1" holes in tops to add two part foam later.
Cockpit floor is ready to install, need to coat bottom side with epoxy first.
.
Re: Build log of LM18 RC LS
Posted: Sat May 11, 2019 3:11 pm
by OrangeQuest
Looks good Capt UB, what is the pipe with the 90° elbow for?
Re: Build log of LM18 RC LS
Posted: Sat May 11, 2019 4:02 pm
by Capt UB
OrangeQuest wrote: ↑Sat May 11, 2019 3:11 pm
Looks good Capt UB, what is the pipe with the 90° elbow for?
Just seeing how much I need to cut off of the pipe to keep the 90° close to frame E. I have not cut the PVC pipe yet. That pipe is for power to the console switches (NAV. lights, deck lights...), kill switch and start switch. The other pipe is for the fuel line from the portable 6 gal. fuel tank inside the console.
Re: Build log of LM18 RC LS
Posted: Sat May 11, 2019 7:42 pm
by Capt UB
Not pretty, but wood flour....
Glue up angled ply and sand/fair.
Then drill holes in top to pour BBC's two part foam, about 3.5 cubic ft.
If my math is close those two compartments should support 217 lbs. That's just the foam.
.
Re: Build log of LM18 RC LS
Posted: Sun May 12, 2019 11:27 am
by fallguy1000
I have a feeling you are going to hate that 90. It looks pretty short, like a vent 90. Switch it to a long 90. Small wires are even harder to get to turn.
Otherwise, things look great.
Re: Build log of LM18 RC LS
Posted: Sun May 12, 2019 1:19 pm
by Capt UB
fallguy1000 wrote: ↑Sun May 12, 2019 11:27 am
I have a feeling you are going to hate that 90. It looks pretty short, like a vent 90. Switch it to a long 90. Small wires are even harder to get to turn.
Otherwise, things look great.
I don't glue them on. I have in the past glued them on and hated trying pull/push the wire through the bend!
Thank you
Bob
Re: Build log of LM18 RC LS
Posted: Sun May 12, 2019 3:56 pm
by Bogieman
Nice
Re: Build log of LM18 RC LS
Posted: Tue May 14, 2019 12:36 pm
by Capt UB
Capt UB wrote: ↑Thu Jun 14, 2018 8:33 pm
Looking for a new home.....
Push pole platform
0922181357f.jpg0922181400.jpg
0922181357d.jpg
Re: Build log of LM18 RC LS
Posted: Tue May 14, 2019 1:03 pm
by Dr. Pete
Have been enjoying watching this. Next week I plan to put in the laminate of 1708 on the inside of my XF20. Then stringers snd finally get to decks and such. I need someone to tell me what material you folks are using for cleats, bracing etc. Pine? 1x2? 1x3? 2x4? Thanks all!
Re: Build log of LM18 RC LS
Posted: Tue May 14, 2019 1:33 pm
by OrangeQuest
Capt UB wrote: ↑Sun May 12, 2019 1:19 pm
I don't glue them on. I have in the past glued them on and hated trying pull/push the wire through the bend!
Thank you
Bob
Use a heavy cord and fray the end. Use a vacuum cleaner to suck the cord through. Use cord to pull the wiring through. Works very well on single 90° elbows.
Re: Build log of LM18 RC LS
Posted: Tue May 14, 2019 9:44 pm
by BB Sig
Dr. Pete wrote: ↑Tue May 14, 2019 1:03 pm
Have been enjoying watching this. Next week I plan to put in the laminate of 1708 on the inside of my XF20. Then stringers snd finally get to decks and such. I need someone to tell me what material you folks are using for cleats, bracing etc. Pine? 1x2? 1x3? 2x4? Thanks all!
I've been using "select" pine 1x4's ripped to 1x1's because they are knot free. Others have been saying that they get 4x4x8 Douglas Fir posts and ripping those down to what they need.
Interesting tip that someone was mentioning was to heat the wood prior to the first coat of epoxy and the wood will draw the epoxy into the pores. I'm going to try that after I get settled in the new house.
Re: Build log of LM18 RC LS
Posted: Wed May 15, 2019 6:03 am
by Capt UB
Dr. Pete wrote: ↑Tue May 14, 2019 1:03 pm
Have been enjoying watching this. Next week I plan to put in the laminate of 1708 on the inside of my XF20. Then stringers snd finally get to decks and such. I need someone to tell me what material you folks are using for cleats, bracing etc. Pine? 1x2? 1x3? 2x4? Thanks all!
On my FS14, I used off the shelf 1x2's pine. The LM18 I am using off the shelf top choice pine 1x1, but top choice 1x2's as cleats in the aft deck because of the poling ptatform. Also, using the 1x2's for support bracing under the fore deck and aft deck.
My FS14 is a heavy built boat, with no center bench seat, but does have a cockpit deck.
The LM18 hopefully will be lighter then planned. No big motor, just a 9.8 untill I can buy a 15-25 hp.
Your XF20 is a very different boat from my 14 and 18.
I would post your question on the boat builder help area.
Also, your plans should tell you what you need.
Different parts of the States...World.. don't have the same lumber, one must use what available.
Re: Build log of LM18 RC LS
Posted: Wed May 15, 2019 8:37 am
by Jeff
Capt UB, Get us some updated photos when you have time!! Jeff
Re: Build log of LM18 RC LS
Posted: Wed May 15, 2019 9:47 am
by Dougster
I have mostly used off the shelf 1x2 pine from HD, ripped in half on the table saw.
Dougster
Re: Build log of LM18 RC LS
Posted: Wed May 15, 2019 9:49 am
by OrangeQuest
Capt UB wrote: ↑Wed May 15, 2019 6:03 am
Different parts of the States...World.. don't have the same lumber, one must use what available.
Very good and accurate advice!
Re: Build log of LM18 RC LS
Posted: Wed May 15, 2019 10:17 am
by jacquesmm
The type of wood used for the cleats is unimportant. It can be cedar, pine, fir etc. As long as there is no incompatibility with epoxy, it will be fine.
Some builders have used strips of plywood cut from leftovers.
Re: Build log of LM18 RC LS
Posted: Wed May 15, 2019 10:19 am
by Capt UB
This is how I install the cleats on an angled frame or hull. The space on top of cleat is filled with epoxy glue. The outside edge is the high side level with the deck. I think this is much stronger because you have epoxy and the wood cleat holding the deck...

- cleat.jpg (21.36 KiB) Viewed 1364 times
.
This is not how I do it now.

- bad%20cleat.jpg (23.88 KiB) Viewed 1364 times
.
Re: Build log of LM18 RC LS
Posted: Wed May 15, 2019 10:54 am
by OrangeQuest
Your build is looking great Capt UB!!
But so many pictures and the little first mate is in none of them. Hope she is ok?
Re: Build log of LM18 RC LS
Posted: Wed May 15, 2019 11:24 am
by Capt UB
Hope is in school learning how to fix props....
.
Re: Build log of LM18 RC LS
Posted: Fri May 17, 2019 9:33 am
by Capt UB
Will finish gluing the foam transom boxes tonight. The red area, sand and seal this weekend.
.
If time allows, will put in cockpit foredeck and start building the frame for casting deck extension. I'm adding 24" to the casting deck and making an open (frame will be open) storage space under the casting deck between new frame (B2) and frame B. The cockpit will be much smaller, but the cockpit deck will still go to frame B.
.
Re: Build log of LM18 RC LS
Posted: Fri May 17, 2019 9:40 am
by ctbeutel
Your LM18 is looking great. I think that is a smart idea extending the front deck. It will give a ton more space to fish from. Especially if you add a trolling motor. Extra dry storage is always welcomed too.
Re: Build log of LM18 RC LS
Posted: Fri May 17, 2019 12:07 pm
by Capt UB
ctbeutel wrote: ↑Fri May 17, 2019 9:40 am
Your LM18 is looking great. I think that is a smart idea extending the front deck. It will give a ton more space to fish from. Especially if you add a trolling motor. Extra dry storage is always welcomed too.
Thanks, finely getting things done. Still have to flip again and finish the bottom!
No trolling motor, can't see me using one in 2 or 3 inches of water. That extra storage (all weather) will be open on the front of the frame. I'll use it for tackle boxes and I may put the battery there.
Re: Build log of LM18 RC LS
Posted: Fri May 17, 2019 12:12 pm
by Jeff
Nice progress Capt UB!! Have a good weekend up there!! Jeff
Re: Build log of LM18 RC LS
Posted: Fri May 17, 2019 3:05 pm
by Biney777
It is looking good. I am curious tho why aren't you filling the compartments with foam before the tops are on? When I was trying to figure out how to use the 2 part foam, I saw so many foam blow out stories and videos that your 1" hole plan is making me nervous for you..
Re: Build log of LM18 RC LS
Posted: Fri May 17, 2019 5:33 pm
by Bogieman
She looks really good, CaptUB.
Re: Build log of LM18 RC LS
Posted: Fri May 17, 2019 5:55 pm
by Capt UB
Biney777 wrote: ↑Fri May 17, 2019 3:05 pm
It is looking good. I am curious tho why aren't you filling the compartments with foam before the tops are on? When I was trying to figure out how to use the 2 part foam, I saw so many foam blow out stories and videos that your 1" hole plan is making me nervous for you..
Thank you.
Too much foam in one area will blowout. Small amounts on a pour like this.
Not my first time doing foam pours into 1" holes.
Also I plan on a hot day and hot hull for max expansion.
Re: Build log of LM18 RC LS
Posted: Fri May 17, 2019 5:56 pm
by Capt UB
Bogieman wrote: ↑Fri May 17, 2019 5:33 pm
She looks really good, CaptUB.
Thanks getting there!
Re: Build log of LM18 RC LS
Posted: Fri May 17, 2019 5:59 pm
by Capt UB
Jeff wrote: ↑Fri May 17, 2019 12:12 pm
Nice progress Capt UB!! Have a good weekend up there!! Jeff
Thank you Jeff.
Just got the BBC foam. Thank you for getting here in time for the weekend.
Re: Build log of LM18 RC LS
Posted: Fri May 17, 2019 6:04 pm
by Capt UB
Just bought this, it fits better and looks right.
POLING PLATFORM, USED, $250.00
TOP 26" x 43"
BASE 19" x 37" Outside dimensions
.

- 00c0c_3x2qtTYhtKh_600x450.jpg (30.25 KiB) Viewed 1145 times

- 00H0H_7AfsDt06Bee_600x450.jpg (29 KiB) Viewed 1145 times
.
Paid $ 225!!!
Re: Build log of LM18 RC LS
Posted: Fri May 17, 2019 7:54 pm
by OrangeQuest
Capt UB wrote: ↑Wed May 15, 2019 11:24 am
Hope is in school learning how to fix props....
.
20160731_104111.jpg
She looks like she is doing great in class!
Re: Build log of LM18 RC LS
Posted: Fri May 17, 2019 7:58 pm
by OrangeQuest
I was just thinking of how I was going to do my cleats on the sides of my FS14 and came to the same conclusion you stated. But where the side meets the bottom of the hull at the front I am still dreaming about how to do them. They will have to have a taper and two angles.
Re: Build log of LM18 RC LS
Posted: Fri May 17, 2019 10:37 pm
by Capt UB
OrangeQuest wrote: ↑Fri May 17, 2019 7:58 pm
I was just thinking of how I was going to do my cleats on the sides of my FS14 and came to the same conclusion you stated. But where the side meets the bottom of the hull at the front I am still dreaming about how to do them. They will have to have a taper and two angles.
Photo please.. not sure what you are talking about.
.
I like the epoxy mix to form the taper (if sanding does not work) and the angles..

- cleat.jpg (21.36 KiB) Viewed 1115 times
Re: Build log of LM18 RC LS
Posted: Sat May 18, 2019 5:54 am
by OrangeQuest
Like the picture you posted there but where the sole meets the chine I would need the bottom of the cleat tapered to match the bottom of the boat.
Re: Build log of LM18 RC LS
Posted: Sat May 18, 2019 10:36 am
by Capt UB
Got the flotation chambers glued, will sand to shape and fair after I pour BBC's 2 part foam. Like said, if my math is right, 200 lbs. plus of buoyancy. The decks of the chambers are angled in by 1/4", so water wil not sit.
.
.
Installed cockpit aft deck. Noodles installed loosely, so any water that gets in will drain aft and through the drain holes.
.
Re: Build log of LM18 RC LS
Posted: Sat May 18, 2019 3:42 pm
by Capt UB
Re: Build log of LM18 RC LS
Posted: Sat May 18, 2019 4:11 pm
by Capt UB
Foam trimmed and will be coated with epoxy.
.
Re: Build log of LM18 RC LS
Posted: Sat May 18, 2019 5:43 pm
by Capt UB
Two of three cockpit decks are in. Leaving middle one for later, console will be attached to it.
.
.
.
This is the cockpit foredeck, will be adding new frame B2 for extending casting deck
Re: Build log of LM18 RC LS
Posted: Sun May 19, 2019 6:12 am
by OrangeQuest
Your extension will be open under it?
Re: Build log of LM18 RC LS
Posted: Sun May 19, 2019 6:24 am
by Coach
Looking good CaptUB! Thanks for posting these pics...you are giving me ideas of my next steps.
Re: Build log of LM18 RC LS
Posted: Sun May 19, 2019 10:14 am
by Capt UB
OrangeQuest wrote: ↑Sun May 19, 2019 6:12 am
Your extension will be open under it?
The new compartment between new frame (B2) and B, will not have a hatch on top, just an opening in front on frame B2. Basically, it's a frame cutout in the middle. 3" on sides and top of frame.
Re: Build log of LM18 RC LS
Posted: Sun May 19, 2019 10:15 am
by Capt UB
Coach wrote: ↑Sun May 19, 2019 6:24 am
Looking good CaptUB! Thanks for posting these pics...you are giving me ideas of my next steps.
Thanks.
Now I"m back at having fun...
Re: Build log of LM18 RC LS
Posted: Sun May 19, 2019 11:36 am
by Capt UB
Foredeck of cockpit.
.
Installing middle cockpit deck.
Re: Build log of LM18 RC LS
Posted: Sun May 19, 2019 11:45 am
by Capt UB
She is ready for the water....
Re: Build log of LM18 RC LS
Posted: Sun May 19, 2019 11:59 am
by fallguy1000
Estimated time to launch?
Re: Build log of LM18 RC LS
Posted: Sun May 19, 2019 12:19 pm
by Capt UB
fallguy1000 wrote: ↑Sun May 19, 2019 11:59 am
Estimated time to launch?
I'm tempted to cover the hull with a blue tarp and clamp it to the gunwales... And go fishing!!
.
.
Hopefully before the end of Summer.
Re: Build log of LM18 RC LS
Posted: Sun May 19, 2019 1:47 pm
by Capt UB
The cockpit deck is in and glued down....
Taping the cockpit deck to the hull and tape on the two seams is next.
Re: Build log of LM18 RC LS
Posted: Sun May 19, 2019 2:09 pm
by OrangeQuest
Looking good Capt UB! While you waiting for the epoxy to cure you going fishing in the Sand Piper?
Re: Build log of LM18 RC LS
Posted: Sun May 19, 2019 4:03 pm
by Capt UB
OrangeQuest wrote: ↑Sun May 19, 2019 2:09 pm
Looking good Capt UB! While you waiting for the epoxy to cure you going fishing in the Sand Piper?
Too windy on the river for me.
Still going to do taping today. No reason to wait! The BBC's MarinEpoxy slow hardener works great in 90° weather.... No blush to worry about, still light cleaning then sanding to level some high spots. I'm going to cover the cockpit deck with lite cloth after I've done taping and sanding the edges of the tape. The cloth part is next week.
So hope to tape cockpit deck to hull and frames B, E and the two deck seams.
Re: Build log of LM18 RC LS
Posted: Sun May 19, 2019 6:41 pm
by Capt UB
Well nothing else got done....
Will clean, sand and tape this week..
Re: Build log of LM18 RC LS
Posted: Sun May 19, 2019 7:12 pm
by OrangeQuest
Looks like the first mate is happy how things are going!
Re: Build log of LM18 RC LS
Posted: Sun May 19, 2019 7:24 pm
by piperdown
Looking absolutely fantastic Capt!
Seems the 1st Mate is please too
Re: Build log of LM18 RC LS
Posted: Sun May 19, 2019 10:00 pm
by Bogieman
Love it!
Re: Build log of LM18 RC LS
Posted: Mon May 20, 2019 10:04 am
by Jeff
Nice pup and progress!! Jeff
Re: Build log of LM18 RC LS
Posted: Mon May 20, 2019 8:36 pm
by Capt UB
Biney777 wrote: ↑Fri May 17, 2019 3:05 pm
It is looking good. I am curious tho why aren't you filling the compartments with foam before the tops are on? When I was trying to figure out how to use the 2 part foam, I saw so many foam blow out stories and videos that your 1" hole plan is making me nervous for you..
Take a look at my latest.... I did not get a blowout, but a foam shrinkin! I know not a word...
https://forums.bateau2.com/viewtopic.php?f=2&t=64207
I poured 10 oz. of foam in the holes, waited till it started coming through the first hole. Then the next hole....
I once had a 6' x 4' sailboat rudder blowup because we poured too much too fast... Took me two weeks to build a new rudder, foam pour went slowly!
Re: Build log of LM18 RC LS
Posted: Sun May 26, 2019 3:50 pm
by Capt UB
Cockpit deck sanded and level. Need to fill in between deck panels, will just use fillet mix. Will try to fillet the hull and frames to the cockpit deck today, almost 100° !!
Got tape cut and ready....
Re: Build log of LM18 RC LS
Posted: Sun May 26, 2019 10:13 pm
by Capt UB
Got tape down. Still in the low 90° at 10pm!!!
Glad I'm using BBC's MarinEpoxy with slow hardener.
Going to let this sit for a couple of days before I sand the tape edges and cover with the 3.5 oz. cloth from BBC.
Re: Build log of LM18 RC LS
Posted: Sun May 26, 2019 11:07 pm
by Bogieman
Very nice work!
Re: Build log of LM18 RC LS
Posted: Mon May 27, 2019 1:57 am
by Jwhitakeriii
Tape job is on point
Re: Build log of LM18 RC LS
Posted: Mon May 27, 2019 5:25 am
by OrangeQuest
fantastic looking tape job!
Re: Build log of LM18 RC LS
Posted: Mon May 27, 2019 6:18 am
by Capt UB
Thank you guys. Just looked at it this morning, so glad it turned out nice.
Now on to the aft compartment with the weird foam pour. Sand/shape, seal (epoxy) and paint.
Console build is next.
Re: Build log of LM18 RC LS
Posted: Mon May 27, 2019 6:55 am
by Aripeka Angler
Nice looking glass work captain.
Re: Build log of LM18 RC LS
Posted: Mon May 27, 2019 4:00 pm
by Coach
Looking good!
Re: Build log of LM18 RC LS
Posted: Tue May 28, 2019 11:10 am
by Jeff
Really nice, clean work Captain UB!! Jeff
Re: Build log of LM18 RC LS
Posted: Thu Jun 06, 2019 9:40 am
by Capt UB
After sanding the edges and tops of the cloth and tape, the first coat of fairing is to soften the edges, fill in the low spots and fill the weave. Most of the fairing mix will be thin, less sanding. Remember I do it wrong.... I use wood flour only and just enough to hold on to the substrate. It has to be a thin coat and mixed thin...
Started this near the end of the build of the SandPiper. And will do the same on the LM18.
I may try the BBC's fairing mix on the cockpit deck, flat surface, if that goes well, then on to the insides of the cockpit (8" tall by 9' long and frame B/E). I think I have 3 bags of the BBC's fairing mix that came with the LM18 plus a bag I bought to try out on the FS14. Looking back on my notes, I did not use a lot of BBC's mix, but did try it.
Re: Build log of LM18 RC LS
Posted: Thu Jun 06, 2019 12:48 pm
by Capt UB
Who has the best Photos and text on making flush hatches.
I want to make a large front edge opening hatch on the aft deck of my LM18.
Needs to be lockable (no key)
270 lbs. person needs to be able to jump up and down on it (I get excited when I hook a jet ski)
flush on deck
I'm going to try to build one for the aft deck, if it turns out good, I'll make one for the casting deck (fore deck).
We need one place to put this information, no comments, just build information.. and lots of photos.
Re: Build log of LM18 RC LS
Posted: Thu Jun 06, 2019 6:51 pm
by poleposition
Capt UB wrote: ↑Thu Jun 06, 2019 12:48 pm
Who has the best Photos and text on making flush hatches.
https://forums.bateau2.com/app.php/page ... 30fc42d724
seaslug had the best tutorial on building hatches; I think there is another link w/ pics but don't have time to look now---will try later
Re: Build log of LM18 RC LS
Posted: Sat Jun 08, 2019 10:14 am
by Capt UB
How to work on your deck in the rain....
.
Re: Build log of LM18 RC LS
Posted: Sat Jun 08, 2019 12:41 pm
by Capt UB
Got the basic points down, now to the saw...
Need to cut in half at an angle for two topsides of the casting deck. Then lay parts on top to mark the hull shape and cut.
.
Re: Build log of LM18 RC LS
Posted: Sat Jun 08, 2019 2:18 pm
by Capt UB
Was able to cut ply. Flipped over ply so straight edges butted up to each other. Centered ply and ran a marker under the ply along the rub rail. Then flipped cut ply, flipped again..
.
Re: Build log of LM18 RC LS
Posted: Sat Jun 08, 2019 6:07 pm
by Capt UB
Cut the ply for the aft deck.
.
Re: Build log of LM18 RC LS
Posted: Sat Jun 08, 2019 6:13 pm
by Capt UB
Found this very nice layout on a Cracker Larry FS18 build.
Two hatches and lots of foredeck.... Very clean...
.

- a064f1ca-bbbd-4322-bf9f-2f87ff86586f_zpsf3eda314.jpg (250.97 KiB) Viewed 1021 times
Re: LM18 low sheer round chine
Posted: Thu Jun 13, 2019 12:38 pm
by Capt UB
Ordering SeaTeak 6 (5') long Edge molding and 4 corner edge molding for the Coaming.
.

- untitled.png (14.03 KiB) Viewed 2661 times
.

- long.jpg (54.26 KiB) Viewed 1021 times
.

- 754427.jpg (8.23 KiB) Viewed 2661 times
.
red lines are teak layout.

- drawing 1 deck and side.jpg (29.57 KiB) Viewed 2658 times
Re: LM18 low sheer round chine
Posted: Thu Jun 13, 2019 2:23 pm
by OrangeQuest
Looking good Capt UB. First Mate seems to approve too, doing her impression of the girl on the bow of the Titanic. "I'M FLYING!!"
Re: LM18 low sheer round chine
Posted: Fri Jun 14, 2019 12:40 pm
by Capt UB
Re: LM18 low sheer round chine
Posted: Wed Jun 19, 2019 12:26 pm
by Capt UB
I forgot I bought a tan (sand) color monstaliner kit. I was for the FS14, but never used it. Thinking this would be a good coating for the cockpit deck, not sure how or what I going to do to the aft/fore deck. Some short of non-skid. Still need to fair the deck or the seams and cloth will show.
.
Monstaliner on just the cockpit deck/floor/sole
Re: LM18 low sheer round chine
Posted: Sat Jun 22, 2019 5:03 pm
by flyfishingmonk
Looking good!!!
Casey
Re: LM18 low sheer round chine
Posted: Sat Jun 22, 2019 7:17 pm
by Aripeka Angler
Yes, looks great!
Re: LM18 low sheer round chine
Posted: Sun Jun 23, 2019 10:18 am
by Capt UB
Working on layout of gunwales.
Going with 1x4.
It will be a little wider in the middle, good place for boarding ladder mounts and non-slip boarding step plate. May install flush rod holders on gunwale too.
.
Re: LM18 low sheer round chine
Posted: Wed Jun 26, 2019 9:40 pm
by flyfishingmonk
That is going to look cool.
Casey
Re: LM18 low sheer round chine
Posted: Thu Jun 27, 2019 8:29 am
by Jeff
Nice progress Captain UB!! Jeff
Re: LM18 low sheer round chine
Posted: Thu Jun 27, 2019 8:55 am
by Bogieman
Very nice, Capt UB! Looks great and solid too
Re: LM18 low sheer round chine
Posted: Thu Jun 27, 2019 9:23 am
by Capt UB
flyfishingmonk wrote: ↑Wed Jun 26, 2019 9:40 pm
That is going to look cool.
Casey
Thank you. I'm hoping the wide gunwales will support a boarding ladder and my 270 lbs. walking on it. No room to add rod holders horizontally under the gunwales, 8" from cockpit deck top. Most of my Fly rods are 2 or 3 parts, will store under the deck.
Re: LM18 low sheer round chine
Posted: Thu Jun 27, 2019 9:28 am
by Capt UB
Jeff wrote: ↑Thu Jun 27, 2019 8:29 am
Nice progress Captain UB!! Jeff
Thank you Jeff.
You, Reid, JM and BBC have been a great find!! Love my little FS14 and this LM18 is going to be bad ass fly boat!
Looking forward to flipping her again to finish the hull bottom, a little nervous about the shape/look of the round chine. But I have lots of wood flour!!
Re: LM18 low sheer round chine
Posted: Thu Jun 27, 2019 9:31 am
by Capt UB
Bogieman wrote: ↑Thu Jun 27, 2019 8:55 am
Very nice, Capt UB! Looks great and solid too
Thanks...
After reading about some gunwales/side deck cracking, I'm going to beef up my side decks/gunwales! I need it to holdup to 270 lbs. of ME!!
Re: LM18 low sheer round chine
Posted: Fri Jul 05, 2019 9:59 am
by Capt UB
Mom is recovering well after her fall, broke her hip (87 years old), it's been about a month plus now. Sister has been a great help staying with her. I go over after work and staying the weekends, so Kim can breathe a little. I'm a block away, Kim's house is in Miami (it's for sale,
https://www.realtor.com/realestateandho ... 4802-49068).
Going to finish deck frames/supports, but not install deck. I want to flip the boat and finish the hull first. Going with bright Yellow on the hull!! Graphite/epoxy (black) on bottom. The White HBN mix, I had planned on doing would cost too much to do.
Still, it is way too hot in the carport to work... 7 am it's 87*.
Re: LM18 low sheer round chine
Posted: Fri Jul 05, 2019 11:15 am
by Bogieman
Capt UB wrote: ↑Fri Jul 05, 2019 9:59 am
Mom is recovering well after her fall, broke her hip (87 years old), it's been about a month plus now. Sister has been a great help staying with her. I go over after work and staying the weekends, so Kim can breathe a little. I'm a block away, Kim's house is in Miami (it's for sale,
https://www.realtor.com/realestateandho ... 4802-49068).
Going to finish deck frames/supports, but not install deck. I want to flip the boat and finish the hull first. Going with bright Yellow on the hull!! Graphite/epoxy (black) on bottom. The White HBN mix, I had planned on doing would cost too much to do.
Still, it is way too hot in the carport to work... 7 am it's 87*.
Good to hear your mom is recovering well. It is not an easy thing when we have to take care of our aging parents. Your sisters home is beautiful, especially the back pool area. If that was mine It'd be hard to leave. Your build is looking really good. The yellow will look really nice. What paint brand are you going with?
Bogie
Re: LM18 low sheer round chine
Posted: Fri Jul 05, 2019 4:42 pm
by OrangeQuest
hope you Mom starts feeling better.
Re: LM18 low sheer round chine
Posted: Thu Jul 18, 2019 1:41 pm
by Capt UB
Bogieman wrote: ↑Fri Jul 05, 2019 11:15 am
Capt UB wrote: ↑Fri Jul 05, 2019 9:59 am
Mom is recovering well after her fall, broke her hip (87 years old), it's been about a month plus now. Sister has been a great help staying with her. I go over after work and staying the weekends, so Kim can breathe a little. I'm a block away, Kim's house is in Miami (it's for sale,
https://www.realtor.com/realestateandho ... 4802-49068).
Going to finish deck frames/supports, but not install deck. I want to flip the boat and finish the hull first. Going with bright Yellow on the hull!! Graphite/epoxy (black) on bottom. The White HBN mix, I had planned on doing would cost too much to do.
Still, it is way too hot in the carport to work... 7 am it's 87*.
Good to hear your mom is recovering well. It is not an easy thing when we have to take care of our aging parents. Your sisters home is beautiful, especially the back pool area. If that was mine It'd be hard to leave. Your build is looking really good. The yellow will look really nice. What paint brand are you going with?
Bogie
Thank you, Mom's an old farm girl from Minnesota! They heal quick and strong..
Sister's home is from the 50's, they paid under 200,000 (25 years ago?) for it I think. The people who buy it will knock it down and build a bigger house, 0 lot lines nowadays! Miami suck now days!!!
Re: LM18 low sheer round chine
Posted: Thu Jul 18, 2019 1:42 pm
by Capt UB
OrangeQuest wrote: ↑Fri Jul 05, 2019 4:42 pm
hope you Mom starts feeling better.
Thanks OQ.
Re: LM18 low sheer round chine
Posted: Thu Jul 18, 2019 1:48 pm
by Capt UB
Looks like I will be able to work on the boat this weekend.....
Will finish installing the gunwales and add another layer of .25" x 1.50" pine lattice for the rub rail.
Re: LM18 low sheer round chine
Posted: Fri Jul 19, 2019 10:40 am
by Capt UB
Damn, did not know it's been over a year now...
LM18 low sheer round chine
Post by Capt UB » Thu Jun 14, 2018 8:33 pm
Re: LM18 low sheer round chine
Posted: Fri Jul 19, 2019 11:20 am
by Jeff
Happy building Capt UB!!! Jeff
Re: LM18 low sheer round chine
Posted: Mon Aug 05, 2019 12:28 pm
by Capt UB
Well, another weekend shot! Too many things to do and no time to build!!!
The rain here (DeLand, Cantal Florida), has cooled things down a bit....
Hopefully next weekend the deck goes on....
Re: LM18 low sheer round chine
Posted: Mon Aug 05, 2019 12:58 pm
by Jeff
Capt UB, hope you mom gets better soon!!! Jeff
Re: LM18 low sheer round chine
Posted: Mon Aug 05, 2019 2:29 pm
by Capt UB
Jeff wrote: ↑Mon Aug 05, 2019 12:58 pm
Capt UB, hope you mom gets better soon!!! Jeff
Thank you Jeff. Me too!
Re: LM18 low sheer round chine
Posted: Mon Aug 12, 2019 5:10 pm
by Capt UB
Re: LM18 low sheer round chine
Posted: Mon Aug 12, 2019 8:05 pm
by Bogieman
Re: LM18 low sheer round chine
Posted: Mon Aug 12, 2019 8:10 pm
by OrangeQuest
I like eating well too!
Re: LM18 low sheer round chine
Posted: Tue Sep 17, 2019 5:45 am
by Capt UB
First morning to wake up to 76° temp., it's been months of near 100° at 5 am. Hope this is a sign of building to start!
Re: LM18 low sheer round chine
Posted: Tue Sep 17, 2019 4:48 pm
by OrangeQuest
Capt UB wrote: ↑Tue Sep 17, 2019 5:45 am
First morning to wake up to 76° temp., it's been months of near 100° at 5 am. Hope this is a sign of building to start!
We have been seeing temps in the high 70s also. But we are also still getting into to high 90s and a few 3 digits too. Oh, and this week a tropical storm that came to be a few miles off the coast.
Re: LM18 low sheer round chine
Posted: Wed Sep 18, 2019 12:15 pm
by Capt UB
OrangeQuest wrote: ↑Tue Sep 17, 2019 4:48 pm
Capt UB wrote: ↑Tue Sep 17, 2019 5:45 am
First morning to wake up to 76° temp., it's been months of near 100° at 5 am. Hope this is a sign of building to start!
We have been seeing temps in the high 70s also. But we are also still getting into to high 90s and a few 3 digits too. Oh, and this week a tropical storm that came to be a few miles off the coast.
Hope some cool air comes our way soon. I took the SandPiper out the other day just for a ride.... Forgot my hat, forgot the sunscreen and forgot the cooler.... From 5 pm to 8 pm on the St. Johns River, 3 hour cruise. It was 98* and humid. Still a great ride, you will love that FS14 you are building.
Re: LM18 low sheer round chine
Posted: Sat Sep 21, 2019 9:10 am
by Capt UB
74° at 8:30am Got the windows opened!
Got to do alot of yard work in backyard for the SandPiper. Need to level out an area, maybe put down white gravel. I put her back there for the storms, but not on a level surface.
The Stiletto (LM18) is airing out, been covered for too long! With the weather as nice as it is, building will be in full swing now...
Mom's hip is healed very well. The doctor told her she can drive if she feel like it, she just turned 88 on the 16 of Sept. I think she is doing better then me and most of my friends, hell we are in our 50's and 60's!
Bob
Re: LM18 low sheer round chine
Posted: Sat Sep 21, 2019 2:31 pm
by ks8
Are you going to toss in a picture of the LM18 among all the weather reports? Or a cup of mixed epoxy with mixing stick, or sandpaper, or the clogged shopvac filter?
Re: LM18 low sheer round chine
Posted: Sat Sep 21, 2019 2:54 pm
by Capt UB
ks8 wrote: ↑Sat Sep 21, 2019 2:31 pm
Are you going to toss in a picture of the LM18 among all the weather reports? Or a cup of mixed epoxy with mixing stick, or sandpaper, or the clogged shopvac filter?
The SandPiper (FS14) parking spot. Just need to remove the trellis and level with gravel. Should have taken a photo before clearing the jungle. The Stiletto (LM18) will stay in the carport for now. Going to build a low ceiling boat shed in the backyard after I finish her.
Re: LM18 low sheer round chine
Posted: Sun Sep 22, 2019 1:04 pm
by ks8
Looks like it will be a good spot. Will there be any sort of canopy for the Sandpiper, or sun, clouds, and stars?
Re: LM18 low sheer round chine
Posted: Mon Sep 23, 2019 6:44 am
by Capt UB
ks8 wrote: ↑Sun Sep 22, 2019 1:04 pm
Looks like it will be a good spot. Will there be any sort of canopy for the Sandpiper, or sun, clouds, and stars?
Going to be room for both boats and yes a canopy. That photo is just showing half way done... Deck and arbor are going away.
Re: LM18 low sheer round chine
Posted: Mon Sep 23, 2019 9:37 am
by Jeff
Nice Capt UB!!! Jeff
Re: LM18 low sheer round chine
Posted: Mon Sep 23, 2019 10:17 am
by Bogieman
Re: LM18 low sheer round chine
Posted: Tue Sep 24, 2019 8:23 pm
by ks8
Re: LM18 low sheer round chine
Posted: Fri Sep 27, 2019 5:21 pm
by Capt UB
More vines pulled down and a few more small trees cut down. Going to be a great storage place for the boats. I think making a safe and easy access for the boats is just as important as the right tools.
Re: LM18 low sheer round chine
Posted: Sat Sep 28, 2019 5:52 pm
by ks8
Capt UB wrote: ↑Fri Sep 27, 2019 5:21 pm
I think making a safe and easy access for the boats is just as important as the right tools.
And servicing the trailer and its bearings.
Re: LM18 low sheer round chine
Posted: Mon Sep 30, 2019 9:32 pm
by Bogieman
Nice, CaptUB!
Re: LM18 low sheer round chine
Posted: Thu Oct 10, 2019 3:19 pm
by Capt UB
Got to work on the boat today!!!
I totally forgot how I mix my mixes!!!! It's been too long!
I did write down the formulas....
Working on the gunwales. First two of 6, fillet in, will need sanding to shape.
Re: LM18 low sheer round chine
Posted: Thu Oct 10, 2019 3:26 pm
by Bogieman
Glad you're getting a chance to work on the boat. Everything looks great too
Re: LM18 low sheer round chine
Posted: Thu Oct 10, 2019 10:00 pm
by Rtorres2411
Nice to see you are back at building
.
Re: LM18 low sheer round chine
Posted: Sat Oct 12, 2019 11:25 am
by Capt UB
Building the console, base will be 20", plans call for 22".

- FLATS.png (119.08 KiB) Viewed 1004 times
Got all parts cutout. Need to cleanup the cuts.... Wish I had a covered space to setup the right tools.. But a little wood flour will fix all....
Few more 1x4's to install in gunwale/side deck support.
Damn it feels good working on the boat again, the summer heat this year just about killed me!!
But I still feel the leftover pain from having the Shingles, almost a year now!!! Get you Shingles shots if you are over 50....
Re: LM18 low sheer round chine
Posted: Sat Oct 12, 2019 2:48 pm
by Capt UB
Need to sand and then glue up the supports and the fore/aft finish/frame 1x4 boards.
Re: LM18 low sheer round chine
Posted: Sat Oct 12, 2019 11:01 pm
by Bogieman
Looks really good, CaptUB! And you're right this summer was a hot one. Fall is in the air up here. Hope its cooling off nicely for you
Re: LM18 low sheer round chine
Posted: Sun Oct 13, 2019 5:49 pm
by Capt UB
Supports installed for the gunwales/side decks. Will tape in tomorrow. Thinking of covering the bottoms of the gunwale/side deck with plastic covered ply clamped to hold. Then pouring foam inside the spaces before putting down the deck.
Not pretty, but will be.... Got cleats glued in on center console, will be strong and with some fairing will be good looking CC.
Re: LM18 low sheer round chine
Posted: Mon Oct 14, 2019 9:57 am
by Dougster
Looks good to me. That seems like a clever idea, putting foam underneath the gunwales. The whole thing seems to be coming together pretty fast now.
Dougster
Re: LM18 low sheer round chine
Posted: Mon Oct 14, 2019 12:50 pm
by Capt UB
Just wanted to see what the deck would look like. Still need to trace the gunwales under the ply to cut out...
Re: LM18 low sheer round chine
Posted: Mon Oct 14, 2019 1:43 pm
by Capt UB
Ruff cut of the deck showing forward cockpit.
Re: LM18 low sheer round chine
Posted: Mon Oct 14, 2019 3:13 pm
by Jeff
Nice Capt UB!!! Jeff
Re: LM18 low sheer round chine
Posted: Mon Oct 14, 2019 3:40 pm
by Capt UB
Ruff cuts for gunwales/side decks, foredeck and aft deck.
Re: LM18 low sheer round chine
Posted: Mon Oct 14, 2019 7:03 pm
by Cbuf
Nice work. I'm no where near as clean and neat as you.
Cbuf.
Re: LM18 low sheer round chine
Posted: Mon Oct 14, 2019 8:17 pm
by Capt UB
Cbuf wrote: ↑Mon Oct 14, 2019 7:03 pm
Nice work. I'm no where near as clean and neat as you.
Cbuf.
Thank you.
Got a new leaf blower.... Works great on cut grass, leaves and Saw Dust!
Re: LM18 low sheer round chine
Posted: Mon Oct 14, 2019 8:18 pm
by Capt UB
Jeff wrote: ↑Mon Oct 14, 2019 3:13 pm
Nice Capt UB!!! Jeff
Thank you.
Re: LM18 low sheer round chine
Posted: Mon Oct 14, 2019 8:20 pm
by Capt UB
Bogieman wrote: ↑Sat Oct 12, 2019 11:01 pm
Looks really good, CaptUB! And you're right this summer was a hot one. Fall is in the air up here. Hope its cooling off nicely for you
Thanks.
Still in the upper 80's, but low humidity.
Re: LM18 low sheer round chine
Posted: Mon Oct 14, 2019 8:25 pm
by Capt UB
Dougster wrote: ↑Mon Oct 14, 2019 9:57 am
Looks good to me. That seems like a clever idea, putting foam underneath the gunwales. The whole thing seems to be coming together pretty fast now.
Dougster
Thanks.
Going to seal (epoxy) all areas under, inside and out before I pour the foam. Once the foam hardened (week) I'll coat the bottom of the foam under the gunwales with epoxy then primer/paint.
Re: LM18 low sheer round chine
Posted: Tue Oct 15, 2019 9:59 am
by Capt UB
LM18 low sheer
Looking at a grab bar (BBC's) instead of the console I was building (looks too big).
What height should I get, 42" or 36"?
How wide of a cooler can I put between the legs?
Maybe a cooler and a glassed in fuel tank box?
Can I run a wire bundle up the back leg?
Any problems with them?
Only thing is I need a place for the battery or 6 gal fuel tank. Battery can go under foredeck, fuel tank can't (not enough height for fill fittings). Maybe a center console box with no tower? I could build a box 18-20" wide, 36" long and 15-18" tall. Then mount a u-shape brag bar on the back of it. Glassed in fuel box (would hold a portable tank) as a CC seat with grab bar? No vent or fill to install!!
Re: LM18 low sheer round chine
Posted: Tue Oct 15, 2019 2:46 pm
by Reid
Capt UB,
The footprint for the grab bar is 16" wide (on center of pipe) and 12" deep. The clearance width would be 14.5" to clear the inside of the legs and 12.25" to clear the inside of the feet. I am 6' tall and would prefer the 36" height (we sell more 36" than 42"). We definitely have had people run wires through the legs in the past, not hard to do. I plan on doing that when I mount one on my FS18. As far as quality goes, they are built by a local shop in Stuart, FL. They do EXCELLENT work with very clean welds! Because of the size, shipping isn't that cheap but maybe you could drive down and pick one up when you are ready.
-Reid
Re: LM18 low sheer round chine
Posted: Wed Oct 16, 2019 10:49 am
by Capt UB
Reid wrote: ↑Tue Oct 15, 2019 2:46 pm
Capt UB,
The footprint for the grab bar is 16" wide (on center of pipe) and 12" deep. The clearance width would be 14.5" to clear the inside of the legs and 12.25" to clear the inside of the feet. I am 6' tall and would prefer the 36" height (we sell more 36" than 42"). We definitely have had people run wires through the legs in the past, not hard to do. I plan on doing that when I mount one on my FS18. As far as quality goes, they are built by a local shop in Stuart, FL. They do EXCELLENT work with very clean welds! Because of the size, shipping isn't that cheap but maybe you could drive down and pick one up when you are ready.
-Reid
Thanks Reid.
The coolers I use are a bit wider, Tundra 35 and 45 are 16" wide and my new Lifetime 77 is 19" wide.
Re: LM18 low sheer round chine
Posted: Wed Oct 16, 2019 10:54 am
by Dougster
I have the 36" one on my SK14. I'm 5'10 these days and wouldn't want it taller. It's a good fit and very sturdy. Never thought or running wires up the legs, great idea. I just measured mine and get 13 3/8" between the legs. Didn't measure the space between the feet, but a cooler could easily sit on them or if it has feet would sit above a bit.
Dougster
CC box
Posted: Thu Oct 17, 2019 8:56 am
by Capt UB
Dougster wrote: ↑Wed Oct 16, 2019 10:54 am
I have the 36" one on my SK14. I'm 5'10 these days and wouldn't want it taller. It's a good fit and very sturdy. Never thought or running wires up the legs, great idea. I just measured mine and get 13 3/8" between the legs. Didn't measure the space between the feet, but a cooler could easily sit on them or if it has feet would sit above a bit.
Dougster
Thanks for the information, my coolers are a bit wider.
I'm still thinking of making just a long rectangle (30" long, 15-18" tall, and no more then 20" wide. That way I'll have a place for the portable fuel tank and ? maybe a live well ?... I could mount a grab bar on the back.
CC box
Posted: Thu Oct 17, 2019 12:17 pm
by Capt UB
What I want:
.
.
What I'm going to build:
.

Re: LM18 low sheer round chine
Posted: Thu Oct 17, 2019 12:28 pm
by Jeff
Nice!!! Jeff
Re: LM18 low sheer round chine
Posted: Thu Oct 17, 2019 1:02 pm
by Capt UB
Jeff wrote: ↑Thu Oct 17, 2019 12:28 pmNice!!! Jeff
Jeff,
I'll still need a grab bar, just don't know how wide yet. The height will be 36" from what you guys say. May/will need flat panels on each leg to mount to box, plus I think a panel to mount some toys higher up. No rod holders.
Going to see if I can build the box this weekend, can't work on boat.... it's suppose to rain all weekend.
Re: LM18 low sheer round chine
Posted: Thu Oct 17, 2019 2:23 pm
by Reid
Capt UB,
If you are looking for us to have a custom grab bar made for you, we can certainly look into it. The grab bars we currently have made are made the same every time from a jig and we purchase them in quantities of 5, which is how we keep the cost down.
If you are wanting something custom you will need to get us exact specs of what you want. Obviously, the cost will be higher than the cost of the 36" ($290).
Reid
Center Console box LM18
Posted: Sat Oct 19, 2019 1:40 pm
by Capt UB
Cut the CC box, taped to hold. Looks good, but will round the edges and corners to soften the look and feel of the box.
Opening in back is for the 6 gal portable fuel tank. I'll be able to carry a backup 3 gal under the foredeck and swap out if needed. There is room for a small live well....
The grab bar will have to be 16" inside and 36" tall. It will mount on the back of the box, through bolted.
.
Re: LM18 low sheer round chine
Posted: Sun Oct 20, 2019 6:52 am
by Capt UB
Reid wrote: ↑Tue Oct 15, 2019 2:46 pm
Capt UB,
The footprint for the grab bar is 16" wide (on center of pipe) and 12" deep. The clearance width would be 14.5" to clear the inside of the legs and 12.25" to clear the inside of the feet. I am 6' tall and would prefer the 36" height (we sell more 36" than 42"). We definitely have had people run wires through the legs in the past, not hard to do. I plan on doing that when I mount one on my FS18. As far as quality goes, they are built by a local shop in Stuart, FL. They do EXCELLENT work with very clean welds! Because of the size, shipping isn't that cheap but maybe you could drive down and pick one up when you are ready.
-Reid
What I need is a 36" high, 16" INSIDE the feet and no bottom mounts (just open bottom). Would be nice 1.25" dia. tubing (more things mount on 1.25).
Bob
Re: :)∆π€¥ LM18 LS RC
Posted: Sun Oct 20, 2019 11:18 am
by Dougster
Agree on the 1.25. Mine's bigger and nothing much fits. You may need custom but it could well be worth the $ as the grab bar is pretty dang useful and nice to have. I mounted my sonar on mine:
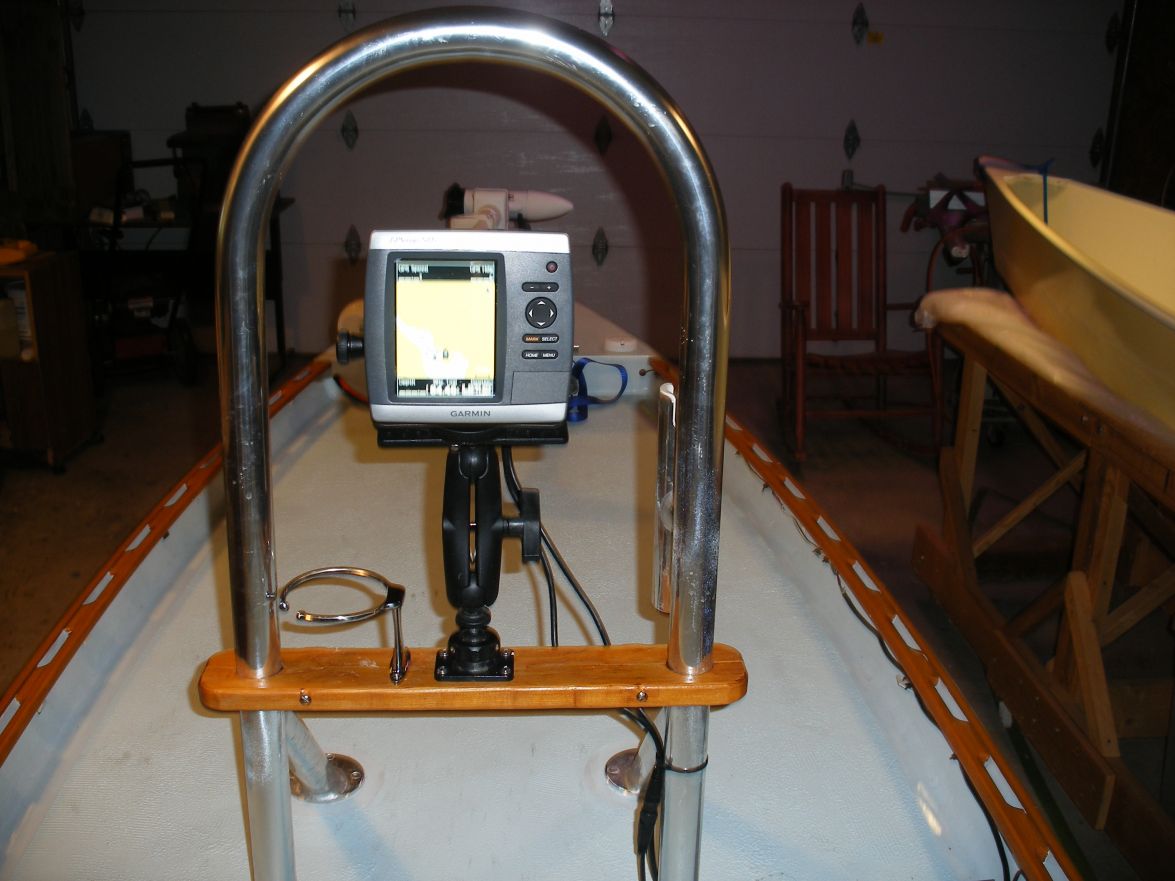
That center box seems nice, especially being able to use a portable fuel tank in it. I don't like under sole ones. Just something to worry about, and since I don't use my with 18 gallons in it enough, I end up worrying about bad gas every year and having to siphon some out. No problem with smaller portable.
Dougster
Re: :)∆π€¥ LM18 LS RC
Posted: Sun Oct 20, 2019 12:52 pm
by Capt UB
Dougster wrote: ↑Sun Oct 20, 2019 11:18 am
Agree on the 1.25. Mine's bigger and nothing much fits. You may need custom but it could well be worth the $ as the grab bar is pretty dang useful and nice to have. I mounted my sonar on mine:
That center box seems nice, especially being able to use a portable fuel tank in it. I don't like under sole ones. Just something to worry about, and since I don't use my with 18 gallons in it enough, I end up worrying about bad gas every year and having to siphon some out. No problem with smaller portable.
Dougster
I don't have the height under under the deck on the low sheer LM18. And like you said about the fuel.... I can run all day on a 3 gal portable with the 9.8 4 stroke on my FS14, but use a 6... Don't know what OB I'm going to put on the LM18, once done it will have to be under powered by the 9.8! I plan on a Yam 25/30 2 stroke, but a 4 stroke would be better...
Is that a BBC grab bar? I do like the way they are built. I need 16" between the tubes, so custom it is..
This is a setup I had on one of my Gheenoes, I was able to mount a lot of stuff!!

- 036.jpg (102.67 KiB) Viewed 1034 times
Re: :)∆π€¥ LM18 LS RC
Posted: Sun Oct 20, 2019 7:17 pm
by Capt UB
Got the box glued inside. Start sanding/shaping this week, something I can do when raining. Going to really soften the edges and corners then tape the seams and cover with light cloth (APA marine Fir) to stop checking.
Re: :)∆π€¥ LM18 LS RC
Posted: Sun Oct 20, 2019 10:24 pm
by Rtorres2411
Nice to see you making some headway there Capt. The LM18 is such an awesome looking boat.
Re: :)∆π€¥ LM18 LS RC
Posted: Mon Oct 21, 2019 5:52 am
by Capt UB
Rtorres2411 wrote: ↑Sun Oct 20, 2019 10:24 pm
Nice to see you making some headway there Capt. The LM18 is such an awesome looking boat.
Thanks, hopefully we will run into each other on the water soon...
Re: LM18 LS RC
Posted: Mon Oct 21, 2019 8:35 am
by Jeff
Nice progress Capt UB!!! Jeff
Re: LM18 LS RC
Posted: Mon Oct 21, 2019 9:08 am
by Capt UB
Jeff wrote: ↑Mon Oct 21, 2019 8:35 am
Nice progress Capt UB!!! Jeff
Thank you.
Re: LM18 LS RC
Posted: Mon Oct 21, 2019 10:16 am
by Bogieman
Really nice work! Your dog seems to love it too
Re: LM18 LS RC
Posted: Mon Oct 21, 2019 10:18 am
by Dougster
Capt.---yes, that's the BBC grab bar in my pic. It is quite solid and well made, but of course no 16" inside width.
Dougster
Re: LM18 LS RC
Posted: Mon Oct 21, 2019 2:48 pm
by Capt UB
This is what I'm going to have made..

- front cc box.jpg (16.25 KiB) Viewed 3792 times
Re: LM18 LS RC
Posted: Wed Oct 23, 2019 11:04 am
by ks8
Nice progress!
Woof!
Re: LM18 LS RC
Posted: Wed Oct 23, 2019 9:27 pm
by Capt UB
ks8 wrote: ↑Wed Oct 23, 2019 11:04 am
Nice progress!
Woof!
Re: :)∆π€¥ LM18 LS RC
Posted: Thu Oct 24, 2019 8:11 am
by fallguy1000
Capt UB wrote: ↑Sun Oct 20, 2019 7:17 pm
Got the box glued inside. Start sanding/shaping this week, something I can do when raining. Going to really soften the edges and corners then tape the seams and cover with light cloth (APA marine Fir) to stop checking.
IMG_20191020_180917000~2.jpgIMG_20191020_180853530~2.jpg
Make sure the glass wrap the box bottom Capt!
Those endgrains are a good place to wick any leaks.
All my marine plywood (Roseburg) has delaminated...all I did was epoxy coat it; no glass...
Best regards.
Re: LM18 LS RC
Posted: Thu Oct 24, 2019 10:36 am
by ks8
Capt UB wrote: ↑Wed Oct 23, 2019 9:27 pm
ks8 wrote: ↑Wed Oct 23, 2019 11:04 am
Nice progress!
Woof!
1230171533b~3.jpg
Now there's a case for adding a 'like' button to the forum!
The only other thought I have about a like button is that some post'ers may unjustifiably imagine their post was not appreciated by anyone if the like button is never clicked. And that is simply not true. I rarely 'like' posts, many of which I very much appreciate.
I simply cover too much ground across many sites, which makes thorough replies or even 'likes', a lower priority in the schedule. But a quick 'like' would be far more likely... and Woofie earned one!
re: delamination at the bottom of such a structure.... I laid on 3 or 4 seal coats at the bottom edge of cheap 1/4 inch exterior ply panels used for a utility trailer 'box'. They are fine after about seven years, while other areas of the cheap ply are becoming more problematic. But here's how I finished up those seals -- I setup the panels on edge with the bottom edge facing up, so I could literally build up a slight 'bead' of epoxy as the last coat. I used fast cure epoxy on that final bead, so I could watch it and keep it a bead as it 'set'. I also had all those coats extending 1 or 2 inches from the edge. Not saying that this will always completely prevent delamination, but I have no glass on those edges. Additionally, one might still get delamination if moisture gets in elsewhere on the panel, and it goes through any sort of freeze/thaw cycle in your regional climate. Freeze/thaw cracks open boulders, if water gets in there. So glassing the entire structure, and sealing the edges well, will certainly help more than just one or two quick seal coats. A good encapsulating lamination of glass certainly helps stabilize plywood panels, but any sort of 'less than ideal' climate with increase the need for inspection and maintenance. Maybe fallguy will post a picture of his delamination?
Re: :)∆π€¥ LM18 LS RC
Posted: Thu Oct 24, 2019 12:26 pm
by Capt UB
fallguy1000 wrote: ↑Thu Oct 24, 2019 8:11 am
Capt UB wrote: ↑Sun Oct 20, 2019 7:17 pm
Got the box glued inside. Start sanding/shaping this week, something I can do when raining. Going to really soften the edges and corners then tape the seams and cover with light cloth (APA marine Fir) to stop checking.
IMG_20191020_180917000~2.jpgIMG_20191020_180853530~2.jpg
Make sure the glass wrap the box bottom Capt!
Those endgrains are a good place to wick any leaks.
All my marine plywood (Roseburg) has delaminated...all I did was epoxy coat it; no glass...
Best regards.
Thanks Fallguy. I will be covering the whole box with a lite cloth (got it from BBC for my deck) and epoxy inside on all the ply, then painting both sides (in/out).
Re: LM18 LS RC
Posted: Thu Oct 24, 2019 12:31 pm
by Capt UB
ks8 wrote: ↑Thu Oct 24, 2019 10:36 am
Capt UB wrote: ↑Wed Oct 23, 2019 9:27 pm
ks8 wrote: ↑Wed Oct 23, 2019 11:04 am
Nice progress!
Woof!
1230171533b~3.jpg
Now there's a case for adding a 'like' button to the forum!
The only other thought I have about a like button is that some post'ers may unjustifiably imagine their post was not appreciated by anyone if the like button is never clicked. And that is simply not true. I rarely 'like' posts, many of which I very much appreciate.
I simply cover too much ground across many sites, which makes thorough replies or even 'likes', a lower priority in the schedule. But a quick 'like' would be far more likely... and Woofie earned one!
re: delamination at the bottom of such a structure.... I laid on 3 or 4 seal coats at the bottom edge of cheap 1/4 inch exterior ply panels used for a utility trailer 'box'. They are fine after about seven years, while other areas of the cheap ply are becoming more problematic. But here's how I finished up those seals -- I setup the panels on edge with the bottom edge facing up, so I could literally build up a slight 'bead' of epoxy as the last coat. I used fast cure epoxy on that final bead, so I could watch it and keep it a bead as it 'set'. I also had all those coats extending 1 or 2 inches from the edge. Not saying that this will always completely prevent delamination, but I have no glass on those edges. Additionally, one might still get delamination if moisture gets in elsewhere on the panel, and it goes through any sort of freeze/thaw cycle in your regional climate. Freeze/thaw cracks open boulders, if water gets in there. So glassing the entire structure, and sealing the edges well, will certainly help more than just one or two quick seal coats. A good encapsulating lamination of glass certainly helps stabilize plywood panels, but any sort of 'less than ideal' climate with increase the need for inspection and maintenance. Maybe fallguy will post a picture of his delamination?
Thanks and LIKE the reply...
I will be covering the box with cloth, and will have a edging (lip for bolts to hold the box down) around the bottom, so the end grain will never be open or just covered with epoxy, the light weight cloth will wrap around the edges.
At least that's the plan!
See the lip around the base of this console, I plan on doing this. The cloth will wrap around the lip.

- rough-water-center-console-23-x-22.jpg (11.33 KiB) Viewed 1018 times
Re: LM18 LS RC
Posted: Fri Oct 25, 2019 10:07 am
by Bogieman
Nice progress Capt UB! Love the dog too
Re: LM18 LS RC
Posted: Mon Oct 28, 2019 2:52 pm
by Capt UB
I OK'd the design of the grab bar and paid for it (less then $ 200). Should have it in a few weeks. It's not like most grab bars, top is not like a horse shoe, 16" wide (inside) and it's made with 1.25" dia. tubing. This is the company making it,
https://marinefiberglassdirect.com.
.
Re: LM18 LS RC
Posted: Mon Oct 28, 2019 4:16 pm
by Jeff
Good Capt UB!! Jeff
Re: LM18 LS RC
Posted: Tue Oct 29, 2019 9:23 am
by Dougster
That's cheaper than I thought it would be. Very nice to have it custom made to just the right specs.
Dougster
Re: LM18 LS RC
Posted: Fri Nov 01, 2019 9:38 am
by Capt UB
Going to try to build a locker in the console box. I was not sure if I had the skills or patience to build the locker lid and box top for the lid, on the LM18. I am going to try on the console box.
Re: LM18 LS RC
Posted: Fri Nov 01, 2019 10:41 am
by Bogieman
Nice! I might have to give them a call for stern rails. Haven’t had any luck anywhere
Re: LM18 LS RC
Posted: Fri Nov 01, 2019 1:13 pm
by Capt UB
Bogieman wrote: ↑Fri Nov 01, 2019 10:41 am
Nice! I might have to give them a call for stern rails. Haven’t had any luck anywhere
I'd check with Jeff first, he has the drawings in hand and a local welder. Draw it up and see if he can help. I think you posted a drawing of what you wanted, pm me the drawing, I'll see if I can find something made for another boat! They should be SS 1" dia.
Re: LM18 build in DeLand
Posted: Fri Nov 01, 2019 2:48 pm
by ks8
Digging back a bit...
Capt UB wrote: ↑Fri Aug 10, 2018 9:46 am
Well the FS14 build is coming to an end. I have lots of notes of what I did wrong and how I fixed it or replaced/removed the problem. And lots of notes on how to do things much better!!
This time going to build like I was coding (writing programming code), one line at a time from a (ladder logic-diagram) style list on a dry erasable board mounted on the carport wall.
So have you been tracking the LM18 with git? If only we could simply backup a few commits when there is an epoxy mix goofup!
Is the Sandpiper building sea time in the mean time?
Re: LM18 LS RC
Posted: Fri Nov 01, 2019 6:44 pm
by Bogieman
Capt UB wrote: ↑Fri Nov 01, 2019 1:13 pm
Bogieman wrote: ↑Fri Nov 01, 2019 10:41 am
Nice! I might have to give them a call for stern rails. Haven’t had any luck anywhere
I'd check with Jeff first, he has the drawings in hand and a local welder. Draw it up and see if he can help. I think you posted a drawing of what you wanted, pm me the drawing, I'll see if I can find something made for another boat! They should be SS 1" dia.
Ok I’ll do that. Thank you!
Baitwell build
Posted: Sun Nov 03, 2019 3:20 pm
by Capt UB
The console box is ready to be finished. Going to slide the 6 gal portable fuel tank in to the side of the box instead of the back. There is enough room between the gunwale and box to do that. The rest of the box will be a cooler or baitwell.
.
Re: LM18 LS RC
Posted: Fri Nov 08, 2019 6:23 pm
by ks8
nice
Re: LM18 LS RC
Posted: Fri Nov 15, 2019 5:45 pm
by VT_Jeff
Capt UB,
Just went through this front to back today(or back to front maybe) and learned a ton!. I'm just getting started with an FS14 LS and got a lot of great ideas from your build, you do a great job with the photos and descriptions, really helpful. Keep up the good work, your boat is going to be awesome.
Thanks,
Jeff
Re: LM18 LS RC
Posted: Sun Nov 24, 2019 7:34 pm
by Capt UB
Box is on hold....
Installing the two pieces of the foredeck going with butt joints using some scrap 3/8" Okoume.
Will first coat the bottoms of the panels with a neat coat of epoxy, then make a little wood flour glue and glue the ply butts joints down.
Should be able to glue the deck down in a day or two.
If all goes well, will glue down aft deck the same day.
As I have done in the past, butt joints on all joints/seams like the the cockpit deck, aft/foredeck and side decks/gunwales. Did not do butt joints on the hull panels because they had BBC's Puzzle joints (two boats).
Should be very strong and when I cutout the deck for the hatch, I can if needed add some support.
Bob
.
Re: LM18 LS RC
Posted: Mon Nov 25, 2019 12:06 pm
by Eric1
Nice Bob!!
Re: LM18 LS RC
Posted: Mon Nov 25, 2019 12:22 pm
by Jeff
Nice Capt UB!!! Jeff
Re: LM18 LS RC
Posted: Mon Nov 25, 2019 12:28 pm
by OrangeQuest
I am going to agree with everyone else, very nice looking.
Re: LM18 LS RC
Posted: Mon Nov 25, 2019 5:23 pm
by ks8
Nice
If you (or the heaviest crew you expect might join you) plan to stand up there, ever, you may want to frame around the hatch cutout, extending to the sides, and or bow and aft frame.
Bounce that one off JM. It might not need it if the deck will be sitting right on the flotation foam, but even then (you know me
) I like the look of a hatch cutout nicely framed for extra strength (to make up for what was lost with the cutout). The dimensions on those framing battens depend on the boat and the cutout size, etc. I don't remember the structure that is already under your deck, if any. Enjoy researching, planning, deciding and doing, and doing it right, whatever that might turn out to be.
Re: LM18 LS RC
Posted: Mon Nov 25, 2019 6:23 pm
by Capt UB
Well one year ago I found out I had Shingles.... Still a lot of damage/pain on the left shoulder and left arm!
Get your SHINGLES SHOT!!!!
.
Got butt joints glued down. Wood flour and epoxy.
I did not do a neat coat of epoxy, just made the glue a bit wet. Used a chip brush to do a trowel like coat on ply. Because of the seam length, had to use some drywall screws to pull both sides together. Using BBC's MarinEpoxy with slow hardener and their wood flour.
.
Re: LM18 LS RC
Posted: Mon Nov 25, 2019 7:00 pm
by Jeff
Nice work Capt UB!!! Jeff
Re: LM18 LS RC
Posted: Tue Nov 26, 2019 7:28 am
by Capt UB
Thanks Jeff.
Re: LM18 LS RC
Posted: Tue Nov 26, 2019 9:48 am
by Bogieman
She's looking great, CaptUB!
Re: LM18 LS RC
Posted: Tue Nov 26, 2019 10:07 am
by Eric1
Nice work Capt. Bob!!
Re: LM18 LS RC
Posted: Tue Nov 26, 2019 5:36 pm
by Capt UB
Well got something done on the old girl today...
Wiped down the the whole bottom of the fordeck and did a little sanding to knock down the screw holes.
I put a small drop of epoxy in each screw hole, then added a bit of filler and did a neat coat over the whole back.
Almost forgot to put in the 1/2 pvc pipe for the bow nav light. The deck is too low to use Shark Eyes, to bad would have looked cool at night! Cool and dead, seen and alive is better!
The last photo is the top of the deck, before I filled in the screw holes from the bottom. Came out nice and flat/even.
Before gluing the deck down, I'll sand where there will be contact between the bottom of the deck and cleats. I'll also coat the foam in the bow on top to add a bit more sealing of the foam.
.
Re: LM18 LS RC
Posted: Wed Nov 27, 2019 4:50 am
by Eric1
Nice!
Re: LM18 LS RC
Posted: Wed Nov 27, 2019 7:21 am
by Jeff
Nice work Capt UB!!! Jeff
Re: LM18 LS RC
Posted: Wed Nov 27, 2019 11:15 am
by ks8
Time to layout deck bling, or are you keeping it clear for fishing line(s)?
Re: LM18 LS RC
Posted: Thu Nov 28, 2019 3:13 pm
by Capt UB
ks8 wrote: ↑Wed Nov 27, 2019 11:15 am
Time to layout deck bling, or are you keeping it clear for fishing line(s)?
With my Fly casting skills, I too need to stay off the deck!
Thinking of a Cheap 12vt. clamp troiling motor, using a Gheenoe mount/stick anchor on the bow. I have never needed one, but sometimes I'll be using the LM18 in fresh water.
Will have a small LED 2 nm Nav light right on the bow and a fold down 8" SS cleat. That's it, not sure with way to go with stripping, bag, tub, none...
No deck bling, just 14 ft. x 10" STILETTO knife vinyl graphics with a bit of red dripping off the blade, will have it on both sides! How's that for some Bling!?
Re: LM18 LS RC
Posted: Sat Nov 30, 2019 6:38 pm
by Capt UB
Added some cleats to the supports for the foredeck. Last minute do.....
.
Re: LM18 LS RC
Posted: Sat Nov 30, 2019 8:22 pm
by Bogieman
Nice progress CaptUB! I like the idea for the knife graphic too
Re: LM18 LS RC
Posted: Sun Dec 01, 2019 10:40 am
by Rtorres2411
Nice progress Capt.
Ruben
Re: LM18 LS RC
Posted: Sun Dec 01, 2019 1:17 pm
by ks8
Bloody bling!
Oooh.... foam!
Re: LM18 LS RC
Posted: Sat Dec 14, 2019 3:04 pm
by Capt UB
So I decided to cut up the casting/fore deck for ease of handling. Glad I did, Central Florida weather turned hot.....
So the front part of the fore deck (no storage under this, just a 5" round screw in/out inspection hatch), is glued in. Found the hull/bow pulled down from the deck a bit. No big deal, a little wood flour fixed that.
Now that the next area has more support, just laying the deck down you can feel how sound it is. When I cutout for the hatch I can add more cleats if needed.
I now regret painting the inside of the front storage area, will need to sand and repaint later.
.
Re: LM18 LS RC
Posted: Sat Dec 14, 2019 4:21 pm
by Capt UB
Well got some things done today!
Got the next part of the deck glued down.
Tomorrow I hope to sand the fore deck and seal the ply. I still need to install the side decking and aft deck. That part will be a bit later.
.
Re: LM18 LS RC
Posted: Sun Dec 15, 2019 7:57 am
by Capt UB
Things are looking good. I'm glad I did not make the foredeck (got the spell check fixed) bigger. There is enough room for a casting platform or a big cooler.
I hope to get more done in the next few days. I have not done any cleanup yet, sanding shaping....
.
Re: LM18 LS RC
Posted: Sun Dec 15, 2019 9:45 am
by Bogieman
She's looking great, CaptUB!
Re: LM18 LS RC
Posted: Sun Dec 15, 2019 10:34 am
by Capt UB
Bogieman wrote: ↑Sun Dec 15, 2019 9:45 am
She's looking great, CaptUB!
Thanks.
Re: LM18 LS RC
Posted: Mon Dec 16, 2019 6:13 am
by OrangeQuest
Yes, Looking good!
Re: LM18 LS RC
Posted: Mon Dec 16, 2019 8:35 am
by Jeff
Nice!! Jeff
Re: LM18 LS RC
Posted: Sat Dec 21, 2019 2:37 pm
by ks8
NIce
I had laid down masking paper in my pre-painted underseat compartments, before gluing down the seat tops. I was able to get under them through hatch openings, so I could smooth the fillets, and later remove the masking paper. This preserved the painted areas during the glue up, eliminating the need to re-sand and re-paint them. Not sure if that will help you in other sections of the build. You could pull out masking paper through the hatch opening, once you cut that out.
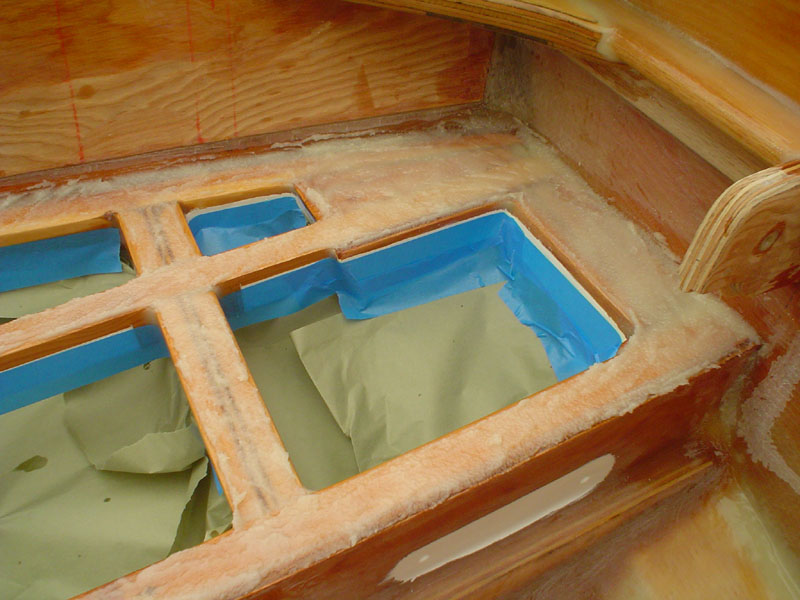
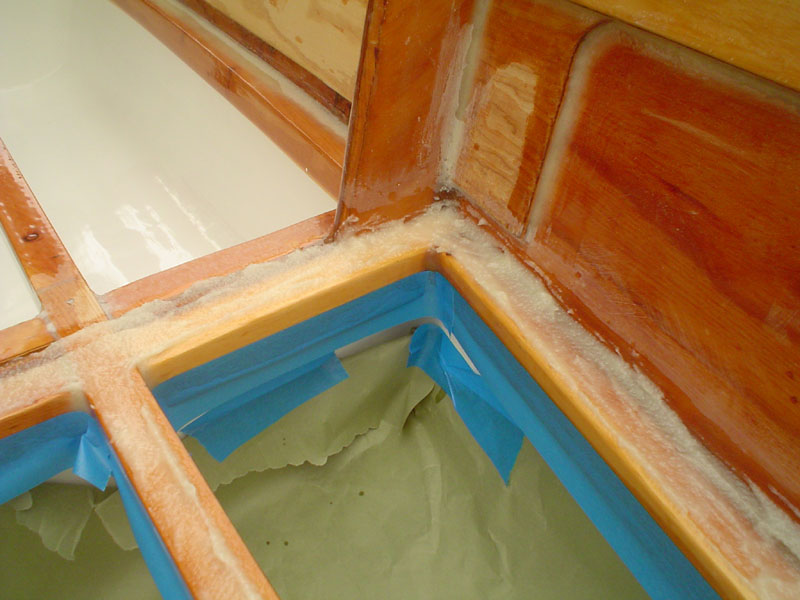
And after it is glued down, and the masking is removed...
Actually, I pulled the paper after the fillets had been smoothed, since they would not run anymore (I used that sort of thixotropic blend), and while smoothing the uncured fillet, some had spread over the masking tape edges. Since they were not yet cured, after I pulled the tape, I was able to smooth them a little more where the tape edge had been. I'm thinking they might well outlast me, being mostly protected in those compartments, although I do need to wipe them down once or twice a season from humidity and mold trying to get started with its ugly funky thing.
I had planned hatch openings positioned and big enough for me to reach in there enough, but it is a bit of a contortionist operation.
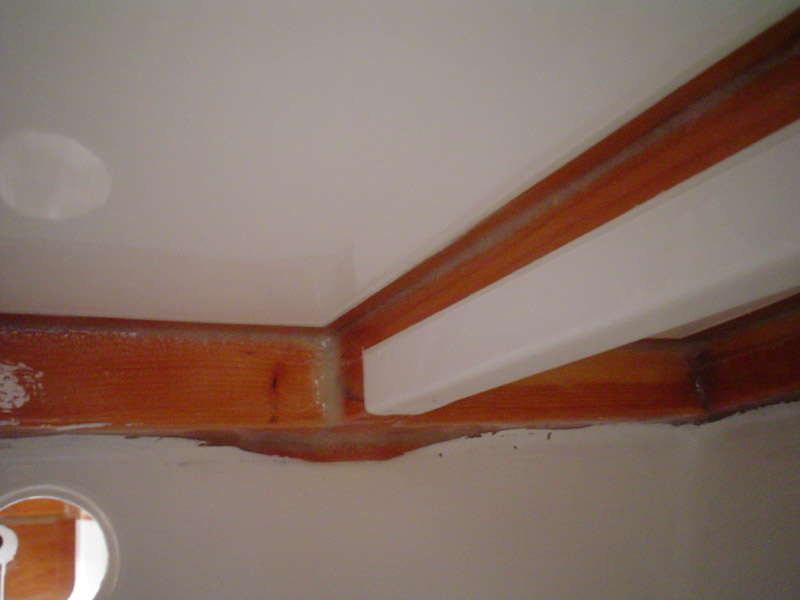
It is a little extra work, but it saves much more work later. Frustrating is the masking tape expense.


Re: LM18 LS RC
Posted: Sat Dec 21, 2019 10:15 pm
by Fuzz
I am not sure the underside of an LM18 is supposed to look that nice
Re: LM18 LS RC
Posted: Sun Dec 22, 2019 10:36 am
by Capt UB
Fuzz wrote: ↑Sat Dec 21, 2019 10:15 pm
I am not sure the underside of an LM18 is supposed to look that nice
That's Ks8's CV16 Caravelle.
Re: LM18 LS RC
Posted: Sat Dec 28, 2019 12:14 am
by ks8
I'm pretty sure I don't want to sand and paint a compartment interior through a hatch hole, if I can do it before the compartment top is glued down. But there is some work in that too, planning and taping and masking... much easier than sanding through a hatch. And now, over ten years later, my body complains more loudly with some of that bending aound. You know I could actually squeeze my 6 foot 1.5 inch body into that cv16 cuddy, and shut the hatch... back then.
Not anymore!
but doing that with a curved fore deck was much more of a project! Look for it in my gallery if you want to see what that took! I'd rather not relive it right now.
Here we need more pictures of an LM18, and its shaping together nicely
Re: LM18 LS RC
Posted: Sat Dec 28, 2019 11:04 am
by Capt UB
Going to finish the aft deck storage area. Add some more cleats and backing for the poling platform. Going to turn the sides areas into their own compartments leaving the center open. So three hatches on the aft deck.
Re: LM18 LS RC
Posted: Sat Dec 28, 2019 5:32 pm
by Bogieman
Nice!
Re: LM18 LS RC
Posted: Mon Dec 30, 2019 1:48 pm
by Capt UB
Well I tried to work on her.... Rain and wind got the best of me!!
I did find a build that the rain could not stop....
Funny thing my dog Hope does not like the rain... As soon as the roof was up, she came out..... About 200000000 screws...... $ 350 with floor frame.
Two days of rain and wind, but it came out nice. Now I can make some room in the carport to work on the LM18 easier.

- 1577577617629.jpg (19.73 KiB) Viewed 1829 times
Re: LM18 LS RC
Posted: Mon Dec 30, 2019 2:23 pm
by Jeff
Nice Capt UB!!! Jeff
Re: LM18 LS RC
Posted: Wed Jan 01, 2020 4:52 pm
by ks8
Nice.
hmmm...
DeLand, Florida...
What's your plan for anchoring that structure down? Did you use those big ground screws? That's what was done with a shed we had in Bradenton, and a few days I was mighty glad of it, and that was a heavy stick and frame shed, with a lot of weight on its floor holding down even more. Thoughts?
I put the thin blue foam insulation on the ceiling in that shed and it dropped the summer temps in there by 20 deg F or more. What heat was then trapped between the foam board and the roof would mostly vent out a peak vent. I left a one inch gap between the walls and the celing foam board so the air could flow up and between the insulation and roof, and up out the peak. Made all the difference when I needed to do some work in there, and made me a bit more comfortable with Gas storage in there. Both I and the neighbor didn't think it would make that much of a difference, but wow! Enjoy the storage and the increased room for the boat work.
Re: LM18 LS RC
Posted: Wed Jan 01, 2020 5:10 pm
by Capt UB
ks8 wrote: ↑Wed Jan 01, 2020 4:52 pm
Nice.
hmmm...
DeLand, Florida...
What's your plan for anchoring that structure down? Did you use those big ground screws? That's what was done with a shed we had in Bradenton, and a few days I was mighty glad of it, and that was a heavy stick and frame shed, with a lot of weight on its floor holding down even more. Thoughts?
I put the thin blue foam insulation on the ceiling in that shed and it dropped the summer temps in there by 20 deg F or more. What heat was then trapped between the foam board and the roof would mostly vent out a peak vent. I left a one inch gap between the walls and the celing foam board so the air could flow up and between the insulation and roof, and up out the peak. Made all the difference when I needed to do some work in there, and made me a bit more comfortable with Gas storage in there. Both I and the neighbor didn't think it would make that much of a difference, but wow! Enjoy the storage and the increased room for the boat work.
4 big ground screws. Going to seal all seams, hope to keep out the wasps and rain.
It was fun removing the old one...
Re: LM18 LS RC
Posted: Fri Jan 03, 2020 11:59 pm
by ks8
Glad it was fun!
Re: LM18 LS RC
Posted: Sat Jan 04, 2020 11:03 pm
by Bogieman
Very nice, CaptUB!
Re: LM18 LS RC
Posted: Tue Jan 07, 2020 5:40 pm
by Aripeka Angler
Happy birthday Bob
For a 101 year old, you’re doing pretty good
Re: LM18 LS RC
Posted: Tue Jan 07, 2020 7:12 pm
by Capt UB
Aripeka Angler wrote: ↑Tue Jan 07, 2020 5:40 pm
Happy birthday Bob
For a 101 year old, you’re doing pretty good
Thanks..... I saw that, date!
Re: LM18 LS RC
Posted: Tue Jan 07, 2020 8:10 pm
by Jeff
Capt UB, Happy Birthday but not 101!!!! Jeff
Re: LM18 LS RC
Posted: Wed Jan 08, 2020 3:53 pm
by Capt UB
Jeff wrote: ↑Tue Jan 07, 2020 8:10 pm
Capt UB, Happy Birthday but not 101!!!! Jeff
Thanks Jeff,
It's how I feel at times...
Re: DeLand LM18 LS RC
Posted: Thu Mar 12, 2020 7:29 pm
by Capt UB
Going to take a week off to finish the aft deck and compartments. If it works out, I maybe able to finish the gunwales too.
These photos are how things are now.
Re: DeLand LM18 LS RC
Posted: Thu Mar 12, 2020 7:50 pm
by OrangeQuest
Ohhh, that looks nice with everything on it. Hope you get it done.
Re: DeLand LM18 LS RC
Posted: Fri Mar 13, 2020 8:34 am
by Jeff
Nice Capt UB!!! Jeff
Re: DeLand LM18 LS RC
Posted: Fri Mar 13, 2020 9:43 am
by Bogieman
Looks great! Build on CaptUB!
Re: DeLand LM18 LS RC
Posted: Tue Apr 28, 2020 2:23 pm
by Capt UB
Well I'm going to try again.... Got 9 days off...... 23-31 of May.
.
.
.
.
This was in March 12..... Did not happen!!!
.
Going to take a week off to finish the aft deck and compartments. If it works out, I maybe able to finish the gunwales too.
Re: DeLand LM18 LS RC
Posted: Tue Apr 28, 2020 2:40 pm
by Jeff
Enjoy Capt UB!! Jeff
Re: DeLand LM18 LS RC
Posted: Tue Apr 28, 2020 6:41 pm
by OrangeQuest
I hope working on your boat helps you relax Capt UB!! Good luck.
Re: DeLand LM18 LS RC
Posted: Tue Apr 28, 2020 7:48 pm
by Coach
Looking good CaptUB! Enjoy the time off doing something you enjoy!
Re: DeLand LM18 LS RC
Posted: Wed Apr 29, 2020 5:41 am
by cape man
Build on!
Giving away my unfinished LM 18 Hull
Posted: Sat May 30, 2020 10:27 am
by Capt UB
LM18 Round Chine Low Sheer, from a BBC CnC kit.
https://forums.bateau2.com/viewtopic.php?f=6&t=65012
I live in DeLand, Fl. That's west of Daytona Beach, north of Orlando...
Giving away just the unfinished boat and the strong back.
What you see is what you get. You will be able title it.
The hull needs to be finished, glass is done but not the fairing, painting...
Inside, needed deck completed.....
Re: Giving away my LM18
Posted: Sat May 30, 2020 10:32 am
by Capt UB
LM18 Round Chine Low Sheer, from a BBC CnC kit.
https://forums.bateau2.com/viewtopic.php?f=12&t=63302
I live in DeLand, Fl. That's west of Daytona Beach, north of Orlando...
Giving away just the unfinished boat and the strong back.
What you see is what you get. You will be able title it.
The hull needs to be finished, glass is done but not the fairing, painting...
Inside, needed deck completed.....
Here are the last pictures, done today...
.
.
This is the strong back
0111191603~2.jpg
This is what she could look like with deck
IMG_20191014_150013873~2 (1).jpg
.
These are todays photos...
.
IMG_20200530_084413884.jpg
IMG_20200530_084300257.jpg
IMG_20200530_084452155.jpg
IMG_20200530_084437466.jpg
Re: Giving away my LM18
Posted: Sat May 30, 2020 1:28 pm
by Capt UB
I'm buying a Catalina 22 sailboat or AMF Sunbird sailboat, don't have the time or need for this boat build. My Batesu FS14 SandPiper will get a little of a facelift.
Re: Giving away my LM18
Posted: Sat May 30, 2020 2:20 pm
by fallguy1000
Just glad you are well. Best of luck.
Re: Giving away my LM18
Posted: Sat May 30, 2020 3:47 pm
by Capt UB
Re: Giving away my LM18
Posted: Mon Jun 01, 2020 1:33 pm
by Jwhitakeriii
Capt UB wrote: ↑Sat May 30, 2020 10:32 am
LM18 Round Chine Low Sheer, from a BBC CnC kit.
https://forums.bateau2.com/viewtopic.php?f=12&t=63302
I live in DeLand, Fl. That's west of Daytona Beach, north of Orlando...
Giving away just the unfinished boat and the strong back.
What you see is what you get. You will be able title it.
The hull needs to be finished, glass is done but not the fairing, painting...
Inside, needed deck completed.....
Here are the last pictures, done today...
.
.
This is the strong back
0111191603~2.jpg
This is what she could look like with deck
IMG_20191014_150013873~2 (1).jpg
.
These are todays photos...
.
IMG_20200530_084413884.jpg
IMG_20200530_084300257.jpgIMG_20200530_084452155.jpg
IMG_20200530_084437466.jpg
I missed something I guess. Hate to see you couldn't finish the lm18. Best of luck


