CX19 progress updates Perth WA

To help other builders, please list the boat you are building in the Thread Subject -- and to conserve space, please limit your posting to one thread per boat.

Please feel free to use the gallery to display multiple images of your progress.
gerry
Frequent Poster
Frequent Poster
Posts: 97
Joined: Sat Feb 05, 2005 9:49 pm
Location: Western Australia
Contact:

Post by gerry »

An update so far on the CX19. I have laminated all the Stringers, cut the notches for frames and the clamping board. The two sheets of ply making up the transom have been laminated. I have cut the Clamping board to the plans specs and everything is aligning correctly so far.

I have cut out all the hull panels and am currently joining them together, but while I am doing that I need to double check on laminating the clamping board to the transom.

It seems to make sense to glue it now. It is sitting pretty flat on transom at the moment. I will still need to make sure not to create a curved transom from clamping though.

So I am hoping someone is able to answer this, is it better to glue the clamping board on now or after the hull is flipped and the inside has been taped and glassed? If I do laminate it now does the inside of the transom need to be glassed first, is there any advantage in that? I think I have now answered my own question I will glue it on today, ready for the weekend!

Image

The clamping board is mahogany and was a rough cut plank so have only sanded the sides but can make the inside a smooth surface if necessary.

gerry
Frequent Poster
Frequent Poster
Posts: 97
Joined: Sat Feb 05, 2005 9:49 pm
Location: Western Australia
Contact:

Post by gerry »

Back again, have been busy with the bottom and side panels last month. They proved very difficult to move with one person. I had to make a light cradle for the bottom panels to support two panels at once without snapping them at the joints!

I have many pictures that are not that crash hot from the video camera, but will still try to post the better ones here as I go. But, if interested, all the thumbnails are at http://stitchandglue.hobby-site.com/CX19/ of my progress so far....list is slowly getting crossed off!!

Are there any other completed CX19's out there? I am still searching?

Hopefully this weekend I will be able to join the panels and finally see the shape of a CX19.

Gerry

gerry
Frequent Poster
Frequent Poster
Posts: 97
Joined: Sat Feb 05, 2005 9:49 pm
Location: Western Australia
Contact:

Post by gerry »

I have begun to stitch the hull panels together and this by the looks of it is going to take all weekend! So back reading other posts on getting the stitching right.

The larger this forum gets, the more difficult ( more time ) it is taking to search and read all the information, tips and tricks, and then view all the images for a particular task. A moderated wiki on each building step with referenced photos, would be really great. As this is the first boat after a canoe, I am discovering it has a whole new set of challenging issues.

Will give it another go tomorrow and the bottom four panels should be touching at the bow. Then I can fix the hook I can see developing over frame E.

I am still looking at all the forums/photos from WobblyLegs, JimW, bwb, Kingfish, and Shine, plus many others and these have been a fantastic help...

Also, am wondering how are you going on your CX19, JTBear67?

Daniel Huckleberry
Very Active Poster
Very Active Poster
Posts: 862
Joined: Mon Jun 19, 2006 12:40 pm
Location: Fairhope, Alabama

Post by Daniel Huckleberry »

Hey Gerry

Somehow missed your photo link before. Great documentation and workmanship. I have really wanted to see one of these big boats come together. I would love to have one but can't bring myself to make that large of a commitment!

Build on and good luck

Huck

User avatar
Cracker Larry
* Bateau Builder - Expert *
Posts: 22491
Joined: Fri Mar 11, 2005 3:39 pm
Location: Savannah, GA

Post by Cracker Larry »

Gerry, I also missed this before. Agree with Huck, that is both great work and documentation. I will spend some time looking at all that. Very nice :!: Thanks for sharing. It makes me tired to think about all that work 8O
Completed GF12 X 2, GF16, OD18, FS18, GF5, GF18, CL6
"Ships are the nearest things to dreams that hands have ever made." -Robert N. Rose

gerry
Frequent Poster
Frequent Poster
Posts: 97
Joined: Sat Feb 05, 2005 9:49 pm
Location: Western Australia
Contact:

Stitching Panels

Post by gerry »

Thanks for the feedback...well it was a bit of a mission getting the panels stitched together because I could not work out why the transom was not lining up properly.

At first I thought it was the jig, and then that the transom was not straight, but they were ok. I went and bought a 8 foot straight edge and still could not find it. I let it sit for a day and remeasured everything again, but it all seemed ok.

After poking around taking more photos, I finally found what was stopping the transom sitting properly, the stringer knee seems to be out on one side. I will have to take it the transom off again and see where I went wrong. I really do not want to see a twisted boat when I finally can take it outside and look at it at a distance, which is one downside of building it in a shed.

It is very close I think to being ready to tack weld together. The bow mold was very useful. I have put some more pictures in the gallery and the rest of the thumbnails are at http://stitchandglue.hobby-site.com/stitch_up_1/

gerry
Frequent Poster
Frequent Poster
Posts: 97
Joined: Sat Feb 05, 2005 9:49 pm
Location: Western Australia
Contact:

Post by gerry »

I finally got the transom to sit right again. One stringer at the front was also sitting to low in the frame notches, so now all the stringers at the front are braced level with the sole floor. They can not be forced down by the bottom panels. I also took a little off the edges of the stringer knees and the transom fits flush now with the engine bay sides, if you push it.

I can even out the chine lines and should be able to "tack weld" next week end. Only took four days but should be a lot quicker next time!!

gerry
Frequent Poster
Frequent Poster
Posts: 97
Joined: Sat Feb 05, 2005 9:49 pm
Location: Western Australia
Contact:

Post by gerry »

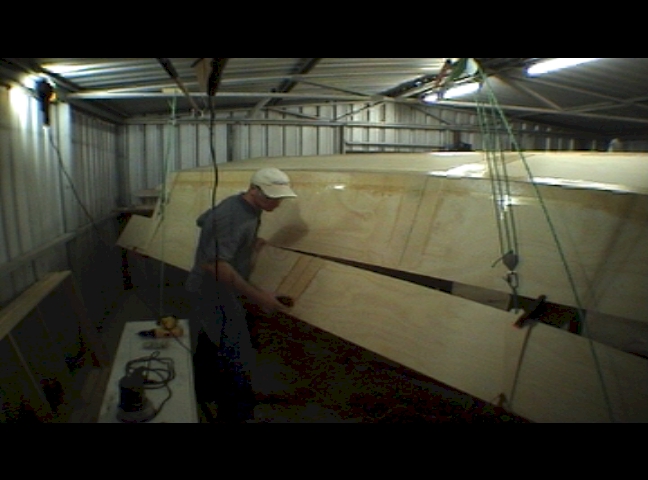
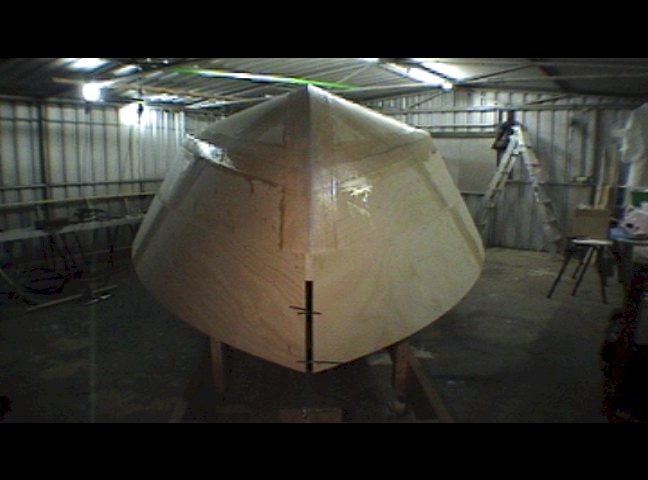
I am starting to find out this is not exactly a small boat. Trying to get better at breaking tasks down to four hour stints!

Image

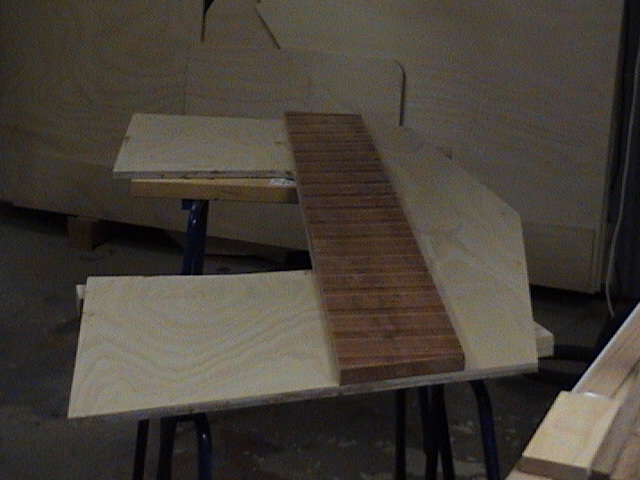
I have now joined the top side panels with tape. I made each side identical first while each was still in three pieces with a low angle block plane. The bottom and lower side panels were difficult to move when joined, hence the pine cradle under the top panels now. It does make it easier to move long thin panels and also work with them on the floor with clamps.

Image

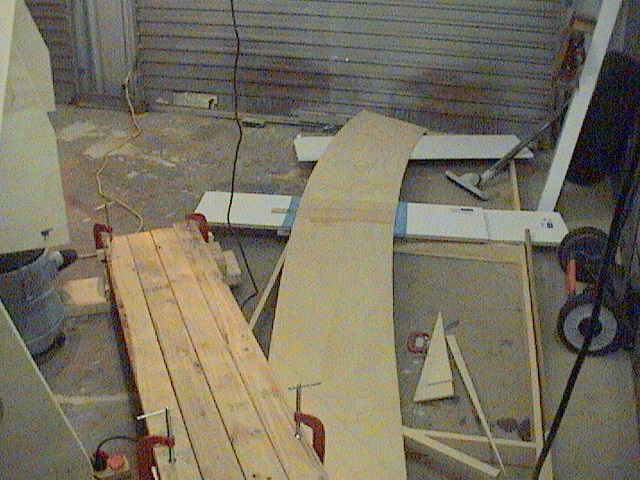
The four pine lengths were to walk on while taping the chine. I did not want to move the top panels yet as was raining outside!!

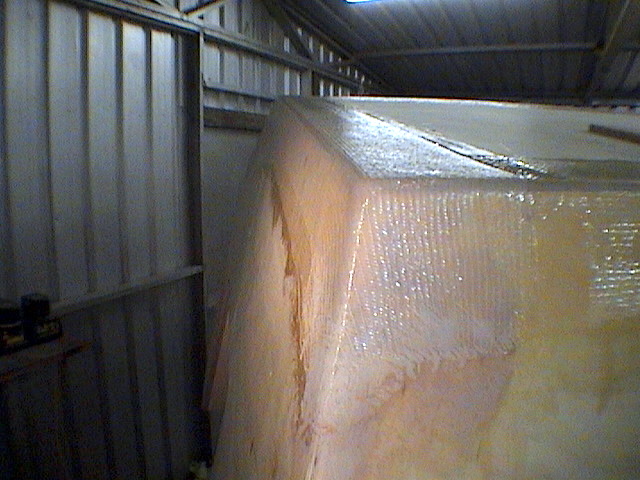
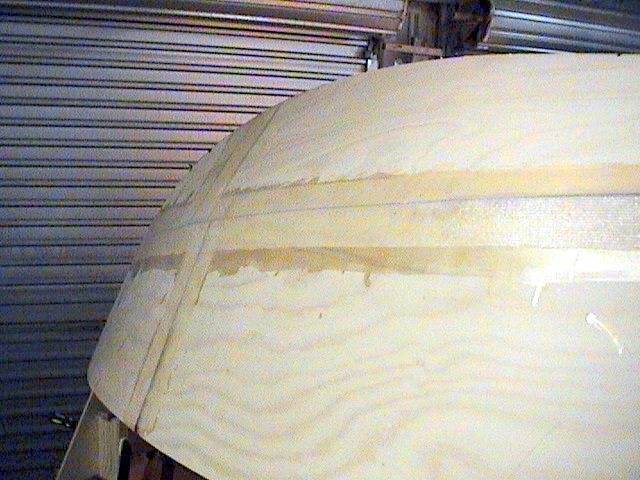
This weekend I taped both chines at one per day. It took about 4 hours each side with most of the time used getting the air bubble out between the fibre threads with a roller.

I did the whole 20ft length of tape in one hit. I split the resin in three equal amounts. The first wetted out the tape region with a squeegie (1" plastic putty knife) marked with a pencil. Then the biaxial tape was rolled on and patted down using gloves. The second resin was mixed and spread on to the tape with the the squeegie again. The tape was almost all wet by this time. The third portion of resin was spread on tape sections that were still not wet yet. A metal roller and a bright light was used to roll out the bubbles and excess resin which was minimal. Scales make it very simple now not to waste resin. The air bubbles which looked like very thin slivers of silver between the threads were time consuming to remove? Figured I had better try and remove them then regret it the next day.

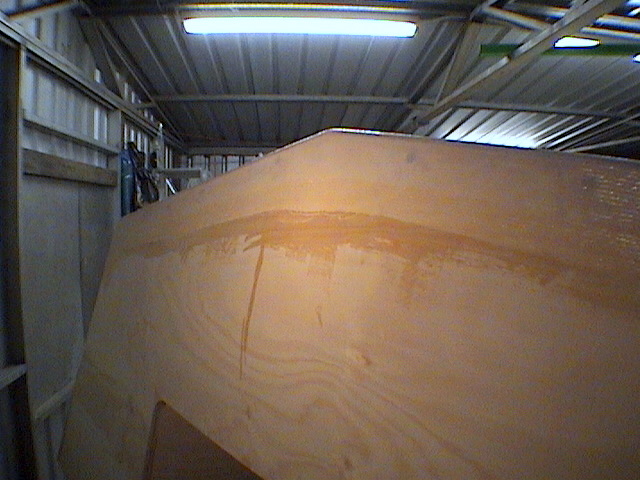
Yesterday's effort turned out ok.
Image

So did the same today on the other side and can check it tomorrow.
Image

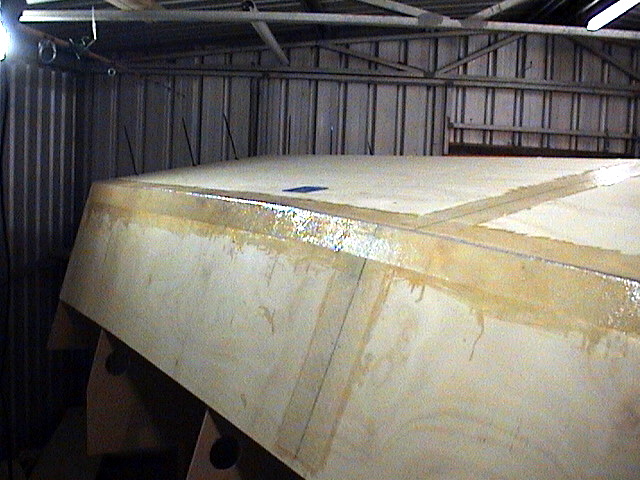
I need to fix a small bow section where the glass overlapped and one side was short but will remove and tidy before keel and bow is taped. So hopefully the next fortnight I will be able tape the keel and glue the top side panels on.

Other thumbnails are also at http://cx19.blogspot.com/ again. Getting there slowly!!
Last edited by gerry on Tue Mar 16, 2010 10:28 am, edited 1 time in total.

gerry
Frequent Poster
Frequent Poster
Posts: 97
Joined: Sat Feb 05, 2005 9:49 pm
Location: Western Australia
Contact:

Post by gerry »

Another quick update...

Have finally taped the transom bottom, I did not expect the glass tape to go around the corner so easily. I rounded the corner before I started to match the round edges and the tape did not need cutting as I first thought. But I wish I had gone the full length down the transom sides but that will be next weekend.

Image
Am happy how the corners turned out.

Image


I set up some pulleys to help lift the panel when it had the resin on it, made positioning it pretty easy with only one hand, so I could use the drill with other.

Image

The side panels are now glued on and seemed to fit the curve quite good, but I ended up with the bow edges a bit further apart than expected. I should be to join them up with nice round edge next weekend.

The wide angle video frame makes the gap appear wider, but is about 18mm wide.

Image

Once the transom sides are taped and the bow section joined, that should be all the outside taping completed, and then I have to sit down and work out the order of what's next! I am still yet to buy the wood for the strakes and spray rails.

If interested there are more thumbnails at

http://picasaweb.google.com/gerard.hale ... de_panels# and

http://picasaweb.google.com/gerard.hale ... ls_fitted#

they are really snapshot frames from video.

looking forward to the weekend!
Last edited by gerry on Tue Mar 16, 2010 10:32 am, edited 1 time in total.

PastorBob
Very Active Poster
Very Active Poster
Posts: 533
Joined: Sat Dec 23, 2006 10:02 pm
Location: Titusville, FL

Post by PastorBob »

WOW 8O


That boat is huge!
... you thought epoxy was strong!
Romans 8:38-39

Post Reply

Who is online

Users browsing this forum: Google [Bot] and 4 guests