Page 1 of 1
Moonfish Build
Posted: Sat Aug 22, 2009 10:25 pm
by fishin'
hey everybody. I guess I finally got my wish of wanting to build a boat. My brother in law decided he was also interested so we are doing it together. Ordered and received the plans this week and have a few questions before we get started. Unfortunately I cannot find any builds for this boat on the website so I can't find answers anywhere.
1. The plans suggest putting together all the frames and stringers upside down using the deck as the base. Will I notch the frames and or stringers to get them to fit together? if so how much for each?
2. should I screw them to the deck from underneath to keep them in place or is there some other way to keep it all standing up?
3. Once we put the bottom pieces on and flip the boat do we need to remove the frames and stringers from the hull to tape the keel, transom, and chine seams? The plans do not say.
4. also the plans do not mention stitching ever, is it not necessary when using the temporary screws as suggested?
Thanks in advance everyone. I realize this should probably go in the technical message section, but thought I would keep everything here for future builders and ease of searching. I can move it if necessary.
Peter
Re: Moonfish Build
Posted: Sat Aug 22, 2009 10:56 pm
by chrisobee
You may or may not get answers here. You certainly won't get answers from shine or J.
Re: Moonfish Build
Posted: Sat Aug 22, 2009 11:48 pm
by fishin'
really? They're that particular about where they answer questions? I guess I'll have to place them in technical questions then.
Re: Moonfish Build
Posted: Sat Aug 22, 2009 11:59 pm
by chrisobee
They just don't bother to read this section. They have to read everything else but this section is basically a blog for recording your build experiance. Technical support is done on the other board. Post your questions one at a time and they will get answered on the other section.
I will give you my opinion of your current questions but I have not seen the plans for moon fish.
1. The plans suggest putting together all the frames and stringers upside down using the deck as the base. Will I notch the frames and or stringers to get them to fit together? if so how much for each?
Notch both as little as possible.
2. should I screw them to the deck from underneath to keep them in place or is there some other way to keep it all standing up?
Use as few screws as possible. remove as soon as possible.
3. Once we put the bottom pieces on and flip the boat do we need to remove the frames and stringers from the hull to tape the keel, transom, and chine seams? The plans do not say.
No leave the frames and stringers tape in between. you will be taping the stringers and frames as well.
4. also the plans do not mention stitching ever, is it not necessary when using the temporary screws as suggested?
Use stitches as required but if they are not mentioned in the plans they probably don't need to be used.
I don't think that there is a documented moonfish under construction here I am looking forward to seeing your progress.
Re: Moonfish Build
Posted: Sun Aug 23, 2009 12:15 am
by fishin'
Thanks for the help Chrisobee and I realize you haven't seen these plans but I have one more point to clarify. Because of the way this boat is designed the stringers and frames are the same height all the way from the front to back. Would you think to notch each of them halfway through then? Thanks again.
Re: Moonfish Build
Posted: Sun Aug 23, 2009 12:38 am
by chrisobee
fishin' wrote:Thanks for the help Chrisobee and I realize you haven't seen these plans but I have one more point to clarify. Because of the way this boat is designed the stringers and frames are the same height all the way from the front to back. Would you think to notch each of them halfway through then? Thanks again.
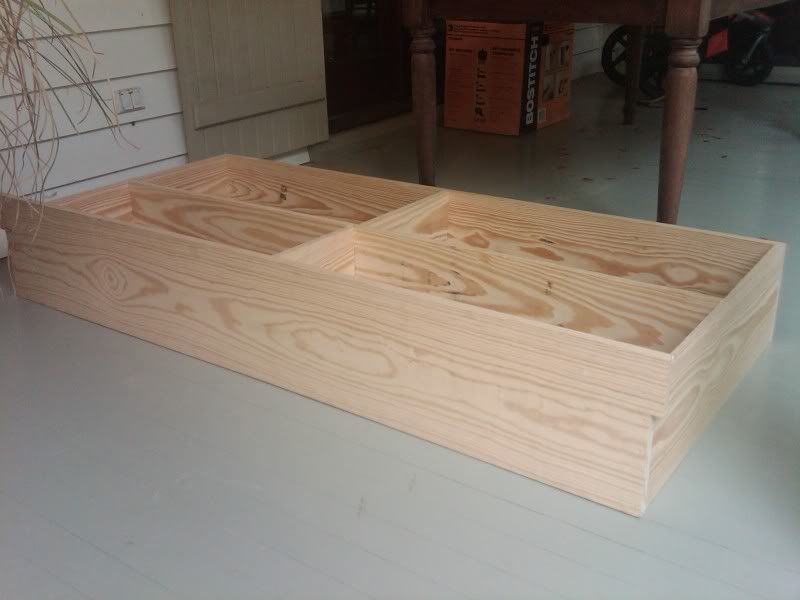
Yes I that sounds right. Its like an egg crate.
I'm eager to see your build. I sailed a sunfish for the first time this summer. Quite the comic adventure. 280 pound men ought not to sail a sunfish. Perched on the corner of the cockpit I ended up with bruises on both knees and accross my butt. Lovely day sailing though. I walked funny for a couple of days and learned alot.
Re: Moonfish Build
Posted: Sun Aug 23, 2009 9:44 am
by peter-curacao
What's a Moonfish? can't find it in the sailboat plans

Re: Moonfish Build
Posted: Sun Aug 23, 2009 9:55 am
by chrisobee
peter-curacao wrote:What's a Moonfish? can't find it in the sailboat plans
Small boats / small sailboats
http://www.bateau.com/proddetail.php?prod=MF14
Re: Moonfish Build
Posted: Sun Aug 23, 2009 9:57 am
by Cracker Larry
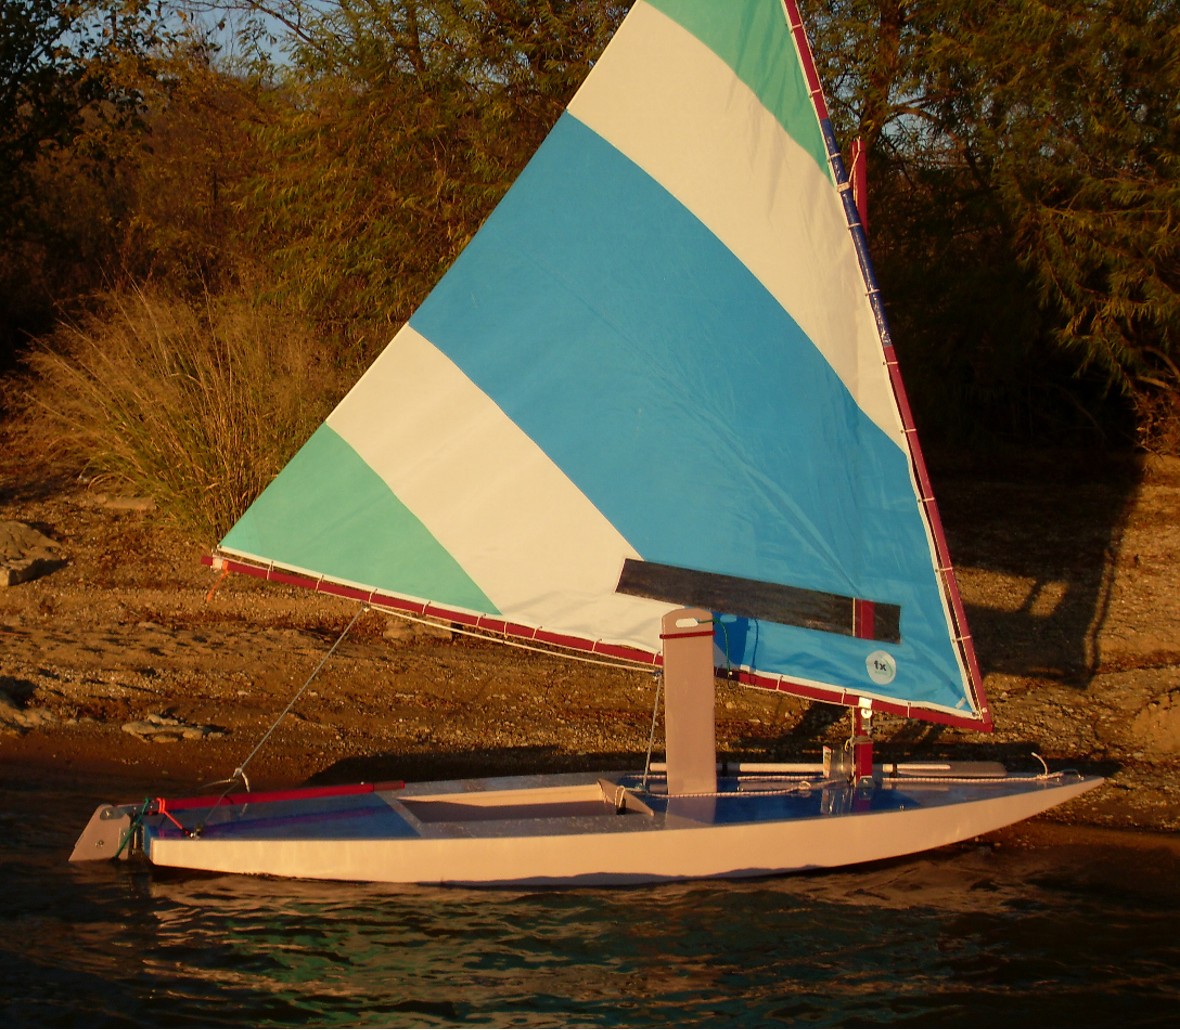
Peter, the Moonfish is almost identical to a Sunfish. I'm not sure what happened to the study plans on the website, I can't find them either
It's a 14' board boat.
Fishin' I've got a set of Moonfish plans, I'll look at them in a bit and reply.
Edit: Chris found them


Re: Moonfish Build
Posted: Sun Aug 23, 2009 10:02 am
by peter-curacao
That's strange I can't find it in the plans very nice boat, Larry I think it looks better as a sunfish, don't know if it is faster but for sure it looks faster as a sunfish
I think I'm gonna build this for my mom
Re: Moonfish Build
Posted: Sun Aug 23, 2009 10:08 am
by chrisobee
peter-curacao wrote:That's strange I can't find it in the plans very nice boat, Larry I think it looks better as a sunfish, don't know if it is faster but for sure it looks faster as a sunfish
I think I'm gonna build this for my mom
Its not under sailboats its under small boats. The study plans say that it has a smaller sailplan than a sunfish but you could use the rig from a sunfish if you liked.
Re: Moonfish Build
Posted: Sun Aug 23, 2009 10:30 am
by Cracker Larry
1. The plans suggest putting together all the frames and stringers upside down using the deck as the base. Will I notch the frames and or stringers to get them to fit together? if so how much for each?
No, no notches. Frames go in first, full sized, no notches. The stringers are cut and fit between the frames. They are glued, filleted where they butt to the frames. Use a couple of temp drywall screws to hold them
2. should I screw them to the deck from underneath to keep them in place or is there some other way to keep it all standing up?
No. First you will build the daggerboard trunk and set it on the plastic covered deck. Then the forward and mid frames are glued to the trunk. Use drywall screws to temporarily hold them. This will create a self-standing grid.
3. Once we put the bottom pieces on and flip the boat do we need to remove the frames and stringers from the hull to tape the keel, transom, and chine seams? The plans do not say.
No. you'll put on the bottom panels, secure with a few screws, then cover all the seams with duct tape. Flip the hull and remove the deck. Now you'll build all your inside seams. This is all covered in the building notes.
4. also the plans do not mention stitching ever, is it not necessary when using the temporary screws as suggested?
This boat will require almost no stitches. You might need a few to pull a seam together but probably not.
Hope this helps ya, Fishin

Re: Moonfish Build
Posted: Sun Aug 23, 2009 11:44 am
by peter-curacao
Larry did you build this one? if so can/will you show some pic's?
Re: Moonfish Build
Posted: Sun Aug 23, 2009 12:13 pm
by fishin'
thanks for help larry. Nice to know someone else has a set of plans to look at. I saw where it said to add the bottom then duct tape and flip. I just didn't understand if I was only supposed to fiberglass the chine and keel seams between the frames or remove them like I see done on many builds. Thanks for the help. Can't wait to really get started.
Peter
Re: Moonfish Build
Posted: Sun Aug 23, 2009 12:36 pm
by Cracker Larry
I just didn't understand if I was only supposed to fiberglass the chine and keel seams between the frames or remove them like I see done on many builds.
Notice the building notes Step 3. After you glue up the frames and stringers, still working on the upside down deck, next you glue the transom to the stringers. Then you install the side panels, glued to the transom and each frame, and to the forward stringer. Once the sides and transom are glued, then the bottom panels are temporarily screwed to the frames and stringers. Duct tape the seams and flip.
At this point, the framework cannot be removed, it's already glued to the sides and transom and screwed to the bottom. So you'll have to build your inside seams working between the boxes.
Larry did you build this one? if so can/will you show some pic's?
No Peter, I almost built one

Joel Shine had asked me to build one for his Dad a while back. He sent me the plans and I studied them real good so I could give him a quote. In the meantime he found a used Sunfish in good shape for a very good price, so the Moonfish build was cancelled.
Want me to build you one? and deliver it to Curacao

Re: Moonfish Build
Posted: Sun Aug 23, 2009 12:53 pm
by peter-curacao
Cracker Larry wrote:
Want me to build you one? and deliver it to Curacao
Come on over and we build one together

Re: Moonfish Build
Posted: Sun Aug 23, 2009 1:21 pm
by Cracker Larry
That sounds good. See you Monday
Re: Moonfish Build
Posted: Sun Aug 23, 2009 1:32 pm
by peter-curacao
Cracker Larry wrote:That sounds good. See you Monday
Oke I'll pick you up at the airport, you bring some BBB ?I will arrange a barrel of aged Rum

Re: Moonfish Build
Posted: Sun Aug 23, 2009 1:42 pm
by Cracker Larry
I'll have to swing by Craigs for some BBB
Re: Moonfish Build
Posted: Wed Aug 26, 2009 12:22 pm
by fishin'
Hey guys. The plans call for a fg splice for the deck on the bottom side only. Does this mean just one piece of fg tape? I have never done one before so I don't know how many layers to put down. Thanks. Will be getting some pictures up at least by sat. possibly sooner.
Re: Moonfish Build
Posted: Wed Aug 26, 2009 12:53 pm
by chrisobee
fishin' wrote:Hey guys. The plans call for a fg splice for the deck on the bottom side only. Does this mean just one piece of fg tape? I have never done one before so I don't know how many layers to put down. Thanks. Will be getting some pictures up at least by sat. possibly sooner.
Yes one layer of tape. You should probably look at the FAQ and How Tos there is a wealth of information there.
Re: Moonfish Build
Posted: Wed Aug 26, 2009 3:23 pm
by Cracker Larry
I'll pull the plans and take a look, standby..
Hey guys. The plans call for a fg splice for the deck on the bottom side only. Does this mean just one piece of fg tape?
OK, got them. First, it calls for the splice to be on the "inside" face only, not on the bottom side
Yes, just one layer of tape. I'd put some epoxy and wood flour glue in the joint before taping it. This splice will be mostly temporary to begin with, just to hold things together. Notice that the cockpit cut out will later eliminate the majority of the splice.
Re: Moonfish Build
Posted: Wed Aug 26, 2009 5:52 pm
by fishin'
I did notice that larry, that's why I thought more than one layer might be good, but I also see how in the end it isn't really needed at all. Thanks.
Chrisobee- I did look at the how to's and didn't see one relating to FG splices and definitely not one that told me how to do it specifically for this build. There is a lot of great information there. Thanks for the help.
Re: Moonfish Build
Posted: Wed Aug 26, 2009 6:09 pm
by Cracker Larry
I did notice that larry, that's why I thought more than one layer might be good,
In almost all cases, if 2 layers are needed then 2 layers will be clearly specified. It's a small boat with small forces involed and you want to keep the weight down for good sailing performance. Just follow the notes one step at a time and most things will become self evident as you progress. No need to second guess the designer, he's really pretty good
Don't hesitate to ask questions if you don't understand something
Re: Moonfish Build
Posted: Wed Aug 26, 2009 9:11 pm
by fishin'
thanks Larry. I don't doubt jacques at all. I am just learning how to interpret the plans. It doesn't say one layer or two layers and I just need to learn that if it doesn't specify then probably the least amount is ok.
Re: Moonfish Build
Posted: Wed Aug 26, 2009 11:54 pm
by Cracker Larry
I am just learning how to interpret the plans.
Yes, it takes some time to grasp all the information that's on them, and where to find it
It doesn't say one layer or two layers and I just need to learn that if it doesn't specify then probably the least amount is ok.
Actually it does say. You just haven't found it yet
Look at Construction drawing B244/3. Bottom left,
Note 4. Use FG splices to assemble long panels, one layer tape each side.
That particular deck panel was specified to tape the inside only in the building notes, so that's every thing you need to know. Just have to hunt around a little bit. You'll get it
Re: Moonfish Build
Posted: Thu Aug 27, 2009 10:40 am
by fishin'
darn, I was hoping not to ask any questions that were so obviously answered on the plans. Thanks again.
Now that I see those notes I have another question though. Those notes say to make the mast step out of 3/4" ply but the drawings on b244/6 don't show that. I guess I'll go with the drawings? Also those same drawings show one layer of 3/8 on one side of the daggerboard and two layers of 3/8 on the other side. That is a problem because I don't have any 3/8 since the bom only calls for 1/2 and 1/4. Should I just make out of 1/2". The problem then becomes that the mast step area becomes to wide. Using 1/2 for the daggerboard trunk the mast step ends up at 2 3/4' instead of 2-1/4 I guess I could just block it back down with a piece of 1/4" on each side? keep in mind when you look at the measurements that the 1x1 block near the daggerboard needs to be more like 1-1/4" because the daggerboard needs 1/8 clearance on both sides according to the notes on that page.
I hope all that makes sense and I am not asking another question that is answered somewhere in the plans. (maybe I should have picked a set of plans where I could follow someone else's build)
Re: Moonfish Build
Posted: Thu Aug 27, 2009 12:23 pm
by Cracker Larry
Those notes say to make the mast step out of 3/4" ply but the drawings on b244/6 don't show that. I guess I'll go with the drawings?
No, you have to do both. That's what I'm saying about the information being spread around, it's like an Easter egg hunt
There is no redundant information, if it's presented on one drawing or note, it won't be repeated on another. You have to assimilate all the information. The mast step is nothing more than a small block of 3/4 glued flat to the hull. This keeps the mast from bearing directly on the hull panel. Drawinng 244/6 just shows appendages. The 3/4 mast step will fit inside the mast box and flat to the hull.
Also those same drawings show one layer of 3/8 on one side of the daggerboard and two layers of 3/8 on the other side. That is a problem because I don't have any 3/8 since the bom only calls for 1/2 and 1/4. Should I just make out of 1/2". The problem then becomes that the mast step area becomes to wide. Using 1/2 for the daggerboard trunk the mast step ends up at 2 3/4' instead of 2-1/4 I guess I could just block it back down with a piece of 1/4" on each side?
Now that is a mystery that I'm not sure how to answer. The plans clearly show the 3/8 ply, but there is no 3/8 listed in the BOM
I'm not sure why the daggerboard is offset 3/8 to port either
keep in mind when you look at the measurements that the 1x1 block near the daggerboard needs to be more like 1-1/4" because the daggerboard needs 1/8 clearance on both sides according to the notes on that page
I see that, and this further muddies the water. Usually solid stock lumber is specified by it's nominal thickness. A lumberyard 1X1 is actually 3/4 X 3/4. But the daggerboard is made from 2 layers of 1/2 ply, making it a full 1", plus I'd give it a layer of glass cloth. So you are correct, that dimension need to be at least 1 1/4- 1 3/8. Maybe that's a typo and it should be a 2X2 instead of a 1X1. That would almost make it right. Something isn't exactly right with the plans, which does happen sometimes.
If it were me, instead of the weird 3/8 stagger, I'd use a piece of 1/2 on each side, and center the board in the slot, then rip the spacer blocks from 2X stock to achieve the 1 1/2 width. Mock it up and adjust accordingly. I doubt any of it is critical.
But the plans should be correct and not cause so much aggravation. If we wanted to figure it all out ourselves, we wouldn't need the plans. I suggest you post this question to JacqueS, in the Sailboat section here
http://forums.bateau2.com/viewforum.php?f=3 and see what his thoughts are. He may have something in mind that I'm not picking up on, or it may just be a typo.
(maybe I should have picked a set of plans where I could follow someone else's build)
Naw, let's blaze a trail that someone else can follow. Nothing but a thing
Re: Moonfish Build
Posted: Thu Aug 27, 2009 1:07 pm
by chrisobee
These are nothing but details. Don't let it get you down.
Re: Moonfish Build
Posted: Thu Aug 27, 2009 2:25 pm
by fishin'
Thanks again for all the help Larry. My confusion on the mast step issue was from not realizing the difference between a mast step and trunk, thanks. As for the other issue I think what you suggest may be the best solution but I posted the question over in sailboats to see if jacques will respond. What do you prefer for marking the curved lines when cutting frames and stringers? small diameter PVC?
Chrisobee thanks for the encouragement with yalls help I'll make it through.
Re: Moonfish Build
Posted: Thu Aug 27, 2009 4:16 pm
by Doc_Dyer
fishin' wrote:drawings show one layer of 3/8 on one side of the daggerboard and two layers of 3/8 on the other side. That is a problem because I don't have any 3/8 since the bom only calls for 1/2 and 1/4. Should I just make out of 1/2". The problem then becomes that the mast step area becomes to wide. Using 1/2 for the daggerboard trunk the mast step ends up at 2 3/4' instead of 2-1/4 I guess I could just block it back down with a piece of 1/4" on each side? keep in mind when you look at the measurements that the 1x1 block near the daggerboard needs to be more like 1-1/4" because the daggerboard needs 1/8 clearance on both sides according to the notes on that page.
)
found the same thing on my plans....even more so when I put into cad
here is a rough mock up of what I planned.
was going to get some 3/8 scrap from someone

since you dont need a lot and buying a whole sheet for these 2 little pieces didnt make sense
Bradley
yellow 3/8 ply
black is 1/8 gap around the board
purple is 1/16 or so for glass and resin coating

Re: Moonfish Build
Posted: Thu Aug 27, 2009 5:00 pm
by Cracker Larry
That looks good Bradley.
I've got plenty of 3/8 scrap, enough for both of you to make those pieces. Probably better for shipping if I make them and send them to you. Be glad to help, I can't do much else with it but make bird houses anyway.
Re: Moonfish Build
Posted: Thu Aug 27, 2009 7:23 pm
by fishin'
I posted over in sails boats, so I can give it a few days and see if jacques responds. Thanks for the offer though Larry that would be a big help and I might have to take you up on it.
Do the plans actually call for fiberglassing the daggerboard? Without that I can make this all work using 1/2 instead of 3/8.
doc are you building this boat now?
Re: Moonfish Build
Posted: Thu Aug 27, 2009 9:44 pm
by Cracker Larry
Do the plans actually call for fiberglassing the daggerboard
I don't think so, but I would. Daggerboards tend to hit bottom sometimes. Yall let me know if you need some small pieces of 3/8.
Re: Moonfish Build
Posted: Sat Aug 29, 2009 9:50 am
by chrisobee
fishin' wrote:Do the plans actually call for fiberglassing the daggerboard?
The wooden boat crowd would recoil in horror if you used ply for a centerboard. They would cry out that only 1/2 the fibers run to opposed the forces on the board. I am inclined to agree. I am not one to advise that you should overbuild beyond what the designer suggests but in this case I think its a good call. One layer of biax on both sides of the board particularly at the point that the board extends through the hull. Remember you may have to stand on the centerboard to right a capsize.
Re: Moonfish Build
Posted: Sat Aug 29, 2009 8:28 pm
by fishin'
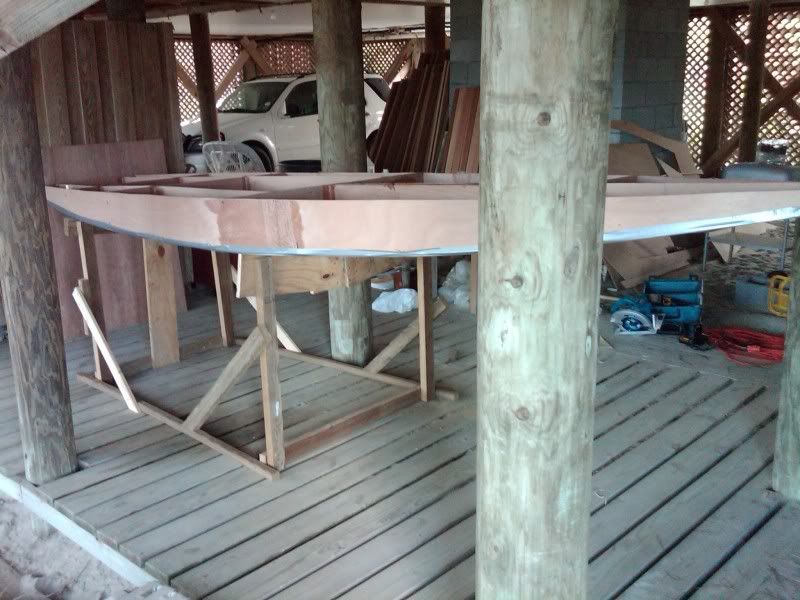
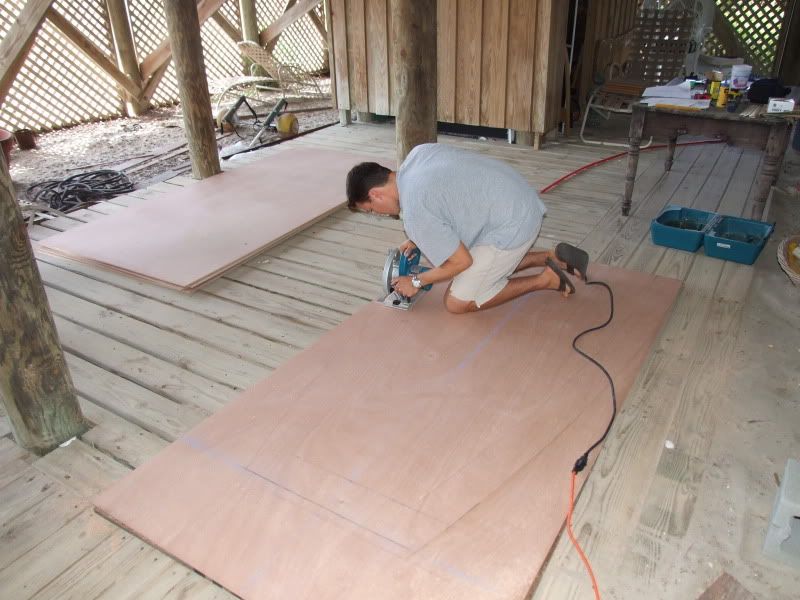
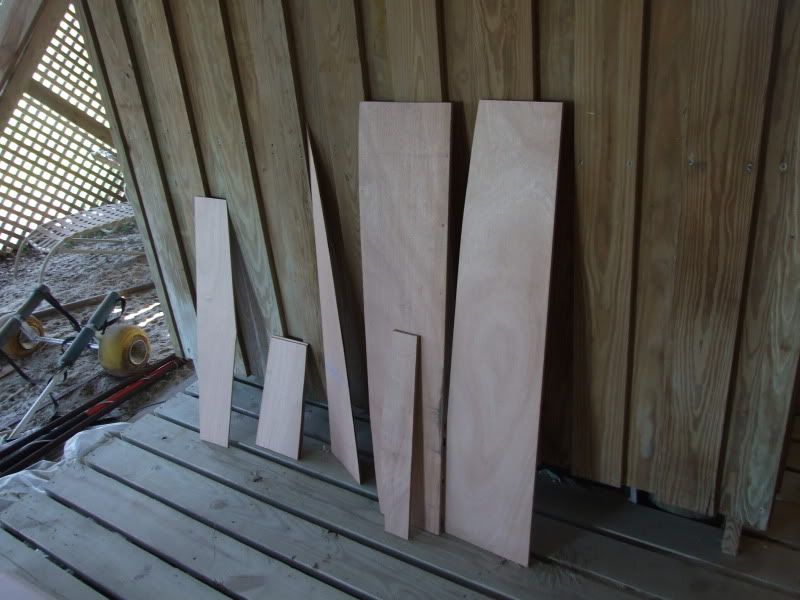
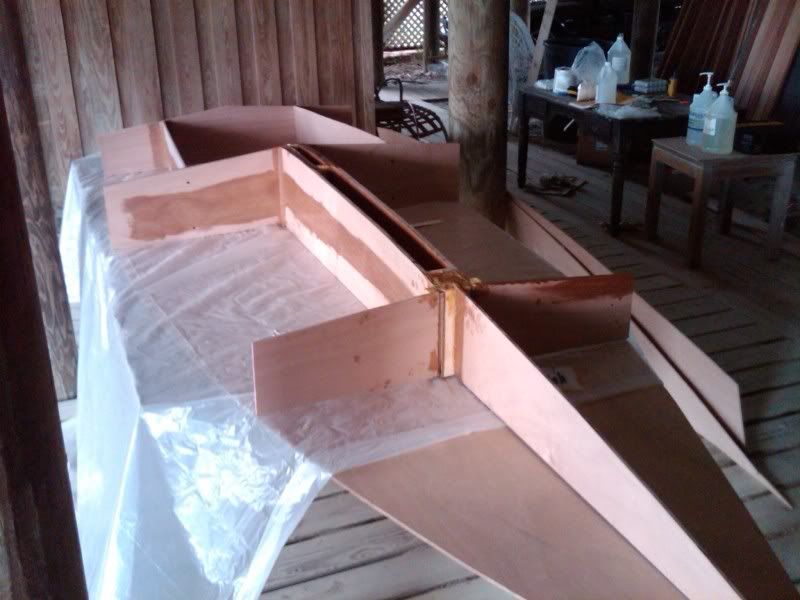
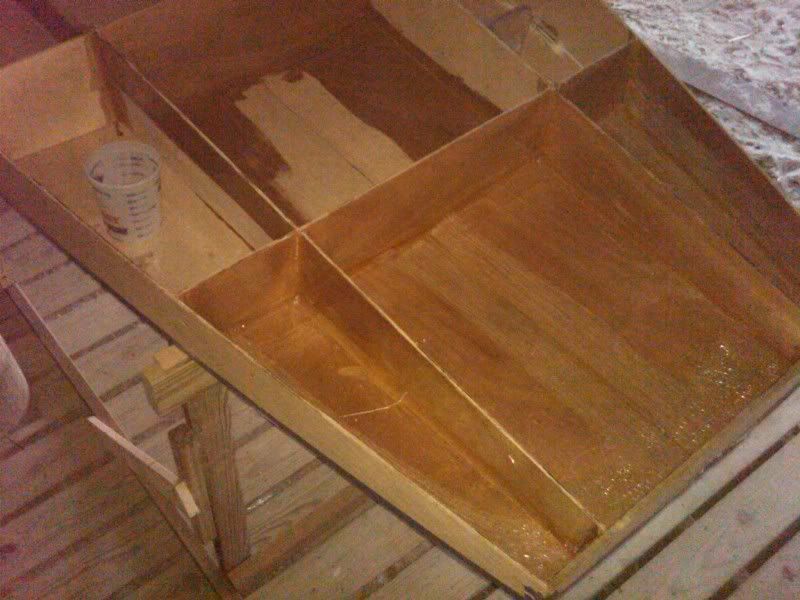
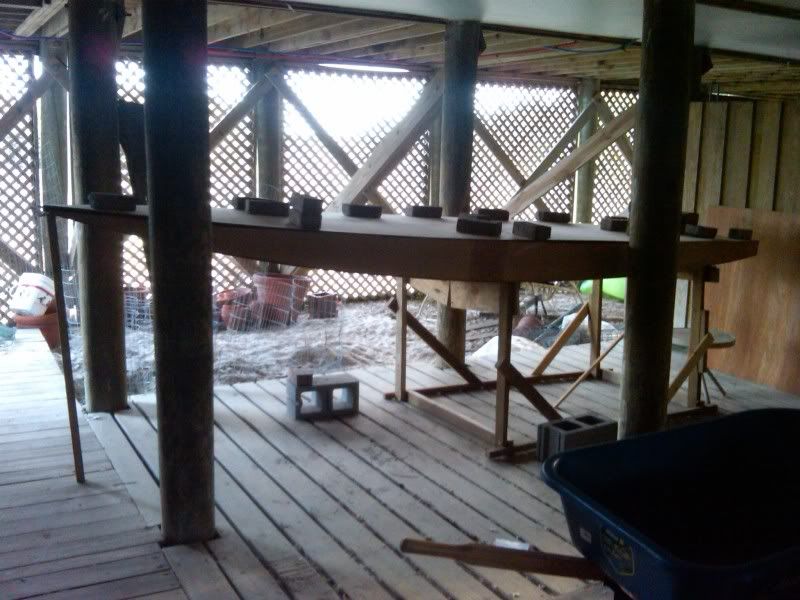
ok, got started cutting today. Felt good to finally get to it and stop asking questions. Anyway, got the deck cut and the fiberglass splice put in. Also cut a bunch of the frames along with daggerboard trunk and forward stringer. Well, here are the pictures.
Just getting started
Some pieces cut and laid out.
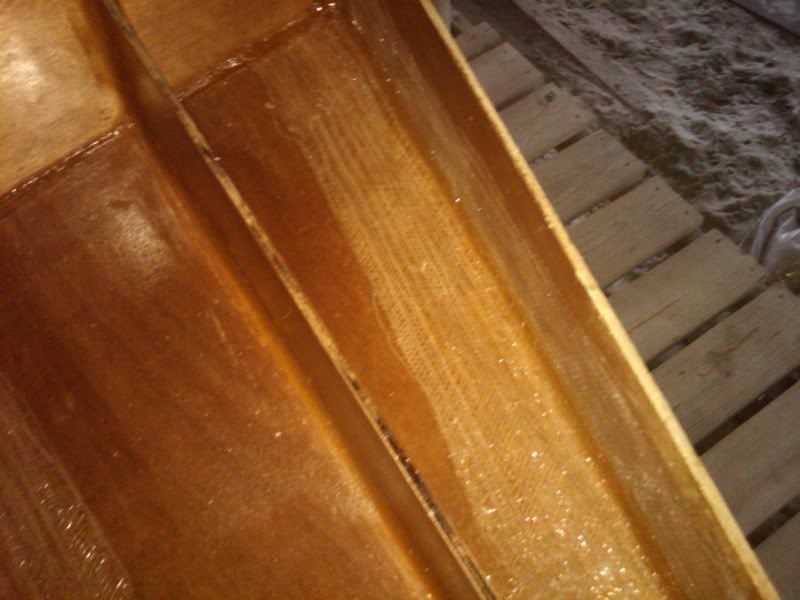
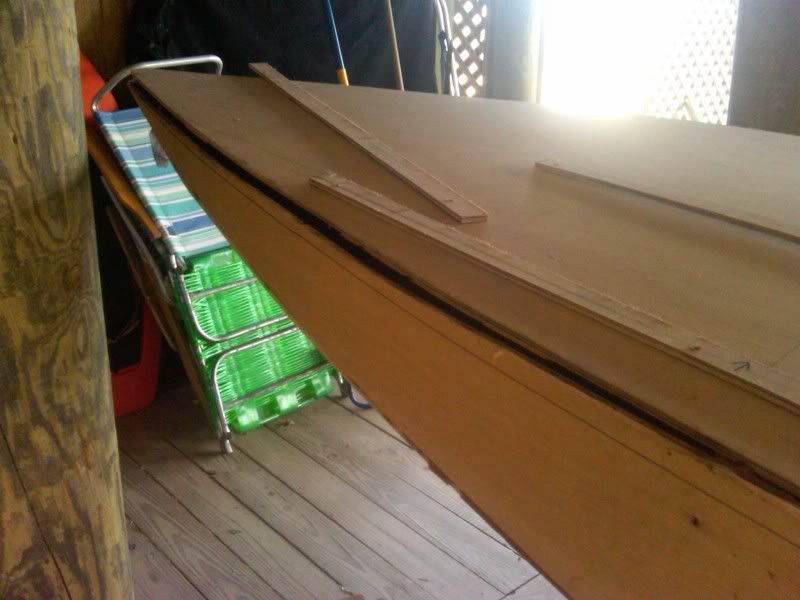
The deck laid out and the fiberglass splice put in. The weight is on top just to keep the two panels lined up.
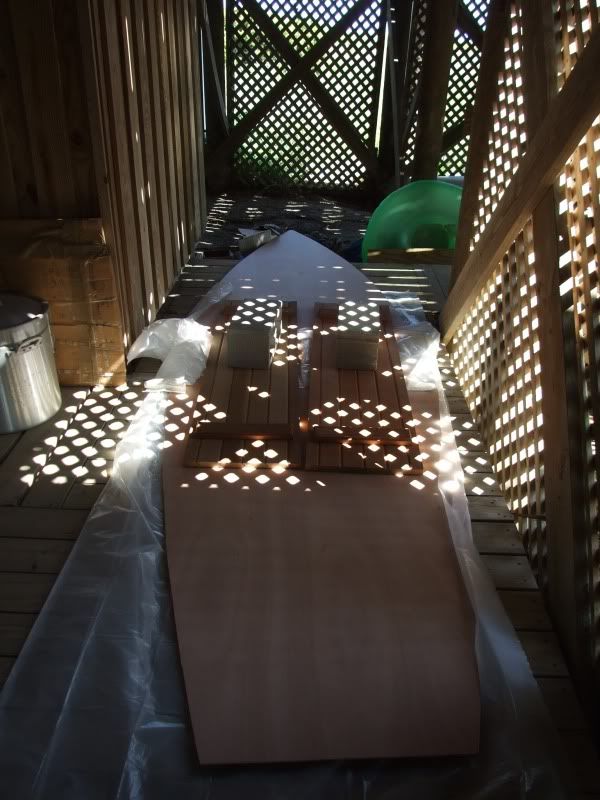
we'll be getting back at it tomorrow. Hope to get the daggerboard trunk put together and the rest of the pieces cut out.
I don't have my plans with me right now and I don't remember them saying whether the side panels need fiberglass splices or the bottom panels for that matter. what do yall think? I remember the plans specifically mentioning them for the deck but not anywhere else but it seems like they would be needed. Thanks for looking.
Re: Moonfish Build
Posted: Sat Aug 29, 2009 8:41 pm
by peter-curacao
Seems like your building right on the beach? there are worse places to put a boat together
Re: Moonfish Build
Posted: Sat Aug 29, 2009 8:45 pm
by fishin'
Yes I basically am. Underneath my parents house. No room at my own. There might not be a better place but there has got to be a cooler one! lol. Can't say I mind too much though.
Re: Moonfish Build
Posted: Sat Aug 29, 2009 8:52 pm
by peter-curacao
fishin' wrote:but there has got to be a cooler one! lol.
Fur sure you won't find it here

Re: Moonfish Build
Posted: Sun Aug 30, 2009 9:09 pm
by fishin'
Got a little more work done today. bought the dimensional lumber for cleats and spacers in the daggerboard trunk. Glued together part of the daggerboard trunk which is now ready for fiberglass. Will post some pictures tomorrow perhaps, they are not all that interesting though.
Hours: 6.5 total
Re: Moonfish Build
Posted: Mon Aug 31, 2009 1:26 pm
by Doc_Dyer
fishin' wrote:
doc are you building this boat now?
NO but it is on my list of things to build.
they are a blast on the beach on vacation
Bradley
Re: Moonfish Build
Posted: Wed Sep 02, 2009 10:26 pm
by fishin'
I hope they are, I will be launching mine off the beach in front of my parents home. I've never sailed a sunfish in particular so I am excited to try it out.
Put in a few more hours over the last couple days. Got all the remaining pieces drawn. Just have to cut them all out now. Tomorrow we do more fg splices and then hopefully the next update will show some real progress. Perhaps some pictures tomorrow.
By the way, since I am launching off the beach some kind of lifting rudder would be nice. I have heard hear of being able to make such a thing but can't seem to find exact information. Does anyone know anything about this or have other recomendations?
Hours: 9.5
Re: Moonfish Build
Posted: Thu Sep 03, 2009 2:58 pm
by ks8
Since I don't have the plans in front of me, it is difficult to comment. Are you looking for a kick up rudder, or a lifting rudder? If your plans have neither (which I assume from your request), it may be because they weigh more, or the transom does not have the height to support the hardware. Either option tends to steal some room from the lower part of the rudderhead for mounting the lower pintle...
And here is the structure on the inside... I did a relief cut on the blue line so the rudder goes almost 90° horizontal.
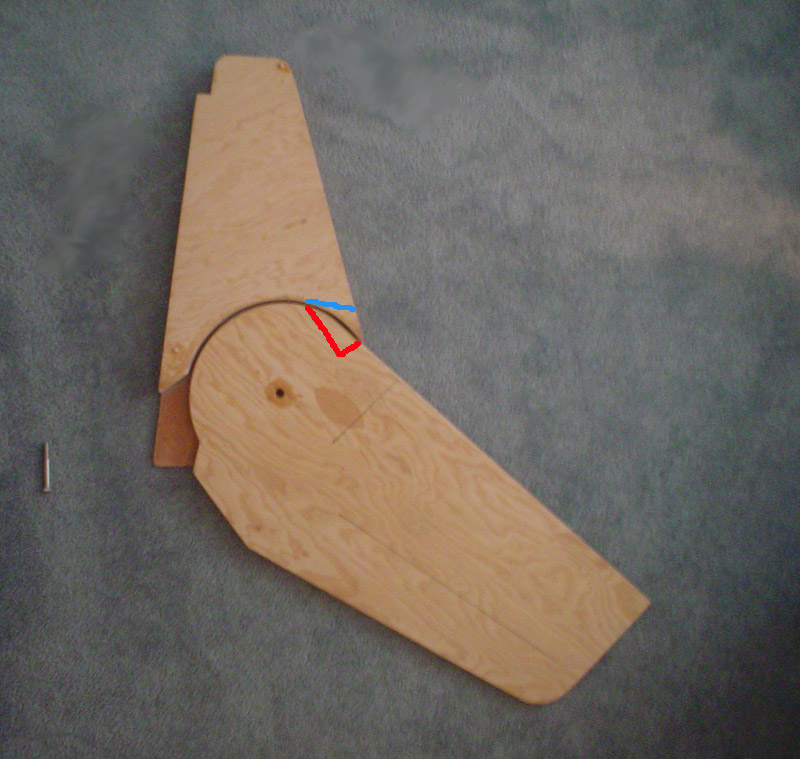
The kickup rudder will spare some damage in a clunk. The lifting rudder would not unless you first lift it.
But you see this sort of design is heavier than a metal or composite alternative. It is easier to build a plywood and glass assembly, but on a smaller boat, a metal rudderhead, or a composite one, would be much lighter. Some research might result in a source for something very suitable.
You could adapt a design similar to
this for a lift up rudder...

And here is what Richstrat is using on his AR15 ...
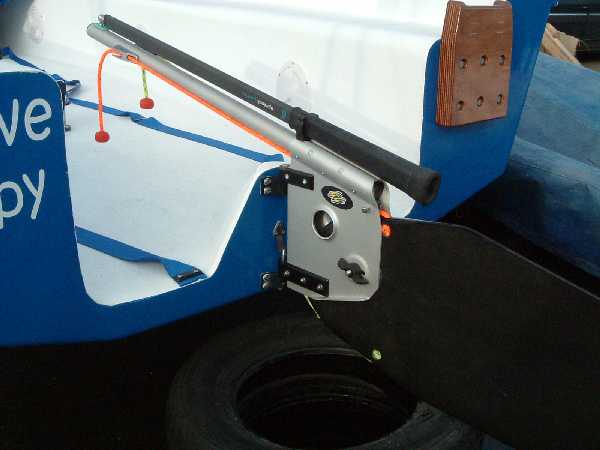
You can surf around on his thread
here for more helpful details about the rudder arrangement, even though his boat is different.
Hope that helps.
Re: Moonfish Build
Posted: Fri Sep 04, 2009 8:41 am
by topwater
Find a sunfish and copy that design for rudder, or you could see if you could find a sun fish rudder
and dagger for sale and use them, i think it said that in the study plans i could be wrong .
You could also use the sail rig it would give you a little more sail area.
Re: Moonfish Build
Posted: Fri Sep 04, 2009 9:47 am
by fishin'
Thanks for the help guys.
topwater, you are correct I can use sunfish daggerboard and rudder and also the sails. I probably will use a sunfish sail since they are so readily available but would like to make the rudder and daggerboard if I can, since that is kinda the whole idea. I may change my mind though if I can find a good rudder to use for beach launching. Thanks again guys.
Peter
Re: Moonfish Build
Posted: Fri Sep 04, 2009 1:55 pm
by sitandfish
fishin' wrote:Thanks for the help guys.
...would like to make the rudder and daggerboard if I can, since that is kinda the whole idea. I may change my mind though if I can find a good rudder to use for beach launching. Thanks again guys.
Looks like "fragi" is using this 'router' method. Hope this helps.
http://forums.bateau2.com/viewtopic.php?f=3&t=19965
Re: Moonfish Build
Posted: Sun Sep 20, 2009 2:40 pm
by fishin'
thanks for the suggestions guys. I think I will try to build a lifting rudder in the fashion of what the Sunfish comes with. I'll let you all know how it turns out. We are in the process of putting the fiberglass splices on both sides of the bottom and side panels. I have a question about that, and unfortunately I think I know what the answer is going to be. One of the side panels got missaligned while the tape was drying so that the edges are about 1/4" off. Is this likely to cause a large problem, or is it something that can be fixed by using extra glue or something along that line? I am thinking I should probably grind away the tape and redo it, but wanted to see what some of you experts thought. Thanks for the help.
Re: Moonfish Build
Posted: Sun Sep 20, 2009 9:12 pm
by gk108
You probably have it done by now, but it will be easier, quicker and cheaper to re-do the splice.
Re: Moonfish Build
Posted: Mon Sep 21, 2009 12:45 am
by ks8
I vote for redo.
Re: Moonfish Build
Posted: Mon Sep 21, 2009 11:08 am
by fishin'
yeah that's what I figured
Re: Moonfish Build
Posted: Fri Sep 25, 2009 10:05 am
by fishin'
so i haven't redone it yet and I have a question about that. Do I need to remove completely the first layer of tape and redo or just sand it down some? If I need to redo it completely is sanding going to work? I don't have a grinder.
Re: Moonfish Build
Posted: Fri Sep 25, 2009 10:58 am
by Cracker Larry
I would first cut the joint open with a jig saw or circular saw, then sand most of the tape off with an R/O sander and 50 grit. It won't take but a few minutes.
Re: Moonfish Build
Posted: Fri Sep 25, 2009 11:40 am
by ks8
When you glue it up again, lay the good panel (that you didn't have to redo) down on the ground first, and lay plastic wrap down in the area of the splice. Then glue up the final panels right over the top of the good panel (over the plastic wrap) so you can line up that final panel to be exactly the same as the previous good one. (Of course, make sure everything is flat). You can glass one side of the splice like this, and once cured, lift it away from the other panel (thanks to the plastic wrap), flip it and glass the other side. This way, your two sides or two bottoms will be perfect mirror images of each other, which helps keep everything true and symetrical when you stitch things together. Hope that made sense...
Re: Moonfish Build
Posted: Thu Oct 08, 2009 12:29 pm
by Doc_Dyer
any progress?
pics please
Re: Moonfish Build
Posted: Fri Oct 16, 2009 3:46 pm
by fishin'
Sorry doc, progress has been slow. There has been some work though. I will hopefully be working this weekend and will try to get some pics then.
Re: Moonfish Build
Posted: Sat Oct 17, 2009 3:03 pm
by fishin'
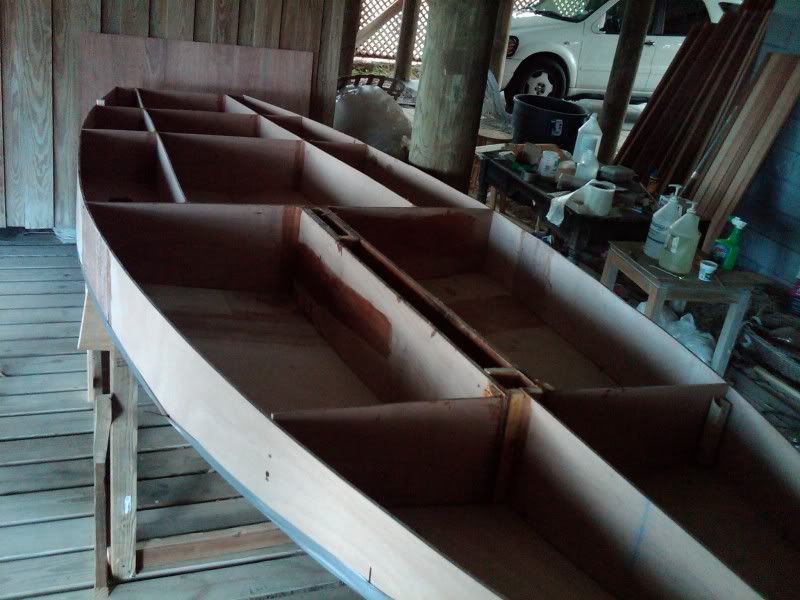
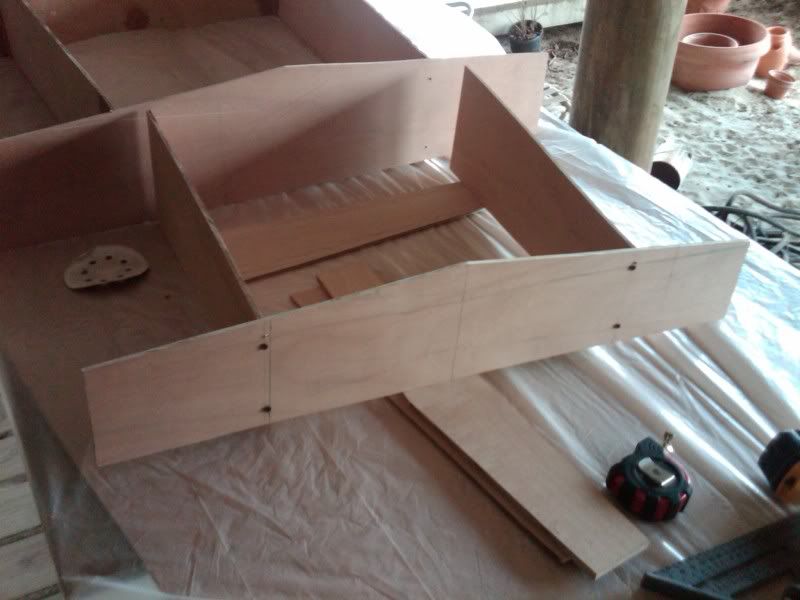
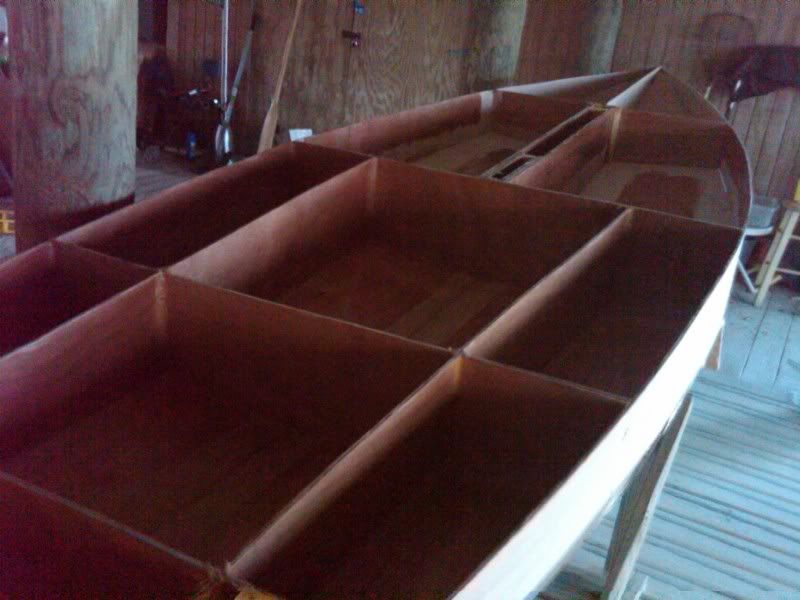
ok got some more frames and stringers glued up today. The plans are slightly confusing at times but I figured out how to do it. I'll try to explain what I mean at a later date using some pictures. For now, this is all that I have.
there is one more frame to place in the back and then the transom. So two more sections of stringers. Sorry the picture isn't great it's from my Blackberry. Thanks for looking.
Peter
P.S. Haven't been keeping great track of time but lets call it 8.5 hours to this point.
Re: Moonfish Build
Posted: Sat Oct 17, 2009 4:41 pm
by chrisobee
Very good. I'm tempted to build one of these for my daughter. next on my list is a kayak, but moonfish may be number three.
Re: Moonfish Build
Posted: Sat Oct 17, 2009 11:05 pm
by ks8
Nice. the blackberry camera was fine. It is very easy to *see* the hull lines now. Thanks. I'm with Chrisobee on this one... very tempting... and *quick*...
That, or maybe an Optimist for my niece. hmmmm.... I might even be able to trailer it nested on top of the CV16. hmmmm.... (somebody stop me)
Keep those picture updates coming, even if it is only with the blackberry camera.
Re: Moonfish Build
Posted: Sun Oct 18, 2009 4:32 pm
by chrisobee
ks8 wrote: I'm with Chrisobee on this one... very tempting... and *quick*...
That, or maybe an Optimist for my niece. hmmmm.... I might even be able to trailer it nested on top of the CV16. hmmmm.... (somebody stop me)
They can't stop you they can only hope to contain you.
Just think there is very little interior to fair. I think it would be a great boat for you.
The reason that I am tempted by this design is that I feel that wooden birdsmouth spars and a hand sewn sail are a real possibility.
Re: Moonfish Build
Posted: Sun Oct 18, 2009 9:11 pm
by ks8
I'm already envisioning storage to port of the Daggerboard slot, a battery to stbd of it, a small pad on the back for an electric trolling motor, a couple of pole holders on those hatch lids, foam all other compartments, so when you're not sailing, you've got a handy fishing board for protected waters, without the sail rig, in case there's no wind, or, no fish. With that shallow deadrise, you may even be able to stand to cast.
Don't mind us
fishin'. Keep building and posting progress.
Re: Moonfish Build
Posted: Sun Oct 18, 2009 9:51 pm
by fishin'
No problem. Got a couple more stringers and frames glue up today.
As you can see I am using temporary screws to hold the section of the stringer to the frames. I had to trim a slight bit off the top of the stringers so that they line up with this most recent frame. this is the recommended method in the directions (temporary screws) I wish there was a better way as I can only line up so many of these sections in a day because I have to remove the screws before the next stringers get glued in. Also, it is very hard to screw into the end of a 1/4" thick piece of plywood.
9 hours
Re: Moonfish Build
Posted: Mon Oct 19, 2009 8:32 am
by Cracker Larry
I wish there was a better way as I can only line up so many of these sections in a day because I have to remove the screws before the next stringers get glued in. Also, it is very hard to screw into the end of a 1/4" thick piece of plywood.
There is. Clamp or screw a temporary cleat to the side of the piece and screw into it
Re: Moonfish Build
Posted: Mon Oct 19, 2009 8:50 am
by fishin'
Thanks Larry that is a good idea. I guess then you still can't do all your fillets right away but probably ends up quicker in the long run. I'm pretty close to done now but maybe I'll give that a try at the end. I knew there had to be another way
Re: Moonfish Build
Posted: Mon Oct 19, 2009 9:39 am
by Cracker Larry
Yeah, you've got the hard part whipped now Peter. Looks real good!
Re: Moonfish Build
Posted: Tue Oct 20, 2009 3:07 pm
by Doc_Dyer
I like that you are putting the hours spent working on the boat at the bottom of your post....
NICE !!!!!!!!!!!!!!!!
keep posting boat porn....for those of us that are tempted to build the moonfish
Bradley
Re: Moonfish Build
Posted: Tue Oct 20, 2009 5:08 pm
by sitandfish
fishin' wrote:I wish there was a better way as I can only line up so many of these sections in a day because I have to remove the screws before the next stringers get glued in. Also, it is very hard to screw into the end of a 1/4" thick piece of plywood.
9 hours
Sometimes I think that posting little frustrations is a great method of boat building. As you can see, you already got a quick helpful response that may help you a little but, could certainly help someone else a lot before they got to the problem. Don't keep your frustrations to yourself.
Cool little boat. Everyone is here to help you along.
Re: Moonfish Build
Posted: Tue Oct 20, 2009 9:23 pm
by ks8
I'm already sketching a 30 pound tabernacle for one, and a stern pilothouse with standing headroom, after lengthening the hull by two feet....
Re: Moonfish Build
Posted: Tue Oct 20, 2009 10:20 pm
by fishin'
Larry,
I tried your suggestion today without much luck. I only had 1 1/8" screws so the cleat could not be too thick in either direction. The problem was that I could get it screwed to transom and then when I put more screws in to attach it to the stringer it would split. the idea would probably work if you could make the cleat larger in at least one of the dimensions.
I am realizing that I am going to have this issue also when I attempt to attach the bottom and side panels in the same manner. I guess I could stitch the panels together even if that is not the recommended method. That may be the best method for me. I am open to any suggestions.
Peter
Re: Moonfish Build
Posted: Tue Oct 20, 2009 10:30 pm
by Larry B
fishin' wrote:Larry,
I tried your suggestion today without much luck. I only had 1 1/8" screws so the cleat could not be too thick in either direction. The problem was that I could get it screwed to transom and then when I put more screws in to attach it to the stringer it would split. the idea would probably work if you could make the cleat larger in at least one of the dimensions.
I am realizing that I am going to have this issue also when I attempt to attach the bottom and side panels in the same manner. I guess I could stitch the panels together even if that is not the recommended method. That may be the best method for me. I am open to any suggestions.
Peter
Did you predrill the cleat???
Re: Moonfish Build
Posted: Wed Oct 21, 2009 12:01 am
by gk108
Try a C-clamp on one or both sides of the cleat, instead of screws.
Re: Moonfish Build
Posted: Wed Oct 21, 2009 12:49 am
by sitandfish
gk108 wrote:Try a C-clamp on one or both sides of the cleat, instead of screws.
Pre-drill or
hot glue. Clamps if you have them. You can see that some people have made clamps out of old pieces of PVC. It will likely be... part, what do you have available and part, what can you make work for you. Keep trying.
I think I saw Shine use hot glue or epoxy as temporary glue and then pulled the temporary parts off and sanded as needed.
Re: Moonfish Build
Posted: Wed Oct 21, 2009 8:32 am
by fishin'
I think I have some ideas that might work, I will give them a try. Clamps are not a going to work great for this boat. When you clamp you can see how the clamp will be in the way of the fillet on one side and the cleat will be in the way on the other. It isn't like these pieces are a couple feet long and I can just fillet in between the clamps. Some of them are as small as three inches so it is impossible to fillet when the clamps are in the way,
I did try pre drilling the cleat but ended up drilling it too large and the screw wouldn't pull itself into the plywood. This may be the best method with the right size bit.
I'll let you all know how it turns out.
By the way, I got the last section of stringer and the transom attached.
10 hours.
Re: Moonfish Build
Posted: Sun Nov 01, 2009 10:01 pm
by fishin'
ok, got the bottom panels temporarily screwed on tonight. I have only one question right now, what is an acceptable gap to have between the bottom panels at the keel? In a couple spots it gets pretty large, not for very long but I just want to check. I'll try to get some pictures tomorrow.
Also, the plans were not completely clear as to how the forward most frame attaches. Apparently we did it slightly incorrectly because it is around a half inch long on both sides. I know this won't be a problem and I can just trim the excess but wanted to point out that this happened for future builders. I'll post a picture of how we attached them so you can see the options there are.
10.5 hours.
Re: Moonfish Build
Posted: Mon Nov 02, 2009 12:36 am
by ks8
More important than a wandering gap is to keep the bottom panels as fair and natural a curve as possible. Sometimes when you tighten too many stitches, too much, the panels can be forced into an unnatural curvature, one symptom of which is a wandering gap between the panels. If you cut good curves in those panels, you should have a near uniform gap, or perhaps at worst a gap that gets bigger, then narrow, but only once. If it gets wide then narrow then wide then narrow, eyeball along the bottom curve and see if it is a nice *fair curve*. If it looks *bumpy*, you may need to readjust the panel tensions to allow the wood panels to bend more naturally. A big gap can always be filled, even with scrap ply, and epoxy blend, and then properly glassed on both sides, but you want as smooth and fair a curve in the panels as possible, and often, a simple readjustment of panel tension in stitching will smooth them out. On my CV16, I finally adjuted to have a single wide gap near where the CB slot would be, so I filled it in with lots of putty and glassed it properly (could have filled it with scrap ply more cheaply), and ended up cutting most of it out for the slot anyway. But the panels were mostly fair, except for some bad ripple in a few spots from building out in a damp tent. That got faired with more epoxy later.
But at first I had some wandering gap and had to loosen some stitches and readjust. Sometimes fewer stitches make for a fairer curve instead of too many stitches that can *torture in* an unnatural *unfair* curve. Almost sounds counter-intuitive, but sometimes it is what is behind wandering gap syndrome.
Hope that helps.
Re: Moonfish Build
Posted: Mon Nov 02, 2009 9:24 am
by fishin'
ok, the gap is because of an errant cut with the saw when making one of the panels. I think it will probably be fine and I will be able to fill it without problems. The curve seems pretty fair, there are only a couple stitches, at the bow. The rest of the panels are screwed to frames along the way (the method recommended by the plans)
Re: Moonfish Build
Posted: Wed Nov 04, 2009 3:05 pm
by fishin'
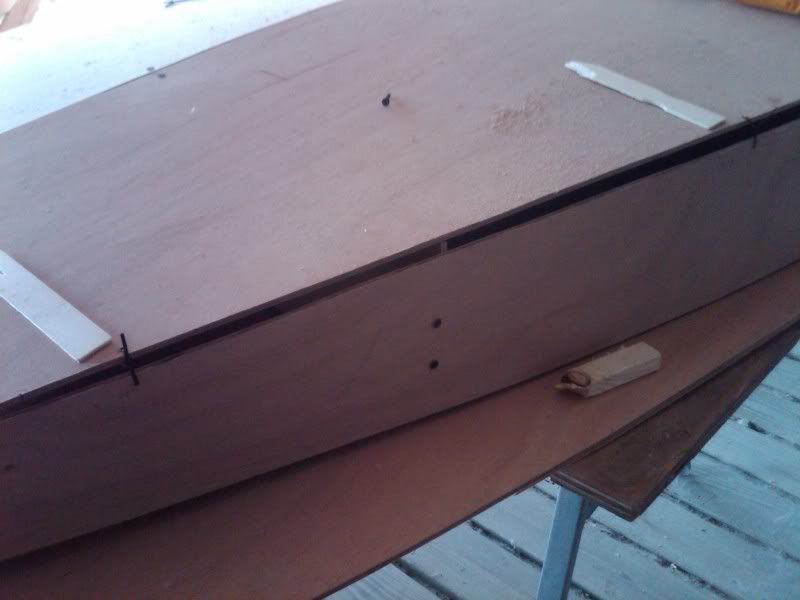
Worked on the boat this morning some. I decided after looking at the gap again that with just a small trim with the circular saw the gap would be much smaller. Below is a picture of before the fix on the keel gap. I apparently did not take a picture of after but the gap was much smaller
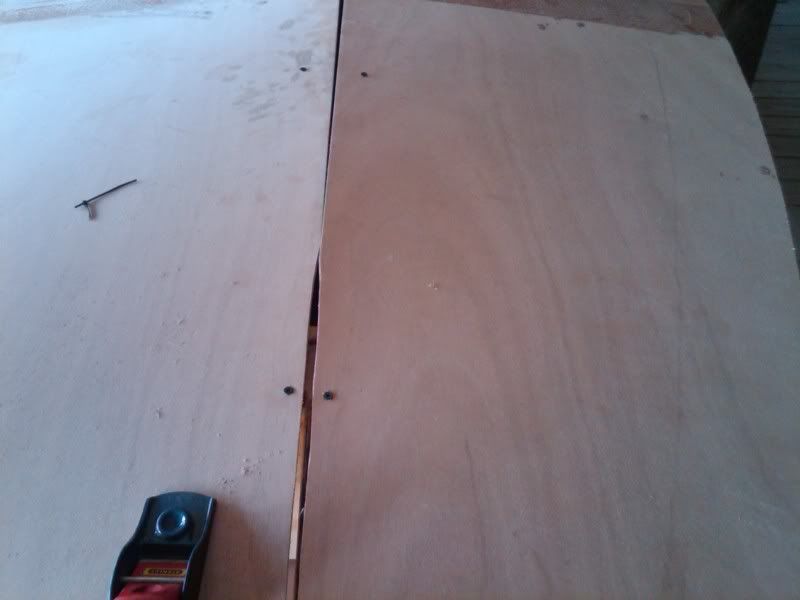
here is a picture of what I mentioned in my last post about the forward frame being slightly too long. I just used a handplane to take of the excess.
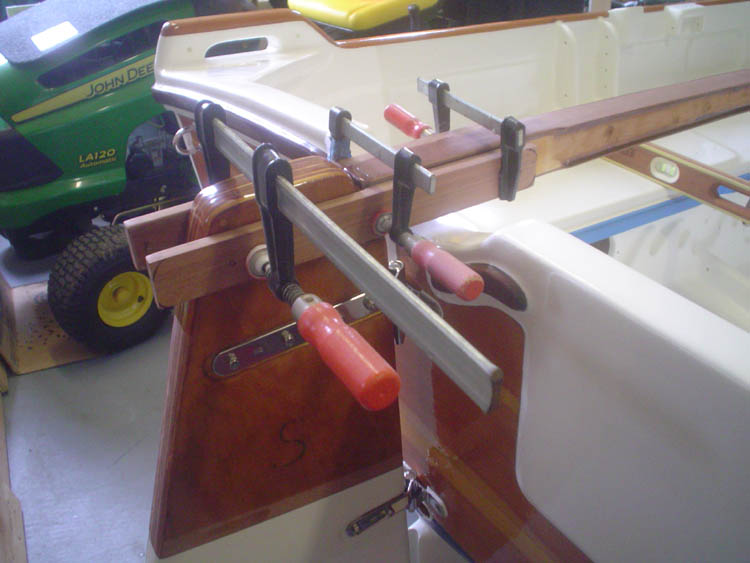
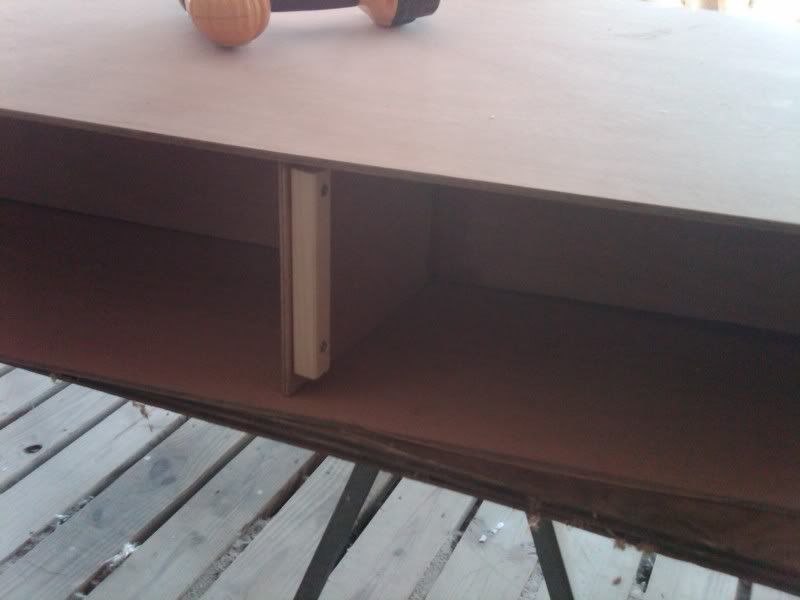
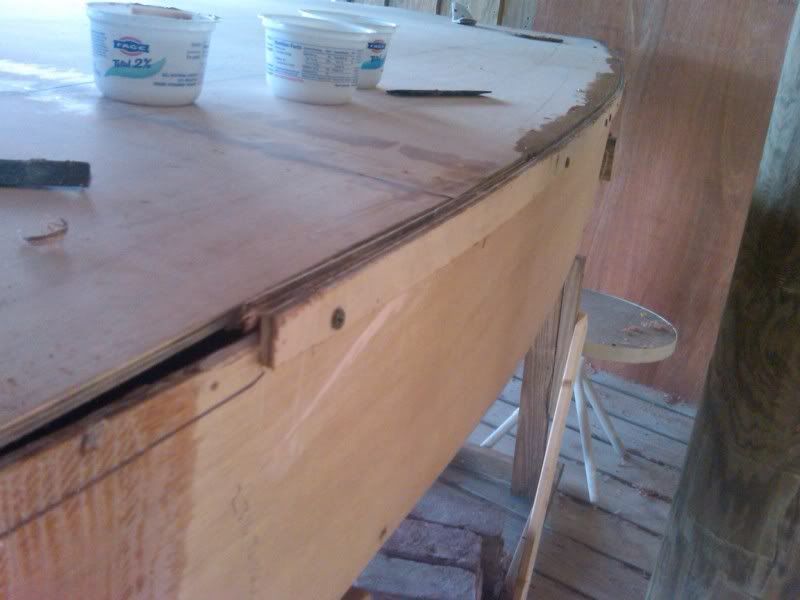
I then proceeded to attach starboard, side panel. I used cleats as shown in the pictures below. I was able to screw into the mid frame that was made of 1/2" ply and I also used a few stitches here and there where the side panel bowed out to far between where it is attached to the frames.
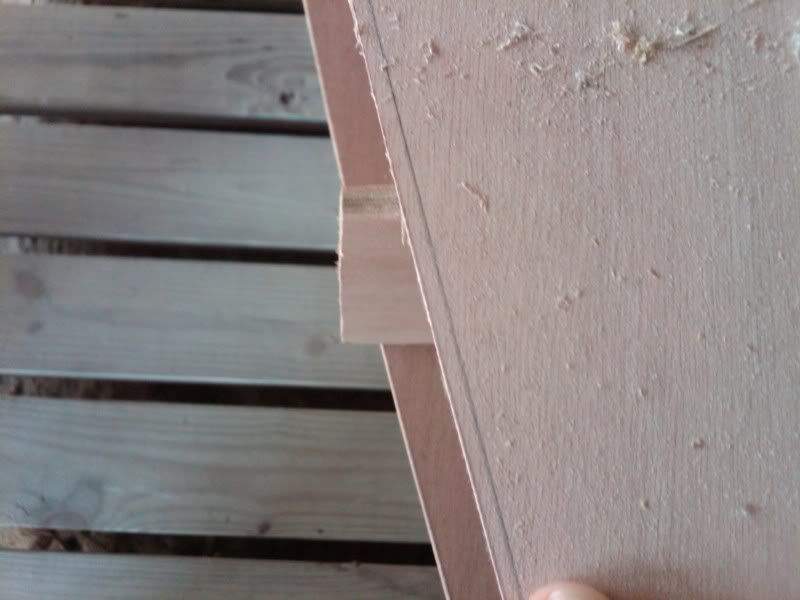
I started at the transom attaching the side panel and as I worked my way forward, realized I had a bit of a problem. The side panel isn't nearly tall enough in the forward 1/3 of the boat.
I decided to check the side panel and make sure I cut it correctly. It is off by no more than 1/8-3/16 at any of the stations described on the plans yet the gap is up to 1/2" in most of this area. Where the two stir sticks are sitting on the hull is where two of the measurements are made on the plans. Those two are barely off by 1/8. I have no idea why this gap is quite so big it is as though the measurements on the plans are not quite right. I decided to check the height of the forward most frame seen in the picture. It is exactly the right size. When it comes down to it, the reason it is off doesn't matter as much as what I should do to fix it. Thanks for any and all help.
11.25 hours this includes all the pondering about what could have gone wrong
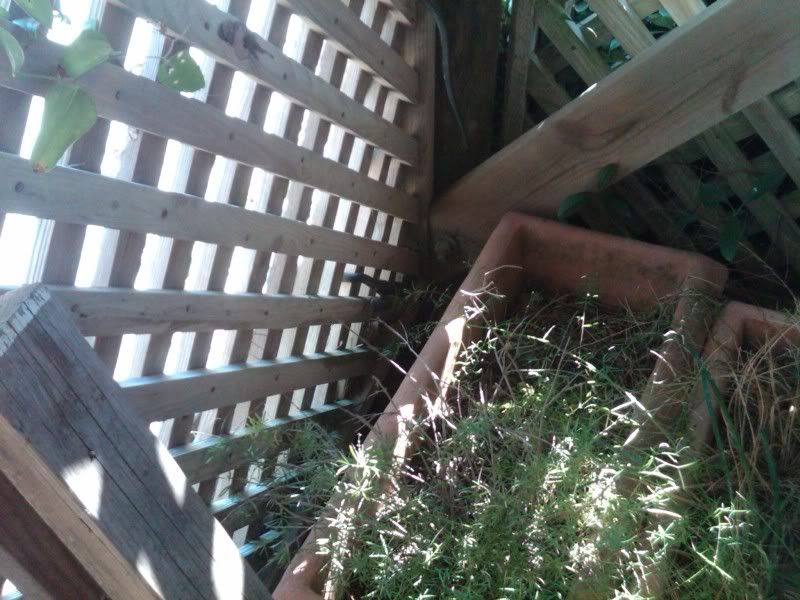
forgot to add, this little (well maybe not too little!) bad boy showed up with a still kicking baby marsh rat still kickin' and sqealin in its mouth. You can see it's tail hanging through the lattice near the top of the picture in the center and then it's head sticking through the very center with the rat in its mouth. Mama rat came chasing after her squealing baby but left when she realized there was nothing she could do. oh I'm pretty sure the snake was (surprise surprise) a rat snake.
Re: Moonfish Build
Posted: Wed Nov 04, 2009 6:46 pm
by chrisobee
I decided to check the side panel and make sure I cut it correctly. It is off by no more than 1/8-3/16 at any of the stations described on the plans yet the gap is up to 1/2" in most of this area. Where the two stir sticks are sitting on the hull is where two of the measurements are made on the plans. Those two are barely off by 1/8. I have no idea why this gap is quite so big it is as though the measurements on the plans are not quite right. I decided to check the height of the forward most frame seen in the picture. It is exactly the right size. When it comes down to it, the reason it is off doesn't matter as much as what I should do to fix it. Thanks for any and all help.
Well, it sure doesn't look like a fit issue, either you cut the interior framing too tall or the side too low or the plans are off. Compare the dimensions on the plans of the interior frames to that of the width of the side panel. that should tell you if it was your mistake or that of the designer.
Re: Moonfish Build
Posted: Wed Nov 04, 2009 7:57 pm
by sitandfish
The tolerances on this boat build look fairly close to zero. All sides are enclosed. Most builds have at least one open side or at least, they have stages where you can take interim measurements before you build subsequent parts/panels. I live a short distance from your build. I would love to see your boat in person and have some thoughts about how to help you resolve your immediate dilemma. Just email me if you want some "on-site" help. This is with NO guarantee I will solve your problem.
If you drink Corona, I might even help you sand!
Re: Moonfish Build
Posted: Wed Nov 04, 2009 9:18 pm
by fishin'
Chrisobee- I tried to explain in my post (apparently unsuccessfully) that I did compare the height of the frames to the height of the side panel and to the plans. In the second to last picture you can even see this. The two stir sticks mark the spots where the plan measurements fall. In the middle of these two is the forward most frame. It is cut according to the plans and is still too tall by about 1/2". Do you have any suggestions about how to fix this?
Sitandfish- you're more than welcome to come check it out sometime. How close are you?
Re: Moonfish Build
Posted: Wed Nov 04, 2009 9:31 pm
by sitandfish
fishin' wrote:
Sitandfish- you're more than welcome to come check it out sometime. How close are you?
Right across the river on James (Jim) Island.
Re: Moonfish Build
Posted: Wed Nov 04, 2009 9:33 pm
by chrisobee
fishin' wrote:Chrisobee- I tried to explain in my post (apparently unsuccessfully) that I did compare the height of the frames to the height of the side panel and to the plans.
Well.... I've allways been a little slow. Is the gap consistent the entire lenght of the seam? If so you can rip a long piece of ply and paste it into place. I'm also assuming its the same on both sides. another option is to just center the panel on the side and just use epoxy and wood flour to make up the difference. put in masking tape on the back of the pieces and then lay in enough epoxy and filler to form the corners.
I think you should enter a thread on the tech support board with the problem. Jacq and Shine won't see this one.
just saw this might help.
is the side sitting on the same surface as the bottom panel? If so it's position is probably 3/8" low. Is the side panel positioned half way up the frame?
Re: Moonfish Build
Posted: Fri Nov 06, 2009 5:59 pm
by fishin'
I think I'll just take your advice of splitting the difference between the top and bottom. I'll probably form some simple type of rubrail along the top edge anyway. I went ahead and did this today. It seems as though the gap isn't too large to fill after making this change. I think it will work out.
Any suggestions on what type of cradle to make for flipping this boat? it doesn't have any flat sections to the hull. I guess I'll have to make it conform to the hull in a few different places instead of just having straight bunks like many people use?
I put the other side panel on today and it seems to fit a little better but still has a gap of some sort.
hours 12.75
Re: Moonfish Build
Posted: Fri Nov 06, 2009 9:55 pm
by chrisobee
fishin' wrote:I think I'll just take your advice of splitting the difference between the top and bottom. I'll probably form some simple type of rubrail along the top edge anyway. I went ahead and did this today. It seems as though the gap isn't too large to fill after making this change. I think it will work out.
As long as the gap is less than 1/4" you really don't have a problem. Just fill the gap with goo and move on.
Any suggestions on what type of cradle to make for flipping this boat? it doesn't have any flat sections to the hull. I guess I'll have to make it conform to the hull in a few different places instead of just having straight bunks like many people use?
Given the size of the boat I don't think a cradle with be needed.
I put the other side panel on today and it seems to fit a little better but still has a gap of some sort.
Gaps are to be expected, its a normal part of the build method. fill with goo and don't be concerned. It is not a desirable outcome to have tight joints and perfect fits.
Re: Moonfish Build
Posted: Fri Nov 06, 2009 11:20 pm
by fishin'
if a cradle will bnot be needed what should I place the boat on?
Re: Moonfish Build
Posted: Fri Nov 06, 2009 11:44 pm
by ks8
It will be very easy to make two simple cradle frames from 2x4. One for each end, maybe 1/4 of the hull length in from each end, perhaps right at a frame position. With some scrap carpet on it, it will be handy storage for the hull as well, when not in use. Nice to work on a steady work surface. Maybe an hour or less to make them both. But some people build small hulls with only a couple sawhorses, or on the floor. I like the cradle support.
Re: Moonfish Build
Posted: Sat Nov 07, 2009 7:38 am
by chrisobee
fishin' wrote:if a cradle will bnot be needed what should I place the boat on?
I would probably be good to get the boat up off the floor. That will save you back. I don't think you need a cradle to flip the boat. But some sort of frame to raise the boat up and to keep it secure while you work on it will be a good thing. Mine is on casters because I don't have a lot of room around the boat.
Re: Moonfish Build
Posted: Sat Nov 21, 2009 6:07 pm
by Doc_Dyer
ok been 2 weeks any progress?????
Re: Moonfish Build
Posted: Wed Nov 25, 2009 12:39 pm
by fishin'
sorry doc, haven't made much progress recently. I still need to make something to flip the boat into. I'll update soon I hope.
Re: Moonfish Build
Posted: Thu Nov 26, 2009 12:18 pm
by ks8
If you take 7 years to build a moonfish, I'll have to hand over my *longest build* trophy, and it better be one tricked out moonfish when you're done and launched!
Enjoy your build as you get to it.
Re: Moonfish Build
Posted: Tue Dec 29, 2009 10:50 am
by Doc_Dyer
ok been over a month... any updates?
Bradley
Re: Moonfish Build
Posted: Sat Jan 02, 2010 12:23 pm
by fishin'
sorry guys it's been crazy around here over the holidays. Being out of town, having visitors coming in. I'm hoping to get something done tomorrow though, maybe I'll have a flip for you guys soon.
Re: Moonfish Build
Posted: Wed Mar 24, 2010 7:51 pm
by jim cav
Any updates? We are (not so) patiently waiting.
Re: Moonfish Build
Posted: Mon Apr 12, 2010 10:04 pm
by fishin'
Funny you should ask, I had plans to work on it saturday but came down sick friday afternoon. Hope to have some time this coming weekend to get started again. Work is also picking up. Actually right now, I am slammed. That is a good thing though. Hopefully I'll have an update soon. Gotta get it finished for the summer.
Re: Moonfish Build
Posted: Mon Jun 07, 2010 9:15 pm
by fishin'
Re: Moonfish Build
Posted: Mon Jun 07, 2010 10:04 pm
by gstanfield
I think this is one where you'll get as many answers as there are people answering. I personally like the zip lock bags and find that I get very little waste and very nice control of the amount of material laid down. Some people find that it doesn't work for them. I guess it's all in what works for you. The boat is looking great BTW, keep up the good work, just do more of it
Re: Moonfish Build
Posted: Mon Jun 07, 2010 10:15 pm
by sitandfish
I don't have any pro tips for you but, did you happen to see this Moonfish build from days gone by?
http://gallery.bateau2.com/thumbnails.p ... h=moonfish
Re: Moonfish Build
Posted: Tue Jun 08, 2010 8:11 am
by fishin'
No, I hadn't seen that one. Thanks!
Re: Moonfish Build
Posted: Wed Jun 09, 2010 12:18 pm
by jim cav
For fillets, I'd go with the baggy and skip the refillable tubes. The tubes will have to be cleaned after use, while the bags can tossed in the trash. And you can control the size of the fillet by cutting a larger or smaller hole in the bag.
If you expect to beach your Moonfish on rocky shores, you might want to consider glassing the entire hull. That adds a HUGE amount strength and durability to it.
Your build is looking good. Keep the posts coming...
Jim
Re: Moonfish Build
Posted: Wed Jun 09, 2010 12:56 pm
by tech_support
the caulking tubes are great, and they can be tossed out too. At $1.50 or less a pieces they are a HUGE time saver. Bags work too, but I can get a thicker mixed putty in the caulk tube and not worry about blow outs.
Re: Moonfish Build
Posted: Wed Jun 09, 2010 2:03 pm
by wegcagle
Joel,
I tried to use the tubes, but couldn't figure out how to properly stir everything up. What's your technique?
Will
Re: Moonfish Build
Posted: Wed Jun 09, 2010 2:58 pm
by tech_support
mix up the glue/putty, spoon it in to the tube (i use the mixing stick), tap the tube so the putty moves down the tube and releases air, keep going until the tube is full. I cut the end off the tip first, that helps the air escape as you fill it.
Next time I do it, I will try to make a video.
Re: Moonfish Build
Posted: Thu Jun 10, 2010 11:19 pm
by fishin'
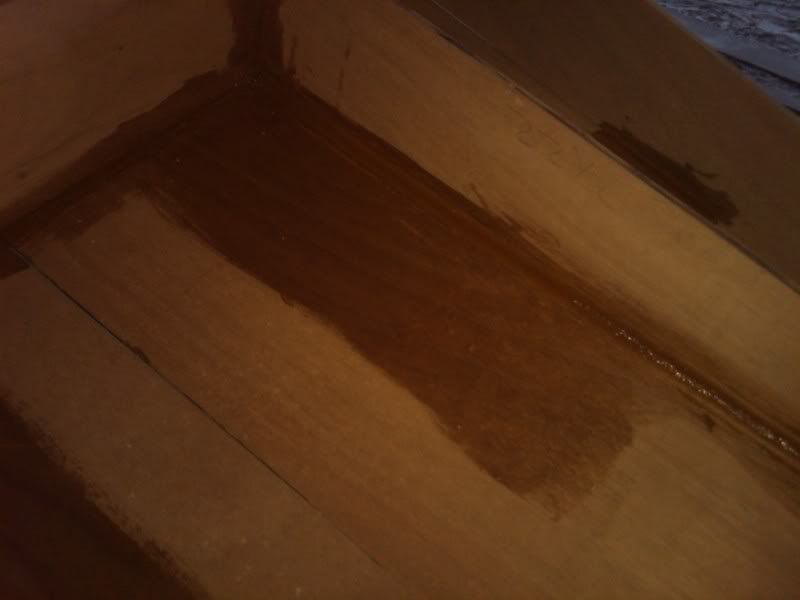
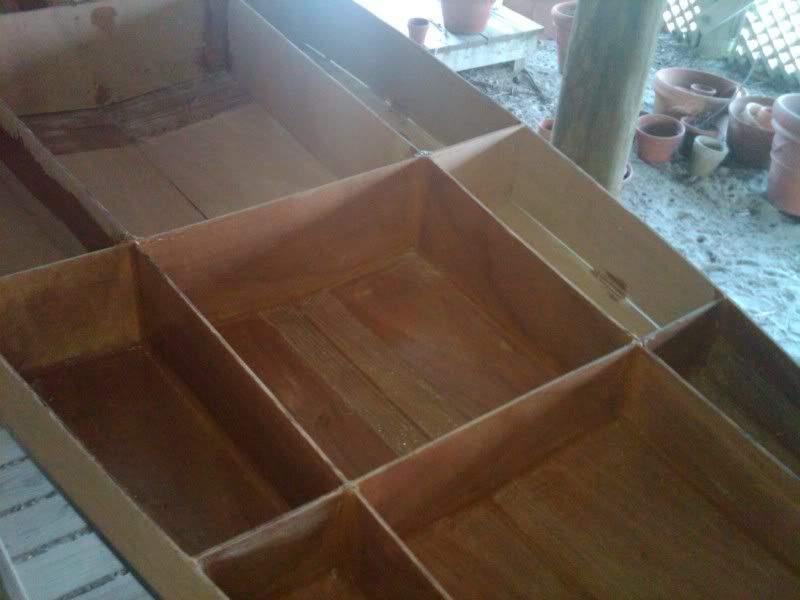
ok, got some more done after work today.
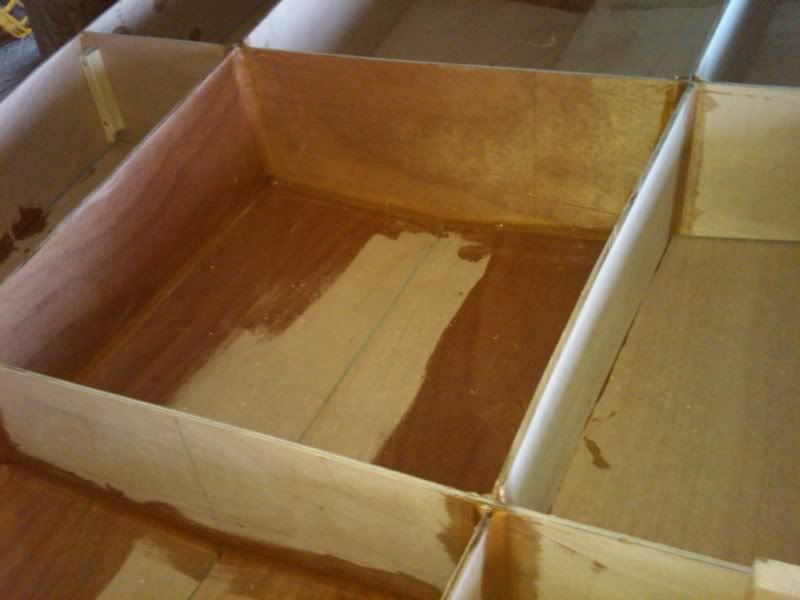
glued all joints in the three bays furthest aft and glassed the keel seam and transom seams in these areas also, all wet on wet.
1 more hour up to 11.5 I think>?
Re: Moonfish Build
Posted: Fri Jun 11, 2010 1:17 am
by Cracker Larry
Looking good
That's all the time in it so far?
Re: Moonfish Build
Posted: Fri Jun 11, 2010 8:24 am
by fishin'
yeah that's it so far larry. You might add a slight amount of time if working by yourself since we have been working two people at the same time occasionally. If you start one now, you could probably finish before us. If you could work all day I bet it wouldn't take three days to get to where we are.
Peter
Re: Moonfish Build
Posted: Fri Jun 11, 2010 9:46 am
by tech_support
Thanks for posting the pictures, like to see more of these built
Re: Moonfish Build
Posted: Fri Jun 11, 2010 3:07 pm
by sitandfish
shine wrote:Thanks for posting the pictures, like to see more of these built
Yes. It is actually a very sharp looking boat, as can be seen in this example from another builder. Just trying to inspire fishin'.
Re: Moonfish Build
Posted: Fri Jun 11, 2010 8:51 pm
by fishin'
Did a very small amount of work today. Mainly cleanup. I also sanded a few previously coated areas where tape will have to be placed along the keel seam. Also removed some of the temporary cleats used to screw the sides to the frames.
Gotta build a bed tomorrow for my 2 1/2 year old nephew then back to the boat I hope if I have time.
Lets say we're up to 12 hours
Re: Moonfish Build
Posted: Sat Jun 12, 2010 5:39 pm
by fishin'
got a little bit more done today. glassed and filleted a few more seams. Also built the bed and did some tomato picking in the garden.
12.75 hours
The bed, minus the plywood top. It slides into an alcove for a dormer window.
and the garden

Re: Moonfish Build
Posted: Sun Jun 13, 2010 4:50 pm
by fishin'
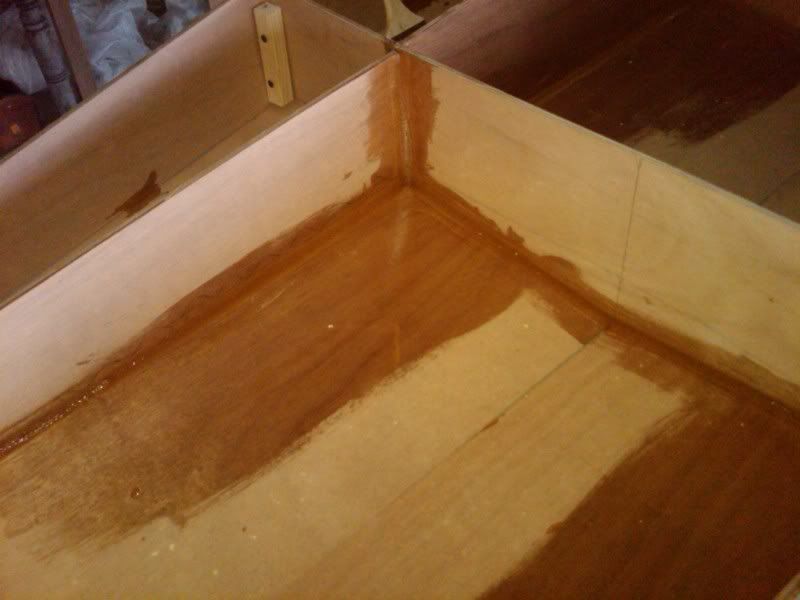
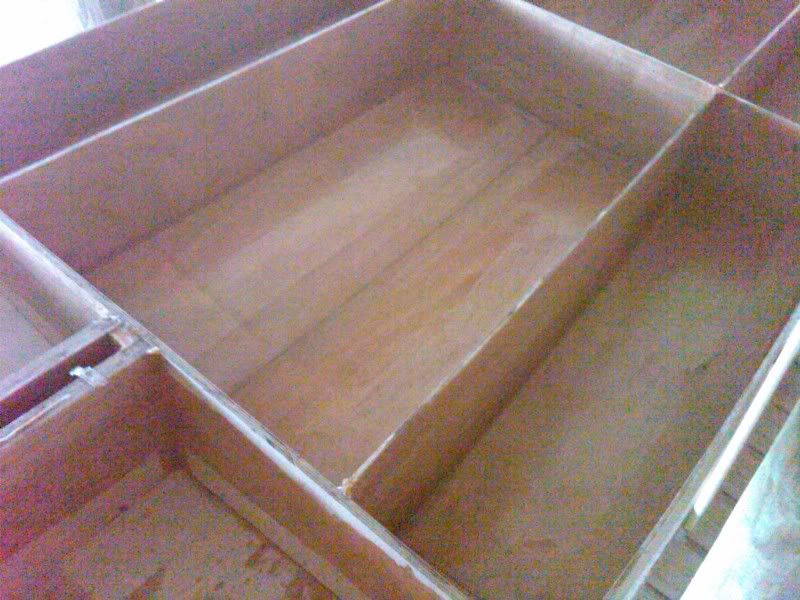
got some more done today. Filleted and taped the seams in the next four bays as well as coating the wood in these areas. Also attached a few cleats preparing for gluing down the sole someday soon I hope. Only four more bays to go, and they are starting to get smaller now heading toward the bow.
Also, I am basically out of woodflour. I will need more to finish the last fillets and then glue down the deck. What does everyone recommend for fairing? quickfair? microballoons? more woodflour?
Re: Moonfish Build
Posted: Sun Jun 13, 2010 10:09 pm
by Doc_Dyer
Looks great keep the pictures coming
Re: Moonfish Build
Posted: Sun Jun 13, 2010 10:39 pm
by mechdave
I don't know if your going to glass all exterior surfaces. The most economical method I believe is this. On the glassed surface use the micro balloon/silica fairing mix sold here. Mix it to catchup consistency and fill the weave of the glass. Then take a long board to it. This will show up any low spots. Depending on the results you may want to make another pass with the micro balloon mix. If it looks pretty good go to the quick fair. That stuff is great. Seeing as your boat is small you might start off with it. Wood flour is not fun to sand but it would work too.
Re: Moonfish Build
Posted: Mon Jun 14, 2010 7:44 am
by fishin'
I'm kinda thinking straight to quickfair because the boat is so small. Or just using micro balloons for the whole thing. what do yall think? how much fairing material will I need? thanks dave
Re: Moonfish Build
Posted: Mon Jun 14, 2010 11:17 am
by tech_support
I agree, the glass transition is so small that you could do it with one swipe of the spreader. 1.5 Qt should be plenty
Re: Moonfish Build
Posted: Mon Jun 14, 2010 11:55 am
by fishin'
another question. The plans don't call for glassing the top of the boat, but I know many people do. The only concern I have is checking. With two coats of epoxy on the top sides, primer, and paint, will that be an issue? I am using okume.
Also, how much primer and paint will I need? thanks everyone.
Re: Moonfish Build
Posted: Mon Jun 14, 2010 12:18 pm
by ks8
If it is pine or fir or exterior grade, checking will be an issue. 4oz glass cloth.... done deal.
Just don't sand through it.

Slap the microballoons into the weave. I have 4 oz on the rear seat tops. four years later... no checking. I have it on the underside of the seat top panels also. Doug Fir BCX.
Re: Moonfish Build
Posted: Mon Jun 14, 2010 3:59 pm
by jacquesmm
Okume should not check.
Re: Moonfish Build
Posted: Mon Jun 14, 2010 9:26 pm
by jim cav
I think woodflour will give you the best strength while stretching your epoxy supply. I think it's also the cheapest.
Re: Moonfish Build
Posted: Fri Jun 25, 2010 10:28 pm
by fishin'
Got to the last bay tonight and ran out of chip brushes without realizing it. Anyway, this means I did the last fillets but didn't wet out he tape. do I have to sand all the fillets before adding the tape now? I sure hope not. No new pictures but they basically look the same. up next is gluing down the deck after I add some cleats. Do I need to double coat all the wood inside?
Re: Moonfish Build
Posted: Sat Jun 26, 2010 1:11 am
by Cracker Larry
do I have to sand all the fillets before adding the tape now? I sure hope not.
24 hour rule. Longer than that, sand it
Do I need to double coat all the wood inside?
Yep, or triple coat.
Re: Moonfish Build
Posted: Wed Jun 30, 2010 6:27 pm
by fishin'
no pictures but all the fillets and taping are done. I started today with the second coat of epoxy on the inside and also with cutting and applying some of the 1x1's for the deck to be glued to. just have a few more things to wrap up before she'll be ready to have the deck glued down. Put in another 3.5 hours or so.
Re: Moonfish Build
Posted: Fri Jul 23, 2010 8:12 am
by fishin'
applied some more 1x1's and backing block for the rudder. This has got to be the most tedious part so far. I don't have a ton of clamps so I can't do too much at one time.
Peter
1 more hr
Re: Moonfish Build
Posted: Mon Nov 08, 2010 7:58 am
by Decus666
No news in a while. Still building? I was waiting for you to get to the rigging. What does anyone use for mast, boom and sprints? All Ive found is aluminium pipe, and its gonna run me around 400 bucks.
Re: Moonfish Build
Posted: Mon Nov 08, 2010 8:04 am
by topwater
Look around for a used sunfish rig, you mite be able to buy the whole boat for that.
You could use the daggerboard and the rudder and the rig .
Re: Moonfish Build
Posted: Mon Nov 08, 2010 12:27 pm
by Decus666
i did look for a sunfish before i bought the moonfish plans. couldnt find one near me so i figured id build one
Re: Moonfish Build
Posted: Sun Jan 30, 2011 8:26 pm
by fishin'
got some more done. Attached all cleats, and got the deck installed. Probably another couple hours involved.
Re: Moonfish Build
Posted: Thu Feb 03, 2011 2:40 pm
by fishin'
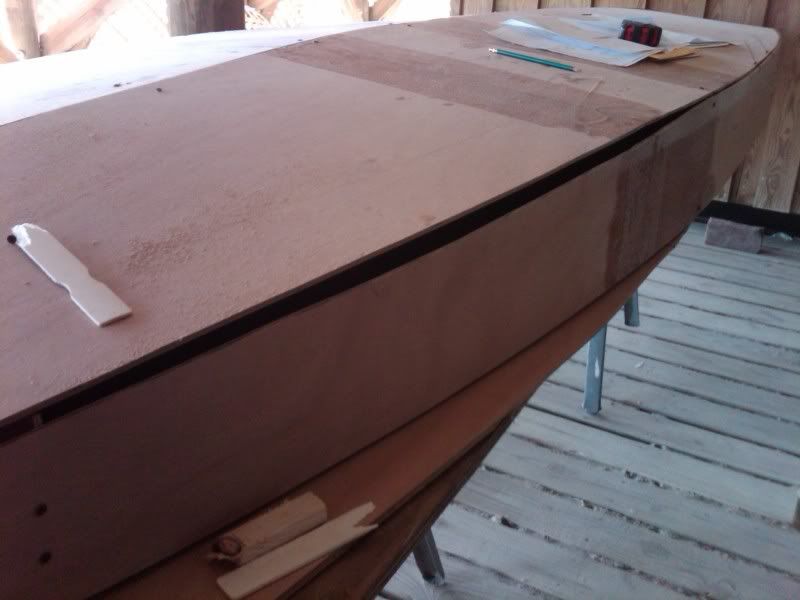
Trimmed the top where it overhung the sides. Also, started attaching a rubrail. I have a few large gaps near the bow that will have to be filled with epoxy and scrap pieces of wood. Like I said before, I believe there is a measurement that isn't quite right somewhere in this boat. The gap is too even on both sides to be an accident. A previous builder also noted this during construction. Anyway, here are some more pictures showing that gap and the rubrail being used to help cover it.
20.5 hours total
Re: Moonfish Build
Posted: Thu Feb 03, 2011 4:15 pm
by fishin'
I'm looking for suggestions on how everyone thinks I should finish the edge of the cockpit.
Cut the opening flush with the surrounding frames and round the edge?
Cut the opening smaller and try to laminate a lip onto the edge?
Re: Moonfish Build
Posted: Thu Feb 03, 2011 4:19 pm
by Cracker Larry
Glad to see you back at her Peter
I'd cut it flush and round the edges. That joint needs tape if I remember right.
Re: Moonfish Build
Posted: Thu Feb 03, 2011 4:34 pm
by sitandfish
Cracker Larry wrote:Glad to see you back at her Peter
I'd cut it flush and round the edges...
Sounds good to me. You might want to consider some kind of finger hold rail attached somewhere in the cockpit. Can't remember if Sunfish have those but I remember them on the Lasers. I also remember USING them.
So, I guess you could do this with either a lip on the two sides of the cockpit and not needed fore and aft OR install a finger grab rail inside the cockpit. You get to hook your toes under the lip too. Don't think you need straps?
Re: Moonfish Build
Posted: Thu Feb 03, 2011 4:41 pm
by sitandfish
Yep, you will probably want a lip or rail on the sides for your toes (or fingers) and I would probably just roll the fore and aft edge over. Looks like fun.

Re: Moonfish Build
Posted: Thu Feb 03, 2011 5:44 pm
by Cracker Larry
Those boats use a hiking strap down the centerline to hook your feet under, not a lip
A lip would kill your toes after about 3 minutes

see
http://www.sunfishdirect.com/sunfish.ph ... h_deckview
Re: Moonfish Build
Posted: Thu Feb 03, 2011 6:47 pm
by sitandfish
Don't know if the Moonfish shows straps but, you are going to want something when she goes over. Trying to grab a smooth edge won't get you back in the boat. I just remember the finger rail from the Lasers. So, maybe a belt and suspenders.
The strap is a simple matter of a D-ring mounted fore and aft in the cockpit. Without a strap or an edge or finger rail, you will have to pop up on the deck like a sea lion.
Re: Moonfish Build
Posted: Thu Feb 03, 2011 9:36 pm
by fishin'
Thanks guys. I want to make sure if I do cut it all the way flush with the frames the deck area that is left isn't too narrow. I don't remember the plans calling for tape there Larry, I'll have to check.
I'm glad to be back too Larry, been busy.
went from this.
to this.
Re: Moonfish Build
Posted: Fri Feb 11, 2011 6:14 pm
by fishin'
ok, got all the rubrail attached today while my fingers froze. After doing so, I looked through the plans to figure out what I will do for mast and boom parts. I don't see where the plans specify any particular wall thickness for these parts. Is there a specification that these parts should meet? Thanks for your help.
The boring pictures will be up later
Re: Moonfish Build
Posted: Fri Feb 11, 2011 6:30 pm
by bondo
Looks good fishin'. I dont know about the mast. Dwyer has a catalog of mast profiles and tubing. You may want to post the question in the sailboat tech forum above. House and boat looking good.
Re: Moonfish Build
Posted: Fri Feb 11, 2011 7:06 pm
by Cracker Larry
IMO, FWIW, IINAL, that boat so similar to a sunfish that their mast and boom parts would work perfectly, and the specs of those are available on line. There are a lot of those rigs sitting around in garages and back yards too. There was a used sunfish for sale on craigslist a couple of weeks ago for $650, including mast, boom and sail.
Of course, if you want to build a mast, that's cool too
Re: Moonfish Build
Posted: Fri Feb 11, 2011 7:14 pm
by AussieBoater
Cracker Larry wrote:IMO, FWIW, IINAL,
OK I just love acronyms... NOT!
I get the first 2... what is the 3rd one, please???
I just know I'm gunna feel stupid once it is explaned...
Re: Moonfish Build
Posted: Fri Feb 11, 2011 7:54 pm
by Cracker Larry
I am not a lawyer
I thought I'd get all the disclaimers in there
It was supposed to be acronym humor.
Re: Moonfish Build
Posted: Fri Feb 11, 2011 8:01 pm
by AussieBoater
And I thought it was funny... I got your humour, just trying to work out what you said.
Re: Moonfish Build
Posted: Fri Feb 11, 2011 10:38 pm
by Dog Fish
.
Re: Moonfish Build
Posted: Sat Feb 12, 2011 12:36 pm
by fishin'
I would get a used mast, spar, boom, and sail system but haven't seen any for sale locally. A new mast cost around $170 whereas I can get a 12" length of tubing for only $75. Guess I'll have to keep looking.
Re: Moonfish Build
Posted: Sat Feb 12, 2011 1:11 pm
by sitandfish
fishin' wrote:I would get a used mast, spar, boom, and sail system but haven't seen any for sale locally. A new mast cost around $170 whereas I can get a 12" length of tubing for only $75. Guess I'll have to keep looking.
Craigslist has a local sunfish with spars, dagger, racing sails, rudder, hull and trailer for $225 (asking price).
Re: Moonfish Build
Posted: Sat Feb 12, 2011 2:56 pm
by fishin'
crap I have been looking under boats not all for sale and there was nothing. thanks for the tip!!
Re: Moonfish Build
Posted: Sat Feb 12, 2011 3:08 pm
by sitandfish
fishin' wrote:crap I have been looking under boats not all for sale and there was nothing. thanks for the tip!!
Never a problem. Boat looks pretty good for parts. Trailer looks great from the cel phone picts. If it has all the stainless parts (pintels, gudgeons, fairlead, cleats,eyestraps, etc.) you could save yourself some coin. All the little parts add up fast.
Re: Moonfish Build
Posted: Sat Feb 12, 2011 3:50 pm
by Cracker Larry
That's an excellent deal. The sail is probably worth that much. The trailer also. I'd go buy that today, before someone else does
Re: Moonfish Build
Posted: Sat Feb 12, 2011 6:14 pm
by fishin'
yeah I would I tried calling and no answer. left a message but I don't know. the post is from december probably gone already at that price.
Re: Moonfish Build
Posted: Sat Feb 12, 2011 6:27 pm
by sitandfish
fishin' wrote:yeah I would I tried calling and no answer. left a message but I don't know. the post is from december probably gone already at that price.
Sorry, I didn't even check the date. Just saw that it was still active. Thought those things only stayed up a short time? I wouldn't give up til I got a definite NO, though.
But, as you see, you can probably find a parts boat. Just have to keep an eye out.
Re: Moonfish Build
Posted: Sat Feb 12, 2011 8:38 pm
by Cracker Larry
I'll be glad to keep an eye on out locally for you as well.
Re: Moonfish Build
Posted: Sat Feb 12, 2011 11:02 pm
by fishin'
great thanks larry
Re: Moonfish Build
Posted: Mon Feb 14, 2011 9:45 pm
by fishin'
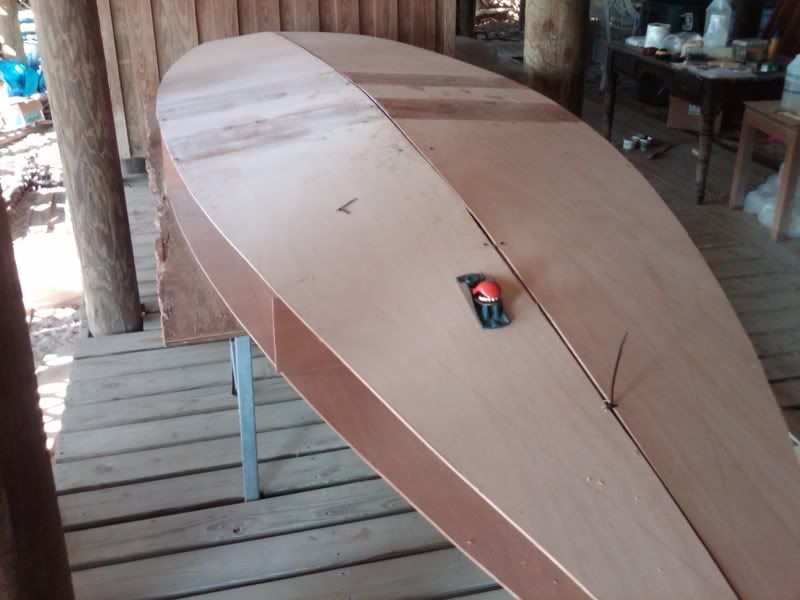
Got all the rubrail attached and filled in all the gaps between the side panels and the deck. We also flipped the boat upside down and started rounding over the chines and transom in preparation for fiberglass tape. A few areas needed a little more fillet material so those areas will have to be sanded again to make sure the tape and cloth will lay flat over the corners.
What is the consensus on sanding the fiberglass splice area in the hull bottom? I know it needs to be since it has been more than 24 hours since it was done, but my question is how much sanding. If I go over with the orbital the areas inside the weave of the tape don't really get sanded because the weave of the fabric sticks up higher. Basically you have tiny little squares that aren't sanded. Should I worry about these or just call it good enough?
24.5 hrs.
Re: Moonfish Build
Posted: Fri Feb 18, 2011 2:07 pm
by fishin'
I got the two chine seams rounded over and taped this week. Hopefully I'll get the keel and transom done this afternoon. Then maybe I can do the bottom cloth this weekend with a helper. Anyway, here are the pics.
sailing rig
Posted: Wed May 18, 2011 7:25 pm
by bratzcpa
Your boat project looks awesome - I enjoyed reading of some of the exact same "issues" that I am seeing on my first project too.
What do you think of this:
http://cgi.ebay.com/LATIN-SAIL-KIT-RIG- ... 2310ccae7e
The mast seems pretty "wimpy" at just 3 cm wide. But even if you'd use a stiffer pole for the mast, you sure can't beat the price for the rest of this stuff.
I'm doing a D5 and am starting to look for sail components - interested in your opinion(s).
~markb
Re: Moonfish Build
Posted: Wed May 18, 2011 8:08 pm
by ks8
Ah... this thread needed a bump.
How goes the build?
Re: Moonfish Build
Posted: Mon Nov 21, 2011 12:04 pm
by fishin'
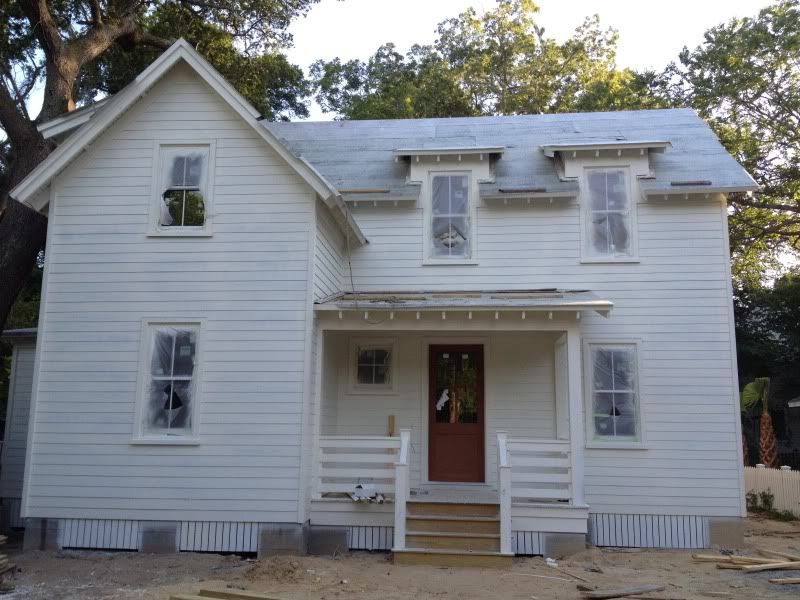
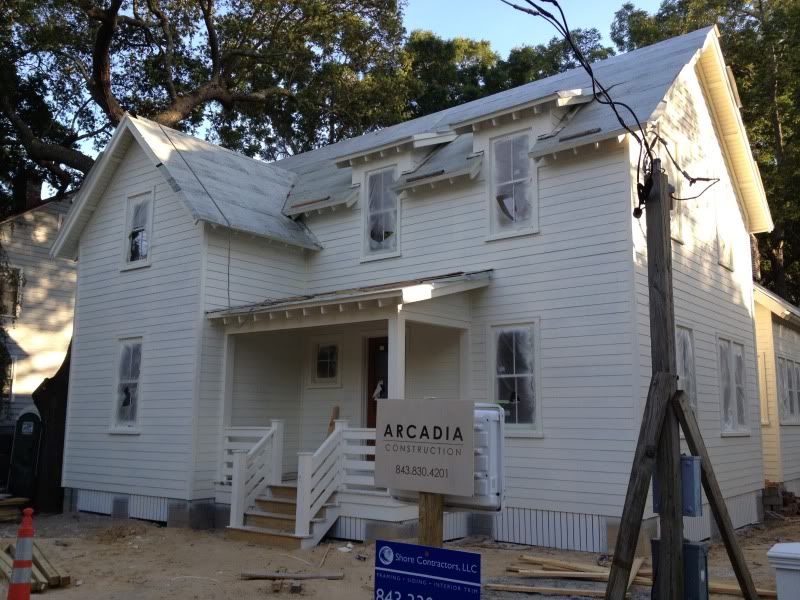
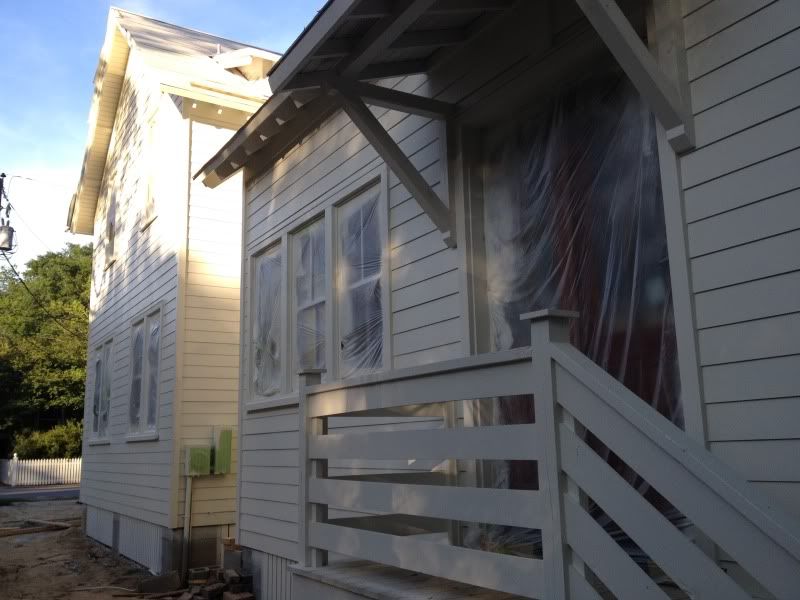
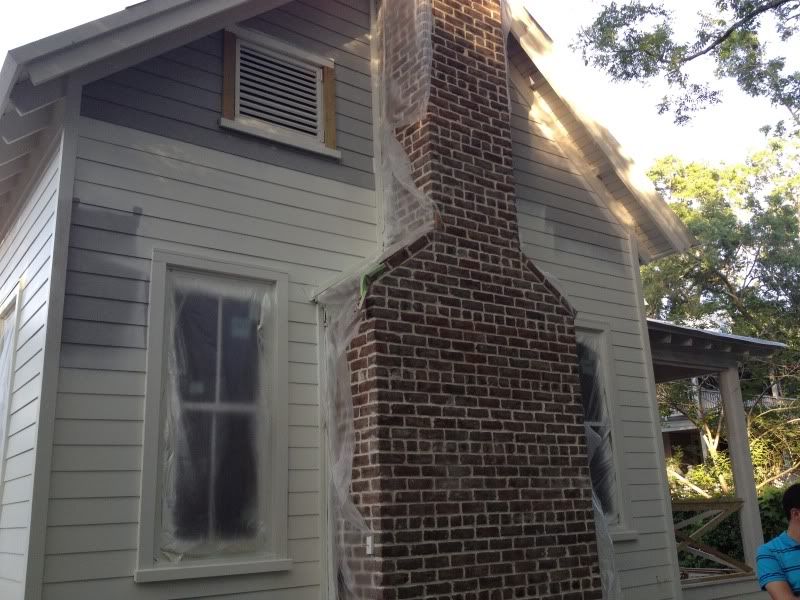
Hey guys. Unfortunately there is not much progress to report i've been pretty busy with work. Now, I am starting to build a new home for my wife and I. Hopefully when that is completed in 6 months or so I will get back to it. I should also be ble to move the boat to my new house which will substantially increase the amount of time I can spend working on it. I'll keep you all updated.
Re: Moonfish Build
Posted: Mon Nov 21, 2011 1:02 pm
by ks8
I think you're just trying to beat my record for how many years per foot length of boat, for the build time.
Wouldn't mind a picture of the new roof...
Re: Moonfish Build
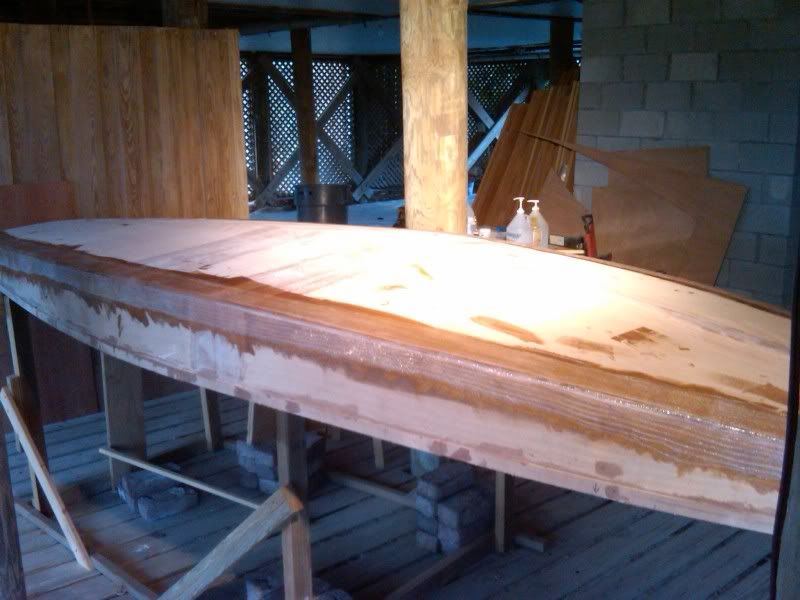
Posted: Sat Dec 31, 2011 10:15 pm
by fishin'
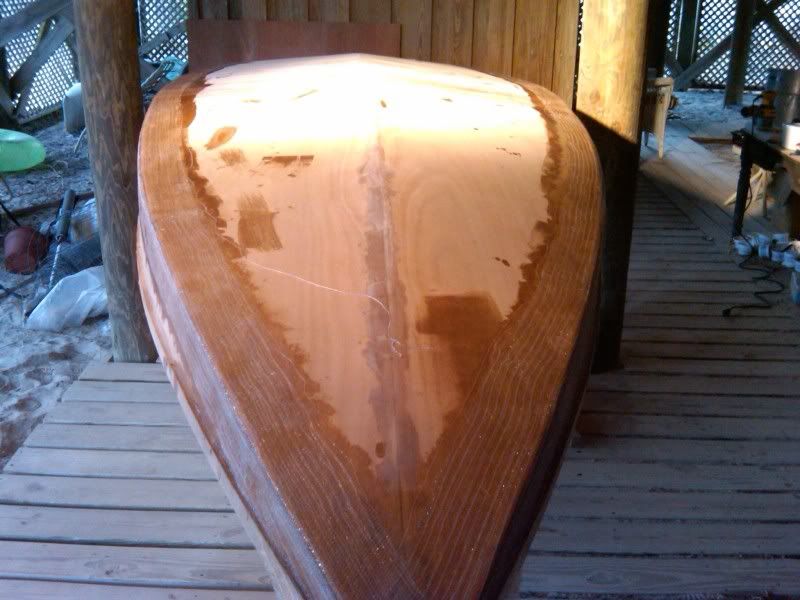
Thanks ks8. I hope i dont break any records but it is almost looking that way. I got the keel seam taped along with the transom and also glassed the bottom. Wet on wet with a big sheet of fabric is pretty tricky but i got it done. Hopefully my next progress wont take so long. I think were up to about 29 hours.
I cant get the photos to post with the ipad but they arent that exciting anyway. I'll put em up later.
Re: Moonfish Build
Posted: Mon Jan 02, 2012 1:45 am
by bondo
The hull picture above looks great. It looks very fast and fun to sail. Nice work Fishin'.
Re: Moonfish Build
Posted: Wed Jan 04, 2012 1:16 pm
by fishin'
I'm worried that i might have created a problem while laminating the cloth on the bottom of the hull. When wet I couldn't see any of this but now that it is dry there appears to be air pockets underneath some of the glass. There are a only a few big spots like pictured, but along the tape there are lots of tiny little areas where the fabric seems to be floating above the grid of the tape. It has been wet out but it is just floating. What do I have to do to fix this?

Re: Moonfish Build
Posted: Wed Jan 04, 2012 2:10 pm
by ks8
What kind of finish were you planning? Are you going to be fairing the hull?
If you are going to fair, you could *carefully* sand out those areas (or dremel or grind, then sand), reseal it with epoxy, cure, scratch up the new sealing cured epoxy a little for *tooth* and then fair. Small areas like that should be alright on this hull to be finished in that way. You will still have plenty cloth over the entire surfaces protecting things.
I had a few areas like that on my railcaps, but my problem was a little different because the railcaps are finished *bright*. To remedy the problem on them, I ultimately had to sand off the glass in the areas where the doug fir was gassing out and causing bubbles each season in the sun.
http://gallery.bateau2.com/thumbnails.p ... 202&page=6
You might have put a little too much epoxy on the cloth that overlapped the cured tape seam. The excess epoxy did not then *soak into* wood beneath, since there was a cured glass laminate beneath it, and the glass cloth floated up on top of the excess epoxy. I had this too in some small areas, being inexperienced with wetting out with epoxy. I didn't get air bubbles trapped.... I squished all those out with a stiff chip brush... but before the epoxy cured, I had slight bulges in the cloth by the time it cured, because the cloth floated up, as epoxy gathered under the floating cloth in small dime to quarter size areas. When I sanded prior to fairing, it made dime to quarter size areas where the cloth was completely removed, in maybe half a dozen spots. I sealed, cured, scratched for tooth, and faired over this and have had no problems at all in those areas, for several years of use.
If you want to absolutely have glass coverage there, grind out the larger bubbly areas, and put a glass patch over it with about 2 to 3 inches overlap, and then you'll need to fair that to feather the *bump scar*. I had one here, and the fix is doing fine... start at the 5th picture in. Since this was the bottom, I wanted the assurance of knowing the entire bottom, everywhere, is protected by glass, and that the football patch (that was causing the high spot) would not one day break out. Ah... the joys of working with cheap wood... NOT
http://gallery.bateau2.com/thumbnails.p ... 44&page=10
Larger bubble areas may bulge and delaminate if they get hot in the sun over time. A few tiny bubbles in an area where the hull will never get *hot*, should be alright, but again, if you want absolute assurance, you can clean it up and patch and fair. I have a feeling there are areas worse than that on quite a few hulls, that are doing alright, but the *peace of mind fix* is not difficult at all.
Re: Moonfish Build
Posted: Wed Jan 04, 2012 11:21 pm
by bondo
I like what Ks8 said. Don't worry about it at all. The seams look very strong. Finish sanding will tell you more about which areas want some attention. Fill them and paint. It will look and perform great.
Re: Moonfish Build
Posted: Thu Jan 05, 2012 10:25 am
by fishin'
thanks for the responses guys. You made me feel better. '
bondo- stop looking at my messy boat and go back to your perfect build thread
Re: Moonfish Build
Posted: Mon Jun 18, 2012 6:43 pm
by fishin'
Re: Moonfish Build
Posted: Mon Jun 18, 2012 7:18 pm
by gstanfield
Looking good
Re: Moonfish Build
Posted: Tue Jun 19, 2012 11:41 am
by fishin'
Thanks George, Can't wait to get back to boat building.
Peter
Re: Moonfish Build
Posted: Tue Jun 19, 2012 8:38 pm
by ks8
Re: Moonfish Build
Posted: Wed Jun 20, 2012 8:03 am
by Cracker Larry
Nice looking house, Peter
Good luck with the new family member

Re: Moonfish Build
Posted: Thu Jun 21, 2012 10:30 pm
by fishin'
Thanks larry. Not here yet. Just bothering momma for now.
Re: Moonfish Build
Posted: Thu Feb 26, 2015 10:00 pm
by fishin'
Just wanted to let everyone know that this build has not been abandoned, and I now have two boys! Also, I can't believe I started this 6 years ago. Hopefully I'll have some progress to report soon.
Re: Moonfish Build
Posted: Fri Feb 27, 2015 8:19 am
by Cracker Larry
Welcome back again
Re: Moonfish Build
Posted: Fri Feb 27, 2015 9:06 am
by jacquesmm
Soon you'll be able to sail with the boys!
Re: Moonfish Build
Posted: Fri Feb 27, 2015 12:24 pm
by fishin'
Thanks Larry. Jacques you're right!
Re: Moonfish Build
Posted: Fri Feb 27, 2015 2:22 pm
by Stuff
I am in the same situation. I have to kids (2 year old girl and a 3 year old boy) and they are a handful. I moved to a new home in June and have been remodeling since. Also I was traveling almost every week for the past 3-4 months. There is never time but with patient we will make it. Hang in there.
Re: Moonfish Build
Posted: Fri Feb 27, 2015 3:32 pm
by ks8
It's not like you haven't been building.... just not boats.
Glad you'll be back at it soon.
Build on!