Page 1 of 1
AD16 Karenina
Posted: Tue Oct 23, 2012 10:53 am
by Stuff
Hello Everybody,
I decided to build a AD16 and I can't be more exited : D ! Last weekend I began building the cradle and this weekend I will be picking up the CNC Kit from Bateau. I decided to go with the Kit due to time constraints (My wife is having a baby at the end of February). This will be my first boat of any kind therefore I will be asking lots of questions. Hopefully everything goes smooth and get to set sail by December 5 of 2013 (My wife’s birthday). If you have any advises for a newbie please don’t hesitate to write.
Thanks
Re: AD16 " Karenina"
Posted: Tue Oct 23, 2012 11:45 am
by jacquesmm
Good plan: one year is reasonable for that boat.
If you have technical questions after taking delivery of the kit, please post in the technical section.
There are several good thread about the building of AD14/16's.
Re: AD16 " Karenina"
Posted: Tue Oct 23, 2012 9:08 pm
by ks8
Congrats on the start, boat... and baby.

Is your shop climate controlled? Heat? AC? If not, tell us the avg temps so you can get the right hardener purchased to get started in the temps you will be experiencing, pre-baby.
Re: AD16 " Karenina"
Posted: Wed Oct 24, 2012 8:44 am
by Stuff
I am building the boat in my garage , which is a slow cooker in the summer. I live in Orlando therefore it should be around 80 degree . Thanks
Re: AD16 Karenina
Posted: Thu Oct 25, 2012 1:04 am
by ks8
In that temp range of 80F. I like slow hardener, particularly on larger glass laminations, or for things like bonding down a seat top or deck or sole. It sometimes takes awhile to get those things right, and fast or medium hardener can *go off* before you're done. But I also find the *fast* hardener handy for a smaller job, if I will have sufficient working time to get it done and settled and cleaned up *in place*. Budget mindedness might hope to get just one speed hardener, but it can be sooooooooooo handy to have another speed hardener on hand, so you might want to pencil that into your *expanded* budget...
Re: AD16 Karenina
Posted: Thu Oct 25, 2012 2:12 pm
by AMC
I don't even sail, and I think that is a very cool little boat.
With a total of 15 gallons of epoxy needed (that means 5 gallons of hardener) I would also recommend you get a gallon of fast to go with the slow. (maybe 1/2 gallon) I like the slow, I like the open time, but there will be days, where you do some small work, and have to stop working for 12 - 24 hours till it sets. And that is not productive.
Re: AD16 Karenina
Posted: Fri Oct 26, 2012 4:11 pm
by Stuff
Thanks for the Advise guys. I went over Bateau this afternoon and got 1 gallon of medium hardener. They were vey nice and help me with every question I had. I will begin the building process next week and I will start to post picutes then.
Re: AD16 Karenina
Posted: Sat Oct 27, 2012 5:53 pm
by bondo
Hi Stuff. Bondo here. I was planning to summarize my experience building the AD 14 when finished but it seems that you are ready to go. So, winging it, I will throw out some thoughts.
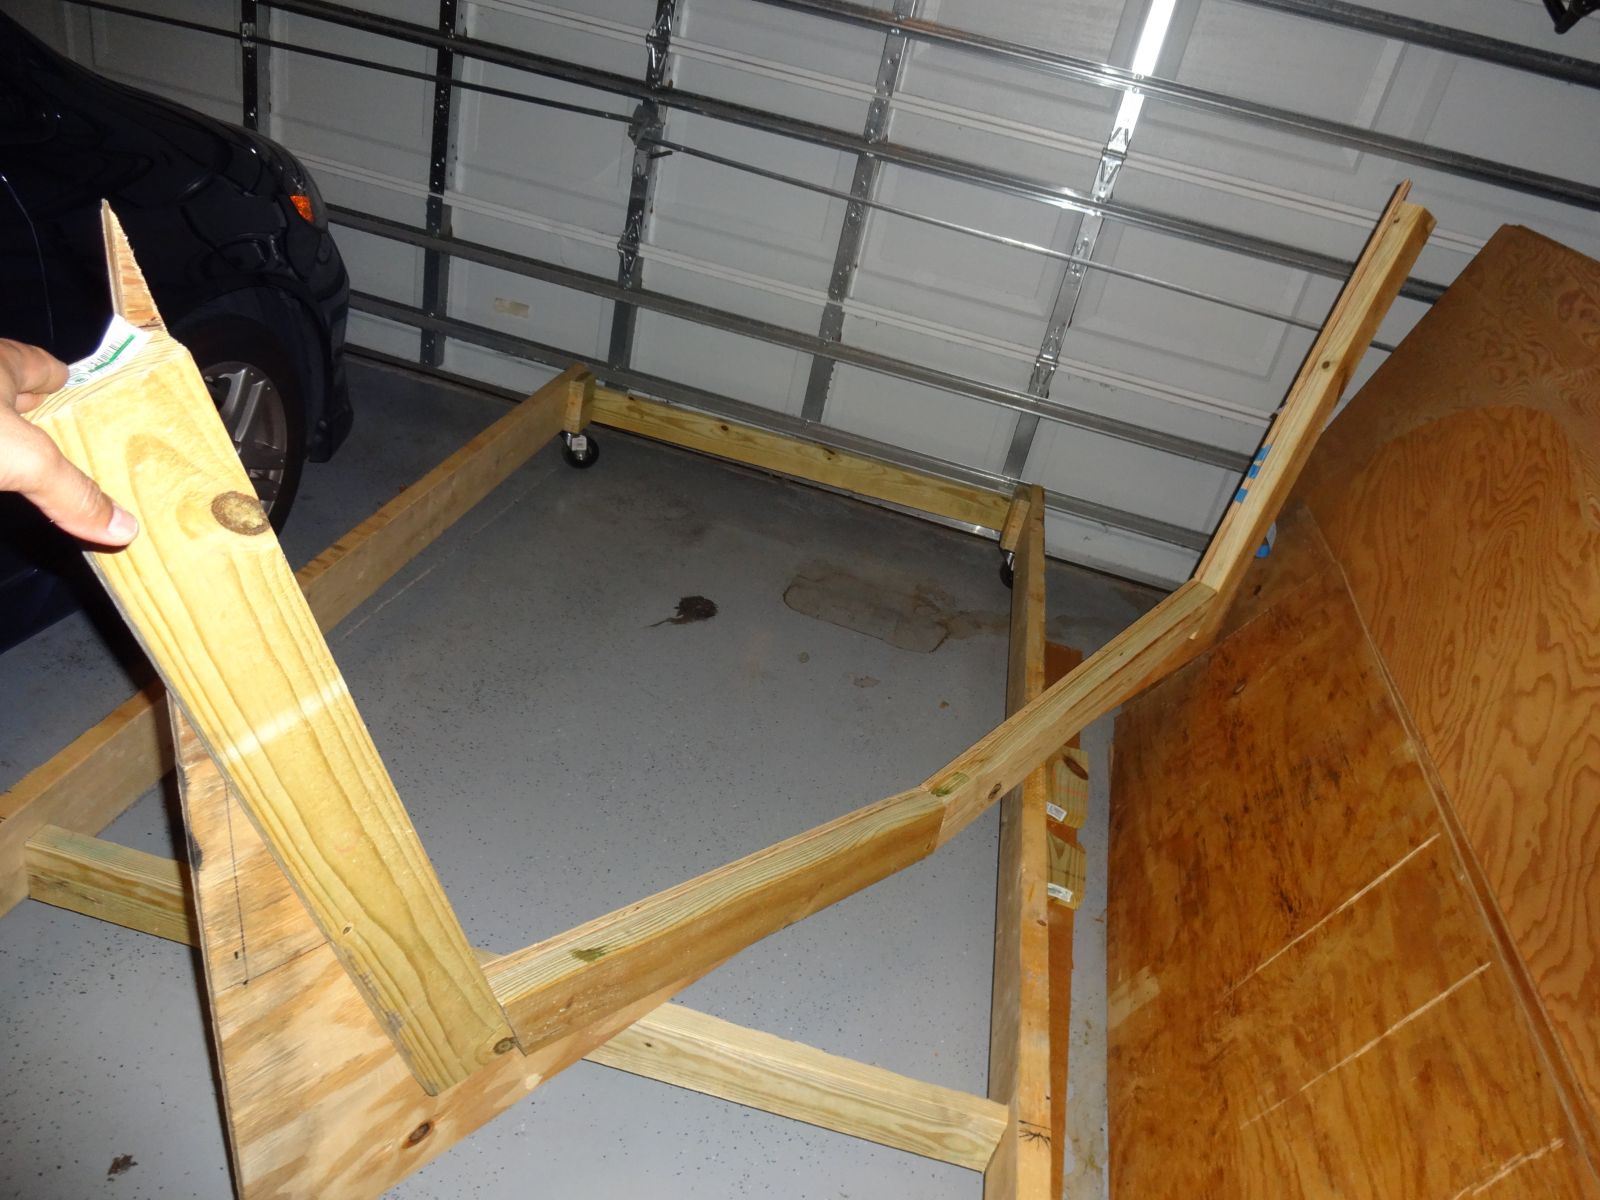
1: If you make a rolling cradle by chance, have two of the wheels fixed and two steerable.
2: Jacques knows what he is doing. Do things his way.
3: This boat is very strong. I glassed more areas than the minimum but it was not necessary.
4: I did not use as much epoxy as the plans suggested. The designers are correct about estimates. I used premixed fillet material and gel instead of mixing everything from scratch.
5: I would coat all parts from the kit with epoxy on both sides before proceeding. (read number 2 again)
6: The fillet size suggested seemed too small for me but in the end, I just added weight and expense. I like it, but unnecessary. The best radius working tool for each joint will not always be the same size.
7: I believe there is a problem with the full size pattern for the centerboard. I think something compressed in the printing? The other builders did not have a problem and Jacques saw nothing wrong. Just check it for me.
Re: AD16 Karenina
Posted: Sat Oct 27, 2012 7:25 pm
by bondo
8: With every modification I have made from Jacques plans, I could later tell you why he did not design it that way. Be very careful.
9: You have to fiberglass the inside bottom of the hull. It is shown on the drawings but is omitted in the step by step instructions. Again, the others did not seem to have any problems. Fiberglass the inside bottom before you install any frames or stringers.
10: The elevation of the centerboard trunk in relation to baseline was confusing to me as drawn. Probably drawn correctly. Just saying.
11: The AD 14 plans list the mast rake at 2degrees but should read 5 degrees. The boats share the same centerboard and rig so I would check.
Re: AD16 Karenina
Posted: Tue Oct 30, 2012 7:35 am
by Stuff
Bondo,
I have being looking at your work and you have excellent workmanship. I hope my boat can look half as good as your!!

I want to thank you for your advices and let you know that you inspire me to take this challenge. If somebody can do a sailboat in a small shed then I can do it in my garage. It is funny that you mention to fiberglass the bottom of the hull before installing any stringers because I ask the same question to Joel when I went to Bateau. By the way they are very impress with your work as well. About the wheels, yes I am putting the cradle in 4 well but because I need to move the boat in every direction I decided to put 4 swivels instead of two but they all have stops. Can you tell me why you put only 2 swivel wheels?
Re: AD16 Karenina
Posted: Tue Oct 30, 2012 10:29 am
by AMC
Stuff wrote:... I went over Bateau this afternoon and got 1 gallon of medium hardener. ...
Must be nice to be that close.
Re: AD16 Karenina
Posted: Thu Nov 01, 2012 11:59 pm
by bondo
Hi Stuff. I put swivel wheels on my cradle for the same reasons you did. I just wish I had one pair fixed so it is easier to control. I used a laser (bubble stick would be fine) to set the hull level in a specific location inside my shed. Then I could roll it all over different grades (the hull could twist) when I rolled it "home" it would sit level again. Be sure not to glue up the hull parts with the cradle in different locations unless you know your garage slab will allow it. Mark the centerline and other reference marks on the hull and cradle accordingly so you will be able to confirm the hull doesn't wander around on the cradle. I even had screws through the hull panels in the early stages to assure the hull stayed in the correct location on the cradle.
Re: AD16 Karenina
Posted: Fri Nov 02, 2012 1:23 pm
by Stuff
Thanks for the advice Bondo,
In the incoming weeks I am hoping to finish the basket. At this point I am concentrating on the lamination process. I Follow your advice and decided to buy some gel magic for lamination and putting togeteher the Transom, Ruder, Keel, centerboard and centerboard gabinet. I have not being able to post any pictures this week but hopefully this weekend I get a chance. I check my garage floor and I got lucky because the floor is relative level at any position.
Re: AD16 Karenina
Posted: Sat Nov 03, 2012 3:15 pm
by bondo
I started like you but held off on the cradle. The workspace is most comfortable to build in when there isn't some big plywood boat in the way.
Re: AD16 Karenina
Posted: Sat Nov 10, 2012 10:38 pm
by Stuff
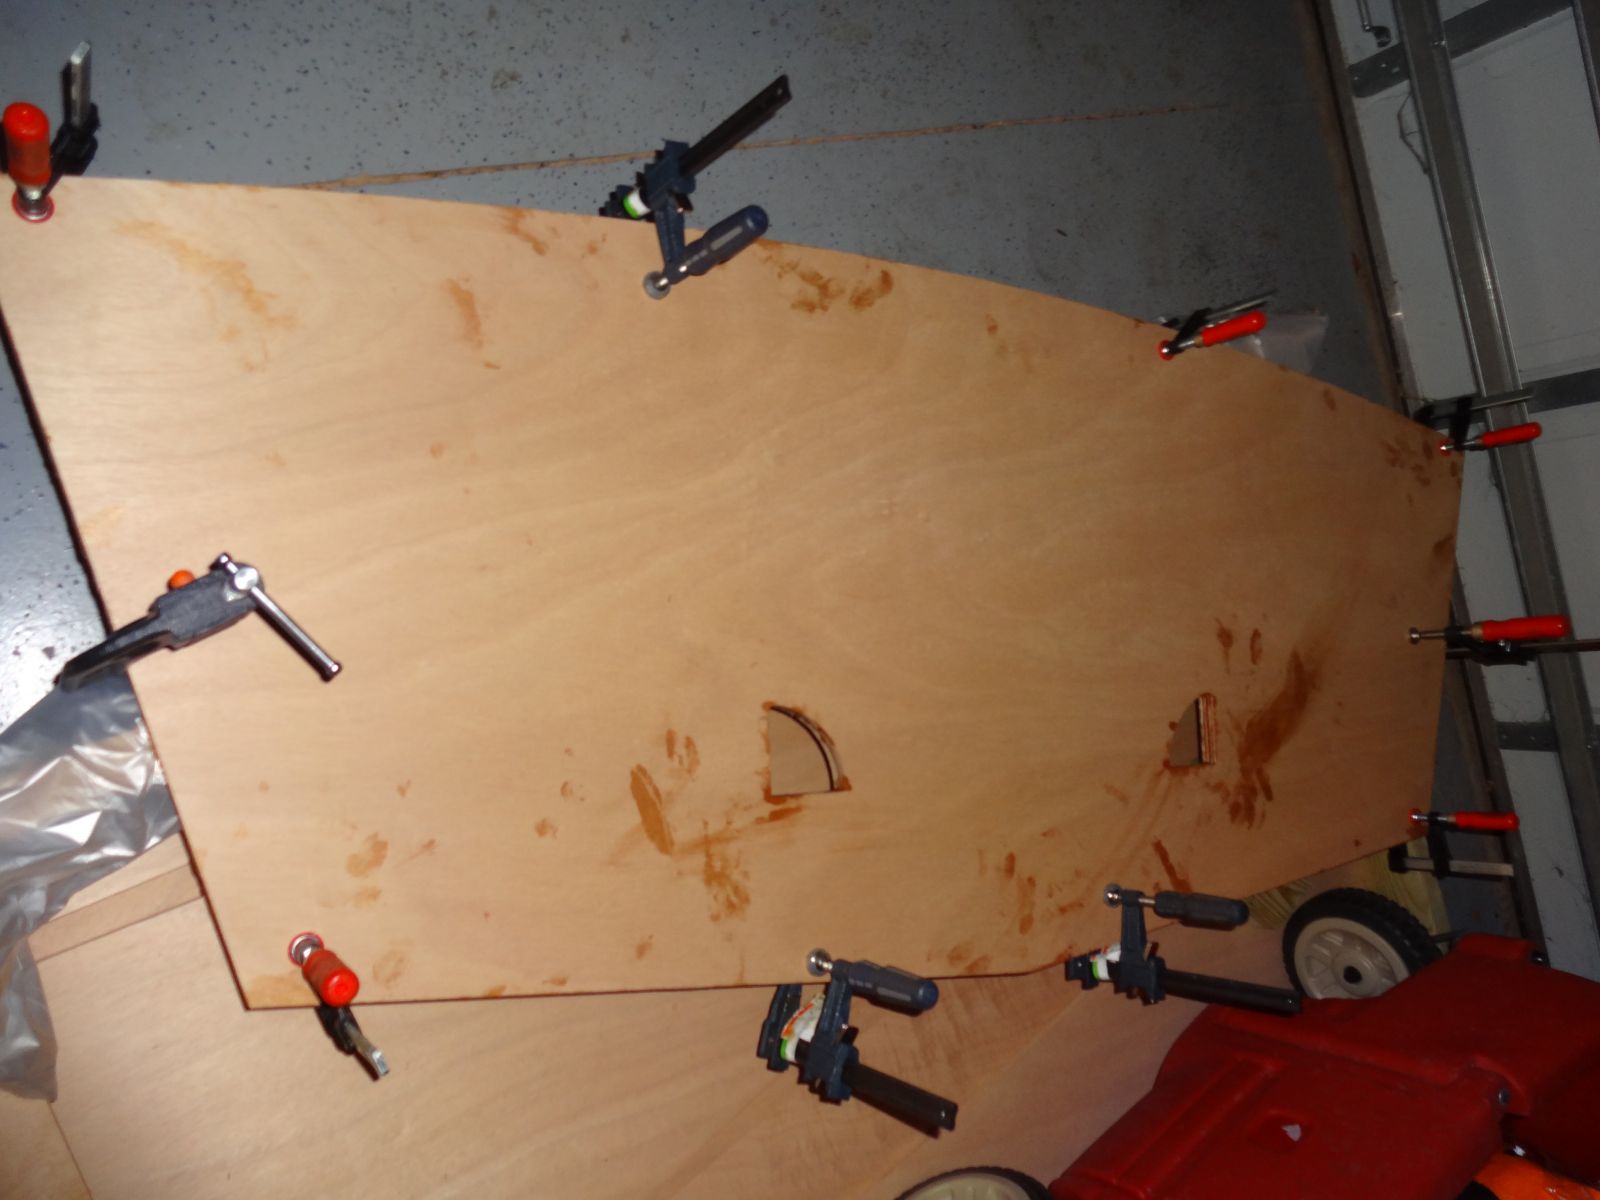
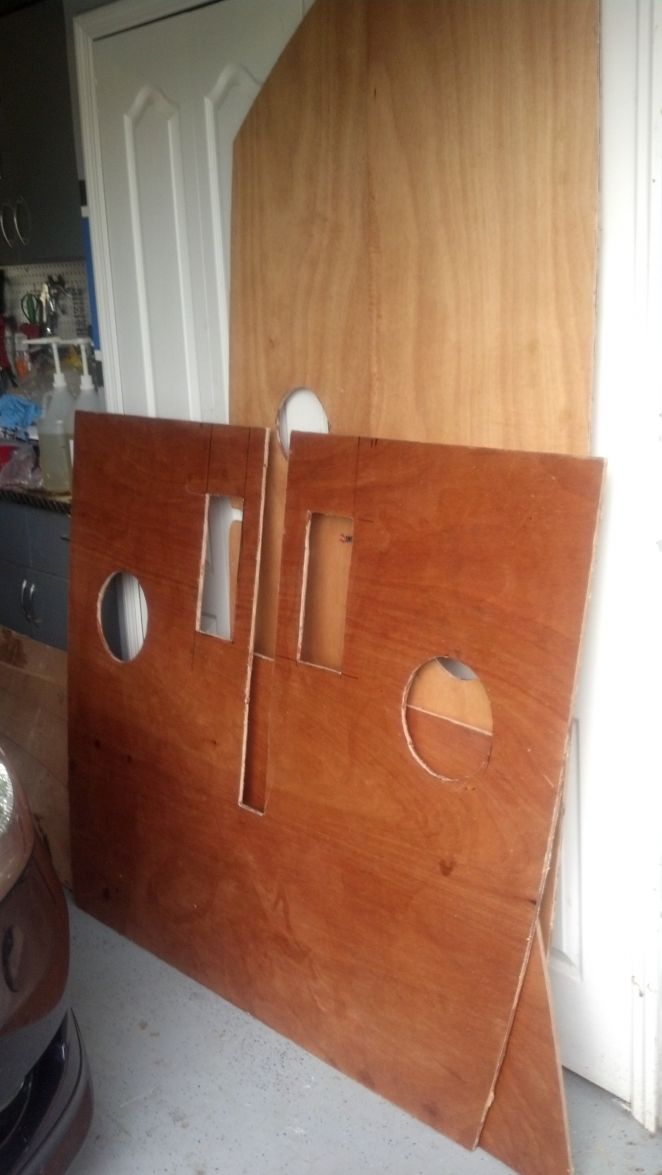
Here is m fist attempt to built the basket
Re: AD16 Karenina
Posted: Sat Nov 10, 2012 10:39 pm
by Stuff
Re: AD16 Karenina
Posted: Sat Nov 10, 2012 10:41 pm
by Stuff
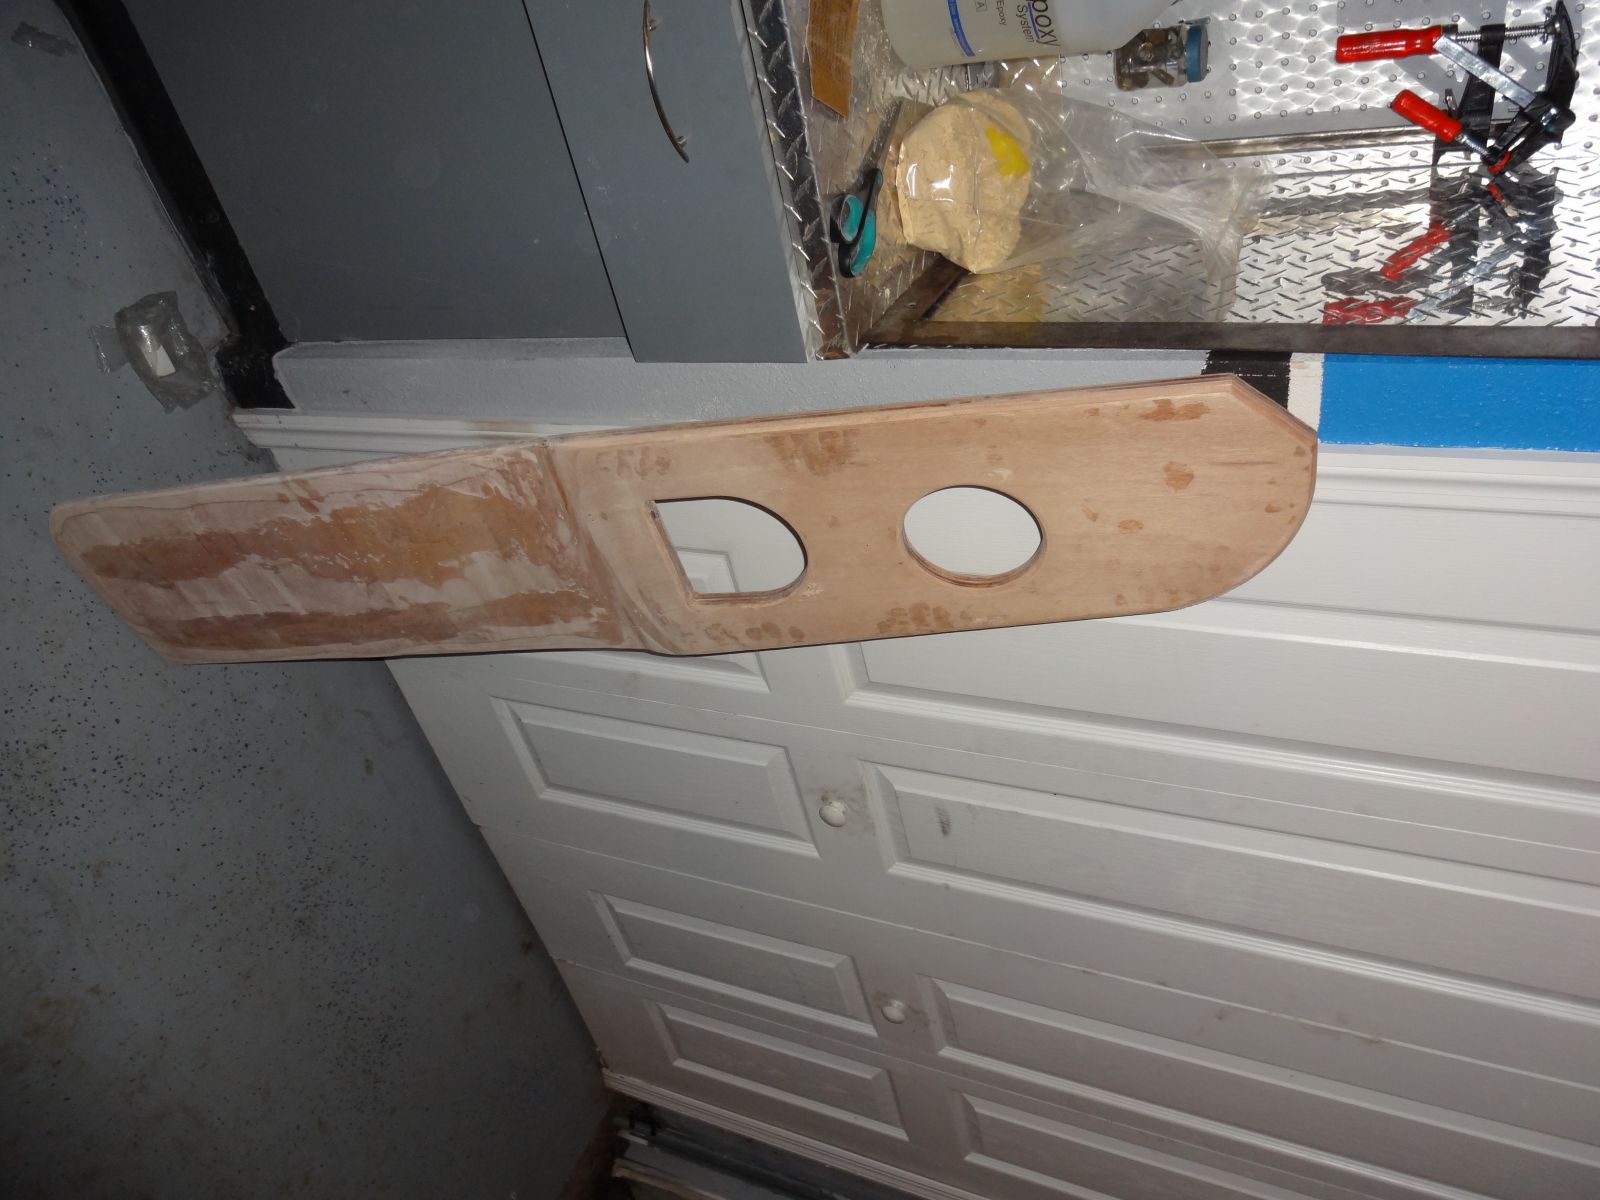
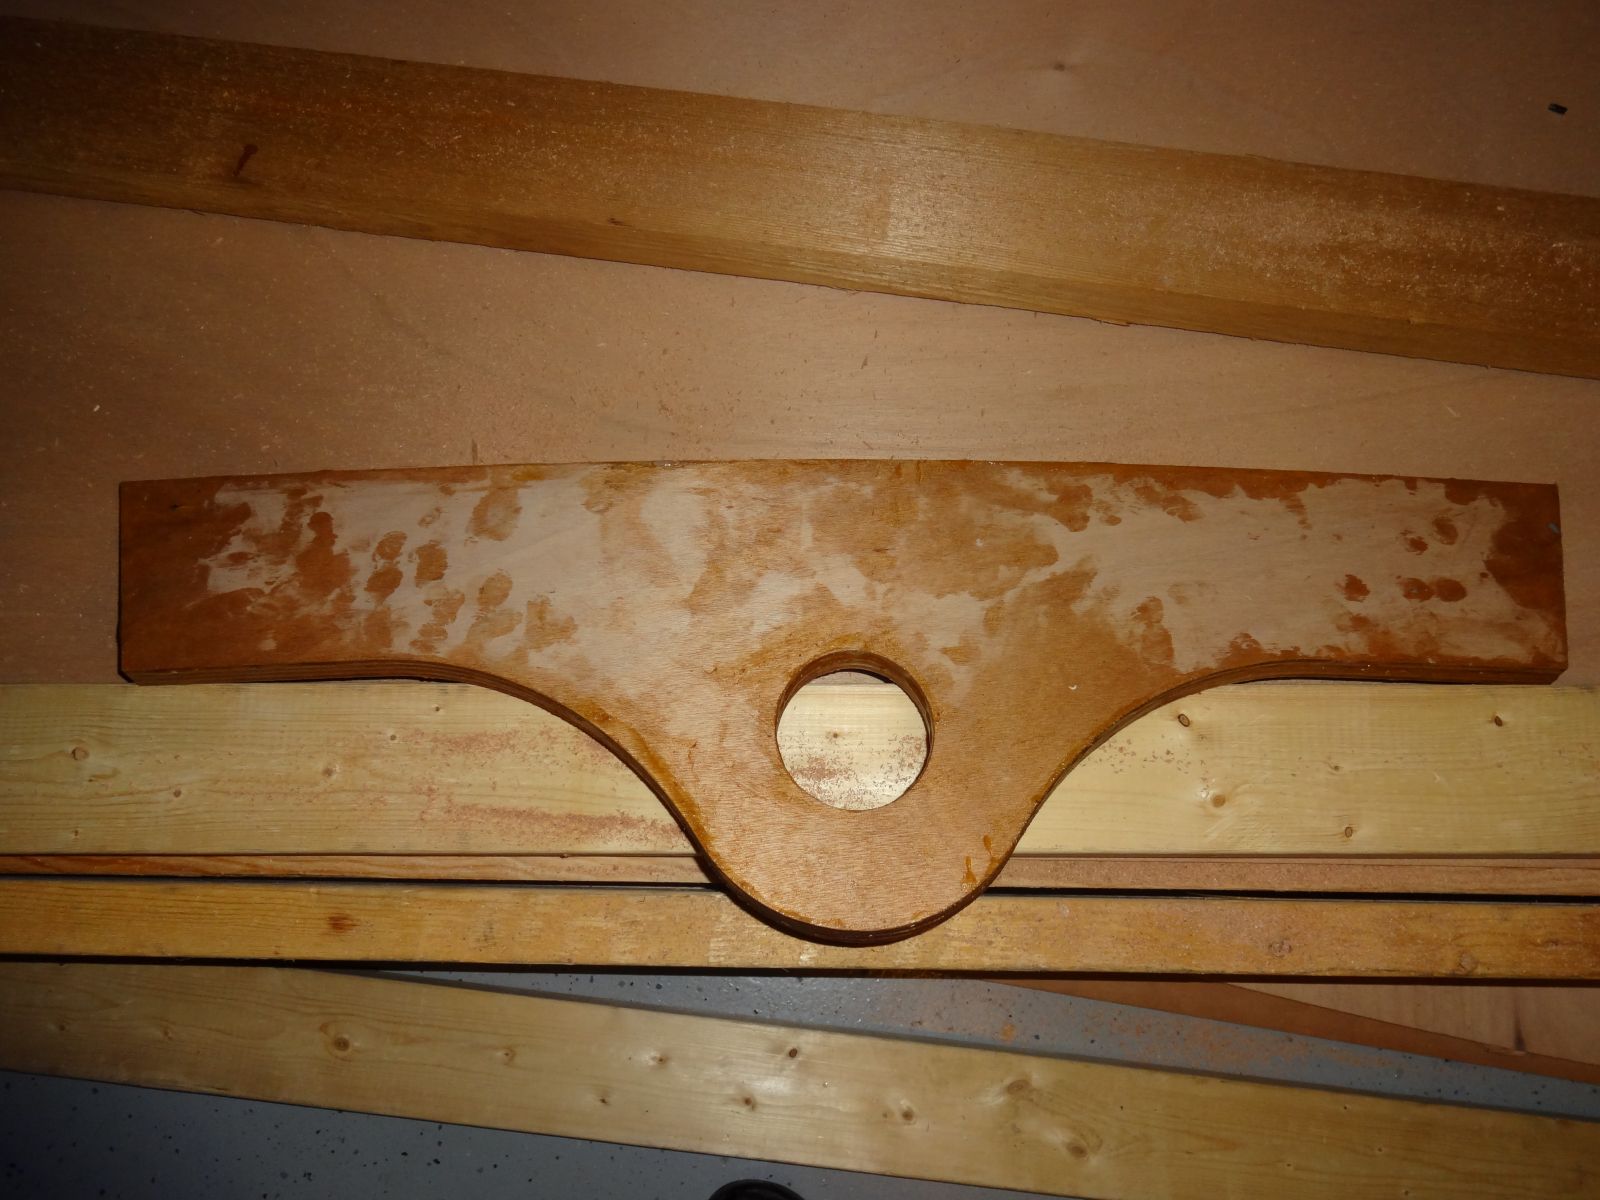
Cutting the Rudder. After gluing it my dad decided to make the profile. Next week I will post the pictures.
Re: AD16 Karenina
Posted: Sat Nov 10, 2012 10:46 pm
by Stuff
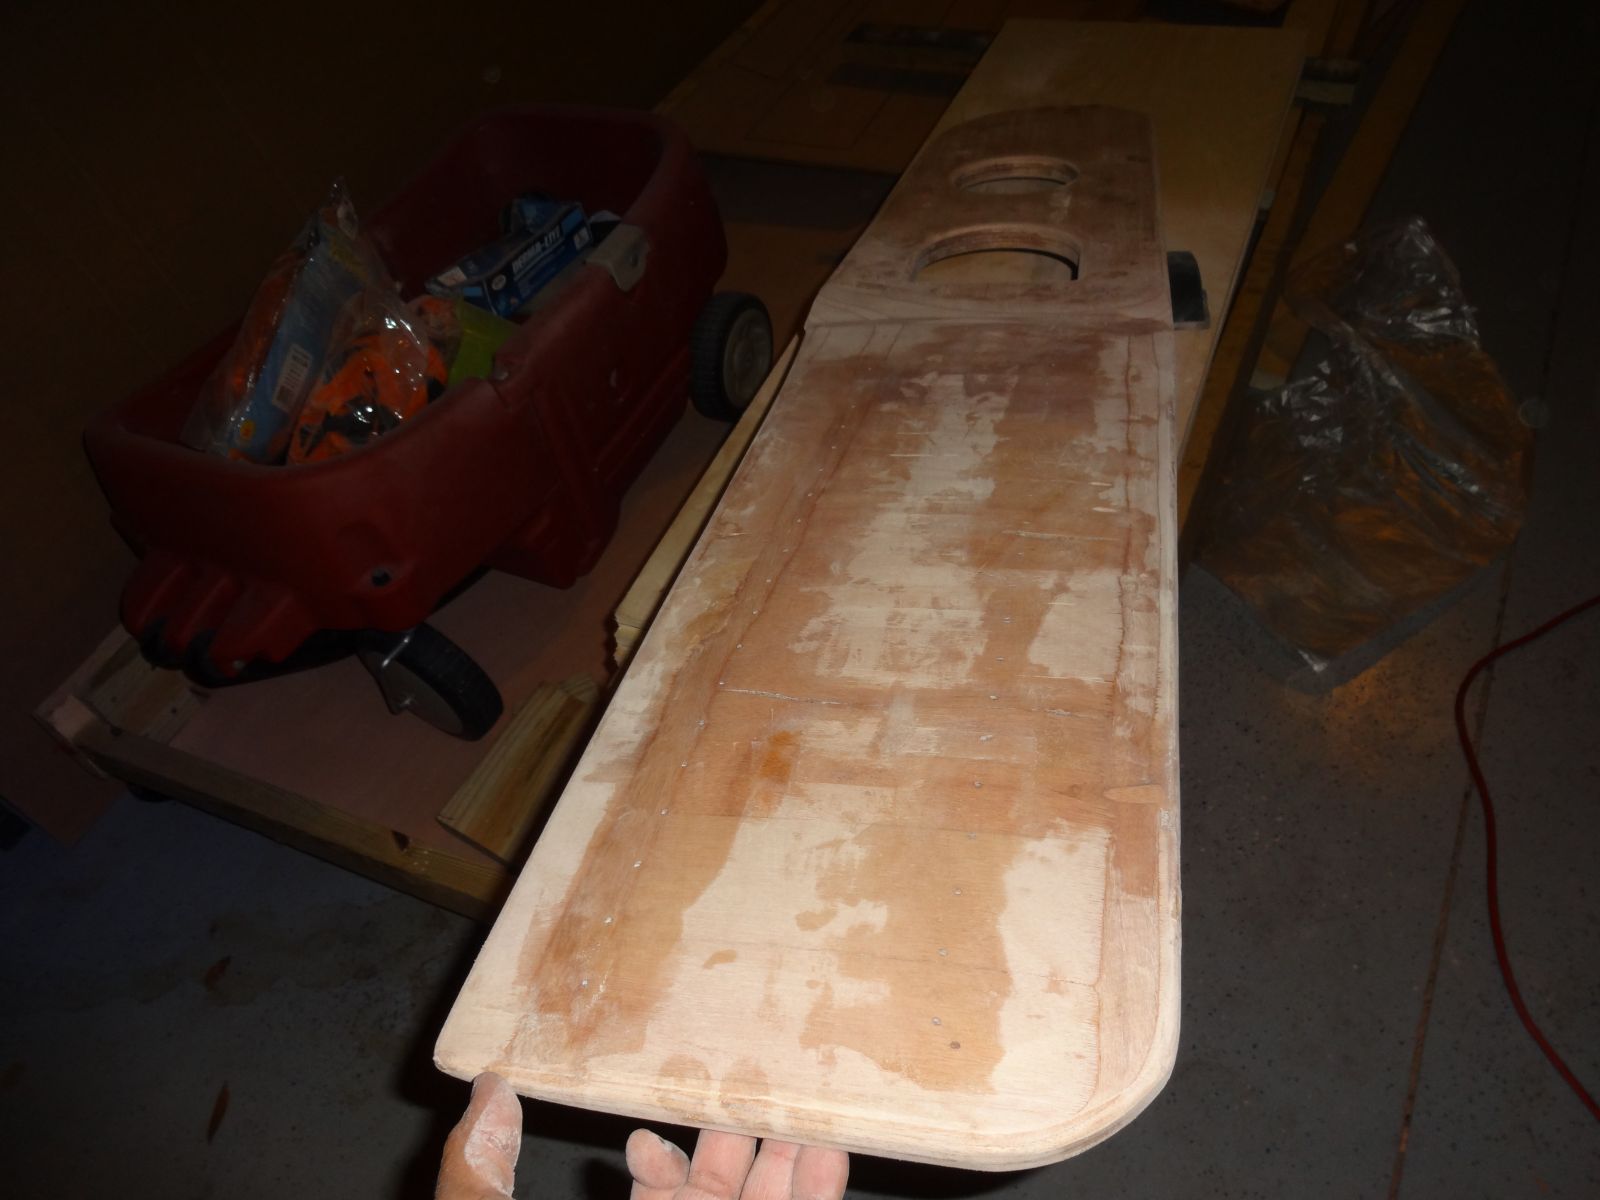
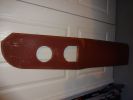
Here is the centerboard. I need to make the profile before adding the lead.
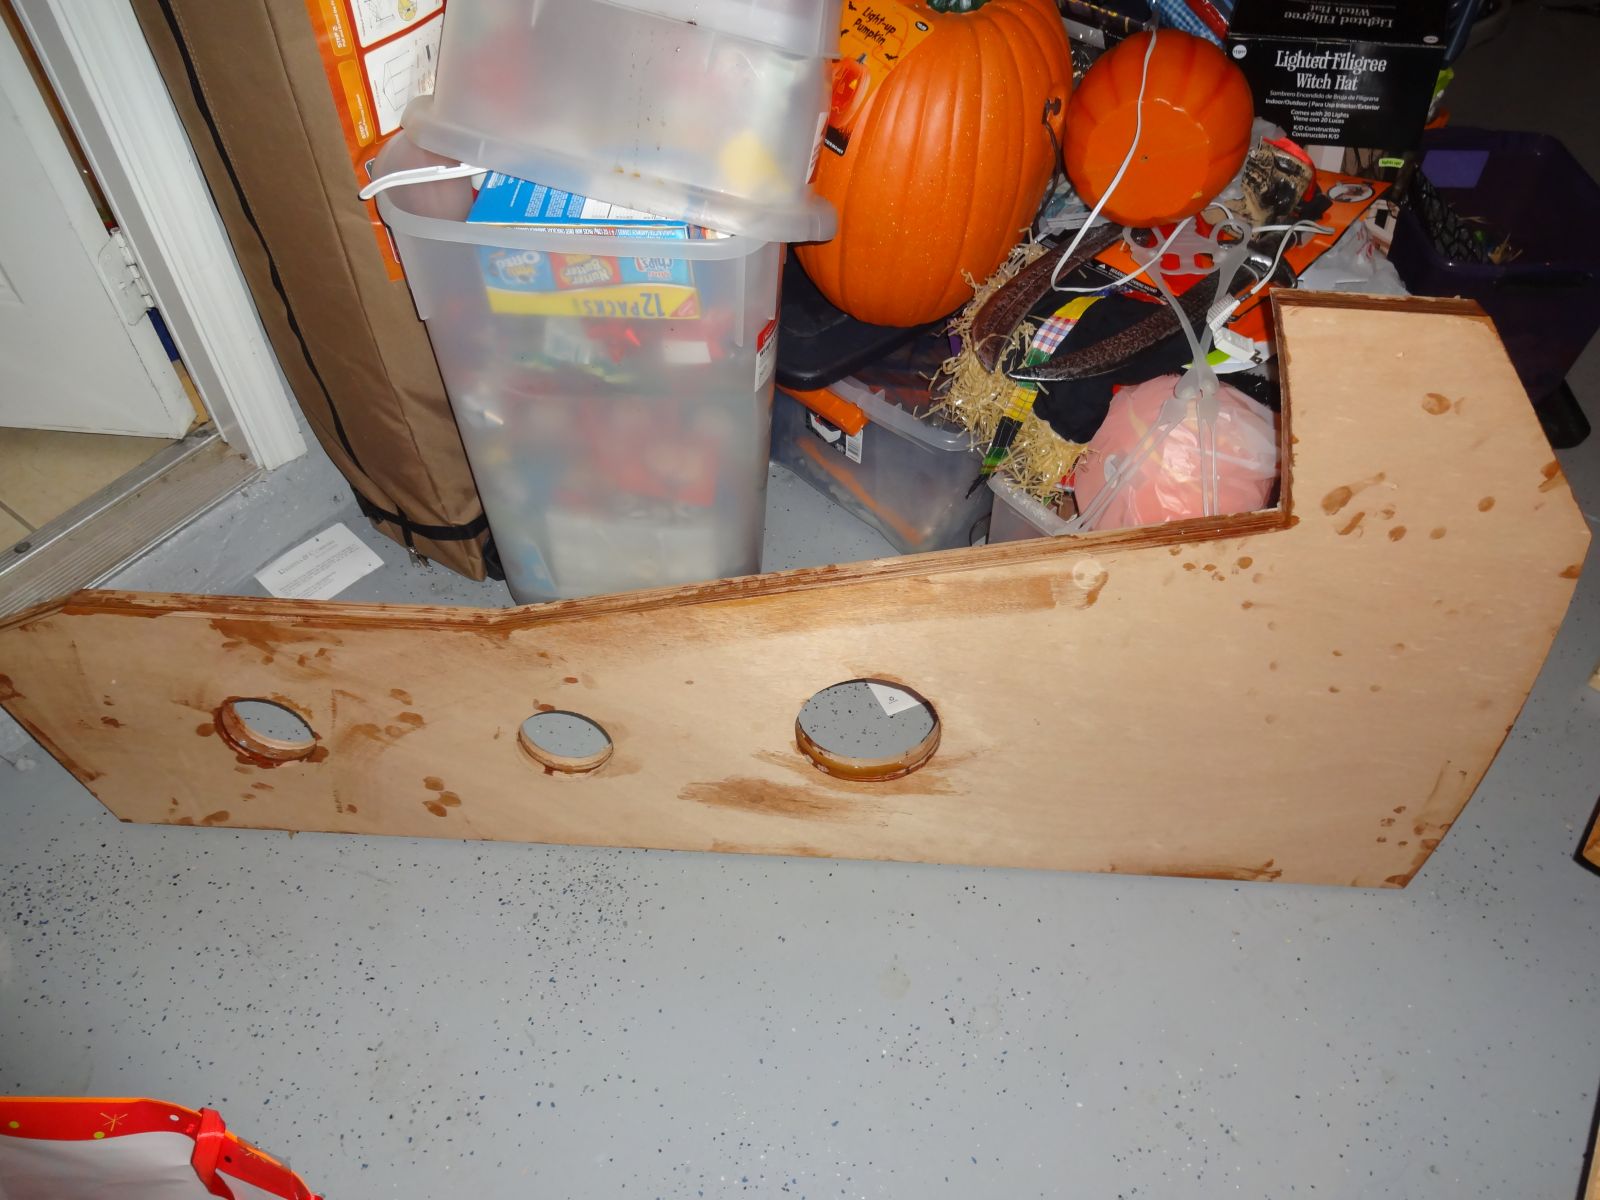
. All the Halloween decorations in the back.

I need to organize the garage!!!
Re: AD16 Karenina
Posted: Sat Nov 10, 2012 10:48 pm
by Stuff
Finished gluing the transom.
So far everything is OK
Re: AD16 Karenina
Posted: Sat Nov 10, 2012 10:52 pm
by Stuff

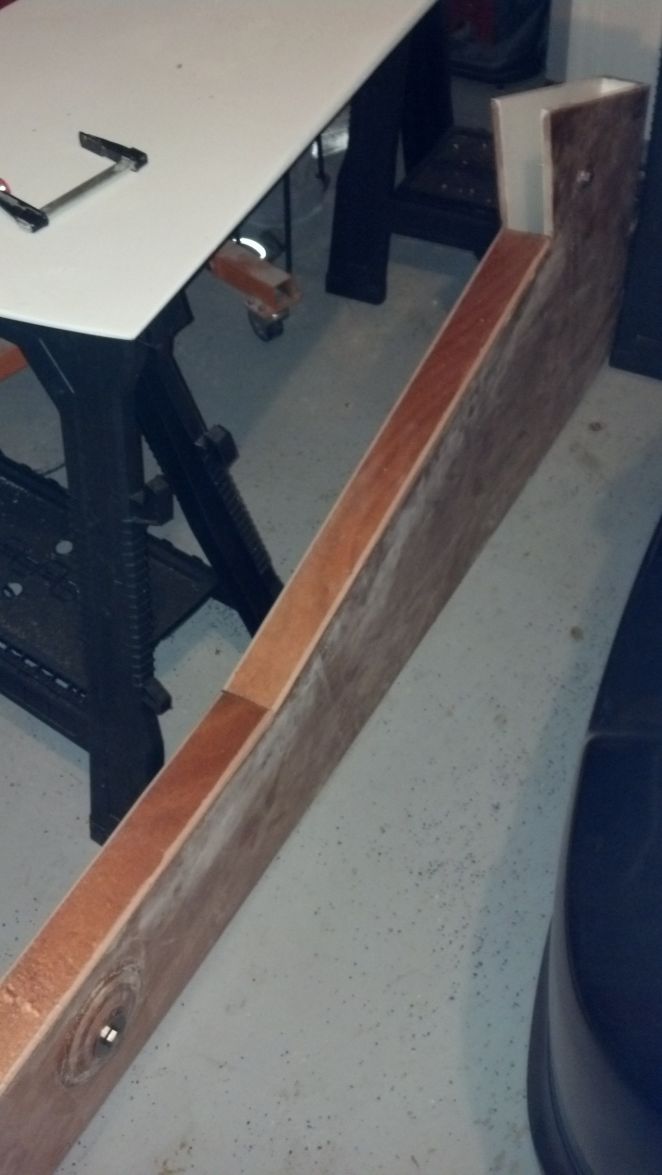
my first big mistake. I decided to laminate the mast painter but forgot that it need to be bended. I was able to bend it with some deep cycle batteries but it was not enough. I need to cut a few groves in order to get the desire curvature.
Hopefully it can be fix!
Re: AD16 Karenina
Posted: Wed Nov 14, 2012 9:42 pm
by bondo
Looks good Stuff. Glad to see the pictures.
Re: AD16 Karenina
Posted: Wed Nov 14, 2012 10:31 pm
by Stuff
Thanks Bondo
Here is a picture of the ruder after my dad finished the profile. I think he did awesome for a first timer.

Re: AD16 Karenina
Posted: Wed Nov 14, 2012 10:32 pm
by Stuff
Re: AD16 Karenina
Posted: Sat Nov 17, 2012 6:12 pm
by bondo
The rudder looks great. I lost mine. Seriously, I lost my rudder and have to make another.
Re: AD16 Karenina
Posted: Sun Nov 18, 2012 6:18 pm
by Stuff
Bondo
That really sucks. specially now that i know the work that goes in a rudder. Today I finish fairing the ruder and is ready for build up primer. Any suggestion on which brand I should use?

Re: AD16 Karenina
Posted: Sun Nov 18, 2012 9:17 pm
by bondo
I would check with ks8 or Cracker Larry. Most seem to go with a two part system. I went with a one part paint. I don't have much first-hand experience with finishing. The "paint" section of this forum will help.
Re: AD16 Karenina
Posted: Sat Nov 24, 2012 6:32 pm
by ks8
I like the system 3 two part epoxy primer. I 'think' it is compatible with most finish systems, but if you want the 100% guarantee of compatibility, then get the primer recommended for your choice of topcoat finish system.
Re: AD16 Karenina
Posted: Sun Dec 02, 2012 11:36 pm
by Stuff
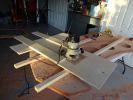
creating the centerboard profile. I used a router with two profile jigs. I have a 1/8" two finish with the belt sander. I came out great!

Re: AD16 Karenina
Posted: Sun Dec 02, 2012 11:37 pm
by Stuff
Here how it looks with the router jig.
Re: AD16 Karenina
Posted: Sun Dec 02, 2012 11:40 pm
by Stuff
Here is the rudder after laminating it with a biaxial 12 oz. layer in both side. After reading stories from you guys I decide to fiberglass it.
Re: AD16 Karenina
Posted: Tue Dec 04, 2012 8:46 pm
by Stuff
Ready to poor the lead into the centerboard but @ $1.60/ lbs I probably wait until after the holidays

Re: AD16 Karenina
Posted: Wed Dec 05, 2012 2:19 pm
by ks8
I enjoy watching how builders 'tool up' for a particular task. If I weren't so busy now, this would inspire me to make a spare foil or two for the CV16.
Looking good.

Re: AD16 Karenina
Posted: Thu Dec 13, 2012 12:14 pm
by Stuff
I am super happy because I found some clean lead for on $1.00 per pound. No Taxes, No shipping. I am going to pick it up this Friday. Now, I need to figure out a stadegy to fill the centerboard with lead. If you have a sugestion please don't hesitate to write since this is going to be my first time melting lead.
Re: AD16 Karenina
Posted: Thu Dec 13, 2012 12:25 pm
by jacquesmm
A sand mold is easy. Do a search, there are many web pages about lead melting, it's not very difficult.
Re: AD16 Karenina
Posted: Sun Dec 23, 2012 12:03 pm
by bondo
I was able to have it poured by a local shop. Screwed plywood flush to one side, laid it down and filled with lead. Weighed exactly one pound from plan. Expect some burn around edges. Filled around edges with epoxy and fiberglassed centerboard.
Re: AD16 Karenina
Posted: Thu Jan 03, 2013 7:57 am
by Stuff
Thanks Bondo. I used your method and it worked great. The only issue I have is that the plywood slighly bended creating a 1/8" bumb on each disk. I am grinding the disks this week and I will post pictures.
Re: AD16 Karenina
Posted: Thu Jan 03, 2013 8:42 pm
by Stuff
Here is the Centerboard after pouring the lead
What a pain in the you know what


. Finally I found a use for my turkey fryer.
Re: AD16 Karenina
Posted: Sat Jan 05, 2013 12:48 pm
by bondo
That looks great. The centerboard was the most time consuming part for me to build and finish. It is a handful to muscle that thing around.
Re: AD16 Karenina
Posted: Wed Jan 09, 2013 2:20 pm
by Stuff
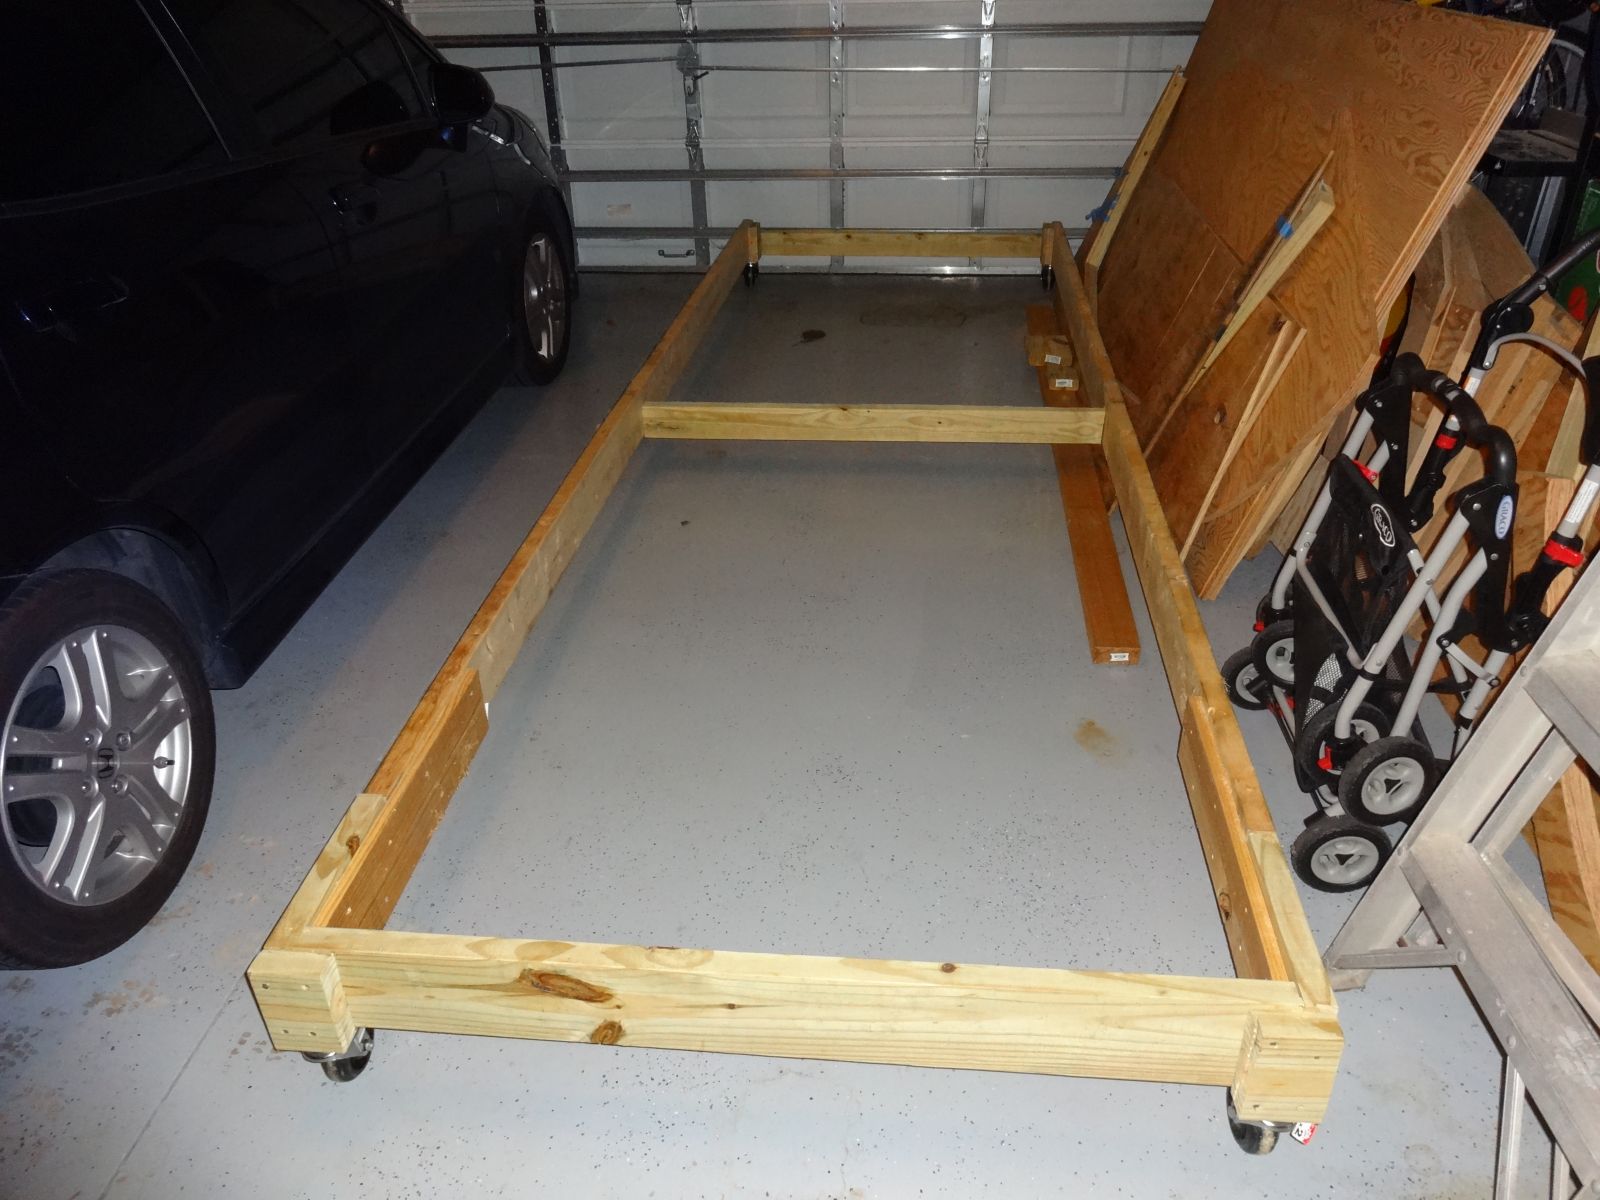
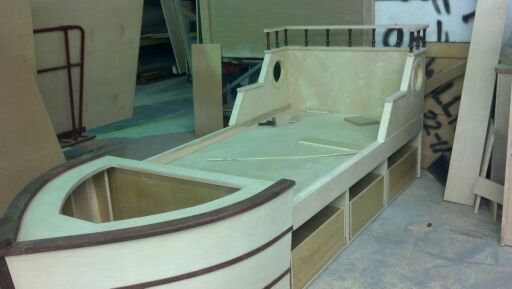
I have to stop bulding the boat for a moment and concetrate on building a bed for my son.
Well becasue he likes Jake and the neverland pirates I decided to build a boat bed with my dad. So far this is how is looking.

. He is going to love it
Re: AD16 Karenina
Posted: Thu Jan 10, 2013 12:55 pm
by Stuff
Looking good
. Here is the where the mattress will be sitting
Re: AD16 Karenina
Posted: Tue Jan 15, 2013 12:40 am
by bondo
Really cute, Stuff. Bookshelf headboard? Someone is going ask Jacques if they can add a cabin to the design.
Re: AD16 Karenina
Posted: Tue Jan 15, 2013 5:10 pm
by Stuff
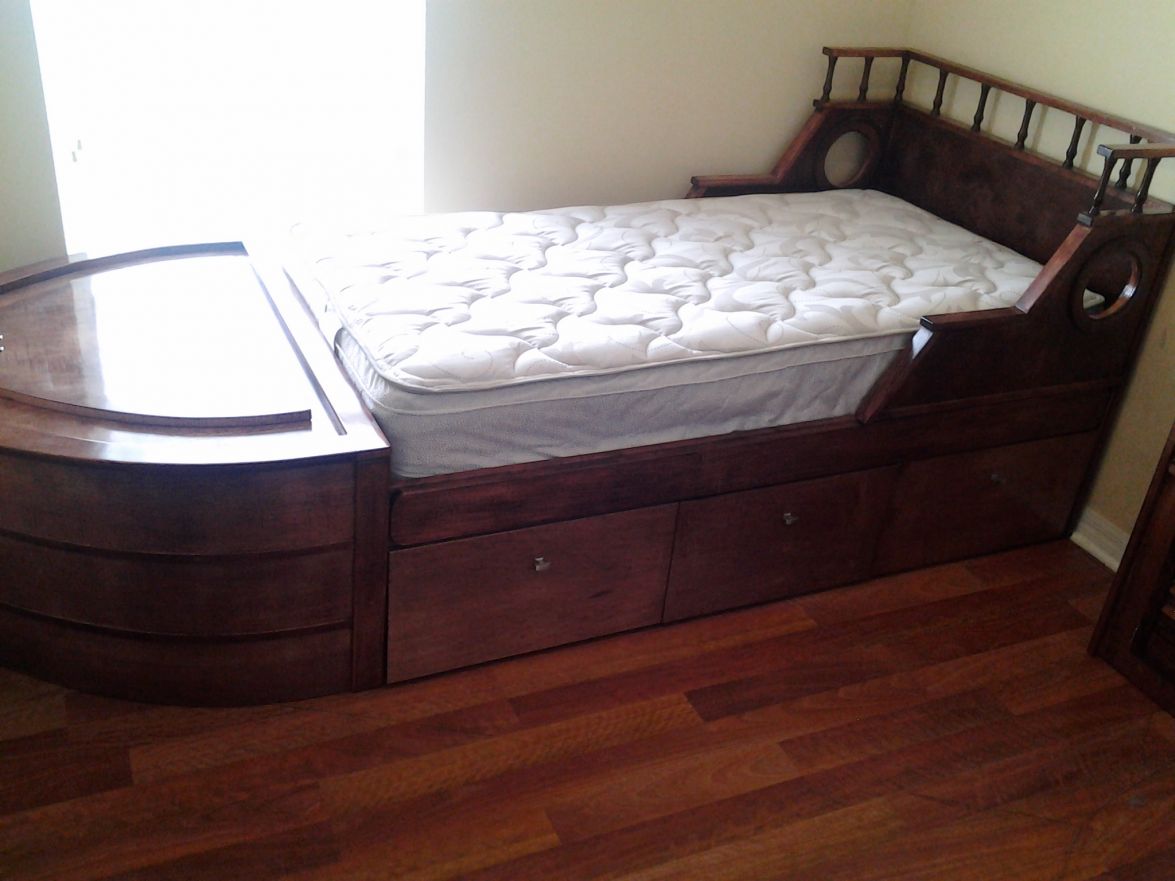
Almost done with the bed
it is so easy when you dont have to fiberglass of fair anything
Re: AD16 Karenina
Posted: Tue Jan 15, 2013 5:14 pm
by Stuff
Bondo I had to remove the shelf because it was not going to fit the room. So I have to modifiy it. It looks better this way anyway.
Re: AD16 Karenina
Posted: Wed Jan 16, 2013 1:47 pm
by ks8
nice! will there be a mast with light(s) and recognizable constellation/stars painted on the ceiling, or a cheap planetarium as a night light?
Re: AD16 Karenina
Posted: Tue Jan 22, 2013 7:31 am
by Stuff
Here is the finished product.

This bed is cool
Re: AD16 Karenina
Posted: Wed Jan 23, 2013 8:52 am
by Stuff
Here is a better picture.
Re: AD16 Karenina
Posted: Wed Jan 23, 2013 9:46 am
by Cracker Larry
Beautiful
Re: AD16 Karenina
Posted: Wed Jan 23, 2013 10:56 am
by peter-curacao
That's a lucky kid
Re: AD16 Karenina
Posted: Wed Jan 23, 2013 9:18 pm
by Stuff
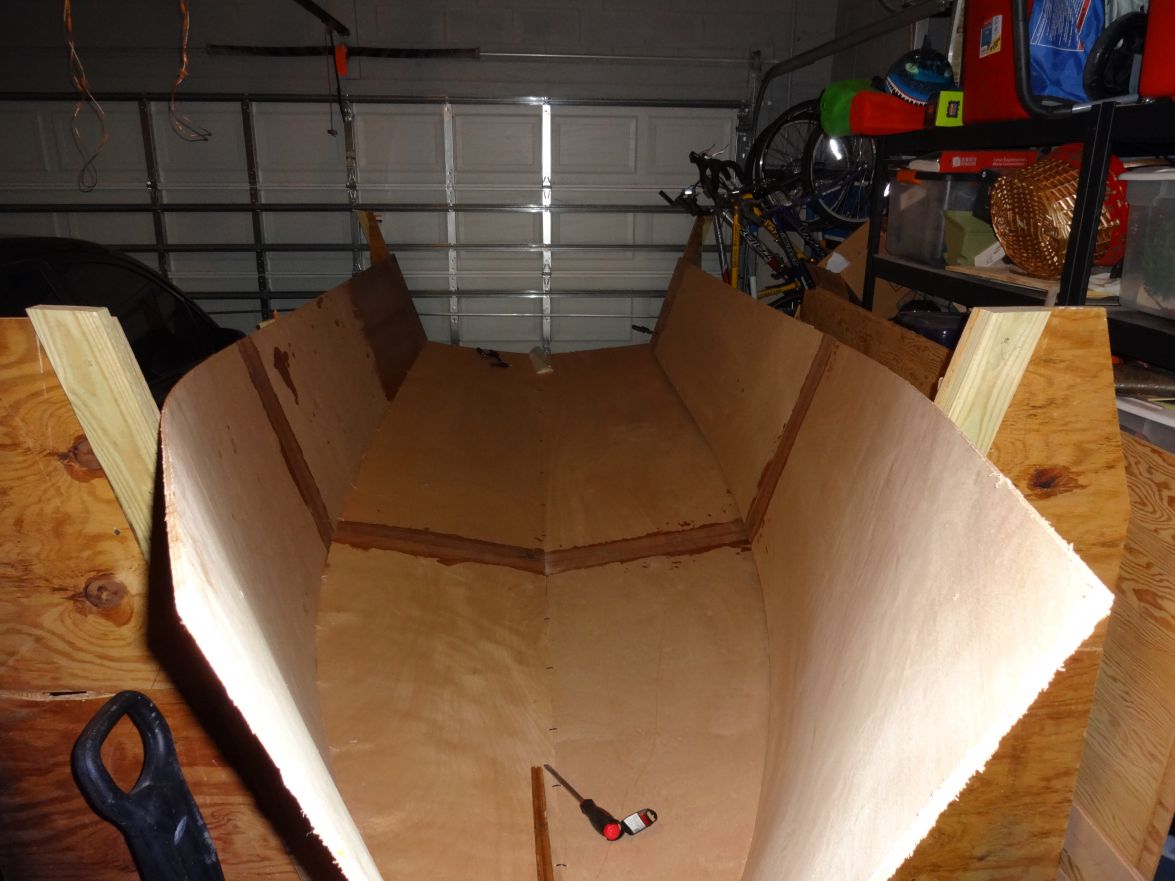
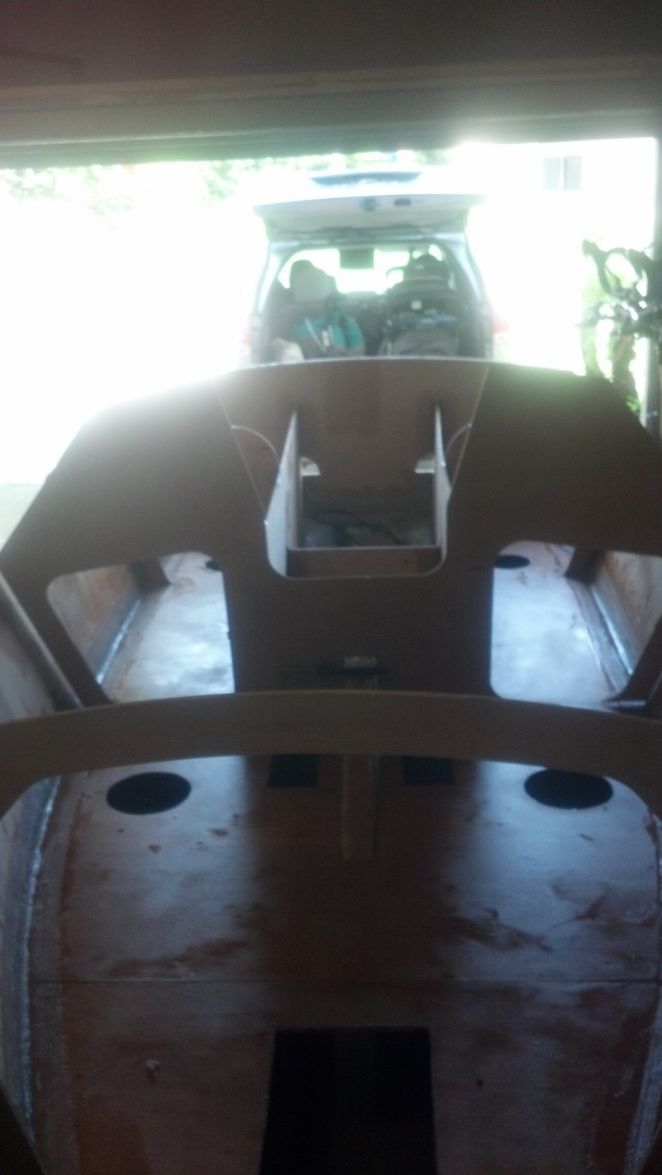
Back To building the boat. Tonight I started the stitching process. It looks great but the basket was not perfect. I notice that the boat shape does not fit the basket well. I bight have to do some modifications to make it stronger.
Re: AD16 Karenina
Posted: Fri Jan 25, 2013 7:29 pm
by ks8
wonderful bed
Re: AD16 Karenina
Posted: Sat Jan 26, 2013 4:37 am
by das boot
Your boat is looking good I have had me AD16 in the water for 5-6 years now and am still happy with it. I have been folowing the boat Bondo is doing you can save yourself a lot of dusty dirty work by doing like he did finish as much of the inside before you mount the deck section i was in a rush and put the deck on then finished the inside later a dusty dirty job. It took me slihtley over a year to build mine and am quite happy with it i will follow your build if you have any questions do not hesitate to ask
Re: AD16 Karenina
Posted: Mon Jan 28, 2013 4:38 pm
by Stuff
Can somebody tell me the dimensions of the master painter hole location? It seems that is right in front of frame A, but it does not have the actual distance in the plans. Neither the floor mast holder made out of laminated plywood (Don’t know the actual name) or the retractable pole hole. It is driving me crazy.

Re: AD16 Karenina
Posted: Wed Jan 30, 2013 4:21 am
by das boot
on my boat it worked out with that peace going over the top of frame a the mast hole through the deck is just in front of frame a probley about 1 inch forward the of frame a. as for the base for the mast i just built mine out of scrap and worked it out to give me the proper mast high on mine it was a bifferent as the mast i had was about 2 feet short of what was required so i made of a pipe out of tubing one sise larger and put a plug in it two feet op from the botton with a slot that matched the bottom of the mast so it would always line up proper this tube extends above the deck by about 1 inch and is solid at both top and bottom with bog it makes it easy to stand the mast as all you need to do is get the foot of the mast started down the pipe and it just drops into place and a small twist to make sure the seat is fitted in its slot and it is dun no trying to line up the foot with a saddle in the bottom of the boat that you can not see. I did it to gain the extra hight but you could do the same without the plug at the 2 foot mark it makes it easy to stand the mast just get a peace of tubing that just fits over the mast you hace
Re: AD16 Karenina
Posted: Wed Jan 30, 2013 7:08 am
by Stuff
Das Boot,
Thanks for the dimensions and the advise. I would like to see pictures of your mast aligment system. It seems like a great idea and might do that on my boat.
Re: AD16 Karenina
Posted: Thu Jan 31, 2013 1:29 am
by bondo
What you will want is the 5 degrees and an adjustable mast step. I had the same question but found the location based on the mast partner itself. One of the elevation drawings shows the mast partner "wings" centered over "A" frame. Do that and the mast hole is located. (by the way, Das boots' sounds about right) I made a little plywood jig that was 5 degrees, used in relation to the mast hole to locate the center of my mast step. Remember, the plans incorrectly show the mast rake at 2 degrees.
Re: AD16 Karenina
Posted: Thu Jan 31, 2013 2:50 am
by bondo
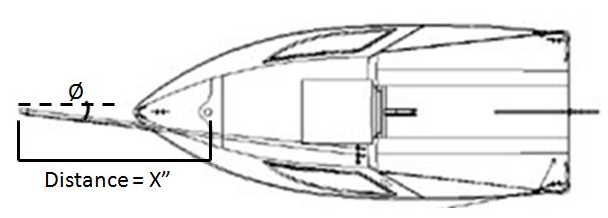
You must be way ahead of yourself asking these questions. But before I forget, to locate the angles and locations of the bow sprit: String a line down the center of your boat. Follow the deck angle downward as well. Then you can start locating things. For example, you want the top of the bow sprit tube, to finish ??? inches down from that string.(parallel with the deck so it retracts just under the frames) Mark on the string the distance forward of the bow you want to finish at. Take another line and locate it at an angle that intersects the point you want to sprit to finish and where you want it to be when retracted. When you start this process it wil be much easier than I am making it sound. Use a level to plumb down from the string for center points of holes. Start with the holes undersized and run a string through the center of them to check for accuracy. You will discover that a piece of string will tell you exactly where to put everything.
Re: AD16 Karenina
Posted: Thu Jan 31, 2013 9:16 am
by ks8
bondo's description is understandable. i wonder if a conceptual sketch or two could be drawn up and made available for present and future builders? i don't have those plans and am myself a bit too busy lately. any graphics or 'drafting familiar' forum members out there, with access to those plans?
edit: There are many ways to think some of these things through. If bondo's method is unclear, I'll try to do a few sketches, if the need is there, and no one else does it. Personally, I'd have trouble with a freely tightened marked string. I would put an upright and plumb 2x4 in the shop, on the longitudinal centerline of the hull, and mark on it where the extended spi pole tip should be, But that is not because bondo's method is lacking, but because my skills and 'eye' are not up to his.
Because every hull is slightly different in finalized shape, giving 'exact' measurements for the exit hole position and shape probably is not the best way. It has to be marked, shaped and finessed after most of the hull is finished and finalized in shape, with the objective being to get the deployed spi pole tip in the right location out in front of the boat, within an inch or so, and on the longitudinal centerline. Mistakes in the hole position or shape can be fixed by filling with epoxy and woodflour 'thick' blend. The string will get you close.
Re: AD16 Karenina
Posted: Fri Feb 01, 2013 9:42 pm
by bondo
Yes, good eye ks8. I didn't explain that very well. I set up two string lines. Tape measure. Small level. It will come to you much easier than I can explain.
Re: AD16 Karenina
Posted: Sun Feb 03, 2013 1:41 am
by das boot
I found the retractable bow sprit hard to work out as well and i could not work out how to keep it from being a tight fir so for the first few years i just ran the jib to the front of the bow with out the bow sprit i found the jib would get hung up on the mast while tacking this was a real pain so to get around that problem and avoid trying to install the retractable one after the fact I had a machine shop make me up two plates out of steal that run up each side of the upper bow and across the front of the bow and on the front their is a 2 inch stub pipe that sticks out at the angel i wanted it at and i slide the aluimun bow sprit into that with 2 quick pins once painted it looks good and i needed the weight in the bow anyway if i want i can remove it quick by pulling the quick pins however i just leave it in place it works good the only problem I have found is in a good wind untill I get up to 3-4 MPH the rudder can not hold it so it drops off i extend this spring to shorten it by about 1 foot that should help it is easy to do as it is just a pease of tubing with a plug in he end. It is also hard to reach the tip of it to take the jib down that is anouther reason to shortin it pardon the spelling it is late and it has been a hard day. I do not know how to get pictures on this system however call me and I can email them to you or send me your email address
Re: AD16 Karenina
Posted: Mon Feb 04, 2013 8:04 am
by Stuff
Hello Guys,
I was reading your post and now I have a more clear view of what needs to be done. Ks8, I understand that every hull is different but it is possible to make a sketch that fits any hull (At least I think). The distance from the center of the mast to the end tip of the retractable bow has to be the same on each boat regardless of the hull shape (once again I am speculating

). This way every sail can be interchangeable between boats. Then to get the right position of the retractable bow, you should give top view angle (the retractable bowl runs parallel to the deck therefore no angle needed for the side view). Now regardless of the hull shape, every boat will be the same in the front. Now, if somebody can give me does dimension I will appreciate it.

Das Boot I was reading your reply and I am interested on your retractable pole system. I have a friend that owns a machine show and I know he can help me with the plates. I was not able to get your phone. Do you know how I can get it?
Thanks guys
Re: AD16 Karenina
Posted: Mon Feb 04, 2013 8:24 am
by Stuff
Guys this is what I was talking about. I still have some paiter skills
Re: AD16 Karenina
Posted: Mon Feb 04, 2013 7:56 pm
by das boot
Hi Stuff give me a quick call to give me your Email address and I can email you pictures 604-648-3847
Re: AD16 Karenina
Posted: Tue Feb 05, 2013 1:30 am
by bondo
I know it is frustrating to not have a measurement. I haven't finished rigging yet but I think this is correct: In this case Jacque wants the mast partner centered fore and aft over "A" frame. Doing this locates the mast center at the deck and the mast step 5 degrees forward of that on the keel. If I recall correctly my bow sprit will be 89 1/4" but check the plans. They also show the sprit guide tube ends 4" back from "A" frame. Subtract 4" from your sprit and you know where your bow sprit needs to center when deployed. Use two string lines. One is the centerline of the boat, the other represents the sprit. Have your sprit (string) retract back toward the corner like shown. Mark where the string touches the frames, plumb down from those marks for hole locations. My cabin is 9" shorter than yours but be sure not to foul the companionway when retracted.
Re: AD16 Karenina
Posted: Tue Feb 05, 2013 1:51 pm
by Stuff
Bondo, KS8 and DAS BOOT,
Thank you for the feedback. Now I have a better understanding on what to do. Das Boot I will try to call you today around 7 pm eastern time. Now, that I know what to do about the bow spirit and the master painter, I can concentrate on a differnt issue. I bought a 1/2" bolt with washers for the CB but I was not able to find a SS sleve. I was wondering if you guys used a 5/8" SS pipe which has an ID of .54". I seems that it will have some play
. Can you tell me were do you found hte sleve? ( maybe an internet website that sell them).
Thanks in advance
Re: AD16 Karenina
Posted: Wed Feb 06, 2013 12:54 am
by das boot
just keep in mind we are 3 hours behind you. On that pin first i found the stainless bolt i wanted took it to the metal shop where they found me a chunk of thick walled ss tubing that was a good fit i put a peice of it through the keel and also through each side of the keel box i let it stick out about 1/2 inch outside of each side of the keel box and built up around it with a lair of bog to fair it in while traveling it spreads the weight out over ore area to travel i just put a jam nut on it and have had no problems. I have a cable with a tee handle on it mounted to an eye i built into the top of the keel I can pull t up with my left hand and slide the bolt in with my right hand. Also on the pivot point I did like the guy from South Africa his site helped me a lot I put a peice of duralon plastic into the keel at the pivot point bogged and glasses it in then drilled the pin hole it has been working fine still tight 6 years latoe
Re: AD16 Karenina
Posted: Wed Feb 06, 2013 1:28 am
by bondo
The detail in the plan is confusing. The ss tube is the pivot. The weight of the centerboard rests on the tube. The tube rests on the trunk sides. (the tube is exactly as wide as the full width of the trunk) The holes in the trunk are the same size as the tube, so you can slide it in place from either side, through the centerboard. The trunk/tube fit is where water can gain access. The bolt is sent through the tube to pull the large washers against the trunk, squeezing plumbers putty against that fit for waterproofing. You can't over tighten and distort the trunk because the washers will stop at the tube.
Re: AD16 Karenina
Posted: Wed Feb 06, 2013 2:29 pm
by Stuff
Jikes,
I am glad that you guys told me that. I was looking for a close tolerance between the sleeve and the bolt. That way all the weight will fall on the bolt instead of the sleeve. Putting the weight on the sleeve changes everything. I need to get a thick pipe that will take the weight of the CB. I look on a few site and was able to find a 3/4" pipe with a .51" inner diameter. The pipe is 1/8" thick. According to my mechanical engineering books it should be able to hold the CB. Can you guys tell me the OD, ID or thickness that you used for your sleeve? Also, I want to make sure that people understand the differnece between SS. DO NOT USED 304 SS. Anything that goes on a boat should be 316 or 316L specially if you are using it in salt water. 316 has better corrosion resistance properties and is ideal for marine applications. In the plans they don't specify the SS grade.
Re: AD16 Karenina
Posted: Wed Feb 06, 2013 9:04 pm
by bondo
The one you mentioned will be good but I don't know that the tubing needs to be extra thick walled. You will want a standard size O.D. that you can match with a drill bit. I don't know what kind of stainless I have.
Re: AD16 Karenina
Posted: Thu Feb 07, 2013 11:34 am
by Stuff
Bondo,
Thanks for the advise. I was able to order 2 types of tubing a thin one (.049" thick) and thick a thick one (.12" thick). I have a drill bit for both pipes so I should be OK. By the way the reason I recomended 316 instead of 304 was becasue of some testing I have done for the companies I have worked for. Usually 316 does better on salt and fog test but is not much of a difference. Both can withstand corrosion for many years. IF you don't want to replace the bolt ever then 316 is the way to go.
Re: AD16 Karenina
Posted: Thu Feb 07, 2013 11:53 pm
by das boot
If you let me know what you want pictures of My boat is in storage but i will pull the tarps off and get pictures of anething you want one thing not to do I used the same type of hatch as Bondo to put a storage locker in the floor of the cockpit that was a mistake while it is handy sand and gravel from the beech tends to get built up around the seal and it leeks rain water in to the lower part of the hull so that was one mistake. One the better ideas at the aft end of the seats on each side i built in a storage locker but could not work out a good way to seal them. So what i did was to build in the storage lockers before i put the seats on and sealed them in with glass then i drilled a dranage hole out the back of each it works good one is used to carry my fuel tank and the other handles the ropes and bumpers etc it worked out well
Re: AD16 Karenina
Posted: Fri Feb 08, 2013 7:52 am
by Stuff
Das Boot,
I call you 2 days ago and left you a voice message with my email adress. If you did not get it my email adress is
robertoairline@yahoo.com. If possible can you sent me pictures of the mast block and painter, storage lockers and the rectactable bow spirit system that you have in your boat. I will like to get as many ideas as possible before I start the fiberglass process.
Thanks in advance,
Re: AD16 Karenina
Posted: Sat Feb 09, 2013 3:18 am
by das boot
Just a hint on glassing i tried the rubber things for body fill to squigee excess resen out of the glass but found the sharp corners tended to get hung up on the glass and pulled it that maid a mess so i ended up using a deck of playing cards easy to hadel nice rounded corners and cheep just throw them away
Re: AD16 Karenina
Posted: Sat Feb 09, 2013 2:26 pm
by bondo
I didn't use a squeegee much for glassing but that sounds like a good idea for many uses Das boot. If (when) the cockpit hatches give me grief my first plan was to make a painted 1/4" ply. hatch washer/riser. A plywood ring to set the hatch on. Maybe 1/8" round-over edge. Just large enough around the shape of the hatch for a good caulk joint. Another caulk joint at the base of the ring to the floor. This is where the sand will try to go to work. It might not seem like much but I wonder if the 1/4" will make the difference. More aggressive ideas after that if needed. To me it seems you need access to all the storage for this design to make sense.
Re: AD16 Karenina
Posted: Sat Feb 09, 2013 5:46 pm
by Stuff
Das Boot
Thank you for the pictures. I love the front plate for the bow spirit, I might go that route. By the way if you want me to post some of your pictures please let me know.
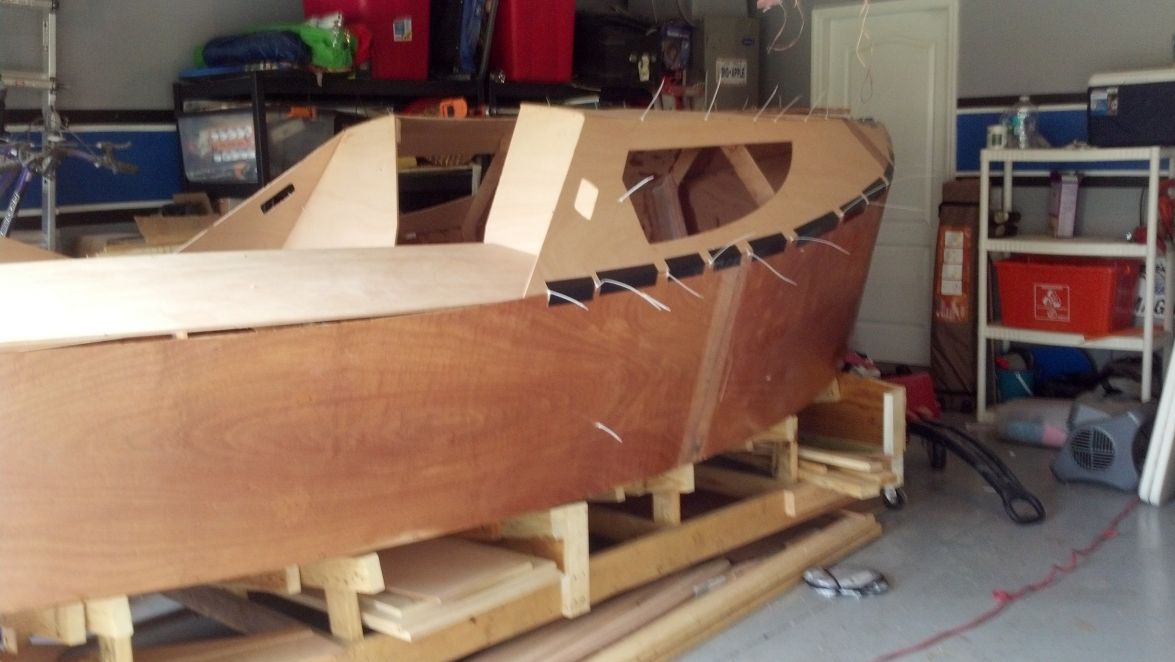
Finally finished to stitch the hull. Here are some picture after I was done.
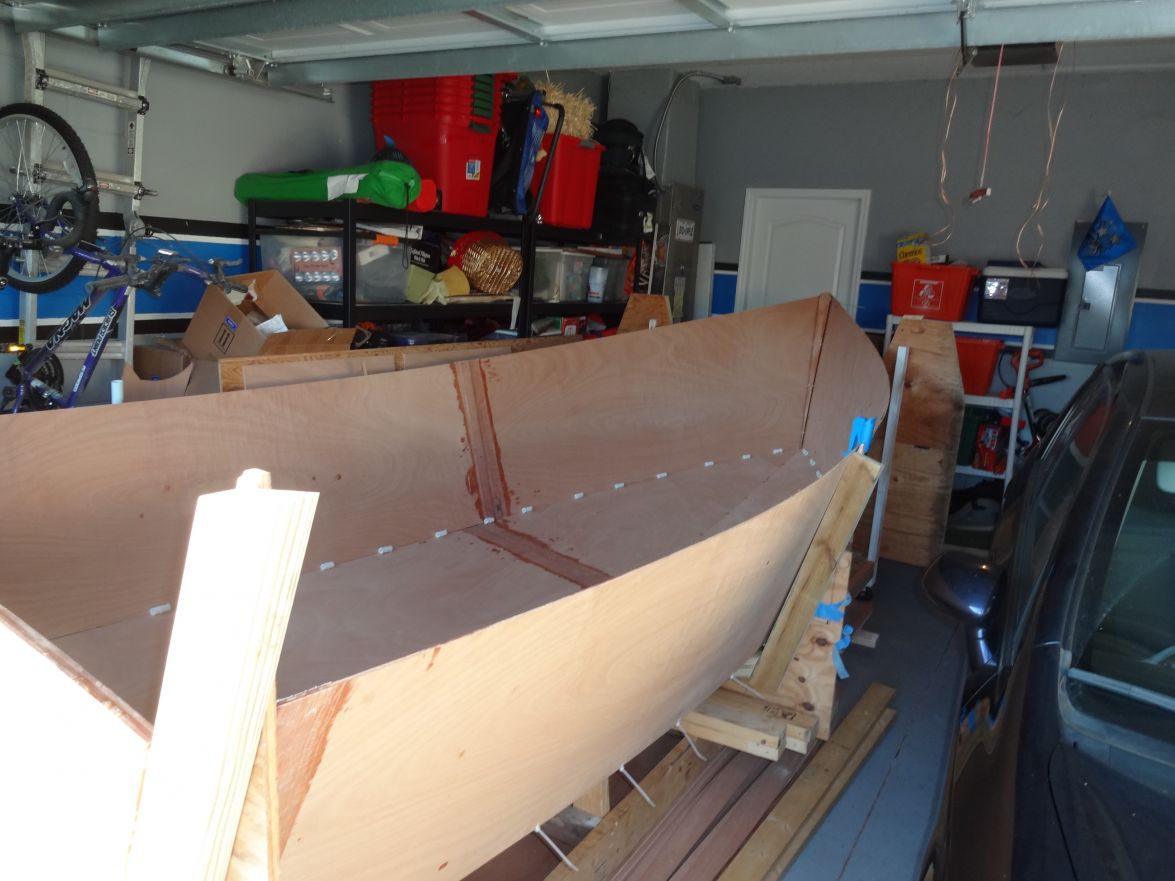
.
My baby girl will be here at any time therefore I might not be posting for a while.
Re: AD16 Karenina
Posted: Sat Feb 09, 2013 9:52 pm
by bondo
Looks good. I gave up on those little white spacers. I know what you are thinking..."this is a big boat!" The hull looks like it wants big water when you see it up close. Wishing Mom well this week. Good Luck!
Re: AD16 Karenina
Posted: Sun Feb 10, 2013 6:07 am
by das boot
Bondo the hatch problem is kind of funny while it looks good the problem comes from sand and gravel that gets into the bottom of the coopit getting in and out of the boat not the way it seals to the floor but the rubber seal in the hatch itself it takes very little dirt to cause a problem once it gets on that rubber seal. It would never sink the boat but after sitting out in the rain for a bay or two and you know the west coast rain it might cause a cup or two of water to get in ma by if i cleaned around it before i parked boat after each use it might help but somehow i just never think of it and my drive way is on quite a slope so all the rain water that gets on the deck runs back into that area before it drains out. I should not complain this is the only problem i have had in 6 years of use and it is not a boat design fault but a hatch problem i would just hate to see others fighting the same problem.
Re: AD16 Karenina
Posted: Thu Mar 21, 2013 10:43 pm
by Stuff
I am back!
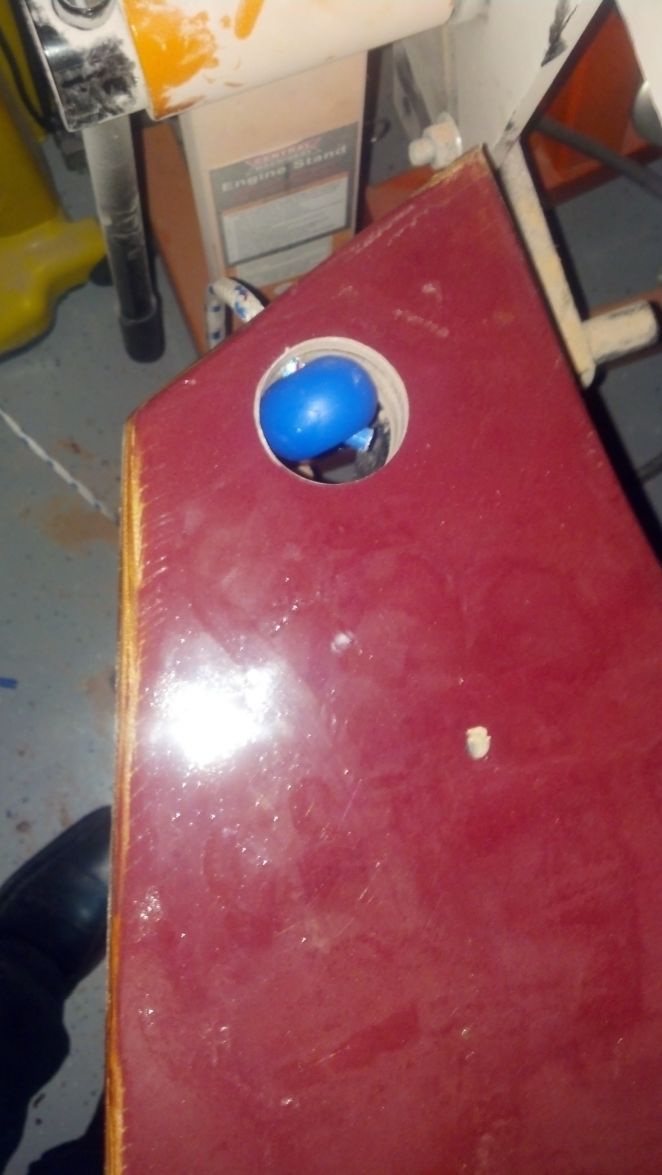
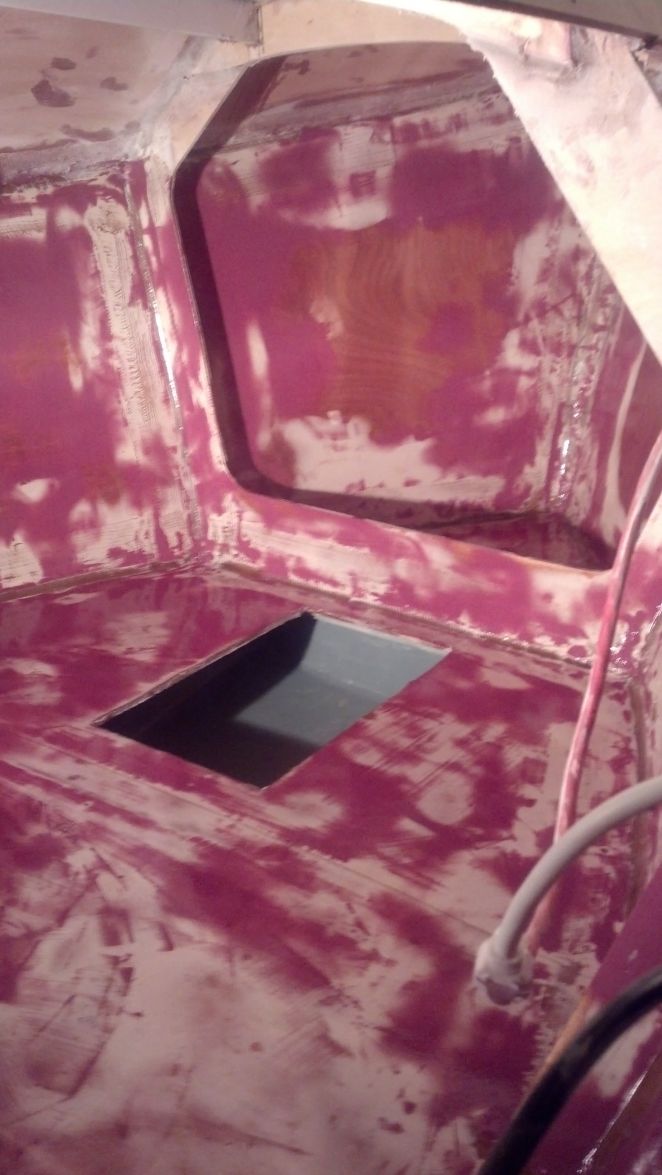
My baby Victoria was born 2/21 healthy and happy. I am a proud papa. After taking care of my three babies (son, daughter and mama) for the past month I am ready for businesses. I am finishing my centerboard and CB case but I think I did a dummy mistake
. I made the hole for the lifting mechanism to close to the edge. From the edge of the hole to the edge of the centerboard I have a little more than 1/2". Probably 9/16" at the most. I don't know if that enough material to hold the centerboard without breaking it. Here is a picture and please give me some feedback.
Thanks in advance
Re: AD16 Karenina
Posted: Fri Mar 22, 2013 1:24 am
by bondo
Congratulations! For the boat you could probably get away with it but I think I would just use a layer of fiberglass on the inside of the hole to strengthen it. It looks fine.
Re: AD16 Karenina
Posted: Fri Mar 22, 2013 1:50 pm
by Stuff
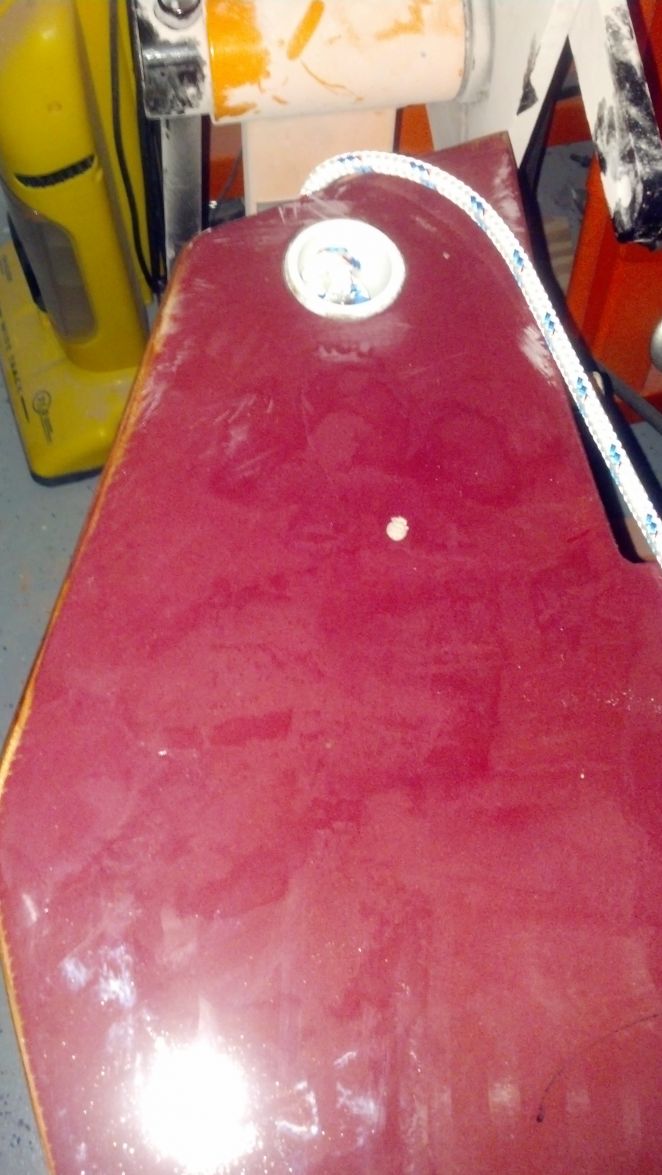
You gave me a good idea

i will put a high pressure pvc pipe inside the hole this way all the stress is distributed around the hole and not just the edge of the hole. Also it should work as good as fiberglass.
Thanks bondo.
You are the man!
Re: AD16 Karenina
Posted: Sun Mar 24, 2013 12:15 pm
by das boot
just put the plug back in the hole with bog and drill a new one
Re: AD16 Karenina
Posted: Sun Mar 24, 2013 12:39 pm
by TRC886
Stuff wrote:I am back!
My baby Victoria was born 2/21 healthy and happy.
Congrats

I hope that she's just as pretty as her name
Re: AD16 Karenina
Posted: Sun Mar 24, 2013 9:14 pm
by Stuff
I put the 2" OD PVC pipe in the hole and it came out great. I just hope that the epoxy glue is strong enough to hold it for years to come. Here is a picture.
Re: AD16 Karenina
Posted: Sun Mar 24, 2013 9:19 pm
by Stuff
TRC886 Thanks!!. She is the greatest present I guy can ask.
I have being working with the centerboard the past few days ( one hr at a time) and here is a picture of the centerboard prime.
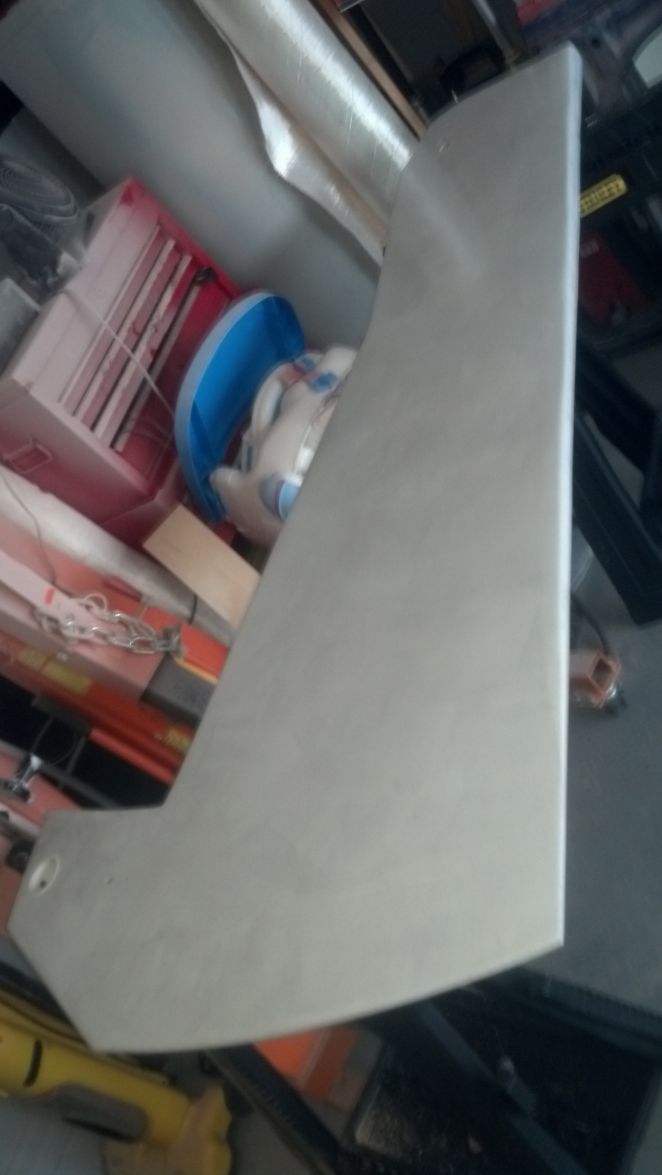
.
I will put coats 2 and 3 in the next days. My plan is to paint the waterside of the centerboard with powder graphite and the rest of the centerboard and the inside of the centerboard box with VC Performance. IT is going to look like shamu the killer whale
Re: AD16 Karenina
Posted: Mon Mar 25, 2013 11:24 am
by ks8
Re: AD16 Karenina
Posted: Fri Mar 29, 2013 12:45 pm
by das boot
I was trying to work out where the 2 inch hole was now that i see the pictures I understand when I did mine I used a ss eye bolt with a long shank on it and built it into the center part of the center board i put several nuts on the bottom of it so it can not pull out it works fine. on the pivot point i cut a square hole about 2-2 and put in a square of durlin a real hard plastic then drilled the hole for the through bolt this has held up well over the years. The one mistake i made is i did not put strips along the side of the keel to stop water being forced up along the sides of the keel so in ruff water each time i go over a big wave water splaches up like a fountain into the cock pit not a big deal but it can be a pain we just joke about it it keeps the floor clean self washing glad to see you are back at it
Re: AD16 Karenina
Posted: Mon Apr 08, 2013 11:03 pm
by Stuff
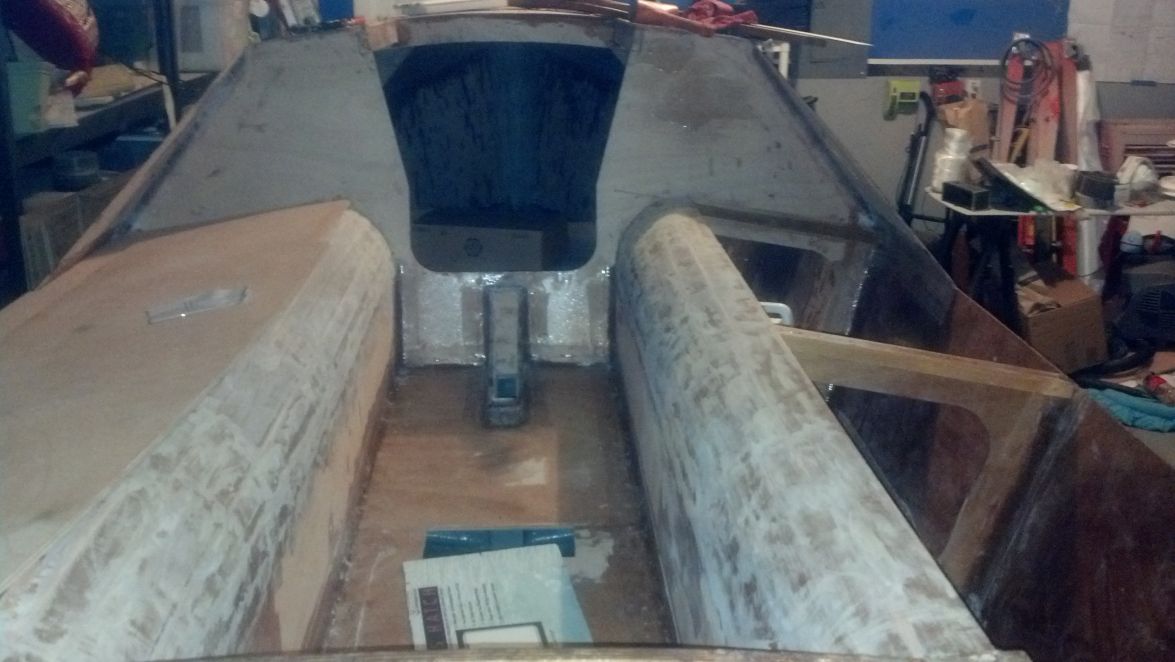
Finally finished to fiberglass the inside of the hull. The task was not as easy as I imagine. After gluing my underwear to my behind and a long 6 hrs of going inside and out of the inside of the hull is done. Now I know what a woman feels when she wax her legs
. Here is a picture of the progress.
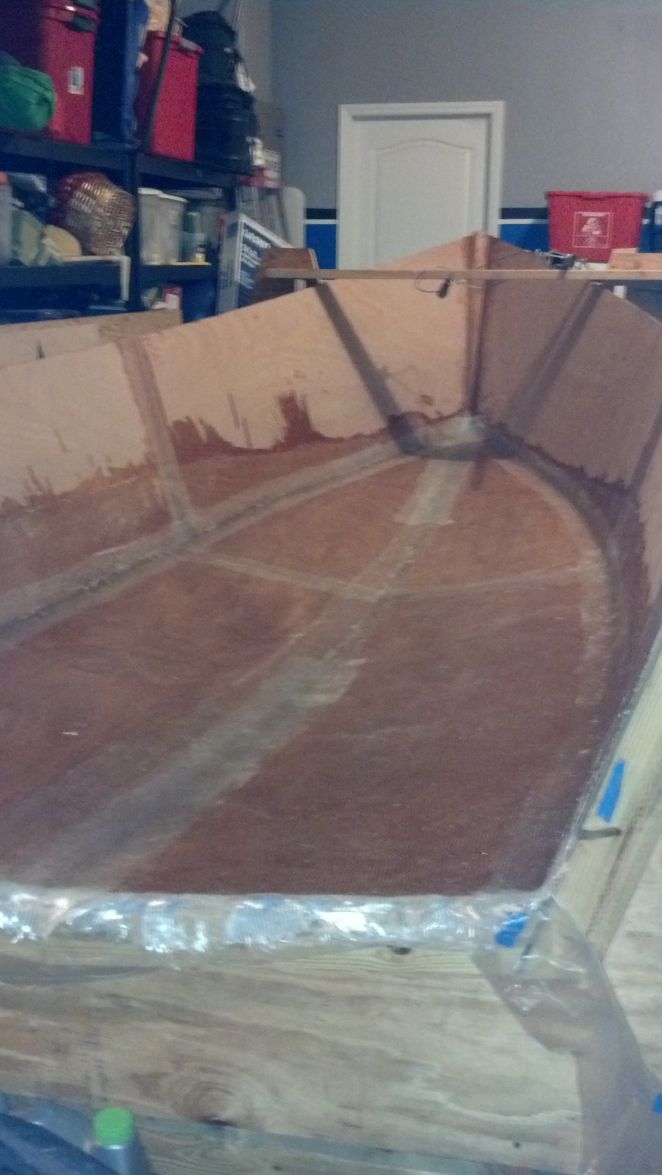
.
Also I was able to finish the centerboard case. Next weekend I will fiberglass it.
Re: AD16 Karenina
Posted: Tue Apr 09, 2013 10:11 pm
by bondo
You are producing nice work. For me, the inside bottom fiberglass job was a pain as well.
Re: AD16 Karenina
Posted: Sat Apr 13, 2013 12:24 am
by das boot
looking good
Re: AD16 Karenina
Posted: Fri Apr 19, 2013 8:13 pm
by Stuff
Thanks guys. I have being working hard in the past days. Started the dry fitting process and here is what I got so far.
.
The centerboard box fiberglass was a nightmare. The tape kept getting unglued therefore it does not look good but it will do the job. lots of quickfair and sanding will take care of the imperfections.
Re: AD16 Karenina
Posted: Fri Apr 19, 2013 11:56 pm
by MWhiting04
I am new to this forum and boat building.
I started with a sharpie to figure out how it all works.
My long range plan is to build the AD14 or 16.
First things first.
How is it going? Did you building anything before you started the AD14?
Do you have a picture gallery to look at?
I saw a few in this thread, looks great.
Mike
Re: AD16 Karenina
Posted: Sat Apr 20, 2013 10:39 am
by Stuff
MWhiting04 ( Mike),
I was more adventurous but it is a good Idea to do a small boat first. This is the first boat I have ever built. The boat is has not been hard so far but I has given me some difficulties. The hardest part so far was the centerboard. My dad is a retired carpenter therefore he was able to help me form it. casting hte lead was a pain the the you know what. I recommend to built this part first. The other skills you need to perfect is the tapping of the seems but by building the small boat you will be a expert in no time. It has being a cool project so far. I choose the AD 16 because is the biggest sailboat you can store in a garage with a trailer. Also it was a very simple design compare to other boats that I saw in the internet. if you have any question about the boat I recommend talking to Bondo. He know more than me about the boat and he has excellent workmanship but I can help you as well. My gallery name is karenina but it has the same pictures.
Good Luck
Robert
Re: AD16 Karenina
Posted: Sun May 26, 2013 10:37 pm
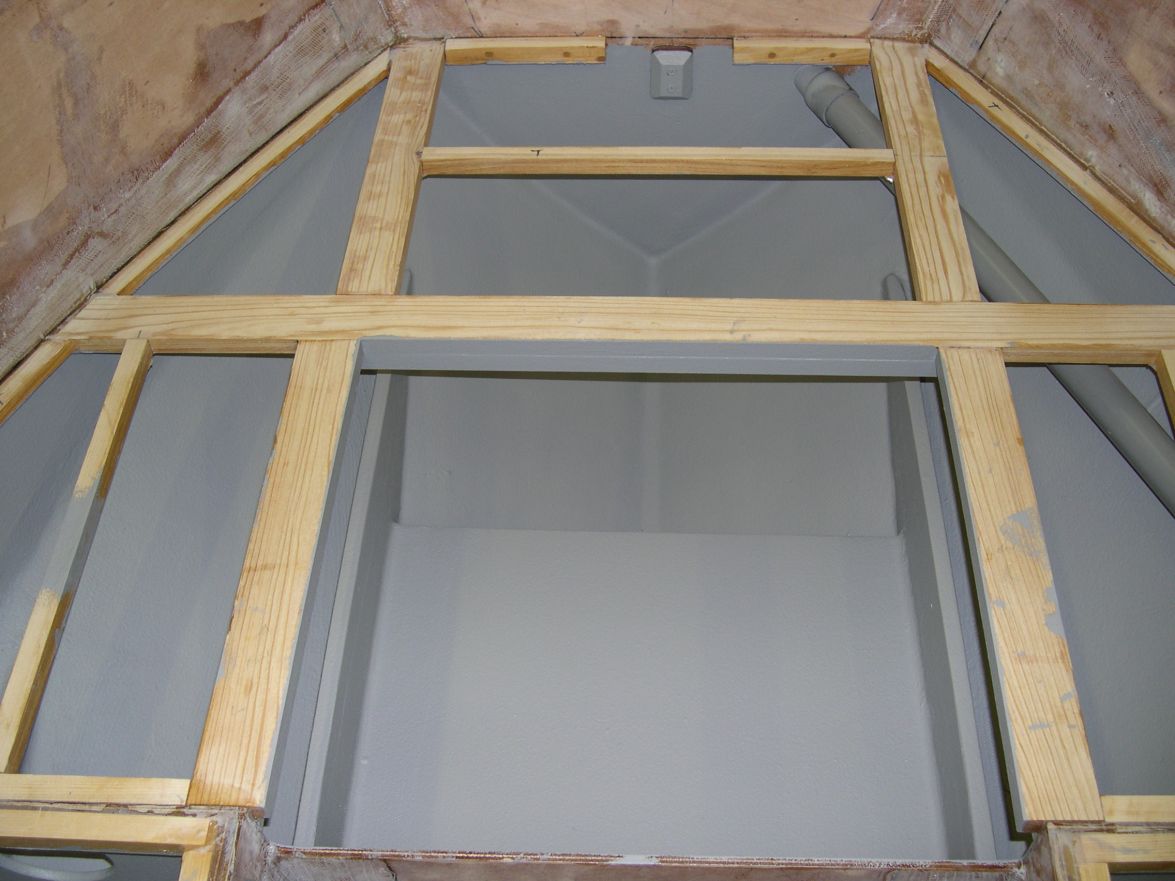
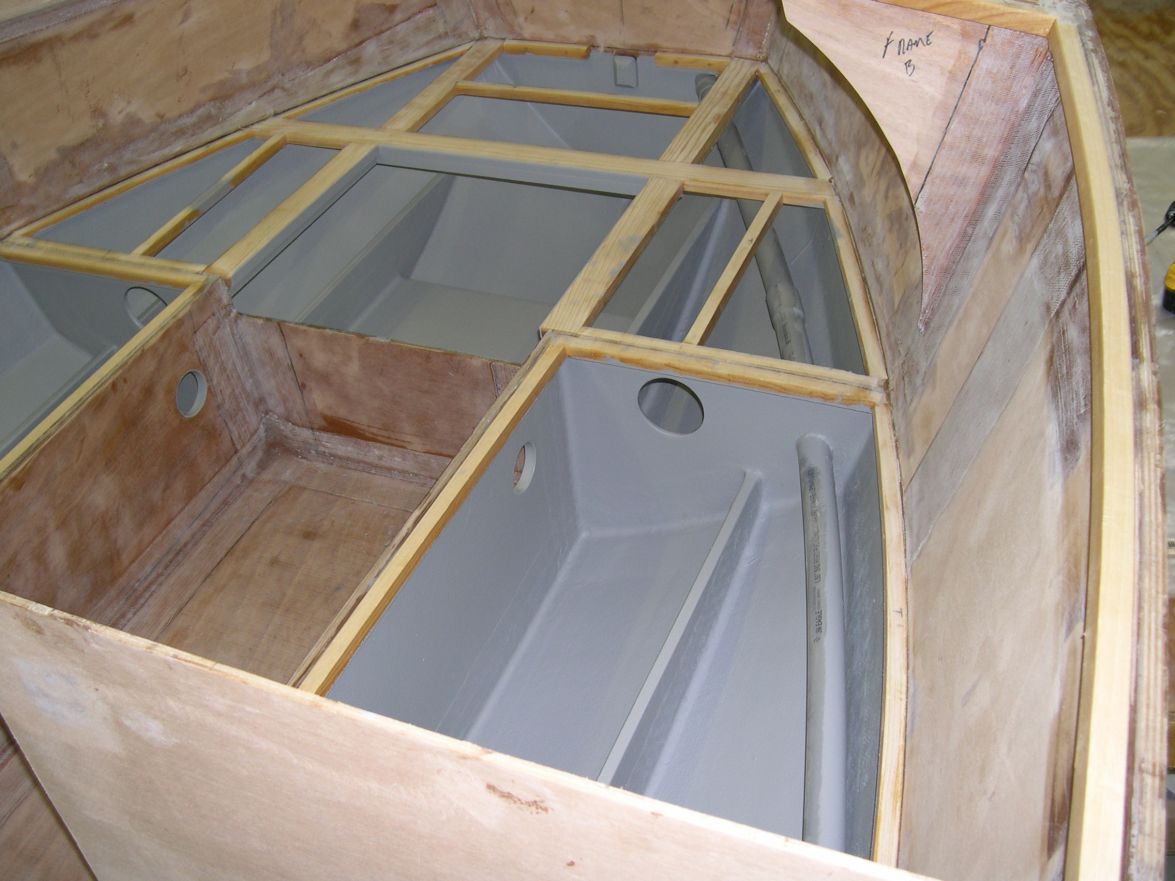
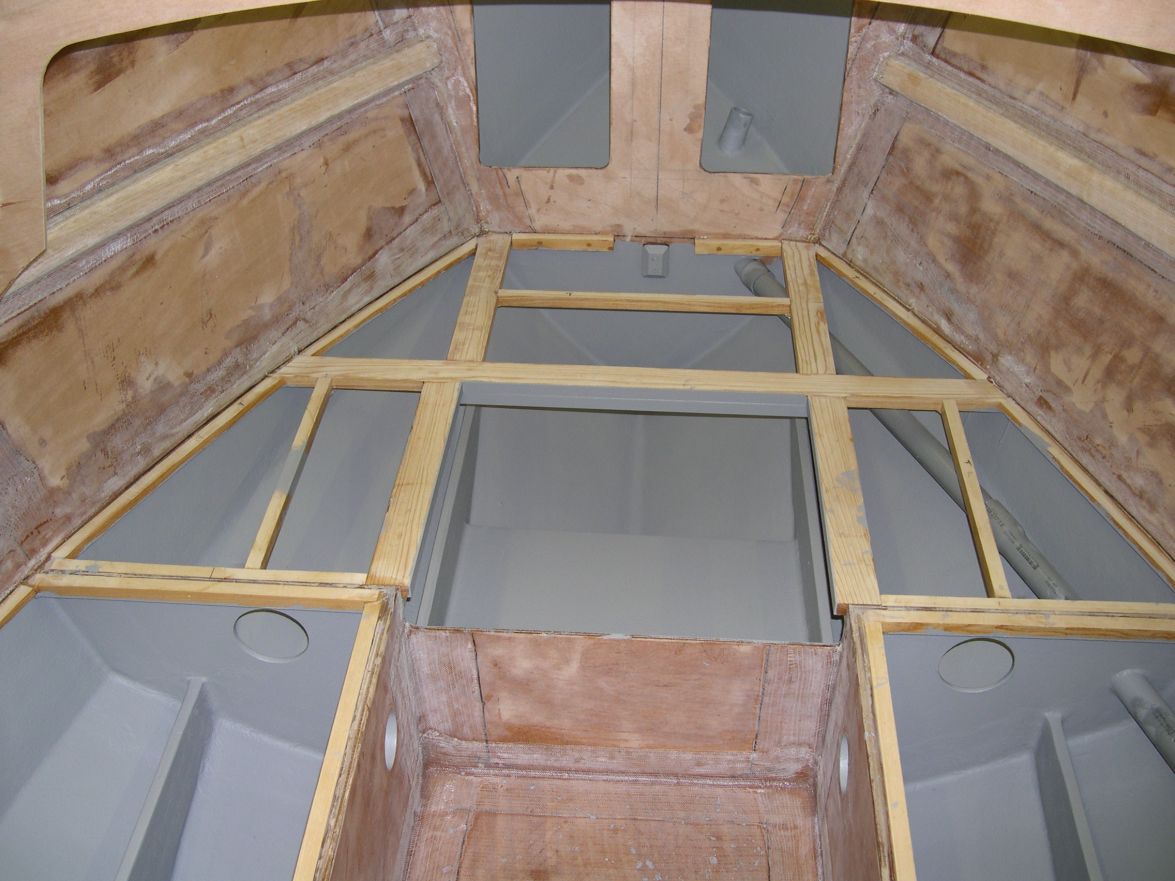
by Stuff
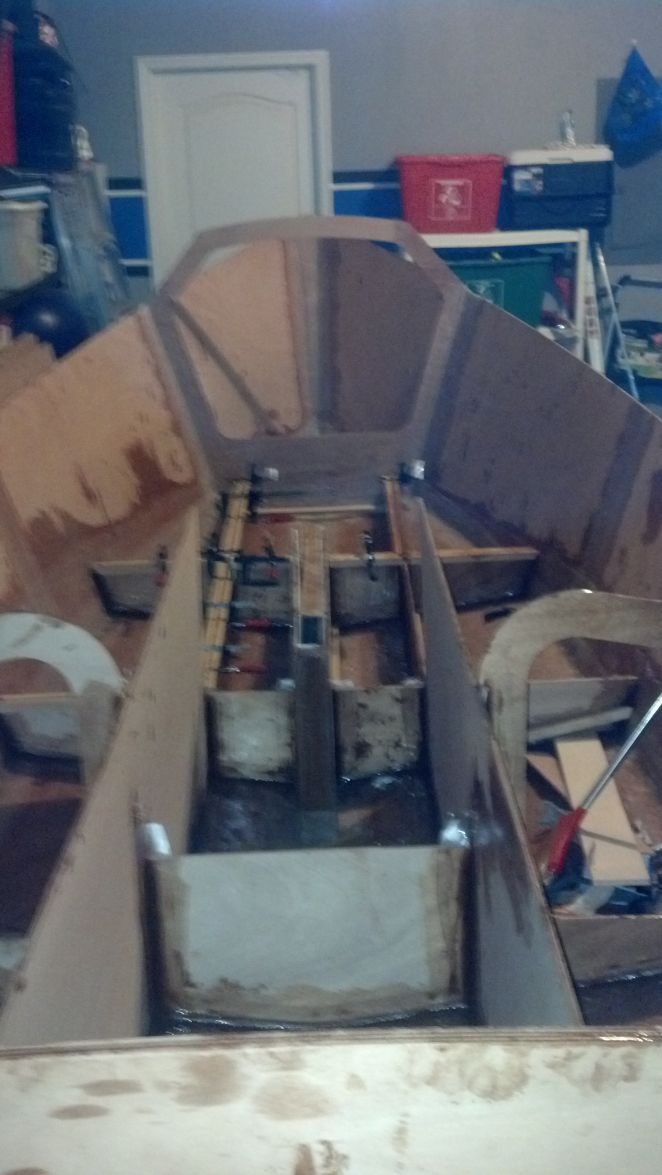
Finally finished tapping al of the frames
, Now a new dilemma. should I fair the Bilge before i paint it or not. What do you guys recommend.
Re: AD16 Karenina
Posted: Mon May 27, 2013 6:41 pm
by bondo
I didn't do any fairing with compound but I sanded so there aren't any sharps or burrs. (accessible storage) I didn't paint. I tinted my epoxy grey and rolled on a seal coat after everything was sanded. I was trying to skip a step and I'm good with it. Paint may be better, I dont know. What are you planning for the bilge/storage/flotation? It was hard for me at the stage you are at. I didn't seem to be getting anywhere until I got the sole installed. It is hard to work in there with all those damn frames and no place to put yourself. Good work Stuff.
Re: AD16 Karenina
Posted: Mon May 27, 2013 7:17 pm
by ks8
Any corner or crevis that you plan to be able to effectively wipe clean from time to time will clean up easiest if it is smoother, and with any deep glass weave at least partially filled with *something*. Some builders apply final coats with tinted epoxy instead of paint -- some don't bother tinting the final epoxy -- some prime and paint. Set your own standard. At cleaning time, the learning curve complete you will young jedi ...
Final tinted epoxy coats are fine if there is to be no regular exposure to sunlight. I primed and painted most stowage/underseat areas. It took time, but cleaning is sooooooo much easier. I left some bond areas paint free for, well, bonding, and for inspecting for rot in the doug fir cleats.
4705
Re: AD16 Karenina
Posted: Mon May 27, 2013 7:48 pm
by Stuff
Thanks for the advises. I was thinking to do a light fairing and paint the bilge with ez bilge. I saw bondo's bilge with pigmented epoxy and it looks great. Do anybody has experienced ez bilge? Is not pigmented epoxy but it seems to be a good comprises. Also I am planning to put flotation foam I 4 of the holes. How much does the foam expands before it cures?
Re: AD16 Karenina
Posted: Tue May 28, 2013 12:31 am
by das boot
On my boat i filled the outer part of the bilge areas with foam as well as one compartment in the stern and the bow area. If it is full of foam even if you poke a hole in it it can not fill with water if it is full of foam. The water is cold up here so keeping afloat is the most important thing. On the areas you plan on for storage smooth it out so nothing gets hung up ropes etc. tend to snag on anything they can
Re: AD16 Karenina
Posted: Thu May 30, 2013 8:45 pm
by Stuff
Finally finished with all the cleats for the interior sole. Now some fairing and paint and I will be ready to put the sole.
Re: AD16 Karenina
Posted: Thu May 30, 2013 10:33 pm
by Stuff
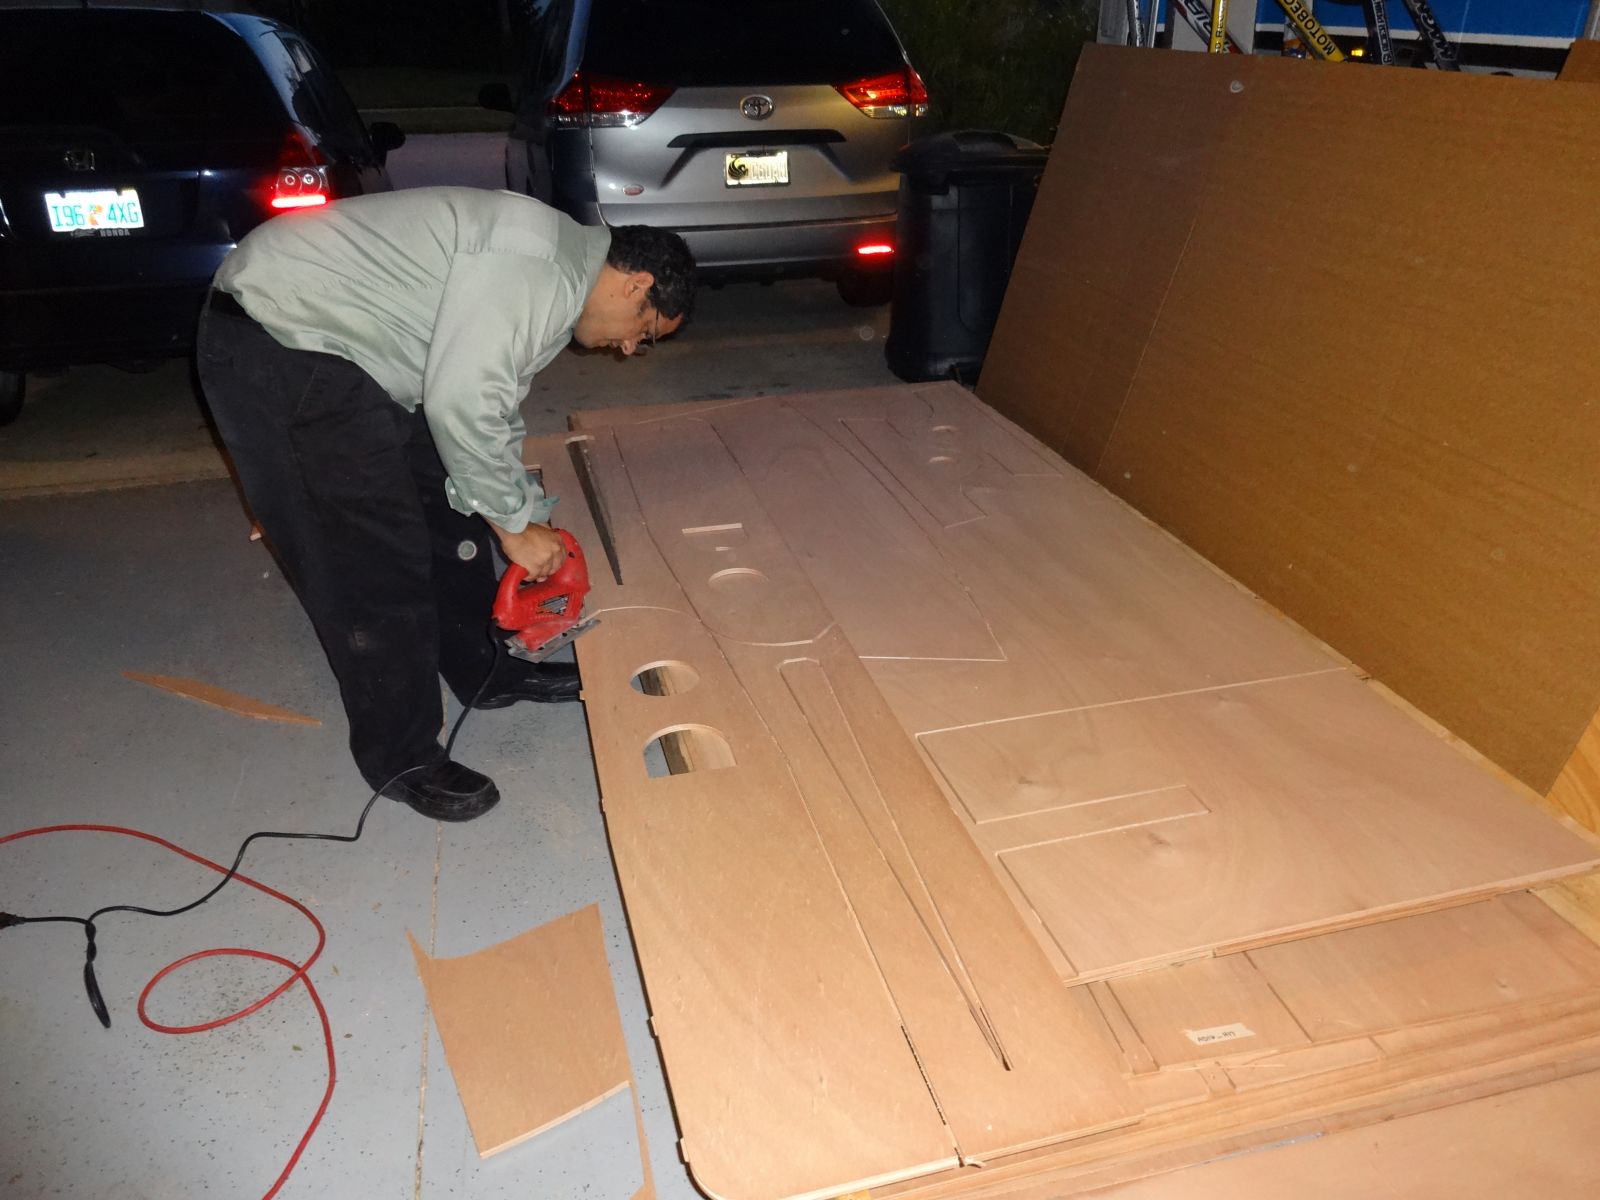
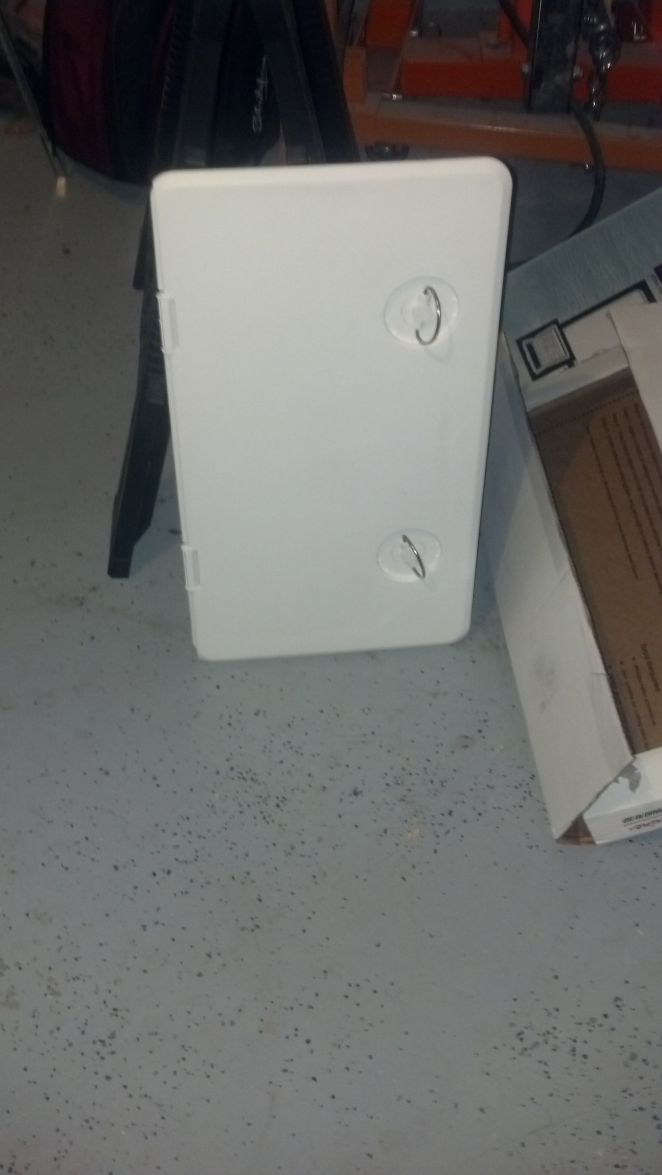
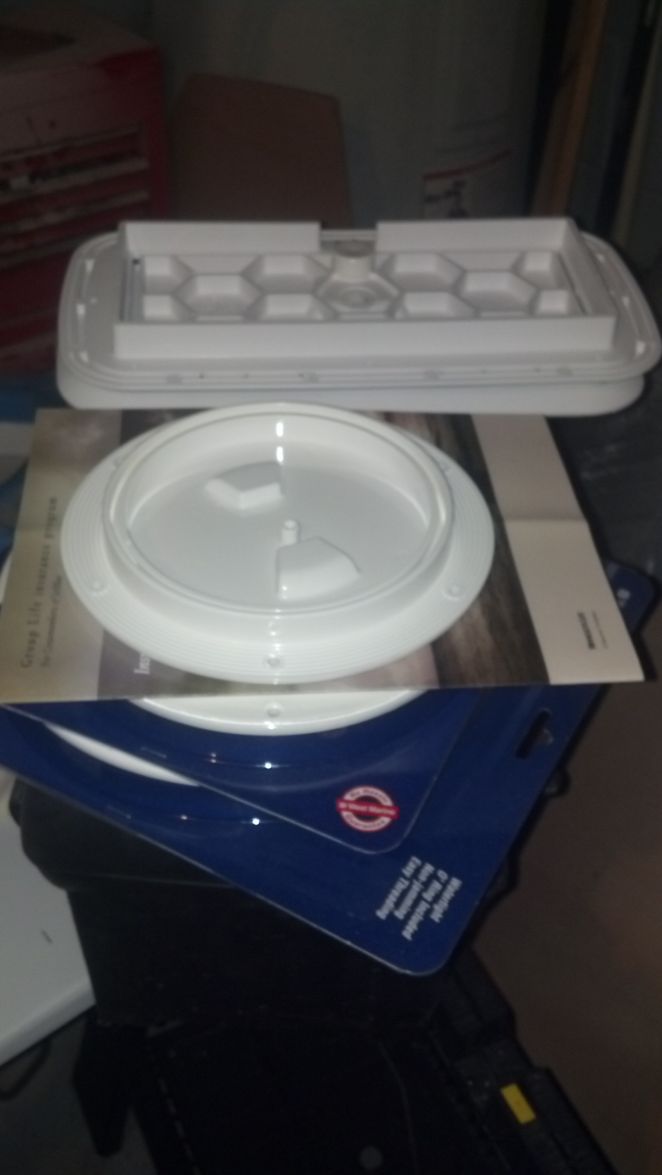
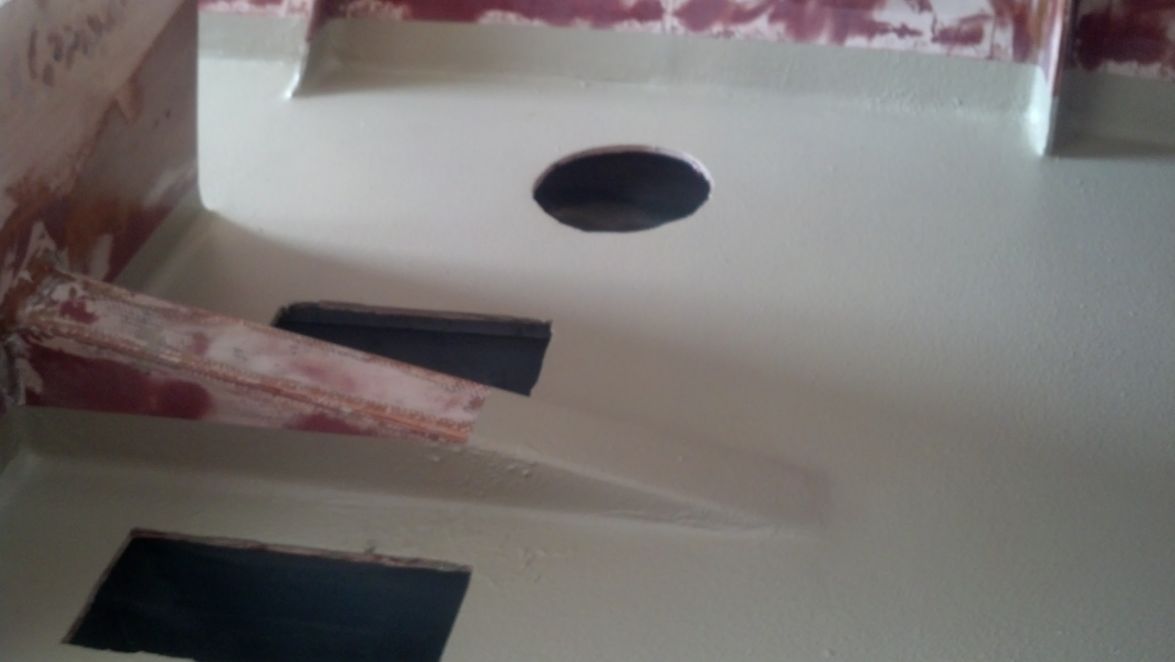
Christmas came in May. Got all the hatches and inspection holes.
Re: AD16 Karenina
Posted: Thu May 30, 2013 11:13 pm
by ks8
stuff to make cutting big holes less painful...
Re: AD16 Karenina
Posted: Fri May 31, 2013 10:23 am
by bondo
Nice stuff stuff. The AD design affords so much storage doesn't it? Got to have access. For a laugh I loaded a 2x4x8' stud in through the finished cabin and back down under the seat. Takes a second and you could load maybe 20 more down each side.
Re: AD16 Karenina
Posted: Wed Jun 05, 2013 11:22 pm
by Stuff
Bondo
Why I did not listen to you
. I try to fair the bilge before putting the sole and it was a complete failure. I took me 5 Hours to fair one hole and it does not look that good. I'm just glad that nobody is going to see it. I decided to go with plan be and put 3 coats of epoxy to the rest of the holes. Tomorrow I am going to sand it smooth and start painting with EZ Bilge. Hopefully I will have pictures by next week. For now on I will listen to you guys.
Re: AD16 Karenina
Posted: Fri Jun 07, 2013 9:10 pm
by bondo
Be careful with advice from me as I am an amateur. There were several different bits of advice from the forum I wish I had followed. I have learned to listen a little better as my build progresses. BTW the tinted epoxy as a coating really doesn't look very good when you look at it up close. But it seems to look fine (even good) when I see it as storage.
Re: AD16 Karenina
Posted: Sat Jun 08, 2013 2:05 pm
by ks8
BTW the tinted epoxy as a coating really doesn't look very good when you look at it up close. But it seems to look fine (even good) when I see it as storage.
... and it is much easier than priming and painting. my painted stowage is UV protected and easy to wipe clean, but it was extra work.
pictures here...
if your stowage hardly ever (or never) gets exposed to UV, then paint just might be needless overkill from the 'function' point of view.
Re: AD16 Karenina
Posted: Sat Jun 15, 2013 11:25 am
by gonandkarl
Hallo Stuff,
Thank You very much for the advise about the height of AD14/16. I will build it in the garage and store on the trailer there and while I am waiting to get the plans i have a look at Your marvellous interior work You have done on Your boat. I hope I will come to the same high quality level You and Bondo have achieved in boat building.
Greetings from Austria
Re: AD16 Karenina
Posted: Sun Jun 16, 2013 10:43 pm
by Stuff
Thanks mate
I am not an expert in boat building but if you have any question don't hesitate asking. To be honest with you I think Bondo's workmanship is 10 times better than my. Hopefully I can create a boat half as nice as his. Thanks for the complement and good luck in your journey. I can't wait to see your first pictures.
Re: AD16 Karenina
Posted: Sun Jun 16, 2013 10:53 pm
by Stuff
Happy Father's day to all dads. This weekend my wife let me work on the boat as one of my presents. I was able to do a few things. I finished painting the bilge using EZ Bilge from pettit. Great paint, Highly recommended. Also I put the flotation foam in for of the bilge compartments.
Also I was able to fiberglass both sides of the sole with a 4oz woven cloth. Thanks you bondo for the advise.
.
This week I will do some clean up before putting the sole.
Re: AD16 Karenina
Posted: Fri Jun 21, 2013 2:48 am
by bondo
Way to go. Looks good. You got through this part of the build nicely Stuff. Storage looks good too.
Re: AD16 Karenina
Posted: Sat Jun 22, 2013 9:38 pm
by Stuff
Sometimes you have to do what you have to do
. I have to use my wife's sewing machine to put pressure to the sole while the glue was cure. I used west system 610 and it work as good as gel magic, but next time I will use gel magic. 610 is not as thick as gel magic. Also when I looked in the website Gel magic has more tensile strength. Both are the same price and both come in a calking gun tube.

Here is the final product. Finally the sole is in
Now lets start building the companionway.
Re: AD16 Karenina
Posted: Mon Jun 24, 2013 1:14 am
by bondo
Dang. There it is. Nice work Stuff. It looks perfect. Fast job of it too.
Re: AD16 Karenina
Posted: Tue Jun 25, 2013 11:30 am
by ks8
Re: AD16 Karenina
Posted: Sat Jul 06, 2013 7:48 pm
by Stuff
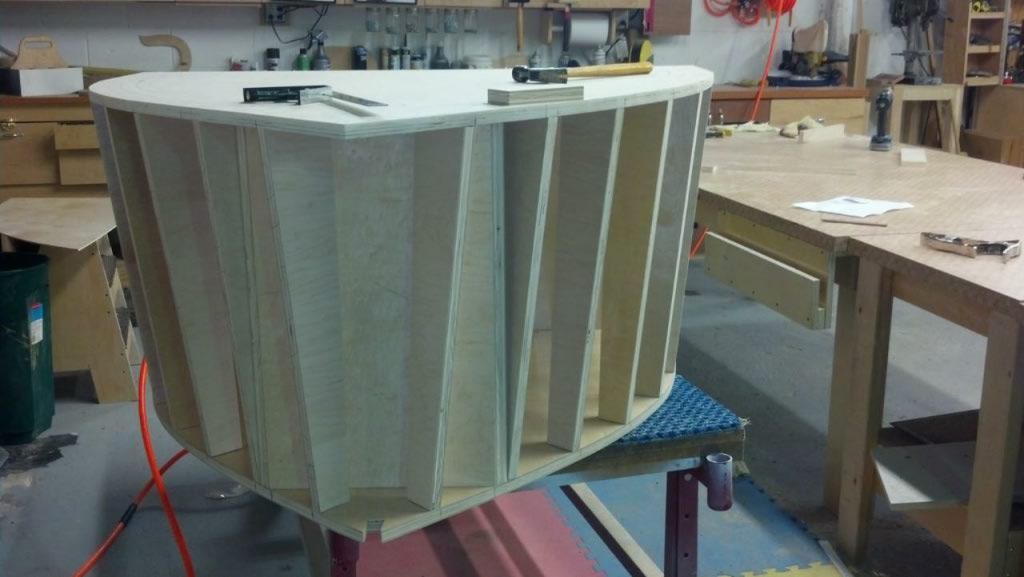
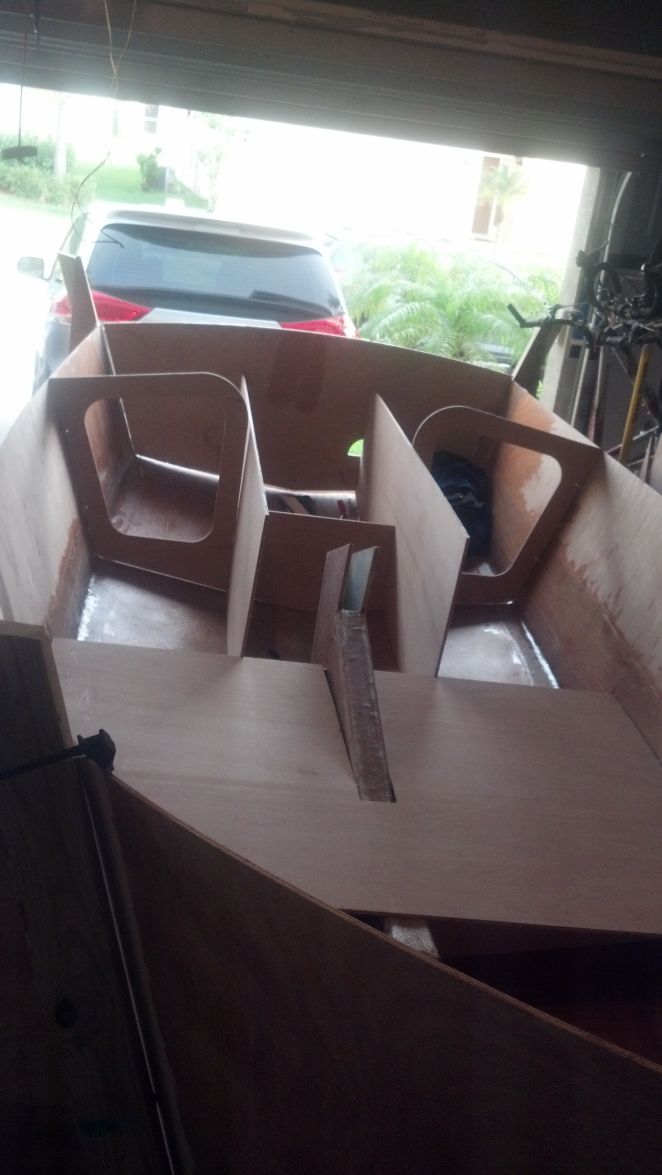
Dry Fitting the companionway.
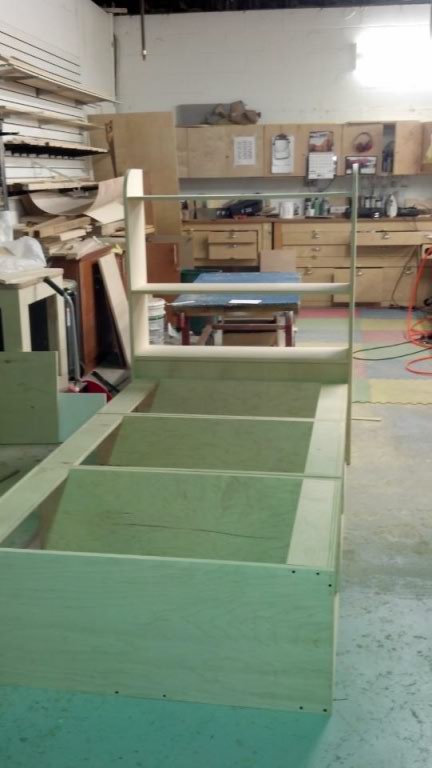
I am having difficulties with the seats.

I guess a part of the top seat panel has to bend to the contour of the frame but I have not seen it on any other build
Re: AD16 Karenina
Posted: Sun Jul 07, 2013 12:16 am
by das boot
It took me a few tries to work out how to get that curve in the seat area. What I did was to run the wood through my table saw twice cutting an angle on boot sides of the strip of wood i forget the angle but it worked out to be about 1 inch wide on top and 1/2 inch on the bottom when you lined them up after cutting it makes the curve you want i then put them in place a few at a time and set them in place with bog. Once it had set up a little sanding with the belt sander and it is dun. Your boat is looking good
Re: AD16 Karenina
Posted: Mon Jul 08, 2013 9:26 pm
by das boot
if you go to builders galleries then search ad16 on page 2-3 you can see how i did it
Re: AD16 Karenina
Posted: Tue Jul 09, 2013 4:25 am
by AD16 The Opportunist
Looks like the seat frame (D) is too high...
Re: AD16 Karenina
Posted: Tue Jul 09, 2013 8:51 pm
by das boot
it all worked out when it was finished suprising what sanding and filler can do
Re: AD16 Karenina
Posted: Sat Aug 03, 2013 10:25 pm
by Stuff
It does look like frame d is too high in the picture but really is not at the edge. Once I fit it in place is going to look good
. I just finished all the companionway fillets. Next week I will sand all imperfections on the filets and start taping. I am hoping to finish all the companion way and seats by the end of this month. Then I will flip the boat. I think I am 50% done and at this rate i probably finish by mothers day next year.
Re: AD16 Karenina
Posted: Thu Aug 15, 2013 1:35 pm
by Stuff
I decided to dry fit the sole but before I could start I cut my finger with the circular saw
. I will be out for a few weeks. It really sucks. Thank God I did not cut the bone or the tendons. I have worked with wood since I was 7 years old and never had an accident. I guess I lost the respect to the power tools and it almost cost me a finger. Lesson learned.
Re: AD16 Karenina
Posted: Sat Aug 17, 2013 9:00 am
by gonandkarl
Hallo Stuff,
I hope Your finger will soon be alright. I thought that You went rather fast with a planned 1 Year building time. Now at least with Your injury there is the excuse to postpone the splash from Your wifes birthday in Dec to next Years mothersday. By then You can even have the baby on board.
I will just miss Your boat building pictures during the next few weeks. You must know, it is always a big encouragement for lots of builders worldwide to see them. Maybe You can post some during Your recovery. ( I am also delayed for 4 weeks waiting for the plywood to arrive from France. Will catch up as I am retired and can build everyday as much as I like.)
Greetings from Karl ( Austria )
Re: AD16 Karenina
Posted: Sat Aug 17, 2013 12:20 pm
by bondo
Sorry to hear you got bit. Your boat is looking great. BTW I couldn't help much with your seat question because I don't have any of my photos from back then. Also, I see your window looking correct. I was intending to build mine with no frame/mullion but I accidentally filleted one of the cabin sides to the frame in that location (I had no windows yet).
Re: AD16 Karenina
Posted: Sun Aug 18, 2013 8:06 pm
by das boot
sorry to hear about you finger but now you can say there is blood sweet and tears in the boat while i did not fight with a saw on this project but managed to stick a drill into my hand so i know how you feel i to am missing a finger got it caught up in the rotor head of a bell 47 helicopter a number of years ago not smart but these things happen keep up the good work looking good
Re: AD16 Karenina
Posted: Mon Aug 19, 2013 10:47 pm
by Stuff
Thank you guys for the good wishes. The finger is doing better but still hurts a little. I was able to cut the mast step this afternoon while my wife was shopping. She was very upset

. I will try to do some light work during the next week to allow the finger to heal. Hopefully I will be posting new pictures soon.
Re: AD16 Karenina
Posted: Sun Sep 08, 2013 5:43 pm
by Stuff
My finger is 90% cure so I decided to start working on Karenina. Finished taping the inside of the companionway, put the mast step and I put the last permanent lead ballasts. After reading dasbot comments on how she sails I decided to put 30lbs in front of frame A. Hopefully it helps her to keep the nose in the water.
Re: AD16 Karenina
Posted: Mon Sep 09, 2013 10:57 am
by ks8
if you setup some 'non-injury' causing
tie down points in the cabin, you can position stowage as far forward as possible, and secure it there (even something substantial like a spare battery) for when you are sailing alone and, for whatever reason, you are sailing back at the transom. I changed the position of my 'active' battery to the cuddy on my cv16 and it helped quite a lot when motoring at the stern with a short tiller. that puts the battery about 4 feet more forward than previously. when one figures the 'moment' for a 30 pound battery shifted forward 4 feet, it may not seem like much, but every little bit helps. if you want to confirm how every little bit helps -- just have another boater take a picture of the waterline with you at the transom, and then with you slid 4 feet forward of the transom, and then with you at the companionway.
it's helpful to have a GPS with a large display for speed, for getting the best speed and 'handling' on various points of sail, and for different sitting positions at the helm, and at different angles of heel. all part of creating your mental version of the skipper's operating manual, or, getting to know your boat and what she likes. she'll let you know -- one way or another.
there may be times when you want her nose down, and other times when you want her nose high, depending on point of sail, and wind speed, sea state, and a maneuver you will execute in a few seconds. it is all part of the fun that comes after the first launch and sail.
and did I say, I like well placed and non-injury causing tie-down points, throughout the boat?
Re: AD16 Karenina
Posted: Thu Sep 12, 2013 9:50 am
by Stuff
Believe me I am not planning to get another injury during this built. I need all my fingers to open and hold my bottle of whiskey!
. KS8, I still have 100lbs of removable ballast which I will move around once the boat is in the water. Hopefully is enough weight to counteract all the junk that my wife is going to put in the boat when we go out camping. Also, you mention to get a large display GPS. Can you give me some recommendations on what brand of GPS should I get. I was planning to buy one that contains marine charts as well. I have never own a boat therefore any recommendations are gladly appreciated.
Re: AD16 Karenina
Posted: Thu Sep 12, 2013 10:12 am
by Cracker Larry
I need all my fingers to open and hold my bottle of whiskey!
.
Nah, you only need about half of them for that
Humminbird GPS with Navionics charts is my favorite.
Re: AD16 Karenina
Posted: Fri Sep 13, 2013 6:18 pm
by ks8
large display is not as important as it displaying the most useful data 'largely'. there is a difference.
I look forward to the day when the user will have the 'easy' ability to create and save and select from a dozen presets for things like what is displayed, and in what position on the screen, and in what font size. the manufacturers are starting to understand this, and it is all the more important on the smaller screens, which could be excellent units with such freedom for adequately managing the data displayed on the smaller screen. if the manufacturers don't stay fresh on their game, the app developers on the tablets will grab the market... as soon as there are sufficiently marinized and affordable tablets.
Re: AD16 Karenina
Posted: Sat Sep 28, 2013 2:55 am
by das boot
location of ballest in the AD16 it took me a quite a while to get it worked out on my boat but while under sail each time the kids were in the cabin or someone went to use the john the boat would pick up 1-1.5 mph on the GPS then it hit me and i moved a bunch of weight forward so now i get 5.5 to 6 mph under normal conditions and have had it up to over 7 mph in a strong wind such a small weight movement makes a big change
Re: AD16 Karenina
Posted: Sat Sep 28, 2013 1:24 pm
by ks8
Increasing effective waterline length, back to the design, and better flow.
Try different angles of heel in different sea states too.
Re: AD16 Karenina
Posted: Mon Sep 30, 2013 8:53 am
by Stuff
Thanks for the advice guys. I can't wait to put the boat in the water and see what she can do. I am very surprise with the performance Das Boot. I was not expecting 7 MPH is such tiny boat but I'll take it
.
For the past two weeks I have not being able to work on the boat. My dad has been in the hospital and he will be going through a rough operation on the 17 of October. When I first started the project I aim to finish on the 5th of December of this year but now who knows. I really suck because the reason I am doing the boat was to expend time with my dad building something together. Sorry guys bu I needed to vent out my feelings. I am feeling better know
Re: AD16 Karenina
Posted: Tue Oct 01, 2013 12:56 am
by bondo
Hey Stuff, I hope your dad will have a quick recovery.
Re: AD16 Karenina
Posted: Tue Oct 01, 2013 3:50 am
by gonandkarl
Hallo Stuff,
All the best for Your father. I hope he will be OK soon and then You can again report cheerfully about the work he helped You with like the centreboard shaping. I am about the age of Your father and therefore I pray for him and myself to see our Adelie s
splashing soon. Give him my good wishes when You visit him in hospital again. I believe lots of other Bateau Builders round the world are in thoughts also with him after they read Your lines.
Greetings from Karl ( Austria )
Re: AD16 Karenina
Posted: Tue Oct 01, 2013 1:22 pm
by ks8
Well said, and ditto.
My Dad watched the launching and first sail. He was no longer mobile enough to get in the boat himself, but he saw the splash of the boat he helped flip a dozen times.
His time in this theater ended three years ago, but one day we shall go fishing again, better boat, better sunsets, better water, better fish, better times.
http://www.youtube.com/watch?v=Khdsopx102Y
Hoping your Dad has a speedy recovery so you can enjoy more good times and memories here, and add to the hopes of yet better times.
Re: AD16 Karenina
Posted: Tue Oct 01, 2013 2:11 pm
by Cracker Larry
Our thoughts and best wishes are also with you. This community might be spread out, but it is tight. If you need something, just mention it. I sure miss my Dad sometimes, he died while I was building No Excuse.
Re: AD16 Karenina
Posted: Wed Nov 06, 2013 11:07 am
by Stuff
I will like to thanks everybody for the words of support. My dad is doing better know and he had a decent prognosis (at least 3-5 years or even more). He was operated (Whipple operation) and everything is looking great. The doctor was impressed on how good he is doing. Now I can work on Karenina!
This past weekend I was able to finish the sole in the cockpit and did the curvature portion of the seats. Bondo, I use your method to build them and they came out good. Here is a picture of the seats. Next week I am going on a Cruise ( Oasis of the seas) and I will not be able to work on the boat. The plan is to fair and prime the inside of the seat before closing it.
Re: AD16 Karenina
Posted: Thu Nov 07, 2013 9:26 am
by bondo
Looking good. I pre-glassed the underside of the seat tops (ks8 advice) before installation for added stiffness. Not necessary but I like it.
Re: AD16 Karenina
Posted: Mon Dec 30, 2013 12:10 pm
by Stuff
Almost done with fairing the inside bottom half of the boat. Once I am done I am thinking to use Mostalinner for the whole interior. I wanted a texture look for the inside of the boat, similar to LineX. The reviews for the product are really good and they have many colors.
http://www.monstaliner.com/. Just want to know if anybody has used this product before.
Thanks guys
Re: AD16 Karenina
Posted: Tue Dec 31, 2013 8:42 am
by topwater
Yea I have used this on my pickup truck rocker panels and also did my storage compartments in my
NV 23.
I also plan on doing all decks and cabin with it .
Re: AD16 Karenina
Posted: Tue Dec 31, 2013 4:29 pm
by Stuff
Topwater
How many gallons you used to paint the bilge.
Re: AD16 Karenina
Posted: Wed Jan 01, 2014 9:59 am
by topwater
I used a gallon kit to do everything forward of frame C including the anchor compartment . That is a lot
of surface area in my boat . That is also two heavy coats . It goes on a lot like Kiwi grip only a little thinner.
Wear a good mask the fumes are brutal .
The berths are almost 7 ' long to give perspective .
Re: AD16 Karenina
Posted: Wed Jan 01, 2014 4:02 pm
by Stuff
Thanks Top water
I am going to get one and a quarter gallons for the floor and a 2 gallon kit for the rest
Re: AD16 Karenina
Posted: Thu Mar 06, 2014 8:22 pm
by Stuff
Just finished to fair the bottom inside of Karenina. That was a lot of work but it came out nice
Re: AD16 Karenina
Posted: Fri Mar 07, 2014 2:13 pm
by das boot
Looking real good to this point keep up the good work
Re: AD16 Karenina
Posted: Sat Mar 08, 2014 1:58 am
by gonandkarl
Hi Stuff,
Nice to see your progress and as you know I am building an AD14 and therefore Your pictures are an example for me how my boat must look when I am at the same stage.
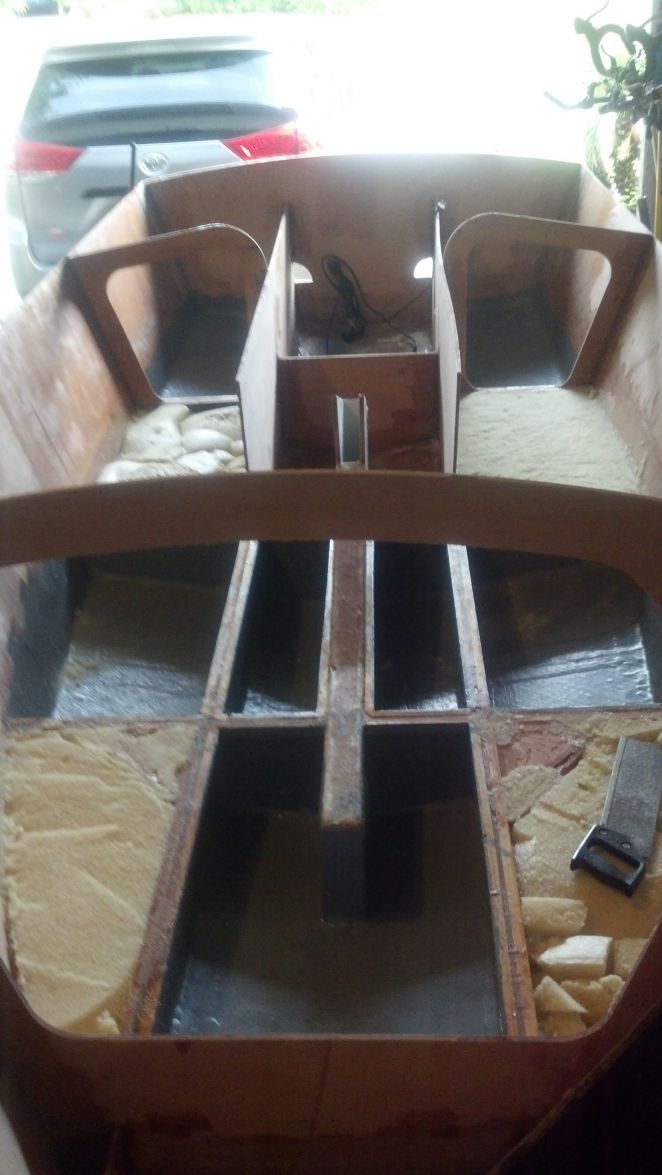
I have one question after carefully looking at the foto: It looks as if there are 2 pipes coming out of your floorboard, one going up and the other one going forward past frame A. Have you provided for some wiring for electricity ?
Greetings from Austria
Re: AD16 Karenina
Posted: Sat Mar 08, 2014 8:02 am
by pee wee
gonandkarl wrote:Hi Stuff,
I have one question after carefully looking at the foto: It looks as if there are 2 pipes coming out of your floorboard, one going up and the other one going forward past frame A. Have you provided for some wiring for electricity ?
Greetings from Austria
That's what I first thought when I looked at that photo. I think what we are looking at is not part of the boat, just part of an extension cord, possibly leading to a drop light, and another black electrical cord in the foreground. Did I guess right?
Re: AD16 Karenina
Posted: Sun Mar 09, 2014 10:23 am
by Stuff
That's an extension cord that I was using to power my tools and the working light.
Re: AD16 Karenina
Posted: Sun Mar 23, 2014 9:19 pm
by Stuff
used Monstaliner for the inside of the boat and I am very happy with the results.
. Here are some pictures of the inside floor.
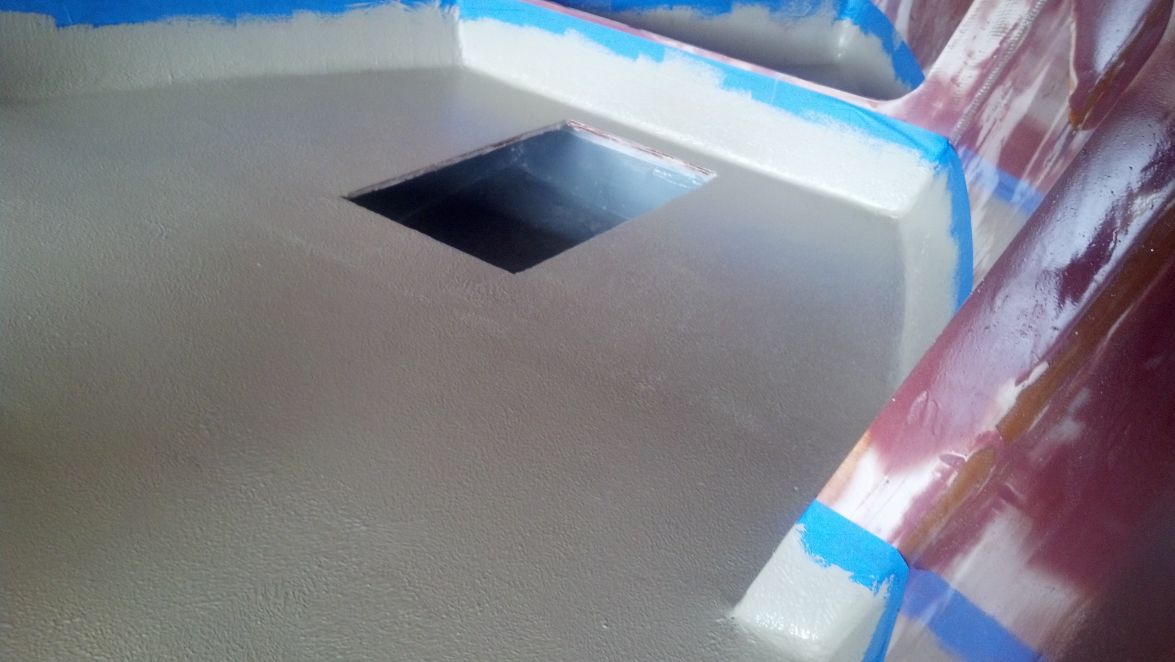
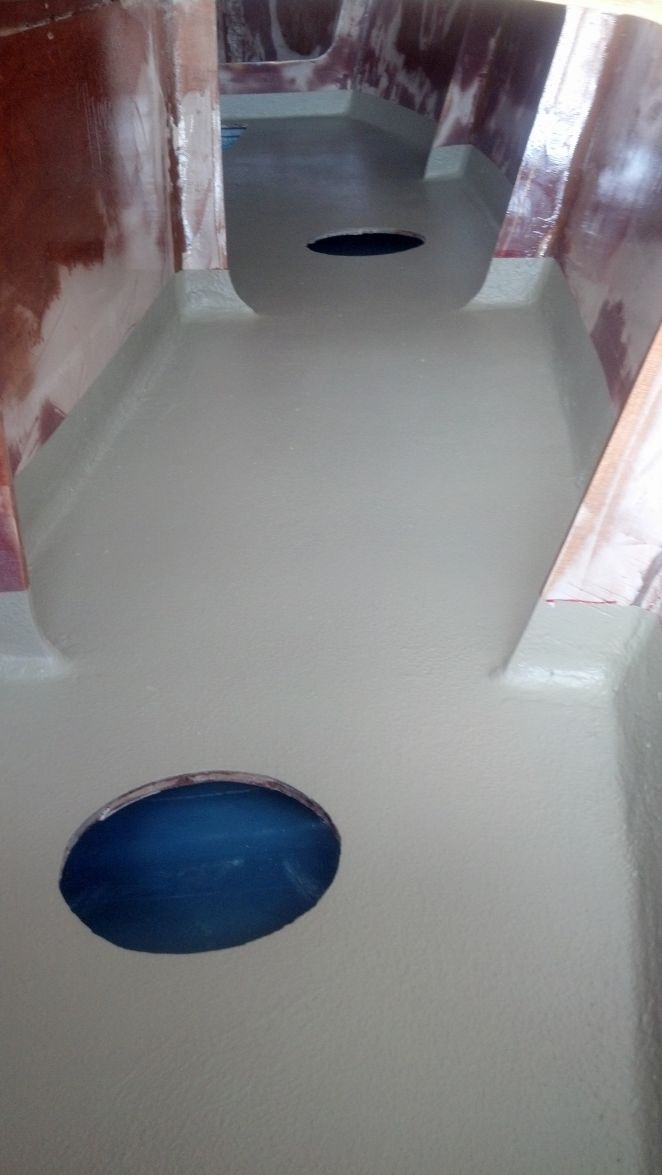
Next week I will install all the hatches and cover the floor with plastic to protect it. Hopefully I will be able to finish the seats and the spinnaker boom hole before moving to the new house.
Re: AD16 Karenina
Posted: Mon Mar 24, 2014 2:34 am
by gonandkarl
Hallo Stuff,
The inside of your boat looks really great , I wish I were that far.
Hopefully I can get Monstaliner here in Europe.
How big did you make the inspection holes 15 cm ( 6 inches ) diameter or is it only 10 cm ( 4 inches )?
Greetings from Karl (Austria)
Re: AD16 Karenina
Posted: Mon Mar 24, 2014 6:45 am
by Stuff
Thanks Karl
I have two different sizes for the holes. The ones in the cabin are 8 inches and the ones by the seats are 4 inches.
Re: AD16 Karenina
Posted: Mon Mar 24, 2014 9:14 am
by Noles309
Very cool. I emailed them last week about using it on fiberglass and they said it was good to go. I was going to do the rubrail and possibly the inside on my GF16. How did the application go, what color is that and how much did you use?
Re: AD16 Karenina
Posted: Mon Mar 24, 2014 2:19 pm
by Stuff
Believe it or not it was very easy but I had an issue. I did not mixed constantly and the paint created small chunks of paint. I will mix it every 15 to 20 minutes.Use a little of MEK two thin the paint before applying the second coat. I removed most of the chunk with my finger but not all of them were removed. I paint color is desert sand but for some reason it looks gray in the picture.
overall I give the paint 9/10.
I will use kills beez color for the walls. One more thing, I use close to a gallon to paint the floor. They are very accurate with the 60 sq claim.
Re: AD16 Karenina
Posted: Mon Mar 24, 2014 11:02 pm
by Noles309
I was leaning toward one of those two colors as well and pass the bubbly. Hard to tell colors from the computer screen though.
Re: AD16 Karenina
Posted: Mon Mar 24, 2014 11:34 pm
by das boot
I am going to try using gator paint for the floor of the cockpit area I have been using PETIT epoxy paint but find it gets scratched up quickly in that location. It seams to hold up well on the rest of the boat. Food for thought
Re: AD16 Karenina
Posted: Tue Mar 25, 2014 9:30 am
by Stuff
Das Boot
I have used a few DIY linners in my past trucks and I have to said I was not happy wiht most of them. Line-X is the top of the line but it has to be installed by their dealers. About Gator linner I was not to happy with the reviews. Most website said that is to rough and it only comes in black and white. I guess it will be ok for a truck bed but since you are going to be sitting and moving around the cockpit I will not recomend it. One last thing Gator linner is made out of epoxy therfore it will chalk after the exposure of sunlight. Just my two cents. Here is a website for monstalinner that describe all of the DIY bedlinners.
http://www.monstaliner.com/monstaliner_comparisons.htm
I know that it migth be bias but they were on point with 3 diffenent products that I have used prevously. (Duplicolor Truck Bed Coating , Durabak and stoleum Road Warrior Truck Bed Coating ). Also once you put any of this product in your boat it will be almost impossible to remove them.
Re: AD16 Karenina
Posted: Tue Mar 25, 2014 9:50 am
by topwater
I agree , any liner with ground up rubber in it will be real coarse . I have monstaliner liner on my trucks rocker
panels for over a year now with no fading and with temp swings from a 100 degrees to neg 30 with no problems.
I have also used it in my storage areas in the bow of my build. Plan on using it in the seat boxes and also the decks.
Re: AD16 Karenina
Posted: Tue Mar 25, 2014 11:25 pm
by das boot
Thanks for the advice so it is back to square one and just repaint more often. Still on paints I did my cockpit and deck areas with bright white on a bright sun day something we do not see often in Vancouver Ha Ha the glair is hard to deal with so this time I am going to do the cockpit area with a light sand colour it might help cut the glair. Again thanks for the in put I may be old but not to old to take advice. The AD16 has been a good boat and has not let me down last year was the first time I took it out into the salt water and it handled the trip to Vancouver Island and back no problem I usuley sail it in a lake near Vancouver.
Re: AD16 Karenina
Posted: Sun Apr 13, 2014 10:46 am
by bondo
Wow! That looks great Stuff. You are really building this boat beautifully. There is a lot of surface areas in this little design isn't there? Your coating material will work out great. I love seeing the progress, keep it up.
Re: AD16 Karenina
Posted: Mon Apr 14, 2014 8:02 am
by Stuff
Thanks Bondo
Here is what I have done so far. I was able to put the seats past week now iam getting things ready to start to fiberglass the cockpit.
still wondering if I should put seatbacks or leave it the way it is
Re: AD16 Karenina
Posted: Mon Apr 14, 2014 11:54 am
by peter-curacao
Stuff wrote:still wondering if I should put seatbacks or leave it the way it is
Clean as it is looks nice
maybe you can rout in a channel in the seat what house a flip up back support? (stainless or aluminum pipe frame)
Re: AD16 Karenina
Posted: Thu Apr 24, 2014 7:57 am
by icelikkilinc
Steel wire with removable cushion on top...
imho, With the leaning angle, any back rest may cause water bailing issues..
Re: AD16 Karenina
Posted: Sun May 11, 2014 7:40 pm
by das boot
I built a back rest into my boat the same as the fellow in SA did I find it a handy place to store junk and my beer dose not fall over the side it also helps on a cool day to keep the wind off my back but I do not think there are any two of these boats built exactly the same. That is why we build them so we can display our one ideas. I know mine works well for me.
Re: AD16 Karenina
Posted: Thu May 15, 2014 10:50 am
by Stuff
Thanks for the opinions on the seatback guys.
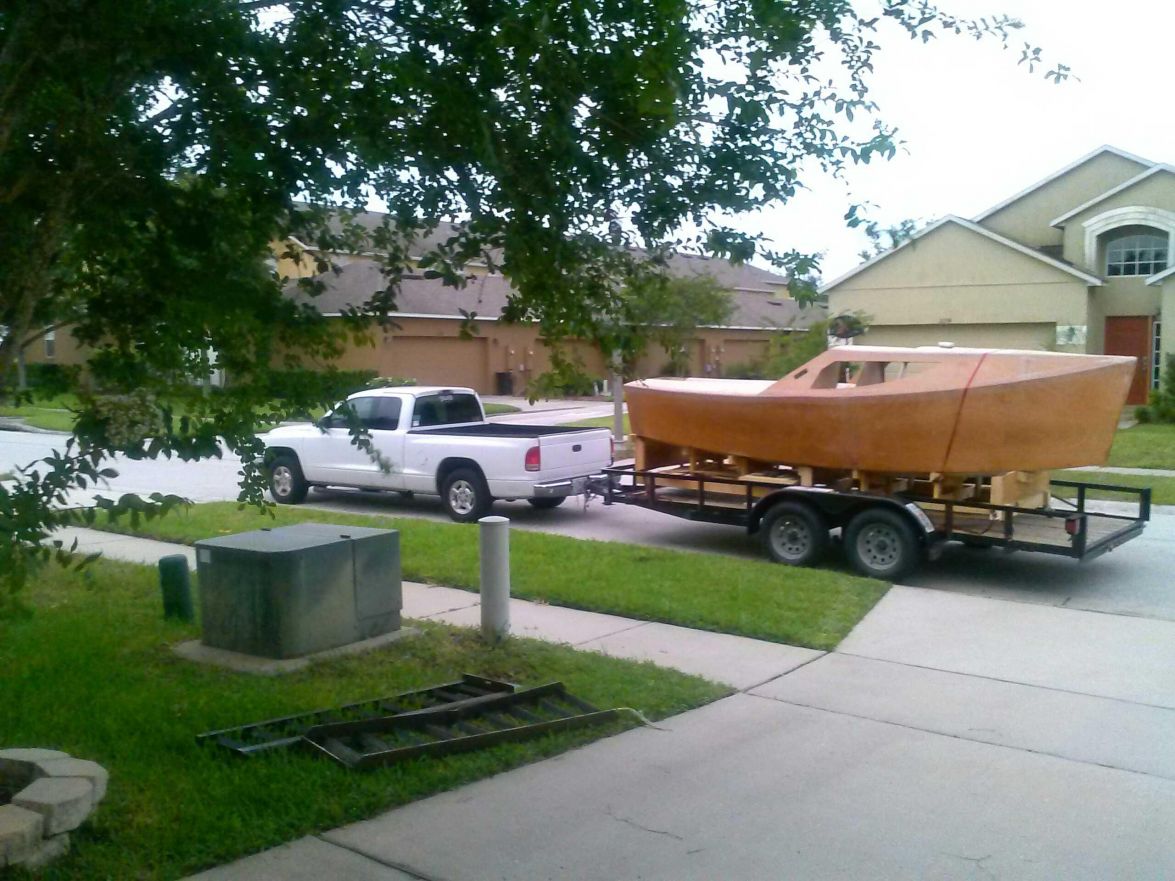
I am leaning towards no sebacks with padded life lines to be safe since I will be using the boat in Florida. Summer storms with high winds are very unpredictable in Florida and they may try to flip the boat before me knowing. The seatback might make it harder to straigthen the boat if the seat goes under water. I think looks wise the seatback make the boat more complete. Just my opinion.
Now I have to concentrate on the house move. I am getting Karenina to its temporary house (My dad's house) unitil I get my new house on June 9th. Here is a picture in the flat bed trailer.
Re: AD16 Karenina
Posted: Thu May 15, 2014 11:02 am
by jacquesmm
Yes, go for the straps. I have sailed many boats without seat backrests but fitted with padded lines. It is safe.
Re: AD16 Karenina
Posted: Fri May 16, 2014 12:55 pm
by ks8
... on the road ...
Re: AD16 Karenina
Posted: Sun May 18, 2014 12:16 am
by bondo
Hey Stuff. The only sailboat I've ever owned had seats like the AD's. We should have a discussion about the AD cockpit. You asked about the mast I ordered. I ordered per plan. But you will need to go through the process of laying it out until you get a better understanding of what you need i.e. How high is the Dwyer mast step? + How high to my mast partner + how high to the boom and so on. I didn't completely understand what I wanted or why I wanted it until I did the layout. (my mast step might be an inch or two taller than yours so I have to measure what I've built)
Re: AD16 Karenina
Posted: Sun May 18, 2014 10:49 am
by bondo
Love the picture. Looks good. Only 16' but these things are big for their age. I meant to build my windows with no mullion at "B" frame like you did. I had no cutouts at that stage and glued the cabin panels to "B" frame, and filleted them before I realized my mistake.
Re: AD16 Karenina
Posted: Mon Oct 06, 2014 5:05 pm
by Stuff
Bondo I like what you did more than the actual plan. It looks more completed from the cabin.
Finally after 3 months working on my house I can work on Karenina. I'm going to sand the cockpit and the outside of the cabin to get her ready for fiberglass. Pictures coming soon.
Re: AD16 Karenina
Posted: Wed Oct 08, 2014 9:36 am
by bondo
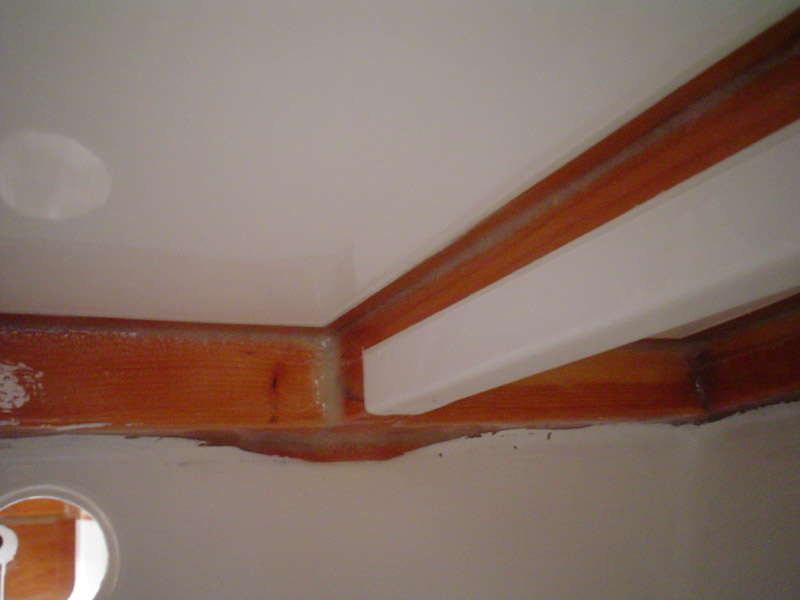
That's great to see you're back at it. I think you were wondering about the spi pole so copy these pictures. You can see the 2" aluminum bow sprit in its retracted position. Off to the side of the companionway, as high as possible. Just below the frames.


Re: AD16 Karenina
Posted: Wed Oct 08, 2014 10:28 am
by Stuff
Actually I was referring to the mullion in your window but the picture of the spi was very helpful. Now I have a better idea on how to make the hole. BTW please don't remove your pictures. I use them for references all the time. Also they inspire me to keep working hard on Karenina.
Re: AD16 Karenina
Posted: Thu Oct 09, 2014 4:05 pm
by Salvatore
Re: AD16 Karenina
Posted: Thu Oct 09, 2014 4:34 pm
by Stuff
That's nice. I like that you sandwich the plexi between two frames. Is more water tight that way. I might do the same.
Re: AD16 Karenina
Posted: Thu Oct 09, 2014 10:29 pm
by Salvatore
Did you notice the cable chain brace? I got the idea of exposed wood from Bondo. What I did is use a solid piece of timber 3/4 inch (18cm) thick and I placed the chainplate between the brace and the boat then I put SS skrews from outside the boat through the chain plate and into the timber, and glued it all together, it hides the chain plate and gives you a few extra degrees swing on the boom.
Ps: Did you notice that the top of the window runs parallel with the top of the cabin, I think it looks better, (It is not as per plan) It's not to late for you to make that change. I actually did it by mistake it was Bondo that noticed it.
Re: AD16 Karenina
Posted: Fri Oct 10, 2014 8:12 am
by jacquesmm
Corrected: my previous post was wrong, only twp of the windows edges is parallel to the panel side.
You have complete freedom there as long as you leave 2 or 3' along the edges.
Re: AD16 Karenina
Posted: Fri Oct 10, 2014 3:10 pm
by Stuff
I did notice that Salvatore and was considering doing something similar. Can I ask why the 3/4 piece of wood? It seems like an overkill since the boat is designed with a step mast. Looking at your pictures it looks like you are doing a deck step for your mast, which might explain the stronger support.
Re: AD16 Karenina
Posted: Fri Oct 10, 2014 4:15 pm
by Salvatore
3/4inch beacuse that is how wide the chain plate is, it is completly hidden between the bace and the haul, also it needs to be thick enough to take the SS skrews into the thickness of the brace. I used 2inch (50mm) 6gauge skews don't forget to drill a 1/8th (3mm) pilot hole into the wood to prevent it form spliting. The stronger support is for the deck stepped mast, I am still putting a pole in the cabin to help support the mast. one of reasons I am doing a deck stepped mast is because it will fit in the garrage with the boat, if storing the mast was not a problem I would have it as per plan.

Re: AD16 Karenina
Posted: Fri Oct 10, 2014 9:45 pm
by Stuff
After looking at your drawing i got a better understanding of what you were saying. It is very clever and I like it.
the only issue I have that you made them permanent. I know they're stainless steel but even stainless get corrode. What happens if they break for any reason. How you're going to replace them? By the way I know they are very unlikely to fail.
Re: AD16 Karenina
Posted: Sat Oct 11, 2014 2:44 am
by Salvatore
Make sure the shrews are 316 grade and that you glass over them. We will be long gone before they fail
Re: AD16 Karenina
Posted: Sat Oct 11, 2014 9:54 am
by jacquesmm
I have to look at the plans Monday to understand what that modification is about but in all cases:
- use through bolts not screws
- never cover SS with resin or paint, it will corrode. It must stay exposed to the air.
Re: AD16 Karenina
Posted: Sat Oct 11, 2014 3:06 pm
by Salvatore
I didn't know there was a conflict with SS and Resin
, you learn somthing new everyday, thankyou for correcting me on that
Re: AD16 Karenina
Posted: Sat Oct 11, 2014 5:49 pm
by jacquesmm
The steel becomes stainless because a thin layer of oxyde exist on it. If you keep the air from reaching the steel, it may degrade.
I don't know the details.
Re: AD16 Karenina
Posted: Sat Oct 11, 2014 9:18 pm
by ks8
A good reason to inspect SS shroud terminations regularly too, especially if you wrap them tight with tape, as some do.
I'm no metalurgist, but here's my little blurb. My limited understanding is that the SS does hold up better than steel, usually, resisting oxidation of the steel (rust), but in some situations, where air doesn't get to the SS, the chromium in the SS doesn't form or fully maintain the chromium oxide protective layer over the steel. I've got good 316 SS rusting a little already too. It should be rinsed with freshwater (oops) to get the salt off, and then as much of its surface as possible allowed to contact the air, if one would have it do its magic best. I have good SS screws in some yard furniture. I live very near the Gulf. The SS screws rust a little from the salt in the air, if not rinsed regularly with fresh water. Heavy keel bolts are generally not SS, but bronze -- partly, I imagine, because they mostly have no exposure to air, and or might be immersed in water in a wet bilge in some types of boats.
Next season I've got to pull out the embedded SS ubolt that my mainsheet attaches to on the CB trunk, and make sure it is still happy after being sealed up in that 4200 for a few years. Crevice corrosion can happen, but my install, I'm pretty sure was mostly moisture free. Now, I *say* that, but technically, 4200 cures from moisture in the air. Since it is cured for several years now, through and through, there *was* moisture in the bond. Soooooo .... even the SS fittings should be inspected regularly, at least minimally, moreso if offshore or otherwise mission critical. One might say that the mainsheet attachment is *mission critical* when sailing.
The ability to inspect and re-bed is one of the reasons I prefer 4200, when possible, instead of 5200. 4200 comes off much easier, and is more of a bedding compound instead of an adhesive (like the more aggressive 5200). If you bed SS screws in 5200, to, say, install a teak bit of trim rail, that is different, as it is generally not structural and is not mission critical, and is acting double duty, as an adhesive also. If the SS screws ever do fail on a simple decorative trim rail, its just an inconvenience. The boat won't sink or lose power.
I also only *seal* the deck surface area of any through bolts (such as mounting bolts for hardware like cleats), and not the lower surface under the deck. If the lower surface is sealed with 4200 or something else, around the washer and backing plate, and the upper seal above deck ever fails, water gets in the hole on the bolt and can't get out. If the lower surface is NOT sealed, the worst that can happen is that you discover the upper seal needs fixing, because of a leak down below. I'd prefer a dripping as a warning, rather than no dripping and a failed through-bolt trapped in years of watery corrosion goop, as long as it isn't dripping on the electrical system. But everyone comes up with their own methods. These are mine, along with some of the *why*.
Re: AD16 Karenina
Posted: Fri Feb 27, 2015 9:14 am
by Stuff
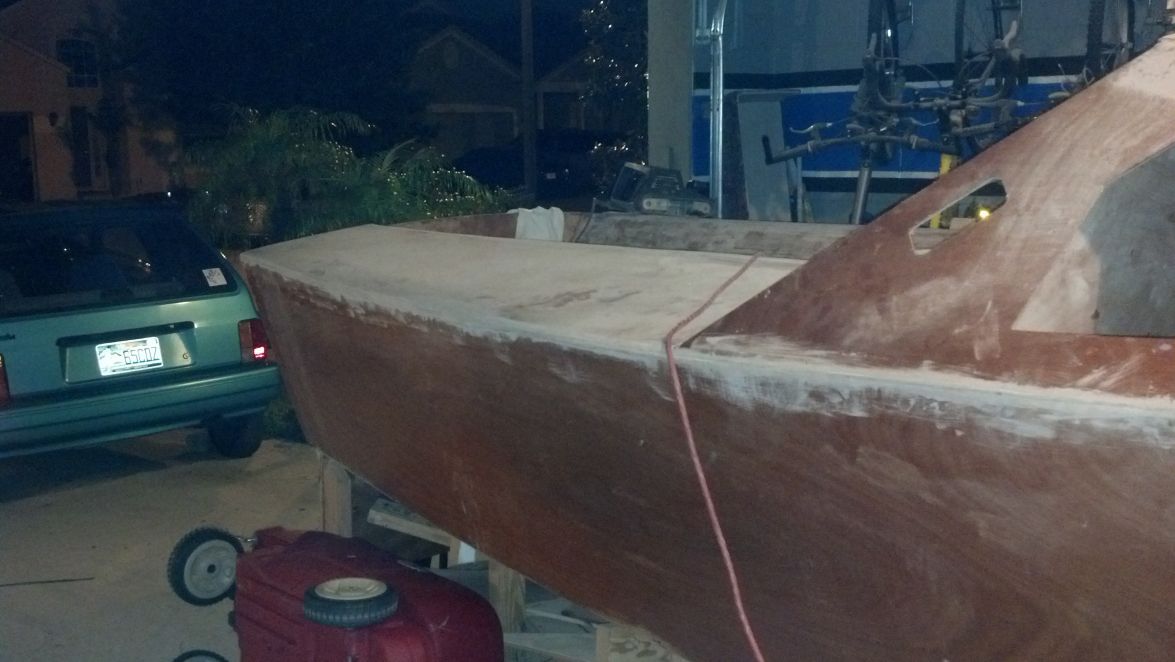
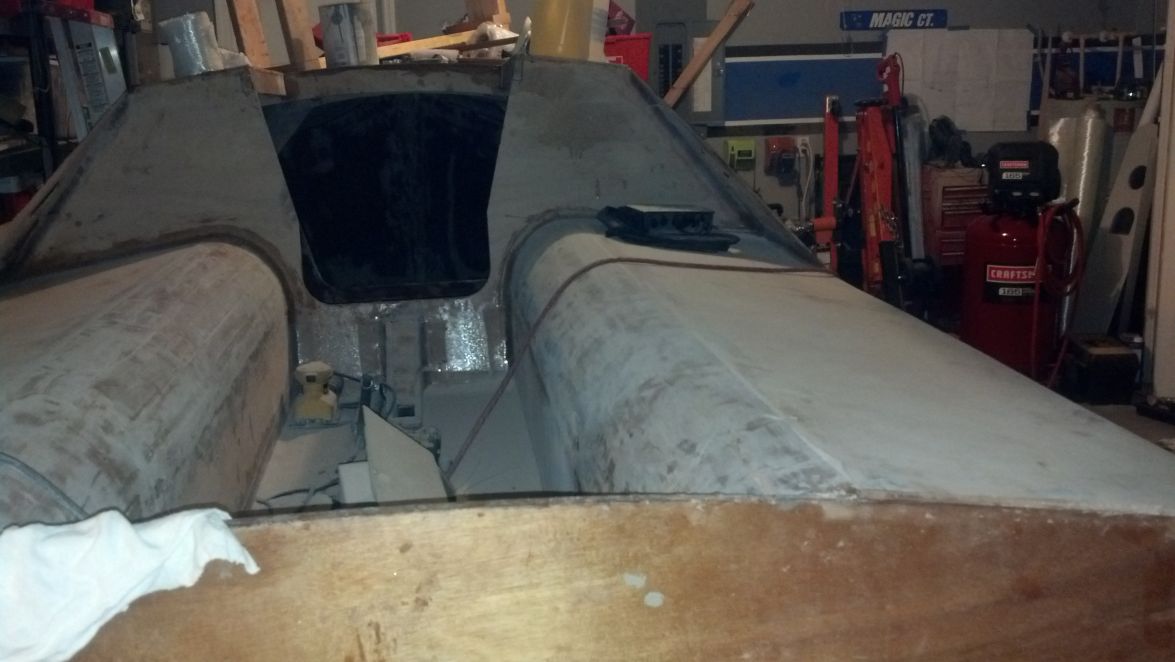
Karenina is flipping out!!!!!
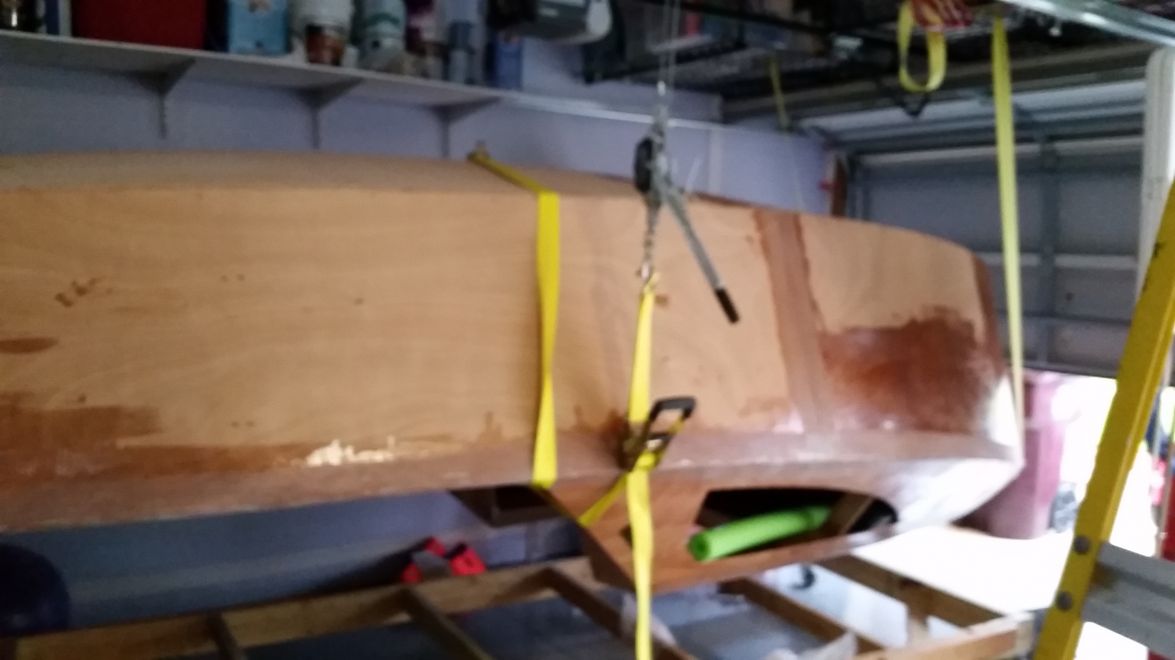
I am making the cradle into a flat bed and she will rest there backwards until the bottom is done.
Re: AD16 Karenina
Posted: Fri Feb 27, 2015 9:54 am
by jacquesmm
Major step forward, congratulations.
Re: AD16 Karenina
Posted: Fri Feb 27, 2015 3:28 pm
by ks8
wheeeeeeeeeeeee!
Re: AD16 Karenina
Posted: Fri Feb 27, 2015 11:21 pm
by das boot
Good job getting it flipped over is a big step the next big problem is getting back upright the next project after that is to get it on the trailer. I built mine in an old car port and hanging it from the rafters to put the trailer under it was a chore but it worked. Keep up the good work.
Re: AD16 Karenina
Posted: Sat Feb 28, 2015 8:12 am
by gonandkarl
Hallo Stuff,
Well done and now only 2 steps before splashing : glassing and painting.
Godd luck with it.
Greetings from Karl ( Austria )
Re: AD16 Karenina
Posted: Fri Jan 20, 2017 3:38 am
by gonandkarl
Hi Stuff,
Have not heard from you for a long time. I post this to show some other builder the mast partner mistake of your page 2 .
Hope your boat is coming soon to the splashing time.
Greetings from Karl
Re: AD16 Karenina
Posted: Fri Jan 20, 2017 9:19 am
by terrulian
Yes, long time no see.
I have always wanted to ask you the reason for your boat's name.
Re: AD16 Karenina
Posted: Sat Jan 21, 2017 5:41 pm
by ks8
Yes. How are you doing?
Re: AD16 Karenina
Posted: Sun Jan 22, 2017 12:23 pm
by waytootall
I am the builder who made the mast partner mistake
, I also notice that I ended up flipping my AD14 in a similar fashion - but I hadn't seen your posts. It would have been much easier if I had read your posts first.
Re: AD16 Karenina
Posted: Wed Apr 12, 2017 4:00 pm
by Stuff
Hello Everybody. After a year+ vacation I am back. This weekend I will be working on my boat. (at least that is my plan). Hopefully I should be able to put 2-10 hour per months during this summer.
Re: AD16 Karenina
Posted: Wed Apr 12, 2017 4:25 pm
by terrulian
That's great! We are starved for entertainment, or as Cracker Larry and others call it, boat porn.
Re: AD16 Karenina
Posted: Wed Apr 12, 2017 4:42 pm
by ks8
Is the AD still hanging upside down??
Re: AD16 Karenina
Posted: Thu Apr 13, 2017 5:40 pm
by Stuff
Yes Still upside down on a flat bed cradle that I build for it. IT allow me to push it in and out the garage for sanding.
Re: AD16 Karenina
Posted: Fri Apr 14, 2017 8:34 am
by ks8
Very handy.
Re: AD16 Karenina
Posted: Wed Apr 26, 2017 1:20 pm
by gonandkarl
Hi,
Please let us have your newest pictures of your boat. I often think of you and your build because right now I think only 3 AD builder world wide are busy building such a nice sail boat. We should share the infos as much as we can. I hope you have seen the newest video of Salvatore from Australia who is sailing his long finished boat extensively.
Greetings from Karl
Re: AD16 Karenina
Posted: Wed Oct 23, 2019 11:19 am
by ks8
Pictures?