Page 1 of 1
AD 14 KIELGE
Posted: Fri Jun 14, 2013 9:15 am
by gonandkarl
Hallo everybody,
Just ordered the plans for AD 14 and I am looking forward to build the boat KIELGE.
The last boat plan I ordered was on May 1 st 2005 for a FL11 . For some reason that I dont know myself I never built it most probably because my job was to stressful at the time. But the boat building dream exists for the last 35 years when I got the boatbuilders bug caused by some neighbors who were working on concrete boats ( the hulls were buit of chicken mesh and concrete ) in their gardens to sail the Cape to Rio race. Unfortunately a busy life with family and 3 kids and a move from South Africa to Austria came first and now that I am retired is the time to build an AD 14.
I have a brick walled shed 24 x 9 foot with a coal stove in it and a 20 x 8 foot garage where I can build.
Can anyone tell me the height of AD 14 from keel shoe to the top of the deck, because this will determine if I can build it in the shed where I can replace the existing door 205x100 cm with one of 205x150 cm ???
Re: AD 14 KIELGE
Posted: Fri Jun 14, 2013 11:16 am
by Stuff
If my conversions are correct that is a 3ft 4 in door (100cm). It seems to small

. Even the the 150cm door (just under 5ft) seems to small. I have a 7ft heigth garage door and my boat has about a foot of clearance. The boat is about a foot above the ground. You have to think about trailer clearance if you are going to store the boat in the sheed. I think you are to close for confort with does dimension.
BTW
I am building a AD16 it might be a little different.
Re: AD 14 KIELGE
Posted: Fri Jun 14, 2013 11:23 am
by bondo
Wow, I haven't heard of anybody else wanting the AD14. That's great. Why did you choose the shorter version? BTW I've got approximately 142 cm here for a number.
Re: AD 14 KIELGE
Posted: Fri Jun 14, 2013 3:31 pm
by gonandkarl
Hallo Bondo,
Thank You for Your reply.
The number 142 is for sure the height keelshoe to top.
This would mean if I build in my shed I can get it sideways out thru a 150 cm door but just by the skin of my teeth.
It is too close. I will use the shed for cutting all the plywood, building rudder, centerboard + case and use it as a workshop even in wintertime. And when I am ready to assemble I will do it in the garage.
Why I am building the smaller Adelie has a lot to do with Your excellent job You done on Your boat the last 3 Years.
You have proved that size is not everything and I am mainly thinking of Your massive building shed.
I have read all your posts and want to reach the same quality in applying the epoxy and as I was only daysailing in small dinghys in my youth I want to do just that when it is finished. My wife is not to keen to go to the Mediterranen sea on longer cruises so I might be sailing often alone and for that it is plenty big enough.
And the building of the nice design AD 14 is just as fullfilling for me as the sailing afterwards.
Right now I am finishing Devlin's Micro Petrel and practise the stich & glue method, before I starts the AD
Greetings from Austria
Re: AD 14 KIELGE
Posted: Wed Jun 19, 2013 12:40 am
by das boot
Bondo has dun a real good job on his boat I built the AD16 and have been sailing it for the past 6 years it has not let me down works gright on the west cost of Canada we can get some big water that is why i went with the 16 i tried to send you some pictures but they bounced back
Re: AD 14 KIELGE
Posted: Thu Jun 20, 2013 6:47 pm
by Laszlo
bondo wrote:Wow, I haven't heard of anybody else wanting the AD14.
bondo,
It's a stealth popular boat. Lots of us bought the plans when they first came out in 2004. You're just the first to be actually building one. I almost started on one 2 1/2 years ago, but things came up and I couldn't devote the time to build it. Actually, the day after I received my plans 9 years ago, I cut out the skeg so I could claim title to the record of the longest AD14 build ever

It's a great little design. Jacques had a real collaboration with us when he did it
http://forums.bateau2.com/viewtopic.php ... 1&start=70 and I feel as if he did a custom design for me at stock plans prices. So I had to order the plans even if I wasn't ready to build yet. With any luck at all I can start sometime in the next couple of years and maybe join you and karl in a regatta one day.
Really nice job with your build, BTW.
Laszlo
Re: AD 14 KIELGE
Posted: Fri Jun 21, 2013 3:27 am
by bondo
Sorry we hijacked your thread. Das Boot knows, and has the only real experience with an AD on here. Lazlo is right. The original discussion about the design is interesting and helpful. (and it is his idea) I wondered if there were any other AD 14's. Btw I like some of Devlin's designs. Little Petrel is one of them. The extra foot is really going to pay off. Making the leap to the 1 + sheets of plywood for length doesn't seem like much but if plywood were 9 ft. long, every dingy design would be 9 ft. long. You have got to finish the petrel.
Re: AD 14 KIELGE
Posted: Fri Jun 21, 2013 10:39 am
by Laszlo
It was Jacques' idea, we just made suggestions
Re: AD 14 KIELGE
Posted: Sat Jun 22, 2013 7:23 pm
by gonandkarl
Hallo Bondo,
Thanks for the encouragement to finish the Petrel. BTW I am not building he Little Petrel, but the Micro Petrel this saved me from having to scarf plywood on my first boat building experience. Being retired from my job as IT manager I can spend all my time building if I would not have to cart my wife to libraries, shops and other appointments besides tending the garden.
This left me nevertheless a lot of time and I should be finished in 3 weeks time. Tommorrow is the big day for glassing the outside hull. ( Start was on 16th May with taking the first photos of cut plywood panels. The Micro Petrel should be finished the latest by 31st of july . If we would not have had 3 weeks of tropical temperatures unusual for Austria and Middle Europe i could have done the fiber glas job already. )
I first printed the studyplans of Adelie 14 in 2005 as well as the D4 design of Jaques Mertens, but knew that it was a dream of the future.
I am just glad to start building this Year for sure, hope to finish it within 1 1/2 Years and will be dreaming at the same time of building the next bigger boat on which I will be able to use the Micro Petrel as a tender on the foredeck.
I cant believe that Your launch date is not close, because all You need is finish the rigging and away You go.
Or is your mast still in the making ?
Carry on doing such an exemple job on your boat. It is a pleasure to see any new photos of it.
Greetings from Karl ( Austria )
Re: AD 14 KIELGE
Posted: Sat Jul 13, 2013 5:31 pm
by gonandkarl
Hi,
At last the plans for my AD 14 have arrived and now starts the ordering of the Okoume marine plywood.
Unfortunately here in Europe it is difficult to order such quality wood panels. The fact is that there are only 2 suplliers in Germany ( Daniel Georgus offers 8x4 ' and Sommerfeld & Thiele 10x5 ' ) and they are both 800 KM away from me.
That I can compare their offers I have to first draw a new nesting plan for 10 x 5 foot sheets.
Has anybody out there done such a redrawing of the nesting plan for an AD14/16, because I believe in the US you also get the big panels ?
It sets me back a few days, but on my test boat building projekt Micro-Petrel I am also behind plan.
Right now I am fairing and sanding and fairing again and sanding again, but I hope I can put the primer paint on during next week.
Weekends I dont build on the boat because my family is not to keen on my boatbuilding activities and therefore I calm them Saturdays with the traditional barbecue.
Greetings from Karl ( Austria )
Re: AD 14 KIELGE
Posted: Sun Jul 14, 2013 3:17 pm
by bondo
We do not have easy access to 5' x 10' panels in the U.S. Only 4' x 8' here. Not knowing the details I would go with the 4' x 8' for most of the boat. I think I would get two or three 5' x 10' sheets. You might be able to get both cabin sides out of one panel. The main part of the sole could be one piece. The cabin top could be one piece.
Pull drawing #D264/11. Please tell me that the mast detail on the right side of the drawing doesn't call for a 2 deg. rake.
Re: AD 14 KIELGE
Posted: Sun Jul 14, 2013 5:06 pm
by gonandkarl
Hallo Bondo,
Thank You for the suggestion about a mix of the panel sizes. I did also some drawing of the nesting on the bigger boards,
but I came to the conclusion to rather go for the 8x4 panels of Daniel Georgus.
Yes plan sheet D264/11 Sail Plan Al.Mast has the rake 2 degrees. But if I read correctly in the forum somewhere it should be 5 degrees. Once I come to building the mast step I will contact Jaques, because I want to build the Chinese Sail and that is normally with a rake forward and usually an unstayed mast.
Talking about plans I have a problem with B264/8 Appendages. At the bottom on the left side are 8 points Centre board case.
Can You tell me what it says on your plan under 5. I ordered metric plans and there it says 5. Cut 51 mm slot through bottom.
(That would be 2 inches ?!?)
Even that it says one should not study all detail before the start of the building, that is exactly what is the only thing one can do before the wood arrives.
Greetings from Karl ( Austria )
Re: AD 14 KIELGE
Posted: Mon Jul 15, 2013 9:05 pm
by bondo
Yes my plans call for a 2" slot but the instructions disagree on this step. They recommend installing the trunk first. I would install the trunk first. I had a problem with the centerboard pattern and the centerboard trunk as drawn. So far I am the only one to have had a problem but there was a conflict for me. The centerboard pivot is drawn incorrectly. There is a correction for that. Detail #8 suggests rounding from the outside but the keel shoe still needs to be applied.
Re: AD 14 KIELGE
Posted: Fri Jul 26, 2013 10:43 am
by gonandkarl
At last I have ordered the plywood Okoume at a nearby supllier here in Austria. It is cheaper than the German suppliers but with the disadvantage that it comes all the way from France and I will have another wait for 6 weeks.
I tested in the meantime how to upload pictures into the builders gallery of my boatbuilding test ( Devlins Micro-Petrel ).
I should finish the boat by the end of next week. ( Inside finishing and painting is still to do and oar building according to
Jim Michalak s article )
Re: AD 14 KIELGE
Posted: Sat Aug 17, 2013 12:40 pm
by bondo
Marine plywood via France? If you receive "Joubert" brand you are in luck. That is the plywood I was able to build with and I really liked it.
Re: AD 14 KIELGE
Posted: Wed Oct 16, 2013 2:32 am
by gonandkarl
Hallo everybody,
At last my Okoume plywood from France has arrived ( unfortunately one 9 mm panel short ) and I have started cutting the first panels for my AD14 build. As I justified the buy of different sanding machines and an electric file ( very narrow belt sander ) with the necessary renovating of all doors in the house I am practicing painting on the doors and hopefully the experience will help eventually painting the boat. The practice to build a smaller boat ( Micro-Petrel dinghy ) was very valuable and the splashing of it was great fun even that I did row it only once more before it is packed away for arriving Winter.
Greetings from Karl ( Austria )
Re: AD 14 KIELGE
Posted: Tue Oct 22, 2013 10:39 pm
by bondo
Beautiful. Nice work Karl. Pretty little thing. Way to go with posting the picture too. 'Love the pictures. With the keel shoe, glue all the full size laminations together minus one. Keep one aside and you can dial in the total thickness to finish just proud of the centerboard edge when retracted. I believe 2 1/4" inches is called for on the plans? The real purpose of saving one part is to retain a pattern. If you find you need to get taller with your keel shoe to protect the centerboard when the boat is grounded you can copy another thickness before glueing on. You might even make one less of those keel shoe parts to begin with and save the wood for the time being.
Re: AD 14 KIELGE
Posted: Wed Oct 23, 2013 5:00 am
by gonandkarl
Hallo Bondo,
Thanks for the adice about building the keelshoe.I have one more question about it.
According to the plan one should make at the bow end a 25 mm ( about 1 " on your plan ) radius.
I cannot see it on any of your pictures.
Did you prefer it to be pointed and when yes why ?
Greetings from Karl ( Austria )
Re: AD 14 KIELGE
Posted: Wed Oct 23, 2013 8:57 pm
by bondo
My understanding is that from the plan view/looking down the keel shoe should should be somewhat sharp.

And in the profile/side view the "corner" of the leading edge is eased (for grounding or trailer handling). Hard to see but I think mine ended up around 3/4" rad. I hope I don't find out I was wrong about this detail.

Re: AD 14 KIELGE
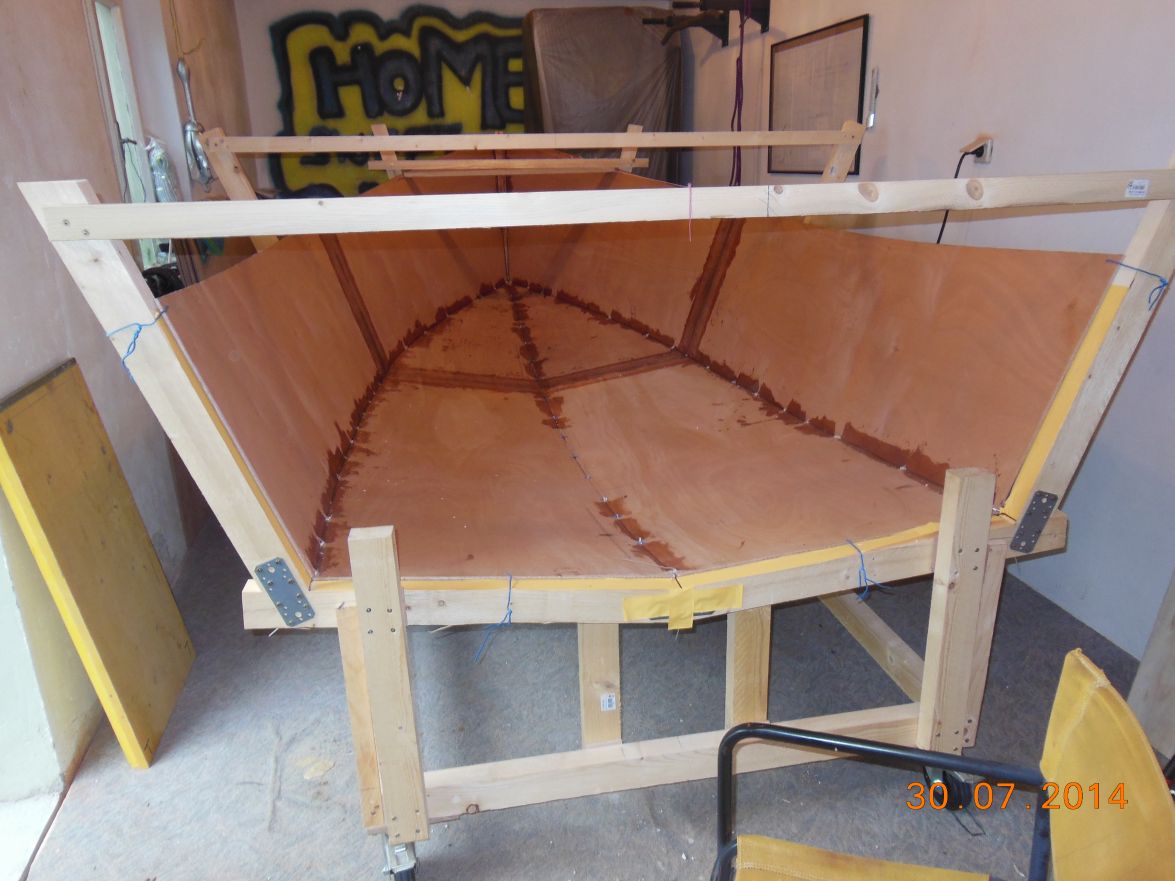
Posted: Sat Nov 16, 2013 8:38 am
by gonandkarl
Hi,
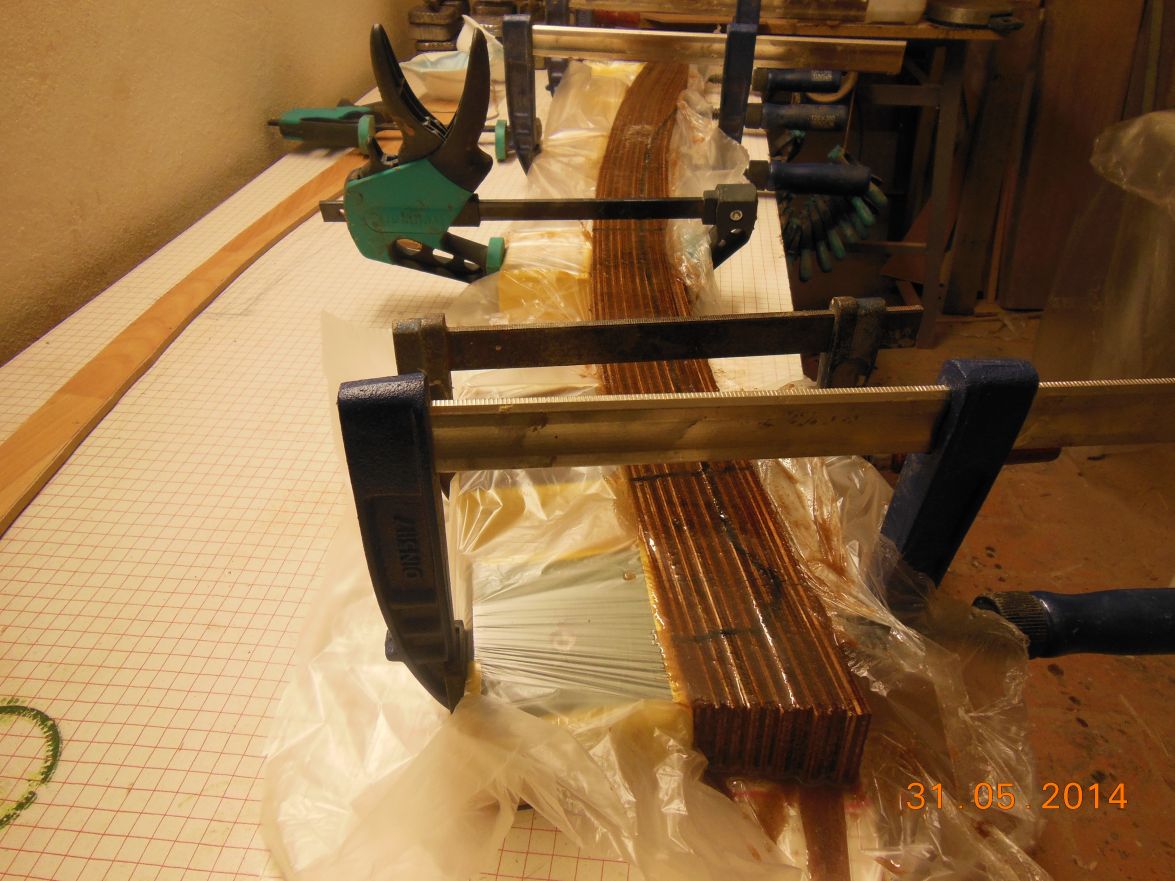
At last I have cut all the plywood panels for bottom, sides, transom, rudder, keelshoe, centerboard and centerboard case.
Now I carry on over Winter to laminate the pieces in my cellar workshop which has a steady 17 degrees celsius.
I also melted about 45 kg of lead which I got from a scrap yard for 1.5 € a kg. It worked fine with a camping gaz cooker
and an old pot.
Greetings from Karl
Re: AD 14 KIELGE
Posted: Sat Nov 16, 2013 10:20 am
by ks8
You will blink and there will be a boat taking shape in front of you.
Re: AD 14 KIELGE
Posted: Sat Nov 16, 2013 11:08 am
by gonandkarl
Thanks KS8 for encouraging me to carry on a bit faster in Winter.
It took me so long because I had some chores like painting ten doors of my 110 year old house and getting the garden
ready for Winter.
Greetings from Karl
Re: AD 14 KIELGE
Posted: Sat Dec 14, 2013 7:53 am
by gonandkarl
Hi,
Progress is slow in comparison to all the guys building, but I have now the centerboard ready for melting the lead into it.
Re: AD 14 KIELGE
Posted: Sat Dec 14, 2013 8:32 am
by gonandkarl
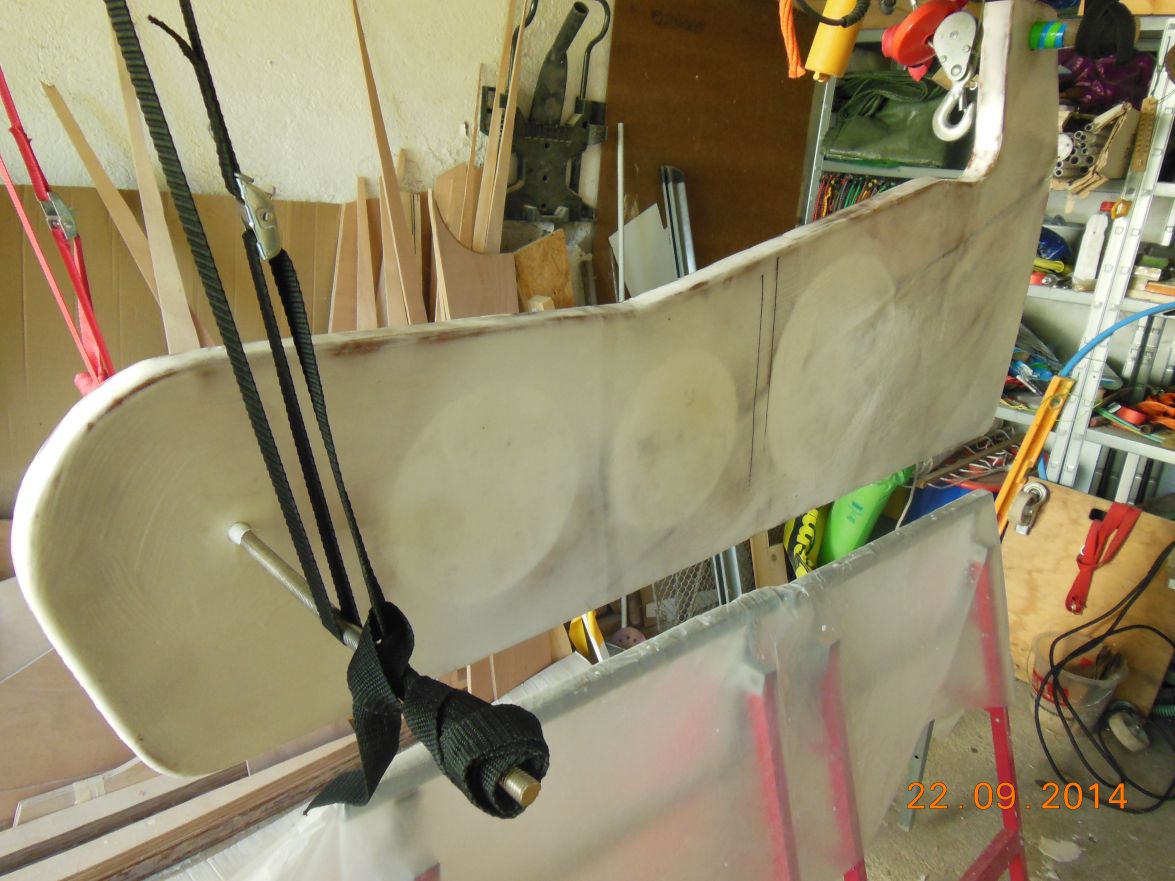
Hi,
Here is a picture of the top of the centerboard, where I am planning to use the lifting system for small boats described in the How To's. I hope my AD14 is small enough that it will work.

and here one of the pivot hole which has a diameter of 16 mm while the ss pipe going thru has 15 mm.
Re: AD 14 KIELGE
Posted: Mon Dec 16, 2013 10:43 am
by Stuff
It looks really good. I am using the same method to lower my centreboard. The only issue Iis that the centreboard can slam back to the retracted position if the boat flips. Hopefully that never happens

Re: AD 14 KIELGE
Posted: Mon Dec 16, 2013 11:01 am
by jacquesmm
Somewhere on the plans, I show a line or a pin that keeps the CB form slamming back in the boat in case of a very unlikely 180 degree capsize.
A pin with a wooden dowel is easy yo install. Make the dowel small enough to break in case of grounding.
Re: AD 14 KIELGE
Posted: Sat Dec 21, 2013 2:01 pm
by das boot
I use a ss bolt to booth hold the keel up when traveling and when he keel is down that same bolt stops it from retracting should I end up upside down
Re: AD 14 KIELGE
Posted: Sat Dec 21, 2013 7:37 pm
by Stuff
Cool Das boot. That's a good idea.
Re: AD 14 KIELGE
Posted: Sun Dec 22, 2013 9:46 am
by gonandkarl
Thanks jacques and das boot,
I will use such a pin when I get towards putting the keel into the finished trunk. ( "Big" problem is to choose a thin dowel or Georges ss pin. )
Right now I want to finish the trunk and leave the melting of lead on the keel because I wouldnt be able to test fit it
with an additional 56 KG.
I have a question about glassing the inside of the trunk. Should i put a small strip of glass also on all connecting 51 mm ( 2") battens with which the 2 sides of the trunk will be put together ?
I want to use as batten material paulownia wood which has the advantage that it is a hardwood nearly as light as balsa.
With my Adelie 14 I want to reach the designed weight and I think this could help me towards that goal.
I know it is beeing used on standup paddle boards. I used it as seats on my Micro-Petrel dinghy and I liked working with it.
Its woodworking characteristics is close to NW Red Cedar and it it is much cheaper here than oak for instance.
Any suggestions or comments if I should do this or experiences of forum members are very welcome.
Greetings from Karl ( and cold Austria )
Re: AD 14 KIELGE
Posted: Sun Dec 22, 2013 5:25 pm
by Stuff
Karl
I used WRC (Western Red Cedar) because is very rot resistance. The only issue with it is the strength. Since the sole and the frames hold the center trunk in place the battens don't need to be as strong as teak. I will use something that is rot resistance with a tick coat epoxy.
Re: AD 14 KIELGE
Posted: Sun Dec 29, 2013 10:49 am
by bondo
That is great looking work. Love the pictures. My understanding is the fiberglass wrapped around the outside of the trunk is where the strength comes from. (and the frames as Stuff said) The wood isn't counted on to hold the trunk together. I used Phillapine Mahogany for all my hardwoods but I don't know what's best. I fiberglassed the inside of my trunk parts before assembly but the centerboard (with no painter) actually bears against the keel shoe if allowed to drop.
Re: AD 14 KIELGE
Posted: Sun Dec 29, 2013 2:20 pm
by das boot
I made some mistakes while glassing the inside of the keel box after putting it in place and glassing it I put heave glass around the corners thinking it was smart but it was to heave to take the bend and I have had cracking problems with it last year I had to grind a bunch of off and re do it . As for the pin I used a SS bolt my thought was while traveling the doul could brake letting the keel drag. The only problem as after the first year the holes in the side of the keel box started to go out round so I drilled it out bigger and put a brass tube through booth the box and the keel. I then put a reinforcement on the outside of the keel box after it was all lined up and bogged in place I used a hack saw blade to slide down beside the keel and cut the copper tube on booth sides. After cleaning it up it looks good and have had no more problems with it when the keel is down I stick the bolt into the hole that stops the keel coming up if inverted while trailing I put a a lock nut on it so it can not fall out it works fine.
Re: AD 14 KIELGE
Posted: Mon Dec 30, 2013 12:52 pm
by gonandkarl
Thank You Bondo and Das Boot,
The two of you are teaching me hopefully right up to the end of my boat.
Thanks for the tip that the strength comes from the outside fiberglass.
I will just fiberglass the big inside panels of the centerboard case and put enough resin on the battens and I will be using beech wood for battens because jaques advised that the weight gain of Paulownia is minimal and one should not risk using it.
I will make the locking pin like you explained and because I have lots of ss pipe and ss rod from the pivot over I will be using 2 pieces of pipe and a ss rod as the pin on the case including some reinforcement on the deck sides.
I wish George a speedy recovery and Bondo that he will be able to post soon the newest pictures of your very last lap towards the splashing. I am writing from my bed in the local hospital (is only 200 m away from my house) where I am staying sinc Dec 23 because of a slipped disk in my back after having transferred all my lead pieces into the winter workshop in much too heavy buckets in the wise foresight that they are ideal as weights for the splicing.
Lesson learned : Dont carry heavy weights and definitely not with one hand.
Happy New Year and greetings from Karl ( Austria )
Re: AD 14 KIELGE
Posted: Sun Jun 01, 2014 1:02 pm
by gonandkarl
Hallo everybody,
I have a specific question to all Adelie builders:
On the nesting plan sheet is the suggestion to cut out of a 13 mm plywood the rudder twice, the transom 3 times, but the stem only once.
Did you all build your Adelies with just a 13 mm thick stem ?
I tend to laminate 2 pieces to have more strength in it like the rudder.
( I am thinking specially about pulling the boat onto a trailer where the whole weight of the boat is on the stem. )
Greetings from Karl ( Austria )
Re: AD 14 KIELGE
Posted: Mon Jun 02, 2014 11:20 pm
by bondo
Hi gonandkarl. I built mine with only 1 layer of plywood per plan. I don't have any concerns about strength. The fiberglass tabbing inside and out are strong and overlap/double each other. I have a plate washer backing the inside of my bow eye. I don't expect too much of a load under normal use but I'm sure the bow eye could handle the full weight of the boat. Btw, I carelessly installed my stem with a twist in it. I have been chasing after it ever since to make it look right. Hope you guys are doing well.
Re: AD 14 KIELGE
Posted: Tue Jun 03, 2014 3:15 am
by gonandkarl
Hallo Bondo,
Thank you very much for the info, I will do it naturally your way. I forgot that the strength comes from the fiberglass connection to the sides of the boat.
I am doing well with my build and I will post some pictures as soon I have the cradle finished.
Did You actually bevel the frames of the cradle to follow the form of the bottom and sides of the boat ?
Greetings from Karl
Re: AD 14 KIELGE
Posted: Tue Jun 03, 2014 10:18 am
by bondo
Hey gonandkarl. I did not bevel any of the cradle frames. However I did re adjust and modify my cradle several times along the way to better fit what I had. For example, I know my hull is about 1/4" deeper "V" than per plan in the middle. Check, and re check to know what's going on but at some point you"ll want to build the boat that's in front of you.
Re: AD 14 KIELGE
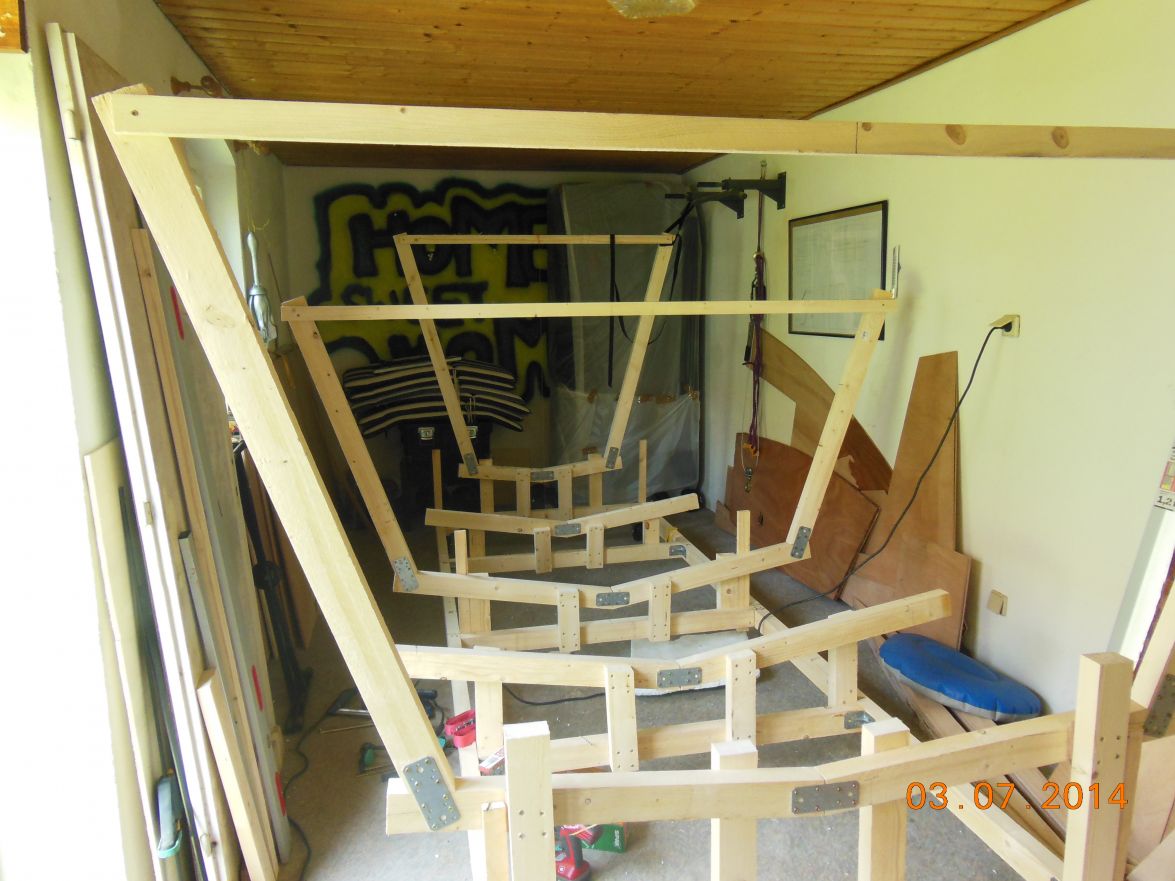
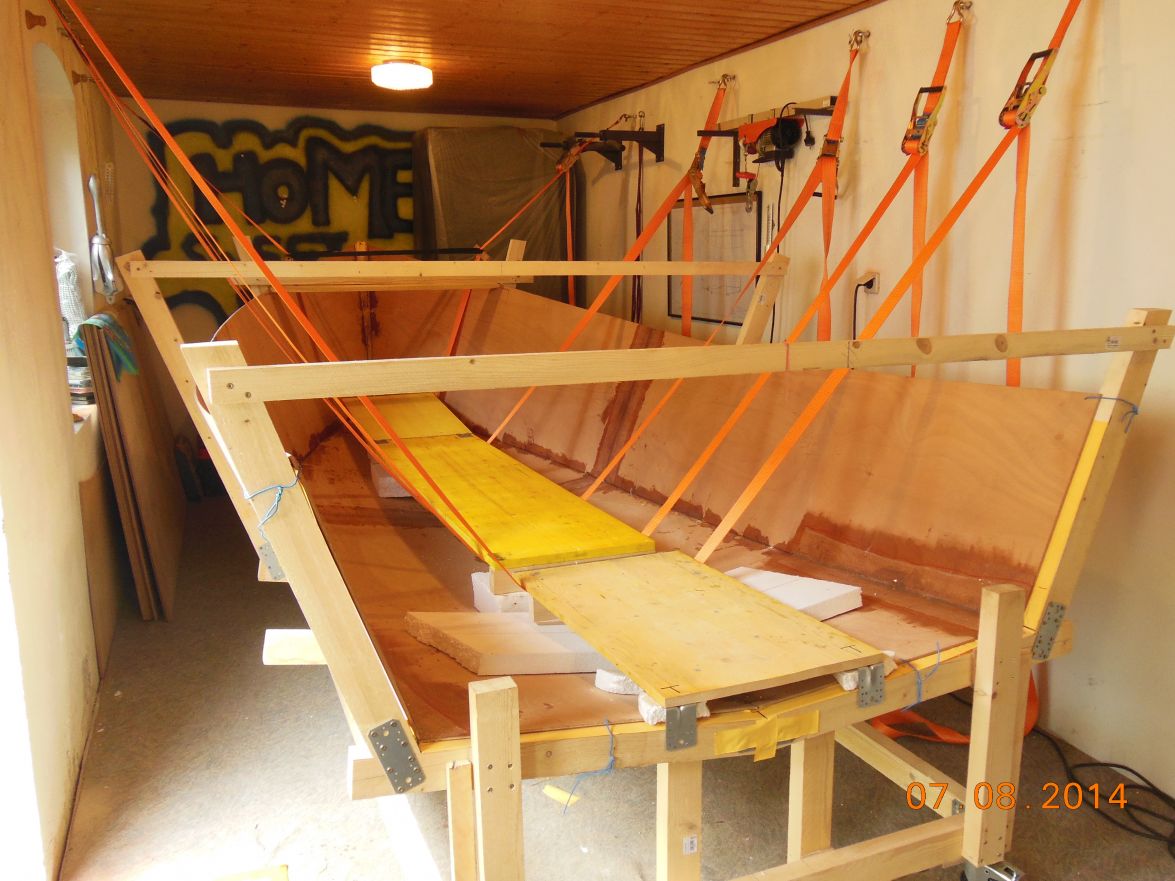
Posted: Tue Jul 08, 2014 5:21 am
by gonandkarl
Hallo everbody,
At last a bit of a progress report:
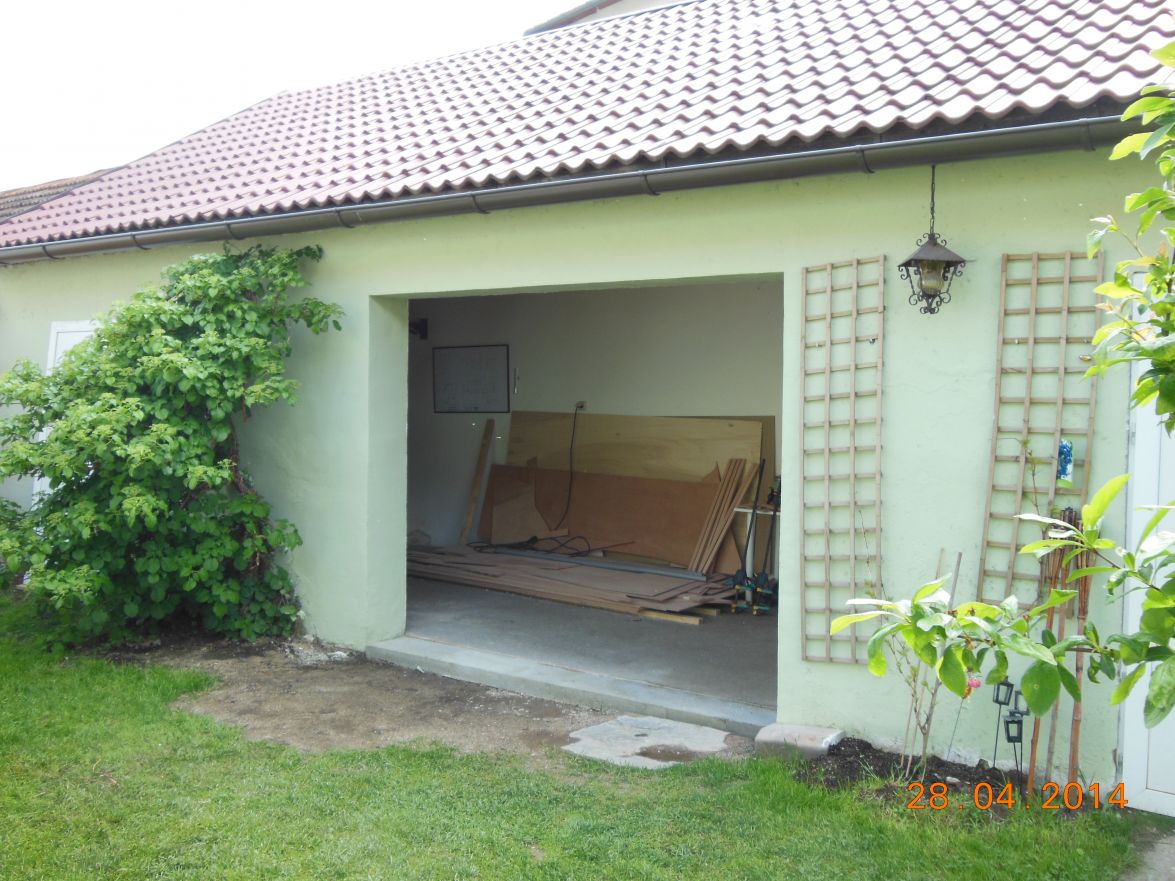
First I had to modify my entrance to the building shed, because I decided to use it rather than the only single garage we have got:
The shed beforehand:
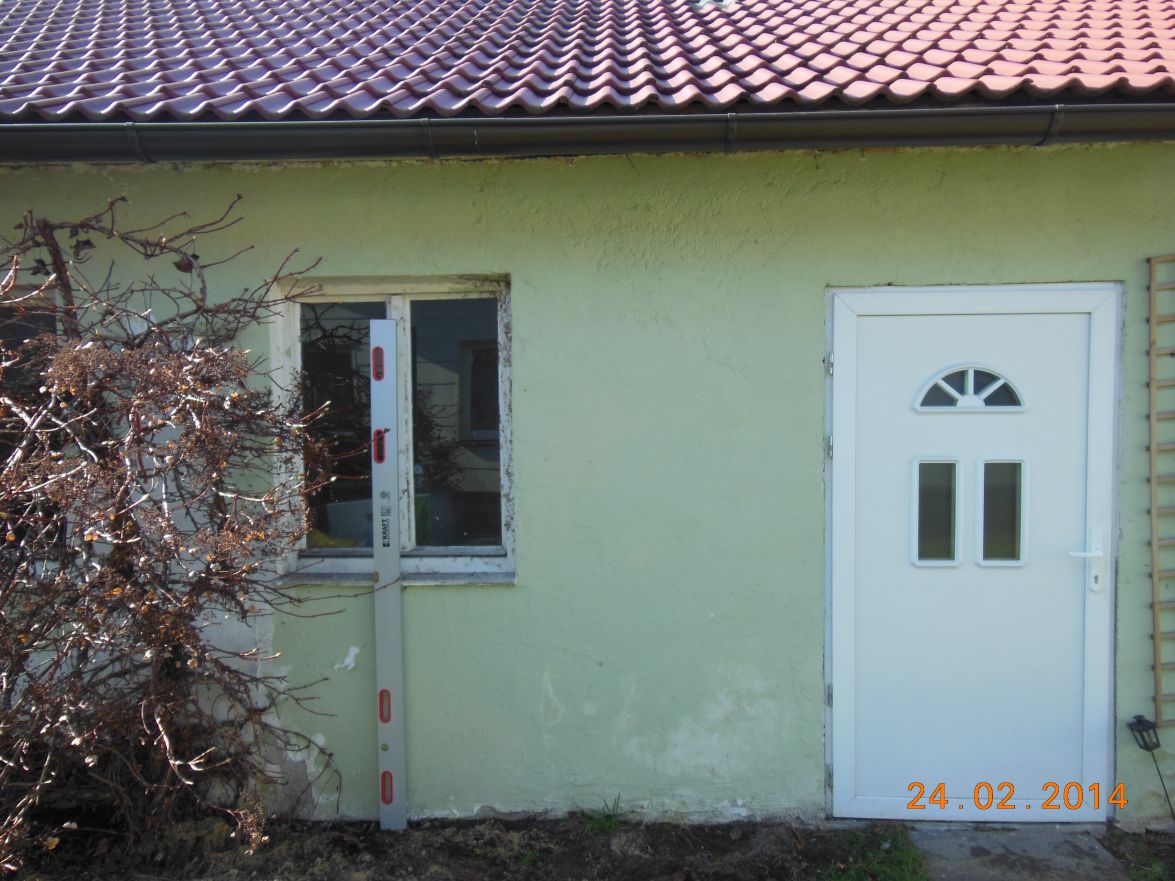
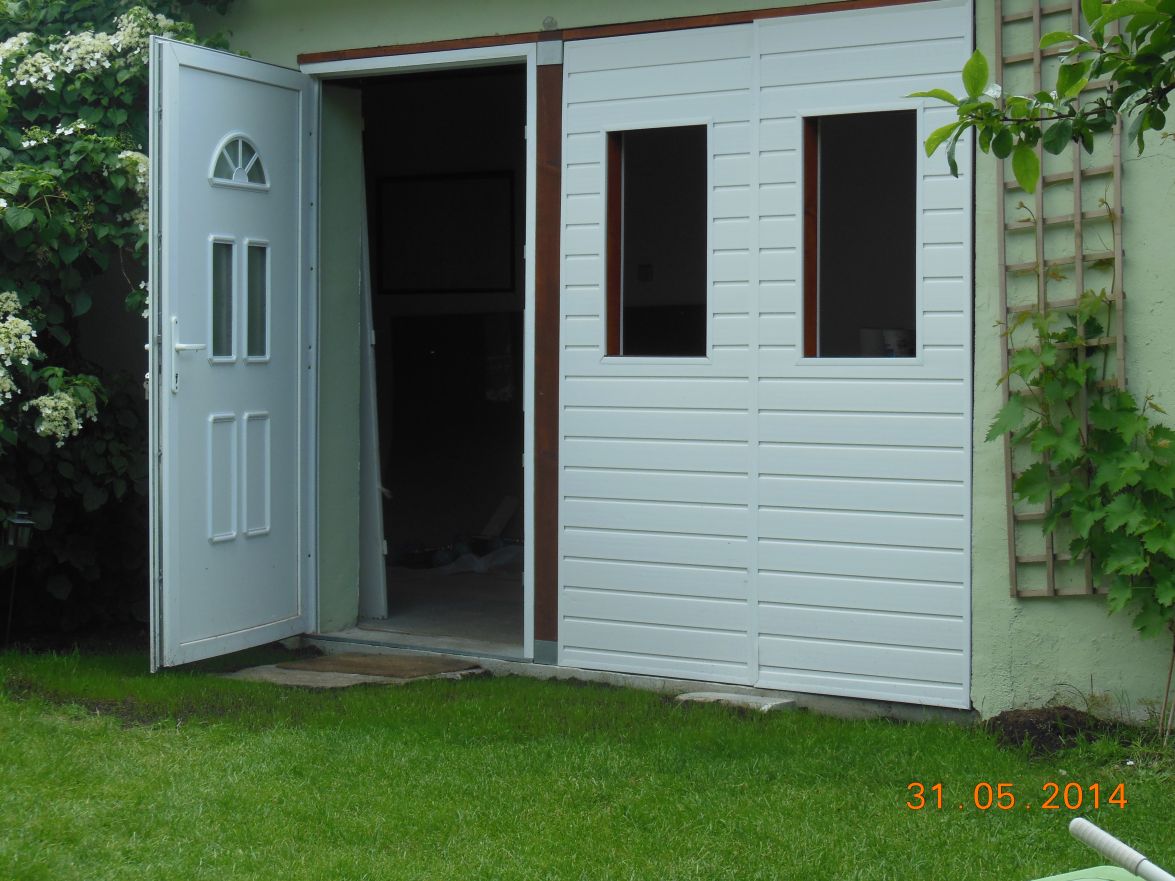
The shed with the new opening:
And then with the original door mounted on the left handside on a removable half frame and
two doors which can be lifted out easyly:
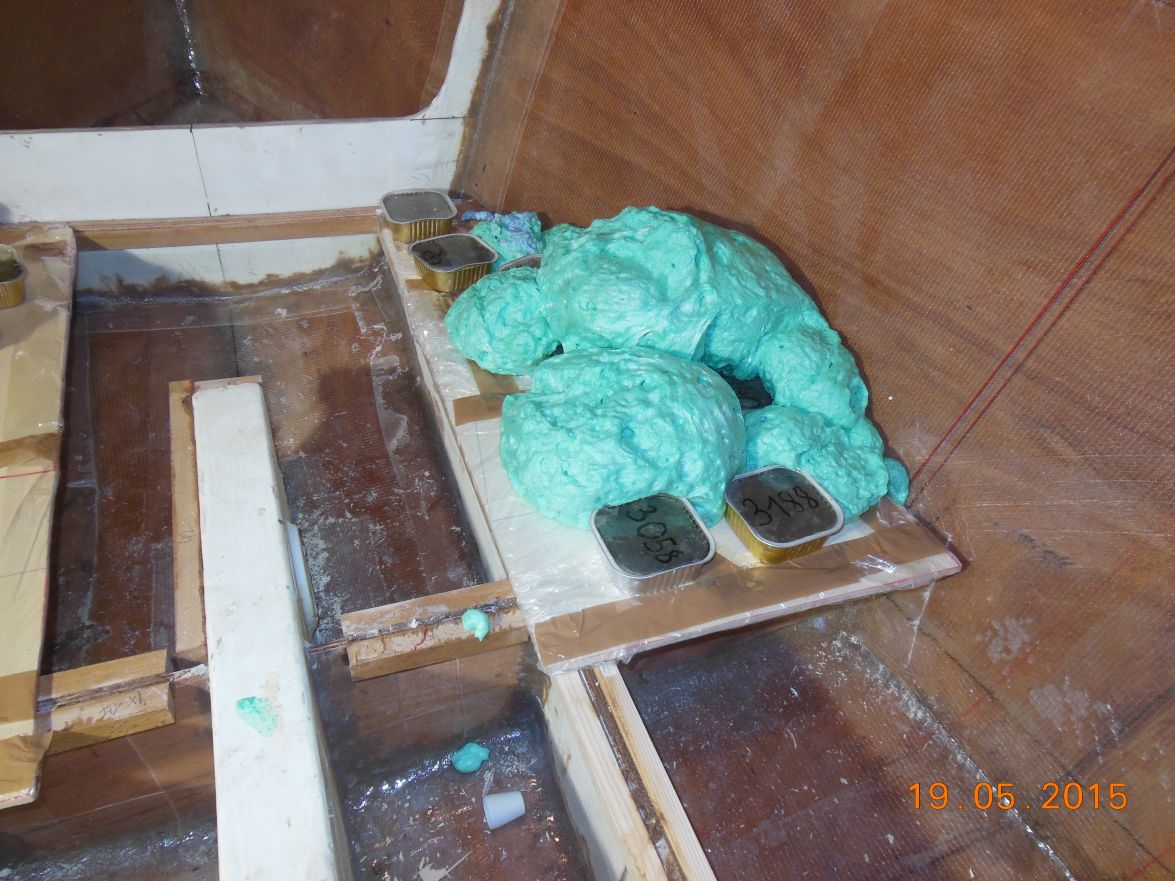
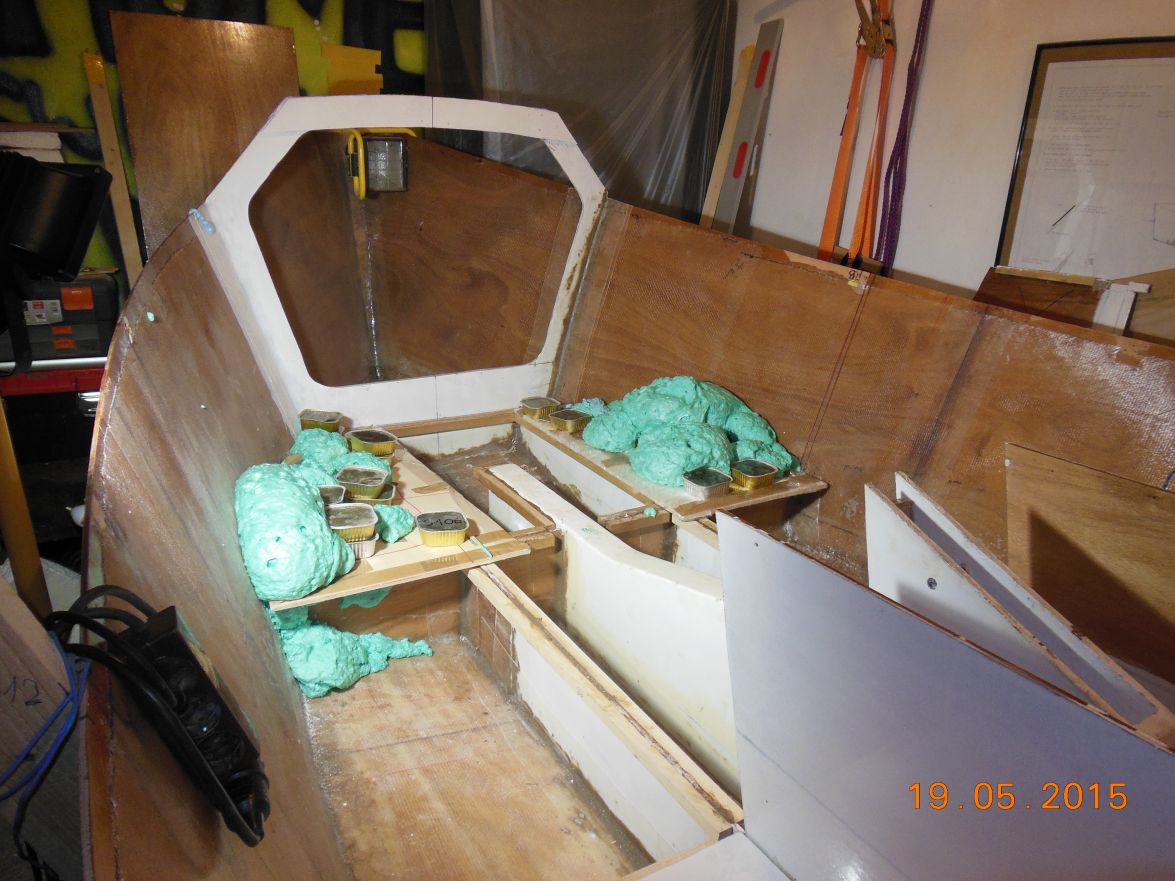
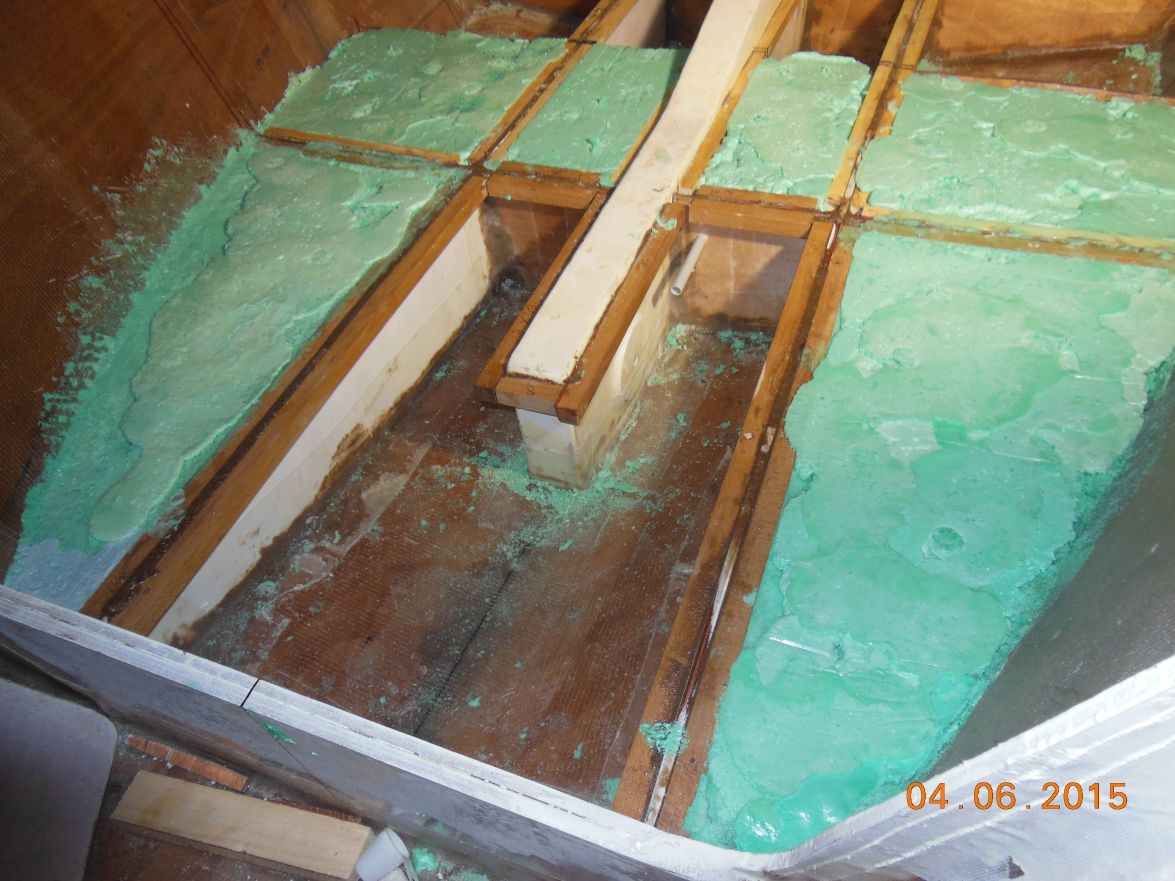
Then I played with pouring lead into the centreboard, which was ok but right at the end on the big hole I poured the lead to hot and to much and it melted out thru the bottom support of aluminium:
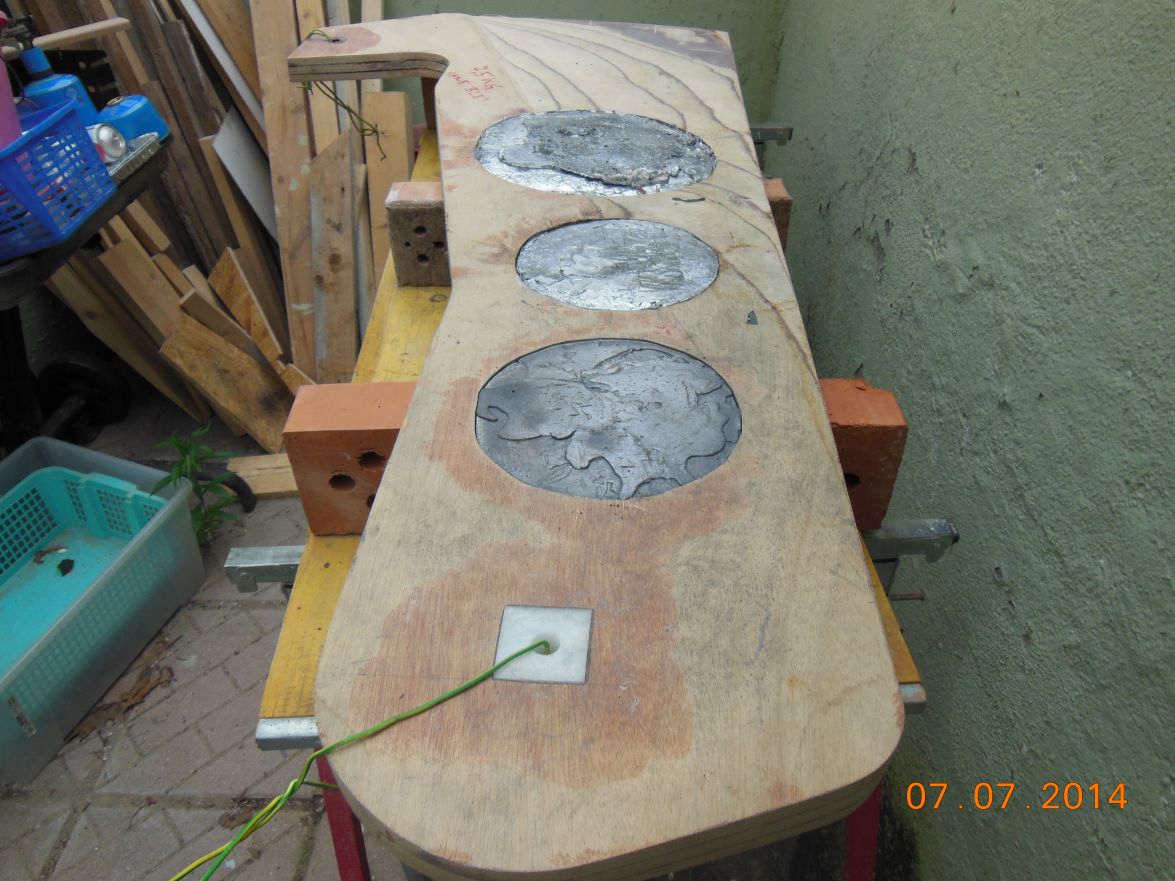
That means still a lot of work to get it completely flush with the surface.
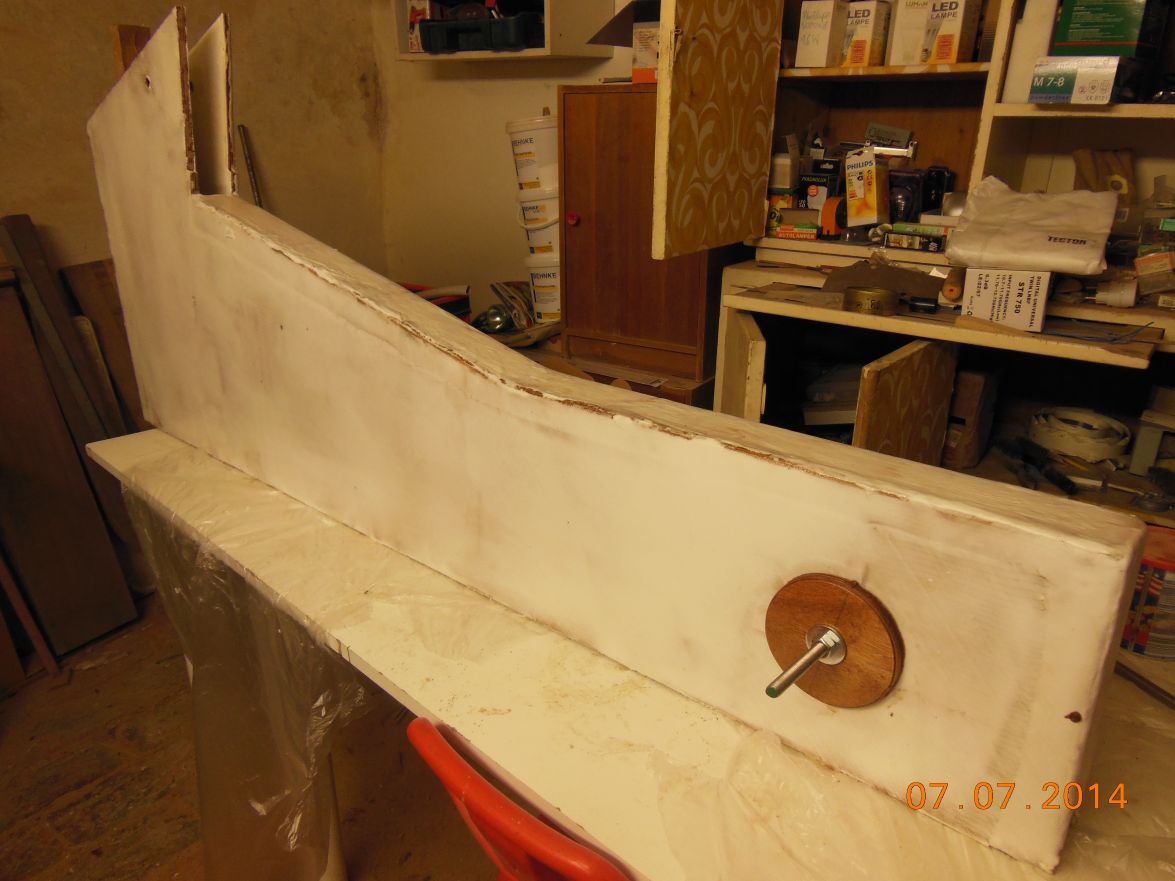
As the keel is build of about 10 narrow pieces of plywood I decided to use the cutouts for the centreboard as lamination pieces for the tiller. I hope it will become a nice tiller:
Then I carried on a bit with the centerboard trunk and it is now ready for sanding and installation.
The bottom curvature I will only cut at installation time, therefore it stands evenly on the work bench
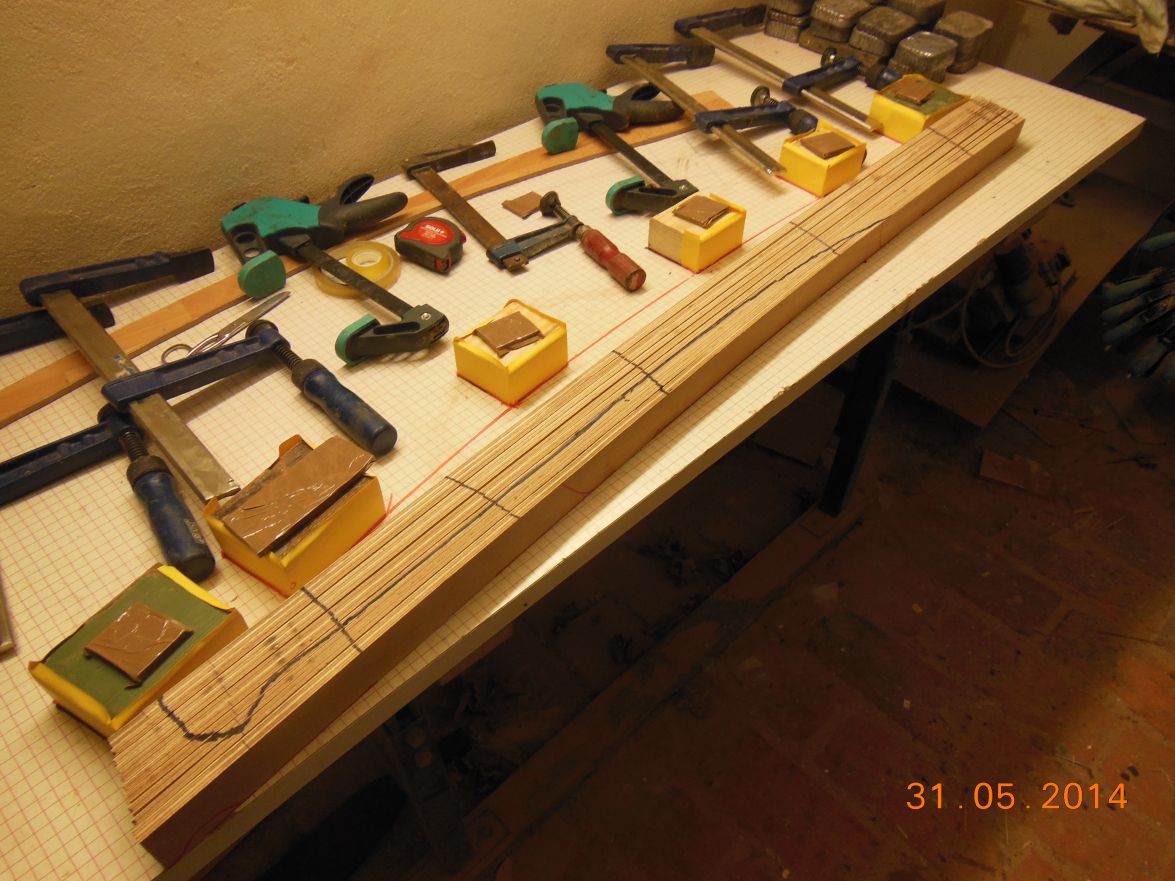
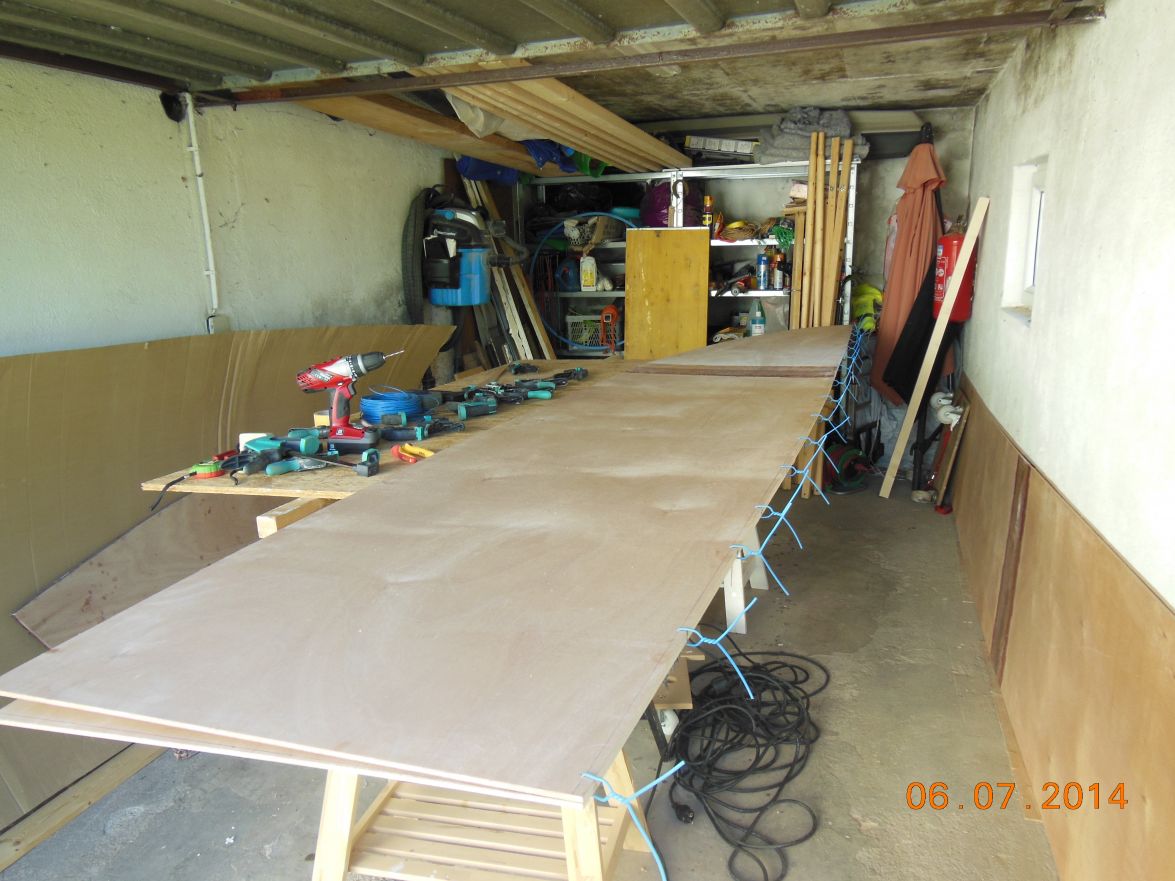
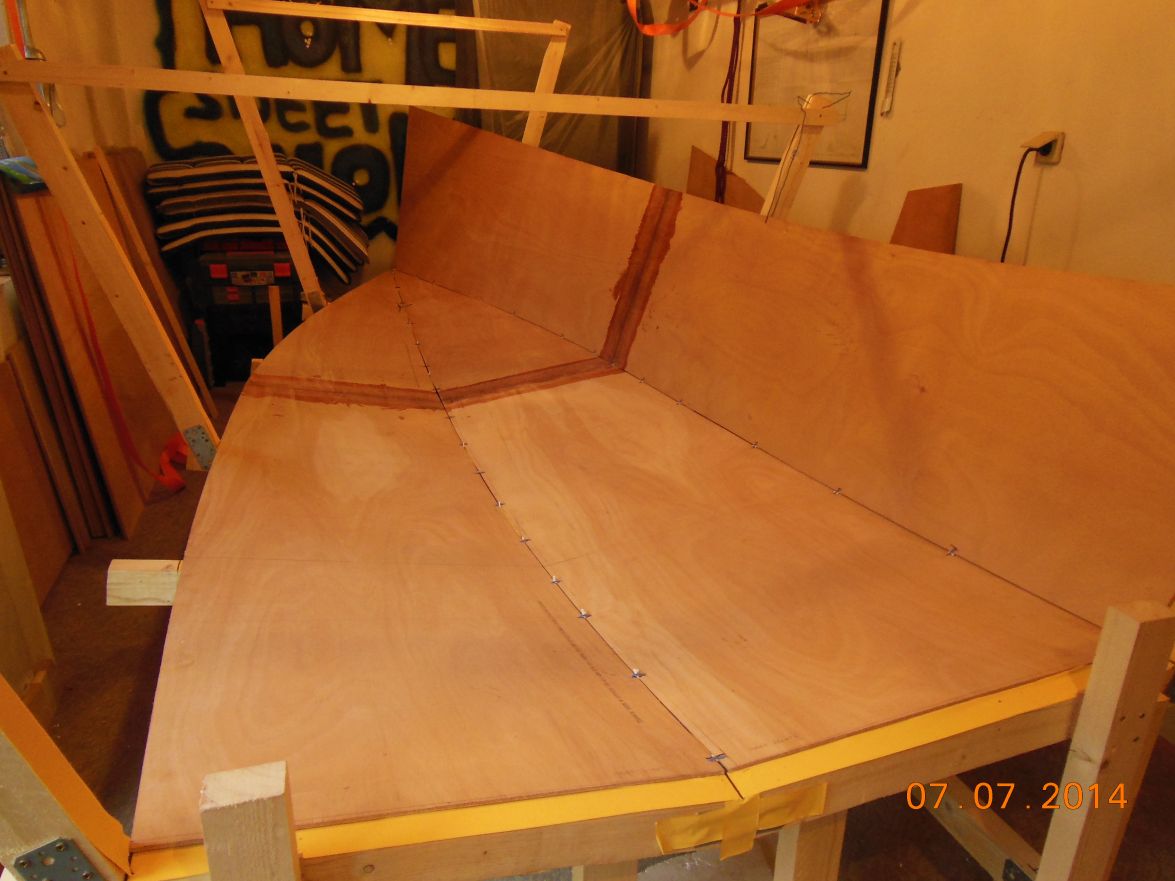
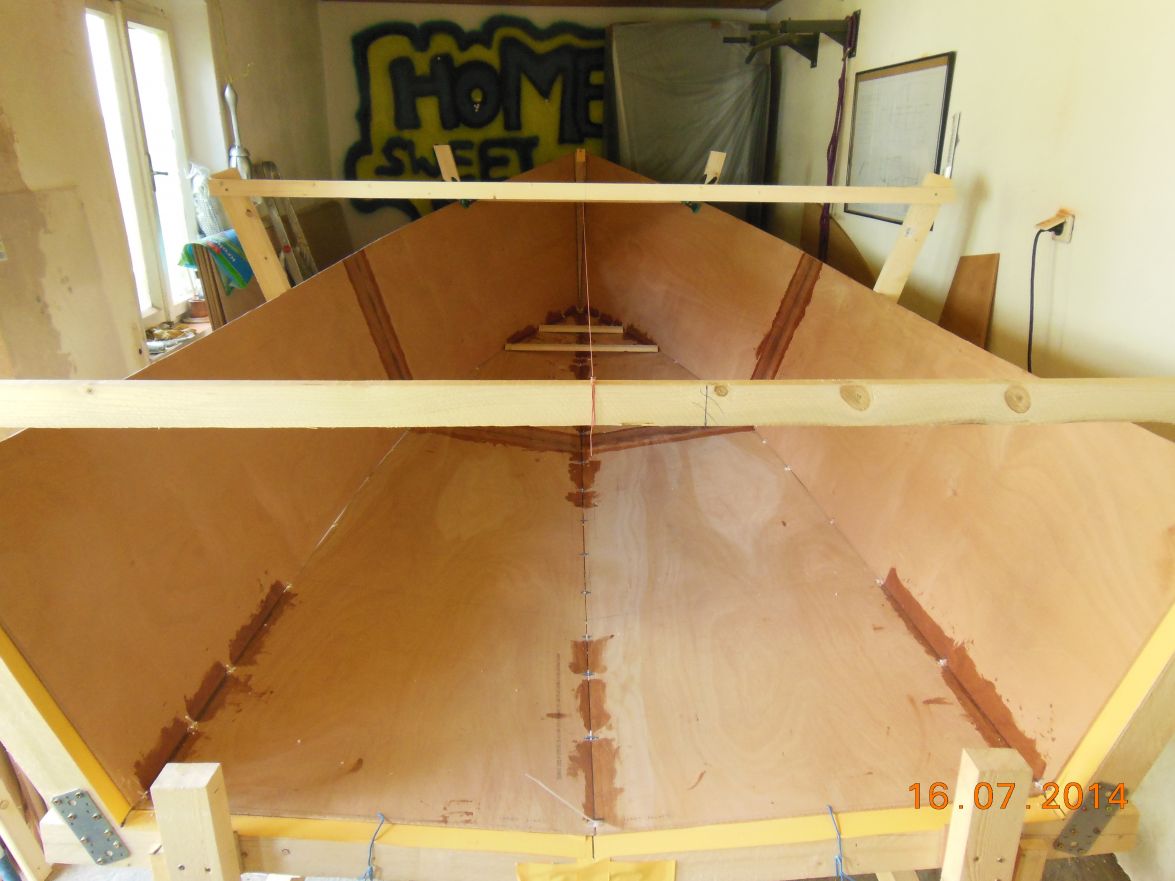
Next came the lamination of the side and bottom panels:
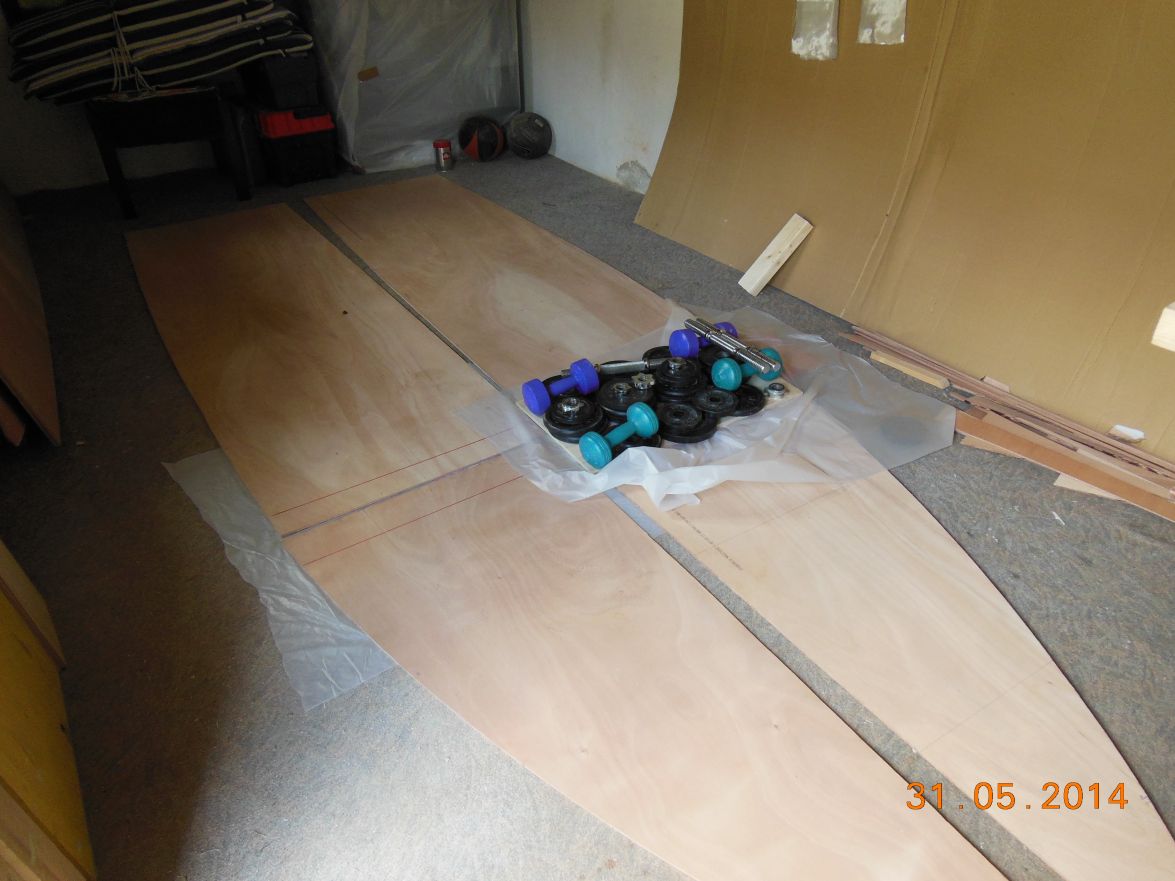
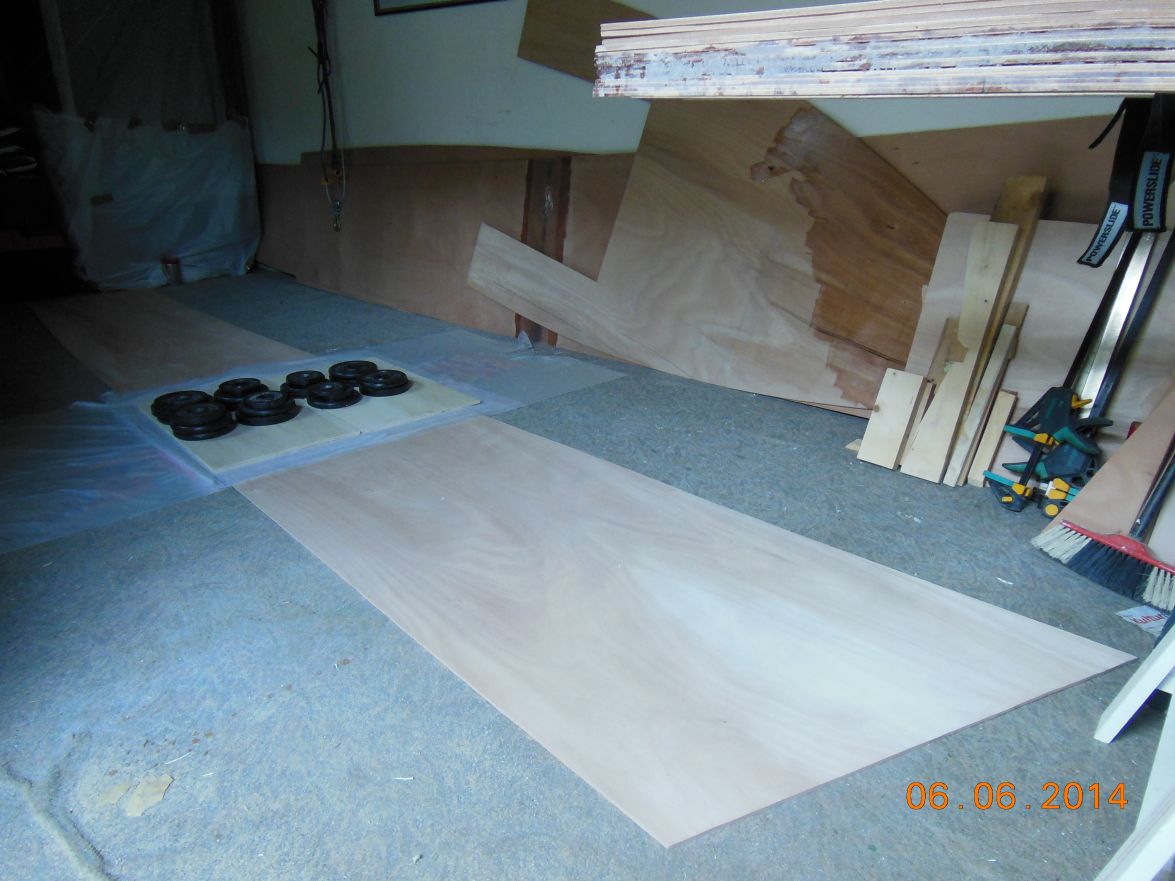
And in the last few days I finished the cradle and stitched bottom panels and the starboard side panel:
The bottompanels I stitched finished beforehand and then could open them like a book into the cradle:
( I learned this from Devlins boat building book )
That is all for the day and I wish You all happy building.
Greetings Karl
Re: AD 14 KIELGE
Posted: Fri Jul 11, 2014 12:49 am
by bondo
Looking good Karl. I like the new access. Very professional job. The boat parts are showing nice work too. I read the Devlin book as well. Speaking of Devlin, his fillets are much larger than specified in the AD plans. I wanted slightly larger (for no reason) radius fillets than the 1/2" called for but I ended up too big. I was afraid to pour the lead but it looks like you've got it. I worry that a plywood-laminated tiller might have some unwanted flex to it. Looks like a great place to build a boat Karl. Oh, you might be interested, the DWL for an AD14 is 1,340# and the PPI is 240#.
Re: AD 14 KIELGE
Posted: Fri Jul 11, 2014 6:12 am
by gonandkarl
Hallo Bondo,
Thank you for your answer. As if You must have guessed I was puzzling in the last few days about the displacement of AD14 because of the trailer that I should get.
Did You get the figure 1340 pounds for DWL and 240 PPI from Jaques or did You weigh your boat ready to sail and calculate the PPI figure somehow ? That would mean about half of that in kilogramm the trailer should be able to carry as a load weight. The PPI is mentioned by Ted Brewer as rather more interesting than the DWL. My understanding of pounds per inch is the pressure onto the submerged part of the boat. Am I right with this or what else can one interpret out of PPI ? Can we deduct from this figures that our AD14 is a heavy displacement hull ? For me the questions never end.
I have 2 questions that You can answer for sure.
Did You put the boats sides onto the bottom panels with a little gap for putty and then bevel the bottom panels to be flush with the sides or did You put them edge on edge and have the putty and taping do the corner ?
( Devlin suggests to bevel bottom and side by 45 degrees, which I did when I built Micro-Petrel, but I think it is not necessary and one could save time.)
Did You fiberglass the inside of the boat as advised in the notes just above the chine or all the way up to the sheer ?
Greetings Karl
Re: AD 14 KIELGE
Posted: Fri Jul 11, 2014 9:49 am
by jacquesmm
Please post technical questions like weight and displacement in the technical section of the forum.
http://forums.bateau2.com/viewforum.php?f=18
I do sometimes miss posts in this section.
About weight and displacement.
The study plans show the trailer weight. This is the complete boat weight without the outboard, mast and sails or inside ballast. It includes the boat with all it's hardware, portholes and everything that is permanently part of the boat.
I calculated it that way because I expected builders to ask about the minimum weight to tow, with the outboard and ballast in the trunk of the car and the mast on the roof. That allows the use of a small trailer.
That minimum trailer weight is 565 lbs or 257 kg:
http://www.bateau.com/studyplans/AD14_s ... ?prod=AD14
I prefer a trailer with more capacity and the ballast fixed in the boat but that idea of minimum trailer weight makes sense in Europe where cars are smaller and big trailers rare.
When living in Europe, I have towed boats that way.
The displacement at 12" (310 mm) is 1835 lbs and the PPI is 256 lbs.
In metric, 832 kg and 45 kg/cm.
Those are calculated values for the boat built as designed.
The other figure was for a waterline at 10": empty boat, no crew, no stores.
Before more questions are asked: the DWL is at 33 cm (13"), the calculated displacement I give above is for 31 cm and the one at 10" (254 mm) is the boat floating at the design baseline.
In most cases, the boat with 2 persons and gear, ready to sail, will be at 31 cm draft. Heavy load = 33, empty = 25.
I am certain about the values of 1835 and 256. Those are the ones calculated at the time of the design.
PPI is Pounds Per Inch of Immersion.
It means that, at the waterline, it takes 256 lbs to bring the waterline up by 1".
In metric, at DWL, it takes 45 kg to bring the hull down 1 cm.
Calculated at another WL, it would be different.
One last word about weight: it will depend on how you build and load the boat. Some builders will build her light and will be able to have more ballast. Reports have been positive: boats built float in their lines and sail well.
About beveling, don't.
We do not build the boats the same way than Devlin. While trying to improve, you could make the hull weaker.
We want that epoxy putty in the corner.
Re: AD 14 KIELGE
Posted: Tue Jul 15, 2014 6:38 pm
by bondo
Hi Karl. I fiberglassed above the sole inside the cabin with 3.2 oz cloth I believe. If I were to build this boat again it would be closer to the way Jacques recommends but I am happy with what I have.
Re: AD 14 KIELGE
Posted: Wed Jul 16, 2014 8:17 am
by gonandkarl
Hi,
At last I have spotwelded the first seems of the hull :
Greetings Karl
Re: AD 14 KIELGE
Posted: Thu Jul 17, 2014 6:39 pm
by bondo
Good work Karl. Nice and fair and it looks like good plywood. Reminder that the written instructions omit the step of fiberglassing the bottom before installing any frames. It is shown on the drawing of the boat's fiberglass schedule. I like the pictures, keep them coming.
Re: AD 14 KIELGE
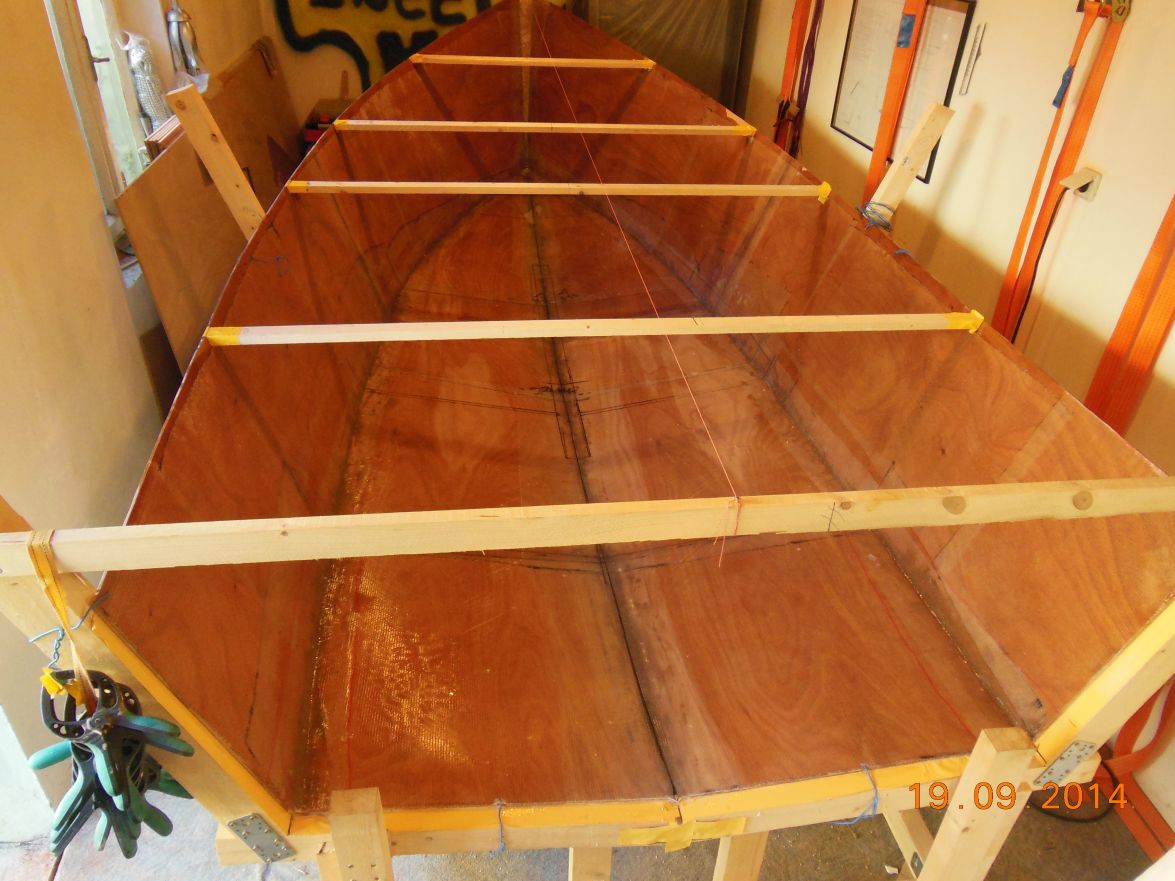
Posted: Mon Sep 15, 2014 5:23 am
by gonandkarl
Hi,
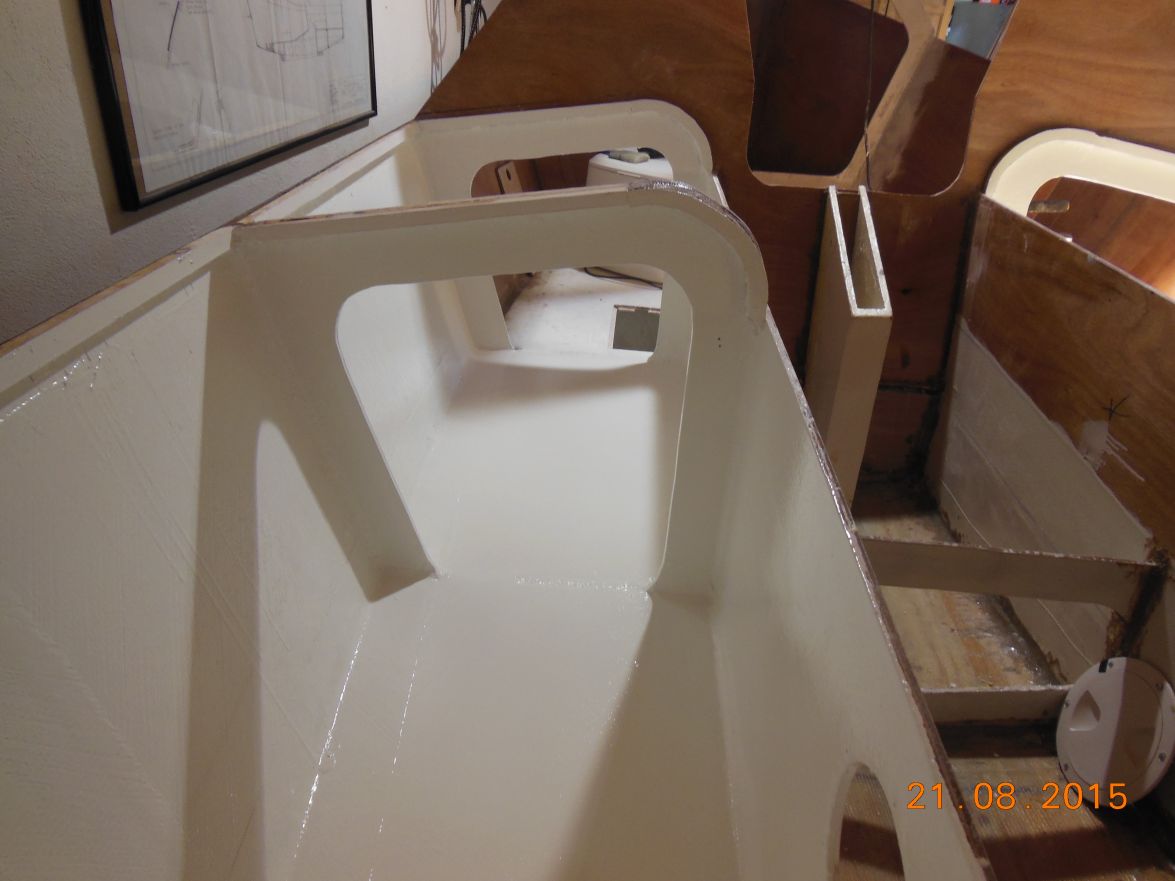
I made a bit of progress and here are my latest pictures:
Here I have finished just about all inside tapes
Because of my heavy weight I thought hanging support of a working platform is necessary.
In practice it was difficult to crawl along it and tape the side seams therefore I did the rest of the taping with the support of just 10 cm thick polystyrene pieces of foam which are here in Austria normally used to insulate houses on the outside.
I will use the supports for lifting and turning the boat like bondo did. As this straps said one should not use them for lifting I installed on the wall my electric hoist to do the lifting which works fine. I tested it by lifting the whole building frame and the boat.
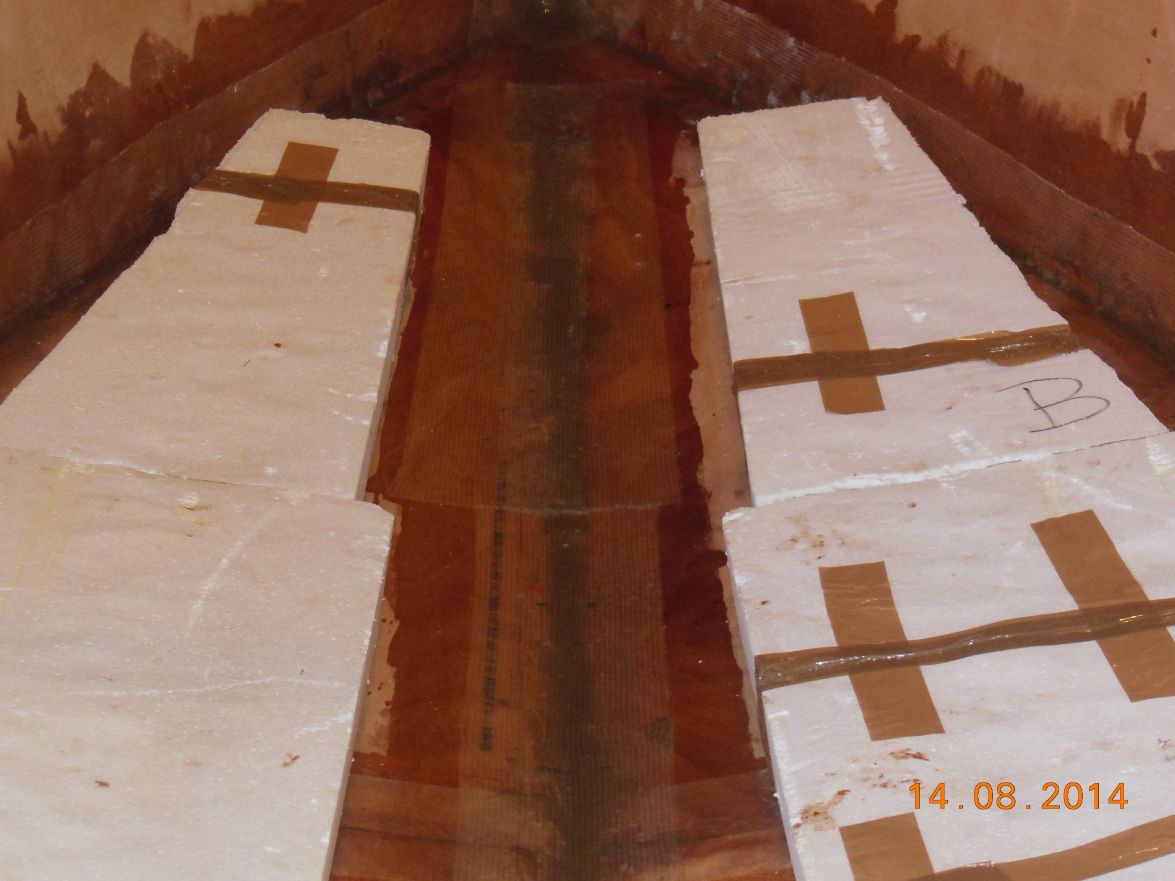
After having glassed the bottom I am now ready to put the glass on the inside
Greetings Karl ( Austria )
Re: AD 14 KIELGE
Posted: Tue Sep 16, 2014 7:49 pm
by bondo
Everything is looking great Karl. That is actually a difficult stage, crawling in there. For me, this part up until the floor was on was the hardest physically to work on.
Re: AD 14 KIELGE
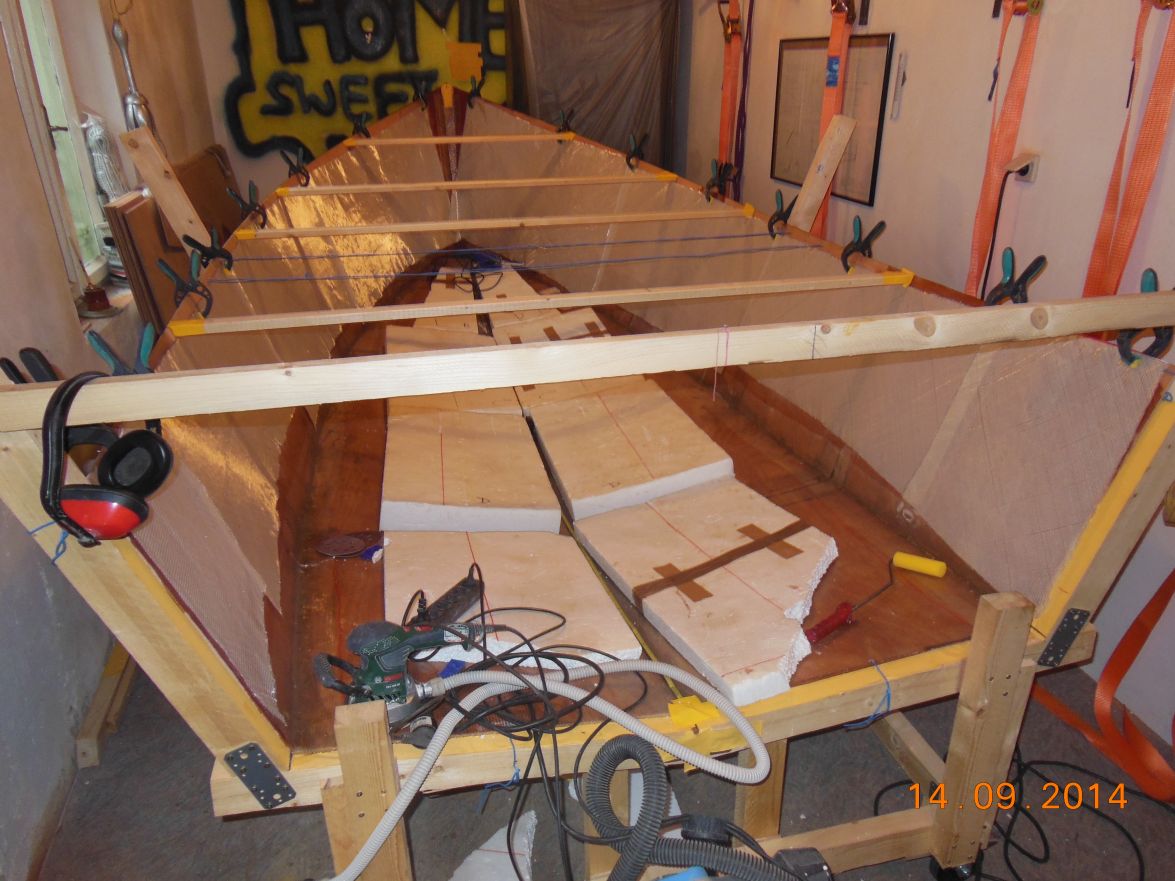
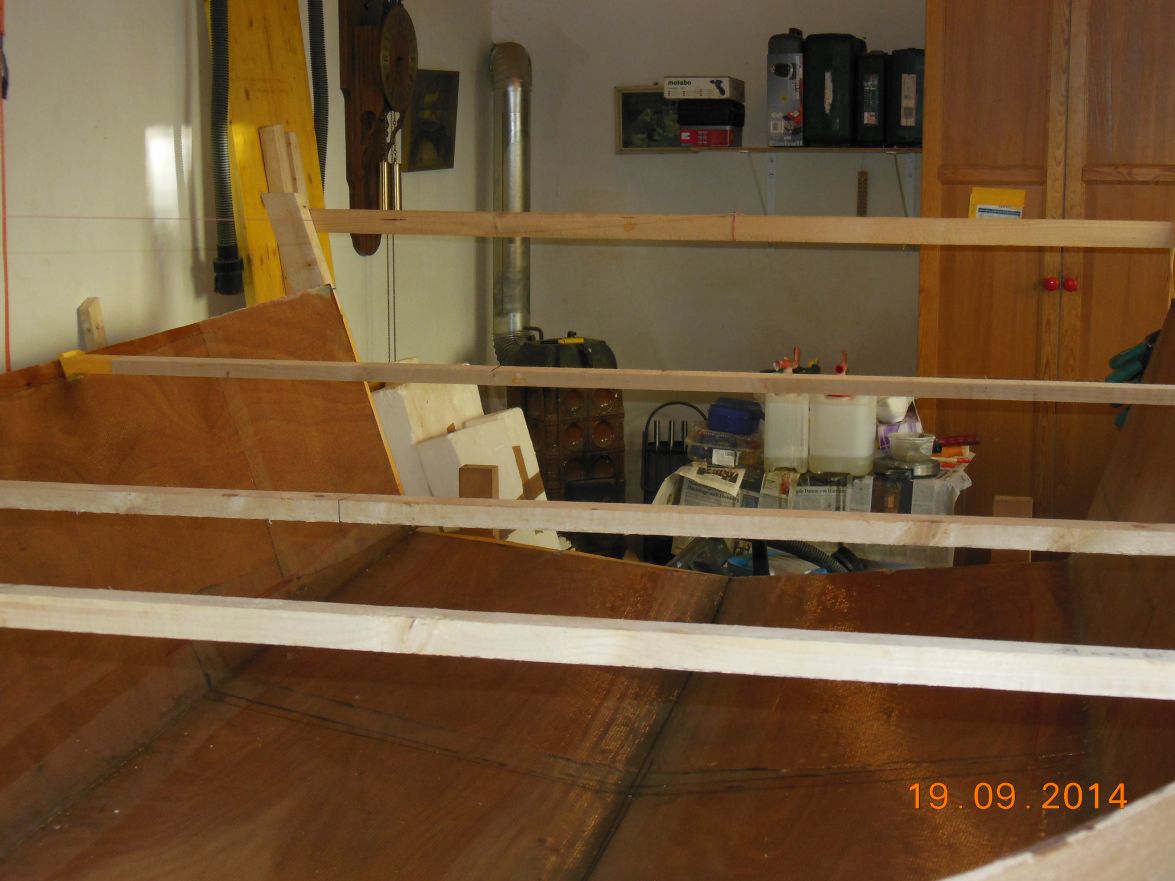
Posted: Sat Sep 20, 2014 3:17 am
by gonandkarl
Hallo everbody,
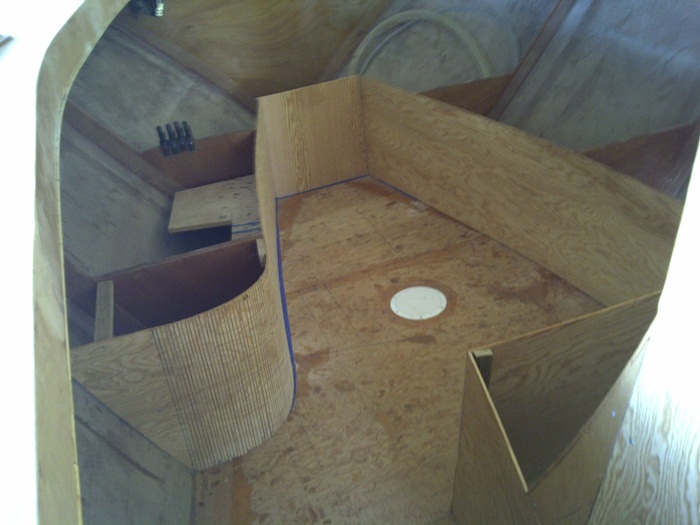
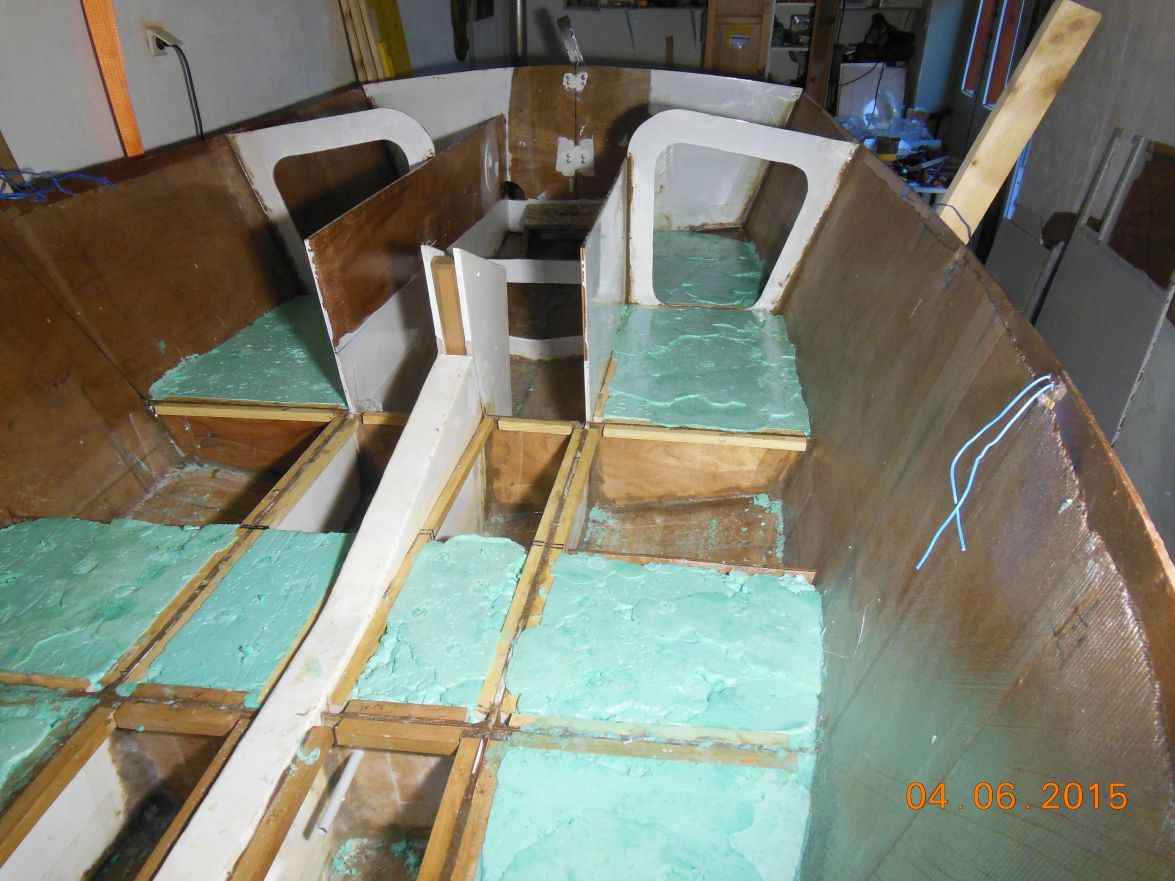
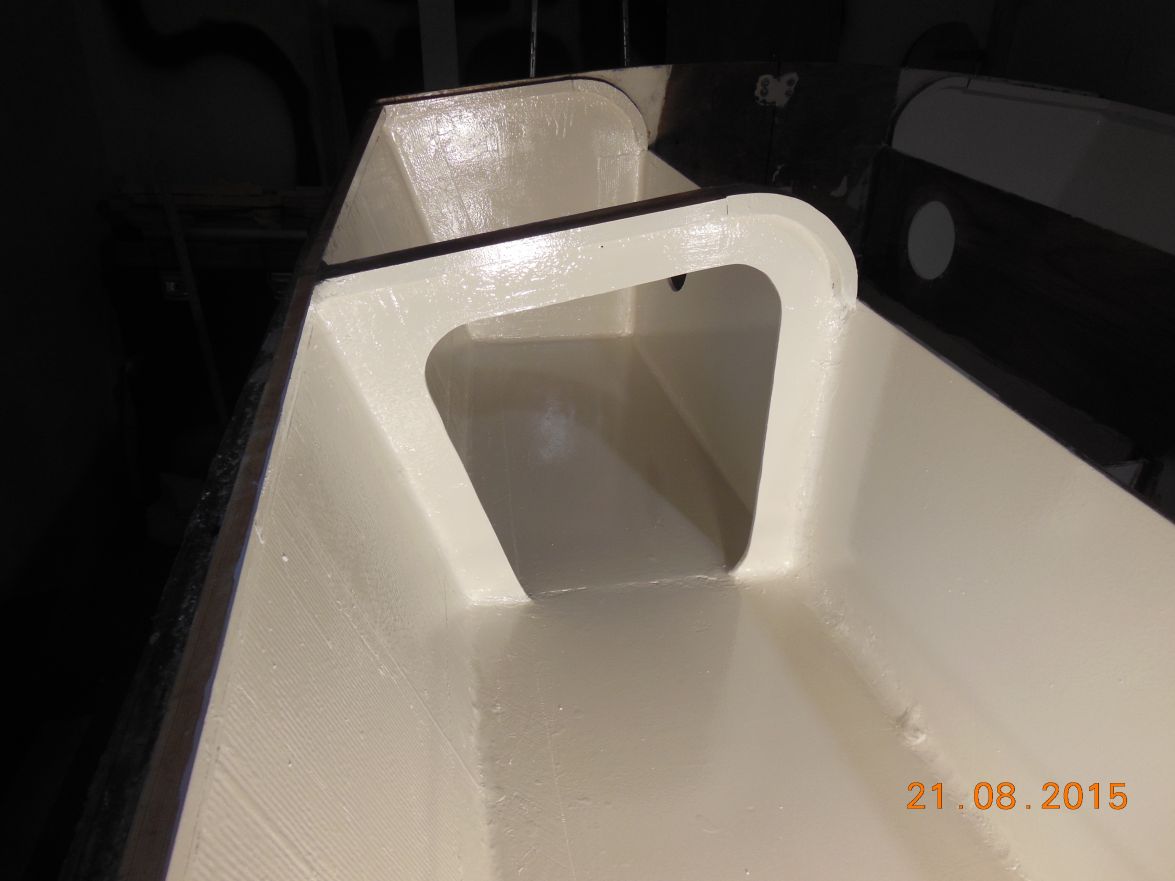
At last i have finished glassing the inside of my AD14 and here is the picture to it.
I am sure this is the last time I see the boat so empty. I hope to crowd it before winter with centreboard, frames, 2 stringers and sole.
Here one can see the drawn position of the centreboard case
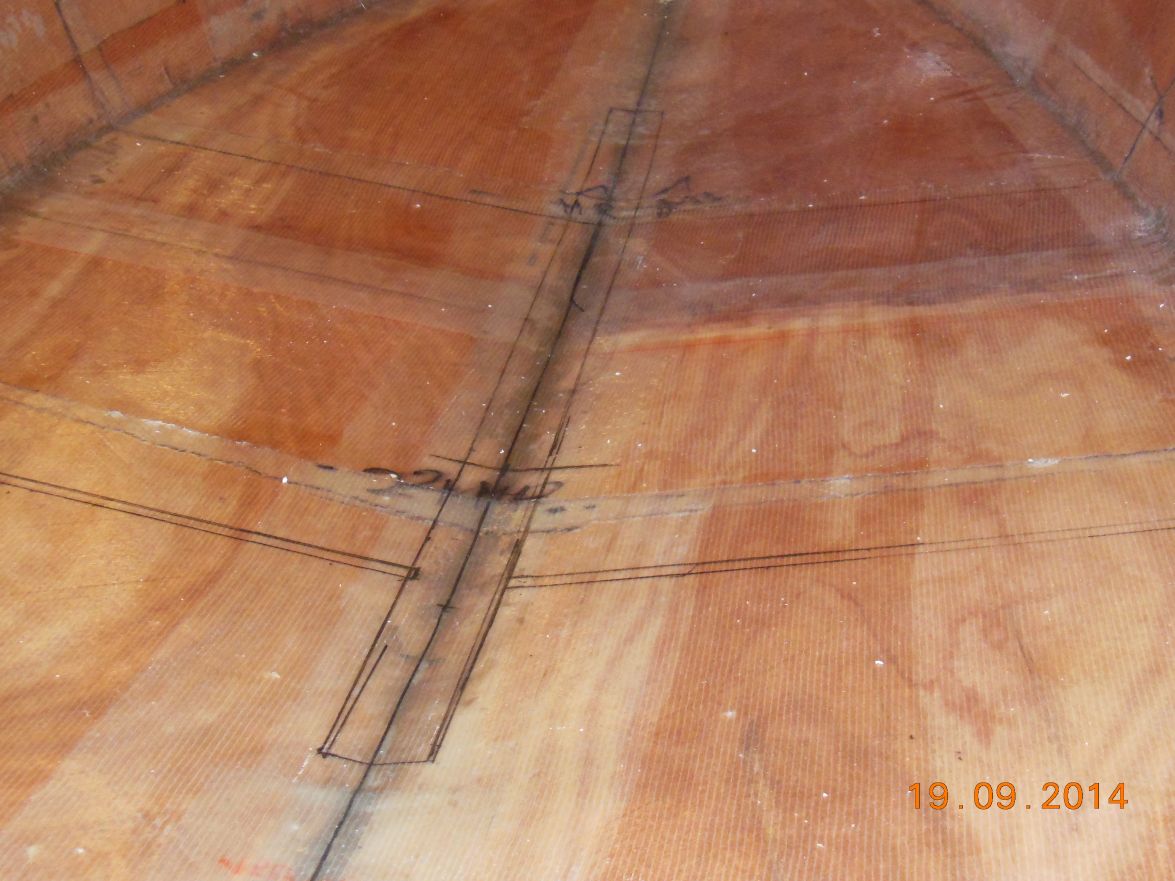
On this one only the clock on the wall I mounted is worth mentioning to remind me of the time and to finish this build hopefully before I kick the bucket. My momentary plan is to have the splashing in summer 2016 at the latest just ahead of my 70 th birthday.
That is all for today and I will post more when I have made a bit of a move on.
Greetings Karl ( Austria )
Re: AD 14 KIELGE
Posted: Fri Sep 26, 2014 10:03 am
by bondo
Very pretty work. Light and strong. I did not cut for the centerboard until after the trunk was installed. I used the frames to help with alignment. Notches for the stringers, elevation of the sole, elevation of the trunk, straightness of the trunk. All of this gets sorted out now. I had some confusion with trunk elevation. This is the point when if you are diligent about checking level and straight and non twisted then you set the boat on track to building itself straight from that point on. (for me, the hardest part was getting the sole on) looking in great shape Gonandkarl.
Re: AD 14 KIELGE
Posted: Sat Sep 27, 2014 4:33 am
by gonandkarl
Hallo Bondo,
I only marked the trunk when I first put it in and now I will progress the same way as You did and cut the hole once the whole inside is finished and I am putting the boat on its side. Right now I am painting the trunk and the centerboard before I install the trunk.
Here are my latest pictures of it and my treasure of self produced removable ballast.
Greetings from Karl ( Austria )
Re: AD 14 KIELGE
Posted: Mon Sep 29, 2014 7:39 pm
by bondo
Very nice Gonandkarl. Great work. Your ballast looks like exactly what you want.
Re: AD 14 KIELGE
Posted: Tue Dec 02, 2014 12:50 pm
by gonandkarl
Hallo everybody,
At last I made a bit of progress.
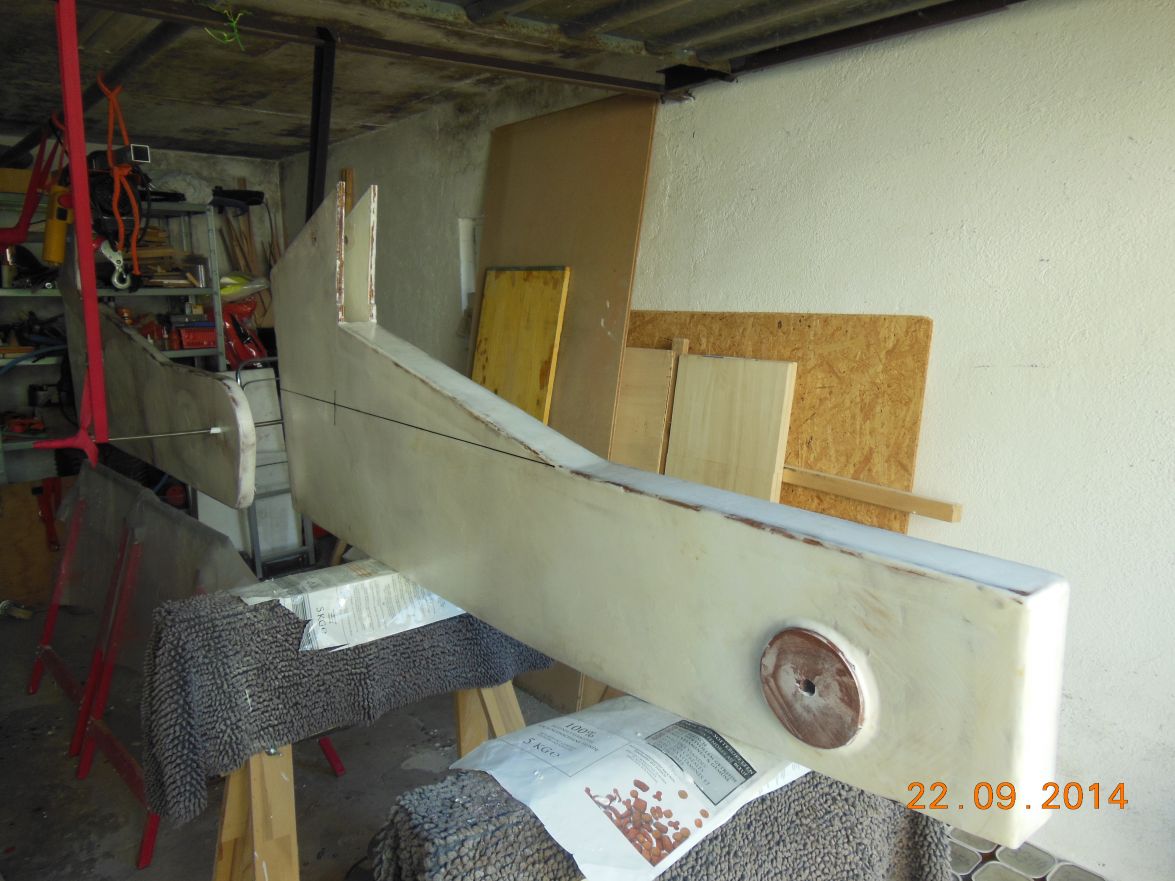
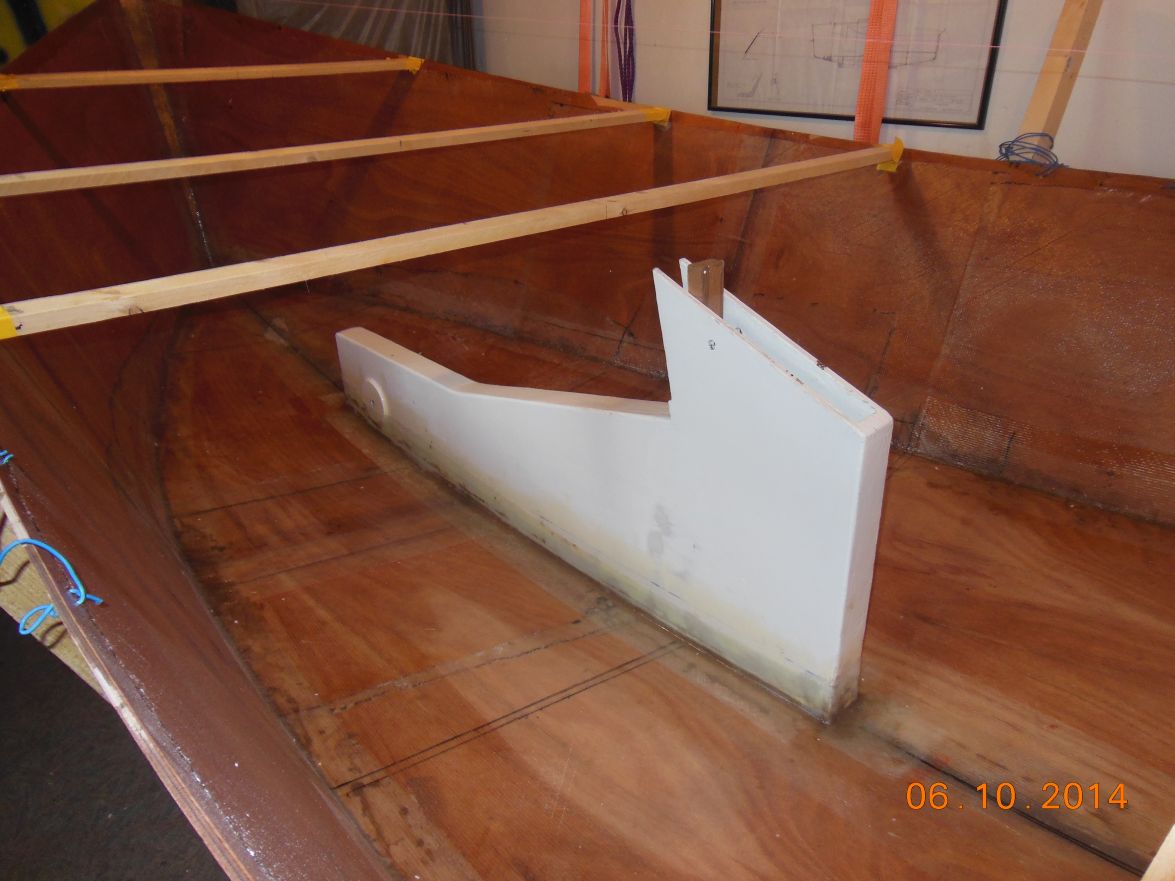
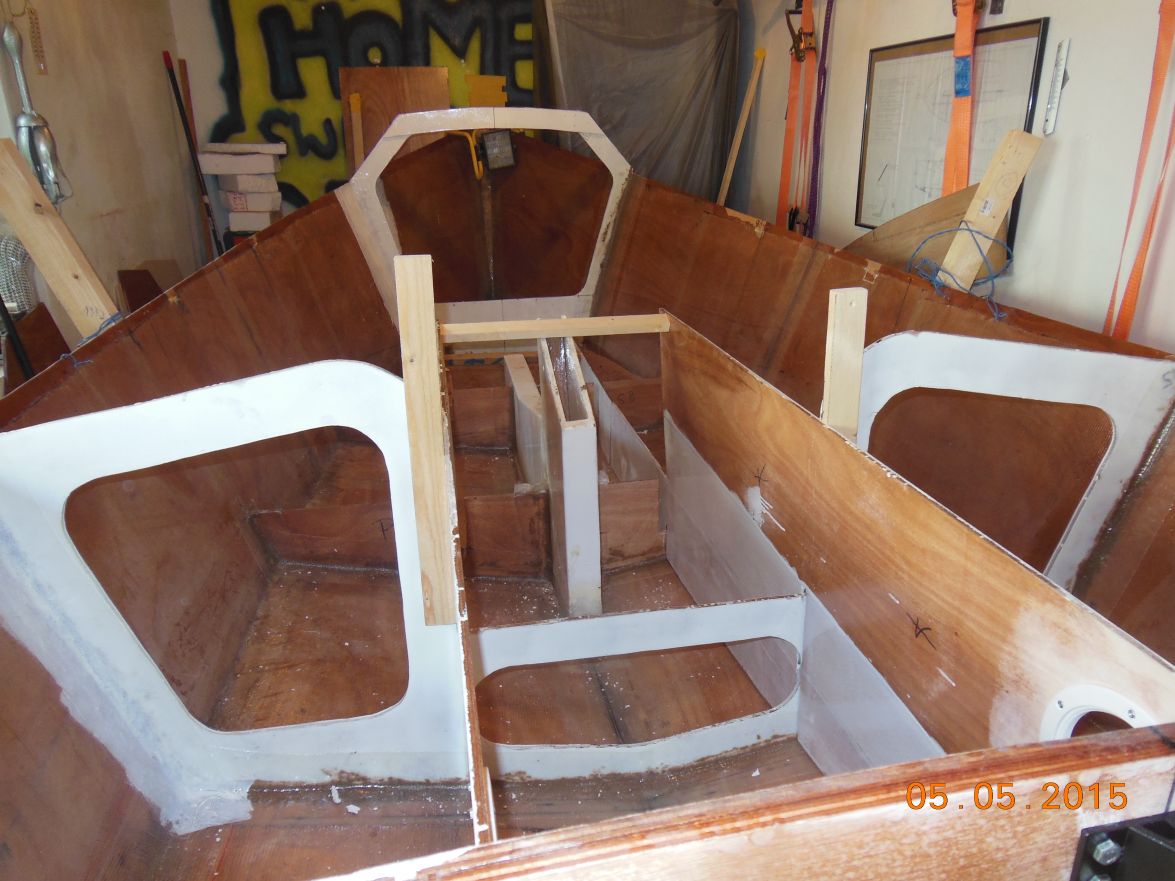
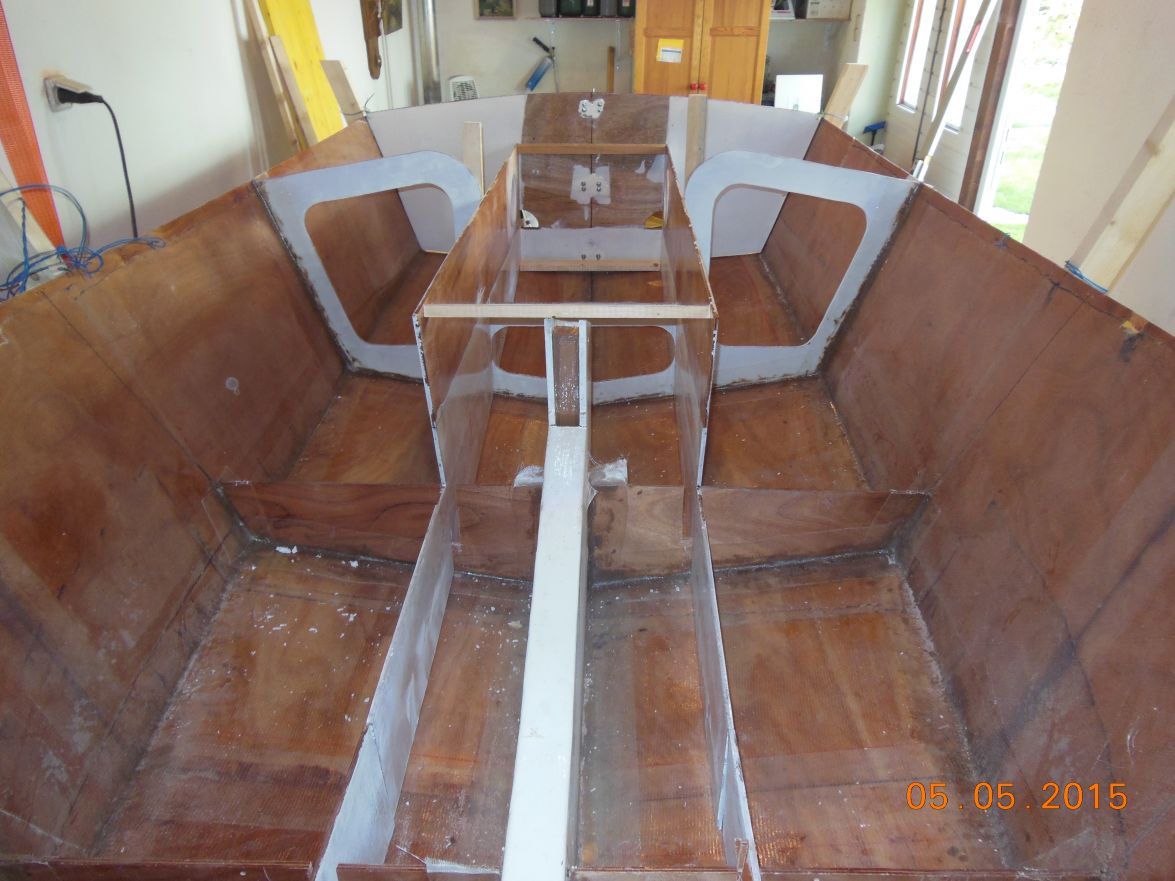
Here is the picture of the installed centreboard trunk:
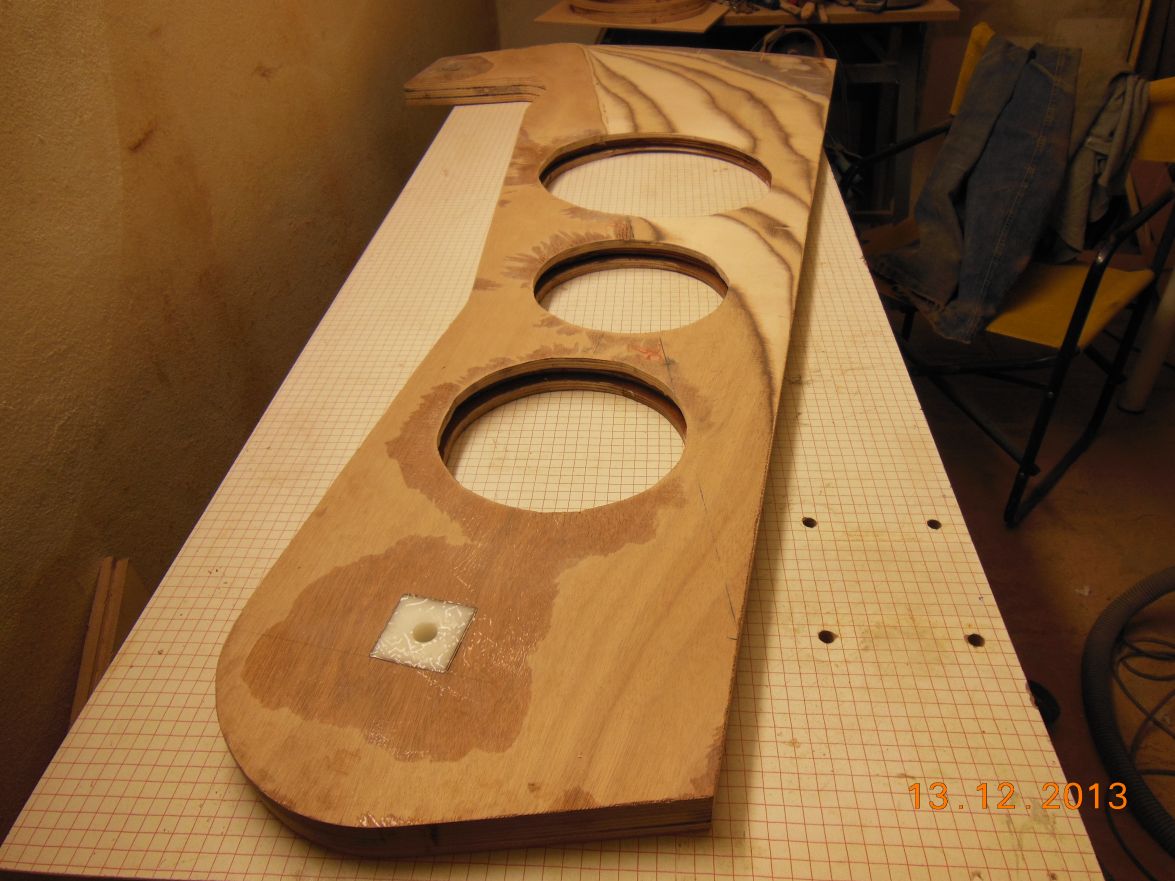
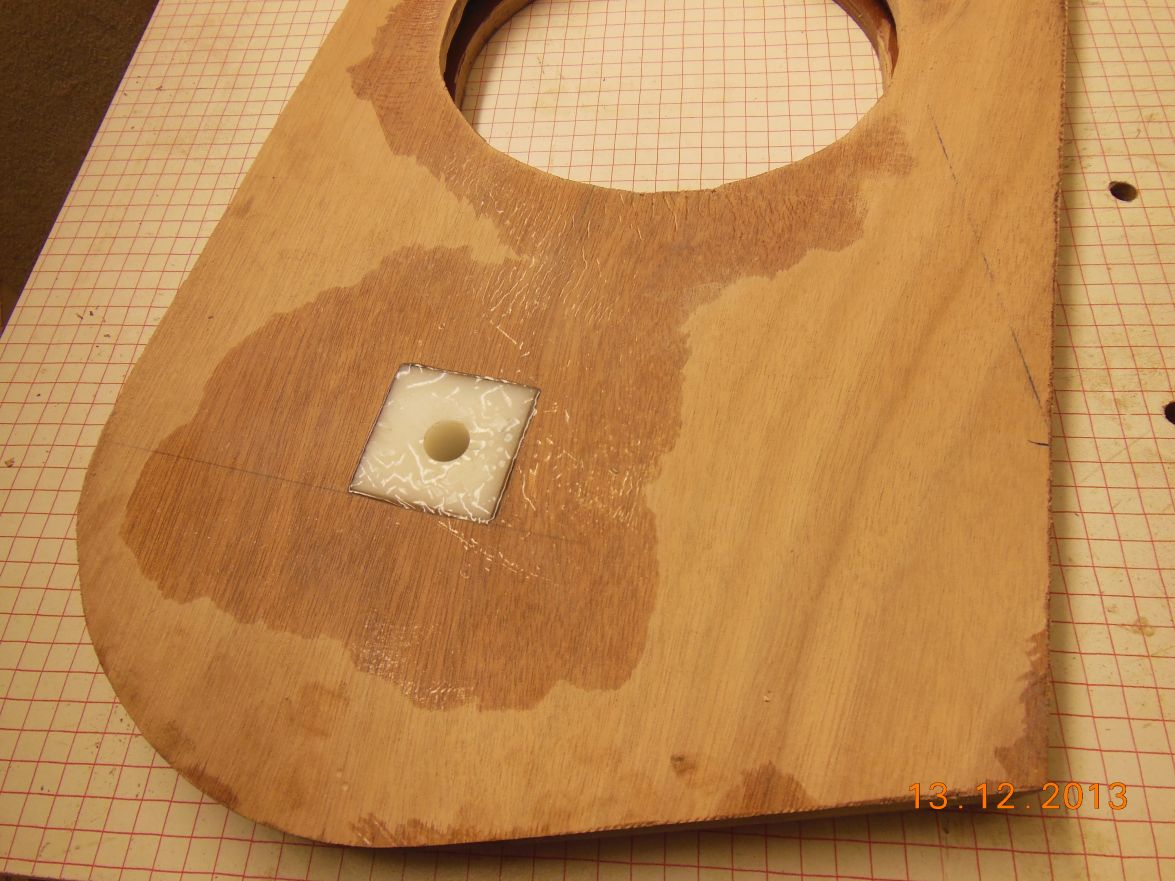
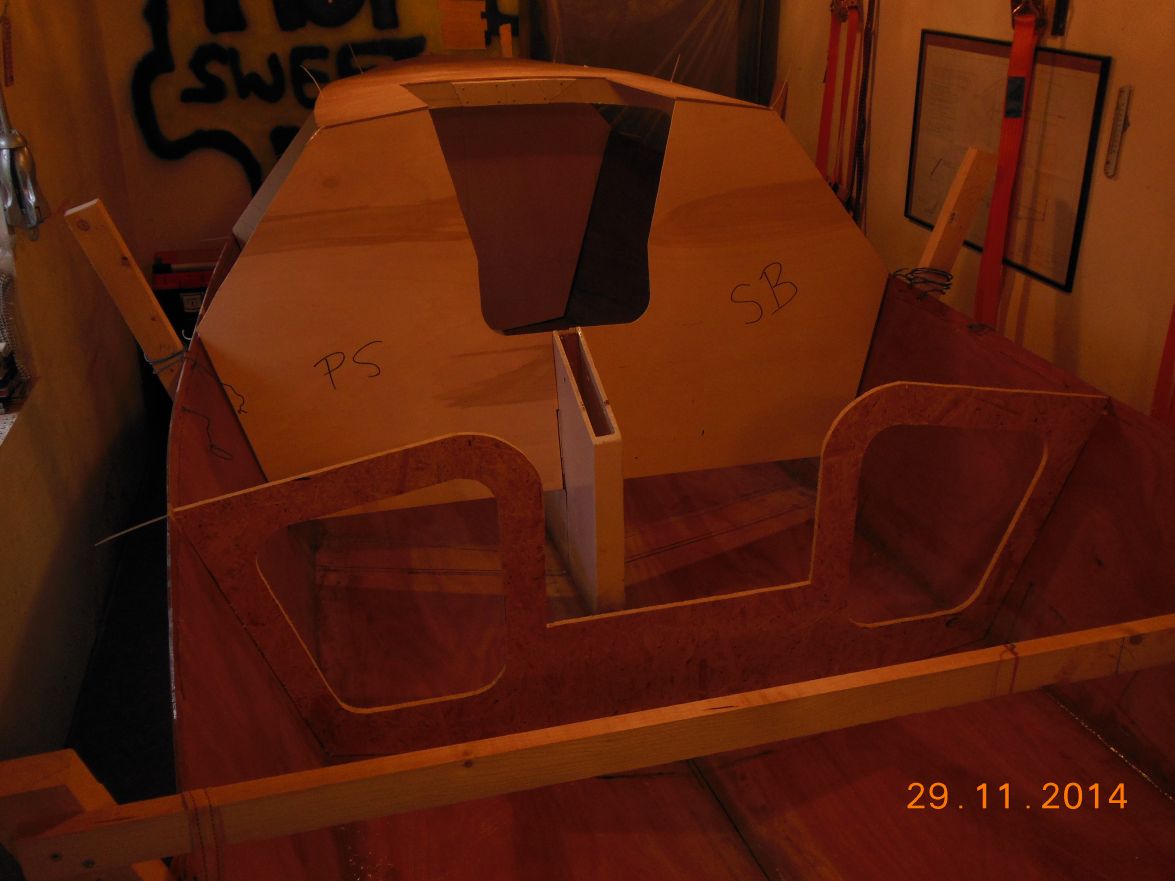
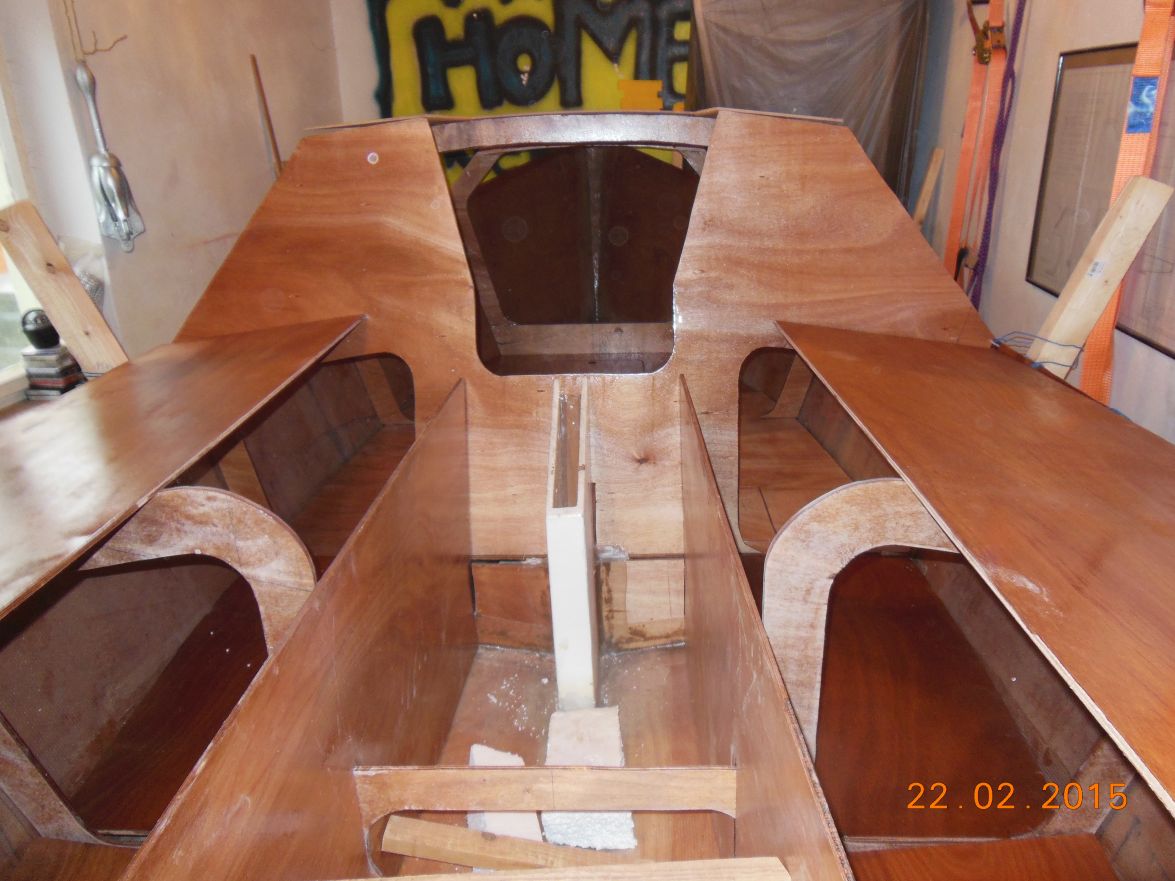
This is the dry fitting stage of the frames A, B, C and D which I made out of chipboard and cheap plywood and I will use them as patterns on the the expensive Okoume plywood:
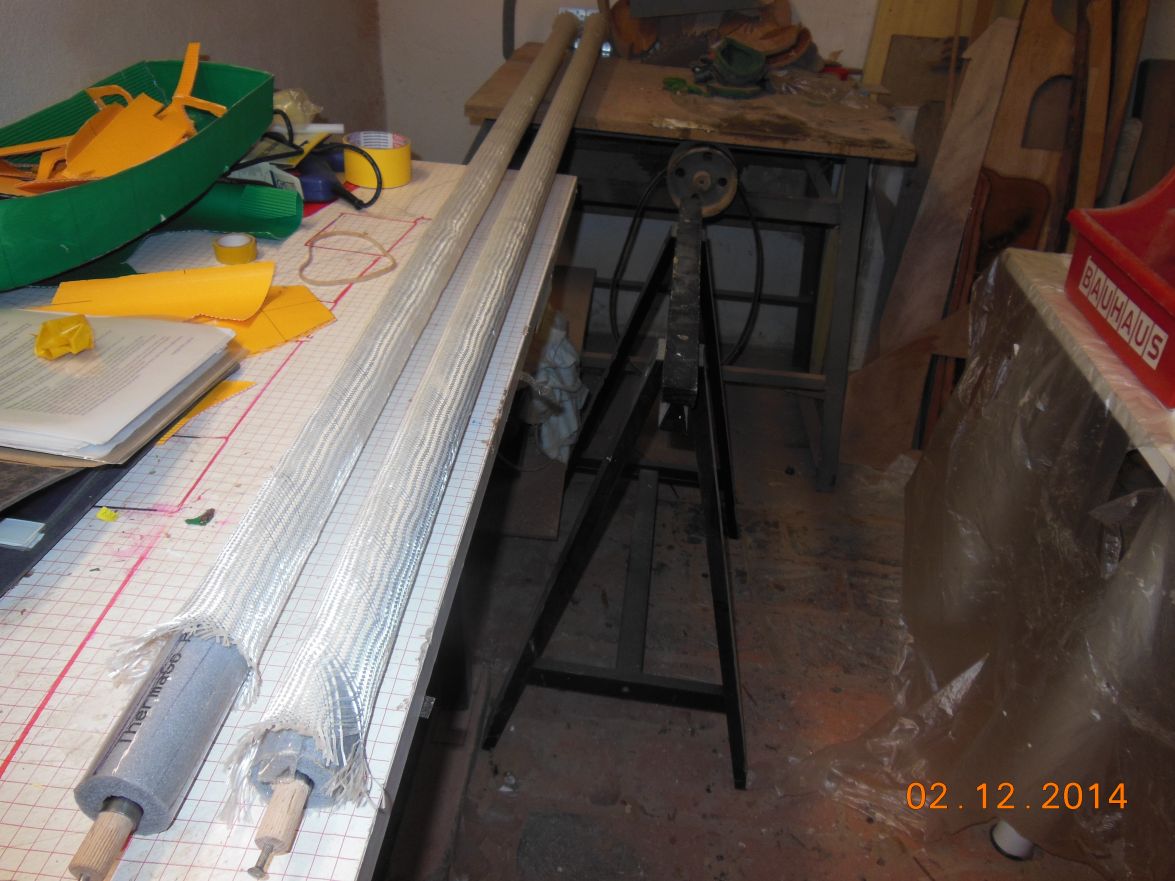
And this two funny things will eventually become the boom. I put the fiberglass sleeve over a hard foam pipe and I battled doing this until I found out that one has to push it over the foam kernel instead of pulling it because by pulling it, it tightened itself all the time. That is why the ends dont look so good.
Of my 3 grownup children even the oldest one moved out of our house to her own flat at the tender age of 37.
This gives me over Winter a nice big heated bedroom which is now an additional boat building room besides the 2 workshop rooms I have in the cellar.
I hope to get a few things done over Winter .
Greetings from Karl ( Austria )
P.S.: I always mention my homeland Austria, because it is so small and could easily be mistaken for Australia which You all know is Salvatore s land.
Re: AD 14 KIELGE
Posted: Tue Dec 02, 2014 1:17 pm
by terrulian
Mighty clean work

.
Re: AD 14 KIELGE
Posted: Tue Dec 02, 2014 2:17 pm
by peter-curacao
gonandkarl wrote:
P.S.: I always mention my homeland Austria, because it is so small
Don't tell Luxemburg

Very nice work on that AD, I hope we sea
this one progress including the splash!

Grüß Gott from Curacao (I think its even smaller as Wien
)
Re: AD 14 KIELGE
Posted: Tue Dec 02, 2014 3:21 pm
by das boot
Your boat is looking good do take a hint from how bondo did his and before you secure the seats and cabin top get your sanding and painting of the inside or at least as much as you can before sealing it up. I did not do it that way and by doing it later I do not know how much dust I took in to my body not smart but I wanted to see it put together. Trying to get into the birth area to sand and paint once finished was a chore do it the smart way. Keep up the good work.
Re: AD 14 KIELGE
Posted: Tue Dec 02, 2014 6:40 pm
by ks8
Yep. Whatever you do, I'm sure you'll think it through first.
My boat doesn't have a cabin top, but I did paint the cuddy interior, and the underside of the cuddy top, before sealing it shut. Very glad I did. But it meant some thinking first, such as making the top of two thinner laminates, so I could lock in the curved shape before bonding it permanently to the boat. It worked out well.
Of course, all the bonding areas were kept free of any of the finishing system, so there would be a good structural bond.
Enjoy thinking yours through.
Re: AD 14 KIELGE
Posted: Tue Dec 02, 2014 10:51 pm
by das boot
How do you intend to get the curve on the seat edge ? I tried 3 or 4 ways to do it with the least amount of filler I ended up cutting ply into 1 inch strips then running them through the saw putting a 20 degree bevel on each side one going each way so they ended up like a wedge shape and when layed into place it worked out fine with the least amount of filler food for thought. It worked for me.
Re: AD 14 KIELGE
Posted: Wed Dec 03, 2014 5:57 am
by peter-curacao
das boot wrote:How do you intend to get the curve on the seat edge ? I tried 3 or 4 ways to do it with the least amount of filler I ended up cutting ply into 1 inch strips then running them through the saw putting a 20 degree bevel on each side one going each way so they ended up like a wedge shape and when layed into place it worked out fine with the least amount of filler food for thought. It worked for me.
Maybe this helps?
Re: AD 14 KIELGE
Posted: Wed Dec 03, 2014 7:06 am
by gonandkarl
Hallo das boot and peter-curacao,
Thank you both very much, that is exactly how I want to do it.
George gave me the perfect description and Peter shows me the stages with nice pictures.
Unfortunately I am still far of making the seat tops, but then I just have to look it up here to refresh my mind.
Greetings from Karl ( Austria )
Re: AD 14 KIELGE
Posted: Thu Dec 04, 2014 9:24 pm
by Salvatore
G,day Karl,
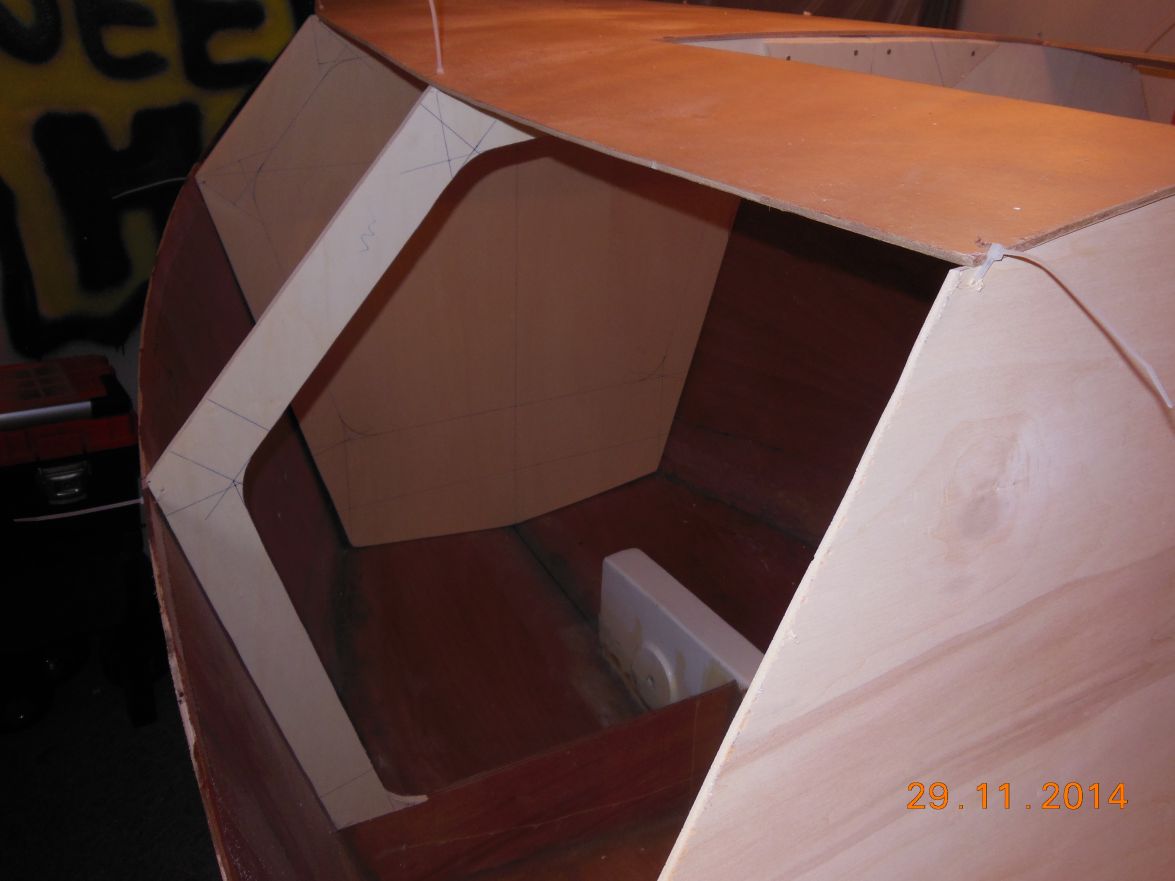
She's comming along nicely, you are doing well to be able to work in a cold climate. I noticed in you pictures dated 29/11/14 that B frame sits a little high, I had the same issue I was carefull to correct it so that the cabin sides came together correctly this will help reduce on fairing afterwoods also run your eye along the curve of top of the boat sides try and keep them as true as a curve as possible. I was able to keep by boat weight down by keeping the curve as true as I could. once again great work.
Salvatore.
Re: AD 14 KIELGE
Posted: Tue Feb 24, 2015 4:57 am
by gonandkarl
Hallo my friends,
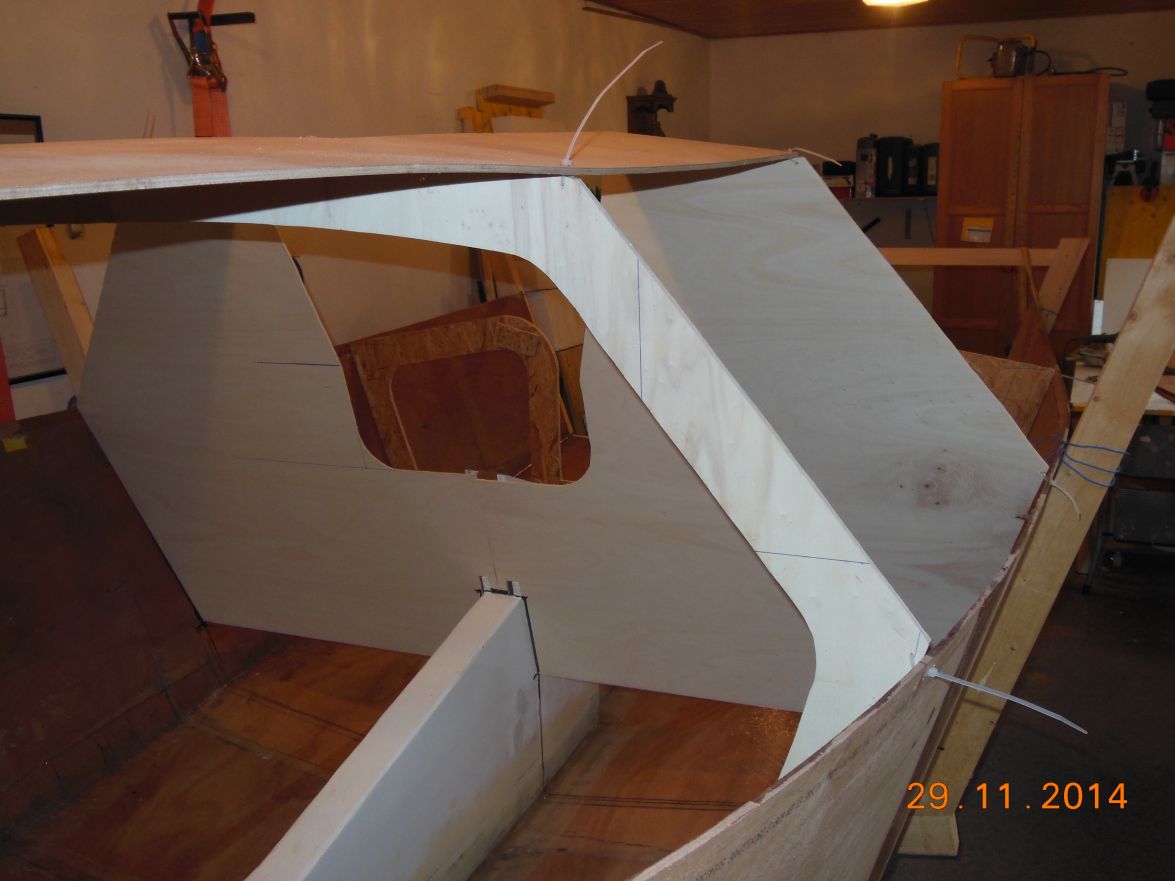
Yes the frame B sits a bit high, but I just put it all together as a test just to see if I am horribly wrong with my cut plywood.
I like the idea about getting the curvature of the deck with 2 thinner pieces of plywood. I will definitely do it as well as the painting and finishing of the inside as far as possible before I cant move in there anymore.
As I cannot work with epoxy right now in the boat shed even that I fired my coal stove a lot, only to reach 12 degrees celsius I gave some loose pieces like sole stringers frames B and C a coat of epoxy inside the house.
This weekend we had a visitor who showed a little bit of interest in my boatbuilding and therefore after lunch and pudding I forced him and also my family to have a look at my progress after having quickly chucked all above pieces onto the boat that one gets an idea what it will eventually look like.
Here are two pictures of it:
Test fitting of the sole with cutouts for access to storage
The holes to lift the hatches I copied from the glass shower door of our recent cruiseship cabin
Greetings from Karl ( Austria )
Re: AD 14 KIELGE
Posted: Tue Feb 24, 2015 9:14 am
by terrulian
Nice.
I know what you mean about forcing people to look at the boat
. I have a whole collection of interests that no one I know gives a groat about, so it is so nice to have this forum to share with people who do. Perhaps I should take up gardening. Tons of people enjoy that sort of thing

.
Re: AD 14 KIELGE
Posted: Thu Feb 26, 2015 3:46 am
by Salvatore
Hi Karl, I agree it is nice to be able to share with others of like mined. and your boat is coming along nicely. Your picture dated 22/5/15 shows just loos hatches on your cabin deck, I may be wrong but I'd be amiss if I didn't ask, Are you putting in proper water tight hatches

One of the things I liked about the ad14/16 was that the cabin floor acts as a second hull. the cabin floor sits at around the waterline if you where to put a hole in the boat it would still float, it came across as a nice safety feature to me also a lot of that space I filled with foam. Perhaps some other boat builders can add to this question.
Re: AD 14 KIELGE
Posted: Thu Feb 26, 2015 4:29 am
by gonandkarl
Hallo Salvatore,
The loose hatches in the cabinfloor are just lids to get to the storage space underneath. I will also put foam under the sole outside the longitudinal stringers except between frame B and C. The loose hatches on deck are explained easily, because they are the seat tops cut roughly to size and with a coat of epoxy just lying on frame D and nothing one sees on the picture is fitted permanently. I piled everything together to get a rough idea how it will look like once it is finished.
The big top hatch I want to build like you have described to me earlier but also this is still future music.
Right now I am battling to sew my main sail which will be a Chinese Chunksail according to my own sailplan. It has the same size 11 squaremetres but it is not like the sailplan of the AD14. I am making 5 equal parallelograms with two-pannel fanned head in total seven pannel and 3-part single sheets with two 3-point spans and the top batten will not be sheeted. The book of HG Hasler and JK McLeod Practical Junk Rig is a great help to design ones own sail. But the problem lies in the detail of using my wifes sewing machine and handling big pieces of sailcloth. When it is finished I will post a picture of it.
Greetings from Karl ( Austria )
Re: AD 14 KIELGE
Posted: Thu Feb 26, 2015 6:45 am
by gonandkarl
Hallo everybody,
About my loose hatches in my cabin sole I have an afterthought. I will make them watertight but because its inside the cabin I wanted to make it cheap until I have splashed the boat and hopefully until it is watertight I wont have a hole below ( rather unlikely in our local lakes ). This will be a project for the next Winter like John Almberg sometimes says because when you cant sail you can get on with maintenance. His link is well worth visiting .
http://www.unlikelyboatbuilder.com
Greetings from Karl ( Austria )
Re: AD 14 KIELGE
Posted: Thu Feb 26, 2015 8:53 am
by terrulian
I had the same concern about the hatches, although I've seen much more dangerous arrangements on production boats. But I see you have it sorted.
Thanks for the link. It looks right up my alley.
I admire you for undertaking the sewing of the sail and for going for the junk rig. There are very few of the arts of the sailor that I have no interest in, and sewing is one of them. I love ropes and knots and woodworking and navigation and rigging and weather study and stowage plans and...ok, sanding and varnishing and changing oil on the diesel (which you appear to have skipped) are also not favorites.
As for sewing, I use sticky-back tape or alternatively a spare sail for emergencies, and then I take the sail to a professional with a big machine and a loft. I've survived many decades now this way and I probably won't change. It's nothing I'm proud of, but a weakness that I've learned to accept.
Re: AD 14 KIELGE
Posted: Thu Feb 26, 2015 9:13 am
by gonandkarl
Hallo Tony,
I am making the sail myself because having a sail made here in innermost of Europe is hardly possible or horribly expensive.
The first thing I assume a sailmaker thought of me when I showed him my sailplan and asked for a quote, that I must be filthy rich. After that I had to tackle it myself.
In another thread I have read that you wrote a book about your circumnavigation. I would like to buy the book but cant find the thread where you mentioned it. Please let me know the title.
Greetings from Karl ( Austria )
Re: AD 14 KIELGE
Posted: Thu Feb 26, 2015 9:25 am
by terrulian
That's funny about the sailmaker. But by building the sail yourself you'll not only learn a lot but get so much practice that any sail repair will be easy. It really is an essential seaman's skill.
The book is "The Captain and Mr. Shrode" and can be found here in print or digital form:
http://www.amazon.com/The-Captain-Mr-Sh ... mr.+shrode
Re: AD 14 KIELGE
Posted: Fri Feb 27, 2015 11:33 pm
by das boot
Looking good you should be able to get it in the water by fall weather permiting keep up the good work.
Re: AD 14 KIELGE
Posted: Sat Feb 28, 2015 7:39 am
by gonandkarl
Hallo George,
Thanks for the encouragement and I will try to water her this autumn. Whenever I have got time I look at all your pictures of your boat which I downloaded onto my PC in the folder GEORGES_pictures. Have you ever heard of the Arizona builder who I think uploaded your pictures. Is he just sailing his AD16 and not posting here anymore ?
I would like to ask you this question:
How high did you mount the eye bolt ( I think it is called like that in English ) on the bow, or/and did the height of the trailerwinch influence where to put it ?
Greetings from Karl ( Austria )
Re: AD 14 KIELGE
Posted: Sun Mar 01, 2015 12:42 pm
by das boot
Hi Karl.
Funny you should ask that question that was just one of many things I did wrong but the one I regret every time I lunch the boat. I have mine mounted too high and when I bring the boat onto the trailer I have a problem with the bow sprit hitting on the winch and I have to fight to get the trailer strap hooked to that tie down point. As my ne is to high and I need to hook over not under the winch. I welded an metal and tried to mount the winch higher but it dose not work well. it should bring the tie down strap under the winch to work properly but since I filled that bow compartment of my boat with foam and glassed it in it would be hard to re mount that point. I will get you a measurement later today and send it to you.
Re: AD 14 KIELGE
Posted: Sun Mar 01, 2015 3:03 pm
by Salvatore
Karl wrote:
How high did you mount the eye bolt ( I think it is called like that in English ) on the bow, or/and did the height of the trailerwinch influence where to put it ?
G,day Karl, The post hitch varies on many trailers, some have adjustable ones, wait until you have your trailer before putting in the front eye bolt. I needed to put my eye-bolt as high as i could because i wanted to use that point for the chain that goes to my bowsprit. You don't have to do that. I had to weld my adjustable hitch as I was at the top end of its adjusting point

My Youtube Channel
http://www.youtube.com/channel/UCK7N0Z3MuI9Awisupeh_7dw
Re: AD 14 KIELGE
Posted: Sun Mar 01, 2015 10:57 pm
by das boot
Hi . Salvatore go it better than I did but I got stopped by the cops that told the winch needs to have the line going out under the winch so that on the road it is pulling down mine is like the one pictured and the tie down strap gose from the top of the winch. I did not get a ticket just told to fix it never got stopped again. But when I see other boats at the ramp they come from the bottom.
Re: AD 14 KIELGE
Posted: Mon Mar 02, 2015 12:51 am
by Salvatore
Hi George, Never heard of such a thing? The winch will not work the other way. In Australia the cable goes over the top not under, we don’t have that problem here, you just make sure you strap your bout down well, it may be a rule for the US State that you are in
My Youtube Channel
http://www.youtube.com/channel/UCK7N0Z3MuI9Awisupeh_7dw
Re: AD 14 KIELGE
Posted: Mon Mar 02, 2015 3:55 am
by gonandkarl
Hallo George and Salvatore,
Thank you both so much for the information how you fit the eye bolt on your boats. I think I will take up the advise to wait until I have got a trailer and then decide where to put the eyebolt once I have the boat lifted onto the trailer. In the meantime I will have a look how the cable goes normally here to the winch underneath or over the top. A little detail which I hadnt thought of till you both told me. T
Today I carry on sewing my sail ( takes longer than I thought ) because the weather here in Austria is still too lousy to work with epoxy on the boat.
Greetings from Karl ( Austria )
Re: AD 14 KIELGE
Posted: Sun Apr 26, 2015 3:45 pm
by gonandkarl
Hi,
At last I can report a bit of progress. Because of the cold weather here it was impossible to work with epoxy in my boatshed.
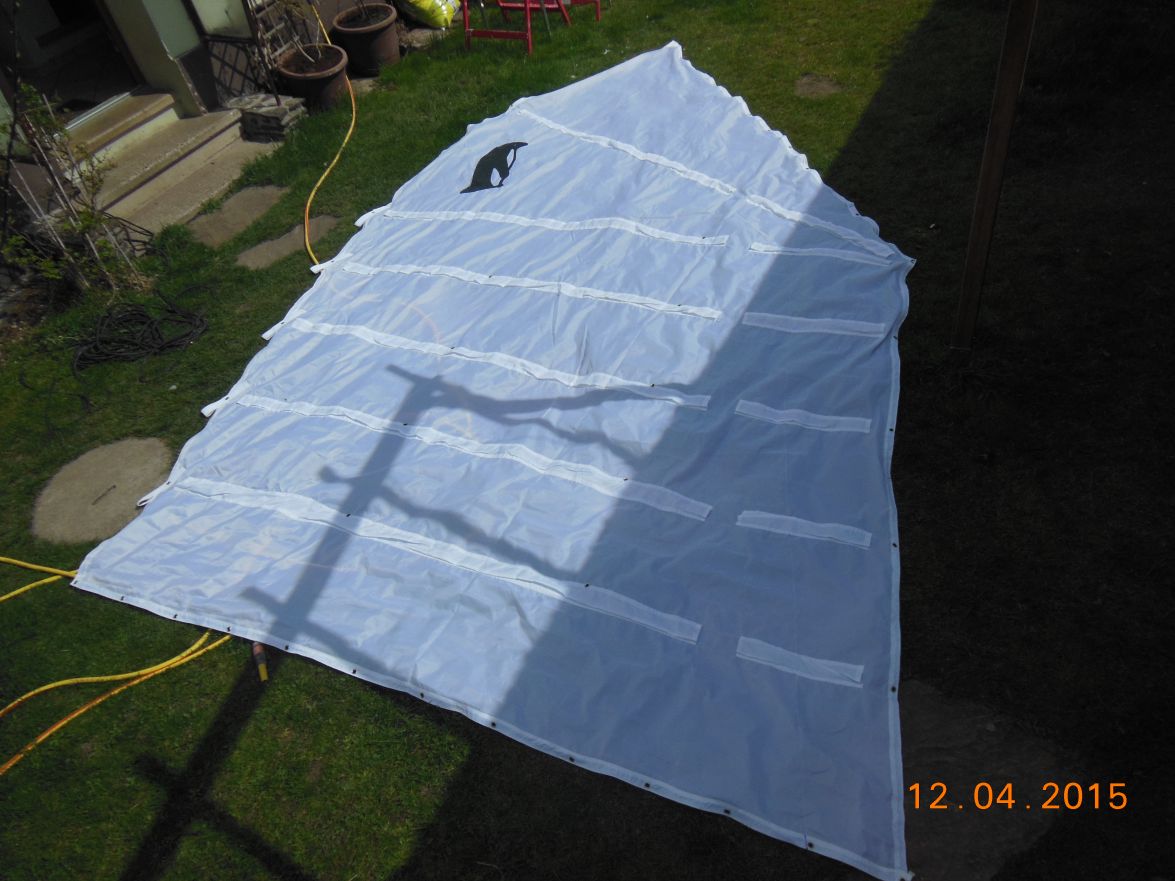
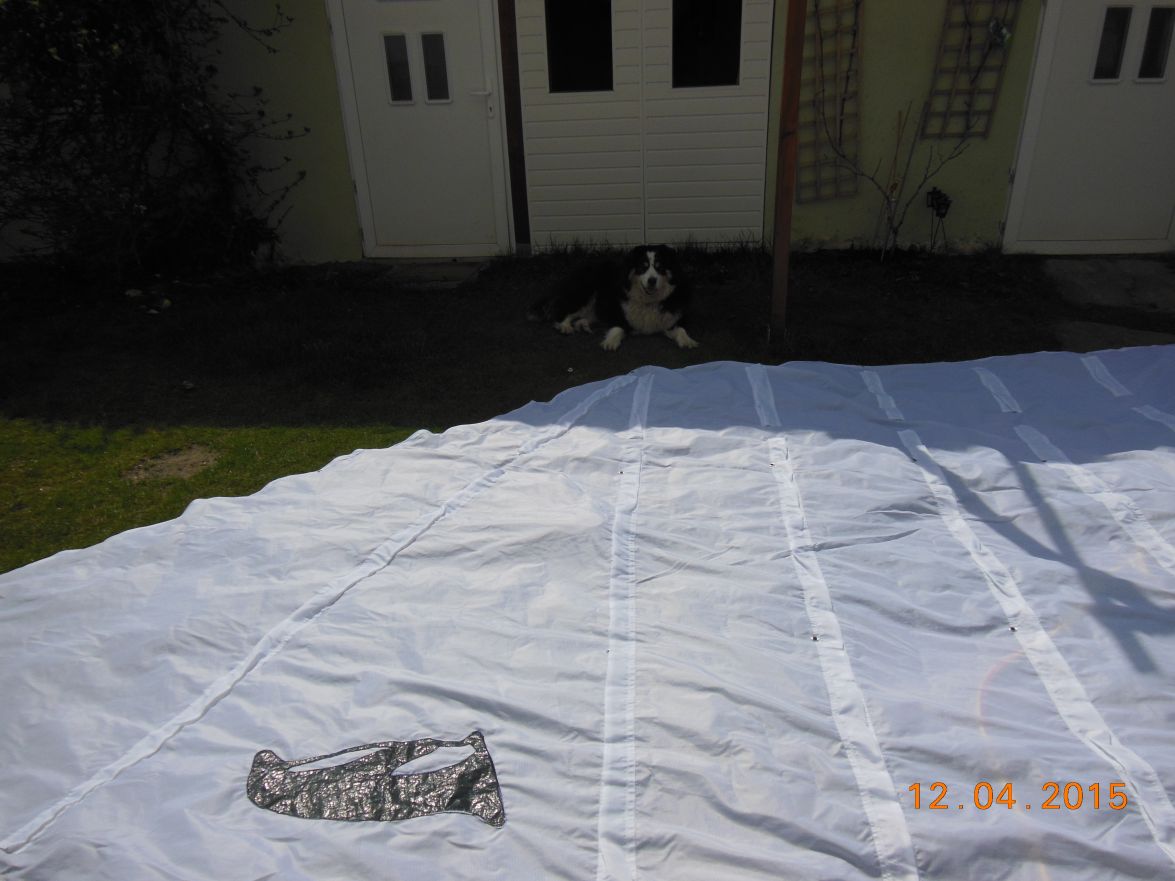
I have got an old coal stove in there but after firing it up for hours I reached only 15 degree celsius and there I reached the point to leave the boat alone and carry on in my cellar workshop as well as in the diningroom. There I started sawing my Chinese Chunk sail initially out of white politarp until I realised that this stuff is to heavy and much to akward to sew and then I ordered proper sailcloth for 80 euros and finished the sail in rather long sessions at the sawing machine. Here is a picture of it spread out on the lawn in the garden:
Then I went about producing the boom and the yard both the same length ( 3 m ) and made them over an insulation foam core and a layer of fiberglass sleave. I got this foam only in 2 metre length therfore I had to make out of two 2 metre long pieces a 3 metre long spar. I cut a 40 cm piece of the first hard fiberglass pipe cut it open lengthwise squashed it abit and inserted it with a bit of epoxy into the two pieces I wanted to join to reach 3 m length. then I put another fiberglass sleeve over it and 2 carbon sleeves and at last one more fiberglass sleeve to have them finished for fairing and now they look like this :

When I made the second spar I used peelply tape over every sleeve that I epoxied and the result was much nicer and the end weight was also lower: The first boom weighs 1,640 kg and the second one 1,759 Kg
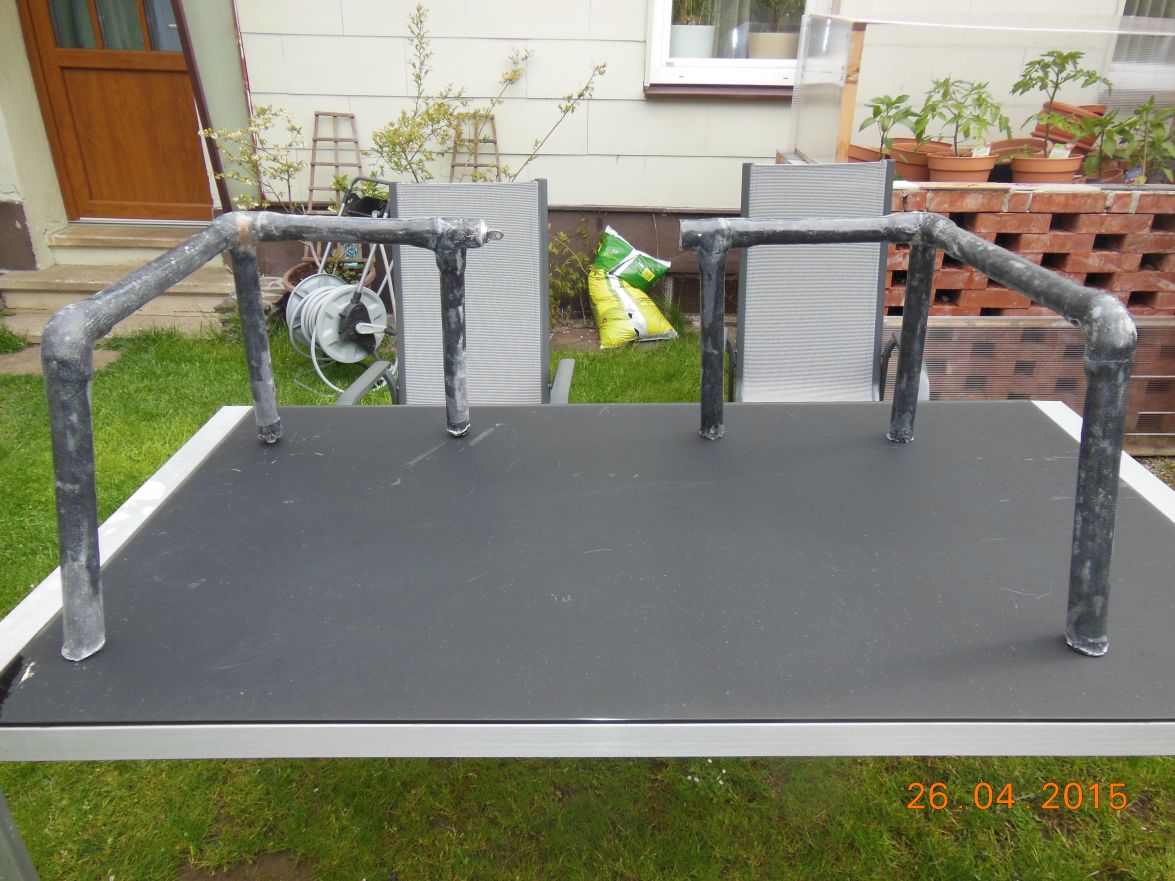
I also made myself 2 pushpits out of foam covered with 2 fiberglass sleeves, 2 carbon sleeves and another fiberglass sleeve. I dont really know if this will be strong enough but once I have them mounted on the seats PS and SB I will test
hang my weight onto it. Right now before fairing they look like this :
One picture of the sail I find quite cute because it looks as if the pinguin on the sail looks at my bored dog behind it:
And now that the temperature outside is turning nicer I wil start fitting frame A, D and the longitudinal frames in the next few days.
Greetings from Karl ( Austria )
Re: AD 14 KIELGE
Posted: Sun Apr 26, 2015 10:03 pm
by Cracker Larry
Nice sail and spars but..
1,640 kg and the second one 1,759 Kg

That might be a bit heavy for spars. I'm not real good in metric but a 3,700 pound mast on that boat might be a little top heavy

Re: AD 14 KIELGE
Posted: Mon Apr 27, 2015 2:24 am
by gonandkarl
Hallo Larry,
I like your pun, but I just mentioned the weight ( with a comma sign ! ) because I was myself surprised that these spars only weigh in a little bit over 3 pounds each. The pushpits also weigh only a bit over 2 pounds each and seem as strong as steel.
Greetings from Karl ( Austria )
Re: AD 14 KIELGE
Posted: Mon Apr 27, 2015 9:19 am
by jacquesmm
Yes Larry, in Europe they use a comma as a decimal.
Those carbon spars look good.
Re: AD 14 KIELGE
Posted: Mon Apr 27, 2015 11:04 am
by Cracker Larry
Yes Larry, in Europe they use a comma as a decimal.
I didn't know that. Learn something new every day

Crackers use commas to separate thousands from hundreds, and decimals
Re: AD 14 KIELGE
Posted: Mon Apr 27, 2015 4:28 pm
by gonandkarl
Hallo Larry,
Whenever you say something about boat building it always makes a lot of sense and I like reading all your comments.
This in mind I could not stop thinking about your remark, that the yard might be top heavy and maybe you really meant it.
What if it is not a mistake to make the yard the same size ( diameter 2 inches ) as the boom. After long thinking I came to the conclusion that I wont go back and build a lighter yard ( maybe with a diameter of 1 1/2 inches ) because I would only gain a weight reduction by 25 % and then it would turn out maybe at 1.2 kg ( = about 2 1/2 pounds ) and I dont have to follow Larry ' s advice to do everthing twice to make it real good. I am sure the chance to make something twice will still come at the latest when I make a real big mistake.
But with all this brainstorming about my spars I came up with the decision that I will use the lighter one of the two as yard and the heavier one as boom although according to Hasler's Practical Chunksail Rig there is not much force on either of the two.
And the good news besides thinking about the past things I got frame A spotwelded into the boat today in 20 minutes after measuring the 100 % right position beforehand for hours.
Greetings from Karl ( Austria )
Re: AD 14 KIELGE
Posted: Mon Apr 27, 2015 4:58 pm
by jacquesmm
Are you planning a junk sail or a lug sail or something in between named a chinese lug?
I have the Hassler book and the Van loan book but our sail plan is a little different, it's a modified chinese lug.
Re: AD 14 KIELGE
Posted: Tue Apr 28, 2015 10:27 am
by gonandkarl
Hallo Jacques,
I am planning a Junk Rig and designed it according to HG Haslers book ( Practical Junk Rig - Design, Aerodynamics & Handling ). This lets me use a freestanding alu mast ( 6,10 m ) and and I wont have the problem with side spreader lines touching the sail. But I will put the fittings on each side of the boat if I ever should use a Marconi rig and a foresail and the I need to support the mast. The rig will be very similar to Haslers boat Pilmer : All battens the same length, five-panel parallelogram with two-fannel head, total seven panels with 3-part single sheets with two three-point spans, top batten not sheeted, long batten parrels, luff hauling parrel, no downhauls and all hauling ropes led to the cockpit.
I just stuck to the sailsize designed by you. ( 11.35 square meter )
Greetings from Karl ( Austria )
Re: AD 14 KIELGE
Posted: Tue Apr 28, 2015 11:42 am
by jacquesmm
OK but you shouldn't worry about the shrouds. That was completely ridiculous fear, our shrouds angle is standard in many boats.
Anyway, I like a free standing mast and the multiple sheets set up. It can be fun to play with and efficient.
Re: AD 14 KIELGE
Posted: Wed Apr 29, 2015 12:59 pm
by ks8
Re: AD 14 KIELGE
Posted: Thu Apr 30, 2015 2:13 am
by gonandkarl
Hallo Ks8,
Yes all projects small enough to be done inside the house are put back for realisation in Winter like my 2 walkon deck hatches ( Inside opening 40/40 cm ). Can you believe that this size deck hatch I need cannot be bought anywhere. I need it to drop the Porta Potti which is 38,5/43 cm in one of them and the small outboard motor in the other. Before I do them I will study all pictures that you put in your library. These hatches you built seem perfect and waterproof which is a must for my walkon deck hatches that I have to mount on the sloping ( selfbaling ) floor towards the transom.
Greetings from Karl ( Austria )
Re: AD 14 KIELGE
Posted: Thu Apr 30, 2015 2:15 am
by gonandkarl
I meant an inside opening of 40/50 cm.
Re: AD 14 KIELGE
Posted: Thu Apr 30, 2015 12:45 pm
by ks8
Guten Tag Karl,
When I open my hatches, any water on the structure around the opening drips or runs into the opening. The best way to make the hatch is probably to have a runoff channel around the opening, deep and wide enough to handle and drain away (to somewhere) any maximum amount of water near the opening, and maybe even a slight downward edge on the hatch around its outside, an edge that descends a little into the runoff channel. I think Joel made a few of those, and some other builders. It is a little more complicated to make it strong enough to walk on. The *lip* of the opening needs to be thick enough to make the properly sized drainage channel in it, and still be plenty strong enough to support a maximum load of stomping or falling (ouch) on the hatch cover (for a horizontal hatch). Not difficult, but certainly more effort than a very simple hatch.
I tried to make my hatches less complicated (for me
), where the water seal is mostly accomplished by a custom fitting gasket, made of a bead of 4200, shaped by squishing it between the finished hatch *cover* and the surrounding finished opening surface, with both surfaces taped with packing tape to prevent the 4200 from sticking, and then letting it cure to the perfect seal shape. After removing the cured gasket is then permanently glued to one surface with some other more permanent sealing adhesive (5200?). 4200 is slightly flexible and compressible, but does not stick well (by design), so it needs some help on one of the surfaces to stay stuckeded, once shaped and cured. I have not yet perfected that method, but when I do, I'll post on my thread.
For current use, the hatches are water-tight enough for me, at this time, but it is not my ideal custom shaped and fitted hatch system. I did not aim to keep any water from ever getting in the stowage, because, it is a boat, an open boat, in a very wet environment already.
But I did want certain hatches to keep the stowage compartment *mostly dry*, and more importantly, stay sealed enough so the chamber would be a buoyancy chamber, in case the boat was swamped or worse. Such a hatch is much easier to accomplish than the more complicated ideal.
If you would like, I could sketch something closer to my ideal, but it will not be an engineering drawing. Just a freehand *concept*. Probably something like others posted already, but it is not always easy to find other posted pictures. I would label it well in the gallery section, to make a search much easier.
Sincerely,
ks (que es... what is.... was ist... karl)
Re: AD 14 KIELGE
Posted: Fri May 01, 2015 5:21 am
by gonandkarl
Hi Ks8,
Thank you so much for the explanation how I can make it with a channel. I am not sure yet if I will make it like that or the not so komplicated version that You described lateron. For the one with the lip I thought I can use a cheap plastic moving container and its lid ( has correct opening size ) as moldings for fibreglass mat which is quite an effort to make the 2 parts.
I tend to your make of hatch covers because I would not mind if the surrounding water drips inside when I open it which I will only do when the weather is fine and waves are small.
To your method I have a question what is a 4200 bead you mentioned ?
Is it some kind of silicone?
( I am not sure I can get 4200 here )
Greetings from Karl ( Austria )
Re: AD 14 KIELGE
Posted: Wed May 06, 2015 7:06 am
by AD16 The Opportunist
The 4200 mentionned from Ks8 is a marine sealant from 3M. As alternative, here in Europe you can find a range of similar products under the names Pantera, Sika and others... do a search in the net, there are a lot of marine shops selling those products, or try in the nearest marine shop ;)
Re: AD 14 KIELGE
Posted: Mon May 11, 2015 4:31 pm
by gonandkarl
Hi,
As I have a lot of knotfree pine 25x25 mm ( 1 inch square ) battens I would like to use them as cleats along the bottom frames where then the floor will be epoxied on it. I understand that they are just to be mounted to produce a bigger area on which the floor will be resting. For the first cleats along frame A and B I used beech wood, but I cant find more of it in the local hardware stores.
My question is can I use knotfree pine for these cleats ( epoxied all over before glueing it with wood putty to the frames ) or should it be rather some hardwood.
Greetings from Karl ( Austria )
Re: AD 14 KIELGE
Posted: Mon May 11, 2015 5:11 pm
by jacquesmm
Pine is fine.
Re: AD 14 KIELGE
Posted: Sat May 16, 2015 2:38 am
by gonandkarl
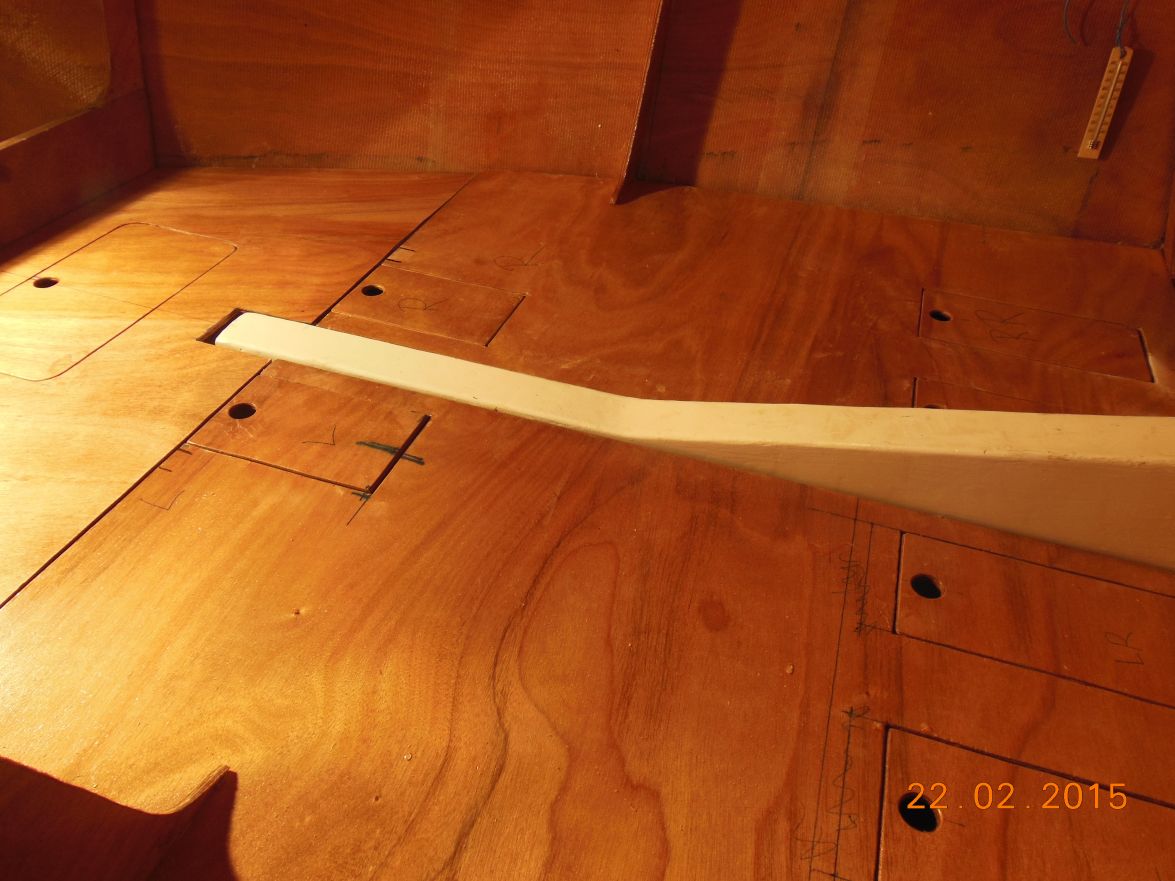
Hi,
I just finished putting in the 2 long stringer frames in my boat and now I am busy glueing the battens against all the bottom frames to hold the floor which will be filled with 2 component foam underneath to make it unsinkable.
Shall I put any pipes ( you power boat guys call it chasing tubes ) under the berth floors from the transom towards midship for later electric cables before I put foam there or does it make more sense to install any electric cables under the seats in the top corner of the 2 berths ?
Has anyone just epoxied the berths and the stowage area under the floor with white tinted epoxy instead of boat paint ?
I think of doing that because there will never be any UV rays getting there.
Greetings from Karl ( Austria )
Re: AD 14 KIELGE
Posted: Sat May 16, 2015 9:31 am
by terrulian
I used tinted epoxy in my lockers and I think it's pretty common. Of course, if you don't like it, you can always paint it later. The advantage is, you already have the epoxy and the tint won't cost much. Here's a picture before I installed the bow seat:
The power boaters will be more expert on the chase tubes, and I would say it wouldn't hurt. On the other hand, as long as you can secure the wires under the berths in a way that they are protected from stuff you might jam in there for storage, that would be OK. What I would avoid is denying yourself later access to the entire length of the wire should it it become necessary to replace it (or add another wire) for some reason. Either way will work as long as you can pull the wire through the tube. The worst thing to do is to bury wires in epoxy or some other kind of goop or behind a panel that is glassed in. A lot of production boats have this problem.
Re: AD 14 KIELGE
Posted: Mon May 18, 2015 10:28 pm
by das boot
Looking good the only wires from the back of the boat 1 wire for light 1 wire for fish finder and 1 to charge the battery from the motor I just drilled a whole through each frame at the top and pulled them to my wiring box that way. It is a good idea to mix colour into the epoxy once you get the seat tops in place it is hard to get in there to paint so do everything you can at this point.
Re: AD 14 KIELGE
Posted: Tue May 19, 2015 2:47 am
by gonandkarl
Hallo George / Tony,
Thank you so much for the confirmation about the tinted epoxy and I will also lead the wiring thru the frames like you George has done. Your boat is all the time a reference to what I want to get mine to. ( I have printed out a few photos of your boat and keep them in my AD14 file always ready to look at.) My skil is not so that I can build myself a Wally Boat but I at least dont want to make big mistakes and get it in the foreseeable future into the water. Or as my wife says that as a libra starsign I am no good for boat building because I want everything straight and perfect. I will try my best and present new pictures soon.
Greetings from Karl ( Austria )
Re: AD 14 KIELGE
Posted: Tue May 19, 2015 8:08 am
by gonandkarl
Hi,
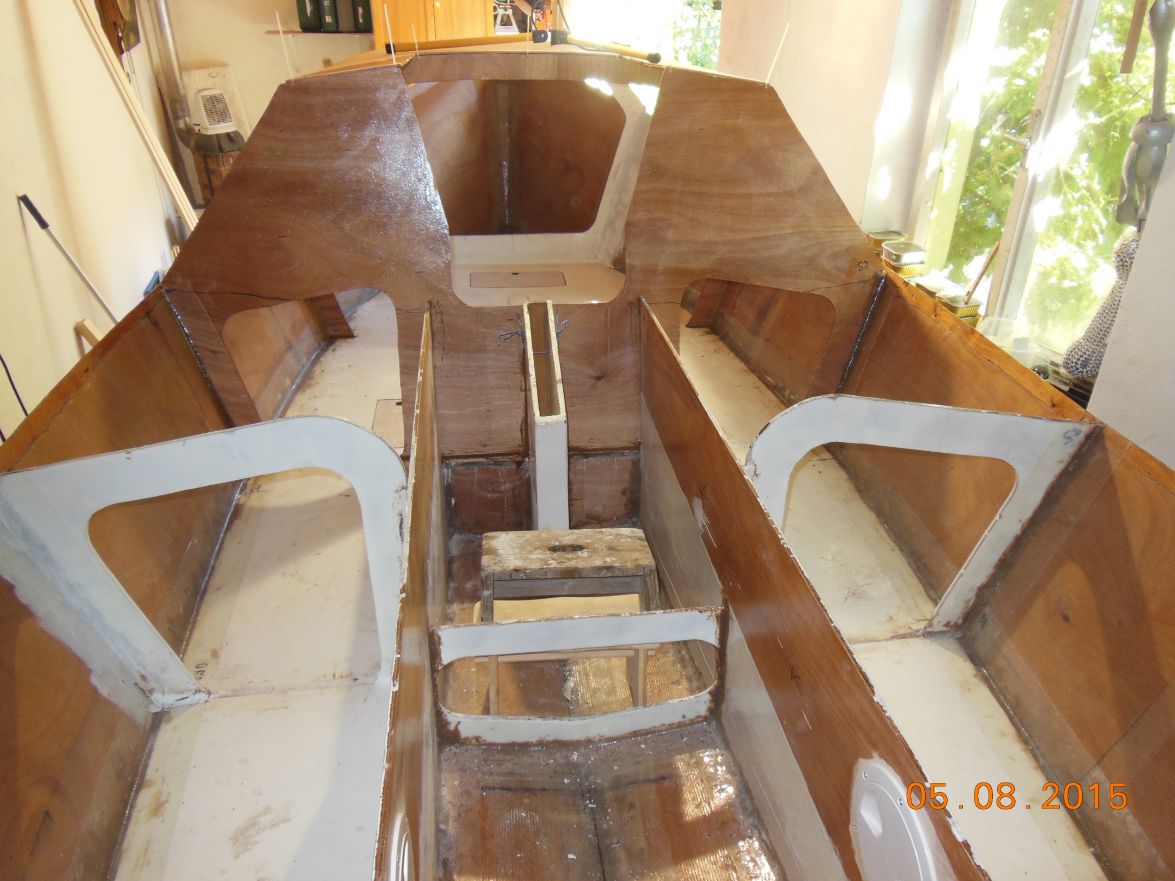
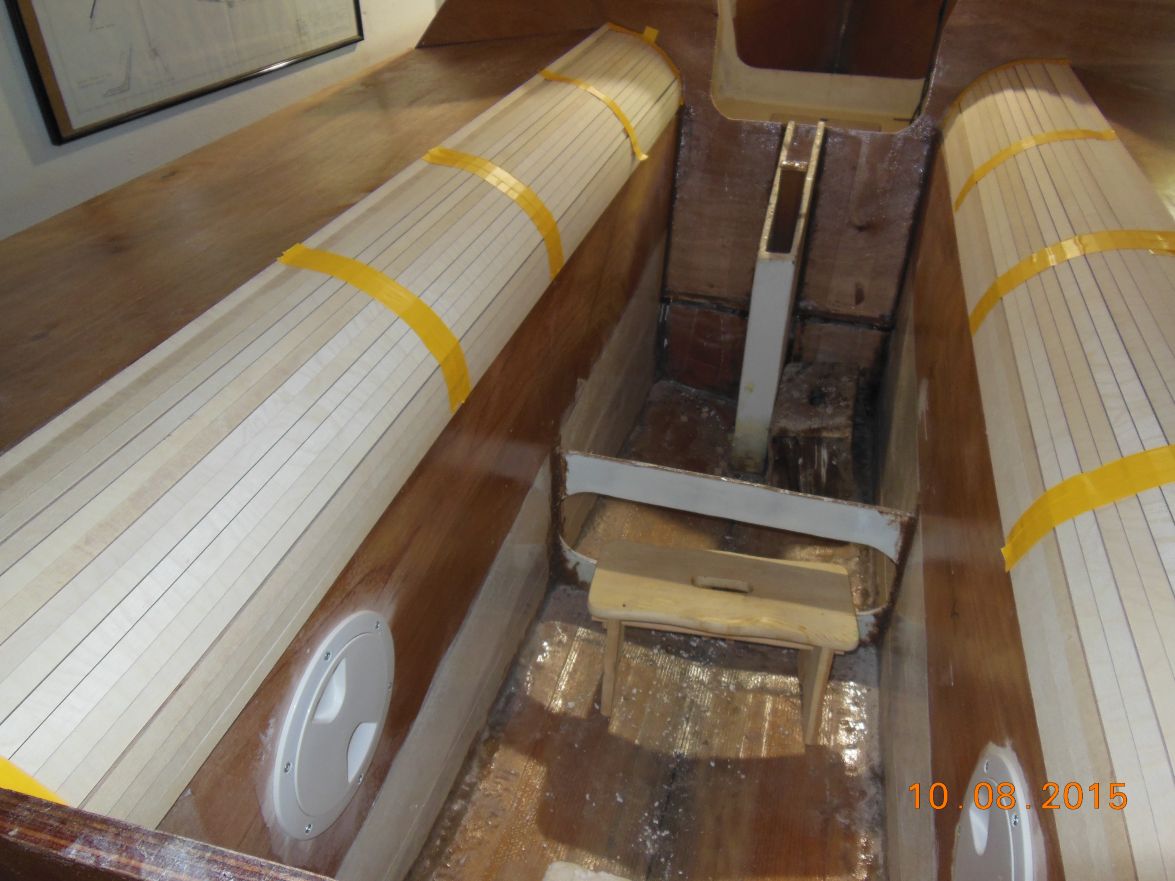
The newest pictures of my boat just before I fitted the battens along the frames for the floor boards:
Longitudinal_frames_fitted
Transom_dry_fitting
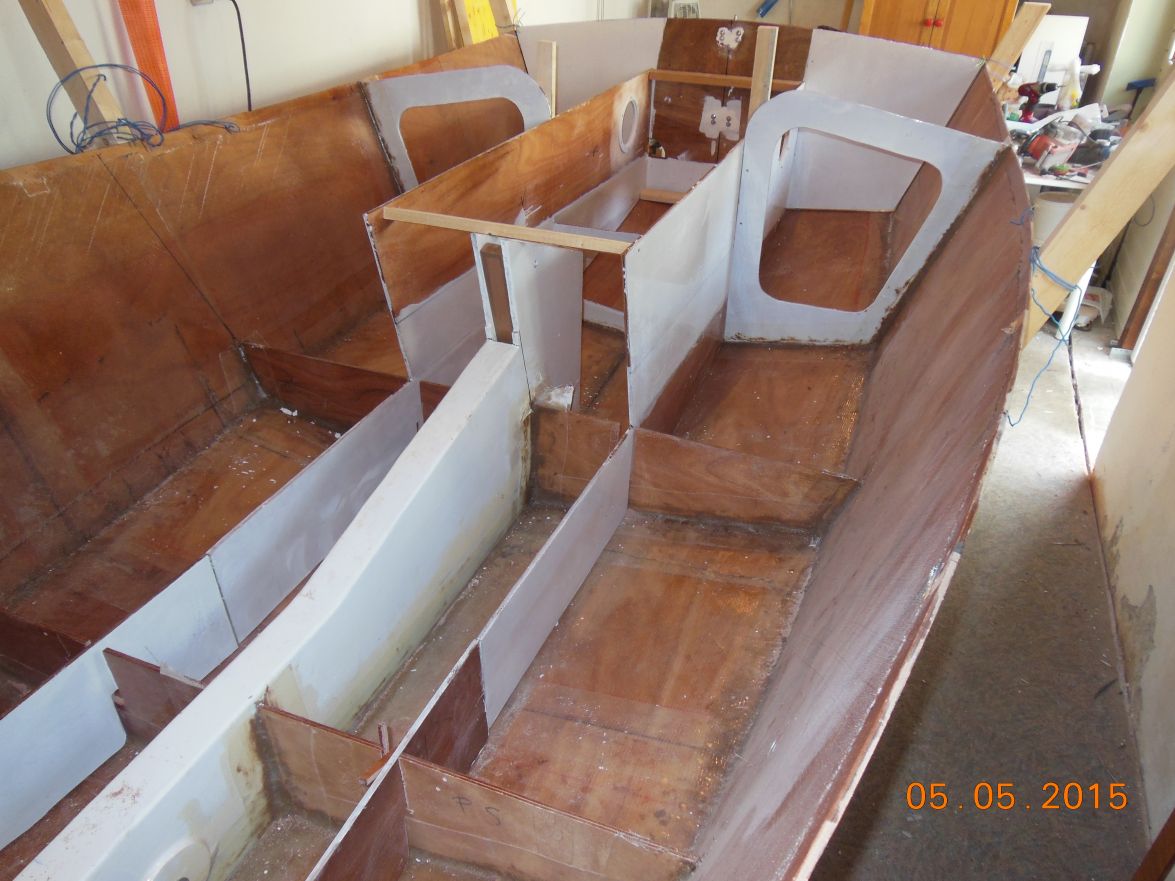
Centreboard_case_and_long_frames

View_from_bow_with_dry_fitted_transom
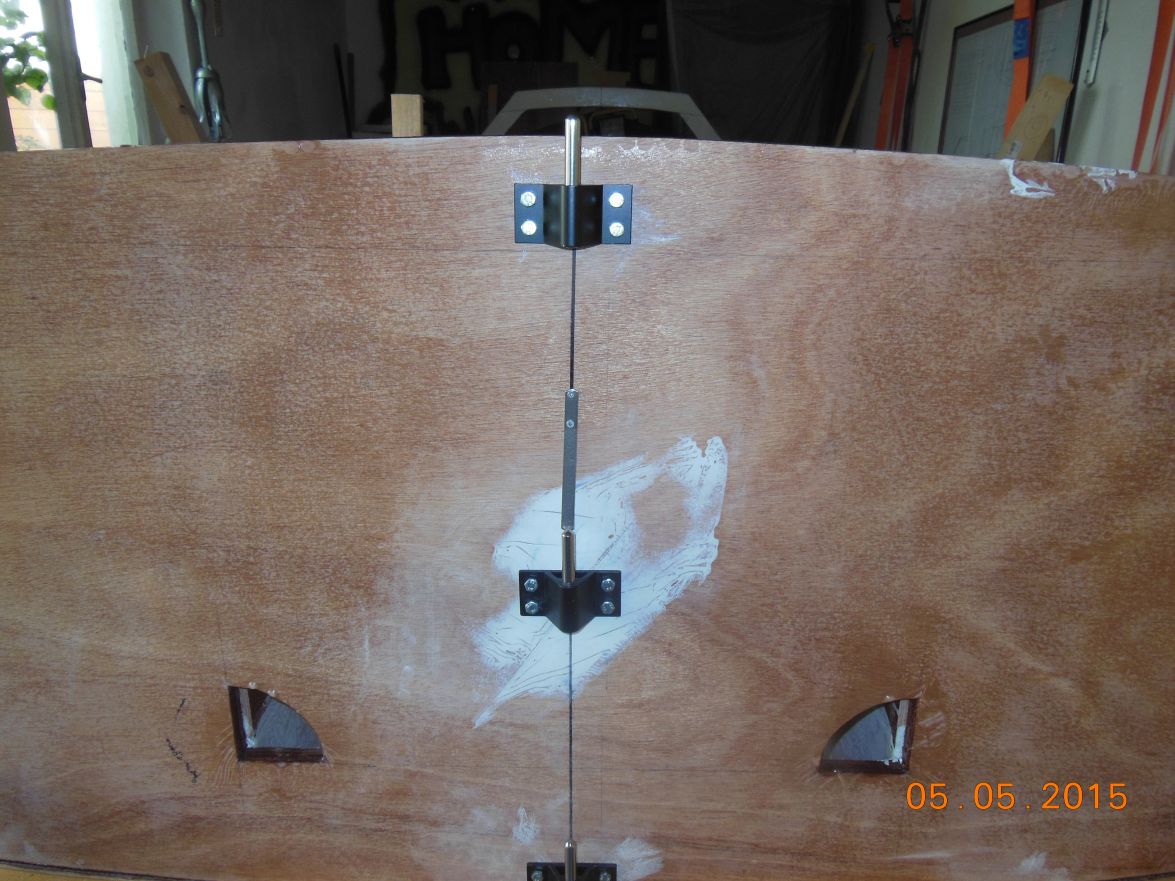
Transom_with_rudder-fittings
Greetings from Karl ( Austria )
Re: AD 14 KIELGE
Posted: Tue May 19, 2015 9:02 am
by terrulian
A lot of solid progress there, Karl.
Re: AD 14 KIELGE
Posted: Tue May 19, 2015 4:09 pm
by gonandkarl
Hi,
I had a very active day driving my wife to some shops, doing some work on the computer for the firm I was employed at before retirement and thinking all the time that Salvatore finished his boat in something like 8 months.
That made me take a quick decision that towards the evening I will try and fill the 2 front parts under the floor with foam.
I had 14 bottles of 2K foam and I was told that 2 component foam does not expend all that much. In the back of my mind was some boatbuilders question "How much foam do I need per kubik foot ?" which Jacques answered lengthy . Unfortunately I did not read it properly because it was not in the metric system which we use here in Europe.
The result of my hasty work towards the evening just to feel good that I did something on the boat you can see here
and I advise anyone not to copy that:
I started filling in foam on the starboard side and when it came out of five 1 1/4 inch holes I cut into a temporary floorboard
I knew that 8 or nine bottles was to much.
Then I thought on the portside I have only 5 bottles of foam left to put in that it would not be enough.
I was again wrong:

And here one can see the complete mess. Luckily I carried my 120 pounds of lead ballast from the cellar to the boatshed
to hold the temporary floorboards down so I hope I will be able to fix it tomorow reasonably well.
Greetings from Karl ( Austria )
Re: AD 14 KIELGE
Posted: Tue May 19, 2015 7:41 pm
by terrulian
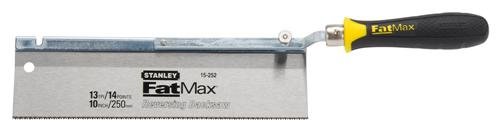
What a mess!! You can just saw that stuff off, though.
You have a flush cut saw?
Re: AD 14 KIELGE
Posted: Wed May 20, 2015 2:40 am
by gonandkarl
Yes thank god for Stanley handsaws.
Re: AD 14 KIELGE
Posted: Tue Jun 02, 2015 1:22 am
by das boot
I SEE YOU INSTALLED SOME SCESS PORTS INTO THE BIRTH AREA NEAR THE BACK THAT IS A REAL GOOD IDEA I PLAN ON DOING THAT MOD ON MY BOAT ONE OF THESE DAYS. kEEP UP THE GOOD WORK
Re: AD 14 KIELGE
Posted: Tue Jun 02, 2015 2:41 am
by gonandkarl
Hallo George,
Yes I have seen this inspection holes on some other boat and I thought it would be a good idea to have them. The two of them only cost 8 Euros each and have a screw on watertight lid. I did install them because I thought it would be much more difficult to install a chest with a lid on the seat like you have for your gas.
Right now I am still busy with the foam under the floor but I hope to finish it today and then I will post new pictures.
Greetings from Karl ( Austria )
Re: AD 14 KIELGE
Posted: Thu Jun 04, 2015 4:14 pm
by gonandkarl
Hi,
Today is a religious holiday in Austria and we got real high temperatures ( 31 celsius ). On this holiday it is custom to praise the lord from nicely decorated boats on the local lakes and the whole thing is becoming a big tourist attraction. As one should not work on a Roman Cathlic holiday ( definitely not with loud homeworkers machines like shop vacs and grinders ) I had the idea to finish the under floor foam at last which does not make any noice. It took me 38 bottles of 400 ml foam ( 200 Euros ) and the best part of the last 5 days to install the transom and finish the foam.
And here are the pictures of the nonexpert foam worker:
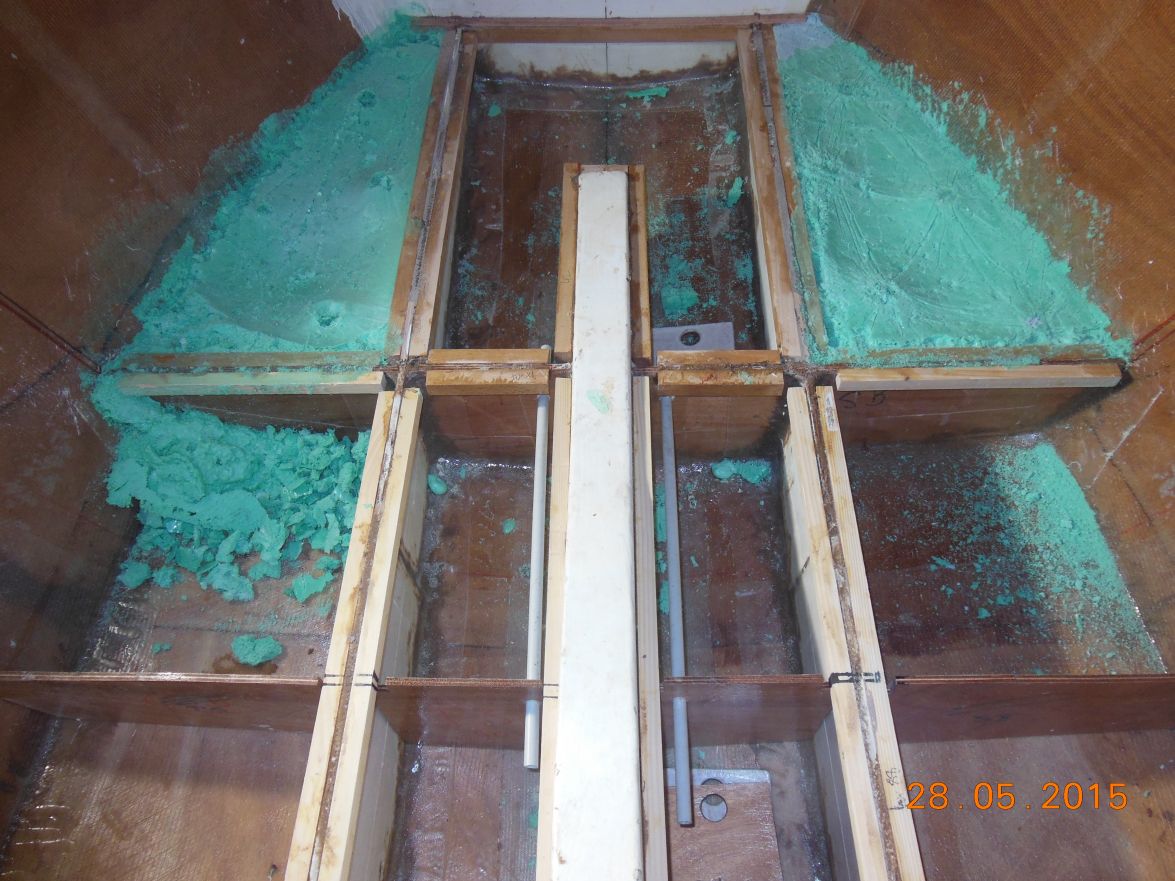
Between frame B and C I installed a 6 mm extra frame to create some storage space in front of frame C and to make a border against the foam across the mid section.
For all of You who dont know where frame C is : It is not there yet because if I go exactly according to the building notes B and C must be installed after the floor is finished. Makes sense as both this 2 top frames rest on the floor:
Greetings from Karl ( Austria )
Re: AD 14 KIELGE
Posted: Fri Jun 05, 2015 9:47 am
by Corto Maltese
Well... messy stuff this foam, but at least you can clean it and it is not as hard to do like when you spill epoxy.
I'm very glad to see my neighbour advancing with the project so fast
Wish you moderate temperatures.
Cheers,
Dario
Re: AD 14 KIELGE
Posted: Mon Jun 15, 2015 12:36 am
by das boot
It sounds like it is hot over there In Vancouver we never get that hot if it gets to 20 we scream abought it being to hot. your boat is looking real good it should not sink with all the foam in it I think I installed frame 3 before I got that far along I was never good a following the plans but it worked out well despite doing it wrong. Putting the hatches in the seat to hold the gas tank was no big deal once I had the seats built I cut out the hatch and built the box inside the hole I did not try to make the hatches water tight it was easy to seal the box with glass through the hole it is self draining through a hole in the stern once completed then I mounted the hatches in place it only took a day or so to do but it gets rid of the gas tank and no fumes can get into the boat.
Re: AD 14 KIELGE
Posted: Wed Aug 05, 2015 1:32 am
by Salvatore
Hi Karl, how are you going on you boat?
Regards Salvatore.
http://www.youtube.com/channel/UCK7N0Z3MuI9Awisupeh_7dw
Re: AD 14 KIELGE
Posted: Wed Aug 05, 2015 4:58 am
by gonandkarl
Hi Salvatore,
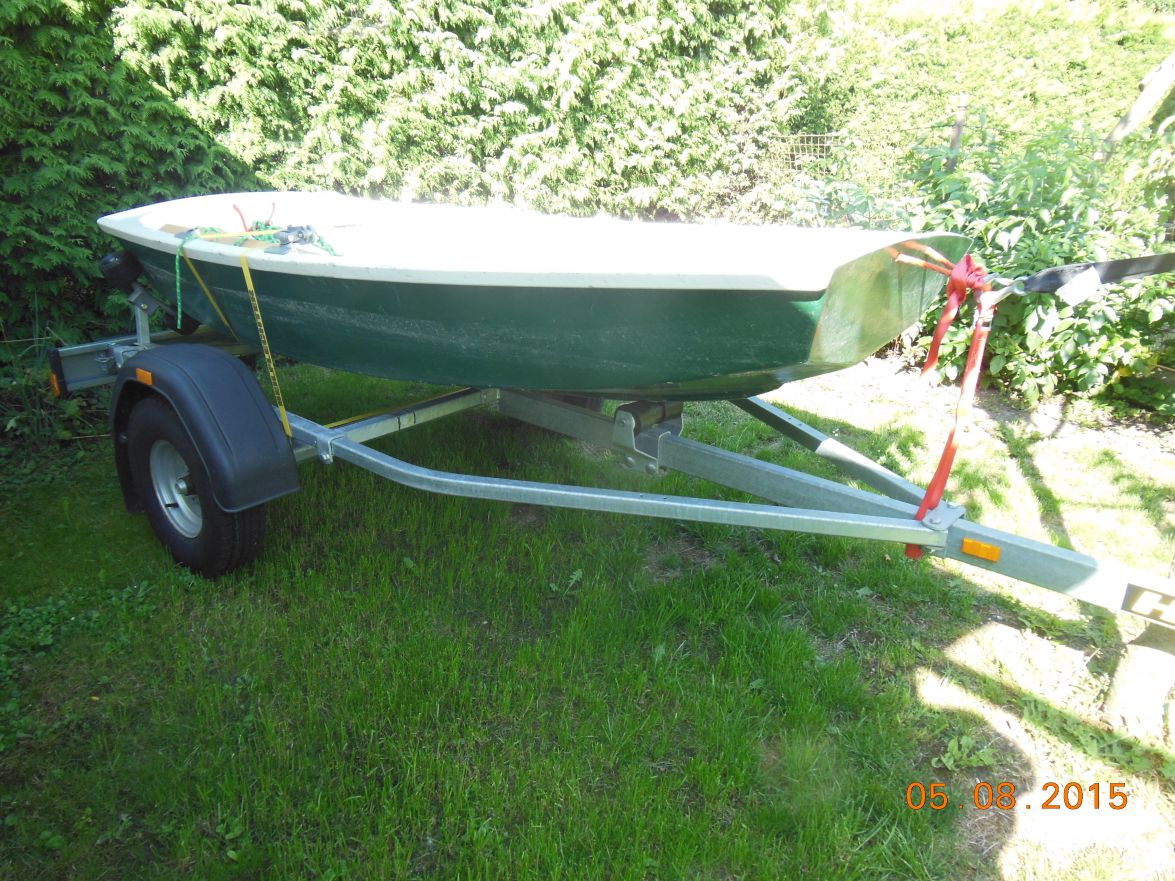
Yes I was a bit lazy lately, but between gardenwork, taxiing my wife around, teaching my grandson to drive ( needs 3000 km) before he can make the test on his 17th birthday, painting the plywood top of my garden table with boat paint and the general heat here above 30 degrees celsius I got a little bit done:
I bought myself a trailer ( shop exhibition model therefore cheaper ) for 850 euros with a net loadweight of 450 kg and a total
weight of then 600 kg. I was sick and tired to lift my ( much to heavily built ) rowing boat onto the roof carrier of the car.
It took me half and hour to get it up and down and then I was bushed enough to only row for half an hour.
And when I have finished my ADELIE it will serve as its trailer as well.
Here is a picture of it:
and here are 2 pictures of my boat:

Today my pensum is the 4 glass tapes of frame C and the longitudinal frames before I am really finished with C
Greetings from Karl ( Austria )
Re: AD 14 KIELGE
Posted: Wed Aug 12, 2015 1:55 pm
by gonandkarl
Hi,
A little bit of progress. I dry fitted the seats with the seat top being okoume and the round parts is birch plywood.
I got delivered one okoume panel short of the required number of panels.
I hope that if I encapsulate the round parts of the seats heavily with epoxy on the inside bunk and on deck before painting that I should not have a problem ever water to get in there.
Please let me know if anyone of you has a different opinion.
I wait with the birch plywood installation before I have heard of you.
Greetings from Karl ( Austria )
Re: AD 14 KIELGE
Posted: Thu Aug 13, 2015 9:55 am
by gonandkarl
Re: AD 14 KIELGE
Postby gonandkarl » Wed Aug 12, 2015 7:55 pm
Hi,
A little bit of progress. I dry fitted the seats with the seat top being okoume and the round parts is birch plywood.
I got delivered one okoume panel short of the required number of panels.
I hope that if I encapsulate the round parts of the seats heavily with epoxy on the inside bunk and on deck before painting that I should not have a problem ever water to get in there.
I wait with the birch plywood installation before I have heard some opinions of you.
Greetings from Karl ( Austria )
Re: AD 14 KIELGE
Posted: Thu Aug 13, 2015 10:11 am
by Cracker Larry
Think the birch will be fine, well sealed with epoxy and glassed. Dang, that's a lot of wood strips!
Re: AD 14 KIELGE
Posted: Thu Aug 13, 2015 12:15 pm
by gonandkarl
Hi Larry,
Thanks for the quick answer about the birch. The shop where I bought the birch plywood offered to cut it for me in exactly 1.5 cm wide strips in their machine within a few minutes.
Your boat building forsight answered what would have been my next question if I should put a light glass mat over the top.
Greetings from Karl ( Austria )
Re: AD 14 KIELGE
Posted: Thu Aug 13, 2015 1:15 pm
by Cracker Larry
I think I would put 12 oz. biax on that. It will get a lot of foot pressure with the boat heeling.
Re: AD 14 KIELGE
Posted: Fri Aug 14, 2015 9:16 am
by gonandkarl
Hi Larry,
Thanks a lot for the 12 ounce glass tip, You must have noticed that I wrote "light glass".
I will definitely use the heavy glass mat because my foot pressure is 118 kg.
Greetings from Karl ( Austria )
Re: AD 14 KIELGE
Posted: Fri Aug 21, 2015 8:31 am
by gonandkarl
Hi,
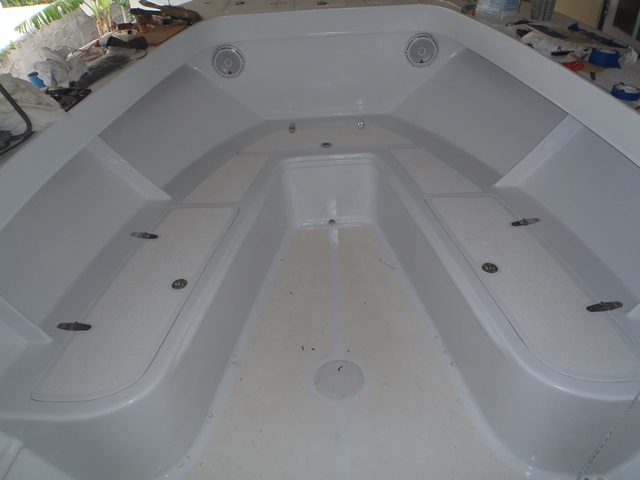
I finished painting the inside of the 2 bunks. Even that I follow the how to perfect paint discussions on the forum carefully I decided to be a bit lazy on the 2 bunks. I put white tinted epoxy on the floor boards and the longitudinal stringer which is the side of the bunk and then after just a little bit of sanding with 120 grit on my rotary sander I put 2 coats of primary boat paint and 2 coats of finish boat paint on it.
The main thing was that I followed Georges advice to paint before the seat tops are mounted because then it would only be
possible to crawl into the bunks from the cabin.So far I have not tried this because I dont want to know if my fat body can get in there head first.
Here is the result I have to live with:
Greetings from Karl ( Austria )
Re: AD 14 KIELGE
Posted: Fri Aug 21, 2015 8:45 am
by terrulian
That's nicer than the inside of lockers on most production boats. For my little rowboat, I just stopped after the tinted epoxy in the interior of the seats. I don't plan to visit there very often.
Re: AD 14 KIELGE
Posted: Sat Aug 22, 2015 12:52 pm
by Corto Maltese
Karl,
you're going on really fast. Looking good.
Cheers my neighbor,
Dario
Re: AD 14 KIELGE
Posted: Sat Aug 22, 2015 3:17 pm
by gonandkarl
Hallo Dario,
Thank you for the nice comment. I want to see again some more pictures of your boat. In the meantime I look at the beautiful picture of your signature looking out into the Adria.
You wrote that you are sanding a lot.
Is that sanding for the final touches ?
Greetings from Karl ( Austria )
Re: AD 14 KIELGE
Posted: Mon Aug 24, 2015 1:38 pm
by Corto Maltese
No, Karl not for final touches. I'm laminating inside of the hull. There are 4 layers and a lot of sanding inbetween. 4x40m2=160m2 of fg and 60-70kg of epoxy. I want to put the stringers inside and get the inboard engine this autumn. Not time for updating the forum thread, this job is waiting the November rain.
Wish you a lot of Vergnügung in your bild,
Dario
Re: AD 14 KIELGE
Posted: Sun Aug 30, 2015 3:19 pm
by gonandkarl
Hi,
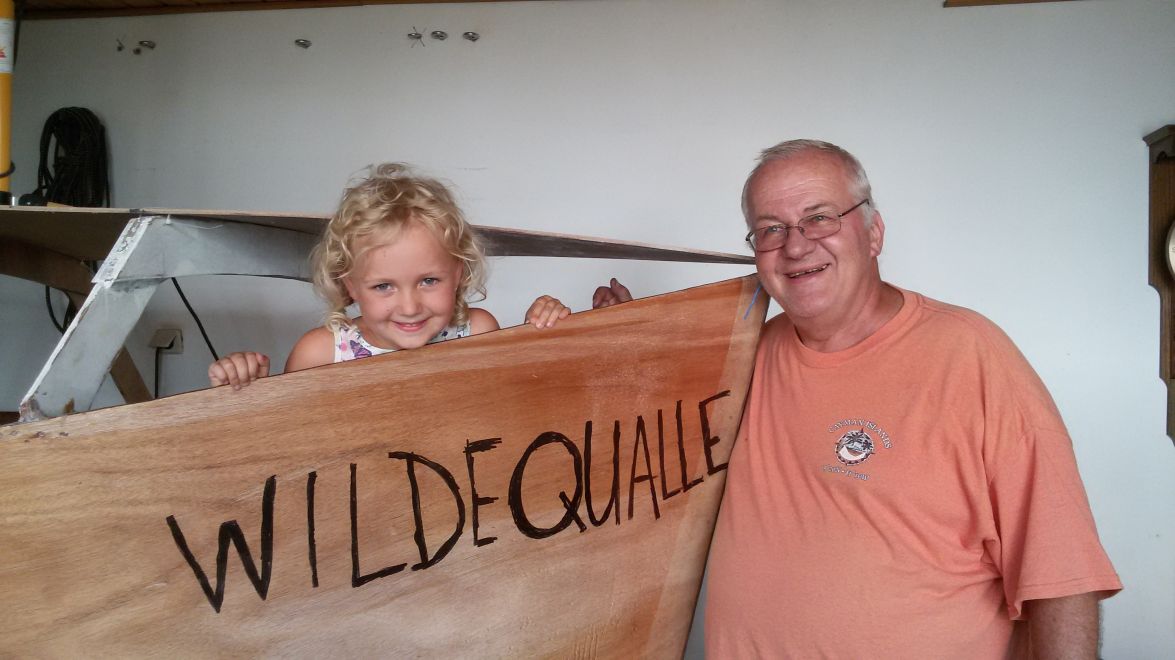
As a family man I always wanted to name my boat after my 3 childrens first names ( of each 2 letters )
KIRSTEN ELKE GERHARD and thats why I came up with KIELGE.
Nobody in the family likes this name including my 3 kids.
And while we had a nice barbeque today my granddaughter came up with a new name which it will definitely be:
Wilde Qualle ( in English: Wild jellyfish ) she got it from a picture book of pirates and their sail boats name.
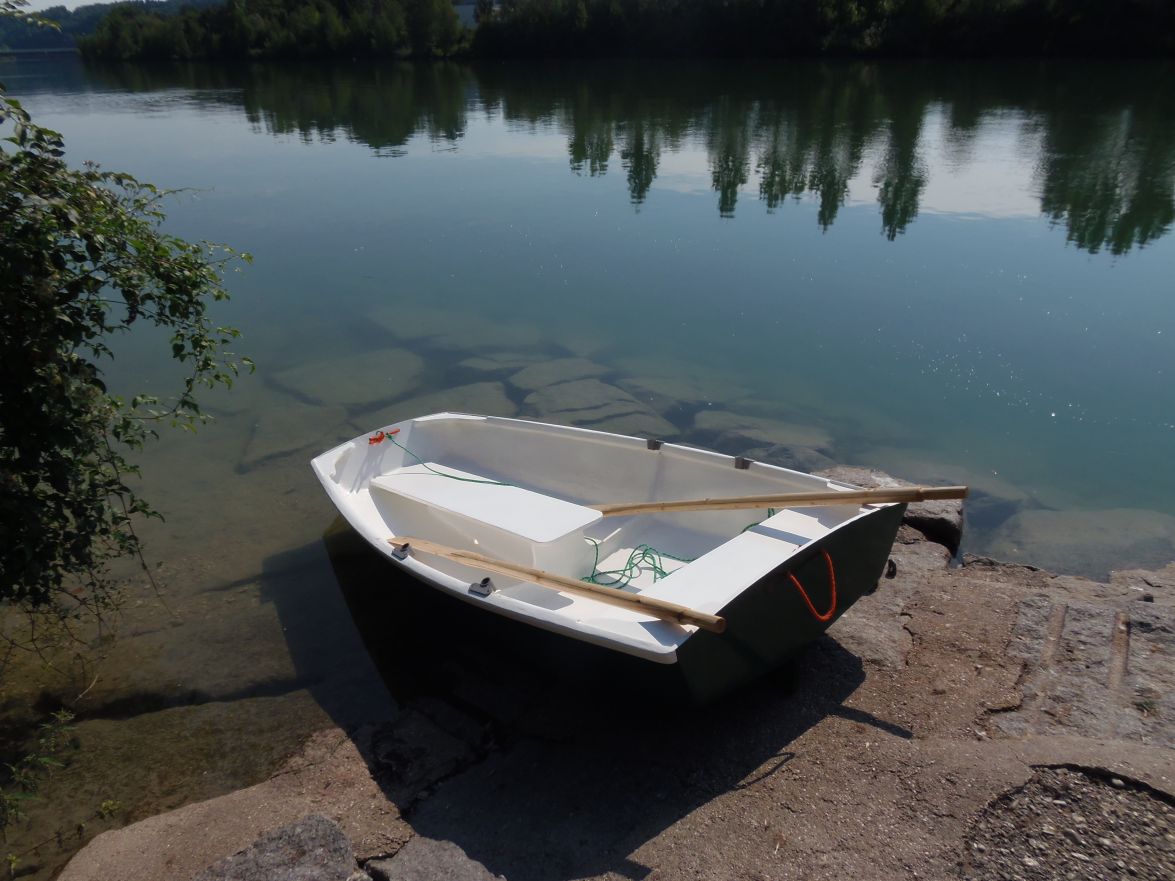
Here is a quick picture of it. I will carry on posting on the thread AD 14 KIELGE until splashing.
Wishing You all a nice Sunday whats left of it.
Greetings from Karl ( Austria )
Re: AD 14 KIELGE
Posted: Sun Aug 30, 2015 4:09 pm
by Cracker Larry
Wild jellyfish
Are there any tame jellyfish?
Jellyfish is a good name
Re: AD 14 KIELGE
Posted: Tue Sep 01, 2015 4:40 am
by Corto Maltese
Cool name.
Larry, wild jellyfish jumps like dolphin
Re: AD 14 KIELGE
Posted: Sun Sep 13, 2015 12:50 am
by das boot
You are making good headway looks good keep up the good work the hard part is completed it comes together fast from this point on. The biggest problem is sliding the keel into place I had my sun in law help me and trying to line the pin hole up I had no option but to use my fingers to do it I am aleady missing one dew to a helicopter accident and was worried abought loosing a second but if you can find a safer way to line it up do so I tried smaller pines to start with but had to resort to the fingers It worked I hope I never need to do that again.
I did not get in the water this summer at all doctors told me to stay out of the sun next year will be different I hope. What colour are you going to use?
Re: AD 14 KIELGE
Posted: Sun Sep 13, 2015 6:04 am
by gonandkarl
Hi George,
Thanks for the advise about fitting the centreboard, but I am still far of that action. I think you once mentioned to put a thin steel rope thru the centreboard case and the centreboard and then push it up from underneath ( I will do it with a trucks hydraulic cylinder lifter) and when the steel rope is completely straight then it should be lined up correctly to be able to push the ss sleeve thru. This is how I plan to do it, but if the plan wont work I have also my strong 34 years old son inlaw and my own strong son also aged 34 to help me with this heavy chore.
To your question about the color, I am pretty sure to paint the boat white with the bottom dark blue similar like Salvatore made it in Australia. But I always admire your yellow boat which for me as a color blind is the only color I can see well. Maybe I follow you and paint it also yellow. There is still time to think it over till next spring.
About the yellow color I have a question to you : Your trailer is also yellow and did you paint this color over the steel its made
of ? I bought my trailer recently and it is galvanized steel which should keep it from rusting. Is it advisable to paint it to have even more protection against rust ?
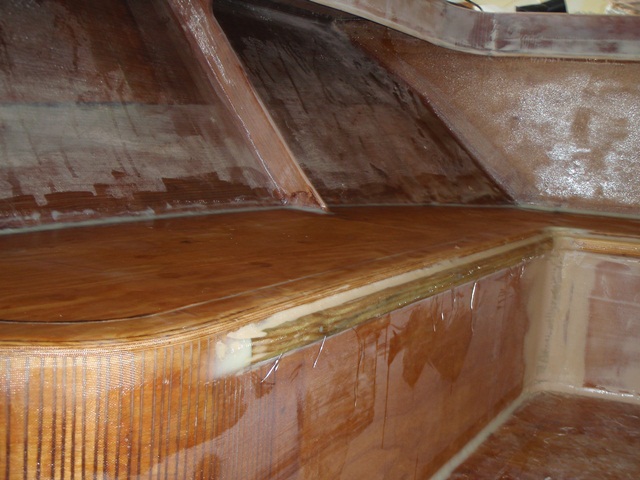
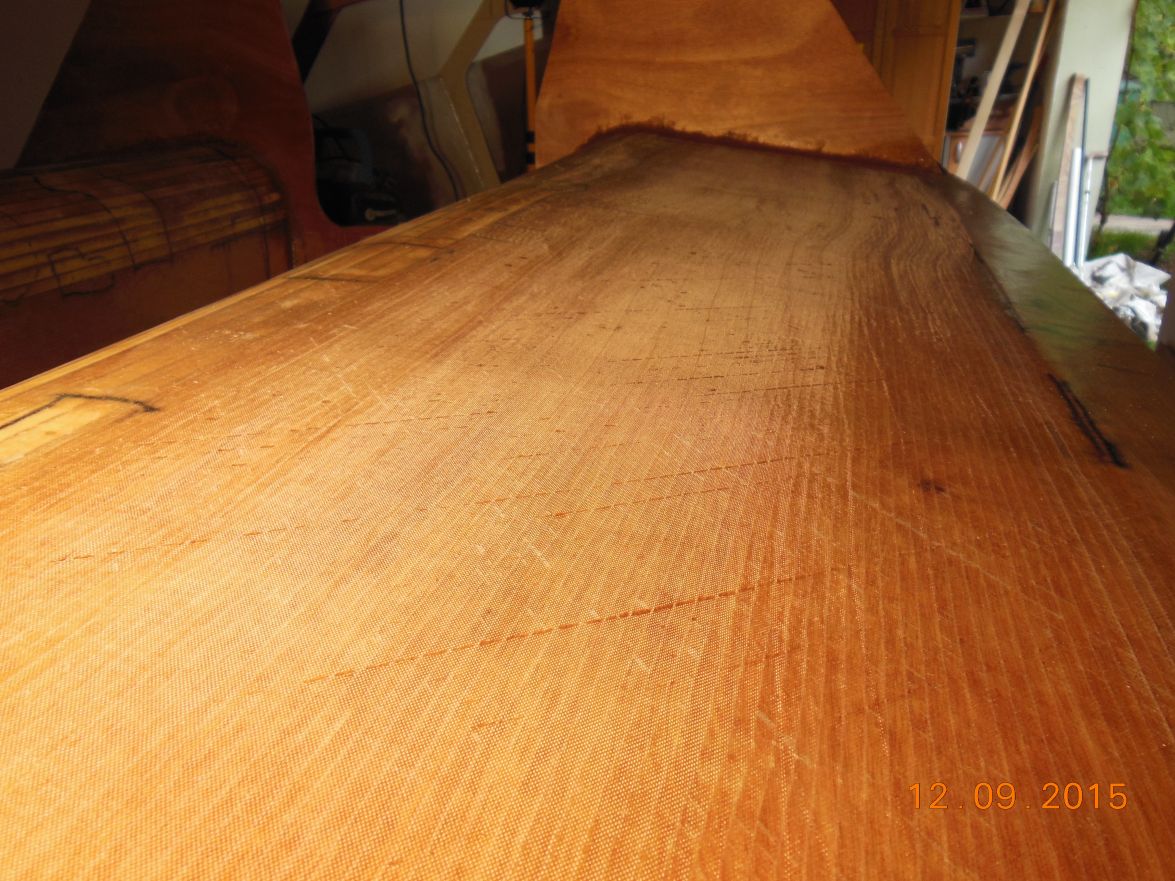
Here are my newest pictures of my progress. I am not sure if I starved the fiberglass of epoxy by putting just a little bit more of epoxy on the seat tops than the weight of the glass. As I put peel ply over it I am happy enough with the outcome and I will finish the seats with epoxy/microballoons fairing before painting.
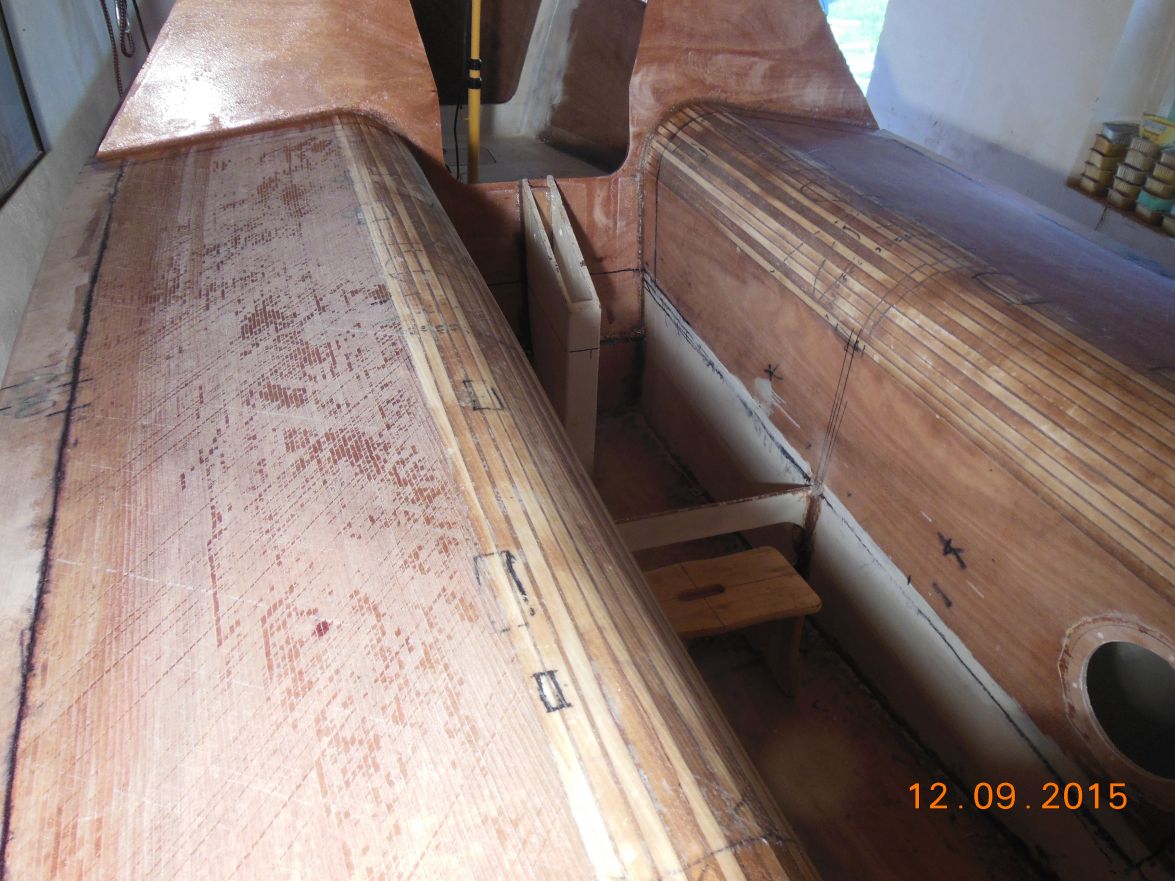
PS maybe epoxy starved ?
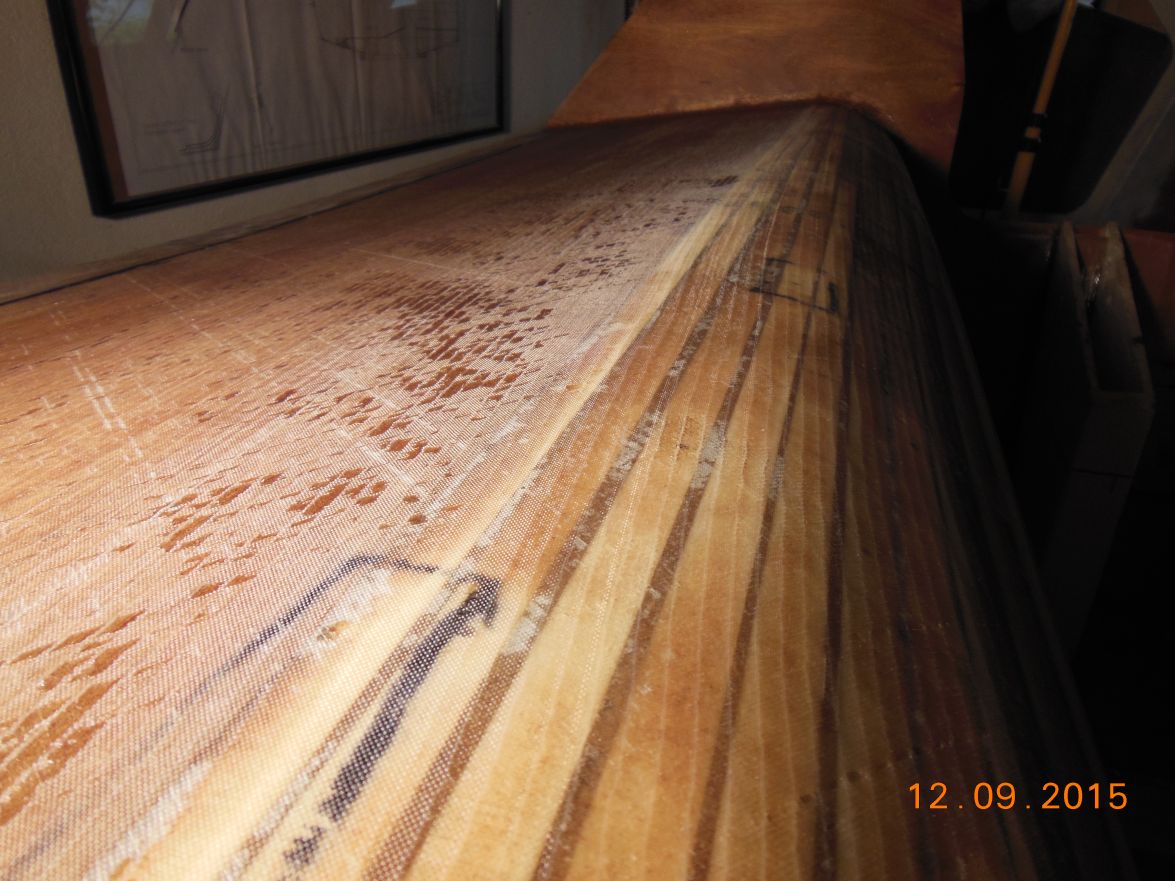
SB maybe epoxy starved ?
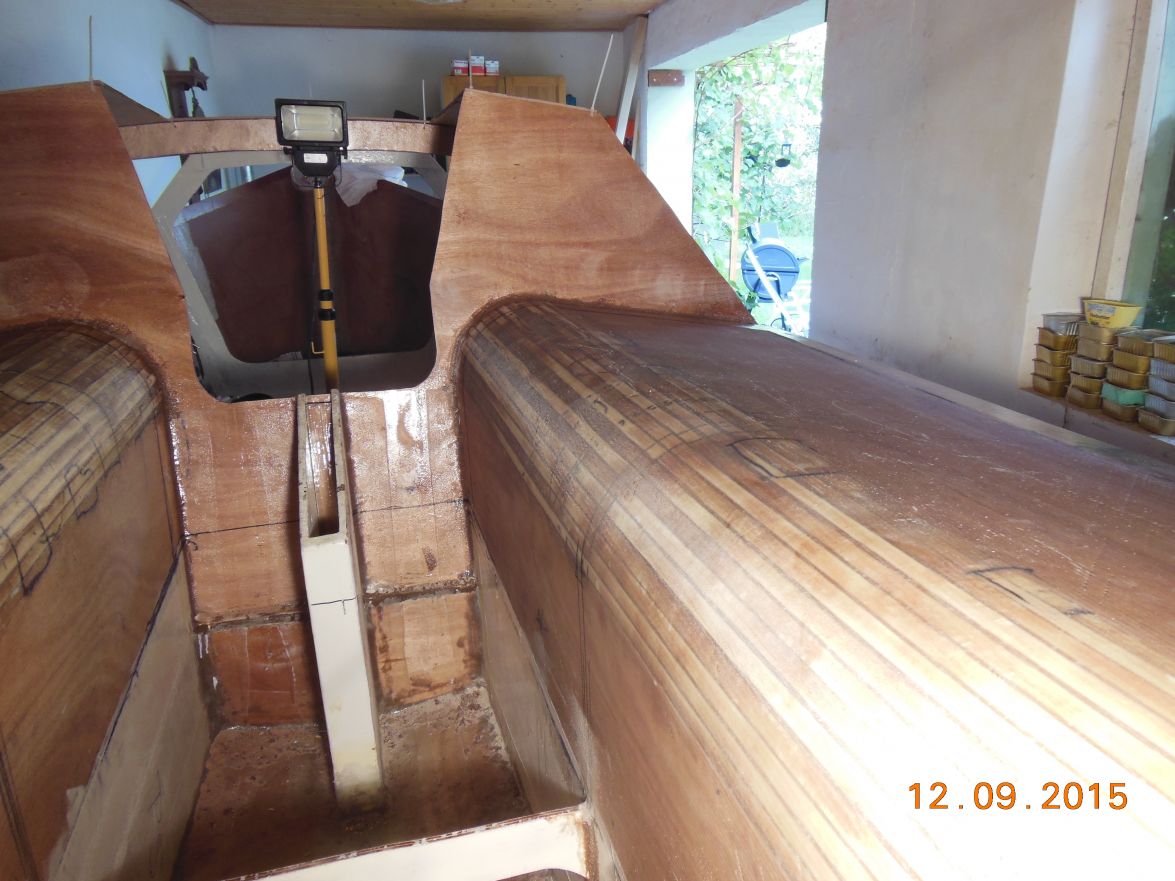
Here it looks OK I think it depends on how one takes the picture.
Greetings from Karl ( Austria )
Re: AD 14 KIELGE
Posted: Thu Sep 17, 2015 2:24 pm
by das boot
Looking real good the seats came out well a bought the same as mine nice curve it is a lot of work but it looks good when finished. As for the paint I chose Yellow it shoes up well on the water I have had many other boaters make coments that they can spot me miles away on the lake and that is important as a lot of speed boat people do not see well and I am the smallest one on the lake.
When I put my keel into place I had the boat up on its side and slid the keel in that way you just need to bee real careful so no one gets heart you will have a lot of fun with it once finished.
Re: AD 14 KIELGE
Posted: Wed Sep 23, 2015 2:38 pm
by gonandkarl
Hi,
I have fitted the side decks and taped them to the sides and now I leave the roof lying on top with weights for a weeks holiday in Croatia.
I hope the roof will bend in this week to make a nice camber before I fiberglass it to frame A , B and C. Right now I put a couple of screws into the frames to hold it nicely there. ( The srews are only temporarily. )
From this angle the roof fits quite OK but I must have made a bit of a cutting mistake when I cut the side decks because I have on each side a 2,5 cm gap ( 1 inch ) where I will have to fit some plywood in.
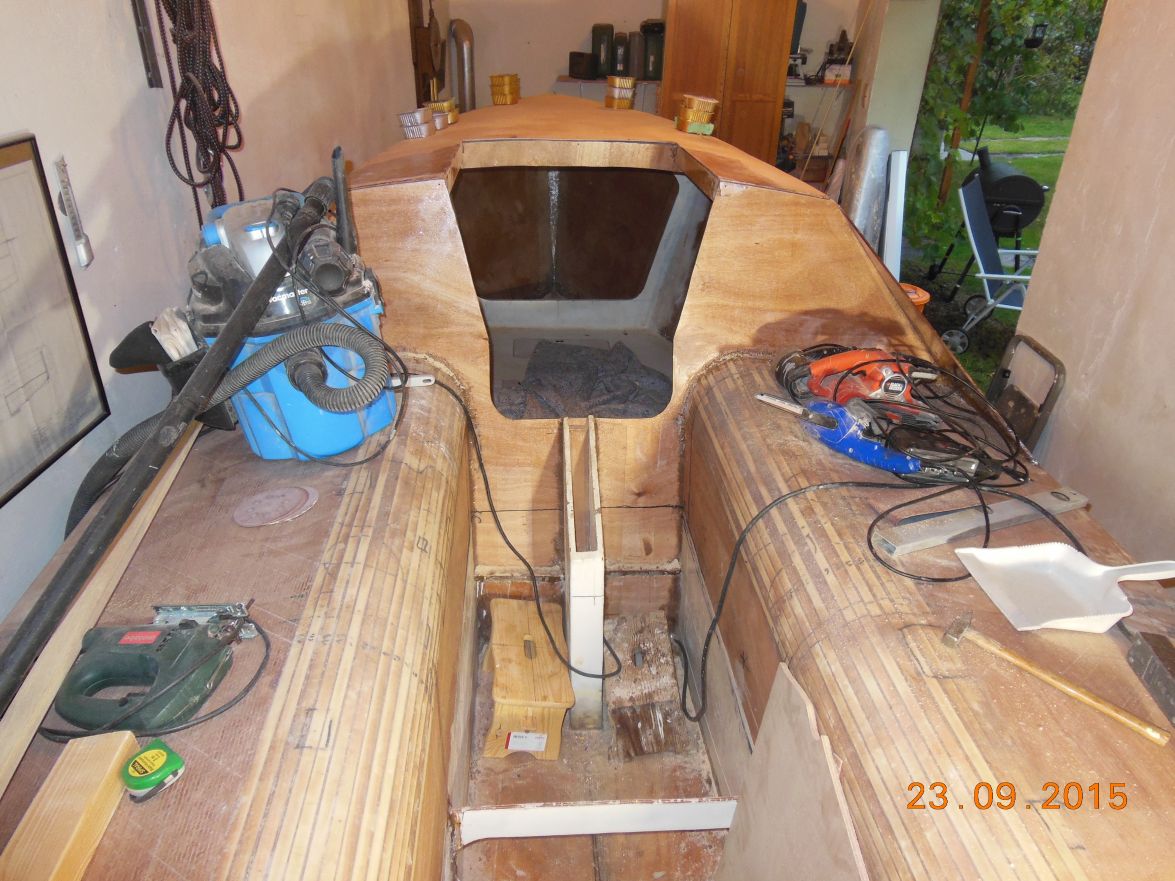
Here the gap is clearly visible.
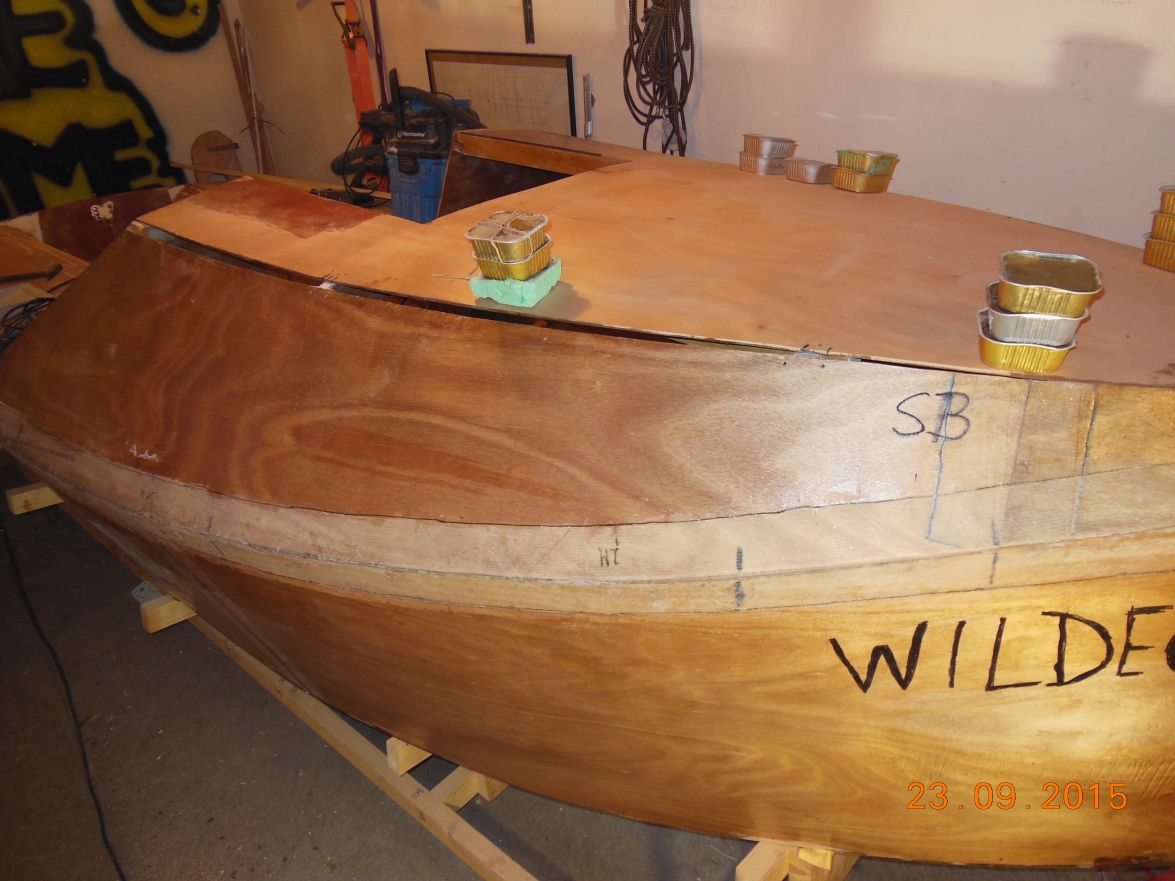
Greetings from Karl ( Austria )
Re: AD 14 KIELGE
Posted: Sat Oct 10, 2015 12:16 pm
by gonandkarl
Hi,
At last the hull is finished, I taped the roof to the side decks yesterday and today I took this 3 pictures.
I am building now for 2 years and again I hope that next year in summer it will be splashed. In my mind I have built the even smallest detail ten times over. I am confident that it will happen the same as I am confident that my 3. grandchild born 5 days ago and been operated on the heart yesterday will also make it.
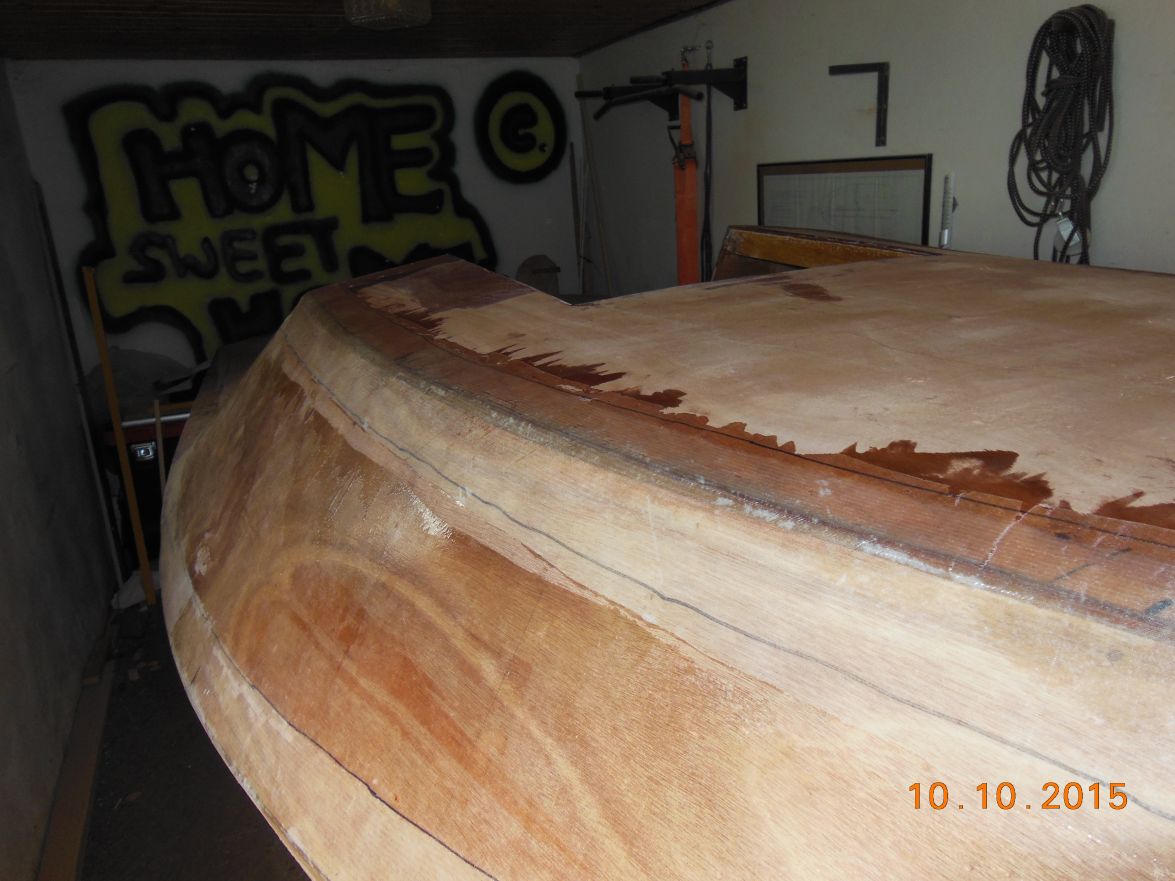
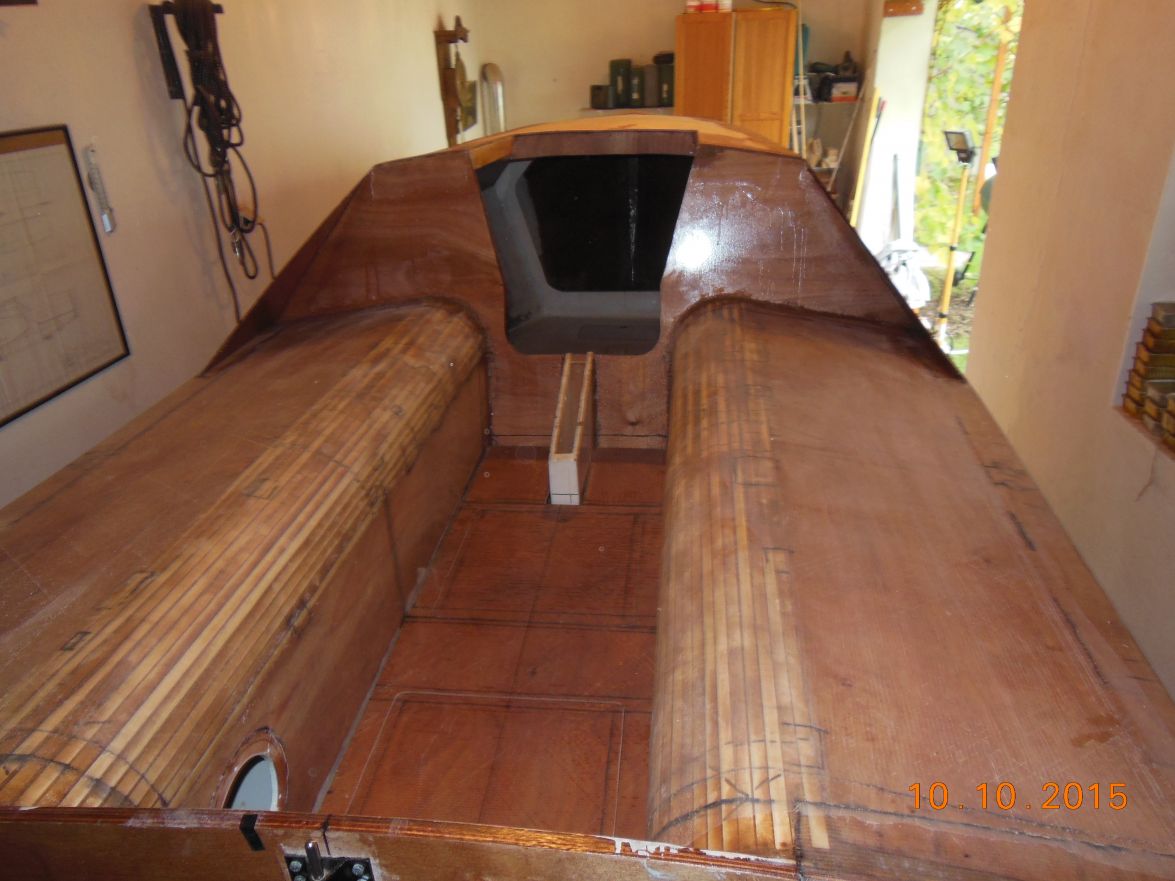
Greetings from Karl ( Austria )
Re: AD 14 KIELGE
Posted: Sun Oct 11, 2015 9:33 am
by das boot
I hope your grand child makes it through ok are thoughts are with you on this, The boat is coming fine just one thought it looks like you are going to put hatches in the floor of the cockpit I put one in mine and it is the only place water gets into my boat I might have used the wrong hatches but dirt sand etc tend to get into the sear and allow rain water to get in to the lower part of the boat so be care full on the hatches you use it is a real pain getting the water out of there.
Re: AD 14 KIELGE
Posted: Sun Oct 11, 2015 10:19 am
by Cracker Larry
The boat looks great. Prayers and best hopes for your grandchild.
In my mind I have built the even smallest detail ten times over.
I do that too. 20 times even
Re: AD 14 KIELGE
Posted: Sun Oct 11, 2015 11:05 am
by terrulian
Best thoughts to your grandchild, Karl.
Boat is coming along beautifully.
Re: AD 14 KIELGE
Posted: Mon Oct 12, 2015 2:48 am
by Salvatore
terrulian wrote:Best thoughts to your grandchild, Karl.
Boat is coming along beautifully.
I also say as above

Prey your little one will be well soon. love the work on the boat. Salvatore
Re: AD 14 KIELGE
Posted: Mon Oct 12, 2015 7:51 am
by Corto Maltese
My dear neighbor, I wish all the best to the little one and the family. They'll enjoy the ride on your beautiful boat!
Dario
Re: AD 14 KIELGE
Posted: Thu Nov 05, 2015 12:59 am
by Salvatore
G,day Karl,
How is your grandchild doing? I hope it is good news
Re: AD 14 KIELGE
Posted: Thu Nov 05, 2015 1:50 pm
by gonandkarl
Hallo Salvatore,
My new granddaughter has come out of hospital 5 days ago and she must be fed thru a pipe going to the stomach via the nose because she is still very weak and cannot suck very long. I am thinking positive even that she has lost some weight after the big heart surgery. I have seen her an hour ago and she looks fine and looked at me with big eyes when I told her that I am busy with the companionway framing on the sailing boat I am building for my 3 grandchildren. My daughter meant at last one that does not turn away when I start talking about the boat.
I will post some pictures of my progress soon.
Greetings from Karl ( Austria )
Re: AD 14 KIELGE
Posted: Thu Nov 05, 2015 2:03 pm
by pee wee
gonandkarl wrote: at last one that does not turn away when I start talking about the boat.
Greetings from Karl ( Austria )
That's funny! Great news about your granddaughter, little ones can heal so quickly.
Re: AD 14 KIELGE
Posted: Thu Nov 05, 2015 2:15 pm
by terrulian
Best wishes for her, Karl.
Re: AD 14 KIELGE
Posted: Fri Nov 06, 2015 3:25 am
by gonandkarl
Hi Hank and Tony,
Thanks for the wishes, I am sure it helps the little one when there are more than just family members who spend a thought about her whellbeing.
In the meantime I really spend all my time on the companionway. ( I did not just tell my granddaughter that )
I put a frame on the inside that the 3 drop boards can lie on the skew bulhead C. The 3 drop boards I made out of the piece of plywood which one has to cut out of frame C to make the opening for the companionway. On the outside of bulkhead C I glue also some frames with a 6 mm groove and then I glue 4 mm plywood boards onto the drop boards with a little overlap down onto the next board so that the rain cannot get into the slots between the drop boards. I would have liked to build it as nice like Salvatore but my woodworkings skills are not so good as his. I will show some pictures in the next few days when it will be finished.
I take too much time thinking and playing with the epoxy woodflour where I always wait 24 hours before I carry on.
From the cutout of the roof I also made the sliding hatch by glueing 2 cleats left and right so the hatch can slide on a low plywood frame. I will reinforce this still with glassfibre maybe 2 layers that one could step on it if necessary. Also here I will follow up with pictures.
And I hope to get the download email soon for the FS13 I ordered. I hardly ever buy clothes or any luxury things but a nice new boat plan to look at in the evening is a treat.
Greetings from Karl in cold and foggy Austria
Re: AD 14 KIELGE
Posted: Sun Nov 08, 2015 7:14 pm
by das boot
I am glad to hear you grand child is recovering they are so much fun but they grow up so quickly we are holding a 17 th birth day party for mine in a few hours. I did something like you on the entry to my cabin I did it in two pieces so two boards that drop in then when the hatch is closed it latches to the top drop in board and the bottom board locks to the bace of the frame this keeps it all secure I can send you some pictures if you like
Re: AD 14 KIELGE
Posted: Mon Nov 09, 2015 6:27 am
by gonandkarl
Hallo George,
Best wishes to your grandsons 17th, my grandson Jan celebrated his 16th on October 11 th and is way taller than I am,
( Easy I am only 1.78 m) while my 2 granddaughters Lea and the new one Isa share the same birthday October 5th.
Yes George I would like to see pictures of your companionway hatch and the drop boards and please send them to my email adress. I think looking at all the pictures in the forum help me the most getting things more or less right. Even that I built a little rowing boat beforehand I still come across some problems building an AD14, like how much goo do I make for a certain area to be glued together. But I am getting better in guessing and the consistency I get mostly the way I want it. I am proud not to have to throw away any of it, but sometimes I have to make a small batch of goo when it was not enough.
The next thing I will do is to glue the mast step in front of frame A.
Greetings from Karl ( Austria )
Re: AD 14 KIELGE
Posted: Mon Nov 09, 2015 8:49 am
by terrulian
How come we don't get to see the pictures?
Re: AD 14 KIELGE
Posted: Mon Nov 09, 2015 11:19 am
by gonandkarl
Hi Tony,
My camera is really fast, but I am a painstakingly slow builder. The three drop boards I glued on 3 consecutive days because I ran after each finished board from my cellar workshop to the boatshed to see if it fits. I also sit to much at my PC reading in the Bateau forum and checking my emails for the ordered FS13 plans. The idea is to finish my AD14 and FS13 at the same time for a common splashing and have someone take pictures from the single seater.
Tommorow will be the day of my companionway and sliding hatch pictures and then I will proudly present them here.
Greetings from Karl ( Austria )
Re: AD 14 KIELGE
Posted: Tue Nov 10, 2015 10:31 am
by gonandkarl
Hi,
Today I finally fitted the drop boards and the sliding hatch.
I made both according to the AD15 plans with a little slot on each side of the drop boards where rainwater can flow into the cockpit.
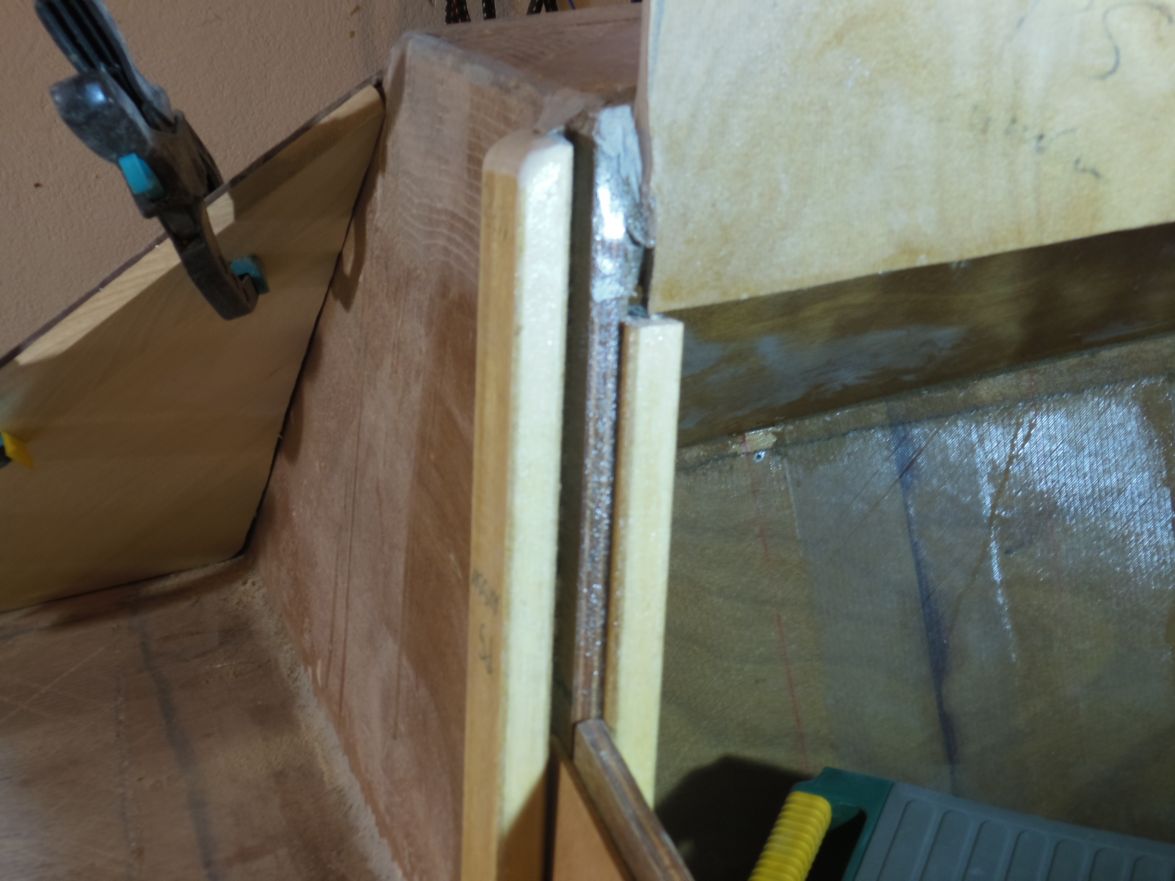
I have to use 2 footstools to get into the boat as long I have not mounted the sole, because it is a big step to get into the cabin.
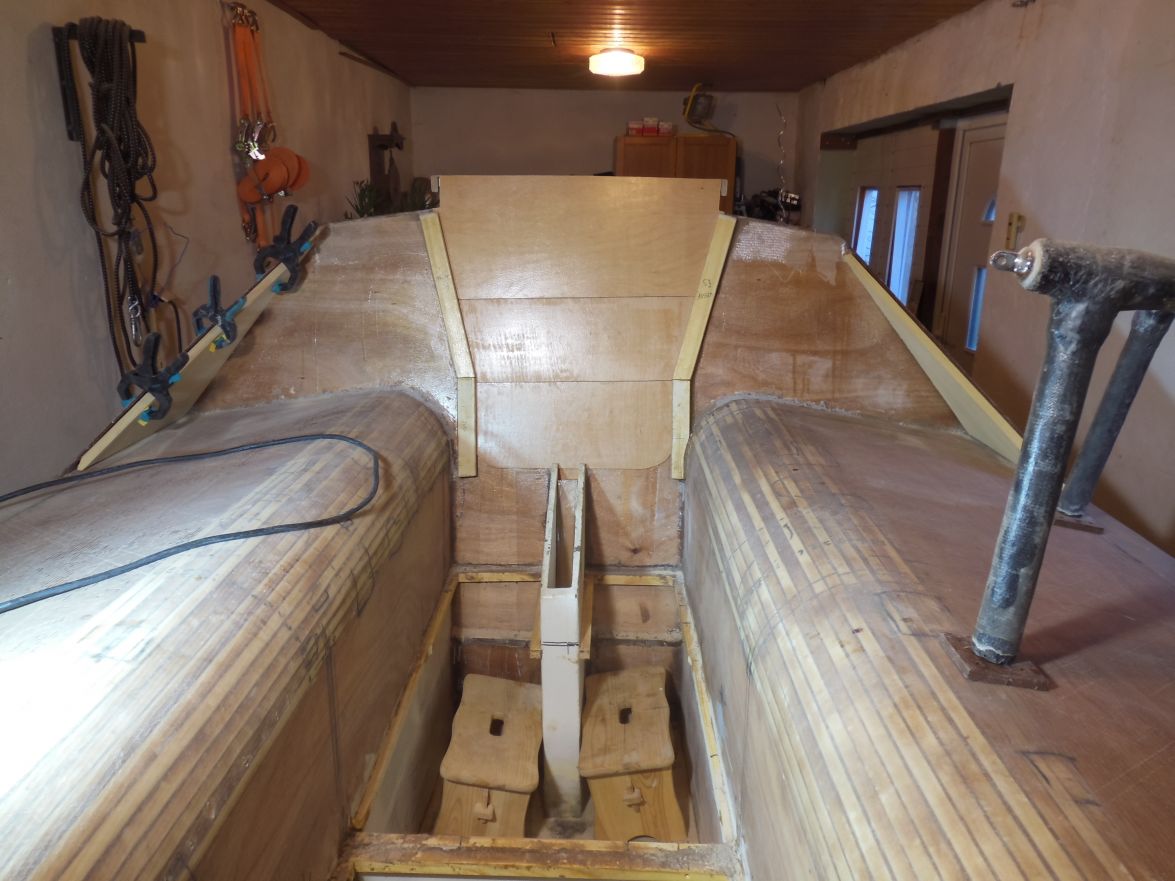
Unfortunately I cut the door and the drop boards a bit skew and therefore also the framing around it is 10 mm too far right
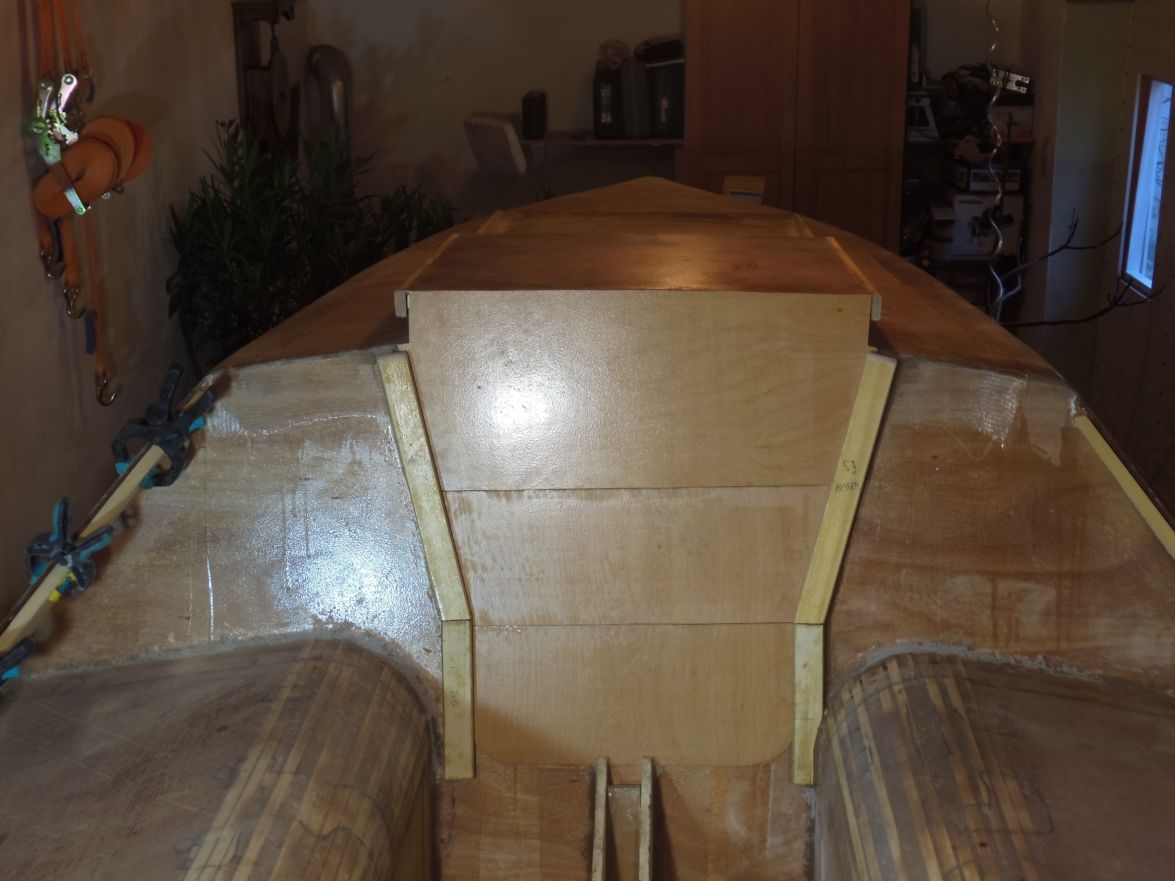
But it should sail and not win a beauty competition. If I look at the companionway from the starboard distance the mistake is hardly noticable.
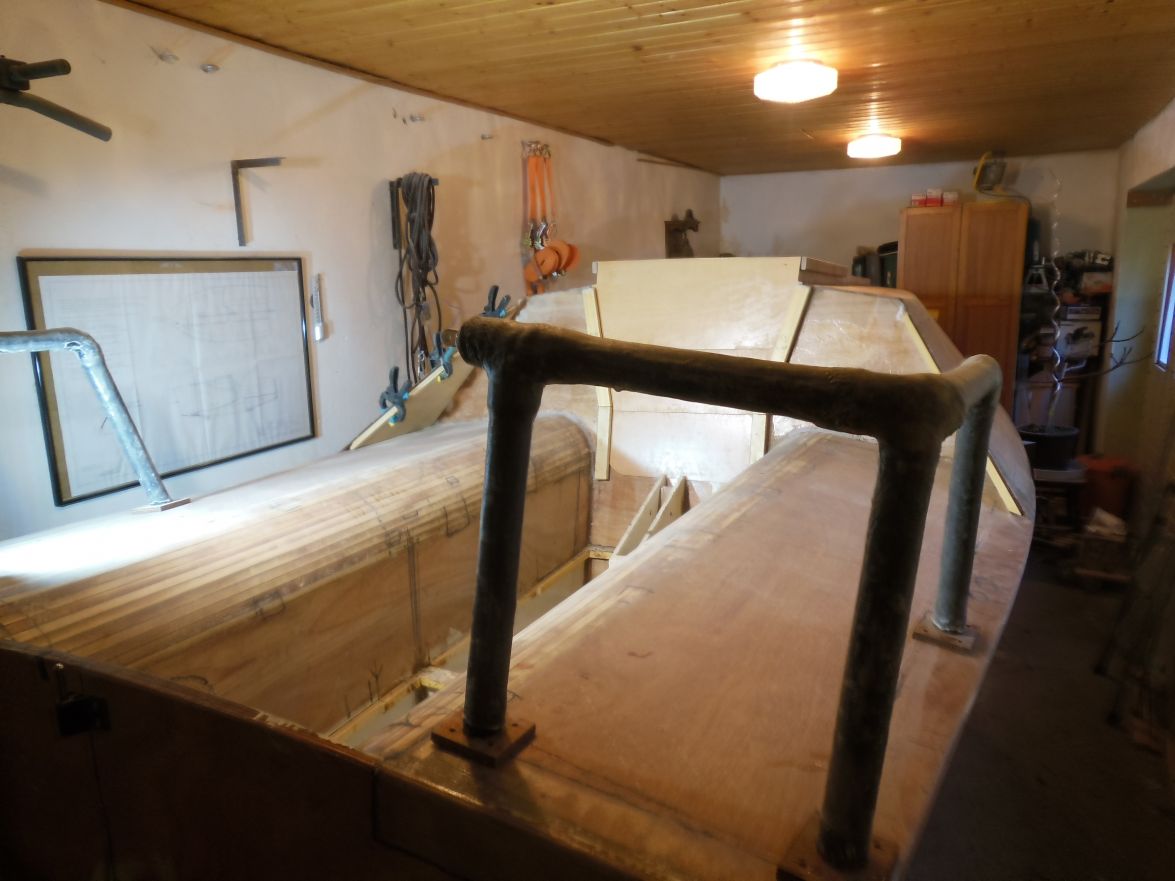
Greetings from Karl ( Austria )
Re: AD 14 KIELGE
Posted: Tue Nov 10, 2015 10:35 am
by jacquesmm
It's a not mistake. It is cut with angle to let water drain sideways instead of sitting on the batten that will cover the seam.
Re: AD 14 KIELGE
Posted: Tue Nov 10, 2015 3:39 pm
by gonandkarl
Hi Jacques,
Thank You for this advice, I feel much better now not having made a big mistake but rather achieved something positiv for a big down pour. Not that I will go sailing when the weather forecast is bad, but anybody noticing the skew drop boards will hear then from me your expert explanation. I really thought I measured horribly wrong when I mounted the frames around the companionway and it upset me even more when I saw it again on the pictures I took today of the boat. So much that I quit working on the boat for the rest of the day and rather studied the FS13 plan.
Now I am looking forward again for tommorrows fiberglassing of the sliding hatch.
Greetings from Karl ( Austria )
Re: AD 14 KIELGE
Posted: Sat Nov 14, 2015 3:40 am
by das boot
Hi Karl do not let the off set on the hatch get to you just mount your compass sounder screen and any thing else you want on that left hand side and it will look like you did it on purpous to fit all of these things. The second approach is the one I use if they do not like it go away it will work just fine. I brought my hatch back far enough so that seals over top of the entrance hatch boards it helps keep the cabin dry I left abought a 1 inch overhang
Re: AD 14 KIELGE
Posted: Sat Nov 14, 2015 1:16 pm
by Salvatore
Hi Karl,
You can try the following, its an old builders trick, we all make mistakes it is how we deal with them that matters. remove the front strips and get some wider timber then place the piece on the left just a little further to the left and the right piece just a little to the left so that it looks OK to the eye and it all works well and does not look funny test to position with clamps while you do it forget your ruler and just use your eyes you won't regret it . In the construction world we have to do this sort of thing every now and then, Image below. Regard Salvatore
 http://www.youtube.com/channel/UCK7N0Z3MuI9Awisupeh_7dw
Re: AD 14 KIELGE
Posted: Sat Nov 14, 2015 4:02 pm
by terrulian
Genius, Salvatore.
Re: AD 14 KIELGE
Posted: Sat Nov 14, 2015 4:37 pm
by Cracker Larry
forget your ruler and just use your eyes you won't regret it
Wise words of boat building there. I build by eye more than measuring devices.
Re: AD 14 KIELGE
Posted: Sat Nov 14, 2015 5:35 pm
by gonandkarl
Hi,
Thank you for the good advise George to mount things on the left side, I will do that because it is much less work than Salvatores idea with the 2 boards. I must say though it is really geniuous like Tony also commented. I know now how Salvatore built his boat in a record time because any problem I have to think over for hours he solves in minutes and also takes only minutes to implement it on the boat. How did you do the drawing on my photo ? I could also do that but again only very slow like print the photo draw the lines and scan it again into the computer a lengthy job. I am sure you did that also with a much better and quicker tool like paint.net or something even newer.
I am busy making also an overhang at the hatch roof over the top drop board, but as much as I try I will always be bloody slow.
Even that little thing is taking me the second day. Yesterday I fitted a small piece of plywood which rests exactly on the top drop board and todays work was to fit one in front to and then I glued the 2 sole hatches together. I want to fit the 2 hatches with flush latches to lock and I mount them in the sole while I still got it in my workshop. I could not imagine doing that in 56 cm width and kneeling down to a sole glued to the boat. I take much to long preparing everything before I start with the epoxy. As usual I did not know how much glue I will need to stick the 2 sole hatches lids ( 40 x 44 cm onto a 52 x 52 cm lid ) together so I weighed in 6 cups epoxy and hardener only to find out that the 3rd batch was over. Then I put yellow masking tape all around them to make sure I dont get epoxy where I dont want it. Next was my primitive solution to align the 40 x 44 cm Boards in the correct position on the 52 x 52 cm boards. I clamped them together and drilled 4 little holes thru both boards and stuck 4 nails from underneath up so that after I spread the epoxy gue I could drop the not square board down to its right position.
And all that took me half of the morning and 3 hours in the afternoon but I enjoyed every minute knowing that I will
finish the baot even at such slow speed.
Greetings from Karl ( Austria )
Re: AD 14 KIELGE
Posted: Sun Nov 15, 2015 12:09 am
by das boot
Keep up the good work you will get it completed you are now at the point it starts to go quickly just try and keep it simple it took me a year working 3-4 hours each night and weekends to get my hull completed then 3-4 mounts to finish and paint it. The biggest pain was when using power and epoxy to fair it all I used a belt sander a lot and I would come into the house covered with white dust. My good wife kind of put up with it. When I was building model aircraft a number of years ago I built up a 1/3 scale piper cub it is 8 feet long with a 12 foot wing span. I built that on the kitchen table it took me over a year to build. So for a year we ate on tv tables as the kitchen table was tied up with the plain. Our wives are the ones that put up with it somehow. In 37 years together she has put up with this kind of thing in 1974 she was flying with me in my Bell 206 jet ranger helicopter at night in the mountains of the Yukon Territory in northern Canada when the jet engine decided to quit we then proceeded to crash into 150 foot high trees. We booth survived but my back was broken in two places she put up with me in the house foe 6 mounts while I recovered from the operations on my back. So when I was building the boat at lest I was out of the house. The wives are the ones that should have their pictures taken with the finished boats.
Re: AD 14 KIELGE
Posted: Sun Nov 15, 2015 3:31 am
by gonandkarl
Hi George,
I have 2 rooms in my cellar to to use as workshop in Winter ( 20 degree Celsius ) and in the gardenshed is the boat, where I have now besides an old coal stove a new gasheater which I can run for 2-3 days to let epoxy cure at an even temperature of 18 degrees. It is funny that you say you used the kitchen table. Our kitchen is rather small therefore we have a big table in the diningroom which I had to aquire also for some time to sew the sail and now and then to lay out the plan and spread all sorts of drawings. As my dear wife sort of ignores boat building and cant understand that one can discuss a hatch opening at length she gently reminds me to clear the diningroom table when I acquire it for too long and she doesnt like eating on the lap in the lounge any longer and. I think she is very understanding about my boat building activities, but is not the least interested in sailing with the finished boat. I overheard her speaking to a friend that she is not looking forward to bob up and down on lake Attersee for the rest of her life. It will just be me together with grandchildren or the dog who is actually very shy of water.
But boat builders always think of new ways to expand their workshop floor area. As I want to build the FS13 parallel over Winter to have a common launch with AD14 next summer I am planning to use the huge space in the loft underneath our roof ( 6 x 5 m ) to splice the plywood pannels and then cut the 4 metre long parts, before I assemble the FS13 in spring in our single garage.
Greetings from Karl ( Austria )
Re: AD 14 KIELGE
Posted: Thu Dec 10, 2015 6:56 am
by gonandkarl
Hi,
Today I was a bit shocked, because when I stepped into the boat at the transom I fell boat and all a foot down towards the transom.
I decided to finish the transom completly with glassing fairing and painting so that I can mount the pintles for the rudder before glueing the sole into the boat. The bottom pintle is between the sole and the keel and can be reached only thru the hatch in the sole. I wanted to save myself of crawling down there with a mounted sole. Thats why I removed the support at the transom to be able to fair and paint it and the result is now unfortunately this following picture. When I fix the hole mess I will fix the supports in a hrizontal direction as well.
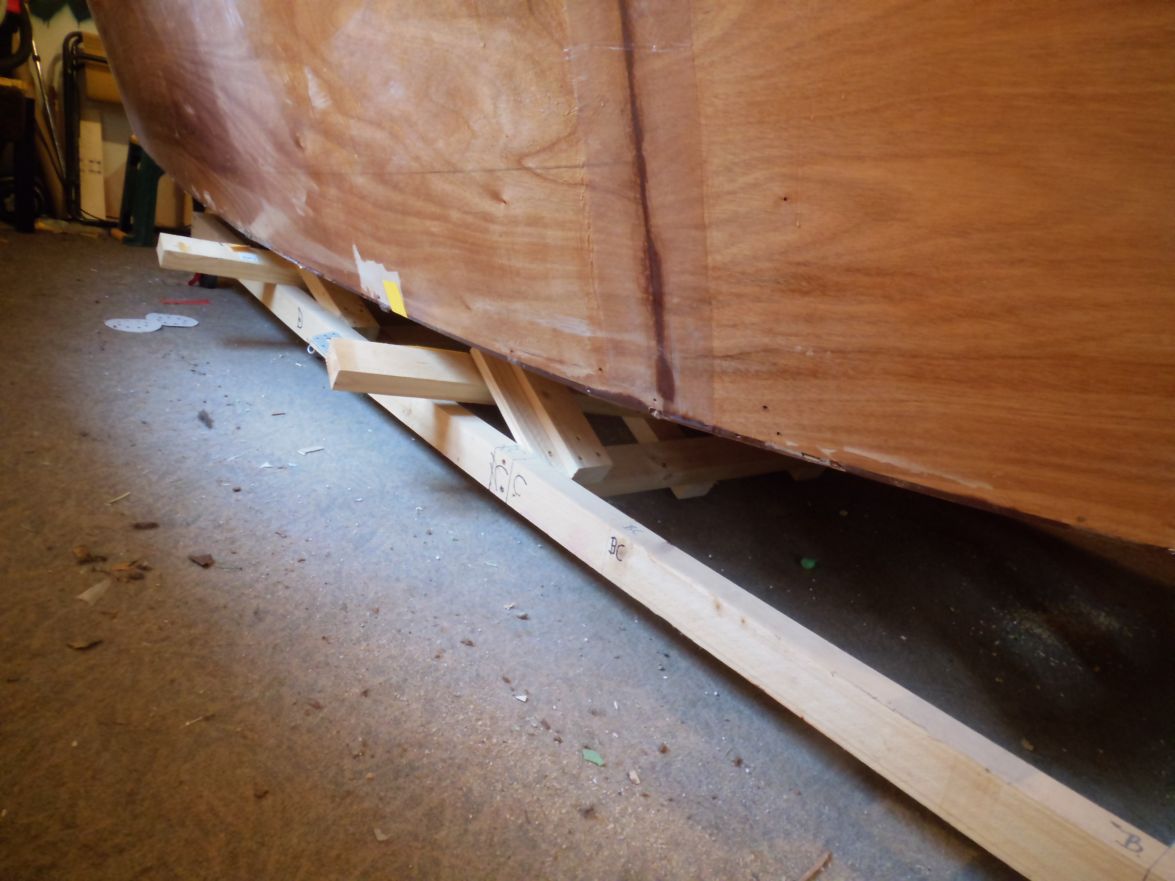
But I have a bit of progress to report on my hatches, which I have finished by now:
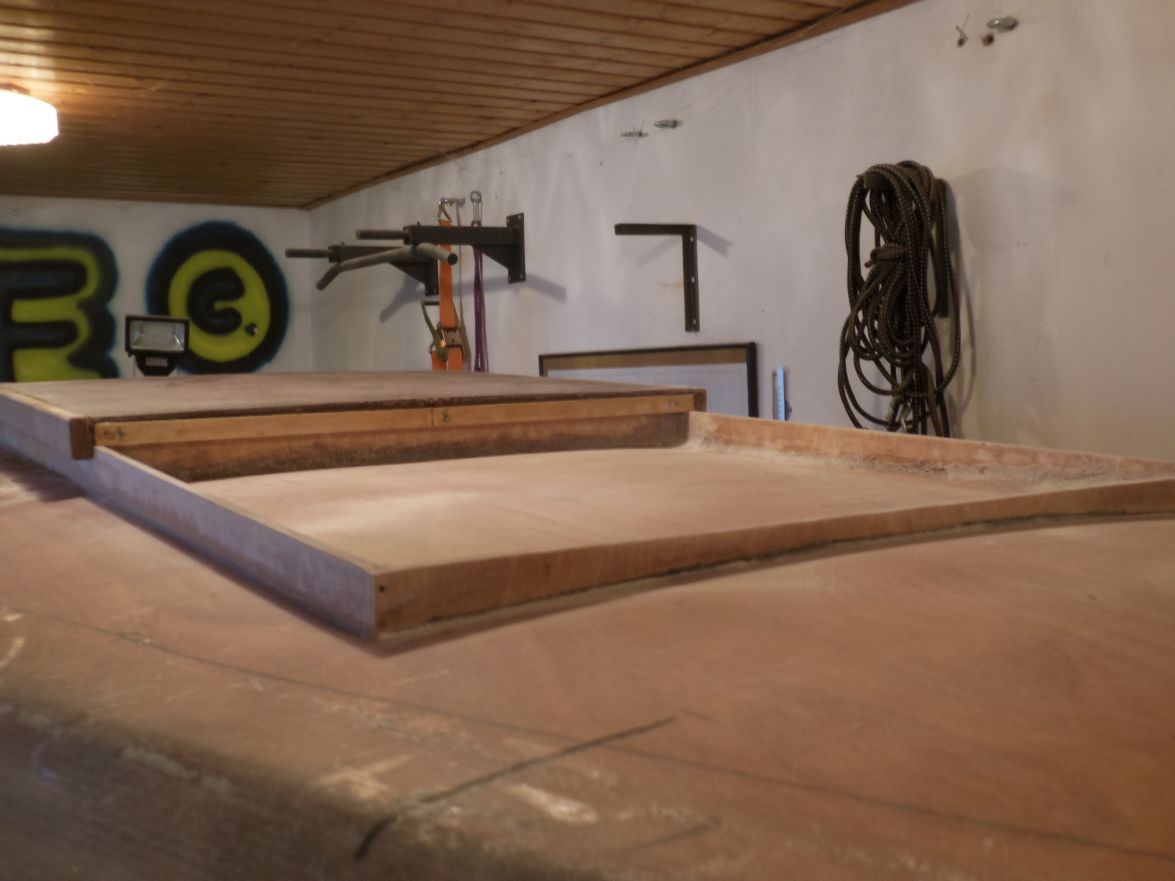
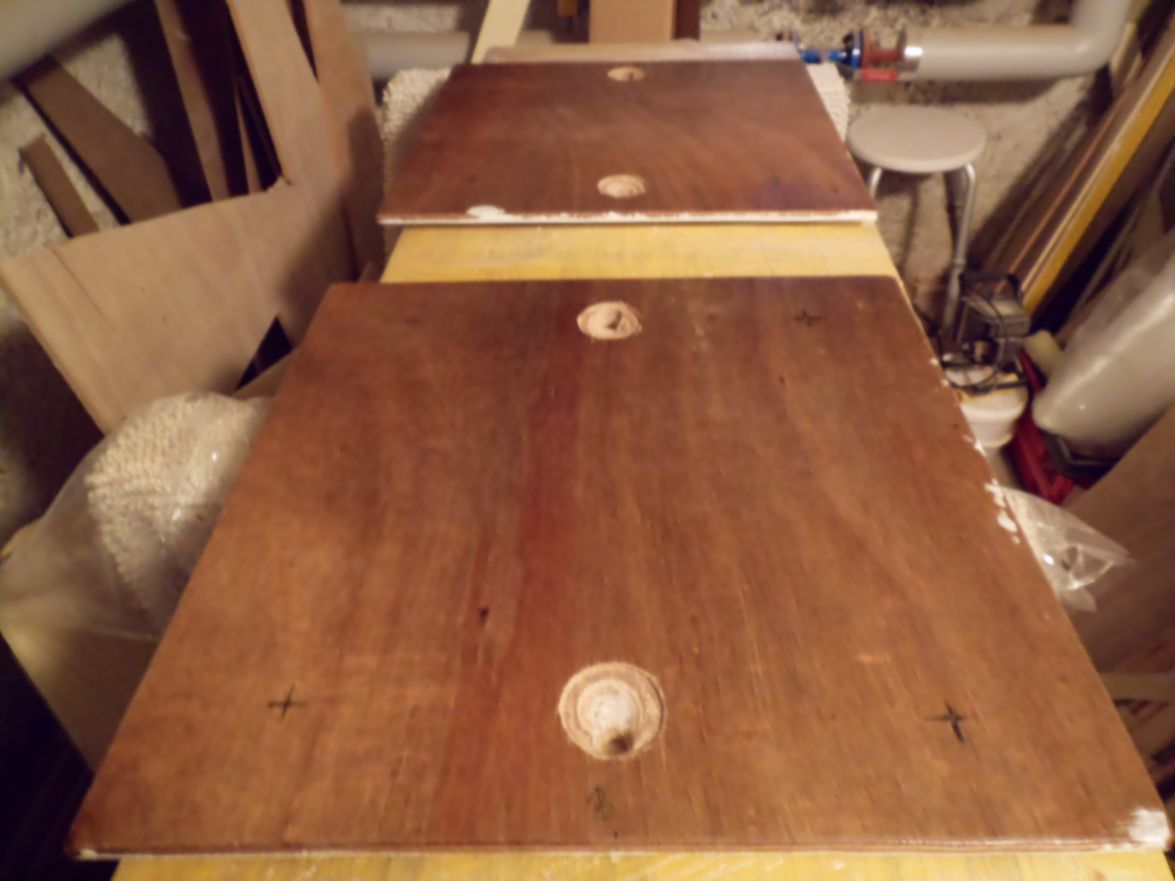
Greetings from Karl ( Austria )
Re: AD 14 KIELGE
Posted: Sat Dec 12, 2015 6:20 am
by gonandkarl
Re: AD 14 KIELGE
Posted: Tue Dec 15, 2015 1:25 pm
by das boot
Have you thought of how you are going to drain water out of those hatch rails mounted on the deck? I did my hatch a bit different by putting a strip of SS on top of the back part of the hatch rails the hatch slides back and forth on those rails and when the hatch is pushed forward open I had a small problem with it rubbing on the deck so I installed a 4 inch wide strip of plastic mounted to the deck that it rides on. but it leaves the deck clear. I can send you pictures if you would like.
Re: AD 14 KIELGE
Posted: Tue Dec 15, 2015 2:47 pm
by gonandkarl
Hi George,
Yes please send me pictures. All ideas are very welcome, because I think I learn most about small detail problems when I see pictures of them and how others have solved them.
I will drain the deck at the forward end of the rails thru a hole on each side. But I have not made that yet. I will make this 2 holes before I start fairing the deck and maybe I can also use them with dowels to lock the hatch top in the foward position. Because till now I have not yet solved the problem that my well forward and back sliding hatch is nowhere attached to the rails it is just lying on them. I could imagine a strong wind blowing into the cabin thru open drop boards could lift it and throw it over board. Thats why I am toying with the idea of 2 holes on the sides in the complete forward and aft position of the top and rails accordingly. Or should I think of another way that the top doesn not fly away, wooden dowels seems to be a rather primitive solution.
Right now I have finished fairing and painting the transom while the boat is still hanging in straps while I repair the cradle with its supports at the stations A B C D and T. I have changed it that I attach the supports on the bottom rectangle with machine srews and nuts and washers so I can take them away any time and later when I put the boat on its side it can then rest with other supports on the bottom rectangular part . I am making this so elaborate because I want to use it further on to rest the boat on it in the garden over winter or should I use the trailer for the rowing boat.
Tommorow I will post pictures again of my progress.
Greetings from Karl ( Austria )
Re: AD 14 KIELGE
Posted: Tue Dec 15, 2015 3:35 pm
by terrulian
Karl,
You definitely want to secure that hatch. I don't think I like the idea of pegs but I suppose it would work. When the wind pipes up a little you'll want to slide the hatch back so spray coming over the deck won't enter the cabin. I think you'll find it nice to be able to just slide it to any position you want.
Here's a possible solution, based on what you have now: Take a router and notch out a 1/4" rabbet on the inside bottom of the rails on the sliding hatch, next to the frame of the opening. Then trim these side rails on the sliding part so they are a bit narrower, say 1/2". Now the hatch will be very sloppy of course...but what you do in that space is go to a plastic supplier and buy yourself a strip of plastic of some variety that is slippery. Install 1/4" x 1/4" pieces of this along the outside tops of the frame, either with glue or with countersunk screws or both. This will now fit into the rabbet you've created in the sliding hatch. Next step is to take a piece of wood the same as your sliding hatch frame and with either a router or table saw, create another rabbet so you have an L-shaped piece that will be attached flush to the outside of the sliding hatch, and then fit inboard to underneath the plastic part you've installed. Glue this up and fair it out and you'll have a hatch that won't come off in any weather.
To really keep it dry below, however, you need a shield on the forward outside of this whole arrangement, that does not slide. You can construct this out of 3/8" plywood, just a shallow box that is open in the back. You want it strong enough to stand or even jump on (this should be true of the sliding part as well). I presume something like this is in the plans but in any case, without it, spray will enter the cabin through the forward, open end of the hatch.
Re: AD 14 KIELGE
Posted: Tue Dec 15, 2015 4:47 pm
by terrulian
Re: AD 14 KIELGE
Posted: Wed Dec 16, 2015 7:51 am
by gonandkarl
Hi Tony,
Thank you very much for this detailed explanation how I can make it. That is exactly how I will finish it. First I read and did not quite understand it but with the pictures you drew it is now perfectly clear.
Greetings from Karl ( Austria )
Re: AD 14 KIELGE
Posted: Wed Dec 16, 2015 8:41 am
by pee wee
There's another design I've seen that involves screwing an aluminum flat bar to the bottom edge of the sliding hatch, and providing a rabbet for it to travel in. It's simple and weather tight, use a stop block to limit travel as desired.
Re: AD 14 KIELGE
Posted: Wed Dec 16, 2015 9:31 am
by terrulian
That's good, too, but if Karl chooses it I would suggest thickening the fixed hatch frame, as that dado will weaken it.
Whatever you do, Karl, you really want to prevent the possibility that the hatch may get loose.
Re: AD 14 KIELGE
Posted: Thu Dec 17, 2015 11:27 am
by gonandkarl
Hi Hank,
Thank you for your nice and easy solution. I think I will make a combination of Tonys idea and yours. I will not make a rabbet into the frame that I wont weaken it and therefore I glue plastic to it, but I like your aluminium flat bar instead of an additional L shaped wood on the sliding part which will reach underneath the 1/4 " plastic and prevent the hatch from getting lost.
Greetings from Karl ( Austria )
Re: AD 14 KIELGE
Posted: Thu Dec 17, 2015 11:34 pm
by das boot
Hi Karl
I will take some pictures of how I installed my hatch it is simple and works well. I have never worked out how to post pictures on the site but I can email them to you. send me a quick email with your address I will get them away to you my email is
George@mkysecurity.com
Re: AD 14 KIELGE
Posted: Wed Dec 23, 2015 6:46 am
by gonandkarl
Hi,
After just over 2 years of building my boat I have the following status report:
My cradle base is repaired and the cross beams are made stronger with metal connectors.
The boat is back on the cradle and the sole with its 2 painted hatches, the painted dropboards and sliding hatch is testwise in position. I made the following pictures to document my build:

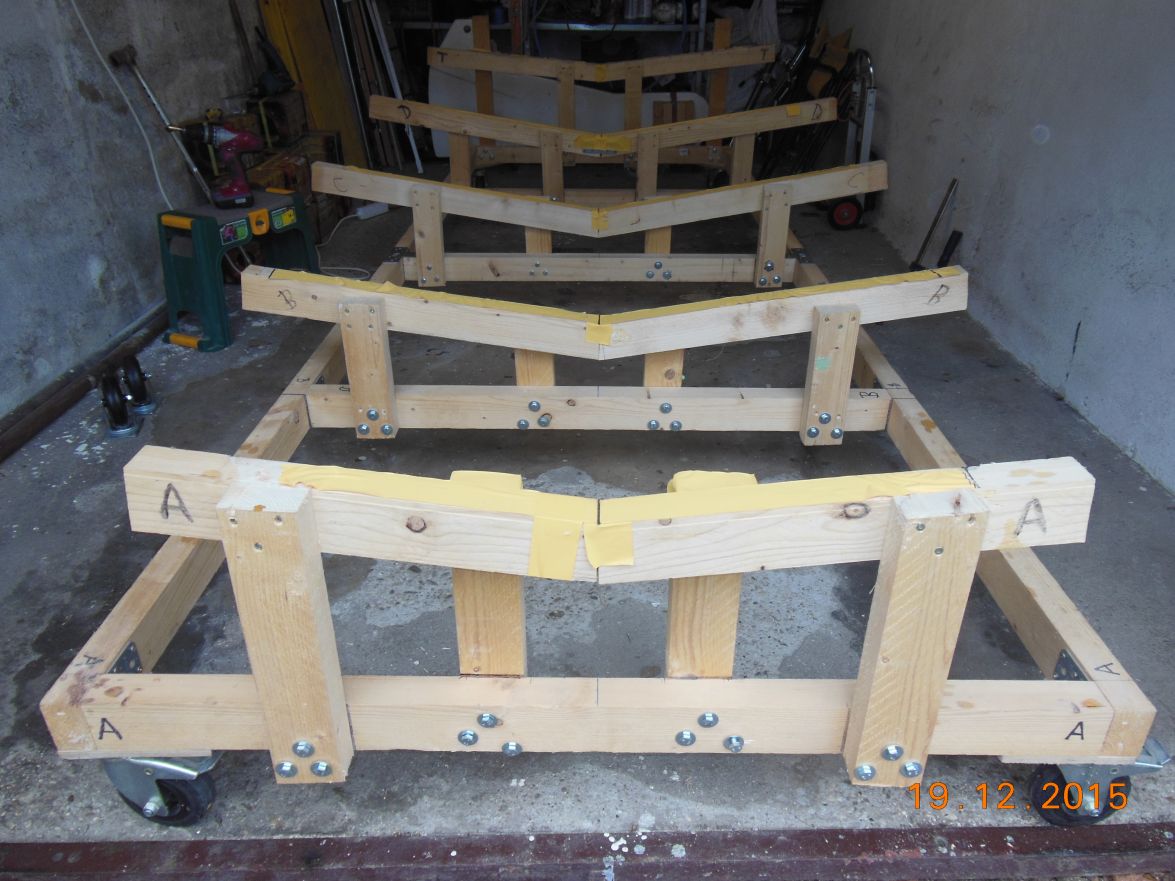
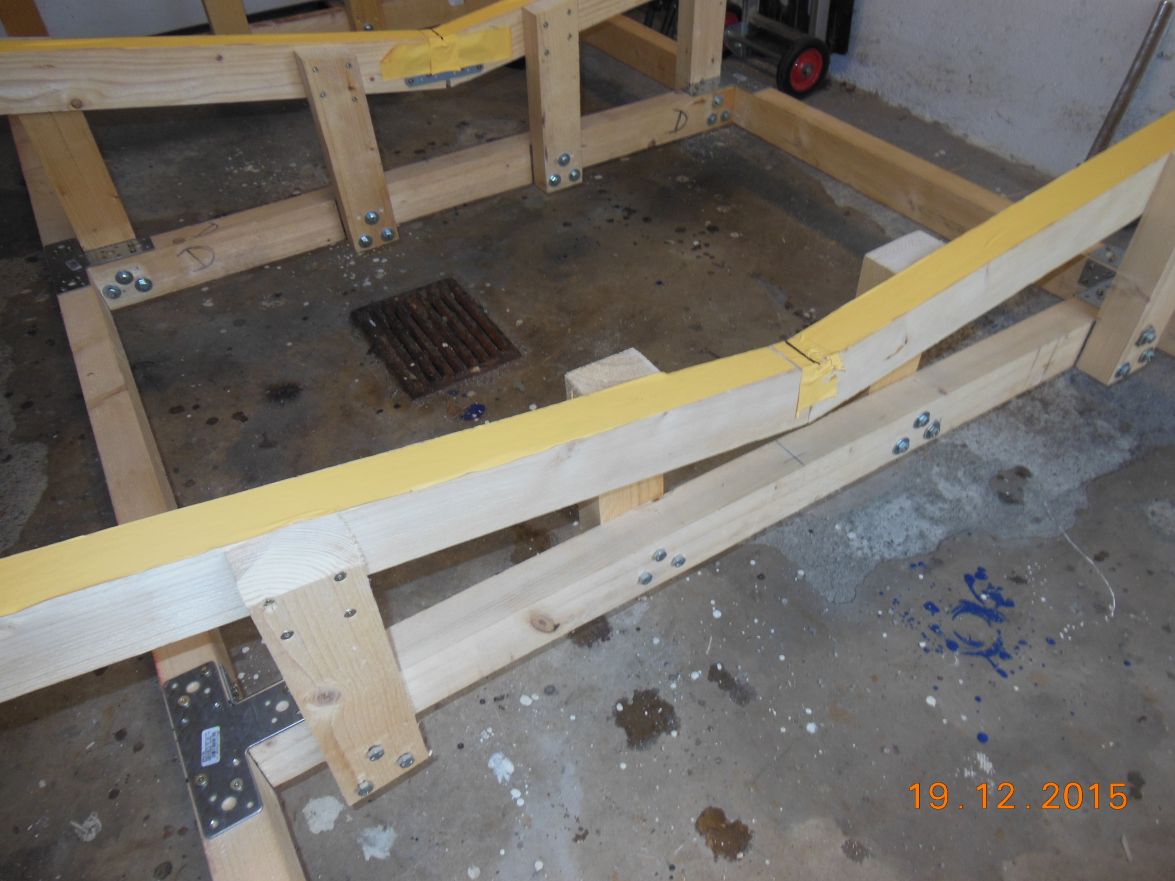
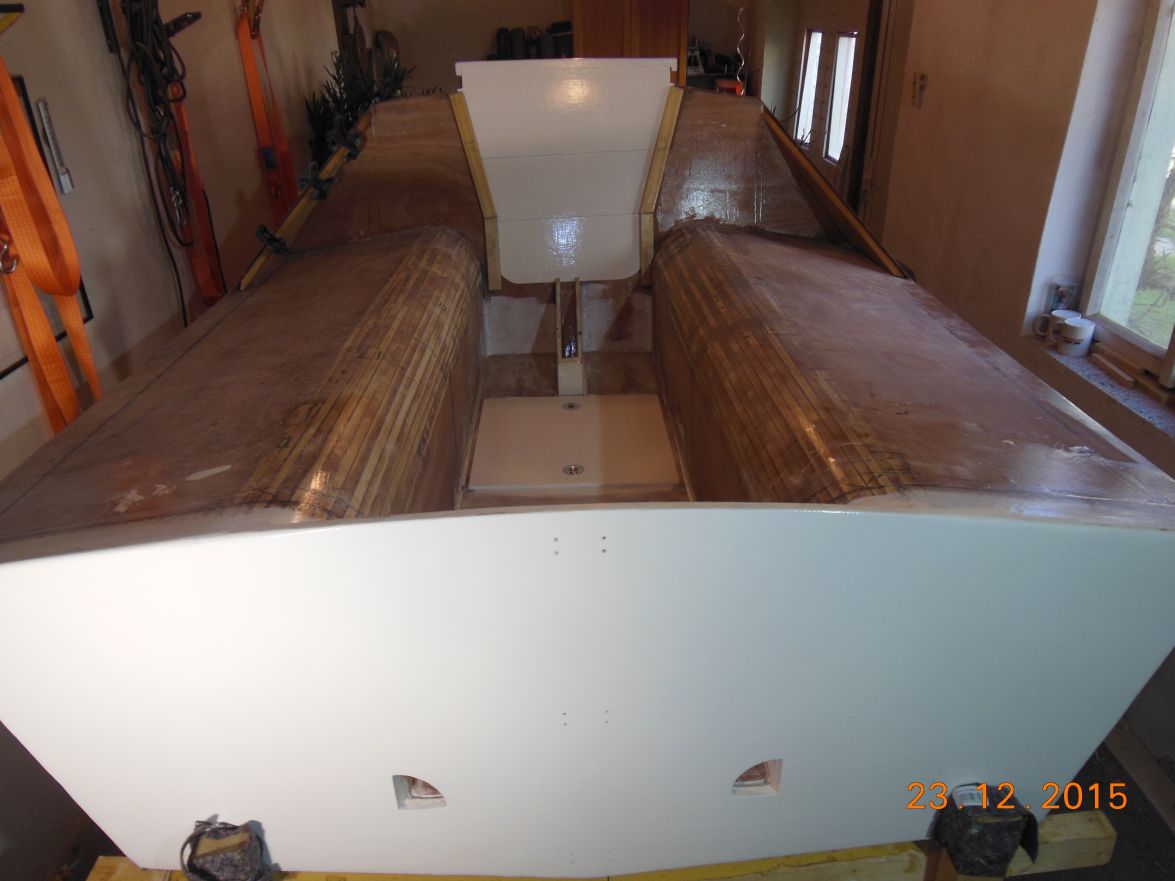

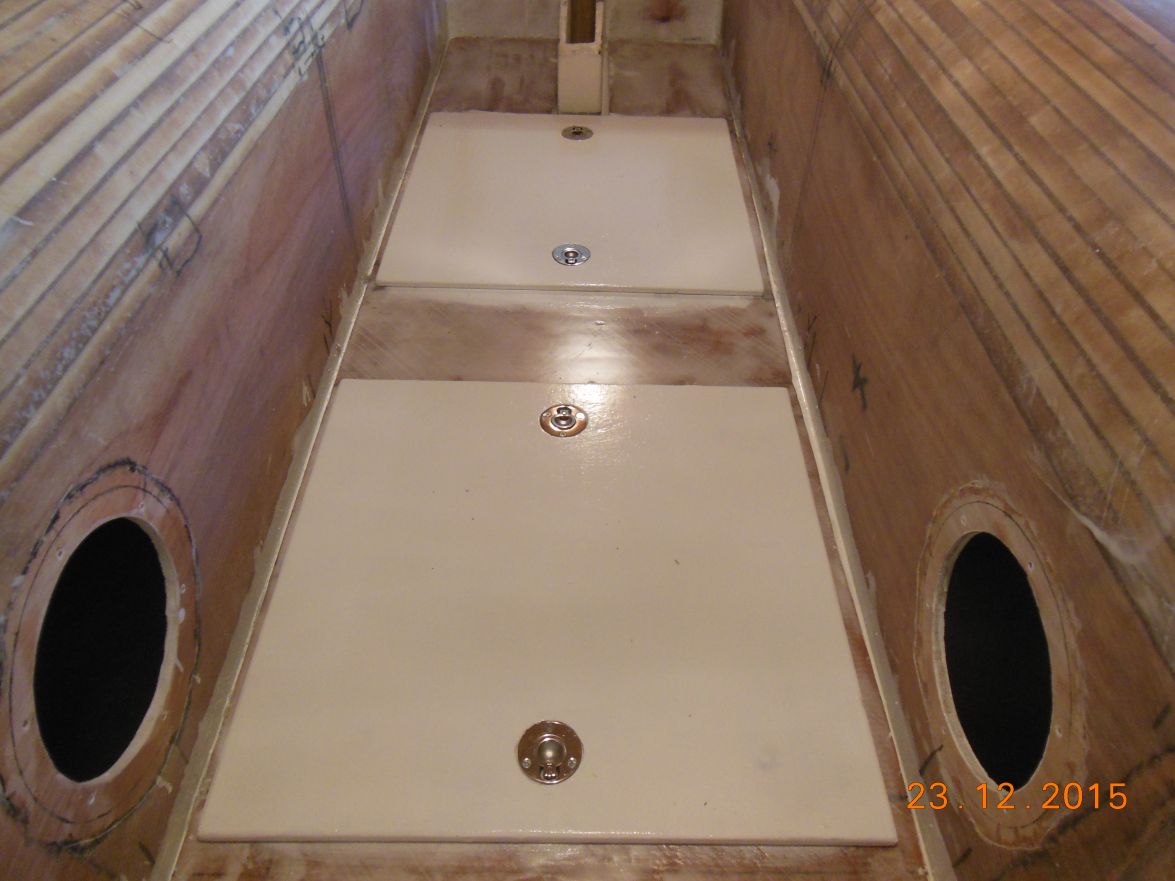
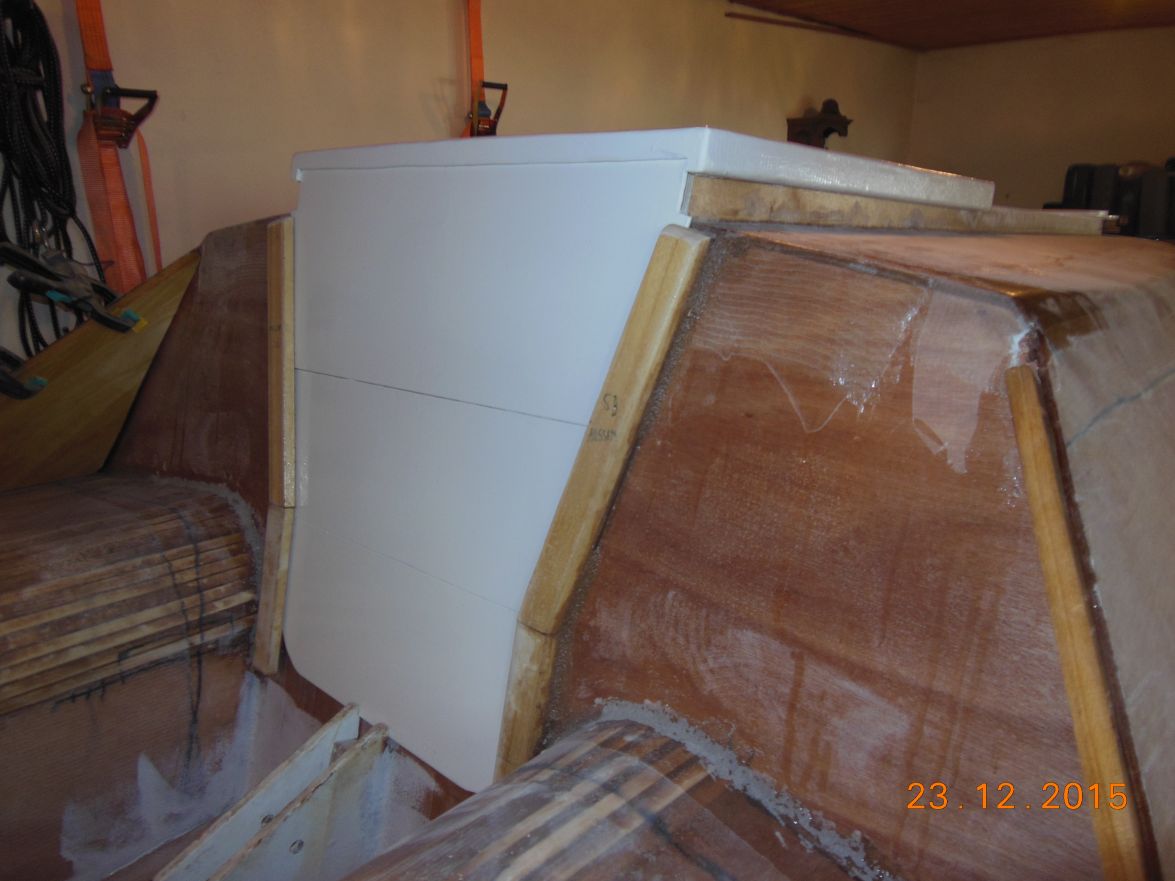
Next I will glue the sole into the boat but this will happen after Christmas.
I wish you all a very nice and peaceful festive season.
Greetings from Karl ( Austria )
Re: AD 14 KIELGE
Posted: Wed Dec 23, 2015 8:33 am
by terrulian
Karl,
Love the update and photos.
I notice there are no cockpit coamings, that that seats extend all the way to the topsides. The pictures of other AD 14s show them. Are you planning to add them later?
Best wishes to you and all the other builders and their families for the holidays.
Re: AD 14 KIELGE
Posted: Wed Dec 23, 2015 10:11 am
by gonandkarl
Hi Tony,
On the AD14 plan there is no coaming but on all AD16 built there is. I will have only 2 straps to lean against which will be attached to the pushpits and the side of cabin. Should I nevertheless fall once too often over the side into the water I can add coamings at a later stage. I once put the coamings question to Jacques and he meant the straps are very comfortable and in the case of capsize the righting is better with the straps. As it is less work I will just have the straps at the splashing.
Greetings and Merry Christmas to You and Your wife Theresa
Karl
Re: AD 14 KIELGE
Posted: Wed Dec 23, 2015 10:21 am
by jacquesmm
No need for a coaming. many boats in that size are built without a coaming.
The straps are very safe and sitting on deck (the deck is the seat top), the coaming will be uncomfortable, it will push against your back while the straps will conform to your back.
If you make the coaming at the correct angle, it makes the seat top too narrow to my taste.
There is no reason to fall through the straps
Use 3 straps if you want.
That being said, those who have added a cooaming by extending the cabin sides seem to be happy with it.
It's your boat, you decide,
Re: AD 14 KIELGE
Posted: Sat Dec 26, 2015 11:45 pm
by das boot
The main reason I put the coaming on my boat is our wind is cold up here and on other boats I have been on I found the cold wind got to my lower back got cold that is why I put them on. The second reason is with ought them the cans of beer or pop fishing gear etc would tend to fall over the side. I find they are a fright place to keep all the little things tucked away but close at hand if I need them it works for me. But every one adds their own touch to these boats.
Re: AD 14 KIELGE
Posted: Sun Dec 27, 2015 9:55 am
by terrulian
Greetings and Merry Christmas to You and Your wife Theresa
To you and yours as well, Karl, and to all the knuckleheads on this forum.
Re: AD 14 KIELGE
Posted: Sat Jan 09, 2016 7:39 am
by gonandkarl
Hi,
At last the windows are cut out and I am busy with the frames which I produce in my warm cellar workshop.
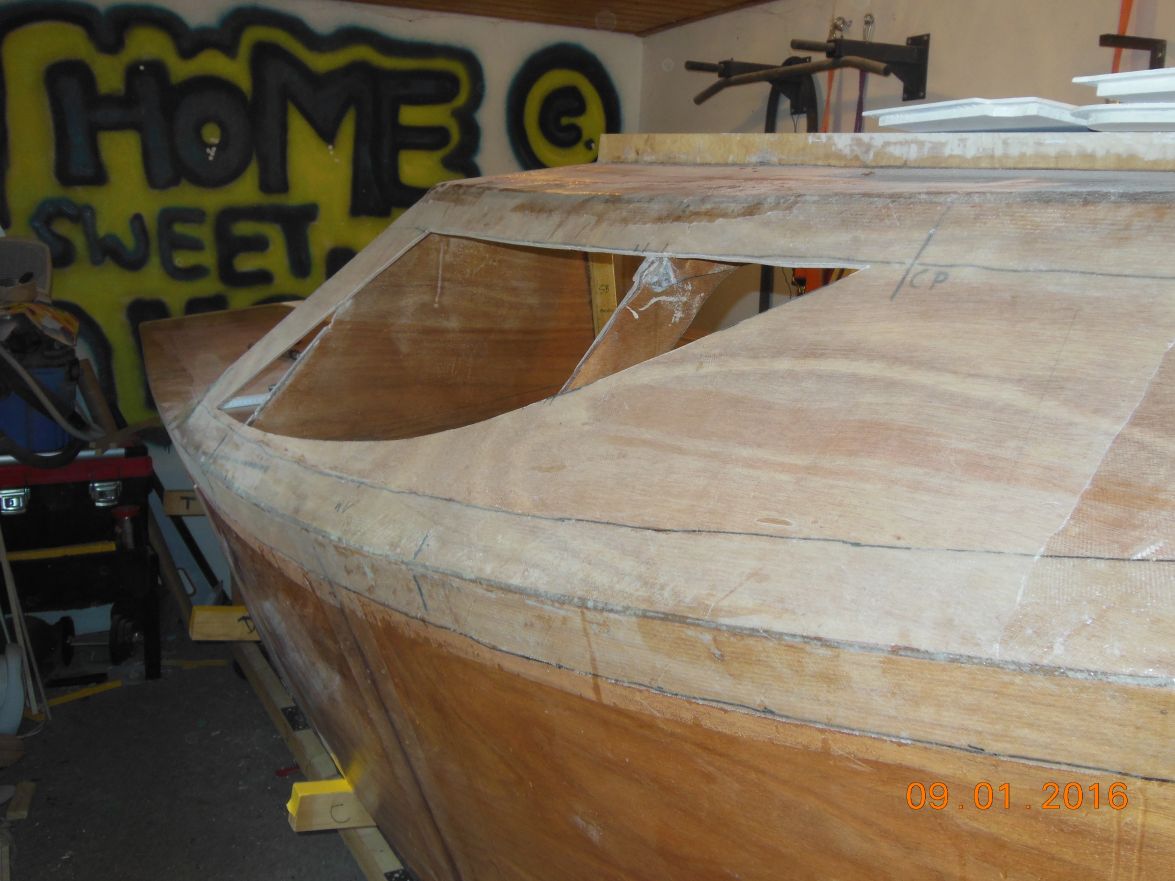
Greetings from Karl
Re: AD 14 KIELGE
Posted: Sun Jan 10, 2016 10:02 am
by das boot
Did you get the drawing I sent you on the rigging ?
Re: AD 14 KIELGE
Posted: Sun Jan 10, 2016 2:38 pm
by Salvatore
terrulian wrote:
I notice there are no cockpit coamings, that that seats extend all the way to the topsides. The pictures of other AD 14s show them. Are you planning to add them later?.
G,day all
There is no coamings on either the AD14 or AD16. Individual boat builders have added the coamings to their boats, I have only sean one unfinished AD16 without backrest, It is called Karenina you can see pictures of it on this site. The coaming on My boat "Angelina" is more than an add-on It is part of the boat in that I lowered the height of the benches to suit my needs, this also helped me to keep the height of the coaming down as I did not want to increase wind-age on the boat.
A taller person can make better use of no coamings as He/She can lean out and improve speed performance in a stiff breeze even more so on the AD14
Regards Salvatore
Re: AD 14 KIELGE
Posted: Sun Jan 10, 2016 4:28 pm
by gonandkarl
Hi George,
Thank You very much for the drawing You sent me of the rigging. I did get them but because of the Christmas and New Year holidays I was quite busy with the family rushing from one place to the other always eating and drinking too much and that is how I forgot to answer.
Greetings from a rather warm Austria
Karl
Re: AD 14 KIELGE
Posted: Wed Feb 03, 2016 11:31 am
by gonandkarl
Hi,
A little bit of progress:
One more coat of paint for the under sole compartments and then I can glue the floor at last into the boat.
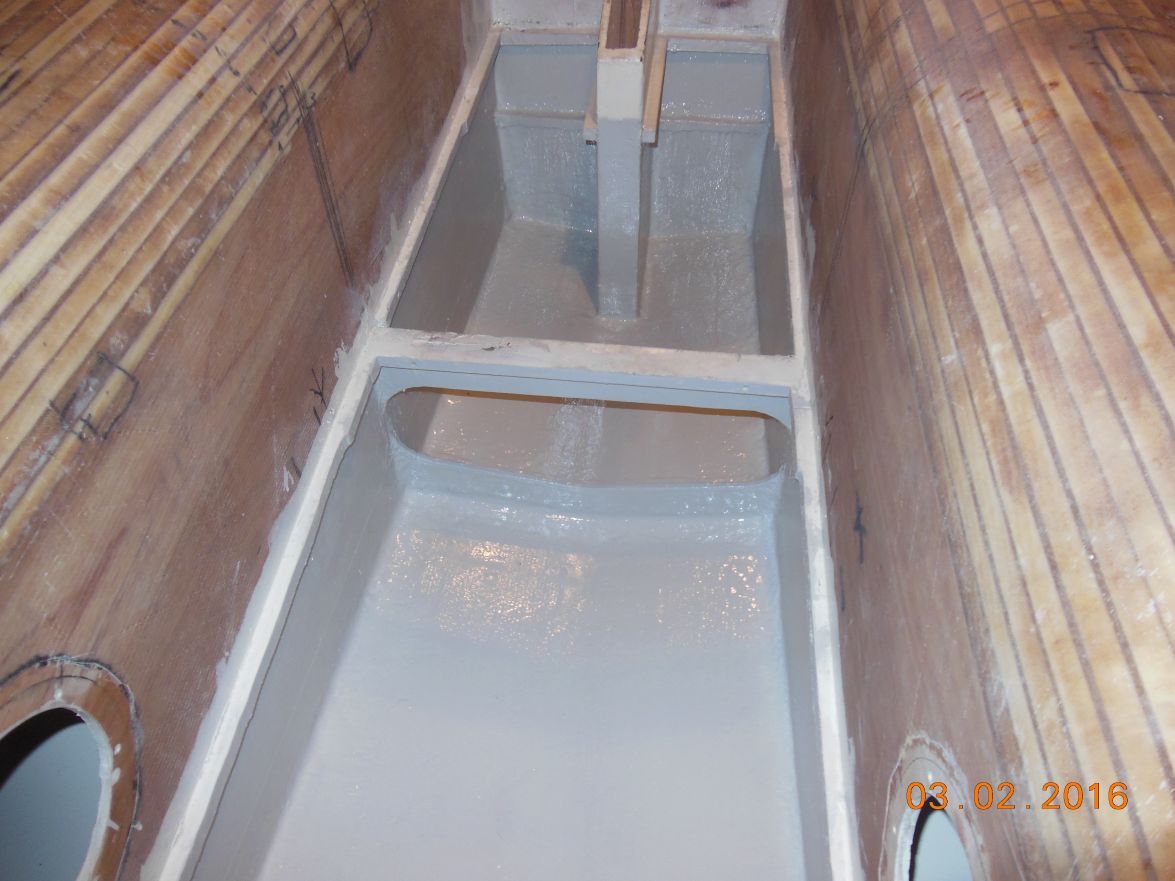
And the window frames are mounted for a test and are now also ready for painting :
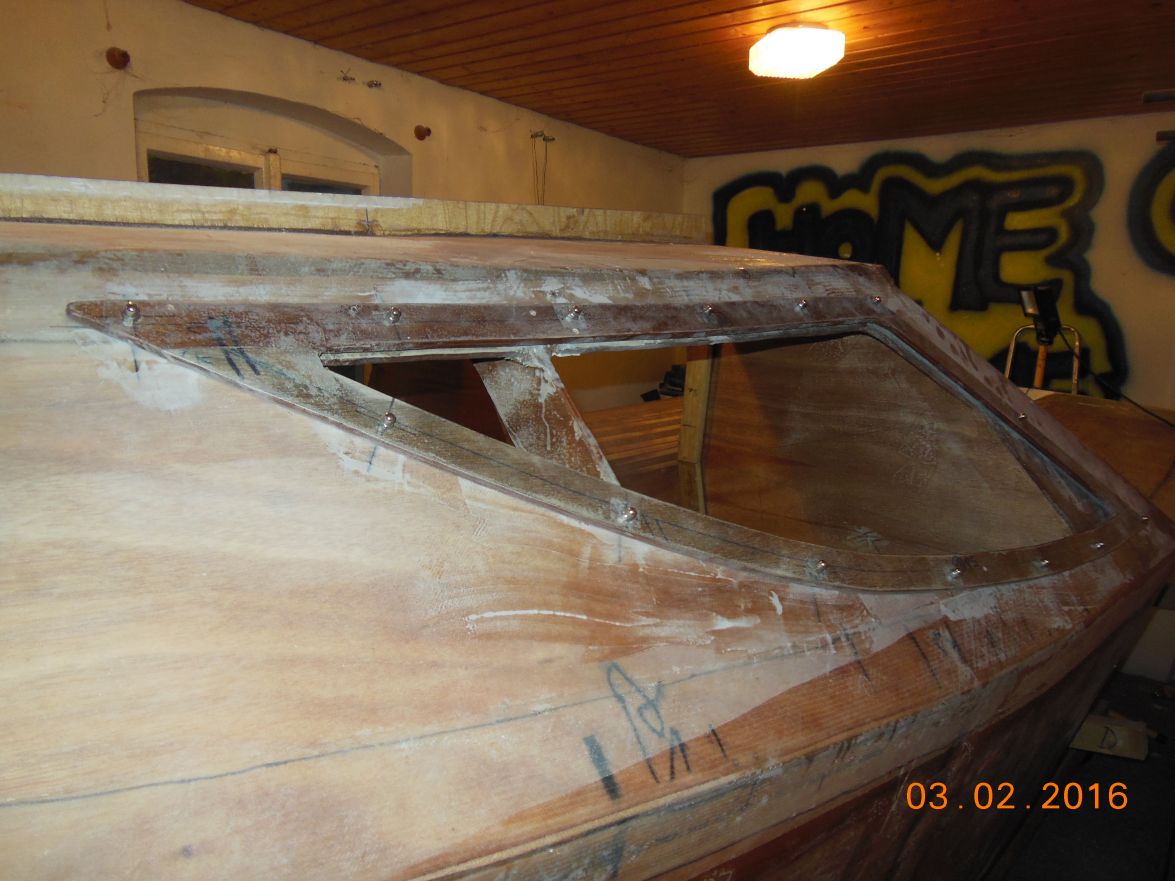
Greetings from Karl
Re: AD 14 KIELGE
Posted: Wed Feb 03, 2016 4:56 pm
by terrulian
Great progress, Karl, keep those pictures coming.
Re: AD 14 KIELGE
Posted: Thu Feb 04, 2016 12:53 am
by das boot
When I put the windows on my boat I put the nuts on the inside of the boat to keep the outside smooth so that the running lines did not get hung up on them
Re: AD 14 KIELGE
Posted: Thu Feb 04, 2016 4:23 am
by gonandkarl
Hallo George,
This is a good remark about the nuts. I thought I saw it on Salvatores boat like I did it. I just thought the capped nuts look better on the outside, but I was also in doubt if it is right like this. I am using #10 ss machine screws and if I put the nuts inside I could cap the outside with white plastic caps which one can get for such screw heads and it would be all white like the rest of the boat. I have the same problem with the 3 rudder pintles should I have the 4 nuts outside or inside ? The additional problem there is that I can only find screws 3 or 4 cm long of which the 3cm is nearly too short and the 4 cm long ones are too long so that I have to use some washers because the thread in this shining cap nuts is only 5 mm long. Length problem solved with open nuts on the inside.
Problems ever since I started building the boat and the hardest thing is to sit in front of the boat thinking am I right or wrong if I decide it one way or the other. My wifes advice to me is to get away from my bit thinking ( on/off right/wrong) of my computer career and accept that boat building decisions can be in between.
Greetings from Karl
Re: AD 14 KIELGE
Posted: Mon Feb 08, 2016 1:15 am
by das boot
The rudder mount would look a lot better with the nuts on the inside you can always cut off the excess bolt if the threads do not go down far enough take them to a machine shop and have them run a die down them to extend the threads thay way you can make it look a lot smother. If you are going to cut the bolts shorter put a nut on the bolt before you cut it then after you cut it when you back the nut off it will clean off any damage to the treads at the same time
Re: AD 14 KIELGE
Posted: Mon Feb 08, 2016 3:12 am
by gonandkarl
Hallo George,
Thanks a lot for the idea about cutting the bolt shorter with the nut on. That is how I will do it. I should have known this already when I shortened the pivot bolt for the centre board. There I battled with an electric file to get the thread right again to get the nut on.
Greetings from Karl
Re: AD 14 KIELGE
Posted: Mon Feb 08, 2016 9:38 am
by terrulian
I would do it with a die, as stainless easily galls. If you don't have a die, then the nut is worth a try...it's a cheap experiment.
Re: AD 14 KIELGE
Posted: Mon Feb 08, 2016 3:57 pm
by das boot
One problem I have had with my boat and the rudder on my boat if I have the rudder all the way down when I launch it the rudder pops off. So I launch it with the rudder only using the top two brackets then I need to re set it into all three once it is in the water I found it hard to get all 3 lined up at the same time hanging over the stern. The way to solve this is to cut the pins at different lengths so that you get one and two into place then three will line up properly trying to fet all three at the same time was just to hard to do.
Re: AD 14 KIELGE
Posted: Tue Feb 09, 2016 3:11 am
by gonandkarl
Hi George,
Before I put the sole in I tried again the rudder and the pintles and in the building shed it is easy to line up the three pintles.
I have Valdana pintles from Italy which are made of steel and they have a hard plastic insert with holes. I hope this helps lining up easier. But If I should encounter the really rough lake Attersee and have the mentioned problem I will remember your idea of shortening the bottom pin. Thanks a lot and
Greetings from Karl
Re: AD 14 KIELGE
Posted: Tue Feb 09, 2016 10:22 am
by jacquesmm
To line up the pintles and easily install the rudder while in the water, there is a trick: offset the pintles so that they do not engage all at once.
Put the first gudgeons a little bit higher than the second one and the second one a little bit higher than the next one (if using 3).
That way, the rudder first engage in the top one, push it down and it grabs the 2nd one and then the 3rd. That way you engage them one at a time, not need to struggle with all 3 at the same time.
I wonder if I don't mention that in the building notes? I know that I mention a Ronstan spring to keep it in place.
Re: AD 14 KIELGE
Posted: Wed Feb 10, 2016 11:56 am
by gonandkarl
Hi,
After everbody on this forum tells to use ziplock plastic bags to get the epoxy glue into corners, I thought I was very clever and bought myself a nice grease gun which one can disassemble very easy and I thought thats the thing to use with the epoxy glue in corners like on the cleats for my sole.
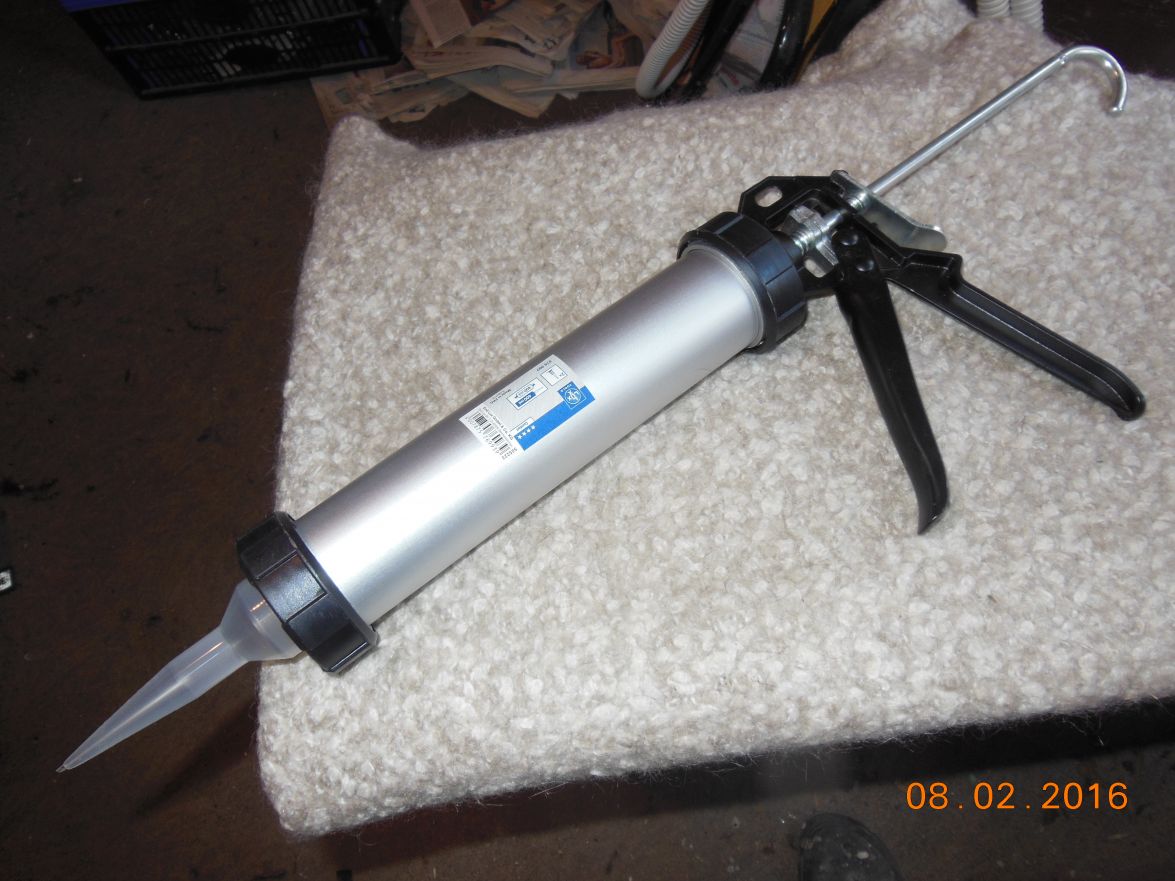
It can take 400 ml which was fine for half of the cleats for the sole and the first use then I had to stir some more glue and after filling it into the gun it did not want to come out of the nozzle anymore. In my panic I decided to cut the plastic nozzle a bit higher in the hope that it will come out of a bigger hole. And it did because suddenly all the inside pressure had a release and with the knife still in the hand I did not point the nozzle at the sole cleats and had the glue everywhere just not where I wanted it to be.
Here the nicely painted bottom
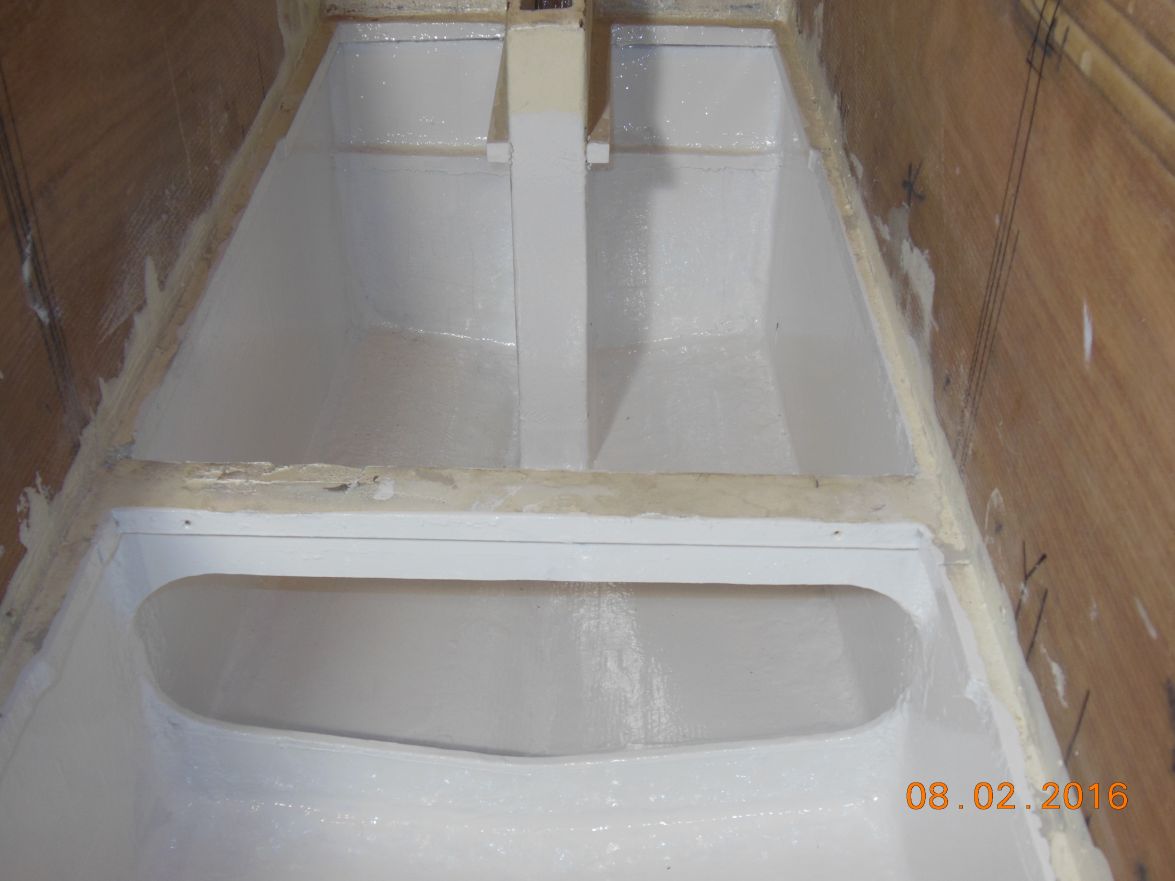
and after the finally glued in sole it looked like that
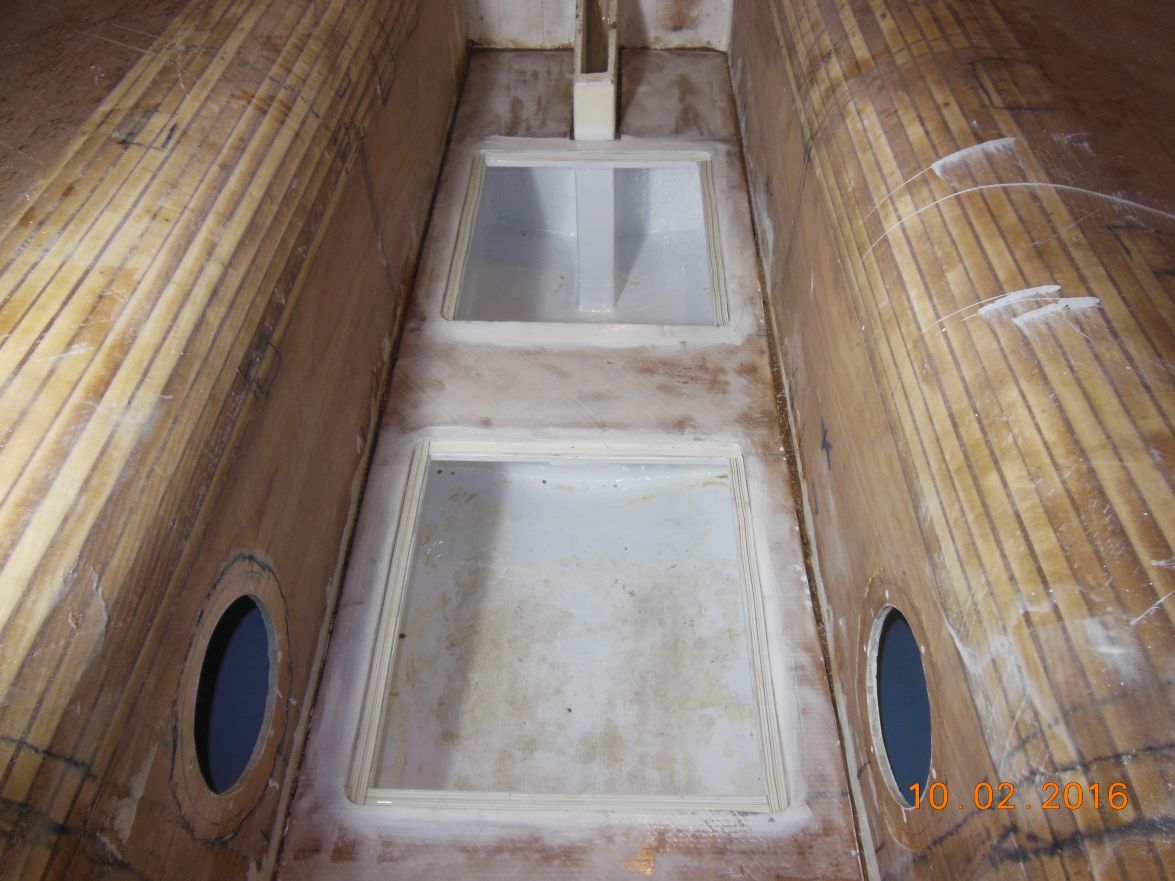
So I have learned to use a ziplock plastic bag in future as the cleaning of the grease gun took twice as long as its use with epoxy glue.
To compensate for this mishap I bought myself today a Minnkota C2 34 pounds thrust electric motor which was on sale.
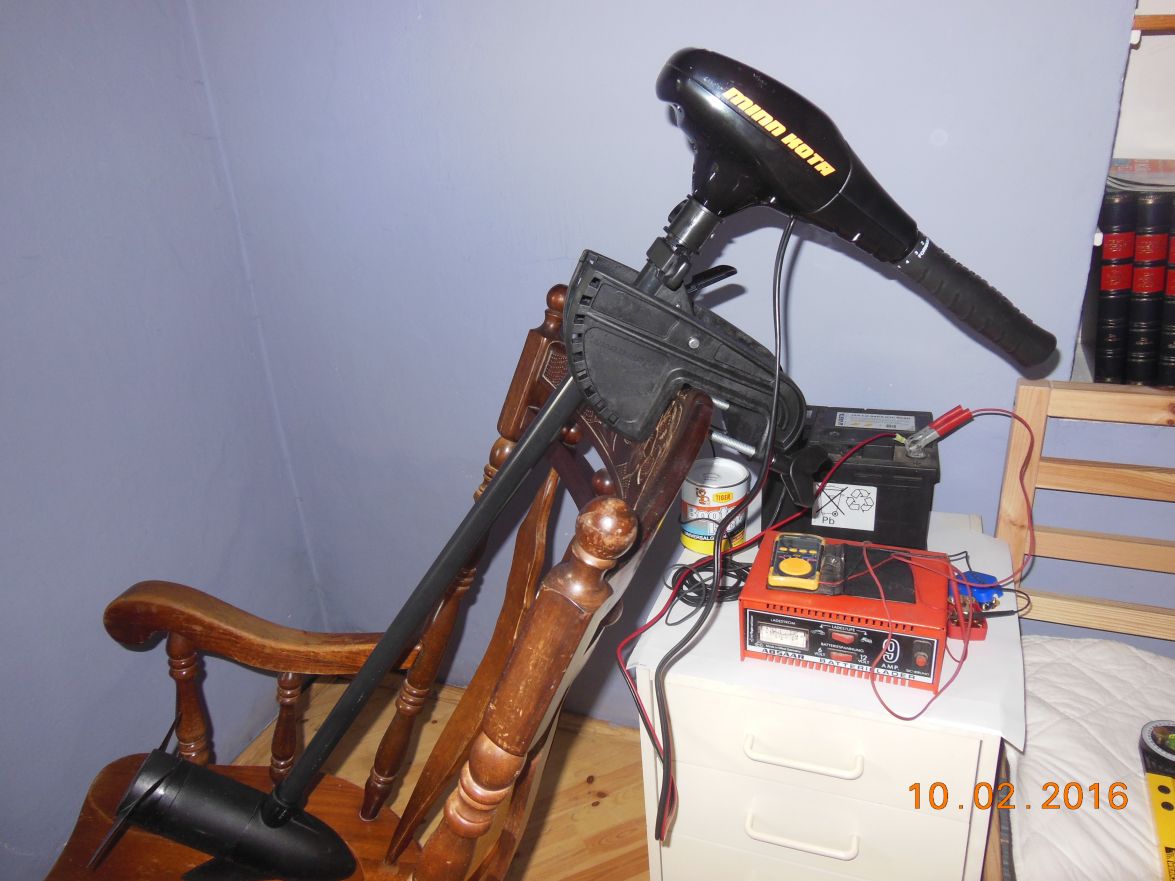
Even that it said one should not operate it outside the water my temptation was too big to see if it works so I mounted it on this rocking chair and switched it on shortly on all 5 forward and reverse gears. It works fine because I did not feel the need for a friends advise to fill a big plastic dust bin with water and clamp the motor to it for testing.
The only problem I made myself with buying just this model with a 91 cm ( 36" ) shaft length is that it wont fit under the sole compartments together with the porta potti. Porta potti will have to be in the cabin while the motor is there for transporting it.
I can clamp this electric motor directly to the transom and save myself a permanently installed motor clamping board which is used to lower motors with a shorter shaft length.
I hope I will be able to use it also on my FS13 with a tiller extension.
But now I have to work again on my sole. I still have to make the fillets and tape all around against the benches, transom and frame C and then paint once more over the messed up bottom.
Greetings from Karl
Re: AD 14 KIELGE
Posted: Wed Feb 10, 2016 12:00 pm
by jacquesmm
gonandkarl wrote:
To compensate for this mishap I bought myself today a Minnkota C2 34 pounds thrust electric motor which was on sale.
Greetings from Karl
Re: AD 14 KIELGE
Posted: Wed Feb 10, 2016 7:01 pm
by pee wee
gonandkarl wrote:Hi,
After everbody on this forum tells to use ziplock plastic bags to get the epoxy glue into corners, I thought I was very clever and bought myself a nice grease gun which one can disassemble very easy and I thought thats the thing to use with the epoxy glue in corners like on the cleats for my sole.
So I have learned to use a ziplock plastic bag in future as the cleaning of the grease gun took twice as long as its use with epoxy glue.
I like the ziploc bags too, but you could load epoxy in an empty caulk tube and throw it away when done . . . they can be bought empty, I think.
Re: AD 14 KIELGE
Posted: Thu Feb 11, 2016 10:58 am
by tcason
empty caulk tube
My experience - by the time you fill tube, load in gun and use it and then throw away $6.50 tube you might as well use the System Three Gelmagic Cartridge (see link)
http://boatbuildercentral.com/proddetai ... _cartridge
empty tube:
http://www.amazon.com/CRL-Plastic-Seala ... caulk+tube
Re: AD 14 KIELGE
Posted: Thu Feb 11, 2016 1:06 pm
by das boot
I used bog to do all the seams on my boat I found if I used the back of and old spoon to get a nice curve on the seam makes it water tight and smooth at the same time it makes it stronger and leave no way for water to get into the seam. I used up a few spoons but they are cheep
Re: AD 14 KIELGE
Posted: Fri Feb 12, 2016 2:00 pm
by gonandkarl
Hi George,
I had to make the seems between the benches and the sides today and I did it with a baby spoon with an extra long handle.
Like you said a spoon works perfect and at last I got good looking seams.
Thank You for this really excellent tip.
Greetings from Karl
Re: AD 14 KIELGE
Posted: Sun Feb 14, 2016 3:29 pm
by das boot
No problem my friend I am glad it worked for you keep up the good work you will be in the water in the spring
Re: AD 14 KIELGE
Posted: Tue Feb 16, 2016 5:03 pm
by gonandkarl
Re: AD 14 KIELGE
Posted: Tue Feb 16, 2016 5:17 pm
by gonandkarl
Re: AD 14 KIELGE
Posted: Tue Feb 16, 2016 5:20 pm
by gonandkarl
Hi,
The last 4 wooden parts must be installed now:
Mast shoe, partner and the 2 chain plate supports of which I hope to get shoe and chain plates done today on a very rainy day in Austria:

Greetings from Karl ( Austria )
Re: AD 14 KIELGE
Posted: Sun Feb 21, 2016 5:03 am
by gonandkarl
Hi,
The last 4 wooden parts must be installed now:
Mast shoe, partner and the 2 chain plate supports of which I hope to get shoe and chain plates done today on a very rainy day in Austria:
God only knows why I posted this twice.
Greetings from Karl ( Austria )
Re: AD 14 KIELGE
Posted: Sun Mar 27, 2016 9:01 am
by gonandkarl
Hi,
While I am stilll waiting for warmer weather and working on the FS13 in the garage in the meantime to be able to flip both boats at the same time for fiber glassing their bottoms, I took these nice pictures of the neighbor kids playing around my boat:


Greetings from karl ( Austria )
Re: AD 14 KIELGE
Posted: Sun Mar 27, 2016 9:33 am
by terrulian
Great stuff Karl. I didn't get that you were building two boats at once!!
When you finish, take those kids sailing on a windy day and replace their sweet smiles with terror and delight.
Re: AD 14 KIELGE
Posted: Thu Mar 31, 2016 1:05 am
by das boot
Looking real good you should get in the water this summer
Re: AD 14 KIELGE
Posted: Wed Apr 27, 2016 11:37 am
by gonandkarl
Hi,
As I am about to start fairing the deck of my boat, I practise it hard on my a bit smaller FS13 before I dare to do it on my AD14.
I have test fitted the bow eye and I think the 10 mm inside ply wood backing plate glassed with 2 tapes to the sides should be strong enough for a 300 k boat.
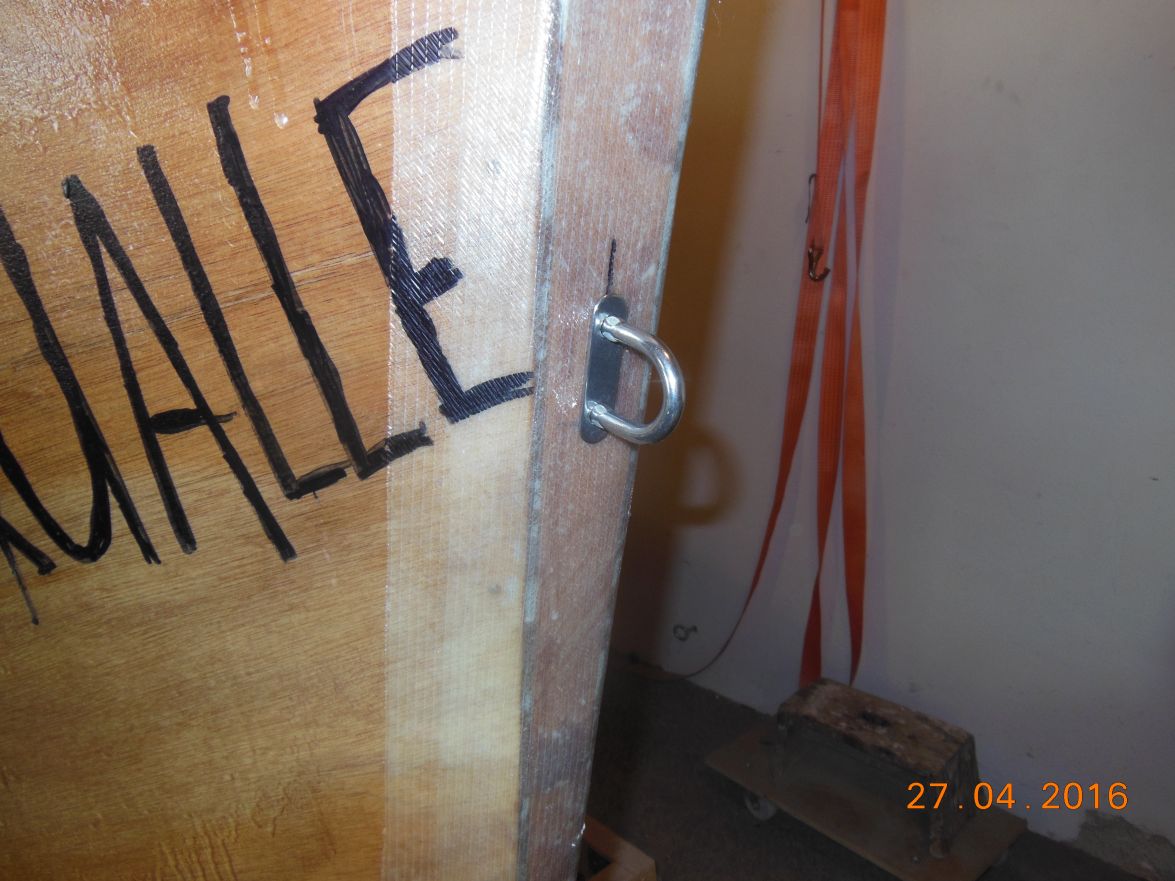
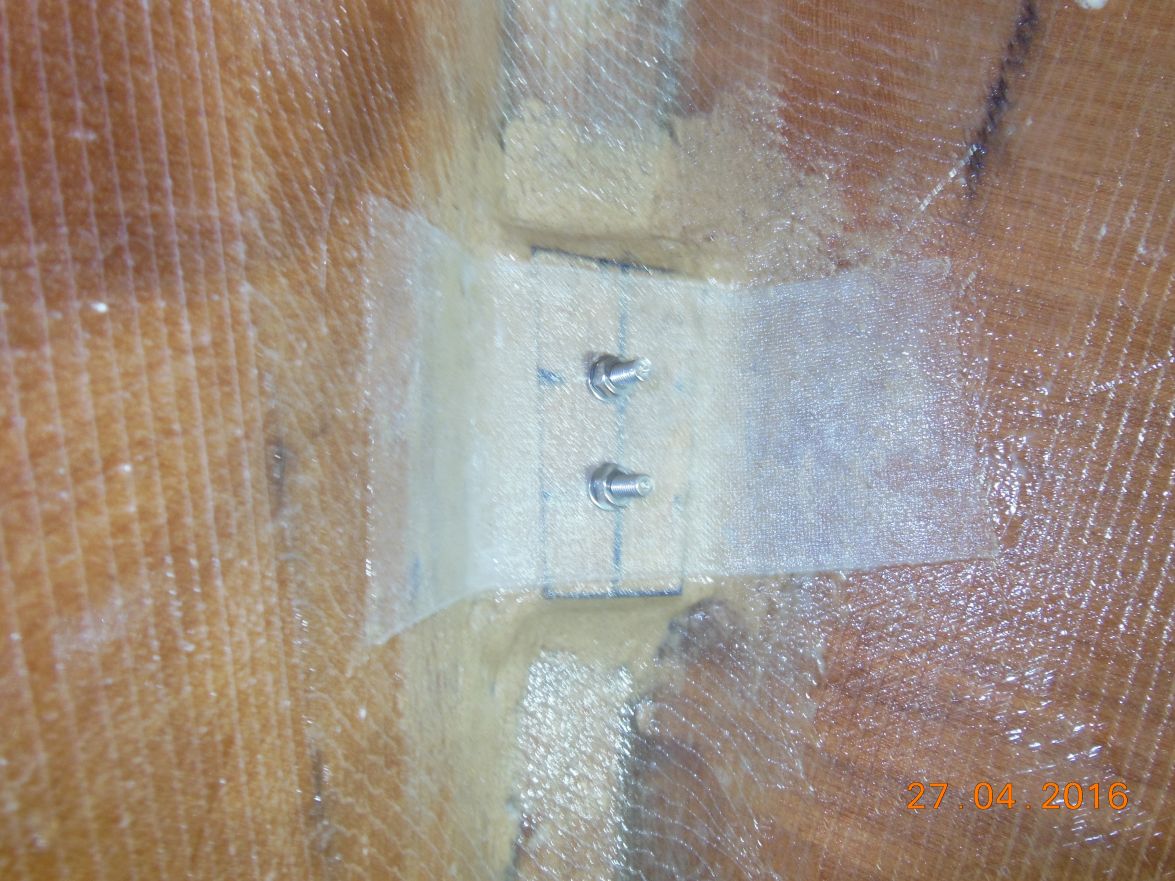
Greetings from Karl
Re: AD 14 KIELGE
Posted: Tue May 03, 2016 7:47 pm
by das boot
I used a belt sander on my boat and just used finer belts each time I would put a coat of filler on then I finished it off using an orbital sander it came out good or at least I was happy with it. Your bow hold bow point looks good mine is dun the same way and has worked well for years. The sanding is the hard part to do and takes a lot of time but it is worth it when finished. Keep up the good work.
Re: AD 14 KIELGE
Posted: Wed May 04, 2016 1:40 am
by gonandkarl
Hallo George,
I have really practised sanding on my parallel build the FS13 and found out that I cannot use my belt sander because I cannot adjust the speed and it takes to much off at once. But I have built myself 2 fairing boards after the instructions I got for my question " How do I build a fairing board ? " This fairing boards work fine and also I am using the rotary sander and I found out sanding by hand and with the sanding paper around a cork block works best in corners. I have bought three 20 metre rolls of sanding paper 80 120 and 180 grid and they really work well even that I will use the 180 only at the painting stage. You are definitely right that sanding takes the longest and I catch myself sanding over a part where I was already finished but found out it must still be a bit smoother. It is also the part of boat building where the progress is not very visible for a long time and one gets worried if one ever will get to an end of it. But encouraging postings like yours help me a great deal to get the 2 boats into the water by the end of July.
Greetings from Karl
Re: AD 14 KIELGE
Posted: Wed May 04, 2016 6:32 pm
by terrulian
Your stem is flat!! That's cheating.

Mine had a radius so that's what made it hard to find the center when drilling from inside.
Sanding and fairing my boat somehow changed me a little I think. I did it for endless hours but now I have confidence I can make something look good eventually if I try and I'm kind of fond of that process. A pro could do it in 1/10 of the time, of course.
Re: AD 14 KIELGE
Posted: Thu May 05, 2016 11:24 am
by gonandkarl
Hi Tony,
I am not sure if I will ever get fond of the sanding process but like You I like the outcome of it looking really nice. I am busy sanding the 2 push pits in my cellar workshop because outside it is still to cold to work with epoxy mixed fairing paste. I started fairing on them because I thought one can easily correct a mistake. My mistake with them was, thinking if I use fairing paste on them and rolling peel ply over it would fasten the process. It came out ok but I wont do it anymore. I still have to sand by hand a lot on them.
My house has 14 windows of which I replaced 10 myself including new frames. It took ages and decided to let a professional do the last 4 windows and the front and rear house doors as well. He did the lot in 6 hours.
On the boat(s) I would feel bad if I have not done all the work myself. It is the joy of having made a really nice looking boat which drives me on till splashing day in July and my armada JAN, WILDE QUALLE ( Crazy Jellyfish ) and ISA will be complete.
Greetings from Karl
Re: AD 14 KIELGE
Posted: Thu Jul 07, 2016 10:32 am
by gonandkarl
Hi,
After splashing my FS13 Isa it is back to sanding the decks of my AD14. Having done that now for 2 days I got doubts if I have learned enough about sanding whilst building my 2 boats Jan and Isa. My problem is that my quality desire is higher for the Adelie 14. I used a dry wall thing which is quite handy because it has got a spring for applying pressure with the finger, but I will never be an artisan.
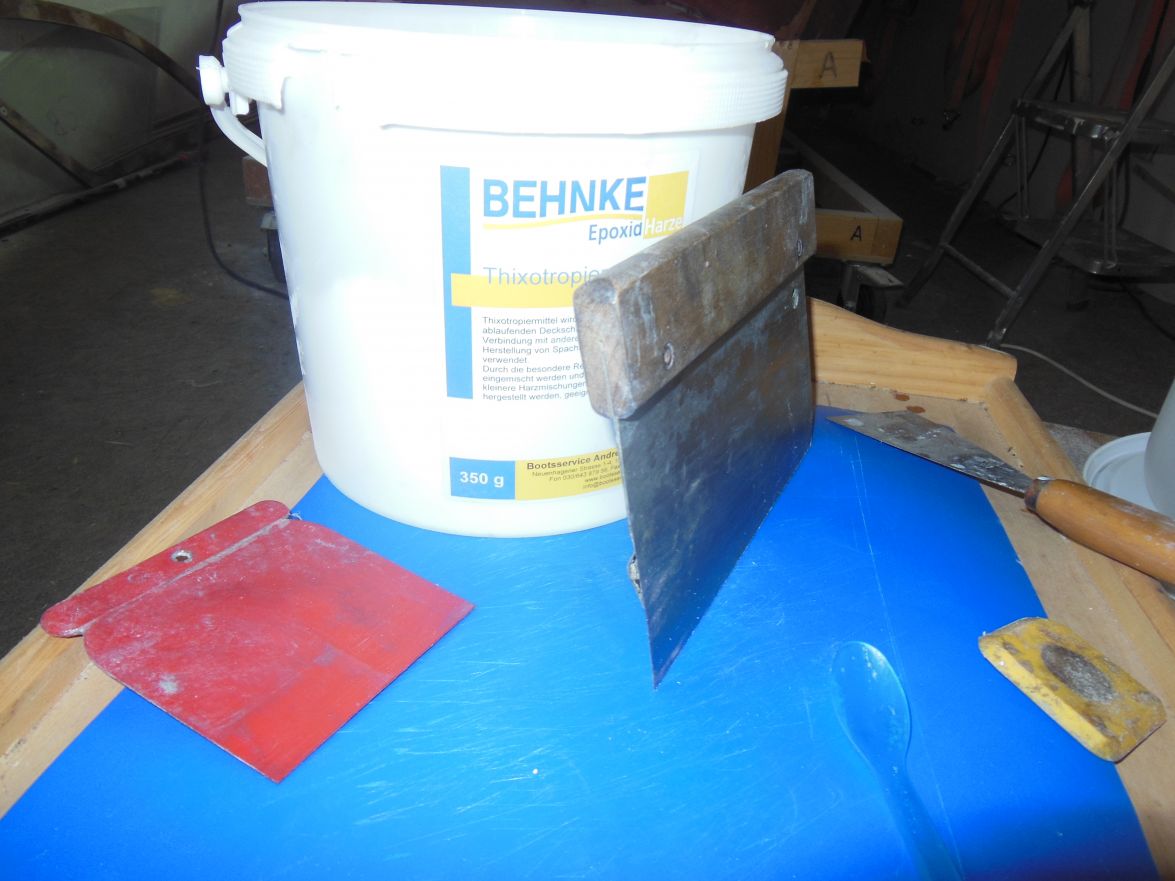
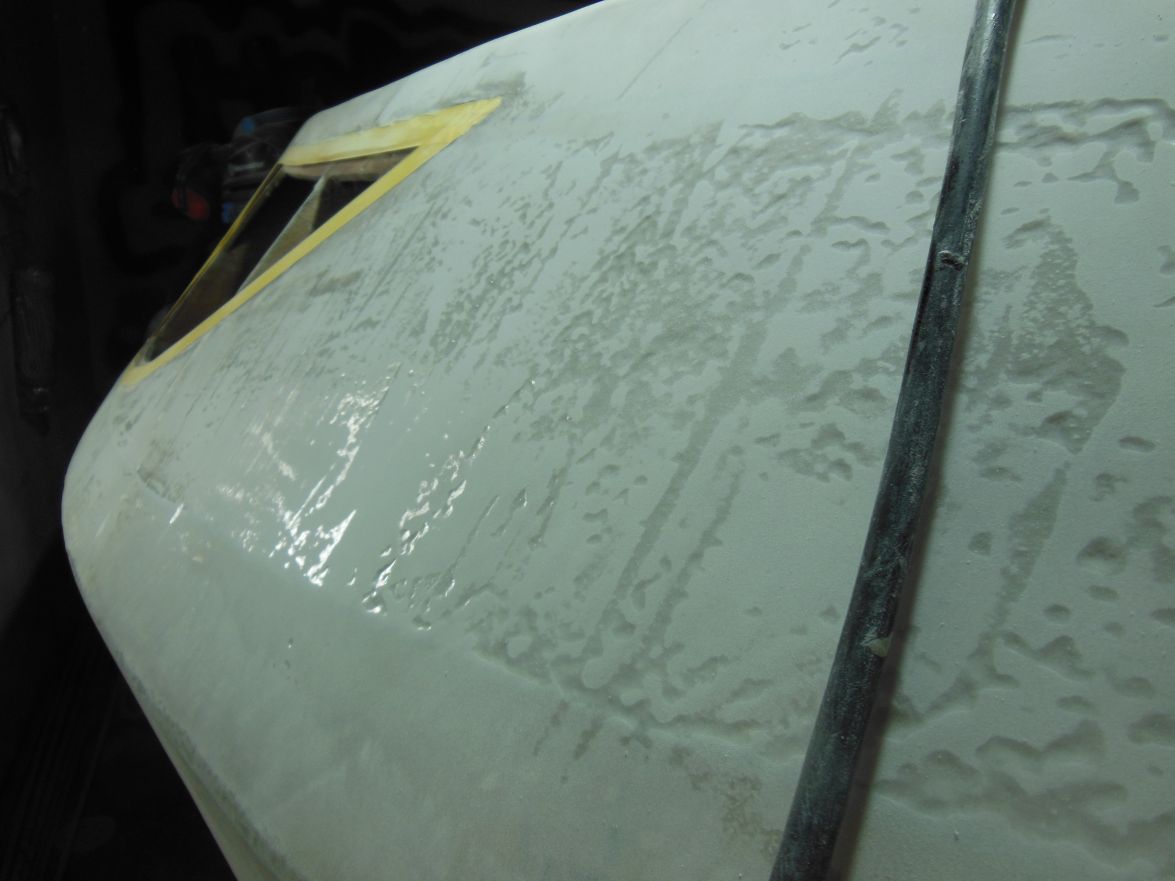
So when I saw the result after applying epoxy/silica/micro balloons and sanding afterwards I was devastated and decided to quit for the day and rather search for posts how it is done properly. Luckily I found one who battled with a 14 footer like me and naturally the perfect replies documented with pictures by CL. Now at least I know that fairing is an ongoing process until one reaches the desired quality. Thank god I am not building a 30 footer whose owner faired and sanded for more than 3 months.
Right now it looks like this and I am sure I can do it in less time and with the good ideas of CL I start working on the boat again with confidence but tommorrow .
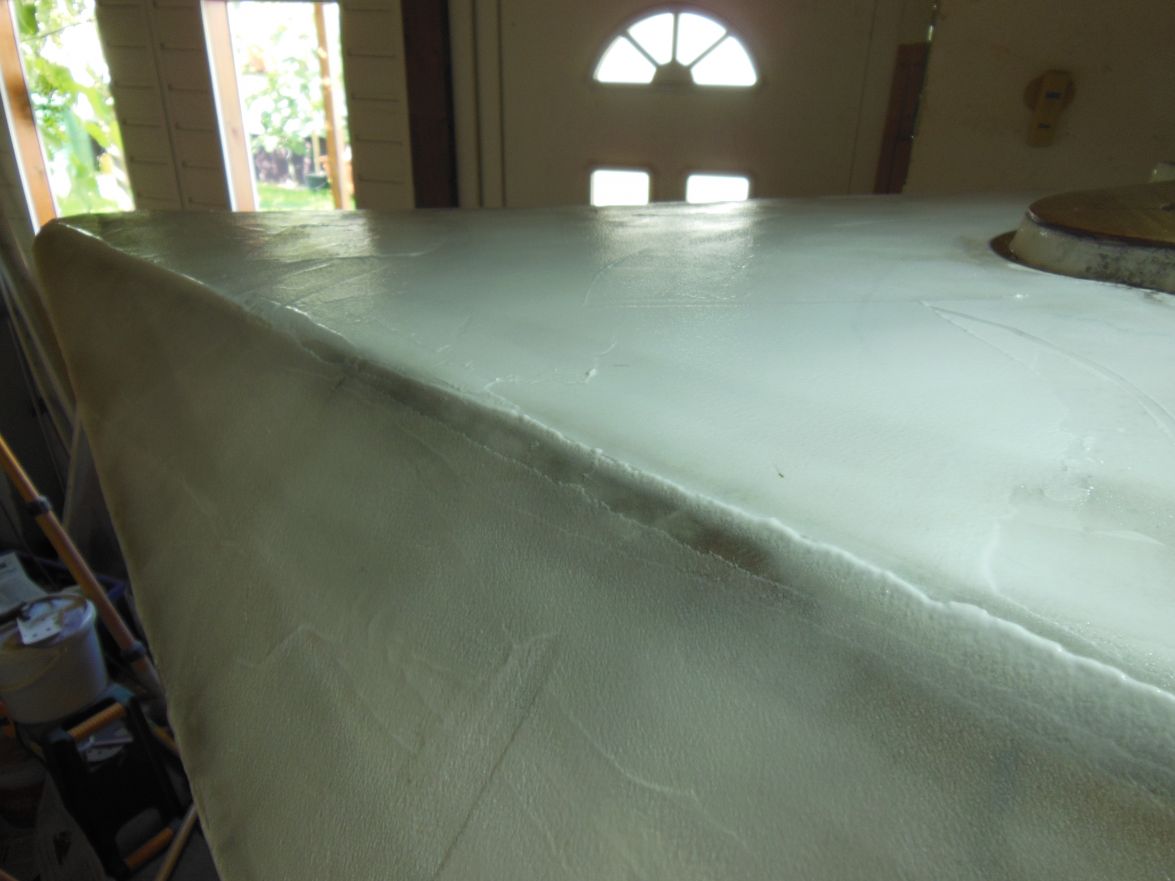
Greetings from Karl
Re: AD 14 KIELGE
Posted: Fri Jul 08, 2016 5:58 am
by glossieblack
Karl, I'll bet my house that you get your fairing and sanding spot on. You only know how to do good work. And you're old enough and smart enough to know that the time required to do so is a mere trifle. Build on!
Re: AD 14 KIELGE
Posted: Fri Jul 08, 2016 10:27 am
by jacquesmm
I wish you had access to Quickfair.
What I see is similar to the fairing done with an epoxy slurry. The product you use is probably shrinking a little bit and is harder to sand.
You can still do it, it takes more labor but how about experimenting with some other fairing compounds or mixing that one with some extra micro-balloons?
You don't want to have too thick a coat there, keep the weight low.
Micro-ballons or glass bubbles mixed in that compound may help.
Re: AD 14 KIELGE
Posted: Sat Jul 09, 2016 6:00 am
by Salvatore
Hi Karl, your mix is way to high in resin I can tell because it looks way to shiny a mix more micro beads or talcum powder in the mix is needed you will really struggle unless you can reduce the resin content take a look at my YouTube clip of building angelina and you will see a picture with me using the fairing compound I made it is nowhere near as shiny as what you have make up a small batch using a lot less resin and try that
Regard Salvatore
Re: AD 14 KIELGE
Posted: Sat Jul 09, 2016 2:27 pm
by Salvatore
Hi Karl, here is the picture. The Surface was not overly hard to do and sand, it has been a extremely durable surface and I have had no issues with it. I made my standard resin mix using the "slow hardener" (here we can get fast, standard or slow hardener). And then I added micro beads or you can use talcum powder until it was a little thicker than tooth paste (it should not be runny it needs to be firm) then I applied it with a steel trowel, not a scraper, a proper trowel allows you to press the mix firmly against the surface (see image below) The Image is 2:59 seconds into the video (link Below) I hope this info will be helpful for you.


Building Angelina video
https://youtu.be/plQZZJgnWzk
Regards, Salvatore
Re: AD 14 KIELGE
Posted: Sun Jul 10, 2016 3:14 am
by gonandkarl
Hi,
Thanks Jacques, Michael and Salvatore for your useful comments. Without them one could get close to despair.
I looked at your building video and it just proofed to me that I am clumsy. I did use silica and microballoons and the consistency I have I must still work on. The advise it should be like toothpaste I like a lot. My main problem seems to be the fine feeling application to the hull. Thats why the pictures I showed from close up looked rough and it was not sanded. Yesterday I sanded a lot on one side deck and it is getting where it should be. To apply rather thin I must also adhere and remember Larrys advise that I am not icing a cake, which I tried once and I was hopeless at that as well. ( My wife does it ever since much better )
I must say I want the fairing and sanding to happen fast, but I am finding out that there is no short cut way to have a smooth hull and what I put on too much I just have to sand off until it feels smooth to my bare fingertips.
I will show pictures again in a few days when I think I got somewhere near Tony s V10 or Bondos AD14 perfection. In the meantime I slog on and when I have a rest I look at the beautiful finished boats of the forum posts. Like looking at your 7 minute video with the nice bar music in the background is most relaxing. Even my wife commented on that positively because she normally hates the background music coming out of my notebook when I watch any boating videos.
Greetings from Karl
Re: AD 14 KIELGE
Posted: Sun Jul 31, 2016 6:14 am
by glossieblack
Hi Karl,
How's progress on your beautiful build?
Trust you've put the fairing/sanding blues behind you, even if fairing and sanding are still part of your life.
Re: AD 14 KIELGE
Posted: Sun Jul 31, 2016 8:21 am
by gonandkarl
Hi Michael,
The sanding blues are really gone but I am still sanding and trying for perfection I can see on what you call a work boat. I often look at your posts and I am most interested on the installation of your stern tube even that I never will install something like it. Between sanding I am also busy painting the push pits I built from carbon/glass fiber. As soon as I have painted the deck and benches and deck sides I want to flip the boat completely like Salvatore did in Sydney and there the mounted push pits might come in handy to rest the upside down hull on the deck near the hole for the mast and the stern with its push pits , makes it sort of level and hopefully nice to work along the sides and bottom. Pictures to come soon.
Greetings from Karl
Re: AD 14 KIELGE
Posted: Sun Jul 31, 2016 9:45 am
by terrulian
I have to tip my hat to all you guys with the bigger boats. My little V10 had way less surface area requiring fairing, and it still took me a very long time. But on the other hand, I miss working on it.
Re: AD 14 KIELGE
Posted: Sun Jul 31, 2016 7:47 pm
by das boot
Hi Carl, On sanding those large areas i use a belt sander i would start with a crose belt then go down to a fine belt i finished it off with an orbital sander. If you get the mix proper it works out well if you get two much hardner that is when you get this problem.I ran into it ounce or twice i found out it was because i was not using fresh cups to mesure my mix there would be enough of the old mix still in the cup to throw it off once i found that out i went to fresh cups every time they are cheep
Re: AD 14 KIELGE
Posted: Wed Aug 03, 2016 8:30 am
by gonandkarl
Hi George,
Thank you for the hint to use always new cups for the epoxy mixture. I will definitely do it from now on.
No matter what some say fairing and sanding is still tedious that is why I let myself be distracted by other boat chores like I want to paint the 6 sail battens. But before I can do that I fitted them into the sail pockets and made a little dip on each end as well as a 1 cm hole to tie them to the sail. Then I naturally wanted to see how it will look rigged on the mast. I leaned the mast against the house secured it with a line in the first floor room and hoisted the sail. Was ok for a test rig and then it looked like this.
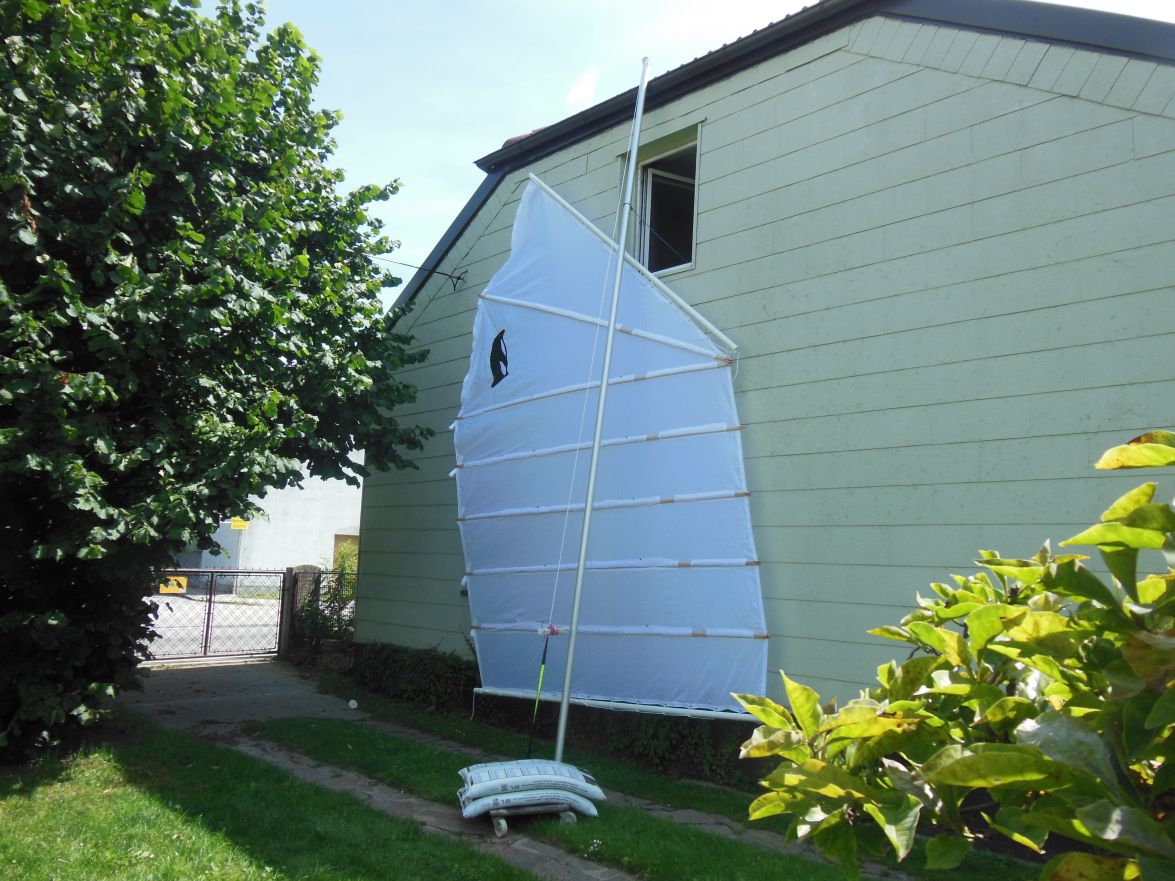
Because the parrels are still missing the sail did hang just straight down and nowhere near the mast line but at least I got an impression how it will look like on the boat. The lacing of yard and boom I must also still improve with practise but seeing I did that for the first time I am already happy that none of the lines came loose.
Even that there is no wind a little bit of it started to move the sail away from the house wall and I feared already the worst the chair in the upstairs room where the mast was fastened to coming flying out the window. So I just made a few pictures and lowered the sail again. Now nothing stops me from painting the sail battens as an alternative to a sanding afternoon.
Greetings from Karl
Re: AD 14 KIELGE
Posted: Wed Aug 03, 2016 9:18 am
by terrulian
Wow, how cool is that? Excellent, Karl.
Re: AD 14 KIELGE
Posted: Wed Aug 03, 2016 10:55 am
by jacquesmm
You can re-use the cups but you must wait until they fully cure, probably the next day. The cured resin will peel off and you will have a clean cup.
Re: AD 14 KIELGE
Posted: Thu Aug 04, 2016 2:38 am
by Salvatore
Hi Karl,
The sail looks really cool
how is it held by the Mast and how does the stay on the lee side of the boat stay on? I have never taken a close look at Junk sails and I am curios
Re: AD 14 KIELGE
Posted: Thu Aug 04, 2016 4:39 am
by glossieblack
Way to go Karl. Break up the fairing work with fun work.
Such an elegant sail on KIELGE is going to set her off nicely.
Re: AD 14 KIELGE
Posted: Thu Aug 04, 2016 9:23 am
by gonandkarl
Hi Salvatore,
The sail will always be on the port side of the mast and it is held against it with long batten parrels made of rope. These will be attached to the battens well forward ( at the luff ) and well aft of the mast thus allowing the batten considerable for-and-aft movement and it will develop the minimum amount of friction when hoisting or lowering. Its function is to hold the battens in to the mast on the starboard tack. You see on the picture of my sail I left the batten pockets open behind the mast line to be able to attach the parrel with a clove hitch tighened ( behind a round-headed screw in the batten) until a flat hand can just lie between mast and parrel. At the top there will be a yard hauling parrel attached at the sling plate and it passes round the mast and then down to the deck. It is comparable to a mast traveller in traditional Western lug rigs. It permits a certain amount of fore-and-aft position of the yard on the mast. From batten 5 over 4 and 3 there will be a luff hauling parrel running down to the deck and batten 1 and the boom end will have a standing lower luff parrel. I am sure now you are quite confused from my description of my chunk rig. I think it is best I go back sanding, finish the boat as fast as I can and show pictures of the rig on the boat.
But in the meantime I took a picture of the rig of Haslers boat Pilmer. I planned my sail according to Pilmer just half the size.
My sail is only 11.2 square metres.
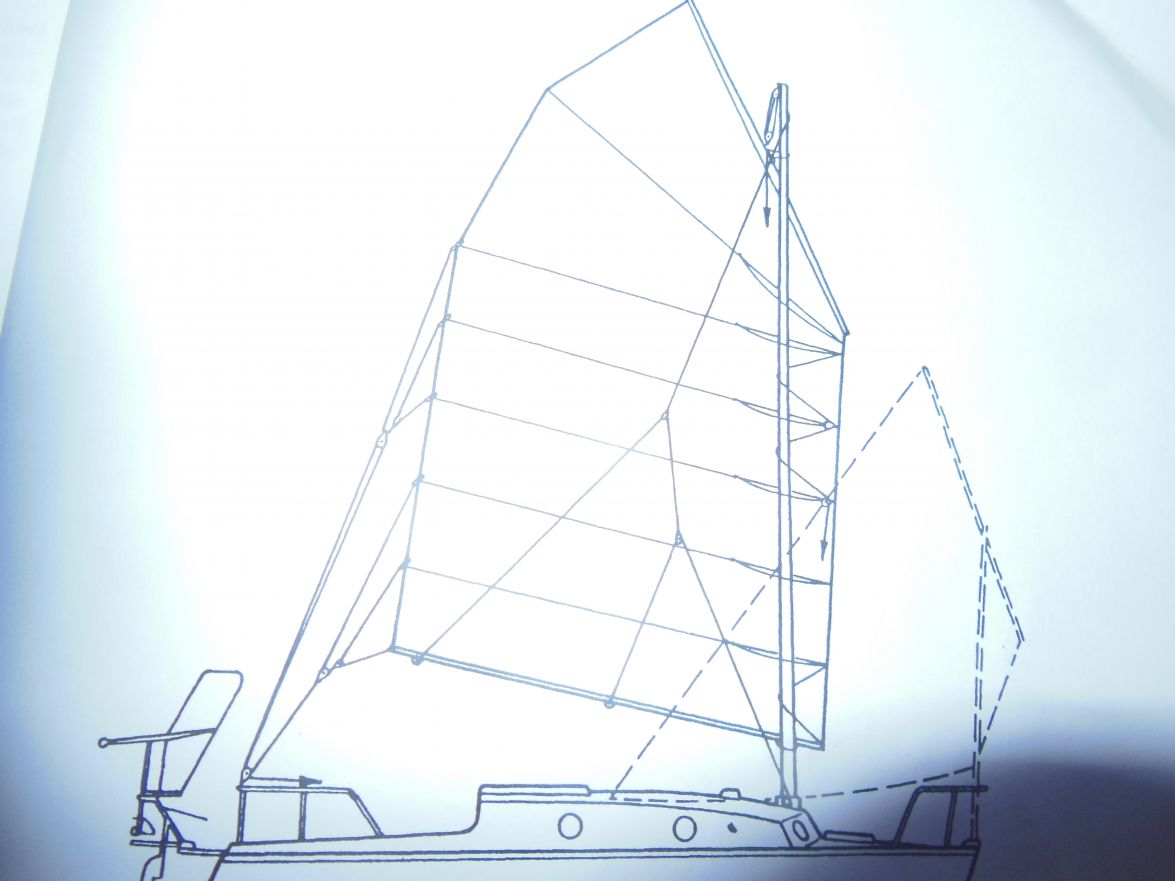
Greetings from Karl
Re: AD 14 KIELGE
Posted: Fri Aug 19, 2016 1:58 pm
by gonandkarl
Hi,
For some reason or the other I catch myself doing something else whenever I feel tired of fairing and sanding the boat. I use a Bosch rotary sander but even the light weight of it makes me tired after a 2 - 3 hour session.
When I stumbled over personal floating devices ( swimming noodles ) I bought 10 of them each being 160 cm long and started making cockpit seats of them. I got this idea from Practical Boat Owners Great ideas and tips from reader Edward Sutton who explained in an article of the October 2015 edition how to do it .
I cut the noodles into pieces to make 6 cushions consisting of 5 lengths then I burned 6 holes through both sides with a poker heated in a gas burner. Unfortunately I ran out of the blue synthetic fibre for stringing the pieces together and I have to get some more for the 6 th cushion. The resulting cushions are in my opinion surprisingly comfortable and are waterproof and buoyant enough to be the first item at hand to throw to anyone overboard. I hope to be able to use them also as cheap fenders and will not buy any blow up fenders at the beginning of my sailing.
When I got home from buying the swimming noodles I realized I had 11 and made therefore from one of the noodles this test seat 33 x 32 cm and this should be ok for one of my grandchildren:
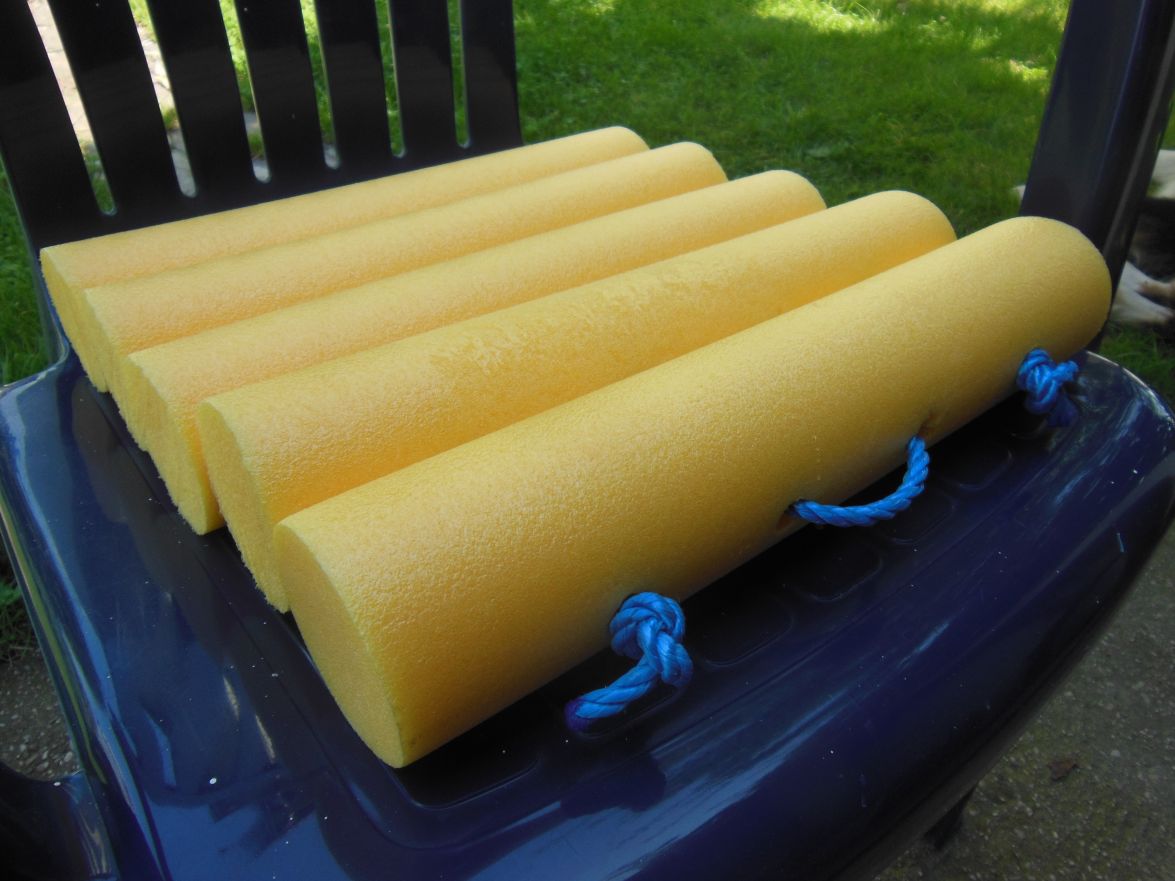
Afterwards I used the 10 noodles to produce the following 6 cushions each measureing 33 x 52 cm and they will fit nicely onto the two benches of my AD14:
Here they are partially cut:
And here they are finished :
All in all was this little project not neccessary to come nearer to splashing. But on the other hand nobody will suffer from uncomfortable seating after a few hours should I not get the boat ashore on the maiden trip.
Greetings from Karl
Re: AD 14 KIELGE
Posted: Fri Aug 19, 2016 5:52 pm
by Cracker Larry
Very cool idea!
Re: AD 14 KIELGE
Posted: Sat Aug 20, 2016 8:34 am
by Jeff
Karl, very creative idea and excellent for safety as well!!! See you in October!!! Jeff
Re: AD 14 KIELGE
Posted: Sun Aug 21, 2016 7:50 am
by waytootall
I love the look of the sail. I am starting the process of figuring out what I want to do for my sail. What are you using for the mast in that picture?
Re: AD 14 KIELGE
Posted: Sun Aug 21, 2016 8:05 am
by gonandkarl
This is just a standard aluminium sailing mast 7m which I bought 400 km away at (
http://www.fk-mastbau.de/ ) from me and brought it home on the roof carrier. They cut 90 cm cut off because my mast needs to be 6.1 metre high and they fitted a simple masthead for me. ( It also has a groove for a normal sail which I wont need for the junk sail. Total cost 280 Euros ( 317 $ )
Re: AD 14 KIELGE
Posted: Sat Aug 27, 2016 4:21 am
by gonandkarl
Hi,
After sanding and fairing for quite a few days I read in some other post this important sentence from the designer:
I lack the finesse when it comes to finishing. I know how to do it but all my boats are work boat style.
I will give the deck another thin coat of fairing and a following sanding with 180 and that is it.

Greetings from Karl
Re: AD 14 KIELGE
Posted: Sat Aug 27, 2016 3:48 pm
by Jeff
Really looks nice Karl! Jeff
Re: AD 14 KIELGE
Posted: Sun Aug 28, 2016 2:10 pm
by glossieblack
gonandkarl wrote:I will give the deck another thin coat of fairing and a following sanding with 180 and that is it.
If you're down to 180 sandpaper, and knowing the quality of your work, she's going to boast more than a workboat finish.
As I'm about to enter the fairing and sanding tunnel, your persistence is an inspiration.
Re: AD 14 KIELGE
Posted: Wed Aug 31, 2016 7:37 am
by gonandkarl
Hi,
Port and starboard corners of seats to side decks are the only last 2 areas left to sand and before I tackle them I rest a bit and ask the following question:
Are there any tips how to send best in a rotary sander inaccessable place like this:
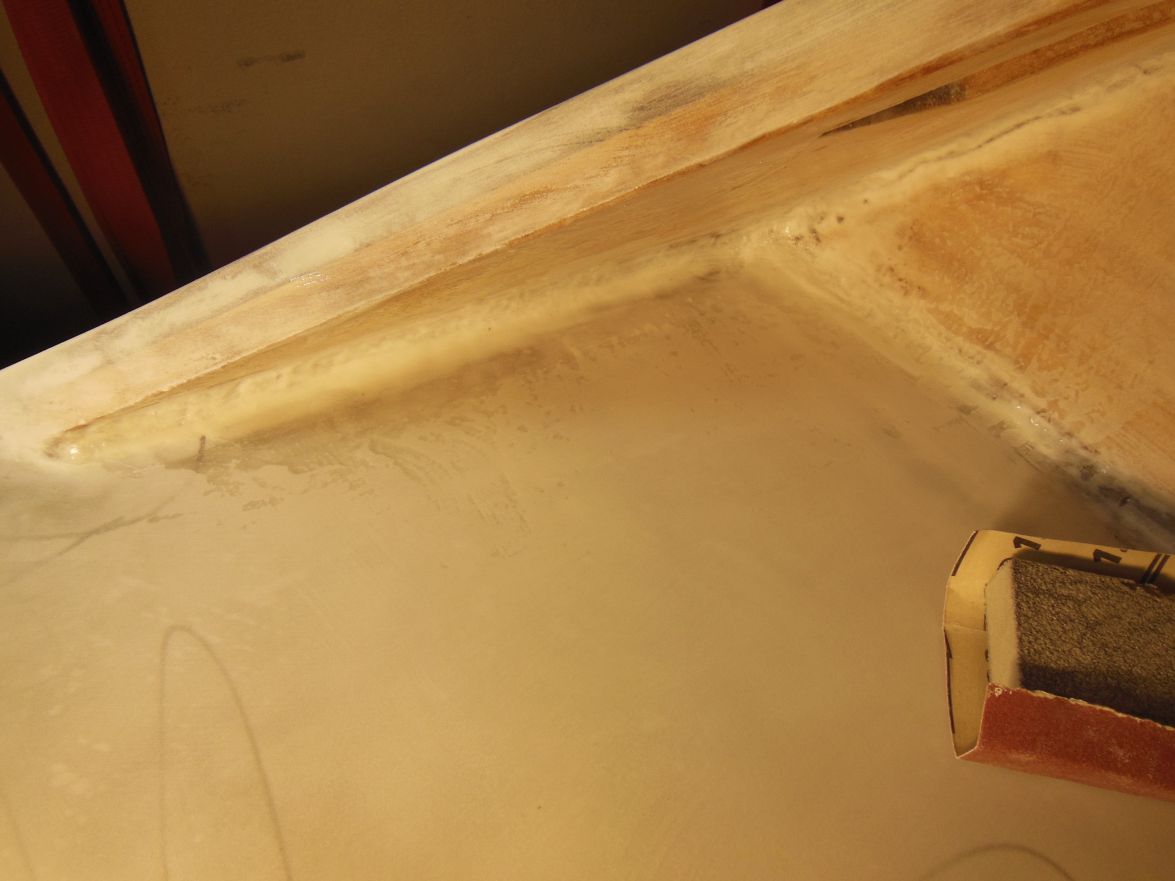
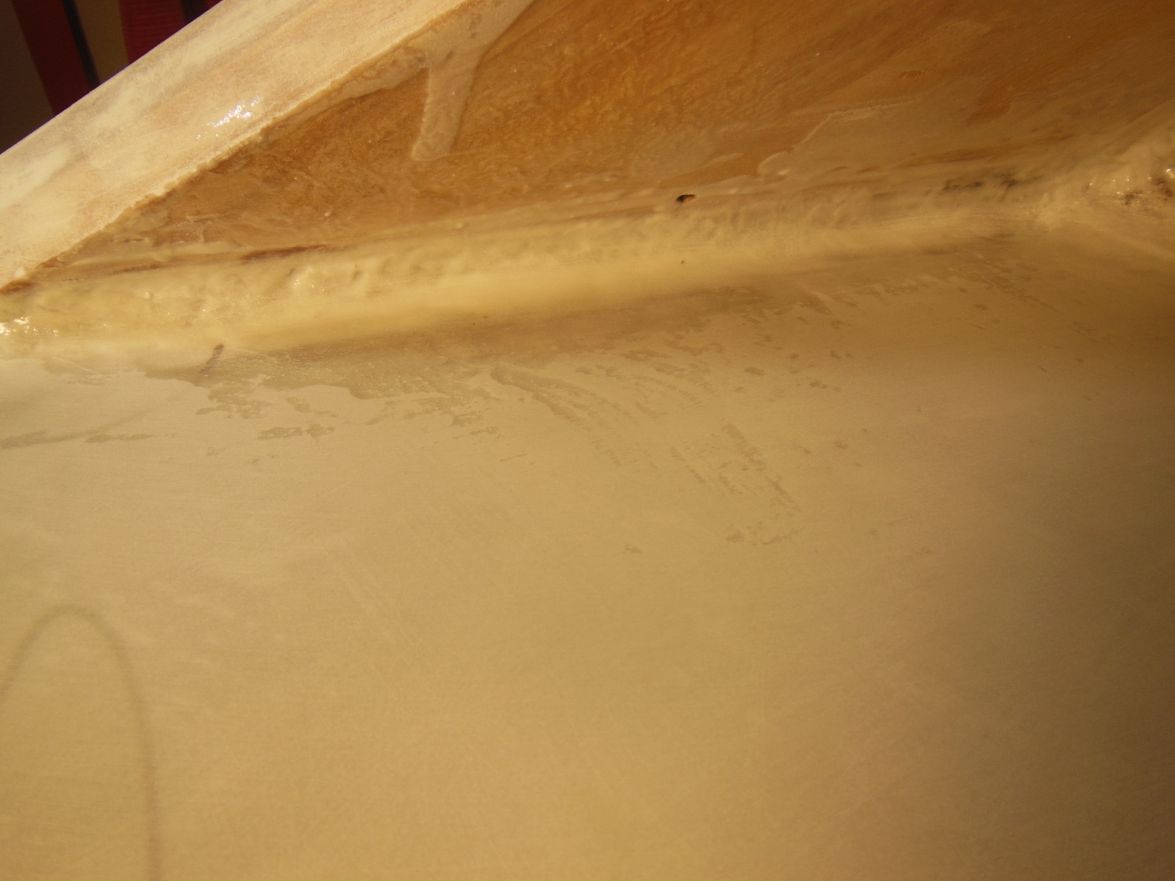
I can only think of a sponge or a spatula with a handle wrapped with sandpaper.
But maybe I find another solution here after my lunchtime snooze.
Greetings from Karl.
Re: AD 14 KIELGE
Posted: Wed Aug 31, 2016 7:54 am
by Jaysen
I hate to ask the obvious question, but "why bother?"
If it is inaccessible and not in view, then I'm not sure it is worth the effort. In the boats I've been looking at recently (production and custom) those areas always look like crap. Doesn't seem to effect the boat any at all.
For the record, I think "because it is my boat and I want it to be beautiful everywhere" is a completely valid answer. To that I would suggest a "trim sander". Those are the crazy looking multi tools that have a shaft that provides oscillation for sanding/cutting. Most of them have a "long" attachment that will allow you to get right up in there and sand all the flats. The fillet... that's all going to be done by hand.
Here's a link to the tool I'm referencing above (just the first one I found)
http://www.homedepot.com/p/RIDGID-JobMa ... /206824272
Re: AD 14 KIELGE
Posted: Wed Aug 31, 2016 9:01 am
by terrulian
Karl,
I can't tell exactly where that is. I'm sort of with Jaysen so for example, the inside of the lockers in my seats were just sanded smooth enough to take away any gnarly rough spots on the glass. The underside of my center seat is sanded, primed, and painted, but I didn't use any fairing compound on it. There's no glass there anyway and it is pretty smooth but I figure that considering the amount of contortions you'd have to go through to even look at it, I could relax a little.
However, if it is visible, I think I'd try to come up with something, and I bet Larry will have an idea. The only thing I can think of is a version of your spatula concept, only you might try this: Use a multitool as Jaysen suggests, but sacrifice a blade, drill a couple of holes in it, and then bolt something like your spatula idea to it.
Re: AD 14 KIELGE
Posted: Wed Aug 31, 2016 9:34 am
by Cracker Larry
A rotary sander isn't going to get in there. I use what Jaysen suggested, a multi-tool. I've had a couple and the Rockwell Sonicrafter I have now is a fantastic tool for many purposes. If you don't have one, you want one and don't know it
https://www.rockwelltools.com/en-us/Son ... r-F50.aspx
Re: AD 14 KIELGE
Posted: Wed Aug 31, 2016 9:49 am
by terrulian
Since I can't tell where that is, it is not clear to me that a normal multi-tool will have the clearance to fit in. That's why I suggested the jury-rigged idea. Larry's right, if you don't have a multi-tool, you need one. I like my Porter-Cable, which has a quick-release head for changing tools.
Re: AD 14 KIELGE
Posted: Wed Aug 31, 2016 10:27 am
by gonandkarl
Hi,
Thank you so much Jayson, Tony and Larry. It is the top of both benches where they meet the bulkhead and the sidedeck has a triangular extension onto the seat along the chine. I agree with Jayson one will hardly see what finish I have there, but I want it at least completely flat so that dirt cannot attach itself in a hollow. My first mistake was after fibre glassing the seat top and using peel ply to think, I have to spread fairing on top of it which gave me the uneven area. But worst of all is that I am getting old and it needed Jason to remind me what electric tool I can use. When I saw his posted picture I remembered that I have 2 Multifunction tools from Bosch 240 E and a Bosch PM 180, the 240 even with a nice triangle prolongation to get into any corner. I think the answer is I must clean my workshop on a regular basis and by doing that I will see all the tools I have got on the shelves and not used since ages and have the benefit of a workshop like glossiblack where I have not seen a speck of dust.
Sorry to bother you guys but thanks nevertheless.
Greetings from Karl
Re: AD 14 KIELGE
Posted: Wed Aug 31, 2016 11:46 am
by Fuzz
Karl don’t feel bad. I am the same way. When I clean my shop I always find things that have been missing for ages. And if I am working on two projects in different locations....................well forget about it
Re: AD 14 KIELGE
Posted: Wed Aug 31, 2016 11:48 am
by Jaysen
I was helpful? Don't tell the Mrs, I don't want her getting the wrong impression
i know the feeling about tools. I sold most of my shop and have refused any projects until Lil Bit. Now I keep wandering around looking for tools only to realize "I sold it" before we moved. Then I go buy a new one, stop at storage unit to get something for Mrs and guess what? I didn't sell it.
I keep telling myself I'm not old enough to have this bad a memory but the evidence is against that statement being true.
Re: AD 14 KIELGE
Posted: Thu Sep 01, 2016 1:46 pm
by gonandkarl
Hi,
Tony asked me where on the boat it is that I cannot get to with the rotary sander.
I answered:
It is the top of both benches where they meet the bulkhead and the sidedeck has a triangular extension onto the seat along the chine.
I made a mistake I should have said sheer instead of chine. Not only do I forget which tools I have got but also that the chine is along the bottom side of the boat and the sheer is on the side of the top.
I have sanded the 2 areas in question in the meantime with my Bosch 240 E and it looks OK, or like some say at the distance of 3 feet it looks perfect.
Greetings from Karl
Re: AD 14 KIELGE
Posted: Thu Sep 01, 2016 2:47 pm
by terrulian
OK, Karl,
Not only do I get it now but I had a very similar problem on my V10. The forward bulkhead also forms an acute angle making it impossible to sand along the fillet with a proper tool, except for a dowel and elbow grease. That wasn't producing an acceptable result, which is why I resorted to using a piece of PVC as a form for the curve; and then some more sanding. It was tedious and frustrating but finally got done.
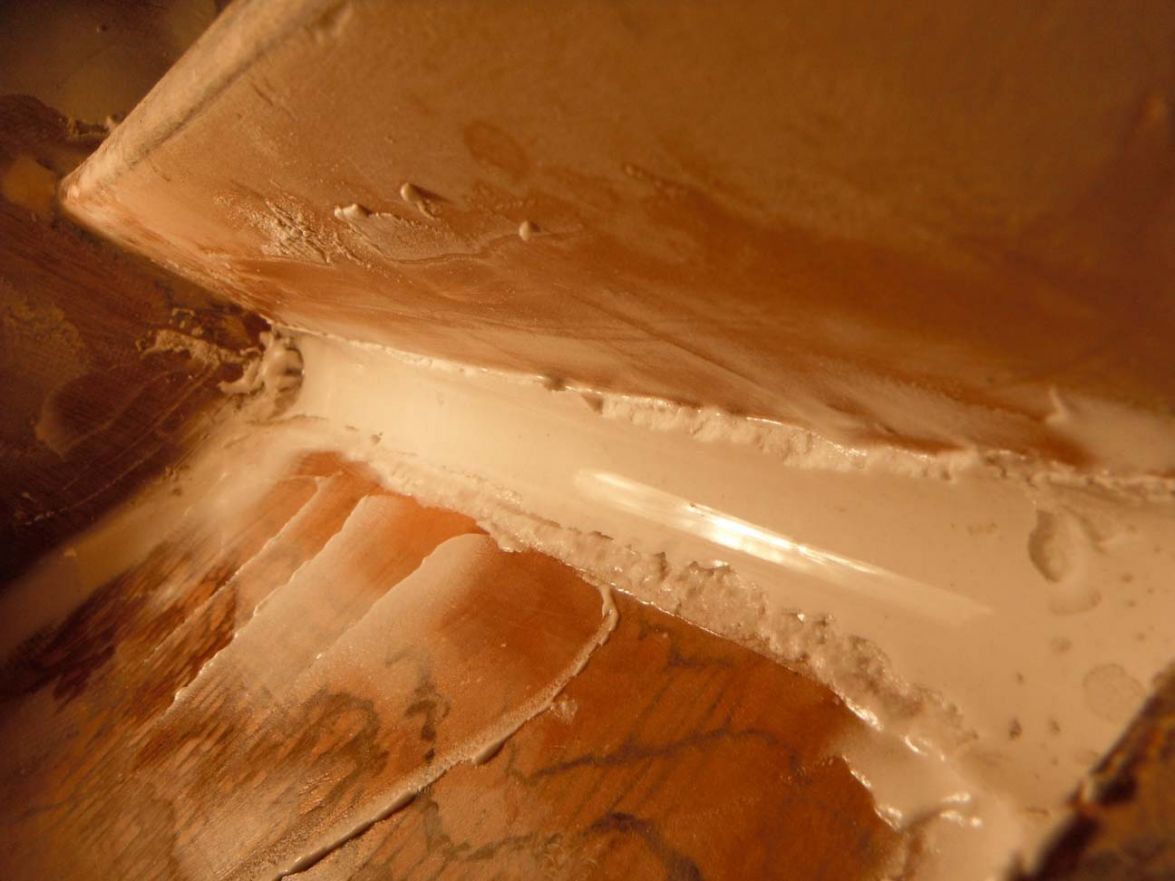
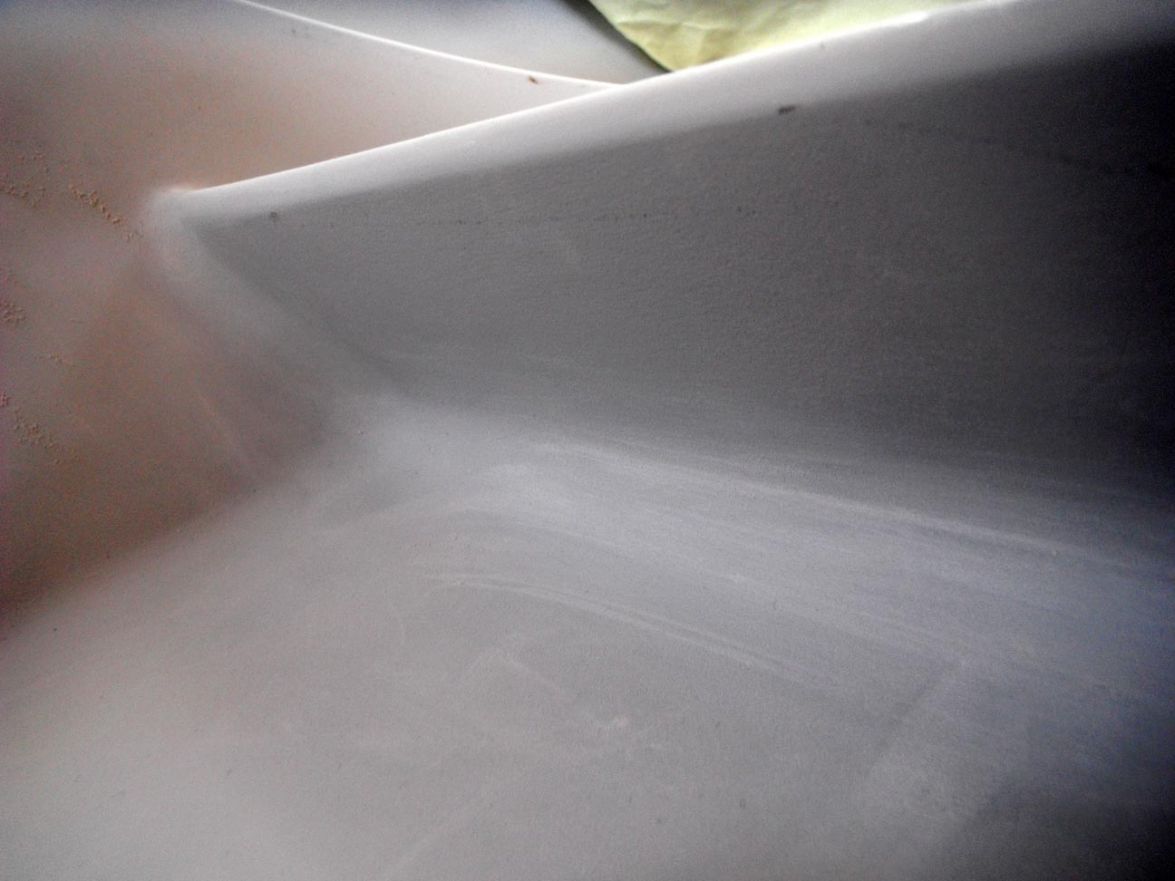
The second photo looks way worse than it actually is. It's a very nice, smooth radius now.
Re: AD 14 KIELGE
Posted: Thu Sep 01, 2016 3:01 pm
by Jeff
terrulian, it looks great!! I am sure this was a lot of work but great result!! Jeff
Re: AD 14 KIELGE
Posted: Thu Sep 01, 2016 4:15 pm
by Corto Maltese
Karl, I find usefull this fingerschleifer

You can access the most hidden spaces, which could be admired later only by mice
Re: AD 14 KIELGE
Posted: Sat Sep 03, 2016 1:11 pm
by gonandkarl
Hi,
At last I have faired and sanded the deck, sides and cockpit seats and can start to paint them tommorrow.
I even got the radii of the fillets between seats and bulkhead reasonable smooth.
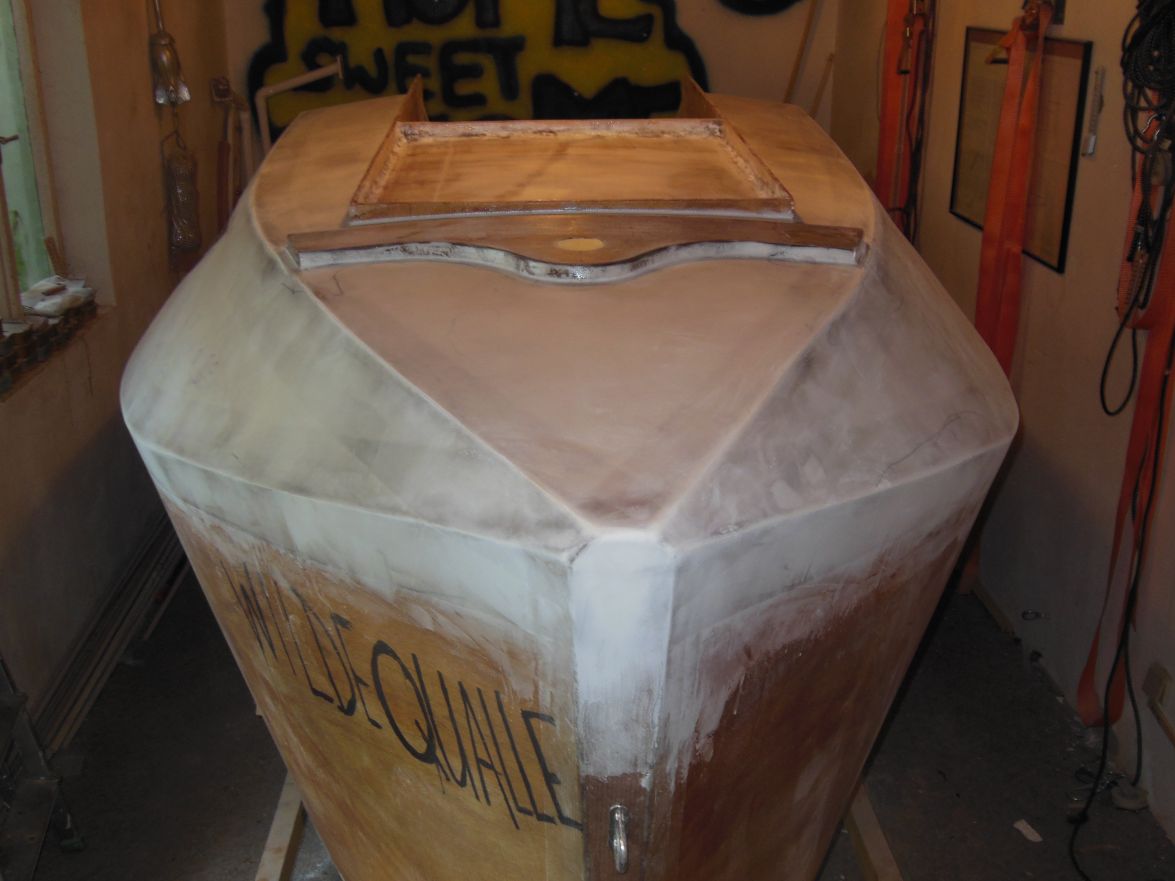
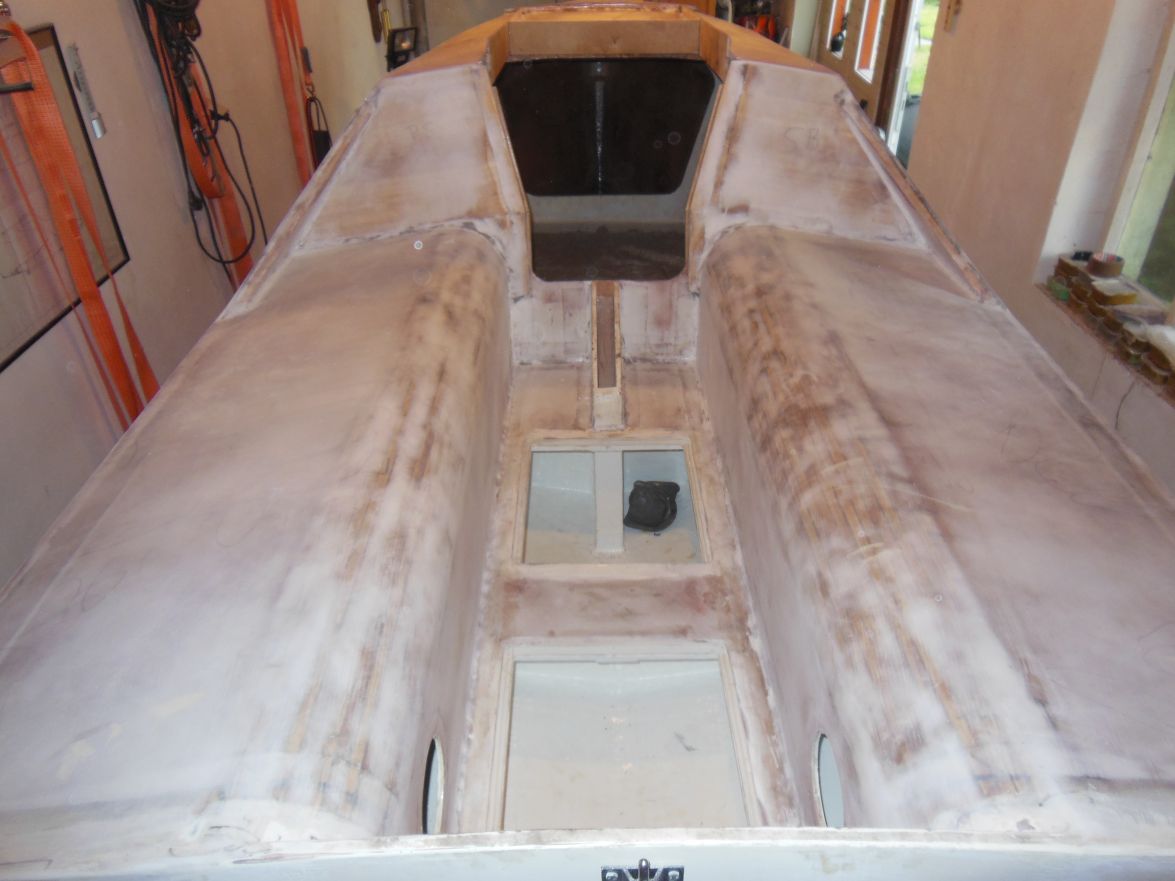
Greetings from Karl.
Re: AD 14 KIELGE
Posted: Sat Sep 03, 2016 1:46 pm
by Jeff
Looks really good Karl!! Jeff
Re: AD 14 KIELGE
Posted: Sat Sep 03, 2016 5:49 pm
by waytootall
Looks very good. I really appreciate what you are doing since I am just starting this on the bottom of mine. You are making me want to do a better job
Re: AD 14 KIELGE
Posted: Sun Sep 04, 2016 2:49 am
by gonandkarl
Hi waytootall,
I will start to paint the deck and seats before I flip.
Then I will glass the bottom and sides and mount the keel shoe. (*)
Then I will epoxy/graphite the bottom.
Then I will paint the sides.
This sequence I found out to be best when I built the FS13, because any runs of epoxy/graphite or side paint will be down and can easyly prevented with 2 layers of masking tape along the lines.
That is the plan but at the speed I am going you will have your AD14 already in the water. Can you splash your boat in Melbourne (Florida) also in Winter ?
You are really fast with your build. I admire that. While I am thinking ahead about the above plan you already have it done. I think I juggle any next boat building step longer in my mind than actual making it.
And I am not so sure if I am making a better boat I have used one of terulians tricks with my pictures. I took them from a few feet away.
* I have one question to you: Did you first mount the keel shoe and then glass the bottom or glass the bottom first and then cutting the hole for keel shoe and mount it ?
Greetings from Karl
Re: AD 14 KIELGE
Posted: Mon Sep 05, 2016 10:22 am
by waytootall
I am not really ahead. I am doing things in a little different order for other convenience reasons. I only partially finished the top and seats before flipping because I wanted to get the bottom done so I wouldn't have to worry about frames for flipping it while finishing the topside. I could splash in winter (anytime other than January really) but I doubt I will be ready. I still haven't decided what I am doing for a mast yet or started on the tiller or any sailing hardware.
On you keel shoe question, here is the order I did which worked for me:
1. Cut the slot in the bottom
2. Tape the seam (in front of and behind the slot and tape the inside of the keel trunk to the bottom)
3. Fiberglass side and 1/2 of the bottom (top half that is now easily accessible)
4. Mount keel shoe
5. Fair side and 1/2 of bottom at is accessible
Planned next steps:
6. Flip to the other side
7. Fiberglass other side and other half of bottom
8. Fair this side and bottom half
9. Paint bottom
I will be posting pictures of steps 4 & 5 that I did this weekend over in my build soon.
Re: AD 14 KIELGE
Posted: Mon Sep 05, 2016 4:21 pm
by gonandkarl
Hi,
Thank you waytootall now I know what sequence of to dos are ahead of me. I painted the deck and benches and sole between them yesterday with a primary white paint and today I put on a second coat. I used a bit of colour pigments on the second coat so it was easy to see where I have not covered the white yet.
After first coat of paint:
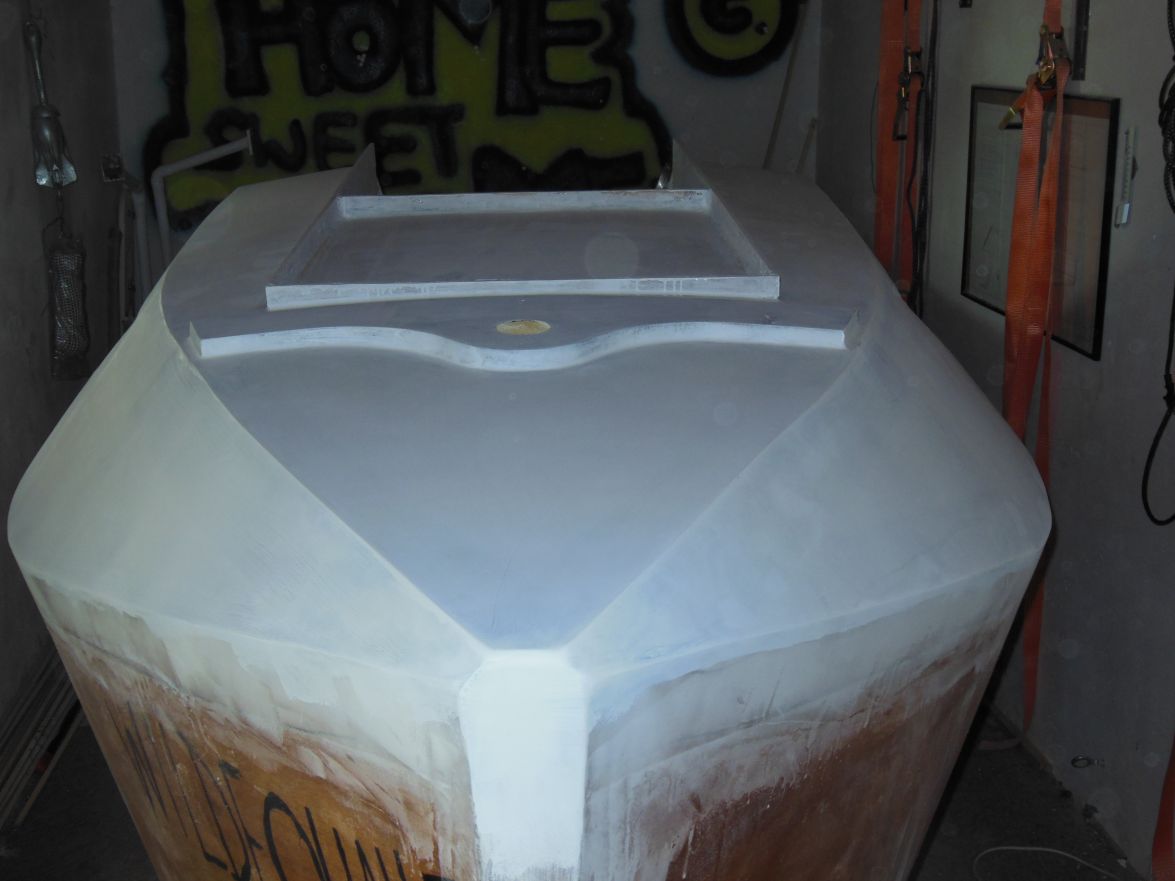
After second coat of paint:
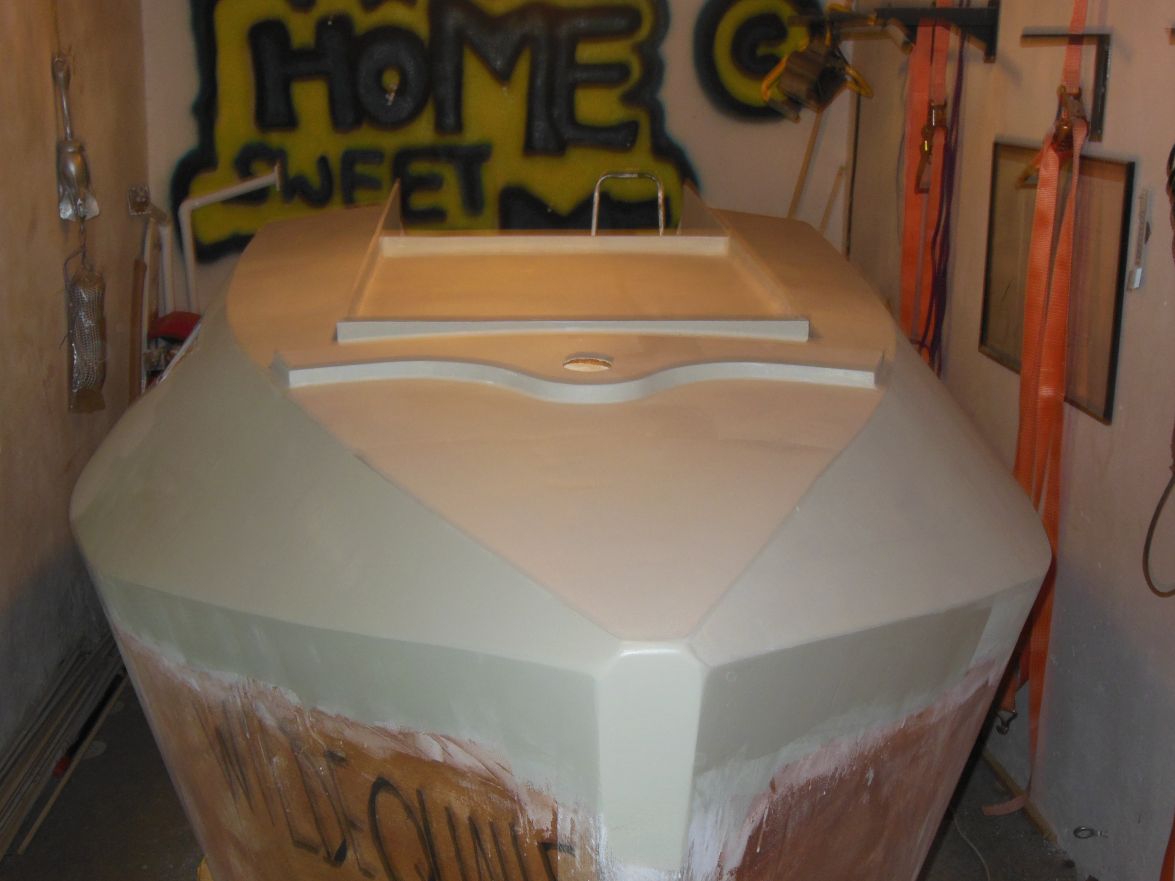
Tommorrow I wil be putting on the 3rd coat of paint white again.
Greetings from Karl
Re: AD 14 KIELGE
Posted: Mon Sep 05, 2016 6:52 pm
by Jeff
Karl, really looking nice!! Jeff
Re: AD 14 KIELGE
Posted: Tue Sep 06, 2016 2:22 am
by glossieblack
Congratulations Karl on mastering the fairing caper. She's looking great.
Re: AD 14 KIELGE
Posted: Fri Sep 09, 2016 1:58 am
by gonandkarl
Hi,
It looks as if I master the rolling and tipping of paint also soon. After the 3rd primary coat I put on the first topcoat and I am happy how I got the tipping done. It looks as if I got a light in the mast hole but it is the reflection of the ceiling light on some piece of yellow swimming noodle I pushed into it to prevent paint dripping into the boat.
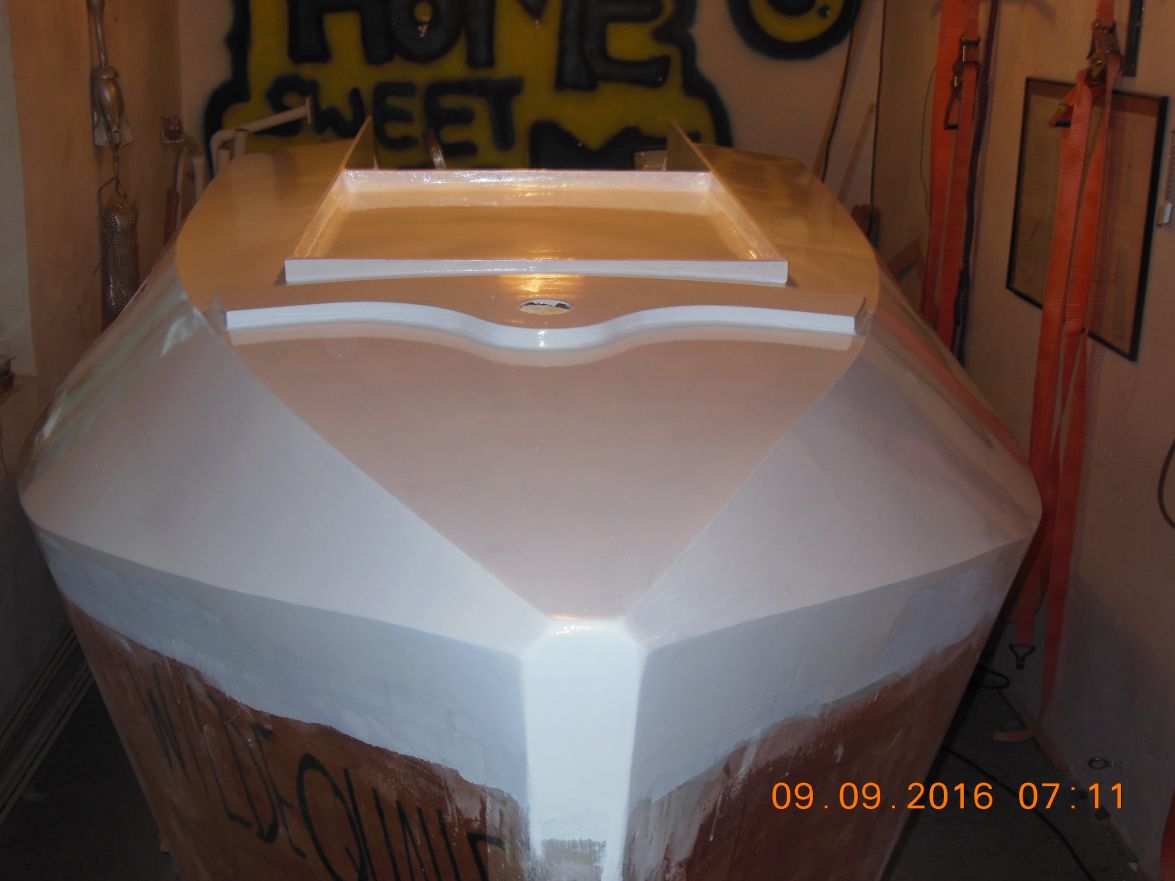
Unfortunately I got about 10 very small fruit flies onto the fresh paint coming from the grape vine I have just outside the boat shed.
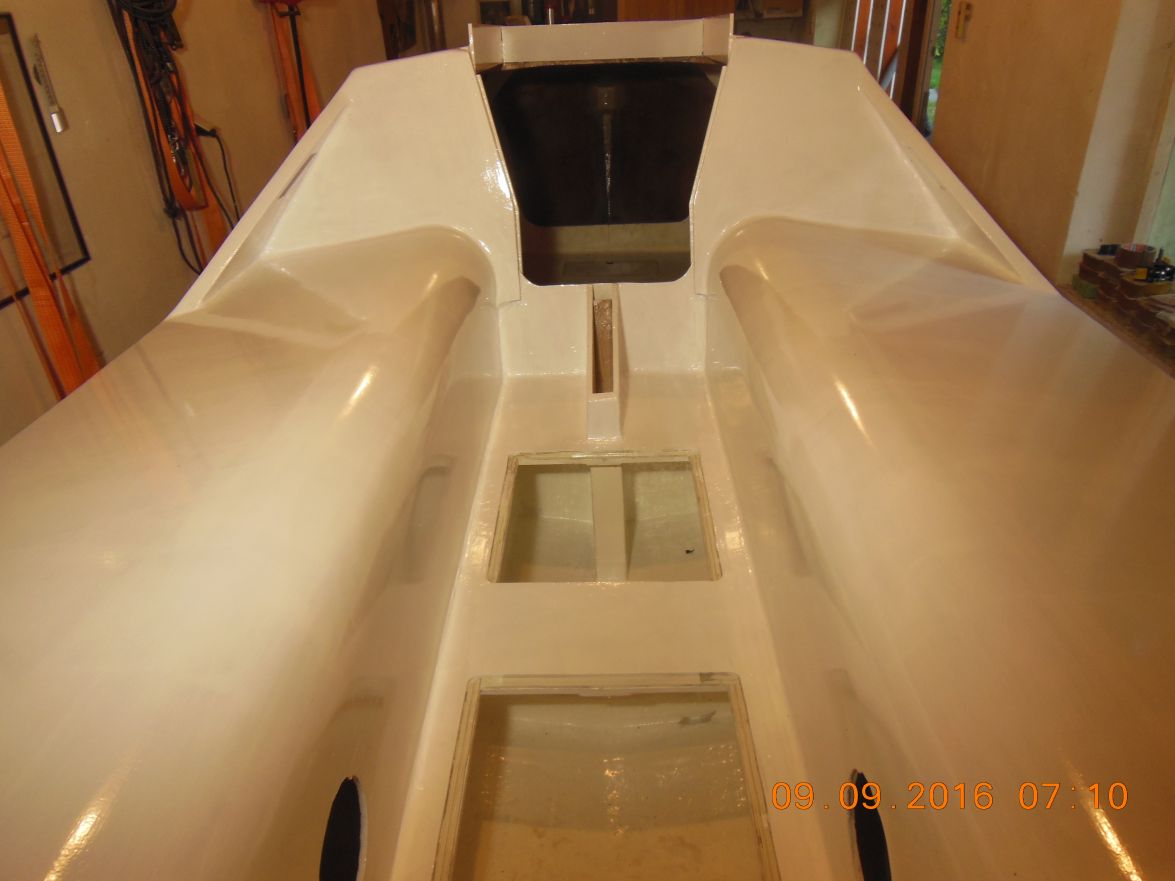
Two more top coats and I am ready for the first flip.
Greetings from Karl
Re: AD 14 KIELGE
Posted: Fri Sep 09, 2016 4:11 am
by glossieblack
Take a deep bow Karl. Well done!
Re: AD 14 KIELGE
Posted: Fri Sep 09, 2016 7:47 am
by Jeff
Karl, Very nice work!! Jeff
Re: AD 14 KIELGE
Posted: Fri Sep 09, 2016 8:43 am
by terrulian
I found the mastery of painting, or should I say,junior varsity mastery of painting, very frustrating and tedious, but in the end a tremendous boost to my confidence. I know that with the proper attention I can now make things look pretty good if I want to. But you seem to have crossed this barrier with ease. Looks great, Karl.
Re: AD 14 KIELGE
Posted: Fri Sep 09, 2016 8:44 am
by pee wee
That looks great. I don't know why bugs like fresh paint so much, but they can't resist it.
Re: AD 14 KIELGE
Posted: Fri Sep 09, 2016 11:33 am
by gonandkarl
Thanks Michael, Jeff, Tony and Peewee,
It was not easy at all and I swet like hell at 30 degree Celsius yesterday, but the main thing is that I think I got licked is tipping the one brush stroke from left to right into the square foot of area I did before. I watched the video on Tony s posts of page 32 quite a few times to really inhale how it is done and then I just planned the sequence of painting where I always started right and painting in the left direction.
1. Deck to bulkhead on SB
2. Deck from bulkhead to bow PS
3. Side deck to bulkhead on SB
4. Side deck from bulkhead to bow PS.
5. Bulkhead next to companionway
6. PS seat top and side from bulkhead to transom.
7. SB seat top and side from transom to bulkhead. ( most problematic as I did not want to touch the other already painted side with my backside. )
8. Sole between benches from bulkhead to transom.
I describe this so detailed, maybe it might help any other Adelie builders to do it the same way.
And that is also why I show also the above mentioned link from TJ s V10 it is really worth watching.
https://www.youtube.com/watch?v=k-SGcSl ... r_embedded
Because I was happy about this first topcoat I immediately put in a lazy day today just doing a bit of garden chores.
Greetings from Karl
Re: AD 14 KIELGE
Posted: Fri Sep 09, 2016 11:54 am
by terrulian
Karl,
As I mentioned in my thread, I ended up not being able to achieve the same results as the guy in the video using his technique. I tried many brushes, cheap, expensive, bristle, foam, but all were failures for me.
What I discovered after much experimenting and have used since is not so difficult but requires very good lighting--often the most difficult part of the process--and careful application. I use a foam roller to apply it, and then come back in a direction 90 degrees from that and tip it with the same roller, very lightly. You don't have much time to do this before the paint begins to set, and once that happens, you are going to have to let it dry, sand it, and try again. The lighting has to be good to see the potential lines or ridges between strokes.
Of course, it goes without saying even though that's what I'm doing now, that without proper preparation it doesn't really matter how you apply the final coat.
Re: AD 14 KIELGE
Posted: Fri Sep 09, 2016 12:55 pm
by gonandkarl
Hi Tony,
As you said the tipping only works when the previous area has not started drying. That is why I do it like the guy on the video only 3 roller widths of paint criss cross and then immediately tipping. I use a fleece roller 10 cm wide and with 5 mm hair length and a rather expensive brush for tipping with black hair so I could see a lost hair on the glossy white straight away. Did not happen on the whole paint job. What I did notice that after a while the brush needs cleaning of paint rests but because the time is not there without paint drying up I used halfway thru a second new brush which I had at the ready on the SB seat. I think the close up on my boat shows that I did not achieve the video guys or your quality but all the tips of your thread and your pictures of painted parts helped me to get somewhere to a good quality. Even that my boat shed is rather light I used extra lighting besides the three 100 watt ceiling lamps to see every tipping stroke. Next time I will not make the mistake to having to move the light from SB to PS and bow to transom but rather have 4 fixed lamps. Practise seems to help the most which I had so far on 2 boats and a big garden table where the challenge was less as on a flat surface there are no runs, which I wiped this time with a cloth away immediately.
Thanks again for your discussion on your thread about painting which was invaluable for me.
Greetings from Karl
Re: AD 14 KIELGE
Posted: Fri Sep 09, 2016 1:44 pm
by terrulian
I find it most interesting that a technique that works for one person is not what works for another. Oddly enough, of all the options, for me the fleece roller was the most problematic. Of course what is available at one paint supplier, even if it is the same type, may be different if not the same brand. This along with all the other variables like temperature, technique, and lighting, makes it quite complicated to figure out. Your point about practice is, unfortunately, true. I did get better and better at it but by that time I had put on (and sanded off) a whole lot of paint!
Re: AD 14 KIELGE
Posted: Sat Sep 10, 2016 9:34 am
by gonandkarl
Hi,
Today I painted the decks, seats and cockpit of the boat with the second layer of top coat and only one more to go then I can flip the boat. Again I forgot to close windows and door of the boat shed whilst painting. Found that out when the first little fruit flies landed on the white paint. At least I closed everything after painting.
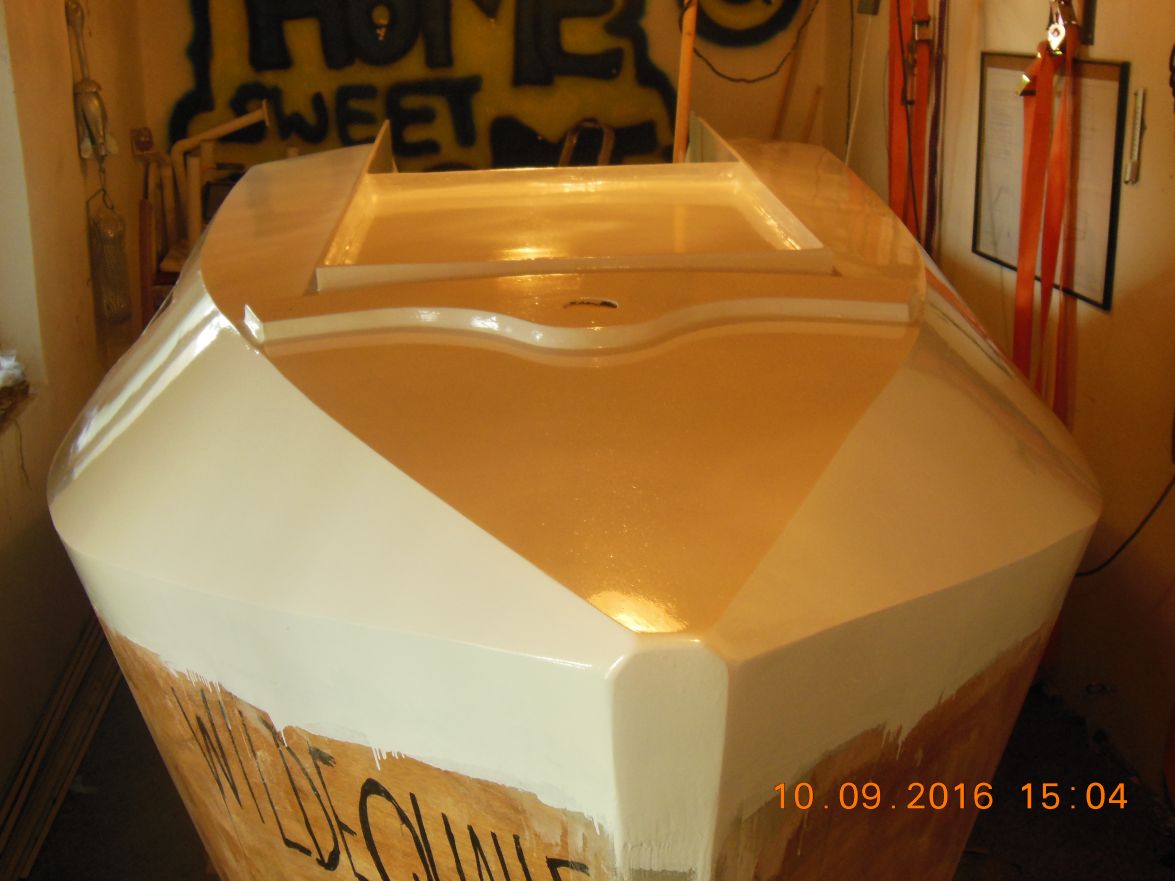
Greetings from Karl ( on a real hot Summer day in Austria 10 th Sep ! )
Greetings from Karl
Re: AD 14 KIELGE
Posted: Sat Sep 10, 2016 9:39 am
by terrulian
What paint are you using?
Re: AD 14 KIELGE
Posted: Sat Sep 10, 2016 7:11 pm
by gonandkarl
Hi Tony,
As I dont want to spend a lot of money on paint I am using paint of a local ( here in Wels Upper Austria ) paint factory
http://www.tiger.at which is called Tiger Bootslack meaning Tiger ( the companys name ) and boat paint.They have a primary boat paint and a top coat paint in lots of colours in gloss or no gloss which I think you call dull or dead. I have used 3 coats of primary paint and so far 2 coats of their gloss top coat paint. This firm has also a small branch in the USA and their link is
http://www.tiger-coatings.com but I think they do not sell the boat paint there, at least I could not find any boat paint searching their US homepage while on the Austrian homepage one finds it immediately searching for Bootslack.
I think it has something to do with the application of the paint and the health risk, because all international well known boat paints you cannot buy here except if you are a professional boat builder who has gas masks like for world war 3. This local paint is most probably just as hazardous about the health but one can buy it in any home depot or hardware store where the sell everything for house builders and also paint.
For me the price and the easyly availability was important.
One Litre of primary Bootslack costs 14.48 $
One Litre of Top Coat Bootslack costs 20.16 $
And that it is not too bad I proved with my garden table painted with it and survived 2 winters outside already with rain snow and ice on top of it.
I should not have rambled on so long just about paint but I did.
Greetings from Karl
Re: AD 14 KIELGE
Posted: Sat Sep 10, 2016 8:36 pm
by terrulian
Well, it looks good. You're probably right about the different regulations in different countries.
I am happy with using the cheaper paint. It still looks good (when I wash the mud and sand off) but it has a few scratches that mysteriously appeared. It couldn't possibly have been my boat handling!!
Re: AD 14 KIELGE
Posted: Sun Sep 11, 2016 5:21 pm
by waytootall
It looks really good. I am just starting to think about the painting since that is coming soon. I haven't looked at choosing a paint yet but unfortunately I don't think I want to order it from Austria
Re: AD 14 KIELGE
Posted: Mon Sep 12, 2016 2:33 am
by gonandkarl
Hi waytootall,
I am sure you can also get cheap paint in the USA. Just ask terulian what he used.
Today is the big day I am putting on the last coat of top paint and will flip in a few days.
Greetings from Karl
Re: AD 14 KIELGE
Posted: Tue Sep 13, 2016 12:31 pm
by Cracker Larry
Looks real good, Karl
Found that out when the first little fruit flies landed on the white paint. At least I closed everything after painting.
I don't know what it is about fresh paint that bugs love so much, but a fresh coat of paint draws half the bugs in the county to it
Re: AD 14 KIELGE
Posted: Tue Sep 13, 2016 2:32 pm
by gonandkarl
Hi,
Today I put on the third coat of top paint and now the preparation for the first flip can begin. I want to make such a box support like glossieblack near the transom under frame D and a second one a much smaller box unter frame B and C.
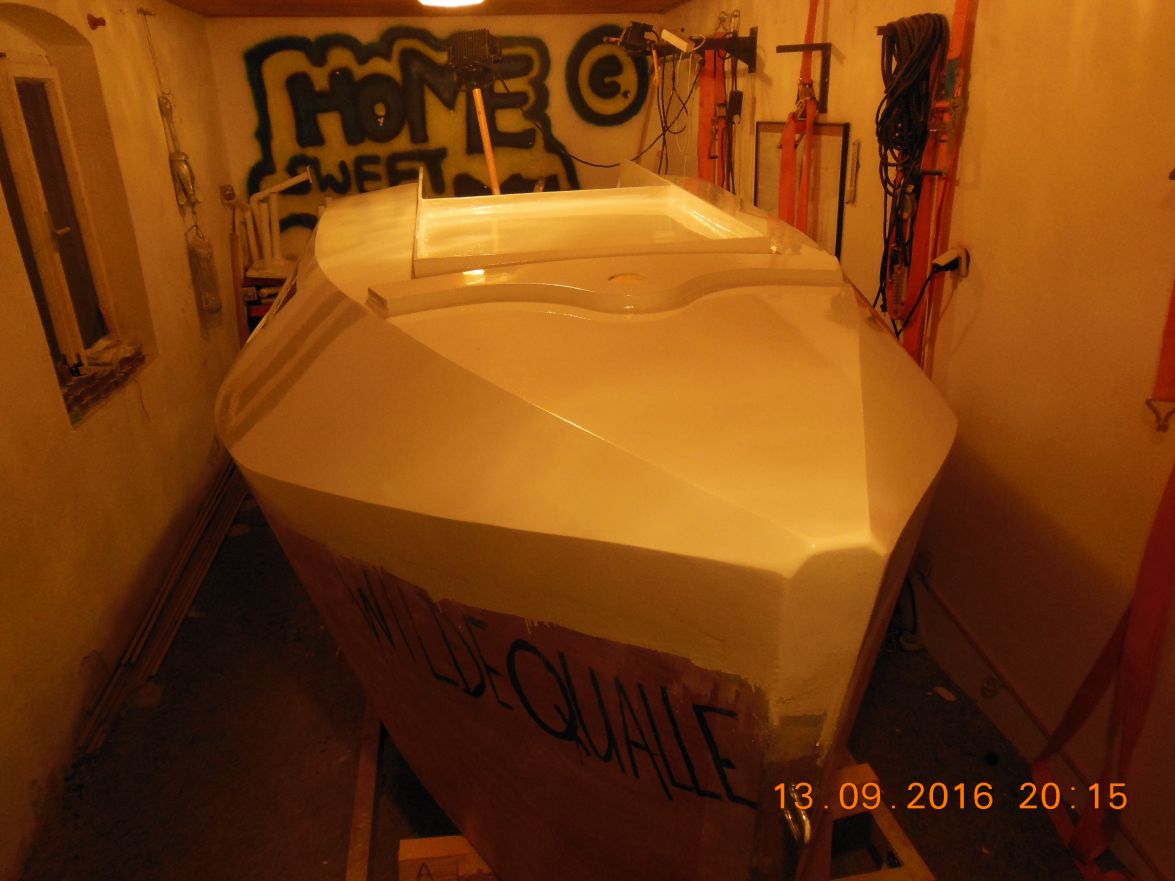
Greetings from Karl
Re: AD 14 KIELGE
Posted: Tue Sep 13, 2016 7:56 pm
by Jeff
Karl, if possible, get us a little more clear photos before you flip!! The last photo was a little dark!! Thank you in advance, Jeff
Re: AD 14 KIELGE
Posted: Wed Sep 14, 2016 2:54 am
by gonandkarl
Hi,
Here are more pictures of the boat after the third top coat. My camera ( automatic Sony ) took the following pictures with a flash light while the one above it chose not to switch on the flash light even that they were taken all at the same time at 22:00 with the 3 ceiling lamps on. I think that is why it is darker. The same as I will never be an expert boat builder I wont be ever a good camera man, a jack of all trades and a master of none. The excuse is old age colour blindness overweight and a touch of lazyness.
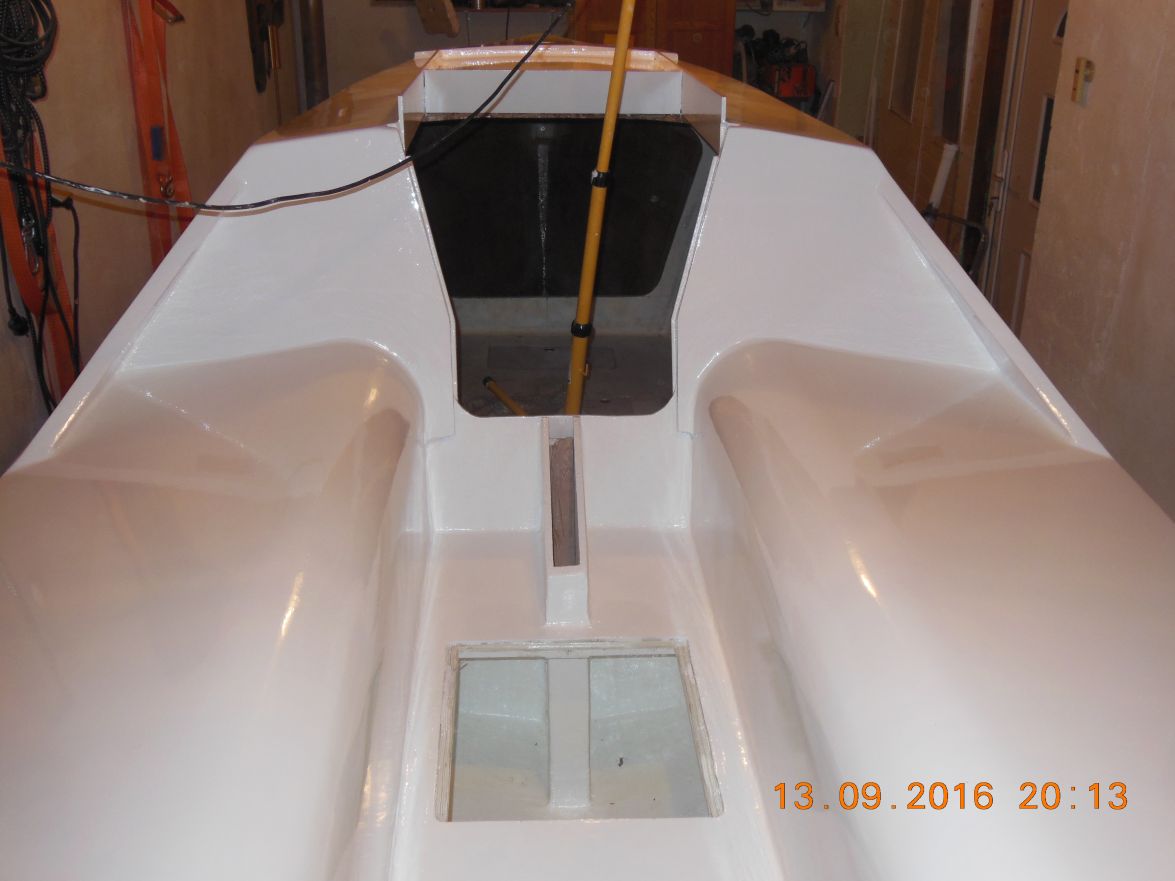
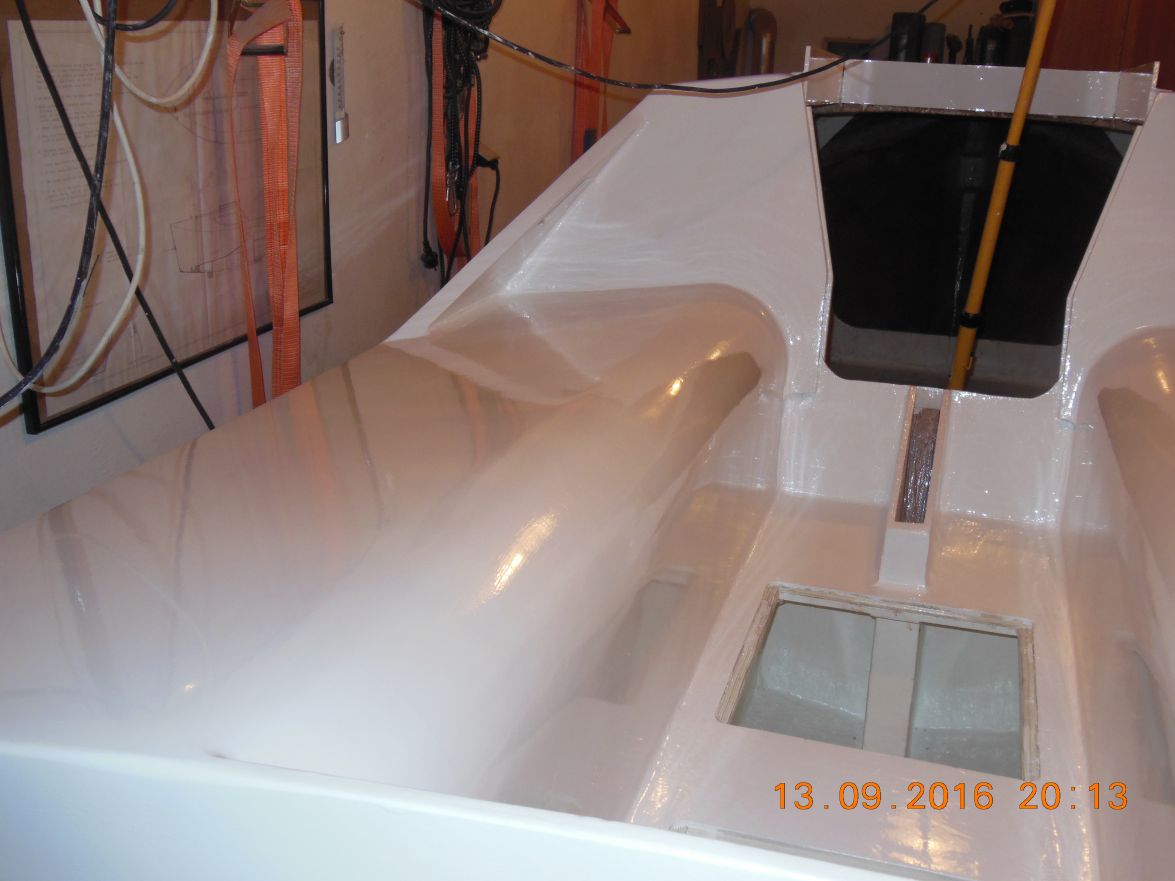
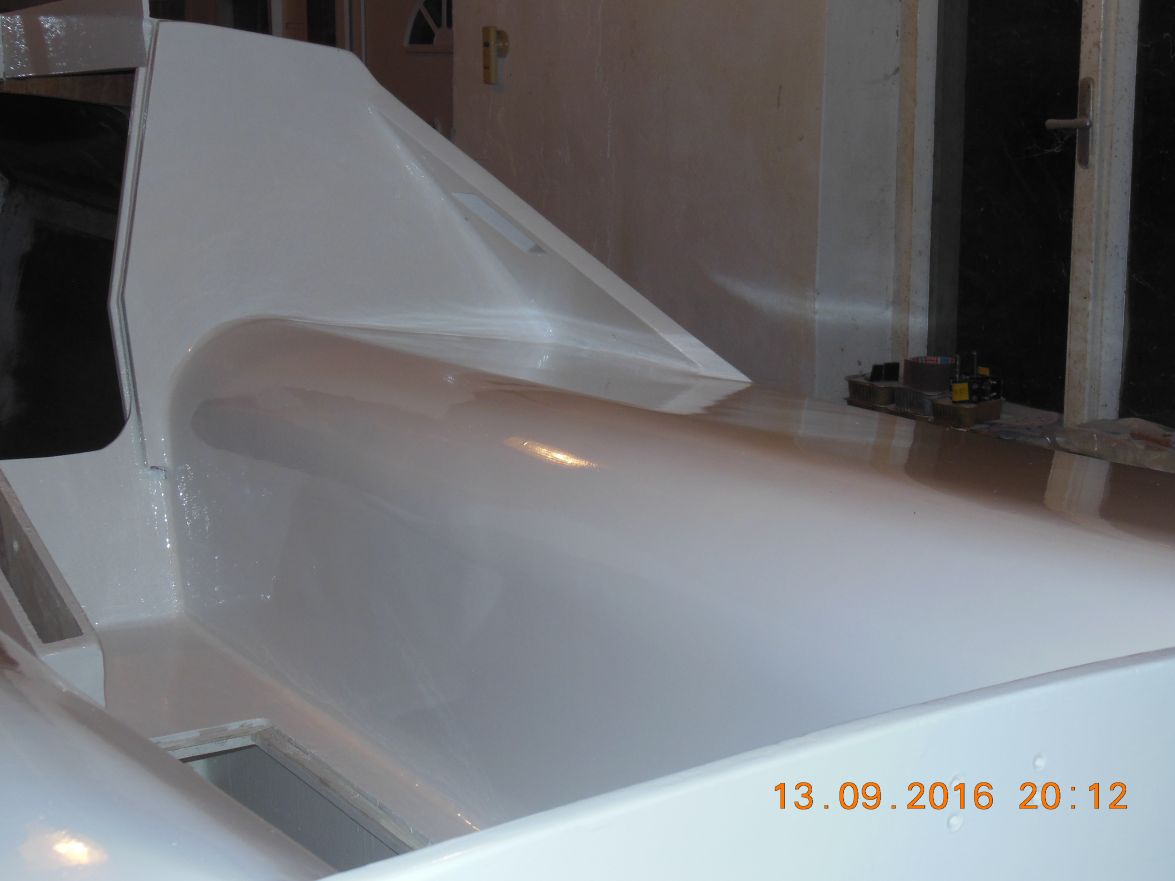
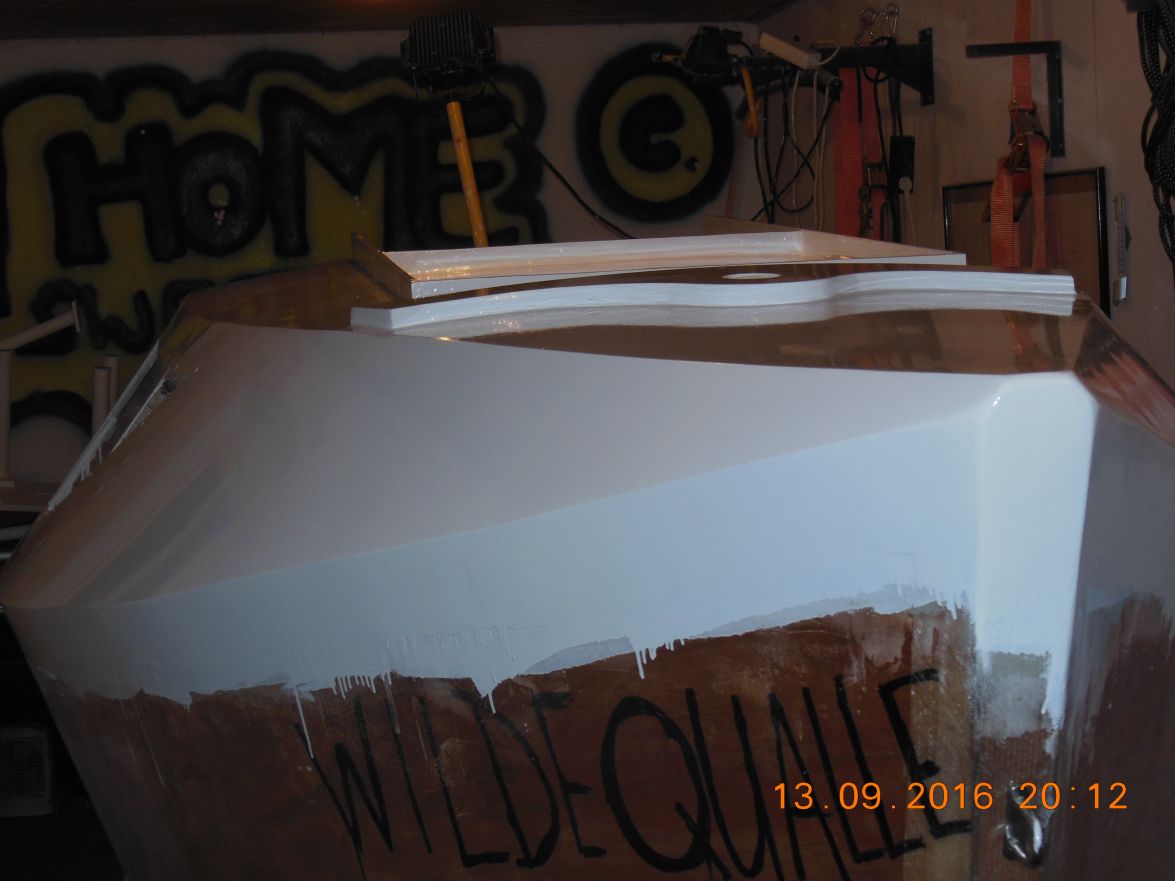
Greetings from Karl
Re: AD 14 KIELGE
Posted: Wed Sep 14, 2016 6:38 am
by Jeff
Excellent Karl and thank you!! Paint loos great!! Jeff
Re: AD 14 KIELGE
Posted: Wed Sep 14, 2016 6:55 am
by glossieblack
Re: AD 14 KIELGE
Posted: Fri Sep 16, 2016 6:16 am
by Salvatore
Starting to look the part
very nice work. Are you hoping to get it into the water for next Summer
Regards Salvatore
Building Angalina
https://youtu.be/plQZZJgnWzk
Re: AD 14 KIELGE
Posted: Sun Sep 18, 2016 11:13 pm
by das boot
it looks real good keep it up
Re: AD 14 KIELGE
Posted: Mon Sep 19, 2016 2:39 am
by gonandkarl
Hi,
Thank You George, Salvatore and Jeff for the compliments. You will not believe how tedious the painting of the topside was which I should most probably have left for after flipping the boat. Now I am busy for 2 days already to make 2 support boxes for the flip and my big problem is how do I protect this paint while I am flipping. I think I will stick old bed sheets to all painted areas and then use 5 cm thick styro foam pieces where the boat rests on the support boxes and lots of corrugated cardboard along the bottom and rub rail chines.
I hope to flip still this week before we go on Saturday to the Adriatic sea for a weeks sunshine.
Greetings Karl
Re: AD 14 KIELGE
Posted: Mon Sep 19, 2016 9:45 am
by terrulian
Karl,
I bet the paint is hard enough by now that with the precautions you are taking it should be OK. But also, you should cover it with masking tape holding masking paper. I know that even when I'm careful I'll find an errant splatter or drop that somehow found it's way to where it shouldn't be.
Re: AD 14 KIELGE
Posted: Thu Sep 22, 2016 9:28 am
by gonandkarl
Hi,
Not working on the boat today just letting Tony s advise sink in and thinking of thousand other problems that might occur when I flip the AD14 I discovered a mistake on my support boxes which are finished at last. To be able to work at a nice height on the turned boat I built the support box for the cabin rather low and wanted it to be in a level line with the rear support box which has eight legs and is holding the cockpit benches above the building frame. Now that I tried out my new camera taking a few pictures of the support boxes I saw immediately I made the legs too long ( by 15 cm ) because I glanced over the builders 2metre alu level and did not subtract its height from the length of the legs.
Its not really a problem because the base which will sit eventually on the building frame is not screwed to the legs yet. I just have to lift it up shorten the legs and put it back again and then screw everthing together to make it hurricane proof. Here is a picture showing the mistake:
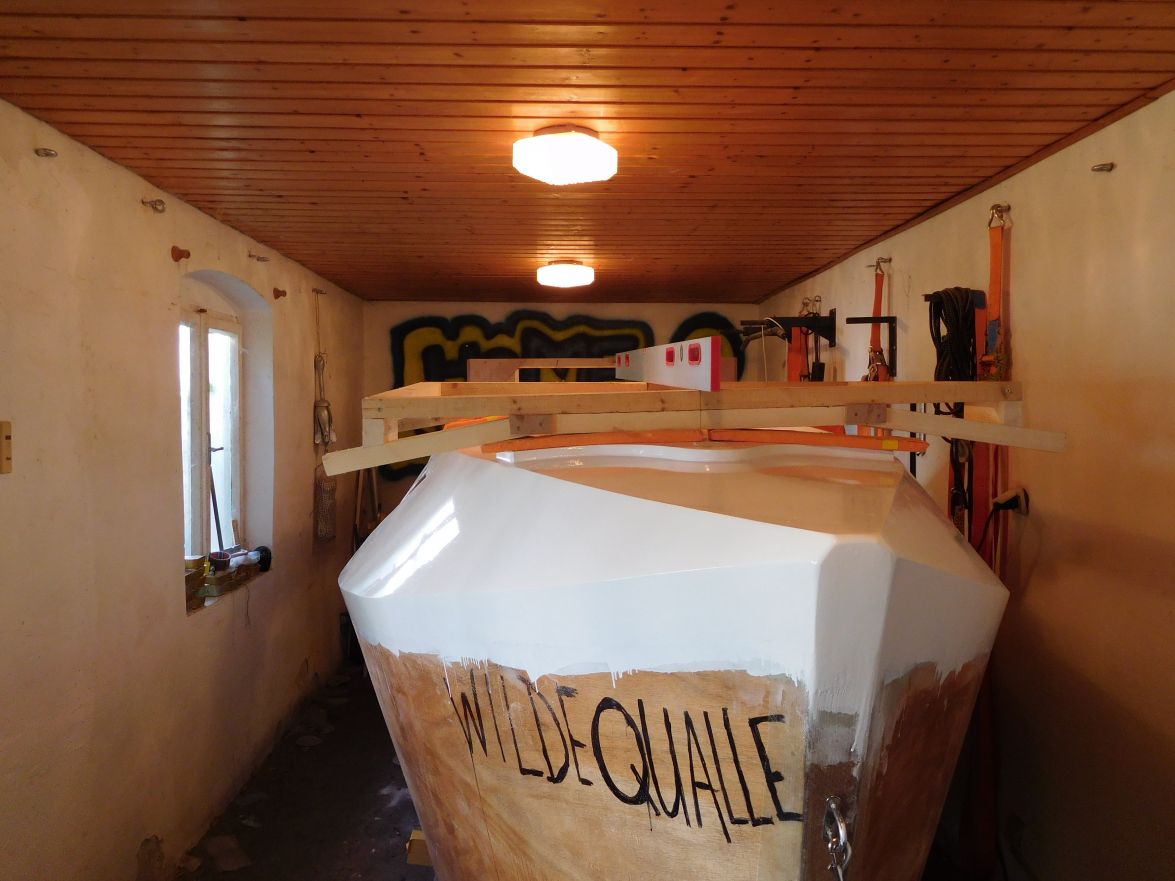
I will postpone the flip for 10 days because like glossieblacks yearning to sail to the Great Barrier Reef I have it as well for just being at the sea prolonging the Summer with a short vacation with my wife on the isle of Korcula.
Greetings from Karl
Re: AD 14 KIELGE
Posted: Sat Oct 01, 2016 5:13 pm
by waytootall
Hey terrulian - what paint did you use? I am getting ready for that step on my boat and I am overwhelmed by all the options - and prices
Re: AD 14 KIELGE
Posted: Thu Oct 06, 2016 1:58 pm
by gonandkarl
Hi,
Flipping the boat is for all of You fellow boat builders a quick affair and done in a short time. Not quite so with me, but I have started today and got it so far at an angle of about 60 degrees. Then I had to stop and start taking away the support frames because I was touching the ceiling lamp because the room is only 2,35 metres high. As I have to remove 24 bolts with machine screws per frame I did not even get finished with that by the evening but was tired and happy that I have started turning the boat. Tommorrow I have to remove frame B C and D and then I will carry on playing with comealong and winches.
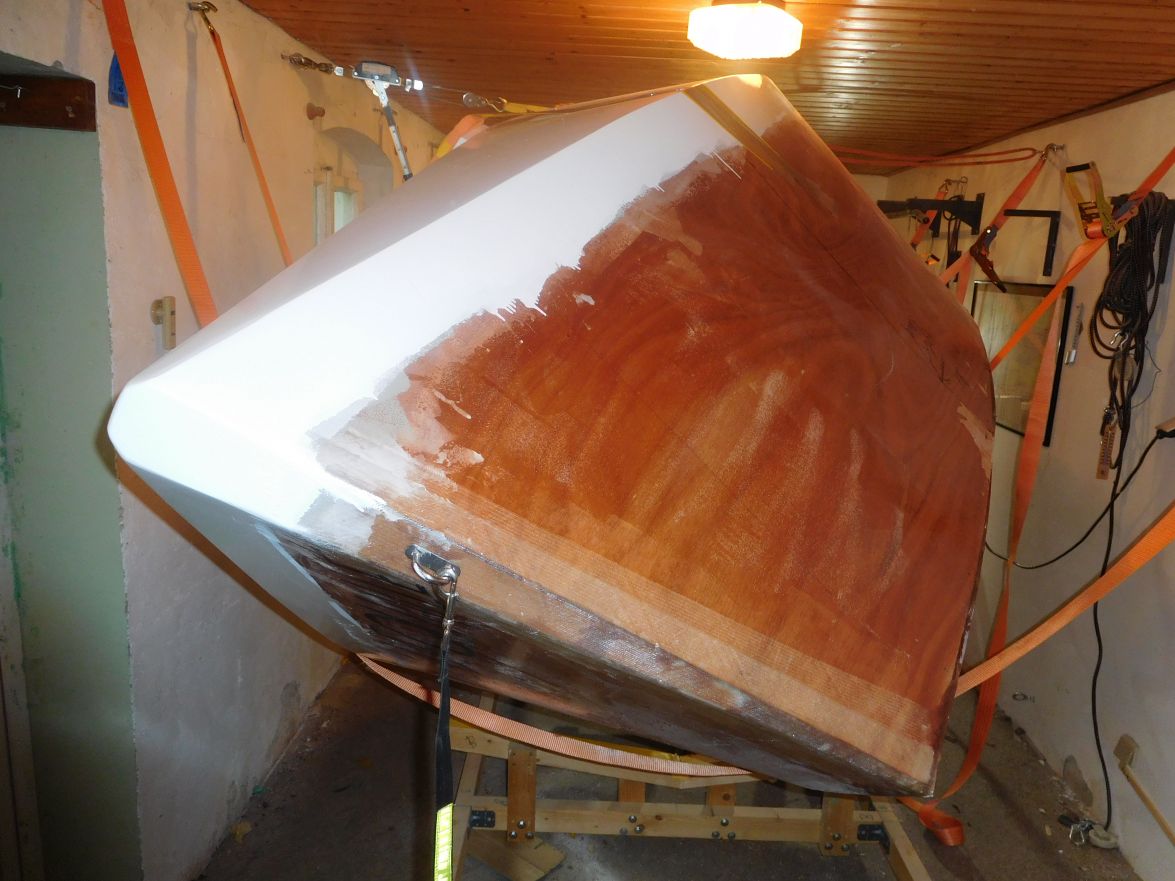
Greetings from Karl
Re: AD 14 KIELGE
Posted: Thu Oct 06, 2016 2:09 pm
by terrulian
[Karl, sorry to hijack your post]
Hey terrulian - what paint did you use? I am getting ready for that step on my boat and I am overwhelmed by all the options - and prices
Hey, Waytootall:
I don't know how I missed this but apparently I didn't answer? My apologies
.
I used Interlux Brighside Hatteras Off-White and Flag Blue, with S3 primer. I rolled on with a foam roller, say about 6 sq. ft. at a time, and then immediately tipped with the same roller, very very lightly. I tried a huge number of combinations--different levels of thinning, cheap brush, expensive brush, cheap and expensive rollers. I'm pretty sure I came up with the technique that works best for me. I used the same paint, although a different white, for this boat:
I tried every major brand of varnish. I think I came back to Epiphanes at the end but I wasn't really happy with what I achieved. I've done a lot of varnishing before but in the past wasn't trying to make it look real sweet. Turns out it's not that easy, at least for me. Looks easy in online videos, but I notice they don't show close-ups!
Re: AD 14 KIELGE
Posted: Thu Oct 06, 2016 2:12 pm
by terrulian
Karl,
I can't believe you're building that boat in that space. Must do a lot of shimmying and crawling!
Congrats on the progress. I'll be tuning in for the drama of the flip.
Re: AD 14 KIELGE
Posted: Fri Oct 07, 2016 7:39 am
by gonandkarl
Hi Tony,
Yes it looks every boat builder builds exactly the size boat he can just fit into his building shed. I remember your V10 was also in a rather small shed. I worried for nothing the whole of last night, I managed the flip by 12:00 today just using my come along and the 5 pair of straps I had hanging on each side on the wall near the ceiling. I planned to also use an electric hoist for the flipping but it was not necessary. I got the boat nicely placed onto the 2 supporting boxes I previously built and after clearing all the straps away it looks like this:
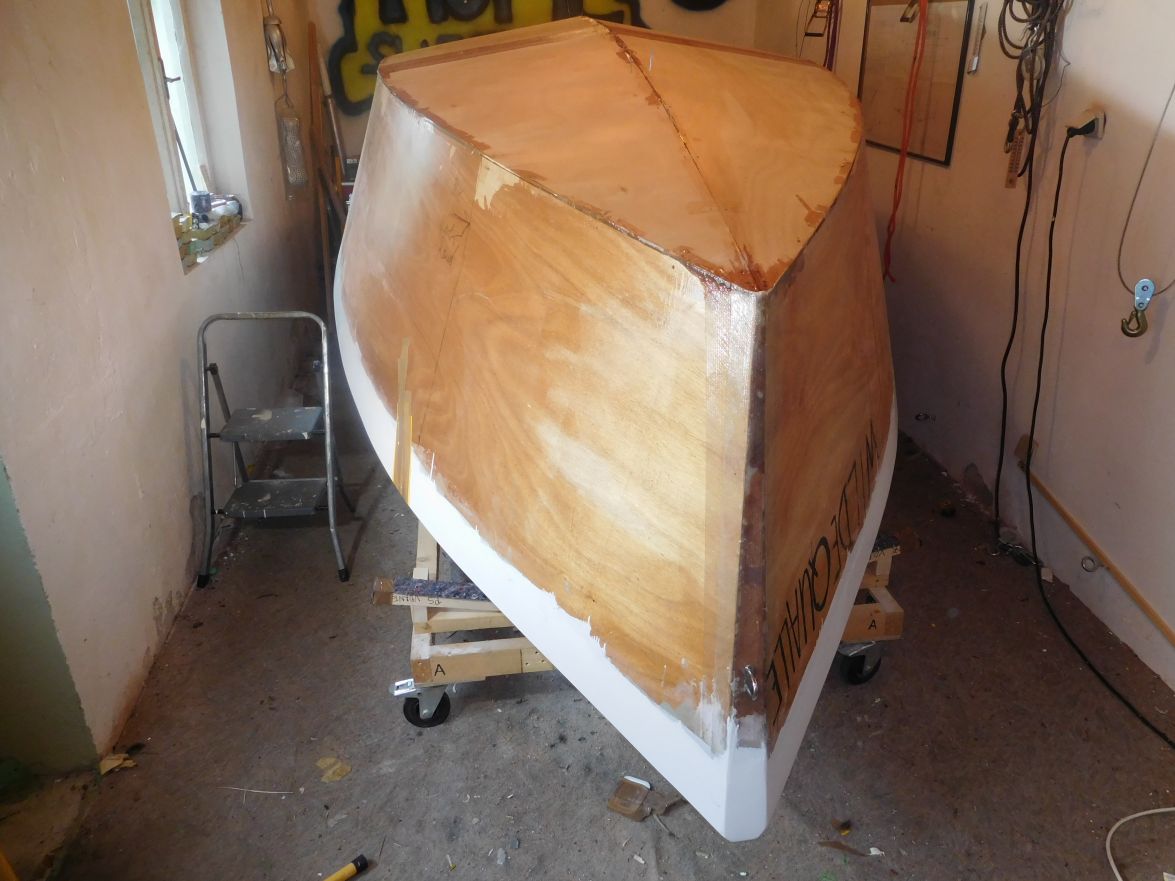
I can see 4 pink toothpics at the keel. I forgot all about them when I drilled 4 holes to mark where the keelshoe slot needs to be cut, that I pushed thru this holes pink plastic toothpics in case I wont find the holes after flipping.
Now that I have finished turning the boat I remembered Salvatores advise to keep it as low as possible which I did not adhere to and I will have to work on some scaffolding to reach the keel where I need to mount the keelshoe. It is 1,7 metre above the ground but I have the luxury that it is on the building frame on wheels. Thank God I can lock the wheels so I can lean onto the side without the boat rolling away from me. Lesson learned if I ever should build another boat.
Greetings from Karl
Re: AD 14 KIELGE
Posted: Fri Oct 07, 2016 10:11 am
by terrulian
Great, I'm glad there was no drama.
Yes, you're right. Some main considerations when building the V10 were whether it would fit in my van and in the shop. I actually made a mock-up of the gunwale out of pvc and put it in the shop to see if I could work around it. For the van, it wasn't so easy because the pvc flexes. So I just took measurements about 25 times to keep reassuring myself it would fit. It just barely fits, but that's all I need.
I guess you can roll your boat out of the workspace to see it? I couldn't do that because I had to turn the boat sideways to get it out of the shop and that wasn't all that easy. So I never had a good look at it until the day we launched it.
Re: AD 14 KIELGE
Posted: Fri Oct 07, 2016 3:51 pm
by waytootall
Nice job with the flip. I think it will be easier to work on with the way you flipped it completely upside down compared to my rolling it on the side. I just couldn't figure out a frame I liked to keep the bottom level while compensating for the height difference of the cabin and cockpit. Yours seams to work well.
Re: AD 14 KIELGE
Posted: Fri Oct 07, 2016 4:31 pm
by gonandkarl
Hi,
Yes I made a square box 60 cm high which supports the benches and a very shallow box 8 cm high underneath the deck top so the boat sits ther pretty level in its upside down position. As I placed both boxes onto the rectangular building frame this added also to the keel height 170 cm. I will let you know if it was the right choice to flip completely after I am finished with the bottom work. ( Keelshoe, skeg and tapes and fibre glass )
Greetings from Karl
Re: AD 14 KIELGE
Posted: Sat Oct 08, 2016 6:19 pm
by glossieblack
A well thought through and executed flip Karl. Given your experience fairing and painting one and a half boats to date, remaining fairing and painting should be comparatively enjoyable.
Re: AD 14 KIELGE
Posted: Sun Oct 09, 2016 1:29 am
by gonandkarl
Hallo,
Thanks to Your idea with the boxes made of 2 x 4 s which I covered with cheap felt not to damage the paint, the support of the flipped boat is perfect.
Yesterday I cut the keel slot into the centreboard trunk and early this morning even before breakfast I had to drop the dummy keel into the trunk to see how far it stands out, from that I can adjust the keel shoe maybe with some more layers of plywood to be able to beach the boat eventually on the shoe like our friend Salvatore documented so well. I used a dummy keel out of 10 mm thick plywood because the real keel weighs 60 Kg with its 3 heavy lead inserts and this I can only lift into the trunk when it is flipped again.
Grreetings from Karl
Re: AD 14 KIELGE
Posted: Sun Oct 09, 2016 9:20 am
by Jeff
Karl, When will you be arriving in Homosassa? Safe travel and I look forward to meeting you!! Jeff
Re: AD 14 KIELGE
Posted: Sun Oct 09, 2016 2:35 pm
by gonandkarl
Hi Jeff,
Will be landing in Tampa 20th Oct 21:44 and then my day is already 6 hours longer than the local time and therefore I will be catching some sleep and arrive in Homosassa next morning sometime.
Greetings from Karl
Re: AD 14 KIELGE
Posted: Sun Oct 09, 2016 4:24 pm
by Jeff
Thanks Karl!! I look forward to meeting you!! Safe trip!! Jeff
Re: AD 14 KIELGE
Posted: Tue Oct 11, 2016 1:11 pm
by das boot
Your boat is looking real good the next big part is getting the keel into its slot and that is interesting to get into place but it can be dun.
Re: AD 14 KIELGE
Posted: Sat Oct 15, 2016 11:45 am
by gonandkarl
Hi,
A small update on my progress. After I flipped the boat and had it on 2 support boxes which were themselves on the building frame on 4 wheels I realised for working on the bottom it is for my age height and weight class to high. So I removed the building frame ( gained 25 cm ) and will do all the bottom work on just the 2 support boxes standing on the floor or keep the boat hanging on straps like this :
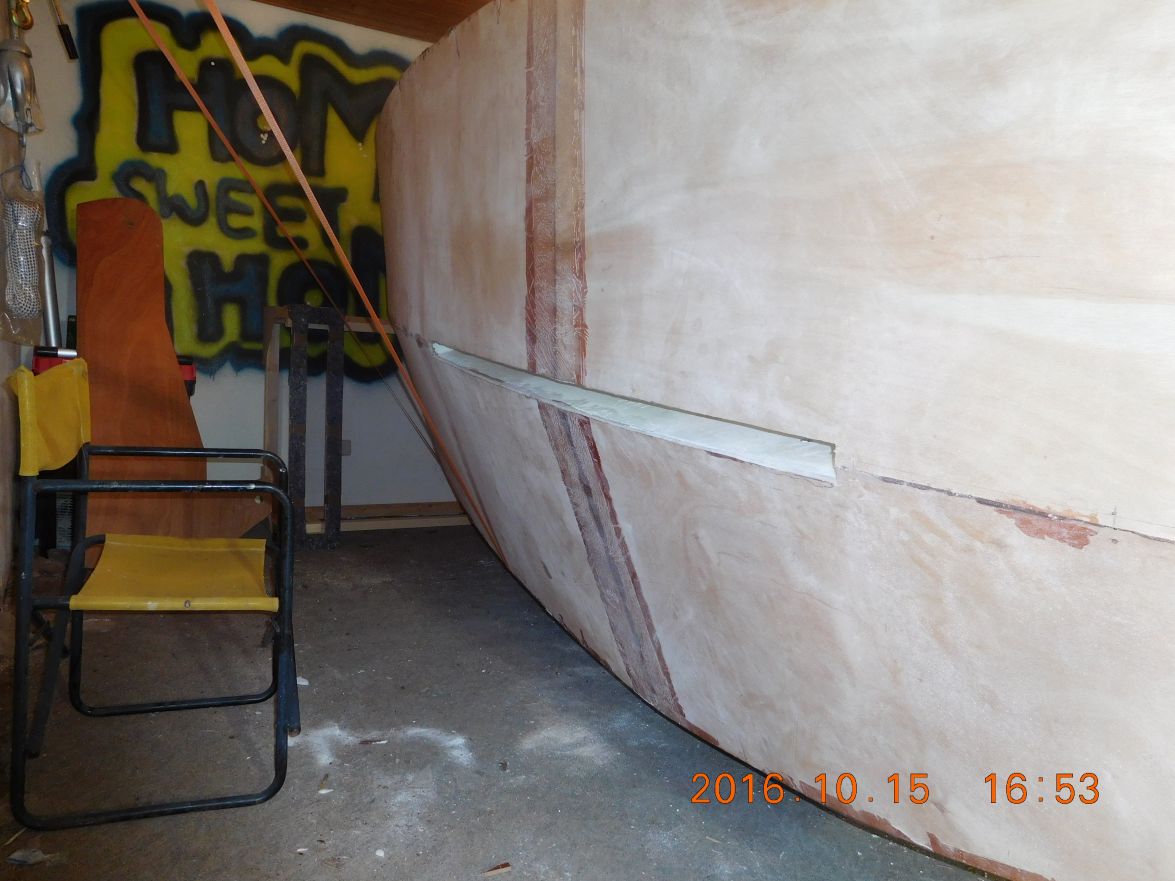
I can even work from my directors chair preparing the keel for the mounting of the keel shoe starting on Monday because for the rest of the weekend we celebrate the 35 th birthday of our youngest child. ( O so sorry he is a full grown strong man who will carry the heavy pot with our fig tree into the boat shed for the Winter. )
Greetings from Karl
Re: AD 14 KIELGE
Posted: Sat Oct 15, 2016 11:52 am
by terrulian
That's pretty brilliant. I wish I had figured out how to work sitting down.
Re: AD 14 KIELGE
Posted: Sat Oct 15, 2016 11:55 am
by Jeff
Karl, excellent method!!! Jeff
Re: AD 14 KIELGE
Posted: Sat Oct 15, 2016 8:47 pm
by das boot
If you are short of clamps to fit the keel box just get some threding stock long rods with threds on them and drill holes trough a chunk of 2/4 then use nuts on each end you cam make those clamps as long as you like
Re: AD 14 KIELGE
Posted: Sat Oct 15, 2016 9:01 pm
by glossieblack
Karl,
Sleepless nights worrying about a flip are well and truly behind you!
As a fellow non North American bateau boat builder, I'm hoping you'll act as my proxy when glasses are raised at Homosassa. Have a great time there!
Michael.
Re: AD 14 KIELGE
Posted: Sun Oct 16, 2016 2:26 am
by gonandkarl
Hi George,
Thanks for the tip with the rods, but when I glue the shoe to the bottom I will put the boat again completely upside down and let gravity hold it there at the first moment and then I will be laying my 20 movable ballast weights ( dog dishes filled with lead together 60 KG ) on top of the keel. I think Salvatore from Down Under did it that way. I will maybe add an additional long clamp at the end of the centreboard trunk where it is open towards the cockpit. Like Bondo once said the flipping of the boat is a big thing but in the end he could do it in half an hour. It took me a whole day using only one come along and my transportation straps. Yesterday I managed to remove the building frame and the support boxes ( copyright Glossiblack ) and putting the boat to one side with the help of my electric hoist in less than 2 hours. The hoist can only pull vertical so I let it pull a rope attached to the handle at the side deck over 2 pulleys at ceiling and floor to position the boat quick and effortless where I wanted to have it.
Greetings from Karl
Re: AD 14 KIELGE
Posted: Sun Oct 16, 2016 2:46 am
by gonandkarl
Hi Michael,
Thank You for the wishes for my trip and I definitely will raise a glass in the name of all non North American boat builder and especially because I celebrate on the first day in Homosassa my 70 th birthday. I spent every birthday since 1974 with my wife and family but she suggested I should treat myself with the trip to meet other boatbuilders at least once in my lifetime and we can have another party when I get back. Yes the flipping is over and I am looking forward to the rest of the work to hopefully splash in May 2017 on one of our lovely "Salzkammergut" ( Salt Chamber Store ) lakes. They are called so because salt was mined for the last 5000 years in the area of these lakes.
Greetings from Karl
Re: AD 14 KIELGE
Posted: Sun Oct 16, 2016 12:33 pm
by peter-curacao
gonandkarl wrote:I should treat myself with the trip to meet other boatbuilders at least once in my lifetime
Yes you should Karl, it's really fun you won't regret it, if it wasn't so close to our vacation in December I would be there to.
Have loads of fun and say hi to the guys and gals from me.
Re: AD 14 KIELGE
Posted: Wed Oct 26, 2016 10:43 pm
by Corvidae
I still can't believe you were able to build and flip that hull in that tiny little space. I felt like I was building a ship in a bottle with my CR13, but you're on a whole new level in there. Great looking work too!
Re: AD 14 KIELGE
Posted: Sat Oct 29, 2016 12:53 pm
by gonandkarl
Hi,
After being for one week away in Homosassa I started sanding the chine and the keel and it is now ready for taping. My boat shed looks rather small but there is still enough place to have winter storage for the fig tree in a big pot as well as the Oleander ( flowering ) shrub.
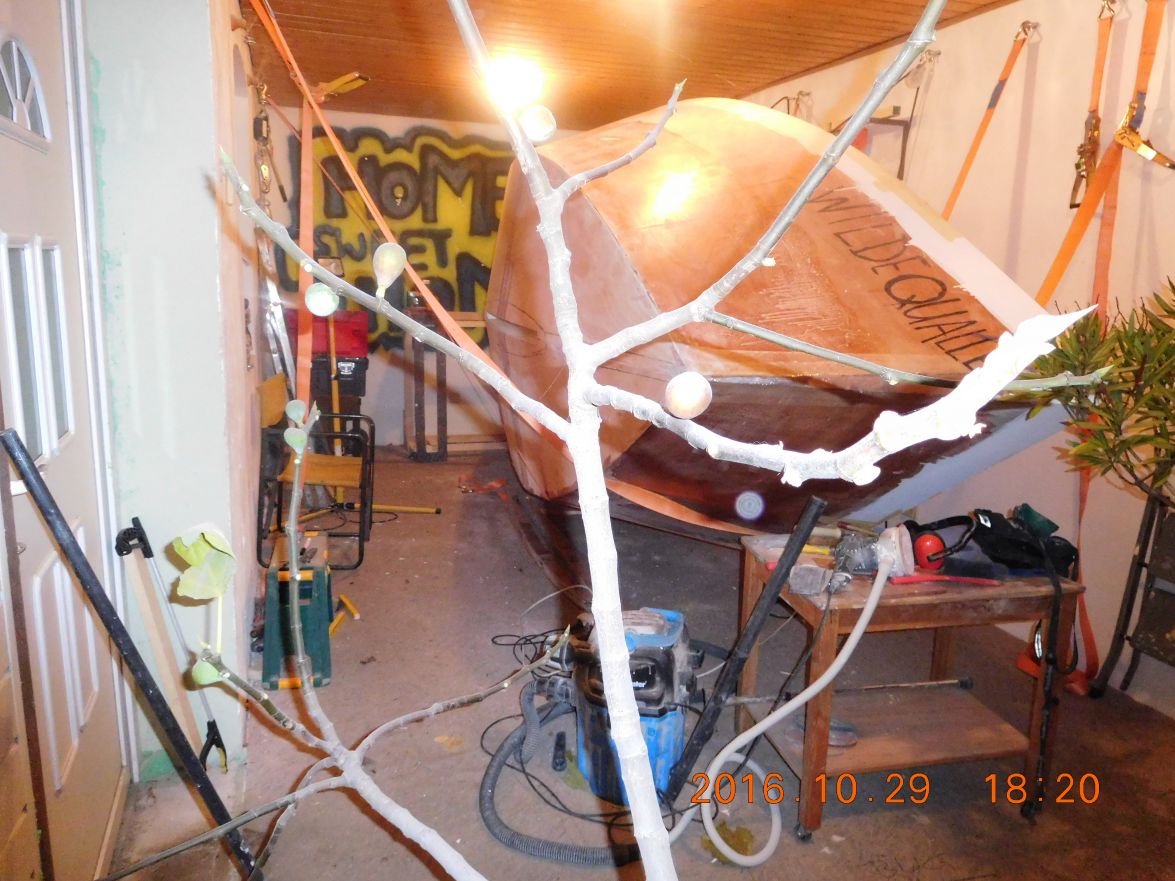
The best doping for work on the boat is my fast disappearing birthday cake. It is a pity that also the picture of the Adelie will soon be gone.
Greetings from Karl
Re: AD 14 KIELGE
Posted: Sat Oct 29, 2016 1:59 pm
by terrulian
Very festive, Karl!
I guess you'll have to make another cake!
Re: AD 14 KIELGE
Posted: Sun Oct 30, 2016 6:19 am
by glossieblack
Karl, does her name translate in English to 'Wild Jellyfish'?
Re: AD 14 KIELGE
Posted: Sun Oct 30, 2016 6:40 am
by gonandkarl
Hi,
Yes this was my first translation when I mentioned it on a previous post. But the immediate response of Cracker Larry was :
I did not know that there are also tame jellyfish. Then I got thinking and the correct translation is Crazy Jellyfish originating in a German storybook of my granddaughter ( 6 ) where it is some pirates ship name. She did not want to let me use her name Lea for her boat . The other 2 grandchildren had no objection using their names for their boats. ( Jan 17 for Micro Petrel, Isa 1 for FS13 )
Greetings from Karl
Re: AD 14 KIELGE
Posted: Sun Oct 30, 2016 8:58 am
by terrulian
Karl, I had to look up your Micro-Petrel build. I wasn't familiar with it. So you too have a little rowboat.
I also like your loading system for that boat, although it wouldn't work for me so easily as I transport my boat in a van, the top of which is quite high, and I'm quite small and the boat weighs a lot so...
But I was considering something like this if my boat didn't fit in the van, which was undetermined until I actually got it in there. It's a bit of a pain to load it but the hardest part of the process is getting it onto my dolly when I'm on an uneven beach. I'm still working on that.
Re: AD 14 KIELGE
Posted: Sun Oct 30, 2016 9:31 am
by gonandkarl
Hi Tony,
Yes the Micro Petrel was my first boat I built and is a Devlins design. The idea was to build a small boat and make small mistakes before building a bigger boat and hopefully make still just small mistakes. The way of putting the row boat onto the roof carrier with the Joe Dobler design worked ok, but I still had to lift the boat from the ground and tip it against the struts leaning at the side of the car and then lift it again until it was at the cars roof height. The problem was that I built the boat much too heavy and that is why I only transported it 3 times this way before I bought the small trailer which I have used since for the FS13 Standup paddle boat as well and hopefully it will support my Adelie 14 from now on.
Talking of small mistakes: As I am not working on Sundays on the boat I thought I will just cut one length of fibre glass tape for the chine by laying it onto the chine and when I reach the bow I cut the end of it with a pair of scissors. I tried 3 times and always when I was near the bow it slided down from the transom forward and was just hanging in the straps which are supporting the boat. The method was changed, measured the length with a roll metre and then cut the 4,45 m on the flat dining room table just to finish a minute before Sundays family lunch for which 2 of our children came around. Lesson learned I will most probably tip the boat a bit more to the other side of the room to be able to glass the tape nicely to the chine without any sliding movement of its own.
Greetings from Karl
Re: AD 14 KIELGE
Posted: Sun Oct 30, 2016 11:09 am
by Cracker Larry
Karl, just use a few small pieces of masking tape to hold it in position until you start wetting it out. Take off the masking tape as you go along.
Re: AD 14 KIELGE
Posted: Sun Oct 30, 2016 11:33 am
by terrulian
CL, you need to build another boat. We're getting bored out here.
Re: AD 14 KIELGE
Posted: Sun Oct 30, 2016 2:36 pm
by peter-curacao
Cracker Larry wrote:Karl, just use a few small pieces of masking tape to hold it in position until you start wetting it out. Take off the masking tape as you go along.
Or use drawing pins, I tried masking tape but the fricking wind here keeps blowing it loose, also I learned that cutting the biax goes a lot easier using a utility knife like in the picture, just lay it between wood and a (wood)guide and cut,you get much nicer cuts as with scissors, easier on the hands also
Re: AD 14 KIELGE
Posted: Thu Nov 03, 2016 3:40 pm
by gonandkarl
Hi,
Thank you I will use masking tape pieces and drawing pins and with both these tips I cannot go wrong. Also using the Stanley knife will let me forget the scissors. I specially bought a scissors sharpening machine and even then I battled to cut fibre glass being it tape or mat. Right now my BB virus is like the November weather here cold and foggy speak slow and lazy. But next week I start with new strength and a gas heater warmed shed. Till then I look at Peters Flyer becoming a boat in warm weather.
Greetings from Karl
Re: AD 14 KIELGE
Posted: Thu Nov 03, 2016 4:52 pm
by waytootall
I found the masking tape always pulled the fiberglass apart when I tried to remove the tape. I highly recommend the pins. I found the knife works great of the wet fiberglass, but not on dry fiberglass. For cutting the dry fiberglass I use my wife's sewing scissors since she is an avid sewer and they work really well. I think I am ruining her scissors, but she hasn't figured that out yet so I am not going to tell her
Re: AD 14 KIELGE
Posted: Thu Nov 03, 2016 5:19 pm
by peter-curacao
waytootall wrote:I found the knife works great of the wet fiberglass, but not on dry fiberglass. For cutting the dry fiberglass I use my wife's sewing scissors since she is an avid sewer and they work really well. I think I am ruining her scissors, but she hasn't figured that out yet so I am not going to tell her
I don't share that opinion, maybe I did something wrong but cutting wet fiberglass with the knife didn't go well for me, dry on the other hand perfect sharp cuts (see picture) and you don't ruin your wife's scissors
less fatigue on the hands also
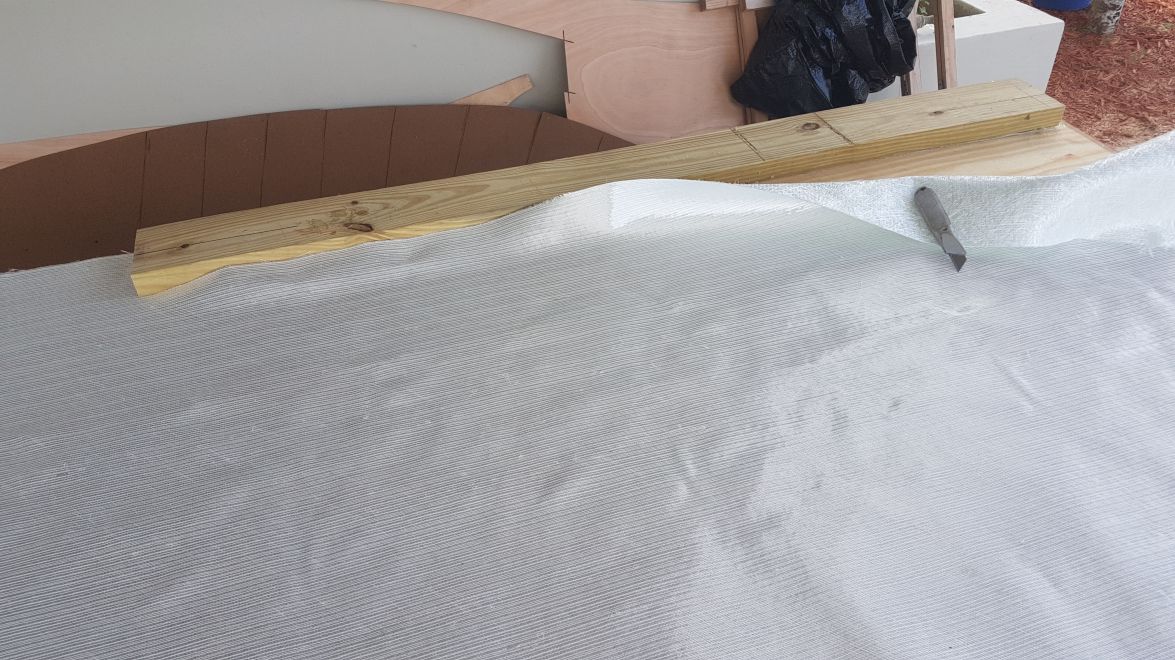
Re: AD 14 KIELGE
Posted: Thu Nov 03, 2016 6:52 pm
by gonandkarl
Hi,
I dont dare to cut wet fibre glass, because I would for sure move it out of position and as Peter even shows me a picture I will use a Stanley knife for my next fibre glass cut. In my family it is me that is sewing ( AD14 sail ) and also damaged the scissors so knife is my best bet. The mentioning of wet fibre glass makes me think: Am I wrong to painstakingly cut the fibre glass for the area I want to cover before I wet it ? So far it happened to me that after wetting out it was sometimes an inch or more too short or long at any rate not as nice as when it was lying there dry. Too short I fitted pieces of it on and too long I cut it off after 24 hours. Maybe it makes sense to do the wetting out from the middle of the fibre glass towards its 2 ends which should make it rather too long on each side ? I have to glass the bottom of the boat soon and that is why I am bouncing this ball all the time against the wall. Too much thinking and not enough done.
Greetings from Karl
Re: AD 14 KIELGE
Posted: Thu Nov 03, 2016 8:25 pm
by terrulian
Hey, guys, here's a tip: Buy your own fiberglass scissors and keep the missus happy.
Re: AD 14 KIELGE
Posted: Thu Nov 03, 2016 11:44 pm
by Fuzz
So does anyone have a brand of scissors they really like?
Re: AD 14 KIELGE
Posted: Fri Nov 04, 2016 7:52 am
by Jaysen
Fuzz wrote:So does anyone have a brand of scissors they really like?
My favorite are which ever brand the boss lady buys. She's taken to always buying two when she buys new. That lets me kill one before i reach for her "special" one.
Obviously I'm not the only guy who forgets that the boss lady scissors are NOT for shop use.
Re: AD 14 KIELGE
Posted: Fri Nov 04, 2016 9:39 am
by peter-curacao
Fuzz wrote:So does anyone have a brand of scissors they really like?
At the marine shop where I buy my biax they have something like this to cut from the roll of full fabric, they work really well
and hey more power = guy scissors


Re: AD 14 KIELGE
Posted: Sat Nov 05, 2016 11:37 am
by das boot
Just use her sisors and by her a new pair before she finds out that is what I did you can also cut wet glass with them but wash them well with acitone between uses it worked for me
Re: AD 14 KIELGE
Posted: Sat Nov 05, 2016 11:41 am
by das boot
I always painted the area with resin before i layed the glass on it so it did not move around on me then i would cover the glass with more resin and scrape off all the extra it worked for me
Re: AD 14 KIELGE
Posted: Mon Nov 07, 2016 11:15 am
by gonandkarl
Hi,
Firstly I thank all you dear fellow boat builders without your always good tips I would spend too much time scratching my 3 grey cells left to think things out myself.
Yes I found out the hard way that I must clean scissors with acetone when I had all the scissors messed up with epoxy including all of my wife s including the scissors from the kitchen drawer. Since then I have bought a whole set of new scissors and always clean them should I have to use them with wet epoxy which I avoid mostly. If you buy a whole set of scissors it gives you a reason to search for one and still dont find it quick like with all my roll metres. I also wet the area like George does and stick the tape on it before wetting out further but in the dry state I definitely will use pins and masking tape. Right now I am too lazy due to this horrible November weather so I sit mainly at the PC and inform myself about everything still to do.
So I found a very good video how to mark the waterline. I think one of you posted me this video some time ago when I also had the waterlin on my mind.
[youtube]
https://www.youtube.com/watch?v=dEoi2E05zDU[/youtube]
And then Bondo informed me via email where exactly the DWL is for AD14 . It is at the rear corners ( 3/4 inch ) and the bow ( 2 inches up ) there is nothing to stop me to get it right once I epoxy graphited the bottom. I will mark it like in the video but without the 2 inital marks wading into the water as Bondo told me were they are.
The weather is still too bad so I ordered a nice 2 inch wide tape which I will place at the water line like I did on the FS13 ( 3/4 inch wide ). I naturally ordered only one colour the red one:
and 3 Italian style SS cleats 2 for the transom and one for the bow:
What I like about these is that there are no screws visible on deck and I get good exersize in crawling into each bunk and tighten them from underneath to the seats. I think I will reinforce the deck at the bow and seats ( both 6 mm thick ! ) underneath with a 1/2 inch thick piece of plywood before I screw these cleats down with a big washer between screw head and plywood to spread the load. So a work step for May 2017 is now also put down.
Greetings from Karl
Re: AD 14 KIELGE
Posted: Mon Nov 07, 2016 1:42 pm
by glossieblack
Nice cleats.
Re: AD 14 KIELGE
Posted: Mon Nov 07, 2016 1:50 pm
by peter-curacao
gonandkarl wrote:
So I found a very good video how to mark the waterline. I think one of you posted me this video some time ago when I also had the waterlin on my mind.
[youtube]
https://www.youtube.com/watch?v=dEoi2E05zDU[/youtube]
Or if you have an extra US$ 85,- laying around you can use this, probably a lot quicker and you can do it alone.
http://www.homedepot.com/p/Bosch-Self-L ... /205387264
Since it is a Bosch they could be cheaper in Austria
Re: AD 14 KIELGE
Posted: Tue Nov 08, 2016 7:17 am
by topwater
Yep that's how i did it , shot it with a laser.
Re: AD 14 KIELGE
Posted: Tue Nov 08, 2016 8:12 am
by gonandkarl
Hi John,
Yes a laser level would be fine, but what I like about the old shipwrights method is that I do not even have to have the upside down boat levelled ( I have it hanging in 2 straps ) just the 2 temporary wooden boards must be level across the transom and bow and as I have no 2 helpers for the string I can stretch the time of my build endlessly having to run from stern to bow adjusting the string for making each little pencil mark on the side. The thing is I found out if I hurry I make mistakes and therefore I do not mind anymore that when I estimated the time it will take me to build the boat I had to double the time what I thought it will be and multiplied it by three in the meantime but then it will be splashed for sure. If I where to build a top class boat like your beautiful Nor Easter I would most probably resort to a laser to have the DWL to the millimeter exact and to save time because on such a big boat the work is 3 times as much because of engine tank and cabling installation.
Thinking of you and your Nor Easter thanks again for the ride down the Homosassa river. I feed on this sunny memory in the horrible November weather here.
Greetings from Karl
Re: AD 14 KIELGE
Posted: Tue Nov 08, 2016 11:54 am
by peter-curacao
gonandkarl wrote:
but what I like about the old shipwrights method is that I do not even have to have the upside down boat levelled ( I have it hanging in 2 straps )
Greetings from Karl
You also can do that with a laser as long you have the 2 reference points (the 2 temporary wooden boards)
Re: AD 14 KIELGE
Posted: Mon Nov 14, 2016 12:03 pm
by gonandkarl
Hi,
Finally I have finished taping the keel and the chines hopefully soon to be followed by the mounting of the keel shoe and skeg.
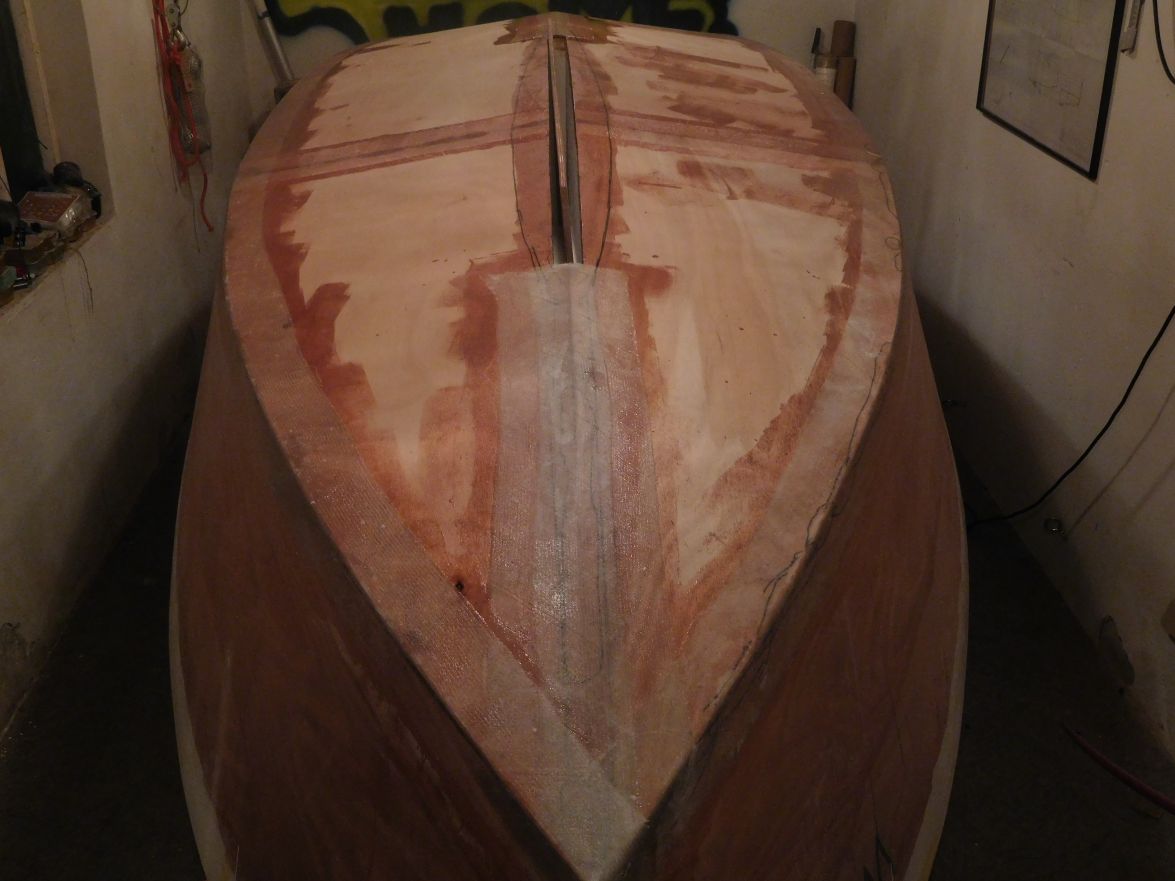
It is cold enough so I have to have the gas heater running to reach the required 20 degrees celsius for the hardening of the epoxy. My epoxy hardener works from 10 degrees upwards and ideal is 20 and then it is completeley hard in 36 hours.

The centerboard in the trunk is just a 1 cm thick dummy and it will help me to align the keel shoe properly.
Greetings from Karl
Re: AD 14 KIELGE
Posted: Mon Nov 14, 2016 1:36 pm
by Fuzz
Dang that is pretty glass work Karl.
Funny you and I have to work to get it warm enough to glass and most of the others say it is too hot to glass. Grass is always greener I guess
Re: AD 14 KIELGE
Posted: Mon Nov 14, 2016 4:12 pm
by gonandkarl
Yes that is also the reason my boat building takes so long with always worrying to get the boat building shed warmed up to 18 degrees celsius before I can start. I practically have to heat from November through to middle of May. I think Peter on the caribic Isle of Curacao has the perfect climate all Year round. One of our fellow boat builders also like you from Alaska posted that he is building 2 months of the year on a small Island near Tahiti. That is another way to overcome our handicap to heat whilst playing with epoxy. Can you still use your OD18 this time of the year ?
Greetings from Karl
Re: AD 14 KIELGE
Posted: Wed Nov 16, 2016 9:21 am
by gonandkarl
Hi,
Now I am trying to mount the keel shoe to the bottom of the boat. I am not quite sure how one does it. I think the bottom of the shoe should be parallel to the water line or that is how it looks on the plans. My waterline mark at the bow is 20 cm below the waterline mark at the transom because my 2 bow and transom support boxes under the boat do not support the boat to be horizontal. Should I lift the front box by 20 cm to have the WL level or just measure the angle and try to mount the shoe at that same angle.
Right now I can adjust the keel shoe quite easy like a seesaw as it is lying only on approximately 40 cm at the keel like this :
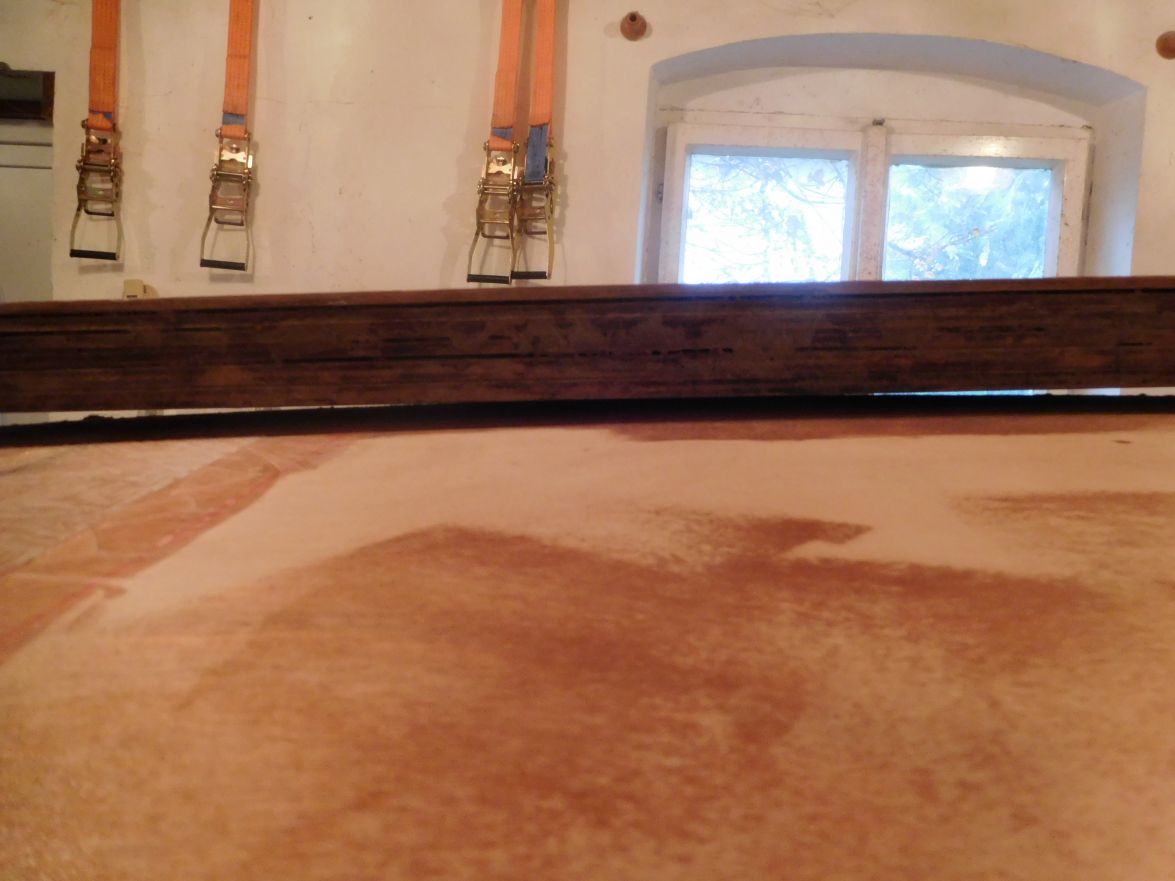
I have to build up the shoe anyway near the bow and transom with a lot of wedges and hopefully I can even make minute adjustments when I glue it to the keel.
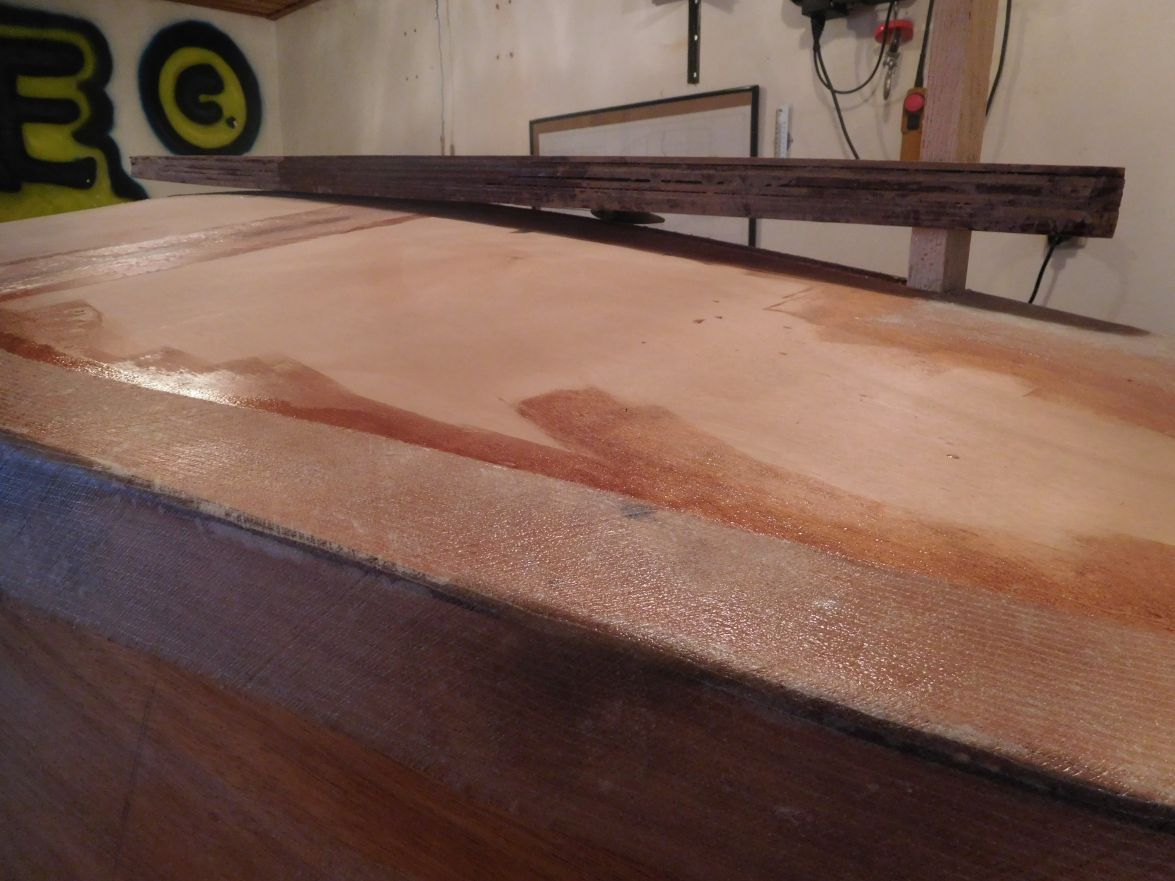 Please let me know which way I should mount it level or at the angle of the waterline which exists now.
 And any other comments are really very welcome.
It is with the last post of Fuzz where he wrote: Nice glass work Karl . Until I got his confirmation it is OK I doubted it very much. My own judgement how to do things derives only from looking at all your pictures and reading everything being posted and even then I am often unsure how the outcome of my work is right wrong more right or more wrong. So please hammer me with your great experienced comments. Anything helps me a lot.
Greetings from Karl
Re: AD 14 KIELGE
Posted: Wed Nov 16, 2016 9:41 am
by jacquesmm
The plans show the keel bottom parallel to the DWL and baseline.
You build up with wedges then fill the small gaps left with epoxy putty.
Re: AD 14 KIELGE
Posted: Wed Nov 16, 2016 10:25 am
by cape man
Funny you and I have to work to get it warm enough to glass and most of the others say it is too hot to glass. Grass is always greener I guess
It was frigid 48 degrees F (9 degrees C) this morning in Lithia, Florida. High this afternoon is however projected at 80F (27C)...
Re: AD 14 KIELGE
Posted: Wed Nov 16, 2016 1:37 pm
by Fuzz
gonandkarl wrote:Can you still use your OD18 this time of the year ?
Greetings from Karl
No more using the dory until next April

I have her in the shop doing a couple of minor things and then she gets wrapped up for the winter.
CapeMan is just sticking the needle to us with his 48F this morning but it will warm up to 80 in the afternoon.
I guess it is fair as summers there would be too hot so they should have nice winter weather.
Re: AD 14 KIELGE
Posted: Wed Nov 23, 2016 11:23 am
by gonandkarl
Hi,
Gave the bottom one coat of epoxy and now it is ready for fiberglass.
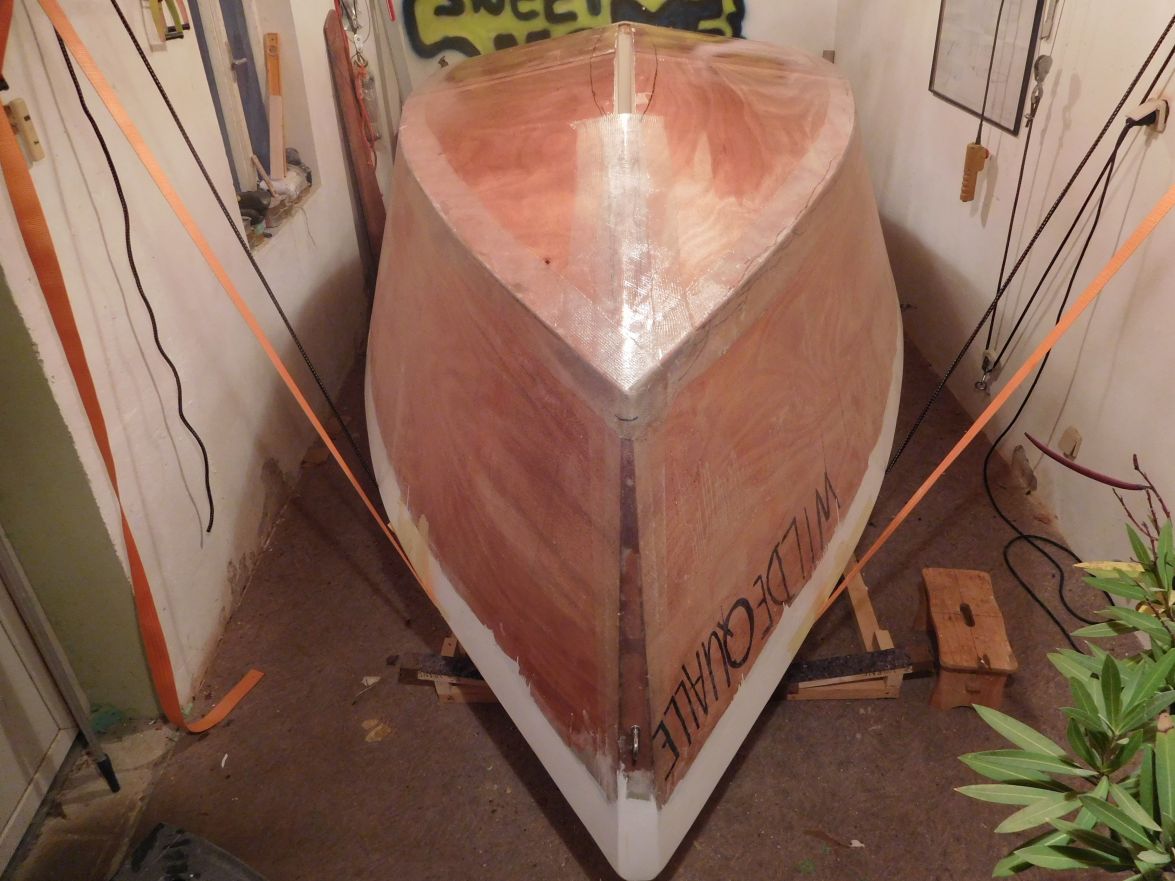
In the building notes it says one should not waste glass where the keel shoe is going to be mounted. That is why I marked the area and will cut the glass accordingly.
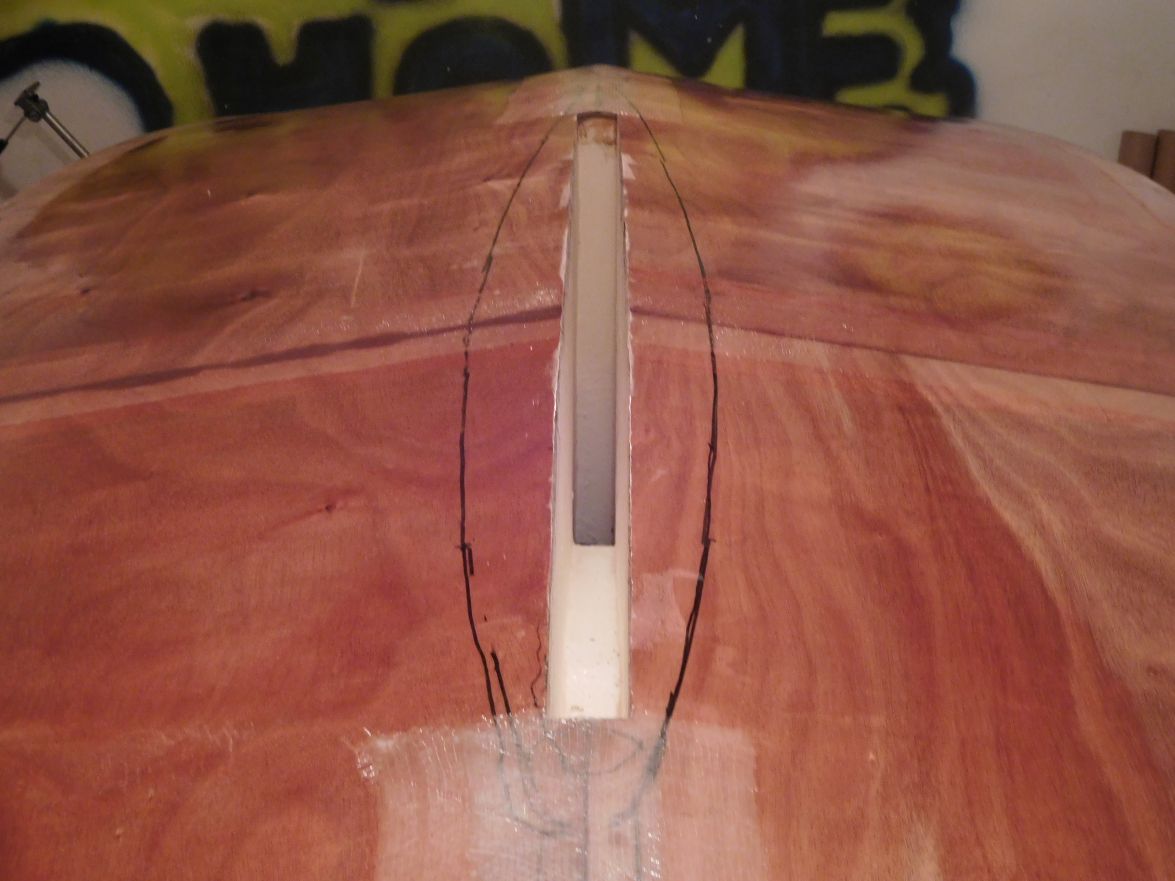
Should I leave out a triangular slot of glass for the skeg as well because the skeg will be fiberglassed on each side to the bottom with glass tape anyway ?
Greetings from Karl
Re: AD 14 KIELGE
Posted: Wed Nov 23, 2016 12:04 pm
by jacquesmm
No, regular glass lamination under the skeg.
Re: AD 14 KIELGE
Posted: Thu Nov 24, 2016 5:59 pm
by glossieblack
Looking good Karl, and quality work as usual.
Re: AD 14 KIELGE
Posted: Thu Nov 24, 2016 11:46 pm
by Fuzz
How you do that nice of work in that small of space just amazes me Karl.
Re: AD 14 KIELGE
Posted: Fri Nov 25, 2016 3:59 am
by gonandkarl
Hi,
Yes compared to your shop where you can ride a bycicle around any size boat you build it looks a bit small. I have 35 cm free distance to the wall each side of the widest part of the boat and I am glad when I have mounted the keel shoe, skeg and done the glassing of the hull.
After that one more flip and out thru the door towards the water.
Greetings from Karl
Re: AD 14 KIELGE
Posted: Fri Nov 25, 2016 1:13 pm
by gonandkarl
Hi,
Because it is always some hassle to move my boat around with my straps and the fixed position electric hoist, I decided to buy myself a workshop crane which was on sale and now I can lift the boat easily but more important is the fact that this hydraulic crane can let the boat down slowly which I did not manage with my tools so far. This crane I will also use once I have to lift the boat onto the trailer or lower it down onto the centerboard. It can lift 2 metres high and that should be fine for my further boat handling.
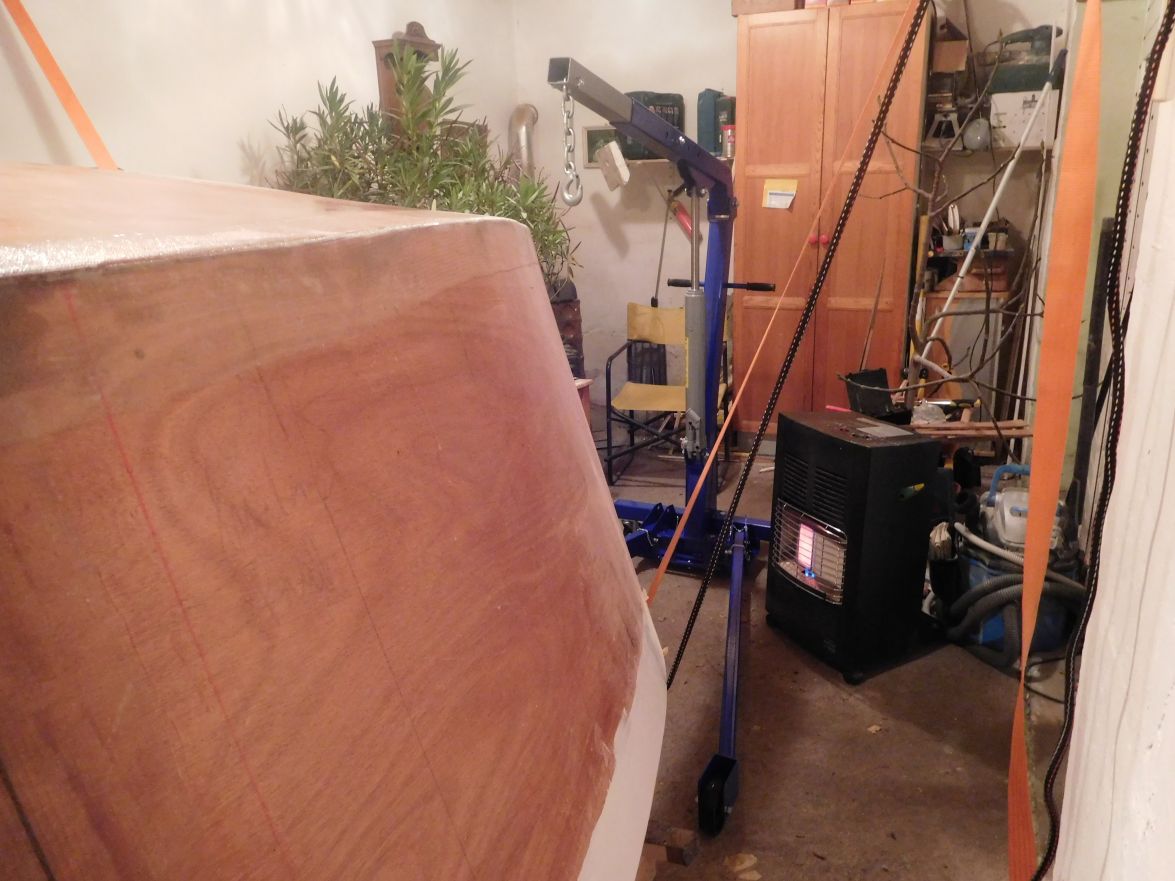
Depending on where I mount the boom it can lift a weight of between 250 kg and 1000 kg and the hydraulic cylinder is operated by a handle like a car jack. It weighs 72 kg and therefore it was good that it came in pieces and it took me the whole afternoon to screw it together. So this day must be written down to no progress on my keel shoe but tomorrow I will glue the next 2 wedges to it. I do it like that in small steps and always put it onto the keel for a test after the glue has hardened.
Greetings from Karl
Re: AD 14 KIELGE
Posted: Fri Nov 25, 2016 1:25 pm
by terrulian
Re: AD 14 KIELGE
Posted: Fri Nov 25, 2016 1:48 pm
by Jeff
Very nice addition to your shop Karl!!! Jeff
Re: AD 14 KIELGE
Posted: Mon Nov 28, 2016 1:35 am
by narfi
Those are nice. Looks like you got one that can fold up the legs out of the way which is even nicer.
Re: AD 14 KIELGE
Posted: Mon Nov 28, 2016 1:42 am
by gonandkarl
Yes for storing the 2 legs fold up and can be arrested with a pin and I can put it against some wall. Getting it there is also easy with the 2 wheels moving in any direction.
Re: AD 14 KIELGE
Posted: Tue Nov 29, 2016 7:27 am
by cape man
Looking good Karl!
Pattie says hello! She likes your boat.
Re: AD 14 KIELGE
Posted: Tue Nov 29, 2016 12:48 pm
by gonandkarl
Hi,
My boat is coming along but it will be
really fat contrary to people who are jokingly called fat. I want to apologize to my dear breakfast partners for my out of place humor and I hope David also knows that he is not old. Send my regards to Patty and maybe she remembers this lovely moment:
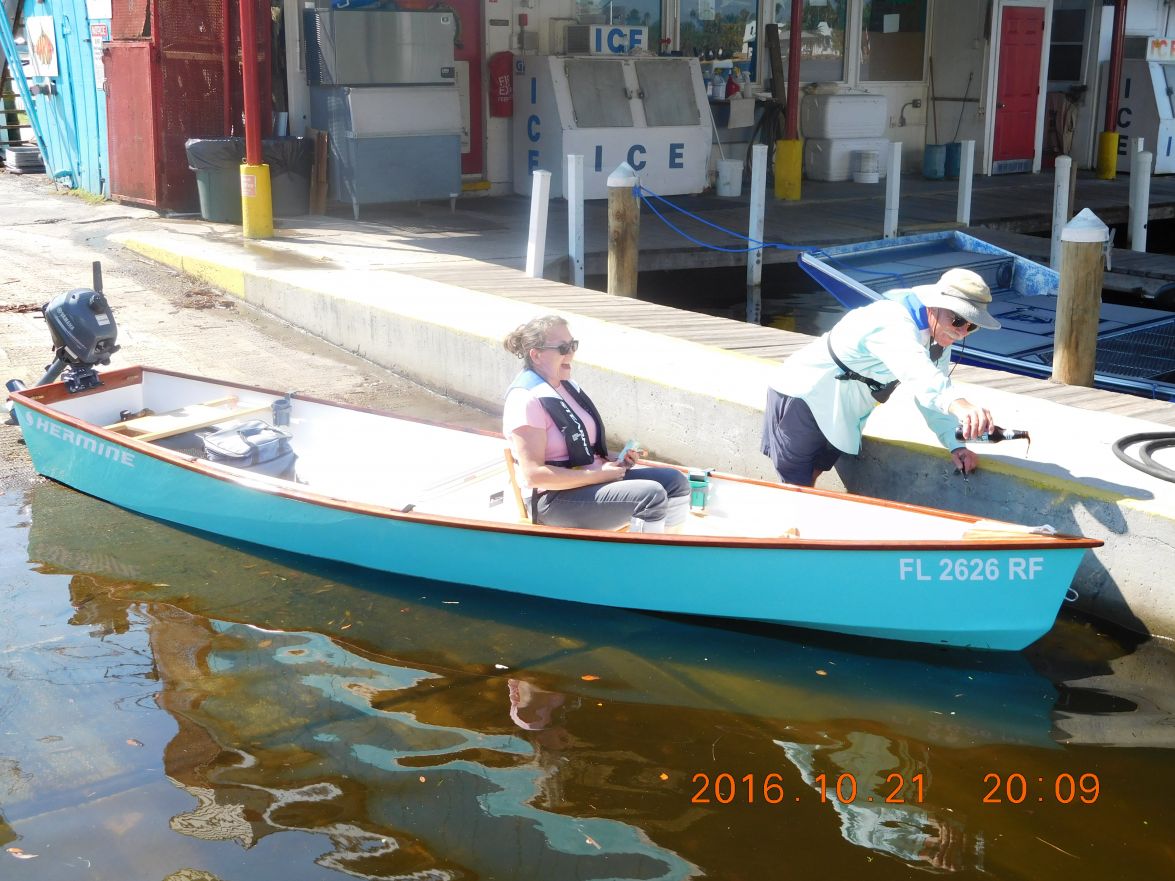
I definitely wont forget this one as I was not wearing my glasses at that time, so I first went close to you to be able to read what was written on your shirt and then I naturally had to take the picture:
Greetings from Karl
Re: AD 14 KIELGE
Posted: Tue Nov 29, 2016 2:00 pm
by Fuzz
' Not sure what you are talking about Karl
I do know I really enjoyed meeting you. I hope you had as good of a time at the meet as I did. I am not sure when I will get to go to another meet but I know I sure want to.
Re: AD 14 KIELGE
Posted: Wed Nov 30, 2016 3:22 am
by gonandkarl
Hi,
Dont you remember at one of our breakfasts I called Patty fat and you old. It was a joke. Yes I am thinking often of this beautiful place Homosassa and meeting all you guys. I also enjoyed it so much that I would not mind going to meet all of you again. The nice thing was to meet normal cheerful people with the common madness for wanting to build boats. Some guy has as a signature it is so nice to have made something that was not there before and then already starts the world cruise in my mind. In reality I follow just Michaels pictures on his great Barrier Reef cruise. All in all it is the best of life a boat builder can have even that I am only becoming one and then I want to become a sailor. What a great future I still have at my age. On my boat progress I test fit the shoe everyday on the keel and then glue the next 2 wedges onto it. I should have it finished by Saturday after which we make a weeks trip to visit my wifes family in Holland with the hind thought to check out if they have a decent slip for my boat should I ever tow it there to Almere Haven.
Greetings from Karl
Re: AD 14 KIELGE
Posted: Wed Nov 30, 2016 7:57 am
by terrulian
Re: AD 14 KIELGE
Posted: Wed Nov 30, 2016 9:32 am
by gonandkarl
Hi Tony,
Thanks for the video just the right thing on a lazy cloudy November day and the daily epoxy job done. One just wants to be somewhere else.
Greetings from Karl
Re: AD 14 KIELGE
Posted: Thu Dec 01, 2016 4:54 am
by gonandkarl
Hi,
Finished glueing the wedges to the keel shoe and here it is lying over the keel slot where I have to attach it to the boat:
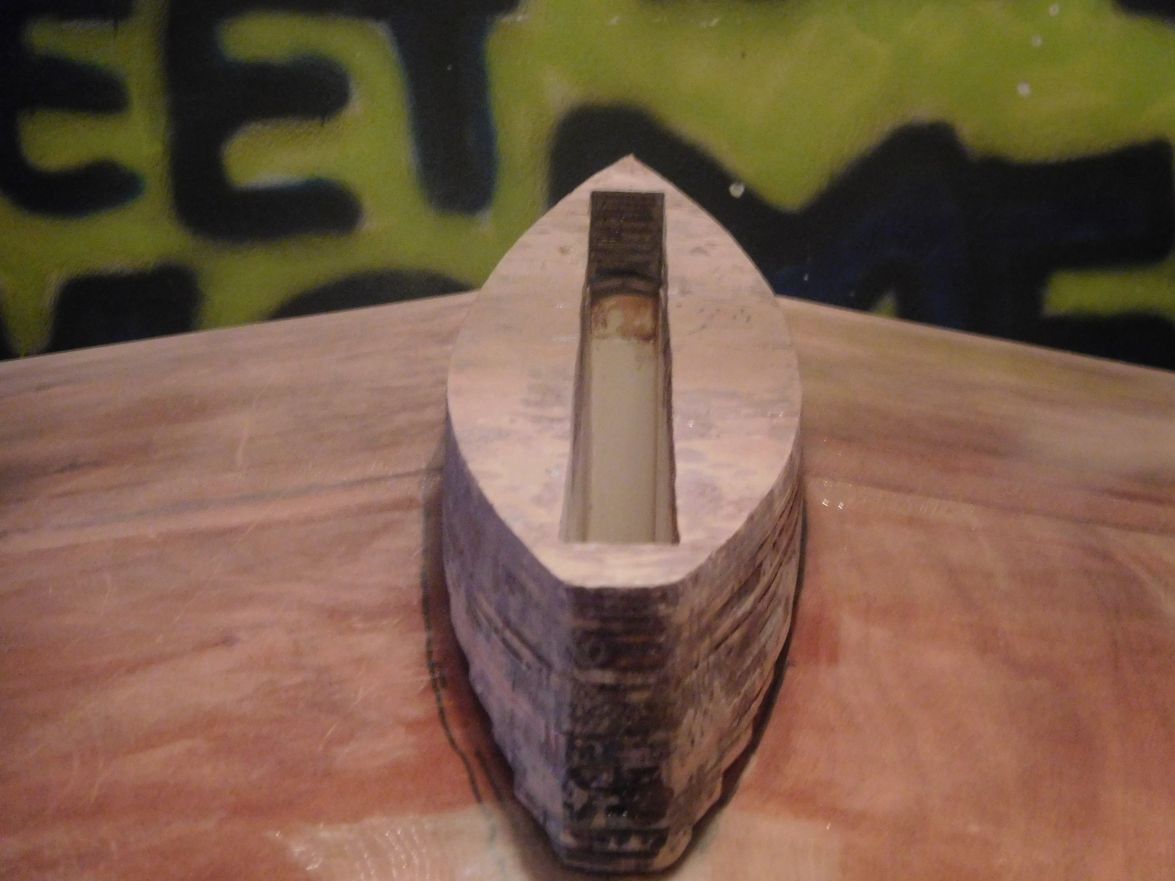
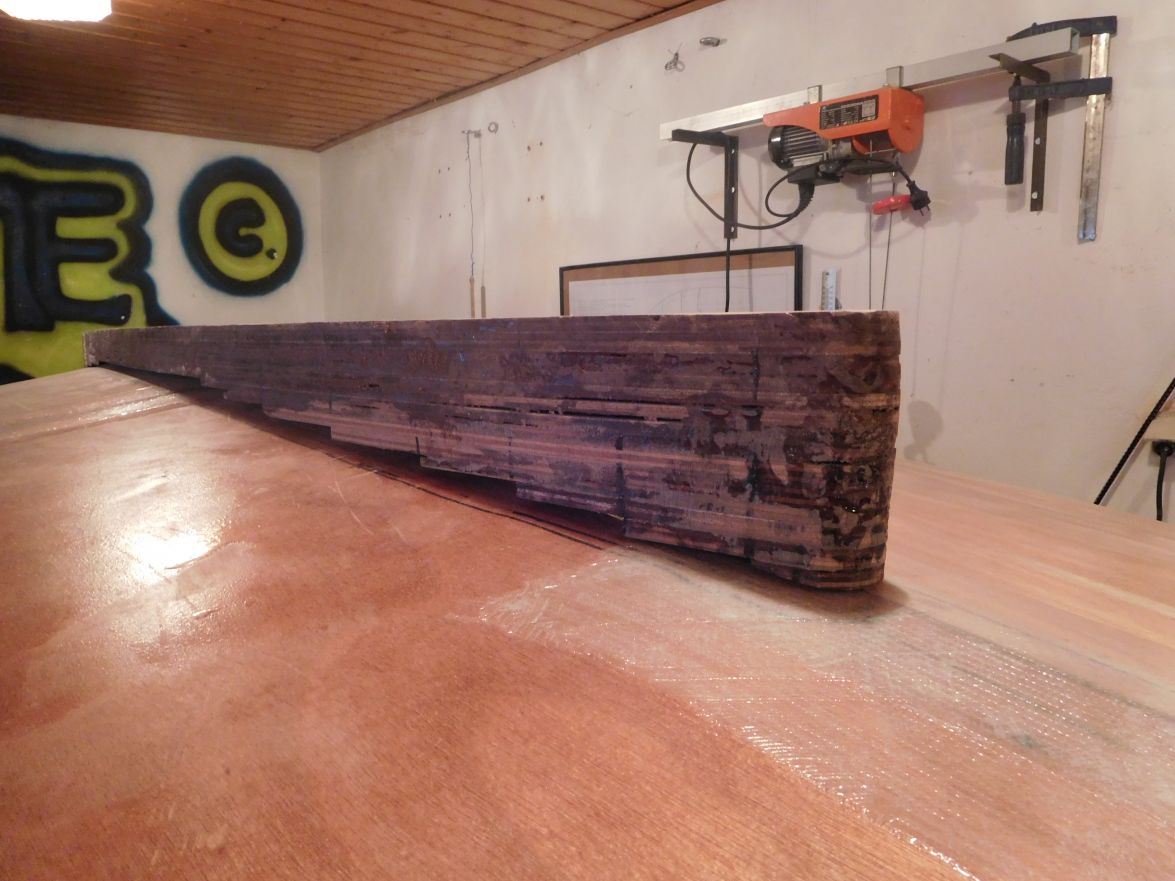
Greetings from Karl
Re: AD 14 KIELGE
Posted: Thu Dec 01, 2016 7:08 am
by Jeff
Karl, well done!!!! Hope you are staying warm over there!!! Jeff
Re: AD 14 KIELGE
Posted: Sat Dec 03, 2016 7:56 am
by cape man
Pattie loved the picture of Hermine being christened with a splash of BBB. Your comments at breakfast were taken in the jovial spirit with which they were delivered!
Re: AD 14 KIELGE
Posted: Sun Dec 11, 2016 4:46 am
by glossieblack
Hi Karl, Missing hearing from you. How goes it?
Re: AD 14 KIELGE
Posted: Sun Dec 11, 2016 9:20 am
by Jeff
I agree, Karl, how are you? Happy holidays to you and the family!! Jeff
Re: AD 14 KIELGE
Posted: Sun Dec 11, 2016 4:29 pm
by cape man
He went to Holland. When Europeans say a week they mean two.
Re: AD 14 KIELGE
Posted: Sun Dec 11, 2016 6:39 pm
by gonandkarl
Hi Glossieblack and Jeff,
I am still around but as Capeman said I went for a week to Holland where we visited my wifes ancestor town called Enkhuizen which has 2 beautiful harbours and lies on the other side of the Ijsselsea. The way to Enkhuizen goes over a more than 20 km long dam across Ijsselsea and in the middle of that stretch they have a parking place with this cute roadhouse.
The following picture shows a big sailing boat whose name depicts what I have got here with you guys.
The ships leave the smaller town harbour past the drawing bridge:
and naturally we also went to the North Sea at Wijk aan Zee were besides a few kite surfers we 2 were the only dogs being blown off the chain I think Michael calls it so when you have to lean into the wind.
I needed the whole of today to recover from yesterdays 950 km car drive home on the busy German highways so it took us 10 hours with only 2 short pit stops.
But tomorrow I will be in my cellar workshop and epoxy the SB side of the keel shoe with picture to follow.
Greetings from Karl
Re: AD 14 KIELGE
Posted: Sun Dec 11, 2016 6:55 pm
by Jeff
Nice trip and great photos!! I bet the water was really cold for the para-sailors!! Jeff
Re: AD 14 KIELGE
Posted: Mon Dec 12, 2016 1:46 am
by Fuzz
Great pictures Karl

Good to hear you had a good vacation. Take your time and rest up before getting back to the boat work. This is supposed to be fun not a job
Re: AD 14 KIELGE
Posted: Mon Dec 12, 2016 9:24 am
by cape man
Re: AD 14 KIELGE
Posted: Mon Dec 12, 2016 6:14 pm
by Fuzz
Re: AD 14 KIELGE
Posted: Tue Dec 20, 2016 3:25 pm
by gonandkarl
Hi,
I forgot Fuzz and got to work on my keel shoe but I did not kill myself but made enough rests in between admiring my just finished work steps. And so it comes that I took 10 days of sanding applying epoxy wood glue where necessary followed by more sanding and then I epoxy graphited the inside and the keelside 3 times. Now it is ready to be glued to the hull. But I let it cure until after Christmas and then I can count on the help of my wife and son to stir epoxy glue while I spread it on the hull. My cellar workshop looks such a mess so I had to use the dining room table for the pictures. To my wifes question Does that have to be in the diningroom ? I naturally had the correct answer at the ready. The temperature in the dining room is 21 degrees celsius and therefore best for the 3 day cure of the epoxy till Christmas eve.

The outside of the keelshoe I still want to cover with fibreglass after it is mounted on the hull and after fairing it and the fibreglassed bottom of the boat they both will also be epoxy graphited.
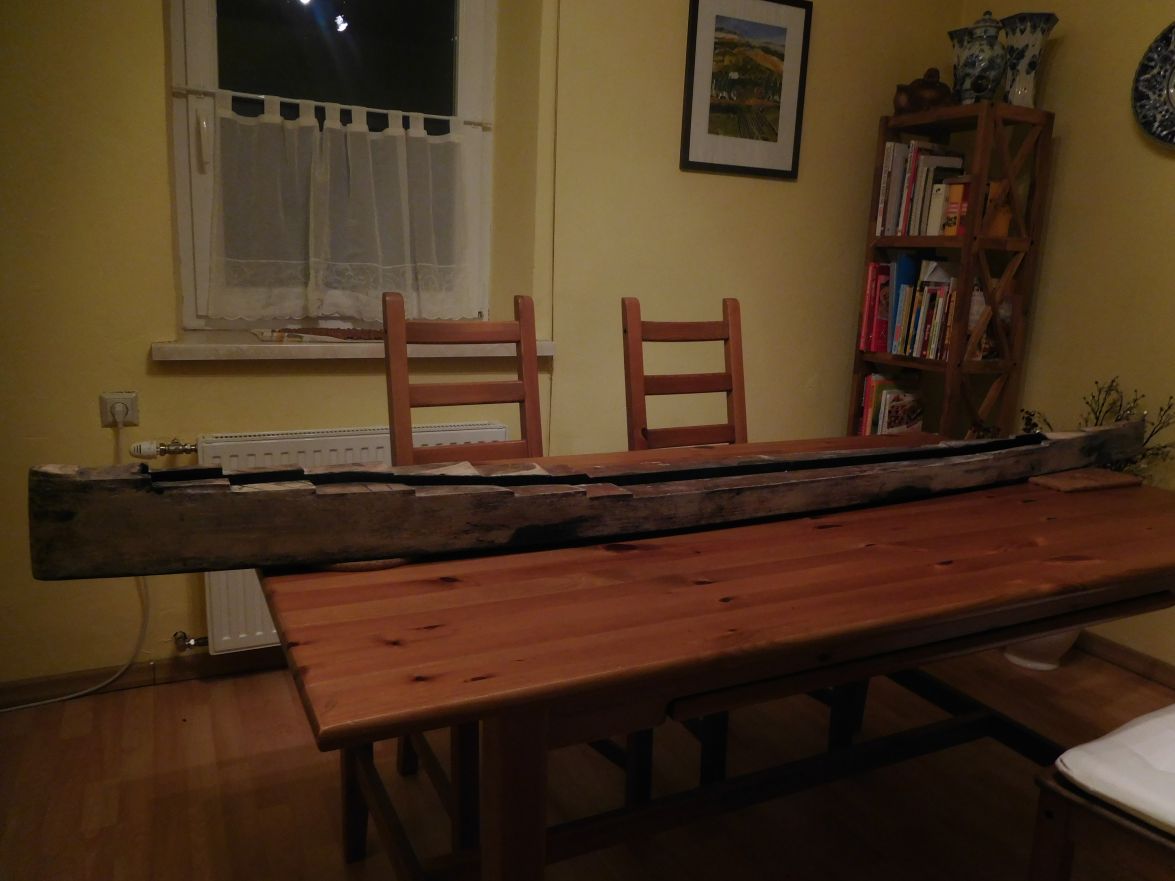
Not much progress but everything helps.
I wish you and all your family member a very happy festive season and clear your dining room tables of boat stuff before the Christmas dinner just like I will.
Greetings from Karl
Re: AD 14 KIELGE
Posted: Tue Dec 20, 2016 4:37 pm
by glossieblack
Just lovely work Karl. Seasons greetings to you and yours.
Re: AD 14 KIELGE
Posted: Tue Dec 20, 2016 7:42 pm
by seaslug
Karl, I think it makes a beautiful center piece. Just fill it with flowers for Christmas dinner. Nice work. Have a Merry Christmas. Mike
Re: AD 14 KIELGE
Posted: Wed Dec 21, 2016 1:32 am
by Fuzz
Well I don't mind being forgotten as long as the guy doing it is building nice boat stuff
You are a braver man than me...........I would not even dream of bringing boat stuff into the house much less putting it on the dinning table
Re: AD 14 KIELGE
Posted: Wed Dec 21, 2016 10:31 am
by cape man
Beautiful work Karl! Have a fabulous Christmas and New Year!
Re: AD 14 KIELGE
Posted: Wed Dec 28, 2016 10:03 am
by gonandkarl
Hi,
Fuzz if I had a workshop like yours which is as big as the hall of the Spanish Horse riding School in Vienna I would also not drag things inside. You even mentioned that your workshop in Alaska is heated. How do you heat such a big workshop with coal or diesel or some municipal hot water supply?
I actually cannot complain my cellar workshops 3 rooms of 18 x 12 feet have a permanent temperature of 20 degrees caused by the 2 hot water pipes which come from the municipality into my house for heating. That is why I potter around down there and today I made use of the router which my father bought himself 30 years ago and I routed my tiller to receive the 2 ss fittings which will be attached to the rudder like this. I did it again use the dining room as the foto studio.
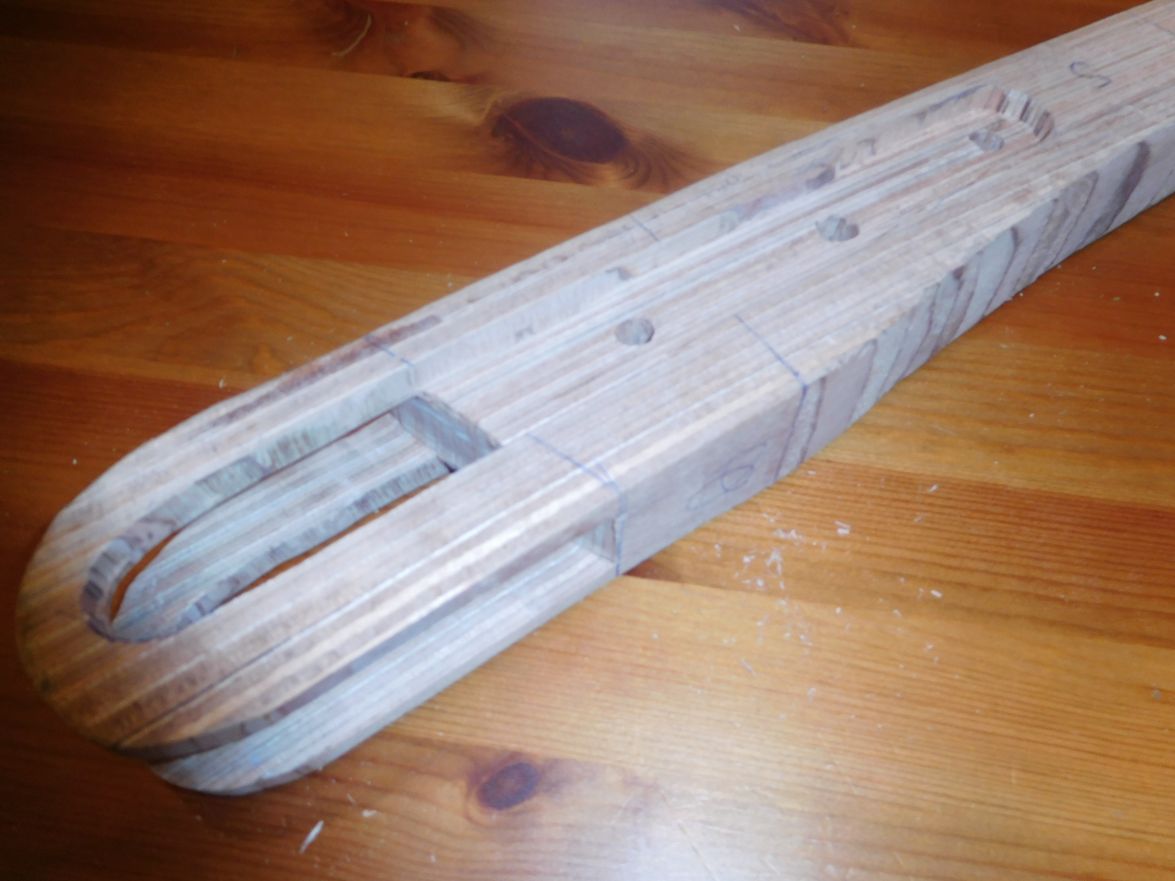
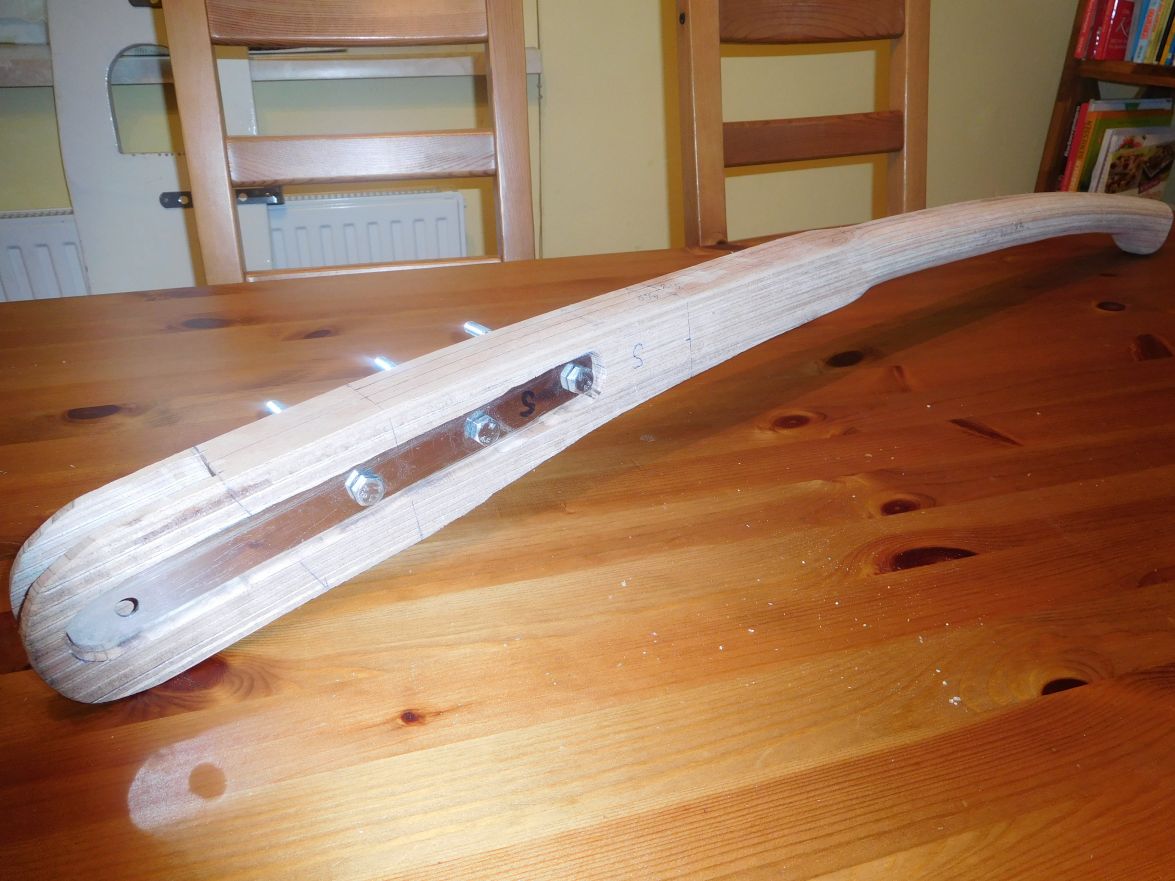
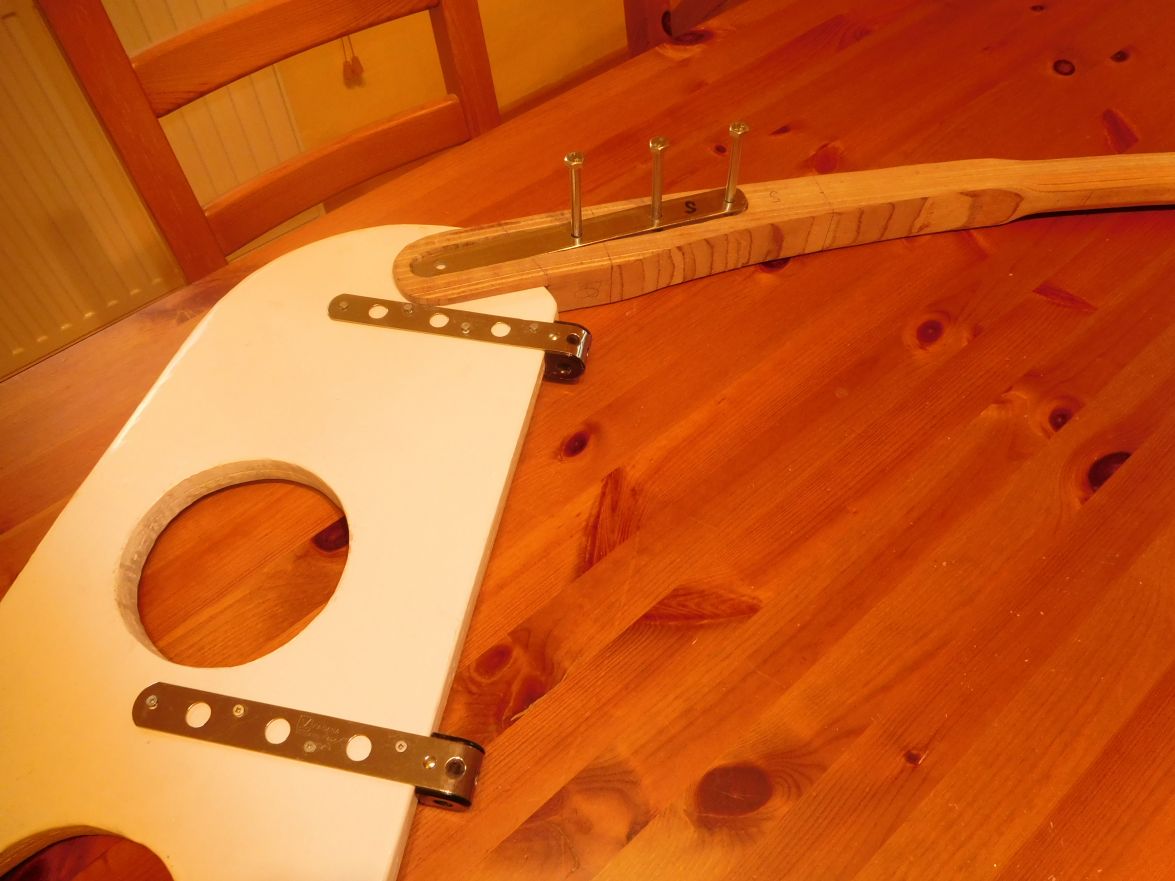
Now that 8 of my family members ( wife, 3 children, 3 grandchildren and son in law ) were sick with flue and virus infections over Christmas I was naturally not one of them who else would have eaten all the dinner rests and puddings finished I wish all of You my friends out there a Happy New Year.
Greetings from Karl
Re: AD 14 KIELGE
Posted: Wed Dec 28, 2016 10:51 am
by Jeff
Karl, looks great!! Sorry the family was sick!! Happy holidays to you and the family!! Jeff
Re: AD 14 KIELGE
Posted: Wed Dec 28, 2016 11:06 am
by terrulian
Beautiful work with the router, Karl. I assume you made a jig?
Re: AD 14 KIELGE
Posted: Wed Dec 28, 2016 11:13 am
by seaslug
Nicely done Karl. The router is one of my favorite tools. Did you build the tiller, or just router it for the hardware? Looks like you'll be sailing this spring. Have a Happy New Year! Mike
Re: AD 14 KIELGE
Posted: Wed Dec 28, 2016 11:23 am
by terrulian
I'm betting Karl made the tiller, which brings up the following point: Why did you use the router to make a recess in the tiller? Removing that material will make it weaker. Why not just leave it the original width?
Re: AD 14 KIELGE
Posted: Wed Dec 28, 2016 2:10 pm
by gonandkarl
Hi,
I laminated the tiller already 2 Years ago in May 2014 from the cut outs of the keel shoe which were about 2 inches wide and 5 1/2 foot long. I was thinking of making a jig for routing the recess of the hardware. But then I remembered that I battled a lot when I made a jig for routing the centreboard keel where the routing had to produce a skew plane. So this morning I decided to use the router freehand and the tiller mounted in my iron vice at my workbench. It was ok because I did not router right to the marked lines and had to use my electric finger rasp to work to the marks. Now that Tony asked why I rmade the recess for the metal bands and therefore weakening the tiller I am again in doubt if it was the right thing to do. I decided to to it because the part of the tiller which cheeks the rudder on both sides is only 6 mm wide on each side of the rudder. So I thought using a wing nut there to fix the tiller in different height positions could easily break the two 6 mm cheeks off. I can achieve the fixing of the tiller at any height by having the metal lying flat against the rudder. The way I made it will work but the wood around the metal band at the rudder is just there for looks. I want to leave the tiller just covered with epoxy and clear paint and then it will look nicer if it is not sort of chopped off skew at the rudder. It is Tonys fault showing clear painted parts of his lovely rowing boat which made me think out this tiller idea. If it should break at the first sail I can make a new one and that I will strengthen with extra plywood laminates in the rudder area and can mount the metal fittings outside.
Greetings from Karl
Re: AD 14 KIELGE
Posted: Wed Dec 28, 2016 3:03 pm
by terrulian
OK, I get the logic now.
As you can see in the photo below, the tiller on my Catalina 22 is attached to the rudder with the metal flanges only. Although this photo shows the tiller I made, it is a copy of the original equipment (but nicer, I'd like to think); so your design is not uncommon. I kind of doubt you'll break it but I was out once in my boat in 30+ knots with following seas and I thought mine would fail.
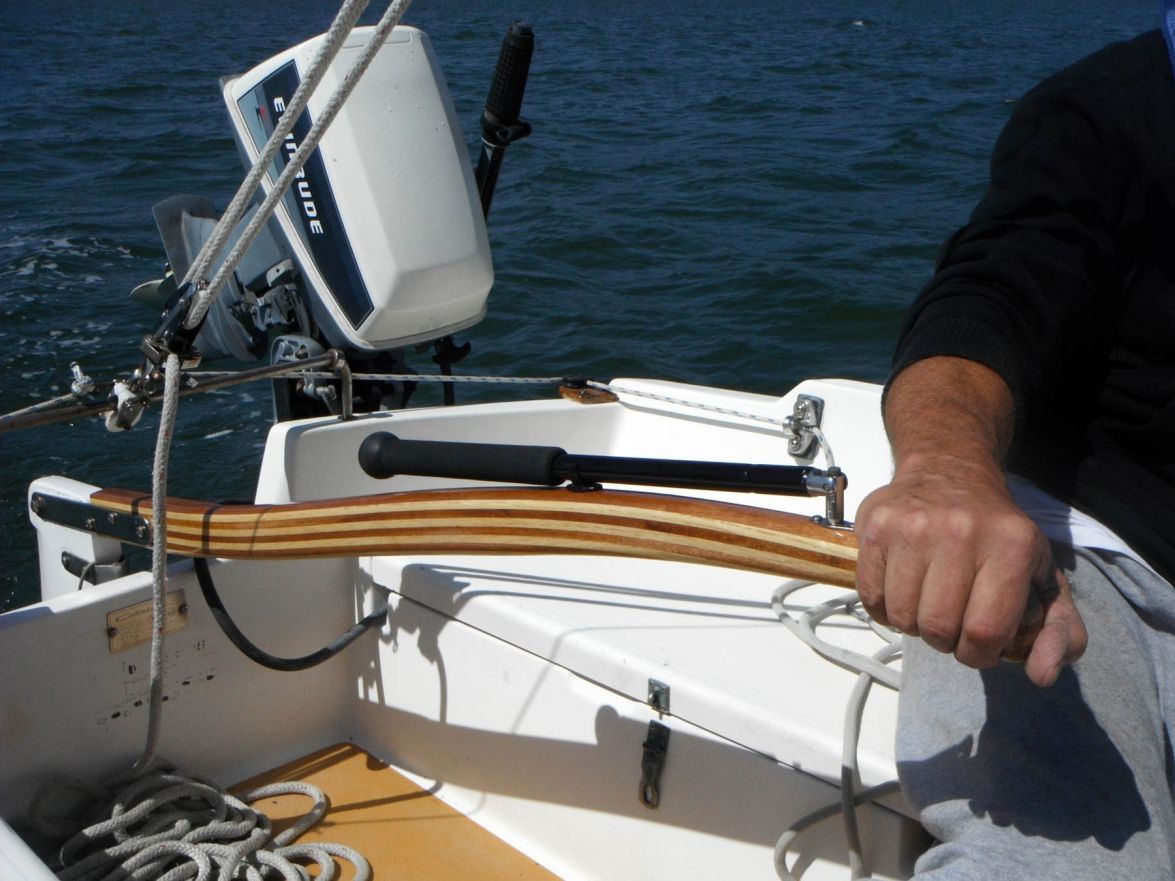
Re: AD 14 KIELGE
Posted: Wed Dec 28, 2016 3:21 pm
by gonandkarl
Hi Tony,
The recess on my tiller makes it as narrow as the rudder and so it will be mounted like your Cattalina 22 tiller which I think looks really nice. Mine has got the same plywood all thru so I will not reach the beautiful stripe effect you got out of real wood but on the other side I will also not ever have storms or following seas so there might be a good chance the tiller wont break when I sail on the beautiful lakes in my vicinity. I will have lots of use of my electric outboard because of lack of wind. But that is a future story. Tomorrow I give the tiller the first coat of epoxy just not to overdo my work effort until after New Years Eve.
Greetings from Karl
Re: AD 14 KIELGE
Posted: Thu Dec 29, 2016 5:08 am
by Fuzz
gonandkarl wrote:Hi,
Fuzz if I had a workshop like yours which is as big as the hall of the Spanish Horse riding School in Vienna I would also not drag things inside. You even mentioned that your workshop in Alaska is heated. How do you heat such a big workshop with coal or diesel or some municipal hot water supply?
Greetings from Karl
Karl, first happy new year to you and your family. I hope you are able to do sailing this coming summer
As for the shop. I heat it with diesel. I live 16 miles from the closest town so that is my only option. I only use most of my shop for dry storage so I am able to keep most of it partitioned off and only heat a small area. Heating the whole thing would take too big of a bite out of the boat building budget.
Fuzz
Re: AD 14 KIELGE
Posted: Fri Dec 30, 2016 3:24 am
by gonandkarl
Hi Fuzz,
I did not know that you are miles away I imagine sort of in the middle of nowhere. That must be nice not to have a crowd running past your house on the side walk from morning till night like in my case.
Now that I had a good look at the Spanish Horse Riding School hall I must admit their hall is bigger than your workshop but also nice to look at.

If we were to build our boats in that hall we could even ask entrance fee from the spectators on the gallery.
Greetings from Karl
Re: AD 14 KIELGE
Posted: Sat Dec 31, 2016 4:29 am
by Fuzz
Well if we get a few more builders I think we could fill up that place with spectators
I do love living out of town and not having to worry with strangers.
Re: AD 14 KIELGE
Posted: Wed Jan 11, 2017 9:53 pm
by das boot
I used 3 of the pin mounts to hang the rudder so i can rase it up and use the top 2 when in shallow water or launching the boat then i can move it down and use all 3 when the water is deep enough
Re: AD 14 KIELGE
Posted: Thu Jan 12, 2017 6:32 am
by gonandkarl
Hi George,
This is exactly how I did it and I tested the rudder on the transom already in the down and up position. I think it will help sailing away from a shallow beach. Right now I dont feel like doing a lot for the boat because the weather is so cold and it is freezing permanently. That is why I go most afternoons Eisstockschießen with some other CLOOF s on a frozen pond. It is like bowling on ice and it is done with a heavy pear wood thing like this:
Hope to bring more boat building progrees pictures soon.
Greetings from Karl
Re: AD 14 KIELGE
Posted: Thu Jan 12, 2017 9:20 am
by terrulian
Cloof?
Re: AD 14 KIELGE
Posted: Thu Jan 12, 2017 9:28 am
by jacquesmm
Funny, that same word also exist in the local dialect of Brussels. Karl's wife speaks Dutch, that may be where he got it.
Re: AD 14 KIELGE
Posted: Thu Jan 12, 2017 9:51 am
by gonandkarl
Hi,
It seems to be a German word also used In Belgium but it is also called Bavarian Curling. It is the Wintersport for Austrians at or over the pension age and that is why I used the all too funny letters CLOOF which originate from our Australian friend glossieblack and he disclosed its meaning when Fuzz reacted like you Tony. ( Clapped Out Old Fart ) My wife killed herself laughing when I told her what an over 70 year old boat builder can also be called.
Greetings from Karl
Re: AD 14 KIELGE
Posted: Thu Jan 12, 2017 12:56 pm
by terrulian
Now I'm really confused.
Clapped out old fart...plenty clear enough, if not a little
too clear.
But are you saying the word also refers to the sport?
Re: AD 14 KIELGE
Posted: Thu Jan 12, 2017 3:44 pm
by cape man
Now I'm really confused.
Don't feel bad. Part of becoming a Cloof is regular confusion
With a K it is a deep, wooded, ravine and according to the Urban dictionary
Kloof
(noun)
A universal derogatory term for anyone
(adjective)
Something bad
(noun) You little kloof
(adjective) That's pretty kloofed
Karl you better start building again or this thread is going to be Kloofed
Re: AD 14 KIELGE
Posted: Thu Jan 12, 2017 3:47 pm
by narfi
cape man wrote:Now I'm really confused.
Don't feel bad. Part of becoming a Cloof is regular confusion
With a K it is a deep, wooded, ravine and according to the Urban dictionary
Kloof
(noun)
A universal derogatory term for anyone
(adjective)
Something bad
(noun) You little kloof
(adjective) That's pretty kloofed
Karl you better start building again or this thread is going to be Kloofed
That is a very cleaned up definition from what I found when I googled it this morning.......
Re: AD 14 KIELGE
Posted: Thu Jan 12, 2017 4:55 pm
by gonandkarl
Hi,
Yes my English is not all too good so when I try to explain words like Eisstockschiessen ( Bavarian Curling ) and also use Australian 4 letter words for the sport team members and dont put it the way it is understandable the result must be confusion.
And Yes I agree with Cape Man confusion is often part of me being a CLOOF even when I hardly put any rum into my belly warming Jagatee ( immediate translation: tea spiked with fruit schnapps or rum ).
As long as I am hardly building I dont mind being kloofed. I even got so distracted that I drive on Saturday 150 miles to attend a whole day workshop in Vienna on mushroom growing out of coffee dregs. ( The edible kind not what you think )
Greetings from Karl
Re: AD 14 KIELGE
Posted: Thu Feb 23, 2017 9:12 am
by gonandkarl
Hi,
At last a little bit of progress I finished the rudder and tiller and both are waiting for the boat.
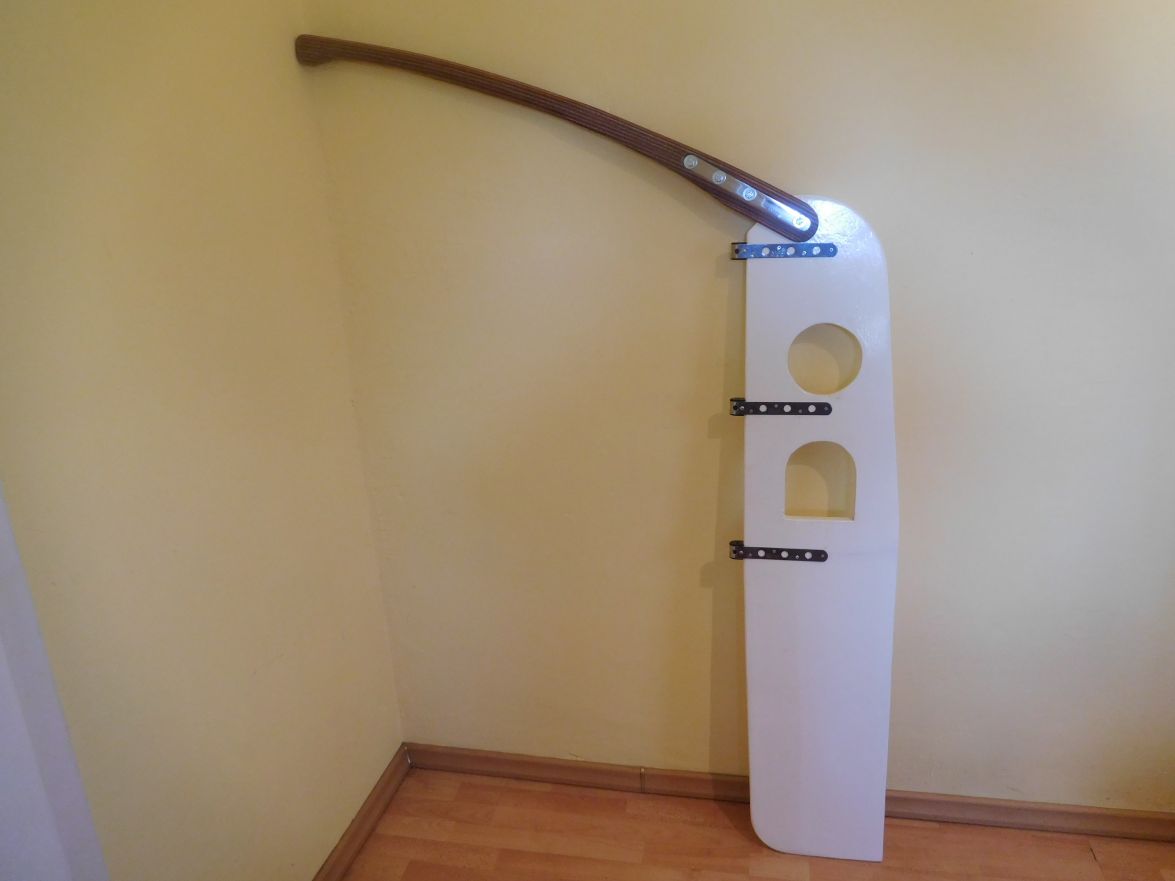
Greetings from Karl
Re: AD 14 KIELGE
Posted: Thu Feb 23, 2017 9:19 am
by Jaysen
Karl, are the cutout per plan? What is using them?
Re: AD 14 KIELGE
Posted: Thu Feb 23, 2017 9:58 am
by pee wee
Jaysen wrote: ↑Thu Feb 23, 2017 9:19 am
Karl, are the cutout per plan? What is using them?
From the study plans: "Note the lightening holes in the rudder. They are shaped as foot steps: the rudder makes double use as a boarding ladder."
Great idea!
Re: AD 14 KIELGE
Posted: Thu Feb 23, 2017 10:46 am
by Jeff
Really good idea!!! Jeff
Re: AD 14 KIELGE
Posted: Thu Feb 23, 2017 11:16 am
by Fuzz
Really clever idea there Karl. And the rudder looks great too
Re: AD 14 KIELGE
Posted: Thu Feb 23, 2017 11:32 am
by Jaysen
That's something I need to steal when I build something that is can be gotten back into once you exit!
Thanks for the explanation.
Re: AD 14 KIELGE
Posted: Fri Feb 24, 2017 3:30 am
by gonandkarl
Hi,
This clever idea comes from the AD14 plan of Jacques the designer and for using the holes to get out of the water over the transom I think it can work for a bit lighter chap than me. When I started building the boat I misread lightning holes and understood that in a thunderstorm the flash of the lightning can pass through this holes. The rudder is a bit lighter with these 2 holes and in an emergency even I would get out of the water with them by gripping first the bottom and then the top hole and then the transom and the push pit and as I cannot pull myself up with the arms any more the right foot in the bottom hole could help. I will try it out this summer when the Attersee lake will have a temperature more than 24 deg Celsius. In the meantime there is some more building to do.
Greetings from Karl
Re: AD 14 KIELGE
Posted: Fri Feb 24, 2017 1:14 pm
by Fuzz
gonandkarl wrote: ↑Fri Feb 24, 2017 3:30 am
Hi,
When I started building the boat I misread lightning holes and understood that in a thunderstorm the flash of the lightning can pass through this holes.
Greetings from Karl
Clever folks you Austrians are. Training your lightning to jump through hoops
Re: AD 14 KIELGE
Posted: Fri Feb 24, 2017 2:09 pm
by cape man
Just good to see you back at Karl!
Re: AD 14 KIELGE
Posted: Sat Feb 25, 2017 4:03 pm
by gonandkarl
Hi,
Today I mounted the skeg on the boat and because it is still freezing around here I wanted to plant a fan heater exactly in front of the skeg to get the 20 degree celsius temperature for the epoxy wood glue. As this heater switches off when it is not standing on a flat surface I glued the switch with packing tape at the bottom so that I could hang it from the top of a step ladder to be near the skeg and as necessity is the mother of inventions I used a Wine from South Africa box to cover the skeg and let the blower heat its inside. It is not really worth taking a picture of it, but rather than watching Gravity together with my wife on TV I did go out to the shed to check the temperature around my skeg and took some pictures. It looks as if it is working alright, therefore I am planning to glue a biax tape on each side of the skeg and the bottom tomorrow morning so to say wet on wet because only 12 hours will pass. My keelshoe is waiting also some time already to be glued to the bottom and I think if I put a 170 cm long cardboard tunnel box over it I could also heat it the same way as with the skeg, maybe with just a small vent on the end opposite where the fan heater is blowing into the tunnel.
Even that we finished the wine from South Africa a while ago the box had a second use:
And here is the skeg inside the box with a thermometer at the end where I achieve a temperature between 16 and 23 celsius:

Greetings from Karl
Re: AD 14 KIELGE
Posted: Sat Feb 25, 2017 4:08 pm
by Jaysen
Great idea!
Re: AD 14 KIELGE
Posted: Sat Feb 25, 2017 4:12 pm
by Fuzz
Really good idea Karl. It is amazing what folks come up with to keep going. As they say where this is a will there is a way
Re: AD 14 KIELGE
Posted: Sat Feb 25, 2017 4:27 pm
by Jeff
Karl, great idea!! Hope it warms up for you soon!! Jeff
Re: AD 14 KIELGE
Posted: Thu Mar 02, 2017 11:43 pm
by glossieblack
Greetings Karl, is it getting close so Springtime temperatures?
Re: AD 14 KIELGE
Posted: Fri Mar 03, 2017 4:28 am
by gonandkarl
Hi,
Yes the temperature is slowly rising and therefore I will glue my keel shoe within the next few days to the bottom with a heated cardboard tunnel over it for 36 hours and I hope to have the underside of the benches the support plywood pads for 3 cleats and the and 6 support plywood pads for the 2 pushpits mounted on the inside of the boat by the end of March.
Greetings from Karl
Re: AD 14 KIELGE
Posted: Fri Mar 03, 2017 2:18 pm
by cape man
Karl,
Good to see you are still at it even if you have to get as creative as the box heater to do something.
Re: AD 14 KIELGE
Posted: Fri Mar 10, 2017 4:41 pm
by das boot
Glad to see you are moving forward looks good I just a bought forgot to put that small keel at the back of my boat when I built it I only noticed it just as I was putting it on the trailer but I caught it in time. As for using the holes in the rudder to clime into the boat I tried it mabey I am just to old i finely got in but it was a battle I picked up a rope type ladder that hooks to a cleat and drops over the side that works well.
Re: AD 14 KIELGE
Posted: Fri Mar 10, 2017 4:53 pm
by terrulian
Rope ladders work fine unless you're by yourself when you go over.
Re: AD 14 KIELGE
Posted: Sat Mar 11, 2017 6:57 am
by gonandkarl
Hi,
When I eventually sail my boat I will have a boarding ladder which my sister gave to me after rescuing it from a rubbish dump. She thought it would work fine for her as she battled to get aboard a sail boat after a swim in the lake over a rope ladder only a few days before she found this one. She is not quite my weight class but also in her late sixties, so the rope ladder was a big problem for her but with 3 strong men on board they could pull her up onto the sail boat. This ladder I have tested on my transom already and it can take my weight with the only disadvantage I have to lift the rudder into the boat to be able to hang the round part over the transom. The round parts had the plastic covering of the alu pipe it is made of a bit damaged and that is why it landed in a shipyards dump. I just put some yellow tape over it and it will most probably outlive me. The adjustable studs and the round parts fold sideways so it can be stored flat in the cabin.
And now that the weather is getting better I will glue the keel shoe to the boat this weekend. It was a long time without epoxy that is why I played in the cellar not only with boat parts. Being so far away from the sea and not as close to oyster banks like Michael in Australia I tried my luck with growing oyster mushrooms out of coffee dregs and today I harvested the first 202 grams of it. Now you know why my boat is not finished yet, because the stress of retirement chases me from one task to the next. Coffee being the most traded commodity in the world after oil gets at least a second use in my cellar after hot water is being pressed thru it for our wake up drink. And to make it really environmentally right I fetch all the coffee dregs in buckets on the carrier of my bicycle from 2 coffee shops and a retirement home.

So enough of the cackle and off to the keel shoe.
Greetings from Karl
Re: AD 14 KIELGE
Posted: Sun Mar 12, 2017 6:38 pm
by cape man
Karl, you make me smile.
Re: AD 14 KIELGE
Posted: Wed Mar 15, 2017 4:12 pm
by das boot
The big thing is do not fall out of the boat when sailing alone i trail a rope with a float on it once you let go of the rudder the boat will slow down or stop our water is cold here this gives you something to get back to the boat with. I also ware a self inflating vest this ladder i have has hard plastic steps but they fold into each other so it is small for storage. I also have a small inflatable on the boat that I can inflate using my 12VDC battery I have used it to get to shore with and I have used the lader to get in and out of that it works once I get the boat out of winter storage I will send you a picture of it you could build it quick I bought mine but it is simple to build.
Re: AD 14 KIELGE
Posted: Wed Mar 15, 2017 4:47 pm
by jacquesmm
The mushrooms look good and I agree about the need for a ladder but, I designed steps in the rudder to use as a ladder.
Someone mentioned it in a thread but now it looks like we forgot about it.
It is kind of any emergency ladder, not as nice as your full fledged ladders but it works.
I also agree about dragging a line with a float behind the boat. That line is conected to the rudder and if a single handed sailor falls over board, he grabs the line and boat turns in the wind and stops.
Re: AD 14 KIELGE
Posted: Sun Mar 19, 2017 4:28 am
by gonandkarl
Hi,
Last Sunday I wrote cut the cackle and on to the keel shoe. Now that it is Sunday morning again I can report the keel shoe and skeg is on and glassed with 450 biax tape on each side and as the tape is 16 cm wide I could lay it nicely over the fillet to the bottom of the boat. This and future graphite epoxy should be able to take some beating.
Keeltrunk filled with styrofoam covered in packing tape and keelshoe ready to be glued
Keel shoe glued to bottom SB with two wedges to be 100 % level until hard
Keel shoe tunnel heating
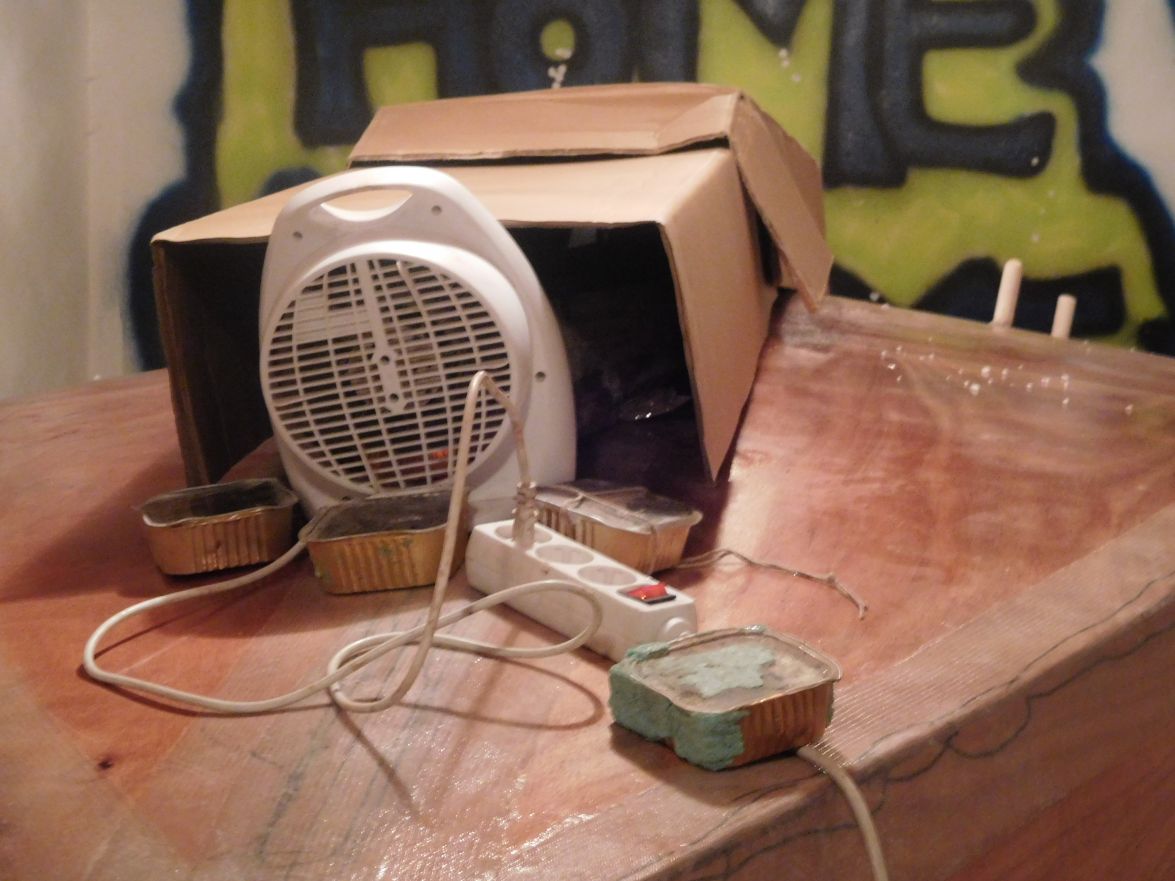
Keel shoe glassed with 450 biax tape
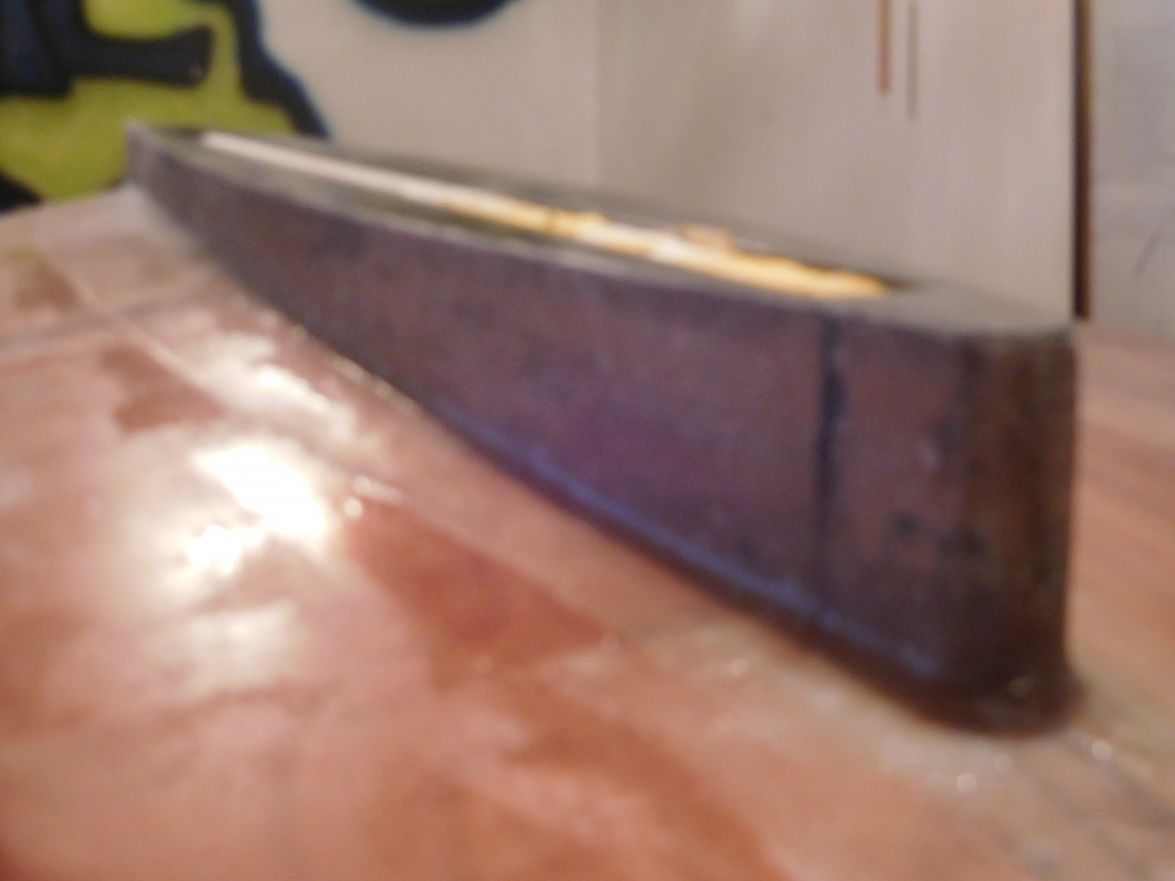
Keel shoe glassed with 450 biax tape from bow view
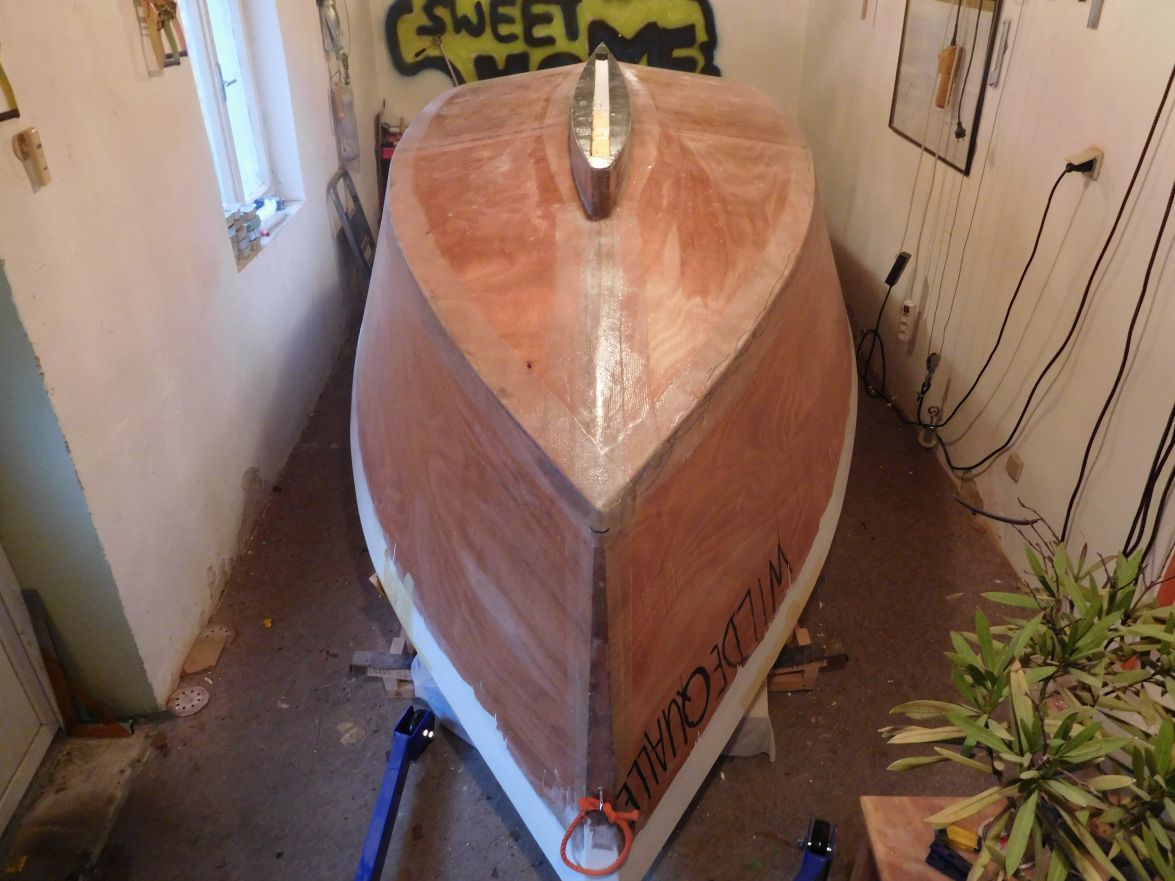
Now I am ready to cover the bottom and sides with fibreglass.
Greetings from Karl
Re: AD 14 KIELGE
Posted: Sun Mar 19, 2017 5:26 am
by glossieblack
Great to see that the weather gods have let you recommence serious work Karl. And what good progress you've made! Quality work by a quality builder. Well done!
Re: AD 14 KIELGE
Posted: Sun Mar 19, 2017 6:16 am
by gonandkarl
Yes I try to work as accurate as you down under guys. Salvatore was my first inspiration to try hard to do it right and soon after he finished his sail boat in record time your build started and is an idol for me to work clean and correct. I study even every electric motor detail of your build even that I will never have an electric inboard myself but your perfection is a good example for me how to build. I will not reach the quality and perfection of my many idol builds on the forum like Tonys V10, Bondos Adelie, Graigs and Richards and Johns ( Nor ' Easter ) boats which I had the pleasure to have a ride on in Homosassa. Yes it is fun building a boat and drinking some red wine in the evening watching others being built around the world and being in contact with their builders.
Re: AD 14 KIELGE
Posted: Sun Mar 19, 2017 9:27 am
by terrulian
Looking sound and strong, Karl. I admire your ability to persevere and think of creative solutions to the weather.
Re: AD 14 KIELGE
Posted: Sun Mar 19, 2017 3:58 pm
by Salvatore
Hi Carl,
Nice work! Considering that you have done the top half you don't have far to go now
.
Talking about ladders, the ladder on my boat works well for me, it doesn't clutter up the deck when not in use, bottom half folds up when beaching the boat and is very easy to use. You can find them online I think I paid about $150 Australian dollars for it

Regards Salvatore
Building Angelina
https://youtu.be/plQZZJgnWzk
Re: AD 14 KIELGE
Posted: Sun Mar 19, 2017 4:23 pm
by terrulian
I have something similar on my Catalina 22. It is held in the upright position by Velcro that you can release from the water. I figure at my age, I will be in something like panic mode if I go overboard so I want to make it as easy as possible to get up to the cockpit.
Re: AD 14 KIELGE
Posted: Sun Mar 19, 2017 7:43 pm
by waytootall
I wondered why the holes were in the design for the rudder. I never considered it was to be an emergency ladder! I am glad I put them in even though I didn't know why. The keel shoe looks great. Very clean work.
Re: AD 14 KIELGE
Posted: Mon Mar 20, 2017 12:00 am
by Fuzz
Nice clean and clever work Karl. Glad it is warming up there for you. I hope it will happen here soon but it shows no sign of it. Still below 0 this morning
Re: AD 14 KIELGE
Posted: Mon Mar 20, 2017 12:44 pm
by gonandkarl
Hi,
As everyone here on the forum says that bunks are much better for a boat on the trailer than rollers, I laminated the first 2 pieces of three metre long plywood bunks. I glued them with epoxy/woodflour together and hope it keeps the shape of the boats bottom. The weights keep it nicely against the hull. I did not forget to put enough plastic between bunks and boat. Tomorrow I glue the third plywood layer onto the bunks.
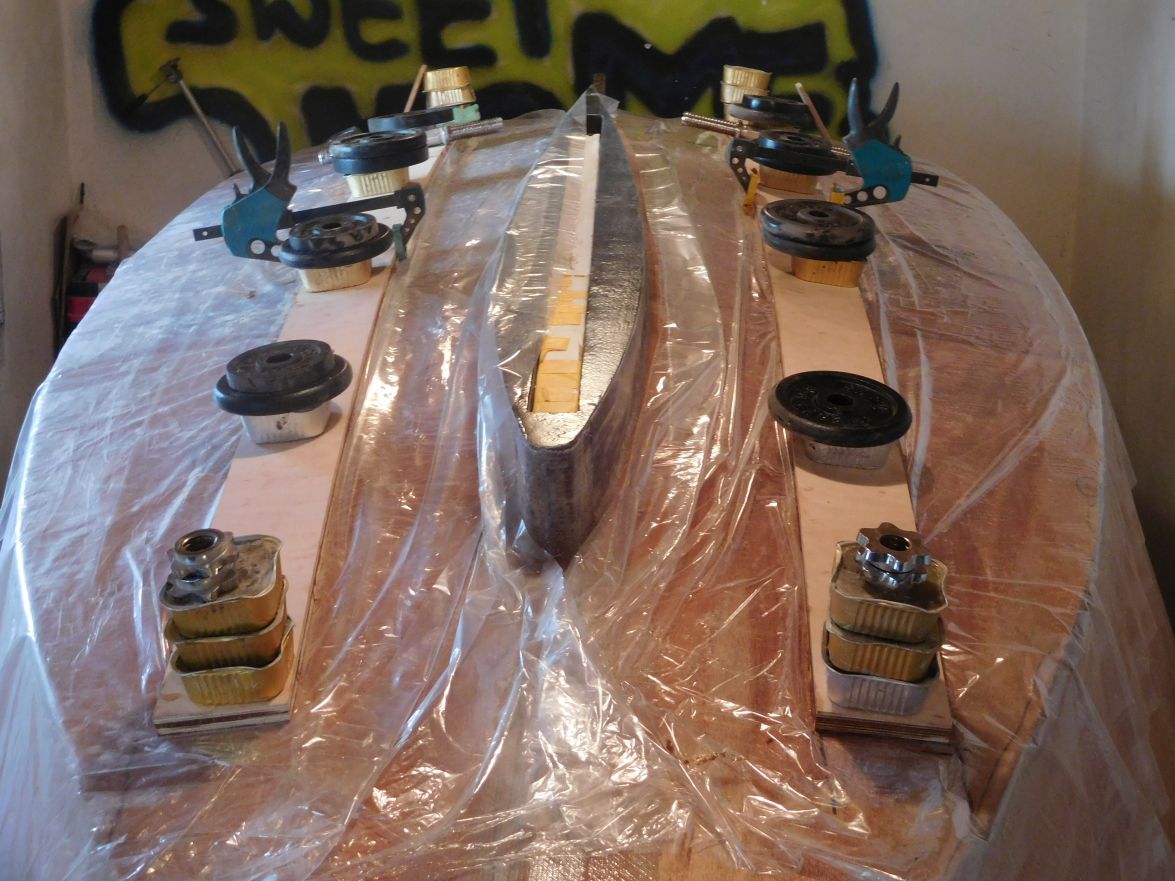
Greetings from Karl
Re: AD 14 KIELGE
Posted: Mon Mar 20, 2017 12:56 pm
by Jaysen
Karl,
If possible measure the deflection of the wood at the points where the bunks will attach to your trailer. This will let you but spacers between the mounts and the bunk to ensure you get the best fit. It doesn't matter what tangent on the arch you use as long as you use the same point for measure and set up.
You will get some spring back with the lamination. It shouldn't be too bad, but those measurements will be worth the time if it springs more than you like. Knowing the needed deflections have saved my bacon more than once on laminations like that.
Re: AD 14 KIELGE
Posted: Mon Mar 20, 2017 12:57 pm
by Jaysen
Forgot to tell you, I really like your build. Cant wait to see it on the water.
Re: AD 14 KIELGE
Posted: Mon Mar 20, 2017 1:31 pm
by gonandkarl
Hi Jaysen,
I am not quite sure what you mean with the angle of deflection. I will definitely use some spacers at the support to make the bunks stronger there and give extra height for the screws whose heads will have the thickness of the first plywood panel and have to be countersunk into it. But I think I will try and make it like Bondo who sent me a picture of his trailer support and on it it looks like the one top screw let one adjust the angle of the bunk towards the boats bottom. Right now I dont know yet were the bunk supports will be. I hope to find out where to place them once I got the boat hanging over the trailer more or less in the position where it should rest on it. Then I will look where on my trailer metal cross beams I can place the bunk supports. The problem is the skids should be more or less underneath the 2 longitudinal stringers of the boat and this will guide me where to position the skids supports and hopefully also underneath frame B and D. But that is still far away. I just thought having the boat still upside down I could get the skids laminated using the bend of the bottom. I have seen that Bondo did it that way.
Here is his support:
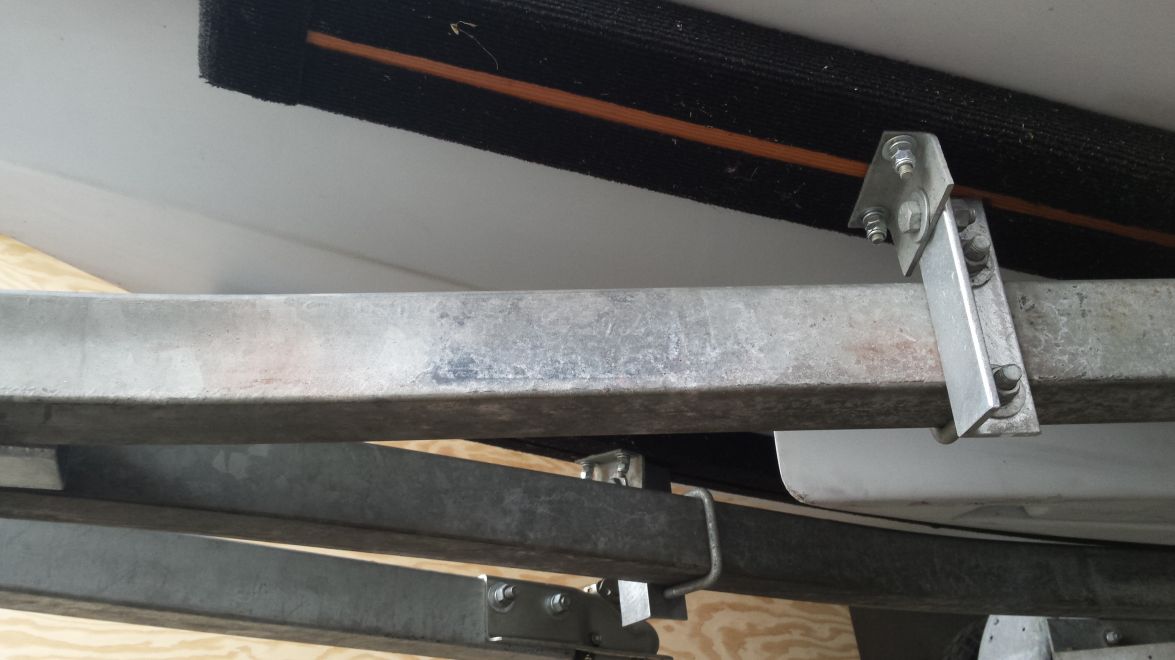
and that is how he made the bunks and me copycat wants to do it the same:
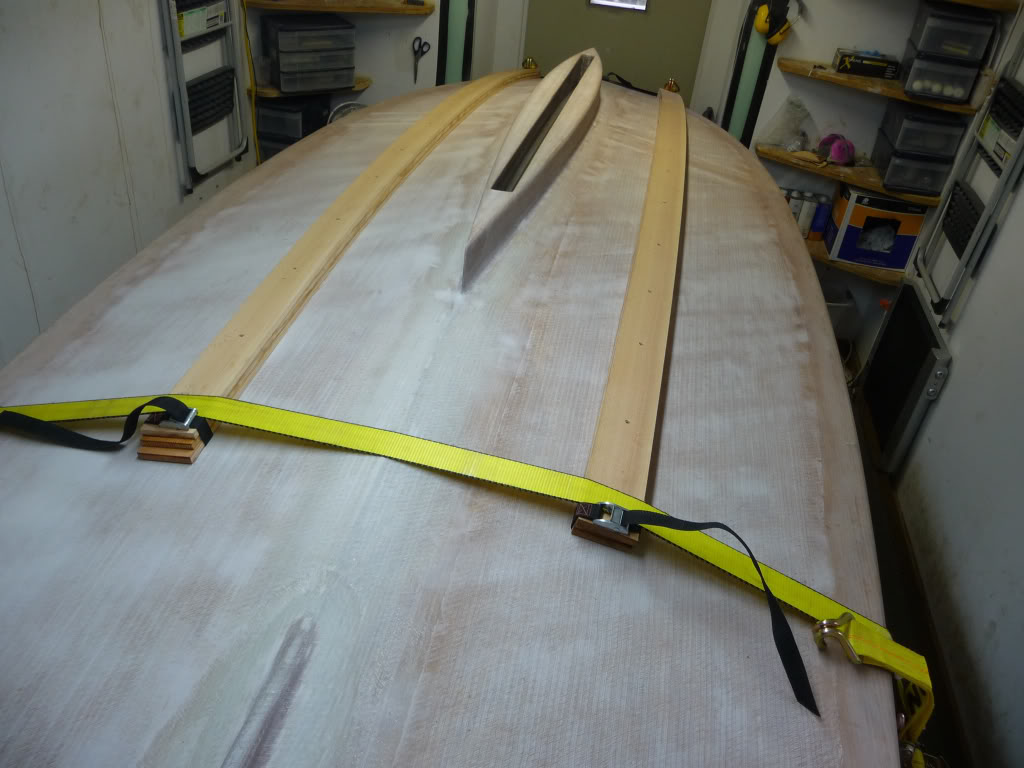
I hope to have the boat in the water this summer
Greetings from Karl
Re: AD 14 KIELGE
Posted: Tue Apr 04, 2017 4:04 pm
by gonandkarl
Hi,
So today I got the foam out of the centreboard trunk which I had there while glueing the keel shoe to the boat. I naturally battled even with this small task going at it with knives and thin saw blades and pliers and getting nowhere until I used a jimmy and a club hammer and got it out in a few minutes and had the floor covered with lots of small pieces of styrofoam. Now I have the boat ready for glassing the bottom and sides.
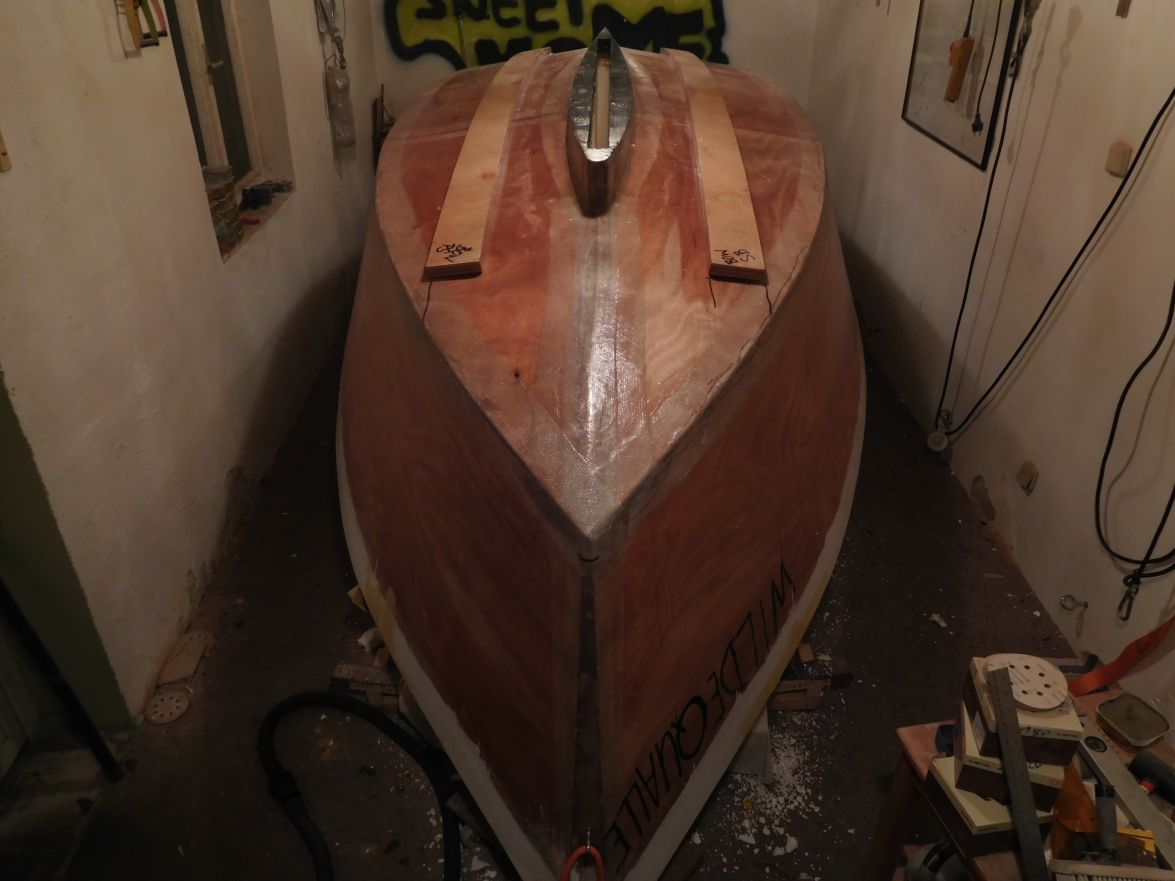
Naturally I will take away the 2 skids I made for the trailer beforehand. After laminating these bunks for the trailer out of 3 plywood panels they keep the shape of the boats bottom perfectly even when I take them away from it.
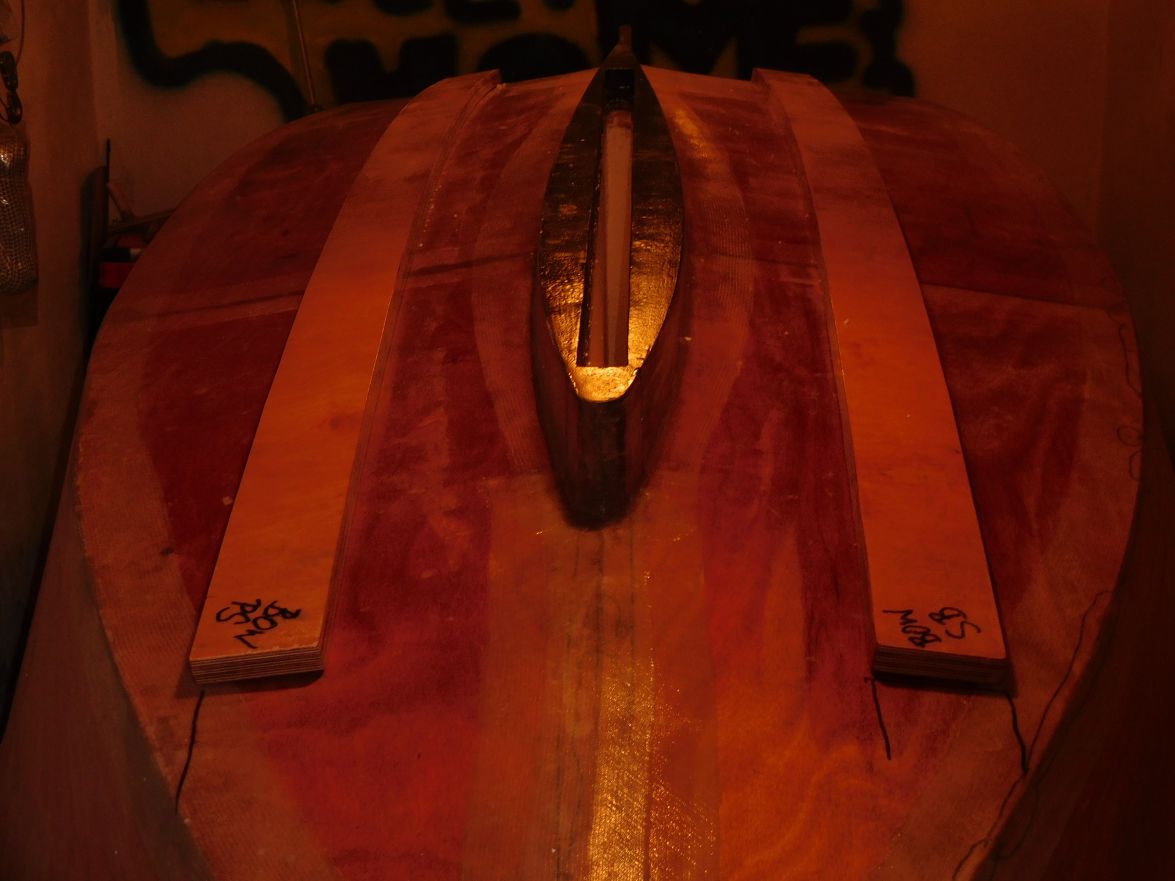
Greetings from Karl
Re: AD 14 KIELGE
Posted: Tue Apr 04, 2017 4:55 pm
by Jeff
Really nice Karl!! Great work!! Jeff
Re: AD 14 KIELGE
Posted: Tue Apr 04, 2017 5:13 pm
by Fuzz
Very nice work with the trailer bunks. Your entire build is looking good, keep it up.
Re: AD 14 KIELGE
Posted: Sat Apr 15, 2017 9:50 am
by gonandkarl
Hi,
Today I got the PS bottom and side ready for fibreglass. First I placed the fibreglass nicely against the hull
and then I prepared 5 pieces of peel ply and laid them out as a test and then I rolled them around cardboard rolls and put them at the ready numbered from 1 to 5 in the corner of my shed.
Here the peel ply over the fibreglass:
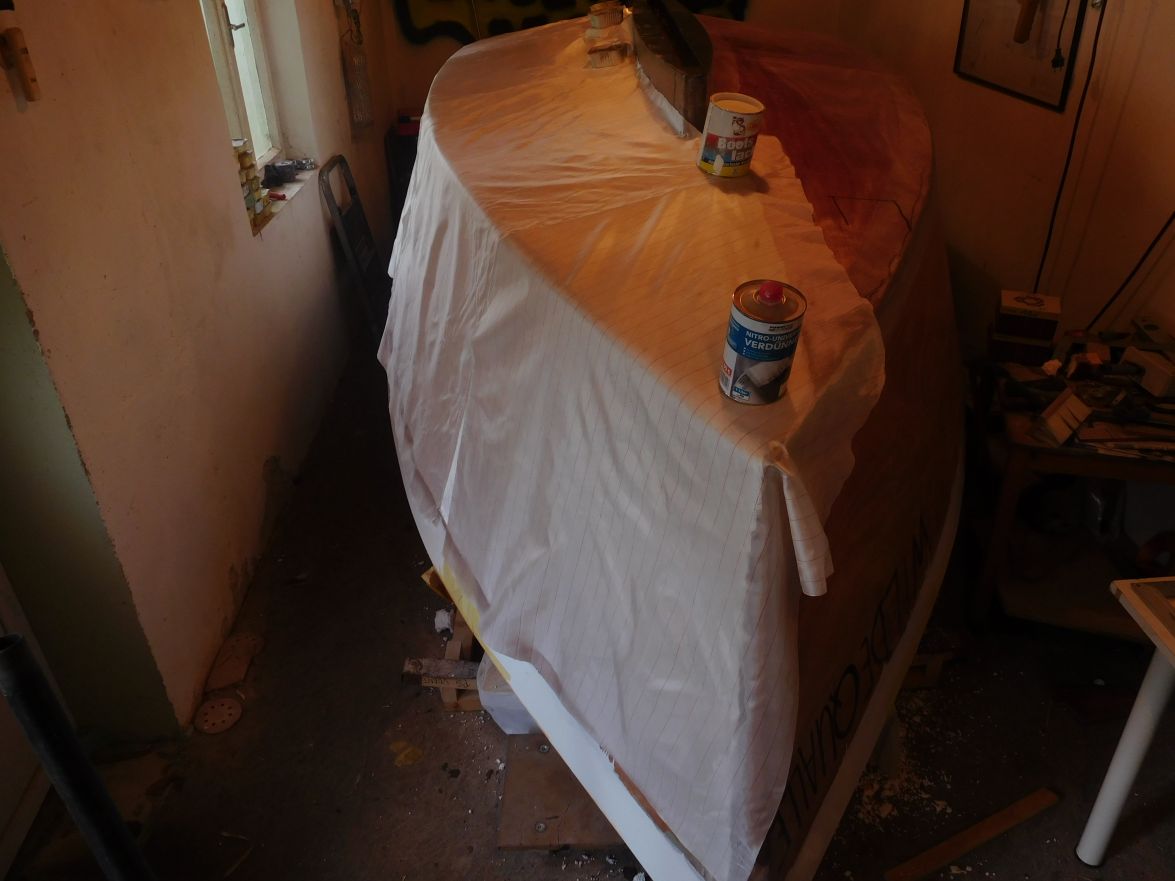
And here just the fibreglass:
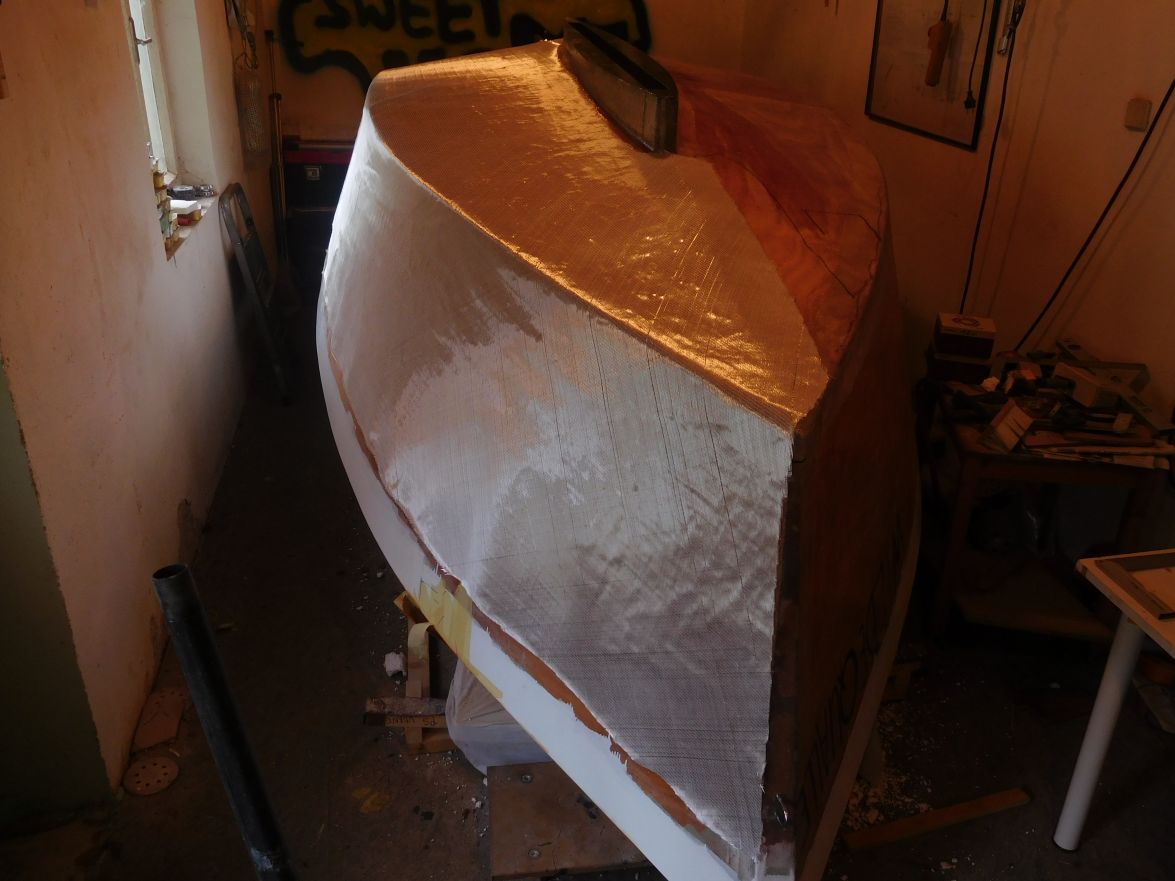
And now according to the weather report I have to wait with the wetting out for a whole week. Only then it will be warm enough. But it does not matter I have 3 small chores to do.
First I will extend the flanged deck ring on the bow side with a 6 cm high half pipe. I built the deck ring up of 2 rings of plywood. I will glue this half pipe also out of plywood pieces and once I have glued the deck ring to the mast partner it will serve as a hold against the mast end when I step the mast. I hope to be able to do it with the sail assembly already bent to the mast because the lot will only weigh roughly 12 kg.
The other 2 things I must do is to drill the 4 holes of the bottom rudder pintle ( or is it the gudgeon ? at any rate the metal piece attached with 4 screws to the transom ) and the 2 holes of the bow eye one number bigger and fill them with epoxy before I can redrill them again with no 6 for final mounting.
It sounds like not very much but my experience is, that I must not plan how long this will take, it will take longer like all my boat builder tasks do. Nevertheless I am confident that splashing time this summer is very likely.
Greetings from Karl
Re: AD 14 KIELGE
Posted: Sat Apr 15, 2017 11:16 am
by Jeff
Nice work Karl!! Hope your weather is getting warmer now!! Jeff
Re: AD 14 KIELGE
Posted: Sun Apr 16, 2017 3:08 am
by Fuzz
It has started to warm up here so it must be getting nice there for you by now. Funny how a little warm weather makes life seem brighter
I hope it warms up and lets you make good progress on your boat.
Re: AD 14 KIELGE
Posted: Sun Apr 16, 2017 3:24 am
by gonandkarl
Yes it is warm enough during the day but at night we still have 2 - 8 degrees celsius which is a bit to cool for the epoxy.
I think I will start the gas heater over night and will have always a temperature over 10 degrees celsius which my noname epoxy ordered from Germany needs.
Re: AD 14 KIELGE
Posted: Sun Apr 16, 2017 7:48 pm
by Fuzz
I think most epoxy needs to be that or more to cure. Plus it is much nicer if you are working in that temperature
Re: AD 14 KIELGE
Posted: Mon Apr 17, 2017 10:17 am
by cape man
Good to see you back at it Karl, even if it is just getting ready to go. Summer splash!
Re: AD 14 KIELGE
Posted: Tue Apr 18, 2017 2:59 am
by gonandkarl
Hi,
While I am waiting for the right temperature for my epoxy application to side and bottom I came across this 9 pages Hall of Fame :
http://www.junkrigassociation.org/resou ... 20Hill.pdf
Greetings from Karl
Re: AD 14 KIELGE
Posted: Tue Apr 18, 2017 7:56 am
by terrulian
OK, I like sailing and adventuring and perhaps have sailed more than some. But I have limits, and this couple has traveled way beyond them. We overcame the serious breakdowns but they they add up over time and have an impact on your mind. The variety and severity of them finally convinces you that you are walking a thin line when you go to sea that is not merely abstract or theoretical. Things at almost any moment, even a calm one, can go belly up. You feel it viscerally. Their catalog of disasters would almost certainly have defeated me. In addition, we had no appetite for cold weather but these folks are gluttons for punishment. A tip of the hat. They do get some serious bragging rights although I'm sure that wasn't their goal.
Re: AD 14 KIELGE
Posted: Sun Apr 23, 2017 11:10 am
by glossieblack
gonandkarl wrote: ↑Sat Apr 15, 2017 9:50 am
It sounds like not very much but my experience is, that I must not plan how long this will take, it will take longer like all my boat builder tasks do. Nevertheless I am confident that splashing time this summer is very likely.
Yep, everything seems to take a little longer with boat building, but the journey sure is enjoyable, so long as you're not worried about time. Splashing this summer would be nice, but enjoying the build each step of the way will be nice too. With a bit of luck, you'll achieve both.
Re: AD 14 KIELGE
Posted: Tue Apr 25, 2017 5:29 am
by gonandkarl
Hi,
Yesterday I fibre glassed PS bottom and side with the help of my wife who stirred the epoxy while I did the wetting out and put peel ply over it. After 20 hours and at 20 degrees celsius reached with the gas heater I removed the peel ply and have a few small mistakes which need a bit of sanding and some more epoxy. There is unfortunately one air bubble at the bottom near the transom which I have to sand off ( 7 cm diameter ) completely and replace the hole with a piece of fibreglass and epoxy. I had 6 lots of 310 gram resin prepared for mixing but in the end it was not enough so I got hectic and had to weigh out another 310 grams and apply it. Lesson learned for the SB bottom and side to prepare 14 cups and to take even more care to remove air bubbles and that it is evenly wet all over after working with a squeegee on the peel ply. Another thing is one should not leave the scene when one thinks one is finished because the one big bubble developed later while the resin was curing. If I would have stayed in the boat shed I could have repaired it as it developed. Here are a few pictures:
Peel ply still on:
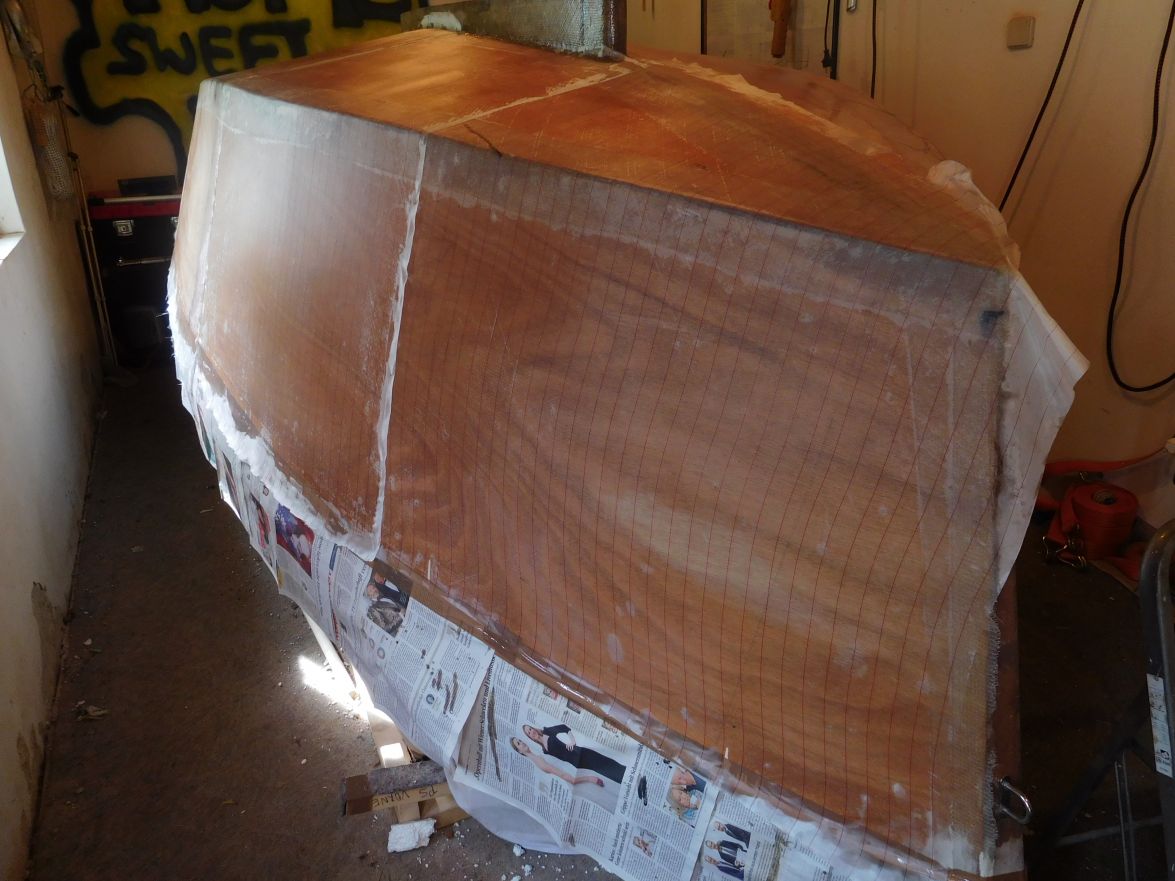
Peel ply half removed:
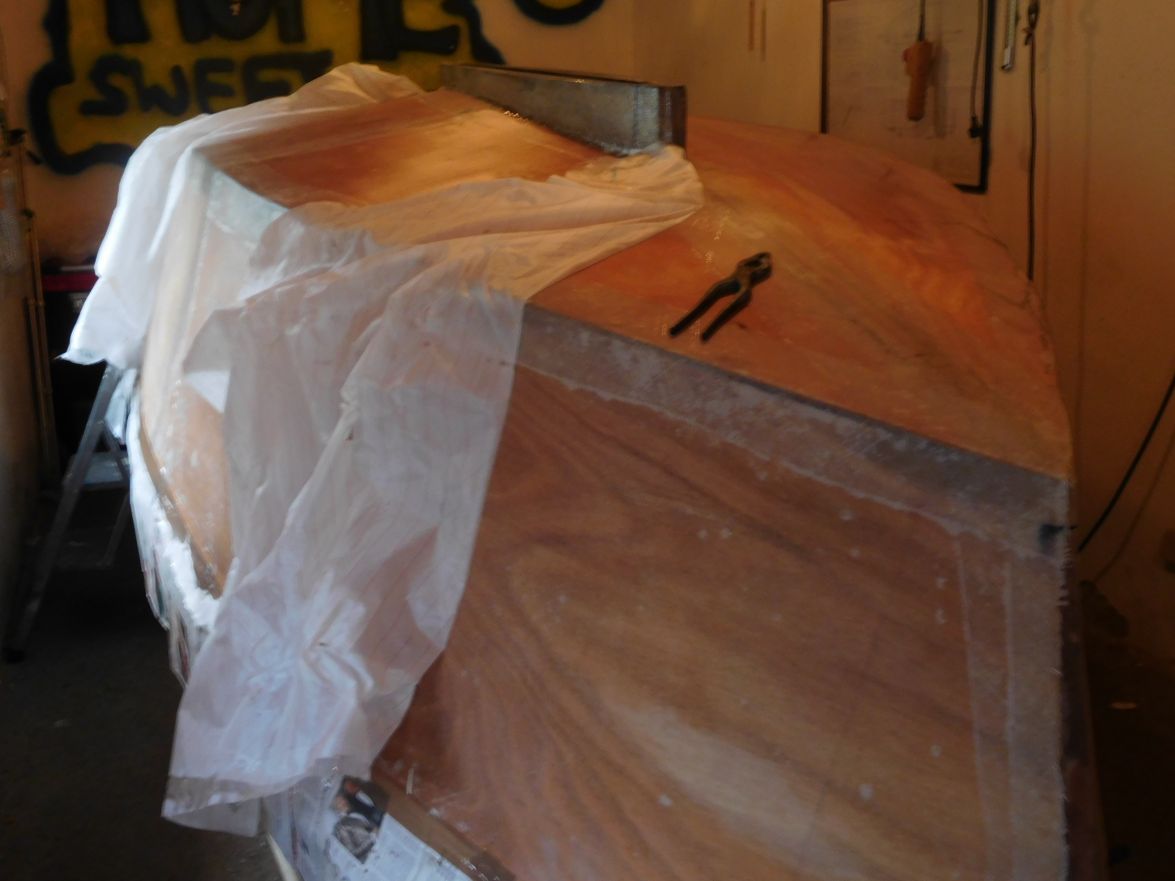
All peel ply removed:
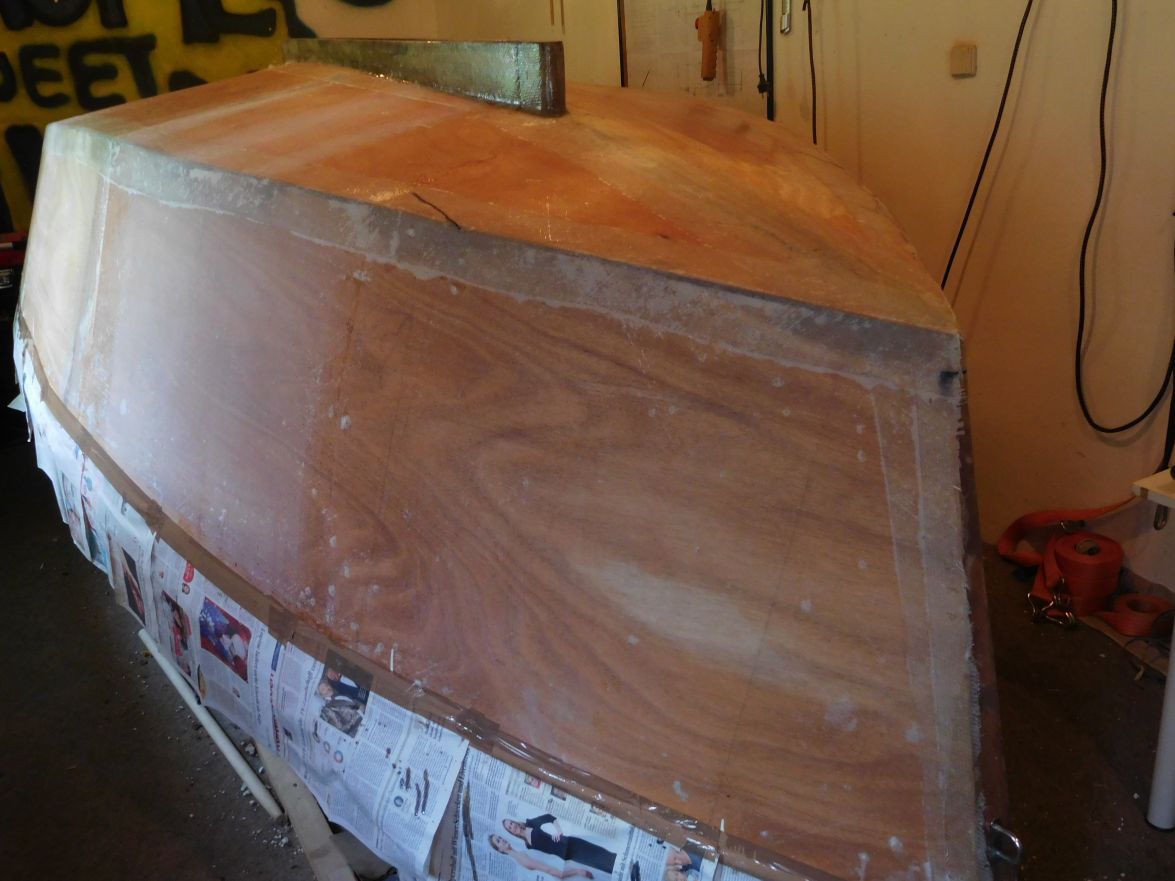
And here the big air bubble:
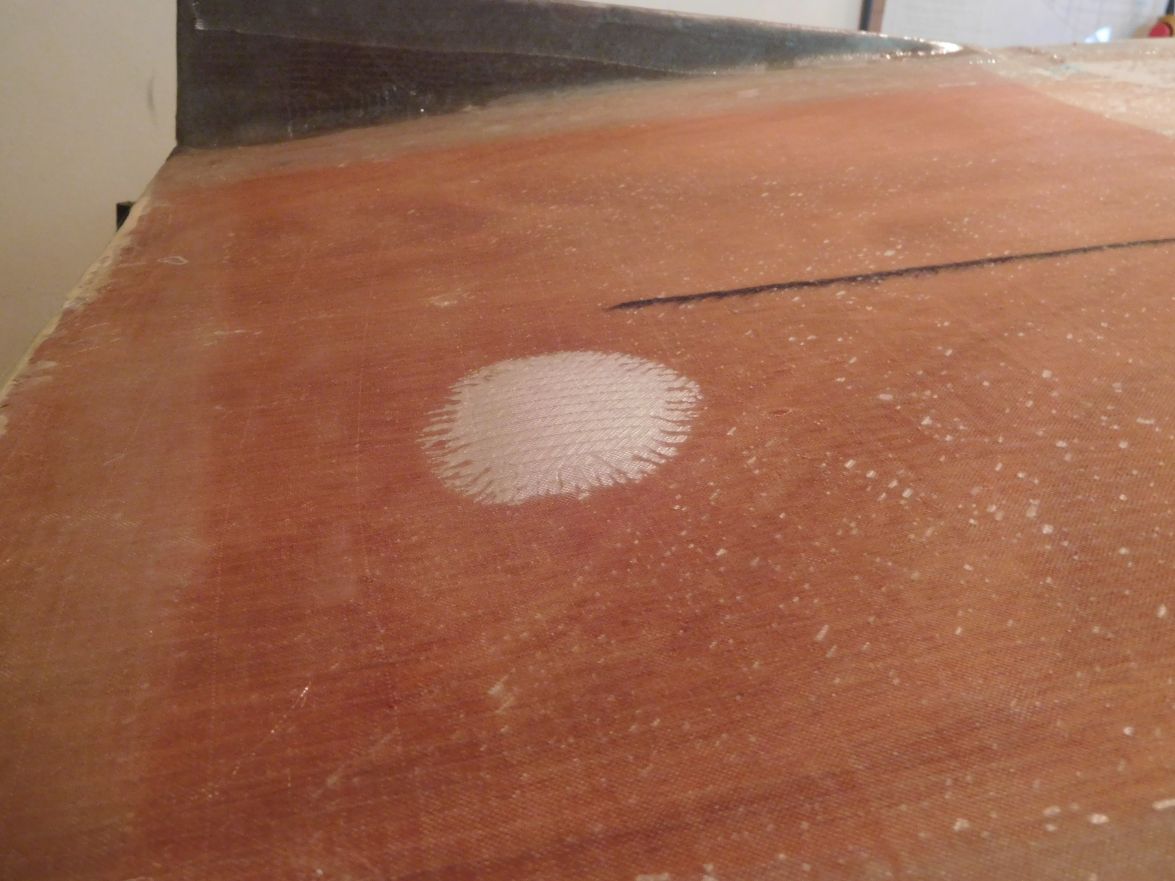
Hope to have the starboard side also finished in a few days.
Greetings from Karl
Re: AD 14 KIELGE
Posted: Tue Apr 25, 2017 7:53 am
by Jaysen
You make a pretty compelling case for the use of peel ply!
Despite of the bubble that looks really good. Congratulations on getting that out of the way. I'm sure the repairs will be easy.
Re: AD 14 KIELGE
Posted: Tue Apr 25, 2017 9:03 am
by terrulian
That bubble would have put me in a bad mood, after all that nice work. Inanimate chemicals and cloth conspiring against me!

I didn't use peel ply but did try mylar on the hull, which wasn't successful since it doesn't like curves in three dimensions, and on the seats, since they were flat. In the end, I still had to do quite a bit of sanding. At first the cloth and epoxy appeared to come out like plate glass and I was chuffed, as they say in England. The photo below shows what the glass looked like immediately after the epoxy kicked and the mylar was removed. The white splotches are not smudges, they are reflections of the microballoon mix on the sides.
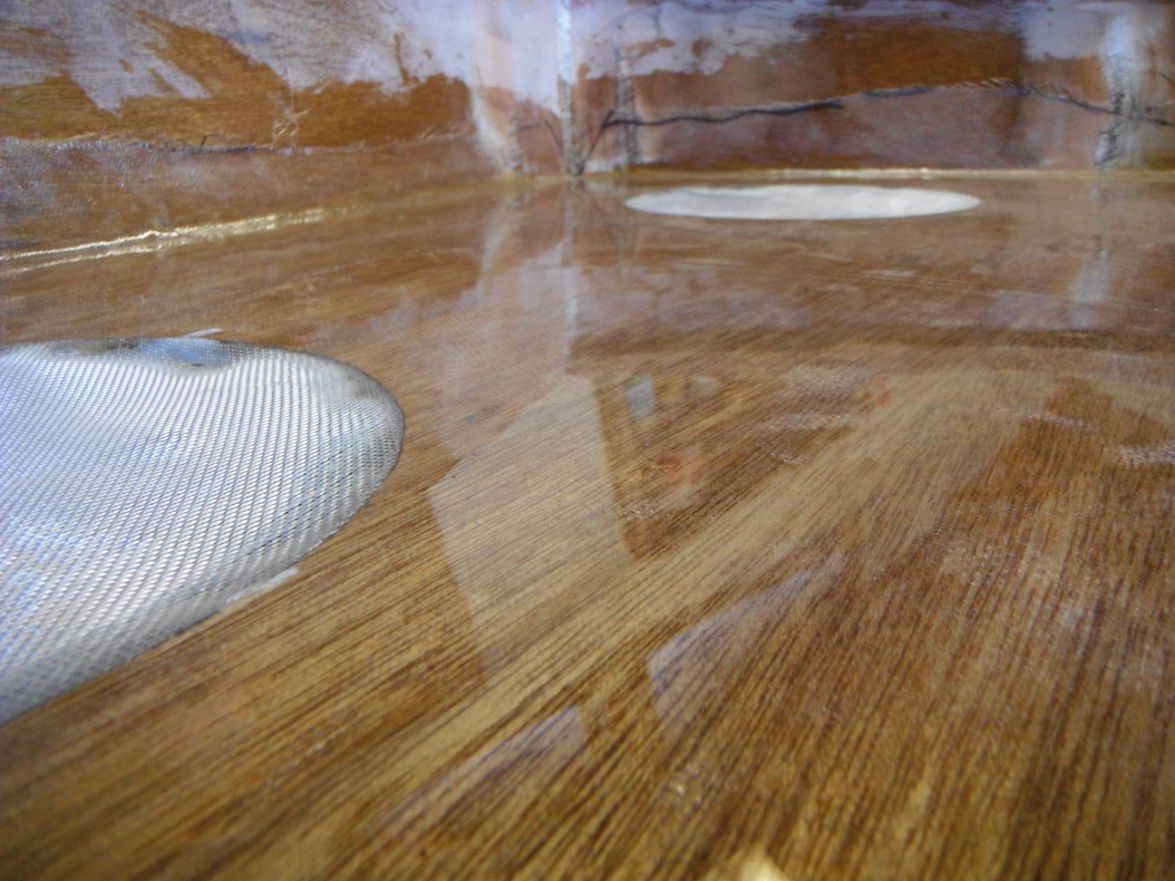
However, the reason a lot of sanding had to be done was that where the mylar comes to an end around the edges of the seats and meets the vertical sides, there remained a seam. This had to be faired out, requiring no small amount of time. In addition, it turned out to be quite difficult to get the mylar perfectly flat. I used a hard roller to squeeze out out the epoxy in the glass, so it migrated to the top under the mylar (leaving enough saturation) and created the glass-like surface. I don't remember the weight but the mylar was pretty heavy. But there still remained what you could call very gentle waves--just as on the sea on a perfectly calm day, there are still undulations in the surface.
Now, the pros know how to use both peel ply and mylar and get amazing results. However, I am not a pro. Peel ply and mylar are both expensive and in the end, for a newbie like me, I found the mylar didn't save me much work and I think the same would have been true of peel ply. Other builders have reported great success, but they are mightier men than I am.
Speaking of which, do we have at least one or two mighty women in this august group?
Re: AD 14 KIELGE
Posted: Tue Apr 25, 2017 3:01 pm
by gonandkarl
Hi Tony,
I am most probably as talented as a boat builder like an elephant in a china shop and read about all help and view everything on the forum and elsewhere to overcome my non talent. That is why I liked peel ply since it was mentioned here on the forum and I have used it always hoping I save myself some sanding time and use less epoxy by working on it with a squeegee achieving a 50 percent fibreglass percentage. But I am still learning how to use it. I feel a bit of improvement is there since my first peel ply usage when I was completely nervous and could not sleep the night beforehand. But to work as casual and confident with peel ply like knottybouys on his video without any air bubbles will be a dream for me or achieving the quality like glossiblack on his Skinnydip wont happen on my boat. But I think positive and tell myself I would have had much more air bubbles if I had not used peel ply. My mistake this time was that I did not weigh the already cut glass before wetting it out with epoxy. This would have given me the exact glass area. I used glass with 300 grams per square metre and from the weight I could have deducted a correct length and width knowing the area and would have been able to prepare the correct resin quantity for my desired 50 percent penetration. I just measured roughly the width and length of the laid out glass on the hull with a roll metre and that was too inaccurate for a correct preparation of resin in the cups and that is why I panicked when I had to weigh a seventh lot of resin and consequently I produced the mistakes towards the end. My idea to let not only my wife but also my daughter ( was sick on the day ) stir the resin was just a plan but it is not necessary. One person can easily stir the resin that the other is putting on the boat. I am looking forward to do the starboard side with all this in mind and it might then be my first perfect application of resin with the help of peel ply. I dont mind that it is costly as long I believe it helps me overcome my doubts and self confidence to be able to work with my clumsy hands and have eventually a sail boat. 40 Years of being a white collar worker leaves its marks where the thinking about any project was always more present than that someone has to do the work realizing the project being computer software absolutely nothing tangible and dumped after a few Years for ever. Now I do everything the thinking and the realisation of the project sail boat and that is why I enjoy every moment building this boat knowing by now that I am coming close to splashing time and that it will not sink. The next boat I build I want to use the from you mentioned Mylar. When that time comes I will bombard you with questions about it. Maybe then I come closer to perfection which I think you achieved on your V10. What still puzzles me how you corrected any mistakes you made so, that one cannot see that there was any mistake or that is has been done over and over again like your beautiful fillets or your paint jobs.
Most probably Friday this week I will tackle the starboard bottom and side glass fibre and then I only need to sand, fair, graphite epoxy, paint, flip, mount the centreboard, fit the cleats and push pits, fit the boat to the trailer and sail it for the first time.
Greetings from Karl
Re: AD 14 KIELGE
Posted: Tue Apr 25, 2017 4:17 pm
by terrulian
Karl, thanks for the very kind words.
I think most of us, even Cracker Larry, spend more time contemplating jobs than actually doing them...but one place this was not the case with me was the fairing on the interior fillets, which just took hours and hours of doing them over and over until they seemed passable. I didn't have much thinking to do on that, just hand sanding forever.
Another place was paint and varnish. I tried as many different methods of application as I could come up with and in the end got a result I was pleased with--but just by the skin of my teeth. In other words, even on the very last coat--the only one anyone sees--I was aware that one little screwup and I'd have to start all over. However NOW, if I ever build a boat again, I know how to put paint on. In fact, we painted our Catalina 22 with the same paint and I had it down. It looked good right away. I have taken some satisfaction in seeing professionals on You Tube who end up with paint and varnish no better than mine.
Still would have trouble with the fillets, though, despite all the numerous tricks suggested by other builders.
I realize that since many of us are beginners in various aspects of the build, the pros and more experienced builders will be able to achieve better results in 1/4 the time. But learning new things and techniques is part of the wonder of the whole process, and seeing something that you've struggled and struggled with finally reach a stage you can call good enough is about as satisfying as things get. I know I was a little obsessive. That isn't typically my nature, but I really enjoyed the process and don't regret a minute of all that fairing and sanding. Of course, I built a very small boat.
Re: AD 14 KIELGE
Posted: Tue Apr 25, 2017 4:40 pm
by pee wee
gonandkarl wrote: ↑Tue Apr 25, 2017 3:01 pm
My mistake this time was that I did not weigh the already cut glass before wetting it out with epoxy. This would have given me the exact glass area. I used glass with 300 grams per square metre and from the weight I could have deducted a correct length and width knowing the area and would have been able to prepare the correct resin quantity for my desired 50 percent penetration.
Karl, I think there is one other factor that could have resulted in your coming up short on resin, and that is the amount that is absorbed into the plywood. I don't know how to figure that amount, but it is in addition to the 50% you need for the fiberglass. If you begin by painting the wood with resin, and then lay the glass down, you can separate the calculations. It also might make laying out the dry fiberglass very hard to do, so many builders just let the resin soak through the glass into the wood. Easier, but it confounds the calculations. It also can cause dry areas because after you walk away the wood might continue to absorb resin.
I enjoy watching the progress on your boat, and seeing the care you put into each step.
Re: AD 14 KIELGE
Posted: Wed Apr 26, 2017 2:36 am
by gonandkarl
Hi,
Thanks for your responses it boosts my ongoing determination towards the goal a lot. The handicaps I have remain and that is I am getting old ( ->71 ) at 5 foot 10 weighing 264 pounds and my clumsyness is my only sickness or as my wife calls it are you suffering again of dropsy. But as the German author Goethe lets the angels say at the end of Faust : Who always is conative striving we can redeem which was my maxim all my life and that is how my grown up kids always jokingly ask what I am busy trying to achieve next after boats, oyster mushrooms in the cellar or the carport for the boats trailer. They dont know yet that after I finish the carport it will serve as a boats lift as well like I have seen in Florida. But that is still future music because I have dug only 4 holes for the car ports foundations and the last 2 are the challenge because they are exactly at the place where I cut 2 old trees and now I have to dig out the roots. You see when you are a boat builder you dont get bored or have too much time.
Greetings from Karl
Re: AD 14 KIELGE
Posted: Wed Apr 26, 2017 7:18 am
by Aripeka Angler
Nice looking work Karl, I may have to test your peel ply technique.
Re: AD 14 KIELGE
Posted: Wed Apr 26, 2017 8:16 am
by gonandkarl
Did you not use it on Red Alert underneath the mirrorlike finish I saw in Homosassa ?
Re: AD 14 KIELGE
Posted: Wed Apr 26, 2017 8:19 am
by terrulian
Karl, with apologies, the Faust quote is "Who ever exerts himself in constant striving, Him we can redeem."
Of course, when I wish to consider the wisdom of Goethe, I turn to the pages of Bateau.
In high school, I pronounced his named "go-thee"
Re: AD 14 KIELGE
Posted: Wed Apr 26, 2017 10:13 am
by gonandkarl
Hi Tony,
I should have asked you straight away to say my maxim in English instead of trying to translate it with the help of
www.dict.cc ( German English dictionary ) and failing badly or as my English teacher in high school said to me once: You will never learn the English language never ever. And he said this loud in front of the whole class. I thought I wanted to disappear somehow beneath the floor. Met the guy 35 Years later at a class union and after my years in South Africa and he meant with a smile on his face I am sure I did not say something so demotivating to you.
Yes you are right the bateau forum brings all sorts of people of the whole world not only with their thoughts on boats together and this is just as nice as our building efforts, because in the mind one travels to the guys whose posts one is busy reading. You wont believe how often I have been near you underneath the Golden Gate bridge you rowing and me watching or in Sydney harbour on Salvatores sail boat Angelina thinking that after the sail he will fire up his so nicely home built pizza oven.
And thanks again for teaching me English a bit more and therefore the quote "Who ever exerts himself in constant striving, Him we can redeem." will stay in my mind as much as the German one did for the last 55 Years.
Greetings from Karl
Re: AD 14 KIELGE
Posted: Wed Apr 26, 2017 10:33 am
by terrulian
Well, Karl, I know zero German so you're way ahead of me. Americans are for the most part limited to their own language. Europeans, probably because of their close proximity to one another, get a much better education in this regard.
In any case, I am a fan of Goethe's Faust and of that maxim...although I read every word in an English translation, of course.
Re: AD 14 KIELGE
Posted: Wed Apr 26, 2017 12:57 pm
by Fuzz
Karl you are doing a wonderful job on your boat. I am sure it will look great when it is done
Like you and Tony were saying it is amazing the people you get to know on this forum. I got to meet you in person, I read Tony's book and feel like I know him, our friends from Australia, and all the great folks in the southern US.
Re: AD 14 KIELGE
Posted: Wed Apr 26, 2017 4:51 pm
by Walkers Run
Sorry for the hijack.
But about tony's book. I thought we would have a sequel by now
Re: AD 14 KIELGE
Posted: Wed Apr 26, 2017 5:30 pm
by gonandkarl
I dont think there will be a sequel because a sailor usually makes only one circumnavigation and writes one book about it. But I do not need a sequel I have read his book more than once there is no better way to relax and dream of the unknown places he has visited with his friend during the circumnavigation..
Re: AD 14 KIELGE
Posted: Wed Apr 26, 2017 5:35 pm
by Jaysen
Tony has a book?
Re: AD 14 KIELGE
Posted: Wed Apr 26, 2017 6:29 pm
by Fuzz
Jaysen wrote: ↑Wed Apr 26, 2017 5:35 pm
Tony has a book?
Dang Jaysen you being a want-to-be blow boater I would have thought you kept Tony's book under your pillow
Buy the book it is a very good read. I shared it with a friend and almost did not get it back.
Re: AD 14 KIELGE
Posted: Wed Apr 26, 2017 6:38 pm
by Jaysen
Mrs limits me to "reasonable efforts". If she didn't I'd have sold the house, bought a boat and killed us both somewhere in the middle of the Atlantic by now. I'll have to find said book and order it "for a neighbor". One of the neighbors that is never here.
How does one find the aforementioned book? Direct from Tony?
Re: AD 14 KIELGE
Posted: Wed Apr 26, 2017 6:52 pm
by terrulian
Here's a link to the book:
https://www.amazon.com/Captain-Mr-Shrod ... mr.+shrode
Thanks for the kind words, guys.
Re: AD 14 KIELGE
Posted: Wed Apr 26, 2017 8:59 pm
by Aripeka Angler
gonandkarl wrote: ↑Wed Apr 26, 2017 8:16 am
Did you not use it on Red Alert underneath the mirrorlike finish I saw in Homosassa ?
No, just hard work and a long board. After the 1708 glass work, it took me 120 hours of sanding and filling to get the hull sides and bottom good enough. That's why I am liking your peel ply technique
Looks great!
By the way, I sure wish we could have gotten a photo of the big fish
Re: AD 14 KIELGE
Posted: Wed May 03, 2017 12:36 pm
by gonandkarl
Hi,
Yes Richard we did not have a camera with us but the picture of the big fish as you called it will be in my mind for ever and thanks to you I know since then that it is called Tarpon. It most probably had to give its name to the nearby town of Tarpon Springs I guess. This warm temperature we experienced on that day in Homosassa I wished I had here today. But no luck I fibre glassed the starboard side and bottom at mere 11 degrees Celsius. It took me exactly 3 hours and stirred all the prepared cups of resin myself because my wife was not there to help me with it. I then switched on a gas heater and have now ideal epoxy curing 22 degrees Celsius. The application of peel ply went better this time and I hope it really helps me in fairing and sanding because I could not imagine to sand and fair for 120 hours like you did. I would like to have a result like you but am too lazy to invest so many hours knowing that my fat body always needs a rest after only short stints working on the boat.
Here is my glass and peel ply result of today:
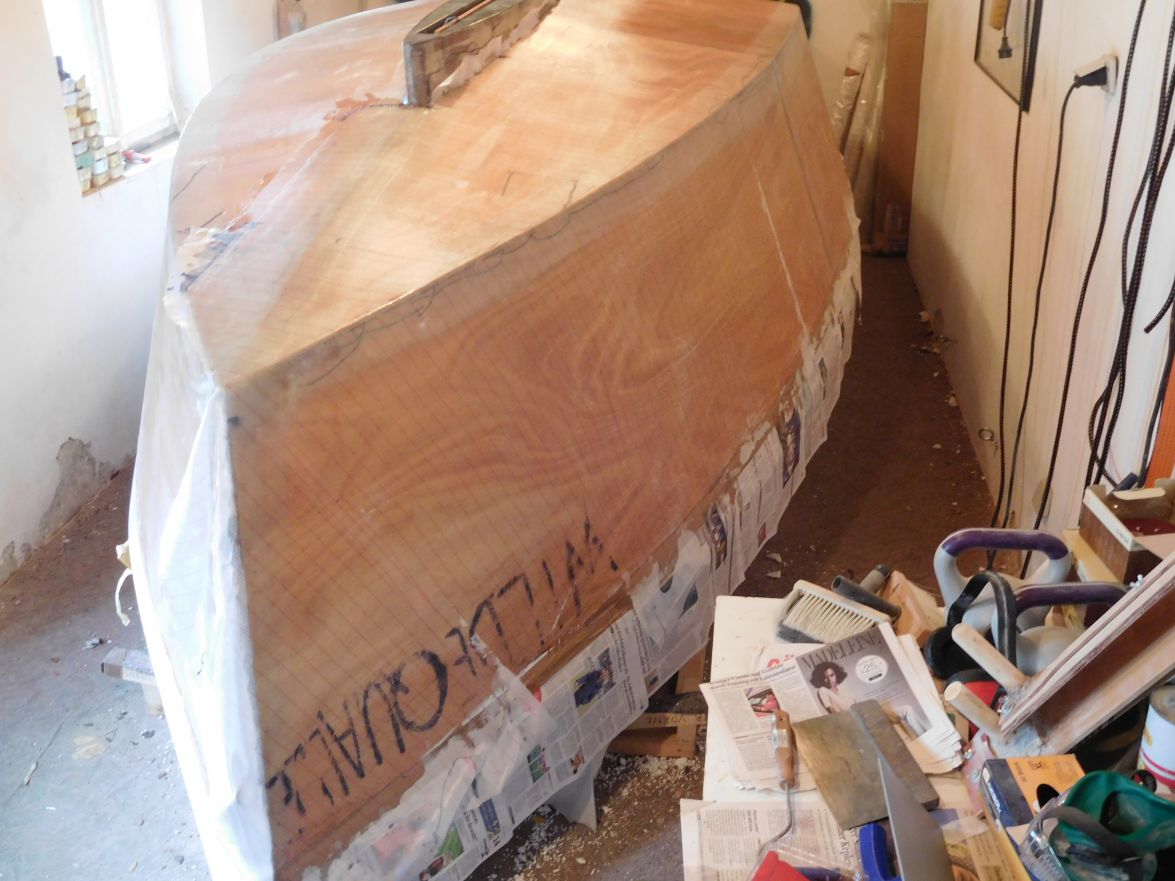
As splashing time is nearing I entered a basic sailing course which will be from May 18th to 21st full day including practical dinghy sailing at a very nice lake nearby. (
www.yachtschule-koller.com ) I am looking forward to it as I have a starters record already. I am the oldest and heaviest sailor in that class, because the other 4 registered guys are in their teens.
Greetings from Karl
Re: AD 14 KIELGE
Posted: Wed May 03, 2017 1:04 pm
by terrulian
Good luck in the sailing class, Karl.
I've been teaching for 20 years now so if you've got any questions...feel free to....ignore what I say and pay attention to your instructor.
Re: AD 14 KIELGE
Posted: Wed May 03, 2017 1:08 pm
by Jaysen
Show those whippersnappers how it's done!
Karl, I admire your persistence. I'm a bit over 1/2 your age and I live in a near tropical climate and you're making me look bad with the way you plow through the various issues. I'm hoping that in my next build I will be more like you.
Re: AD 14 KIELGE
Posted: Wed May 03, 2017 2:32 pm
by Fuzz
Karl I too remember that Tarpon. I hear they are great fighters and would love to find out first hand.
Your boat is coming long nicely. Keep up the good work.
Re: AD 14 KIELGE
Posted: Thu May 04, 2017 5:57 pm
by das boot
Almost completed Just add paint and water and away you go.
Re: AD 14 KIELGE
Posted: Thu May 04, 2017 10:21 pm
by Aripeka Angler
Hi Karl,
I have to tell you I truly enjoyed the no wake ride to the mouth of the Homosassa River with you and David.
The fish was a bonus, nature wherever you are is truly a gift to cherish.
I'm enjoying your build, keep after it. Very nice work! You will splash soon
Re: AD 14 KIELGE
Posted: Fri May 05, 2017 1:14 pm
by gonandkarl
Hi,
Thank you my friends for the well wishes to my sailing course and the hopefully splashing of the boat in the near future.
To make it happen I spent the day putting on a first coat of fairing on both sides. As I cannot get the wonder thing Quickfair that you have in the US I mixed my own fairing and am slowly but surely getting the mixture right even that the application onto the boat is still a battle for me. But I am quite happy with what I have achieved today. Actually I lifted the boat in the 2 straps to a reasonable height that I can sit on a chair underneath it and can sand the deck underside before me but then all of a sudden I did not feel like crawling under the boat and put the fairing on instead. A sanding job postponed but I have to do it sometime.
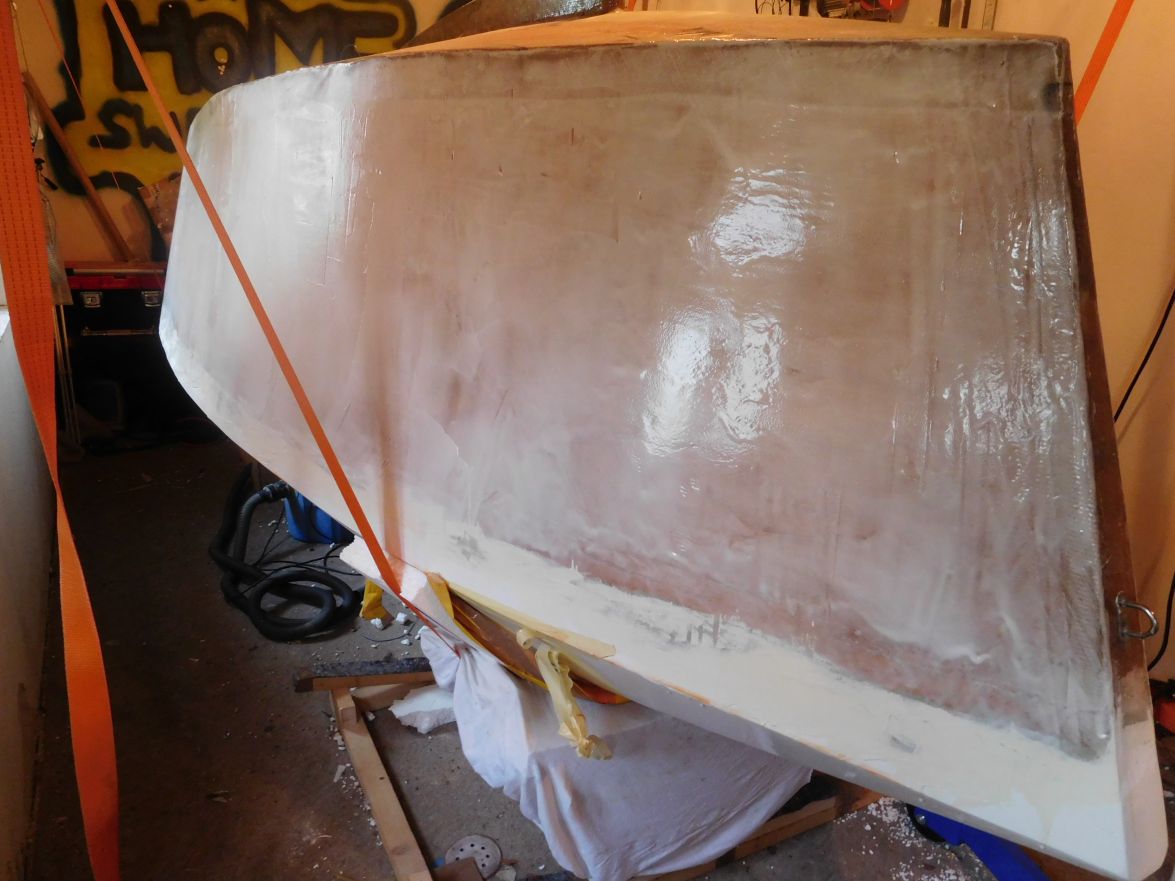
Greetings from Karl
Re: AD 14 KIELGE
Posted: Sat May 06, 2017 6:00 pm
by gonandkarl
Hi,
I sanded my first coat of fairing on the 2 sides for 5 hour with my Bosch rotary sander and 80 grit discs and I think I took most of it off again what I put on yesterday. I understand now that Richard took 120 hours of sanding because one repeats the job of putting fairing onto the boat and then sanding it off again more often because one doubts all the time that it is smooth enough and next time it is better and I can switch to 120 and hopefully to 180 and paint after that.
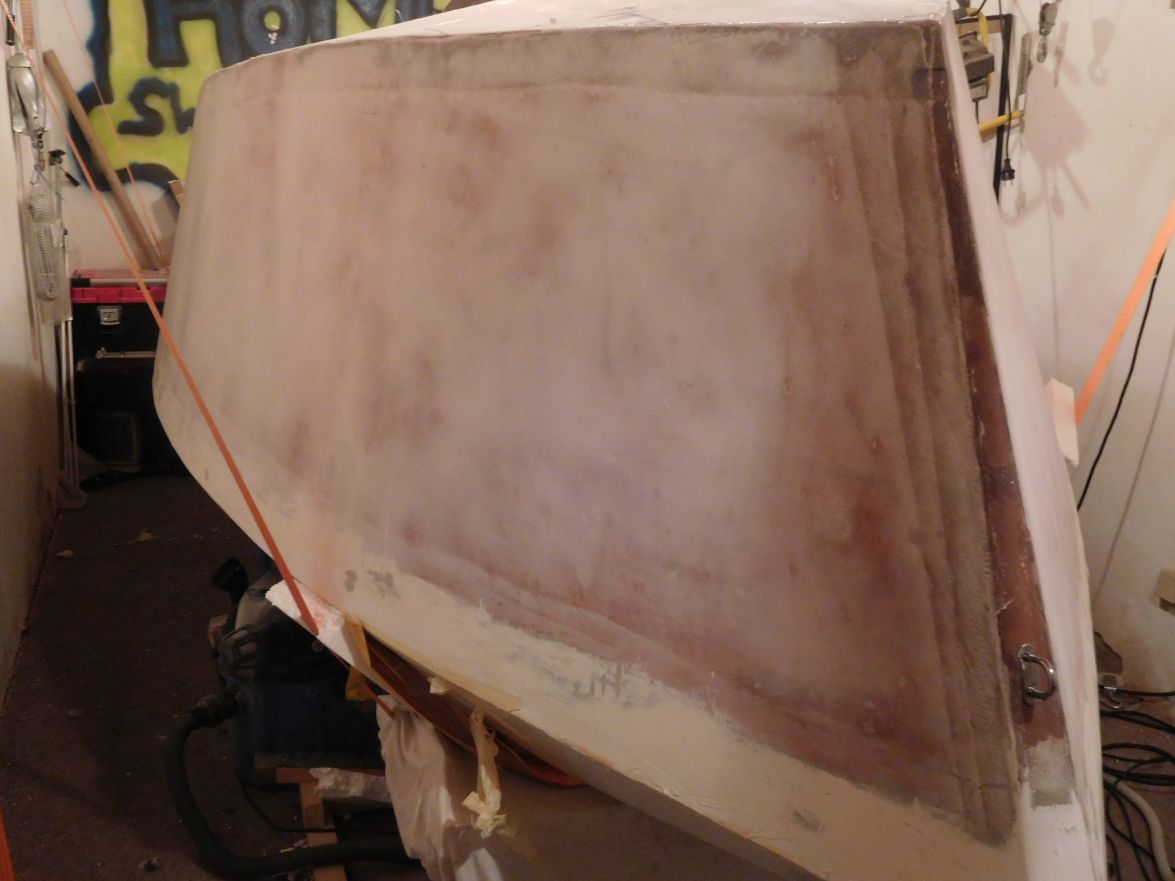
Greetings from Karl
Re: AD 14 KIELGE
Posted: Sat May 06, 2017 6:41 pm
by terrulian
Looks pretty good to me, Karl. At this stage I was using mainly the long board.
Re: AD 14 KIELGE
Posted: Sun May 07, 2017 3:00 am
by gonandkarl
Thanks Tony it also feels smooth under my bare hand and fingertips which I think was a hint some time ago from you. I must just battle on and really use my long boards.
Re: AD 14 KIELGE
Posted: Sun May 07, 2017 4:49 am
by glossieblack
gonandkarl wrote: ↑Sun May 07, 2017 3:00 am
I must just battle on and really use my long boards.
I agree. Longboards swept through figure of eights. Keep at it and soon it will be done.
Re: AD 14 KIELGE
Posted: Sun May 07, 2017 8:53 am
by terrulian
Karl,
The long board starting with 60 or so will remove a lot of material pretty quickly and though it is tempting to use a power sander, the result will be much fairer with the long board. I go diagonally up, then diagonally down, then horizontally. Then you just decrease the grit up to about 150. It is tiring but at my age I don't push myself. When it becomes odious I leave it and go do something else. I want the build to be a pleasure, not a job.
I do recommend the guide coat if you can stand that level of effort, because when you put that shiny paint on it will reveal a whole lot of stuff you won't like.
Re: AD 14 KIELGE
Posted: Tue May 09, 2017 2:51 am
by Fuzz
I see you did 4 hours sanding in one day. That is a lot of sanding for anybody
I am sure it will be worth it to you when it is done.
Re: AD 14 KIELGE
Posted: Tue May 09, 2017 5:11 am
by gonandkarl
Hi,
My stint of sanding yesterday was not successful with a figure 8 which Glossieblack suggested I just did not get it right with my 2 hands on the handles but with Tonys diagonal methods plus horizontal I succeeded. I am satisfied with the first 4 hours of sanding but I will change the sand paper more often from today. I put a few pictures in my gallery that I can see the before and after I sanded. Here is one example of the near transom sanding. I have done it all with 80 grit, because I only got rolls of 80 120 and 180. On the sides I want to achieve eventually 180 grit before painting while at the bottom and up to the waterline I will sand up to 120 because I want to put graphite/epoxy there. I found out that the long board really makes better results than the rotary electrical sander and that I must not push too hard onto the board rather light and more often moving it forward and back. The disadvantage against the rotary sander is the sweat running down on my body in streams but this does not outweigh the result. On the right hand side of the picture it is nice and smooth while on the left side the last third towards the bow I have not sanded yet. One thing I will change today also I will use an airtight ski mask above my breathing filter mask because I used glasses which were open on the side and I got the dust all around my eyes so that my wife said I look like Yeti from head to toe.
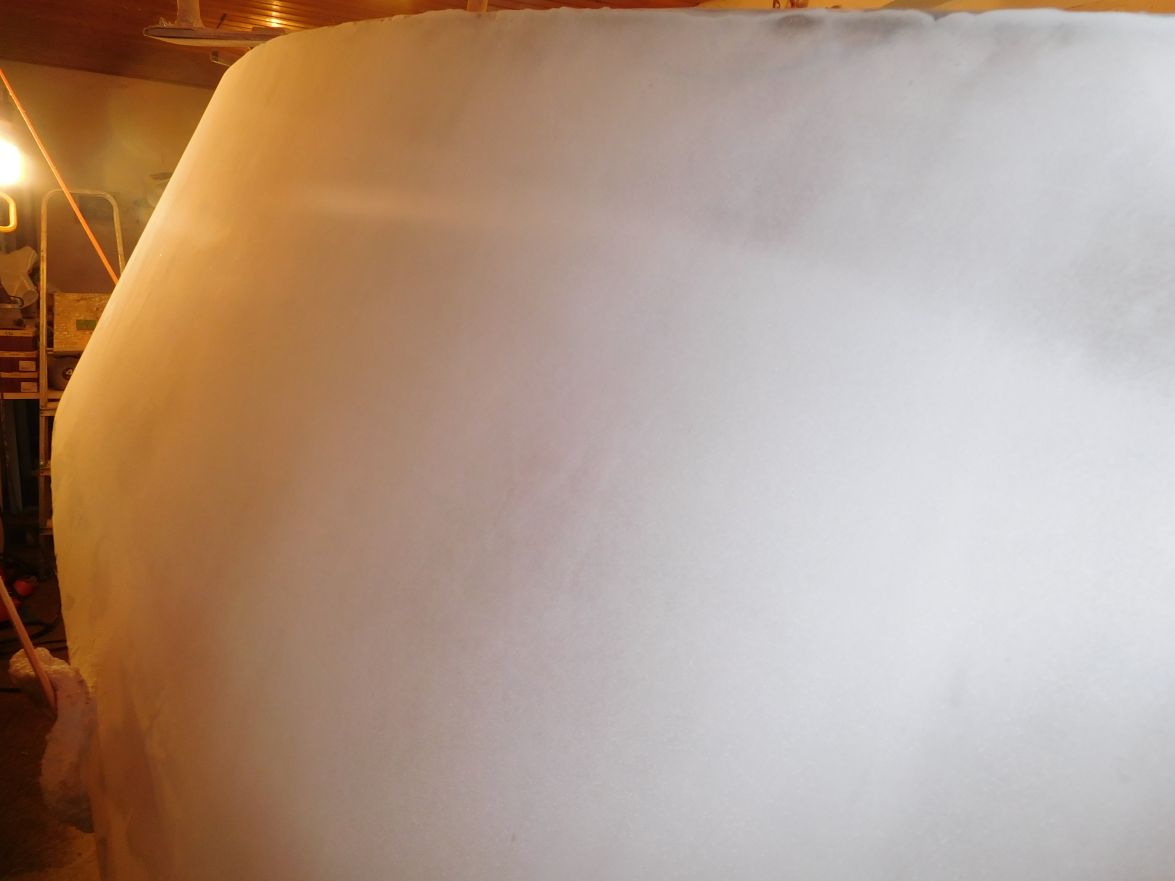
Greetings from Karl
Re: AD 14 KIELGE
Posted: Tue May 09, 2017 5:24 am
by Aripeka Angler
Karl, great advice by Tony on the use of the longboard.
Much better and more fair, the pain and suffering will soon be forgotten
Re: AD 14 KIELGE
Posted: Tue May 09, 2017 7:19 am
by cape man
Looking good Karl. Very good.
Re: AD 14 KIELGE
Posted: Tue May 09, 2017 7:55 am
by Jaysen
Man... that looks great. Just remember that each stroke with the long board gets you closer to being in the water.
Re: AD 14 KIELGE
Posted: Tue May 09, 2017 8:06 am
by terrulian
I know many of you will resist the idea of a full face mask like I did for a long time, but remember Cracker Larry's eventual allergic reaction to epoxy. I don't know whether this was caused by dust or fumes or contact. But in any case for this build I was pretty disciplined about wearing the 3M full mask, as I myself suffered from a bad reaction to wood dust about 25 years ago. It is expensive, that's a negative. But after struggling with goggles and a smaller mask, I found this was more comfortable, completely kept the dust out of my eyes, nose, and mouth, and gave me much better vision. I also can wear it together with the ear-muff type ear protection, which I was never able to easily do with goggles or safety glasses.
Re: AD 14 KIELGE
Posted: Tue May 09, 2017 8:42 am
by gonandkarl
Hi,
You are so right I have red eyes today because of the sanding dust and because I had bare arms which were covered with the sanding dust I got a rash there. The microballoons with even dried out epoxy seems to be real bad stuff.

That is why I will wear a full body suit and my breathing filter mask and in addition my sisters ski mask after having searched for my own for an hour only to realize that I must have thrown it away when I stopped skiing a few years ago.
Greetings from Karl
Re: AD 14 KIELGE
Posted: Tue May 09, 2017 8:51 am
by Jeff
Karl, That mask is a really good look for you!! But seriously, I agree with you regarding proper clothing and the use of masks!! Very important to be as safe as possible!! Jeff
Re: AD 14 KIELGE
Posted: Tue May 09, 2017 1:02 pm
by narfi
I have no idea what the cost of the filter setup is, but we have a system at work I really like.
We have a portable wooden box with filters in it that we can hook up to shop air, it goes through 2 different filters and then back out the box, I can hook up an air hose to it that goes to my belt.
On my belt is a splitter with two regulators, one goes to my mask, and the other is a short whip hose I can connect to my paint gun or tools.
The umbilical cord runs up my back from the belt over my shoulder to the mask and doesn't impede any movement or feel awkward with weight or anything.
It is unbelievable how good it feels to have clean cool air running over your face while you work, instead of sweating inside a respirator.
***** Added bonus: I don't have to shave!
Edit 2: found it...
https://www.amazon.com/SAS-Safety-2001- ... respirator
Re: AD 14 KIELGE
Posted: Wed May 10, 2017 1:38 pm
by gonandkarl
Hi,
I carried on sanding the starboard side today in full protection outfit air filtering mask ski goggles and full body painter suit. Everything worked fine until I got nearer the bow where the curvature is bigger and my 2 sanding long boards both turned out to be to thick ( 10 mm ) to follow the curvature. But it was time to babysit for my 2 granddaughters so I had to stop sanding anyway. In this pause I decided to make new sanding boards which will follow a curve without any problems. I just reused from the old boards small parts around the handles and epoxied these together with the handles onto the new thinner boards. The mounting of the sand paper I also changed. I did away with washers and wing nuts onto screws. On the new boards I will screw 3 woodscrews on each end of the board from the sandpaper side naturally countersunk to the top where the spiky part of the screw will stick out and I can press the sandpaper easy onto them.
Tomorrow after the epoxy is hard I hope to finally sand to the starboard bow and then do the port side as well.
Greetings from Karl
Re: AD 14 KIELGE
Posted: Wed May 10, 2017 4:44 pm
by Jeff
Karl, Send me a picture of the tool you developed for sanding!! Glad you are wearing protective gear!! Jeff
Re: AD 14 KIELGE
Posted: Wed May 10, 2017 5:05 pm
by terrulian
This won't work for Karl but I got a cheap flexible longboard from HF that worked great. I don't see it on their website, though. Worth a look.
Re: AD 14 KIELGE
Posted: Wed May 10, 2017 5:19 pm
by Jeff
Thanks Terrulian!! I will have a look next time I am in my local HF. Jeff
Re: AD 14 KIELGE
Posted: Wed May 10, 2017 6:17 pm
by terrulian
Looks like this yellow thing:
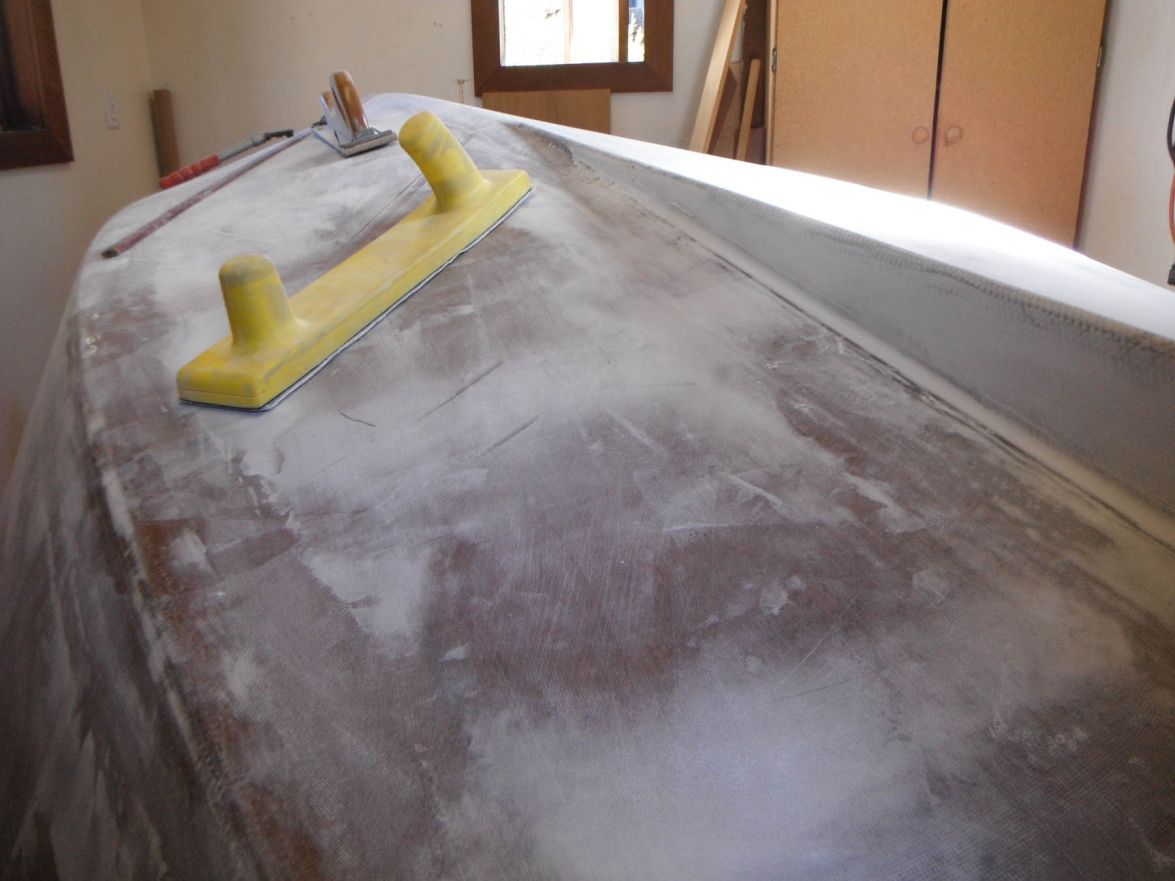
Re: AD 14 KIELGE
Posted: Thu May 11, 2017 1:53 am
by gonandkarl
Hi,
Properly protected yesterday
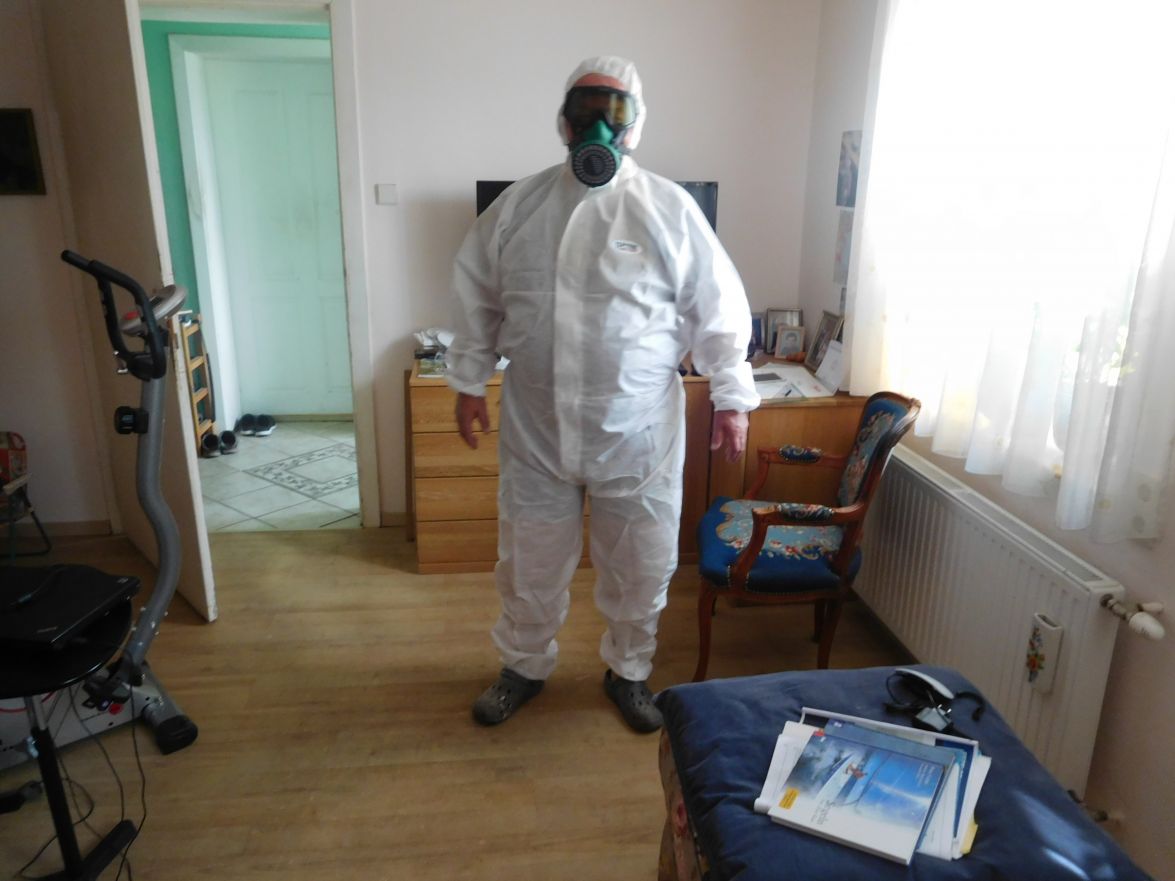
I made myself version 2 of the sanding boards with a thin 6 mm base
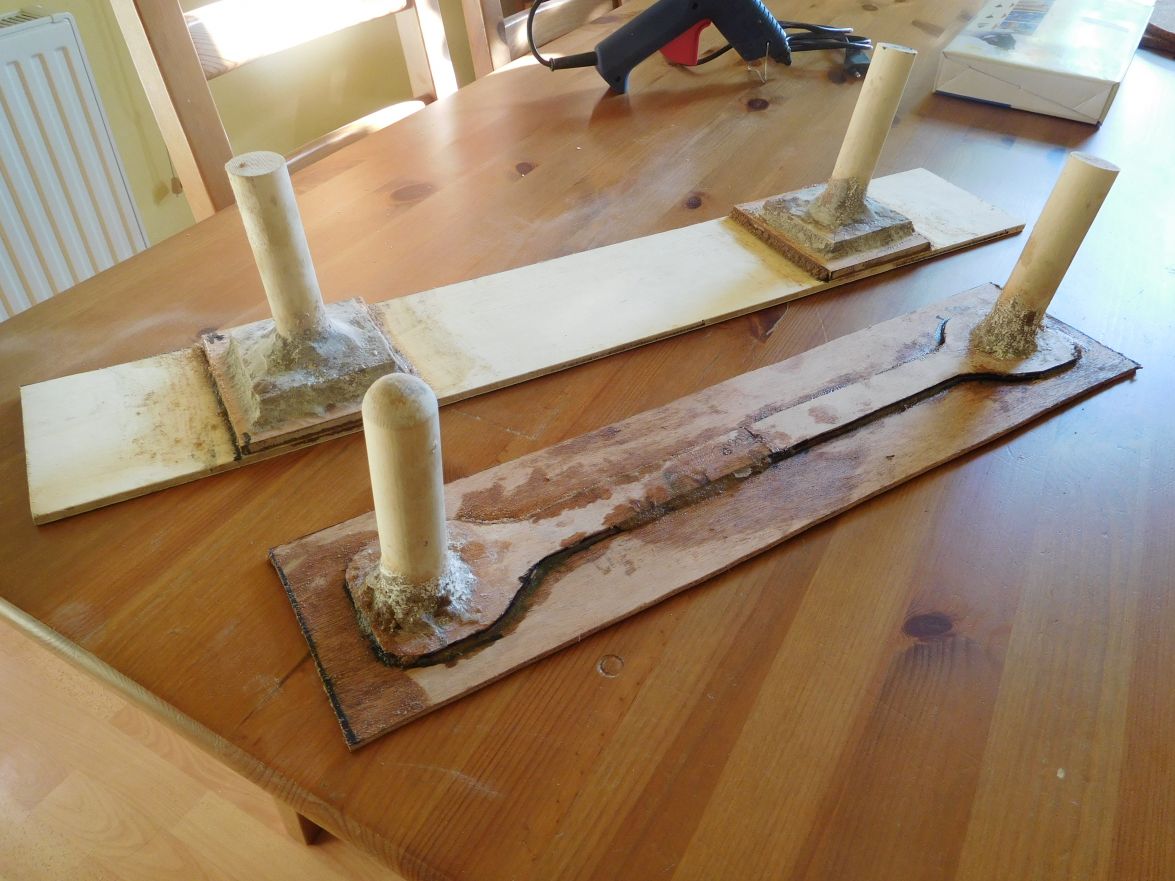
just to find out that the longer board does not touch the curve of the boat on its ends because I mounted the handles for comfort the same distance apart as on the short one. So what, I will work with the shorter one today while version 3 of the longer board can cure. I asked the question
How do I build myself a fairing board in 2016 and got good answers from my bateau friends and with version 3 of the long board I will have mastered the build of fairing boards as well delaying the build of the boat another day or so. I think my boards look a bit like the bought one of terrulian. I wish we had shops like you over there my boat would most probably finished long time ago.
Greetings from Karl
Re: AD 14 KIELGE
Posted: Fri May 12, 2017 1:23 am
by gonandkarl
Hi,
Yesterday I sanded half of the port side with 80 grit sandpaper and because it is such a tedious job I keep thinking all the time ahead. I should be finished in a few days and then arises for me the question:
Must I put onto the whole boat a thin layer of fairing before I sand it with the 120 grit and then again before the 180 grit paper ?
I am asking this question, because when I am finished with 80 grit sanding there are some spots where the glass shines through and I am worried by further sanding I will get at it.
Greetings from Karl
Re: AD 14 KIELGE
Posted: Fri May 12, 2017 4:02 am
by Salvatore
G,day Karl,
I did two things to help me in the sanding process:
I started with 40 grit (it is easy to fill in any deep scratches with filler)
I mixed as much micro-beads into the resin it would take
Regards Salvatore
Building Angelina
https://youtu.be/plQZZJgnWzk
Re: AD 14 KIELGE
Posted: Fri May 12, 2017 7:47 am
by Jaysen
I don't think you have to cover "everything". At least I didn't and the graphite coat came out much better than anticipated.
My understanding is that fairing compound is really only there to fill "voids" in the hull. That void could be a gouge from a tool, weave/edge of glass, or a place where the arch of the hull is not full to a perfect arch. As long as the lines are good (arcs full and smooth, flats smooth, edges shaped proper) it doesn't matter if the surface is bare (glass) or compound.
I could be wrong, but that's what all my research led me to conclude. Hopefully someone smarter than me will chime in.
Re: AD 14 KIELGE
Posted: Fri May 12, 2017 11:11 am
by gonandkarl
Hi,
Thanks Jayson for the advise. My problem is I did sand with 80 grit paper with my long fairing board and it is nice and smooth all over mainly because I think I sanded 80 percent of the compound off. If I sand now with 120 grit paper the surface will become even smoother but I am sure I remove some more fairing compound which is already rather thin on the hull and glass and glass tapes are shining through. That is why I would like to put a thin layer of fairing compound all over so that I can sand with the fairing board again and this time with 120 grit paper and not to worry to come through to the glass. Or maybe I should try and sand without a layer of fairing but use a very light hand when I use the fairing board ?
Greetings from Karl
Re: AD 14 KIELGE
Posted: Fri May 12, 2017 11:23 am
by Jaysen
I think your latter proposal is what you should do.
If you do opt for another layer, you will inevitably create highs that you will need to cut down no matter how careful you are or how thin your application tool is. Cutting those highs down with 120 will take time. Even more time with 120 than with 80. I think all you really want to do is use the 120 with a light hand to further smooth the 80gr sanding.
That said, I'm using 60gr for my LAST sanding on Lil Bit. No matter what you do, you will have the better finish between the two of us
Re: AD 14 KIELGE
Posted: Thu May 18, 2017 8:03 am
by gonandkarl
Hi,
Sofar I have postponed the decision to sand with 120 after finishing the 80 grit sanding of the sides. Yesterday I changed the supports for the boat. I copied quite some time ago Glossies support boxes but in my cramped boat building shed it was not as comfortable as in Glossies workshop which is big enough that he can ride a forklift around his boat. I removed the box under the bow completely and replaced it with a 60 cm square platform with 4 swivel wheels which I had for moving heavy things like the washing machine. The box under the stern I modified and made it as low as possible and also mounted under it a platform on each side with swivel wheels. Now at last I can push the upside down boat with one hand on the 12 swivel wheels to any side of the room giving my fat behind enough place on the side I plan to work.
Then I put a layer of fairing on the bottom and from tomorrow sanding it will be the chore I am not looking forward to.
Sides sanded and bottom ready to receive the fairing
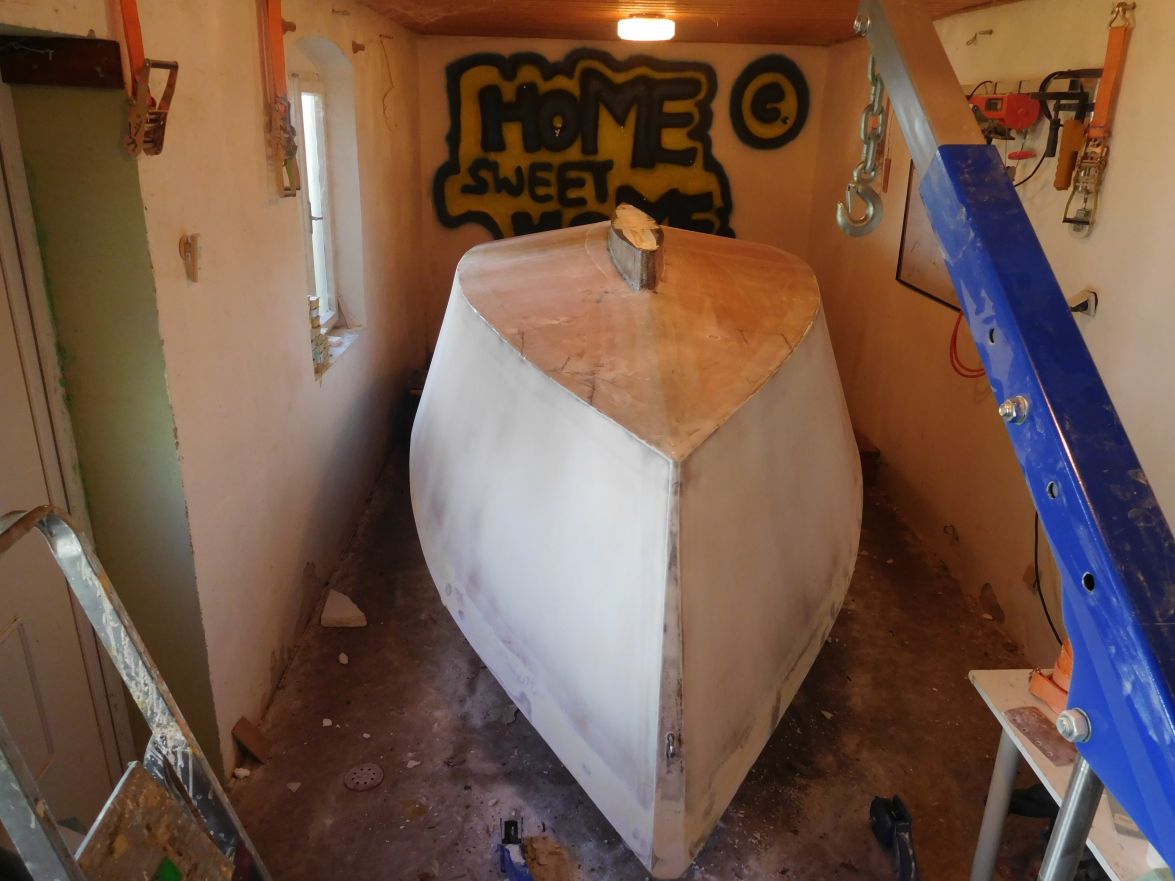
Bottom and keel shoe and skeg with fairing sloshed on because I am not talented to get it on any better. I used 2170 gram of mixed resin in six batches of 310 gram, 40 teaspoons of microballoons and 10 teaspoons of silica.
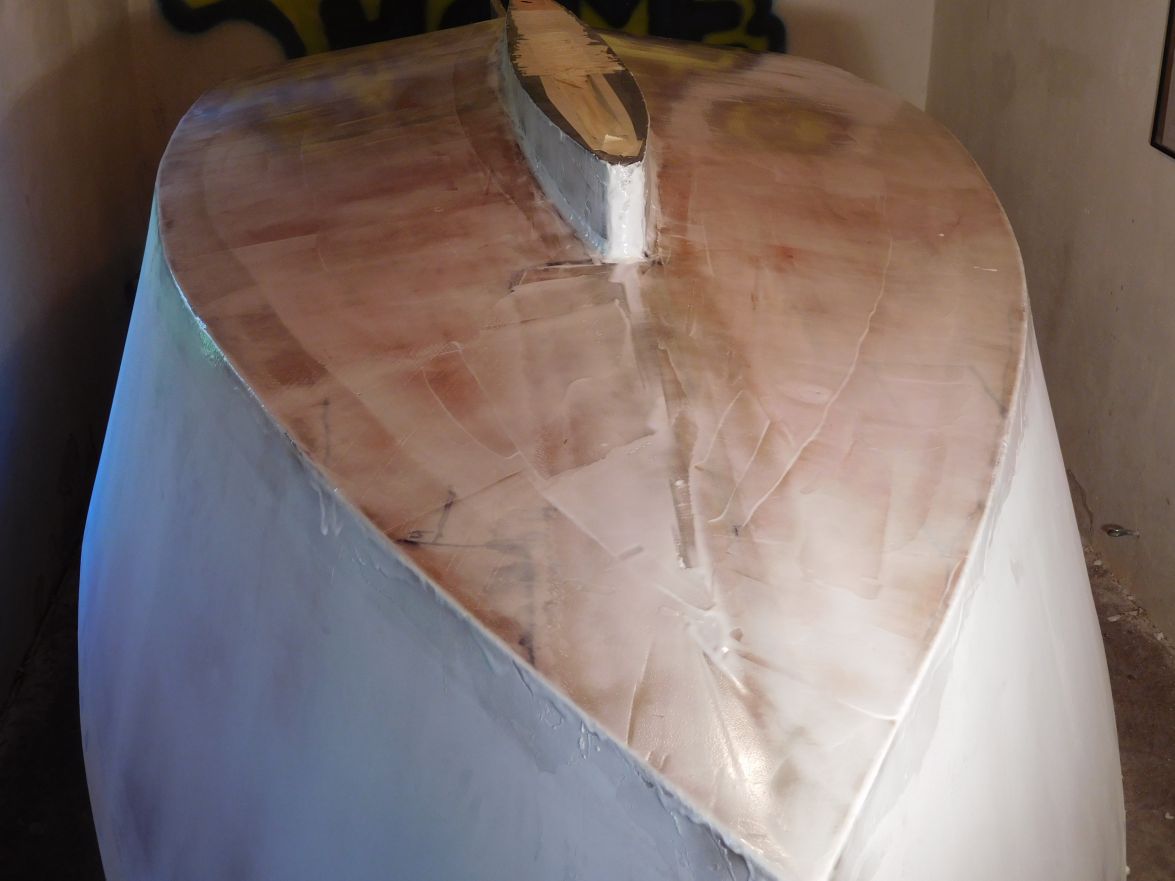
Greetings from Karl
Re: AD 14 KIELGE
Posted: Thu May 18, 2017 8:14 am
by Jaysen
Great progress!
These guys with huge, inclosed, climate controlled shops sure have it nice, don't they? I've got lots of space, but bugs, rain, and temps that I can't control make it all kinds of fun. Now that you can move the hull easily I'm sure you'll find the sanding to be a bit easier.
Still on track for your planned splash date?
Re: AD 14 KIELGE
Posted: Thu May 18, 2017 8:39 am
by gonandkarl
My boatshed is rather small and I keep the door, the one window and the big opening closed that I will not get any insects in there until it is painted. The big opening is 2.70 metres where I will pull the boat out most probably already on its trailer on the building frame it rolled out quite easyly last year.
The planned splash date is this Summer but my wife seems to be the better nautical forecaster because I overheard her talking to a friend saying that splashing date will be early September when the weather is still fine and the lakes are not so crowded. She might be right because I catch myself all the time taking longer than planned for anything I do on the boat. A good tip at sanding was to take a rest after a while and do something else. The carport I am building for the boat to stay underneath needs also lots of little jobs. I managed to shorten 4 of the six supporting poles with my jigsaw using the longest and biggest blade, so the roof of the carport will have a 7 cm incline over its length of 5 metres.
Re: AD 14 KIELGE
Posted: Thu May 18, 2017 6:39 pm
by Fuzz
Big shop or not you are doing great work Karl. I think your fairing looks just fine. Not all of us are blessed to be experts doing that. Keep up with the work and it will be done sooner or later
Re: AD 14 KIELGE
Posted: Thu May 18, 2017 9:45 pm
by cape man
What David said...
Re: AD 14 KIELGE
Posted: Thu Jun 08, 2017 2:15 am
by gonandkarl
Hi,
I am back to finishing my boat after 4 days of intensive sailing course. I am so glad I am building a tame sailing boat like the AD14, because the sailing in the course was so strenuous pulling on the sheets ( no blocks ! ) that I was resting for 2 full days before moving my body again. For 2 days I just sat and did not even cycle with the dog. But I am now the proud owner of an International Basic Sailing Licence and can even tie the knots blind folded. The wind was rather strong on all practice days ( Beaufort 6 ) and so it was not a surprise that we had a near knock down when an uncontrolled jibe happened and I was sitting up to the hips in the water with my 120 kg on the port side losing my Bateau cap in the wind before I threw myself high up to starboard which put the boat into the upright position again and with the forward speed the water was soon pumped out of the boat again. The exam on the 4th day was perfect and now I am confident that I will water my Adelie this summer with the necessary know how for the right of way and respect the condition of weather and lake.
Greetings from Karl
Re: AD 14 KIELGE
Posted: Thu Jun 08, 2017 3:55 am
by glossieblack
Well done Karl, you're now a certified salt.
Re: AD 14 KIELGE
Posted: Thu Jun 08, 2017 6:13 am
by Jaysen
Congrats on the cert/license. Can't wait for some video of kielge on the water with you at the tiller.
Re: AD 14 KIELGE
Posted: Thu Jun 08, 2017 6:21 am
by gonandkarl
Hi,
Thanks Glossie and Jaysen, you most probably beat me to the first sailing as you only have to build the mast finished. I get sidetracked to often like this morning I made myself a tiller extension for my electric motor very urgent task just to prolong the finishing process.
Greetings from Karl
Re: AD 14 KIELGE
Posted: Thu Jun 08, 2017 6:58 am
by Jaysen
I don't know. I've still got to drill and mount a bit. Then I have to deal with legal junk. From what I can tell, the state here makes it a long, nonsensical process. We shall see.
You will have a great tool me enjoying your ship with the little ones. Someday I hope to be like you. Giving the grandkids and kids find memories of their grandparents.
Re: AD 14 KIELGE
Posted: Thu Jun 08, 2017 8:25 am
by topwater
Karl now that you have your license when are you going to sign up as a AC catamaran crew member.
Sailing is a lot of fun Karl you will have a blast in your new boat.
Re: AD 14 KIELGE
Posted: Thu Jun 08, 2017 8:58 am
by terrulian
Karl,
It sounds like the instructor was running this class like law school: make it difficult so people will drop out! Congrats for hanging in there and learning your knots.
It must have been a small boat to get you that wet with an accidental jibe. What kind of boat was it?
Again, good work, and build on!
Re: AD 14 KIELGE
Posted: Thu Jun 08, 2017 9:34 am
by gonandkarl
Hi,
It was a small boat and we were 3 sailors here leaving the harbour for the final exam on the water Monday afternoon.
It is called Zugvogel which is a German National class boat with a keel and a length of 5.8 m.
I think I would not be a candidate for an AC boatcrew member my weight being the same as the whole carbon hull and that would make the foils obsolete and the fat duck would never fly.
Greetings from Karl
Re: AD 14 KIELGE
Posted: Thu Jun 08, 2017 10:02 am
by terrulian
Looks beautiful. That's a good sized boat to learn on because you can really feel what difference it makes when you steer and trim the sails. Immediate feedback.
Re: AD 14 KIELGE
Posted: Thu Jun 08, 2017 10:17 am
by Jeff
You look great Karl!! Congrats!! Jeff
Re: AD 14 KIELGE
Posted: Thu Jun 08, 2017 10:34 am
by Jaysen
gonandkarl wrote: ↑Thu Jun 08, 2017 9:34 am
I think I would not be a candidate for an AC boatcrew member my weight being the same as the whole carbon hull and that would make the foils obsolete and the fat duck would never fly.
You'd be the moveable windward ballast... just like me!
Re: AD 14 KIELGE
Posted: Fri Jun 09, 2017 5:23 am
by Fuzz
One of my good friends once refereed to his wife as moveable ballast. The rest of the days sail was long and quite
Karl that is a truly beautiful looking lake. When you get the boat out on it we need more pictures.
Re: AD 14 KIELGE
Posted: Fri Jun 09, 2017 6:06 am
by Jaysen
Even I know that was a bad move. The ladies should always be referred to as "relocatable boat bling" unless they own the boat and take it out solo. In that case you call them "your ladyship" since they WILL throw your a$$ over the side at the slightest provocation.
You just don't mess the "gentler sex". They can put a serious hurt on you.
Re: AD 14 KIELGE
Posted: Tue Jun 13, 2017 4:37 pm
by das boot
You are making good headway on it I cheated on the sanding part I used a belt sander and used Tallcom powder for the filler it worked well when it was getting close to being smooth I went to a orbital sander for the finish it worked out well for me.
I got in contact with Bondo thanks for that contact info.
Re: AD 14 KIELGE
Posted: Mon Jun 19, 2017 8:41 am
by gonandkarl
Hi,
My progress with the boat would be much faster if I did not distract myself with other projects. I found a special offer at the local hardware store for a sturdy carport for 370 euros where I could not say no. My wife thinks we need no carport but I would like my new sail boat to be from the start under a roof to protect it from the bad weather we have up to 8 months of the Year. Little did I know that mounting such a think does take time and someone with preferably strong arms. So I battled along by myself for the last 4 weeks in which I managed only to paint the 27 wooden parts with wood preserving paint and to dig 5 of the 6 foundation holes and concrete the 3 left supporting poles into the holes. Luckyly my son came home this weekend and he finished in 2 days the rest. He dug the last hole helped me concrete the 3 right hand poles and then put the 9 crossbeams for the roof on to the top. And the screwing down of the roof panels and the surrounding boards was a matter of 2 hours for him. So from Wednesday onwards it is sanding the boats bottom again and with some luck I will splash at the begin of September a date my wife decided on because it will not be so hot any more and I can stuff around at the slipping place as long as I want because I will be the only one there besides all my splashing guests, family from Holland and London and friends of Austria and some school mates who actually got me hooked on sailing some 60 years ago all in all at least 50 people. With a bit of luck my sister in law who lives on the Dutch Island Saba can also make it with one of her 2 sons and her grandchildren. But here is a picture of the car ( boats ) port.
Greetings from Karl
Re: AD 14 KIELGE
Posted: Mon Jun 19, 2017 9:46 am
by Jaysen
Tell Mrs Karl she's lucky. Mrs and I fought over Lil Bit's home... the garden was moved
Re: AD 14 KIELGE
Posted: Mon Jun 19, 2017 10:09 am
by terrulian
Yes, Karl, I find that digging post holes doesn't go quite as fast as when I was 25.
Re: AD 14 KIELGE
Posted: Tue Jun 20, 2017 7:09 am
by glossieblack
Keep focussed on that September splash Karl, and it will happen.
Re: AD 14 KIELGE
Posted: Fri Jun 23, 2017 10:26 am
by gonandkarl
Hi,
I am focusing on the splash in September but there is only so many hours one can sand in this god forsaken heat, so when I have to rest I look for boating things. I cam across a special offer for automatic life jackets from Marinepool so I ordered one. I received it today and played around with it for now 2 hours after lunch reading the instructions carefully over and over again. Luckily my brother in law who is sailing every year in the Adria or Baltic sea could solve my foremost question. Do I have to open the little zip on the sides should I fall into the water ? He knew the answer that the co2 gas bottle will blow up the jacket and press the zip open. I am really glad about that because I know for sure I would not be able to fiddle with a little zip in an emergency. And so it looks on the dry dock just dont know how to change the portrait to stand up.

Greetings from Karl
Re: AD 14 KIELGE
Posted: Fri Jun 23, 2017 10:35 am
by Jeff
Karl, You look really safe!! Very nice!! Jeff
Re: AD 14 KIELGE
Posted: Fri Jun 23, 2017 11:17 am
by terrulian
Karl,
Here's an idea for you, it doesn't cost much: Jump into a pool with this vest on; you can replace the cartridge. I recommend this not so much to test to see if it works, although that's not a bad idea, but to get an idea of how well you can swim when it is inflated. Although I'm not familiar with this brand, generally these vests are usually designed to inflate to a type I (at least that's how the US coast guard rates them) which means that if you are unconscious, they will hold your head out of the water so you can breathe. But they are not necessarily the best to swim in since they are designed primarily to keep you afloat while you wait for rescue. This is not meant as criticism at all, but just to give you an awareness of what to expect in an emergency.
That said, I've never gone overboard except when sailing a dinghy, and my recommendation is to stay on the boat.
Re: AD 14 KIELGE
Posted: Fri Jun 23, 2017 2:37 pm
by gonandkarl
Thanks Tony,
In the desrciption they suggest the same thing as what you said just to try it out without gas but to inflate it with the mouthpiece. But I will test it with the gas it only costs 8 euros for a new one and then I will know what to expect even that the lakes I will be sailing on are not wider than 3 km and the longest one is 32 km overall and they are all well equipped with storm warning lights and a lot of water rescue volunteers on the shores. The only person who drowned after falling from a boat on our beautiful lakes over the last 50 years was last year a fisherman without a life jacket and he was unable to swim. As these lakes are so clear a lot of divers are attracted to them from all over Europe and they die quite often because of some problems mainly low temperatures at considerable depths ( 50 metre plus ). I am definitely looking forward to nice and safe sailing soon. Until it is that far I am the proud owner of 3 life jackets 2 cheap ones and this new one which is not clumsy at all and lets you move around on the boat and it weighs very little.
Greetings from Karl
Re: AD 14 KIELGE
Posted: Fri Jun 23, 2017 3:55 pm
by Jeff
Glad you planning to be safe!!! Jeff
Re: AD 14 KIELGE
Posted: Fri Jun 23, 2017 3:55 pm
by Jeff
Glad you planning to be safe!!! Jeff
Re: AD 14 KIELGE
Posted: Fri Jun 23, 2017 4:19 pm
by cape man
I bought a pair for my boat last year. They are not the fully auto ones, you have to pull a chord, but you can wear them all day and they are really comfortable. I'm a very good swimmer, and have never left the boat unless I was trying, but I've seen and heard of accidents that went worse because someone didn't have a vest, or didn't have time to get one.
The other huge advantage, and one of my big motivations for the purchase, is that the water cops are less likely to stop you for a safety check if they see you wearing a life vest. Have never had a problem when stopped, but it is a pain in the keister to go through the 20 minute drill of checking safety gear, fishing licenses, cooler contents ("Excuse me sir, but who drank all those?").
You look good in it, but please go put a shirt on!
You coming to Florida again this October? Other coast, different climate and things to see for sure. You can make fun of my wife and David at breakfast again.
Re: AD 14 KIELGE
Posted: Tue Jun 27, 2017 7:05 pm
by das boot
I have on of them it works real good very easy to ware all day I can not swim well and our water is very cold on the west coast. Funny for years I flew helicopters on the west coast of Canada over the water and never put a life vest on but always wore one on the boat
Re: AD 14 KIELGE
Posted: Wed Jun 28, 2017 12:29 am
by Fuzz
One thing you need to keep in the back of your mind is if it has an automatic deployment feature it will most likely work but it might not. One my good friends had a high dollar regularly inspected life raft with a hydrostatic deployment feature. It got lost over the side and did not deploy. I am pretty darn sure the rafts deployment feature was much more robust than a life jackets.
Re: AD 14 KIELGE
Posted: Thu Jun 29, 2017 2:52 am
by gonandkarl
Hi,
Because it was a hot day yesterday and I was in no mood to sand so I went for a short trip to my daughters house to see my grandchildren and my grandson then took the following video of my life jacket test in their pool. The test worked fine and the funny thing was I could not find any button to let the air out again and in the description there was also no mention of how to let the air out. After a few minutes I realized that the mouthpiece which can be used to put in more air has a valve which one must press to let the air out. I would definitely not drown with this vest but rather be strangled by the tightly blown up ring around the neck.
[youtube]
https://youtu.be/h3FDF2FweMM[/youtube]
And now I have to find out where do I get a replacement co2 cylinder for my life jacket that it is loaded again.
Greetings from Karl
Re: AD 14 KIELGE
Posted: Thu Jun 29, 2017 3:17 am
by Fuzz
Nice demo Karl
It was nice of you to demonstrate how yours works.
I am pretty sure the inflation trigger must be very reliable or our Coast Guard would not approve them. But my point is they do rely on some form of triggering that could have a weakness. I have seen a couple of cases where the wearer got splashed and that triggered inflation. For sure having something that you will wear is much better than something stored in the boat.
Re: AD 14 KIELGE
Posted: Thu Jun 29, 2017 7:52 am
by Jeff
Hey Karl, great demo!!! And yes, that did inflate quickly!! Glad it worked!! Jeff
Re: AD 14 KIELGE
Posted: Thu Jun 29, 2017 8:16 am
by Jaysen
Look in a bicycle shop for the C)2 cartridges. Often used for inflating flats. Also anyplace that sell paint ball or pellet guns. The CO2 cartridges are common for "pistols".
I think I need to find me one of those vests. My current vests are too big for rowing and a bit bulky for sailing (got tangled in sheet). I think you've hit the perfect size for safety and comfort.
Re: AD 14 KIELGE
Posted: Thu Jun 29, 2017 8:52 am
by terrulian
Karl,
Without meaning any disparagement of all the great boating videos on the Bateau site, this may have my vote for favorite footage.
Truthfully, you are doing a service for those who have never bothered, as you wisely have, to make this experiment. Good work!
Re: AD 14 KIELGE
Posted: Thu Jun 29, 2017 8:52 am
by BB Sig
It would be really hard to swim with that horse collar! Thanks for testing this for us to see.
I see a lot of merits of wearing one of the auto-inflation style. My dad likes to go for a boat ride by himself and I've been trying to convince him to get one. He refuses to wear one...
Re: AD 14 KIELGE
Posted: Thu Jun 29, 2017 9:41 am
by gonandkarl
Hi,
Boatbuilding must also be a bit of fun and that included for me the test of this safety gear which Tony suggested I should do. I know now how it feels when it deploys and as the future owner of my sailboat Wilde Qualle granddaughter Lea was present at the test pool I got a fan for another such light 700 grams rescue vest because she stated the one I got for her is much too clumsy to wear for being on the boat. But first she has to reach herself a weight of 40 kg which is the minimum weight for the person wearing this vest.
Thanks for the hint with the cycle shops about co2.
For the father who does not want to wear such a thing I can only say one definitely can swim with it sure not in crawl, breaststroke or butterfly style but swimming on the back or like a seahorse upright or is it called water treading is for sure possible and now since I know how to let some air out of the vest it will not squash my neck and head like in a vice and will let me easily survive until the rescue team is there as my sailing buddys cannot miss that the biggest ballast is MOB Karl. Should I sail all by myself it has a rescue ring which I can attach to a life lineon the boat and I am as quick on board again as I fell into the water.
I think I made a good buy as it for sure keeps me afloat even without any swimming moves like when the boom should knock me out and send me overboard.
Greetings from Karl
Re: AD 14 KIELGE
Posted: Thu Jun 29, 2017 6:13 pm
by cape man
Made my day! Too good!
Re: AD 14 KIELGE
Posted: Thu Jun 29, 2017 7:16 pm
by Jeff
Agree with Cape Man Karl, really enjoyed the test!! Jeff
Re: AD 14 KIELGE
Posted: Fri Jun 30, 2017 8:40 am
by gonandkarl
Hi Jeff,
Because I am right now not building on my boat I am sitting here at my notebook reading new posts of the Bateau forum and the next moment my wife walks in handing me an envelope asking if I bought another boat plan ?
No I did not but I thank you so much for the beige Bateau cap you sent me. You remembered that I mentioned loosing my favorite colour Bateau cap at the near capsize when I made the sailing course. So this will be again my favorite ( sand ) colour cap. The other one I keep as a spare cap because my wife says I look like Trump with the red one.
Thanks again

Greetings from Karl
Re: AD 14 KIELGE
Posted: Fri Jun 30, 2017 8:55 am
by Jeff
Excellent Karl!! I could not let you go without that sand colored Bateau cap!!! Have a nice weekend, Jeff
Re: AD 14 KIELGE
Posted: Thu Jul 13, 2017 11:13 am
by gonandkarl
Hi,
Faired and sanded with 120 grit the bottom of my boat. Only 3/4 of it because I ran out of epoxy and had to wait the last 3 days for the hopefully last gallon of it. My plan is to fair the last quarter of the bottom then go with some fairing once more over the sides and transom and sand it all. Then I have to put 3 coats of epoxy graphite below the water line and use the rest of the epoxy to do some more fairing and sanding in the cabin while she is upside down.
Thanks David for the advise to round the chine and sheer it is much easier to get them round than a sharp edge.
Here the 5 foot look as Tony calls it:
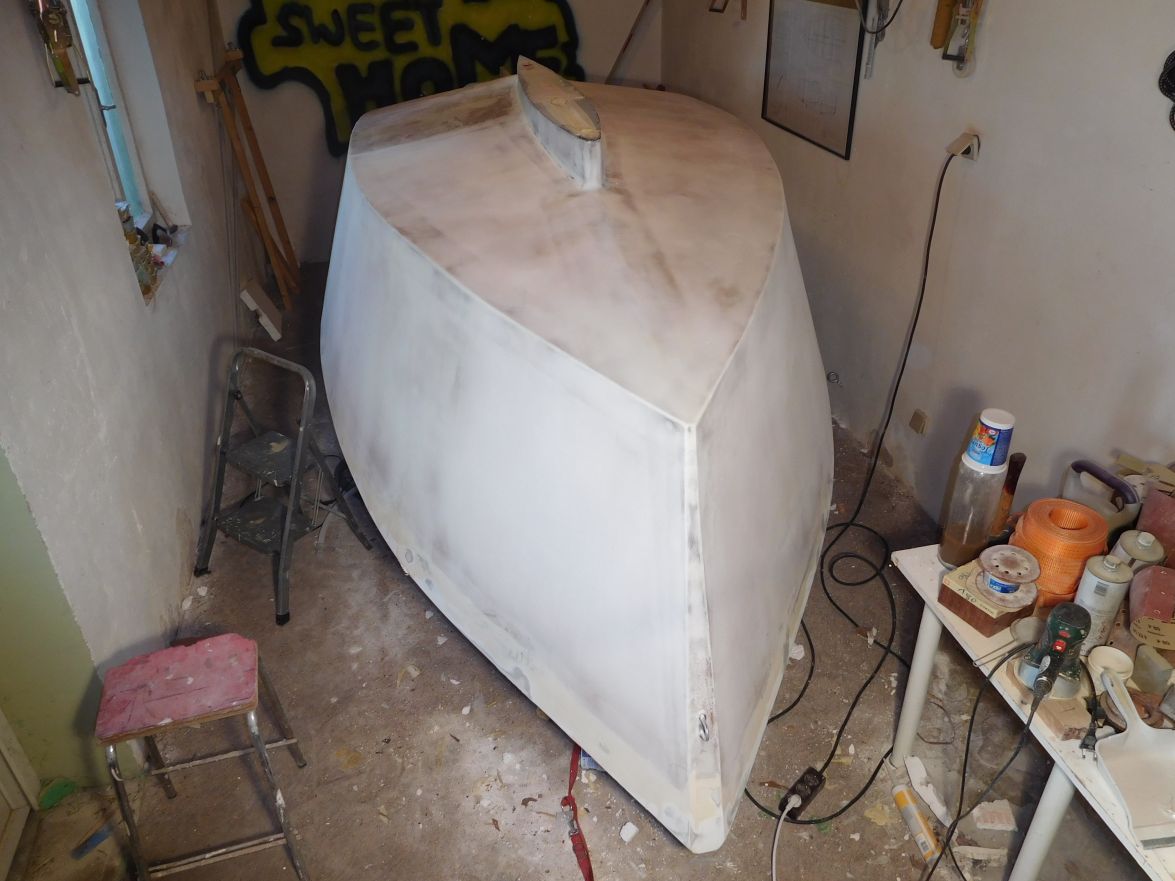
and this one is taken a bit closer:
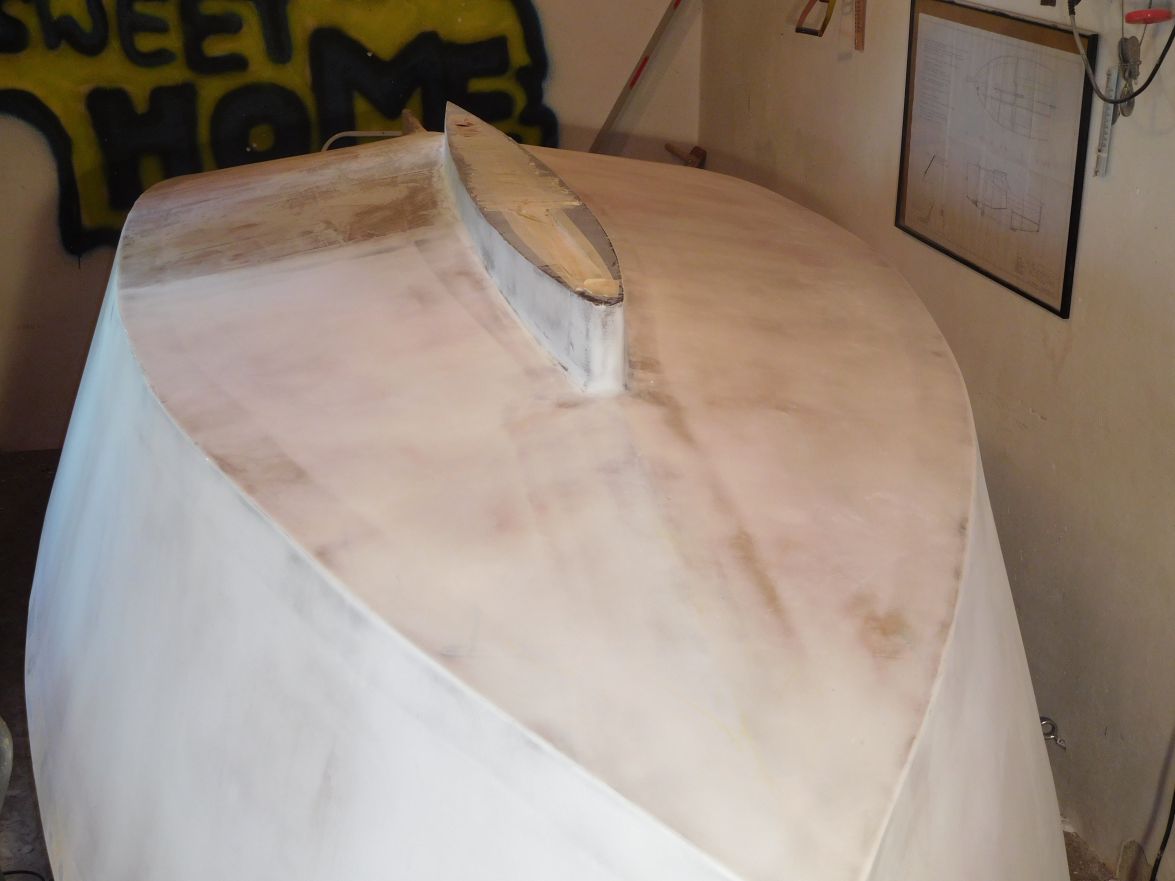
I think more talented builders out there would have achieved a much better look in the same awful lot of time I invested in sanding. But I am not unhappy and if I take my glasses off and use the 3 foot inspection it even looks perfect. Most important is it will not sink in the harbour at the first splashing like it happend to a fellow pensioner in England after he restored a 40 foot yacht since 2013. The 3 1/2 ton lead keel opened the bottom of his boat and it sank within a few minutes in the shallow harbour. The whole story is coming up in the next Practical Boat Owner. I am not superstitious but I am also a pensioner building since 2013 and thank God not restoring some boat older than World War 2.
http://www.pbo.co.uk/news/restored-proj ... _source=ET
Greetings from Karl
Re: AD 14 KIELGE
Posted: Thu Jul 13, 2017 11:40 am
by terrulian
Karl,
Thanks for that story. I had never heard the term "happy as a sandboy" before.
"I'll always be known as the arse who sank his boat in the harbor." Funny, I've had a few near-disasters when I thought, if that had gone belly up on me, it would be the thing I'd be remembered for.
I've heard of a lot of sinkings, but that one is quite different. The silliest one I've heard is a guy who owned a Swan, a very expensive boat, and had it tied up to the float next to his house near the place I often sail out of. He had it hooked up to city water and some valve was left in the wrong position so it just filled up with fresh water and sank.
Anyway, your boat looks great and won't sink. It's brand new!
Re: AD 14 KIELGE
Posted: Thu Jul 13, 2017 12:35 pm
by gonandkarl
Hi Tony,
Glad you enjoyed the story , I hope you also read The cup that cheers Dave Selby's Mad about the Boat a bit further down in the PBO link especially as you also followed Americas Cup and Tour de France about which Sir Ben Ainslie said in The Times: ‘The America’s Cup is sailing’s Tour de France.’
http://www.pbo.co.uk/news/cup-cheers-da ... vRhcXmm.99
Greetings from Karl
Re: AD 14 KIELGE
Posted: Fri Jul 14, 2017 7:48 am
by glossieblack
Good to see you're boat building again Karl.
Re: AD 14 KIELGE
Posted: Sat Jul 15, 2017 4:28 pm
by Aripeka Angler
You boat is looking great Karl
Re: AD 14 KIELGE
Posted: Sun Jul 16, 2017 8:17 am
by gonandkarl
Thanks Richard,
When I look at all your speedy progress in boat building I also want to jump up and put mine also into fast forward. But it does not work with me. As sanding the bottom I cannot do for hours on end I deviate to other little chores which need to be done before flipping the boat and then launching it. I shortened my building frame by cutting off the T frame and the 2 pieces towards frame D because I will support the boat only on Frame A and D and the keel shoe in the future. And before I sand the sides again I am constructing 2 detachable dinghy wheels to be mounted against the transom. The bow will be supported by a steerable short 50 cm axle also detachable and I hope to use it for launching when it is not possible from the trailer sort of an RIB launch. It will be something special to push a sail boat into the water and scramble over the transom ladder onto the boat take them wheels off and store them in the cabin hoist the sail hang the rudderand off I go with a slight breeze.
I want to mount the dinghy wheels in the boat shed on the upside down transom to get the sides higher for sanding than they are now on the support boxes. What one does not think out not to bend the old worn out back and body too much.
As soon I have my wheels concoction so far that it is worth while taking a picture I will post it. I also hope it will help me to move the boat easily on and off the trailer on land so that there is some more use of it than the RIB style launch.
Greetings from Karl
Re: AD 14 KIELGE
Posted: Sun Jul 16, 2017 6:21 pm
by Fuzz
Karl I think all of us try to find easier ways to do things as we get older
But you are making progress and your work looks really good. Keep after it and you will be sailing soon
Re: AD 14 KIELGE
Posted: Sun Jul 16, 2017 8:17 pm
by Aripeka Angler
Karl, your post about the bateau hat got me to thinking that I needed to post something on your page.
You really are doing a great job and boat building is not a race but is a form of art.
I will always have great memories of meeting you and enjoying a boat ride aboard Red Alert with you and David in Florida.
Build on my friend
Re: AD 14 KIELGE
Posted: Tue Jul 25, 2017 7:22 am
by gonandkarl
Hi,
Today is a holiday for me, I finished sanding the outside of the hull and I am ready to put 3 coats of graphite + epoxy mixture to the bottom and below the waterline which I will draw this afternoon. There is a light at the end of the tunnel.
Here is the picture of the boat after I washed it down with water and if anyone of you thinks there is a lot of black on the sanded hull it is small rests of graphite powder which I sanded off the keel shoe and I did not feel to wash the hull twice even that the water was already quite black. I sanded the already 3 times coated keel shoe that the epoxy graphite will stick better and it will be the part which has at the end 6 layers of graphite epoxy.
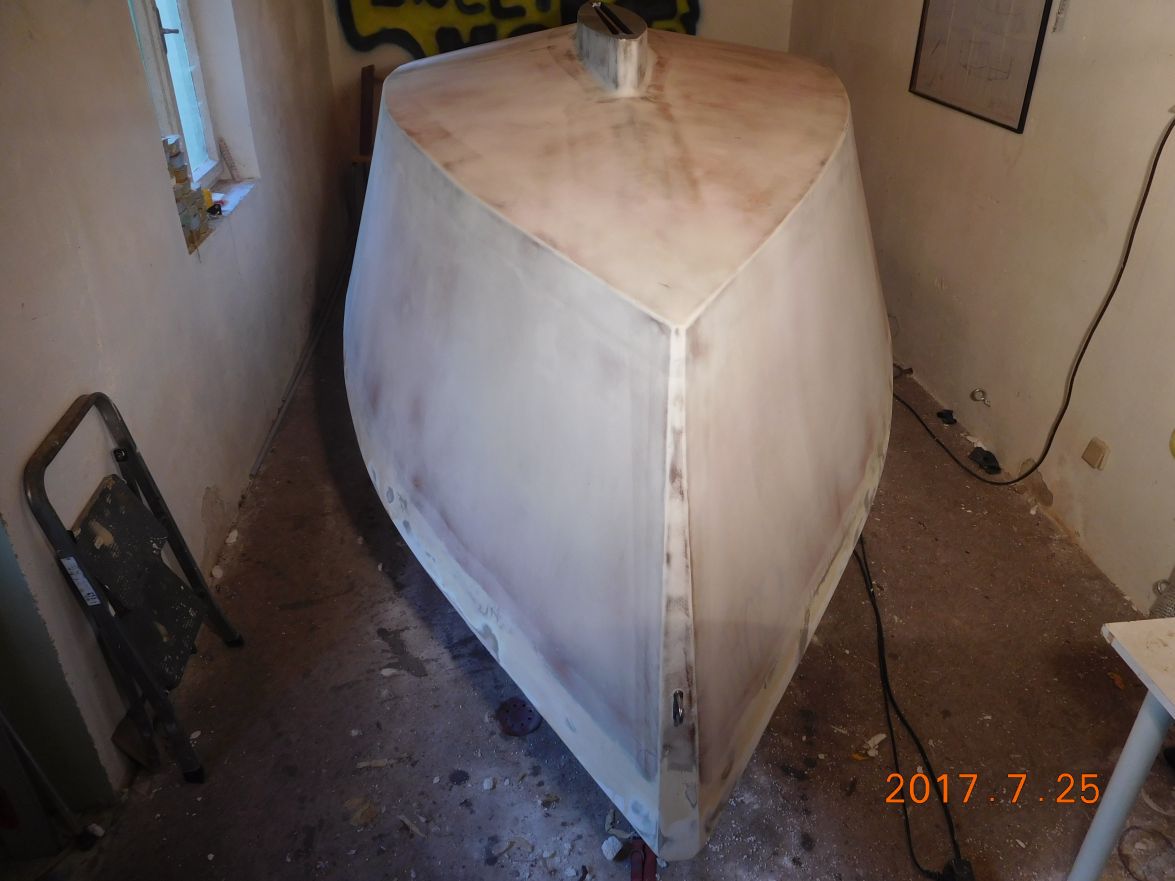
Greetings from Karl
Re: AD 14 KIELGE
Posted: Tue Jul 25, 2017 7:44 am
by Jeff
Karl, really nice milestone for your build, congratulations!!! Jeff
Re: AD 14 KIELGE
Posted: Tue Jul 25, 2017 9:49 am
by topwater
Karl i can't wait to see the boat with paint and her new bottom
Nice progress .
Re: AD 14 KIELGE
Posted: Tue Jul 25, 2017 10:06 am
by gonandkarl
Hi John,
I also cannot wait because in my mind is always this beautiful white painted Nor ' Easter at the jetty in Homosassa. I hope you still enjoy your outings with it as I did when I could come along last year. Thinking back of your nice boat or Richards, is what gives me the drive to finish my boat to then enjyoy pleasure rides like we had last year.
Greetings from Karl
Re: AD 14 KIELGE
Posted: Tue Jul 25, 2017 2:21 pm
by cape man
Looking sharp Karl! Still not too late to make arrangements to come visit Florida again...
Re: AD 14 KIELGE
Posted: Tue Jul 25, 2017 2:22 pm
by Jeff
Yes, would love to have you attend Karl!!!! Jeff
Re: AD 14 KIELGE
Posted: Wed Jul 26, 2017 8:41 am
by gonandkarl
Hi,
My going to the boat builders meet last year was my 70 th birthday present to myself. As funds are not there all the time lets see if I could repeat it every ten years. Should have saved enough money to treat myself at my 80 th birthday then business class because economy class last year was the only not nice part of the trip.
But now to my furious progress:
Before I started marking the waterline I studied the Youtube video of the old shipwright over and over again Yesterday. He showed in 4 minutes how it is done including measuring the bow and transom marks in the water. I wanted it to do the same way without the water part as I know my bow and transom marks until I found out no 2 helpers to permanently adjust the string next to the hull and my boat shed is to narrow or the bo(w)dy of the Adelie too fat. So my next try was with a see through hose water level filled with coloured water. For some reason it did not work because I could not get a few air bubbles out from within the hose. Then I started with a normal water level to make marks with pencil every 5 inches just to find out in the end that I started 2 centimetre below the correct bow and transom marks. And then it was evening and I had to watch Germanys ladys beating Russia in the European women soccer championship. At last this morning I had the great idea to use a cheap small Stanley laser level to help me get that waterline onto the boat. I bought it a long time ago very cheap because it had practically besides a magneto no other way to position it anywhere. So I attached it with a metal clamp to my camera tripod from the seventies and managed to get that line drawn on the port side in a record time of 2 hours. So fast because whenever I moved the tripod a bit further on I battled to adjust the laser line to the pencil marks already drawn. And my afternoon job is scheduled to be the starboard side and transom. I will let you know if I beat my own Austrian record of 2 hours.
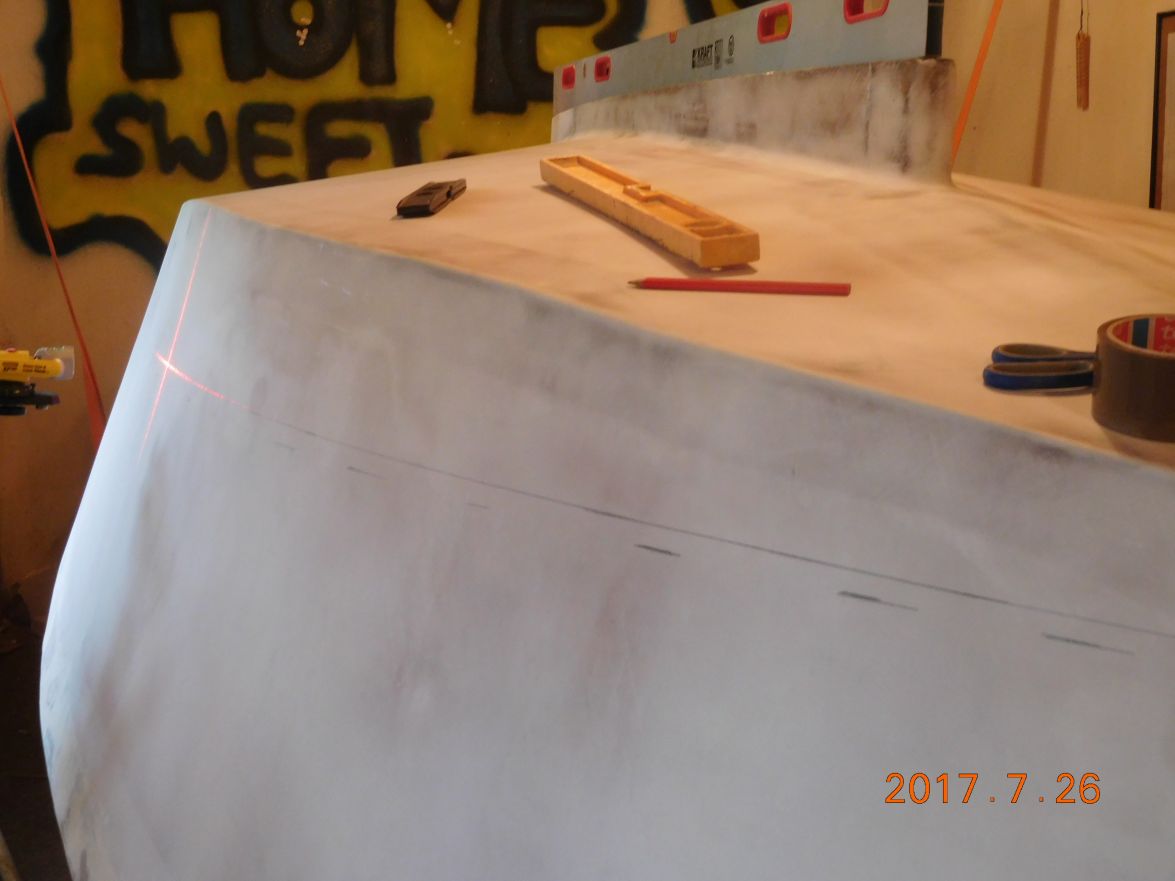
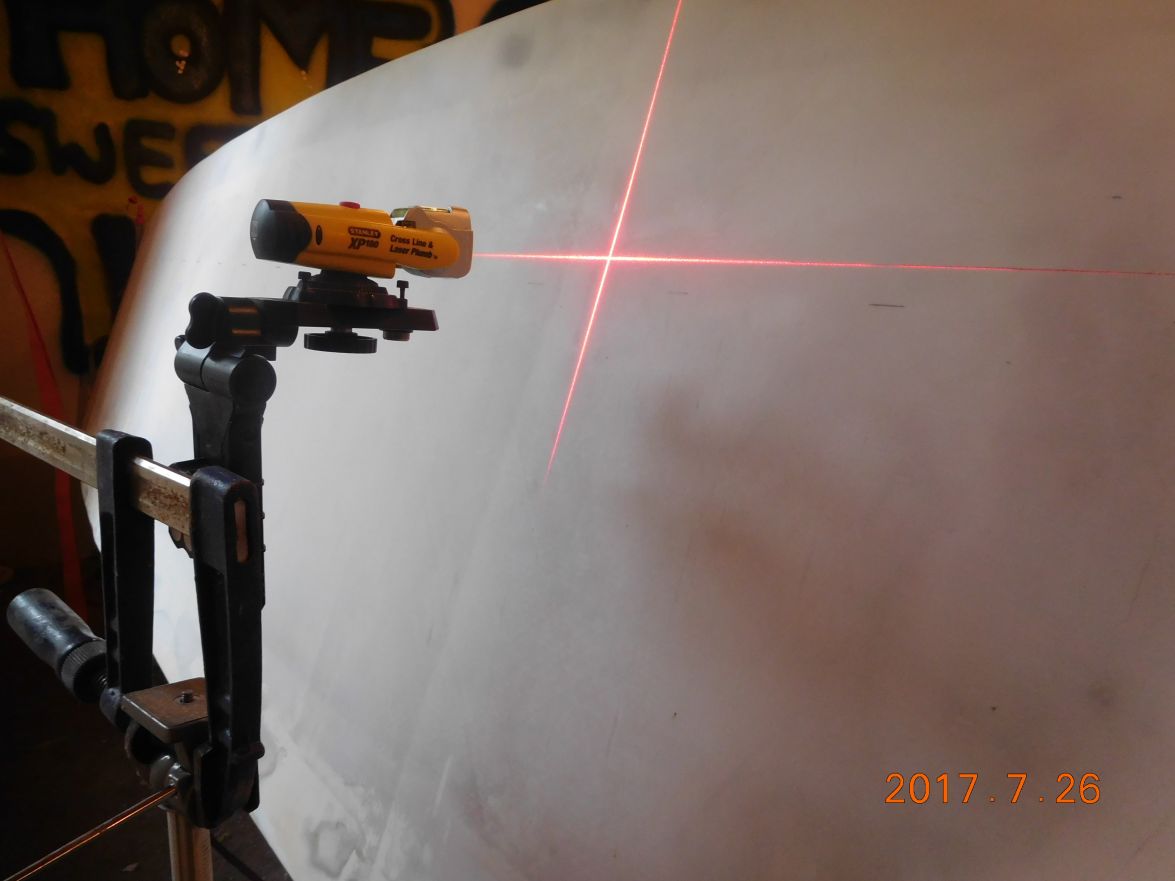
I hope all of you work a bit faster because I love seeing the speed boat building of the younger ones.
Greetings from Karl
Re: AD 14 KIELGE
Posted: Thu Jul 27, 2017 2:09 pm
by gonandkarl
Re: AD 14 KIELGE
Posted: Thu Jul 27, 2017 2:19 pm
by gonandkarl
Hi,
Today I finished my waterline marking and the boat is ready for 3 thin coats of epoxy graphite tomorrow every six hours.
Will use for the first coat 310 grams of mixed epoxy and 90 grams of graphite. Hope it is not miles too much or not enough for one coat. I also want to mix some silicate with it so that the epoxy will not run on the sides.
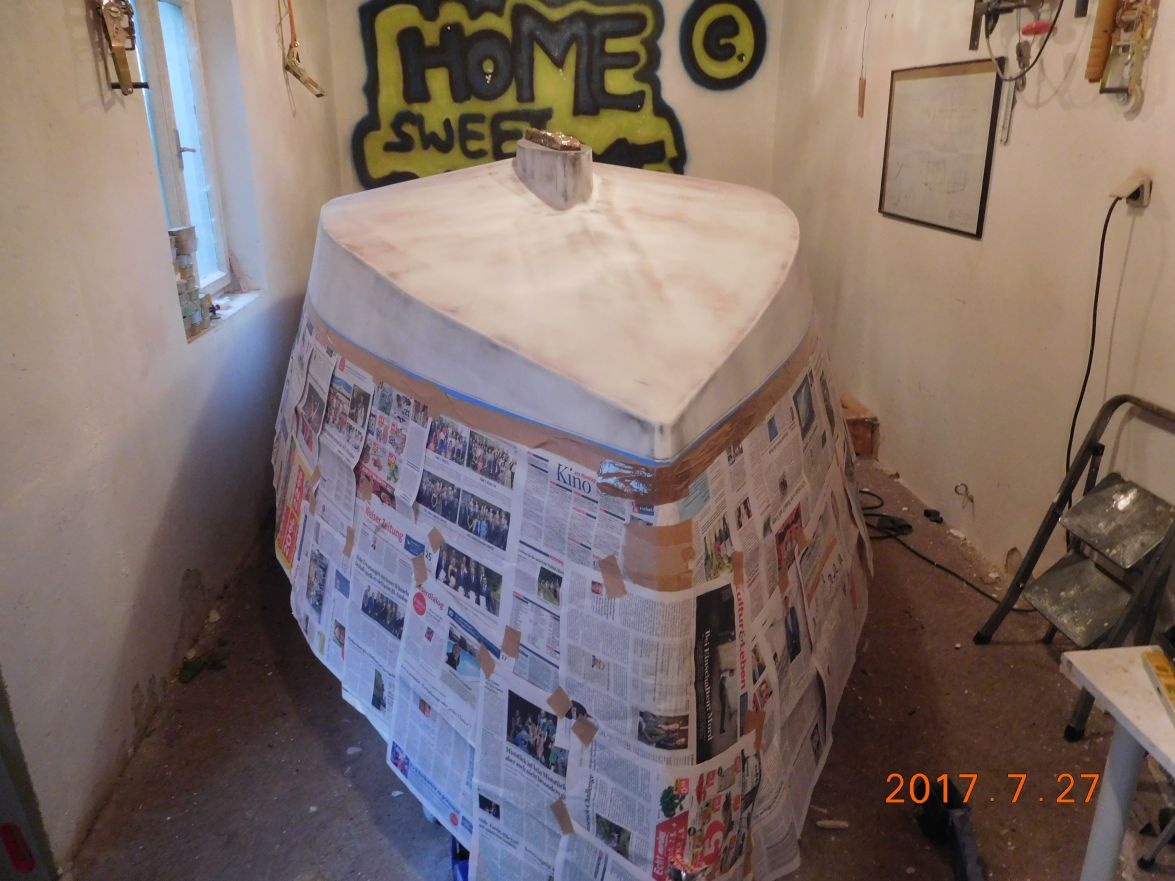
Greetings from Karl
Re: AD 14 KIELGE
Posted: Thu Jul 27, 2017 2:24 pm
by Jeff
Looking good Karl!! Send us more photo's tomorrow. Jeff
Re: AD 14 KIELGE
Posted: Fri Jul 28, 2017 2:43 pm
by gonandkarl
Hi,
The plan was to put 3 coats of epoxy today onto the boat. I managed only 2 and the third one will follow tomorrow morning after 12 hours it should still count as wet on wet. I also planned to use some silica that I will not have any runs on the boat sides but then I forgot to mix it in and the graphite must have thickened it enough because there are none.
Luckily I mixed only 233 grams of epoxy with 60 grams of graphite which was more than enough for half the boat.
The port side I did with the same quantity and it was again a bit to much. After the first coat I realized that I run out of graphite which I got from a builder supply market but a different brand and it needed sifting like Larry advised and the weight of sixty grams produced for the second coat a thinner mixture and therefore the 2 lots of 233 grams + graphite were again to much. I learned at least that tomorrow morning when I do the third lot I will use only 155 grams of mixed epoxy and then I should not have anything left in the cups.
Here the picture after the second coating:
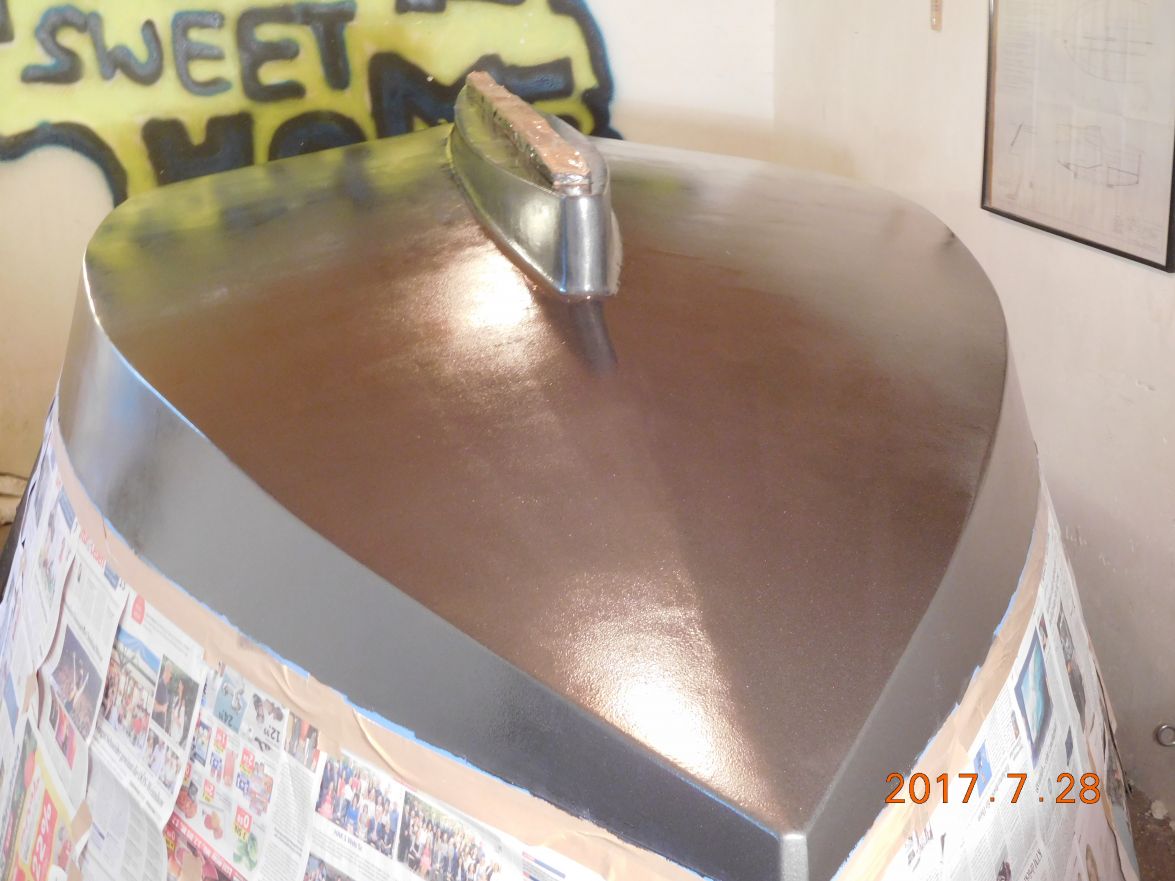
Greetings from Karl
Re: AD 14 KIELGE
Posted: Fri Jul 28, 2017 3:09 pm
by Jaysen
She's looking great! That graphite can be tricky. Looks like you've got it under control.
Re: AD 14 KIELGE
Posted: Fri Jul 28, 2017 3:37 pm
by terrulian
Looks good, Karl.
Re: AD 14 KIELGE
Posted: Fri Jul 28, 2017 3:38 pm
by Jeff
Karl, really nice work!!! Jeff
Re: AD 14 KIELGE
Posted: Sat Jul 29, 2017 6:28 am
by gonandkarl
Hi,
Finished at last the bottom this morning with a third and final coat of epoxy graphite and that was all the boat works for this weekend because the lawn needs cutting and then I am ready for my daughters family visiting and barbecue with the grandchildren the 3 future owners of my 3 boats. My wife mentioned the other day as we only have 3 grandchildren I am not allowed to build another boat.
On Monday I start painting the sides and transom and carry on fairing and sanding the cabin.

Greetings from Karl
Re: AD 14 KIELGE
Posted: Sat Jul 29, 2017 7:18 am
by Jeff
Karl, that looks really good!!! Jeff
Re: AD 14 KIELGE
Posted: Wed Aug 02, 2017 6:12 am
by Eric1
Nice work Karl!
Re: AD 14 KIELGE
Posted: Wed Aug 02, 2017 6:35 am
by glossieblack
Karl,
I've just caught up with your build. Wow, you've been making real progress, and she's looking great.
You're on the home stretch now.
Re: AD 14 KIELGE
Posted: Wed Aug 02, 2017 7:05 am
by cape man
Looks fantastic Karl!
Re: AD 14 KIELGE
Posted: Wed Aug 02, 2017 1:16 pm
by Fuzz
Karl you are doing a really nice job. Your graphite looks real good.
As for building more boats that is easy...........tell your kids you need more grandkids
Re: AD 14 KIELGE
Posted: Mon Aug 07, 2017 2:09 pm
by gonandkarl
Hi,
The last day of sanding the sides and transom was today and tomorrow I can start painting at last.
I watched last year while on holiday on the island of Korcula a fisherman who prepared and painted his approx. 20 foot old open Boat within 2 days inside and outside. I wonder how he did it ? Sure it was a work boat but it did look nice after 2 days and I spent a whole month for the same task. I was thinking of Tony ' s 4 foot view of the boat. Mine will be nice for sure from a 4 foot distance when I am finished, but the problem is one is sanding at 1 foot in front of once nose and there you get stuck at the smallest spot which still glances a bit and is not dull grey. Enough lamenting about my slow show, now I look forward to finishing the inside of the cabin, flipping the boat, hanging the heavy centreboard, getting it onto the trailer and splashing in September ( hopefully 2017 ).
Ready for painting:
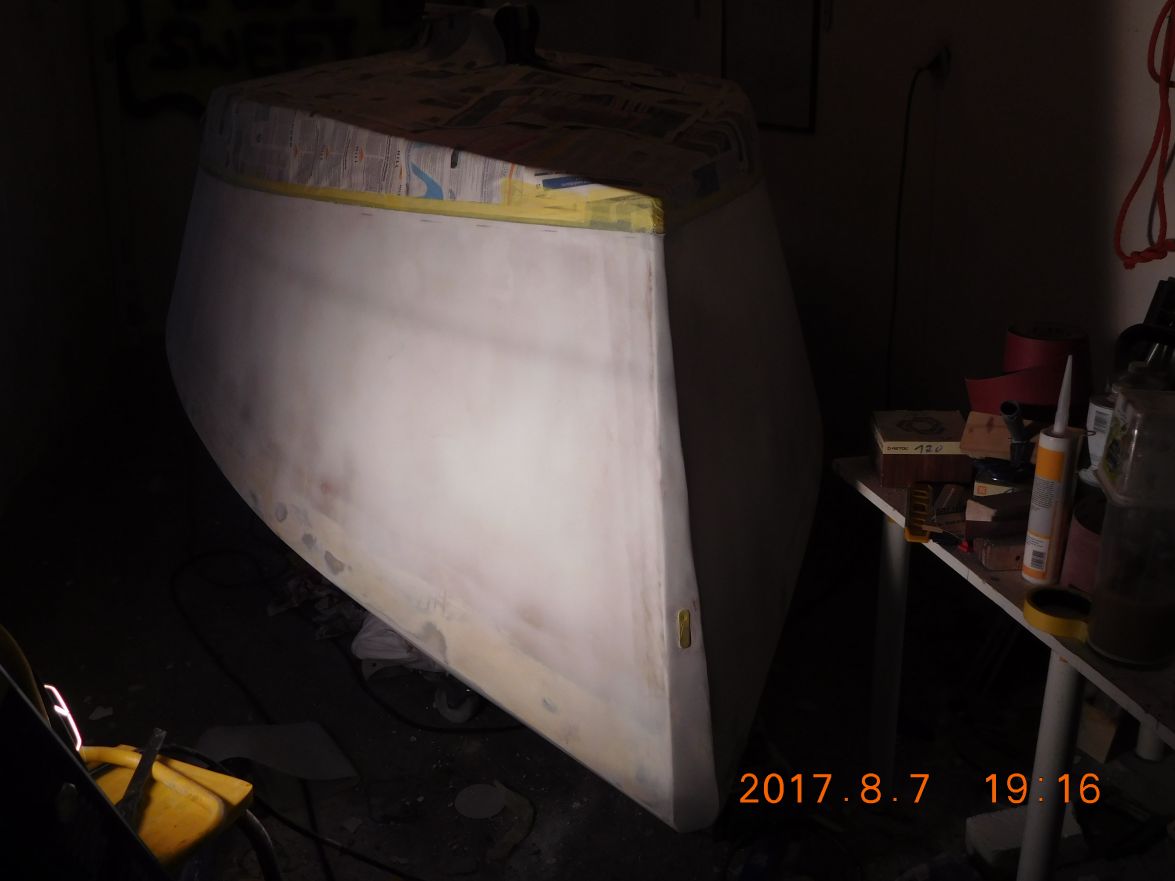
Greetins from Karl
Re: AD 14 KIELGE
Posted: Mon Aug 07, 2017 2:24 pm
by Jaysen
Karl, that's why I always let the boss decide. Mrs would come outside and give me an eval based on "i want it to look like" conversations. She was a great sanity check for how much I really needed to do. And, it helped to make sure she would be happy to ride in a "work boat". as it is, she loves the finish on Lil Bit and doesn't notice all the small things I do.
Now if only life would let me get Lil Bit out on the water...
Re: AD 14 KIELGE
Posted: Thu Aug 10, 2017 2:21 am
by gonandkarl
Hi,
Here my newest update. Put on the first primary coat with a bit of grey colour paste mixed into it.
From close up I can see some mistakes especially near the bow but like Jaysen I asked my wife and she gave the OK for the second prime coat this time in white. Asian boat builder apparantly always make some mistakes into their boats not to upset the gods. I will wait for some dings in the next 2 seasons and then I will go back and fair and sand the bow part better.
After first prime coat:
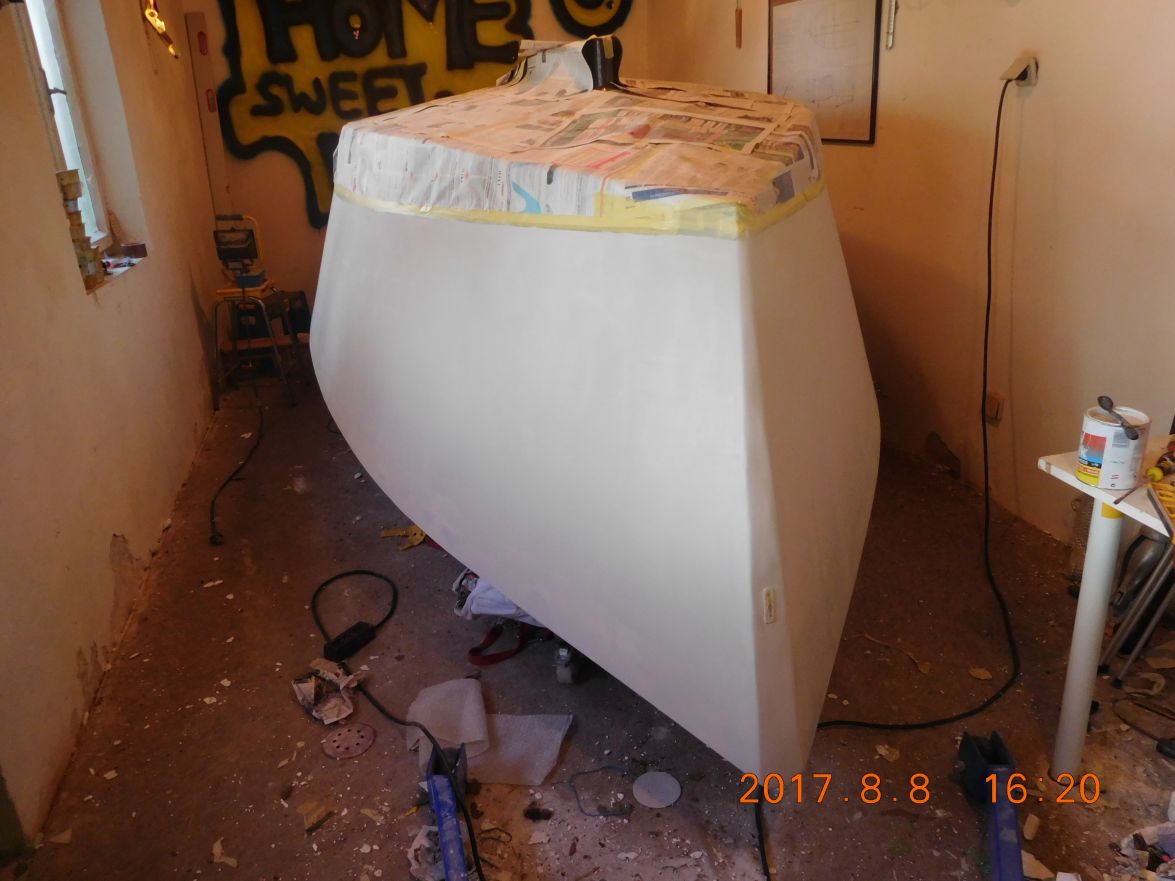
After second coat of primary paint:
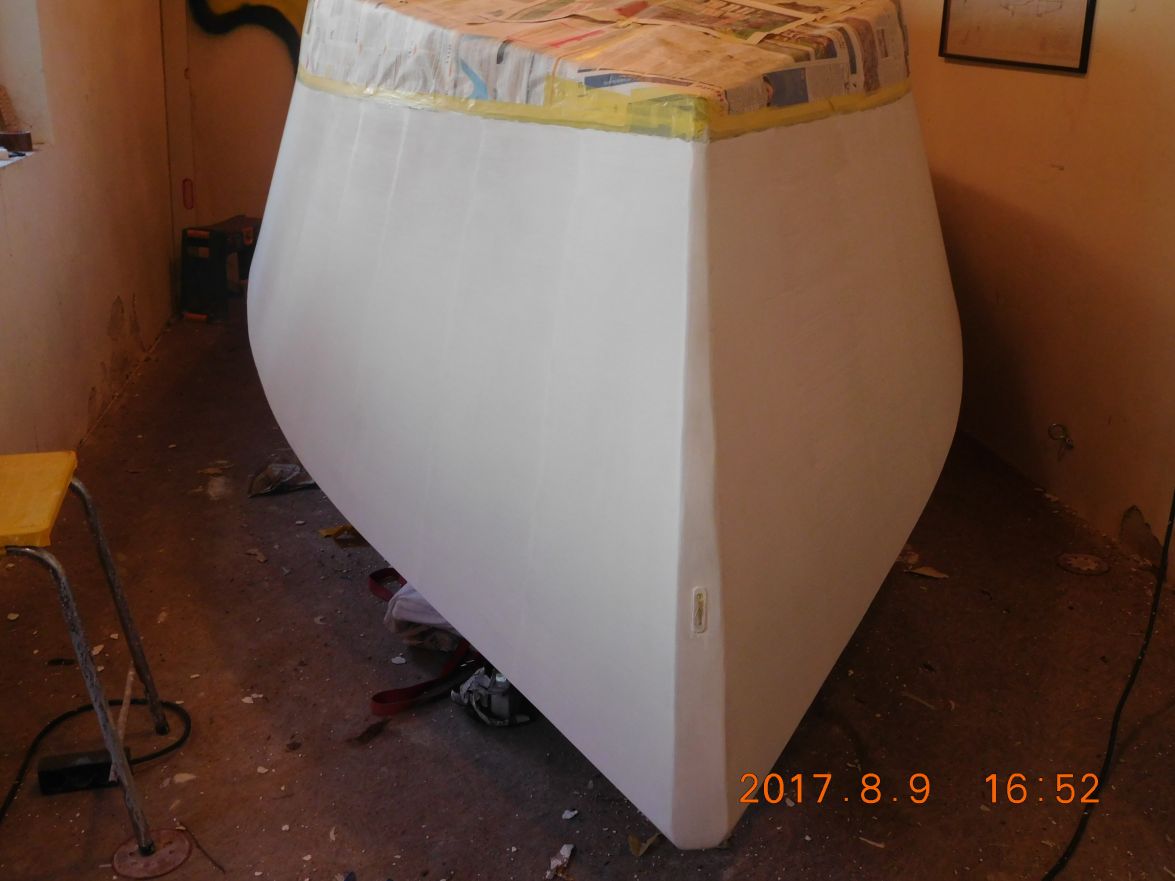
Today I will do a third coat with amber colour paste mixed into it and from tomorrow onwards I put on 3 coats of glossy white boat paint.
Greetings from Karl
Re: AD 14 KIELGE
Posted: Thu Aug 10, 2017 3:11 am
by Fuzz
Karl the boat is looking good. I will be waiting to see it with paint. Thanks for telling us about leaving the small flaws
Without even trying to please the sea gods I have done it with every boat I have built
Re: AD 14 KIELGE
Posted: Thu Aug 10, 2017 8:11 am
by glossieblack
Nice to see you're making steady progress on painting the hull Karl. Looking good. Build on.
Re: AD 14 KIELGE
Posted: Thu Aug 10, 2017 8:41 am
by gonandkarl
Hi,
Third and last prime coat on transom and sides.
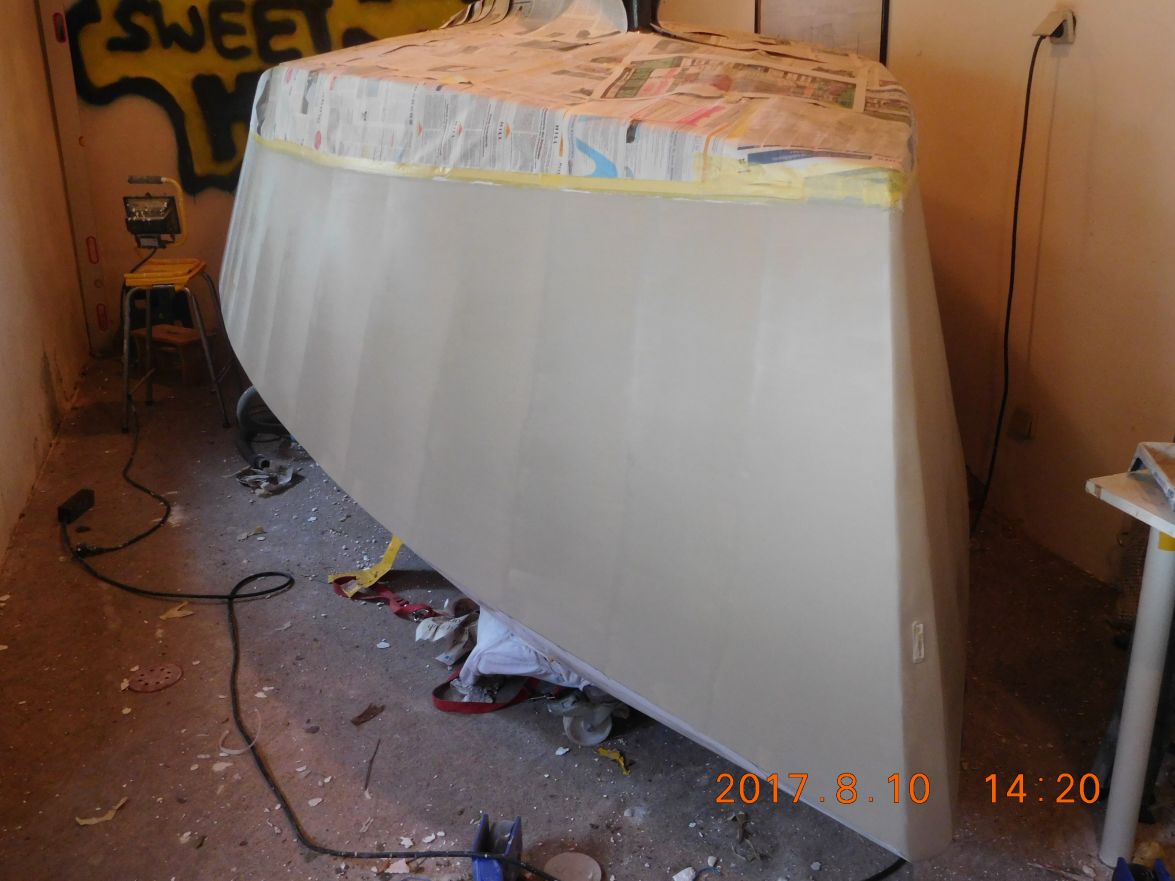
Greetings from Karl
Re: AD 14 KIELGE
Posted: Thu Aug 10, 2017 9:10 am
by Jeff
Looks great Karl!!! Jeff
Re: AD 14 KIELGE
Posted: Fri Aug 11, 2017 8:51 am
by gonandkarl
After first topcoat

Re: AD 14 KIELGE
Posted: Fri Aug 11, 2017 9:02 am
by pee wee
That looks great, Karl! I don't know how you manage to work in that tight space, though. I guess that makes the good results all the more impressive!
Re: AD 14 KIELGE
Posted: Fri Aug 11, 2017 9:33 am
by terrulian
Right.
I built my boat in a small space, too, but not this small. Up to this point you didn't need to worry about accidentally brushing against the surface as you moved around the hull; but now, with the topcoat, you must have to move like a ballerina to avoid touching anything!
Re: AD 14 KIELGE
Posted: Fri Aug 11, 2017 10:25 am
by gonandkarl
Hi,
Because the room is only 2,70 metres wide ( the boat 1,94 ) I put 3 transport trollies with 4 swivel wheels each underneath the boat one near the bow and the other 2 near the transom on port and starboard sides. Like this I can easily push the upside down boat in any direction. When I put on the topcoat I followed the video of Tony s thread page 32 to the tee except that the guy in the video is standing and I am sitting on a small garden plastic stool. I started painting at the transom port side and then move an even smaller stool with the paint tray and the tipping brush and the 500 watt lamp along at 1 foot steps until I finished the transom and the SB while the boat was pushed close to the window wall. ( From Knottybuoyz I learned to move from right to left which he suggests for fiberglassing but it is also correct for painting ) Then I moved the whole setup my 2 stools and the lamp to port side and before I did this last leg I pushed the boat with the painted side close to the wall opposite the window and had again approx 80 cm of space to sit and paint. Like this I was always looking against the light of the lamp while tipping the just rolled on 1 foot of paint into the wet end.
I had the doors closed all the time but one small fruit fly landed on the paint just when I was finished. With my wifes tweezers from her bedside cupboard I got rid of it and then I was bushed not because it was physically so strenuous but because it took me the whole of 2 1/2 hours to paint a transom and 2 sides. Thanks Tony for the video it is invaluable for me. I must have looked at it at least a dozen of times before I started painting.
Here you can see I had enough space.
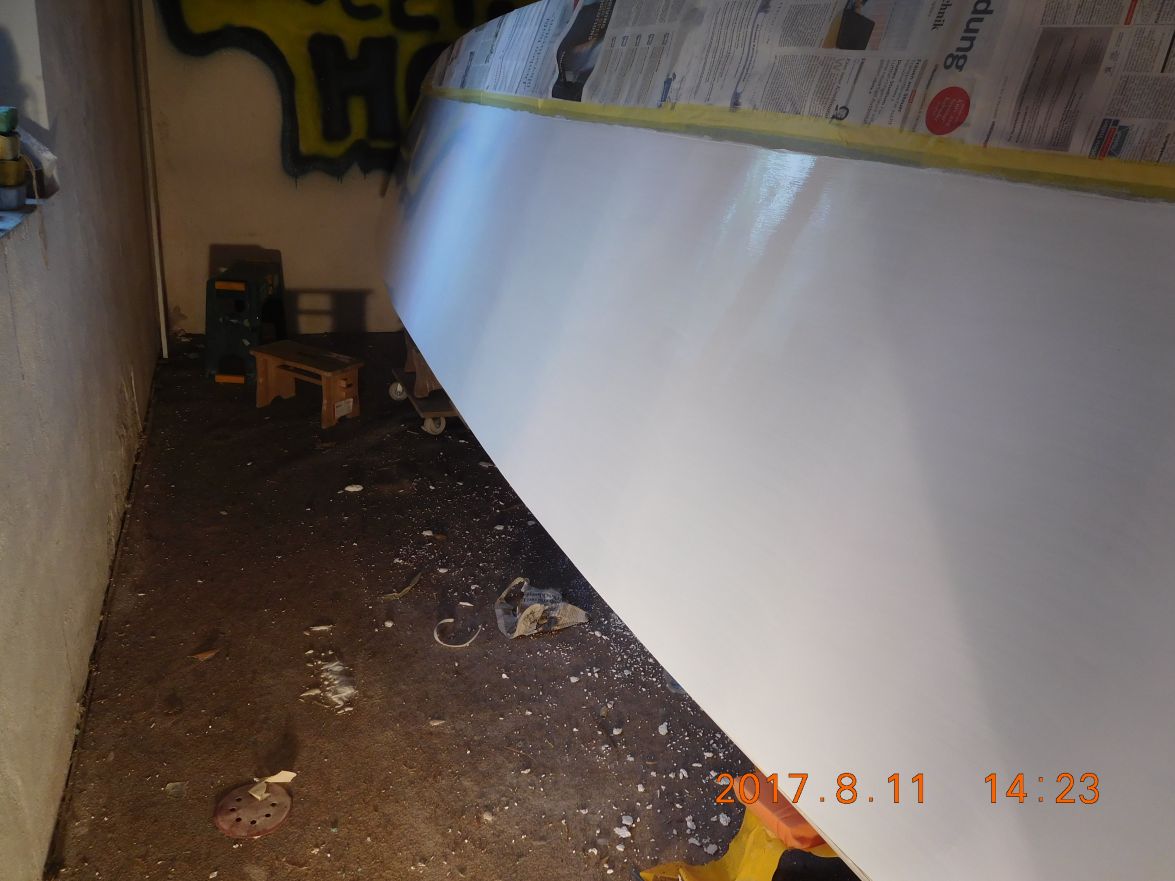
I just see the mess on the floor, yes I cannot work as clinical or dust free as Glossieblack.
Greetings from Karl
Re: AD 14 KIELGE
Posted: Fri Aug 11, 2017 10:38 am
by terrulian
Yes, Karl, I imagine you were tired! You had the fatigue from the concentration required to attend to details, plus the physical challenges of moving around in a tight area without touching the boat.
The bit you mentioned about the light is absolutely essential. You just cannot see what you're doing without the light coming from the right direction. I'd say this is the most essential piece of advice there is about painting and varnishing, and it is rarely emphasized. I think it is more important than what brush or roller you use, what paint you use, how much you thin it, the temperature and humidity of your space, or anything else. I never managed to get mine just right even though I made a lot of adjustments to do my best. This is partly because my shop has windows which complicated the situation...and they could not be moved of course. I even contemplated boarding them up temporarily but didn't do it.
The pros have paint booths that are lit properly, but I don't see them in booths when varnishing.
BTW, thanks again for the kind comments on the book. It is very gratifying that it continues to entertain you.
Re: AD 14 KIELGE
Posted: Fri Aug 11, 2017 10:39 am
by Jaysen
Karl, compared to my work environment, you're area is a medical surgery.
She looks great. Congratulations on getting another coat on.
Re: AD 14 KIELGE
Posted: Fri Aug 11, 2017 11:05 am
by gonandkarl
Hi,
Thanks Hank Tony and Jaysen, yes I have to move on to also have a little bit of fun sailing. At my age I am going to bed every evening a bit tired from the days boat building activity and otherwise as fit as a fiddle but worry if I should not wake up in the morning I would definitely miss the splashing of my Adelie. Luckily right now the temperature in my building shed is 20 degree celsius, humidity is 60 percent and I have enough paint, so no excuse not to put it onto the boat.
Greetings from Karl
Re: AD 14 KIELGE
Posted: Fri Aug 11, 2017 8:26 pm
by glossieblack
Go Karl, you're on a roll!
Re: AD 14 KIELGE
Posted: Sun Aug 13, 2017 4:31 am
by gonandkarl
Hi,
The second topcoat glossy white is done. By the way I am using Bootslack from Tiger a local company here in Wels Austria and it costs in the 2,5 l can 43 Euros. I have a long time test ( 2 years ) of it running on my garden table and it is still fine.
(
www.tiger-coatings.us )
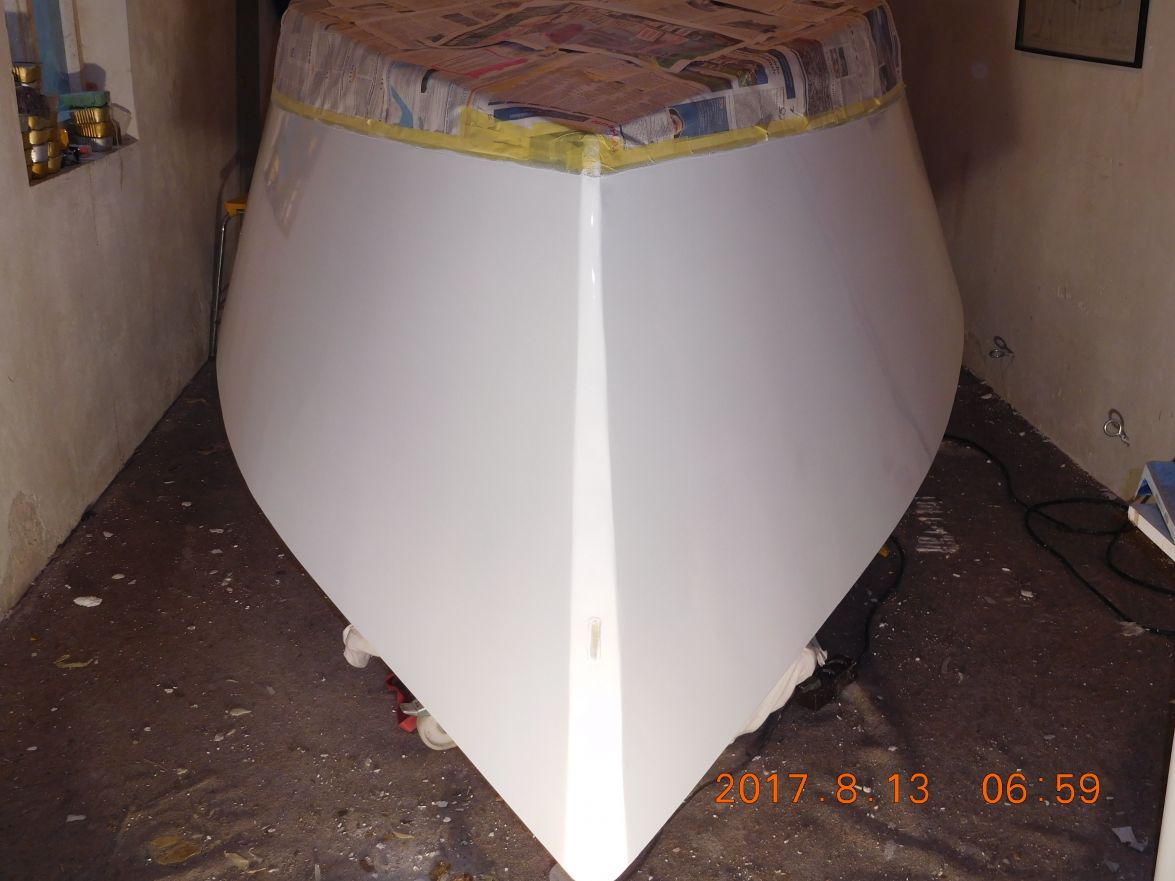
Do not think I am advertising for the company, they stop producing this boats paint for the homeworker by the end of the Year.
Greetings from Karl
Re: AD 14 KIELGE
Posted: Sun Aug 13, 2017 7:05 am
by glossieblack
Looking very nice Karl. The 3rd top coat will be the icing on the cake.
Re: AD 14 KIELGE
Posted: Sun Aug 13, 2017 7:43 am
by Jeff
Nice Karl!!! Jeff
Re: AD 14 KIELGE
Posted: Mon Aug 14, 2017 10:49 am
by gonandkarl
Hi,
Third topcoat done, so the outside painting is finished. The day would have been perfect, if I would not have gotten a 35 Euro fine for not having the dog on a leash during the morning cycle round even that it was heeling on my left. I will have to suffer under bureaucracy in Austria till death. Because of it I immigrated to South Africa as a young man and only returned to this s##t place for the sake of my childrens education and safer upbringing. Any future emigrants from Austria I would advise to go to Australia a country with a future and a place where you can sail in the sea.
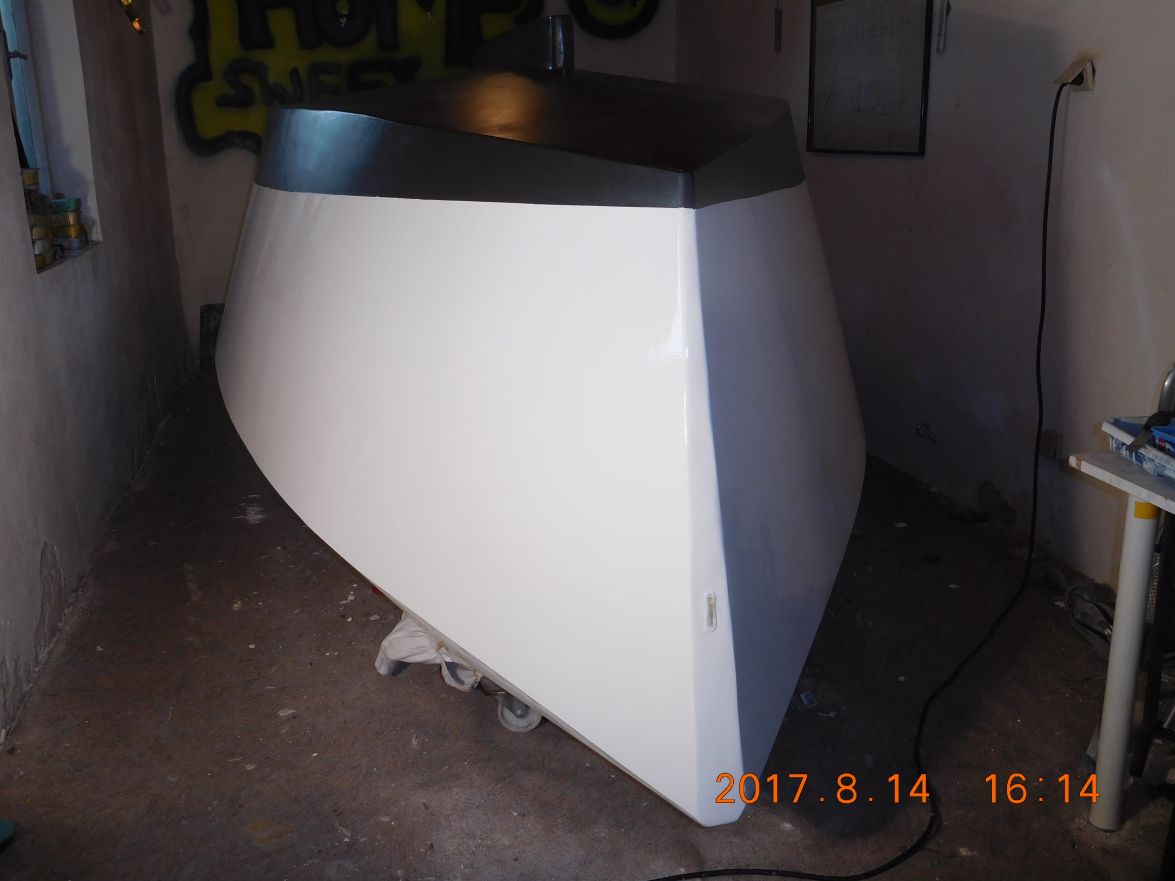
Greetings from Karl
Re: AD 14 KIELGE
Posted: Mon Aug 14, 2017 11:49 am
by Fuzz
Karl the boat looks really nice. I am sure you are ready to look at it right way up
I agree with you about Australia. That is one of the very few countries I would ever consider moving to even though I have never been there. If the boys do get a builders meet happening I might have to attend as that would let me kill two birds with one stone
Re: AD 14 KIELGE
Posted: Wed Aug 16, 2017 3:13 am
by glossieblack
Well done Karl! Finishing the topsides is a milestone. Celebrate and forget the dog botherer.
Re: AD 14 KIELGE
Posted: Wed Aug 16, 2017 4:38 am
by Eric1
Your boat looks nice! Sorry about the silly fine. The US is not much better, you have to pay a license for just about everything.
Re: AD 14 KIELGE
Posted: Wed Aug 16, 2017 7:27 am
by Jeff
Karl, I agree with everyone, very well done!! Jeff
Re: AD 14 KIELGE
Posted: Wed Aug 16, 2017 8:56 am
by terrulian
Karl, thanks for the details on your biography. Very interesting. Complaining about the government is an American tradition. Perhaps you should move here!!
Congrats on the paint!
Re: AD 14 KIELGE
Posted: Thu Aug 17, 2017 3:38 pm
by gonandkarl
Hi,
While waiting for the paint in the cabin near the bow to dry I carried on with my slipping wheels construction. I do not like to damage the precious transom with holes for slipping wheels the same as Tony said on some other thread and all the ones you can buy are usually only to support a transom weight up to 100 kg. So I decided to make my own which can be used to push the boat into the water or run out of it on a beach. I made them so that one can take them off when already sailing away from the shore. I will loosen the 4 bolts lift it over the transom take the 3 wooden parts apart take off the wheels and store them in a bunk.They are held against the transom with wing nuts on 4 bolts against 2 inside brackets standing on the deck sole in front of the drain holes. 2 bolts hold the vertical bars of the slipping wheels thru the drain holes ( temporarily blocked with 2 plugs epoxy glued to the inside bracket ) and the other 2 bolts are holding them above the transom also to the inside bracket. So there are no holes to be made into the transom. I am also planing to make the outboard motor bracket attached to the deck screws of the SB pushpit and a boarding ladder on the PS pushpit so that the transom has only the rudder fitting screws. I think the three metal pieces are called pintles and they have the only 12 screws thru the transom with nice cap nuts on the inside. My son does not understand my slipping wheels provision because I will mostly launch the boat from the trailer being pushed into the water. I consider it a second possibility to move the boat around on land or water like an RIB just for the fraction of a cost. The two wheels on a short steerable axle for the bow I have not finished yet but are also coming along nice. The first test of the whole setup will be to wheel the boat on it around the garden towards the drive way rather than on the trailer all by myself.
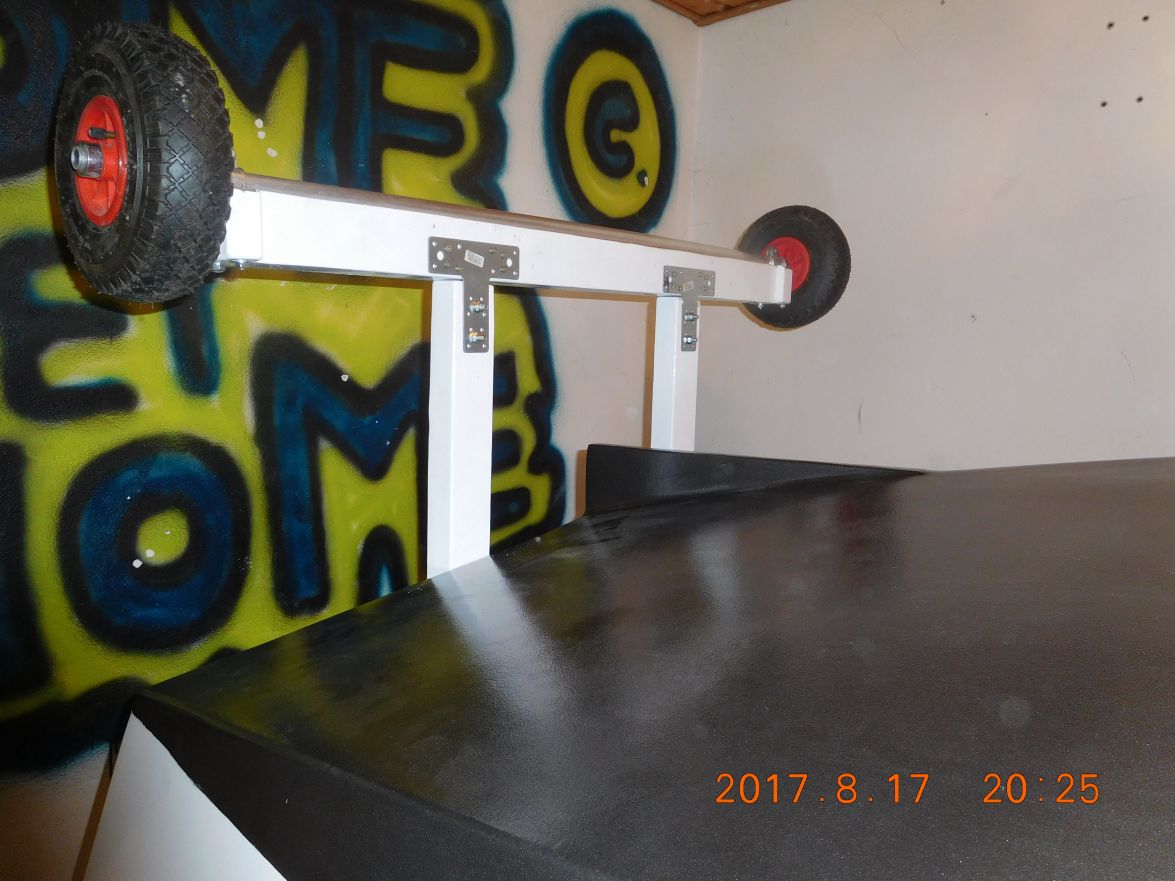
Greetings from Karl
Re: AD 14 KIELGE
Posted: Fri Aug 18, 2017 3:35 am
by Fuzz
This will be interesting to see how it all works. You sure come up with some neat ideas Karl.
Re: AD 14 KIELGE
Posted: Sat Aug 19, 2017 12:37 pm
by das boot
You are getting there not much left to do before you launch KEEP UP THE GOOD WORK
Re: AD 14 KIELGE
Posted: Sun Sep 10, 2017 10:55 pm
by snook
just beautiful, you have such a great mind for problem solving. Terrulian called it, that life vest demo was just great fun and gets my vote.
Karl, let me be the first to say, you are an Austrian badass!
thanks for being Karl from Austria.
eric from florida
Re: AD 14 KIELGE
Posted: Mon Sep 11, 2017 2:33 am
by gonandkarl
Hi,
Someone wrote the more one is on the computer updating the building thread and reading all the other threads the less one will get on with the boat building. I can only say this is really true with the exception of Glossieblack he gives us a perfect update and achieves in one day as much on his build for which I would need a month. The moral of the story is that I have to forget the splashing now in September but will have it for sure next May. It is already too cold and I am still sanding the inside cabin with 1. flipping, 2. hanging centreboard, 3. fitting deck hardware, 4. adapting to the trailer and 5. rigging still to be done it just will not work out this month. But I am confident that I can do these 5 tasks over Winter.
The cabin near the bow is finished and was inspected yesterday by my granddaughter Lea for whom I am building this boat:
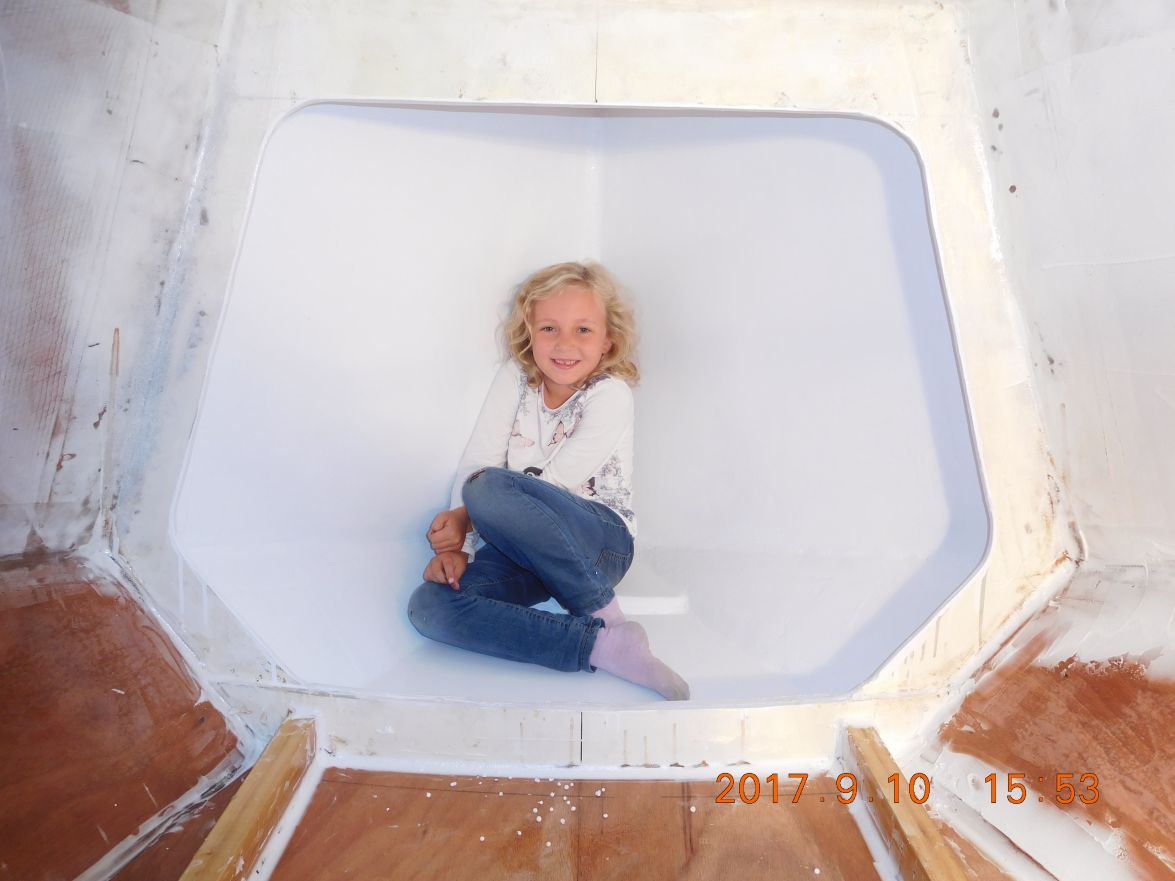
The rest of the cabin still needs sanding and painting:
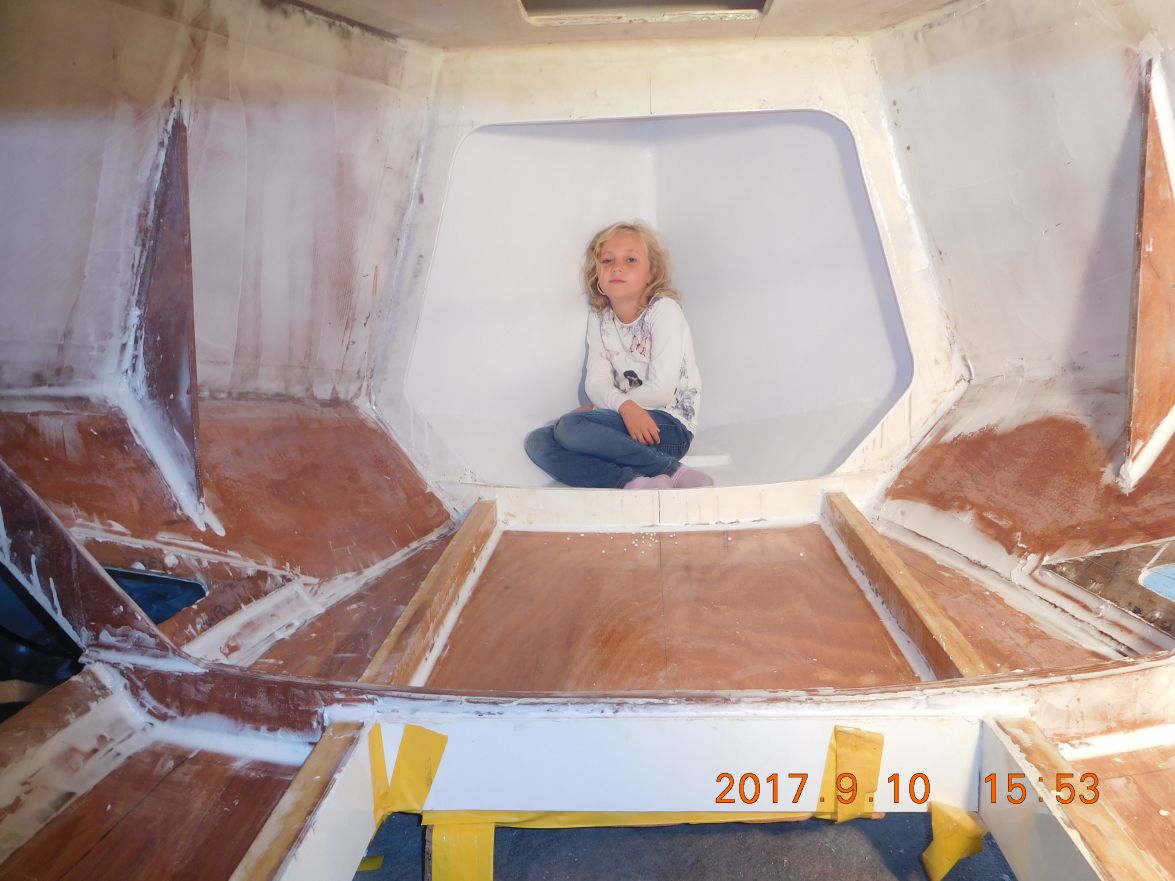
Greetings from Karl
Re: AD 14 KIELGE
Posted: Mon Sep 11, 2017 5:01 am
by glossieblack
Greetings Karl,
It looks as though we'll be launching around the same time next year.
Smart decision to not make life a misery trying to launch this year. Even if you turned yourself inside out and made it, you'd only get a day or two on the water before winter forced you to hibernate.
Re: AD 14 KIELGE
Posted: Mon Sep 11, 2017 6:31 am
by Jaysen
How do you eat an elephant?
One bite at a time.
Not sure who it was around here that said that in response to a comment from a builder about the overwhelming aspect of completing a build, but it has stuck with me. It really does apply to just about any big job we have to do. Pick a task then do it. It's exactly how you've gotten this far in your build. You're almost done. Just a few more bites.
As to glossiblack and his build... I'm still not convinced he's a human. He has to be a demigod at a minimum.
Karl, that picture of your granddaughter sitting in the bow with a smile on her face is priceless. I can see why you are building her a boat. I think I'd do the same.
Re: AD 14 KIELGE
Posted: Mon Sep 11, 2017 3:50 pm
by Eric1
Karl you should be proud! That is a sweet looking baby girl!!
Spring will come soon enough and you and that pretty granddaughter will be sailing in style!
Re: AD 14 KIELGE
Posted: Fri Sep 29, 2017 2:20 pm
by gonandkarl
Hi,
I do not know about others but there is one thing I really do not like in building my boat and that is sanding. Yesterday I sanded the cabin in the morning and another 2 hours in the afternoon and because of the lot of small places I had to do it mainly by hand with the exception of some use of the finger wide electric sander. This morning I still thought I will finish sanding the cabin today but then I spent a lot of time reading in my Practical Junk Rig book about the halyard because I actually planned to use a single part halyard. But my back was playing up again a bit last week, so I read everything about halyards with more parts and then I wanted to try the 3 part halyard and that is a weight I can still pull up easily. So no sanding today but rather halyard finalising.
The local pet pinguin Sunny did insist to lie on its usual place on the drive way lawn.
The top 2 panels are still a bit floppy but I hope this will disapear when the rigging is complete with the sheet and yard and luff hauling parrels. if not then it has to stay floppy and I put it down to a minor mistake I made in sewing the sail.
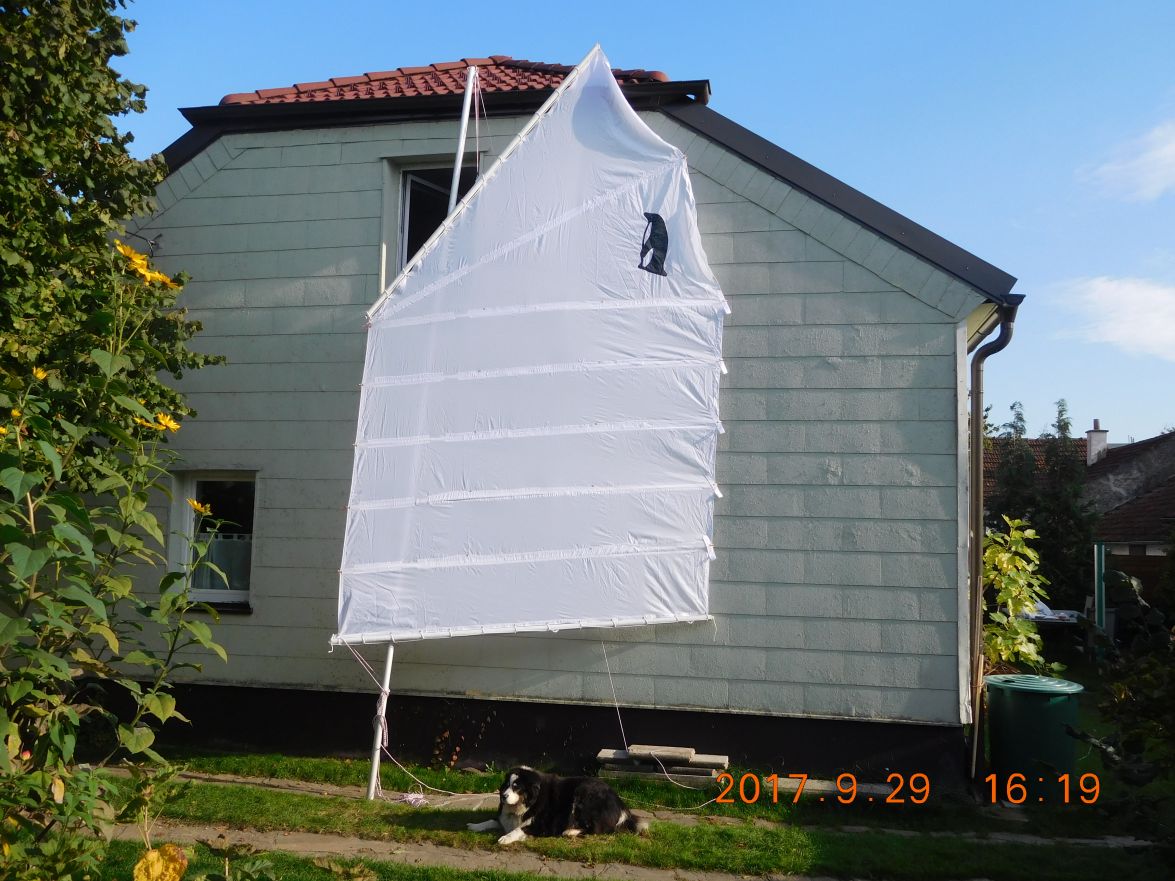
Greetings from Karl
Re: AD 14 KIELGE
Posted: Fri Sep 29, 2017 3:02 pm
by terrulian
Karl,
I believe you can run a peak halyard to the after end of the gaff. This can be a loop that attaches through the middle of the gaff and the end and then down to the deck, or a variation of that. That should help firm up the leech at the top. As it is, I don't see that rigged.
Re: AD 14 KIELGE
Posted: Fri Sep 29, 2017 3:58 pm
by Jeff
Karl, very nice sail but an excellent looking pup in front of it!! Jeff
Re: AD 14 KIELGE
Posted: Fri Sep 29, 2017 4:04 pm
by Netpackrat
gonandkarl wrote: ↑Fri Sep 29, 2017 2:20 pm
I do not know about others but there is one thing I really do not like in building my boat and that is sanding.
I am pretty sure there is something fundamentally wrong with people who actually enjoy sanding.
Re: AD 14 KIELGE
Posted: Fri Sep 29, 2017 4:42 pm
by terrulian
I am pretty sure there is something fundamentally wrong with people who actually enjoy sanding.
I must admit that although I don't like it, I found it pretty amazing what you can accomplish if you have the patience. I think I used my whole lifetime's worth of patience up on that boat, though.
Anyway, now I know that if I really want to, I can make things look right.
Re: AD 14 KIELGE
Posted: Fri Sep 29, 2017 4:50 pm
by cape man
Karl,
Watching with interest. Beautiful granddaughter! If pulling the top of the gaff rig up won't straighten out that top panel, you might consider pulling and sewing a pleat to flatten it. Won't look as uniform as your current panels, but the top of that sail is where you will get a lot the performance...or not. I would follow terrulian's advice first and then decide on the pleat option after you see what she does next spring.
90 degrees Fahrenheit here today...wish it was getting too cold for boat building...
Re: AD 14 KIELGE
Posted: Sat Sep 30, 2017 7:26 am
by gonandkarl
Hi,
Thank you all for the good advice about my 2 top panels. I like Tonys suggestion of a loop but I am sure once the sheet is attached to all battens except the top one the sail will be nicely pulled back and with the yard hauling parrel I can pull the yard sling plate closer towards the mast and with the luff hauling parrel attached to the top 3 battens I can pull the sail a bit back. For yesterdays test there were no parrels just the halyard and I used a double block at the masthead and a single block with becket at the yard and I am happy to be able to raise the sail with the strength that I still got. At the end of the yard I can mount another single block and get the desired loop before the line goes up to the double block and down to the deck. And if that will not work I take Graig s idea of stiffening the 2 top panels with sail cloth. But I wait now until spring time and will test from the cockpit with the mast on the boat sitting on the trailer and all the complete rigging attached via deck hardware.
So and today it is sanding the cabin again and it is really true the patience which I did not have in my whole life I am developing while getting a small area nice and smooth. I just do not like the idea that I start painting the inside and only see the flaws in the surface magnified by the glossy paint. I plan to finish sanding the cabin today but if I do not get finished it is no big thing.
Greetings from Karl
Re: AD 14 KIELGE
Posted: Sat Sep 30, 2017 9:54 am
by Bogieman
Karl,
That's great to hear. Looking forward to seeing more pics too.
Bogie
Re: AD 14 KIELGE
Posted: Sat Sep 30, 2017 9:55 am
by terrulian
Karl,
In looking through photos and drawings of junk rigs I see they don't do what I suggested, which is used on a gaff rig. I don't know that it wouldn't work though.
But another idea I had was moving the attachment point slightly aft, which would raise the after end of the spar just a little and tension the leech.
Others' suggestions such as re-cutting the sail may also work.
I admit, I have no experience with a junk, I just love rigging...so...
I would really enjoy messing around with this so keep us abreast of how things work out for you.
Re: AD 14 KIELGE
Posted: Sat Sep 30, 2017 10:07 am
by Jaysen
The problem with the topping lift (I think that's the right one...) on junks is that the individual spars/battens between panels really complicate how it gets rigged up.
I "think" the trick is moving the halyard point out (toward luff) on the topmost spar while maintaining the mast yokes at the 15-20% of width mark. I gave up on junk as it was impossible to find locals with a clue so triple check my memory (it seems to be going downhill of late).
Karl, I'll drink a few every night to help you recover from sanding.
Re: AD 14 KIELGE
Posted: Sun Oct 08, 2017 12:44 pm
by gonandkarl
Hi,
My steps are getting shorter and the progress on the boat is accordingly slow but today on a Sunday where I originally do not like to work I had an attack of getup and go and finished the first prime coat of the cabin.

It took me so long that lunch only happened at 2 pm with a few moans from my wife. And now that autum is really there I already have to put the gas heater on in the shed to have a nice 18 degree temperature.
I have all the excuses for my slow progress at the ready:
My garden needed to be made ship shape for the Winter with cutting the lawn. Then I made a big square box for the fig tree which is now planted in it and will grow in the garden. The first three years of its life it was in a pot and I dragged it always into the boat shed over the Winter. I am not sure that the lot of figs on it will still ripen because it did not have enough sun being hid behind a plum tree which did not carry any fruit. That was its death penalty and I fell the tree as it was also in the way of the boats path towards the driveway in spring. Then I noticed that one bulb of the dim light on the car was bust and I had to replace it with my broad hands fumbling under the bonnet for at least half an hour. And the rest of the time I was most probably lazy or driving my wife to the library or hairdresser or pedigree appointment to the optician a short hospital check up and so on and while I was dawdling my 3 small kids turned 36 38 and 40 the other day. Because their birthdays are very close together the same as the 3 grandchildren birthdays we celebrate all of them on October 15th.
By then I want to have prime coat 2 in white and 3 again in gray and then 3 coats of glossy white paint finished in the cabin.
Greetings from Karl
Re: AD 14 KIELGE
Posted: Sun Oct 08, 2017 2:21 pm
by cape man
Good job Karl! She will be absolutely beautiful when done.
Re: AD 14 KIELGE
Posted: Sun Oct 08, 2017 3:42 pm
by peter-curacao
Looks great Karl.
Re: AD 14 KIELGE
Posted: Sun Oct 08, 2017 8:38 pm
by terrulian
Attacks of get-up-and-go are in rare supply these days!
Re: AD 14 KIELGE
Posted: Mon Oct 09, 2017 5:57 am
by Eric1
Best Wishes Karl!! The boat is looking great!
Re: AD 14 KIELGE
Posted: Mon Oct 09, 2017 12:17 pm
by Bogieman
Very nice, Karl!
Re: AD 14 KIELGE
Posted: Fri Oct 13, 2017 9:28 am
by gonandkarl
Hi,
Today on Friday 13th I did not really exert myself and rather put together my now finished 2 part launching dolly. I painted it yesterday after the cabin got its first topcoat and for a launching dolly one topcoat after two prime coats is enough. I know making such a thing months before the launching is not the done thing but I just felt like having it although I hope to launch the boat mainly from the trailer. So here it is on the garden table
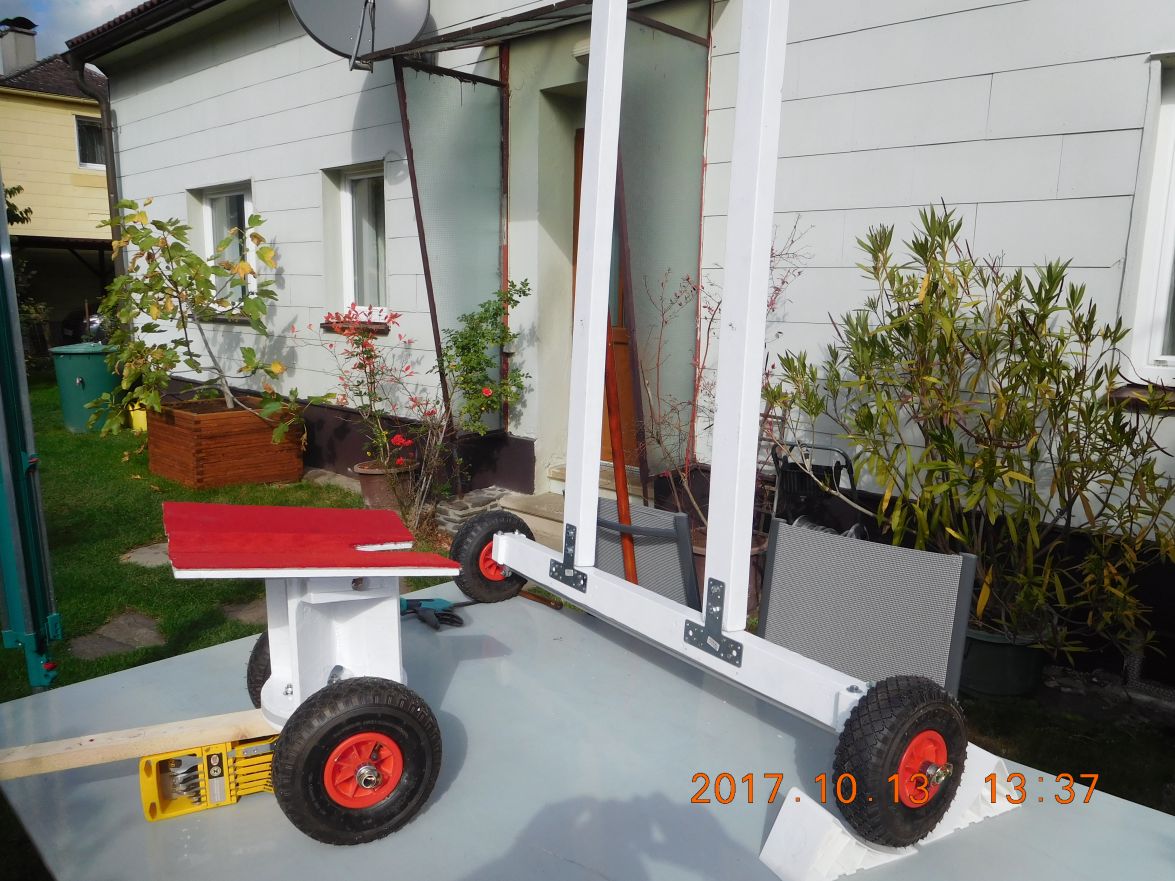
and that the boat in the shed is not getting jealous to the garden table I also put it on her too and then it looks like this. When in real use the front part with its wheels will get fixed with a strap on both sides of the boat to the chain plates so that it stays firm not only by the weight of the boat. The chain plates will be used for it because my mast will be unstayed and so they have besides fender ropes a second reason for being on the boat.
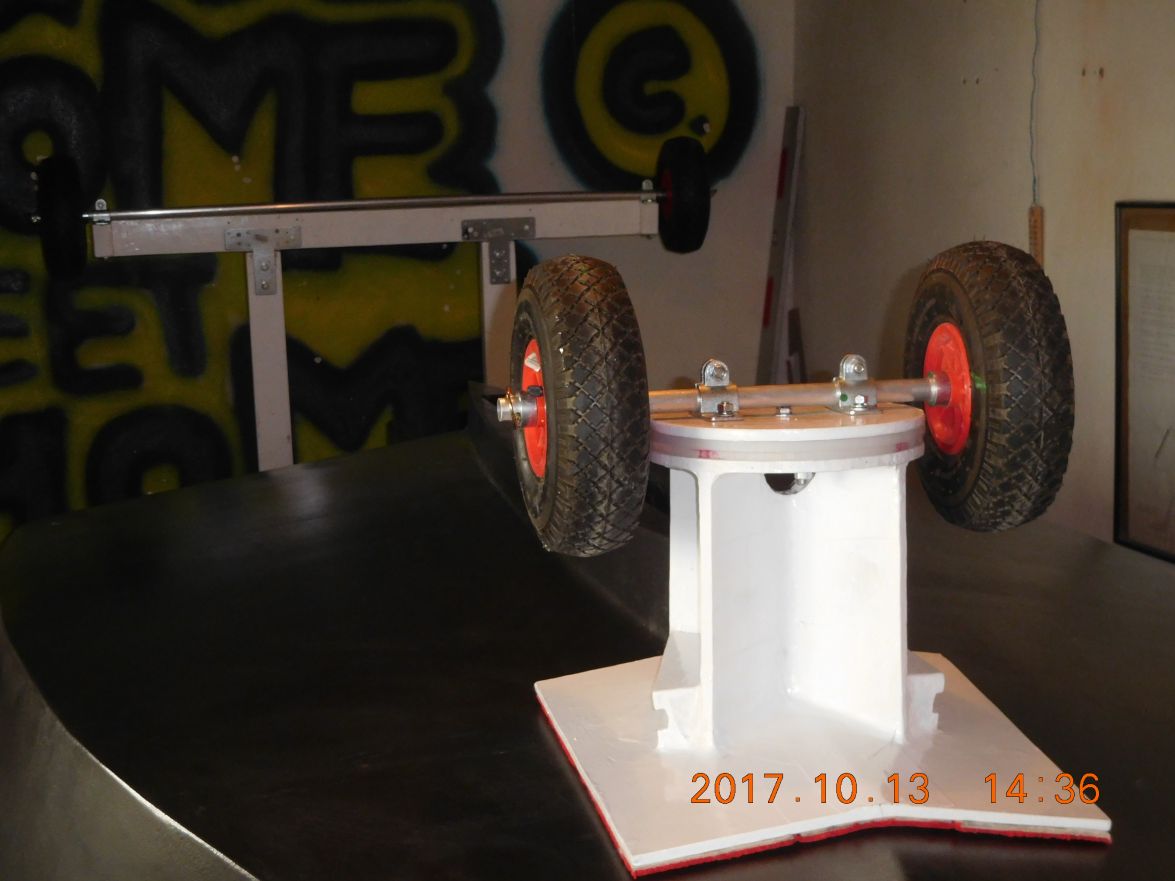
And now that the postman brought the November issue of Practical Boat Owner no mishap on this Friday can occur to me because reading it I will end the day in leisure.
Greetings from Karl
Re: AD 14 KIELGE
Posted: Fri Oct 13, 2017 9:57 am
by Jeff
Very nice Karl!!! Have a good weekend, Jeff
Re: AD 14 KIELGE
Posted: Fri Oct 13, 2017 10:10 am
by Jaysen
Karl, how are you securing the front dolly to the hull?
I really like this idea. Looks like a real winner for the lighter weight on the bateau sailing hulls. I'll have to see if I can copy that for my fat girl.
Re: AD 14 KIELGE
Posted: Fri Oct 13, 2017 10:24 am
by terrulian
Yes, I'll be interested too.
Your boat is quite a bit more massive than mine and I don't need anything that substantial but I enjoy all of the creative engineering on this site.
You're going to need a tongue on the dolly, no?
Re: AD 14 KIELGE
Posted: Fri Oct 13, 2017 11:59 am
by gonandkarl
Hi,
It will be fixed like I said on my previous post with 2 straps towards the chain plates. Here is the picture but as I am still busy painting the cabin the chain plates are not yet mounted on B frames and I let them just hang down next to the hull for the picture:
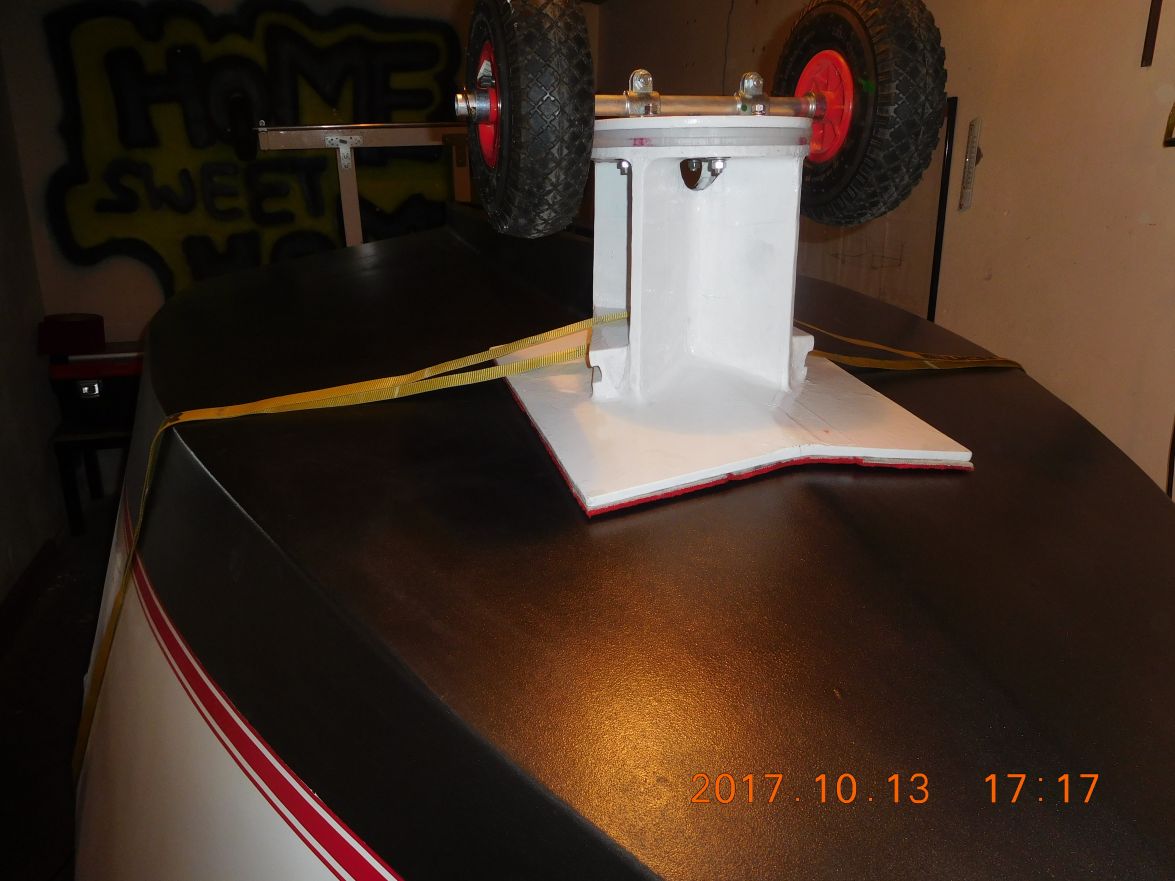
The following picture shows that these straps will hold it back to the keel shoe:
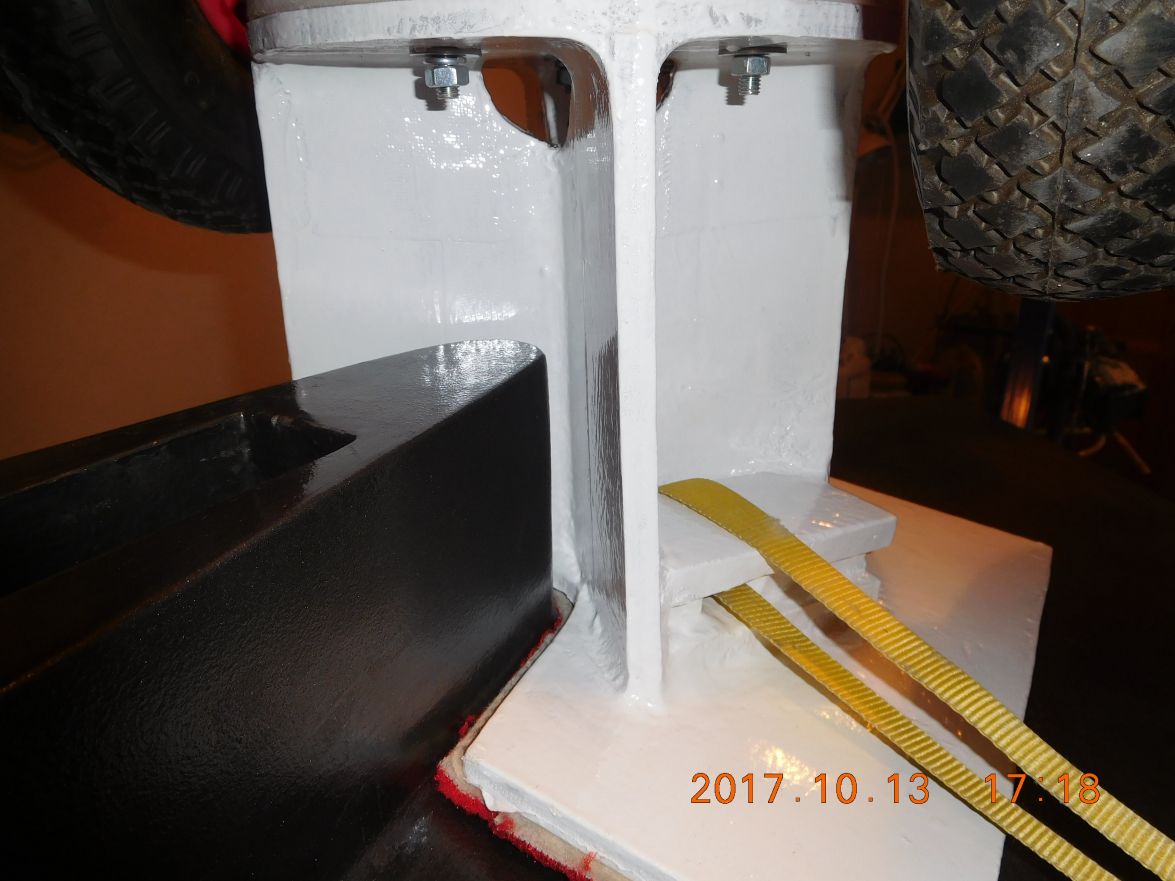
Yes I am planning some tong or just a long leash attached to the axle next to each wheel to steer in any direction with friends or relatives pushing the boat at the transom. The wheels can turn around completely ( 360 ) because the original idea from an English chaps article in PBO could only turn 45 degrees each side and he said that to be a mistake which he found out by manouvering his 400 pound dinghy lots of times to change direction.
Greetings from Karl
Re: AD 14 KIELGE
Posted: Fri Oct 13, 2017 12:12 pm
by Jaysen
That second picture is what I was missing.
That will be slick. Can't wait to see it in action
Re: AD 14 KIELGE
Posted: Fri Oct 13, 2017 9:13 pm
by Bogieman
Re: AD 14 KIELGE
Posted: Sat Oct 14, 2017 11:42 am
by peter-curacao
gonandkarl wrote: ↑Thu Jun 29, 2017 2:52 am
Hi,
Because it was a hot day yesterday and I was in no mood to sand so I went for a short trip to my daughters house to see my grandchildren and my grandson then took the following video of my life jacket test in their pool. The test worked fine and the funny thing was I could not find any button to let the air out again and in the description there was also no mention of how to let the air out. After a few minutes I realized that the mouthpiece which can be used to put in more air has a valve which one must press to let the air out. I would definitely not drown with this vest but rather be strangled by the tightly blown up ring around the neck.
[youtube]
https://youtu.be/h3FDF2FweMM[/youtube]
And now I have to find out where do I get a replacement co2 cylinder for my life jacket that it is loaded again.
Greetings from Karl
Haha just saw this this when going through your thread, made me smile big time
hilarious
Beautiful spot btw, cant wait to be in Austria again coming December
Re: AD 14 KIELGE
Posted: Sat Oct 14, 2017 11:44 am
by peter-curacao
Try to find it in your thread is that steel or wood build? looks very cool
Re: AD 14 KIELGE
Posted: Sat Oct 14, 2017 2:22 pm
by gonandkarl
Hi Peter,
The front launching dolly is naturally from leftover marine ply 10 mm thick and with 2 round hard plastic plates cut from 2 Ikea kitchen cutting boards (Euro 1.70 each ) between the part that is strapped to the boat and the axle part with the 2 wheels. There is one no 10 bolt in the centre holding it together and allowing the bottom part to swivel 360 degrees. I stuck the wooden pieces together with epoxy and woodflour and glassfibre tape on all joints and I think it turned out as strong as an elephants foot stool. The 2 back supports for launching are made of spruce wood and an alu axle underneath the cross beam. If you are in Austria in December maybe we could meet, we can talk boats and our better halfs Dutch gossip and eat drop.
Greetings from Karl
Re: AD 14 KIELGE
Posted: Sat Oct 14, 2017 3:59 pm
by peter-curacao
gonandkarl wrote: ↑Sat Oct 14, 2017 2:22 pm
I think it turned out as strong as an elephants foot stool.
You can say that if I could have mistaken it for steel, very well done sir
gonandkarl wrote: ↑Sat Oct 14, 2017 2:22 pm If you are in Austria in December maybe we could meet, we can talk boats and our better halfs Dutch gossip and eat drop.
Haha my better half is a Spanish speaking Dominican so not much Dutch gossip there
would be cool meeting though but we are staying in Wien almost 300 km east of you and I didn't reserve a car because we are only there for 4 nights, but I always wanted to go back to Klopeinersee in summertime so maybe then is a better time since I would do everything by car then
Re: AD 14 KIELGE
Posted: Fri Oct 20, 2017 2:24 pm
by gonandkarl
Hi,
Today I fixed 2 wooden ledges against the walls of my boat building shed. Then I cut a steel pipe which held the TV areal in the eigthys on the house roof to the exact length so it fits just between the walls. The idea behind is to carry my electric winch ( or hoist ) and lift the transom of the boat.
And then I forgot that Jacques said the AD14 will right itself quickly after a knock down in the sea. When I lifted the boat at the transom a bit off centre a very quick flip of the whole boat happened in one second.
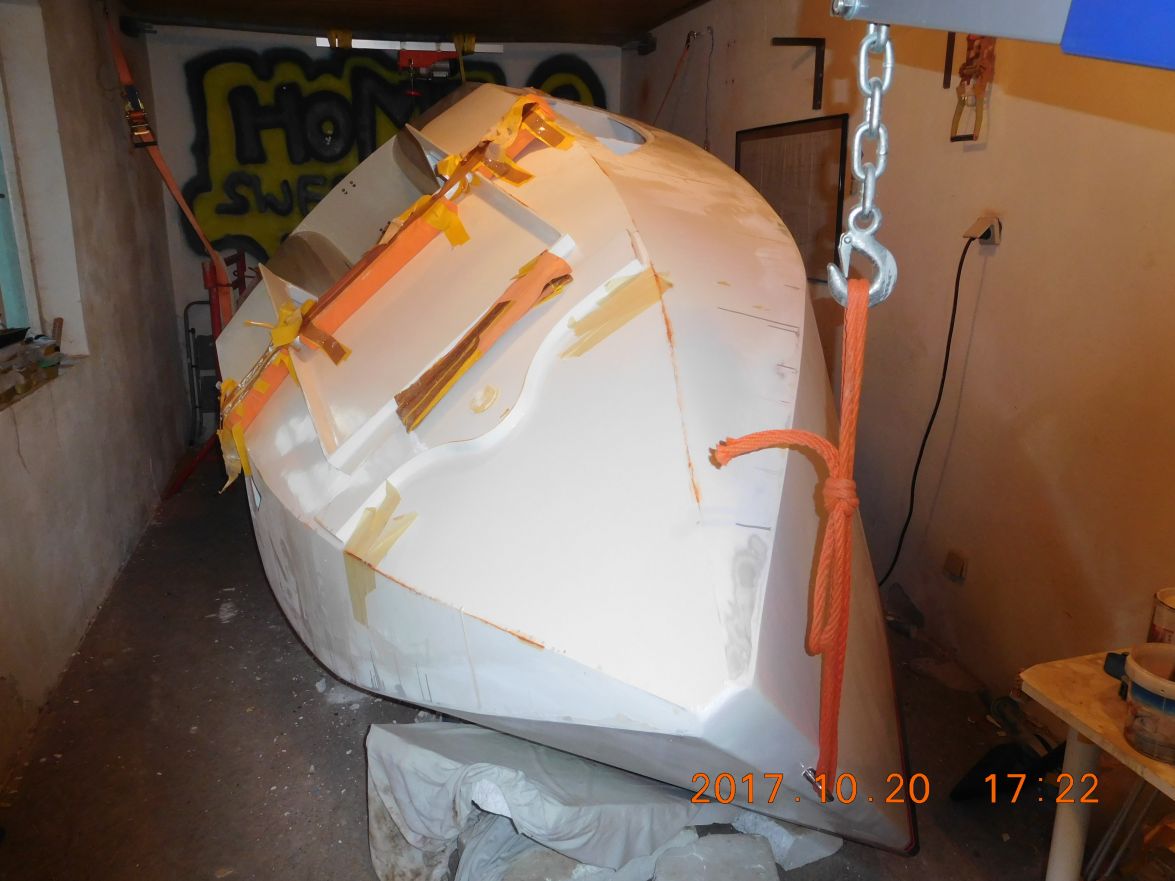
This was not my intention but luckily it went well and shocked me a bit as being just an onlooker who swallowed and then I sat down and started analysing why it flipped all of a sudden. I hooked a rope to the hoist which I looped through the 2 drain holes in the sole corners of the cockpit at the transom. This 2 holes are only 56 cm apart and that is like lifting the boat on a straight line as it was attached at the bow eye held up by my crane and at the transom middle by my electric hoist. So the test of the self righting Adelie was very successful without any centreboard and water. I then remembered a family holiday in Croatia where I wanted to rent a sail boat for my family. I stepped into the middle of the boat and ended in the water after the second try I was in the water again and only then I realized they hooked the bow eye and and transom line to a pole in the sea during flood and then I come along at low water and learned that a boat hanging on 2 lines cannot be entered. That was in the late eightys and I forgot the learned lesson till todays flip.
I hope all of you are also having a lot of fun building your boats because there is never a dull moment.
Greetings from Karl
Re: AD 14 KIELGE
Posted: Fri Oct 20, 2017 2:48 pm
by terrulian
I'll bet that was a scary moment!
Re: AD 14 KIELGE
Posted: Fri Oct 20, 2017 4:35 pm
by Jeff
Karl, missed you this year at the get-together!!! Jeff
Re: AD 14 KIELGE
Posted: Fri Oct 20, 2017 5:37 pm
by gonandkarl
Hi,
It was scary enough and that is why I sat for a long time in my directors chair and let it sink in and was thankful that the boat did not break the 2 lines or the only strap I had as safety. My personal safety was given as the electric hoist has a remote device with which I was standing in the rooms corner.
Greetings from Karl
Re: AD 14 KIELGE
Posted: Fri Oct 20, 2017 5:47 pm
by peter-curacao
She looks good
Re: AD 14 KIELGE
Posted: Sat Oct 21, 2017 5:56 am
by glossieblack
Happy birthday Karl.
Re: AD 14 KIELGE
Posted: Sat Oct 21, 2017 10:21 am
by Jeff
Happy birthday Karl!! Hope you have a good day!! Jeff
Re: AD 14 KIELGE
Posted: Sat Oct 21, 2017 1:17 pm
by Bogieman
Happy birthday Karl!
Re: AD 14 KIELGE
Posted: Sat Oct 21, 2017 1:22 pm
by Fuzz
Happy birthday Karl. I missed your smiling face at this years meet. While eating a meal Craig, Patti and I talked about how we were missing our meal time buddy.
Re: AD 14 KIELGE
Posted: Sat Oct 21, 2017 2:58 pm
by bateau-webmaster
Happy Birthday! Hope you had Fun!
Re: AD 14 KIELGE
Posted: Sun Oct 22, 2017 2:21 am
by gonandkarl
Hi,
Thank You all for the birthday wishes and yes I did have fun yesterday with my whole family coming together for lots of talks and good food and a nice birthday cake baked by my wife one day after she came back from a 3 day hospital stay with hopefully nothing serious coming again in the future. Naturally the boats in the garden and shed were visited and looked at and the critical eye which all my 3 kids inherited let them tell me what I still have to do over again or better. Even the dust and mess in the workshop was mentioned and I promised cleaning up before splashing time with a picture in my mind of glossies floor from which you can eat. Nevertheless I enjoyed being completely lazy for a whole day even sitting in the sun in a garden chair in the morning watching my son uprooting a tree for me because of my back problems and strength I would not have been able to do that anyway any more and my granddaughters could eat the first ripe figs from the tree I transferred the other day from a pot into the garden.
I was also thinking back a Year ago at the previous meet in Homosassa meeting all you guys. I appreciate your friendship and also all your supporting and encouraging advises.
Life could not be any better.
Greetings from Karl
Re: AD 14 KIELGE
Posted: Sun Oct 22, 2017 8:38 am
by Corto Maltese
Congratulations dear neighbour!
Don't clean your workshop to much. A boutbuilders shop has to be messy
Cheers,
Dario
Re: AD 14 KIELGE
Posted: Sun Oct 22, 2017 10:08 am
by Jeff
Nice comments Karl!! Hope your wife is doing well and really glad you had a fun birthday with the whole family!! Jeff
Re: AD 14 KIELGE
Posted: Thu Oct 26, 2017 5:10 am
by Eric1
Happy Belated Birthday Karl. Sorry I'm so late and I missed the party.
Re: AD 14 KIELGE
Posted: Thu Oct 26, 2017 9:48 am
by gonandkarl
Thanks Eric1,
There was not really a party but the nice thing is that I am still around at 71 and enjoy seeing all family members. When I was young I was so interested in sky diving, marathon running, every weekend being on the coast of Durban or in Lourenzo Marques ( Maputo today ) the capital of Mozambique as it was called then and missing no party and the least thought I spent was on having a family with kids and everything that goes with it. But if you burn the candle on both ends like I did with hard work and partying you naturally have a breakdown in my case it was a pulminary embolism and then I started thinking and became a family man with 3 kids and by now there are also 3 grandchildren and therefore the boat building planned to start already in 1977 was postponed to 2013. It is still fantastic building boats now although the original plan was postponed by 36 years. The feeling of it would not have been any different if I built them in the seventies with the one difference that the future was not so foreseeable as now and the strength I had then is also gone. Does not matter I love reading about all your boat building activities everyday and I got the advice "How do you eat an elephant ... bite by bite " exactly like that my sail boat will be finished in Spring. Right now I am using again the sewing machine to sew white pieces of linen over my orange transportation straps with which I juggle the boat around in the shed. You might think I just want to fill the time of my days but there is a sense to the madness. I used the orange straps on the boat and the already painted deck was all orange at least near the rub strakes, so they need to be covered with something white and as I want to use them later on on the trailer as well it is not completely useless. My wife sees it different because I occupied the dining room for the last 2 days with sewing machine and general mess that goes with working for ones boat like using all scissors of the house, double sided tapes, sharp knives, clamps to hold the material to the diningroom table while cutting oh I could go on but then I mentioned Tony s Steam Engine thread and any plans in that direction got smashed immediately. Because I am still thinking using and building my PX14 as a base for a Barouche and why not a steam engine to move it.
or one like this:
I think I finish my Crazy Jellyfish alias Wilde Qualle alias KIELGE first and as it is Austria National Celebration day today I take it easy and hope to find lots of boat pictures and progress reports on the forum.
Greetings from Karl
Re: AD 14 KIELGE
Posted: Sat Nov 04, 2017 3:31 pm
by gonandkarl
Hi,
Today I finished the last hard task on the keel shoe which was putting some epoxy wood flour glue and graphite in some little gaps between shoe and hull which was still missing. When I was first gluing the shoe to the hull I was so worried that some glue might end up in the trunk so I filled the trunk with styrofoam covered with plastic. It did prevent any glue getting into the centre board trunk but it did not get smoothly to the inside connection between keel shoe and hull. Now that this is fixed I can put the boat tomorrow onto the building frame and concentrate on the last few easy tasks : Mounting of the deck cleats, deck plates and push pits and paint the floor of the cabin. This will all have to be done with the gas , electric or coal stove heater on as the temperature here is already down to 7 Celsius ( = 44 Fahrenheit )
Pictures to follow soon.
Greetings from Karl
Re: AD 14 KIELGE
Posted: Sat Nov 04, 2017 3:51 pm
by Bogieman
Re: AD 14 KIELGE
Posted: Sat Nov 04, 2017 4:10 pm
by Eric1
Good Work my Friend.
Re: AD 14 KIELGE
Posted: Sat Nov 04, 2017 6:01 pm
by terrulian
Build on.
Looking forward to more pictures.
Re: AD 14 KIELGE
Posted: Sat Nov 18, 2017 9:32 am
by gonandkarl
Hi,
Painting the deck is now also nearly finished. The SB bench side in the cockpit still needs to be painted but that was not possible yesterday because it is so narrow between the 2 benches that I would have touched the PS already painted side with my fat behind.
Here the view from the bow:
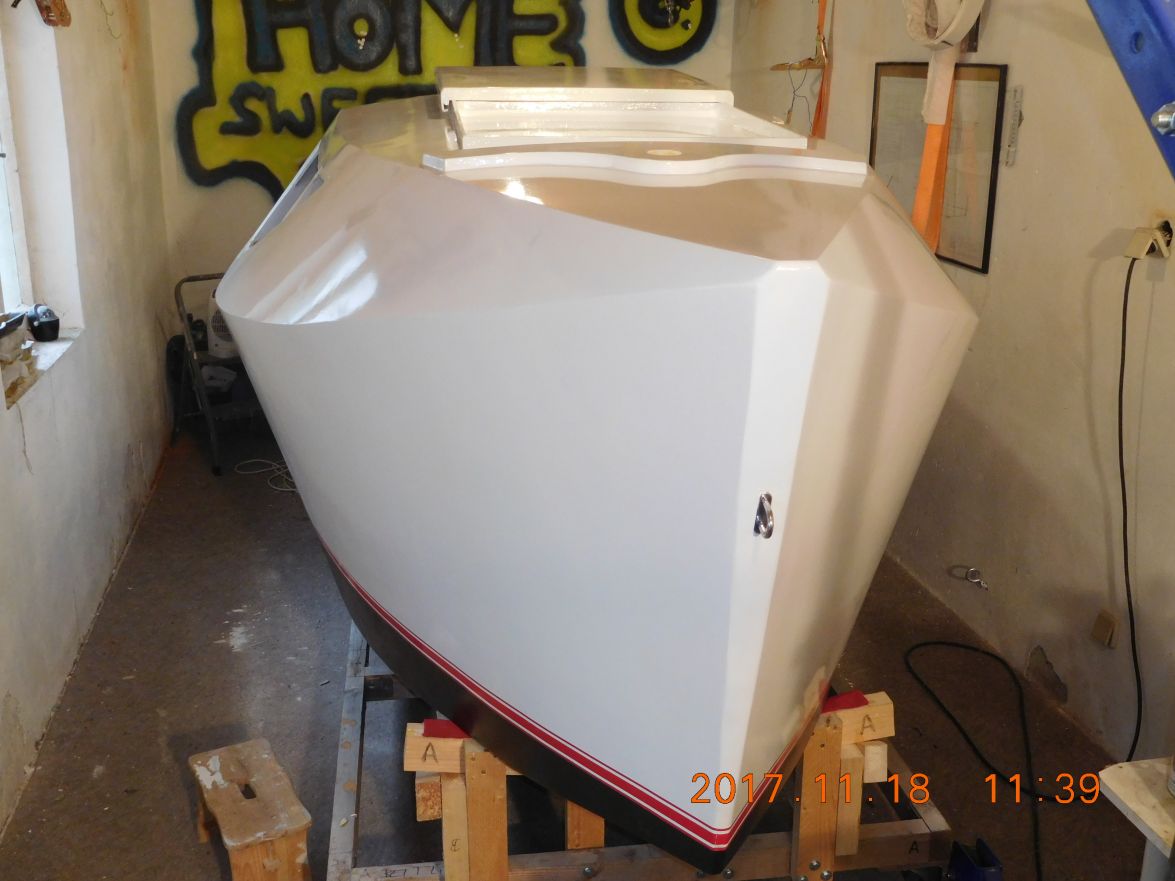
Funny the view from the transom looks as if the rudder pintles are not mounted in the midlle of it, but nothing to worry the photographer was not standing in the middle or the boat is not completely level on the 2 carpeted supports at station A and D
Here the view from the transom:
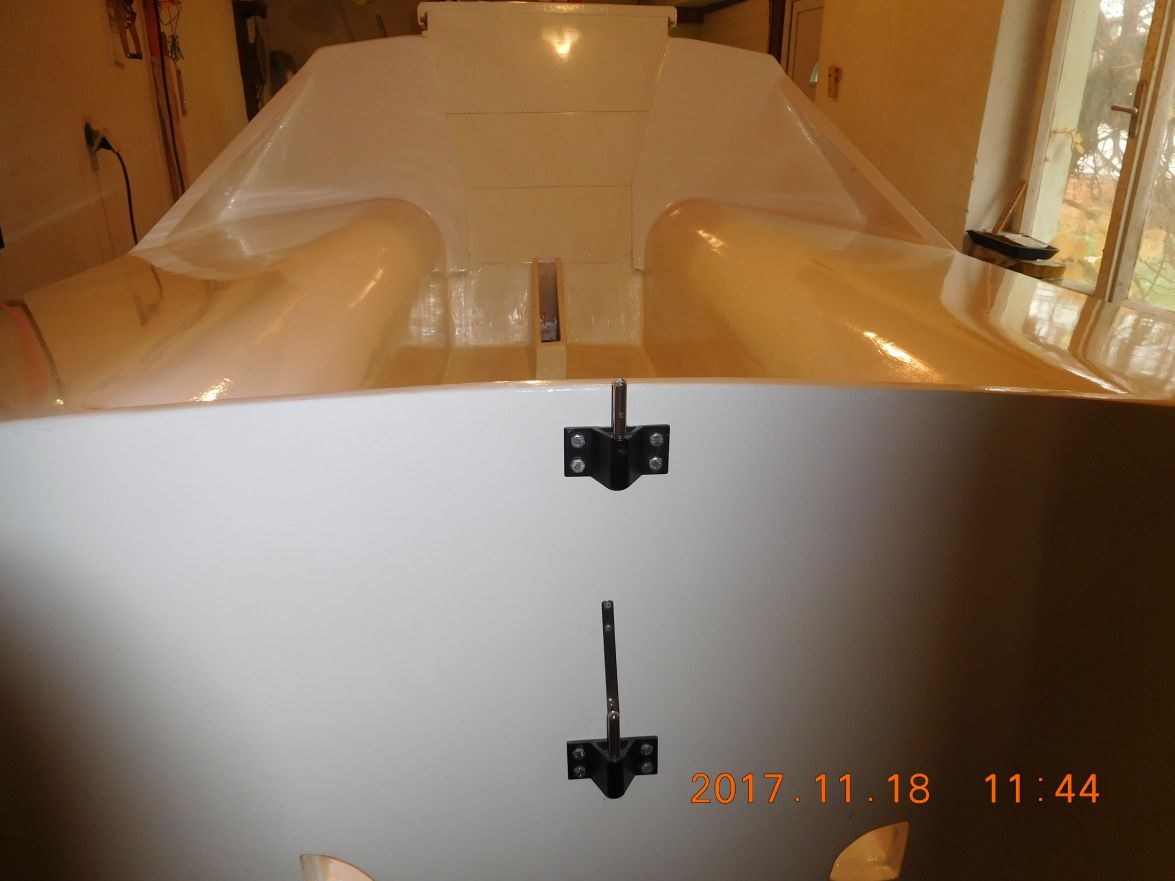
And here I managed also a funny one and that is just sunlight shining in through the window.
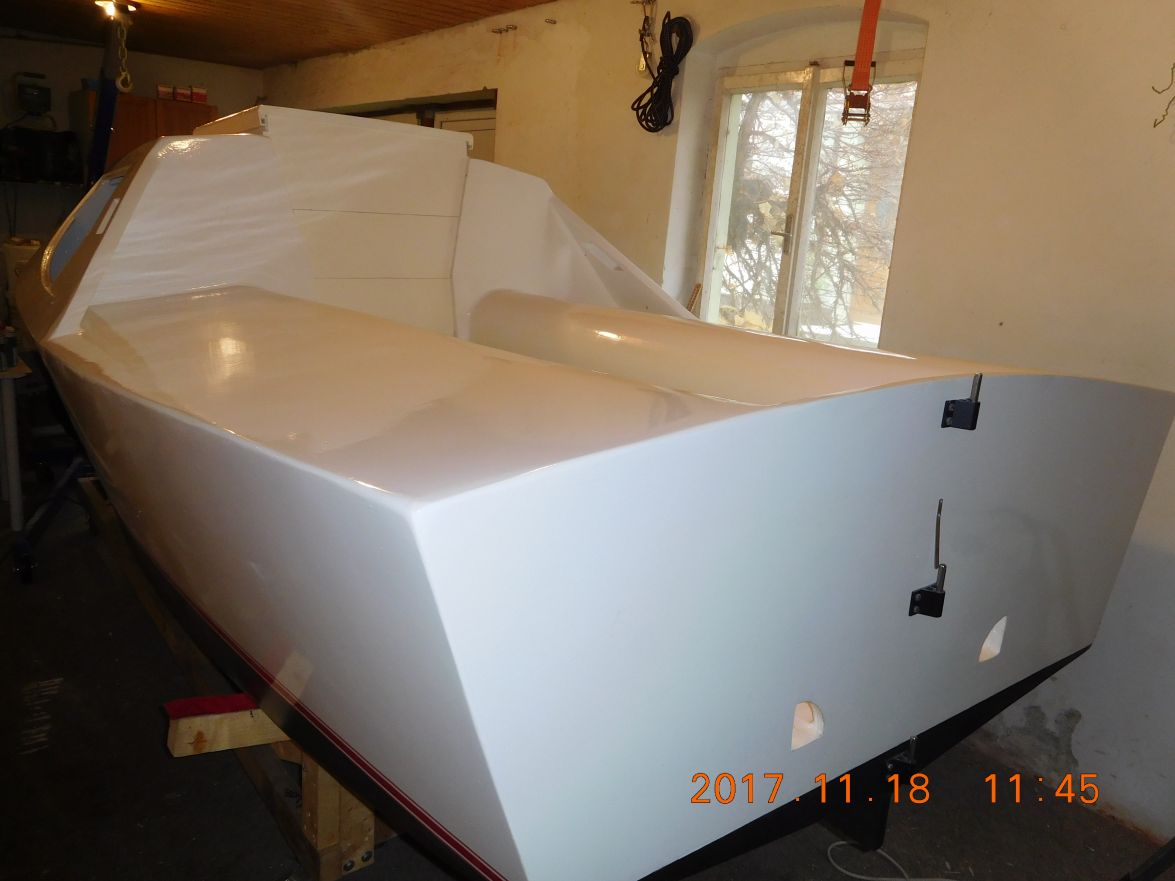
I can also see on this picture that I still need to give the washboards a glossy white Tiger paint because the glossy white ( RAL 31 ) I painted them last year was from another manufacturer and the hatch roof also gets another coat. It is not easy for a colour blind and now also snow blind old toppy after having seen to much white paint for hours.
All in all it is not perfect but I am happy with the outcome. Tomorrow I have the annual check up at my optician and the older I become the less I need the glasses for close up viewing. This lets me see any flaw left by tipping with the brush clearly. But then I walk away 4 foot and I see my nicely painted effort of the last 5 years.
Greetings from Karl
Re: AD 14 KIELGE
Posted: Sat Nov 18, 2017 10:13 am
by pee wee
That looks great, Karl!
Re: AD 14 KIELGE
Posted: Sat Nov 18, 2017 11:16 am
by topwater
looking good Karl
love the boot stripe
Re: AD 14 KIELGE
Posted: Sat Nov 18, 2017 1:54 pm
by Eric1
Beautiful work Karl!!
Re: AD 14 KIELGE
Posted: Sat Nov 18, 2017 3:15 pm
by Fuzz
Very nice Karl
You work looks really good to me. She will be ready for spring and fun times on the water
Re: AD 14 KIELGE
Posted: Sat Nov 18, 2017 4:39 pm
by cape man
Beautiful Karl! Just beautiful.
Re: AD 14 KIELGE
Posted: Sat Nov 18, 2017 4:57 pm
by peter-curacao
Re: AD 14 KIELGE
Posted: Sat Nov 18, 2017 7:12 pm
by Jeff
Karl, beautiful work!!!! Jeff
Re: AD 14 KIELGE
Posted: Sun Nov 19, 2017 1:09 am
by Doug N
That is a gorgeous boat. Very striking. Wow.
Re: AD 14 KIELGE
Posted: Sun Nov 19, 2017 12:34 pm
by terrulian
Karl, I would also compliment your work but am concerned you might start to get a big head.
Re: AD 14 KIELGE
Posted: Sun Nov 19, 2017 3:02 pm
by glossieblack
Re: AD 14 KIELGE
Posted: Sun Nov 19, 2017 11:39 pm
by das boot
Looks real good something to be proud of you did a real good job
Re: AD 14 KIELGE
Posted: Mon Nov 20, 2017 3:03 am
by gonandkarl
Hi,
Thank you all my friends for the compliments and Tony is right but only paint fumes and smell got to my head and therefore I am glad to smell clean fresh air for the next few days before I tackle the last paint job the cabin floor from frame A to C. After that I hope it will be clear sailing through mounting the deck hardware. This is my plan till the end of this year leaving the fitting to trailer and bunks and final sail rigging to the New year before next May.
Greetings from Karl
Re: AD 14 KIELGE
Posted: Mon Nov 20, 2017 8:29 am
by Bogieman
She looks great Karl!
Re: AD 14 KIELGE
Posted: Mon Nov 20, 2017 9:17 pm
by das boot
I was going to send you pictures on how i did my sail rigging if you still want them let me know once I saw you were using a lung said i did not know how they work but I can still send them before I put my boat in storage for the winter
Re: AD 14 KIELGE
Posted: Tue Nov 21, 2017 1:51 am
by gonandkarl
Hi George,
You did send me a picture of a hand drawing of the sail rigging per email, but if you could send me also pictures of your deck fittings near the mast it would help me for sure. I do not understand what you mean me having used a lung ? I will concentrate today on preparing the cabin floor for painting. The last bit of painting where I need to switch on the gas heater for a couple of days.
Greetings from Karl
Re: AD 14 KIELGE
Posted: Tue Nov 21, 2017 9:00 am
by terrulian
Karl, I'm guessing he meant "lug" rig.
Re: AD 14 KIELGE
Posted: Tue Nov 21, 2017 10:30 am
by Bogieman
Looking forward to seeing your lug rig. I am strongly considering going that route as well.
Re: AD 14 KIELGE
Posted: Tue Nov 21, 2017 2:19 pm
by gonandkarl
Hi,
Yes George must have meant lug rig. Today I was back to sanding the cabin floor before I can paint it and because I loathe sanding so much I only managed to finish half of the small cabin floor. Then I got a funny picture sent from my sister should I not make it onto the water with my boat next Year I could always use one of these:
In my family there is still the thought prevalent that my sailboat will not float and sink like a stone on splashing day that is why they rather want to push me into direction old age home and the transport vehicles there.
I am looking forward to the big splashing party and with the first sail on the boat I have the support of my brother in law who is a real captain who is sailing every Year a couple of weeks on the Adria or Baltic sea. Nothing can go wrong wrong wrong.
Greetings from Karl
Re: AD 14 KIELGE
Posted: Tue Nov 21, 2017 9:57 pm
by Fuzz
I love that walker
Need a home for old boat builders and every one would have one like it
Re: AD 14 KIELGE
Posted: Wed Nov 22, 2017 10:47 am
by Bogieman
Re: AD 14 KIELGE
Posted: Wed Dec 13, 2017 11:28 am
by gonandkarl
Hi,
Today it took me the better part of 2 hours to mount the first piece of deck hardware. My excuse why I took so long to mount the bow cleat is, that it has hidden screws which looks nice but is a bitch to tighten in the small bow area by a 250 pound builder without anyone holding it in position on deck. I just did lay it on the thru hull holes on deck and tried a couple of times to gently find the thread of the cleat. But I think it was worth the effort and that is why I took a picture of it.
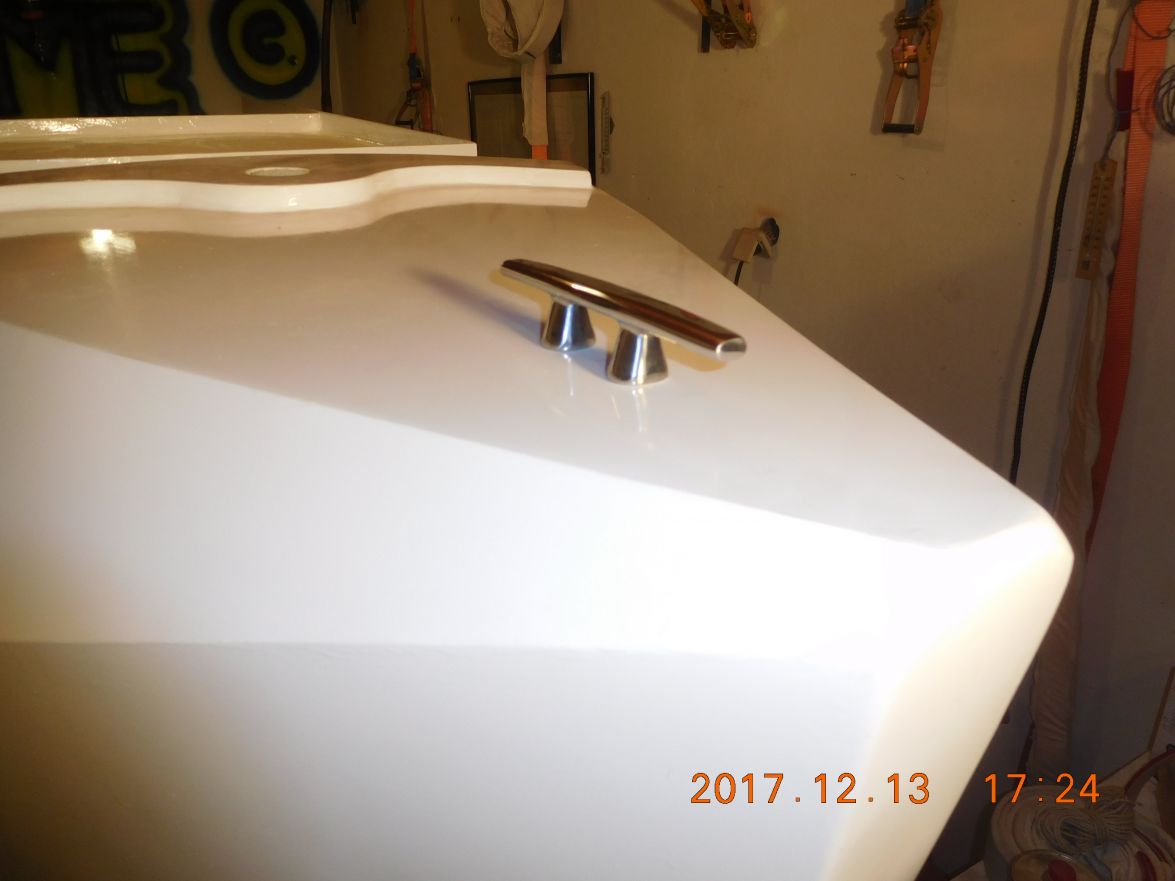
Greetings from Karl
Re: AD 14 KIELGE
Posted: Wed Dec 13, 2017 11:33 am
by Jaysen
Very nice. Very nice.
Re: AD 14 KIELGE
Posted: Wed Dec 13, 2017 12:05 pm
by terrulian
Excellent, Karl, perfect.
Could you have used tape to hold the cleat in position while you struggled under the deck to get the screws in?
Re: AD 14 KIELGE
Posted: Wed Dec 13, 2017 12:28 pm
by Jaysen
5200? Silicone?
Re: AD 14 KIELGE
Posted: Wed Dec 13, 2017 12:56 pm
by gonandkarl
Hi,
Thanks for the idea with tape and glue I will make use of that when I mount the 2 cleats SB and PS near the transom. I have only used marine glue the other day when I glued the plastic windows onto the boat but never thought of using it for the cleat here. I was tempted to ask my wife to hold the cleat in position but dismissed her help for some time when I really need 4 hands. The cleats near the transom I will mount only after having mounted the 2 push pits which I ordered also in stainless steel with a sore heart because of the high price and because I will not use my self made fibreglass carbon push pits. They are very light and would have done the job for sure but I did not like the fact that I did not get them uniquely round and therefore not looking so good. I cannot throw them away having put so much work into them and keep them therefore as spare which will most probably never needed. The SS pushpits from Osculatti an Italian boat supplier I ordered 10 days ago and am waiting eyeryday since for them to arrive. Another lesson for being patient which I never was and wonder if I ever will be.
Greetings from Karl
Re: AD 14 KIELGE
Posted: Wed Dec 13, 2017 2:02 pm
by terrulian
Hey, we're all particular about showing workmanship that we're not proud of, but I'd still like to see the carbon pushpit.
Re: AD 14 KIELGE
Posted: Thu Dec 14, 2017 9:13 am
by Bogieman
Wow! Looks fantastic! I can only imagine how excited you must be now that you are so close to the finish line.
Re: AD 14 KIELGE
Posted: Thu Dec 14, 2017 9:14 am
by Jeff
Very close Karl!! Looks great!! Jeff
Re: AD 14 KIELGE
Posted: Fri Dec 15, 2017 10:28 am
by gonandkarl
Hi,
Today the ordered push pits arrived by mail and I put both the old self made ones made of fibreglass and carbon sleeves and the new ones onto the boat and took these pictures.
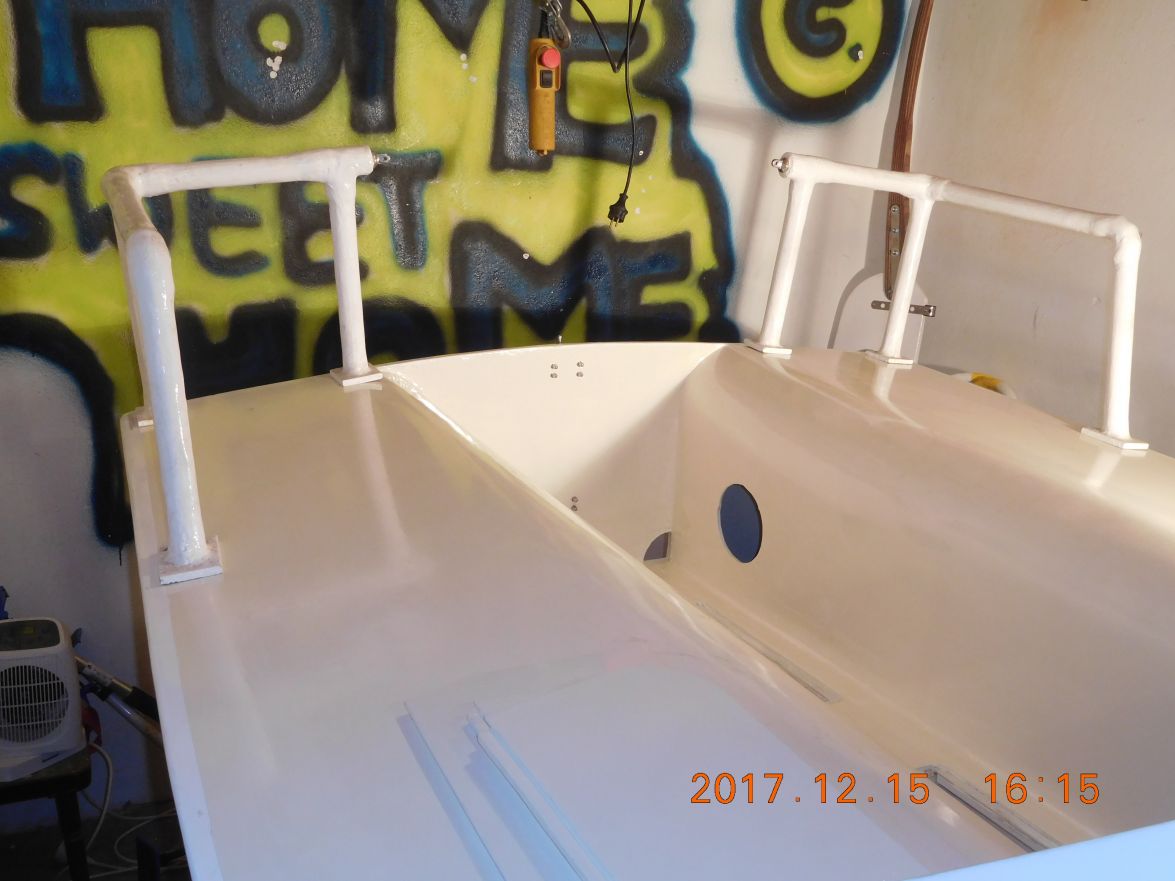
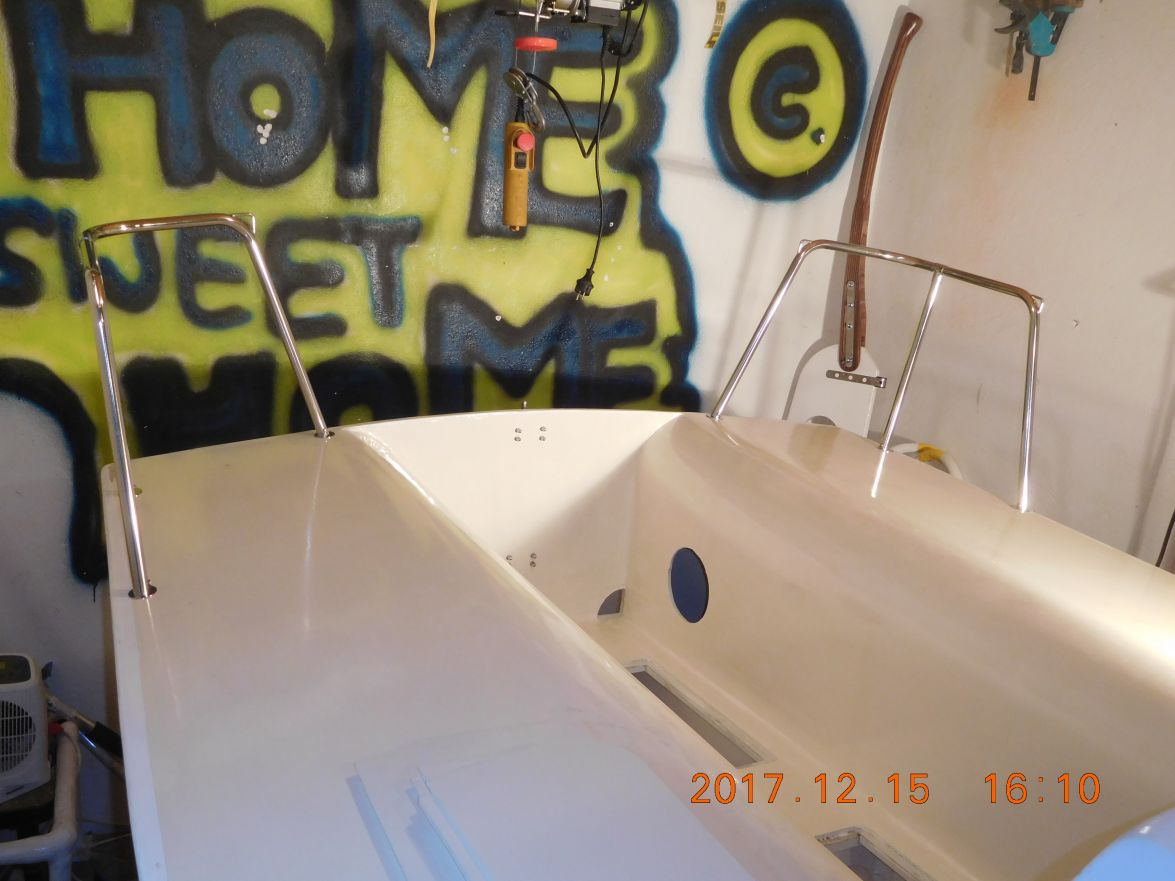
And now that I see both of them I must admit the SS ones from Italy look better and I will definitely mount them. They cost the small fortune of 344 Euros ( 405 US dollars ) and they came with only a base plate per leg the size of a big washer with one no 8 screw bolt fitting in the middle of each leg but the washers for under deck I have to add otherwise the nuts would be fastened to the wood backing plates. That does not make me all that happy and I am thinking if it would be better to mount decent bottom plates like one uses for railings when round with 3 screw holes or square with 4 screw holes.
I would not mind if anyone of you could advise me in this regard .
Tell me if I am overdoing it to mount each leg of the push pits with 4 or 5 screws depending on the choice of round or square base plates.
I was thinking of something like they ones on the following picture in addition to the central screw in the middle of each leg.
Greetings from Karl
Re: AD 14 KIELGE
Posted: Fri Dec 15, 2017 10:41 am
by Jeff
Karl, Go with the Italian ones, much better appearance!! Jeff
Re: AD 14 KIELGE
Posted: Fri Dec 15, 2017 11:02 am
by Marshall Moser
I think through bolting them would give a cleaner appearance.
Re: AD 14 KIELGE
Posted: Fri Dec 15, 2017 12:01 pm
by terrulian
Pushpits and pulpits can take a real beating (of course that will never happen to you
) so mount them very robustly. Through-bolted backing plate is my recommendation.
Re: AD 14 KIELGE
Posted: Fri Dec 15, 2017 12:02 pm
by Jaysen
I'm thinking that you won't like bulk of the 3 screw feet. Some 5200 then a large backing washer for the through bolt and I bet those suckers will never come off.
Now, to the home made vs SS ... I like both. The FG units look like you took the time to make them. not bad just not as shiny. I'd probably use those just because I think it sticks with the "build not bought" process. But I do see the attraction to the SS. you can't go wrong either way so go with what feel best to you.
Re: AD 14 KIELGE
Posted: Sat Dec 16, 2017 10:02 am
by Bogieman
Those SS pushpits look great! I've been doing some early research trying to locate a quality builder who can make them out of aluminum.
Re: AD 14 KIELGE
Posted: Sat Dec 16, 2017 11:01 am
by terrulian
Why aluminum?
Re: AD 14 KIELGE
Posted: Sat Dec 16, 2017 11:29 am
by OrangeQuest
If you have access to get the bolts in I would go with through bolts as it was designed and the large backing washer. The feet seem a little small and I would be concerned with the point of contact causing the epoxy to crack. Maybe with the 5200 a nylon or rubber washer.
Re: AD 14 KIELGE
Posted: Sat Dec 16, 2017 12:29 pm
by Bogieman
terrulian wrote: ↑Sat Dec 16, 2017 11:01 am
Why aluminum?
Hi Tony,
Only because it's cheaper but I'm a looooooong way away from needing to worry about them really. Just keeping myself busy since the start of my build is a few months out.
Re: AD 14 KIELGE
Posted: Sun Dec 17, 2017 4:50 am
by gonandkarl
Hi Tony Bogie and OrangeQuest,
Thank You guys for the help on my pushpits. Yesterday evening after long hours of thinking where exactly to place them I drilled the 6 holes into the bench seats within a few minutes and accurate enough so with just a slight clap on their top the push pits went in with their bolts. I agree that the through bolts with big washers and backing plates inside the bunks is the way to go and the nice looking Italian push pits did come with 6 bolts but unfortunately too short because 25 mm of them get screwed into the uprights and the rest reaches only down to the end of my thick plywood backing plates I epoxy glued underneath the bunk seats. But it being Sunday today I cannot buy threaded bolts material so I remembered that I have got some left from my first boats roof carrier lifting device which I do not need any more since I got a trailer. So I will be busy even today and present the finished results later.
Greetings from Karl
Re: AD 14 KIELGE
Posted: Sun Dec 17, 2017 5:15 am
by cape man
You chose well! I hope you enjoyed building your own , but the stainless look much better. Remember to overdrill, fill with epoxy, and redrill the holes through the boat.
Re: AD 14 KIELGE
Posted: Mon Dec 18, 2017 1:39 am
by gonandkarl
Hi Craig,
Yes to build my own push pits was an experience in how to work with fibreglass and carbon sleeves and it took me quite a while to make them and that is why I will not throw them away and keep them as a sentimental spare in the loft of my house. The experience also helped me make the boom and the yard for my chunk rig and these 2 pieces I will definitely use.
With the over drill, epoxy and re drill I have to wait till spring until the temperatures are higher but I have a question to the procedure:
Will the epoxy get hard in the hole which is 1 1/2 inches deep like all my through hull holes for the cleats and push pits if I fill them in one go or should I fill half of the hole depth let it cure 2 or 3 days and then fill the holes completely ?
Greetings from Karl
Re: AD 14 KIELGE
Posted: Mon Dec 18, 2017 6:08 am
by cape man
It will get hard in a single pour.
Re: AD 14 KIELGE
Posted: Sun Dec 24, 2017 7:38 am
by gonandkarl
Hi,
I finished building my boat and now is only left to wish You all a Merry Christmas and a Happy New Year and because I have no Christmas card picture to send You get 2 pictures of my boat. You all helped me a lot to build it to this point thank You for that and
Greetings from Karl ( Austria )
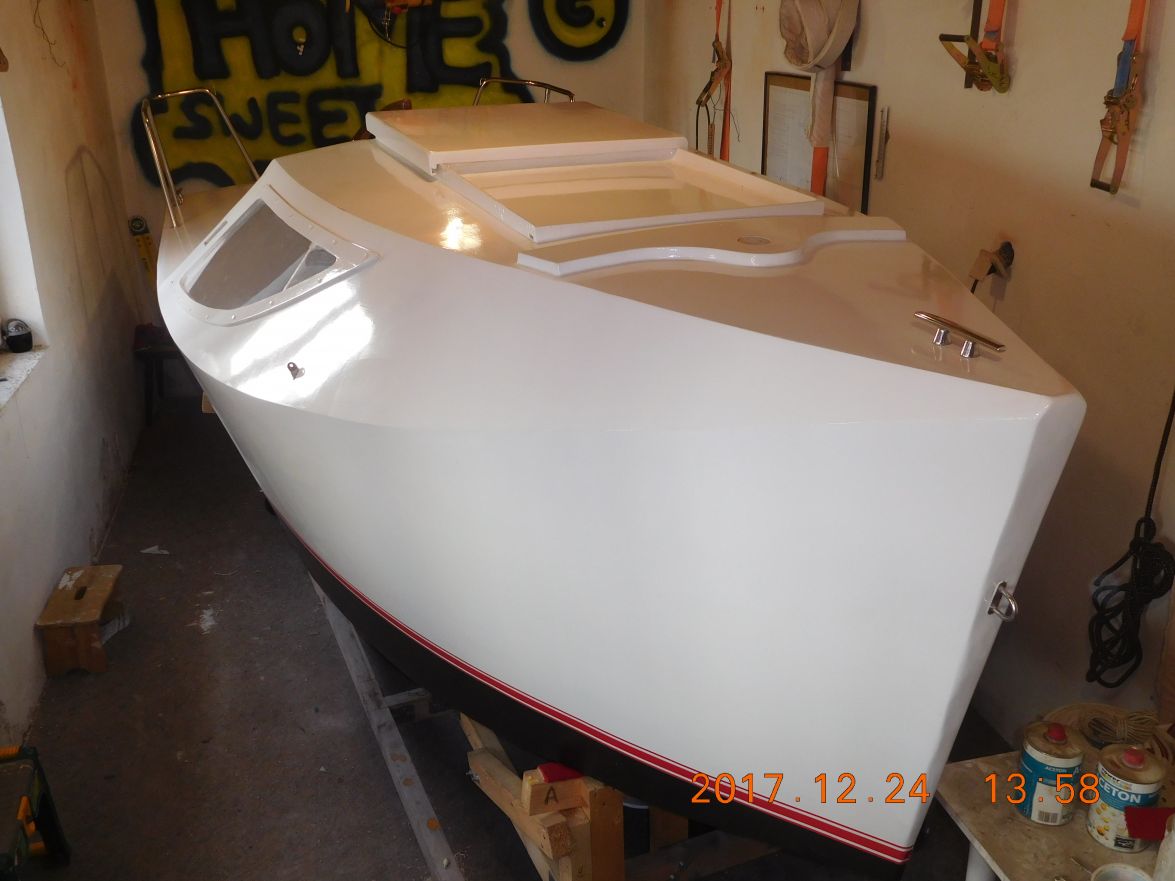
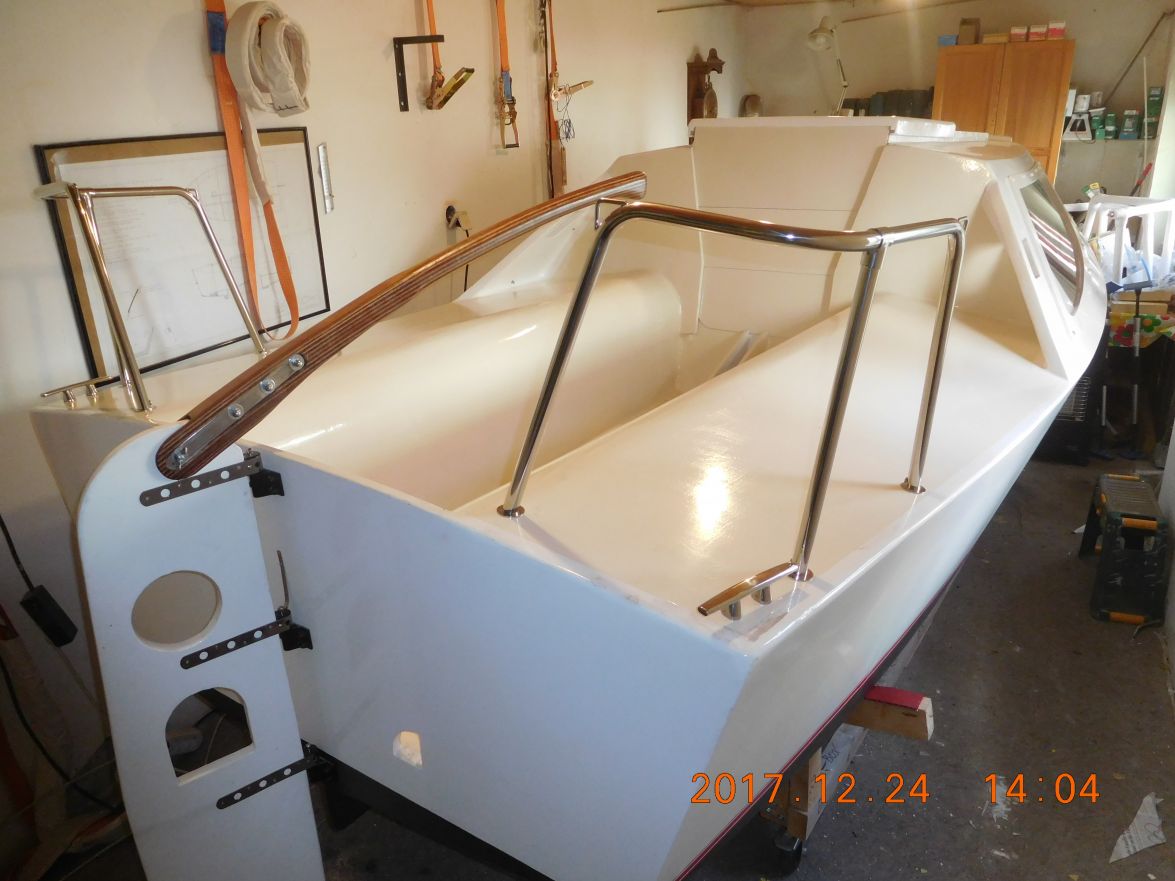
Re: AD 14 KIELGE
Posted: Sun Dec 24, 2017 9:01 am
by topwater
Merry Christmas Karl
Re: AD 14 KIELGE
Posted: Sun Dec 24, 2017 9:15 am
by terrulian
Not so fast, Karl. I don't see any rigging yet.
That's a lot of the fun.
I don't think you're quite done.
Merry Christmas from California.
Re: AD 14 KIELGE
Posted: Sun Dec 24, 2017 10:00 am
by Bogieman
She looks awesome Karl! Merry Christmas!
Re: AD 14 KIELGE
Posted: Sun Dec 24, 2017 12:20 pm
by cape man
Absolutely beautiful sir! Merry Christmas!
Re: AD 14 KIELGE
Posted: Sun Dec 24, 2017 1:24 pm
by Fuzz
Merry Christmas to you and yours Karl. The boat looks great, I bet it will be hard waiting for spring.
Re: AD 14 KIELGE
Posted: Sun Dec 24, 2017 2:45 pm
by glossieblack
Congratulations on your beautiful build Karl. It's Christmas Day here, and I'll be raising a glass of good red to you come lunchtime. all the best.
Re: AD 14 KIELGE
Posted: Sun Dec 24, 2017 3:15 pm
by Jeff
Karl, Absolutely beautiful!!! She is glowing and I bet you are as well!!! Merry Christmas to you and your family!! Jeff
Re: AD 14 KIELGE
Posted: Sun Dec 24, 2017 7:43 pm
by Doug N
That is a beautiful boat sir. Wishing you and your family a great Christmas from our family.
Doug
Re: AD 14 KIELGE
Posted: Mon Dec 25, 2017 2:35 am
by gonandkarl
Thanks to John, Tony, Bogie, Graig, David, Michael, Jeff, Doug N for the compliments and all the others who gave me such a lot of advise that it feels now that building my boat was actually a piece of cake. This mental and actual support from all over the world is fantastic and better than any thick book of building notes. Forgotten that tools fell on my toes and hitting my shin on some corner or the hospital stay with my back from carrying the centreboard lead on one side in a bucket. But as Tony says I am not finished completely but the tasks till spring are foreseeable and I am looking forward to them. These 3 jobs I still have to complete ( again with your help when I am stuck ) before splashing:
1. Hanging of the centreboard into the centreboard case I hope to get done before New Years Eve with the help of my son.
2. Attaching the bunks to the trailer with 4 supports and then moving the boat onto it.
3. Mast foot arrangement with mounting deck blocks and rigging. I hope to get away with placing everything so that I will not have to make a single hole into the mast. The masthead fittings according to my Haslers Junk rig book was done for me when I bought the mast so I did not have to learn how to attach things with rivets.
Happy New Year to all forum members from
Karl
Re: AD 14 KIELGE
Posted: Mon Dec 25, 2017 9:04 am
by terrulian
Rivets are real easy, Karl, no big deal at all.
Re: AD 14 KIELGE
Posted: Mon Dec 25, 2017 9:08 am
by Jaysen
Karl, you've completed nearly all the hard stuff. Just a few "small" things left (even though they are technically large). I'm sure you will have a ball this summer sailing Kielge around the lakes.
Merry Christmas!
Re: AD 14 KIELGE
Posted: Mon Jan 01, 2018 5:52 pm
by das boot
It looks real good ready for spring launch you will have fun with it. What are you going to use as a kicker engine?
Re: AD 14 KIELGE
Posted: Tue Jan 02, 2018 2:43 am
by gonandkarl
Hi George,
As on nearly all of our Salzkammergut lakes the cleanliness is of the biggest importance to keep the water up to drinking water quality for everybody and especially the swimmers it is not allowed to use any combustion outboard motors so I will use an electric MinnKota C20 which I have tested already on my FS13 and it worked very well. The biggest lake is only approximately 20 miles long and 1 mile wide which lets me get to the shore easily with an electric out boarder when there is no wind. Right now I have the boat on the slipping wheels which I have constructed and I am testing the moving of the boat inside the shed. For the bow support I made a 360 degree swivel axle 40 cm long from aluminium pipe which bent on both sides where the 2 wheels are attached the moment I let the whole weight of the boat onto it. I changed it already to a steel axle and now it is fine. I think I will need the slipping arrangement because the slip on Traunsee ( the Romans called it Lacus Felix ) is very shallow and even that I got a 2 meter tow bar which I can fit on the cars tow ball and the trailer it will not be possible to push it deep enough into the water. Come May and I will see. I still have to make such a pipe support on each side of the trailer which I have seen on your trailer as guidance when the boat needs to be towed out of the water and also to hold the plug of my electric cable high up above the water. It is in the trailer frame and plugs into the lights panel which one can pull out of the frame and leave it on the shore for slipping.
A bit late, a Happy New Year to all of you guys who helped me so much to build my boat. I think we all have a very good year ahead.
Greetings from Karl
Re: AD 14 KIELGE
Posted: Thu Jan 11, 2018 12:37 pm
by gonandkarl
Hi,
The same as Glossie goes for a long cruise when it is too hot for boat building we decided to fly towards some warm weather and just spend 2 weeks on the beach in Egypt because it is too cold for boat building right now here.
I replaced all the stainless steel screw bolts on the window frames with polyamide ones so that I can paint them glossy white the same as the boat and I have fitted my launching slip wheels with SS axles because the aluminium axles bent at the first time I put the weight of the boat onto them. It looks like it can work to mount them on land and dash into the water, dismount the launching wheels and store them in the cabin and remount them while on the water before being winched at the bow eye out onto the beach again. Here is the result and I can quite easy wheel the boat in the shed now all of a meter fore or back or 40 cm sideways. It is just a pity I did not buy wheels with ball bearings that would have made the wheeling even easier.
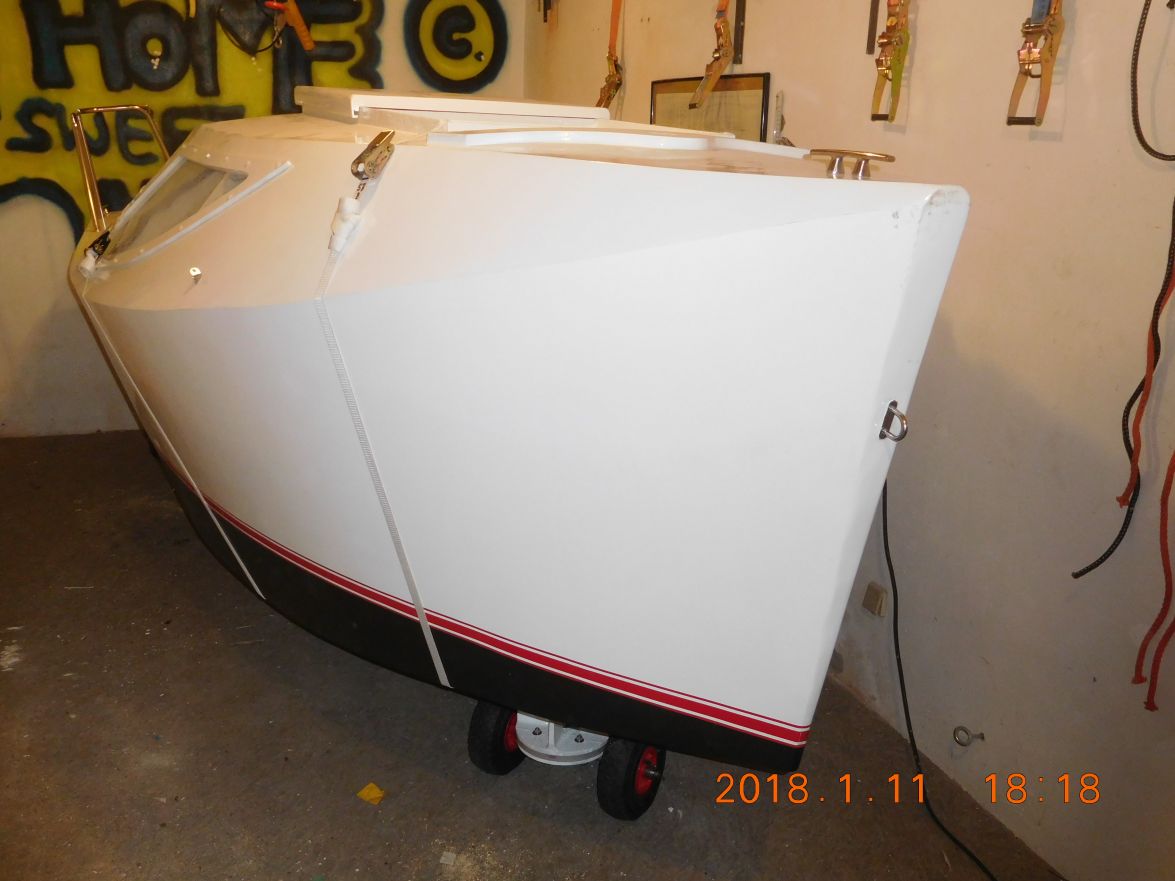
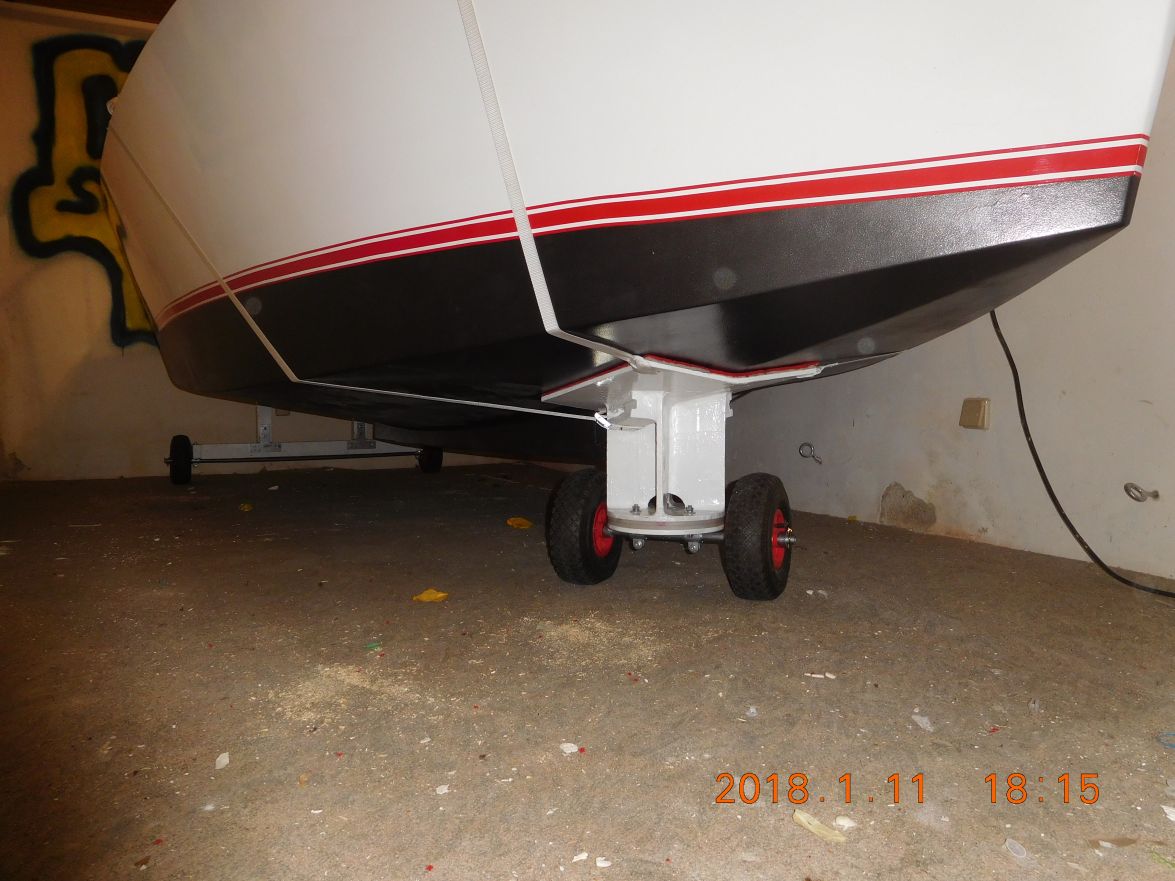
Will report back at the end of January.
Greetings from Karl
Re: AD 14 KIELGE
Posted: Thu Jan 11, 2018 12:39 pm
by Jeff
Karl, she looks great!! Enjoy your time on the beach!!!! Jeff
Re: AD 14 KIELGE
Posted: Thu Jan 11, 2018 2:47 pm
by Fuzz
Yep have fun and do some warming up
Just wondering why you chose Egypt for the place to go
Re: AD 14 KIELGE
Posted: Thu Jan 11, 2018 4:09 pm
by Bogieman
Karl,
She looks great! Love your choice of colors too. Can't wait to see more pictures once you're able to walk around her 360.
Bogie
Re: AD 14 KIELGE
Posted: Thu Jan 11, 2018 5:09 pm
by gonandkarl
Hi,
I chose Egypt for the place to go because it only takes 4 hours to fly there on small plane seats which are murder for me and the sun is garanteed as well as the daily temperature which are around 25 Celsius ( 77 F ) and on top of it we have been there twice in a small place called Sharm el Sheik and had a beautiful stay with lots of coloured fish swimming around our feet when we swam in the sea. My wife sees it more pragmatic, she likes going there because she does not have to cook for us and only then she gets the feeling of retirement I enjoy already for 7 years ( meaning boat building is better than cooking
). This time we go to a place called Hurghada which also is at the Red Sea and I checked just now the night time temperature there at 23:00 pm is still 16 C ( 60 F ) that is exactly what I need to get out of the Austrian fog and depressing grey sky everyday here despite of some warnings that terrorists might attack tourists. I dont worry so much anymore about my life as I could be run over by a bus here just as well. I did worry when my kids were still small and I had the responsibilty to bring them up and therefore had life and accident insurances. Now my only looking forward to happy worry is not to sink my boat when it gets splashed in May.
Maybe I have wlan in the hotel then I can follow all your builds.
Greetings Karl
Re: AD 14 KIELGE
Posted: Thu Jan 11, 2018 6:16 pm
by terrulian
Karl,
As you may remember, we were in Hurghada, at the nearby Abu Tig marina.
Here we are just offshore of Hurghada, anchored after sailing up the Red Sea and surviving a dust storm. We were happy to have the hook down!
Re: AD 14 KIELGE
Posted: Thu Jan 11, 2018 8:48 pm
by Fuzz
Karl it sounds like a good place to go warm up. I hope you have a great time.
Tony that picture shows how a true cruising boat looks, and two guys real happy to have the hook down.
I love this forum and having members from all over the world. You get to see and learn so much about this planet and not just boat building stuff
I feel like I have made friends from all over, just have not meet some of them in person yet.
Re: AD 14 KIELGE
Posted: Thu Jan 11, 2018 9:28 pm
by terrulian
Tony that picture shows how a true cruising boat looks, and two guys real happy to have the hook down.
Yes, the sheets were stiff and full of grit, which was everywhere inside and outside the boat from the dust storm. The oil on the topsides is from Eritrea, not a particularly clean harbor. Very nice people, though. Once we had some time and access to running water we washed everything down, soaked the sheets, and cleaned the hull.
Re: AD 14 KIELGE
Posted: Thu Jan 25, 2018 2:12 pm
by ks8
Nice! Glad I jumped over to Bateau for a few minutes today to start to catch up.
Re: AD 14 KIELGE
Posted: Thu Jan 25, 2018 9:20 pm
by seaslug
Karl, I don't know how I missed this post, but I see it now, and your boat came out absolutely beautiful. Don't know how you did it in such tight quarters, but a fine job for sure. Very well done my friend. I look forward to the sailing pictures in the spring. Mike
Re: AD 14 KIELGE
Posted: Thu Jan 25, 2018 10:09 pm
by Fuzz
Like Mike said that is one fine looking boat Karl
You should be proud
Re: AD 14 KIELGE
Posted: Thu Jan 25, 2018 11:24 pm
by glossieblack
Re: AD 14 KIELGE
Posted: Thu Feb 08, 2018 2:59 pm
by das boot
It Looks real good one thing I found with my boat the deck and cockpit are painted bright white on a sunny day it is all most to bright to look at after a while if I repaint it this spring I will use an off white for those big flat areas to get away from the glair
Re: AD 14 KIELGE
Posted: Fri Feb 09, 2018 8:11 am
by gonandkarl
Hi George,
Because of the glare of bright white that is why I did paint the cockpit and benches and the bulkhead in the off white colour creme. Being colour blind is a handicap in painting anyway, but I can see at least some difference between 2 paints when they are next to each other. The top of the hatch and the deck is still bright white and until splashing time I leave it that way except that I have to put another topcoat on because I have some dings and scrapes from working with deck fittings. Right now I am making the 3rd version of seat straps to lean against while sitting on the cockpit benches. Number 1 I built from black bag straps and when it was finished I did not like the black straps on the boat. Number 2 I built from leftover white lashing straps just to find out it was not wide enough and that is why I ordered 2 inch wide red strap material and fitting carabiners. That is definitely the last version for the cockpit straps not to become a stickler for details.
Greetings from Karl
Re: AD 14 KIELGE
Posted: Fri Feb 09, 2018 9:42 am
by Bogieman
Welcome back Karl. Hope you had a great vacation.
Re: AD 14 KIELGE
Posted: Fri Feb 09, 2018 9:52 am
by terrulian
If you're going to put another coat on, I'm with das boot and recommend you continue, or switch as the case may be, to off-white.
Re: AD 14 KIELGE
Posted: Mon Mar 26, 2018 6:06 am
by gonandkarl
Hi,
I am still pottering around with my brackets for electric outboard motor and the ladder for the transom at the port side and it would not be me to be distracted by the Spring cleaning of the garage and so I tackled the transport of the centreboard of its hibernating place to the boat shed to hang it into the boat soon. Ever since my slipped disc in my back prohibits me to carry any heavier weights than 7 KG ( 15 1/2 pounds ) I got my manual crane out to hopefully get it done within 2 hours before lunch.
Here is the centreboard on its way with a bored helper lying in the background.
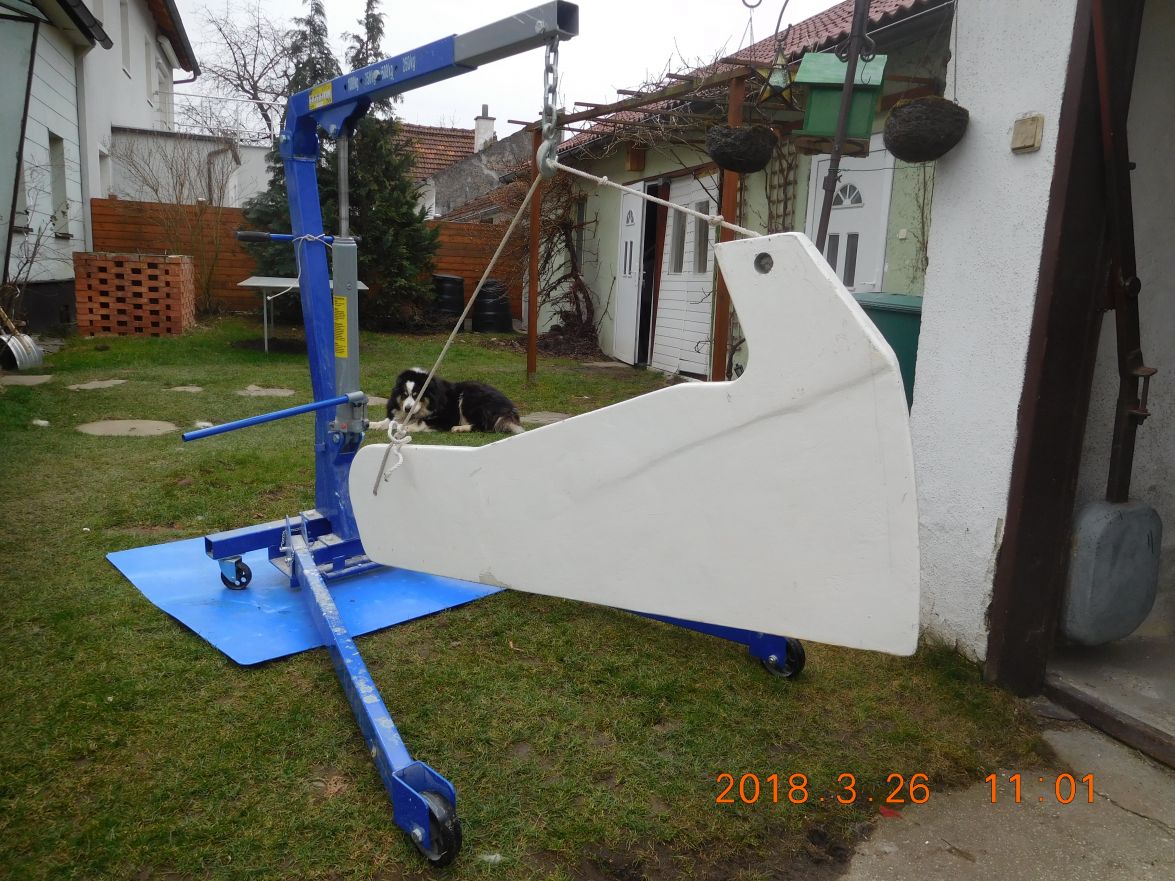
and here it is gone because the real helper, my soon to become son in law came around and just picked the 63 KG ( 138 pounds ) centreboard up of the crane and put it down in the boat shed for me. Job finished in under a minute.
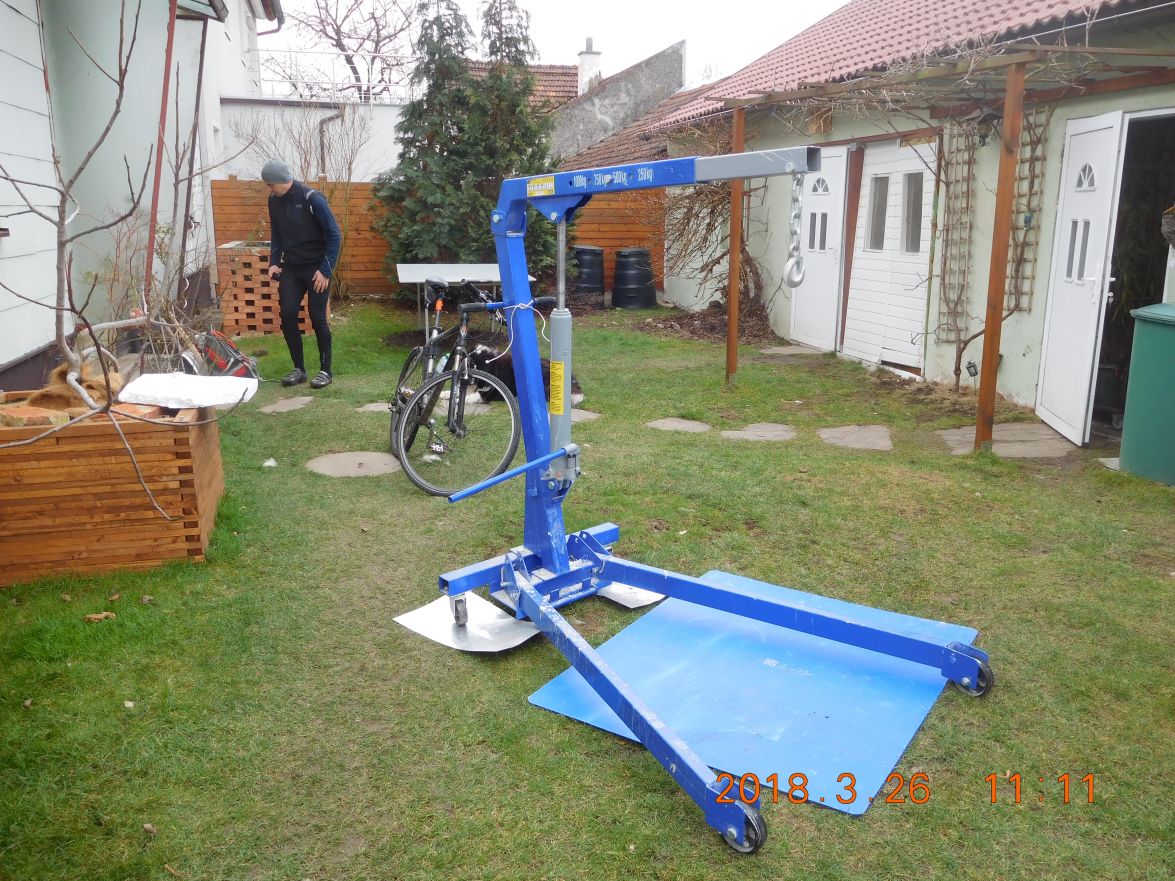
I wish everything would go as fast on my build.
Greetngs from Karl
Re: AD 14 KIELGE
Posted: Mon Mar 26, 2018 6:42 am
by cape man
Got to love youthful helpers!
Re: AD 14 KIELGE
Posted: Mon Mar 26, 2018 9:47 am
by Bogieman
Very nice Karl!
Re: AD 14 KIELGE
Posted: Mon Mar 26, 2018 3:15 pm
by das boot
Glad to see you back at it I hope your back problem will not get in the road of you enjoying your boat this summer
Re: AD 14 KIELGE
Posted: Mon Mar 26, 2018 4:13 pm
by Jeff
Karl, Good to hear from you!!! Jeff
Re: AD 14 KIELGE
Posted: Mon Apr 02, 2018 4:29 pm
by ks8
At just the right moment too!
Re: AD 14 KIELGE
Posted: Tue Apr 10, 2018 7:44 am
by gonandkarl
Hi,
The centreboard got its last coat of paint before it is hung into its case. Painting was necessary because it got quite some bashing over the last 3 years from the exhaust of my car which was parked in front of it in the garage.
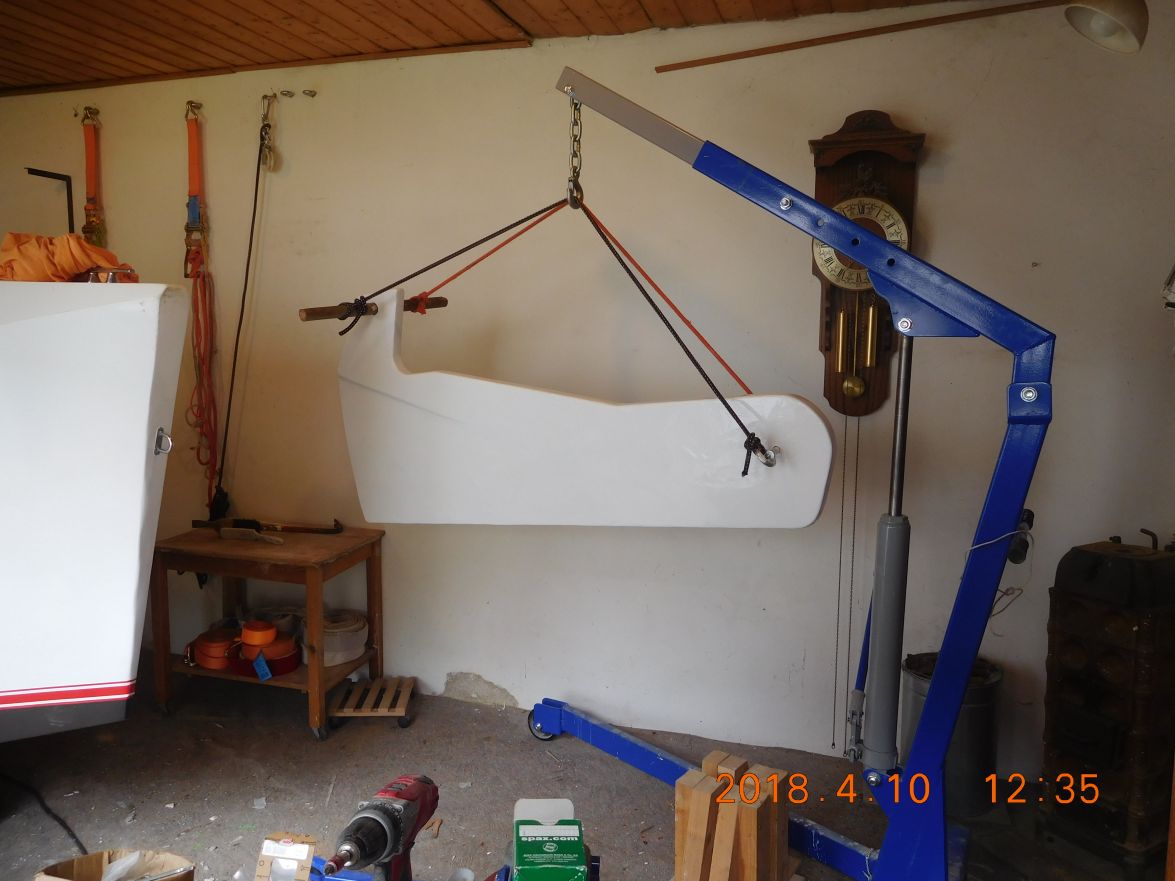
At last another thing finalized before splashing.
Greetings from Karl
Re: AD 14 KIELGE
Posted: Tue Apr 10, 2018 8:24 am
by cape man
Go Karl! Can't wait to see you sailing!
Re: AD 14 KIELGE
Posted: Tue Apr 10, 2018 8:25 am
by Jeff
Nice job Karl!! Hope you and the family are well and your Spring weather is getting nice!! Jeff
Re: AD 14 KIELGE
Posted: Tue Apr 10, 2018 8:41 am
by terrulian
Karl, I'm very curious how you hang that thing.
We have a similar folding keel on our Catalina 22 and of course we have a genius way of removing it when necessary. But although genius, it is a big pain to do as it weighs 500 lbs (226 kg.).
Re: AD 14 KIELGE
Posted: Tue Apr 10, 2018 9:46 am
by Bogieman
Hi Karl.
You are so close now. I have a question about your centerboard. In the plans it shows two holes to allow it to be locked in the fully up or half way down position, but it appears you only have one. Was this just a personal choice or are my eyes fooling me?
The weather here has been lousy this last week so I haven't worked on the boat, but it's supposed to clear up over the next few days.
P.S. Would it be possible for you to post more pictures of the inside?
Re: AD 14 KIELGE
Posted: Tue Apr 10, 2018 10:23 am
by ks8
Yes, do tell us about it Karl..
And I hope your back improves soon.
Re: AD 14 KIELGE
Posted: Tue Apr 10, 2018 11:52 am
by gonandkarl
Hi,
The half way down position hole I have not made yet because in my notes it says it should be in the centreboard trunk and that I want to drill only when the centreboard is hung and only then I know where to make the hole when I let it down to my half way knot.
I actually do not understand the 2 small holes on the plan I think the left one is for lifting and the right one for locking in the up position. I made a biggish hole combined for lifting and locking. In the begin I wanted to put a pulley into the big hole to make the lifting easier.
Somebody told me that I should not do it so I dropped the idea
In heavy weather, the CB keel should be locked in place. We show 2 holes in the top of the keel and one in the part of the trunk protruding in the cockpit. A hardwood dowel pushed through those holes will lock the keel in two positions all the way up or halfway down.
Here you see the dummy plywood centreboard in the trunk secured in my big "up hole" with a screwdriver.
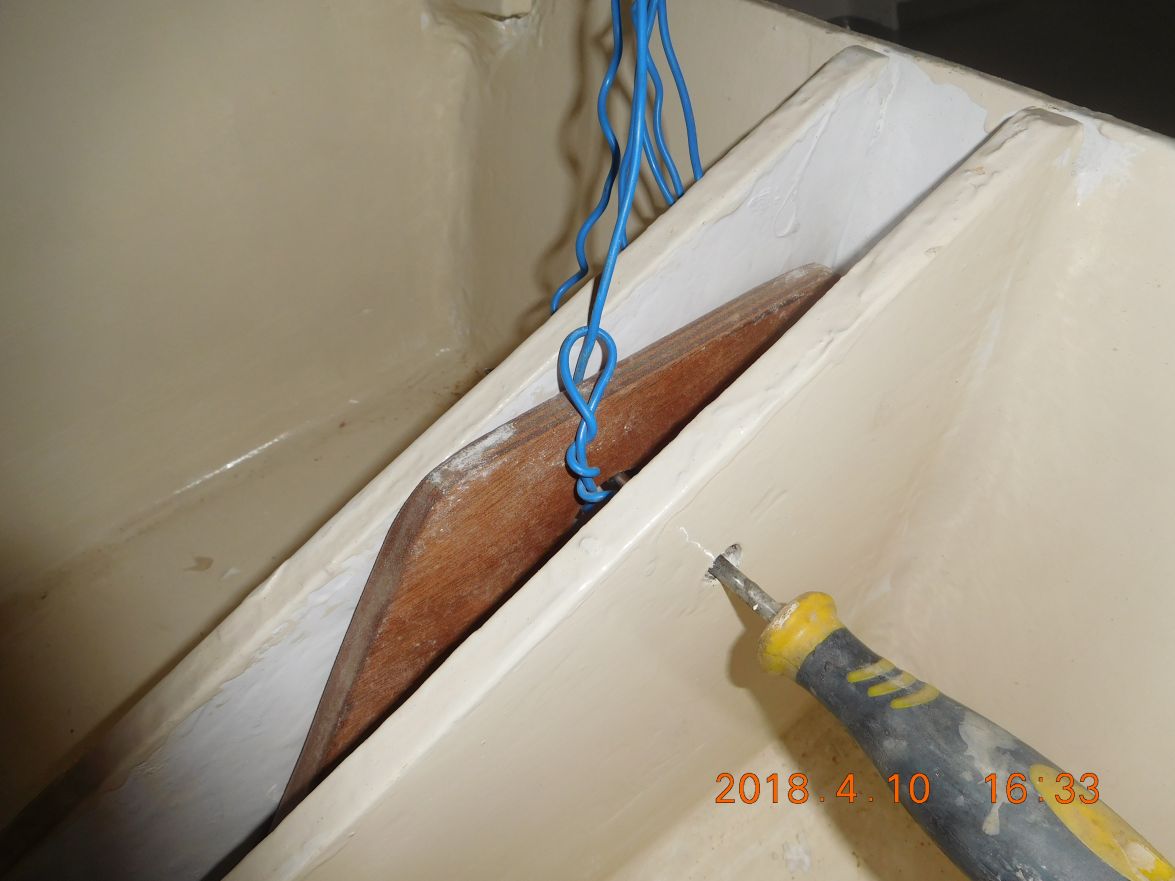
Here the combined hole for up locking and lifting the centreboard.
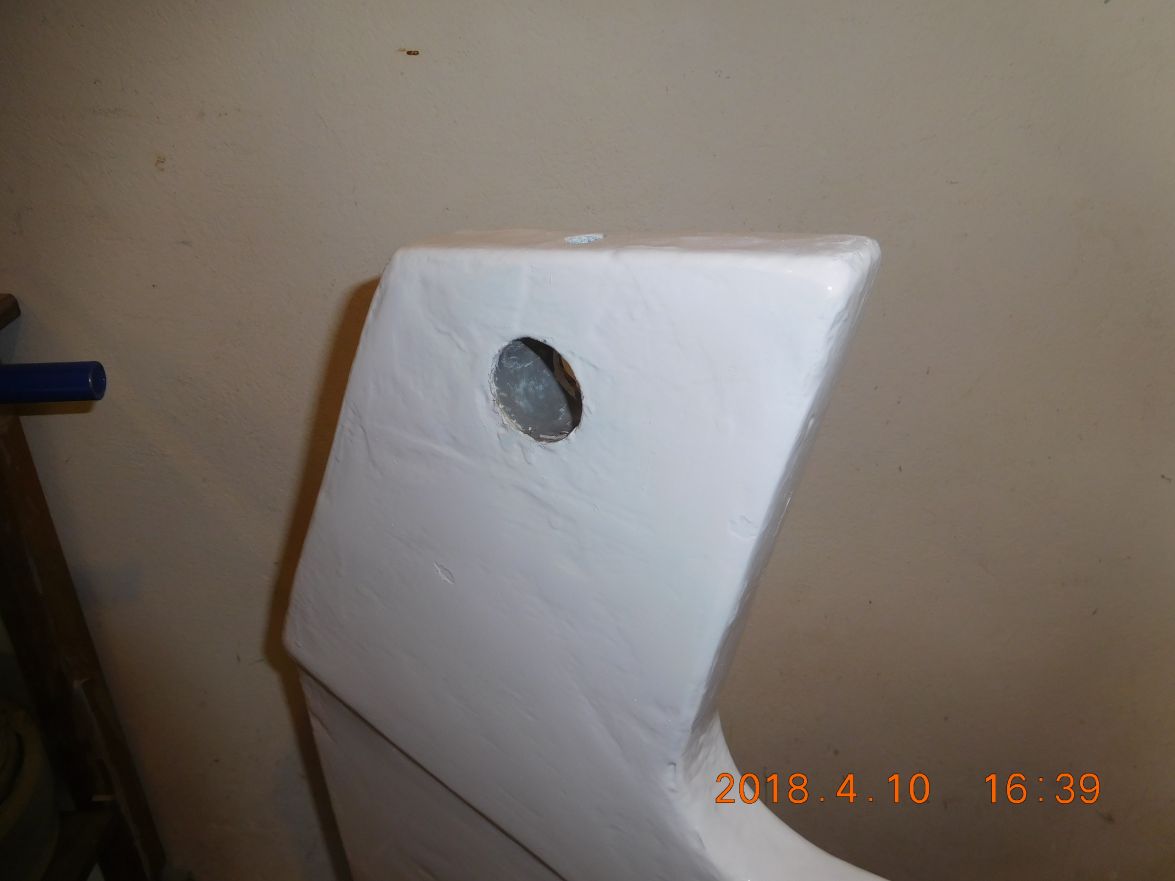
and now with the thick nylon rope with knots in the up halfway down and completely down position. The knots I can slide into a slot of a sort of wooden lid for the centreboard trunk top.
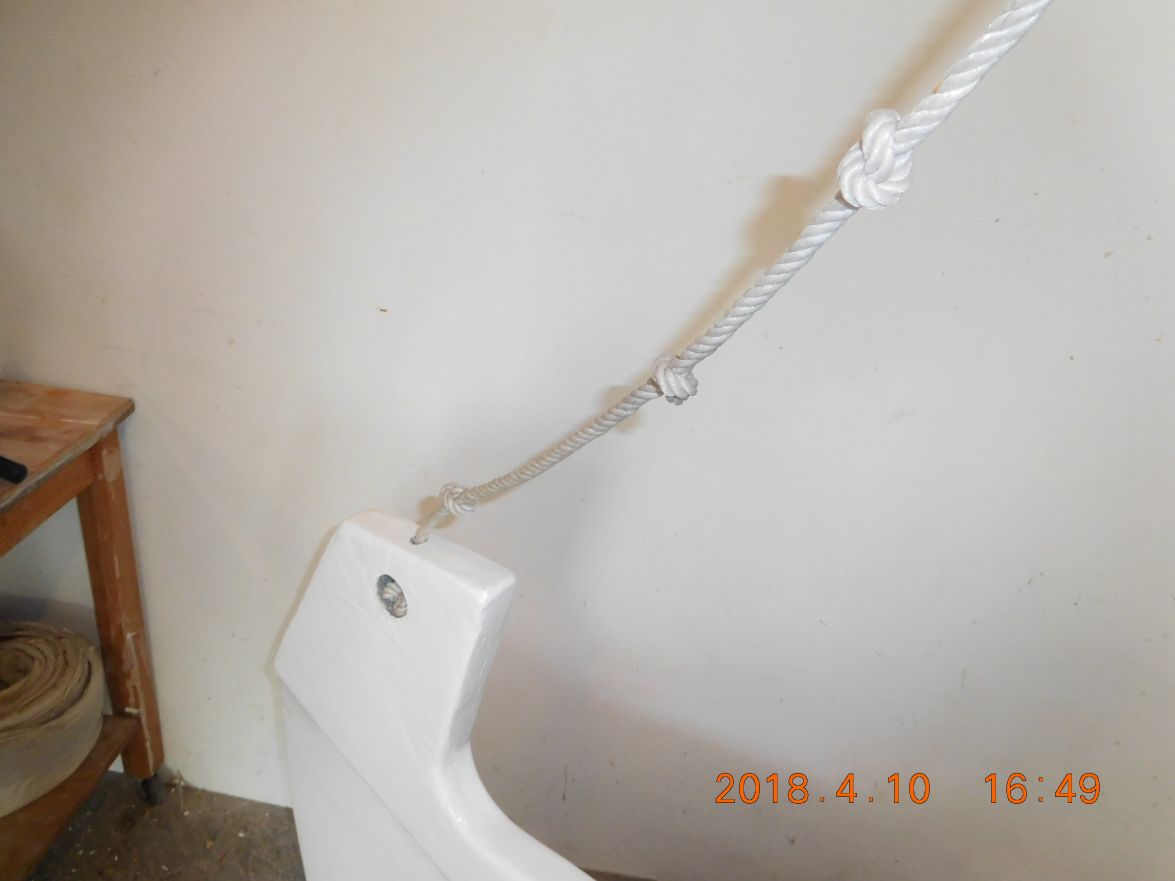
The procedure to hang the centreboard in its trunks I am still juggling in my mind. All I know that I have to lift the boat rather high because the front where the pivot is, must be completely secured before one can lift the rear of the centreboard up. I want to use my 2 four wheel trolleys to move it under the keel then let the boat down until the keel trunk holds it on the tip of the top so it cannot fall left or right. Then my pneumatic car lift and a second manual scissor car lift and my two muscle men come onto the scene. ( My son and son in law both 36 and top fit sportsmen will do the rest like they did before the last braai ( South African for barbecue ) with the dummy centreboard. I will overlook the whole thing and provide the thin loop ( tip from George ) thru the pivot hole and let them pull it up from two handles on each side from inside the cabin.
Now Tony that I laid my plan out I would dearly know your intricate plan how to hang your board. I know mine is only 63 kg but maybe I can adopt your 500 pound plan even for my light board.
Bogie what pictures from inside would you like to see ?
Greetings from Karl
Re: AD 14 KIELGE
Posted: Tue Apr 10, 2018 12:36 pm
by Bogieman
gonandkarl wrote: ↑Tue Apr 10, 2018 11:52 am
Bogie what pictures from inside would you like to see ?
Greetings from Karl
Hi Karl. Thank you for that explanation; it all makes good sense to me now. The idea of using a dummy centerboard to help align things is a good idea. I plan to do the same and will be doing some work on those parts soon.
As far as the pictures go I was wondering if you have any from inside the cabin facing aft with a view of the longitudinal berths ? Some of my crew are curious how a person can sleep under there. For me it just looks like a cozy little spot, not too much smaller than my old bunk in the Navy.
Re: AD 14 KIELGE
Posted: Tue Apr 10, 2018 12:37 pm
by terrulian
Karl,
The plan, of course, was not genius at all except for the fact that there didn't seem to be an alternative and where there's a will there's a way. Doesn't sound too different from your plan; unfortunately I have no pictures.
To remove the keel: First, we made a brace out of 2x8 lumber which had two vertical slots to lower the keel into. This contraption was mounted on a strong dolly. But the boat, which weighs about 2500 pounds counting the keel, was on a trailer so the trailer, with the boat on it, had to be raised using a floor jack and then blocked up so that we could get the dolly under the cross-members of the trailer. When we got the dolly in position under the keel, we jacked up the dolly to the keel and undid the keelbolts, then lowered it back on its wheels and rolled it out. Same in reverse. There was more to it than that, but that's the basic idea.
As to this: "In heavy weather the keel should be locked in place." We have a mechanism on the 22 for that purpose, but it was leaking so I glassed it over. I have been in very heavy weather (for that boat) more than once and have never had a problem, but there could well be completely different reasons for it in Jacques' design. Your boat is smaller and lighter and so the justification for it may be that but whatever Jacques says, I would follow his instructions. I think they tell you to do that in the Catalina 22 because if the boat suffered a knock-down and the keel wasn't locked, gravity may theoretically retract it into the hull, at which point the boat may have negative stability and turn turtle. Twice I've been caught out in 30 plus knots on San Francisco Bay with full sail up because both times a mellow 12-knot breeze turned suddenly into a gale. There was no prediction of this either time on the marine weather and I was by myself. (I'm probably going to cut out the single handing at my advanced age. Maybe.) Anyway, a small boat like that is basically in survival mode in 30+ knots with one guy aboard, but nonetheless, one of the times I got a reef in and made it home on main alone, but it wasn't pretty. The other time was a little more interesting. When the wind came up it blew from a new direction and I was now being driven to a shoal which was only about 2 feet deep (the boat draws 5 with the keel down). I had about one minute to deal with before I touched bottom it so there was no time to reef and getting the keel up was also not doable. The boat was on its ear even with the sails eased completely, but water was not coming aboard. However, if I were to touch bottom the boat would trip on its keel and then get pretty horizontal, the cockpit would flood, and the boat would sink. Of course I didn't have the boards in the companionway as it had been such a mellow day. I had to think fast. The main sheet is attached to a traveler on the transom and when you jibe it rakes across the cockpit and in those winds would take your head off, but jibing was the only option. So I laid myself down down on the cockpit sole so as not to get beheaded, and shoved the tiller. I couldn't see where I was going and was doubtful the boat would respond, and if it did respond, I was pretty sure I'd break the gooseneck. But sure enough, she jibed pretty as you please, nothing broke, and I still had my head! At that point I had enough sea room to tuck in a reef and off I went.
Anyway, since the boat didn't capsize either time and since I don't figure that in my dotage I'll see more treacherous situations, and since the mechanism holding the keel down wasn't necessary in those moments and it was leaking, I glassed it closed.
Re: AD 14 KIELGE
Posted: Tue Apr 10, 2018 1:29 pm
by gonandkarl
Hi,
Thank you Tony for your explanation about the hanging or removal of the centreboard. I am lucky that I can lift my boat high enough in the boat shed with straps and I have also a little trolley which holds the centreboard vertical and if we can lift it in front from there with my car jacks up to the pivot hole we should be fine. You notice I talk in the royal we because I put all my hopes into the strong sons and will be a bystander with dozens of clever or dumb advises. The locking of the centreboard I do take serious even that a pending knockdown in our lakes is unlikely. I got some pictures from Bondo to show me how I can do it. I think it might also benefit Bogie.
Bondos trunk in the cockpit notice the little hole in the right corner for locking the board in the down position.
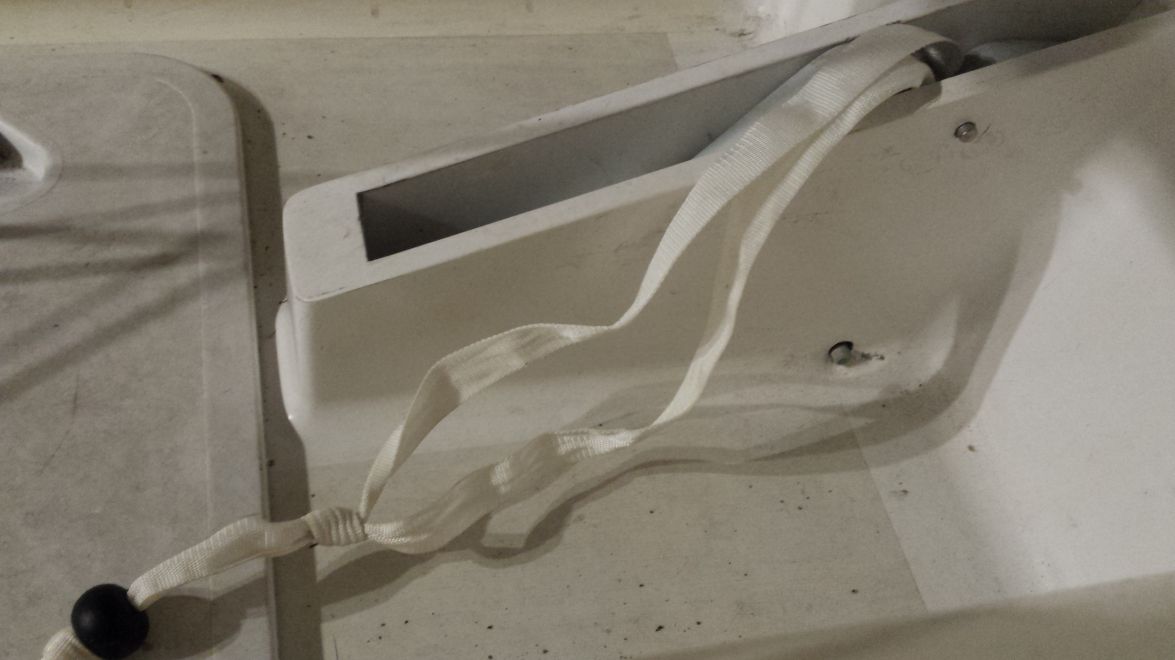
That is how he solved the lifting with a strap
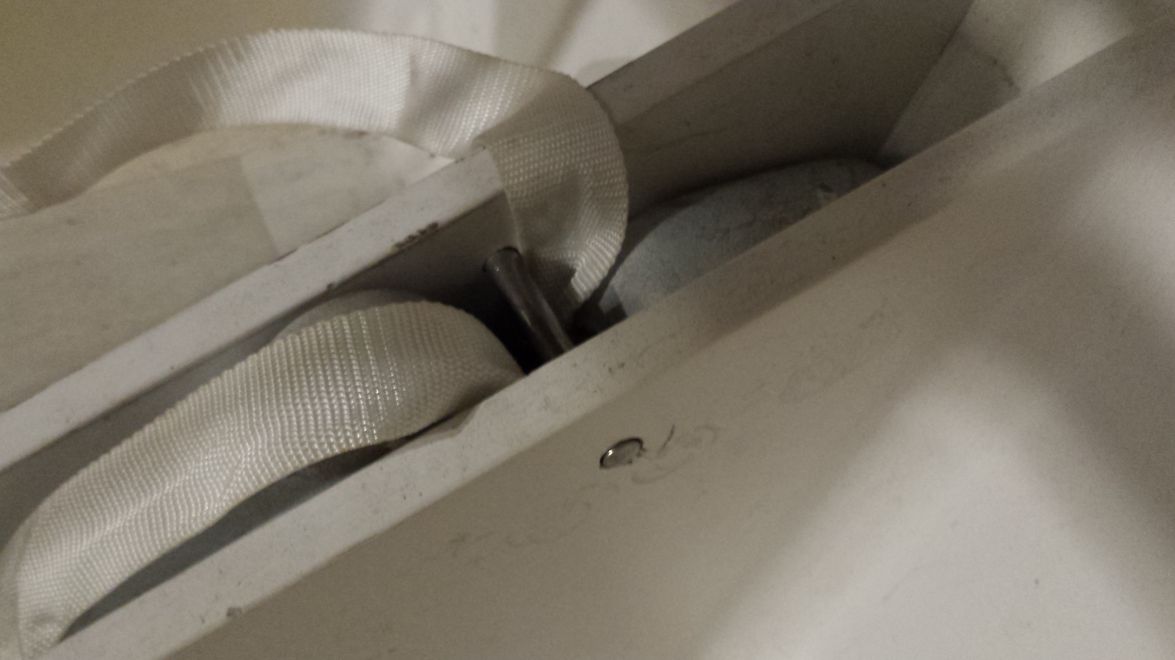
And here is his beautiful board
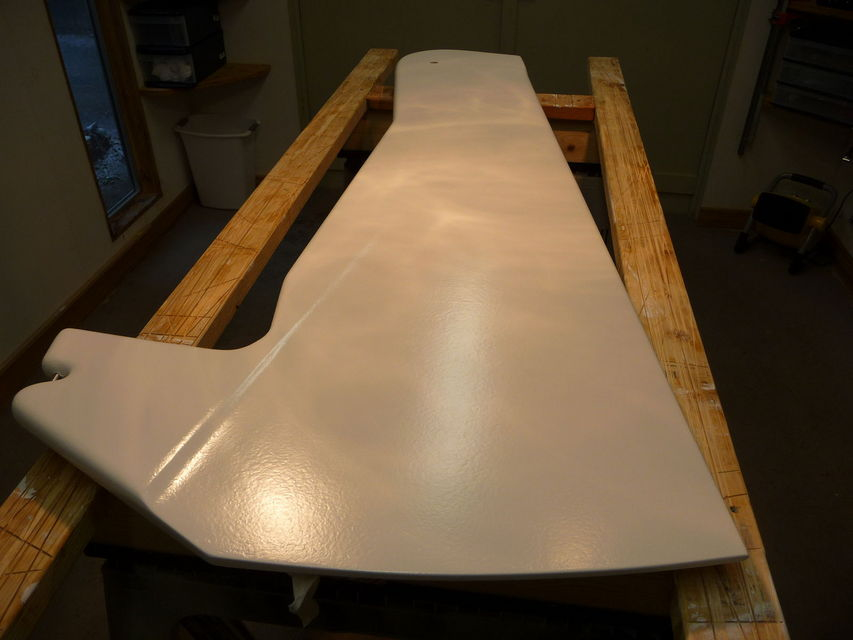
Bondos boat on straps with test centerboard hanging from the pivot
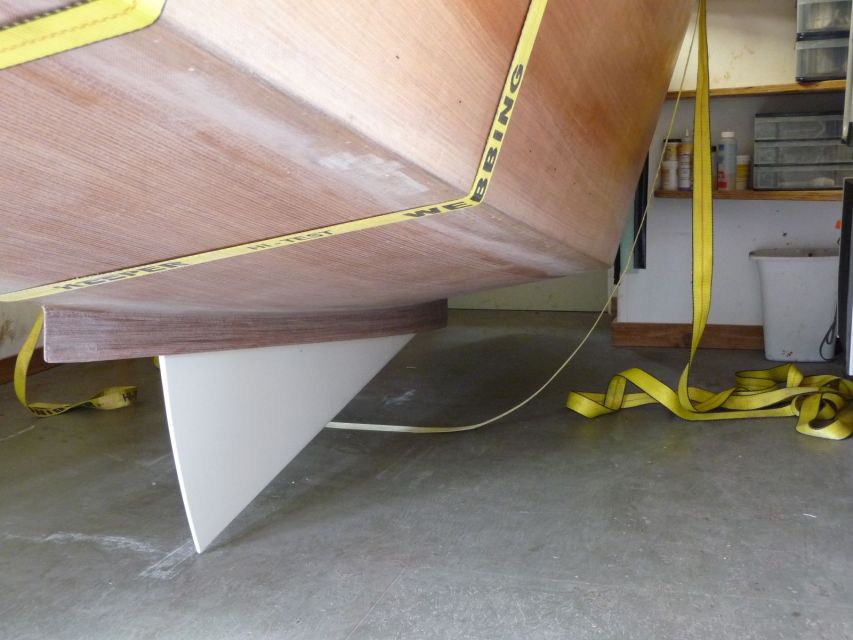
Greetings from Karl
Re: AD 14 KIELGE
Posted: Tue Apr 10, 2018 1:31 pm
by terrulian
Great shots of his nice work. Please forward my compliments to Bondo.
Re: AD 14 KIELGE
Posted: Tue Apr 10, 2018 1:43 pm
by gonandkarl
Will do, we are in regular contact and he still teaches me a lot about boat building. Lately more about sailing an Adelie as he is already on his fourth set of sails and I am glad I built such a nice boat and am looking forward to move it leisurely over the Traunsee where the splashing will take place.
Re: AD 14 KIELGE
Posted: Tue Apr 10, 2018 2:16 pm
by das boot
That strap idea will work the next thing is how you hold it up while in transport behind your car. I have a pin I slide through booth the keel box and the keel to hold it up after the first few years I found that hole through the keel box was going out of round dew to the wood being worne away. I solved that by putting a brass sleve trough booth the keel box and the keel once the flass had set up i used a hack saw blade to cut that tube on booth sides of the keel inside of the box then i was able to lower the keel and clean up the inside of the keel box with a file. The result is the brass dose not ware out but the keel stays up during transport it works well easy to do now while you are still at this stage. I can send you pictures if you want just let me know.
Re: AD 14 KIELGE
Posted: Wed Apr 11, 2018 11:48 am
by Bogieman
Karl,
I'm curious to know how Bondo installed that pin at the top of the centerboard...Maybe it was bedded / recessed in the middle board before the other two boards were glued and glassed together?
Bogie
Re: AD 14 KIELGE
Posted: Wed Apr 11, 2018 4:26 pm
by das boot
I think he had some way to winch it up and down and a bord with a slot in it to slide over the rope he used to pull it up and lower it there was a not in the cable that would hang up on that cable. The problem I had was the pin waring the hole oblong in the sides of the keel box from viberation during transet on the highway.
Re: AD 14 KIELGE
Posted: Thu Apr 12, 2018 1:34 am
by gonandkarl
Hi,
Yes Bogie he glued the stainless pin in the middle board of the centreboard and he holds the board in the up position with a pin on the top right hand side of the trunk on deck and if you look along the strap there is a knot and another loop behind it to a black plastic ball and this loop he uses to pull the board up and down. I got the idea of the knots from him for positioning the board in the 3 positions up, halfway and completely down except that I will be using a thick nylon rope where I can rest the knots in a piece of wood. I will take a picture of it today together with the pictures of the inside bunks.
Greetings from Karl
Re: AD 14 KIELGE
Posted: Thu Apr 12, 2018 4:58 am
by gonandkarl
Hi,
The more I finish the boat the more questions arise. After quite some time I finished my outboard motor bracket for mounting on the SB side of the transom and the bracket for the aluminium boarding ladder on the PS. After I tried standing and climbing into the boat it did work but the whole thing was not really trustworthy so I ordered a stainless steel boarding ladder from Osculati to be more adequate for my heavy weight. When it arrived I was surprised to read that I should not use it except when the boat is in the water.
My question to you experts: Does this apply for climbing into the boat from a boarding ladder mounted at the transom of a sailboat always or only for my ordered ladder ? It might explain why my alu ladder was rather wanting to break under my weight.
Here is the bracket for the alu ladder attached with just 2 strings to the cleat and pushpit.
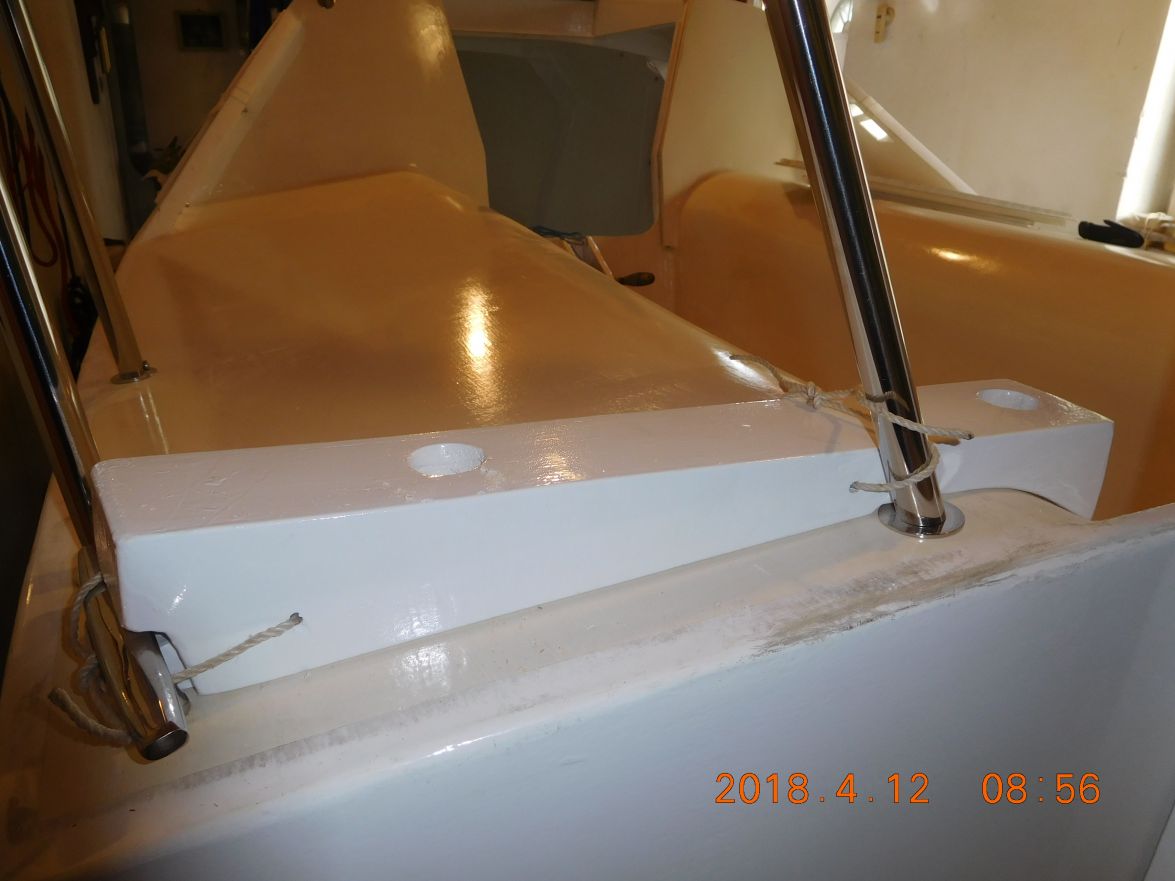
And here with the ladder hooked into the 2 holes of the wooden bracket.
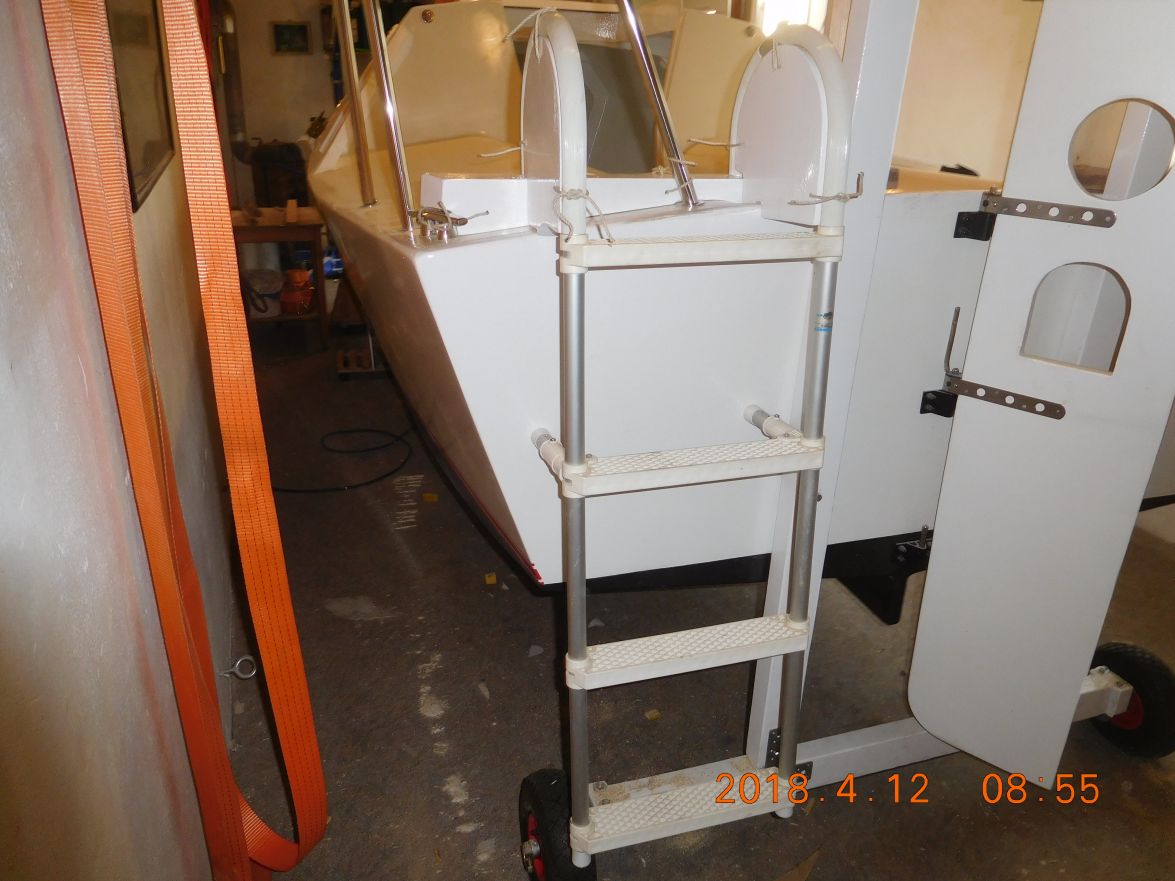
And this is my outboard motor bracket also attached to the pushpit with 3 strings for quick fitting and removal. I made it from aluminium and wood.
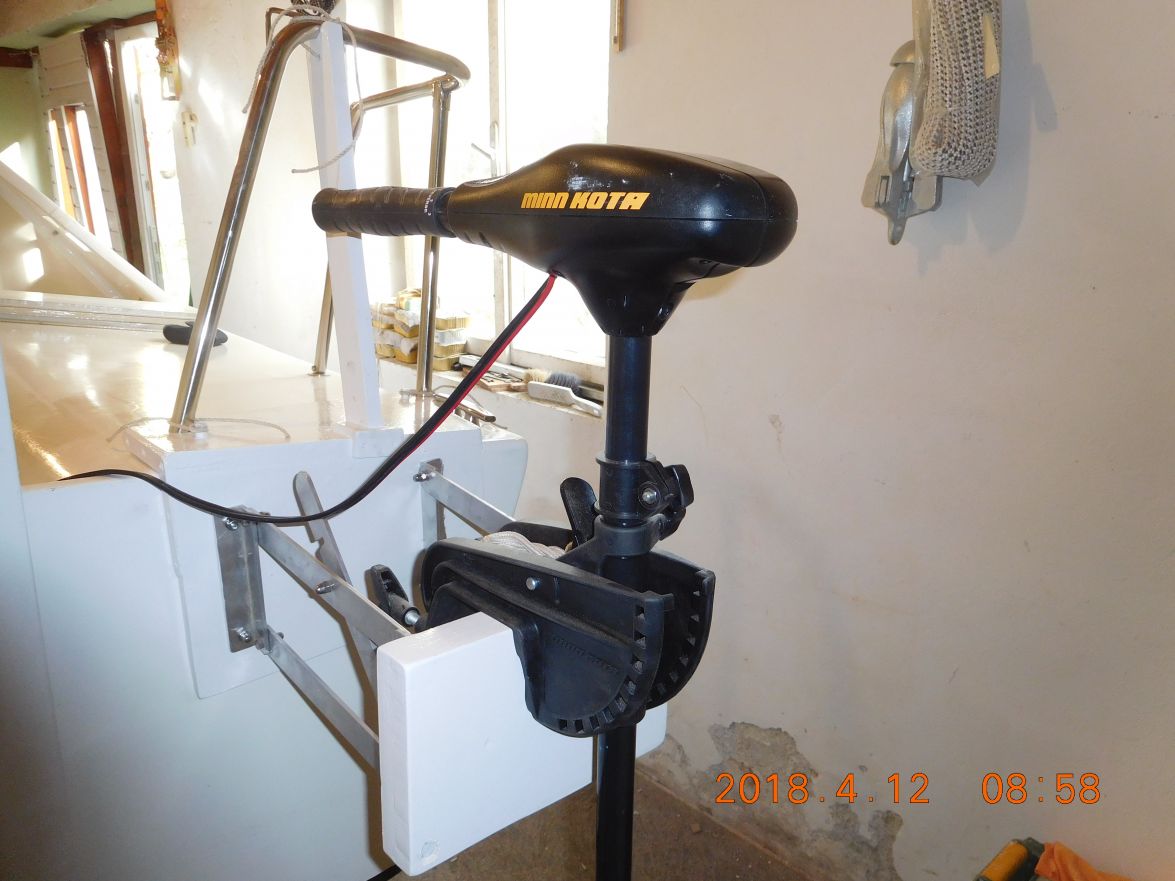
This is the picture of a test wooden piece how I want to lock the centreboard at the top of the trunk. I am thinking of making it a bit more elaborate as a lid for the open top with a hinge a bit like Salvatore did on his Adelie but he mounted a winch on the top to lift the centreboard.
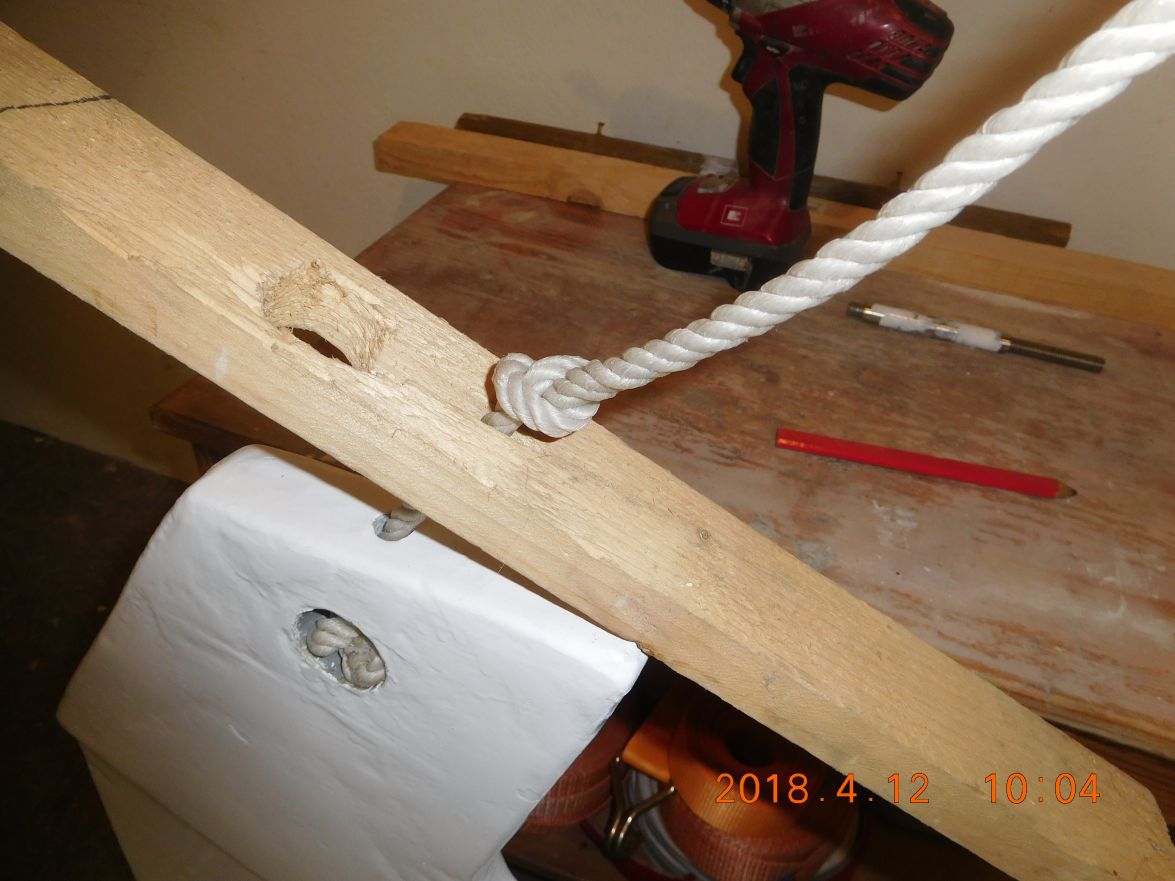
Greetings from Karl
Re: AD 14 KIELGE
Posted: Thu Apr 12, 2018 5:09 am
by gonandkarl
Hi,
I forgot to show you the fancy boarding ladder over which I should board the boat only when it is in the water. I want to make a similar bracket as for my alu ladder so it can be removed from the transom easily and again no screw holes in the boat. This allows me to take both ladders along and mount them in the spur of a moment aluminium ladder for people who want wider steps and SS ladder for the heavyweights like me.
Here in the up position
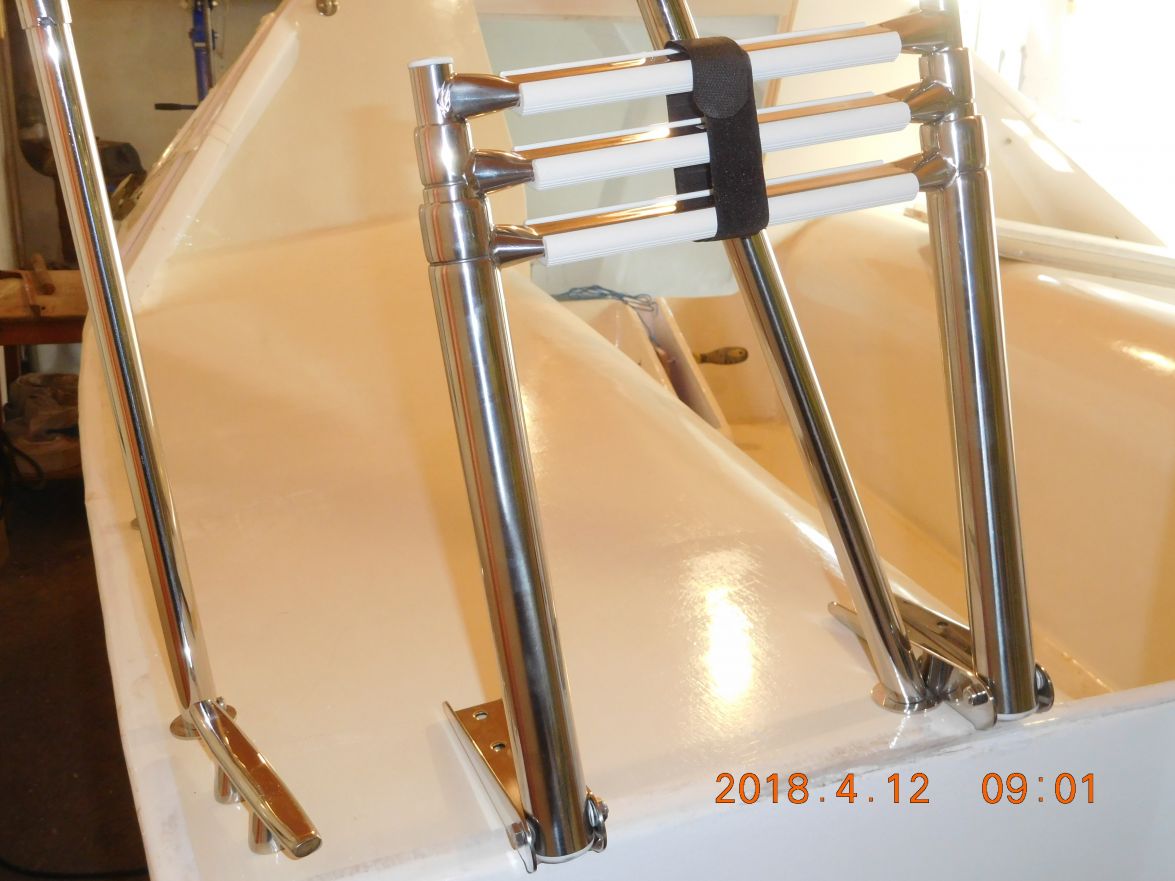
And here in the down position temporarily laid on top and ballasted with my portable lead weights.
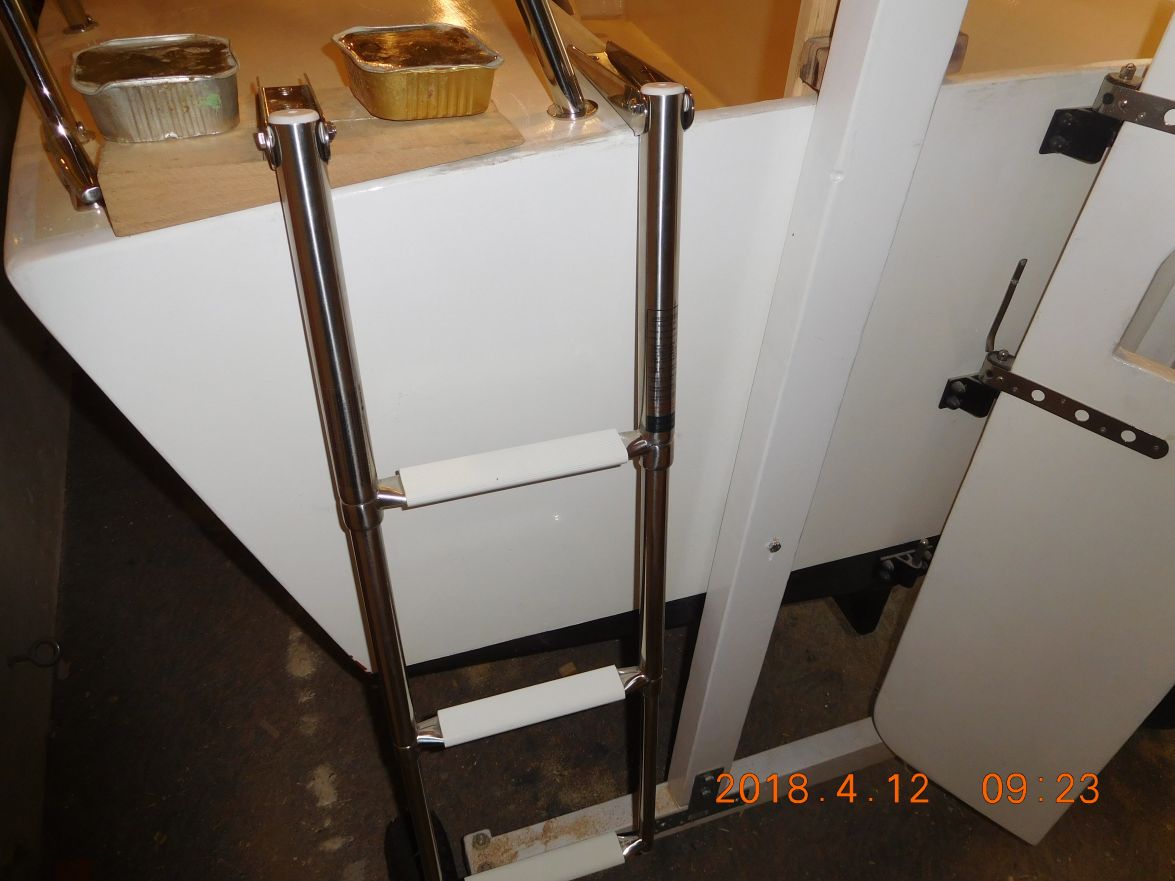
Greetings from Karl
Re: AD 14 KIELGE
Posted: Thu Apr 12, 2018 7:14 am
by Jeff
Karl, very nice!!!! Jeff
Re: AD 14 KIELGE
Posted: Thu Apr 12, 2018 8:21 am
by terrulian
That is quite an assortment of issues. So:
How are you visualizing using the ladder when the boat is not in the water? Are you planning to use these ladders for swim ladders? We don't do that around here, the water's cold, so the ladder on our 22 is never used except in emergencies and that's happened only once when someone managed to flip the dinghy. For emergencies I'd like the ladder to live in its functional position at all times when in the water and be accessible from the sea. You need to have a ready method of getting a person back on board. This means that for my money the SS ladder that folds, with a lanyard long enough to grab from the water to deploy it, is the only option. If you are by yourself you can't depend on any arrangement that requires assistance. The aluminum ladder as shown could not be used while sailing and could not be deployed quickly in an emergency, so really it could only be used at anchor for a swim ladder and that means carrying two ladders, one for each purpose. In a small boat I don't see the practicality of that. I see you have Jacques' holes in the rudder for getting back into the boat and those may be climbable, I don't know. If that is your emergency solution, then you don't need the stainless one at all.
As for not using the ladder except when the boat is in the water I have a feeling this was a clause written by lawyers in case you do something stupid. Of course, as we are sailors, doing something stupid is a given, so I get their motivation. Still, I think it would hold your weight but on the other hand see above about when it is going to be used.
As to the keel arrangement, I don't know enough about this particular boat to have an opinion except that you can't expect that pin to hold the keel while going down the road on a trailer. As was mentioned earlier, this will result in wearing out the hole from vibration. So you need a line or a rubber plate on the trailer to support the keel when not in the water, and that will not do any damage.
Re: AD 14 KIELGE
Posted: Thu Apr 12, 2018 10:18 am
by Jaysen
Keep in mind that a body in water requires less support than a body on land thanks to increased density of water. There's also a difference in how support for climbing has to be done when you need to keep someones head off the concrete vs letting them hit water (you only have one support point on the swim ladder vs 2 support points for land ladders... think about it).
Re: AD 14 KIELGE
Posted: Thu Apr 12, 2018 10:54 am
by gonandkarl
Hi,
Thank you Tony and Jayson for explaining the ladder and keel issue. You are so right it should be used for an emergency and therefore I will leave the stainless steel ladder permanently at the ready and I can pull myself up on the lightening holes of the rudder per Jacques Adelie plan should the stainless steel ladder not be deployed and deploy it from the water. When the boat is on the trailer I can take a little telescopic ladder along in the boot of the car to get onto the deck. Sometimes I am thinking much too complicated and you guys from the forum remind me of common sense.
Greetings from Karl
Re: AD 14 KIELGE
Posted: Thu Apr 12, 2018 11:56 pm
by das boot
I have been using that pin for years to hold that keel up and it is a 20 mile drive for me to get to the lake one way so 40 miles each time round trip the pin is a stanless steal bolt 1/2 inch works well. As for the ladder i have a small inflatable i use to go to shore with I tried once to clime into the boat from it using the holes in the rudder I made it but it was not an easy clime. Now I have a rope ladder with plastic rungs on it it folds up small for storage I leave it hooked to a cleat on the back of the boat and it can be deployed from the water by pulling on a rope from the water. I have never tried it in the water yet but it should work.
Re: AD 14 KIELGE
Posted: Fri Apr 13, 2018 2:04 am
by gonandkarl
Hi George,
I will definitely work with a pin like you are using to hold up the centreboard. My sister only 5 years younger than me had a bad experience with a rope ladder because when she tried to get out of the water the first step was too high near the water surface and when she had her foot on it it swung underneath the boat. She got pulled up on board by 2 strong men with the rope ladder she would not have managed. That is why she used the second hand alu swimming ladder the next time and gave it to me as she stopped sailing all together. I agree with Tony that it is of no use while sailing and to deploy it if I fall into the water is not possible if it is lying some were in the cabin. So I will mount the stainless steel ladder permanently seeing that I have bought it already. It will be easily deployed from the water when I am the MOB and no one else on the boat. As you say that it is difficult to come back into the boat with the rudder holes they will help me at least to have a nice grip for my hands while getting up the ladder. This weekend I want to hang the centreboard with your idea you gave me a long time ago with a thin line and two handles in the cabin and with what Tony told me recently.
I hope all of you hold thumbs for me that this biggest task since flipping the boat will go OK.
Greetings from Karl
Re: AD 14 KIELGE
Posted: Fri Apr 13, 2018 8:16 am
by terrulian
I have zero experience with this boat and I'm sure das boot is the best source of info about that pin. I probably am not visualizing its use correctly. What we have is a stainless cable connected to the aft of the bottom of the rudder with a padeye, which leads to a winch under the companionway. When we put it on the trailer, we pull the keel up, get the boat on the trailer, and then we lower the keel to a pad on a crossmember of the trailer to support it while driving so as not to put any wear into the lifting mechanism. Like I said, ours weighs 500 lbs. or 227 kilos.
Re: AD 14 KIELGE
Posted: Fri Apr 13, 2018 9:34 am
by Bogieman
Good luck Karl!
Re: AD 14 KIELGE
Posted: Fri Apr 13, 2018 7:27 pm
by das boot
I will take pictures of that pin set up and post it in the AM.
Re: AD 14 KIELGE
Posted: Fri Apr 13, 2018 8:28 pm
by Bogieman
Karl,
Take a look at Salvatore's ladder. It looks like a good set up that might work for you.
George.
I'm also looking forward to pics of your centerboard pin assembly.
Bogie
Re: AD 14 KIELGE
Posted: Sat Apr 14, 2018 3:04 pm
by das boot
I sent the pictures through to you Via Email they are in two emails dew to file size I do not know how to post them onto the site can you post them for me thanks
Re: AD 14 KIELGE
Posted: Sun Apr 15, 2018 4:15 am
by gonandkarl
Hi,
Here are all the pictures George sent me by email and I think they will not only help me but any Adelie builder with his pictures and explanations.
Hi Karl,
I will send these in two parts dew to file size
I do not know how to post them on the site can you do that for me thanks
One of the most important things if you are sailing alone is to keep a rope with a float on it trailing behind the boat so you have something to grab on to. I have a small inflatable that I drag behind me a lot of the time I keep it on a 50-75 foot rope most of the time if I am alone.
Picture-2018 is the boat still in storage waiting for spring

Picture-1023 This is the way the ladder stores in the boat
Picture-1025 This is the ladder deployed
I am sorry the boat is dirty I did not have time to clean it up before I took the picture and you can see some cracking in the glass on the keel I will fix it before I put it in the water this is not a new boat at this point . At 71 I find it hard to get motivated
Picture-1019 The bolt that I put through the keel on the right hand side you can see where I built it up with thick bog around that brass tube I had to do that dew to the fact the hole had worn out the wood that bad this just adds more support to the pin.
Picture-1020 That is where the pin comes out the left side of the keel box again you can see I built that side up as well
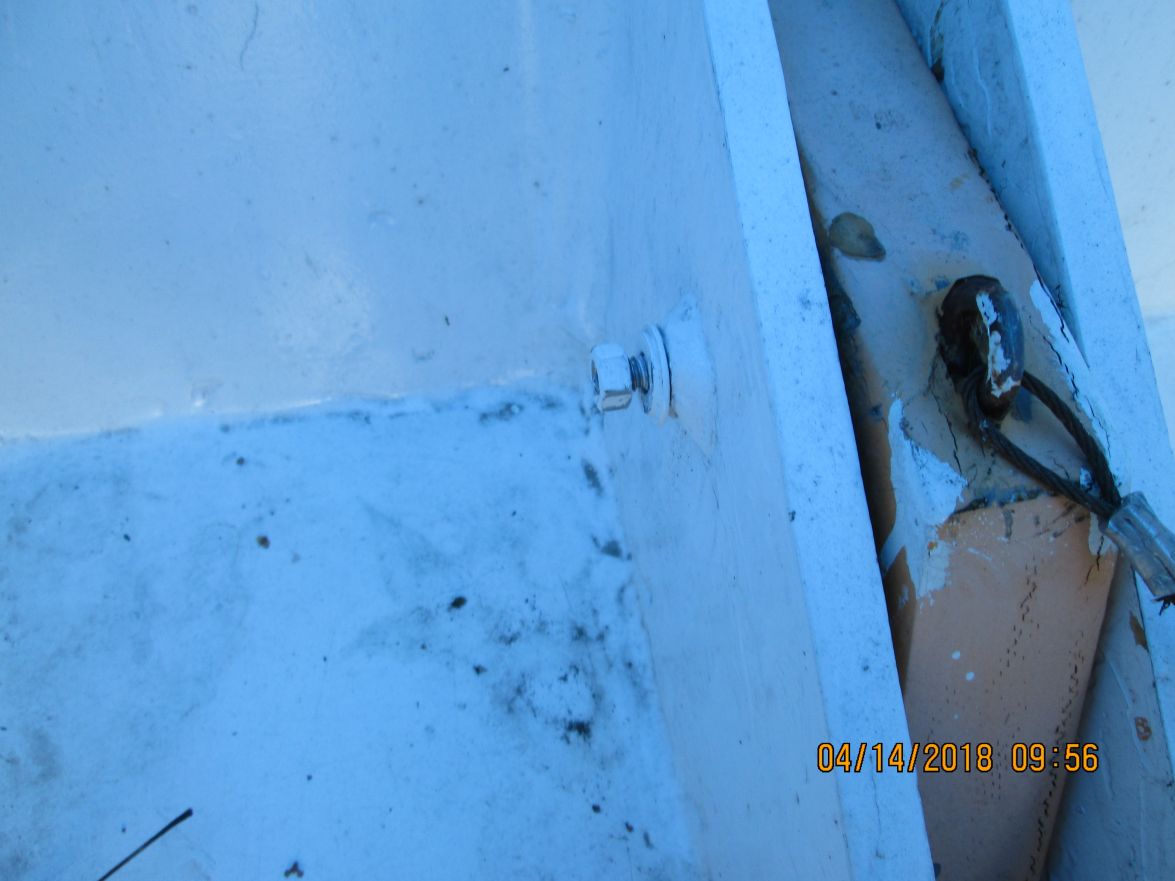
Picture-1021 There are booth sides in the same picture you can also see the cable I use to pull it up and lower it when the keel is down I have a loop at the top of the cable that I shove a small hunk of ½ inch pipe through to give me a handle to work with when the keel is down I stick the bolt through the hole and through the loop in the cable so even if the main pivot point broke off the keel is still hooked to the boat.
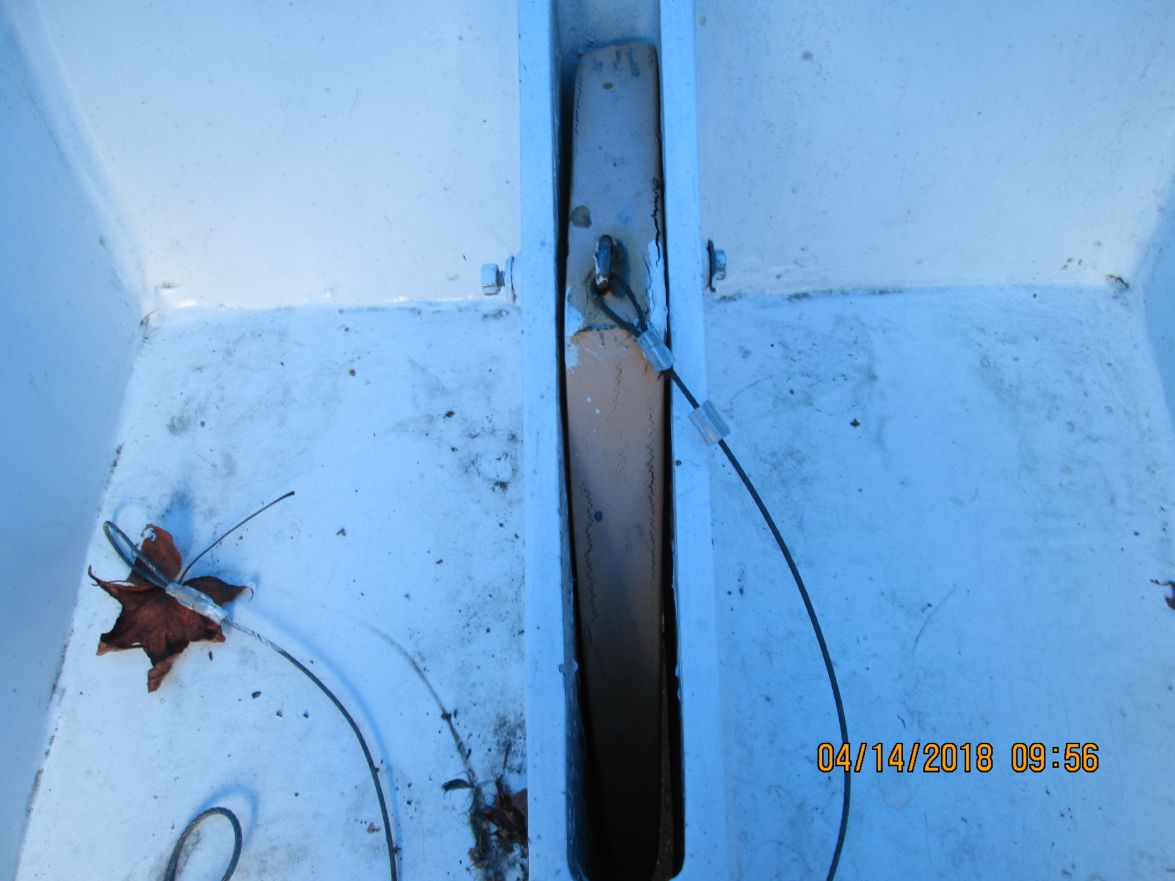
Greetings from Karl
Re: AD 14 KIELGE
Posted: Sun Apr 15, 2018 5:29 am
by gonandkarl
Hi,
It is a warm and sunny Sunday morning here in Austria and I am glad that I can report about hanging the 63 kg ( 138 pounds ) centreboard into its trunk which my son and I did yesterday. My idea was to also fetch my son in law to help and to use Georges tip with a thin rope to guide the board with its pivot hole up to the trunk hole. My son decided different because he said
I have not got time the whole day to stuff around for such a small task
For him small for me sleepless nights for nearly a whole week thinking it is nearly hardly surmountable. We wheeled the board under the boat which was hanging in straps at the right height at 11 am. Then we let the boat down enough so that the back of the board was just inside the trunk so it cannot fall sideways anymore. The next job was to lift the front of the board with the car jack up and we tried to position it so high that the pin with its sleeve can be shoved thru the pivot hole under cabin sole. We tried a bit allways supporting the board with the jack and pieces of wood. By then half an hour was gone and my son said
You know what, I have a lunch appointment in town and we finish it right afterwards without a jack just by me lifting it up and you trying to find the hole with sleeve and pin in the cabin. I will be back in an hour
While he was away I thought I carry on by myself positioning the board still better with wood and the car jack and climb into the boat and hook it up by myself. Then my plan went haywire because when I climbed onto the bench at SB I pressed the seat so much down that the boat did hang completely skew in its straps and I heard the my wooden pieces and car jack collapse sideways. Now I thought I have to revitalise my building frame so the boat will be fixed for the hooking up of the centreboard and I cut the cross pieces at frame station B an C away to make place for the centreboard. Just when I finished with the building frame my son came back exactly at 1 pm and discarded this building frame business immediately and meant we should not stuff around but get finished and I was speechless because 15 minutes later the board was hooked up me lying on my stomach in the cabin pushing sleeve and pin through the pivot hole while he was lying on the floor lifting the board up with his hands. So much for an elaborate plan you do not need it for hooking up the centreboard it is better to have a strong son. One thing I realized right at the end as the centreboard increased the weight of the boat by about 25 % it bent quietly my steel pipe support wit my hoist across the room by quite a bit. Thank god the boat was supported by enough straps additionally.
Ready
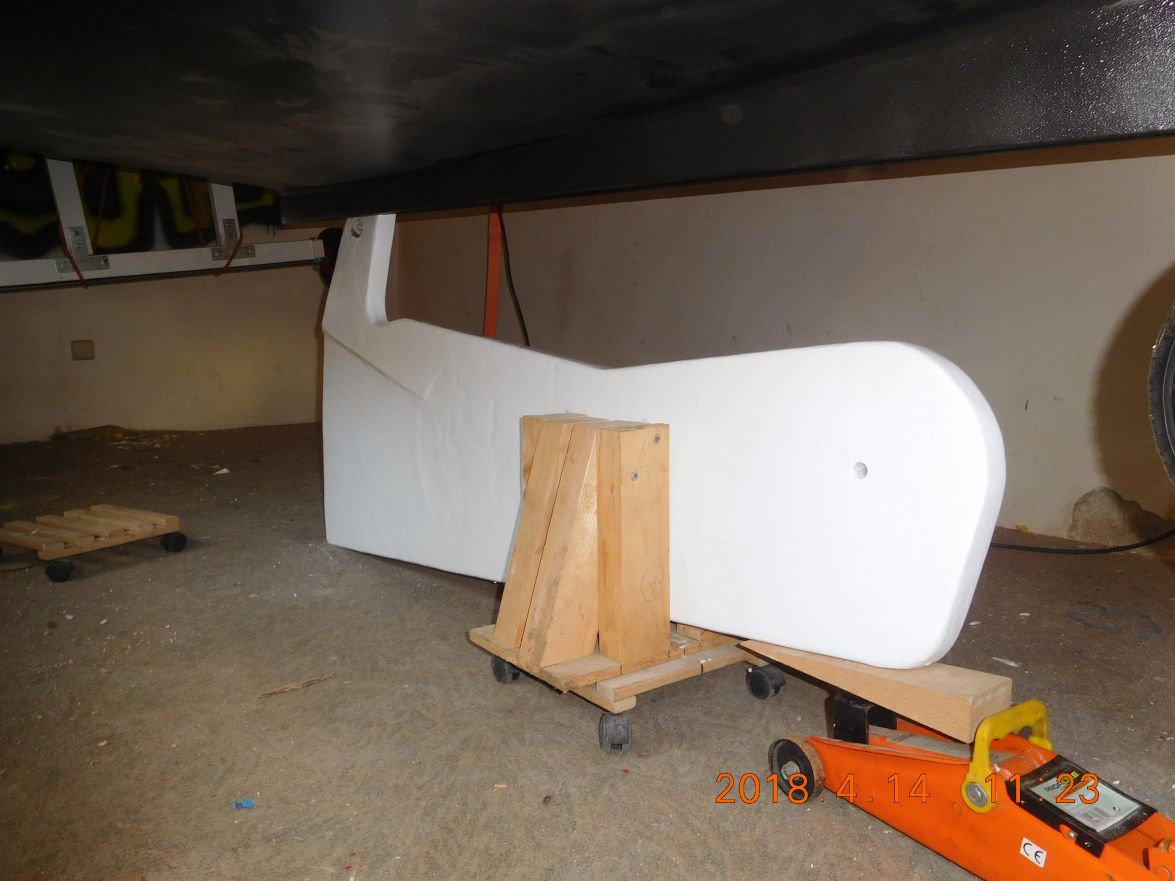
Front lifted up
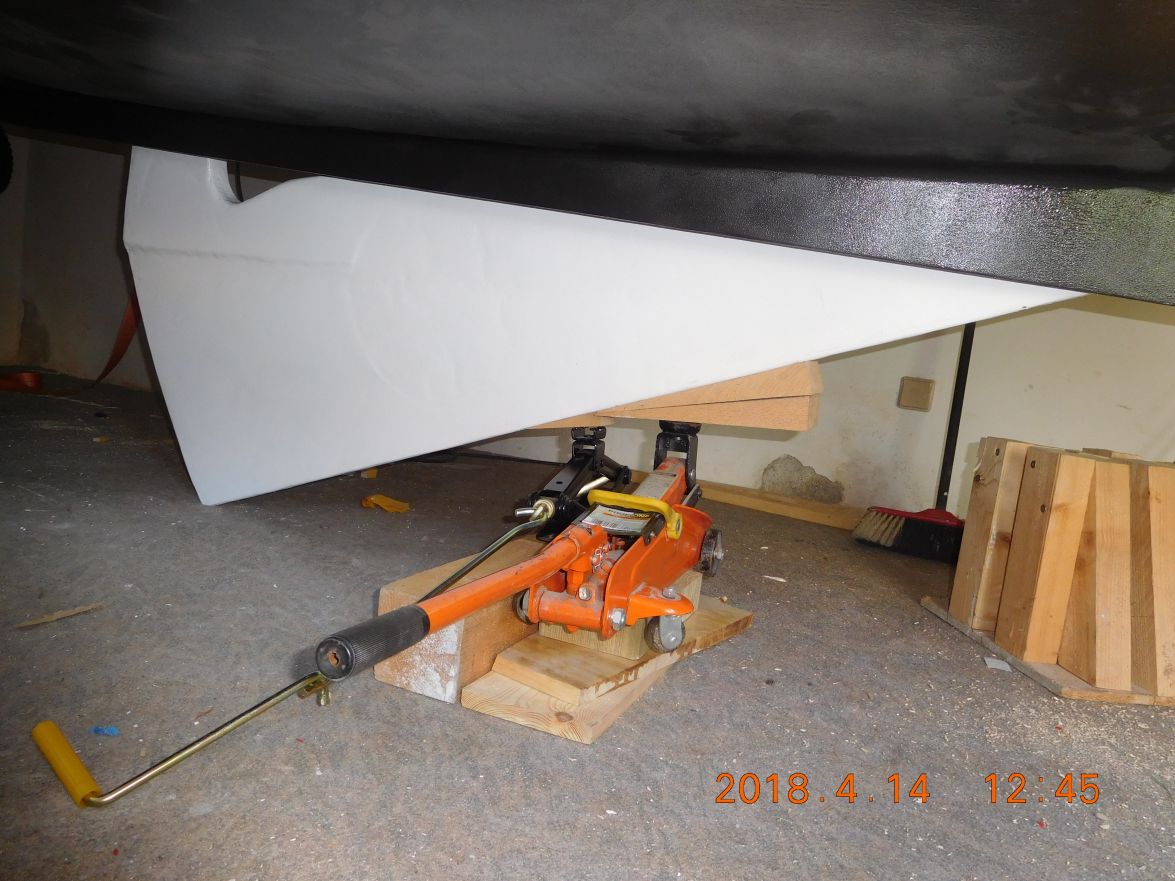
Nicely supported with wood an carjack
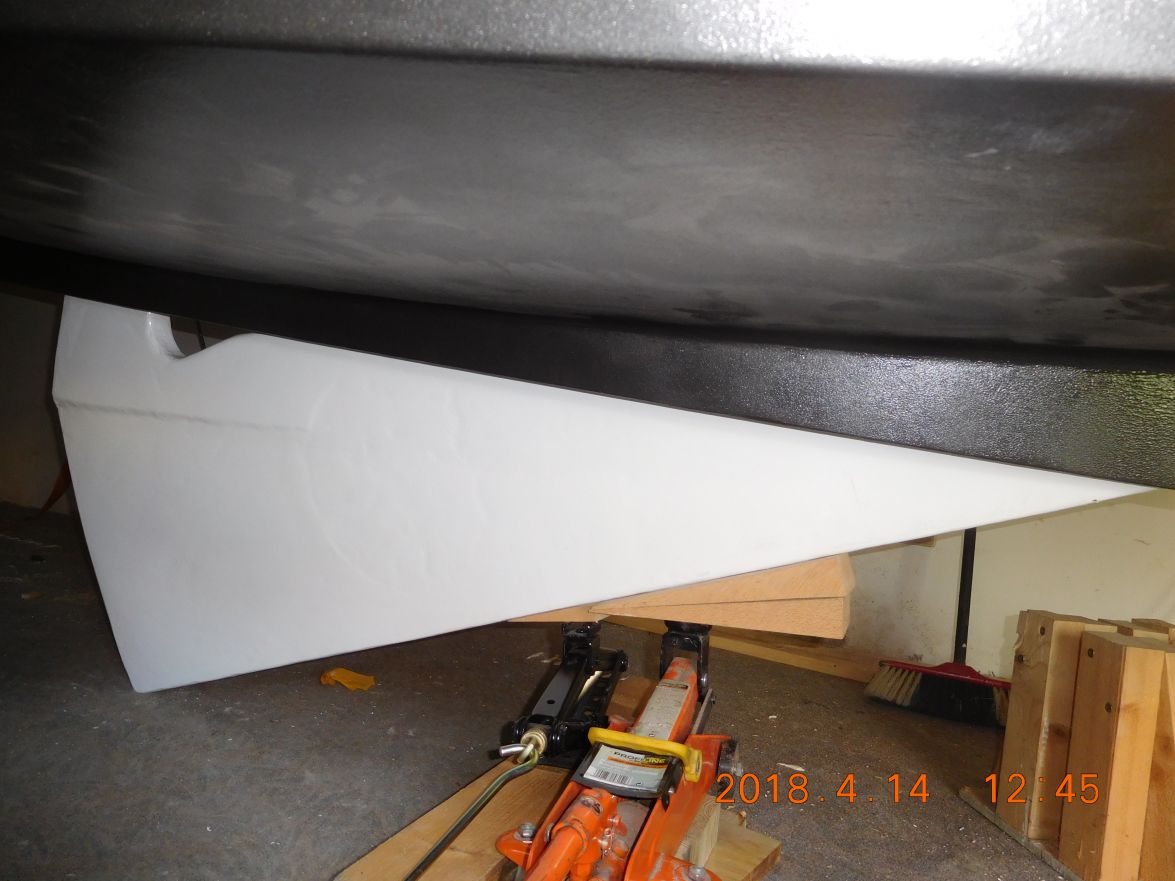
Nicely collapsed
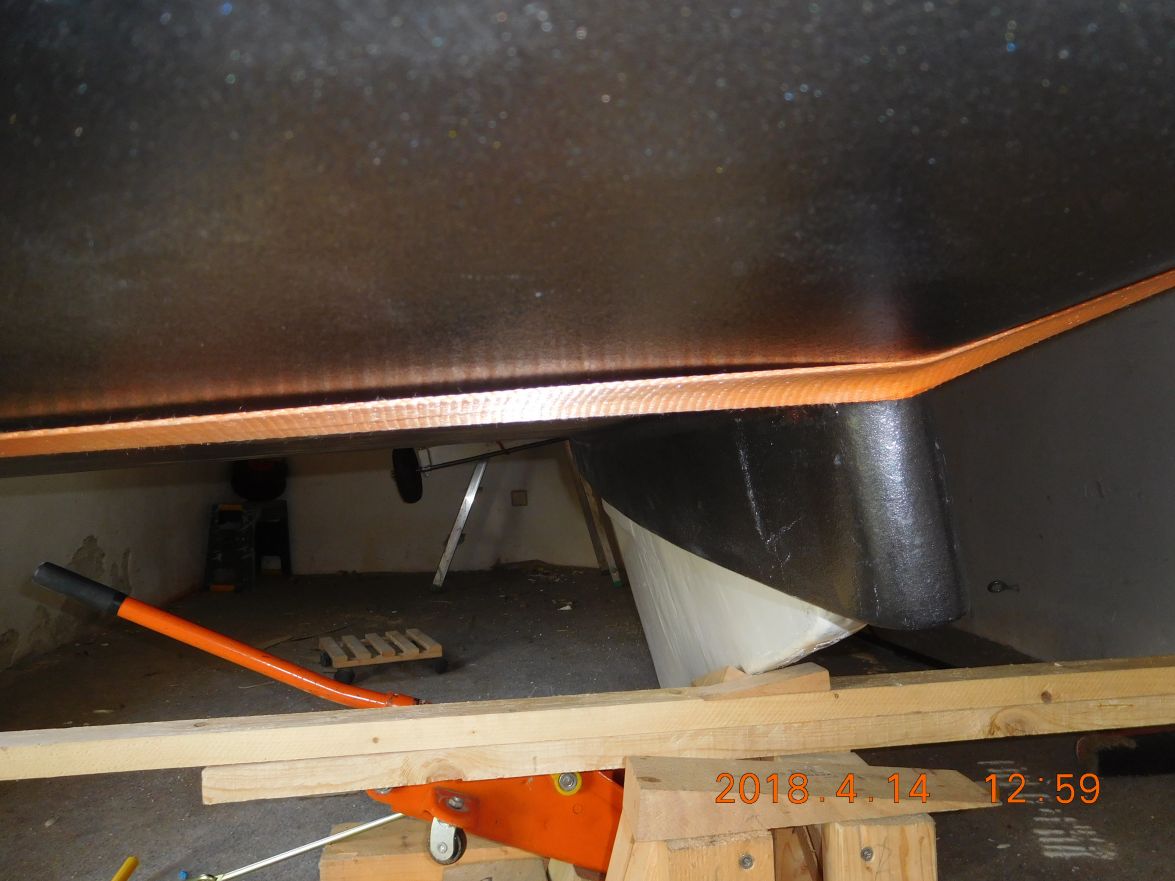
Building frame at the ready
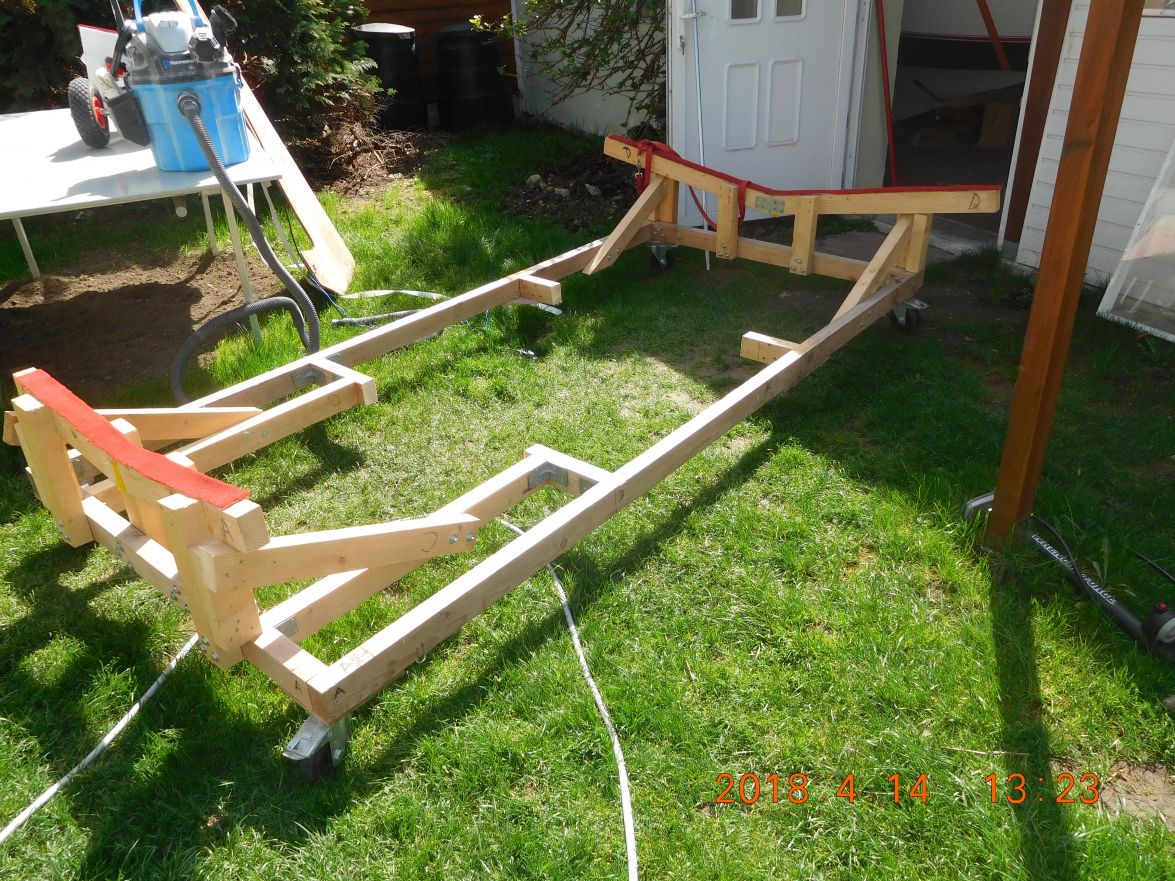
Finished with a bent steel pipe acoss the room
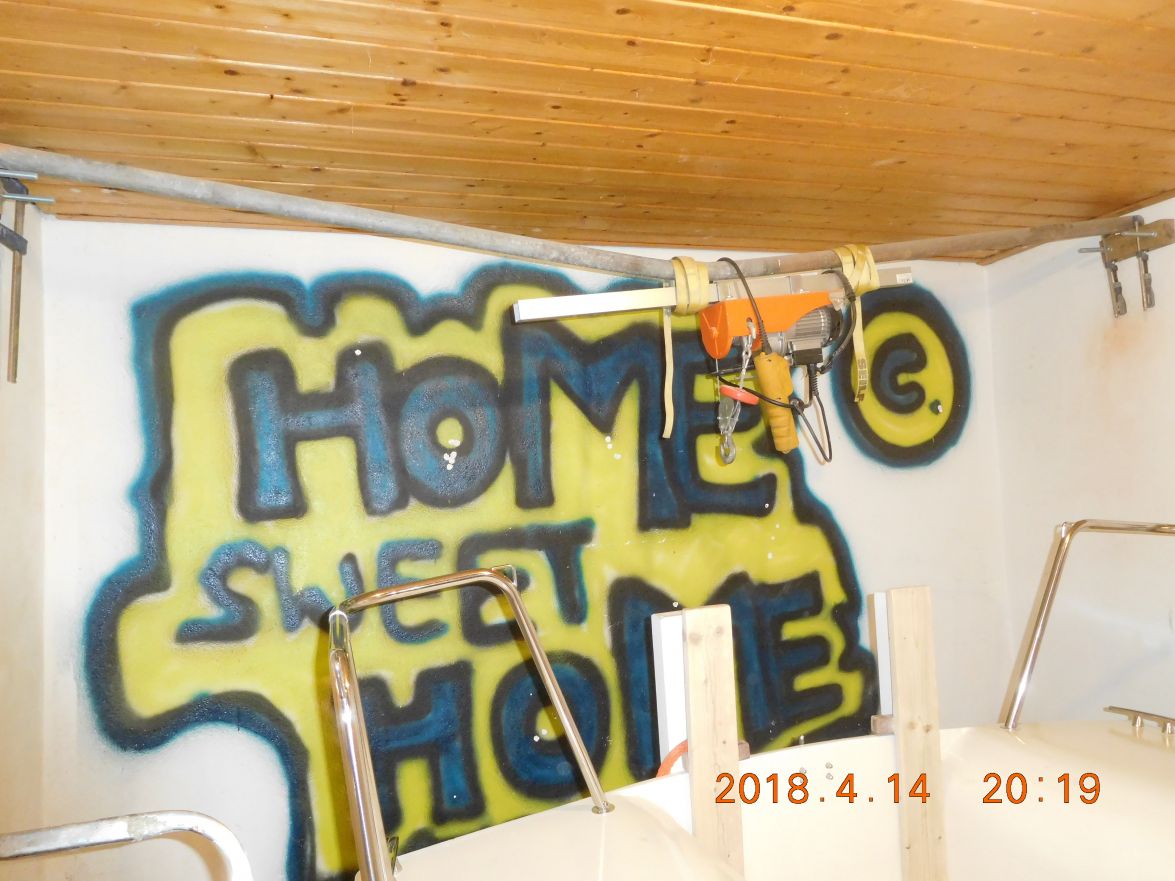
Greetings from Karl
Re: AD 14 KIELGE
Posted: Sun Apr 15, 2018 6:40 am
by cape man
That picture of the pipe is scary! So glad it didn't come loose on you and your son.
Build on!
Re: AD 14 KIELGE
Posted: Sun Apr 15, 2018 7:26 am
by Jaysen
Yikes. That was a close one. Glad the son was able to make short work of that for you. Good kids seem to be a rare thing these days. Congratulations on raising a good one.
Re: AD 14 KIELGE
Posted: Sun Apr 15, 2018 8:51 am
by BB Sig
As I get older, the more I regret muscling things instead of using finesse. Muscling has lead to a number of problems as I get older. I had a girlfriend that use to love watching me throw hay bales into the barn loft. I miss that loft and those days!
Re: AD 14 KIELGE
Posted: Sun Apr 15, 2018 10:27 am
by Bogieman
Re: AD 14 KIELGE
Posted: Sun Apr 15, 2018 10:30 am
by Bogieman
[quote=gonandkarl post_id=420145 time=1523780123 user_id=77433]
Hi,
Here are all the pictures George sent me by email and I think they will not only help me but any Adelie builder with his pictures and explanations...
[quote]
Thanks for sharing Karl.
Re: AD 14 KIELGE
Posted: Sun Apr 15, 2018 10:32 am
by Bogieman
das boot wrote: ↑Sat Apr 14, 2018 3:04 pm
I sent the pictures through to you Via Email they are in two emails dew to file size I do not know how to post them onto the site can you post them for me thanks
Thanks George.
Re: AD 14 KIELGE
Posted: Sun Apr 15, 2018 10:50 am
by das boot
Glad to see you got that keel into place it was one of the hardest things to do while building my boat. You are making good headway on your project keep it up and you will be in the water in no time
Re: AD 14 KIELGE
Posted: Tue Apr 17, 2018 7:22 am
by gonandkarl
Hi,
After the keel was in the boat I realized that my idea with having a thick nylon rope in the centreboard hole serving also as the hole for the locking cross pin does not work. The thick knot in the hole does not leave enough place for a proper pin to be pushed thru I managed only to get a thin screwdriver thru. So I decided to lift the boat as high as possible at the stern so the hole will appear under the boat and I can remove the nylon rope and use something like George or Bondo a strap or a thin steel rope only to find out that the centreboard did not come out under the boat completely because I hit the ceiling of the room with the push pits. This kept me busy the whole of yesterday and the last thing in the afternoon was demounting the push pits. To do that I had to unscrew 3 nuts inside each bunk. It is quite a task to get my slender body in there and on the PS I had to belly crawl a second time because I unscrewed in the corner a nut of the cleat instead of the push pit one. After this post I will try and lift the boat again in the ceiling direction to have access to the centreboards top. Should the stern of the boat still not be high enough then I will have to do it in the garden.
PS bunk accessible even with my body part that has the biggest circumference. On these pictures you can see already my next task after splashing. I will have to fair the ceilings and curves of the bunks and repaint them.
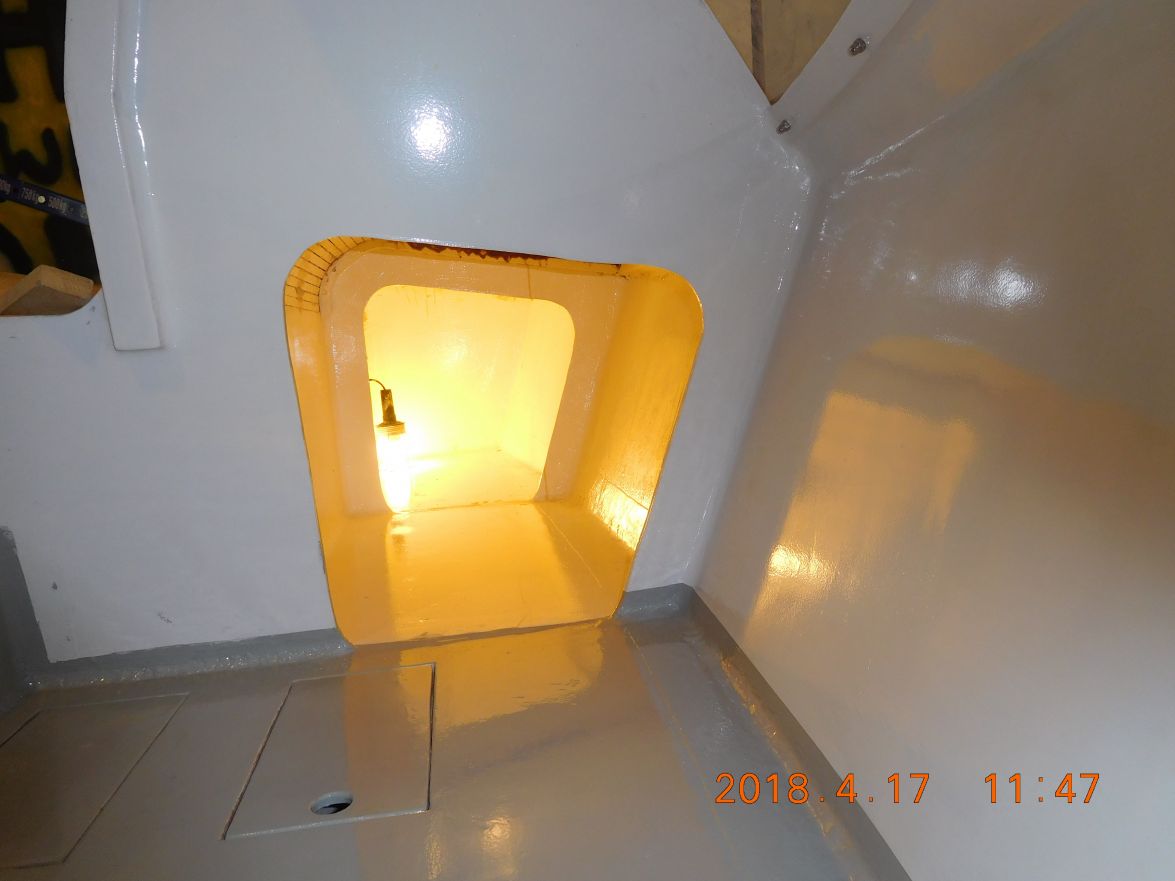
And for Bogie who wanted to see the inside of the boat to get an idea where his crew members can sleep are the following pictures.
One definitely can sleep in the 2 bunks because they are rather long. If I ever should sleep in there I would definitely sleep in the SB bunk because it is a bit curved and I always sleep on my right side and then my head would be near the main cabin. If I would want to sleep in the PS bunk the head would have to be at the transom end of the bunk and that I cannot imagine as preferable when my senile escape from bed at night is preceded by a belly crawl backwards.
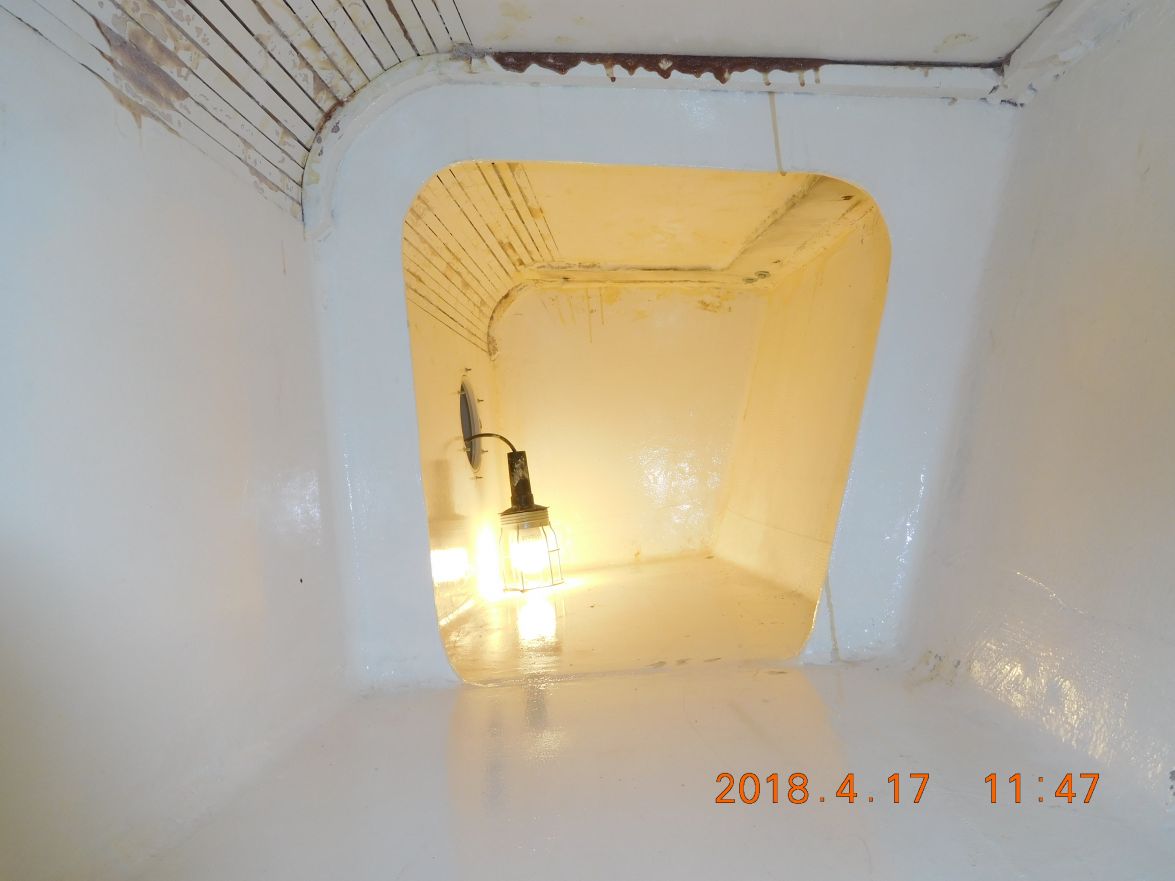
Both bunks viewed from the cabin. You notice the boat is nicely vacuumed but my feet are still dirty.
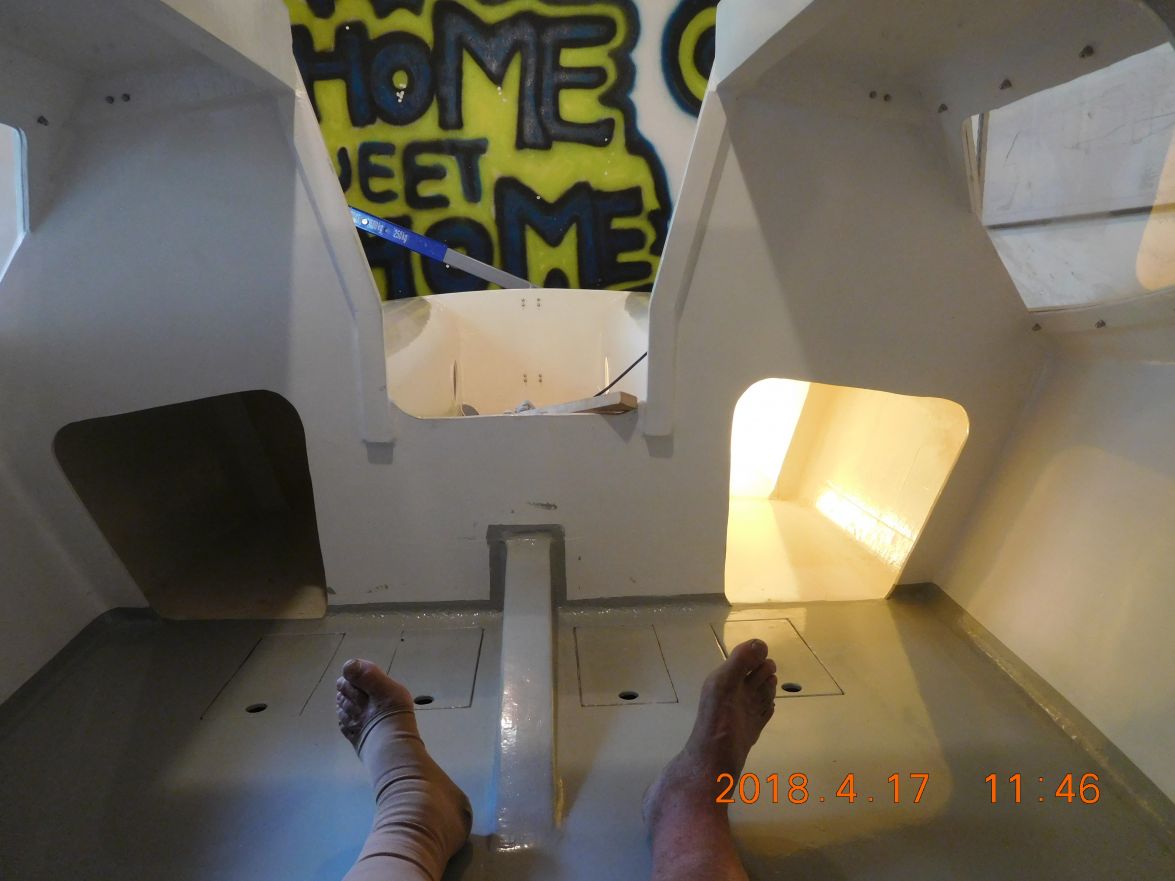
View of the main cabin where you have a berth on each side but sleep a bit hard because there is only the floor.
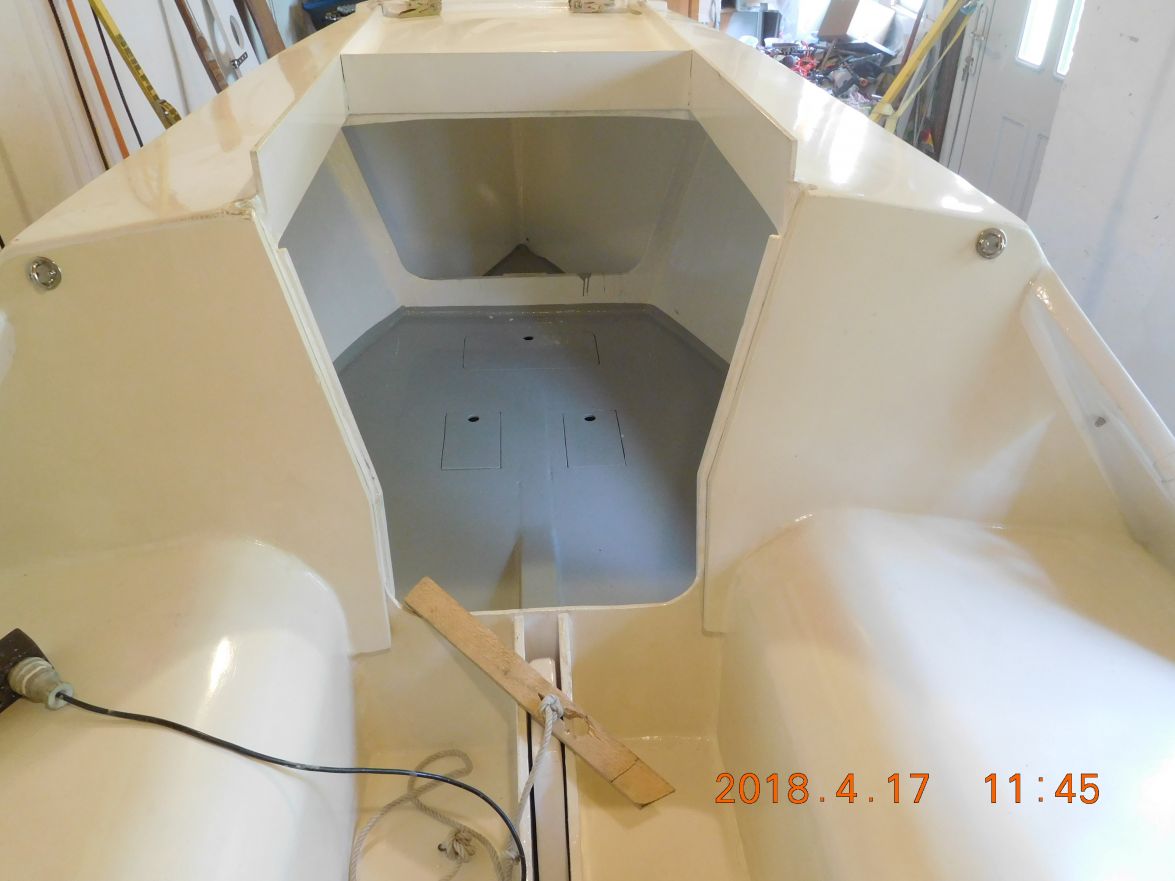
Bogie I think your crew ( your children I assume ) will definitely have fun in an Adelie. My neighbors kids visit me often just to play with the dog and climb around in my boat.
Greetings from Karl
Re: AD 14 KIELGE
Posted: Tue Apr 17, 2018 9:47 am
by Bogieman
gonandkarl wrote: ↑Tue Apr 17, 2018 7:22 am
...And for Bogie who wanted to see the inside of the boat to get an idea where his crew members can sleep are the following pictures.
One definitely can sleep in the 2 bunks because they are rather long. If I ever should sleep in there I would definitely sleep in the SB bunk because it is a bit curved and I always sleep on my right side and then my head would be near the main cabin. If I would want to sleep in the PS bunk the head would have to be at the transom end of the bunk and that I cannot imagine as preferable when my senile escape from bed at night is preceded by a bell crawl backwards...
Thanks Karl. Those pictures give real perspective. And the boat looks fantastic. You obviously spent a lot of time and effort faring and painting the inside. Looks like there's a lot of room in the cabin and inside the bunks.
I hope you solve your centerboard issue soon. Sounds like she knows you are close to being done with her so she's throwing one last fit.
The weather here has been cool, windy and rainy over the last week and a half. Not much progress on my end.
Bogie
Re: AD 14 KIELGE
Posted: Tue Apr 17, 2018 9:55 am
by Jaysen
Karl, that's going to be a fun boat for you to sail around in. I'm kind of wishing I had a "fun" boat for pleasure sailing to go along with the work boat Lil Bit really is.
One question I have regarding the bunks: how much of a cushion is needed do make the frames unnoticeable? The look to be about 3" out from the hull sides. I'd be temped to use a hammock for sleeping or some type of a panel to turn that space into storage (but I think that is a "bad idea" which is really the kind of idea I'm good at).
Kudos on letting the the little neighbors play on the boat. The world needs more "good neighbors" showing the next generations how to be civil.
Re: AD 14 KIELGE
Posted: Tue Apr 17, 2018 11:27 am
by terrulian
Karl,
Nice progress.
How do you plan to use the forepeak?
Re: AD 14 KIELGE
Posted: Tue Apr 17, 2018 11:45 am
by das boot
Looks real good you took more time than I did on those bunk areas the idea of the small hatches at the rear of the birth is a good idea i have not installed on my boat and things tend to slide to that location while in transit and i need to clime in there to get them out i should install them. The pin idea is easy where you have the keel held up by the rope just drill the hole through the keel box and the keel at the same tome slide the brass tube through the home and use a hack saw to slide between the keel and the keel box to cut that tube on booth sides then lower the keel and clean the cut ends of the brass tube using a file. When you rase the keel you just slide that pin into place and put the nut on it to hold everything in place simple,
Re: AD 14 KIELGE
Posted: Tue Apr 17, 2018 2:39 pm
by gonandkarl
Hi,
Jayson, the bunks are very small they look bigger on the picture and the place between frames C and D one has to use with the arms to for instance turn around from the stomach onto the back, but I could imagine thin cushions against the side of the boat between the frames might be cosy. Yes the neighbour kids are looking forward to splashing time and check my progress nearly daily as I always have an open house ( never locked ) and the gate also wide open as the dog is like me knows where is home and therefore always lies at the open gate or on the sidewalk and has not so far bothered people walking by or dogs been walked past. We are both overweight and that makes us most probably jovial, cant remember the dog or me ever having a fight with anybody life is too short not to just have fun and laughs. And now to Tony s question. I had to look up in the dictionary what is the forepeak, now that I know I think I have not thought about it much more than storing my throw over board anchor and maybe fenders and any other stuff that I cannot accomodate in the 2 under floor compartment. In the cabin I want to put similar reclining seats like Bondo has bought for his boat. Maybe I can trick my wife on the boat if it looks like that.
Bondos cabin
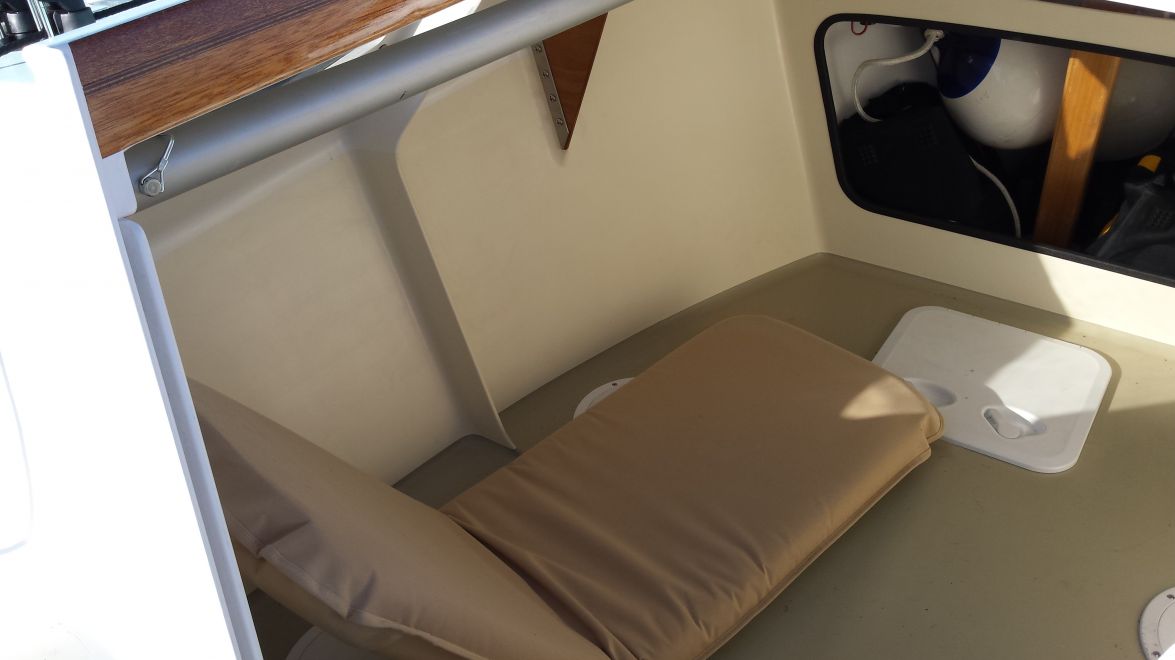
Greetings from Karl
Re: AD 14 KIELGE
Posted: Tue Apr 17, 2018 5:42 pm
by gonandkarl
Hi,
I got the boat now back on the floor of the building shed after fitting a SS eye bolt on top of the centreboard with a skew hanging boat across the room. The push pits still need to be screwed down from inside the bunks but the crawl in them I leave for tomorrow.
The skew boat
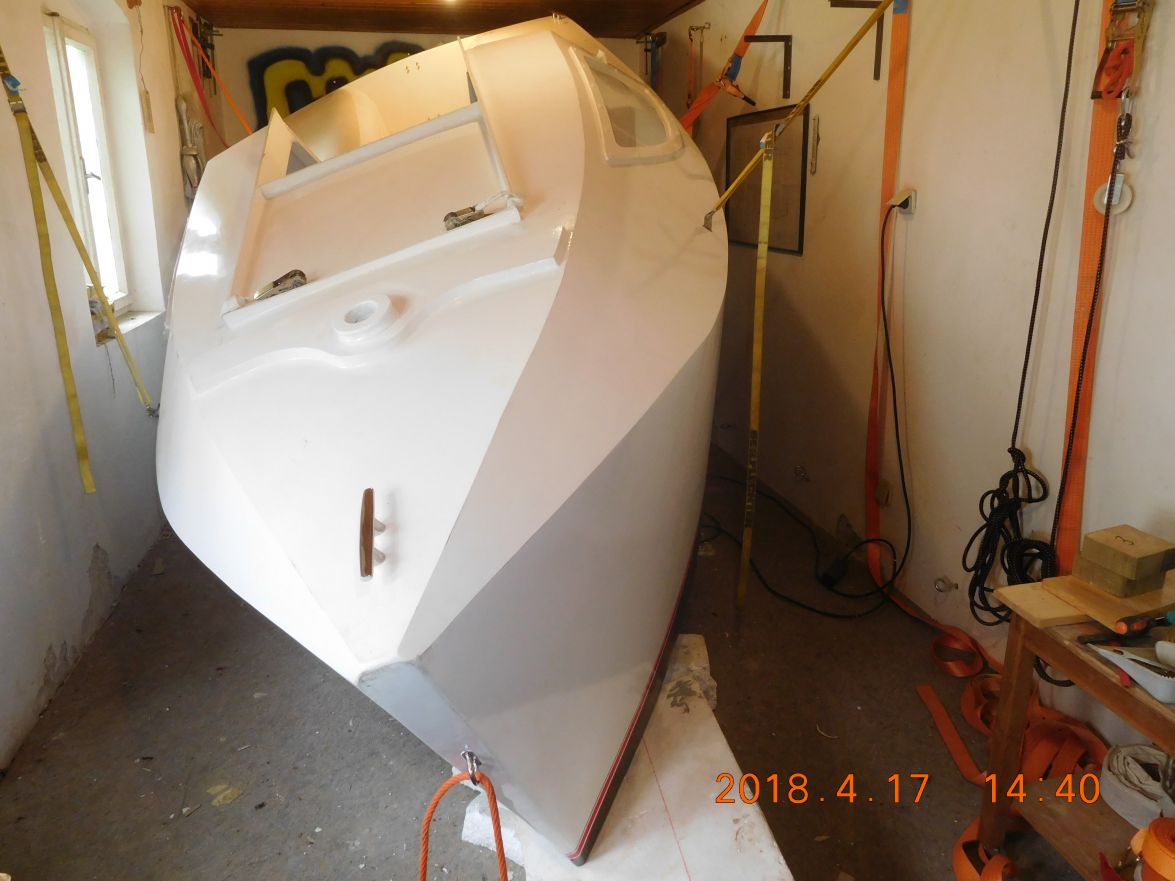
Underneath the boat with an eye bolt length cut to size and tightened with a self locking nut. I naturally battled like hell to get that nut on in this 3 cm hole.
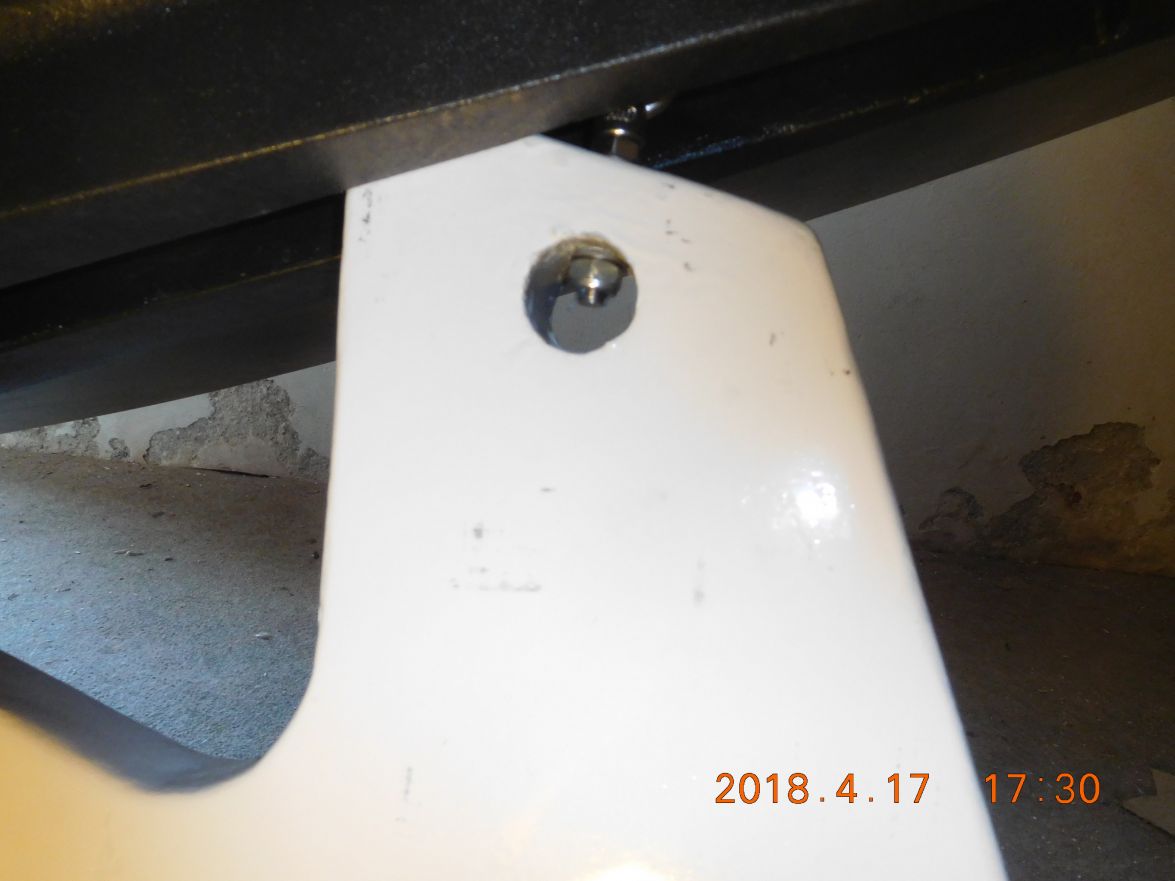
Temporary locked on deck with 2 screw drivers, will go most probably for white strap with knots and loops to pull up the centreboard and to let it down.
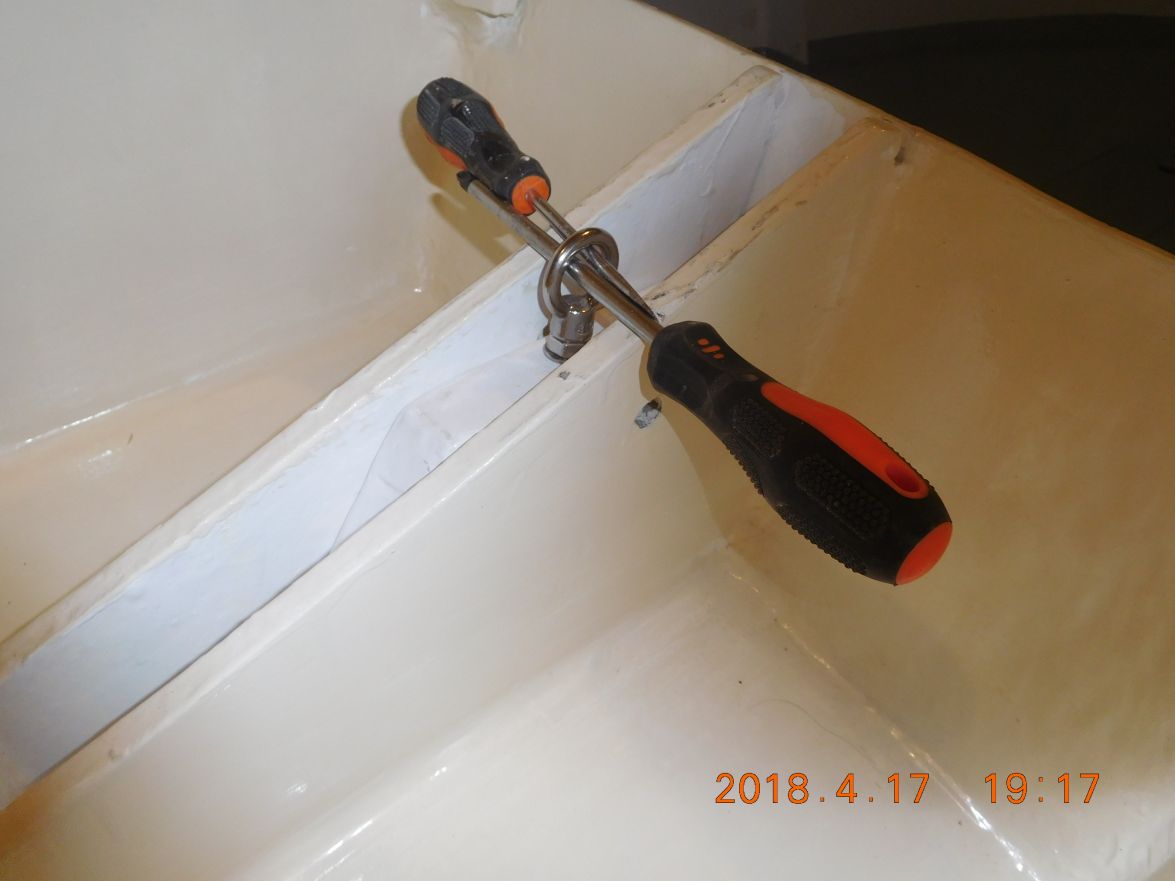
Boat back to ground level and tomorrow I will fit 3 deck blocks near the mast partner.
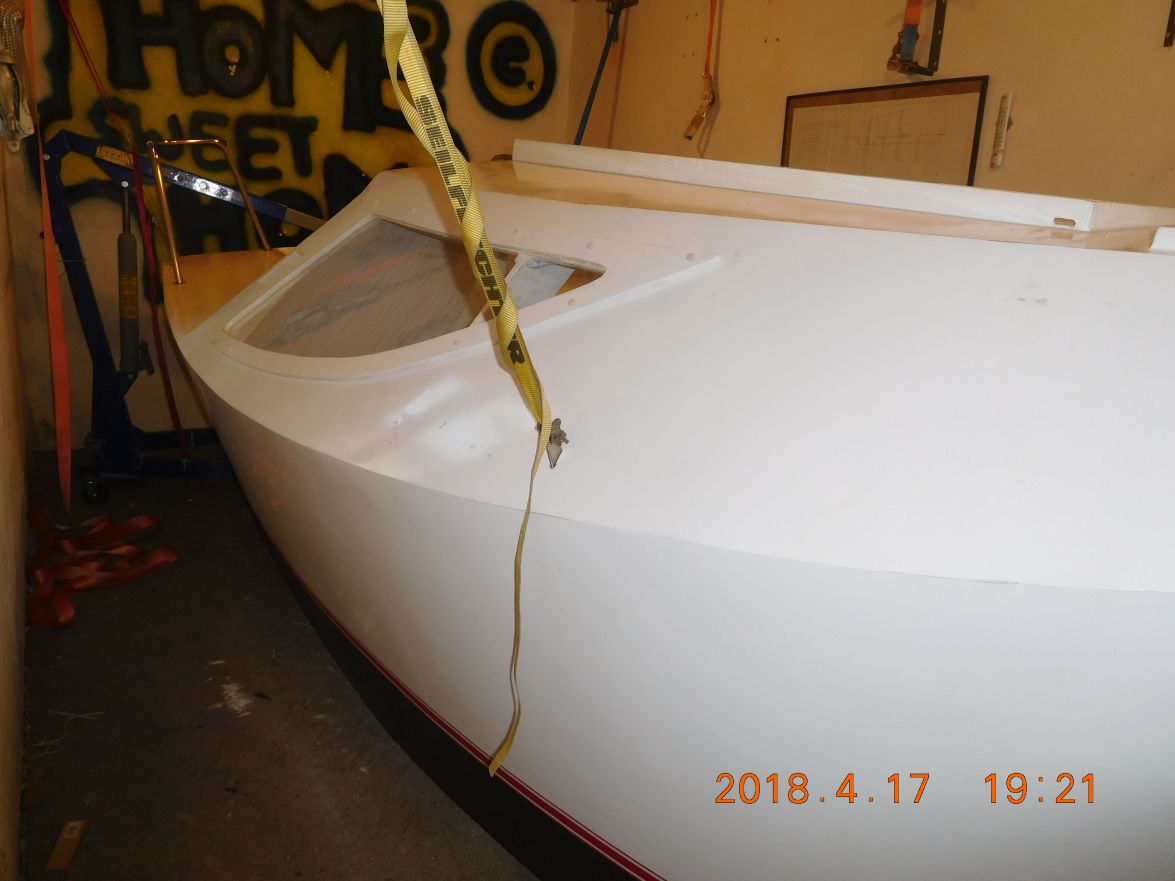
Greetings from Karl
Re: AD 14 KIELGE
Posted: Tue Apr 17, 2018 8:52 pm
by das boot
That should work well for you I wish I had finished the inside of mine as well as you did yours. I bought some padded tiles that are 1/4 inch thick out of some kind of foam that snap together and put them on the floor of my cabin it makes it a lot softer to kneel on I can send you a picture if you want.
Re: AD 14 KIELGE
Posted: Tue Apr 17, 2018 9:26 pm
by ks8
Nice progress Karl.
My CV16 centerboard also rests on a pad when on the trailer so that there is not much weight on the pivot bolt when trailering, including during several 750 mile road trips. No problem with the bolt or the mount holes in the centerboard case (trunk). That same CB pad on the trailer extends to the stern and the skeg also sits on it. It has worked well for me, with my lighter boat (but not much lighter
). I had to do a bit of shopping to get a trailer shape that would support this layout. For only a few hundred dollars more, I gave the specifications of angles and crossmembers to a trailer manufacturer and they delivered in a few weeks. It was easier than I had imagined. But the first trailer dealer I went to would not commit to a build for more than a year. The next place I went was a quick order and build. It took that second opinion to get it done. I was patient because the boat was not yet ready for the trailer during that ridiculous year wait for a commitment from the first dealer. But all is well now 'as is' (if I ever finish painting the seats).
Of course there will be pictures from you of the splash, yes?
Re: AD 14 KIELGE
Posted: Tue Apr 17, 2018 11:22 pm
by das boot
Hi Karl,
Did you leave some drain holes fot the square you have forward of your hatch or is it just my old eyes playing tricks on me?
Re: AD 14 KIELGE
Posted: Wed Apr 18, 2018 1:40 am
by gonandkarl
Hi,
Yes please George send me the pictures of the floor as I find kneeling on it rather hard as well and yes I have some drain holes forward of the hatch they are about an inch long and 2/8 inch high. I use them also to put a strap thru it to hold my slip wheels for the bow and they are secured with a second pair of straps going to the hand holds behind the window on each side of the boat. While the slip wheels at the transom are secured with 2 bolts thru the transom drain holes to a board leaning inside against the transom.
Ks8 I can assure you there will be pictures of the splashing. I bought a trailer a few years back when it became too cumbersome to put my rowing boat onto the roof carrier but I had in mind to use it for the Adelie as well. It was a special offer so I did not hesitate a lot and did not really find out if it is suitable for my sail boat I only knew it is for a boat with max 4,5 m long which my AD14 is. Ever since then I am puzzling how to adapt it to hold my bunks I made for the Adelie. I think I will wheel it into my building shed and place it under the lifted boat and let it down onto the trailer as is with 2 struts with twin wheels and a keel roller and see how it likes that and most of all where to place it to have only 40 kg of tongue weight at the tow hitch. The trailer has the option to move the axle 16 cm ( 6,3 inches ) forward which I might have to do depending on my finding of centre of gravity. Then I want to strap my 2 bunks under the boat and try to find out where to place the 4 support struts that I want to have under the bunks.
Any ideas what I should or should not do in this trailer adaptation is welcome.
Greetings from Karl
Re: AD 14 KIELGE
Posted: Wed Apr 18, 2018 7:18 pm
by das boot
I sent you the pictures you requested via Email.
Re: AD 14 KIELGE
Posted: Wed Apr 18, 2018 7:23 pm
by das boot
As for the trailer your idea sounds good I bought an old used trailer built for a 20 foot inboard run abought a lot heaver than I needed but it was cheep I think I pais a few hundred dollars that was a lot of years ago the back end of it is getting week dew to salt water but I can weld in some plates if needed. For now it works fine. On my boat I can slide the boom into the front of the cabin and then swing the back into one of the birth areas to the boom fits into the birth for travel it works.
Re: AD 14 KIELGE
Posted: Wed Apr 18, 2018 8:56 pm
by ks8
I did something like that fitting my boat and custom made bunks to the trailer, but it would be too long to detail here. I was fortunate. The final solution and fitting was barely enough to get the boat to launch at most ramps, but enough. whew! Some shallow descent ramps require a push off to launch and some cranking to get her back on the trailer, but most ramps are just enough to float her off. And that is my thought for you.... that the final bunk position will be low enough in the water at most ramps so that the boat will float off and away easily. It was a detail that I did not think through as well as I should have, but I was fortunate. If I had not had the custom trailer made with a vee in the cross members, and the extra long tongue, it would have been quite an embarassment on splashday with the new trailer, I was planning to use the same trailer in the future for a VG18, but life is throwing plenty of curve balls lately. I'll enjoy the CV16 for now. But that long tongue also helps get the trailer down the ramp far enough to help float the boat off, at most ramps. Of course the nice steep ramps make launching very easy, as long as they keep the ramp clean so the wheels do not spin when hauling her out. Overall, the work and thought put into the trailer and bunks will be appreciated at every launch.
My pictures of the trailer are not nearly as thorough as other parts of the boat build, but
here is the gallery.
Re: AD 14 KIELGE
Posted: Thu Apr 19, 2018 2:35 am
by gonandkarl
Hi,
Thanks George for the pictures of the floor and KS8 for the trailer pictures. I realized that through the curve of the trailer bunks its angle support needs to have a wedge to be horizontal for the support struts. It looks like you made them out of aluminium. Is that so ?
I will definitely use angle profiles on the bunks and U-profiles for the support struts like you showed me in your trailer gallery.
Greetings from Karl
Re: AD 14 KIELGE
Posted: Thu Apr 19, 2018 10:24 am
by das boot
On setting the bunks on my trailer i kind of alined then but leaving all adjustments loose then set the boat on the trailer and let the boat settel in place only then did i tighten all the boots this worked well for me,
Re: AD 14 KIELGE
Posted: Thu Apr 19, 2018 1:34 pm
by ks8
I used the typical available hardware used for mounting bunks, purchased at the local marine store -- the galvanized steel uprights and the 90 degree mounting angles and galvanized bolts, washers and nuts. I did not make anything metal myself. The only thing I 'made' were the custom shaped bunks themselves (the shape locked in by making them of tortured three layer laminates as in the photos -- simple but time consuming), the large keel/skeg 'pad', and the various props and supports needed while I fit the bunks to the boat and the trailer for attachment. Of course, I had the trailer manufactured to a sketch and measurements I had provided (I couldn't find them quickly now if I tried), so that I would get a trailer that had the vee in the lateral crossmembers, and the crossmembers were positioned very close to where the frames in the boat are located. The vee was necessary (for me) to allow for the keel/skeg pad to mount low, without having the boat sit way too high on the trailer. It never would have worked out if the crossmembers had been straight. I had first 'shopped' at a marina yard looking at the various WESCO trailers there with boats on them already. That is where I saw the option for the Vee crossmembers on some of the trailers. I figured since they manufacture the trailers themselves, a slight repositioning of their welding jig should easily accomodate my measurements so that the bunk mounts would be directly under the frames in the boat. After contacting them, this was indeed the case and they said it would be no trouble at all. (This was inspired by a fellow CV16 builder (Leon I think) who had a roller bunk break through his hull while trailering -- it was not positioned under the structural frame of his hull). My trailer manufacturer was about 400 miles away, but they made regular deliveries to a dealership only 50 miles away. What a pleasurable difference from the first company that couldn't give me a commitment after a year. The only problem was that one of the hub grease seals was very leaky, but they swapped that out for free within a week and I was good to go. btw -- in case I ever trailer my CV16 on a roller bunk trailer with roller spacing beyond my control, I added a laminate under the seats to hopefully prevent what Leon experienced
(you can see it in this picture laminated to the hull bottom panel, extending to just short of the cuddy frame).
Just another extra ten pounds to my boat.... and another... and another....
But she is tough, and a few unexpected incidents proved it!
Understandably, adapting a used trailer will require a little more creativity, but should be a minor project compared to having built that beautiful boat.
Well what do you know!
I found the sketch attached to the 2010 email that I had not yet deleted! Note to any current NC or SC builders.... the contact info on that sketch is outdated. The company has changed since 2010. If they still make trailers, you will need to research the current state of the company and their products.
Re: AD 14 KIELGE
Posted: Fri Apr 20, 2018 3:50 am
by gonandkarl
Hi Ks8,
Thank you for the extensive way you described the trailer adaptation. I am also scared to use rollers and therefore I built the same as you 2 bunks laminated and shaped while the boat was upside down. I have now quite a bit of theoretical knowhow and now I start the practical side. First I want to find out the centre of gravity of the boat to know where the axle of the trailer has to be. I will put the keel on twin wheels and move it fore and aft until it balances on these wheels. Naturally I will put straps on both sides to hold the boat upright. This is my plan for today.
Greetings from Karl
Re: AD 14 KIELGE
Posted: Fri Apr 20, 2018 10:27 am
by ks8
Happy balancing
Re: AD 14 KIELGE
Posted: Thu Apr 26, 2018 2:44 pm
by gonandkarl
Hi,
Before I can balance the boat any further I mounted a new steel cross beam for my boat building shed that will not bend under the weight of the boat.
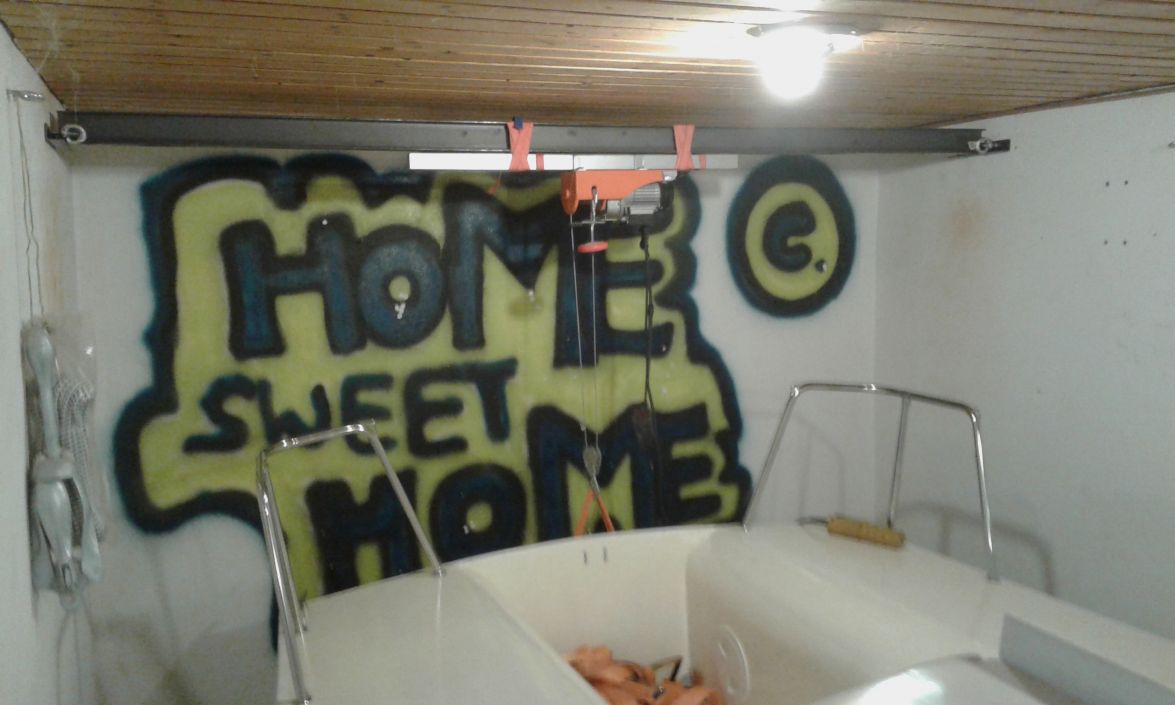
And I removed the three doors of my shed so the place is ready to move the boat out soon.
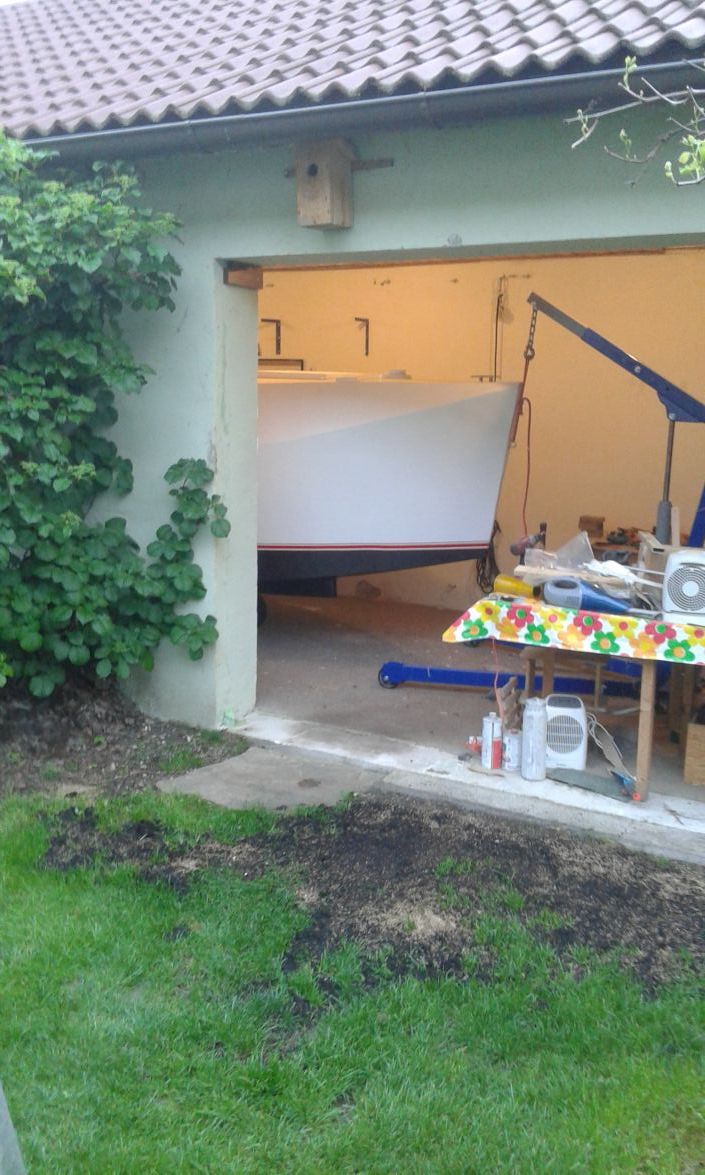
Tomorrow I will balance my boat again to find the centre of gravity and I will put the cabin roof the wash boards and the rudder on to the boat to have it exactly as I want to tow it.
Greetings from Karl
Re: AD 14 KIELGE
Posted: Thu Apr 26, 2018 3:16 pm
by Bogieman
Very nice Karl! Can't wait to see pics of you sailing her.
Re: AD 14 KIELGE
Posted: Thu Apr 26, 2018 4:47 pm
by Jeff
Nice work Karl!!! Jeff
Re: AD 14 KIELGE
Posted: Thu Apr 26, 2018 5:52 pm
by OrangeQuest
Good luck on the move!!
If you going to keep using that cross beam maybe consider STEEL clamps to mount the hoist on! You scaring me!!
Re: AD 14 KIELGE
Posted: Thu Apr 26, 2018 7:42 pm
by das boot
One thing to keep in mind do not mount all your ballest weight into fixed locations until you have it in thw water and sail it a few times I ham myne all locked in position then I found I had to add 50-60 pounds up into the bow to trim it out that is extra weight but that weight transfer sped the boat up 1.5 to 2 mph. I would not have noticed it but my father in law was out sailing with me and went into the cabin for something and the boat sped up i could see it on the GPS so them we started to play with the weights, so just keep that in mind when you are out there the fastest I ever got my boat going under sail was 7.5 mph 5-6 mph is average not bad for a small boat.
Re: AD 14 KIELGE
Posted: Fri Apr 27, 2018 2:14 am
by gonandkarl
Hi,
Yes the hoist is not mounted on the steel beam as an engineer would do it. I used 2 red straps around a 1 metre long aluminium square.
I agree that they must be replaced by steel clamps. Some family members are also worried that the boat might bury me whilst lying underneath it when I use old tie down straps to hold it up. I will report again tomorrow if I survive this sunny Friday.
Greetings from Karl
Re: AD 14 KIELGE
Posted: Fri Apr 27, 2018 8:24 am
by terrulian
Karl!! No deaths or injuries!
Re: AD 14 KIELGE
Posted: Sat Apr 28, 2018 12:41 pm
by gonandkarl
Hi,
So yesterday I tried to find out the centre of gravity of my boat by balancing it on 4 approx. 10 inch diameter wheels on a 15 inch axle by lowering it at the bow with my manual crane and at the transom with my electric hoist loosely held by 2 straps from the sides. I positioned the drum of 4 wheels so often always a few inches forward or back until my weight on a bathroom scale stayed the same at the bow or transom when I pushed the boat a bit down or up. The resulting centre of gravity is exactly 2 m from the transom practically in a vertical line down from the top of frame C which is at the end of the cabin. Then I put the boat down onto the keel shoe and it is nice just to use one step to be in it and today I mounted the block and tackle for lifting or lowering the centreboard as Tony suggested I could use like a boom vang to go easy on my back for not lifting too heavy. It works beautiful even that I could lift it only one inch because the boat is standing on the carpet of the shed the same as the centreboard. The snap shackles I used were taken of 2 old dog leashes which I do not need any more. The block and tackle purchase will be attached to a strap which I can lock in full down, half down and up position across the trunk so that the purchase does not disappear in the trunk and can be taken off at its bottom end and the top washboard easily.
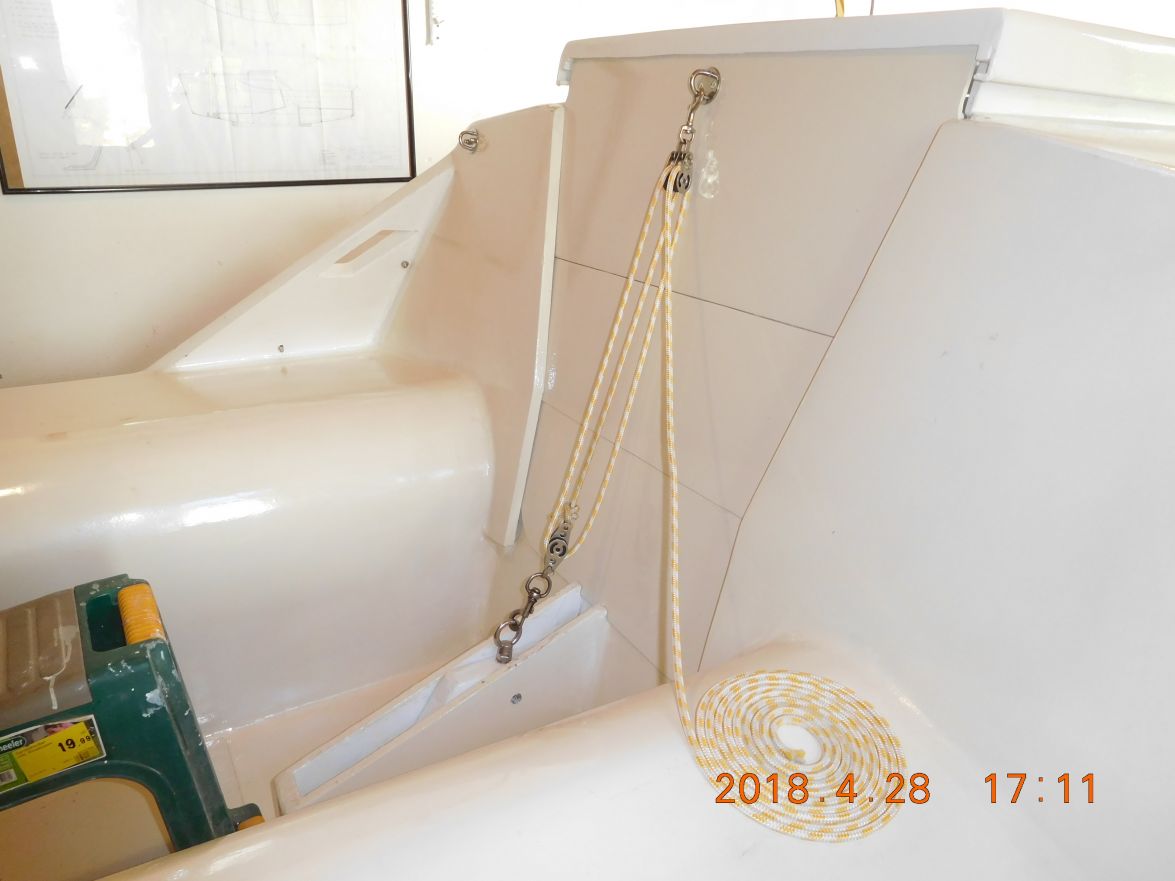
Today I asked myself what I must still do before launching day and I came to the following list of which I finished point 1 already.
1. Make a block and tackle with 3 to 1 purchase from the roof above the washboards down to the strap of the centreboard to be able to lift and lower it without damaging my back. Done and picture above.
2. Adapt my 2 trailer bunks and boat to the trailer.
3. Mount 3 deck blocks just behind the mast partner for the rigging and some clutches near the companionway on starboard and port side.
4. Fit a removable cross bar between the 2 push pits which will be my traveller holding 2 blocks for the sheets.
5. Make and fit the straps between push pits and cabin side decks so no one falls over backward into the lake.
6. Sew covers for the swim noodle seats I made for the 2 benches. These seats will serve for the start as fenders and as lifebuoys to be thrown into the water for men over board.
7. Put silicone under the sole at the pivot of the centreboard so that no water can get into the boat. Take the window frames off once more and make a radius chamfer as I do not like the sharp corners and then after remounting also make a silicone fillet against the plastic window panes.
8. Give the sides, deck and transom another coat of paint because working around the boat has produced a few marks and small scratches and glue the name Wilde Qualle on each side near the bow.
9. Then move the boat into the drive way and practice raising the mast, sail setting and readying for launching until I can do it in a reasonable time although I will not reach Bondos record time by raising the mast in 59 seconds which I saw when he sent me a video of it.
10. Then I can park it for the first time under the car port I built last year and prepare for the splashing and the barbecue party afterwards.
11. The date for the splashing I will determine only when I know that all family members can be present. My son resigned his job and is cycling across eastern Europe all the way up to Finland and he should be back by the end of May. I definitely wait with the launching until he is here again.
Greetings from Karl
Re: AD 14 KIELGE
Posted: Sat Apr 28, 2018 8:32 pm
by Bogieman
Hi Karl.
Everything looks great! I'm a little curious if the washboards will handle the weight of the keel ok. Will you have to have the boards in every time you raise or lower the keel or will it be attached only for trailering purposes?
I hope you are having a nice weekend.
Bogie
Re: AD 14 KIELGE
Posted: Sun Apr 29, 2018 2:09 am
by gonandkarl
Hi Bogieman,
I will have to put the washboards in always when I want to lift or lower the centreboard. They should be easily available as I will store them on deck under the forward pushed hatch cover of the cabin. The washboards are rather strong because I used the 9 mm cut outs of the top part of frame C for the companionway and then I cut twice across to have the three washboards. Then I glued a 2 x 1/2 inch wide frame inside the cabin on each side and glued a 6 mm wide piece of plywood underneath flush to the door to leave a 6 mm wide slot where the washboards can be pushed down. On top of each washboard I then glued a 6 mm thick piece of plywood which fits nicely left and right into the slot. So the overall thickness of the washboards is 15 mm or 5/8 of an inch. As the block and tackle goes from the top washboard nearly at the same angle down as the washboards themselves all the force is nearly on their plane and will never rip out the deck block which is screwed at a 90 degree angle through the top washboard and fastened with nuts on the cabin inside. I will lock the centreboard with a pin going through at the top of the trunk when I trailer the boat. You can see the 10 mm hole for it on the picture of my last post.
As it is Sunday I will not really work off any of my to do points but only cut the foam plastic floor into the boat which George mentioned to me for being a blessing to the knees on the otherwise hard cabin floor. And then I have to change my 4 wheels on the car from the set with winter tyres to the ones with summer tyres to conform with the Austrian law where it is compulsory to have winter tyres from November 1 st to April 15 th and this is well past.
Greetings from Karl and a summerly sunny Austria
Re: AD 14 KIELGE
Posted: Sun Apr 29, 2018 7:07 am
by glossieblack
Instead of the washboard routine, why not a temporary timber beam spanning between the side decks with the block and tackle attached?
Re: AD 14 KIELGE
Posted: Sun Apr 29, 2018 9:36 am
by gonandkarl
Hi,
I like the idea with a timber beam but my sail boat is so small I have to think very careful where to store whatever is not in use and in an emergency like a sudden gale the drop boards should be closed anyway and are ready to lift the centreboard while it would most probably difficult to place the beam there additionally. The drop boards I found out I can store under the cabin tops hatch cover if it is pushed open towards the mast and there is a small fence around it on which the hatch cover slides and so they cannot fall sideways overboard . I can still put it there with that round deck block screwed to the top drop board and the block and tackle attached to it. The other situation when I need to lift the centreboard is if I want to beach the boat and this can be done slowly with enough time to place the washboards into their slot. As I am a novice sailer with hardly any experience I do not know when one should lower the centreboard fully down or to half down or change between the 2 of Jacques designed positions. I hope I find out the difference between the 2 centreboard positions and when I have to apply them. My intention is to try it in light winds to have plenty of time for any manoeuvre. If I find out it is a nuisance always to place the washboards in their place I definitely might try my luck with a timber beam.
For the start I am happy that I can lift the board without hurting my back and I am so thankful for all your advises that will make my sailing a time of real bliss where nothing can go wrong any more because everything is being thought out thoroughly during the building stage.
So I hope.
Greetings from Karl
Re: AD 14 KIELGE
Posted: Sun Apr 29, 2018 10:09 am
by das boot
Looks real good that idea on raising the keel should work fine. I have never tried sailing with my keel 1/2 up i just put it all the way down after I lanch the boat and leave it there if I am running up on the beech I just pull it all the way up . The travel I use on my boom sounds much the same as the way I did it it works fine. I hook it on one side with a clevis so I can remove it if I am running with the motor that way the cockpit is fully open for moving around this works for me.
Re: AD 14 KIELGE
Posted: Sun Apr 29, 2018 11:02 am
by terrulian
Karl,
Thanks very much for the detailed report and the summary of your thought process.
I'm not sure of Jacques' thinking on the two positions of the centerboard. Dinghy sailors pull the centerboard up when off the wind to reduce the amount of "wetted surface", which produces a small amount of drag. However, their boards contain no ballast. I've no doubt Jacques has the numbers and the boat will be just fine with the centerboard in the 1/2-way position; however, my guess is that, like das boot, you'll find that you just put the keel down and leave it there.
Our Catalina 22, which has a similar arrangement, can be set in any position merely by how much you let out the winch. However, I always just leave it down. If you were a serious racer, you'd pull it up off the wind. Are you a serious racer? Me neither. The centerboard in the fully down position provides lateral resistance when sailing upwind, which reduces leeway. It is not necessary off the wind, when leeway is not much of an issue; and since the weight is still below the center of gravity, it still provides stability.
As you say, when you get ready to beach it, or when getting ready to put it back on the trailer, you'll have plenty of time to get the keel up with your arrangement.
I've followed your progress with interest and am awaiting splash day!
Re: AD 14 KIELGE
Posted: Sun Apr 29, 2018 11:04 am
by Bogieman
HI Karl,
Sounds like everything was very well thought out.
Re: AD 14 KIELGE
Posted: Wed May 02, 2018 1:28 pm
by Bogieman
Hi Karl, (and George too)
I'm ready to put my CB case together and install the pivot assembly (threaded bolt & sleeve), but I have a question about something that's a little confusing in the plans. The plans say the length of the sleeve has to be equal to the size of the case, including the width added by the backing plates on each side of the case... I'm OK with that part, but then it says the sleeve has to be inserted from inside the case. I don't see how that's even possible! It seems to me the only way the sleeve could be inserted from inside is if the sleeve is the same diameter as the inside of the case. If the length of the sleeve is to be flush with the outside face of the backing plates then both the sleeve and bolt could be inserted from the outside with not trouble then when the washers and nuts are added the nuts could be tightened down until they meet the end of the sleeve. Am In missing something here?
Thanks for your help
Bogie
Re: AD 14 KIELGE
Posted: Wed May 02, 2018 5:01 pm
by gonandkarl
Hi Bogieman,
Yes you understood it completely correct. The sleeve you can only put through the pivot holes of the trunk ( there are 2 one in each trunk wall ) from one of the sides. I think the most important thing is that the length of it is from the left backing plate to the right one if you glued some onto the case. I put just today the silicone onto it and then the big washers over the threaded stainless steel rod and then I hand tightened the nuts and 2 hours later with 2 no 19 spanners until I could not turn them any more because the washers were pressing onto the sleeve each side and that is hopefully watertight.
This talk of inside means you have to align the centreboard inside the case with its hole exactly with the 2 holes of the centreboard case and then you can push the sleeve through and the threaded rod inside the sleeve. I have the rod sticking out on both sides about 1 1/2 inches. I would advise you, before you close the case test lie the board into it lay and clamp the side onto it which you will later glue and push also the sleeve through it . If you battle to push it through, the holes are maybe a tiny bit too tight. Now you can correct that easily when the centreboard trunk is installed and the sole of the boat is also in there all you can do then is push the sleeve through going in there over the inspection holes of the sole. No more place to drill the holes any wider. George had a good idea to get the centreboard into place with a very thin steel wire and a handle on each side pulling it up from inside the cabin. I just pushed a medium long screwdriver from the left side into the hole while my son was pushing the centreboard by hand up from under the boat. Once I had the screwdriver completely through the case and board I pushed the sleeve over it from the right side and let it follow through the holes while pulling the screwdriver slowly out again at the left side. Tomorrow I will post a few pictures and they may be clearer than my description.
Greetings from Karl
Re: AD 14 KIELGE
Posted: Wed May 02, 2018 7:06 pm
by Bogieman
Hi Karl.
Thank you very much! It is as I thought. The plans make it a little confusing, but I'm willing to accept that it's maybe just me. Your detailed explanation helps me a lot.
I have one more question: Can you tell me where to find the measurement or explanation of how to cut / sand the angle at the top end of the centerboard pivot end? It's the angled flat spot that appears to act as a stop or catch on the pivot end. Right now mine is still rounded.
Can't wait to see your latest pics.
Bogie
Re: AD 14 KIELGE
Posted: Thu May 03, 2018 4:14 am
by gonandkarl
Hi Bogieman,
I think on plan D 264_8 Appendices it says a radius of 127 mm which in my case was not quite correct because the centre of the circle to a radius of 127 is not where the pivot hole is. As the board gets swung around the pivot I rounded it by what I felt is correct top and especially at the bottom. The front of the board is straight and if it is left hanging completely down this straight part will bang into the vertical piece of the centreboard case and could damage it. I do not know if this is the ideal stop if the board should slam down and therefore I rounded it so that should it happen the straight part of the board is also nearly at the straight forward end of the case. The whole thing started with the incorrect pivot. I remember having encountered your problem in 2013 when I posted:
Talking about plans I have a problem with B264/8 Appendages. At the bottom on the left side are 8 points Centre board case.
Can You tell me what it says on your plan under 5. I ordered metric plans and there it says 5. Cut 51 mm slot through bottom.
(That would be 2 inches ?!?)
Even that it says one should not study all detail before the start of the building, that is exactly what is the only thing one can do before the wood arrives.
and then I got the answer of Bondo which was this:
Yes my plans call for a 2" slot but the instructions disagree on this step. They recommend installing the trunk first. I would install the trunk first. I had a problem with the centerboard pattern and the centerboard trunk as drawn. So far I am the only one to have had a problem but there was a conflict for me. The centerboard pivot is drawn incorrectly. There is a correction for that. Detail #8 suggests rounding from the outside but the keel shoe still needs to be applied.
Greetings from Karl
Re: AD 14 KIELGE
Posted: Thu May 03, 2018 5:11 am
by gonandkarl
Hi,
Here a picture with the inspection lids in the sole to be able to mount the sleeve in the pivot holes and the front one to put portable ballast under the sole.
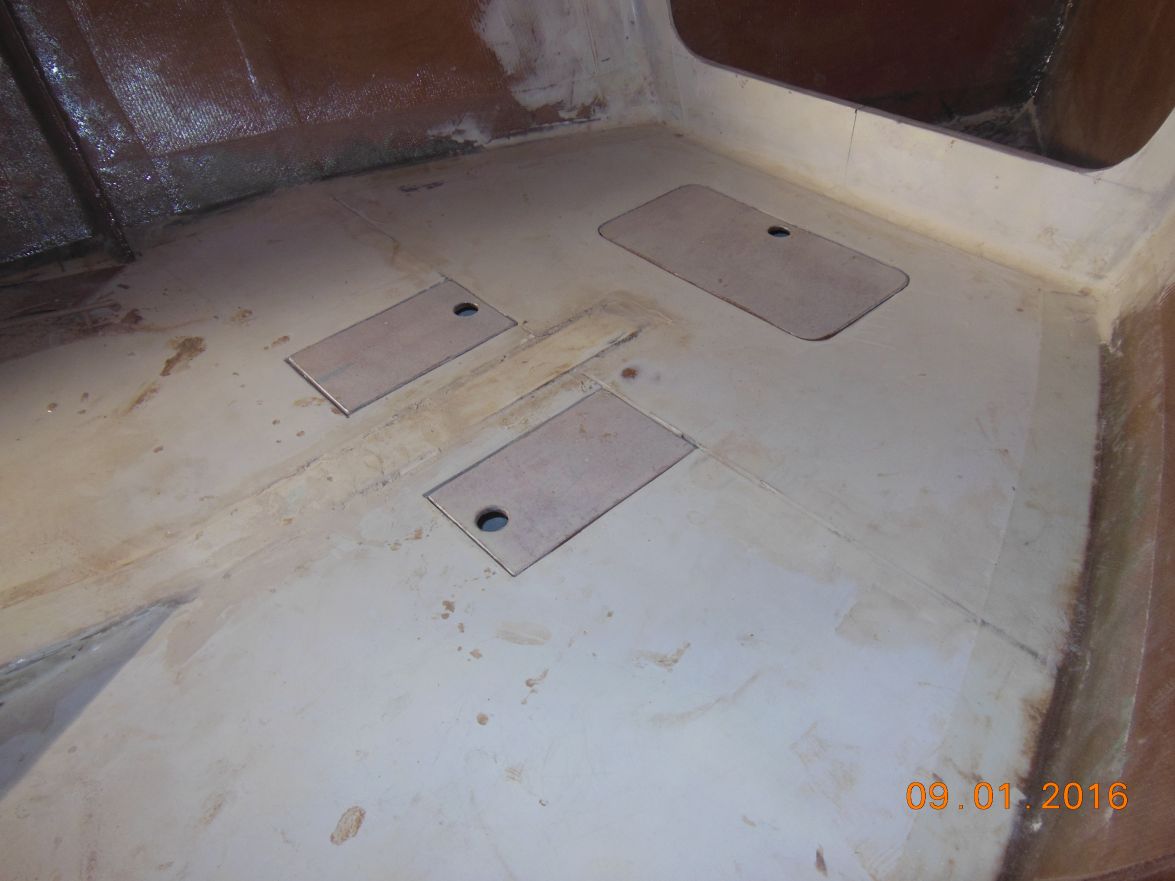
Trunk and case united for the test.
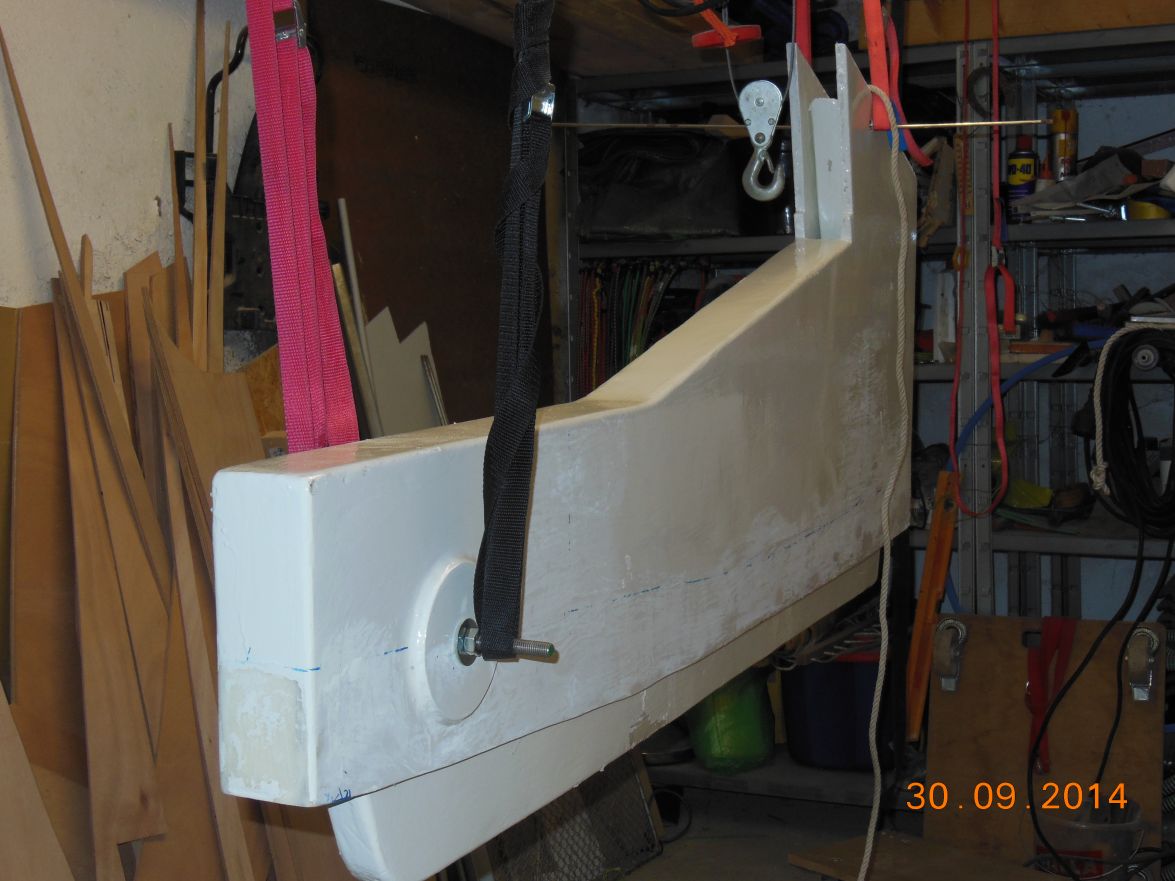
and here fully down
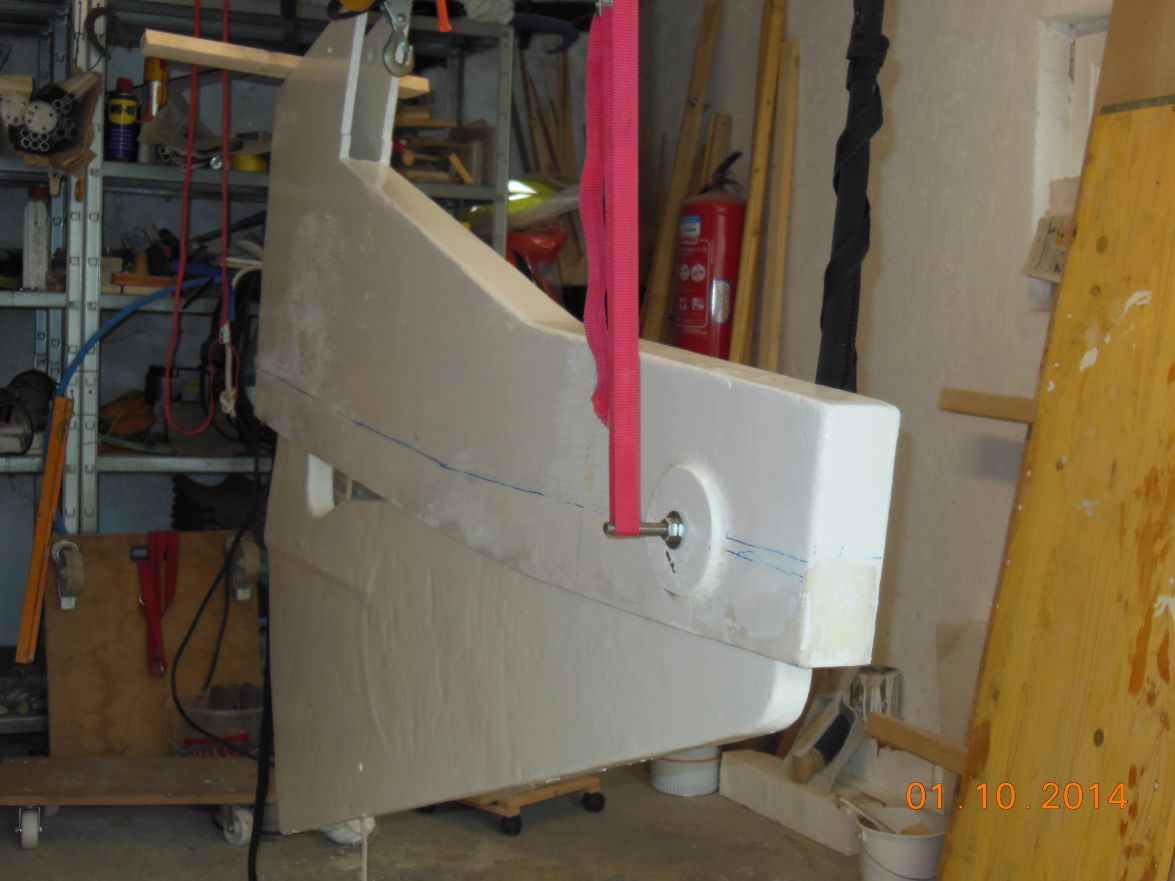
You can do this test having everything lying flat on the floor with the lid ( side of the trunk ) not yet attached.
Unfortunately I have no detailed pictures before I assembled the centreboard case.
Greetings from Karl
Greetings from Karl
Re: AD 14 KIELGE
Posted: Fri May 04, 2018 9:35 am
by Bogieman
Thanks Karl. I think I'm just going to leave the pivot end round. Now I'm trying to find a local store that carries a threaded SS bolt that is at least 5" long and a SS sleeve that is 3 1/2 long. So far no luck. I'll probably have to order something online. I like (and will use) your idea of clamping everything together and testing the entire assembly while it's lying on a table top. Also, I made a little mistake on the CB case by adding a spacer to the forward vertical portion on the swing end of the CB case. This has caused me to have to sand some of the radius off the curved / aft portion of the keel (maybe a half inch) so it can fit. I don't think it's a big deal.
I'm planning to install the biaxial cloth to the inside of the hull this weekend.
Can't wait to see your next posts
Bogie
Re: AD 14 KIELGE
Posted: Fri May 04, 2018 9:45 am
by Jaysen
Bogieman wrote: ↑Fri May 04, 2018 9:35 am
Now I'm trying to find a local store that carries a threaded SS bolt that is at least 5" long and a SS sleeve that is 3 1/2 long.
Fastenal. Lowes has them in 3/4 inch. Napa, Advance, and most car parts places should have something in the 1" range. TSC as well. these things are typical in control arm assemblies.
Consider G8 not just stainless. That suckers going to take a beating. And, since you are in salt water, you may want to consider buying multiple sets once you find them. You might need to replace it a few times with the kind of use you are planning.
Re: AD 14 KIELGE
Posted: Fri May 04, 2018 10:12 am
by gonandkarl
Hi Bogieman,
I also bought my stainless steel rod ( 15 mm diameter ) and sleeve which fitted over it at the local hardware store for 3 Euros in your case dollars. The only disadvantage is that they sell them in one meter lengths but both are easy to cut with a iron handsaw takes a while but even I could do that. Important is 2 nuts on the rod and then cut it so that the nuts can sort out the thread at the cutting point and a small iron rasp will help to clear up the cutting surface of the rod to have an easy screwing and unscrewing on it.
Greetings from Karl
Re: AD 14 KIELGE
Posted: Fri May 04, 2018 3:21 pm
by gonandkarl
Hi,
Today I fitted my 3 base plates for the three deck blocks for Halyard, Yard hauling parrel and luff hauling parrel. I could not think of any other way than to use 4 Allen keys on the through deck screws while lying on the cabin sole on my back a bit lifted up by cushions to reach with my short arms to tighten the domed nuts over washers.
Here the Allen keys to hold the screws

Inside the cabin
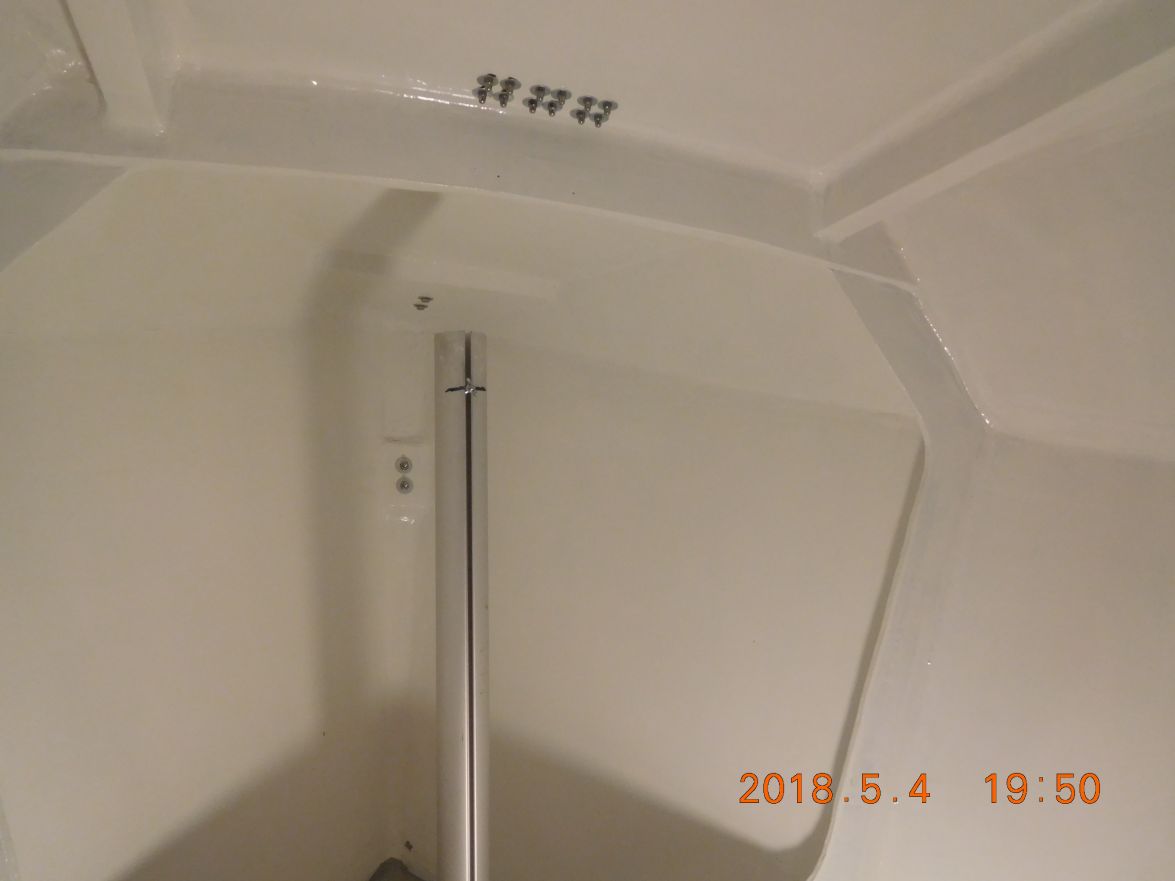
Finished mounting after too long a time
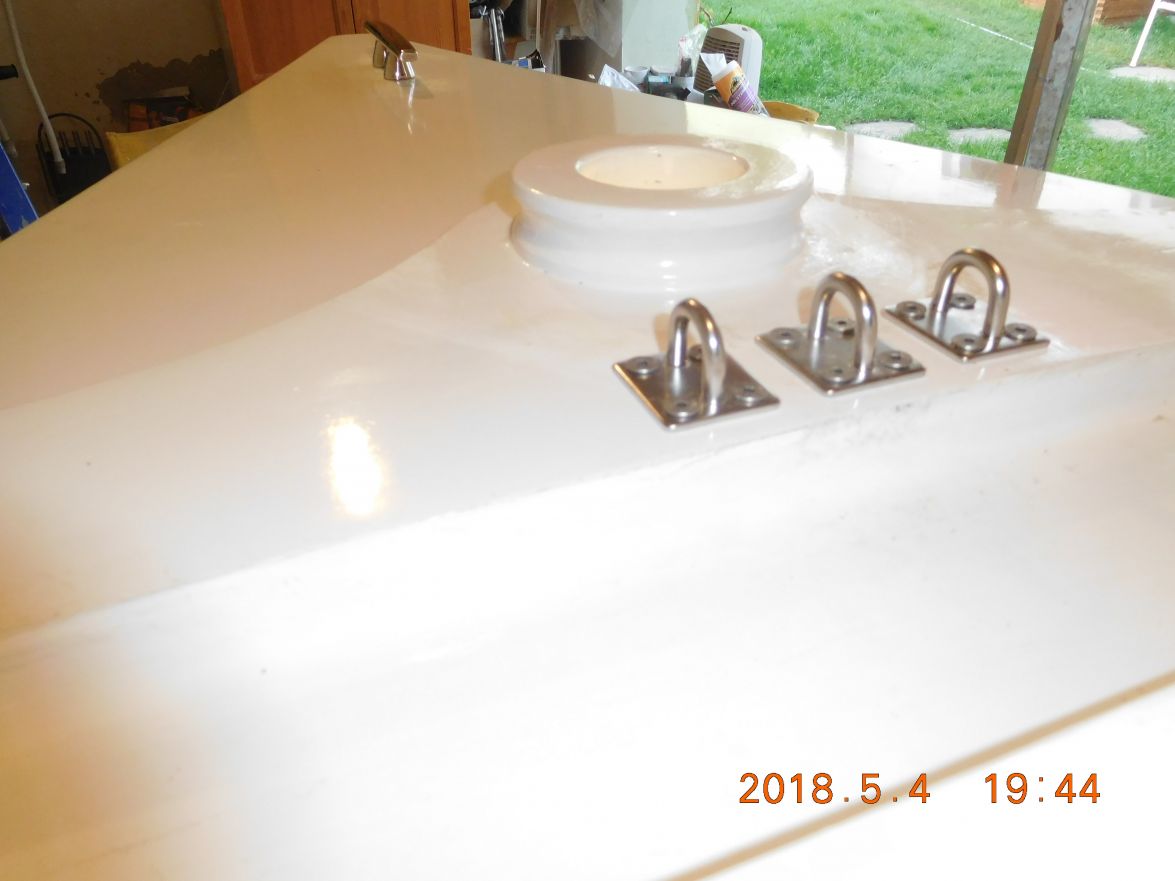
And here with the deck blocks I got from a neighbor telling me I can dismantle any hardware I wanted before he is sending his sail boat to the scrap yard. I have cut a few pieces of plastic hose to support the deck blocks and made holes on one side for the shackle pins.
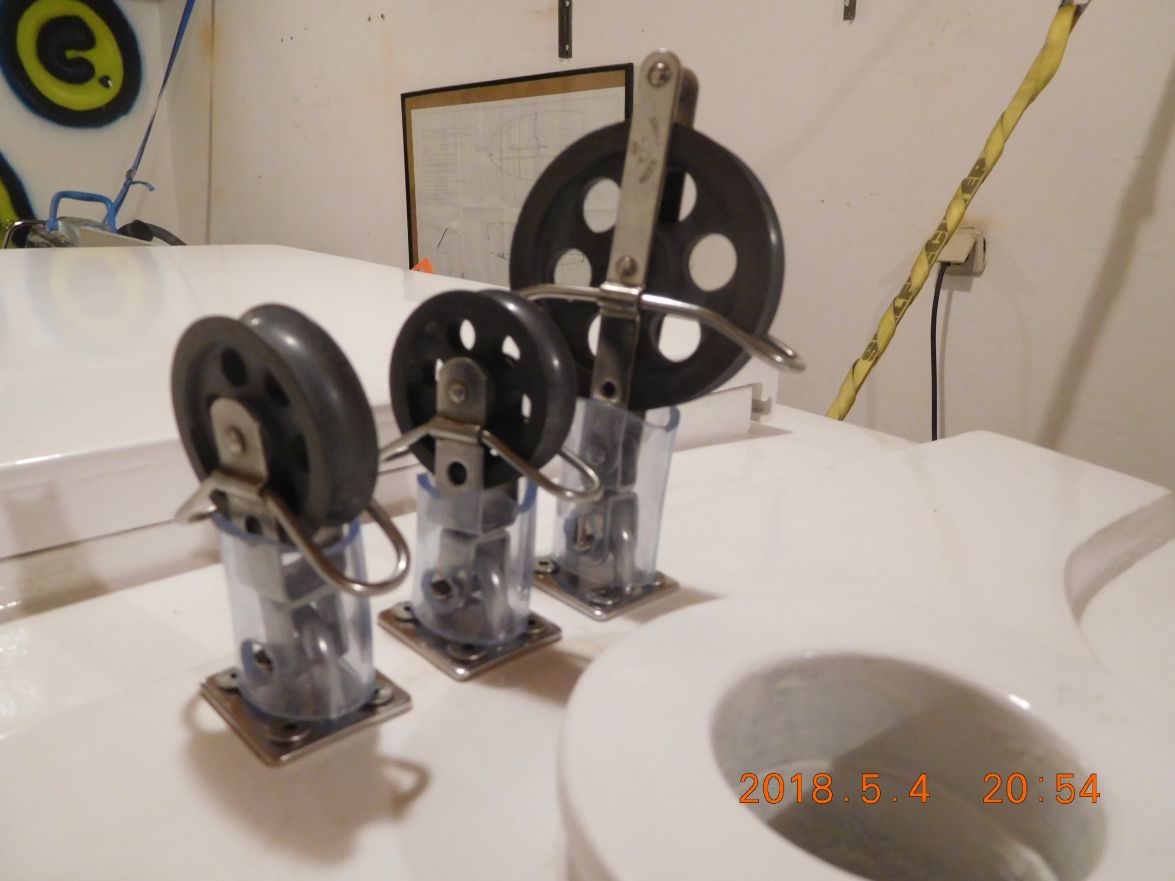
And now I definitely have to show my new foam floor in the cabin which was a good idea of George. Unfortunately on the 3 packets the colour grey is not the same on all puzzle pieces.
As I still want to do the bunks under the benches as well I ordered another 2 packets and hope to get evenly grey pieces in the cabin and the darker ones in the bunks. If you wonder about the piece of mast in the mast foot it was a cut off the 7 meter mast when I bought it and now I am using this 0.9 meter piece for holding the real mast during trailering together with a plumbers plastic pipe as an extension above deck.
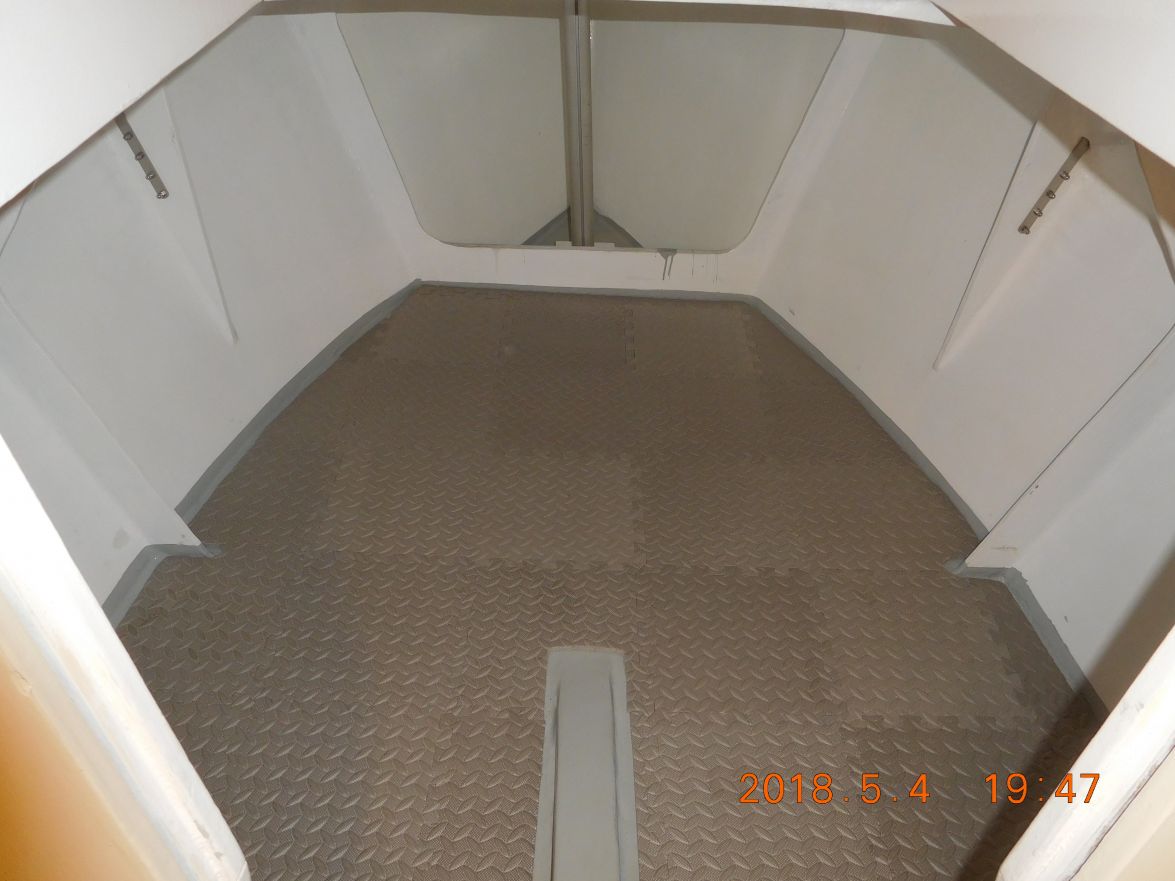
Greetings from Karl
Re: AD 14 KIELGE
Posted: Fri May 04, 2018 3:42 pm
by narfi
I like your puzzle mat, it looks comfy and simple and clean.
Re: AD 14 KIELGE
Posted: Fri May 04, 2018 4:10 pm
by gonandkarl
Yes I got the idea from George he has it in his Adelie and it is actually meant for toddlers play pens or rooms and they are all with pictures on it which would not look so good in a boat and it took me quite some time looking for a unique colour. At last I can kneel on my boats sole without hurting.
Re: AD 14 KIELGE
Posted: Fri May 04, 2018 4:14 pm
by narfi
its nice dense foam, my boy is older now so I didn't need them, threw most out, but found one when I was making sanding boards. I cut a strip and glued it to a 1"x4" board and mounted handles on it, it works really well for the 4" rolls of sticky back sanding paper.
Re: AD 14 KIELGE
Posted: Fri May 04, 2018 4:31 pm
by das boot
Using the plastic pipe to cary the bow part of the mast in transit wooks well for me I also made up one to cary the mast at the stern my back suport for transit is PCV black pipe and I used pop rivets to mount two pins on it that fit into the ruder mounts that holds the aft part of the mast well.
Re: AD 14 KIELGE
Posted: Sat May 05, 2018 12:30 am
by Bogieman
Wow Karl, your boat looks fantastic! I'm not far enough along yet to understand or appreciate the hardware rigging. Your cabin looks ready for you to spend a night inside.
Bogie
Re: AD 14 KIELGE
Posted: Sat May 05, 2018 6:20 pm
by das boot
I sent you some pictures of the brackets I made up to hold my mast while in transet I used the same mounts on the boat as I use for the rudder the one mistake i made is I used 3 pin brackets to give me the option of ruder 1/2 up or full down that part works well and in my boat when it is on the trailer i can not put the ruder full down it hits the ground. That part works well but over the years I have had to grind off around 1/2 of the bottom pine trying to line up all 3 pins for the ruder while in the water to lower the rudder was real hard by shortning up the one pin i can get the top 2 in easy then the third falls into place as i push down on the rudder. A miner thing but over the rears it has cost be 2 pares of glasses that have falen into the lake while trying to lean over the back of the boat to get that rudder pin into place.
Re: AD 14 KIELGE
Posted: Fri May 11, 2018 4:23 am
by glossieblack
Greetings Karl,
Spring must be in the air in Austria by now. I'm been thinking of you as you approach your splash.
All the best.
Re: AD 14 KIELGE
Posted: Fri May 11, 2018 8:14 am
by terrulian
For Bogie and Karl:
Now that you may be approaching doing the running rigging, I want to put in a word for the Spinlock pxr cleats here:
https://www.youtube.com/watch?v=BGqEevr50II
They are pricey but easily cleated and released with one hand, which is great on a small boat when you may be often singlehanding.
I've used Harken and Shaefer but I prefer these, although they are a bit pricey.
Re: AD 14 KIELGE
Posted: Fri May 11, 2018 9:15 am
by Bogieman
Ohhh, I want those! Thanks Tony.
Re: AD 14 KIELGE
Posted: Sat May 19, 2018 1:01 pm
by gonandkarl
Hi
I also want those but I mounted already the ones from a scrapped sail boat. But most important while I am working along with drilling holes into my SS trailer bunks support angles I managed to coerce my wife into the boat and even take a picture of it even that she swore never to put a foot onto it. It was easy with a nice lunch made by her consumed in the sunny garden and the sommelier Karl serving South African Nederburg Sauvignon.
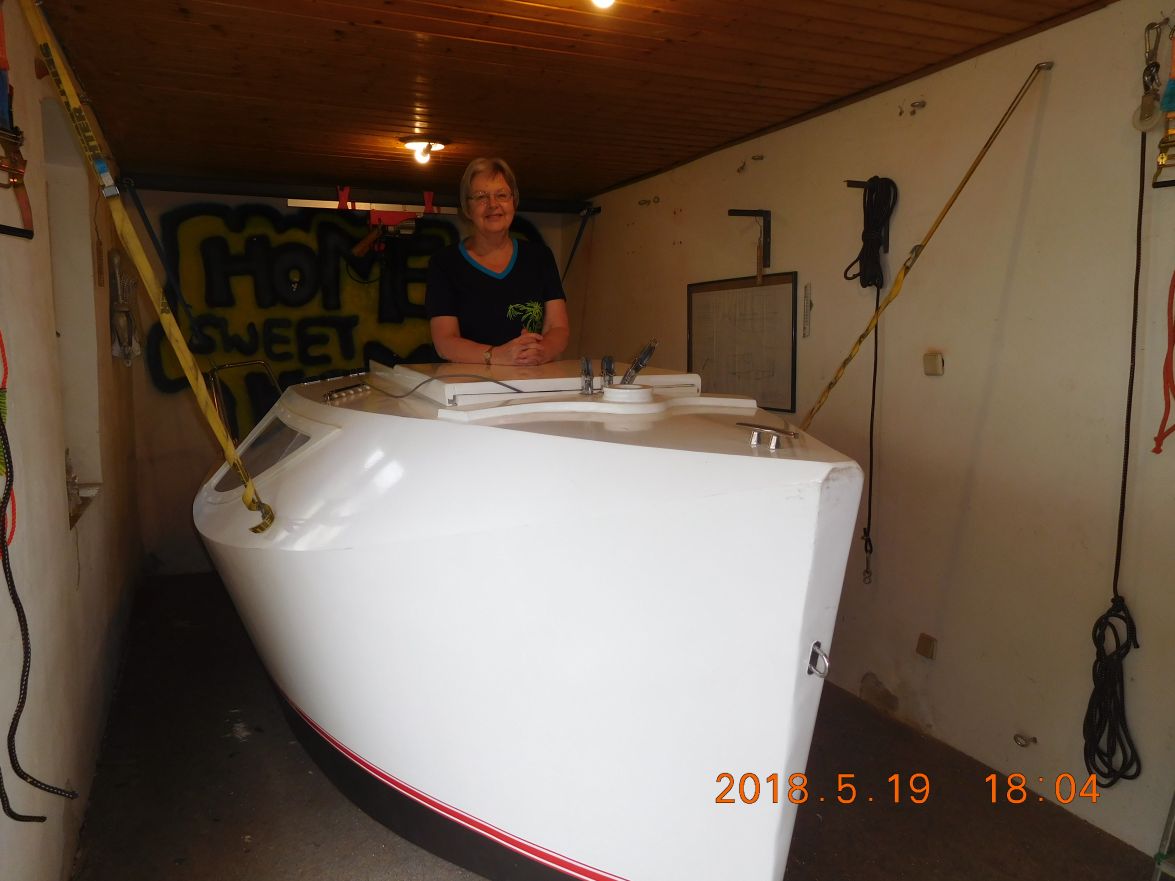
No other news on my build but it makes me happy that she even said she could imagine to go onto the boat again because she thought of getting onto it would be much more difficult with her buggered knee joints.
Greetings from Karl
Re: AD 14 KIELGE
Posted: Sat May 19, 2018 7:14 pm
by Fuzz
You did good Karl getting momma into the boat. Do that once it is in the water and you might not have much problem after that.
Re: AD 14 KIELGE
Posted: Sun May 20, 2018 4:17 am
by glossieblack
The smile says it all. I think you may have a crew member.
Re: AD 14 KIELGE
Posted: Sun May 20, 2018 5:30 am
by gonandkarl
Hi,
I think the smile comes from being sligthly sozzled but I really hope for her to being my crew member mainly that the sail will not be a lonesome affair. The good thing on an Adelie is the deckhand can just enjoy the view because holding a sheet and tiller will be easy for me and I am convinced it is the ideal single handed sail boat, thanks to Jacques well thought out design to just being on the water at a leisurely speed.
Greetings from Karl
Re: AD 14 KIELGE
Posted: Sat May 26, 2018 9:30 pm
by glossieblack
It must be starting to feel like summer Karl. And you must be getting close to being ready to splash? I'm really looking forward to that day.
Re: AD 14 KIELGE
Posted: Sun May 27, 2018 1:54 am
by Fuzz
Me too Karl
I want to see that same smiling face I meet at the builders meet
Re: AD 14 KIELGE
Posted: Mon May 28, 2018 11:31 am
by Bogieman
Hi Karl! That's a great pic.
Re: AD 14 KIELGE
Posted: Mon May 28, 2018 11:32 am
by Jeff
Nice Karl, very nice!! Jeff
Re: AD 14 KIELGE
Posted: Fri Jun 08, 2018 6:13 am
by gonandkarl
Hi,
Today is a big day for me as the last 2 small jobs need to be done before I can say the sail boat is finished. I must sand with 180 grit the starboard side before I can give both sides the last coat of paint. Port side I sanded yesterday evening. Notice the bow cleat is mounted strong enough that I can lift the whole boat with a rope around it. The boat definitely looks as if it wants to come out of the shed which was its home for the last 5 years. In 2 or 3 days I will attach the name Wilde Qualle on both sides and then in goes the trailer for adaptation of the bunks and to balance it on the axle with the right tongue weight.
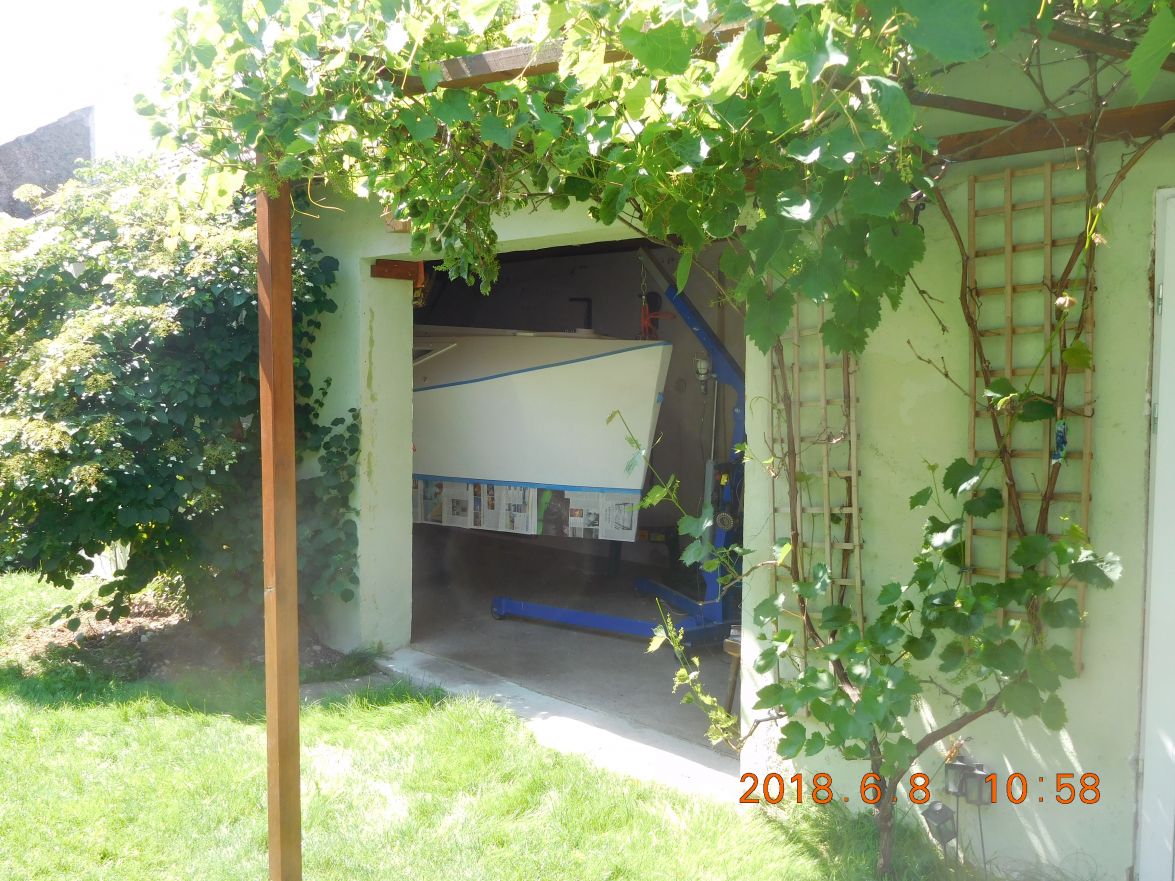
Greetings from Karl
Re: AD 14 KIELGE
Posted: Fri Jun 08, 2018 6:37 am
by cape man
She is definitely peeking out the door like she wants to sail! Can't wait! Go Karl!
Re: AD 14 KIELGE
Posted: Fri Jun 08, 2018 7:15 am
by Jeff
Nice Karl, really looking forward to her splash and first sailing adventure!!! Jeff
Re: AD 14 KIELGE
Posted: Sat Jun 09, 2018 8:42 am
by Bogieman
Nice pic Karl! She's so close now. One can only imagine how proud and excited you must be.
Bogie
Re: AD 14 KIELGE
Posted: Sat Jun 09, 2018 1:26 pm
by gonandkarl
Hi,
On the eve of fathers day which is celebrated here in Austria tomorrow my boat is finished with the help of my son. I did paint yesterday the last 2 sides of the boat and mentioned before I can adapt it to the trailer I need to exchange the top fitting of my centreboard because I made a mistake when I first mounted it. I fitted a rather big nut in the hole which also was meant to be the hole for arresting the centreboard in the up position just to find out that the pin did not get through anymore to hold the board up. My son suggested lets do it together and within the next 2 hours we put the boat on its side enough at an angle so we could let out the centreboard completely. The fitting was quickly exchanged and now it is standing back on its keel shoe and the centreboard can be fixed in the up position with a screwdriver pushed through case and board to be replaced later with a SS pin.
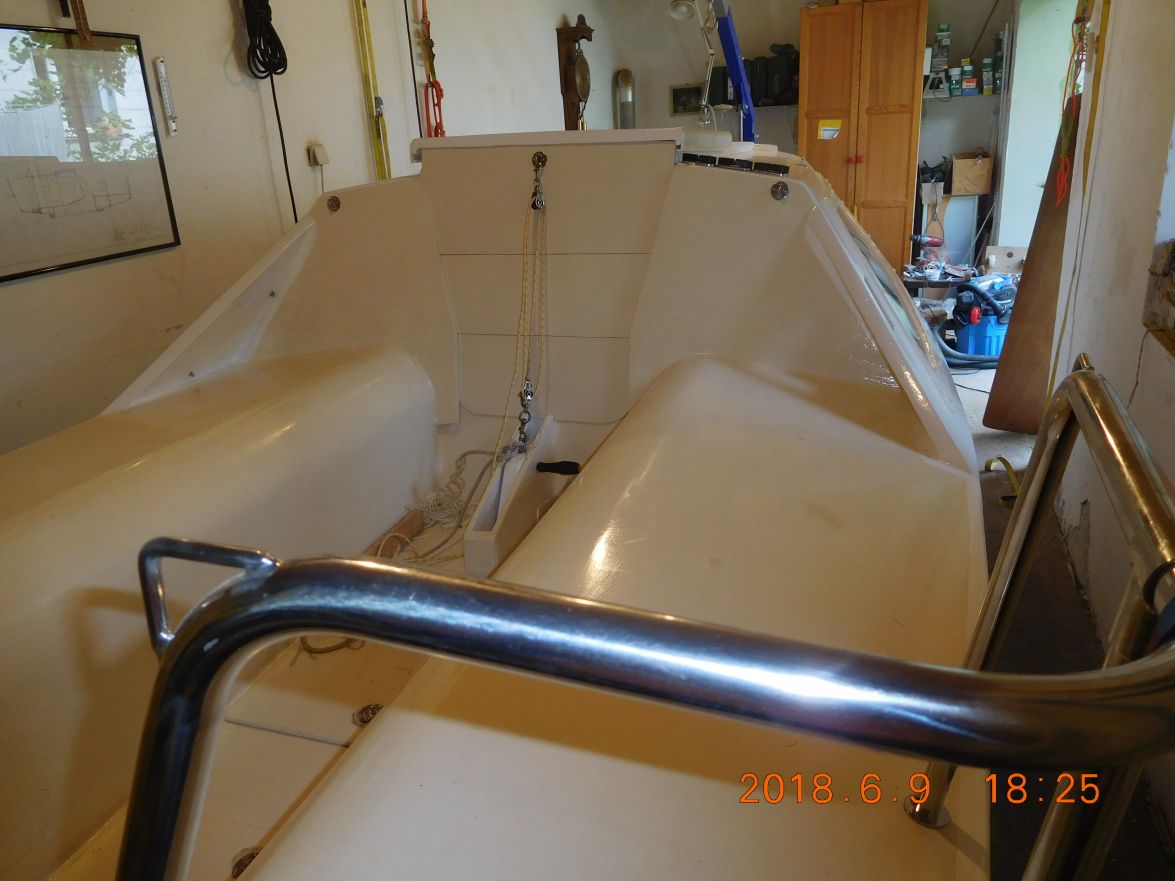
And here is the finished boat 4 Years behind schedule but so what I lived to see that enjoyable moment today.

And now its time for a nice Stellenbosch Shiraz as it is well past five.
The tasks to do for splashing are diminishing fast. My boat trailers road safety had to be checked for the first time after 3 years of age and is ready for the boat. The next check will be in 2 years time and after that annually. Now I will fix the name to the 2 boat sides and adapt the trailer bunks to the boat and then pull it out of the shed for the first time to have my rat rod test as Michael would say.
Greetings from Karl
Re: AD 14 KIELGE
Posted: Sat Jun 09, 2018 1:38 pm
by terrulian
This is getting exciting.
Re: AD 14 KIELGE
Posted: Sat Jun 09, 2018 1:53 pm
by Fuzz
Like every one else I am waiting for your big day
Re: AD 14 KIELGE
Posted: Sat Jun 09, 2018 1:58 pm
by Jaysen
Party at Karl's for the maiden voyage?
Re: AD 14 KIELGE
Posted: Sat Jun 09, 2018 2:48 pm
by OrangeQuest
terrulian wrote: ↑Sat Jun 09, 2018 1:38 pm
This is getting exciting.
YES IT IS!!!
Re: AD 14 KIELGE
Posted: Sun Jun 10, 2018 9:15 am
by Bogieman
Very exciting Karl. Congratulations!
Re: AD 14 KIELGE
Posted: Tue Jun 12, 2018 5:30 pm
by gonandkarl
Hi,
Today I pushed the trailer into the boat shed and as I have done it in my thoughts often before I was so surprised that there was a snag when it had to happen for the first time in reality. The dammed wooden pole of the gardens grape whine pergola was so much in the way that it took the better part of the morning to push the trailer into the shed just to find out that the boat was not lifted high enough. I am thinking already of a way that the wooden pergola pole can be taken away temporarily while mucking around with the trailer there. But after the boat was lifted a bit higher is was clear sailing the choice of words came most probably thinking ahead a month or so and splashing.Then I fetched the bathroom scale to find out the tongue weight. Because my car is rather small and should only tow with a maximum tongue weight of 40 kg I packed my battery in front of the transom ( later on inside the SB bunk in front of the transom ) put the rudder and tiller into the cockpit and then came the moment of truth. The weight was much too high 48 Kg but I got it down to 43,7 kg by pushing the light bar of the trailer onto its back. Then my burning ambition broke out and I packed my anchor with its line also into the cockpit in front of the transom. This is not a place where the anchor should be but as I will use it rather by throwing it over the transom it will be stored in the future nearby under the hatch of the cockpit floor. The aim of 40 Kg was still not reached but 40,7 I can live with for the first day of playing boat meets trailer. While I am writing this I thought of some more transom weights I can try tomorrow: My outboard bracket mounted on the transom and the electric outboard motor stored in the PS bunk.
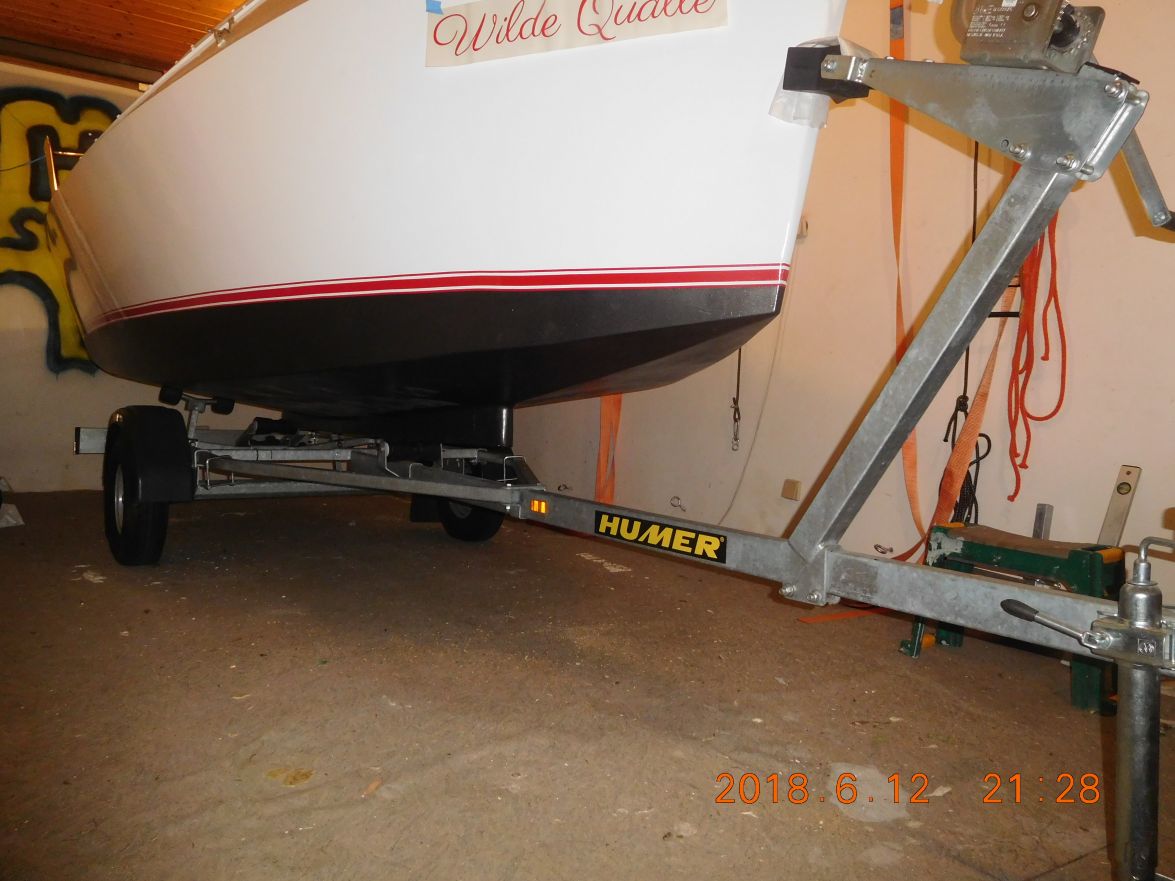
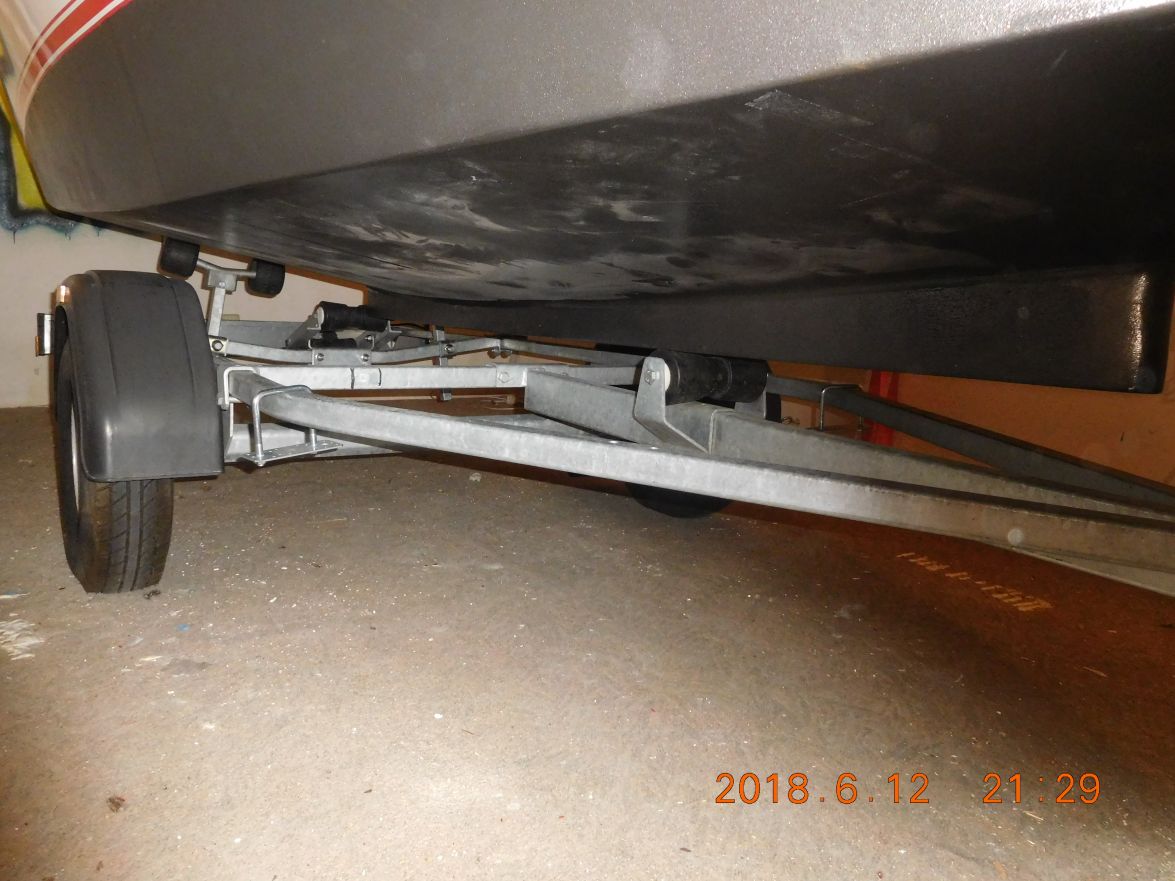
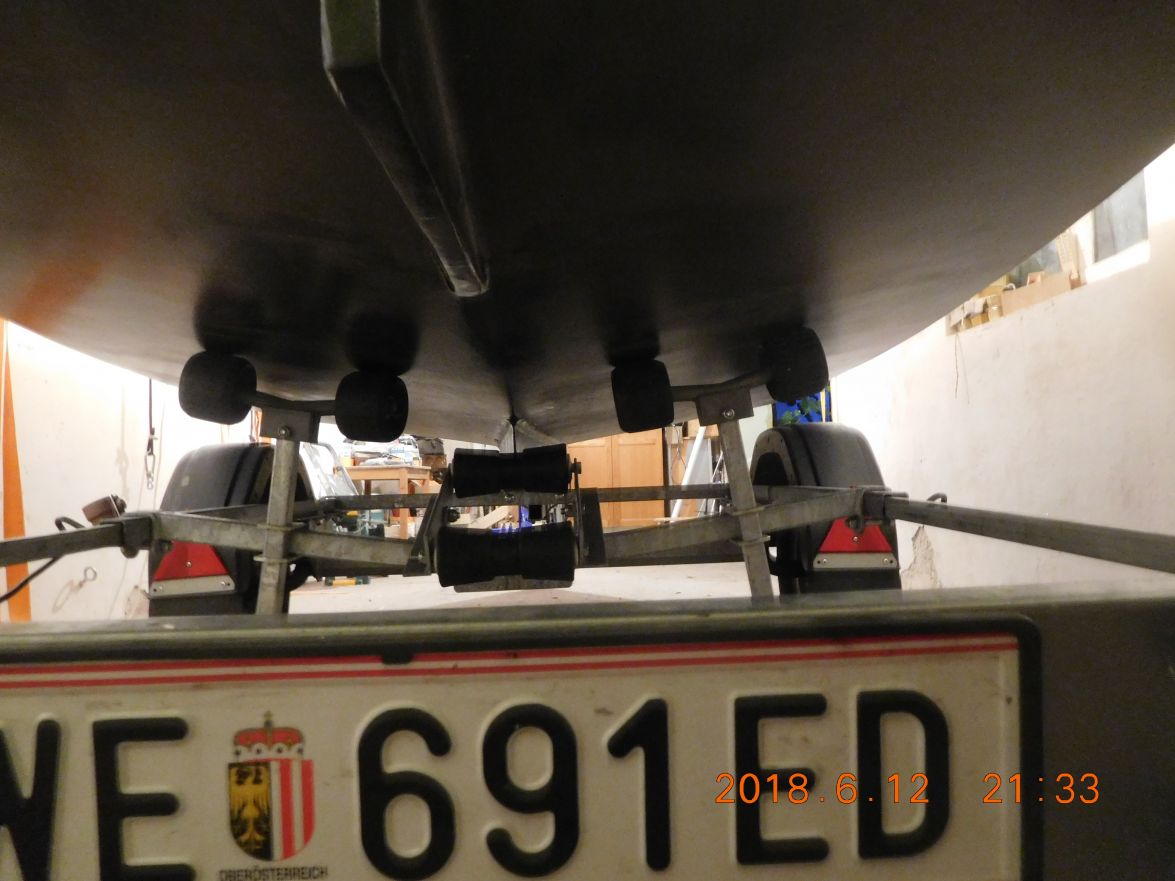
My son suggested I should first try the trailer and boat with all the wheels and keel roller which where on the trailer. So today I have done this but my lovely with epoxy glue laminated 3 meter long skids I will try to mount them tomorrow and soon after that I want to do my rat rod test with wheels or skids I do not know yet a toss up. The next big problem is also already there. The names I have to attach on both sides near the bow and I do not know if it should be parallel to the water line or follow the curve of the sheer line. Maybe one of you can chip in on that.
Greetings from Karl
Re: AD 14 KIELGE
Posted: Tue Jun 12, 2018 5:54 pm
by OrangeQuest
I lot of times you can adjust your axle forward or backward a little to get correct tongue weight. Must be done very carefully and correctly to keep it square with the trailer frame.
Re: AD 14 KIELGE
Posted: Tue Jun 12, 2018 6:12 pm
by terrulian
Unless there are regulations contrary to this in your country, put the name (and number?) parallel to the shear. I'd have a look online and see where Austria requires them to be.
Re: AD 14 KIELGE
Posted: Wed Jun 13, 2018 8:49 am
by Bogieman
She looks great, Karl. Really happy for you.
Re: AD 14 KIELGE
Posted: Wed Jun 13, 2018 11:36 am
by Jeff
Beautiful work Karl!! Jeff
Re: AD 14 KIELGE
Posted: Wed Jun 13, 2018 1:40 pm
by cape man
I'm watching!!!! Go Karl!
Re: AD 14 KIELGE
Posted: Wed Jun 13, 2018 11:01 pm
by seaslug
Karl, your boat looks fantastic. If you leave now you can probably make the builders meet in October! Happy sailing my friend. Mike
Re: AD 14 KIELGE
Posted: Thu Jun 14, 2018 5:33 am
by glossieblack
Karl, I'm really looking forward to seeing your beautifully built hull with her attractive sail installed.
Enjoy her launch!
Re: AD 14 KIELGE
Posted: Thu Jun 14, 2018 8:41 am
by terrulian
Karl,
When speaking about the numbers on the bow I forgot about the unusual shear on your boat.
I think you should, absent regulations to the contrary, put them where they look best to you, and see what the other AD builders have done.
Re: AD 14 KIELGE
Posted: Thu Jun 14, 2018 11:17 am
by gonandkarl
Hi,
Thank you Tony for the shear suggestion and as there are no regulations for a boat as small as mine anything shorter than 4,5 meters is considered flotsam and needs no registration I really can put the name where it looks best. My brother in law also a captain like you had the same idea as you and suggested to follow the shear line which goes well with the letters leaning to the right. Today I mounted temporarily my skids on the trailer and put the boat on top. Looks ok but I have to order 2 universal couplings also for the 2 rear support of the skids which I only mounted on the 2 supports near the bow. I thought the boat is rather flat near the transom but it does swing up and to the side so that I need the cross joint couplings there as well. I also got the tongue weight down to 39 kg. Tomorrow I will get it down a bit more by moving the boat a bit further back on the trailer and then the Wilde Qualle name will be stuck to the 2 bow sides.
Greetings from Karl
Re: AD 14 KIELGE
Posted: Thu Jun 14, 2018 11:23 am
by Jaysen
now I'm really thinking about those letters... What about on the upper part following the shear? Or is that what we are talking about? I've been known to be behind when if comes to thinking.
Re: AD 14 KIELGE
Posted: Thu Jun 14, 2018 1:16 pm
by Bogieman
Are you planning to put her name on the transom? That might look nice too.
Re: AD 14 KIELGE
Posted: Thu Jun 14, 2018 2:24 pm
by gonandkarl
Hi,
Yes I have decided to let the name follow the shear line but not so steep that the first letter W falls sort of backwards.
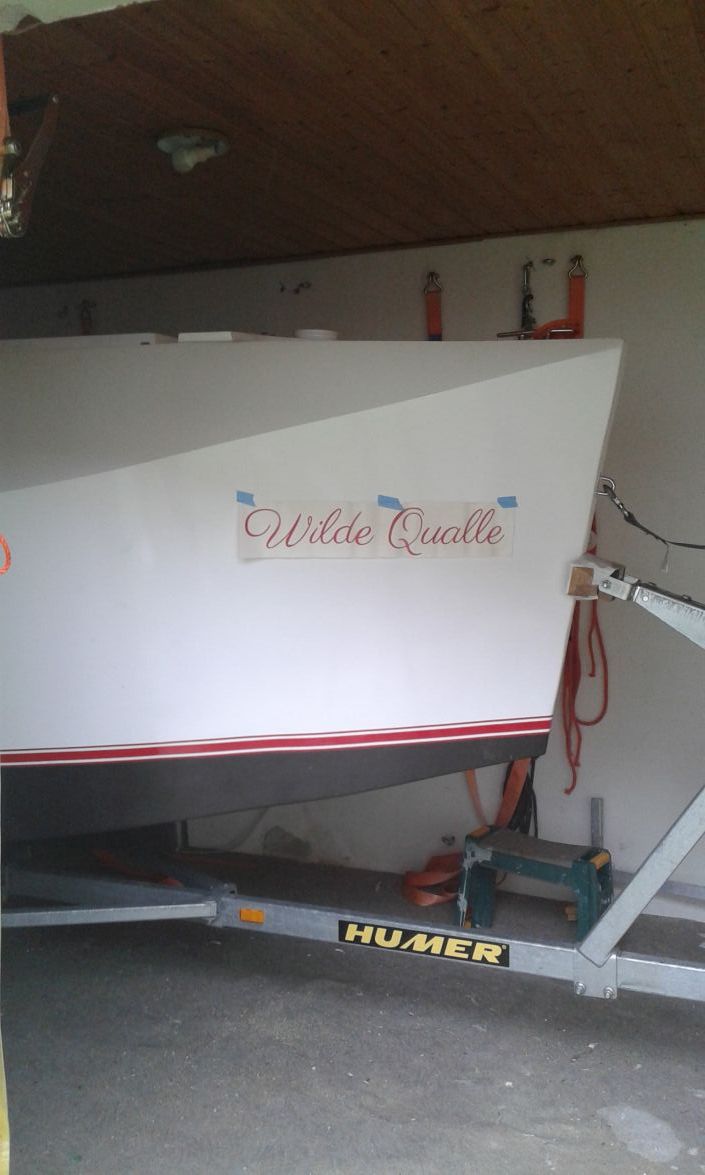
This one I will fit tomorrow
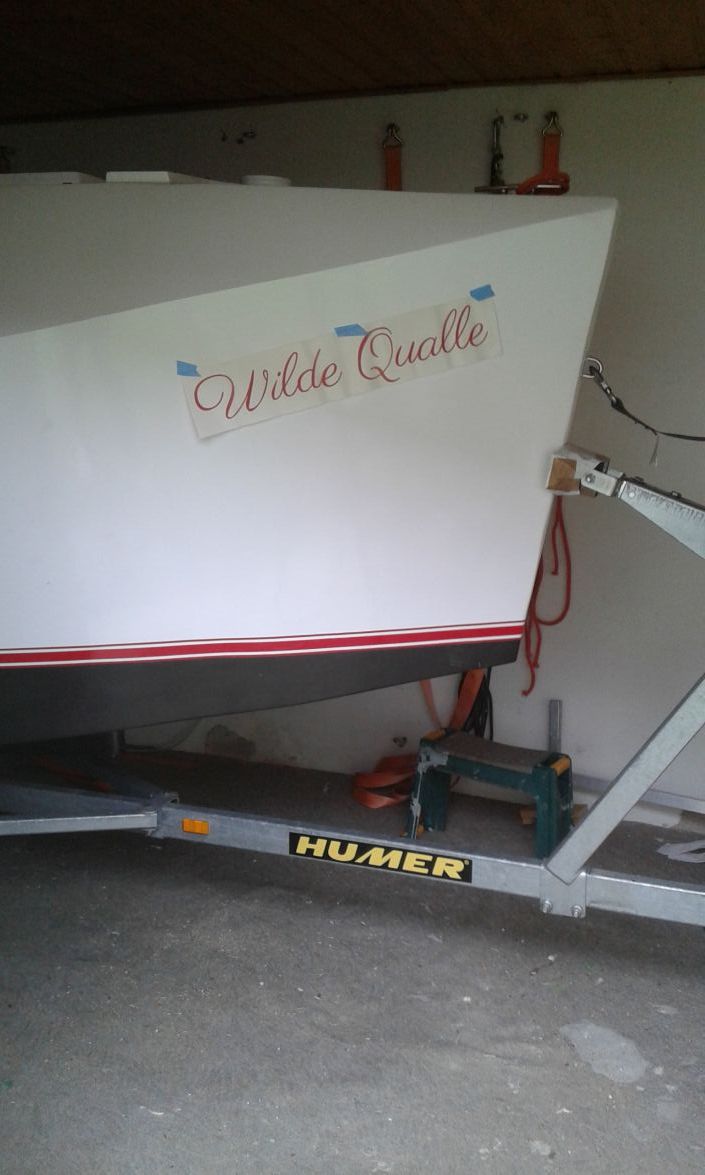
On bigger boats it is usual to put the name and home harbour town onto the transom. I do not want to do that because my transom is rather small and I like it nice and white without anything on it except the rudder hardware wit 12 screws.
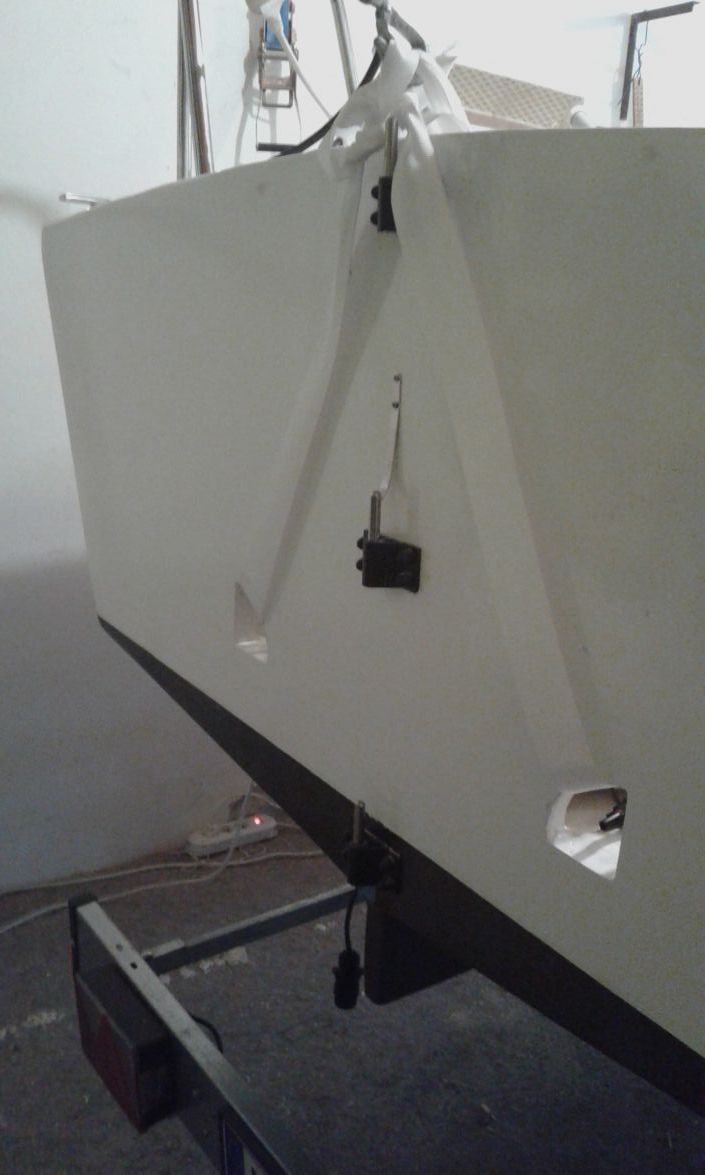
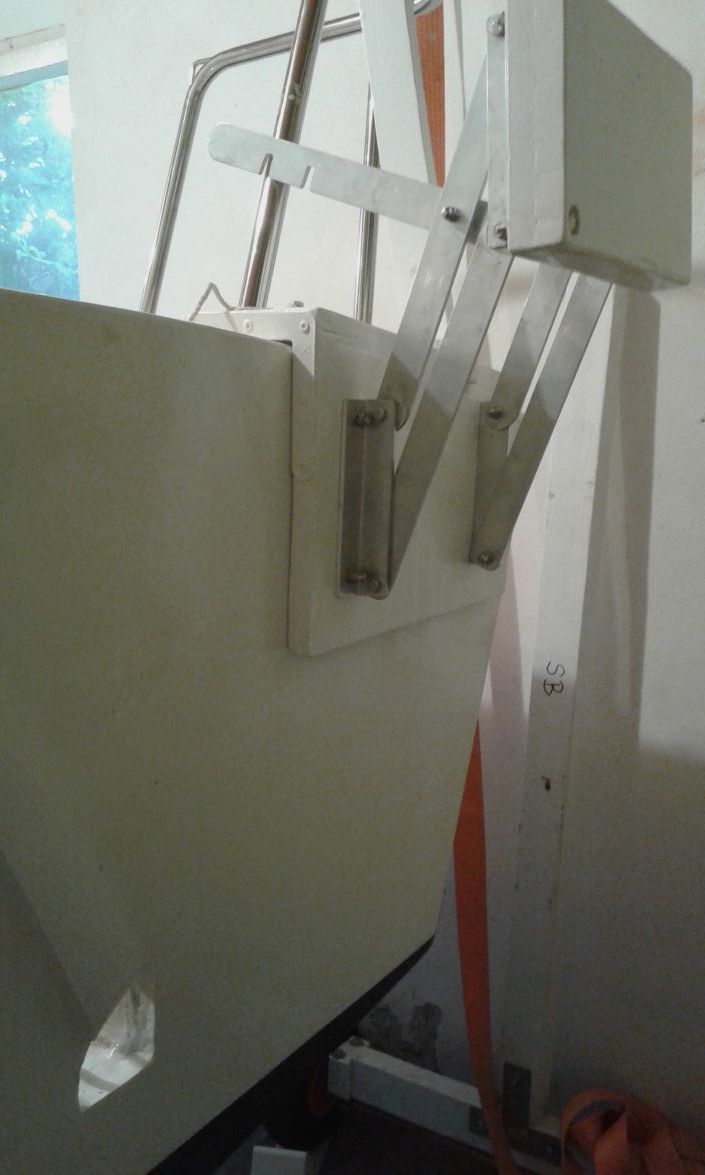
and here the outboard bracket taken away within 30 seconds.
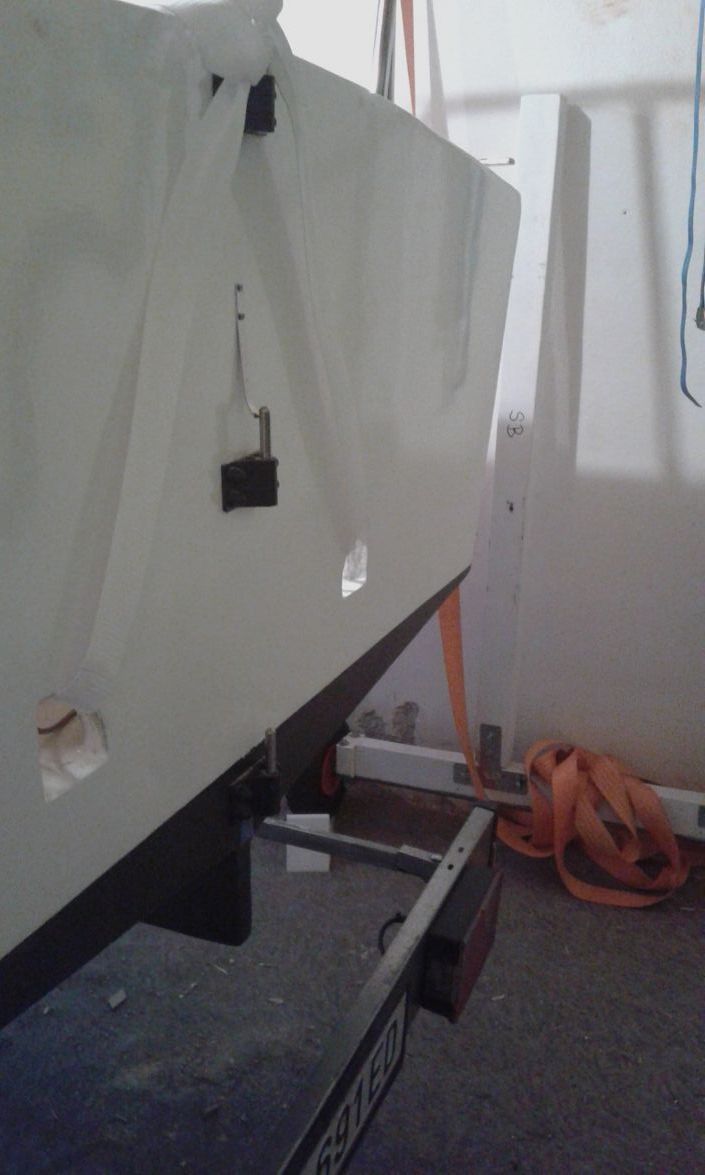
Greetings from Karl
Re: AD 14 KIELGE
Posted: Thu Jun 14, 2018 3:34 pm
by Bogieman
Very nice, Karl.
Re: AD 14 KIELGE
Posted: Thu Jun 14, 2018 3:35 pm
by Eric1
Yes, My Friend! That looks Very Nice!
Re: AD 14 KIELGE
Posted: Fri Jun 15, 2018 6:40 am
by gonandkarl
Hi,
Thank you my friends for the compliments. The most joy I get out of building this boat is that I my progress is always slow like Fuzzes elephant bite by bite and when a small thing is done I cannot stop looking at it like a kid who got a new tricycle and then I retreat for hours resting and be happy. Same today I did the massive job of affixing the name to the boat so I got the afternoon and evening off ( the boat ) for watching 3 FIFA World Cup games of soccer.

Greetings from Karl
Re: AD 14 KIELGE
Posted: Fri Jun 15, 2018 7:13 am
by Jaysen
Excellent! now it's time to get her into the water!!!
Re: AD 14 KIELGE
Posted: Fri Jun 15, 2018 7:43 am
by Jeff
Beautiful Job Karl!!!!
Re: AD 14 KIELGE
Posted: Fri Jun 15, 2018 8:04 am
by terrulian
Looking good, Karl.
Re: AD 14 KIELGE
Posted: Fri Jun 15, 2018 9:09 am
by Bogieman
Perfect!
Re: AD 14 KIELGE
Posted: Fri Jun 15, 2018 9:12 am
by OrangeQuest
Very nice shot of the bow! Makes her look massive! Very good job.
Re: AD 14 KIELGE
Posted: Fri Jun 15, 2018 12:01 pm
by das boot
Looking good you are just abought there are you putting lights and a depth sounder on it ? I have all that and a radio as well as a 12 plug in for the lids to run their video games etc, I have a small solar panel that keeps the battery all charged up works well
Re: AD 14 KIELGE
Posted: Tue Jun 19, 2018 6:27 am
by gonandkarl
Hi,
It must be a bit of the summer cough I got that my energy goes down to zero. Right now I am still working with fitting the skids to the trailer just in minute steps. Yes George I would like to put in a radio VHF ( I assume you have ) and a 12 volt plug. I found these 2 pictures from you one is the port side electrical box of your boat and the next one is port bunk with electrical installation of Cool Change I think.


I have some questions which you for sure know the answers to.
Did You install your battery also in the PS bunk near the transom like Cool Change or at some other place ?
Do you leave the battery in the boat during trailering ? How well did you tie it to the boat so it does not shoot through the cabin when you are braking ?
Maybe you can send me a picture of it ?
Greetings from Karl
Re: AD 14 KIELGE
Posted: Tue Jun 19, 2018 8:10 am
by Bogieman
Oh now this is some good stuff! I'm taking notes
Re: AD 14 KIELGE
Posted: Tue Jun 19, 2018 10:11 am
by terrulian
Gentlemen: Please secure your batteries! It's a sailboat, it experiences pitch and roll!
Re: AD 14 KIELGE
Posted: Tue Jun 19, 2018 10:16 am
by Jaysen
terrulian wrote: ↑Tue Jun 19, 2018 10:11 am
Gentlemen: Please secure your batteries
in an approved water tight device! It's a sailboat, it experiences pitch and roll!
Don't forget that you have water ingress in all this stuff too. You need to take that into account or you may experience... unpleasantness.
Re: AD 14 KIELGE
Posted: Tue Jun 19, 2018 10:27 am
by terrulian
BTW, I built my own battery boxes out of--guess what?--plywood and fiberglass and epoxy. Epoxy is impervious to battery acid. It's easier to buy them but what are we? Are we not builders?
Re: AD 14 KIELGE
Posted: Tue Jun 19, 2018 10:40 am
by OrangeQuest
terrulian wrote: ↑Tue Jun 19, 2018 10:27 am
BTW, I built my own battery boxes out of--guess what?--plywood and fiberglass and epoxy. Epoxy is impervious to battery acid. It's easier to buy them but what are we? Are we not builders?
Whatttt?
That is what I did on our work canoe. Replaced the plastic seats with wood and using a riding lawn mower battery. Rated for 230CCA and weights about 20 pounds. It is enough to run the 500gph and running lights for more than 8 hours without a charge. Also has a 12V outlet to plug stuff into. Switch panel is right next to the handheld VHF radio and compass.
Re: AD 14 KIELGE
Posted: Tue Jun 19, 2018 10:54 am
by terrulian
Do you charge it with a solar panel?
Re: AD 14 KIELGE
Posted: Tue Jun 19, 2018 11:20 am
by OrangeQuest
terrulian wrote: ↑Tue Jun 19, 2018 10:54 am
Do you charge it with a solar panel?
I have, but the panel I have is to small and is easier to take it out to charge it. I have a 12 volt deer feeder panel that I have used just to maintain the charge. This being a work boat a panel would get crushed by something/someone. For work it is used to act as safety escort on tours/tow vessel and to cut out log jams on the near by bayous and water ways. It has been out in the bay a few times just to fish.
Re: AD 14 KIELGE
Posted: Tue Jun 19, 2018 4:02 pm
by das boot
I built a box into the floor of my boat when I built it just insidweof the cabin beside the keel box I have the pottie on one side and the battery on the other side it is sealed up with epoxy and a piece of the floor lifts up to get at it the wiring from it runs up to the inside of the cabin bulkhead where I have my switch panel I have a small solar panel 8-4 inch mounted on the deck beside of the hatch that keeps it all charged up. The bigest problem is to get a battery with a handel built into the battery to get it in and out of tat box. I ran the cables for my sturn light and depth sounder through the birth on that side and used LED lighting for the bow and stern lights to keep power usage down the radio is inside of the cabin and a small ant near the solar panel the only thing I did not hook up was the lights to my Compous that is mounted on the cabin bulkhead. The depth sounder read out is mounted on the opiset side of the hatch from the Compus. That solar pannel cost around $50 when I bought it even during the winter when the boat is covered by a tarp it still gets enough light to keep that battery charged.
Re: AD 14 KIELGE
Posted: Wed Jun 20, 2018 8:46 am
by Bogieman
das boot wrote: ↑Tue Jun 19, 2018 4:02 pm
...I built a box into the floor of my boat when I built it just insidweof the cabin beside the keel box I have the...
Thanks for posting this, George.
Re: AD 14 KIELGE
Posted: Sat Jun 23, 2018 7:48 am
by glossieblack
Greetings Karl, hope you're feeling better and the launch is just around the corner.
Re: AD 14 KIELGE
Posted: Mon Jun 25, 2018 6:27 am
by gonandkarl
Hi,
not all so well will spend a few days with pneumonia in hospital and the only connection to the sea is me myself asPopeye the sailor pulling
cannot find underline character on the smartphone will search further to post the picture as well
Greetings from Karl
Re: AD 14 KIELGE
Posted: Mon Jun 25, 2018 7:49 am
by Jeff
Karl, Very sorry to hear you are sick!! Listen to your doctors, get some rest & enjoy the World Cup via TV!! Did you see Colombia beat Poland yesterday, great match!! Get better and keep us posted!! Jeff
Re: AD 14 KIELGE
Posted: Mon Jun 25, 2018 9:04 am
by gonandkarl
Re: AD 14 KIELGE
Posted: Mon Jun 25, 2018 9:08 am
by glossieblack
Speedy recovery and all the best Karl!
Re: AD 14 KIELGE
Posted: Mon Jun 25, 2018 9:48 am
by Bogieman
Feel better Karl.
Re: AD 14 KIELGE
Posted: Mon Jun 25, 2018 10:06 am
by OrangeQuest
At least you don't have to wear a gown backwards! Get well soon.
Re: AD 14 KIELGE
Posted: Mon Jun 25, 2018 10:14 am
by terrulian
Jeesh, Karl, cut that sickness excuse out and get back to work!
We need our entertainment.
Best wishes!
Re: AD 14 KIELGE
Posted: Tue Jun 26, 2018 12:43 am
by Fuzz
The man may be sick but he still has that happy face
Re: AD 14 KIELGE
Posted: Tue Jun 26, 2018 8:15 am
by Bogieman
Hope you're feeling better, Karl.
Re: AD 14 KIELGE
Posted: Wed Jun 27, 2018 9:53 am
by pee wee
Fuzz wrote: ↑Tue Jun 26, 2018 12:43 am
The man may be sick but he still has that happy face
I think that's Popeye and his pipe!

Re: AD 14 KIELGE
Posted: Wed Jun 27, 2018 10:30 am
by Bogieman
Re: AD 14 KIELGE
Posted: Thu Jun 28, 2018 4:08 am
by gonandkarl
My son also had the same thouught I look like Popeye the sailor and sent me the Popeye graphic on whattsap. As I am improving and hopefully be home from hospital soon I spend all the time about the few tasks towards splashing.
Greetings from Karl
Re: AD 14 KIELGE
Posted: Thu Jun 28, 2018 7:03 am
by Jeff
Karl, glad to hear you are improving!! Enjoy the world cup and get well!! Jeff
Re: AD 14 KIELGE
Posted: Thu Jun 28, 2018 7:51 am
by OrangeQuest
gonandkarl wrote: ↑Thu Jun 28, 2018 4:08 am
My son also had the same thouught I look like Popeye the sailor and sent me the Popeye graphic on whattsap. As I am improving and hopefully be home from hospital soon I spend all the time about the few tasks towards splashing.
Greetings from Karl
All you need is the sailor hat!
Continue getting well!
Re: AD 14 KIELGE
Posted: Thu Jun 28, 2018 8:20 am
by terrulian
Good news, Karl!
Re: AD 14 KIELGE
Posted: Thu Jun 28, 2018 8:59 am
by Bogieman
Yes, that is great news. Glad you're feeling better.
Bogie
Re: AD 14 KIELGE
Posted: Thu Jun 28, 2018 11:08 am
by narfi
Eat your spinach and get better!
Re: AD 14 KIELGE
Posted: Thu Jun 28, 2018 1:53 pm
by Fuzz
The best of news
Very pleased to know you are getting better. And when you get home do NOT rush things with the boat. It will still be there when you are back to full health.
Re: AD 14 KIELGE
Posted: Fri Jun 29, 2018 3:07 am
by glossieblack
Sounding good Karl. All the best.
Re: AD 14 KIELGE
Posted: Fri Jun 29, 2018 6:15 am
by cape man
Like Fuzz, was good to see that smile! Pattie and I remember it well. Even when you called me old, and her fat
Re: AD 14 KIELGE
Posted: Fri Jun 29, 2018 7:00 am
by Jeff
Karl, how are you feeling? Going home soon? I hope you are enjoying the World Cup, even from the hospital!! Jeff
Re: AD 14 KIELGE
Posted: Fri Jun 29, 2018 8:53 am
by gonandkarl
Came home just now and I will leisurely do the few remaining tasks before splashing
Re: AD 14 KIELGE
Posted: Fri Jun 29, 2018 9:58 am
by Bogieman
gonandkarl wrote: ↑Fri Jun 29, 2018 8:53 am
Came home just now and I will leisurely do the few remaining tasks before splashing
That's great news! Hope you get back to full strength soon.
Re: AD 14 KIELGE
Posted: Fri Jun 29, 2018 10:24 am
by Jeff
Karl, Just take it easy and get well!! Jeff
Re: AD 14 KIELGE
Posted: Thu Jul 05, 2018 6:32 pm
by Bogieman
Hi Karl! Just wanted to check in on you since we haven't heard from you in a little while. Hope you are feeling better.
Bogie
Re: AD 14 KIELGE
Posted: Fri Jul 06, 2018 11:20 am
by das boot
Get well so you can enjoy your boat
Re: AD 14 KIELGE
Posted: Fri Jul 06, 2018 1:36 pm
by Jeff
Karl, give us an update on your health!! Jeff
Re: AD 14 KIELGE
Posted: Sun Jul 08, 2018 1:51 pm
by gonandkarl
Hi,
Thanks my friends for all the well wishes. I am OK again and can announce that I finished building the Adelie 14 today by mounting the wooden skids to the trailer and lowering the boat onto them.
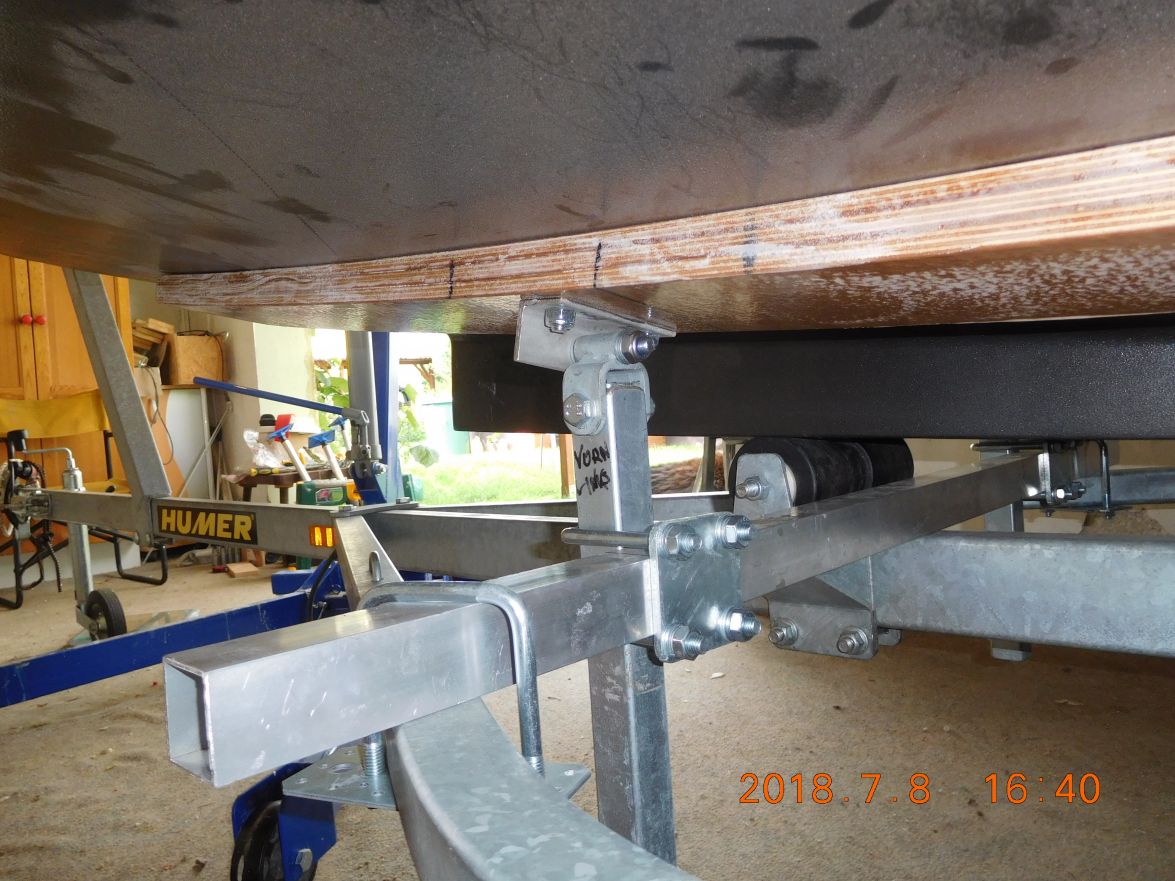
I know this is not really a stunning picture but for documentation purpose I took pictures of all 4 supports and uploaded them into my builders gallery.
It does not show the plenty of crawling under the boat and out again but I am glad the skids fit nicely and are exactly under the longitudinal stringers of the hull. The whole thing should last a while. I reached 38,1 kg of tongue weight at the towing ball which is under the maximum of 40 kg for my little towing vehicle Citroen C3. Now I have to demount the skids a last time by opening 4 screws and paint them and glue some carpet to them on that part where they support the hull. But building the boat is finished with approximately 8 ounces of epoxy left.
I naturally had to celebrate this while uploading the pictures with an Austrian ZIPFER beer in a glass shaped like a sail which I got at some Winter holiday on the East sea at the Störtebeker brewery. As my wife is not fond of beer she did not get one and also because she broke the second such beer glass I had when washing the dishes. She rather got a glass of South African red and we are both happy that the build is finished. From now on I can potter around the boat whenever I am not sailing and I am looking forward to this episode of boat ownership just as well.

Note the three mast sail boat on the glass.
Greetings from Karl
Re: AD 14 KIELGE
Posted: Sun Jul 08, 2018 2:05 pm
by Eric1
Excellent news Karl!! Happy you are well again!!!
Re: AD 14 KIELGE
Posted: Sun Jul 08, 2018 2:23 pm
by gonandkarl
Hi,
Dust of hull bottom will be washed off at the splashing on September 1st 9 AM to 3 PM and braai ( South African word for barbeque ) afterwards at my place in Wels. I hope anyone of you my friends being maybe then in Austria will attend and celebrate with us. Rat rod tests till then I see it takes time like with Michael. Lucky me One car battery and electric outboard and if it fails there is the sail and if there is no wind I will try sculling over the transom with my long standup paddle. I think that is the wrong word for rowing over the transom. My rat rod test will mainly be exercising the slipping in and out of the water and handling the lines of my junk rig and checking for no water ingresss at the pivot point of the centreboard .
Greetings fro Karl
Re: AD 14 KIELGE
Posted: Sun Jul 08, 2018 2:44 pm
by Bogieman
Hi Karl! Glad to see you are feeling better. Congratulations on finishing your Adelie. Now we will look forward to seeing pictures of her in the water with the proud captain at her helm.
Re: AD 14 KIELGE
Posted: Sun Jul 08, 2018 2:45 pm
by Jaysen
Sailing is a lot more fun than building!
Karl, I’d love to attend your splash party. Regretfully the timing is not workable for the Mrs and me. If I find myself in your side of the world I hope we can meet and you can show me your AD14.
Re: AD 14 KIELGE
Posted: Sun Jul 08, 2018 6:41 pm
by Jeff
Karl, really glad you are feeling better and Congratulations on the completion of your AD14!! Send us more photos!! Jeff
Re: AD 14 KIELGE
Posted: Mon Jul 09, 2018 8:37 am
by glossieblack
gonandkarl wrote: ↑Sun Jul 08, 2018 1:51 pm
Thanks my friends for all the well wishes. I am OK again and can announce that I finished building the Adelie 14 today
That's good to hear Karl. Congratulations.
Re: AD 14 KIELGE
Posted: Tue Jul 10, 2018 2:31 pm
by Fuzz
That is good news about the boat but it is even better to know you are doing better now.
Re: AD 14 KIELGE
Posted: Thu Jul 12, 2018 9:43 am
by gonandkarl
Hi,
As I am only a week or so away from my first rat rod test I checked out the slipways where I want to let the boat into the water. I have 2 choices a shallow slipway and a steep one which is mainly used by motor boats. Which one of the 2 should I use for my Adelie14 ? I have a towing extension bar which lets me push the trailer 2 meters further into the water and then maybe wind up the jockey wheel very high and push it more into the lake by hand and lift it up so the boat slides off the trailer. I also got an extra winch with which I can pull the trailer plus boat out of the lake until I can attach it again to the tow ball. This is my idea for the shallow slipway. The steep slipway has a sign Please leave the slipway fast which means I need a second person who holds the boat on a bow line while I look for parking of car and trailer. I think the steep slipway has the advantage that the boat floats of the trailer skids immediately. If I get a few answers from you then it will be easier for me to decide which slipway to try first.
Greetings from Karl
Re: AD 14 KIELGE
Posted: Thu Jul 12, 2018 9:53 am
by terrulian
Either way, you'll probably be fine, but on the steep one there is a possibility that your towing vehicle may slip, depending on traction and also whether you have four-wheel drive. My vote is for the shallow one so that you don't have to rush on your first day and can send us some photos.
Re: AD 14 KIELGE
Posted: Thu Jul 12, 2018 11:30 am
by gonandkarl
Thanks Tony,
I always feel better to get advise from you because someone having surrounded the world can be trusted with boats near the shore.
The shallow one is a good idea because if I should not be able to push the trailer far enough into the lake I can play around with my slipping axles with wheels I built for transom and bow and there is hardly ever anybody at this slip. So I can take my time. The steep slipway has me worried because I have no 4 wheel drive and the vehicle would for sure slip because there is gravel to help that too.
I am still busy painting the skids for the trailer and it should be finished by Monday for an exciting next week towing and weighing the trailer with the boat and trying the slip. I found a weigh bridge at a near farmhouse where I can weigh my boat even gratis while all other weighing stations wanted 20 Euros.
Pictures to follow soon.
Greetings from Karl
Re: AD 14 KIELGE
Posted: Thu Jul 12, 2018 1:44 pm
by cape man
Karl, I'm very excited for you, and agree to start with the shallow ramp. Wish I was there to take pictures for you as you did for me! Can't wait to see the smile!
Re: AD 14 KIELGE
Posted: Thu Jul 12, 2018 2:04 pm
by Jaysen
Shallow ramp. Every time.
1. It reduces the "oh shoot" factor if things go wrong (gravity is not trying to break you)
2. It allows humans to be more foot sure in the water to guide our babies on and off the trailer
3. Easier on vehicles
4. If you need help, you will have the options of use "more small people" than "one MONSTER person" (#1 point again)
5. When you are in recovery the "impact" to the bow will be more slide than hit (think angle+force)
6. if you are "shoving off" you will have longer contact with terrafirma to climb in the boat.
I could say "these are my experiences" but, I've never really launched from trailer shallow. I will tell you that pushing off from the beach is MUCH easier then from the steep ramp or a dock in my v12 for all the reasons above.
I sure hope that makes sense. And if you can, see if you can get someone to take video. You know how much we all love looking at maiden voyages.
Re: AD 14 KIELGE
Posted: Fri Jul 13, 2018 8:27 pm
by das boot
If you are conserned on getting it to float free from the trailer take a small air pump with you you can always soften the tires to lower the trailer a few inches and pump them back up after you pull it out of the water. The only problem with extending the tung is it might let the trailer wheels drop off the end of the ramp I have seen that happen then you have a real problem. Just food for thought. It should work out fine I wnt through the same thing with mine.
Re: AD 14 KIELGE
Posted: Mon Jul 16, 2018 6:18 am
by glossieblack
gonandkarl wrote: ↑Sun Jul 08, 2018 2:23 pm
.... splashing on September 1st 9 AM to 3 PM and braai ( South African word for barbeque ) afterwards at my place in Wels ... Rat rod tests till then I see it takes time like with Michael. Lucky me One car battery and electric outboard and if it fails there is the sail and if there is no wind I will try sculling over the transom with my long standup paddle. I think that is the wrong word for rowing over the transom. My rat rod test will mainly be exercising the slipping in and out of the water and handling the lines of my junk rig and checking for no water ingresss at the pivot point of the centreboard .
Karl, looking forward to progressive rat rod test reports. May the sailing gods be with you.
Re: AD 14 KIELGE
Posted: Mon Jul 16, 2018 1:13 pm
by das boot
I had the same wories of how to launch my boat as you can see in my pictures i tried the launch before i had even painted my boat it all worked out fine but it depends on the ramp. in our area there is always a dock beside the ramp so i am able to grab the lines from the boat once i am on the dock and just walk the boat from the trailer with ought getting my feet wet at all the same with getting it back onto the trailer. i will email you some pictures. The only problem i ran into is if I have my rudder in the full down position it tends to get hung up on the ramp so i launce it with the rudder in the 1/2 down position.
Re: AD 14 KIELGE
Posted: Mon Jul 16, 2018 1:58 pm
by OrangeQuest
Mark a pole with where the waterline on the boat, while on the trailer should be, walk out into the water at each slip to see how far you have to have the trailer for the boat to slide off. The measurement should be done at the very back of the boat. pace the steps it takes to walk the length of the trailer tow vehicle combo. Reason I say a pole is so you can probe in front of you for a drop off. Power boats and gravel means there will be holes in the ramp where the power boaters use their motor to push the boat onto the trailer.
Good luck on your launch!!
OQ
Re: AD 14 KIELGE
Posted: Mon Jul 16, 2018 2:01 pm
by OrangeQuest
glossieblack wrote: ↑Mon Jul 16, 2018 6:18 am
gonandkarl wrote: ↑Sun Jul 08, 2018 2:23 pm
.... splashing on September 1st 9 AM to 3 PM and braai ( South African word for barbeque ) afterwards at my place in Wels ... Rat rod tests till then I see it takes time like with Michael. Lucky me One car battery and electric outboard and if it fails there is the sail and if there is no wind I will try
sculling over the transom with my long standup paddle. I think that is the wrong word for rowing over the transom. My rat rod test will mainly be exercising the slipping in and out of the water and handling the lines of my junk rig and checking for no water ingresss at the pivot point of the centreboard .
Karl, looking forward to progressive rat rod test reports. May the sailing gods be with you.
If you are moving the paddle in a figure 8 pattern to make the boat move then your use of the word is correct. If you are putting the paddle far away from you and then putting in the water and drawing it towards you it is then a draw stroke.
Re: AD 14 KIELGE
Posted: Mon Jul 16, 2018 5:05 pm
by das boot
hook up a solar panel the worst you would need to do is sit back and have a few beers while you get a charge back in the battery
Re: AD 14 KIELGE
Posted: Wed Jul 18, 2018 11:20 am
by gonandkarl
Hi,
Today I finished the wooden skids for the boat trailer with glueing carpet onto them and after 24 hours they can be put back onto the trailer
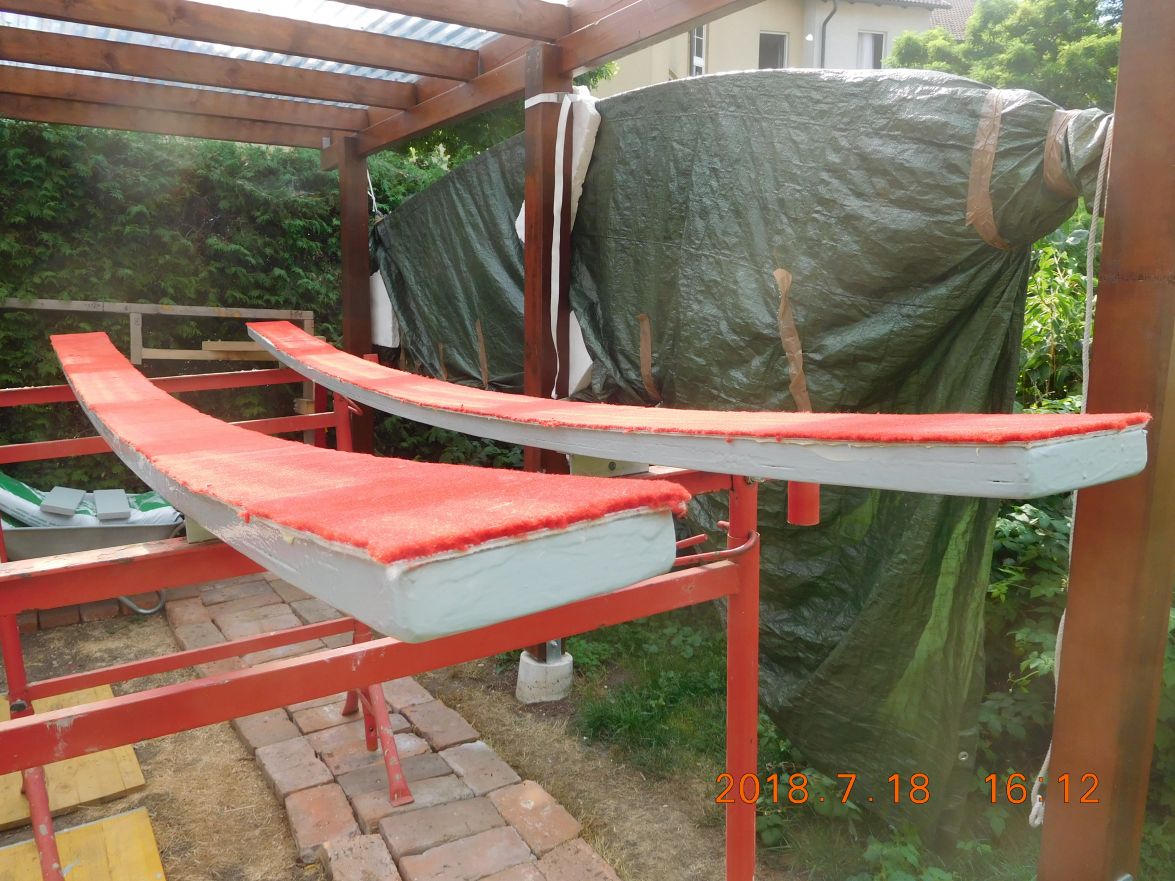
and while I was carting my wife across town to a doctor and some shopping I decided to buy myself a pair of additional outside mirrors for the car when towing the boat. I naturally mounted the mirrors at the shop where I bought it and drove around town like a trucker or a car with a big caravan behind. When I picked up my wife she did not even notice the extra mirror but after seven tries I reversed into our drive way with her comment Why dont you use these new toys only when you are towing the boat because normally I have empted the boot by now and stashed away the shopping.
Women just do not enjoy the build up tension to the actual towing which will be this Saturday. My son told me he is coming home from Vienna to help me with the first tests and my sister I sort of ordered already to stand at the ready with a camera when we test splash.
Greetings from Karl
Re: AD 14 KIELGE
Posted: Wed Jul 18, 2018 11:34 am
by Bogieman
Re: AD 14 KIELGE
Posted: Wed Jul 18, 2018 11:37 am
by OrangeQuest
Already becoming interesting!!
Re: AD 14 KIELGE
Posted: Wed Jul 18, 2018 1:14 pm
by das boot
When I build model RC aircraft I painted them all the same paint paint sceam my wife never knew if I had any new ones that way she could not get upset about the number of plains I had on hand. Sometimes they are better off knowing what we spend money on.
Re: AD 14 KIELGE
Posted: Wed Jul 18, 2018 1:15 pm
by cape man
Women just do not enjoy the build up tension to the actual towing which will be this Saturday.
Don't kid yourself. She's just not showing it!
I'll be logging in this weekend!
Re: AD 14 KIELGE
Posted: Thu Jul 19, 2018 11:37 am
by gonandkarl
Hi,
For all the Adelie builders these 3 following pictures might be of interest. I just got them from George and it shows his boat at the dock.
It gives at least me a good idea how an Adelie sits in the water next to the dock and especially to know how to get my 116 kg mass from the dock onto the boat. I have capsized a sailing boat twice in former Yugoslavia 30 years ago when trying to enter it. I weighed a lot less then and it was the sail boat owners fault because he tied the boat at high tide at the bow and the transom and me stepping onto it at low tide was sort of on a seesaw.
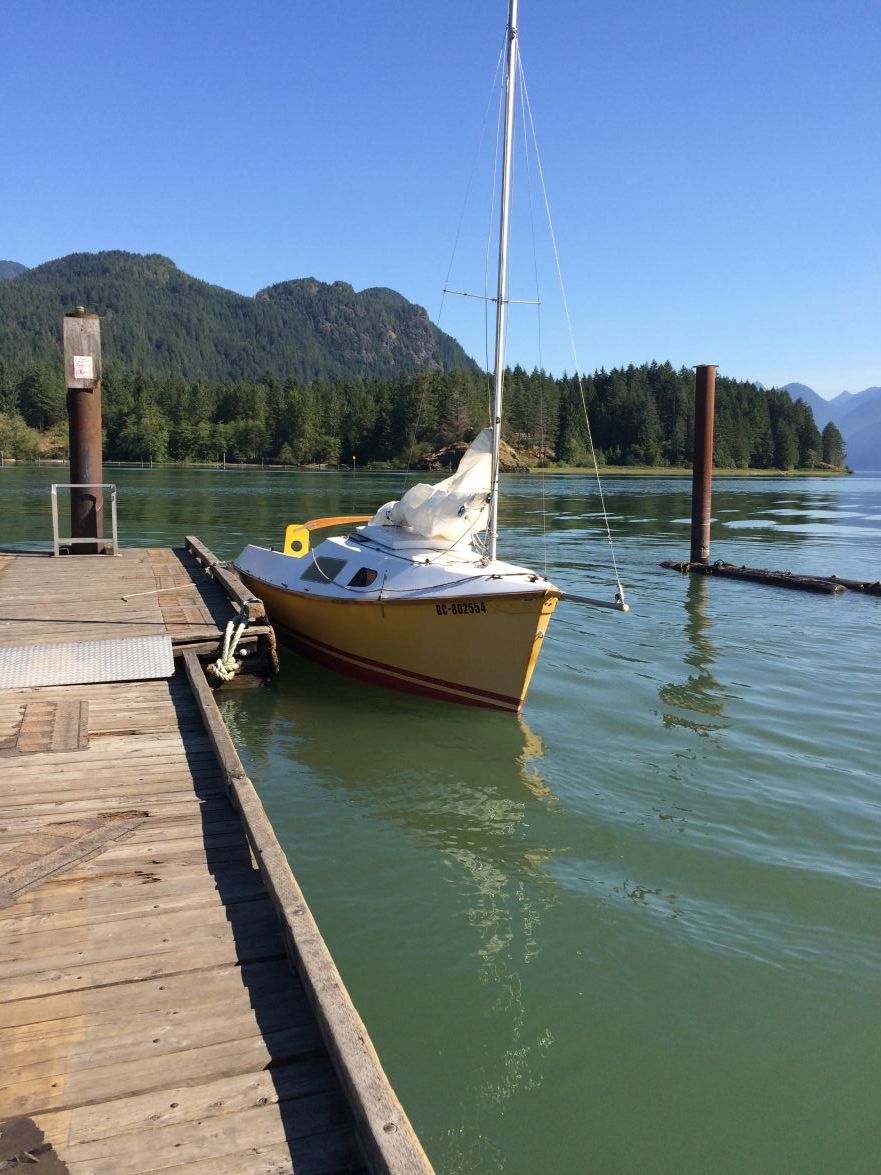
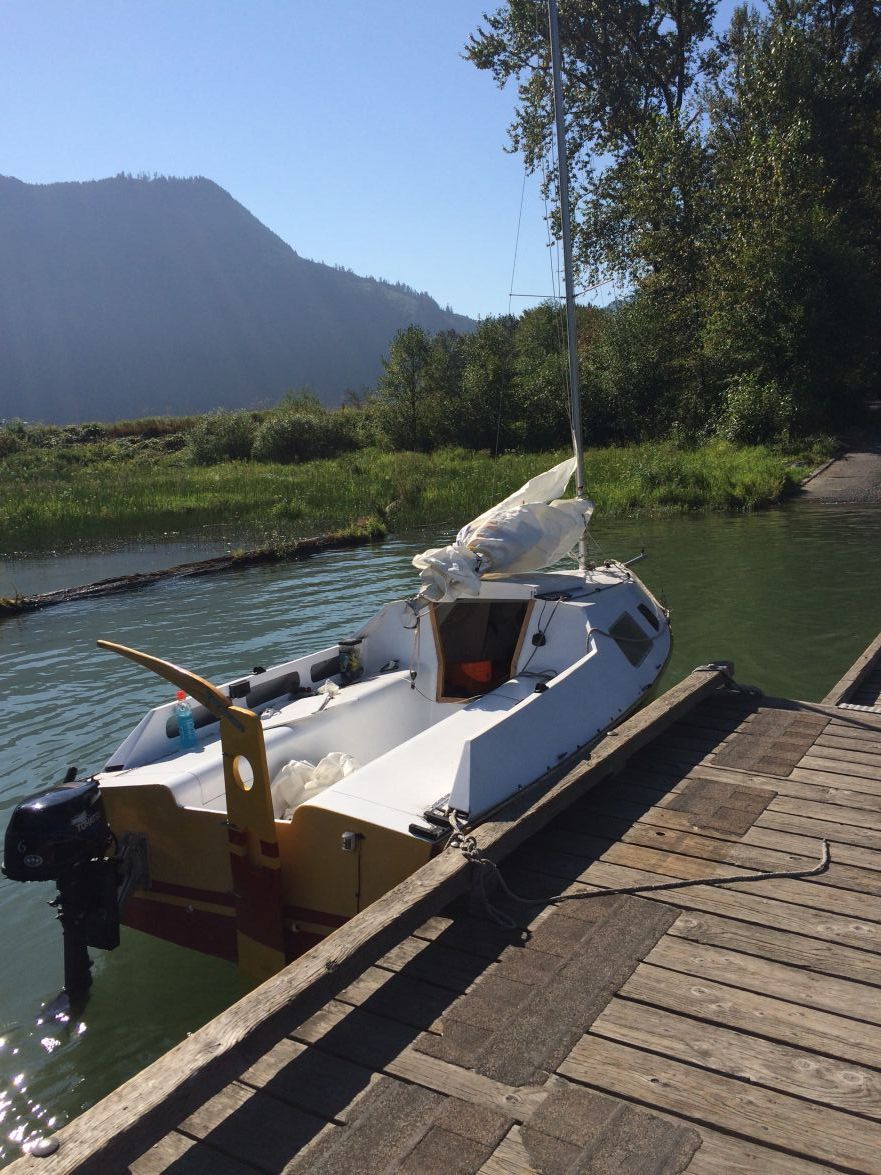
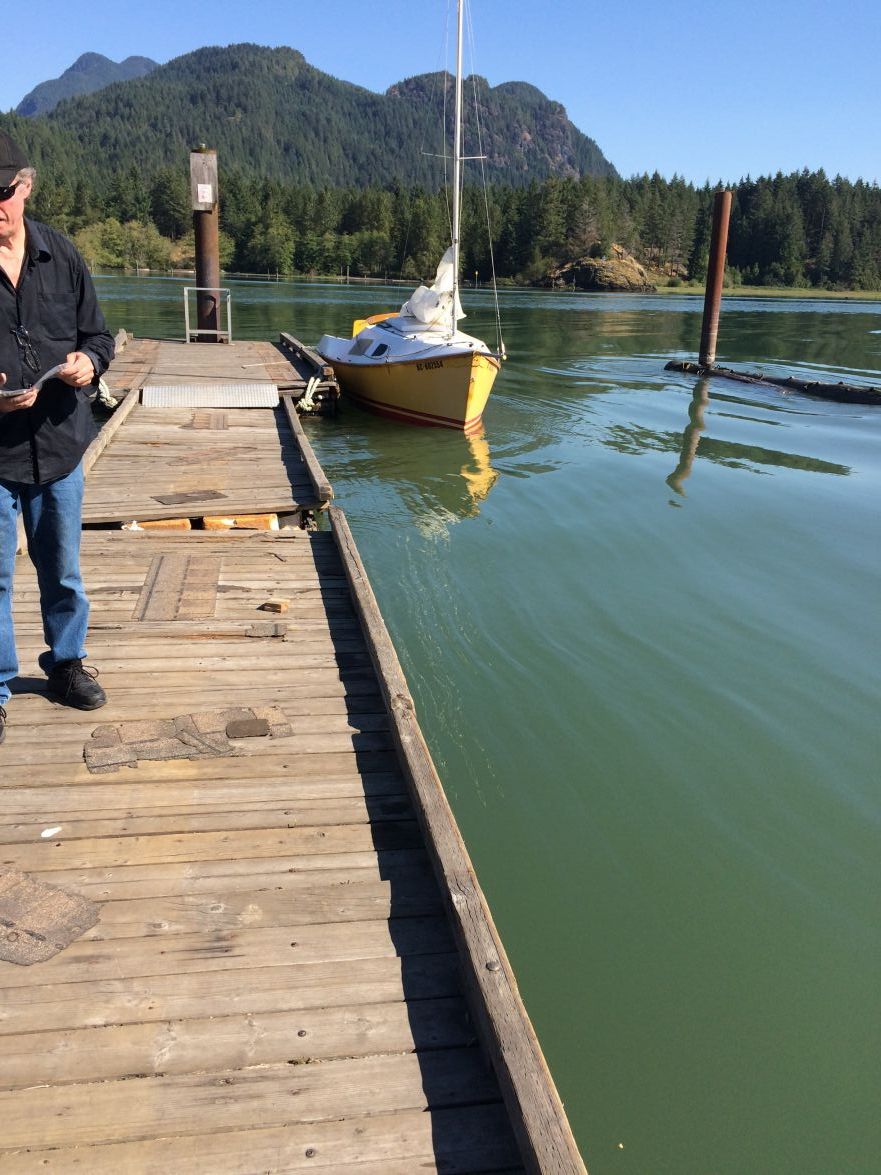
Greetings from Karl
Re: AD 14 KIELGE
Posted: Thu Jul 19, 2018 11:45 am
by terrulian
Boy, my first thought was, Karl launched his boat! But then I saw it was yellow and thought ????
Karl, no way you're going to capsize that boat getting into it.
Re: AD 14 KIELGE
Posted: Thu Jul 19, 2018 11:48 am
by das boot
You can see in the pictures how that back rest on the seats keeps things from falling into the water and storing all the little things when you are out sailing on your boat they are easy to add at a later date if you deside to go that route
Re: AD 14 KIELGE
Posted: Thu Jul 19, 2018 11:56 am
by das boot
Also you can see I get the sales both main a jib mounted and rigged before I launch I just use a bungee cord to hold every thing in place until I am ready to pull away from the dock. It is much easier to do that while the boat is still on the trailer. I need to keep my rudder in the high position until I pull away from the dock put a rope on it until you get it lowered just in case it slips and gets lost I have around 40 pounds of led in the bottom of my rudder so it might not float. I wanted as much weight as low as I could get it when I built the boat. Once you get used to it you can judge how fast you are going my the feel on the rudder
Re: AD 14 KIELGE
Posted: Thu Jul 19, 2018 4:50 pm
by Bogieman
terrulian wrote: ↑Thu Jul 19, 2018 11:45 am
Boy, my first thought was, Karl launched his boat! But then I saw it was yellow and thought ????
Karl, no way you're going to capsize that boat getting into it.
I thought the same thing.
Re: AD 14 KIELGE
Posted: Thu Jul 19, 2018 4:51 pm
by Bogieman
das boot wrote: ↑Thu Jul 19, 2018 11:56 am
Also you can see I get the sales both main a jib mounted and rigged before I launch I just use a bungee cord to hold every thing in place until I am ready to pull away from the dock. It is much easier to do that while the boat is still on the trailer. I need to keep my rudder in the high position until I pull away from the dock put a rope on it until you get it lowered just in case it slips and gets lost I have around 40 pounds of led in the bottom of my rudder so it might not float. I wanted as much weight as low as I could get it when I built the boat. Once you get used to it you can judge how fast you are going my the feel on the rudder
Thanks for sharing those with Karl and the rest of us.
Re: AD 14 KIELGE
Posted: Sat Jul 21, 2018 8:12 am
by gonandkarl
Hi,
So it is weekend and it would not be me to have hit another snag in my boat building. When I finally wanted to pull the trailer with boat out of the shed yesterday evening I first dinged it at the starboard side at the wall and at the same time smashed the glass of the picture containing the building plan with the PS transom just to find out the trailer front is too long and I will not get the whole lot out together. By far not such a mishap as Michael has got as I need no experts just some more own muscle work will correct my dilemma. I lifted the boat off the trailer and wheeled the trailer alone into the garden. Then I lifted the boat back down onto the building frame with its 4 swivel wheels. And now I have to wheel the boat out into the garden and transfer it there onto the trailer. So no test splashing this weekend because it also started to rain quite a bit. I will just tow the trailer to have it weighed to be able to get the accurate boats weight when I will weigh them together. The trailer should be a bit lighter as I removed the keel rubber roller with its metal fitting and the double stern rubber rollers that came with the trailer. I do not need them as I have these nice 2 skids where I hope my boat will flow off.
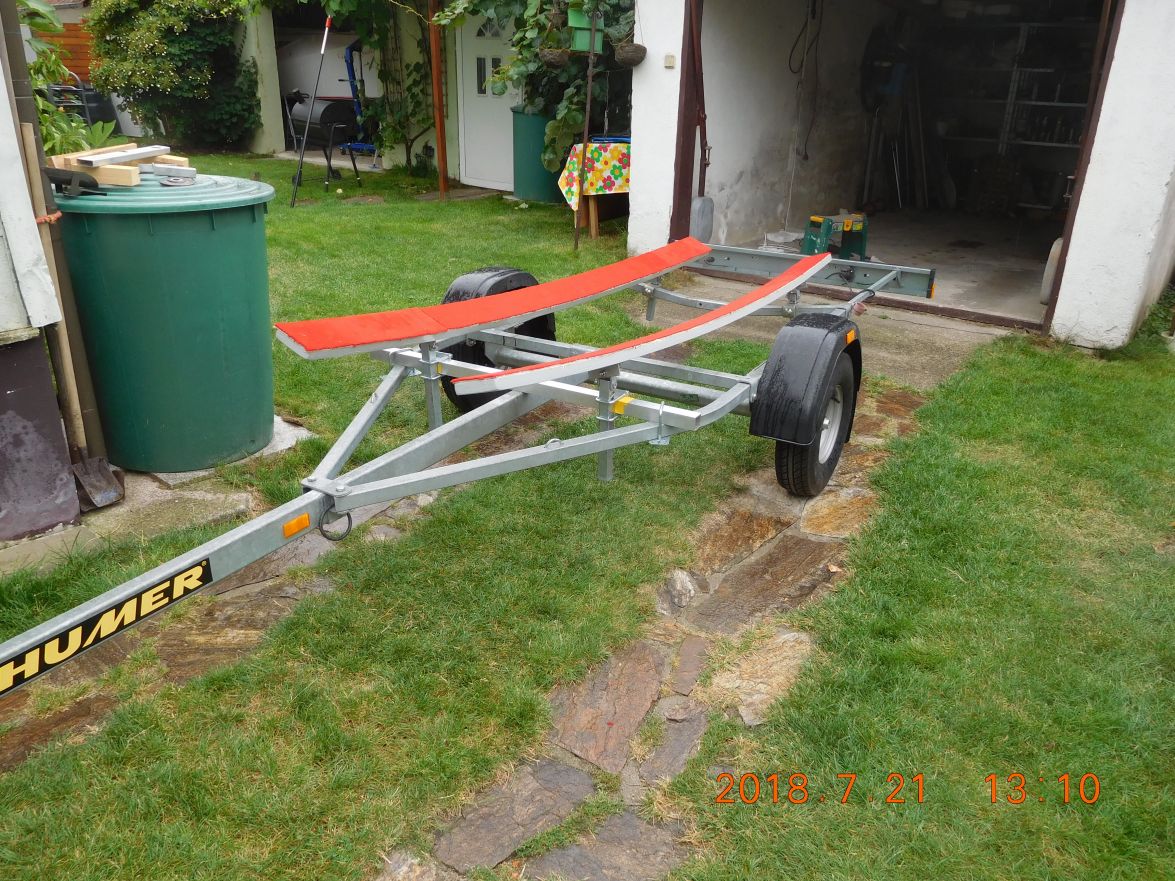
Greetings from Karl
Re: AD 14 KIELGE
Posted: Sat Jul 21, 2018 12:19 pm
by gonandkarl
Hi,
I am so close to towing the boat I had to try and pull it out of the shed. I greased the 4 wheels of the building frame a bit and it was quite easy to do it all by myself. Five minutes before closing time of the hardware shops ( they close till Monday morning ) I realized I have not got enough yellow boards on which I wheel the boat over the lawn. So I quickly got 4 more boards and will break the habit of no Sunday work on the boat and carry on pulling it out tomorrow.
Half of the boat is already out.

Greetings from Karl
Re: AD 14 KIELGE
Posted: Sat Jul 21, 2018 12:27 pm
by terrulian
Quite an operation.
What damage was there when you "dinged" the boat?
Re: AD 14 KIELGE
Posted: Sat Jul 21, 2018 12:49 pm
by gonandkarl
Hi,
The ding is very small 1 inch long where the deck meets the side. But I have an orange discolouration on the port side as well where I forgot to put a white towel under a strap and now I have to sand again a bit and paint it with another layer of topcoat. I am just glad that my calculation of the door size for getting the boat out with the building frame was correct and tomorrow I can carry on with the wooden boards on the lawn because the wheels would sink into the grass and get stuck.
Greetings from Karl
Re: AD 14 KIELGE
Posted: Sat Jul 21, 2018 12:54 pm
by das boot
It is good to get that first ding over with you will rub up agenst a few docks once you get it in the water. When I get a new car or truck the first thing once i get it home it to take a hammer and put a small dine in it somewhere it is not show up but it gets you passed getting upset when someone dings it in a parking lot once it has that first ding it is not a new car just another car it works for me. How are you going to get the trailer back under the boat out in the yard ?
Re: AD 14 KIELGE
Posted: Sat Jul 21, 2018 1:05 pm
by Bogieman
Looks like you're trying give birth but that sucker's intent on staying put
This is very exciting stuff!
Re: AD 14 KIELGE
Posted: Sat Jul 21, 2018 1:15 pm
by OrangeQuest
Bogieman wrote: ↑Sat Jul 21, 2018 1:05 pm
Looks like you're trying give birth but that sucker's intent on staying put
This is very exciting stuff!
Yes it is!! Good luck on more moving tomorrow!
Re: AD 14 KIELGE
Posted: Sat Jul 21, 2018 1:39 pm
by gonandkarl
Hi,
To get the boat in the yard onto the trailer again I want to use 2 builders trestles left and right of the transom and use my steel bar lying across with my electric hoist attached to it and pull up the transom high enough for the trailer underneath. When it is high enough I will attach my slipping wheels to the transom and then move the trestles with the cross beam and electric hoist to the bow and lift the boat there as well high enough to push the trailer underneath it. I could not think of any way how I could use my manual crane like I used for bow lifting in the shed and then hold it up with a strap from wall to wall to get the crane out of the way. In the yard I would have had to buy an extra pair of trestles to hold the bow up with straps and clear the crane away. But my plan with the slipping wheels for the transom lets me solve the transfer to the trailer with one pair of trestles.
At least that is my hope. I will keep you updated with pictures.
Greetings from Karl
Re: AD 14 KIELGE
Posted: Sat Jul 21, 2018 5:38 pm
by Eric1
Sounds good Karl!
Re: AD 14 KIELGE
Posted: Sun Jul 22, 2018 1:04 am
by Fuzz
Use lots of blocking, stay out from under it and take your time. Jacking boats up is a pain but more time consuming than hard. You will be ready for he big launch day before you know it
Re: AD 14 KIELGE
Posted: Sun Jul 22, 2018 2:23 am
by gonandkarl
Hi,
Thanks for the advise, I really need it because my computer orientated office brain is still not really adapted to tell the body what manual task it has to do next. And when it sends the command it gets thought over another 15 minutes before it is executed. As it is raining today I fell back into my analysing habit to draw things on a sheet of paper like how I put the yellow wooden boards on the lawn when I want to change the direction of the boat moving in the garden. I came up with 30 degree and 45 degree cut pieces of the boards to get around a corner. But tomorrow when the sun is shining I most probably do it by gut feel and slow like Fuzz told me.
And now I unpack my sewing machine and sew the stain less steel ratchets to my white holding down straps and also do all the sewing of the red straps between stern pulpits and the side decks so that no one falls into the water because I did not build the boat like George who has got an edge compartment to lean against. The side straps I am sewing for the second time because I was not happy with the first version in white and only 2,5 cm wide and that is why I ordered 5 cm wide red strapping material and this is then exactly like on Jacques studyplan picture for the Adelie. Should that not be good enough for my boat passengers to lean against then there is already the plan to widen it to 15 cm ( 6 inches ) by adding another 5 cm white and red strap representing the Austrian colours red white red.

This will be done only if the passengers insist because before my imaginary eye it will be too much red the boot stripe and name already being red.
I hope you also spin your boat thoughts on if the Sunday is also rainy on your side.
Greetings from Karl
Re: AD 14 KIELGE
Posted: Sun Jul 22, 2018 2:48 am
by Fuzz
Any body who can build a beautiful boat like yours can get it on a trailer and moved out of the yard no problem
A little red and white flagging will look just fine on your girl
When time and weather allow we will all be waiting for the launch pictures.
Re: AD 14 KIELGE
Posted: Sun Jul 22, 2018 6:53 am
by cape man
Take your time and you'll be fine. What about bringing in the Austrian army to just pick her up and set her down on the trailer? Seriously, I put together 8 strong guys and we carried the OD18 out to her trailer. She weighed 900 lbs. Maybe 12 men for your boat?.
Love the picture of her nose poking out of the shed! And the grapes look yummy.
Re: AD 14 KIELGE
Posted: Sun Jul 22, 2018 8:05 am
by gonandkarl
Yes they are yummy and todays rain pushed the whole graoe vine down onto the deck. I will have to cut it all away before I can carry on moving the boat. I forgot to cover the mast hole with a lid I wonder how much rainwater went down to the mast shoe. Does not matter I am sure I need no bilge pump a sponge and bucket will do.
Greetings from Karl
Re: AD 14 KIELGE
Posted: Sun Jul 22, 2018 8:15 am
by Jeff
Karl, as CapeMan said, just take your time and check & recheck!! You will be fine, I know it!!! Jeff
Re: AD 14 KIELGE
Posted: Sun Jul 22, 2018 9:52 am
by Bogieman
A lesser man might have knocked the walls down just to get her out.
Re: AD 14 KIELGE
Posted: Sun Jul 22, 2018 1:49 pm
by das boot
If you go to the auto supply store they have a rag it looks like a chamey type material but it absordes water tape a chunk of it on the end of a stick and stick it down the hole t soak up the water i have been using that for years works well
Re: AD 14 KIELGE
Posted: Sun Jul 22, 2018 2:24 pm
by gonandkarl
Hi,
After the rain I had to move the boat more out of the shed. It went all right on my yellow wooden boards until I got stopped by a rubber wheel coming off its rim. By then I was quite bushed and left the garden for today.
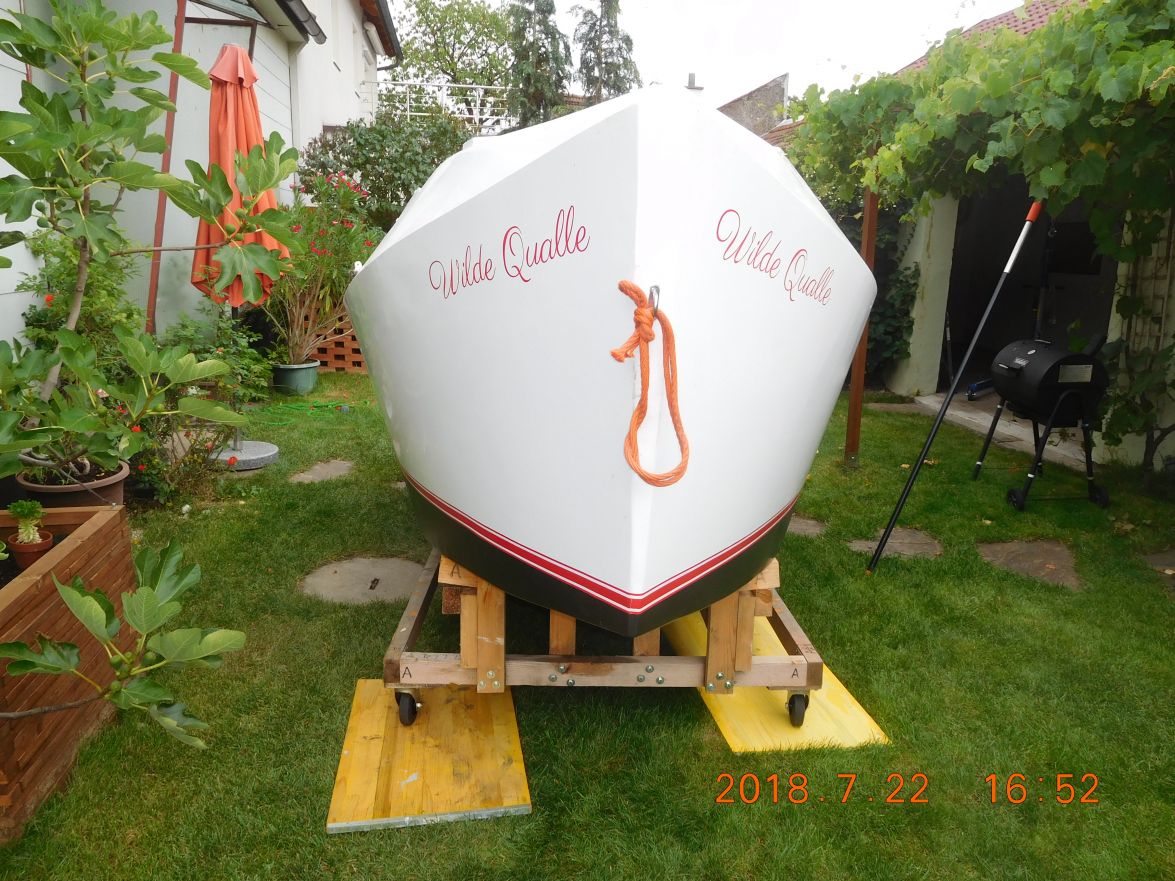

I naturally had a strong helper in the yard slleeping it off most of the time.
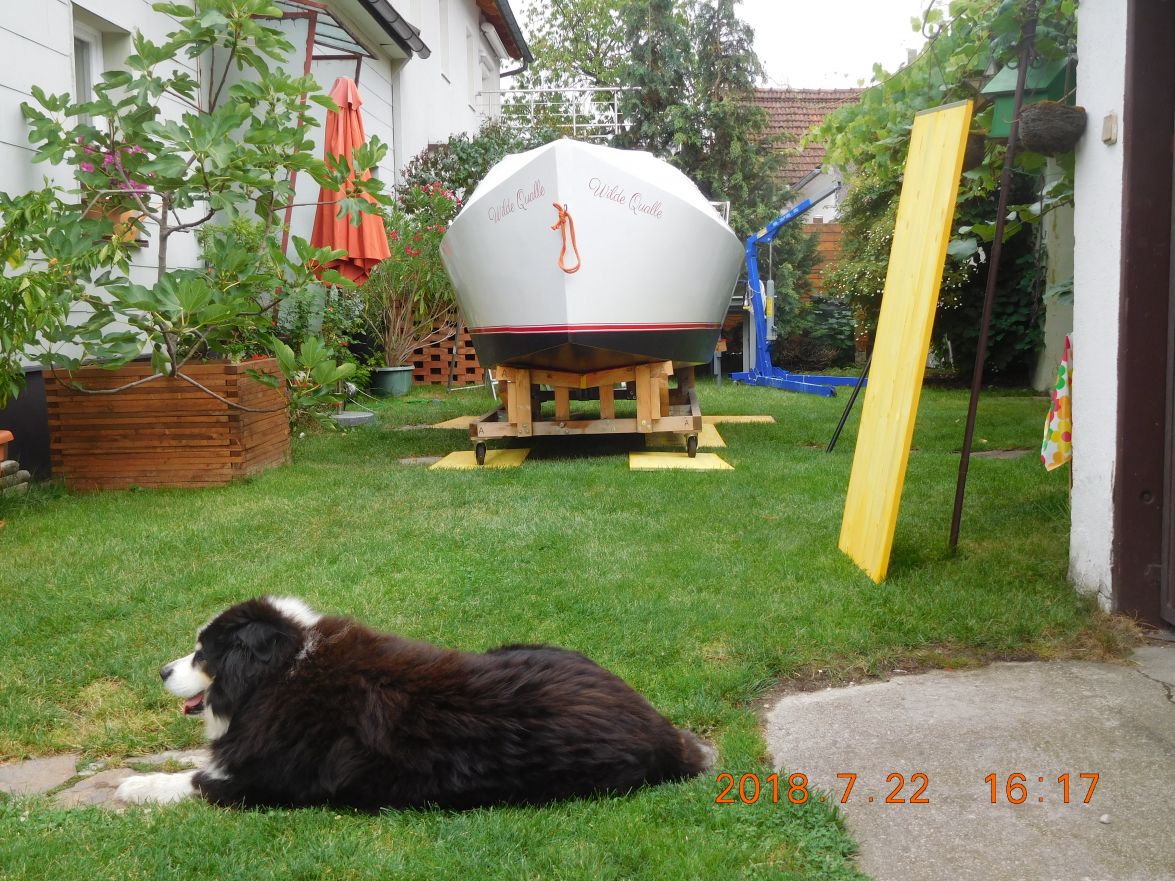
Tomorrow I am sure I have some more energy to carry on.
Greetings from Karl
Re: AD 14 KIELGE
Posted: Sun Jul 22, 2018 5:33 pm
by glossieblack
You are winning Karl.
Re: AD 14 KIELGE
Posted: Sun Jul 22, 2018 6:25 pm
by Fuzz
Might want to think about taking the other wheel off and putting some pipes down on the yellow boards to move the boat with.
Re: AD 14 KIELGE
Posted: Sun Jul 22, 2018 8:06 pm
by das boot
do you thing putting water on it it might grow into a bigger boat ? HaHa
Re: AD 14 KIELGE
Posted: Mon Jul 23, 2018 6:00 am
by Jeff
Good looking helper Karl!!!! Jeff
Re: AD 14 KIELGE
Posted: Mon Jul 23, 2018 10:29 am
by Bogieman
She looks great her first time in the sun light.
Re: AD 14 KIELGE
Posted: Mon Jul 23, 2018 11:45 am
by gonandkarl
Hi,
Thanks Fuzz for the idea about the broken building frame wheel. But after some more thinking I realized that I needed the building frame only to get the boat out of the shed and that I can transfer it to the trailer exactly there in the yard where the wheel broke down.
I first weighed my trailer ( 150 KG ) and then it took me 3 1/2 hours to transfer the boat from the building frame to the trailer. At last I could use my winch with a 20 metre steel rope pulling the trailer in direction carport and the come along which George mentioned to me once. At that time I did not even know what a come along is but I managed to work with it all right especially to pull the trailer round the house corner. And when I was ready to tow the boat to the weighing station just then a thunderstorm hit us with rain so I left it and weigh it tomorrow. It would have been no fun to put the light line to the end of the trailer in a rain puddle.
The main thing is that I got the boat on the trailer.
Transom lifted off the building frame with the manual workshop crane
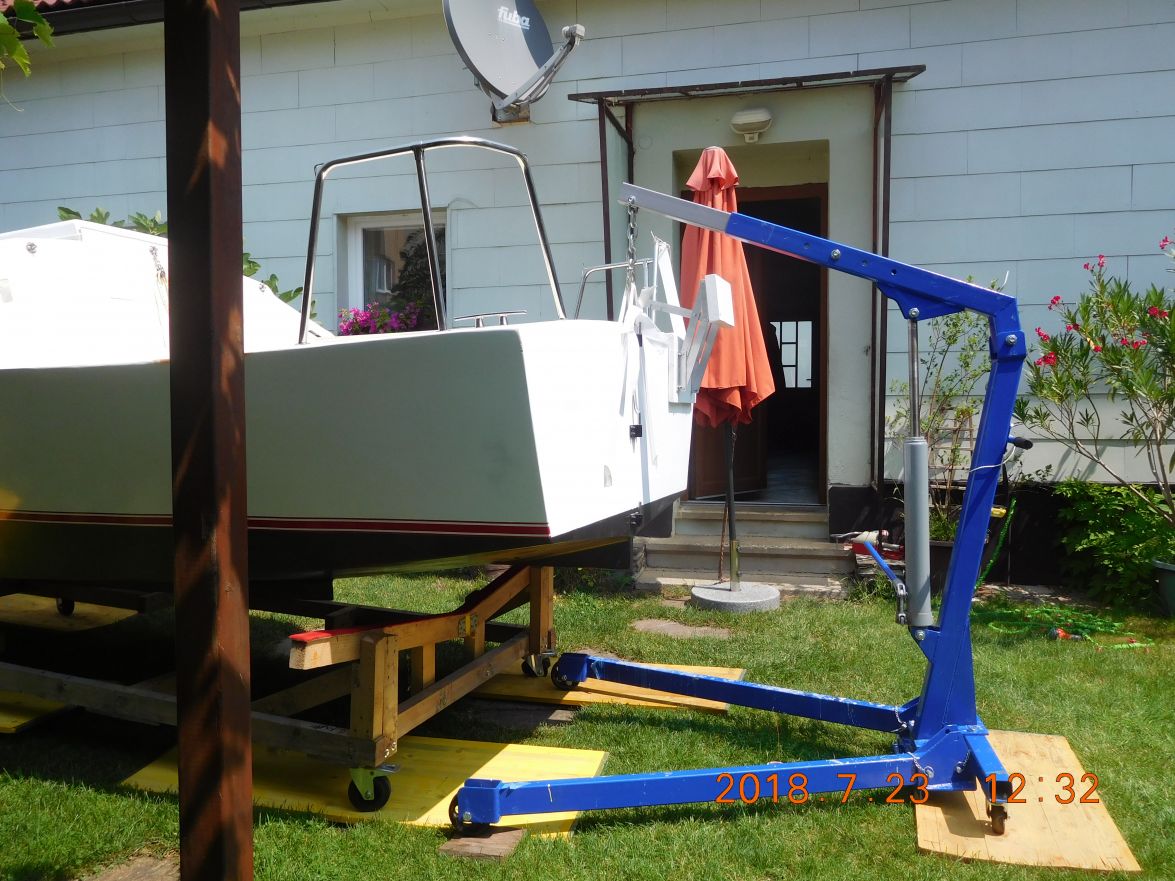
Bow lifted with my electric hoist
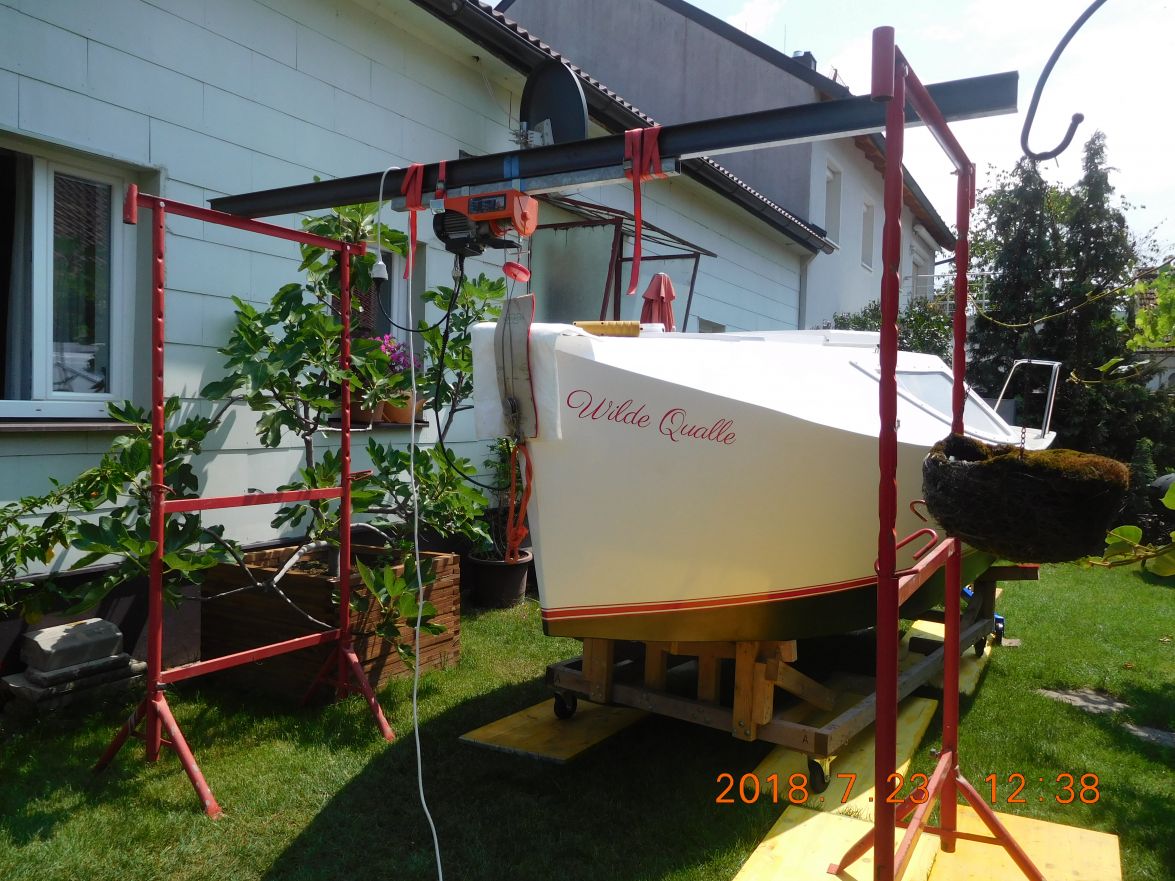
Building frame removed and ready for pushing the trailer underneath
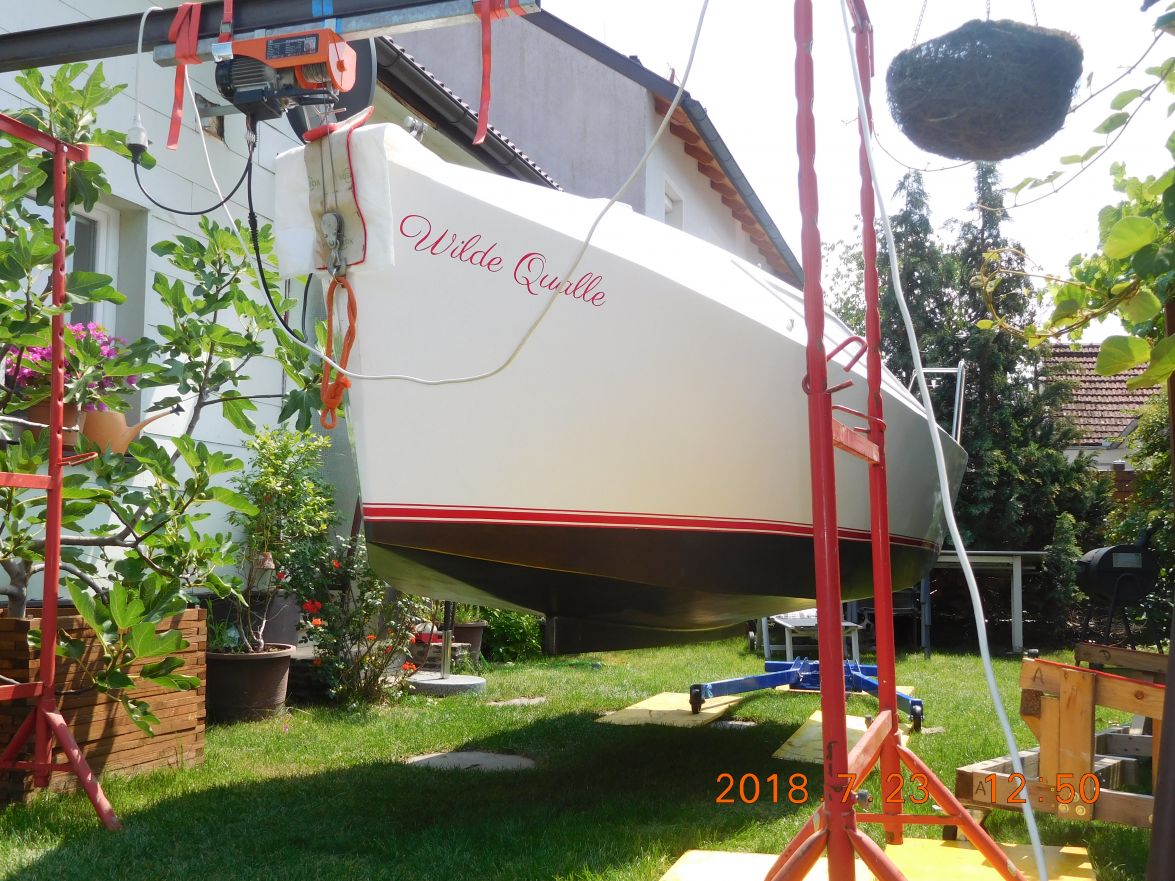
The boat is nearly on the trailer what helped me a lot was the extra long jockey wheel instead of the standard wheel to be able to lift the front of the trailer higher

The boat is on the trailer just before the thunderstorm
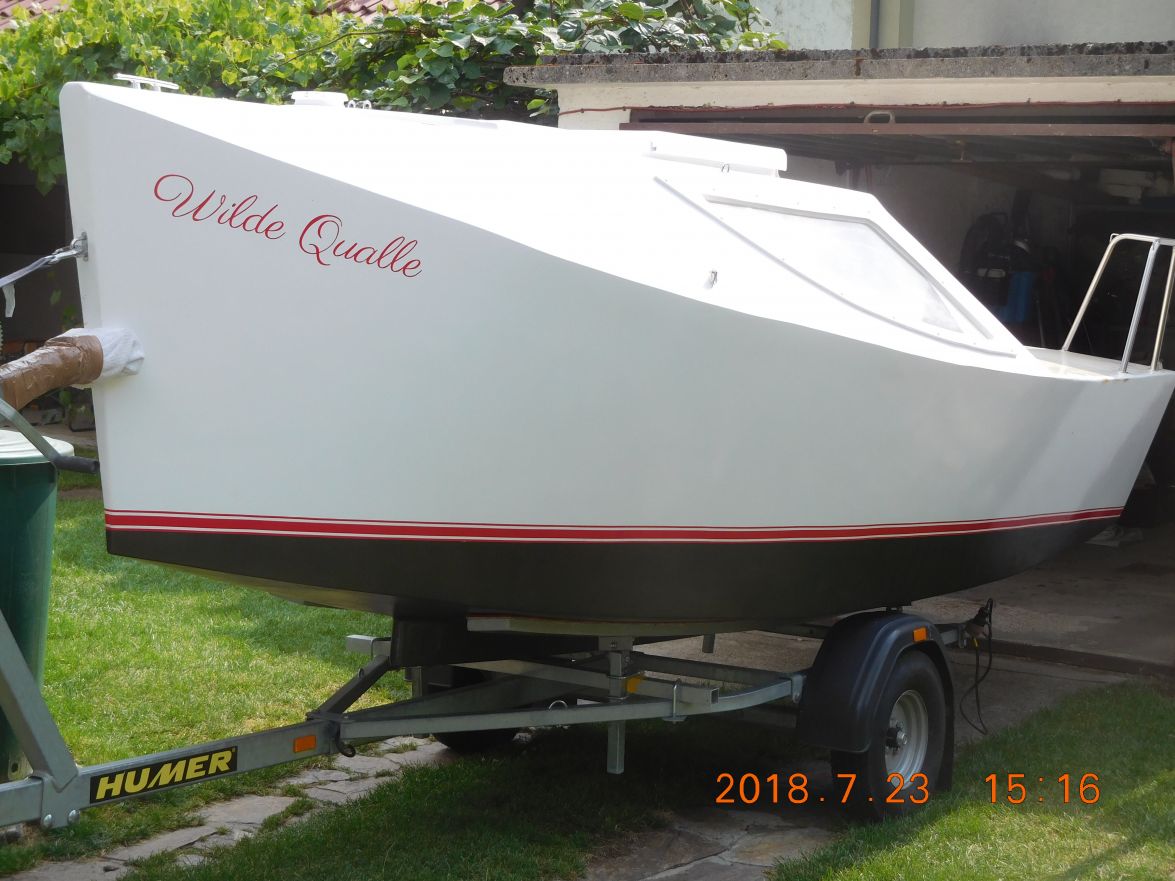
And now it got its first wash in the rain of the thunderstorm
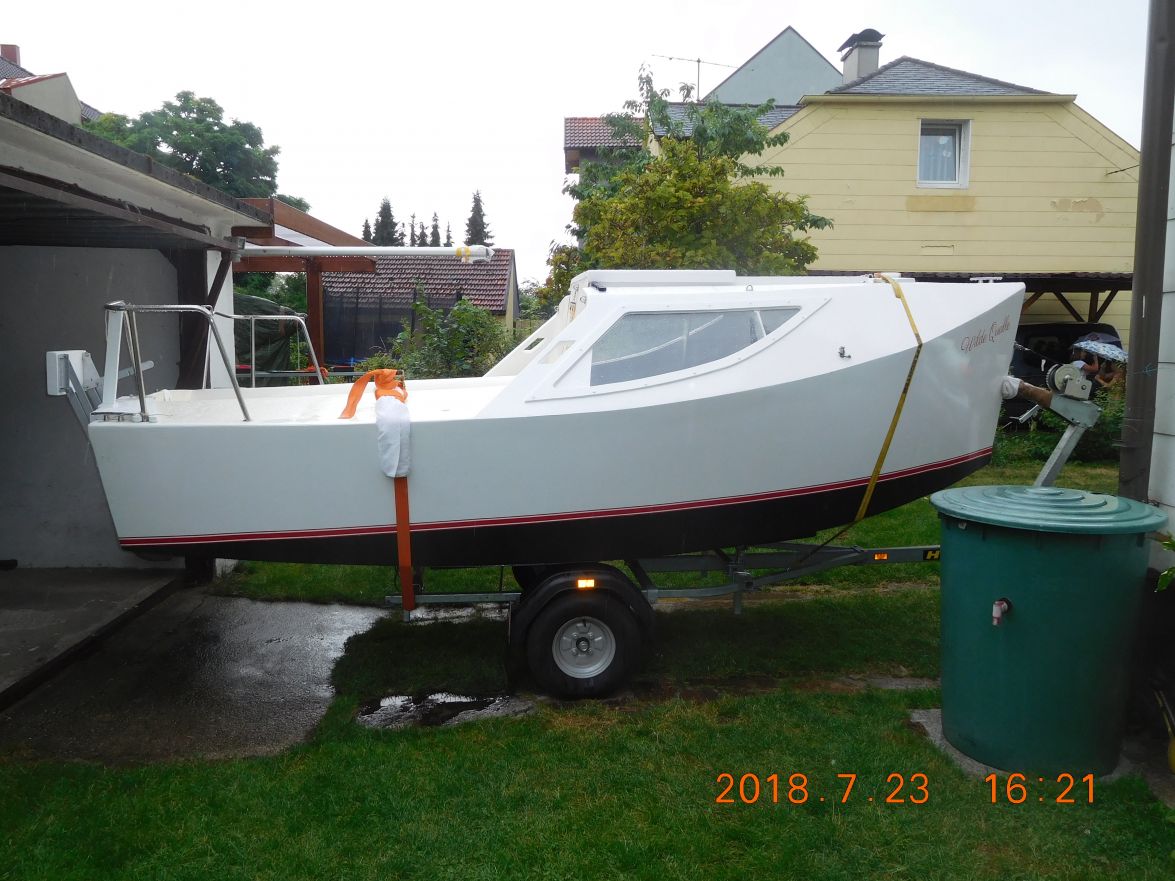
Greetings from Karl
Re: AD 14 KIELGE
Posted: Mon Jul 23, 2018 11:50 am
by das boot
You have it well in hand at this point I am intrested to find out what the weight comes in at
Re: AD 14 KIELGE
Posted: Mon Jul 23, 2018 12:08 pm
by terrulian
Good engineering, Karl.
Re: AD 14 KIELGE
Posted: Mon Jul 23, 2018 1:23 pm
by cape man
Way to go!!! Whoooo Hooooooo!
Splash her baby, splash her!
Re: AD 14 KIELGE
Posted: Mon Jul 23, 2018 3:43 pm
by Bogieman
Well done, Karl! She looks fantastic. If my boat ends up looking as good as yours I would consider myself a very happy man.
Bogie
Re: AD 14 KIELGE
Posted: Tue Jul 24, 2018 4:11 am
by Fuzz
Slick rigging to get her on the trailer. I knew you would find a way to make it all work.
Re: AD 14 KIELGE
Posted: Tue Jul 24, 2018 7:51 am
by Eric1
Nice Karl!!
Re: AD 14 KIELGE
Posted: Tue Jul 24, 2018 8:00 am
by Jeff
Very nice Karl!!! Congratulations!! Jeff
Re: AD 14 KIELGE
Posted: Tue Jul 24, 2018 9:41 am
by gonandkarl
Hi,
Today I was as happy as one can be when I started towing the boat out of the driveway. The car is rather small but was towing it easily and in the rear view mirror the trailer sat on the road without any swaying or other movement. I was on the way to the nearby farmer and his weigh bridge. I stopped to make 2 pictures and then half a mile on I made another picture of trailer and boat on the weigh bridge. Then the first disappointment was there when I looked at the display of the scale it showed 570 KG for boat and trailer together, so the boat weighed in at 420 kg because the trailer I weighed yesterday at 150 KG. I now have to weigh what I can transport in the future in the car which is: 1 car battery, 1 anchor plus line, 1 electric outboard, 1 boarding ladder, 1 outboard bracket, 1 rudder plus tiller. Then I really know what my boat weighs. As the little trip was a test towing trip so I wanted to go home over another more hilly route and go past my sisters house to show my boat off. She immediately took pictures and liked the looks of the boat and I nearly fell over backwards when I realized that the companionway hatch lid was gone. It must have been the airflow of the car even tough I only travelled at a modest 60 - 70 km/h. That let me come down from my high a bit and now I will build myself a better hatch lid with a connexion rail to the boat like Tony suggested to me a long time ago. My lid was made according to the plan but when I notized there is no rail connexion to the boat Tony said I should glue a plastic corner on the side and let a lip hold it down. The plastic corner is leaning in the shed one of the litle unfinished things of the boat. So now it is obsolete and I am looking forward to build a well designed hatch lid.
So the towing test was OK but as it is with me so often one step ahead and two backwards.
Next test will be a launching test on Saturday at the lake without a hatch lid I am such a daredevil to take that risk, because I finish the new hatch only sometime in August and my son will be there to give me support.
Here my picture in front of a corn field
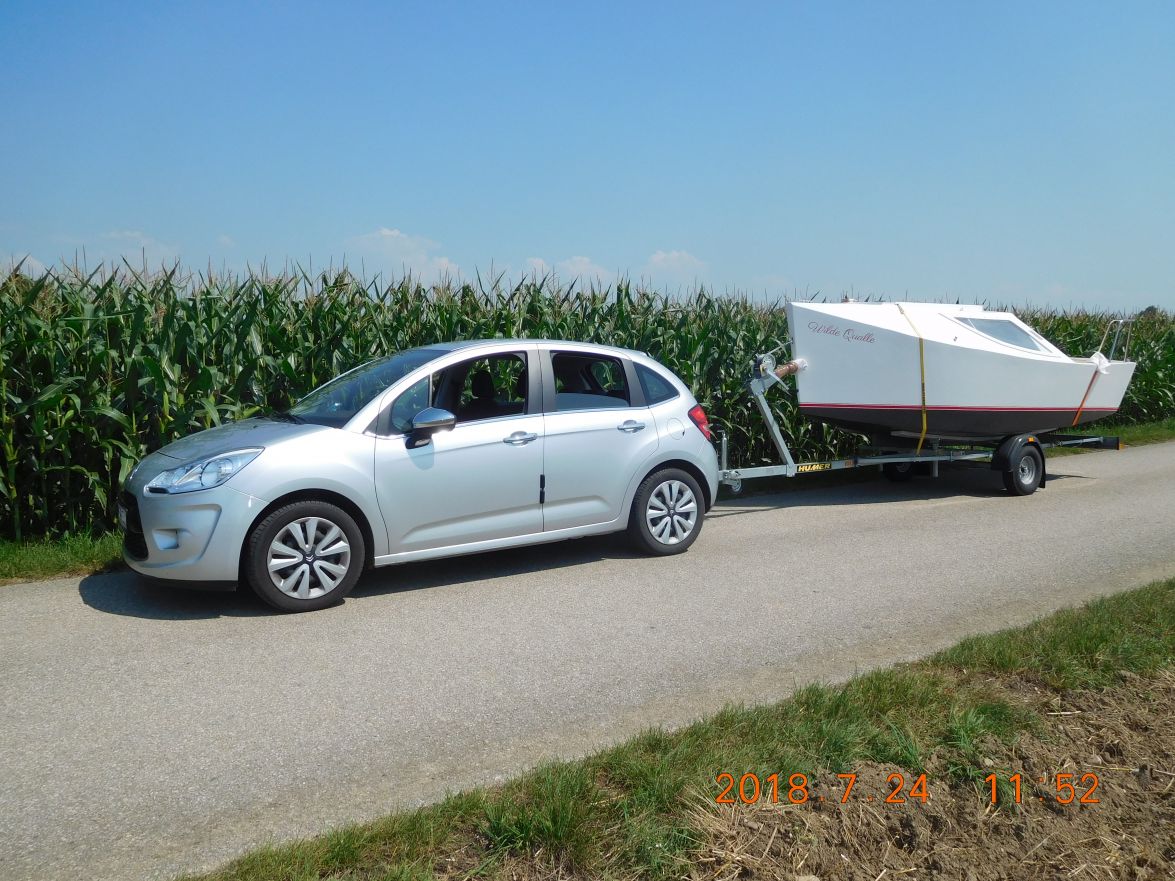
And here at the weigh bridge

I enlarged the pictures and the lid was gone already, so I lost it on the first 2 miles from home.
Greetings from Karl
Re: AD 14 KIELGE
Posted: Tue Jul 24, 2018 10:25 am
by pee wee
Sorry to hear about your lost hatch, did you search for it? If you find it somewhere in those two miles maybe it could be repaired?
Wilde Qualle looks great on her trailer. It sounds like your car had little trouble pulling it.
Re: AD 14 KIELGE
Posted: Tue Jul 24, 2018 10:53 am
by terrulian
Great new beginning, Karl. I admire your prudence in taking the transport bit step-by-step...and better you find out now that the hatch needs to be secure than on the day of the launch.
How to you plan to secure the mast to the boat for trailering?
Re: AD 14 KIELGE
Posted: Tue Jul 24, 2018 11:32 am
by gonandkarl
Hi,
The mast will be secured the same way as George did it with a vertical pole at the rudder fittings and one in the mast hole. I was still thinking to take the mast like this along for todays test ride and this would have prevented the loss of the hatch because it would have been practically lying on the hatch holding it down. But at the last moment I decided against it.
Does not matter I am looking forward to make a much better hatch than the first one.
Greetings from Karl
Re: AD 14 KIELGE
Posted: Tue Jul 24, 2018 11:33 am
by cape man
She looks amazing!
Re: AD 14 KIELGE
Posted: Tue Jul 24, 2018 2:31 pm
by Jeff
She is a beauty Karl, and bigger than the car pulling her!!! Nice work!! Jeff
Re: AD 14 KIELGE
Posted: Tue Jul 24, 2018 3:43 pm
by gonandkarl
Hi,
Yes not only we drive small cars here in Austria so that even small boats like an Adelie are bigger, everything here is small in Austria even to get the trailer back into my small driveway needed a tricky manoeuvre with the front tow bar ball.
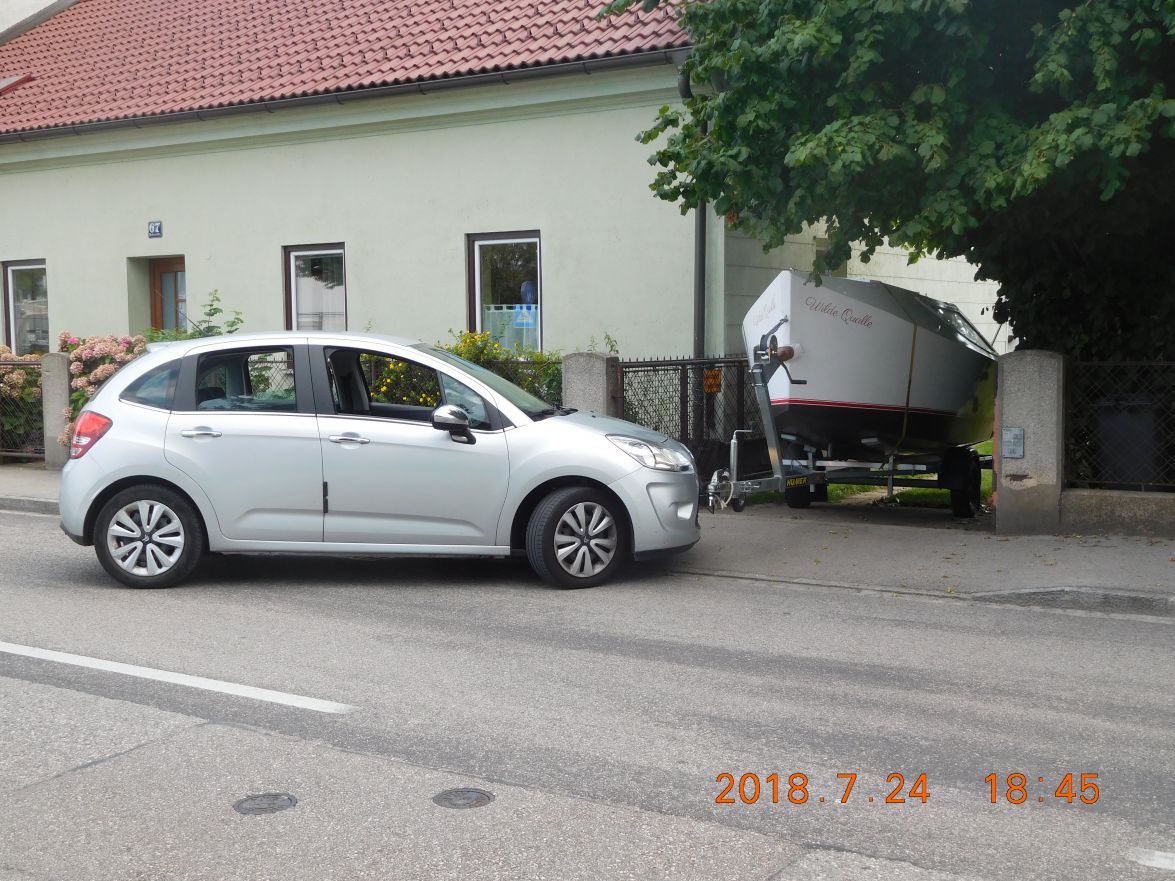
But after some battle in utter Summer heat both car and boat are at home in garage and carport.
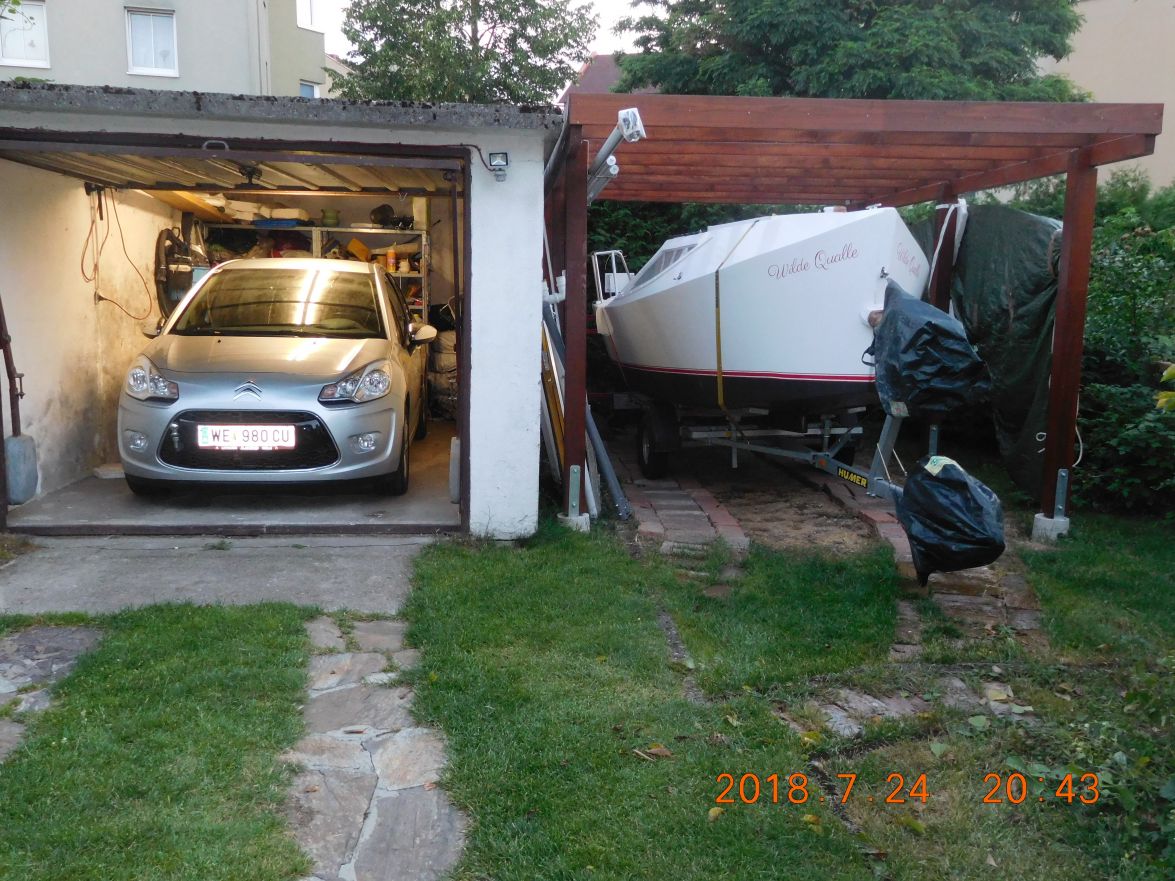
Greetings from Karl
Re: AD 14 KIELGE
Posted: Tue Jul 24, 2018 6:25 pm
by das boot
Sorry to hear on you hatch I have two SS strips that my hatch slides on to open and close they stick out 1/4 of a inch on booth sides and there is a lip on the hatch that goes under those strips it works. The other thing I found when I slid my hatch opened it was scratching the top of my deck so I ran a strip around 3 inches wide and mounted it on the deck so now the hatch rides on that when i open it saves a lot of scratches. As for the weight that is around where I thought it would be my boat with all the junk ancoures chain 6 hp motor and everything else one carries I worked mine out to be around 1500 pounds so you are in the ball park, It will serve you well as for weight I weigh 170 pounds and two of us at 170 getting in and out at the same time or sitting on the same side is no problem this is a very stable boat.
Re: AD 14 KIELGE
Posted: Tue Jul 24, 2018 6:28 pm
by das boot
Do not forget to unplug your trailer lights before you back into the water !
Re: AD 14 KIELGE
Posted: Tue Jul 24, 2018 6:56 pm
by das boot
do you have a transmition cooler on that car. You might want to look into adding one is it a standard or auto ?
Re: AD 14 KIELGE
Posted: Wed Jul 25, 2018 1:31 am
by gonandkarl
Hi George,
I have some more questions about your hatch. I want to do my new hatch like you have it with a stainless steel rail to run on. I have quite a few pictures of your hatch which you sent me some time ago.
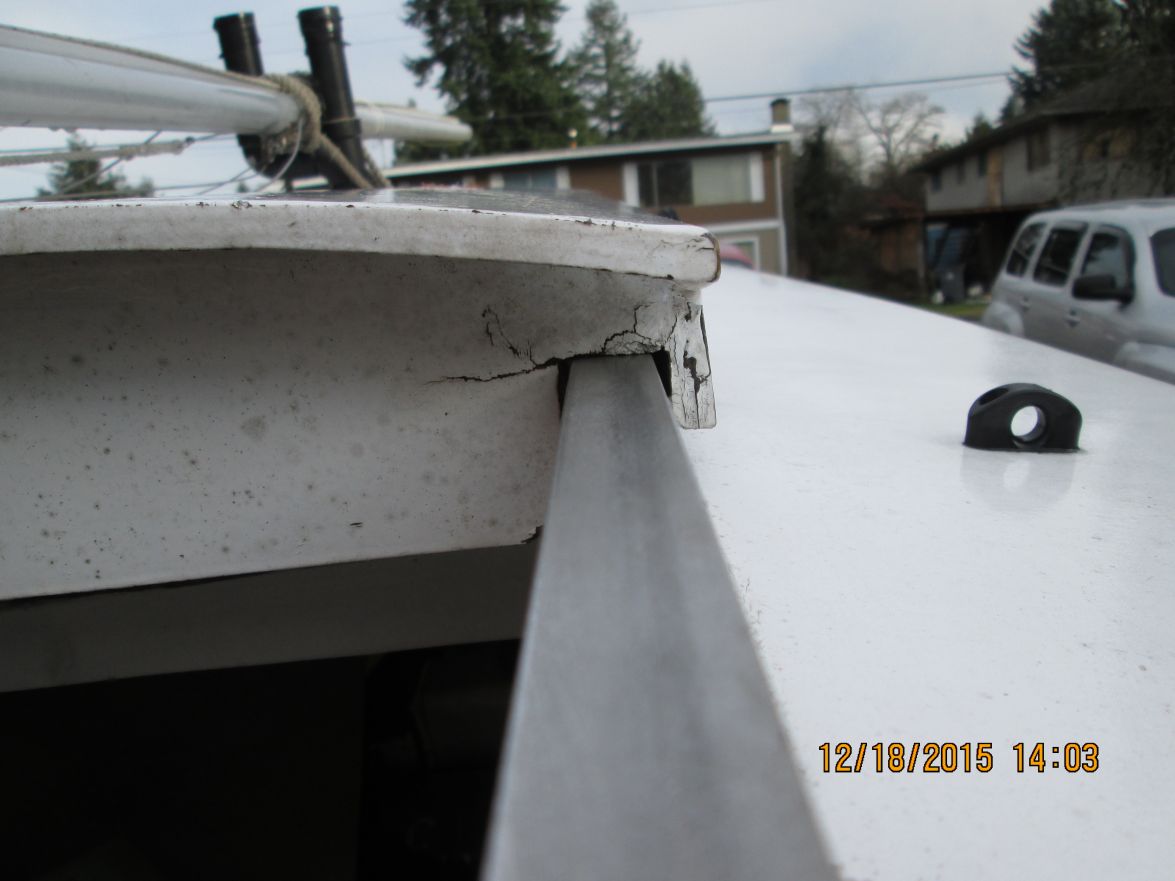
Now my questions to it.
Can you step onto the cambered part of your hatch ?
Can you remember what wood you used for the hatch and did you cover it both sides with fibreglass before you painted it ?
My car has a standard shift gear transmission as is usual in Europe. When I was still working I always had bigger company cars with automatic transmission. But my little car will do for towing the rather short distances to the nearby lakes. It was fine on a 10 % increase hill yesterday but the consumption indication naturally goes up to double than normal.
Greetings from Karl
Re: AD 14 KIELGE
Posted: Wed Jul 25, 2018 2:44 am
by Fuzz
Karl if you can pull a 10% grade hill you have plenty of power for towing your boat. 10% is darn steep
Re: AD 14 KIELGE
Posted: Wed Jul 25, 2018 9:23 am
by terrulian
Karl, please make your hatch strong enough to stand on!
Re: AD 14 KIELGE
Posted: Wed Jul 25, 2018 10:36 am
by das boot
The ss strips mount to the top of the hatch rales and stick out on booth sides by 1/4 of a inch on the outside of the hatch the sides of the hatch stick down bellow the ss strips and curl under the ss overhang that way they lock it in place the front of the hatch is scrued into place so the hatch can not move aft past the front of the hatch hole. If I need to remove the hatch I remove that front cover plate and the hatch can be slid off the rales to the back. So far I have not needed to remove it. There are 3 frames on the inside to give support one front one back and center. I used strips of left over ply for the top and cut an angle on each side so they fit together in a curve then filled any spaces with bog sanded and glassed inside and out. You can stand on it with no problem. My boat is still in storage but if you want I can go and get more pictures of that hatch just let me know.
Re: AD 14 KIELGE
Posted: Thu Jul 26, 2018 5:14 am
by glossieblack
Karl, I went looking for a thread you started a year or so ago on MI 12, and can't find it. What section of the forum is it in? Thanks, Michael.
Re: AD 14 KIELGE
Posted: Thu Jul 26, 2018 6:57 am
by gonandkarl
Hi,
When I read in your thread if it would not be better to build an MS12 without any engine problems because it is human powered I thought to myself should it not be MI12. Now that you are asking for my threads of MI12 you must be serious to maybe build one.
Here you find it: MI Bateau mulltichine questions
Greetings from Karl
Re: AD 14 KIELGE
Posted: Sat Jul 28, 2018 3:06 pm
by gonandkarl
Hi,
Today I woke up not because of senile bed flight but because I remembered that I forgot to load the old car starter battery for our planned rat rod test on the lake early in the morning. So I quickly did hook up the charging unit in the shed and off I went to no more real sleep until I could not take it any longer and started packing the boot with all the things we need to take to the slip. My son and son in law promised to help me with this first test outing.
Thank god for that and therefore it was a piece of cake to drive the 50 km to the lake, splash the boat, ride around with the family, them swimming around the boat and coming back home in a beautiful state of mind. At 2 AM I was close to being a nervous wreck and at 2 PM I was so relaxed that I realized on the way home my plan to check water ingress at the pivot of the centreboard was the most important thing for the day was not done and I laughed it off.
Here a few pictures of the perfect family outing on a lovely Austrian lake.
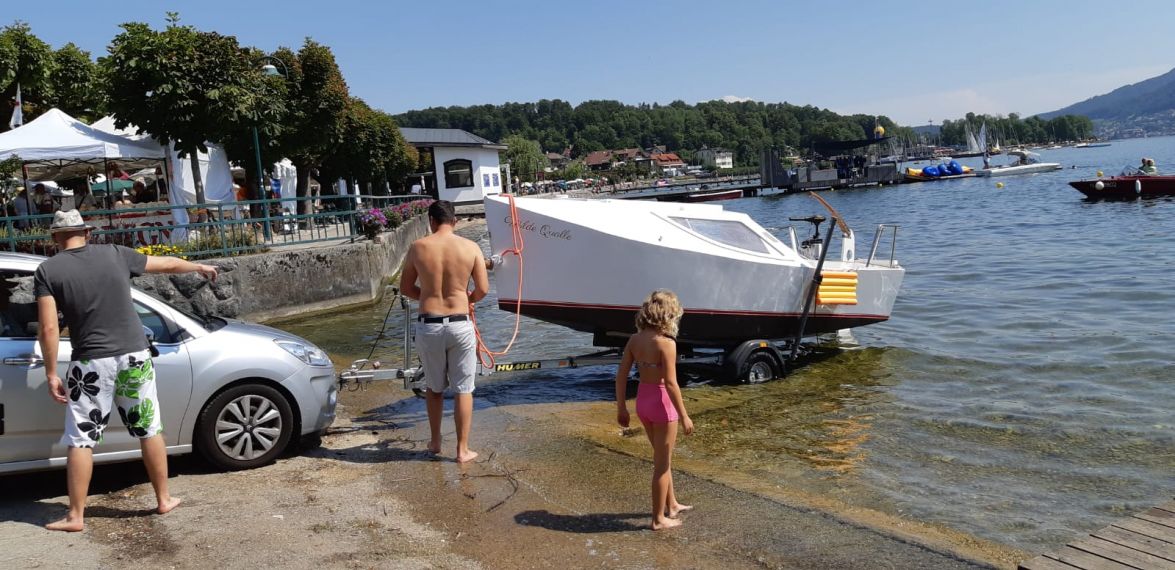
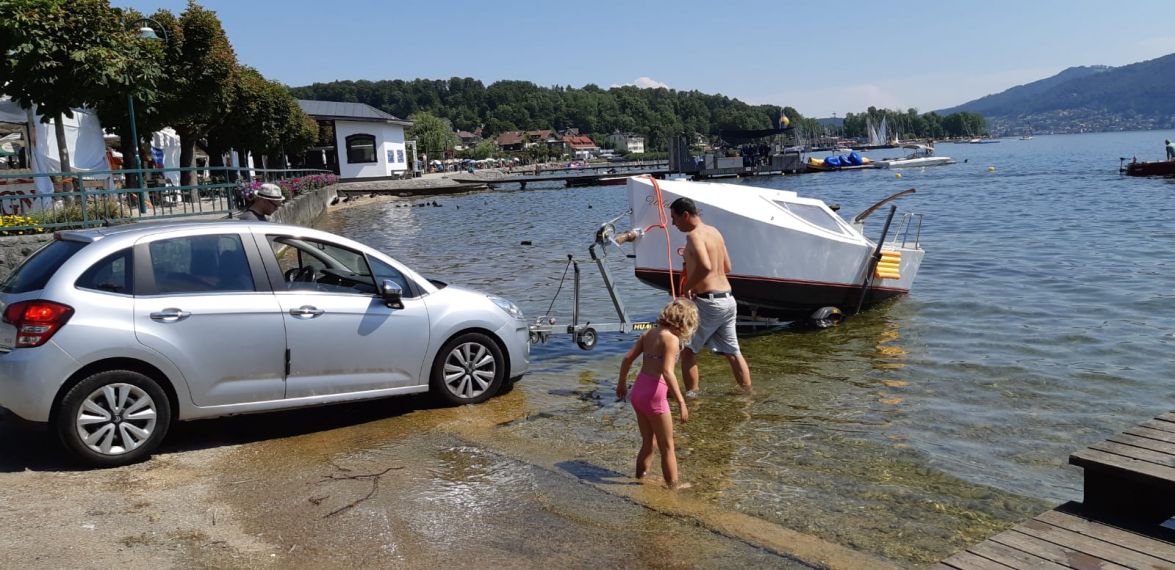
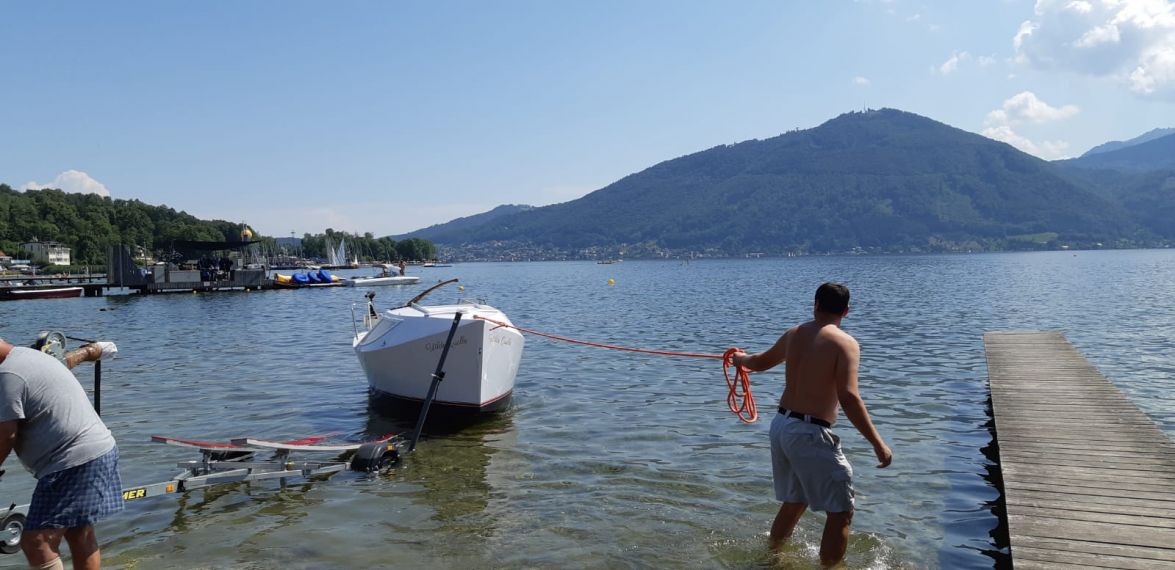
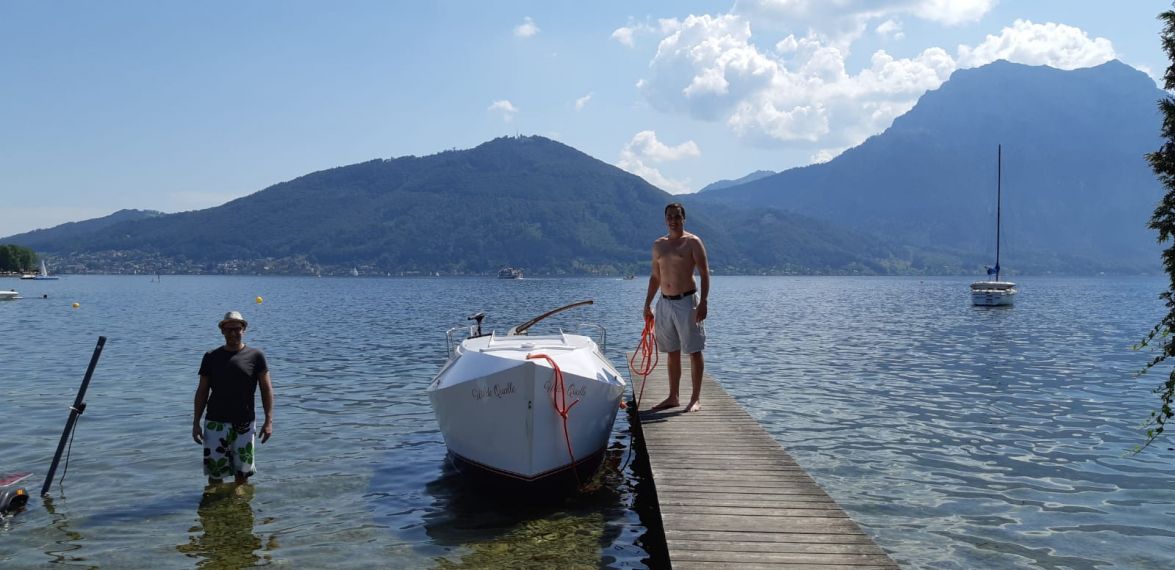
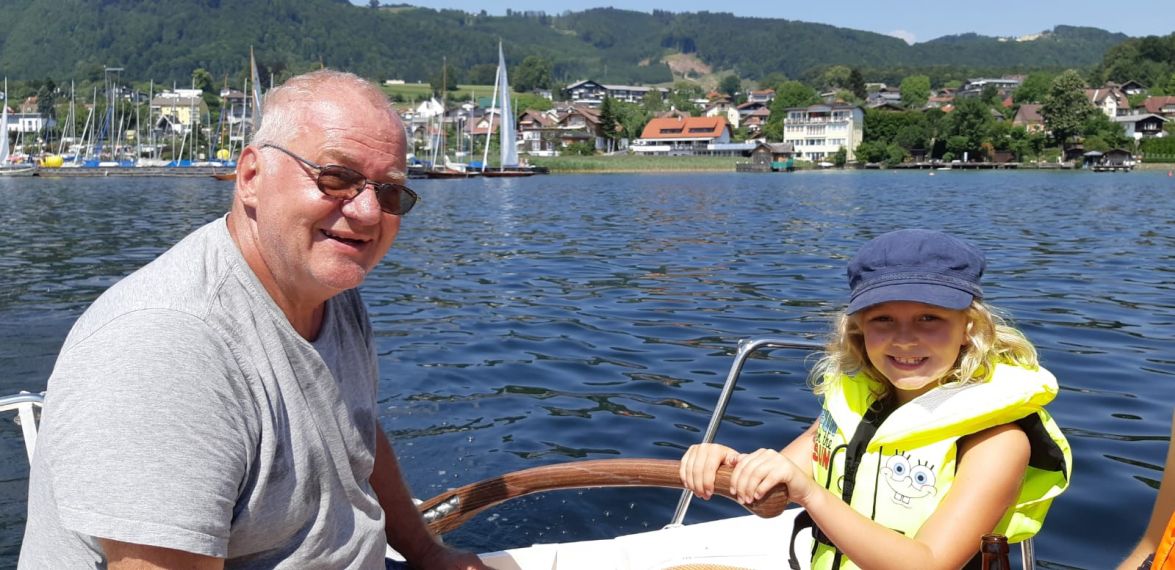
I hope you notice the bateau cap of the man on the last picture
Greetings from Karl
Re: AD 14 KIELGE
Posted: Sat Jul 28, 2018 3:27 pm
by das boot
That looks real good you will enjoy that boat for many years looks like every one is smiling that is the big thin
Re: AD 14 KIELGE
Posted: Sat Jul 28, 2018 4:55 pm
by Jaysen
It looks like you forgot to pack the mast and sail!
Re: AD 14 KIELGE
Posted: Sat Jul 28, 2018 5:19 pm
by OrangeQuest
looks like everyone enjoyed the day.
Because you have to submerge your trailer wheels to launch your boat you need to inspect them often on the inside for the wheels seals to leak. If moisture gets in there you will have issues with the bearings.
Re: AD 14 KIELGE
Posted: Sat Jul 28, 2018 6:52 pm
by Jeff
Karl, great day for you and the family!!! Boat is beautiful on the water and yes, I did see you cap!!!! Jeff
Re: AD 14 KIELGE
Posted: Sat Jul 28, 2018 7:06 pm
by das boot
Nice stable boat I told you it could pack a load.. If you put bering buddies on your trailer wheel that will stop water getting into those wheel barings
Re: AD 14 KIELGE
Posted: Sat Jul 28, 2018 7:08 pm
by Bogieman
Congratulations Karl! You should be very proud. Looking forward to future pics of her sailing and performance updates.
Bogie
Re: AD 14 KIELGE
Posted: Sun Jul 29, 2018 2:09 am
by glossieblack
She looks pretty Karl. Congratulations on a quality build.
Re: AD 14 KIELGE
Posted: Sun Jul 29, 2018 3:11 am
by gonandkarl
Hi,
Yes it was a beautiful day on the water with my kids who enjoyed the first test splashing of the boat a lot.
Here my son jumping from the deck so it was good that the mast stayed at home.
Yes Jaysen you are an attentive observer of my pictures, but my rigging for the mast I did not get finished in time for this outing. I still need to make 2 euphroes for the sheets and cut all the lines according to my rigging warrant and then practise to step the mast with the boat on the trailer in my driveway until I can do it in a reasonable amount of time something like Bondos 60 seconds record. I hope he does not mind to showing his mastraising video to you.
[youtube]
https://youtu.be/FMrag_5Xs2g[/youtube]
As soon as I got my rigging sorted out I will test with mast and sail.
Greetings from Karl
Re: AD 14 KIELGE
Posted: Sun Jul 29, 2018 4:58 am
by Fuzz
Congratulations Karl
The smile on your face tells the whole story. And I love the pictures of you with your family.
I am sure you are going to have lots of good times on the boat with your family.
Re: AD 14 KIELGE
Posted: Sun Jul 29, 2018 7:48 am
by terrulian
Karl, I was off teaching sailing yesterday so I'm just getting to the photos and videos. Congratulations of course! The first launch is a memorable occasion in any boatbuilder's life and is hard to match.
That mast weighs
nothing! Raising the mast on my 22 takes forever and involves extra gear to get it up. It can't be picked up by one person and just put in the step, so I'm jealous!
Looking forward to more documentation when the rig is up.
Re: AD 14 KIELGE
Posted: Sun Jul 29, 2018 8:46 am
by topwater
Congratulations Karl , can't wait to see her sailing
Re: AD 14 KIELGE
Posted: Sun Jul 29, 2018 10:14 am
by pee wee
She didn't sink, everyone is smiling including you, looks like a winner! Congratulations on the splash, she looks great.
Re: AD 14 KIELGE
Posted: Sun Jul 29, 2018 1:58 pm
by Bogieman
Re: AD 14 KIELGE
Posted: Sun Jul 29, 2018 3:08 pm
by Jeff
Nice Karl, congratulations!! Jeff
Re: AD 14 KIELGE
Posted: Mon Jul 30, 2018 2:40 pm
by cape man
I was busy all weekend redoing our kitchen so missed the pics. Wow! That is a gorgeous boat on the water, and looks like there's plenty of room for the whole family. Can't wait to see her under sail.
Congratulations Karl!
Re: AD 14 KIELGE
Posted: Mon Jul 30, 2018 5:11 pm
by Eric1
Re: AD 14 KIELGE
Posted: Wed Aug 01, 2018 6:00 pm
by das boot
When it comes to checking the rake on you mast this is how I did it I hung a plum bob from the aft top of my mast If I recall it should hang to around the center of the keel when the keel is down this also allowed me to check that my stays were set properly as that string on the plum bob should hang streight down the center of the mast. Just a thought and how I did it.
Re: AD 14 KIELGE
Posted: Sun Aug 05, 2018 6:16 am
by gonandkarl
Hi,
The last few days I made small progress because of the extreme heat here. And whatever I started like attaching the plastic rails at the deck for the new hatch I battled first with too long screws and then when I had it half way finished I had to exchange the normal nuts with round headed ones so not to scratch myself getting into the cabin and that all with thick fat fingers a small spanner on one side and a small Allen key on the other. I felt doing that under the carport at 40 Celsius ( 104 Fahrenheit ) like Sisyphus must have felt with his stone who was so nicely posted by Tony in connexion with sanding. So this time the rail is finished before the hatch.

And for the strenuous work successfully finished I had to reward myself by ordering 6 small long fenders and a bit bigger ball fender so the small scratches from the first outing next to the board walk will be history for the future. So I have to make 7 eye splices for the fender lines but before that I even there struggled to pump them up with a small bicycle pump just because I did not understand the valve system on the fender. After long thinking and looking into the holes where the valves are at last the penny dropped and it took 5 minutes to pump up all 7 fenders with the little compressor run by the cars cigarette lighter. The thoughts take the most time in my boat building. At my age luck is entering a room and knowing what I wanted to do there. All I know is we fixed the official splashing date as September 8 th 2018 and I still have a lot to do especially get the mast setting and rigging finished. It will not be such a problem if my new hatch does not get finished as the boat goes well without one. I have exactly 2 weeks before splashing for the epoxy work on the hatch because my epoxy supplier is on Summer holiday.
I have stocked up on beer and wine for the barbecue afterwards at least that is done.
Greetings from Karl
Re: AD 14 KIELGE
Posted: Sun Aug 05, 2018 6:34 am
by cape man
September 8 I'll be watching! Go Karl!
Re: AD 14 KIELGE
Posted: Sun Aug 05, 2018 8:50 am
by Jeff
OK Karl, just over a month away!!!! Jeff
Re: AD 14 KIELGE
Posted: Sun Aug 05, 2018 8:54 am
by Bogieman
You really have a way with words. Funny stuff right there.
Re: AD 14 KIELGE
Posted: Sun Aug 05, 2018 10:10 am
by terrulian
Karl, I've used those same nuts on my Catalina 22 for the same reason. You don't want be gouging your head with the ends of bolts.
I've also struggled to pump up fenders which seems like it should be easy.
Lastly, I'm very impressed you know how to do an eye splice.
Re: AD 14 KIELGE
Posted: Sun Aug 05, 2018 11:00 am
by gonandkarl
Hi,
An eye splice is easy if you have Splicing Modern Ropes A practical Handbook by Jan Willem Polman lying on the dining room table, the PC running with your favorite eye splice video running in a loop and lots of time and three strand ropes to throw away when the outcome is unsatisfactory. I will not dare to tell you guys how long I take to make my seven fender eye splices but I will take a picture of the best looking one.
Greetings from Karl
Re: AD 14 KIELGE
Posted: Sun Aug 05, 2018 11:07 am
by Jaysen
I had more than a little practice making those splices. There’s a reason I refuse to make them any more. Hopefully my attitude will be more “Karl-like” in the future.
Looking forward to the pics.
Re: AD 14 KIELGE
Posted: Sun Aug 05, 2018 11:17 am
by gonandkarl
Now you make me nosy what was the reason you dont make them anymore ? Running out of time ?
Re: AD 14 KIELGE
Posted: Sun Aug 05, 2018 11:45 am
by terrulian
I don't do eye splices frequently enough to be very quick at them but I can definitely pull them off.
Generally speaking, I use them only rarely. Anchor, dock, and mooring lines, for example. I'd rather use a bowline, especially on any free line as an end with an eye splice makes the line unusable for many things. I have never seen an eye splice or a bowline fail so since the bowline can be untied, I prefer it. It's personal preference although this is one of those many areas that sailors like to get into heated arguments about.
Re: AD 14 KIELGE
Posted: Sun Aug 05, 2018 12:03 pm
by Jaysen
I’m kind of in the same place with the exception of anything that gets a shackle. Then I want an eye and that-metal-insert-I-can-never-remember-the-name-of in there. That’s normally just sheets and halyard. I’ve never understood the need for eyes on dock lines. Maybe I’m just slow though.
Re: AD 14 KIELGE
Posted: Sun Aug 05, 2018 12:14 pm
by terrulian
I would never use a hard shackle on a sheet. You don't want metal flailing around. Soft shackles exist for that purpose but I have always used knots.
On halyards, once the splice is in there you can't change the halyard end-for-end to extend its life. An eye splice will not go through a block.
Dock lines can be adjusted for length and attached to the dock cleat with a cleat hitch. The splice on the other end can then be quickly dropped over the cleat on the boat when you return to your slip.
Re: AD 14 KIELGE
Posted: Mon Aug 06, 2018 4:13 am
by Fuzz
Sorry Tony but in Jaysen's case very large Crosby shackles would not only be approved but could even be recommended.
Re: AD 14 KIELGE
Posted: Mon Aug 06, 2018 6:59 am
by Jaysen
Are you on the wife’s payroll?
T is right though. While my experience on the Shannon has shackles in the halyards and sheets if you think about it... seems like a bad idea. It did make sail change easy but yeah... that’s a bit of metal where you may not want it.
Re: AD 14 KIELGE
Posted: Mon Aug 06, 2018 7:05 am
by terrulian
Common to have a shackle on the main halyard, and not uncommon to have an eye splice on the shackle. But for the reasons I mentioned, I attach the shackle with a bowline.
Re: AD 14 KIELGE
Posted: Thu Aug 09, 2018 1:58 pm
by das boot
How did your little motor work on that test run ?
Re: AD 14 KIELGE
Posted: Thu Aug 09, 2018 4:18 pm
by gonandkarl
Hi George,
Yes the little motor did work fine with the exception that I made an extension cable of 6 foot to the battery in the cabin and I did not solder the plugs and the plugs got rather hot and we had a few cases where the motor stopped because it did not get power. Now I have solved the problem by placing the battery under the port side bunk next to the transom and will attach the power cable of the electric motor (130 cm long ) directly to the battery. I just have to make a small hole in the side of the bench next to my inspection hatch to pass the battery plugs through and then connect them through the open inspection hatch to the battery. The hole will be closed afterwards with a wooden lid with just a small cut out with a diameter matching the cable diameter. I will post a picture of the finished electric outboard motor cable installation. Maybe I will need a bit more internal ballast near the bow because the battery weighing 17 kg will be directly under my bum which is not light either. But that I will find out at the next test which hopefully will be with mast and sail.
I had now already two test runs and yesterday the launching was already much easier than the first time. I found out that it is best to push the trailer with the car as far into the water as possible then I move my extra long jockey wheel on the highest position push the trailer by hand a few metres further until the wheels get stuck in the gravel and then I wind the front axle with the jockey wheel up by about 50 cm and push the boat with the other hand into the water. Retrieving the boat from the water is also easy I tow it onto the trailer with the trailer winch and connect the long steel cable from my extra winch at the back of the car and the trailer front and drive the car up the shore until the trailer is out of the water and it can be hitched to the tow ball. I did not time it and thought it was done rather quick while my sister thought it took ages.
Greetings from Karl.
Re: AD 14 KIELGE
Posted: Thu Aug 09, 2018 6:34 pm
by das boot
All of those small problems can be overcome one thing you need to watch for is as you come into the dock area in any kind of cross wind that high bow will get caught by the wind and can turn the boat once you loose speed you will work it out. So to this point you are happy with it?
Re: AD 14 KIELGE
Posted: Fri Aug 10, 2018 2:59 am
by gonandkarl
Hi,
Yes George I am very happy with the boat as it is now and I did notice the cross wind pushing the boat easily sideways especially when my electric cable to the motor gave up completely and my son in law and me had to make the last 50 metres to the shore with paddling on each side me with a long stand up paddle and he on starboard with a double paddle. This looked a bit funny and we even got offered help from a water ski school instructor to pull us to the dock with his big motor boat which we naturally declined being sporty sailors. I could not use my planned sculling with the stand up paddle because I have not yet made the attachment at the rudder gudgeon for the paddle. Thanks Tony for the idea with using knots where ever possible it says the same thing in my Junk Rig book of Hasler. I am busy getting all my sheets and standing rigging together and will be working with lots of knots. As I built a sturdy yard sling plate I will attach the main halyard there with a bow line and will not have any shackles anywhere except at the front of the battens. I hope to be finished soon with the rigging and I am eager to test the sail.
Greetings from Karl
Re: AD 14 KIELGE
Posted: Fri Aug 10, 2018 7:43 am
by Jeff
Can't wait to see her sail Karl!!!! Jeff
Re: AD 14 KIELGE
Posted: Fri Aug 10, 2018 8:54 am
by OrangeQuest
That makes a lot of us Jeff! Not trying to rush the process but excited to see her under sail.
She is a beautiful boat as she is but the rigging will really bring out her beauty.
Re: AD 14 KIELGE
Posted: Fri Aug 10, 2018 10:53 am
by Bogieman
Re: AD 14 KIELGE
Posted: Mon Aug 27, 2018 11:31 am
by gonandkarl
Hi,
Did not post lately because I was too busy making my new hatch and as I have no more epoxy I made it rather strong out of spruce wood put together with screws and 3 cross supports and a flat top to stand on and I am busy painting it because in 5 days is splashing day and I do not want to sail with the cabin roof missing. It weighs 9 KG. In Winter I will make a nice hatch out of marine plywood, fibreglass and epoxy and again a camber on top. When we sail it for the first time I also want to close the cabin for the worst case of turning turtle. I watched Bondos video of raising the mast lots of times and I came to the conclusion even that my mast weighs dressed only 10 KG ( 22 pounds ) I cannot raise it like Bondo just walking up there and sticking the pole into the hole. I am too old , not strong enough and my balance is not any more the same as it was in my thirties. So my son was home last weekend put up the mast like Bondo within a minute and also unstepped it just as fast. He suggested I should just ask bystanders for help whenever I have to raise the mast or when I have to unstep it for going home. As I will mainly be sailing by myself I decided to go for shear legs for working with the mast as suggested by Hasler in his Practical Junk Rig book. First I wanted to use the boom and the yard as shear legs and when I tried these spars they came crashing down the sides because I had mounted small rings at the end of the spars and they were bent to hell and gone so they were useless and at the same time I noticed the sling plate of the yard I attached also with 2 small screws which would have brought my yard and sail down at the very first sail trial. I replaced it with a bow eye with 2 screws right through the yard and because the boom and yard version of shear legs was rather wobbly because they were attached only with rope I managed to raise the mast so so but that was the end of their shear leg existence. I made 2 proper 4 meter long spars which I mounted with strong machine bolts and today I could at last unstep the mast with a 2 to 1 purchase on top. The preparation took me hours but the unstepping was done in 2 minutes. Here is a picture of the shear legs and tomorrow I want to raise the mast and then pull up the sail with all the standing and running rigging including all parrels. I still have to make 2 euphroes for the sheet control before that.
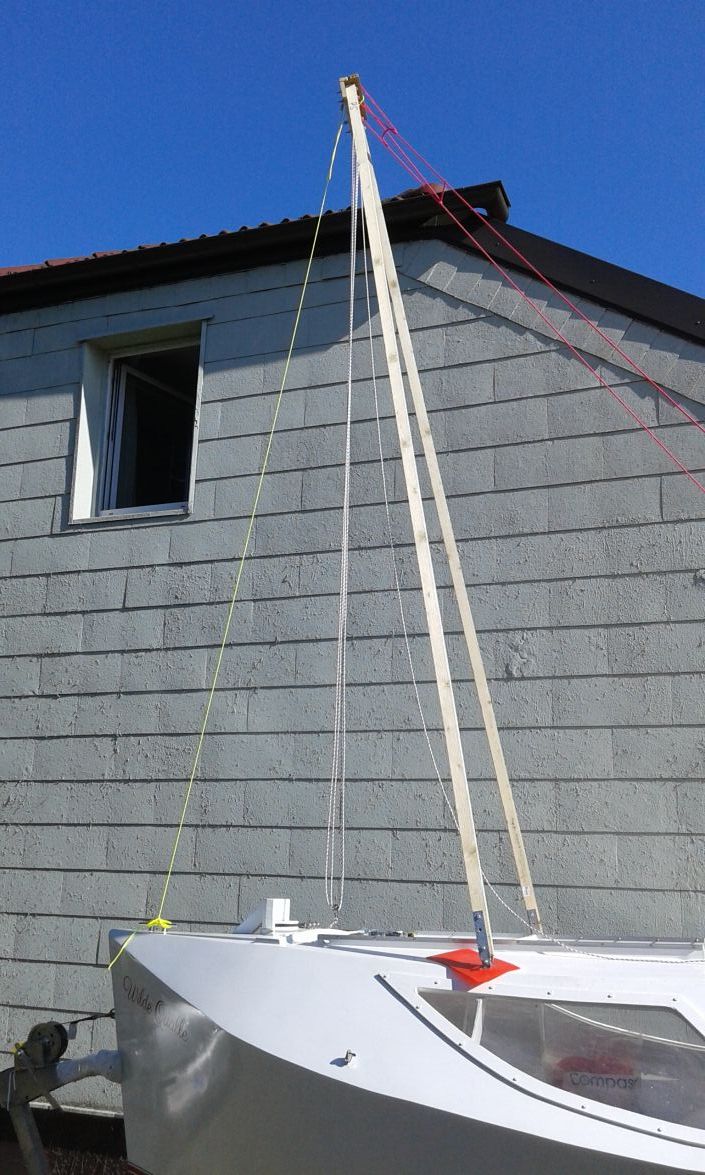
Greetings from Karl
Re: AD 14 KIELGE
Posted: Mon Aug 27, 2018 11:49 am
by cape man
get video when you figure out how to do it all solo. 5 days... The world is watching!
Re: AD 14 KIELGE
Posted: Mon Aug 27, 2018 12:43 pm
by Jaysen
Excellent solution to the problem.
Re: AD 14 KIELGE
Posted: Tue Aug 28, 2018 6:03 am
by glossieblack
Very nice solution Karl. Blondie Hasler was an incredibly innovative blue water sailor. You've picked a great muse.
Re: AD 14 KIELGE
Posted: Tue Aug 28, 2018 7:11 am
by Jeff
Agree with all, good solution Karl!! Soon!! Jeff
Re: AD 14 KIELGE
Posted: Tue Aug 28, 2018 2:20 pm
by Bogieman
Very nice, Karl. Everything you do is so well thought out. Boat looks beautiful in that pic.
Bogie
Re: AD 14 KIELGE
Posted: Tue Aug 28, 2018 3:09 pm
by gonandkarl
Hi,
Today I painted the hatch for the last time and finally made my 2 euphroes for the junkrig. If you notice on the euphroes picture that the second wheels are skew this is on purpose that they are on different planes to prevent the spans from rubbing against each other.
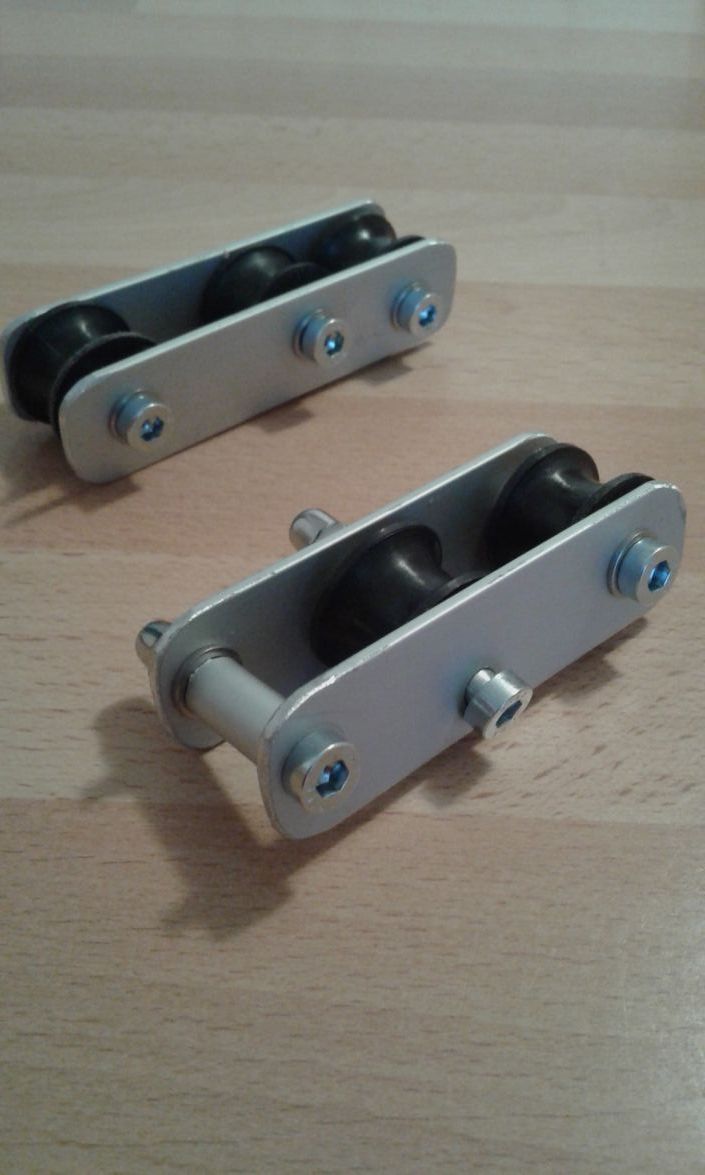
Then I widened the mast hole at the partner to be able to adjust the rake of the mast which will be necessary for the junk rig.
And tomorrow I cut all the lines to size dress and mount the mast and set the sail with all lines.
Greetings from Karl
Re: AD 14 KIELGE
Posted: Tue Aug 28, 2018 3:49 pm
by terrulian
We're all watching with anticipation for the big day. But don't forget to send photos of your progress in the meantime.
Re: AD 14 KIELGE
Posted: Sun Sep 02, 2018 7:04 am
by gonandkarl
Hi,
The last 2 days were quite a bit exciting because of my planned splashing date Sep 1 st. Two days ago my son helped me with the last things to do before yesterdays splashing day. We made it just by the evening to have all the lines and the sheets sorted out cut to length and tested plenty of times by raising the sail and letting it down. The following picture shows me sitting on the PS bunk just before I connect the sheets to the 3 upper spans.

Then came a restless night for me and I woke up the first time at 2 am just to hear it was raining cats and dogs. I jumped out of bed and ran outside to put a plastic table cloth over and across the companionway so that it will not rain into it through the left open bottom wash board where I had the fully rigged sail with yard and boom sticking out of the cabin. In the morning it was clear that there will be no splashing because it did not stop raining.
So the only thing we could do take the boat to the lake and to the waters edge and then we christened the Wilde Qualle with some champagne and went home to have a nice barbecue in the boat shed with friends and family.
That is why I cannot post her sailing pictures in the Finished Posts section.
Soon to follow.
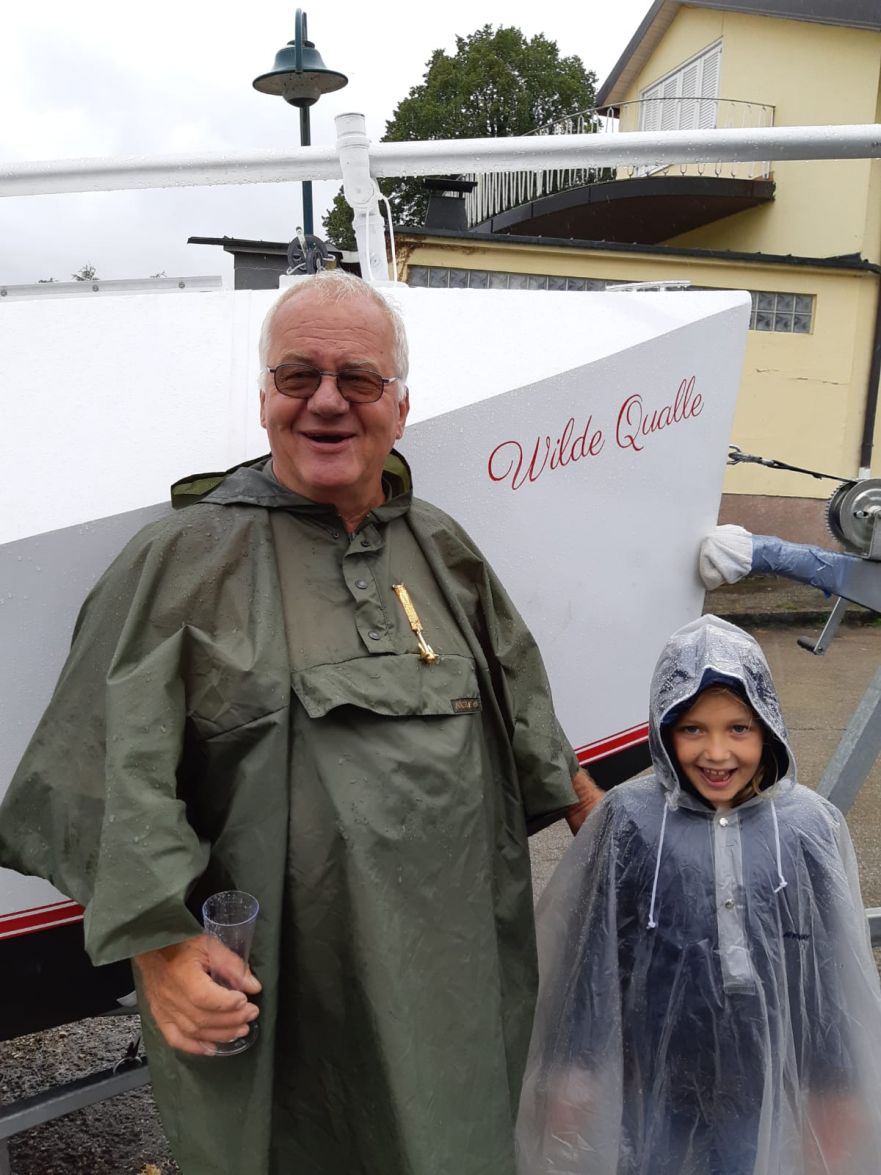
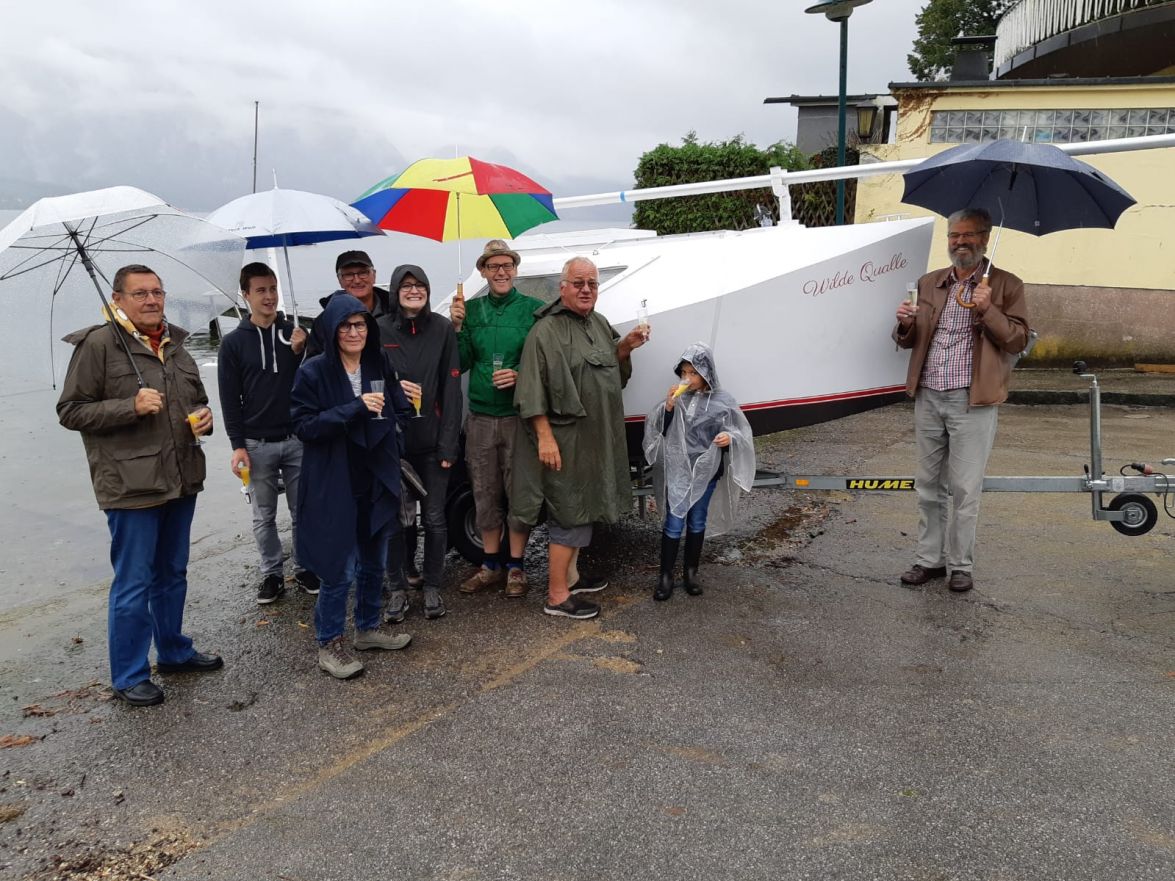
Greetings from Karl
Re: AD 14 KIELGE
Posted: Sun Sep 02, 2018 7:41 am
by terrulian
Well, the smiles are all there anyway. We'll await the next attempt.
Re: AD 14 KIELGE
Posted: Sun Sep 02, 2018 7:45 am
by Jeff
Karl, you, your family and the whole group look very happy even with the rain!! Congratulations regardless!! Next week friend!! Jeff
Re: AD 14 KIELGE
Posted: Sun Sep 02, 2018 8:20 am
by glossieblack
You look like one happy and contented man Karl. Congratulations
Re: AD 14 KIELGE
Posted: Sun Sep 02, 2018 8:26 am
by topwater
Congratulations Karl
Can't wait to see the sailing pic's
Re: AD 14 KIELGE
Posted: Sun Sep 02, 2018 6:26 pm
by Fuzz
Love seeing the giant smile on his face. Reminds me of when we first met at the builders meet.
Re: AD 14 KIELGE
Posted: Sun Sep 02, 2018 8:53 pm
by OrangeQuest
Everyone's faces does say it all. Congratulations and happy sails!
Re: AD 14 KIELGE
Posted: Wed Sep 05, 2018 9:44 pm
by das boot
It will all work out fine looking good nice to see the smiles looking forward to seing it under sail
Re: AD 14 KIELGE
Posted: Tue Sep 11, 2018 4:08 am
by gonandkarl
Hi,
Thanks my friends for the congratulations. As I will have my first sail all by myself I carried on playing around with my shear legs for stepping and unstepping he mast. I did manage to get it to work twice already but also had the lot crash down on me twice. The first time it crashed down on the bow side and made 4 small dents into the cars roof which was hooked up at the boats trailer. I learned to rise the shear legs with a long modified garden rake and the car nowhere nearby. The second time was yesterday when I only attached the 2 after guys and forgot to attach the bow guy and the mast and shear legs came falling down on me towards the transom. No harm done to me or damage to the boat or mast and in future all 3 guys will be tied down.
I battle a bit to lift the mast at its center of gravity being a light-alloy mast because the hitch around there always slides down.
Do you think I could drill a small hole thru the mast at CG and put the rope up to the purchase go thru it or will this have an effect on the masts stability.
Or is there a knot which lets the rope not slide on the masts surface, I am thinking of a constrictor knot laid on slip to be able to open it easily.
The first action today is I will make the 4 meter long shear legs out of 1 x 2 inch wood instead of the 2 x 2 inch wood to be able to handle them easier and use for the 3 guys rope which does not stretch a lot. The dressed mast weighs only 10 kg ( about 22 pounds ) and the 2 x 2 shear legs are much heavier. Will report soon again when I have this last task solved. Then I hope for a few more sunny days to have the first real sail still this year.
In the mean time the boat fully rigged in the garden.
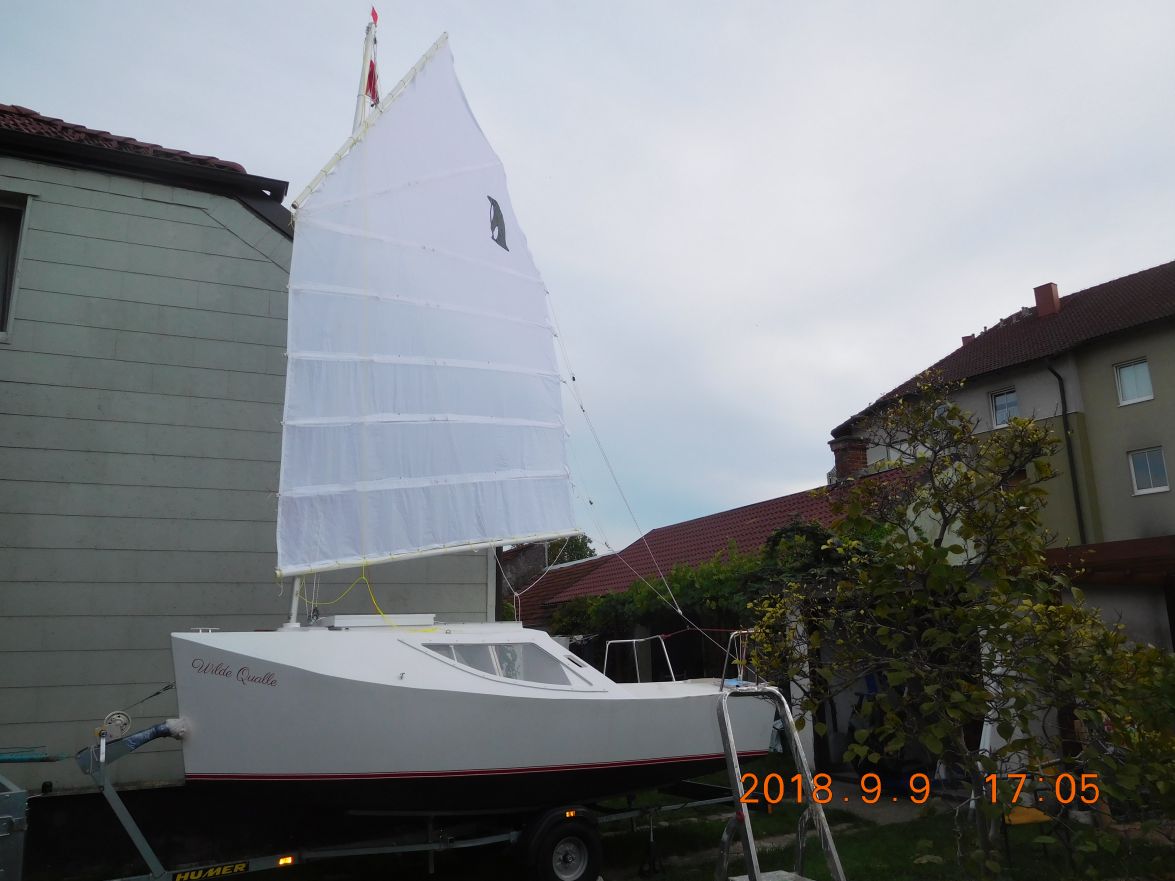
Greetings from Karl
Re: AD 14 KIELGE
Posted: Tue Sep 11, 2018 8:09 am
by Jeff
She is a beauty Karl!!! Congrats again, Jeff
Re: AD 14 KIELGE
Posted: Tue Sep 11, 2018 9:38 am
by terrulian
Karl, perhaps a rolling hitch or better is a Prusik knot. Use fairly light line, say 5 mil which will easily be strong enough. You shouldn't have to drill a hole.
https://www.youtube.com/watch?v=EFHxQ5fiUvI
Re: AD 14 KIELGE
Posted: Tue Sep 11, 2018 10:50 am
by gonandkarl
Hi Tony,
Thank You so much for this knot. I knew You would come up with this perfect answer.
I tried it already out and it is really tight.
Greetings from Karl
Re: AD 14 KIELGE
Posted: Tue Sep 25, 2018 3:32 am
by gonandkarl
Hi,
I have accepted the fact that this autumn there will not be a sail trial with my boat any more and therefore I concentrate on small things I want to make perfect over the Winter months like my 2 sheer legs I want to make them out of aluminium telescopic struts which I can stow in one of the bunks and this allows me to raise or lower the mast on the water thinking of going under bridges in Holland. I also want to improve the seals of the cockpit hatches because I got a few litres of water into the bilge when I was on the lake. A fancy hatch lid over the companionway out of marine plywood, fibreglass and epoxy is also on the agenda. I established now the exact weight of trailer and boat which is 158 kg for the trailer and 362 kg for the boat and mast ready to sail with all the appendices like rudder, ballast, electric outboard, sail and lines in the car and yard and boom on the roof carrier. Then it looks like this ( I did not pack the car and roof carrier for the drive to the weigh bridge ) and it tows nicely on the highway at 90 km per hour.
Total weight of trailer and boat 530 kg.
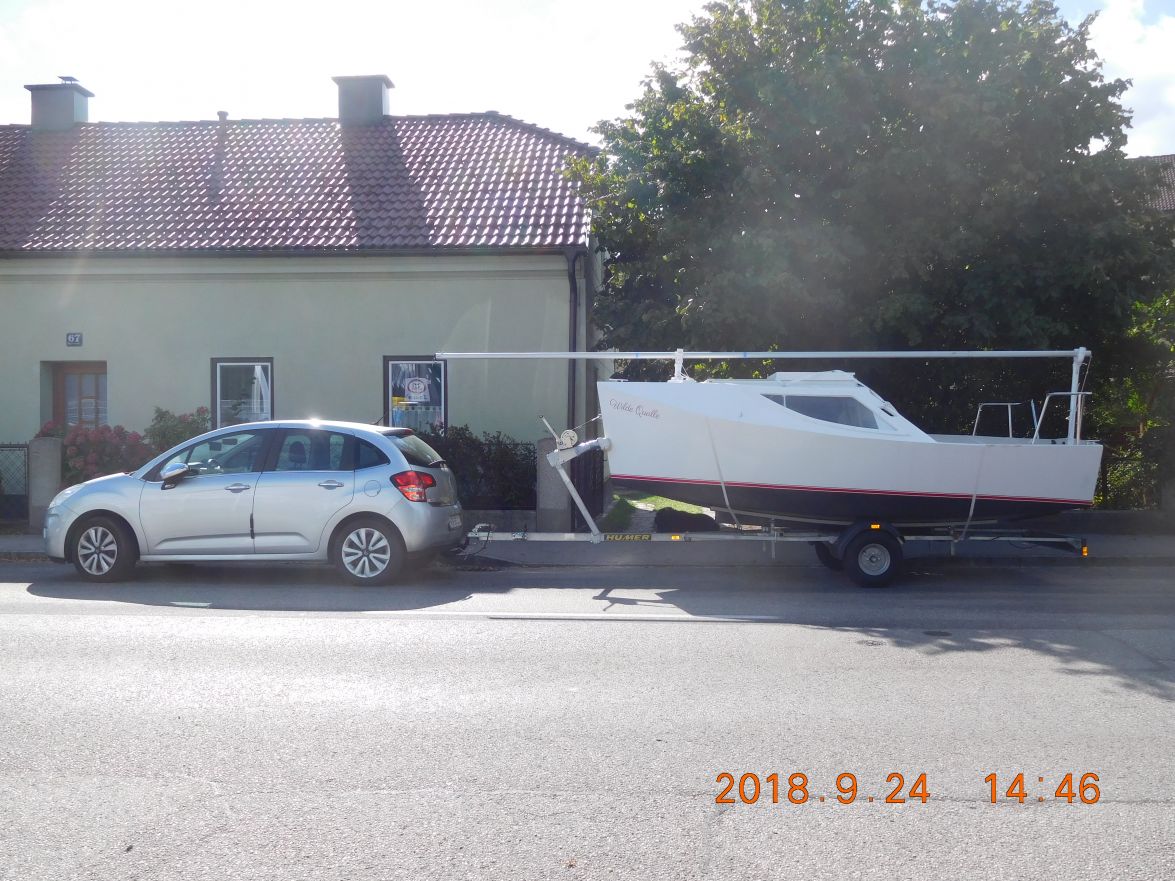
Greetings from Karl
Re: AD 14 KIELGE
Posted: Tue Sep 25, 2018 6:38 pm
by Bogieman
gonandkarl wrote: ↑Tue Sep 25, 2018 3:32 am
Hi,
I have accepted the fact that this autumn there will not be a sail trial with my boat any more and therefore I concentrate on small things I want to make perfect over the Winter months like my 2 sheer legs I want to make them out of aluminium telescopic struts which I can stow in one of the bunks and this allows me to raise or lower the mast on the water thinking of going under bridges in Holland. I also want to improve the seals of the cockpit hatches because I got a few litres of water into the bilge when I was on the lake. A fancy hatch lid over the companionway out of marine plywood, fibreglass and epoxy is also on the agenda. I established now the exact weight of trailer and boat which is 158 kg for the trailer and 362 kg for the boat and mast ready to sail with all the appendices like rudder, ballast, electric outboard, sail and lines in the car and yard and boom on the roof carrier. Then it looks like this ( I did not pack the car and roof carrier for the drive to the weigh bridge ) and it tows nicely on the highway at 90 km per hour.
Total weight of trailer and boat 530 kg
Greetings from Karl
She looks absolutely beautiful on her trailer.
Re: AD 14 KIELGE
Posted: Sun Oct 21, 2018 12:07 am
by glossieblack
Happy 72nd birthday Karl!
Re: AD 14 KIELGE
Posted: Sun Oct 21, 2018 3:50 am
by gonandkarl
Thanks Michael,
I wish you and your wife lots more nice cruising in The Whitsundays Islands and no more ground contact.
Still looking forward to a nice lunch with my family while you are most probably at a sundowner.
Greetings from Karl
Re: AD 14 KIELGE
Posted: Sun Oct 21, 2018 6:34 am
by cape man
Happy Birthday!
Re: AD 14 KIELGE
Posted: Sun Oct 21, 2018 8:16 am
by Jeff
Karl, Happy Birthday!!! Jeff
Re: AD 14 KIELGE
Posted: Sun Oct 21, 2018 11:49 am
by Bogieman
Happy birthday, Karl!
Re: AD 14 KIELGE
Posted: Sun Oct 21, 2018 1:24 pm
by Fuzz
Yes happy birthday Karl! We all hope you are having a great day.
Re: AD 14 KIELGE
Posted: Mon Oct 22, 2018 3:56 am
by gonandkarl
Hi,
Thank you all for the wishes, I had a very nice day with my kids and grandchildren and now I must go on a diet again which gives me more time to work on things for the boat. All 3 boats are stored for a few months and Winter can come. The new hatch I will make in my cellar workshop after first cleaning up the mess of the last 5 years of building.
Greetings from Karl
Re: AD 14 KIELGE
Posted: Tue Oct 23, 2018 1:09 am
by Fuzz
Well I hope you have a good winter and emerge next spring all ready for boating fun
Re: AD 14 KIELGE
Posted: Tue Oct 23, 2018 7:47 am
by Jeff
Karl, Have a great winter and get ready for some sailing in the Spring!! Jeff
Re: AD 14 KIELGE
Posted: Thu Nov 08, 2018 11:11 am
by Salvatore
Hi Karl,
Been looking at some of the pictures of your boat,wow she looks great you have every wright to be proud of her, your hard work has truly paid off.
I have been out of the sailing picture for some time I suffered a massive heart attack in December and almost died, the doctors told my wife to get the family to the hospital asap they didn't think I would last the day, Had a triple bypass and stent put in I am a lot better now, going sailing tomorrow God willing.
I am sure you are looking forward to sailing her I love the "junk rig" it looks great.
Kind Regards
Salvatore
Re: AD 14 KIELGE
Posted: Thu Nov 08, 2018 11:35 am
by terrulian
Jeesh, Salvatore, very sorry to hear this!!
Apparently, you are now on the mend. Good for you. Keep us informed.
Re: AD 14 KIELGE
Posted: Thu Nov 08, 2018 12:03 pm
by gonandkarl
Hi Salvatore,
I hope you are doing fine now and I was shocked when I read your lines. As it happened last December I am sure you have made it for good and a long sailing life is ahead of you. I actually thought a fat guy like me is a candidate for a heart attack and not someone like you who moved so fast finishing your beautiful boat Angelina. You even had your Pizza oven in the garden finished in record time. I wish you a nice sail tomorrow . It is spring on your side of the world so it will be especially enjoyable. Is it your first sail since you were ill ? Take live easy and do a lot of leisurely sailing. I will be thinking of you tomorrow when you sail while I drive with my wife to Vienna to visit the Nature Historical Museum a good place to let the thoughts deviate. All the best for you and keep posting again in your thread maybe with new pictures of you on the boat in Sydney harbour.
Greetings from Karl
Re: AD 14 KIELGE
Posted: Thu Nov 08, 2018 12:19 pm
by Jeff
Salvatore, very sorry to hear about the heart attack!! Glad to hear you are doing better and going sailing tomorrow!! Jeff
Re: AD 14 KIELGE
Posted: Thu Nov 08, 2018 1:33 pm
by OrangeQuest
Salvatore wrote: ↑Thu Nov 08, 2018 11:11 am
I suffered a massive heart attack in December and almost died, the doctors told my wife to get the family to the hospital asap they didn't think I would last the day, Had a triple bypass and stent put in I am a lot better now, going sailing tomorrow God willing.
Kind Regards
Salvatore
From a personal stand point, now that you are again getting a good blood flow to the heart, exercise that muscle. Get your heart rate up, within reason, and get her pumping. Good luck and hope you stay healthy!
Re: AD 14 KIELGE
Posted: Thu Nov 08, 2018 7:40 pm
by Bogieman
Hi Karl, Salvatore, Tony, Jeff and OQ!
Wow Salvatore! So sorry to hear the news of your HA but glad you are on the mend. I've spent many hours studying your thread and YouTube videos; your build was / is an inspiration to me as I build my own AD16. It's good to see you back on the forum.
Bogie
Re: AD 14 KIELGE
Posted: Fri Nov 09, 2018 12:36 am
by Salvatore
Thank you to every ones kind words concerning my health, I am much better now And I did go sailing in my AD16 today she is such a great boat and a real joy to sail. I have no regrets having chosen this design over the many other plans I looked at. There was 4 adults in the boat today and at no time did it feel cramp in that big cockpit. I know that Karl will love his AD14 once he feels the pull of the breeze on his sail. Once again congratulations on the completion of your Boat. Salvatore
Re: AD 14 KIELGE
Posted: Mon Nov 26, 2018 2:28 pm
by gonandkarl
Hi,
Today I finished my shear legs for raising or lowering the mast. Even that my mast weighs only 11 kg I do not dare to just pick it up walk on deck and put it into the mast hole like Bondo did so fantastic within 60 seconds. I have to pay tribute to my age meaning my balancing is not as good as it was 30 years ago. That is the reason I built these shear legs. The 2 legs are aluminium pipes 4 meters long and a 2 mm thickness. I connected them with a 20 cm long U profile and mounted 4 rings for the fore and 2 back guys and for the purchase with which I can raise or lower single handed my mast.
Here are the 2 pictures:
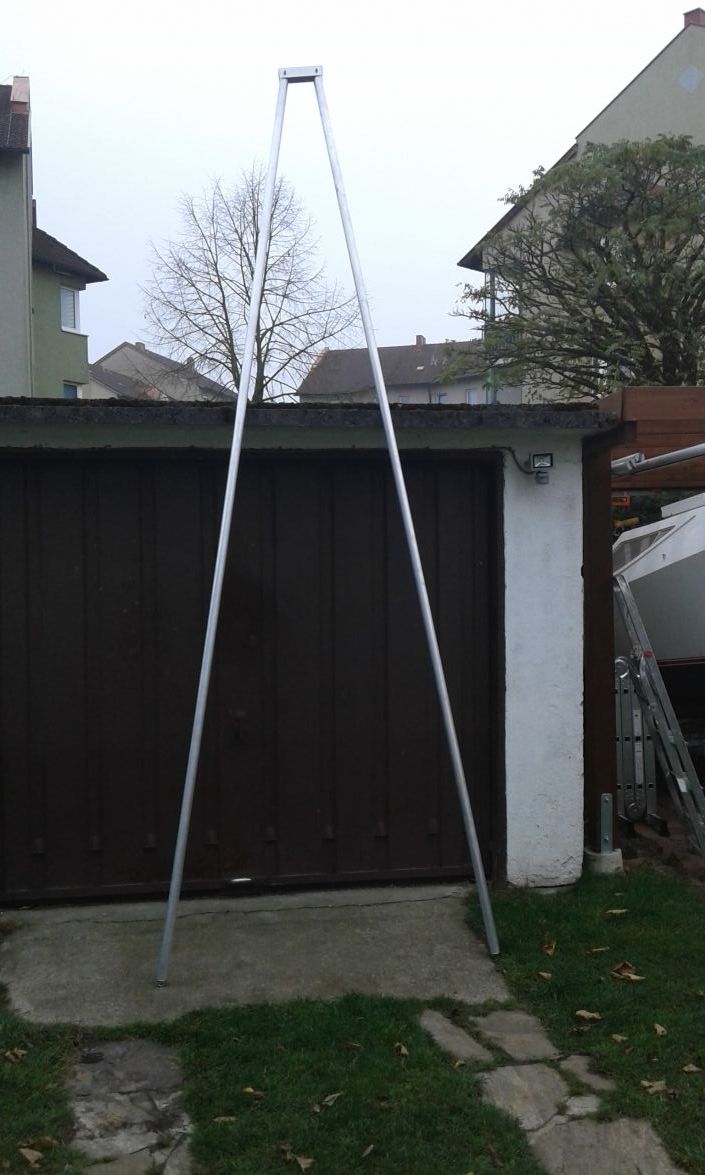
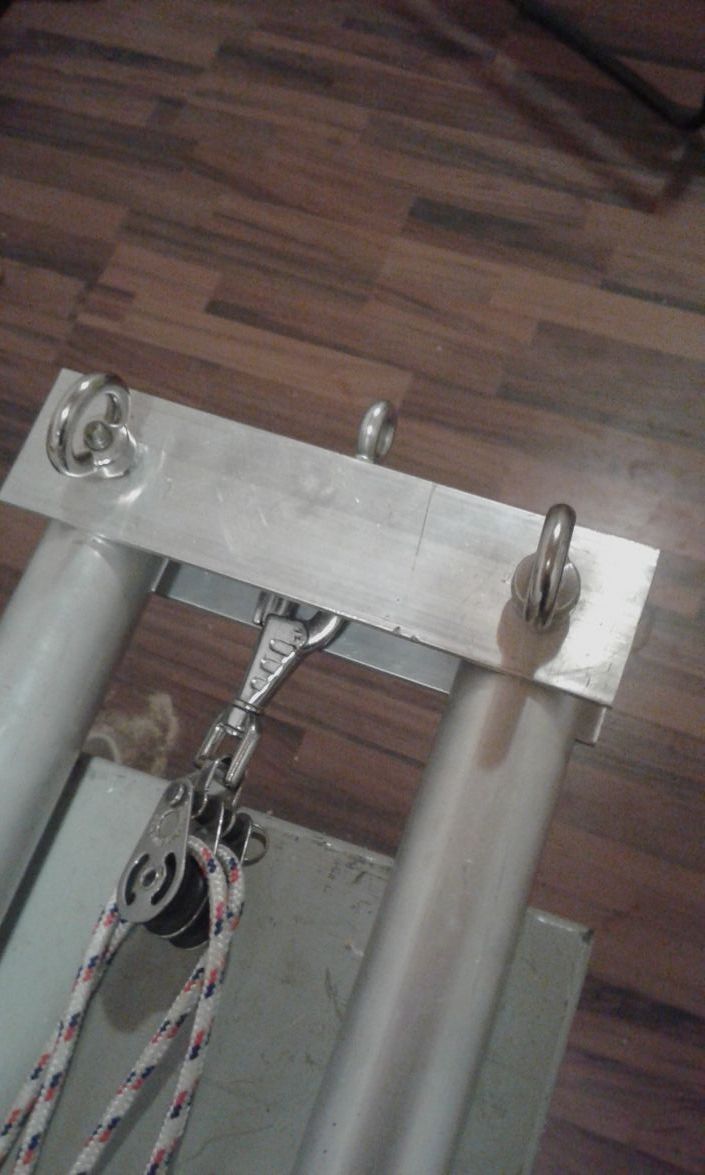
Greetings from Karl
Re: AD 14 KIELGE
Posted: Mon Nov 26, 2018 2:37 pm
by Jaysen
Where are the bottoms of the legs when you are using this? It seems that it's almost as large as the mast so i must be missing something simple.
Re: AD 14 KIELGE
Posted: Mon Nov 26, 2018 2:48 pm
by Jeff
Nice Karl!!! Jeff
Re: AD 14 KIELGE
Posted: Tue Nov 27, 2018 5:44 am
by gonandkarl
Hi,
No Jaysen you are not missing anything just my explanations were not detailed enough. I did not show the bottom of the shear legs which get attached to deck fittings and this is how they look.
Wooden inserts for the aluminium pipes
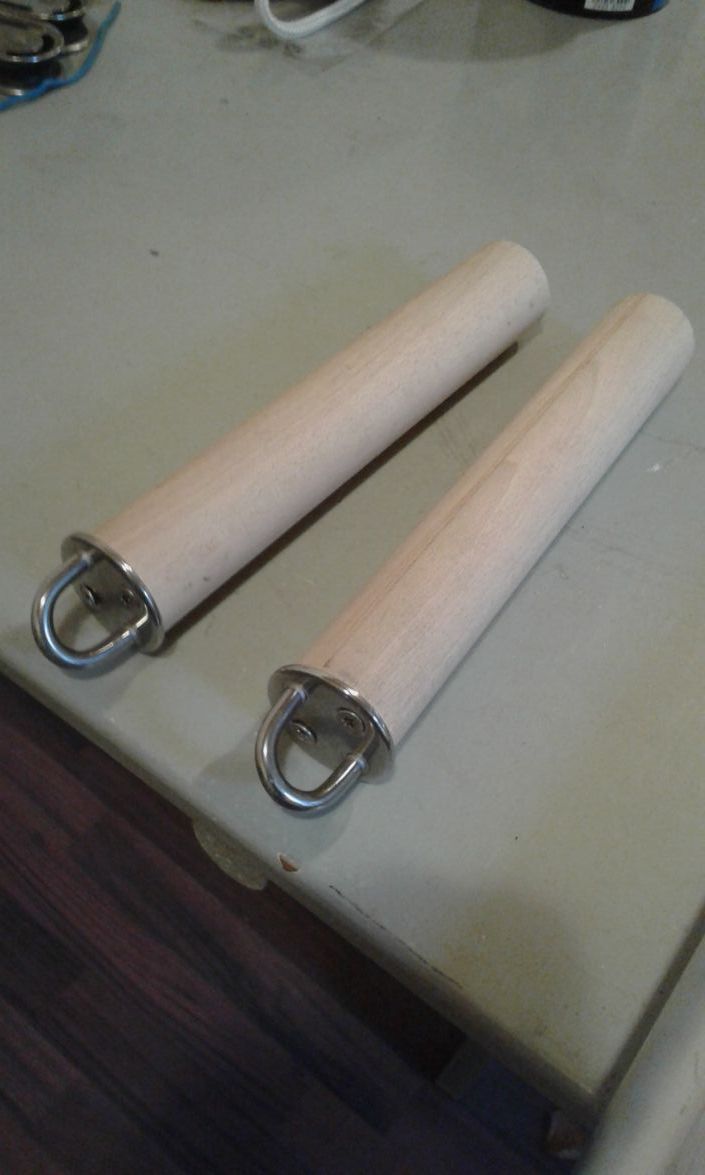
and here they are inserted
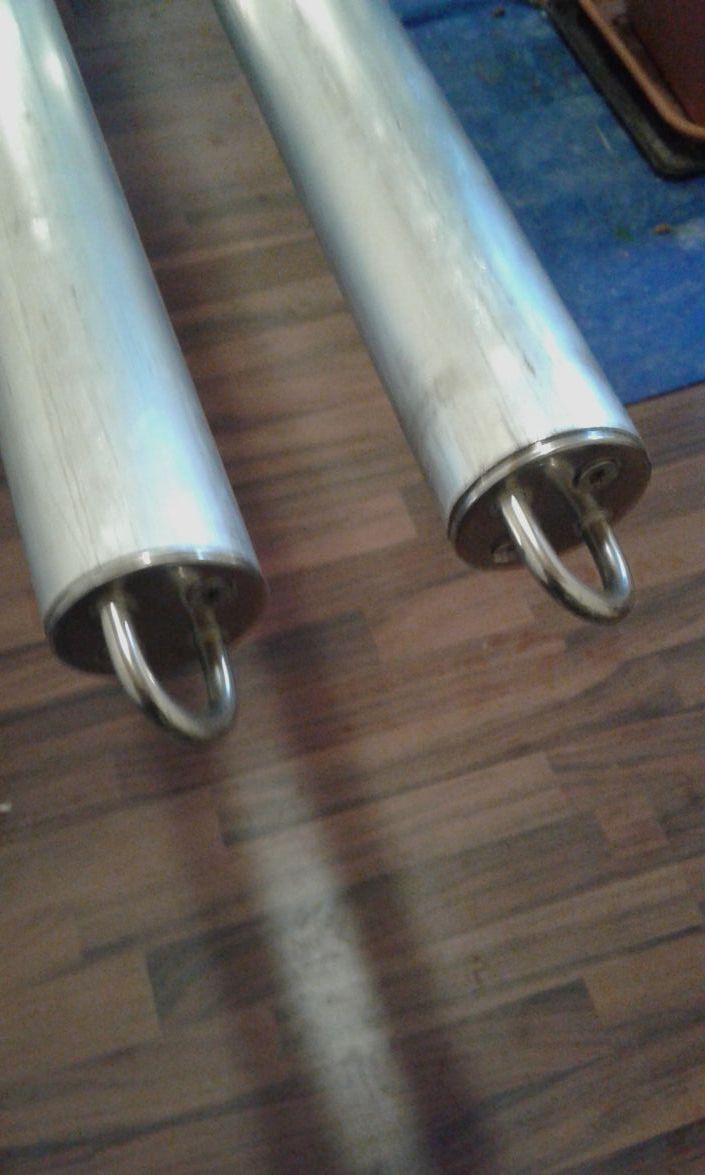
You are right that these things are quite long but it is necessary because my 6,1 meter long aluminium mast has a bury of 1,1 meter which has to be added to the centre of gravity of the mast and then it needs to be slung close to the purchase for raising or lowering. I have tested these exact lengths successfully with my previous wooden spar construction.
I did make this working wooden shear legs new with aluminium, because it is lighter looks better and my distant plan is that I can raise or lower the mast while on the water for instance to get through under a bridge or like Hasler suggests to use them on a world cruise as an ideal jury rig a situation I will never be in. To take the shear legs along on the boat it will be necessary to cut the 4 meter spars in half for storing under the port bunk like boats hook and paddle and when one wants to use them lengthen them again with inserts also from aluminium fitted with 4 screw bolts.
Hasler suggests actually to use a derrick like Tony seems to have for his Catalina and he says it is simpler than shear-legs but it needs more care with the guys.
This is his example of a derrick.
It was not possible for me because the single spar needs to be stepped on a strong coach roof cup and therefore not possible on my AD14 without reinforcing the roof a lot. That is why I decided on this design of HG Hasler.

I will not cut my spars in half for the beginning because I plan to carry them on the roof carrier of the car and for raising the mast on the shore only.
Should I make the trip to the Netherlands to sail there with all their bridges in the future I can still make these cuts.
Tony mentioned that my shear legs look very stout which is true although they weigh only 7 kg including the guys and purchase ropes which is half of the masts weight.
The proof of the pudding is in the eating, so I will report next Spring when I use my concoction at the shore of the lake.
Greetings from Karl
Re: AD 14 KIELGE
Posted: Tue Nov 27, 2018 6:58 am
by Jaysen
Thank you Karl. That makes sense to me and seems so obvious in retrospect. Great job. Can’t wait to see it in action!
Re: AD 14 KIELGE
Posted: Tue Nov 27, 2018 7:10 am
by Jeff
Well done Karl!!! Jeff
Re: AD 14 KIELGE
Posted: Wed Nov 28, 2018 6:20 am
by Bogieman
Very interesting stuff, Karl. Maybe you can take a video of this contraption in action?
Re: AD 14 KIELGE
Posted: Wed Nov 28, 2018 6:27 am
by OrangeQuest
It is very interesting stuff! Very complex!
Re: AD 14 KIELGE
Posted: Sat Dec 08, 2018 9:02 pm
by das boot
On my father in laws 18 foo Bruce Roberts boat he had it set uo so that he had to cables that ran the the back corners of the boat from the spreader bar on the mast he would hookup the stays on booth sids of the mast that would stop the mast falling off to either side and he has a come along from the same position on that spreader bar and he would use the come along hooked to it and his front stay position to pull the bast uo with. This worked well for at least 17 years that he ran that boat.
Re: AD 14 KIELGE
Posted: Sat Dec 08, 2018 9:04 pm
by das boot
Wow glad to here you made it though that you were lucky I was woindering where you had gon to. Glad to see you back at it.
Re: AD 14 KIELGE
Posted: Wed Dec 26, 2018 2:45 am
by gonandkarl
Hi,
Wish you all a Merry Christmas and a Happy New Year and do not want to withhold my funny Christmas present from my daughter. Me not being a hunter of any animal I got a decoy duck which looks like a genuine drake. And this is the history to it. I mentioned that as a solo sailor it might be advisable to pull a float on a long line behind the boat in case one falls into the water and has now a chance to get back along the line to the transom. Our good friend George sailing like this his AD16 for years suggested it to me and as the warm tempered lakes in Austria with no currents are not as dangerous as Georges channel to Vancouver Island I said a plastic duck as a float would most probably do fine here. Some German sailor friends I spoke to meant the line should be at least 20 meter long and have loops every meter to be able to get back to the transom easier and definitely always wear a life vest.
and here is my Christmas duck
The duck had no 5 star rating in the net but the reason for it was exactly what I wanted. They said it looses the paint after a month or so in the water and then it is just a yellow plastic duck which is much better to see in the water than a decoy duck.
Greetings from Karl
Re: AD 14 KIELGE
Posted: Wed Dec 26, 2018 3:22 am
by glossieblack
Trailing a line is a wise safety .
My uncle used to trail a duck behind his plus one plank higher Folkboat on Sydney Harbour.
Happy Christmas Karl!
Re: AD 14 KIELGE
Posted: Wed Dec 26, 2018 5:16 am
by gonandkarl
Hi Michael,
Also a very Merry Christmas and a Happy New Year to you and your child bride. I celebrated on Christmas eve the 45th anniversary of meeting my wife on a blind Christmas dinner date in the Zoo Lake Restaurant in Johannesburg South Africa. From the six people at the table I got the penny in the bottom of the plum pudding. Ever since then we love celebrating Christmas.
Greetings from Karl
Re: AD 14 KIELGE
Posted: Wed Dec 26, 2018 5:29 am
by OrangeQuest
Very thoughtful Christmas gift!
Have a happy New Year!
Re: AD 14 KIELGE
Posted: Wed Dec 26, 2018 8:10 am
by Jeff
Very nice gift Karl!! Happy holidays to you and your family!! Jeff
Re: AD 14 KIELGE
Posted: Wed Dec 26, 2018 8:17 am
by Jaysen
You know... I love this idea and as a moron who will not make smart decisions I really should follow suit and tow a float. I wonder if I can find one that looks like a shark though. That would get folks all kinds of excited.
Re: AD 14 KIELGE
Posted: Wed Dec 26, 2018 9:38 am
by gonandkarl
Hi Jaysen,
The idea has been spun further by my niece a lecturer of chemistry at the University of Vienna who is naturally also concerned about my safety sailing all by myself, she ordered me not a shark but this crocodile and suggests it should follow the duck on a further 10 meter line. If I should not catch the line at the duck at 6 knots sailing speed I might make it to the croc line behind it.

Sailing should be fun on our local lakes not only for oneself but also for the onlookers at the beach who are sorry not to own a sailboat but will be happy to go home having seen a crocodile chasing a duck and sailboat. So no more Christmas bowl after lunch or at least one that contains less rum.
.
Greetings from Karl
Re: AD 14 KIELGE
Posted: Wed Dec 26, 2018 9:51 am
by Jaysen
HA! That's perfect around here as we have actual alligators in the water!
Just a thought (that likely pertains to me more than you), how do we alert other vessels to our tail? I'm think that 20m of line trailing our boats leaves a high probability of getting tangled up with another boat's prop. Maybe we need to trail the duck with the gator and the gator with a 1/3 scale copy of our boats?
Re: AD 14 KIELGE
Posted: Wed Dec 26, 2018 10:05 am
by Bogieman
Jaysen wrote: ↑Wed Dec 26, 2018 8:17 am
You know... I love this idea and as a moron who will not make smart decisions I really should follow suit and tow a float. I wonder if I can find one that looks like a shark though. That would get folks all kinds of excited.
Re: AD 14 KIELGE
Posted: Wed Dec 26, 2018 10:05 am
by Bogieman
Love it!
Re: AD 14 KIELGE
Posted: Wed Dec 26, 2018 11:06 am
by terrulian
As to getting tangled up with another boat: This reminds me of why I chose not to. Yep, don't do it in a harbor. Folks will often pass close astern. We towed two lines offshore to fish. Of course, they had hooks at the end.
Re: AD 14 KIELGE
Posted: Wed Dec 26, 2018 8:09 pm
by ks8
Karl, you must give the duck and croc names, and always refer to them by name.
Hoping you and your family are enjoying this season of celebrating Christmas, and that you have a happy New Year!
ks8
Re: AD 14 KIELGE
Posted: Sat Dec 29, 2018 6:08 am
by gonandkarl
Hi KS8,
I fully agree and therefore the floating duck and crocodile are herewith named Donald and Schnappi and they passed the first floating test in the washbasin perfectly as the whole world can see here. The name Schnappi comes from the German name for snap and was the title of a childrens song a few years ago.[youtube]
https://www.youtube.com/watch?v=TqBLCQbslp0[/youtube]
Donald and Schnappi united
and here Schnappi when he was still single
Happy New Year to you and your family
Greetings from Karl
Re: AD 14 KIELGE
Posted: Sat Dec 29, 2018 7:13 am
by cape man
Too funny! Happy new year Karl!
Re: AD 14 KIELGE
Posted: Sat Dec 29, 2018 8:21 am
by Jeff
Great stuff Karl!!!!!! Happy New Year!! Jeff
Re: AD 14 KIELGE
Posted: Sat Dec 29, 2018 11:33 am
by ks8
Re: AD 14 KIELGE
Posted: Sat Dec 29, 2018 3:03 pm
by Fuzz
Good one Karl. I hope you and yours have a great New Year.
Re: AD 14 KIELGE
Posted: Sat Apr 27, 2019 8:04 am
by gonandkarl
Hi,
Things are moving after my Winter hibernation I cut the lawn for the first time this year and now I will start sailing with Wilde Qualle in about 2 weeks for the first time with its junk rig. Only a few things I have to do before I sail. I have to mount an electric plug for the outboard motor near the transom and the cable connection from it to the battery box which I want to place on the cabin floor starboard side next to the centre board trunk. And the second to do thing is to rubber seal the 2 cockpit hatches on the sole better than what they are sealed now. I noticed that water was in the sole after last years outings and over Winter even that the boat was under the car port the same amount of water collected I think because of condensation. I will also practise raising the mast and setting the sail a few times in my driveway before I go to the lakes slip not to hinder others for any length of time launching their boats. I will definitely sail on a weekday like a Monday morning when I do not expect anyone at the slip. Austrians are weekend sailors and only a few of them are retired who can choose when to sail. I am still thinking of getting such a fisher man s rubber pants up to my chest for pushing the boat off the trailer into the water and guiding it to the board walk, because the water temperature is right now rather low 8 degrees Celsius ( 46 Fahrenheit ) and I do not need to be wet on top of feeling the cold through the pants. I think I have seen Fuzz wearing something like that while he was on his boat in Alaska which is another temperature category altogether. I will definitely take pictures of the first sail and maybe I manage to produce some video close to the water surface with my new under water camera I got in Winter. I will see how I can handle the rudder, the sail, lowering the centreboard, the mobile and the watertight camera all at the same time with my 2 clumsy arms and hands. Fixing the camera on the pushpit rail permanently might work.
Have a nice weekend and
Greetings from Karl
Re: AD 14 KIELGE
Posted: Sat Apr 27, 2019 8:10 am
by terrulian
Looking forward to the videos!
Re: AD 14 KIELGE
Posted: Sat Apr 27, 2019 9:08 am
by Jeff
Karl, great to hear from you!! Can’t wait for videos and photos!!!! Jeff
Re: AD 14 KIELGE
Posted: Sat Apr 27, 2019 10:10 am
by Bogieman
Hi Karl! You must be so excited to finally realize the fruits of all your labor. Can't wait to see the pics/ videos.
I hope you will post some detailed pics of your Chinese lug rig as I'm going to use one too.
Bogie
Re: AD 14 KIELGE
Posted: Sat Apr 27, 2019 11:26 am
by Fuzz
Karl go to a sporting goods store and ask for chest waders. That is what they are called here. They should have built in shoes and be able to keep you dry up to your chest. I too am looking forward to the pictures of your boat out sailing.
Re: AD 14 KIELGE
Posted: Sun Apr 28, 2019 3:48 am
by glossieblack
Enjoy what will be an exciting and challenging day Karl.
Set side the clamours for pics and videos from us boat porn addicts in the peanut gallery.
Supply pics, videos, whatever, in the days and months ahead.
Just concentrate on getting her launched while enjoying every unfolding moment!
Go Karl!
Re: AD 14 KIELGE
Posted: Sun Apr 28, 2019 5:57 am
by OrangeQuest
Very excited for you and your launch approaching!!
We wear chest waders here in Texas too so fishermen can wade fish year round. They make very thin breathable ones for summer and thick neoprene ones for the winter. When buying them make sure you try them one to get the right fit and you wear them over your clothes. Rolling them off your body down to your knees ( then sit in a chair) makes it easy to take off. You just step out of them then and if you leave them like that easy to get back on. I always get a size bigger than I wear in the boot to make it easier to get in and out of when handling our little kayaks.
Good luck and enjoy your sailing adventures!!
Re: AD 14 KIELGE
Posted: Sun Apr 28, 2019 6:00 am
by cape man
I too have been waiting for this event and just wish I were there to be your photographer/videographer as you were for Hermine's launch. I'm with Michael. Concentrate on the launch and enjoying the experience more than the pictures. A simple image of her going in the water will make me smile.
So happy for you.
Re: AD 14 KIELGE
Posted: Sun Apr 28, 2019 11:08 am
by gonandkarl
Thank you guys and Orangequest you gave me the right info for the chest wader. I am looking for all the chest wader infos in the net and then I will buy it at a local fisherman shop because I definitely have to try it on first being unfortunately nearly square ( breadth and height approaching the recently mentioned rum barrel )
Re: AD 14 KIELGE
Posted: Sun Apr 28, 2019 11:11 am
by Bogieman
gonandkarl wrote: ↑Sun Apr 28, 2019 11:08 am
Thank you guys and Orangequest you gave me the right info for the chest wader. I am looking for all the chest wader infos in the net and then I will buy it at a local fisherman shop because I definitely have to try it on first being unfortunately nearly square ( breadth and height approaching the recently mentioned rum barrel )
Re: AD 14 KIELGE
Posted: Sun Apr 28, 2019 11:49 am
by terrulian
Okay, since we're on the subject of books, here's a short supplementary reading list I give my students. They also have an assigned text, and these are just suggestions.
GENERAL SEAMANSHIP
Chapman Piloting and Seamanship, Charles Husick. The most widely used seamanship text.
The Annapolis Book of Seamanship, John Rousmaniere. Better than Chapman for sail.
Oxford Companion To Ships and the Sea, Dear & Kemp. Sailing terms. Hard to put down.
International Regulations for Preventing Collisions at Sea (Colregs). The rules of the road. (Searchable download at
http://www.navcen.uscg.gov/pdf/navRules/navrules.pdf)
KNOTS AND RIGGING
Ashley Book of Knots, Clifford Ashley. The bible of knots. A truly wonderful book.
The Rigger’s Locker and The Rigger’s Apprentice, Brion Toss. A knowledgeable and clear writer on the practical yet recondite science of what strings do on boats.
NAVIGATION
The American Practical Navigator, Nathanial Bowditch. You can download at
http://msi.nga.mil/NGAPortal/MSI.portal ... bCode=0002
Emergency Navigation, David Burch. The lost art of navigating without instruments.
Chart #1. The secret chart decoder—a must for your library. You should have a hard copy but you can download it at
https://www.nauticalcharts.noaa.gov/pub ... art-1.html
NON-FICTION YARNS
Anything by Bernard Moitessier, Tristan Jones, or Frank Mulville.
Maiden Voyage, Tania Aebi. Tania Aebi was a teenaged girl who sailed around the world singlehanded in a small boat before GPS and sat phones, long before the wonderful Jessica Watson. She's not a great writer but for her guts alone this book deserves a read.
This Is Basic Sailboat Cruising, or anything else by J. D. Sleightholme. A smart sailor and the funniest writer in boating. A master of puzzling British nautical slang.
Sailing Alone Around the World, Joshua Slocum. The first solo circumnavigator, an icon for shorthanded sailors, and a fine writer. Later, he disappeared at sea.
HISTORY
Admiral of the Ocean Sea, Samuel Eliot Morison. Still the best book on Columbus, the most impressive of all the great voyagers. He ventured into the murky unknown.
Over The Edge of the World, Laurence Bergreen. As loony as Columbus, Magellan got the credit for the first circumnavigation. But neither he nor most of his ships or crew actually made it around. Francis Drake was the first to accomplish this and survive.
Seamanship In The Age of Sail, John Harland. A detailed, authoritative, and thoroughly researched look at the theory and practice of sailing a square-rigged ship. Lots of drawings to show you just how it was, and still is, done.
Re: AD 14 KIELGE
Posted: Sun Apr 28, 2019 1:34 pm
by gonandkarl
Hi,
Thanks Tony this is a wonderful list I will leave it lying around so my family members know what birthday fathers day or Christmas presents they can give to me. Lying around lists have worked before. I am looking forward to good reads about my retirement hobby.
Greetings from Karl
Re: AD 14 KIELGE
Posted: Sun Apr 28, 2019 3:32 pm
by Fuzz
I recently picked up Beebe's Voyages under Power and another book called Great Voyages in Small Boats. The second book had three books in one. The voyages of Guzzwell,Dumas, and Slocum. The book by Guzzwell was particularly interesting as he built his own boat and at only 20 foot it took him around the world.
Re: AD 14 KIELGE
Posted: Thu May 02, 2019 12:26 am
by das boot
I get mine in and out of the water many times and can do it with out getting my feet wet at al I back in as close to the dock as I can before backing in I run my bow line up to my truck cab once the boat is floating free on the trailer i just use the bow line to pull it back words from the trailer and up to the dock. on getting it out of the water i just use the reverse some times i get one foot wet trying to get from the toung of the trailer to the pick up bumper but at that point I am driving in the pickup cab so I have heat. I should have it worked out after 12 years with this boat.
Re: AD 14 KIELGE
Posted: Thu May 02, 2019 4:14 am
by gonandkarl
Hi George,
Thanks for the good description how you get the boat into the water especially the tip with attaching a line to the roof rack of the car. I want to do it exactly like you my only problem is the slip where I will let it into the water is very shallow and I cannot push the trailer far enough into the water before it floats off the trailer. That is the reason why I want to get a chest wader suit. I even got for the launch a car tow bar extension for my cars front tow ball to push the trailer tong 2 m further like the guy did in Project Just Right which I need because launching al by myself leaves me with too little strength to push boat and trailer on the sandy beach further into the water. I am sure I will find on my planned sailing outings in the future slips steep enough where it floats off quick and easy. But my first sail will be at the shallow slip where we had the splash and first trial without a sail last summer which you can see here.
I hope to sail soon with my granddaughter like you did on the picture you sent me some time ago:
I am sure the launch all by myself will work out fine. I am just a bit excited when doing something for the first time and should I reach 12 years of sailing like you I will laugh at it when thinking of May 2019.
Greetings from Karl
Re: AD 14 KIELGE
Posted: Thu May 02, 2019 5:32 pm
by das boot
it took me a number of times to work it out. You could put a longer extention on your trailer hook up with a wheel on it to support the tung i have seen that used to keep your car out of the water. I have 16 inch tires on my trailer so I need to get it in fairkey deep to float it off I am pulling it with a Ford Ranger 4x4 so I can get in quite deep before the back bumper gets into the water.
Re: AD 14 KIELGE
Posted: Thu Jun 13, 2019 1:08 pm
by gonandkarl
Hi,
My first sail is coming closer. Today I practised raising and lowering the shear legs which I use for raising the mast. I can do it in a few minutes and it should not take too long to raise the mast afterwards. This is now the last version of my shear legs. I made them from aluminium poles and a short U profile on top. If you want to watch the video put the sound high otherwise you cannot hear what I said. Additionally I would advise to skip the first 30 seconds and the last 1 1/2 minute because at the start I walked with the started camera in position and forgot to stop the camera at the end until I sat in front of the PC. Raising and lowering the mast I will practise tomorrow and also make a video of it.
[youtube]
https://youtu.be/R4NHxM8Mv9s[/youtube]
Greetings from Karl
Re: AD 14 KIELGE
Posted: Thu Jun 13, 2019 1:23 pm
by Jeff
Karl, good to hear from you!! Jeff
Re: AD 14 KIELGE
Posted: Thu Jun 13, 2019 2:09 pm
by terrulian
Well done, Karl. Looks good.
Re: AD 14 KIELGE
Posted: Thu Jun 13, 2019 3:54 pm
by cape man
Go Karl!
Re: AD 14 KIELGE
Posted: Thu Jun 13, 2019 5:29 pm
by Bogieman
Very nice, Karl!
Re: AD 14 KIELGE
Posted: Sat Jun 15, 2019 2:18 pm
by gonandkarl
Hi Bogie,
Got your message and question, I just did not know how to answer there and that is why I will answer you here. My mast is a standard aluminium sailing mast with 60 x 55 mm profile. It also has a slot where one would insert a standard sail. Because I do not need this slot for my junk sail I am planning to put an electric cable into it for mast head electricity. ( A future project ) Here is a picture I made today after I raised the mast. The actual raising was finished in one minute but all the newbie problems made my video useless. It took me 22 minutes to change the lifting point from a normal hitch to use Tony s suggestion to use a Prusnik knot. Then the mast was up in one minute and dropped into the hole at the partner down to the foot. I wanted to put the mast down immediately afterwards again and did not manage it for the next 10 minutes because where I attached the Prusnik knot was too high up and and so I could not lift it out. Then I gave up because stuffing around half an hour for raising a mast made me swearing like a fish monger and I decided my son will have to lift it out by hand tomorrow. The video of my Sony camera switched off after 28 minutes and it is not worth posting. When I get the whole procedure right raising and dropping the mast I will make a video again which should be no longer than 5 minutes.
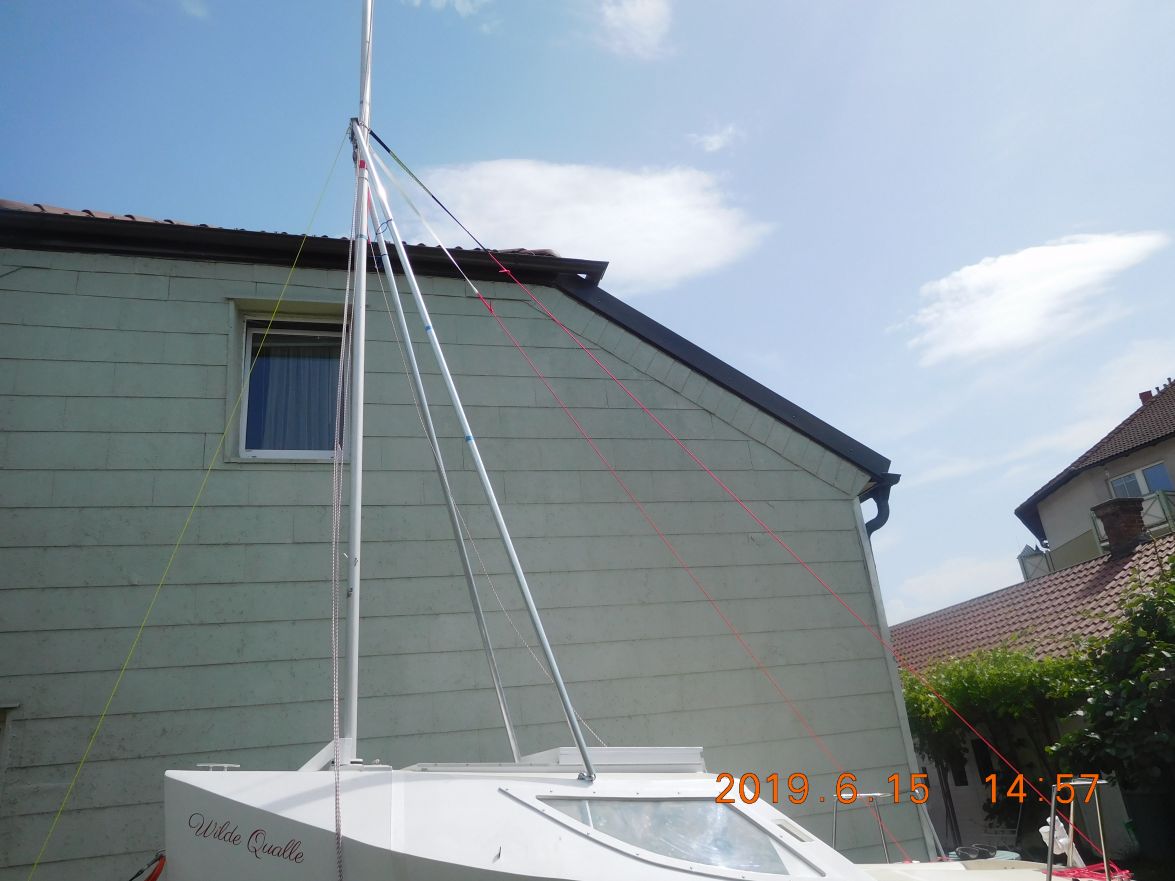
Greetings from Karl
Re: AD 14 KIELGE
Posted: Sat Jun 15, 2019 9:20 pm
by terrulian
Great work, Karl. We'll look forward to the video.
Re: AD 14 KIELGE
Posted: Sun Jun 16, 2019 5:18 am
by glossieblack
Greetings Karl!
The great thing about being a CLOOF is that we've learnt to ignore the urgings of others.
It's not even summer yet. Take your time. Launch only when conditions suit, and its suits you.
All the best,
Michael.
Re: AD 14 KIELGE
Posted: Sun Jun 16, 2019 6:26 am
by gonandkarl
Hi,
Thanks Jeff, Craig, Tony, Bogieman and Michael for the encouragement it boosts me a lot because the families encouragement is not so hot. My son said this morning I first go for a jog then I can help you with the mast and for my wife preparing the Sunday lunch is more important than watching the first successful stepping and unstepping of the mast. I managed everything by myself and take the rest of the Sunday off.
Here is my short video which lets me hope to sail in a few days without taking half a day for the rigging at the lake.
[youtube]
https://youtu.be/NuuxbUTSUfo[/youtube]
Greetings from Karl
Re: AD 14 KIELGE
Posted: Sun Jun 16, 2019 6:42 am
by glossieblack
Re: AD 14 KIELGE
Posted: Sun Jun 16, 2019 6:56 am
by terrulian
Great, Karl, getting exciting to be so near sailing after all that work.
We've just sold our Catalina 22 so there'll be no more of this for me. I'm envious of how easy your rig is to put up. Is it a stayless rig? I don't see any running rigging. Ours had six shrouds and a forestay and backstay, plus it weighed a lot more so it was a bit more difficult to get up.
Secondly, how does that step work? Somehow when you get it vertical, you're able to lower it and I'm assuming this is enough to secure it. Won't it leak at the partners?
Re: AD 14 KIELGE
Posted: Sun Jun 16, 2019 9:06 am
by gonandkarl
Hi,
The mast is free standing and only supported by mast partner and 1,60 meters below by the mast foot.
A line from the side of the foot is attached to the end of the mast so it will not wander when lying ready for stepping.

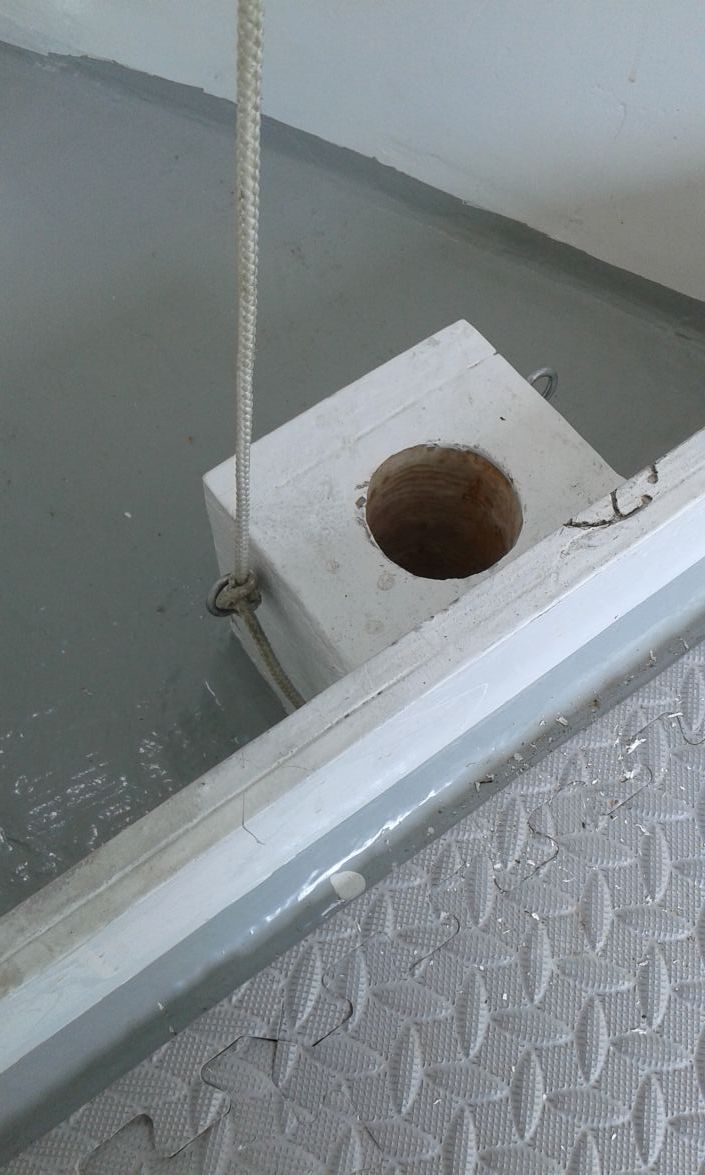
Tony you are right it will rain down at the partner so I will make a mast coat as per plan of Hasler s Practical Junk Rig
Running rigging being Halyard, mast lift, topping lifts and burgee line I have attached now and though I said I call it quits for Sunday I will raise the mast remove the shear legs and then I am ready for playing with the sail for a day or two and then really go sailing.
I am so sorry to hear you and Mr. Shrode sold your Catalina, so only rowing the V10 and no more sailing or a bigger sailboat in the future ?
Greetings from Karl
Re: AD 14 KIELGE
Posted: Sun Jun 16, 2019 11:34 am
by terrulian
Yes, Terry and his wife moved to the mountains. They found what can only be called a country estate with 14 acres, a large house in very good shape, a guest house, pool, hot tubs, a huge shop, and many other amenities for the price they sold their modest bungalow in the SF Bay area for. So the sailing with Mr. Shrode chapter of my life has come to an end. It is bittersweet, but we are still best of friends and I am very happy to see him and Caroline so well situated in a place their entire extended family can use as a resort. As for me, I've done enough ocean sailing for this life. There are people who cruise until they drop, but I also have musician friends who won't give up playing until they can't get up to the stage. I'm happy to move to whatever the next stage will be.
Meanwhile, I still teach sailing, and the club I work for allows me the use of their boats when I want to take friends out. They are not really the kind of boat I'd have myself, as they are new and big and expensive and I'm always attracted to the beaters that need a bit of love. But they are fine boats and I'm grateful to be able to use them; so I can still sail as much as I care to.
As for
Whisper, the Catalina 22, we had not even finished detailing her and had not put up any ads, when word of mouth brought three interested buyers. The very first one, a lad of 19, showed up with the entire asking price in cash. We trailered the boat up to Tomales Bay and showed him how to step the mast and set up the rig. He didn't exhibit quite as much interest in the details of this process as I would have preferred--for his own sake--but is very excited. I don't know if I've told the story here of launching her in 30 knots and getting ourselves down to the mooring, boarding an 8-foot dinghy with three guys in 2 feet of chop, and then frantically rowing to shore before we broached and capsized. It was actually pretty tense all day but everyone was in good spirits and good seamanship (or so I would like to think
) prevailed...along with the good graces of King Neptune. We were able to secure the boat at the mooring and get ourselves to shore without incident or damage.
And yes, I do have several plans for more odd adventures with the V10 and am very happy to have made it. Now I am down to just that one fine little yacht.
Re: AD 14 KIELGE
Posted: Thu Jul 11, 2019 6:28 am
by gonandkarl
Hi,
Actually it is nearly six years since starting my Adelie 14 project but yesterday I made my first sail on this lovely boat. It took me much longer to dress and raise the mast than planned. The weather forecast for Tuesday was not all that good so I decided to sail on Wednesday where they predicted better weather. This was so much better that I nearly died in the heat preparing the boat at the ramp. When I finally pushed the trailer into the lake I used my newest invention to move the boat of the trailer. I tried to wind with the trailer winch the keel shoe with the help of a strong manchette of strapping material towards the rear traverse off the trailer where I mounted 2 pulleys. It worked for approximately 2 feet and then the rope attachment of one of the pulleys ripped. I still could not push it by hand off the trailer until I succeded winding a specially long jockey wheel to the highest position.
After that it was just beautiful sailing across the lake in very light wind with one scare after 5 minutes sailing I noticed that I put my car key on the opposite bench and it did not land in the water even that the benches slope towards the sides. I just took a few pictures with my smart phone and will take a video at a later stage. I was too tired from getting the boat into the water and just wanted to relax and enjoy the beautiful scenery. My fear that the 2 top panels of my junk rig are too floppy was unfounded because when the wind got into them they were perfect. The wind was very light so I did not even have to drop the center board. I was just pure bliss.

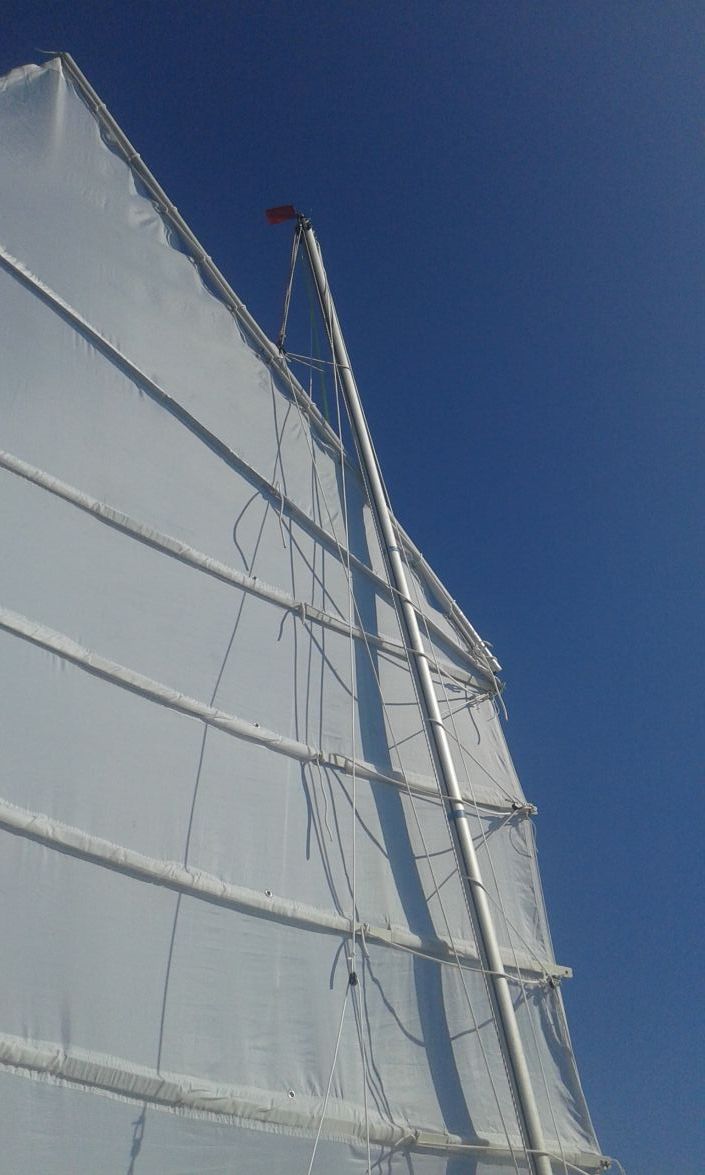
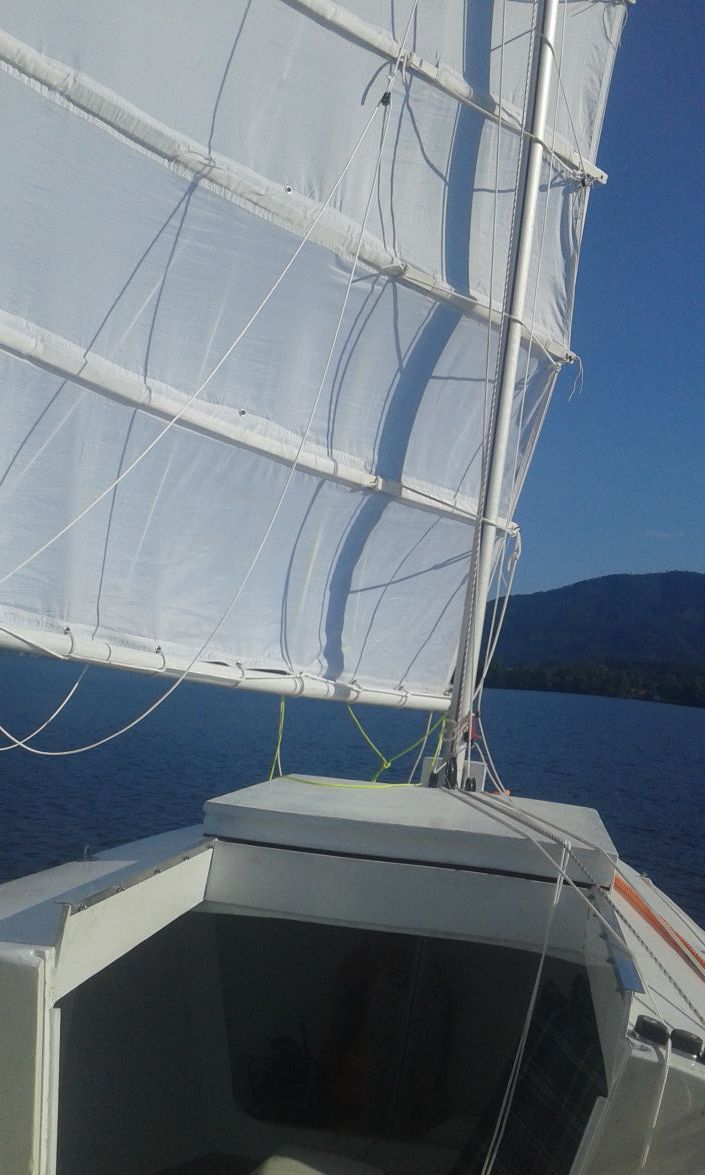
Greetings from Karl
Re: AD 14 KIELGE
Posted: Thu Jul 11, 2019 6:34 am
by Jaysen
Congratulations!
Fair winds and calm seas.
Re: AD 14 KIELGE
Posted: Thu Jul 11, 2019 6:47 am
by cape man
Pure bliss...
Perfect! Congratulations!
Re: AD 14 KIELGE
Posted: Thu Jul 11, 2019 7:04 am
by OrangeQuest
Way to go!! Congratulations!
Re: AD 14 KIELGE
Posted: Thu Jul 11, 2019 7:52 am
by glossieblack
Karl, what wonderful news! Congratulations !
I have so much enjoyed following your build, and your wisdom and wit. Please keep posting as you use your flotilla.
I'm now celebrating your achievement with a glass of a favourite Austrian Riesling: Domane Wachau Gruner Veltliner Federspiel. Do you know it?
All the best Karl!
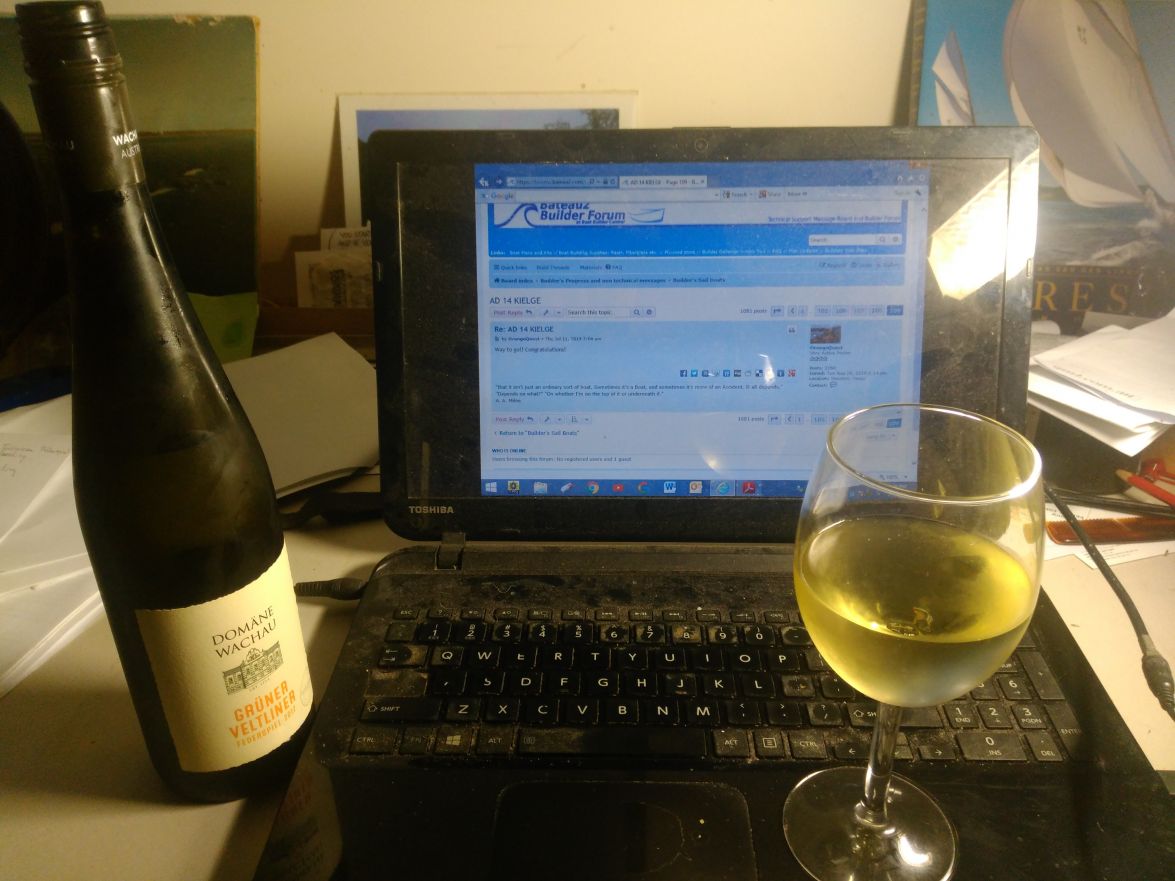
Re: AD 14 KIELGE
Posted: Thu Jul 11, 2019 8:17 am
by Bogieman
Congratulations, Karl! So very happy for you. What a proud moment of accomplishment. The boat and sail look great. Looking forward to many more pics / videos as you enjoy her this summer.
I really like how you made your hatch cover flat and the use of the angle irons for the rabbit joints is genius!
. I will do the same thing with Tipsy's hatch cover.
P.S. Now you need tp buy a floating key ring
Bogie
Re: AD 14 KIELGE
Posted: Thu Jul 11, 2019 9:18 am
by terrulian
Excellent news, Karl! A great outcome in every way.
I too will be looking forward to a lot more photos and videos and records of your adventures.
For some reason, the one mistake and probably the only dumb one I've never made on a boat is dropping my keys in the water. Maybe I shouldn't have said that.
Hoping to hear more soon!
Re: AD 14 KIELGE
Posted: Thu Jul 11, 2019 9:24 am
by Jaysen
Things I've lost since january (all of it "secured" in foul weather pockets or snap pockets on my pant)
* Cheap camera
* Not so cheap camera
* Apartment keys
* Wallet
* sunglasses x3
* dry gloves x2
* pliers
* small winch handle
* snatch block
I'm no longer allowed to carry "anything important" unless it is tied to my arm. If you can make stuff float i really really recommend it. That and make sure all the zippers and snaps are working and closed.
And for the record, I always upgrade the parts I lose that I don't own. Las Brisas has some nice new bling.
Re: AD 14 KIELGE
Posted: Thu Jul 11, 2019 10:17 am
by Bogieman
Jaysen wrote: ↑Thu Jul 11, 2019 9:24 am
Things I've lost since january (all of it "secured" in foul weather pockets or snap pockets on my pant)
* Cheap camera
* Not so cheap camera
* Apartment keys
* Wallet
* sunglasses x3
* dry gloves x2
* pliers
* small winch handle
* snatch block
I'm no longer allowed to carry "anything important" unless it is tied to my arm. If you can make stuff float i really really recommend it. That and make sure all the zippers and snaps are working and closed.
And for the record, I always upgrade the parts I lose that I don't own. Las Brisas has some nice new bling.
Wow, Jaysen you are a sailing debri field!
Re: AD 14 KIELGE
Posted: Thu Jul 11, 2019 10:19 am
by Jaysen
I am the poster child for "we can't have nice things".
Re: AD 14 KIELGE
Posted: Thu Jul 11, 2019 11:58 am
by Jeff
Congratulations Karl!!! Great news and she looks beautiful with her sails up!!! Congratulations again, Jeff
Re: AD 14 KIELGE
Posted: Thu Jul 11, 2019 4:17 pm
by gonandkarl
Hi,
Thank you fellow boatbuilders for the congratulations. I now know what you feel to move ones body on something you made yourself. In 45 years of being a computer guy producing software ( you would call it apps today ) like on a conveyor belt I missed this feeling because the pride was missing having produced something not tangible and death boomed in for sure less than 10 years. That is why I believe boats have a soul that lives for ever that they survive their builders most of the times. While I worked on the ramp some equally old chap came along and told me he is restoring a 1928 wooden boat his grandfather handed down and we had a nice chat. The helpfulness of people just striding by was also fantastic and one guy made my day when he lifted out my mast without me having to mount my shear legs first. He then gave me his number and said please call me anytime you are at my lake ( he lives 200 m from the ramp ) and I raise or lower the mast for you anytime if you take me occasionally along for a sail. His wife standing next to him turned out like my wife no sailing except on cruise ships.
Yes Michael I know the Grüner Veltliner Federspiel very well, because it is also a favourite wine of us. It was 35 years ago when I got a brand new company car a big Chrysler 4 litre automatic ideal for my then small 3 kids to cart around. I suggested to make a trip to the Wachau the Austrian wine region on the weekend and we ended up on a steep gravel road guided by a small sign to a winyard and I raced up the hill hoping that somewhere the road is wide enough to be able to turn around. At the end of the road was just one small building the wine farm and after tasting quite some Federspiel and the boot full of cases of it we drove home scared to death because the last thing the farmer said to me I should be careful going down the hill because I was the first guy visiting him without a 4 wheel drive and when I want to order wine the next time he will rather bring it down with his Toyota 4x4. Ever since that Sunday trip I love the Federspiel Riesling.
I am glad you guys made suggestions about floating bags for valuables, because the gods of the seas most probably let me not loose my car keys for being a virgin sailor. Only my smart phone I had with in a water tight bag if it would float I am not so sure.
Greetings from Karl
Re: AD 14 KIELGE
Posted: Thu Jul 11, 2019 5:11 pm
by Bogieman
Re: AD 14 KIELGE
Posted: Thu Jul 11, 2019 5:24 pm
by das boot
I am glad it is working out for you. Now you know why I put those sides om the cockpit area of my boat that is where I keep all my junk while out on the boat. So far I have not lost any thing over the side. I plan on getting my boat out for the first time this year in the next few days.
Re: AD 14 KIELGE
Posted: Thu Jul 11, 2019 8:42 pm
by cape man
Pattie says congratulations as well!
Re: AD 14 KIELGE
Posted: Fri Jul 12, 2019 2:21 am
by Fuzz
This is great news Karl! I am sure you had the huge smile of yours on your face all day. I am very happy for you that you got the boat done and can now use it.
Re: AD 14 KIELGE
Posted: Fri Jul 12, 2019 4:54 am
by gonandkarl
Hi,
Thanks to David Patty and Greig I love my sailboat and as I am still resting I am studying the How To's article of building a carbon fibre mast which I could lift by hand into the mast hole. I have made my 2 spars boom and yard according to this How To and they are as strong as steel bars. I am still in doubt if I should make it myself or buy a 6,20 metre long ready made carbon pipe for 600 Euros.
Greetings from Karl
Re: AD 14 KIELGE
Posted: Fri Jul 12, 2019 5:47 am
by Jaysen
I do not doubt the quality of your work but consider purchasing the manufactured mast.
1. The mast withstands enormous forces.
2. Commercial process will ensure proper ratios making the lightest product with the strongest outcome
I know €600 is significant cost but the risk associated with a self built mast might be too great. If you do build your own I’ll be cheering on the sidelines. It’s the kind of project I want to try.
Re: AD 14 KIELGE
Posted: Fri Jul 12, 2019 7:37 am
by topwater
Congratulations Karl cant wait to see the video
Re: AD 14 KIELGE
Posted: Fri Jul 12, 2019 8:19 am
by gonandkarl
Hi,
Thank you John, I found another picture taken when I arrived at the lake for the first sail.
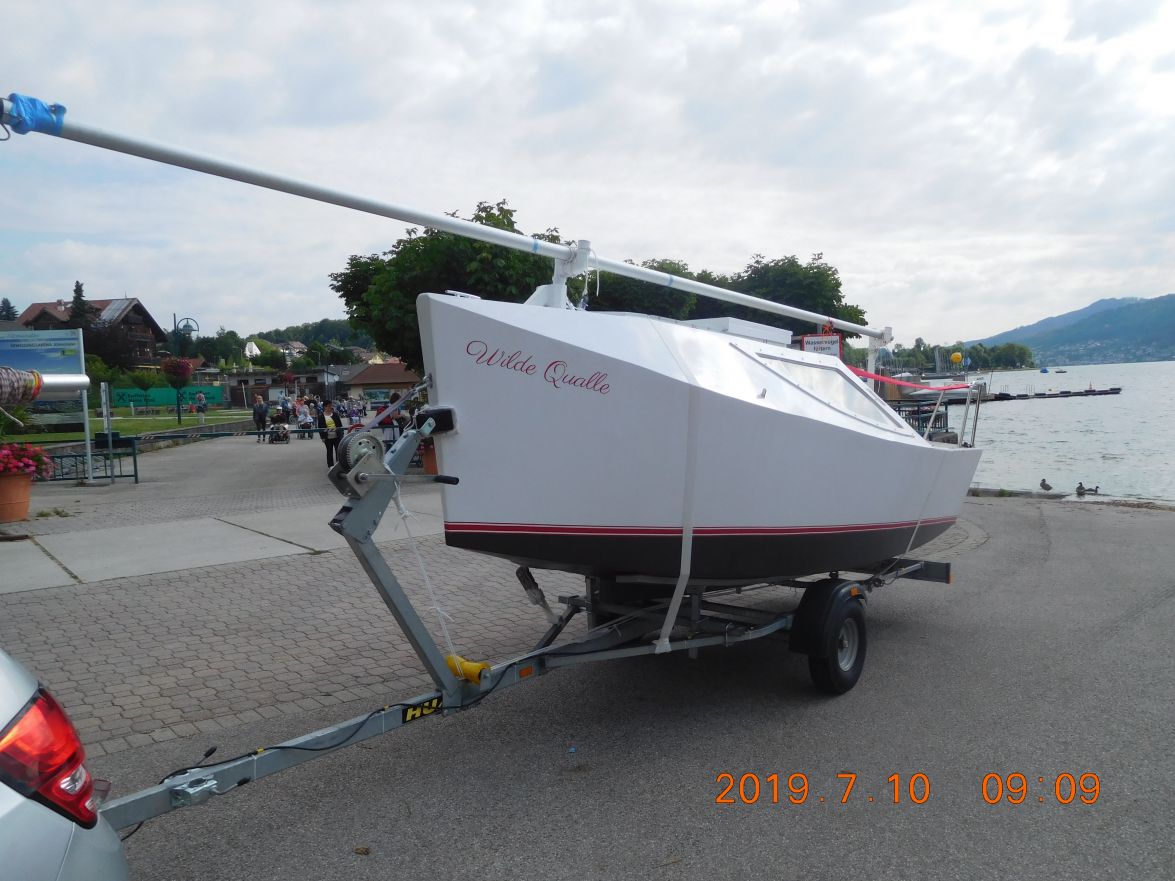
Greetings from Karl
Re: AD 14 KIELGE
Posted: Fri Jul 12, 2019 12:08 pm
by Jeff
Beautiful Karl!!! Congratulations!!! Jeff
Re: AD 14 KIELGE
Posted: Sat Jul 13, 2019 5:27 pm
by das boot
It looks real good Karl I finley got my boat out for the first time this year I covered 23.3 miles on the lake in 5.3 hours with the avg speed of 4.1 MPH not bad for the first trip of the year. The GPS is handy for tracking speed. On launching it took me only a few minits i winder if there is a different launch ram in your area that would work better on the ramps here i can get it in and out of the water and not even get a wet foot.If I do it properley. On the carbon mast I have the same problem raising it and lowering it if I have someone with me it is no problem but alone it is hard I need to get my mast bottom centered over the hole in the deck so it must be streight up and that is hard to do. If the deck were longer a person could get it started and then walk it up i have thought of doing something like you have i have a stub pipe that sticks out of the deck by around 3 inches i might be able to cut one side of it off and have something like you have. How dose that work?
Re: AD 14 KIELGE
Posted: Sun Jul 14, 2019 4:22 am
by gonandkarl
Hi George,
Did you sail all this distance or use the motor a lot ?
Yes I lay the mast end exactly at the hole against my wooden contraption and tie a line from it to the mast shoe at the bottom of the boat in front of frame A. This makes sure that the mast end cannot get away from the hole. Here are the two pictures of mast partner and shoe again.
I will try in my driveway to walk my aluminium mast up the way you explained it with 2 long garden tool extension rods. When I get it right with them it would be much quicker than mounting the shear legs in a fixed position. It will definitely work easy with a carbon mast which I am pretty sure I will get.
Greetings from Karl
Re: AD 14 KIELGE
Posted: Sun Jul 14, 2019 12:47 pm
by das boot
I used the motor for part of it there was a good wind blowing up the lake and part way back to the dock the waves came up so i was fighting 2 to 3 foot waves this boat handles those waves well you get some spray from it but it is fun. This is the first time out in 2 years last year I did not get it out at all. This year I am going out at least once a week. The lake I was on is tidel so when the tide is coming in and the wind is blowing it can get quite rough. You can see the large power boats getting pounded big time and I just putt along . I will look into that mast idea you have. My father in law built a 27 foot sail boat and he had a somilar idea to yours for rasing the mast. But where you are using poles he had to cables actuley the side stays and he would hook them to the sides of the boat and he would use his for stay and a come along to pull it vertical the side stays stopped to from falling off to the sides he also had a rear stay that would stop it going to far forward it worked quite well he sailed that boat for over 20 years and never had any problems with that system
Re: AD 14 KIELGE
Posted: Mon Jul 15, 2019 8:11 am
by Bogieman
das boot wrote: ↑Sun Jul 14, 2019 12:47 pm
I used the motor for part of it there was a good wind blowing up the lake and part way back to the dock the waves came up so i was fighting 2 to 3 foot waves this boat handles those waves well you get some spray from it but it is fun. This is the first time out in 2 years last year I did not get it out at all. This year I am going out at least once a week. The lake I was on is tidel so when the tide is coming in and the wind is blowing it can get quite rough. You can see the large power boats getting pounded big time and I just putt along . I will look into that mast idea you have. My father in law built a 27 foot sail boat and he had a somilar idea to yours for rasing the mast. But where you are using poles he had to cables actuley the side stays and he would hook them to the sides of the boat and he would use his for stay and a come along to pull it vertical the side stays stopped to from falling off to the sides he also had a rear stay that would stop it going to far forward it worked quite well he sailed that boat for over 20 years and never had any problems with that system
Good to hear that you're still enjoying your Adelie after all these years. It's also good to hear the reports on how she sails.
Re: AD 14 KIELGE
Posted: Fri Aug 02, 2019 8:30 am
by gonandkarl
Hi,
Thanks George and Bogie for the information. As there is nothing as boring as a finished boat I am busy to get my new 3,5 KG Carbon mast together.
It cost quite a bit but I will be able to raise it by myself with this small weight.
Here the first picture of it where I put the 4 pieces together for a test:
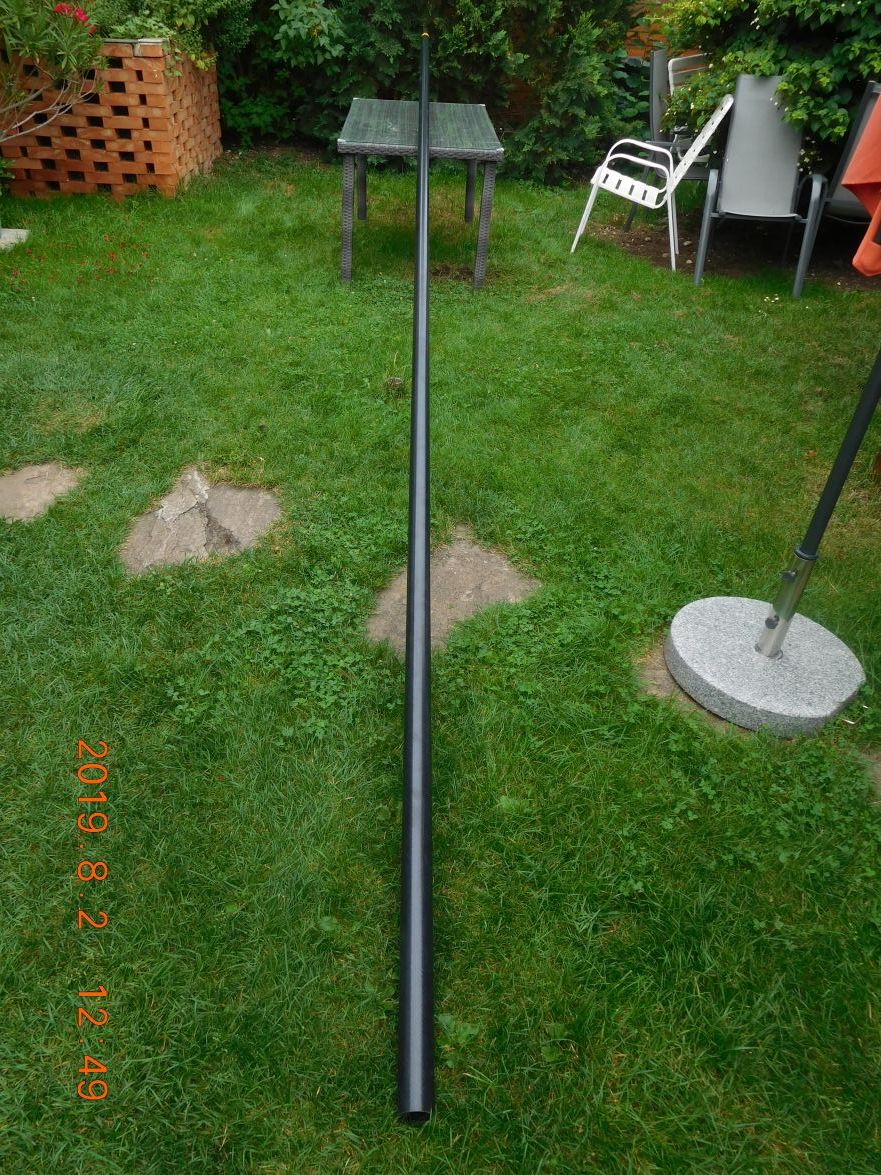
I have sanded the inside of the masts and the connection pieces slightly with 120 grid paper and now they are ready to be glued into the mast.
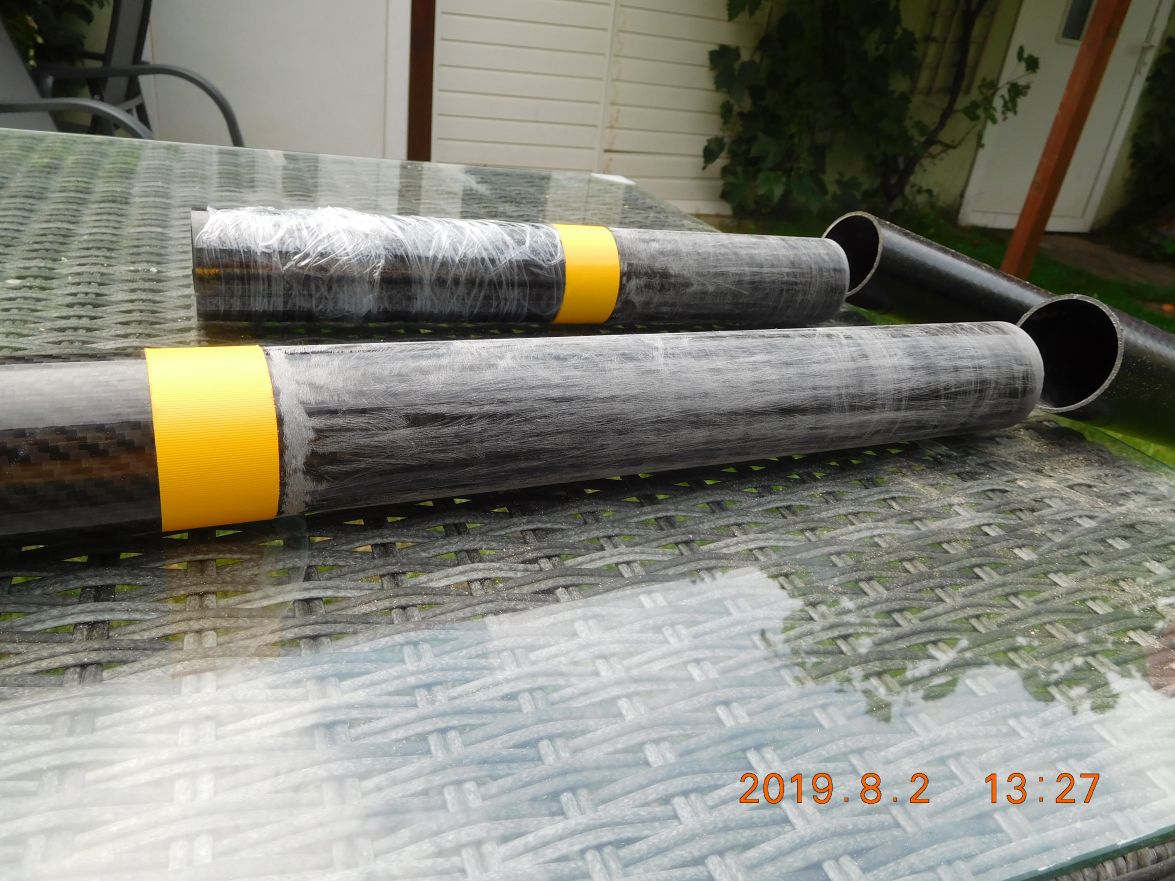
Unfortunately I have to wait for the ordered epoxy to do the gluing until August 10th because my supplier is on holiday till then.
Greetings from Karl
Re: AD 14 KIELGE
Posted: Fri Aug 02, 2019 10:20 am
by Bogieman
That's great Karl!
Re: AD 14 KIELGE
Posted: Fri Aug 02, 2019 11:30 am
by Jeff
Nice Karl!! Really good to hear from you!! Jeff
Re: AD 14 KIELGE
Posted: Fri Aug 02, 2019 10:30 pm
by glossieblack
Hi Karl, I'm really interested in your carbon fibre mast build.
I'm wondering how you decided what size carbon fibre tube to use ?
Re: AD 14 KIELGE
Posted: Sat Aug 03, 2019 3:16 am
by gonandkarl
Hi,
The size of the carbon tube was determined by my aluminium mast which is a standard mast of 55 by 60 mm. I wanted something as strong as that and I did not want to have a bigger hole at the mast partner and foot and then there was the consideration to have a mast like the windsurfers who have a maximum length mast of 4,70 meters and can stick 2 halves of it together which appealed to me as well. Windsurfers masts bend quite a bit like pole vaulters in athletics and therefore I looked for stiff carbon pipes which I found in France at
www.carbonrohr.net and only 4 mm in diameter wider than what I really wanted. That is how I came to 55 ( outside diameter ) x 51 ( inside diameter ) x 3000 mm pipes. For the first sail I will try not to glue the top half of the mast just to stick it onto the 30 cm insert. My friends at the JRA ( Junk Rig Association ) advised me to try it and if I am not happy with the take apart mast I can always glue it together and strengthen it with some left over carbon sleeves from my boom and yard build. One chap also gave me a formula with which I can calculate the breaking point of the mast with parameters like sail area, 15 knot wind speed, sail centre and bending strength of my poles. What he does not know is that no Austrian lake will see me sailing in 15 knot winds. But it is good to know where my mast will break. I will strengthen the mast with carbon sleeves at the partner and at the mast foot right from the start and I will also use it at the top of the mast where the inserted piece of 50 mm diameter sticks out 20 cm to give me the correct length.
Here is a picture of my dry run of the sleeve around the pole.
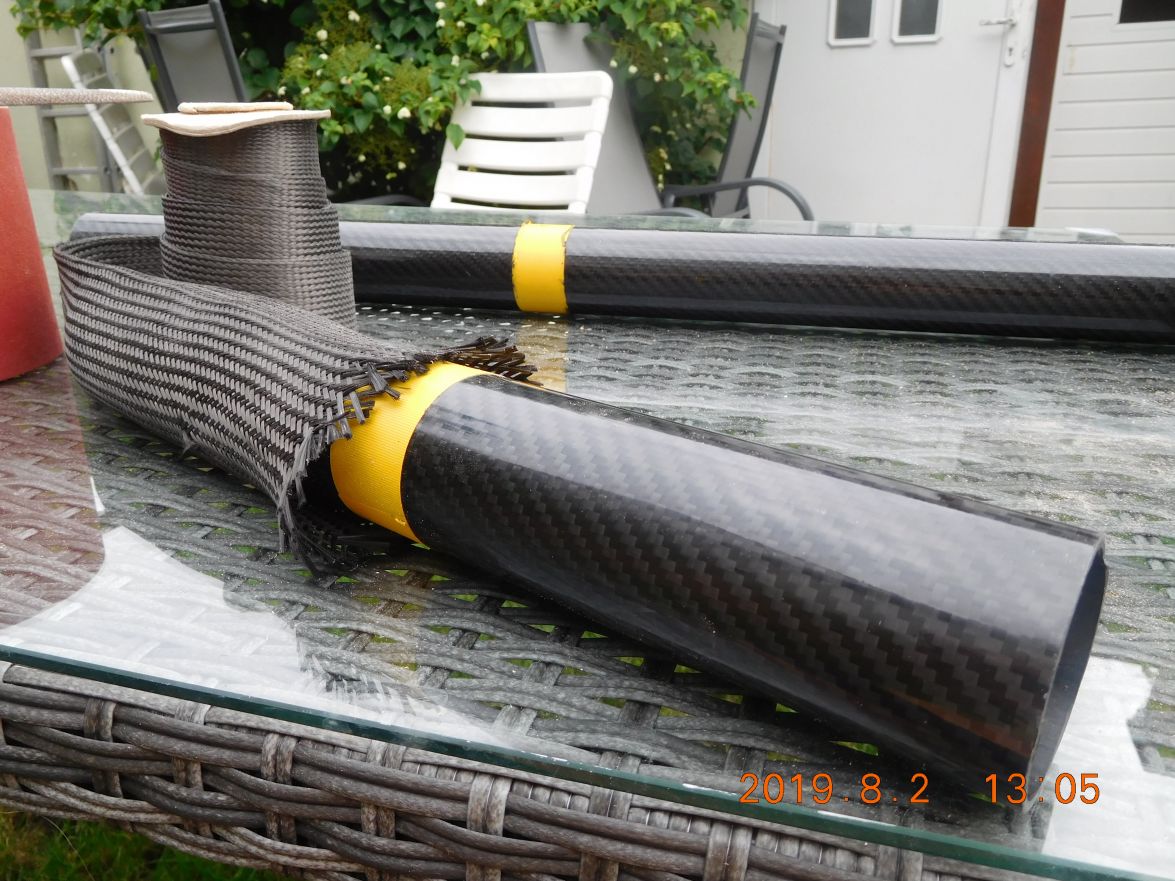
It looks here as if it is too wide but when one pulls the sleeve it becomes narrower and wetted out with epoxy it is less than a mm thick.
Greetings from Karl
Re: AD 14 KIELGE
Posted: Sun Aug 04, 2019 2:02 am
by glossieblack
Thanks for the explanation Karl. Are you going to make the boom and/or yard out of carbon fibre and glass fibre sleeves as per the bateau 3 part tutorial?
Re: AD 14 KIELGE
Posted: Sun Aug 04, 2019 3:32 am
by gonandkarl
Hallo Michael,
Yes the boom and yard I already made a long time ago and they turned out perfect. In hindsight I could have made them with a smaller than 50 mm diameter but they work fine and weigh only around 900 gram each. On one I used peel ply and it weighs a bit less than the other.
Here a picture of boom and yard before fairing and painting :
and here are 2 pictures of them at my first sail :
20190710_180757.jpg
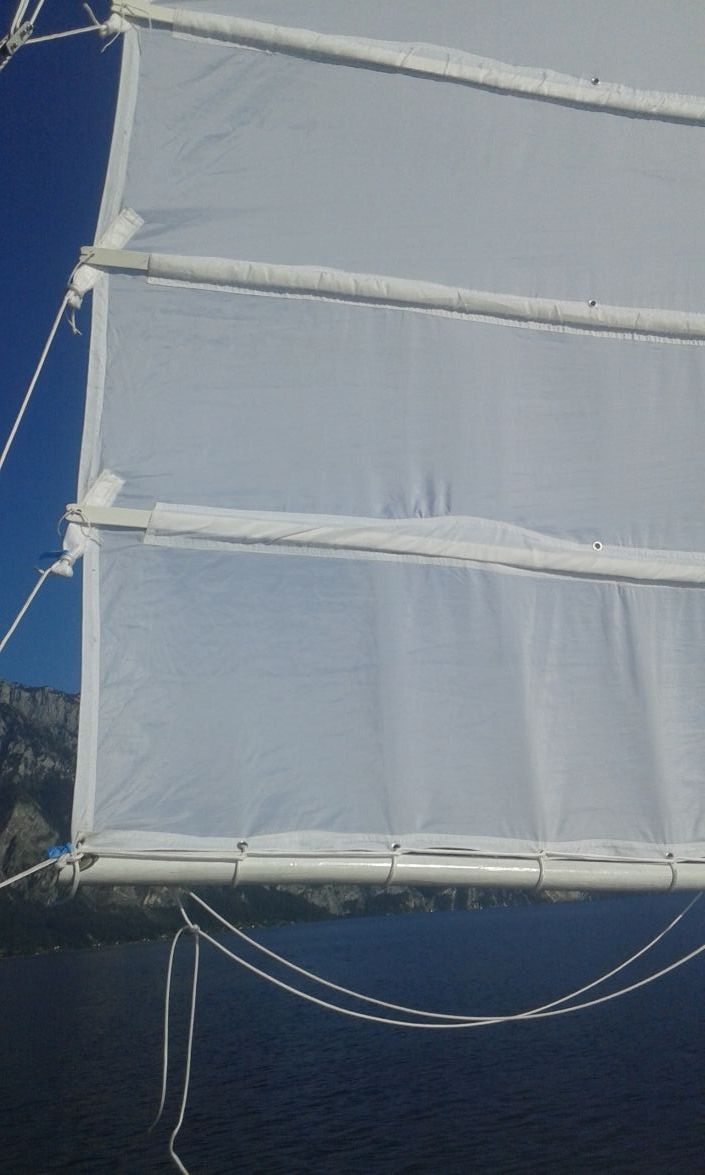
I did not dare to make the mast myself because of the length and getting it straight.
Greetings from Karl
Re: AD 14 KIELGE
Posted: Sun Aug 04, 2019 7:55 pm
by Bogieman
Your rig looks great, Karl. I’m still trying to locate a yard and boom but haven’t had much luck
Re: AD 14 KIELGE
Posted: Mon Aug 05, 2019 9:08 am
by Jeff
Nice Karl!!! Jeff
Re: AD 14 KIELGE
Posted: Thu Aug 08, 2019 6:21 am
by gonandkarl
Hi,
Today after 2 sleepless nights because of thoughts about glueing my carbon mast pieces I did it at last and it took very little time. I think building my boat has taught me preparation for any task is the key to easy execution.
I first stuck on the 2 inserts lots of plastic tape around it like on the picture until it was the same diameter as the long pipes to make sure that it is completely straight lying on the table after glueing.
Mast head and middle insert ready for_gluing:

and then I mixed 25 grams of epoxy with 14 grams of hardener 3 teaspoons of silica and one spoon of wood flour and brushed first the insides of the long pipes and then the inserts themselves and slid them together wiping any excess epoxy away finished in 10 minutes.
Mast insert and head glued to the 3 meter long pipes:
Greetings from Karl
Re: AD 14 KIELGE
Posted: Thu Aug 08, 2019 7:20 am
by Bogieman
Well done, Karl. Hope that mast makes things a lot easier for you
Re: AD 14 KIELGE
Posted: Thu Aug 08, 2019 7:59 am
by terrulian
Great stuff, Karl.
I think building my boat has taught me preparation for any task is the key to easy execution.
--Well, and then there's fairing.
But sorting out the solutions to odd problems you've never encountered before in life is one of the great pleasures attending almost all aspects of sailing. Well done!
Re: AD 14 KIELGE
Posted: Sat Aug 10, 2019 6:04 am
by glossieblack
Nicely thought through and executed mast fabrication Karl.
Re: AD 14 KIELGE
Posted: Mon Aug 19, 2019 5:32 am
by gonandkarl
Hi,
My carbon mast is finished and and my son suggested we should go for a sail on Saturday. Getting the boat ready at the slip was very fast with his strong help and he raised the mast in 15 seconds and then he insisted to make the following picture:
Me in front of the boat just before we put it in the water :
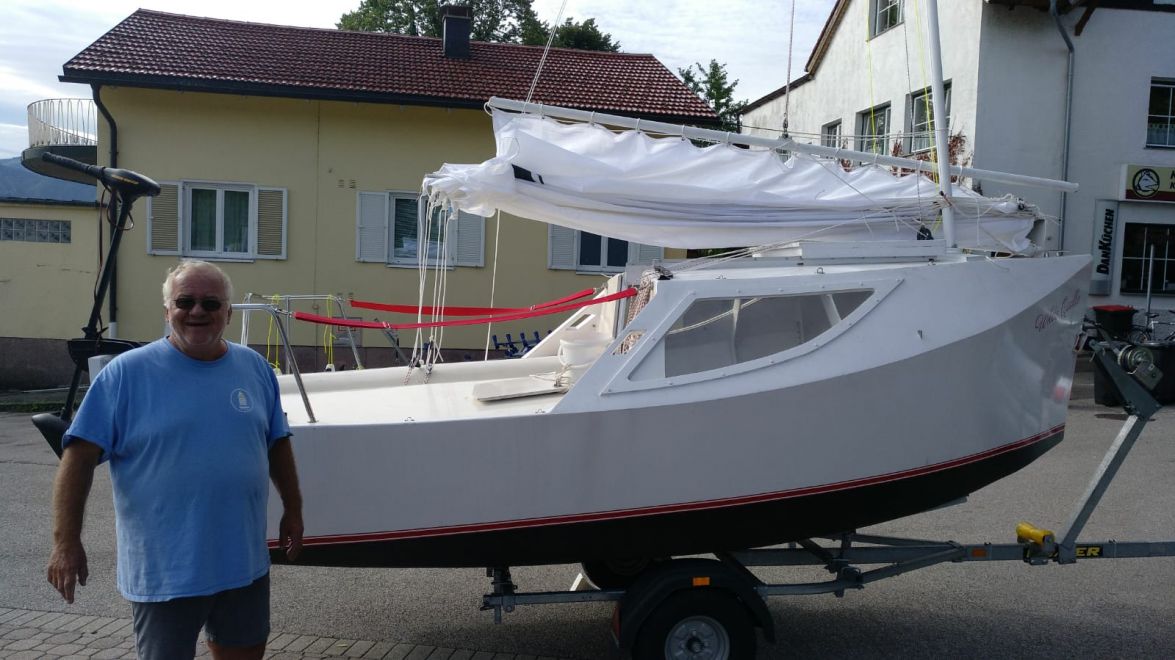
and here it is in the water next to the boardwalk :
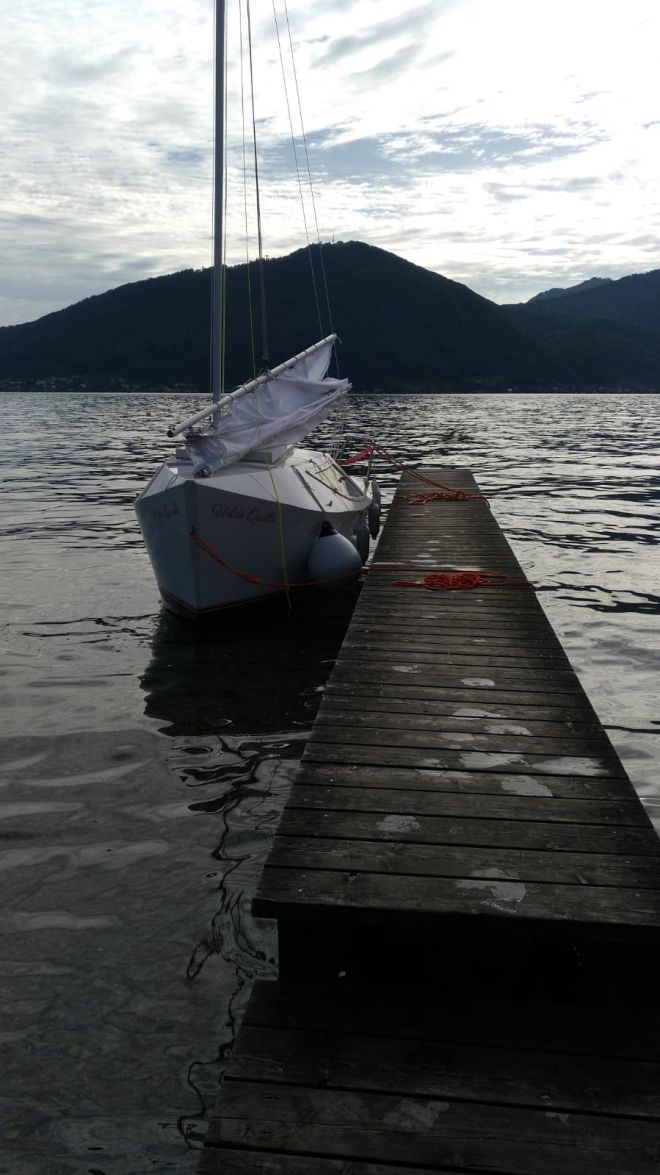
and then I can only show a picture of the boat on the lake taken by my sister from the shore. I took this picture even that it is far away you can see my junk rig not much else.
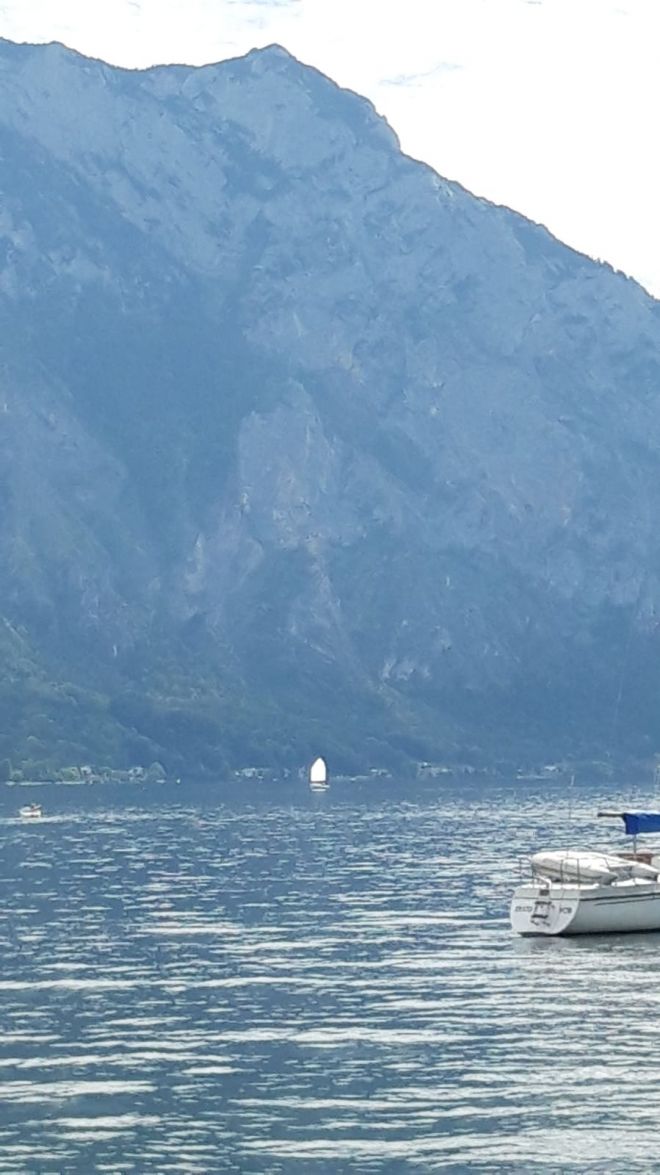
We had a very nice time on the water although with practically next to no wind for four and a half hours.
Greetings from Karl
Re: AD 14 KIELGE
Posted: Mon Aug 19, 2019 5:43 am
by cape man
Watch out for that rock!
Beautiful Karl!
Re: AD 14 KIELGE
Posted: Mon Aug 19, 2019 5:55 am
by gonandkarl
You are so right when I was 5 years old my mother went up a lower mountain right next to this one and all the way up I feared that the big one ( Traunstein ) will fall on us. Must have been the perception of a five year old.
Re: AD 14 KIELGE
Posted: Mon Aug 19, 2019 6:53 am
by glossieblack
Very nice Karl. Thanks for the report.
Re: AD 14 KIELGE
Posted: Mon Aug 19, 2019 9:00 am
by Jeff
Excellent Karl!!!! Jeff
Re: AD 14 KIELGE
Posted: Mon Aug 19, 2019 9:28 am
by Bogieman
Beautiful scenery. Beautiful boat.Thanks for the pics
Re: AD 14 KIELGE
Posted: Mon Aug 19, 2019 12:39 pm
by Fuzz
Great pictures Karl! glad you are able to use the boat. Doing it with your son has to be special.
Re: AD 14 KIELGE
Posted: Mon Aug 19, 2019 5:21 pm
by OrangeQuest
Sweet boat! I like the red lines!
Re: AD 14 KIELGE
Posted: Sat Aug 24, 2019 9:10 pm
by das boot
It looks real good I got mine out a few times in the last week I still have 1-2 mounts good sailing before I put it away this year this week they are calling for 30+ C for the next week. Not normal for us but I will enjoy it.
Re: AD 14 KIELGE
Posted: Sat Aug 24, 2019 10:54 pm
by Bogieman
das boot wrote: ↑Sat Aug 24, 2019 9:10 pm
It looks real good I got mine out a few times in the last week I still have 1-2 mounts good sailing before I put it away this year this week they are calling for 30+ C for the next week. Not normal for us but I will enjoy it.
Post more pics, George
Re: AD 14 KIELGE
Posted: Mon Oct 21, 2019 4:22 am
by Fuzz
Just wanted to say happy birthday and hope you are having lots of fun with your beautiful sail boat
It does not seem like three years could have passed so soon since we meet you.
Re: AD 14 KIELGE
Posted: Mon Oct 21, 2019 7:38 am
by gonandkarl
Thank You,
Yes it does seem as if times flying and as Winter is approaching here I made my boat fit for it under the carport by taking everything out of the boat what I left the whole summer in it like fenders, life jackets, paddles, 2 batteries and my plastic boarding ladder. On your side in Alaska it is most probably pretty cold or can you still go out fishing ?
Greetings from Karl
Re: AD 14 KIELGE
Posted: Mon Oct 21, 2019 8:33 am
by Jeff
Happy Birthday Karl!!!! Jeff
Re: AD 14 KIELGE
Posted: Mon Oct 21, 2019 10:19 am
by Bogieman
Happy birthday, Karl!
Re: AD 14 KIELGE
Posted: Mon Oct 21, 2019 2:52 pm
by Fuzz
Karl the weather here is still not too cold, around 0c or 32f but most of the inshore fish have moved out to deeper water for the winter. Running very far offshore in our winter months can expose you to some pretty nasty weather so I will wait for spring. I am pulling the batteries and covering up the boats for winter.
Re: AD 14 KIELGE
Posted: Thu Oct 24, 2019 2:34 pm
by Eric1
Happy Belated Birthday Karl!!!
Re: AD 14 KIELGE
Posted: Sat Sep 19, 2020 1:18 pm
by gonandkarl
Hi,
At last I can post again about my sailboat. I was busy this whole summer making 2 beds and 2 carry cots for my new grandchildren Rosa and Joseph who are 5 weeks today already and now it is time for me to turn to my sailboat again. I built a 3 metre long extension bar for the trailer for slipping in the shallow slip and I have practised pushing the trailer around a big shopping centre s parking lot after hours and I am confident that I can do it at the slip without any problem as well. This extension bar hides in the trailers tow bar while travelling from home to the lake where I just have to pull it out and lock it with 2 stainless steel bolts for slipping the boat app. 5 metres into the water. Today I also made an important update to my rudder hardware. I have 3 Gudgeons on my rudder and the matching Pintles at the transom. Whenever I go sailing I have to fit the rudder to the transom about 10 metres from the shore because at the shore it is to shallow and the rudder would touch the ground. Now hanging the rudder on the water was a permanent battle to get the 3 Gudgeons onto the Pintles . I attached now the middle and top Pintle 10 mm and 12 mm lower than they were until now. It is now easy to push the bottom Gudgeon a bit onto the pintle and then the middle and top ones as well. Most probably I am the only Adelie sailboat builder that did not fit Gudeons and pintles right at the begin a bit offset for easy hanging of the rudder. The difference between top Pintle ( 12 mm lower ) and the middle ( 10 mm lower ) enables me to hang the rudder already on the shore in the top 2 positions and then out on the lake lift it up again and lower it down so the rudder is held in all 3 attachment pints. All I have still to do is fill the old 8 holes in the transom with epoxy and give the transom a new coat of paint on both sides.
Greetings from Karl
Re: AD 14 KIELGE
Posted: Sat Sep 19, 2020 2:14 pm
by Fuzz
Sounds like a well thought out mod to the boat. The big thing is it is good to see you posting again. Congratulations with the new grandchildren.
Re: AD 14 KIELGE
Posted: Sat Sep 19, 2020 10:59 pm
by glossieblack
Thanks for the update Karl. Nice to know life's good for you.
Re: AD 14 KIELGE
Posted: Mon Sep 21, 2020 9:32 am
by Jeff
Nice Karl!! Great to hear from you!!! Jeff
Re: AD 14 KIELGE
Posted: Mon Sep 21, 2020 11:43 am
by Bogieman
Re: AD 14 KIELGE
Posted: Mon Sep 21, 2020 12:04 pm
by gonandkarl
Hi,
Today I installed my outboard motor bracket which I bought 4 months ago. It had to swallow my pride to drill 4 holes into my lily white transom which I never wanted to have any holes. But this stainless steel bracket is a big improvement on my self made concoction which was just tied with lines to the pushpit doing its job but I could not get properly to the starboard transom cleat and there fore this new bracket. Thank God I have inspection holes near the transom through which I could tighten the 4 nuts lying on my stomak on the sole while the screws outside where held by pinch pliers.
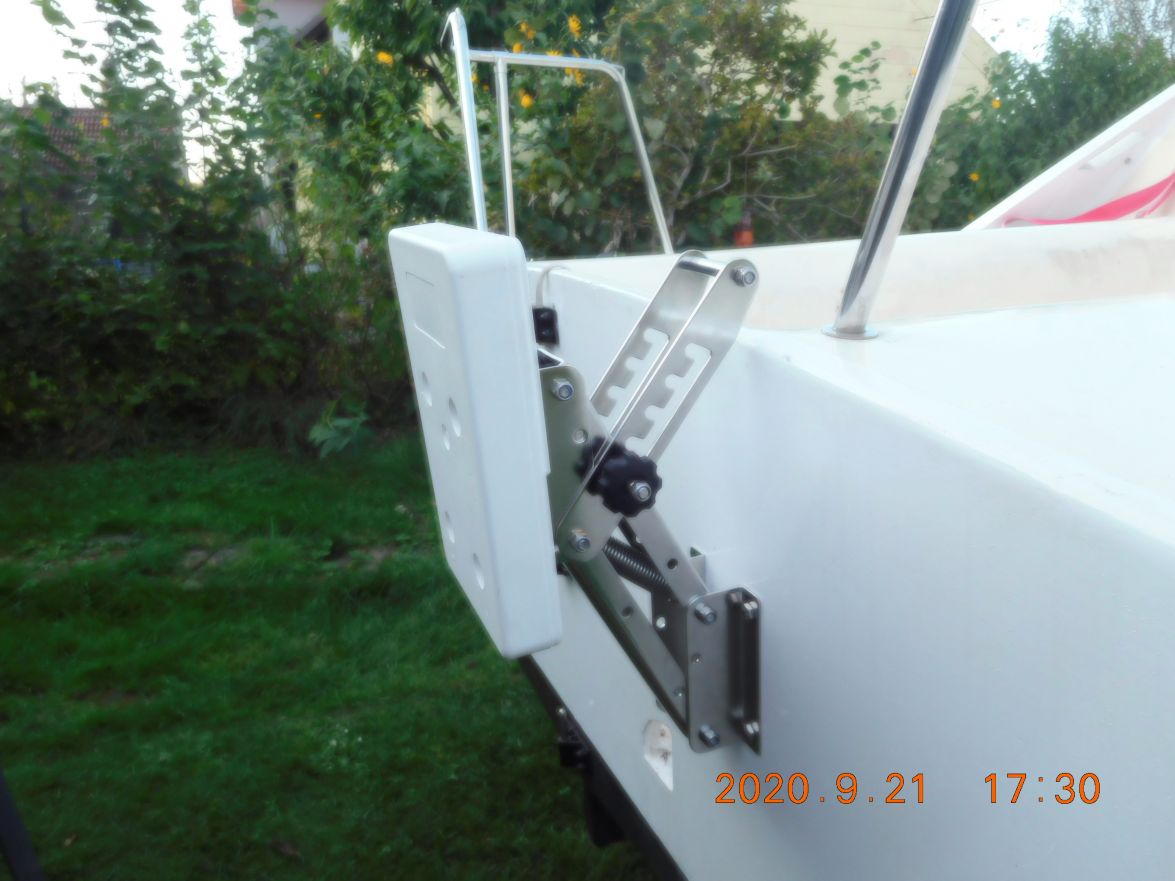
Next sail will be a bit easier as I only have to put the electric outboard motor to it and off I go.
Greetings from Karl
Re: AD 14 KIELGE
Posted: Mon Sep 21, 2020 12:15 pm
by Jeff
Looks good Karl!!! Jeff
Re: AD 14 KIELGE
Posted: Mon Sep 21, 2020 12:17 pm
by glossieblack
The tweaks you're making will make sailing her easier. Nice.
Re: AD 14 KIELGE
Posted: Mon Sep 21, 2020 7:56 pm
by terrulian
Good work, Karl. Rudders can certainly cause the problems you describe. Good solution.
Re: AD 14 KIELGE
Posted: Tue Sep 22, 2020 2:24 am
by gonandkarl
Hi,
Yes the rudder modification will be a great help as I fiddled on the wabbly water for minutes until I had it hung, now it takes 10 seconds. It is a pity that such small detail is not mentioned on the boat plans and you only find out whilst using the boat.
This is a picture of the changed Gudgeon holes and the old ones filled with epoxy and a strip of sticky tape that the epoxy does not run out and down the transom:
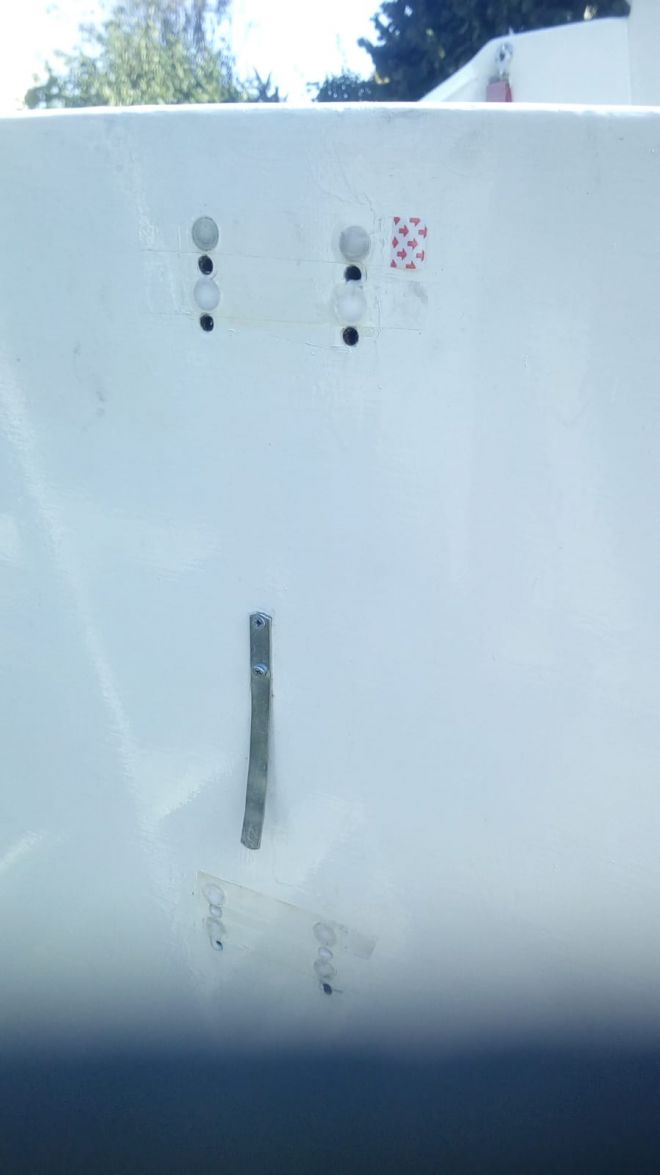
Re: AD 14 KIELGE
Posted: Tue Sep 22, 2020 1:28 pm
by terrulian
Re: AD 14 KIELGE
Posted: Sat Apr 17, 2021 5:40 am
by gonandkarl
Hi,
As You all know a boat is never finished and therefore I show you what I have done to make my life easier when I slip my boat.
It takes me 20 minutes at the slip until I am ready to push the boat into the water. I tested this at a shopping centre parking lot without the boat on the trailer so I could also test manoeuvring the trailer with my front tow ball. I just have to replace the the tow coupling with my tow bar extension and hitch it again to the car :
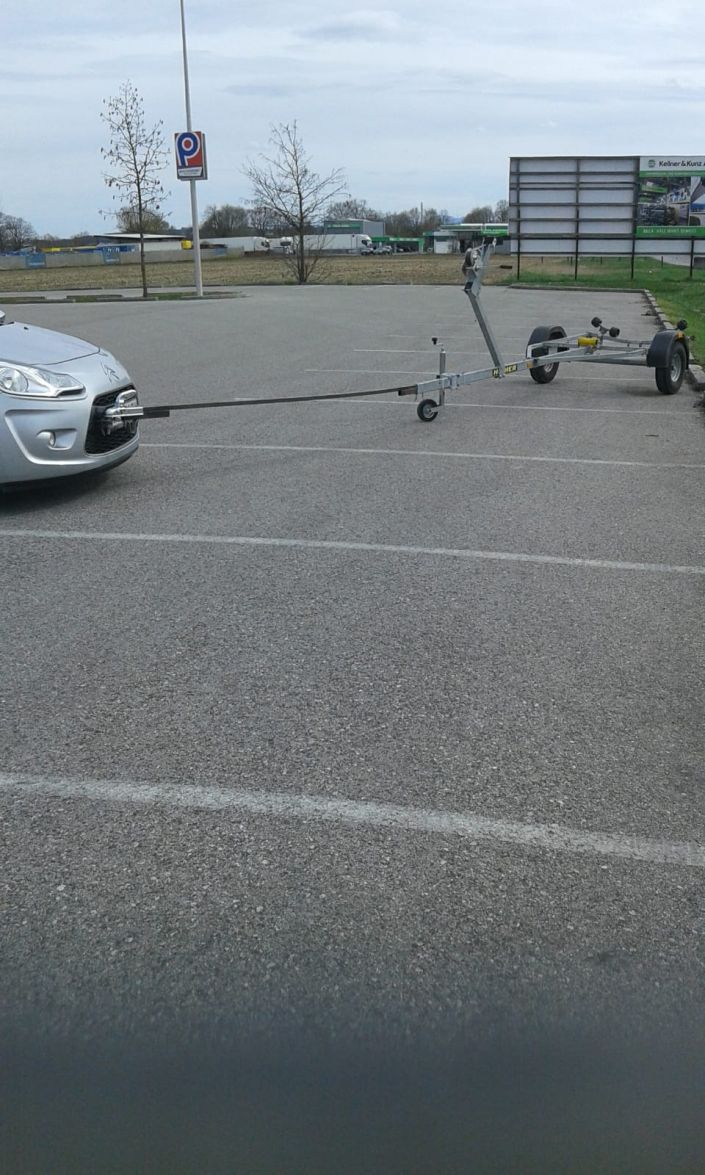
[
And for getting the boat nicely into the middle of the trailer before pulling the trailer out of the water I made myself 2 pilot bars.
Here is a picture of the PS:
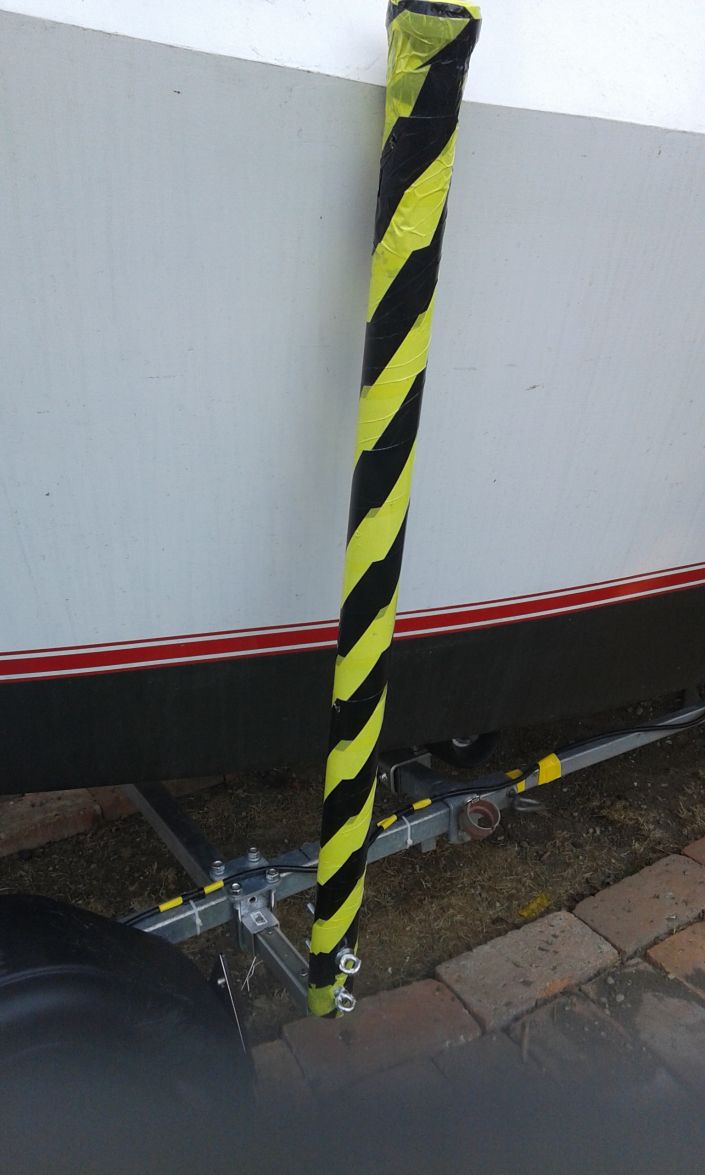
And while I was at the improving stage I also mounted railing wires surrounded them with foam insulation and sewed some covers.
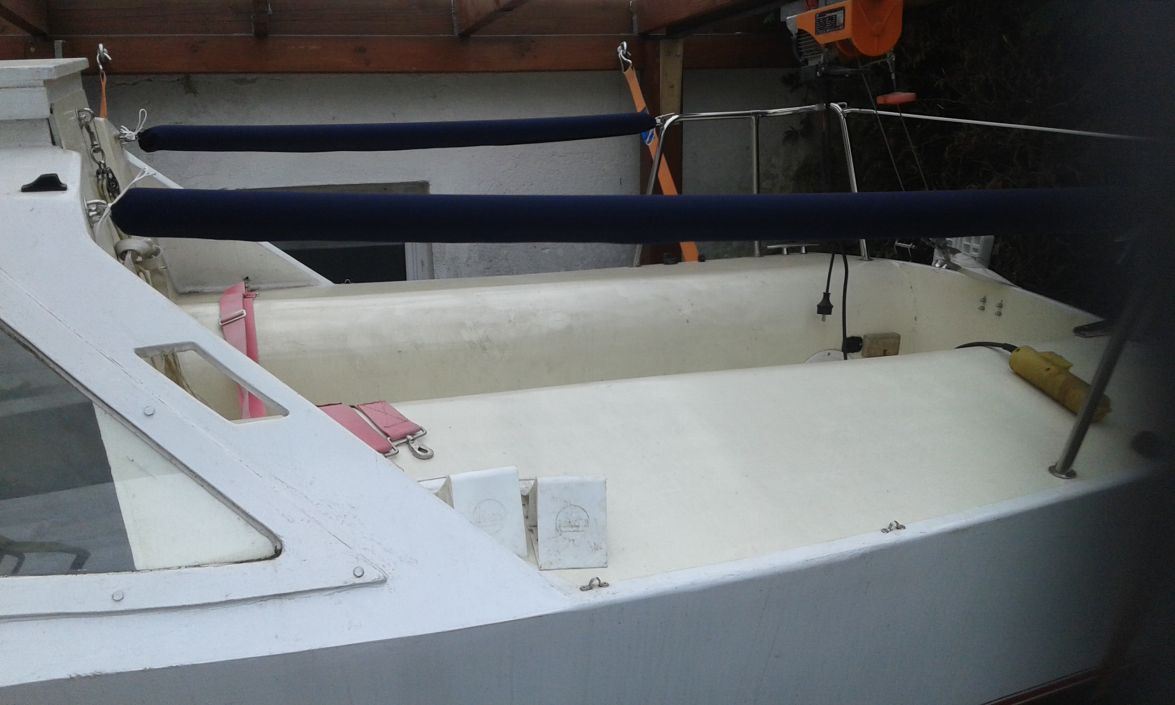
And the next thing I do will be to make an additional hatch so I can stand up next to the mast partner. It will be a glass hatch so the additional benefit is more light in the cabin. I cut the glass plate already and the opening will be 57cm x 57 cm so my big fat body can get through. If I would buy such a hatch I would have to fork out a few hundred Euros, while I hope to make mine for just 150 Euros.
Hope to be sailing next month.
Greetings from Karl
Re: AD 14 KIELGE
Posted: Sat Apr 17, 2021 6:25 am
by Jeff
Good to hear from you Karl!!!! Jeff
Re: AD 14 KIELGE
Posted: Sat Apr 17, 2021 2:10 pm
by Fuzz
Really good to hear from you Karl! I miss seeing pictures of you and your smiling face
Re: AD 14 KIELGE
Posted: Sun Apr 18, 2021 7:06 pm
by Bogieman
Hi Karl! I agree with Fuzz. Great hearing from you. Looks like you have things figured out. I’m curious to see you and the glass hatch in action.
I’m taking Tipsy down to Murrells Inlet (solo) tomorrow morning . She will be fully rigged but I will most likely stay at anchor in the inlet where I will read, drink, eat and work on my tan
And I’m going to sleep onboard for the second time this month - I’ll post pics
Bogie
Re: AD 14 KIELGE
Posted: Sun Aug 15, 2021 12:05 pm
by gonandkarl
Hi,
Just a short report of my last sail two days ago with my daughter, son in law and their 2 kids. It was hot and not much wind but we managed 2 to 3 knots checked on my freesailgps app. We had a lot of fun and it was the first outing of my duck and crocodile on a line and the hit for my granddaughters being towed with them in the water.
And here one more picture of the sail while we were rigging the sail
Greetings from Karl.
Re: AD 14 KIELGE
Posted: Sun Aug 15, 2021 12:28 pm
by gonandkarl
Hi,
I forgot to mention my sail was on Friday 13 th with my trailer front support wheel loosening itself on the highway until it also ran on the tarmac. Problem fixed by taking it off and putting it into the boot. At the arrival at the slip I noticed that half of one hubcap of the trailer which I had recently replaced at the place where I bought the trailer had come off because they mounnted it with only one screw. Thirdly to my own mistake: My companion roof had come off the rails during the drive but luckily it landed in the cockpit not like the first companion roof which disappeared never to be found again. Lesson learned raisl are good for a companion roof but it needs a good lock as well.
By the way my pilot poles were not successful because I made them too flexibel and it took us 3 tries to pull the boat straight in the middle of the trailer out of the water. So what, the next version will be fixed to my trailer like Glossieblack did it and my 3 meter tow bar extension I did not put into action because the slip had enough water and I pushed the boat into it easily with one hand.
Greetings from Karl
Re: AD 14 KIELGE
Posted: Tue Aug 17, 2021 10:15 am
by Bogieman
Very nice, Karl. Glad you and the family are enjoying her. I like your safety lines too.
I haven’t had Tipsy in the water for a month -not because I don’t want to but because the weather has been crap and too many other things…
Re: AD 14 KIELGE
Posted: Tue Aug 17, 2021 12:51 pm
by cape man
Great to see you using the boat!!!
Re: AD 14 KIELGE
Posted: Thu Oct 21, 2021 6:59 am
by glossieblack
Happy birthday Karl, you crafty old CLOOF. How did you mange to turn 75 three months before me? ..... if I make it.
Re: AD 14 KIELGE
Posted: Thu Oct 21, 2021 8:43 am
by gonandkarl
Thanks Glossie,
I always tried to be ahead of others but with the birthdays when and how they happen it is a bit like in a lottery. I was a mathematician student at University in my first year and since then I can explain everything with numbers. When I married my wife she was 25 and so had about 200 chances in the following 18 Years to fall pregnant and the doctors then told me my chance was only 1,5 percent to become a father according to my sperm count, I was so positive that I pronounced I am sure we will have 3 kids ( my simple formula 1,5 % of 200 ) turned out be true. As my Birthday today is on a weekday my kids cannot visit to celebrate, so my wife said does not matter we make ourselves a nice day. She tried it by making me a nice breakfast with ham and 3 eggs and toast and brought it to my bedside table, whilst me being health conscious measured my Birthday blood pressure in the lounge about 30 seconds to long or long enough for my daughters dog whom we look after for a week to have my special breakfast. So what, I saved calories and took the dog for the morning walk. After we came back the egg white of the 3 eggs were vomited twice in the passage to be topped by another hurdling in the garden on the freshly cut lawn. But for every bad birthday surprise there must also be a good one. I play my parents birthdays on a regular basis in the Austrian Lottery and also did this today only because the Lottery company sent me a 5 Euro Birthday credit which turned out a minute later as a 180 Euro Roulette win with my fathers birthday number 17. The main thing is to have fun no matter how many birthdays still come along .Greetings to you and your wife and fair winds in your summer sail trip.
Re: AD 14 KIELGE
Posted: Thu Oct 21, 2021 1:08 pm
by Jeff
Happy Birthday Karl!!! I hope you have a great day!! Jeff
Re: AD 14 KIELGE
Posted: Fri Oct 22, 2021 12:32 am
by Fuzz
Happy birthday! glad to know you are doing well
Re: AD 14 KIELGE
Posted: Mon Feb 07, 2022 2:45 am
by gonandkarl
Hi,
As I voted for line seed oil in Glossies thread I show you now the 2 rocking horses I made for my twin grand children. I finished them only Yesterday and today I will oil them with line seed oil. here the picture as of now and I will post another after the oil treatment. These horses will never be in the water like Glossies Feather pram and the comparison is therefore not valid. But I will just post the oiled horses so you can see the difference.
Greetings from Karl
P.S.: I posted it here because I did not want to mess up Glossies thread with kids toys

Re: AD 14 KIELGE
Posted: Mon Feb 07, 2022 5:48 am
by cape man
I always smile when I see a post from you. Those are awesome!
Re: AD 14 KIELGE
Posted: Mon Feb 07, 2022 7:25 am
by OrangeQuest
Really nice craftsmanship!
I thought all the threads on this forum was about kid's toys. We are just bigger and older and so are our toys!
Re: AD 14 KIELGE
Posted: Mon Feb 07, 2022 9:19 am
by Jeff
Really nice!!! Jeff
Re: AD 14 KIELGE
Posted: Mon Feb 07, 2022 1:23 pm
by Fuzz
cape man wrote: ↑Mon Feb 07, 2022 5:48 am
I always smile when I see a post from you. Those are awesome!
I feel the same way. I always think of Karl with that huge happy smile.
And the rocking horses are great too
Re: AD 14 KIELGE
Posted: Sat Feb 12, 2022 4:51 am
by glossieblack
Lovely work Karl.
Re: AD 14 KIELGE
Posted: Fri Feb 18, 2022 9:41 am
by Bogieman
Hi Karl,
Very nice rocking horses
Bogie
Re: AD 14 KIELGE
Posted: Fri Feb 18, 2022 10:06 am
by pee wee
I agree, the rocking horses look great! Neat work, as usual.


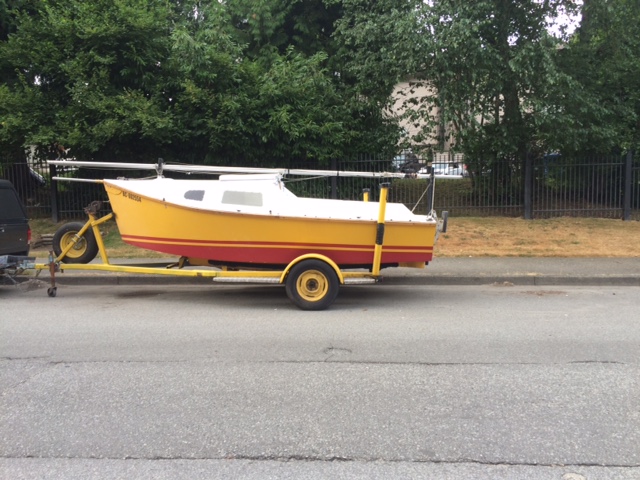
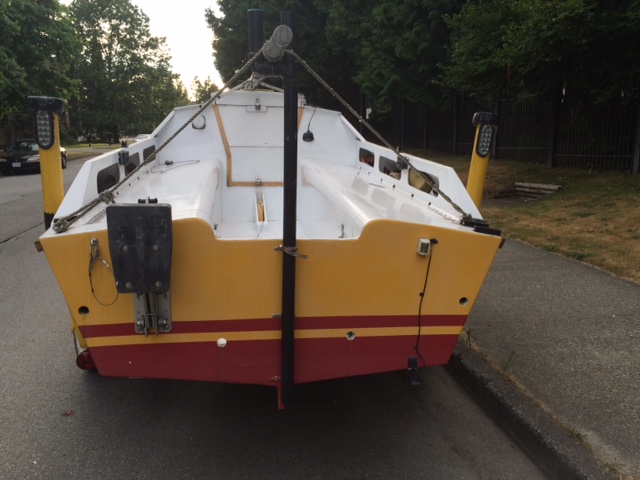
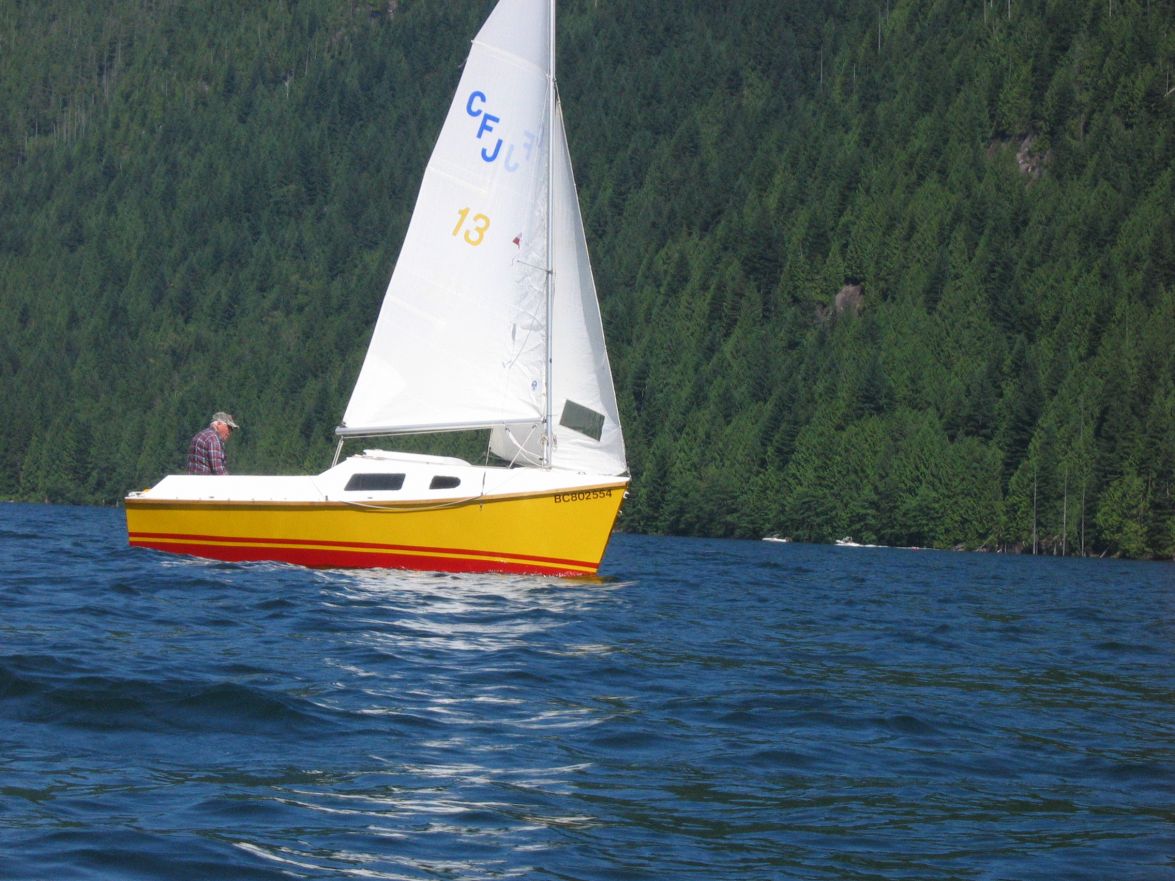
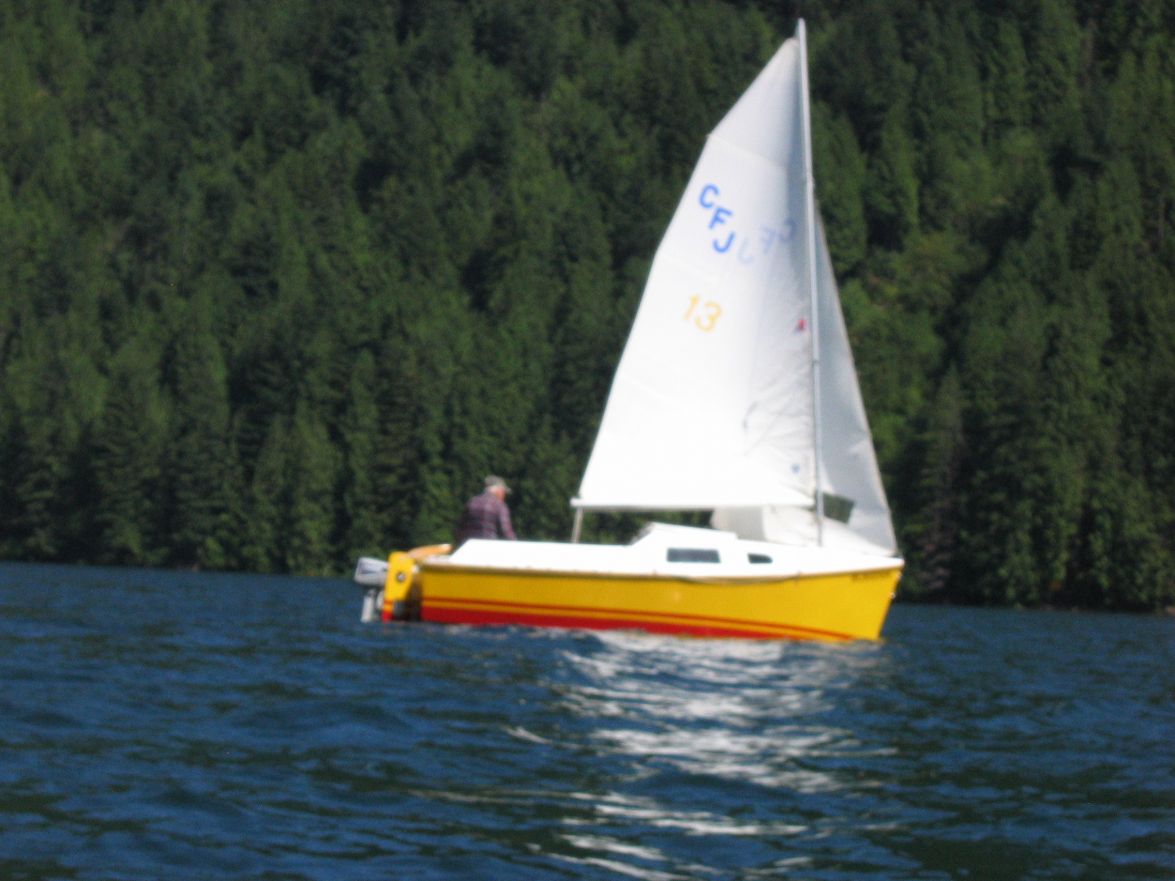

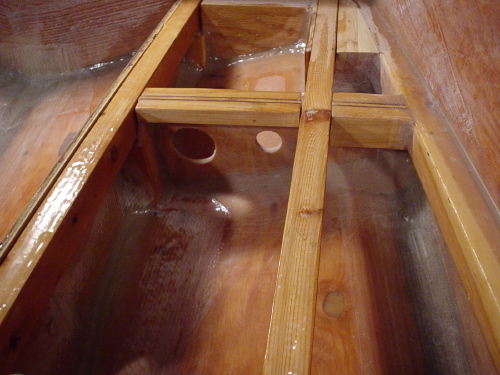