Page 1 of 1
New AD14 build
Posted: Tue Nov 24, 2015 2:05 pm
by waytootall
I recently received my plans for an AD14 and am starting the process of a build. I am a boat building amateur. I am an engineer and general do-it-yourself-er so this is a good stretch of my abilities and a necessary hobby to keep me busy when not acting a a chauffeur for my kids. I have read many of the current AD14/16 build topics and appreciate all the tips and trick and I look forward to receiving more as I go along with my build. Since I am such a novice I am taking it slowly and purchasing materials as I go. I am lucky to live only ~45 minutes from Bateau so I can piecemeal material purchases.
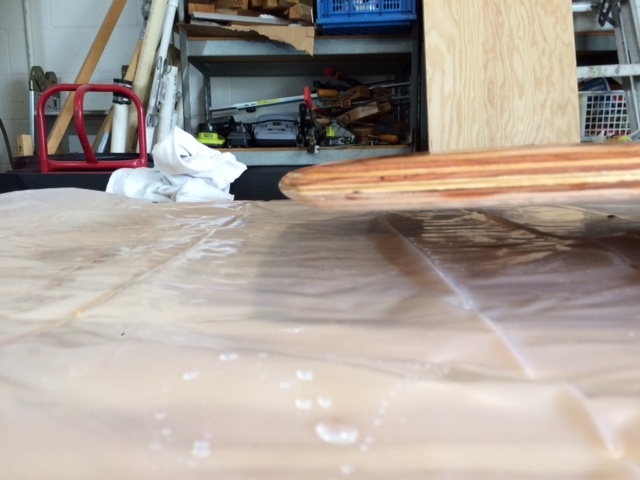
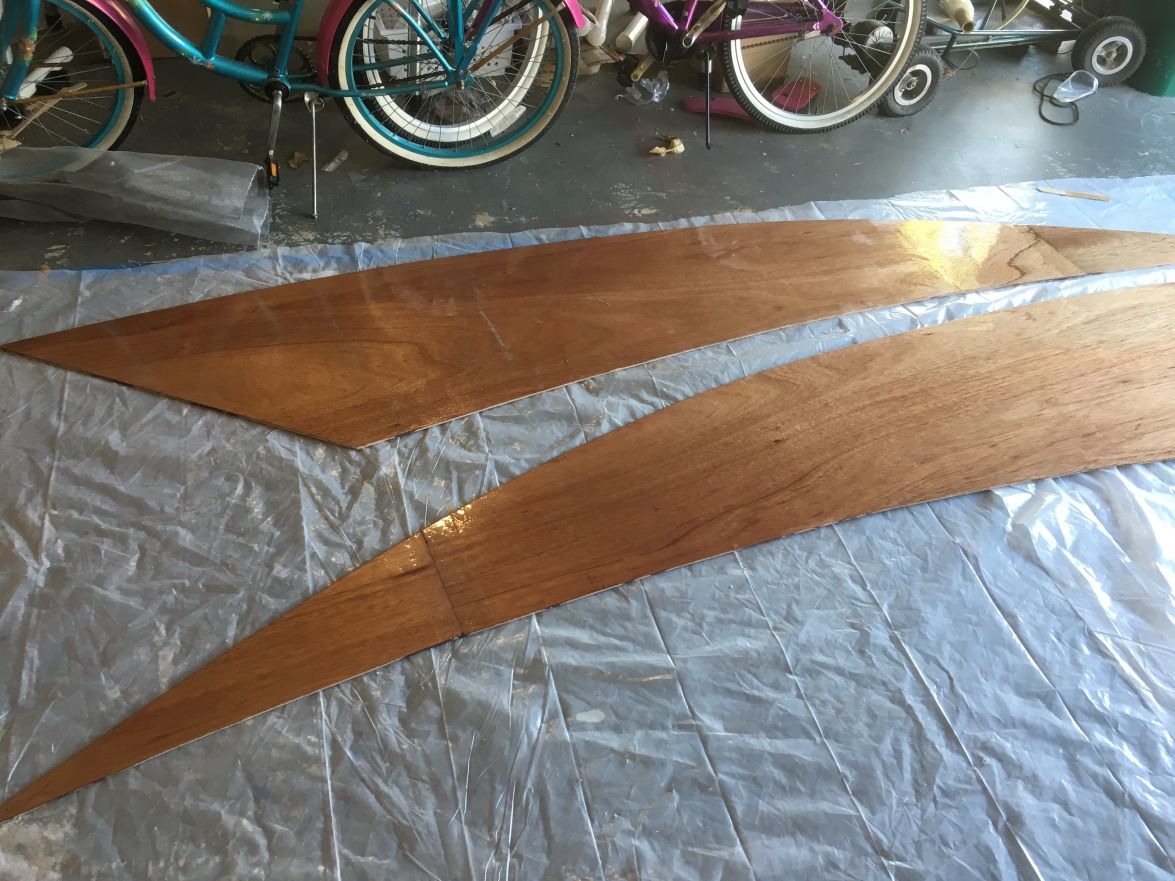
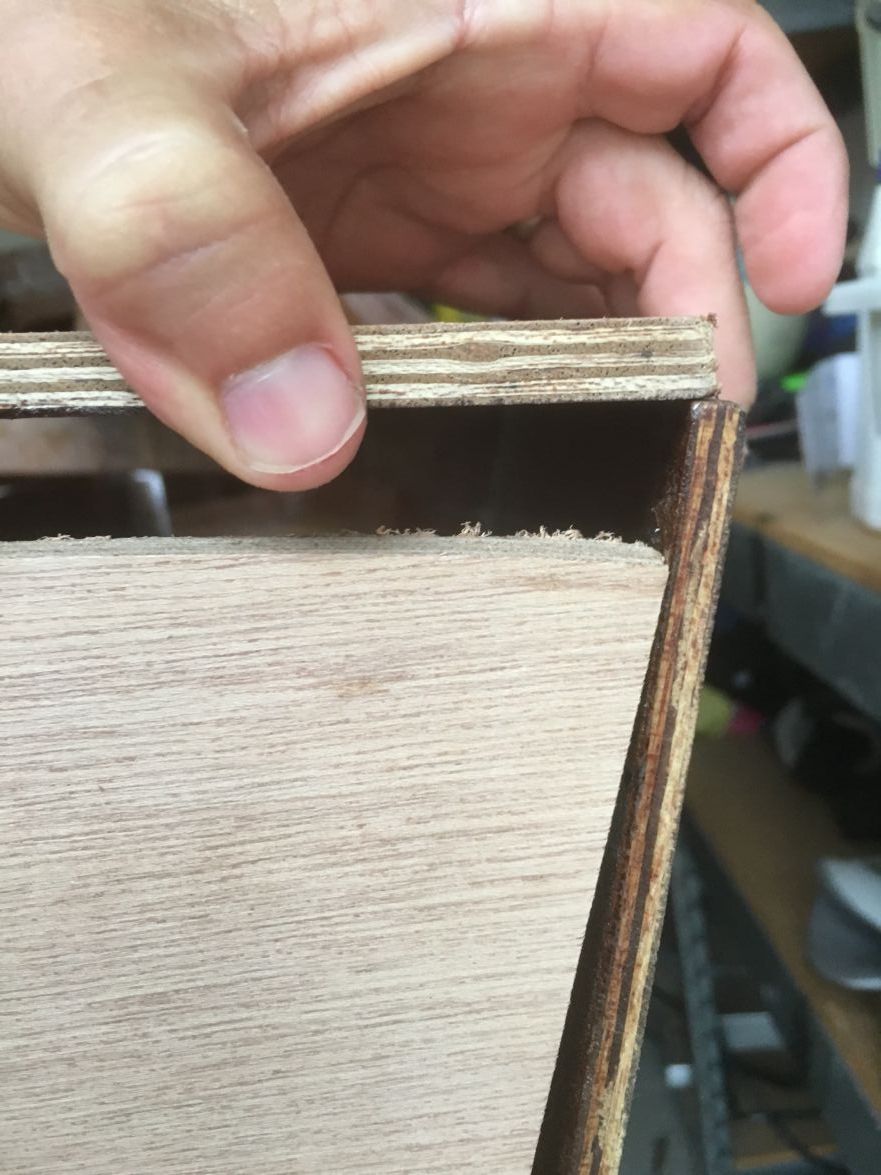
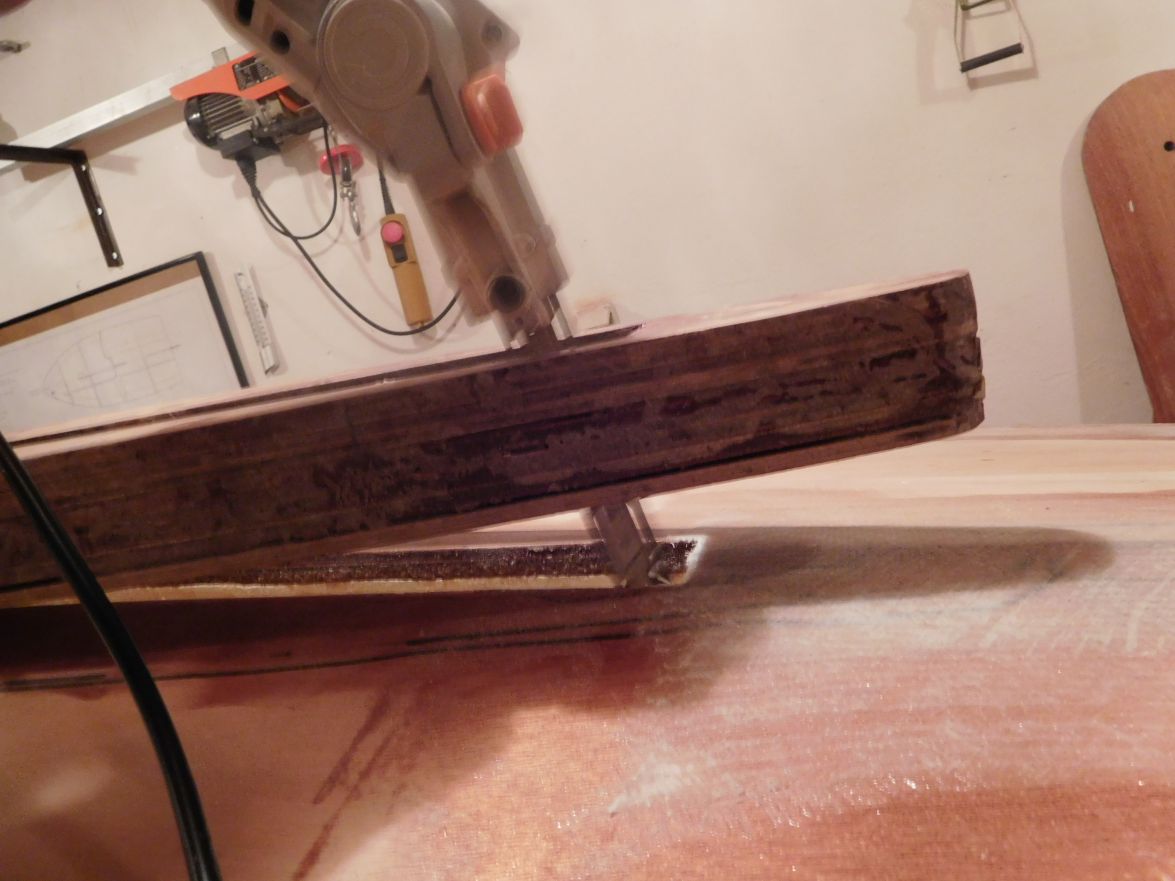
I started with the centerboard as a practice piece using Home Depot Marine grade plywood. I learned why I shouldn't use it when trying to plane/sand the profile in.
Here is the edge profile:
Re: New AD14 build
Posted: Tue Nov 24, 2015 2:17 pm
by waytootall
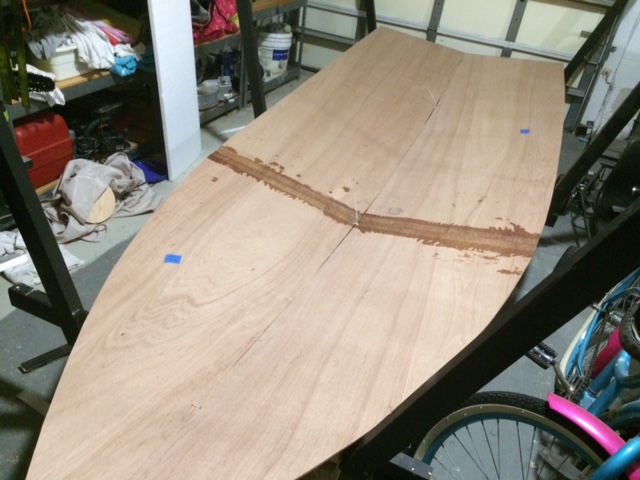
Since that went OK I went ahead and purchased the 1/4inch plywood sheets for the hull. I went with the Meranti since I would like to finish as much of the boat bright as possible and I preferred the grain on the Meranti (and it is cheaper). Here are the sides jointed together:

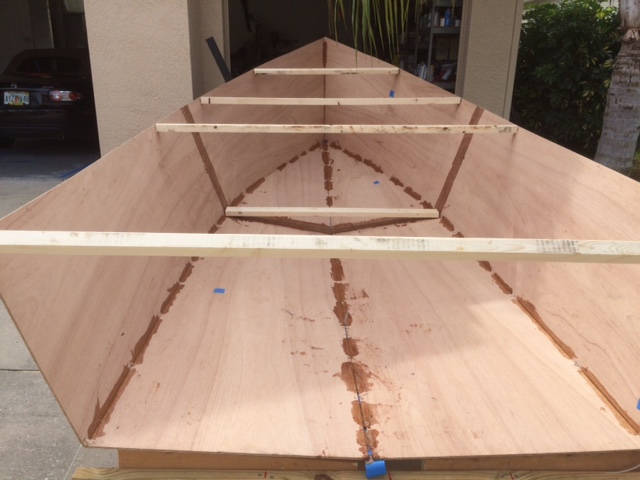
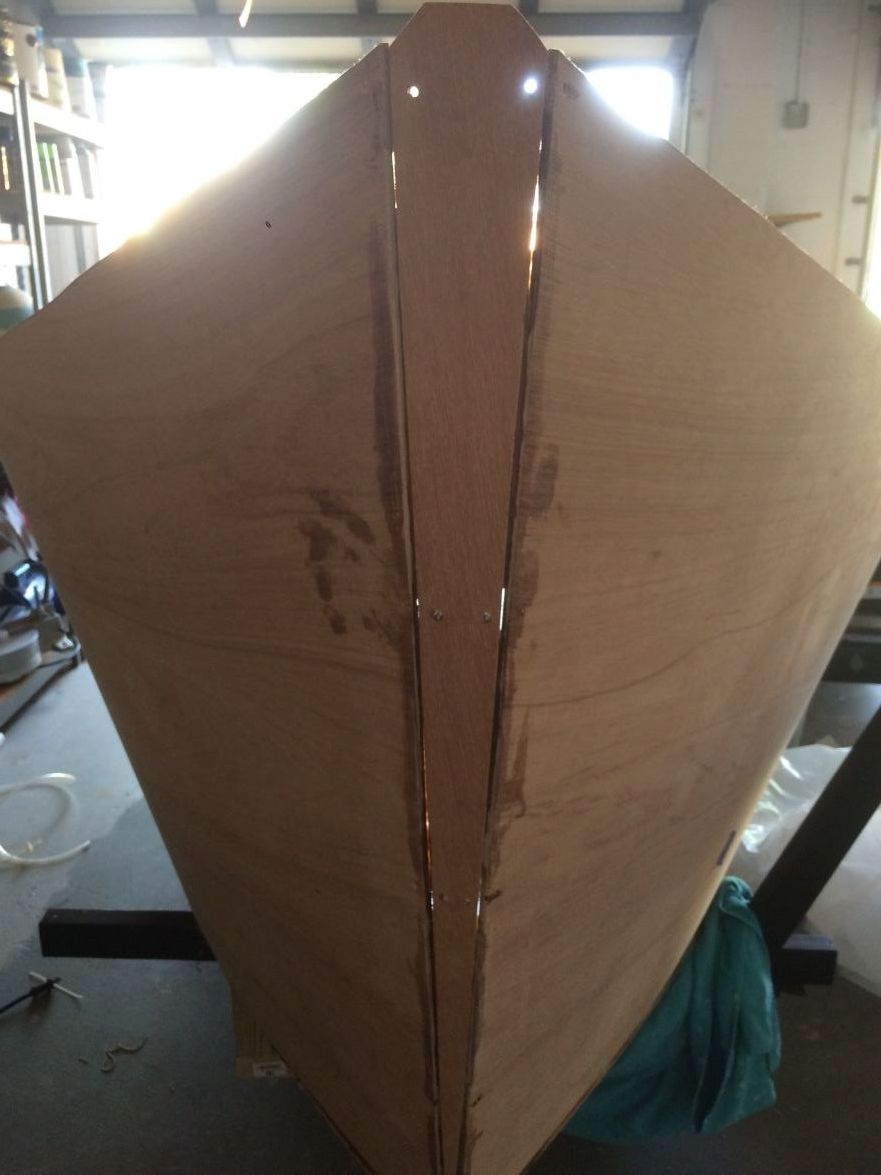
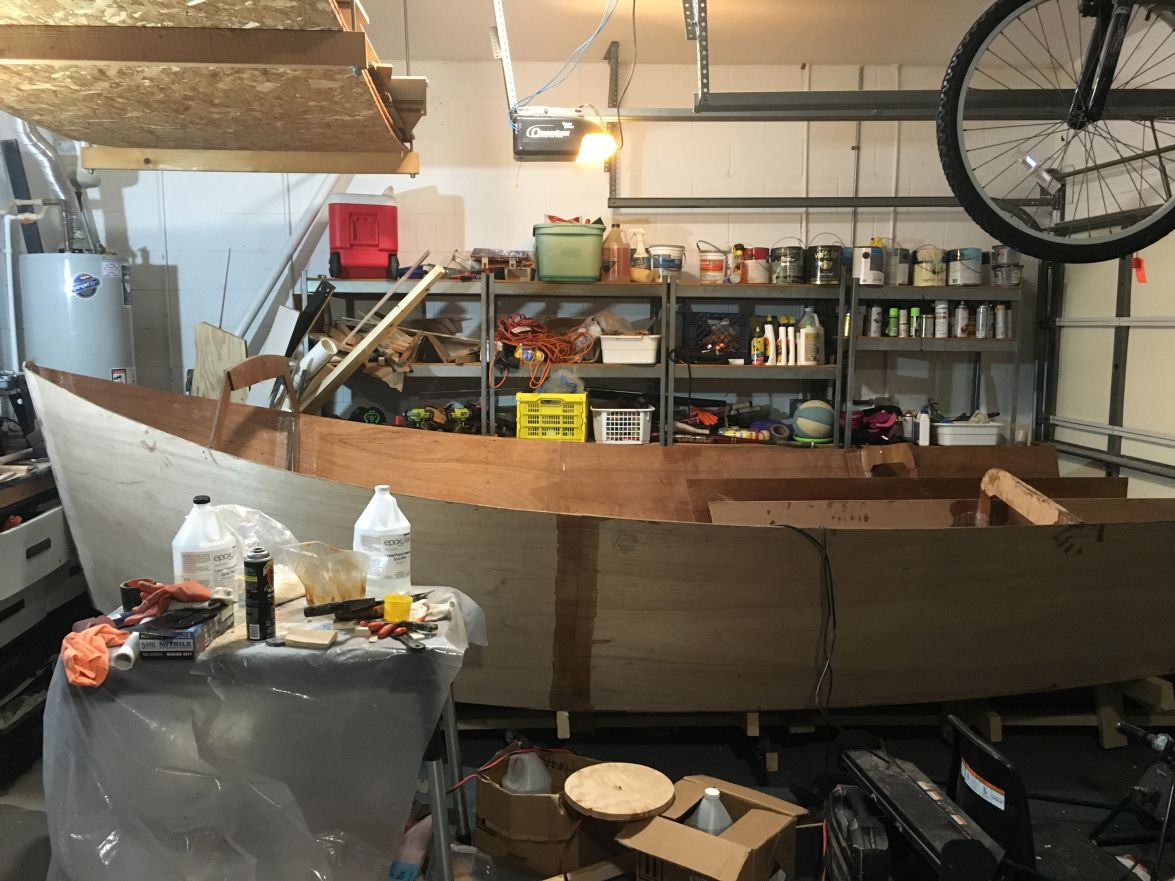
As you can see I am working in my garage so space is cramped. I built my jig with wheels to roll it out into the driveway to work as much as possible the same as others on this board. Here are the bottom panels stitched and setting in the jig:
I made the same mistake as others and under-built my jig frame so that I had all sorts of trouble with the bottom not supporting my weight when I tried to work inside the boat later. I had to re-build the frame (and the center joint of the boat) several times with the boat on the jig which was not easy. Follow other's advise and build the jig with very solid supports at all the station frame locations plus some.
I wheeled the setup into the driveway work the epoxy tabbing and fiberglass.

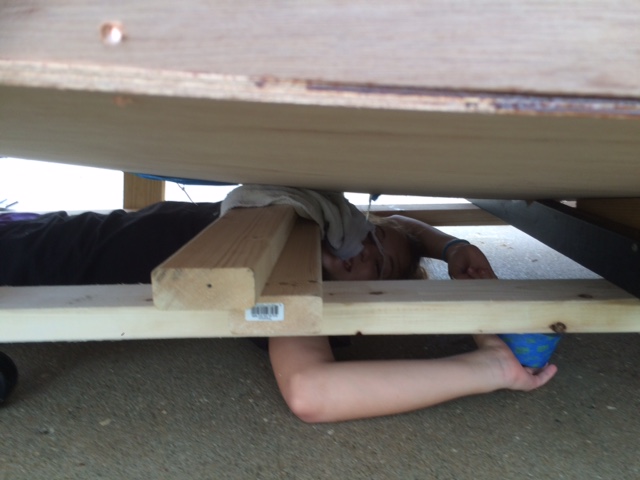
The whole family is involved so I had my 12 year old making tape the bottom seam prior to applying epoxy since she fit under there far better than I. If I had that to do over again I would use far stronger tape since I had a LOT of leakage of epoxy through the joint and onto my driveway which I didn't cover with plastic.
Here is the hull with the seams tabbed and the battons in:
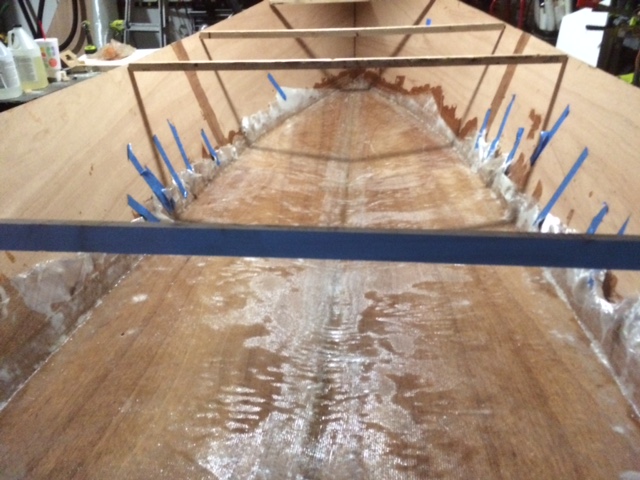
Here is the hull after the first coat of 12oz biaxial fabric. I used painters tape to help hold up the fabric on the sides. I now need clean up the edges going up the sides, sand the bottom, apply another epoxy coat to the bottom and to the sides.
I am trying to figure out exactly where the centerboard trunk should be located so I can mark the hole to cut, but I can't figure it out yet.
Re: New AD14 build
Posted: Tue Nov 24, 2015 2:46 pm
by terrulian
I'll be following your build with interest. Love the pictures and your daughter seems happy enough in a difficult task.
Are those light areas in the middle of the boat in the bottom picture just a result of lighting? It looks like they may be starved of epoxy.
Re: New AD14 build
Posted: Tue Nov 24, 2015 3:53 pm
by waytootall
The light spots are a mix. In the center of the boat it is reflections off the light but on the sides and edges there are areas light on epoxy. This is a first for me. I have worked a lot with epoxy grout on tilework previously but this behaved a bit differently and I had trouble reaching some spots without epoxying myself to the hull. So I have a few patches to apply to bubbles I didn't get out and another coat (or two) of epoxy to apply.
Re: New AD14 build
Posted: Tue Nov 24, 2015 6:37 pm
by das boot
When it comes to filler when making up the bog I used a belt sander and clamped it in place then sanded a lot of left over parts of my good ply into dust it mixed well and made real strong bog to fill in cracks. If you when out of that I got a whole bag from Home Depot for free where the cut the wood just a tip
Re: New AD14 build
Posted: Wed Nov 25, 2015 4:26 am
by gonandkarl
Hi,
Welcome to the AD14 club, you are moving very fast and I wish you all the best for your build. I started my AD14 in October 2013 and will splash it next Summer. You most probably will beat me in finishing yours before me like Salvatore did from downunder.
Greetings from Karl ( Austria )
Re: New AD14 build
Posted: Wed Nov 25, 2015 6:14 am
by waytootall
Thank you das boot and gonandkarl. I have read many of your posts to help me figure out what I am supposed to do so hopefully that will cut down on some of my mistakes and allow me to make brand new ones

. I do have a couple of questions if anyone knows the answers:
Are we supposed to fibergalss all the interior surfaces of the buklheads? The notes say to fibreglass but I am not certain if it just means to fiberglass them at the joints with the hull, or everywhere.
How do you locate the centerboard trunk on the hull bottom? The diagram doesn't give measurements to the location of the trunk, it only shown the locations of the bulkhead frames. I had seen an inserted picture fome someone's post that showed a metric version of the stations drawing that included what look like measurements to the CB trunk, and read where Jaques said he would post a plan update but my enginsh version of the drawings doesn't have it and I don't see a plan update.
Re: New AD14 build
Posted: Wed Nov 25, 2015 8:58 am
by gonandkarl
Hi,
The bulkheads ( frames ) should be taped to the hull on each side.
I also had a problem with the position of the centreboard trunk itself and the position in the boat.
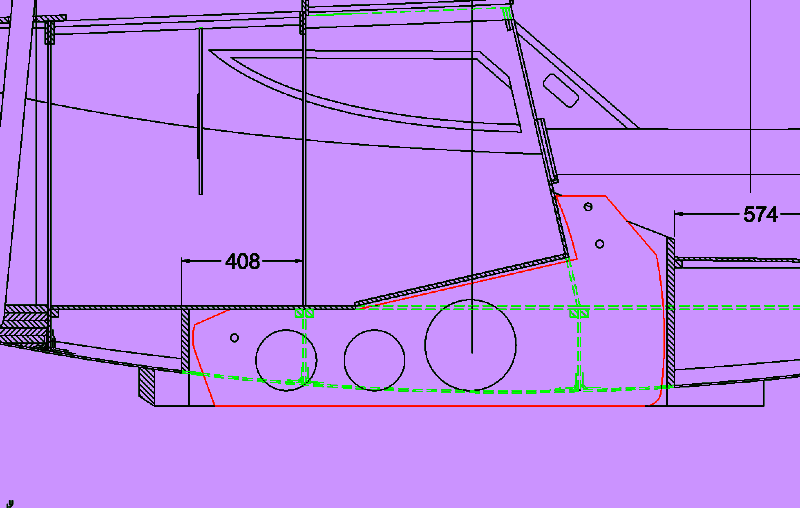
The trunks front position in the boat is
408 mm in my metric version from
frame B forward towards the bow
I got the following pictures from Jacques in the trunk discussion of 2013 in which you can read it all up. I am not sure if the non metric version has the same measuring problem:
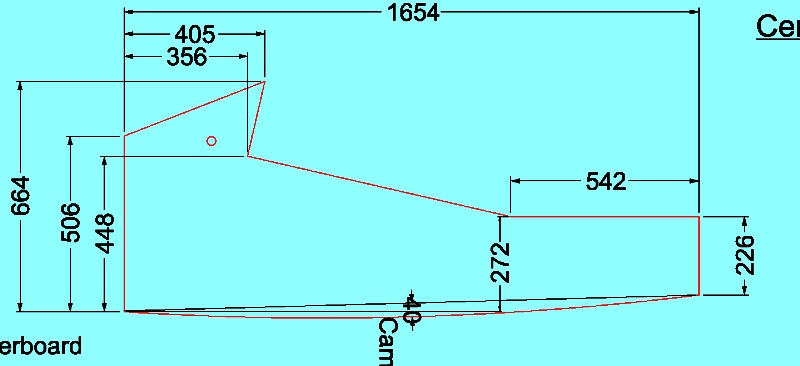
Bow to A is 833 , A to B is 855, B to C (bottom frame) is 936 and C to T is 1807. It was very confusing for me because on plan D264/4 was only a measurement from frame B to the vertical point below the top of bulkhead C ( B to C is 686 ) which is apparently slanted in the boat from the baseline up.
http://forums.bateau2.com/viewtopic.php ... 20#p338873
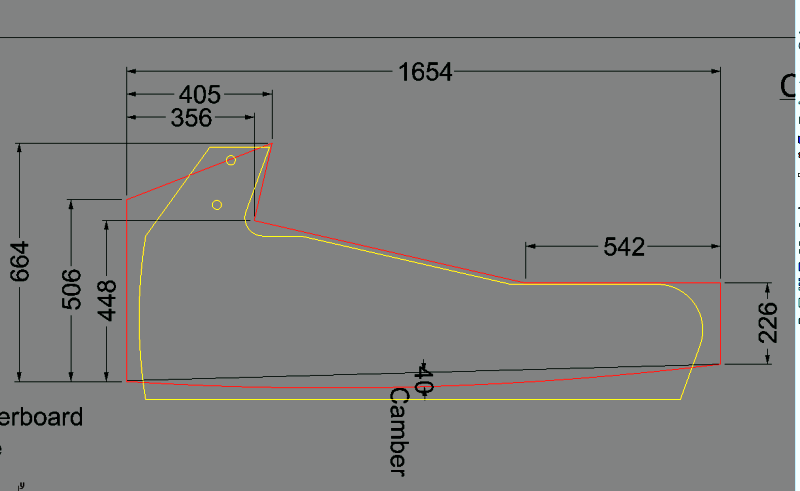
This picture is the best to get the trunk itself correctly constructed, note the measurement 272 which is missing 2 pictures earlier:
I hope you are not as confused thru my explanations as I was 1/2 years ago and it might help you.
Greetings from Karl (Austria)
Re: New AD14 build
Posted: Wed Nov 25, 2015 9:43 am
by jacquesmm
Thank you Karl, that is correct.
The frames are taped to the hull but not completely fiberglassed.
They are entirely coated with epoxy.
The CB trunk is located by the frames. Set your frames and the trunk fits in between.
Re: New AD14 build
Posted: Thu Nov 26, 2015 4:09 pm
by das boot
I glassed all of mine inside and out a tip on glassing so you do not end up with air bubbles 1 cut you glass to fit the area 2 paint the area with epoxy quite thickly 3 lay your glass onto the epoxy 4 rool it out with a small rooler socked in epoxy 5 I used playing cards they work well to squeegee off the excess epoxy This leaves you with the glass well bonded to the wood and gets rid of the extra epoxy
Re: New AD14 build
Posted: Sat Nov 28, 2015 6:05 pm
by Salvatore
Hi,
Welcome to the AD club, your AD14 is already taking shape. If I may ask, just check that the wheels on your frame are strong enough to take the weight, you could have as much as 200kg of boat plus two people working on your boat add another 200kg that adds upto 400kg = 800lbs aprox, If they fail on you it will not be fun fixing the problem after.
Regards Salvatore.
http://www.youtube.com/channel/UCK7N0Z3MuI9Awisupeh_7dw
Re: New AD14 build
Posted: Sat Nov 28, 2015 6:40 pm
by Salvatore
PS: I notice that the small wedge strip is missing in the bow of your boat? if you leave that piece out it will throw out your measurements when you go to install your cabin sections, it will create errors in the panel sizes. I was able to remove the wedge piece from my boat but I had to redo some of the sizes, I worked all this out beforehand, I actually made the side panels longer at the top edge, being a builder I was able to resize all the panels accordingly, my boat is actually 4cm= 1& half inch longer than the plan, this is from the tip of the bow to the stern. If you want a sharp edge on your bow but cain't work out the new sizes just add a solid wedge onto the bow after. If you do look at my boat please note that I made changes to the design above the waterline, making changes to the boat below the waterline will change the way the boat sails and is a big no no, I asked for help from Jacques when I wanted to make a small change to the keal. Most of the pictures of my boat + georges boat and some others, are in the "builders Galleries" on this web site just type AD16 in the search field to find them. I hope this info is helpfull. You will love sailing you AD14 they are easy to sail and even a novice can sail it.
Salvatore
Re: New AD14 build
Posted: Tue Dec 01, 2015 9:15 pm
by waytootall
I admit that I don't know what you are referring to when you say I left out the small wedge strip on the bow. I didn't leave anything out on purpose so if something is missing it means I made a mistake, but I can't figure out what. Could you point me in some way to the piece you are referring to?
Re: New AD14 build
Posted: Tue Dec 01, 2015 9:19 pm
by waytootall
Das boot, thanks for the step by step advice on the glassing. I did OK on the tape for the but-jointed panels and seams but I had some definite problems with the fabric on the bottom and I believe your advice will help me with that when I get to more visible areas. I won't get much more done for a couple of weeks with all the kids activities this time of year but I hope to accomplish a lot around Christmas and New Years.
Re: New AD14 build
Posted: Wed Dec 02, 2015 12:31 am
by Salvatore
waytootall wrote:I admit that I don't know what you are referring to when you say I left out the small wedge strip on the bow. Could you point me in some way to the piece you are referring to?
G,day, very happy to do so
. The two pictures below are of George's boat, I got them from the forum galleries, His boat is a AD16 like mine the AD14 and AD16 are identical except for length. It would be sad if you looked at pictures of my boat and made a mistake because of me

. The bow has a flat piece that is wide at the top and nothing at the waterline. In your plans you should find where it is drawn, please ask Karl as his is a AD14 like yours and the plans are identical. The guys on the forum were a great help to me while I was building my boat, because of them, I built my boat faster and better than it would have been, with less mistakes. please let me know if you require any further info.
Kind regards Salvatore from down under
Re: New AD14 build
Posted: Wed Dec 02, 2015 5:09 am
by gonandkarl
Hi,
As Salvatore mentioned I am also building an AD14 and the wedge at the bow you find on plan
D264/6 named
Expand Plates and it is in the middle of this plan sheet. But it looks from your picture that you made the bow without the wedge already. I just hope you can squeeze the sides far enough apart to get frame A into the boat without any problem.
If you want to put the wedge in you have to cut the connection between the 2 sides at the bow open and then it should be easy to insert the wedge.
The dark piece of wood is the wedge on my bow in the following picture, just to give you an idea what Salvatore mentioned:
Greetings from Karl ( Austria )
Re: New AD14 build
Posted: Wed Dec 02, 2015 9:34 am
by jacquesmm
I like the wedge, it's pretty and it's easy to join the panels that way but you can also build without that wedge.
Re: New AD14 build
Posted: Wed Dec 02, 2015 10:15 am
by waytootall
Wow, thanks everyone. I completely missed that. I will see if I can retro-fit that back in without too much trouble.
Re: New AD14 build
Posted: Wed Dec 02, 2015 2:04 pm
by jacquesmm
It is not very important. No need to change anything.
That part is on the plates dimensions drawing, marked stem.
It is also visible on the plan view of the construction drawing.
I like because it makes assembly of the bow very easy: just a few temporary screws in lieu of stitches.
Later, you can double it and have a nice flat spot for the U bolt and the forestay plate.
Re: New AD14 build
Posted: Sun Dec 06, 2015 1:16 pm
by waytootall
Since it proved not too hard I went ahead and added the stem wedge. I want to stick as close to the design as possible so I don't run into unforeseen problems later.
Re: New AD14 build
Posted: Sun Dec 06, 2015 1:35 pm
by terrulian
Instead of pasting the URL, click "Img" above and then paste the URL of the image. Then the image will appear in the body of your post.
Re: New AD14 build
Posted: Sun Dec 06, 2015 4:37 pm
by Salvatore
waytootall wrote:Since it proved not too hard I went ahead and added the stem wedge.
Thats good news
I am happy you got the wedge to fit without to much trouble. Regards Salvatore
Re: New AD14 build
Posted: Thu Dec 10, 2015 6:29 am
by gonandkarl
Hi,
As someone mentioned it is important to have a good base on which you build the AD14. I thought I made mine strong enough until today. I removed the support at the transom to be able to fair it right to the corner, so the boat was only supported underneath frame A B C and D. With my weight of 120 kg I managed today when I stepped from the stepladder into the boat to let the last 2 supports ( under frame C and D ) collaps towards the transom. I got quite a fright and I hope the bottom of the boat is not damaged which I will see only when I lift it of the building jig. I tell you this story, because I saw your son underneath the boat and advise to be always careful.
Here is the picture which teaches me to fix the supports also in a horizontal way :
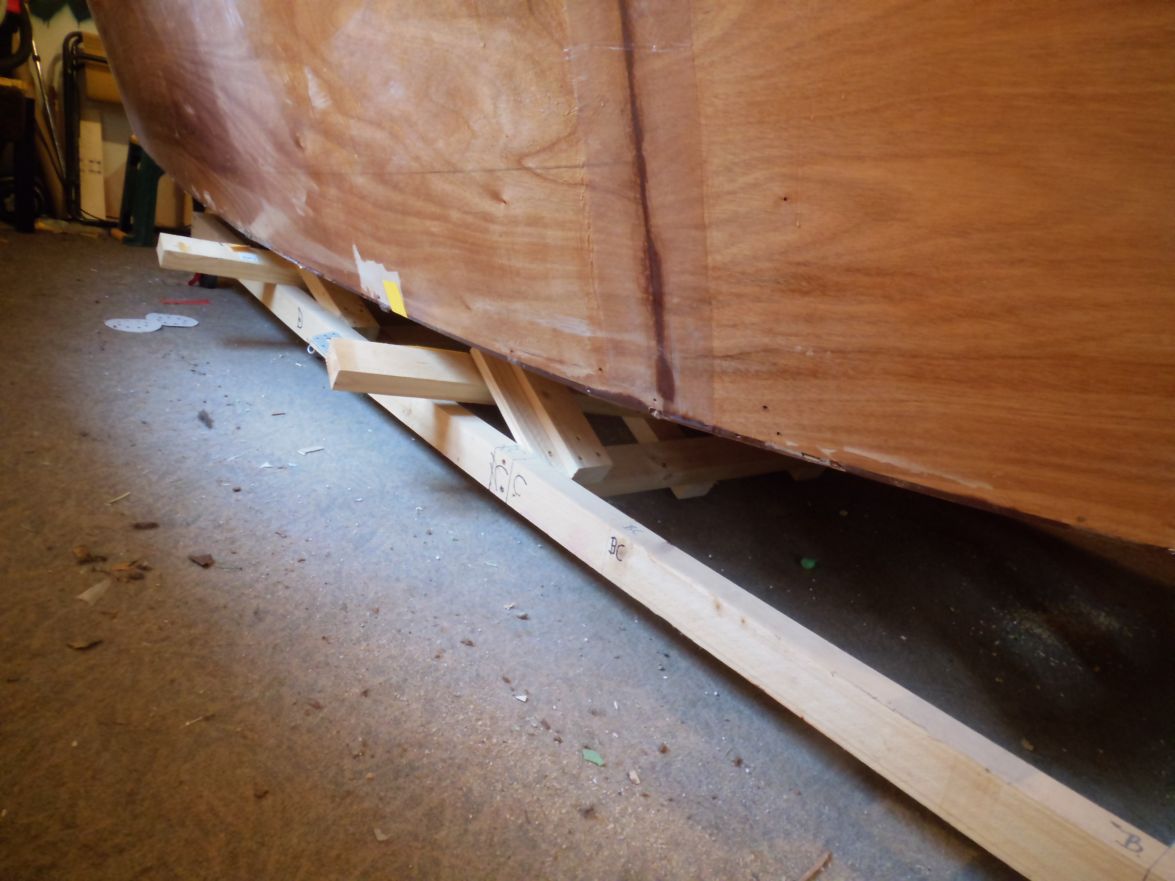
Greetings from Karl ( Austria )
Re: New AD14 build
Posted: Wed Dec 23, 2015 8:48 am
by waytootall
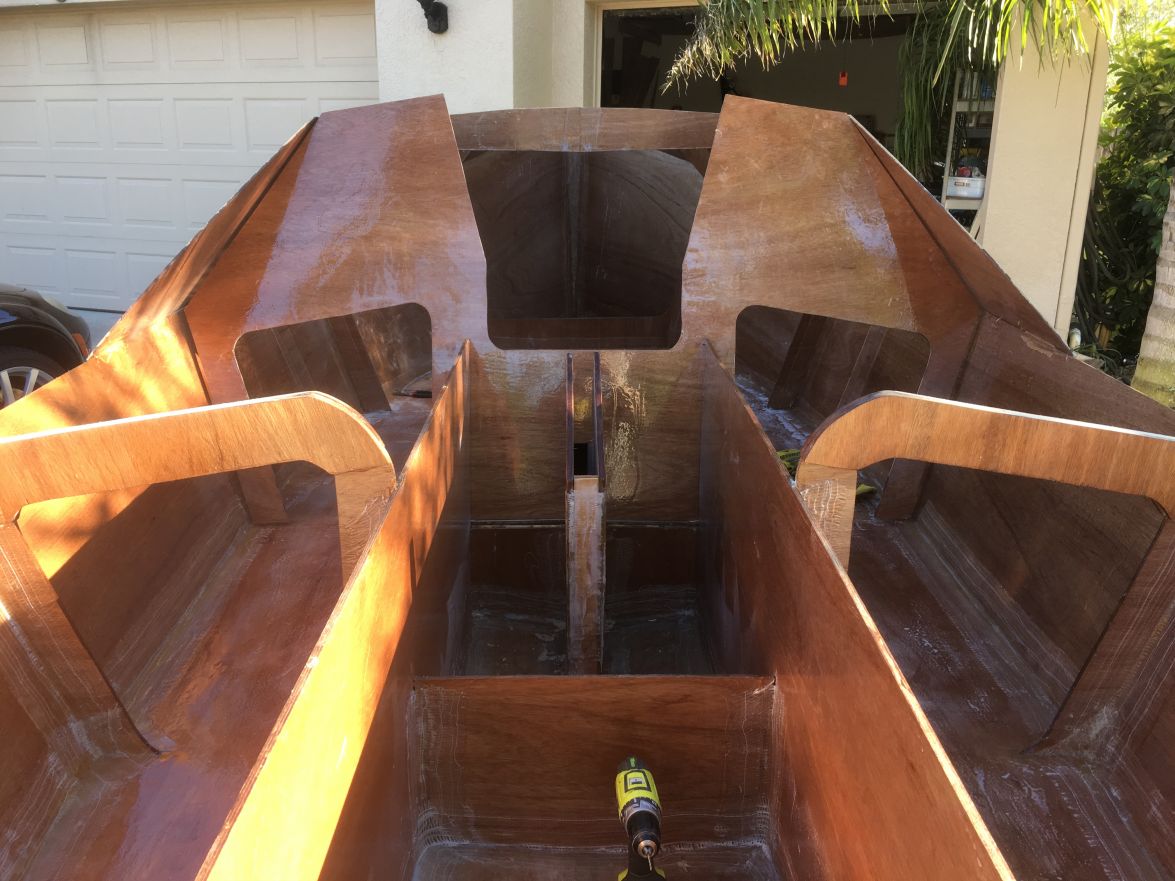
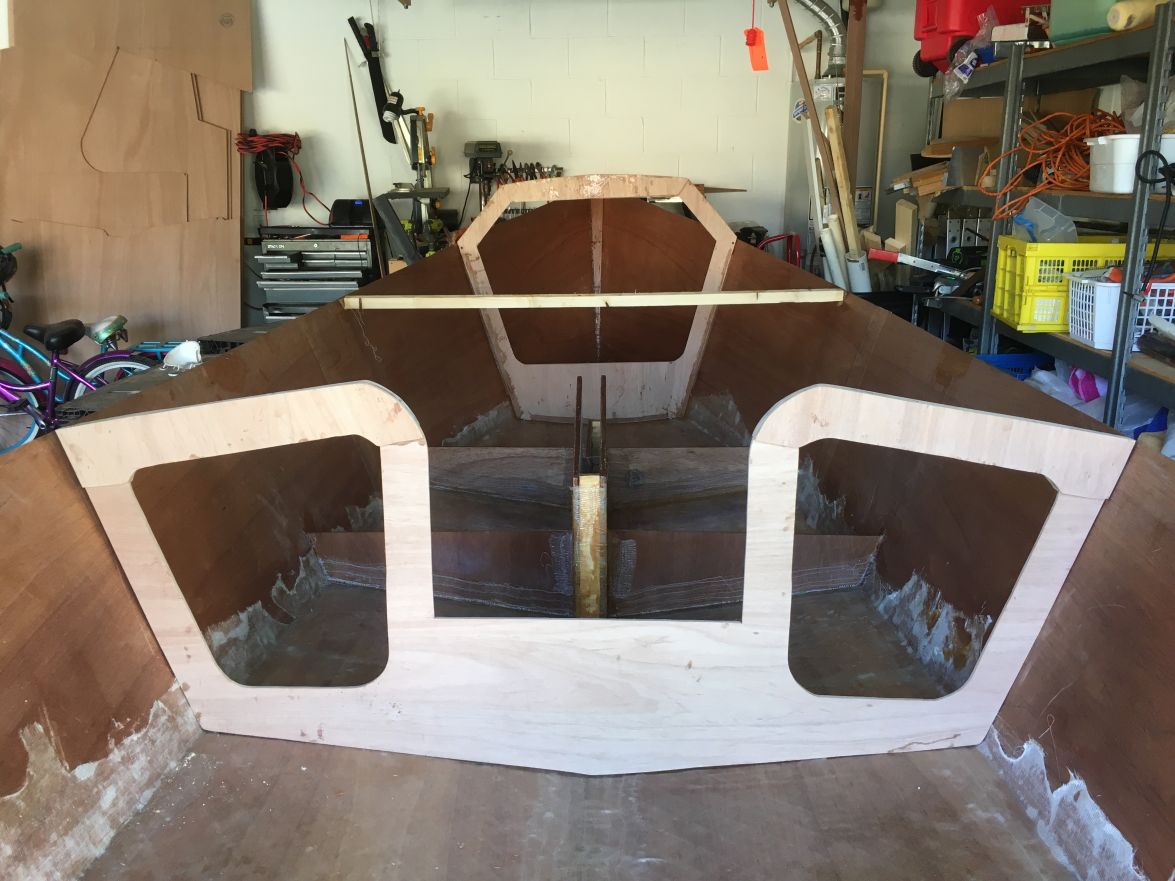
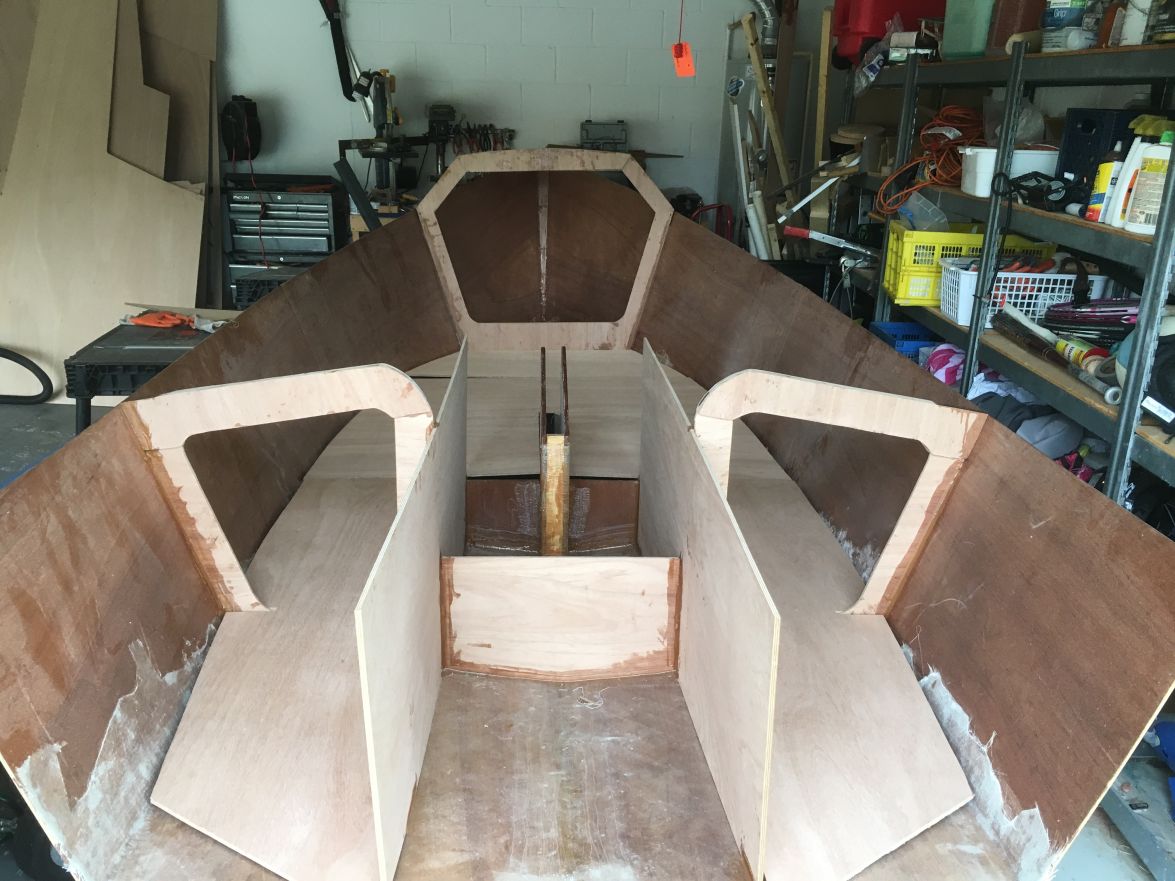
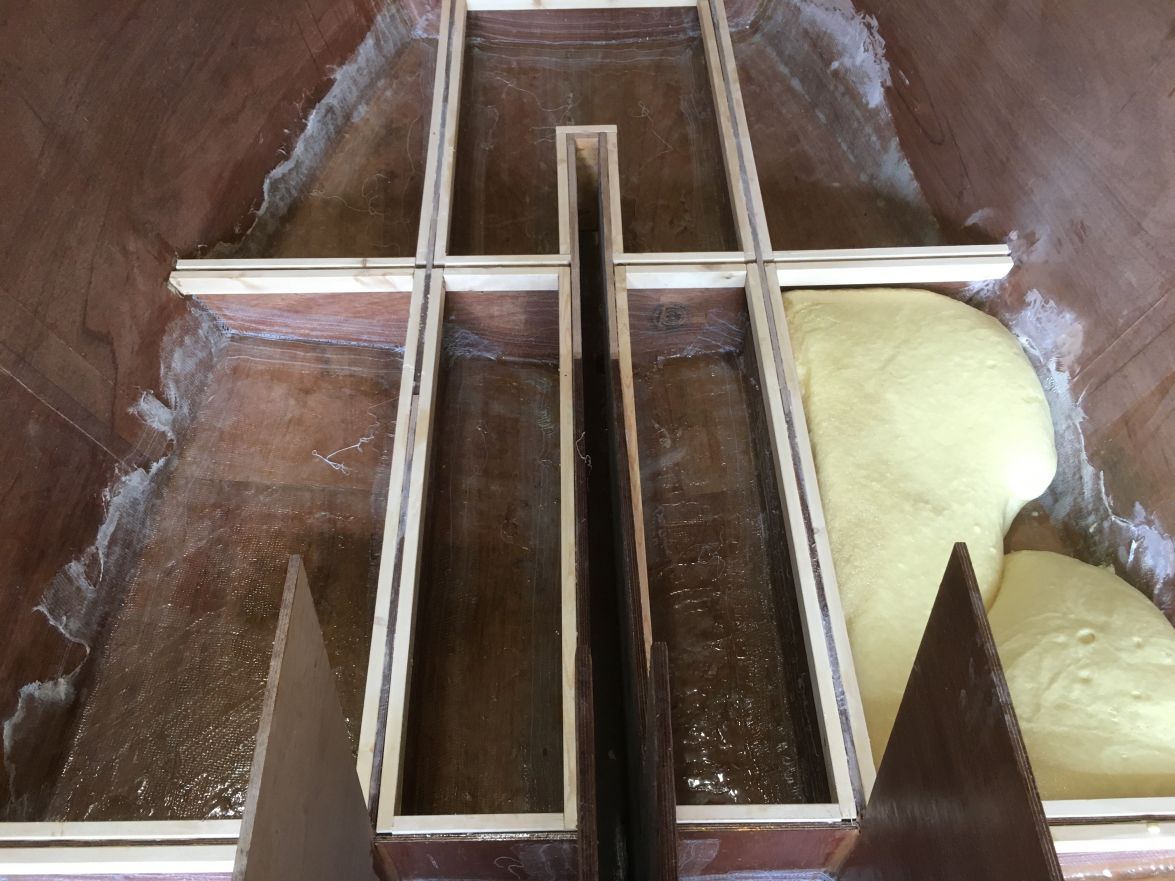
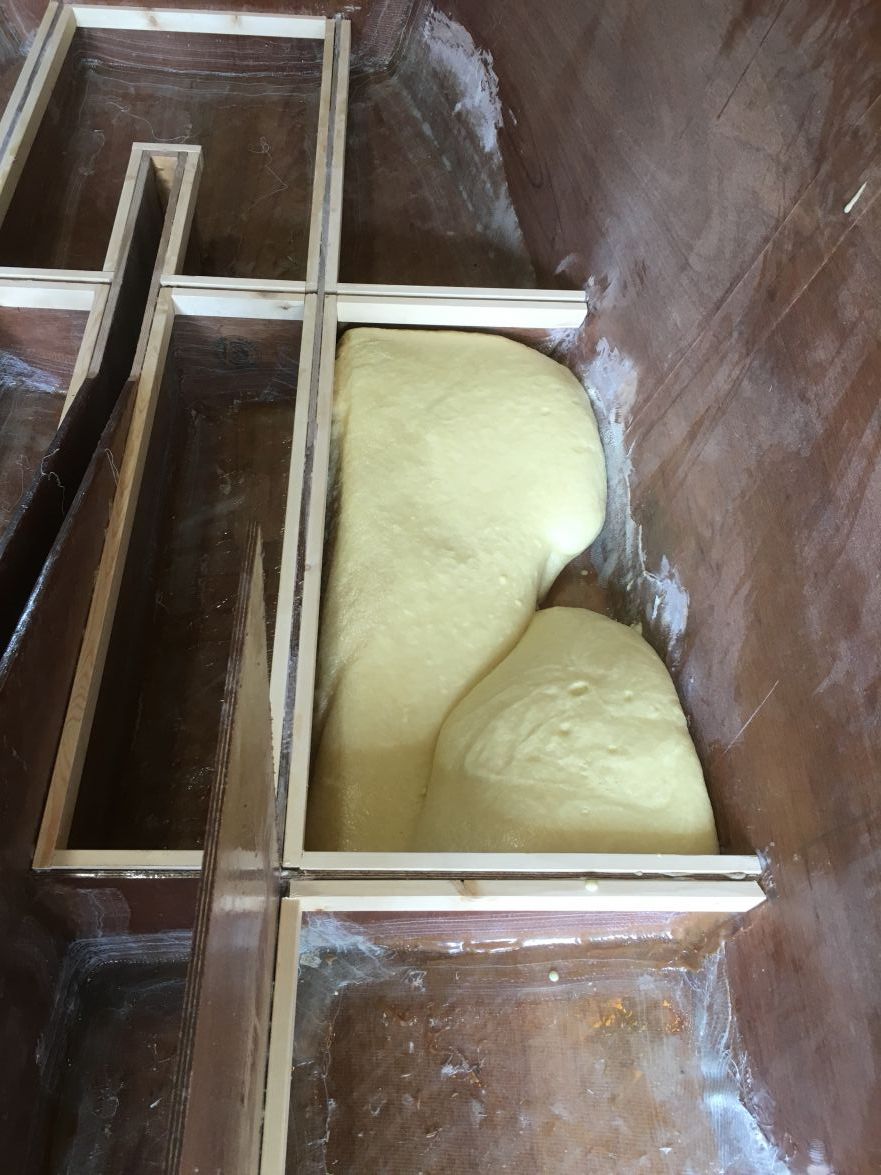
I was afraid of that happening as well so I have 6 support points under the hull. No that I have some time off for the holidays I am making some progress. I finished assembly of the CB trunk and re-testing the fit of the centerboard and it still fits.
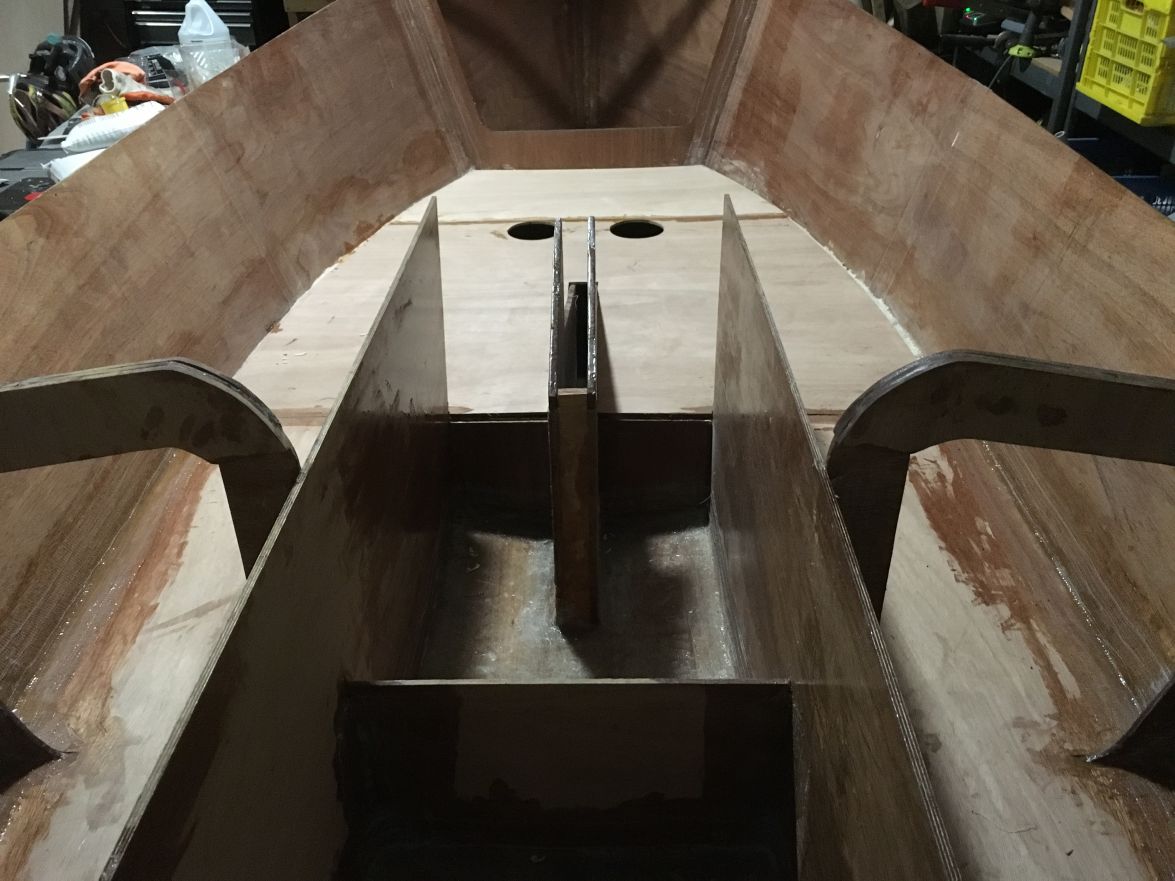
I cutout floor frames B & C and positioned the the frames and CB trunk.
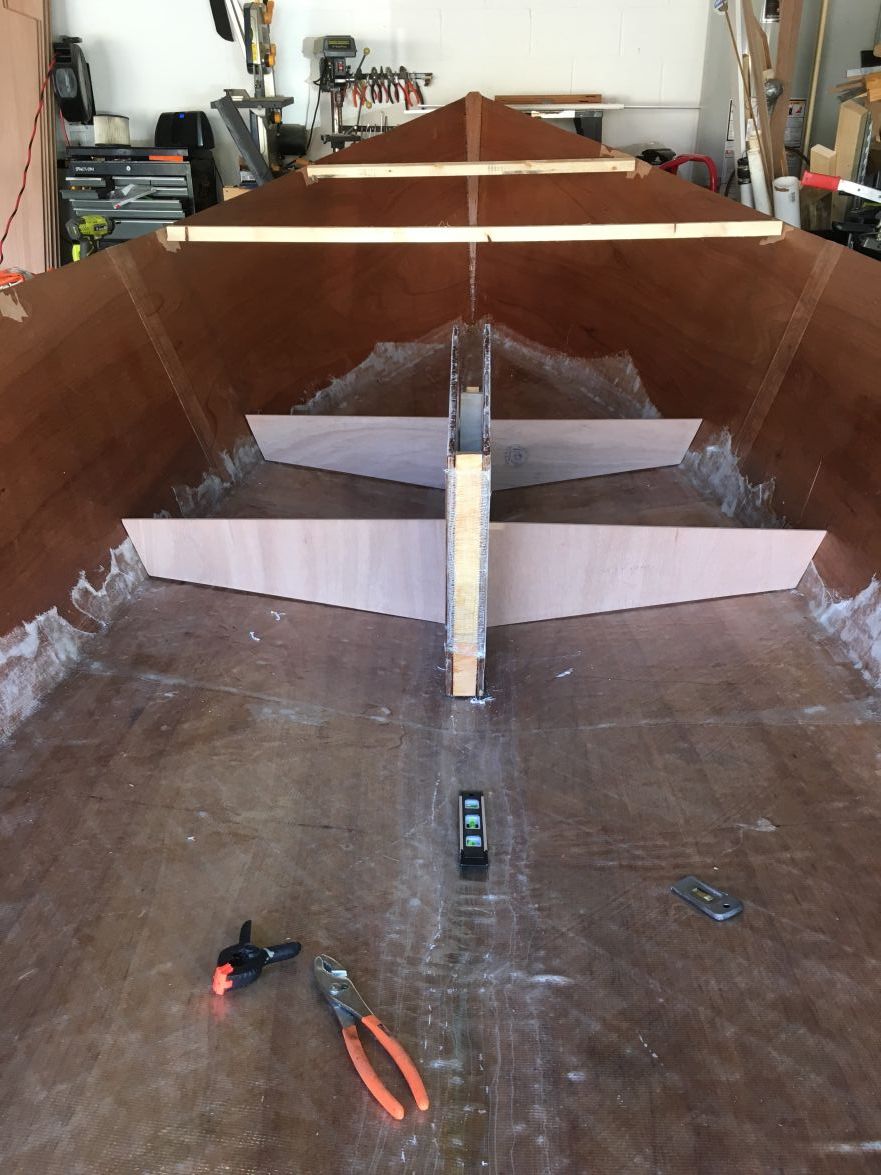
I positioned the CB trunk based on the frames and stations drawings, from reading the many posts about how to position it and from a short conversation with Jaques when I went to pick up my plywood. Then after marking, drilling and fiberglassing everything in place I discovered the 2 additional measurements on drawing 264/3 (construction and lamination) that show exactly where to put the CB trunk. I am about 2 inches too far to the stern. I am not going to try and re-do it. I will just make adjustments to to decking and sole as necessary. Here are pictures of the frames and CB trunk instaled.
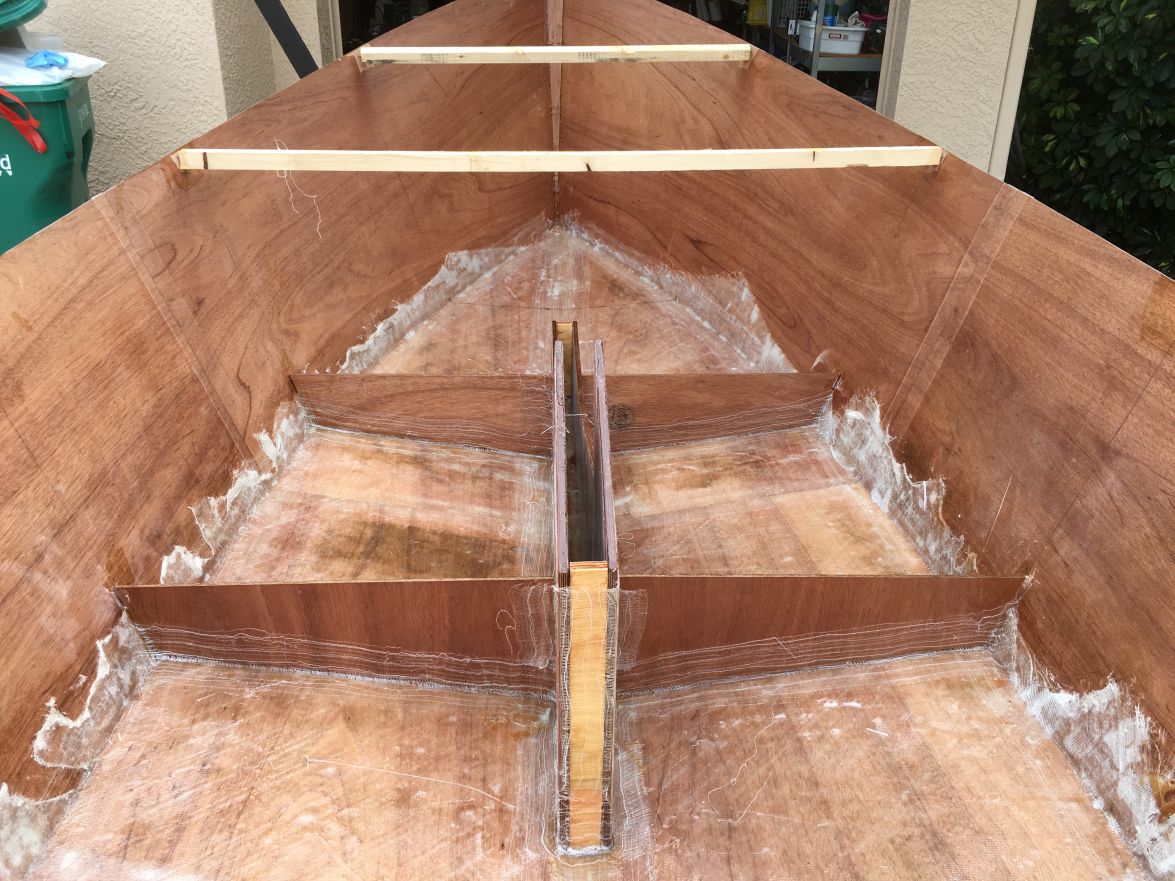

I still have some epoxy coats to full out the fiberglass. I will do that at the same time I glue and fiberglass in frames A & D. I am cutting them out today and installing tomorrow.
Re: New AD14 build
Posted: Wed Dec 23, 2015 9:12 am
by jacquesmm
Your fiberglass looks a little white. Are you certain that you use enough epoxy?
Re: New AD14 build
Posted: Wed Dec 23, 2015 10:07 am
by waytootall
No, I am not certain. Along the inside of the hull sides I know I didn't use enough. On the CB trunk and frames I saturated until the epoxy was just running off and pooling at the bottom. I was planning to do more coats to fill it in, but I could be doing something wrong.
Re: New AD14 build
Posted: Wed Dec 23, 2015 10:22 am
by jacquesmm
It's in between the two.
I was in Melbourne last week and have to go to Eau Gallie next week. If you want, I'll stop by, email.
Re: New AD14 build
Posted: Wed Dec 23, 2015 12:06 pm
by waytootall
I sent you an email. I will keep working on it until I get it right. On the sides of the CB trunk I got the fiberglass looking pretty good. But that was on a flat surface. I guess I have more learning to do on vertical surfaces and corners. Hopefully I can get it right while working on surfaces that won't be seen
Re: New AD14 build
Posted: Fri Dec 25, 2015 1:00 pm
by waytootall
I got frame A built and installed.
Note the triple thickness on the top and double thickness on the bottom, which I only figured out by reading blog entries from previous builders. Thank you for that.
I also built and dry-fit frame D.
I won't accomplish much for the next week due to family vacation. But I received my 250lbs of lead shot ballast and my Delrin block so I will finish up me centerboard when I get back and continue with the framing.
Re: New AD14 build
Posted: Sat Dec 26, 2015 11:34 pm
by das boot
On trying to work out where to cut the slot in the bottom of the boat to fit the keel I used a long drill bit and drilled from the inside of the keel box to find the two rear corners then it was just measuring from there to find the front locations to drill then a saber saw to cut the thing out. One of the hardest parts to get good glassing on is that slot in the bottom it is a sharp corner and heavy glass dose not like that. I used a bunch of light lares of glass for that it worked.
Re: New AD14 build
Posted: Sun Jan 03, 2016 9:18 pm
by waytootall
Working to finish the centerboard. I was a little scared of melting and pouring lead and my wife was more scared so I went with lead shot in epoxy. This is the setup and my older daughter helping.
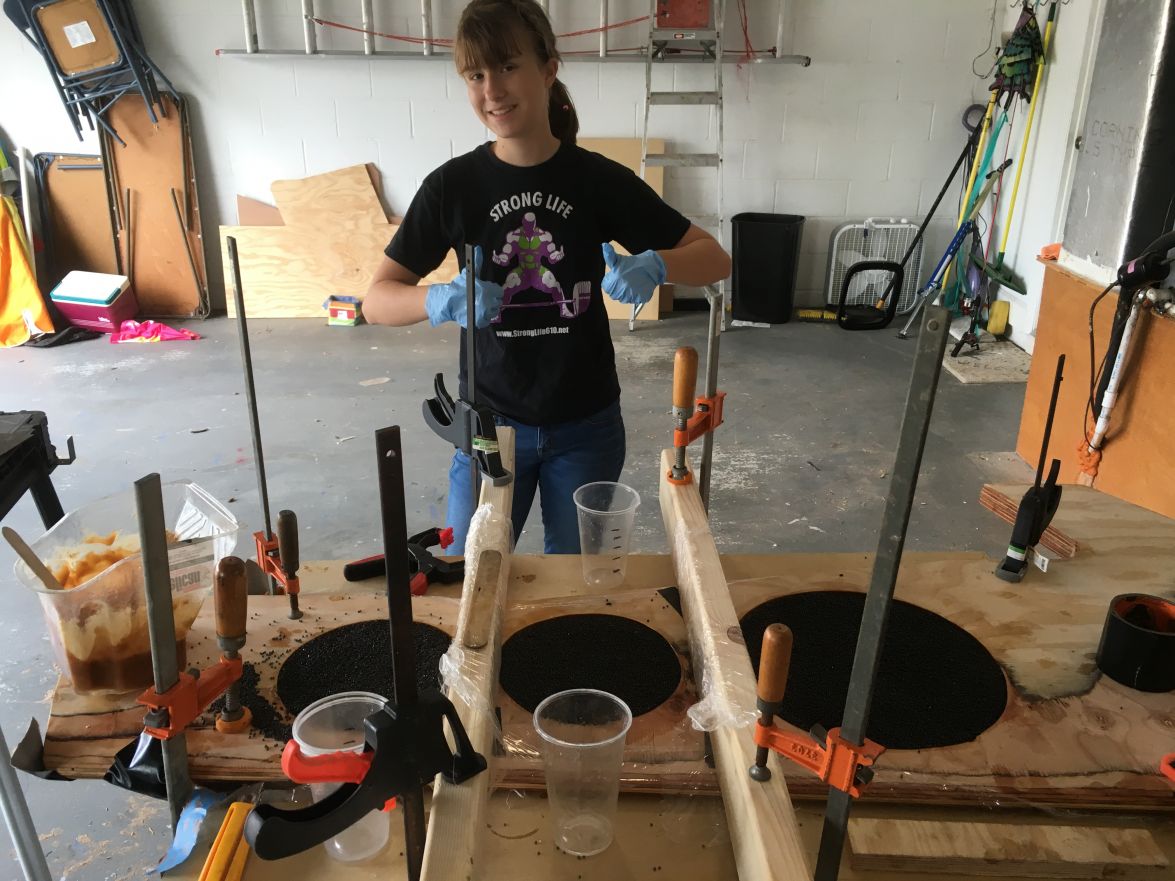
I thought I had the bottom of the CB sealed up to hold the shot and epoxy, but I was wrong and the epoxy leaked all over the place and really messed up the backside of the CB.
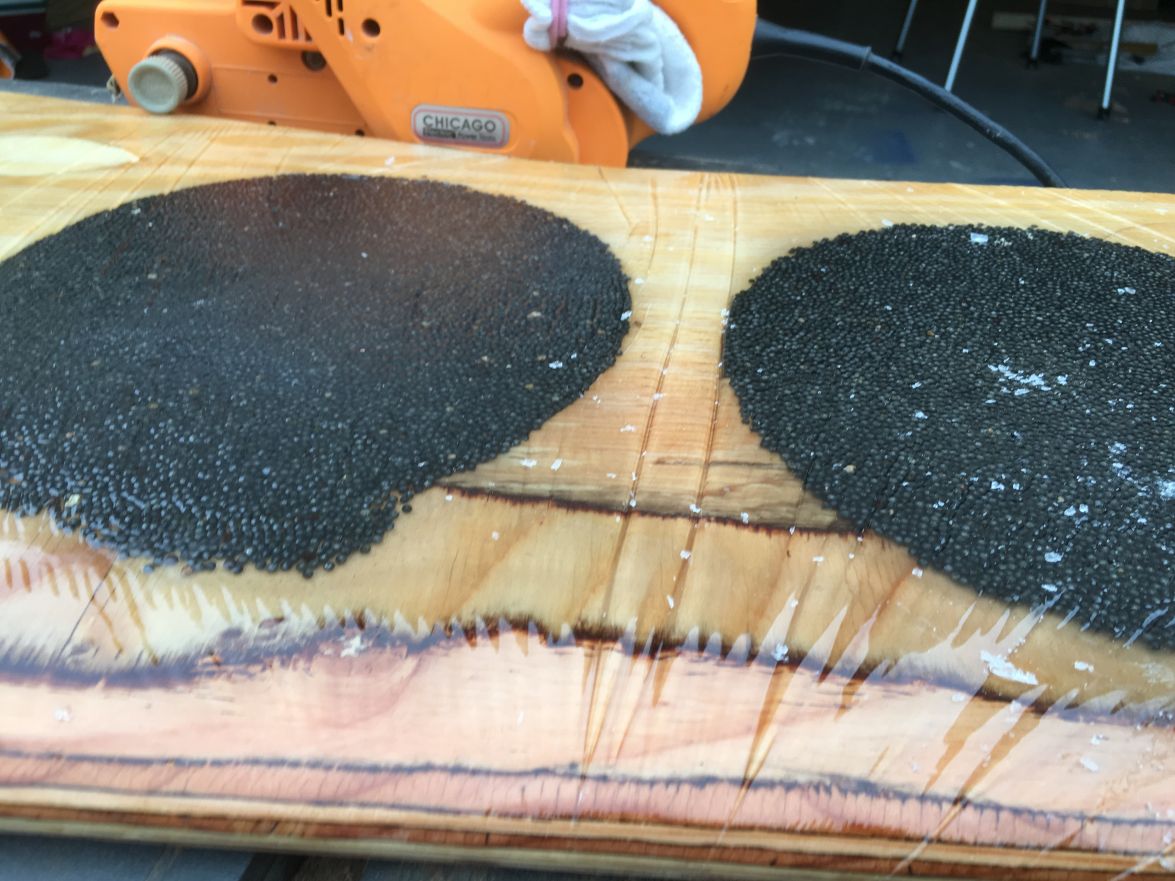
So I spent the next day with an angle grinder removing all the excess epoxy and he runaway shot. For anyone else doing this I would recommend a base layer of thickened epoxy to prevent leaking before pouring in the shot and the unthickened epoxy on top of that.
Re: New AD14 build
Posted: Wed Jan 06, 2016 5:27 pm
by waytootall
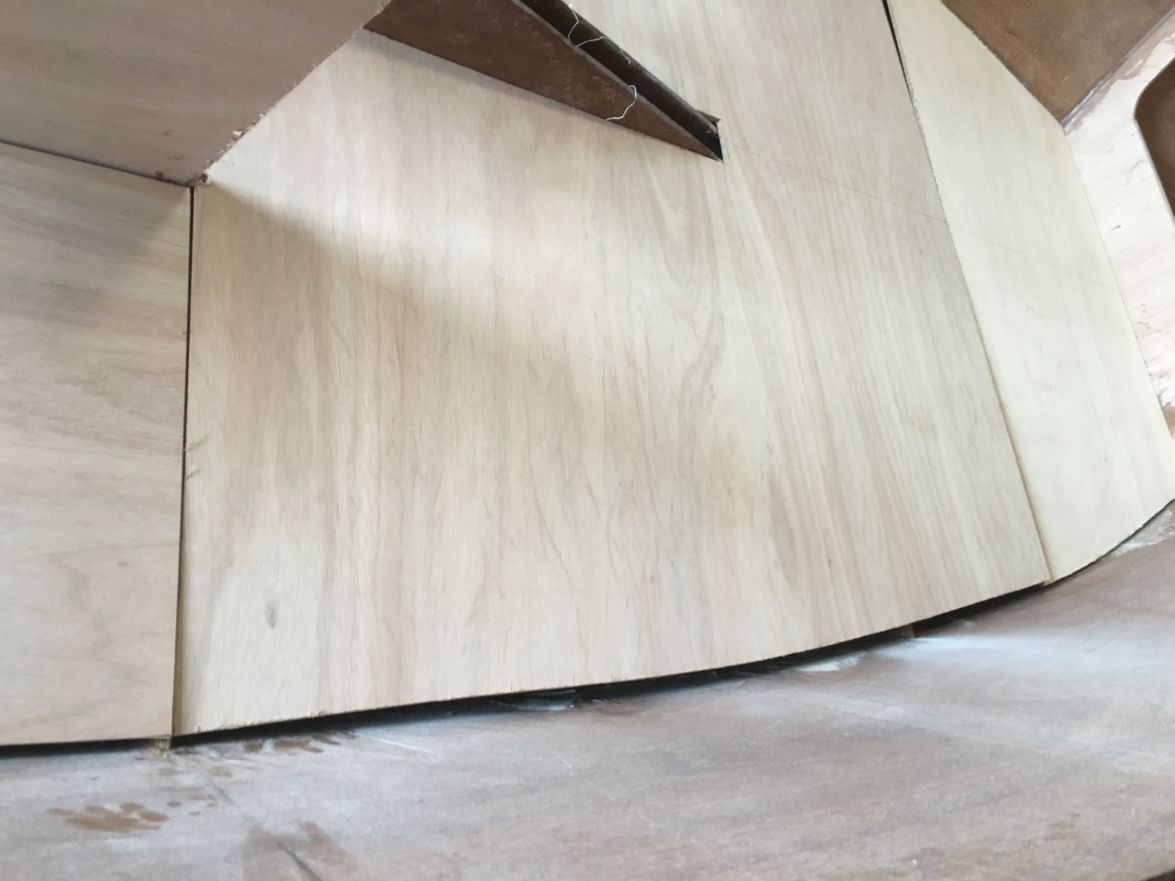
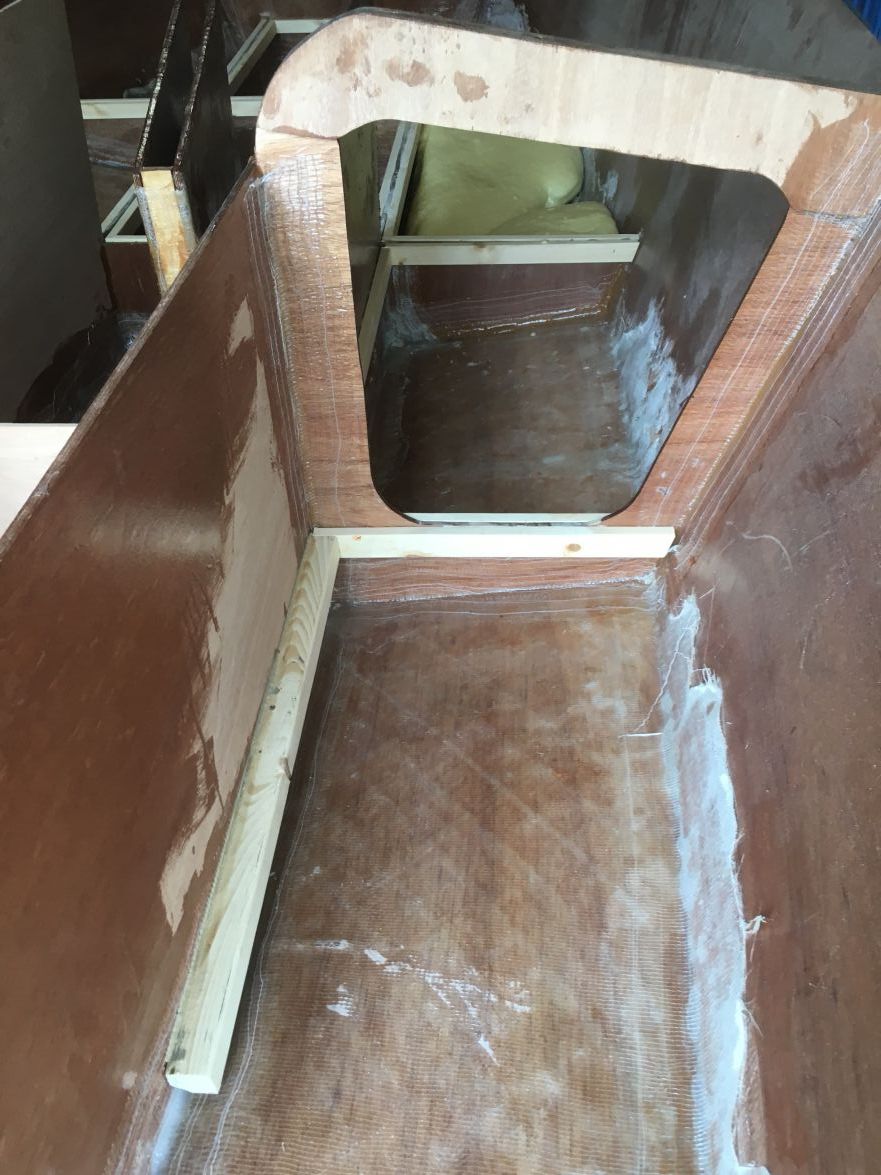
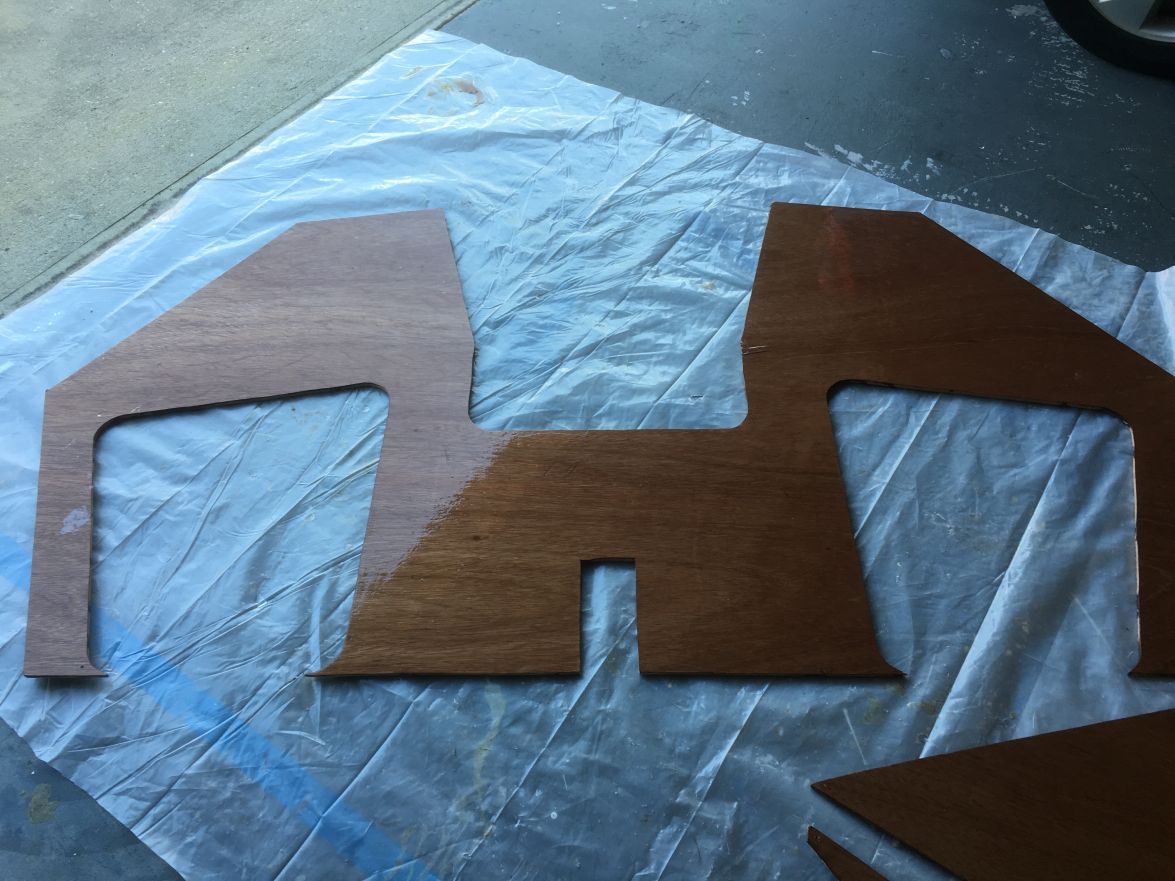
Today I cut and dry-fit the berth/sole.
I had to notch the berth sections to fit through Frame D. This isn't mentioned anywhere in the notes but it seemed necessary.
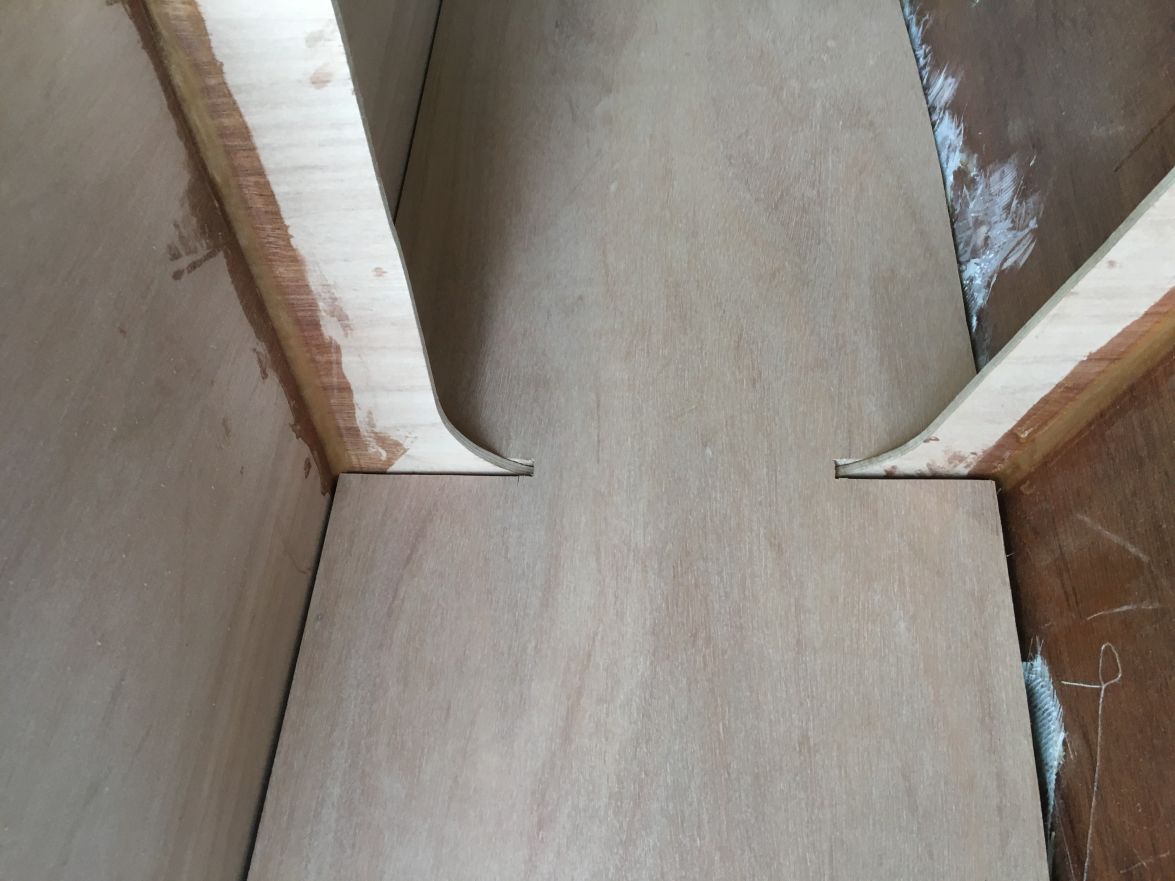
There is a good bit of a gap around the forward portion of the berth/sole between it an the sides of the hull. All the measurements are correct and the frame measurements were correct so I don't know why there are gaps. I guess I will just have to work to fill the gaps. Did anyone else experience this?
Are there supposed to be cleats/battens on the hull sides to support the berth/sole? I don't see them mentioned or on any diagram but it would seem to make sense.
Re: New AD14 build
Posted: Thu Jan 07, 2016 4:06 am
by gonandkarl
Hi,
There are only cleats on the frames and longitudinal stringers to support the sole. I also experienced some gaps next to the sole, but as I poured foam between the frames underneath the floor I just had to fill the remaining gaps with epoxy goo and made it round and put the fibreglass tape on it which holds the sole to the sides.
You are moving very fast with your build. Have you planned the splashing for this summer ?
Greetings from Karl ( Austria )
Re: New AD14 build
Posted: Thu Jan 07, 2016 10:05 am
by jacquesmm
This happens sometimes when the hull panels flare out too much and the basket mold is too wide.
Or you build without the basket mold and nothing keeps the top of the panels from flaring out.
In that case, without the mold, one way to prevent it is to pull the sides against the frames when assembling the hull but few builders do it.
We can not guarantee how every sheet of plywood will bend exactly, some take their shape as expected, other flare out while sitting there, with temperature and moisture changes. It is always safer to cut sole and deck panels after assembly and check if the dimensions match.
This also applies to the deck.
It should go together perfectly, without a gap but a small difference may appear at the sheer level, get larger at the lower side of the cabin, the larger at the deck edge. 1/8" difference each time may become 1/2" at the top.
It is not a big problem. The glass tape will cover all that.
For the sole, as Karl writes, if you foam the compartments, you can fill the gap over the foam.
One easy way to reduce the gap along the edge of the sole is to glue cleats along the side. Where the gap is wide, you can even use a second layer of cleats.
I will add a warning line to the building notes because I realize that several builders have assembled the boat without the basket mold: add some cleats along the hull if you don't fill with foam.
Re: New AD14 build
Posted: Thu Jan 07, 2016 10:20 am
by jacquesmm
Thinking about that: I will write notes about an alternate assembly method, without the basket mold.
All dimensions will stay the same but there are some precautions to take when putting the hull together.
Re: New AD14 build
Posted: Thu Jan 07, 2016 2:27 pm
by Salvatore
waytootall wrote:There is a good bit of a gap around the forward portion of the berth/sole between it an the sides of the hull. All the measurements are correct and the frame measurements were correct so I don't know why there are gaps. I guess I will just have to work to fill the gaps. Did anyone else experience this?
G,day, It would be a good habit to measure what is actually needed and compare it to the size on the plan before cutting your plywood. I also made-up the frames so that I could get the shape of the hull closer to plan by using the frames as a guide. I also used lengths of timber to force the hull to match the shape of my frames, it does not matter if you put holes in the side of the hull as you will be glassing it on both sides (inside and outside). Use lots of support braces. Living materials ( wood, leather, etc ) are not like dead materials (steel, mortar, etc) and the outcome of once living materials can vary

Below: picture of my boat with some bracing.

You are doing really well and your boat is starting to look good, you are at a stage where what you are doing is very important, take the time to get all your sizes correct. Some boat builders use old or cheap pieces of ply, Masonite,cardboard,craft-wood any kind of scrap materials and make-up templates first. I used this technique in areas of my build that I was not confidant about. Take the time to look at pictures on this website, I spent hours just looking at pictures to see how other boats are being built, go to my youtube page there are some other AD16s in the build process.
http://www.youtube.com/channel/UCK7N0Z3MuI9Awisupeh_7dw Regards Salvatore
Re: New AD14 build
Posted: Thu Jan 07, 2016 3:34 pm
by waytootall
Thank you all for the replies. I had actually done most of the things suggested except cutting test pieces with cheep wood. I have to force myself to slow down and be patient, I am not good at that. I will focus on more careful measuring. I had a couple weeks off from work so I got a lot done but it will slow down a good bit. I have no illusions of splashing this summer.
Re: New AD14 build
Posted: Fri Jan 08, 2016 6:48 pm
by waytootall
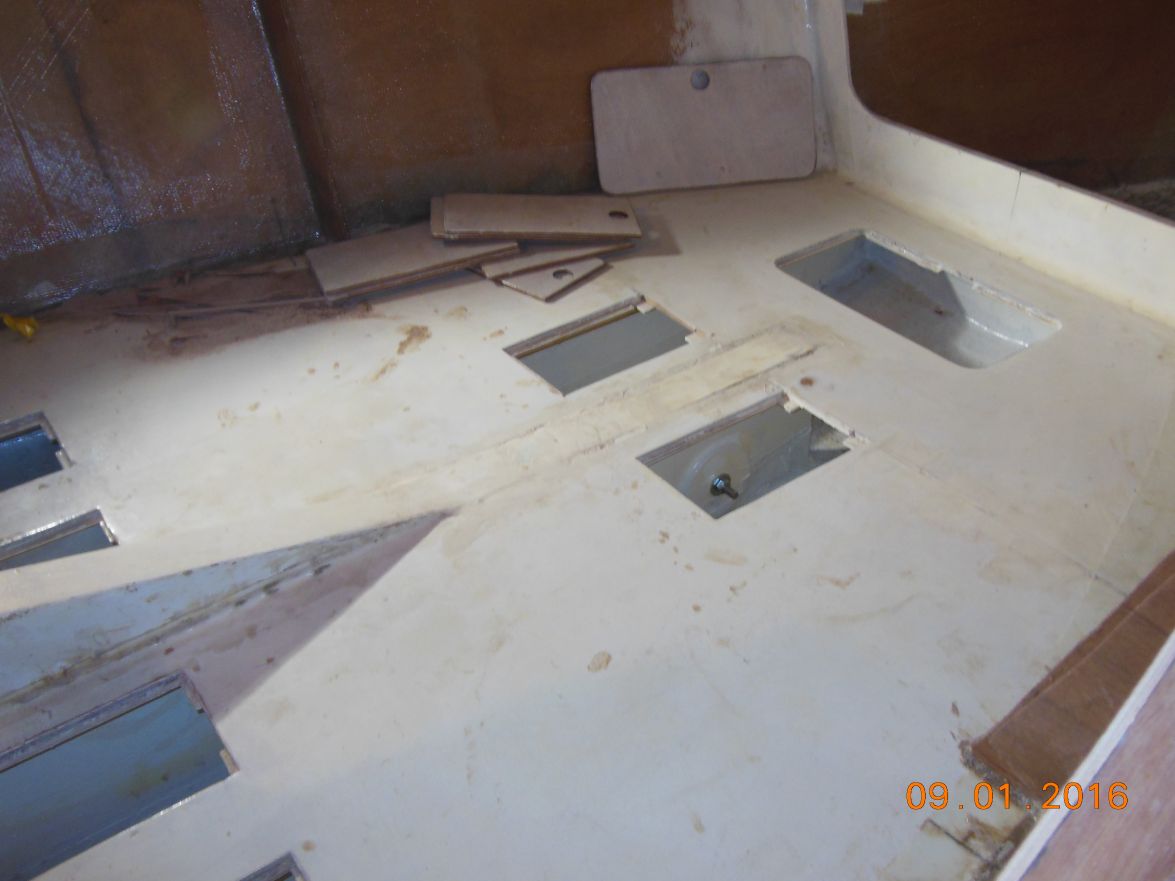
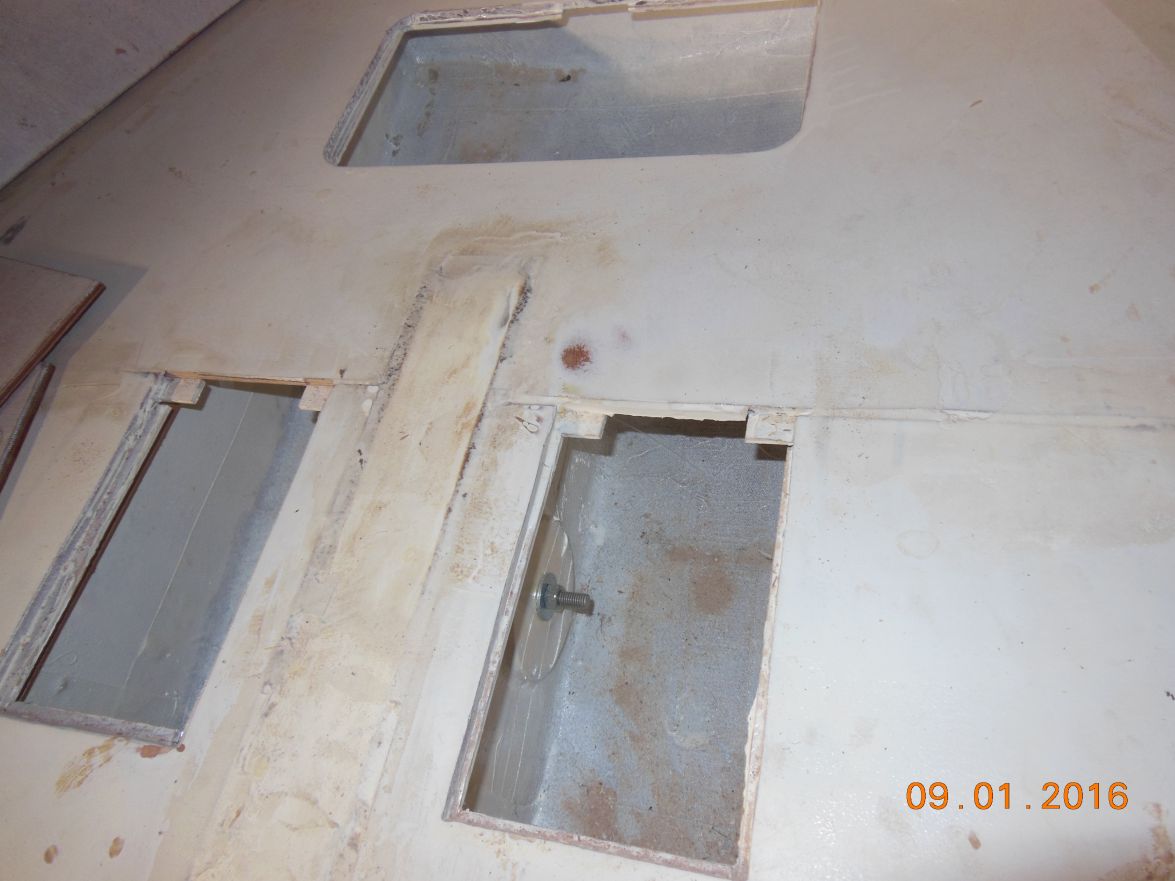
In planning ahead for cutting the proper access hatches in the sole, I have a couple of questions:
1. Can someone clarify of explain what they did in the placement of the ballast that isn't in the center board? The notes say "in front of frame B". I would think that the weight would be best nearest the keel but just in front of B at the keel is where the centerboard pin is so I don't want to block access the that. I do plan on putting foam in the outer compartment in front of B so I don't want to put the ballast there. I want to plan this now so the access hatch can get at the CB pin and the ballast I believe.
2. Does anyone have any suggestions on how to do the access hatch? gonandkarl did nice looking hatches as he shows in this picture

Did you put cleats underneath the sole to support the cover? Did you cut the covers from a separate piece of plywood or were you that good to make the piece you actually cut out of the sole look that good? Or should I just go with a round twist out cover like this:
https://www.google.com/shopping/product ... QieAygAMBA
but there in't much room between the CB trunk and the stringers to fit a round cover and still have the recommended 3 inch clearance.
Re: New AD14 build
Posted: Sat Jan 09, 2016 12:37 am
by das boot
I pored my ballest led into a series small bricks and set them in around the keel I did not fix them into place at that point and that was a good thing. After I sailed the boat for a few trips I realised I needed to move 40-50 pounds to the bow to make my boat sail properly and I was able to move the small bricks around to do that. After that was all worked out I just pored some foam over them to hold them in place
Re: New AD14 build
Posted: Sat Jan 09, 2016 12:54 am
by das boot
The hatch is not hard I built up the sides of the hatch opening on each side with 1-4 and topped it off with 2 pieces of stainless steal they protrude out the outside by 1/2 inch that is the track the hatch slides on then when I built the hatch itself there is a lip that goes under that stainless slider when it was all dun I slid it into place and capped over the end so there is no way it is coming off. The opening from the cockpit I cut groves into a good piece of hard wood on each side something like a H when looking from the top cut and glue them into place then I have two drop in pieces that drop into place when it is closed up and locked it is secure and dry
Re: New AD14 build
Posted: Sat Jan 09, 2016 7:35 am
by gonandkarl
Hi,
Now that I at last kicked out Windows of my notebook after having hated it for the last 25 years and installed Linux my Uploads of pictures work a mile faster and therefore I took a few to hopefully answer your questions. I also was thinking of using round inspection holes where you just screw the lid on and it is watertight. But I decided against it for the following reasons:
1.) I am old ( nearly 70 ) , overweight and have not very long arms and so I would never get into a corner of a hatch that is why I made them out of the cut outs and fitted small cleats under the sole so that the cut out lids wont fall into the hatch.
2.) I bought a porta potty which is 33 cm high and again because of our age it would be difficult to sit so low and therefore I made this 4 hatches near the companionway where we can put the 2 feet on each side of the longitudinal stringer down. They are not very long about 40 cm.
3.) As Salvatore and Tony Johnston pointed out to me that the hatches I made are not all that safe I put in an extra bottom frame just before my loo holes and filled foam into that space up to frame B the same as outside the longitudinal stringers. After the splashing I will make the lids of the hatches watertight and then it should be OK on the safety side.
4.) I made the bit bigger hatch near the bow to have good access to the centreboard pivot and to be flexible where to put the loose extra weights as well as having enough underfloor stowage.
Here are the pictures of the hatches just taken for which I had no time to dust not one of my forte.
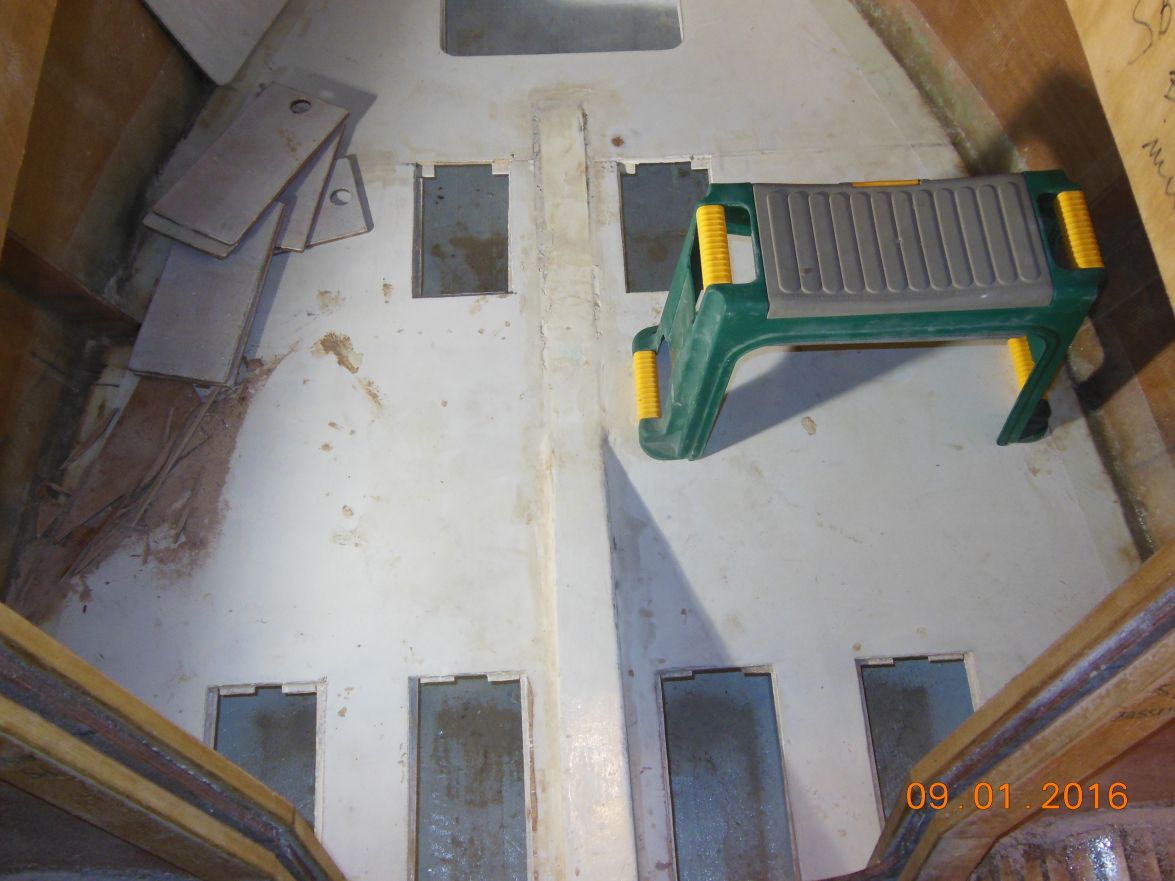
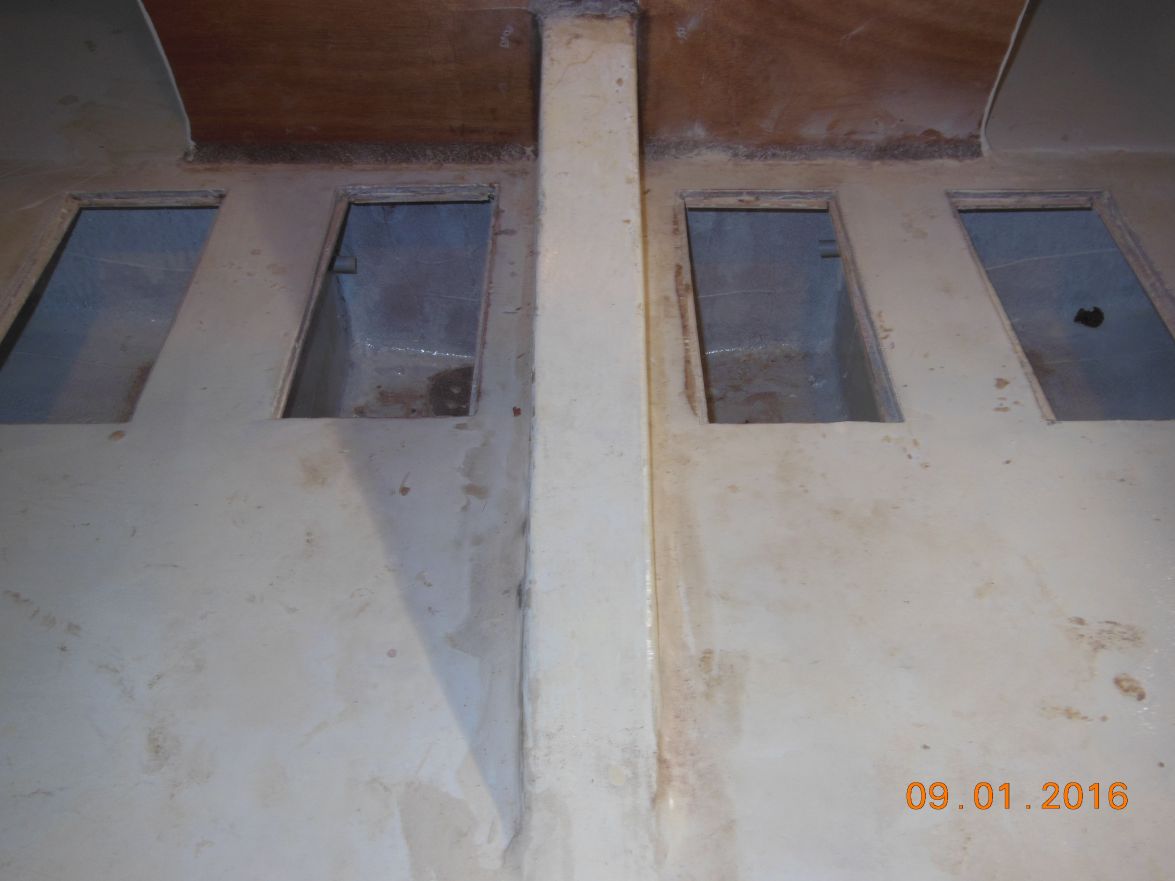

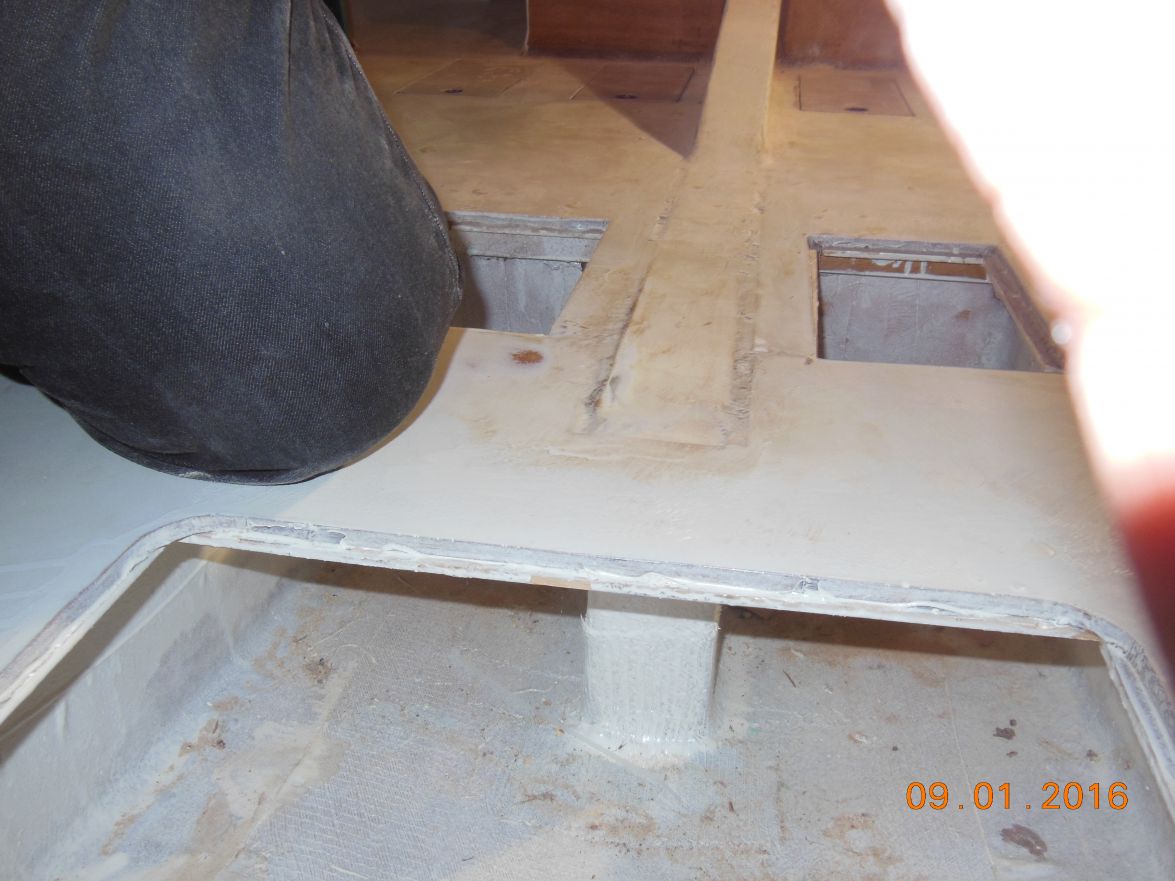
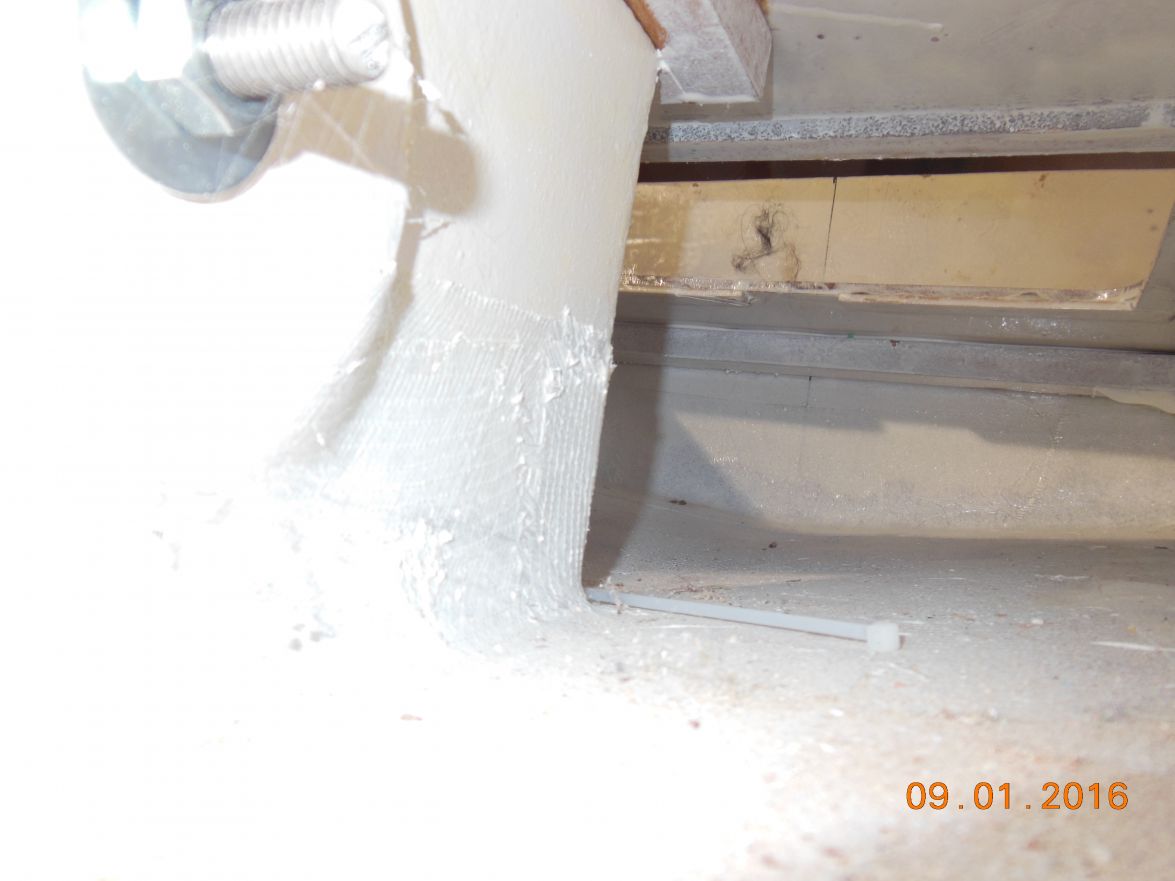
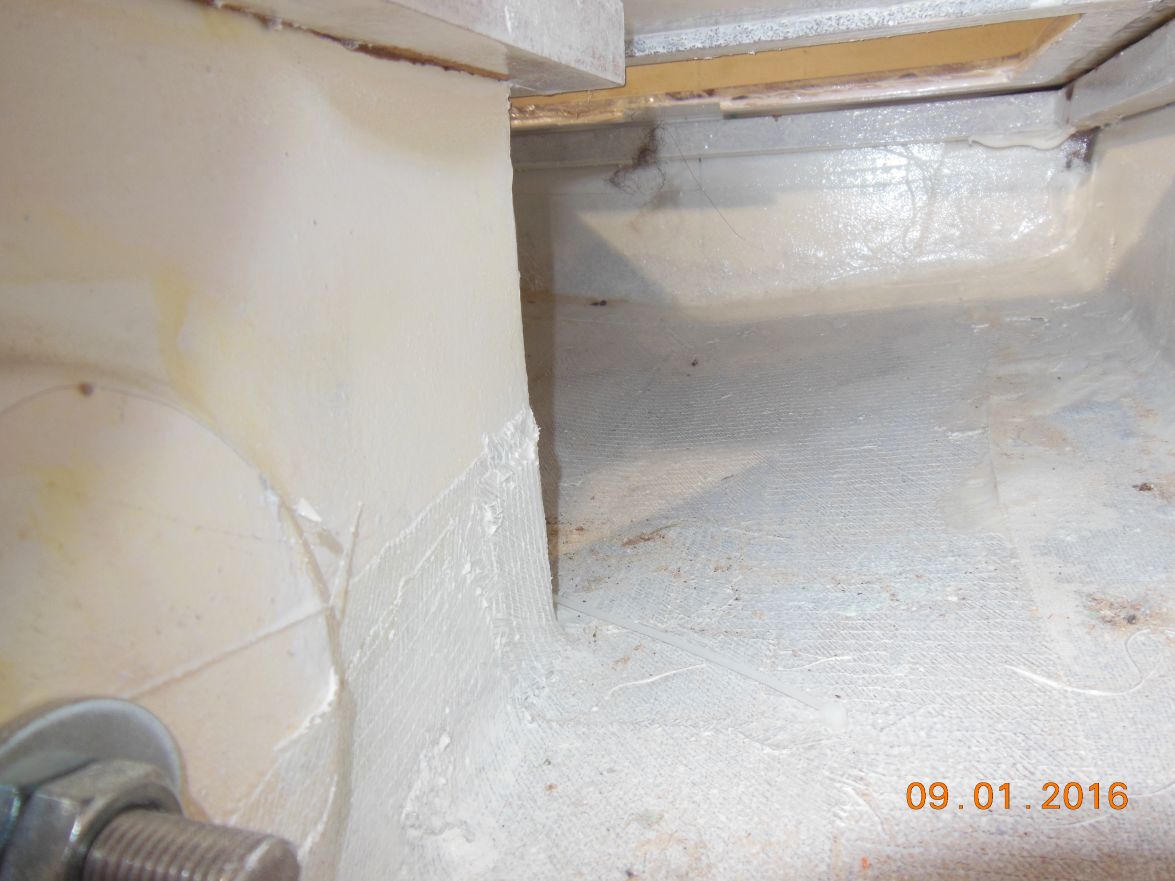
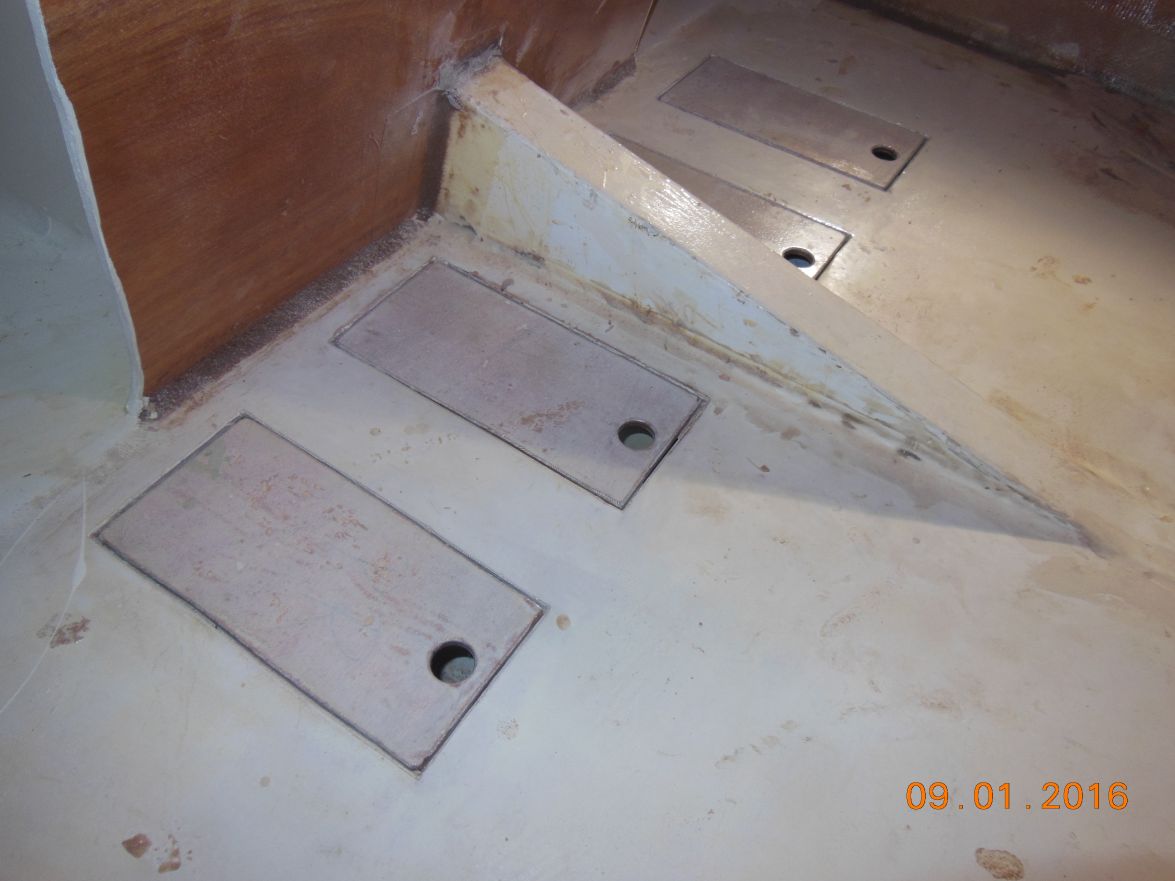
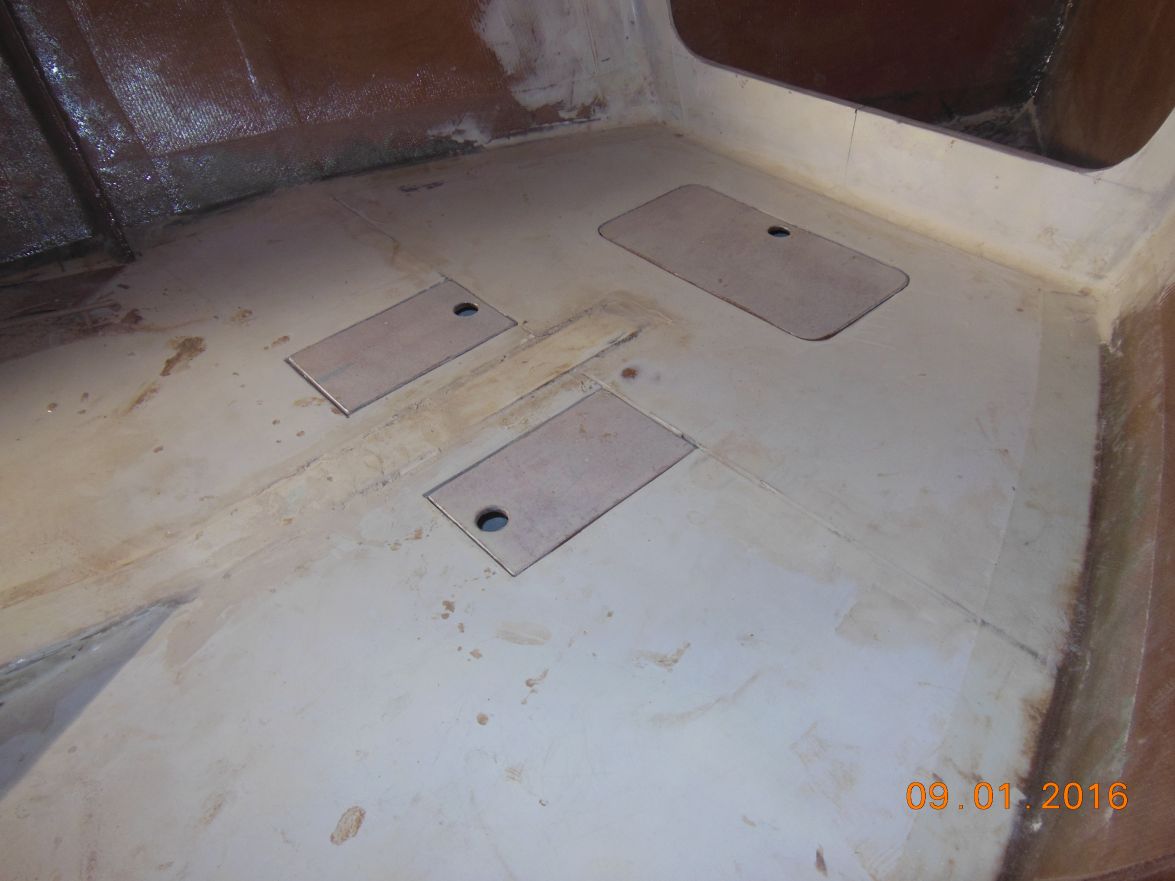
By the way the 3 inches distance to the longitudinal stringers and the centreboard case I did not quite reach as you can see on the pictures, but I am sure I built everything strong enough.
The little pipes you can see in some hatches are pipes to get electricity cables under the floor towards the bow and across the longitudinal stringers.
Greetings from Karl ( Austria )
Re: New AD14 build
Posted: Sat Jan 09, 2016 7:40 am
by waytootall
Wow, great pictures, thank you! I learn much better from pictures and diagrams than words.
Re: New AD14 build
Posted: Sat Jan 09, 2016 8:43 am
by terrulian
gonandkarl wrote:
...pictures of the hatches just taken for which I had no time to dust not one of my forte.
That's OK, Karl, I can relate. Not sure which I like better, the admirable pictures of the fastidious and superior craftsmen on this forum, or the ones from us ordinary mortals.
This sure looks like a fun part of the build.
Re: New AD14 build
Posted: Sun Jan 10, 2016 4:20 am
by Fuzz
gonandkarl wrote:Hi,
Now that I at last kicked out Windows of my notebook after having hated it for the last 25 years and installed Linux my Uploads of pictures work a mile faster and therefore I took a few to hopefully answer your questions.
Greetings from Karl ( Austria )
Linux Mint makes me

Fuzz
Re: New AD14 build
Posted: Sun Jan 10, 2016 4:59 pm
by gonandkarl
Hi Fuzz,
You write LINUX Mint me

Does that mean Linux is a peppermint in Alaska ?
I was a computer professional for 40 years and hated Windows from the beginning but had to use it on all PC s of the various firms I was employed for the only reason because the working collegues hardly needed teaching about using PC s because they also had one at home. But since I am not employed any more and using just my Lenovo Notebook with Windows 7 I installed the free Linux software on it and will live happy from now on. ( I installed
Ubuntu which is an open source software platform that runs everywhere from the smartphone, the tablet and the PC to the server and the cloud. It was created originally by Linus Torvalds a scandinavian software developer) Try out Linux or you know all the above anyway and You only wanted to joke about a Mint.
Sorry that I got a bit sidetracked on this interesting New AD14 build thread.
Greetings from Karl ( Austria )
Re: New AD14 build
Posted: Mon Jan 11, 2016 6:29 pm
by waytootall
SIdetracked is OK. I am still a computer professional (25+ years). LINUX is definately better than Windows but Macs are my favorite.
Re: New AD14 build
Posted: Tue Jan 12, 2016 7:33 am
by Jaysen
waytootall wrote:SIdetracked is OK. I am still a computer professional (25+ years). LINUX is definately better than Windows but Macs are my favorite.
20+ years here as well. Actually wrote a few things in the early Linux kernels. I don't use linux at all at home (I don't count chromebooks for the wife and son as they are more appliance). All my systems are Apple. All my peers use Apple. The only IT folks that I know that use Windows are people do nothing but windows server or desk side support. Even then, some of those folks use apple at home.
There might be something to the fact that a very large number of IT professionals use Apple products professionally and personally.
Re: New AD14 build
Posted: Tue Jan 12, 2016 2:06 pm
by Fuzz
gonandkarl wrote:Hi Fuzz,
You write LINUX Mint me
Does that mean Linux is a peppermint in Alaska ?
Greetings from Karl ( Austria )
Karl when I said Linux Mint I was speaking of a distro. Mint is made using a Ububtu base. They took the base system and improved it a bunch in my opinion. Others may disagree? I have been using it for close to ten years now and have always been happy. My computers are duel-boot so I can have Windows also if I need it. I only go there to play solitaire

One of my kids also uses it and is pleased with it, she is in collage. The wife and son both use Apple but I am not a fan. Different strokes I guess

Fuzz
Re: New AD14 build
Posted: Sun Jan 24, 2016 8:42 am
by waytootall
Finally had a free weekend last weekend so I made some progress. I got the cleats installed to support the cabin sole and experimented with pour foam to add buoyancy and to help fill the gaps at the edges enough for epoxy fillets.
Here are the battens made from pine 1x2s from Lowes except for the rear under-seat inside cleat which is a 2x2 because I ran out of 1x2s.
The single cavity partially filled with foam was an experiment to figure out how much I would need. This is 1 quart of 2-part 2lb foam. So I figure a gallon more will do it for the cavities I want to fill.
Re: New AD14 build
Posted: Thu Jan 28, 2016 9:51 am
by waytootall
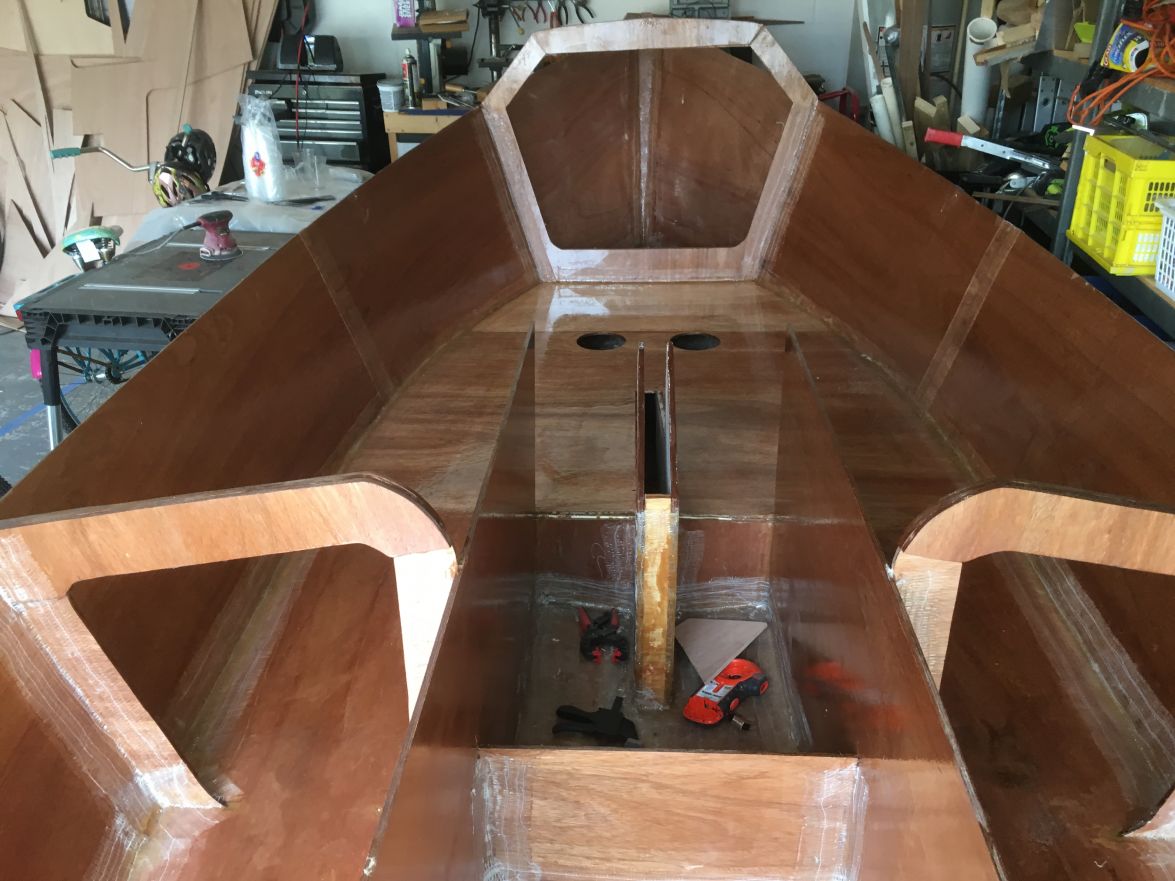
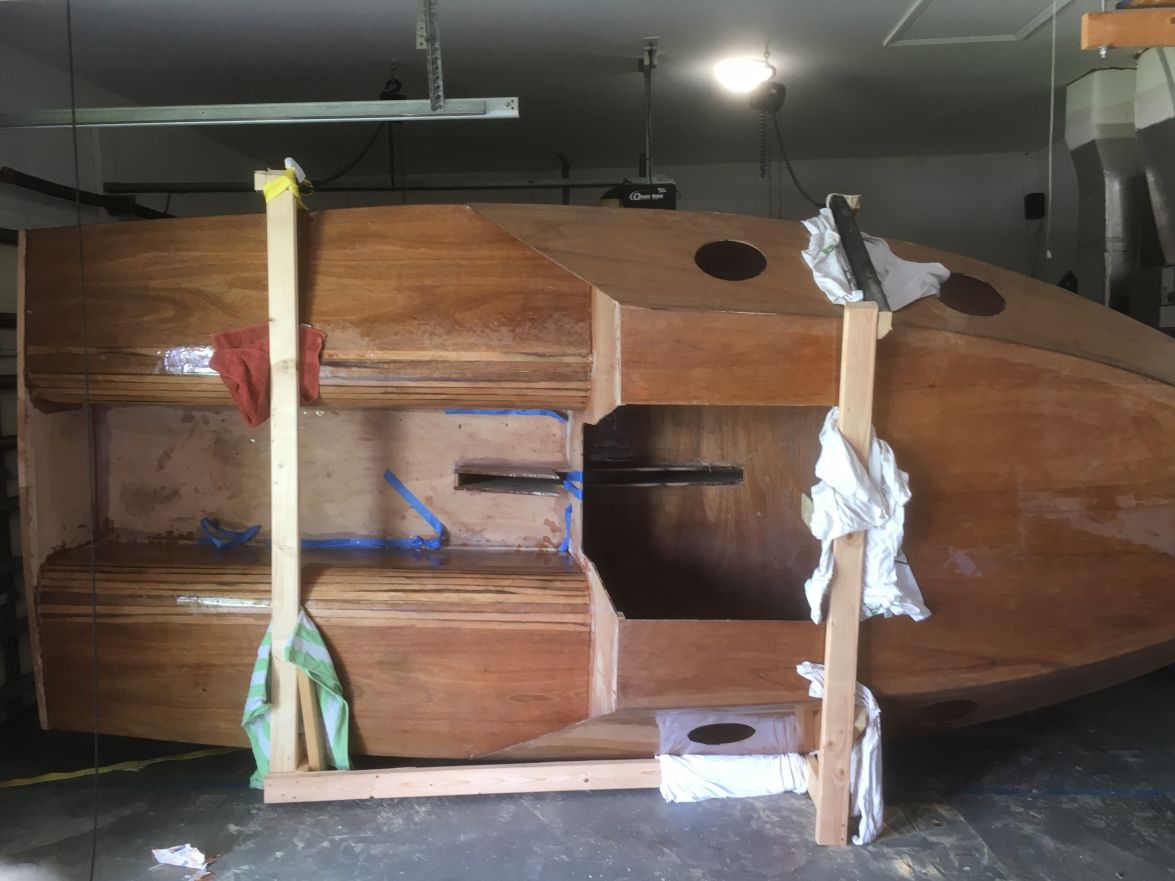
This past weekend I got the sole epoxyied in place. It was cold (for Florida) so I had to work with the boat in my garage, which makes it a bit cramped as you can see:
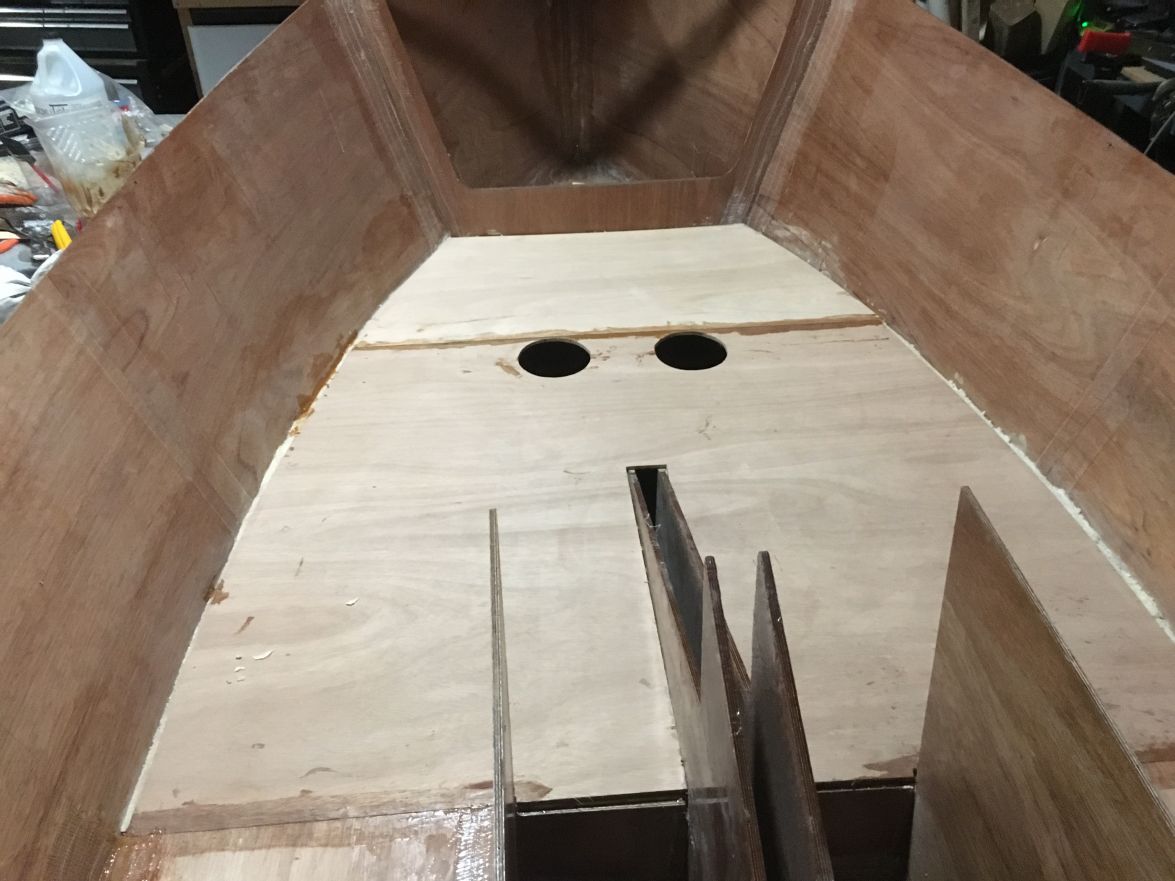
Here are the pictures of the in-place sole and I have started taping it in. The 2 circular holes are the centerboard pin access. I have screw-in covers for them.
Re: New AD14 build
Posted: Mon Mar 07, 2016 3:15 pm
by waytootall
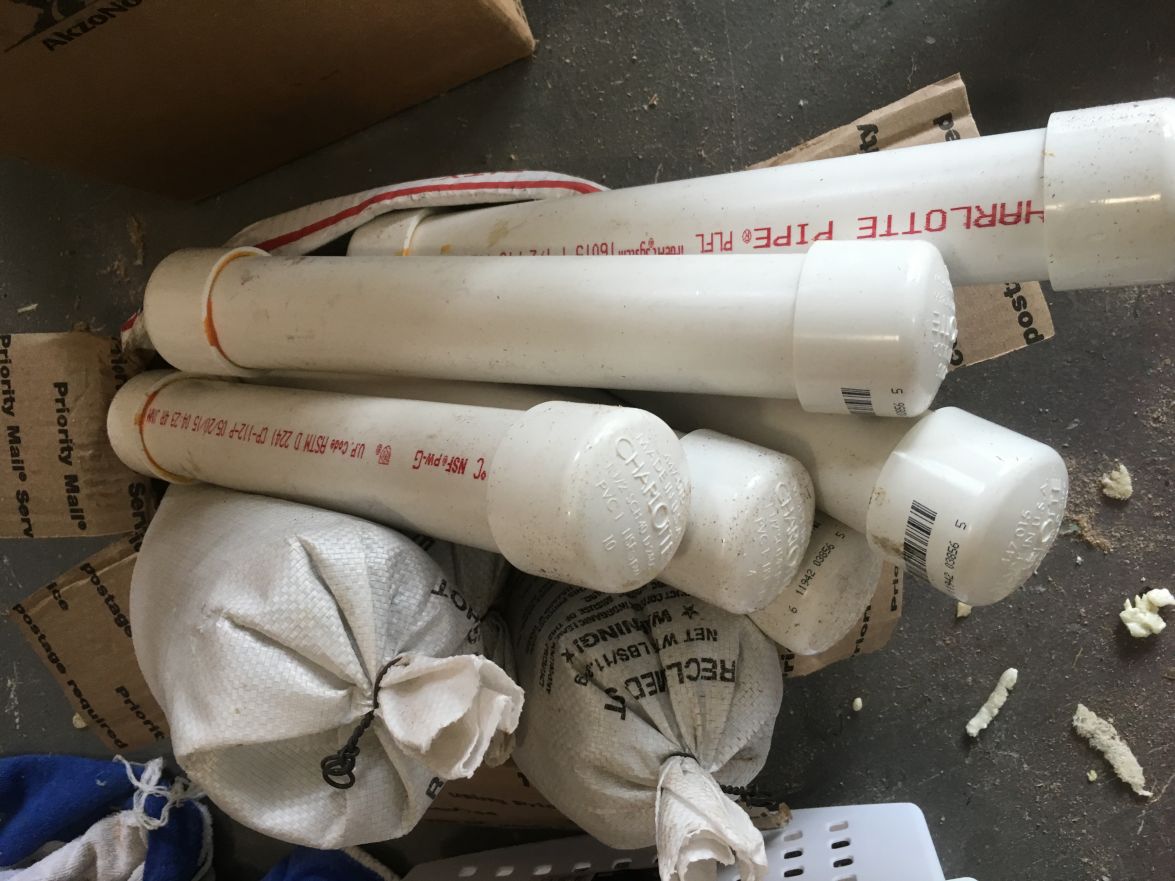
Progress has been slow due to spending most of my time driving my kids to activities on weekends but I got some done the last couple of weekends. A result of my wife and my paranoia about melting lead I had to figure out an approach for the ballast weights inside the hull to contain the lead shot in an easy to handle manner. I used PVC pipe and caps to make 8lbs weights.
Re: New AD14 build
Posted: Mon Mar 07, 2016 3:16 pm
by waytootall
I've got the deck installed with initial coats of epoxy.
Re: New AD14 build
Posted: Mon Mar 07, 2016 3:41 pm
by jacquesmm
Nice epoxy job.
Re: New AD14 build
Posted: Mon Mar 07, 2016 4:09 pm
by waytootall
I learned the art of properly pre-coating flat pieces that will not be horizontal in the boat or will be hard to reach. I am starting to learn how to get good finishes.
Here is Bulkhead C:
Here are the deck sides:
Re: New AD14 build
Posted: Mon Mar 07, 2016 4:11 pm
by waytootall
Re: New AD14 build
Posted: Tue Mar 08, 2016 1:37 am
by das boot
Your boat is coming along and looking good. Just a thought on the glass I found it no problem to work on the vertical parts if you paint it first with the epoxy just a light coating lay the glass into place it will stick to the epoxy then you use a old playing card as a squigie to smooth it out and get rid of the extra epoxy they work well as there are no sharp corners to snag on the glass. Once it has started to set you can then put on your filler coat of epoxy again using the cards to get rid of any surplus it worked well for me. I was using a slow set epoxy it had a 12 hour set up time it was quite thin but it worked well. As for the led that should work but how do you stop them moving around. It is simple to melt and pore into a brick type chunk just do not do it on the kitchen stove. I used 4 bricks sitting on edge and set an old pot on top of the brick then stuck a torch under it in a few short time it is melted just do not try and pore to much at one time. I tried the led shot at one point in epoxy it did not work well at all and real messy.
Re: New AD14 build
Posted: Wed Mar 09, 2016 2:51 pm
by waytootall
I plan to try your approach of the playing card squeegee on the exterior glass. I have had all sorts of runs/drips when using any kind of spreader/squeegee on the vertical surfaces so far. Part of my problem is being patient enough
.
Re: New AD14 build
Posted: Thu Mar 10, 2016 3:04 am
by gonandkarl
Hi,
For vertical application of the epoxy for instance the side of the boat one can add thixotrope powder as thickener. It worked for me quite well when I glassed the inside of the cabin. It is cheap and I got it from my epoxy supplier. I just dont know how much one has to add. I used for 155 grams ( 5 1/2 ounces ) of mixed epoxy 6 or 7 heaped teaspoons of powder.
When I do the outsides of my AD14 I dont want to lay the boat onto its side as suggested in the building notes. I will have it hanging in straps and just turn it so far sideways in these straps that I can place the tape to bottom and side and then glass the side which is not directly vertical and there wont be any runs with my thixotrope powder. I will attach the glass with masking tape to the deck side and the bench top onto the previously epoxied side which I let get hard for 2 days and then sand it slightly to get good adhesion of the glass and epoxy. In this dry starting situation I can place the glass perfectly and flatten it everywhere by hand. After saturating the glass with epoxy I will roll peel ply from a broom stick over it and squeeze that one flat with a wide plastic spatula.
That is my plan for the near future and I hope it will all go according to it without any runs of the epoxy.
Greetings from Karl
Re: New AD14 build
Posted: Thu Mar 10, 2016 9:06 am
by jacquesmm
Silica is a thixotropic powder.
Re: New AD14 build
Posted: Mon Mar 14, 2016 12:25 pm
by waytootall
I am starting to consider your straps from the ceiling approach. As the boat builds out and gets heavier I am constantly more concerned about how in the world I am going to rotate it and keep it rotated on it's side without breaking something (including my back). I will either have to recruit a bunch of strong guys (my kids are too little) or do a rig like you did.
I am trying to avoid the silica filler since I would like to finish as much bright as possible. I am probably being overly optimistic, but I figure if I go for a bright finish and fail, I can always use a filler coat, sand that and then paint later.
Re: New AD14 build
Posted: Mon Mar 14, 2016 4:45 pm
by jacquesmm
You can roll it alone if well planned: a bunch of tires, a couple of tackles.
Install the rubrail or a fake rubrail before rolling. The load on that edge must be spread over the length of the boat.
If you have to push or block with a support, do it at the frame locations.
Re: New AD14 build
Posted: Wed Mar 16, 2016 12:31 am
by das boot
I rolled my boat a few times during construction by myself I used some herk straps and a come along it worked just fine the biggest thing is to put a third line on it limiting how far it will role over and not hit anything in the process the come along works well as it is easy to shorten or extend as needed My biggest problem came in getting it high enough to get it on the trailer I was working in an old car port it was shakey but it worked out ok.
Re: New AD14 build
Posted: Wed Mar 16, 2016 6:59 am
by gonandkarl
Hi George,
Me stupid Austrian dont understand what is a come along. As I have to roll the boat soon to its side I would do it like you mentioned here. Did you use 2 straps and the third one is the " come along " ? I have 4 straps at the frame positions and have lifted the boat with them easily. I think it will be best just to use 2 straps at frame B and D and then try and roll it with your come along.
I can hold the boat back with a strap going round the frame C, the companionway and the already cut out handle on the side to prevent it tilting too much. On your pictures one can see that you leaned it against the carport supports. I have no such possibility and therefore I will put thick pieces of styrofoam on the floor and some wooden support at frame A C and the transom.
Please give us your opinion. I hope the New AD14 build guy wont mind that I discuss it on his thread. It might help him too.
Greetings from Karl ( Austria )
Re: New AD14 build
Posted: Wed Mar 16, 2016 8:34 am
by BB Sig
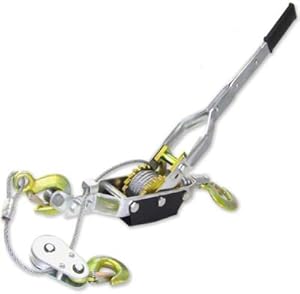
It is a ratcheting hand winch. Small ones are usually 2 ton rated when doubled and larger ones can be 5 ton or more doubled. Half that if it is used without the pulley doubled back. I bought a four ton model and use it without the pulley 95% of the time.

Re: New AD14 build
Posted: Wed Mar 16, 2016 11:23 am
by gonandkarl
Hi Barry,
Thank you for the info about the come along. I even have got one like that and used it to lift my 60 kg centreboard even that it said one should only use it for pulling. I never thought about it anymore but it will come in handy to pull my boat to the side.
Greetings from Karl ( Austria )
Re: New AD14 build
Posted: Wed Mar 16, 2016 11:49 am
by BB Sig
No problem. I can't add much about boat building but chime in on parts that I can help with.

Re: New AD14 build
Posted: Wed Mar 16, 2016 2:09 pm
by waytootall
I very much appreciate the discussion since I will need to figure out how to do this. I have a bunch of come alongs and that picture of using it mounted to a stake in the ground is a good thought. I will still need to build supports on my jig to hold it on its side, along with the temporary rub rail mentioned. I was thinking foam padding for protection on the top surface.
Re: New AD14 build
Posted: Wed Mar 16, 2016 3:36 pm
by terrulian
All I can say is, when you flip take some pictures or videos. These can be pretty entertaining.
Have you seen this?
https://www.youtube.com/watch?v=Foytm4q ... e=youtu.be
Re: New AD14 build
Posted: Thu Mar 17, 2016 6:10 am
by gonandkarl
Thanks Tony,
The video is very informative and I am sure I can do it all by myself with all the maschines I have. My brotherinlaw got himself a cheap sortof Gopro camcorder and he can document my flip of the boat.
Greetings from Karl
Re: New AD14 build
Posted: Thu Mar 17, 2016 6:10 am
by gonandkarl
Thanks Tony,
The video is very informative and I am sure I can do it all by myself with all the maschines I have. My brotherinlaw got himself a cheap sortof Gopro camcorder and he can document my flip of the boat.
Greetings from Karl
Re: New AD14 build
Posted: Sat Mar 19, 2016 3:34 pm
by waytootall
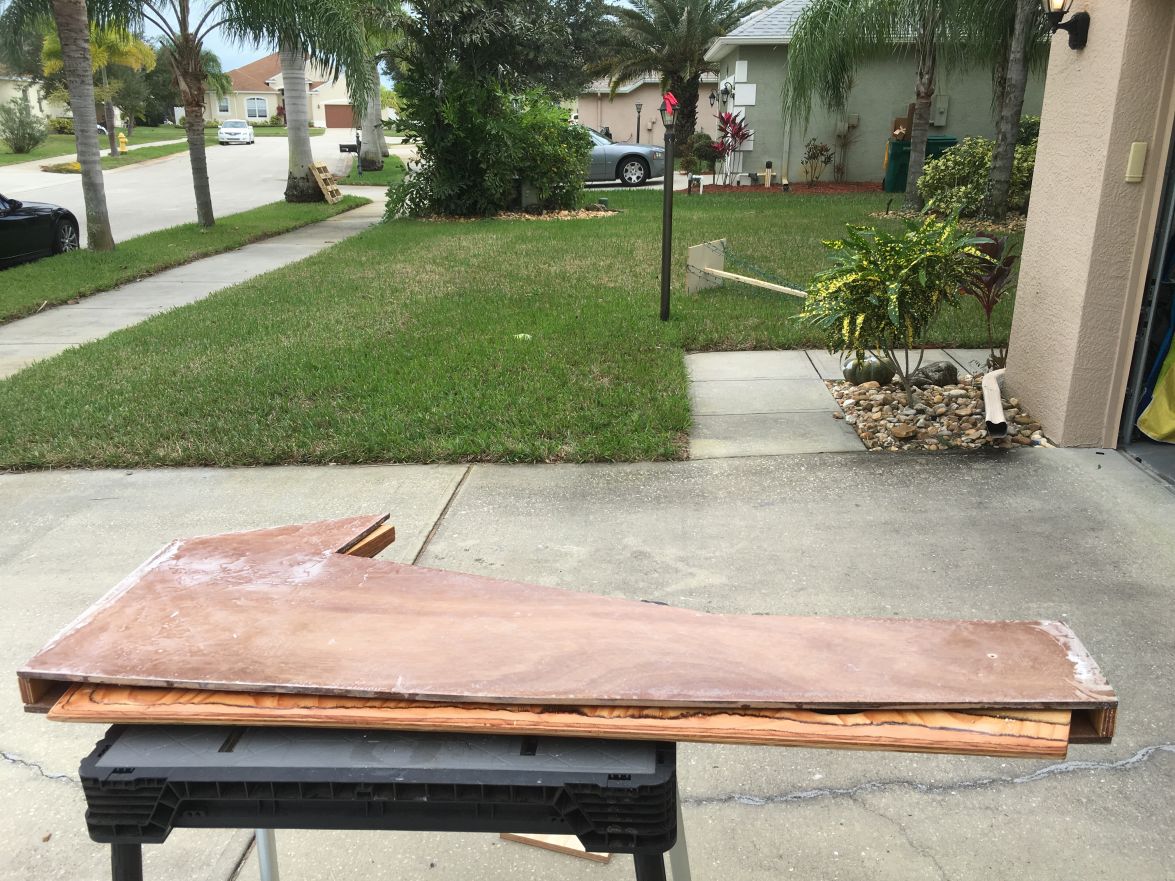
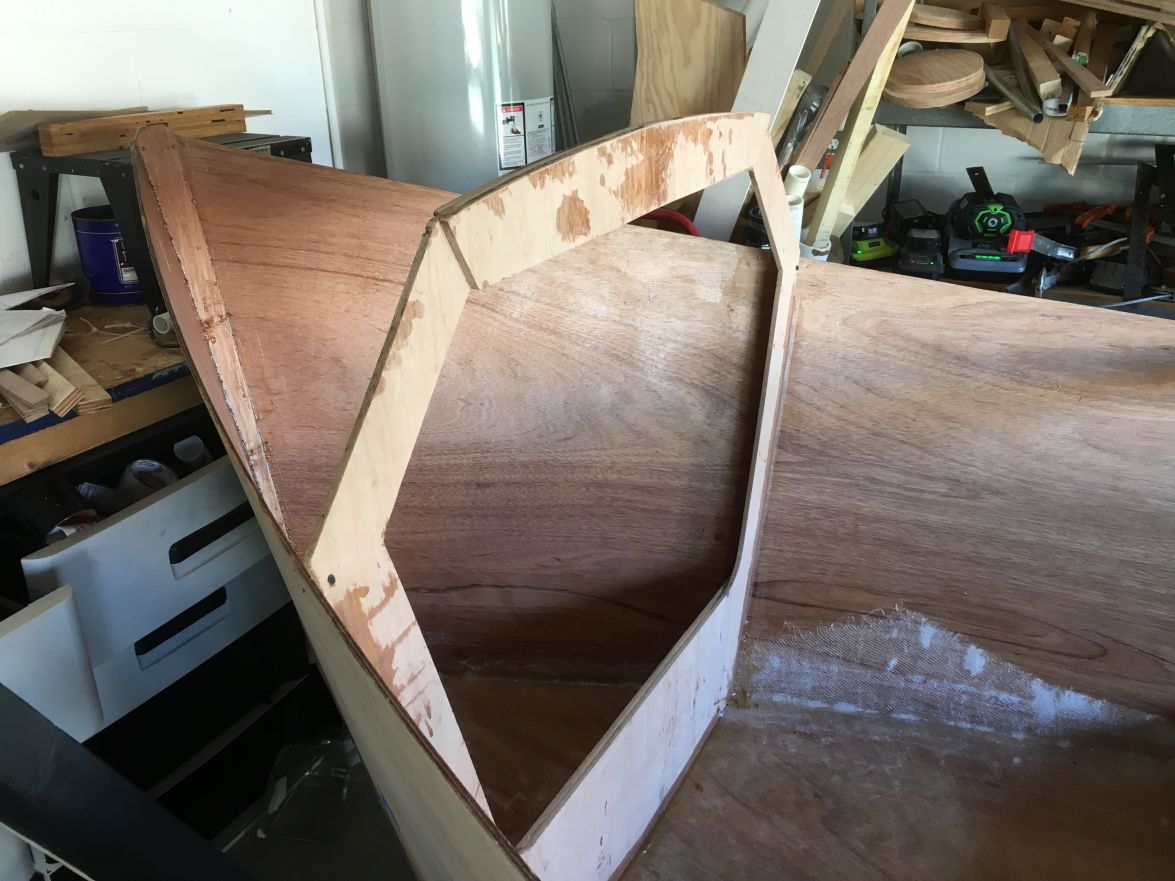
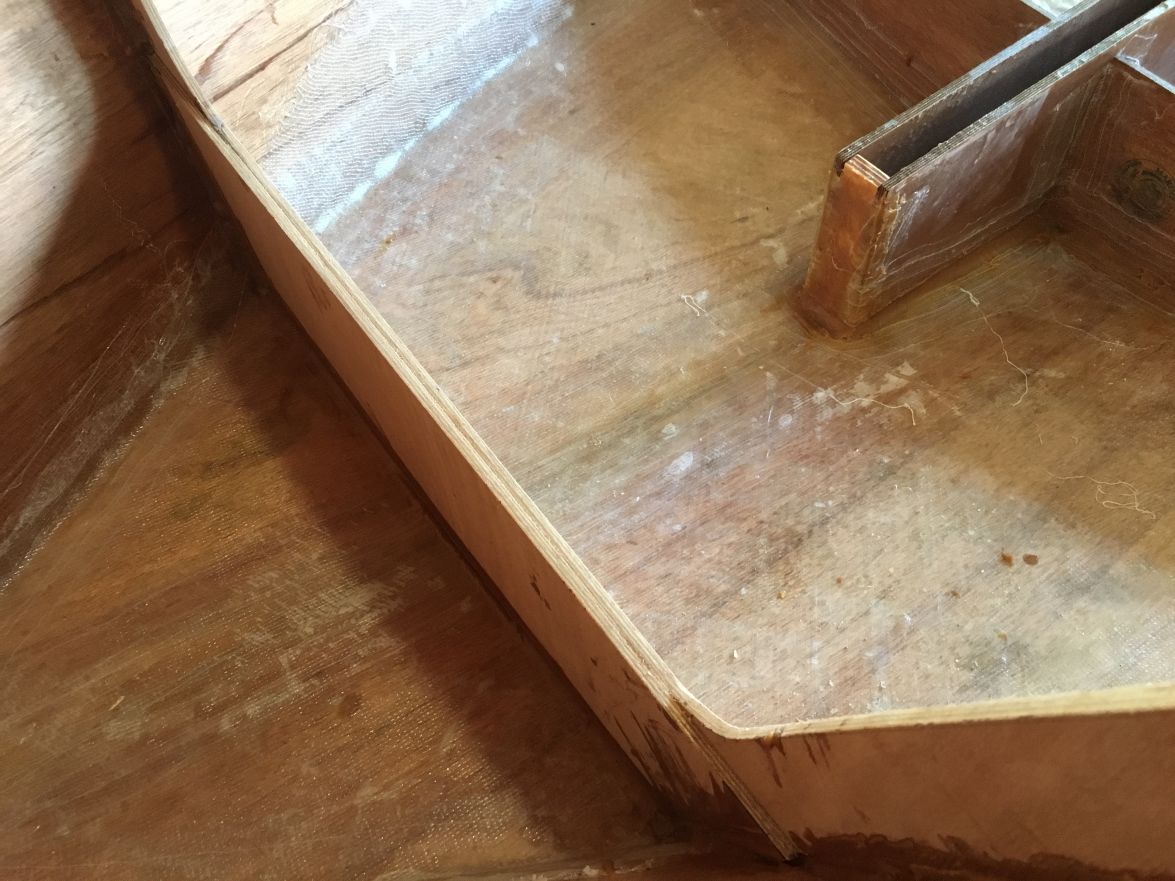
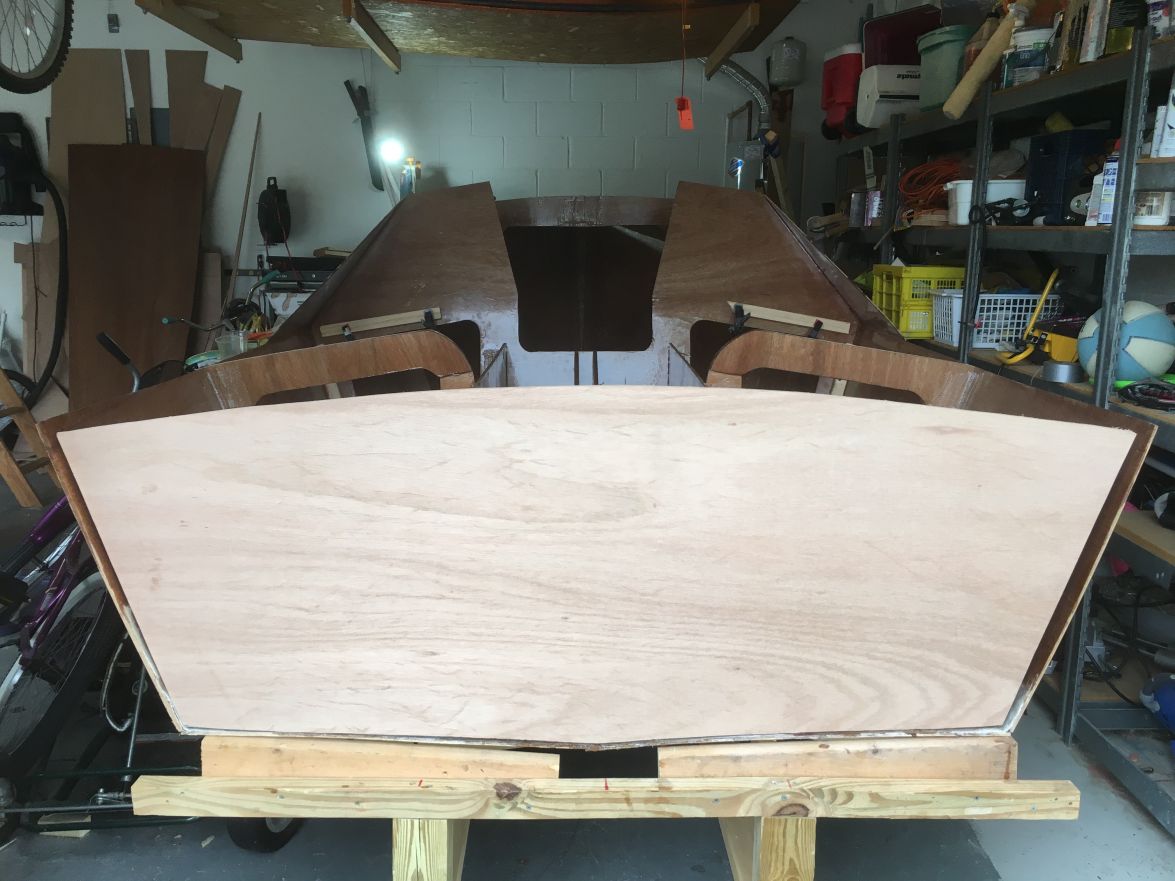
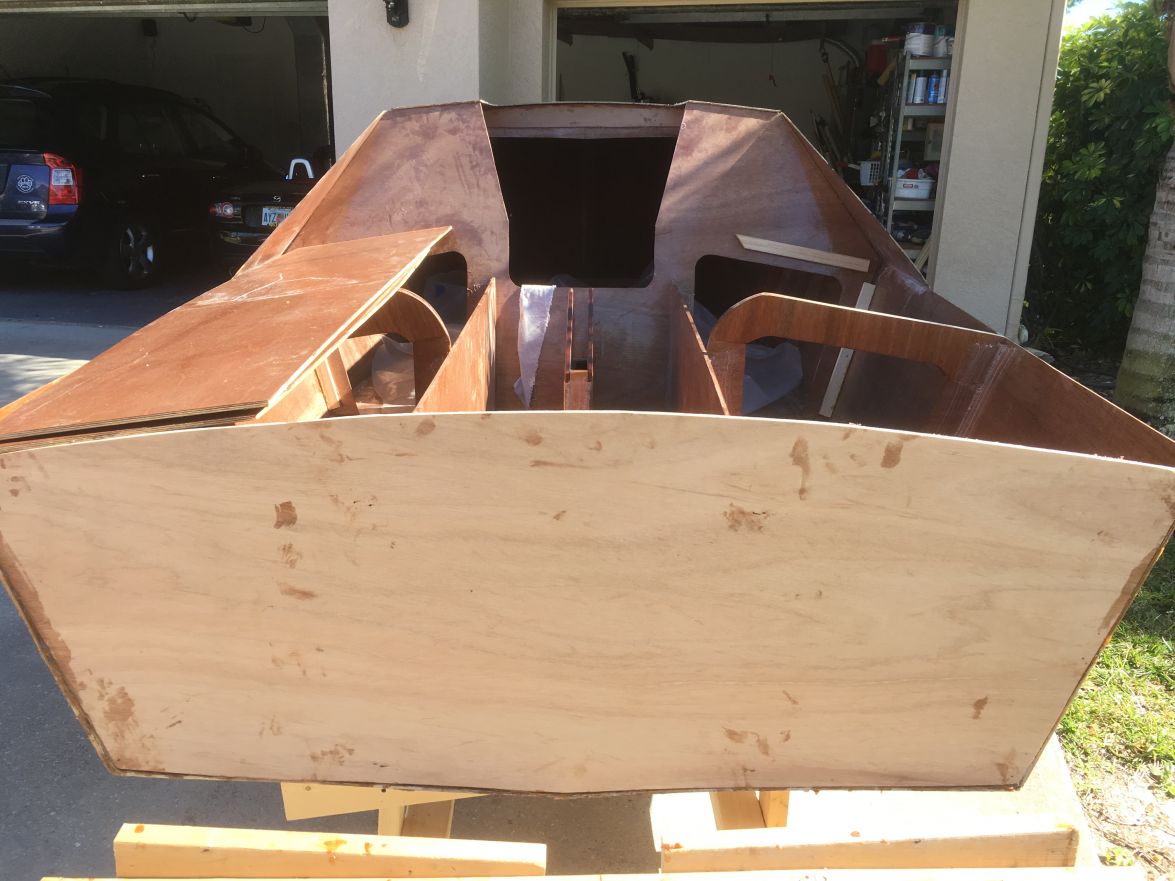
Help! I am planning the installation of my transom but I think I have a problem. I think I did all the measuring correctly but the transom seems too short. It doesn't come up to or above the level of the side hull or the seat tops. Did I do something wrong or is it supposed to be this way?
Also, should the seat tops rest on top of the hull side panels as I have it sitting, or should it but up against the hull panel with the hull panel extending to the top of the seat top?
I delayed installing the transom until after the frames for 2 reasons: It made access to the interior of the boat easier and I was hoping I would figure out I hadn't messed up cutting the transom which means I need to buy more wood
Re: New AD14 build
Posted: Sat Mar 19, 2016 4:37 pm
by jacquesmm
I am at home now and don't have the plans but on all my designs, the transoms fit between the hull panels.
I always check the lengths of the sides after developing and they match. One of your measurements was wrong.
We can fix it but:
- post a better picture, one showing the whole transom
- tell us what the lengths of the sides are, transom and hull panels. We"ll know which one is wrong. We"ll see if we have to cut a slice or add piece.
The seats and decks always go on top of the framing, always.
Re: New AD14 build
Posted: Sat Mar 19, 2016 5:34 pm
by waytootall
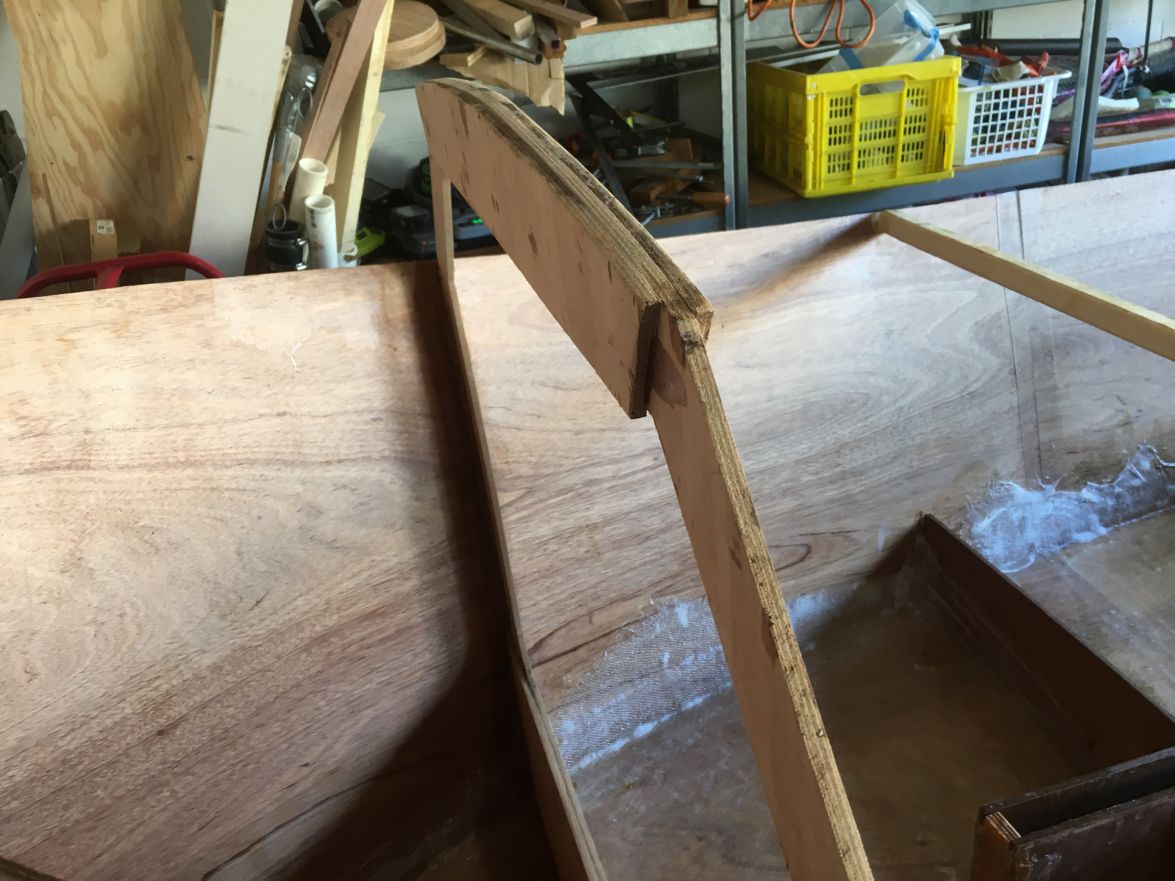
I haven't attached the transom yet so this is it dry-fit in. The side-to-side measurements fit pretty well. The top of the side panels will need to pull-in to meet the transom but I was expecting that. The dimension that doesn't fit after I cut it (I am sure I the design is right and I misunderstood something) is the height of the transom compared to the height of the hull. Here is the picture of the entire transom:
Here is the right side of the transom with the measurements added to the picture:
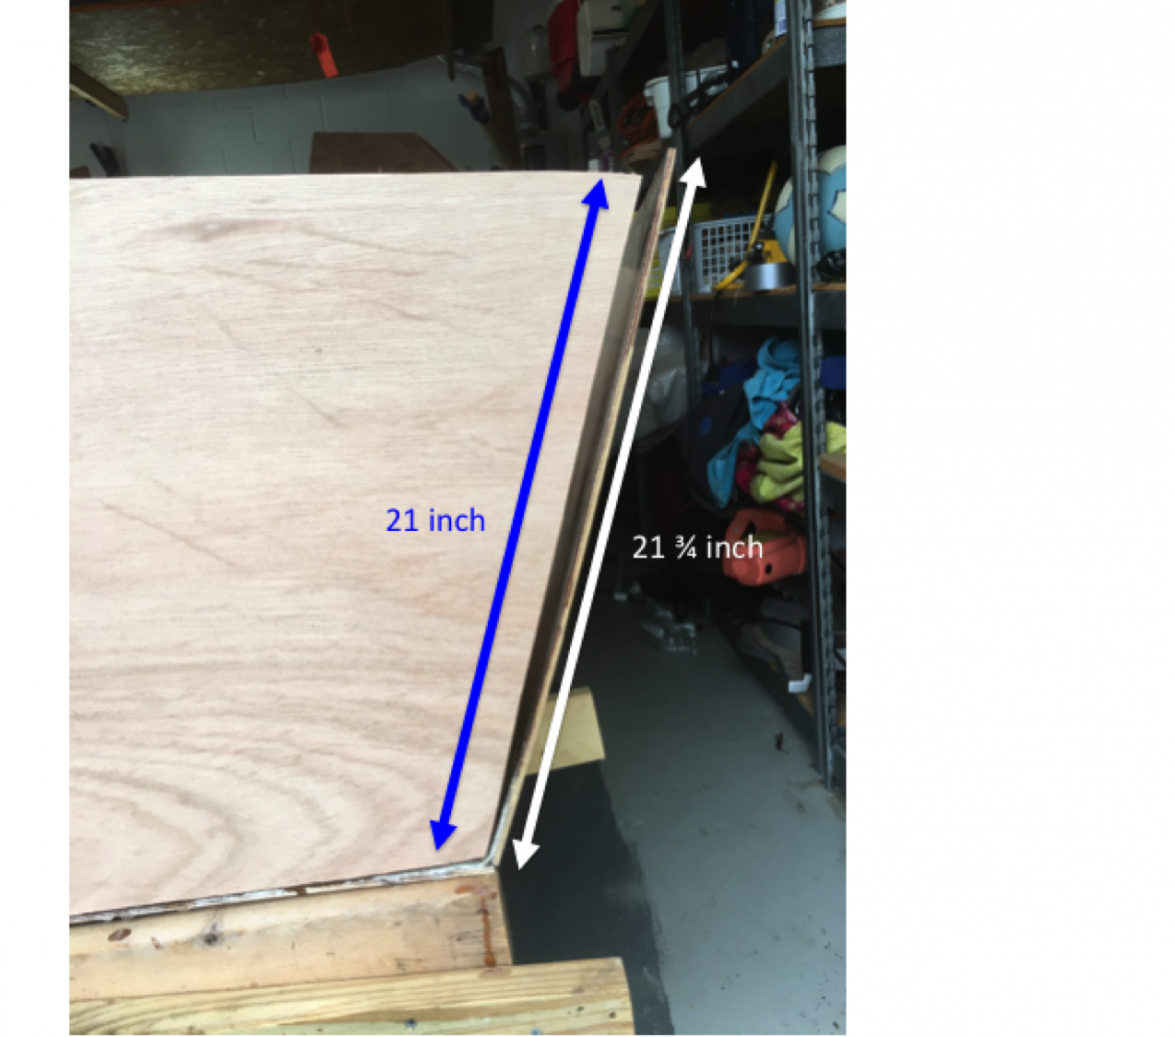
The 21 3/4 measurement matches the design. The length of the side of the transom measurement doesn'y appear in the design directly anywhere since it is a function of the angle and height above the baseline. I guess I could get my kids to do that math
Re: New AD14 build
Posted: Sat Mar 19, 2016 6:59 pm
by jacquesmm
It looks fine on the bottom but not the sides.
I"ll check on Monday but many AD14 have been built and we never saw that problem.
We'll find a solution.
Re: New AD14 build
Posted: Sat Mar 19, 2016 7:09 pm
by waytootall
The sides bend in to make pretty good contact with the sides of the transom. I will just need to clamp them in place when I glue it in. I figure I can either re-cut it (probably the best idea) or add a tall (1+ inch) strip on top of the transom. Should the transom be the same height as the hull sides where it meets the side or should it be taller than the hull side? If this is the only piece I need to completely re-cut I am probably lucky.
Re: New AD14 build
Posted: Sun Mar 20, 2016 4:09 am
by gonandkarl
Hi,
When I cut all the panels for my AD14 I checked and rechecked and therefore I did not have the problem with the transom you have. I measured roughly the length of my transom side and it is 550 mm (21.65 inches)
My plan is metric and I give you a few measurements converted to inches you can check.
In the centre the overall height of the transom should be 26 5/8 inches. (676 mm)
Without the coaming the round part on top it should be 23 5/8 high. (600 mm)
The corner of the transom bottom is 1 5/8 inches (40 mm) above the BL while the bottom tip of the transom is 1 7/16 inch (36 mm)
below the BL. These too measurements are mostprobably the cause of your height problem.
Seeing that your angle with the bottom fits pretty well and also the sides you can pull in ok I think you made the slight mistake at the support for frame T and the same mistake at the bottom of the transom. Looking at the picture I think I am seeing that the bottom panels are too flat on the outside and this tiny mistake lets you lack the height on top.
I would add the missing height with a strip the same width as the transom and reinforce it on the seats sides with a higher strip of 3/8 inch thick plywood. This extra height is not visible because it will at the inside end of the bunks.
Maybe Jacques will tell you a much better solution on Monday.
Greetings from Karl Austria
Re: New AD14 build
Posted: Sun Mar 20, 2016 6:34 am
by waytootall
Thanks gonandkarl!
Re: New AD14 build
Posted: Mon Mar 21, 2016 11:11 am
by jacquesmm
I compared the dimensions on the plans and they match.
The edge of the bottom panel is 688 mm and the edge of the side is 552, at the transom.
Before we talk about cutting or adding, can you please measure?
The bottom first but what are the lengths of the side edge, transom and panel?
If the panel is too large, we will cut it. If the transom is too small, we must add a piece somewhere.
Re: New AD14 build
Posted: Mon Mar 21, 2016 11:16 am
by jacquesmm
Oops, I measured in metric.
The length of the side should be 21.732" = 21-3/4".
2 mm more than Karl
That is a very accurate job by Karl.
Re: New AD14 build
Posted: Sat Mar 26, 2016 3:14 pm
by waytootall
I was gone for a few days, but back now. The side hull panel is 21.75 inches and the transom is 21 inches.
Re: New AD14 build
Posted: Thu Mar 31, 2016 7:50 pm
by waytootall
I am looking for opinions and advice on what to use for mast and spar for the AD14. I am leaning toward the standard sail plan. I don't think I want to try carbon fiber, I have seen thoughts of round aluminum tube, the plans mention a Dwyer Mast Profile of DM1 (which doesn't seem to match the 3inch mast bottom diameter since the Dwyer web page shown that as a 2x2.25 inch) and I have read wood approaches from single pieces of long stock and from laminated boards. What have people used successfully? So I can plan my Mast Step and Mast Partner to match the mast.
Re: New AD14 build
Posted: Tue Apr 05, 2016 1:18 pm
by jacquesmm
The post below was lost while moving our server
Thanks Tony, The video is very informative and I am sure I can do it all by myself with all the maschines I have. My brotherinlaw got himself a cheap sortof Gopro camcorder and he can document my flip of the boat. Greetings from Karl
Re: New AD14 build
Posted: Sun Apr 17, 2016 3:47 pm
by waytootall
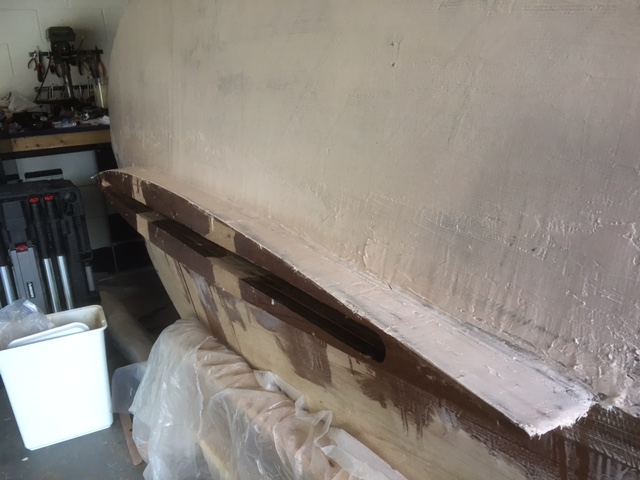
I have made some progress in the last couple of weeks. I have attached transom. I will add a piece at the top to make up it's shortcoming. I am trying to see if I can get a nice piece of exotic wood that I can bend to fit and act as a nice accent.
I have attached the cabin roof/deck and sanded all the joints to a nice smooth, rounded junction.
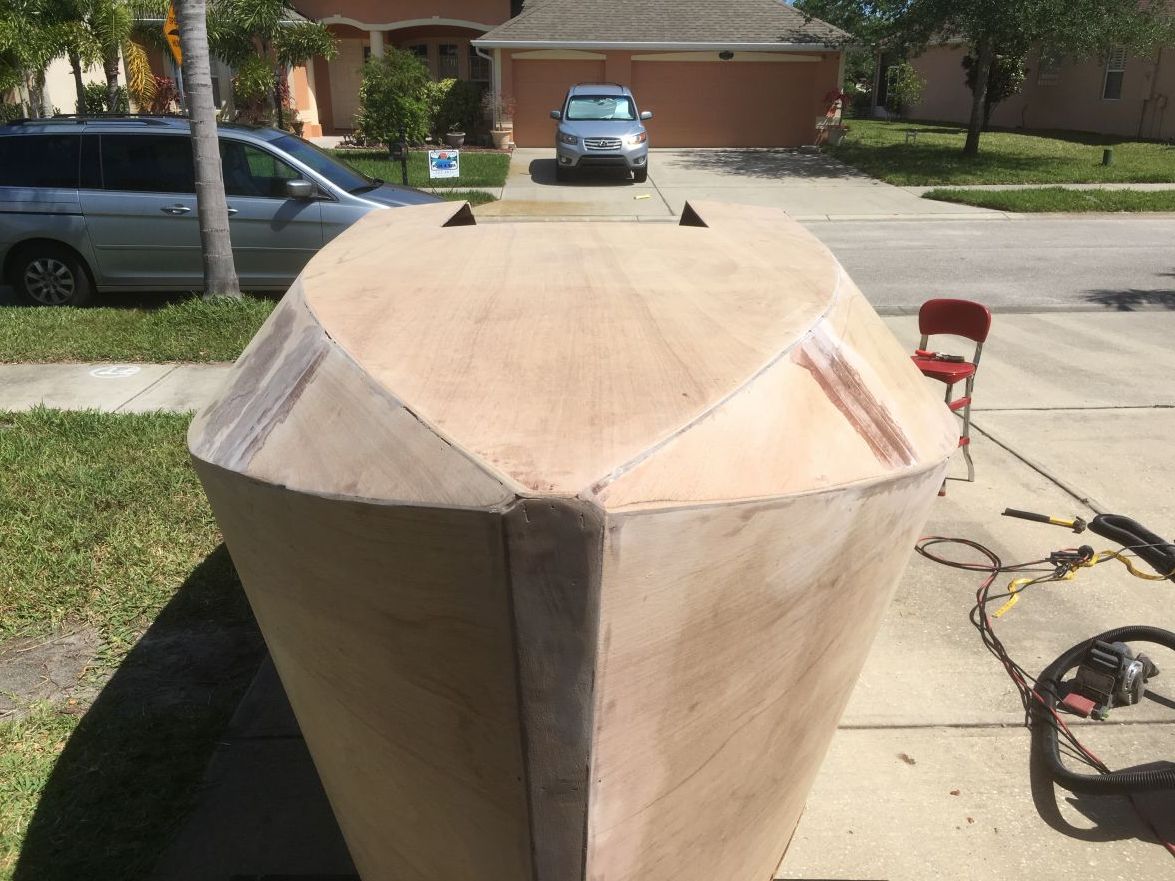
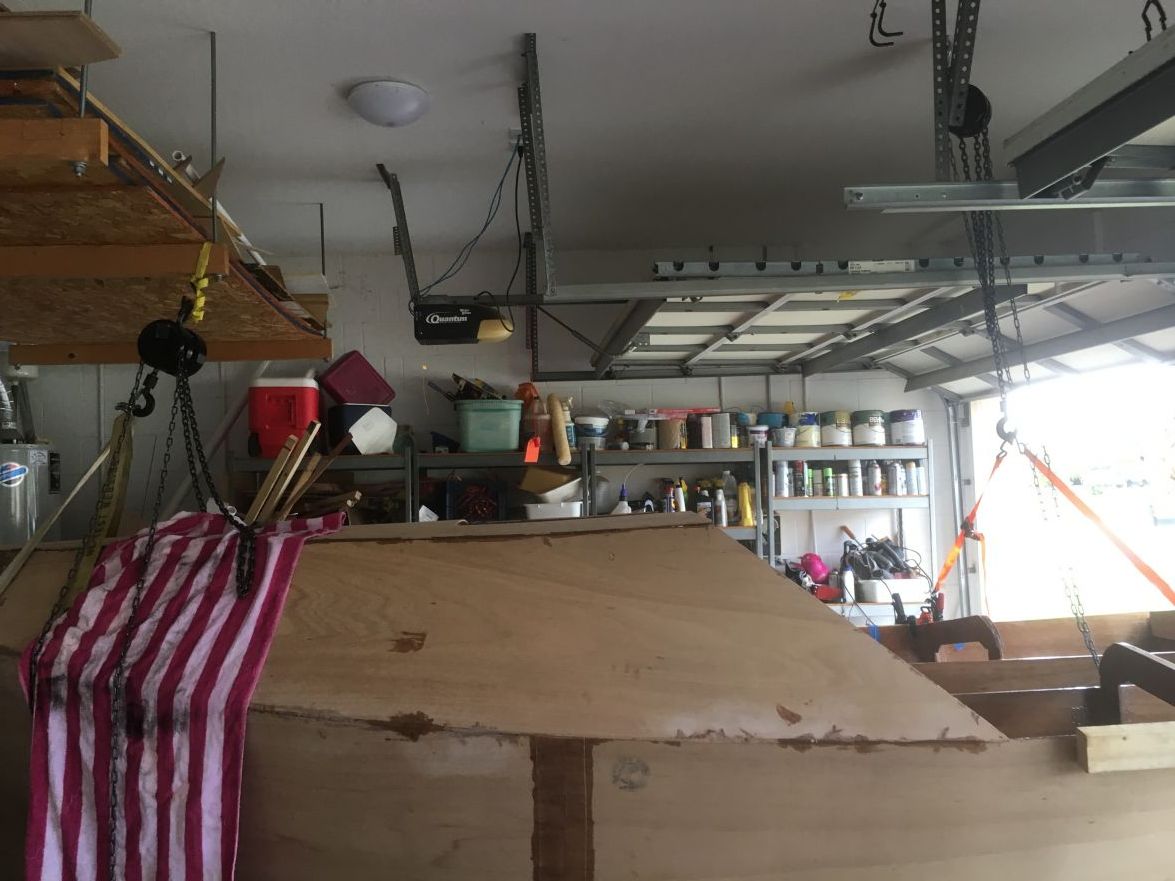
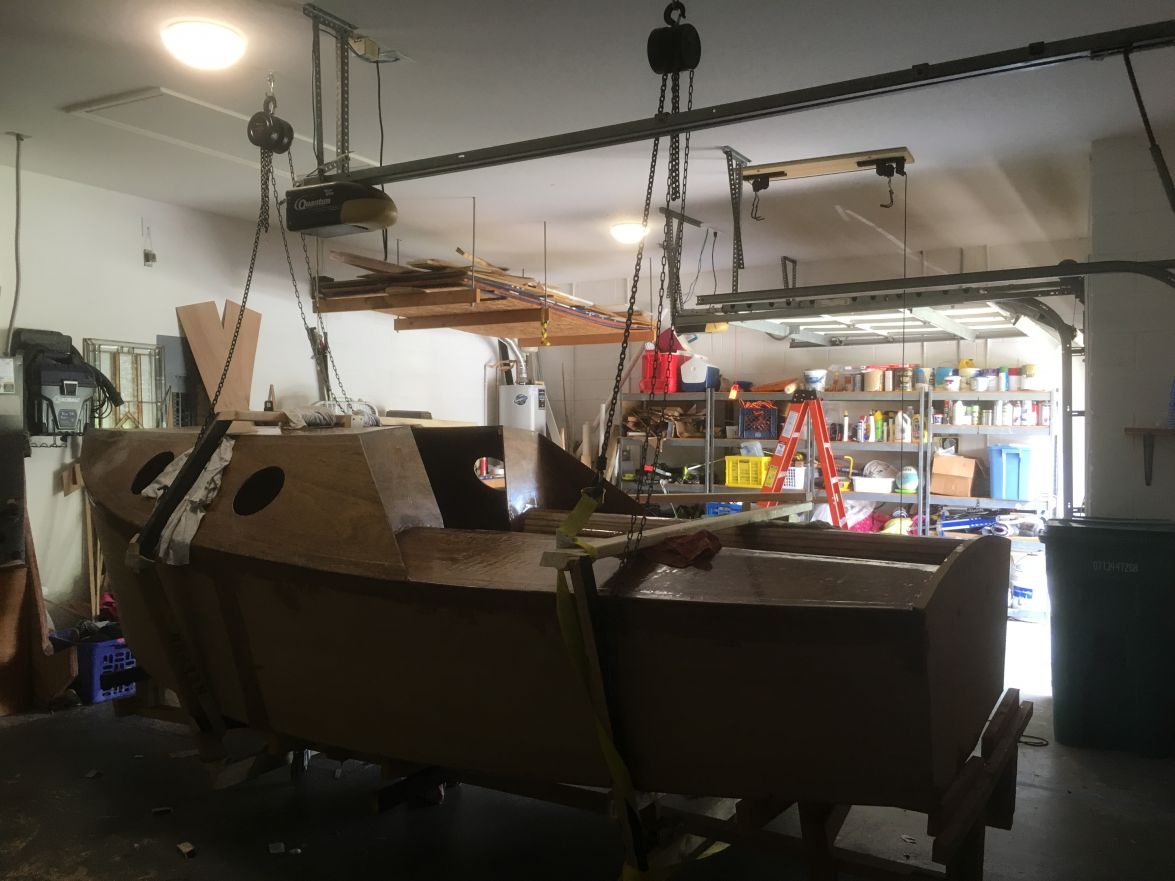
I had some troubles with the boat on my rolling jig as it got heavier just like others have had. I needed to lift the boat in order to adjust it on the jig and build up the jig a little. Taking cues from others and from online videos I rigged a couple of chain hoists into roof joists in my garage to lift the boat. I will also use this same setup to turn the boat over when that time comes. It worked really well and the chain hoists were not expensive. I am now using one of the to pull the boat back into the garage after working on it just like a winch.
Re: New AD14 build
Posted: Sun Apr 17, 2016 4:07 pm
by gonandkarl
Hi,
You made nice progress and the boat looks really good. Your sanding is much better than what I manage on my AD14. But thats why I take so long putting on filler sanding it off and repeating the process until I am too tired to do it once more and just accept the level of smoothness I reached which is often nowhere near perfect.
Keep up the good work and send us pictures again.
Greetings from Karl ( Austria )
Re: New AD14 build
Posted: Wed Apr 20, 2016 11:12 pm
by abahambi
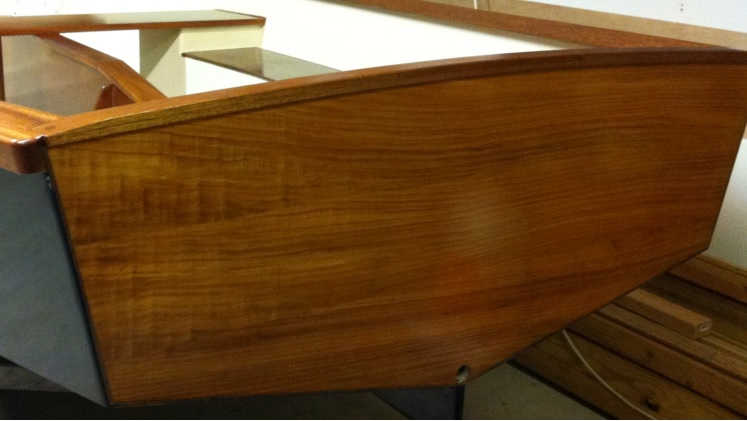
waytootall wrote:I have made some progress in the last couple of weeks. I have attached transom. I will add a piece at the top to make up it's shortcoming. I am trying to see if I can get a nice piece of exotic wood that I can bend to fit and act as a nice accent.
This will work just fine making up the missing 3/4" and as you say, a capping on the transom will add a nice accent to the finish.
This one made up of two 1/2" laminations mahogany. Capping needs to be at least 1-1/8" to 1-1/4" wide otherwise it will look odd. You may therefore have to glue on a full length cleat cut to the same shape as the transom top to give yourself a landing for the capping.
Re: New AD14 build
Posted: Thu Apr 21, 2016 4:03 am
by glossieblack
I'm not sure who's work this is, but what a sweet transom detail. Congrats to the builder.

[/quote]
Re: New AD14 build
Posted: Thu Apr 21, 2016 11:50 am
by waytootall
I agree that is beautiful, and exactly how I was picturing it in my head.
Re: New AD14 build
Posted: Sat May 14, 2016 9:26 pm
by waytootall
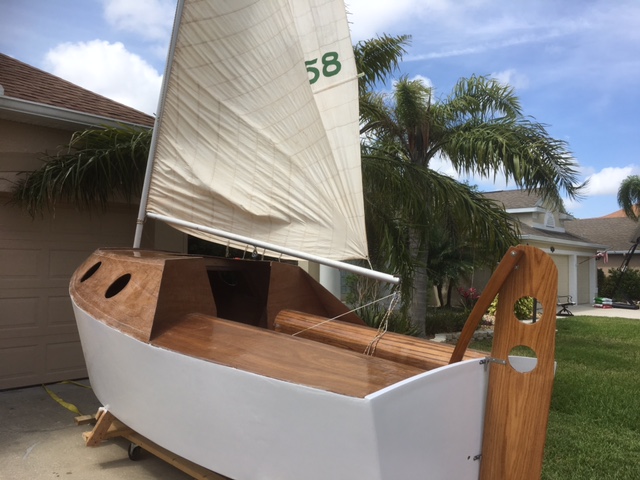
I have been getting work done, just nothing very visible until this weekend. I installed the seat tops and the curved seat transitions. Following the advice of others I cut the plywood into 1 inch strips to follow the curve. I beveled the edges in 10 degrees to minimize gaps as much as possible. I still have more sanding work to do but I am pretty pleased with the results so far.
I also built the topper to my transom. I cut many extra 1 inch strips for the seat curves expecting to mess several up. I did mess up several, but I still had a good number left over so I built the topper from laminated 1 inch strips of the meranti and got a nice true curve.
To have the topper be wider than the transom for looks I had to fit it around the curve of the seat which wasn't easy.

Re: New AD14 build
Posted: Sun May 15, 2016 9:25 am
by pee wee
Looks good, that's a nice detail.
Re: New AD14 build
Posted: Mon May 16, 2016 8:43 pm
by abahambi
Transom detail looking very promising. The seat curves definitely adding a finishing touch. Nice work!
Re: New AD14 build
Posted: Sun Jun 12, 2016 8:24 am
by waytootall
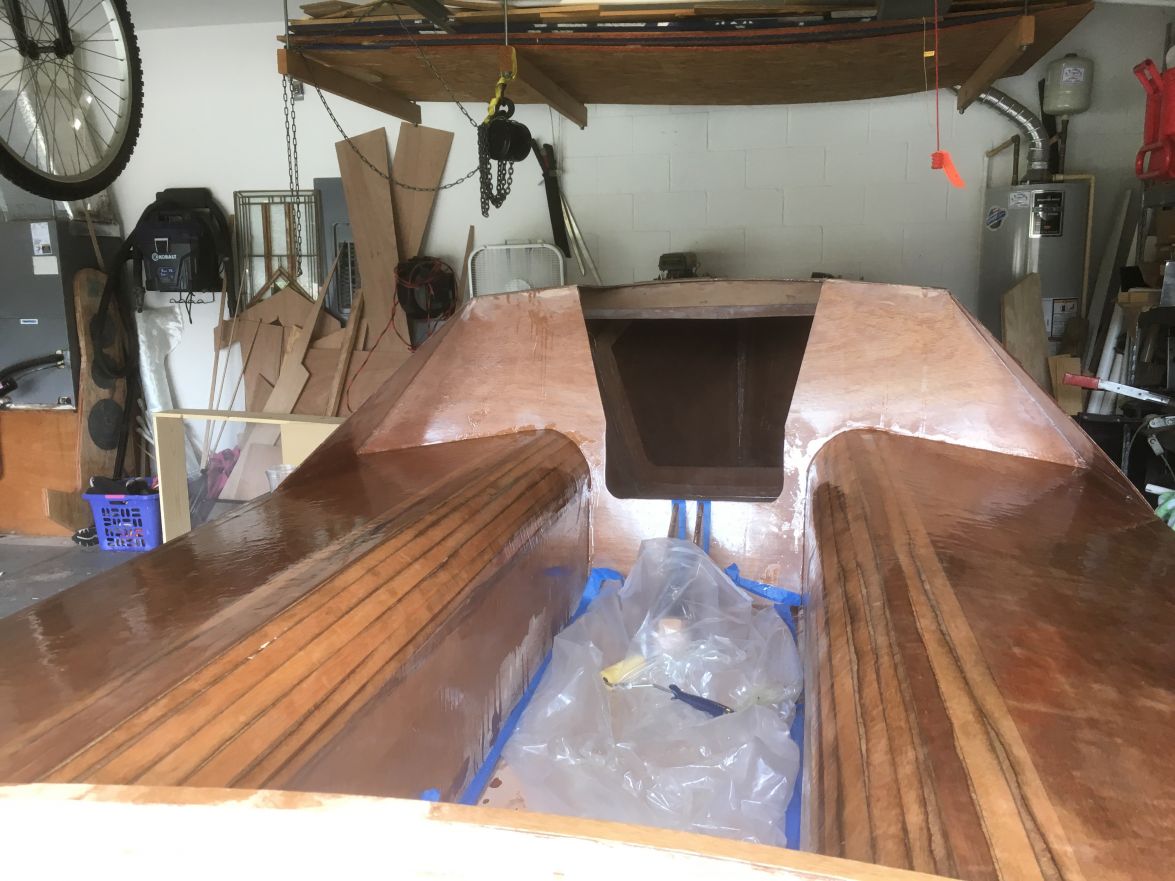
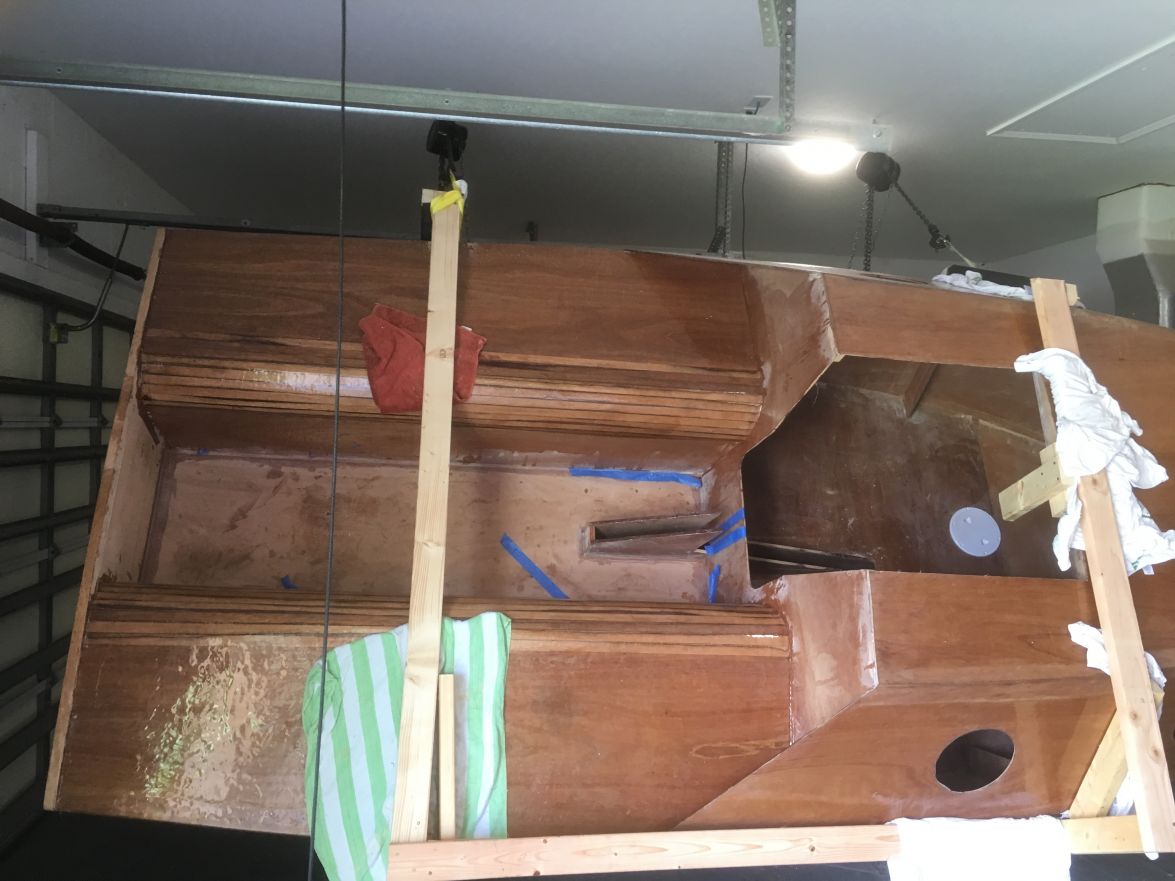
I've been getting a little done at a time the last few weekends, but not really much to show for it until I had an uninterrupted day yesterday. My daughter has been helping - which is fun and truly helpful. I got the cockpit sole installed. I still have a lot of work to do to finish is since the gaps at the seams are challenging.
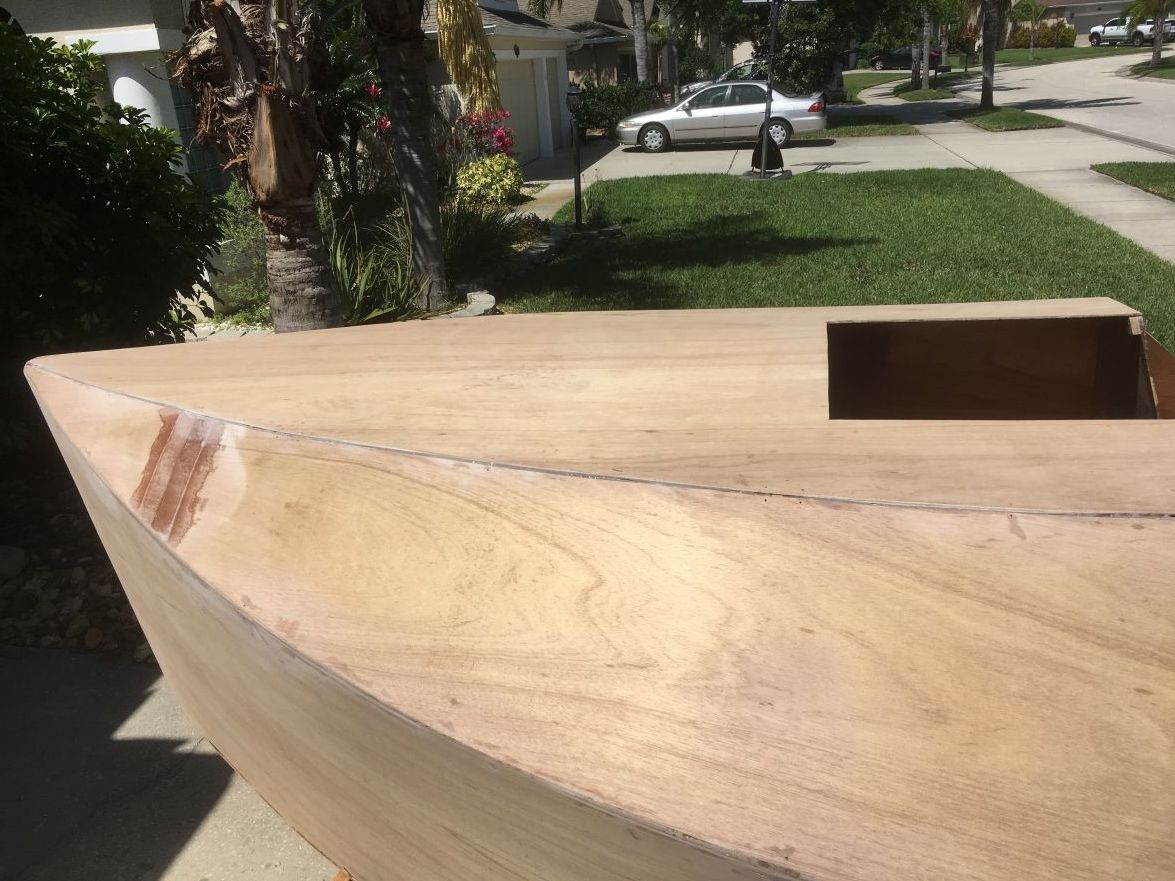
I also fiberglassed the upper seams and entire cabin top yesterday. Other than a few blemishes at tape seams and some troubles with fraying edges where I trimmed the fabric I am thrilled at how it turned out. I think my dream of keeping the cabin deck and sides finished bright will work out.
I did the seam between the hull sides and the cabin sides and the seats as one long tape line to avoid tape joints and hopefully keep it as strong as possible.
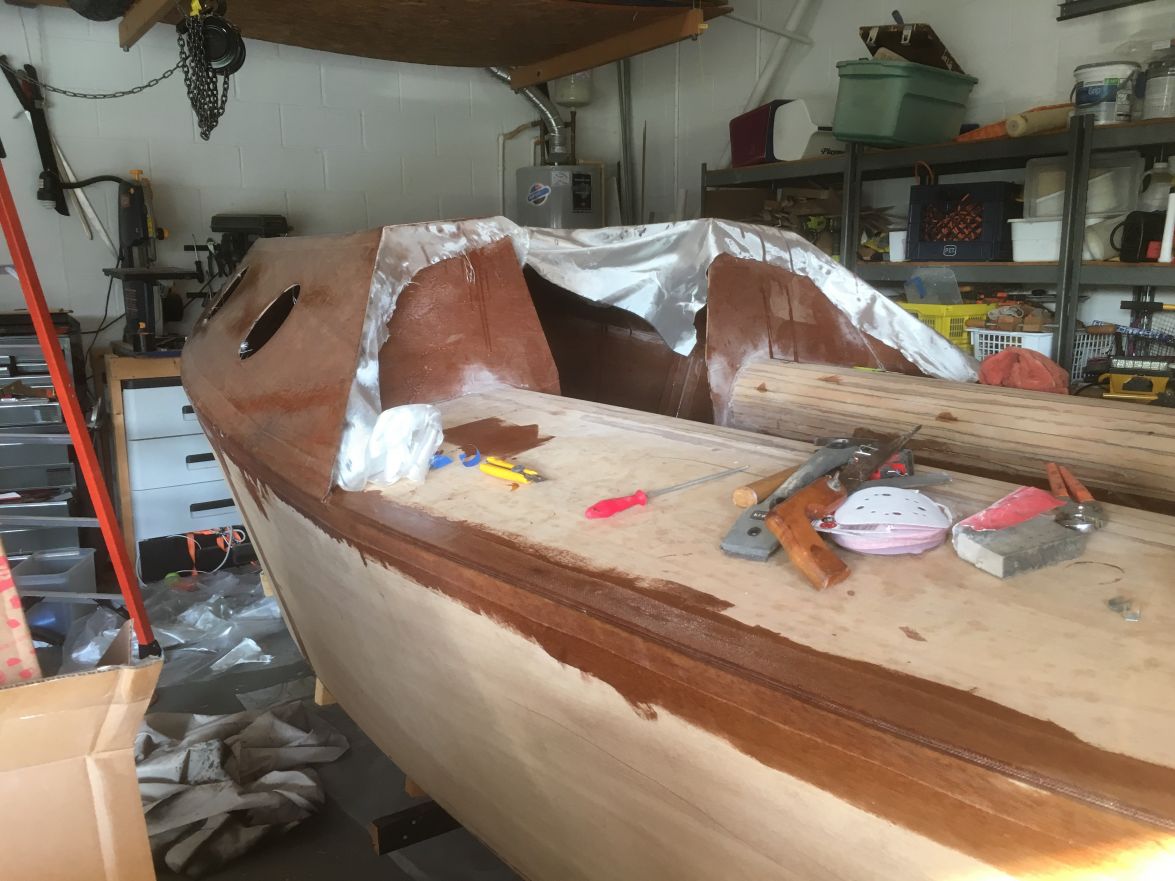
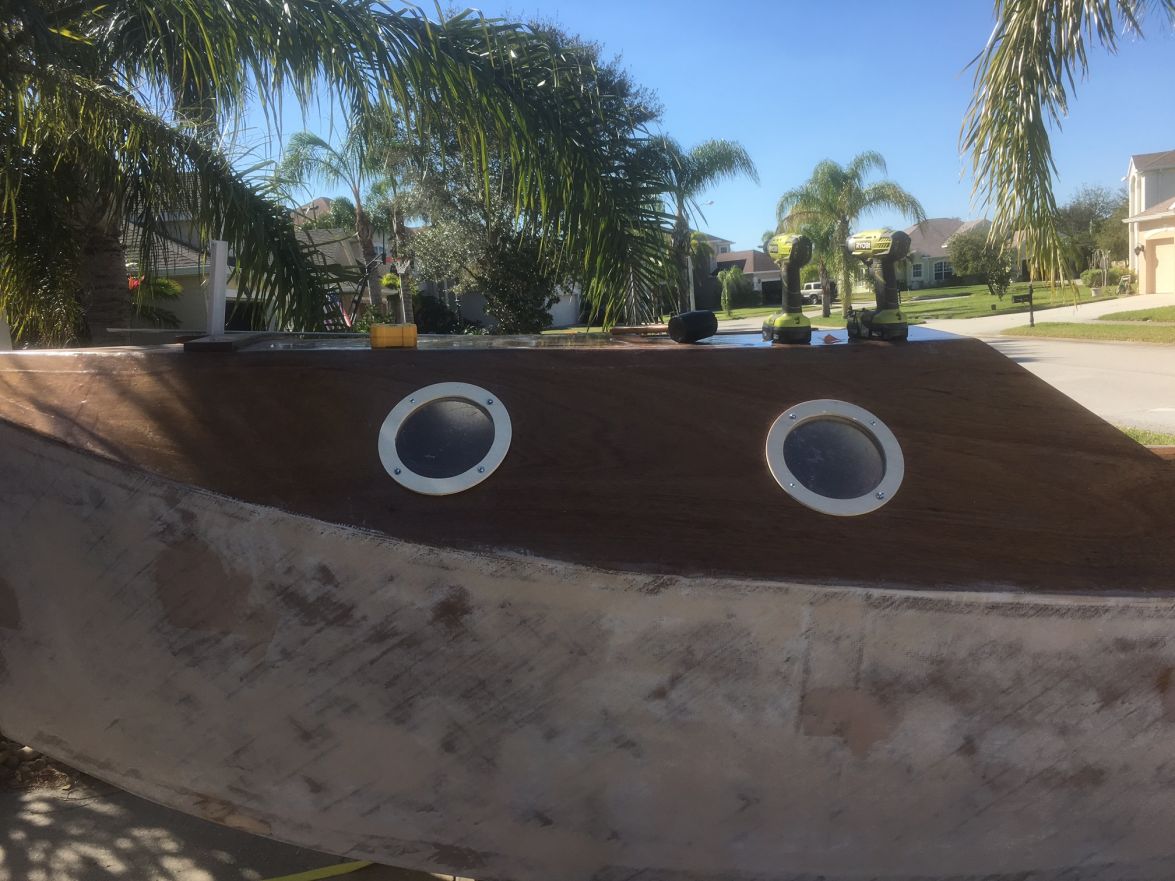
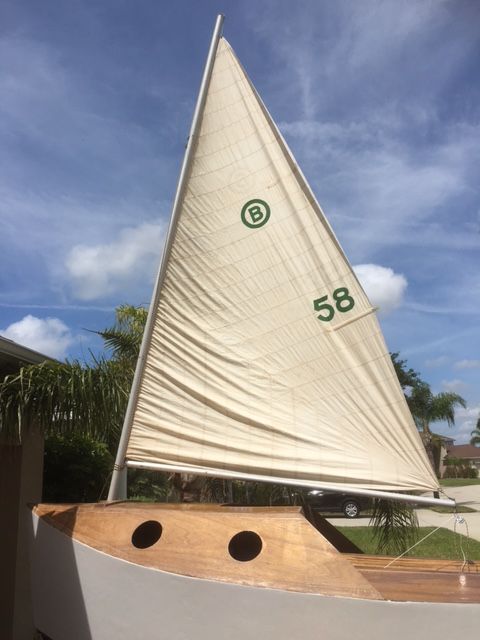
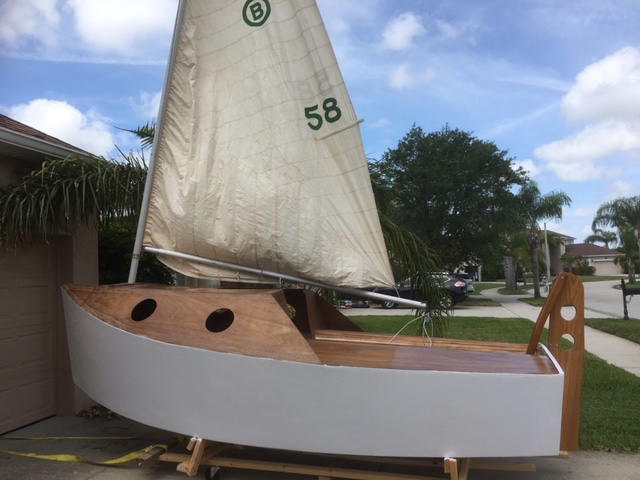
For the window in the cabin sides, I modified the design to porthole-style windows because I prefer the traditional look. I know I am losing some light but I am willing to sacrifice light for the style.

I learned a big lesson while doing the fiberglassing about trimming the fabric. I had problems with fraying edges when trimming the dry fabric. I will trim the fabric after the epoxy is dry where I can - which is why there is still the excess fabric on there, or I trimmed the fabric when wet with epoxy to get a much smoother edge.
Re: New AD14 build
Posted: Sun Jun 12, 2016 8:58 am
by terrulian
Great work. I'll be interested in seeing how the bright look works out.
Re: New AD14 build
Posted: Wed Jun 15, 2016 3:04 pm
by SP
Your boat is looking great.
I like how each builder of the AD series is adding their own personal touch with the portholes.
Re: New AD14 build
Posted: Wed Jun 15, 2016 6:46 pm
by das boot
It looks real good as for the windows I like what you have dun everyone seams to add there private touch to their build that is what keeps it intresting. Keep up the good work
Re: New AD14 build
Posted: Thu Jun 16, 2016 5:40 am
by glossieblack
Clever detail finishing choices.
Re: New AD14 build
Posted: Thu Jun 16, 2016 10:21 am
by ks8
With or without a name added there....
nice
Four portholes... Four Eyes?
They look salty. And you could mount one of those porthole fans in one of them to get air circulation, although I couldn't find a link for one quickly. Maybe the industry is sticking with cabin roof fans now -- further away from water and spray? Certainly handy in Florida, if you've got the electric for it. One healthy solar panel, charge controller and deep cycle would do it. Anyway.... nice.
Got a name picked yet?
Re: New AD14 build
Posted: Fri Jun 17, 2016 1:20 pm
by das boot
The solar panel will work I have a small one on my boat it keeps the battery charges and it is only 12 inches -4 inches keeps the fish finder and lights running as well as radio so it should handle a fan as well I have a 120AMP battery on board to hold the power
Re: New AD14 build
Posted: Sat Jun 18, 2016 8:39 pm
by ks8
Re: New AD14 build
Posted: Sun Jun 19, 2016 5:17 pm
by waytootall
There will be a name on the back. Although the picture you included in your question post is unfortunately not the back of my boat. That work of art was an example posted to give me an idea about the transom trim piece. I hope mine looks that good. As for a name - I am a fan of bad puns so the leading candidate is "Freudian Sloop".
Re: New AD14 build
Posted: Sun Jun 19, 2016 5:23 pm
by waytootall
Did some more fiberglassing work on the top. This time I did 4oz woven fabric on the seats and curves. I am learning every time I do it, which means I should be good at this by the time I am done and it is too late. I have learned that if is easiest to just use your (gloved) hands on the very wet fabric to smooth it out. No tool works nearly as well. I have also learned to put the fabric on too large and when it is wet and smoothed on - I then trim the excess with a razor knife and get good edges with no fraying.
There is definitely some bumpy/wavy unevenness in the epoxy surface that will involve a lot of sanding eventually. But I am happy with the start and can move on to other things and save detail finish work until later. Maybe even after splashing.
Re: New AD14 build
Posted: Mon Jun 20, 2016 2:27 am
by gonandkarl
Hi,
I dont think you should use one of your port holes for a fan. Rather use the hole for the sprit pole for ventilation as suggested from Jaques in the building notes. You are progressing very fast and your boat is looking really good. Let us always have lots of pictures.
Greetings from Karl
Re: New AD14 build
Posted: Mon Jun 20, 2016 9:15 am
by ks8
waytootall,
Between Melbourne FL weather and all the good wisdom on this board, let us know what finally works best for you for ventilation, both while you are in the boat, and when it is on the trailer. I like the idea of using the sprit hole while on the trailer, maybe with a screen fitted over it to keep out the many winged (and otherwise) Florida critters. While sailing or at anchor, let us know what you come up with.
Weather this morning in west Florida is ideal, and rare. Cool with a breeze on the first day of summer. If only it was like this every morning and night! Time to go enjoy working in it.
Re: New AD14 build
Posted: Mon Jun 20, 2016 3:53 pm
by waytootall
ks8
Where is Western Florida are you? Unfortunately, I work prevents me from sailing whenever I want
Well, that and lack of a sailboat yet. I am hoping the weather will still be warm enough in the fall to early winter when I might be ready to get this one out on the water. There is a good chance it will be.
Re: New AD14 build
Posted: Mon Jun 20, 2016 5:27 pm
by ks8
See my location listed to the right, next to
Location:
Enter that full EL87qm code in the box labeled *grid* on
this page. It is within a half mile or so.
Re: New AD14 build
Posted: Mon Jun 20, 2016 5:35 pm
by waytootall
Wow do I feel stupid. I had never noticed that data over there
Re: New AD14 build
Posted: Mon Jun 20, 2016 5:37 pm
by ks8
If this is a contest, I may have you beat...
Re: New AD14 build
Posted: Sun Jun 26, 2016 6:58 pm
by waytootall
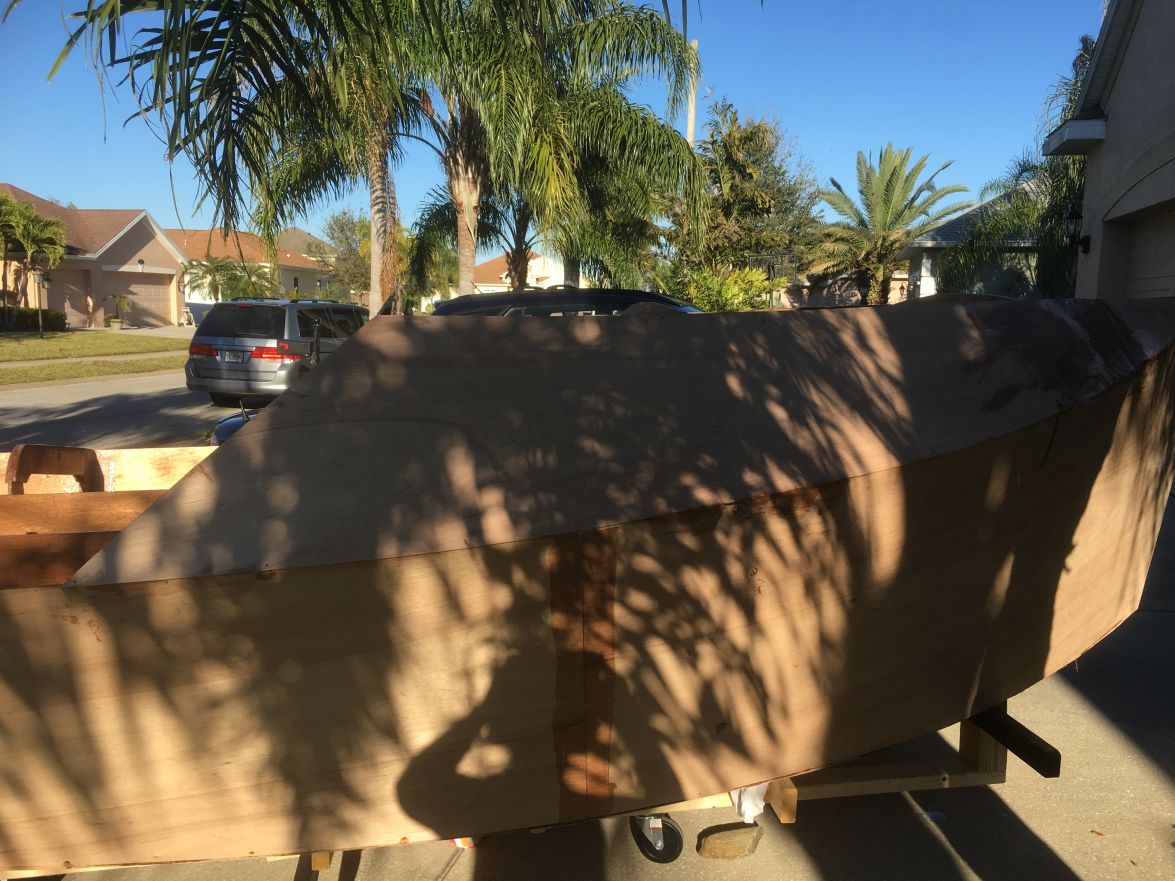
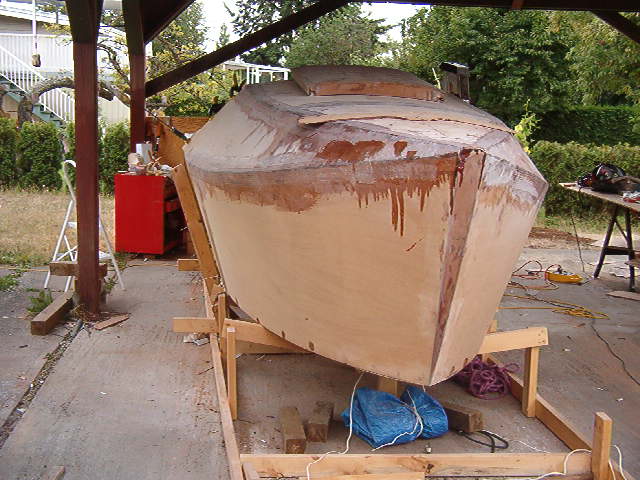
Big job this weekend. It was time to turn the boat on its side to fiberglass the bottom. I know the directions say it can be turned easily by a single person with a good lever, but either I have made it too heavy or I am too much of a wimp, but there was no way I was going to turn it myself and my kids are too small an neighbors no help. So my engineering self took over and I over-engineered the heck out of it, but it worked beautifully.
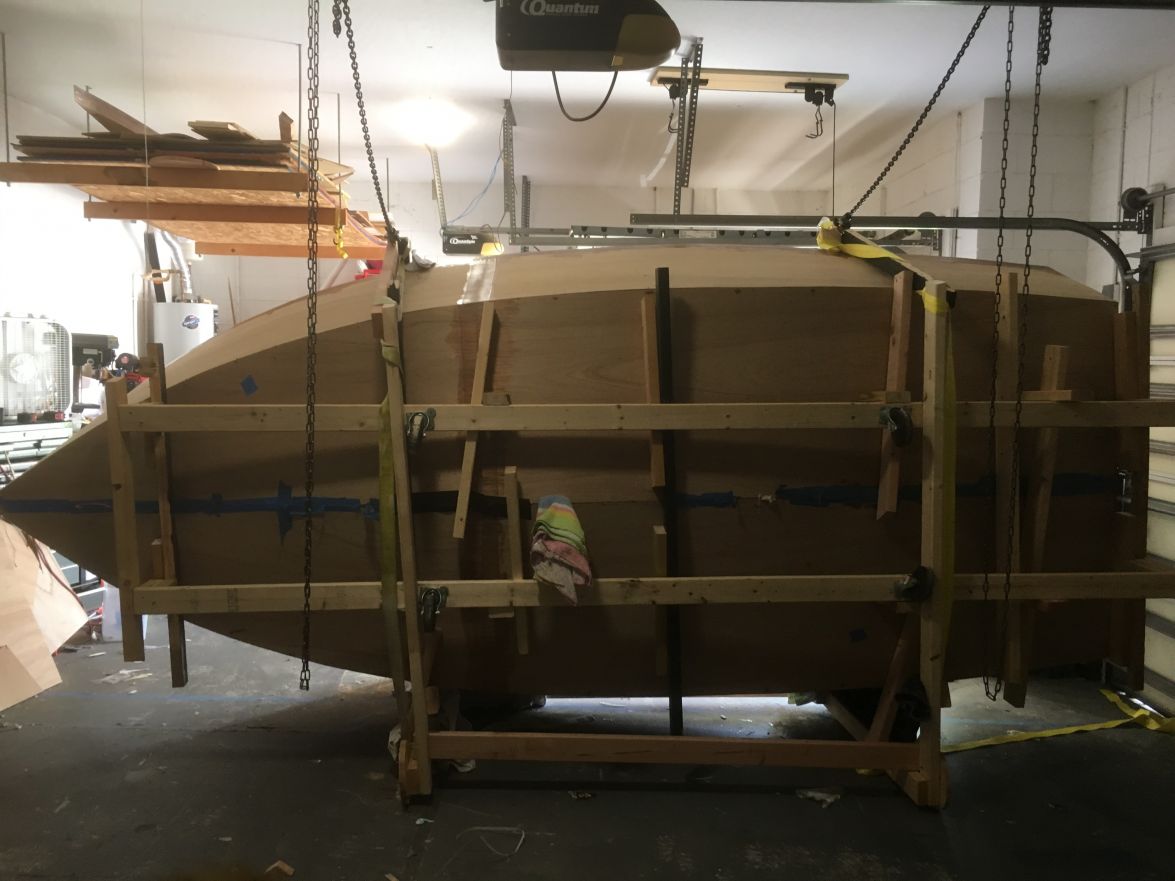
I first built a new a new jig cage to hold it in place during and after rotation.
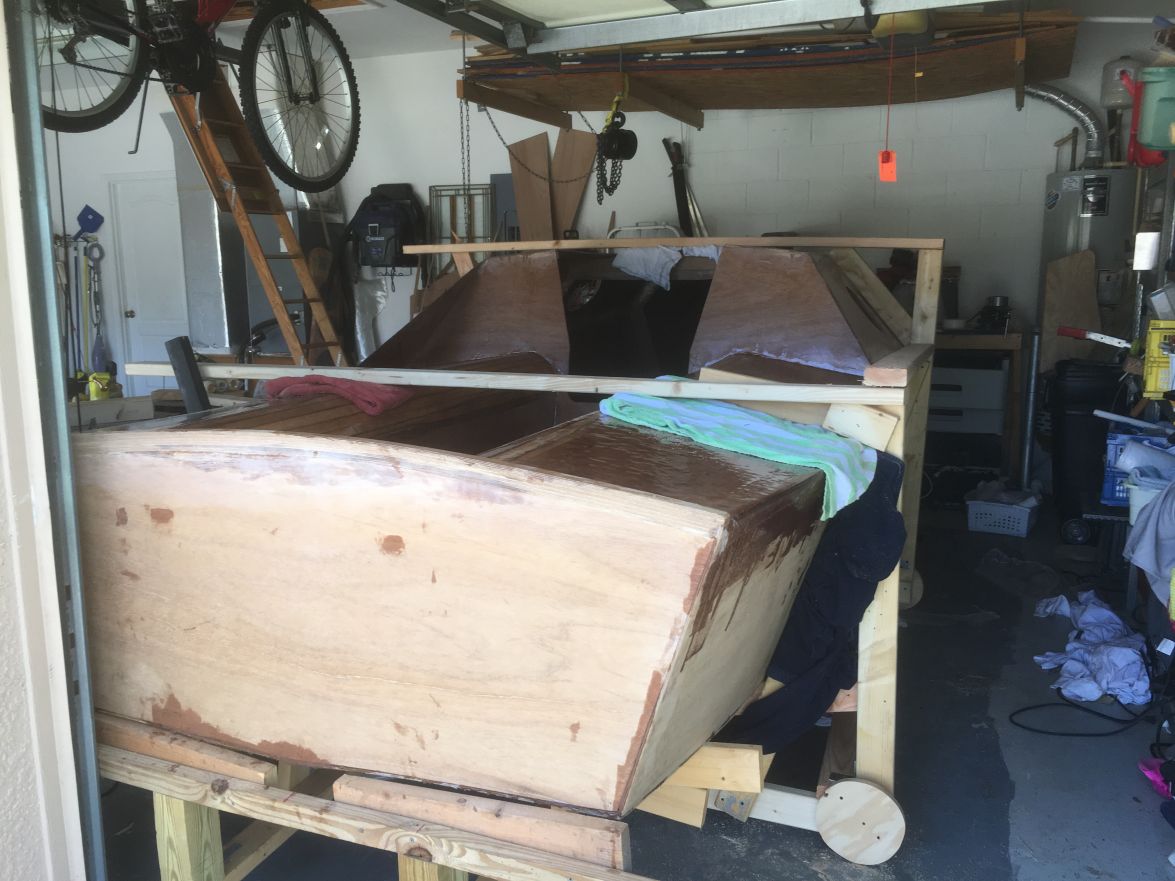
I used the cutouts from the centerboard on the corners as points of rotation
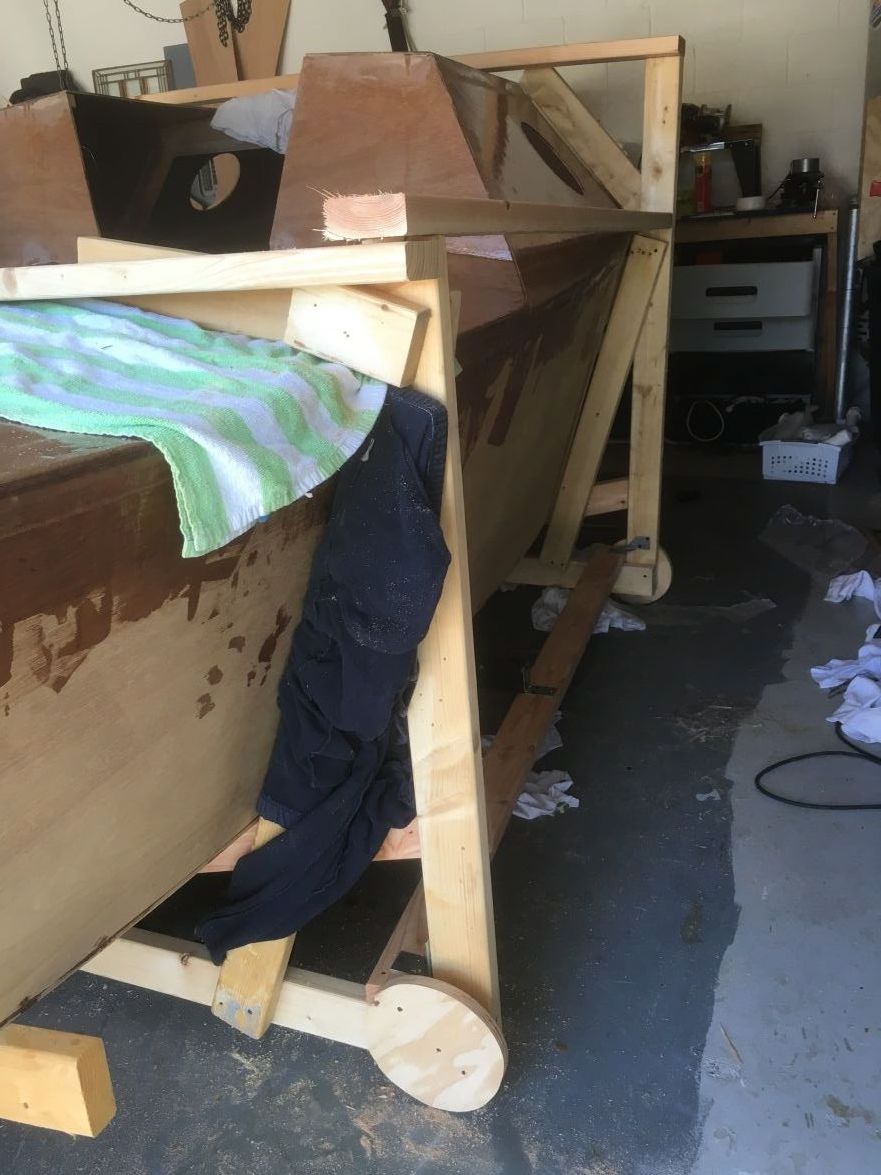
I attached a pair of 2 ton chain hoists into ceiling joists in the garage and attached the chain to the top corner of the jig cage
I had 2 of my kids work the chains to rotate simultaneously while I supervised
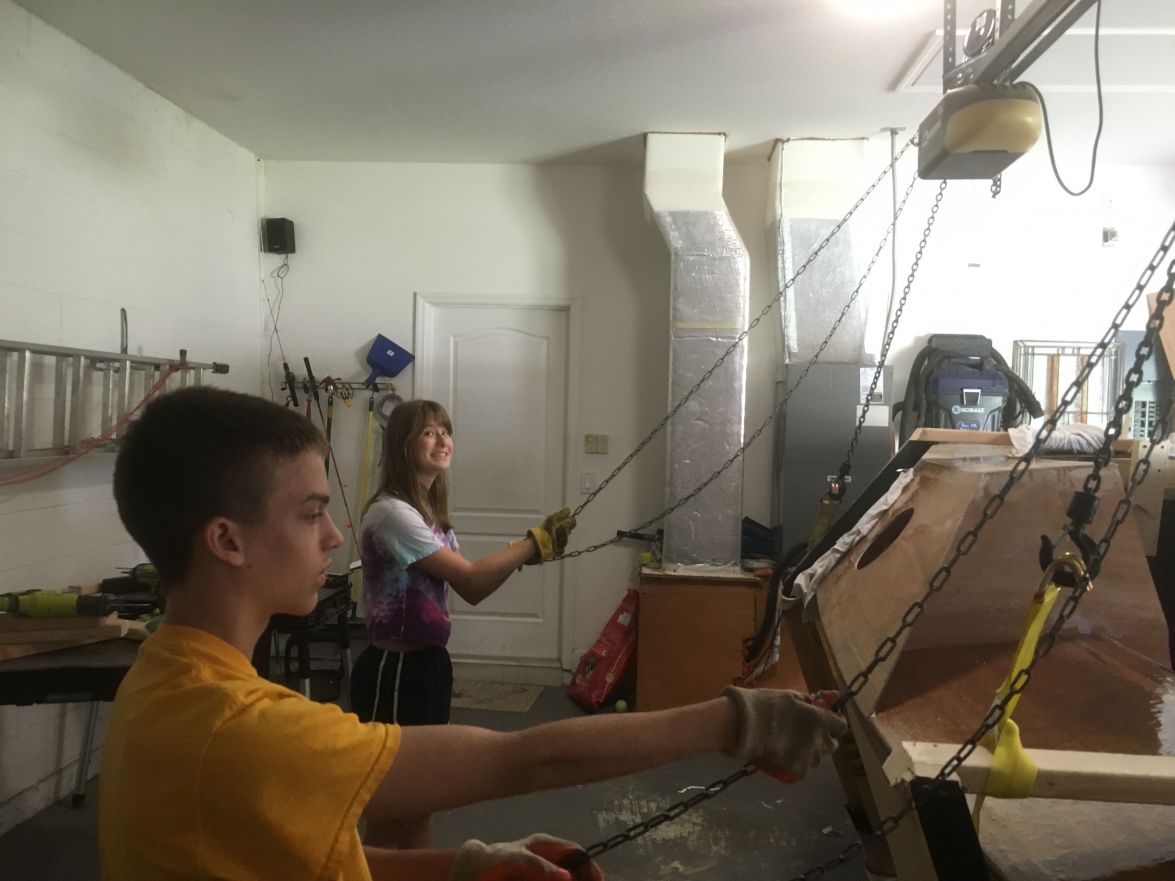
The hoists lifted the corner to the ceiling rotating on the rounded bottom corner of the jib
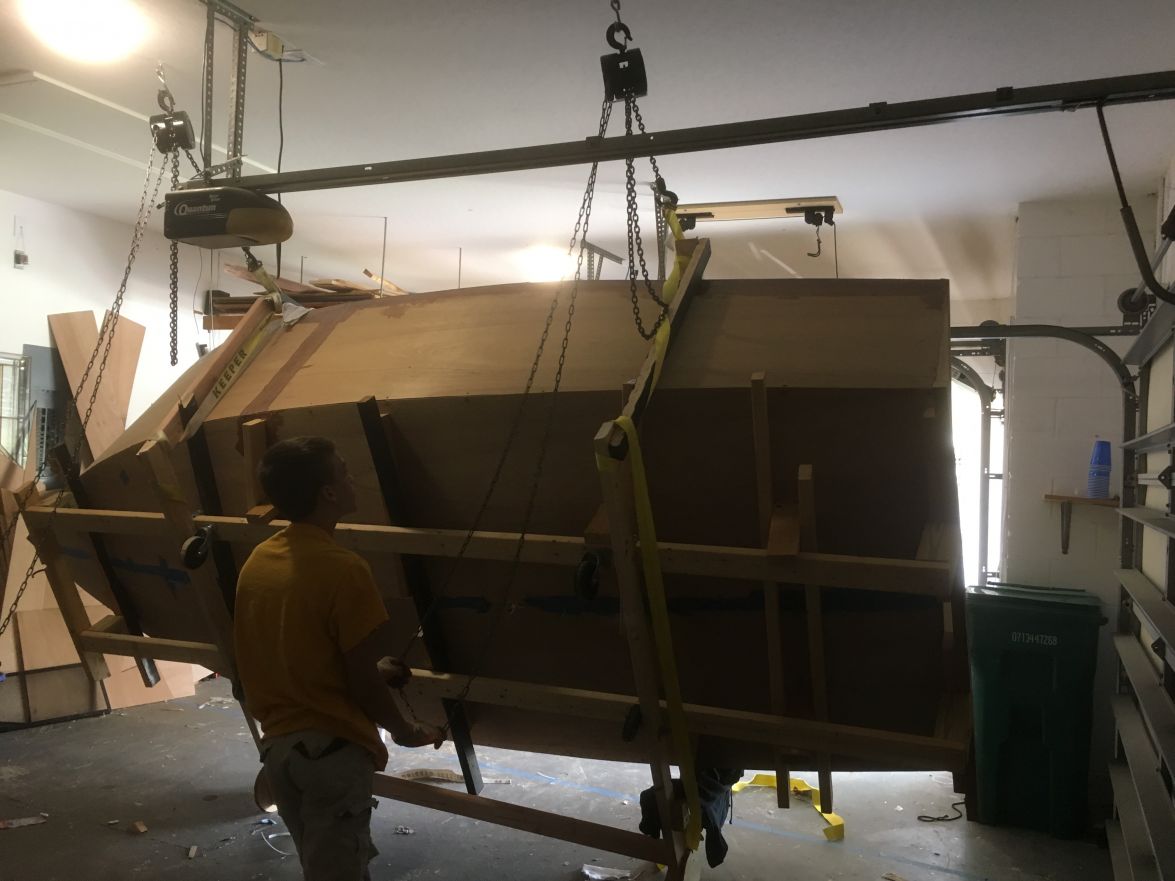
As you can see it barely clears the garage ceiling and garage doors so a lot of math went into building the jig to fit. Once the corner reached the peak I nudged the boat over a little past the balance point and then we reversed direction on the hoists to lower it gently down onto the side of the jig
At this point the rolling chassis I have been using to move the boat in and out of the garage is still attached
After removing the rolling chassis, the bottom is ready for work. I will do all the bottom work in the garage since it is too hot to work outside these days.
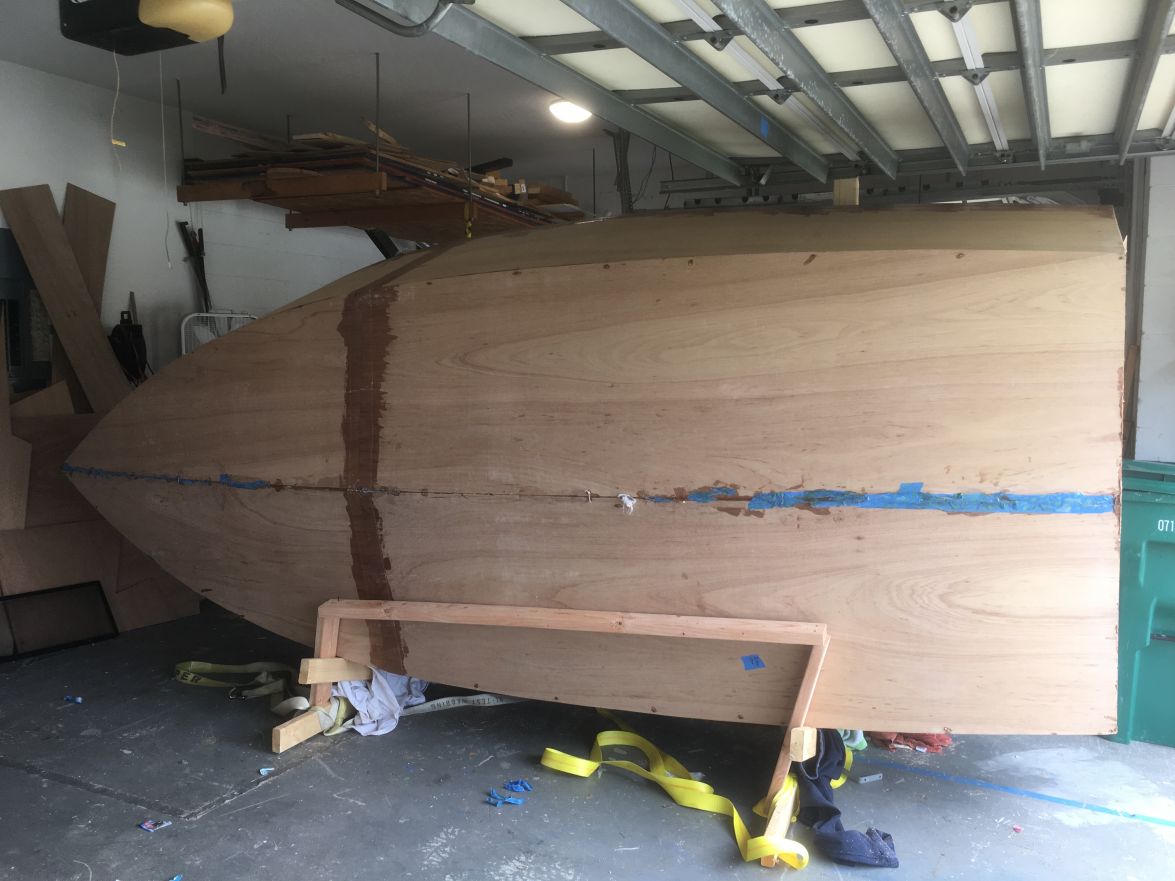
This took a lot of work and preparation but worked amazingly well with the boat under complete control the entire time so was well worth the effort not to potentially break the boat or my back.
Re: New AD14 build
Posted: Sun Jun 26, 2016 7:09 pm
by ks8
Wheeeeeeeeeeeeeeeee !
Nicely done.
Re: New AD14 build
Posted: Sun Jun 26, 2016 7:22 pm
by Jeff
Completely agree!! Very well done!! Jeff
Re: New AD14 build
Posted: Mon Jun 27, 2016 11:31 am
by gonandkarl
Hi,
Really nicely done and for me most important that you documented it with pictures so perfect that I can do it on my AD14 the same way with a jig like yours. I have lifted the AD14 with straps already to test if my electric hoist can manage the muscle part of the flipping. But with a jig like yours I am even more confident that I can do it on my own. I should be that far in a few weeks.
Will also take pictures to help also all future AD14 flippers.
Greetings from Karl
Re: New AD14 build
Posted: Tue Jun 28, 2016 4:40 am
by glossieblack
Nicely executed flip.
Re: New AD14 build
Posted: Sun Jul 03, 2016 3:59 pm
by waytootall
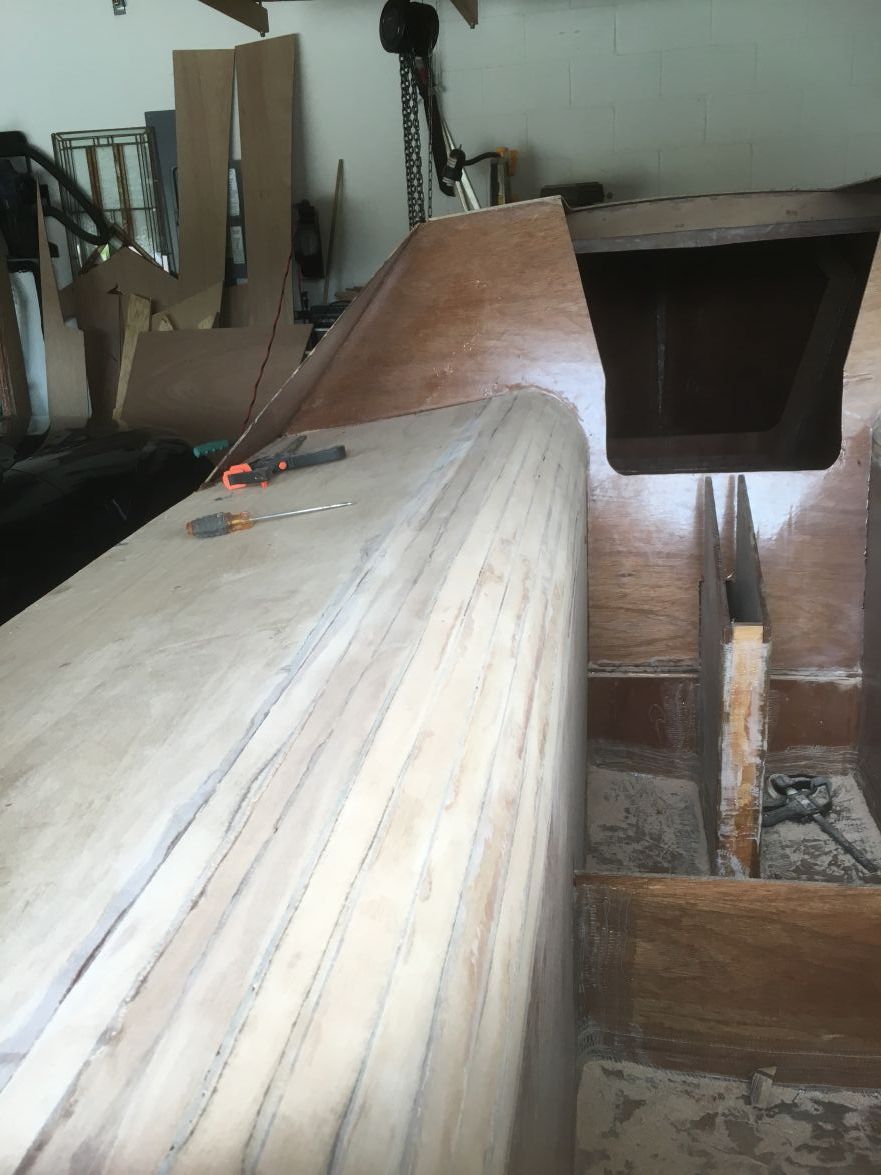
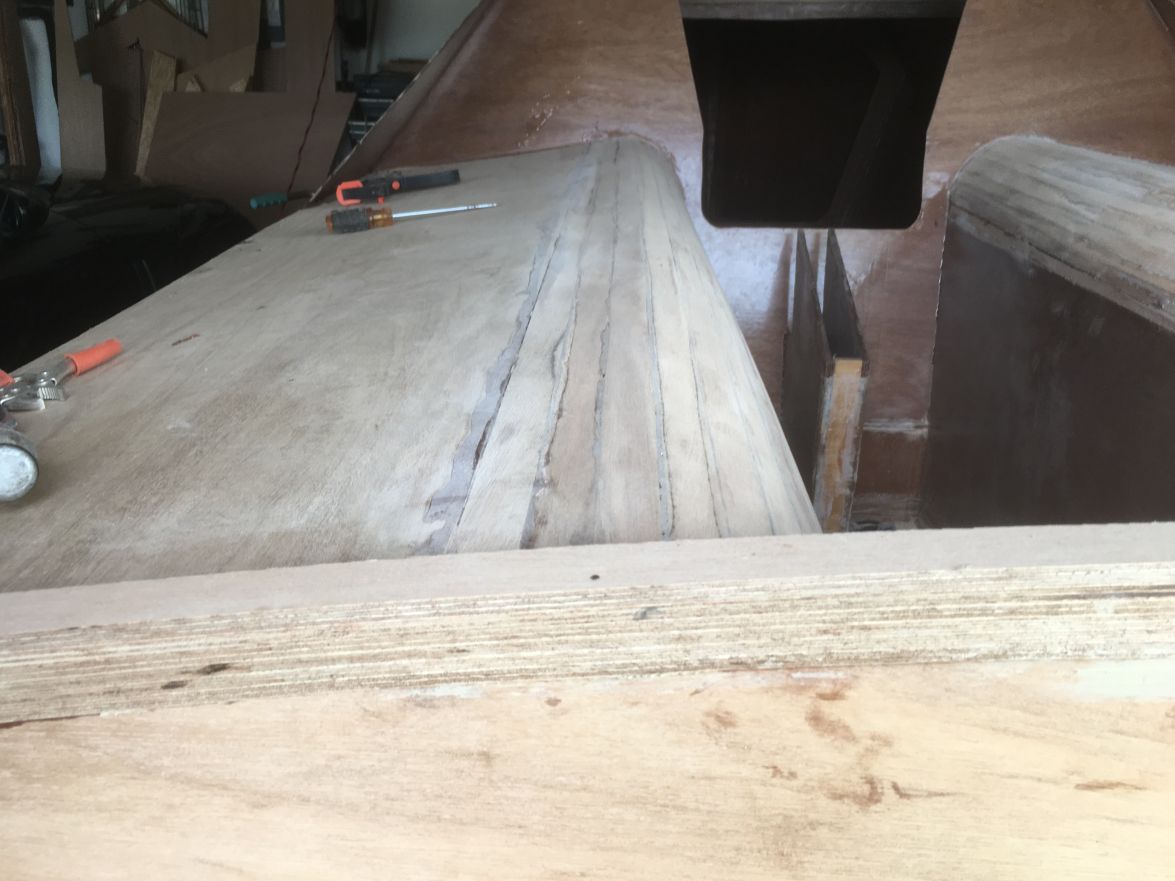
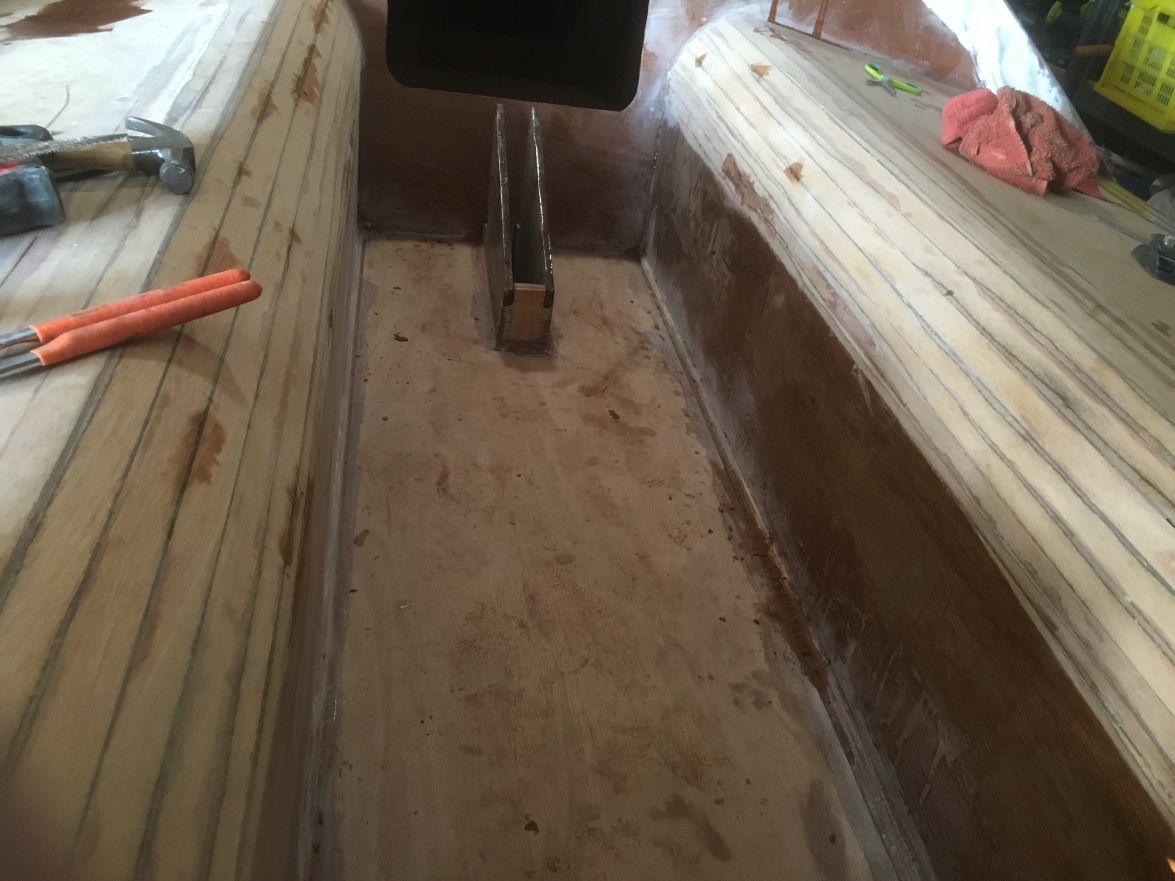
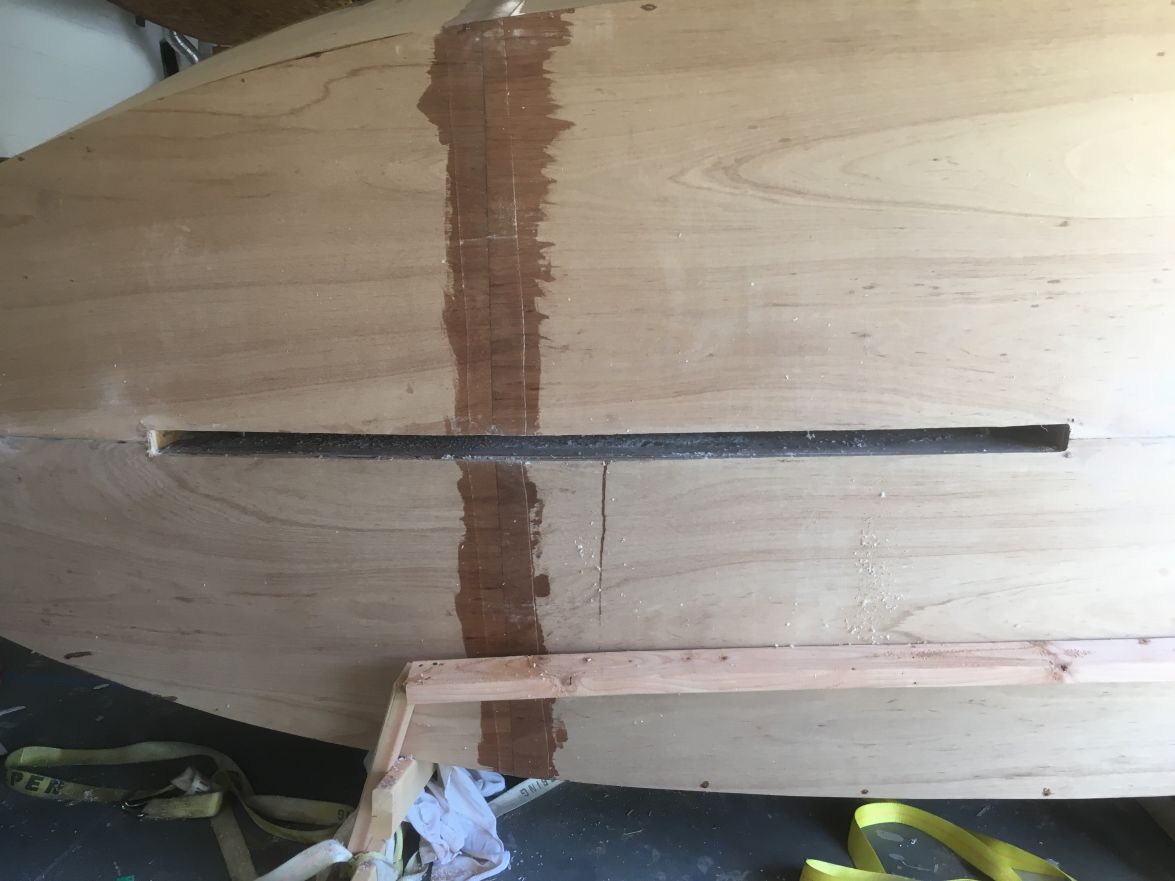
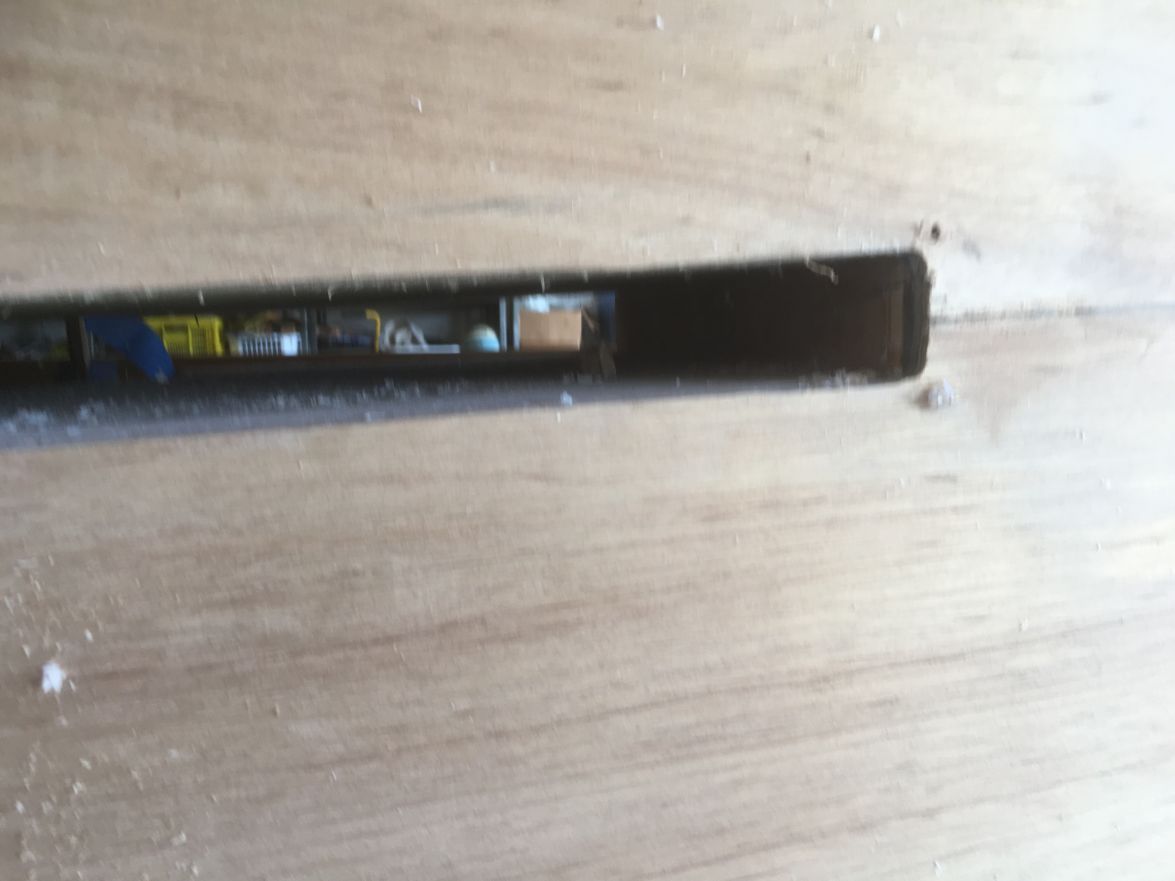
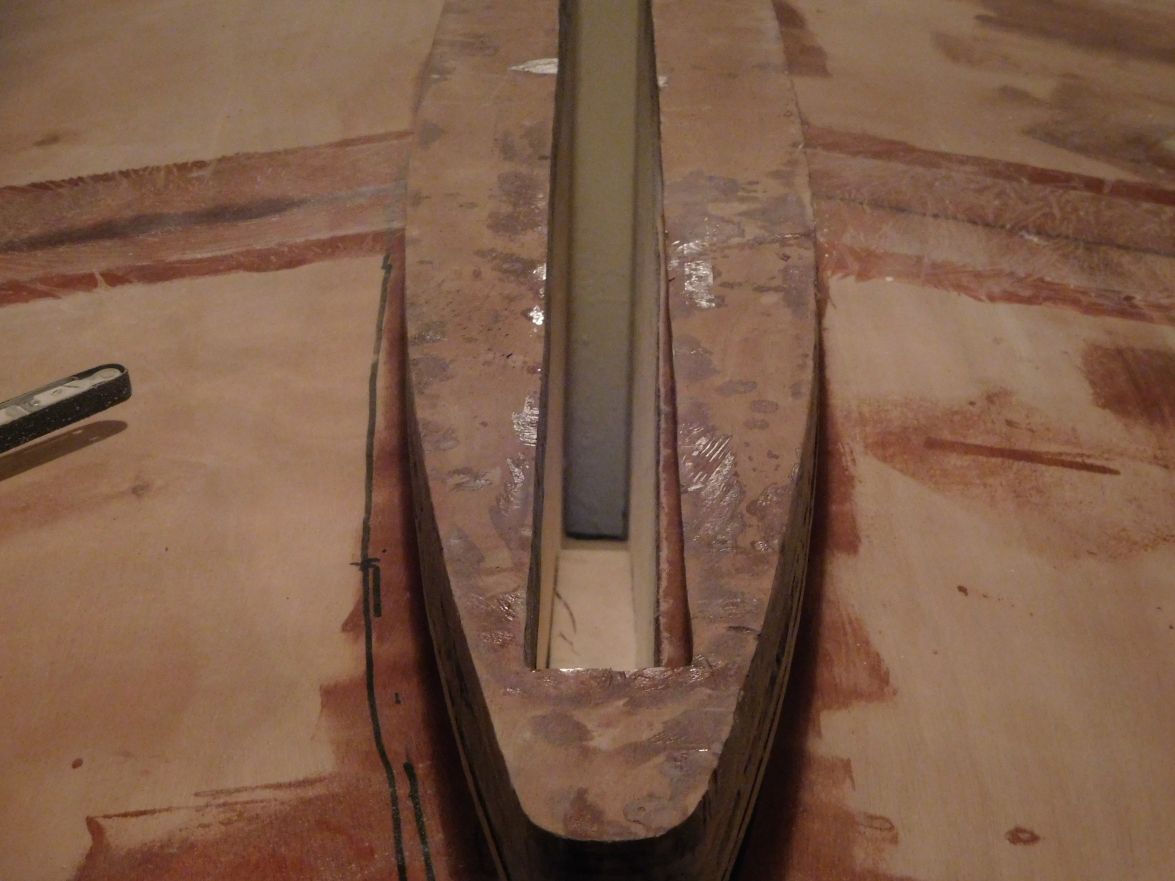
Started prepping the bottom for fiberglassing. Lesson learned with epoxy - when I did the fiberglass on the inside of the hull bottom I used too much and apparently it pooled in the keel seam a lot. I got a lot of seepage through the seam so had a lot of grinding and cleanup to do with the seam. Apparently it pooled up to over a half inch thickness at the lowest point. I cut the slot for the centerboard and proved once again that using the right tool for the job is key. Starting at first using a hand saw, then a jigsaw and then a sawzall I was struggling to get a good slot. I switched to a 1 inch trim flush-cut router bit and that produced a very nice slot perfectly aligned with the inside of the centerboard trunk.
This is the router bit
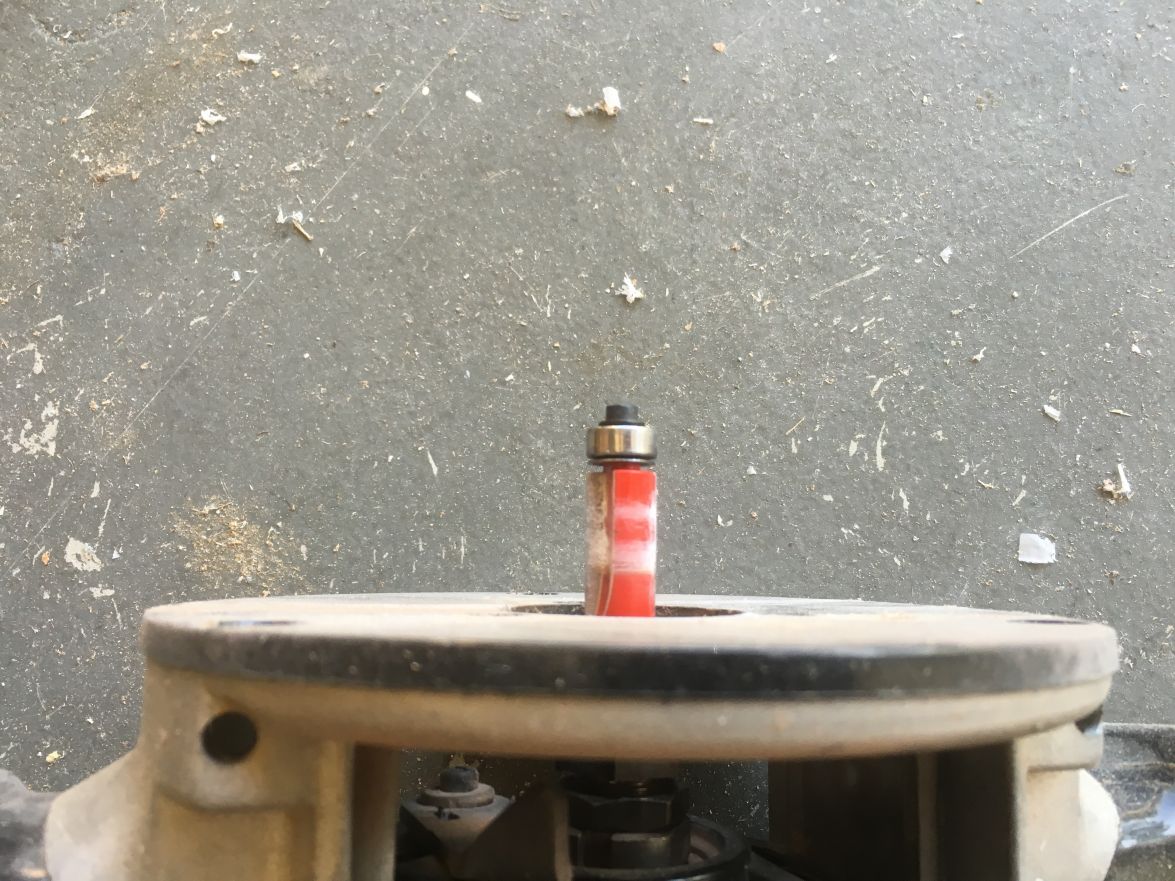
And the slot with a cleaned up keel seam
Re: New AD14 build
Posted: Sun Jul 03, 2016 4:19 pm
by ks8
Re: New AD14 build
Posted: Mon Jul 04, 2016 1:43 am
by SP
I use routers and pattern bits all the time on many different projects.
Routers are great tools.
Re: New AD14 build
Posted: Sat Jul 16, 2016 7:35 am
by waytootall
I am looking for thoughts and advice on fiberglass in the bottom and sides of the boat. The directions and lamination schedule only call for fiberglassing the bottom to 6 inches above the chine up the side. This would leave the large side panel bare wood which would seem to be the most likely area for minor collisions and dings. Is the quarter inch plywood strong enough to stand on its own or should I also fiberglass the sides up to the seem with the cabin sides?
Re: New AD14 build
Posted: Sat Jul 16, 2016 8:49 am
by gonandkarl
By minor collisions and dings I understand them to happen when going ashore and these I will prevent using fenders, but I agree with you it makes sense to fibre glass the whole side and I will do it as soon I have my AD14 on its side. I hope it will also help me with fairing not having a step from the deck side tape.
Greetings from Karl
Re: New AD14 build
Posted: Sat Jul 16, 2016 10:08 am
by waytootall
I was thinking of placing the rub rail so it covers the transition from the tape seam to help with that fairing problem.
Re: New AD14 build
Posted: Sat Jul 16, 2016 6:18 pm
by Salvatore
Hi,
It said's in my building notes on page 8 for my AD16 to: "Fiberglass the side and bottom with wide fabric as specified on plans"
The Lamination Schedule in Step 4 Shows the glass layer going up and over the Gun rail. When the instructions say bottom that includes the side also Please look at the plan carefully. IF this is missing from your plan it is a mistake, there is absolutely no reason for the AD14 and the AD16 to have a different lamination schedule
The plywood by itself is way to soft and will not withstand a hard hit.
The Idea of these boats is that the ply is thin and the layer of glass inside and out gives it its strength.
You can see what I did on my AD16 if you watch my youtube clip
Building Angelina
https://youtu.be/plQZZJgnWzk
Regards Salvatore
Re: New AD14 build
Posted: Sun Jul 17, 2016 3:37 am
by gonandkarl
Hi,
Salvatore is right, the glassing outside is a must and only inside it could go a bit up above the sole.
I glassed the whole of the inside up to the gunwale.
Greetings from Karl
Re: New AD14 build
Posted: Mon Jul 18, 2016 8:49 pm
by waytootall
Thanks for the replies. I agree that on page 8 the directions say "Fiberglass side and bottom with the wide fabric". But 2 lines below that it says "We do not specify fiberglass for the whole height of the side panel, only 6" above the chine". That is the line that caused me confusion. I will go ahead and fibergalss the entire outside side panel.
Re: New AD14 build
Posted: Mon Jul 18, 2016 9:46 pm
by ks8
I think there is a minimum that is *specified* in order for a design to meet the designed strength for the purpose of the program in which it was designed to be used. Even a brief look at the build threads on this forum will show that many builders go beyond the minimums *specified* -- ( guilty
) . And that is the benefit of accessibility to the designer(s) and other builders on these forums. One can ask about the pros and cons of going beyond the *minimums*.
Re: New AD14 build
Posted: Sat Aug 20, 2016 10:44 pm
by waytootall
Re: New AD14 build
Posted: Sun Aug 21, 2016 6:23 am
by gonandkarl
Hi,
Nice glassing you have done and I also admire the speed with which you proceed. Alone the statement tommorrow I put on fairing lets me think I am doing it all wrong, because I am still busy fairing the deck on quite a few tommorrows.
Keep up the speedy work and let us always see enough pictures. I like your build a lot.
Greetings from Karl ( Austria )
Re: New AD14 build
Posted: Sun Aug 21, 2016 7:51 am
by waytootall
When I say "put on the fairing coat tomorrow" I really mean that I will start the process on this side. I know it will take me a while. I have been reading your (and everyone else's) advice.
Re: New AD14 build
Posted: Sun Aug 21, 2016 4:35 pm
by waytootall
Re: New AD14 build
Posted: Mon Aug 22, 2016 8:55 pm
by ks8
Nice to see you now working on the keel. Good milestone.
Re: New AD14 build
Posted: Mon Sep 05, 2016 10:44 am
by waytootall
I am getting a lot done on this long holiday weekend, and I need to since the kids activities are ramping up and the next several weekends will be spent at lacrosse tournaments.
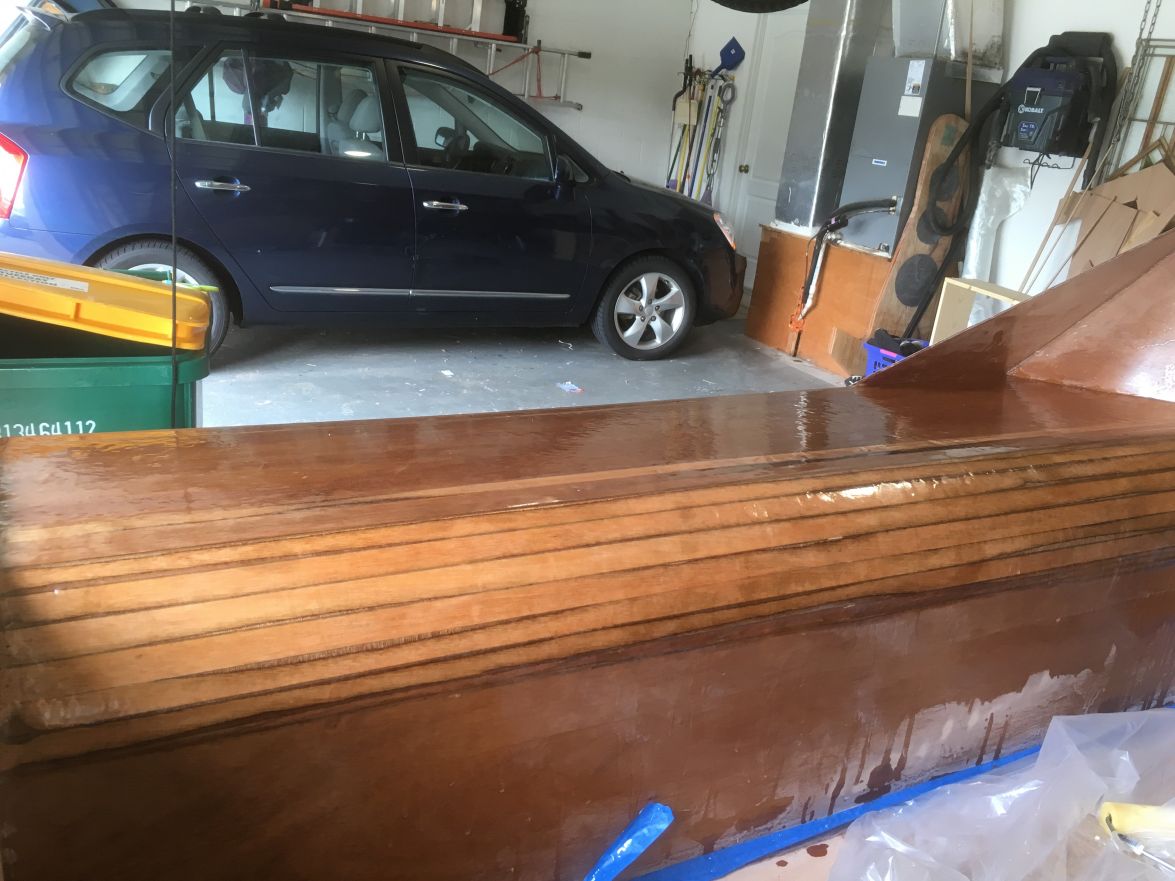
I followed everyone's advice and got QuickFair to do my fairing coat. What a major improvement! It is SO much easier to work with than trying to make your own. It spreads just like cake frosting. In fact, it spreads so much like frosting that I got my oldest daughter who love cake decorating to help me spread it on as smoothly as possible.
I have a lot of sanding to do but I am happy with the starting point. I am just doing what is now the top half and then I will flip the boat on the other side to do the other half. I want to make this as easy on my back as possible.
I then went on to shape the curve on the keel shoe to get it mounted. I ran clamps through the keel truck to hold it in place which worked pretty well. I wish I had a few more of the long clamps though.
The shaped wood on the shoe matches pretty well I think and it glued pretty easily by squirting a mixed epoxy glue/putty in the gaps with a frosting bag.
I then fiberglassed the shoe to the hull bottom with 12oz biaxial tape
And applied QuickFair to the shoe after the tape cured overnight.
Now on to a LOT of sanding.
Re: New AD14 build
Posted: Mon Sep 05, 2016 2:24 pm
by topwater
What age are your kids that play lacrosse ? I use to coach defense all the way to my son got out of
high school . When we lived in Illinios my son played for a travel team and one of the tournaments
was the Paradise Shoot out in Naples. He use to play for a team called New Wave Lacrosse.
Re: New AD14 build
Posted: Mon Sep 05, 2016 8:04 pm
by waytootall
My two daughters play lacrosse. One is 17 and is the defensive captain for her high school team and plays for the Viera Vipers club team. My 13 year old now plays for the RipStix traveling team and will try to play on the high school team with her sister - if they don't kill each other.
Re: New AD14 build
Posted: Mon Sep 19, 2016 9:43 pm
by waytootall
This past weekend I flipped the boat over onto its other side to fiberglass that side and that half of the bottom. I only had a few moments of panic when I had to use brute force to control the flip. I have noticed a few spots in the QuickFair coat where it never cured. I am assuming I had some that I didn't mix well enough so I will have to be more careful in mixing it for the rest of the boat and repairing the non-cured areas where I scrapped all the material away.
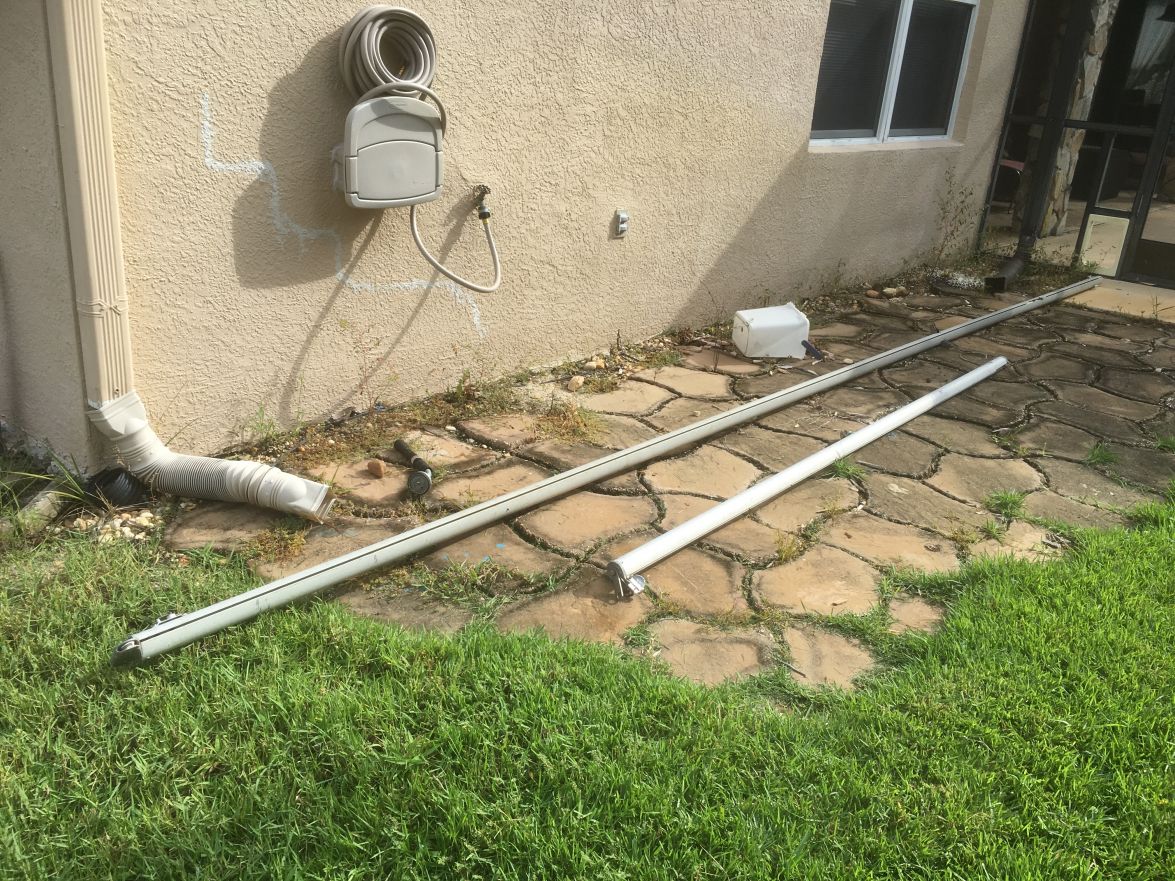
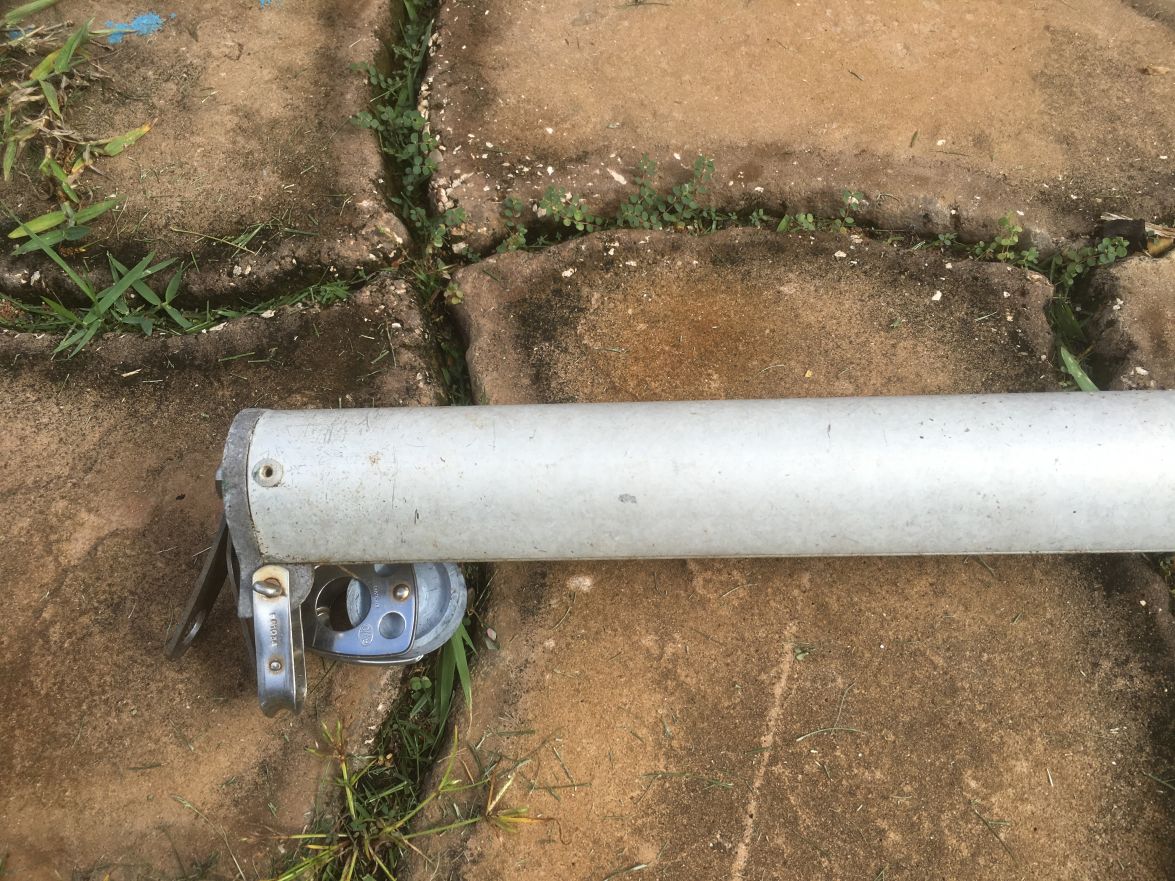
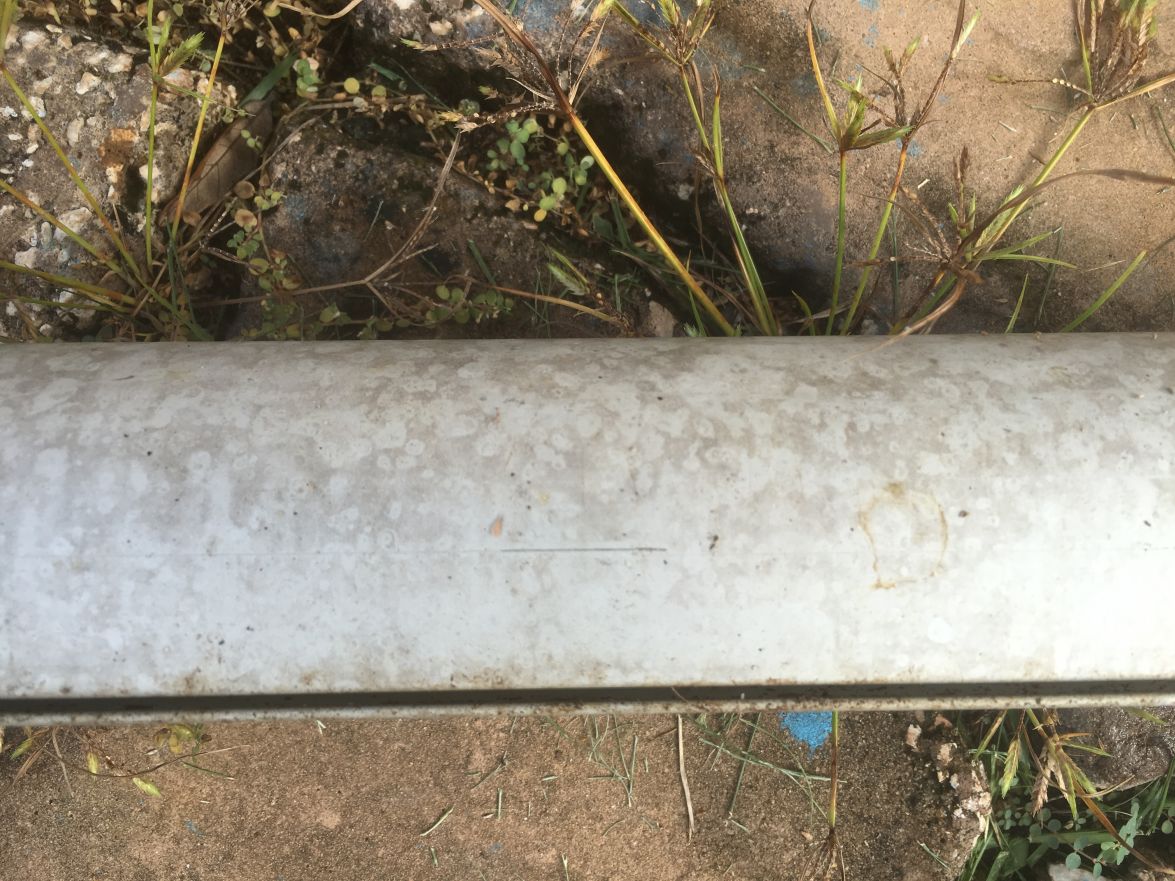
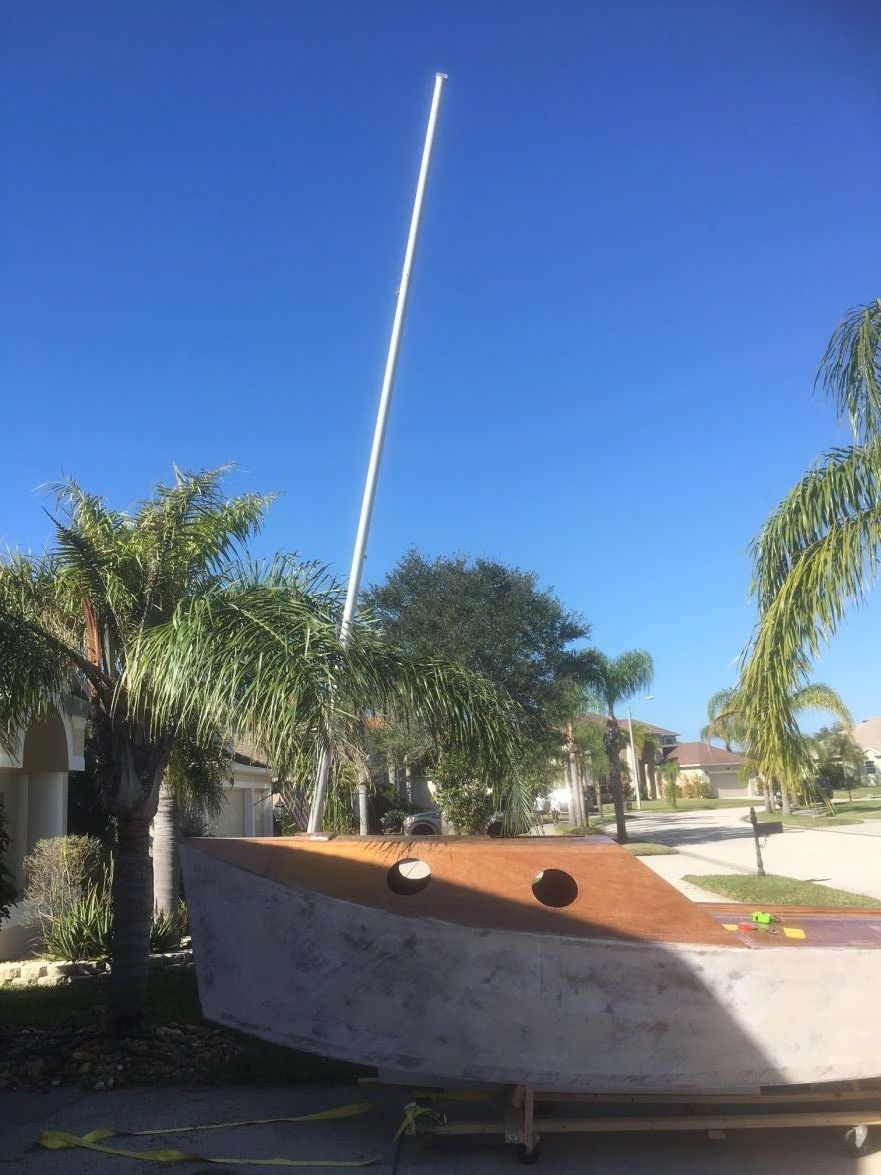
I also solved my mast need. I found a used mast and boom on Craigslist locally that matches the specified mast and boom almost exactly for $100. It includes all the stays, so I am very happy. It does show some age - does anyone know if there is a way to clean up aluminum to make it look new again?
Re: New AD14 build
Posted: Tue Sep 20, 2016 9:19 am
by terrulian
There are products to refresh aluminum which you can find in a web search. You will not be able, and I would not try, to make it look like new. You don't want any real abrasion.
Re: New AD14 build
Posted: Sat Sep 24, 2016 10:29 am
by ks8
Send some closeups. Good deal!
Re: New AD14 build
Posted: Sat Sep 24, 2016 11:26 am
by topwater
You can check out a product called Shark Hide, they use it on pontoon boats. When i use to do my fuel tanks on
my 18 wheeler i would hit hit it with an acid wash which would clean and turn the tanks white and then have to polish
them to get rid of the white. its a lot of work but they would have a mirror Finnish , to much work for a mast .
Re: New AD14 build
Posted: Sun Sep 25, 2016 5:07 pm
by waytootall
Re: New AD14 build
Posted: Mon Sep 26, 2016 9:48 am
by topwater
Try some Flitz metal polish and get a power ball buffer for your drill , should clean it right up.
You can pick this up at most auto parts stores.
Re: New AD14 build
Posted: Mon Sep 26, 2016 1:52 pm
by ks8
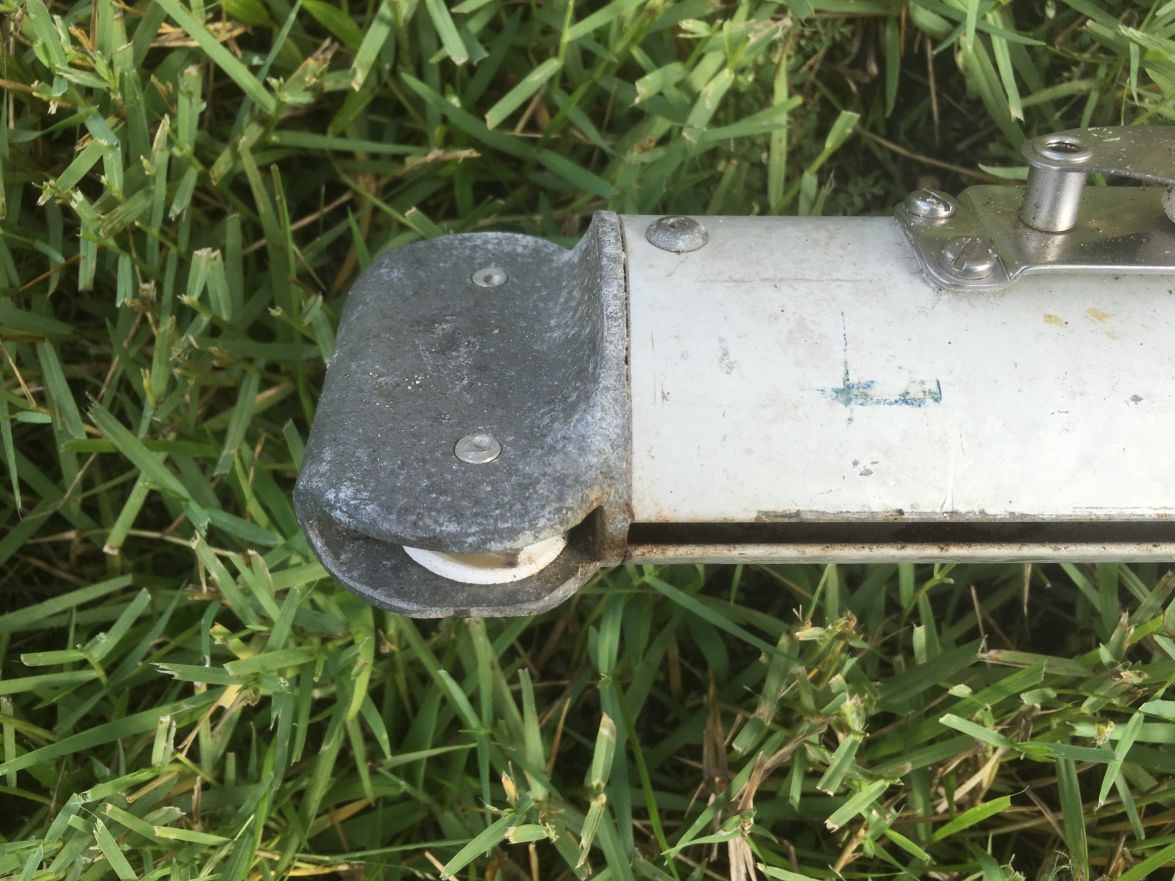
Nice. I have masthead sheaves like that. One of the axles was not sufficiently peened. Fell out and jammed sheave and halyard, of course, at a most inopportune moment. Looks like the only cleaning functionally needed is to polish up the slot so that hoisting and dropping the main will be smoother and easier than in the current condition. I use separate external blocks now, partly because I don't run the halyards inside the mast. One of these days I'll order a plain masthead cap without integrated sheaves. One less thing to be thinking/worrying about.
cv16 mast pictures
Re: New AD14 build
Posted: Sun Oct 02, 2016 5:33 pm
by waytootall
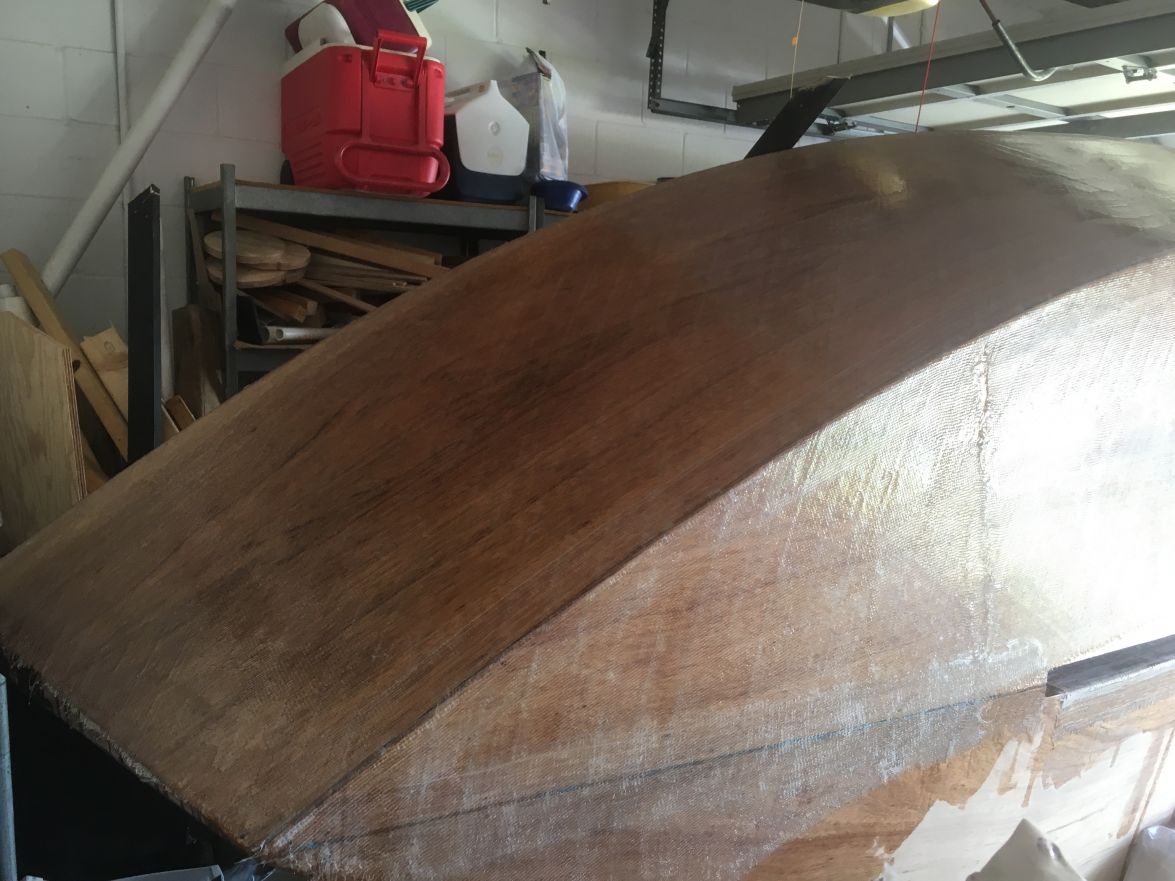
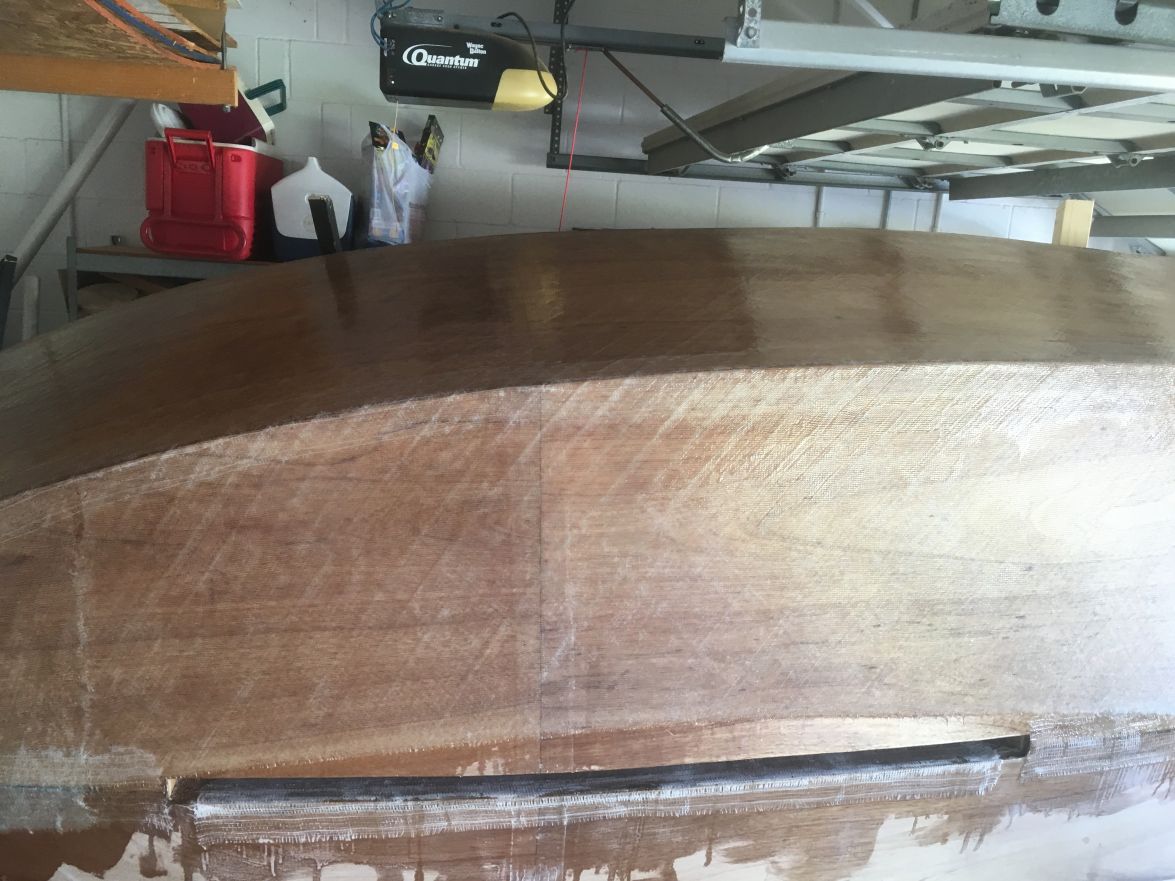
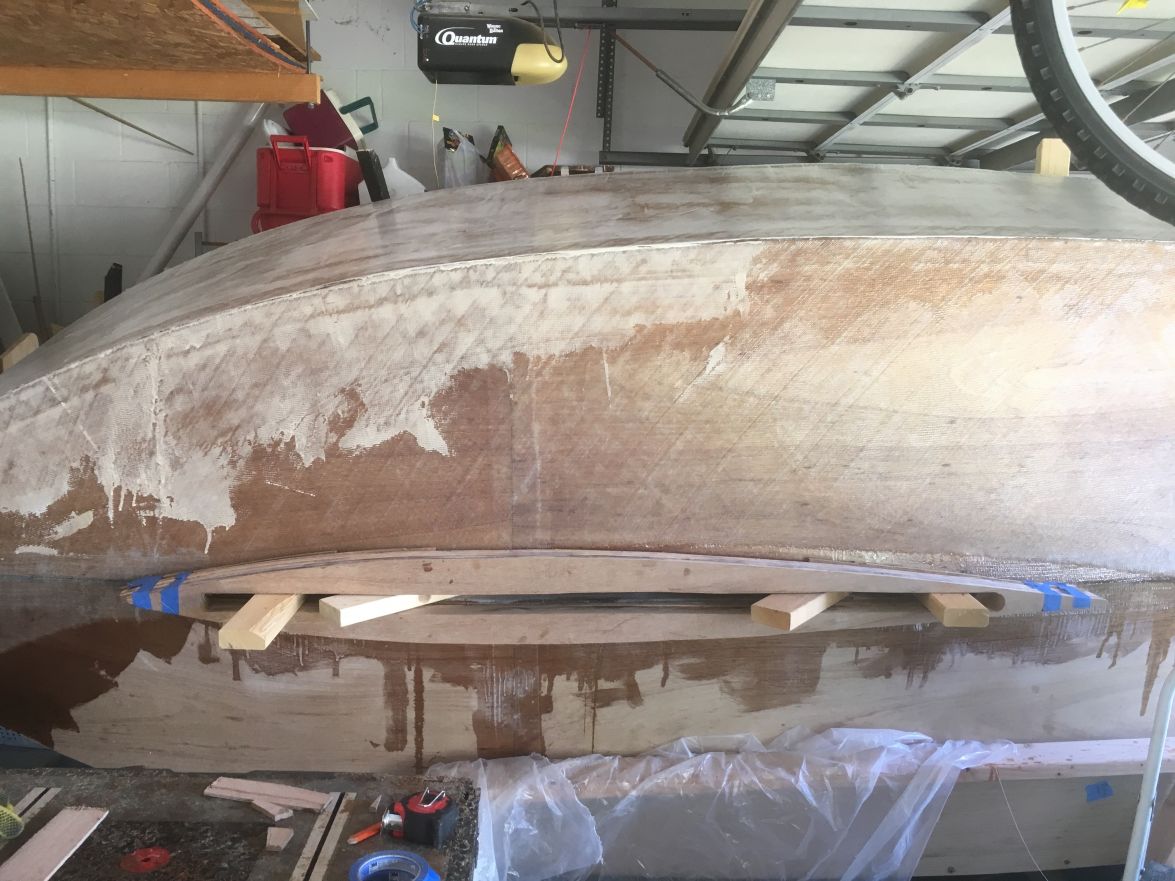
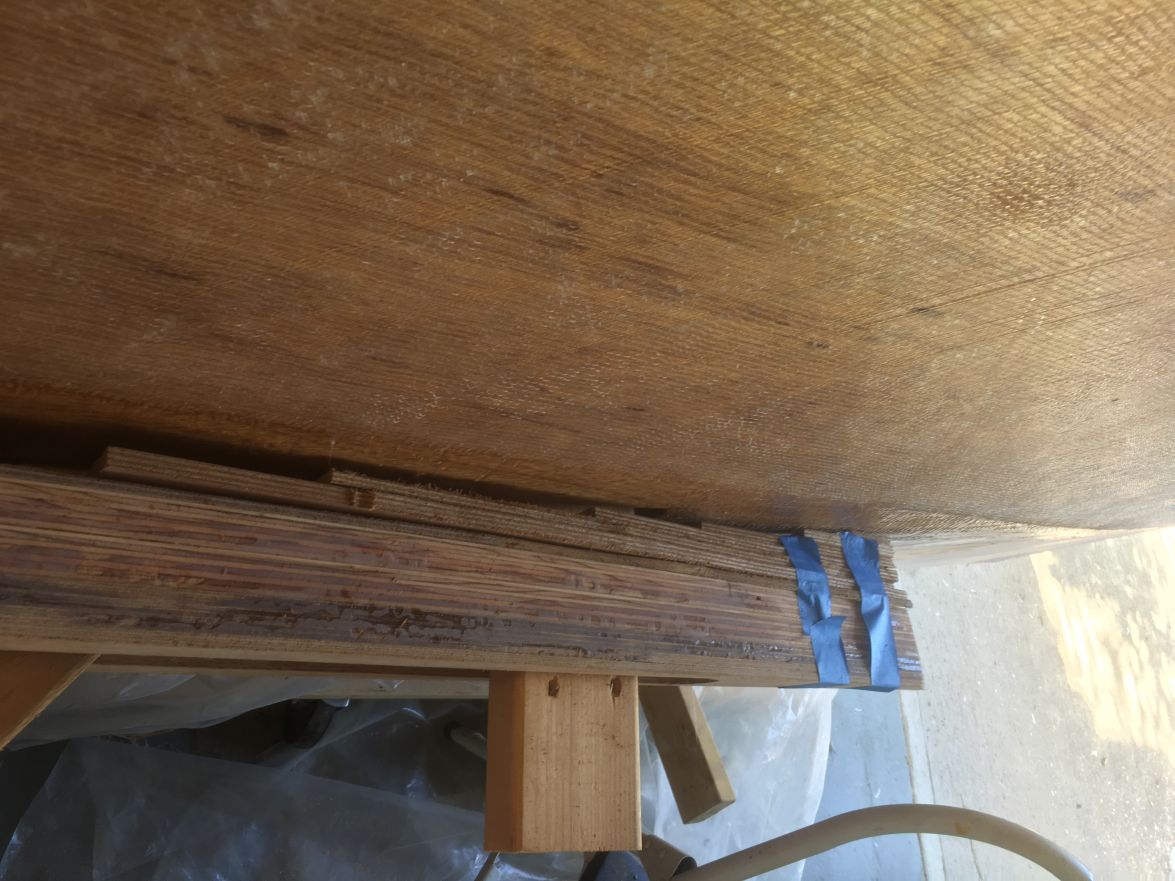
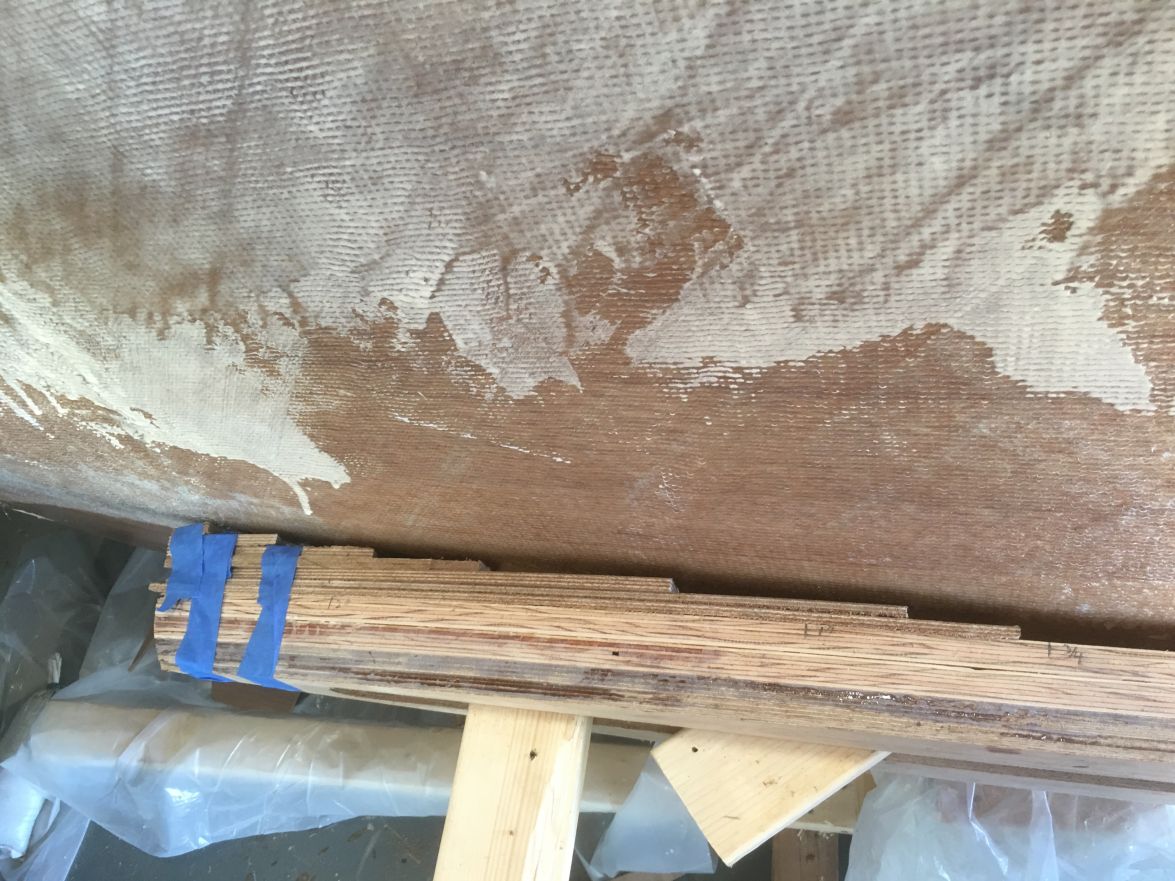
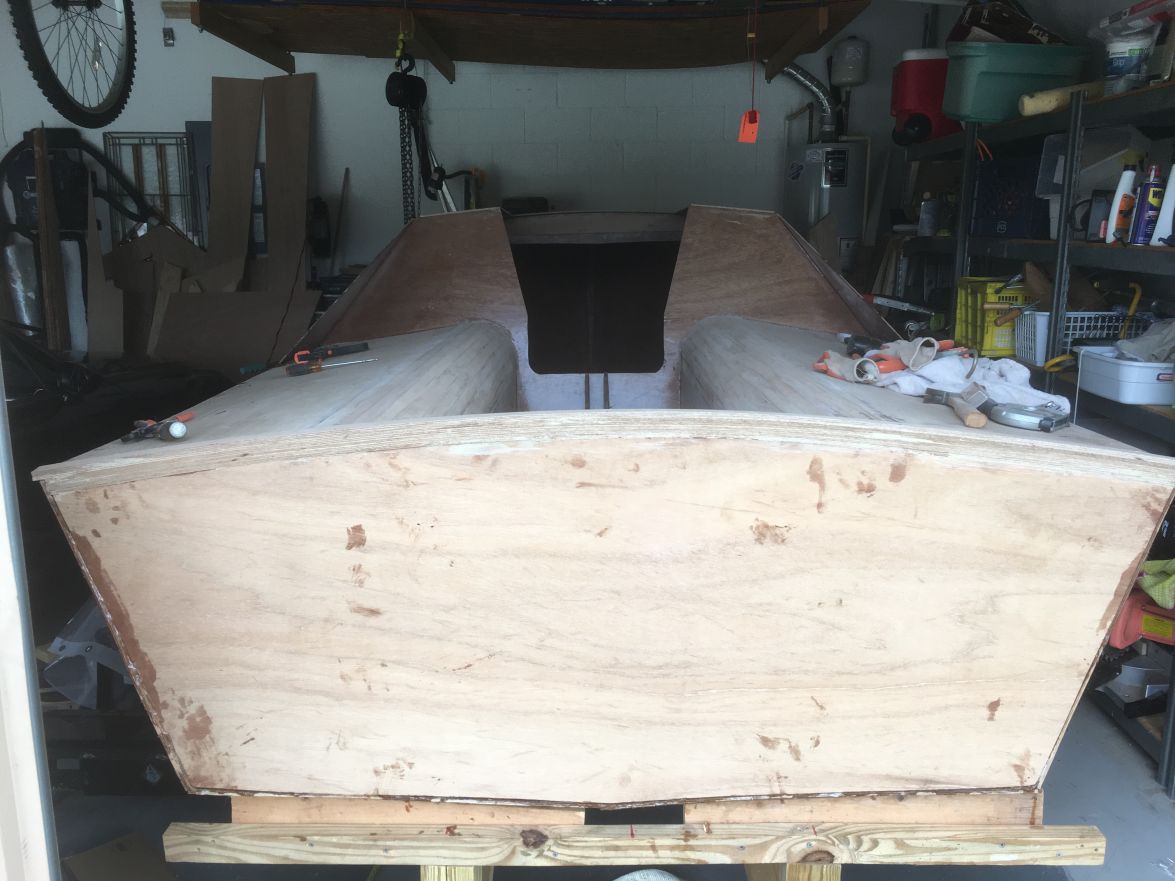
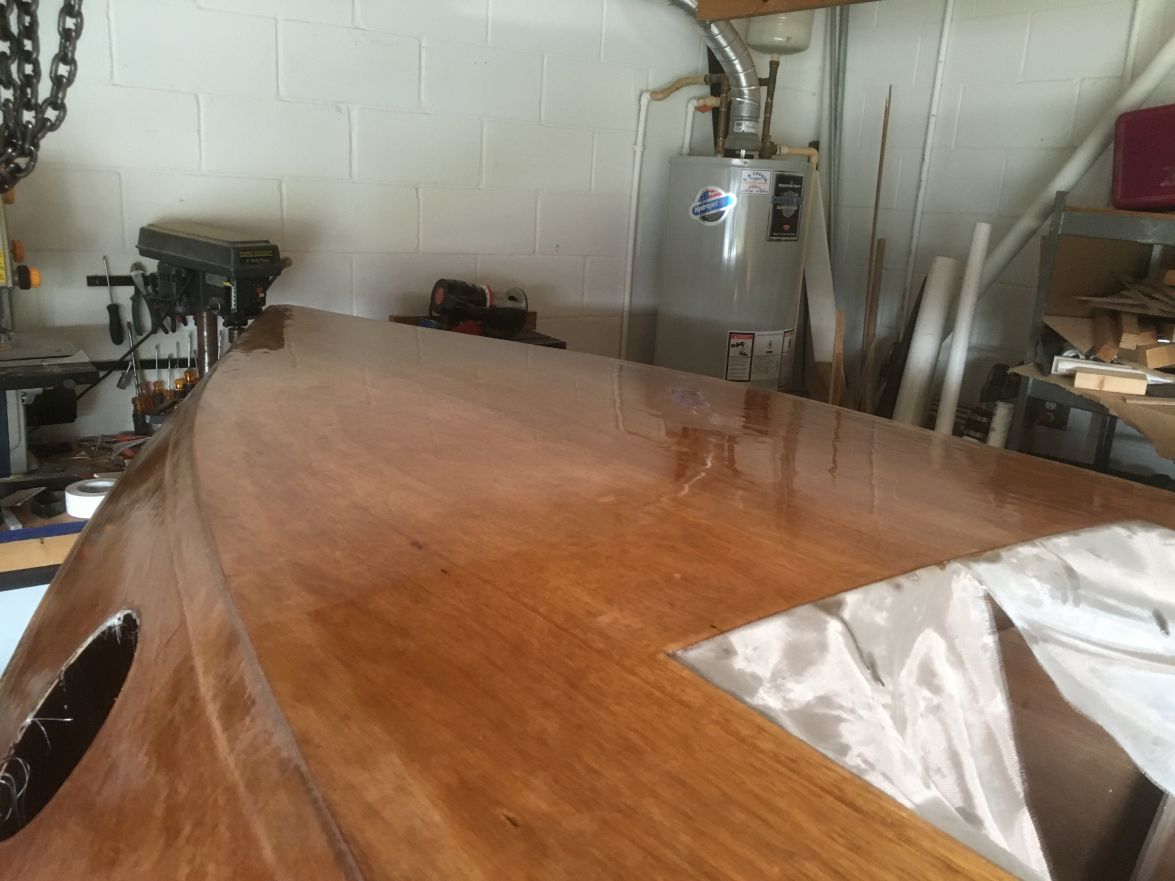
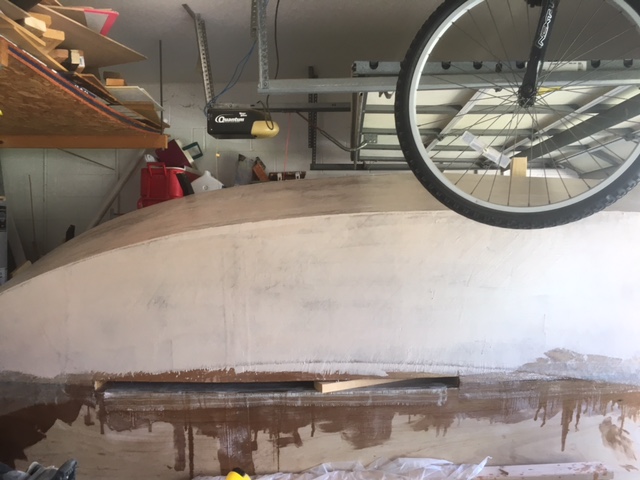
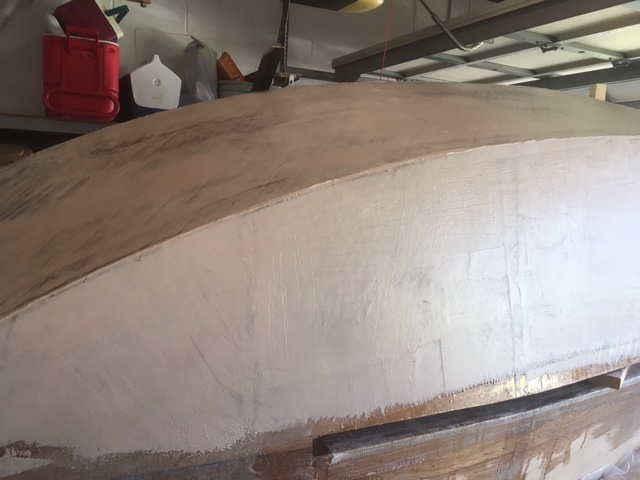
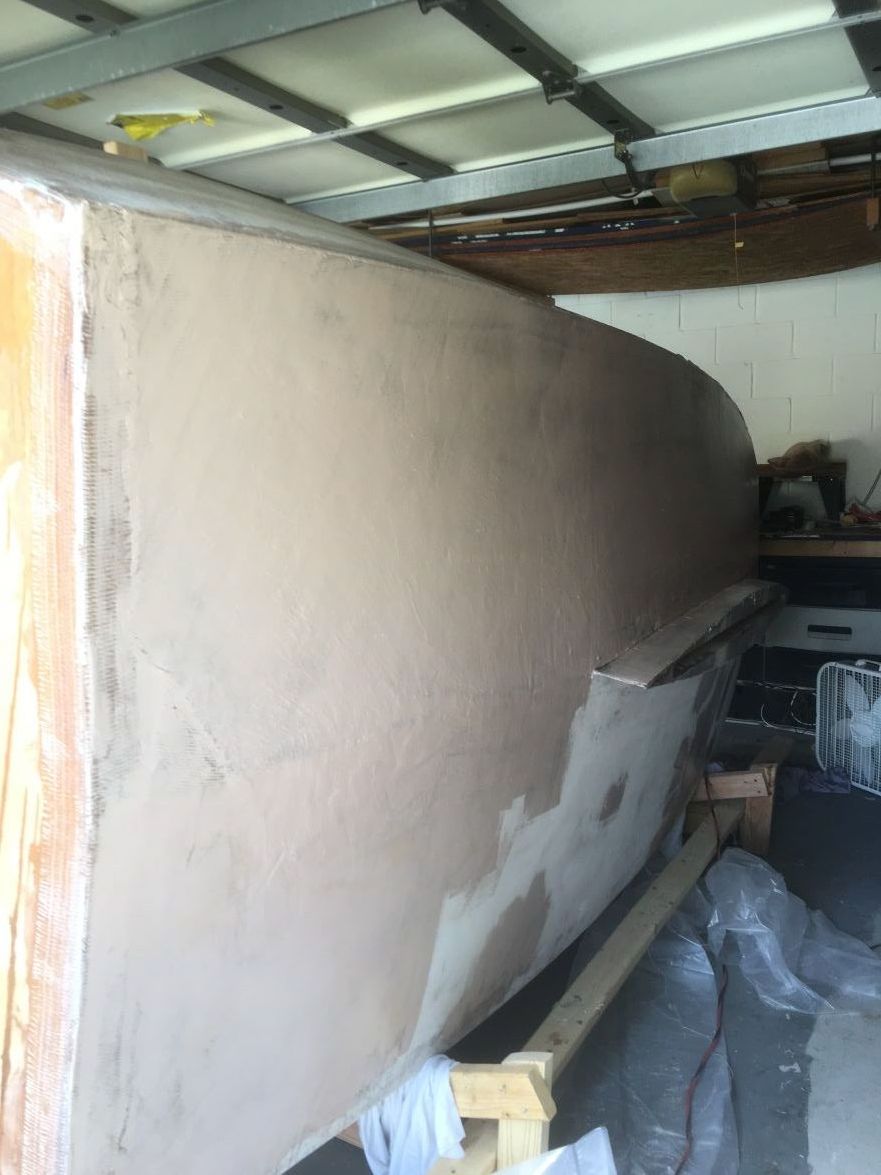
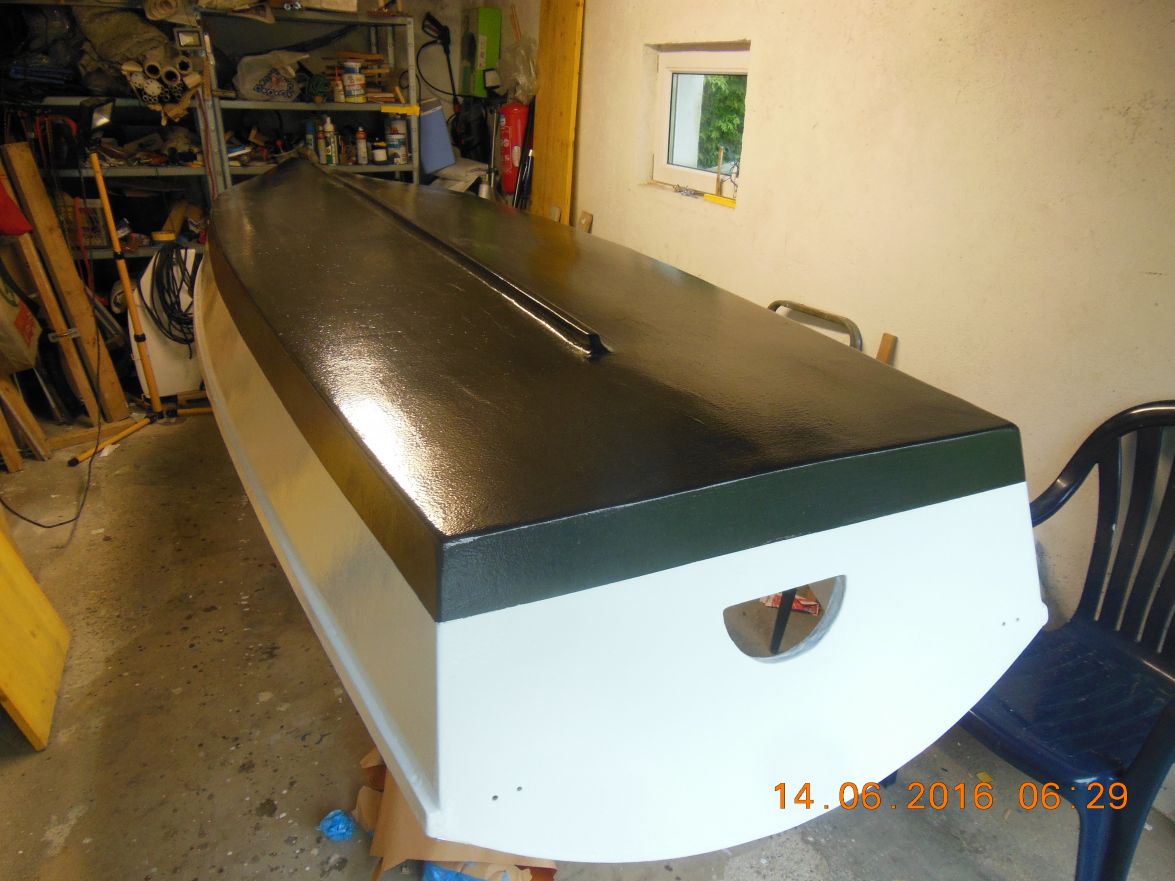
This weekend i got the rest of the bottom and sides fiberglassed:
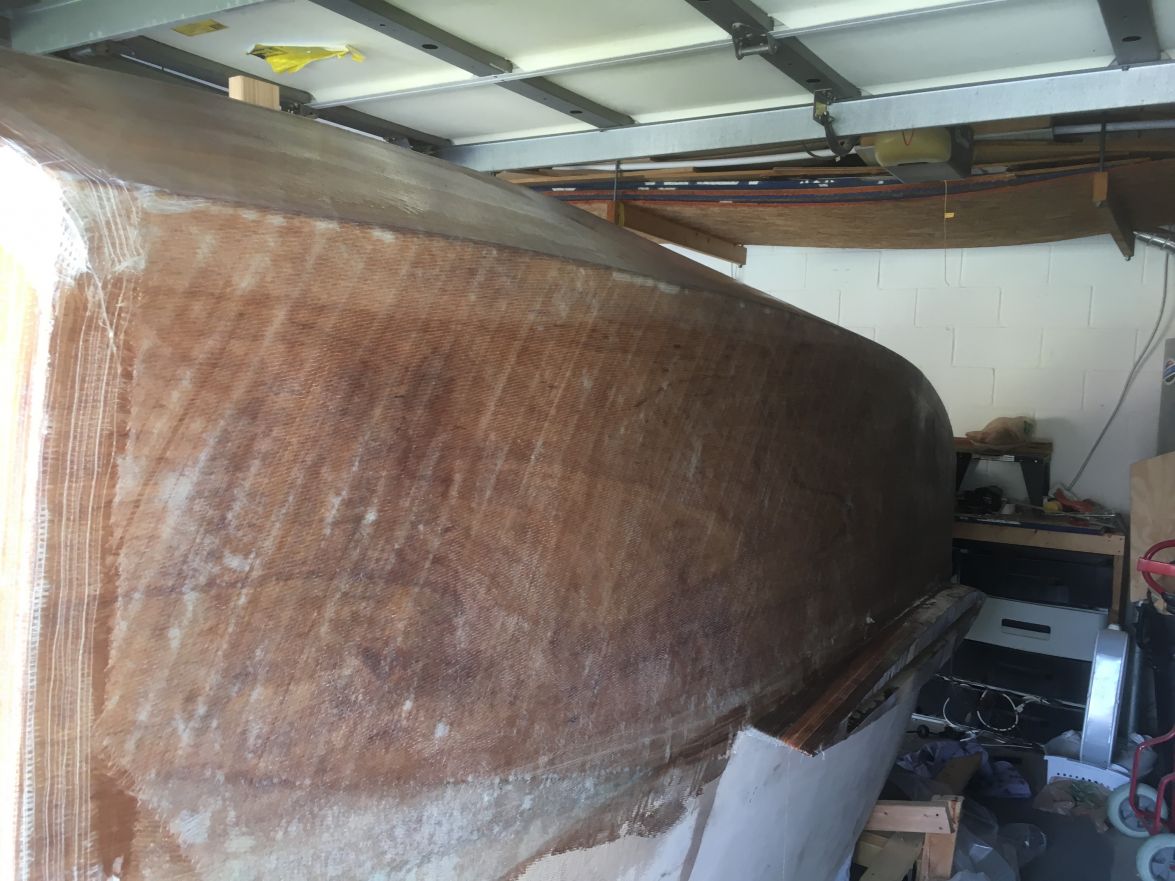
And a coat of QuickFair fairling compound applied to the bottom. I will need a second coat in some spots since there were deep small pockets in the fiberglass that I had trouble always filling up with the first coat. I still need to do a fairing coat to the side. I used less epoxy on this half which meant it used more fairing compound. Not a good trade form a cost perspective, but much easier to work with.
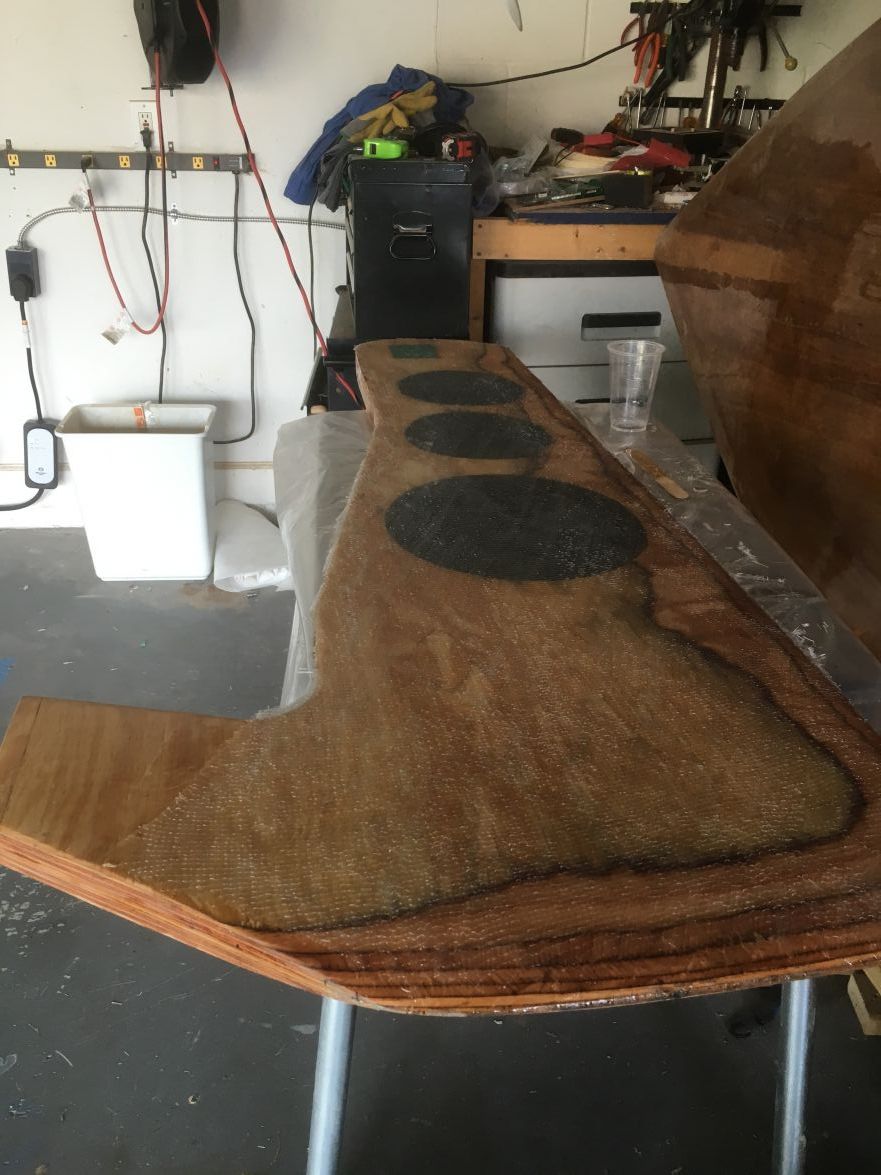
I also got one side of my centerboard fiberglassed. It looks so cool to me like this that I am tempted to smooth it with epoxy and leave it clear. But I know nobody will ever see it under the boat, so I will fair and paint it.
I am now trying to figure out what paint to use on the bottom to finish that part up before rotating the boat back upright for the final time. Any suggestion are greatly appreciated. I am confused about whether I need a primer on the bottom. Do I need anti-fouling since I will trailor the boat? I wouldn't think I would need an epoxy primer since I have so many other layers of epoxy. Since it will not sit in the water and sun (I will cover it) I don't think I need real expensive paint.
Re: New AD14 build
Posted: Sun Oct 02, 2016 6:30 pm
by terrulian
You do not need anti-fouling unless your plans change and you decide to keep it in the water. No marine growth will occur while it's on the trailer!
I do not think you have to use primer but I think it's a good idea. You could use S3 or the primer recommended by the topcoat manufacturer which will be less expensive. The paint could be Interlux Brightside, Pettit EasyPoxy, or Rustoleum Topside which is even cheaper.
Or you could do as many of us have and mix graphite with epoxy. This will not look as nice but will be harder.
Re: New AD14 build
Posted: Sun Oct 02, 2016 8:10 pm
by waytootall
Is the graphite/epoxy mix for a primer or a topcoat? I admit that I would like to get away from epoxy. I miss how nicely and easily paint spreads to an even coat without getting everywhere
Re: New AD14 build
Posted: Sun Oct 02, 2016 10:00 pm
by terrulian
I miss how nicely and easily paint spreads to an even coat without getting everywhere
In that case, forget the epoxy/graphite. It's a bit troublesome to get it right and even though I did the research and tried to make it work, I found it tedious and aesthetically unsatisfying. Unless you expect to put your boat on the beach, it is not necessary. But if that's what you want to do, I'd recommend it.
Re: New AD14 build
Posted: Mon Oct 03, 2016 2:51 am
by gonandkarl
Hi,
My advise is to use epoxy/graphite for a last time on your boat just below the waterline. It comes out smooth like paint when you make 3 thin layers according to Cracker Larries instruction. It will be good for years against scratches. Here a picture of my FS13 bottom as an example:
Greetings from Karl
Re: New AD14 build
Posted: Mon Oct 03, 2016 7:54 am
by Jeff
Again, very nice finish Karl!! Jeff
Re: New AD14 build
Posted: Thu Oct 06, 2016 5:07 pm
by das boot
It looks like you have the same mast and boom set up I have mine came from my father in laws garage he got it from a serpluss store after the olimpic games in 1978 and had it in storage he was going to build a boat to match the mast he never built it so when I started mine he gave me the mast and boom it works well. No problem with rasing the main with that set up it can get trickey on a windy day as you get it pulled near the top but not a big deal. I finley changed some of my rigging around so now I can do it all from the cockpit just getting to old to go on that small deck
Re: New AD14 build
Posted: Sun Oct 09, 2016 3:24 pm
by waytootall
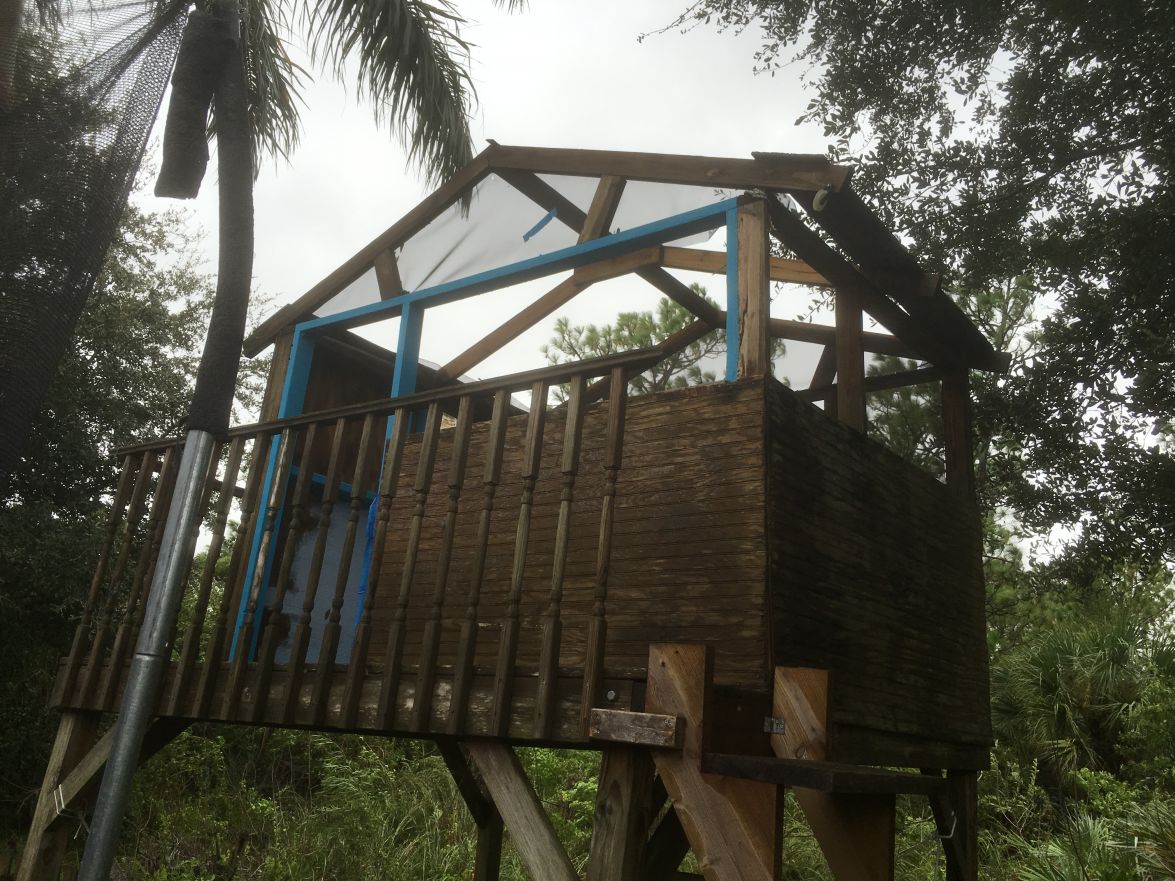
Sorry that this is a little off topic. I am not getting anything done on the boat this week due to spending all my time cleaning up after hurricane Matthew. We were lucky since we here on Florida's Space Coast were supposed to receive a direct hit, but it ended up off shore so we only got low grade hurricane winds and rain. No serious damage, but I did learn that the roof on clubhouse I had built for my kids was apparently not up to hurricane building standards. So one major cleanup project was tearing the rest of it down.
Re: New AD14 build
Posted: Sun Oct 09, 2016 4:22 pm
by Jeff
Glad you guys faired well waytootall!! You can replace the roof of the club house pretty easily!! Jeff
Re: New AD14 build
Posted: Sun Nov 20, 2016 11:12 am
by waytootall
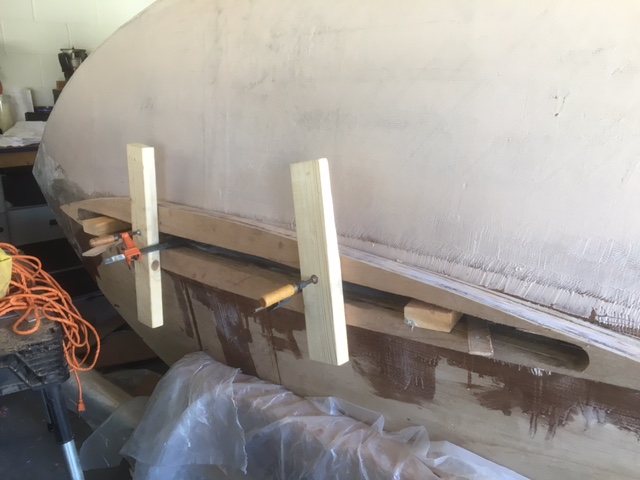
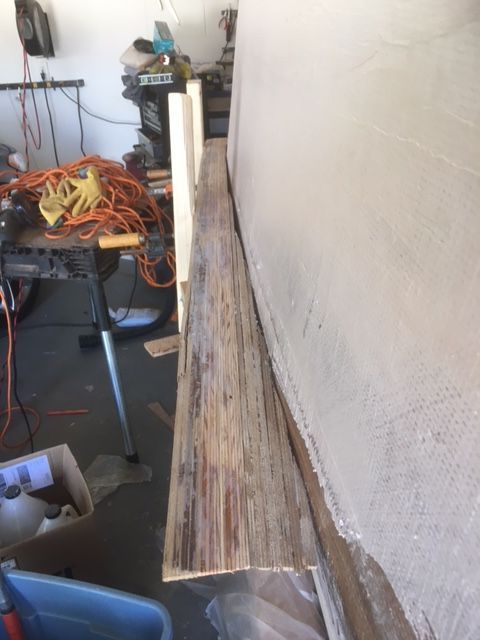
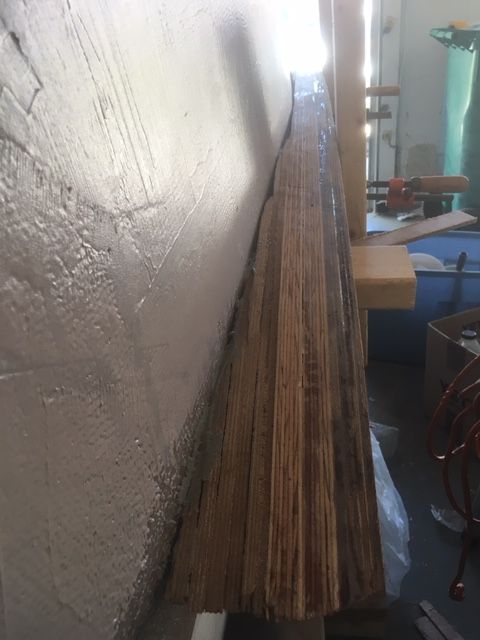
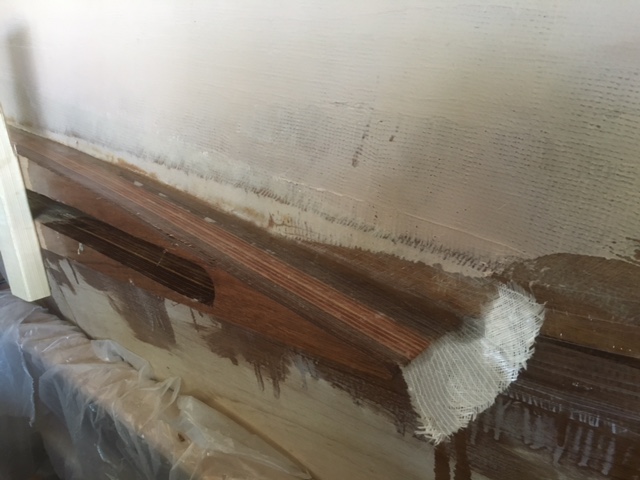
I have a problem and I am looking for ideas. After mounting the keel shoe and fiberglassing the centerboard - the centerboard no longer fits through the keel shoe. Does anyone have any good suggestions on how to sand/grind/rasp/cut to widen the slot through the keel shoe now that it is mounted?
Re: New AD14 build
Posted: Sun Nov 20, 2016 1:32 pm
by gonandkarl
Hi,
Your keel shoe problem you can solve with a narrow sander like Corto Maltese once posted for me after I asked how to get into corners.
It looks like this and is rather cheap I paid about 45 $ for it :
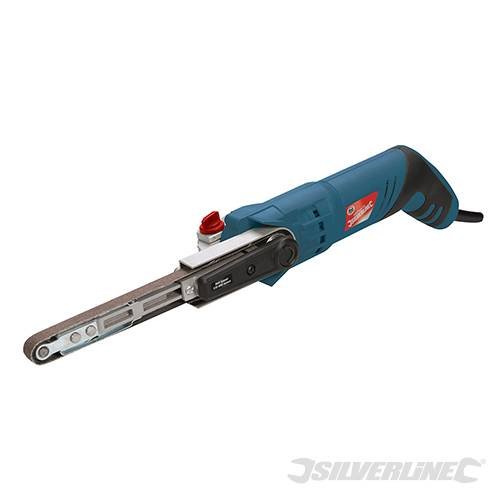
He still added the sentence: You can access the most hidden spaces, which could be admired later only by mice.
Ever since then I use such a sander a lot.
You could widen the slot in the keel shoe with such a sander to the width of the center board case above. I hope the center board case is not too narrow as well because that would need a radical cure of ripping it out from inside the boat and mount a new one with the big enough width.
My shoe is about 8 cm ( 3 1/2 inches high ) to hide the board completely when retracted and the length of the sander is about 13 cm ( 5 inches ) long so it should be easy to widen the shoe or work on it if the slot is not long enough.
The following is a picture of my shoe just lying on top of the keel. You see slot of shoe and the center board trunk are both the same width:
And here a picture with the sander at the bow end of the shoe :
I hope it helps you a bit.
Greetings from Karl
Re: New AD14 build
Posted: Mon Nov 21, 2016 6:59 am
by waytootall
Thanks. I had considered one of those, but I wasn't sure if they actually work. I will get one and try it. It is just the slot in the keel shoe that is my problem. I am also going to try a rasp and sander attachment for my reciprocating saw that a friend from work suggested.
Re: New AD14 build
Posted: Mon Nov 21, 2016 8:01 am
by topwater
I would try the rasp , or maybe a piece of wood with some 40 grit sandpaper . How much are you trying to remove

Re: New AD14 build
Posted: Mon Nov 21, 2016 2:37 pm
by gonandkarl
Hi,
Could you maybe post a picture of the mounted keel shoe. I am about to mount it on my AD14. What looks funny to me I need much more wedges at the bow side of the shoe than near the stern and it will be twice as high than at the transom side. Did you experience the same thing when you attached the shoe ?
Greetings from Karl
Re: New AD14 build
Posted: Mon Nov 21, 2016 8:39 pm
by waytootall
Re: New AD14 build
Posted: Mon Nov 21, 2016 8:43 pm
by waytootall
Topwater - I was trying to figure out how to attach rough grit sandpaper to a 2x4 and have the sandpaper stay in place when enough force was applied to sand down the very hard meranti plywood and epoxy and I couldn't figure out how to do it. I also couldn't figure out how to move it back and forth enough without destroying my shoulders. I admit that I am a wimp and like power tools. I would love for someone to explain how I could overcome these hurdles.
Re: New AD14 build
Posted: Mon Nov 21, 2016 11:12 pm
by Fuzz
I use spray adhesive to stick sandpaper to scrap wood blocks for sanding sometimes. It seems to work pretty well.
The best way to save your shoulders is to have one or more big, strong boys. Feeding them is expensive though so that might not work out cost wise.

The next best is a neighbours kid. If they have a size 12 shoe and a 2 inch bull plug for a hardhat that is even better
Re: New AD14 build
Posted: Mon Nov 21, 2016 11:21 pm
by terrulian
Re: New AD14 build
Posted: Tue Nov 22, 2016 6:24 am
by waytootall
Great suggestions, thanks. Unfortunately my son is even smaller than I am - even though he is a teenager and still eats me to the poor house
. But I do have spray adhesive and a Harbour Frieght just down the street so I will try those as well.
Re: New AD14 build
Posted: Tue Nov 22, 2016 6:36 am
by topwater
I use staples to attach paper to the wood or spray glue , i like staples better . Arrow T 50 stapler .
Re: New AD14 build
Posted: Tue Nov 22, 2016 8:14 am
by terrulian
I am not fond of physical labor my own self. But the real grunt work can often be accomplished with power tools like belt and orbital sanders. The long board process is more like finish work or sculpting. It can be tedious and repetitious because it takes time to achieve a really smooth result if that's what you're after. Many of us use a guide coat at this stage to help determine high and low spots. But the most physically demanding part of this is getting your body in the right position to do the work. If you can set yourself up right, the motion and effort with the sanding block shouldn't be like weight lifting.
Re: New AD14 build
Posted: Thu Nov 24, 2016 12:37 am
by gonandkarl
Hi,
You got a lot of good advice about rasps and sandpaper and so on but I thought all of a sudden why you cant fit the centreboard into the trunk. I found the following out the hard way. Pushing my test centreboard into the slot I had the same problem on my AD14 it did not go in.
One has to push the pivot end of the centreboard in first ( about half of its height ) and then only the rear because of the camber there.
After I did it this way with my test board I got it in easily and when the real heavy board has to go in I will remember pivot end first. Try this and you might not have to rasp or sand whatsoever.
Greetings from Karl
Re: New AD14 build
Posted: Thu Nov 24, 2016 5:12 pm
by gonandkarl
Could you avoid rasping and insert the centerboard pivot end first ?
Re: New AD14 build
Posted: Sun Nov 27, 2016 2:39 pm
by waytootall
Sorry I didn't respond sooner. I just got back from a trip. I will give that a try.
Re: New AD14 build
Posted: Sun Dec 18, 2016 3:25 pm
by waytootall
It has been a while since I could post any progress. It took a lot of effort to get the slot for the centerboard opened up wide enough. The most useful tool turned out to be a sanding attachment for my reciprocating saw. I also finished fairing, sanding and painting the bottom and centerboard so I could install the centerboard and be ready to flip the boat back upright.
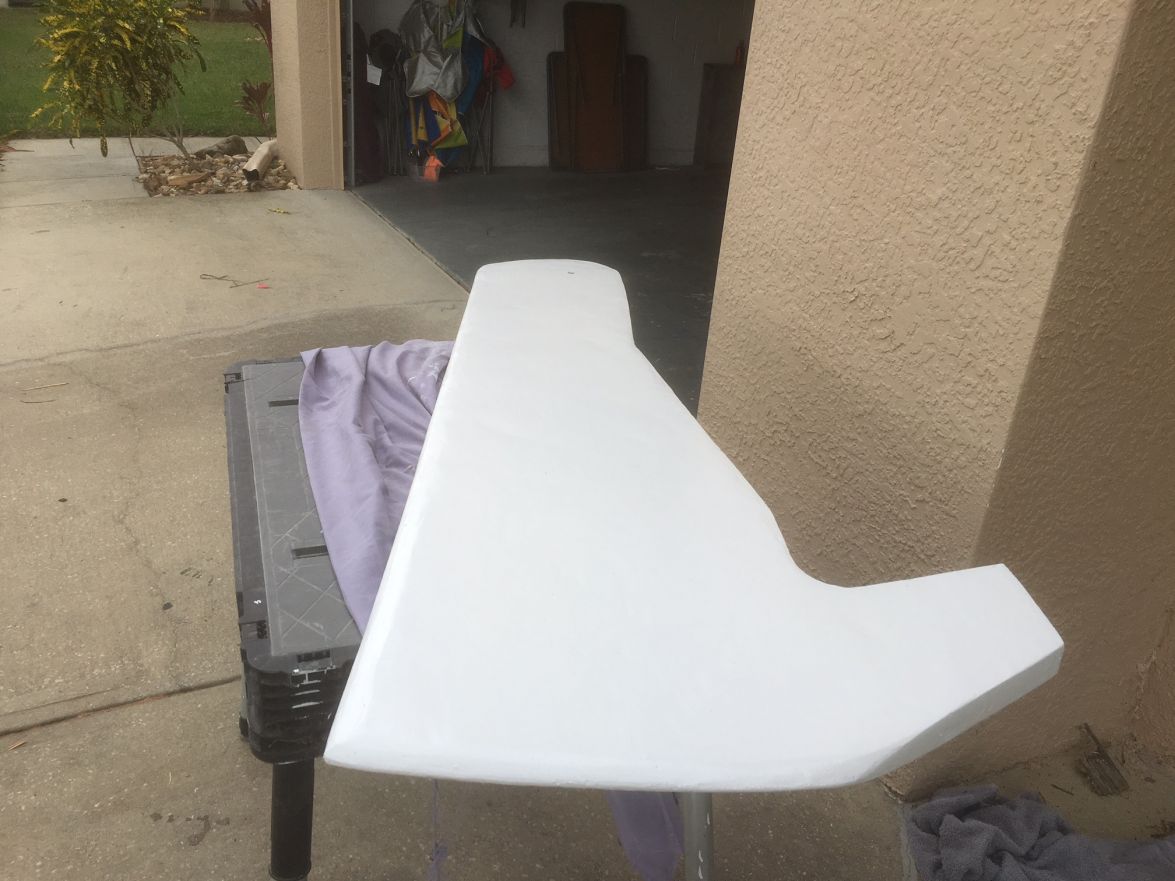
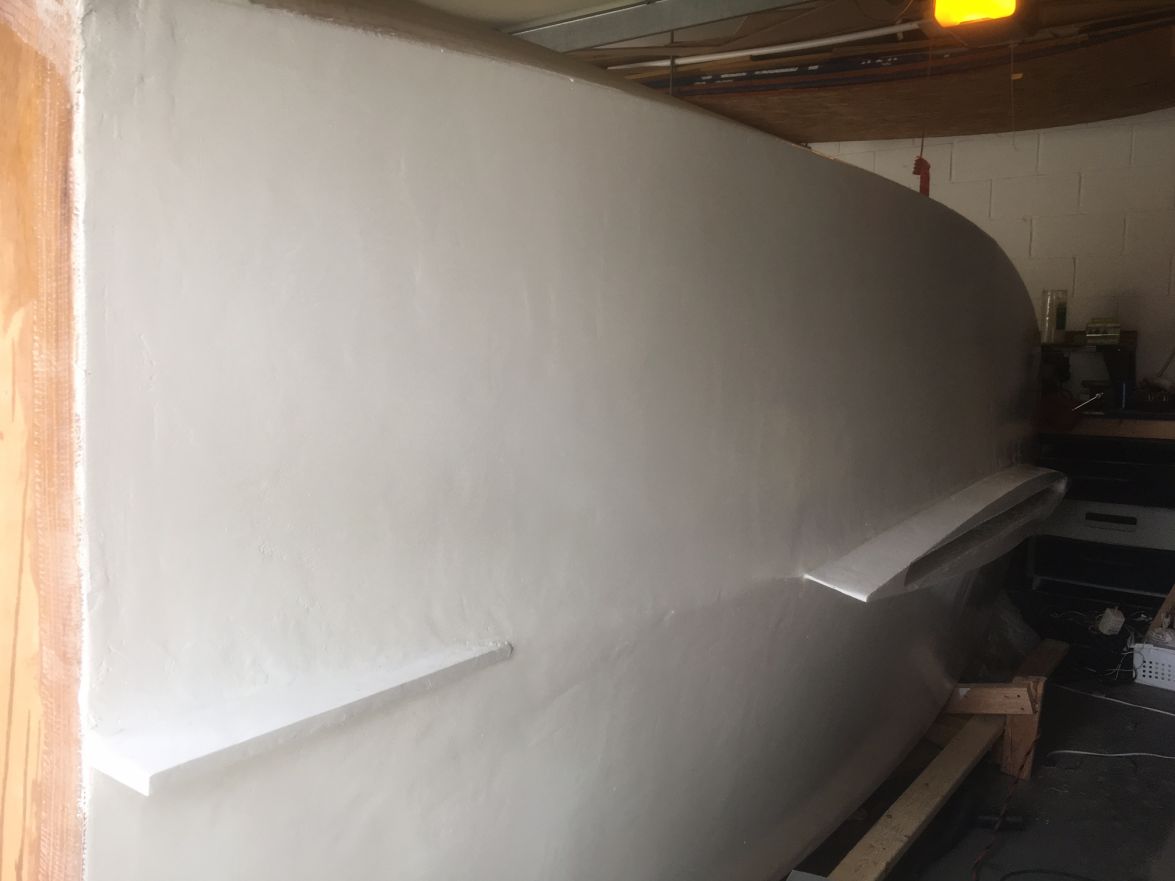
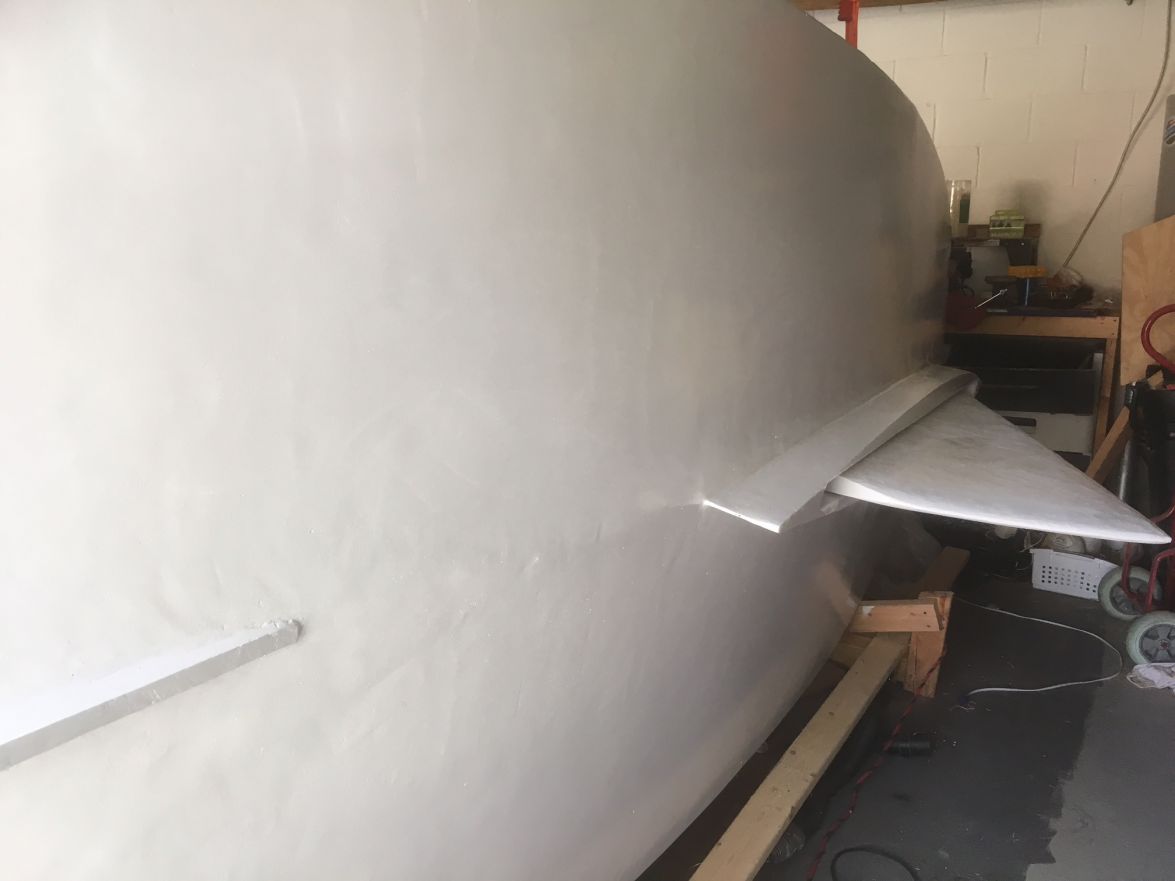
The finish isn't perfectly smooth but I am getting better as I go so hopefully I can get the sides finished smoother.
Re: New AD14 build
Posted: Mon Dec 19, 2016 6:25 am
by topwater
That's okay fish don't care
Re: New AD14 build
Posted: Sat Dec 24, 2016 4:21 pm
by waytootall
My Christmas Eve daytime activity was to get the boat flipped back upright (hopefully for good) so I can continue work on the sides and top. Also so I can roll it out of the garage again since the weather here is perfect for working outside.
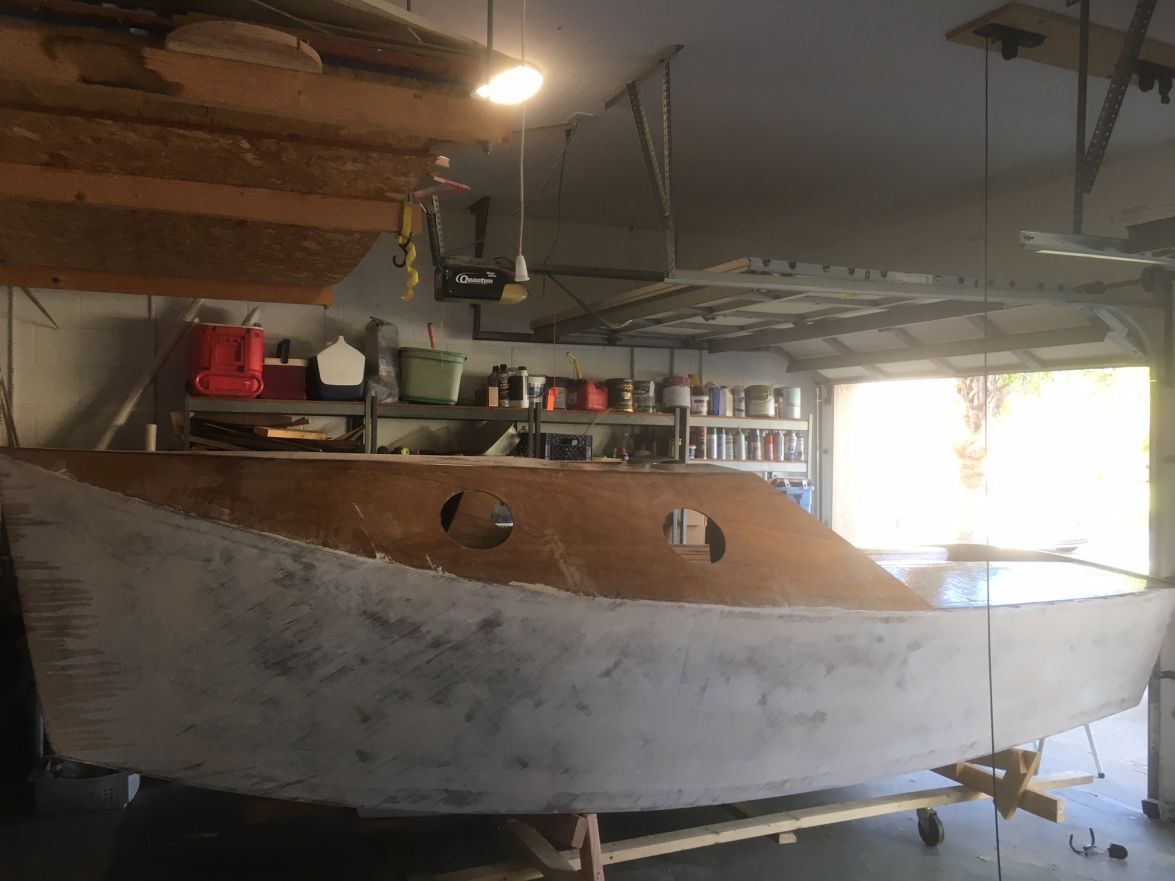
Re: New AD14 build
Posted: Sat Dec 24, 2016 4:31 pm
by terrulian
That's very impressive progress on a boat that big in just one year. Must be satisfying to see her right side up.
Re: New AD14 build
Posted: Sat Dec 24, 2016 6:51 pm
by waytootall
Yep. I am getting excited that I will get her in the water this summer. I will get it up and working before putting the finishing touches on. Partly just to get out on the water, but also partly on the off chance it just sinks
Re: New AD14 build
Posted: Sun Dec 25, 2016 1:50 am
by terrulian
That is not gonna happen...but it makes me wonder if it ever has happened.
My boat, like most I'm sure, doesn't leak.
Re: New AD14 build
Posted: Wed Jan 18, 2017 1:20 pm
by waytootall
The weather is perfect down here so I was able to roll the boat out into the driveway and get some good work done. In addition to getting the transom fiberglassed I also finally got the right tools to make the mast partner and mast step. I got a 2.5 inch forstner bit to match the profile of the mast. Here is my mast partner:
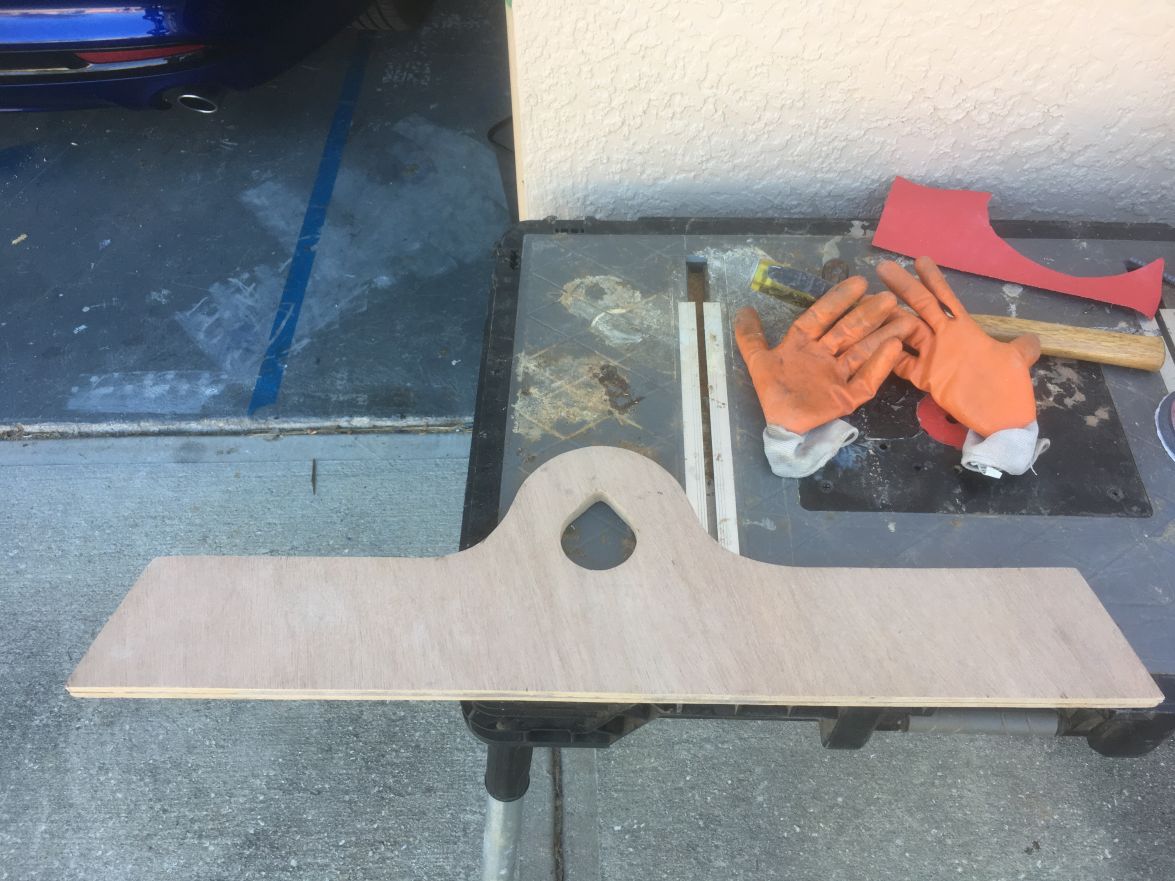
And my (slightly blurry) mast step:
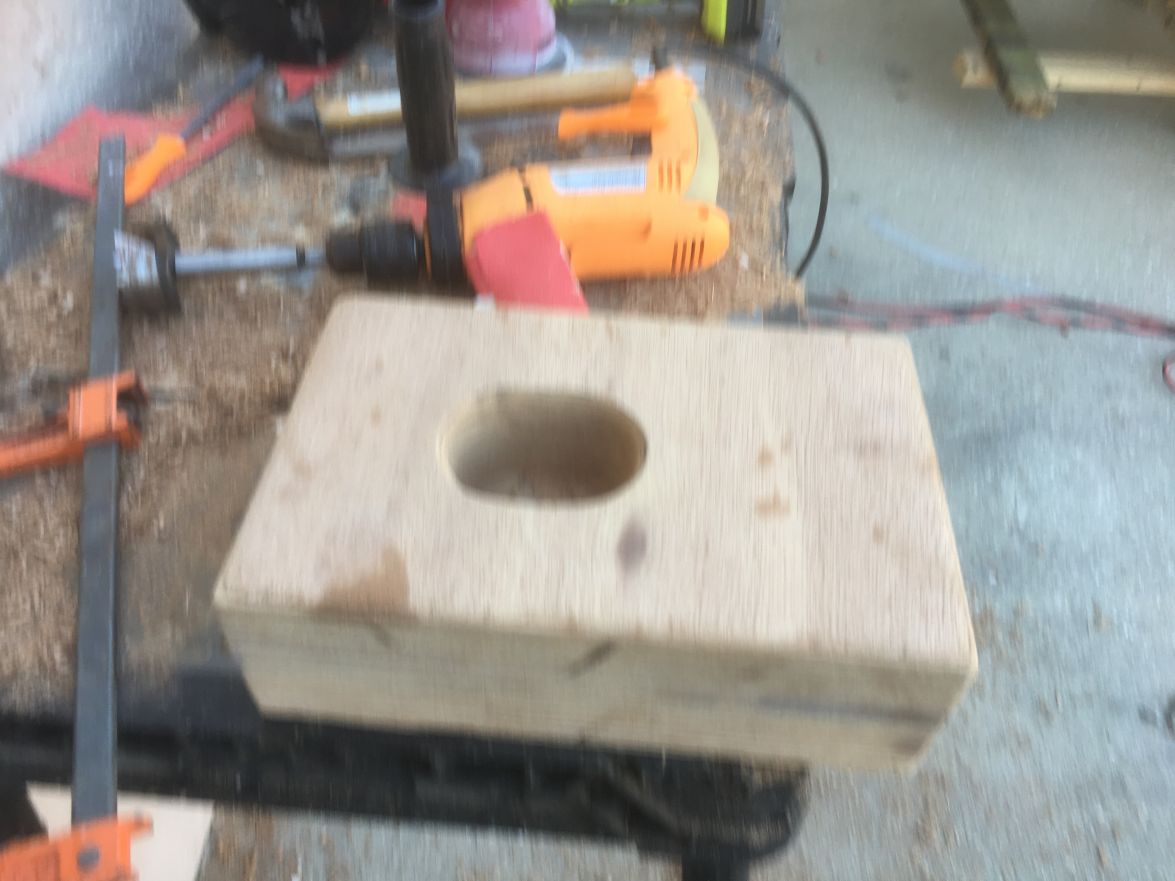
My question for the experienced builders is: How did you attach the mast partner to the cabin roof? As you can see, the partner is not curved like the cabin roof and there are no good placed to use clamps. All I can think of is bolting the partner down at the far ends using stainless steal bolts (in addition to epoxy) for a mount permanently including the bolts. Any other suggestions?
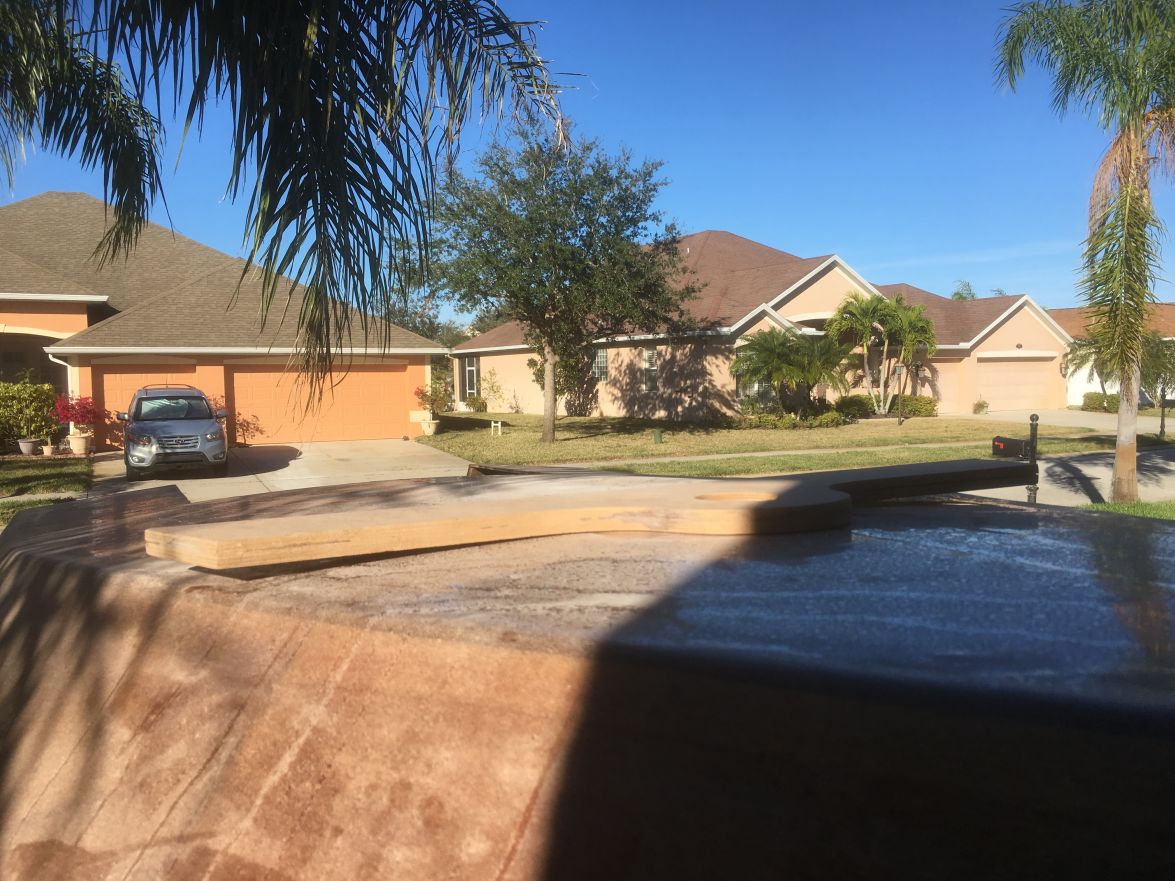
Re: New AD14 build
Posted: Thu Jan 19, 2017 2:25 am
by gonandkarl
Hi,
The way the mast partner should be mounted per plan is glue the first 6 mm piece of plywood to the cabin roof and weigh it down on each side to follow the camber of the roof then do the same with the second and third plywood part. Seeing that you glued the 3 plywood panels together on an even surface you naturally cannot bend it anymore to follow the camber of the roof deck. I would suggest that you glue this straight mast partner to the deckroof with lots of epoxy/woodflour glue. It must just be a bit on the firm side that it will not run away from underneath the partner especially on the sides where the gap between the partner and deck is the biggest. I would place it first there without glue and put a little wooden block on each side to keep it level and then remove it again and spread the glue with a spatula evenly on the roof deck up to the height of the 2 wooden blocks and the press the partner onto it with some weights on top finishing it off with glue all around it.
Greetings from Karl
Re: New AD14 build
Posted: Thu Jan 19, 2017 10:31 am
by waytootall
I did not see/remember that set of steps in the plan darn it. I will go back and check. That would make it easier. I might go back and re-do it.
Re: New AD14 build
Posted: Thu Jan 19, 2017 12:53 pm
by topwater
Redoing it is probably your best bet plus it will never look right if you do some kind of fix and you would never forgive yourself
for not doing right.
Re: New AD14 build
Posted: Fri Jan 20, 2017 3:34 am
by gonandkarl
Hi,
Actually it is not in the plan notes, but I remember Stuff who posted this problem under AD16 Karenina on page 2 and how he solved it.
I will make a short post there so you will find it under new posts.
Greetings from Karl
Re: New AD14 build
Posted: Sun Jan 22, 2017 1:08 pm
by gonandkarl
Hi,
I think it is much easer to cut out 3 new pieces of plywood and then glue it to the deck and achieve the camber after each piece of wood.
If you have not enough plywood only then I would do it the way stuff described how he fitted the mast partner by cutting grooves.
Greetings from Karl
Re: New AD14 build
Posted: Sun Jan 22, 2017 2:45 pm
by Salvatore
Hi, In construction "grooving" is a common practice that works extremely well. The perfect work person in me would say, relay the ply one layer at a time so that each layer would follow the curve of the boat. The lazy person in me would cut the grooves. I think it depends on how you feel about it on the day
For the readers who don't know what grooving is: a picture says a thousand words.

PS: the more grooves the greater the curve and make sure you fill the grooves with epoxy putty for added strength.
Regards Salvatore
Building Angelina
https://youtu.be/plQZZJgnWzk
Re: New AD14 build
Posted: Sun Jan 22, 2017 2:56 pm
by Jeff
Excellent example Salvatore!!! Jeff
Re: New AD14 build
Posted: Tue Jan 24, 2017 9:41 pm
by waytootall
Thanks for the great example. The pictures are exactly what I need. If I have (or can easily get) enough plywood I will redo it since this will be a very visible piece. But I may have to bend the piece I have so this is most welcome.
Re: New AD14 build
Posted: Sun Feb 12, 2017 3:21 pm
by waytootall
Re: New AD14 build
Posted: Mon Feb 13, 2017 1:16 am
by Salvatore
Looks good, great work! Was it hard or easy to drop the mast down the hole? Regards Salvatore
Re: New AD14 build
Posted: Mon Feb 13, 2017 7:33 pm
by waytootall
It was hard to get the mast through the hole. The cabin roof is tall and long so it was impossible for me alone to get it in. With a helper anchoring the foot of the mast at the hole i could do it. That is why I am planning to add a stop at the front edge of the hole to anchor the mast while i am raising it. I am considering a 2 inch (50mm) inner diameter PVC pipe cut in half extending from the mast step up through the mast partner and extending about 4 inches above the cabin roof. I could make this removable and just have it in while raising the mast.
Re: New AD14 build
Posted: Mon Feb 13, 2017 8:43 pm
by Jeff
Nice plan WayTooTall!! Jeff
Re: New AD14 build
Posted: Mon Feb 13, 2017 10:30 pm
by Salvatore
The mast was going to be way to tall and heavy for me, I stand 5ft 2in and it was going to be way to difficult. So what I did was to build a Tabernacle to rest and pivot the mast from the deck this reduced the overall length of the mast and makes it easy to hoist. I just lift the mast and another person pulls a rope attached to the fore stay cable and then attaches it to the bowsprit or in your case to the bow. I then had a solid bar inside the cabin that goes to the keel. This has worked really well for me and I have zero regrets in doing it this way. Also the mast stays on the boat one less thing to do.
PS: I never have to stand on the cabin


George did it a different way, he built a tube sleeve that is solid half way up from the keel, the pipe goes all the way to the keel, the mast drops into a hole/pipe only two feet down from the deck. The pipe makes it easier to slide the mast down the hole the mast is approximately 2 ft shorter.

The builder of an AD16 in South Africa installed a standard deck mast mount.

Regards Salvatore
Building Angelina
https://youtu.be/plQZZJgnWzk
Re: New AD14 build
Posted: Mon Mar 13, 2017 12:45 pm
by waytootall
I haven't been able to get much done the last few weeks due to activities with the kids. I have manages to make the rudder. It is now ready for staining and epoxy.
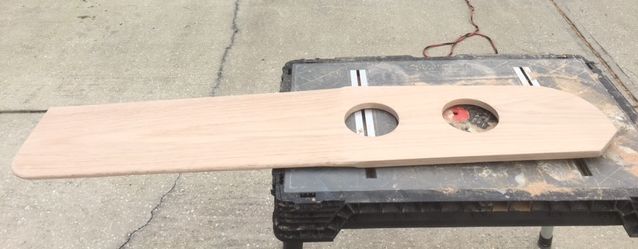
I am pretty happy with the wing profile I managed to get. A lot of planning.
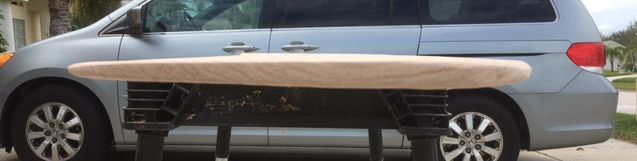
Re: New AD14 build
Posted: Sun Mar 19, 2017 7:36 pm
by waytootall
Started the painting process. I am happy with how the paint makes the wood contrast nicely. The first primer coat did expose some uneven spots so I have more filling and sanding to do before any finish coats.
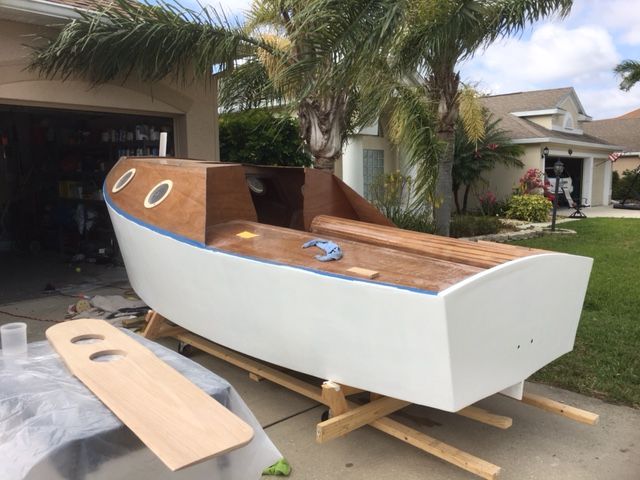
Re: New AD14 build
Posted: Sun Mar 19, 2017 7:40 pm
by terrulian
Looking good.
Re: New AD14 build
Posted: Sat Mar 25, 2017 9:34 am
by waytootall
I am starting to look forward to getting the boat to the water this summer, so I need a trailer. Shopping around I see most trailers are for larger boats. Do you think I could use a jetski trailer for a 14' boat?
Re: New AD14 build
Posted: Sun Mar 26, 2017 3:38 am
by gonandkarl
Hi,
A Jetski trailer will be a bit to short but try to get the smallest boat trailer available. I got mine which is for a boat length of 4.50 metre and 450 kg ( 992 pounds ) gross weight . The trailer weighs 125 kg ( 275 pounds ) and this leaves me 325 kg ( 716 pounds ) for the AD14 which is a bit more than our boats weight per plan. The trailer is unbraked and is rather basic with one keel roller and 2 double weel rollers near the end and therefore I will have to modify it with 2 bunks. If you should tow the boat frequently further than 100 miles I would advise you to get something like my trailer but with double the capacity and maybe with brakes. I will tow my Adelie approximately 30 - 40 miles to nearby lakes and therefore I think a 1000 pound gross weight trailer is fine for me.
Here it is originally bought for the row boat and the Adelie :
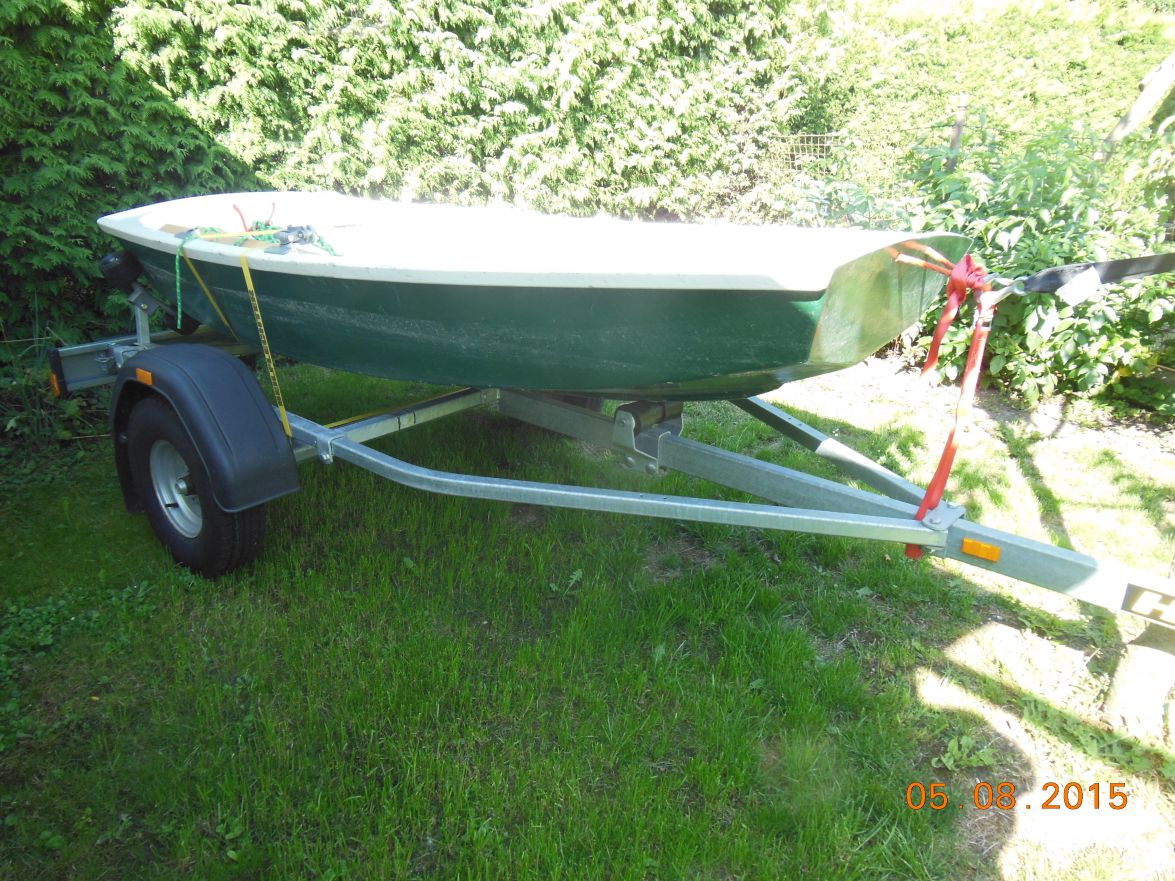
In the meantime I have used it also for the FS13 :
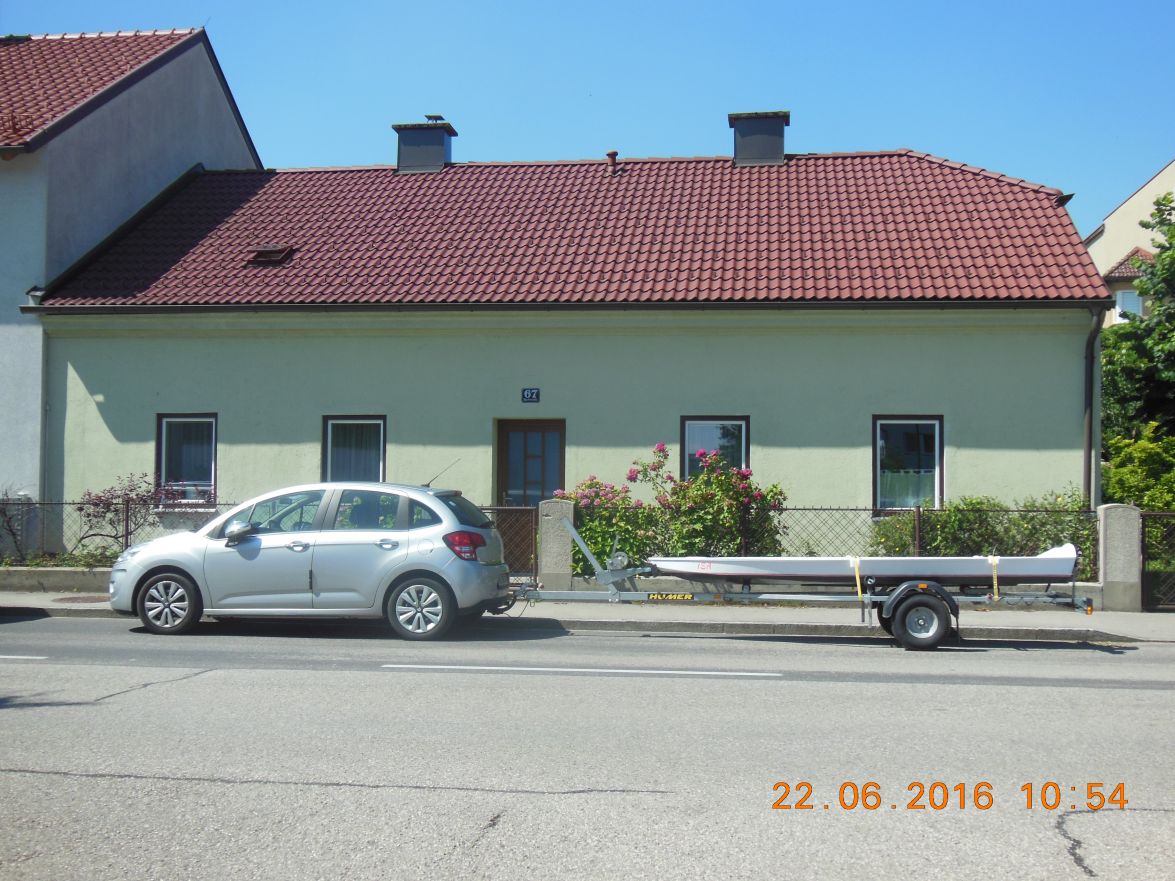
Make your decision depending on the distance you will be towing and if you want to push the trailer over a slip into the water to float the boat. I do not think this is possible with a Jetski trailer.
Greetings from Karl
Re: New AD14 build
Posted: Mon Mar 27, 2017 3:38 pm
by waytootall
Thanks for the thoughts. I am lucky since I only need to tow the boat about 2 miles (5km) to the nearest boat ramp
Re: New AD14 build
Posted: Sun Apr 23, 2017 3:58 pm
by waytootall
I finally have some progress to show. Mostly I have just been sanding a LOT. I have pretty much finished the rudder and tiller. Just applying the last coat of varnish.
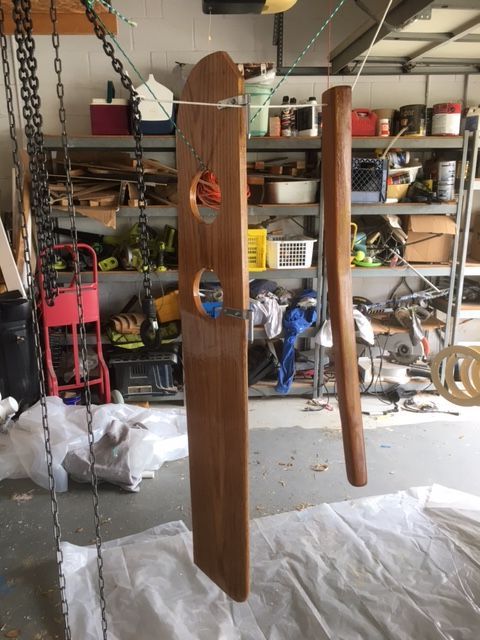
I am also varishing the porthole rings
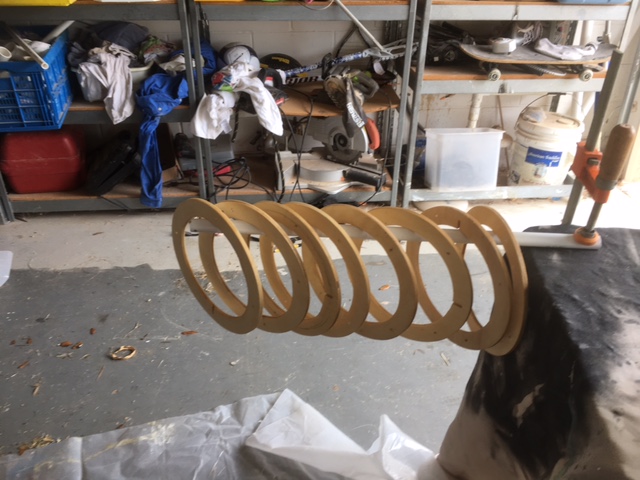
And then installing the rudder
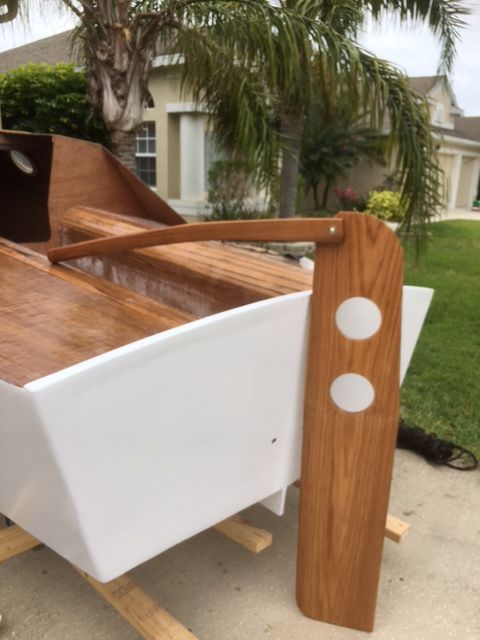

I will be buying a used sail tomorrow. My wife offered to sew one for me, but I can get a used one that is close enough to get me started cheaper. I am looking for a used trailer but I might just end up with this kit from Harbour Freight tools:
http://www.harborfreight.com/600-lbs-ca ... 62668.html and then I am ready to test it in the water since the weather is right!
Still more finishing work and real rigging work to do, but I want to try it to figure out how I want to rig and finish it and then make iterative improvements.
Re: New AD14 build
Posted: Sun Apr 23, 2017 7:11 pm
by Jeff
Waytootall, great work!! Splashing soon??? Jeff
Re: New AD14 build
Posted: Sun Apr 23, 2017 7:57 pm
by waytootall
Hopefully within a month. I have to break down and buy the stuff I can't build.
Re: New AD14 build
Posted: Sun Apr 23, 2017 8:14 pm
by Jeff
Good Waytootall!! Make sure you keep the photos coming!! Jeff
Re: New AD14 build
Posted: Mon Apr 24, 2017 1:39 am
by gonandkarl
Hi,
Beautiful work you are doing. The trailer you show us is practically the same one I got but I paid 800 Euros. I would go for it at the very reasonable price of 399 $. Please let us have lots of pictures when you put the boat into the water.
Greetings from Karl
Re: New AD14 build
Posted: Sat Apr 29, 2017 7:29 pm
by waytootall
Re: New AD14 build
Posted: Sat Apr 29, 2017 7:34 pm
by waytootall
Another thing I am working on is the rub rail and trim. I am experimenting with using 1/8 inch think 4 inch wide rubber strip to wrap over the curved edge. This serves two purposes - to guard the corner to prevent dings and to cover up the spots where the finish is not as good since the fiberglass tape on the corners shows. This is the initial small area experiment. It worked pretty well so I will get the rubber to cover the entire length.
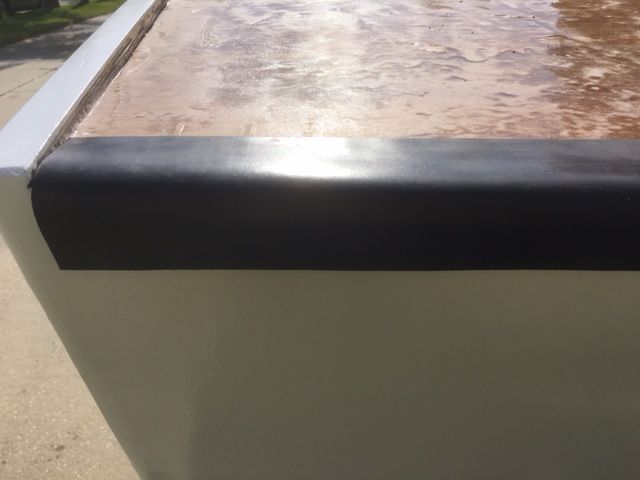
Re: New AD14 build
Posted: Sun Apr 30, 2017 9:03 am
by pee wee
Will you need to take that around any bends, or will it just be used in straight sections?
Re: New AD14 build
Posted: Sun Apr 30, 2017 12:09 pm
by jacquesmm
Remember that a laminated rubrail is a stiffener, it adds strength.
Re: New AD14 build
Posted: Sun Apr 30, 2017 12:29 pm
by waytootall
I was planning to run the rubber strip along the entire length of the boat including the curved section along the deck/hull seam. I did not think of the strength aspect of the rubrail. How important is that?
Re: New AD14 build
Posted: Sun Apr 30, 2017 12:39 pm
by terrulian
It depends on how hard you hit something.
You should be OK if you use fenders, which you need to be doing anyway. A rub rail is well-named; it is not meant to prevent real damage from collisions, just to prevent marring of your boat or others when "rubbing" against something.
I'm assuming you added the structural elements in the plans and this is not a substitute for that.
Re: New AD14 build
Posted: Sun Apr 30, 2017 4:49 pm
by waytootall
Correct. I added all the internal structural elements. The rubber will work well for minor bumps. I also wasn't sure about bending a laminated strip to match the 3 dimensional curve of the hull/deck joint.
Re: New AD14 build
Posted: Sun Apr 30, 2017 5:40 pm
by terrulian
Try heating it either with a heat gun or by soaking it in hot water. With a heat gun of course you have to stay away from the boat so you don't affect the paint.
If that doesn't work you'll have to cut out little slivers, which of course you will do with the precision of a brain surgeon.
Sorry, I just saw that you were talking about laminated strips so maybe the above is irrelevant.
Re: New AD14 build
Posted: Sun Apr 30, 2017 6:01 pm
by Jaysen
Laminated strips can still benefit from heat/steam.
I'll swear by screws though. Requires you to patch later but it does keep things tight and slows you to bend multiple planes.
1 mark spots on inside of hull where screws go.
2 drill out over sized hole
3 wax a pile of screws.
4 prep strip by applying slow or a mixed "medium" epoxy
5 starting at one end clamp the first 24" making sure not to clamp over a screw hole
6 put screws in the first 24". Apply from INSIDE hull through rub rail.
7 continue on down the hull; bend strip, clamp, screw, next hole
8 do other side.
9 go drink beers
10 once epoxy is set back screws off till no longer showing through strip and star with #1 above for the next layer.
11 once all strips applied, remove screws, over drill holes and fill with thickened epoxy.
12 use a flush trim bit to trim the upper side of rail.
13 use thickened epoxy to square up bottom side of rail.
That's basically what I did with some improved steps that will prevent the issues I had. Might work for you as well.
Re: New AD14 build
Posted: Mon May 01, 2017 1:35 am
by gonandkarl
Hi,
I wonder why Jeff did not mention the rubrail they sell at Bateau from Tessilmare which is plastic and can be easily attached. I am thinking of putting it onto my AD14 if the edge on both sides does not turn out all that nice.
I like Jaysens decription of how to attach strips of rubrail. I just dont understand why screwing it from the inside because there is no chance on the whole boat to clamp the strip on the outside except one has a clamp as wide as the seats and as the foredeck. On my FS13 I just screwed the rubbing strip from the outside and after 10 hours of the epoxy hardening I took the screws out again. There is always the chance one can get the edge so nice that one only needs a fender like good old Bondo. I hope he does not mind if I show you his result.

Greetings from Karl
Re: New AD14 build
Posted: Mon May 01, 2017 2:03 am
by gonandkarl
Hi,
Here is the detail of it:
Product ID: BP_1235_wht_roll
Rigid rub rail white per 50' roll
Product ID: BP_1235_wht_roll
Rigid rub rail white per 50' roll
A two-piece system comprised of a rigid base and flexible insert. The rigid base provides for a straight installation and the flexible insert provides a cushioning effect. Pre-drilled every 6" for a #8 screw - makes for very easy installation vs. flexible rub rail. Both black (8178) and white (878) insert will fit.
We have used this rub rail on our own boats and really like how easy it installs. Also, gives a very clean look.
50' max continuous single length
List Price: $150.00
Price: $95.00
The picture of it you can see on Boatbuilding Supplies on the link next to Boat Plans and Kits. I was not capable of copying it to this post.
Greetings from Karl
Re: New AD14 build
Posted: Mon May 01, 2017 2:51 pm
by pee wee
waytootall wrote: ↑Sun Apr 30, 2017 12:29 pm
I was planning to run the rubber strip along the entire length of the boat including the curved section along the deck/hull seam.
Actually, I wasn't addressing strength, function or appearance, merely thinking that if you fold that rubber strip into an L shape it will not want to take a curve as great as it would need to on your boat.
I also am of the opinion that you can do better using some other material, in regards to strength, function and appearance! You've gotten some good suggestions already.
Re: New AD14 build
Posted: Mon May 01, 2017 3:19 pm
by terrulian
Sorry to hijack the thread but Bondo's boat looks great. Looks like he went with wooden spars; I thought I remembered his thinking of aluminum. Please forward my compliments if you're in touch.
In regard to attachment: That's why most rub rails come with an insertion. You screw the base in and then squeeze the rubber insert in, which hides the screws. These are difficult, however, at the bow when an acute angle has to be made.
Don't know about counting on fenders and skipping the rub rail. Touching up against something hard is pretty common even with fenders in place--for example, when approaching another boat to raft up, or when tying up to bollards when you don't have a fenderboard. It only has be be a slight impact to leave a mark in that lovely new paint.
Re: New AD14 build
Posted: Mon May 01, 2017 5:51 pm
by waytootall
gonandkarl - Were you thinking of using the rubrail by Tessilmare like you mentioned (
http://boatbuildercentral.com/proddetai ... TM_Rubrail) or the BP_1235_wht_roll you posted the info about? (
http://boatbuildercentral.com/proddetai ... 5_wht_roll)
I don't see exactly how to install those so that they would cover imperfect seams. I can see aligning it centered over the hull/cabin seam maybe - if it will follow the angle enough. But I don't see how that would wrap around from the hull/seat curve any. What am I missing? The flat rubber roll actually curves over from hull to seat (L curve) very well as shown in the picture. But I defiantly prefer the more professional look of the rubrails goanandkarl pointed out if they will bridge the seam. I had seen those elsewhere, but I remember them being really expensive elsewhere.
Re: New AD14 build
Posted: Tue May 02, 2017 2:32 am
by gonandkarl
Hi,
Yes I was thinking of the rubrail bateau sells in rolls but you are so right they function only on one side of the corner and will not hide any imperfection on the edge. I will first try to get the corner as nice as Bondo and maybe do without a rubrail. Thinking out loud the instructions for you how to install rubrail strips in an earlier post with screwing and epoxying it to the side could perhaps be extended to glue a straight piece on top following the curve and such it would cover up any not so nice corner.
Greetings from Karl
Re: New AD14 build
Posted: Thu May 04, 2017 5:47 pm
by das boot
I used an Oak rub rail on my boat 1+2 inch it went on well but do ont use OAK I need to refinish it every year the spar varnish dose not take well to the OAK. I use 3 fenders on my boat and have had no side damage in the 7-8 years I have had it I do more damage putting it on and off the the trailer but you need to paint it every few years at any rate. You will have a lot of fun out of it.
Re: New AD14 build
Posted: Thu May 04, 2017 5:53 pm
by das boot
I am real glad to see a picture of Bondoos boat It looks real good I stopped in to see it once while it was under construction before he left the site then I lost contact with him he did a real good job on his boat. Glad to see he finished it. If you know how to get in contact with him let me know.
Re: New AD14 build
Posted: Sun May 14, 2017 8:23 pm
by waytootall
The last 2 weekends have been about the boat trailer. I ordered the kit from Harbor Freight tools and it has worked out OK. The kit is pretty good quality and went together well.
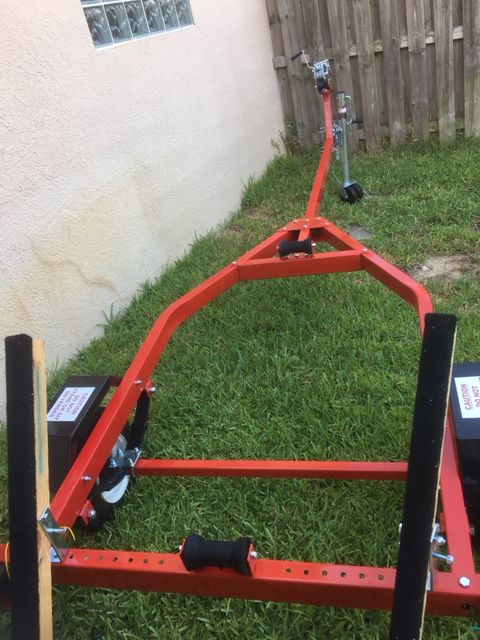
Unfortunately the bunks and rollers won't work with the keel shoe so I had to build new ones
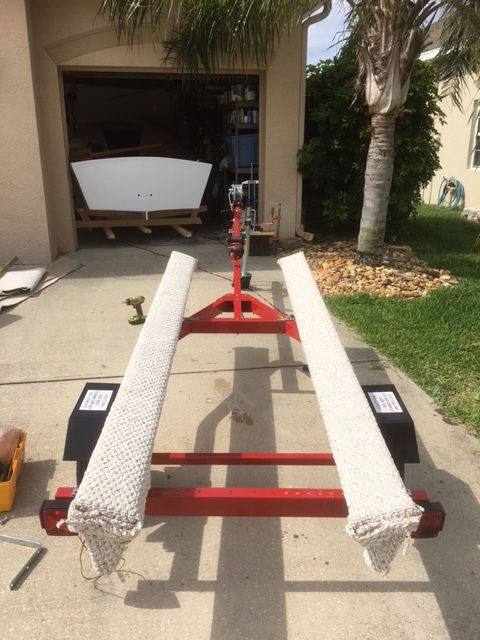
I then rigged up the same hoist system I used to flip the boat in order to transfer it from the building cradle
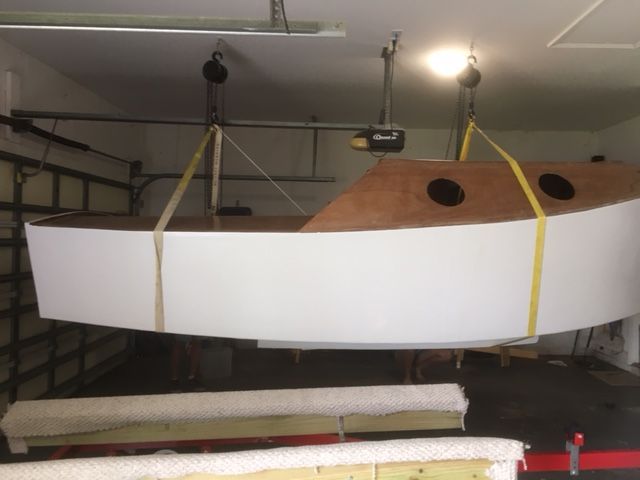
It was quite frightening to have it hanging 4 feet up in the air! Then set it onto the trailer for transportation to the water in a few weeks.
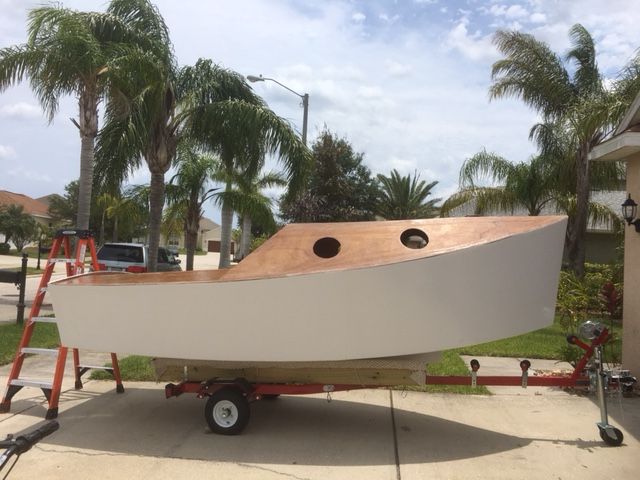
I have some work to do with the hoist and front bumper on the trailer still since they are now too low with the new bunks but it is close. I say "to the water in a few weeks" because lacrosse season is starting for my kids so I will be spending weekends at tournaments and not getting as much work done.
Re: New AD14 build
Posted: Sun May 14, 2017 8:29 pm
by terrulian
A very cool new stage!
Re: New AD14 build
Posted: Sun May 14, 2017 8:32 pm
by Jeff
Very nice Waytootall!! Jeff
Re: New AD14 build
Posted: Mon May 15, 2017 2:25 am
by gonandkarl
You are progressing fast, I really like it how quick you had your boat on the trailer. The trailer is also very good with genuine spring suspension while mine has just 4 rubber sausages in the corners of a square axle, cheapest suspension like the Audi cars had in the fifties when they were still called DKW. Have you fitted the centreboard already inside the trunk ?
Re: New AD14 build
Posted: Mon May 15, 2017 7:19 am
by waytootall
Yes, the centerboard is in the trunk. It has been for a while actually. I have also installed all the rest of the ballast weights. I needed to know how the boat would sit on the trailer with everything in.
Re: New AD14 build
Posted: Mon May 15, 2017 8:27 pm
by das boot
Installing the rub rail was no problem I used OAK and just drilled 1/4 inch holes through it and the side of the hull I counter sunk the heads of the bolts that were SS with philips heads on them when I got to the point where the hull courved up to the bow I just took the nuts on the inside of the bolt a few threds at a time and ket it sit over night and kept doing it that way until it all came in tight to the hull that worked fine. My big mistake was I should have rounded the outer edges before i installed it climing over those edges can be hard on the shins I have been going to fix that for years but I never seam to get around to it,
Re: New AD14 build
Posted: Fri Jun 30, 2017 11:21 am
by waytootall
I haven't done much in a few weeks due to kids' activities, but I am now ready to put the boat in the water (as soon as I get a free day). My daughter painted on the name:
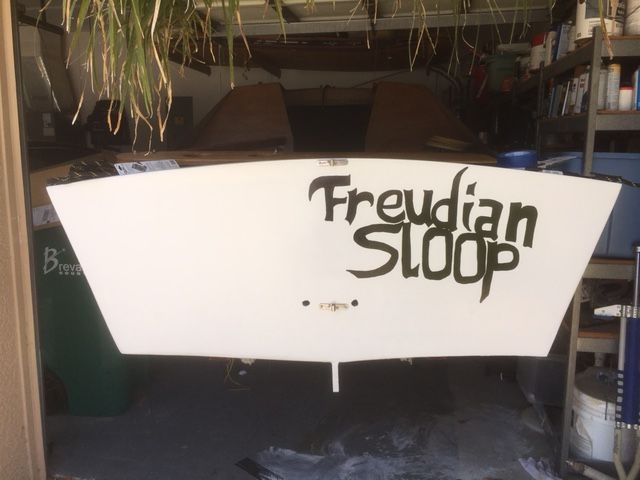
Re: New AD14 build
Posted: Fri Jun 30, 2017 11:27 am
by Eric1
Love It!
Re: New AD14 build
Posted: Fri Jun 30, 2017 12:43 pm
by Jeff
Nice WayTooTall!!! Jeff
Re: New AD14 build
Posted: Sat Jul 01, 2017 5:46 am
by gonandkarl
Re: New AD14 build
Posted: Mon Jul 03, 2017 3:50 pm
by das boot
Do not feel bad I did not round the edges on the rub rail on my boat I keep telling myself to do it every time I hit that edge with my nee getting in and out one of these days I can do it with a router it just takes time
Re: New AD14 build
Posted: Thu Jul 27, 2017 10:50 am
by waytootall
SPLASH!
It has been a busy summer so it took me a lot longer than I expected to find a free day during the week when I could get the boat in the water for the first time. I wanted to do it on a weekday so the boat ramp wouldn't be crowded since I wasn't sure how well this would go. After many unforseen problems getting the trailer hooked up properly everything else was very successful. Not only did the boat not sink, we successfully sailed at on OK pace given a light wind and a LOT of work I need to do on the rigging.
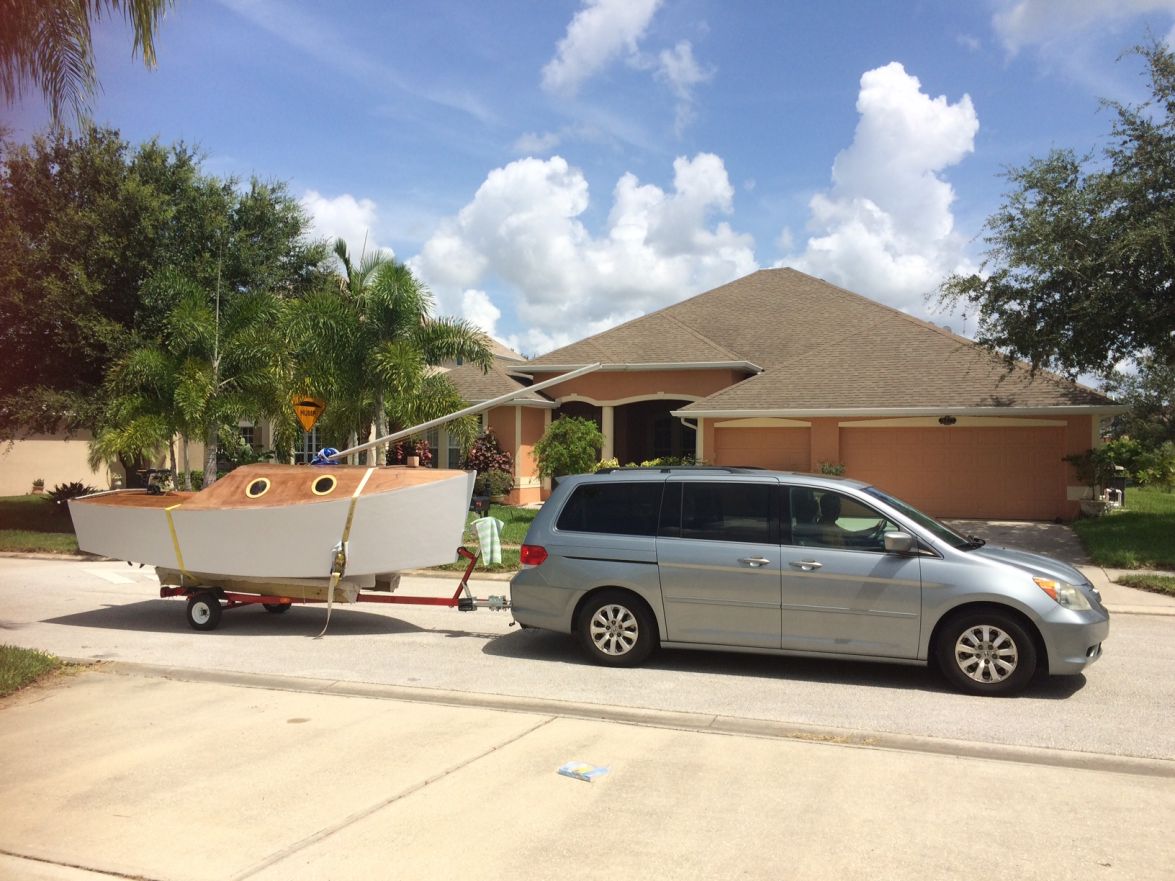
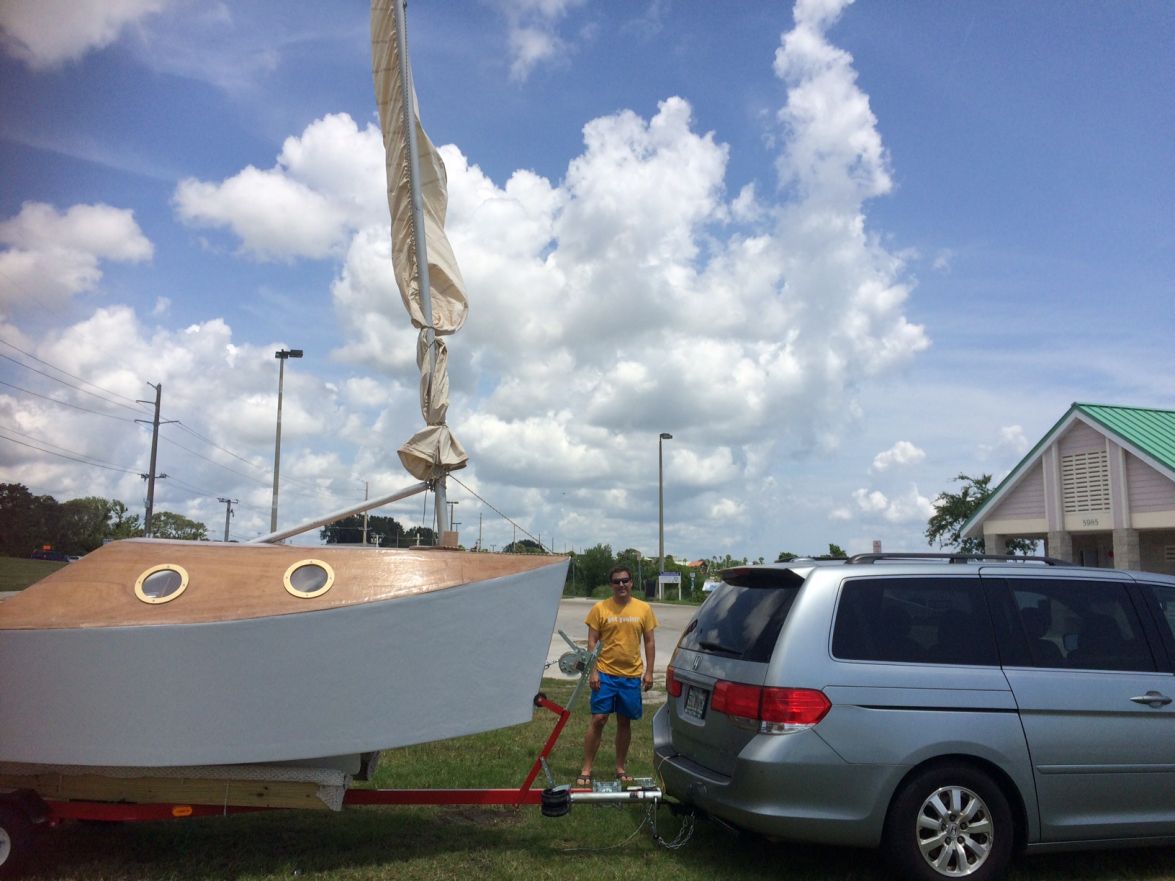
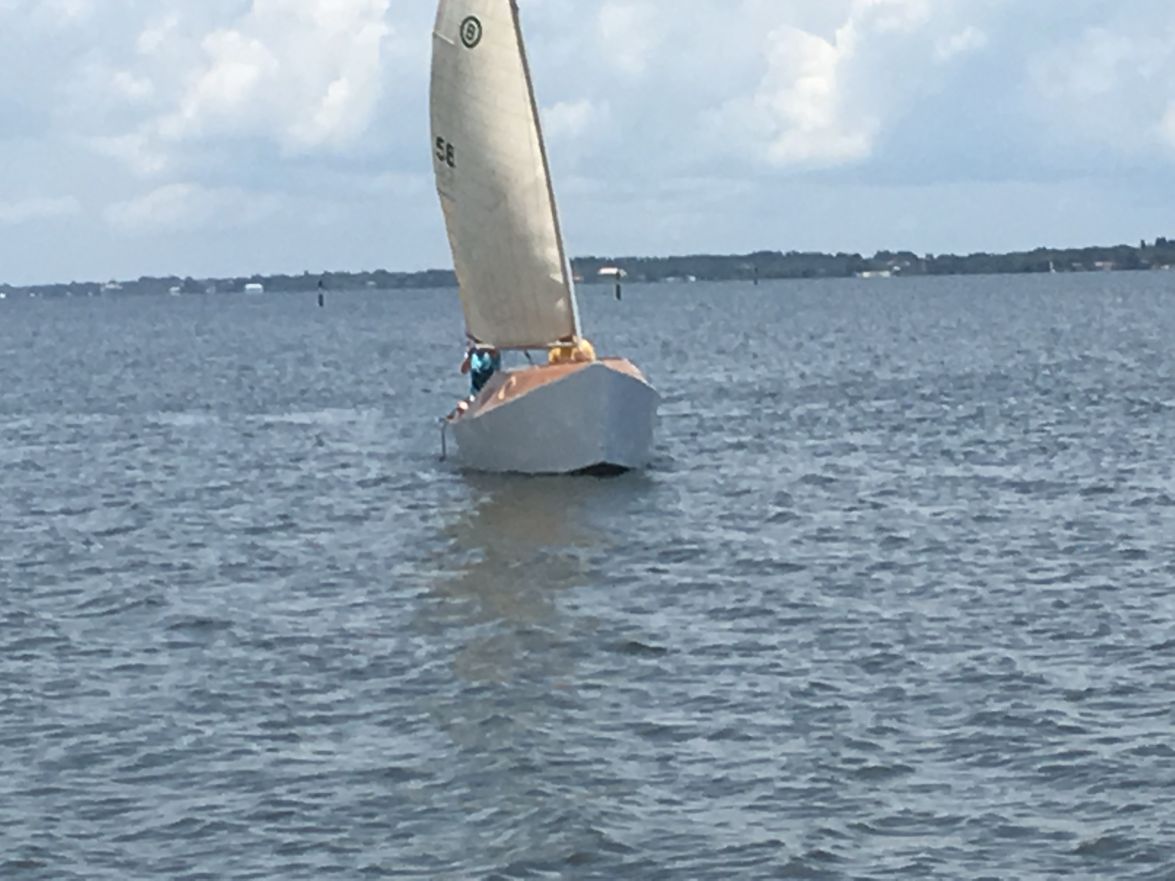
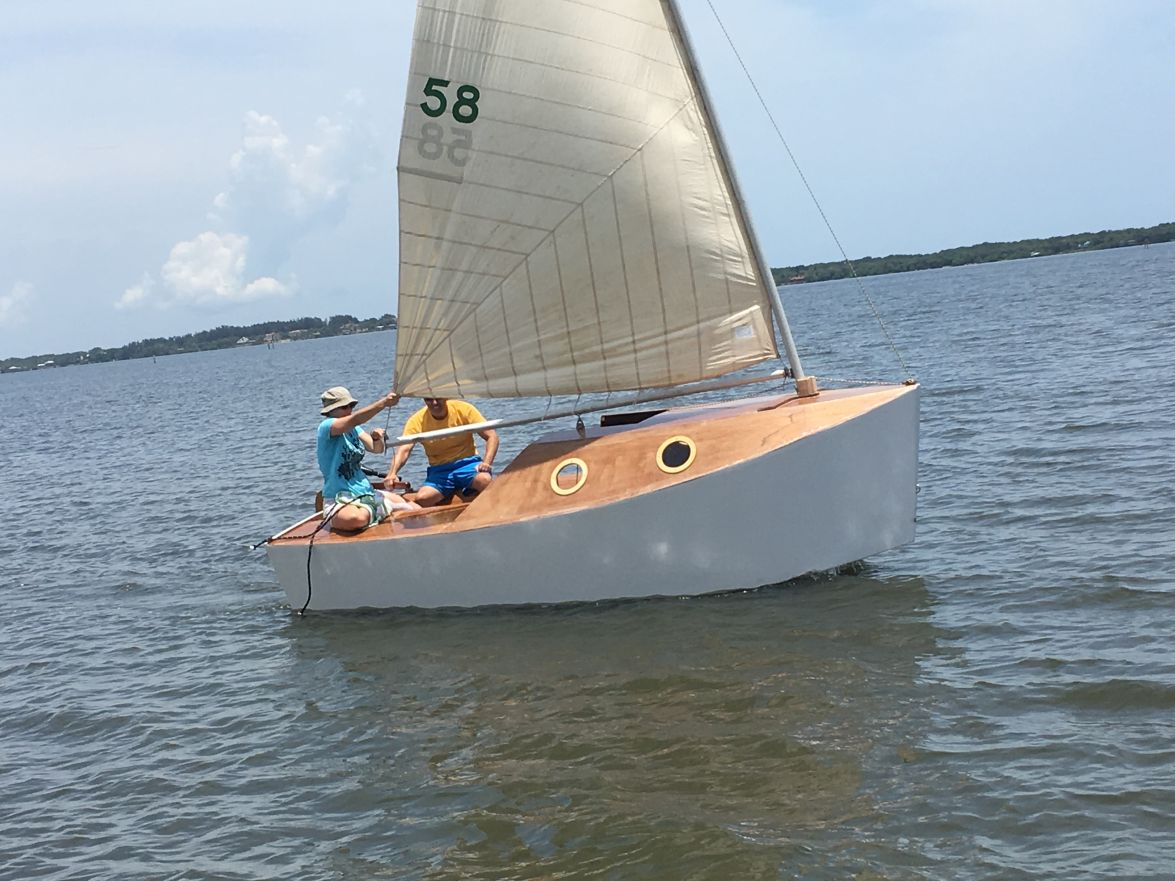
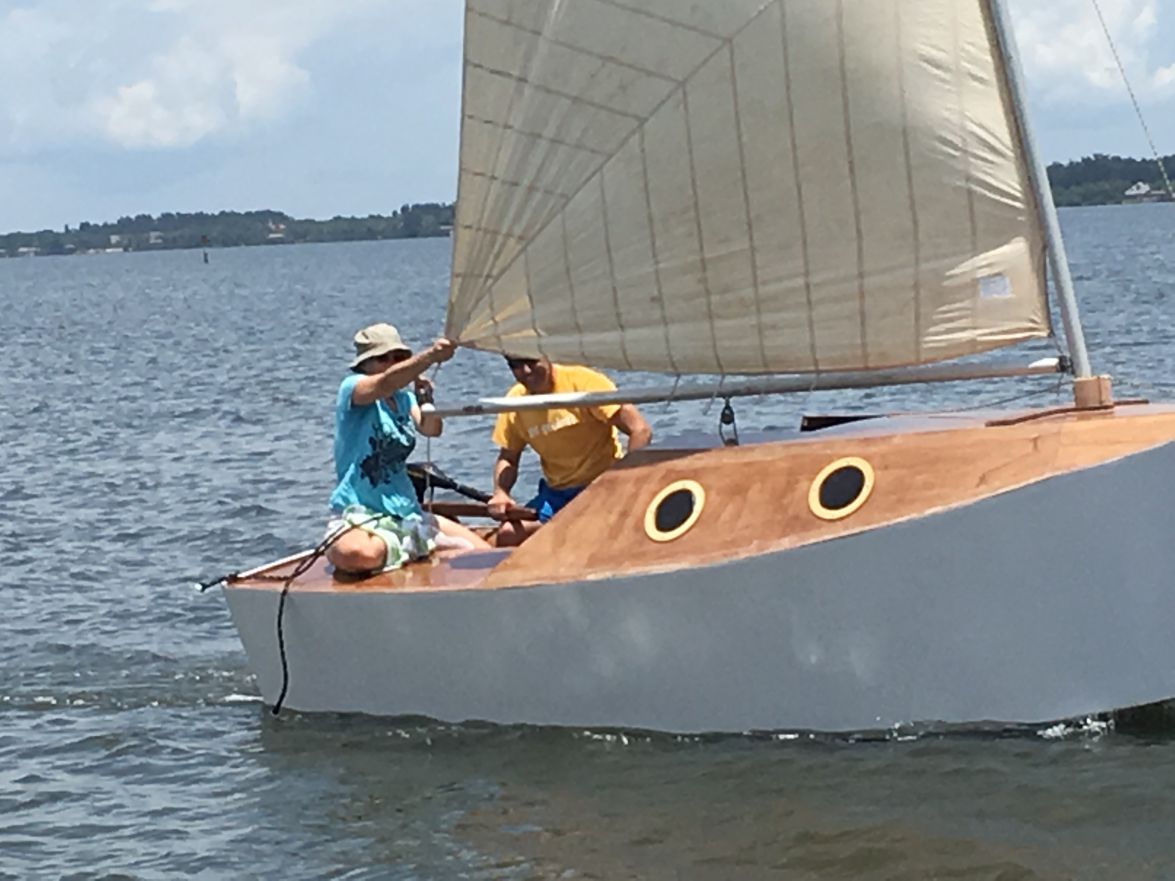
My wife was a big help in getting it rigged and launched. Here we are comming back into the dock to pick up my daughter and you can see my wife strggling with the outhaul. This practice run taught me a lot on what I now need to do to get the rigging right. Which was the goal.
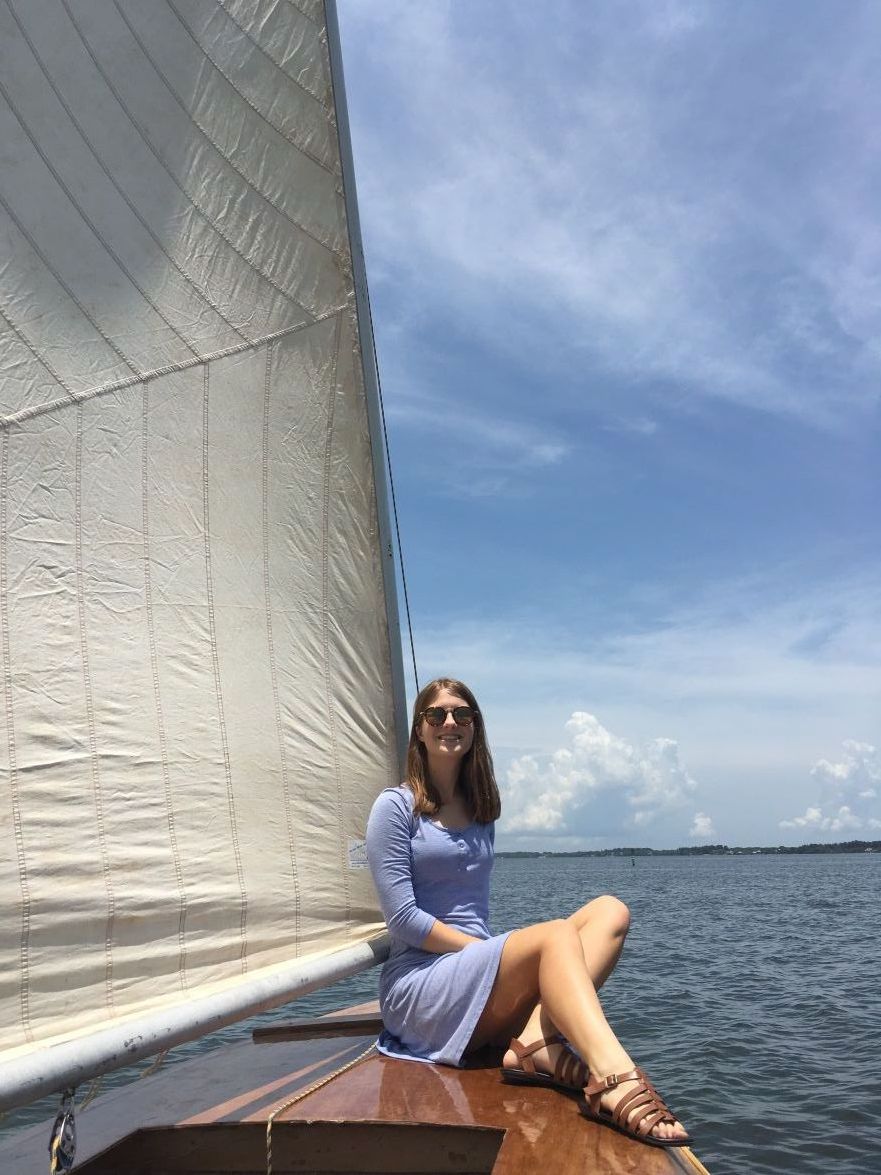
And my daughter sitting on the bow.
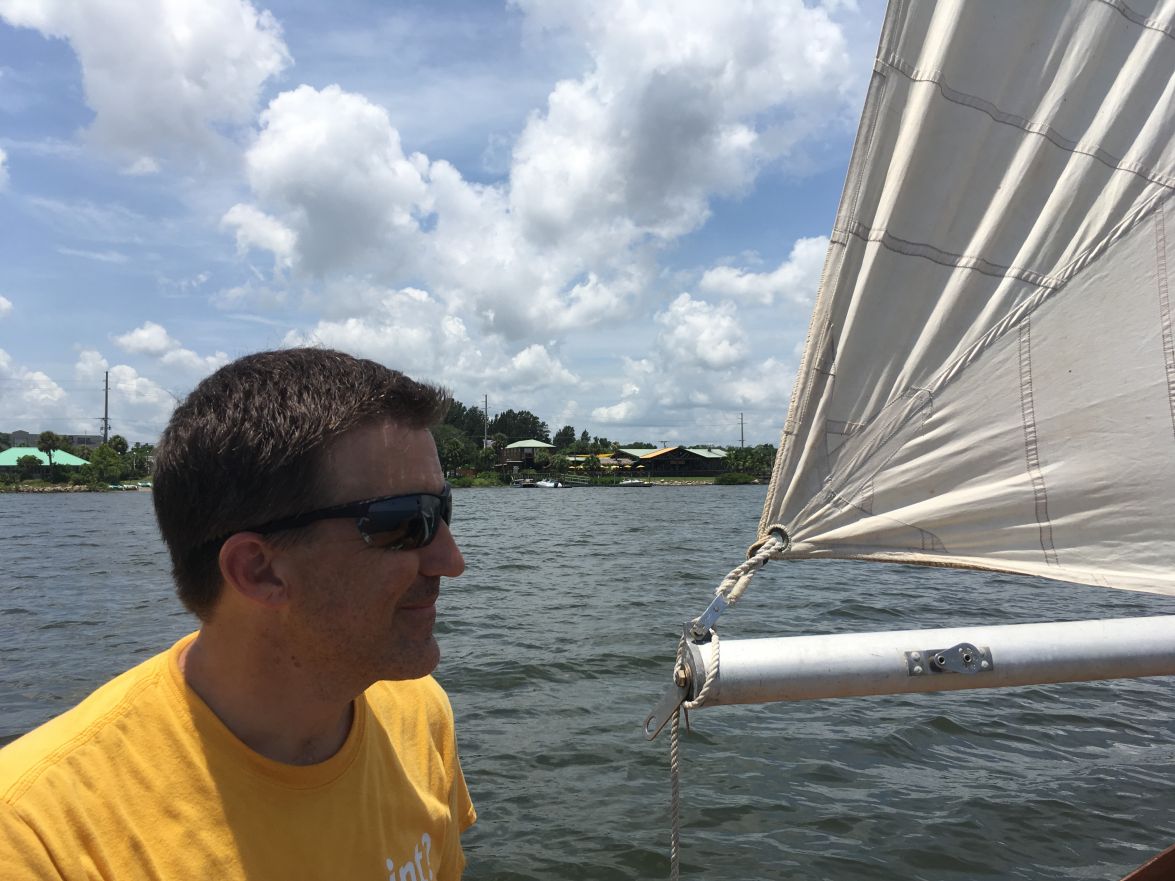
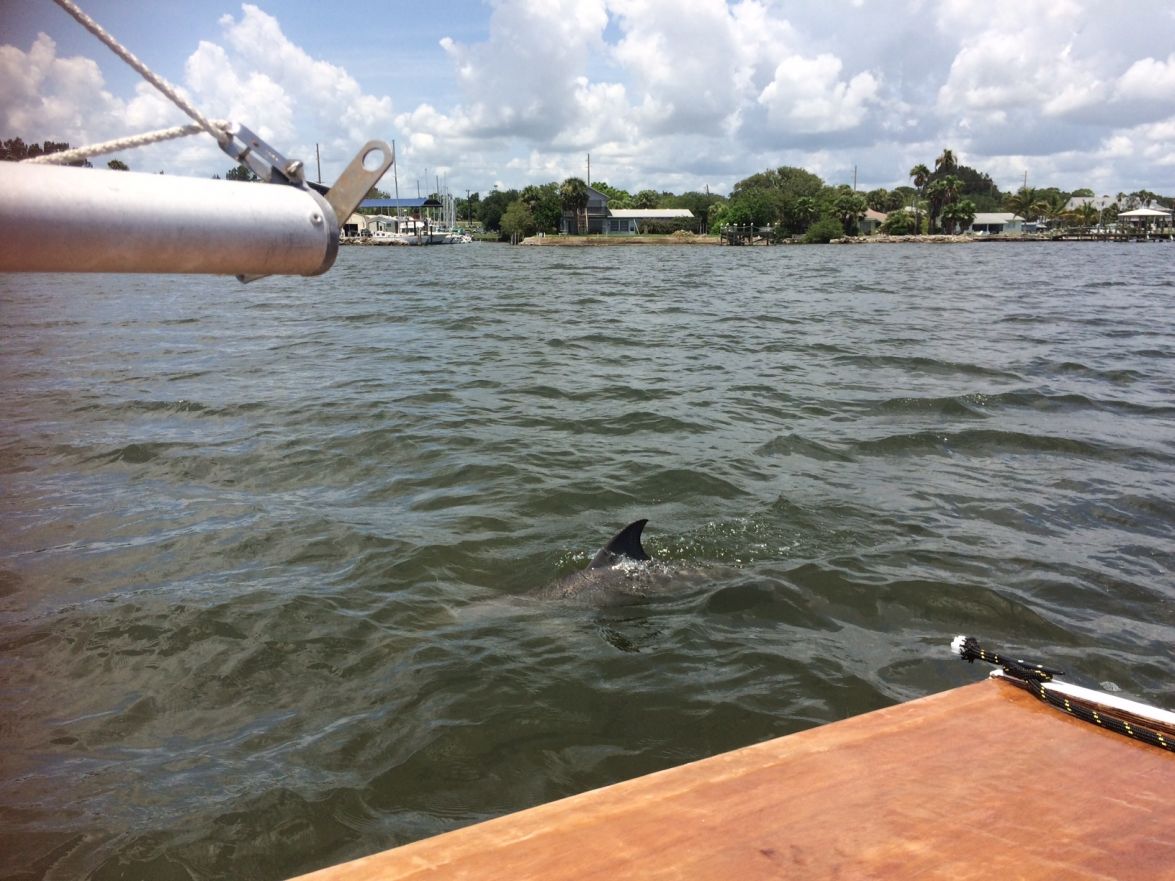
We had a group of dolphins swimming with us. This one was about 5 feet from the boat for about a mile.
Thank you to everyone on here who helped me along the way. I am not done yet, but couldn't have gotten this far without the help.
Re: New AD14 build
Posted: Thu Jul 27, 2017 11:26 am
by terrulian
Congratulations on getting the boat in the water! Great stuff, beautiful shots.
What is the outhaul problem? Was it just not secured?
Re: New AD14 build
Posted: Thu Jul 27, 2017 11:55 am
by jacquesmm
Very nice. Congratulations on the launch.
Re: New AD14 build
Posted: Thu Jul 27, 2017 11:57 am
by Jeff
Waytootall, Congratulations on the splash!! She looks great on the water!! Jeff
Re: New AD14 build
Posted: Thu Jul 27, 2017 12:09 pm
by bateau-webmaster
Very nice! Love the name, by the way.
Good Sailing!
Re: New AD14 build
Posted: Thu Jul 27, 2017 12:15 pm
by waytootall
The outhaul problem is really just because it was just tied to the end of the boom for mow. I need a proper pulley and cleat. And the fact that the sail I have threaded through the mast groove using the rope on the sail, so I can't drop it easily. So, coming into the dock trying to reduce sail to prevent a collision we had to untie the outhaul. Many learning experiences
.
Re: New AD14 build
Posted: Thu Jul 27, 2017 1:14 pm
by gonandkarl
Hi,
Congratulations on the splash. It looks beautiful on the water and being escorted by dolphins is really special. You will still have lots of fun with the Freudian Sloop.
Greetings from Karl
Re: New AD14 build
Posted: Thu Jul 27, 2017 7:46 pm
by BB Sig
Beautiful boat! Congrats on a successful launch.
Re: New AD14 build
Posted: Sat Jul 29, 2017 5:14 pm
by das boot
It looks real good it will take you a few trips to get the hang of it . My main sail also runs in a gruve in the mast I try and drop my sails well before getting near the dock and just use the motor for docking that can be tricky with the high bow the wind can catch it and ruin a nice docking if you can come up to the dock from down wind it works the best but that depends of the number of boats in the area. You will get it worked out.