
Hybird MF14
-
cape man

- * Bateau Builder - Expert *

- Posts: 8282
- Joined: Sun Jan 20, 2008 12:02 pm
- Location: Lithia, Florida
Re: Hybird MF14
Awesome job and the masking tape was a sweet little trick.
The world always seems brighter when you've just made something that wasn't there before - Neil Gaiman

Re: Hybird MF14
Well.
That was a lot more filling, fairing, and sanding than expected. I sanded the first round of filler too agressively so I had to go back and re-apply. I put on some thick filler in the worst spots, then hit the whole bottom with two more "runny" fill coats rolled on. Here's the bottom in the midst of sanding that whole mess:
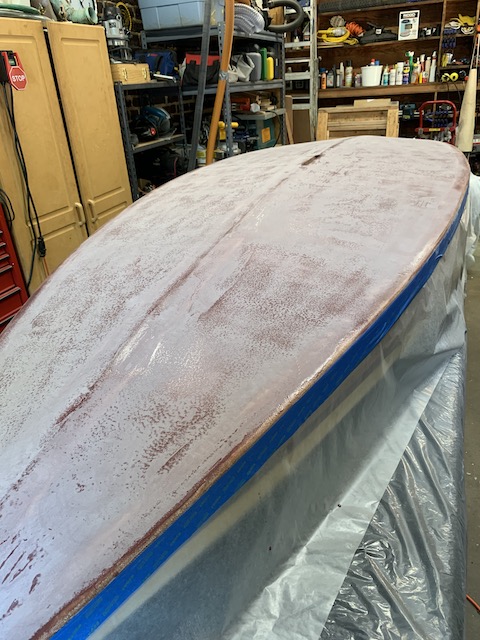
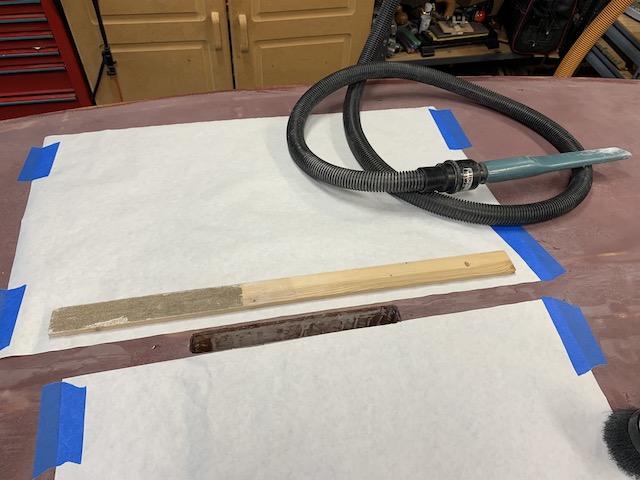
I also noticed some epoxy, from wetting out the fiberglass, had dribbled down into the daggerboard slot. Had to flatten that out, too. Sandpaper on a stick! Lots of fun.
That was a lot more filling, fairing, and sanding than expected. I sanded the first round of filler too agressively so I had to go back and re-apply. I put on some thick filler in the worst spots, then hit the whole bottom with two more "runny" fill coats rolled on. Here's the bottom in the midst of sanding that whole mess:
I also noticed some epoxy, from wetting out the fiberglass, had dribbled down into the daggerboard slot. Had to flatten that out, too. Sandpaper on a stick! Lots of fun.
Re: Hybird MF14
Finally got it all flat and cleaned off the dust:
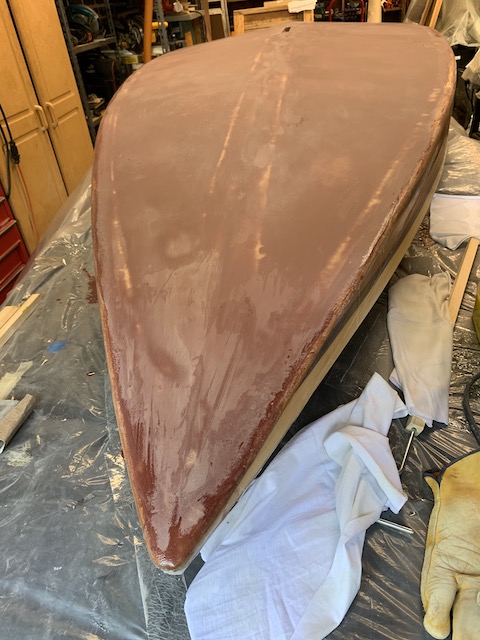
The blotchy effect is from sanding into all the different layers of fill coat. You can see the outlines of the fiberglass tape in the center and around the edges - when I hit the clear epoxy filling the weave on the tape, that was my cue to stop sanding.
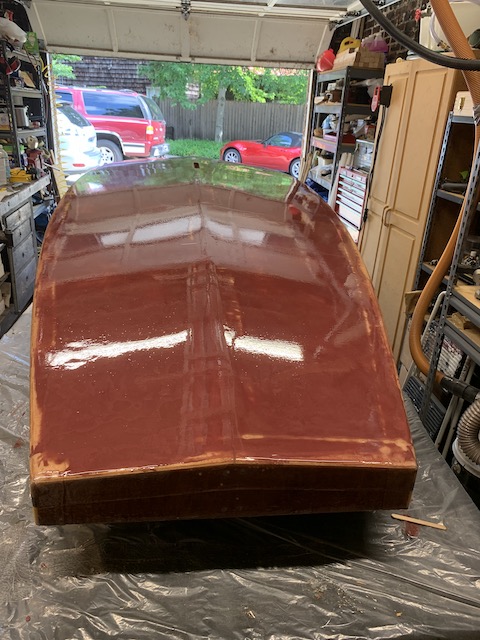
Then a couple coats of unthickened epoxy to encapsulate and protect all those microballoons:
Mirror, mirror on the wall
Who's the fairest bottom of them all?

The blotchy effect is from sanding into all the different layers of fill coat. You can see the outlines of the fiberglass tape in the center and around the edges - when I hit the clear epoxy filling the weave on the tape, that was my cue to stop sanding.
Then a couple coats of unthickened epoxy to encapsulate and protect all those microballoons:
Mirror, mirror on the wall
Who's the fairest bottom of them all?

Re: Hybird MF14
Nice progress!!! Jeff
-
Fuzz
- * Bateau Builder - Expert *
- Posts: 8939
- Joined: Tue Aug 02, 2011 4:23 am
- Location: Kasilof, Alaska
Re: Hybird MF14
Looks like one slick bottom to me
Re: Hybird MF14
Sadly, looks aren't everything. Being epoxy, it needs a UV protection coat. Yeah, I know, UV doesn't get underwater. But think of the hull laying upside down on the beach during the summer. Shudder. So now I'm sanding that shiny epoxy down to 220-grit in prep for paint.
Had intended to go with a green bottom. But SWMBO liked the color of the microballoons. So I'll probably find a similar paint. Thus far EzPoxy Burgundy is the only marine paint I've found that's in the ballpark. I wonder if Rustoleum comes in a high-gloss?
-
Netpackrat

- Very Active Poster

- Posts: 1032
- Joined: Thu Sep 14, 2017 1:35 am
- Location: Anchorage, AK
Re: Hybird MF14
Re: Hybird MF14
Small change in plans.
I had intended to sand and paint the bottom before turning the Moonfish over again and finishing the deck. Got the bottom sanded to 220, then read the instructions on the paint. "The substrate and air temperatures must be between 50ºF and 90ºF throughout the entire mixing, application, and curing process." Urgh. My garage has hit ninety or more every day for the last two months. Paint will have to wait until it starts to cool down around here.
So. Flip the boat over and start sanding the deck and cockpit. That went faster than the bottom - learning curve. Finished sanding them to 110 grit last week. Then checked my notes: I've been sanding since Memorial Day!
Took a few days off from sanding to actually build something for a change. I fashioned a collar to go around the mast step. It's main job is to protect my fancy deck from being stabbed while stepping the mast. Secondarily it makes the mast step round, like the mast, and will be an attach point for the halyard fairlead. Here it is epoxy coated and epoxied in place:
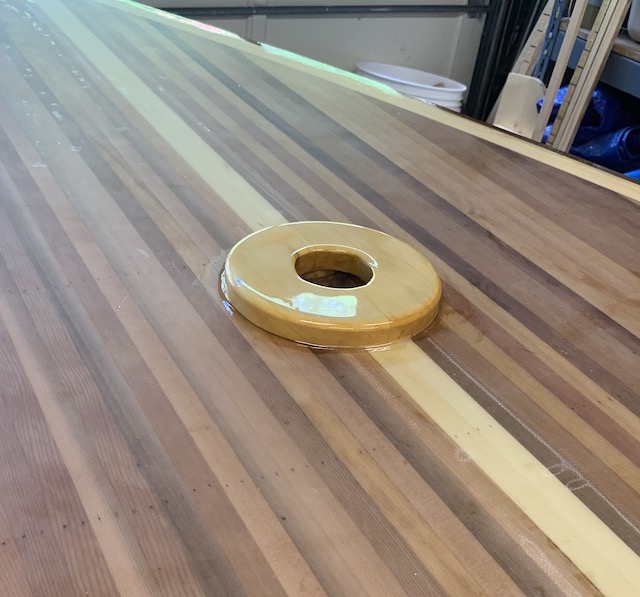
Not much, but that's what passes for excitement around here these days. It needs to sit and harden for four days before I start sanding again - taking everything down to 220 before varnishing happens.
I had intended to sand and paint the bottom before turning the Moonfish over again and finishing the deck. Got the bottom sanded to 220, then read the instructions on the paint. "The substrate and air temperatures must be between 50ºF and 90ºF throughout the entire mixing, application, and curing process." Urgh. My garage has hit ninety or more every day for the last two months. Paint will have to wait until it starts to cool down around here.
So. Flip the boat over and start sanding the deck and cockpit. That went faster than the bottom - learning curve. Finished sanding them to 110 grit last week. Then checked my notes: I've been sanding since Memorial Day!
Took a few days off from sanding to actually build something for a change. I fashioned a collar to go around the mast step. It's main job is to protect my fancy deck from being stabbed while stepping the mast. Secondarily it makes the mast step round, like the mast, and will be an attach point for the halyard fairlead. Here it is epoxy coated and epoxied in place:
Not much, but that's what passes for excitement around here these days. It needs to sit and harden for four days before I start sanding again - taking everything down to 220 before varnishing happens.
Re: Hybird MF14
Looking great!
-
walkabout_slp
- Frequent Poster

- Posts: 52
- Joined: Thu Aug 11, 2016 3:30 pm
- Location: Minnesota
Re: Hybird MF14
Looking good.
Good that you installed the collar now. I installed one a few weeks ago after 2 years of sailing my Moonfish because there was a little too much play on the square mast hole. I ended up with a slightly larger one than yours, but also mounted the halyard fairlead. It does not look as nice as I just doubled up some 1/2" marine plywood and then cut a 2 3/8" hole for the 2 1/4" mast (I was worried that by adding epoxy to a 2 1/4" hole would make the hole too small). I ended up crimping my mast a little when I righted the boat after capsising for the first time. Not sure if it was because I applied too much pressure on the centerboard or it was because of the square mast hole, either way I am hoping the round collar will be better.
I also installed a standard Sunfish self-bailer at the same time as I was tired of hand bailing when big boats would swamp the boat or bigger waves. So far it has worked like a charm. If there is plenty of wind and boat speed I leave it open otherwise I put the plug in it. I struggled to find one though as the manufacturer was delayed in making any, but I was lucky enough to find someone on a Sunfish forum that sold me an extra one.
You adding a splash guard? Before or after varnishing?
Who is online
Users browsing this forum: No registered users and 5 guests