
Hybird MF14

Re: Hybird MF14
Thanks. It's great to see the boat finally start to "take shape"!
Re: Hybird MF14
Dry fitting the frame together (see previous page) allowed me to mark where all the aft stringers intersected with the frames. I could then take it all apart and lay out the lightening and ventilation holes. The optional lightening holes at the outer ends of the frames are indicated in the plans. I added additional holes in the two aft-most stringers and in Frame D, where they're protected from the elements. The plans say to keep lightening holes 2 inches from the edges of their parts. I also kept the holes 2 inches from each other.
Here are the finished holes in Frame D and the aft-most stringers:
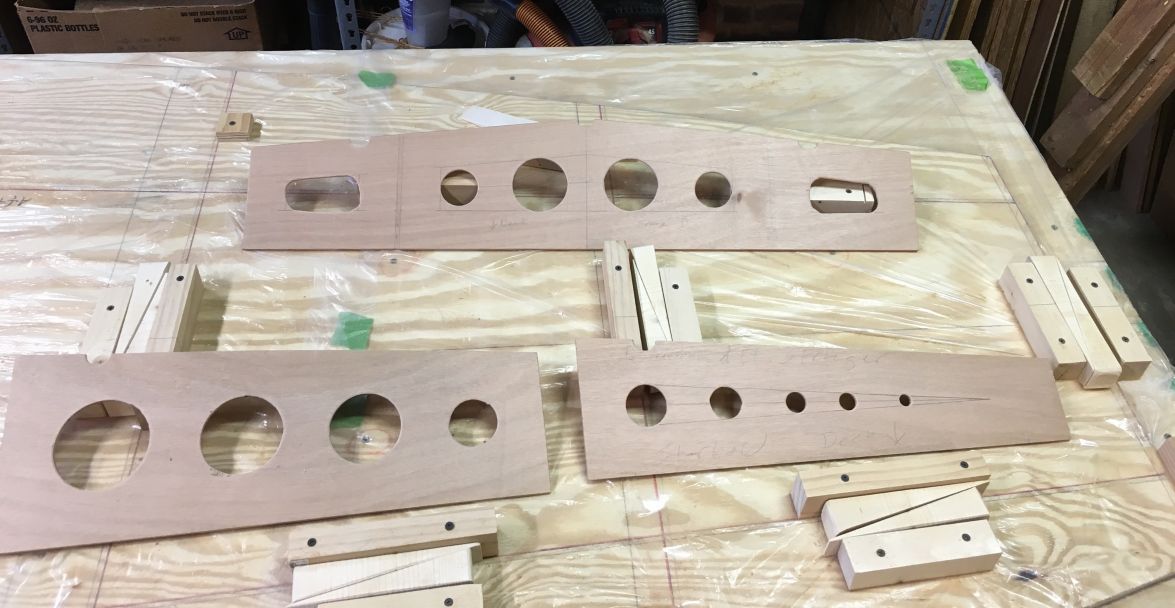
During the build I kept track of the weight of the wooden plugs taken out of all the lightening holes (I didn't weight the sawdust.) For the record they added up to 40 ounces - 2.5 pounds. That seems like not much payback for the work involved.
The holes will serve another function, though: ventilation. I'm planning to install ports in Frames B and C that can be left open when the boat is in storage. The Sunfish fleet has a history of rotting badly inside their hermeticaly sealed hulls. Hopefully the additional lightening holes will allow all corners of the boat to air out.
Here are Frames B and C with 1/2" doublers added and holes for their 6" ventilation ports cut:
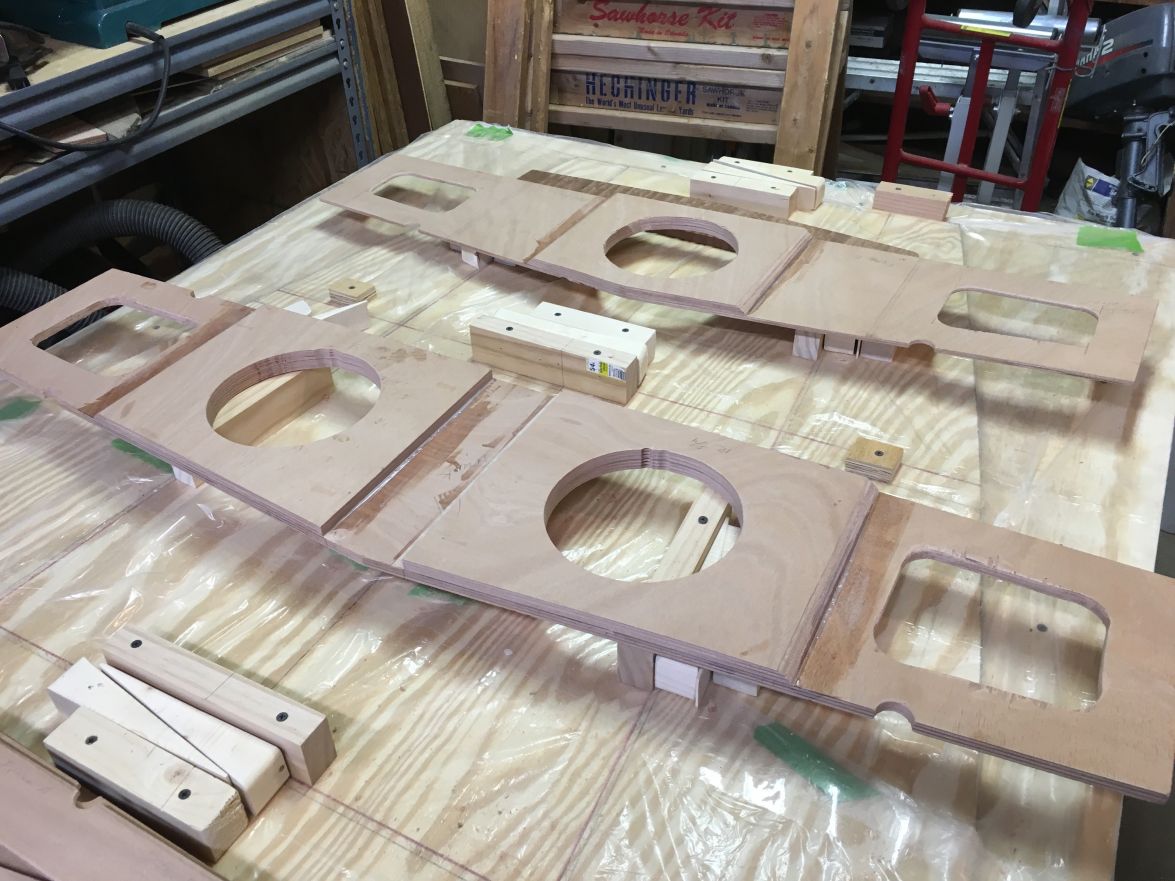
Incidentally, the boating industry calls these ventilation ports "deck plates".
Here are the finished holes in Frame D and the aft-most stringers:
During the build I kept track of the weight of the wooden plugs taken out of all the lightening holes (I didn't weight the sawdust.) For the record they added up to 40 ounces - 2.5 pounds. That seems like not much payback for the work involved.
The holes will serve another function, though: ventilation. I'm planning to install ports in Frames B and C that can be left open when the boat is in storage. The Sunfish fleet has a history of rotting badly inside their hermeticaly sealed hulls. Hopefully the additional lightening holes will allow all corners of the boat to air out.
Here are Frames B and C with 1/2" doublers added and holes for their 6" ventilation ports cut:
Incidentally, the boating industry calls these ventilation ports "deck plates".

Re: Hybird MF14
Good stuff.
Re: Hybird MF14
Oh no, the bow isn’t straight!
I built the trunk and bow stringer assembly last summer. Since then it’s been stored vertically in my shop, usually leaning up against something. Looks like it took a set. It's off by 2/3 of an inch or so.
On top of that, there’s a big gap between the bow stringer and its doublers and the side of the deck, on both sides.
This is a challenge because the building instructions say to epoxy glue the side panels to the bow. There's a 1/4-inch gap between the doublers and the side of the deck at the bow.
Re: Hybird MF14
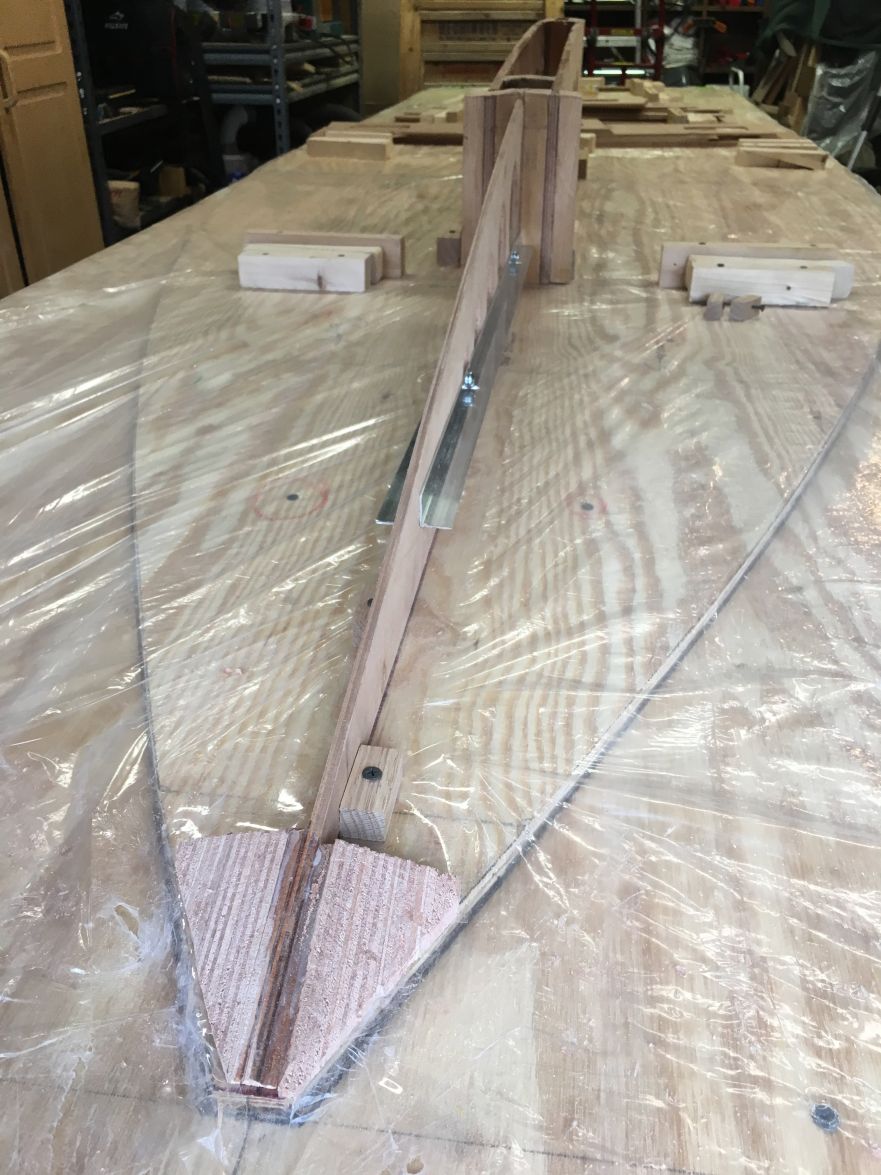
The gap at the bow was both better and worse than I expected. The bow is supposed to be one inch wide and it turned out to be 1.25 inches. Don’t know how I made it an eighth of an inch too wide on both sides but I did. Weird, because the deck width 5 inches away at the 14-foot line (the line at the cleat in the picture) is correct to within a sixteenth. It was easy to shave down the sides of the deck and get rid of the extra 1/4-inch at the bow.
But that’s not the whole story. I made a cardboard template of the forward most portion of the side panel from the plans.

The panel tapers down to zero height at the bow. Understand, this panel fits on the outside of the deck template, snugged up against the deck itself. And the deck is 1/4 inch thick. With the taper the panel doesn’t rise (in this upside-down view) to deck level until 1-3/8 inches back from the bow. And at that point the deck is 2.5 inches wide! How does one glue the side panel to the bow across such a gap?
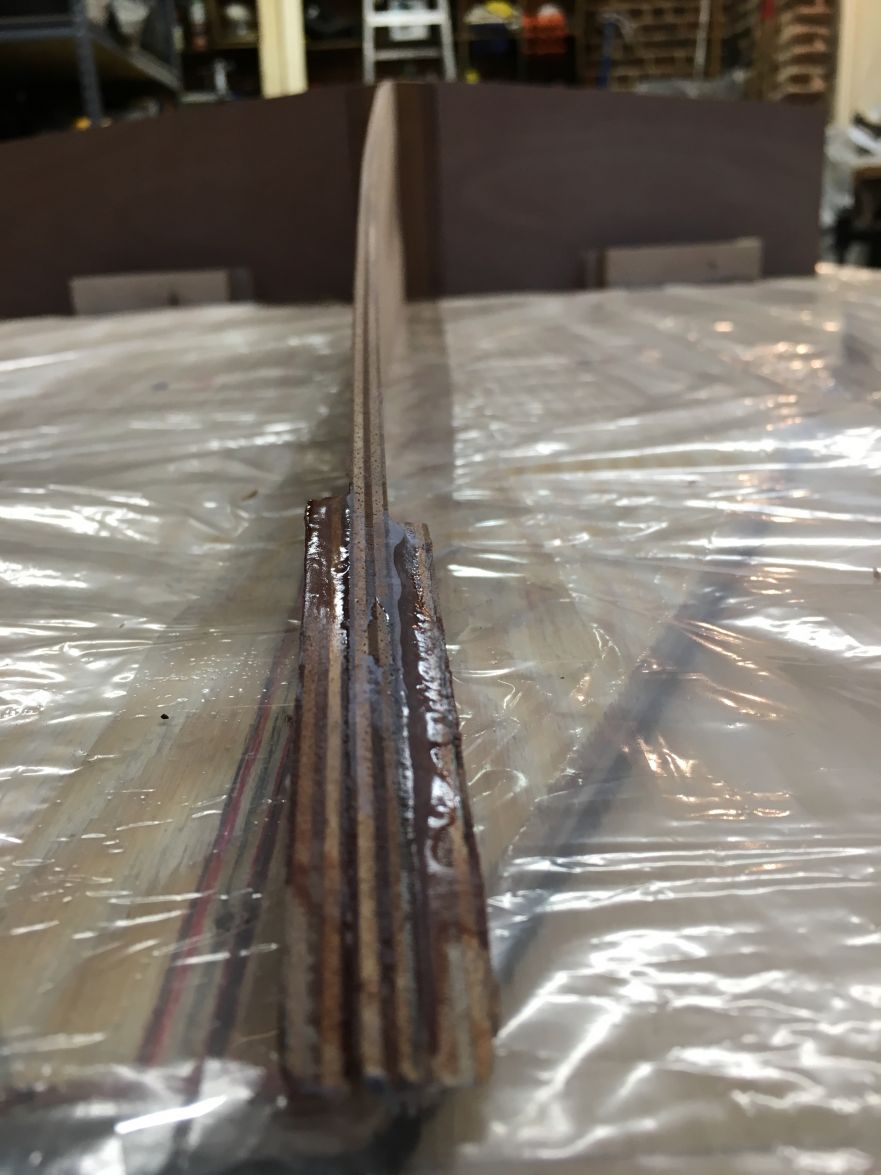
I decided to glue up a little bow block out of scraps of 1/2” marine ply taken out of those lightening holes. This will give me something onto which I can glue the side panels.

The block is only 3 inches long.
But that’s not the whole story. I made a cardboard template of the forward most portion of the side panel from the plans.
The panel tapers down to zero height at the bow. Understand, this panel fits on the outside of the deck template, snugged up against the deck itself. And the deck is 1/4 inch thick. With the taper the panel doesn’t rise (in this upside-down view) to deck level until 1-3/8 inches back from the bow. And at that point the deck is 2.5 inches wide! How does one glue the side panel to the bow across such a gap?
I decided to glue up a little bow block out of scraps of 1/2” marine ply taken out of those lightening holes. This will give me something onto which I can glue the side panels.
The block is only 3 inches long.
Re: Hybird MF14
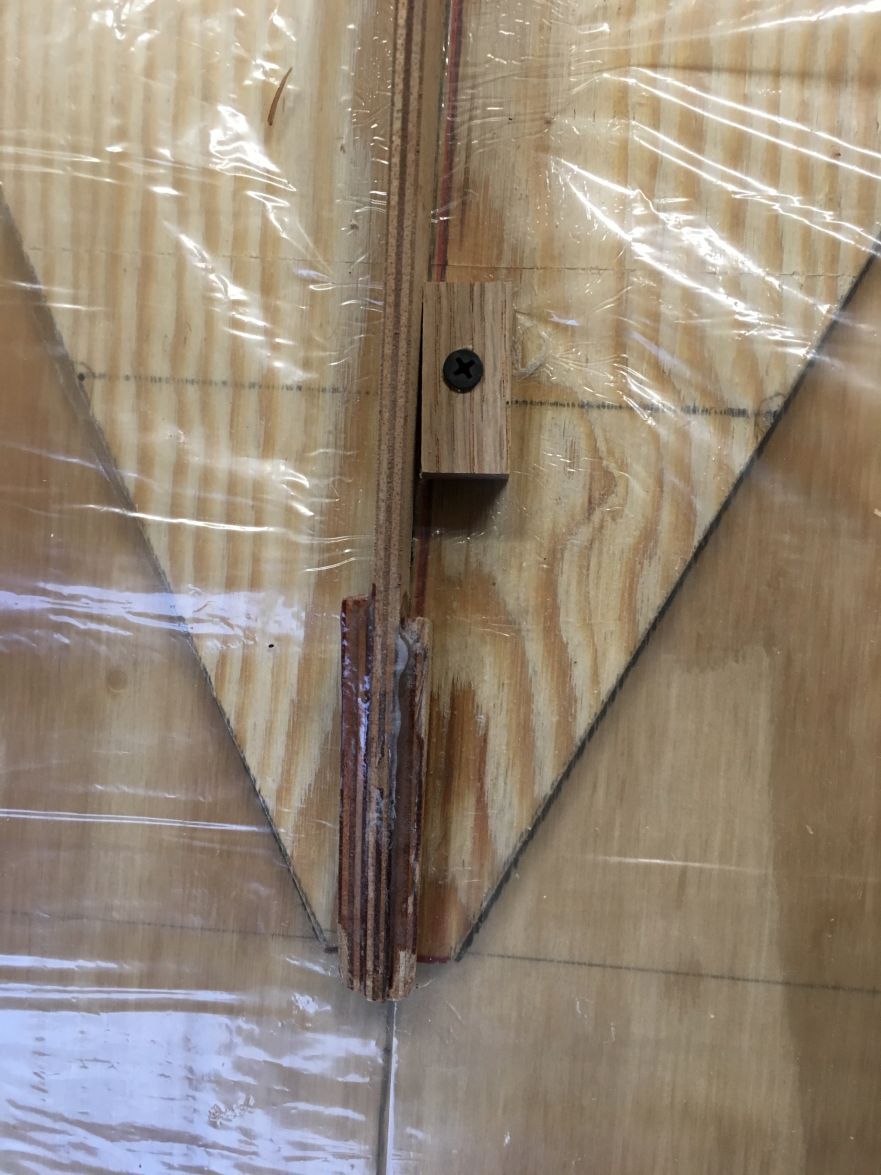
I took the Moonfish to the orthodontist for braces and the plastic surgeon for a nose job. Here’s the result:
I shaved down the sides of the bow block to meet the sides in the back. It’s going to take more fiddling when I apply the bottom panels. The braces are aluminum angle irons bolted together through the lightening holes. (“Holes are handy!” is my motto.) They'll come off when the bottom panels are epoxied in place and the whole assembly is stable.
I shaved down the sides of the bow block to meet the sides in the back. It’s going to take more fiddling when I apply the bottom panels. The braces are aluminum angle irons bolted together through the lightening holes. (“Holes are handy!” is my motto.) They'll come off when the bottom panels are epoxied in place and the whole assembly is stable.
Re: Hybird MF14
Assembly has begun. Last week I glued Frames A and B in place with thickened epoxy:
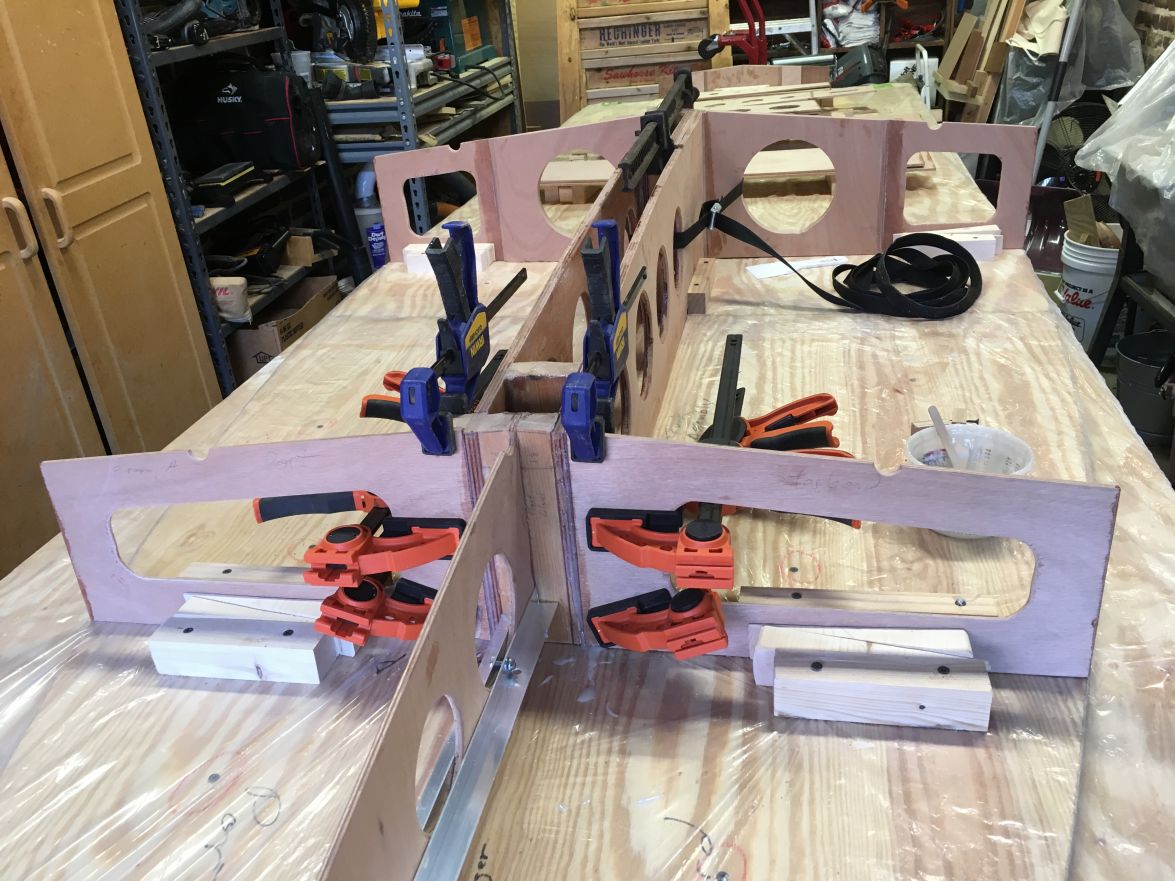
This week I assembled everything aft of Frame B with 1/2-inch epoxy fillets:
The next step, installing the side panels, probably will put stresses on this structure so I'll give the epoxy a few days to cure.
This week I assembled everything aft of Frame B with 1/2-inch epoxy fillets:
The next step, installing the side panels, probably will put stresses on this structure so I'll give the epoxy a few days to cure.
Last edited by Chenier on Wed Mar 13, 2019 3:50 pm, edited 1 time in total.
Re: Hybird MF14
On Drainage
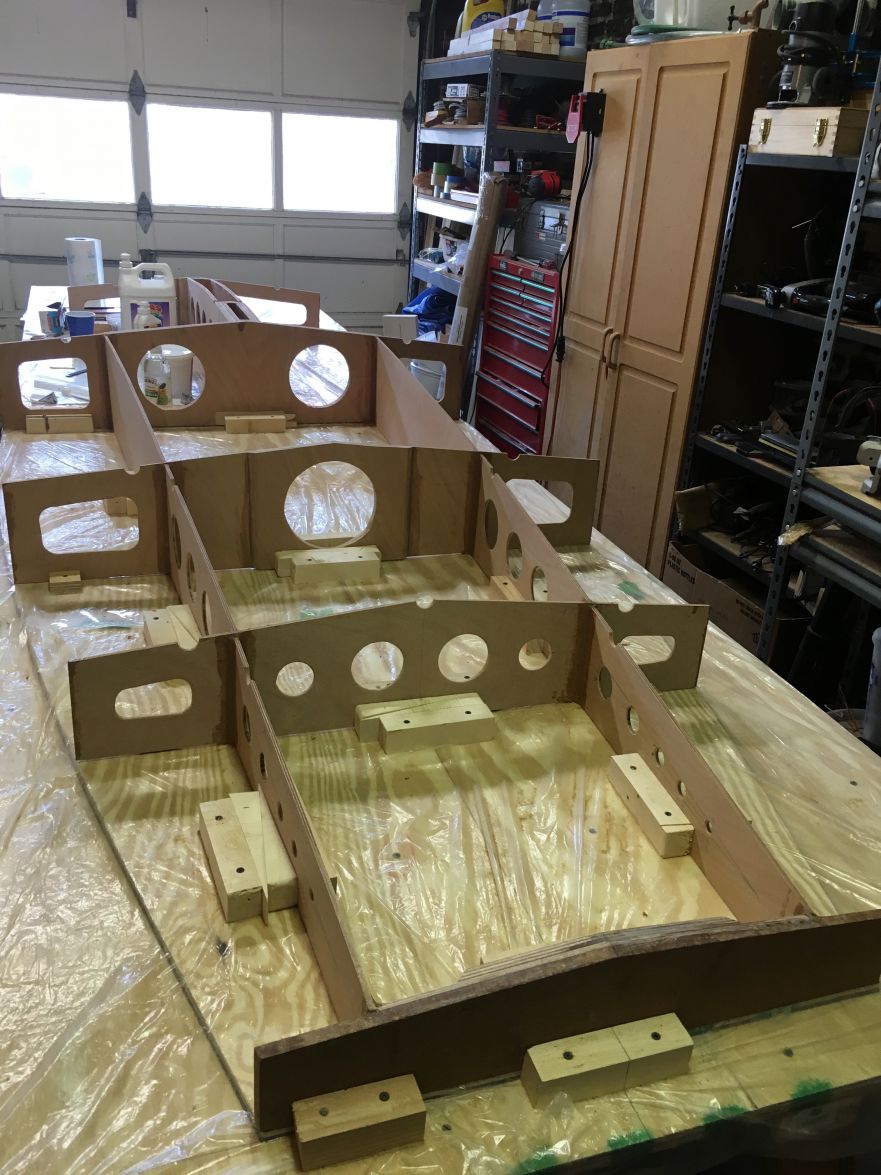
In my last post you can see limber holes in the frames and stringers. They were made with a 1-inch spade bit, making the limber holes 1/2-inch high since they're half-holes.
I thought long and hard about the holes and drains in this craft. Too long and hard. Sunfish are notorious for accumulating water inside and rotting. A factory Sunfish has a drain on the port side of the deck just ahead of the cockpit. You have to roll the boat onto its side to get the water out.
One improvement restorers (and some builders here) have used is to put a couple of drains in the transom. That can work - provided you lift the nose of the boat way up so the water can run back there.
This is because the low point of the hull is right at the front of the cockpit. If the boat is level, that’s where the water wants to go. So I “designed” limber holes in frames and stringers to let water get there - at least until it runs into the cockpit walls. I was going to put garbord drains in Frame B on either side of the centerboard trunk and one centered at the bottom of Frame C. Then I thought better of it.
The drains were going to take considerable fussing and they were going to add weight. In addition, unless the cockpit was completely dry they’d do a good job letting water into the boat instead of out.
The heck with it! The 6-inch ventilation hatches will be big enough to get water out with a boat sponge. I might add a simple deck drain like the Sunfish for days when I don’t feel like fooling around with the screens that are going to be on those hatches.
Last edited by Chenier on Wed Mar 13, 2019 3:50 pm, edited 1 time in total.
Re: Hybird MF14
Uh oh, there's daylight under Frame C!
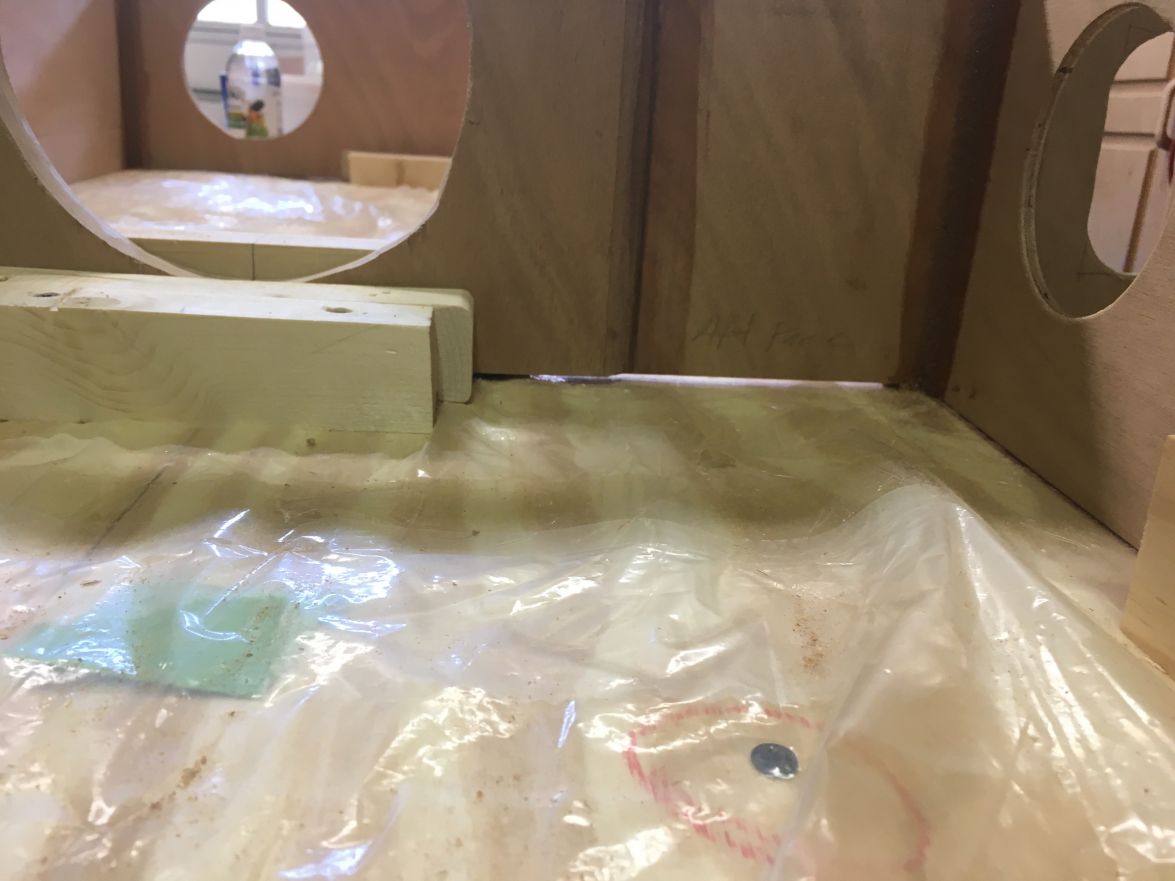
This is supposed to be flush with the deck template.
Don't know how this came to be - the frame was dead flush during the dry fitting. Wonder what got under there? Too late to worry about it now. I'll figure it out later when I flip the boat over and take off the deck template.
This is supposed to be flush with the deck template.
Don't know how this came to be - the frame was dead flush during the dry fitting. Wonder what got under there?
Who is online
Users browsing this forum: No registered users and 5 guests