CH16 - Turbo Cayuco: The Next Phase

To help other builders, please list the boat you are building in the Thread Subject -- and to conserve space, please limit your posting to one thread per boat.

Please feel free to use the gallery to display multiple images of your progress.
ks8
* Bateau Builder *
* Bateau Builder *
Posts: 8403
Joined: Mon Nov 24, 2003 1:00 am
Location: NC USA
Location: Now a much longer sail to Tampa Florida! Back to NC, Youngsville FM05tw

Post by ks8 »

That splice looks good.

Pressure points or *hard spots* are mainly issues with powerboat hulls or high stress bearing hulls. The main idea is to have a uniform and consistent *material* at the bond of the joint, over which the FG tape is laminated, just like in the panel splices. Even if you have *hard spots* of plywood on a canoe, if the rest of the gap is thoroughly packed with fillet material, what I understand is that you will be fine. The real problem is with much higher stress bearing hulls and the stitching and install of frame panels or transoms such that you can't get the fillet material where it needs to be for that uniform and consistent *core*, and it is in those cases that you put spacers in, so that you can then force the fillet material into the larger and consistent gap that the spacers have created. imho.

It is easy to get consistent fillet material into a chine seam without playing the spacer game. If you can't get it from the inside, then you fill the remaining gap from the outside. Simple. Enjoy! :)

rudar
Active Poster
Active Poster
Posts: 313
Joined: Mon Sep 11, 2006 5:23 pm
Location: Vancouver, BC

Post by rudar »

Good to see you're back on track. I guess it's true what they say about there being no problems with stitch-and-glue that can't be fixed... Reassuring, that.

Myself, I haven't even gotten started yet. Decided to upgrade my boat from a CC to a Hiawatha, since I was still waiting for the epoxy anyway. So of course the epoxy arrives 12 hours after I order the Hiawatha plans, and I'm still waiting for the latter.

Oh, well. It just means I'll get to learn from *your* mistakes, rather than my own. So you just keep making them :P

gepineda
Frequent Poster
Frequent Poster
Posts: 75
Joined: Mon Sep 11, 2006 5:31 pm
Location: Langley, BC

Paint scheme

Post by gepineda »

Well I finally stitched all 4 panels together. Next steps involve gap management and prepping for the glassing of the seams. I added a bunch of images to my gallery.
Image

I've been trying to figure out what should be the paint scheme for Turbo Cayuco. So I spent I little time playing on the computer and came up with this. I like it quite a bit, though I have my doubts about graphite coating the bottom and then having the Cayuco stand upside down in the summer sun absorbing all that heat. Is it a good idea to go graphite on the bottom? Could I get away with it if I'm mindful of not exposing the Cayuco to lenghty terms of hot sunlight?
Image

gepineda
Frequent Poster
Frequent Poster
Posts: 75
Joined: Mon Sep 11, 2006 5:31 pm
Location: Langley, BC

Post by gepineda »

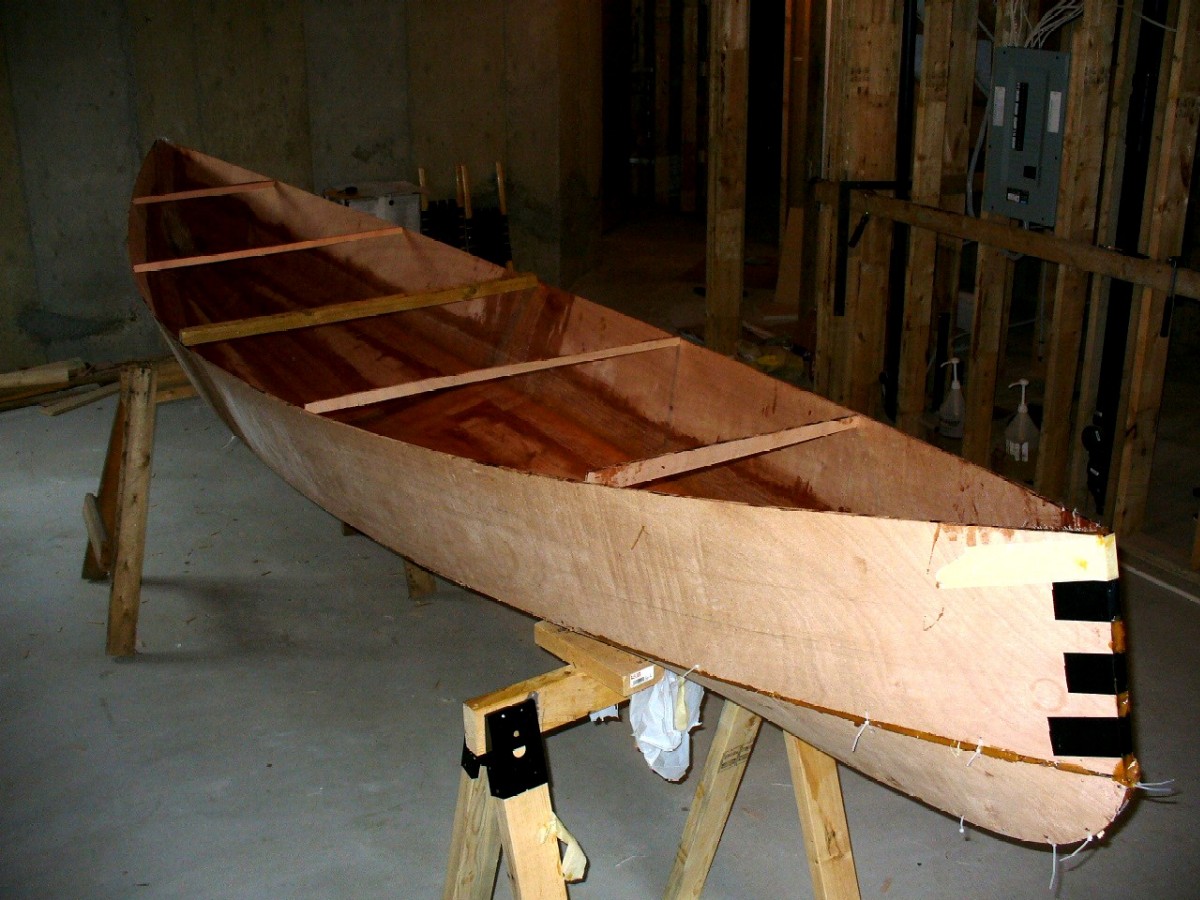
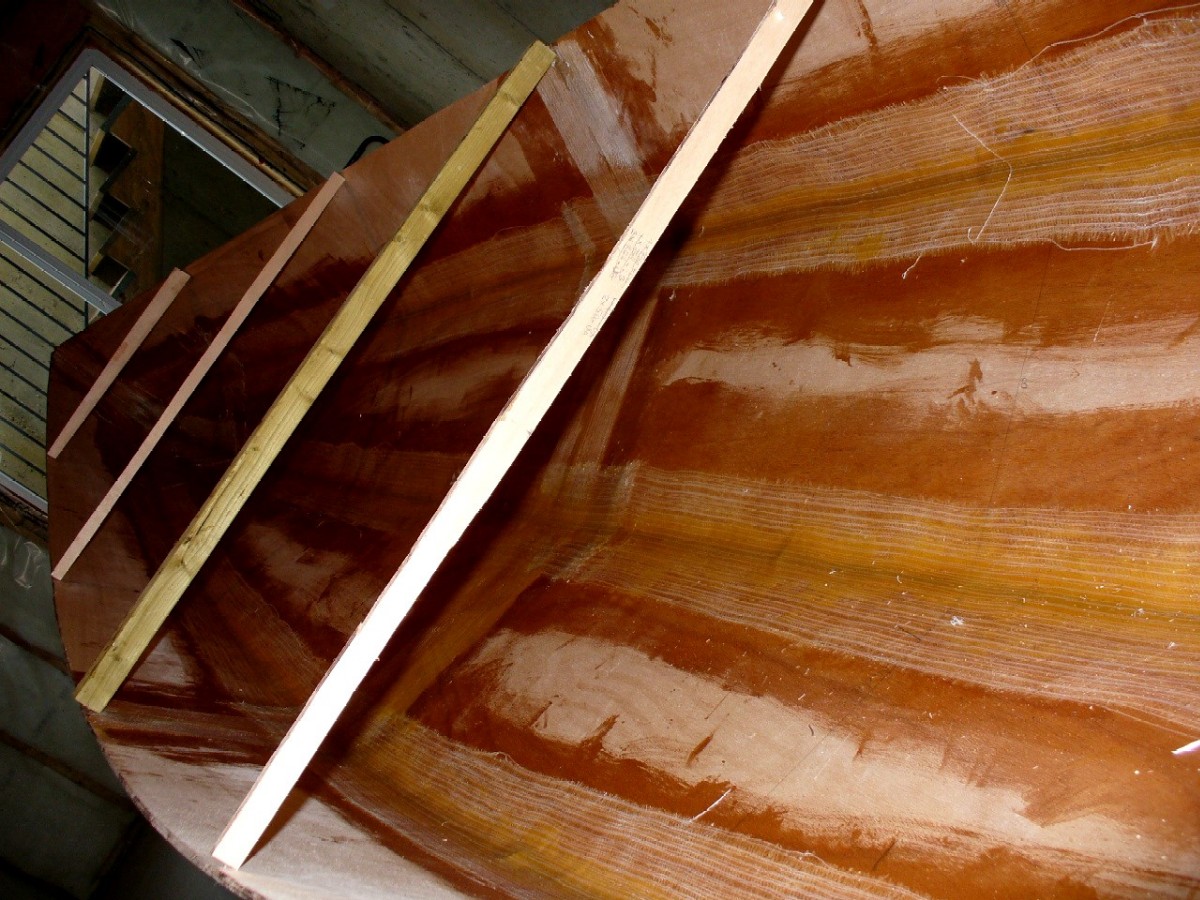
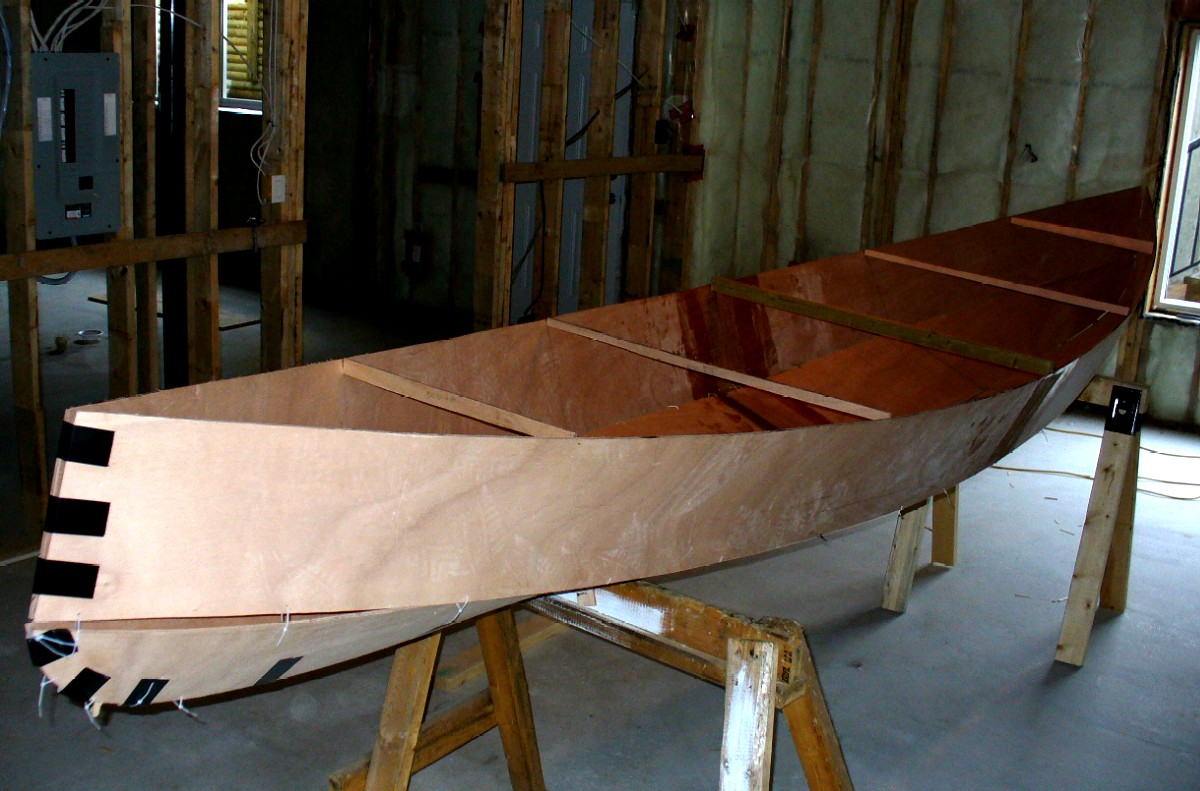
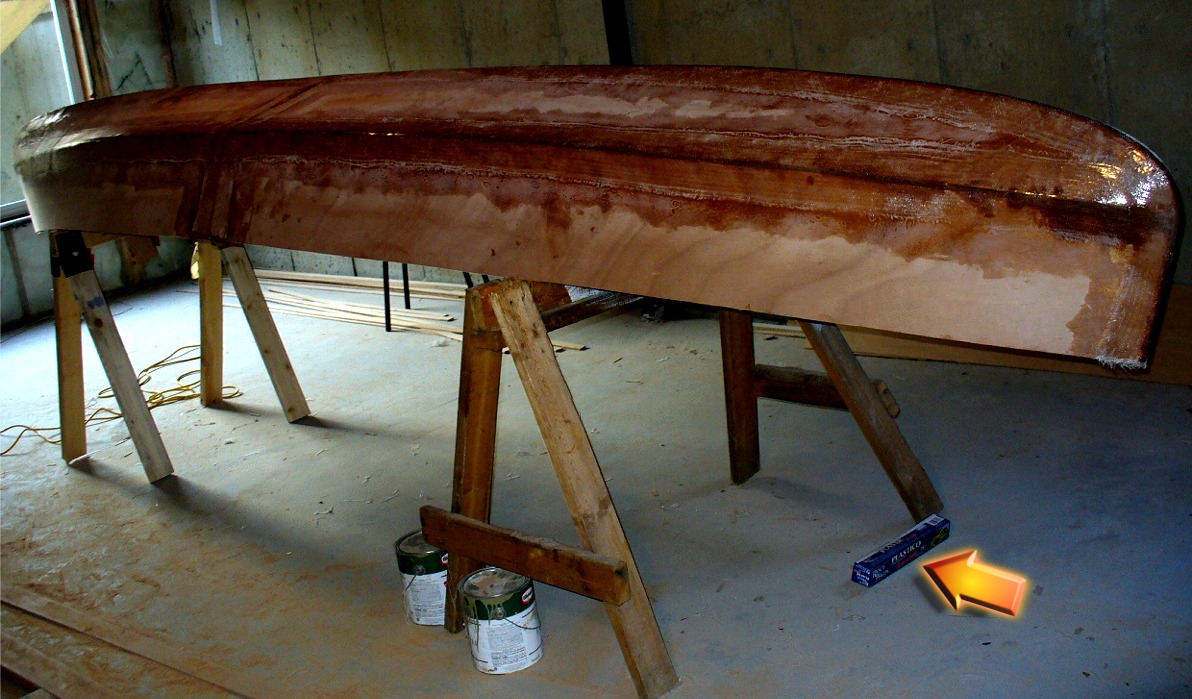
Yesterday was another milestone in the building of Turbo Cayuco. All inside fiber glassing is now done.

I ran out of woodflour yesterday. Resin levels are pretty good. Somewhere around this webpages I read that, "wood flour is cheap... use too much". I guess I've been using pretty thick mixtures on my fillets, and perhaps my fillets have been larger than needed. In any case, as I was was mixing my last batch of putty, I overestimate the final amount of woodflour left and it resulted in a pretty thin putty. It wouldn't have been a major thing except for the fact that the only remaining fillets to make were the vertical bow portions. There was a time I was even considering mixing in real wheat flour just to thicken the stuff, but I held my impulses at bay. I wasn't too sure if it would work, and the bows are not the place where you'd want to have weak fillets.

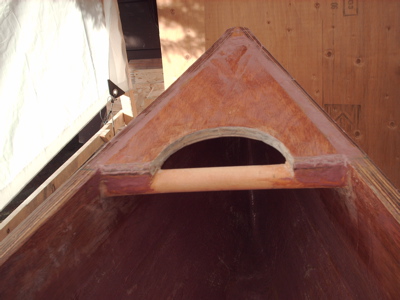
So I slapped in thin putty vertical fillets and the things kept running down on me. For a while I was running from one end of the canoe to the other re-forming uniform fillets on runny putty until the putty started to gel enough to allow me to put in dry fiberglass over it. The FG sucked out a little bit of resin and finally, I ended up having stable uniform vertical fillets. I checked the seams this morning and they are looking quite good.

For this last inside fiberglassing session, I used resin pumps in my resin bottle. Until yesterday I had used 60cc syringes for measuring resin. Pumps are so much faster and uncomplicated. I came upon these pumps while I was looking for a place to buy powdered graphite around the Langley/Surrey area in BC. I did a quick search on the web looking for potential candidates to carry powdered graphite in their inventory. So I give this guys, "Industrial Plastics and Paint" a call, and they tell me they have one last can of a discontinued powdered graphite. This sounded a little strange to me because I was expecting generic graphite that's used as a dry lubricant.

So I ask the guy on the phone, if this would work mixed with epoxy resin and applied to the bottom of a boat and he simply says yes. I go to this industrial platics place half expecting to see big plastic tanks, o-rings, or molded injection parts. But the first thing that I see is a stand full of West System stuff for boat building. I tell the guy at the counter about the graphite, and he brings me a can of "West System 423 Graphite Powder". It turns out that it is not just pure graphite as I was expecting, but it has other stuff in it like crystalline sillica and it is formulated specifically for boat building.

It was past closing hours for this place so I quickly browse around the store. They also have System 3 products. There's fiberglass, carbon fiber, polyester, WOODFLOUR and other fillers, colorants and additives. I, being the overly optimistic type about my own stock of woodflour, make a mental note to come buy woodflour in a week or two. At the time I'm feeling like a kid in a candy store. Apparently the clerk sees my enthusiasm and gives me a free epoxy resin user manual from West System and a boat building product catalog from System 3. The user manual is pretty neat with detailed instructions on techniques for filleting, barrier coating, gluing, fiberglassing, etc.

So in short, it's been an interesting, but good week.

Image
Image

gepineda
Frequent Poster
Frequent Poster
Posts: 75
Joined: Mon Sep 11, 2006 5:31 pm
Location: Langley, BC

Flipped the boat and cut the rubrails

Post by gepineda »

So I flipped the boat and sanded all the joint edges. Everything looks symmetrical and very nice. The curves are so graceful it makes me wonder why I didn't give it a feminine name. At times it did take some effort but I managed to get a gap of up to 10mm everywhere. Tack welds, popsicle sticks, cable ties, gorilla tape, scredrivers, copper wire, nylon thread all of these were witnesses to my frustrations and elations when I finally managed to get a particular section well aligned and ready to be filleted and fiberglassed. I know, I've been told... canoes will not go through the structural stress that high speed boats will, so it's not necessary to leave a gap everywhere. But for some reason unknown to me the notion got into my head, and I HAD TO HAVE a gap in between every piece of plywood.
Image

Last night I cut out 12 8ft long rubrails. This will be enough to do all 3 laminated layers for both sides of the Cayuco. Because the upper edge of the side panels of the canoe was an original curve cut, the rubrails cannot be cut straight. They have to match the curve of the original side panel. I managed to cut 12 curved rubrails with only 7 cuts and one pencil mark. You can see the pictures and read about it in my gallery.
Image

Now I have a left over pieces of plywood that are 345mm wide. This is not the expensive okume plywood I used for the panels. The 16 ft versions of the canoes do not leave much of the two plywood boards after you are done with the panels; which means I had to get another board for rubrails, inwales, and breasthooks. For these things I got the much less expensive exterior plywood with no voids. According to calculations made from the plans, I would need 380mm piece for the breasthooks. It looks like 345mm will work just as fine.
Image

My concern is not whether a 345mm wide breasthook will work ok, but the lack of a breasthook dowel. Taking inspiration in some of the work done rudar I modified the original breashooks. The brown line on the inside of the canoe represents an inwale. The inwale is to fit flush with the inside curvature of the breasthook. The breasthook radius is then interrupted to make room for a 1" diameter dowel.
Image

gepineda
Frequent Poster
Frequent Poster
Posts: 75
Joined: Mon Sep 11, 2006 5:31 pm
Location: Langley, BC

Question for Jacques

Post by gepineda »

Soon I'll be done with all the fiberglassing. As I was thinking on the next steps - cutting and fitting the breasthooks, I realized it may be good to ask the designer if my changes to the breasthook are going to make a structurally sound boat before I find myself in the middle of a lake with the canoe falling apart on me.

Jacques, my assumptions were that since the breasthook dowels are going through the sidepanels (but not through any layer of the rubrail) like they are on rudar's Hiawatha, and since I plan to fit it with an inwale, I would be structurally ok to reduce the lenght of the breasthook from 543mm to 451mm (see graphics in previous post). Do you think this assumption is correct?

jacquesmm
Site Admin
Site Admin
Posts: 28215
Joined: Wed Aug 14, 2002 1:00 am
Location: Florida USA
Contact:

Post by jacquesmm »

What are breasthook dowels? We don't show anything like that. The breasthook is simply epoxy welded to the sides.
A small change in size doesn;t matter.
Jacques Mertens - Designer
http://boatbuildercentral.com

gepineda
Frequent Poster
Frequent Poster
Posts: 75
Joined: Mon Sep 11, 2006 5:31 pm
Location: Langley, BC

Post by gepineda »

What are breasthook dowels?
I guess I am not using the correct term. By breasthook dowels I refer to short thwarts that I intend to put near the breasthook, in a similar way to what rudar did. This is his Hiawatha.

Image

This short thwart should be very convenient for two person carrying, tying painter lines, towing, etc. Thanks.

jacquesmm
Site Admin
Site Admin
Posts: 28215
Joined: Wed Aug 14, 2002 1:00 am
Location: Florida USA
Contact:

Post by jacquesmm »

Ok, I was confused because we do not show that on the plans.
You can install those, no problem but I would not have them go through any panel. To epoxy glue them under the breasthook is sufficient.
Whatever you do there, it is not going to change the structure of the boat.
Do what you like, what you feel is convenient.
Epoxy is a material that let you be very creative with those details.
Jacques Mertens - Designer
http://boatbuildercentral.com

gepineda
Frequent Poster
Frequent Poster
Posts: 75
Joined: Mon Sep 11, 2006 5:31 pm
Location: Langley, BC

Post by gepineda »

Fiberglassing is now done. I wish I had used the food wrapping plastic when I did the fiberglass splices. The polished finish you get when using this poor mans peel ply is so much better.
Image

Post Reply

Who is online

Users browsing this forum: No registered users and 14 guests