GK's V10
Posted: Sun Nov 25, 2007 9:12 pm
I guess it's time to start a thread on this build. I'm building this V10 from 1994 vintage plans that Jacques' daughter sold on ebay last year. No sheets of build notes were included, but hopefully it will be a simple enough build that they won't be all that necessary.
This will be a rowing & sailing version with capability of adding an outboard. Since this is my first attempt at a sailboat, I'm going to tackle the mast, sprit and sail before building the hull. For various reasons, I've decided to use a Bolger 40 sq. ft. leg o' mutton sail plan. The original plan is for a 32 sq. ft. sprit sail and the newer versions list a 35 sq. ft. sail. Following the path of other V10 builders, I wanted to increase sail area, but still want to keep the capability of downsizing to the original plan if I decide I need to store the mast and sprit inside the boat when I win the big lottery and need a dinghy for the yacht. With the sail plan I'm going to use, the CE will be within an inch or so of the original, giving me more area without having to worry about relocating the mast step and partner.
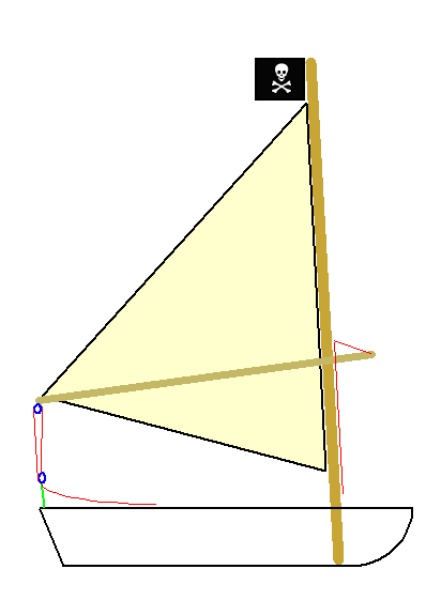
Here's a simplified sail plan. Obviously, the hull isn't drawn right, but the basic dimensions are to scale.
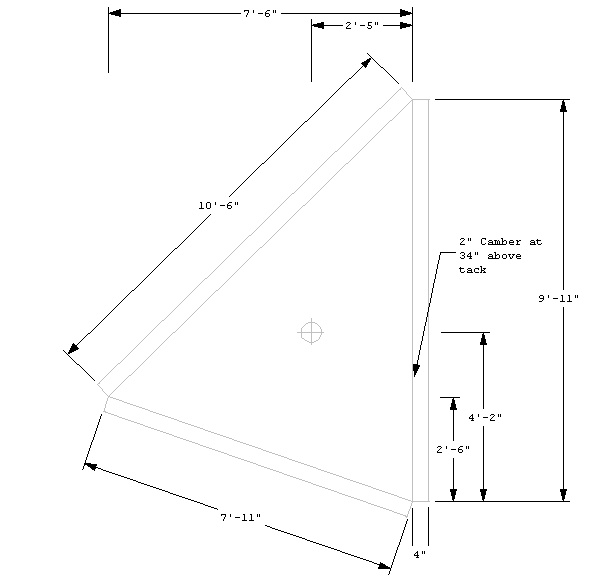
The mast will be a little tall initially to allow some adjustments if necessary. Mast is 13'5", sprit boom is going to be just short of 9' long.
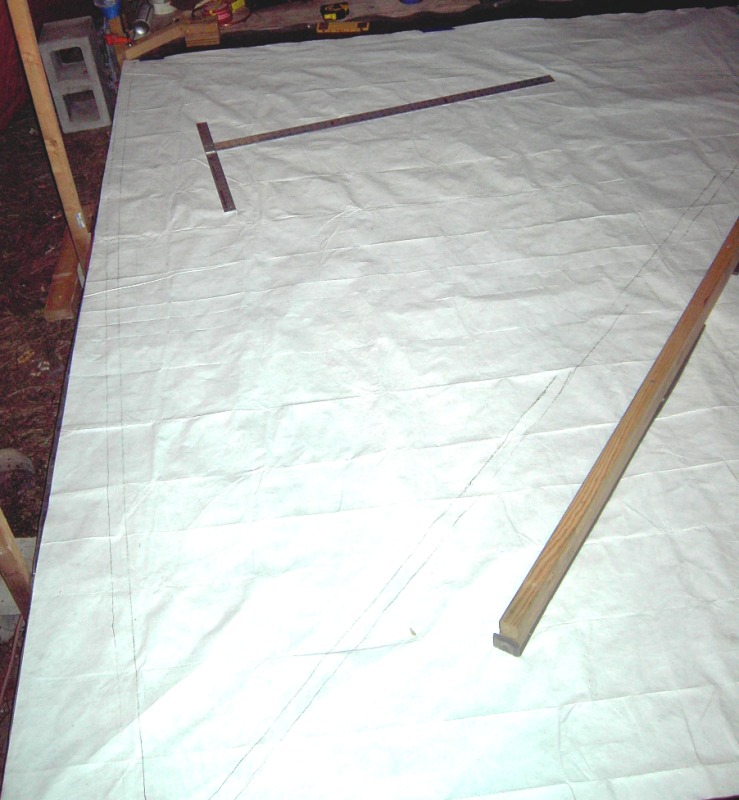
Here's the basic dimensions of the sail.
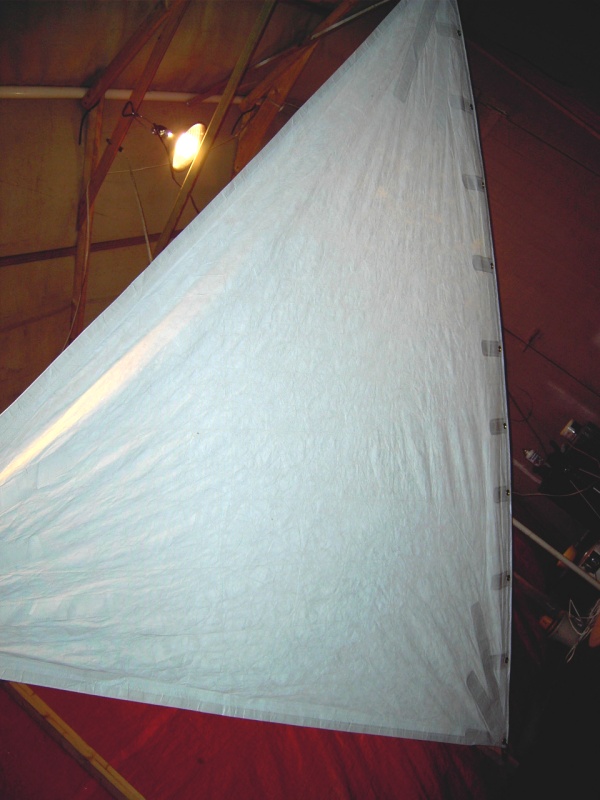
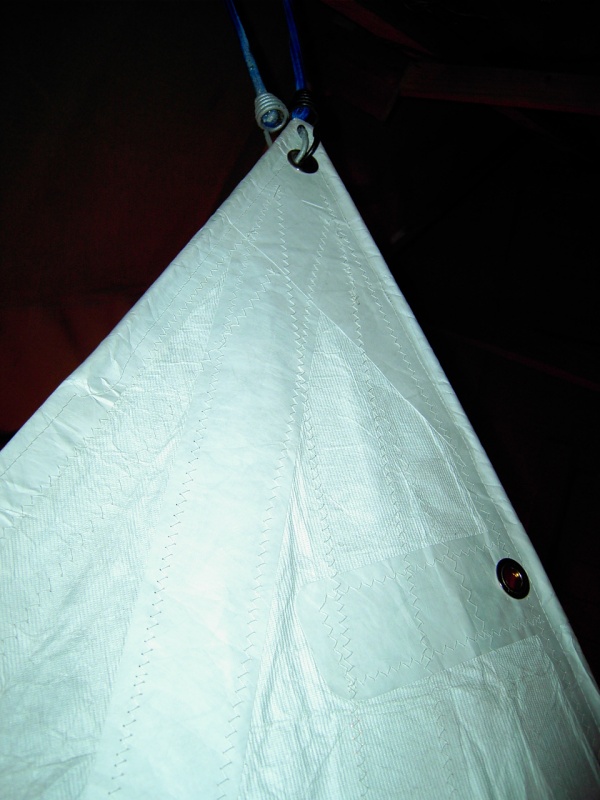
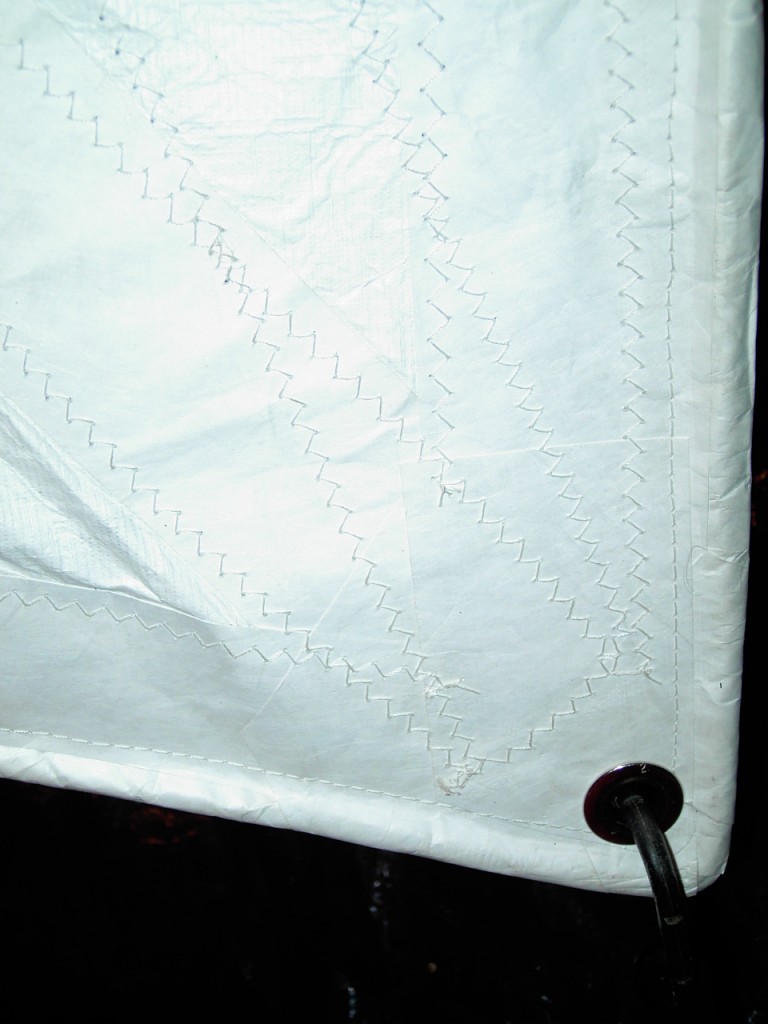
I'll make the first one from polytarp or tyvek and then make a dacron version based on how the starter sail works.
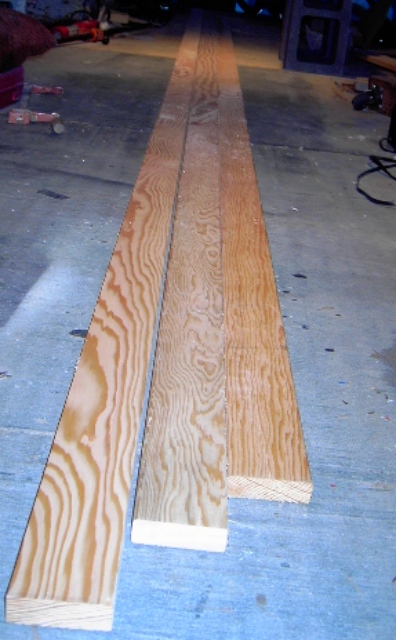
Now for the fun stuff. My mast is made from laminated fir. Finding long enough planks that were suitable was too much of a challenge, so I scarfed together what I could find.
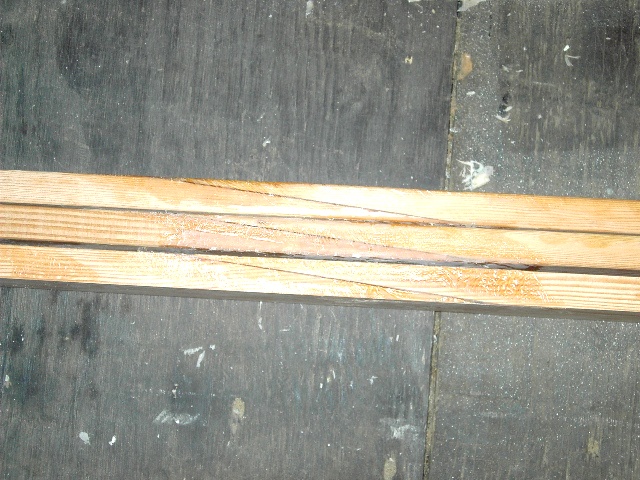
I used 10:1 scarf joints staggered about 2 feet apart.
The scarf joint closest to the mast foot is located in the middle of the laminate. This is it after turning the mast round and 2 coats of epoxy.

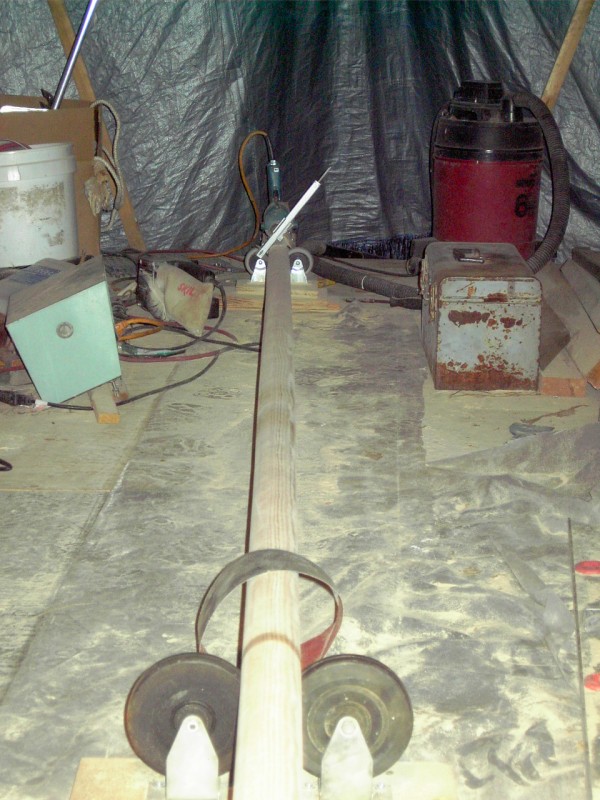
Making the square blank into a round mast was fun. I can't think of anything I've ever made that created so much saw/sanding dust. I ripped the square into an octagon on the table saw and then hand planed it to 16 sides. When I made up the 3 layers of the mast, I cut the middle one a few inches shorter to form a clevis when it was all glued up. A hole through the clevis and an eyebolt chucked in my drill gave me a sort of universal joint drive to rotate the mast so I could cut the taper and finish rounding it off. Each end of the mast sat on rubber wheels for support.
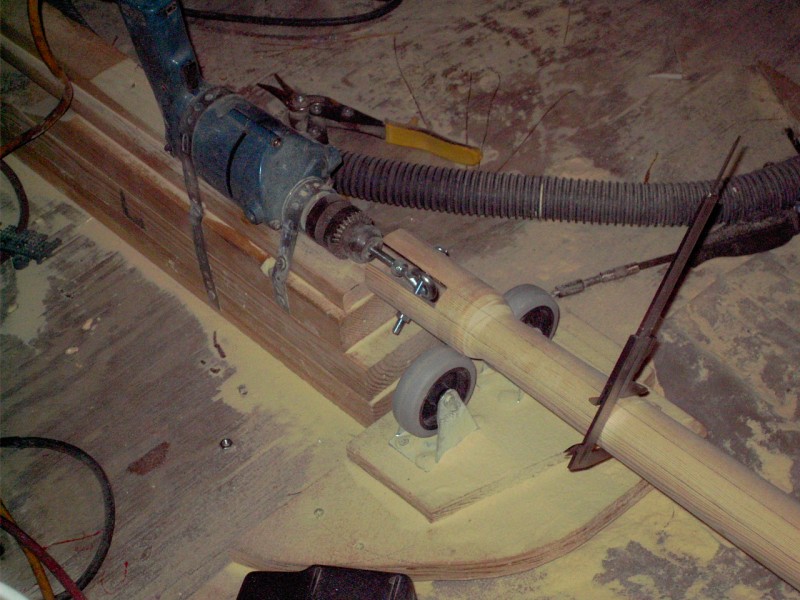
Most of the taper was cut with a 40 grit disc on my grinder, then finished off with the belt sander. Here is the last step of sanding while turning the mast. I used a sanding belt turned inside out. The green box on the left is a variac that I used to control the speed of the drill. Around 25 - 30 volts gave me about 50 rpm and that's about as fast as it needed to turn.
The end result is a not quite perfectly round, not quite perfectly straight, 2 3/16" X 13'5" mast that weighs 13 lbs. I'm quite happy with it.
This will be a rowing & sailing version with capability of adding an outboard. Since this is my first attempt at a sailboat, I'm going to tackle the mast, sprit and sail before building the hull. For various reasons, I've decided to use a Bolger 40 sq. ft. leg o' mutton sail plan. The original plan is for a 32 sq. ft. sprit sail and the newer versions list a 35 sq. ft. sail. Following the path of other V10 builders, I wanted to increase sail area, but still want to keep the capability of downsizing to the original plan if I decide I need to store the mast and sprit inside the boat when I win the big lottery and need a dinghy for the yacht.
Here's a simplified sail plan. Obviously, the hull isn't drawn right, but the basic dimensions are to scale.
The mast will be a little tall initially to allow some adjustments if necessary. Mast is 13'5", sprit boom is going to be just short of 9' long.
Here's the basic dimensions of the sail.
I'll make the first one from polytarp or tyvek and then make a dacron version based on how the starter sail works.
Now for the fun stuff. My mast is made from laminated fir. Finding long enough planks that were suitable was too much of a challenge, so I scarfed together what I could find.
I used 10:1 scarf joints staggered about 2 feet apart.
The scarf joint closest to the mast foot is located in the middle of the laminate. This is it after turning the mast round and 2 coats of epoxy.
Making the square blank into a round mast was fun. I can't think of anything I've ever made that created so much saw/sanding dust. I ripped the square into an octagon on the table saw and then hand planed it to 16 sides. When I made up the 3 layers of the mast, I cut the middle one a few inches shorter to form a clevis when it was all glued up. A hole through the clevis and an eyebolt chucked in my drill gave me a sort of universal joint drive to rotate the mast so I could cut the taper and finish rounding it off. Each end of the mast sat on rubber wheels for support.
Most of the taper was cut with a 40 grit disc on my grinder, then finished off with the belt sander. Here is the last step of sanding while turning the mast. I used a sanding belt turned inside out. The green box on the left is a variac that I used to control the speed of the drill. Around 25 - 30 volts gave me about 50 rpm and that's about as fast as it needed to turn.
The end result is a not quite perfectly round, not quite perfectly straight, 2 3/16" X 13'5" mast that weighs 13 lbs. I'm quite happy with it.