
It's been a while since i reported on the build. But i'm still progressing. Last week i did 0 because i had other stuff prevent me from building.
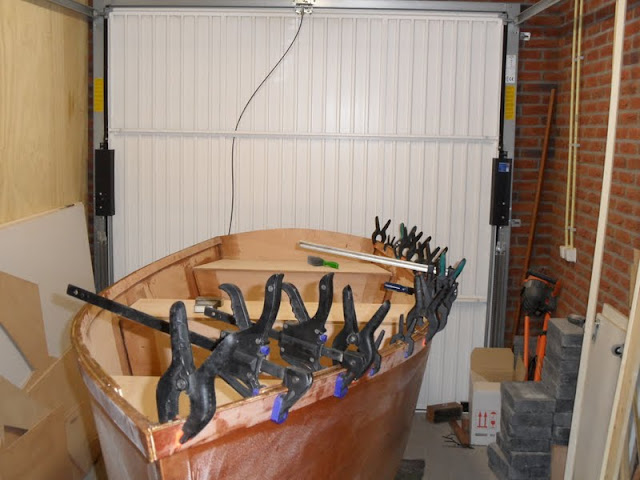
Yesterday i stiched her up with tie wraps because the Ductape wasn't holding her shape rigid enhough. So i got out the drill and made sure she stayed the shape i liked. Then i din't read the instructions and went to town on filiting. When i got the frames in i figured better to filit everhting around the stiches remove them tomorrow and sand smooth. Then fill in the holes i left with stiching.
So that's where i'm at. Today a bit of sanding maybe a bit of fiberglass on the seams.
Prom.
PrometheusNL FL12
-
PrometheusNL

- Frequent Poster

- Posts: 73
- Joined: Sun Jun 05, 2011 11:01 am
- Location: The Netherlands
-
81AirCooled
- New Poster

- Posts: 5
- Joined: Tue Sep 20, 2011 1:14 pm
- Location: Bavaria, Germany
Re: PrometheusNL FL12
Great thread Prom. I`ve got my ply ordered for my first build (Hiawatha 16 canoe) and will order the exoxy and tape next week. I haven´t been able to source woodflour so will use microballoons instead.
Your model looks great and the real thing even better, the fact that it´s come along so far in only a few weeks gives me hope I can get my canoe finished before the end of the year.
Your model looks great and the real thing even better, the fact that it´s come along so far in only a few weeks gives me hope I can get my canoe finished before the end of the year.
-
PrometheusNL
- Frequent Poster
- Posts: 73
- Joined: Sun Jun 05, 2011 11:01 am
- Location: The Netherlands
Re: PrometheusNL FL12
Thanks 81Aircooled,
Since my last post i'm further along she's all glued up now into modifying a few things. This is taking a bit more time. If i'd stuck to the planns i'd already be done but where's the fun in that
Today i primed the seat boxes and they are drying now so i can probablly Glue the tops on after dinner and glass the tops tonight. Then tomorrow fill in some seams with putty. Flip her over and fit skeg + putty seams. then sand until white with dust and prime.
i should be done in a week or 3. Then... end of summer and jobs in the house
as always more pics in the album.
Added a few from the album to complete the build thread a bit more.
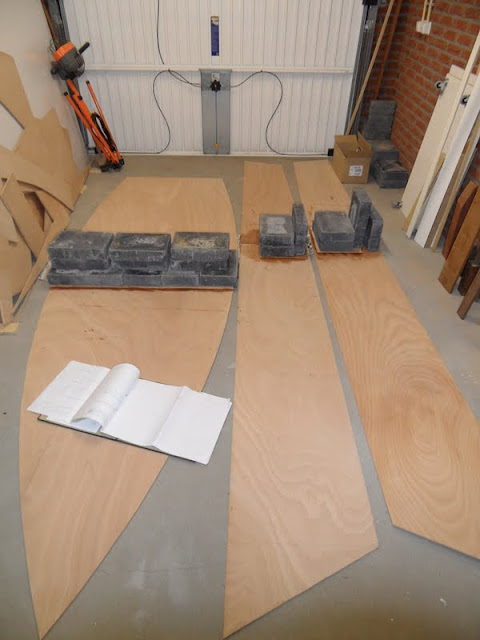
This was before using wood flour i glued the bottom and sides together with sawdust. It worked but way to coarse NEVER DO SOMETHING LIKE THAT ON YOUR BOAT. Find woodflour.
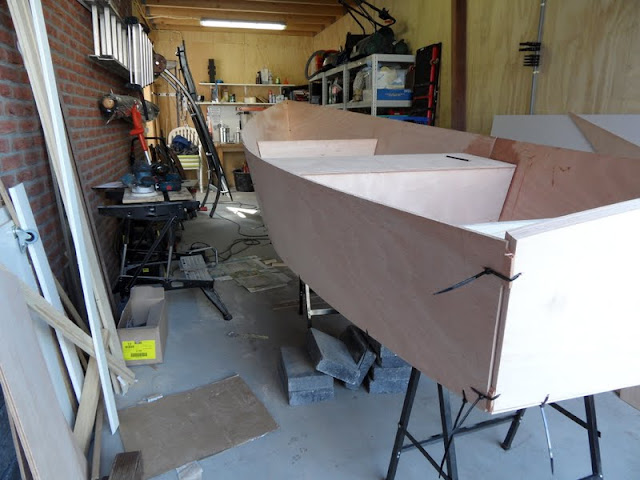
Woahh boy when you get going putting her together you don't stop to take pictures you want her together asap I used tiewraps all around because i couldn't get her to stay tight on the seams with ducttape only.

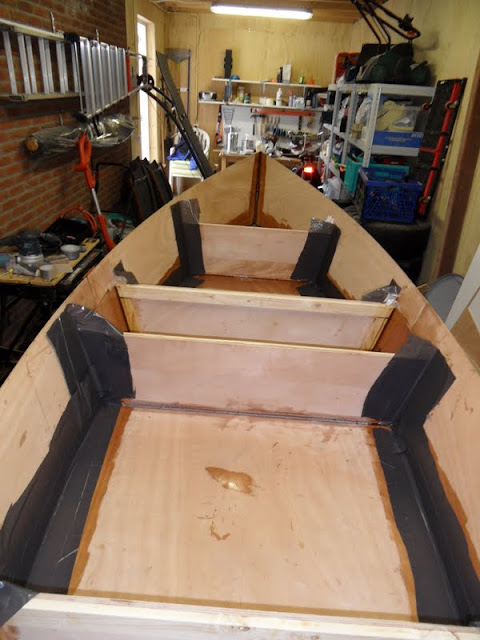
It's so funny to me the persective change when you look from the bow to the stern she looks sleek small and fast. When you look from the stern to the bow you see she has some with in her backside and enhough room for a party in the back

As you can see my doubled up transom made lining up the sides a little harder. But i got it to work with a few bits of scrap plywood and some elctrical conduit.
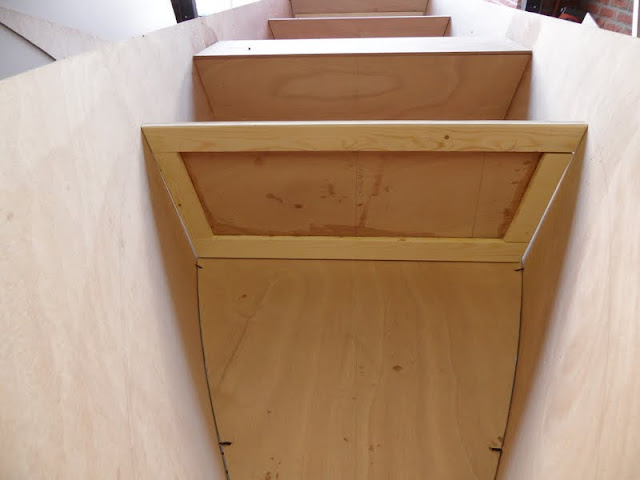
The front frame. I made a huge mistake on that one. I should have glued the backing boards a little in from the edge about 10mm or so. Now i was left with a HUGE gap between the sides of the front frame. Ah well the beginning mistakes of a first time builder
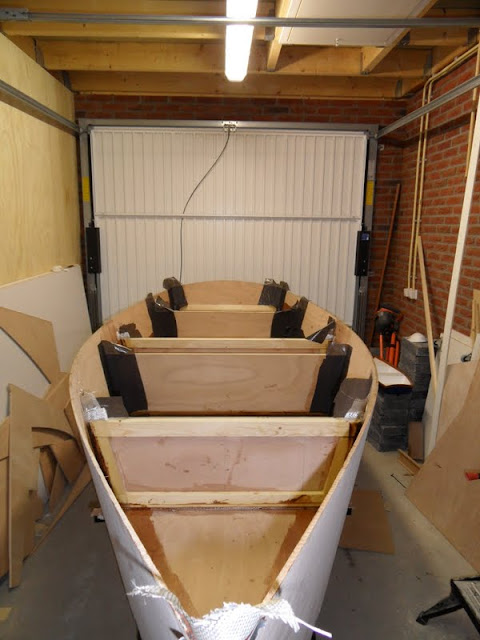
Everything filited and fiberglassed. did it in more stages though. First stiched then removed zipties then fillited the rest in and then glued the fiberglass tape on.
From the other side.
The bow inside overlapping fiberglass just use a good dab of epoxy and it will all wet out.

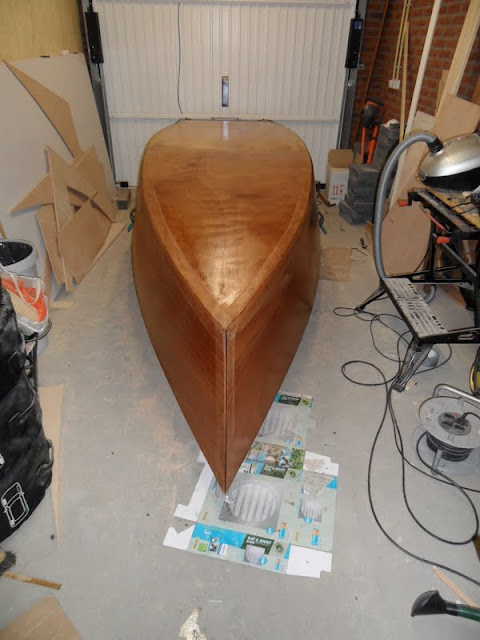
Flipped her over and coated the bottom in 1 coat of neat epoxy.
Taped all the rounded seams
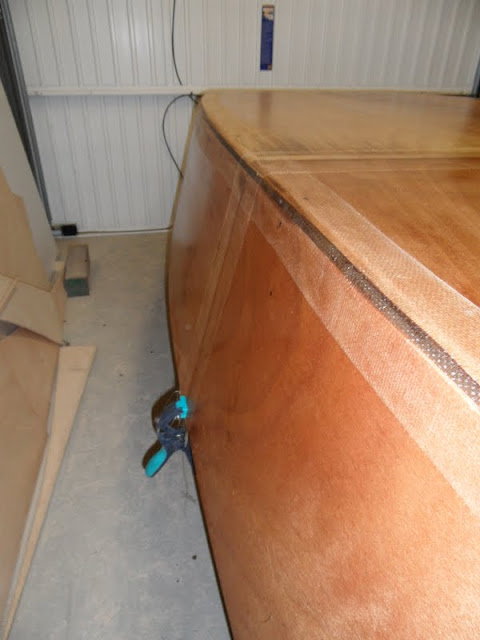
Chine Transom overlap i was sparing with fiberglass so i wouldn't have to sand it all flat.

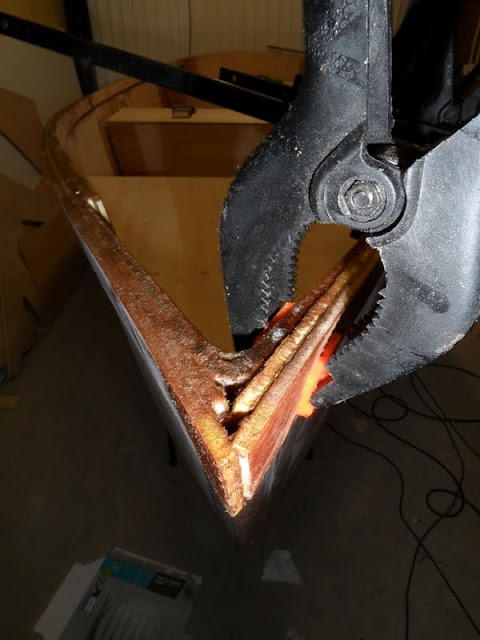
Flipping her back doing the rubraill. Little different then the planns 2 strips on the inside 2 on the outside.
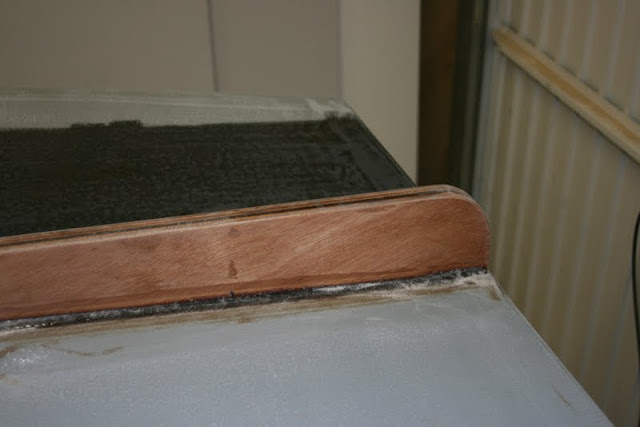
Detail of the rubrail transom. I was a bit low on the side panels so i filled in between the inside and outside rubrail with woodflour epoxy mix turned out great and gave me the 6mm i was short.
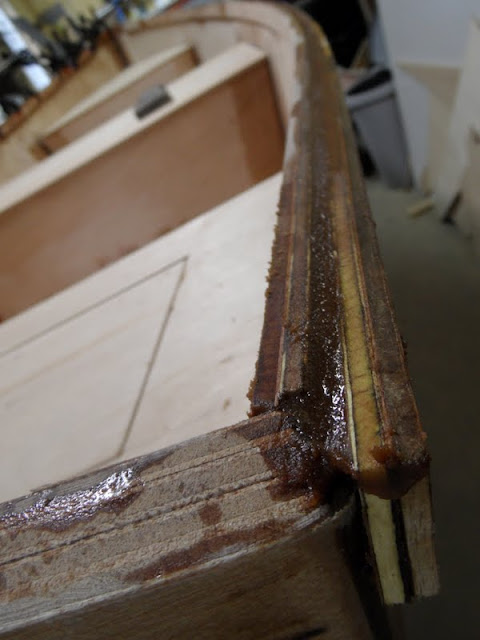
The front rubrail meeting later i filled in with woodflour epoxy. Turned out nicely.
The transom seat. I later decied i wanted storage space so i cut the hatches for the transom seat and mid seat.
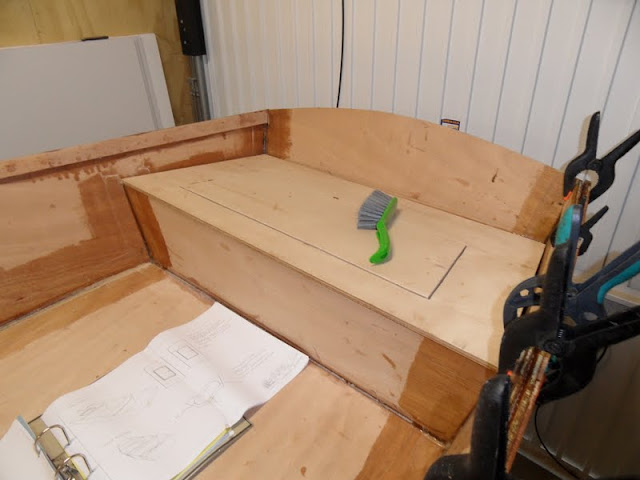
The Bow testing fairing compound on the inside tape edges. Mid seat cut out and glued battens for the hatch.

Since my last post i'm further along she's all glued up now into modifying a few things. This is taking a bit more time. If i'd stuck to the planns i'd already be done but where's the fun in that
Today i primed the seat boxes and they are drying now so i can probablly Glue the tops on after dinner and glass the tops tonight. Then tomorrow fill in some seams with putty. Flip her over and fit skeg + putty seams. then sand until white with dust and prime.
i should be done in a week or 3. Then... end of summer and jobs in the house
as always more pics in the album.
Added a few from the album to complete the build thread a bit more.
This was before using wood flour i glued the bottom and sides together with sawdust. It worked but way to coarse NEVER DO SOMETHING LIKE THAT ON YOUR BOAT. Find woodflour.
Woahh boy when you get going putting her together you don't stop to take pictures you want her together asap I used tiewraps all around because i couldn't get her to stay tight on the seams with ducttape only.
It's so funny to me the persective change when you look from the bow to the stern she looks sleek small and fast. When you look from the stern to the bow you see she has some with in her backside and enhough room for a party in the back
As you can see my doubled up transom made lining up the sides a little harder. But i got it to work with a few bits of scrap plywood and some elctrical conduit.
The front frame. I made a huge mistake on that one. I should have glued the backing boards a little in from the edge about 10mm or so. Now i was left with a HUGE gap between the sides of the front frame. Ah well the beginning mistakes of a first time builder
Everything filited and fiberglassed. did it in more stages though. First stiched then removed zipties then fillited the rest in and then glued the fiberglass tape on.
From the other side.
The bow inside overlapping fiberglass just use a good dab of epoxy and it will all wet out.
Flipped her over and coated the bottom in 1 coat of neat epoxy.
Taped all the rounded seams
Chine Transom overlap i was sparing with fiberglass so i wouldn't have to sand it all flat.
Flipping her back doing the rubraill. Little different then the planns 2 strips on the inside 2 on the outside.
Detail of the rubrail transom. I was a bit low on the side panels so i filled in between the inside and outside rubrail with woodflour epoxy mix turned out great and gave me the 6mm i was short.
The front rubrail meeting later i filled in with woodflour epoxy. Turned out nicely.
The transom seat. I later decied i wanted storage space so i cut the hatches for the transom seat and mid seat.
The Bow testing fairing compound on the inside tape edges. Mid seat cut out and glued battens for the hatch.
Last edited by PrometheusNL on Thu Oct 20, 2011 6:39 am, edited 2 times in total.
-
PrometheusNL
- Frequent Poster
- Posts: 73
- Joined: Sun Jun 05, 2011 11:01 am
- Location: The Netherlands
Starting to get colder.
But not to cold yet. So i'm rushing a few things to get done so i can paint her in the spring and have the rest of the spring summer to go boating / buidling a new bigger one
What i'll build after the winter i'll decide in the winter. But until then here are a few pics of the build.
Glued the seat tops on and front.
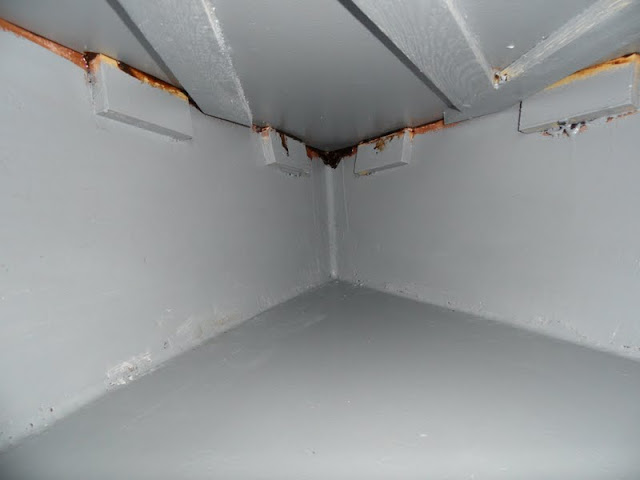
Primed the front storage area and beefed up the 6mm ply front cover with some braces so it won't ever sag.
Did my rubrail different. I went for 5 mm ply strips 2 on the inside and 2 on the outside all stagered sanded and epoxyied. Will finish them with a Teak varnish for UV protection.
Drilled HOLES in the front 9.5 mm for the towing eye. it's an M8 curved bolt. Epoxied loosly in place will put extra support on the inside with a small block and some epoxy woodflour mix.

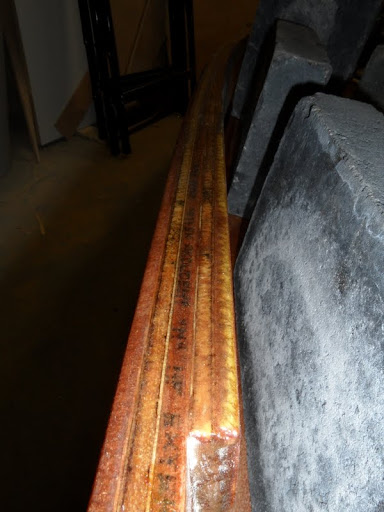
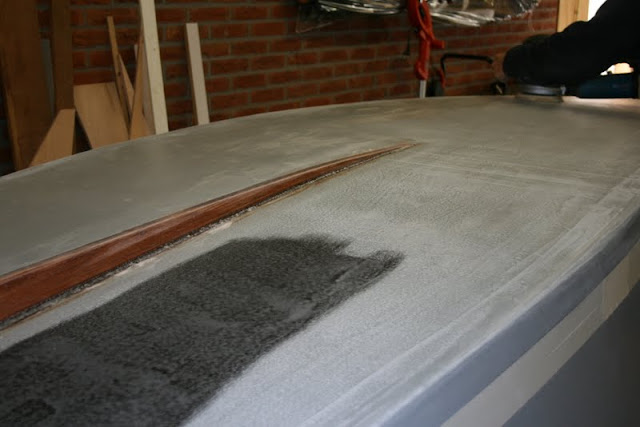
Sanding back the primer to get a smoother finish on the bottom. In the back you can see my epoxy graphite test. Turned out great when i sanded it with 120 grit it went verry smooth. Will sand whole bottom and put a new coat of epoxy graphite on.
Almost forgot fitted a skeg. I was in doubt if i was going to glass it in but it feels solid enhough to not glass it. Besides no rocky lakes here all mud and sand epoxy graphite mix should be fine. The planns told me to use 10mm ply single but i opted for 2 glued together giving me a skeg thats 20mm wide. Sure it will be heavyer but it looks much better proportioned.
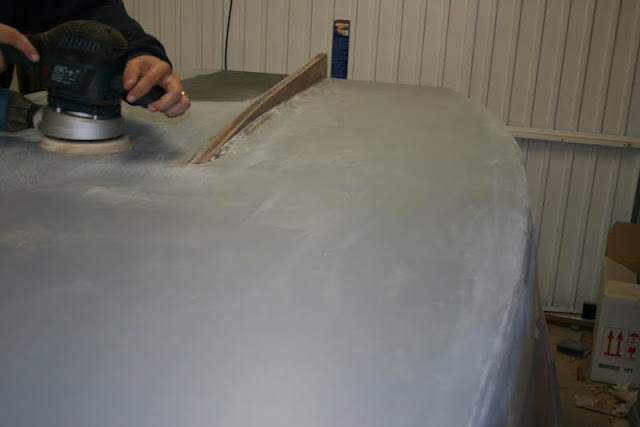
Carefull sanding. Sanded the epoxy primer verry carefully its so easy to take to much off with the bosch.
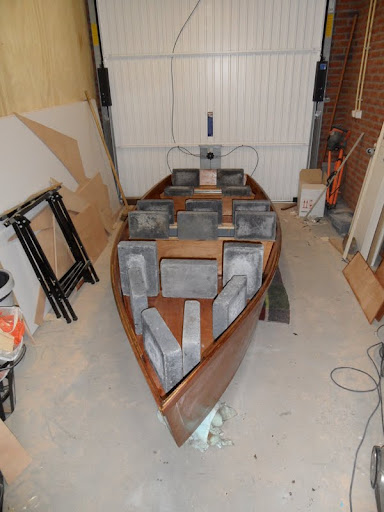
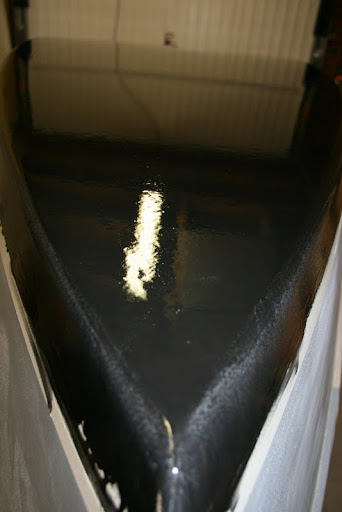
First bottom coat of epoxy graphite on the bottom I was in doubt of the quantities to use so i went with 150g epoxy with 20g of graphite. that gives me 13.3% epoxy graphite mix. I saw mix ratio's on the site of 10 to 15% so i should be good. I probablly will go with 20% next coat en 30% the last coat. I think i read somewhere you need the second and third coat with heavyer graphite ratio's. Here are a few shots and angles.
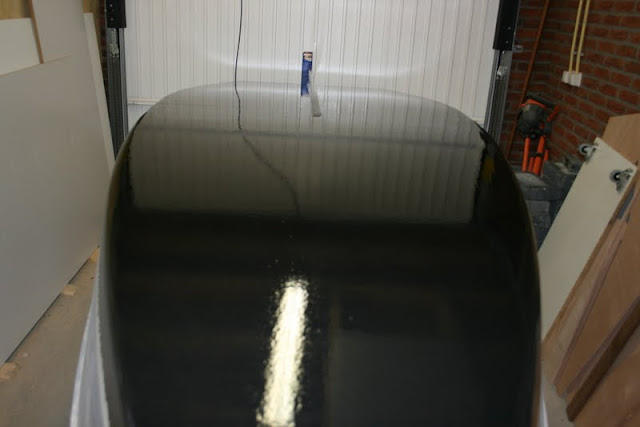

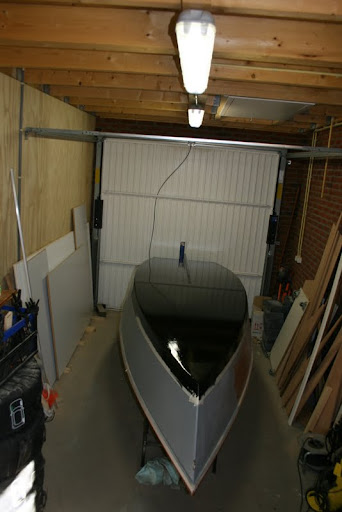
2 coats to go then flip her over and think what i'm gonna do with the top.
I think i made a mistake with the transom i doubled up the transom from 1 single 10mm ply with 2 x 6mm giving me 26mm ply full with transom. Do i still now need the clamping board? I think was only supposed to use 1 10mm transom and a clamping board at the top. I'll look into that after the flip. Then also when i flip her i'll work on securing the towing eye. Finish up the bow cover with cleat. and put some hinges on. Then maybe prime the top and winterize the project so i can hit the ground running in the spring.
It's a sad day when you have to store your epoxy inside because it's become to cold outside so i'll leave you with a sad picture.

Epoxy in the house to keep warm...
Where did the summer go so quikly and why did it go so fast. Must been having tonns of fun because it's already over and i'm still having fun...
Maybe i should get a space heater for the garage so i can keep working... Hmm how do i sell this to the whife any ideas ?
What i'll build after the winter i'll decide in the winter. But until then here are a few pics of the build.
Glued the seat tops on and front.
Primed the front storage area and beefed up the 6mm ply front cover with some braces so it won't ever sag.
Did my rubrail different. I went for 5 mm ply strips 2 on the inside and 2 on the outside all stagered sanded and epoxyied. Will finish them with a Teak varnish for UV protection.
Drilled HOLES in the front 9.5 mm for the towing eye. it's an M8 curved bolt. Epoxied loosly in place will put extra support on the inside with a small block and some epoxy woodflour mix.
Sanding back the primer to get a smoother finish on the bottom. In the back you can see my epoxy graphite test. Turned out great when i sanded it with 120 grit it went verry smooth. Will sand whole bottom and put a new coat of epoxy graphite on.
Almost forgot fitted a skeg. I was in doubt if i was going to glass it in but it feels solid enhough to not glass it. Besides no rocky lakes here all mud and sand epoxy graphite mix should be fine. The planns told me to use 10mm ply single but i opted for 2 glued together giving me a skeg thats 20mm wide. Sure it will be heavyer but it looks much better proportioned.
Carefull sanding. Sanded the epoxy primer verry carefully its so easy to take to much off with the bosch.
First bottom coat of epoxy graphite on the bottom
2 coats to go then flip her over and think what i'm gonna do with the top.
I think i made a mistake with the transom i doubled up the transom from 1 single 10mm ply with 2 x 6mm giving me 26mm ply full with transom. Do i still now need the clamping board? I think was only supposed to use 1 10mm transom and a clamping board at the top. I'll look into that after the flip. Then also when i flip her i'll work on securing the towing eye. Finish up the bow cover with cleat. and put some hinges on. Then maybe prime the top and winterize the project so i can hit the ground running in the spring.
It's a sad day when you have to store your epoxy inside because it's become to cold outside so i'll leave you with a sad picture.
Epoxy in the house to keep warm...
Where did the summer go so quikly and why did it go so fast. Must been having tonns of fun because it's already over and i'm still having fun...
Maybe i should get a space heater for the garage so i can keep working... Hmm how do i sell this to the whife any ideas ?

Re: PrometheusNL FL12
Pro,
Nice work.
For the transom on my FL12 I sort of doubled the whole transome with 6mm (1/4) and 9mm (3/8). Weight wise its fine except too thin for the motor mount jaw opening on the MinnKota electric motor I use. I've since added an additional 6mm (1/4) piece inside and out.
This winter I'm also thinking of adding sacrifical clamping boards using sized HDP kitchen cutting boards. With the MinnKota mount right now it will dent or mar the finish. These would solve that.
-John
aka NW Trout
Seattle, WA
aka NW Trout
Seattle, WA
-
gstanfield

- * Bateau Builder *

- Posts: 4655
- Joined: Sun Jan 10, 2010 5:09 pm
Re: PrometheusNL FL12
Looking good for sure That skeg looks fine, not too wide at all. I did mine with 5/4 cedar (roughly 25mm wide finished size)
I also made a thick transom with 2 layers of 3/8 (10mm) ply and like John mine was too thin for my electric motor to clamp down on. I fixed that with a motor clamp made from the same 5/4 cedar boards. It worked out just fine.
John, are you talking about adding some to the outside of the transom? That's where mine really bit hard into the boat.
Here's a pic of the clamping board I added to mine:
Previous builds: FL14, NC16, and others...
Current build: FL14 (+10%)
Current build: FL14 (+10%)
Re: PrometheusNL FL12
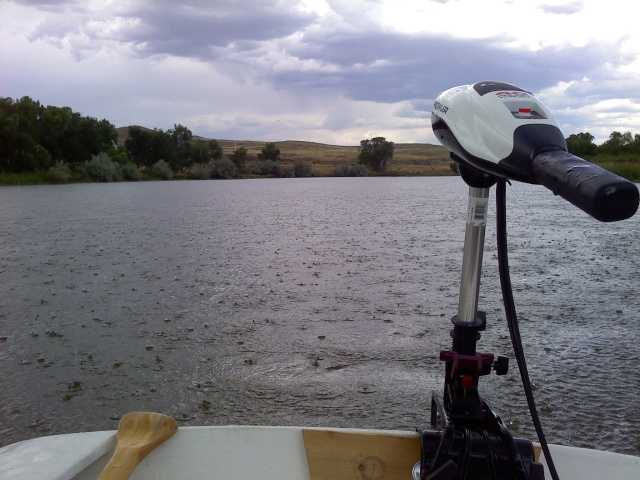
I've added 6mm (1/4) of marine ply to both sides of the transom.
You can barely see the ply wood addition here. Intention is to fair and paint same as hull and then overdrill, fill and drill holes to allow bolting of two squares of cutting board material inside and out. The cutting board material can then be changed out as needed - if at all.

This is fishing the picturesque Duwamish River during this fall's Pink Salmon run.
You can barely see the ply wood addition here. Intention is to fair and paint same as hull and then overdrill, fill and drill holes to allow bolting of two squares of cutting board material inside and out. The cutting board material can then be changed out as needed - if at all.
This is fishing the picturesque Duwamish River during this fall's Pink Salmon run.
-John
aka NW Trout
Seattle, WA
aka NW Trout
Seattle, WA
-
gstanfield
- * Bateau Builder *
- Posts: 4655
- Joined: Sun Jan 10, 2010 5:09 pm
Re: PrometheusNL FL12
Nice! I've admired your boat since you built it and will steal a few ideas from it when I build another FL14 to replace mine.
Previous builds: FL14, NC16, and others...
Current build: FL14 (+10%)
Current build: FL14 (+10%)
-
PrometheusNL
- Frequent Poster
- Posts: 73
- Joined: Sun Jun 05, 2011 11:01 am
- Location: The Netherlands
Re: PrometheusNL FL12
Whoops i forgot to add a few pictures in the post from 23rd of sept. Added those into there so the build is a bit more documented then going from flat sheets to almost finished hull
For other pics and more detail go to the album in my signature.
For other pics and more detail go to the album in my signature.
Re: PrometheusNL FL12
Prometheus,
Your boat looks great. Check this link for your question on oarlock placement
http://forums.bateau2.com/viewtopic.php?f=1&t=9739
Your boat looks great. Check this link for your question on oarlock placement
http://forums.bateau2.com/viewtopic.php?f=1&t=9739
Who is online
Users browsing this forum: No registered users and 19 guests