Page 1 of 1
5Men GV11
Posted: Thu Aug 15, 2013 1:38 pm
by kelpkritter
Hello everyone,
After reading over the plans for the past week or so I have begun construction of a GV11. By way of introduction, my name is Dave and I have been following this site for close to ten years and have marveled at the craftsmanship of so many builders on this site. In the past I taught a boatbuilding class for my summer school students and we built three Cheap Canoes and then raffled them off. My ultimate goal would be to someday build a PH22 or C19. I currently own and tournament fish in California in a solid, well kept 1978 Aquasport 170. However, my four sons are getting older and to the point of being able to fish and boat on their own so my wife and I decided the GV11 would be a good project to work on with the kids and ultimately make it their boat. The name "5Men" comes from a phrase my wife often uses when describing our family, "5men4me", which is her way of saying she is the only girl in the house. Even the dog is a boy!
The goal for the boat is to power with a 10 or 15 HP motor and let the kids have some fun with it. Initially it will be transported in the back of the truck or top of our tent trailer, which makes this a great boat for us as we do a lot of camping by both the coast and near mountain lakes. Sooner or later it will most likely get a trailer so my oldest son can transport a little easier as he is getting his license soon.
So onto the progress. Spent a few hours over the past few days marking up the Meranti BS1088 that I received locally at Bohnoff Lumber. If you are in California, specifically SoCal, they are a family owned business that has been around over a 100 years and they got me the sheets the following day.
I am at a point where I have a question that was not answered in the Small Boats forum, as well as a follow-up. Don't want to start cutting until I can verify my measurements. The boat will be built with an angled transom so I will be using the plan updates from the site.
1. The only dimensional changes are to the transom and the transom gussets, correct? Nothing changes with the long panels.
2. On the third drawing there is a notation that appears to be "12 degrees". Is this accurate? This is the only thing I could imagine it to be.
Nothing photo worthy until I start cutting tomorrow. Once that starts my goal is to document the whole project.
Hope you enjoy the build and I will certainly be open to all of your expertise.
DaveB.
Re: 5Men GV11
Posted: Thu Aug 15, 2013 7:16 pm
by peter-curacao
Welcome and have fun, patiently awaiting the pics

Re: 5Men GV11
Posted: Fri Aug 16, 2013 9:22 am
by jacquesmm
1. The only dimensional changes are to the transom and the transom gussets, correct? Nothing changes with the long panels.
No, there is more. Please see the text at the bottom:
"extend hull panels etc."
It's in red, below the drawing. It requires more plywood.
2. On the third drawing there is a notation that appears to be "12 degrees". Is this accurate? This is the only thing I could imagine it to be.
Yes, it is 12 degrees but you don't really need that angle dimension. Measure the extension of the panel, the 4-3/8" and it will automatically create a 12 degree angle. It's more accurate that way.
Re: 5Men GV11
Posted: Fri Aug 16, 2013 9:23 am
by jacquesmm
Please do not post technical questions in a forum titled "non-technical". I don't read this forum everyday
but I read the technical ones (at the top) every few hours.
Re: 5Men GV11
Posted: Tue Aug 20, 2013 4:52 pm
by kelpkritter
OK, the build has begun!
Started measuring and marking on Friday and started cutting on Monday. So far so good with about eight hours into the project. As this will primarily be the boy's boat each of them has spent some time helping out so far. All hands on deck when we start mixing and spreading epoxy next week. Many hands make light work, but in our case I hope it does not make a mess

Everything is cut out with the exception of a few pieces. The bow seat, in order to insure proper fit, the transom knees as they will be modified slightly, and the transom gussets. I will be building the angled transom version and my initial measurements did not provide the proper shape for the angle of the transom. After some tweaking I think I have it right, but would feel more comfortable fitting the template I made into place before I find myself having to buy another sheet of ply.
Waiting now on epoxy and fabric from BBC and will start the next phase when it arrives.
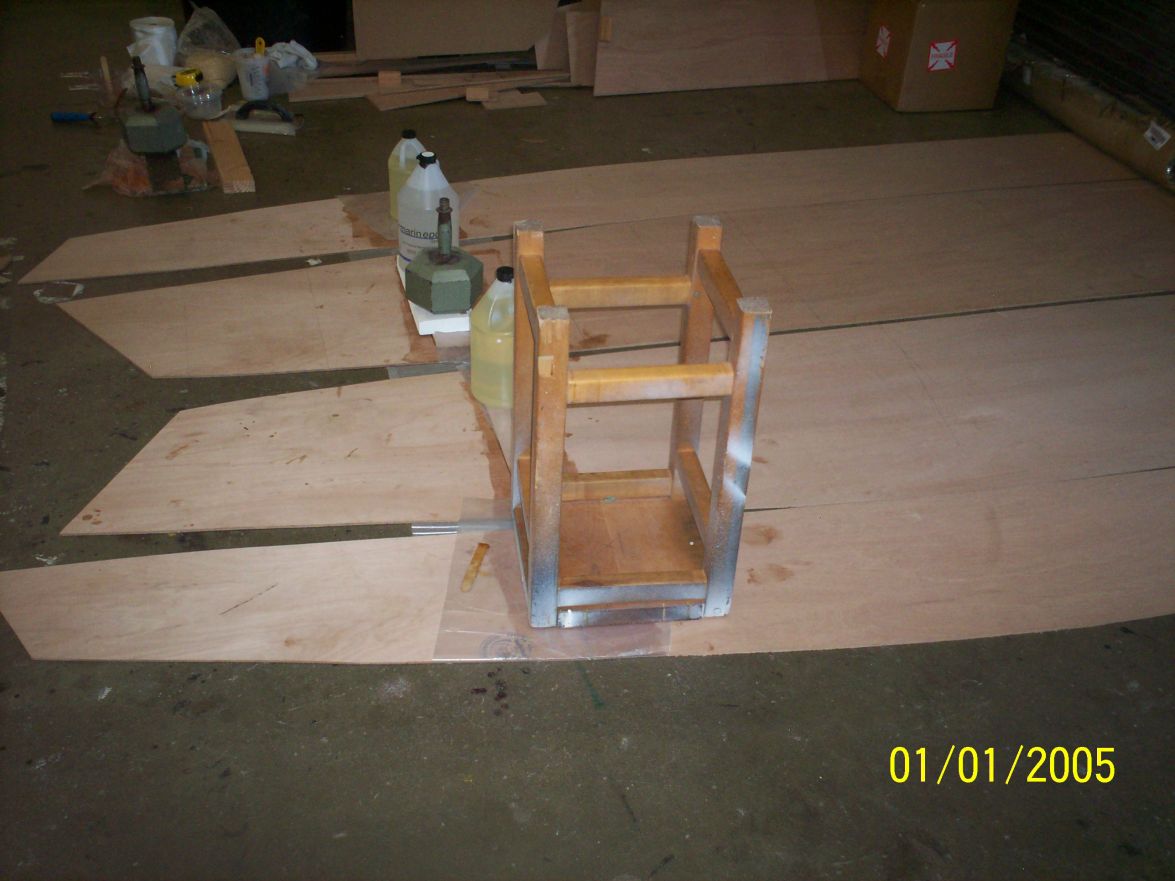
The progress so far.
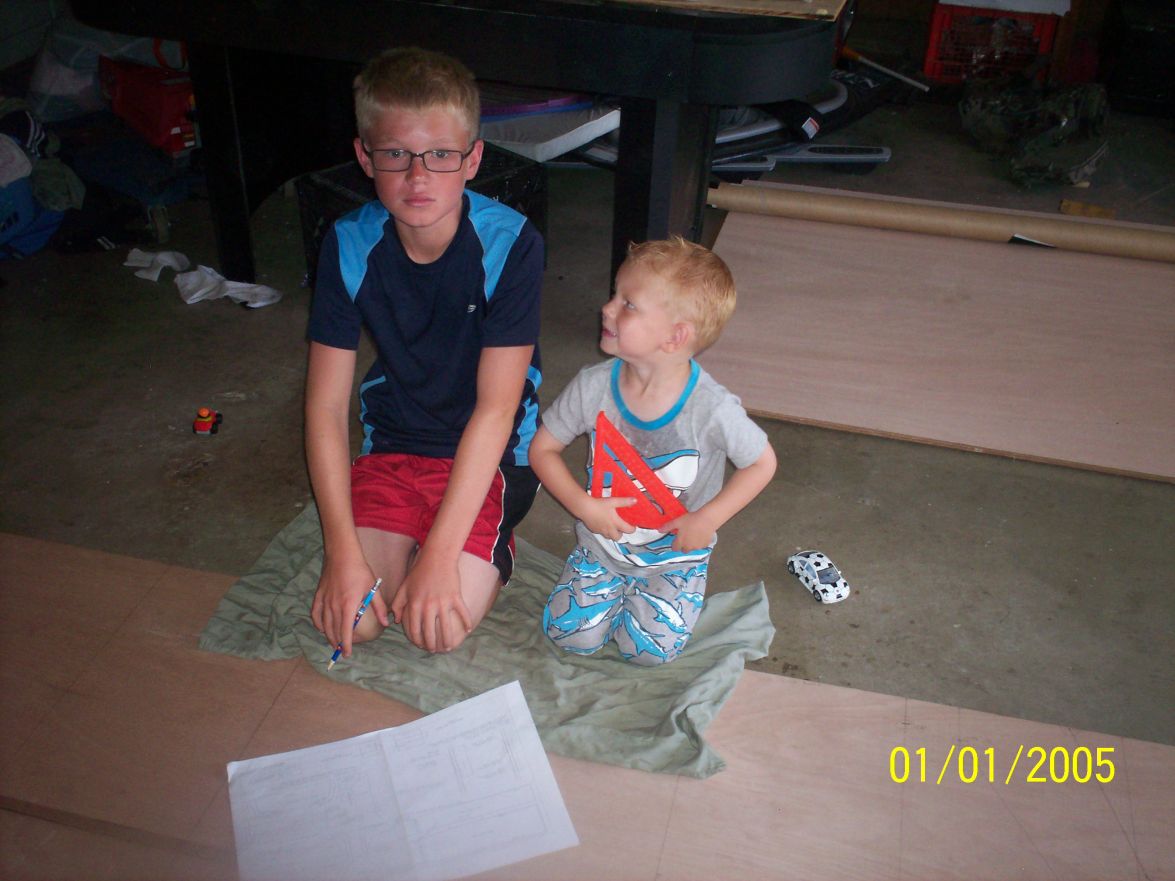
Jarod and Andrew helping with the measurements.
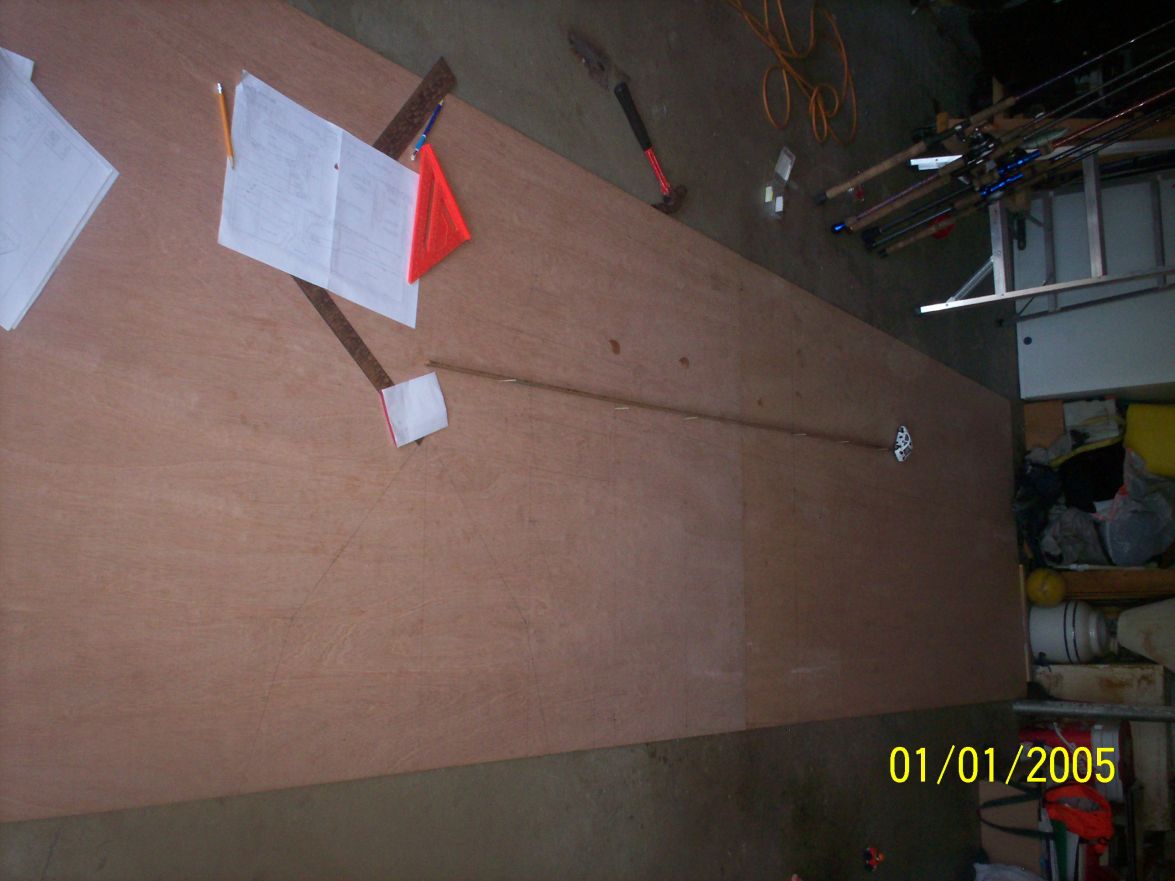
1/4" Meranti BS1088 laid out for long panels.

Andrew all geared up for me to turn on the saw!
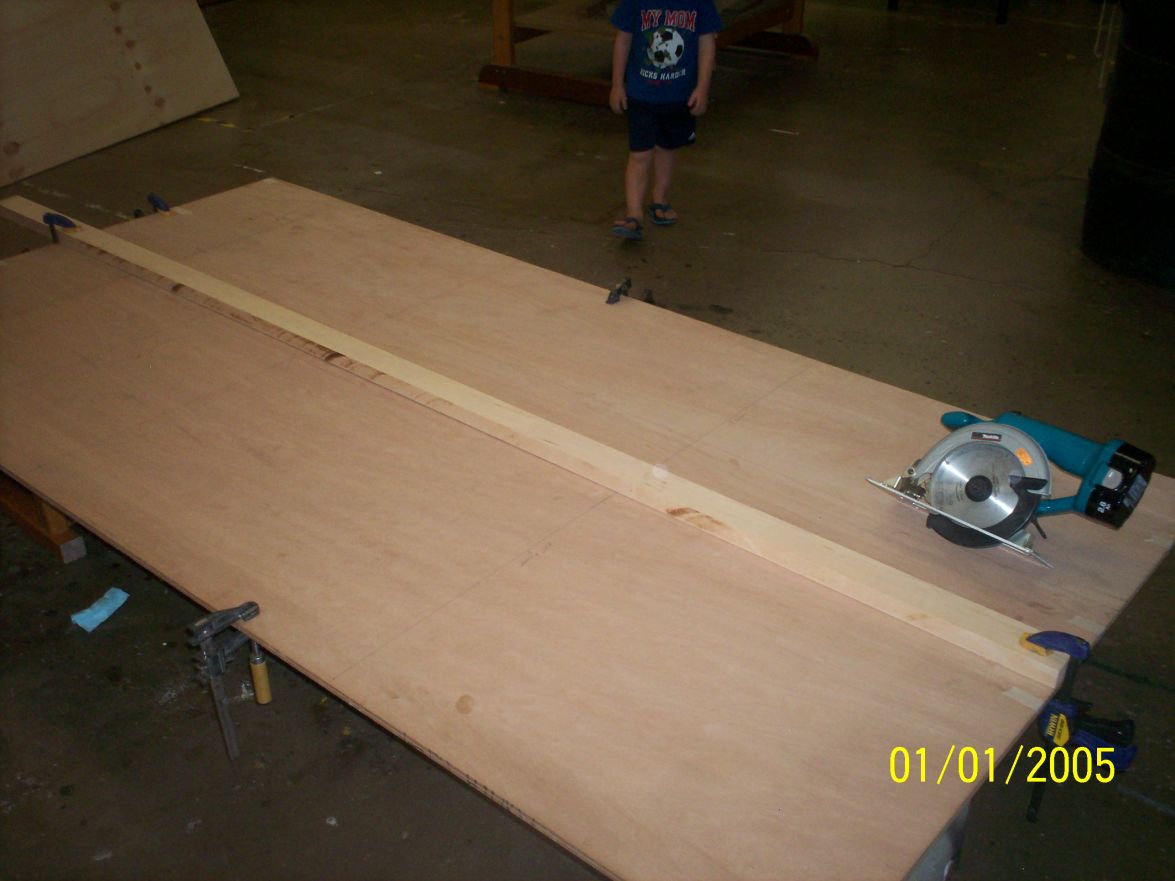
First cut! The Makita 18V circular saw worked great and made quick work of the cutting jobs.
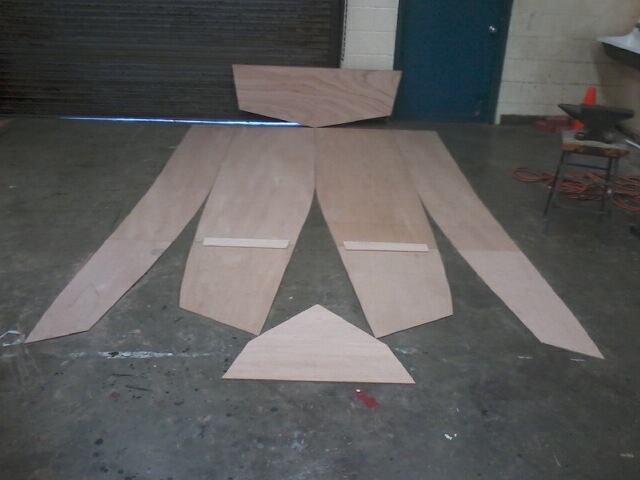
Bottom and side panels and bow and stern transoms all cut and laid out.
Now I just have to sit tight and wait for the mailman to bring some supplies.
DaveB.
Re: 5Men GV11
Posted: Sat Aug 31, 2013 1:37 pm
by kelpkritter
All of the resin. fabrics, and fillers arrived on Wednesday and after getting everything organized I was able to start piecing a few things together. It is hotter than hot in SoCal the last few days, 107 in my neck of the woods so I had to work real quick in small batches.
Got both sides of the long panels spliced with a combination of butt blocks and tape spices and have the one side of the mid and aft seat frames glued up and spliced together. Later today I will flip the frames and finish the taping and gluing with the goal of stitching it all together before Monday.
Gluing up the long panels.
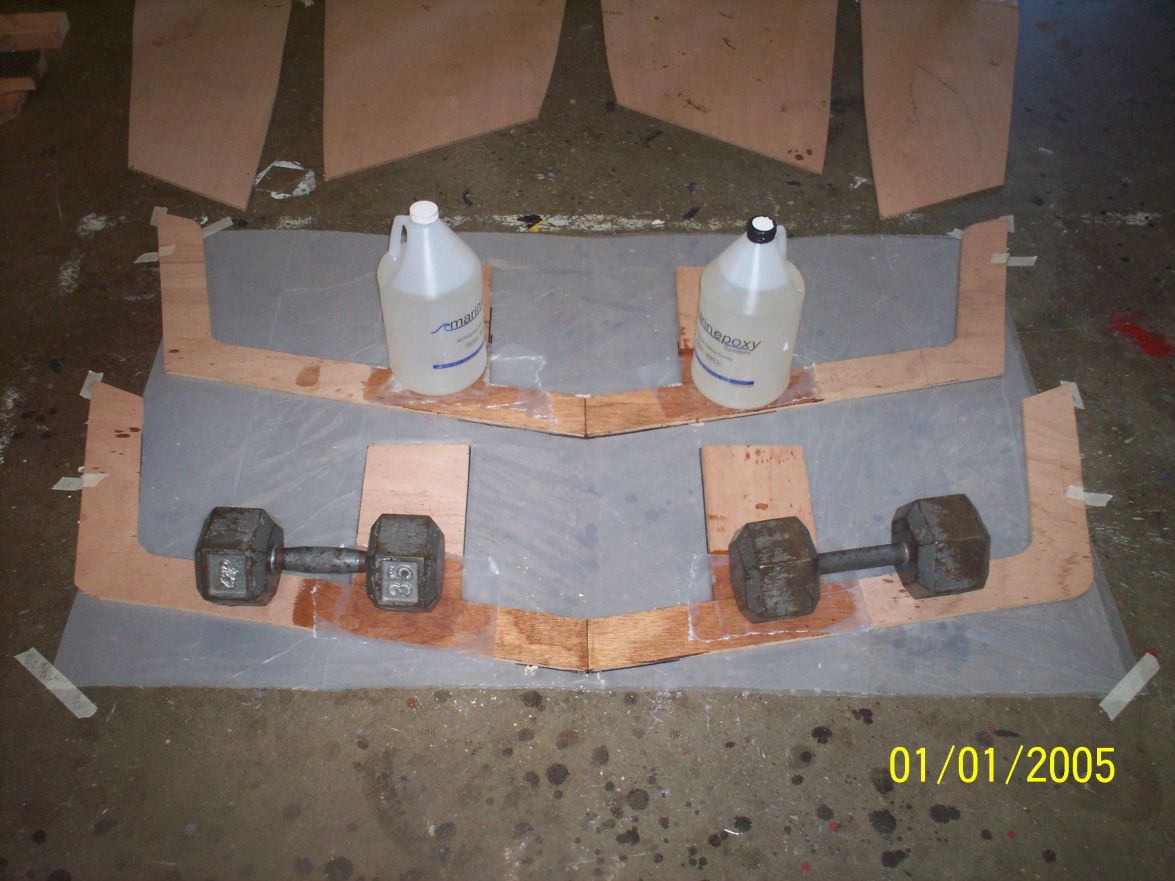
Gluing up the seat frames.
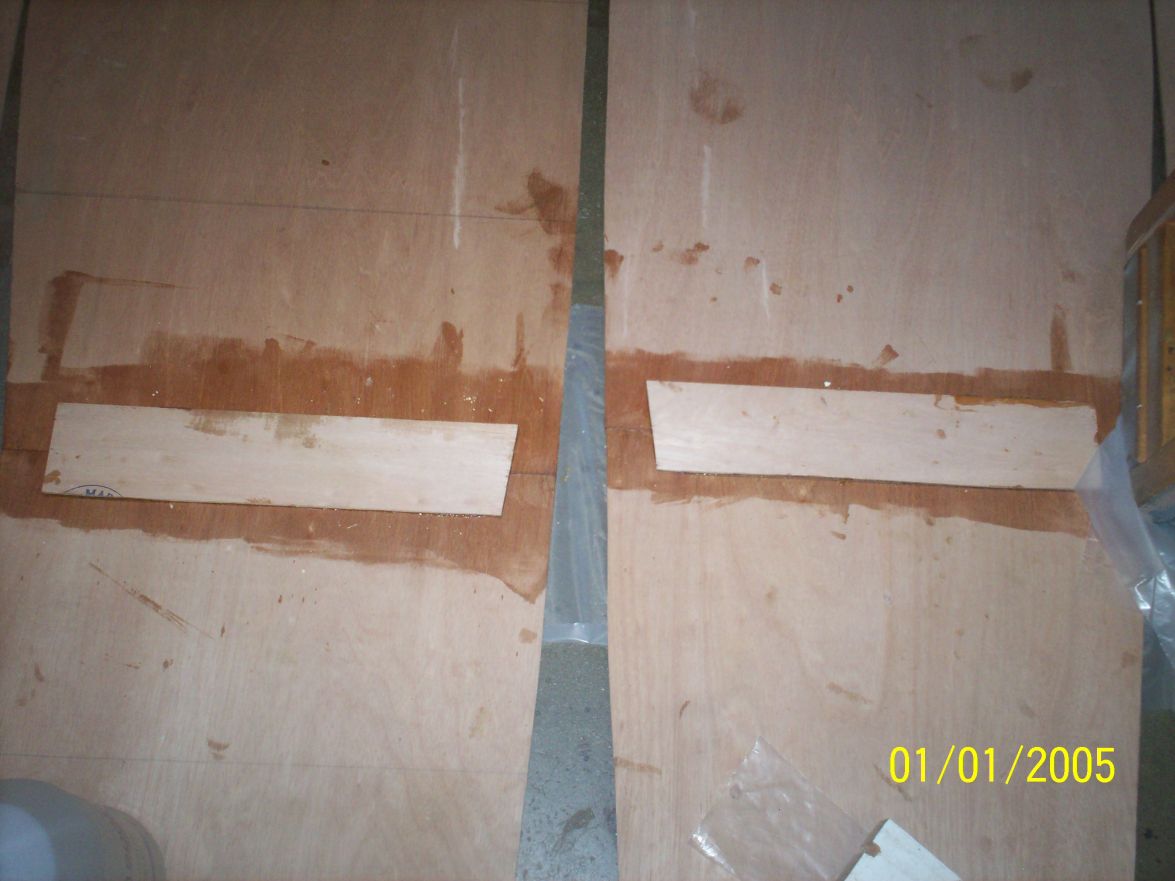
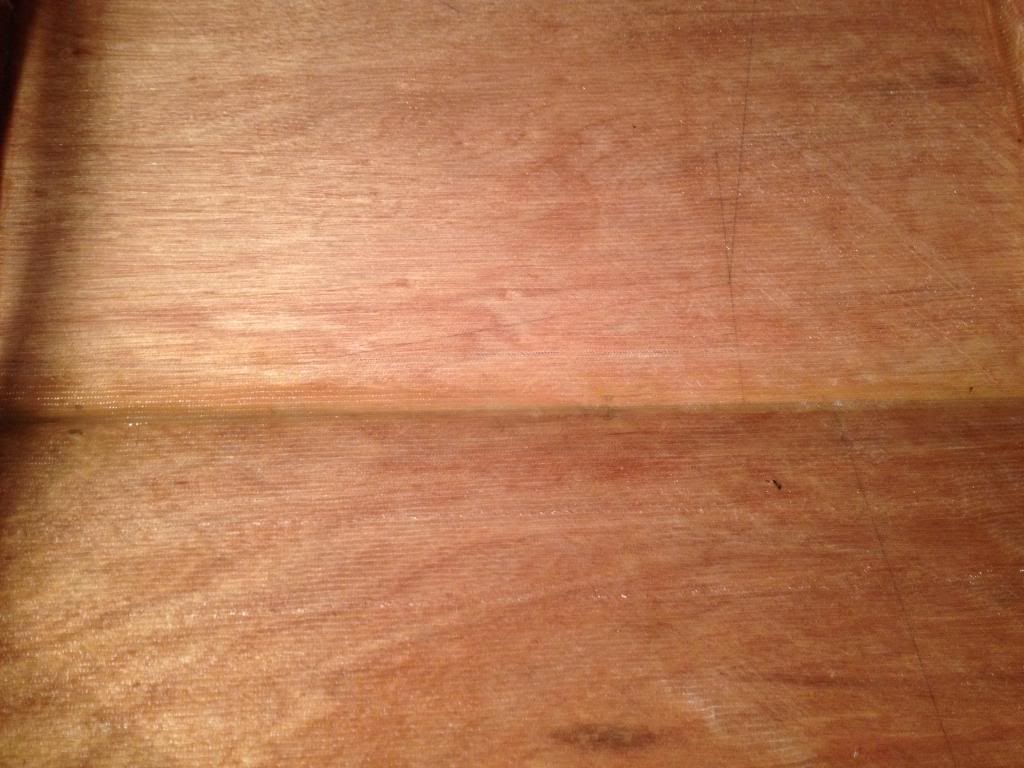
Inside lower panel butt block.
Looking forward to turning all these pieces into what will soon be a boat!
DaveB.
Re: 5Men GV11
Posted: Mon Sep 02, 2013 9:31 pm
by kelpkritter
I have been working in the woodshop of the school I work at and classes start again tomorrow so had to get crackin' so I could move the boat back to the house. Fought with it a bit, but got it all stitched together and brought it home in the back of the pick-up where it sat perfectly in the bed. Got it home and immediately flipped it upright and measured the diagonals and they were within 1/8". Have to go back and tweak a few stitches to line the panels up a bit, but overall pretty happy with the overall shape.
Next steps are taping the seams and then will be to plan out the glassing schedule. I will be adding biaxial fabric to the bottom and transom, inside and out, and woven cloth to the sides per Evan's suggestion. The intent of running a bit faster and working in potentially rougher inner waters makes sense to strengthen her up a bit. Going to be working 'wet on wet' as much as possible so I want to be prepared.
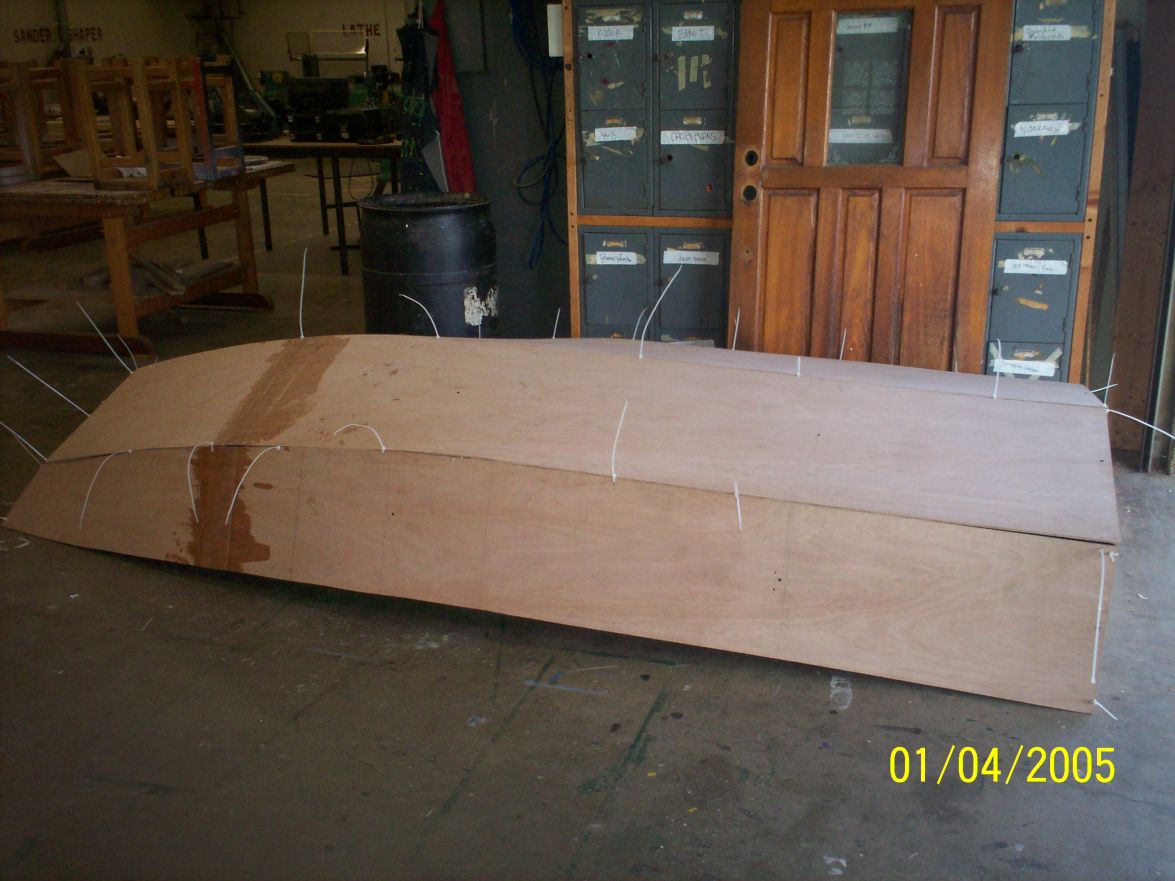
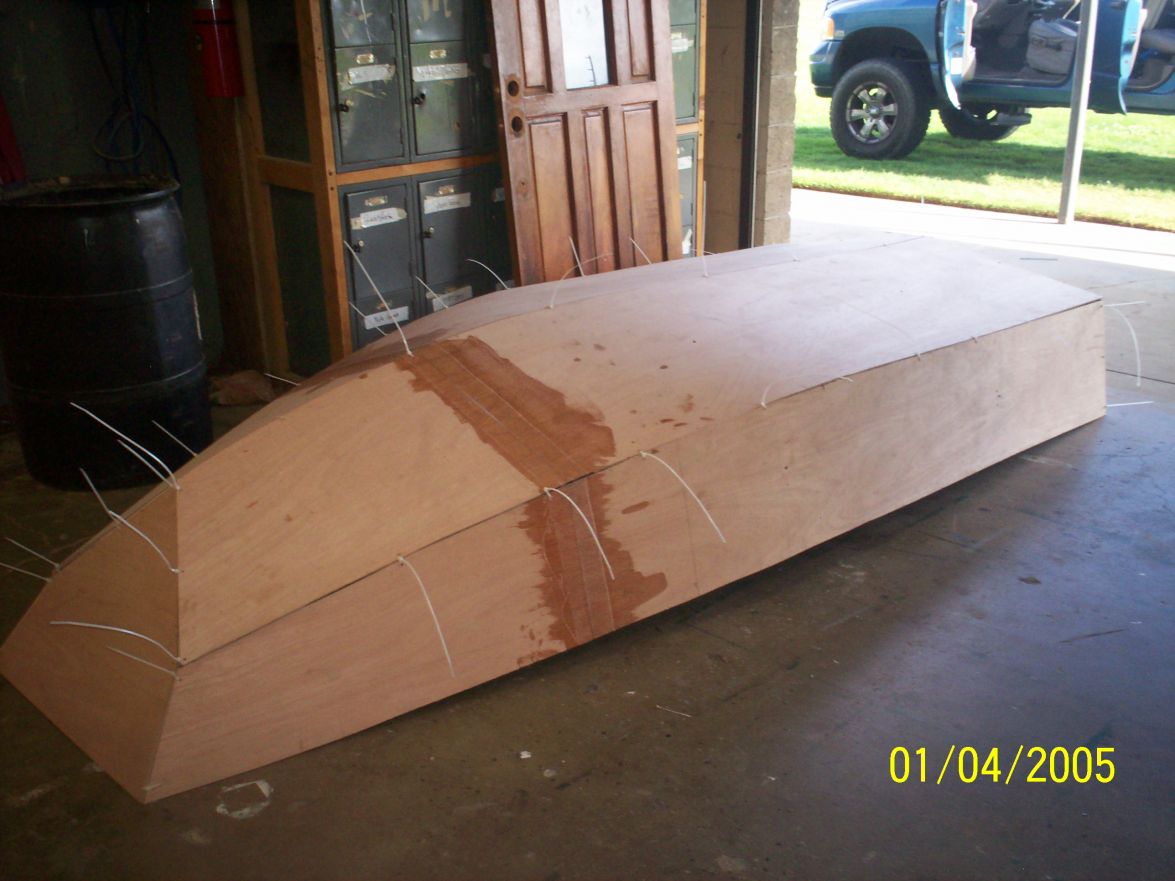
All stitched up!
DaveB.
Re: 5Men GV11
Posted: Tue Sep 03, 2013 7:52 am
by cottontop
Your boys are going to love this whole project. As my grandsons get older(they are 7, 3, 3, and 18weeks now), I hope to build a small boat with and for them. Keep the news coming. John
Re: 5Men GV11
Posted: Wed Sep 04, 2013 8:05 pm
by bondo
Looks really nice Kelpkritter you're off to a good start. I like Evans' designs and its fun to see the hull in 3D. That boat looks fast. Thanks for the pictures.
Re: 5Men GV11
Posted: Wed Sep 04, 2013 10:14 pm
by kelpkritter
Thanks for watching.
It is really cool seeing all of the boats come to life on these forums, but it is even more awesome to do it for yourself.
Need to tidy up a few things in my new work space and hope for some cooler temps before I proceed much more, but there will be more posted. Not a very glamorous boat or all that much that really goes into it, but it is fun to document and see the progress and have a record of it.
If all goes well maybe I can convince the wife to let me build something bigger

DaveB.
Re: 5Men GV11
Posted: Tue Sep 24, 2013 2:00 pm
by kelpkritter
Well after a bit of a building hiatus due to a few fishing tournaments over the past couple of weekends I was back at it last night.
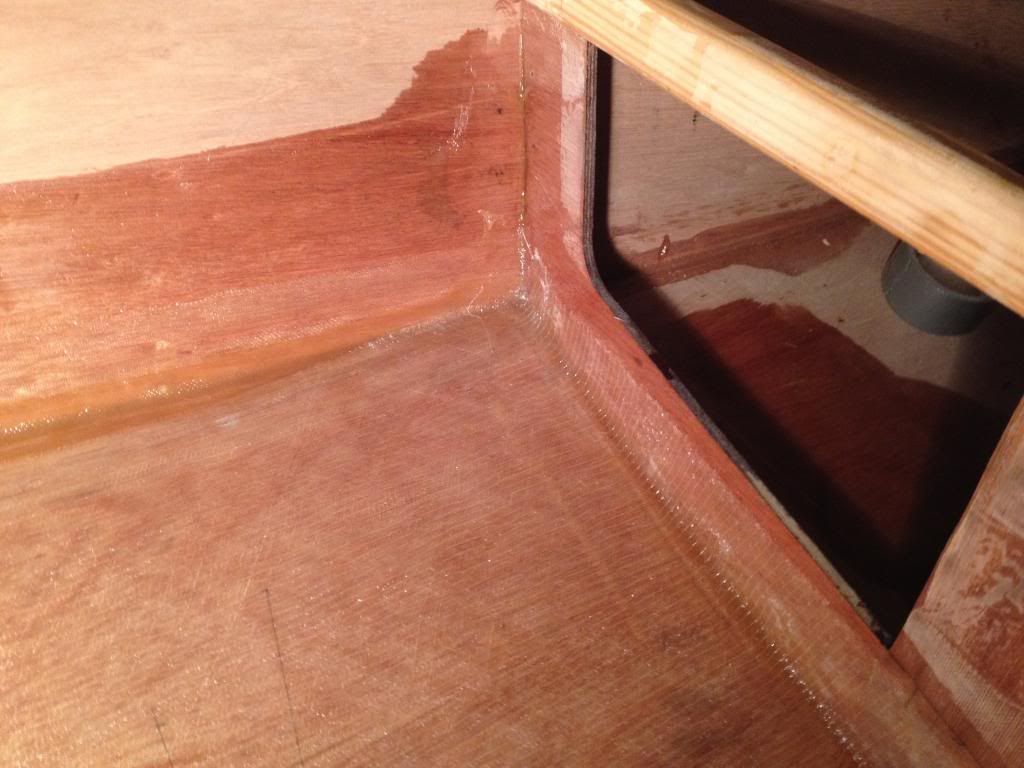
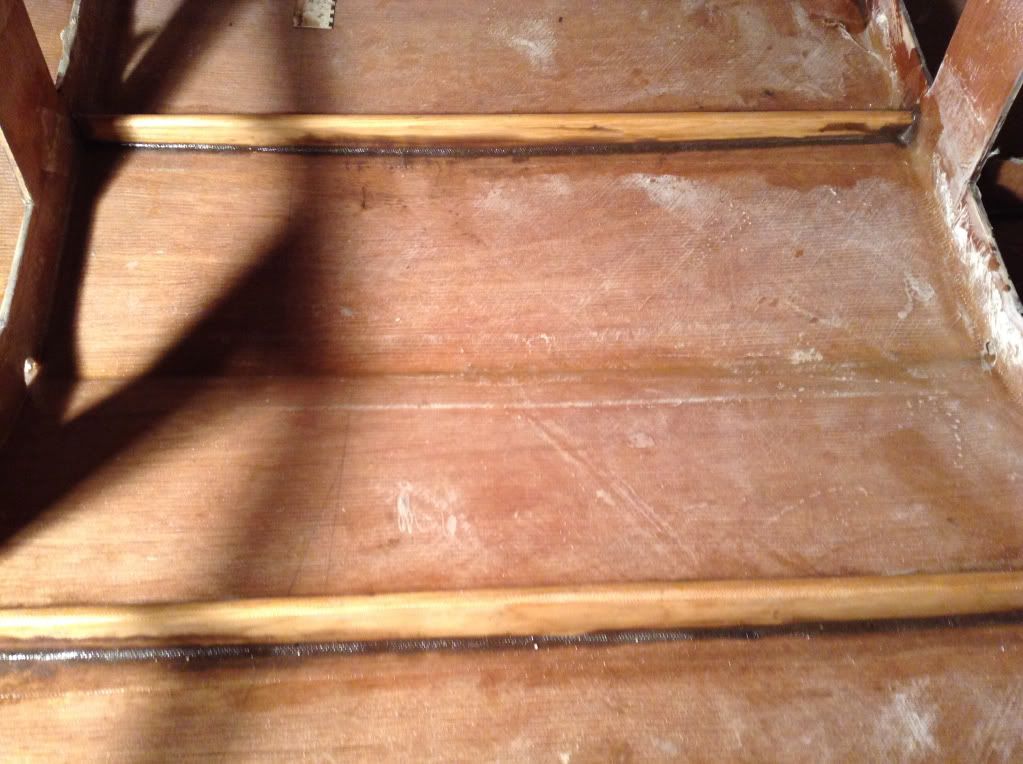
Worked on the section between the aft and mid seats. Working wet on wet I spread neat epoxy over the entire surface and then laid a fillet along the chine, keel, and the seams at the seat frames where they meet the full bottom hull panels. Next I laid the tape on the chine and keel seams. Finally I laid a layer of 12 biax along the bottom and worked the ends up the seat frames to tie them into the hull. All in all it came out really well and will only have minor cleanup on the one edge of the biax that was pretty frayed where it came off of the roll.
Now it is on to the aft section.
Chine and seat frame seams.
DaveB.
Keel seam.
Mid section.
Re: 5Men GV11
Posted: Sat Nov 09, 2013 10:31 am
by kelpkritter
Been away from the boat for a while now doing some fishing and lure making but it was time to get back at it. Laid a layer of 12 ounce biax on the bottom, gave it a light sanding, and only had one small problem where I got a little air bubble at the bow where I did not round over the edge quite as much as needed. Prepped the sides for the 9 ounce woven cloth. Getting ready to spread the resin on the sides this morning once I pick up some supplies from the big box store.
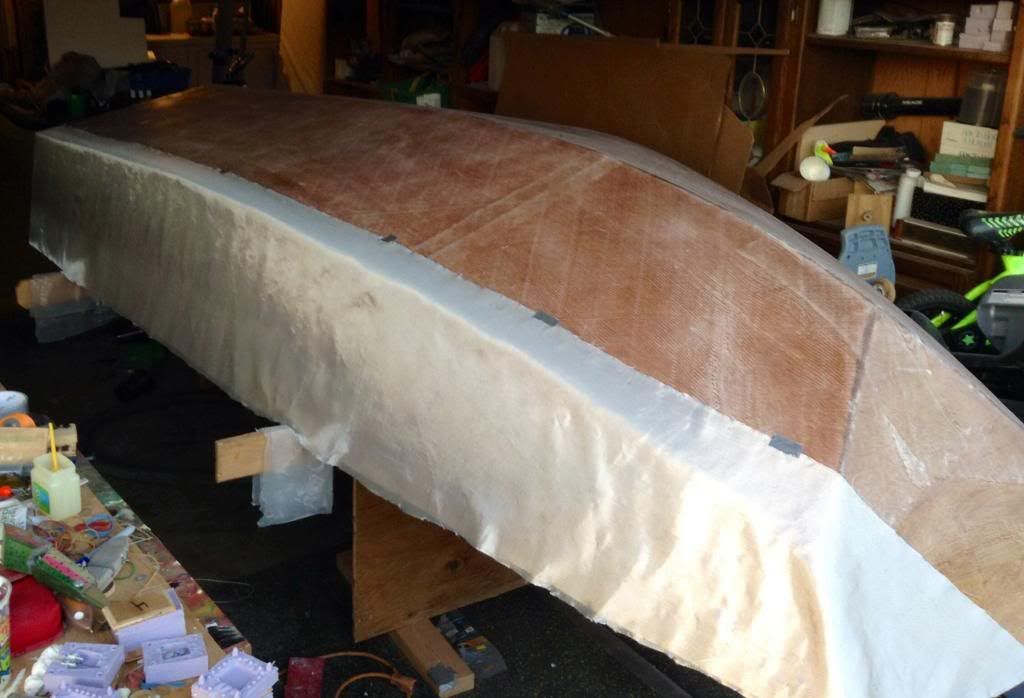
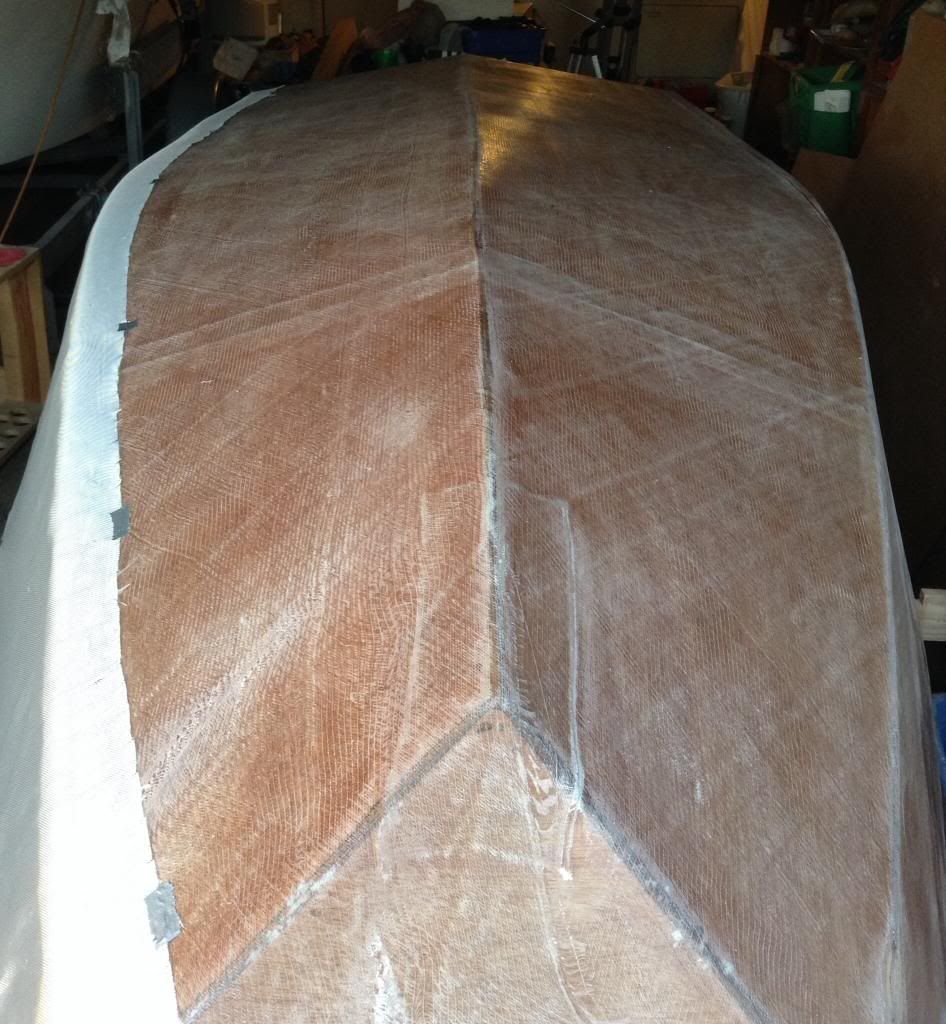
DaveB.
KelpKritter
Re: 5Men GV11
Posted: Mon Mar 24, 2014 2:13 pm
by kelpkritter
The winter months do not leave me much free time because of of a heavier work load so when I get a few minutes to sneak away to work on the boat I can only get a little done at a time. When I get back in the house my better half does not like me on the computer doing more boat and fishing stuff so it was hard to keep things updated as I went along. Here is a pretty thorough recap with pictures to get to this point. Hopefully this will help anyone who builds the same boat. Paint will arrive on Wednesday and along with doing the graphite bottom she will be finished and ready for her maiden voyage real soon!
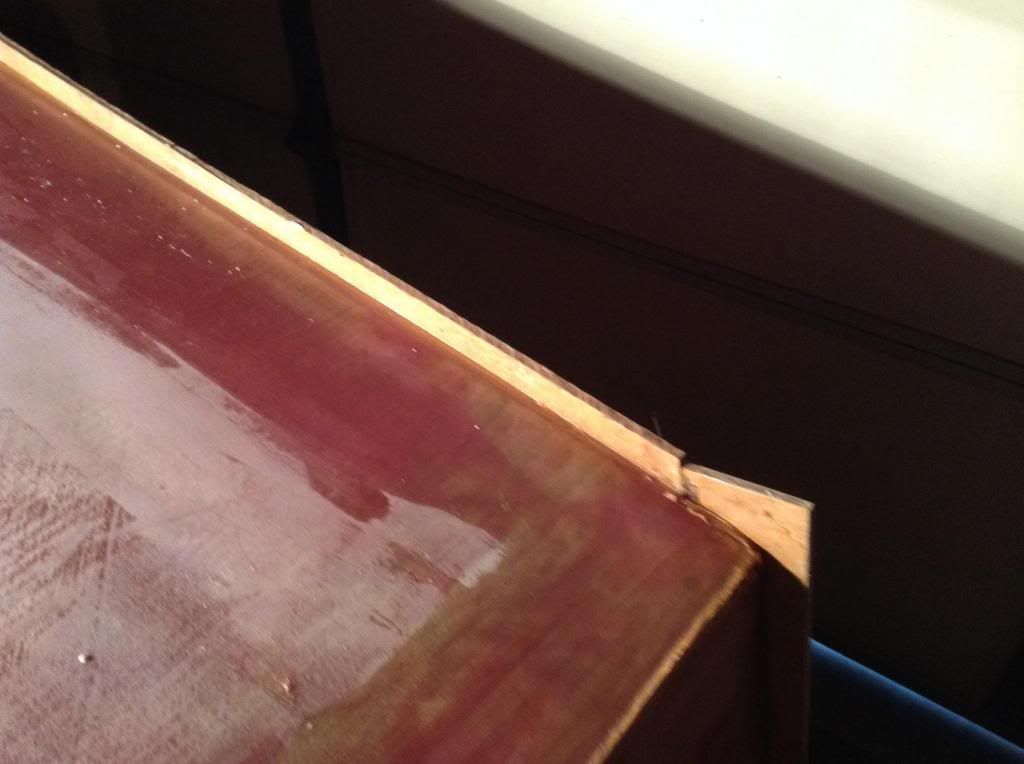
Dam made op to hold thickened epoxy at chine and transom to sharpen the edge.
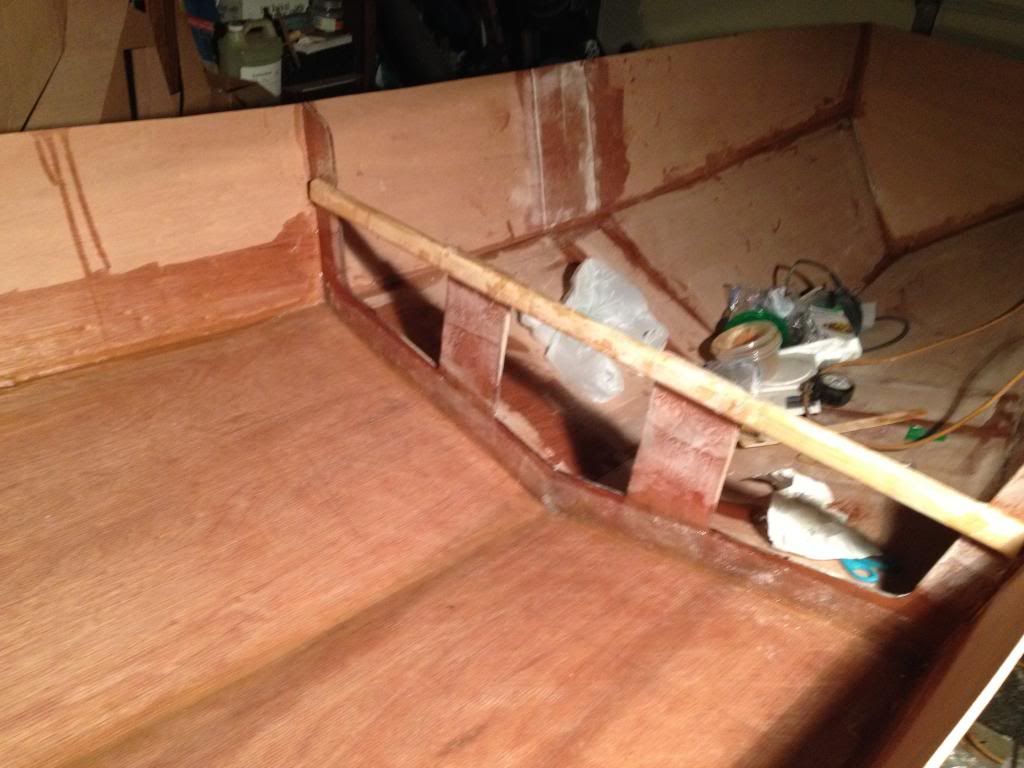
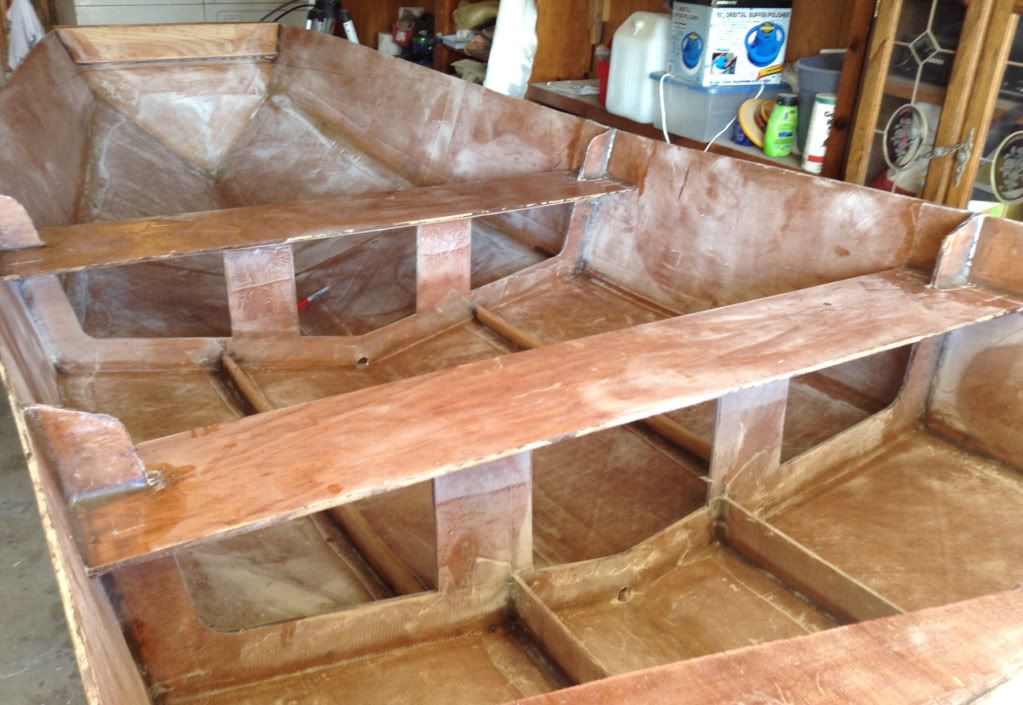
Boat flipped and bottom stiffeners filleted and taped in place.
Spray rail temporarily screwed and glued in place.

Transom gussets filleted and taped in place.
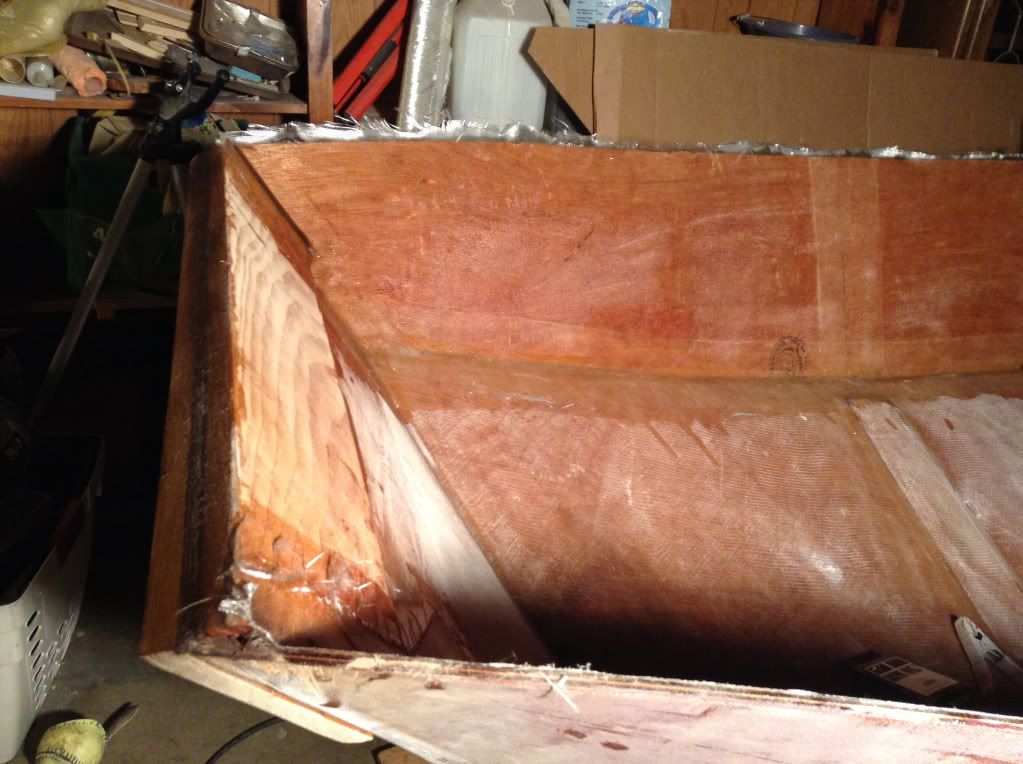
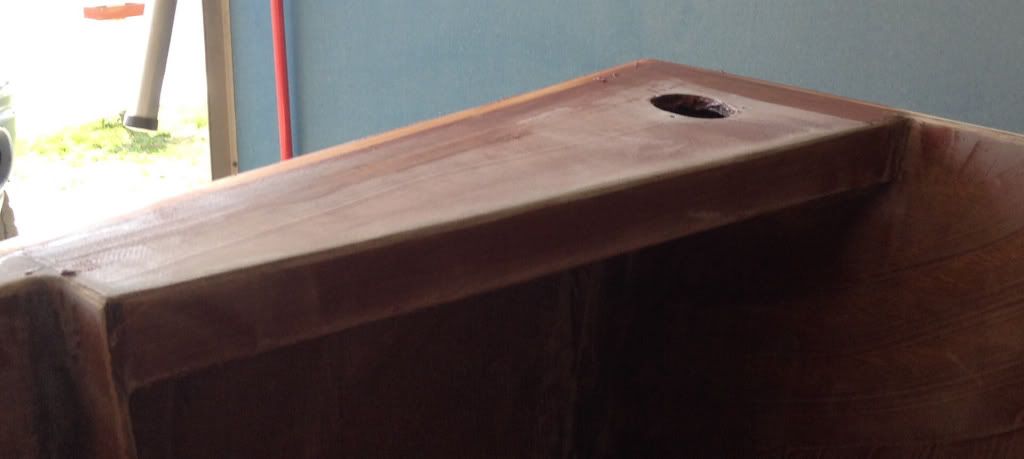
Inside hull panels glassed and ready to be trimmed. Also made a clamping board on the bow to hold a stern mount trolling motor. 3/4" Douglas Fir inside and out.
Seat tops glued and taped in place.
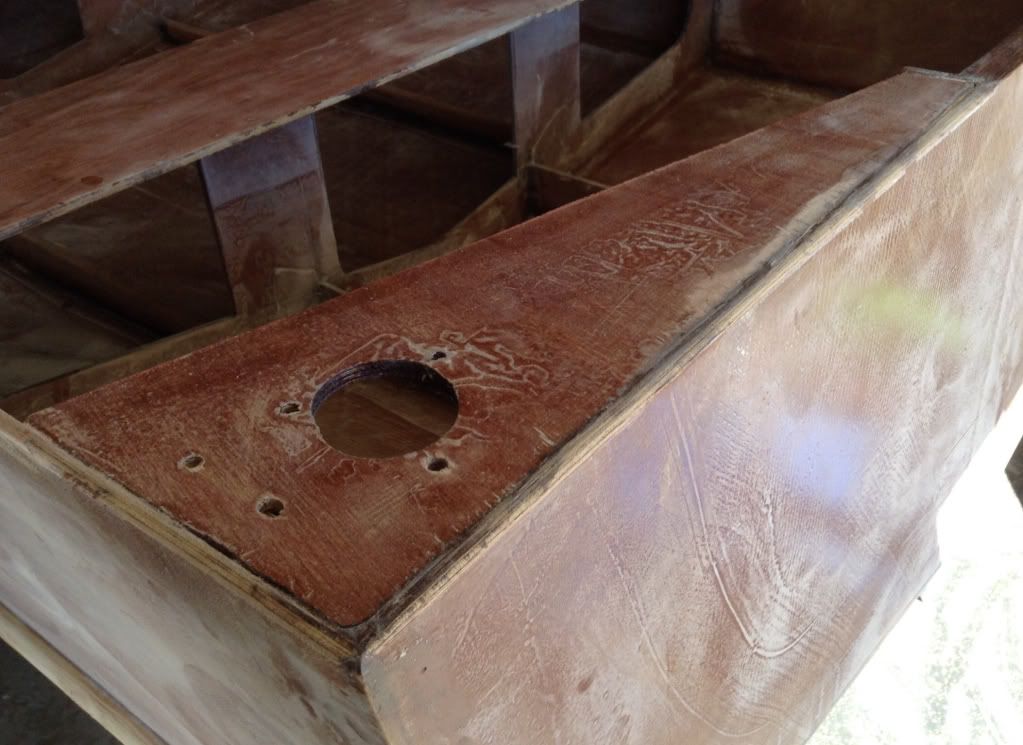
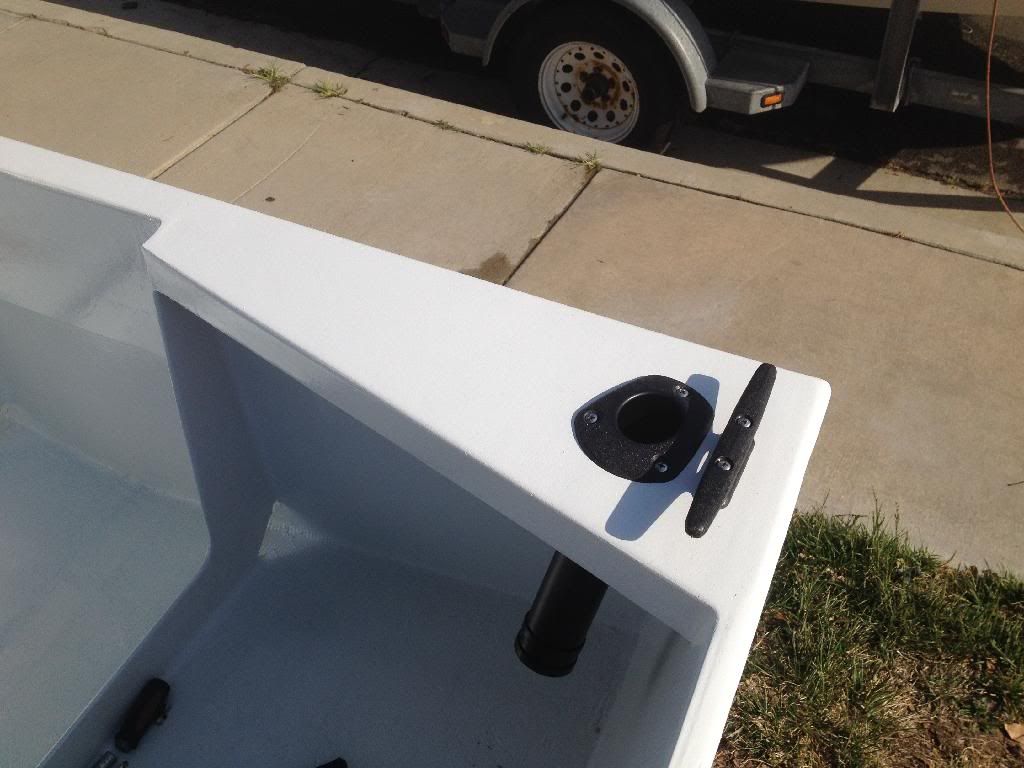
Modified the transom knees like seen in Steven's GV11. Ties the stern together nicely with room for a rod holder and stern cleat. Holes over drilled ready for wood flour/epoxy putty to be re-drilled to proper size.
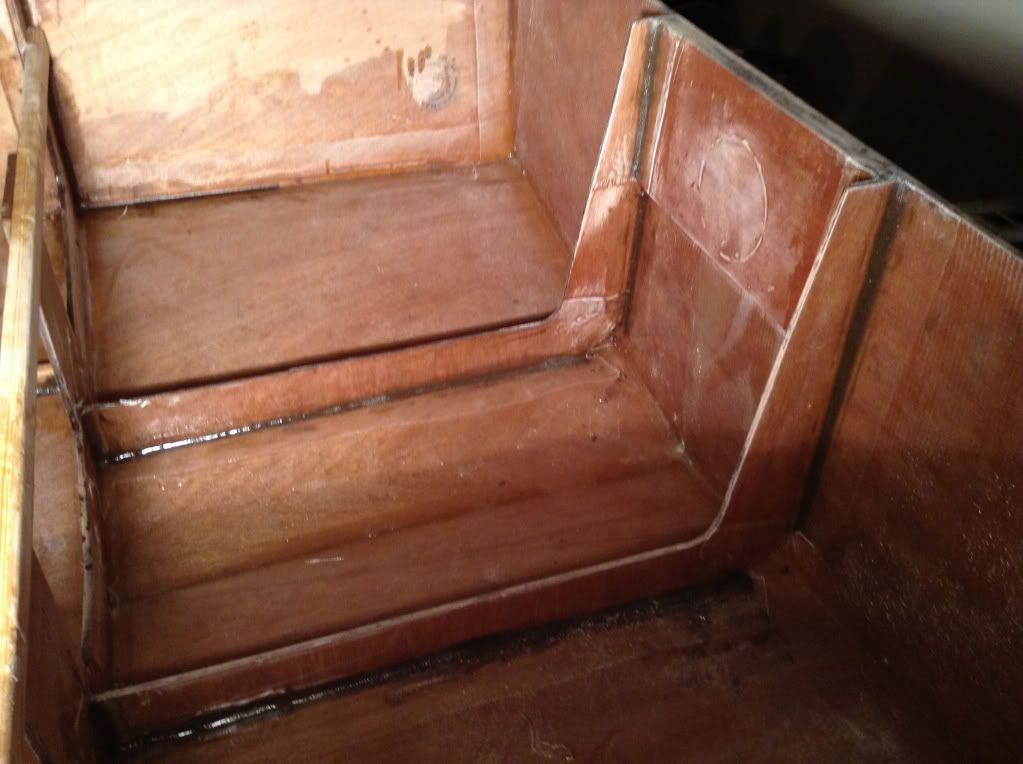
Bow seat and added frame to create some storage area glued and glassed in place.
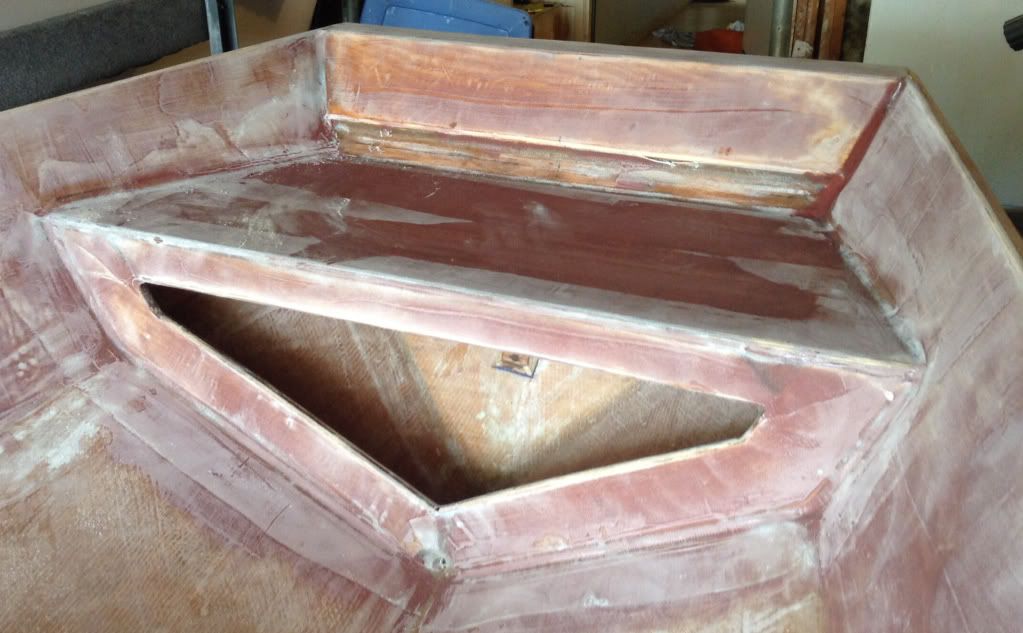
Face of transom knee finished off. Also added a layer of extruded polystyrene under knee to give some more floatation foam.
Boat pulled out into yard to get some better light, do some marking for paint, and of course test out the seating arrangements!
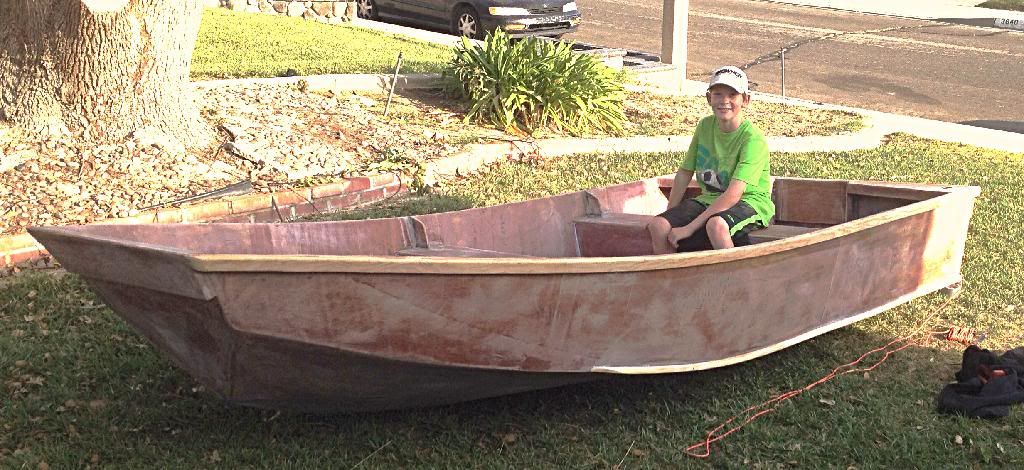
Almost done.
DaveB.
KelpKritter
Re: 5Men GV11
Posted: Sun Mar 30, 2014 8:06 pm
by kelpkritter
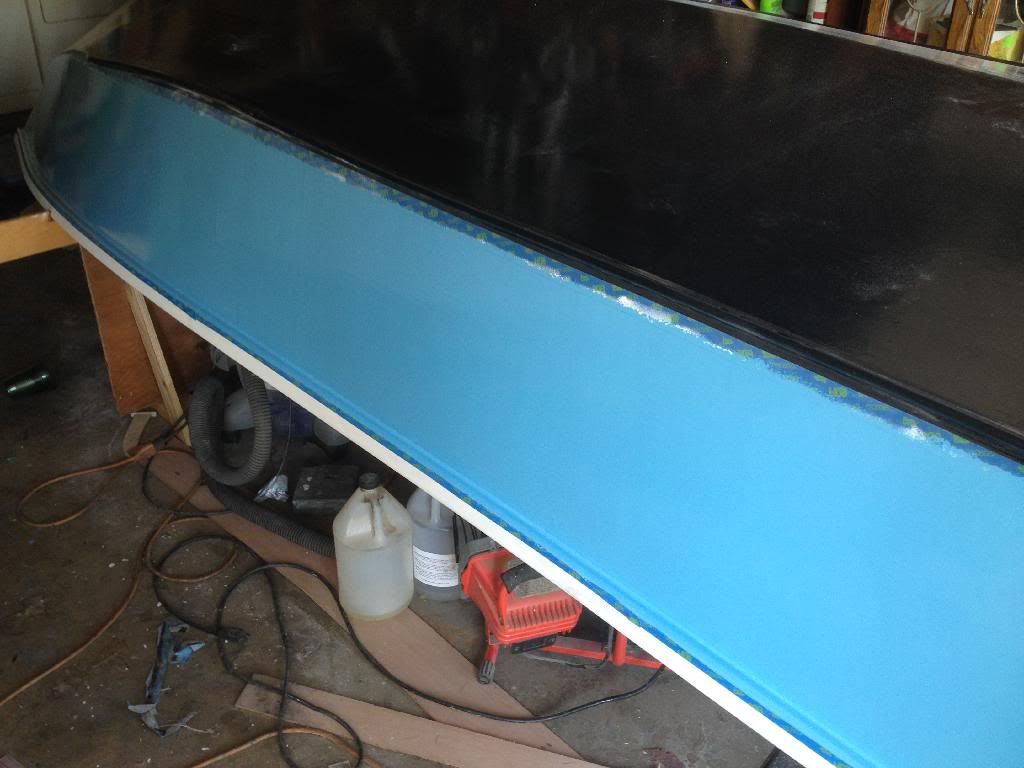
Finished sanding the hull exterior and called it good with the smoothness more to the "workboat" side of the spectrum than a "yacht" finish. Bottom is graphite infused epoxy and went on real easy. Paint is Petite EasyPoxy which I have used before and was very happy with it for its durability and cost effectiveness. Color choices are limited and it is not recommended to tint any of these paints to change the tone. Was hoping for more of a slate blue but this will have to do. Rubrail and interior will be "Mist Grey" which is nearly white. The contrast will look nice.
Two coats of graphite and epoxy covering bottom.
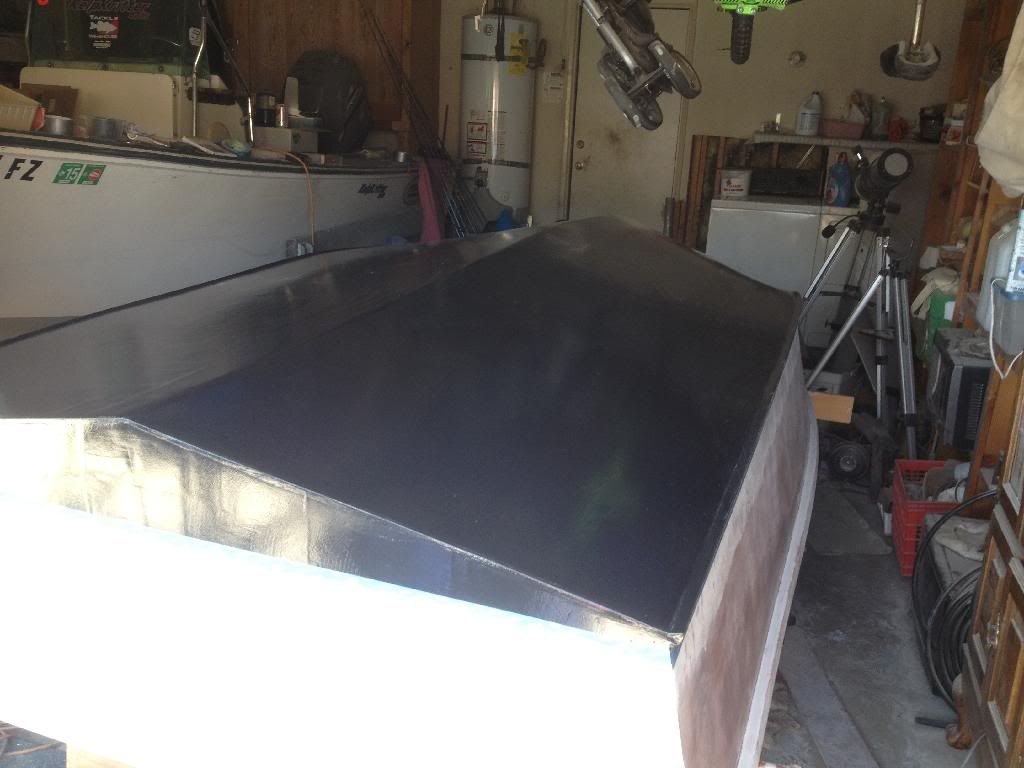
Shiny with a little stipple!!!
Bikini Blue hullsides.
I will get a few more coats on in the next few days but I have a tournament this Saturday so it won't be till next week before she is done. Just in time to splash over Spring Break.
DaveB.
KelpKritter
Re: 5Men GV11
Posted: Thu Apr 03, 2014 8:00 am
by justin_dwyer
Neat little boat Dave, your boys will love it I'm sure

Re: 5Men GV11
Posted: Mon Apr 14, 2014 10:44 pm
by kelpkritter
The GV11 is now completed.
Transom knee with stern cleat and rod holder mounted in place.
Port side with graphite bottom, Petite EasyPoxy Bikini Blue hullsides, and Mist Grey rubrail and interior.
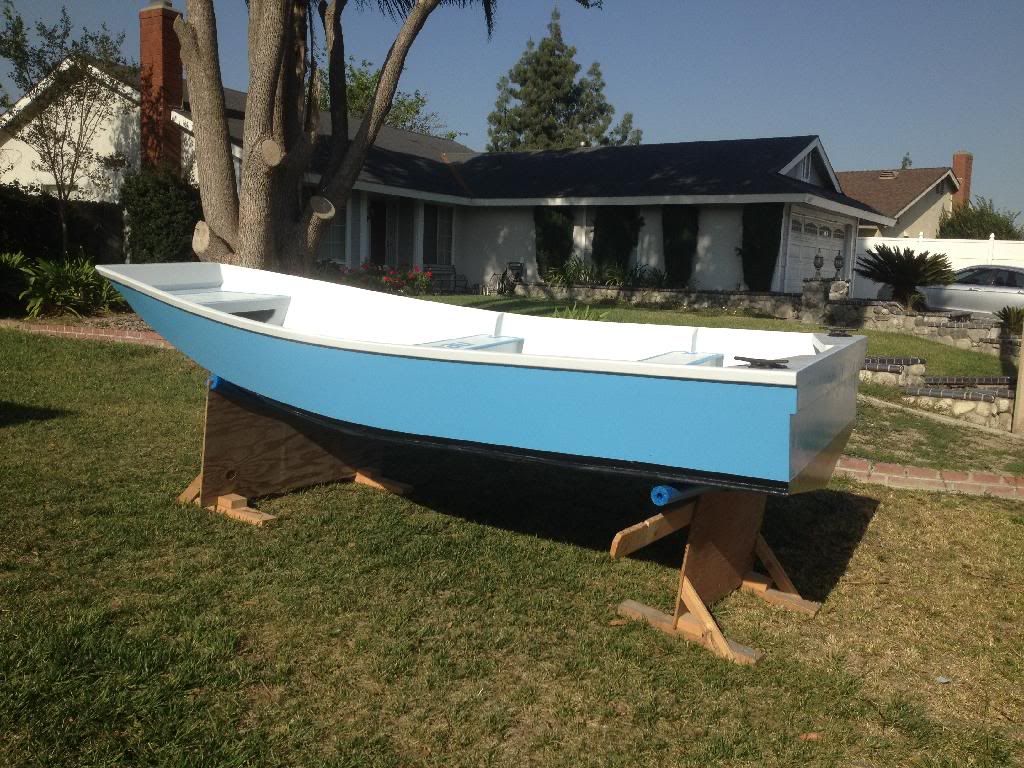
Stern view.
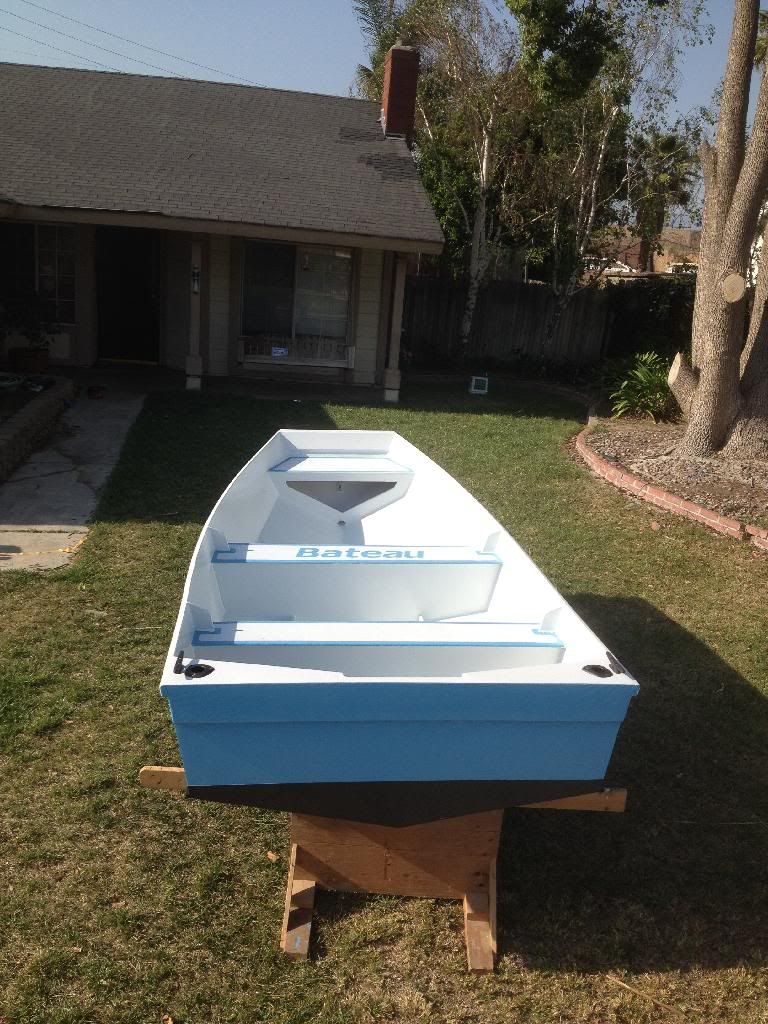
Mid seat with Bateau logo. All seat tops and sole finished with Behr Non-Skid that I sprinkled on after rolling out paint and then rolled again to embed in paint. This worked much better than mixing the non-skid into the paint as directed. Found much better control of the finished product simply shaking it out of 99 cent store salt shaker.

Will be able to launch next week Wednesday and will be counting the days. Going to start with a borrowed 8HP Johnson and go from there.
Until then.
DaveB.
KelpKritter
Re: 5Men GV11
Posted: Tue Apr 15, 2014 7:36 am
by peter-curacao

Beautiful job you did, love the logo

Good luck and have loads of fun on the launch day

Re: 5Men GV11
Posted: Tue Apr 15, 2014 9:07 am
by jacquesmm
Nice looking boat, congratulations.
Before the advent of KiwiGrip, I used the salt shaker method: spread sand over wet paint with a large salt shaker then one more coat of paint.
Now that we have Kiwigrip, I never use sand anymore.


