MF14 - New Build in UK

To help other builders, please list the boat you are building in the Thread Subject -- and to conserve space, please limit your posting to one thread per boat.

Please feel free to use the gallery to display multiple images of your progress.
Whameller
Frequent Poster
Frequent Poster
Posts: 30
Joined: Tue Aug 23, 2011 11:08 am
Location: United Kingdom
Location: West Pembrokeshire, United Kingdom
Contact:

Re: MF14 - New Build in UK

Post by Whameller »

Now it was back on (upside down) to work out where all the deck fittings were going to go (I used the Sunfish class rules diagrams to guide me here), so that I could fit the doublers to support them:

Image
Image
Image

I had to try to take account also of where the bulkheads and stringers would be, which I didn't quite get right (I forgot the width of the cleats in several places) and had to do some refitting when it came to fitting the deck right way up.

Then it was time to re-fit and epoxy glue all the side cleats (which had been on the deck when it was used as a building jig for the sides). The builders notes said to use temporary screws to hold them while the epoxy set, but I used staples as they are faster and leave smaller holes to be filled and faired. I put them in through bits of old ice cream cartons which made later extraction much easier. Not my trick - one I found on the net somewhere - but it worked a treat:

Image
Image

Whameller
Frequent Poster
Frequent Poster
Posts: 30
Joined: Tue Aug 23, 2011 11:08 am
Location: United Kingdom
Location: West Pembrokeshire, United Kingdom
Contact:

Re: MF14 - New Build in UK

Post by Whameller »

Next came the paint job on the cockpit and watertight compartment, together with the fittings for which I needed access to both sides of bulkheads B and C at each end of the cockpit (the hatches and the hiking strap fittings):

Image
Image
Image
Image

The deck was to come next. I really struggled to get it aligned properly with it in one piece. So,after much thought and with considerable trepidation,

....... I cut it in half again !

Image
Image


I realised that the join fell exactly astride bulkhead B at the forward edge of the cockpit. This would give it more than adequate support, even if it did give me some minor fairing issues later on.

The deck was then glued down in two halves, held temporarily with screws into the cleats and staples into all the bulkhead and stringer cleats:

Image

The stern half went on first; the bow half is shown above.

Once the screws and staples were removed, I planed and sanded all the seams to get a 1/2" radius before the taping work began again.

This is where I've got to so far:

Image
Image
Image


The hull is structurally complete, with all seams epoxy taped. The cockpit was finished and painted before fitting the deck. It has a watertight stowage compartment aft (the two forward hatches are for ventilation of the hull when stored), a hiking toe strap (made from an old car seat belt) and non-slip tape on the sole. The paint is white domestic exterior gloss over two layers of epoxy. There is a layer of fibreglass on the sole to add strength and abrasion resistance.

Next up - hull sheathing, fairing and painting. I've also done some work on the daggerboard and deck fittings.

Noles309
* Bateau Builder *
* Bateau Builder *
Posts: 1039
Joined: Mon Aug 29, 2011 8:33 pm
Location: Savannah, GA

Re: MF14 - New Build in UK

Post by Noles309 »

Impressive work. Looks great.
Gary
GF-16 Completed

Whameller
Frequent Poster
Frequent Poster
Posts: 30
Joined: Tue Aug 23, 2011 11:08 am
Location: United Kingdom
Location: West Pembrokeshire, United Kingdom
Contact:

Re: MF14 - New Build in UK

Post by Whameller »

Well - hull complete, painted, varnished and fitted out !

Image
Image
Image
Image
Image
Image

No photos of how I got there, I'm afraid. Hours and hours of filling, painting, sanding and fairing. Not my favourite jobs (tho' critical to the final aesthetics) and not exciting to photograph.

The hull is painted in marine paint over marine primer (both ebay bargains). The varnish is Coo-Var yacht & seaplane varnish, the white paint ordinary exterior house gloss and the red detail line is all-purpose exterior enamel. Rubbing strips are varnished oak D strips from the local DIY store, fastened with bronze ringnails into the chocks (holes sealed with marine mastic). The last photo shows the mainsheet horse and the sunfish-styled rudder fitting.

I need to get the hull onto the trailer (I still haven't posted about renovating that yet), so that I can clear space to work on the foils and spars.

jacquesmm
Site Admin
Site Admin
Posts: 28215
Joined: Wed Aug 14, 2002 1:00 am
Location: Florida USA
Contact:

Re: MF14 - New Build in UK

Post by jacquesmm »

Impressive work!
Jacques Mertens - Designer
http://boatbuildercentral.com

User avatar
Cracker Larry
* Bateau Builder - Expert *
Posts: 22491
Joined: Fri Mar 11, 2005 3:39 pm
Location: Savannah, GA

Re: MF14 - New Build in UK

Post by Cracker Larry »

Beautiful :!:
Completed GF12 X 2, GF16, OD18, FS18, GF5, GF18, CL6
"Ships are the nearest things to dreams that hands have ever made." -Robert N. Rose

Whameller
Frequent Poster
Frequent Poster
Posts: 30
Joined: Tue Aug 23, 2011 11:08 am
Location: United Kingdom
Location: West Pembrokeshire, United Kingdom
Contact:

Re: MF14 - New Build in UK

Post by Whameller »

Thank you, gentlemen.

Whameller
Frequent Poster
Frequent Poster
Posts: 30
Joined: Tue Aug 23, 2011 11:08 am
Location: United Kingdom
Location: West Pembrokeshire, United Kingdom
Contact:

Re: MF14 - New Build in UK

Post by Whameller »

Rudder
Making the rudder has caused me more head scratching than any other part of this build. As allowed for in the Moonfish plans, I am using Sunfish rig and foils. The challenge is finding out the exact dimensions of the foils - particularly the rudder.

The Sunfish class regulations give this information:

Image

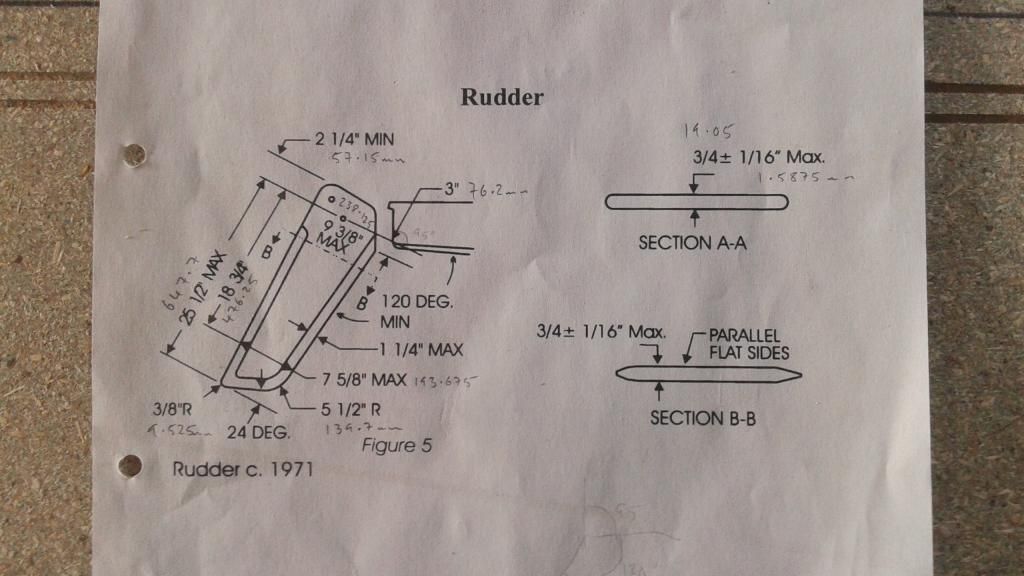
While there are enough dimensions to work out the size and shape of the bottom part of the foil, there is nothing about the size, angles, curve radii or mounting holes (for tiller, rudder head and tension spring). In an ideal world, I would find an existing foil and just take the dimensions from it - but Sunfish aren't all that common here in the UK.

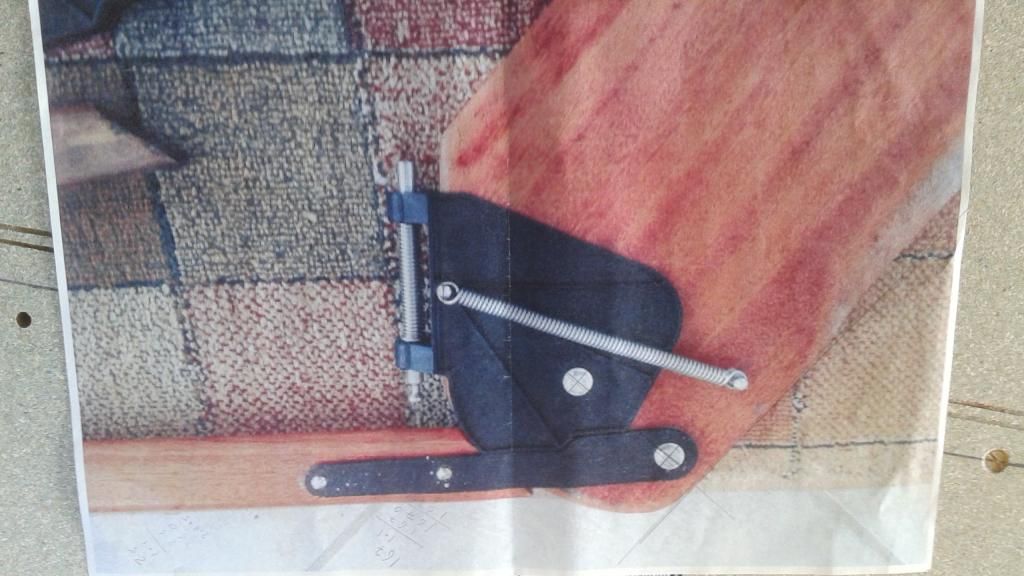
So what I did was find the clearest photos that I could of the foil and the rudder head/tiller on the web and print them out blown up to the largest size I could without loosing resolution:

Image

Image

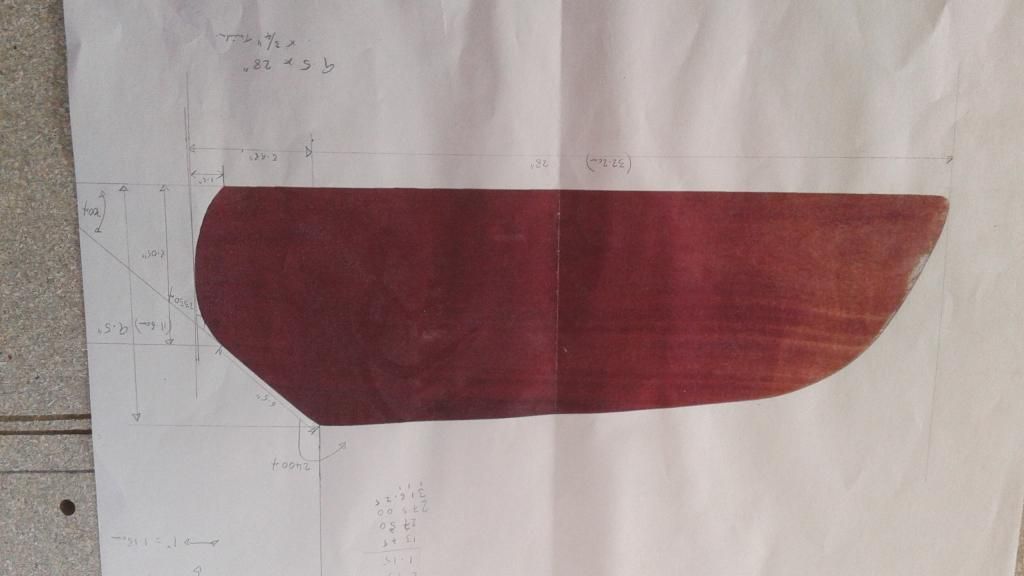
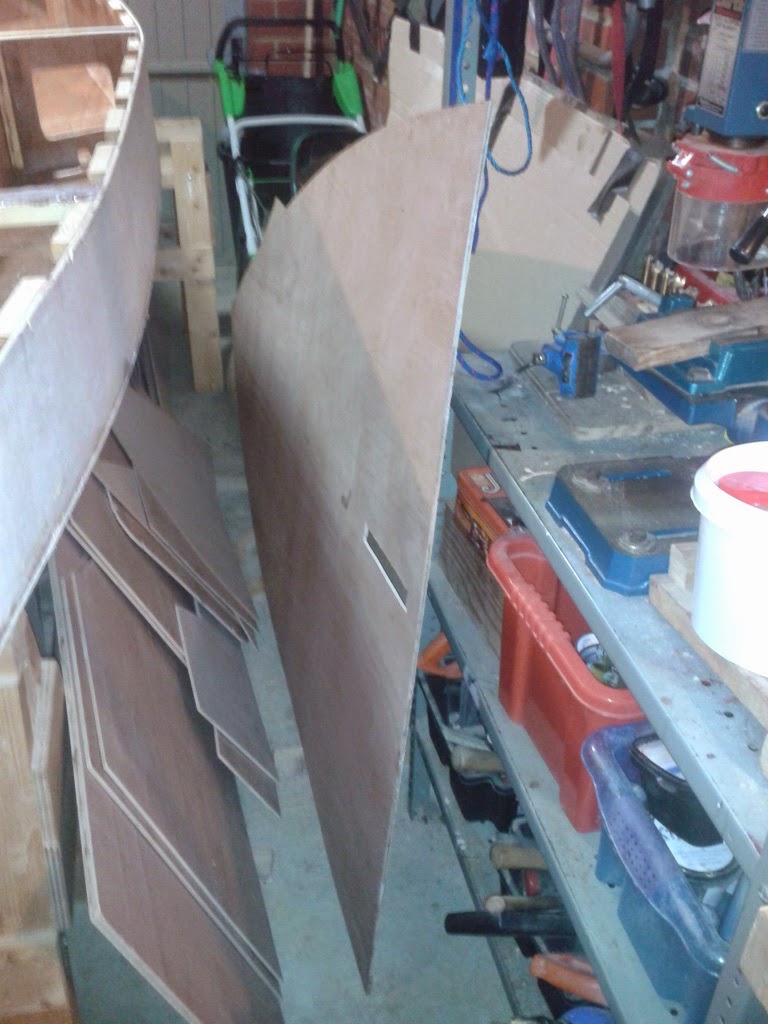
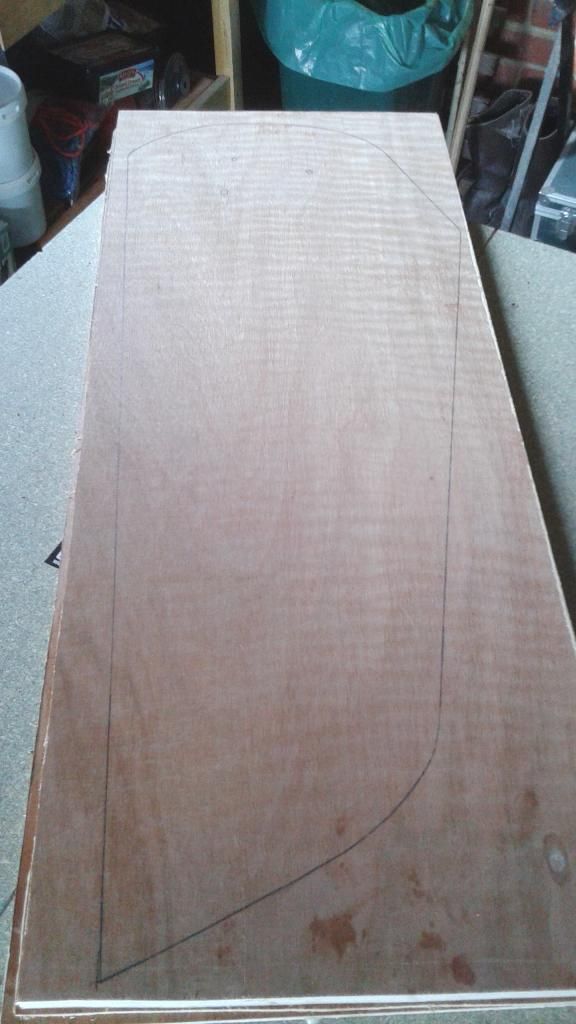
By careful measurement of the photos (in both x and y axes, to take into account probable distortion of the photo views and printing/enlarging processes and all the necessary angles and radii) and comparison with the plan and the Sunfish rudder head and tiller plates that I had bought, I was able to rough out a hardboard template:

Image

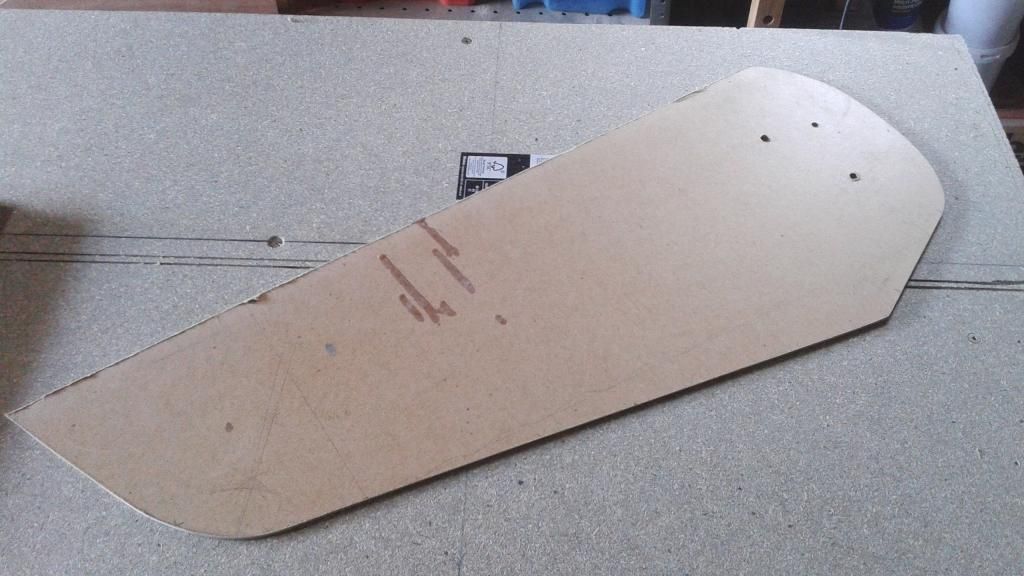
I then fitted the rudder head and tiller plates to the template which allowed me to refine the rough shape and position the three holes:

Image

This whole arrangement allows the foil to kick up, yet be held securely in either the 'down' or 'up' positions without the need for lines.

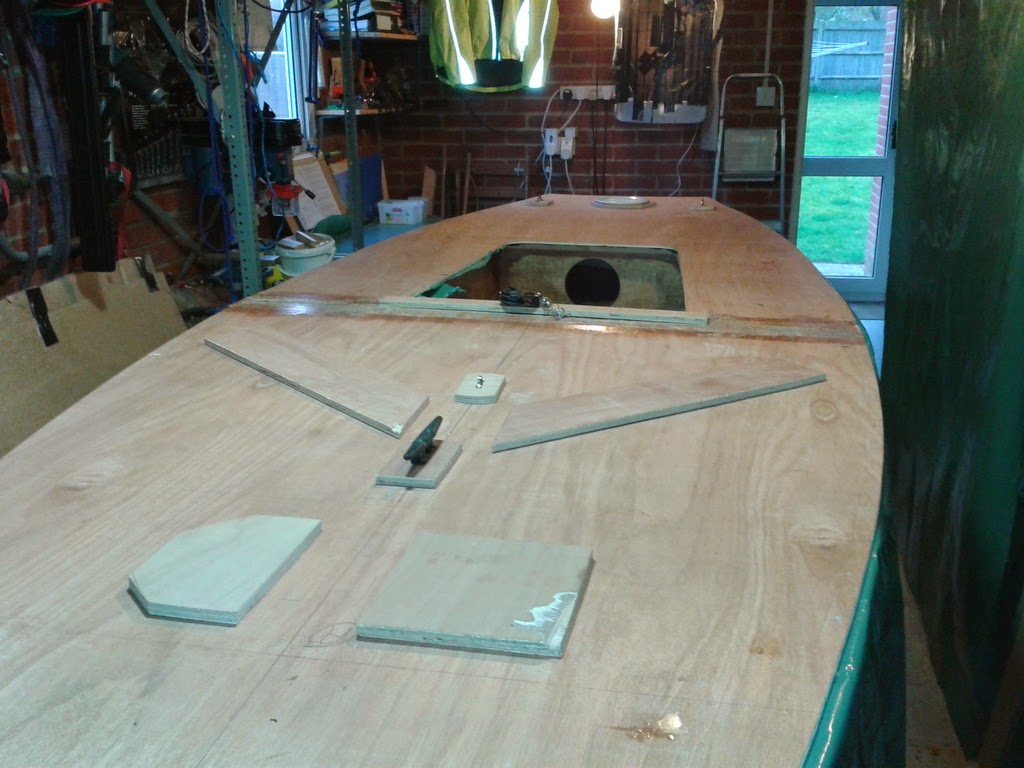
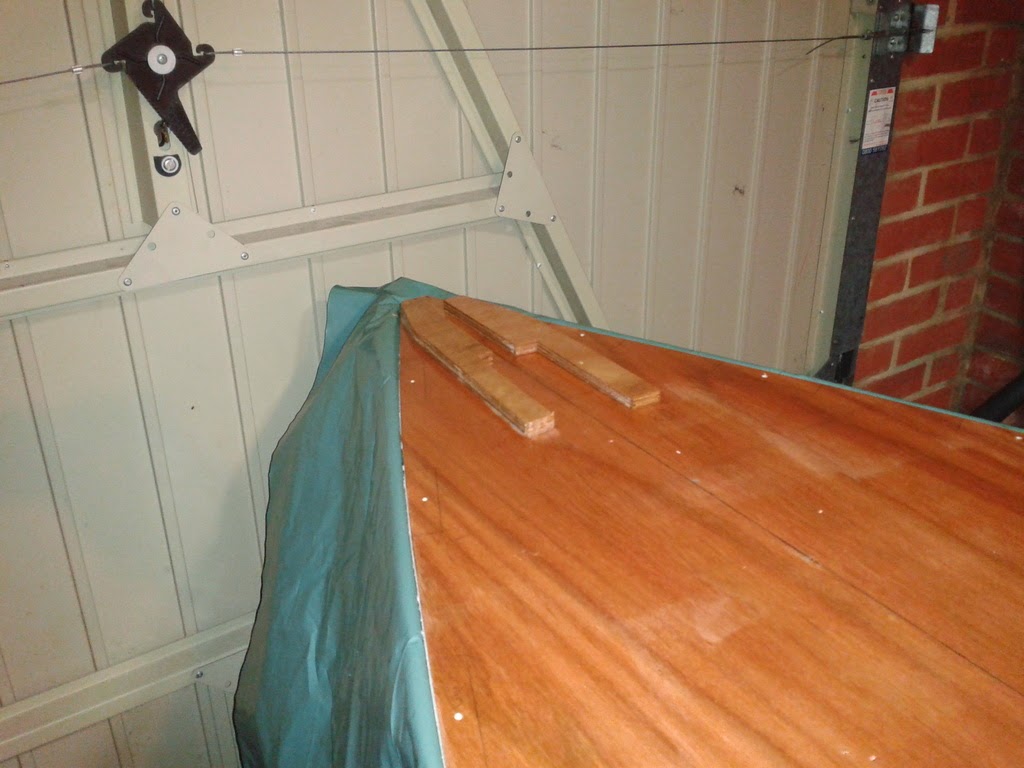
The Sunfish class regulations give the thickness of the foils as 3/4" (+/-), which matches the gap in the rudder head. To achieve a blank of this size, I had to laminate three sheets of ply: one of 12mm, one of 6mm with one of 4mm sandwiched between them:

Image

Image

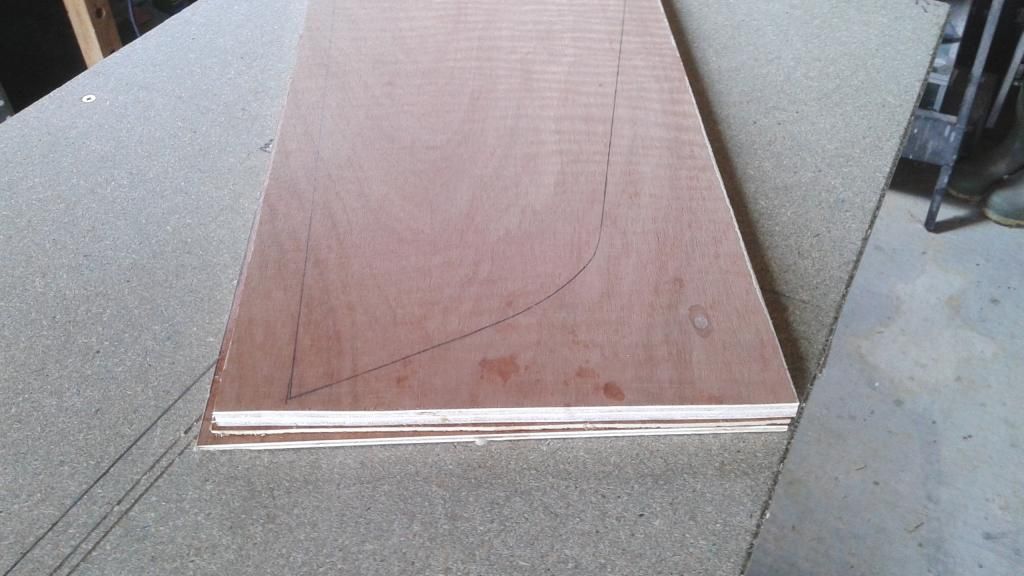
which worked well after a night curing under quite high, but uniform pressure.

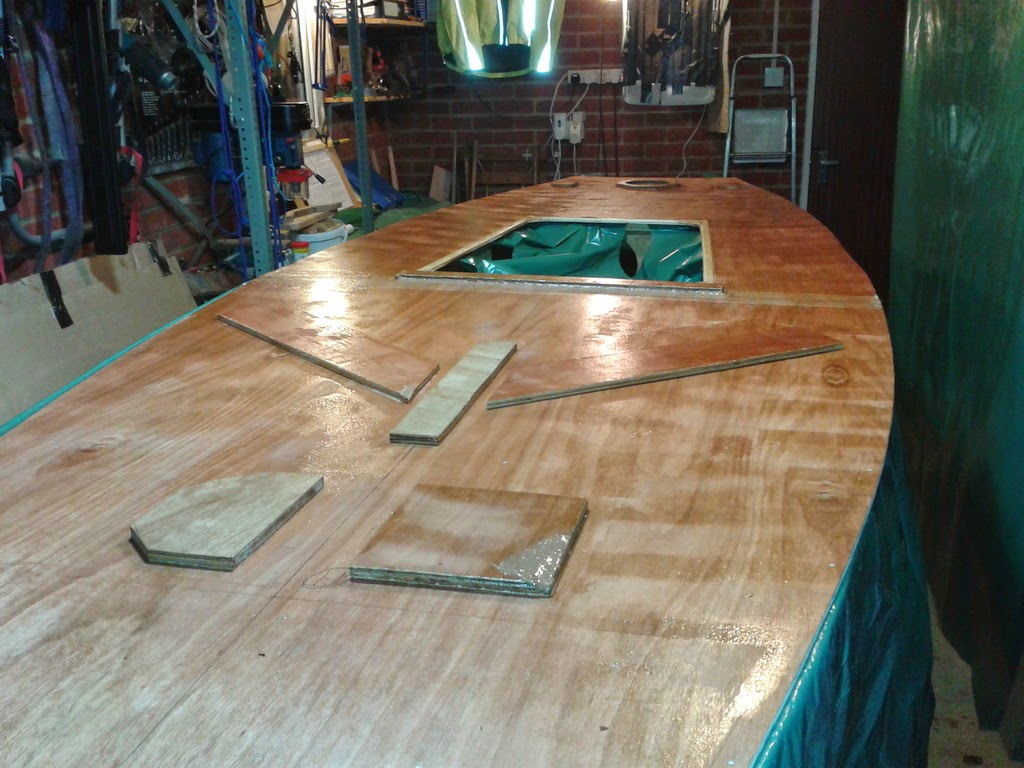
I then marked out the edges and shaped them down, mostly using a low angle block plane (with a small sureform in places), finishing off with sandpaper. There were some rough spots left where some of the rougher filler laminations of the ply were exposed; I filled these with wood filler and then sanded back again to achieve smooth curves and corner radii. The whole thing was then stained with mahogany wood dyes - as I had done on the deck of the hull.

Image

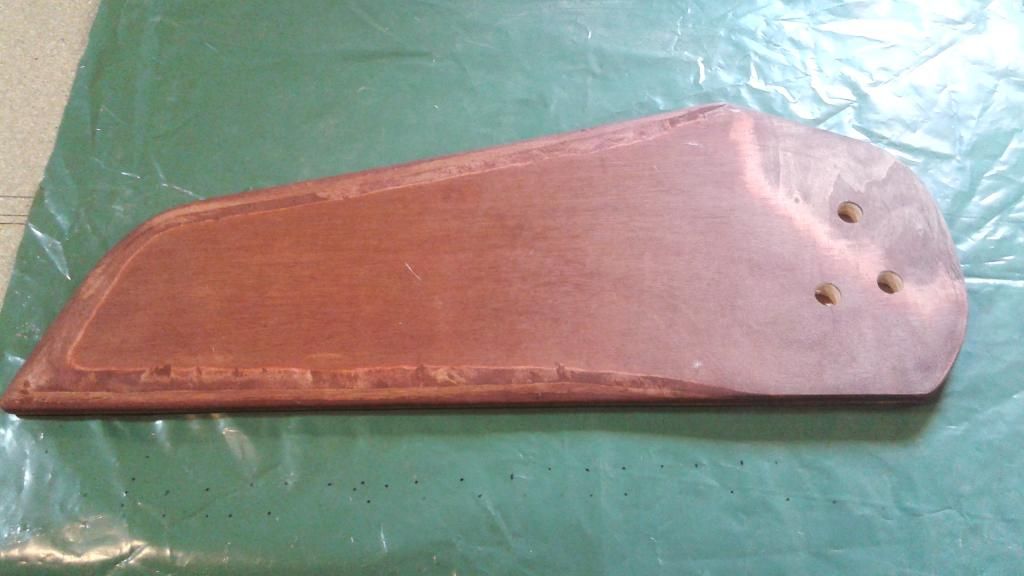
You will see that the three mounting holes have been enlarged (to 20mm with a forstner bit). These will be filled with epoxy before being drilled out again to the exact sizes. This will give me mounting holes that are (a) more robust than bare wood and (b) impervious to water penetration.

Whameller
Frequent Poster
Frequent Poster
Posts: 30
Joined: Tue Aug 23, 2011 11:08 am
Location: United Kingdom
Location: West Pembrokeshire, United Kingdom
Contact:

Re: MF14 - New Build in UK

Post by Whameller »

And a Few More ......
..... gratuitous shots of her outside on the refurbished 1960s trailer:

Image

Image

Image

Image

A bit easier to appreciate the lines, I think.

Whameller
Frequent Poster
Frequent Poster
Posts: 30
Joined: Tue Aug 23, 2011 11:08 am
Location: United Kingdom
Location: West Pembrokeshire, United Kingdom
Contact:

Re: MF14 - New Build in UK

Post by Whameller »

Well - I have finally finished her !

I'm way behind with keeping up with this thread, so I have posted an album 'Whameller's MF14' full of photos of the completed boat, polytarp sailmaking and some others.

I'll keep posting in the thread to fill in the detail.

Post Reply

Who is online

Users browsing this forum: No registered users and 10 guests