
Thank you! I'm still a few days away from needing it. Appreciate the support here.
Mattkab's GV13
-
mattkab

- Frequent Poster

- Posts: 99
- Joined: Thu Feb 25, 2010 8:18 pm
- Location: Washington State
- Contact:
Re: Mattkab's GV13
-
mattkab
- Frequent Poster
- Posts: 99
- Joined: Thu Feb 25, 2010 8:18 pm
- Location: Washington State
- Contact:
Re: Mattkab's GV13
Days 5, 6 & 7
Measured, cut, and joined the hull panels, plus an extra bulkhead since I'm turning one of the bench seats into storage.
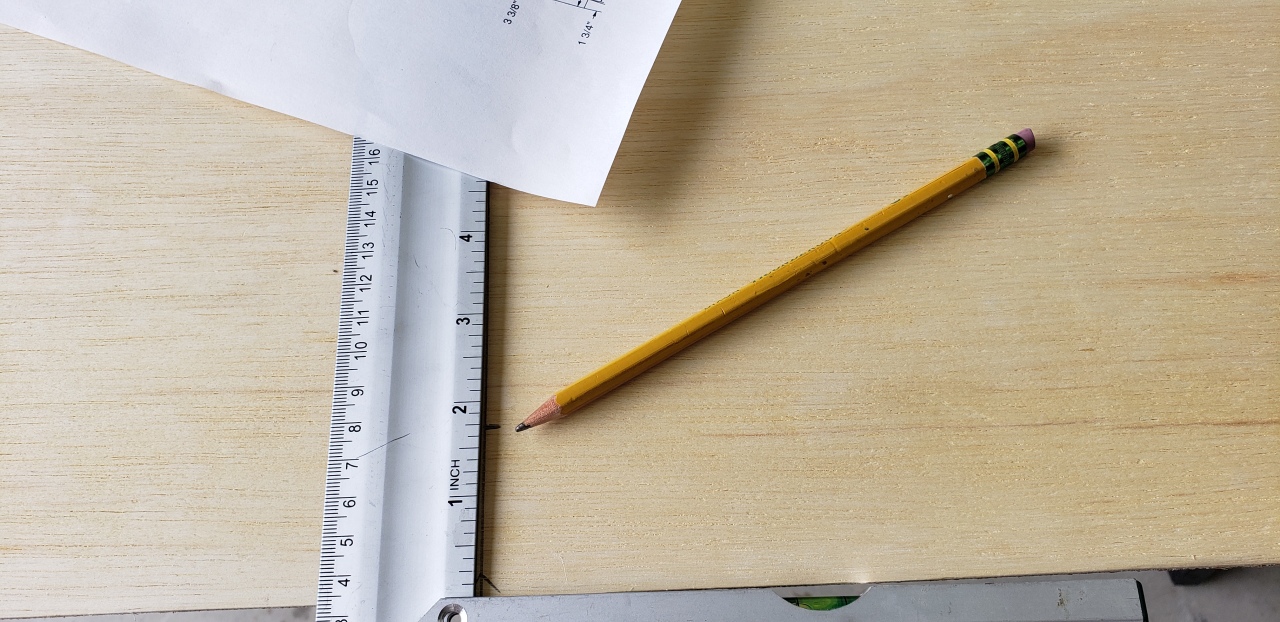
Measuring the offsets on the panels
Creating a curve from the batten
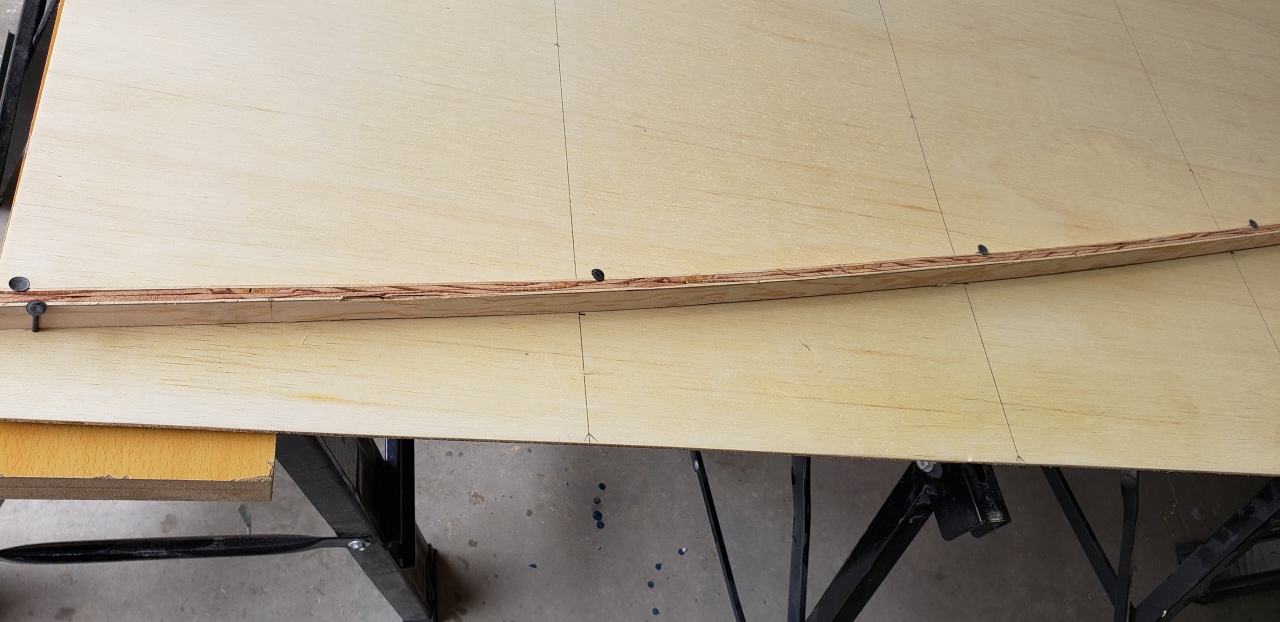
Final curve:
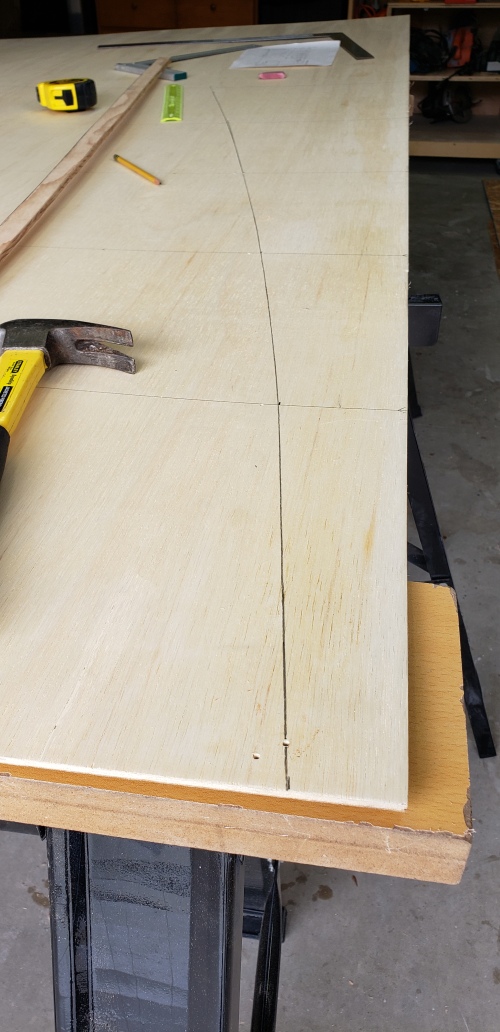
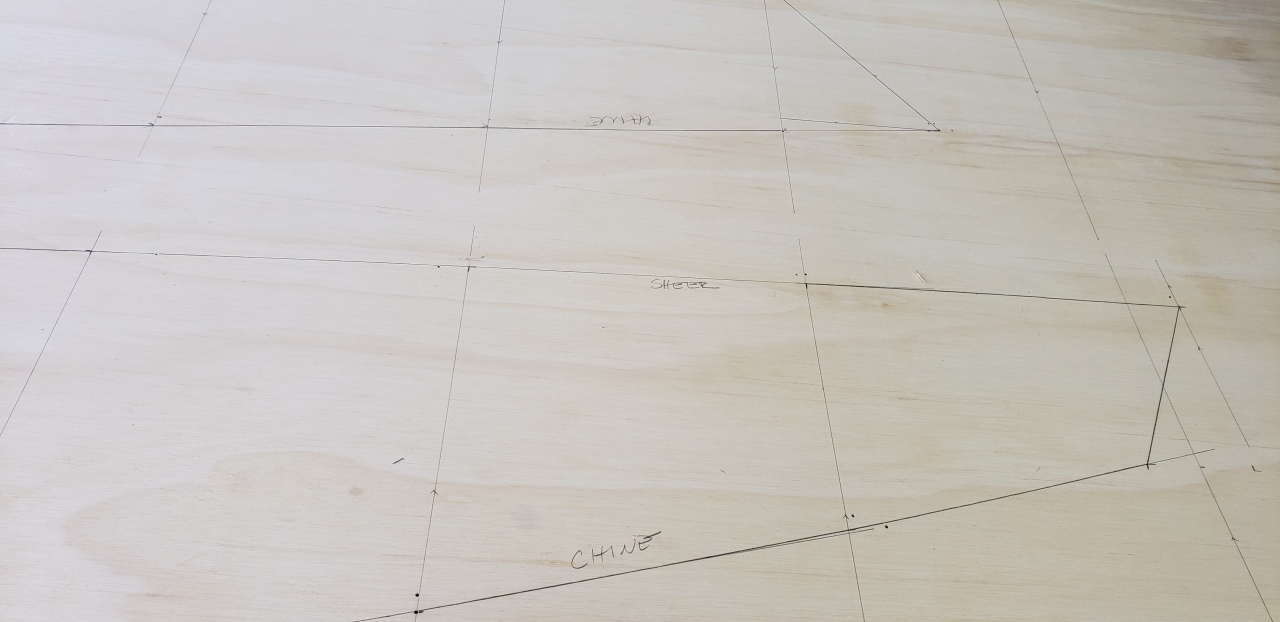
Panels drawn:
Mirror (Port/Starboard) panels cut using the first as a template, and then a shurform makes quick work of the anomalies:
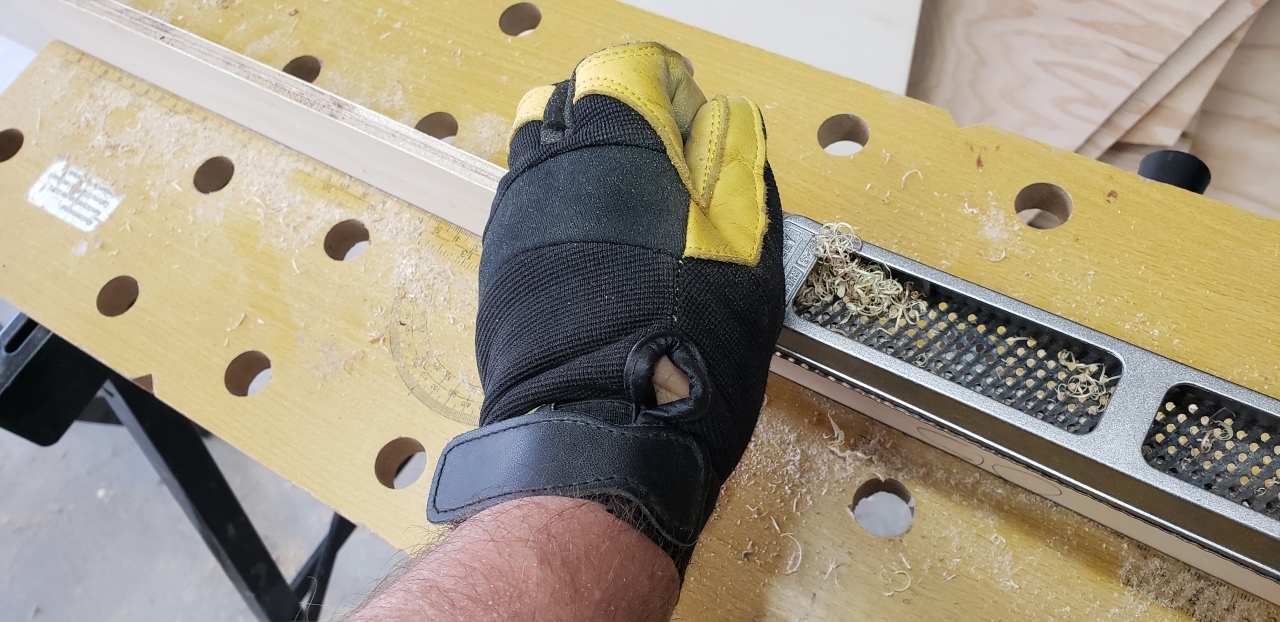
But I couldn't figure out a way to get the bigger panels lined up and clamped down so that I could use the shurform, so I switched to the belt sander for those:
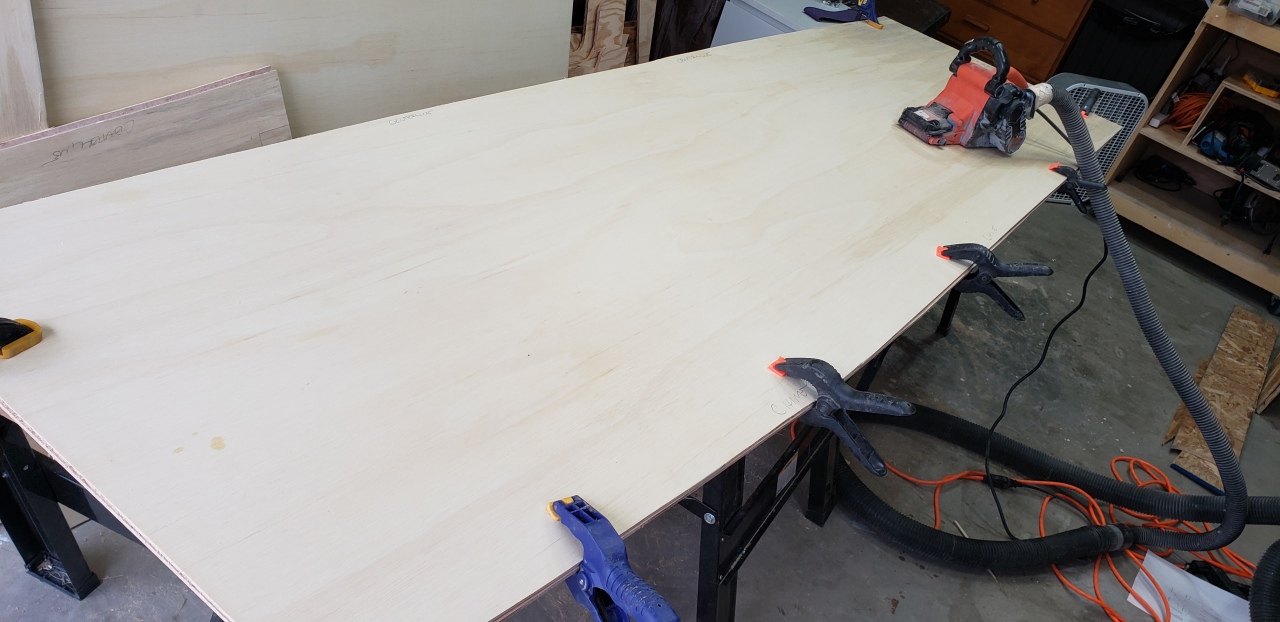
All cut out:

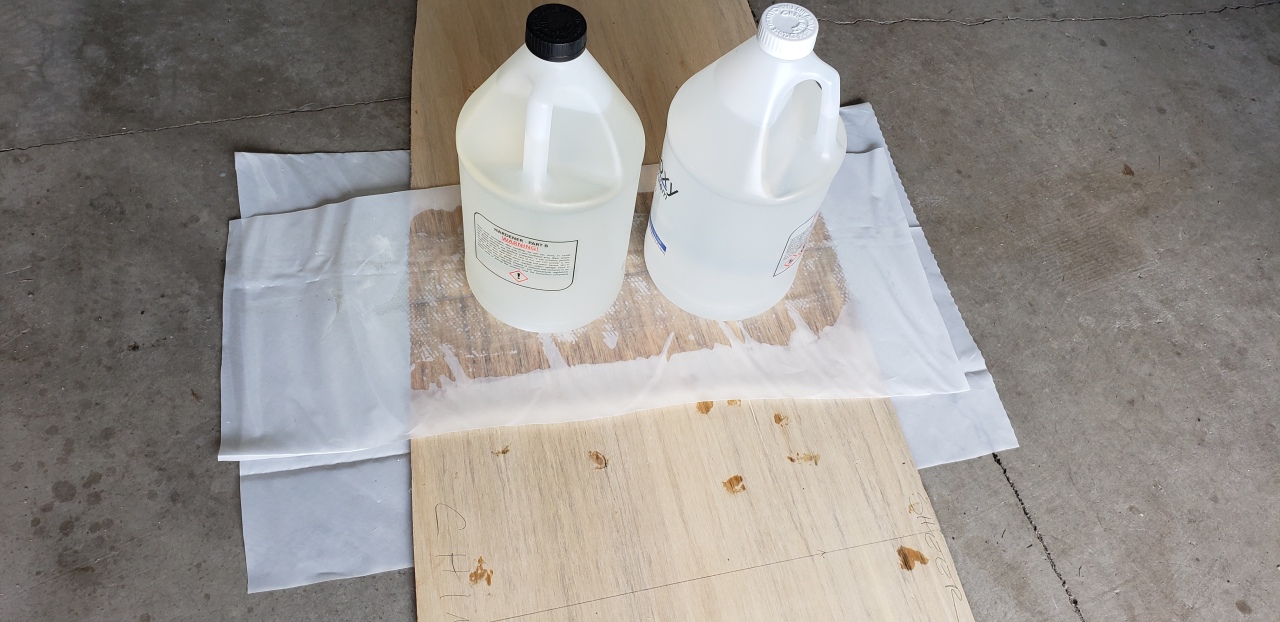
My epoxy station. I have a bit of leftover epoxy from the end of my V10 build that I used, but I'll switch to the MarinEpoxy that arrived last week (Thanks Jeff!!!) for the rest of the build.

...but today it's a weight.
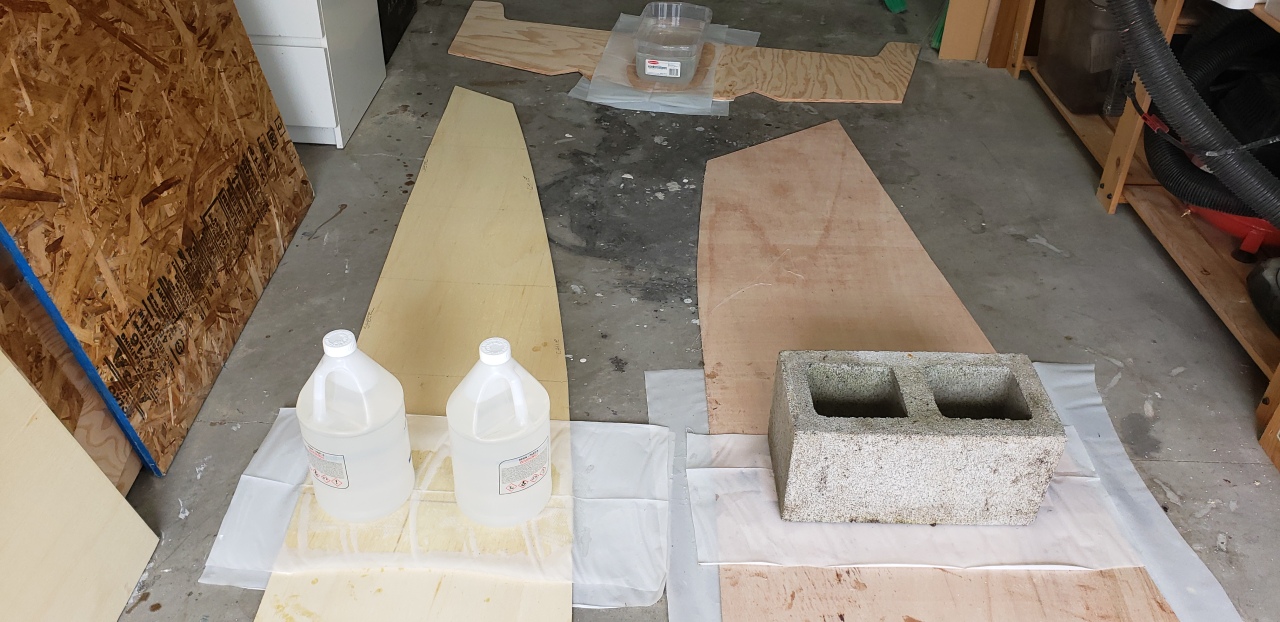
The requisite photo of the panels being weighed down while they cure:
Measured, cut, and joined the hull panels, plus an extra bulkhead since I'm turning one of the bench seats into storage.
Measuring the offsets on the panels
Creating a curve from the batten
Final curve:
Panels drawn:
Mirror (Port/Starboard) panels cut using the first as a template, and then a shurform makes quick work of the anomalies:
But I couldn't figure out a way to get the bigger panels lined up and clamped down so that I could use the shurform, so I switched to the belt sander for those:
All cut out:
My epoxy station. I have a bit of leftover epoxy from the end of my V10 build that I used, but I'll switch to the MarinEpoxy that arrived last week (Thanks Jeff!!!) for the rest of the build.
...but today it's a weight.
The requisite photo of the panels being weighed down while they cure:

Re: Mattkab's GV13
Nice progress Matt!!! Jeff
-
mattkab
- Frequent Poster
- Posts: 99
- Joined: Thu Feb 25, 2010 8:18 pm
- Location: Washington State
- Contact:
Re: Mattkab's GV13
Days 8, 9 & 10
Yes, it took three full days to build the strongback. I was a bit surprised by that, thinking I would knock it out in an evening... but I wanted it to be precise, and strong.
A day in my world of boat-building is a vague reference though . Most of the time, like in this case, it's 2-4 hours after work. On a weekend, though, it may be anywhere from 2-8 hours. I started counting the hours, but breaks, disruptions, etc just made it complicated. I don't really care -- calendar days are what I remember.
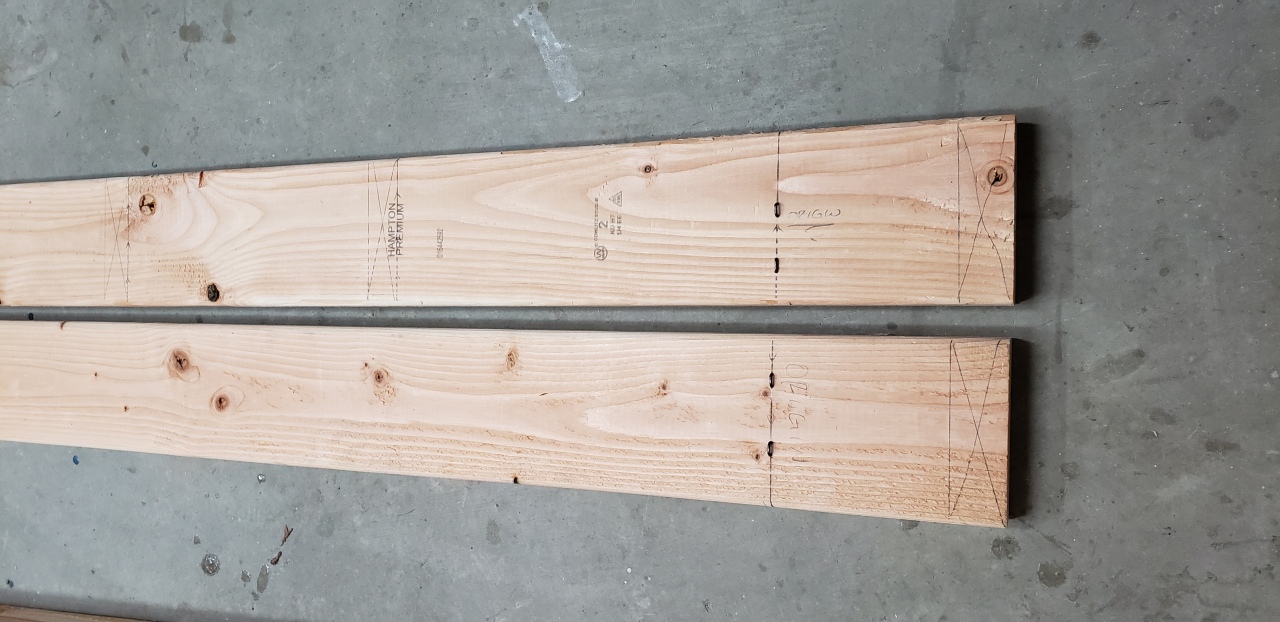
The origin on the GV13 plans is offset from the end of the strongback. I measured this offset, then stapled right on the line, providing a pair of convenient points to put the tongue of the tape measure on, so I could conveniently measure the rest of the braces from that point:
I built the strongback on casters, so that I can more easily move the boat around as the build progresses. Then I used a couple pieces of scrap to lift the uprights while they were glued and screwed into place:

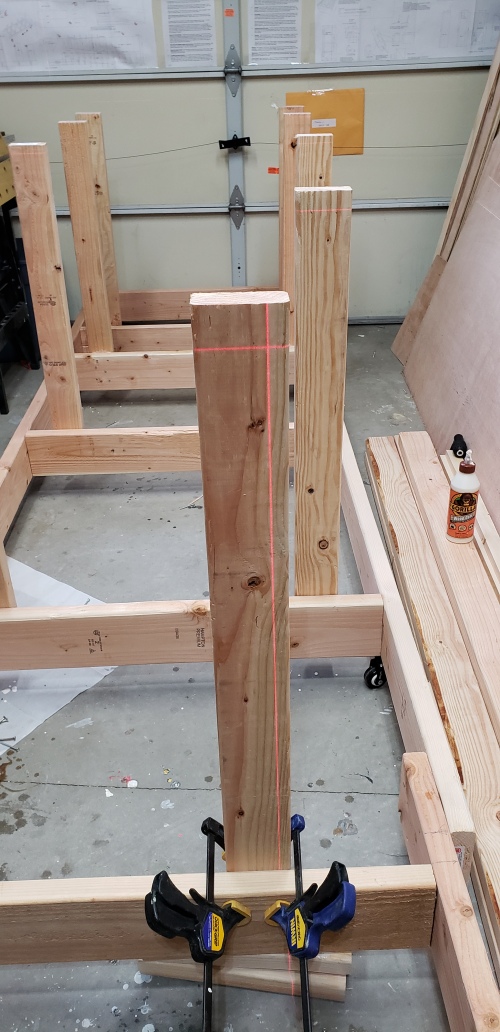
I found that a laser level and a pair of clamps made aligning super simple:
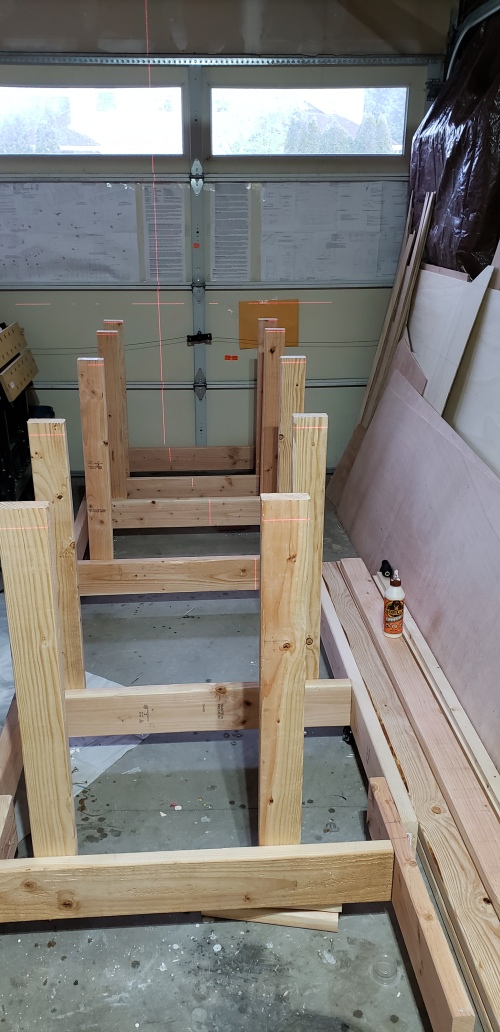
Three days later, all the uprights are square, level, and solid. I will probably add a few cross-braces as I align the bulkheads:
Yes, it took three full days to build the strongback. I was a bit surprised by that, thinking I would knock it out in an evening... but I wanted it to be precise, and strong.
A day in my world of boat-building is a vague reference though . Most of the time, like in this case, it's 2-4 hours after work. On a weekend, though, it may be anywhere from 2-8 hours. I started counting the hours, but breaks, disruptions, etc just made it complicated. I don't really care -- calendar days are what I remember.
The origin on the GV13 plans is offset from the end of the strongback. I measured this offset, then stapled right on the line, providing a pair of convenient points to put the tongue of the tape measure on, so I could conveniently measure the rest of the braces from that point:
I built the strongback on casters, so that I can more easily move the boat around as the build progresses. Then I used a couple pieces of scrap to lift the uprights while they were glued and screwed into place:
I found that a laser level and a pair of clamps made aligning super simple:
Three days later, all the uprights are square, level, and solid. I will probably add a few cross-braces as I align the bulkheads:
Re: Mattkab's GV13
Good work Matt!!! Jeff
-
mattkab
- Frequent Poster
- Posts: 99
- Joined: Thu Feb 25, 2010 8:18 pm
- Location: Washington State
- Contact:
Re: Mattkab's GV13
Days 11 & 12
Still chopping wood.... wait, no, that's not the right phrase.... still making progress.
Got all the bulkheads mounted to the strongback. The process went pretty smooth, but I have a new-found respect for the self-leveling laser level that I bought. I spent a bit of time explaining the process I used below, feel free to ask if you're not clear on anything. It saved me a ton of time -- Once I figured out the process, I could align, level, clamp, double-check, and screw a panel in less than 5 minutes.
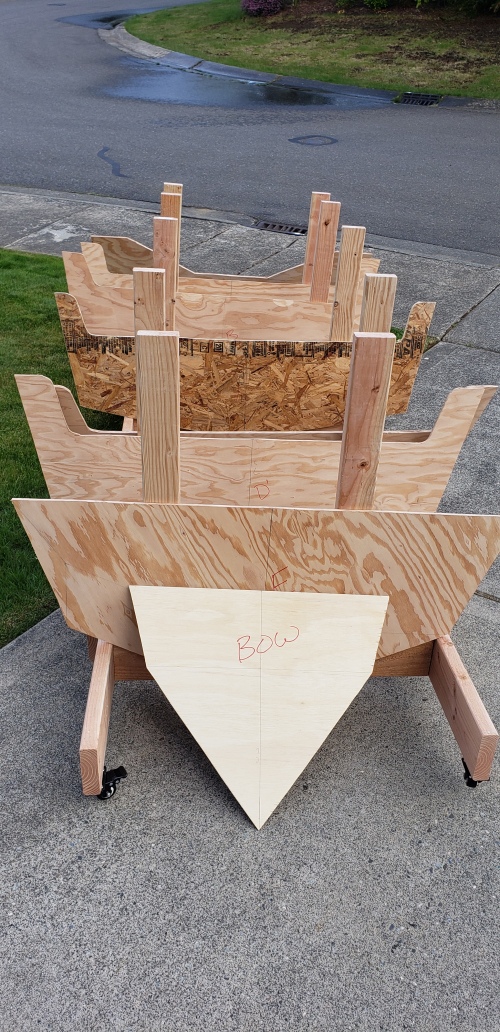
Started by laying out the bulkheads on the strongback while I organized the garage:
I mounted the transom first. Then the forward most bulkhead (E). And then moved forward A->D:
I drew a line on the centerline fore and aft on the strongback, and aligned it with the laser level. Then I marked a horizonal line on a temporary piece of wood the height of the peak of the bulkhead, minus 1". Then, on each bulkhead, I drew a cross 1" down that the laser level would target, clamping and then screwing into place. I double-checked each bulkhead with a level, and was very pleased to see the bubble inside the lines each time:

After two evenings, we're ready for the panels:

Still chopping wood.... wait, no, that's not the right phrase.... still making progress.
Got all the bulkheads mounted to the strongback. The process went pretty smooth, but I have a new-found respect for the self-leveling laser level that I bought. I spent a bit of time explaining the process I used below, feel free to ask if you're not clear on anything. It saved me a ton of time -- Once I figured out the process, I could align, level, clamp, double-check, and screw a panel in less than 5 minutes.
Started by laying out the bulkheads on the strongback while I organized the garage:
I mounted the transom first. Then the forward most bulkhead (E). And then moved forward A->D:
I drew a line on the centerline fore and aft on the strongback, and aligned it with the laser level. Then I marked a horizonal line on a temporary piece of wood the height of the peak of the bulkhead, minus 1". Then, on each bulkhead, I drew a cross 1" down that the laser level would target, clamping and then screwing into place. I double-checked each bulkhead with a level, and was very pleased to see the bubble inside the lines each time:
After two evenings, we're ready for the panels:
-
mattkab
- Frequent Poster
- Posts: 99
- Joined: Thu Feb 25, 2010 8:18 pm
- Location: Washington State
- Contact:
Re: Mattkab's GV13
Days 13 & 14
The stitch-and-glue post in a stitch-and-glue boat build!
I broke from the instructions on the plans, and didn't screw any of the panels down. Instead I drilled 2 holes on the panel, and one on the bulkhead, and zip-tied the panels on. Then I stitched the centerline seam, the lower bow, then the starboard chine, and finally the port chine. Because of the zip-ties I was able to cut problematic attachement points that were preventing the panels from curving appropriately. It took a day to stitch, and an hour or two to glue.
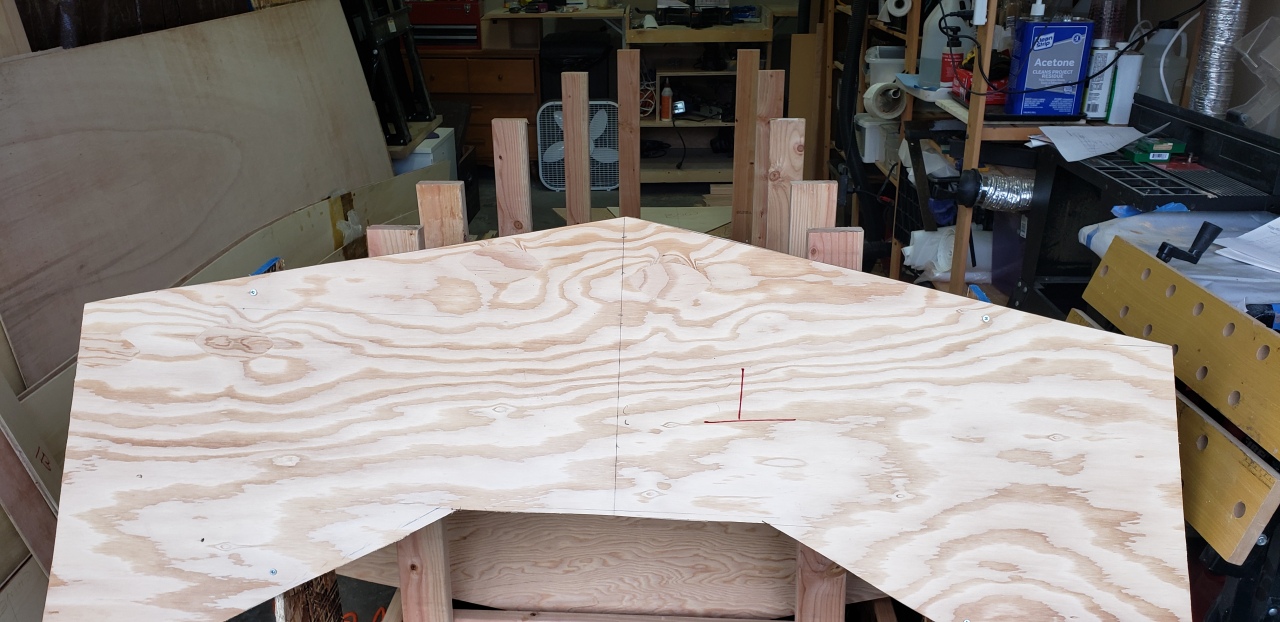
Laying out the two lower panels. I was real concerned for a bit that I had glued the butt-blocks on the wrong side... but after a good 10 minutes of near panic I realized that all I needed to do was swap the panels port/starboard and they fit...
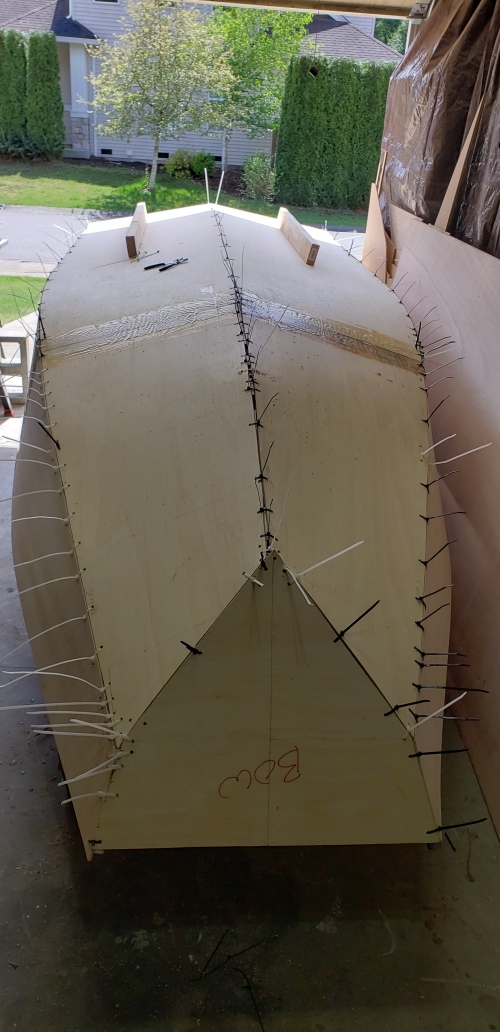
Stitched the centerline and the bow:
Transom view:
Almost done. If you look carefully, you can see that the panel on the left (port on the boat) is about 1/2" above the end of the bow panel. It was actually the black zip-tie on the bulkhead about 1/3 back from the bow that was jamming everything up... I clipped that tie, and the panel almost snapped into place:
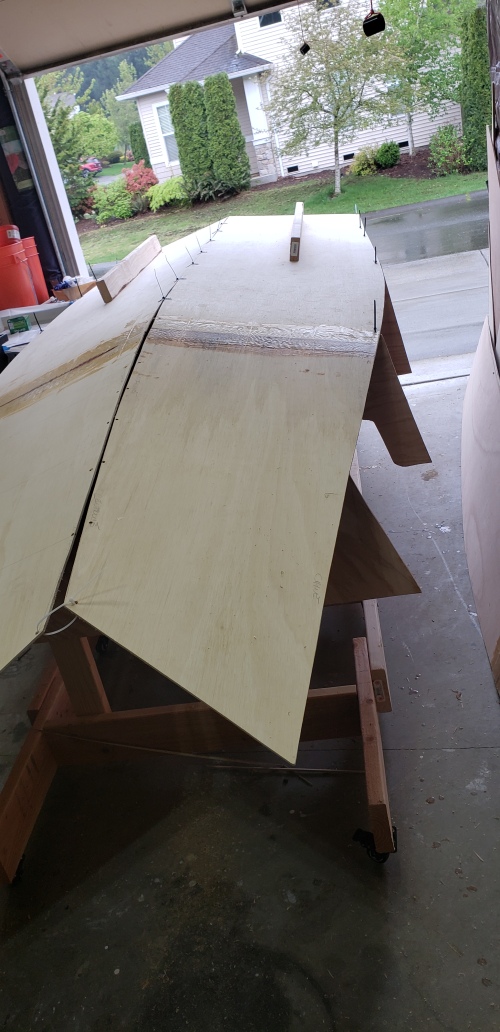
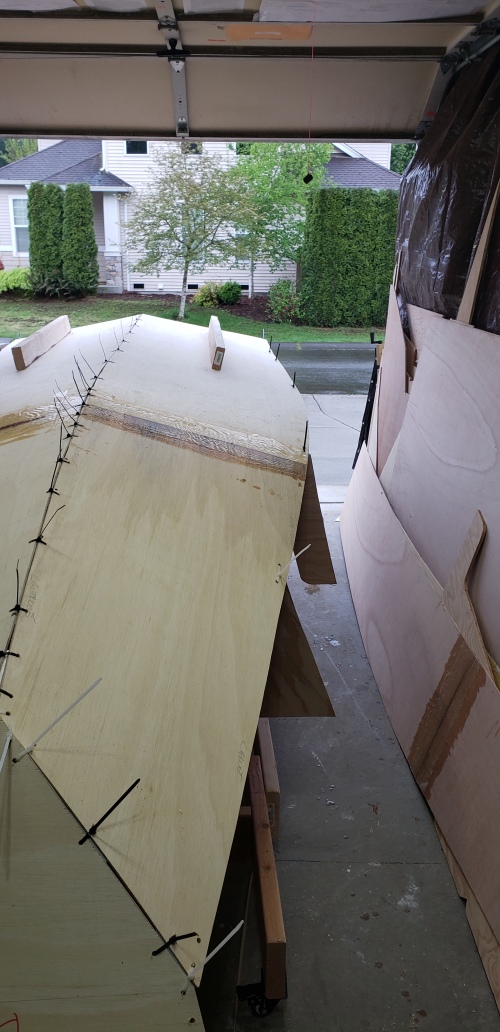
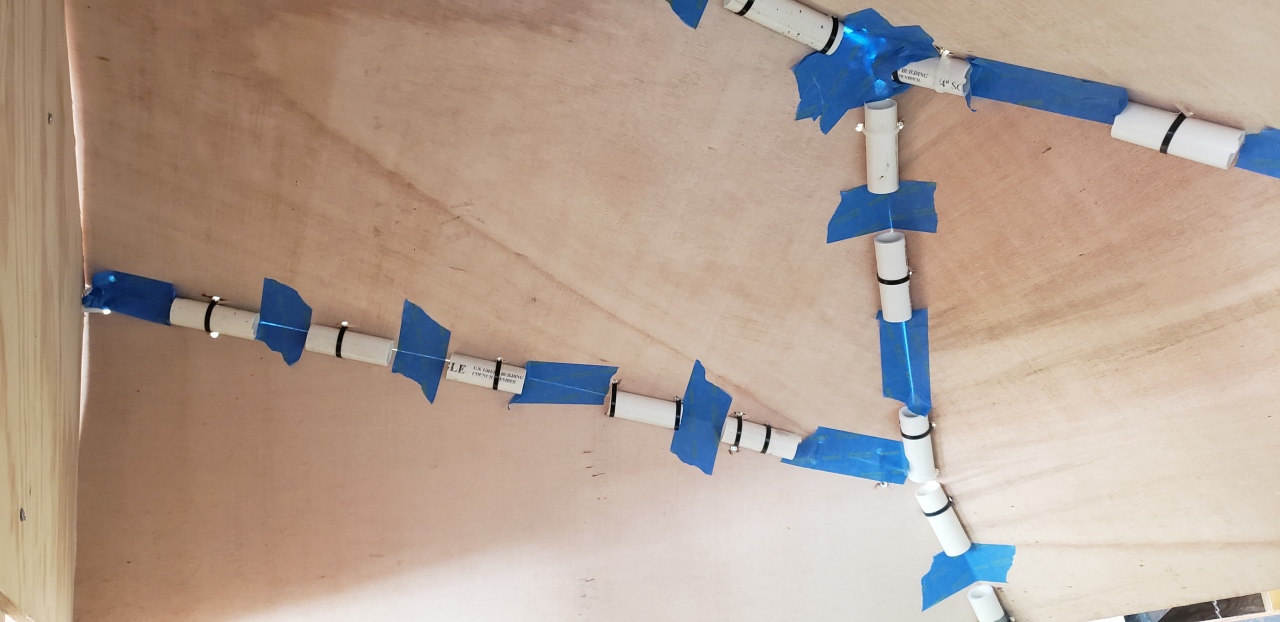
I used 1" PVC under the zipties to help align the seams, with masking tape in between. I'd never done this technique before, but other than the uncomfortable body angles to get under the boat at times, I really like how it works. I'll definitely do it again:
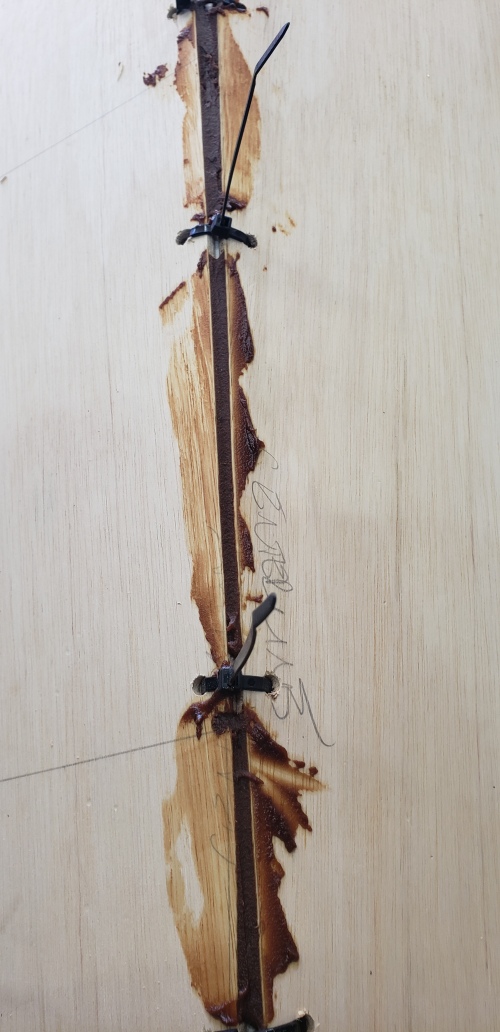
I checked my diagonals, and I was within 3/4" across 13'... that's about as good as I'm gonna get it in a garage. So I mixed up some thickened epoxy, and glued in between the stitches:
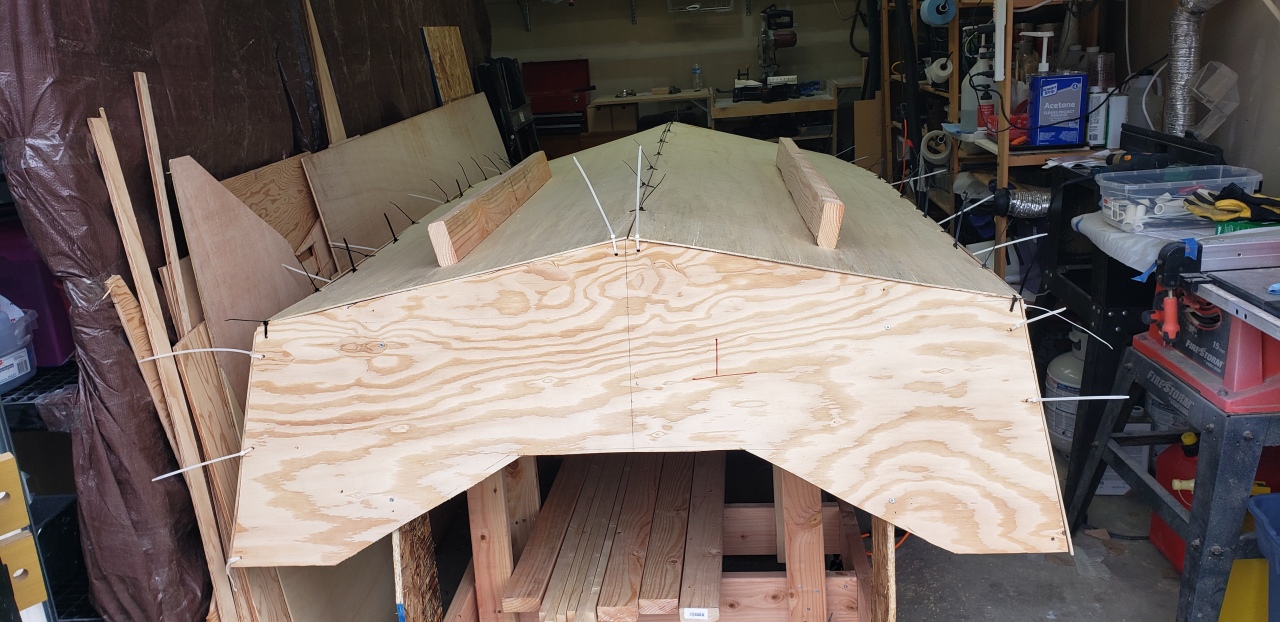
All glued up. Seeing it in person it has much prettier lines than you see in the plans - the bow entry is much nicer than I expected. Kudos to Evan!
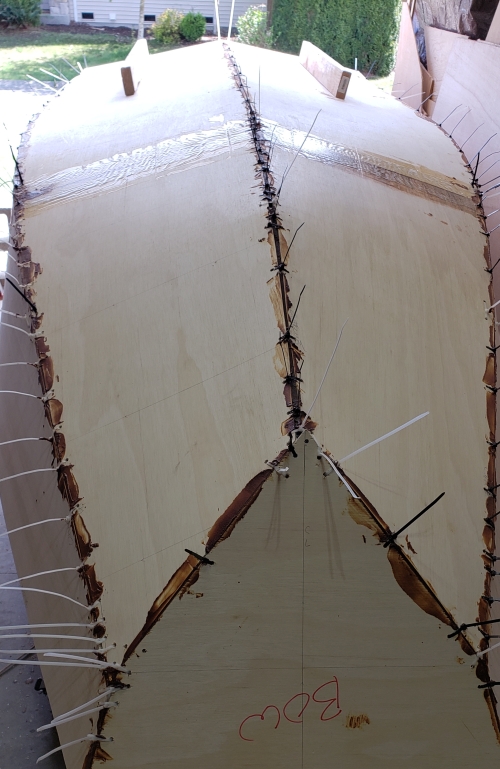
Tonight I'll snip the ties, do a quick sand/grind, and tape the seams. hopefully I can get a the biaxial cloth laid down later in the week.
The stitch-and-glue post in a stitch-and-glue boat build!
I broke from the instructions on the plans, and didn't screw any of the panels down. Instead I drilled 2 holes on the panel, and one on the bulkhead, and zip-tied the panels on. Then I stitched the centerline seam, the lower bow, then the starboard chine, and finally the port chine. Because of the zip-ties I was able to cut problematic attachement points that were preventing the panels from curving appropriately. It took a day to stitch, and an hour or two to glue.
Laying out the two lower panels. I was real concerned for a bit that I had glued the butt-blocks on the wrong side... but after a good 10 minutes of near panic I realized that all I needed to do was swap the panels port/starboard and they fit...
Stitched the centerline and the bow:
Transom view:
Almost done. If you look carefully, you can see that the panel on the left (port on the boat) is about 1/2" above the end of the bow panel. It was actually the black zip-tie on the bulkhead about 1/3 back from the bow that was jamming everything up... I clipped that tie, and the panel almost snapped into place:
I used 1" PVC under the zipties to help align the seams, with masking tape in between. I'd never done this technique before, but other than the uncomfortable body angles to get under the boat at times, I really like how it works. I'll definitely do it again:
I checked my diagonals, and I was within 3/4" across 13'... that's about as good as I'm gonna get it in a garage. So I mixed up some thickened epoxy, and glued in between the stitches:
All glued up. Seeing it in person it has much prettier lines than you see in the plans - the bow entry is much nicer than I expected. Kudos to Evan!
Tonight I'll snip the ties, do a quick sand/grind, and tape the seams. hopefully I can get a the biaxial cloth laid down later in the week.

Re: Mattkab's GV13
From another GV13 builder that looks great - much better than mine at that stage!
It really took a nice shape with great seams!
It really took a nice shape with great seams!
Re: Mattkab's GV13
Nice progress!! Jeff
-
mattkab
- Frequent Poster
- Posts: 99
- Joined: Thu Feb 25, 2010 8:18 pm
- Location: Washington State
- Contact:
Re: Mattkab's GV13
Aw, thank you. That's high praise coming from you, because your boat turned out beautifully!
Who is online
Users browsing this forum: No registered users and 10 guests