
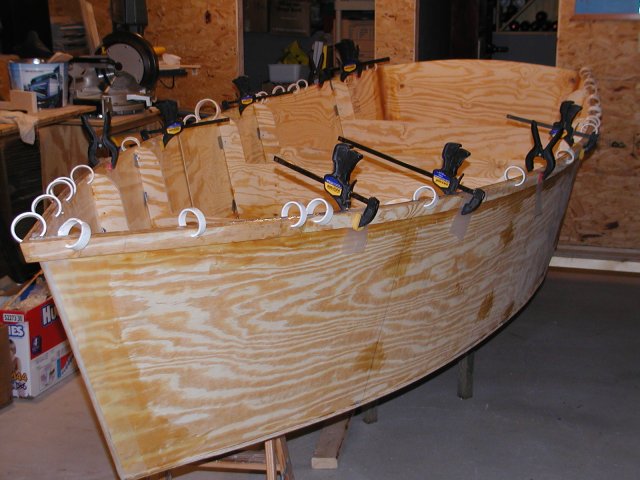
I did just that on my N7 - port rail held in place and cut flush - then starboard rail left long - glue both and let dry, then trim flush with port rail. Then for the next layer - starboard cut flush and port goes long - and so on for three layers. Any gaps filled with the magic woodflour & epoxy putty.
Neat way if your joinery skills are rusty.
FL14 "Robjack" update
-
BilltheCat

- Active Poster

- Posts: 451
- Joined: Fri Sep 20, 2002 1:00 am
- Location: Florida's West Coast
As far as gluing rub rails on one at a time goes, I do not see too much of a problem here unless it is done very early in the building process before the major seams or fillets are built. Once the frames are in place, in my experience not much bad can happen that has not already happened. The rub rails will help fair our long streaches of the sheerline between frame. But I do not think this will add any twist to the hull once the frames are glued inplace (sides and bottom). Unless you are working in teams it is hard to put them on at the same time. Even if you are putting on one ten minutes before the other, you will have clamped it in place, then can hand saw flush and install the other side. Might take one extra minute. Easy to do. When you are going for the nice wood joinery for the exposed varnised wood look then things have to be done well. On the other hand the angle of the symetrical joint could be marked easy enough by clamping in place and putting pencil marks on the top and bottom following the centerline. Cut with a handsaw, and reclamp to make sure it is good. If it is a little off, either try again 1/4 inch in from the old cut or fix the first cut with a belt sander or sanding block to get spot on. Just keep the back side a little long in case you have to nibble back a couple of times to get it where you want it.
JeffS
JeffS
Status: second row of rubrail installed. Starting assembling and glueing bits a pieces for breasthook, skeg, cleats, etc. Resolved buy another sheet of 3/8 if I need to instead of trying to utilize every scrap most efficiently. I can just cut it half glue it, and rip as many cleats as I need.
Now the boat is flipped and I went thru my procedure for the next week; up through fully fiberglassing the exterior.
Now the boat is flipped and I went thru my procedure for the next week; up through fully fiberglassing the exterior.
Well, I have been trimming and sanding, boring and filling voids. Boat was flipped over the weekend. I wasnt quite sure how to go about getting the 1/2" roundover on the edges. I used a router with a roundover bit and bearing, but all that did was serve to get me started...effectively working somewhat as a trim bit since the panels arent at 90 deg. Then I tried my random orbit (Porter Cable 333 since some are interested - with broken dust collector), but I didnt think my roundover was enough and it was slow going. I had been hesitant to try the belt sander, but finally did. It worked alot faster, but you have to be careful with it of course. Then the belt broke. It was medium grit and I replaced it with a course grit. Now, I had to be more careful! Probably should have stuck with medium. In any case, now I have a nice roundover all around the hull and on the transom. I also have some heavy scratch marks in the plywood that I am hoping the cloth and fill will help feather out.
I have also sanded the whole exterior and filled all the holes, knots, etc. That has been about 4-6 hrs of work I guess. I exposed a few voids rounding over the hull. I used a "Rotozip" to open it up and fill it with epoxy (there were 4). One turned out to be a knot and ended up being about the size of 2 quarters!
I have been covering these patched areas with 4mil plastic and it just peels right off 12 hrs later leaving a nice smooth surface!
It will be interesting to see what the hull looks like after its covered and had a coat or 2 of epoxy+microballoons. There are alot of minor imperfections in either due to epoxy or ply and I wonder if the cloth + fairing mix will make them disappear or be more pronounced.
Maybe tomorrow I will get to taping. Steps
1. tape seams, knock down edges next day
2. transom cloth, bottom cloth (this will cover all the tape)
3. next day, hull cloth
4. next, 1st coat of epoxy+balloons
5. another coat of epoxy + ballooons?
-
Mike Adams
- Very Active Poster

- Posts: 774
- Joined: Thu Oct 14, 2004 4:43 am
- Location: Gympie, Queensland, Australia
OK - I uploaded more pictures.
http://gallery.bateau2.com/thumbnails.php?album=238
I have a bunch more, but I dont know how to organize them and it takes a while to do. It isnt the most intuitive interface I have ever seen.....but the rest of the "company and community" more than compensates.
Is there a way to upload more than 1 picture at a time does anyone know?
well....its a basement and there is no heat, but its been holding at 58-62 lately, but in past few days its come down a few degrees. Its taking the epoxy longer to set.... I have forced hot air ducts running across the cieling to heat the 1st floor and my builder implied I could cut them open to put some heat in the basement if I wanted to, but I dont know if it will cause any problems so I havent done it.
-
fishingdan

- Very Active Poster
- Posts: 1376
- Joined: Tue Sep 17, 2002 1:00 am
- Location: Norfolk, MA
Steve,Steve_MA wrote:well.... I have forced hot air ducts running across the cieling to heat the 1st floor and my builder implied I could cut them open to put some heat in the basement if I wanted to, but I dont know if it will cause any problems so I havent done it.
You don't want to do that. In my previous home, the builder did exactly that and it was useless. Unless the system is designed to heat that level, it will be ineffective. Get a gel filled electric heater. They work great. I had a 5' long free standing floor model.
The boat is looking good.
Dan
-
ks8
- * Bateau Builder *
- Posts: 8403
- Joined: Mon Nov 24, 2003 1:00 am
- Location: NC USA
- Location: Now a much longer sail to Tampa Florida! Back to NC, Youngsville FM05tw
I've got one of those electrics also. They work fairly well, but electricity is expen$ive.
A forced air system in a basement may tend to have all the heat rise to the ceiling as the cooler air near the floor and walls is heavier (good enough term), and displaces where the warmer air might have otherwise drifted to (sort of). One or two strategically placed fans, on the floor, pointing straight up, will get the warmer air up there to circulate more in the living regions above the floor, by using the cooler denser air to move that hotter air around more. But when altering a home heating system (cutting a hole in a duct), you always have to make sure that the system can still push warm air to all the spaces where it is needed. You don't want to start, say, getting minimial heat to a second floor, and risk any pipes freezing that may be in outside walls.
In college, I lived in an old huge house with cathedral ceilings. When I was moved to one of the LARGE rooms, I found out what a cold room is like. Someone left a beer on a nightstand one night. I woke the next morning to find it froze solid. I got up on a chair and raised my hand. It was toasty up there, but there were no people typically spending anytime up there! I put in just one small space fan (18") in a strategic corner, on the floor, and aimed it straight up. I partially regret, since it made that room the warmest in the house, and everyone used to stay and chat in there til the wee hours, which doesn't help when sleep tugs at your eyelids.
Try the fan, as it may do the trick without having a skyrocketing electric bill. Even putting the fan four feet off the ground and aiming it up should help. It doesn't need to create a gale, just move the air by the ceiling.
Of course, if you are sanding, that fan will blow and circulate the dust everywhere, and if there isn't positive pressure coming out the hole you cut, all the time, the dust and fumes may spread through the whole house, via the duct system! Maybe the electric is the way to go...
Have fun being Professor wizard...
ks
Who is online
Users browsing this forum: No registered users and 13 guests