Page 1 of 1
FL14 - First Build Started
Posted: Mon Mar 07, 2005 10:47 am
by Dane_Ger
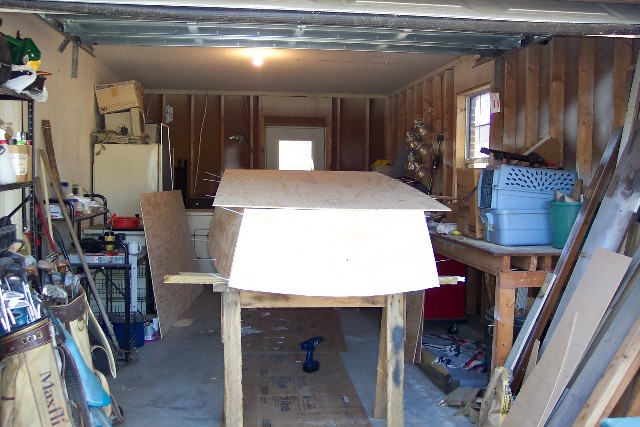
Well I finally began . . . the plans and epoxy/fiberglass kit arrived on Thursday (very fast service, btw). I was sure they'd be here by the weekend so my partner and I had gone and picked out the plywood on Wednesday. On Friday I began transferring the dimensions to the plywood, but ran into a bit of a snag there.
Posted for help and realized where I'd made my error. I forgot to allow for the offset on the transom and stern seat frame which made it appear that the transom and aft side panel edges would not align properly. After correcting my error, everything went along smoothly.
We started again on Saturday, rechecked our measurements, (wow did having my partner read them from the plans while I measured speed things up!) and began cutting . . . a bit of a scary proposition!

Got the side panels lined up and glued with the butt blocks and then cut out the transom and frames. I started a gallery and there are a few pics of our progress posted there. We will glue up the bottom panels tonight and can then start shaping and assembly this weekend.
http://gallery.bateau2.com/thumbnails.php?album=276
Posted: Mon Mar 07, 2005 1:39 pm
by Deltaskipper
Great to see another startup. Keep the picures comming. They make a good tutorial.

Posted: Mon Mar 07, 2005 2:23 pm
by Steve_MA
We will glue up the bottom panels tonight
I think the plans/directions say to stitch the sides to the frames first. Then lay the bottom ply of the hull and trace out its shape. Then cut the ply, butt block the 2 pieces together and then stiitch it to the hull. You can glue up the bottom panels until you cut them and there are no dimensions in the plans for the bottom. You dont get the bottom dimensions till you stitch up the sides and hull


Also, when you put the butt block on the bottom leave a little room on each side to accept the side panels. I had just put them down when I remembered that and had to trim them with epoxy on them.

Posted: Mon Mar 07, 2005 2:49 pm
by Dane_Ger
Steve, thanks for that info . . . I realize that I have to have the sides stitched up in order to get the bottom shape, but I didn't see where it'd hurt to join the bottom panels at this stage. I'll check the plans/instructions again.
Posted: Mon Mar 07, 2005 8:56 pm
by ks8
It seems the FL14 may be the *boat build of the year 2004/2005*.
Good to see another one shaping up.
If the butt blocks get in the way of the side panels at the edges of the bottom panel (gluing up the bottom panel butt ahead of time), there are several ways to make that sort of situation go away, either with a circular saw set just deep enough to trim off the butt height at the edge, or a bit of grind here and there. I don't know your boat exactly, but the general S&G principles apply to many of these boats.
You'll know what needs doing when you get there... or just ask...
If you encounter a situation there, maybe send a couple of pictures of the situation and the approach taken to make it a non-issue?
It's great that you've got Steve and Mike as recent FL14 examples with lots of pictures and *been there* (didn't mean to leave anyone out...).
Enjoy those early steps of seeing flat panels bend into a boat! It will give you the enthusiasm to follow through if some inerior details don't seem as *transformational* (but of course they hold those nice curves in place).
Sincerely,
ks
Posted: Mon Mar 07, 2005 9:29 pm
by Mike Adams
Good to see you've made a start, Dane! As ks8 says, the FL14 is shaping up to be the boat build of the year! You will love this project - it's an easy, fun build. You will probably make some mistakes along the way, as we all do, but they'll be easy to fix and this forum is tops for advice and encouragement.
Unfortunately, Pensacola is on the other side of Florida from where I'm going in a few weeks, or I'd drop by to see how you're getting along with it. Good luck, anyway - and keep the pictures coming!
Posted: Mon Mar 07, 2005 9:49 pm
by ross61
Seems like last year at this time, possibly slightly later, we had a mess of FL14 builds going on too, including mine. Do some FL14 searches and I'm sure you will find all kinds of info and pics. Good Luck, this is a great boat!!
Ross
Posted: Tue Mar 08, 2005 9:26 am
by Steve_MA
Another thing that comes to mind - I would do next - is round over the corners of my butt blocks, transom pad, for example. I think its easier to round these edges over before they get glued in place or assembled. To get rid of these corners, I have been adding small fillets and sanding down the edges. Just more epoxy and more sanding..... Round the edge off with a router (if you have one) and just cover it with clear epoxy. Its just a detail, everyone has their own opinion and now I have mine

I think part of my problem is that I never seem to get my fairing compound thick and thixotropic enough for these vertical surfaces. So it just becomes a pain to make these joints look good. Yesterday I was finishing my side butt block fairing and I remembered about 2-3 hrs after finishing to run down and check it. It was the perfect consistency to run my finger thru and smooth out the fillet.
Otherwise, I would have had a thin fillet at the top and a bulge of epoxy at the bottom.
Posted: Tue Mar 08, 2005 9:58 am
by Dane_Ger
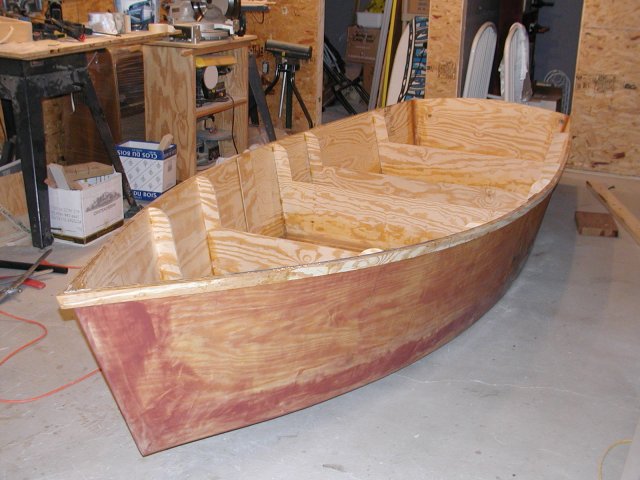
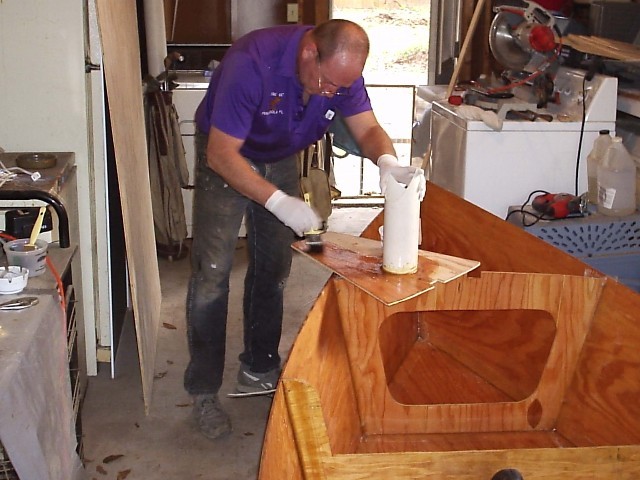
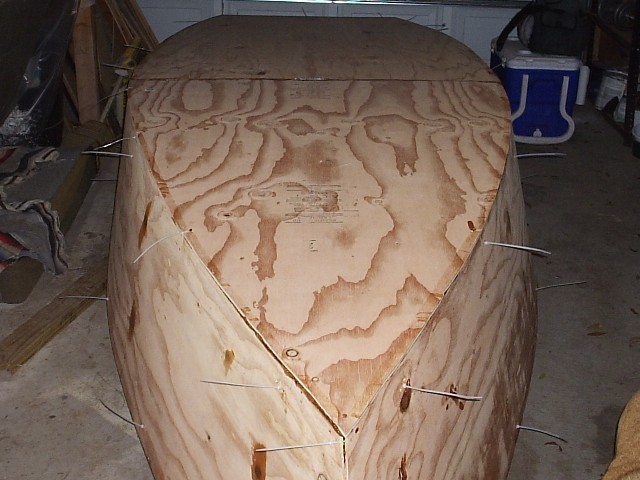
Thanks for all of the tips and encouragement. We stiched up the transom and all of the frames last night . . . and Voila . . . there was a boat!! We are having a great time so far with the build and I will have some new pictures later on today.
Here is a quick shot, the rest I've added the new pics in my gallery!

Posted: Tue Mar 08, 2005 6:21 pm
by Mike Adams
Looking good, Dane!
I'm with Steve - I wish I'd rounded of the edges of the butt blocks before assembling them - it would have been a lot easier than adding fillets afterwards and sanding! Looks like you've gone too far for that now, but anyone else reading this thread might like to take the tip on board for future reference.
Be real careful in scribing out the bottom panels from the shape of the sides that you don't knock the frames out of alignment like I did!

Posted: Tue Mar 08, 2005 9:12 pm
by Dane_Ger
Thanks Mike, I did leave my butt blocks 1/2" short of the full width of the side panels and will likely do the same for the bottom. I'm not sure if that'll help much or not, but I will have the chance to round over the bottom panel block too.
I just measured up all the diagonals and nothing at the moment is off more than 1/2" . . . I just hope I don't do more damage than good as I try to tighten up those tolerences. I think slow and steady and careful may win this 'race'. It also seems to help alot to have an extra set of hands, which I'm fortunate to have.
I'll definitely be careful when scribing the bottom, I can just imagine how easily it'd be to knock things out of 'true' in the process.
Happy building, I'm having a blast!
Dane
Posted: Wed Mar 09, 2005 3:20 pm
by Dane_Ger
In reading about the location of the butt blocks, I've been getting a bad feeling . . . I think I have my frames located correctly, but as far as the side panels are concerned . . . those butt blocks are not anywhere close to any of the frames. Can't wait to get home and see where I've got something mucked up.

Posted: Wed Mar 09, 2005 3:49 pm
by Mike Adams
Dane_Ger wrote:In reading about the location of the butt blocks, I've been getting a bad feeling . . . I think I have my frames located correctly, but as far as the side panels are concerned . . . those butt blocks are not anywhere close to any of the frames. Can't wait to get home and see where I've got something mucked up.
Dane
Don't panic - all's well! The side butt blocks are located about three inches or so forward of the front midseat frame. The bottom panels butt block sits under the front of that frame. See the pic below - the bottom butt block is clearly visible, and the bottom corner of the starboard side butt block can just be seen at the left.
Posted: Wed Mar 09, 2005 4:00 pm
by jacquesmm
Dane_Ger wrote:In reading about the location of the butt blocks, I've been getting a bad feeling . . . I think I have my frames located correctly, but as far as the side panels are concerned . . . those butt blocks are not anywhere close to any of the frames. Can't wait to get home and see where I've got something mucked up.
Do not worry, the location of the butt blocks doesn't matter.
If you followed the plans, the butt blocks are in the proper location.
There has never been a problem with butt block locations except in the mind of some builders before they install them.
I hate it when questions about false problems create fear in other builders.
It all started in another thread because somebody assumed that the butt blocks where not where the plans show them.
This is crazy, the butt blocks are where we show them, period.
There are hundreds of FL11 and 14 built without problems, do not worry.
Believe the designer.
BTW, I am building my 7th FL11 right now, as volunteer at a local school, I know that there is no problem.
Again:
There is no problem with the location of the butt blocks!!!
Keep building, you are doing a fine job.
Posted: Wed Mar 09, 2005 4:49 pm
by Dane_Ger
OK Jacques . . . I'll start building more (exactly according to the plans) and worrying less!
I believe that for us 'first-timers' we tend to 'imagine' how things are going to turn out, rather than just letting them work out according to the plans/design.
Thanks for your input,
Dane
Posted: Wed Mar 09, 2005 6:57 pm
by st
ross61 wrote:Seems like last year at this time, possibly slightly later, we had a mess of FL14 builds going on too, including mine. Do some FL14 searches and I'm sure you will find all kinds of info and pics. Good Luck, this is a great boat!!
Ross
For those new to the fray, the collective noun is "a bale of skiffs". Do a search.
BTW, the plans are perfect, follow the plans. JM knows a little about the subject, so save his time for designing my inboard LB. If something is slightly out or doesn't fit, then you made a mistake (there are lots and lots of reasons for this, none result in the need to scrap the project) but your your boat will still turn out fine.
Don't sweat it and
DO A SEARCH first.
Also use the gallery to look at minute details of the boats. They help heaps.
Scott
Posted: Wed Mar 09, 2005 7:33 pm
by Steve_MA
Mike - Something is odd about your pic. My side butt block is about 12 inches from that frame. The plans show the edge of the ply to that frame to be about 14 inches. Your butt block would have to be pretty wide to be only 3" from the frame.
You can see where mine are here.
Whats harder to see is that the bottom butt block only peeks out about 1.5" from the frame. Whoops. Not really a problem though....
Posted: Thu Mar 10, 2005 2:09 am
by Mike Adams
Steve_MA wrote:Mike - Something is odd about your pic. My side butt block is about 12 inches from that frame. The plans show the edge of the ply to that frame to be about 14 inches. Your butt block would have to be pretty wide to be only 3" from the frame.
Whats harder to see is that the bottom butt block only peeks out about 1.5" from the frame. Whoops. Not really a problem though....
Steve
I don't want to incur Jacques' wrath by prolonging the discussion about butt blocks too much - he might beat me over the head with one when I meet him in Vero Beach in a couple of weeks' time!
Anyway, as he says, the exact position really isn't all that important.
However, your post really has me puzzled. I followed the plans and instructions to the letter and I've just been out and carefully remeasured the size of my side panels and position of each of the frames and compared them against the plans I have. With the possible exception of the bow seat frame (which is slightly bowed and may be 1/2" or so out of position) everything seems to be exactly where it should be. My butt blocks are exactly the recommended width of 254mm and are positioned equally on either side of the joined panels. The distance from the front seat frame on my boat to the edge of the butt blocks is actually 4.5", not three (I was guessing before) and the bottom panel butt block protrudes 90mm (about 3.5") in front of the seat frame. I can't see any dimension on the plans to indicate that the butt blocks should be about 14" from the seat frame as you suggest. Here is a picture of the portside butt block, which also shows the side storage pocket I have installed:
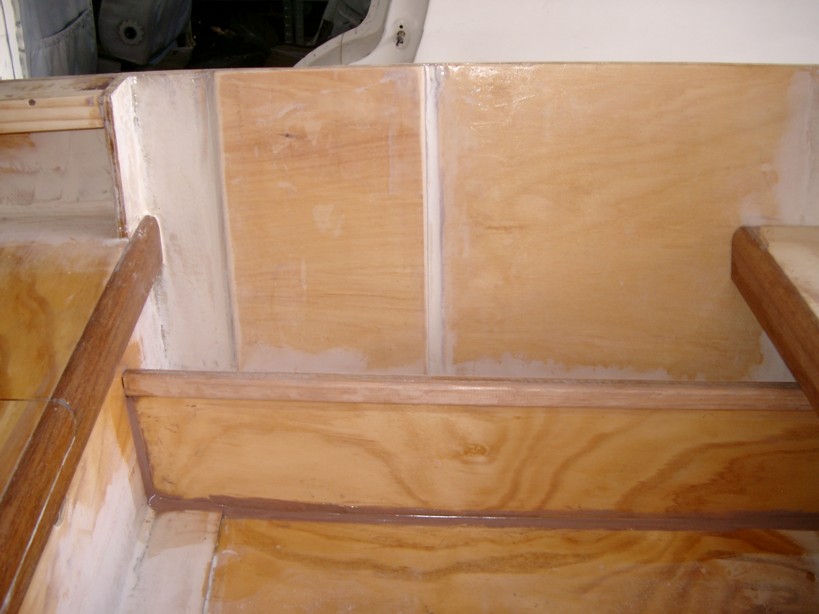
It's a real mystery to me why we should have such a difference between your boat and mine - but hey, that will make them all the more unique!
Posted: Thu Mar 10, 2005 9:45 am
by JeffS
Mike is in Australia, Steve is in USA. Mike may have got metric ply (bigger than 4'x8') And took the measurements from the plans and measured from the edges of the plywood which is not 4'X8'. Then your boat will be something like 4-8" longer. I had to figure this out for myself. I got French marine ply for my boat (metric) and measured from the edges of the plywood as per plans. Then before I cut it, I made direct measurements of the outlined parts. The parts were of different size than expected. Then I measured the ply sheet and found out it was in metric and not a 4' X 8' that i assumed it was. I think the plans assume you are using 4' x8' and if you are not you need to measure from one fixed point and not each of the four sides of the ply.
Not sure if this is what happened but it would not surprise me.
JeffS
Posted: Thu Mar 10, 2005 10:09 am
by Steve_MA
Maybe it is the metric plans compared to the US plans......
My plans show the "mid seat fwd" frame to be 14 3/8" from the edge of the ply. If your ply is longer than 8', then it could be that your plans show the mid seat fwd frame close to the edge.
Your comments about the 254mm (10") butt block got me wondering too. My plans clearly show 6" butt block for side and 10" butt block for bottom.
The designers might have to tune/tweak the US/metric plans to account for the different material sizes. What a headache that must be...... Hopefully the computer makes it easier.
Posted: Thu Mar 10, 2005 8:13 pm
by Mike Adams
Steve_MA wrote:My plans show the "mid seat fwd" frame to be 14 3/8" from the edge of the ply. If your ply is longer than 8', then it could be that your plans show the mid seat fwd frame close to the edge.
I did not measure the position of the mid seat forward frame from the edge of the ply sheet. I butted two sheets of ply together, drew both the side panels and then marked the position of all the frames using the origin point (the front lower edge of the side panel) and the cumulative dimensions for each frame position as shown on the plans. This could account for some of the difference, while the obvious difference in the size of the butt blocks could account for the rest. (My plans definitely give "6mm x 254mm" dimensions for both side and bottom butt blocks in notes 1 & 2).
I'm not sure I understand Jeff's point about the metric size ply resulting in a longer boat - the ply I used was metric (2400mm x 1200mm) but since the measurements are taken direct from the plans to mark out the sides and frames, I can't see why the difference in material size should affect the size of the boat. The LOA of my boat is spot on the stated 4.25 (14ft).
Posted: Fri Mar 11, 2005 9:43 am
by JeffS
I have not seen the fl14 plans. Other plans I have from Bateau show measurements for big parts measuring in from the edges of the sides of the sheets of ply (but all measurtments are there to make the correct part). The assumption is the ply is 8' long. If you have you make all measurements from one fixed edge of the plywood you will have no problems. But if you measure from the opposite edges of different sized ply you get different sized parts. Or if you assume the plywood is 8', but in reality the ply is 8'4" and you measure in 6" from one edge, you do not have a part that is 7'6" long, it is 7'10" long.
You boat looks fine. This is for the sake of discussion.
Jeff
Posted: Sat Mar 12, 2005 10:43 am
by Dane_Ger
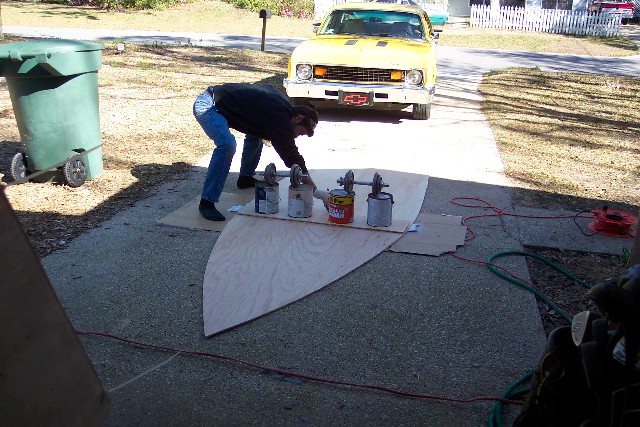
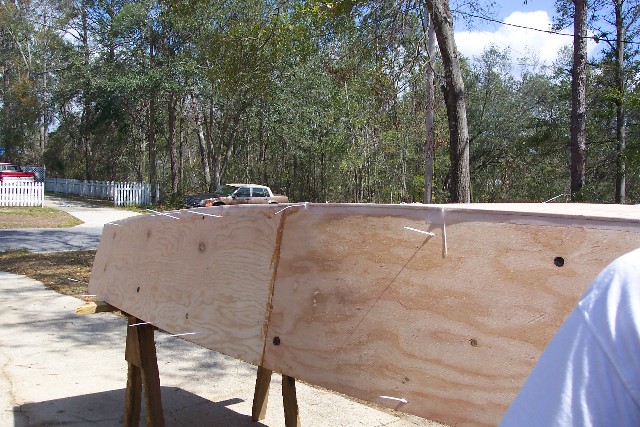
This morning my buddy and I got the boat all 'squared up' . . . all of the diagonals were within 1/4" and most were less.
We then scribed the bottom panels and glued them up. Its supposed to be in the 70's here today so I think it will cure sufficiently to that we'll be able to stitch on the bottom tommorrow afternoon.
Preparing to scribe the bottom panels:
Gluing the butt block and bottom panels:
Posted: Sun Mar 13, 2005 2:17 pm
by Dane_Ger
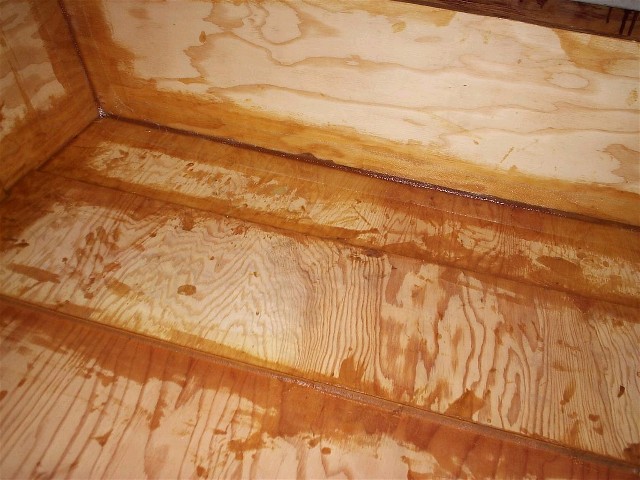
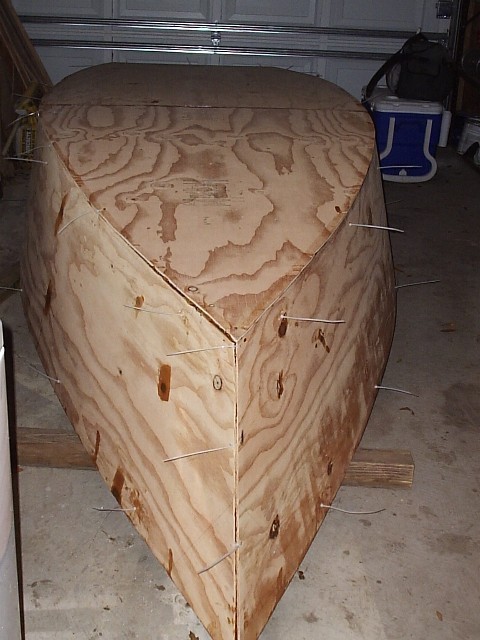
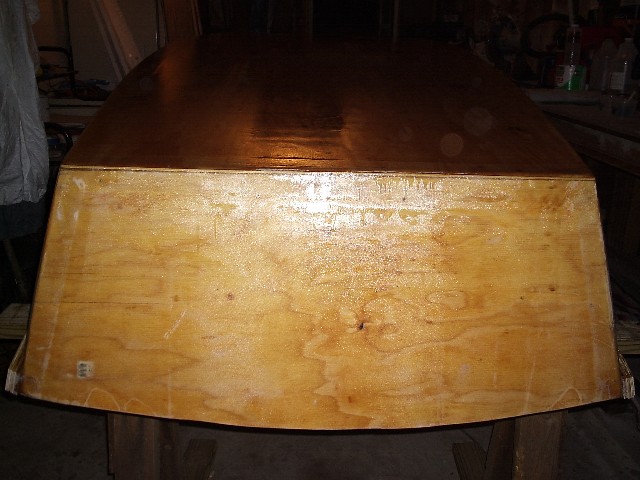
Today we stitched on the bottom, duct taped on the outside seams, and then flipped her over. We then re-trued the hull although since we were pretty careful while turning over, there wasn't much needed.
We then wetted out the bottom joints in the transom section, ran our first epoxy filets, and layed the fiberglass tape and wetted that out, per the instructions. I've seen prettier filets by some of the other builders here, but I was very pleased with our initial effort. And as most have described, we all tend to grow much more proficient in this skill as we gain a bit of practice.
Overall we continue to be amazed and pleased with how things keep coming together with each step and at how much we are enjoying the process!
Here are a couple of the new photos, plus more in the gallery.
Bottom panel stitched to the hull and seams duct taped
First round of epoxy filets and fiberglass tape
Posted: Mon Mar 14, 2005 11:37 am
by Steve_MA
Good work! Starts to look like a boat in a hurry, doesnt it. You will definitely develop your own technique for doing fillets, etc as you go. For the vertical seams, dont be shy about creating a thick paste of wood glue or you will find your filllets dropping with gravity. I also found it useful to shape the corners with my fingers (wet with epoxy) as the epoxy firmed up.
Posted: Mon Mar 14, 2005 3:25 pm
by Mike Adams
Looking good, Dane! Your first fillets look a heck of a lot better than mine were! Keep posting more progress reports and pics - we are all interested in watching your progress and the encouragement we get from each other is one of the greatest things about this forum - especially when you hit a problem and know that there are others out there who are eager to assist.

Posted: Mon Mar 14, 2005 3:47 pm
by Dane_Ger
Keep posting more progress reports and pics - we are all interested in watching your progress and the encouragement we get from each other is one of the greatest things about this forum - especially when you hit a problem and know that there are others out there who are eager to assist.
Thanks Mike! I too think that the support and encouragement I saw on the forum is what convinced me to finally go forward on this project! I truly enjoy watching the progress of other builders as much as my own.
Posted: Mon Mar 14, 2005 11:23 pm
by ks8
What's that? Do I hear the sound of Jacques grinning? Thanks for being the catalyst for this experience for all of us. I'm allowed to say that, right?
ks
Posted: Tue Mar 15, 2005 1:33 am
by pirate
amen,
your first fillets & seams look much better than mine (which is why none of my pictures are posted yet). nice work! i'm building the fl11, and am close to completion. addicting isn't it? i'm already planning my next 2 boats!
keep up the good work!
Posted: Mon Mar 21, 2005 11:21 am
by Dane_Ger
Update: not as much accomplished this weekend as I would have liked; however, I did get the first coat of epoxy finished up in the transom area and the seams all laminated in the area forward of that.
Here are a couple of pictures and the latest will be added to the gallery later.
Getting a little cleaner and neater on my filets and fiberglass taping!?
Posted: Mon Mar 21, 2005 5:19 pm
by Mike Adams
Keep going, Dane - it's looking good!
You will be very glad that you have done such neat fillets later on - as I found out the hard way, there's nothing worse than having to clean up excess epoxy and messy fillets before you can paint!
Posted: Thu Mar 24, 2005 3:35 pm
by Dane_Ger
Thanks Mike . . . I've now finished glassing the seams in the section in front of the transom seat and between the midseat frames.
I also used a piece of cardboard to mock up enclosing the bow section. I really like the way it looks, although it will require me to cut a new frame.
Everything is going well, but no pictures of the latest work yet.

Posted: Sat Mar 26, 2005 4:58 pm
by Dane_Ger
Here are a couple of the most recent photos.


Posted: Wed Mar 30, 2005 10:31 am
by Dane_Ger
Here are the latest pics:
Midseat cleats glueded and clamped. These are 1x3 instead of 1x1 because in order to fit a gas tank in this area, I won't be able to leave the recommended 3 inches all the way around on the seat tops. I'm hoping that when these beefed up cleats are tied together it will regain the strenth here.
Another semi close up of a putty filet and fiberglass lamination.
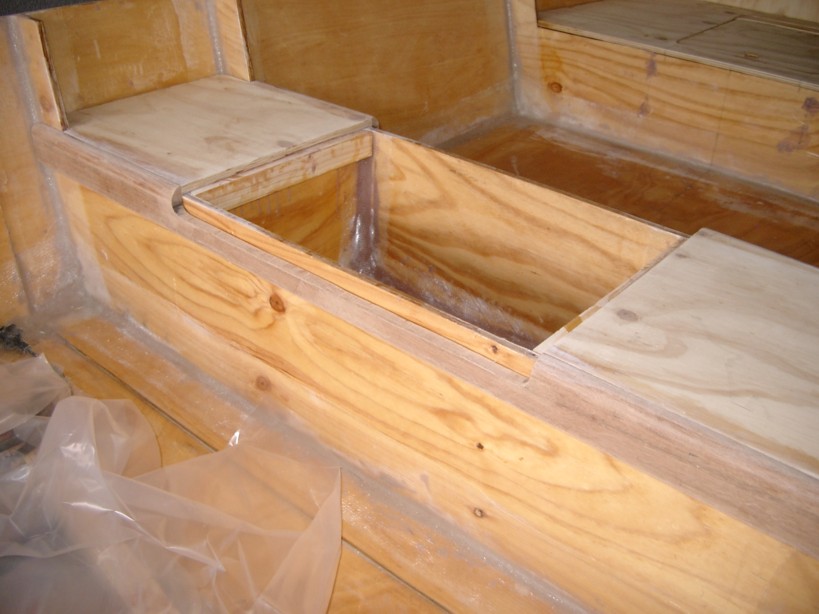
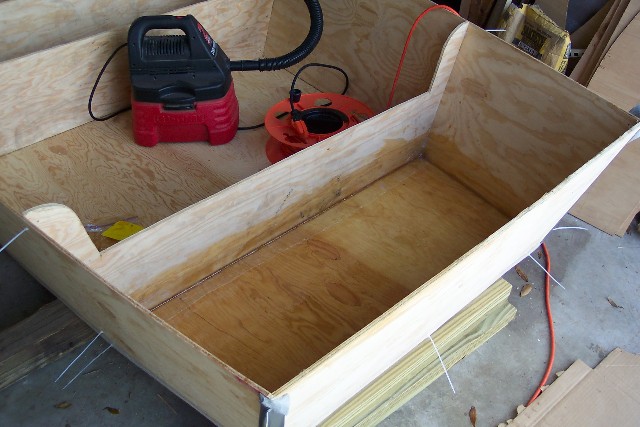
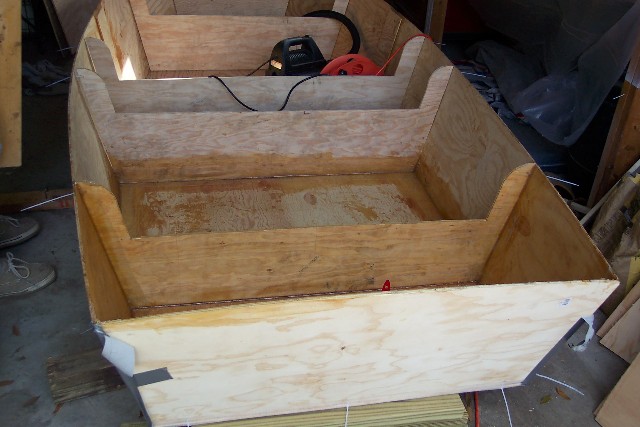
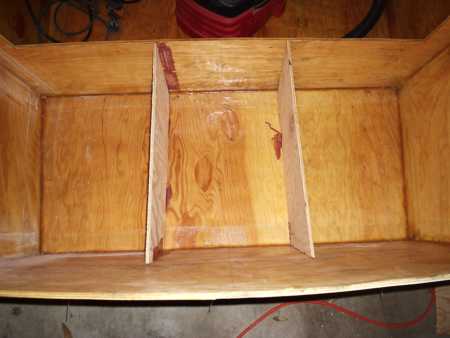
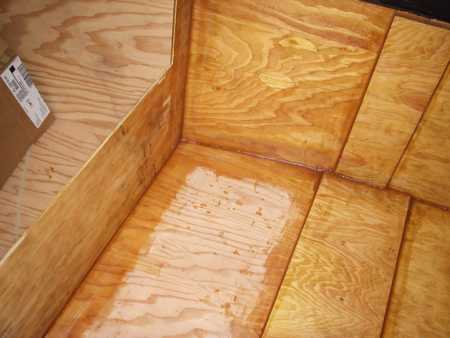
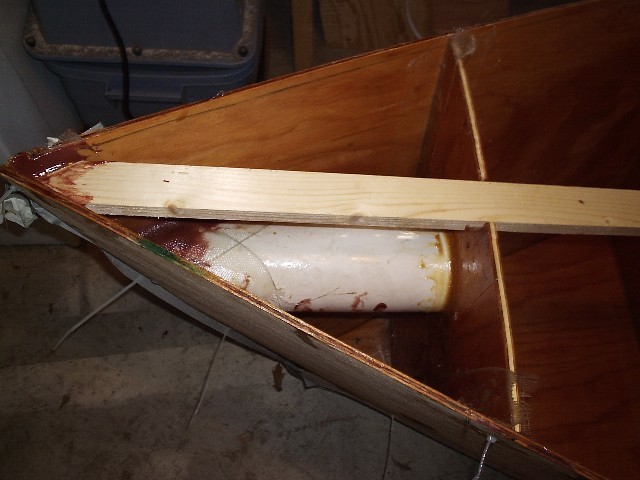
Transom seat area dividers 'tack welded' in place. The outside sections will get bouyancy foam and the center section will be divided again (port to starboard) and will house a 2-tray tackle locker and a small, water tight storage area that I think will be handy for camera, wallet, keys, etc. BTW: it must be an optical illusion, because these panels really ARE parallel.

Posted: Thu Mar 31, 2005 11:20 am
by Dane_Ger
Update from 3/30/05:
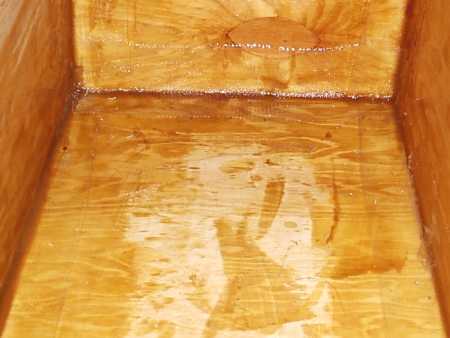
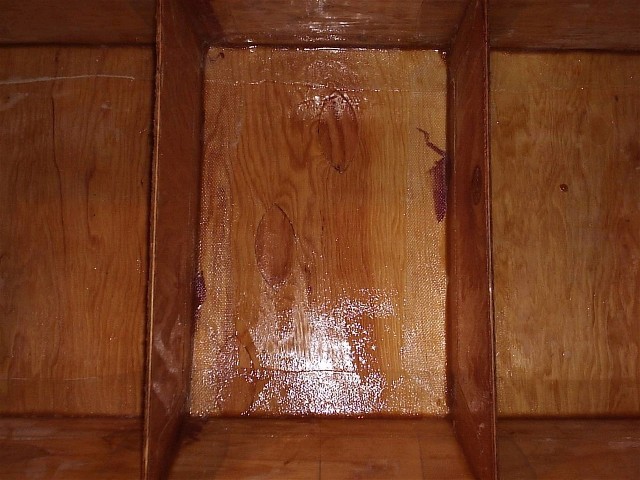
OK, from the last picture yesterday . . . this section has now been glassed into place. Here is essentially the same view:
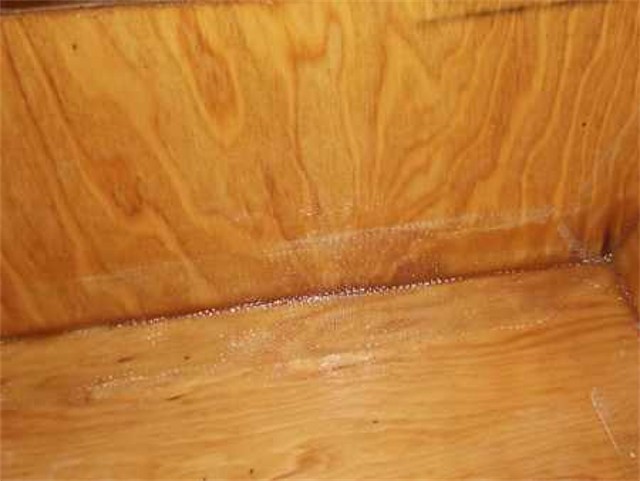
And here is a close-up of one of the fiberglass taped seams:
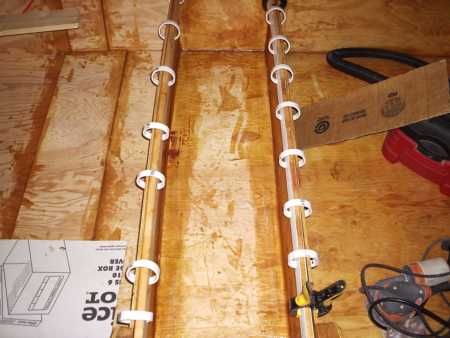
Now moving forward in the boat, this is the section where I added the cleats that the midseat will rest on. Yesterday's photo showed this view with the PVC clamps:
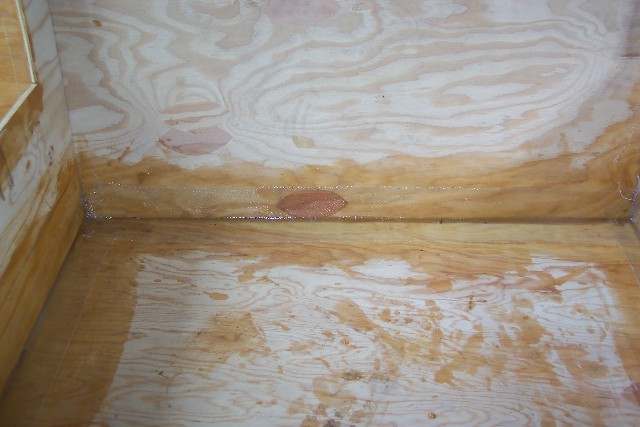
And now just forward of the midseat area, I've taped the first couple of seams in this area. (The butt blocks in this area need some work in order to allow a smooth application of the fiberglass tape fore and aft, I'll be working on this tonight):
Posted: Fri Apr 01, 2005 10:35 am
by Dane_Ger
Update from 3/31/05:
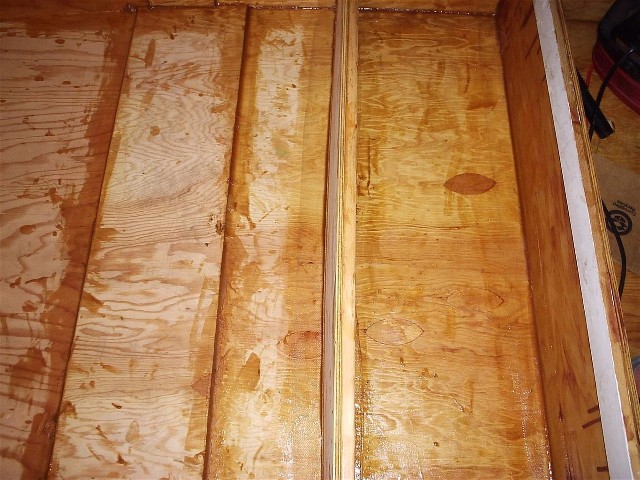
A couple of photos of the completed floor section, just forward of the midseat. It was a bit of a challenge to get the fiberglass tape to lay down smoothly over the butt blocks, but by making slightly larger filets in this area, I was actually able to get the tape to lay down quite well.
Posted: Sun Apr 03, 2005 12:54 am
by Dane_Ger
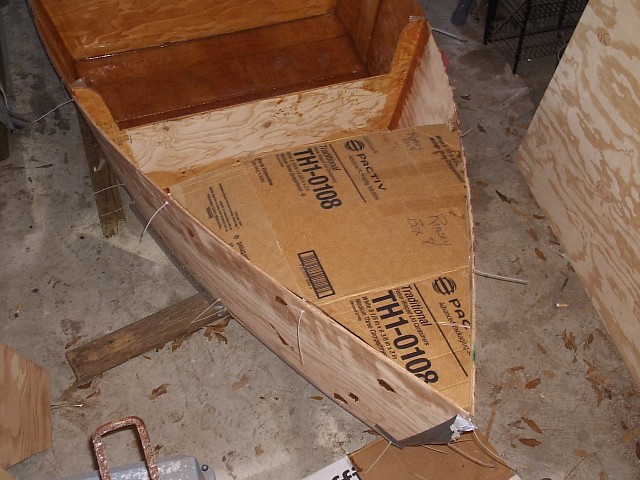
Update 4/2/05:
Here is the new bow frame; I've decided to forego the bow seat and use this area for storage. Who knows, if the boat is stable enough it might make a nice little casting platform too!
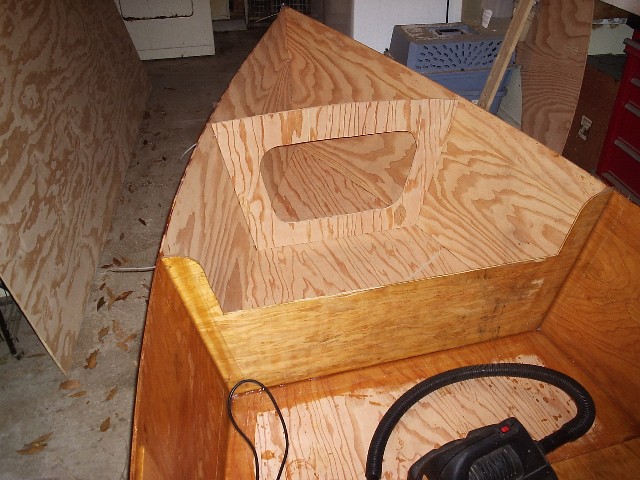
Here is another look at the 'new' bow. I've used a piece of cardboard to make a pattern for the bow platform.
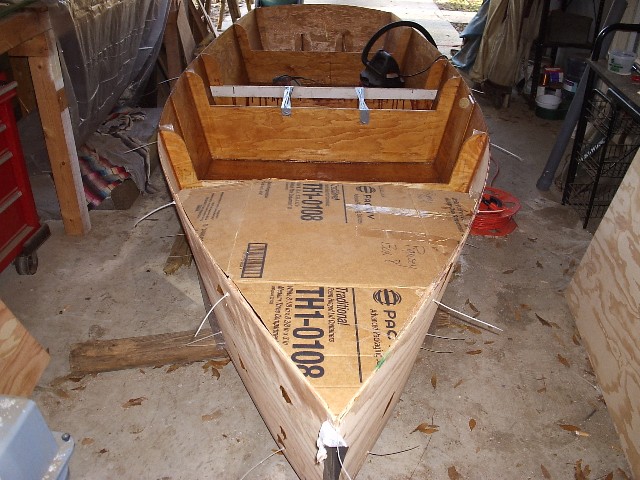
Another view of the 'modified' bow area.
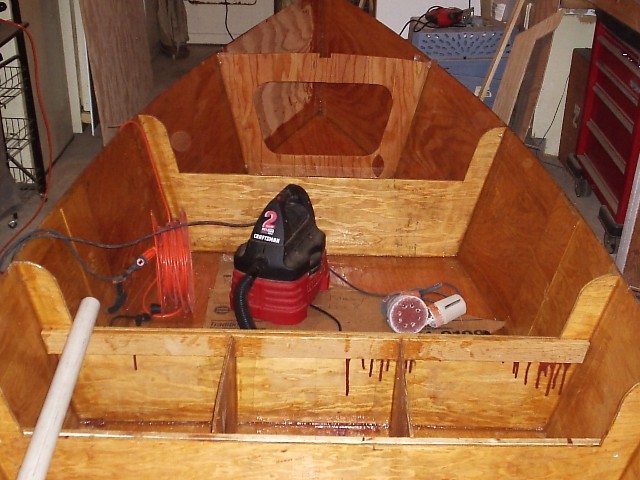
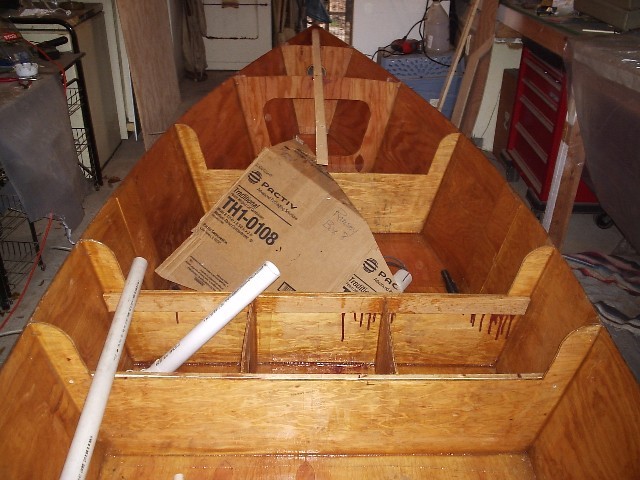
Looking towards the bow. In the immediate forground, you can see where I've divided the area under the midseat. A gas tank will go in the center section and two small insulated coolers will be built into either side. Towards the bow, looking through the opening, you can see a 'false' bulkhead and the area forward of it will contain bouyancy foam. I'll further support this deck with a brace from the bow to the top of the new frame. Also, to insure future access to the bow eye hardware, I'll use a piece of 4" PVC attached to the false bulkhead and to the bow seam.
Here is another look at the new bow design.
Posted: Sun Apr 03, 2005 7:26 pm
by Mike Adams
You're making good progress! The forward storage space and enclosed deck is a neat idea - it will make your FL14 just that little bit different from everyone else's.
Are you planning to put some ventilation holes in the gas tank area, as I have done? I would certainly recommend this for safety (see the discussion thread at
http://forums.bateau2.com/phpBB2/viewto ... sc&start=0 - ventilation was strongly recommended by other builders on this thread.
Posted: Sun Apr 03, 2005 8:50 pm
by Dane_Ger
Mike, no way would we dare make our boats a little "different" from others . . .
I'm hoping to finish the inside seams this week and flip it and begin the outside next weekend.
Hope you enjoyed your visit to Florida! Sounds like you had a nice opportunity to meet some of the folks from not only bateau.com but from the forum as well! Good Deal!
Thanks for pointing out the thread on the ventilation, I've read it several times in hopes that I'll get it right!
D
Posted: Tue Apr 05, 2005 9:35 pm
by FLYonWALL9
Dane,
Nice work man, looks like your getting close...
Posted: Tue Apr 05, 2005 10:06 pm
by ross61
Dane,
Nice work!! You will love the FL14.
Is that a Rigid RO Sander I see in your pics? If so, how do you like it and can you compare it to others?
I was planning on going to Home Depot in the next couple of weeks to buy one - and a Porter Cable circular saw.
Thanks,
Ross
Posted: Tue Apr 05, 2005 11:47 pm
by Dane_Ger
Thanks for the compliments, guys!! I like the way everything is working out thus far!
Scott, I don't know about close . . . LOL, but I hope to have her ready to flip this weekend. I'm looking forward to that and looking at her from another angle for a change.
Ross, yes . . . that is a rigid RO sander . . . it is a 'loner' from a buddy and while I don't have anything to compare it too, I like it very much! Especially the built-in vaccuum/dust collection unit. It is almost dust free when in use.
Here are some pics of the work I just finished this evening.
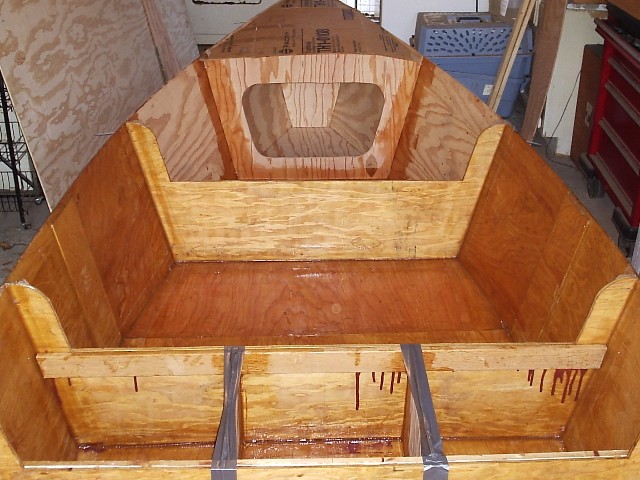
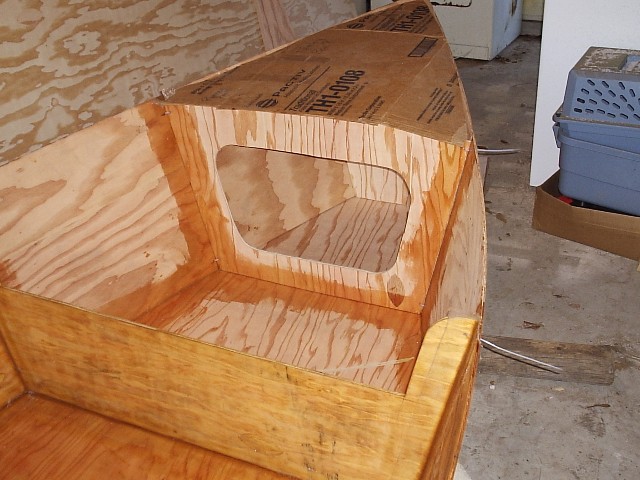
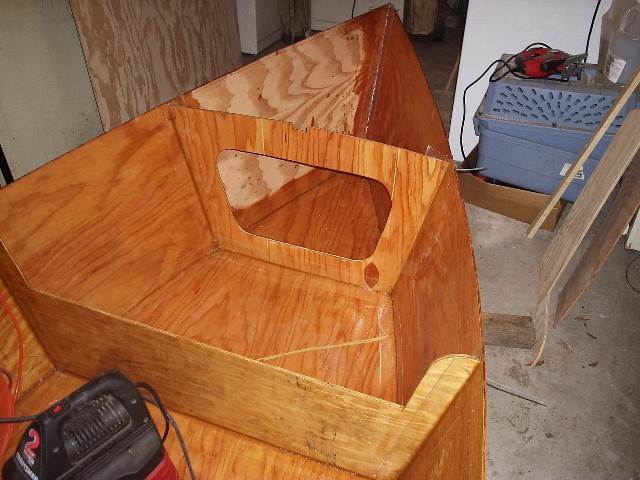
Looking towards the bow, you can see the modified bow frame. All structural frames are now fully glassed into place.
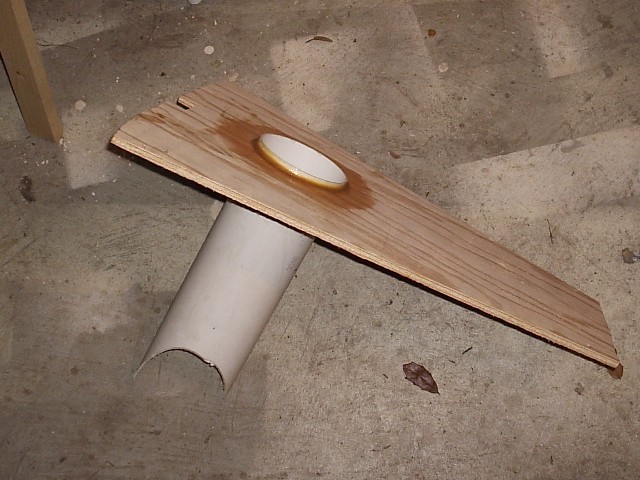
Here is a picture of the 'false' bulkhead/frame and the tube that will allow me access to the bow eye. Notice the very 'odd' cut on what will be the forward part of the PVC tube . . . this matches (with several tries) the curve of the bow very nicely when in place. The forward most section created by this frame will be filled with bouyancy foam.
Pic of the bow area, you can see a notch in the top of the frame that will accept a support member from this point to the tip of the bow.
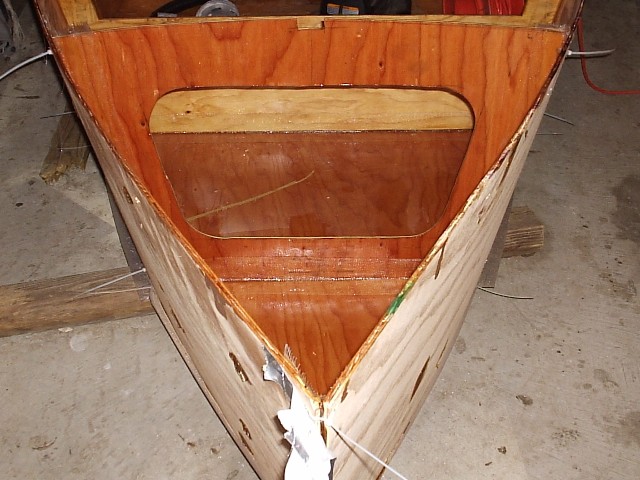
Another view of the bow area, now that I'm essentially done with the interior laminate work I have finally gotten the hang of it . . . and I think these are some of my cleanest seams yet.

One more view of the modified frame and bow area. I have one more section to 'paint' with epoxy . . . I'll get that when I glass in the extra bulkhead tommorrow evening.
Posted: Fri Apr 08, 2005 8:14 pm
by Dane_Ger
Update 4/8/05:
I finally got my partner back to work . . . lol. So here he is pre-coating our extra frame with epoxy.
We now skip ahead a bit, but here is the false/extra bulkhead and support epoxied and glassed into place in the bow. This all went together very well, inspite of it being one of my 'big' modifications to the original design.
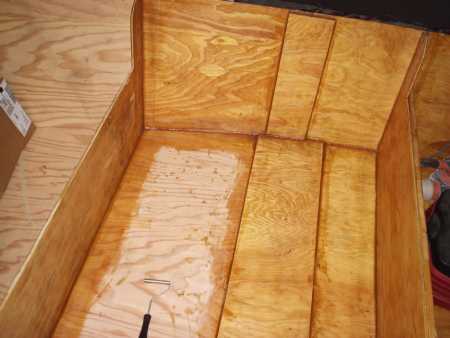
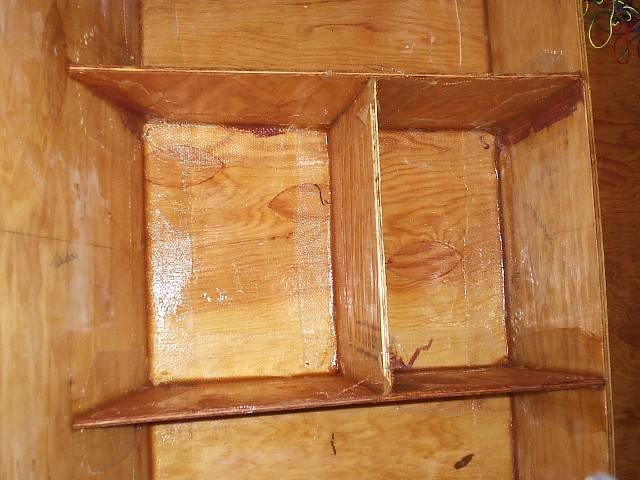
Here is the final divider in the transom seat area. The center section to the left will be fitted with a tackle station and the same section to the right (aft) will take a top accessed hatch and will make a great little water tight valuables locker.
Here is from stern to bow view of the basic interior construction completed.
Then we let her cure . . . and this afternoon, we flipped her over. It was a bit unceramonious as 'flippings' go, but there we went!
Another view.
Posted: Fri Apr 08, 2005 10:09 pm
by Mike Adams
You're making good progress! At that rate you'll have her splashed before I finish mine. This is my last night in Florida - I've had great visit, and managed to meet up with Jacques, Joel and Cottontop, although unfortunately I missed EvilD and Gary. However, I have to admit that I'm looking forward to getting home to my family (and my boat, of course!
). 30 hours travelling ahead of me now...

Posted: Mon Apr 11, 2005 10:03 pm
by Dane_Ger
Mike, I sure don't envy your 30hrs of travel time, but I'll bet you'll be glad to get home and back to work on your boats! Glad your visit was a good one!
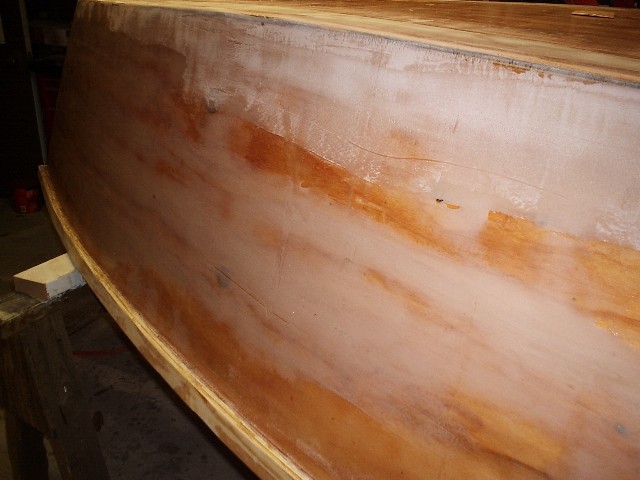
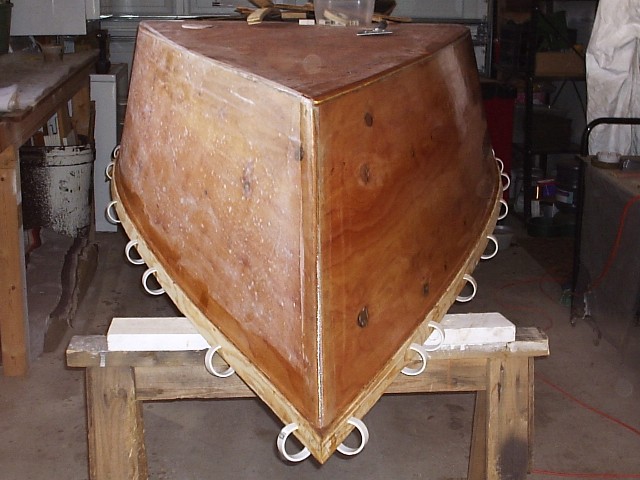
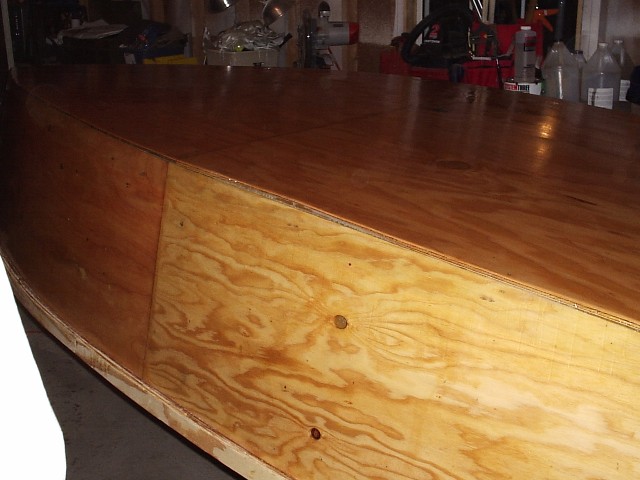
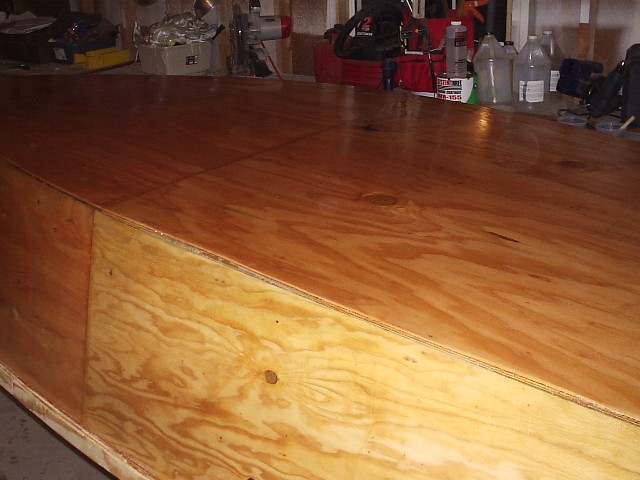
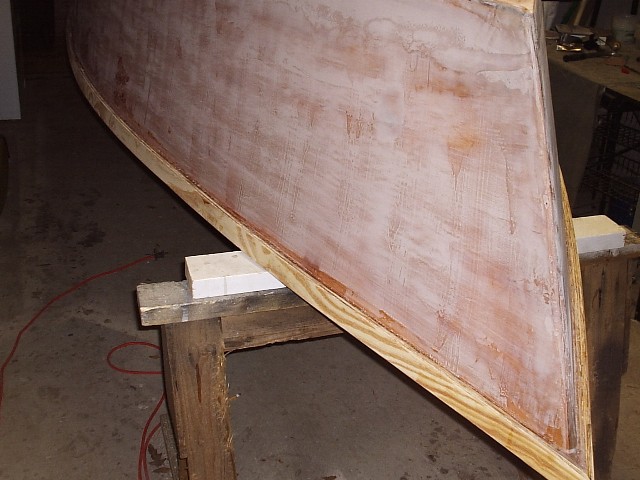
Well I've removed all of the 'zip tie stitches;' rounded over the chines, bow, and transom edges; and lightly sanded the entire outside of the hull.
Here is essentially the same view as the last picture, with the above completed.

The next step will be to tape those seams/edges but I ran into one big problem . . . I'm about 8yds short on fiberglass tape for this step and about 12-15 yds short for completing the boat. I will look tommorrow for a local supplier so I don't have to wait even a few days for a delivery. Big mistake on my part . . . <<edit>> I found a local boat builder who will "loan" me the materials i need . . . . so i'll be placing another order tomorrow first thing <</edit>> I knew I was using more than the plans called for and getting low, but didn't bother to check before placing a recent order from boatbuildercentral . . . rats! I sure was disappointed that I couldn't tape these seams up tonight
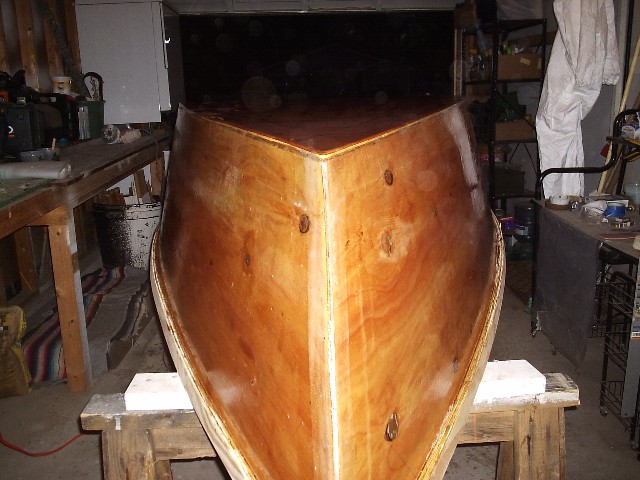
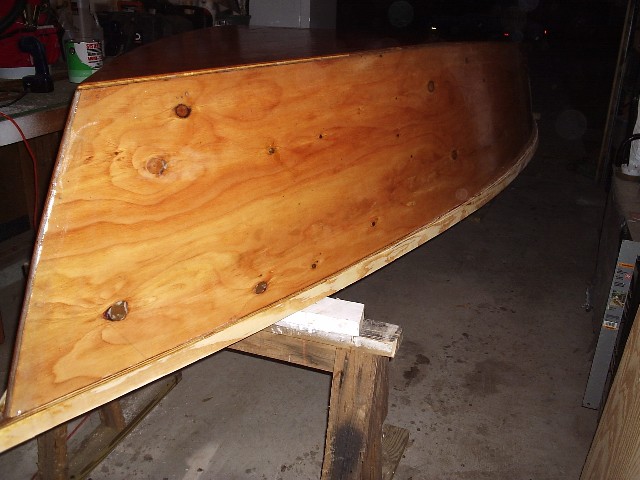
Here is a close up of the bow . . . you can see a gap where the two side panels meet. After pre-coating the exterior seams, these gaps will be filled with epoxy putty to allow a smooth transition for the fiberglass tape, similar to how the filets served this purpose on the interior seams.

And some more gaps at the transom edges, again this will be fixed as described above.

Posted: Tue Apr 12, 2005 7:07 am
by Mike Adams
Dane,
I'm back in Oz again, but the body clock is still not sure whether it's evening or morning! It takes some adjusting after a trip across so many time zones and even the international dateline. I have a couple of days off before I have to return to the office, but I didn't feel up to working on the FL14 today. Instead, I went out and bought a new trailer for it - a new Dunbier Sports 4.2M -10L.
(I decided on this one after reading ST's advice at:
http://forums.bateau2.com/phpBB2/viewto ... ailer+fl14 ).
Maybe I'll feel like working on the boat tomorrow after a good night's sleep!
BTW, in my FL14, to close off the gap at the bow where the two side panels meet, I glued a thin piece dowel in the join. This created a very even and smooth transition for the FG tape. I think Steve also used this method.
Posted: Tue Apr 12, 2005 8:36 am
by Dane_Ger
Mike,
Good Luck on getting your body clock back on track.
I recall seeing a piece of dowel used in the bow section you described, I just couldn't remember which boat/builder had done that. The gap is fairly small at both the bow and transome and while I haven't ruled out using the dowel, I think right now anyway, that I'll be able to get a nice round-over curve with just some epoxy putty. We'll see!?
I almost forgot . . . I think I may have also found a trailer. I Florida Sportsman forum member has this Shoreland'r SLV15 trailer in very good condition that I think will work well.
http://www.shorelandr.com/pages/t_boat_ ... elNo=SLV15
Take Care!
Dane
Glassed, started rubrail
Posted: Tue Apr 12, 2005 9:43 am
by mpacek
http://gallery.bateau2.com/displayimage.php?pos=-3576
Could not decide between skeg or runners so after glassing the bottom and sides I did both. The warm weather last weekend really helped. I have only put about 40 hours in this an its only that much because of the inefficenies ot many starts and stops.
http://gallery.bateau2.com/displayimage.php?pos=-3574
Here is the bottom glassed and rubrail started got cold again on Monday so I am just sanding waiting for warmer weather. I ordered medium set hardner I should have gone with the quick set so at least when it is above 45F I can make some progress.
What is the correct syntax to get photos to appear in the post?
breasthook and knees
Posted: Tue Apr 12, 2005 9:57 am
by mpacek
http://gallery.bateau2.com/displayimage.php?pos=-3575
Here is the port knee. The stern seat is not yet glued. I doubled up the transom from the seat on up to a full 3/4". I am planning to run a 5hp - 7.5 hp engine on it. On the knees I cut a 30 degree angle along the hull and a 15 degree angle along the stern and it layed in nicely. Makes the stern like a rock.
http://gallery.bateau2.com/displayimage.php?pos=-3573
Breasthook came out ok. Still trying to decide about anchor storage up front. I have to say that when my 6 year old son and I flipped the boat there was not one creak, groan, or any cracking noices. Then I put my 50 lb son it and told him to walk around. I thought it was solid before glassing but after it was even more impressive.

Posted: Tue Apr 12, 2005 10:10 am
by Dane_Ger
mpacek, Looking very nice there! The rub rail looks to be coming along very nicely too. Good Work!
I haven't decided whether or not to 'double' up or just use the transom plate . . . I am planning to use a 7.5hp motor.
The syntax for posting a picture is exactly what you used to post the link, except use {IMG}{/IMG} instead of the {URL}{/URL} that you used. Also note that the squiggly brackets should be replaced by the square brackets on the same key!
Dane
Posted: Wed Apr 13, 2005 1:06 am
by Dane_Ger
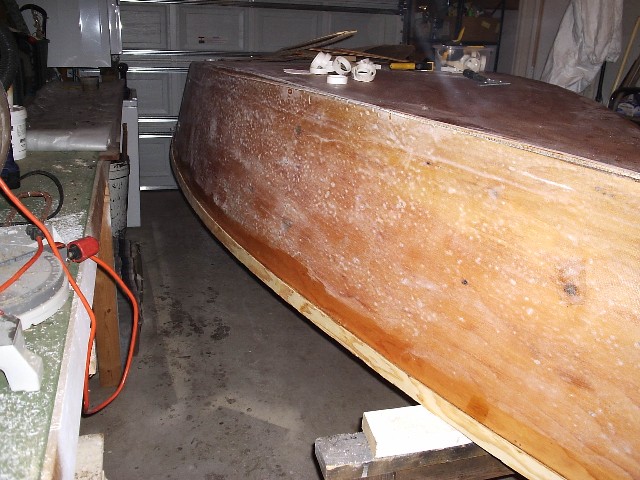
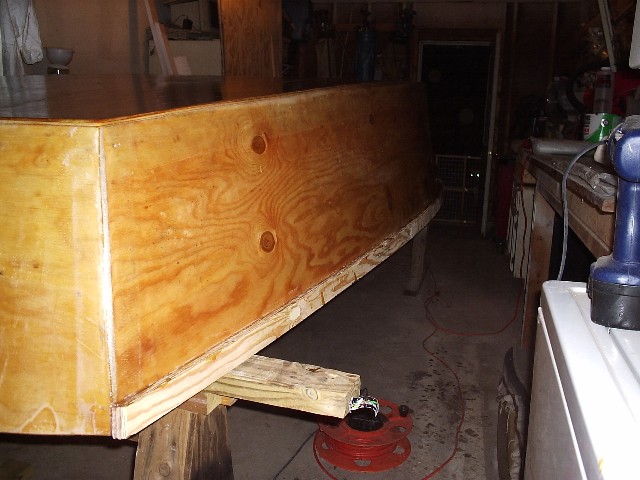
Update 4/12/05:
Here is a view of the bow, since I ran out of woodflour and 4" fiberglass tape (a co$tly mistake I might mention), I had to use some different filler material (West System 403) which is white. This makes it appear in the photo that the tape is not quite tight agains the wood, but I checked carefully and it is OK.

Here is a good look at the taped chine seam . . . I'm using 6" fiberglass tape here as its all I could find on short notice. It took a little bit more epoxy to wet out, but was otherwise no problem to work with.

Another view of the taped seams along chines and at the transom.

Again, the white filler as well as some frayed fiberglase makes this picture a little deceiving, but I think everything is fine here. I hope!

Posted: Thu Apr 14, 2005 9:19 am
by Dane_Ger
Update 4/13:
Here is the bottom all sanded and prepped for fiberglass cloth.

Here is the cloth laid over the hull to measure, etc.

Now the cloth has been trimmed and taped in place, ready to mix some epoxy, lots of epoxy!

I should have gotten a picture or two of the process, but I was elbow deep in epoxy . . . 5 batches of epoxy later
here is the bottom glass:

And another view . . . I'm very happy with how smoothly it went down . . . like, well . . . glass =)

Posted: Thu Apr 14, 2005 5:54 pm
by Mike Adams
Nice job on the glass cloth, Dane. What weight cloth is that? I used 12oz biax to get a feel for what it will be like building the DE23 later, and I found that the weave took a LOT of fairing to fill! Looks like you won't have that problem, as you have a nice clean, smooth finish.
Have you thought about what colour you are going to paint her yet?
Posted: Fri Apr 15, 2005 8:21 am
by Dane_Ger
Mike,
Thanks Mike! I only used 4oz cloth just to get an idea of what using the cloth was like.
I have been thinking of finishing touches quite a bit lately and think I will paint her something close to Fighting Lady Yellow exterior, off white interior, w/ maybe some of the webbing spray and some brightwork too. The color is about the only thing I'm certain of at this point. lol
I posted in the questions about small boat topic an idea I have about incorporating rope into my rub rail for a 'salty' look.
Can't wait to see your boat painted!
Dane
Posted: Fri Apr 15, 2005 8:59 am
by tech_support
4 oz. is great for a finish layer. The boat is coming along, keep the pictures coming.
Joel
Posted: Fri Apr 15, 2005 9:03 am
by Dane_Ger
Thanks Joel . . . I took last night off to celebrate my birthday, but I'll finish glassing the hull tonight and can start to work on the rubrail and fairing over the weekend.
Posted: Fri Apr 15, 2005 6:58 pm
by Mike Adams
Dane_Ger wrote:Thanks Joel . . . I took last night off to celebrate my birthday, but I'll finish glassing the hull tonight and can start to work on the rubrail and fairing over the weekend.
Well, here's hoping you had a real HAPPY BIRTHDAY!
Cloth
Posted: Fri Apr 15, 2005 8:24 pm
by mpacek
Dane great job on the glass. I used the 6oz cloth and it wetted out nice and evenly. What plywood did you use?
fl14
Posted: Sat Apr 16, 2005 8:54 am
by cottontop
Glad to hear you made it home safely. We were very pleased to have you in our home. My wife especially enjoyed your stories about your travels. Haven't gotten much done on the "Easy Morning" in the past 2 weeks. Our daughter's wedding turned out great. Even with the bad weather last Thursday: Friday turned out to be picture perfect. Will post a picture when I get one. Cottontop
Posted: Sat Apr 16, 2005 11:03 am
by Dane_Ger
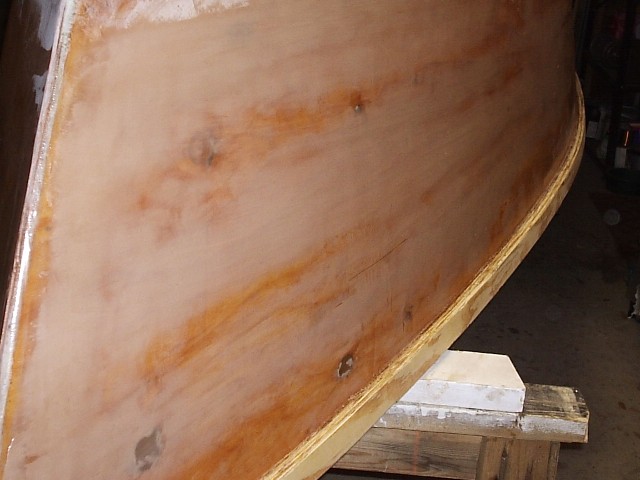
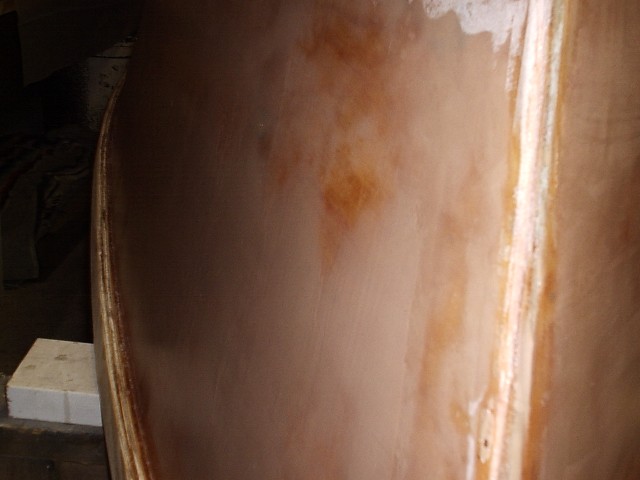
Update 04/15/05:
mpacek,
I used locally purchased ACX plywood (fir). One thing I also did that I think is making sense is that because I knew I was going to glass the exterior, I put the 'ugly' side of the plywood facing out. I filled the knot holes with epoxy putty each time I had a little left over from making filets. Now with the fiberglass cloth over the flaws . . . no one will ever know and the interior has the nice finished side of the plywood.
Mike,
Glad you are safely home too . . . get back to boat building! hehe
First of all I had to trim and then sand down all of the overhanging glass cloth from the bottom. That took awhile but I did get to wear my tyvek suit!
In any event, it wasn't a hard job but it did take longer than I thought . . . I would have more carefully trimmed the cloth if I had it to do over.
Then back to epoxy/glass work . . . lots of pics this round!
Looking at the side which has been precoated with epoxy resin. You can see the fiberglass cloth, cut to size, taped into place, and ready to be laid.

Same deal, another angle.

And the other side.

Saw this pic, of a FL11 elsewhere on the forum and it makes me think that I WILL be able to stand on my little bow deck if need be!?

Starboard side glass laid.

Port side bow with glass applied.

Port side aft view . . . glass looking pretty smooth and even.

The transom exterior glassed too.

Chores to do this morning, then later today and tomorrow I'll be working on the rubrail and begin the fairing process.
Dane
Posted: Sun Apr 17, 2005 7:57 pm
by Dane_Ger
Posted: Mon Apr 18, 2005 12:18 am
by Mike Adams
Dane_Ger wrote:
BTW I like 'hand sanding' . . . is it just me, or does it sooth other builders too?! I use an RO, but the hand sanding is great too . . . put it right where you want i!
Now that's a comment I haven't seen before on this forum!
You could probably make a fortune offering to help sand other builder's boats......
I find it painful enough having to sand even using my son's professional air-driven orbital sander!
Posted: Thu Apr 21, 2005 10:43 pm
by Dane_Ger
Mike, I probably wouldn't feel the same about 'sanding' anyone else's . . . boat!
Sorry for the lack of posts the past few days, I was a bit 'sickly', but now back in the game.
Here is a view of the 2nd laminate of the bow rail glued and clamped. I used a bit of the extra glue to fill in some small voids at the bow/rubrail point.
Clamps removed
The ugly side, I had a little problem laying up the glass on the port side (let the sheet of glass cloth partially wetted out fall to a dirty shop floor). With some more sanding . . . I think I'll get away with it.
Now sanded and re-coated with epoxy . . . the same side from the transom looks OK!? At this point the 3rd rubrail laminate has also been completed. I need to go ahead and 'paint' them with epoxy too, but am waiting because of the modification to the rubrail I intend to make.
And from the bow, I still think I'll get by . . .
Starboard side looking OK too.
Transom still needs some sanding and another coat of epoxy.
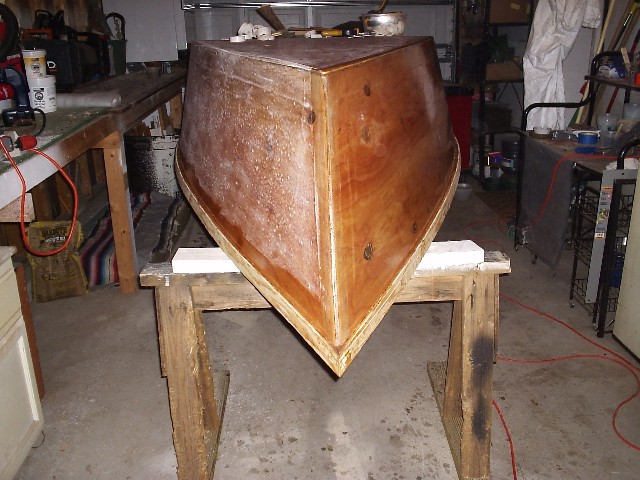
Bottom of the hull with 2nd coat of epoxy, looking from starboard.
Another view.
Posted: Fri Apr 22, 2005 12:55 pm
by HokieBoatbuilder
looking good dude! I was about where you are 2 weeks ago. It's amazing how much stiffness that rubrail adds isn't it? I glassed my entire hull and did three coats of epoxy and still ended up having to fill the weave. I wish I would have did 2 coats and then filled, oh well. [/img]
Posted: Fri Apr 22, 2005 2:20 pm
by Dane_Ger
Taylor,
You bet the rubrail adds alot of stiffness! I only used 4oz cloth on my hull, so the 2nd coat of epoxy filled essentially all of it and the fairing process should take care of the rest . . . I think.
While I've heard some nightmarish things about fairing . . . I'm looking forward to starting something a little different again!
Good luck on your build, keep us posted!
Posted: Fri Apr 22, 2005 5:07 pm
by HokieBoatbuilder
I used 6 oz so maybe that is why it took so much. I just received my 2nd 3 qt. kit of quickfair but I had a nice wave in the bottom of my hull cause like an idiot I moved the boat after it was stitched but not yet glued. I'm following the fairing tutorial for the FL12 and not using a longboard. It still takes a long time. I find it works nicely if I say "ok today I will fair this section of the boat". Less probability of burnout if you take it one section at a time. As a poor college student I have a while before I can afford an EZ loader, so I'm taking my time anyway. Sometimes I wish I built the Fl12 and just put it in my truck but I think I made the right decision by going larger.
Posted: Mon Apr 25, 2005 7:47 pm
by Dane_Ger
Update from 04/24/05:
LOTS of sanding to do!
Anyone with tips, suggestions, etc. for this process . . . I'm all ears!
Here are some pictures as I begin to fair the hull in preparation for primer and paint.
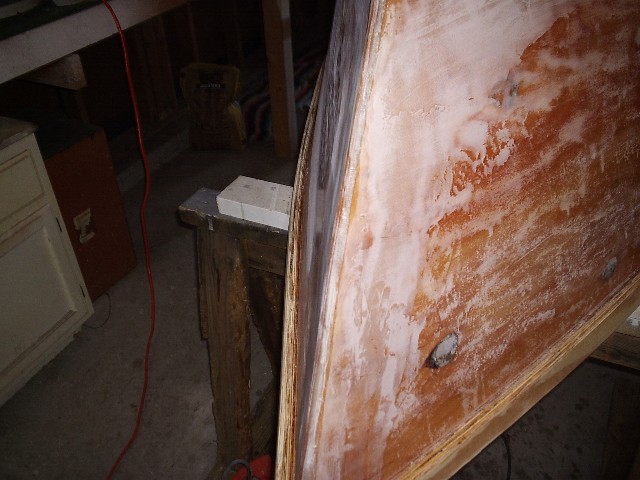
I'm not sure exactly this is supposed to work, so I'm starting in somewhat small areas.
I think the idea is to fill in any low areas and to create a perfectly smooth surface.
Trying to even out the transition from the fiberglass tape.

Letting the fairing compound fill any void and imperfections.
Posted: Mon Apr 25, 2005 9:59 pm
by Dane_Ger
Posted: Mon Apr 25, 2005 10:59 pm
by Mike Adams
Dane,
Looks good - you're catching up with me!
I'm sure you will find filling and fairing a lot easier over 4oz cloth than I have over 12oz biax!
After reading all the posts about not using too much epoxy, I tried to be very sparing with the epoxy and also the fairing mix over the biax, but with hindsight I think I was a bit too frugal and should have used a thicker layer of fairing mix. I've just spent several hours rubbing down the primer coats with 400 grit wet and dry paper, but there are still a lot of tiny pinholes in the surface in a few places - particularly where the tape and cloth are overlapped at the transom edge. I think I may have overworked the mix with my squeegee, which resulted in tiny air bubbles that are now showing up as pinholes. So, it looks like a bit more filling and sanding yet before we can get to the top coats of paint.
However, apart from the places where these tiny pinholes appear, my son's insistence on the extra preparation has resulted in a surface that is incredibly smooth.
Posted: Mon Apr 25, 2005 11:06 pm
by Dane_Ger
Thanks!! I don't think I have prayer of catching you. I do know that today is build day 52, which puts me past halfway of how long I figured it would take. However, I still have a ton of stuff to do when I turn her over again!
Sounds like the extra preparation is going to pay off for you! Good news! although I know its been a lot of extra work for you!
Posted: Tue Apr 26, 2005 9:00 pm
by HokieBoatbuilder
Dane,
Are you sanding the fairing compound by hand? I tried out hand sanding and it gives a much better result, but Jacques seems to indicate that you can get a good finish with a power sander. Any thoughts?
Posted: Wed Apr 27, 2005 12:19 am
by Dane_Ger
Taylor,
At this point I'm not sure what the heck I'm doing, except after sanding on last night's work . . . I think I'm beginning to see what is supposed to happen.
That being . . . any flaw, including that in my fairing or anywhere else is coming quickly to 'light' . . . .
I've mostly hand sanded to this point, but am not afraid to do some with my RO . . . gently.
See if you can make heads or tails from my pics of tonight's work!?
First 2 are after sanding last night's fairing attempt . . . front half of the boat . . . or so
These are pics of just trying to lay on a thin slick of fairing compound on the aft sides.
It's gonna be fine, but I had some other "crud" going on tonight that tried to get me off of my game . . . I'll be back!
Posted: Wed Apr 27, 2005 9:00 am
by HokieBoatbuilder
That looks good to me, you don't seem to have any abrupt edges from the pictures. I've been doing the close your eyes and feel the hull thing and that seems to spot defects. The RO sander just seems to follow all the humps and dips where block sanding does not so I've switched to the block for the outside only. You sound like you agree since you are using mostly hand sanding. You sure are moving quickly, at this rate you probably just have a month or so left.
Posted: Fri Apr 29, 2005 1:35 pm
by Dane_Ger
Taylor,
Last night a local builder that I've previously only known from various forums came over and looked at my boat with me. We had a cold beverage or 2 and talked 'boats' for over 4hrs. He brought a few of his fairing/finishing tools to show me, gave me lots of advice and tips based on his experience. Super nice guy and lots of help for me at this stage of my build
Bottom line is that for sanding and finishing, he swears by hand sanding at this point. He even said it is no problem to quickly remove a lot of material by using 36-grit paper, followed by 80 and 120. He thinks that 100 to 120 is plenty smooth enough prior to priming. His work is beautiful, so I think I'll follow his advice. Here are a couple of new tools (available at auto paint supply stores) I'll be adding to my arsenal:
A 16" sanding board
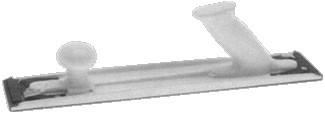
A 9" sanding block

Posted: Fri Apr 29, 2005 1:46 pm
by JollyLolly
I hear you Dane,
See my post at
http://forums.bateau2.com/phpBB2/viewto ... 5377#55377
RO's are fine, but don't get into small corners. That 9" pad looks a good buy for that.
Posted: Fri Apr 29, 2005 1:55 pm
by jacquesmm
That long board works well and we sell it at BoatBuilderCentral.com:
http://www.boatbuildercentral.com/prodd ... ng%20Board
It is hidden in the faring section and the picture is nto greta but it's exactly what Dane_Ger describes.
BTW, I agree with rough shaping with 36 grit then 80 then 120 then primer.
You'll go to 300 or 600 with the primer if you want.
Posted: Fri Apr 29, 2005 1:58 pm
by Dane_Ger
His claim was that when fairing the hull, a 4 1/2" or 5" RO sander tends to follow the irregularities rather than sanding them out, hence the need to use a fairing board or block sander. This guy is a bit of a perfectionist, but even with hand sanding, his tips will save me a lot of work from the direction I was going.
Thanks Jacques, I just couldn't believe I could get away with using that corse of sandpaper at this point, but he showed me exactly how it'd work on a small section. Sweet!
And we are all in agreement on how fine to go with the paper when finish sanding the primer!
Posted: Fri Apr 29, 2005 4:30 pm
by HokieBoatbuilder
Man that sounds like some good advice. I wouldn't mind drinking a few beers with an experienced boat builder. Unfortunately I don't know of any located in southwestern VA. I think Jacques needs to go on tour. I've been to 5 local auto part stores and the best I could do is a flexible rubber type 10 inch board. It works pretty well, especailly for $5. I have been using 60 grit but now I think I might get some 36. I bet that will do a number even on straight epoxy. Are you using S3 paint? If so I might just let you prime first and tell me what not to do
Just kidding, Good luck!
Posted: Fri Apr 29, 2005 4:37 pm
by Dane_Ger
Taylor,
It was fortunate for me to be able to go over my boat with an experienced builder and 'finish' man . . . he was able to clue me in on lots of little tips and tricks in short order, plus is was just great fun to BS with him about boats!
Yes, I will be using all S3 primer and paint products and hope to begin priming the hull next weekend.
When are you going to post pics of your boat?
Posted: Fri Apr 29, 2005 6:36 pm
by Mike Adams
Dane,
I also learned the hard way (and at my son's insistence!) that the only way to get a really good flat finish is to use a longboard. Before stopping work on it last week I had the hull up to the stage where I have three coats of primer down and have been using 400 grit wet and dry paper on it to achieve an extremely smooth (motor body standard) surface. However, it seems the better the finish gets, the more it shows up the flaws! I've used some spot filler on these areas and when I can get back to it I'll sand again with 400 grit and apply 2 more coats of primer, sand again with 400 grit, then apply top coats. My son has one of those 9" pads as well as the longboard, but I found it was difficult to keep the very fine 400 grit paper locked into the holding slots, especially when wet. so I reverted to holding the grit paper pad in my fingers. (I didn't put on any gloves to do this fine sanding, so by the time I got halfway through the boat my finger tips were raw and bleeding.... that was really DUMB!
Won't make that mistake again!).
BTW - my wife is slowly improving and I'm taking her away this weekend for a break at the coast. Thanks for your thoughts and good wishes.
Posted: Sat Apr 30, 2005 10:11 am
by HokieBoatbuilder
Dane,
I don't have a digital camera so I can't post anything. However, I am going to see my parents soon so I might grab theirs and take a few pics. I'm definitely going to post some photos once it is completed.
-Taylor
Posted: Sat Apr 30, 2005 10:56 am
by fishingdan
A long board will be helpful, but don't let that stop you. You can get good results with a random orbit or a finish sander.
Before you start, realistically think about how the boat will be used. Others on this board have used an interesting measurement. They look at their boats and decided that it looks good from a given distance from the hull. For example, a small workboat used commercially may have a nice looking hull from 15' away, but as you get closer, you start to see imperfections. A perfect finish looks good regardless of how close and at what angle you look at it. Most shoot for something that looks good from a few feet away. We all want to do the best job we can, but like a car, a boat will look its best on the day before you use it for the first time. For example, If the boat is going to be dragged up a beach, then there is no need for "showroom" perfect finish on the bottom. A good finish will suffice since it will show marks from beaching.
In the end, you will be the biggest critic of your work. Most observers will be in awe of the fact that you built a boat in the first place.
Some thoughts:
- Use a straight edge against the hull to find areas that need work. I used a 4' (about 3 inches wide) long flexible aluminum ruler.
- Have a portable light handy. You need to position the light near the hull so that you can see irregularities as you look down the side of the hull.
- Use a 12" drywall knife or something larger to apply fairing mix on the hull. At one point, I used the edge of an old level to spread a thin coat of fairing mix on an area that had a few scattered low spots.
- Stay with 80 grit paper until the hull is fair, then a couple of passes with a higher grit before primer.
- If you use small power sanders, you need to work methodically and always keep the tool moving. Always use the tool attached to a shop-vac if possible.
- Buy sand paper in bulk. 5" Random orbit sand paper fills up/wears out quickly.
- Remember the 80/20 rule. The first 80% of a finish requires only 20% of the work. The remaining 20% of a finish requires 80% of the effort.
Good luck and enjoy the process. The results will be worth it the first day that you board the boat.
Dan
Posted: Mon May 02, 2005 11:15 pm
by Dane_Ger
Update 5/2/05
Sorry guys, this IS the so-called boring part . . . it WILL be worth it!
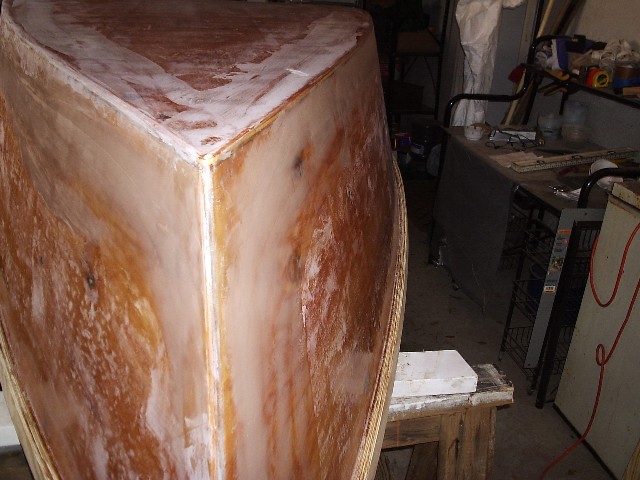
Here is the pic of the transom, it needs work, but another coat of fairing compound and it'll be close.

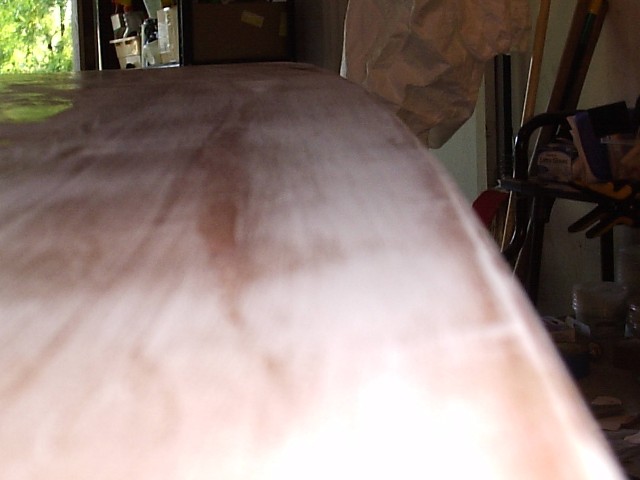
This is from the transom, looking forward . . . I put on another coat of epoxy to fill the weave in the cloth and it looks like that'll do it . . . this was glossy as two marbles before today's sanding. Now, inspite of horizontal lines in the photo, its almost ready for primer!

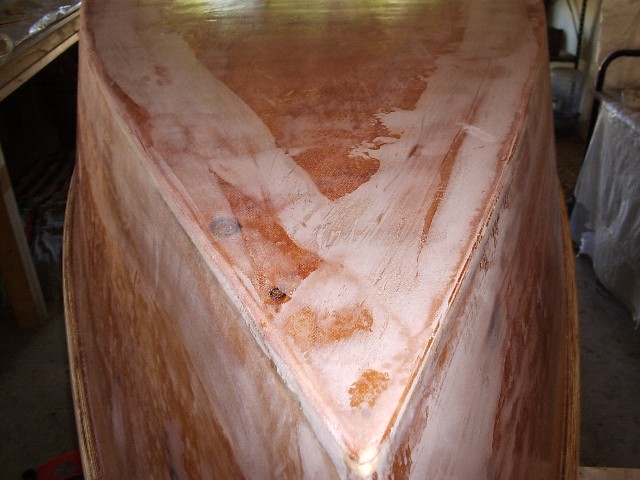
Here is a view from the bow, where most of the fairing is done . . . ready for primer . . . on the whole hull by next weekend.

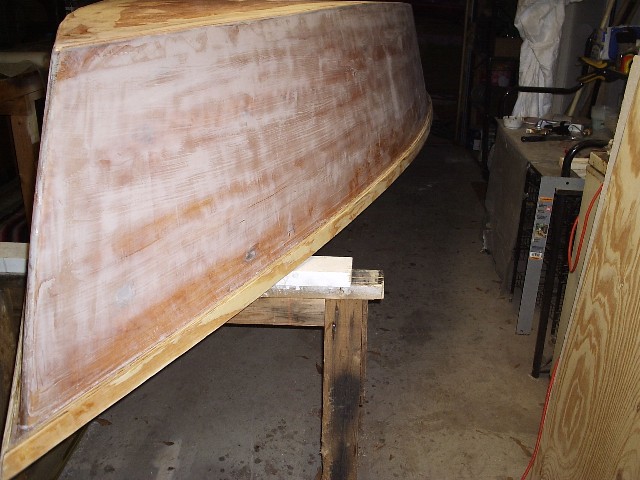
Not much left to do here either, that is after almost 2 hours of sanding . . . . a few low spots to take care of . . . no problem.

Without a doubt . . . a weeks worth of hard "at it" to finish, but I'm all about beginning primer next weekend!! We'll see!?
Posted: Tue May 03, 2005 11:16 pm
by Dane_Ger
I took more pics, but you'd never know from looknig. more fairing and sanding . . . getting close . . . I will begin to prime this weekend!
D
Posted: Tue May 03, 2005 11:32 pm
by JollyLolly
Looking good Dane,
At this rate, you'll be priming as planned. What are you using to fair. I'm still practising on my NC16, and am way over the budget SWMBO 'thinks' it cost so far, so don't/can't invest in QuickFair.
Others say wood flour is too hard to sand, microballoons and silica are not thixotropic so may run on the sides, and Shine says to let the fairing compound (other than QuickFair) cure for 72 hours B4 sanding.
I also want to get on the water this summer
Posted: Wed May 04, 2005 10:02 am
by Dane_Ger
Laurence,
I am using the QuickFair . . . I know it is more expensive (and I think I'll end up needing more than I originally ordered??), but in my mind the benefits FAR outweigh the cost. Time is expensive too and so is having fill pinholes with additional coats of epoxy, etc. However, lots of boats have been built without it. I haven't worked with fairing using either of the mixes you describe, so I can't offer any suggestions there.
Keep up your good work!
Posted: Wed May 04, 2005 10:16 am
by HokieBoatbuilder
I'm on my second 3 quart kit of quickfair
I've probably placed 5 different orders to boatbuilder central.
It's looking good Dane, keep it up. I was going to prime the outside of my hull tomorrow but I've changed my mind and decided to finish fairing the inside, clean the shop, varnish my seats and rail and then move on to priming. It would be great if you could give a detailed account of your primer experience this weekend. Does your boatbuilder friend recommend hand sanding the inside of the boat too? P.S. I noticed my Hokies are playing your Buckeyes in the ACC/Big Ten Challenge next year. Hopefully you guys won't play as well as you did against Illinois
Posted: Thu May 05, 2005 2:09 am
by Dane_Ger
Laurence,
I only much about my Buckeyes when football is involved, well not always, but mostly! j/k lol
My buddy feels pretty much the same about the inside, but he's a perfectionist! While there isn't much opportunity to use the longboard on the inside, he still likes to hand block where he can. I have still got alot of work to do inside . . . I flipped long before I began any 'finishing' there. I'll keep you posted as I begin priming this weekend!
I have some new pics from last night and tonight. I almost forgot to install the runners, but remembered tonight that I wasn't going any further without them.
Here are a few more fairing/sanding pics from last night:
And here are some angles of the runners installed:


Posted: Thu May 05, 2005 11:37 am
by JollyLolly
Dane_Ger wrote:Laurence,
I only much about my Buckeyes when football is involved, well not always, but mostly! j/k lol
.............
My buddy feels pretty much the same about the inside, but he's a perfectionist!
Hi Dane,
Sorry, I'm not the Hokey guy, that's HokieBoatbuilder, but no worries.
Funny how in just a few short days, this guy who you've only met on "various forums" is now your "Buddy"
Good that you remembered your runners before the weekend... that is when you'll be priming, isn't it? Heck, I wish I'd started building when there were some less perfectionistic (is that a word

) guys on the forum, other than you and Mike Adams for me to try and keep up with. I must say I'm not sorry though!
Posted: Thu May 05, 2005 1:58 pm
by Mike Adams
Thanks for the nice compliment, Laurence! But I can tell you that it's not necessarily a good thing being a perfectionist - it can drive you nuts. I get mad with myself sometimes because I find I haven't been able to leave well enough alone and end up creating work for myself! If I hadn't been so fussy I would have had the FL14 in the water by now......
Don't put yourself down - you are doing just fine.
Posted: Thu May 05, 2005 2:13 pm
by Dane_Ger
I have to concur with Mike here . . . thanks for the compliments, but I really don't think my work is anywhere near 'perfect' . . . I just figure at this point I've got enough time invested (not to mention $$$) for this little boat that I may as well spend a little more attention to detail now as opposed to wishing I had at a later time.
I don't know about anyone else, but it sort of gave me the 'willies' last night when I had to drill through my hull to install the runners. Anyone else feel this way about holes in their boat?
Posted: Fri May 06, 2005 2:36 am
by Mike Adams
Yes - I felt the same way about drilling the screw holes for the skeg on my FL14! Doesn't quite seem right putting holes in a nice sealed hull! I put lots of epoxy round the screws to make absolutely sure that there would be no pathway for moisture to get into the plywood.
Posted: Fri May 06, 2005 8:44 am
by HokieBoatbuilder
I built a skeg that I fiberglassed and filleted. No holes necessary, and extremely strong. I chose the skeg vs. runners because I want to row and I knew that it wouldn't require holes. I took some pictures of my boat last night so I should have them up later today.
Posted: Mon May 09, 2005 11:29 am
by Dane_Ger
I got some more fairing and sanding done on Saturday, but broke one of my sawhorses, got a flat tire, and ultimately didn't get nearly as much done as I'd hoped. Then on Sunday I actually went offhore fishing
and didn't get a darn thing accomplished as far as the boat goes.
Looking forward to getting back at it this evening and now looking at late in the week to begin priming.
Posted: Mon May 09, 2005 11:49 am
by JollyLolly
Hi Dane,
I'd love to have seen the peoples' faces when they saw your "Gone Fishing" sign on your upturned, unfinished boat. So what's the rush when you have access to a boat to go offshore fishing anyway?
Hope you've fixed the flat tire on your sawhorse by now !!
Then on Sunday I actually went offhore fishing and didn't get a darn thing accomplished as far as the boat goes.
What could be better motivation than this... ?
Posted: Mon May 09, 2005 12:52 pm
by Rick
Mike Adams wrote:Yes - I felt the same way about drilling the screw holes for the skeg on my FL14! Doesn't quite seem right putting holes in a nice sealed hull! I put lots of epoxy round the screws to make absolutely sure that there would be no pathway for moisture to get into the plywood.
I screwed the skeg onto my PK78, then filleted and glassed it in place. I then removed the screws and filled the holes with slightly thickened epoxy. Good as new!
Posted: Thu May 12, 2005 3:25 pm
by HokieBoatbuilder
Dane,
I've developed a new term: "mid boat crisis" it's when you are halfway through fairing and you start hating yourself for building a boat. I hope you are not having one
I think I'm over mine since I traded in my partailly completed Fl14 for a red bass boat and a hot young blonde wife. Just kidding. Anyway I was just wondering if you started priming yet? I am still fairing the inside, I should be done tomorrow. I'm going to prime this weekend, and it seems like you will probably be doing the same. Keep pressing on, the end is near and the reward will be tremendous.
Posted: Thu May 12, 2005 5:14 pm
by Dane_Ger
Taylor,
Nope, no 'crisis' happening here . . . I just haven't posted because there just isn't really anything much to show at this stage.
I am pretty much on schedule to begin priming tonight, but by the time I finish what I think will be the final pre-primer sanding, I'll probably be out of light that is condusive to applying primer. That means it'll most likely be tomorrow and successive coats over the weekend.
Flip the hull back over on Monday or Tuesday and get back to finishing the interior! I have alot of stuff to do there as far as seats, storage, etc., etc. . . . not to mention fairing, priming, and painting.
I still think I'm looking at a late June splash, but we'll see how things go!
Posted: Fri May 13, 2005 10:05 am
by Dane_Ger
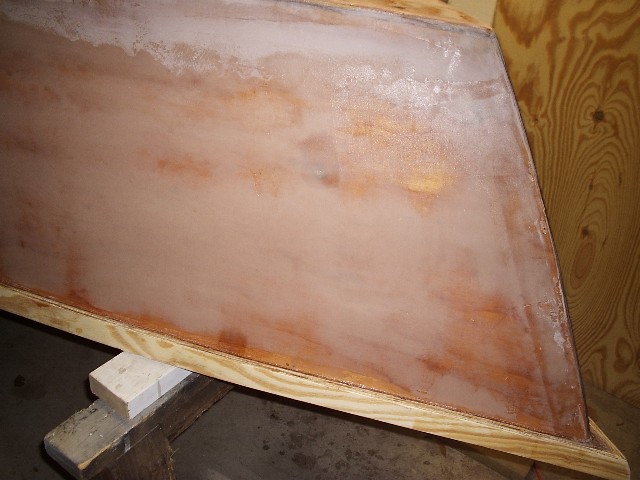
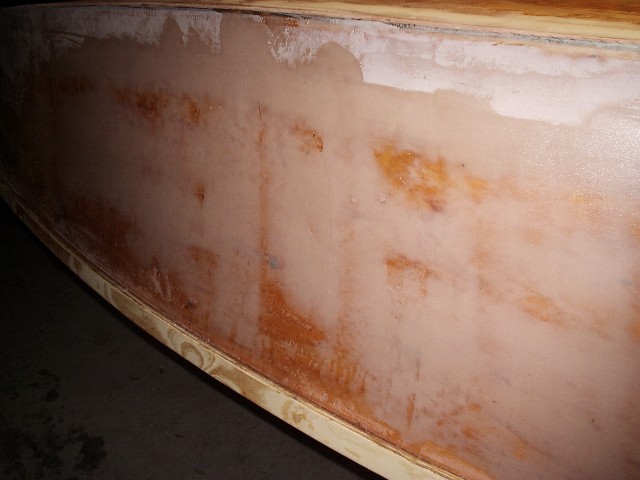
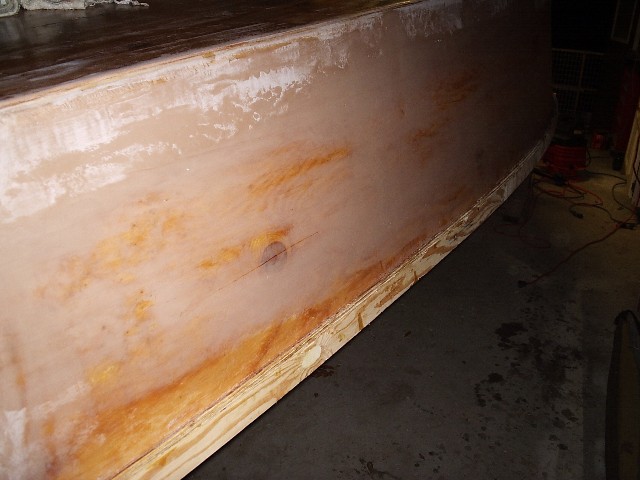
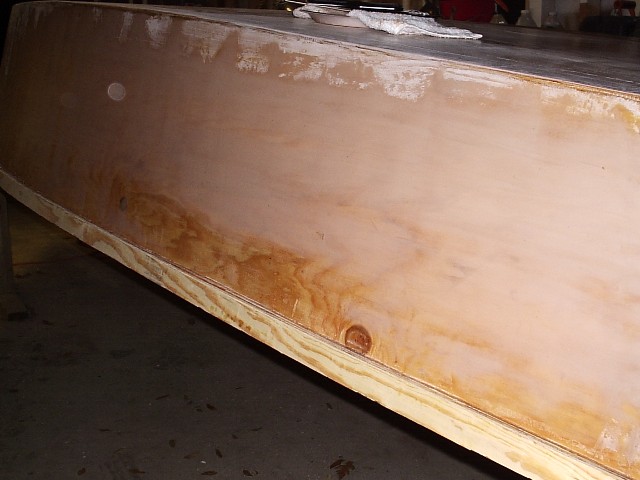
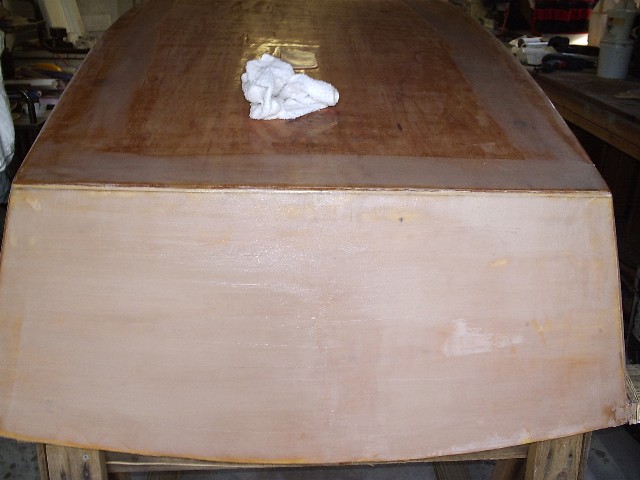
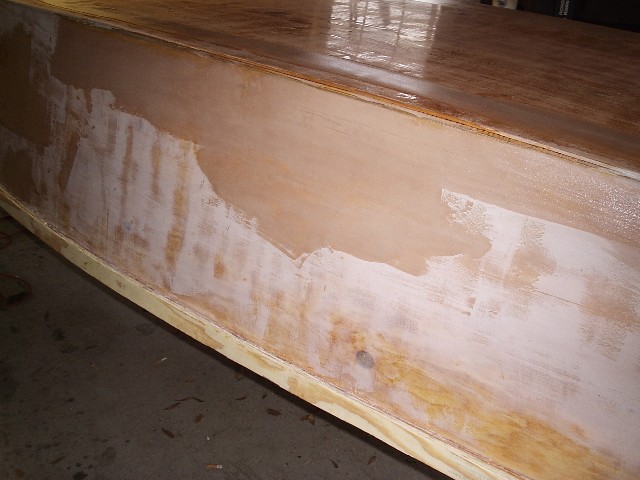
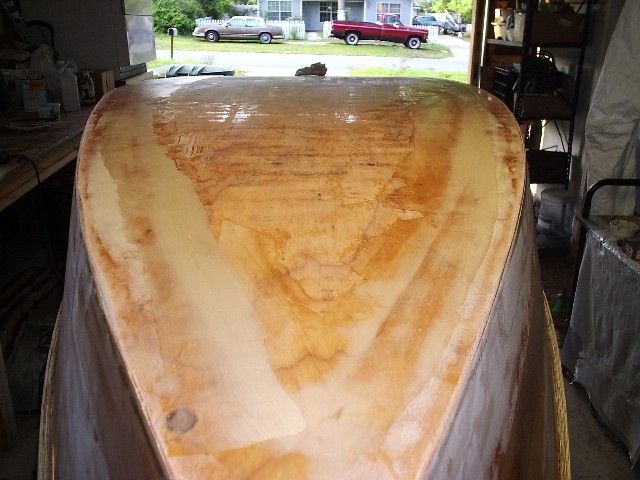
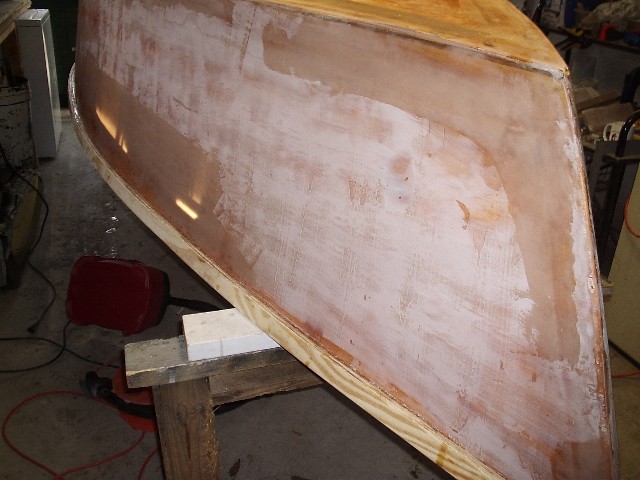
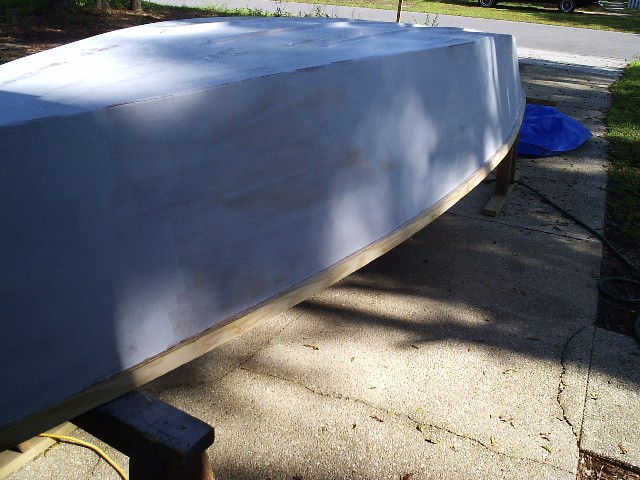
Update 5/13/05:
Last night I filled what I believe are the last of the small remaining low spots. This morning I got up early and knocked of the high spots with 60grit and then sanded the entire hull with 100grit.
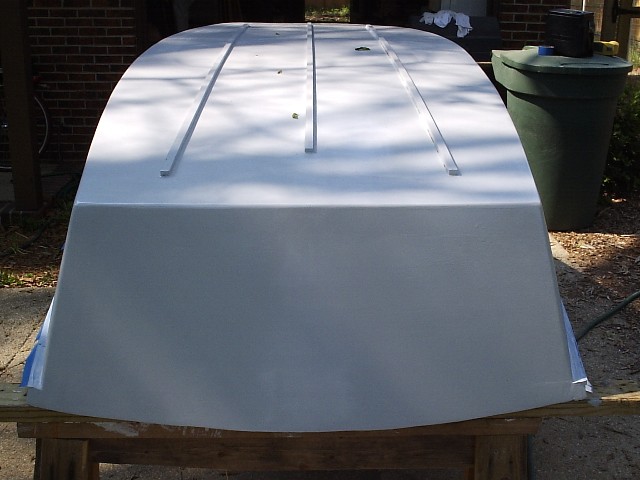
After work this evening, I'll lightly sand her again with 120grit, wash/rinse/dry her, wipe her down with alcohol, and 'roll and tip' the first coat of System 3's high build primer. Hopefully I'll be able to get 3 or 4 coats on during the weekend.
These pics were actually taken the other morning and don't show the last few rounds of fairing and sanding, but I don't think you could tell in the pictures anyway!?
Side shot from stern to bow:

From the bow

Transom:

Posted: Fri May 13, 2005 10:19 am
by rjezuit
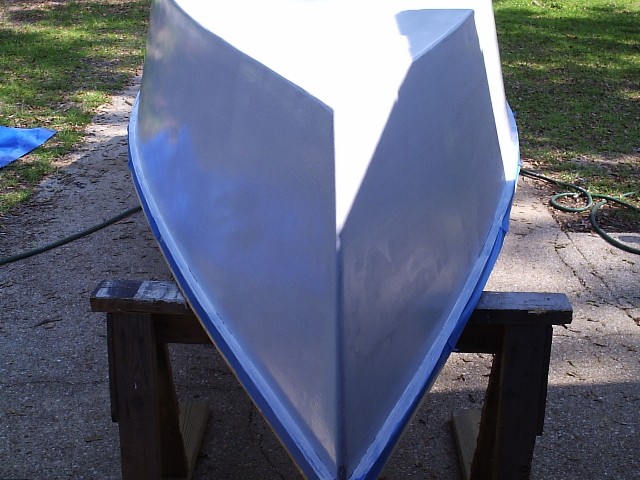
Dane, Are the runners parallel to the long axis of the boat? It looks like they turn in toward the front, or is this just the perspective of the lens? Rick
Posted: Fri May 13, 2005 11:31 am
by Dane_Ger
Rick, they DO run parallel to the long axis of the boat . . . it is just a poor perspective from my cheap, but almost "Dane-Proof" digital camera.
In the second photo, you can see a little better that they run parallel.
Posted: Fri May 13, 2005 12:57 pm
by Rick
Dane_Ger wrote:This morning I got up early and knocked of the high spots with 60grit and then sanded the entire hull with 100grit.
After work this evening, I'll lightly sand her again with 120grit, wash/rinse/dry her, wipe her down with alcohol, and 'roll and tip' the first coat of System 3's high build primer.
For what it's worth, going from 100 to 120 might not do too much to improve things. For a sanding sequence I either use 60-100-150-220 <OR> 80-120-180-320. I believe I'm a typical woodworker -- I skip every other grit in a sanding sequence. Your mileage may almost certainly vary. With a high-build primer it may not make much difference, but 100 and 120 are pretty close together -- you might just be wasting time.
Posted: Fri May 13, 2005 1:02 pm
by HokieBoatbuilder
I thought that the high build primer will fill up to 36 grit scratches? If so why would you sand to such a high grit before priming?
Posted: Fri May 13, 2005 1:26 pm
by Dane_Ger
Rick,
Thanks, actually I meant to say 150 grit (I don't even have any 120grit . . . lol) for the last sanding.
Taylor,
The last round of 150 grit sanding will be short and sweet . . . just to be sure there is no anime or other foreign substances.
Posted: Sat May 14, 2005 1:10 am
by Mike Adams
Hey, Dane - she's looking REALLY good! Congratulations on your progress.
I managed to get the colour paint on to my hull this week, and today my son is going to spray the clear coats, after which it will need to be left for a week or so to cure properly before cutting and polishing. We leave for a two week break in Queensland next Thursday and won't be back until 5 June, so I'm hoping my son will do the cut and polishing job for me while I'm away....!!
I used 40, 80 and 200 grit on the fairing layer, then 400 and finally 2000 grit on the primer coats, but I still don't think the finish is going to be all that I hoped for - where the fairing coat has been applied a little thicker, the finish is super-smooth, but where the fairing coat was a little thin, I still have some patches where there are tiny pin holes in the fairing layer which the primer coat didn't completely hide. There are also a couple of areas that I missed that still show some sanding marks.
Fortunately most of these patches are on the bottom of the boat and won't be seen! In future I will be laying on a thicker epoxy fairing coat before the primer coat goes on, even if it means a bit more sanding.
Posted: Sat May 14, 2005 4:22 pm
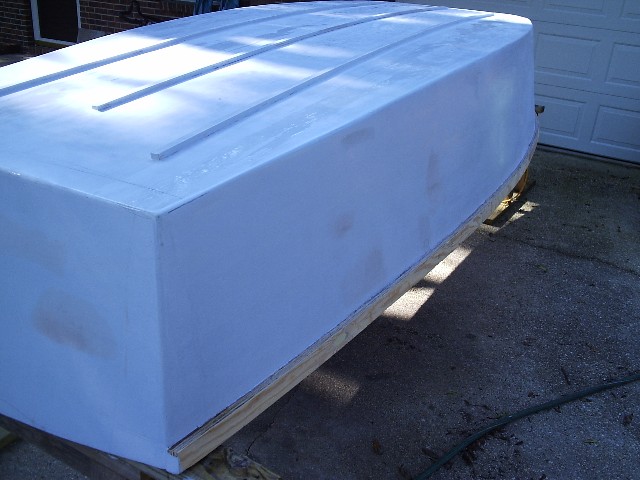
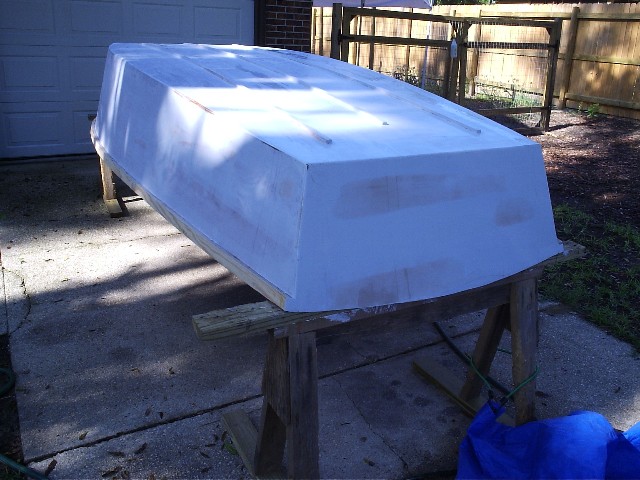
by Dane_Ger
Well I didn't get around to putting on the first coat of primer until this morning . . . I was afraid that by the time I got her prepped last night I would run out of daylight.
Anyway, I am please with the results so far and the S3 high build primer was easy to work with.
Posted: Sat May 14, 2005 6:54 pm
by HokieBoatbuilder
One word....... Beautiful. Good job Dane.
Posted: Sat May 14, 2005 8:39 pm
by Dane_Ger
Thanks Taylor!
I'd hoped to sand again the same day after reading that the primer can be re-coated in 3-4 hours . . . well re-coating maybe, but not sanded.
I have a few small areas that I'm not completely happy with, but will fix those ASAP once the primer has cured enough to sand.
A little more fairing in a couple of places that I'd just overlooked previously.
Then back to more primer. I'm still very happy with the results to date . . . for something that I'd never tried or had any experience with prior to this project.
Dane
Posted: Sun May 15, 2005 11:03 am
by ks8
proving once again... that everyone will finish before me!
Looks great!
on the water please?
ks
Posted: Mon May 16, 2005 11:04 am
by Dane_Ger
Thanks Taylor!
ks8, it ain't no race . . . things get done when they get done. I have been thinking for awhile that a late June launch will be about right, but I'm not about to work myself to death or compromise any building/finishing in order to make that date!
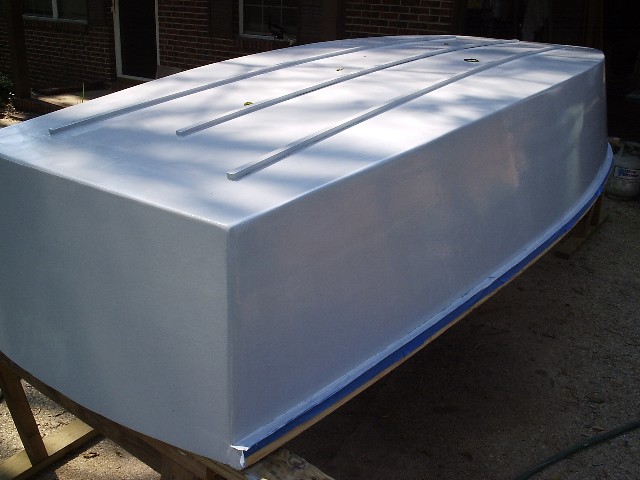
The primer was sufficiently cured on Sunday morning and I was able to sand the entire hull with 220. I again went over the whole thing and circled all of the 'bad spots' with a pencil. I then sanded down the high spots and filled the low ones with a bit more QuikFair and was able to sand those places in the afternoon. I'd hoped to go ahead with another coat of primer too, but the rain in the afternoon changed those plans.
Here are a couple of photos from this morning, if you look closely you can spot the areas that I've re-filled and/or sanded again.
Posted: Mon May 16, 2005 8:48 pm
by HokieBoatbuilder
Dane,
Would you say that the primer sands more easily than quickfair? Are you using a guide coat of spray paint? I'm just trying to see what I can look forward to. I'm varnishing the seats on my boat right now, but I think I'll start priming the inside next week. I really enjoy painting so I can't wait. What do you have left to do on the inside?
Posted: Mon May 16, 2005 9:23 pm
by Dane_Ger
I found a few more spots and quikfaired them . . . I'll sand in the morning and prime in the evening.
Taylor, once cured the primer sands easily, so does the quikfair at 4-6hrs, read the literature about quikfair . . . it actually gets as hard if not harder than any other product, once it fully cures.
Dane
Posted: Thu May 19, 2005 11:38 am
by alball
Looking good Dane,
I just primed my d15, and plan to sand soon. Did you use a RO sander to sand the first coat of primer with 220, or did you sand by hand? Also, how long did you let the primer cure before sanding?
al
Posted: Thu May 19, 2005 11:50 am
by Dane_Ger
Al,
I've essentially sanded everything by hand, only using the RO minimally.
I as able to sand the primer in about 24 hours and I thought it sanded pretty easily at that stage. Apparently you can re-coat after 3-4 hrs, but you cannot sand that soon!
I've gone back over the entire hull with a fine-tooth comb and filled and leveled many tiny imperfections and am now just about ready to start priming again!
I have no plans to be as particular with the finish on the inside of the boat, but I did want to make the outside, especially the sides and transom as close to perfect as I was able.
Dane
Posted: Fri May 20, 2005 7:44 am
by HokieBoatbuilder
I have no plans to be as particular with the finish on the inside of the boat,
It's a good thing. I found the inside much more difficult to fair, there are a lot of tough corners. I'm Priming today
I have a launch date planned (June 25) so I'm really trying to finish my boat. I've been fairing the inside for a long time. I wish I would have used a roller for my fiberglass laminations, fairing would have been a piece of cake.
Posted: Fri May 20, 2005 11:16 am
by JollyLolly
I sympathise with you guys... I am building a simple NC16, and have expended most of my patience/perseverence on the outside as well. Next time, I'm finishing the inside first, then the outside will be a breeze.
Dane, she's looking great.

Posted: Mon May 23, 2005 11:08 am
by Dane_Ger
Didn't get any work done on my boat this weekend
but at least I have a pretty good reason as I joined a Saturday charter trip out of Destin, Fl at the last minute!
The weather, crew, and fishing was very good! I landed my personal best red snapper and grouper along with two new species including a hammerhead shark that was released boatside. Below are a few pics back at the dock.
Our mate, Taylor . . . hanging the catch.

The full board.

45# Warsaw Grouper on the deck.

Hammerhead Shark

Back to working on the boat tonight!!
Posted: Thu May 26, 2005 10:14 am
by Dane_Ger
Posted: Thu May 26, 2005 10:37 am
by HokieBoatbuilder
Looks great Dane. How early did you have to get up this morning? I have the opposite problem, it was 58 for the high yesterday. I guess you decided not to get the sprayer. I'm putting on topcoat this weekend inside and out (roll and tip), I'll let you know how it goes.
Posted: Thu May 26, 2005 10:52 am
by Dane_Ger
Taylor,
I think we have the opposite temperature problem exactly, heck it was a record high 96F here on Tuesday and while the heat doesn't bother me too much, epoxy products just don't do well in those conditions any better than they do in the cold!
I've decided to forego the sprayer for now . . . I'm going to get 2-3 more nice coats of primer on the outside and get her flipped over so I can complete the inside.
I'll decide while I'm working if I want to bother spraying the the interior and/or topcoat. I think the troubles I was having was two-part and spraying wouldn't have solved either of them (A. I needed practice with the "roll & tip" technique, and B. it was simply too warm for the S3 primer to be applied properly).
Looking forward to seeing your boat in paint!
Posted: Sun May 29, 2005 7:12 pm
by Dukydo
Dane your boat looks fantastic. What is your colorscheme going to be?
What is roll & tip?
Posted: Tue Jun 14, 2005 11:14 am
by Dane_Ger
Posted: Tue Jun 14, 2005 6:23 pm
by Mike Adams
Looking good, Dane!
I found the foam horrible stuff to use - and I also overfilled the bow area (maybe the triangular shape makes it more difficult to judge the required amount?).
What is the centre batten in the bow seat for?
Posted: Wed Jun 15, 2005 10:11 am
by Dane_Ger
Thanks Mike,
THe foam was no problem to mix or pour, but judging how much it would expand or how much volume some of the areas held was a bit of a different story.
The batten in the bow end is a support for the small casting platform I'm using instead of a bow seat. This gave me some extra storage underneath and I believe will be plenty stable enough for me to stand on when sight fishing some nearby grass flats.
Dane
Posted: Sun Jun 19, 2005 9:15 am
by CHarris
Looking good Dane. Won't be long now.
Chris
OD18
Posted: Thu Aug 25, 2005 10:56 pm
by Mike Adams
Hey, Dane, - you've been very quiet for a couple of months! Have you finished/launched yet? How about some more pics?
Posted: Fri Sep 02, 2005 6:07 pm
by Dukydo
Hey Dane,
Like many others, I too am on the edge of my seat waiting for the next installment.