


OB 15
Re: OB 15
The hole has been epoxied in using JB Weld. Tomorrow, when the epoxy is hard, I'll cut the excess off and file smooth. The hole that has to be drilled and tapped, has to be perfectly in line. If not, the bolt won't seat on the other side and all is wasted. I need to take my time on this one.
Re: OB 15
The plug has been drilled and tapped.

both pins work fine.
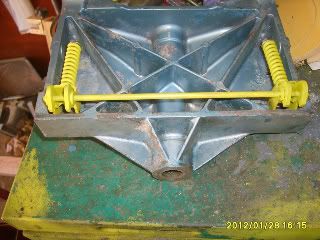
This is how the tension bar assembly is supposed to look.
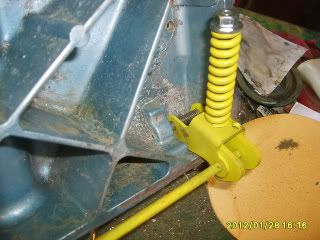
You can see down where the pin holds the tension spring assembly.
Everything is pre-primed with zinc chromate. It takes about 4 days for the primer to "etch in".
I will be using an epoxy primer the the finish epoxy. I may stop this portion of the project to start my trailer.
Re: OB 15
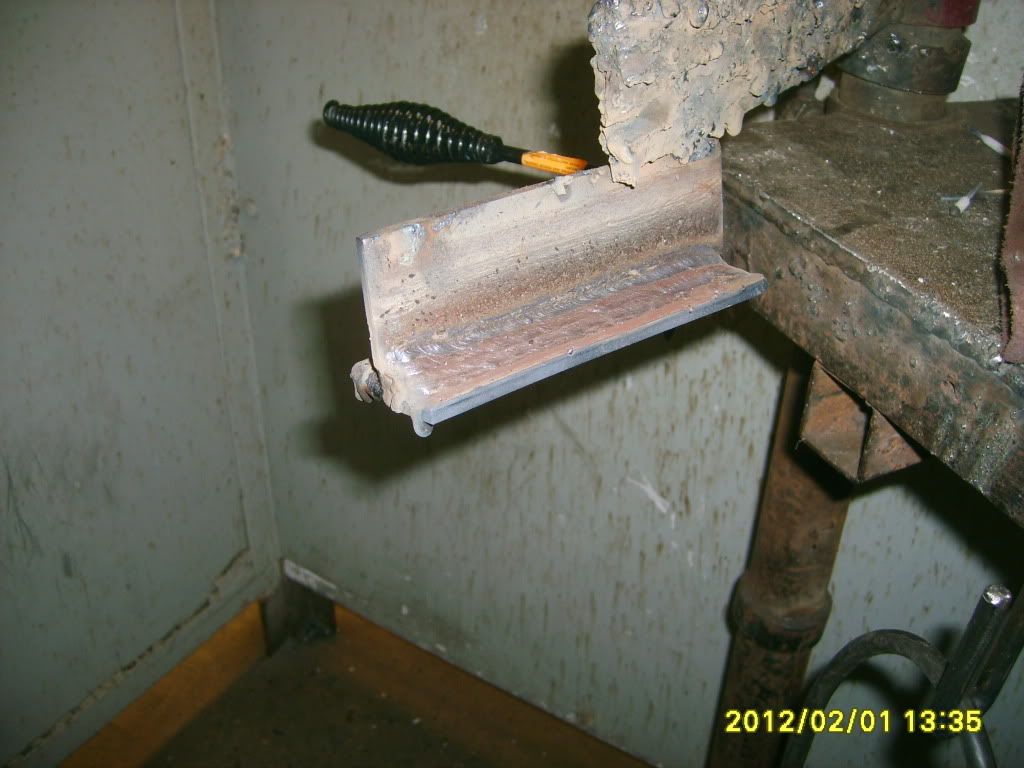
I've now moved on to upright welding. Now, just above the weld, I have to torch that off and weld it on to the bottom. Then weld that using the same technique. We have to make four before we move to the next procedure.
There are two basic types of trailer designs. One with an extension beam and one without. I like the idea of the "A" type. It will probably have a little bit sticking out for the swivel wheel. I'm picking up the steel for the trailer in about a week. I can't wait.
Re: OB 15
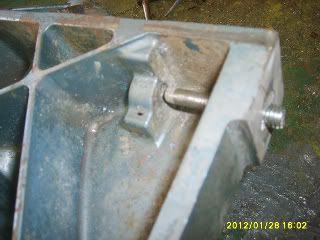
The backplate on the outboard is almost finished. The pins are done, now to finish the threaded tab.
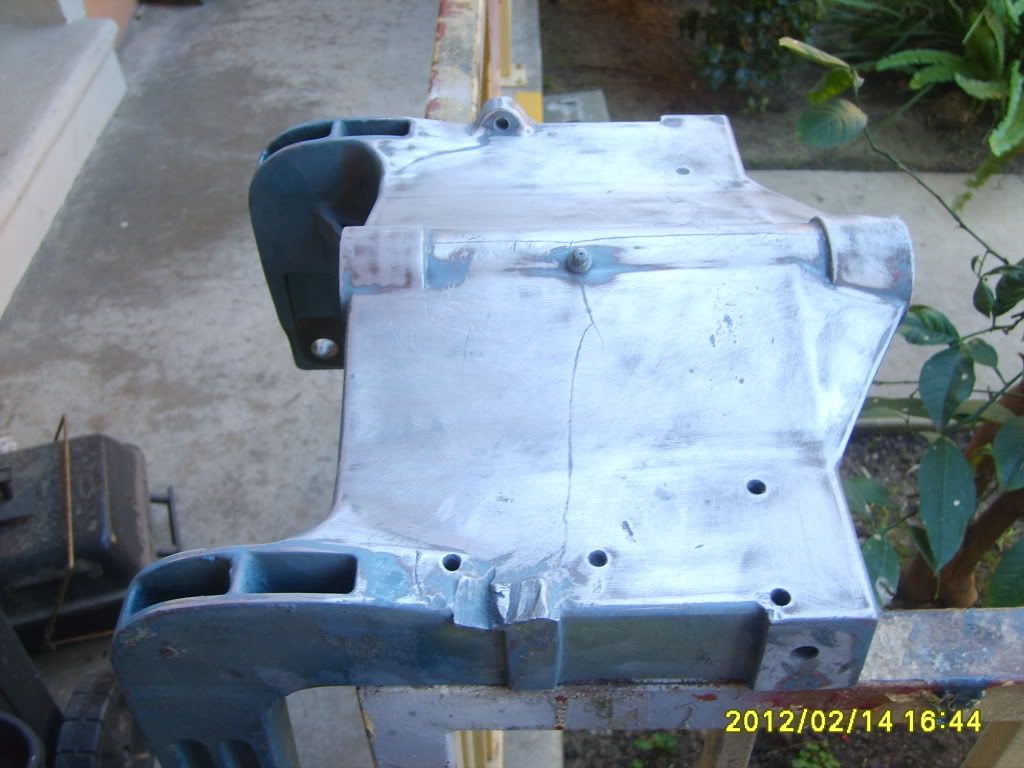
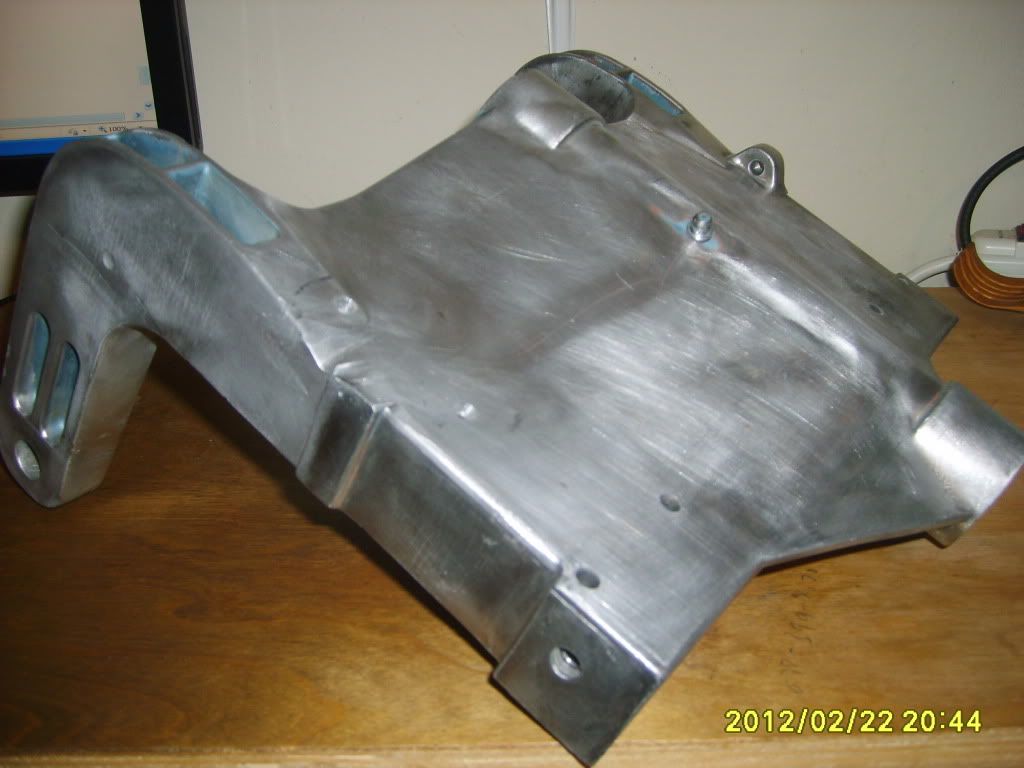
As you can see from the photo, the previous owner has hacked off the tab that holds the swing arms. Why this was done, is beyond me. It's supposed to look like the one on the other side.
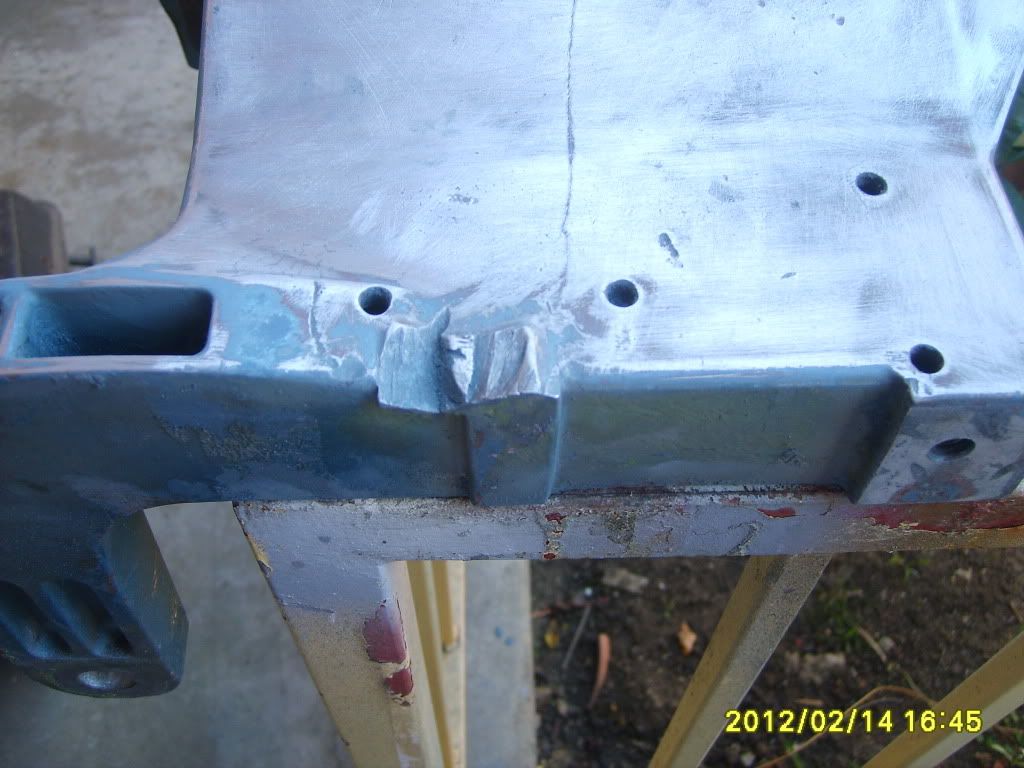
Here you can see a better picture of the holes that held an angle bar that was hodge-podged in such a way that the engine wasn't pivoting level. I'm taking this to my welding class next week. The instructor has agreed to help. My machine won't weld aluminum. I'll weld a 1"x3"x5/8" thick bar along the edge, then shape it and then drill and tap the hole. I should be good to go. after this, I will start the epoxy priming process.
As you can see from the photo, the previous owner has hacked off the tab that holds the swing arms. Why this was done, is beyond me. It's supposed to look like the one on the other side.
Here you can see a better picture of the holes that held an angle bar that was hodge-podged in such a way that the engine wasn't pivoting level. I'm taking this to my welding class next week. The instructor has agreed to help. My machine won't weld aluminum. I'll weld a 1"x3"x5/8" thick bar along the edge, then shape it and then drill and tap the hole. I should be good to go. after this, I will start the epoxy priming process.
-
gstanfield

- * Bateau Builder *

- Posts: 4655
- Joined: Sun Jan 10, 2010 5:09 pm
Re: OB 15
It's nice to see someone trying to do something right instead of just patching it together. This is going to be a very sweet outboard when you get it all new again 
Previous builds: FL14, NC16, and others...
Current build: FL14 (+10%)
Current build: FL14 (+10%)
Re: OB 15
This week, I got a tip where I can get aluminum cheap. I got a 5/8"x1" and shaped a tab which I will now weld to the frame support.
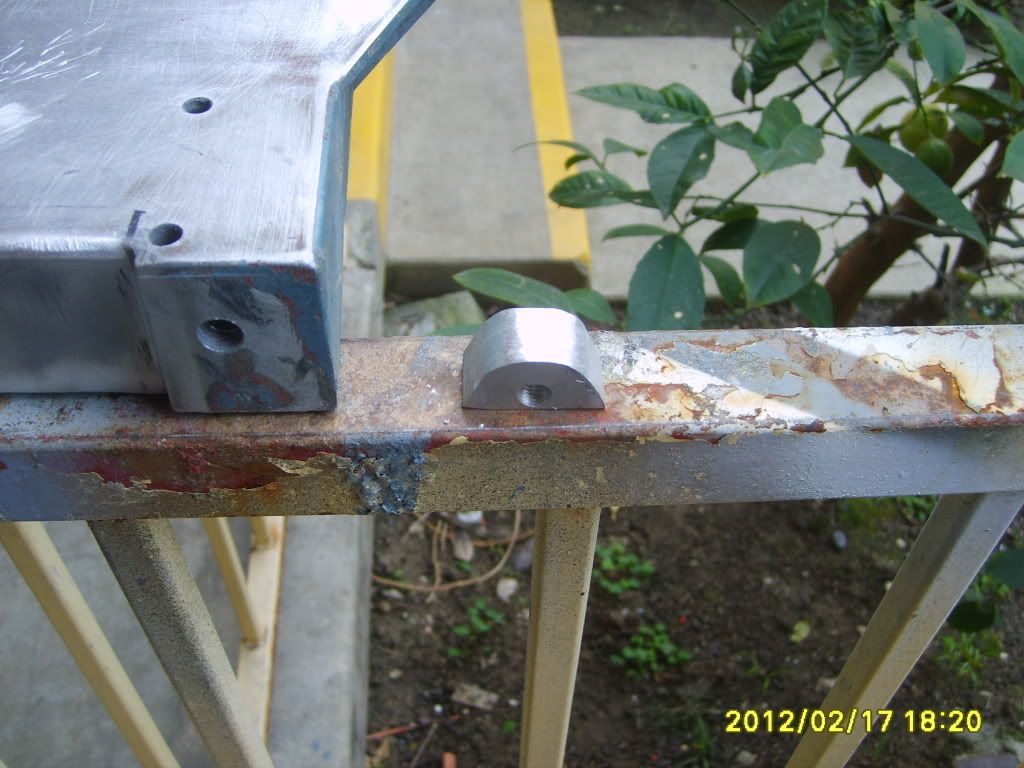
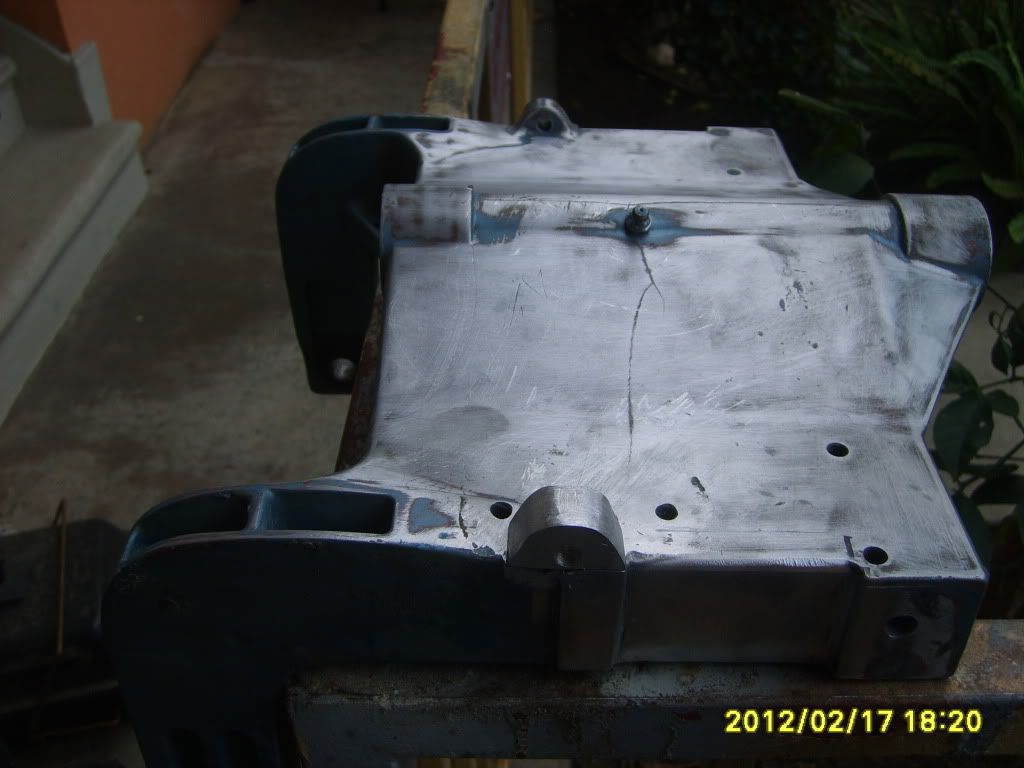
This is where the tab lines up perfectly. After it's welded, I'll buff it out smooth and shape to look close like the other. Notice how close the threaded hole is to the surface. Maybe that's why the previous owner din't want to try to fix it right. Then it's on the zinc oxide, prime and paint. I'm gonna fill those two holes that were to hold an angle bracket.
This is where the tab lines up perfectly. After it's welded, I'll buff it out smooth and shape to look close like the other. Notice how close the threaded hole is to the surface. Maybe that's why the previous owner din't want to try to fix it right. Then it's on the zinc oxide, prime and paint. I'm gonna fill those two holes that were to hold an angle bracket.
Re: OB 15
I was at my welding class today, and I brought my project in. They told me I had to get most of the paint off from around the area to be welded. So I spent the rest of the day using a wire wheel to take the paint off. I'm taking it back tomorrow. I show some pics if it passes and they weld it.
Seems that aluminum welding doesn't like paint. It will draw the melted paint into the weld and the weld will fail.
Seems that aluminum welding doesn't like paint. It will draw the melted paint into the weld and the weld will fail.
-
Mad Dog

- Very Active Poster
- Posts: 1945
- Joined: Sun Aug 05, 2007 1:49 pm
- Location: San Antonio, Texas
Re: OB 15
I can attest to the fact that aluminum needs to be VERY clean to weld properly. My brother did all the welding on my bracket and T-top. We did good on the bracket but got in a hurry on the T-top and had to re-do some welds. 
Looks like you did good cleaning that part.
MD
Looks like you did good cleaning that part.
MD
Ergo piscor, ergo sum
Who is online
Users browsing this forum: Ahrefs [Bot] and 17 guests