Page 1 of 1
building xf20
Posted: Tue May 03, 2016 12:14 am
by MrPaul
I've been planning an xf20 build with casting decks for quite a while and finally have the time to do it. I started on it last Monday.
I have cut all of my hull parts from okume and should be recieving my glass and epoxy on Friday but I'm still frameless. What is the best type of wood for making the frames on the xf20? I want to make a boat that will be strong and last a long time. I plan on pulling it to the boat ramp with my 4 cylinder pickup so i would also like it to be as light weight as possible but don't want to sacrifice strength or hull longevity.
Re: building xf20
Posted: Tue May 03, 2016 9:22 am
by jacquesmm
You can use the boards we show or better, like many builders have done, use 1/2" plywood.
Re: building xf20
Posted: Wed May 04, 2016 12:51 am
by MrPaul
Ok. I can do the plywood frames. Is white oak a good wood for the 2x2s under the deck? I appologize in advance for a bunch of dumb questions, this is my first build.
Re: building xf20
Posted: Wed May 04, 2016 5:59 am
by stickystuff
wHITE OAK WILL BE ADDING EXTRA WEIGHT. fROM PAST EXPERIENCE EPOXY AND WHITE OAK DON'T STICK TOGETHER WITH EPOXY. gET A CLEAR PINE SUCH AS DOUG. FIR.OOPS had cap lock on. Just seal all wood good with epoxy and you should be OK for the long run.

Early morning. Been up since 3:30am
Re: building xf20
Posted: Wed May 04, 2016 9:34 am
by jacquesmm
It's not a dumb question and Ken is correct. White Oak is the only wood with which epoxy has bonding problems.
Re: building xf20
Posted: Wed May 04, 2016 9:56 am
by MrPaul
Thanks Ken, the help is always appreciated. I saw the xf you built and it came out great. Hopeing for similar results. How did the 60 hp yamaha work out?
Re: building xf20
Posted: Thu May 12, 2016 12:31 pm
by MrPaul
I got my resin and glass and have starter glueing up the hull of the boat. I've been reading the posts on the flounder boat which appears to be modified for the air motor, which my build will not have, and you mentioned 2 layers of 1/2 inch ply for the transom. I'm building the sole version amd planning on a 70 hp yamaha. Do i need to use 2 layers of 1/2" ply on the transom as well?
Re: building xf20
Posted: Thu May 12, 2016 12:49 pm
by jacquesmm
Build the boat as designed, that means transom from 2 layers of 1/2". That is what is on the plans. Hundreds have been built that way and work perfectly well with engines within the specifications.
Don't forget the transom knees.
Some builders have used more HP and I have recommended either a transom knee that extends higher or a third layer of 1/2" or the two.
Re: building xf20
Posted: Mon May 23, 2016 11:01 pm
by MrPaul
Please excuse my next dumb question. The plans call for 2 types of tape. Woven roving and biaxial tape. When i ordered all of the fiberglass and resin i only ordered 6" tape and got 5 rolls (145 yds). Is it cool to use the 6" tape you sent for all of the taping applications on the boat or do i need to order the other type of tape as well. Due to the fact that this is my first build i am a bit disorganized and have misplaced my shipping bill, I don't know if i have the woven or biax tape.
Re: building xf20
Posted: Fri Jun 17, 2016 9:36 pm
by Hunch
Hey Jacques remember me? I was one of the 1st builders of your XF20 to radically modify the plans and we argued to no end about it. That was a long time ago.
I used 5/8" ply for the bottom and fore and aft fishing decks, 1/2" for the sides, and 5/8" for the cockpit sole. All the ply used was Weyerhaeuser Marine Ply. Heavier but much cheaper than the fancier stuff. I used 1x2" Honduras mahogany for all the frames. Should be some pics on this site somewhere. Built like a brick shit house and was (is) indestructible.
I hung a super tuned 115hp Evinrude on a CMC Jack plate and used a Powertech 4 blade prop. Used to fly at 45+ mph loaded over 4" of water and was a blast to slide like a dirt track midget in the turns. Used it between the edge of the Gulf Stream to the Inland Waters of the glades.
I sold it several years ago and from what I hear the new owner can't break it either. Twas a fun project.
Re: building xf20
Posted: Sat Jun 18, 2016 10:01 am
by jacquesmm
I remember, thank you for posting and I am glad somebody still has fun with the boat.
There is more than one way to interpret my plans and yes, others have built the XF20 heavier and with more HP. I saw one in TX with a 200 HP engine on it

. Bad trim at rest but the owner looked happy.
Re: building xf20
Posted: Sun Jun 19, 2016 2:46 am
by MrPaul
Thanks for the input Jacques. I'm having a great time with the build. It seems like a lot of people who built this boat were happy with the Yamaha 70 and I seem to remember Ken Owens mentioning that the 60 seemed a little short on power in his thread. I'm not a speed freak but I want good hole shot so I'll use a 4 blade prop. If I can get 35 mph I'll be happy. I know Yamaha 50 - 70 weigh roughly 250 pounds. My boat will hopefully look a lot like hunchs' but with a center console and built with 9mm okume. If you think the 70 is ovrerkill, please let me know.
Re: building xf20
Posted: Sun Jun 19, 2016 3:34 pm
by TomW1
I know of several guys who have gone with the Yamaha 70 HP and this Power Tech multi cup prop in I believe a 13 pitch.
http://www.ptprop.com/index.php?page=sh ... &Itemid=46 With a Bob's jack plate this will allow you to run very shallow.
Tom
Re: building xf20
Posted: Sun Jun 19, 2016 9:11 pm
by MrPaul
Thanks Tom. I saw all the numbers you and George went over on the xxxf20 and it looked to me like that boat came out very nice. So are you saying the lower end of the pitch range is better for hole shot? I'm not too knowledgeable on these things yet and still haven't bought the motor so i don't know all the details/stats on a new f70 but this looks like the prop I'm looking for.
Re: building xf20
Posted: Mon Jun 20, 2016 1:27 pm
by TomW1
Yes the lower pitch will give you two things a better hole shot and higher rpm's at top end. The Yamaha 70 tops oat at 6000 rpm's and you should be running at 5500-6000 rpms. This prop should give you both. I don't know whether you will need the 13 or 12 pitch, it will depend on the final weight of the boat and load you carry.
Tom
Re: building xf20
Posted: Tue Jun 21, 2016 11:38 pm
by MrPaul
Thanks Tom. I don't know what it's going to weigh yet. I'm kind of building by the seat of my pants and haven't figured out all of the things I want to put on it yet. I know I want to keep the weight as low as possible but I've got to have a working live well, trolling motor, 2 in deck fish boxes, an in deck storage locker, etc... and I know that's going to add some weight. Should I assume the heavier the boat the shorter the pitch?
xf20 clamping board question
Posted: Sun Jun 26, 2016 1:46 pm
by MrPaul
My transom is made of 2 layers of 1/2" Joubert Okume. My 1x12 clamping board is Honduran mahogany but it arrived last week and is only 7/8" thick. Will the transom be strong enough to support a 250 pound 70hp Yamaha 4 stroke motor or should I reorder the clamping board to be milled to exactly 1"?-- or....add another layer of 1/2 Okume to the inside of the transom? The tunnel has already been installed if that makes a difference. Any advice is sincerely appreciated.
Re: building xf20
Posted: Sun Jun 26, 2016 3:01 pm
by pee wee
If the plans call for a 1x12, then you're fine with what you have. The common dimensions of a 1x12 are 3/4" thickness and width of 11-1/2".
Re: building xf20
Posted: Sun Jun 26, 2016 8:07 pm
by stickystuff
You need to have at least a 2" thick transom. Plus or minus 1/8 inch wont matter.
Re: building xf20
Posted: Sun Jun 26, 2016 9:00 pm
by TomW1
You are fine. An 1/8 won't matter in a solid piece of wood.
Re: building xf20
Posted: Sun Jun 26, 2016 11:59 pm
by MrPaul
Thanks Guys. I'll keep building as planned. Looks like my wife's not going to get that mahogany bookshelf after all

Re: building xf20
Posted: Mon Jun 27, 2016 7:41 am
by stickystuff
Re: building xf20
Posted: Mon Jun 27, 2016 3:55 pm
by MrPaul
No knocking at all Ken. All advice is appreciated from everyone. I've seen your xf20 build (impressive!) and know you've got experience in building these boats. Are you saying I should ditch the mahogany and make a laminated clamping board? If so, what kind of ply should i make it out of?
Re: building xf20
Posted: Mon Jun 27, 2016 4:49 pm
by Cracker Larry
I would, the same plywood you are building the boat out of. Plywood is much stronger than a solid board.
Re: building xf20
Posted: Mon Jun 27, 2016 10:53 pm
by MrPaul
Ok. I'll build it that way. Jacques made a point of beefing up the struts that run from the stringers up the transom. Does anyone think it would be a good idea to make them a full square from the frame closest to the transom? Like in the cs23 or the phantoms.
Re: building xf20
Posted: Mon Jun 27, 2016 11:39 pm
by jacquesmm
MrPaul wrote:Ok. I'll build it that way. Jacques made a point of beefing up the struts that run from the stringers up the transom. Does anyone think it would be a good idea to make them a full square from the frame closest to the transom? Like in the cs23 or the phantoms.
Correct. They were designed for the original 25HP outboard. For anything larger, beef them up.
Re: building xf20
Posted: Tue Jun 28, 2016 11:50 am
by Aripeka Angler
If you are planning to have an aft casting deck, the deck will also tape to the transom.
The deck will actually do more than the knees to stiffen up the transom.
I'm not suggesting to eliminate the knees though. Use both

Re: building xf20
Posted: Wed Jun 29, 2016 4:43 am
by stickystuff
I will give you a good example of the clamping board prob we had. On the XF I built we had stndard 1/2 ply for transom. I used a 2x8 clear fir clamping board. Also used a 3/4 " plywood horizontal all along the bottom of the clamping board as well as double knees. Now the owner wanted a 10" setback jack plate and a sixty HP Yamaha 4 stroke. The extra setback plus the weight of the engine ,Oh I forgot a power pole also which used the engine bracket mount in stead of transom bolt on mount , caused excessive weight on the transome which in the long run caused the transom to bend back and seperate the rear deck from the transom. Aluminum L shaped brackets were made and bolted down with long lag bolts (6'')down the top of theknees and through the transom with 1/2' bolts. All this and it still caused the transom to bow back out.Nida core for the decks. I would never use this stuff again. Cost to much and not worth the problems with fastening other mounts. Any thing you needed mounting on the decs had to have a plywood backing underneath.The rest of the transom above the clamping board was two layers of 3/4 marine ply. All this and still a fail. Your call.
Re: building xf20
Posted: Thu Jun 30, 2016 12:17 am
by MrPaul
Ken,
This sounds very problematic. I was thinking a larger set back Jack plate might be a good idea to get the motor back into the water coming out of the tunnel. I currently have the entire transom made of 2 layers of 1/2" Okume plywood and still have not done the clamping board. I saw the 3/4 ply you put under the clamping board on the xf20 you built. I would have thought that would have stiffened up the transom substantially. What if I made a motor well like the phantom boats have? Do you think that would help?
Re: building xf20
Posted: Thu Jun 30, 2016 5:26 am
by stickystuff
I think you are on the right track doubeling the transom with 2 layers of 1/2".I only used one layer. Not knowing at the time he was going to use a 10" setback J-Plate. The extra weight of the J-Plate 9approx 30" +-) plus 235# of engine weight plus the torque of the engine running. and last but not least was the power pole which used the transom engine bracket caused considerable stress on the transom, thus bending over a period of time. So, now is the time to really beef itup.Use two layers of biax fastening all the braces and brackets. With the ten in j-plate and 60HP Yamaha he only ran 29mph.Go for it. just brace it off good. Double up on the kneebraces. Thats my .02. Big ass boat. Good luck with it. You will love the big fishing platform.
Re: building xf20
Posted: Fri Jul 01, 2016 1:26 am
by MrPaul
Ok. I think I'm going to put another layer of 1/2" okume on the inside of the transom, make the motor well walls on the inside stringers and beef up the knees on the outer stringers. I'll make the motor well walls angle up to the top of the transom like a flatscat. In essence it will have the 2 center knees running all the way to the top of the transom. After the deck goes on I'll tab it to the transom with 2 layers of tape. Looks like I'm going to have to order more biaxial tape. This is going to be a trailer boat so I should probably buy a transom saver. I sincerely appreciate all of the advice. Hopefully we avoid some future transom issues.
Re: building xf20
Posted: Sat Jul 23, 2016 12:09 am
by MrPaul
I'm done with all of the outside glass and want to start fairing next week. I have 4 bags of silica microballon mix. Reading the forum I see that I need to mix it with resin to get a toothpaste consistency. Is it applied the same way quick fair is applied? Drywall tools? Any advice is appreciated.
Re: building xf20
Posted: Sat Jul 23, 2016 7:18 am
by Cracker Larry
Just like Quick Fair. I use drywall tools.
Re: building xf20
Posted: Sat Jul 23, 2016 1:39 pm
by MrPaul
Thanks Larry!
Re: building xf20
Posted: Sat Jul 23, 2016 1:45 pm
by MrPaul
One last fairing question. Do I use the silica/microballoons to sharpen the rear edge of the boat below the transom?
Re: building xf20
Posted: Sat Jul 23, 2016 5:25 pm
by Cracker Larry
No, it's too brittle for that, it's for fairing only. I use a mix of chopped or milled glass fibers and wood flour for that. Edges take a beating and need to be tough.
Re: building xf20
Posted: Sat Jul 23, 2016 6:03 pm
by puppydrumn
Dam I guess mine is gonna break I mixed a little wood flour with the micro balloon stuff to build chines. Oops. Maybe the five layers of epox/graphite will help.
Re: building xf20
Posted: Sat Jul 23, 2016 7:45 pm
by MrPaul
Looks like its time for another shipment of supplies.
Are we supposed to sharpen the chines as well? Can we fair and then sharpen or should we sharpen the edges first and then fair?
Re: building xf20
Posted: Sat Jul 23, 2016 8:39 pm
by Cracker Larry
Sharpen the edge before fairing.
Re: building xf20
Posted: Sat Jul 23, 2016 11:03 pm
by MrPaul
Should I sharpen where the sides meet the bottom as well?
Re: building xf20
Posted: Sat Jul 23, 2016 11:03 pm
by MrPaul
Should I sharpen where the sides meet the bottom as well?
Re: building xf20
Posted: Sun Jul 24, 2016 7:03 am
by Cracker Larry
I sharpen about the last 6-8 feet of it. The planing surface.
Re: building xf20
Posted: Sun Jul 24, 2016 10:26 am
by MrPaul
Thank you for all of the help Larry. I sincerely appreciate it.
Re: building xf20
Posted: Thu Jul 28, 2016 9:51 pm
by MrPaul
I milled 1708 tonight and milled about 3 sq feet into about 10 oz of milled fiberglass. It took forever with scissors and picking all the threads out. How much do I need to mill to sharpen the bottom of the transom and the last 8 feet of the boat? Does anyone know how to mill faster? I don't think the wife's blender will work so its probably not worth the trouble it will get me into.
Re: building xf20
Posted: Thu Jul 28, 2016 10:04 pm
by Aripeka Angler
Re: building xf20
Posted: Thu Jul 28, 2016 10:28 pm
by MrPaul
I know they sell it here. Thanks for the suggestion but it takes about a week to get here and I've got to start fairing and sanding soon.
Re: building xf20
Posted: Thu Jul 28, 2016 10:43 pm
by Aripeka Angler
Two pounds of milled glass is a huge plenty to create the mix to sharpen your chine edges.
Every edge of the hull of our XF-20 is sharpened to a 1/8" radius.
I sharpened the chine from bow to stern including the lower side of the stern transom...
Re: building xf20
Posted: Thu Jul 28, 2016 11:22 pm
by MrPaul
Wow. I've got a ways to go. Thanks for the advice.
Re: building xf20
Posted: Fri Jul 29, 2016 8:55 pm
by puppydrumn
Mr. Paul,
Just an update on my chines made with the pre mix from here, two nights ago we had severe storms with 80 + mph wind and my boat got slammed into my 8x8's and not so much as a dent in the chines. Not disagreeing just stating my experience. Hope all is well and your time with your Dad was great. Looking forward to seeing so pics.
Re: building xf20
Posted: Fri Jul 29, 2016 10:05 pm
by MrPaul
Glad to hear your boat is ok. Hopefully you will never have any issues with the edges. I shredded glass for about an hour and a half last night and only got 10 oz. I broke down and ordered a 4 pound bag today along with more tape resin and woodflour. I want to put skegs on the bottom as well and think ill mold them with milled fibers and resin using an angle iron and some mold release.
Unfortunately, didn't get to go fishing with my dad because my mom blew out her knee so we just hung out. None the less, I always enjoy hanging out with my parents fishing or no fishing. Every year we go fishing for marlin in Cabo. Usually December or February. Should have some good pics when that trip comes around. I'll post some pics of last year's trip as soon as I can get them off my old phone.
Re: building xf20
Posted: Sat Jul 30, 2016 11:40 pm
by MrPaul
I want to put the tessilmare 40mm rub rail they sell here on the boat and have not put the wood rub rails on yet. The rub rail is only 1 5/8" from top to bottom and looks like part of it would need to go below the wood rub rail. Would the wood rub rail be too weak if it were only 1 3/8" top to bottom if I make it out of double laminate 3/8" ply?
The plans say it's structural.
Re: building xf20
Posted: Fri Aug 12, 2016 12:40 am
by MrPaul
I've sharpened the bottom of the transom, the exit of the tunnel, and the last 8 feet where the sides meet the bottom to a knife edge. Should I do the same to the sides of the tunnel?
Re: building xf20
Posted: Sat Aug 20, 2016 3:24 am
by MrPaul
I put the silica mix on my boat tonight so I can start fairing next week. I don't know if it's going to turn out as smooth as I would like and have a couple of questions.
If it doesn't come out as smooth as I want it, can I put quick fair over the silica mix?
Will the graphite stick to quick fair?
Any help is appreciated.
Re: building xf20
Posted: Sat Aug 20, 2016 7:24 am
by Cracker Larry
If it doesn't come out as smooth as I want it, can I put quick fair over the silica mix?
Yes
Will the graphite stick to quick fair?
Yes, no problem.
Re: building xf20
Posted: Sat Aug 20, 2016 1:24 pm
by MrPaul
Thanks Larry.
Re: building xf20
Posted: Tue Sep 06, 2016 2:10 am
by MrPaul
Been doing tons of sanding and fairing and can't seem to get some spots fair. Namely the bow. The blended fairing mix seems to run. What is the ratio for the silica/microballoon to resin ratio I need to use?
Re: building xf20
Posted: Tue Sep 06, 2016 8:12 am
by Cracker Larry
I start with it thin, and make every mix progressively thicker, ending up with something like peanut butter or mayonnaise. And then I use Quick Fair for the last couple of passes to finish it up. It usually takes me 5-7 fairing rounds before I'm happy. But I'm real picky and want it as perfect as possible.

Re: building xf20
Posted: Tue Sep 06, 2016 10:23 am
by MrPaul
Thanks Larry. Do you have a mix ratio? I have to get it right on the first mix or it hardens in the cup...even with slow hardener.
Re: building xf20
Posted: Tue Sep 06, 2016 10:37 am
by Cracker Larry
No. I don't have a ratio, I just add the thickener until it looks right for the job. Amounts will vary a lot with temperature, and take more filler in hot weather than it will in cold. I highly recommend Quick Fair for the last finish coats.
I have to get it right on the first mix or it hardens in the cup...even with slow hardener.
Don't leave it in the cup! As soon as you mix it, just dump it on the hull about where you want it and spread it out some. The more surface area it has, the longer the working time will be. It won't last but a couple minutes in the cup in hot weather, but you can get 15 or 20 minutes if you spread it out immediately.
Re: building xf20
Posted: Tue Sep 06, 2016 12:48 pm
by MrPaul
That's what I did on the last batch. It started cooking in the cup before I could get the consistency right and I had to dump and spread before I had a hockey puck in my cup. It ended up drying way too thick with a lot of the micro balloons not well blended. Came out a bumpy mess and I had to sand a lot of it away. Looks like I need to make smaller batches or wait for cooler weather. Thanks for the advice Larry.
Re: building xf20
Posted: Tue Sep 06, 2016 1:06 pm
by pee wee
If you don't want to/isn't practical to dump it on the hull, dump it in a paint roller tray liner or some other flat surface that the material can be spread out on. One of the tutorials shows a piece of cardboard covered in packing tape used as a palette. The main thing is to spread the material out so it can't build much heat.
Re: building xf20
Posted: Tue Sep 06, 2016 2:28 pm
by jacquesmm
Keep your resin in an air conditioned place and bring it out only when needed.
Re: building xf20
Posted: Tue Sep 06, 2016 10:41 pm
by MrPaul
jacquesmm wrote:Keep your resin in an air conditioned place and bring it out only when needed.
Thanks Jaques!! ... I only have 1 fridge. My wife's gonna love this.
Re: building xf20
Posted: Wed Sep 07, 2016 8:35 am
by topwater
I use a plastic cutting board to dump it on. Just clean it with acetone use again.
Re: building xf20
Posted: Thu Sep 08, 2016 10:16 am
by MrPaul
Thanks guys. I bought a Styrofoam ice chest and the cutting board. Hopefully this helps. I've used 3 1/2 bags of silica/microballoon mix and have 1 1/2 bags + 3 quarts of quick fair left. Most of the boat is still not fair. Trying to get it done without having to order again before the flip.
My neighbor just finished fairing and painting his whaler and it came out great. I'm trying to get similar results on the xf.
Re: building xf20
Posted: Fri Sep 09, 2016 6:35 am
by puppydrumn
Mr. Paul, I did my bottom fairing in 32oz batches, mixed all with a drill I bought a cheap short paint mixer from local home builders store and it work perfect. Dumped it on th hull and spread out with a large painters edge then last pull was with a piece of aluminum angle iron. Worked perfect and fast. Just a thought
Re: building xf20
Posted: Tue Nov 15, 2016 11:07 pm
by MrPaul
I'm hoping to be done fairing in the next week. I want to put scuppers on the sides of the boat. I thought I would raise the floor 7" and put them through the sides 7" from the bottom even with the floor where it meets up with frame d. I will cover them with clam shell scupper covers. My question is...with the scuppers 7" from the bottom and 4 feet from the transom, will there be problems with water coming in through the scuppers at the boat ramp when I'm putting it in the water? The boat is going to have a 70 hp yamaha 4 stroke which weighs about 260 pounds and the ramp we usually use is not super steep.
Any feedback is appreciated.
Re: building xf20
Posted: Wed Nov 16, 2016 9:11 am
by jacquesmm
Raise the sole 7"?
7" above the designed level of the floor?
No problem with water during the launch but why raise it that much?
As designed, the boat does not take water over the sole. See the pictures of some of our meetings: we had up to 20 persons onboard and no water over the sole.
Re: building xf20
Posted: Wed Nov 16, 2016 10:34 am
by MrPaul
I want to raise the sole about 2.5 - 3 inches above the designed level. 7" above the bottom of the boat. Scuppers will be 1.5" in diameter. We do a lot of wade fishing and you always bring tons of water into the boat when you re-board after wadeing.
The reason I'm asking is because I read that one of the previous builders had some issues with this type of scupper. I believe he had a heavier motor on his boat, a 115 optimax if I'm not mistaken.
Re: building xf20
Posted: Wed Nov 16, 2016 11:06 am
by Aripeka Angler
Hi, 7 inches from the bottom of the boat to the bottom of the drain scupper is perfect.That's pretty much exactly how I did it.
I have front and rear casting decks, so I put the scuppers against the rear bulkhead.
The reason for the clam shell cover over the drain is to prevent the water that is flying off the chines from entering the hole.
Trust me, the clam shell is an absolute necessity
I built my clam shell out of epoxy and glass that I poured into a mold made of pvc pipe.
I will try to dig up a pic for you.
Re: building xf20
Posted: Wed Nov 16, 2016 2:24 pm
by jacquesmm
Good, that is reasonable.
The clam shell side drains look good.
Re: building xf20
Posted: Wed Nov 16, 2016 10:36 pm
by MrPaul
Aripeka Angler wrote:Hi, 7 inches from the bottom of the boat to the bottom of the drain scupper is perfect.That's pretty much exactly how I did it.
I have front and rear casting decks, so I put the scuppers against the rear bulkhead.
The reason for the clam shell cover over the drain is to prevent the water that is flying off the chines from entering the hole.
Trust me, the clam shell is an absolute necessity
I built my clam shell out of epoxy and glass that I poured into a mold made of pvc pipe.
I will try to dig up a pic for you.
Thanks Richard. Those scuppers look sharp. That's exactly how I want to do them. Can't tell by the pic. What diameter did you use?
Re: building xf20
Posted: Wed Nov 16, 2016 11:17 pm
by Aripeka Angler
Mr Paul,
The hole I drilled is 1-3/8" in diameter. You can use a metal clamshell if you don't want to fuss around with the molded in version I came up with.
Before I installed the clamshell and while on plane, water would literally rocket in the open holes and flood the deck.
Re: building xf20
Posted: Wed Nov 16, 2016 11:40 pm
by MrPaul
I really like the way the clamshells on your boat look. I'm assuming I can cut a piece of pvc at an angle cover it with a sheet of plastic and use that for a mold. Did you make your deck at an angle..a bit higher in front so the water flows back to the scuppers when the boat is not moving?
Re: building xf20
Posted: Thu Nov 17, 2016 8:57 am
by Aripeka Angler
MrPaul wrote:I really like the way the clamshells on your boat look. I'm assuming I can cut a piece of pvc at an angle cover it with a sheet of plastic and use that for a mold. Did you make your deck at an angle..a bit higher in front so the water flows back to the scuppers when the boat is not moving?
MrPaul wrote:I really like the way the clamshells on your boat look. I'm assuming I can cut a piece of pvc at an angle cover it with a sheet of plastic and use that for a mold. Did you make your deck at an angle..a bit higher in front so the water flows back to the scuppers when the boat is not moving?
Yes, the pvc mold was cut on an angle with a mitre saw. I actually used the inside of the mold to form up the clam shell.
I covered the pvc with packing tape and dammed up the open end with tape. I leveled up the flat surface of the jig and poured it full of milled glass fibers and epoxy. After it cured, I popped the clamshell out of the mold and hollowed out the inside with the front wheel of a belt sander. You could also do this with a hole saw.
No need to angle the sole aft, it will drain fine following the plane of the top of the stringers.
I used 4 stringers, the two that nest against the tunnel and one on each side equally spaced to the outside of the boat.
Perpendicular to the stringers, I framed up the support for the sole with 2"x3/4" stock. I set the framing at 12" on center.
Re: building xf20
Posted: Thu Nov 17, 2016 10:11 am
by MrPaul
Thanks Richard. Sounds like I'm building a boat almost like yours.
Re: building xf20
Posted: Sun Jan 22, 2017 4:38 pm
by Freaknreakn
Me Paul,
I read through your thread.
-what answer did you get on the tape, biaxial,etc....I have the same questions
-are you posting any pictures? Some people are visual learners (me).
-how is your build going, been awhile since your last update
Re: building xf20
Posted: Sun Jan 22, 2017 10:42 pm
by MrPaul
In reading the forum I found a thread that talked about the tape. As I recall the thread stated that the biax tape is the stronger of the 2 tapes mentioned in the plans so I used only biax.
As far as posting pics and how the build is going. I can't figure out how to get to my gallery to upload since they've updated the site. I need to go over some of the threads on the new functions of bateau.com so I can figure it out. All I've been doing for the last couple of months is fairing the hull. Since I don't really like fairing I've only been putting an hour or so a week in and progress has slowed. On the bright side... I'm almost done with the fairing work and should be ready to do the graphite on the bottom soon.
Your xf is looking good. Other than the fairing process, I've had a lot of fun building mine and it looks like you are too. I'm looking forward to getting back to actual building soon.
Re: building xf20
Posted: Tue Jan 24, 2017 9:43 am
by Freaknreakn
Mr Paul,
I have been having a blast. I find myself thinking about the build at work in between tasks. Hope my boss doesn't find out
. This forum is great! Only in this great country of the good ol USA can someone with NO boat building experience be embraced by expert/novice builders who are willing to help and pass on their knowledge.
I hope to have the hull taped this week. Your build looks great, keep going, it's the "fair" thing to do
Re: building xf20
Posted: Sun Apr 23, 2017 11:00 pm
by MrPaul
It's been a while since I posted but I've been working at it little by little. Fairing is not my strong point. Not that I mind sanding but coming out of the shop covered in dust is just not my thing. I'm happy I'm almost done fairing and ready to start building again....hopefully.
I don't know how the images will come out but ill give it a shot.
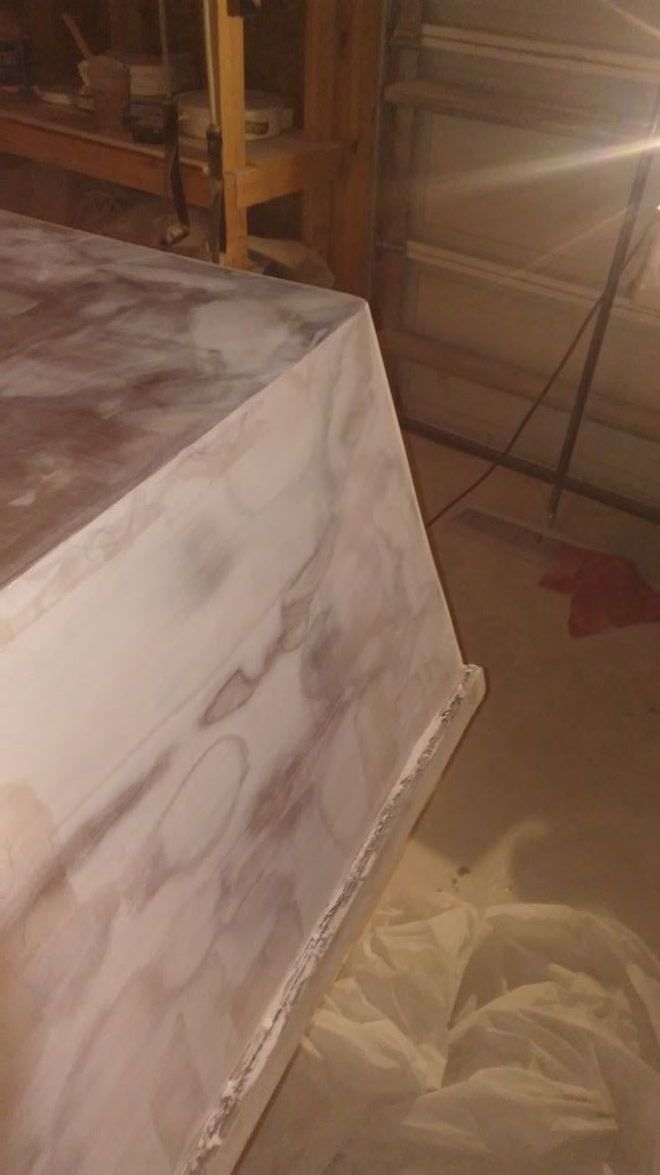
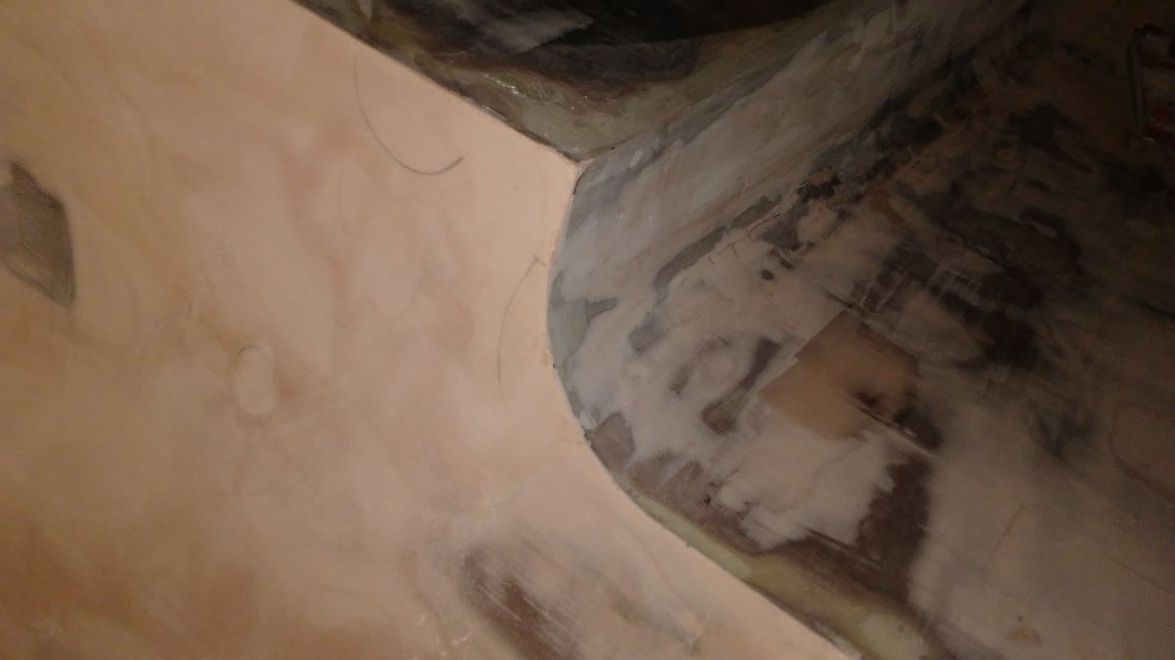
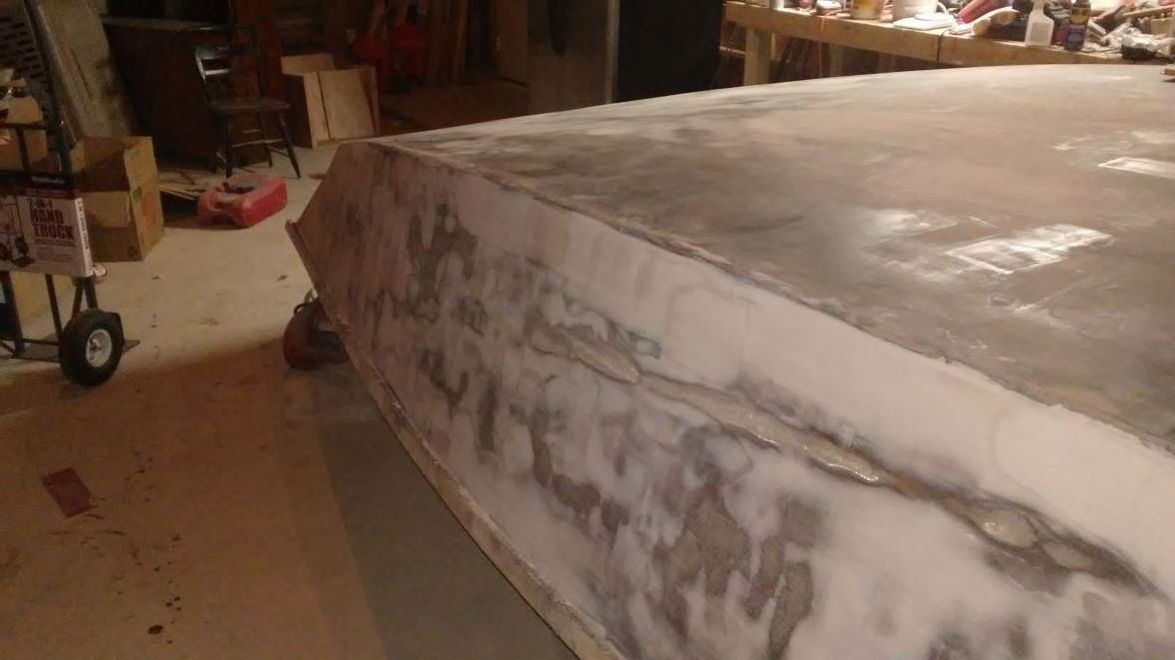
Looks like I'm not quite up to snuff on posting from my phone but I'm glad to being almost done with The fairing process. A little more sanding and a few small spots around the boat and it will be time to do the graphite on the bottom and prime the sides. From what I understand, after you prime the hull more imperfections start to show and you have to fair some more.
(BBC-WM Edit: fixed pictures.)
Re: building xf20
Posted: Tue Apr 25, 2017 10:33 am
by Freaknreakn
Hey Mr. Paul,
I'm going to start fairing myself this weekend. Looking at your pics (great btw), did you wrap any cloth over your rub rail? I'm asking b/c I did but have a few spots to touch up and add cloth to the rub rail where it was short. I'm wondering about not doing it and covering it when I do bow, gunnel and decks. Will having fairing/primer on those areas affect the bond? Maybe someone from the board can chime in.
Re: building xf20
Posted: Tue Apr 25, 2017 11:05 am
by MrPaul
I didn't glass the rails yet. I'm going to tape the decks down so that should count for the glass on the rails. I would think that fairing compound or primer on the rails would affect bonding for the glass so mine are currently all wood. I dripped lots of compound on them in the fairing process so I have to sand them before I tape the decks on.
Re: building xf20
Posted: Wed Jun 07, 2023 12:39 am
by MrPaul
Been working on this boat.off and on for about 6 years. Lots of other things have come up. It's a center console with the front and rear casting decks. Anyways....it's almost done and i need to buy a motor. I think I built the boat pretty heavy and to make things heavier....my wife wants a leaning post and t top (180 extra pounds) I think it might need more horsepower than the 70 hp I had originally planned. I have scuper holes with clam shells 8" above the bottom of the boat. I worry about the scupers going below the waterline if I put a 115 on it. It's about 120 pounds more than the 70 hp + the extra weight from a bigger jack plate.
Also...the boat only has 1 layer of 1708 inside and out. I've got 4 stringers and the transom is thick (4 layers of 1/2 meranti + 1" Honduran mahogany clamping board (more weight). I've also put extra 1708 around the sides inside and out and at the bottom of the transom on the inside. I'm not worried about the transom strength. I am worried about the strength of the running surface with only 1 layer of 1708 2 layers of tape outside and 3 layers inside. With the 24 volt trolling motor a cranking battery and a house battery...that's 4 batteries. The fuel tank is 30 gallons under the console. It seems like a lot of weight for a 70 hp 4 stroke yamaha. I'll be happy if I can get 30 mph out of the boat. Will a 70 hp be enough??? If not...will the boat withstand a 115 with only 1 layer of 1708 on the bottom?
Re: building xf20
Posted: Wed Jun 07, 2023 8:19 am
by fallguy1000
The quality of the bottom laminate is all that matters.
If you did poor work, a 70hp will delam the bottom.
The only way for me to comment about the scuppers is to know the DWL dimension, not the distance off the bottom.
If you are 3" above DWL, then the boat can afford only a couple inches of immersion. But you can always plug the aft scuppers if you realize an issue.
I say go for higher hp, based on your info. Best of luck.
Re: building xf20
Posted: Wed Jun 07, 2023 9:11 am
by MrPaul
The lamination is well done but I don't know where the DWL is yet. I hope everything comes out right. It hasn't been as much work as your boat...but a lot of work none the less.
Re: building xf20
Posted: Wed Jun 07, 2023 7:43 pm
by TomW1
Mr Paul most builders of the XF20 are happy with a 70HP motor. If you want me to I will use my calculators to check on that. There are a lot of things to be considered but the most important is to get correct the weight of the boat as it leaves the dock. There have been several XF20's built with a 70HP motor that achieve 30mph or more.
Tom
Re: building xf20
Posted: Mon Jun 12, 2023 7:47 am
by Dr Pete
Friend told me…”Have you ever heard anyone say they wished they had a slower boat or less motor?” I’ve got a 90 2 Stroke Yami on a heavy XF 20. Jack plate. Draft’s 6”. Top speed going downhill with a tailwind in smooth water is 30. I think 115 would be the way to go.
Re: building xf20
Posted: Mon Jun 12, 2023 1:02 pm
by MrPaul
Hi, Pete, Tom,
I don't know what the weight of the boat is but I know I need to figure out how to weigh it. I'm thinking with the t-top and leaning post, the hull weight will be about 1150 lbs + batteries, fuel (29 gals), fishing equipment, and fisherman. I would like to go with a 70 but I'm having my doubts. In total with the console. I've used 19 sheets of 3/8 okume, 2 sheets of 1/2 meranti for the transom, 1 sheet of 1/4" okume for compartments under the hatches. My nesting was not great and I've probably had more waste than most. Id asume 15%. 1 layer of 1708 with a little extra on the sides and to beef up the transom. The deck is covered with 10 oz glass. I read Pete's posts about his xf with the 90 hp long ago. That was what made me think the 70 would not be enough. I'm also going to have to go with a 4 stroke. I want a new motor and that rules out any 2 stroke motors. My neighbor is a certified yamaha mechanic so yamaha is looking like my best choice.
Tom, based on the estimated weight.....what do you think? Will a 70 work and get me near 30mph? Pete had to go to a 90 and if I'm going that rought with a 4 stroke a 115 weighs the same.
I will find a way to weigh the boat once it's painted and fixed with all of the extras less the motor and jackplate.
Re: building xf20
Posted: Mon Jun 12, 2023 3:06 pm
by fallguy1000
Most of these engines are build from the same block. Yamaha 90 and 115 are the same. So, all they do is bore out more for the 115.
So, when you make a motor decision; you look at categories of blocks.
Engines x,y,z all have the same block and so weights are all very close.
engines a,bc are a next size up and the weight increase is substantial
You can find out from the dealer the block classes, or research and write down weights and back into them.
For my boat, the 115 Yamaha and the 90 are in the same block class. But because my boat is a semi-planing form and I only wanted to achieve 20 knots, with the 115; we estimated up at around 25 knots and just didn't want to push her that hard. Keep in mind, speed changes forces on the hull. I was recently warned to stay below 15 kts in seas over 4' based on composites data.
I am getting 22 knots or so, so very pleased and it feels plenty fast for such a wide beast.
Re: building xf20
Posted: Mon Jun 12, 2023 3:41 pm
by MrPaul
Your boat is a beast fallguy. I'm happy you got a respectable speed out of her. I'm hoping Tom gets back to me and tells me a 70 will work but I don't think ia 70 will get it on plane with 4 fishermen....let alone 30 mph. Maybe if I started hanging out with some smaller folks that would help but most of my fishing buddies are 200lbs and up.
Re: building xf20
Posted: Mon Jun 12, 2023 10:14 pm
by TomW1
MrPaul I will be glad to run the numbers for you. But weight is the most important part of the equation and needs to be the first thing I need to start the calculations. I have all the Yamaha specifications so can run the spreadsheet for 70, 90 and 115HP motors. Since I can not be there with the builder to see what he installs on his boat and every boat is different. I ask every builder to provide the weight of the boat as it leaves the dock when he normally takes it out.
Here is a list that should normally be included:
Weight of boat only
Motor I will do as I will add lube and prop I have all the specs from all the manufacturers.
Number of people and weight
coolers and what is in them, some guy only take 1 small one others take 2 or 3 big ones loaded with icet
Do you have live wells with water how many gallons I will calculate weight of water in calculator
I use a system for fishing gear, bait, lifesaving equipment, to figure this weight it differs by boat size up to a point and number of passengers.
Trolling motor if you have one.
Gas tank size I will calc the weight of gas in it.
Ok that is about is and if I think of anything else I will let you know. As I mentioned we want to get the weight of the boat of the boat as it leaves the dock and with the performance you want not exceeding the builders allowances.
I 'm here to help you so let me know what I can do.
Tom
Re: building xf20
Posted: Tue Jun 13, 2023 7:04 pm
by MrPaul
Thank you Tom. I appreciate the help on this. I will get the weight to you as soon as it's completed.
If we decide we need the 115 would an atlas micro jackplate be advisable? They are rated up to 115 hp and only weigh 27 lbs...but look a little small for the 377 lb yamaha 115 motor.
Re: building xf20
Posted: Wed Jun 14, 2023 3:59 am
by fallguy1000
I'm not sure how Tom's software works exactly, but keep in mind immersion affects wetted area, and wetted area affects drag. So, if the immersion rating is 600 pounds, then you and 3 large buddies load in with coolers and gear; easily adding 1200 pounds over with engine weight, t tops.
It sounds to me like your typical running condition is going to be 2" extra immersion. So, in addition to the need for more engine to push it; you better determine what 2" does to the scuppers.
If Tom does a dry run, he could take one of the other xf20s and add 1200 to it..
I'm willing to give a gutcheck the boat will only do 25 knots at best at 70hp.
Not only must you consider the 2" for scuppers, but the engine will run deep and so a jackplate ought to be considered..
Re: building xf20
Posted: Wed Jun 14, 2023 1:25 pm
by TomW1
Fallguy as I stated to MrPaul weight is the most important factor of the equation. Weight equates to immersion. The more weight the more immersion. I take a lot of other variables into account when working with the builder when propping his boat. The calculator is a 4 page spreadsheet.
Tom
Re: building xf20
Posted: Wed Jun 14, 2023 1:37 pm
by MrPaul
Wow....that's a lot of data. I hope my scupers work at 9" above the water. Tom if we have to go with a 115...do you have any thoughts on the atlas microjack jackplate? It's max hp is 115 but it looks small for such a big motor.
Re: building xf20
Posted: Wed Jun 14, 2023 3:12 pm
by TomW1
MrPaul wrote: ↑Wed Jun 14, 2023 1:37 pm
Wow....that's a lot of data. I hope my scupers work at 9" above the water. Tom if we have to go with a 115...do you have any thoughts on the atlas microjack jackplate? It's max hp is 115 but it looks small for such a big motor.
Whoops forgot that detail. I would be leery of a jack plate that is rated for the max rate of the motor you want to put on it. For $200 you can get a larger higher rated jackplate by the same company.
https://www.amazon.com/T-H-Marine-65302 ... 0AGS&psc=1
Jeff has also had an agreement with Bob's Machine Shop so give him a call at the office to see what he can do for you.
As far as setback follow the plans as I have no calculator to show when wave will emerge at various HP with the tunnel and at what speed.
Tom
Re: building xf20
Posted: Wed Jun 14, 2023 9:14 pm
by MrPaul
The plate on Amazon looks pretty good. Only 3 lbs more than the atlas micro. I'm mainly worried about the weight and I'm strongly considering a 4" just to save the weight.
Re: building xf20
Posted: Fri Jun 16, 2023 12:36 pm
by TomW1
MrPaul wrote: ↑Wed Jun 14, 2023 9:14 pm
The plate on Amazon looks pretty good. Only 3 lbs more than the atlas micro. I'm mainly worried about the weight and I'm strongly considering a 4" just to save the weight.
You will need a minimum of at least 6" set back to catch the water hump coming out of the tunnel. Maybe AA can give you what he has on his XF20. You have to be set back far enough so that the motor is in the hump.
As far as weight is concerned you will need to move some weight forward if you go with a 90 or 115HP motor as they are heavier than a 70HP and will upset the LCG. The difference between the 70 and 115HP motor is 124lbs so if the motor is 10' from the LCG that is 1240 lbs of movement that must be moved forward of LCG. You can do this in any way you want 124lbs 10' forward of the LCG or break it up in smaller increments at different distances.
Tom
Re: building xf20
Posted: Fri Jun 16, 2023 1:48 pm
by MrPaul
I have no idea where the LCG is on this boat. I know Jacques mentioned it somewhere on one of the xf 20 threads. I will have to look. At this point I was looking to put the fuel tank inder the console and the batteries under the seat in front of the console. I don't think that's far enough forward. To offset the weight of the motor. I'm still hoping to be able to use a 70 but it's looking more and more like I will need a 115.
Re: building xf20
Posted: Fri Jun 16, 2023 2:14 pm
by fallguy1000
TomW1 wrote: ↑Fri Jun 16, 2023 12:36 pm
MrPaul wrote: ↑Wed Jun 14, 2023 9:14 pm
The plate on Amazon looks pretty good. Only 3 lbs more than the atlas micro. I'm mainly worried about the weight and I'm strongly considering a 4" just to save the weight.
You will need a minimum of at least 6" set back to catch the water hump coming out of the tunnel. Maybe AA can give you what he has on his XF20. You have to be set back far enough so that the motor is in the hump.
As far as weight is concerned you will need to move some weight forward if you go with a 90 or 115HP motor as they are heavier than a 70HP and will upset the LCG. The difference between the 70 and 115HP motor is 124lbs so if the motor is 10' from the LCG that is 1240 lbs of movement that must be moved forward of LCG. You can do this in any way you want 124lbs 10' forward of the LCG or break it up in smaller increments at different distances.
Tom
Good post Tom.
Most planing hulls have lcg approximately 2/3rd of the waterline. If you pick this number and let'e say the lwl is 20', 2/3rds is 13.66 feet back.
Then the OB is say 24" with the plate. So, the incremental moment created is estimated at 124 pounds at 6.33+2 or 8.33•124 plus the plate is at say 6.5' and use 21 pounds or 6.5•21. So incremental moments are 1033+136.5 or 1169.5 ftlbs.
Moving a battery of 63 pounds from the stern to the bow is a move of about 16' or an offsetting moment of 1008 ftlbs. I would avoid moving the fuel tank, and move other things forward that are more static; perhaps even add a bowsprit and an anchor roller and locker with rope and chain forward.
Fuel or dynamic weights need to remain near lcg.
Re: building xf20
Posted: Fri Jun 16, 2023 3:07 pm
by MrPaul
As I have currently planned... the fuel tank will be close to the lcg. I made sense to me to put it there due to the changing weight. The batteries would be in front of the tank...about 12 feet from the transom. With some work, I may be able to move the batteries further forward. I have the anchor locker at the bow.
Re: building xf20
Posted: Fri Jun 16, 2023 5:32 pm
by TomW1
MrPaul having talked to Jacques many times on where he placed the LCG he placed it 6-8" behind the console. For the XF20 I would use 6" as the boat is light and long. One of the options you have is to move the console forward 6" as that would move the skippers weight forward as well as the consoles weight.
Tom
Re: building xf20
Posted: Fri Jun 16, 2023 6:37 pm
by MrPaul
I need to get some pictures up but I'm never on a computer. Just the phone. I may be a little far along to move the console forward. I'd probably have to take out the sole, move a frame forward and reconfigure my chase tubes in order to move the console forward. I have everything planned right where I want it but if it's not going to work due to weight issues....I have to do something. I'll try and get to a computer soon and get some photos posted. Maybe that way we can think of a way to get this thing on the water. I'm not sure what it weighs yet but guessing 1150 without batteries an fuel and motor. Let me take some exact measurements when I get home.
Re: building xf20
Posted: Fri Jun 16, 2023 9:44 pm
by TomW1
No problem with the console movement I just did not know how far along you were as I had not seen any photos. Tom
Re: building xf20
Posted: Fri Jun 16, 2023 11:43 pm
by MrPaul
I don't know how helpful this is but the console is suposed to start at 7ft 4 in from the transom and the batteries are suposed to start at 10 ft 2" from the transom. My neighbor keeps telling me I need 4 batteries. 2 for the 24 volt trolling motor, 1 house, and 1 starting. He used to work on factory boats for marine max when he was in school but I don't think he has any experience with wooden home built boats. He's going to do the electrical on mine and I need to keep reminding him about weight.
Re: building xf20
Posted: Sat Jun 17, 2023 8:41 am
by fallguy1000
House and troll battery needs to be up front, so you'll run like a 2 or 4 wire or so to the back to the banks up front and set up a troll bridge and acr so the banks can charge and so the house can parallel the start in case it needs it.
Or you setup a 36v troll and use the start as the house.
But 5 batteries will be a lot..for a boat already getting loaded.
Re: building xf20
Posted: Sat Jun 17, 2023 1:07 pm
by MrPaul
My plan was to put all of the batteries under the seat in front of the console. The planned battery compartment would start 10' 2" infront of the transom. I already have a 24v trolling motor and 8 ga wires so no plans for 5 batteries. I would have gone with 6 ga wires for a 36v. I have smaller 3 " chase tube running forward for the trolling motor wires and a 6" chase tube running to the rear for the rest of the wires and hoses. I was going to put the nav lights on the console so I don't have to run so many wires forward.. Are there any options for a smaller lighter house battery? I don't want to go lithium because that opens a whole new can of worms with the instal and my neighbor said he knows nothing about the instal of lithium......other than you can start a fire if it's not done right. My neighbor also wanted to go with hydraulic steering if we need a 115. More weight on the rear. His sea hunt has a 115 with teleflex and the steering isn't great.
Re: building xf20
Posted: Sat Jun 17, 2023 3:11 pm
by fallguy1000
Put the troll and house up front and pickup needed moments...run appropriate wiring back to charging source and console...you have to compensate for the engine weight; that's it
Hydraulic steering is the way to go..
Re: building xf20
Posted: Sat Jun 17, 2023 3:34 pm
by MrPaul
I really need to post photos. The boat is a lot further along than being able to easily change things like battery and fuel tank location more than a few inches I have no chase tube to get batteries all the way up front. In order to get another tube in I would have to remove the lower deck which is already taped in and glassed. I would have to place more hatches up front to access to batteries as well. More hatches more framing more weight. If I have to remove the deck I will but I want to avoid it by trying to achieve my goals by minimizing weight in the rear.
Re: building xf20
Posted: Sat Jun 17, 2023 3:42 pm
by TomW1
While you could get by with a 12v 55lb thrust Minnkota using their calculator, this is due to the light weight of XF20, go with a 24V 80lb thrust motor and 2 batteries. There is no need for a 36V system for the XF20. Then like your friend said a house and starter battery. I say this due to the length vs. width of the XF20 as it is wider and flatter than most boats and overall immersion is smaller. Be careful not to overdue adding weight to the bow, don't want you to introduce a plowing bow.
Teleflex hydraulic steering would be fine with the 115 if you go that way. But you could still go with Teleflex NFB Safty II system and still be fine.
Tom
Re: building xf20
Posted: Sat Jun 17, 2023 3:54 pm
by MrPaul
Is it possible to use a smaller lighter weight battery for the house battery? 4 batteries at 65 lbs each seems like a ton of weight. When the boat is anchored all I need to run would be some LED fishing lights. There are no through hulls so I don't see a need for a bilge pump to run. At his point I'm trying to keep the scuppers, that are 4' forward of the bottom of the transom, reasonably above the water line.
Re: building xf20
Posted: Sat Jun 17, 2023 4:42 pm
by fallguy1000
MrPaul wrote: ↑Sat Jun 17, 2023 3:34 pm
I really need to post photos. The boat is a lot further along than being able to easily change things like battery and fuel tank location more than a few inches I have no chase tube to get batteries all the way up front. In order to get another tube in I would have to remove the lower deck which is already taped in and glassed. I would have to place more hatches up front to access to batteries as well. More hatches more framing more weight. If I have to remove the deck I will but I want to avoid it by trying to achieve my goals by minimizing weight in the rear.
That is not how moments in boats work. If you add 124 pounds on a jack plate; it is a large trim moment you'll want to offset.
Re: building xf20
Posted: Sat Jun 17, 2023 7:25 pm
by MrPaul
I got you.....man I hope a 70 will work.
Re: building xf20
Posted: Sat Jun 17, 2023 9:53 pm
by fallguy1000
MrPaul wrote: ↑Sat Jun 17, 2023 7:25 pm
I got you.....man I hope a 70 will work.
It will be a bit small. I've got enough experience to tell you; the boat will struggle off the hump; it will require propping down for the hump and top speed will suffer.
I don't know why Tom would wait. Just get the lightship weight of another xf20 and add 1200 pounds..it'll be super close to your final plan loaded up.
Re: building xf20
Posted: Sun Jun 18, 2023 12:46 am
by TomW1
fallguy I don't like to do a preliminary calculation as 125-150lbs is enough to change pitch by an inch. It takes the builder and me enough to go through the numbers to do an estimate.
Tom
Re: building xf20
Posted: Sun Jun 18, 2023 2:41 am
by MrPaul
I got you fall guy. Tom, I will do my very best to get accurate numbers. I want to get things done right the first time around. Buying the wrong motor would be an expensive mistake....especially because I want the 70 to work. The wrong prop would be a little more pallatable but I'd rather get it right the first time. I've got the batteries fairly far forward. Don't know what the console will weigh yet and I have a 108 lb t top that will be anchored just in front of the lcg. Unfortunately I have an 88 lb leaning post that will be anchored about 15" behind the lcg. The boat also has a 4' long 21" wide motor well as opposed to the standard little triangle struts connecting the stringers to the transom. 3 of my frames are plywood and douglas fir 1x4s. Wondering if I should remove the motor well. I think it will save about 25lbs but how much will I have to add back to support the rear deck. I've seen Foster's build. The 115 made the boat draft to the top of the tunnel. I'm okay with that...but he didn't have a t top and his leaning post looks lighter than mine. He had a 2 stroke...i will have 4 stroke. My boat also has 4 rows of 1" laminated okume frames under the floor. That's about 40lbs + the weight of the glue and tape. It's as strong as a rock....just not very light. Plus it has 4 stringers that are taller than the standard stringers. I carried all 4 stringers clamped together into my shop after sanding them and I would say the stringers probably wiegh over 100 lbs. All in all...I'd say the build has about 120 lbs of extra wood in addition to the stringers that may not have been needed. I can't lift the front of the trailer anymore...and it's an aluminum I beam single axel trailer. I can still lift the front of the boat off the trailer but forget about lifting it from the sides. I didn't really have any worries until the wife wanted a t top and a leaning post. I was just going to sit on the ice chest and drive......creature comforts are great but now I have another 196 lbs to deal with. I'm glad it doesn't have a live well.
Re: building xf20
Posted: Sun Jun 18, 2023 10:11 am
by pee wee
MrPaul wrote: ↑Sat Jun 17, 2023 1:07 pm
I have smaller 3 " chase tube running forward for the trolling motor wires and a 6" chase tube running to the rear for
the rest of the wires and hoses. I was going to put the nav lights on the console so I don't have to run so many wires forward.
From this statement it sounds like your fuel line and electrical wires will be run in the same conduit, I hope that isn't the case.
Re: building xf20
Posted: Sun Jun 18, 2023 12:05 pm
by MrPaul
pee wee wrote: ↑Sun Jun 18, 2023 10:11 am
MrPaul wrote: ↑Sat Jun 17, 2023 1:07 pm
I have smaller 3 " chase tube running forward for the trolling motor wires and a 6" chase tube running to the rear for
the rest of the wires and hoses. I was going to put the nav lights on the console so I don't have to run so many wires forward.
From this statement it sounds like your fuel line and electrical wires will be run in the same conduit, I hope that isn't the case.
I looked at a lot of production flats boats and that is how they seemed to be done. Am I wrong in running fuel and hydraulic with the electrical? After looking at the production boats I asked my neighbor about this. He rigged boats for a living through school. He told me everything goes through 1 big chase tube. Am I wrong in doing this?
Re: building xf20
Posted: Sun Jun 18, 2023 1:36 pm
by TomW1
Absolutely. USCG regulations require that the fuel line be run separately in its own conduit. Hydraulic and electric wiring should also be separate so that the heavier hydraulic lines do not chafe the electrical wires and are also required to be separated. One other thing most fish finders recommend that their line be run in a separate conduit to avoid static from other electrical wiring.
Hope this helps. In effect the recommended chases to the stern is a 3", 2-2", 2-1-1/2" conduits. This allow easy running of all the needed things and meets all the requirements of the regulating bodies. But most importantly the fuel line.
Tom
Re: building xf20
Posted: Sun Jun 18, 2023 1:49 pm
by Jaysen
I’ve talked to several manufacturers. Triple check the regulations. Look for size limits and “recommended” vs “required”. I regularly see single tube in “small” boats from major manufacturers. I assume they know what they are doing.
Boat Builder Central and the forums here are NOT official sources for regulation compliance. The opinions of individuals posting here are THEIR OPINIONS not an official position of Boat Builder Central. This included posts by me.
Re: building xf20
Posted: Sun Jun 18, 2023 2:14 pm
by TomW1
Jaysen commercial small boat builders may use a single tube by using a waiver acquired from the USCG but the Regulations are still there and still apply to home-built boats unless a waiver is acquired. Former members of the Forum of which I was one went through and confirmed this many years ago. Please do not use what you see on commercial boats as proper or safe for home-built boats, this is not MY opinion, these are USCG and ABYC Regulations.
Tom
Re: building xf20
Posted: Sun Jun 18, 2023 4:17 pm
by MrPaul
Damn. I have to rip out the floor to put in another tube. Or raise the console which will make it heavier.
Re: building xf20
Posted: Sun Jun 18, 2023 5:13 pm
by MrPaul
After reading the regs...it looks like the gas tank under the console might be against the regulations as well. No electrical components allowed over or under the fuel tank. That would rule out having a gps/fish finder. The console is a common place for tanks on commercially made boats. Sec 183.410 of the USCG boatbuilders handbook. I don't see how everyone has been able to follow all 96 pages of these rules.
Re: building xf20
Posted: Sun Jun 18, 2023 5:27 pm
by fallguy1000
MrPaul wrote: ↑Sun Jun 18, 2023 5:13 pm
After reading the regs...it looks like the gas tank under the console might be against the regulations as well. No electrical components allowed over or under the fuel tank. That would rule out having a gps/fish finder. The console is a common place for tanks on commercially made boats. Sec 183.410 of the USCG boatbuilders handbook. I don't see how everyone has been able to follow all 96 pages of these rules.
Wrong.
The fuel tank must be in its own locker and the locker must vent to daylight and the fuel tank must vent overboard.
the fuel tanks cannot be by a spark or ignition source, so you put the tank under or down in the sole and then make closed access panels for all tank fittings...
So, the consoles get wired for all the stuff, but it is cordoned off from the fuel source
Re: building xf20
Posted: Sun Jun 18, 2023 5:34 pm
by fallguy1000
Here is an example I found online for you.
The tank must be isolated and the fittings must all be accessible.
There have been a few debates about whether the vent for the tank can be in the console.
Sorry if my response was harsh. I've been in grindings for about 3 hours.
Re: building xf20
Posted: Sun Jun 18, 2023 5:41 pm
by fallguy1000
I'm sorry, but if you have a surveyor; all decisions go through him/her.
Mine told me it was nonsense to run fuel through separate conduits because they all pass through the rigging tubes and grommets together.
The main thing ALL builders need to pay attention to is avoiding any contact of fuel lines with fiberglass intersections. This is the big no-no. Cuz a glass/ply hole will cut a fuel line and soak the bilge and wood in gasoline.. So as long as you chafe guard your electrical AND especially fuel lines, carry on.
And attachment of conduits is 4' and wires and tubes not in conduit is 18".
And you are welcome to use the rigging tube rationale in any arguments.
Re: building xf20
Posted: Sun Jun 18, 2023 5:43 pm
by fallguy1000
TomW1 wrote: ↑Sun Jun 18, 2023 1:36 pm
Absolutely. USCG regulations require that the fuel line be run separately in its own conduit. Hydraulic and electric wiring should also be separate so that the heavier hydraulic lines do not chafe the electrical wires and are also required to be separated. One other thing most fish finders recommend that their line be run in a separate conduit to avoid static from other electrical wiring.
Hope this helps. In effect the recommended chases to the stern is a 3", 2-2", 2-1-1/2" conduits. This allow easy running of all the needed things and meets all the requirements of the regulating bodies. But most importantly the fuel line.
Tom
Citation, please.
Re: building xf20
Posted: Sun Jun 18, 2023 5:46 pm
by fallguy1000
TomW1 wrote: ↑Sun Jun 18, 2023 12:46 am
fallguy I don't like to do a preliminary calculation as 125-150lbs is enough to change pitch by an inch. It takes the builder and me enough to go through the numbers to do an estimate.
Tom
Tom-the only reason for a prelim is to see if he can make 30mph with 1200# over xf20 lightship. I don't think it possible.
Then you get the real weight and change it. He needs to order an engine sooner than later..
Re: building xf20
Posted: Sun Jun 18, 2023 6:08 pm
by MrPaul
I think at this point...I'll take the hull to twp for registration before I rig it. I'll build a small division under the electronics so they are not in the same compartments with the fuel tank. I can see you using a surveyor for your boat. It was a massive undertaking. My boat is a lot smaller so I don't have a surveyor on the payroll.
Re: building xf20
Posted: Sun Jun 18, 2023 6:47 pm
by fallguy1000
MrPaul wrote: ↑Sun Jun 18, 2023 6:08 pm
I think at this point...I'll take the hull to twp for registration before I rig it. I'll build a small division under the electronics so they are not in the same compartments with the fuel tank. I can see you using a surveyor for your boat. It was a massive undertaking. My boat is a lot smaller so I don't have a surveyor on the payroll.
If you don't need a surveyor; don't bother. Use the school of common sense; no fuel vapors where sparks can be...
My boat was required to be surveyed for insurance..which is required to be kept in a marina.
Re: building xf20
Posted: Sun Jun 18, 2023 9:33 pm
by MrPaul
fallguy1000 wrote: ↑Sun Jun 18, 2023 6:47 pm
MrPaul wrote: ↑Sun Jun 18, 2023 6:08 pm
I think at this point...I'll take the hull to twp for registration before I rig it. I'll build a small division under the electronics so they are not in the same compartments with the fuel tank. I can see you using a surveyor for your boat. It was a massive undertaking. My boat is a lot smaller so I don't have a surveyor on the payroll.
If you don't need a surveyor; don't bother. Use the school of common sense; no fuel vapors where sparks can be...
My boat was required to be surveyed for insurance..which is required to be kept in a marina.
Do I need a survey to get it insured?
Re: building xf20
Posted: Sun Jun 18, 2023 10:25 pm
by TomW1
In most cases probably. Insurance companies have gotten very harsh.
We set up a section on how to register your boat in different states this is for TX Re: How to register y.
our newly built boat
Post by willg » Wed Mar 22, 2017 11:15 pm
Texas. See heading in overview for homemade boats. You need an inspection and assignment of hull ID number to begin.
Overview -
http://tpwd.texas.gov/fishboat/boat/own ... memade.pdf
PWD 143 form -
http://tpwd.texas.gov/publications/pwdf ... cation.pdf
Affidavit of Fact PWD 314 -
http://tpwd.texas.gov/publications/pwdf ... f_fact.pdf
If that doesn't work see the sticky How to Register Your Newly Built Boat and on page 2 is the above for Texas. This is in the first section of questions.
Tom
Re: building xf20
Posted: Sun Jun 18, 2023 11:13 pm
by fallguy1000
MrPaul wrote: ↑Sun Jun 18, 2023 9:33 pm
fallguy1000 wrote: ↑Sun Jun 18, 2023 6:47 pm
MrPaul wrote: ↑Sun Jun 18, 2023 6:08 pm
I think at this point...I'll take the hull to twp for registration before I rig it. I'll build a small division under the electronics so they are not in the same compartments with the fuel tank. I can see you using a surveyor for your boat. It was a massive undertaking. My boat is a lot smaller so I don't have a surveyor on the payroll.
If you don't need a surveyor; don't bother. Use the school of common sense; no fuel vapors where sparks can be...
My boat was required to be surveyed for insurance..which is required to be kept in a marina.
Do I need a survey to get it insured?
Up to the insurer, but I could not get a valuation without survey and so for my valuation is wasn't optional. I could not get liability for a boat this size either...
Re: building xf20
Posted: Mon Jun 19, 2023 12:04 am
by MrPaul
I've uploaded a few new pics to my album but I can't get them to show on a post. I was hoping to be able to show the things I was worried about causing excess weight. I read the tutorial but unfortunately I can't find a bbcode anywhere in my album.
Re: building xf20
Posted: Mon Jun 19, 2023 12:15 am
by MrPaul

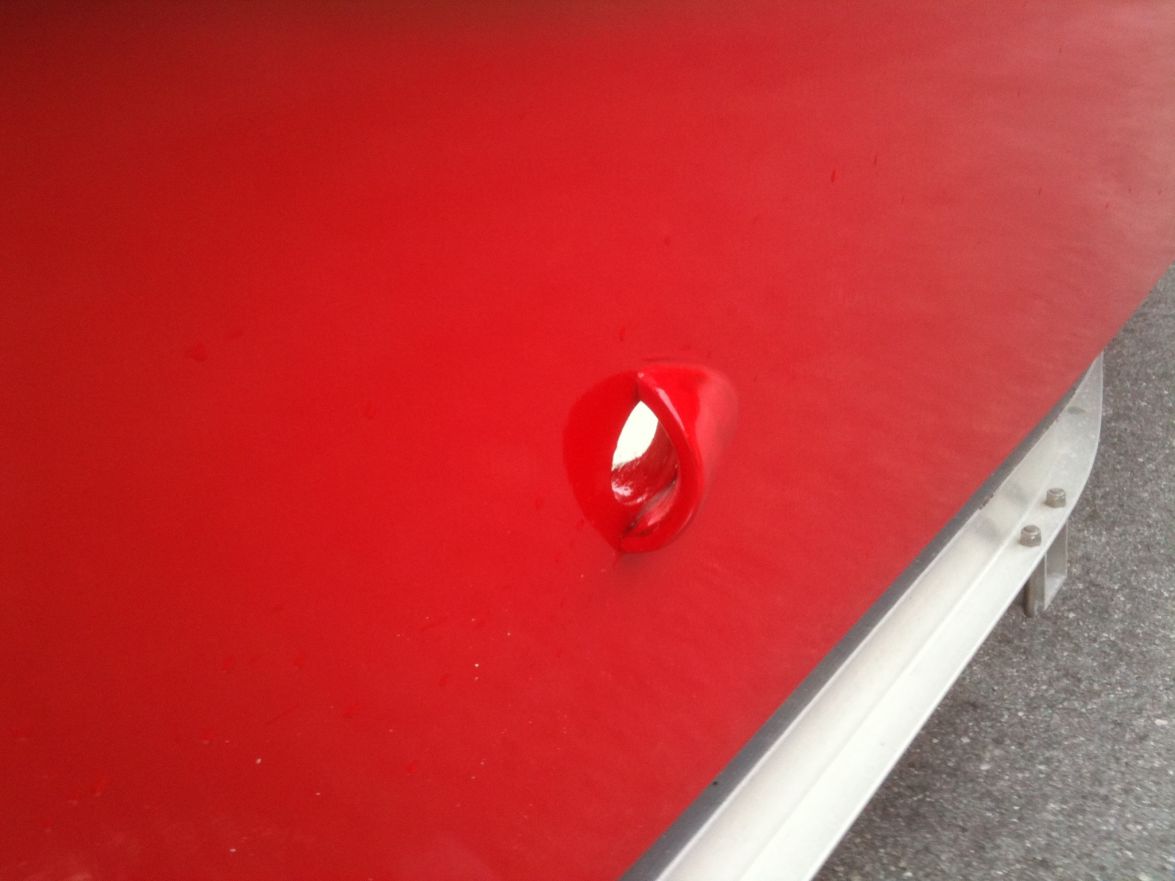
These are the scuppers I am worried about going under water if I put a 115 on the boat.
They're 9" above the bottom. I'm anxious to see where the water line is.

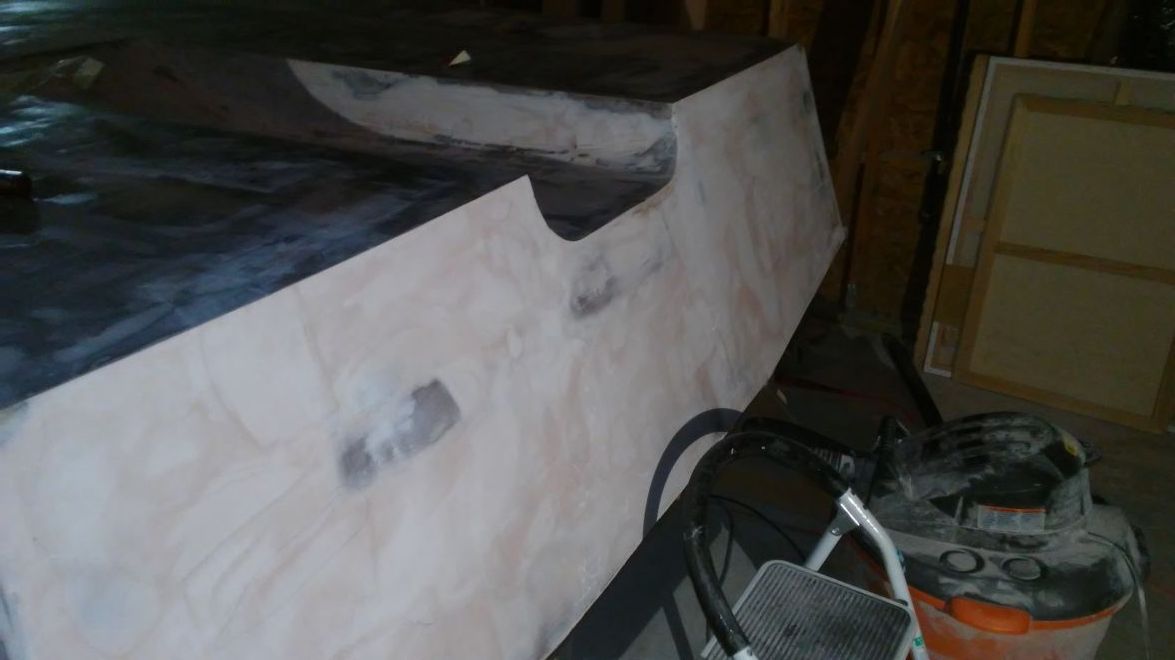
This is the rear of the boat you can see the chase tube and the side of the motor well.

Here you can see the locations of the chase tubes on the deck. The large one going to the rear and the smaller one going
forward to the trolling motor.

The front deck will have a fair amount of weight under it as well. 2 frames and 4 cross beams for the anchor locker and hatch supports.
Not that worried about those...Doug Fir isn't terribly heavy.

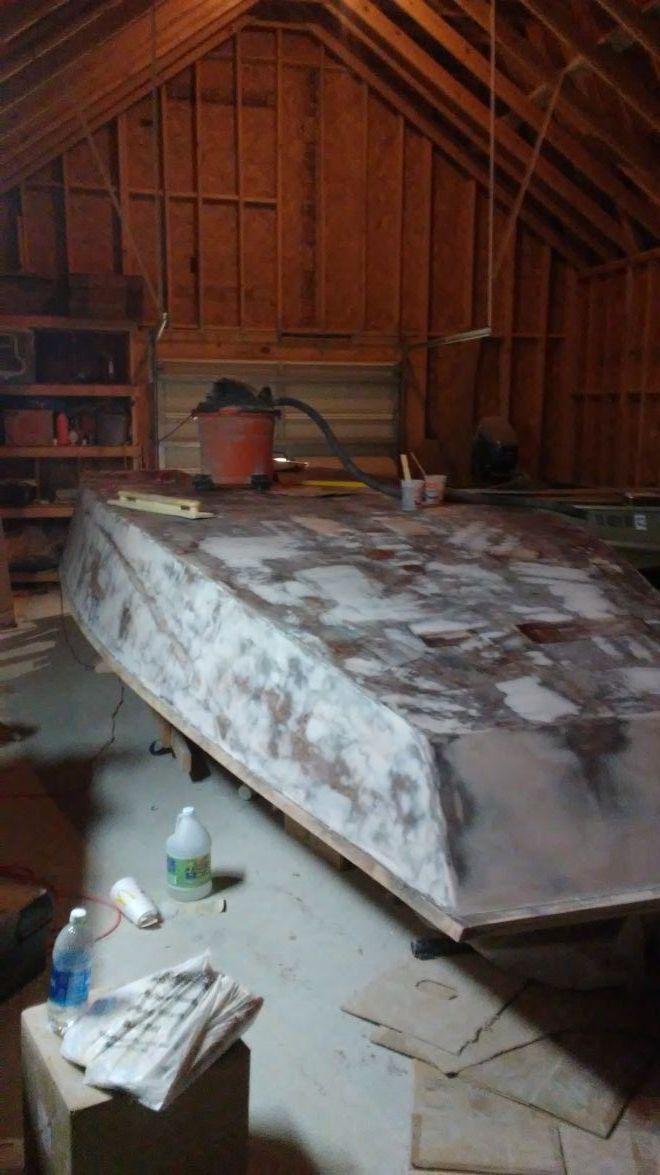
Here is a picture so you can see the overall layout and you can see the top of the motor well.

Here is the motor well. The hatches kind of obstruct the view.

Here is another overall view and a better view of the motor well.

Fishfinder GPS

88 pound leaning post....


Another pic of the gunnel

Pic of my really messy shop.

Picture of the chase tube install and foam going in.

Transom pic. 3" thick if you count the clamping board....heavy!

Floor supports starting to go in.

This is another piece of weight I'm worried about there is about 2/3 of a sheet of 1/2 Okume under the floor
between the stringers to help support the floor. No notches were cut in the stringers they were just glued and
taped between them. If I ultimately have to pull up the floor I think I will get rid of them for weight reduction.
Any comments suggestions on weight reduction possibilities are appreciated. My wife will kill me if I send her
captain's couch back to Fishmaster....But will do if necessary.
Re: building xf20
Posted: Mon Jun 19, 2023 9:45 am
by pee wee
Great to see pictures of what you've got. You've been busy!
Re: building xf20
Posted: Mon Jun 19, 2023 10:15 am
by fallguy1000
Great pics.
Is this a locker bottom or the hull?
Re: building xf20
Posted: Mon Jun 19, 2023 10:17 am
by fallguy1000
Can't you put batteries up here? A couple of side doors...venting, etc..
Re: building xf20
Posted: Mon Jun 19, 2023 12:25 pm
by TomW1
MrPaul if you can give me an estimated weight of your finished boat I will give you estimated top speeds for motors of 70, 90 and 115HP. Make your guestimate as accurate as possible.
Thanks for the pics that lets us see what point you are at and we can make suggestions of where you can go. Since the decks are not down for example.
Tom
Re: building xf20
Posted: Mon Jun 19, 2023 1:31 pm
by MrPaul
fallguy1000 wrote: ↑Mon Jun 19, 2023 10:15 am
Great pics.
Is this a locker bottom or the hull?
IMG_0604.jpeg
That's the bottom of the hull.
Re: building xf20
Posted: Mon Jun 19, 2023 1:46 pm
by MrPaul
fallguy1000 wrote: ↑Mon Jun 19, 2023 10:17 am
Can't you put batteries up here? A couple of side doors...venting, etc..IMG_0604.jpeg
Unfortunately that's the locker and there is no chase tube going from there. It's also only 1/4" okume on the front and bottom so I don't know if it's strong enough to support battery weight. I can reinforce the bottom and front of the center compartment but that would be more weight. I think you're thinking of this from a viewpoint of a guy who just built a very large and impressive mini yacht. This a much smaller boat and a flats boat to boot. Low draft is important. I understand you're point of view for sure. I am trying to keep this boat in the 70 hp class and maybe trying to reduce weight in the rear if possible. I also want to make it insurable.
Re: building xf20
Posted: Mon Jun 19, 2023 1:58 pm
by MrPaul
TomW1 wrote: ↑Mon Jun 19, 2023 12:25 pm
MrPaul if you can give me an estimated weight of your finished boat I will give you estimated top speeds for motors of 70, 90 and 115HP. Make your guestimate as accurate as possible.
Thanks for the pics that lets us see what point you are at and we can make suggestions of where you can go. Since the decks are not down for example.
Tom
Tom,
Let me run the numbers 1 more time this evening and I'll see what I come up with. I'm running them with the weights of the materials used and I will aire towards the heavy side. I will run the list with weight estimates of each material and the components. I still feel like I need an exact weight for the prop. I have the center deck where the console will go installed. My next step if things don't need to change drastically is to paint inside the lockers. After that it's only gluing down the front decks, finish off the rub rail, and build and install the console. Then I can paint the hull and decks and install the t top to make for an accurate hull weight. Hopefully that way we can get the numbers needed for the prop. I'm not opposed to redoing the rear of the boat if you guys can see a way to do it that will reduce the weight by a reasonable number.
Re: building xf20
Posted: Mon Jun 19, 2023 8:23 pm
by TomW1
Make sure you include the weight as it would be loaded for a fishing triip without the motor. Tom
PS: I will suggest 4-blade prop for you. PTprops are my preferred vendor as you can exchange props for a fee without having to buy a whole new prop.
Re: building xf20
Posted: Mon Jun 19, 2023 10:54 pm
by MrPaul
TomW1 wrote: ↑Mon Jun 19, 2023 8:23 pm
Make sure you include the weight as it would be loaded for a fishing triip without the motor. Tom
PS: I will suggest 4-blade prop for you. PTprops are my preferred vendor as you can exchange props for a fee without having to buy a whole new prop.
Tom,
Here is my guess at the weight with an estimate. I hope it's not this heavy. It seems super heavy. Without the motor it would put the draft around 7.25 inches without the motor.
19 sheets 3/8 okume @ 30 lbs each 513 w 10% waste
1 sheets 1/2 meranti 50. 10% waste 45lbs
1 sheet 1/2 Okume 40 10% waste 36 lbs
1x4 doug fir 175 feet @ .61875 lbs per foot 108 lbs
1708 50 yards 104.16 lbs est @25 oz per square yd.
10 oz 30 yards 24lbs est
Epoxy 26 gallons 9lbs per gallon 15% waste 199 lbs
Leaning post 88 lbs
T top 108 lbs
Hydraulic Steering 14lbs teleflex hydro 31 lbs
Jack plate 35 lbs est
Wires and harnesses 25 lbs
Anchor 12 lbs
29 gal gas tank 20 lbs empty
4 Batterries 260 lbs
Electronics 10 lbs (fishfinder and guages)
Rocket launcher 20 lbs.
Lights 10 lbs
Clamping board 20 lbs.
Chase tubes 15 lbs
7 hatches 5 lbs ea. 35 lbs
Trolling motor 50 lbs
1817 lbs. weight w no fuel, motor, fishermen, or equipment.
Fishing equip ice chest etc. 150
4 Fisherman full trip 800
29 gallons of gas 174
2941 lbs. Weight ready to leave the doc.less the motor.
If I raise the console to fit another chase tube
1 more sheet of okume 30lbsand
20 more feet of doug fir 1x3 12 lbs
2 more yard of 10 oz glass. 2 lbs
3 lbs more epoxy
2 more 3" chase tubes 5 lbs.
Raised console +50 lbs
I hope my estimate is way off
Re: building xf20
Posted: Tue Jun 20, 2023 10:44 am
by TomW1
MrPaul, I have a couple appointments this afternoon so will get on this after I get back. Tom
Re: building xf20
Posted: Tue Jun 20, 2023 10:55 am
by MrPaul
No worries Tom. Take your time.
Re: building xf20
Posted: Tue Jun 20, 2023 1:25 pm
by MrPaul
If I drop the t top, the leaning post and the trolling motor it will be 444 lbs lighter. I can also save 25 lbs by going with an okume rub rail and mechanical steering. I may also be able to save another 50 by getting rid of the center rear frame and the motor well. This boat wasn't designed with one anyway. If I really want to go for some abuse I believe I can save 50 lbs more by ripping up the floor and removing the horizontal floor supports between the stringers. Removing all of these things would reduce weight by 569lbs.
Re: building xf20
Posted: Tue Jun 20, 2023 11:55 pm
by fallguy1000
PPI is 413 pounds
Pretty sure dwl includes the specified engine...so your incrementals are adding a bit over an inch...
Keep the creature comforts; ditch unneeded weight.
Re: building xf20
Posted: Wed Jun 21, 2023 11:05 am
by MrPaul
fallguy1000 wrote: ↑Tue Jun 20, 2023 11:55 pm
PPI is 413 pounds
Pretty sure dwl includes the specified engine...so your incrementals are adding a bit over an inch...
Keep the creature comforts; ditch unneeded weight.
The way I see it the only uneeded weight, besides the creature comforts, is the extra wood on the hull. Maybe I should add the creature comforts little by little after I finish the boat and see how they affect the draft. I have a free minn kota riptide copilot but it's a 24 volt. I could save about 80 lbs by switching to a 12 volt. The trolling motor and 2 batteries was my heaviest Item on the list of possible candidates for removal. The leaning post is pure added weight. The way I saw it before the captain's couch was purchased....I was going to sit on the ice chest. I'm going to have to take an ice chest whether I have a leaning post or not. Unfortunately due to my lack of communication with my wife, she put the leaning post boxes out for recycle pick up and they're gone. Returning it is no longer an option. I'm looking for an offshore boat too. Maybe I'll find one that needs a leaning post.
Don't you think a loaded weight of over 3200 lbs (with the motor) leaving the dock is a bit heavy for an xf20? Any opinions are appreciated.
Re: building xf20
Posted: Wed Jun 21, 2023 11:15 am
by fallguy1000
12v trolling motors are almost impractical for a 20' boat, power, battery life; the 24v is the smallest to use; keep it
i really don't understand the scupper love on the forum for a flats boat when a bilge pump is enough..
Re: building xf20
Posted: Wed Jun 21, 2023 11:52 am
by MrPaul
fallguy1000 wrote: ↑Wed Jun 21, 2023 11:15 am
12v trolling motors are almost impractical for a 20' boat, power, battery life; the 24v is the smallest to use; keep it
i really don't understand the scupper love on the forum for a flats boat when a bilge pump is enough..
In Texas flats boats are used to get shallow where the red fish are. Then you get out and wade fish. When you get back in you bring all kinds of mud and water into the boat with you. If it doesn't have scuppers its useless for flats fishing. No such thing as a flats boat without scuppers in Texas. They're one of the most important elements. Unfortunately you can't use duckbill scuppers or scuppers that go into the bilge and then get pumped out. They get clogged or pumps get ruined with the mud. It has to be a plain old hole in the side of the boat. No way around it.
Re: building xf20
Posted: Wed Jun 21, 2023 2:39 pm
by Dr Pete
Mrpaul I fish an XF 20 in Port Aransas. I believe a trip on the water May do you a world of good. I believe you’re getting advice or opinions that are conflicting or really complicating your goals. No scuppers. Exclusively wade. 90 hp and I wish there were more. Email
peterjdvm@yahoo.com
Re: building xf20
Posted: Wed Jun 21, 2023 2:42 pm
by Dr Pete
Addendum. No power pole (would be nice) No troll motor. Draft shallow enough to get where I want to be. 1 battery.
Re: building xf20
Posted: Wed Jun 21, 2023 2:56 pm
by fallguy1000
Dr Pete wrote: ↑Wed Jun 21, 2023 2:39 pm
Mrpaul I fish an XF 20 in Port Aransas. I believe a trip on the water May do you a world of good. I believe you’re getting advice or opinions that are conflicting or really complicating your goals. No scuppers. Exclusively wade. 90 hp and I wish there were more. Email
peterjdvm@yahoo.com
Best post so far. I'd like that invite!
Here is what I said about the 70...hardly bad advice..
fallguy1000 wrote: ↑Sat Jun 17, 2023 9:53 pm
MrPaul wrote: ↑Sat Jun 17, 2023 7:25 pm
I got you.....man I hope a 70 will work.
It will be a bit small. I've got enough experience to tell you; the boat will struggle off the hump; it will require propping down for the hump and top speed will suffer.
I don't know why Tom would wait. Just get the lightship weight of another xf20 and add 1200 pounds..it'll be super close to your final plan loaded up.
Re: building xf20
Posted: Wed Jun 21, 2023 3:47 pm
by MrPaul
Dr Pete wrote: ↑Wed Jun 21, 2023 2:42 pm
Addendum. No power pole (would be nice) No troll motor. Draft shallow enough to get where I want to be. 1 battery.
Hi Pete,
How do you keep the water and mud out when wade fishing? I fish Matagorda Bay and a river near my house....the river is the reason I wanted the trolling motor. Every time we fish the bay when we get home we have to wash the mud out with a hose and let it run out of the scuppers. Everyone wears long pants in the summer to help aliviate the jellyfish problem and waders in the winter. Hit 6 or 7 spots with 4 guys getting in and out of the boat with long pants brings a lot of mud and water into the boat. Waders not so much water but more mud. What's your secret to keeping the mud and water out of your boat? Some days the mud in the boat is so bad I'm thanking God for scuppers and a hose.
Re: building xf20
Posted: Wed Jun 21, 2023 4:11 pm
by TomW1
MrPaul 70HP roughly 28mph, 90HP roughly 33mph, 115HP roughly 37mph. I would not consider the 70 as you would not have much hole shot getting out of the shallows with your weight which is over 3200lbs with 70HP motor, over 3300 with a 90 and 115HP. A prop will be hard to select due to the weight to power ratio. We are looking at a 4-blade for lift on your jack plate. The 90HP would require a 12 x 12 blade at your current weight. Lets not worry about anything until you actually weigh the boat and we get some actual numbers.
Tom
Re: building xf20
Posted: Wed Jun 21, 2023 6:28 pm
by Dr Pete
Mr Paul. Your fishing conditions with several rivers and creeks feeding your bay system is different than ours. We sometimes wade in mud but more typically will fish more stable bottoms with sand. No ankle deep mud. I understand fishing in jeans. Man-o-war/jelly fish not a concern but……I wear fishing pants. They’d keep the vermin off of you. Sun is my enemy. Those pants would not fill the boat with water. Swish our feet in the water sitting on the gunnel to rinse off the mud before boarding. Send me phone by email and I’ll text a couple of pics. No T-top because on the rare occasion I would fish from the boat I don’t want to dance around it. Compromise a canopy top for the Mrs’s. Save weight there.
I’d troll if I had a trolling motor???? Don’t know. Alternatively set up to drift.
I think my boat is relatively heavy. Full sole. Large foredeck and very fish able aft deck. 27 gallon tank that’s mounted at an angle so is full at 20 gallons. First build for me so there was lots of waste. Have now built 15-20 boats here at Farley boat works in PA.
30 mph top speed with 90hp and motor trimmed just right. A little off the tilt and jacked up into the water hump. Take a day and come fish or at least a ride. The things you’re talking about have thousands of dollars and hundreds of pounds in variables. Might be worth your time and I’d like to help.
Re: building xf20
Posted: Wed Jun 21, 2023 8:02 pm
by fallguy1000
TomW1 wrote: ↑Wed Jun 21, 2023 4:11 pm
MrPaul 70HP roughly 28mph, 90HP roughly 33mph, 115HP roughly 37mph. I would not consider the 70 as you would not have much hole shot getting out of the shallows with your weight which is over 3200lbs with 70HP motor, over 3300 with a 90 and 115HP. A prop will be hard to select due to the weight to power ratio. We are looking at a 4-blade for lift on your jack plate. The 90HP would require a 12 x 12 blade at your current weight. Lets not worry about anything until you actually weigh the boat and we get some actual numbers.
Tom
Great contribution Tom...
Re: building xf20
Posted: Wed Jun 21, 2023 8:14 pm
by MrPaul
Thank you very much for the numbers Tom. I really appreciate you taking the time to help. I think I'll go with a 115 over a 90. They're the same motor same bore same weight. I think it's just a different cdi and injectors that differentiate the 115 from the 90. Someone had mentioned a 6" setback on the jackplate to get the prop nto the water hump coming out of the tunnel. I think someone said the builder of red alert had mentioned it. Next step is to find the lightest 6" hydraulic jack plate I can.
Pete, I'd love to take a ride on your boat. The only other BBC boat I've seen was an fs18 going down the highway on a trailer. I tried to follow the guy and see if he stopped at a gas station but he was on a long haul and I had things to do. As far as the mud goes, If I have to raise the floor like Foster did on his boat I will do it. The pants will work to keep most of the water out but the treads on waders and stingray boots won't come clean swishing our feet in the water. Sometimes it takes 5 minutes just to get that nasty blue gumbo clay off the anchor....and it's a slick surface. It's horrible stuff. When you try.to install a duck blind in this area it will stick to your shovel and you have to clean it after every scoop. Wading through it is about as pleasant as syphilis and an ingrown toenail all rolled into one. To bad the red fish seem to like oyster beds that are right in the middle of it. I guess it keeps them safe from the majority of fishermen.
Do you have any idea what the weight is on your 2 stroke 90?
Re: building xf20
Posted: Wed Jun 21, 2023 8:48 pm
by Dr Pete
Book says 263#. You’re welcome to make a visit. There’s a fellow in Corpus building the XF 20. Matt Anderson. He could be close to finished. Saw the shell of the boat in October. No idea about his plans for layout. He’s been on this forum a couple of years back, Might could chase him down. Another great build is Wsmith. Built the 22 version. His build was texasflatsboat if you can find it in the archives. Really cut down the shear. If you’ve got the option on hp I’d go 115.
I am really fortunate with my boat at a community marina. 100 yds walk from my house. Usually fish 20-30 minutes away from the marina. So….speed is not something that is much of a concern. Don’t have to be a weekend warrior. Let me know if I can help.
Re: building xf20
Posted: Wed Jun 21, 2023 8:53 pm
by Dr Pete
The only drain I have in the cockpit is one inch that stays plugged. Could remove the plug when underway and drain. Never have needed to do that. Some water comes in when climbing back into to boat. Has never been of any consequence
Re: building xf20
Posted: Wed Jun 21, 2023 8:55 pm
by Dr Pete
wwsmith. Texas Flats Boat. Beautiful boat
Re: building xf20
Posted: Wed Jun 21, 2023 8:59 pm
by Dr Pete
115 on the Texas Flats Boat. I’ve fished with him. Gets into real skinny water. Enough deck space to be an effective landing craft for invasions or pirating
Re: building xf20
Posted: Wed Jun 21, 2023 9:14 pm
by MrPaul
Man... the 90 2 stroke weighs about the same as a 70 4 stroke. The 4 stroke yamaha 90 and 115 are 377 lbs. The only xf20 ive seen with the 115 4 stroke was jeorge pease xxf20 but that was kind of a different animal... foam sandwich boat. I've looked at the thread for the texas flats boat. That boat is beautiful. He built it right with just 1/2" ply frames to keep the weight down. I put frames and ply in 3 spots in my boat so it's heavy. I've thought about making some 2 inch drain plugs for the scupper holes. Plugs might be an option if they stay a little above the water line.
Re: building xf20
Posted: Wed Jun 21, 2023 11:53 pm
by TomW1
Dr Pete do you have any idea what your boat weighs?
Tom
Re: building xf20
Posted: Thu Jun 22, 2023 7:24 am
by Dr Pete
Tom I believe the boat came in around 2000#. With 4 fellows fishing and 20 gallons of fuel it drafts just under 6.5”.
Re: building xf20
Posted: Thu Jun 22, 2023 8:15 am
by fallguy1000
I misread that. So, if he comes in 2" deeper; he'd be at 8.5".
I'd still keep the other stuff, bigger engine, and move the troll batteries way up front for some help. Then, I'd modify the scuppers for plugs.
By the way, those horizontal sections should have been simple beams across. Then the weight of them is about 1/3rd of what you have or less. Really hard to remove them now; so don't. You can't easily remove the bonding flanges which add quite a bit of weight..it would require a lot of grinding over stringer tabbing..
The way to make the beams is with 1/2" ply rips; in an i shape, and fillet and tabbing in the I. On the stringers; you tab the beam to the bottom or epoxy a butt block to the cleating. When the sole is bonded; the structure gets very strong..
Re: building xf20
Posted: Thu Jun 22, 2023 8:34 am
by fallguy1000
If you were to do anything now with the horizontals; you could cut the bottom half out and skip the grinding...see if it is 30 pounds even with a real calc..if you cut some of them; cut the back ones..
Re: building xf20
Posted: Thu Jun 22, 2023 9:14 am
by Dr Pete
For clarity. Boat loaded full, fishermen and gear floats at 6.5”. Planes drafting about the same. I’ve never given much concern to this mystical “hole shot”. I ease into shallows and ease out of shallows. Once on plane cruise at 6-8”. Often position where I can raise the motor up and let the wind blow into deeper water or just walk the boat a bit to deeper water when ready to relocate. “Hole shot” falls into the same discussion as how large your…….biceps are.
Re: building xf20
Posted: Thu Jun 22, 2023 9:43 am
by fallguy1000
Dr Pete wrote: ↑Thu Jun 22, 2023 9:14 am
For clarity. Boat loaded full, fishermen and gear floats at 6.5”. Planes drafting about the same. I’ve never given much concern to this mystical “hole shot”. I ease into shallows and ease out of shallows. Once on plane cruise at 6-8”. Often position where I can raise the motor up and let the wind blow into deeper water or just walk the boat a bit to deeper water when ready to relocate. “Hole shot” falls into the same discussion as how large your…….biceps are.
Simply not true Pete.
Hole shot can be 15 seconds on an improperly propped boat. Add 50 pounds and a planing boat underpowered or overpropped won't get out of the hole. Add wind under the bow and an underpowered, heavily loaded boat won't get over the hump and get on plane.
A long time under the hump means the bow is high and it is impossible for the helmsman to see.
As I explained when warning the 70 would have issues; the hole shot could be 8 seconds to get on plane with a loaded rig; and the way to push it to 5 seconds is by propping down and losing top end.
My own fishing skiff does 28 mph. In a 20kt headwind; if I am alone; the boat will barely make it on plane with the livewell filled up front. If we have 3 people sitting in the back; it won't plane out. Weights need to be transferred. 50hp
It is not an issue with the 115, but would be with the 70..
Re: building xf20
Posted: Thu Jun 22, 2023 9:55 am
by fallguy1000
Not to double down too hard. But.
Other things happen when a boat is stuck in the hole. The prop gets lower in the water; by a lot.
For shallow waters like the laguna madre; the last thing you want is poor hole shot.
Re: building xf20
Posted: Thu Jun 22, 2023 11:38 am
by MrPaul
fallguy1000 wrote: ↑Thu Jun 22, 2023 8:34 am
If you were to do anything now with the horizontals; you could cut the bottom half out and skip the grinding...see if it is 30 pounds even with a real calc..if you cut some of them; cut the back ones..
Per my calculations:just the wood in the 3 rows of cross beams wieghs 36 lbs I can also remove the doug fir floor supports which are about another 12 lbs. I don't know the weight of the tape, glue and epoxy but that weight would be lost as well and I would lose the weight of the gunnels. It would be replaced by 4 9' lengths of 1x6 doug fir tabbed much closer to the top of the hull. The fir 1x6's would weigh about 38 lbs with tape and glue but the deck would be slightly larger and heavier. By the removal of 2 of the cross beams, the gunnels and the floor supports I think that easily removes about 65 lbs and adds back about 40. It would be a ton of work to save 25 or 30 lbs but I get the advantage of being able to raise my scuppers another 8 to 10 inches. All in all....the work will be less work in the long run than having to shovel mud out of my boat after every fishing trip.
Re: building xf20
Posted: Thu Jun 22, 2023 12:00 pm
by MrPaul
fallguy1000 wrote: ↑Thu Jun 22, 2023 8:15 am
I misread that. So, if he comes in 2" deeper; he'd be at 8.5".
I'd still keep the other stuff, bigger engine, and move the troll batteries way up front for some help. Then, I'd modify the scuppers for plugs.
By the way, those horizontal sections should have been simple beams across. Then the weight of them is about 1/3rd of what you have or less. Really hard to remove them now; so don't. You can't easily remove the bonding flanges which add quite a bit of weight..it would require a lot of grinding over stringer tabbing..
The way to make the beams is with 1/2" ply rips; in an i shape, and fillet and tabbing in the I. On the stringers; you tab the beam to the bottom or epoxy a butt block to the cleating. When the sole is bonded; the structure gets very strong..
My cross supports are made of laminated ply. I'm not sure I understand your cross beam fabrication process but I do understand your reasoning for not wanting to remove them. I don't want to damge the tape on my stringers. What do I need to do to adapt the scuppers for drain plugs. The inside of the hole is laminated with 1 layer of 10oz fiberglass which was pressed in with an inflated balloon once it was wet. Is there anything else I need to do to modify it for plugs?
Re: building xf20
Posted: Thu Jun 22, 2023 1:45 pm
by Dr Pete
Agreed fallguy . But. Depends on how you fish the shallows. I’ll idle or drift out of shallows to deeper water. You don’t take a football to play a game of basketball. I don’t need a hole shot.
Re: building xf20
Posted: Thu Jun 22, 2023 2:36 pm
by Dr Pete
Have yet to see a kayak with a hole shot. That’s the water I wade from the boat to fish calf to chest deep.
Re: building xf20
Posted: Thu Jun 22, 2023 3:16 pm
by fallguy1000
10oz cloth is not very waterproof; it can have pinholes really easily...working a rubber plug in there might delam it ez...not to make you work more, but more glass is wise unless you epoxy painted it a few times..
Just find a way to put a boat plug in them if you find a heavy load fills the boat with water....
Don't cut those horizontals out at this point....unless you just take out the bottom half ... that is 18 pounds
Then make a space for the trolling batteries up front ... 2 agm gr27 deep cells are 126 pounds which is an offsetting moment to the engine and jackplate increase
Then go fishing.
Re: building xf20
Posted: Thu Jun 22, 2023 4:46 pm
by MrPaul
fallguy1000 wrote: ↑Thu Jun 22, 2023 3:16 pm
10oz cloth is not very waterproof; it can have pinholes really easily...working a rubber plug in there might delam it ez...not to make you work more, but more glass is wise unless you epoxy painted it a few times..
Just find a way to put a boat plug in them if you find a heavy load fills the boat with water....
Don't cut those horizontals out at this point....unless you just take out the bottom half ... that is 18 pounds
Then make a space for the trolling batteries up front ... 2 agm gr27 deep cells are 126 pounds which is an offsetting moment to the engine and jackplate increase
Then go fishing.
Looking for a way to get battery cables out ot the front locker without a chafing issue. There has to be some kind of grommet I can buy. I also need to find a hatch big enough to get the batteries in and out of the locker.
Re: building xf20
Posted: Thu Jun 22, 2023 5:08 pm
by TomW1
DrPaul I have been thinking of a way to separate the fuel line from the electrical lines in the 4" tube you have now. Just run a 1 1/2" conduit at the bottom of the the 4" conduit and glue or fasten it so it doesn't move around. Then run your fuel line fuel line through it. Everything all safe. No extra ply or expense, still plenty of room for wiring and hydraulics.
Tom
Re: building xf20
Posted: Thu Jun 22, 2023 6:12 pm
by MrPaul
I had thought about that Tom. I think I have a 6" tube. The tube has some curves in it. I have to figure out how to get it in there with the curves.and be able to glue it in. I spoke with my neighbor about it. He told me most production boats have the same size tube I installed and everything is a tight fit. He also said I shouldn't go with the mechanical steering in the single tube. The mechanical steering cables tend to move when you steer and can chafe things. I'm thinking the mechanical binnacle controls will probably move the cables as well.If I raise the floor there will be plenty of room for another chase tube. I'm just not sure I want to do that before I know the current level isn't going to work. I need to eyeball some things when I get home and take a look at the possibilities with the Ideas you guys have given me. Maybe put up more pictures with more questions

.
Fallguy....when you put a balloon into a round hole that is lined with wet fiberglass and then inflate the balloon, it comes out as smooth as a baby's butt after you pop the ballon the next day. I've seen some metal inserts for scupper holes as well. I think you have kind of like a rivet tool that crimps them on the other side. I just can't find one big enough and I've never seen someone install them. Plugs may be the way to go for now.
Re: building xf20
Posted: Thu Jun 22, 2023 6:33 pm
by fallguy1000
MrPaul wrote: ↑Thu Jun 22, 2023 4:46 pm
fallguy1000 wrote: ↑Thu Jun 22, 2023 3:16 pm
10oz cloth is not very waterproof; it can have pinholes really easily...working a rubber plug in there might delam it ez...not to make you work more, but more glass is wise unless you epoxy painted it a few times..
Just find a way to put a boat plug in them if you find a heavy load fills the boat with water....
Don't cut those horizontals out at this point....unless you just take out the bottom half ... that is 18 pounds
Then make a space for the trolling batteries up front ... 2 agm gr27 deep cells are 126 pounds which is an offsetting moment to the engine and jackplate increase
Then go fishing.
Looking for a way to get battery cables out ot the front locker without a chafing issue. There has to be some kind of grommet I can buy. I also need to find a hatch big enough to get the batteries in and out of the locker.
I used boatoutfitters for my battery locker; custom. Side access..?
U need a tray n venting as well..
Re: building xf20
Posted: Thu Jun 22, 2023 8:50 pm
by MrPaul
Fallguy, there's not enough space for side access on the front wall. I think it's less than a foot tall and 4 inches of whatever it is is a 1x4 deck support. Probably leaves 6-8 inches for an access hatch opening. I wish I could do side access. It would be a better way to keep water out. I'll try to get some pictures of the inside of the front locker posted so you can see what I'm working with.
Re: building xf20
Posted: Fri Jun 23, 2023 8:51 am
by fallguy1000
A GR27 battery with side mounts is 9" high. GR34 is 8" only.. You could maybe sneak it in and put the connections in front. Boat outfitters panels might be trouble...may need to cut the trim ring down.
The beam edge would need a middle support and the beam would need to be made with maybe 4-6 pieces of 1/2" plywood epoxied together...that'd be 2", not 3.5"..
There is a tray requirement, but I made a custom tray with glass. You can buy a full size battt box and cut the tray down and slide it in..
But you will need/want a sill, so water can't get in and the hatch can get screwed on.
Anyhow, might be doable...but tight..
Re: building xf20
Posted: Fri Jun 23, 2023 9:01 am
by fallguy1000
You would need to perhaps tip the battery on edge to get them in and out and it would be tight; so be super careful the pass through dimensions would be enough.
Both the gr27 and 34 need 7" pass through which looks like an 11" door..so might be doable?
Re: building xf20
Posted: Fri Jun 23, 2023 11:58 am
by TomW1
If you get an AGM battery you can lay on its side and a Group 27 is only about 6.75" wide. This is for a BassPro shop AGM Group 27 battery.
https://www.basspro.com/shop/en/bass-pr ... ne-battery You will need to check others, but they will be close in measurements as most are designed to fit in a certain area. AGM's are designed to be placed in various positions with their solid cores.
Tom
Re: building xf20
Posted: Fri Jun 23, 2023 12:59 pm
by MrPaul
I did some measuring last night. I have 8 inches between the floor of the locker and the bottom of the beam. The floor of the locker is only 1/4" Okume covered with 10 oz glass so I would have to put another 1/4 " ply on top of the original locker floor so that would reduce my space to 7 3/4". Unfortunately it's the main beam at the widest point in the boat and it already has 2 1.5" notches at the top. If I cut into it at the bottom it will interrupt the grain of the wood and it will have no strength. I took some pictures last night. I will try to get to a computer and post them tonight. The locker is about 30" in front of the place I had originally planned to install the batteries. Will placing the batteries 30" further forward be worth the effort? I don't know if the space is large enough for 4 batteries and I will have to use battery boxes to keep them dry if I have to go with a top hatch to install them. Battery boxes will make the fit even tighter. I didn't measure it but I know it's only 21" wide. I'd say probably 21"W × 26" L.
Re: building xf20
Posted: Fri Jun 23, 2023 1:06 pm
by MrPaul
TomW1 wrote: ↑Fri Jun 23, 2023 11:58 am
If you get an AGM battery you can lay on its side and a Group 27 is only about 6.75" wide. This is for a BassPro shop AGM Group 27 battery.
https://www.basspro.com/shop/en/bass-pr ... ne-battery You will need to check others, but they will be close in measurements as most are designed to fit in a certain area. AGM's are designed to be placed in various positions with their solid cores.
Tom
Tom, would 2 of these work to run the 24v trolling motor? Can 1 be used for the staring battery? Are there any lighter batteries I can use for the house battery or starting battery? Sorry for the rapid fire questions. The batteries and the weight have been a conundrum for me.
Re: building xf20
Posted: Fri Jun 23, 2023 2:51 pm
by TomW1
Yep two in line for 24V and 1 for starting battery. For a house battery put it in the console and any cheap battery will do. After all it will only supply the lights, gauges, and fish finder. But don't go to cheap a group 24 will last a long time and can be recharged many times. You can get one from Wal-Mart that lasts forever.
For the starting battery since you are going with the 115HP no a Group 27 is as small as you can go also if you put it the bow you will need heavier cables. fallguy mentioned 2 gauge I think you will need 2/0 gauge but check with genuinedealz.com whoops they are now customcableusa.com
they are a great supplier and will put the fittings you need on each end of the cables. Yep, ran their calculator and you will need a minimum of 2/0 for your run from the batteries in the front to the motor in the back. Use their custom cables to get the ends you need. Many of the Forum members have used them for a long time as they can't get a better price on wire. And when I mean a long time I go back to the late 2000's early 2010's with CL's OD18 and others.
Tom
Re: building xf20
Posted: Fri Jun 23, 2023 4:45 pm
by MrPaul
Thabk you for the info Tom. Will placing the batteries 30 inches further forward than I had originally planned make a substantial difference?
Re: building xf20
Posted: Fri Jun 23, 2023 10:48 pm
by TomW1
MrPaul wrote: ↑Fri Jun 23, 2023 4:45 pm
Thabk you for the info Tom. Will placing the batteries 30 inches further forward than I had originally planned make a substantial difference?
I don't think you will have enough room moving them that far forward and don't know if you need that much moment forward.
Tom
Re: building xf20
Posted: Sat Jun 24, 2023 12:33 pm
by MrPaul
Tom,
The original place I was going to put them was under the integrated seat in front of the console. The only other place to put them is in the center front locker which is 30" forward of the original spot. It will be a lot of work to get them moved up front and I still don't know if the extra wiring will fit in the front 2.5" chase tube along with wiring for the trolling motor and the charger. If 30" further forward of the lcg is not going to help substantially I'd rather leave them under the front seat and avoid the additional wiring challenges. Unfortunately i planned my boat using a bunch of production boats as examples for wiring, battery placement, and fuel tank placement. Unfortunately my inspitation came from 3 differnet boats. The fuel tank under the console i saw on a flats cat, the batteries under the seat in front of the console idea came from a Mowdy, and I saw that a lot of the production boats I looked at ran all wires cables and lines through a single chase tube to the motor/transducer/power pole.. The Flats cat also had the batteries under the console and to me it looked like something I didn't want on my boat for saftey reasons. Thats why I opted to put them under the front seat in a separate compartment and pass the cranking wires through a rubber grommet to the rear rigging tube. Now I'm kind of struggling to correct this after I found out that it looks like the USCG/insurance companies treat home builders with different rules. I spoke with the kid who does the rigging at one of the shops near my house and he said the same thing my neighbor told me. He hadn't seen many production flats boats that had more than 1 big chase tube to the rear but that he had zero experience rigging home built boats and he just figured the regs would be the same.
Re: building xf20
Posted: Sat Jun 24, 2023 5:29 pm
by TomW1
Okay moving the batteries 30" forward will move 575lbs of moment forward. I am sorry I thought you had already moved the batteries forward to the forward deck area. This you can afford to do and will help since you are adding the 115HP on a jack plate. Unfortunately, by looking at production boats you were mislead for what you needed for a home-built boat. They are not that much different, but safety is created by separating things in different tubes for safety, preventing rubbing/wearing on wires, hoses. This adds safety to home-built boats.
Tom
Re: building xf20
Posted: Sat Jun 24, 2023 8:50 pm
by fallguy1000
Mount the two batteries on the deck way up front.
Run the wires back to charging source sized based on output of the source..
Re: building xf20
Posted: Sat Jun 24, 2023 10:36 pm
by MrPaul
Based on what you guys are saying I'm going to try to get all 4 batteries up front. 575 lb weight shift may be worth moving them forward more.
Tom,
How do you get the 575 number. The batteries were originally be starting at 42" in front of the LCG and all be lined up side by side in 1 row of 4 battereis. Now they will be in 2 rows of 2 batteries starting 72" in front of the LCG and finishing at 98" in front of the LCG. I hate to over complicate things but I wantt to make sure we are getting the numbers right so the boat will still get on plane and not have a plow bow. Now it will have 4 batteries and the trolling motor up there.
Re: building xf20
Posted: Sat Jun 24, 2023 11:13 pm
by fallguy1000
MrPaul wrote: ↑Sat Jun 24, 2023 10:36 pm
Based on what you guys are saying I'm going to try to get all 4 batteries up front. 575 lb weight shift may be worth moving them forward more.
Tom,
How do you get the 575 number. The batteries were originally be starting at 42" in front of the LCG and all be lined up side by side in 1 row of 4 battereis. Now they will be in 2 rows of 2 batteries starting 72" in front of the LCG and finishing at 98" in front of the LCG. I hate to over complicate things but I wantt to make sure we are getting the numbers right so the boat will still get on plane and not have a plow bow. Now it will have 4 batteries and the trolling motor up there.
Nope.
The starter stays back. The house goes in the console; the two trolling batts put on the bow in boxes. You won't be plowing anything with the bigger engine and all that stuff on the console.
Re: building xf20
Posted: Sat Jun 24, 2023 11:13 pm
by TomW1
It's late I will get the the numbers for you tomorrow. Tom
Re: building xf20
Posted: Sun Jun 25, 2023 1:08 pm
by MrPaul
No worries Tom. I apologize for so many questions. Thank you fallguy.
Re: building xf20
Posted: Sun Jun 25, 2023 2:41 pm
by TomW1
MrPaul wrote: ↑Sat Jun 24, 2023 10:36 pm
Based on what you guys are saying I'm going to try to get all 4 batteries up front. 575 lb weight shift may be worth moving them forward more.
Tom,
How do you get the 575 number. The batteries were originally be starting at 42" in front of the LCG and all be lined up side by side in 1 row of 4 battereis. Now they will be in 2 rows of 2 batteries starting 72" in front of the LCG and finishing at 98" in front of the LCG. I hate to over complicate things but I wantt to make sure we are getting the numbers right so the boat will still get on plane and not have a plow bow. Now it will have 4 batteries and the trolling motor up there.
In this case I took the weight of 3 Group 27 batteries from BassPro
https://www.basspro.com/shop/en/bass-pr ... ne-battery and added an estimate for fittings tubing and the 2/0 wire. Then ran it through the moment formula. 3 65lb baterries x 30 inches is 487.5 lbs then I added 30lbs per battery for fittings, wire and tubing for the length of the run each would need. The starting battery will need 2/0 wire and be heavier than thr 8 or 6 wire the wire the trolling batteries need.
The 575 may be high or it may be low it depends on what battery you get and the fittings as well how far forward you move the 3 batteries.
Tom
Re: building xf20
Posted: Sun Jun 25, 2023 4:53 pm
by MrPaul
Thank you Tom. I rally appreciate all of your help on this. I am looking at using the bass pro size 27 batteries on my boat. Due to thier size they look like they will be a good fit. I may use a smaller lighter battery for the house battery.
Re: building xf20
Posted: Mon Jun 26, 2023 9:01 am
by fallguy1000
The starting battery needs to stay back. You will experience too much current loss to wires. You could maybe put it in the console, but that area is also getting pretty heavy..and then you don't need to run 2/0 which is probably also about $10 a foot..
The engines comes with start cables, and to size up means current in the cables will be changing at the terminal block. Don't do it!
Re: building xf20
Posted: Mon Jun 26, 2023 12:28 pm
by MrPaul
If I keep the staring battery under the front seat in the console it will still be about 10 feet from the motor. Is that too far to run the starter cables without causing an issue?
Re: building xf20
Posted: Mon Jun 26, 2023 2:58 pm
by OrangeQuest
MrPaul wrote: ↑Mon Jun 26, 2023 12:28 pm
If I keep the staring battery under the front seat in the console it will still be about 10 feet from the motor. Is that too far to run the starter cables without causing an issue?
Main thing you want to avoid when extending the starter cables would be under load voltage drop. Most modern boat motors need a voltage higher than 9.6 volts while cranking. Fuel pump and ECM power relays with start turning off below 9.6V. The factory cables are of the correct size to keep that from happening with a good battery. To extend the length of the factory cables you would need know the max current rating for the length of those cables and the voltage drop. Then increase the gauge size for the extra length needed.
one way to do that would be to calculate the gauge of wire needed the total length if it were a continuous single piece wire that would deliver the same amount of current with the same voltage drop. Example: Your factory wires are 4 gauge and 4 feet long (8 feet round trip). Rated for 100 amps with a 1% voltage drop (numbers are made up and not know values and not true values). You look up in a gauge chart that to run the 10 feet (20 feet round trip) you would need 2 gauge 9 made up values again) wire to run the total length. Since you would need to extend your factory cable 6 more feet, you would buy the 2 gauge at 6X2 feet and your voltage drop would be very close to the same as if the starter battery were connected to the factory cables only. You can get custom cables made with terminals and heat shrink for a very factory look at a little more than buying all the hardware and doing it yourself. Then join factory cables with extended cable via two post terminal block. Can then remove and sell/swap out motors with still intact factory cables.
Re: building xf20
Posted: Mon Jun 26, 2023 7:37 pm
by TomW1
If your going back under the console, you may be able to get by with a lower gauge cable. I ran the numbers on Custom Cables and using #1 or 1/0 wiring should work for you. Remember you will be running two wires a red and a black plus the starter cable through a tube. I don't necessarily agree with OQ 6' and 4' as the block will be hidden I would prefer the 10' run and then the joining to the motor cables.
Tom
Re: building xf20
Posted: Mon Jun 26, 2023 10:16 pm
by MrPaul
Thank you Tom and Orange. Hopefully I get this figured out soon. I think I'm about 2 weeks from building the console so I have a little while to figure it out.
Re: building xf20
Posted: Mon Jun 26, 2023 11:14 pm
by fallguy1000
MrPaul wrote: ↑Mon Jun 26, 2023 12:28 pm
If I keep the staring battery under the front seat in the console it will still be about 10 feet from the motor. Is that too far to run the starter cables without causing an issue?
You will have to have a terminal block somewhere back where an aft starter battery would reside..
Re: building xf20
Posted: Wed Jun 28, 2023 4:43 pm
by MrPaul
The terminal block should be easy to find a place for in the console near the starter battery.
Re: building xf20
Posted: Wed Jun 28, 2023 6:27 pm
by TomW1
Wrong the terminal block should be back where the heavy wires from the battery connect to the motor wires that are supplied with it. You don't need to shorten them as they will provide the movement for the motor to move from side to side. Just gather them in the side compartment so they are not chafing.
Tom
Re: building xf20
Posted: Wed Jun 28, 2023 9:30 pm
by fallguy1000
Tom is correct. You'll need to run bigger wires back to a term block. The supplied cables are like 6' long only.
Re: building xf20
Posted: Wed Jun 28, 2023 11:24 pm
by MrPaul
Ok...so let me make sure I'm understanding. I can mount it where the wires come out of the chase tube. Is a terminal block the same as a buss bar? This is where I can connect the 2 Guage wires coming from the battery and the 4 Guage wires going to the motor. Correct?
Re: building xf20
Posted: Thu Jun 29, 2023 5:03 am
by OrangeQuest
MrPaul wrote: ↑Wed Jun 28, 2023 11:24 pm
Ok...so let me make sure I'm understanding. I can mount it where the wires come out of the chase tube. Is a terminal block the same as a buss bar? This is where I can connect the 2 Guage wires coming from the battery and the 4 Guage wires going to the motor. Correct?
The terminal block (power posts) will be a dual post for pos and neg cable to connect. And you want it where you can access it fairly easy. And yes, it is where you connect your battery cables to the motor cables.
https://www.wholesalemarine.com/blue-se ... ower-post/
Re: building xf20
Posted: Thu Jun 29, 2023 7:17 am
by fallguy1000
While we are at it; wires in boats are crimped; not soldered. You'll need a crimper for those big wires..
I still prefer the starter battery back at the stern. I don't like running to a post. If youmust; you ought to consider spraying it or coating it. Or you can mount a remote battery switch and disconnect the battery at the contacts. I don't really like the open power lines.
https://shop.advanceautoparts.com/p/crc ... lsrc=3p.ds
The rbs would stop power flowing to the post when not in use which is how the corrosion happens.
https://www.bluesea.com/products/7713/M ... ease_-_12V
Re: building xf20
Posted: Thu Jun 29, 2023 1:37 pm
by jbo_c
fallguy1000 wrote: ↑Thu Jun 29, 2023 7:17 am
While we are at it; wires in boats are crimped; not soldered.
For those not in the know, why is this?
Thanks.
Jbo
Re: building xf20
Posted: Thu Jun 29, 2023 2:47 pm
by TomW1
[quote=OrangeQuest post_id=509227 time=1688029402 user_id=81591]
[quote=MrPaul post_id=509223 time=1688009044 user_id=79725]
Ok...so let me make sure I'm understanding. I can mount it where the wires come out of the chase tube. Is a terminal block the same as a buss bar? This is where I can connect the 2 Guage wires coming from the battery and the 4 Guage wires going to the motor. Correct?
[/quote]
The terminal block (power posts) will be a dual post for pos and neg cable to connect. And you want it where you can access it fairly easy. And yes, it is where you connect your battery cables to the motor cables.
https://www.wholesalemarine.com/blue-se ... ower-post/
[/quote]
OQ that is a good example but both posts should be the same size to prevent current loss going from the motor to the battery. 5/8 would be best.
As fallguy mentioned you need a battery switch back by the motor to cut off the power to the motor. One like this is pretty standard.
https://www.fisheriessupply.com/battery-switch-basics This a good basic explanation of how one works. This also gets rid of the buss bar. As you run the long wires to it and then the motor wires to it. It will also let you charge the motor and house battery. Here is a battery switch from them
https://www.fisheriessupply.com/perko-a ... ery-switch I chose this in case you forgot to turn off the motor before turning off the power. Another one without the AFD is this
https://www.fisheriessupply.com/perko-b ... tch/8501dp
Tom
Re: building xf20
Posted: Thu Jun 29, 2023 3:52 pm
by TomW1
jbo_c wrote: ↑Thu Jun 29, 2023 1:37 pm
fallguy1000 wrote: ↑Thu Jun 29, 2023 7:17 am
While we are at it; wires in boats are crimped; not soldered.
For those not in the know, why is this?
Thanks.
Jbo
Solder is brittle and can crack over time do to the pounding of the boat. Tom
Re: building xf20
Posted: Thu Jun 29, 2023 5:32 pm
by OrangeQuest
Crimping heavy gauge terminal ends needs a very special way of doing it. Custom cables is the way to go if you don't own gear for that purpose. And only cost a little more than all the terminals, cables and heat shrink tubing. I even had custom cables made between batteries and manually resettable circuit breakers, from breakers to battery switch and then back to the transom. But I ran a separate ground to a bus bar for grounding all the lights and pump in the stern. Then both bilge pumps also have their own grounds.
I don't like running a bunch of grounds off the same terminal post. I used a bus bar for ground and a terminal block to connect each load. Makes for easier and faster diagnoses of an electrical problem. If a pump or something needs replacing just have to unscrew the two terminals and put new eyelet terminals on the new part.
Re: building xf20
Posted: Fri Jun 30, 2023 1:56 pm
by joe2700
OrangeQuest wrote: ↑Thu Jun 29, 2023 5:32 pm
Crimping heavy gauge terminal ends needs a very special way of doing it. Custom cables is the way to go if you don't own gear for that purpose. And only cost a little more than all the terminals, cables and heat shrink tubing. I even had custom cables made between batteries and manually resettable circuit breakers, from breakers to battery switch and then back to the transom. But I ran a separate ground to a bus bar for grounding all the lights and pump in the stern. Then both bilge pumps also have their own grounds.
I don't like running a bunch of grounds off the same terminal post. I used a bus bar for ground and a terminal block to connect each load. Makes for easier and faster diagnoses of an electrical problem. If a pump or something needs replacing just have to unscrew the two terminals and put new eyelet terminals on the new part.
I had good luck crimping 2/0 to 8 AWG terminals with this $20 tool but in a bench vise instead of using a hammer. Made a very solid crimp on ancor battery cable with ancor lugs and I finished them all with color coded adhesive filled heatshrink. No problems, so while a hydraulic crimper or getting them made are good options, I think you can get a quality crimp with a much cheaper tool. It tested it by hanging my full weight off a test crimp.
https://www.amazon.com/gp/product/B00E1 ... UTF8&psc=1
Re: building xf20
Posted: Fri Jun 30, 2023 3:22 pm
by TomW1
Looks like a good tool Joe. Tom
Re: building xf20
Posted: Fri Jun 30, 2023 11:52 pm
by MrPaul
The only place in the rear that is centered is the top of the tunnel...and I think I found a battery box short enough to fit under the hatch framing that I'm going to have to put in to get to the battery. I have about 9 inches between the top of the tunnel and the hatch frames. Would it be a bad idea to put it on top of the tunnel? I have 3 inside layers of 1708 on 3/8' okume and 2 layers of 1708 on the outside of the tunnel.
Re: building xf20
Posted: Sat Jul 01, 2023 1:41 pm
by TomW1
MrPaul even if you move the starting battery a couple of feet off center beside the tunnel there really isn't much affect on a boat as wide as the XF. My OD18 had the starting battery in the compartment next to the motor and there was no noticeable affect on the balance. It also had the main battery switch for the starter battery and the house battery.
Tom
Re: building xf20
Posted: Sat Jul 01, 2023 11:36 pm
by MrPaul
TomW1 wrote: ↑Sat Jul 01, 2023 1:41 pm
MrPaul even if you move the starting battery a couple of feet off center beside the tunnel there really isn't much affect on a boat as wide as the XF. My GF18 had the starting battery in the compartment next to the motor and there was no noticeable affect on the balance. It also had the main battery switch for the starter battery and the house battery.
Tom
Understood. That makes things easier.
Re: building xf20
Posted: Sun Jul 02, 2023 3:15 am
by fallguy1000
That said, you always want to consider offsetting the helmsman in these boats.
Balance is always your friend in laying out.
Re: building xf20
Posted: Sun Jul 02, 2023 6:16 pm
by TomW1
fallguy1000 wrote: ↑Sun Jul 02, 2023 3:15 am
That said, you always want to consider offsetting the helmsman in these boats.
Balance is always your friend in laying out.
Well said FG put the house battery on the left side of the helm/console to offset moving the starting battery to the right as an example. The reason to link the house battery and starter battery is if the starter battery is low you can you can use the house battery in union with the starter battery to start the motor. Just switch to all or 1+2 on the switch.
Tom
Re: building xf20
Posted: Mon Jul 03, 2023 2:12 pm
by MrPaul
fallguy1000 wrote: ↑Sun Jul 02, 2023 3:15 am
That said, you always want to consider offsetting the helmsman in these boats.
Balance is always your friend in laying out.
At this point I have changed plans to put 3 27 size batteries up front and 1 in the rear. I need to put in more flotation foam that can also go up front but that will leave the boat with no foam near the rear. All the foam is currently under the floor. I think I have 2, 2 gallon kits under the floor currently.
Re: building xf20
Posted: Mon Jul 03, 2023 2:16 pm
by MrPaul
TomW1 wrote: ↑Sun Jul 02, 2023 6:16 pm
fallguy1000 wrote: ↑Sun Jul 02, 2023 3:15 am
That said, you always want to consider offsetting the helmsman in these boats.
Balance is always your friend in laying out.
Well said FG put the house battery on the left side of the helm/console to offset moving the starting battery to the right as an example. The reason to link the house battery and starter battery is if the starter battery is low you can you can use the house battery in union with the starter battery to start the motor. Just switch to all or 1+2 on the switch.
Tom
Tom,
I spoke to my neighbor last night and he wanted to link the house and starter at the perko switch. He said the trolling motor batteries will only go to the charger. Will the linking of house and starter batteries need a thicker guage cable considering they are so far apart?
Re: building xf20
Posted: Mon Jul 03, 2023 5:32 pm
by TomW1
In the system your going to now, starter in the back, house in the console you only need #1-2 wire for the house battery to the Perko switch. Then with the Perko in #1 position charge the starter battery for 20 minutes while your running the motor and switch to #2 position and charge the house battery. This is how my OD18 was set up. Or if running longer periods of times just set the switch at the All/1+2 position to charge both batteries. Make sure you have an I believe it is called an ACD to each battery so they do not over charge.
For the trolling batteries just charge them up every evening when you get in and you will have plenty of charge for the next day with two GR27 trolling batteries in a 24V system. You can put a marine charger right on your boat and just run an extension cord to it for charging. Minnkota makes a good one
https://www.basspro.com/shop/en/minn-ko ... ry-charger
Tom
Re: building xf20
Posted: Mon Jul 03, 2023 7:02 pm
by fallguy1000
Usually, it is risky to charge the house by the motor. The reason is a deep discharged house will pull full load on the alternator.
I have this issue on my boat. I setup Orion smart chargers, but don't like them and one might be dead.
Re: building xf20
Posted: Tue Jul 04, 2023 9:44 am
by TomW1
MrPaul this is the simple easy system by Blue Sea which keeps both the house and the starter battery charged
https://www.bluesea.com/products/765000 ... 5BBoxed%5D A simple all in one box approach that gets you everything you need to charge both batteries. I will double check wire size for the House in a few minutes.
Tom
Re: building xf20
Posted: Tue Jul 04, 2023 10:20 am
by TomW1
For a round trip run of 20' the calculator says you need to use #1 wire for the 10' run you have for the house battery. Just a thought if you already have a switch just buy the ACR.
https://www.bluesea.com/products/7610/S ... 4V_DC_120A
Tom
Re: building xf20
Posted: Thu Jul 06, 2023 6:11 pm
by fallguy1000
Not a fan of the acr for charging the house unless the batteries are discharged evenly. That said, I tripped my ACR Tuesday to charge my two separate start batteries without moving the charger.
But if the house is at say 11.5 and the start 12.5; the acr sees 12v and goes into bulk and charges both up and the start gets overcharged. Ask me how I know.
So, a combiner that allows you to select and cheap battery monitors are best. That way, you don't fry the start battery on a deeply depleted house..
Re: building xf20
Posted: Fri Jul 07, 2023 3:19 pm
by TomW1
Dang fallguy you seem to have had a problem with every type of system out there that work well for most people.
Tom
Re: building xf20
Posted: Sat Jul 08, 2023 11:09 am
by joe2700
fallguy1000 wrote: ↑Thu Jul 06, 2023 6:11 pm
But if the house is at say 11.5 and the start 12.5; the acr sees 12v and goes into bulk and charges both up and the start gets overcharged. Ask me how I know.
So, a combiner that allows you to select and cheap battery monitors are best. That way, you don't fry the start battery on a deeply depleted house..
An ACR only connects the batteries, it is not a charger so it can't go into bulk or any other charging mode. The ACR combines the batteries if either one is at a voltage that indicates it is being charged, around 13V. In your example the ACR would keep the batteries isolated until the start battery started charging again(like if you turned the engine on), then it would combine them after a few minutes. That would not result in the start battery being over charged, the start battery would actually be discharging into the house battery until they equalized.
Blue seas does make a combined ACR and battery charger for smaller batteries, but that would still not result in over charging anything. You example where the house is more discharged that the start is basically how ACRs are designed to work all of the time. I think something else was the cause of the problem you had, a house/starting battery isolated by am ACR is a very common practice that is pretty well tested out at this point.
Re: building xf20
Posted: Sat Jul 08, 2023 2:16 pm
by fallguy1000
The alternator is delivering a charge when the ACR is linked to the battery system. Discharging and charging two separate banks with the same charge source results in one bank being charged higher.
While the two batteries are trying to achieve statis; the charging system is delivering bulk charge to a battery in absorption or float.
I fried a battery doing exactly this process. Noone talks about it, but it greatly reduces battery life.
For a boat that is heading to overweight, another solution is to use a single battery for the house and start and use a saver system so the house never takes the system down below cranking needs.
Re: building xf20
Posted: Sun Jul 09, 2023 9:26 am
by Dougster
Most of this is over my head. It does seem overly complicated to me given this is a day use boat. Why not an AGM start battery and a light lithium ion for the house. No on board charger. I just hook my batteries up to their chargers the day before. Never takes more than 2 or 3 hrs. I have a simple, cheap lithium charger and another for the AGM. I'm probably missing something.
Dougster
Re: building xf20
Posted: Sun Jul 09, 2023 9:37 am
by fallguy1000
Dougster wrote: ↑Sun Jul 09, 2023 9:26 am
Most of this is over my head. It does seem overly complicated to me given this is a day use boat. Why not an AGM start battery and a light lithium ion for the house. No on board charger. I just hook my batteries up to their chargers the day before. Never takes more than 2 or 3 hrs. I have a simple, cheap lithium charger and another for the AGM. I'm probably missing something.
Dougster
Actually, you also make a good point that the two batteries could always be in parallel and with a protect/saver switch so the 'house' loads never depletes the start. This way the engines keep the two batteries at the same potential. Using a house battery on a 20 foot boat is silly. All you are trying to do is preserve start which is done with a protect device.
This one uses bluetooth, but they have simpler versions.
I depleted my start bank once before the advent of LED lights; was trolling walleyes for 3 hours with nav lights on..
https://www.victronenergy.com/battery_p ... ry-protect
Re: building xf20
Posted: Sun Jul 09, 2023 3:10 pm
by joe2700
fallguy1000 wrote: ↑Sat Jul 08, 2023 2:16 pm
The alternator is delivering a charge when the ACR is linked to the battery system.
Discharging and charging two separate banks with the same charge source results in one bank being charged higher.
While the two batteries are trying to achieve statis; the charging system is delivering bulk charge to a battery in absorption or float.
I fried a battery doing exactly this process. Noone talks about it, but it greatly reduces battery life.
For a boat that is heading to overweight, another solution is to use a single battery for the house and start and use a saver system so the house never takes the system down below cranking needs.
When two lead acid batteries are connected in parallel the voltages will try to equalize and that will be the case whether or not there is a charging source connected to either battery. When an ACR senses a charging voltage on either battery and combines it is exactly the same as manually setting a battery switch to "both". No one talks about it because this setup is used successfully on hundreds of thousands of boats, there was something unique about your setup or some unrelated problem if you fried a battery.
A single battery could well be a good answer for this boat, I don't know, but ACRs are a tried and true way to set up a boats electrical system in a way where you always have power to start your motor.
Re: building xf20
Posted: Mon Jul 10, 2023 8:38 am
by fallguy1000
Here is the Myth and Lore..
In my situation, I discharged half of a 24v system daily and charged the entire bank at say 26v.
And I assumed the depleted house would behave the same here, but I am/was wrong,
I took some time to read about it today after a wedding Saturday.
The ACR will not guarantee a start. That is the battery saver..
I have a switched ACR on the Redfin. It can be left on by mistake.
https://marinehowto.com/automatic-charging-relays/
Re: building xf20
Posted: Mon Jul 10, 2023 9:41 am
by OrangeQuest
You have two batteries, one at 12.5 volts and one at 10.5 volts and you connect them together, parallel, you have 11.5 volts total. and a charging system sees it at 11.5 volts until both batteries reach fully charged voltage. But the fully charged battery will be over charged and the partial will be under charged once the charging is removed.
The way a fully automatic system should work is when motor is started, the charging system ONLY charges the start battery till fully charged, then the system automatically switches to charging the house battery to full voltage again but isolates the start battery in that process and never are the start battery and house battery connected together unless you use a battery control switch where the start battery can be 1/2/both/off. And that battery switch bypasses the ACR when in use.
But when using such a complex system, then voltage drop from distance, poor connections and under gauge wire can affect the automatic part of the system. 1 volt drop between connections when under load like in a charging cycle can cause the ACR to not work correctly.
Re: building xf20
Posted: Mon Jul 10, 2023 10:01 am
by fallguy1000
OrangeQuest wrote: ↑Mon Jul 10, 2023 9:41 am
You have two batteries, one at 12.5 volts and one at 10.5 volts and you connect them together, parallel, you have 11.5 volts total. and a charging system sees it at 11.5 volts until both batteries reach fully charged voltage. But the fully charged battery will be over charged and the partial will be under charged once the charging is removed.
The way a fully automatic system should work is when motor is started, the charging system ONLY charges the start battery till fully charged, then the system automatically switches to charging the house battery to full voltage again but isolates the start battery in that process and never are the start battery and house battery connected together unless you use a battery control switch where the start battery can be 1/2/both/off. And that battery switch bypasses the ACR when in use.
But when using such a complex system, then voltage drop from distance, poor connections and under gauge wire can affect the automatic part of the system. 1 volt drop between connections when under load like in a charging cycle can cause the ACR to not work correctly.
You have described the voltage sensing acr.
Re: building xf20
Posted: Mon Jul 10, 2023 12:26 pm
by TomW1
But fg isn't that what an ACR is a voltage sensor that then changes which battery to charge or neither in simple terms. Here to me is a typical Blue Seas SI-ACR setup
https://www.bluesea.com/products/7610/S ... 4V_DC_120A
Re: building xf20
Posted: Mon Jul 10, 2023 2:22 pm
by OrangeQuest
All the schematics for the ARC is hooked up parallel to each battery. The start battery always being charged and the ACR decides when to allow the house battery to also be charged. The start battery will always be overcharged. Back to my scenario of the start battery being at 12.5 and the house at 10.5, the charging system sees it as a whole of 11.5v and will keep applying full charge till the total voltage reaches a set threshold and then back off.
A battery isolator would be the way to go for isolating a start battery from house load and house battery. They are made to charge only the battery that needs to be charged up.
" A battery isolator works by protecting your starting battery power so that no matter how weak your accessory battery becomes, the accessory battery will never drain power from the starting battery. This battery isolator also saves time by allowing simultaneous charging of both batteries. The amount of current flowing into each battery is determined by its state of charge, which guarantees that each battery will get fully charged, prolonging its life."
Re: building xf20
Posted: Mon Jul 10, 2023 5:20 pm
by TomW1
No OQ an ACR will stop charging the start battery when it reaches 13.5 and then charge the house battery till it reaches 13.5 and then if they are in balance run the current within itself. It never keeps charging or over charging one battery. I wish I could draw diagrams on here. You do not need a battery isolator with an ACR. It is unneeded and complicates the electrical system.
Re: building xf20
Posted: Mon Jul 10, 2023 6:36 pm
by OrangeQuest
TomW1 wrote: ↑Mon Jul 10, 2023 5:20 pm
No OQ an ACR will stop charging the start battery when it reaches 13.5 and then charge the house battery till it reaches 13.5 and then if they are in balance run the current within itself. It never keeps charging or over charging one battery. I wish I could draw diagrams on here. You do not need a battery isolator with an ACR. It is unneeded and complicates the electrical system.
You can get all the schematics you need on the BlueSea website. Along with how an ACR works. And I am not suggesting a battery isolator AND an ACR. but with the invent of better diodes and transistors, battery isolators are wire and forget. The information on the BlueSea website is old and diodes in battery isolators work better than in the past but correct gauge wire is a must due to voltage drop on to small of gauge.
What are some features of ACRs?
What does “Dual Sensing” mean?
A dual-sensing ACR will sense an active charge source on one or both batteries and not solely on a designated battery. The ACR will operate if the measured voltage on either of the terminals is of a level to initiate a connection or disconnection.
How does an ACR differ from a battery isolator?
Battery isolators use one-way electrical check valves called diodes that allow current to flow to, but not from, the battery. ACRs use a relay combined with a circuit that senses when a charging source is being applied to either battery. ACRs are more efficient than battery isolators because they create little heat and consume minimal charging energy.
From BlueSea:
Will an ACR manage the charge of my individual battery banks?
An ACR does not direct the charge to the battery that “needs it the most” or has the lowest terminal voltage. If there is a charge present on either battery, indicated by a high enough voltage, the ACR will combine the batteries.
What Charge Sources will an ACR work with?
An ACR will work with all charge sources, including an alternator, AC charger, or solar panel. However, low current charge sources might not produce the voltage rise required to force the ACR to combine."
In other words. If you discharge one battery the ACR will no close and will NOT charge the discharged battery and as long as the battery is discharged, it will not receive a charge. Battery isolator it doesn't matter the state of the house battery, when the motor or battery charger is connected, the battery that is lower state gets more of the charge.
Re: building xf20
Posted: Mon Jul 10, 2023 6:50 pm
by OrangeQuest
BTW. You can make a simple ACR with a continuous use starter relay. 12volt relays require 9.6 volts to energize. It will not be certified to work in a marine environment, but be a lot cheaper. ACR is just a mechanical switch that is controlled by a trigger wire that you can set the voltage it is triggered. But all it is is an on/off switch.
I wired one to my sand rail that used a 12v generator (old VW engine). Ran the control wire directly off the generator to the relay to turn on a pair of aircraft landing lights.
The lights would turn off when the rail was at idle.
Re: building xf20
Posted: Mon Jul 10, 2023 7:32 pm
by fallguy1000
The isolater seems to be the best way to go, imo.
But we ought to stop boogering up the thread as well.
I think we gave the man enough to think about.
Re: building xf20
Posted: Mon Jul 10, 2023 10:08 pm
by OrangeQuest
Yes. I am sorry for getting off the build. Always wanted a section for the electrical topics to go to. They get complexed.
Again. Very sorry.
 .
.