Page 1 of 1
FS18 on the double!
Posted: Tue May 21, 2019 8:55 am
by Jacky Chan
Hi Everybody,
I am licking my lips having just ordered all the epoxy, glass, okoume etc for an FS18.

I've been hoovering up everybody's tips and tricks from all the other build threads. I am almost a complete novice when it comes to boat building, though I did spend a few years as a carpenter. Hopefully this thread will be useful to other novices!
Thanks everyone for taking the time to post all your useful info over the years - I would not be starting this project without it. I'll put a list of what I think I've learnt soon to save other novices some time!
More to follow later - this is just a tester post, now that Jeff has helped me figure out how to start a new thread...


Jack
Re: FS18 on the double!
Posted: Tue May 21, 2019 9:24 am
by Jeff
Jack, Good to see you on the Builders Forum, Welcome!!! Jeff
Re: FS18 on the double!
Posted: Tue May 21, 2019 10:47 am
by piperdown
Welcome to the forum!
Looking forward to your build
Lots and lots of pictures please

Re: FS18 on the double!
Posted: Tue May 21, 2019 11:23 am
by Jacky Chan
Thanks Jeff!! Really looking forward to getting started. I'll post a picture of my makeshift boatyard when I can figure out how to upload pictures into the Bateau gallery (FAQ link said: 404 Not Found). Its a little Robinson Crusoe but it should do the job...
The following tips are things that I have picked up from trawling the forum. There are obviously many more tips out there but these are the ones that spring to mind, that I never would have thought of otherwise:
- Use a surform/rasp where possible instead of sanding (easier, less dust)
- Use a painter's edge for spreading epoxy over large areas, scraping
- Scrape off excess epoxy for a stronger laminate and much easier fairing
- Work "wet-on-wet" (steady...
) where possible for a stronger laminate and skipping sanding stages - much quicker but requires longer sessions
- Sellotape between onto the frame edges to prevent the hull epoxy grabbing onto them
- Get under the hull after stitching and put masking tape under the seams to stop the rock-hard bogies that need sanding etc
- Make an epoxy dam to sharpen up the edge
https://forums.bateau2.com/viewtopic.ph ... 4&start=80
- Apply graphite while its nice and warm to mix the graphite in easier
- Get the stern-ward (

) part of the hull truly flat using shims after stitching to save time fairing later on
https://forums.bateau2.com/viewtopic.php?t=13826
- Cables etc through the deck: use the 'drill & fill' method of drilling 1.5x the diameter then filling with a firm mix then re-drilling your hole
Couple of things I still can't figure out, which might seem pretty basic to some I expect..!

- If I want to drop the sheer at the transom 3", tapering to zero at the bow, a la Bayport Bob and Insufficient Funds, can I do this at the ply butchering stage or is it better to wait until just before the rub rail goes on?
- Really dumb question alert

When splicing together the long pieces... do you put a fibreglass splice on, let it cure, flip it, 2nd splice, cure again...?
- Can you use any plastic film for the splicing, eg carrier bag, cling film...? Or should it be heavy duty?
Will hopefully have some pics soon!
Re: FS18 on the double!
Posted: Tue May 21, 2019 11:33 am
by piperdown
Jacky Chan wrote: ↑Tue May 21, 2019 11:23 am
Couple of things I still can't figure out, which might seem pretty basic to some I expect..!
- If I want to drop the sheer at the transom 3", tapering to zero at the bow, a la Bayport Bob and Insufficient Funds, can I do this at the ply butchering stage or is it better to wait until just before the rub rail goes on?
- Really dumb question alert
When splicing together the long pieces... do you put a fibreglass splice on, let it cure, flip it, 2nd splice, cure again...?
- Can you use any plastic film for the splicing, eg carrier bag, cling film...? Or should it be heavy duty?
Will hopefully have some pics soon!
Can't help with the sheer question.
When splicing together long pieces place the plastic under the seam (I used heavy poly ply from HD, but I've also used contractor trash bags), leave a tiny bit of a gap between the 2 panels, like 1/16", and fill that with thickened epoxy, then wet out the ply and apply the tape. Wet out fully, place plastic over it and some weight to hold it down but make sure the panels are flat and lined up (sometimes they like to slide a bit). Let cure until hard.
When flipping, if you don't have extra hands to help, use 2x4s to brace either side of the seam and then flip. Did you get the kit with the puzzle joints or just ordered the plywood from BBC?
Re: FS18 on the double!
Posted: Tue May 21, 2019 11:47 am
by jacquesmm
For lowering the sheer: are you going to lower the outboard clamp too? You can't, the transom height at the clamp depends on your outboard shaft length.
If you lower the sheer, you must change the shape of the transom.
Plus, all your frames are going to stick out, you must adjust them.
You say that you area 1st time builder. It would be safe to stick to the plans unless you copy the successful modifications made by another builder.
If you change the sheer:
- build the boat on the jig with the transom as designed.
- when the sides are planked (hull skin complete). take a long batten and try to draw what you have in mind.
- adjust the transom but keep the clamp at the same height
- cut what sticks out
- do the same to the other side.
- look at it, realize it is ugly and does not work, throw the whole thing away and start over.
OK, the last point is a tease: don't take chances with a 1st build but if you really want to try, do it with a long batten.
Re: FS18 on the double!
Posted: Tue May 21, 2019 11:48 am
by Jacky Chan
Hi Piperdown! Thanks for the response, great idea re the 2x4 bracing and I will be sure to add a little gap of thickened epoxy. (And let it cure hard!) Is 6"/150mm biaxial tape wide enough for this? Some of the pics look as though the have something wider on there.
I haven't got the puzzle joints kit unfortunately... I'm over the pond in the UK and I dread to think what the postage costs would be for that one!
I've found a local okoume supplier that seems pretty good, with all the Lloyds hallmarks, b1088 etc
About to try a photo upload using Flickr as the intermediary!
Many thanks
Re: FS18 on the double!
Posted: Tue May 21, 2019 11:51 am
by Jacky Chan
https://live.staticflickr.com/65535/479 ... c433_b.jpg
https://live.staticflickr.com/65535/471 ... 09e7_b.jpg
https://live.staticflickr.com/65535/479 ... c2ca_b.jpg
Just finished this little pirate ship for my 2yo son, god rid of a lot of rookie mistakes on that one before moving onto the FS18!!
As you can see, the boat yard is rather makeshift, but those slabs are as horizontal as a millpond... for now at least
Re: FS18 on the double!
Posted: Tue May 21, 2019 12:05 pm
by Jacky Chan
Hi Jacques, thanks for the advice, all of which is noted 100%. (I must say the response time here is 2nd to none!)
Yes I understand that the transom clamp height must remain the same, and you also dont want to weaken it by removing too much of the corners. I also noticed on two builders' threads that lowered their sheers that they kept the full height of the knees, so that they protruded above the deck and retained their strength. This was also very much my intention as I do not want to be weakening the boat in any way.
...Or offend the designer! I think the popularity of the FS18 speaks for itself. I was drawn to this low-sheer adjustment for two reasons. 1) it makes a devastatingly sexy boat even sexier, and 2) this will a boat that my two small children will be growing up with, and they'll be hopping in and out of it in shallow water as soon as they can swim (i.e. soon after they can walk!) and this will be that much easier with the low-sheer.
Thanks for keeping me on the straight and narrow!
Re: FS18 on the double!
Posted: Fri May 24, 2019 2:44 pm
by Jacky Chan
https://www.flickr.com/photos/158018895 ... ed-public/
https://www.flickr.com/photos/158018895 ... ed-public/
https://www.flickr.com/photos/158018895 ... ed-public/
Not sure if anyone can see these pics - I'm hoping they appear in the post and don't require you to click through
Strongback now up and running and the okoume ply due to arrive tomorrow. My floor isn't the most level, in fact its probably about 15 degs off the horizontal
Its a lot hillier round here than much of Texas and Florida seem to be! Some carpet off cuts it should feel relatively smooth at least... I'm going to rake it a little smoother before they go down do try and avoid a broken ankle...
At least it doesn't stink of rat's urinal anymore - there was a chicken run on this spot until 2 weeks ago and I am pleased to say it has now had some disinfectant splashed onto it!
Also pleased that the strong back came out nice and level. I've run a centre line down the middle as there is the slightest of bows to the longitudinal 6x2s which might increase over time
Looking forward to a summer of cricket on the radio being drowned out by long periods of sanding haha
Re: FS18 on the double!
Posted: Fri May 24, 2019 3:22 pm
by GuyP
Stared my first stitch and glue 2 months ago. We can learn together. Welcome. These folks ARE very helpful.
Re: FS18 on the double!
Posted: Fri May 24, 2019 4:53 pm
by Jacky Chan
Cheers GuyP! That hull of yours looks like its coming along very nicely!!
Yup there certainly is a wealth of information on this forum - goes beautifully with Bateau's excellent plans

Truly the internet at its finest!
Race you to getting the decks glued down!
Re: FS18 on the double!
Posted: Fri May 24, 2019 6:47 pm
by GuyP
No racing on this end. I’ll concede defeat right now.
Re: FS18 on the double!
Posted: Tue May 28, 2019 4:57 pm
by Jacky Chan
Fair enough Guy (wait that's another possible boat name: Fair Enough?), I'm trying to give myself a time budget as I dont think my marriage will last if this boat takes too long..!! Maybe I'll name the boat after her in some way to buy me some leeway
So I've now done pretty much all of the butchering and am about to start splicing the long pieces together. I did a few experiments with an electric planer (not something i've used much) to try and get a decent recess to sink the 6" biaxial tape into - one with a score at 3", one scored at 3.25" and one with no score at all...
Looks like scoring is not necessary, with the grain at least, though my recess was hardly the level, even-sided effort I was hoping for... My planer is the sort of product I imagine you'd see in the 99c store in the U.S. but I still thought it would turn out a bit more even that this, given I was putting weight in what felt like the right places etc. I plan on trying to remove the first layer of the marine ply, but it looks like it might be a bit wobbly.... Ah well, sounds like fairing is something of a rite-of-passage anyway so I may as well embrace it

Not sure if these photos appear in the post as hoped or even work as links (as they appear on my screen) but here goes:
https://www.flickr.com/photos/158018895 ... ed-public/
https://www.flickr.com/photos/158018895 ... ed-public/
https://www.flickr.com/photos/158018895 ... ed-public/
https://www.flickr.com/photos/158018895 ... ed-public/
https://www.flickr.com/photos/158018895 ... ed-public/
https://www.flickr.com/photos/158018895 ... ed-public/
Re: FS18 on the double!
Posted: Mon Jun 10, 2019 5:26 am
by Jacky Chan
https://www.flickr.com/photos/158018895 ... ed-public/
https://www.flickr.com/photos/158018895 ... ed-public/
https://www.flickr.com/photos/158018895 ... ed-public/
https://www.flickr.com/photos/158018895 ... ed-public/
https://www.flickr.com/photos/158018895 ... ed-public/
https://www.flickr.com/photos/158018895 ... ed-public/
https://www.flickr.com/photos/158018895 ... ed-public/
https://www.flickr.com/photos/158018895 ... ed-public/
SO things are coming along fairly nicely - just tacked in all the hull pieces and transom after zipping it all up with cable ties. Couldn't see how to do the transom so I have cable-tied the side and bottom pieces to the inside edge of the transom... hoping this is an acceptable method..? I figured that so long as it holds it there until I add some glass then everything should be fine.
Planning on letting it cure for a good couple of days before rasping down the 1/2" radius - the bow section in particular was under quite a bit of force (and a handful of snapped cable ties!

) so i dont want to risk it pulling cheesy putty to pieces.
I was also getting worried about accidentally glassing the fore and aft decks to the sid pieces, so I made the jig so that you could slide out the deck pieces without the deck actually moving. Frame E just got screwed to the strong back on two legs (as with C and D), but things got pretty funky with frames A and B, in that I braced them both back to the legs of frame C, using some scrap strips of ply for triangulation to stop it wobbling sideways. As I pulled the bow deck piece out later on, I put little pieces of 9mm in the gaps it left behind every couple of feet. All seems to have worked pretty well and you can also access the underside to put tape, pieces of pvc pipe in etc
I've found some cheap peel ply on the internet that im going to use for the seams and then the cloth - hoping that the money and time saved on fairing will more than offset the £2.86/sqm the peel ply cost! Should also make for a lighter boat
Speaking of lightness - I noticed that lots of people put a layer of cloth on the inside of the hull before the stringers go down, even though the plans say this is not necessary - I was going to stick with the plans to save weight, time, cloth, my back etc but also because the foam and deck should protect everything down there? Do people go the extra mile with inside cloth for extra waterproofing purposes?
Really enjoying the build, everything is at such a nice working height for once!!
Re: FS18 on the double!
Posted: Mon Jun 10, 2019 7:55 am
by seaslug
You need to read the lamination schedule again. Both the outside and inside of the hull get 1 layer of 12oz biaxial, overlapping by 6". What you end up with is 2 layers of the 6" tape inside and outside of the keel, transom, and bow, and 1 layer of 6" tape inside and outside on the chines. Lay the 6" tapes first, then the 50" wide cloth. After the inside of the hull is glassed, than you lay the stringers in and glass those with 1 layer of the 6" tape. What you end up with total inside and outside is 6 layers of 12oz on the keel, transom, and bow, and 4 layers on the chines. Looking good so far, build on. Mike
Re: FS18 on the double!
Posted: Mon Jun 10, 2019 9:18 am
by OrangeQuest
Even my little FS14 boat is done the way SeaSlug stated. Lighter tape but still multi layers inside and out.
Re: FS18 on the double!
Posted: Mon Jun 10, 2019 10:02 am
by pee wee
It's hard to tell from the photos, but your transom should fit between the hull layers with the rear face of the transom lined up with the rear of the hull panels, not sitting behind. Most guys put temporary screws through the hull panels into the transom. Looking like a boat now!
Re: FS18 on the double!
Posted: Mon Jun 10, 2019 10:52 am
by Jacky Chan
Testing the new photo technique...
Re: FS18 on the double!
Posted: Mon Jun 10, 2019 10:58 am
by cape man
works!
Re: FS18 on the double!
Posted: Mon Jun 10, 2019 11:01 am
by Jacky Chan
Thanks for the responses everybody, definitely going to be giving the seams plenty of tape, with the off-set overlap as per the schedule.
I will chuck up a load more photos so that people dont have to click into all the links i put on earlier - its the little things!
If this works then its quite a bit easier than the previous method of going through Flickr!
Thanks Jeff and Reid!!
Re: FS18 on the double!
Posted: Mon Jun 10, 2019 11:27 am
by Jacky Chan
Quick query - I see the rubrail specified 3 layers of 6mm ply. I think I can get my hands on some 12mm teak, so what I am wondering is whether the rubrail will still be just as strong if I replace the outer TWO layers of the 6mm ply with a strip of 12mm teak, or whether I have to have two layers of ply (12mm) plus the teak?
Maybe teak is so weak that I would still three layers of ply underneath it, in which case I probably won't bother
Re: FS18 on the double!
Posted: Mon Jun 10, 2019 12:12 pm
by Reid
The reason for the 3 layers of the 6mm is that the 6mm is easy to bend and make a nice fluid curve. You need layers in order to offset the seams b/c it is obviously difficult to find strips of wood that are 18 feet long. I actually used 2 layers of 6mm for my rubrail and it worked out great. One tip when cutting the rubrail: trace the sheer line of the FS18 and use that to cut your rubrail. Don't try and rip straight pieces of plywood or hardwood and apply it to the hull. It will not sit well against the hull b/c the hull has compound curves.
Reid
Re: FS18 on the double!
Posted: Mon Jun 10, 2019 10:54 pm
by seaslug
It can be a little stiff bending hardwood around the sheer, but with enough clamps it can be done on most boats without having to cut the strips to the curve of the sheer. I ripped 1/4"-3/8" x 1 1/2" strips of fir or Cedar for 2 or 3 layers, than used some extremely hard Maple for the outer and last layer on my FS18. It was 3/8" x 1 1/2" and bent just fine with very little effort. The bend is not very extreme on this boat. I did the same thing on the FS14, SK14, and GF16 with only the extreme curve of the FS14 being a real struggle. So Reid, if you ever hear a loud pop coming from the warehouse, it's probably the rub rail on my FS14 finally letting go. Actually I'm blown away by the strength of the epoxy, because I really struggled to get that bend at the bow. Mike
Re: FS18 on the double!
Posted: Tue Jun 11, 2019 4:11 am
by Jacky Chan
Thanks Reid - good point about the compound curves - ideally I would have transferred the shape when it was flat
but I could always clamp a piece to the hull, mark it from inside and go from there.
Hopefully the teak will flex enough to take the compound curves, as with the cedar and maple in seaslug's various creations
. If not then I could probably score the inside to help it around the corner. Got to say Mike, it was stumbling across a picture of your FS18 that started me off on this little adventure, so thanks for that! I am shamelessly "borrowing" a few of the design features if you dont mind (imitation being the sincerest form of flattery!) At least my boat will be in the U.K so they probably wont be pulling alongside the same jetty any time soon
I've got a friend who's a lot better at woodwork than me booked in to help me with some homemade hatches in a couple of months so that should get interesting/challenging..!
So it looks like 2 layers of 6mm ply + 12mm teak is the way to go, with the joints nicely offset, especially the single teak joint on each side. I could get 6mm teak but then it would only be 32mm wide (1 1/4"). Sounds like I'll need a couple more proper clamps too!
Re: FS18 on the double!
Posted: Tue Jun 11, 2019 4:13 am
by Jacky Chan
Another quick one if anyone is around - if you are going to put graphite+epoxy on the bottom of the hull, should you prime underneath after fairing or go straight to the graphite then prime the sides? CHeers
Re: FS18 on the double!
Posted: Tue Jun 11, 2019 6:47 am
by Aripeka Angler
Jacky Chan wrote: ↑Tue Jun 11, 2019 4:13 am
Another quick one if anyone is around - if you are going to put graphite+epoxy on the bottom of the hull, should you prime underneath after fairing or go straight to the graphite then prime the sides? CHeers
Nice looking work.
It doesn’t matter if you prime under the epoxy/graphite or apply the mixture directly to your faired hull.
Either method will work fine.
Re: FS18 on the double!
Posted: Wed Jun 12, 2019 4:35 am
by Jacky Chan
Cheers Aripeka Angler, I also thoroughly enjoyed reading your thread too - I'll have to put Cape Sable on my destination bucket list
I took a day off work yesterday to get the seams on, and was flying along putting a radius on the edges when I hit a big lump of epoxy and PING!! the blade on my surform snapped off! A couple of muttered oaths later and I was in the car going off to speak to the lumberyard chap about the teak and to see if, on the off chance, that had a replacement blade (£3 as opposed to a new surform at £15). Amazingly they did! I couldn't believe my luck, drove home a happy bunny, a bit late in the day but still just enough time to get the seams on and wet out if I dont hang about. I get home, take the new blade out of the packet and see its got a bit of a kink at one end... so I apply a little pressure to straighten it, aaaaand you guessed it.. PING!! a chunk of it hits the roof and I've got another broken surform blade in my hand...

They must be very high carbon steel! Lesson learnt - surform blades are to be treated like newborn babies!
So i've managed to wangle this afternoon instead to try and get the seams on before getting the cloth down tomorrow - we've got a ton of people coming round for a toddler bbq on sunday and I need it cured hard by then if its going to survive being prodded by children and being used as a bar by their parents!
Re: FS18 on the double!
Posted: Fri Jun 14, 2019 6:08 am
by Jacky Chan
Put a shift in over the past two days after getting another surform blade... got the seams down (should have used a foam roller, quite a few little bubbles) and then yesterday the main biaxial cloth over the whole lot, which went down under a roller and then some ebay peel ply. Cant see how "real" peel ply can be much better - this stuff really seems to have shaved about 5 days of hellish sanding and fairing off the build
I think its all gone well, though obviously I've never done one of these before so lets see what its like in 12 months time!
Got my father to mix most of the epoxy so the the main cloth took about 4-5 hours inc peel ply. We wet it out in 6 sections (a la Cracker Larry's build thread), putting the peel ply on after each one. The first section at the transom didnt get that much of a scrape but all the other ones all got a good going over with the painter's edge to really flatten things out and remove any excess epoxy.
I ripped all the peel ply off this morning and frankly it really doesn't look like its going to need much attention - i'm planning on sanding down the tiny imperfections where the peel ply sheets met, then skimming over some filler epoxy, quick sand with a long board and then move onto graphite and paint (oh and rubrail! Going for Iroko, much cheaper even than the mates-rates teak)
Re: FS18 on the double!
Posted: Fri Jun 14, 2019 6:57 am
by OrangeQuest
Looking really good!!
The blade that broke twice, you should stock a few extras so when one breaks you have a spare so work continues. I also pick up a few "extra" things when I make a trip to the lumber yard or hardware store. Blades and sand paper are a few of the things to can't have to much of.
Re: FS18 on the double!
Posted: Fri Jun 14, 2019 9:29 am
by piperdown
Looking great!
Had to laugh at the surform blades, not at you, but thinking back on my own build. I too broke a couple of blades and ended up ordering two 5 packs off of Amazon (Home Depot is 5 mins from my house but only carries 1 blade to a pack).
Re: FS18 on the double!
Posted: Fri Jun 14, 2019 10:37 am
by Jacky Chan
You couldn't make it up! A full hour round trip basically for 1 surform blade that lasts for all of 2.5 seconds out of its packet!!
As they say, 2 is 1 and 1 is none!
Sounds like I'm not alone in ploughing through the surform blades
The next day, similar to you, I cleaned out another hardware store and then bough another 5 off amazon for good measure!
Did anyone find a good way of slapping on the rubrail layers? I am thinking of drilling holes for dowels, one dowel at each end of each piece + clamps. Then letting it cure, sawing off the dowels and repeating?
Also I'm getting cold feet about going for the low sheer option (3" at the transom, tapering to zero at the bow). Not sure if its my in-built laziness coming to the fore or Jacques' words of caution, or both! I do think it looks even more stunning with the low sheer - does anyone have any views on the matter that has tried it themselves or has fished on a low-sheer FS18?
Last question!, while I'm here, does anyone have any tips on what sort of wood to use for the little joists that go under the deck pieces - would red ok be up to scratch do you think? And do you think I should make the internal rubrail similar dimensions to the external one, i.e. about 1.5" x 3/4"?
Re: FS18 on the double!
Posted: Fri Jun 14, 2019 12:17 pm
by Browndog
Not sure why altering the shear line, especially lowering it, gets so much interest.
I really don’t like getting wet when I’m in a boat and when the shear gets reduced so does the hull flare, increasing the likelihood of water or spray coming over the gunwales. The reduction in hull depth also reduces load carrying ability, buoyancy and secondary stability.
The boat as designed looks great and performs really well.
By comparison to what is traditional in your locale you are already building a boat with a pretty low shear.
Just a word of caution to avoid modifying the design too greatly.
Of course it is your boat and your choice to have exactly what you want, but if you have any doubts then I would recommend building the hull as designed before altering the shear line.
Re: FS18 on the double!
Posted: Fri Jun 14, 2019 2:54 pm
by OrangeQuest
I am with Browndog. Only reason I could see reducing the sheer is if you will be poling it a lot. The low sheer will make it easier to control in a little wind.
Re: FS18 on the double!
Posted: Fri Jun 14, 2019 9:01 pm
by seaslug
Red Oak is not a good boat building wood because of the open cell structure, but White Oak is fine, but they are both too heavy in my opinion for a small light skiff. If you can find clear Fir, or some type of Cedar, either would be preferable.. If you're not going to have a wide "walk around gunwale" I'd suggest an inner "rub rail" of at least 2-3" to stiffen the hull, otherwise you may have some hull flex..... On your question of whether to cut down the sheer, this is what I did. Not necessary of course, but I like the looks of the lower sheer, and it probably helps while poling in a stiff wind. I cut my panels to the straight sheer plan, with the dimension at the transom of 17 5/8" from the hull bottom to the deck. After the flip I cut it down to 15" at the transom to zero at the bow. Not a drastic reduction in sheer height above the water, but I do like the way it came out. If you just built the low, or straight sheer plan it would more than likely look almost identical to mine because it's only 2 5/8" at the transom, tapering to zero, and probably not noticeably different. If you do decide to do it, be sure to have the hull sides pulled in to where the bulkheads will be if they're not already installed because the sides of the boat will be flared out a little from weight and gravity. I would also suggest having the boat sitting on a level surface, and using a laser to mark your cut line. I did mine using a long flexible batten, but it's hard to eyeball the long line because of the curve of the hull, and although mine looks good, it's not perfect. I've fished mine heavily for over 3 years now, a minimum of 200 trips. Being long and light it skips over small chop and small boat wakes, and I've never shipped even a cup of water. It's a great boat whichever sheer you decide. Good luck with your build. Mike
Re: FS18 on the double!
Posted: Mon Jun 17, 2019 7:17 am
by Jacky Chan
Thank you so much for all the points chaps, all really useful, I have been really mulling it over all weekend but haven't had the computer to respond - can't remember my password to log in on my phone!!
I tried measuring how high the 'seat' would be underway with tiller under your arm and I think this might be the deciding factor - at 6'6" I would be hunched over terribly on the low-sheer version, even with a decent seat pad to sit on. Probably the deciding factor, though I have been changing my mind every 6 hours or so so who knows! Problaby going to settled with a coin toss I expect
Also great to see FS18s of all sheer types getting some consistent use - they are clearly such a fantastic design whatever you do with them!
I can see this boat being great for a bit of 'dragon-boating', not sure its a thing but we used to do it when I was young - people sitting on each side with short paddles having a race to see which side of the boat is faster - if it starts heading to port then the starboard side is the winner!
Going to focus on damming up the edges tonight to buy some more mulling time
Re: FS18 on the double!
Posted: Wed Jun 19, 2019 9:16 am
by Jacky Chan
There must be a simpler way to put the sharp edges on!!
What started as a simple idea quickly became more complicated with screws in the wrong place and weights slung to stop the straps pulling it all over the place etc etc... If I was to do it again I'd go and find some long pieces of fairly stiff card and cover them in packing tape, rather than the cheap 3mm ply I had (though I will get to use it as long boards for fairing). Then you could just tape that card to the edges and pretty much call it a day.
Worked out OK in the end with just a couple of dam-buster drips and a few areas that needed a top up of peanut butter the next day. Yes those are my 3yo son's birthday cards from the weekend!
They filled the gaps nicely where I shouldn't have put a screw.
One corner of the transom has a tighter corner than the other, but then it is a home-made boat so I think I can live with that.
I cut 11 8ft rubrail pieces off the 1/4" board I was saving for the sole (now going for 3/8 and airbags instead of buoyancy foam - in the UK you are never far from port and there are no alligators
). Tried to copy the angle of the rubrail at an 'average' spot, I must have made a mistake somewhere as the pieces turned out a little wavy... Was in too much of a rush to realise until pretty much the last piece...
As a result I am going to pre-drill for a ring-shank nail every 2ft or so whenever it waves again to keep it in line with the current edge. Should be fine and possible add stiffness. Hoping to get them on tomorrow and then move onto fairing. New sapele skeg arriving tomorrow too along with plenty of cedar for the struts, cleats etc
Taking some flak from the wife so it might be time for the first bunch of flowers of the build...!
Re: FS18 on the double!
Posted: Wed Jun 19, 2019 10:34 am
by piperdown
Looking good!
Quite a few of us used wooden dowels to line up the rubrail. Stack each side together, seams staggered, clamp and drill holes for dowels. Apply first layer with the dowels glued in. Then the second and third layers will be lined up when it's time to glue them to the first layer. I did each layer one at a time, precoating the inside faces that mate together with neat epoxy then using woodflour epoxy glue and clamping them together. Walked around a bit after clamping and used a paint stick to wipe off any of the squeeze out from clamping.
You can also use coated screws like these
https://www.amazon.com/Grip-Rite-P212ST ... p_pl_dp_13
They don't stick to epoxy and can be reused multiple times. I used them in other areas to help clamp together and have reused them often. Star drive head makes it easy to back them out. After backing them out I drilled them to remove the threads in the hole and filled them with thickened epoxy using a small syringe. Piece of tape on the inside to keep it from running out and a small piece of tape over the outside of the hole to keep the epoxy in.
Re: FS18 on the double!
Posted: Wed Jun 19, 2019 9:54 pm
by Aripeka Angler
Jacky Chan wrote: ↑Wed Jun 19, 2019 9:16 am
Tried to copy the angle of the rubrail at an 'average' spot, I must have made a mistake somewhere as the pieces turned out a little wavy... Was in too much of a rush to realise until pretty much the last piece...
This boat has an almost flat sheer. You really don’t need to custom scribe cut the rubrail strips.
Table saw cut strips will work just fine.
The side panels are curved when laying flat but are almost laser straight when stitched together on the boat.
Re: FS18 on the double!
Posted: Thu Jun 20, 2019 9:47 am
by Cbuf
Am I reading your post correctly. Did you peel ply your entire boat, or just the 6 inch tape?
I'm about at the stage having just removed the zip ties and getting ready to radius the corners. Also, do we need to sharpen the corners? I'm building the lm18.
Thanks
Cbuf.
Re: FS18 on the double!
Posted: Thu Jun 20, 2019 4:24 pm
by Jacky Chan
Hi Cbuf! I did peel ply the whole boat, not just 6 inch tape. I peel ply'd (
) the tape parts first with strips of peel ply partly as an experiment as I've never used it before (first boat) and partly to save on sanding, and a little to do with making a stronger joint - I read somewhere on this forum that less epoxy = more strength.
I have seen peel ply going for 5-6x the price i paid - not sure if thats worth it or not as you obviously need quite a few metres worth! I found some 'replica' stuff on ebay for £2.86 per metre and that sounded like a deal to me given how much time it allegedly saves you in fairing, as well as saving money in less epoxy, fairing mix etc. It came rolled around itself with no cardboard tube and it looked as though a drunk person had rolled it up and stuffed it into a sack in a hurry, but when its on the boat that doesnt matter too much!
Putting the peel ply on probably added an extra hour or so but I feel as though its going to save days of fairing - even a novice like me was able to figure it out and use it to move epoxy around better but more importantly scrape away the "mounds" of epoxy that are hard to see. Haven't started fairing yet but I feel like the peel ply was a very good call. Also saves a huge amount of sanding, dust etc etc
Regarding sharpened corners, I saw on somebody's build thread about how you want the back 7-8 ft (from memory!) sharpened to help with aqua dynamics which makes you faster and more fuel efficient. I'm sure its not essential but makes sense and is the kind of thing I can imagine being glad I did in a few years time.
Hope you've got a surform for those radiuses! I got really into that bit, could do it all day! No sharp edge around the house will ever be safe again
Cheers Piperdown, went for a similar technique but just pre-drilling for a 3mm ring-shank nail that just got poked in. I slapped the first layer on pretty much anyhow and without nails, then by the time I got back to the first side to do the second layer it was ready to stick on without clamps, so it slapped on the second layer then lined up each little 2ft section nicely before pre-drilling and poking a little nail in. Took the nails out about 3 hrs later before the epoxy got too hard, seems to have gone alright so far at least!
Bang on Aripeka Angler - definitely could have just gone with the straight cuts! Havent got space for a table saw unfortunately so just using a circular saw but still could have set up a little jig and whizzed them off straight. Got some 6x38mm Iroko to go as the third layer which is straight cut. Looking forward to a bigger house one day with lots of space to build boats like you boys have it over in Florida, with room for table saws galore!
SO the rubrail has 2 out of 3 layers and also got the sapele (thats for the advice against red oak, seaslug!) skeg in, which if you ask me looks a lot like one of those bullet trains that goes a million miles an hour! Hoping to make a start on the fairing tomorrow if I can figure out how to degrease this fibreglass
Re: FS18 on the double!
Posted: Fri Jun 21, 2019 7:33 am
by Jeff
Great progress Jacky Chan, really nice work!! Jeff
Re: FS18 on the double!
Posted: Fri Jun 21, 2019 9:13 am
by Jacky Chan
Thanks Jeff, must be great fun watching all your various boats being built around the world!
Quick question if anyone is around - I've now sanded all over and brushed off most of the dust with a view to start smearing on some fairing mixture, but I've heard whispers of how you might have to "degrease" everything first...
Does anyone know if this is
a) necessary
b) whether I can do this with a damp cloth or possibly some acetone (what I have available)
Thanks in advance!
Re: FS18 on the double!
Posted: Fri Jun 21, 2019 9:21 am
by BB Sig
What speed/brand hardener did you use? Slow MarinEpoxy should be good without but it never hurts to give her a bath.
Re: FS18 on the double!
Posted: Fri Jun 21, 2019 9:24 am
by pee wee
Jacky Chan wrote: ↑Fri Jun 21, 2019 9:13 am
Quick question if anyone is around - I've now sanded all over and brushed off most of the dust with a view to start smearing on some fairing mixture, but I've heard whispers of how you might have to "degrease" everything first...
Does anyone know if this is
a) necessary
b) whether I can do this with a damp cloth or possibly some acetone (what I have available)
Thanks in advance!
What you heard about is epoxy amine blush, a waxy substance that migrates to the surface as the epoxy cures. Some epoxies produce a lot, some very little. It will rinse off with warm soapy water; since you're working outside you can just douse it and scrub the surface, then rinse with clean water.
Re: FS18 on the double!
Posted: Fri Jun 21, 2019 9:27 am
by Jacky Chan
Cheers for the quick response Barry! Does that mean its OK to just go for some soapy water on a cloth and wipe down? Keen to give her a gentle scrub but dont want to mess up somehow as I know that wet epoxy doesn't like water - presumably you have to let her dry fully or maybe dry her with a dry cloth?
I've got some Epifanes 1500 which gives pot life at 15-40 mins depending on temperature, sandable after 24hrs at 18 degs Centigrade (its generally about 18 at the moment, give or take)
THanks
Re: FS18 on the double!
Posted: Fri Jun 21, 2019 9:47 am
by Jacky Chan
Thanks Hank, just saw your post which must have gone up while I was writing the other one! Soapy water it is, thanks for the explanation
Re: FS18 on the double!
Posted: Fri Jun 21, 2019 10:14 am
by OrangeQuest
When you are using the soapy water, rinse with clean water. The water should "stick" to the sanded surface if it is clean. If it beads up more cleaning. When you use soapy water you can use a scouring pad to help remove the blush. Then give a day to dry fully if possible.
Your boat is looking great!!
Re: FS18 on the double!
Posted: Fri Jun 21, 2019 10:24 am
by cape_fisherman
Jacky Chan wrote: ↑Fri Jun 21, 2019 9:27 am
Cheers for the quick response Barry! Does that mean its OK to just go for some soapy water on a cloth and wipe down? Keen to give her a gentle scrub but dont want to mess up somehow as I know that wet epoxy doesn't like water - presumably you have to let her dry fully or maybe dry her with a dry cloth?
Epoxy doesn't dry, it cures. If it is 'wet' you should do nothing. It needs to cure (dry) before you give her a wash. If it's tacky to the touch, do not wipe it down with a dry cloth.
Re: FS18 on the double!
Posted: Fri Jun 21, 2019 10:53 am
by Jacky Chan
Thanks Orangequest thats just the tips I'm after
Apologies Cape Fishinerman I obviously minced my words atbout the epoxy - it cured nicely last week, I meant to say 'let her dry fully (after scrubbing her down with soapy water)' not after wetting out the fibreglass
I wasn't able to roll her out into the sun for a post-cure like some people seem to do but I was thinking of trying something similar later on when the graphite is on by draping a tarp over her and sticking a radiator/heater under there over night (not sure if they make radiators over in Florida, Georgia etc but its something you plug into the wall that actually RAISES the air temperature! Very popular here in the UK especially in winter time
)
Re: FS18 on the double!
Posted: Sun Jun 23, 2019 11:36 am
by Jacky Chan
Right I've now got all the fairing compound on and have cobbled together a sanding longboard to hopefully get things nice and fair tomorrow. Am I right that the teeny-weeny little holes should get filled with by either the primer or the graphite + epoxy?
Speaking of graphite, I saw the Cracker Larry masterclass on how to apply it, which was obviously amazing, but I am a bit wary of sanding in between coats, even with the wet and dry paper - I've seen some photos of builders where sanding the graphite has gone a bit pear-shaped...
Does anyone know the best way to go about sanding the graphite in between coats - just lightly with 120grit-ish, so the next coat has something to grip onto, or does the roller leave bumps that needs to be really sanded down?
I've also had to make a new ridgeline for my tarp boatyard as the wind and rain make a worrying combination... while we dont have hurricanes here, it will often be pretty windy for a bit (loosening the tarp) and then rain heavily (making huge puddles in my shoddy roof that is too flat..!!). I have to go away for a week soon so this should give the roof a fighting chance...!

Good excuse to not spend too long on the fairing and get this boat built before it all caves in!
Re: FS18 on the double!
Posted: Sun Jun 23, 2019 12:00 pm
by cape man
I faired the bottom and then applied graphite and epoxy, wet on wet ( within 12 hours) , 3 thin coats. Biggest trick is to sift the graphite (I used a tea strainer) and THOROUGHLY mix before applying to avoid clumping. Mix it with just the resin and then add the hardener. It spread out nicely, and remember....no one except the fish are going to see it.
Re: FS18 on the double!
Posted: Sun Jun 23, 2019 1:18 pm
by Jacky Chan
Haha good point thanks Cape Man. Love the idea of wet on wet and no sanding!
Sounds like you might have used a squeegee spreader, or was it a roller? Thanks
Re: FS18 on the double!
Posted: Sun Jun 23, 2019 6:12 pm
by piperdown
Jacky Chan wrote: ↑Sun Jun 23, 2019 1:18 pm
Haha good point thanks Cape Man. Love the idea of wet on wet and no sanding!
Sounds like you might have used a squeegee spreader, or was it a roller? Thanks
I think most just rolled it on. That's what I plan on doing. I'm getting close to that point and figure I'll try and roll about 4 coats on. Means most of a Sat or Sun.
I bought a flour sifter that I was using to break up the chunks of the fairing compound (silica likes to clump) and will probably use that for the graphite.
Re: FS18 on the double!
Posted: Sun Jun 23, 2019 10:16 pm
by Bogieman
Very nice work!
Re: FS18 on the double!
Posted: Mon Jun 24, 2019 9:02 am
by Dougster
I had a bunch of nibs in my graphite, despite mixing and did wet sand on one of the coats. It's not a big deal. I used a spray bottle of water in one hand and the sandpaper in the other. Did a few square feet at a time. Better to roll all the coats on at once though, wet on wet, Cape Man style. I do know I fussed too much over mine. Years later I still haven't crawled under the boat to look at her bottom again. Heck why would I?
Dougster
Re: FS18 on the double!
Posted: Mon Jun 24, 2019 9:11 am
by pee wee
Jacky Chan wrote: ↑Sun Jun 23, 2019 11:36 am
Speaking of graphite, I saw the Cracker Larry masterclass on how to apply it, which was obviously amazing, but I am a bit wary of sanding in between coats, even with the wet and dry paper - I've seen some photos of builders where sanding the graphite has gone a bit pear-shaped...
Does anyone know the best way to go about sanding the graphite in between coats - just lightly with 120grit-ish, so the next coat has something to grip onto, or does the roller leave bumps that needs to be really sanded down?
The goal is to do all the coats of graphite/epoxy without doing any sanding. Thin coats are best, and done as cleanly as possible. If you get lumps, sometimes called "the uglies", you may have to sand those flush. If it requires extensive sanding, do it wet, as it will be extremely messy if done dry. If you see the roller is leaving bubbles, some timely yet judicious work with a heat gun or torch will get most of them.
A short nap roller seems to be the favorite applicator; get a good quality roller cover and use masking tape to remove loose fibers from it before you start. I don't recall seeing perfect results on any builds, so do the best you can and don't worry about some minor flaws.
Love your garden in the background, very nice! Oh, and the boat is looking good, too!
Re: FS18 on the double!
Posted: Mon Jun 24, 2019 9:52 am
by Jeff
Nice progress JC!!! Jeff
Re: FS18 on the double!
Posted: Fri Jun 28, 2019 1:40 pm
by Jacky Chan
Been a bit busy this week but managed to carve out a day today to sort out the graphite. I've got three coats down and about to do a 4th. Its a pretty warm day by english standards (about 28C) but just for good measure I left the epoxy resin by a heater overnight... no problems in getting the graphite to dissolve!!
Only issue was in leaving it to stand for a minute too long with the second coat, around midday when it was hottest too, the mixture started getting really claggy and left a few peaks where it had been too thick on the roller. I tried flattening them out with a rolling pin and some plastic sheet which worked well enough (could have tried it sooner) and got them down to a respectable level of bumpiness!!
ALl in all i'm pretty happy with it - its not perfectly smooth but perhaps graphite never is? I'm telling myself that sharks have deliberately rough skin in order to go faster, now this boat does too! It has showed up plenty of fairing imperfections but I am going for a fast build... my next boat will have more time spent on the fairing stage
Getting really excited about flipping her over once the sides are painted and having a look at her from a different angle

Also getting carried away thinking of the fishing opportunities she is going to unlock!
Still a while off but I feel like its downhill from the flip all the way to firing the motor up. Thinking of borrowing RJS Redchaser's carbon fibre side-mounted grab rail idea to mount a fishfinder, some more rod holders and, of course, cup holders
Re: FS18 on the double!
Posted: Sat Jun 29, 2019 9:44 am
by pee wee
Everything looks good, but one thing that I'm curious about is the graphite/epoxy surface is not shiny. I'm not saying that it need to be shiny, it just usually is. Did you continue to go over it will the roller after it started to set up?
Re: FS18 on the double!
Posted: Sat Jun 29, 2019 5:05 pm
by Jacky Chan
Hi Hank, I didn’t do much by way of rolling offer she started setting up, no... Should be OK right..?
I was thinking of just wet sanding her down a little and calling it a day - presumably once she’s been dragged over a few sandy, shingly beaches the the shine would come off anyway? Could always give her a 5th coat after the sanding and use a second pass with the roller if you think it would be worth it? Thanks
Re: FS18 on the double!
Posted: Sun Jun 30, 2019 9:26 am
by pee wee
I don't think there's anything wrong with what you've got, and as far as making the bottom of the boat pretty . . . most of us spend more time on it than we need to.
You titled your build FS18
on the double!- don't let me slow you down!
Re: FS18 on the double!
Posted: Thu Jul 11, 2019 11:05 am
by Jacky Chan
Cheers Hank, I am keen to do a final coat of graphite now that I've sanded most of the bumps down a little, just to give that little be more protection and hopefully less water resistance if I go over her with the roller a few times after its started to set up, as you say.
I'm in a rush because otherwise I'll get bored and it'll never be finished!!
That and the autumn is a good time to be out fishing in the UK, for what we call bass at least - I think you guys call it WSB/white sea bass, like a striper without the stripes. I've got a holiday booked for mid september that I want to take it on and leave it down there for 48hr trips as and when
I wish I had been able to spend a bit more time on fairing the sides, which are looking a bit workboaty now that the undercoat is on...
I am consoling myself that this can be remedied in a few years time when the 2-part polyurethane starts falling to pieces and my baby children arent so baby anymore!
So I lost a week or so from my bro-in-law coming over from Thailand and going on a family holiday, but have got the second undercoat on today and really hoping to be flipping her over on sunday or monday

Re: FS18 on the double!
Posted: Thu Jul 11, 2019 11:54 am
by Jeff
Excellent progress!!! Jeff
Re: FS18 on the double!
Posted: Fri Jul 12, 2019 9:44 am
by Jwhitakeriii
Jacky Chan wrote: ↑Thu Jul 11, 2019 11:05 am
Cheers Hank, I am keen to do a final coat of graphite now that I've sanded most of the bumps down a little, just to give that little be more protection and hopefully less water resistance if I go over her with the roller a few times after its started to set up, as you say.
looking great... I don't think he was saying you should go over it with a roller I think he was asking/suggesting/wondering if that is what you did to make it look more flat? Based on my experience I would not advise touching it once it starts to set/gel. Build on!
Re: FS18 on the double!
Posted: Fri Jul 12, 2019 12:59 pm
by Jacky Chan
Haha I’m thanks JWhiterkariii, I thought it was some kind of magic trick you use to get nice shiny graphite
Glad not to need to bother
Re: FS18 on the double!
Posted: Tue Jul 16, 2019 1:48 pm
by Jacky Chan
Feels great to make some decent progress again, in the last few days I've finished the paint job, got her flipped and glassed the inside, ready for stringers. Very happy with the result of this 2-part polyurethane paint from International, just a shame that the surface it was painted onto resembled the moon during asteroid season!
Very glossy finish, actually looks wet, and I have already swung a chunky strap clasp into it pretty heavily and its barely left a scratch
Interesting looking at the inside without any guts for some reason
Son Charlie wanted to sit right underneath it of course mid-flip
I dropped the strong back down about 10 inches so i could reach inside - she was hitched up pretty high in the first half to save my back! I put her on some carpet with a recess for the skeg but really need to prop her up at the bow on some wedges so she doesnt deform when all the frames go in
Need to bite the bullet and soften the tip of the bow off a little before she skittles somebody's yacht!!
Today I smoothed down all the snotty lumps, cleaned her out, chopped up the tape pieces and just about remembered which was which, taped everything in and laid some cloth across the base. Absolutely pooped and now settling in for some well earned light refreshment! Luckily most days are only an hour or so!
Re: FS18 on the double!
Posted: Tue Jul 16, 2019 3:10 pm
by Jeff
Again, good progress!!!! Jeff
Re: FS18 on the double!
Posted: Mon Jul 29, 2019 6:39 am
by Jacky Chan
Been a couple of weeks since my last post - I went to a farmer friend's festival last weekend and I must be getting old or something because the hangover lasted a lot longer than usual!!

I think the main cause of the headache wasn't so much the excessive cider consumption as much as getting a photo from my wife at home, on the first morning, of my boatyard's roof having caved in following some heavy rain and reports of the boat being full of water..!!!

If I was in any state to drive I would have gone straight home there and then!
Luckily there wasnt anymore rain forecast so I just set my forgiving wife to work bailing and toweling. The hull had dried out nicely by the time I limped home a few days later to dry and sort the roof out. In the end an easy fix that I should have thought of way way way earlier - I just jacked up the ratchet strap that forms the roof's ridgeline.
Wasn't feeling up to anything resembling work so I started playing around with the deck pieces and imagining where a side-mounted grab-rail/micro-console might sit and how it could be supported with some CF posts, £8 each on ebay. Not sure the best way to attach them but once they are cut to fit I guess its just a case of scratching up all the bonding surfaces and epoxy puttying them in place?
Found this earwig that didn't make it out before the inside cloth went down! Probably the first place to see rot in a few years haha
Eventually mustered up the energy to tape the stringers in with some more messy filleting work
Another low intensity job was to start thinking about the hatches, where I am going to have a crack at something similar to seaslug's fine creations (in the hope that by going for perfection I might be able to achieve something relatively functional!!
) The hatch for the transom compartment is going to be set in from the edge, a la seaslug, but the one for the bow compartment I am planning on putting the hatch up against frame B so that the guttering just runs directly out into the deck, without any need for a drainage pipe. If anyone thinks this is a dumb idea please stop me before its too late!
A good job for keeping 3yos entertained is chopping up and sanding some cleats! On the cleats, without wanting to sound downright lazy, do you really need a cleat on each side of the stringers? Planning on both sides as its what everyone else does, but I can't help wondering if its a bit overkill? Could you drop the cleats on the outsides of the stringers?
And finally in the last 24 hours I've bitten the bullet and just got on with making frames C and D, before fillet and taping the frames in.
Tip for other novice boat builders out there - this round of filleting went much better because i did it slightly differently to the seams and stringers:
1. more filler for a stiffer mix (I'm using a pre-blend mix of wood flour and silica equivalent) - even a big lump doesnt fall off the stirring stick.
2. pipe it out of a bag with a fairly big hole, seems to get in there more forcefully and evenly.
3. make smaller fillets - mine were too big before
4. leave to set up for a little while/make a brew after the fillets go in!
I am thinking of putting a 2x1 joist underneath the centreline of the sole to provide support as I am not using buoyancy foam. The plan was to just epoxy it in with some little bits of tape/fillet. Do you guys think this would work out ok? Perhaps it needs a cleat alongside it too?
I've also added the limber holes as specified in the plans, as without buoyancy foam I should be able to drain any water that gets in from the bow compartment if necessary (driving the trailer down a slope). Obviously all deck water will drain out the bilge/transom hole as usual. The buoyancy bags should allow for water to drain past them under the sole. Does anyone who knows about limber holes know whether mine look correct?
Many thanks for any answers,
Build on!
Re: FS18 on the double!
Posted: Mon Jul 29, 2019 8:16 am
by piperdown
Good progress and it's coming together nicely, except from the earwigs point of view
My boat doesn't have stringers and I'm in no way shape or form anything but a speculative beginner but I think the cleats are needed for support of the deck. Plus, it makes the stringers and frames into an 'I' beam that becomes incredibly strong. Last thing you'd want to discover is that the deck flexes a bit on the outside if you skip the cleats.
Re: FS18 on the double!
Posted: Mon Jul 29, 2019 8:26 am
by Jeff
Nice progress and good clean work!!! Jeff
Re: FS18 on the double!
Posted: Mon Jul 29, 2019 8:58 am
by Jacky Chan
Good point re the I beam - I hadn't thought about the strength of the stringer itself, might help beef up the whole boat's rigidity! I need to stop being such a lazy bones... my wife thinks that's what I should call the boat, no joke!
Re: FS18 on the double!
Posted: Mon Jul 29, 2019 9:11 am
by Jacky Chan
Quick question while looking ahead a little: is it best to "drill and fill" for the transom drain hole, even though its going to be an inch or so wide? (i think I ordered a 1 1/4" pipe)
Or maybe with such a big hole its easier to drill just a little oversize, then just epoxy the inside of the cut and insert the pipe with plenty of putty...?
Cheers!
Re: FS18 on the double!
Posted: Mon Jul 29, 2019 9:58 am
by icelikkilinc
You are doing great tbh.
Always, Drill oversize and refill and drill again.
In this building method, this is the Achilles heel if not done correctly.
you do not want exposed ply, it will check. Water will find its way so make sure you spend the extra day at this point of the build.
+1 for the beam. Does not add too much weight but the feel will be more robust and comfortable. Again easy to do at this stage, rather than having the flex and should have done it moment later
Re: FS18 on the double!
Posted: Mon Jul 29, 2019 10:39 am
by BB Sig
For small screw holes it is normally double the size due to alignment issues. For larger holes, I wouldn't do much larger than .25 - .33" larger. Just my opinion. More experienced builders might have a better suggestion.
Re: FS18 on the double!
Posted: Mon Jul 29, 2019 10:43 am
by Jacky Chan
Cheers Ilker, i've been trying like mad to avoid those "should have done it" moments - unfortunately i don't have a time machine so its best to get it right first time! Anything that buys you another year or two before a big repair is worth an extra week at this stage!
Thanks for the encouragement, great relief to hear I haven't gone too far off course yet. I've got a 40mm saw bit so I'll just fill that hole and take it from there.
Your TW28 sounds like a beast! And a beauty
I couldn't see any pics on your thread but I imagine that took a lot of perseverance to get her to dunking point!
Re: FS18 on the double!
Posted: Mon Jul 29, 2019 10:46 am
by Jacky Chan
Thanks Barry, that makes a lot of sense re the alignment - I've got to do the bow eye and two off the transom at some point so will make them twice the diameter as both are going through some thick material!
I dont know where I'd be without this forum haha
Re: FS18 on the double!
Posted: Mon Jul 29, 2019 3:24 pm
by icelikkilinc
For me any boat is success, some you gotta be a bit more stubborn

Got some pics in Bateau builder gallery
I live in Essex now, hope to see your boat one day

Re: FS18 on the double!
Posted: Tue Jul 30, 2019 2:43 am
by Jacky Chan
Re: FS18 on the double!
Posted: Tue Jul 30, 2019 6:07 am
by icelikkilinc
My local that I usually go to is East Hanningfield reservoir, you can rent boats there per day which are fully rigged so comes quite handy.
And only 10 mins drive from my home
I certainly will give you a shout if I am SW but if you are planning any voyage with the FS18, more than happy to join
Re: FS18 on the double!
Posted: Tue Jul 30, 2019 8:17 am
by Jacky Chan
I'll be shouting Ilker!
Not sure why you dont get more boats like the FS18 in the UK, or maybe you do in the Fens etc on the east coast. I suppose most of our coastline is a bit choppy for something with such low freeboard? I personally think its a fantastic design as I recreational angler with small children - you dont want to be going out in big swells anyway! Perfect for estuaries, lakes, rivers and flat calm days out to sea, which certainly happen, every now and then at least
Being so shallow, it would be rude not to have a little seine-type net for scooping up a few sandeels from the comfort of your micro-skiff... I'm going to spend the winter figuring out the best way to keep them alive, probably just an aerator in a bucket with a bailer for water changes
low-tech and easy to leave at home if not required
Re: FS18 on the double!
Posted: Tue Jul 30, 2019 2:25 pm
by icelikkilinc
FS18 would be perfect in this reservoir
you can rent this 15' boats for the day
Isn't this lovely?


on the east coast, I really can't see FS18 working, the tide and wind is shifting so quickly
Re: FS18 on the double!
Posted: Tue Aug 06, 2019 5:31 am
by Jacky Chan
Lush lake, Ilker!!
Putting it on my trip list
So I've got an update on how the cleats found their way in the boat, slowly but surely... I didn't have enough clamps to do them all in one but only had little pockets of time so it worked out pretty well over about a week doing a few here and there. Had to straighten my back out after each one!
These are the cleats for the main deck sole area only:
I actually did a little practice run on the lower poop deck area as it wouldn't be taking much weight so it didnt matter if I was a bit sloppier... My conclusions were that its definitely easier to epoxy three sides beforehand (leaving the glueing side bare for a stronger joint, grain going horizontally across the cross-section for strength, as it is cedar). Also you can pre-soak both glueing faces and then just add another blob if its completely flat, but any deflection at all will just end up with dribbling and a weaker cut - I added a fairly stiff ketchup to 95% of the cleats, probably worth just doing all of them... Theres that lazy bones again
 Viewed 3321 times")
I built in a little bilge area, so that the hatches wont be vertically above it and if the deck floods then water can flow into it in front of the knees, when theres too much to flow through the little drain holes at the transom. I'm going to make little walls to keep the area under the hatch relatively dry and keep a basket sitting there for various gear
Hatches update on the way!
Re: FS18 on the double!
Posted: Tue Aug 06, 2019 6:11 am
by Jacky Chan
So the hatches have come along a bit too, I've now pretty much got the gutters ready
I went for the typical "360 degree moat" style for the stern hatch, which will have short drain tubes into the bilge, because then you can sit on the 4" firm edge and not purely on the hatch lid.
In the forward hatch, I went a little off-piste and made a C-shaped gutter that runs directly onto the deck. I felt this was simpler and theres less chance of knocking a pvc pipe out that would be a real pain to replace and would no doubt see water get under the sole if there was a crack etc... No idea if it is actually going to work, and the edge of the lid is going to be pretty unorthodox... time will tell if its a masterstroke or a shot to the foot!
or
we shall see!
So I have tried to follow Seaslug's directions as closely as possible - the gutters have been gouged out to 1 3/4 inches, no quite the 2" he specifies but the 9mm deck will add a bit... on one side of the gutter...!
Here are his instructions, off the Bateau site:
I got a mate to help me out as he has a router and is a builder so he should know what he's doing. To get some clean walls to the gutters, we used a circular saw and then I knocked out the innards with a chisel and cleaned up the bottom with it too. This was all pretty straightforward. The corners required the router, and with his big one broken, we had to make do with the mini-router. This did a fine job for most of the corners, but eventually smashed the bit up. I am going to clean it up with a forstner bit and some more chiselling then it should look OK. Planning on making a little jig to help fair the inside of the gutters, to try and get them looking decent at least, after the moonscape that is my hull
Also routed in some of the metalwork - starting to get a glimpse of what the finished boat will hopefully look like
This is a cross-section of what a glue joint looks like for anyone who's interested - I suppose the further in you can get the epoxy to seep, the stronger it is
Re: FS18 on the double!
Posted: Tue Aug 06, 2019 6:16 am
by Jacky Chan
Quick question as one of the next jobs is glueing down the sole - is it just a case of laying down plenty of ketchup on every surface, i.e. mainly the cleats, some naked stringers?
And is it worth coating the underside of your sole just before hand so its wet-on-wet?
I've got loads of bricks, buckets of water car batteries etc kicking around ready for action!
Re: FS18 on the double!
Posted: Tue Aug 06, 2019 6:39 am
by Jacky Chan
Also is there a good way to lower the sole down without splattering the glue on at least one edge? Maybe land one corner then lower it from the diagonal corner?
Re: FS18 on the double!
Posted: Tue Aug 06, 2019 6:44 am
by Jacky Chan
One more for luck - Of course the deck needs taping in around the edges, but is there much point in laying bias over the whole thing if I am going to be using KiwiGrip on the top face of it?
I imagine the main reason for laying wide cloth is for abrasion/ding resistance, but perhaps KiwiGrip also does this pretty well as its so much thicker than paint?
Re: FS18 on the double!
Posted: Tue Aug 06, 2019 8:00 am
by fallguy1000
Jacky Chan wrote: ↑Tue Aug 06, 2019 6:16 am
Quick question as one of the next jobs is glueing down the sole - is it just a case of laying down plenty of ketchup on every surface, i.e. mainly the cleats, some naked stringers?
And is it worth coating the underside of your sole just before hand so its wet-on-wet?
I've got loads of bricks, buckets of water car batteries etc kicking around ready for action!
You want the underside of the sole coated to protect ot from any water. Then rough sand it so the thickened epoxy sticks well. Ketchup is a bit thin. I prefer a bit stiffer mix.
Re: FS18 on the double!
Posted: Tue Aug 06, 2019 8:05 am
by fallguy1000
Jacky Chan wrote: ↑Tue Aug 06, 2019 6:44 am
One more for luck - Of course the deck needs taping in around the edges, but is there much point in laying bias over the whole thing if I am going to be using KiwiGrip on the top face of it?
I imagine the main reason for laying wide cloth is for abrasion/ding resistance, but perhaps KiwiGrip also does this pretty well as its so much thicker than paint?
Glassing the deck is insurance against ingress. But 6 oz glass can pinhole and you must precoat the dry wood woth epoxy; let it go to gel and then wet the glass out to avoid dry sucking the glass. If you use a light glass like wovens under 12 oz; you really must come back and neat coat after sanding/fairing the deck, or you'll risk a small hole leaking through. If you prime with an epoxy primer two coats; you can avoid the neat coat, but typically the neat coat is cheaper than the paint and will also weave fill.
Re: FS18 on the double!
Posted: Tue Aug 06, 2019 8:30 am
by icelikkilinc
You are doing great. little more tidy up on the hatches and you are good
I personally don't like uncovered ply so if it was mine, I would at least laminate a 6oz before I glue. peace of mind.
the common approach at bare minimum is to coat with epoxy.
agree with fallguy1000 on consistency, you do not want ketchup, a bit more dense. when pressure is applied from top, you do not want it squeezed and dried out, you need ample mixture between cleat and sole.
Re: FS18 on the double!
Posted: Tue Aug 06, 2019 12:05 pm
by Jacky Chan
Sweet thanks for the tips Fallguy and Ilker, yes I meant a consistency more like peanut butter - I still get in a muddle between all these technical terms
When that sole goes down I am going to be a happy man, as I can finally start messing around with the rod holder supports
been looking forward to these puppies for ages for some reason!
Re: FS18 on the double!
Posted: Wed Aug 07, 2019 8:50 am
by Jacky Chan
I've taken the plunge with the transom scupper and put a massive hole below the waterline of my beloved hull!!
Feels all kinds of wrong but I suppose you have to be cruel to be kind sometimes! I over-drilled it so there will be between 1/8 and 5/16 around the brass pipe, with the 1/8 most likely at the bottom as I am trying to get the opening below the level of the bilge in order to completely drain it when underway/on even a slight slope - there could be absolutely anything in there and I want it out of the boat, not building up a layer of scuzz.
So I drilled the whole as low as I dared, and am pretty happy with the result. I filed it out a little on the inside and filled it with a flat face in line with the transom so that the pipe can be cut square without protruding. (I was sweating over this stage for a while so hopefully this will be of use to other first-time boat builders - I'll let you know if the boat sinks
)
THe cardboard backing piece (with backing tape of course) for the peanut butter fill worked much better than the birthday cards and sticks I have used before - I think that little bit of flexibility helps it really seal the hole.
Had a go at smoothing out my hatch gutters with some two-part epoxy filler which went relatively well, thouhg it is going to get mighty fiddly to really flatten the bottom before making the bottom corners rounded for easy cleaning. Planning on making a sanding jig as its nigh on impossible to get your digits in there...
Carbon Fibre Grab rail
Posted: Wed Aug 07, 2019 9:08 am
by Jacky Chan
Looking a little further ahead, does anyone have any tips on how to put together a CF grab rail?
I am basically wondering about the lamination schedule - If I manage to bend a PVC pipe successfully, can you just slap on a CF sock or do you have to put on a fibreglass one first, or do you need two FGs and a CF, etc etc?
Again, with imitation being the sincerest form of flattery, this time I am essentially planning on ripping off RJS Redchaser's exquisite grab rail, with little struts to keep it upright, and then glueing a little "micro console" block half-way up to hold some rods on the forward face, pliers/knife on the outer face, a fish-finder on top, lure/fly boxes in a net below, and a nice pair of cupholders/phone holders inside in the shade (slot for a freezer-block, anyone..?
)
This is RJS's before any paint. I'm hoping to do the same but with an extra support strut (i'm 6'6" and don't want to take it out if we have a bump) from the outer leg down to the gunnel:
Re: FS18 on the double!
Posted: Wed Aug 07, 2019 10:59 am
by GuyP
Can’t advise on carbon fiber. Looking good, great progress.
Re: FS18 on the double!
Posted: Wed Aug 07, 2019 11:16 am
by piperdown
Re: FS18 on the double!
Posted: Fri Aug 09, 2019 5:02 am
by Jacky Chan
Piperdown you are my hero!!
I saw Noles's post a while back but lost it in the forum! Looks like he has several layers of FG and CF over some foam pipe insulation. I'm going to try and bend some PVC and if that fails go for the pipe insulation. I feel as though PVC would be stronger and easier to attach to the boat because you can have big epoxy plugs at the ends, and easier to run a wire through if you are that way inclined
I saw a few youtube vids of plumbers bending PVC pipes - so I'm going to try plugging one end, filling the pipe past the bend-area with hot sand from a saucepan... let it warm out for a minute then cover it with a towel and pour boiling water over it... and have the heat gun waiting in the wings just for good measure!
Bit concerned that I wont be able to get the boat out of my garden with the grab rail attached, so it might be a case of just painting the boat as normal and then sanding off the glue areas some time in the winter - I dont want to rush this micro-console, its going to be the brains of the operation!
Re: FS18 on the double!
Posted: Fri Aug 09, 2019 6:14 am
by Aripeka Angler
Your boat is looking great!
Here are a some photos of my cf tinkering. Perhaps you can get a tip or two from them.
The cf and heat shrink are shown. I used silvertip, it works better with cf. Pics...
I used a wood core, you can use pvc. You fair with straight epoxy, no fillers. Cf comes in different weights just like glass so I can’t give you any advice other than just experiment.
Re: FS18 on the double!
Posted: Fri Aug 09, 2019 6:18 am
by Aripeka Angler
FS18 grab rail set pics from various build stages...
Re: FS18 on the double!
Posted: Fri Aug 09, 2019 6:58 am
by piperdown
Using pvc you probably only need 1 layer of CF.
After the bending you'll want to rough up the pvc with sandpaper so the epoxy will bond or flame treat the pvc.
https://www.epoxycraft.com/top-tips-bes ... t-plastic/
I've not done any epoxy work with pvc and have only read some articles or watched a couple vids. In other words, hopefully one of the other guys that have actually done this will pop in with practical advice.
Re: FS18 on the double!
Posted: Fri Aug 09, 2019 7:08 am
by Jacky Chan
Got the sole glue down yesterday!!
Butt-blocked the sole overnight, sanded the top f the cleats etc, blew her out with a leaf-blower, re-coated in epoxy anything under the sole, gave the sole underside a nice thick coat, mixed up about 6 pots of glue to make a matrix of hot dogs, chucked in all the buoyancy bags I could afford to support the motor in a sinking situation, before finally weighting the sole down in position
On the buoyancy, I know some people have done some pretty hefty calculations on the boat's mass, foam requirements etc, but surely the ply should have a lot of its own buoyancy? I'm pretty sure I've got enough to keep me afloat, at least until the bags start rotting or a mouse gets in
. I wonder, has anyone successfully sunk their plywood boat...?
Going to glass the sole in this afternoon so I can start getting the cockpit full of sawdust and dirt without it trickling below deck. Definitely feel like I'm on the home straight now, albeit a 6-week long one - theres quite a long snagging list but its all fun little jobs from now, and at an increasingly pleasurable working height
Re: FS18 on the double!
Posted: Fri Aug 09, 2019 7:24 am
by Jacky Chan
Wowzer, I had that last post going for so long that I only just saw you guys' posts! Many thanks indeed, and Aripeka Angler where have you been hiding that beauty??
I got side-tracked the other day for a good hour by Cracker Larry's GF18 thread, just dipping my toe in as its a mere 291 pages!!
Had to promise myself no more of this until I've finished my boat!!
So do you think just a single layer of CF on some PVC would be strong enough, without any FG? That would certainly save a bit of time
My wife is demanding that its finished in time for a family trip to the coast in September, even though she's quite happy to give me an earful every time I go outside to do any work on her
women
Love the sound of some heat-treating, with the water droplet test like after degreasing. Not sure where the shrink-wrap comes in but I think I'm just going to call up a CF sock supplier and grill them for info
Cheers for the pointers lads,
Build on!
Re: FS18 on the double!
Posted: Fri Aug 09, 2019 7:58 am
by Aripeka Angler
Jacky Chan wrote: ↑Fri Aug 09, 2019 7:24 am
So do you think just a single layer of CF on some PVC would be strong enough, without any FG?
No, one layer is probably not enough.
Put on a layer, let the cf cure, clamp the bottom and twist it. Add layers until you’re happy.
Re: FS18 on the double!
Posted: Fri Aug 09, 2019 8:00 am
by Aripeka Angler
This is changing the subject, are you going to put in the frames that support the hull sides?
Re: FS18 on the double!
Posted: Fri Aug 09, 2019 4:18 pm
by Jacky Chan
Ay ay AA! Good idea about taking one layer at a time - seems pretty all of a sudden!
I am planning on adding the rod holders and gunnels as per the plans, if that’s what you mean? I had a few custom plans but have heeded Jacques’ advice on sticking to the plans, given it’s my first boat.
Will most likely whack it out a bit on the next one...
once I’ve caught about a million fish with this lady of course. We now have tuna coming back within range of the UK so I might have to start something a bit more off-shore at some point... won’t be rushing that one though
Re: FS18 on the double!
Posted: Fri Aug 09, 2019 4:40 pm
by Aripeka Angler
Jacky Chan wrote: ↑Fri Aug 09, 2019 4:18 pm
Ay ay AA! Good idea about taking one layer at a time - seems pretty all of a sudden!
I am planning on adding the rod holders and gunnels as per the plans, if that’s what you mean? I had a few custom plans but have heeded Jacques’ advice on sticking to the plans, given it’s my first boat.
You can put on multiple layers of cf in one shot, but as you guys say over there “this is bloody expensive”.
One layer of cf on a pvc grab bar is not enough. So put a couple on, let it cure and test the flex. Add layers as needed...
Hence the one layer at a time comment.
On the gunwale supports- I’m pretty sure they are structural. I attached mine to the cross frames below the deck. When I didn’t see your supports, I figured it might be a good idea to make sure you plan to install them. I’m not near my FS18 plan right now, I’ll try to double check tomorrow. Maybe the supports are ok glued to the sole but it would be better if they were part of the below the deck framing.
Re: FS18 on the double!
Posted: Fri Aug 09, 2019 5:31 pm
by Jacky Chan
Just re-read my last post - it’s was supposed to say “seems pretty obvious”, though hopefully the grab rail will look “pretty” too
I see what you mean about the structural frames of C and D that include the rod holders. I guess fillet and taping them in is strong enough as this is what the plans advise. I know Cracker Larry did his this way and Seaslug has taken his on over 200 trips without mentioning an issue, though his rod holders are made of something like mahogany (now that must be “bloody expensive” as you say
)
Speaking of being bloody spenny, I kissed goodbye to my max budget a long time ago
but I really don’t want a weak link in the chain! Have had to make a few cutbacks elsewhere in life but well worth it to get a boat you are really really really chuffed with if you ask me
Re: FS18 on the double!
Posted: Fri Aug 09, 2019 8:14 pm
by Aripeka Angler
I knew Larry very well, I also have met Mike. Capeman and I fished and hung out with Larry a bunch. In fact, Capeman and I are probably the only two guys on the planet to have seen both boats you just mentioned. They were/are well built for sure, works of art. Larry was a hell of a craftsman, Mike as well.
All that said, I tend to fall in the way overbuilt camp. I interprete the thinys that most call rod holders on the FS18 as extensions of the frames below. The frame parts as drawn will assemble as a full frame that fits perfectly in the location detailed in the drawing. I personally think it’s a little stronger to assemble C and D as frames and notch the sole around it. It’s definitely harder to tape and sand with this method. I am obviously not suggesting ripping anything apart, I was just curious as to what you were planning.
Re: FS18 on the double!
Posted: Fri Aug 09, 2019 9:49 pm
by seaslug
First I want to compliment you on a fine job so far. Very clean work, and the way you glued down the sole you can be sure it will never give you any trouble. Both my decks and sole got 1 layer of 6 oz. woven, than faired, primed, and painted. They are as solid as a rock, and I don't see the need for anything heavier, unless you plan on dropping a 30 pound anchor onto the deck on a regular basis. Beautiful job routing out for the hinges, but on mine I widened them just a little, than eased the edge so glass would lay into the recess nicely. What I did after laying the glass was, I wrapped the hinges tightly with cellophane and pressed them into place and put a little weight on them to hold them down. It's nice to see someone finally build hatches the way I did, and yours are looking really good. The 6 oz. deck glass goes over the radiused edges of my gutters, but not down to the bottom. My gutter assembly just has multiple coats of epoxy brushed on and let flow down into the gutter bottom and self level. I let each coat cure, then sanded before brushing on another coat, then after probably 3 coats of epoxy, primer and paint. Over 3 years and no cracks or any other issues......Now for a long explanation on how I approached the sole, rod holders, and gunwales. The sole is 1/4" epoxy coated on the bottom side and pre glassed on the top side with 6 oz. The deck is 9 3/4" off the sole, low sheer version, lowered a little more than the plans, with gunwales 10-11" wide. I epoxied down the sole as you did, filled in the gap around the sole with thickened epoxy, filleted with fairing filler, but did not glass to the sides or to the forward and aft bulkheads. There are 3 rod holders per side spaced about 30" apart, which are 1 1/4" Mahogany. These are only held in with 5200 to the sole, sides, and deck, no glass. I can honestly say it's the most solid boat I've been on, and after more than 3 years there is not a single blemish anywhere due to stress or movement. Even the Awlgrip paint on the 5200 holding the rod holders is perfect. I'm sure guys will not agree with my decision to not glass these areas, but with the low sheer, and wide gunwales, I thought I'd be ok, and that fortunately turned out to be true. These stitch and glue boats sure are strong. Keep up the good work. Mike
Re: FS18 on the double!
Posted: Sat Aug 10, 2019 4:34 am
by Jacky Chan
Sorry to hear about Larry, I couldn’t help noticing that there were no posts from him in recent years. He certainly lives on in this forum though, and in many other places I expect.
I had ordered the extra 12oz cloth and literally an hour or so later started reading a bunch of posts saying how 6oz is all you need on the top!!

ah well I can get pretty clumsy at times so it could be a blessing in disguise
Many thanks Mike, I owe you a pint as I wouldn’t have discovered Bateau were it not for your FS18
That is a genius idea re wrapping the hinges to press the cloth into the recess, and presumably something similar could be done with the gutters using some taped strips of ply jammed in to keep the cloth neatly down. Did you have to shave down the inside wall of the gutters to allow 1/8 or so for the rubber seal strip?
Also do you think I could get away with some 3/4” screws for the hinges (into some pre-filled epoxy of course) or does it have to be bolts?
I am really impressed with how stiff the vessel is already even with no gunnels yet - it takes some effort to move the rubrail 1/4” in the middle as she is now! Should slice across wakes pretty happily I expect
Re: FS18 on the double!
Posted: Sat Aug 10, 2019 6:22 am
by seaslug
Maybe you misread my post, but I did not glass down to the bottom of the gutters, but just glassed over the radius from the deck and brushed a few coats of epoxy on the sides and bottom letting it essentially pool up in the bottom and build thickness. 1 coat at a time, sanding between coats, and it's worked beautifully. I did trim down the inner wall somewhere between 3/16" and 1/4" depending on the rubber seal used. I bought the peel and stick seals in the door section of our big box lumber stores. All of my hardware, hinges, poling platform, are just screwed down with coarse threaded stainless wood screws, and I've had no problems. My boat is so stiff I can hit any wake and the rods never even move the slightest little bit hanging in the rod holders, and unlike all the other skiffs I've been on, the rods do not need to be bungeed down to keep them from bouncing out of the holders. The way you've built yours, you'll have a rock solid boat. Mike
Re: FS18 on the double!
Posted: Sat Aug 10, 2019 8:22 am
by Jacky Chan
Cheers Mike there’s a lot of very useful tips in there!
I think I read your post correctly but clearly didn’t write my response very well
Great to hear screws do the job - bolts sound like a recipe for leaks eventually. A rock solid boat is also a very welcome prospect!
just need to lug her out of the garden somehow without gouging a hole down the side going through the gate

Re: FS18 on the double!
Posted: Fri Aug 23, 2019 12:19 pm
by Jacky Chan
OK so I've been away a bit, went salmon fishing to cool down
I have been tinkering since getting back so here is a bit of a dump of the little jobs I've been ticking off slowly but surely:
Scupper holes:
Rear compartment drainage 'steering' walls, to make a semi-dry area just below the hatch for a basket of bits and bobs:
Planning rod holders - a good excuse to pull out a load of fishing rods!
I wanted to max out the strength provided to the gunnels as I can't think of anything worse than breaking one
so I tried to keep as much material up in the armpit of the gunnel support - where the 45' square is sitting - as this is where the forces will be:
I've actually ditched the CF handrail plan - the more I started designing it (back of a fag packet stuff) the more I wanted a bigger console so I can have all my lures, drinks, flies etc to had without opening hatches. Pretty soon the console outgrew the handrail and then came the eureka moment where I realised you could just sit the console on the gunnel and put a support piece/sheet down to the deck where the handrail was going to go.
To have something to grab onto, I am going to put in a vertical piece of cedar up the near corner of the console that you can hold onto like a joystick and spike a gull-scarer into as well. FF sits on top as per previous plan. Lets see how she turn out!
And finally I have had the little router out again, and borrowed a neighbour's fret-saw to cut out the rod holders - over the moon with how they turned out, tempted to give them some kind of clear coat so they stand out against the white:
What do you see?
Pick a rod holder, any rod holder
Re: FS18 on the double!
Posted: Fri Aug 23, 2019 12:36 pm
by piperdown
Very Nice and great progress!
Re: FS18 on the double!
Posted: Fri Aug 23, 2019 2:19 pm
by Jeff
Really nice work!!! Jeff
Re: FS18 on the double!
Posted: Mon Aug 26, 2019 4:26 pm
by Jacky Chan
Hi everybody, i've got a bit stuck on drain pipes - has anyone got any advice on how to fit a brass pipe before I completely trash the whole boat...?
I drilled the hole weeks ago and have been putting off fitting the pipe for ages... tonight I had resolved to do it by:
- scratching some grooves around the pipe,
- wetting out the inside of the hole,
- putting some peanut butter around the edge,
- poking the pipe in,
- stuffing in as much peanut butter as I could,
- syringing in more epoxy for good measure,
... and filling rim edges at a later date.
But I had a quick look on Youtube and saw some guys using a flange tool - basically a bolt with a special nut that rolls the edges of the side that doesn't yet have a flange to make it a double-ended flange - and it made me think again about my plan...!!
I cant find a flange tool for sale in the UK so does anyone have any ways of doing it without one? I'm sure I saw somebody's boat just had a flange on the outside..?
This is where I am at right now, though I do have a spare tube if I need to cut a longer one...
Many thanks in advance!!
Re: FS18 on the double!
Posted: Tue Aug 27, 2019 1:45 pm
by icelikkilinc
Re: FS18 on the double!
Posted: Tue Aug 27, 2019 6:54 pm
by Cbuf
When I redid my last transom I found a 4 inch brass tube with a flange on one end. The flange end went on the outside to perfectly seal against the hull. I was told to cut it an 1/8 short and build up with epoxy to make a nice smooth transition. The diameter I cut was about an 1/8 bigger all around the tube, and the entire thing was epoxies in. Then smoothed out on the inside.
Never had any issues.
Thanks
Chris
Re: FS18 on the double!
Posted: Wed Aug 28, 2019 4:56 am
by Jacky Chan
Ok nice one Ilker! I’ve ordered a 1 1/4 version that should arrive before the trailer is ready
Doe you think it’s best to fill the little gap around the pipe with epoxy mixture or sealant? Or maybe a few coats of epoxy and then finally some sealant? I have already drilled and filled.
Many thanks, looks like the kind of job you want to do properly..!
Re: FS18 on the double!
Posted: Wed Aug 28, 2019 5:09 am
by Jacky Chan
Hi Chris, thanks for this, great to know that this technique works too! Sounds similar to what I was thinking but your way should help get the last bit of the water out of the bilge by having the pipe a fraction lower than the floor.
I have ordered the flanging tool now so may as well use it but if I split the flange then I will now confidently be using your technique with the pipe that I have already cut down.
Cheers guys, I can feel my blood pressure starting to subside
Re: FS18 on the double!
Posted: Wed Aug 28, 2019 7:14 am
by Browndog
Your boat build looks great! Well done.
I really like the look of a brass drain tube and have used them on three different projects.
Hard to tell from your pictures, but the drain tube flaring tool requires some clearance all the way around the hole to properly roll the edges of the tube down on to the surface. Essentially a die goes on each end of a threaded rod and there are washers on the outside of the die to spread the clamping force evenly and prevent galling as force is applied by the two wrenches on each side. If you don’t have enough clearance you can grind a flat on one side of the drain tube or on one of the dies to try and make everything fit, but the dies and the tubes tend to twist as you wrench on the tool.
I had some problems installing brass drain tubes as scuppers in the Plyak 12 I built earlier this year and in the cooler I built recently. Sometimes it is easier to use the preformed side on the interior if you have better access on the other side.
Also, if the tube is cut too short, the two dies can meet in the middle and won’t provide enough clamping force to roll the edges. You can grind the dies down to make them shorter, but then they don’t support the tube as well and the tube can collapse.
The tubes work best in a situation like a solid transom completely supporting the tube. They don’t work so well in thinner hull sides or where there is a gap between the two hard faces like in a foam filled cooler.
I’ve experienced all of the above and it turns a quick and easy installation into a real chore. No fun to have to try and uninstall a brass tube that hasn’t worked right, especially if it is coated in thickened epoxy or 3M’s 5200.
Some builders make their own drain tubes out of fiberglass cloth saturated with epoxy and then formed around a piece of PVC pipe that has been covered with packing tape. It is another option if you have trouble with the brass drain tubes.
Keep up the good work.
Re: FS18 on the double!
Posted: Wed Aug 28, 2019 12:14 pm
by Jacky Chan
Thanks Browndog, always good to hear that one hasn't made a complete pig's ear of something!
Some very useful tips there - for a novice like me this has been probably the most panic-inducing part of the build, given it involves putting a big hole in below the waterline through your beloved laminations
and using metal for the first time on the build... really want to get it right first time!
My transom is about 30mm thick and I have flattened off the inside enough to fit the flange both ways, but was planning on poking it from inside-to-outside as you say, just so I can spin a wrench that much easier. The flange tool is coming from you guys' side of the pond so won't be here for a few weeks. Hoping to pretty much have her all dressed up and ready to party by then so it will hopefully be one of the last jobs before I try and tease her out of my garden and onto a trailer!
Thinking too much about all the fishing potential and not spending enough time building!
Re: FS18 on the double!
Posted: Thu Sep 05, 2019 6:19 pm
by Jacky Chan
So Christmas came early this year when a shiny new poling platform arrived!!
Might have ordered it a little high, but at least it will definitely clear the motor underneath... and a little wide, which should allow room for a couple of rod holders and a cup holder
Also been fiddling around with a few little jobs - cutting holes for things, re-coating stuff, taping rod holders, and fitting a few cleats here and there... guilty of doing a lot of head scratching
trying to figure out the best order of doing things... now I am trying not to think but just tick off the jobs one by one without thinking about the next job/ten jobs
Pretty much ready to paint the compartments, which I am seeing as a massive milestone, and am going to have a crack at steaming some long pieces to support the inwales. Somebody on this forum mentioned this technique using temporary gutter tubes, where you clamp the pieces along the rubrail to shape them perfectly, and pretty much in position - looks genius, we'll see if it works with a kitchen kettle instead of a massive gas stove!
https://www.youtube.com/watch?v=--iPQIw ... x=166&t=0s
Re: FS18 on the double!
Posted: Thu Sep 05, 2019 6:29 pm
by Jacky Chan
P.S The eagle-eyed forumers will notice that I started to fair the inside of my compartments, then decided not to bother and just epoxied over it and called it a day...
Very happy with my decision, though I am fully intending on putting a shift in with the fairing around the cockpit and sides around the rod holders where there won't be any kiwi-grip. Hopefully it wont look toooooo bad with paint on it, but planning on sticking some neoprene over most of it anyway for grip and soundproofing
Re: FS18 on the double!
Posted: Thu Sep 05, 2019 7:33 pm
by BB Sig
The boat and platform look great! Most only use tinted epoxy in the compartments. Gives it a finished look without the finish work!
Re: FS18 on the double!
Posted: Fri Sep 06, 2019 7:50 am
by Jeff
Nice work and I really like the Platform!! Jeff
Re: FS18 on the double!
Posted: Mon Sep 09, 2019 5:22 am
by Jacky Chan
OK compartments painted and back onto gluing bits of wood together!
So the micro-console has pretty much taken shape, just needs a couple of triangulation supports for the joystick (to go flat against the 45deg panel up towards the top of the joystick) and then drill and fill the holes for the rod holders and fish finder cables.
Wondering whether I need to bother in taping it all together?was thinking one band of 6" tape across the leg and one around the body might save it from splitting up if I really fell into it? Tempted not to bother as I am now desperate to take this thing fishing!!
Re: FS18 on the double!
Posted: Mon Sep 09, 2019 7:59 am
by Jeff
Nice work!!! Jeff
Re: FS18 on the double!
Posted: Mon Sep 09, 2019 6:38 pm
by icelikkilinc
Great job and the little man looks very happy
On the micro console taping, defo on outside. Inside looks quite tight to work so might use some 45 degree length cut cleats acting as joint stiffner, hope makes sense. You might be leaning on it and doing sudden movement/applying force etc so making it stiff will help in the long run.
Re: FS18 on the double!
Posted: Wed Sep 11, 2019 7:10 am
by Jacky Chan
Taping it is, thanks Ilker
Steam-bending went surprisingly well - I put the two bits of timber into the long socks with 2' spare either end, wedged it into the jig with a slight angle upwards for the steam to rise, and stuffed a kitchen kettle in the bottom hole so the spout was pointing up the tube...
Then just cable-tied the kettle so it was stuck 'on' even though the water was already boiling
Left it like this for about 45 mins, with one water top-up in the middle, and the timber was almost as floppy as a piece of rope! (hard to play snooker with
) After that I cut the plastic away and left it to dry and set - a few hours later it seemed dry as a bone and had held its shape almost completely - I had over-bent it too much as I thought it would ping back a lot more!
Great technique and only cost £10 for the tubing, here's the link again
https://www.youtube.com/watch?v=--iPQIw ... x=166&t=0s
Also i've put a corner on the micro-console to soften up the shape a bit
And done a bit more joisting and had a look at the gunnel deck pieces in situ (I must have spent a good half hour just imagining the finished boat if Im honest
) I obviously marked them up horribly but its nothing that can't be sorted with a load of peanut butter and the odd sliver of ply here and there
Re: FS18 on the double!
Posted: Wed Sep 11, 2019 7:11 am
by Jacky Chan
One quick question - does anyone know how thick you should make the hatch lids? I've got some spare 5mm ply that could do the whole lids, or I could make it out of 9mm ply using scraps?
THanks
Jack
Re: FS18 on the double!
Posted: Wed Sep 11, 2019 8:27 am
by Jwhitakeriii
Jacky Chan wrote: ↑Wed Sep 11, 2019 7:11 am
One quick question - does anyone know how thick you should make the hatch lids? I've got some spare 5mm ply that could do the whole lids, or I could make it out of 9mm ply using scraps?
THanks
Jack
I did mine out of 3/8 or 9mm with 10oz weave on the top side and they are solid (i dont think the weave contributed to stiffness that much as they felt the same before it). Could prob use 5mm with some backing stringers or glass or a combo and be fine. I know ive seen it done but cant think of where
Re: FS18 on the double!
Posted: Wed Sep 11, 2019 11:35 am
by icelikkilinc
some areas asked for 6mm on the plans but when I stepped on, it was flexing too much and I did not feel comfortable.
I laminated another 6 mm on top.
I would go 9/10mm directly, there won't be too much of a weight penalty but if there is too much foot traffic, it will take more abuse and feel more solid.
Re: FS18 on the double!
Posted: Thu Sep 12, 2019 6:58 am
by seaslug
Really nice work on everything you're doing. My decks are 3/8" and the cut out for the hatch opening became my hatch lids, but I epoxied another 3/8" piece to the underside, but smaller in size for where the rubber seal sits. My decks have 1 layer of 6oz. woven, but the undersides have no glass, only epoxy, primer, and paint. Over 3 years of heavy use, and solid as a rock.
Re: FS18 on the double!
Posted: Thu Sep 12, 2019 11:26 am
by Jwhitakeriii
seaslug wrote: ↑Thu Sep 12, 2019 6:58 am
Really nice work on everything you're doing. My decks are 3/8" and the cut out for the hatch opening became my hatch lids, but I epoxied another 3/8" piece to the underside, but smaller in size for where the rubber seal sits. My decks have 1 layer of 6oz. woven, but the undersides have no glass, only epoxy, primer, and paint. Over 3 years of heavy use, and solid as a rock.
just emailed reid asking to take my whole thread down. every time i see your work I feel unworthy.
Just kidding but for real those are some sexy hatches
Re: FS18 on the double!
Posted: Fri Sep 13, 2019 3:44 pm
by Jacky Chan
Fear not, Jwhitekaraiii - in a few weeks time I'll post a photo of my hatches... warts and all...!! After that you'll feel a whoooooooooooole lot better!
Just re-read my post - I obviously left out the bit I meant to say "how much extra should I stick onto my existing sheet of 9mm...? 5mm or 9mm?" Sounds like 9mm is the way to go! Thanks again Seaslug
Next job is taking the plunge and cutting out the hatches, having glued in the gutters... They look they will line up near enough that I can shave an edge or two off the deck pieces to make it work, where's the 'fingers crossed' emoji anyway..
Thought I had glued my last cleat but it turns out there another 5 to do
Re: FS18 on the double!
Posted: Mon Oct 07, 2019 4:43 am
by Jacky Chan
Had a busy month with work and family stuff but slowly getting closer to the next milestone of glueing down all the top decks
Huge thanks to Cbuf for the post about a plan B transom drain - as Browndog suggested, the flange tool just wasn't right for this transom - too narrow so the dies met in the middle. Didn't start it as it would have been a real PITA to take off. Delighted with the result of Cbuf's technique so far
I smeared some epoxy and then some putty on the inside of the hole, then poked the tip of the drain in and piped some more putty around the rim each time it went another 3/8ths or so in. It was all very sensual
Then used an elastic band to put some gentle pressure on it to keep it all in place. It got some filler and an epoxy seal coat and will get painted soon. My only worry would be shrinkage from temperature allowing water to trickle in around the brass drain but Cbuf hasn't had any issues so thats good enough for me!
Re: FS18 on the double!
Posted: Mon Oct 07, 2019 4:57 am
by Jacky Chan
The main thing holding me up was getting the cockpit faired and painted so that I could glue in the long steamed pieces that support the inwales. The fairing went on much better than when fairing the outside. Its still a hell of a long way off pretty much every other boat I see on this forum, but good enough for me in a hurry!
Got the 4th coat of 2-part poly onto her yesterday and am starting to picture how she'll look when she's finished
Also added some furniture to the platform in the form of two rod holders and a cup holder - first of many
Re: FS18 on the double!
Posted: Mon Oct 07, 2019 5:09 am
by Jacky Chan
The hatches and decks are also getting closer to being glue together, slowly but surely.. The rear hatch line up nicely but the forward hatch was a little skewiff on the sides - I vaguely remember having to turn the hatch upside down to mark it on the deck without the lip raising it up... It was late at night and I obviously forgot to flip the deck piece too or something. Anyway no big deal as I can just take an edge off one side and glue it onto the other. Its all going to get routed and filled and probably routed again so no biggie.
I also glued some flexible silicone tubes into the drain holes last night, having scuffed up around the tops in order to key into the putty for a better hold. Will report back to see if that has actually worked haha
Re: FS18 on the double!
Posted: Mon Oct 07, 2019 5:24 am
by Jacky Chan
The micro-console is also ready to fit once the gunnels decks are on. I made a very rough and ready mortise and tenon for the 45deg support, only to... ahem help with epoxy adhesion of course
It has some wire holed for the fish finder conduit running up inside it, but I'll need to drill and fill the 4 holes for the mount when I'm in the shop - same guy selling me the motor and FF - I am not taking any chances on any holes not being properly drilled and filled haha
Shame to have to paint over some of this epoxy stuff!
Re: FS18 on the double!
Posted: Mon Oct 07, 2019 8:18 pm
by seaslug
You're doing a beautiful job, and I really like the rod holders. Those hatches bring back memories, I'm glad that you decided to go that route, they look great.
Re: FS18 on the double!
Posted: Sat Oct 12, 2019 3:32 am
by Jacky Chan
Cheers Seaslug!
Very pleased with the hatches so far - they are a bit more work but they are the perfect size and are flush with the decks so it should all be worth it if I can get the lids to match up to gutters... I seem to have cut a bit too much off the lids (rushing as per) so might have to do something to widen them by flaring the lips and adding some filler
Really boshed it for the last two days and have got the decks on:
And then got the glassed in along with the micro-console and some little pads for the poling platform to sit on. Toyed with some diy pole clips but the first one took up too much room so I'm just going to retro-fit some clips once i've saved up for the pole!
Well Piperdown did say put up lots of pictures
Re: FS18 on the double!
Posted: Sat Oct 12, 2019 3:51 am
by OrangeQuest
Those are great pictures!!!
Re: FS18 on the double!
Posted: Sat Oct 12, 2019 4:56 am
by changeat44
Very nice to see!
Daniel
Re: FS18 on the double!
Posted: Sat Oct 12, 2019 10:31 am
by Jeff
Very nice work!!!!! Jeff
Re: FS18 on the double!
Posted: Sat Oct 12, 2019 4:58 pm
by Fuzz
Really nice glass work!
Re: FS18 on the double!
Posted: Tue Oct 15, 2019 11:34 am
by Cbuf
Do you mind providing the foot print of your poling platform?
What is the inside width from port to starboard?
What is the depth for front to back?
Include the feet in the measurement
Thanks
Cbuf
Re: FS18 on the double!
Posted: Tue Oct 15, 2019 8:19 pm
by Browndog
Getting there. Well done.
Re: FS18 on the double!
Posted: Wed Oct 16, 2019 9:10 pm
by piperdown
Excellent! Lots of pics mean more drooling for us and a very real likelihood someone down the road will be helped by detailed pics and lots of them!
Re: FS18 on the double!
Posted: Thu Oct 17, 2019 8:38 am
by Jacky Chan
Cheers lads
Glad you asked for plenty of pics, Piperdown - my memory is appalling so the photos really help jog it!
Cbuf, thanks again for the transom drain solution, that little job really had me flummoxed. As for the measurements for the platform, I thought it might be best if I just took some photos with a ruler to show the dims. In hindsight I think I've made it too high, as I couldn't get a reliable measurement for the motor underneath - now I either have to improve my lanky balance or get used to going swimming more often
The front two legs are made of thicker steel pipes as they are the ones taking most of the weight
Re: FS18 on the double!
Posted: Thu Oct 17, 2019 8:40 am
by Jacky Chan
P.s. its wider than necessary though this one was deliberate so I could fit in some jewellery like two angled rod holders and a cup holder for something cold and refreshing to help with the balance..! Happy with the with and depth of the actual platform in light of these extra fittings
Re: FS18 on the double!
Posted: Thu Oct 17, 2019 12:03 pm
by Jacky Chan
Have done a little fairing after sanding - first major load of sanding i've done as I've always used peel ply for the hull and the cockpit deck (peel ply much easier on balance and avoids all the glass dust that is still hovering around everywhere even though there are only two walls on my yard!)
The plan with the fairing was to fair all the edges that won't get Kiwigrip, with a little bit of an edge ad some styling which will hopefully be just visible against the kiwigrip (both white). The guy at the boat supply shop seems to really know his onions and has advised that I don't use the roller they supply but just a regular mohair roller - despite looking pretty smooth, its apparently its still plenty grippy whilst not being abrasive on your skin, which is good for me as i'll have have my children in there quite a bit over the years hopefully, unless they somehow grow up hating fishing!
It also uses less kiwigrip, which is why I am inclined to believe him
If its not grippy then I can always go over with another coat and the main roller
Re: FS18 on the double!
Posted: Thu Oct 17, 2019 12:29 pm
by Jeff
Nice work!! Jeff
Re: FS18 on the double!
Posted: Tue Oct 22, 2019 12:04 pm
by Jacky Chan
Just doing the last bit of building before it starts getting into our paint territory - I've added some teeny weeny little blocks so the hatch lids can have some longer screws in order to withstand a bit more abuse over the years. Then glassed the tops and epoxied the bottoms
The indents needed filling with some extra epoxy to fill the gap a bit, given that the deck pieces were about 1/8th or so off the gutter frames and I had already shaved down the inner walls of the gutters...
If I was to do it again then I could have saved a lot of work in just not doing any of that... Hopefully I got them level enough so it isn't all lop-sided!
Just need to fair the tops a little, glue a piece of iroko across the front of the forward hatch lid and then drill three whopping great holes in the middles for the latches to sit in!!
Re: FS18 on the double!
Posted: Tue Oct 22, 2019 12:07 pm
by Jacky Chan
P.S. Seaslug's tip about how to glass the sunken hinge areas worked a treat, though this time i forgot to sand around the little lips so the FG got raised off the ply around the hinges... nothing an random orbit sander and some fairing putty wont sort out
Re: FS18 on the double!
Posted: Tue Oct 22, 2019 12:09 pm
by Jacky Chan
OK these pics are mainly for me when looking back at this in my old people's home! Seal coat on for painting and I just can't help staring at her!!
Re: FS18 on the double!
Posted: Tue Oct 22, 2019 12:35 pm
by Jeff
Really nice work!!!! Jeff
Re: FS18 on the double!
Posted: Tue Oct 22, 2019 1:54 pm
by blueflood
Hi Jacky Chan,
From experience, any areas not faired and then rolled over with Kiwi Grip, the seams or overlaps on the glass will telegraph thru. It does not hide or cover any sins much at all. Even if it is a light fairing layer, that would be better than nothing at all and more so since you are using a less grippy roller. Just a thought.
Marc
Re: FS18 on the double!
Posted: Tue Oct 22, 2019 4:25 pm
by Jacky Chan
Hi Marc, many thanks for the tip-off! I was about to start painting tomorrow but maybe more fairing needed..
I was under the impression that you are supposed to slap on a decent amount of kiwigrip, and as a result you could get away with not fairing the one areas. I even heard that people spent the extra money on the KG in order to avoid the fairing (what I did because I am naturally bone idle!)
I’ve got a fair bit of the KG so I’m tempted to go for it and do another layer if necessary as it’d be easier than fairing?
Many thanks in advance for any further advice!
Re: FS18 on the double!
Posted: Tue Oct 22, 2019 5:25 pm
by Jacky Chan
Marc, I just re-read your post and spotted that you were only talking about the seams... not the actual FG strands themselves... doh
Luckily the only seams that will show are at the transom so I can live with that - I need to move onto the painting!
Many thanks for the pointer though
Fog Blotches..?
Posted: Wed Oct 23, 2019 4:24 am
by Jacky Chan
Hi ALl,
So I woke up this morning to find a lot of fog outside... went to check on how my shiny new hatch lids had cured overnight, and found this peculiar blotchiness all over them!!
Does anyone know what this means, and if its a problem or not? I think the epoxy had gone pretty hard before the fog rolled in under my awning, so even though everything was wet to the touch, it was still hard as normal underneath, just with these funny blotches...
I think I dodged a bullet in doing the epoxy in the afternoon instead of at night, as it would have been still wet when the water arrived! Not sure why it affects it but I remember someone saying that wet epoxy and water really do not mix!
Before:
After:
Re: FS18 on the double!
Posted: Wed Oct 23, 2019 5:03 am
by Jacky Chan
OK panic over it seems haha
I looked online for amine blush and it looks like my blotches are just a bit of that so will scrub it off with warm soapy water...
Re: FS18 on the double!
Posted: Mon Oct 28, 2019 5:46 am
by Jacky Chan
Best feeling so far - hoovering her out and wiping her down in the knowledge that there isnt any more real building/sanding to do!
THen started getting the paint onto the tops where there won't be any Kiwigrip. I've got 3 of the 4 coats on in these pics and really looking forward to getting a 4th on this afternoon so I can rip that tape off and really start gorming at her
Where the paint meets the iroko (cheap teak), I've tried to get it so that the paint slightly overlaps any fairing/epoxy, so that I can rasp a little off the edge and get a nice crisp transition. Not sure if iroko needs any staining or not? I think teak wouldn't, but maybe I should with iroko?
Scrubbing the blush didn't really work so I just sanded it back and got nearly all of it off before another goat of epoxy. Just need to fair around the holes for the latches and a little at the hinges then they are ready to paint too
Building up to a big Kiwigrip sesh and then fitting all the bits of bling, or maybe the other way around, and then she really will be on the home straight
I said that if England beat the double-world-champ Kiwis in the rugby on saturday (you guys in the US might have to google what rugby is haha) to reach the world cup final, then I'd be calling her Sweet Chariot, as in the song Swiiiiiiiiiing Loooooooooow, Sweeeeeeet Chaaaaaaariooooooooott!! So it looks like that is what she shall be called
Re: FS18 on the double!
Posted: Mon Oct 28, 2019 8:41 am
by Fair WX Pilot
Great name and great result. The boat looks fantastic.
Re: FS18 on the double!
Posted: Mon Oct 28, 2019 9:26 am
by Jeff
Nice progress, Jeff
Re: FS18 on the double!
Posted: Sat Nov 02, 2019 5:37 am
by Jacky Chan
OK so its now onto the jobs that suddenly make it look like you are making progress
Perfect working height, no respirator, I could get used to this!
So it took the best part of the day to tape everywhere, sand it, wipe it up and slap on the kiwigrip. Really nice stuff to work with as tis water soluble so you can wash it off with warm water, goes on really easily and makes some lush textures with a gentle roll of a 4" mohair roller (the tight ones about 1" diameter).
I used the kiwigrip loopy goopy roller for the tip of the bow where you might be stepping on and off and dont want to to slip, but was advised just to use a mohair roll so the texture isn't too aggressive for when you are lounging around sunbathing butt-naked
Apparently the texture in these pics will offer plenty of grip - i'll let you know in the future!
Either way, I am expecting to re-coat it march/april when it warms up again, with more texture if necessary. Looks good to me though, given that this is not a racing yacht and will be pretty level most of the time. Much prettier patterns than the loopy goopy roller
I thought i had two tins of white but it turned out one was grey! I didnt have time to replace it as it was probably the last day over 10 degrees C until March so I just made some areas white and some areas grey and am over the moon with the results!
The white is a bit thin in places but plenty to see me through the winter, no issues with the grey
I think a Floridian summer might be a little different but November in the UK meant that I didnt have any issues with the paint drying too fast before the tape was pulled up
I pulled it asap of course but the paint was still very wet several hours later! By the morning it had firmed up pretty nicely to touch in all but the thickest blobs. I blobbed up the edges where you might like a bit more grip when hopping in and out of the boat, will see how well or not that works when its really hardened
Re: FS18 on the double!
Posted: Sat Nov 02, 2019 8:17 am
by Browndog
Really looks good. Kiwi Grip nonskid really puts a nice finishing touch onto a boat and it is fairly easy to use.
My best results with it followed a similar path as yours. Tape everything off first, wipe it all down and then use a brush to glob it on the surface and spread it around. The brush allows you to get right up next to or over the tape and provides a nice base coat that helps to avoid thin coverage. Generally with Kiwi Grip, the more the better. Then follow up with the roller of your choice. Don’t go too fast with the roller or you can get splatters. I like the textured roller that they include. It provides just the right amount of texture that is not too sharp for standing or sitting on.
The only times I’ve had trouble with Kiwi Grip was when I didn’t clean the surface adequately or didn’t let it cure long enough before getting it wet. Otherwise the stuff is nearly foolproof and will really make whatever project you use it on look better. Once I put Kiwi Grip on a surface near where some white 3M 5200 sealant had been applied. The 5200 wasn’t fully cured and the Kiwi Grip caused the 5200 to yellow a bit.
Good stuff. Keep it up!
Re: FS18 on the double!
Posted: Sat Nov 02, 2019 8:40 am
by Eric1
Excellent work!!
Re: FS18 on the double!
Posted: Sun Nov 03, 2019 6:40 pm
by Dan_Smullen
Looking sharp!
Re: FS18 on the double!
Posted: Mon Nov 04, 2019 9:12 am
by Jeff
Well done!!! Jeff
Re: FS18 on the double!
Posted: Thu Nov 07, 2019 10:28 am
by icelikkilinc
Looking great
For Iroko, treat same as Teak, use teak oil
Re: FS18 on the double!
Posted: Mon Nov 11, 2019 11:56 am
by Jacky Chan
Nice one Ilker, thanks buddy
Not much to update as I've had to do a bit more actual work and have had some sickbugs kicking around the house which makes for a lot more laundry!
I have been messing around with some more rod holder layouts, for trolling for bass (the original bass, same as your WSB Americans
) and pike or bait fishing
And have got 3 of the 4 coats on for the hatch lids and platform. I think I have juuuuuuuuuust enough kiwigrip to do them all but need to go and buy and anchor, ropes, a fender or two etc anyway so can re-up
I am looking forward to building my next boat in a hermetically-sealed vacuum to avoid all this dust and debris that flies around whenever I start painting! Absolute nightmare for the finish though I can't really do it indoors as apparently these 2-part polys are about as toxic as you get paint-wise and theres too many babies around!
Not sure if this will show up but it is caked
Re: FS18 on the double!
Posted: Mon Nov 11, 2019 11:57 am
by Jacky Chan
Going to try hosing the floor down to see if that makes an difference and hope that I can gently sand the debris off first
Re: FS18 on the double!
Posted: Tue Nov 12, 2019 3:18 pm
by icelikkilinc
Boat is looking great and like the wine glass. used to do the same when I was pondering on layouts or design etc
If I was building a boat on 15-18 range, I would really search for a auto paint booth.
After all the prep work, on the trailer, take the boat to the shop, mask the trailer and paint within sealed booth, drive back off with the trailer
Re: FS18 on the double!
Posted: Fri Nov 15, 2019 12:32 pm
by Jacky Chan
Now that does sound like the way to do it Ilker - very Pimp My FS18
Luckily the debris was all sanded off very happily and I managed to find an area that had some wind but no dust. Very happy with the results
This yachty paint really is the mutts' nuts - I was heaving the platform around (with all the rod holders etc it is pretty unwieldy) to mark up the screw holes when I bashed the transom fairly hard with the sharp base of the platform...
I looked down in horror to see how bad the damage was.. and there wasn't even a scratch!! FG + epoxy filler + yacht paint is an impressive combination
So I spent most of yesterday morning fiddling around with all the little washers, split washers, lock-nuts etc to finish off the platform and all its jewellery. With most of it being fitted underneath, I remembered towards the end how to do the technique where you put the nut, split washer and washer all inside/on top of your socket wrench so they all stay together... (after spending most of the morning picking up tiny bits of 316 Stainless off the floor
I went for the loopy goopy kiwigrip roller for the platform as I don't want to be slipping off and landing in a crumped heap in the cockpit! Or on the prop for that matter
Then today it was more fiddling around with drilling and filling all the screw holes for the platform, hatch hinges, hatch latch catches (
) and bow cleat. Obviously I wanted to get the biggest screw possible into all the holes, which meant wrapping some tape around the drill bits and generally bricking it about punching through the paint on the other side... Everything went well apart from the furthest-in of the hatch lid screws, where it seems I put the extra little blocks in slightly the wrong place, which was doubly bad given that I was drilling the holes with the lids in place, so ended up taking little gouges out of the inside gutter walls
Its all been properly wetted and filled so it shouldn't be an issue, and hopefully not too visible after a few blobs of paint, but certainly added a bit of work and a few oaths!!
Another big job ticked off, very few left now
Re: FS18 on the double!
Posted: Fri Nov 15, 2019 1:45 pm
by Jeff
Very well done!!!! Jeff
Re: FS18 on the double!
Posted: Tue Nov 19, 2019 4:52 pm
by VT_Jeff
Wow, really nice work. Boat is looking amazing and I have yet another budget-busting benchmark to contend with! I learned a lot from your pre-build research as well, i thought I had come up with a pretty good list if things to look out for but yours was far more complete, nicely done.
I've been thinking about the SeaSlug hatches and had the same idea as you, I think, to start with a dado blade to remove a lot of material. I was thinking of running the whole 4X4 piece through the dado to create a channel at it's final width, then cutting it down into the 4 sections at the correct mitre angle for a trapeziod, so when I joined the 4 pieces I would have a channel already dug all the way around, be interested in any thoughts you may have on this approach. I realize this will leave some work to get the corners radiused, though I'm not convinced they actually need to be for any reason beyond aesthetics.
My other question about those hatches is if there is any concern about the inside lip of the gutter carrying the load of an angler standing, or possibly jumping, on the hatch lid and the torque that I imagine this putting on the gutter.
Keep up the great work!
Jeff
Re: FS18 on the double!
Posted: Fri Nov 22, 2019 5:06 pm
by Jacky Chan
Cheers Jeff & Jeff
Jeff sorry to only just catch this, your idea to pre-gutter and then mitre the joints is genius!! Rounding off the inside corners might be fiddly, definitely worth adding some putty to beef up the inside where you are about to whittle the edges off - the whole thing would have been so much easier with a big boy router - I only had a trimmer at my disposal and it did get pretty fiddly. With a big router you could just make a jig piece in the centre to work around and bobs your uncle
The corners were the fiddliest bit, so I like your idea a lot as it would mean 95% of the corner material is already gone! I would also recommend picking the straightest timber you can find for the gutters - mine had a bit of warp to it, which meant the gutter trapezoid was a little wobbly, which meant that when the top decks went on, the lid didn't sit evenly and needed filling to make it look flat with the rest of the top decks.
Regarding strength, to be honest you have got me a teeny weeny bit worried, though previously I hadn't been at all so I think it probably is solid. I havent tried standing on it properly as my makeshift yard is too low, but I have sat on both and they feel as solid as you would hope. If you jumped up and down on it and tried to break it then you probably could, but then if someone did that on my boat they can swim home
I think its strong sideways, as any real force would probably just tip the boat, my only worry would be cracking the bottom of the gutter if you stamped on the corner...
Right thats it, only bare feet allowed on her from now on
All jokes aside, I think you can go relatively thin on the material as its a tippy boat so people wont be charging around the place - just dont jump off the poling tower with too much gusto!
4 x 4" would be plenty big - I think mine was something like 2 3/4 x 4", and that was with lots of material left on the outsides to act like joists. My gutter walls are around 1/2", bottoms a little thicker, plus with about 3/16" of epoxy puddled at the bottom (great way to smooth things off down there!).
Best of luck with your build, I for one have never seen a boat in the flesh that has such a long sleek shape (as far as I can tell, this is the first fs18 or similar hull in the UK, maybe europe) - to say I am excited to find out how she performs on the water would be the understatement of the year, and thats putting it mildly
Re: FS18 on the double!
Posted: Fri Nov 22, 2019 5:10 pm
by Jacky Chan
Speaking of tippy boats and things to watch out for, does anyone know if these boats are likely to actually flip over? Im thinking if two people happened to be right over to the same side of the boat
Or indeed are there any other mishaps that someone might like to keep an eye out for during the first sea-trial..?
Re: FS18 on the double!
Posted: Fri Nov 22, 2019 5:22 pm
by Jacky Chan
Still slowly creeping towards the finish line - I've now done every single bit of painting, including under the gunnels and the touch up areas inside the compartments. The lids have got kiwi'd and look much better than the other bits of white kiwi because I put a layer of undercoat over the whole thing, not just where the gloss was going to go. Should have done this all over for sure... I'm going to see what its like in direct sunlight first and then probably do a second coat at some point, maybe summer 2021
I've got some fenders and generally kitted out the poling platform so it really is ready to go now. It wont see the boat now until we've lugged it over a few fences into a field where I can drive the trailer to (if the rain ever eases up..!!)
All thats left is to oil up the iroko rub rails, fit the pipes under the gunnels (and some £8 lets strips to the pipes), and finish off fitting the hatch lids
Re: FS18 on the double!
Posted: Sat Nov 23, 2019 6:43 am
by icelikkilinc

I haven’t been on one but I remember this pic which is a nice display of stability. Considering you won’t be standing there to fish, You will be fine unless you are 2 guys weighing 300 each

But breaking the gunnels will be the first issue if you are that heavy not flipping
Re: FS18 on the double!
Posted: Sat Nov 23, 2019 1:34 pm
by Jacky Chan
Re: FS18 on the double!
Posted: Fri Nov 29, 2019 4:57 am
by Jacky Chan
Last medium-sized job out of the way!! Rubrails oiled:
Had a bit of a sweep out and took off all the protective sheeting so I could take some photos while the sun is out for a change!
And I've added this safety ladder for when I fall in off the tower
After struggling to get into a kayak wearing a weight belt, this lad offers a lot of peace of mind
The blue tape in the corner is to hold on a block of plastic for mounting the fish finder sounder - I suddenly thought that I didnt like the idea of drilling and filling below the water line, found a product online called Stern Saver and then thought I could save a bit of cash by doing a diy version (sorry Stern Saver...
) We shall see if it holds, but basically i scratched/gouged up both surfaces with a saw and the sharp tip of a file, drilled a few little holes at funny angles just inside the edge of the plastic and glued it in place just above the bottom of the boat. I will put some sealant around the edge to smarten it up and stop sand and salt getting in, then fingers crossed it stands up to scrutiny! Seemed to work for some guy on another forum, I'll let you know how it gets on
Boat getting moved out of the garden next weds, then off to get the motor and FF fitted, hopefully in time for a rag around to bed the motor in before Christmas. I've resisted the urge to stick on my cheapo under-gunnel LEDs until the chap has fitted the motor as the LEDs will stick onto the pipes for the fuel and electricity lines and they might just flop off. I reeeallly hope this thing floats
Re: FS18 on the double!
Posted: Fri Nov 29, 2019 5:28 am
by Eric1
That pretty rig will more than float!
Re: FS18 on the double!
Posted: Fri Nov 29, 2019 5:51 am
by seaslug
Your boat is a real beauty, but I'm biased, it looks just like mine. I hope you love yours as much as I love mine, in fact going fishing this morning. At least 200 trips in my boat with no issues, and I still get people asking every time I go out what boat it is. I tried one of those rope ladders and I could not get any leverage or advantage because my legs would just push under the boat, and it would actually make it more difficult to get over the side. That was on my other boat with much higher sides though, but try yours out to see if it helps, before you need it. Good luck, and post some water pictures. Mike
Re: FS18 on the double!
Posted: Fri Nov 29, 2019 12:06 pm
by Jacky Chan
Thanks Eric1, I think this is the start of a beautiful friendship!
Thats very kind of you too Mike, though unfortunately the finish on mine is quite a long way off yours!! Still I am beyond happy with her - now I know what its like to be a woman going through labour and giving birth to your pride and joy (well sort of
) Thanks also for the inspiration on the colour and the hatches
its great to have something to copy when you havent got a clue what you are doing!
Re: FS18 on the double!
Posted: Sat Nov 30, 2019 3:46 am
by OrangeQuest
Your boat looks fantastic! It would be great to see a few pictures without all the tools on her!
Good luck on your splash!
Re: FS18 on the double!
Posted: Mon Dec 02, 2019 8:39 am
by icelikkilinc
Be proud mate, you have done a cracking job on her.
Rope ladders have the tendency to go under the hull when you are trying to put the first step in, but you are tying that to the platform and that should provide a nice place to grab and upright yourself.
Re: FS18 on the double!
Posted: Tue Dec 10, 2019 5:30 am
by Jacky Chan
Well then, the c-section went without a hitch, I am delighted to say
Everyone was keen to help move her back in the summer, but then flaked out at the prospect of doing it in -1 (C) conditions!! Luckily I know a few guys who aren't complete wetties and can be persuaded to do pretty much anything with the promise of a few beers
I left the platform off to save weight and made up some runners to slide her up over the first fence as there was lots of stone and a little wall that could have punctured her if dropped, but to be honest it would probably have been much easier just to tie a beam at the front (as we did at the transom) and just walk her all the way out. Anyway alls well that ends well
SO now shes off to Bristol on thursday to get the motor and fish finder plumbed in
Fear not, I'll keep the photos coming when she gets on the water. Not many fish around in Jan but there should be some squid inshore and I might try and catch my first big pike before it all kicks off in the spring/summer
Re: FS18 on the double!
Posted: Tue Dec 10, 2019 7:39 am
by Jeff
Congratulations!!!! Jeff
Re: FS18 on the double!
Posted: Tue Dec 10, 2019 9:07 am
by pee wee
Nice! Good to have a few friends not afraid of chilly weather!
The boat looks really light sitting on that trailer, might not have felt that way going over the fences.
Re: FS18 on the double!
Posted: Tue Dec 10, 2019 4:36 pm
by lelandtampa
No offense but it just looks odd seeing a flats boat and a pickup truck in Castle cooooom. That boat is a knockout.
Re: FS18 on the double!
Posted: Wed Dec 11, 2019 3:55 am
by Jacky Chan
Re: FS18 on the double!
Posted: Mon Jan 13, 2020 11:22 am
by Jacky Chan
Good news, dear reader - after 7 months of messing about, Sweet Chariot has passed the float test!!
I was racking my brains as to what I had forgotten to do - transom drain plug, all straps removed etc, until there really was nothing for it but to reverse down that ramp and find out once and for all! To be honest I couldn't quite believe it as she gently slid over towards the side to get tied up - I was waiting for the bubbles/explosion/shark attack to happen!
Such an amazing feeling, must be right up there with childbirth for women, only a lot less painful haha.
I have to doff my cap again to the designers, as she really does perform beautifully on the water - handling some chop without any fuss, gliding around swan-like when its really glassy. I was having an absolute ball standing up holding the post (glad I put that in as I am a lanky git) and putting in some fast turns - i really am so grateful to everyone at Boat Builder Central for offering the design so affordably and everyone who has been so generous with the tips on this forum! It really is an amazing combination.
We went on a family trip the next day and the fish finder worked wonders in finding some shoals of baitfish getting hammered by mackerel - my 3yo son managed to "catch" his first fish, closely followed by my 1yo daughter taking her first steps!! She was obviously waiting for the boat to be ready - walking on land is lame haha
Went back and scoffed the mackerel to cap off undoubtedly one of the best days of my life, all thanks to this little boat!
The next day I had a go at standing on the platform, which actually felt surprisingly stable - much easier than a paddle board, and with a slower, steadier tip, if you tried to tip it. I just need to get myself a pole in time for the bass, mullet, bream etc to come into the estuary (the closest thing to a 'flat' around here, with plenty of untapped sport). I get the impression that a longer pole is the way to go as we have a lot of tide here and the bottom is muddy in places, maybe 20-22ft? Anyone got any recommendations? It will have to be shipped form America as for some reason this sort of fishing hasn't caught on yet here!
Anyway here are some pics, I'll keep them coming as more species get caught and the sun starts coming out!
Re: FS18 on the double!
Posted: Mon Jan 13, 2020 11:45 am
by Jeff
Congrats JC!!! Glad to see her in the water!!! Jeff
Re: FS18 on the double!
Posted: Mon Jan 13, 2020 11:53 am
by Reid
Jacky Chan,
Congrats on the completion of the FS18! She looks great! You also took some really nice pictures of the boat on the water. We will definitely add these photos to the FS18 gallery on our website.
Any idea what kind of speeds you were seeing with the 20HP Tohatsu?
Congrats again and I hope you enjoy it!!!
-Reid
Re: FS18 on the double!
Posted: Mon Jan 13, 2020 12:15 pm
by Dougster
She's a stand out! Just can't beat that feeling, launching a boat you made yourself.
Dougster
Re: FS18 on the double!
Posted: Mon Jan 13, 2020 1:42 pm
by Fuzz
Outstanding all the way around.
Re: FS18 on the double!
Posted: Mon Jan 13, 2020 4:23 pm
by cape man
Beautiful! Nice job!
Re: FS18 on the double!
Posted: Mon Jan 13, 2020 4:41 pm
by Jacky Chan
Cheers you guys for the kind comments!
Reid yes I do, the FF has a speedo that was clocking 21 knots but that was still rising when I eased off - it’s a new motor and the chap said not to go over 2/3rds throttle for long until it’s gone for 20hours to bed the engine in. I’ll do a proper speed check once she’s ready to rock and let you know.
To be honest 21kts felt pretty rapid at the time! That said, it would be rude not to find a bit of a tailwind and see if we can’t hit 30!
Well-chuffed to make the gallery!
Re: FS18 on the double!
Posted: Mon Jan 13, 2020 5:11 pm
by Crystal Craft
Wow! What a boat! A great story and beautiful photos!
Enjoyed it with you very much. Thank you for sharing these moments! Wow!
Crystal Craft
NW Michigan
Overcast/10 in snow covers ground/33 degrees
Re: FS18 on the double!
Posted: Mon Jan 13, 2020 7:16 pm
by OrangeQuest
Your boat looks great on the water!!! And your write up is awesome!
Need to get the spare tire some place else. From the first picture it looks like it is a few inches from rubbing the ground, one small incline and it will. Can you move it to behind the winch, laying flat?
Again, your boat looks at home on the water!
Re: FS18 on the double!
Posted: Mon Jan 13, 2020 9:00 pm
by seaslug
Congratulations on a great build and successful launch. The boat is beautiful, and your pictures really showcase the great lines she has, thanks to Jacques once again. I use a segmented 21' graphite pole, and someday when I have an extra $1300 bucks laying around I'll buy a 22' one piece pole for the extra stiffness, and lighter weight. That being said, the segmented poles are really quite good, just very slightly heavier, and a bit more flexible, but very good overall. I don't know if anyone will ship overseas, but you can't go wrong with Carbon Marine, they make a great pole. I think it would be more than $500 for a 19-21' pole though. I recommend no less than a 19' pole, longer if you can afford one. Great write up and pictures, thanks for posting, and happy fishing. Mike
Re: FS18 on the double!
Posted: Mon Jan 13, 2020 11:09 pm
by VT_Jeff
Boat looks amazing and your splash story is awesome, really stoked for you, congrats!
Jeff
Re: FS18 on the double!
Posted: Wed Jan 15, 2020 1:03 am
by changeat44
Very nice boat and pictures!
Daniel
Re: FS18 on the double!
Posted: Wed Jan 15, 2020 4:48 am
by Jacky Chan
Thanks everyone for your comments, and your tips along the way!
If anyone in the UK is thinking of building one of these boats, I can thoroughly recommend a few otters people that I was lucky to encounter that have also been a huge help:
Motor/FF/Electrical: Duncan from Wet Marine Bristol/SW Marine Store Salcombe
www.swmarinestore.com He really took me under his wing as a novice in need of a lot of advice!
Poling Platform: Julian from Phoenix(316) Ltd in Plymouth
https://phoenix316.com Was an absolute pleasure to work with and really knows his stuff.
Paint etc: All the boys from Force4 in Bristol
www.force4.co.uk They were so helpful with all the little details that really add up, steered me clear of some costly mistakes, and generally told me how to build and paint - glad I went with the more expensive paint as it is bombproof!
I also had good experiences with the suppliers I went for - Pecepoxy in Cumbria for the epoxy and East Coast Fibregalss for, you guessed it, the glass.
https://www.pecepoxy.co.uk
https://www.ecfibreglasssupplies.co.uk
Jeff - I will delete the bit about the suppliers if you start shipping to the UK!
A special thank you is to Jeff and Jacques for having the genius to create such an exquisite design, and the generosity to make it available for $75!
Re: FS18 on the double!
Posted: Wed Jan 15, 2020 4:50 am
by Jacky Chan
Er that should say "a few other people" not "a few otter people"... though I have heard tales of otter people in certain parts of Devon before
Re: FS18 on the double!
Posted: Wed Jan 22, 2020 10:27 am
by Jacky Chan
Just thinking about ways to keep the boat to hand on a far-away beach for, say, a long lunch, or overnight - has anyone ever tried these inflatable rollers?

- image005s.jpg (81.2 KiB) Viewed 920 times
They seem like a good way to do it without having to anchor it and swim/have an inflatable tender etc. Seems like three is the magic number, and two of them could double as a seat as you hold the tiller. If you could roll the boat above the high-tide mark (we get a lot of tide here) then you could sleep soundly nearby without worrying about anchors slipping, leaving the single malt on the boat etc etc
Now I promise you I havent been drinking, but I also thought about using a replacement handle for a garden fork to hold the boat in position going up the beach like a ratchet, as you move a roller, or take a breather. The idea was to whittle the handle-end so you can stick it up underneath the armpit of the raised motor, held in place with a bungee. Then as you roll up the hill, the sharper end (maybe with a more acute angle cut, in order to dig in) would drag along the sand until you come back a little way, when it would hopefully dig into the sand and hold the boat in position...
Then to go back downhill you just take the weight off the stake, lift it, and roll on down till your next roller becomes free.
I'm going to give it a go when the weather next improves, which might be a while - any thoughts in the meantime much appreciated!
Re: FS18 on the double!
Posted: Wed Jan 22, 2020 10:36 am
by Jacky Chan
Trying that link again:

- Beach roller pic.jpg (81.2 KiB) Viewed 920 times
Re: FS18 on the double!
Posted: Wed Jan 22, 2020 3:25 pm
by Fuzz
They use rollers to put boats up above high tide mark a lot around here. Mostly I see this done with larger boats that are too big for any lift in this area. I did a crane inspection on a 120x40 steel barge last month that was hailed out using rubber rollers, just way bigger than what you show. We have a little tidal action here also
Re: FS18 on the double!
Posted: Wed Jan 22, 2020 4:21 pm
by cape man
Depending on how far from shore you would need to anchor to keep it afloat, you might use a loop of rope that feeds through a shackle on the anchor, with a tag attached to the bow, and the other end of the rope secured on shore. That is what I use when beach camping here, allowing me to come ashore and then pull the boat back out to anchor. If I need anything off the boat ("Damn! Where did I leave my sunglasses?"), it is simple task to pull it in and back out.
Here's a video I found of the concept, but the guy has added a separate line to the loop for the anchor.
https://www.youtube.com/watch?v=4hxOFQ8t6F0
Another example of the principle, but this guy has added pulleys to it (I don't think you need them).
https://www.youtube.com/watch?v=kLzqQwcd1g0
The really nice thing is that once set, you are actually distributing the force of the floating boat onto two points - the anchor and the shore attachment - making the anchor set more secure if the wind or currents pick up. The bow will also turn into the current or wind if it shifts. I use a 200 ft piece of 3/8" poly rope threaded through a stainless shackle on the end of the chain rode which works fine on Cape Sable with a maximum of 4-6 feet of tide. I have been to Weston Super Mare (visited Steve 392 who built a gorgeous FS17 high sheer) and saw the tides. You may need MORE rope for the loop!!!
Re: FS18 on the double!
Posted: Thu Jan 23, 2020 9:41 am
by lelandtampa
Otter people? All we have here in Florida is the skunk ape or grassman.
Re: FS18 on the double!
Posted: Thu Jan 23, 2020 10:40 am
by Jacky Chan
Well Skunk Ape and Grassman certainly get the imagination firing on all cylinders
Thanks Fuzz and Cape Man, I'll let you know how the rollers and stake go as I already have all the ingredients now, but I will give the running-line a try in the summer once I've scoped out some suitable spots - it looks perfect for the steeper beaches, and for a bit of autumnal night-fishing right next to your camp spot
Yeah I am very jealous of your relaxed 4-6ft tidal range - Cornwall is more like 4-6 metres! The Bristol Channel (about 100 miles away) is 12-14 metres...
Good for the fishing but the currents can get a bit gnarly if you are in the wrong place at the wrong time
Those FS17s look like another fine design - so many boats to build, so little time!
Re: FS18 on the double!
Posted: Thu Jan 23, 2020 11:14 am
by cape man
You Bateau builder guys in the UK are quickly getting to a critical mass to schedule a get together. Would be great to see all the boats together.
Re: FS18 on the double!
Posted: Thu Jan 23, 2020 4:51 pm
by Jacky Chan
Well I for one would be up for that - any idea how many there are? I know of Illker and your mate Steve but there must be others.
Everyone who has seen my boat seems astonished that it’s home made, particularly by me! Here’s hoping it catches on over here
Re: FS18 on the double!
Posted: Sun Mar 22, 2020 10:08 am
by Jacky Chan
SO this virus outbreak has obviously got me stuck at home more than I'd like... and I've finally got round to putting a video together of the build photos and some videos on the water. If anyone else is having to self-isolate and is bored out of their minds, they might be interested in watching it:
https://www.youtube.com/watch?v=4pRPqJN0r2g
Hope you all stay safe and we can all get our social lives back before too long, as well as get something in place to stop this happening again!
Re: FS18 on the double!
Posted: Sun Mar 22, 2020 11:48 am
by Dan_Smullen
Great video! Nice to see the boat in action.
7 months has to be damn close to record time.
Social distance on the water, and stay healthy!
Re: FS18 on the double!
Posted: Sun Mar 22, 2020 1:35 pm
by cape man
Nice!
Re: FS18 on the double!
Posted: Sun Mar 22, 2020 5:15 pm
by icelikkilinc
Absolute cracker, brilliant video.
Lovely family, hope all healthy in this madness.
Hope when all this ends, we can have an outing

I’ll pack the beers


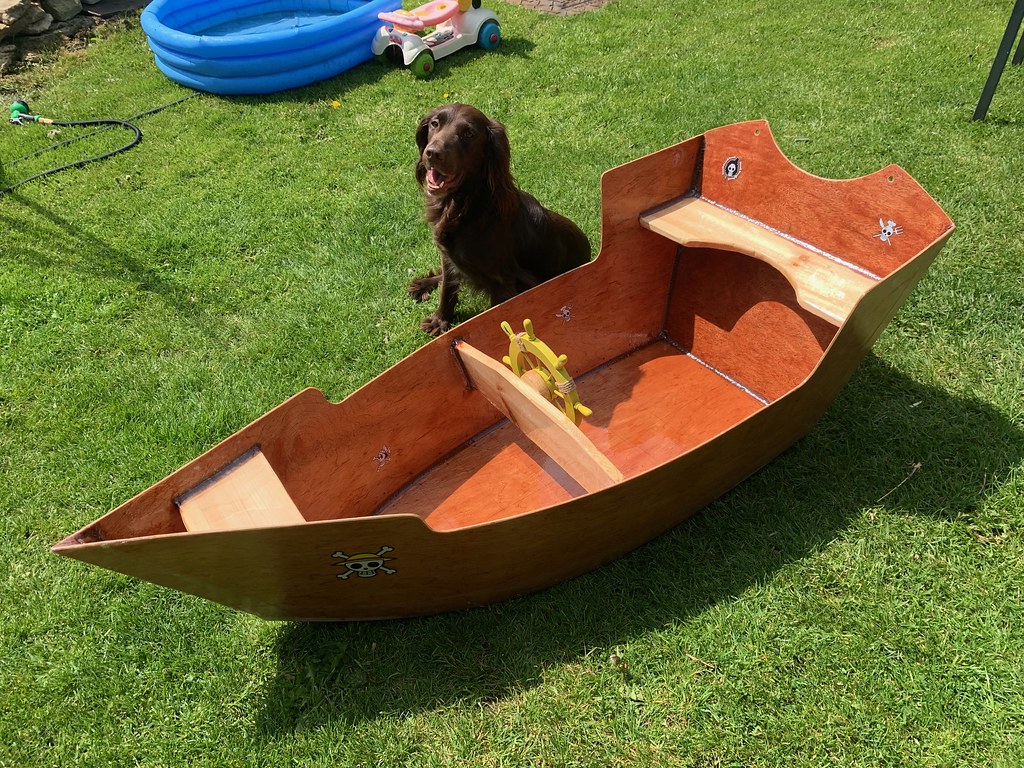
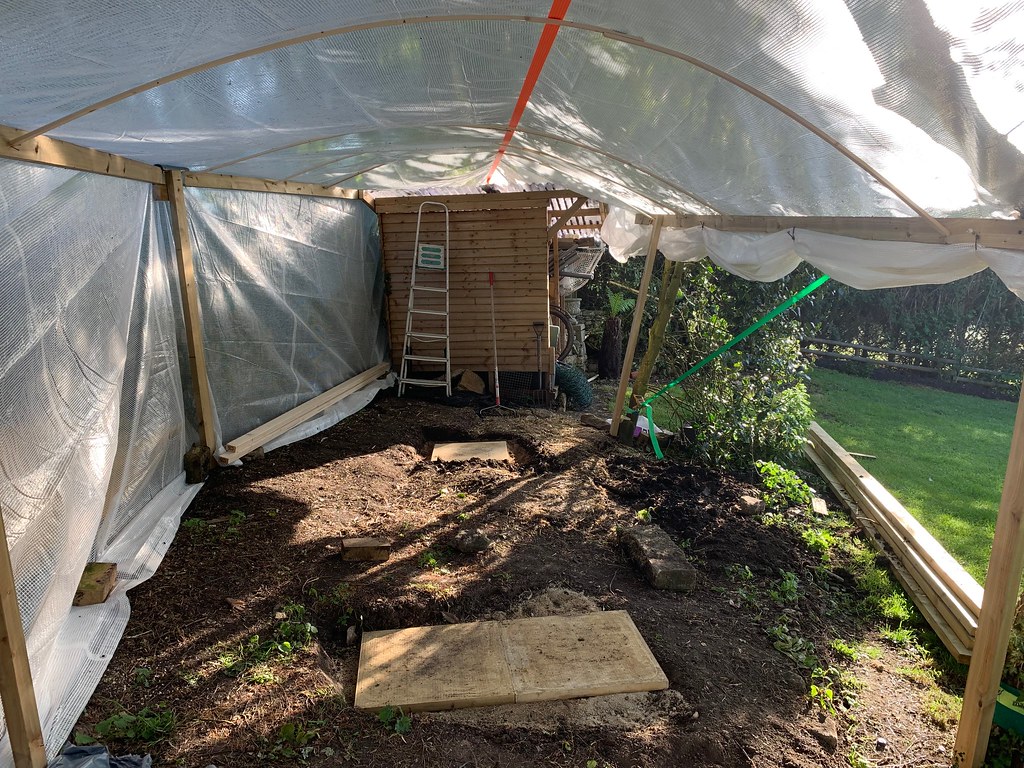