
I say go for it
PrometheusNL FL12
-
gstanfield

- * Bateau Builder *

- Posts: 4655
- Joined: Sun Jan 10, 2010 5:09 pm
Re: PrometheusNL FL12
Looks good  I guess you could build full size, or you could go ahead and build it at 1/2 scale next then finally step up to full size

I say go for it
I say go for it
Previous builds: FL14, NC16, and others...
Current build: FL14 (+10%)
Current build: FL14 (+10%)
-
Cracker Larry

- * Bateau Builder - Expert *

- Posts: 22491
- Joined: Fri Mar 11, 2005 3:39 pm
- Location: Savannah, GA
Re: PrometheusNL FL12
No, you've already got more practice than most beginnersSo what do you guys think is this resonable for a first time builder? Or should i practice more before i start on the full size FL12?
Completed GF12 X 2, GF16, OD18, FS18, GF5, GF18, CL6
"Ships are the nearest things to dreams that hands have ever made." -Robert N. Rose
-
PrometheusNL

- Frequent Poster

- Posts: 73
- Joined: Sun Jun 05, 2011 11:01 am
- Location: The Netherlands
Re: PrometheusNL FL12
Thanks guys!
As soon as the ply gets here i'm hitting the ground running. Until then model making lol Half scale you crack me up
As soon as the ply gets here i'm hitting the ground running. Until then model making lol
-
gstanfield
- * Bateau Builder *
- Posts: 4655
- Joined: Sun Jan 10, 2010 5:09 pm
Re: PrometheusNL FL12
Previous builds: FL14, NC16, and others...
Current build: FL14 (+10%)
Current build: FL14 (+10%)
-
vla
Re: Another week gone.
Prom,PrometheusNL wrote:So what do you guys think is this resonable for a first time builder? Or should i practice more before i start on the full size FL12? If the plywood ever arrives
Stop playing and start building the real thing! There's only one way to learn a thing and that is by doing it. Working with epoxy is really not difficult. Did you also buy that epoxy Lijm 700? I find it very easy to to work with, to make fillets and to fill gaps. Highly recommended.
I hope soon to hear from you that you really started.
Oh, I forgot, but I'll sent you what I promissed.
Allard
-
PrometheusNL
- Frequent Poster
- Posts: 73
- Joined: Sun Jun 05, 2011 11:01 am
- Location: The Netherlands
Re: PrometheusNL FL12
Hi Allard,
Nope i haven't started yet i'm stuck without plywood that's sutable for building. It should have been ordered but the place that was going to supply it did not have the quality required and specifications where totally wrong so we canceled that order. I went to Poly service because it's pretty local to me and got a great discount i forgot to get the 700 Glue so i'll try mixing my own and try it out later when i need some more. Or if i totally fail at mixing my own sneak out and get a tub of the stuff.
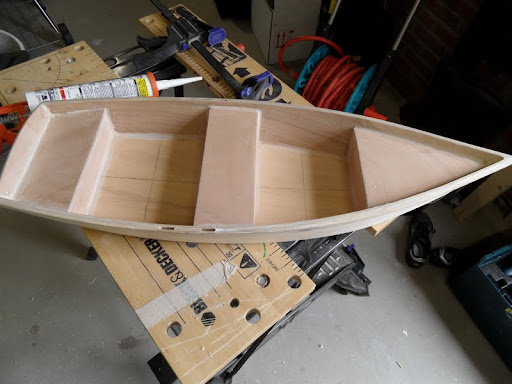
I'm keeping busy though cleaning up the garage so i can start building quicker and getting everything set up for easy acces when i'm building. This longer wait gave me a chance to build the model. And during the model i learnt to take it easy don't finish the boat in 50 hours straight but take your time. I'll upload some pics soon when i get them from the cam. The model is done not the best of finishes but workable.
Prom
Nope i haven't started yet i'm stuck without plywood that's sutable for building. It should have been ordered but the place that was going to supply it did not have the quality required and specifications where totally wrong so we canceled that order. I went to Poly service because it's pretty local to me and got a great discount i forgot to get the 700 Glue so i'll try mixing my own and try it out later when i need some more. Or if i totally fail at mixing my own sneak out and get a tub of the stuff.
I'm keeping busy though cleaning up the garage so i can start building quicker and getting everything set up for easy acces when i'm building. This longer wait gave me a chance to build the model. And during the model i learnt to take it easy don't finish the boat in 50 hours straight but take your time. I'll upload some pics soon when i get them from the cam. The model is done not the best of finishes but workable.
Prom
-
PrometheusNL
- Frequent Poster
- Posts: 73
- Joined: Sun Jun 05, 2011 11:01 am
- Location: The Netherlands
All done!! should i splash it in the bathtub?
Well the model is atleast.
Where did we leave off. Ohh yess the rubrail needed finishing and loads and loads of sanding. I used mixing sticks for this and practiced to create a glued together rubrail from small sticks one that i'll have to do on the bigger model too. I noticed some sticks and began to sag and left me with a little uneaven surface so back to sanding it smooth to get all the bumps and dips out.

It actually worked out great i got to use all the clamps i had to hold down the rail while gluing it all together. Good practice because i wanted to move to fast and ran out of hands to press it all down. Then you figure out a way to make it work by going slowly. The sagging problem should be less since i won't be glueing the whole combined rail at once in the bigger version.
And an overview of the rubrail all sanded smooth.
Sand and fill some more.
Time for some tape around the rubrail.
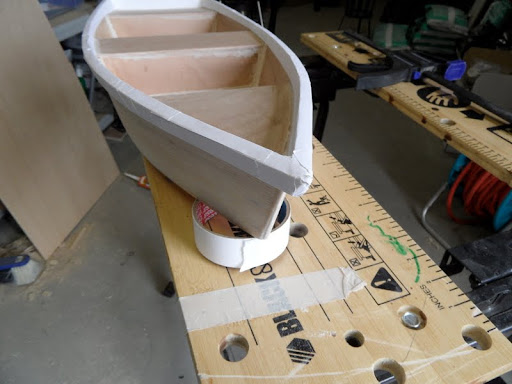
After masking tape comes primer

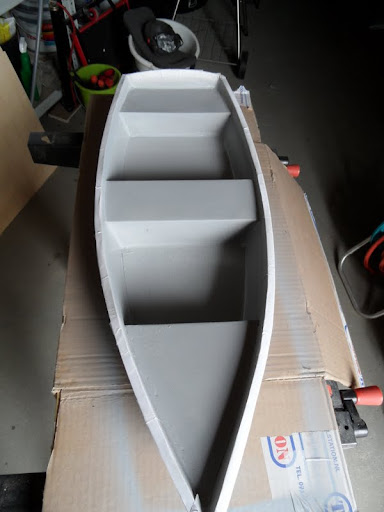
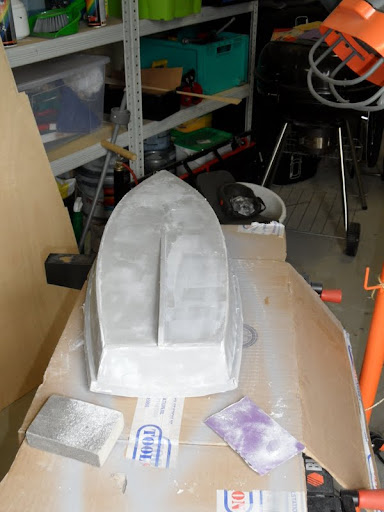
Needed more filler wasn't happy with the finish
And sanding ofcourse.
Time for some color.
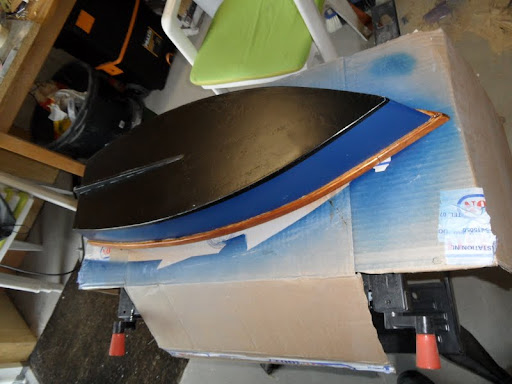
Inside was painted white first. Then masked off for outside blue. and bottom Black. Then Painted rubrail Teak color.

Now for the finished product.
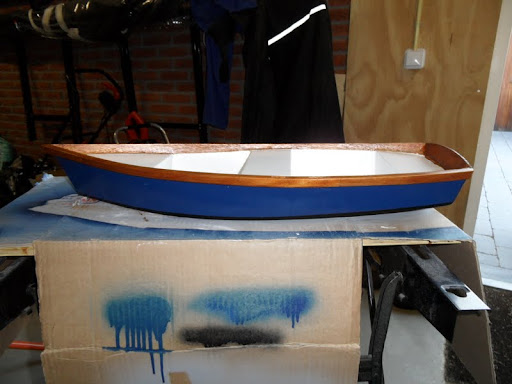

Al in all good fun and now i have something to look at and show the family.The never could beleave i wanted to build a boat. I think they now know i'm serious
My whife also kinda gets now that im serious and saw me work on the small boat with a verry small dremel imitation 12 volt multi purpos tool. She offered to buy me a bigger version after seeing how much use the little one was getting. So actually using your tools in front of SWMBO gets you new tools

Quotes on ply tomorrow
I also like creating posts on the forum showing build progress and slapping pictures in the thread. Good fun to look back though it and see your own journey into the world of boatbuilding.
Where did we leave off. Ohh yess the rubrail needed finishing and loads and loads of sanding. I used mixing sticks for this and practiced to create a glued together rubrail from small sticks one that i'll have to do on the bigger model too. I noticed some sticks and began to sag and left me with a little uneaven surface so back to sanding it smooth to get all the bumps and dips out.
It actually worked out great i got to use all the clamps i had to hold down the rail while gluing it all together. Good practice because i wanted to move to fast and ran out of hands to press it all down. Then you figure out a way to make it work by going slowly. The sagging problem should be less since i won't be glueing the whole combined rail at once in the bigger version.
And an overview of the rubrail all sanded smooth.
Sand and fill some more.
Time for some tape around the rubrail.
After masking tape comes primer
Needed more filler wasn't happy with the finish
And sanding ofcourse.
Time for some color.
Inside was painted white first. Then masked off for outside blue. and bottom Black. Then Painted rubrail Teak color.
Now for the finished product.
Al in all good fun and now i have something to look at and show the family.The never could beleave i wanted to build a boat. I think they now know i'm serious
My whife also kinda gets now that im serious and saw me work on the small boat with a verry small dremel imitation 12 volt multi purpos tool. She offered to buy me a bigger version after seeing how much use the little one was getting. So actually using your tools in front of SWMBO gets you new tools
Quotes on ply tomorrow
I also like creating posts on the forum showing build progress and slapping pictures in the thread. Good fun to look back though it and see your own journey into the world of boatbuilding.
-
vla
Re: PrometheusNL FL12
Prom,
Are you building your boat in a garage? Then it seems convenient that you mou nt wheels back under your strongt. Then you can sand outside teh garage (that prevents a quarrel!). If you use nose wheels of a caravan, you can easy level the whole lot again. I did that too, when I was building my first boat.
Allard
-
PrometheusNL
- Frequent Poster
- Posts: 73
- Joined: Sun Jun 05, 2011 11:01 am
- Location: The Netherlands
Re: PrometheusNL FL12
There's Method in that maddness of sanding in a garage. See this boat i can build in the garage and have enhough space left for other stuff. The other boat i'm thinking about an (RB16 maybe +10%) i want to build outside in the garden but she'll have to sacrafice her parking space for that. So if i make a good mess in the garage i get booted outside to the garden
Bigger boats can then be built in a tent
Atleast that's the Idea. If you see a wedding ring on Ebay under this username you know what happend
Bigger boats can then be built in a tent
Atleast that's the Idea. If you see a wedding ring on Ebay under this username you know what happend
-
PrometheusNL
- Frequent Poster
- Posts: 73
- Joined: Sun Jun 05, 2011 11:01 am
- Location: The Netherlands
Moving to the Big time.
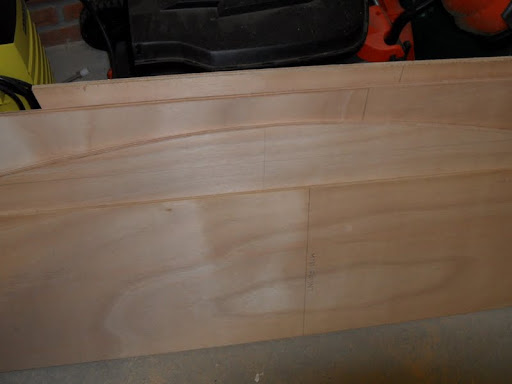
The wood came Tuesday morning.
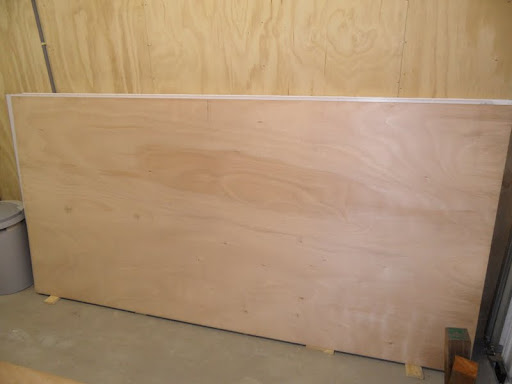
I had to work Tuesday ohh boy was that hard. Left an hour early and went home started drawing. By dinnertime i was a quarter of the way in. After dinner i was finished drawing the 9mm ply.

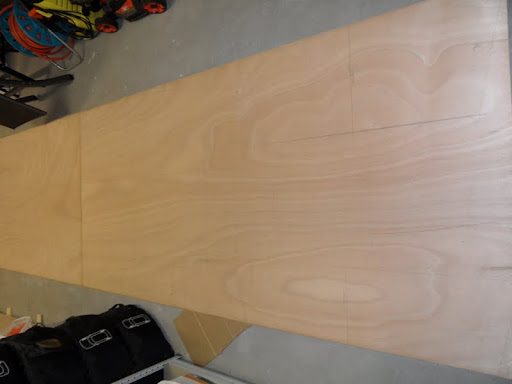
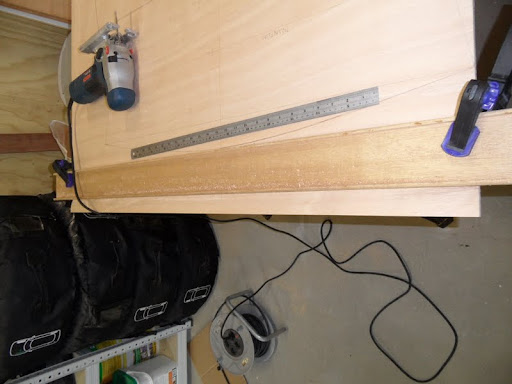
Wednesday after work i drew the 6mm ply sheets and cut out the first piece out of the 9 mm ply.
For the next boat i'll use a metal straight edge to get even straighter cuts with the jigsaw. BTW the Jigsaw did GREAT. I was worried i needed a circluar saw but this worked fine. Just made sure i had the right blade a Bosch Clean cut blade 3 to 30 mm.
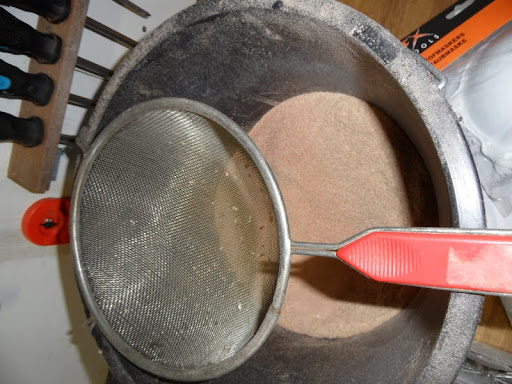
Putting sawdust though a sieve for the woodflour mix. Still a bit coarse i have no idea how to make this finer. Looked all over the place for wood flower but no joy.
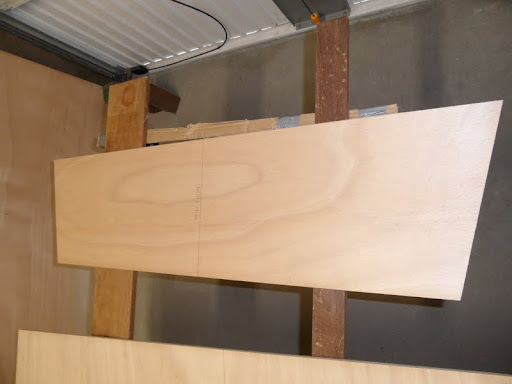
Thursday evening cut out all the rest of the parts.


Whoops run into the first snag.
I damaged one of the Side panels where the butt block is glued on. This is the Rub rail side so i can't hide it like i could on the chine. Options should i cut it out and replace with new ply with epoxy glue or leave it and build up the rubrail around it then fil it in with epoxy glue. Possible color difference on the repair?

Second snag.
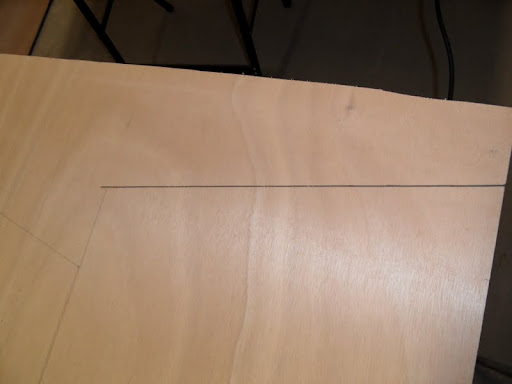
Din't measure quite right on the batten curve on the side panels. This one is correct. overal height 406MM

This one is short 6 mm so it will probablly have a high spot in the chine i should be able to hide this with a little bigger filet right? overall hight 400 mm

Now ready for the gluing part. It's scaring the pants off me hope i can make it work right.
regards Prom
Ps sorry about the pic load it's kinda overkill on the pics..
I had to work Tuesday ohh boy was that hard. Left an hour early and went home started drawing. By dinnertime i was a quarter of the way in. After dinner i was finished drawing the 9mm ply.
Wednesday after work i drew the 6mm ply sheets and cut out the first piece out of the 9 mm ply.
For the next boat i'll use a metal straight edge to get even straighter cuts with the jigsaw. BTW the Jigsaw did GREAT. I was worried i needed a circluar saw but this worked fine. Just made sure i had the right blade a Bosch Clean cut blade 3 to 30 mm.
Putting sawdust though a sieve for the woodflour mix. Still a bit coarse i have no idea how to make this finer. Looked all over the place for wood flower but no joy.
Thursday evening cut out all the rest of the parts.
Whoops run into the first snag.
I damaged one of the Side panels where the butt block is glued on. This is the Rub rail side so i can't hide it like i could on the chine. Options should i cut it out and replace with new ply with epoxy glue or leave it and build up the rubrail around it then fil it in with epoxy glue. Possible color difference on the repair?
Second snag.
Din't measure quite right on the batten curve on the side panels. This one is correct. overal height 406MM
This one is short 6 mm so it will probablly have a high spot in the chine i should be able to hide this with a little bigger filet right? overall hight 400 mm
Now ready for the gluing part. It's scaring the pants off me hope i can make it work right.
regards Prom
Ps sorry about the pic load it's kinda overkill on the pics..
Who is online
Users browsing this forum: No registered users and 18 guests