
Another side of boat building
-
DrBones
- Very Active Poster

- Posts: 881
- Joined: Sun May 04, 2003 1:00 am
- Location: Tallahassee, Florida, USA
As to the paint trays - Here's what I do: I line the paint tray first with newspaper (this to get rid of the ridges...often left in the roller to be transfered to the painted edge!) and then I cover that with aluminum foil (from the kitchen).
That way you can easily re-use the paint tray every time by replacing the aluminum foil and/or newspaper (if necessary).
Good building by the way!
That way you can easily re-use the paint tray every time by replacing the aluminum foil and/or newspaper (if necessary).
Good building by the way!

Building update
OK, works goes on, I want to splash her in the summer. Here is an update.
After turning I had to install butts at the bottom joints inside the flotation chambers. I decided to install glass butts.
This is the aft port flotation chamber, where the bottom plywood panels meet. A glass splice has been installed. There are the fillets that round the two chines and four layers of 225 gm/m2 (approx 7 oz) glass, each layer covering the previous one plus 1 inch. So we have 1 layer of 3 inches, 1 of 5, 1 of 7 and 1 of 9 inches. There is also one layer of glass on the outter side. The fillets are from iroko sawdust. Everything was done wet on wet.
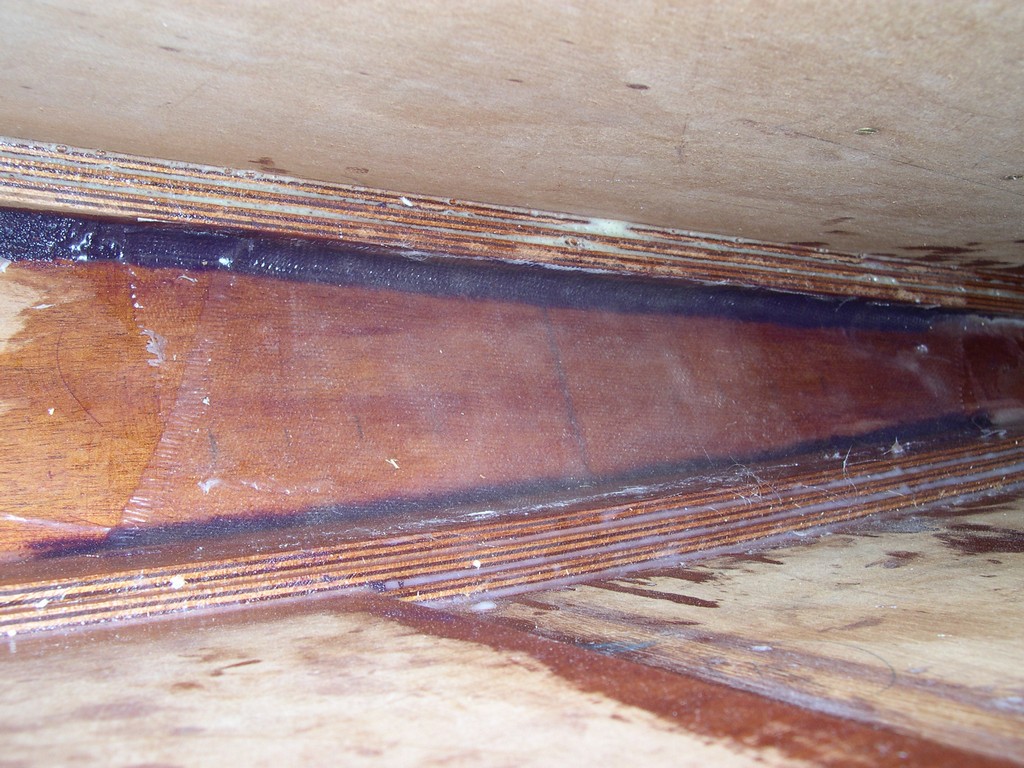
I think there is enough glass there to keep me afloat Can anyone please comment on this?
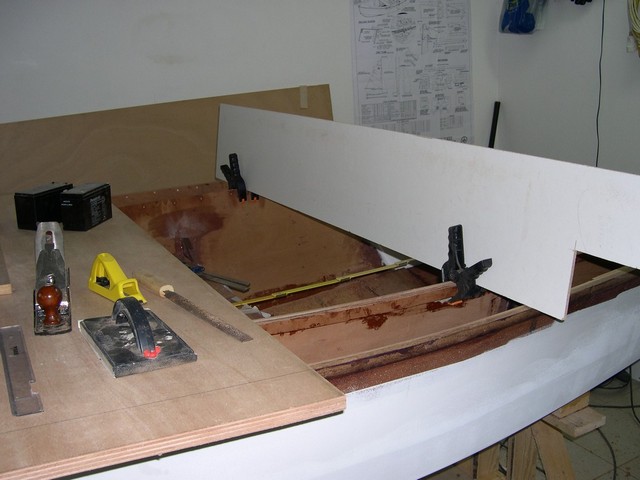
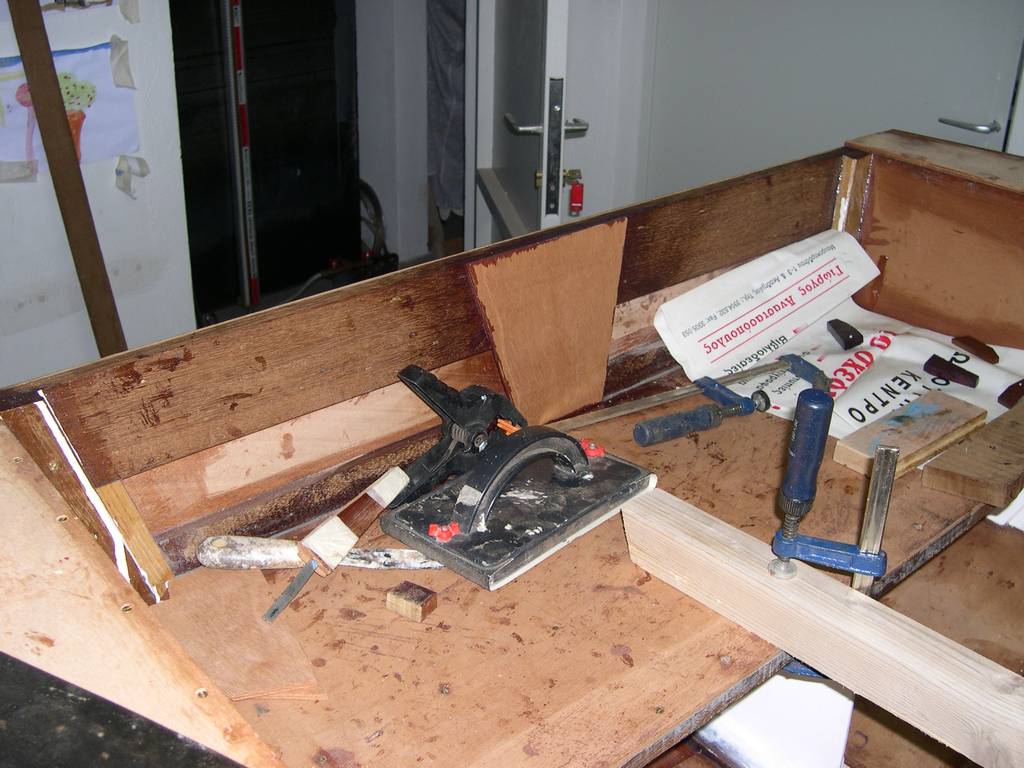
Then I installed the deck cleats on the outer planking, and then on the inner planking. There are pictures in the gallery. After the glue set I have to start fairing the deck cleats. This was difficult because all 4 side planks had to be on a straight line atwartships. I tried hard to keep the outer cleats level and only had to bevel them and only remove excess on the inner cleats. A picture of the fairing work in progress follows. More pictures in the gallery.
The I cut and dry fitted the deck supports at the bow area. This was a very entertaining part of the work. These parts will be glued after I finish all work inside the flotation chambers.
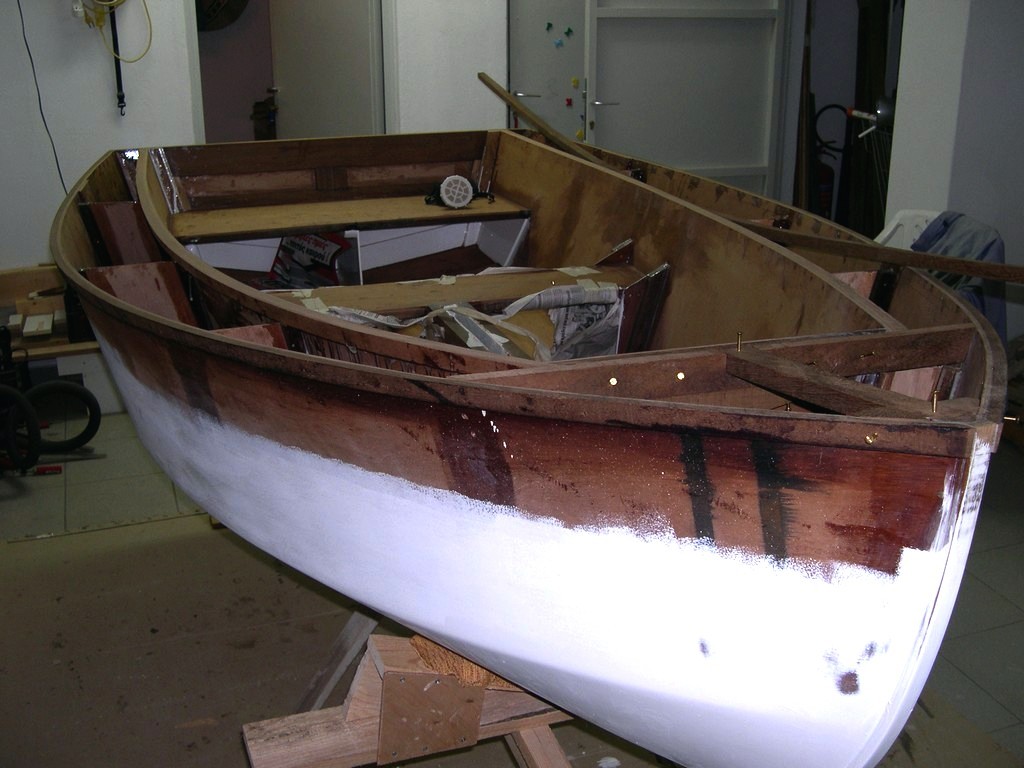
The following picture shows her as she is now.
I also bought the first hardware. More on the next update.
This is a link to my gallery
http://forums.bateau2.comindex.php?cat=15358
Keep building
After turning I had to install butts at the bottom joints inside the flotation chambers. I decided to install glass butts.
This is the aft port flotation chamber, where the bottom plywood panels meet. A glass splice has been installed. There are the fillets that round the two chines and four layers of 225 gm/m2 (approx 7 oz) glass, each layer covering the previous one plus 1 inch. So we have 1 layer of 3 inches, 1 of 5, 1 of 7 and 1 of 9 inches. There is also one layer of glass on the outter side. The fillets are from iroko sawdust. Everything was done wet on wet.
I think there is enough glass there to keep me afloat
Then I installed the deck cleats on the outer planking, and then on the inner planking. There are pictures in the gallery. After the glue set I have to start fairing the deck cleats. This was difficult because all 4 side planks had to be on a straight line atwartships. I tried hard to keep the outer cleats level and only had to bevel them and only remove excess on the inner cleats. A picture of the fairing work in progress follows. More pictures in the gallery.
The I cut and dry fitted the deck supports at the bow area. This was a very entertaining part of the work. These parts will be glued after I finish all work inside the flotation chambers.
The following picture shows her as she is now.
I also bought the first hardware. More on the next update.
This is a link to my gallery
http://forums.bateau2.comindex.php?cat=15358
Keep building
It has been very long since the last update, there has been some progress but overall I slowed down because I now also have the sailboat to work on.
So here is the story.
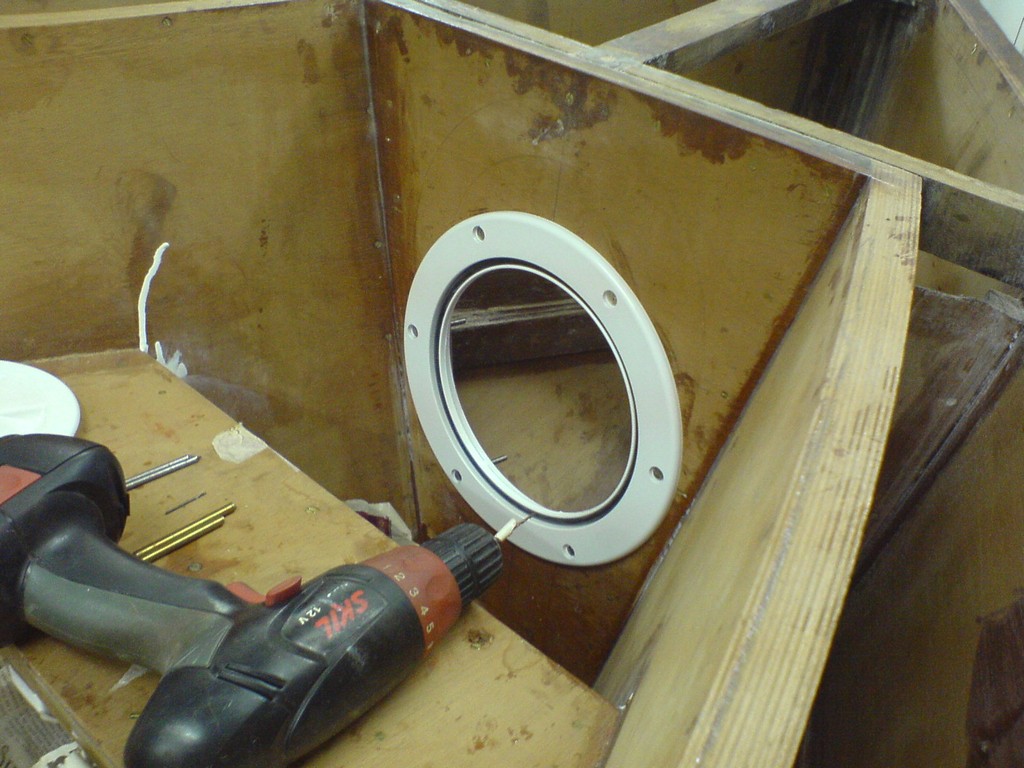
First I dry fitted access portholes, for storage inside the flotation chambers and ventilation. There is one porthole at each side and one in the bow. I plan to install a net inside the flotation chambers to hold stored items from banging around. Cutting these holes has been really stressing.
In the back you can see the oarlock support that has been laminated on the outer skin. There are 8 layers of 6 mm plywood.
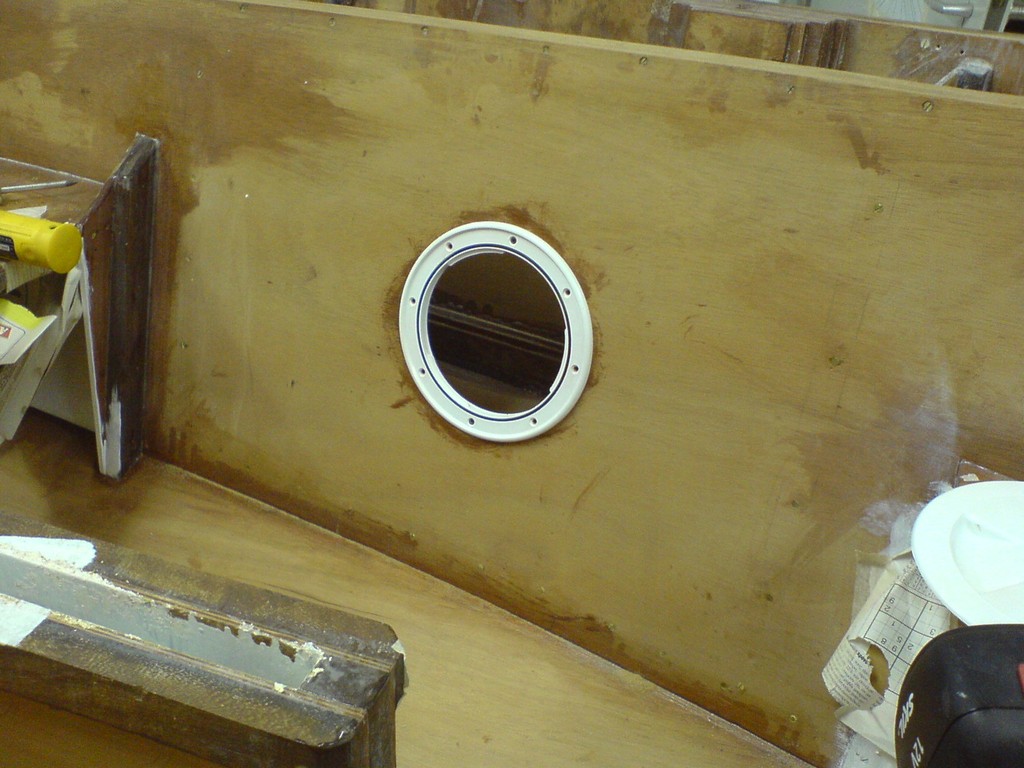
This is a view of the bigger bow porthole.
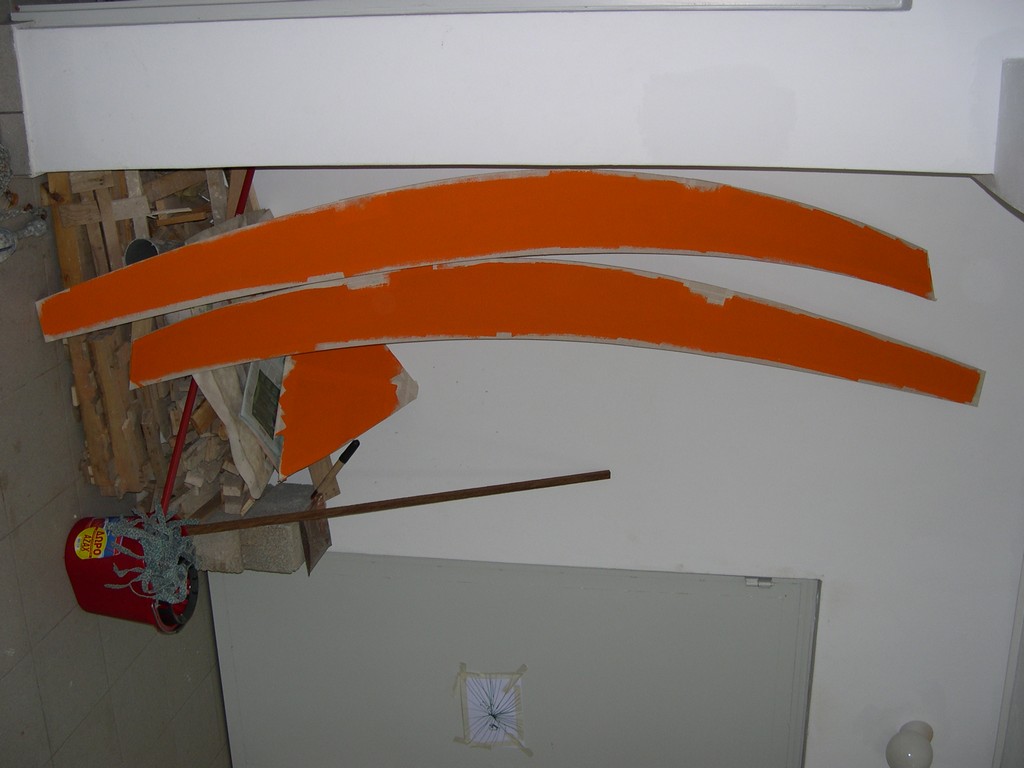
Next, I cut the deck pannels. I decided to cut the side deck panels without making a patter on paper first. I placed the plywood on top of the boat and marked the trace of the outer skin. To mark the inner skin (which was not accessible as the plywood was wider than the boat) I use a technique called 'spilling' to generate it. You use a pair of compasses to transfer triangles from the boat to the panel. You take two points on the outer skin and tranfer them to its trace on the plywood using the compasses. Then you choose a random point in the inner skin, somewhere between the two other points and using the compasses transfer it to the plywood. People that build glued lapstrake boats use it extensively to trace the planking.
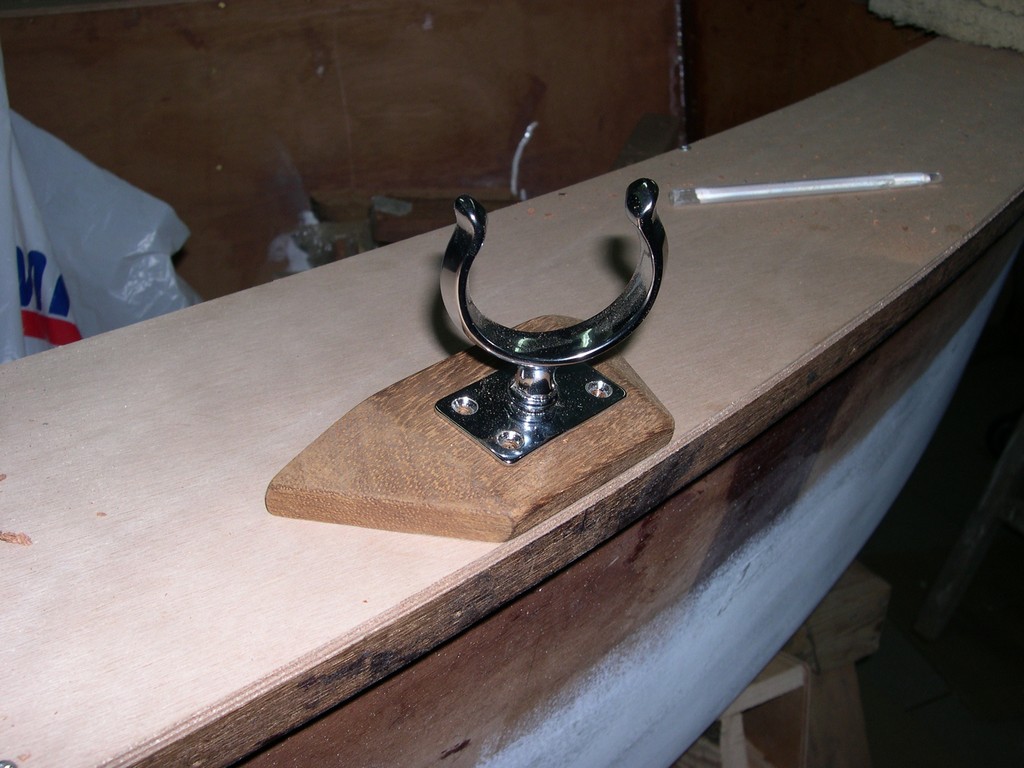
Oarlock supports are from solid iroko. They are cut so that the oarlock is parallel to the side panel.

This is the first piece of hardware that I fitted on her. Hand cutting the oarlock supports has been a very rewarding woodworking experience. There is also oarlock support inside the flotation chamber (8 lams of 6 mm plywood). The hole for the oarlock stops before reaching the flotation chamber and drains overboard through a small hole on the side planking (not visible here, probably I had not opened it yet).
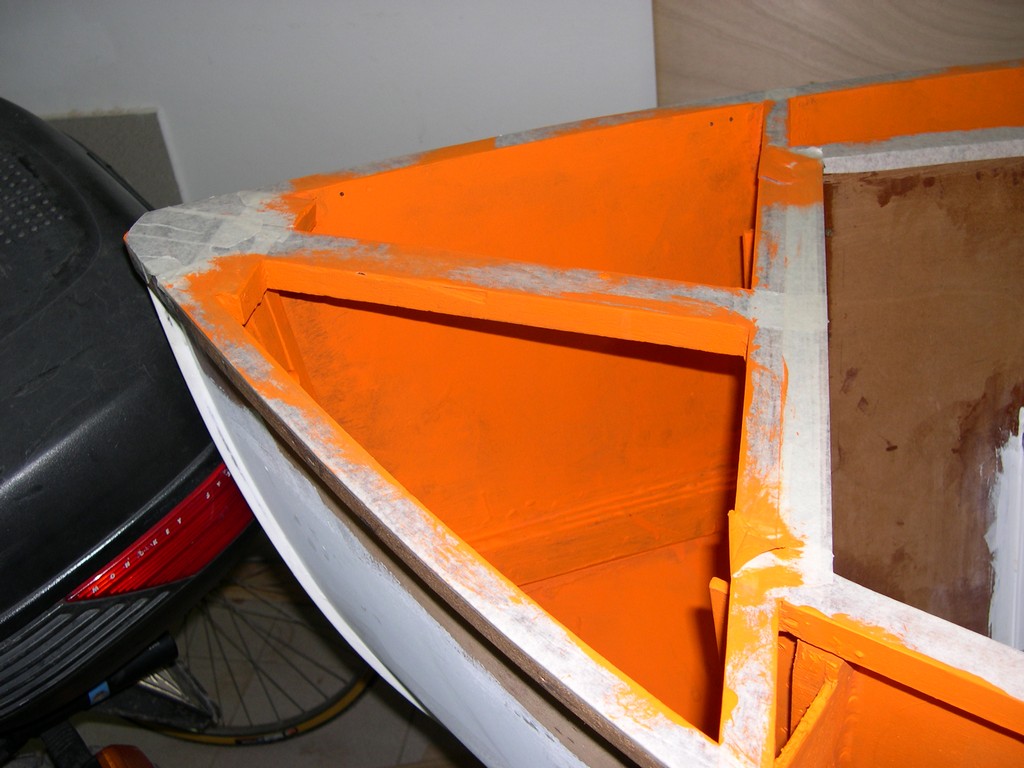
I decided to paint the flotation chambers using traditional materials. I put two coats of red lead primer (shown here) and 3 coats of alkyd paints. Red lead primer has been the primer of choice for all wooden boats in Greece, I think because of its high toxicity and resistance to water. It is very soft though. The same treatment was given to the deck panels.
This is a link to my gallery
http://forums.bateau2.comindex.php?cat=15358
Regards to all of you
So here is the story.
First I dry fitted access portholes, for storage inside the flotation chambers and ventilation. There is one porthole at each side and one in the bow. I plan to install a net inside the flotation chambers to hold stored items from banging around. Cutting these holes has been really stressing.
In the back you can see the oarlock support that has been laminated on the outer skin. There are 8 layers of 6 mm plywood.
This is a view of the bigger bow porthole.
Next, I cut the deck pannels. I decided to cut the side deck panels without making a patter on paper first. I placed the plywood on top of the boat and marked the trace of the outer skin. To mark the inner skin (which was not accessible as the plywood was wider than the boat) I use a technique called 'spilling' to generate it. You use a pair of compasses to transfer triangles from the boat to the panel. You take two points on the outer skin and tranfer them to its trace on the plywood using the compasses. Then you choose a random point in the inner skin, somewhere between the two other points and using the compasses transfer it to the plywood. People that build glued lapstrake boats use it extensively to trace the planking.
Oarlock supports are from solid iroko. They are cut so that the oarlock is parallel to the side panel.
This is the first piece of hardware that I fitted on her. Hand cutting the oarlock supports has been a very rewarding woodworking experience. There is also oarlock support inside the flotation chamber (8 lams of 6 mm plywood). The hole for the oarlock stops before reaching the flotation chamber and drains overboard through a small hole on the side planking (not visible here, probably I had not opened it yet).
I decided to paint the flotation chambers using traditional materials. I put two coats of red lead primer (shown here) and 3 coats of alkyd paints. Red lead primer has been the primer of choice for all wooden boats in Greece, I think because of its high toxicity and resistance to water. It is very soft though. The same treatment was given to the deck panels.
This is a link to my gallery
http://forums.bateau2.comindex.php?cat=15358
Regards to all of you
Major milestone reached  I Finished the wood work for the hull and have already stared to finish her.
Here are some pictures of the progress so far.
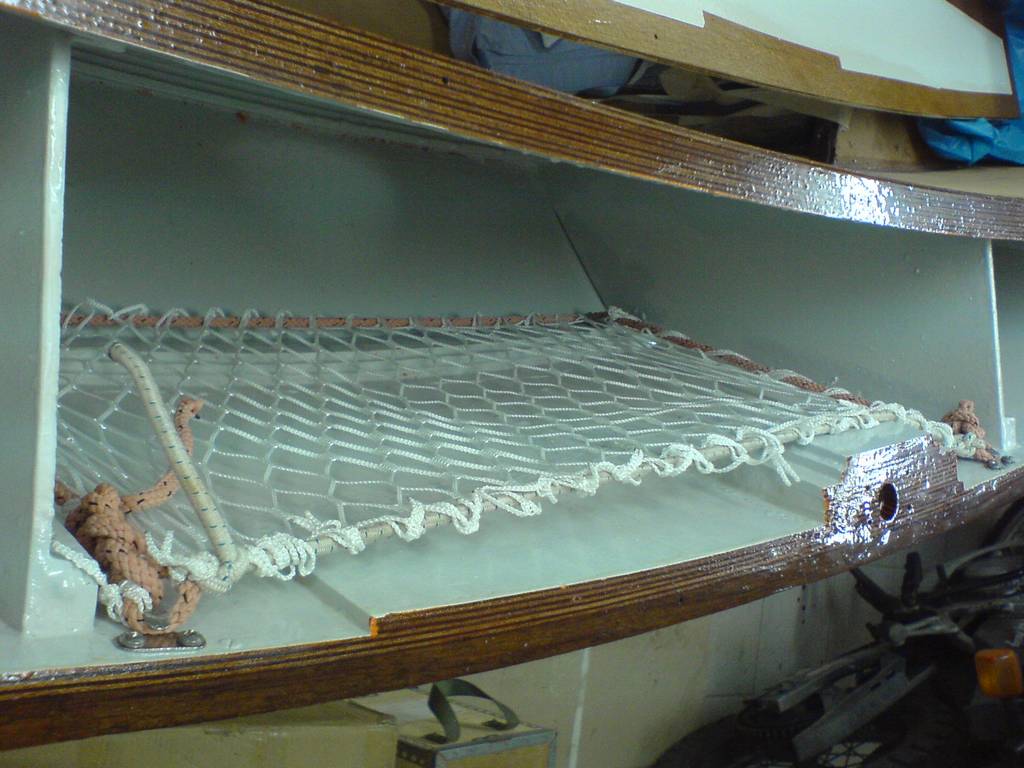
The flotation chambers are painted, 2 coats of red lead primer and 2 more of alkyd enamel. Then I installed nettings that will hopefully help to keep things that are stored in the chambers in place. I want my sandwiches dry
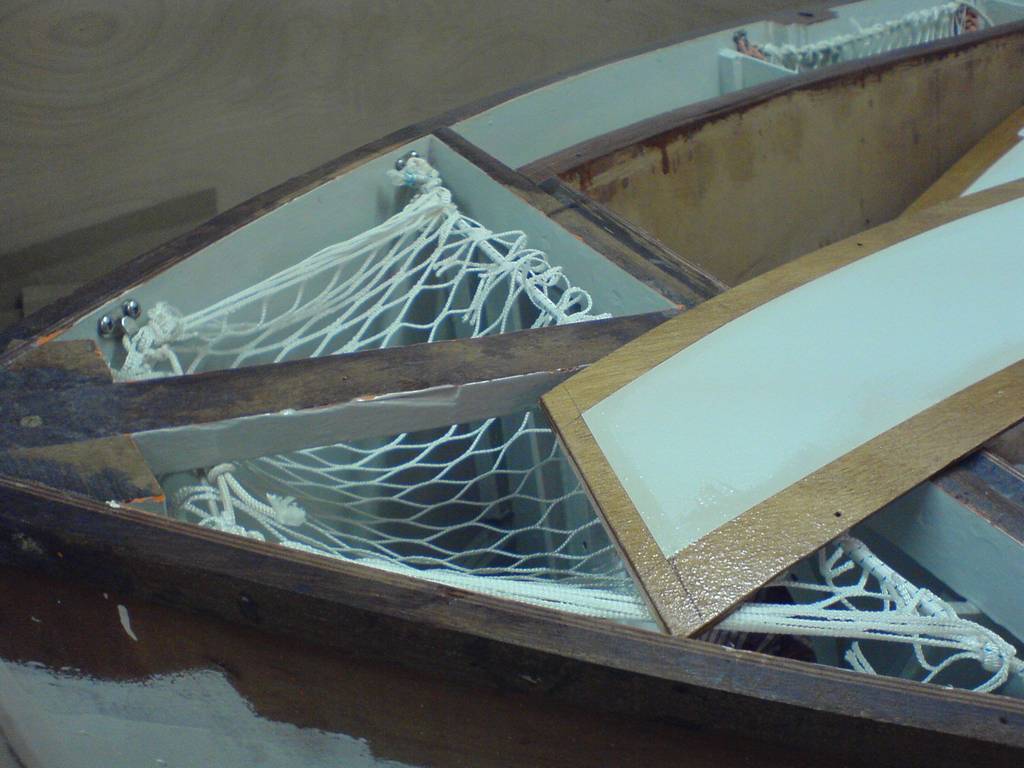
This is the netting in the port flotation chamber. There is a similar in the starboard one.
All decks are now installed, glued and screwed in position. A trimming all around is required.
The rub rails have been installed flush with the deck. The are two parts each, with a scarf joint at about the 2/3rds of their length.
The wooden blocks that will accept the oarlocks have also been glued in place.
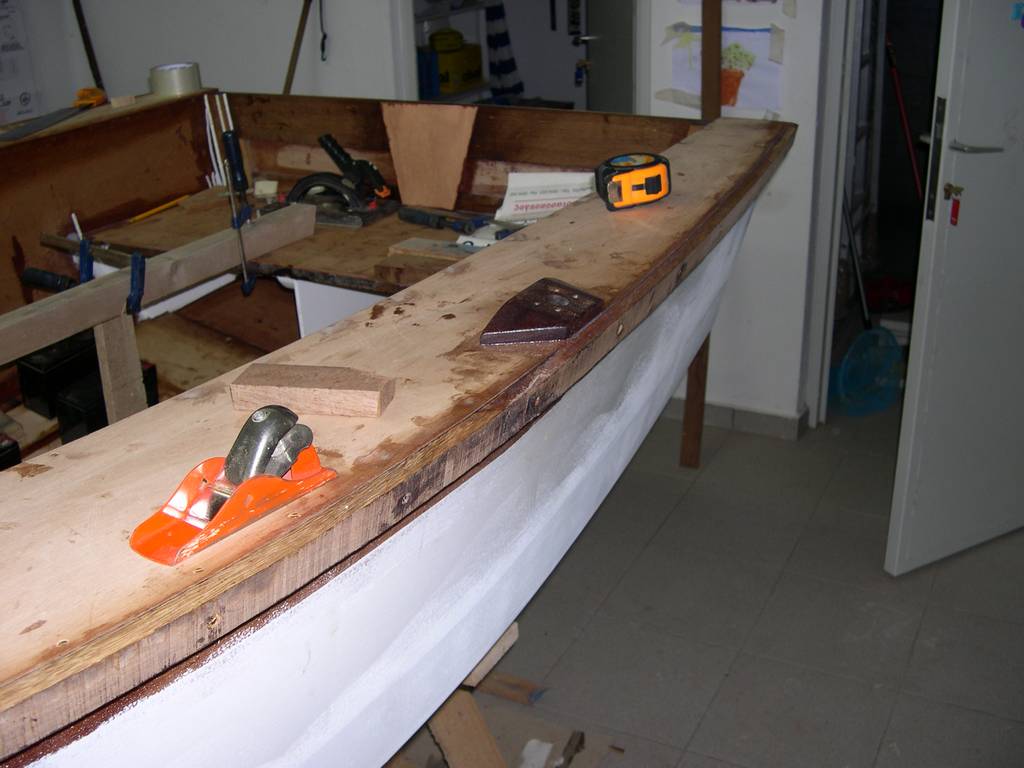
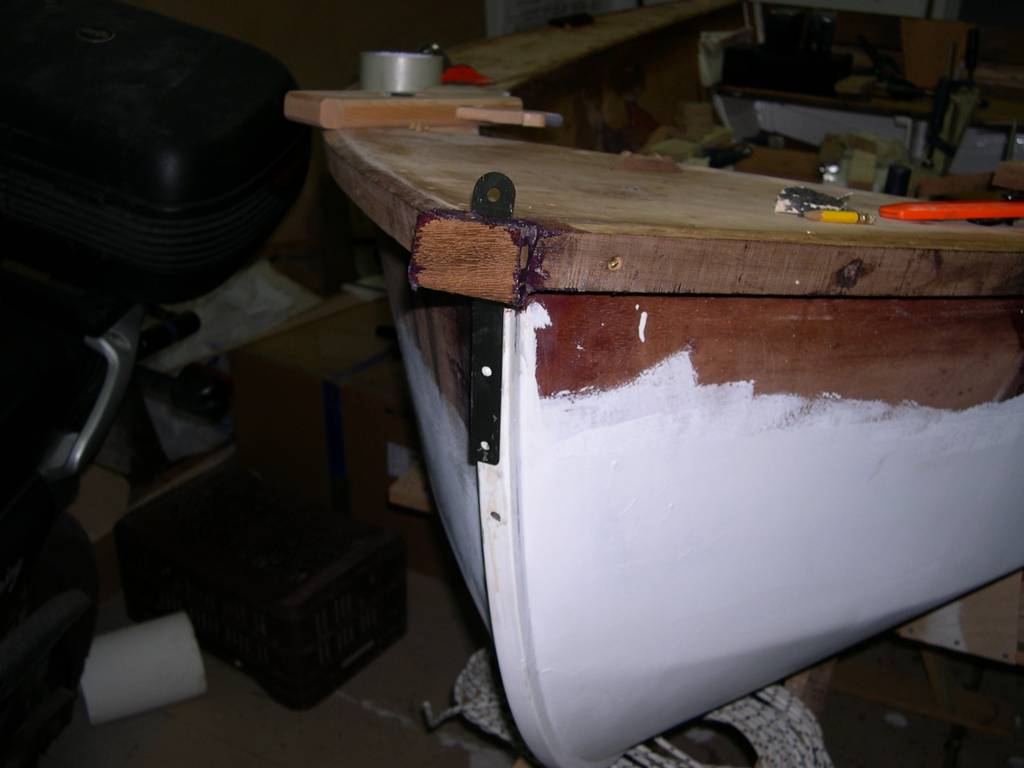
This is the last piece of the rub rail. I glued it in place while the bow chainplate was resting on the stem, wrapped in plastic. After epoxy set, I removed the chainplate. It will be installed again after the painting is complete. Notice how much trimming the last piece of wood needs!
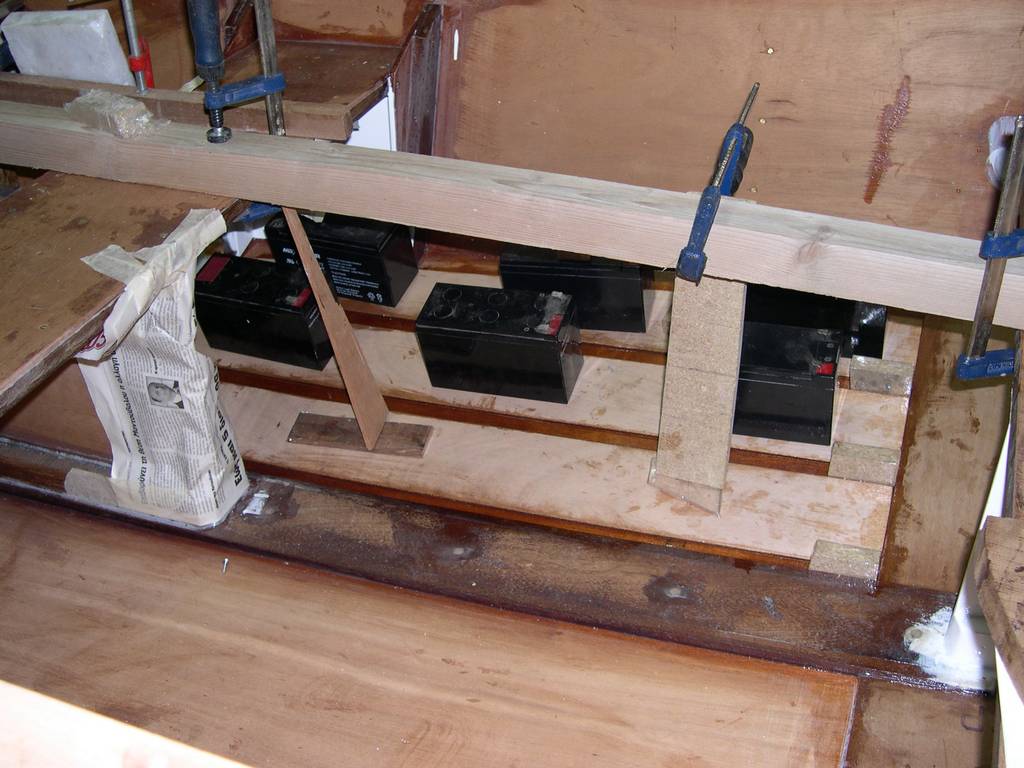
3 strips of plywood, each 10 cm wide, was epoxy glued on each side of the bottom. This is the setup that pressed them on the floor. Notice the wrapped spacers that keep the strips form slipping to the center of the boat. Old UPS batteries are really handy for boat building.
The gusset at the transom is the last piece of wood glued on the boat. This is the end of the wood work and the beginning of the finish work. Sanding strikes back
This image shows how nice the flooring strips look.

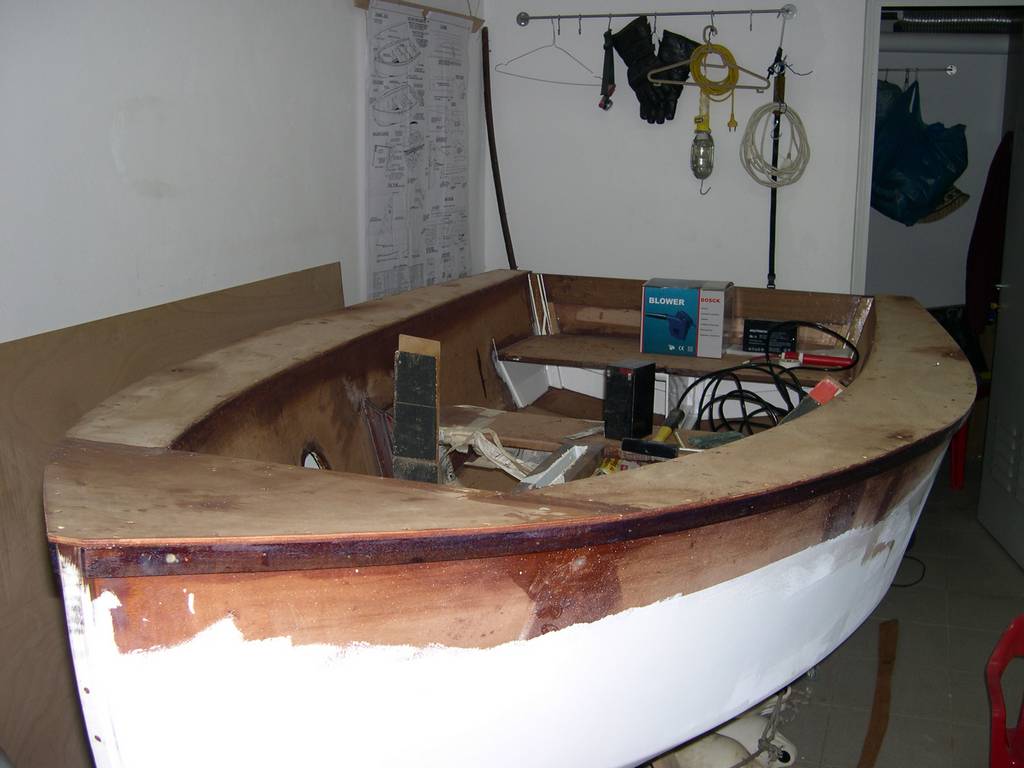
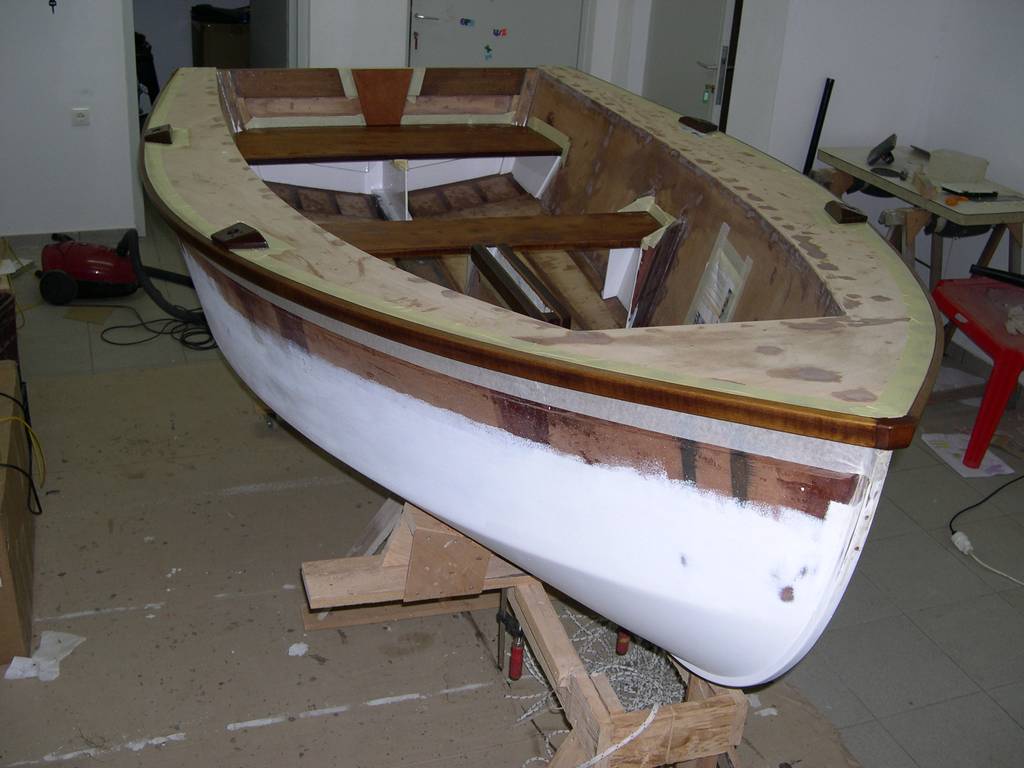
There she is, all holes filled and corners rounded. She is sanded, ready to receive high build primer on the inner side but first I will prime all the bright areas with three to four coats of varnish to protect them from spills, paint runs, etc.
The rub rails, the seats, the oarlock blocks, the transom gusset and the upper cleats of the centerboard case will be finished bright. The rest will be painted.
Regards to all of you.
Here are some pictures of the progress so far.
The flotation chambers are painted, 2 coats of red lead primer and 2 more of alkyd enamel. Then I installed nettings that will hopefully help to keep things that are stored in the chambers in place. I want my sandwiches dry
This is the netting in the port flotation chamber. There is a similar in the starboard one.
All decks are now installed, glued and screwed in position. A trimming all around is required.
The rub rails have been installed flush with the deck. The are two parts each, with a scarf joint at about the 2/3rds of their length.
The wooden blocks that will accept the oarlocks have also been glued in place.
This is the last piece of the rub rail. I glued it in place while the bow chainplate was resting on the stem, wrapped in plastic. After epoxy set, I removed the chainplate. It will be installed again after the painting is complete. Notice how much trimming the last piece of wood needs!
3 strips of plywood, each 10 cm wide, was epoxy glued on each side of the bottom. This is the setup that pressed them on the floor. Notice the wrapped spacers that keep the strips form slipping to the center of the boat. Old UPS batteries are really handy for boat building.
The gusset at the transom is the last piece of wood glued on the boat. This is the end of the wood work and the beginning of the finish work. Sanding strikes back
This image shows how nice the flooring strips look.
There she is, all holes filled and corners rounded. She is sanded, ready to receive high build primer on the inner side but first I will prime all the bright areas with three to four coats of varnish to protect them from spills, paint runs, etc.
The rub rails, the seats, the oarlock blocks, the transom gusset and the upper cleats of the centerboard case will be finished bright. The rest will be painted.
Regards to all of you.
A quick update.
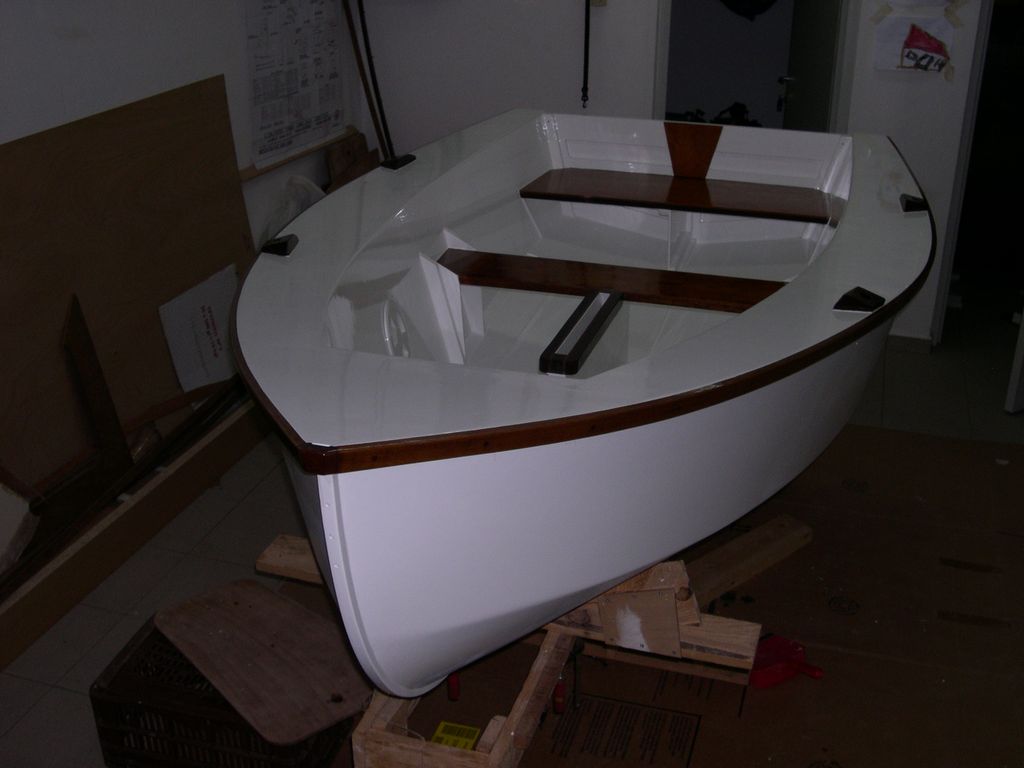
Here she is, ready to receive paint. There are 4 coats of high-build primer, hand sanded to a smooth surface plus four coats of one component polyurethane varnish on the bright areas. She is realy smooth.
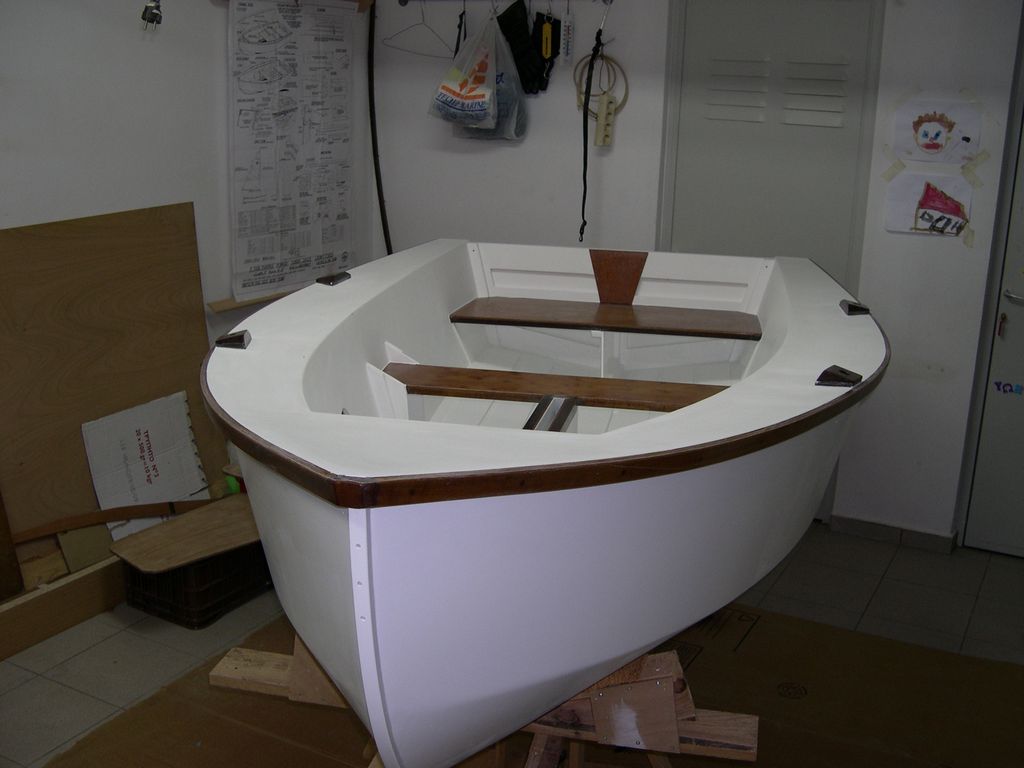
Now she is coated with 4 coats of LPU paint rolled and tipped and 7 coats of varnish brushed. It looks great at the picture but this is deceiving. The is much dust and plenty of brush strokes.
I really found the LPU paint very difficult to use. It dried so fast that I could not even blend the new paint with the old during rolling. I used a slow reducer, reduced to the maximum degree allowed (35%, suggested for spraying), but apparently I was not fast enough.
The results are far from my expectations.I like much more the smooth flat finish of the primer.
It's nice that this picture shows my avatar reflected on the boat.
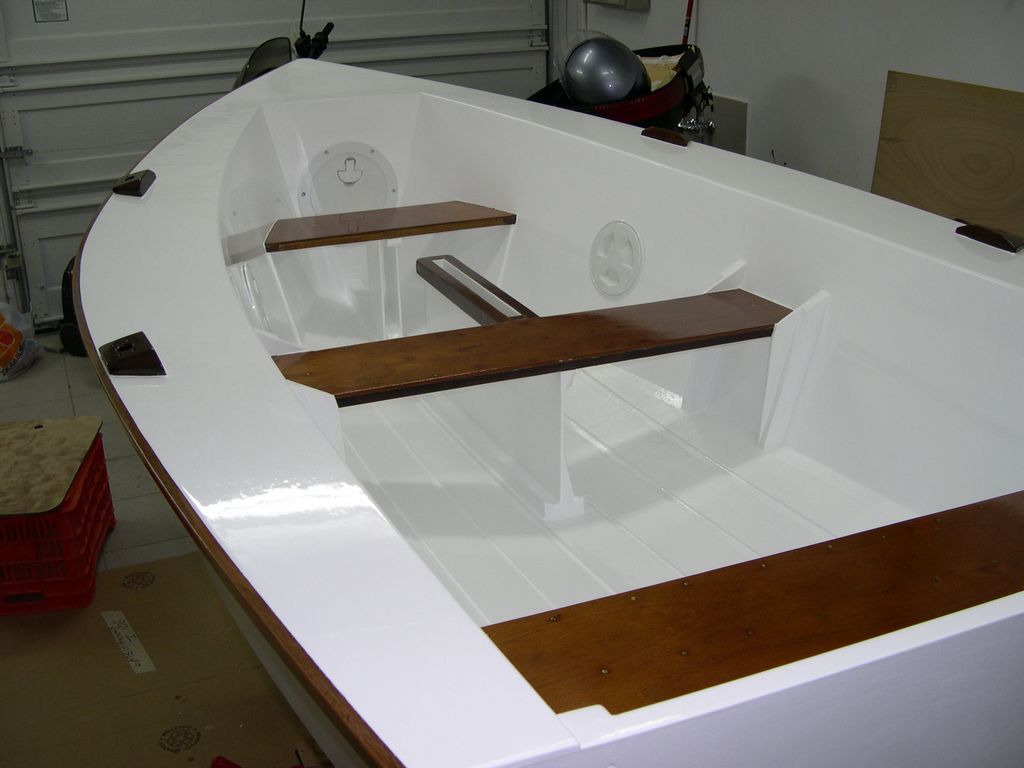
The plastic covers are just laied on the holes to get a better view. It is difficult to see but there is an antiskid texture on the flooring strips. It is a mixture of fillite pearls and LPU paint. Fillite is a dust of inert hollow small spheres. I read somewhere that it is the same as Blakes (Hempel) antiskid additive. It gave a nice, non abrasive surface that hid all imperfections.
This is hardware, waiting to be fitted. I have to buy more suitable screws to continue.
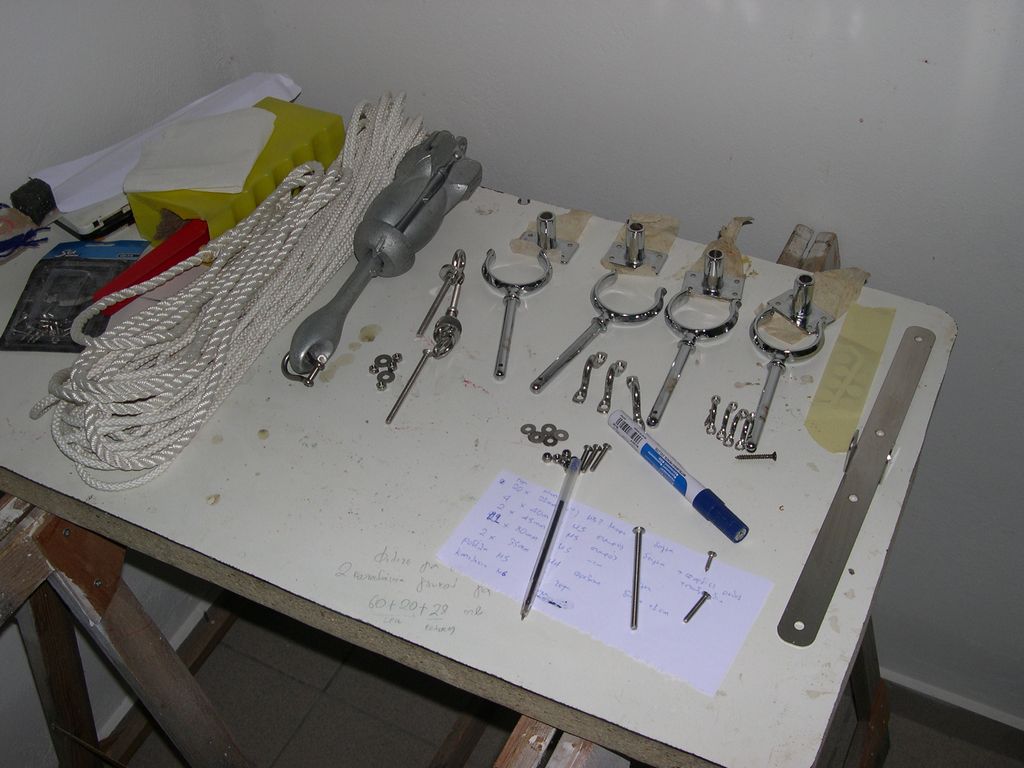
I plan to splash her to mark the waterline. I will use the aluminum oars of my rib for the first splash. Then, she will be painted on the outside, blue LPU above the waterline and white epoxy paint bellow. The next project will be to build a nice pair of oars for her. Then spars, centreboard, rudder, sail, ...
Regards
Here she is, ready to receive paint. There are 4 coats of high-build primer, hand sanded to a smooth surface plus four coats of one component polyurethane varnish on the bright areas. She is realy smooth.
Now she is coated with 4 coats of LPU paint rolled and tipped and 7 coats of varnish brushed. It looks great at the picture but this is deceiving. The is much dust and plenty of brush strokes.
I really found the LPU paint very difficult to use. It dried so fast that I could not even blend the new paint with the old during rolling. I used a slow reducer, reduced to the maximum degree allowed (35%, suggested for spraying), but apparently I was not fast enough.
The results are far from my expectations.I like much more the smooth flat finish of the primer.
It's nice that this picture shows my avatar reflected on the boat.
The plastic covers are just laied on the holes to get a better view. It is difficult to see but there is an antiskid texture on the flooring strips. It is a mixture of fillite pearls and LPU paint. Fillite is a dust of inert hollow small spheres. I read somewhere that it is the same as Blakes (Hempel) antiskid additive. It gave a nice, non abrasive surface that hid all imperfections.
This is hardware, waiting to be fitted. I have to buy more suitable screws to continue.
I plan to splash her to mark the waterline. I will use the aluminum oars of my rib for the first splash. Then, she will be painted on the outside, blue LPU above the waterline and white epoxy paint bellow. The next project will be to build a nice pair of oars for her. Then spars, centreboard, rudder, sail, ...
Regards
Who is online
Users browsing this forum: No registered users and 6 guests