Page 1 of 1
1981 FORMULA F233 RESTORATION - COPY
Posted: Sun Aug 01, 2010 8:40 pm
by NOTHING ELSE MATTERS
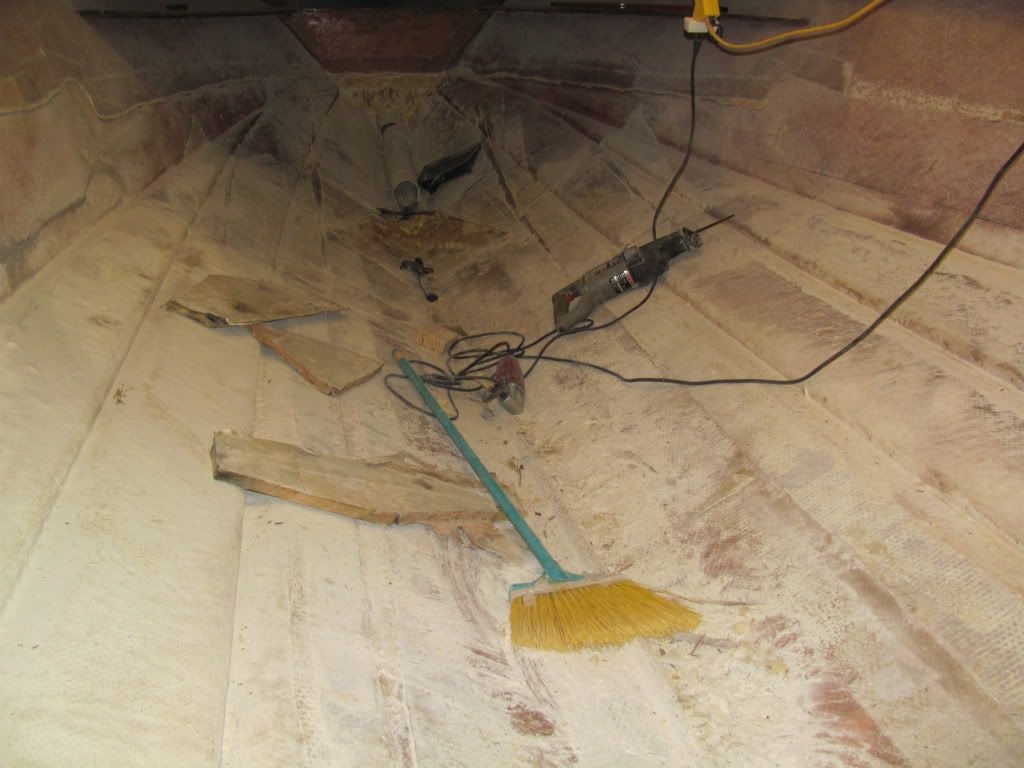
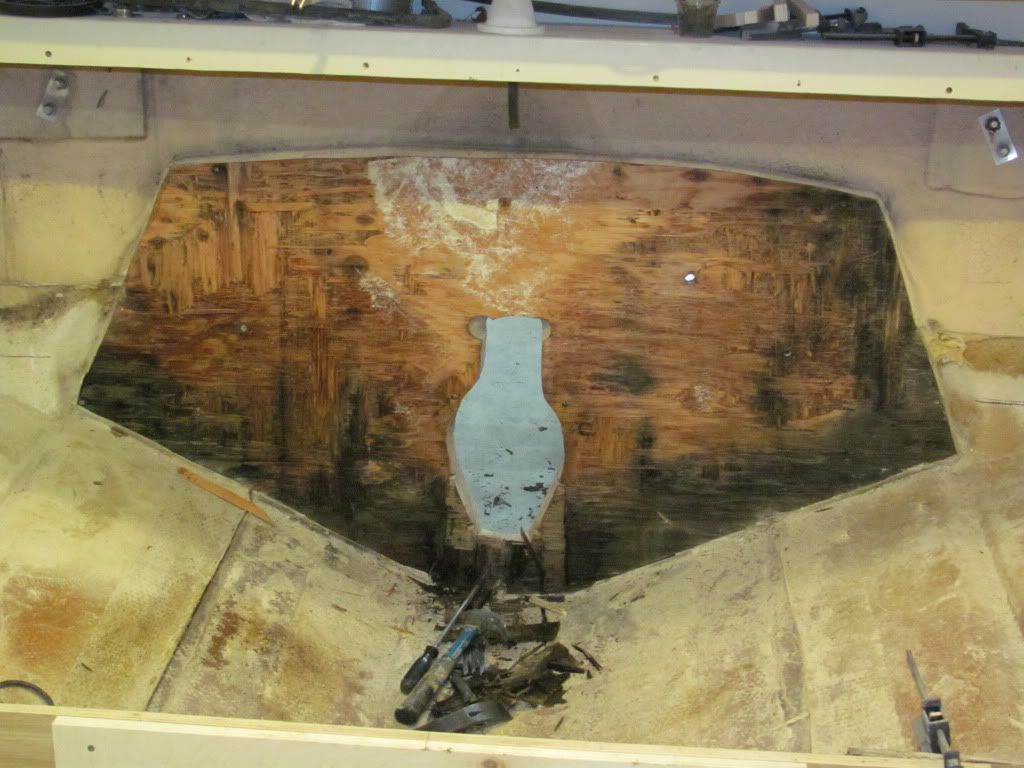
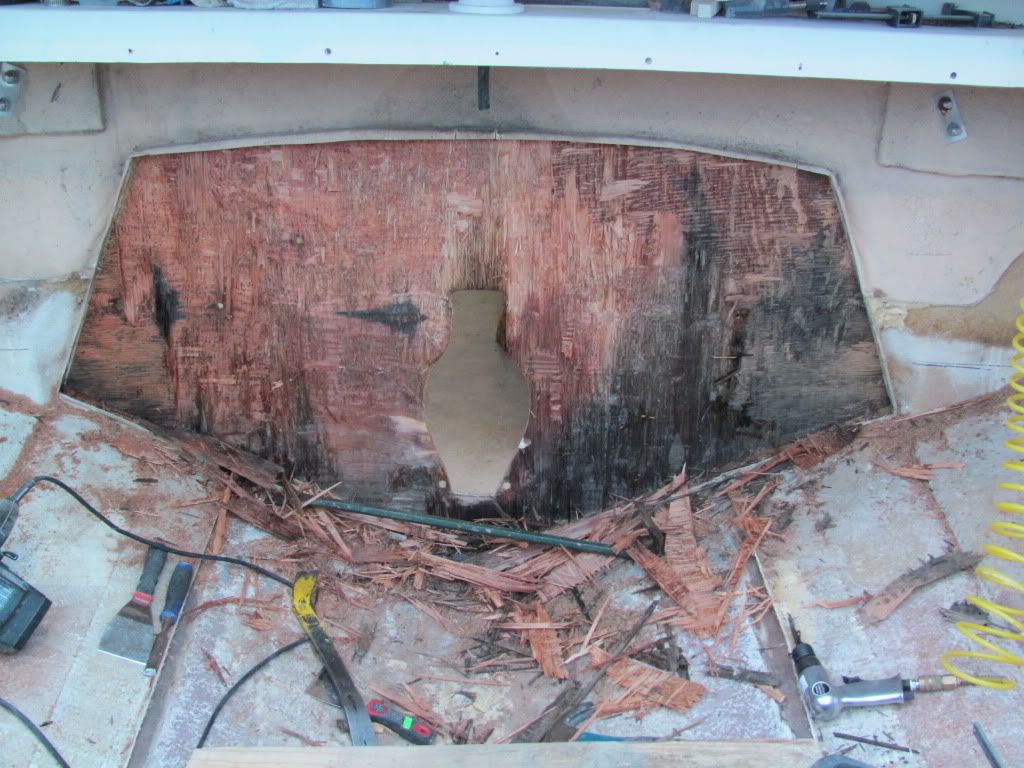
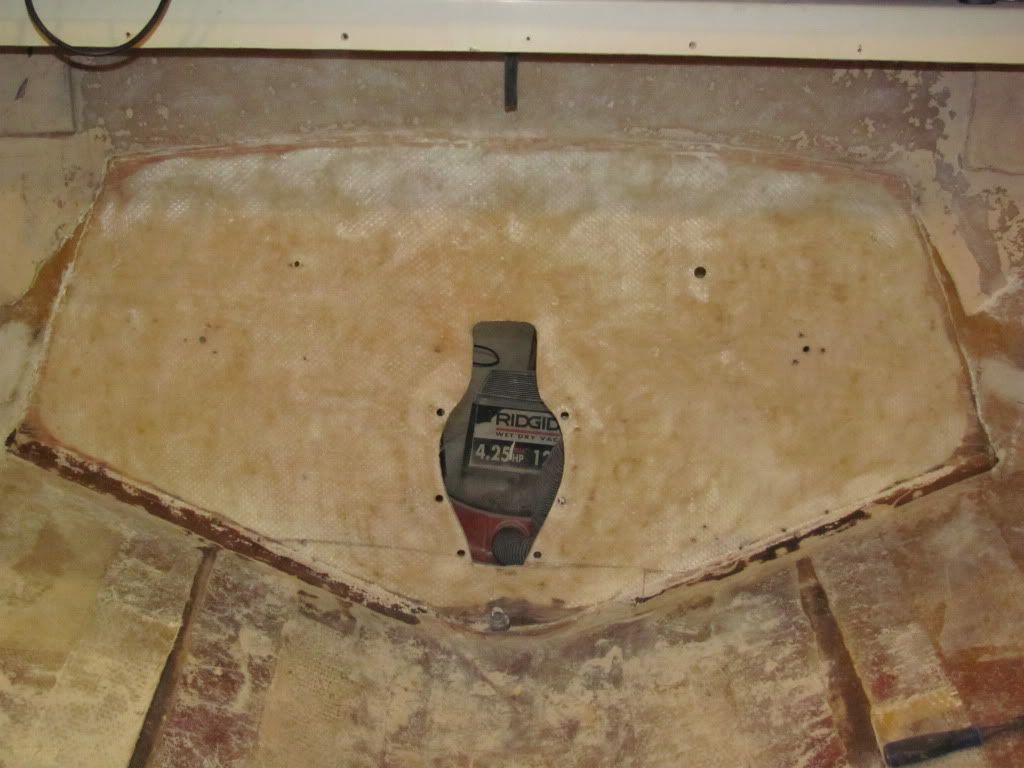
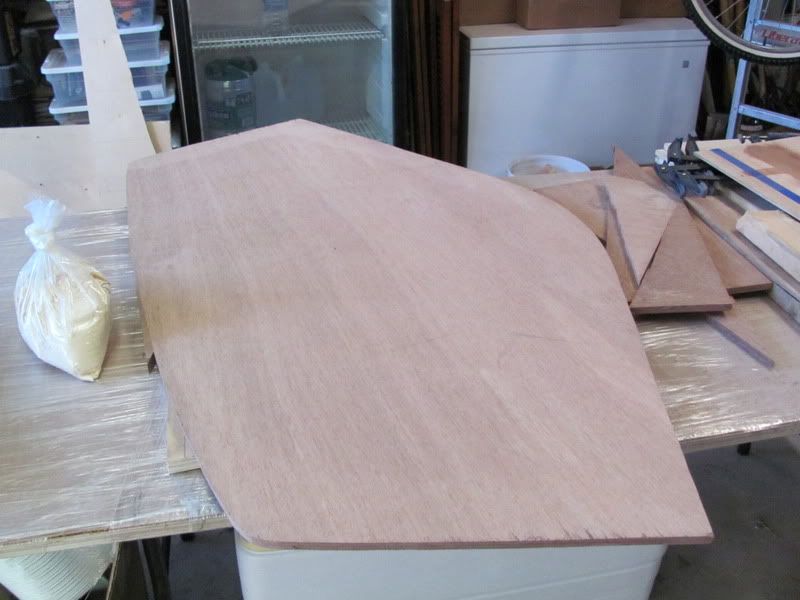
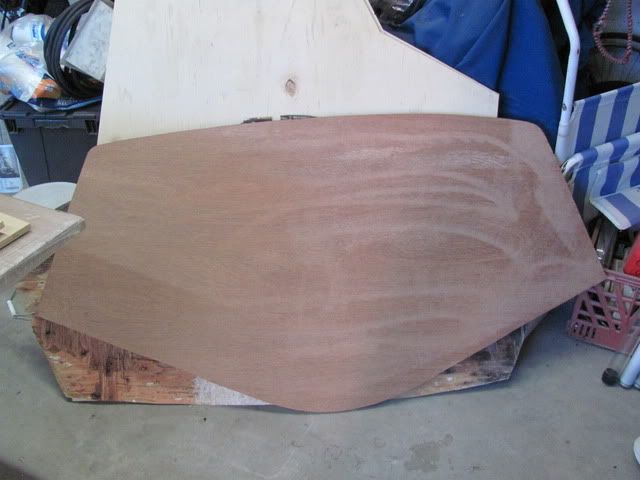
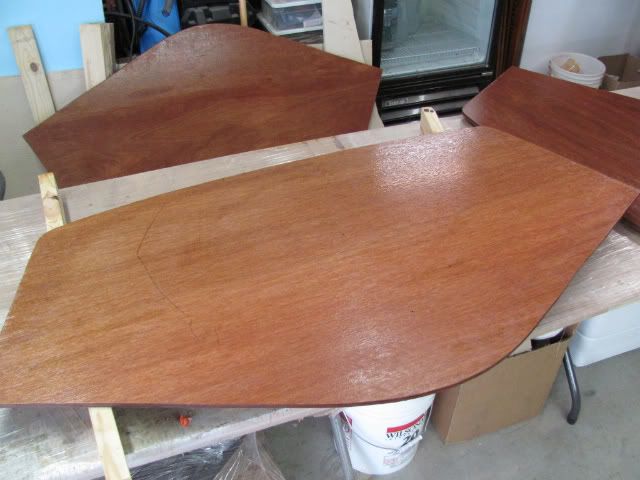
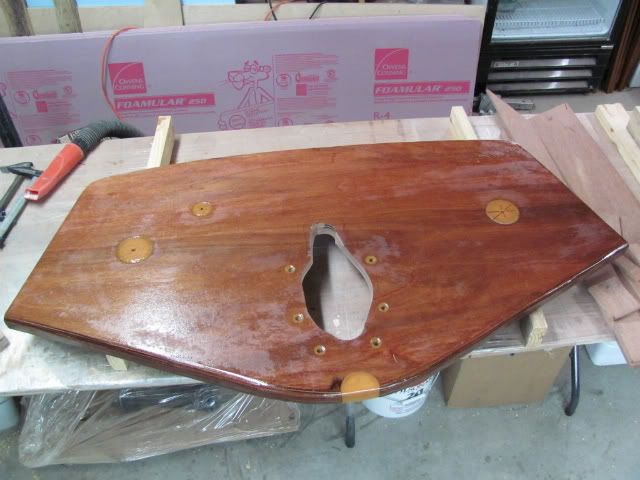
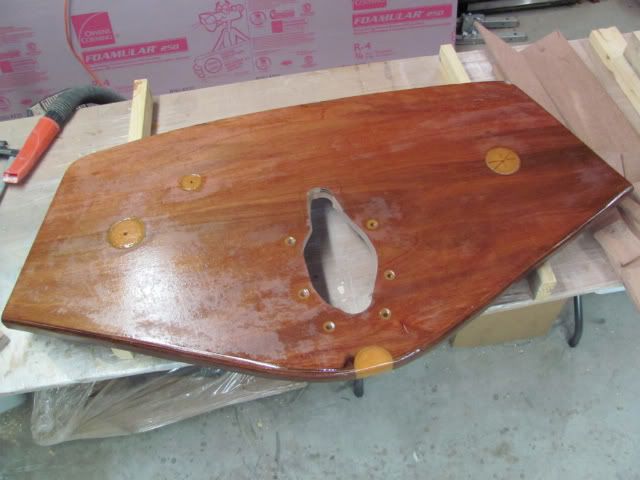
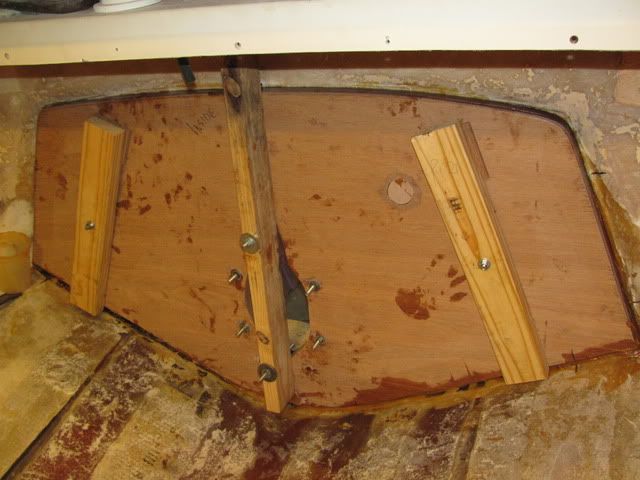
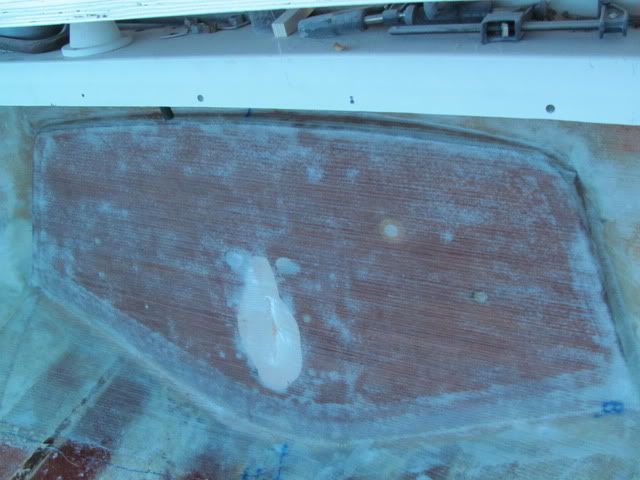
Hi everyone, finally i'm almost done ripping the Formula apart getting it ready for new stringers, transom and floor. Here are some pictures.

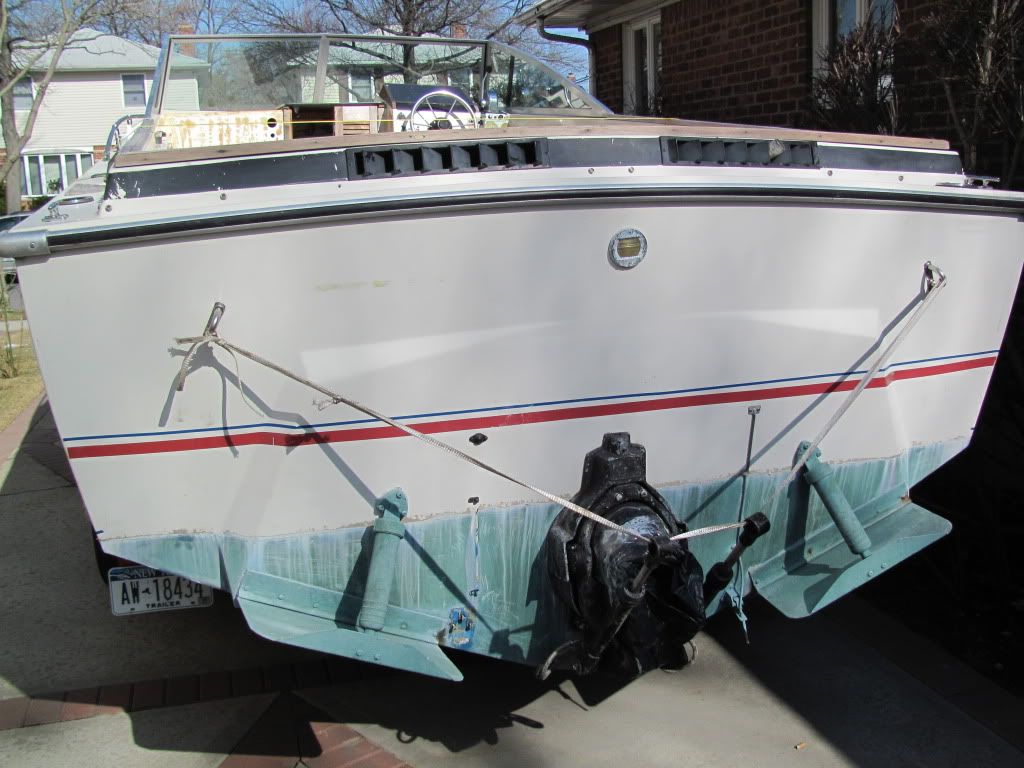
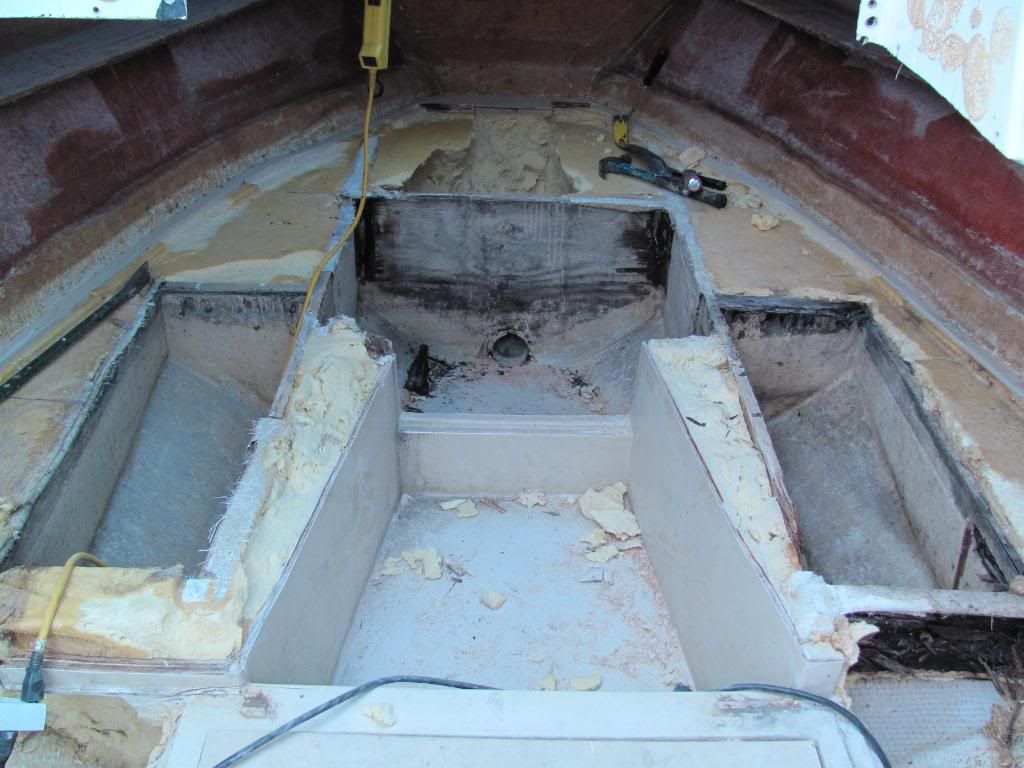
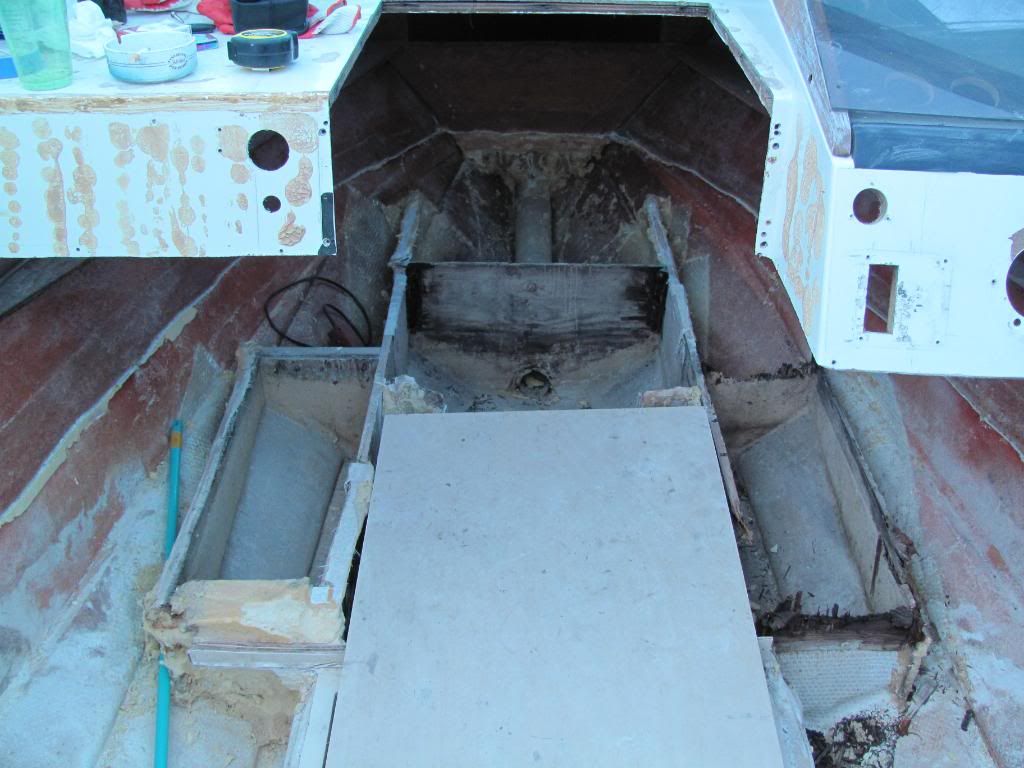
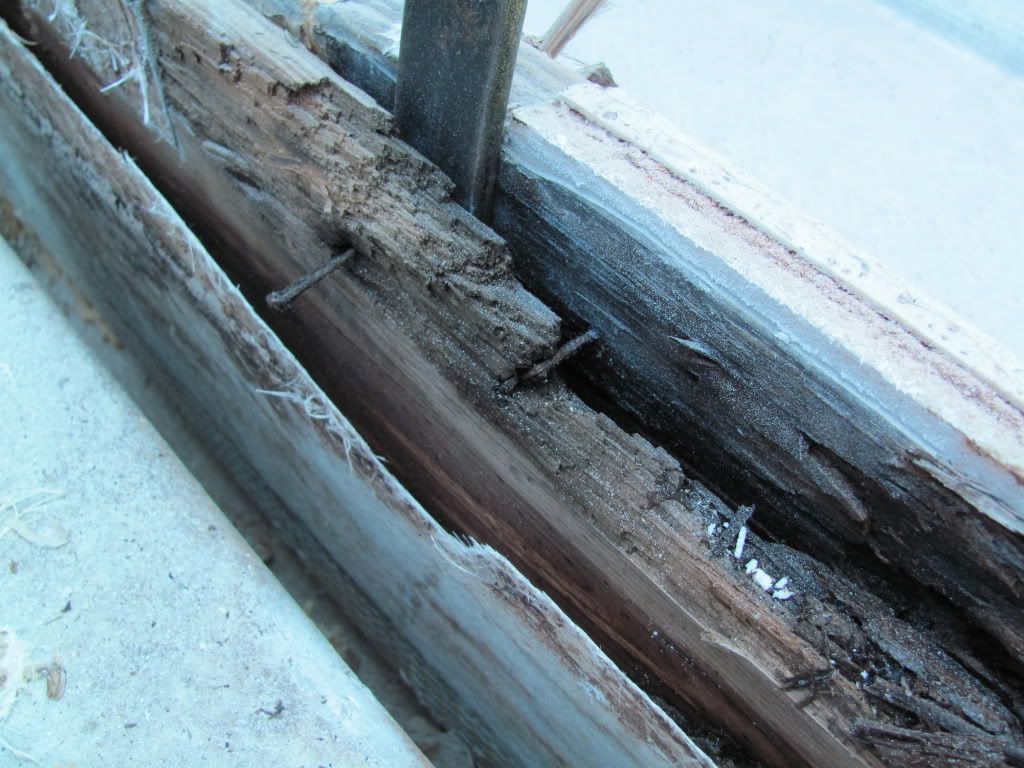
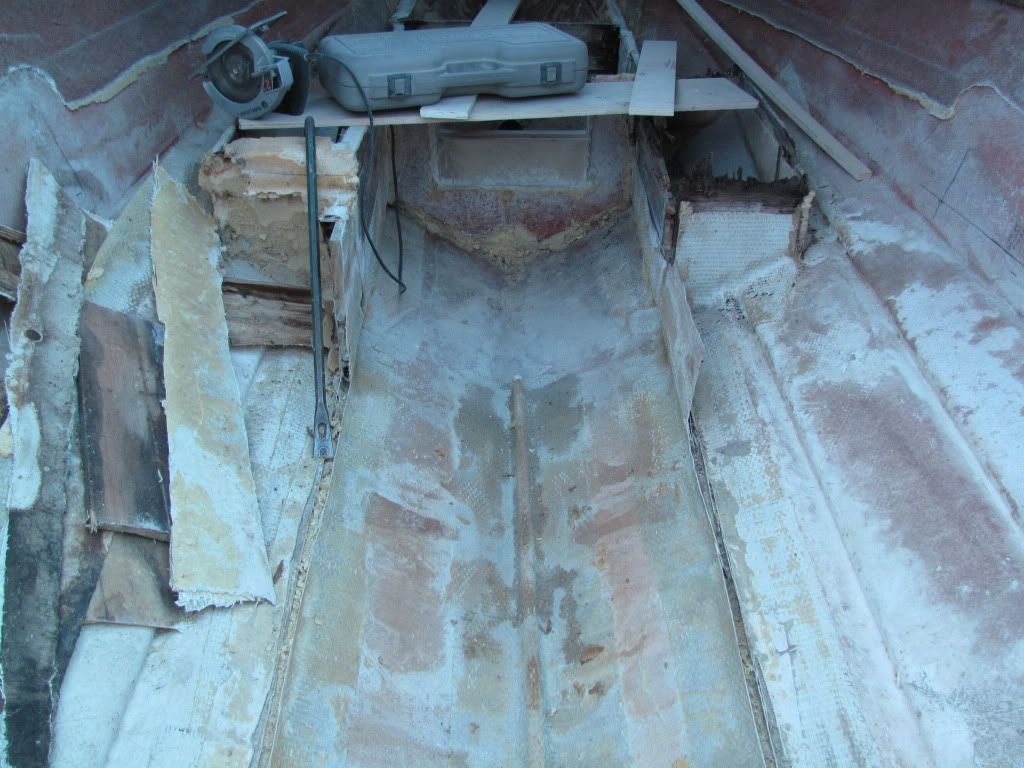
Boat was built with only two stringers 3/4 thick 27" apart made out lumber from the front of the boat to the bulkhead in front of the motor(is an I/O set up). No other bulkheads in the boat but all the empty areas were filled with soaked closed cell foam.
A few questions for the pros now.
1) I would like to install two additional stringers, one on each side.I was thinking of making the two main stringers out of double 3/4 plywood(BS1088) and the second ones just 3/4 plywood with some bulkheads in between. Is this O.K to do?
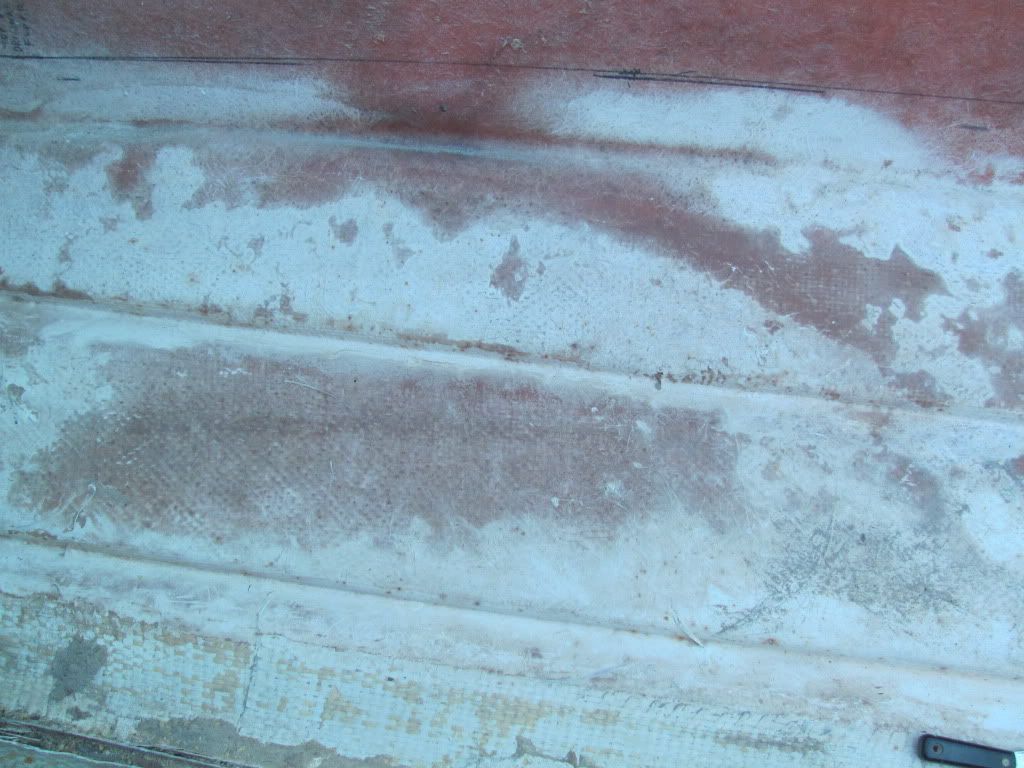
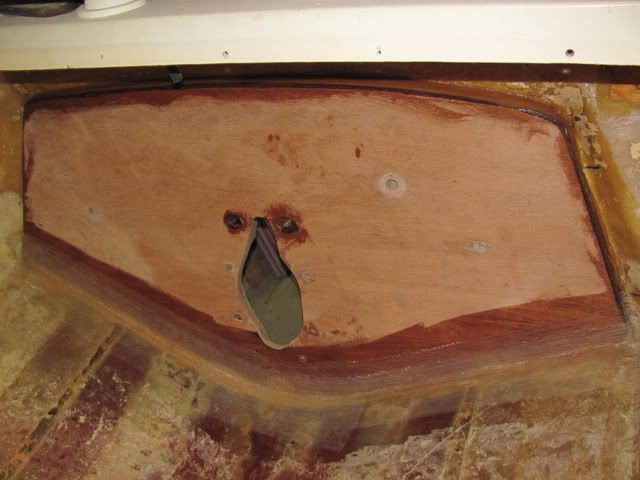
2) When i removed the "floating" stringers i end up with a lip of fiberglass as you see below. My question is when i grind that down flat should i remove also the flat piece of fiberglass holding the old stringer?

3) I also would like to thicken the bottom of the boat. How do i do that and what kind of glass do i use there?
Also, i wanted at the same time to fill the inside of the strakes to be even with the boats interior.
4) I also noticed that the interior floor is two different colors(was not painted or primed) some places is red and some places is
white.
Sorry for the long post and questions.
Shine, i'm also ready to place the order for everything but the plywood, including the glass to thicken the bottom of the boat(if i have to do that). The glass on the outside of the transom is 1/4" thick and i'm suppose to have no more than 2 1/4" total thickness according to Mercruiser. I would like to go with the Marine Epoxy brand, but i don't know if i should get medium or slow hardener, you tell me.
Thank you.
Re: 1981 FORMULA F233 RESTORATION
Posted: Sun Aug 01, 2010 8:50 pm
by NOTHING ELSE MATTERS
The pictures i posted suppose to show more area but for some reason they don't. Do i have to resize them?
Re: 1981 FORMULA F233 RESTORATION
Posted: Sun Aug 01, 2010 8:52 pm
by tech_support
1) I would like to install two additional stringers, one on each side.I was thinking of making the two main stringers out of double 3/4 plywood(BS1088) and the second ones just 3/4 plywood with some bulkheads in between. Is this O.K to do?
Sure, thats fine. More structure than original.
2) When i removed the "floating" stringers i end up with a lip of fiberglass as you see below. My question is when i grind that down flat should i remove also the flat piece of fiberglass holding the old stringer?
Yes, you should remove as much as possible.
3) I also would like to thicken the bottom of the boat. How do i do that and what kind of glass do i use there?
Also, i wanted at the same time to fill the inside of the strakes to be even with the boats interior.
no need to, especially considering the additional stiffeners you will be adding
4) I also noticed that the interior floor is two different colors(was not painted or primed) some places is red and some places is
white.
red is the color of the glass, the white is some overspray of gelcoat
Shine, i'm also ready to place the order for everything but the plywood, including the glass to thicken the bottom of the boat(if i have to do that). The glass on the outside of the transom is 1/4" thick and i'm suppose to have no more than 2 1/4" total thickness according to Mercruiser. I would like to go with the Marine Epoxy brand, but i don't know if i should get medium or slow hardener, you tell me.
Thank you.
Marinepoxy is good, I would get all slow hardener
Re: 1981 FORMULA F233 RESTORATION
Posted: Sun Aug 01, 2010 9:08 pm
by NOTHING ELSE MATTERS
Shine, thank you for the super quick reply. Do you need any more specifics as to how much material do i need?
I will also need some closed cell foam. Does that have any shelf time? Also, how do i figure how many gallons do i need?
Thank you.
Re: 1981 FORMULA F233 RESTORATION
Posted: Sun Aug 01, 2010 9:29 pm
by sitandfish
NOTHING ELSE MATTERS wrote:The pictures i posted suppose to show more area but for some reason they don't. Do i have to resize them?
I think most people know that they can open your pictures in a new window if they want to see more of the areas. Your pictures are fine.
Re: 1981 FORMULA F233 RESTORATION
Posted: Tue Aug 03, 2010 10:16 am
by NOTHING ELSE MATTERS
Another question for the pros.
By the gas tank area i wanted to install either stiffeners lay down flat if i go with a "v" bottom tank, or make a sub floor and install 3-4" high stringers to install a flat bottom tank.
My question is:
1) What kind of material do i use(i.e flat 2X6 lumber or flat doubled 3/4 ply 6" wide) for the flat stiffeners ?
2) What kind of material do i use to make 3-4" high stringers ? (I think this is no brainer, plywood, right?
Re: 1981 FORMULA F233 RESTORATION
Posted: Tue Aug 03, 2010 11:19 am
by JGB
shine wrote:1) I would like to install two additional stringers, one on each side.I was thinking of making the two main stringers out of double 3/4 plywood(BS1088) and the second ones just 3/4 plywood with some bulkheads in between. Is this O.K to do?
Sure, thats fine. More structure than original.
Joel,
Are 1.5" stringers (double 3/4 plywood) required here or would 3/4" stringers (double 3/8 plywood) be OK? Seems like he said original stringers were 3/4" and many other boats here have used 3/4" stringers.
Re: 1981 FORMULA F233 RESTORATION
Posted: Tue Aug 03, 2010 11:37 am
by tech_support
By the gas tank area i wanted to install either stiffeners lay down flat if i go with a "v" bottom tank, or make a sub floor and install 3-4" high stringers to install a flat bottom tank.
My question is:
1) What kind of material do i use(i.e flat 2X6 lumber or flat doubled 3/4 ply 6" wide) for the flat stiffeners ?
2) What kind of material do i use to make 3-4" high stringers ? (I think this is no brainer, plywood, right?
Plywood for both, I would standardize and use 3/4" for those parts. This is a big and heavy boat, no need to skimp.
for the long stringers, you should use two layers of wood to make the stringer one pieces (2 x 3/8" to make 3/4" stingers, or 2 x 3/4" to make 1.5" stringers)
Since you are doubling the amount of stringers, there is no need to make them any thicker that the original 3/4". You will need to tab them in with 3 layers of 12 oz biax tape, then cover them completely over with two layers of heavy biax (1708), this is probably more glass than what was covering them previously. This assumption is based on the picture where it looks like the old stringers had only one layer of heavy roving. Do you have an actual measuemtn of the thickness of the glass on the side of the stringer?
What about the transom?
I can give an estimate on the amounts because we do not have measurements of the pieces (length/height).
You will need epoxy, wood flour, silica, 12 oz biax tape, and a heavy biax (1708 is a good choice). I can tell you that you will need the following to get started: 6 gallons epoxy, 5 lb. wood flour, 1 lb silica, 2 rolls biax tape, 10+ yards of 1708. That may be enough o get the new stringers in
Re: 1981 FORMULA F233 RESTORATION
Posted: Tue Aug 03, 2010 12:36 pm
by NOTHING ELSE MATTERS
Joel, can i fax you a sketch with the measurements ? My scanner gave up. (give me your fax #).Thanks.
Re: 1981 FORMULA F233 RESTORATION
Posted: Tue Aug 03, 2010 1:12 pm
by tech_support
sure, 772-770-3249
Re: 1981 FORMULA F233 RESTORATION
Posted: Tue Aug 03, 2010 1:35 pm
by NOTHING ELSE MATTERS
Faxing to you now.
Re: 1981 FORMULA F233 RESTORATION
Posted: Tue Aug 03, 2010 2:35 pm
by tech_support
got the fax, thank you. That is exactly the sort of info we need

I will take it home and respond tonight.
Re: 1981 FORMULA F233 RESTORATION
Posted: Tue Aug 03, 2010 2:39 pm
by NOTHING ELSE MATTERS
shine wrote:got the fax, thank you. That is exactly the sort of info we need
I will take it home and respond tonight.
Thank you, you can post my artwork here if you like, i don't mind, just make sure they don't make fun of me of my drawing skills

Re: 1981 FORMULA F233 RESTORATION
Posted: Wed Aug 04, 2010 8:47 pm
by tech_support
I have not forgot, I promise to post first thing in the a.m.
Re: 1981 FORMULA F233 RESTORATION
Posted: Thu Aug 05, 2010 8:38 am
by NOTHING ELSE MATTERS
No problem, i understand you are a busy man.
Re: 1981 FORMULA F233 RESTORATION
Posted: Thu Aug 05, 2010 10:47 am
by tech_support
transom:
You mention outdrive needs 2.25" max. If outside skin is 1/4", then I would make my core 1.75" thick, then build the inside skin up until you reach the 2.25" You can do this a couple ways, 2 layers of 3/4" and one layer 1/4", or two layers 1/2" and one layer 3/4". I would go with the two layers of 1/2" and one layer of 3/4" because it will eave you will more usable scrap (1/2" scrap will be more useful than 1/4"). With three layers of glue (two between cores and one to the outside skin) you will probably only need 3/16" or so inside skin to reach 2.25" total.
grid structure:
what you propose in the sketch is very safe

For structural purposes you do not need those two most forward frames between the inside stringers, but there is no problem to include them for the purpose of dividing the compartments (anchor/porta potty)
Im pretty surprised there was not another stringer set in the original design, that is a large area from the stringer to the chine. Adding another is a good idea. 3/4" thickness for stringer plywood core. Locations on the sketch are good.
floor frames: you do not need that many, 30" between them is fine. The locations of the floor frames between the two stingers looks right, make the frames on the outside (between outside stringer and chine) at the same location, omit the the most forward frame on the very outside.
motorwell bulkhead: 3/4" is pretty thick, but it will not hurt. Is there a reason not to take the stringers all the way back tot he transom (interference with motor mounts maybe

)
stringers: tabbed in with 3 layers of 12 oz tape, covered with 1708 and overlapping the tabbing
frames: tabbed in 2 layers 12oz tape
An estimate based on the sketch:
12 oz biax tape: 3 rolls for stringers, 2 rolls for frames and the rest
1708: 13 yards for stringers, 13 yards for transom (4 layers including overlaps to side and bottom)
Epoxy: 15 gallons - maybe more depending on how much you use for filling gaps
wood flour: get at least 5 pounds to start
silica: 1 pound
you did not include any details about the new soul, but with such tight spacing of supports, 1/2" is plenty. If you use good wood you only need glass on the top side, 2-3 coats epoxy on the underside.
I think that should get you pretty far
I would start with the transom, then rip out the rest and build the grid. Mkae sure the boat is supported on bunks and blocks. Keep the pictures coming.
Re: 1981 FORMULA F233 RESTORATION
Posted: Thu Aug 05, 2010 11:10 am
by NOTHING ELSE MATTERS
Joel, thank you very much. I will follow what you are saying, the only thing i will do different is do the stringers first because i ripp them already and don't want to have the hull for too long with no stringers. The reason the stringers don't go all the way in the back is because there is not enough width for the motor(is only 27"), BUT, my next question to you would be if i could have my stringers 35" apart(this is how much i need for engine) and run them as one piece front to back.
Also, the plywood i' m using is meranti 1088BS. I was also thinking 1/2" for floor.
How do i go ahead and place the order with you? Can i also call you on the phone and speak to you?(i need the number)
Thank you again.
Re: 1981 FORMULA F233 RESTORATION
Posted: Thu Aug 05, 2010 12:41 pm
by tech_support
That is what I thought (space for motor), no problem.
Also, the main reason for doing the transom first is so that the stringers can come all the way back to the new transom skin - in your case this isnt happening anyway, so no problem doing the stringers (to the bulkhead) first.
You can either enter the order through the website, or you can call and we will enter it, its up to you. phone order line 772-770-1225, normally I answer the phone. If you have more technical questions, I prefer to answer them here so I can remember everything.
Re: 1981 FORMULA F233 RESTORATION
Posted: Sun Aug 08, 2010 10:13 pm
by NOTHING ELSE MATTERS
O.K gentlemen, stringers have been removed and grind down all the old tabbing. Between the tabbing and the place where the stringers were i still have a raised old tabbing of approximate 1/8".
1- What do i do with that space? Do i have to fill it in some epoxy filler? (new stringers go to the same spot)
2- After i sweep and vacuum all the fiberglass dust, what do i clean with the interior of the boat? I mean, do i use any chemicals like acetone or denaturated alcohol or anything else?
Re: 1981 FORMULA F233 RESTORATION
Posted: Sun Aug 08, 2010 10:26 pm
by Chief Brody
I had the same issue and I ground it down until the transition was totally smooth....no light spots or edges...just solid color
Re: 1981 FORMULA F233 RESTORATION
Posted: Mon Aug 09, 2010 1:09 am
by NOTHING ELSE MATTERS
Chief Brody wrote:I had the same issue and I ground it down until the transition was totally smooth....no light spots or edges...just solid color
I could grind it more, but i'm afraid going to grind the original floor and loose strength. I tried to peel it of with a crow bar to check the strength and it won't budge.
Re: 1981 FORMULA F233 RESTORATION
Posted: Mon Aug 09, 2010 10:02 am
by tech_support
its ideal to remove all tabbing, you want you stringers to be bonded (with epoxy) to the hull, not bonded to old tabbing. If the new stringers are bonded to the old tabbing your stringers are not bonded any better than the residual tabbing to hull bond.
I understand its almost impossible to get it all off, but try to get close
Re: 1981 FORMULA F233 RESTORATION
Posted: Mon Aug 09, 2010 10:46 am
by NOTHING ELSE MATTERS
So, what if i lay a layer of glass on the whole bottom on top of the old tabbing, then start building on top of that?
Also, the cleaning question, after i wipe and sweep the hull interior, do i clean the hull with any chemicals or just water?
Re: 1981 FORMULA F233 RESTORATION
Posted: Mon Aug 09, 2010 10:52 am
by tech_support
not as good as glassing stringers to hull, but it is better than nothing. How wide is this strip of old tabbing material?
Yes, wipe down areas before new glassing. I would use acetone or denatured alcohol
Re: 1981 FORMULA F233 RESTORATION
Posted: Mon Aug 09, 2010 10:53 am
by NOTHING ELSE MATTERS
shine wrote:not as good as glassing stringers to hull, but it is better than nothing. How wide is this strip of old tabbing material?
About 6" wide woven roven.
Re: 1981 FORMULA F233 RESTORATION
Posted: Mon Aug 09, 2010 11:10 am
by Chief Brody

After grinding smooth, I washed down all the dust with water.....let dry...then wipe down with solvent pror to glassing....I'm using denatured alcohol
Re: 1981 FORMULA F233 RESTORATION
Posted: Mon Aug 09, 2010 11:23 am
by NOTHING ELSE MATTERS
One more question.
Floor frames:
1-Do i bring them to touch the side of the boat of i have to leave a space?
2-Do i install them on the floor or i have to leave a space same as the stringers?
Re: 1981 FORMULA F233 RESTORATION
Posted: Mon Aug 09, 2010 11:28 am
by tech_support
NOTHING ELSE MATTERS wrote:One more question.
Floor frames:
1-Do i bring them to touch the side of the boat of i have to leave a space?
2-Do i install them on the floor or i have to leave a space same as the stringers?
Tiny gap all around is ideal, let the glass tabbing carry the loads
Re: 1981 FORMULA F233 RESTORATION
Posted: Tue Aug 10, 2010 10:50 pm
by NOTHING ELSE MATTERS
Joel, can i install the main stringers at 32" apart? I will install 3/4 flat plywood 4" wide as stiffeners under the tank.
Re: 1981 FORMULA F233 RESTORATION
Posted: Wed Aug 11, 2010 9:36 am
by tech_support
NOTHING ELSE MATTERS wrote:Joel, can i install the main stringers at 32" apart? I will install 3/4 flat plywood 4" wide as stiffeners under the tank.
Thats a wider span than original. What is the deadrise angle of the hull (midsection going aft)? Is there room for a 4" tall stringer under the tank, down the centerline?
Re: 1981 FORMULA F233 RESTORATION
Posted: Wed Aug 11, 2010 10:27 am
by NOTHING ELSE MATTERS
Joel, she is a 24* dead rise and yes, there is room, if you remember i was going to have a sub floor under the tank with a drain pipe by the keel and one stringer on each side 4-5" high. Also i was going to put 3/4" x 4" plywood stiffeners about 8" away from the length of the keel.
Re: 1981 FORMULA F233 RESTORATION
Posted: Wed Aug 11, 2010 11:02 am
by tech_support
Also i was going to put 3/4" x 4" plywood stiffeners about 8" away from the length of the keel.
no need for this if you glass that "sub floor" to the hull. If you glass that "subfloor" to the bottom, you have basically made a stringer. Also with 24 deadrise, the keel itself is a stringer. No problem moving the main stringers out to 32" apart, they will then only be 10" for the keel stringer structure (glassed in subfloor).
The span for your sole will now be wider, that only means you might need a stiffener of framing under the sole in this wide spot.
Re: 1981 FORMULA F233 RESTORATION
Posted: Thu Aug 12, 2010 12:30 am
by NOTHING ELSE MATTERS
Joel, got the shipment today, thank you very much. I'll be in OBX all next week, when i come back will start working on this old girl again, can't wait.
Re: 1981 FORMULA F233 RESTORATION
Posted: Wed Aug 25, 2010 11:12 pm
by NOTHING ELSE MATTERS
Question for the pros.
How much foam do i need on a 5000 lbs boat? I'm trying to figure out some storage compartments on my boat.
Re: 1981 FORMULA F233 RESTORATION
Posted: Thu Aug 26, 2010 8:40 am
by Cracker Larry
How much foam do i need on a 5000 lbs boat?
A lot

Foam supports 60 pounds per cubic foot, so that would be 83 cubic feet. A 2 gallon kit of foam makes 8 cubic feet, so you would need about 21 gallons of liquid.
Re: 1981 FORMULA F233 RESTORATION
Posted: Thu Aug 26, 2010 9:49 am
by NOTHING ELSE MATTERS
That's what i figure, 11 kits=5280 lbs, but that seems a lot of foam or maybe not, i never used this product before, so

With another words, in order for the boat to float if swammed, i have to have the amount of the boats weight same with foam buoyancy or more?

What i mean is that the boat weighs 5000 lbs, if filled with water weighs more, how much buoyancy do i need now?
Re: 1981 FORMULA F233 RESTORATION
Posted: Thu Aug 26, 2010 9:52 am
by wadestep
Don't forget that the boat itself displaces water. It would be hard to calculate, but you can subtract the bouyancy of the boat from the extra flotation required. I'd bet this would cut down the amount of foam required significantly.
Re: 1981 FORMULA F233 RESTORATION
Posted: Thu Aug 26, 2010 9:56 am
by wadestep
NOTHING ELSE MATTERS wrote:That's what i figure, 11 kits=5280 lbs, but that seems a lot of foam or maybe not, i never used this product before, so
With another words, in order for the boat to float if swammed, i have to have the amount of the boats weight same with foam buoyancy or more?
What i mean is that the boat weighs 5000 lbs, if filled with water weighs more, how much buoyancy do i need now?
If your boat was infintessimly small, yet still weighed 5000 lbs (like a mini black hole) (impossible), then you would need 5000 of bouyancy. However, your requirement should be significantly less than that. I don't know how to figure this out without sinking the boat and then weighing it underwater. there must be another way...
Re: 1981 FORMULA F233 RESTORATION
Posted: Thu Aug 26, 2010 10:01 am
by NOTHING ELSE MATTERS
wadestep wrote:NOTHING ELSE MATTERS wrote:That's what i figure, 11 kits=5280 lbs, but that seems a lot of foam or maybe not, i never used this product before, so
With another words, in order for the boat to float if swammed, i have to have the amount of the boats weight same with foam buoyancy or more?
What i mean is that the boat weighs 5000 lbs, if filled with water weighs more, how much buoyancy do i need now?
If your boat was infintessimly small, yet still weighed 5000 lbs (like a mini black hole) (impossible), then you would need 5000 of bouyancy. However, your requirement should be significantly less than that. I don't know how to figure this out without sinking the boat and then weighing it underwater. there must be another way...
Now you got me more confused. I know about the physics that what ever you put in the water looses as much weight as the weight of the water displaced, that is what i'm trying to understand.
Re: 1981 FORMULA F233 RESTORATION
Posted: Thu Aug 26, 2010 10:21 am
by tech_support
You do not need enough to displace 5000 pounds, but you do need enough (assuming you want positive flotation) to displace what the rest of the boat does not. The materials that make up the boat have a volume (wood/glass/gas/tanks/etc) that volume displaces water. So what you actaully need is enough buoyancy foam to float the difference between the boats weight and its submerged displacement. Now the problem
what is that volume of all the parts in the boat?
You cant answer that unless you have a very detailed spreadsheet or a 3D computer model. The easy way: assume the original designers did this calculation correctly when they deigned your boat, and they knew how much foam they needed to give positive flotation. So you can fill that same spaces they filled and have the same amount of buoyancy.
In your case, you are moving things around, but you can still measure the volume of the areas that used to have foam. I would replace that same volume, plus a little to be conservative.
All of this is just to say that you have to use 5,000 pounds of buoyancy
Of course it doesn't really hurt anything to use more foam.
In the case of your boat, they were using the foam to support the sole and stiffen up the hull - so you may find that they used more than they needed for just buoyancy

Re: 1981 FORMULA F233 RESTORATION
Posted: Thu Aug 26, 2010 10:24 am
by Cracker Larry
Good point Wade. I started to bring that up initially, but don't know how to figure it either
so I just answered the question for 5000 pounds. A plywood boat has a lot of flotation from the wood itself. To figure it accurately you would have to know the specific gravity of each component in the boat. That's why we pay Jacques the big bucks, so he can tell us how much we need
Edit: I see Joel posted the same time I did. Sorry

Re: 1981 FORMULA F233 RESTORATION
Posted: Thu Aug 26, 2010 12:13 pm
by NOTHING ELSE MATTERS
Thank you guys for your answers.
Now, because i don't want to high jack Larry thread, Shine, i read everything you post about my question on ratio for 1708 and i understand what you are saying, but if i really want to find out the ratio just for me to know that i'm applying enough resin(or i don't), how can i figure that out?
Also, for the sole, do i use the same 1708 you gave me and how many layers, or do i have to get 12oz biax?
Re: 1981 FORMULA F233 RESTORATION
Posted: Thu Aug 26, 2010 12:24 pm
by tech_support
12 oz is good for the top of the sole, 1708 would be overkill for normal use
Re: 1981 FORMULA F233 RESTORATION
Posted: Thu Aug 26, 2010 1:49 pm
by Chief Brody
NOTHING ELSE MATTERS wrote:but if i really want to find out the ratio just for me to know that i'm applying enough resin(or i don't), how can i figure that out?
After cutting your fabric, you can weigh each piece and determine how much resin is required....if a section uses 5lbs of fabric, you'll need 5lbs of resin for a 50/50 glass to resin ratio. If you run short of resin, you know you're putting it on a little too heavy. This does not include what the wood core will soak up during pre-coat.
Re: 1981 FORMULA F233 RESTORATION
Posted: Tue Aug 31, 2010 10:31 pm
by NOTHING ELSE MATTERS
One more question(out of thousands i have), my stringers are going to be 18' 3" long, they are 1/2" plywood doubled to make up one inch, what is the best way to join/divide in order to get the best performance out of them? Thank you.
Re: 1981 FORMULA F233 RESTORATION
Posted: Tue Aug 31, 2010 11:34 pm
by TomW
The best way is to make them is so there is at least a 2' overlap between the seams of the two differerent sides of the stringer. You will need to make them out of 3 peices since they are over 16' long. So plan on making your seams 2' apart as you lay out the peices. Say start with a 6' peice on one an 8' peice on the other until you get the full length.
Re: 1981 FORMULA F233 RESTORATION
Posted: Sat Sep 04, 2010 10:33 pm
by NOTHING ELSE MATTERS
O.K, removed the rotted plywood from the transom, sand everything nice and smooth, what's next ?
Do i have to clean with alcohol the old fiberglass?
I was thinking of making the transom plywood first to the 1 3/4 thickness i want, then mix some resin with wood flour for glue.
Do i apply the glue to the boat transom AND the plywood, or just on one ? I know i have to coat the plywood with resin before in order to absorb some resin, do i have to wait for that resin to dry?
Re: 1981 FORMULA F233 RESTORATION
Posted: Sun Sep 05, 2010 9:33 am
by gk108
Do i have to clean with alcohol the old fiberglass?
Acetone would be the best solvent for cleaning. It will get any oily residue out of there.
I was thinking of making the transom plywood first to the 1 3/4 thickness i want,
You could, but things have a tendency to wander around a bit when assembling. With the way your boat is made with the small insert, it might be the most practical way.
Do i apply the glue to the boat transom AND the plywood, or just on one ?
Both sides. Use a notched spreader to apply the glue and you'll get a nice even glue joint if you apply clamping pressure evenly. No need to let that first coat of neat epoxy set up first, it will be better to go wet on wet as much as possible around your transom.
Re: 1981 FORMULA F233 RESTORATION
Posted: Sun Sep 05, 2010 11:55 pm
by NOTHING ELSE MATTERS
Thanks gk108.
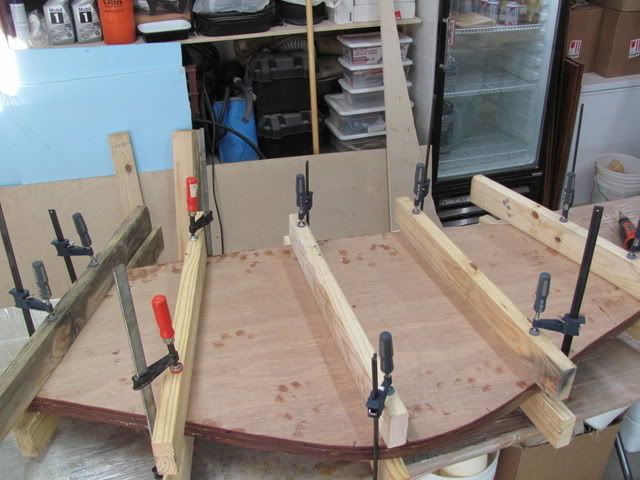
I spend the whole day making a template for the transom then cut 3 pieces of plywood (1/2"-3/4"-1/2"), i coated the sides that were going to glue together with 3 coats of resin, then while was still tacky i made up some glue with wood flour and glue them together. I clamped them together and will leave them over night to cure( i was done gluing around 4 PM.
Question. I have some holes on the transom which i like to close, basically old screw holes. Do i have to apply a small piece of the 6" 12oz tape i have before i spread the glue or the glue it's self will plug those holes?
I really like to work with epoxy, never did before, i always used polyester, this stuff gives you a lot more working time and the resin spreads very good with the roller.
Re: 1981 FORMULA F233 RESTORATION
Posted: Mon Sep 06, 2010 12:48 am
by NOTHING ELSE MATTERS
shine wrote:NOTHING ELSE MATTERS wrote:One more question.
Floor frames:
1-Do i bring them to touch the side of the boat of i have to leave a space?
2-Do i install them on the floor or i have to leave a space same as the stringers?
Tiny gap all around is ideal, let the glass tabbing carry the loads
Joel, i'm a little confused. If i raise the stringers let's say 1/4", when i apply the fillets, do i squeeze the mix to go under the gap(do i have a hard spot this way?) or i just apply it at the edge on the stringer?
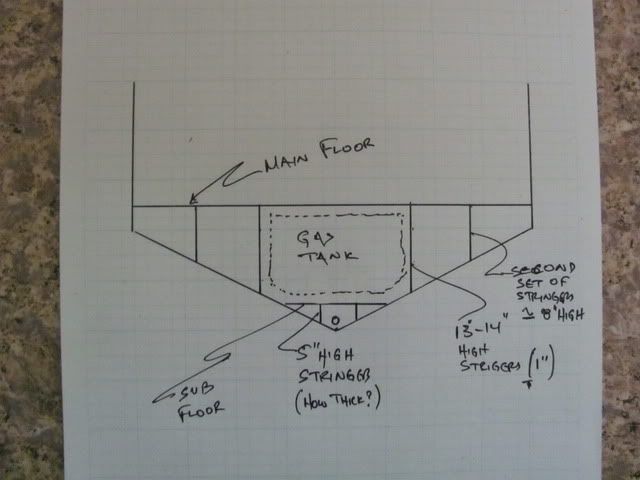
Also, Joel, i've been thinking of what you told me in the beginning and wanted to bring the stringers all the way to the transom. If i do that, i will have a span of 35" between the two inner stringers. The way i figured is that will have enough room for at least TWO 5" stringers by the keel and have the 1 1/4" drain pipe in the middle, then install a flat sub floor to be the floor where the tank will seat.
This is a "cut away" drawing so you know what i'm talking about
Re: 1981 FORMULA F233 RESTORATION
Posted: Mon Sep 06, 2010 8:59 am
by tech_support
what is the width of the part your calling the sub floor? The stringers underneath are not needed. Your boat has enough deadrise angle that the keel actually counts as a stringer
Re: 1981 FORMULA F233 RESTORATION
Posted: Mon Sep 06, 2010 12:50 pm
by NOTHING ELSE MATTERS
shine wrote:what is the width of the part your calling the sub floor? The stringers underneath are not needed. Your boat has enough deadrise angle that the keel actually counts as a stringer
Would be between 18" and 24"
Re: 1981 FORMULA F233 RESTORATION
Posted: Mon Sep 06, 2010 12:53 pm
by NOTHING ELSE MATTERS
NOTHING ELSE MATTERS wrote:
Question. I have some holes on the transom which i like to close, basically old screw holes. Do i have to apply a small piece of the 6" 12oz tape i have before i spread the glue or the glue it's self will plug those holes?
Anyone before is too late
Re: 1981 FORMULA F233 RESTORATION
Posted: Mon Sep 06, 2010 12:54 pm
by NOTHING ELSE MATTERS
shine wrote:what is the width of the part your calling the sub floor? The stringers underneath are not needed. Your boat has enough deadrise angle that the keel actually counts as a stringer
So you think is O.K to go with a spread of 35" on the stringers and all the way to the transom? I really like that idea better as it ties everything together much better.
Re: 1981 FORMULA F233 RESTORATION
Posted: Mon Sep 06, 2010 1:29 pm
by JamesT
as far as filling the holes...my opinion would be to just glue up the transom as is, then fill the holes with epoxy/fairing mix from the outside...just my two cents hope it helps. Looking good so far.
Re: 1981 FORMULA F233 RESTORATION
Posted: Tue Sep 07, 2010 9:54 am
by tech_support
So you think is O.K to go with a spread of 35" on the stringers and all the way to the transom?
assuming you have that floor or small stringers down the middle, yes
Repair the holes from the outside after you have glued in the new core
Re: 1981 FORMULA F233 RESTORATION
Posted: Tue Sep 07, 2010 11:40 am
by NOTHING ELSE MATTERS
Joel, i'm a little confused. If i raise the stringers let's say 1/4", when i apply the fillets, do i squeeze the mix to go under the gap(do i have a hard spot this way?) or i just apply it at the edge on the stringer?
Re: 1981 FORMULA F233 RESTORATION
Posted: Tue Sep 07, 2010 11:43 am
by tech_support
What little squeezes under there will not create a hard spot
Re: 1981 FORMULA F233 RESTORATION
Posted: Wed Sep 08, 2010 1:00 am
by NOTHING ELSE MATTERS
I did some work yesterday, after i took out the clamps i dry fitted the transom plywood, then i marked for all the holes i need, i over drill them by double the size and filled with epoxy and wood flour.
Today i took a day off to run some honey do's.
Re: 1981 FORMULA F233 RESTORATION
Posted: Wed Sep 08, 2010 1:07 am
by NOTHING ELSE MATTERS
On a piece of core that i cut with the hole saw i noticed that i can't see the glue line between the three pieces of plywood. Is this normal ? I did a "field" test trying to get it apart with a hammer, but that was impossible.
Re: 1981 FORMULA F233 RESTORATION
Posted: Wed Sep 08, 2010 1:18 pm
by FitzFisher
I ran into the same thing when I did mine, but then I realized that I mixed up a bunch of glue/putty and very little squeezed out the sides when I clamped it together, so it has to be in there doing it's thing. So unless you ended up with massive globs of glue coming out when you clamped it together (and I doubt you did based on what I saw in your pictures), I wouldn't sweat it. You'll have a very solid piece when you are all done. Keep up the good work

Re: 1981 FORMULA F233 RESTORATION
Posted: Wed Sep 08, 2010 11:21 pm
by NOTHING ELSE MATTERS
The good thing is (i hope) that VERY little squeezed out from EVERYWHERE. Anyway i did another "hammer" test today with a heavy 24oz hammer, i waked it pretty hard, did not come apart. Sooooooooooooo, today i dry fit the plywood again, made all my holes to match the transom, coated two coats of epoxy, i will give one more tomorrow and then glue it to the skin.
Re: 1981 FORMULA F233 RESTORATION
Posted: Wed Sep 08, 2010 11:53 pm
by NOTHING ELSE MATTERS
Question for the pros/u]
I would like to make the new motor mounts
I know how to make them, my question is the section that sticks up about 2"-2 1/2" that the motor mount gets fasten is always a problem with the water going into the screw holes. I will not do the engine installation and most likely i will not be there to see if they will seal with 4200 or 5200, so, how can i make that piece to be totally waterproof ? The rest of the stringer/mount i will make it out of plywood.
What i was thinking was to make that little section(12"L x 3 1/2"W x 2 1/2"H) out of poured epoxy and wood flour, mold it around it of course. What you guys think or i'm open to ALL ideas.
BTW, this has to be quick i'm doing them next.
Re: 1981 FORMULA F233 RESTORATION
Posted: Thu Sep 09, 2010 8:08 am
by Cracker Larry
What i was thinking was to make that little section(12"L x 3 1/2"W x 2 1/2"H) out of poured epoxy and wood flour, mold it around it of course.
That would work fine and it wouldn't matter if some water got in there. I would add some chopped or milled glass fiber to the mix to give it a little more strength, or if you don't have any, just cut up some cloth scraps. Also, if it's warm where you are, pour the mold in 2 or 3 batches, not all at once, so it doesn't get too hot and boil the epoxy.
Re: 1981 FORMULA F233 RESTORATION
Posted: Thu Sep 09, 2010 9:23 am
by Chief Brody
You guys feel just epoxy putty in a 12x3.5x2.5 block will be strong enough to hold the engine mounts and torque action over time? I would lean more towards making a thickly stacked laminate out of small pieces of glass and glueing that in instead and taping it over....the glass should be what carries the load, no? Just thinking out loud....
Re: 1981 FORMULA F233 RESTORATION
Posted: Thu Sep 09, 2010 10:08 am
by NOTHING ELSE MATTERS
Chief Brody wrote:You guys feel just epoxy putty in a 12x3.5x2.5 block will be strong enough to hold the engine mounts and torque action over time? I would lean more towards making a thickly stacked laminate out of small pieces of glass and glueing that in instead and taping it over....the glass should be what carries the load, no? Just thinking out loud....
After i'm done with the pour, i will wrap everything with at least 3 layers of 1708 and more where that motor mount is.
Chop glass is a good idea and i do have plenty of that.
Re: 1981 FORMULA F233 RESTORATION
Posted: Thu Sep 09, 2010 2:44 pm
by FitzFisher at Work
How about mounting a stud or something with a litle more purchase. Or Maybe even leave an access window in the block where a nut and washer could be fastened to the bolt that comes in from the top Make all the mount out of laminated plywood and wrap it all real good. Do the overdril, fill and drill method and you would have soemthing that would last forever.
Re: 1981 FORMULA F233 RESTORATION
Posted: Thu Sep 09, 2010 3:08 pm
by FitzFisher
Here is a diagram of my suggestion to address the motor mount. Could be completely encased plywood laminations for strength with the overdrill and fill method where the bolt goes through. Strong and watertight....what do you think dudes?

Re: 1981 FORMULA F233 RESTORATION
Posted: Thu Sep 09, 2010 4:52 pm
by NOTHING ELSE MATTERS
The problem i have is that i don't know exactly where those bolts would be.
Re: 1981 FORMULA F233 RESTORATION
Posted: Thu Sep 09, 2010 9:23 pm
by FitzFisher
The problem i have is that i don't know exactly where those bolts would be.
I'm not sure what you mean. My diagram is a side view. It looks like you already have a similar pad setup on your stringer no?
If it is a matter of forward/aft position, you could do a slot setup to give you some adjustability. Otherwise you may have to take some measurements. It looks like you had two smaller bolts holding the mount down to the stringer pad and the main bolt going through the rubber block into the mount, so maybe you don't need as much holding power as I have shown. Depends on how much torque you expect and how much beating and banging the boat/engine will take. Just a thought....
Or you could modify the setup to include a stainless or aluminum block to adapt the mount to allow the through bolt setup. Someting like this..

Then again I have a tendencey to overengineer stuff....
Re: 1981 FORMULA F233 RESTORATION
Posted: Thu Sep 09, 2010 9:45 pm
by Cracker Larry
You guys feel just epoxy putty in a 12x3.5x2.5 block will be strong enough to hold the engine mounts and torque action over time?
Not just epoxy, but with plenty of wood flour, some chopped glass, some scrap cloth, heck yeah it will carry the load
Re: 1981 FORMULA F233 RESTORATION
Posted: Thu Sep 09, 2010 10:13 pm
by TomW
Yes agree with Larry, if you mix milled fibers, wood flour and fiberglass cloth it can hold about anything. Your going to want a fairly thick mix. I'd start off with 50% milled fiber by volume, they thicken some more with woodflour, and other thickeners mentioned. Your not going to be able to pour more than about 1/2" at a time until the epoxy sets other wise you may get an exothermic reaction and the epoxy will get way to hot.
Cost wise it may also be more beneficial to go with wood.
Tom
Re: 1981 FORMULA F233 RESTORATION
Posted: Thu Sep 09, 2010 11:54 pm
by NOTHING ELSE MATTERS
O.K, what is milled fibers ? I was going to put everything else you mention, but you got me with the fiber thingie.
What about if i use pressure treated 2 X 4 for that little piece only?
Re: 1981 FORMULA F233 RESTORATION
Posted: Fri Sep 10, 2010 12:13 am
by TomW
Milled fibers are chopped fiberglass that make a very strong mix. Often called "liquid fiberglass"
http://boatbuildercentral.com/proddetai ... =E_mil_2lb
Tom
Re: 1981 FORMULA F233 RESTORATION
Posted: Fri Sep 10, 2010 7:56 am
by Cracker Larry
What about if i use pressure treated 2 X 4 for that little piece only?
No, epoxy doesn't bond well to PT lumber.
Re: 1981 FORMULA F233 RESTORATION
Posted: Fri Sep 10, 2010 9:22 am
by Chief Brody
Cracker Larry wrote:What about if i use pressure treated 2 X 4 for that little piece only?
No, epoxy doesn't bond well to PT lumber.
Man, I hope thats not 100% totally true CL.....at least not for PT XL Ply....except for a few areas, my whole project is pretty much using the PT plywood I got here.....the stuff at the local depot may be a little different though...probably a little higher moisture content which can make it harder to bond properly.
One thing you can do for the motor mount bolt holes is if you know what sized bolts they are, you can make some epoxy/fiberglass dowels that are oversized and pre-drill the bolt holes on the big dowels.....now when the boat yard installs the motor mounts, they can drill out the wood stringer oversize to match your pre-made dowel and epoxy it in.....now the wood core is protected and the boat yard can place the holes anywhere they need to.
Re: 1981 FORMULA F233 RESTORATION
Posted: Fri Sep 10, 2010 9:36 am
by tech_support
Resin will not bond well to pressure treated wood UNLESS the wood is dried out, then its fine. So you either buy kiln dried wood, or you wait for it tot dry and use a moisture meter to make sure its 12% or less (thats a rough figure)
The XL fir we stock is kiln dried.
Re: 1981 FORMULA F233 RESTORATION
Posted: Fri Sep 10, 2010 9:48 am
by Cracker Larry
I know I've got epoxy and glue and glass all over my PT building frames and picnic tables. After about a month it peels right off. It appears to be well bonded, but you can pull it off with your fingers. This is wood that's been in the sun for over 10 years.
Re: 1981 FORMULA F233 RESTORATION
Posted: Fri Sep 10, 2010 10:01 am
by tech_support
then dont build any boats with that wood
Could be a lot of things keeping it from sticking, could be it too slick, or the beams could be thick enough that the treatment hasnet dried out after 10 years - quite possible.
For those wondering, one can always do a test on any wood you are concerned about. Glue two pieces together, then rip it apart. If it peels off without tearing wood from wood then its failed (what Larry describes on those beams for example). If the bond of the epoxy is stronger to the wood than the internal strength of the wood, then thats all you need to know. Its a success when the epoxy rips up the first veneer of the plywood.
I have bonded a few pieces of the XL fir (kiln dried pressure treated) and the wood fails before the epoxy bond
Re: 1981 FORMULA F233 RESTORATION
Posted: Fri Sep 10, 2010 10:03 am
by Chief Brody
shine wrote:Resin will bond well to pressure treated wood UNLESS the wood is dried out, then its fine. So you either buy kiln dried wood, or you wait for it tot dry and use a moisture meter to make sure its 12% or less (thats a rough figure)
The XL fir we stock is kiln dried.
Joel, will or won't bond well to PT wood unless its dried out...
Re: 1981 FORMULA F233 RESTORATION
Posted: Fri Sep 10, 2010 10:06 am
by tech_support
sorry, forgot the "not"
Epoxy will NOT bond to pressure treated unless its dried out. Kiln dried mean we know it dry, aged means it may be dry (unless you have moisture meter). You can always test the bond as I describe above
Re: 1981 FORMULA F233 RESTORATION
Posted: Fri Sep 10, 2010 10:26 am
by Cracker Larry
Just to show I'm not crazy (well, not about this anyway
), I went out and took a couple of pics.
This is epoxy and woodflour glue, spilled on PT picnic table. You can see the wood isn't slick at all, nor is it wet. It wasn't wet when the glue was spilled. I've done this dozens of times
The first few months it seems to be bonded solid as a rock, then it eventually comes unglued. Not just this table, but all my PT wood acts the same way. Leave it alone for a couple of months and it comes right off
Glue blobs on table...

Glue blobs pulled off with my fingers...

So, there ain't no way I'm going to use it on my boats. Yall can do what you want with yours
Re: 1981 FORMULA F233 RESTORATION
Posted: Fri Sep 10, 2010 10:35 am
by gk108
I've used ½" PT plywood on a rebuild, but...
It was wet and warped when I bought it. I stored it for 4 months in the back of an old school bus, flat stacked and well ventilated and HOT in the Ga. sun. After that, it was well dried out and not warped. In use, every bit of each cut part was sanded before any epoxy was applied.
With all of that, it was still CD grade pine plywood, so it all had to be filled and sheathed in glass to make it durable.

Re: 1981 FORMULA F233 RESTORATION
Posted: Fri Sep 10, 2010 10:59 am
by Cracker Larry
I just pulled a piece of 2X6 out of my scrap pile, it was left over from the building frame of my GF16, had a lot of epoxy spills. This epoxy has been set on this lumber for 5 years.

Just using my fingernail I was able to peel it right off. There is no bond at all between the epoxy and the wood.

You could have never pulled it off in the first month or so, but wait a few months and it will fall off. If you're going to do a test, I'd recommend plenty of time, not an overnight test
I wish it would behave the same way on my concrete floor
Re: 1981 FORMULA F233 RESTORATION
Posted: Fri Sep 10, 2010 12:47 pm
by FitzFisher
Yeah it's funny what this stuff will stick too and not. I saved a big piece of glass to work as a wet out table and figured it would just peel off when dried. I tried to scrape a piece off the other day and it pulled glass up with it...easier to break the glass T han the bond..
But back to his dilemma. Seems like the epoxy filler bed would be a good option as long as you follow the guidelines herein and use a good grade coarse lag bolt to attach the mounts into the epoxy bed after predrilling to prevent cracking. Once it is down it should not have enough raw torque to just pull out as long as it remains snug and isn't banging around or vibrating excessively.
Re: 1981 FORMULA F233 RESTORATION
Posted: Fri Sep 10, 2010 2:08 pm
by Chief Brody
NEM, sorry for derailing the thread a little, but it kind of goes hand in hand with what you're trying to do with PT lumber.
Cracker Larry wrote:I just pulled a piece of 2X6 out of my scrap pile, it was left over from the building frame of my GF16, had a lot of epoxy spills. This epoxy has been set on this lumber for 5 years.
Just using my fingernail I was able to peel it right off. There is no bond at all between the epoxy and the wood.
You could have never pulled it off in the first month or so, but wait a few months and it will fall off. If you're going to do a test, I'd recommend plenty of time, not an overnight test
I wish it would behave the same way on my concrete floor
CL.....I have the same scenario with some lumber and a wooden step ladder that I'm using to get in and out of the boat.....the globs of epoxy did pop off in spots like you said, but I think the reason is two-fold.....1) the epoxy has been exposed to UV over time outside...once it turns from a clear amber to a more muddy color, with or without filler, she's pretty much done. 2) when using the wood for building or repair, you normally encapsulate the entire surface and seal excess moisture out...my ladder, as with your table and lumber was open to air and moisture and continued to breath allowing moisture to get behind the epoxy and lose the bond.....on my boat, even with factory polyester resin....anywhere the wood was completely encapsulated, the bond from the factory was still good...anywhere they cheated or had poor workmanship and left areas open to moist air, the skins popped off with my hand once they got started.....I don't know if this theory holds water,
but I hope it does or I just wasted a lot of time and money...
Re: 1981 FORMULA F233 RESTORATION
Posted: Fri Sep 10, 2010 5:05 pm
by Cracker Larry
I think your theory is sound Chief, at least to some extent, but I can show you epoxy on non-PT lumber that's been exposed to the weather and it still has a good bond. My boats stay outside and have constant weather exposure too. I've only personally seen this happen with PT lumber, specifically only on Southern Yellow Pine. I have no experience with the plywood you've used, and I'm sure that if it came from Joel, it will work perfectly as advertised. Didn't mean to shake you up
But based on my experience with it I thought I should caution against using it for motor mounts when there are better options available.
Re: 1981 FORMULA F233 RESTORATION
Posted: Fri Sep 10, 2010 11:28 pm
by NOTHING ELSE MATTERS
O.K, i'm sold, NO PT for me, thanks.
Re: 1981 FORMULA F233 RESTORATION
Posted: Fri Sep 10, 2010 11:32 pm
by NOTHING ELSE MATTERS
TomW wrote:Yes agree with Larry, if you mix milled fibers, wood flour and fiberglass cloth it can hold about anything. Your going to want a fairly thick mix. I'd start off with 50% milled fiber by volume, they thicken some more with woodflour, and other thickeners mentioned. Your not going to be able to pour more than about 1/2" at a time until the epoxy sets other wise you may get an exothermic reaction and the epoxy will get way to hot.
Cost wise it may also be more beneficial to go with wood.
Tom
What happens when the epoxy gets too hot? Is it really bad for the mix?
Re: 1981 FORMULA F233 RESTORATION
Posted: Sat Sep 11, 2010 1:38 am
by TomW
It gets so hot it can literally weaken the fiberglass fibers. Any of us that have worked with epoxy can tell you of at least one batch that we had go off and literally start smoking on us.
Re: 1981 FORMULA F233 RESTORATION
Posted: Tue Sep 21, 2010 12:27 am
by NOTHING ELSE MATTERS
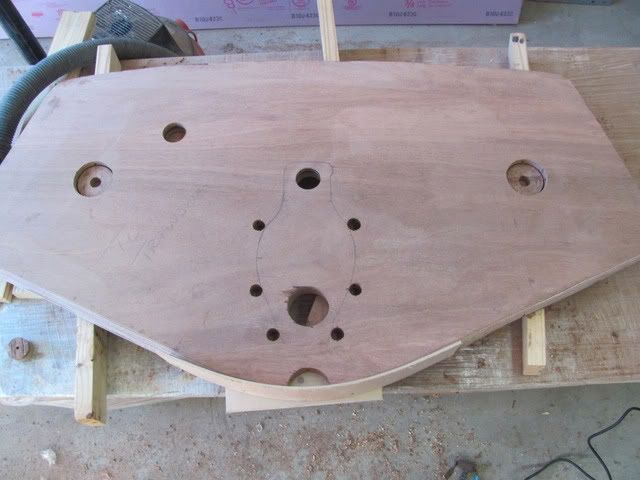
I've been doing some work on the Formula here and there, i wish i could work every day on her though. Anyway, i installed the plywood core for the transom
Then i decide to make the motor mounts out of layers of plywood, then overdrill where the studs will go and fill it with epoxy, wood flour and some chopped mat.
Built also a stand/holder for my roll of 1708
Here is a picture of the core installed, tabbed and glassed.
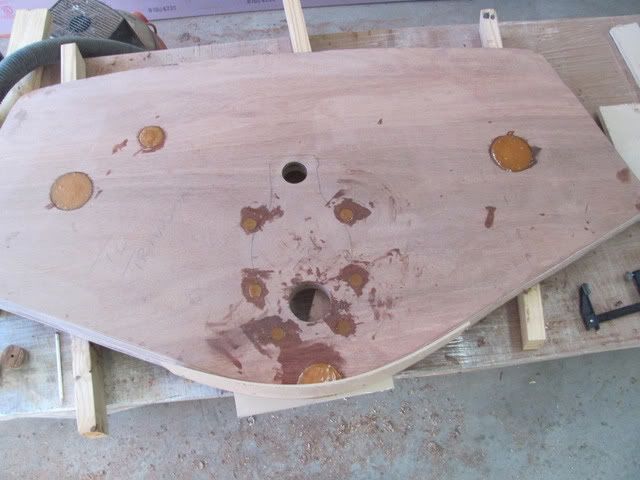
I have a question though, what and why do i have those white spots on the transom core? They are not bubbles.
I did get some bubbles on the floor where i made some turns and where the original floor was not smooth and i did not grind it down before, but i grind those bubbles, filled them and re glass over them.
Re: 1981 FORMULA F233 RESTORATION
Posted: Tue Sep 21, 2010 2:15 pm
by Fitz at Work
Those are places where the glass is not quite saturated or where there are very tiny air bubbles in the layers or at the surface of the bond with the wood. You can avoid that in the future with a little more work on the Hard roller or squeegee and a little more resin in between your layers. THose are not a big deal from what I can see, but you will be able to avoid them in the future by working the area a little more.
Re: 1981 FORMULA F233 RESTORATION
Posted: Tue Sep 21, 2010 3:57 pm
by NOTHING ELSE MATTERS
HELP, anybody ????
Shine, are you out there?
Re: 1981 FORMULA F233 RESTORATION
Posted: Tue Sep 21, 2010 4:07 pm
by tech_support
White spots are resin starved. While not ideal, I dont see anything that needs to be fixed (with the exception of the edges). Did you take the last picture after sanding?
Did you sand the biax tape before the 1708? If you do not sand off the stitching, it will keep the 1708 for laying out perfect.
Re: 1981 FORMULA F233 RESTORATION
Posted: Tue Sep 21, 2010 10:48 pm
by NOTHING ELSE MATTERS
I did sand the edges but i did not go crazy, i was afraid i was going to remove a lot material.
When you say about the edges, do i have to do anything now at this point?
Last picture was taken after a day i finished the glass. I did not sand afterwards(if that is what you mean).
You said that white spots is starvation of resin, when i wet out the 1708 i had the mat side up, roll resin on it until the other side had changed color, i did not apply too much on the plywood, what i did was wet out the plywood until dark brown, then went and wet out the 1708, waited a few minutes, then wet out the plywood again(lightly, maybe this was my mistake), then install the 1708 on the plywood, roll it with the grooved roller to get the bubbles out and to lay it as flat as possible, then pushed some more resin with the 2" chip brass, then roll again. What did i do wrong here?
BTW, after the regular tabbing(the tape you gave me), i tabbed the bottom section with 1708 to make it "stronger"
Re: 1981 FORMULA F233 RESTORATION
Posted: Wed Sep 22, 2010 9:49 am
by Chief Brody
Looks like the wood end grain soaked up a liitle more than expected before the epoxy cured up. Maybe need to let it tack up a little before laying any glass. If I'm not mistaken, it looks like the wood is standing a little proud around the perimeter....maybe the 1708 had a hard time making the bend over the edge if it wasn't rounded over?? Just a thought.
Re: 1981 FORMULA F233 RESTORATION
Posted: Wed Sep 22, 2010 9:55 am
by tech_support
to avoid the white spots you just need to use more epoxy.
1708 needs a pretty generous radius to make turn and not "pop up".
If you have any true air pockets, where there is clearly an air bubble under the glass, then you will need to cut/grind it out
Re: 1981 FORMULA F233 RESTORATION
Posted: Wed Sep 22, 2010 3:39 pm
by NOTHING ELSE MATTERS
I made 3/8" radius all around except the bottom.
No, i don't have any air pockets on the wood( i can tell when i tap on it).
So, i should be good to go ?
So i know for the stringers, how can i tell that i have good amount of resin on the 1708 and on the wood?
Thanks guys, i never used 1708 before.
Re: 1981 FORMULA F233 RESTORATION
Posted: Thu Sep 23, 2010 9:32 am
by tech_support
You can proceed, but you need to sand the prior layer before putting on more. Its the stitching that keeps you fomr getting it to lay smooth (even if you did use enough epoxy). If the prior layer is cured/hard, you must sand it briefly of the next layers will look dry
Re: 1981 FORMULA F233 RESTORATION
Posted: Sun Sep 26, 2010 10:27 pm
by NOTHING ELSE MATTERS
shine wrote:You can proceed, but you need to sand the prior layer before putting on more. Its the stitching that keeps you fomr getting it to lay smooth (even if you did use enough epoxy). If the prior layer is cured/hard, you must sand it briefly of the next layers will look dry
Should i sand with 120 grit ? Or, better yet, what grit should i use ?
Re: 1981 FORMULA F233 RESTORATION
Posted: Sun Sep 26, 2010 10:38 pm
by NOTHING ELSE MATTERS
One more question for shine and the rest of the pros. I am ready to install the stringers the next couple of days. My stringers are 1" thick and i am using a 3/8" round over bit to smooth the top edges for the 1708. My question is can i bring the 1708 all the way up to the stringer, let's say 1/2" shy, then use 2-3 layers of 6" 12 oz tape to cap the stringers? The reason i am asking is i am afraid that the 3/8" round is not big/wide enough to have a smooth transition and i might end up with the 1708 not sticking and have a very long bubble at the top edge. The way i was going to glass the stringer is 50" at the time.
Also, how many layers of 1708 on the stringers ? I was thinking two of them.
Re: 1981 FORMULA F233 RESTORATION
Posted: Mon Sep 27, 2010 1:41 am
by FitzFisher
Lots of Questions but let's see if I can help.
120 grit is a little fine. Rougher is better, but you don't have to take a lot off, just knock of the high spots from the stiching.
The 3/8 round should be OK, but a good tip on getting the sutff to hold down on the corners is to get some heavy grade food/plastic wrap and pull it down across the top after you lay the glass and work out the bubbles down the sides. You can smooth all the remaining air out and keep it tight against the wood while it cures and then just peel it off after it cures up good. Tat way you can do it in one big 50" wide piece up one side and down the other. Worked great on mine. just make sure you have a decent amount of resin in on the wood and mat side and you'll be fine.
I only used 12oz to cover my stringers and was told that was plenty. Only one layer was used. , but my stringers are 1.5 thick so maybe you are relying on more glass for strength. That is a Jaques/Shine question, but it sure seems like one layer of 1708 with the tabbing should be plenty.
Hope this helps. I ahve become a big fan of the plastic wrap on the stuff I have been doing lately. Check out my post and see how it help me keep the glass down on some 3/4 plywood with lots of curves.
Re: 1981 FORMULA F233 RESTORATION
Posted: Mon Sep 27, 2010 2:07 am
by NOTHING ELSE MATTERS
Fitz, thank you for the shrink wrap trick.
Re: 1981 FORMULA F233 RESTORATION
Posted: Mon Sep 27, 2010 9:49 am
by tech_support
I use 60, you could even use a grinder (but thats risky), it should take about 1 second per foot to sand, you only taking odd the stitching.
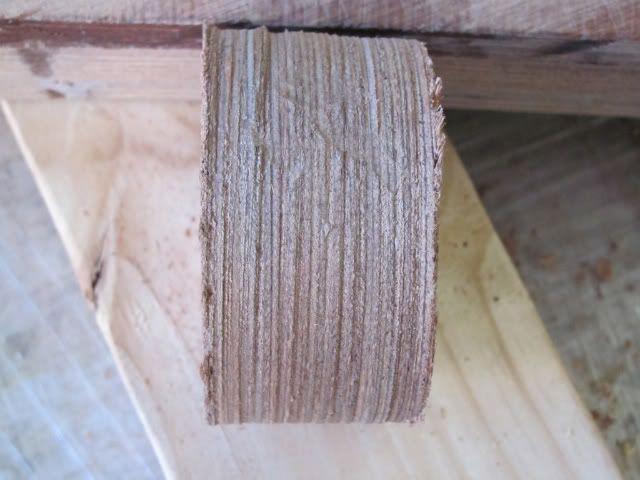
Here is a picture of the tops of stringers being wrapped with plastic, you can really squeeze the air out doign this. The picture is a "cap" of carbon fiber, but the principle is the same for the biax.
wet out carbon (its saturated with epoxy, but you can tell because its black
)

plastic pressed over top

result

Re: 1981 FORMULA F233 RESTORATION
Posted: Mon Sep 27, 2010 10:02 am
by NOTHING ELSE MATTERS
Shine, how many layers of 1708 on the stringers?
Re: 1981 FORMULA F233 RESTORATION
Posted: Wed Sep 29, 2010 10:56 am
by NOTHING ELSE MATTERS
NOTHING ELSE MATTERS wrote:Shine, how many layers of 1708 on the stringers?
??????
Re: 1981 FORMULA F233 RESTORATION
Posted: Wed Sep 29, 2010 11:00 am
by NOTHING ELSE MATTERS
I am getting ready to install the stringers. I am lifting them off the bottom of the hull by 1/2" to 3/4", what do i do with that space, what i mean is when i start filleting all the glue (PB) will go under it, is it a trick to do in order to prevent this?
Re: 1981 FORMULA F233 RESTORATION
Posted: Wed Sep 29, 2010 11:13 am
by tech_support
NOTHING ELSE MATTERS wrote:Shine, how many layers of 1708 on the stringers?
have we not discussed that? I can read back, but I'm sure we have done this before, more than once.
Re: 1981 FORMULA F233 RESTORATION
Posted: Wed Sep 29, 2010 11:16 am
by tech_support
NOTHING ELSE MATTERS wrote:I am getting ready to install the stringers. I am lifting them off the bottom of the hull by 1/2" to 3/4", what do i do with that space, what i mean is when i start filleting all the glue (PB) will go under it, is it a trick to do in order to prevent this?
dont lift them that much, thats asking for a big mess
all you need is a slight gap, the thickness of a mixing stick is fine, max 1/4". Then you squeeze the fillet materiel under as much as you can. You dont have to go crazy getting the putty 100% under there.
Re: 1981 FORMULA F233 RESTORATION
Posted: Wed Sep 29, 2010 11:16 pm
by NOTHING ELSE MATTERS
shine wrote:NOTHING ELSE MATTERS wrote:Shine, how many layers of 1708 on the stringers?
have we not discussed that? I can read back, but I'm sure we have done this before, more than once.
Originally you had told me two layers of 1708 on each stringer but that was when i was going to install only two stringers as it was original, now i am going with this version
Do i still have to put two layers of 1708 on all stringers?
Thanks.
Re: 1981 FORMULA F233 RESTORATION
Posted: Thu Sep 30, 2010 10:57 am
by tech_support
OK, with 4 stringers spaced as in your drawing, with 1" thick stringer. 1 layer overlapping to 6" on the bottom, thats after 3 layers 12 oz tape tabbing on each side
Re: 1981 FORMULA F233 RESTORATION
Posted: Thu Sep 30, 2010 11:21 am
by NOTHING ELSE MATTERS
Thanks Joel.
Re: 1981 FORMULA F233 RESTORATION
Posted: Thu Sep 30, 2010 11:40 am
by tech_support
NOTHING ELSE MATTERS wrote:Thanks Joel.
Your very welcome
Re: 1981 FORMULA F233 RESTORATION
Posted: Thu Sep 30, 2010 3:19 pm
by NOTHING ELSE MATTERS
Re: 1981 FORMULA F233 RESTORATION
Posted: Thu Sep 30, 2010 3:51 pm
by tech_support
nice spacers
Re: 1981 FORMULA F233 RESTORATION
Posted: Thu Sep 30, 2010 9:55 pm
by FitzFisher
Looking Good Mon. Your coach is keeping you moving in the right direction. He is a good looking dude.
Re: 1981 FORMULA F233 RESTORATION
Posted: Thu Sep 30, 2010 11:21 pm
by Dumb Axe
You didnt happen to buy that 77 Formula I put on here did you? That thing sat there for years and now it is gone so thought maybe you came and got it.
Re: 1981 FORMULA F233 RESTORATION
Posted: Thu Sep 30, 2010 11:51 pm
by NOTHING ELSE MATTERS
Dumb Axe wrote:You didnt happen to buy that 77 Formula I put on here did you? That thing sat there for years and now it is gone so thought maybe you came and got it.
No, this is a 1981, but i am interested on the one you saw also.
Re: 1981 FORMULA F233 RESTORATION
Posted: Thu Sep 30, 2010 11:55 pm
by NOTHING ELSE MATTERS
FitzFisher wrote:Looking Good Mon. Your coach is keeping you moving in the right direction. He is a good looking dude.
Thanks Fitz, he is the best dog i ever had but a little stubborn.
Re: 1981 FORMULA F233 RESTORATION
Posted: Fri Oct 01, 2010 11:18 pm
by Dumb Axe
I put the guys phone number on that other post. Somebody worked on the trailer this week and then it was gone. Not sure if he sold it or took it somewhere else. I am just glad it is moved it was tempting me.
Re: 1981 FORMULA F233 RESTORATION
Posted: Fri Oct 15, 2010 12:43 am
by NOTHING ELSE MATTERS
Re: 1981 FORMULA F233 RESTORATION
Posted: Fri Oct 15, 2010 10:46 am
by Chief Brody
NEM, the work looks pretty good!!! That second "doner" boat looks to be in good shape....you're pullin' that motor and tossing "raising hell"? Must have been a really good deal. Will you need to do anything structurally by converting her to a center console? Any additional support to keep the gunwales in shape?
Re: 1981 FORMULA F233 RESTORATION
Posted: Fri Oct 15, 2010 11:48 am
by NOTHING ELSE MATTERS
Chief Brody wrote:NEM, the work looks pretty good!!! That second "doner" boat looks to be in good shape....you're pullin' that motor and tossing "raising hell"? Must have been a really good deal. Will you need to do anything structurally by converting her to a center console? Any additional support to keep the gunwales in shape?
The way i' m building under the sole it will be bulletproof. As far as the sides i will be installing plywood pieces perpendicular to the sides of the boat as support and also to be used as rod holders and a toe space on the bottom. For the front i will be building either a casting platform with storage and drain overboard or forward seating type (one long bench on each side) also with storage and drain overboard.
As far as "raising hell", yes, it was a great deal with a rebuilt outdrive in the front cabin as an extra bonus(long story), the boat i am throwing away(unless anybody here wants a free 22' Baja 1986(i think, i don't remember) and the trailer has no papers but i sold it for 350 bucks to a marina.
Re: 1981 FORMULA F233 RESTORATION
Posted: Fri Oct 15, 2010 12:11 pm
by FitzFisher
Yeah that is looking good. Looks alot like mine on the inside, so you could probably do the casting deck as it was designed in mine too. I am in the process of putting that in right now and should have some pretty good pictures up soon. Basically the bulkhead across the front of the stringers goes up another 6 inches and the foredeck will sit on a combination of cleats, the top of the bulkhead and the lip of the fishbox. I just have to figure out how to attach cleats to the forward vee section that really doesnt have any support under it to rest them on. I'm headed to my post to ask that question now. Keep up the good work!

Re: 1981 FORMULA F233 RESTORATION
Posted: Sun Oct 17, 2010 9:03 pm
by Chief Brody
http://www.thehulltruth.com/boating-for ... -info.html
NEM...thought you'd be interested in another 233 rebuild....interesting to say the least....
Re: 1981 FORMULA F233 RESTORATION
Posted: Sun Oct 17, 2010 10:43 pm
by NOTHING ELSE MATTERS
WOW, thanks a lot.
That is a lot of work.
Re: 1981 FORMULA F233 RESTORATION
Posted: Fri Dec 03, 2010 12:40 pm
by NOTHING ELSE MATTERS
Guys, question. I still have some glassing to do and temps here are at 40's. What can i do to raise the temp in the boat? The boat sits under a car port with tarp all around the boat. Is it safe to use a propane heater while glassing (epoxy) or should i use a heat lamp? Heat lamp would heat just the space i'm working on, while propane heater will heat the whole area.
This is the heater i would like to use
http://www.northerntool.com/shop/tools/ ... %2Bheaters
Also, after the glassing i have to install the foam, what do i do for heat for that task?
Re: 1981 FORMULA F233 RESTORATION
Posted: Fri Dec 03, 2010 1:09 pm
by tech_support
Epoxy needs at least 45-50 degrees before it will start to cure. You can keep the epoxy inside, then keep it under the heat lamp while your working. This way the epoxy itself is warm, so the reaction starts and hopefully tacks up quickly.
The foam is easy, just make sure the cans are warm, it will expand quickly. After expansion it doesn't matter what temp the air is.
Re: 1981 FORMULA F233 RESTORATION
Posted: Fri Dec 03, 2010 2:11 pm
by Chief Brody
the only problem with any fuel type heaters is CO buildup inside your enclosed area. I did that in my garage for a few weeks in really cold weather one time. After keeping the garage warm for a few days, my CO monitor started going off in the basement as its attached to the garage with a door that was constantly opened. I was using one of those tube type 35,000 BTU heaters. I would opt for some type of electric heater instead since you're working inside the area. Those oil filled electric radiators ($50), while bulky, put out some good BTU's safetly.
Re: 1981 FORMULA F233 RESTORATION
Posted: Fri Dec 03, 2010 4:00 pm
by NOTHING ELSE MATTERS
Chief, the tarp on the sides passes the gunnels by maybe a foot below and at least a foot away from the gunnels, so ( i think) i have a good circulation of fresh air, i could also use the box fan i had summer time on low speed for circulation. No?
Re: 1981 FORMULA F233 RESTORATION
Posted: Fri Dec 03, 2010 4:03 pm
by NOTHING ELSE MATTERS
Shine, when you say "worm" for the foam, how much warm? What i did the resin, i filled half a bucket of hot water from the sink and had my gallon of resin there to keep it warm and pour and mix for the rest 2-3 hours, it was like 55 degrees out that day though.
Re: 1981 FORMULA F233 RESTORATION
Posted: Fri Dec 03, 2010 4:45 pm
by Cracker Larry
You'll get the best expansion from the foam if it's 90-100 degrees. As long as the mixture is warm it doesn't matter much what the outside temp is. Most of the expansion takes place within a minute or 2 of mixing.
Re: 1981 FORMULA F233 RESTORATION
Posted: Fri Dec 03, 2010 5:02 pm
by Chief Brody
as long as you keep a fresh supply of oxygen around, you won't deplete the ratio at the burner, so you should get complete combustion...it's when the burner is using the same air over and over that the % of oxygen in the air gets lower and lower and results in excess CO, incomplete.
Re: 1981 FORMULA F233 RESTORATION
Posted: Sat Jan 01, 2011 7:27 pm
by NOTHING ELSE MATTERS
Well, the last snow storm we had did a number on my boat cover, simply the whole canopy collapsed and snow went inside the boat and started to melt. Water sat at the bottom of the boat (by the keel) where is still the original polyester resin. Should i worry about absorbing water? Do i have a huge problem? As you know, the boat has no floor yet and just finished the transom and stringers( a month or so ago).
Re: 1981 FORMULA F233 RESTORATION
Posted: Sun Jan 02, 2011 7:27 am
by gk108
I don't think the moisture will do any permanent damage. Just dry it out good before you proceed. If any uncoated wood on the new stringers got wet, it may take up to a week or more to get that dried out again, but polyester hull and coated wood should dry out in a day or two of warm dry air exposure. The tent over my D15 build collapsed during a thunderstorm and made a big funnel that drained into my uncoated hull. It looked OK after drying a week, but I let it go for another week, just to be safe. I guess that was long enough, since there are no issues with paint or resin adhesion, etc.
Re: 1981 FORMULA F233 RESTORATION
Posted: Mon Jan 03, 2011 1:06 pm
by NOTHING ELSE MATTERS
gk108 wrote:I don't think the moisture will do any permanent damage. Just dry it out good before you proceed. If any uncoated wood on the new stringers got wet, it may take up to a week or more to get that dried out again, but polyester hull and coated wood should dry out in a day or two of warm dry air exposure. The tent over my D15 build collapsed during a thunderstorm and made a big funnel that drained into my uncoated hull. It looked OK after drying a week, but I let it go for another week, just to be safe. I guess that was long enough, since there are no issues with paint or resin adhesion, etc.
Thanks gk, yes, all wood is coated so no worries there, just the old polyester i was worry about. Can i put like a small heater in there and dry it that way?
Re: 1981 FORMULA F233 RESTORATION
Posted: Mon Jan 31, 2011 9:54 pm
by NOTHING ELSE MATTERS
Shine and the pros: I found another Formula center console which i really want to get and restore her too(when done with this one). What i wanted to do is replace the transom and close the hole from the I/O outdrive and use a single 250-300 outboard but NOT on a bracket. Can i cut the transom to accept a 30" shaft length outboard and then built one box on each transom corner so i will not have any flexing back there and a gate between them? Reason for the 30" transom is to have as much as transom i can above the water. For picture references you can use the pictures i have from the other Formula in this thread, boats are identical.
Re: 1981 FORMULA F233 RESTORATION
Posted: Mon Jan 31, 2011 10:25 pm
by TomW
Sure it would be similar to what you have done to date. Replace the transom with a peice that is 30" tall and then build the motorwell frames the distance for out from the transom for the proper disance for that size motor. AYBC has standards set for motors and Joel or Jacques can give you that measurement.
It will mean taking out more of the deck and stringers and tying everything new into the hull out about 20" or maybe a little more or less, but it's doable, by all means.
Re: 1981 FORMULA F233 RESTORATION
Posted: Mon Jan 31, 2011 11:23 pm
by NOTHING ELSE MATTERS
Tom, thanks for the quick reply. The boat will need new stringers and deck, so no problems there, my main concern is that the plywood at the transom does NOT go across the width of the transom, i know i will have to install knees but is that enough or after i am done with the transom, install another sheet of plywood over the transom plywood and the rest of the transom which is 1/4" solid glass ?
Re: 1981 FORMULA F233 RESTORATION
Posted: Tue Feb 01, 2011 9:02 am
by TomW
NEM the big problem is the bump out that they did for the outdrive.
That makes it hard to tie a new transom wood to the old outside fiberglass shell. One way to do it would be to build the wood up and fill in the hump so that you could then add full sized sheets of ply to get your proper transom thickness of 2 1/4" or so for a 300HP.
Re: 1981 FORMULA F233 RESTORATION
Posted: Tue Feb 01, 2011 12:57 pm
by Chief Brody
And it looks like the bump out has a curve to it as well.....wonder if you'd be better off making a new transom like Joels Aquasport rebuild......start with a clean sheet.
Re: 1981 FORMULA F233 RESTORATION
Posted: Tue Feb 01, 2011 3:20 pm
by NOTHING ELSE MATTERS
Chief Brody wrote:And it looks like the bump out has a curve to it as well.....wonder if you'd be better off making a new transom like Joels Aquasport rebuild......start with a clean sheet.
Chief, on the one i did all ready, after i was done with the 1 3/4 plywood and 5 layers of 1708 on the inside i end up even with the inside of the transom, i could fill the gap that the bump out creates and then go with a full sheet. What i really asking if i HAVE to do that or the existed bump out transom with 1 3/4 plywood and overall thickness of 2 1/4 is enough for a single 4S 300 outboard.
Re: 1981 FORMULA F233 RESTORATION
Posted: Tue Feb 01, 2011 4:11 pm
by Chief Brody
right..understood.....I was looking more at how you would mount the outboard on a curved section of the transom and not use some type of bracket with gap filling ability....maybe I'm missing on how the motor will be hung on there flush.
Re: 1981 FORMULA F233 RESTORATION
Posted: Tue Feb 01, 2011 6:12 pm
by TomW
The other problem that I see is the classic straight transom to the angled transom. An outdrive can use a straight transom, while an outboard needs a slanted transom of at least 6-8 degrees. Most builders use 11-13 degrees to ensure that any forward protruding objects don't hit the transom.
Another option NEM is to remove the bump out by cutting it out, then grinding it smooth on the edges. After that you would fill in the gap with 1708 and 1700 over lapping the edges so that you would have the strength and thickness you need to get what is already there on either side. Shine can help you there on overlaps and fill layers.
Good luck you have a great old boat and it's interesting to follow.
Re: 1981 FORMULA F233 RESTORATION
Posted: Tue Feb 01, 2011 8:38 pm
by NOTHING ELSE MATTERS
O.K, i went and measured the angle of the transom and is 11*. Does that mean i can't mount an outboard on a transom with that angle?
Also, the bump out section of the transom is flat and is NOT curved.
Re: 1981 FORMULA F233 RESTORATION
Posted: Wed Feb 02, 2011 8:15 am
by TomW
NOTHING ELSE MATTERS wrote:O.K, i went and measured the angle of the transom and is 11*. Does that mean i can't mount an outboard on a transom with that angle?
Also, the bump out section of the transom is flat and is NOT curved.
That makes sense NEM and no problem at all in mounting an outboard, that's a normal angle. Let's begin by removing the bump out so we have the same angle all the way across. That leaves a wide area to attach the new transom boards to and then to build up the outside hull area to match the current hull area.
The new transom boards will be be 2-2 1/4" plus fiberglassing to handle a 300HP enginel
Re: 1981 FORMULA F233 RESTORATION
Posted: Wed Feb 02, 2011 2:41 pm
by NOTHING ELSE MATTERS
O.K, NOW i am confused
Why do i have to remove the bump out ?
That section of the transom is flat, has the 11* angle and ends up to aprox. 30-31" from the keel to the top of the bump out.
Re: 1981 FORMULA F233 RESTORATION
Posted: Wed Feb 02, 2011 4:46 pm
by Chief Brody
I think what Tom is saying is the 1-3/4 you filled in from the inside is only the thickness of the transom in the bump out and the whole transom needs to be 1-3/4.....if you made it even from the inside, the rest of the transom surrounding the bump out may be flat inside, but not the same thickness ( a little less, correct)....so you'd need to make the whole transom an even 1-3/4 by adding more around the bump from the outside, or just shaving the bump and putting one big flat layer of wood to make a uniform thickness transom.....I think..
In other words...what's the thickness of the rest (sides surrounding the bumpout) of the transom? 3/4? 1?
Re: 1981 FORMULA F233 RESTORATION
Posted: Wed Feb 02, 2011 9:01 pm
by NOTHING ELSE MATTERS
To the right and left of the bump out is 1/4" thick.
Re: 1981 FORMULA F233 RESTORATION
Posted: Thu Feb 03, 2011 4:13 pm
by Chief Brody
NOTHING ELSE MATTERS wrote:To the right and left of the bump out is 1/4" thick.
wow, only 1/4 inch thick for the remaining transom surround? I guess for an I/O its OK...but other than the thick portion of the bump out, that 1/4 inch transom will need to handle a 300HP heavy powerplant......Most transoms hanging a motor are a uniform thickness all the way across......my GW with twin 150's is a solid 2" plus...I would think it would need to be beefed up.
Re: 1981 FORMULA F233 RESTORATION
Posted: Thu Feb 03, 2011 4:15 pm
by Cracker Larry
That's got to be a mis-type
Re: 1981 FORMULA F233 RESTORATION
Posted: Thu Feb 03, 2011 4:34 pm
by NOTHING ELSE MATTERS
Cracker Larry wrote:That's got to be a mis-type
Which one?
Re: 1981 FORMULA F233 RESTORATION
Posted: Thu Feb 03, 2011 5:28 pm
by Cracker Larry
Which one?
To the right and left of the bump out is 1/4" thick.
Re: 1981 FORMULA F233 RESTORATION
Posted: Thu Feb 03, 2011 5:35 pm
by tech_support
NOTHING ELSE MATTERS wrote:O.K, i went and measured the angle of the transom and is 11*. Does that mean i can't mount an outboard on a transom with that angle?
Also, the bump out section of the transom is flat and is NOT curved.
Yes, thats close to standard 12
the "bump out" is a cored section. Much better to have a new core span the entire transom (for outboard)
how about some pictures of how the boat is put together?
You could have a thin single skin outside of the core area so long as the forces are being transmitted to the hull somewhere else. 1/4" is enough to keep the water out - not nearly thick enough single skin for any amount of stiffness.
Re: 1981 FORMULA F233 RESTORATION
Posted: Thu Feb 03, 2011 5:44 pm
by TomW
NEM let's look at a cross section of the transom. First you have the bump out, the outside angle you say has an angle of 11 degrees. and the width varies from 1 1/2" to 0" at the top where it meets the rest of the transom. The transom all parts of it including the bump out is 1/4" fiberglass.
First we need to fill in the bump out to make a firm fitting, next we need to build a transom that will support your 300HP motor. This will require 2 1/4" of built up plywood formed and glued to the 1/4" fiberglass outer hull and the built up bump out. After that we will build up an internal shell of fiberglass to protect the wood and add further strength.
Additionally build the proper motorwell for the engine and it's structure and then and only then are you ready safely attach that big 300HP motor.
Re: 1981 FORMULA F233 RESTORATION
Posted: Thu Feb 03, 2011 6:50 pm
by NOTHING ELSE MATTERS
Guys, i am talking about the same boat i am restoring in this thread with the only difference the "new" one will be a center console. If you go to page 5 on this thread you'll get a clear picture of how the transom is set up.
Re: 1981 FORMULA F233 RESTORATION
Posted: Thu Feb 03, 2011 8:12 pm
by tech_support
The force of the motor has to be transferred to the hull, and it is not through the outside of the transom if its 1/4"
do you have a shot of one of these before its cut up?
Re: 1981 FORMULA F233 RESTORATION
Posted: Thu Feb 03, 2011 11:59 pm
by NOTHING ELSE MATTERS
Re: 1981 FORMULA F233 RESTORATION
Posted: Fri Feb 04, 2011 12:12 am
by NOTHING ELSE MATTERS
Again, i hope i made my self clear on this. I am planing on redoing the transom with new plywood core to the thickness of 1 3/4" plywood, 1/4" outer skin and 5 layers of 1708 on the inside, that would make the inside of the bump out transom even with the rest of the transom on the inside. Then i was going to put 2 layers of 3/4" plywood over the whole transom. Now, where the outboard would mount i am going to have 1/4"+1 3/4+1/4+1 1/2+ 2 or 3 layers of 1708. That makes 3 3/4 plus where the outboard will mount. My question is, am i going to find that long of bolts to mount the motor?
Also, the whole transom will get supported from the stringers by using 1 1/2" thick knees.
Re: 1981 FORMULA F233 RESTORATION
Posted: Fri Feb 04, 2011 7:17 am
by tech_support
I buy bolts from a local store, I would check with a local supply co. or search the web for long 1/2" bolt - I cant imagine it will be hard to find
If your going to hang the motor ont he transom without a bracket, you should check to see if the "bump out" will interfere with the motor mounting and trimming.
If it were mine, I would take the bump out.
Re: 1981 FORMULA F233 RESTORATION
Posted: Fri Feb 04, 2011 9:43 am
by Chief Brody
Re: 1981 FORMULA F233 RESTORATION
Posted: Fri Feb 11, 2011 8:43 pm
by NOTHING ELSE MATTERS
O.K Gents, it is official, i am cutting the cabin out and making the Formula into a center console. Took me a while to decide this, but now i am firm and ready to go. I would like to know if there is a place that i can buy a ready made walk in center console, BUT i am ready also to make my own which is going to be time consuming but made the way i like it and cheaper. If i go with my second choice(make my own) what is the best and strongest material to use besides the good ol plywood? If plywood, what thickness?
The center console will be aprox. 40" wide(left to right) X 48-52" front to back(at the base) X 54" high. T-top would be mounted basically on the floor of the boat with some stantions (spell?) attached to the console.
Also, if someone has any standard measurements to give me/show me i will listen.
Thanks again for the help.
Re: 1981 FORMULA F233 RESTORATION
Posted: Fri Feb 11, 2011 9:20 pm
by Chief Brody
http://themarineconnection.net/
these guys are the home depot of used boat parts
Re: 1981 FORMULA F233 RESTORATION
Posted: Fri Feb 11, 2011 9:59 pm
by NOTHING ELSE MATTERS
For some reason i knew it would be you the first to respond, thanks.
Re: 1981 FORMULA F233 RESTORATION
Posted: Fri Feb 11, 2011 10:13 pm
by Chief Brody
I hope thats a good thing.......
Its a long, cold winter
Re: 1981 FORMULA F233 RESTORATION
Posted: Fri Feb 11, 2011 10:33 pm
by NOTHING ELSE MATTERS
Chief Brody wrote:I hope thats a good thing.......
Its a long, cold winter
It is.
Re: 1981 FORMULA F233 RESTORATION
Posted: Sun Feb 13, 2011 9:16 pm
by NOTHING ELSE MATTERS
Re: 1981 FORMULA F233 RESTORATION
Posted: Mon Feb 14, 2011 11:09 am
by Chief Brody
Holy Cow Batman.......you
did do it......and in the middle of winter.....
This will be an interesting build.....a 233 CC
Re: 1981 FORMULA F233 RESTORATION
Posted: Mon Feb 14, 2011 2:14 pm
by ericfebs
I don't know where you are located, but the Marine Surplus in Bradenton/Sarasota, FL, near my house, had a crapload of center consoles with gauges and sweet T-Tops with electronics boxes for like $1,500. They are from the 26' Tarpon model made by Andros Boatworks (i believe). The tops are really, really nice and the consoles are also quality. I was shocked and considered for my build but they'd require too much modification for my boat which has a step up to the bow.
I go there frequently so if you'd like, i can get some more info for you. Also, the girls there are friendly on the phone and would take and send pics to you if you requested...
Re: 1981 FORMULA F233 RESTORATION
Posted: Mon Feb 14, 2011 2:19 pm
by ericfebs
Just called Marine Surplus and they still have 2 left. One if $1,900 and the other is like $2,100. Andros pulled them off the boats because the customers bought from a dealer and wanted a full tower instead and with a full tower, they use a slightly diff console and thus, they pulled these off (brand new with T-Top and entire console) and basically scrapped them. You can probably even knock them down on price a bit, but the top itself is probably worth $2,500 (easily) nevermind the console, etc.
www.marinesurplusinc.com/
7070 15th Street East
Sarasota, FL 34243-3242
(941) 758-3552
Re: 1981 FORMULA F233 RESTORATION
Posted: Mon Feb 14, 2011 4:34 pm
by NOTHING ELSE MATTERS
ericfebs wrote:Just called Marine Surplus and they still have 2 left. One if $1,900 and the other is like $2,100. Andros pulled them off the boats because the customers bought from a dealer and wanted a full tower instead and with a full tower, they use a slightly diff console and thus, they pulled these off (brand new with T-Top and entire console) and basically scrapped them. You can probably even knock them down on price a bit, but the top itself is probably worth $2,500 (easily) nevermind the console, etc.
http://www.marinesurplusinc.com/
7070 15th Street East
Sarasota, FL 34243-3242
(941) 758-3552
Eric, thank you for looking out for me. I just called them, but those consoles are not the walk in type, i guess i will keep looking.
Re: 1981 FORMULA F233 RESTORATION
Posted: Wed Feb 16, 2011 2:40 pm
by NOTHING ELSE MATTERS
Re: 1981 FORMULA F233 RESTORATION
Posted: Wed Feb 16, 2011 2:46 pm
by Cracker Larry
The windows are no problem, just cut a plywood plug, glue it in and glass over it. See GKs sailboat rebuild thread, he did the same thing.
http://forums.bateau2.com/viewtopic.php ... 7&start=20

I don't know what to tell you about the foam cored deck. I think I'd be inclined to cut the whole thing off and start over with plywood. I don't have enough experience with foam to give a good answer, better wait for Joel
Re: 1981 FORMULA F233 RESTORATION
Posted: Wed Feb 16, 2011 2:51 pm
by NOTHING ELSE MATTERS
Larry, the core is balsa, but what i am asking is how to make it even.
Re: 1981 FORMULA F233 RESTORATION
Posted: Wed Feb 16, 2011 3:03 pm
by Chief Brody
Also, look at Joel's Aquasport rebuild...he made an entire deck for the boat from scratch....you maybe able to get away with just doing a partial rebuild using his same techniques and core material ( if you want to switch from balsa)...but just for that lower center portion after its been cut out...the camber from whats left is already there to build a partial mold, so to speak.
Re: 1981 FORMULA F233 RESTORATION
Posted: Wed Feb 16, 2011 3:16 pm
by Cracker Larry
Larry, the core is balsa, but what i am asking is how to make it even.
I would still probably cut the whole thing off to the gunwales and rebuild it with plywood. You maybe could fill that gap with a structural foam and glass over it. You could build it up with plywood too, and glass over it but that would be heavy. Lots of ways to do it. I'm thinking the seam act as stiffeners for the deck, like a stringer in reverse. They probably need to be there to support the span, or you will have to build an equivalent frame under it.
Re: 1981 FORMULA F233 RESTORATION
Posted: Tue Feb 22, 2011 11:16 am
by gw204
Good grief man. How many beers did it take for you to get up the nerve to do all that cutting????
Re: 1981 FORMULA F233 RESTORATION
Posted: Tue Feb 22, 2011 4:03 pm
by NOTHING ELSE MATTERS
gw204 wrote:Good grief man. How many beers did it take for you to get up the nerve to do all that cutting????
Unfortunately for me i can't drink beer anymore, doc said i will have a hole in my stomach, but, it took looooooooooooooong time to decide this. Let me tell, the boat looks double now.
Re: 1981 FORMULA F233 RESTORATION
Posted: Wed Feb 23, 2011 9:28 am
by gw204
NOTHING ELSE MATTERS wrote:Let me tell, the boat looks double now.
So, why not make it longer then? 2' hull extension ending in a flat transom.
Re: 1981 FORMULA F233 RESTORATION
Posted: Wed Feb 23, 2011 1:36 pm
by NOTHING ELSE MATTERS
gw204 wrote:NOTHING ELSE MATTERS wrote:Let me tell, the boat looks double now.
So, why not make it longer then? 2' hull extension ending in a flat transom.
O.K, how do i extend the hull bottom
Re: 1981 FORMULA F233 RESTORATION
Posted: Wed Feb 23, 2011 5:11 pm
by Cooper
NOTHING ELSE MATTERS wrote:gw204 wrote:NOTHING ELSE MATTERS wrote:Let me tell, the boat looks double now.
So, why not make it longer then? 2' hull extension ending in a flat transom.
O.K, how do i extend the hull bottom
I know you're kidding, but extend hull like this:
http://www.classicmako.com/forum/topic. ... C_ID=24608
And here's another formula cabin to cc:
http://s223.photobucket.com/albums/dd64/pablof1/
Re: 1981 FORMULA F233 RESTORATION
Posted: Wed Feb 23, 2011 8:13 pm
by Chief Brody
Thats a lot of work extending it another 2 feet...its like designing your own bracket and glassing it to the hull....this will be one heck of a rebuild
Re: 1981 FORMULA F233 RESTORATION
Posted: Wed Feb 23, 2011 11:22 pm
by NOTHING ELSE MATTERS
Chief Brody wrote:Thats a lot of work extending it another 2 feet...its like designing your own bracket and glassing it to the hull....this will be one heck of a rebuild
I will not do that, i was just kidding with GW204
Re: 1981 FORMULA F233 RESTORATION
Posted: Wed Mar 02, 2011 2:38 pm
by gw204
NOTHING ELSE MATTERS wrote:
I will not do that, i was just kidding with GW204
Aw man...I was just about to ask if you were done yet?
Re: 1981 FORMULA F233 RESTORATION
Posted: Wed Mar 02, 2011 3:47 pm
by NOTHING ELSE MATTERS
gw204 wrote:NOTHING ELSE MATTERS wrote:
I will not do that, i was just kidding with GW204
Aw man...I was just about to ask if you were done yet?
Not ready yet to take on such a project
Re: 1981 FORMULA F233 RESTORATION
Posted: Fri May 06, 2011 12:02 am
by NOTHING ELSE MATTERS
Re: 1981 FORMULA F233 RESTORATION
Posted: Fri May 06, 2011 3:20 pm
by gw204
Looks good man!
Are you going to put some glass over those bulkheads?
Re: 1981 FORMULA F233 RESTORATION
Posted: Fri May 06, 2011 4:05 pm
by NOTHING ELSE MATTERS
gw204 wrote:Looks good man!
Are you going to put some glass over those bulkheads?
Only by the side inside the console, the rest i was planing on leaving it like that, unless the pros in here tell me different. I am planing on foaming, so that might change my approach ?
Re: 1981 FORMULA F233 RESTORATION
Posted: Fri May 06, 2011 8:04 pm
by Chief Brody
Looks good NEM, you got a lot of work done since last time....I would glass the bulkhead though....all the bulkheads on my boat and others Ive seen have been glassed on both sides...at least a layer.
Re: 1981 FORMULA F233 RESTORATION
Posted: Fri May 06, 2011 11:46 pm
by NOTHING ELSE MATTERS
Chief Brody wrote:Looks good NEM, you got a lot of work done since last time....I would glass the bulkhead though....all the bulkheads on my boat and others Ive seen have been glassed on both sides...at least a layer.
Glassing them it is then. What about the frames between the stringers?
Re: 1981 FORMULA F233 RESTORATION
Posted: Sat May 07, 2011 10:57 pm
by Chief Brody
I don't see any drawbacks doing them either....and its not like it will cost you much to do it.....but I think you'll need more clamps!!!
Re: 1981 FORMULA F233 RESTORATION
Posted: Sat May 07, 2011 11:03 pm
by NOTHING ELSE MATTERS
Re: 1981 FORMULA F233 RESTORATION
Posted: Sat May 07, 2011 11:09 pm
by NOTHING ELSE MATTERS
Chief Brody wrote:I don't see any drawbacks doing them either....and its not like it will cost you much to do it.....but I think you'll need more clamps!!!
That is one thing you can't have enough, you always need more.
Re: 1981 FORMULA F233 RESTORATION
Posted: Sat May 07, 2011 11:16 pm
by NOTHING ELSE MATTERS
Another thing i am debating on is how to run all the DC wires and rigging. I really do not want to cut or drill the stringers and divider to run them in a rigging tube. What i was thinking was to run everything (in PVC pipes) on top of the tank, so this way all i have to do is notch the two bulkheads to run the tubes. Is that acceptable or i am looking for trouble (DC wires running on top of fuel tank)? I think i know the answer, but just maybe.................. ?
Re: 1981 FORMULA F233 RESTORATION
Posted: Sat May 07, 2011 11:23 pm
by NOTHING ELSE MATTERS
Just had an idea, instead of PVC pipes, what about aluminum pipes or square tubes on top of the tank?
Re: 1981 FORMULA F233 RESTORATION
Posted: Sun May 08, 2011 7:46 am
by stickystuff
Watching that restoration blurb it scares the crap out of me.i would have def. run the stringer extensions through the old transom and scissored them to the old stringers. Looks to me they used polyester resin also. Might be wrong here. thats going to be a lot of weight and torque on that extension. would really hate to see the entire extension fall off and lose all of it overboard. Lots of time and $$$$$ spent on this. Beautiful job. just have a major concern. Hope they know what they are doing. maybe jacques will give his .02 worth on this one. Me personally I wouldn't have done it this way.

Re: 1981 FORMULA F233 RESTORATION
Posted: Sun May 08, 2011 7:51 am
by stickystuff
I gave Cracker larry an article that somebody did the same thing. basically without the side panels. He did all his out of plywood. cut through the hull and scissord it to the existing stringers. Great article with pictures. I originally was going to send this to jacques and Joel. maybe larry can post this. I took it out of a magazine article. don't remember which mag. it was but to me was a hell of a lot stronger than this one.
Re: 1981 FORMULA F233 RESTORATION
Posted: Sun May 08, 2011 10:54 pm
by NOTHING ELSE MATTERS
Re: 1981 FORMULA F233 RESTORATION
Posted: Sun May 08, 2011 11:42 pm
by gstanfield
I think he was referring to this link posted earlier in the thread:
http://www.classicmako.com/forum/topic. ... C_ID=24608
Re: 1981 FORMULA F233 RESTORATION
Posted: Mon May 09, 2011 6:54 am
by stickystuff
I saw the link. It just concerns me that the extra stringers are just butted to the transom. Even though they are epoxied i I can't help but think that with all the engine wait and torque that eventually something is goint to give. maybe I am wrong. Hopefully for his sake. I may be mistakenly see just what exactly he is doing. I hope for his sake.I have a lot of experience in cantilever building and this just concerned me. Not bad mouthing the guys work. It looks great. I personally wouldn't do it that way. No offence intended here. Hope I am wrong.
Re: 1981 FORMULA F233 RESTORATION
Posted: Mon May 09, 2011 4:28 pm
by NOTHING ELSE MATTERS
NOTHING ELSE MATTERS wrote:Another thing i am debating on is how to run all the DC wires and rigging. I really do not want to cut or drill the stringers and divider to run them in a rigging tube. What i was thinking was to run everything (in PVC pipes) on top of the tank, so this way all i have to do is notch the two bulkheads to run the tubes. Is that acceptable or i am looking for trouble (DC wires running on top of fuel tank)? I think i know the answer, but just maybe.................. ?
Anyone ????????
Re: 1981 FORMULA F233 RESTORATION
Posted: Mon May 09, 2011 4:29 pm
by NOTHING ELSE MATTERS
NOTHING ELSE MATTERS wrote:Just had an idea, instead of PVC pipes, what about aluminum pipes or square tubes on top of the tank?
What you guys think?
Re: 1981 FORMULA F233 RESTORATION
Posted: Mon May 09, 2011 4:44 pm
by tech_support
You have to ground all those aluminum tubes.
Yes I know PVC can build a static charge too, but I prefer to use like inert/non reactive materials (yes I know PVC can build a static charge too
)
You can certainly notch the top of the frames and run PVC down the notches, but the problem can arise with hard to bend cables, they need a wider radius to make the turn.
Re: 1981 FORMULA F233 RESTORATION
Posted: Mon May 09, 2011 4:49 pm
by Mad Dog
NEM, I ran all my wiring, and control cables through electrical PVC tubing. The tubing goes through the sole into the fuel coffin and through one frame. I used the 2" PVC with the slow 90 deg elbows. I really had no other reasonable choice. I don't see any real issue if you have have the system properly fused. The PVC is meant to contain more juice than you'll ever produce in your boat. Here is a pic to give you an idea how mine went in. Be sure to seal around the PVC where it penetrates the coffin.

MD
Re: 1981 FORMULA F233 RESTORATION
Posted: Tue May 10, 2011 12:19 am
by NOTHING ELSE MATTERS
Mad Dog wrote:NEM, I ran all my wiring, and control cables through electrical PVC tubing. The tubing goes through the sole into the fuel coffin and through one frame. I used the 2" PVC with the slow 90 deg elbows. I really had no other reasonable choice. I don't see any real issue if you have have the system properly fused. The PVC is meant to contain more juice than you'll ever produce in your boat. Here is a pic to give you an idea how mine went in. Be sure to seal around the PVC where it penetrates the coffin.
MD
That is what i was going to do and most likely end up doing, but running on top of the tank would eliminate a lot of trouble, lot of drilling and solid frames and stringers.
Re: 1981 FORMULA F233 RESTORATION
Posted: Tue May 10, 2011 12:30 am
by NOTHING ELSE MATTERS
shine wrote:You have to ground all those aluminum tubes.
Yes I know PVC can build a static charge too, but I prefer to use like inert/non reactive materials (yes I know PVC can build a static charge too
)
You can certainly notch the top of the frames and run PVC down the notches, but the problem can arise with hard to bend cables, they need a wider radius to make the turn.
I was concerned for fire hazard running pvc tubes on top of the gas tank, but if that is acceptable, i will run pvc tubes then.
Re: 1981 FORMULA F233 RESTORATION
Posted: Tue May 10, 2011 12:36 am
by NOTHING ELSE MATTERS
Another question. I finished the cole tar epoxy on the tank. After i install it, can i fiberglass around the top of the tank to prevent water and condensation running down the sides between the tank and the stringers/frames? With another words, would epoxy and 12 oz tape stick on the cole tar epoxy? I think i saw shine doing that on the Sea Craft.
Re: 1981 FORMULA F233 RESTORATION
Posted: Tue May 10, 2011 9:54 am
by tech_support
NOTHING ELSE MATTERS wrote:Another question. I finished the cole tar epoxy on the tank. After i install it, can i fiberglass around the top of the tank to prevent water and condensation running down the sides between the tank and the stringers/frames? With another words, would epoxy and 12 oz tape stick on the cole tar epoxy? I think i saw shine doing that on the Sea Craft.
After the coal tar you can pretty much whatever you want to it. I used strips of 1708 around my tanks so that I could spray down the compartments if I ever wanted to. It was something I saw on a high end custom center console - I copied the idea.
Re: 1981 FORMULA F233 RESTORATION
Posted: Tue May 10, 2011 11:04 am
by NOTHING ELSE MATTERS
shine wrote:NOTHING ELSE MATTERS wrote:Another question. I finished the cole tar epoxy on the tank. After i install it, can i fiberglass around the top of the tank to prevent water and condensation running down the sides between the tank and the stringers/frames? With another words, would epoxy and 12 oz tape stick on the cole tar epoxy? I think i saw shine doing that on the Sea Craft.
After the coal tar you can pretty much whatever you want to it. I used strips of 1708 around my tanks so that I could spray down the compartments if I ever wanted to. It was something I saw on a high end custom center console - I copied the idea.
Great, thanks.
Re: 1981 FORMULA F233 RESTORATION
Posted: Mon Jun 06, 2011 12:30 am
by NOTHING ELSE MATTERS
Started to work a little on the boat again.
I added one more bulkhead and created another space in front of the console area which i will use for dry storage and/or drink/food cooler, after i install the floor and fill with foam under it i will line it with 1" foam then glass over it.
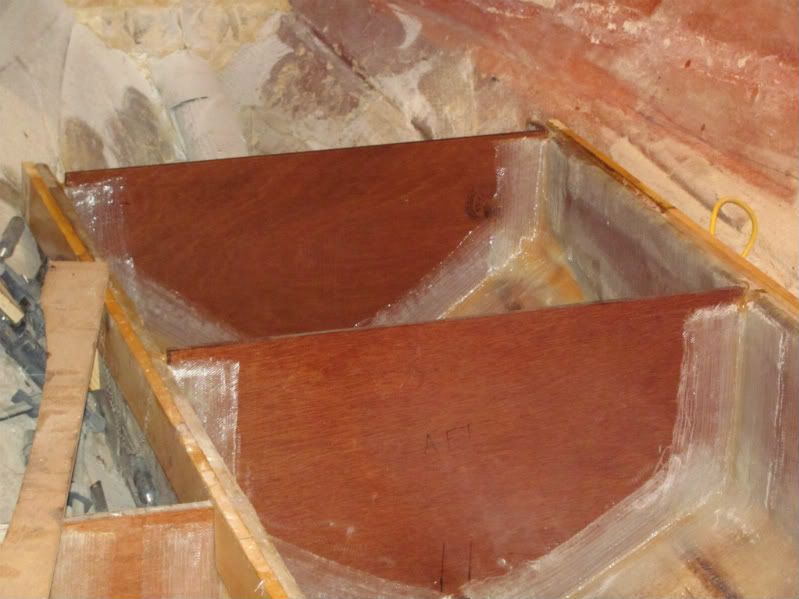
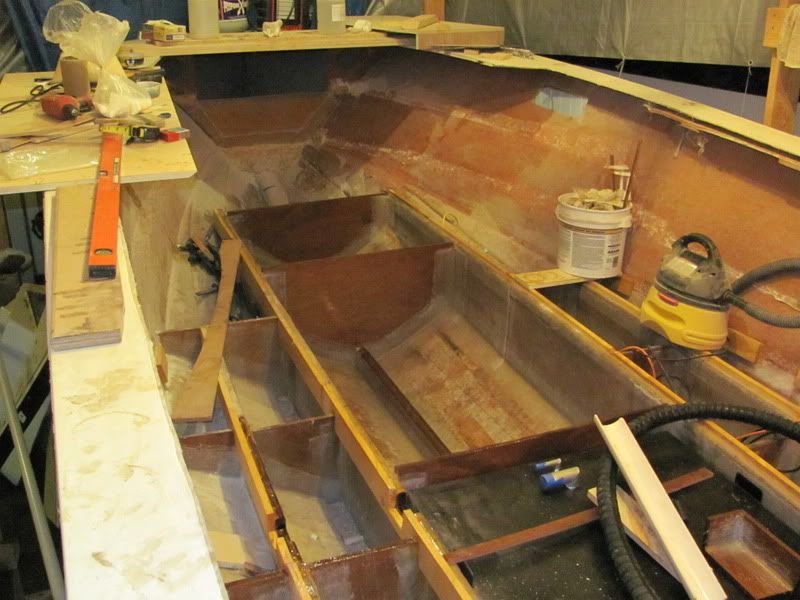
I also made a chase for the gas fill and vent lines and it will fit at the "u" shape cut i made. You can see the cut on the picture above.
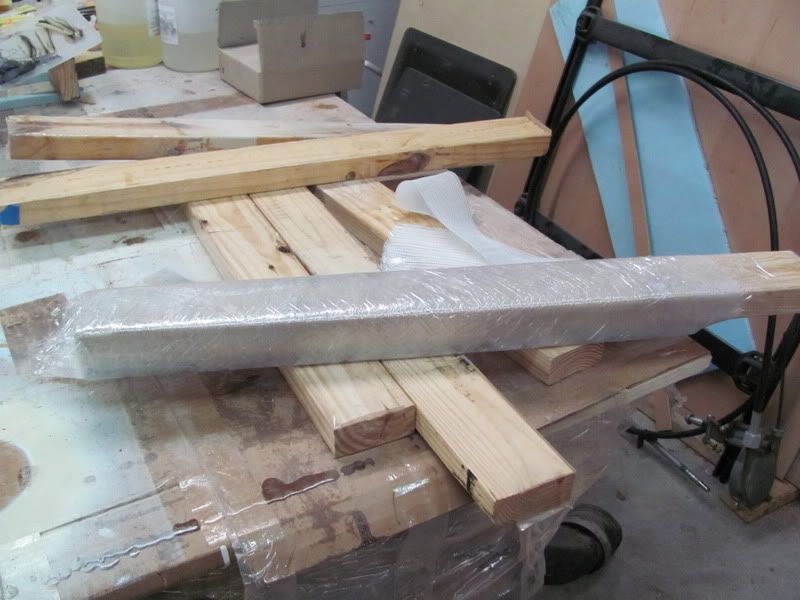
I also went today and picked up the t-top and leaning post. The console i had picked up in April from Judge Yachts in Maryland.
I have to get a door and install it.
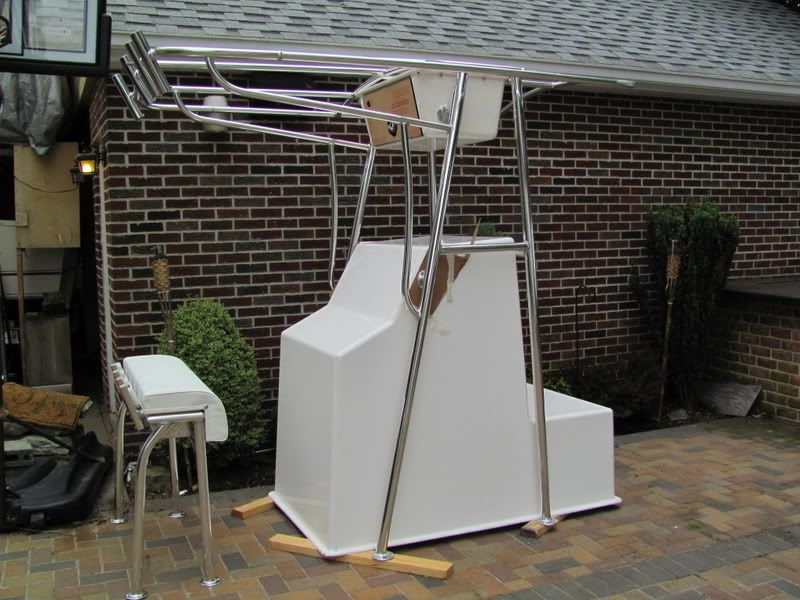
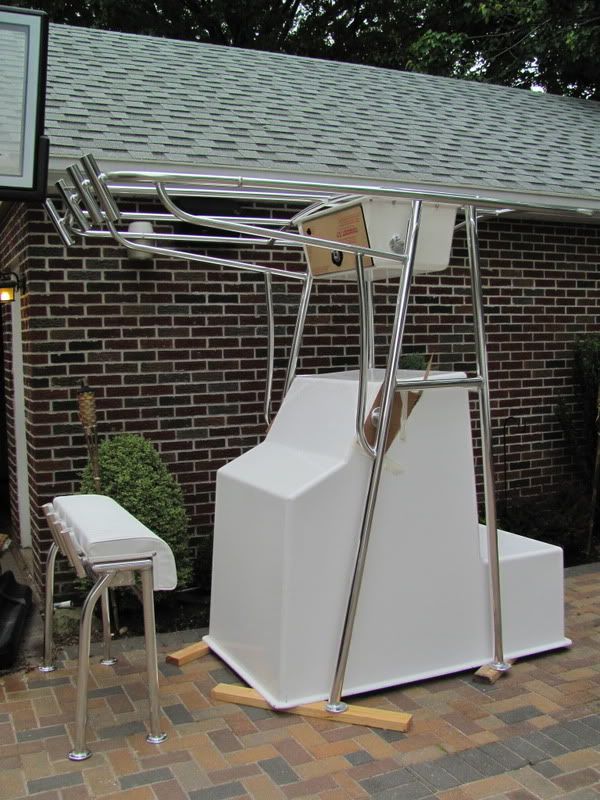
Re: 1981 FORMULA F233 RESTORATION
Posted: Mon Jun 06, 2011 10:17 am
by Mad Dog
That's a nice set right there. Kind of envious.
MD
Re: 1981 FORMULA F233 RESTORATION
Posted: Sun Jun 12, 2011 11:54 pm
by NOTHING ELSE MATTERS
Getting ready to pour some foam into the hull. I have two questions.
1)Is there a maximum of ounces that i'm not suppose to exceed?
I did a test and most of my spaces will require around 70 ounces total.
2)When i pour and realize that is not enough to fill the space, do i have to wait for the foam to completely dry or i can pour right away?
Re: 1981 FORMULA F233 RESTORATION
Posted: Mon Jun 13, 2011 12:09 am
by gk108
1. It's mostly a matter of how much you can stir up in the cup before it kicks. Around 16 oz. total per round seems to be what most folks work with.
2. The foam hardens fairly quickly and it's best to wait for that to happen before the next pour. If you work with two compartments at a time and alternate pours between them it should work out well.
Puoring foam is the fun part of this stuff, better round up a spectator or two.
Re: 1981 FORMULA F233 RESTORATION
Posted: Mon Jun 13, 2011 4:55 pm
by NOTHING ELSE MATTERS
Mad Dog wrote:That's a nice set right there. Kind of envious.
MD
Thank you, i didn't see your post earlier.
Re: 1981 FORMULA F233 RESTORATION
Posted: Mon Jun 13, 2011 4:59 pm
by NOTHING ELSE MATTERS
gk108 wrote:1. It's mostly a matter of how much you can stir up in the cup before it kicks. Around 16 oz. total per round seems to be what most folks work with.
2. The foam hardens fairly quickly and it's best to wait for that to happen before the next pour. If you work with two compartments at a time and alternate pours between them it should work out well.
Puoring foam is the fun part of this stuff, better round up a spectator or two.
Thank you, i did mix 48 oz on one shot and it was not much of a problem but less mix would be much better, i didn't get any on my cloths or my hands though
Re: 1981 FORMULA F233 RESTORATION
Posted: Mon Jul 18, 2011 12:50 am
by NOTHING ELSE MATTERS
Has been a while till i update my progress. I've been working a little on the Formula lately, so here are some progress pictures.
I installed the tank. I had bought from here the rubber strip that goes under the tank which i 5200 it under the tank and made sure there is no open spaces around the strip. I also glass the tank all around( i got the idea from Shine's project, thank you) and also bolted it, this thing is not going anywhere. I also drill a hole on the bottom of the aft bulkhead which is going to be plugged with a rubber plug, so i can drain the compartment in case of condensation accumulates in there.
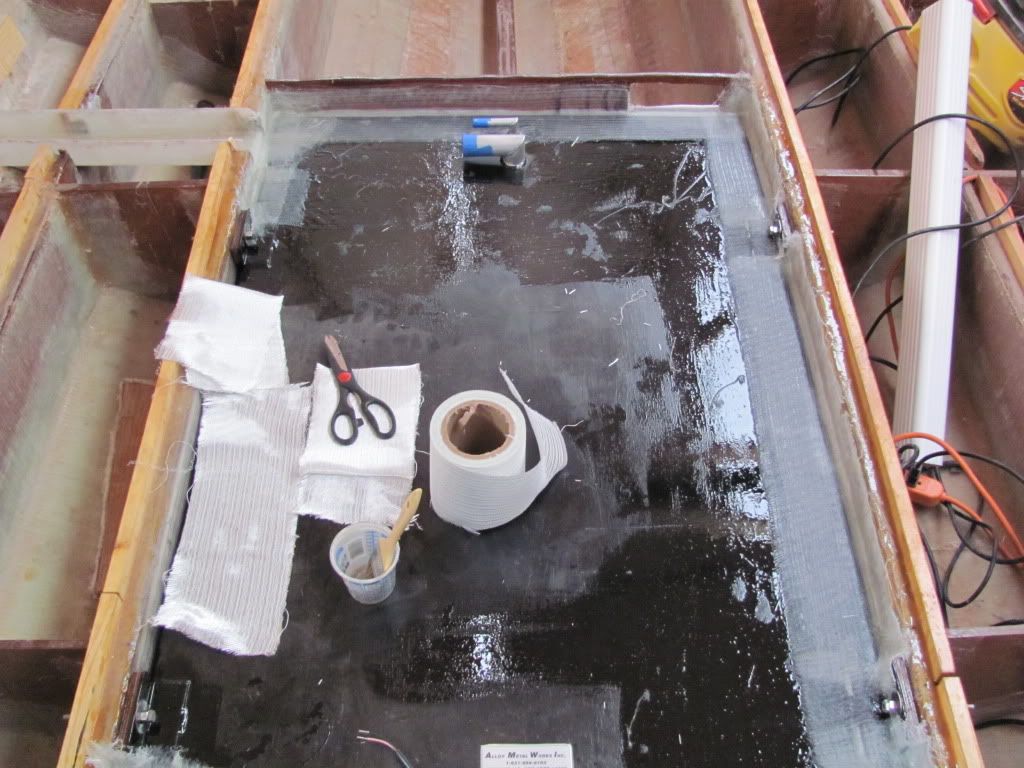
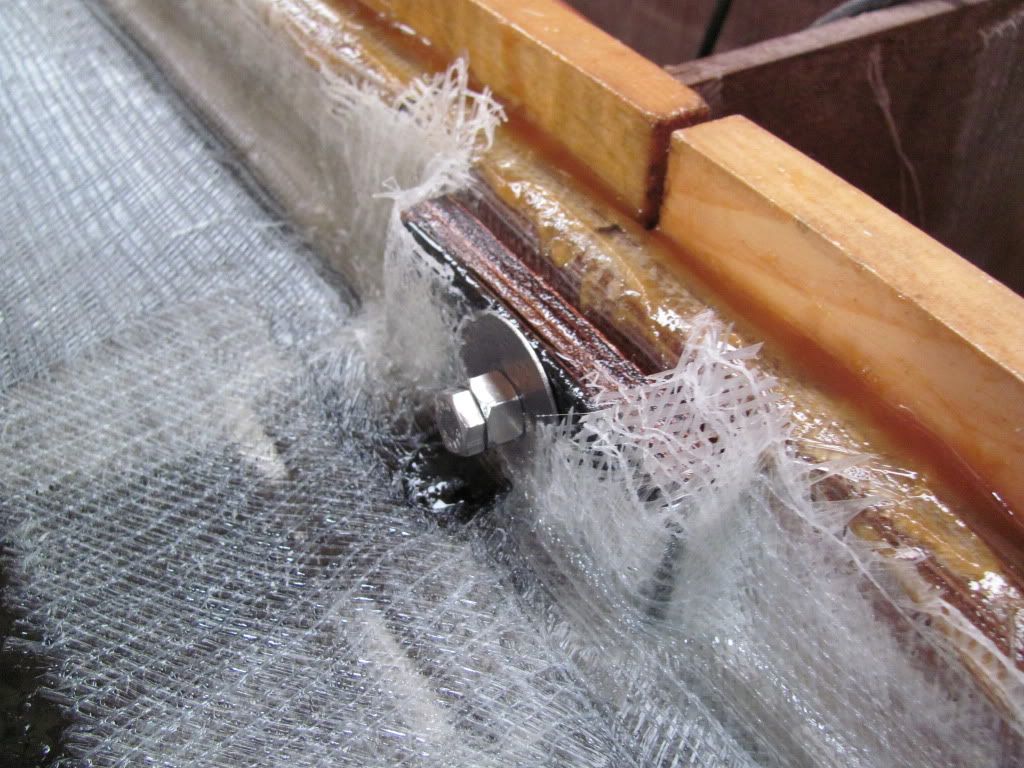
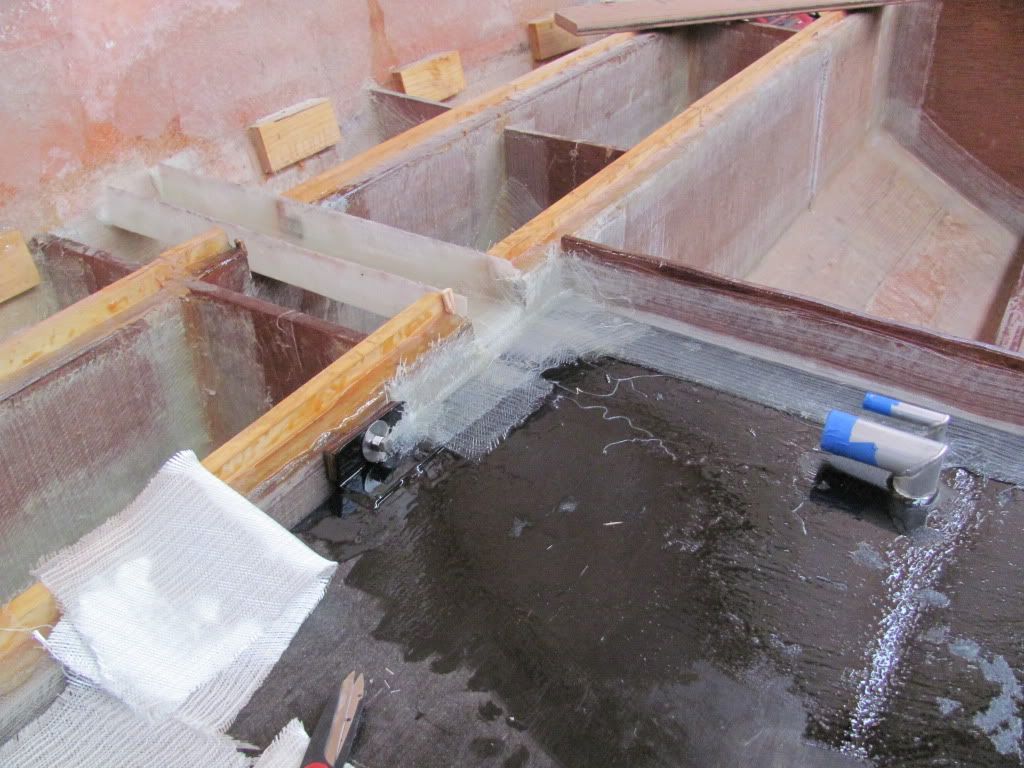
I also built a chase to run the gas fill and vent line.

I also worked on the center console a little. I drilled for the twin HDS10, for the two all in one gauges, for the helm, for the throttle control and between the HDS10 i installed 3- 4 gang switch panels but did not take a picture of that yet. Sorry .
I also made a shim for the throttle control to make it a little more angled. I paint it with some left over black Interlux i had from a previous project.
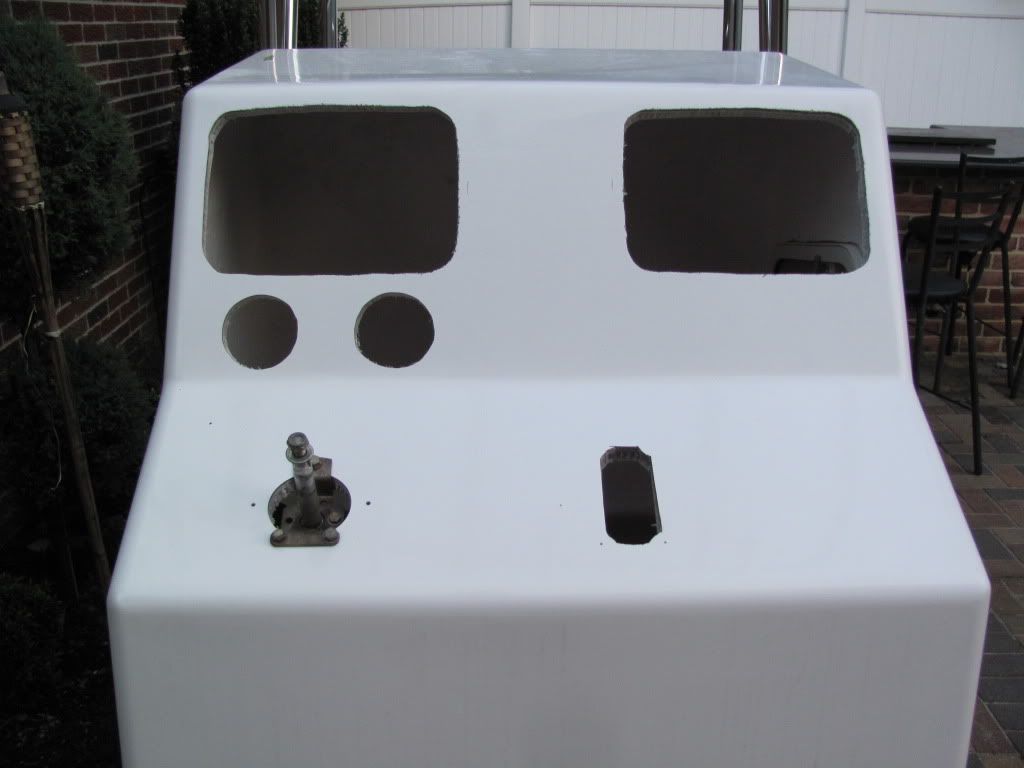
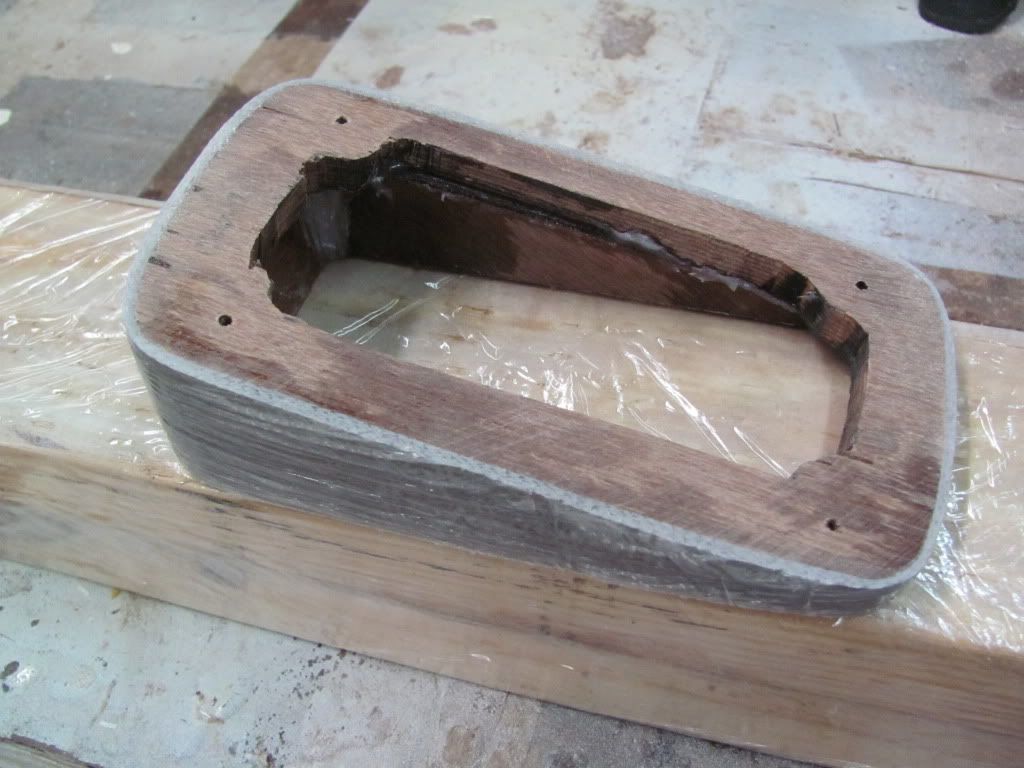
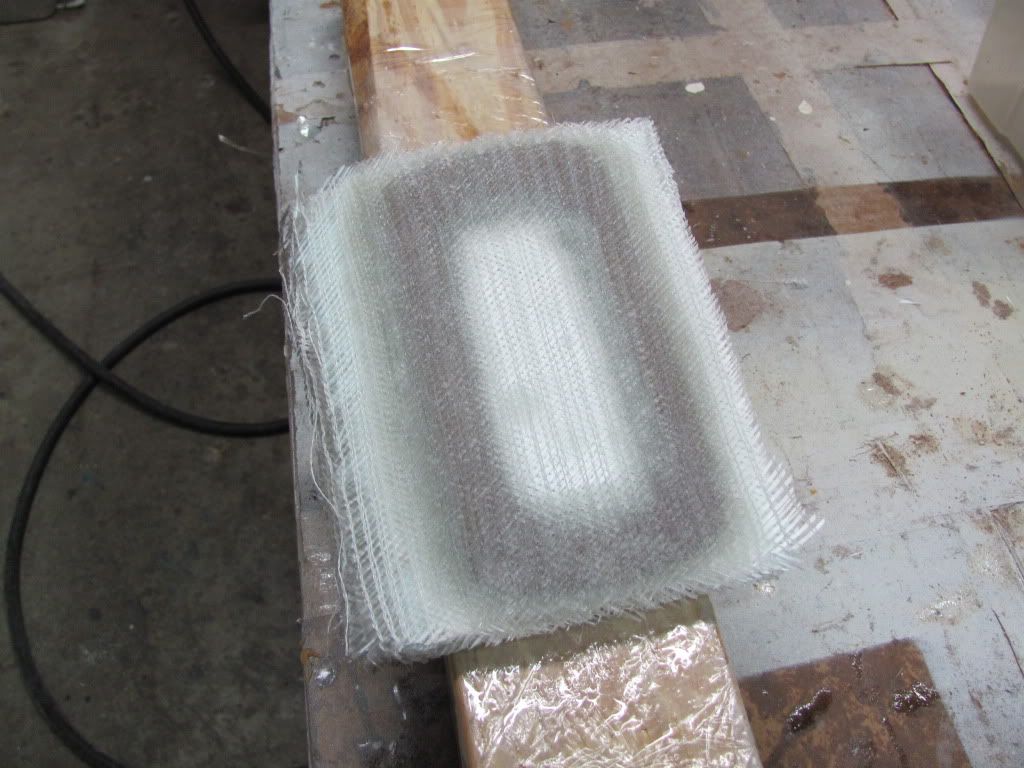
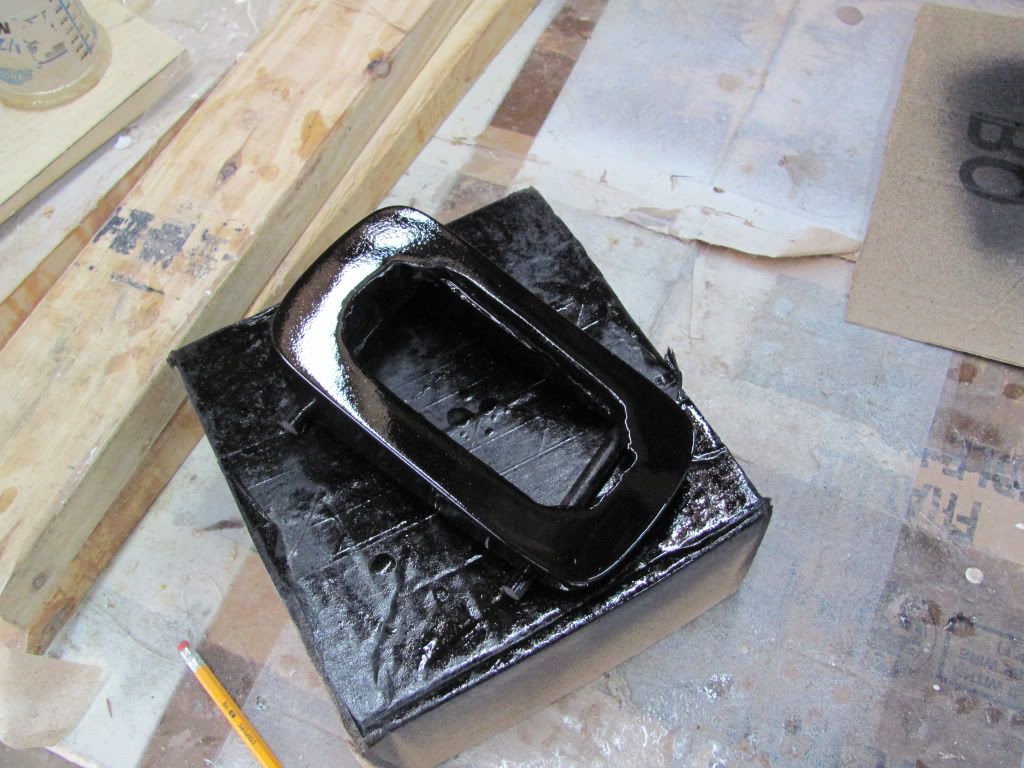
I also made a compartment to be used as a food/drink cooler in front of where the console will end. Is foamed under it the two sides and will be foamed in front of it too. The aft wall will be the divider with the console step down cabin, i don't know how to foam there, i was thinking of installing on the inside portion of cooler a 3/4" blue foam from Home Depot, what you guys think?
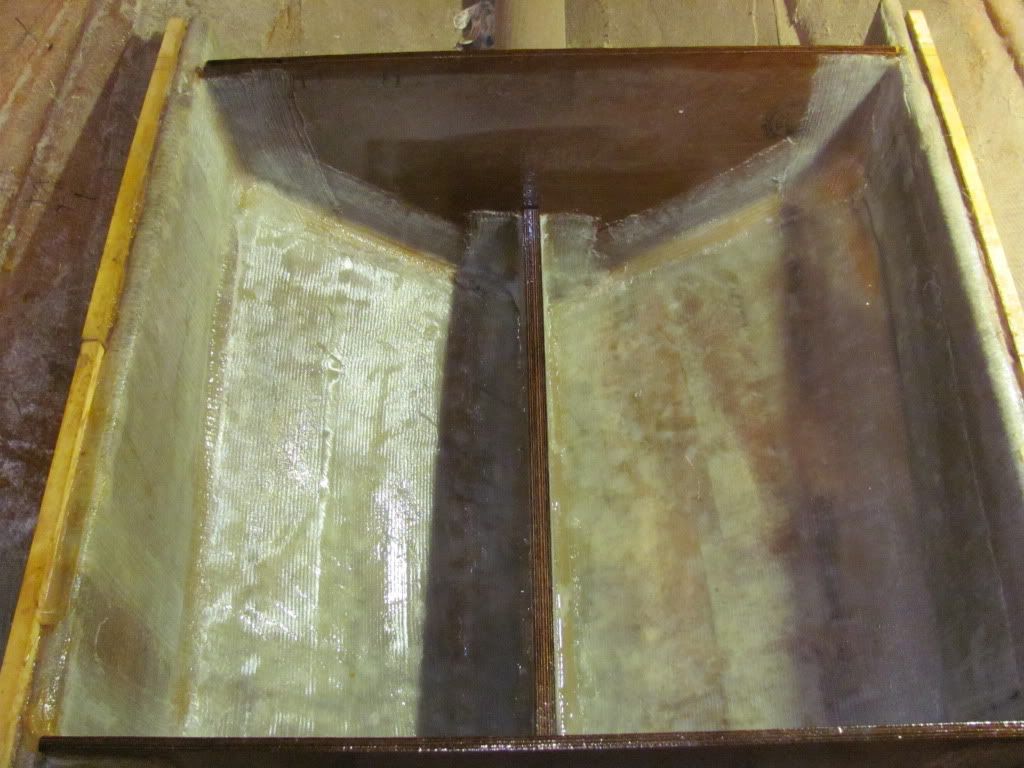
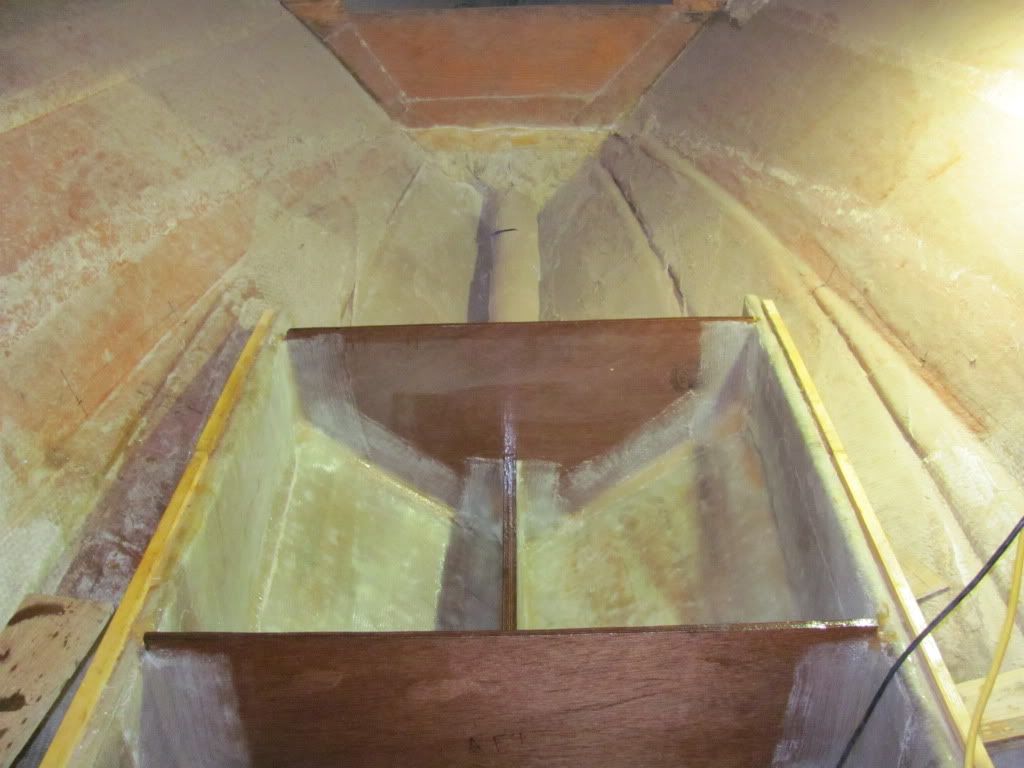
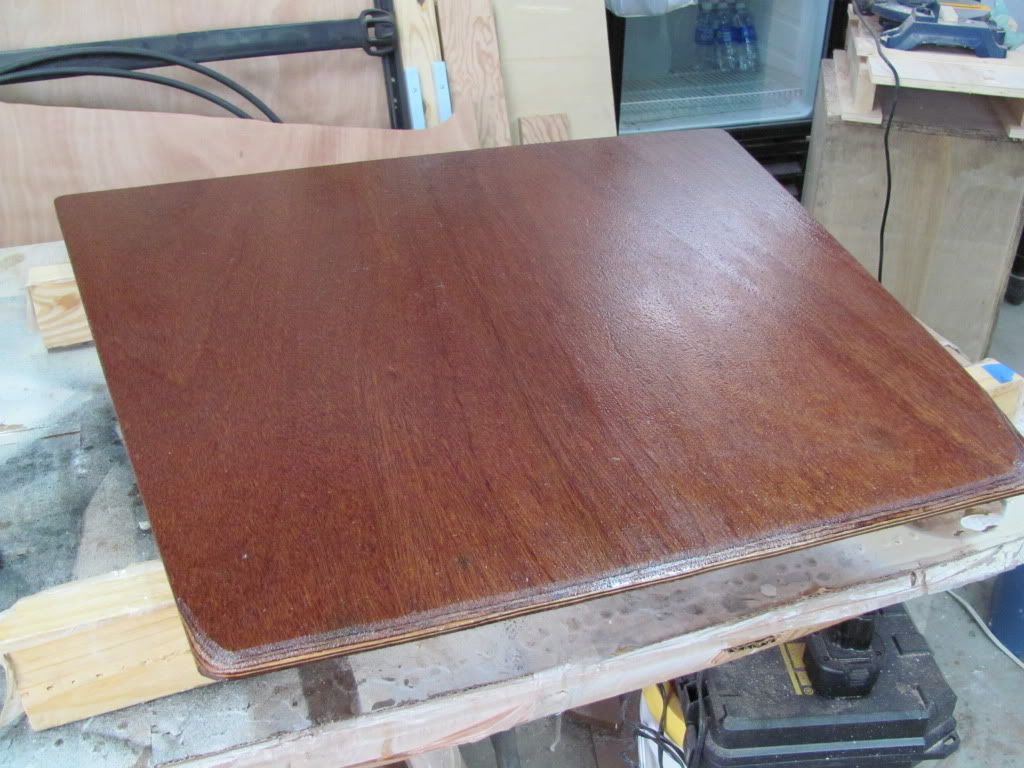
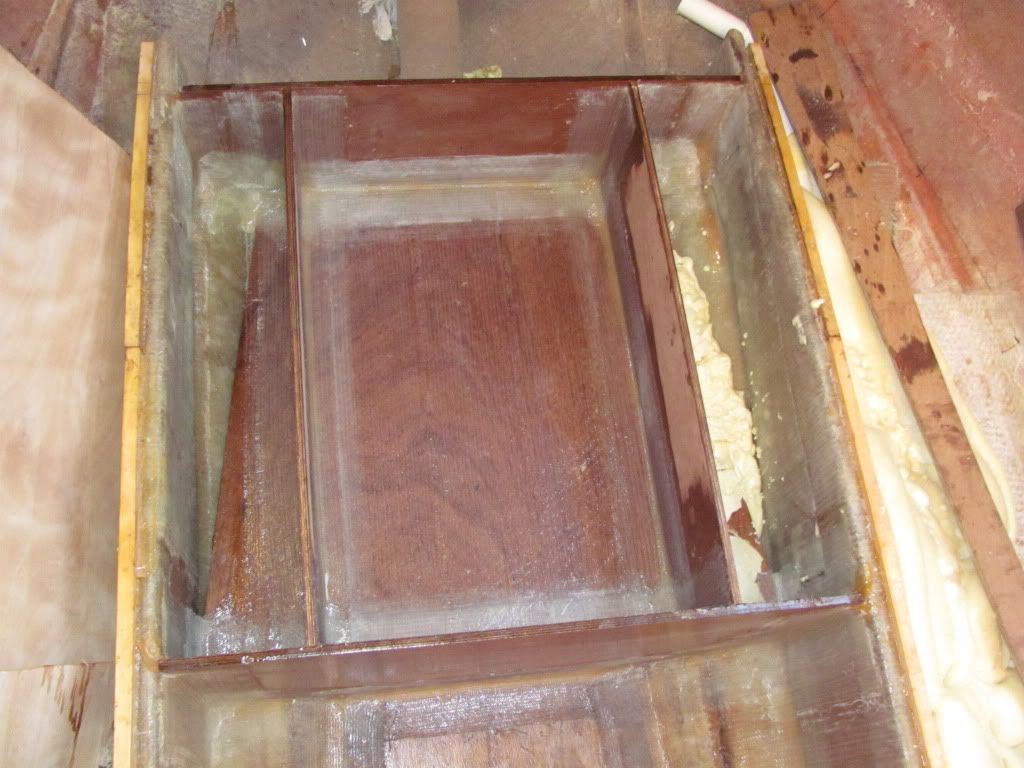
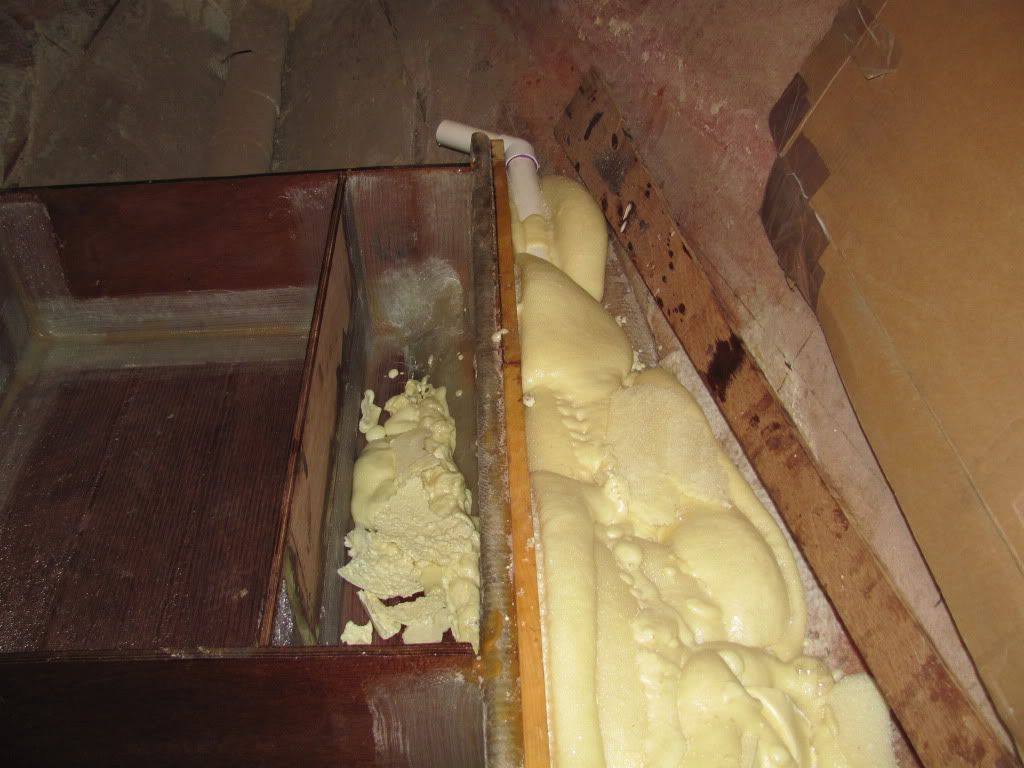
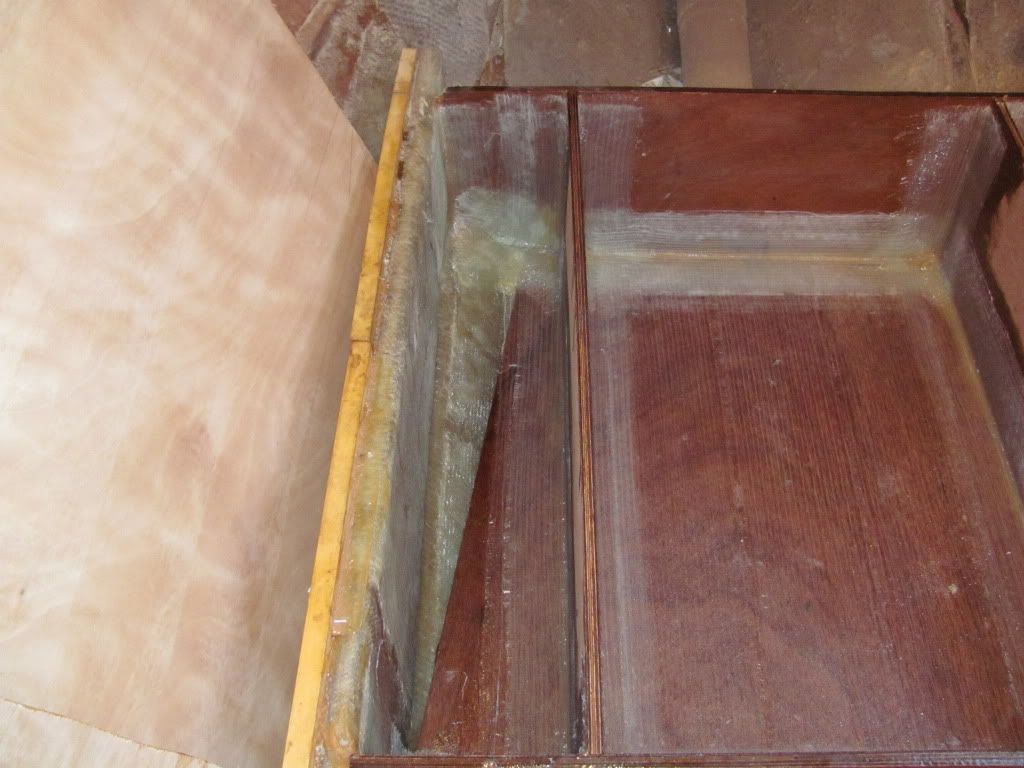
I also installed all the rigging PVC tubes and foamed some compartments. I have poured ten gallons of foam(5- 2 gallon kits) and i have one more 2- gallon kit left. Do you guys think is enough for positive flotation? I think i have room for at least 2 more 2-gallon kits making it total of 8 2-gallon kits.
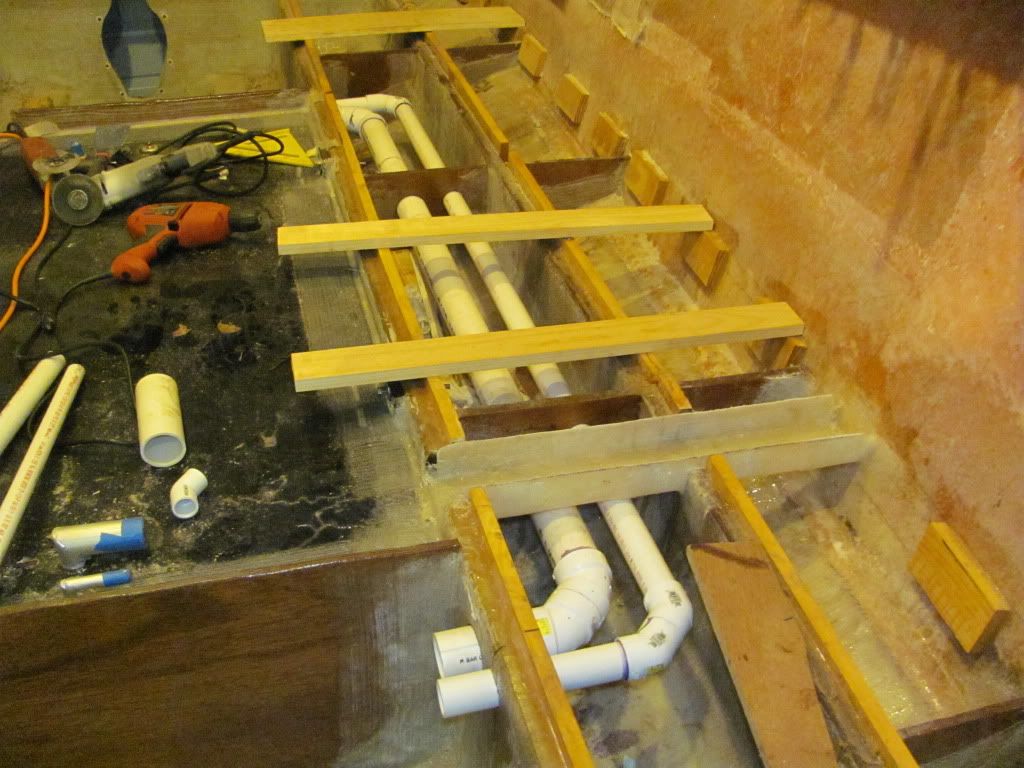
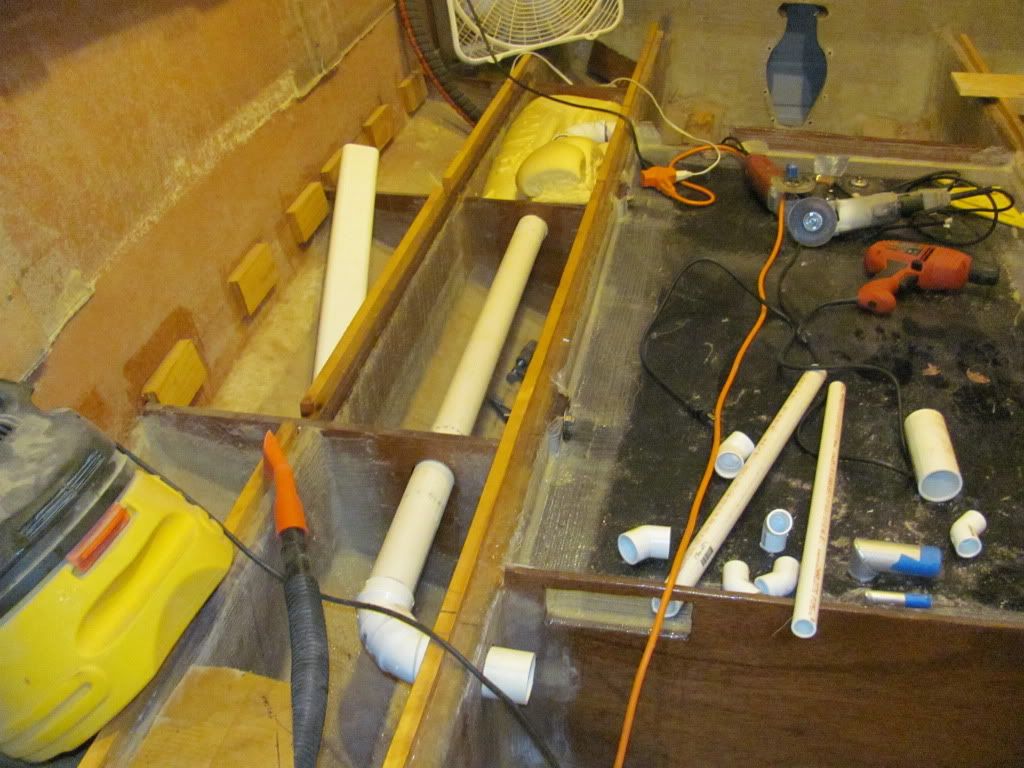
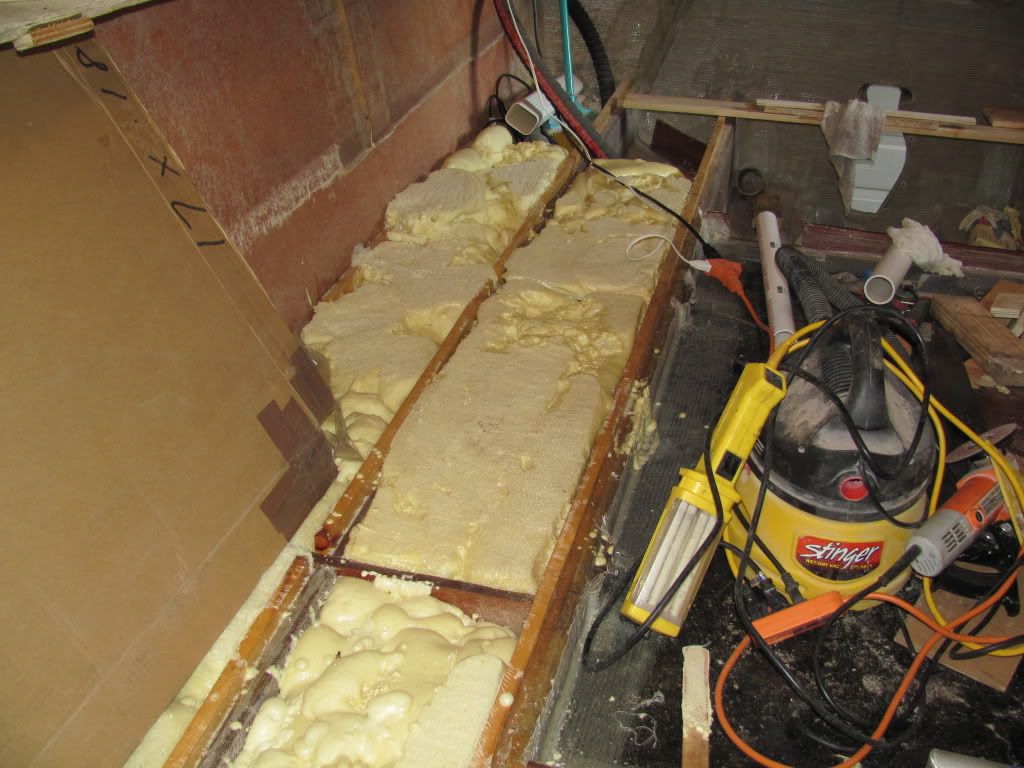
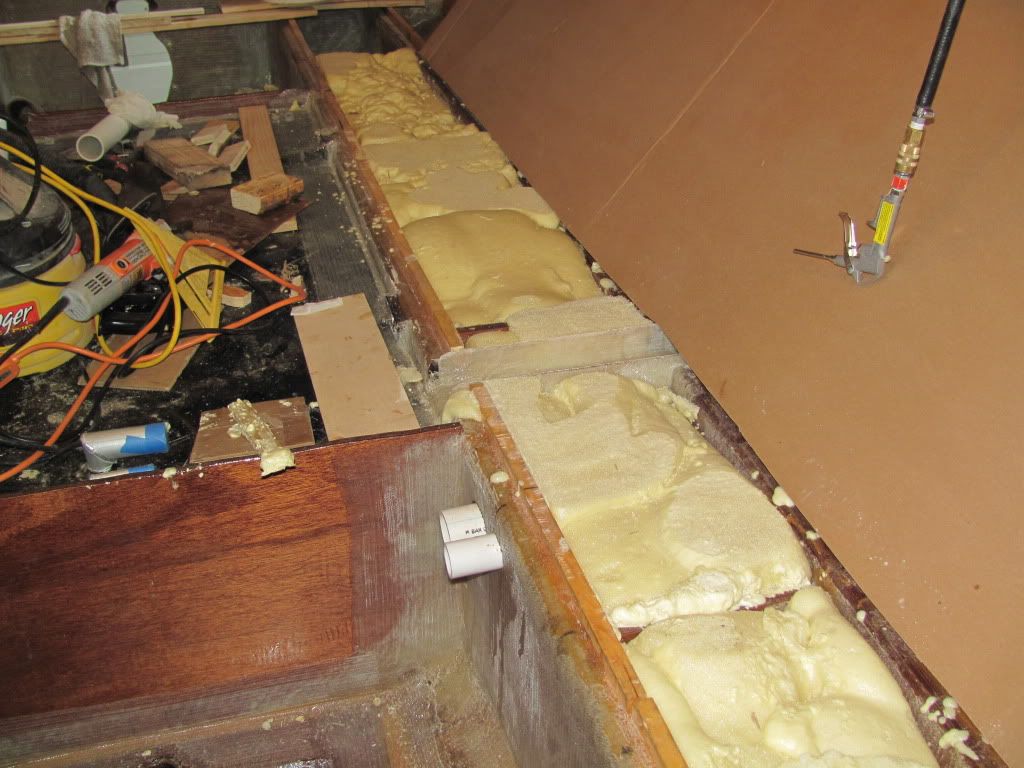
Re: 1981 FORMULA F233 RESTORATION
Posted: Mon Jul 18, 2011 10:11 am
by Chief Brody
NEM, is that a Formula or Boston Whaler...
Its lookin' good.....I personally would foam every nook and cranny...not because you need it, but for the simple fact that if there's an open compartment, water will somehow find its way in...I would fill it, and after sawing it level like you did, put a coat of epoxy over it to seal the open foam pores. As far as the blue foam, if you use it, you will probably need to glass it..I don't think its water resistant?? I would also go thicker than 3/4...make it 2 inch and it will hold ice better than a Yeti Cooler.
Good job in this hot weather!!!
Re: 1981 FORMULA F233 RESTORATION
Posted: Tue Jul 19, 2011 12:15 am
by NOTHING ELSE MATTERS
Chief Brody wrote:NEM, is that a Formula or Boston Whaler...
Its lookin' good.....I personally would foam every nook and cranny...not because you need it, but for the simple fact that if there's an open compartment, water will somehow find its way in...I would fill it, and after sawing it level like you did, put a coat of epoxy over it to seal the open foam pores. As far as the blue foam, if you use it, you will probably need to glass it..I don't think its water resistant?? I would also go thicker than 3/4...make it 2 inch and it will hold ice better than a Yeti Cooler.
Good job in this hot weather!!!
Well, still a Formula
That's what i'm thinking too, i will fill all the voids, i also hate the sound of an empty space when i hit a wave.
What i was going to do with the top of the flotation foam was to glass it, am i overdoing it?
As far as the blue foam sheets, i am glassing a layer or two of 1708 over it.
Re: 1981 FORMULA F233 RESTORATION
Posted: Thu Jul 21, 2011 5:28 pm
by Chief Brody
NOTHING ELSE MATTERS wrote:Chief Brody wrote:NEM, is that a Formula or Boston Whaler...
Its lookin' good.....I personally would foam every nook and cranny...not because you need it, but for the simple fact that if there's an open compartment, water will somehow find its way in...I would fill it, and after sawing it level like you did, put a coat of epoxy over it to seal the open foam pores. As far as the blue foam, if you use it, you will probably need to glass it..I don't think its water resistant?? I would also go thicker than 3/4...make it 2 inch and it will hold ice better than a Yeti Cooler.
Good job in this hot weather!!!
Well, still a Formula
That's what i'm thinking too, i will fill all the voids, i also hate the sound of an empty space when i hit a wave.
What i was going to do with the top of the flotation foam was to glass it, am i overdoing it?
As far as the blue foam sheets, i am glassing a layer or two of 1708 over it.
For the cavities, I would either just epoxy seal it or use a thin layer like surfboard cloth to encapsulate it....I don't think you'll need anything like biax cloth. Your money is better spent elsewhere IMHO....
Re: 1981 FORMULA F233 RESTORATION
Posted: Sun Sep 18, 2011 10:54 pm
by NOTHING ELSE MATTERS
Re: 1981 FORMULA F233 RESTORATION
Posted: Mon Sep 19, 2011 9:47 am
by tech_support
excellent work
I installed the floor up to pass the console area, then fillet and tabbed with two layers of 12 oz 6" tape. Should i do one more layer?
that is enough
Re: 1981 FORMULA F233 RESTORATION
Posted: Thu Sep 22, 2011 9:23 am
by gw204
Great looking work! Keep it up.
Question about epoxy coating of panels that aren't exposed though... Because those areas aren't exposed to the elements, is there no risk of the ply "checking" and developing small cracks in the epoxy where moisture intrusion could occur? I know that will happen on exposed panels. Why not put something light like a 6 oz. cloth on all hidden plywood surfaces?
Re: 1981 FORMULA F233 RESTORATION
Posted: Thu Sep 22, 2011 11:20 am
by NOTHING ELSE MATTERS
gw204 wrote:Great looking work! Keep it up.
Question about epoxy coating of panels that aren't exposed though... Because those areas aren't exposed to the elements, is there no risk of the ply "checking" and developing small cracks in the epoxy where moisture intrusion could occur? I know that will happen on exposed panels. Why not put something light like a 6 oz. cloth on all hidden plywood surfaces?
Brian, normally the meranti 1088BS should not "check" . I've done it before and never had a problem. All the bulkheads i laminated them with 8 oz fiberglass. I had made a sign for my business 7 winters ago just out of 1088BS vinyl letters and a few coats of epoxy and still there, just turned a little yellowish.
Re: 1981 FORMULA F233 RESTORATION
Posted: Thu Sep 22, 2011 11:40 am
by Chief Brody
NEM, what are you going to use for the final finish on your floor panels? Are you going with Kiwi Grip non skid or are you going the flexmold pattern method? (assuming the original carpeting will never come back to use)
I kinda agree with GW though on the bare wood...I know it's not needed per se, but after seeing so much rot and wet wood in my boat, I couldn't sleep well at night if I closed it up without a least a thin layer of 6oz or something on it.
Re: 1981 FORMULA F233 RESTORATION
Posted: Thu Sep 22, 2011 3:47 pm
by NOTHING ELSE MATTERS
Chief,the floor is not touching anywhere under it the foam, so i wouldn't worry for the plywood to get soaked under it. In the tank compartment there is a 2 1/2" gap between tank and bottom of plywood and enough ventilation, so no condensation there either. Hey, boat is 30 years old, stringers we made using pine 1X's with no resin on it and i was pulling good pieces of wood.
As far as the floor, yes, i think i will go with the KIWI grip but i would LOVE the fake plastic teak look. What is flexmold pattern method? (maybe the fake teak?)
Re: 1981 FORMULA F233 RESTORATION
Posted: Thu Sep 22, 2011 4:05 pm
by Chief Brody
NOTHING ELSE MATTERS wrote:As far as the floor, yes, i think i will go with the KIWI grip but i would LOVE the fake plastic teak look. What is flexmold pattern method? (maybe the fake teak?)
That's the flexible pattern that you set in wet gelcoat or paint to get your factory non skid........some people make their own by pulling a copy off a good area of the boat...but you can buy it in sheets ....it ain't cheap though!! $40 per square foot pattern
Just wondering if you have or were going to use it....my OEM non skid looks like hell, and I wasn't sure which way I was going to go with it...repair as factory or repaint with Kiwi...don't know anyone with first hand application to see how either turns out/looks/feels.
Re: 1981 FORMULA F233 RESTORATION
Posted: Fri Sep 23, 2011 9:57 am
by gw204
Re: 1981 FORMULA F233 RESTORATION
Posted: Fri Sep 23, 2011 10:06 am
by gk108
^^^ That's pretty dang good
Re: 1981 FORMULA F233 RESTORATION
Posted: Fri Sep 23, 2011 10:11 am
by tech_support
Good idea using the flexible rubber as a mold .
A lot of work, but it looks nice. You relaly dont have much of a choice if you want to match the existing pattern.
Re: 1981 FORMULA F233 RESTORATION
Posted: Fri Sep 23, 2011 10:20 am
by gw204
Thanks guys.
The bedliner worked, but it's a one-time use only thing. After it sits for two days or so, it gets too brittle to fold back over itself and cracks. The folding is necessary in order to get the mold to line up with the existing non-skid.
I also tried a product called "Rubberize-it". Made for coating the handles of tools and such. I think it would have worked better had I not put it down so thick. It started to develop cracks as it cured. Completely my fault. No patience.
Re: 1981 FORMULA F233 RESTORATION
Posted: Fri Sep 23, 2011 10:56 am
by Chief Brody
Nice work Brian!
Yeah, an entire floor is a little tough....my largest one piece area is a hatch cover that's like 4'x5' roughly...was wondering what NEM was planning on using for his entire new deck......that hatch cover would cost $800 just for the flex mold.
Re: 1981 FORMULA F233 RESTORATION
Posted: Mon Oct 10, 2011 11:27 pm
by NOTHING ELSE MATTERS
Hey guys, i have a question. I have a situation that i have to glue something and can not use regular epoxy glue, it will run down the sides of my boat. What i am gluing is epoxied meranti 1088 BS on grinded gel coat but not down to the original poly glass. I was thinking of using PL adhesive or 5200, what you think? I would rather use the PL because it dries within 12 hours.
Re: 1981 FORMULA F233 RESTORATION
Posted: Tue Oct 11, 2011 9:21 am
by tech_support
you can use epoxy, it just needs be thicker. Add some silica to your wood flour and you can glue things vertically without it running out.
what is it you are gluing?
Re: 1981 FORMULA F233 RESTORATION
Posted: Tue Oct 11, 2011 11:35 am
by NOTHING ELSE MATTERS
shine wrote:you can use epoxy, it just needs be thicker. Add some silica to your wood flour and you can glue things vertically without it running out.
what is it you are gluing?
I am extending the height of the side of the boat by 2" (making new gunnels). What i am thinking doing is
1-glue a 1/4"x3" high outside of the boat (where the rub rail gets mounted)
2-then glue a 1/4"x1 1/2" high on top of the side skin of the boat(is 1/4" thick)
3-then glue a 1/4" x 3" high on the inside, maybe two layers of 1/4"
So now i have sandwiched the top 1 1/2" of the side of the hull and is at least 3/4" or 1" thick.
Re: 1981 FORMULA F233 RESTORATION
Posted: Tue Oct 11, 2011 11:55 am
by NOTHING ELSE MATTERS
shine wrote:you can use epoxy, it just needs be thicker. Add some silica to your wood flour and you can glue things vertically without it running out.
what is it you are gluing?
I am extending the height of the side of the boat by 2" (making new gunnels). What i am thinking doing is
1-glue a 1/4"x3" high outside of the boat (where the rub rail gets mounted)
2-then glue a 1/4"x1 1/2" high on top of the side skin of the boat(is 1/4" thick)
3-then glue a 1/4" x 3" high on the inside, maybe two layers of 1/4"
So now i have sandwiched the top 1 1/2" of the side of the hull and is at least 3/4" or 1" thick.
Re: 1981 FORMULA F233 RESTORATION
Posted: Tue Oct 11, 2011 12:55 pm
by tech_support
thats going to be a lot of work to make it look decent
Re: 1981 FORMULA F233 RESTORATION
Posted: Tue Oct 11, 2011 4:25 pm
by NOTHING ELSE MATTERS
This is what i am talking about.
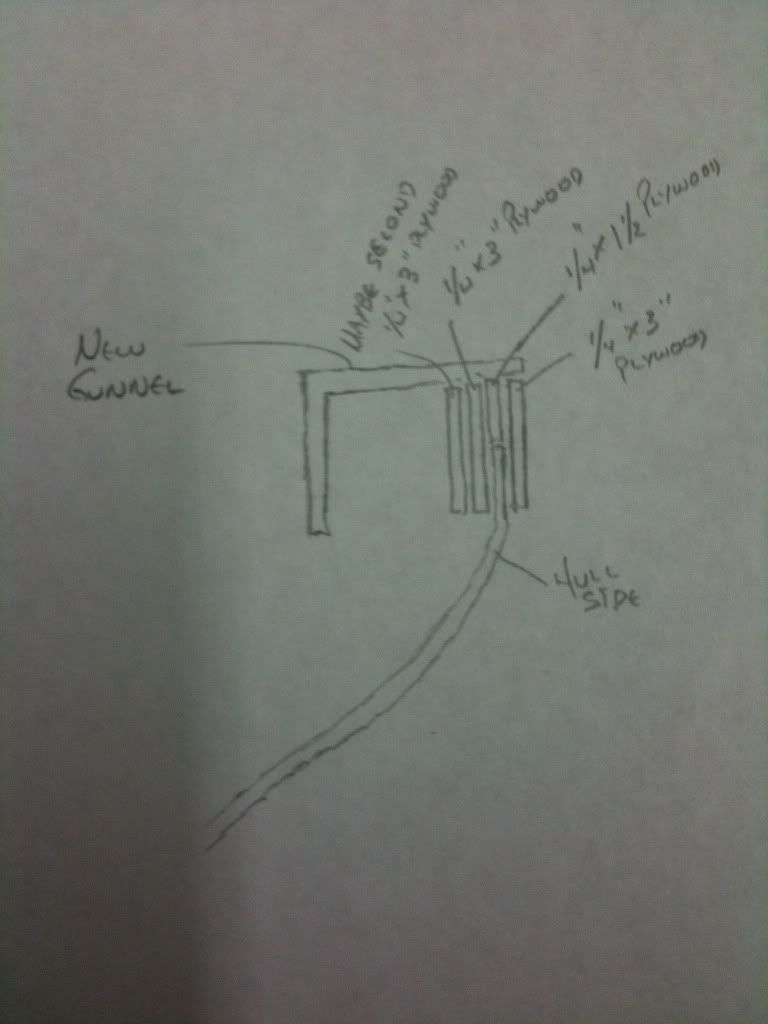
Re: 1981 FORMULA F233 RESTORATION
Posted: Thu Oct 13, 2011 8:03 pm
by Chief Brody
NEM, for some reason I cant open the image...but based on the explanation, it sounds like a ton of work for 2 inches of freeboard....I thought the F233 were good to go in that repect.....are you changing the gunwale all the way around? I recently saw someone modify the bow of a similar boat......came out nice, but not perfect in terms of fairing....ton of work in that aspect.....did you remove the cap on this one? Are you trying to extend just the sides and put the OEM cap back on?
EDIT: Now I see what youre trying to do,,,,it just popped up for some reason.....
I have no idea if this is the right way to extend the height, but I would first taper the gunwale to a point for those 2-3 inches starting about 6 inches lower on the gunwale ...then temporarily attach a plastic band , like you show in wood, around the perimeter, and glass from the inside out, a good 6 inches away to the top till you reach the right height and thickness......then trim the height all around and see how the old gunwale top bolts back on.....if the flare of the sides doesnt change and move outward, the cap should fit back on, no?
You got guts doing that...lots of work, but may be fruitfull in the end if youre up for it....cool project
Re: 1981 FORMULA F233 RESTORATION
Posted: Thu Oct 13, 2011 10:44 pm
by NOTHING ELSE MATTERS
Chief, thanks for your kind words. I am making(going to) new gunnels all around. The reason i am raising the sides is because i had raised the floor 2" to make her self bailing.
As of now i am up to it and if it comes out the way i vision it, it should look good. I know is a lot of work, but hopefully will be rewarded.
Re: 1981 FORMULA F233 RESTORATION
Posted: Mon Oct 17, 2011 2:08 pm
by gw204
I would leave it alone. That boat has tons of freeboard already and I don't think raising the floor 2" is going to make any difference at all.
Re: 1981 FORMULA F233 RESTORATION
Posted: Mon Oct 17, 2011 4:38 pm
by NOTHING ELSE MATTERS
Brian, now from the floor to the top of the side( all the way aft) i have 23". I had to make new gunnels anyway because of the conversion, so that is why i bother raising them. I already finished it, i hope the way i did it is O.K
Re: 1981 FORMULA F233 RESTORATION
Posted: Mon Oct 17, 2011 5:14 pm
by gw204
Given how the rest of your work looks, I'm sure it's fine.
Re: 1981 FORMULA F233 RESTORATION
Posted: Tue Oct 25, 2011 12:15 am
by NOTHING ELSE MATTERS
Well, i finished the deck and laminated it with one layer of 10 OZ cloth for now (one more layer when all is done).

I made a new anchor locker divider out of 1/2" ply and two layer of 10 oz cloth on each side.
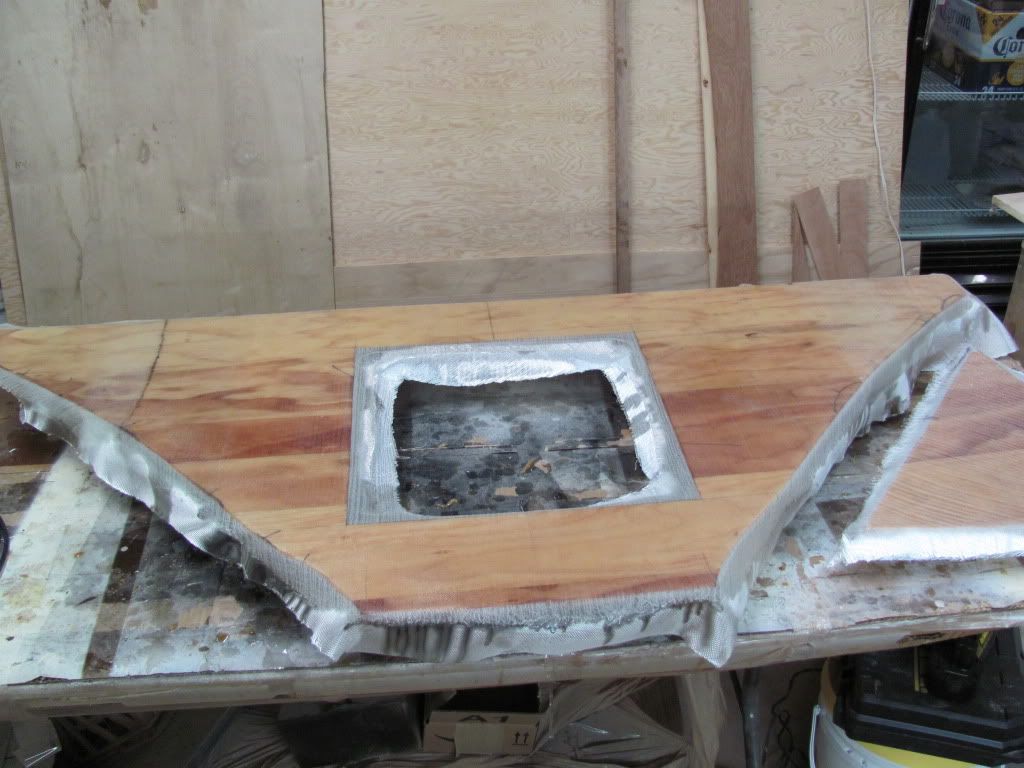
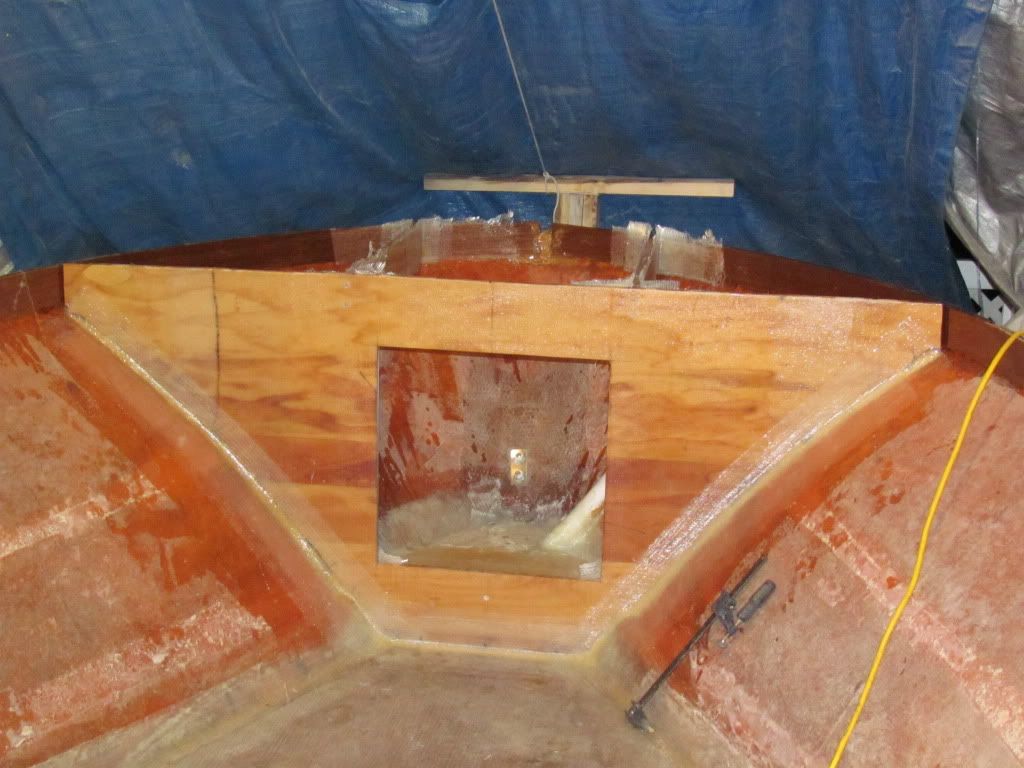
This guy took permanent residence on the bulkhead.
I also made a sub floor for inside the anchor locker, i wanted to raise up a little so i can drain it overboard.

I also finished with raising the hull sides by 2", it came out pretty strong. Three layers of 1/4" plywood.
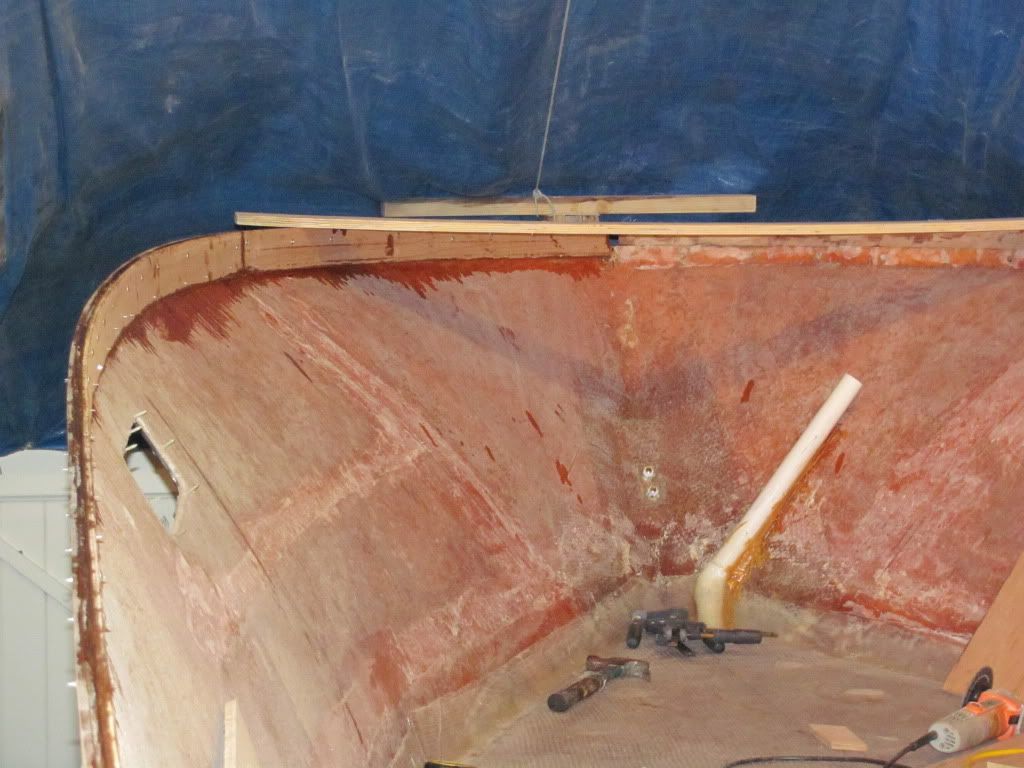
NOW, i have a question.
I am planning on installing "cleats or dividers or spacers" every 32"( i don't know how to call these) to make the gunnels. I debating on if i should use 2 pieces of 3/4 or use regular 2X4 pieces (encapsulated in resin and cloth of course).
They are the ones that i have clamped.
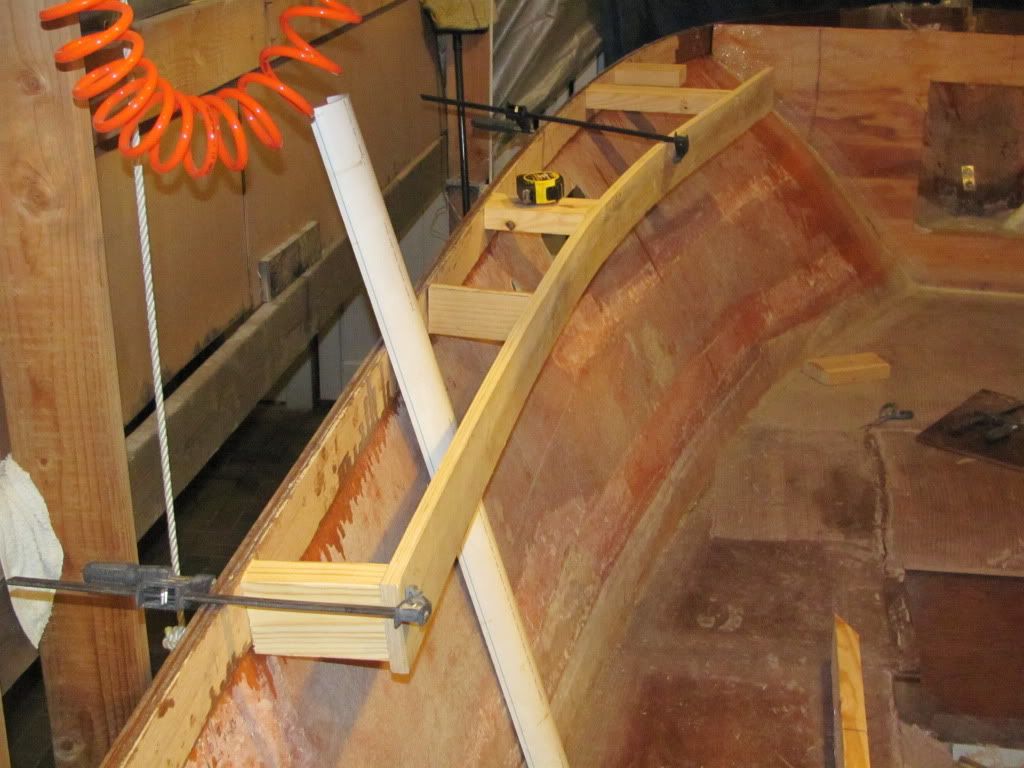
ALSO, the hull sides, the top two thirds are flexing, so obviously i want to add stiffeners.
I am also debating on using two 3/4" plywood (to make up 1 1/2" thick) or use a 3" PVC pipe cut in half and laminate them with a few layers of 10 oz cloth that i have.
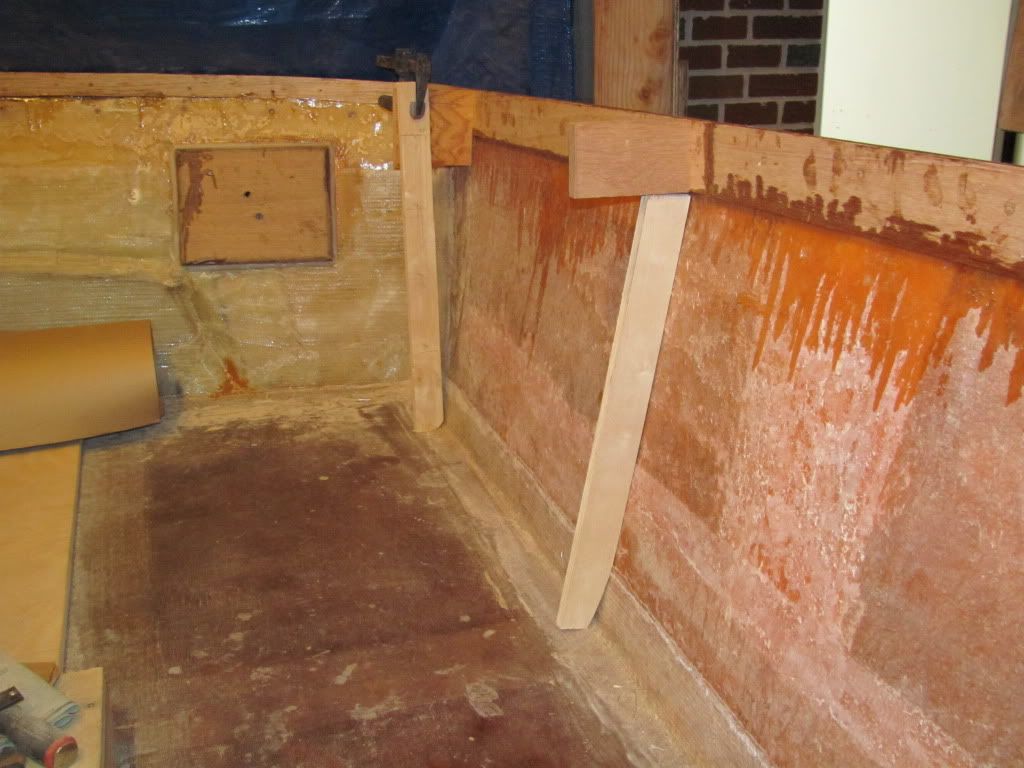
Sorry for the long post, but i need some advise............. PRONTO
Re: 1981 FORMULA F233 RESTORATION
Posted: Tue Oct 25, 2011 9:44 am
by tech_support
for the spacers, i would use two layers of 3/4" - it should be more stable over time than plain stock wood. Make up a big slab of it and cut off what you need for each piece, that way you only have to glue up one time.
For the frames, you need to replace the stiffness that was there before with the liner. Reverse engineering this is not very easy. How closely spaced do you have these pieces now?
What I can tell you is that the stiffness comes from the height of the beam (frame in this case), so it is much better to have a 1/2" piece of wood that is 3" offset from the hull side vs. a 3" wide piece that is only 1.5" offset.
Re: 1981 FORMULA F233 RESTORATION
Posted: Tue Oct 25, 2011 10:36 am
by NOTHING ELSE MATTERS
Shine, those pieces are 32" apart, i could make them closer, they are not installed yet. As far as the stiffeners, i was thinking of coming out of the hull side to about 2 or 2 1/2" .
Re: 1981 FORMULA F233 RESTORATION
Posted: Tue Oct 25, 2011 10:38 am
by tech_support
32" between frames is good, probably more than what was there before. Do you have any pictures of how the liner was built, it would be useful to see how they stiffened the hull sides originally
Re: 1981 FORMULA F233 RESTORATION
Posted: Tue Oct 25, 2011 11:38 am
by NOTHING ELSE MATTERS
Re: 1981 FORMULA F233 RESTORATION
Posted: Tue Oct 25, 2011 11:49 am
by Chief Brody
NEM, what about the Prisma stiffeners Joel used on the Seacraft? Or maybe make your own using marine foam and glass......
Re: 1981 FORMULA F233 RESTORATION
Posted: Tue Oct 25, 2011 11:54 am
by NOTHING ELSE MATTERS
I forgot to take a picture, but i did make three "u" shape channels out of fiberglass, one to cover the fuel line and vent line and the other for across the other side so it looks uniform, then i will fill them with foam(not the one with the gas line). I might as well make three more ( i still have the mold) and use those, but is very time consuming.
Re: 1981 FORMULA F233 RESTORATION
Posted: Tue Oct 25, 2011 11:57 am
by Chief Brody
You can probably do it faster by cutting and glueing some marine foam to the sides first, then glassing them over like a stringer...you won't need to mold the part as the foam becomes your mold....
Re: 1981 FORMULA F233 RESTORATION
Posted: Tue Oct 25, 2011 1:05 pm
by NOTHING ELSE MATTERS
Chief Brody wrote:You can probably do it faster by cutting and glueing some marine foam to the sides first, then glassing them over like a stringer...you won't need to mold the part as the foam becomes your mold....
What kind of marine foam?
Good idea BTW, thanks.
Re: 1981 FORMULA F233 RESTORATION
Posted: Tue Oct 25, 2011 1:19 pm
by tech_support
You can probably do it faster by cutting and glueing some marine foam to the sides first, then glassing them over like a stringer...you won't need to mold the part as the foam becomes your mold.
the last two frame on the seacraft are made just like that. Glued up scrap 1/2" dicivnycell, rounded the outside edges, glued into hull, the covered with two layers 17 oz. Glass overlapped the hull by 2" and 4"


from my thread ....
In the back of the boat, I wanted less obtrusive frames. I will mount a rod/gaff/brush holder to these. I glued up some 1/2" divinycell to make a 2" block, ripped it into 3.25" blanks, then ran a 1/2" round over to shape the top. These were epoxied again the side of the hull, filleted, then glassed over. These frames will be true foam sandwich stringers/frames vs. the larger hollow glass frames - they get their strength in different ways.
Re: 1981 FORMULA F233 RESTORATION
Posted: Tue Oct 25, 2011 2:08 pm
by Chief Brody
Exactly! You can use scraps of Divinycell and make your own version of the Prisma beams....I think Prisma doesn't even use that type of higher density foam....they go with marine urethane, I think, and let the beam shape and the glass do all the work...their foam is actually soft on the inside....I was surprised when I first saw it.....
I think thats a cleaner and easier install doing it like the Seacraft.
Re: 1981 FORMULA F233 RESTORATION
Posted: Tue Oct 25, 2011 2:19 pm
by gw204
I think I would simply core the entire hull side w/ foam or balsa. IMO that would make for a cleaner look than a beam-type stiffener.
Re: 1981 FORMULA F233 RESTORATION
Posted: Tue Oct 25, 2011 3:17 pm
by NOTHING ELSE MATTERS
gw204 wrote:I think I would simply core the entire hull side w/ foam or balsa. IMO that would make for a cleaner look than a beam-type stiffener.
Wanted to do that to tell you the truth, but i have no clue how to vacuum bag, nor the supplies.
Re: 1981 FORMULA F233 RESTORATION
Posted: Tue Oct 25, 2011 3:18 pm
by tech_support
gw204 wrote:I think I would simply core the entire hull side w/ foam or balsa. IMO that would make for a cleaner look than a beam-type stiffener.
thats always an option too.
Judging from the "before" pictures it looks like the deck piece was bonded up the side of the hull a little, this made the panel area smaller. They had a single transverse glassed in stiffener as well as a longitudinal up towards the bow. What your trying to do is keep the panel area the same of less than before
Re: 1981 FORMULA F233 RESTORATION
Posted: Tue Oct 25, 2011 3:22 pm
by NOTHING ELSE MATTERS
Joel, would you have any scrap of that foam to sell me ?
Re: 1981 FORMULA F233 RESTORATION
Posted: Tue Oct 25, 2011 4:31 pm
by tech_support
sure, I will see what we have around. What is the biggest piece you need?
If you want a discount on the Forespar stuff, please let me know the exact part numbers and I will be sure to include them in our first inventory stock order. just email to me a list please.
Re: 1981 FORMULA F233 RESTORATION
Posted: Tue Oct 25, 2011 8:48 pm
by NOTHING ELSE MATTERS
shine wrote:sure, I will see what we have around. What is the biggest piece you need?
If you want a discount on the Forespar stuff, please let me know the exact part numbers and I will be sure to include them in our first inventory stock order. just email to me a list please.
The pieces vary from 23" to 36"
For the Forespan items, i left you a message/order with the Forespan item #'s.
Joel, let me know when you will be getting the Marelon stuff. I will need a complete seacock assembly. (# MF867, # MF865, # MF849)
NOTHING ELSE MATTERS
Frequent Poster
Posts: 199
Joined: Fri Mar 12, 2010 12:26 am
Re: 1981 FORMULA F233 RESTORATION
Posted: Wed Oct 26, 2011 9:20 am
by tech_support
For the Forespan items, i left you a message/order with the Forespan item #'s.
our phones do not take messages
Please email them to me a to
shine@e-boat.net or fax it to 7727703249
Re: 1981 FORMULA F233 RESTORATION
Posted: Wed Oct 26, 2011 11:24 am
by NOTHING ELSE MATTERS
](./images/smilies/eusa_wall.gif "Brick wall")
i left it on your Sea craft built thread.
Re: 1981 FORMULA F233 RESTORATION
Posted: Wed Oct 26, 2011 12:26 pm
by tech_support
I am guessing you mean these? The MF number will sometimes have multiple part numbers associated with it....
906059 MF 867 3/4 thru-hull
906061 MF 865 3/4 Screen Only
904010 MF 849 3/4" SEACOCK WITH 3/4" FEMALE THREADS AND FLANGE
Re: 1981 FORMULA F233 RESTORATION
Posted: Wed Oct 26, 2011 1:32 pm
by NOTHING ELSE MATTERS
shine wrote:I am guessing you mean these? The MF number will sometimes have multiple part numbers associated with it....
906059 MF 867 3/4 thru-hull
906061 MF 865 3/4 Screen Only
904010 MF 849 3/4" SEACOCK WITH 3/4" FEMALE THREADS AND FLANGE
YES
Re: 1981 FORMULA F233 RESTORATION
Posted: Thu Mar 22, 2012 10:47 pm
by NOTHING ELSE MATTERS
Re: 1981 FORMULA F233 RESTORATION
Posted: Sun Mar 25, 2012 3:15 pm
by doug42190
I am pleased to see a new post. It is looking really good. I have not seen anyone redo the cap the way you are doing it. I am looking forward to seeing how it all turns out. Nice job.
Re: 1981 FORMULA F233 RESTORATION
Posted: Mon Mar 26, 2012 12:25 am
by NOTHING ELSE MATTERS
Thank you. As far as the cap/gunnels i really didn't have any better way of doing it.
Re: 1981 FORMULA F233 RESTORATION
Posted: Mon Mar 26, 2012 10:35 pm
by NOTHING ELSE MATTERS
Yesterday started mocking the top of the gunnels.
Predrilled for rod holders, pop up cleats and fuel fill.
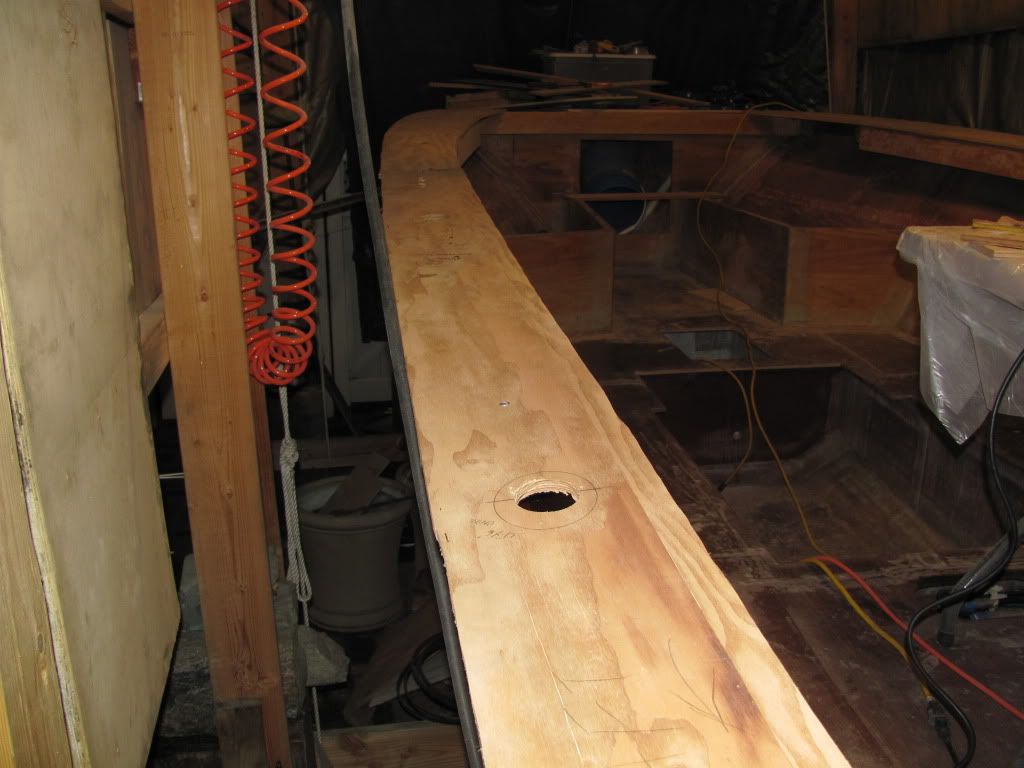

Dry fitted everything and took them in the garage and laminated a layer of 1708 under it.
Under each hardware i will install a 3/4" backing plate the over drill all holes, fill them with thickened epoxy then re drill everything.
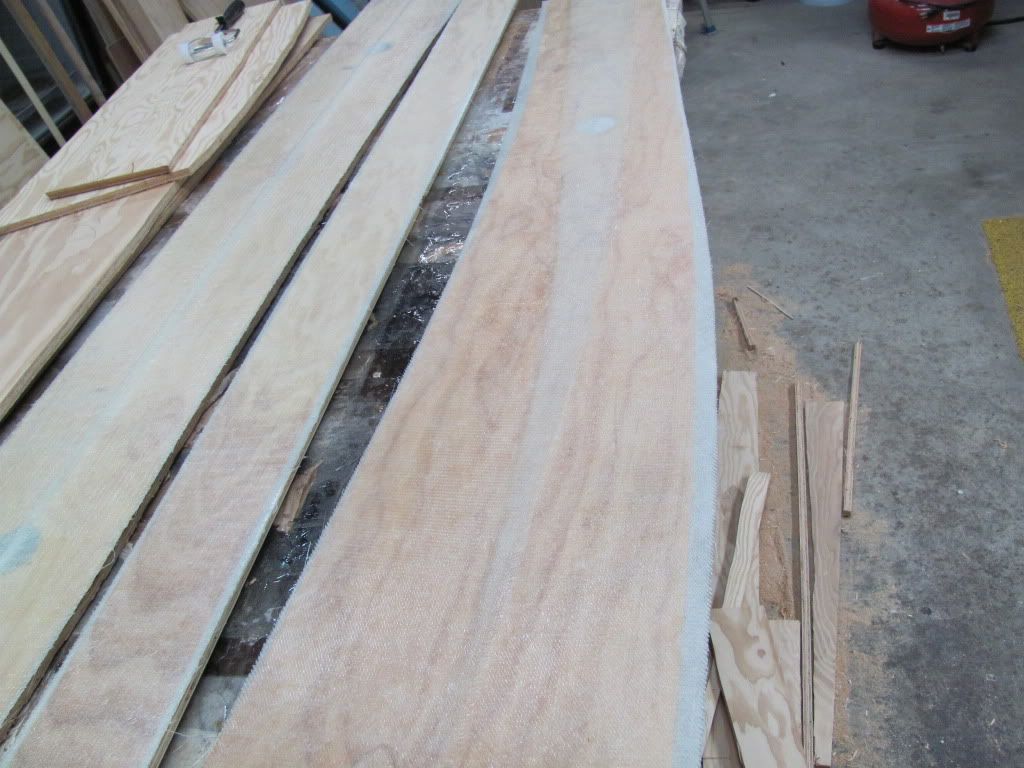
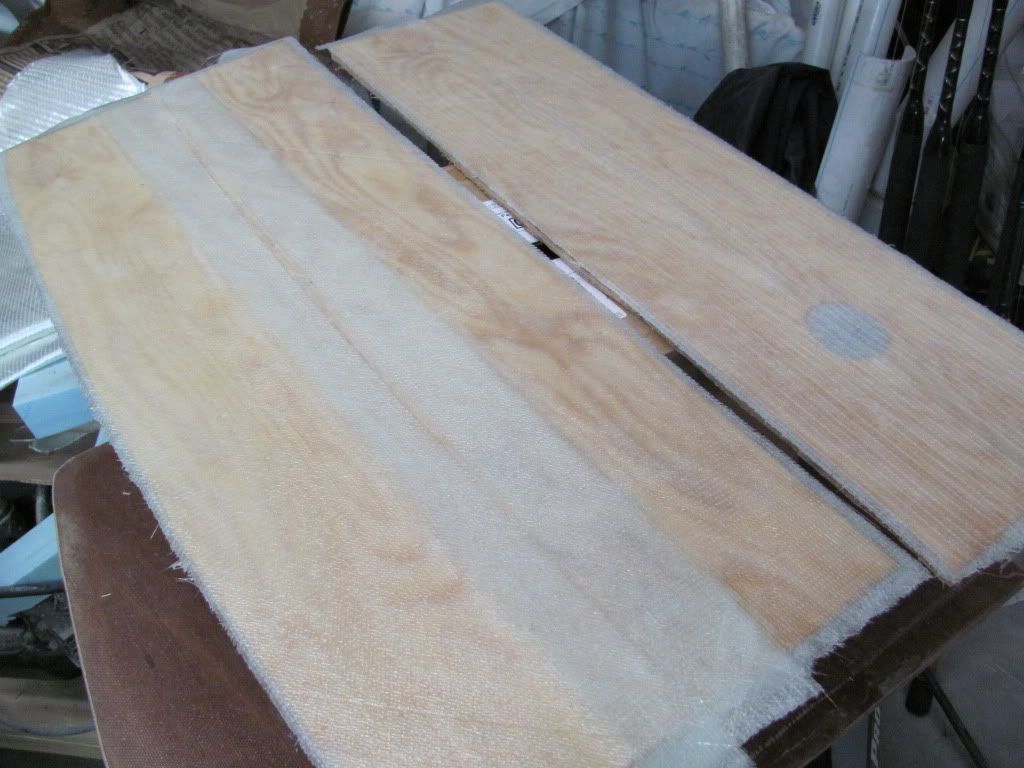
This is a in floor 24 gallon/96 quarts food/drink cooler insulated all around, it should keep stuff in there pretty cold.
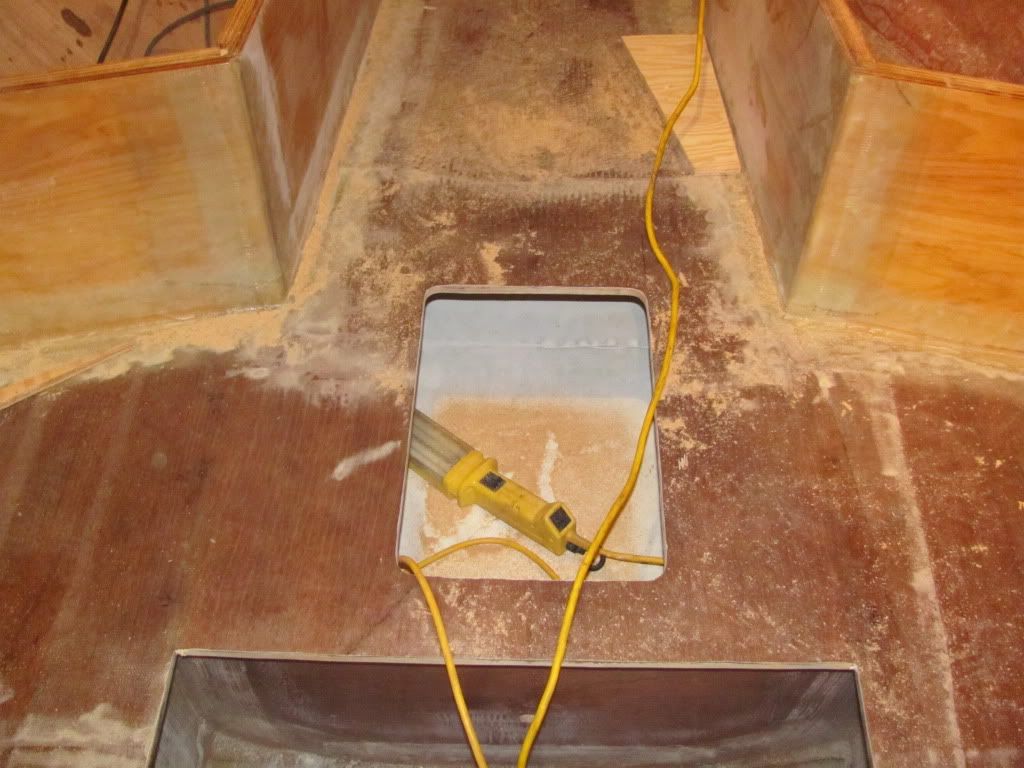
Re: 1981 FORMULA F233 RESTORATION
Posted: Wed May 23, 2012 11:48 pm
by NOTHING ELSE MATTERS
Re: 1981 FORMULA F233 RESTORATION
Posted: Thu May 24, 2012 12:52 am
by gstanfield
The progress is looking good to me
Re: 1981 FORMULA F233 RESTORATION
Posted: Thu May 24, 2012 3:52 pm
by tobolamr
Wow! You are a machine! Keep up the great work!
Re: 1981 FORMULA F233 RESTORATION
Posted: Thu May 24, 2012 4:23 pm
by Chief Brody
Starting to look like a real boat again NEM......you'll be done by end of summer at this pace...nice!
Re: 1981 FORMULA F233 RESTORATION
Posted: Tue Aug 14, 2012 1:14 pm
by doug42190
NEM. Where are you. Don't leave me hanging like this. How is it going?
Doug
Re: 1981 FORMULA F233 RESTORATION
Posted: Tue Aug 14, 2012 1:26 pm
by NOTHING ELSE MATTERS
Very busy with work, very hot in NY not too much to show. Just primed the gunnels and 1/3 of the front of the inside. Also opened some huge drain scappers.
Re: 1981 FORMULA F233 RESTORATION
Posted: Tue Aug 14, 2012 1:28 pm
by doug42190
Cool!!!
Hotter than heck here in NC also. Give us a peek -- show us some pictures, please.
Thanks,
Doug
Re: 1981 FORMULA F233 RESTORATION
Posted: Tue Aug 14, 2012 1:30 pm
by NOTHING ELSE MATTERS
I'll try to take some tonight.
Re: 1981 FORMULA F233 RESTORATION
Posted: Fri Aug 31, 2012 8:56 am
by gw204
How you making out with this thing man?
Re: 1981 FORMULA F233 RESTORATION
Posted: Fri Aug 31, 2012 7:27 pm
by NOTHING ELSE MATTERS
Not much to show. Been really busy with work and is hot like hell under the tarp. I'll post some pictures of the "progress" later.
Re: 1981 FORMULA F233 RESTORATION
Posted: Sun Sep 02, 2012 2:15 pm
by FitzFisher
Re: 1981 FORMULA F233 RESTORATION
Posted: Tue Sep 04, 2012 12:22 am
by NOTHING ELSE MATTERS
OK, i promised some pictures. I've been working a little on boat lately so here is the progress i've made.
I opened up two BIG drain holes(1 1/2x6 if i remember well), also check out the piece i cut, that is next to the bump out where the plywood transom is, this is solid glass, WOW.
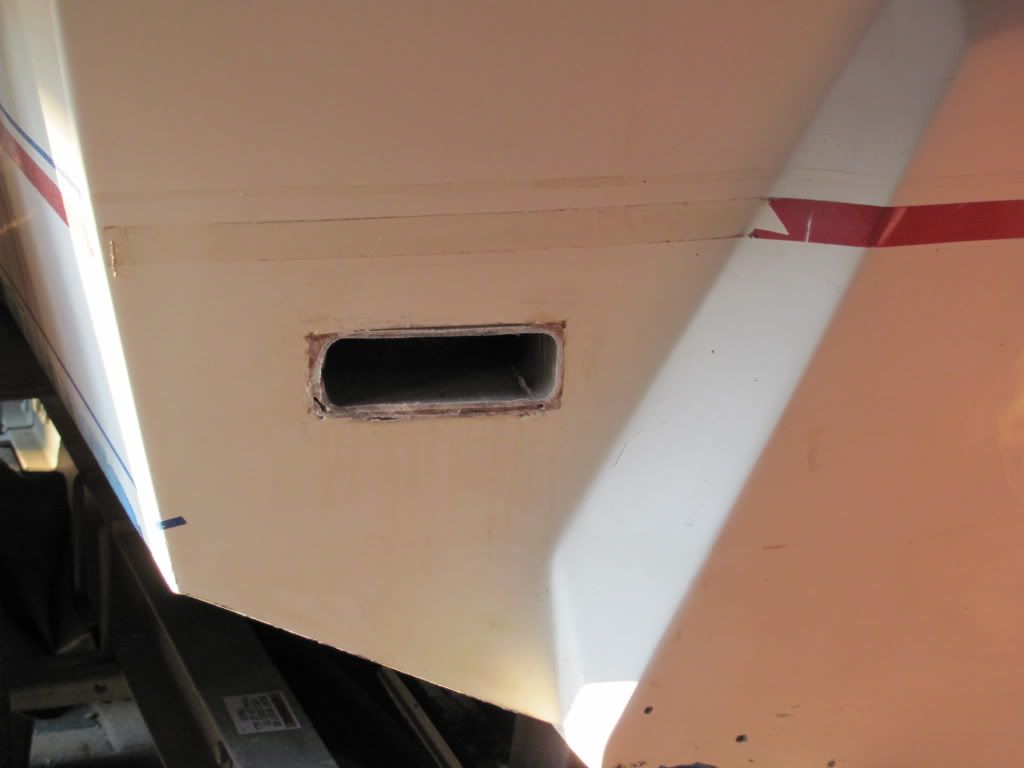
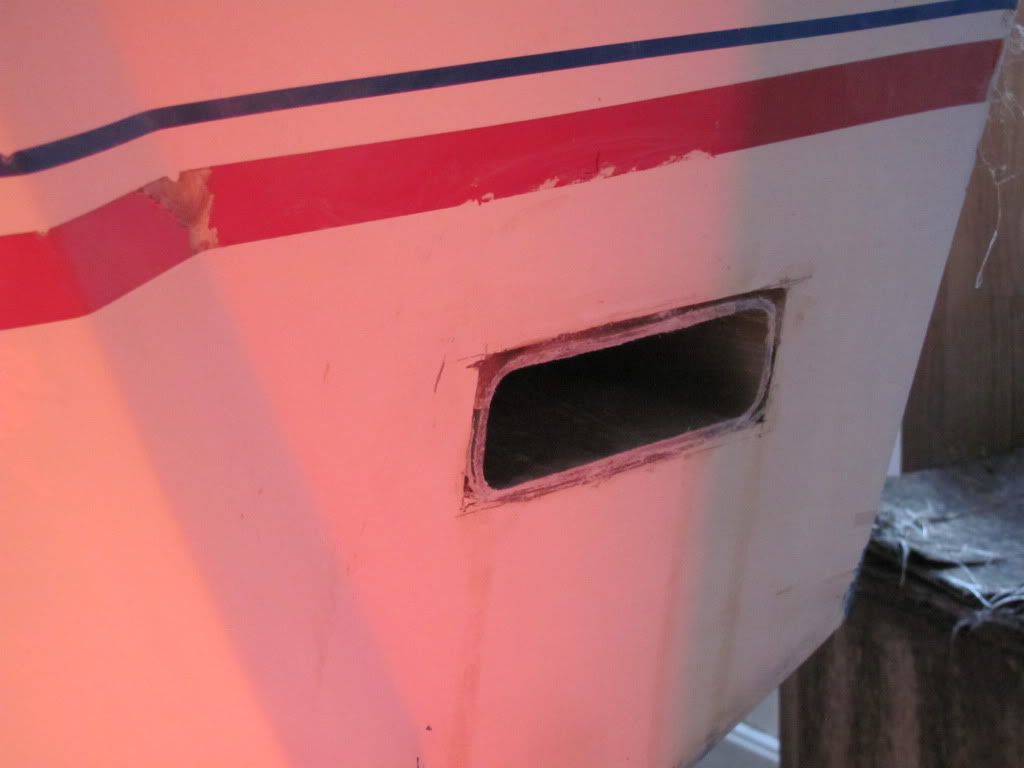

Also primed most of the gunnels, bow and front storage boxes.
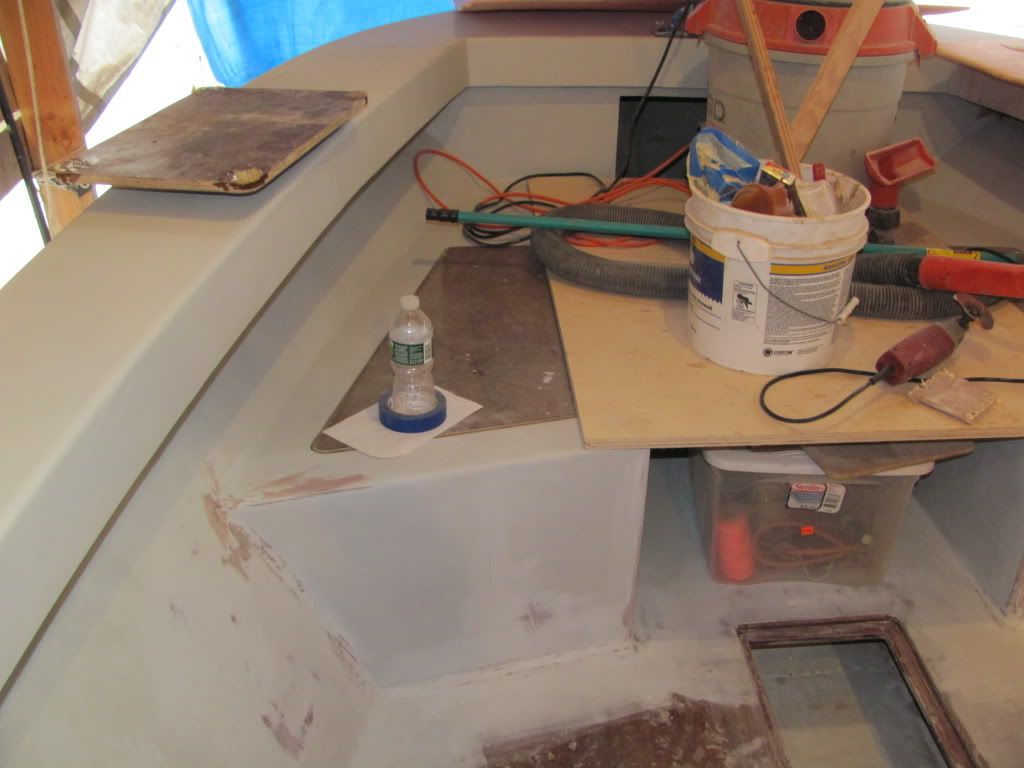
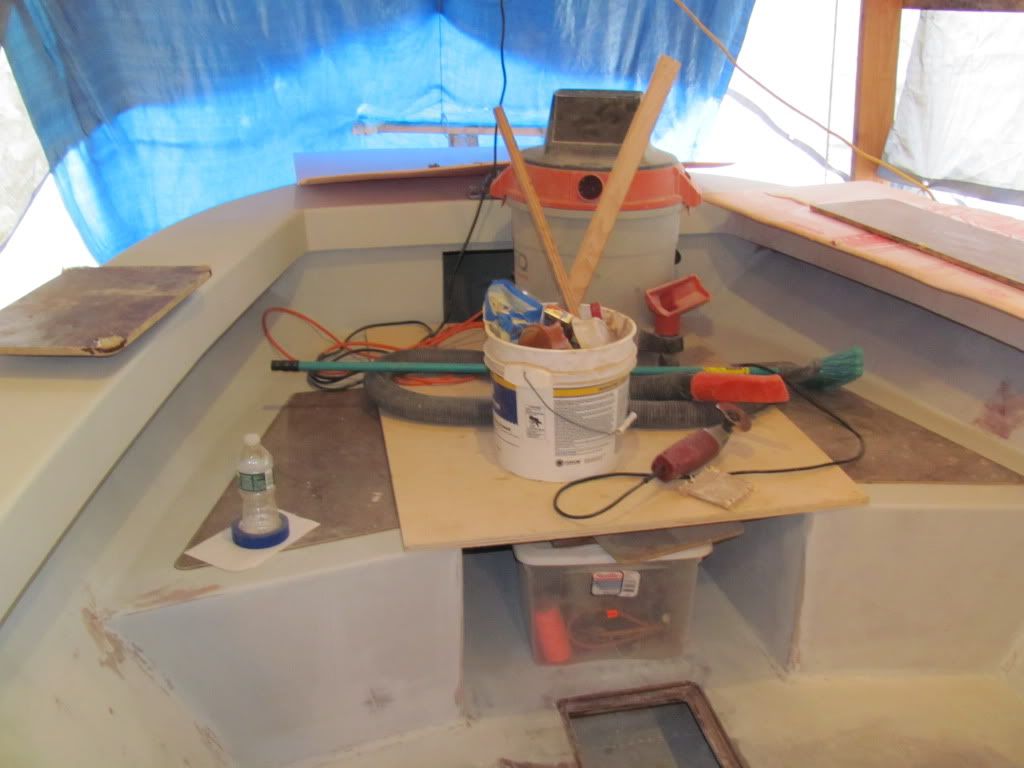
finished the transom top and drilled for pop up cleats, i also primed the inside of the transom(the square on the picture is a shadow)
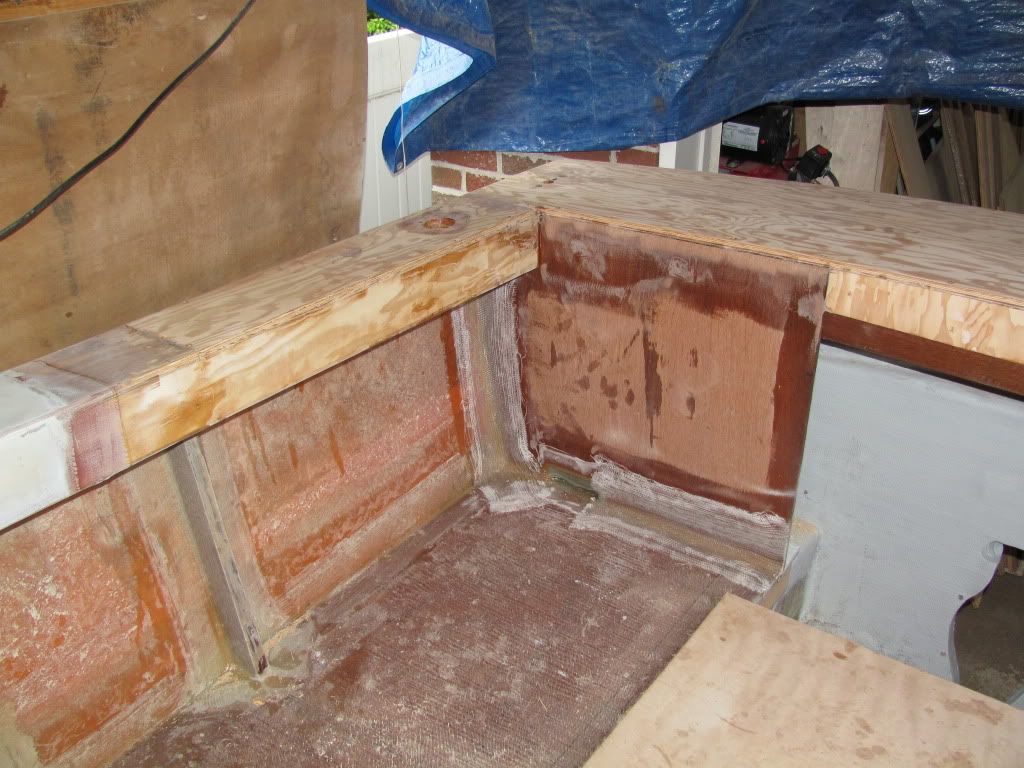
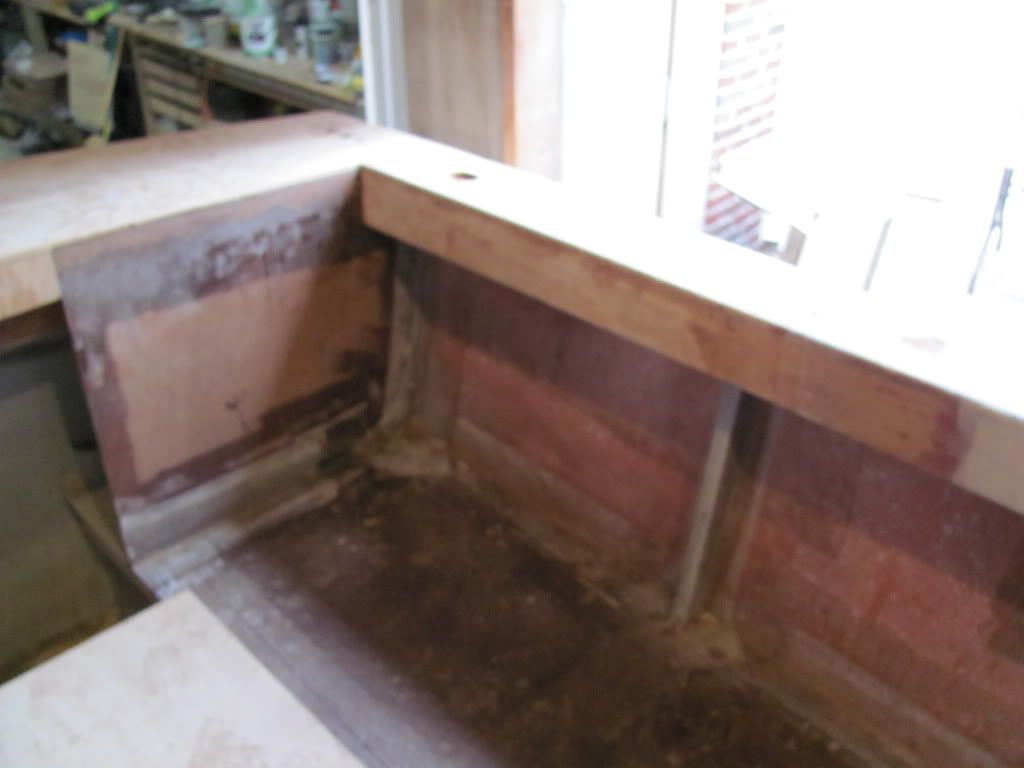
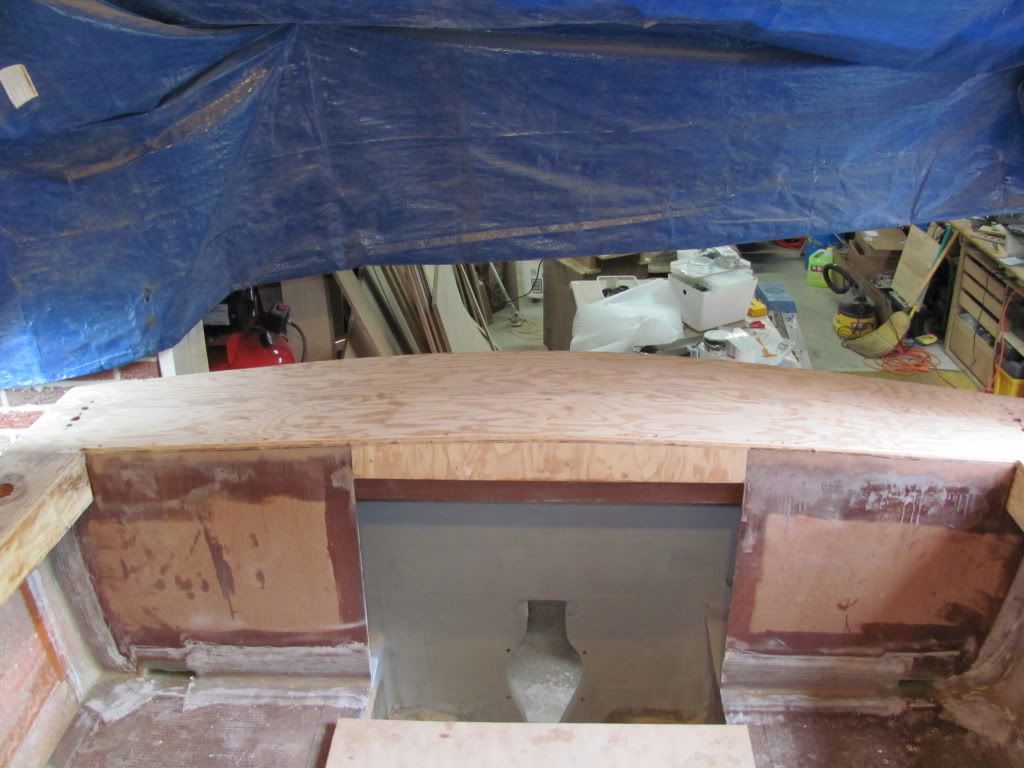
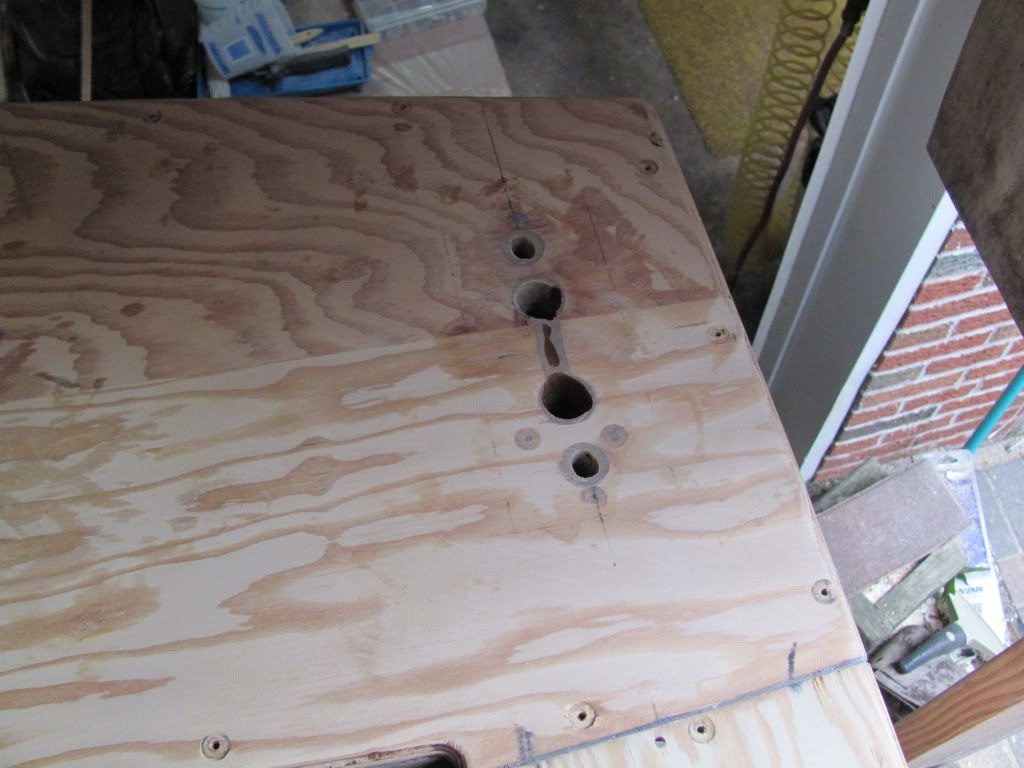
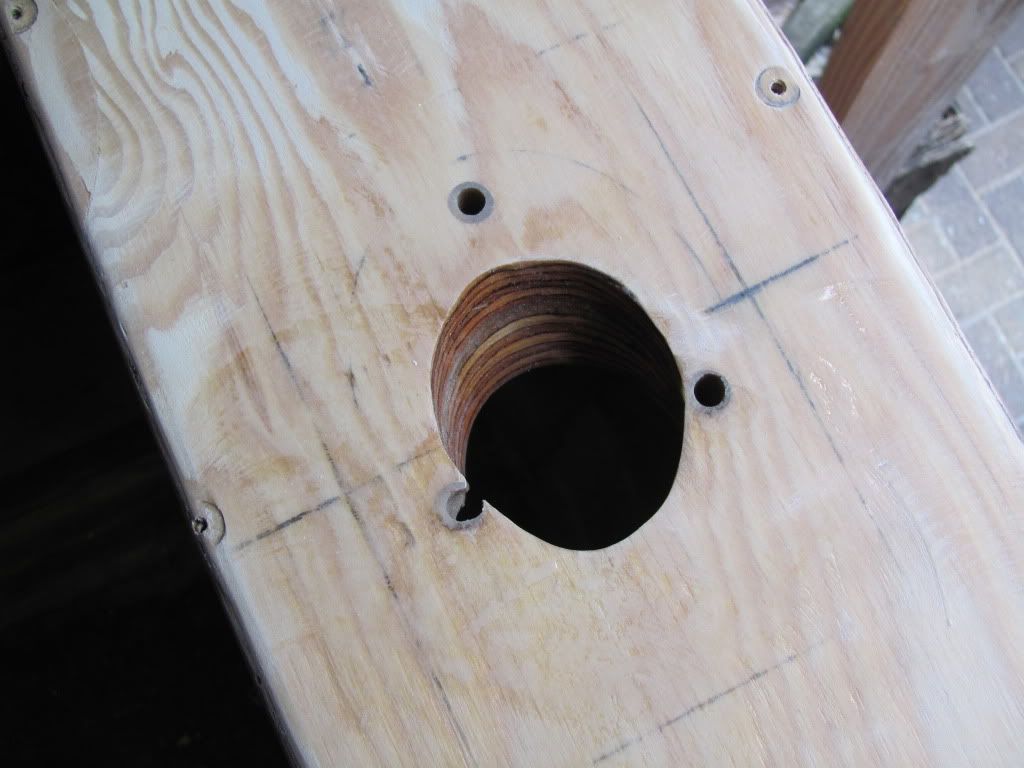
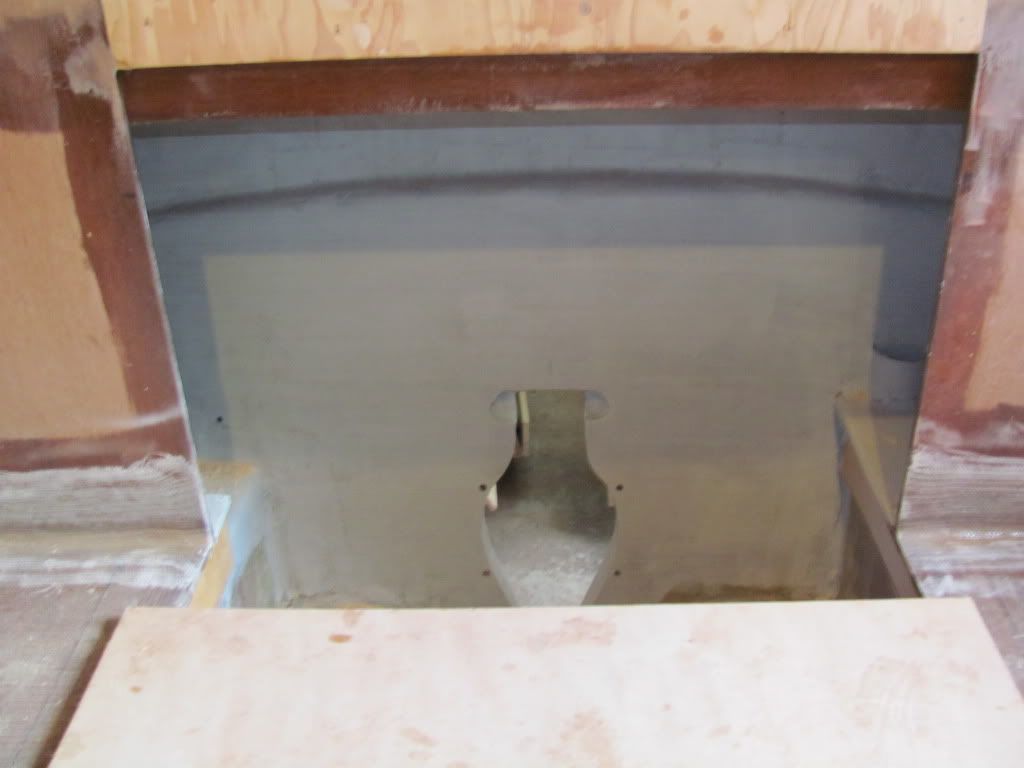
I also made the frame for the console to sit on, this is only 3/4 plywood but i think i will make it 1 1/2" high, what you think?
Is 3/4" high OK or should i go with 1 1/2"
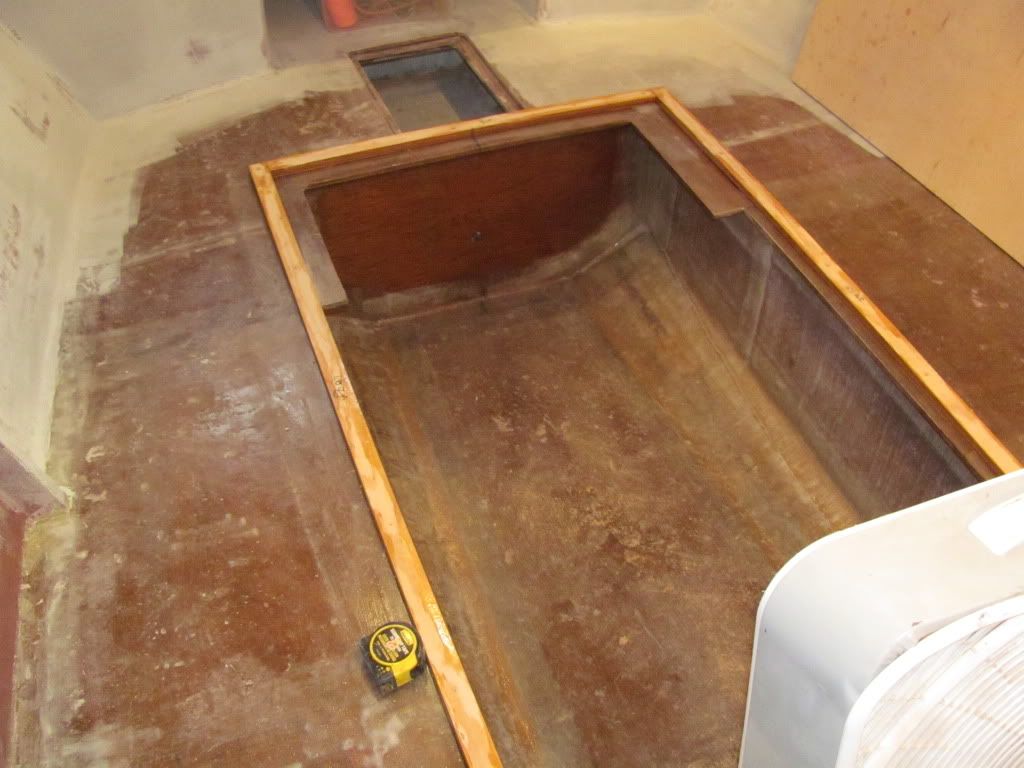
Also, PROBLEM that i have. How do i Quick Fair the tabbing (cove), is like 3/4" radius, any tips on what tool should i use.
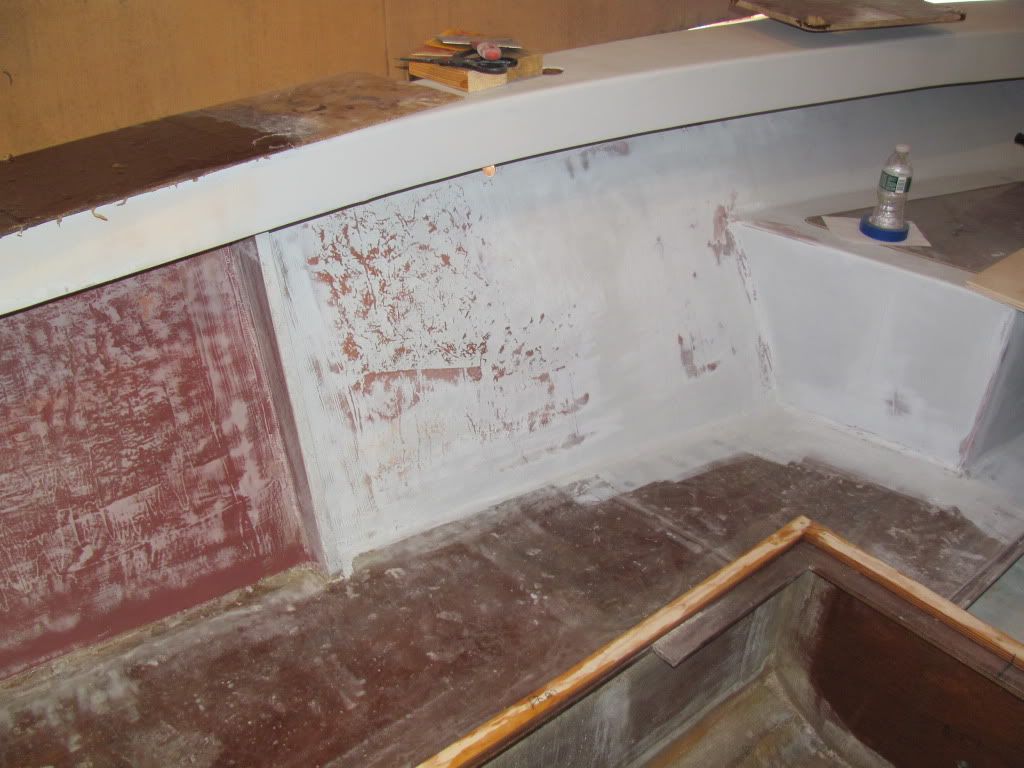

Re: 1981 FORMULA F233 RESTORATION
Posted: Sun Dec 09, 2012 9:37 pm
by NOTHING ELSE MATTERS
Not much is done due to the cold weather and been busy. I managed to prep the bow area for the windlass, an 8" cleat, stainless pulpit and nav lights.

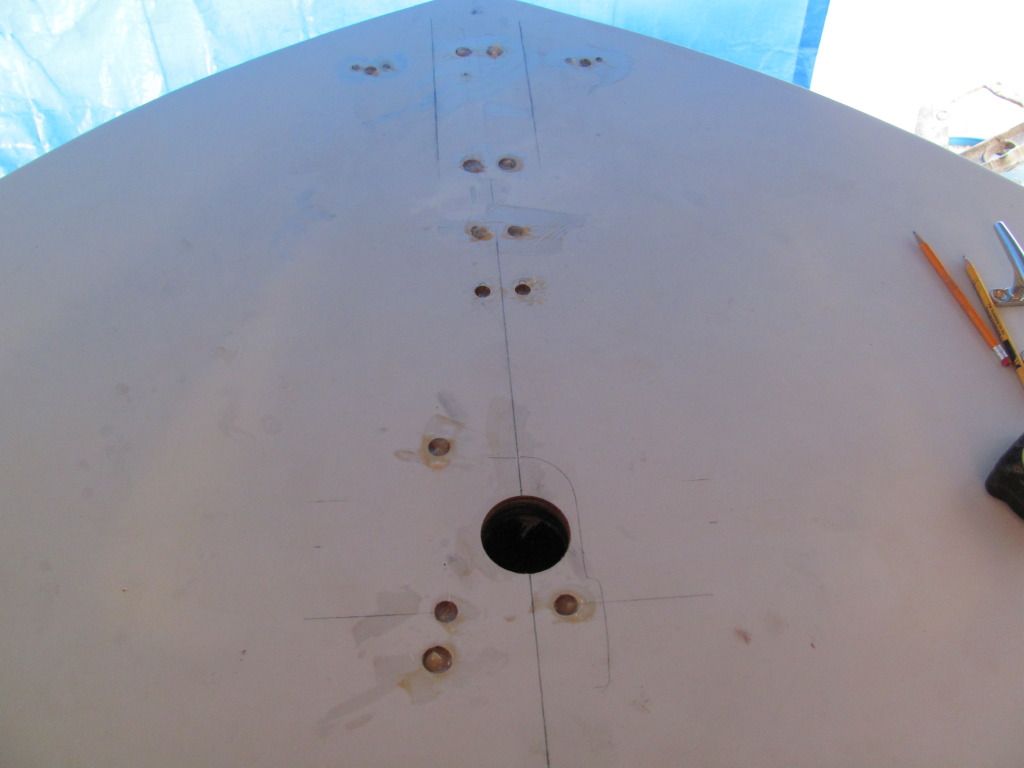
Also fair the transom cap and prep it for the pop up cleats.
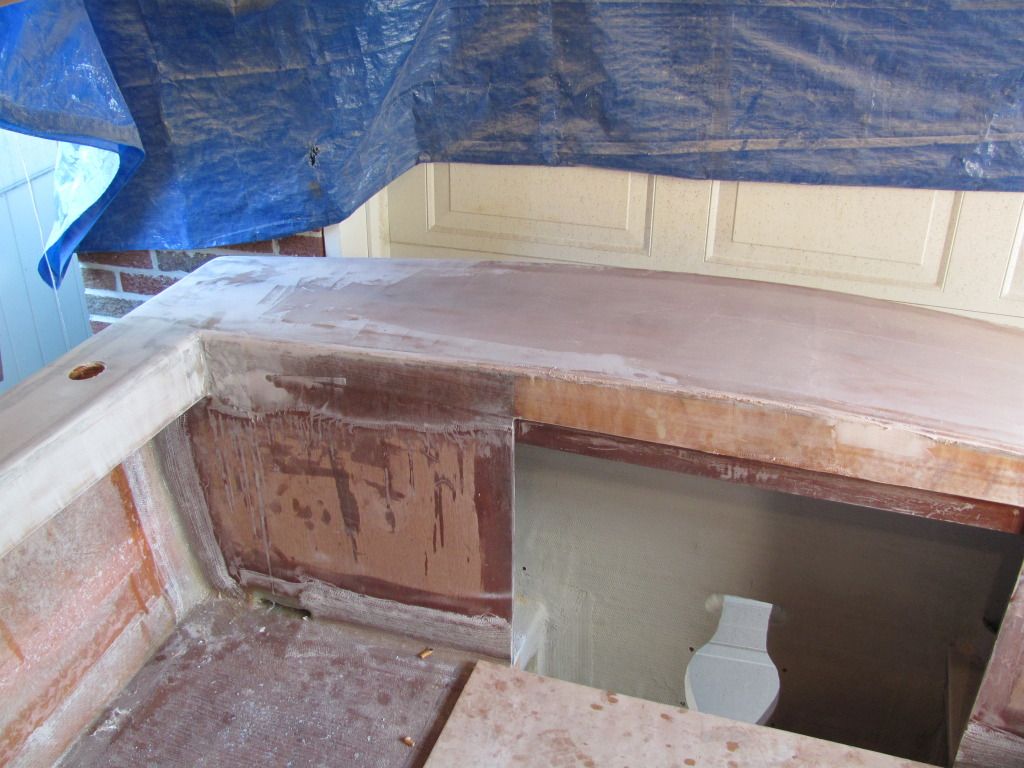
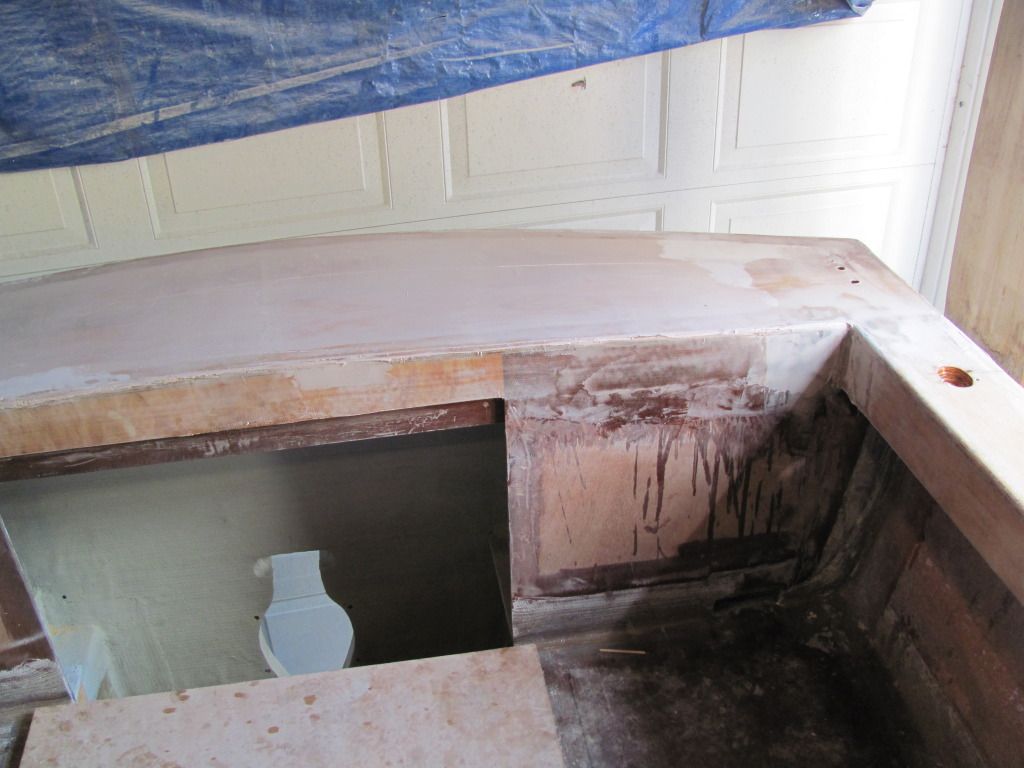
Also prepped the console for the new electrical panel i had made. I think i made a mistake making it gloss, might have a glare problem.
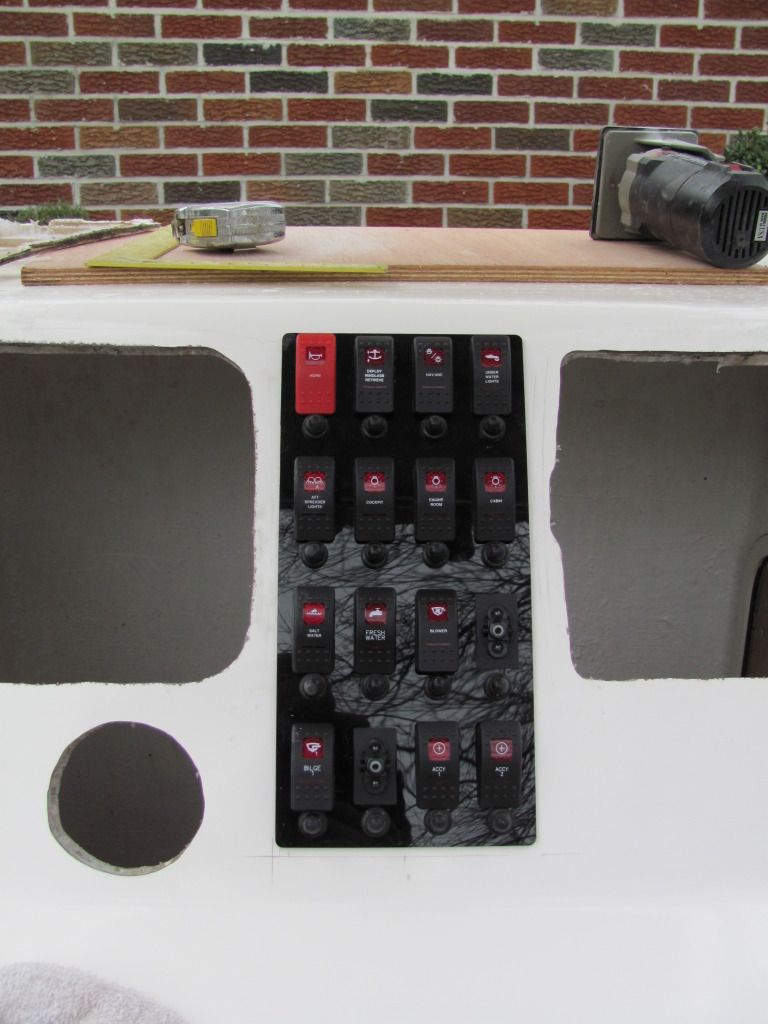
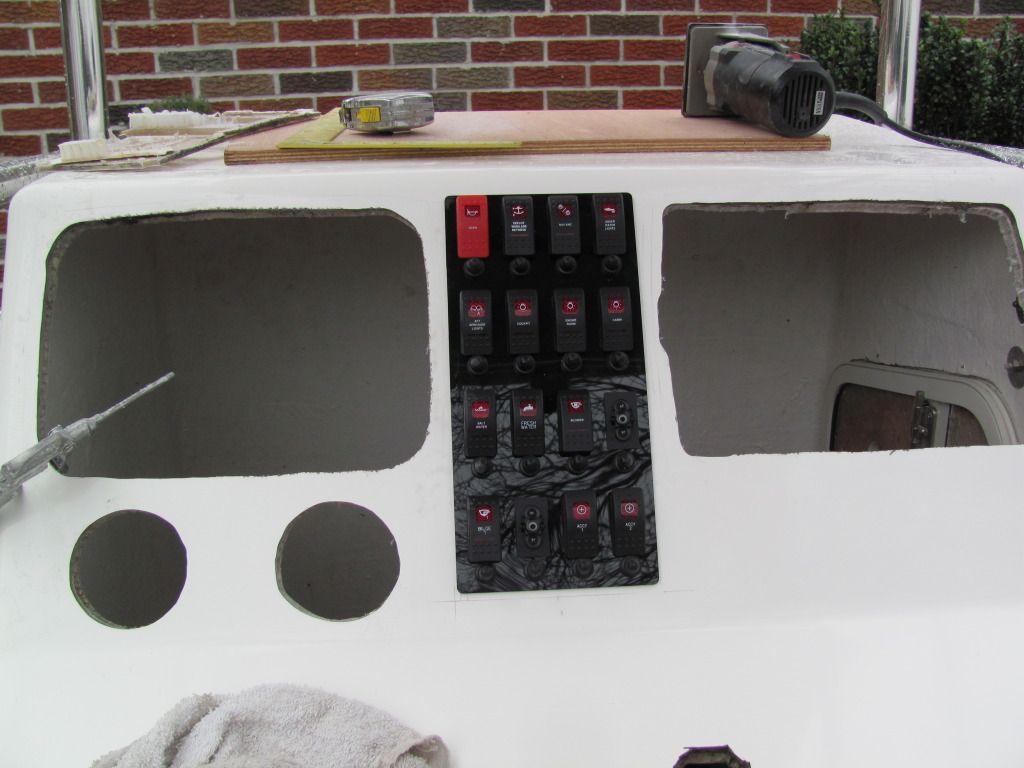
I will start all the electrical work since can't do any glass or paint work.
Re: 1981 FORMULA F233 RESTORATION
Posted: Wed Dec 19, 2012 11:12 am
by Cooper
Looking great! I always check for new updates on your project. You could hit that panel with some 1200 grit sandpaper or something similar to knock down the gloss if it gets to you.
Re: 1981 FORMULA F233 RESTORATION
Posted: Wed Dec 19, 2012 9:00 pm
by NOTHING ELSE MATTERS
Cooper wrote:Looking great! I always check for new updates on your project. You could hit that panel with some 1200 grit sandpaper or something similar to knock down the gloss if it gets to you.
I was thinking of doing that with 600 grit, i will try the back of it to see what results i am going to have. You think 1200 would do it?
Re: 1981 FORMULA F233 RESTORATION
Posted: Wed Dec 19, 2012 9:51 pm
by callyb
If you have access to a sand blaster it works very well too. I have frosted numerous plexi/lexan and glass pieces and the finish comes out very nice. Just remember to start with a lower pressure and work your way up because you can heat it up and mess it up.
Carl
Re: 1981 FORMULA F233 RESTORATION
Posted: Thu Dec 20, 2012 9:19 am
by Cooper
I was thinking you may be able to get in there with a folded up piece of paper by hand and not have to remove the switches. If you're going to remove the switches and use a palm sander, 600 would be perfect.
Re: 1981 FORMULA F233 RESTORATION
Posted: Thu Dec 20, 2012 10:10 am
by Chief Brody
I would just tape off the console and spray another coat of paint with flattening agent mixed in.....not sure how uniform you can get something like that using a sanding technique.....usually, you go the other way with multiple steps of fine sanding to get it glossy....now you're trying to go backwards? May not be so easy. Project is looking good though!!
Re: 1981 FORMULA F233 RESTORATION
Posted: Thu Dec 20, 2012 9:27 pm
by NOTHING ELSE MATTERS
I wasn't planning on removing the switches(too much work now), maybe the breakers. As far as paint, i know i will mess it up big time. I will leave it the way it is for now and try it, if i really don't like it or bother me, i will remove everything and cover it carbon fiber film.
Re: 1981 FORMULA F233 RESTORATION
Posted: Fri Mar 01, 2013 1:54 am
by NOTHING ELSE MATTERS
Re: 1981 FORMULA F233 RESTORATION
Posted: Sun Mar 03, 2013 12:39 pm
by slvrlng
I know you have already crimped them but if you haven't done them all I like to fill the shrink with silicone then shrink. It seals a lot better and pretty much cures water and or air from ever getting in there. Just a suggestion .02! I really like those hulls and all your work is really showing! I found a 25 Bertram up here with the motors out and the topside in terrible shape the other day and it looks to be a similar design on the hull bottom. Hmmmmmmmm...... wasn't priced that bad!
Re: 1981 FORMULA F233 RESTORATION
Posted: Sun Mar 03, 2013 5:25 pm
by peter-curacao
slvrlng wrote:I know you have already crimped them but if you haven't done them all I like to fill the shrink with silicone then shrink.
There is crimping sleeve on the market with resin inside, when you crimp those the resin becomes liquified and makes a watertight seal, those are often used to extend cables on deep well pumps.
Re: 1981 FORMULA F233 RESTORATION
Posted: Sun Mar 03, 2013 10:44 pm
by NOTHING ELSE MATTERS
peter-curacao wrote:slvrlng wrote:I know you have already crimped them but if you haven't done them all I like to fill the shrink with silicone then shrink.
There is crimping sleeve on the market with resin inside, when you crimp those the resin becomes liquified and makes a watertight seal, those are often used to extend cables on deep well pumps.
This is what i used. It has the seal inside of it. Looks like hot glue when melts, and seals all around. It is called adhesive lined.
Re: 1981 FORMULA F233 RESTORATION
Posted: Mon Mar 04, 2013 9:01 am
by Mad Dog
That is some very neat workmanship! I wish mine wiring would come out so well organized.
MD
Re: 1981 FORMULA F233 RESTORATION
Posted: Thu May 30, 2013 10:55 pm
by NOTHING ELSE MATTERS
Re: 1981 FORMULA F233 RESTORATION
Posted: Fri May 31, 2013 10:05 am
by tech_support
your real close now
Nice work on the rigging. Rigging its not somethign I like doing, but its somethign I like to knowing that I did... if that makes sense
Re: 1981 FORMULA F233 RESTORATION
Posted: Fri May 31, 2013 12:44 pm
by Cracker Larry
Nice wiring job
Re: 1981 FORMULA F233 RESTORATION
Posted: Fri May 31, 2013 1:34 pm
by Chief Brody
Cracker Larry wrote:Nice wiring job
Absolutely.....nice work NEM!
Re: 1981 FORMULA F233 RESTORATION
Posted: Fri May 31, 2013 3:33 pm
by NOTHING ELSE MATTERS
shine wrote:your real close now
Nice work on the rigging. Rigging its not somethign I like doing, but its somethign I like to knowing that I did... if that makes sense
It does make sense. That is why i did all the electronics and even complete rewire on all new or used boats i ever bought.
Re: 1981 FORMULA F233 RESTORATION
Posted: Fri May 31, 2013 3:34 pm
by NOTHING ELSE MATTERS
Chief Brody wrote:Cracker Larry wrote:Nice wiring job
Absolutely.....nice work NEM!
Thanks a lot both of you guys. I try to do my best
Re: 1981 FORMULA F233 RESTORATION
Posted: Fri May 31, 2013 8:39 pm
by wildbill
Nice Work.
Re: 1981 FORMULA F233 RESTORATION
Posted: Fri May 31, 2013 9:57 pm
by AtTheBrink
B-U-T-FULL!
Re: 1981 FORMULA F233 RESTORATION
Posted: Fri May 31, 2013 11:04 pm
by Auger01
Well done. From the pictures, it doesn't look like this is your first rodeo.
Re: 1981 FORMULA F233 RESTORATION
Posted: Fri May 31, 2013 11:27 pm
by NOTHING ELSE MATTERS
Thank you guys and no, i've done it couple of times.
Re: 1981 FORMULA F233 RESTORATION
Posted: Mon Jun 10, 2013 8:45 pm
by FitzFisherGuy
Very Nice my man! You are way ahead of me, but I am back to work again...
Re: 1981 FORMULA F233 RESTORATION
Posted: Mon Aug 26, 2013 9:41 am
by tech_support
looks like this thread had been hit by spammers, I just re-opened it.
Re: 1981 FORMULA F233 RESTORATION
Posted: Mon Aug 26, 2013 9:59 am
by gw204
Dang...I thought we were going to see an update.
Re: 1981 FORMULA F233 RESTORATION
Posted: Mon Aug 26, 2013 10:02 pm
by FitzFisher
Spammers?
Re: 1981 FORMULA F233 RESTORATION
Posted: Tue Aug 27, 2013 9:26 am
by tech_support
Spammers?
You cant see them because all guest posts are manually approved by a moderator before you can see them. For example, there are already 5 new spam posts in this thread
It makes for a lot of extra work, but the alternative is to make people register to ask a question. In the "repair" and "questions before purchasing plans" sections, we want people to be able to ask away without registering. Im afraid that's probably going to change soon
Re: 1981 FORMULA F233 RESTORATION
Posted: Tue Aug 27, 2013 8:25 pm
by FitzFisher
Damn spammers......
Re: 1981 FORMULA F233 RESTORATION
Posted: Wed Aug 28, 2013 9:38 am
by tech_support
FitzFisher wrote:Damn spammers......
3 full pages of new spam posts this morning on this thread, they are hitting it faster than I could delete them. Will try to change permission on this thread (without changing them on whole category), but for now its locked

Re: 1981 FORMULA F233 RESTORATION
Posted: Wed Aug 28, 2013 9:42 am
by tech_support
This is the copy of the old post, hopefully it works....
Re: 1981 FORMULA F233 RESTORATION
Posted: Fri Aug 30, 2013 7:19 pm
by FitzFisher
Looks good, Now we just need an update from the builder! C'mon NEM! give us something!
Re: 1981 FORMULA F233 RESTORATION
Posted: Fri Aug 30, 2013 11:11 pm
by NOTHING ELSE MATTERS
Came back from Greece last week and i am so lazy to do ANY work, including my money making work, oh well......., going fishing in a few hours, that will cheer me up
Re: 1981 FORMULA F233 RESTORATION
Posted: Tue Oct 01, 2013 10:10 pm
by NOTHING ELSE MATTERS
Hello every one, i am still working on the boat but not as much i would like to, anyway, i have a question, i drilled two holes, one for water washdown pick up (1 1/8) and one for the transducer (2 3/8
). BTW, the hull there is 5/8 to 3/4" thick. Can i coat the thickness of the hole with thickened epoxy or with just 5200 as per the transducer specs or both?
Re: 1981 FORMULA F233 RESTORATION
Posted: Wed Oct 02, 2013 9:43 am
by Cracker Larry
I would do both.
Re: 1981 FORMULA F233 RESTORATION
Posted: Wed Oct 02, 2013 10:02 am
by NOTHING ELSE MATTERS
Thank Larry. I sure will do.
Re: 1981 FORMULA F233 RESTORATION
Posted: Mon Oct 07, 2013 12:31 am
by NOTHING ELSE MATTERS
Re: 1981 FORMULA F233 RESTORATION
Posted: Mon Oct 07, 2013 9:21 am
by tech_support
dremel/grind them back until they stop, then fair.
Re: 1981 FORMULA F233 RESTORATION
Posted: Mon Oct 07, 2013 10:18 am
by NOTHING ELSE MATTERS
shine wrote:dremel/grind them back until they stop, then fair.
Is Quick Fair O.K to use or should i mix mine ?
Re: 1981 FORMULA F233 RESTORATION
Posted: Wed Oct 16, 2013 11:43 pm
by NOTHING ELSE MATTERS
Re: 1981 FORMULA F233 RESTORATION
Posted: Thu Oct 17, 2013 9:23 am
by tech_support
I cannot see the images
Re: 1981 FORMULA F233 RESTORATION
Posted: Thu Oct 17, 2013 10:27 am
by NOTHING ELSE MATTERS
shine wrote:I cannot see the images
Sorry, pics are fixed now.
Re: 1981 FORMULA F233 RESTORATION
Posted: Thu Oct 17, 2013 8:33 pm
by Cracker Larry
Quick Fair is perfect for that, and you are sure doing some fine work. That boat will be better than the day it left the factory
Re: 1981 FORMULA F233 RESTORATION
Posted: Sat Oct 19, 2013 9:08 am
by FitzFisher
Wow, your boat is looking really great! You should be very proud of that work. I am now inspired to go spend yet another Saturday Sanding and priming....Pix later. Keep up the good work!
TG
Re: 1981 FORMULA F233 RESTORATION
Posted: Fri Jun 27, 2014 4:11 pm
by NOTHING ELSE MATTERS
Still around, not much to show, just bringing my thread up
Re: 1981 FORMULA F233 RESTORATION
Posted: Sat Jun 28, 2014 7:09 am
by FitzFisher
You gotta have some recent pix... Cmon Man Give us something!

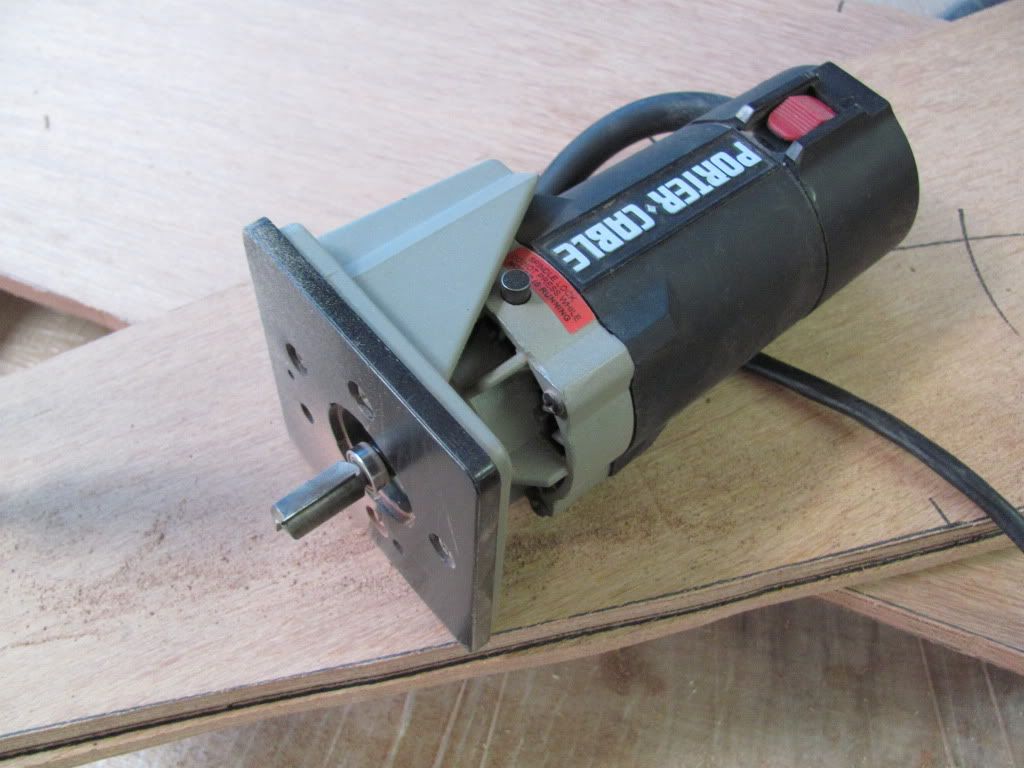

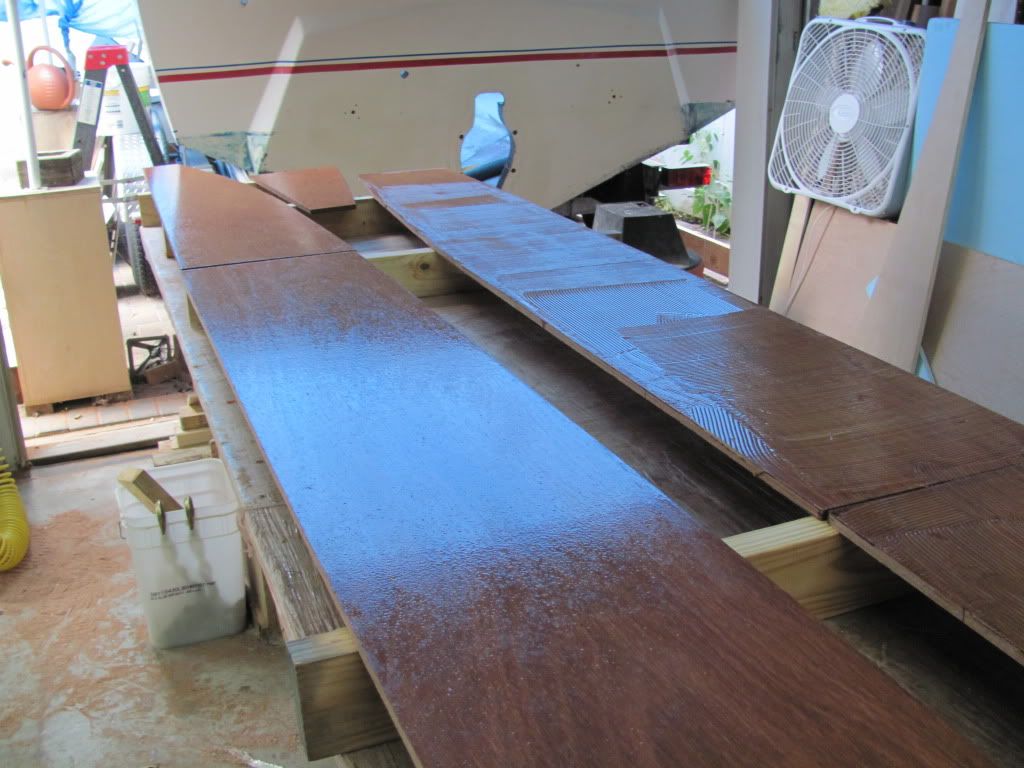

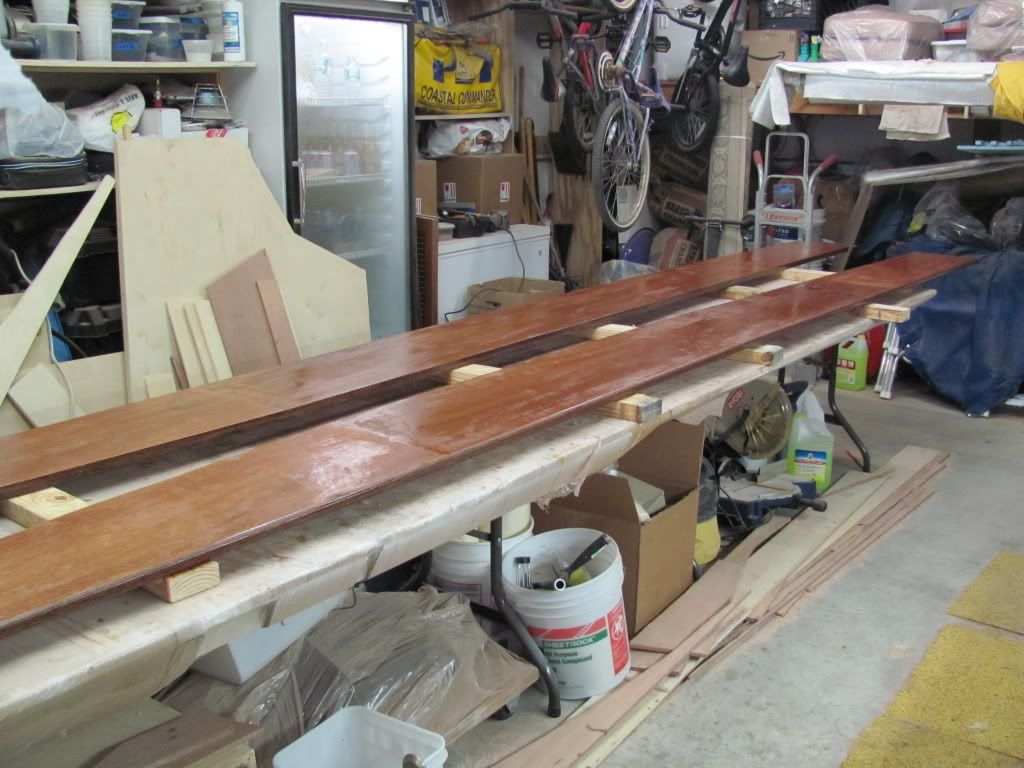
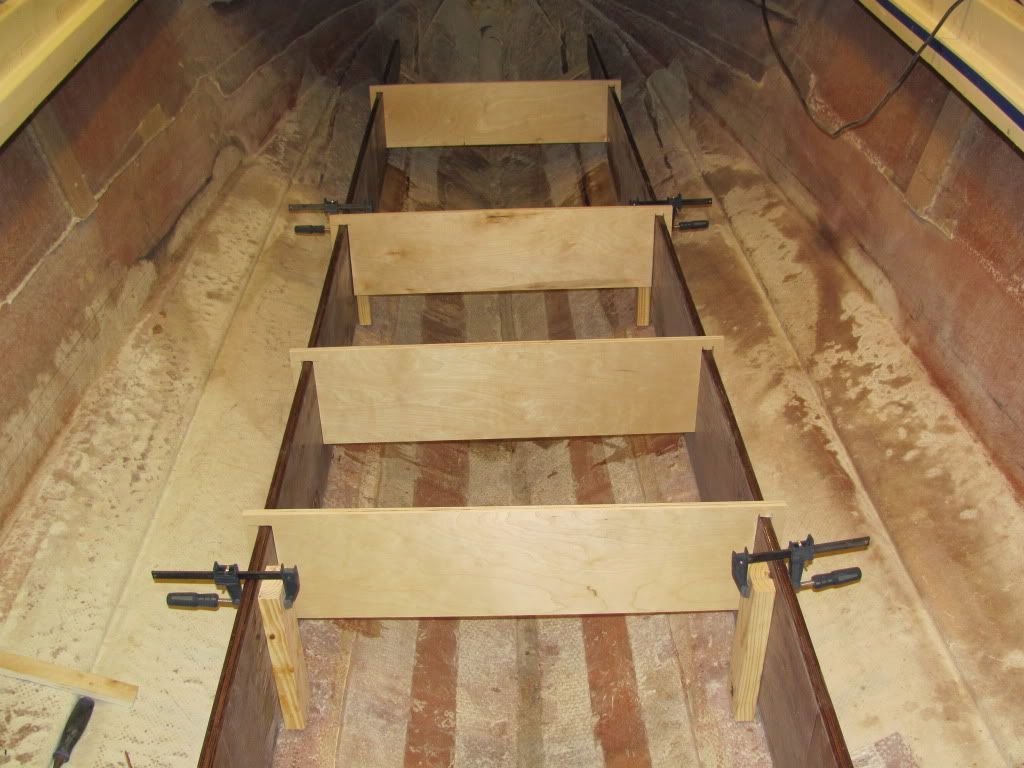
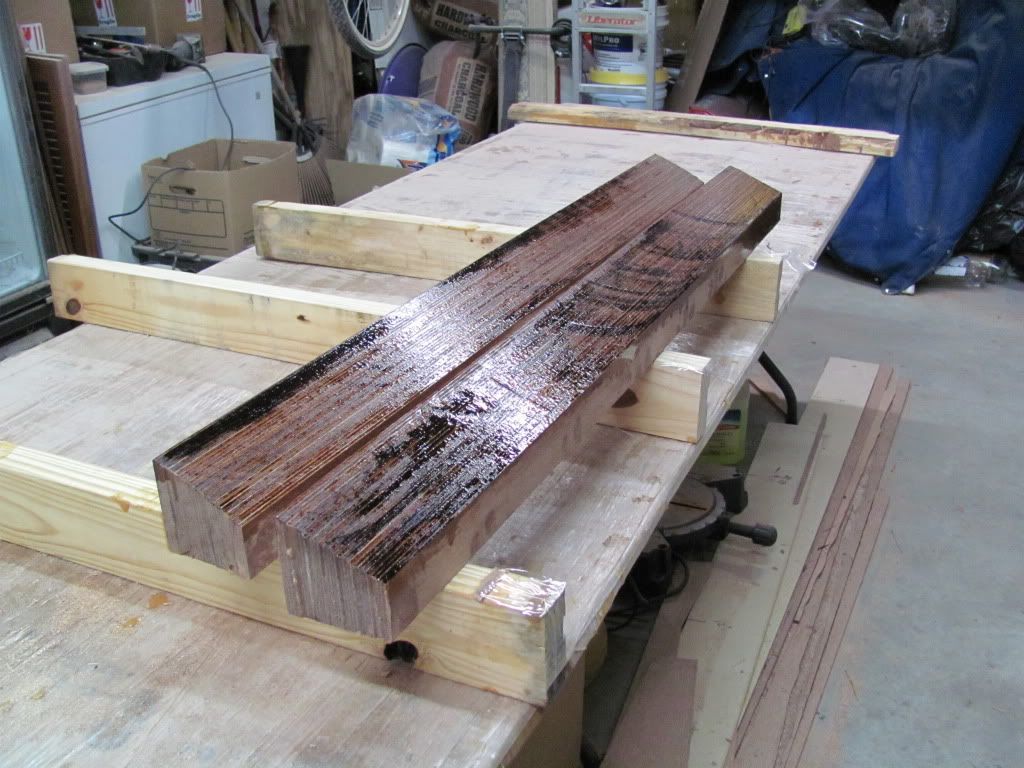
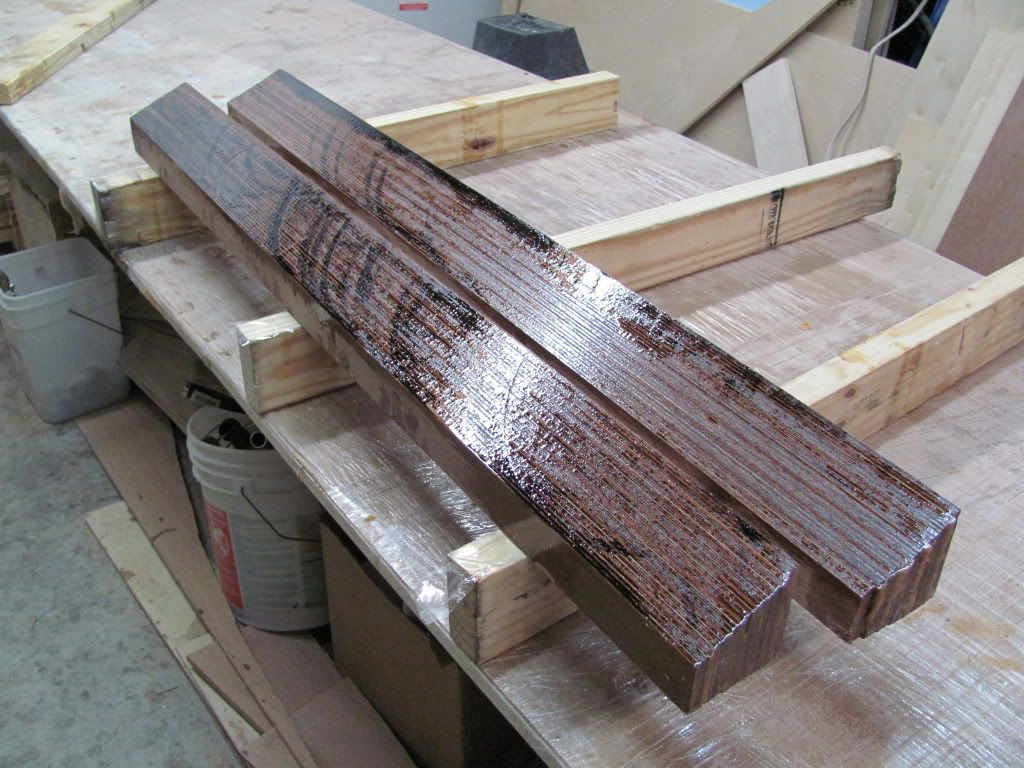
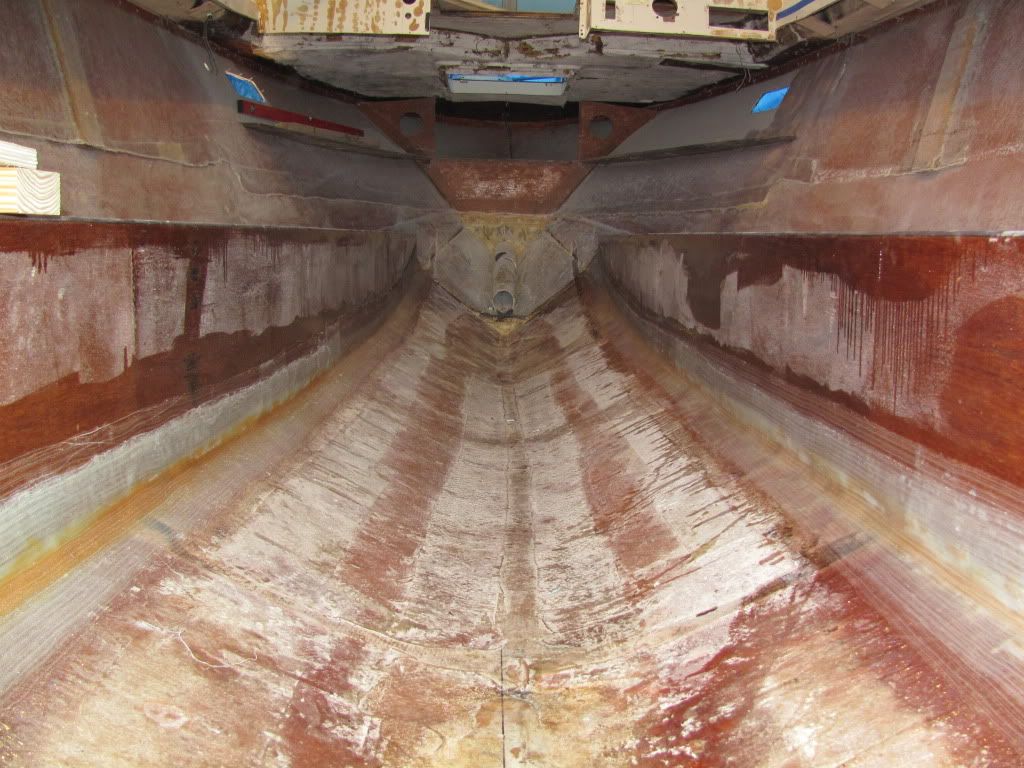
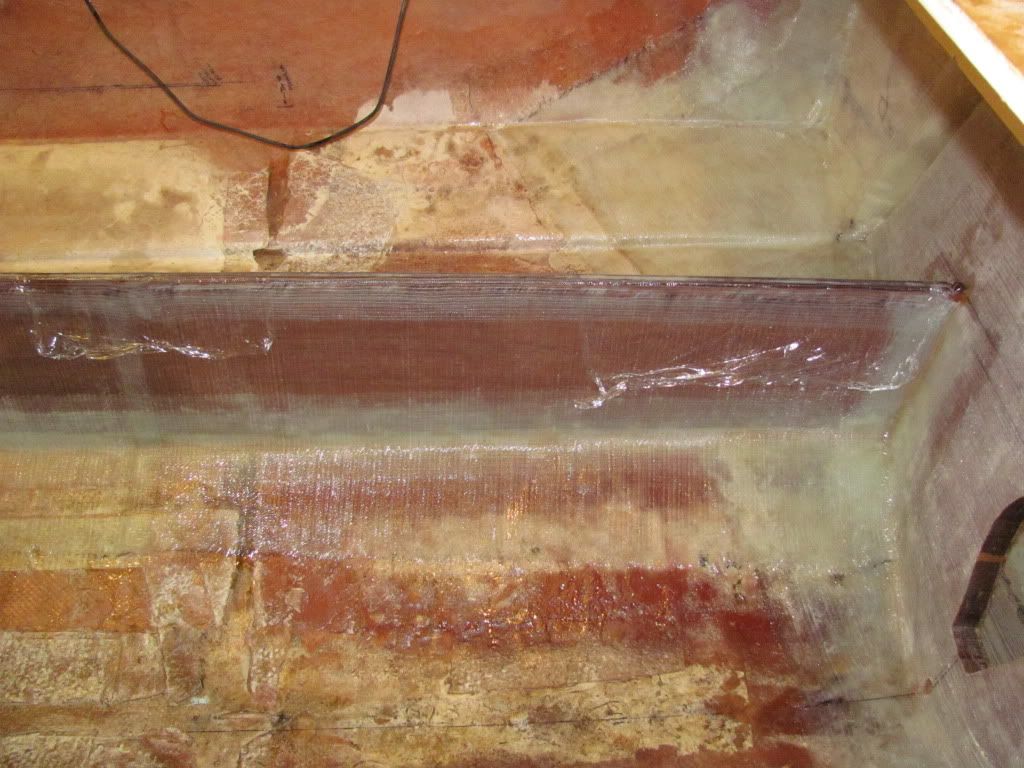
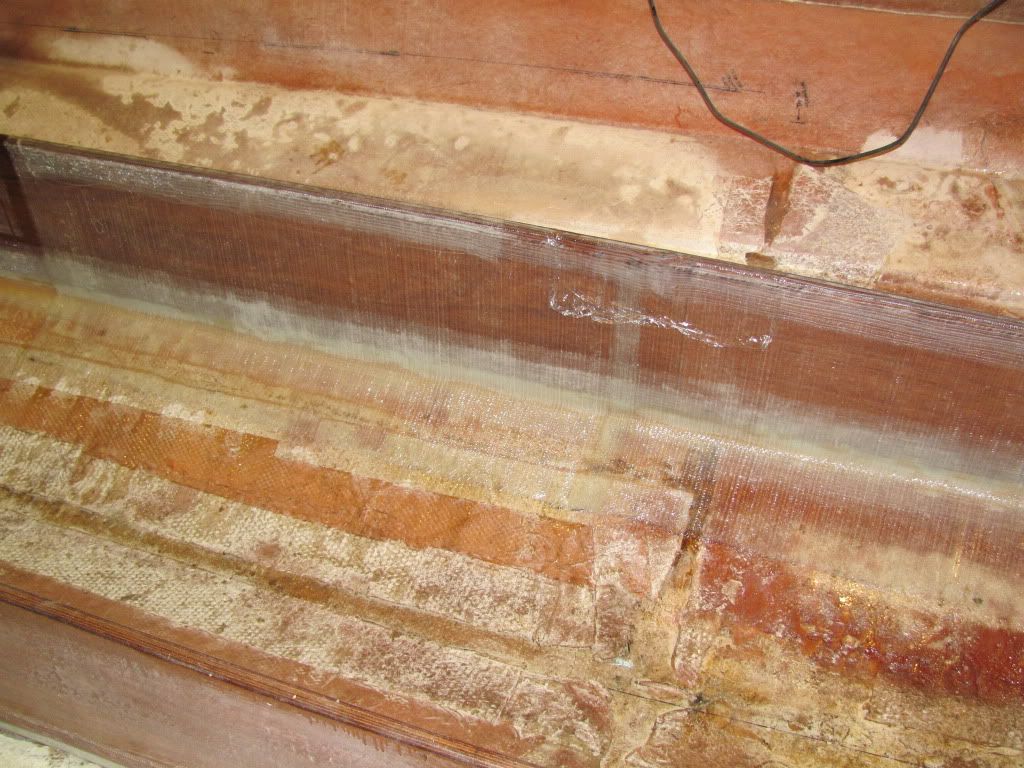
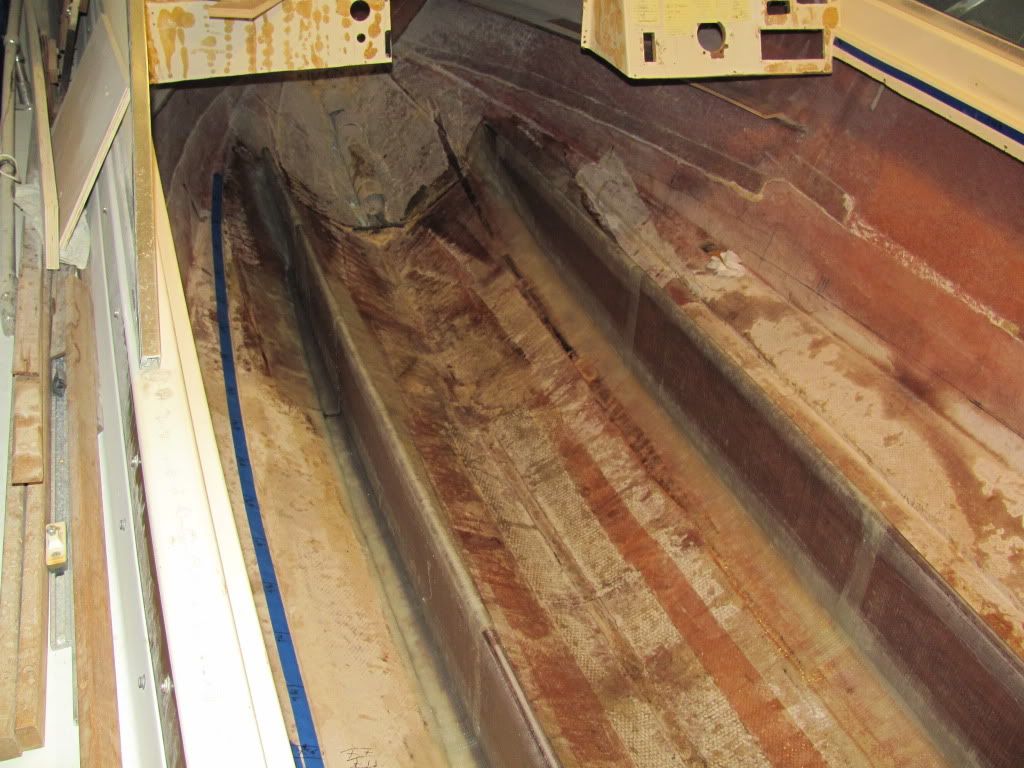
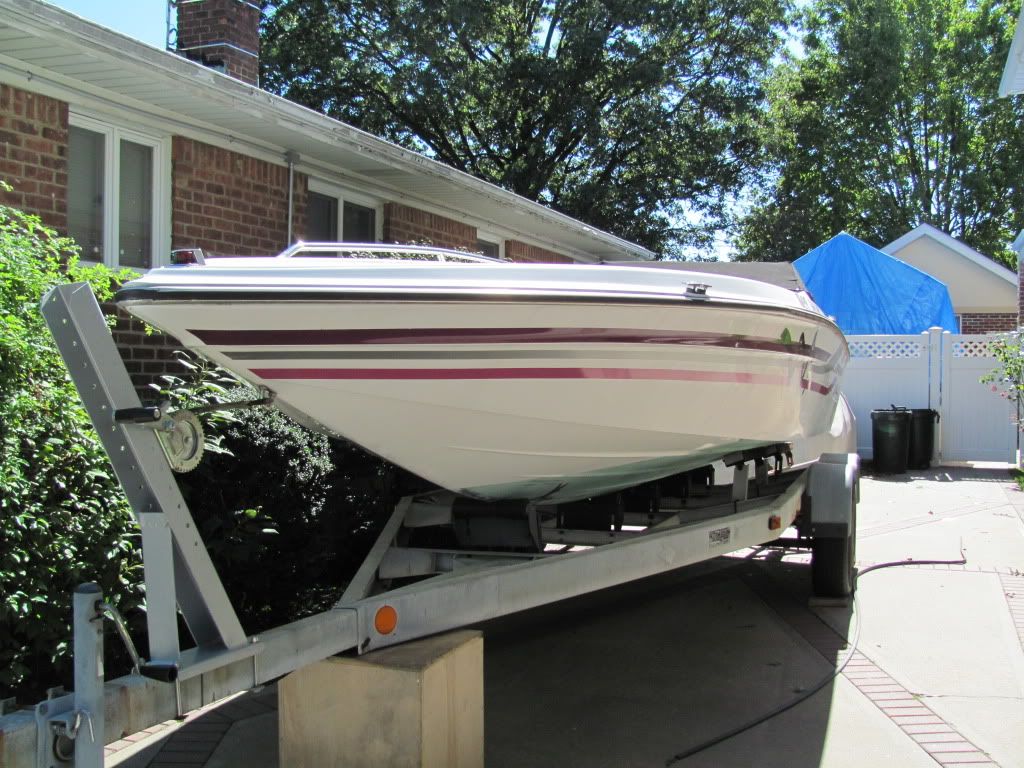
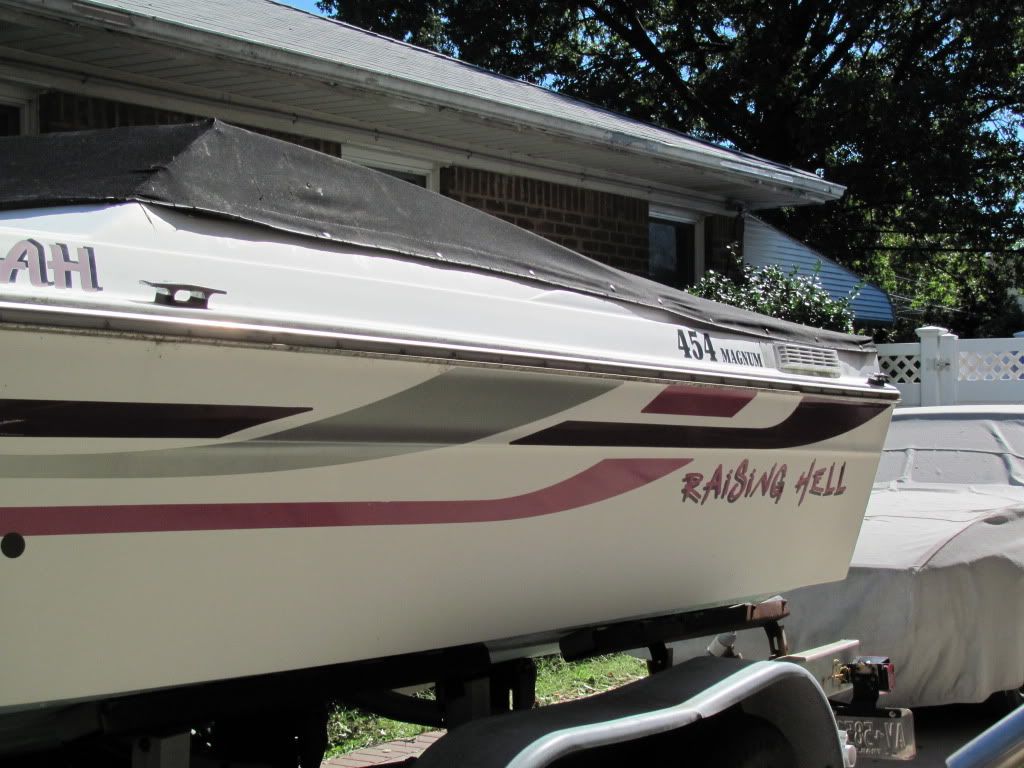
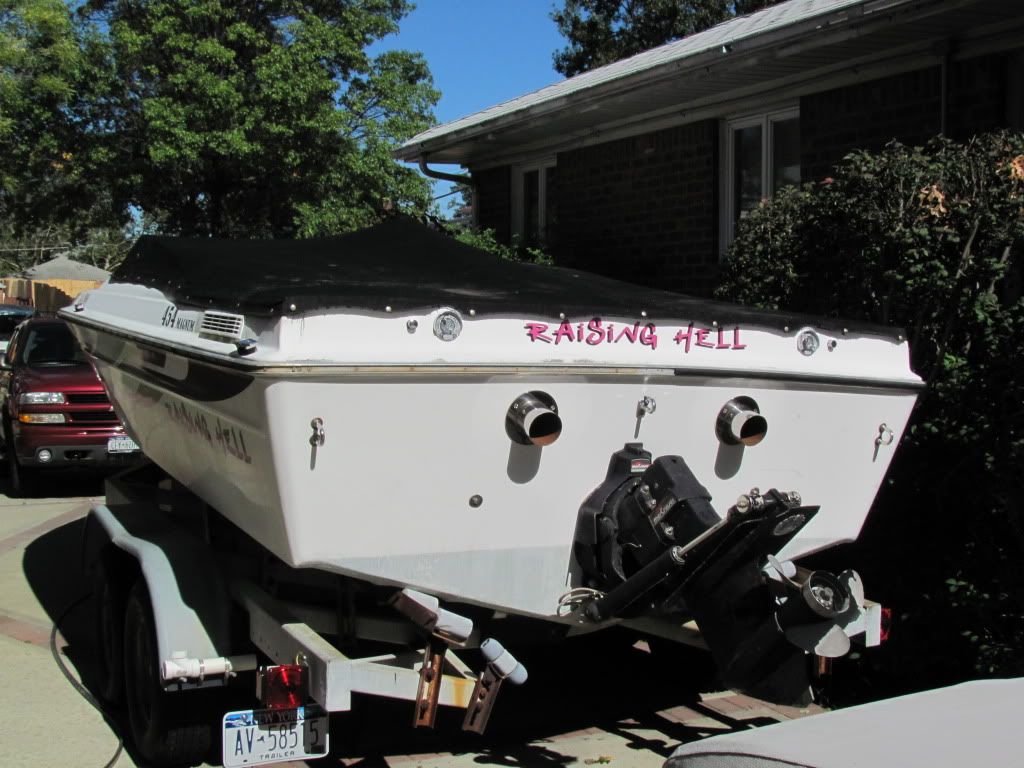
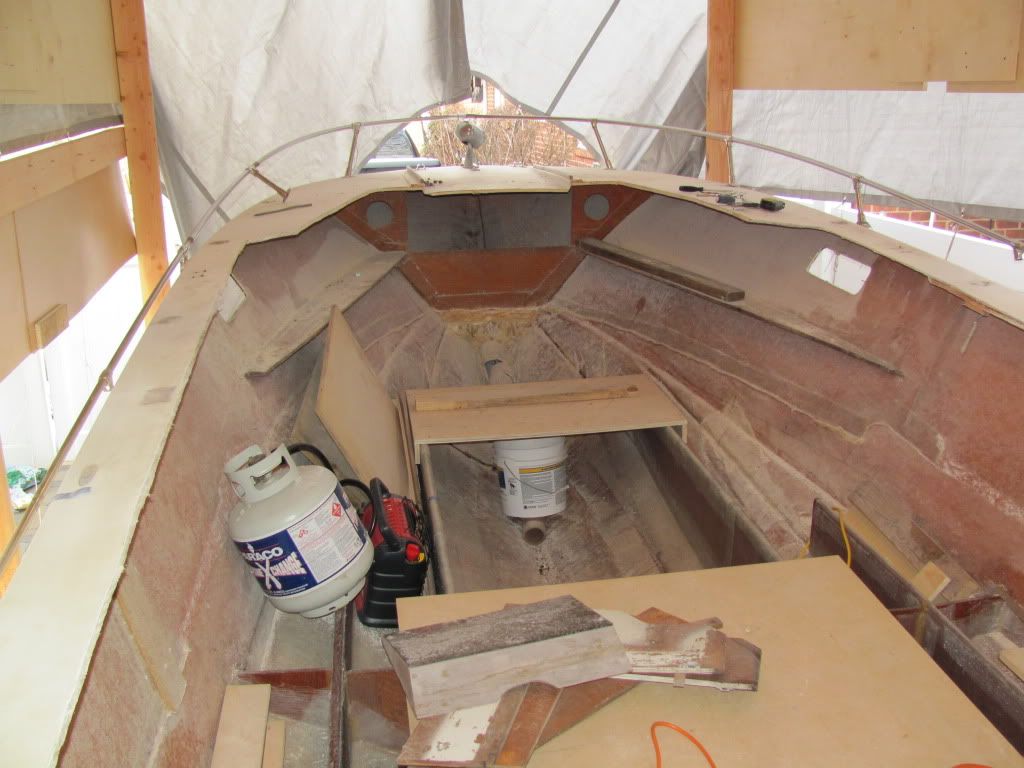
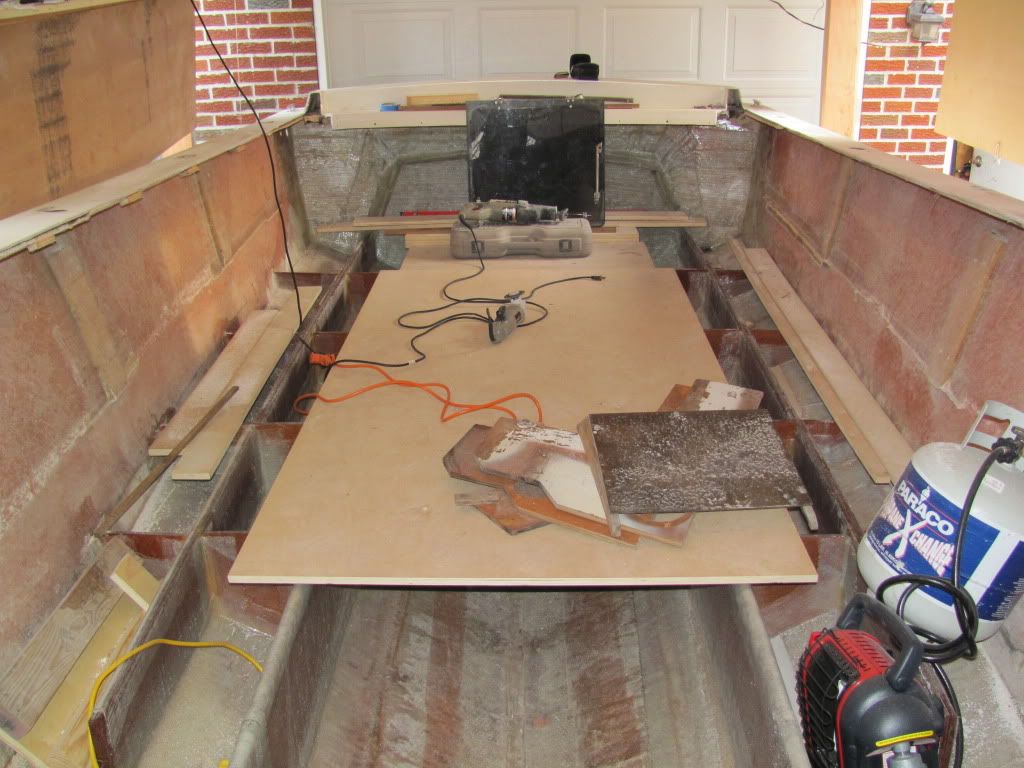
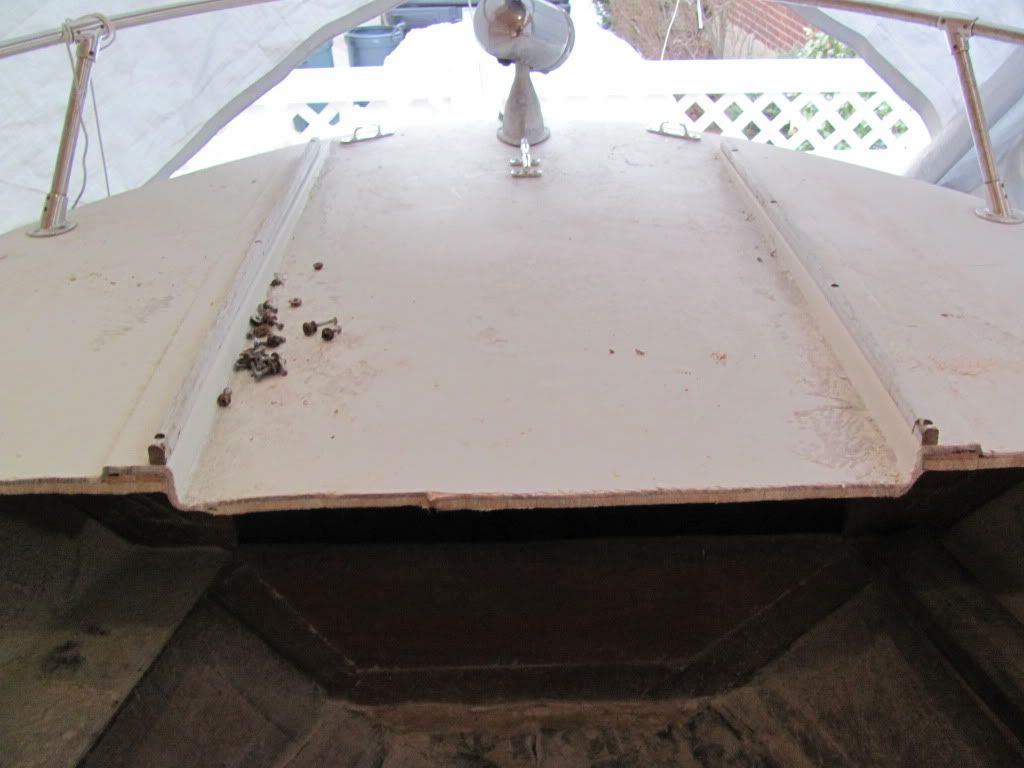
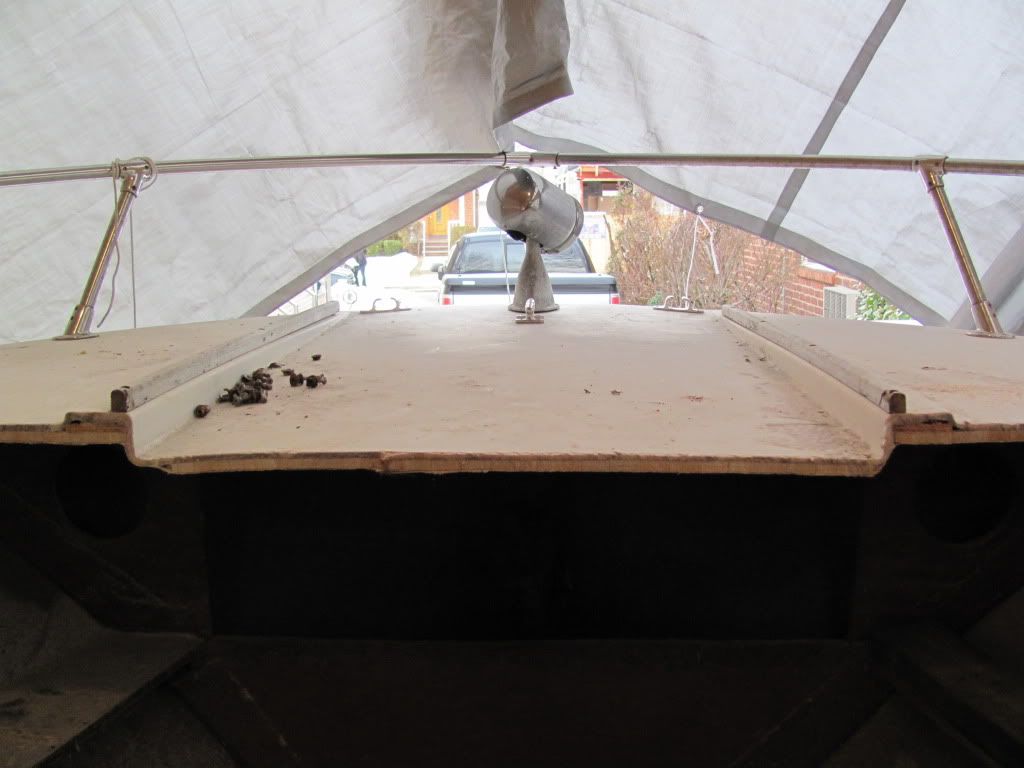
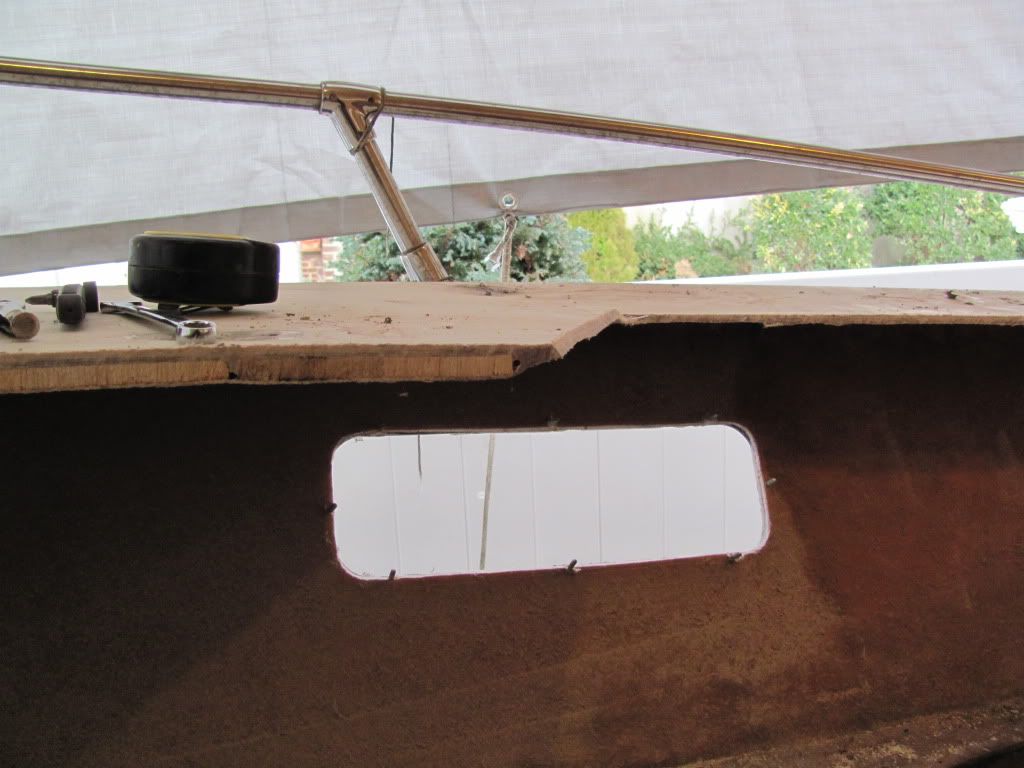
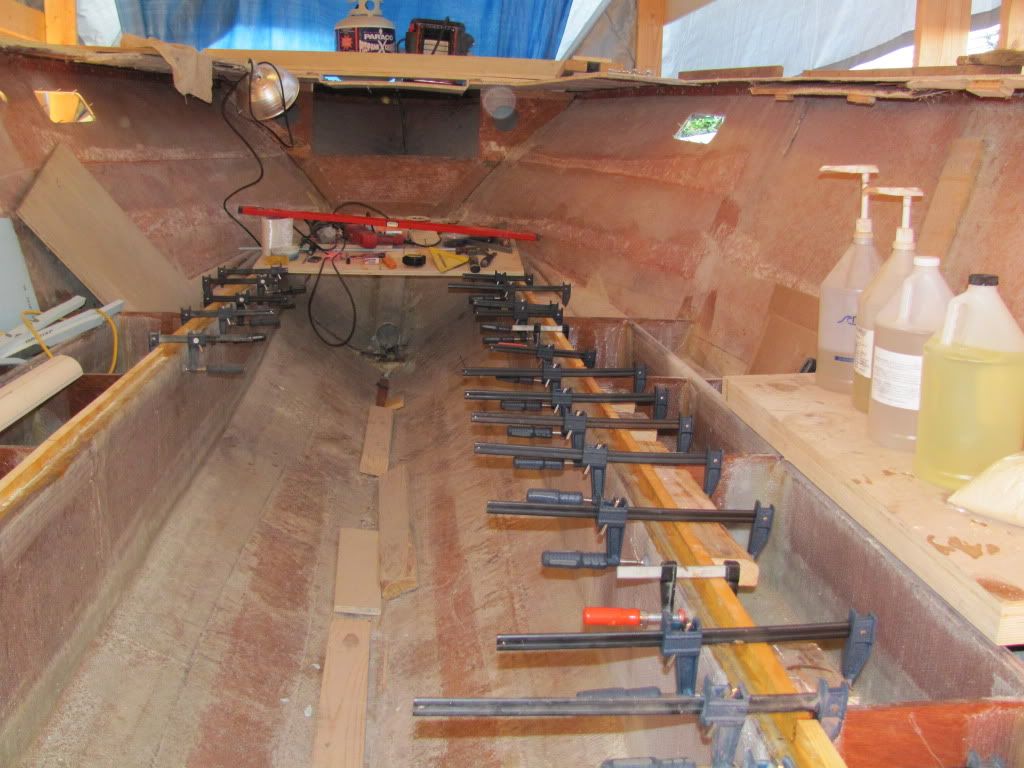
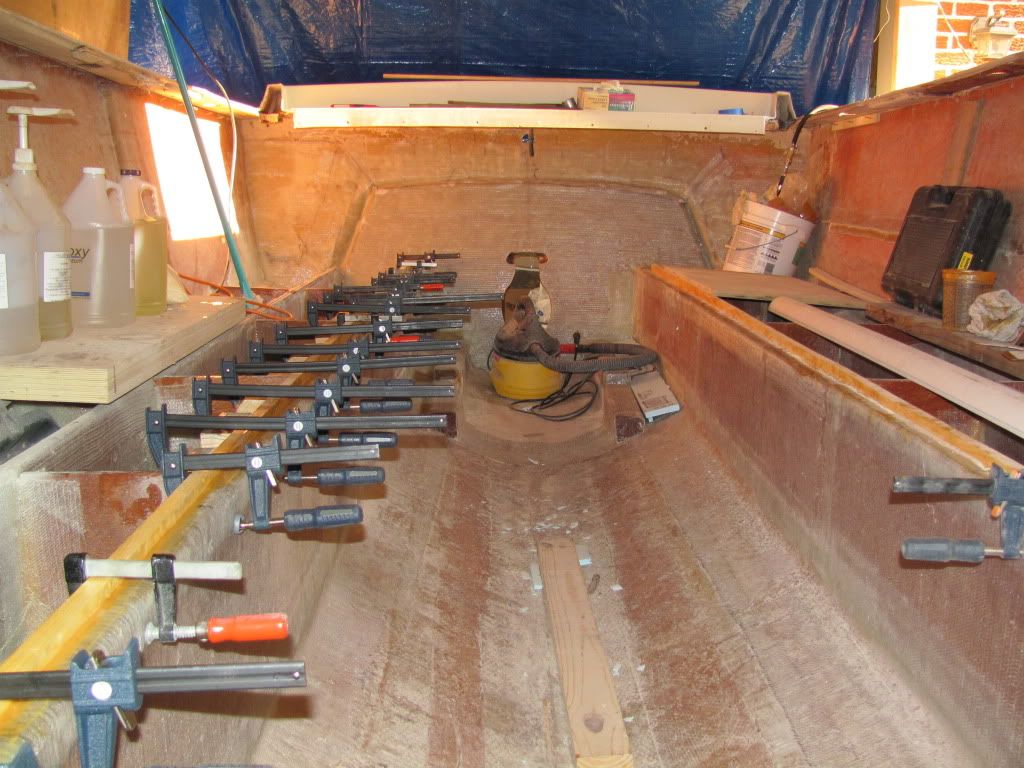
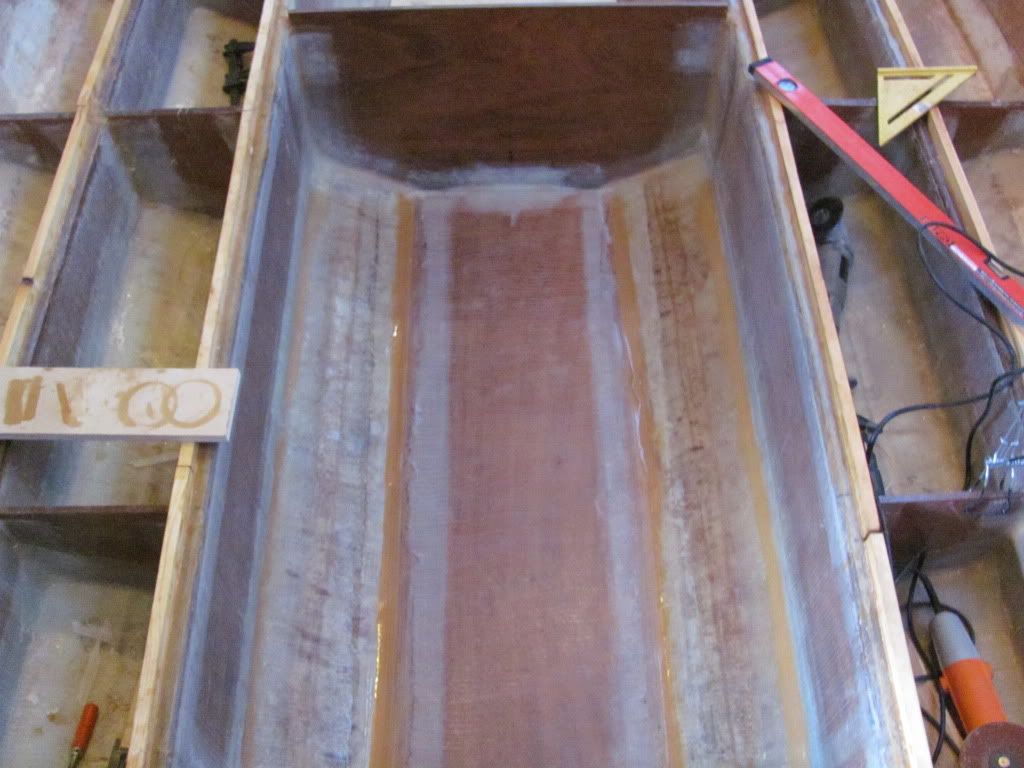
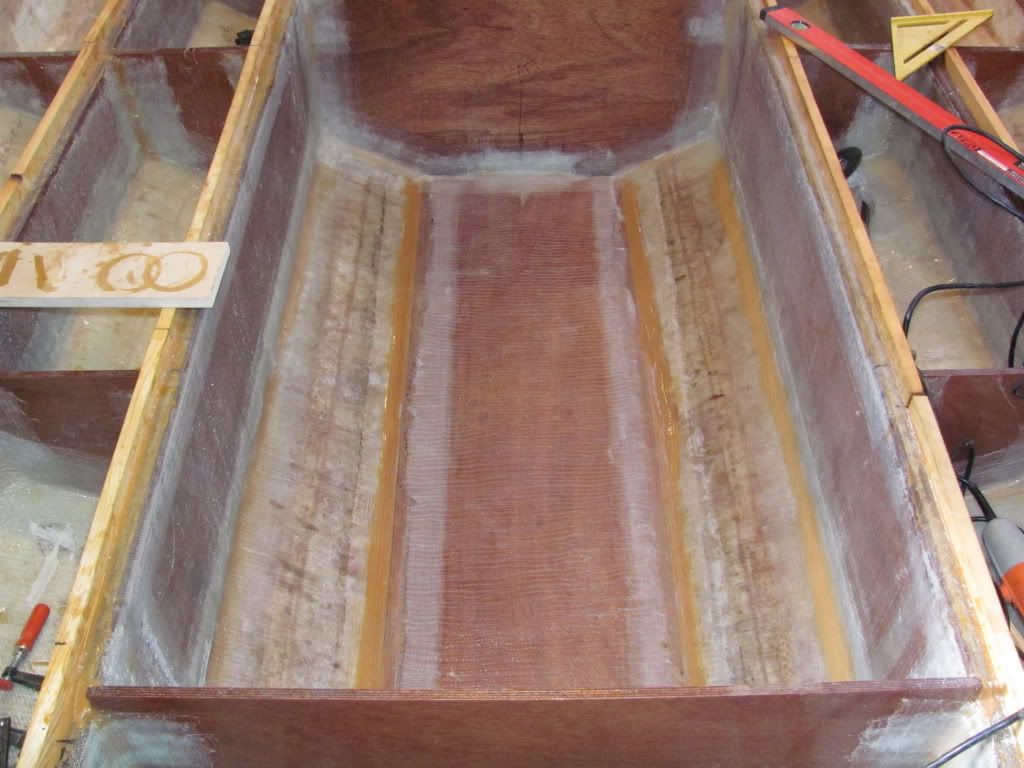
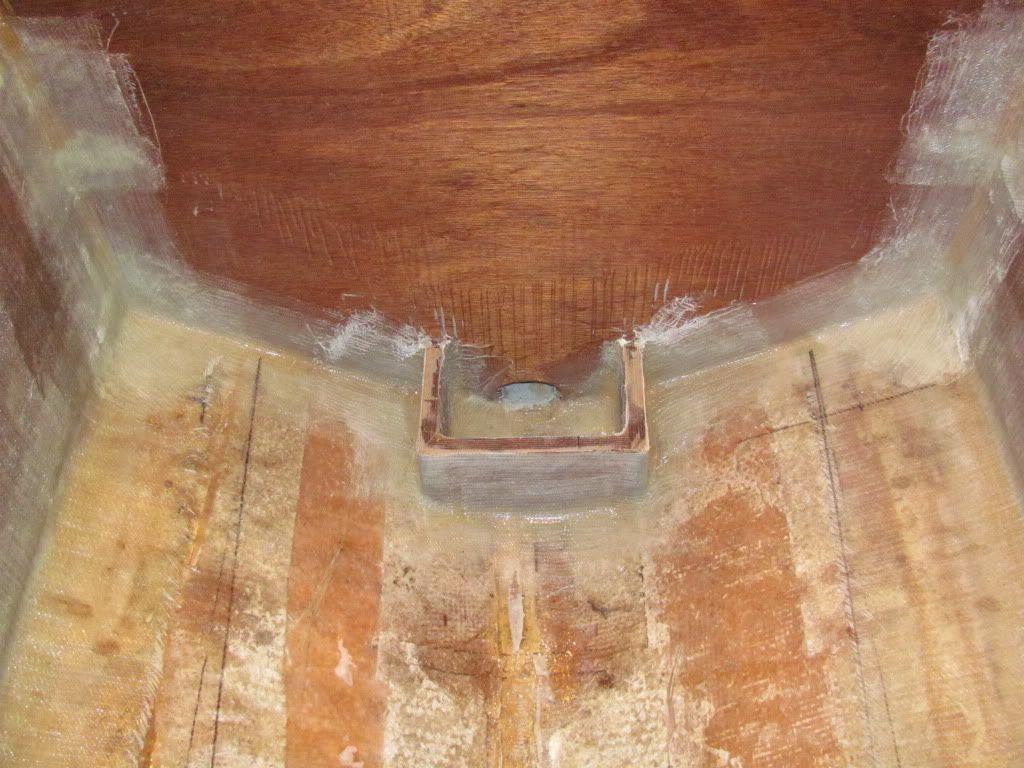

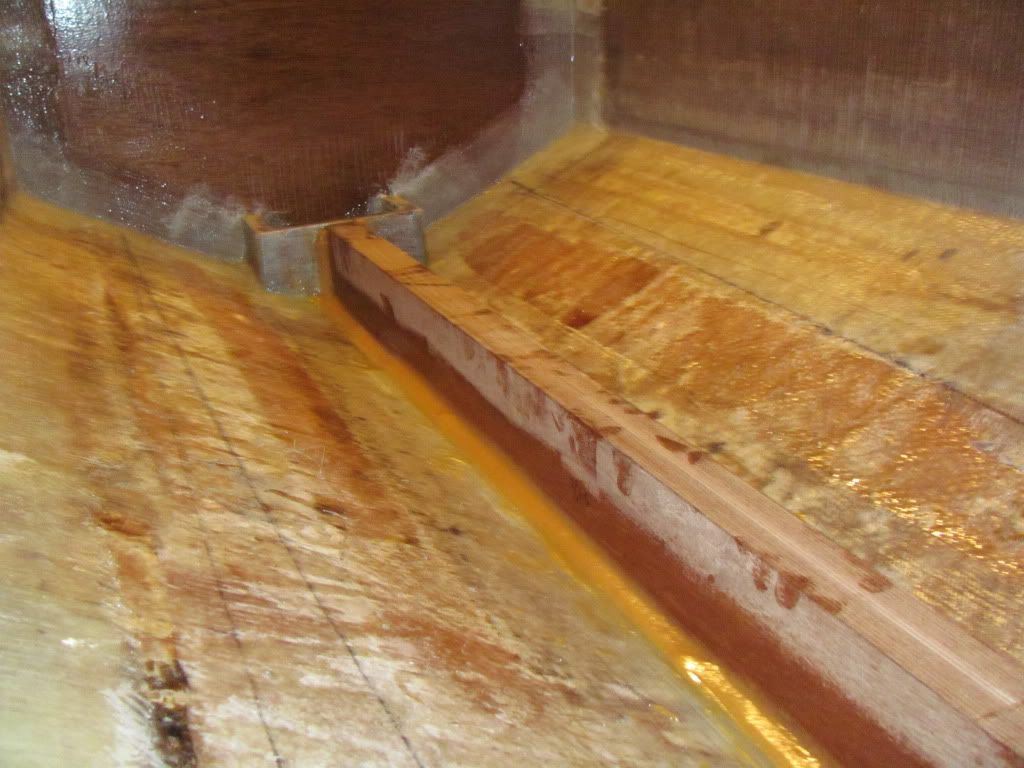

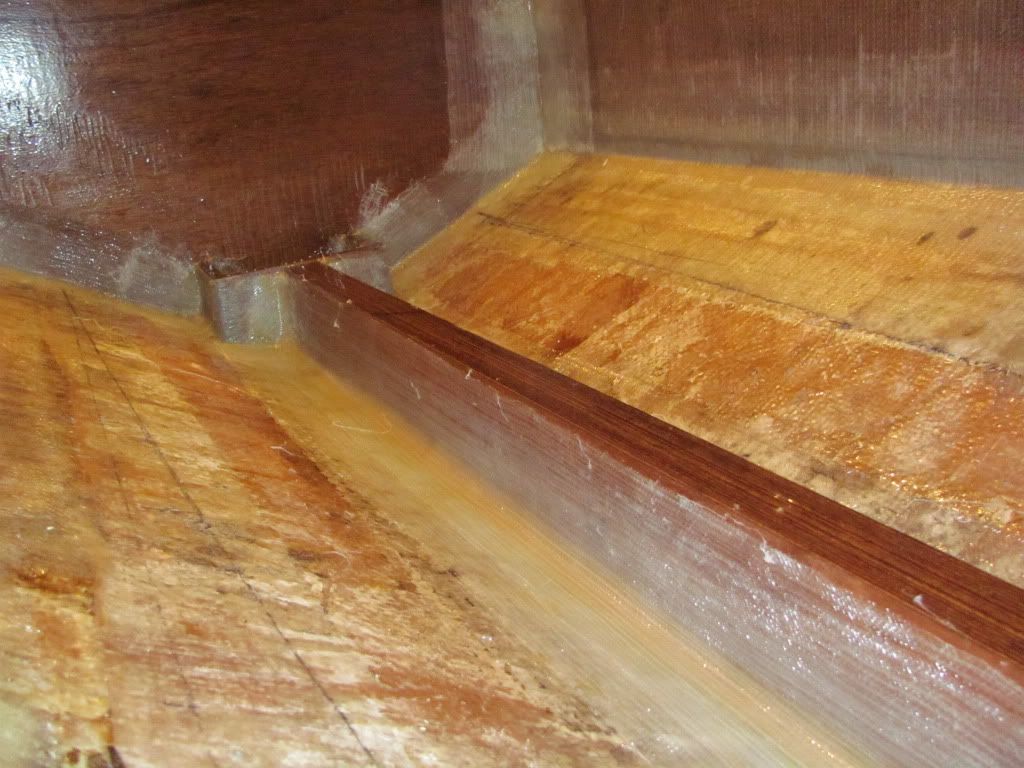
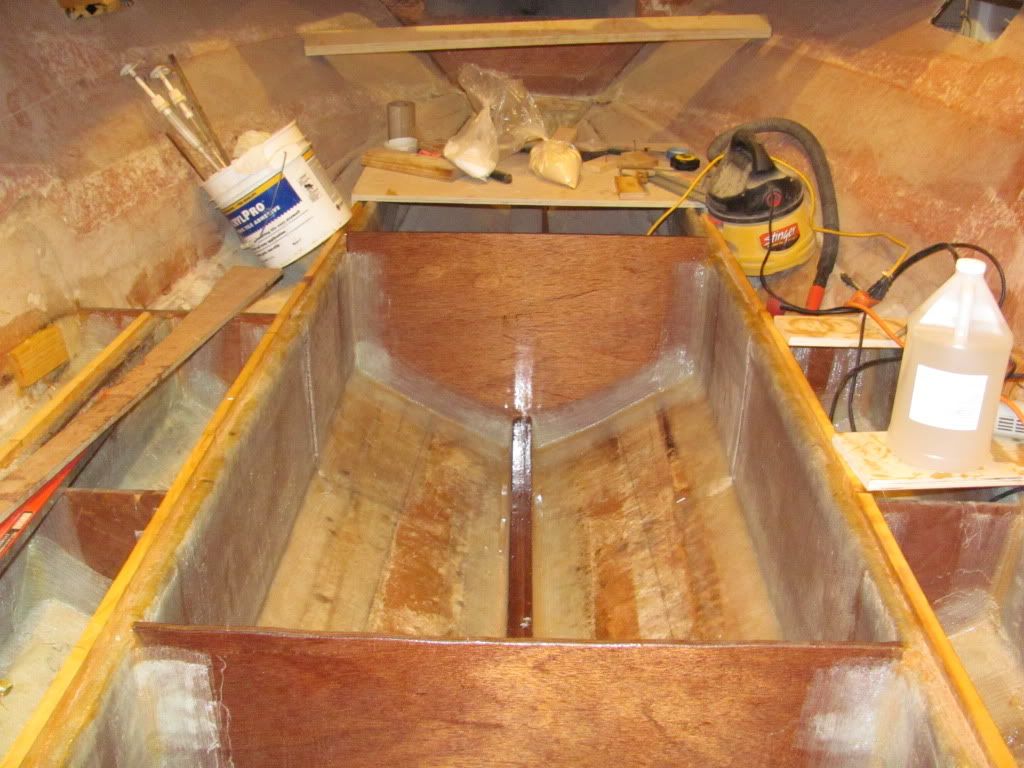
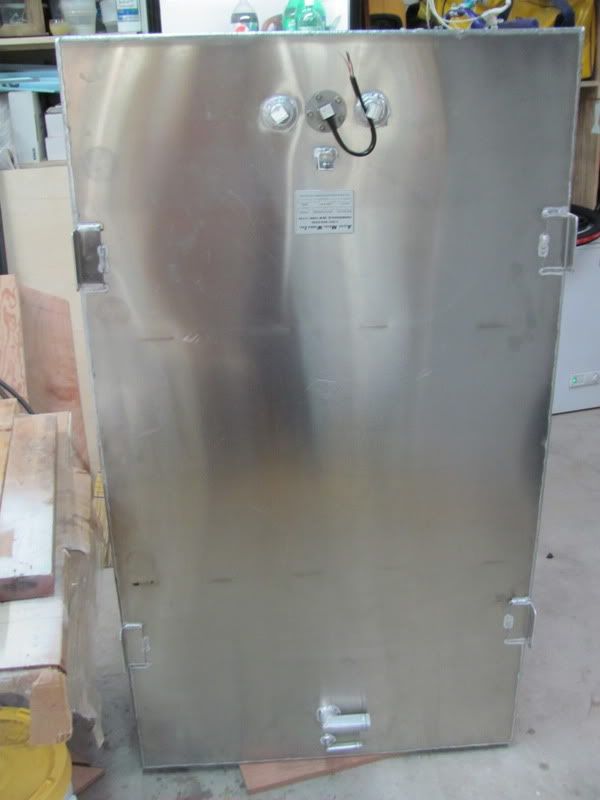
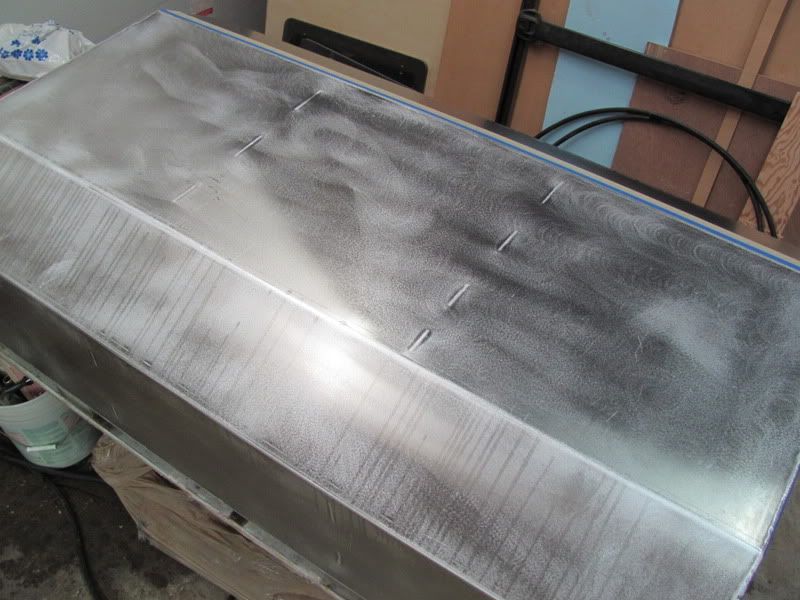
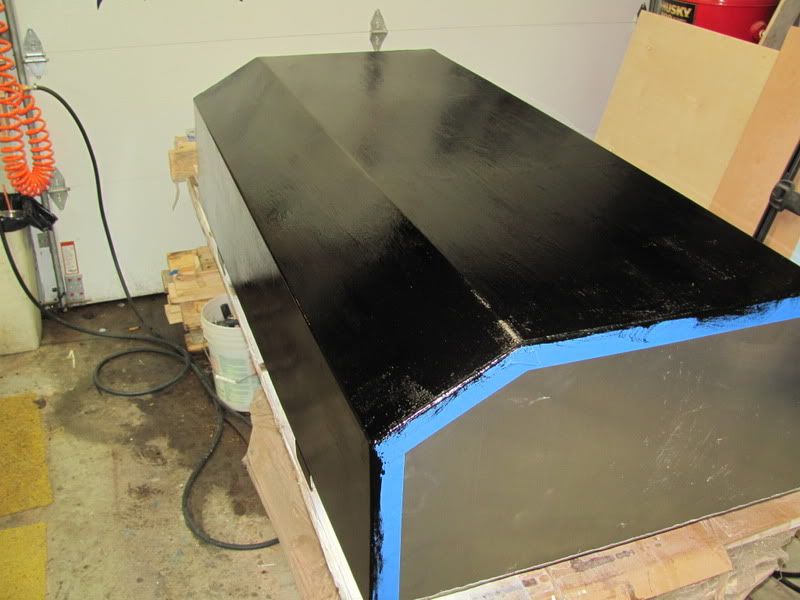
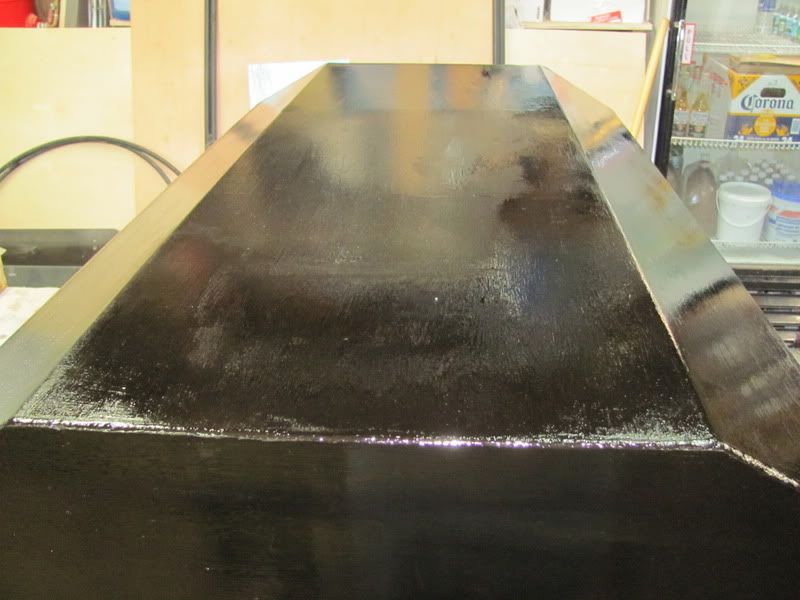
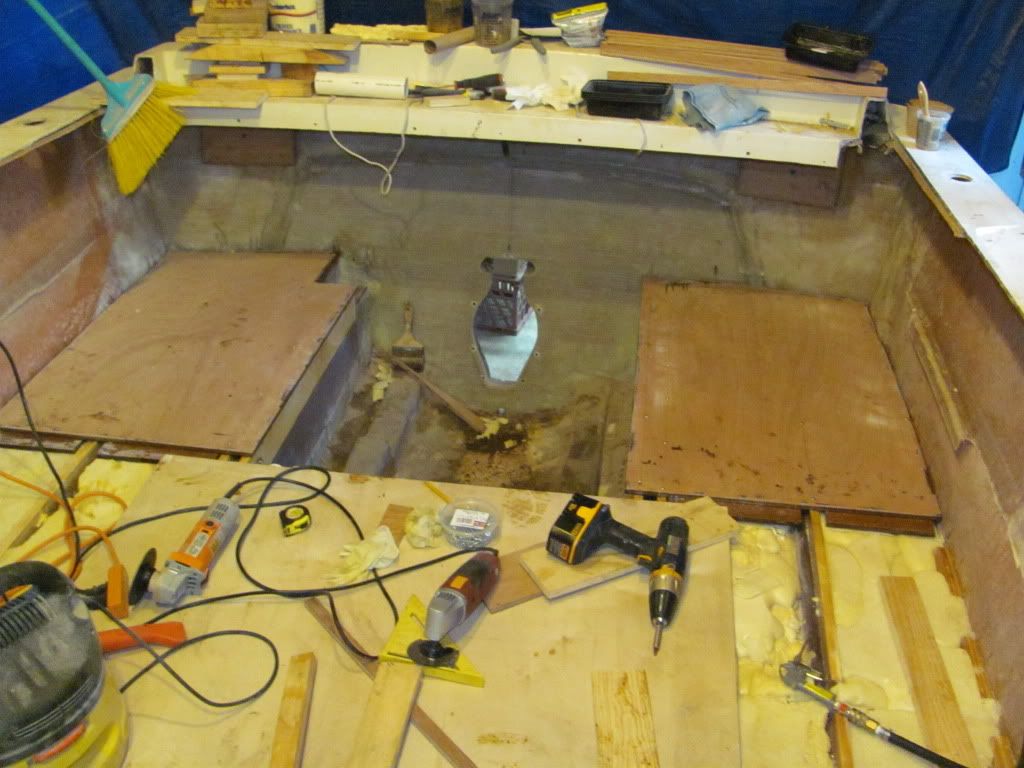
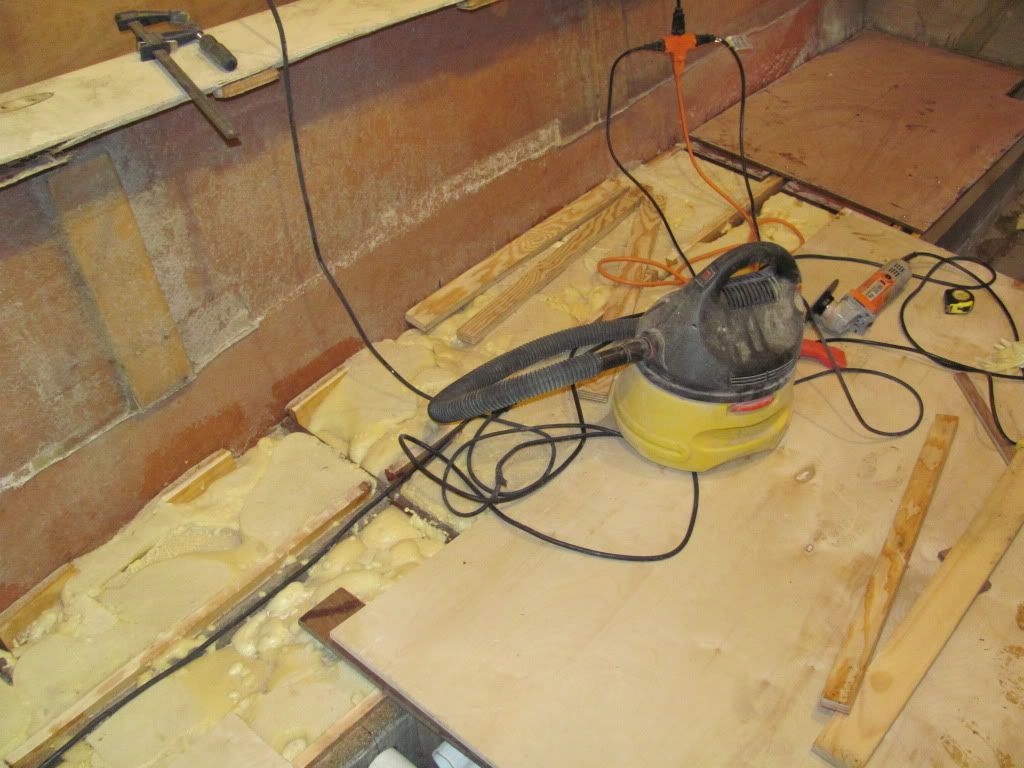
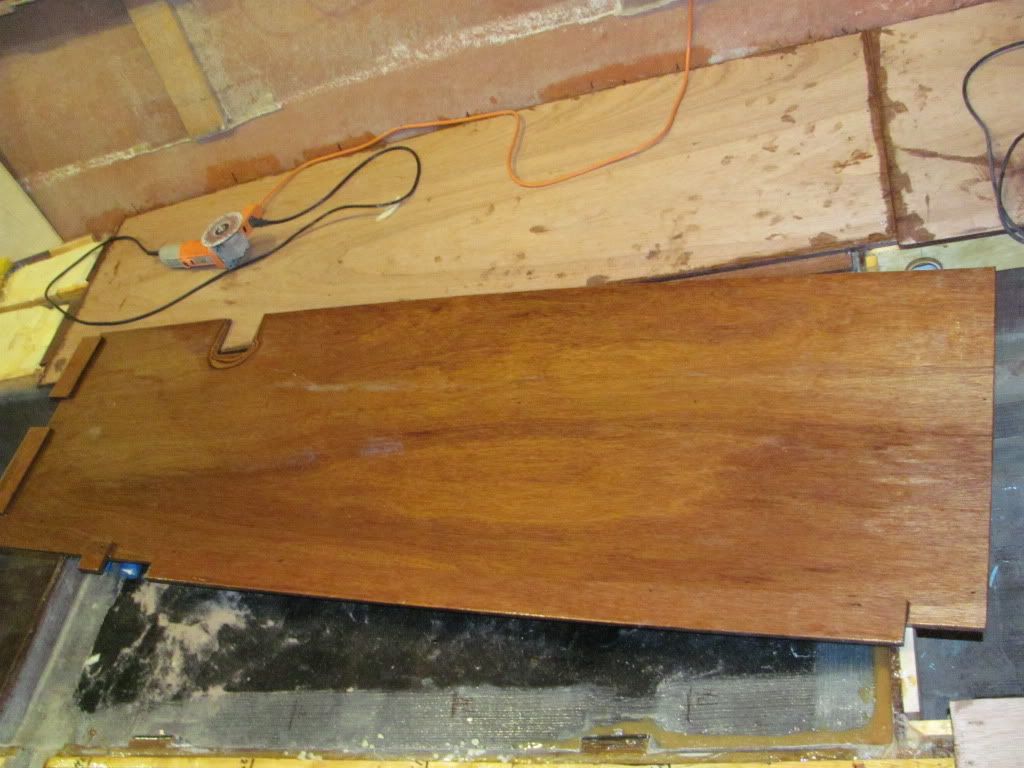
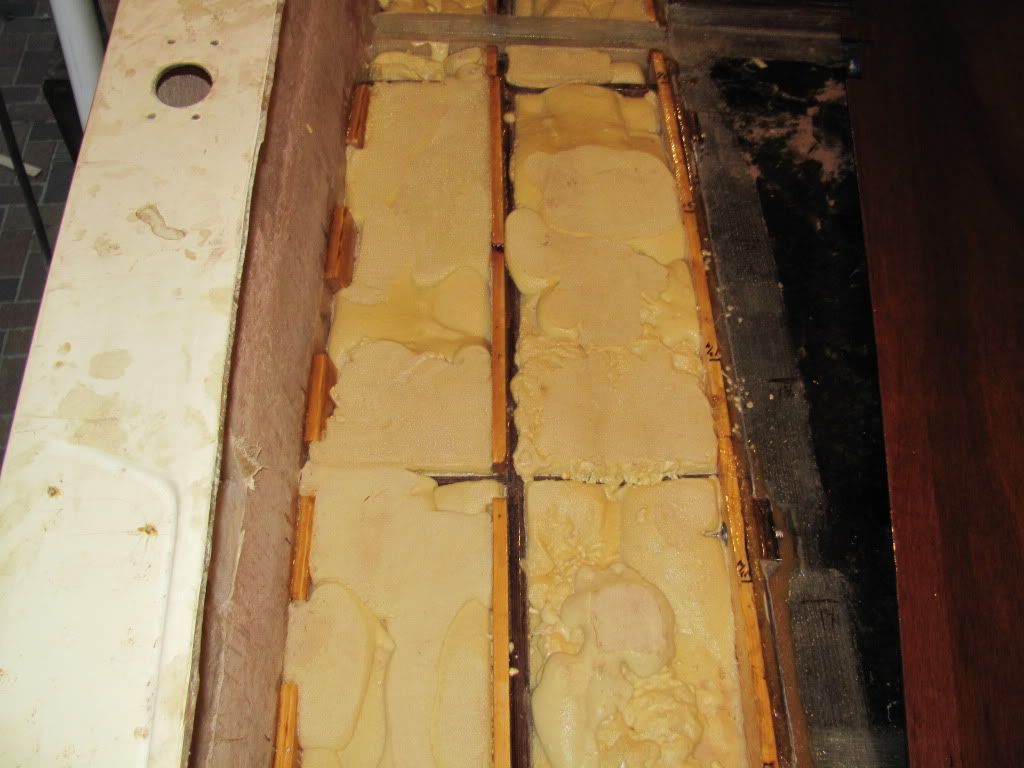
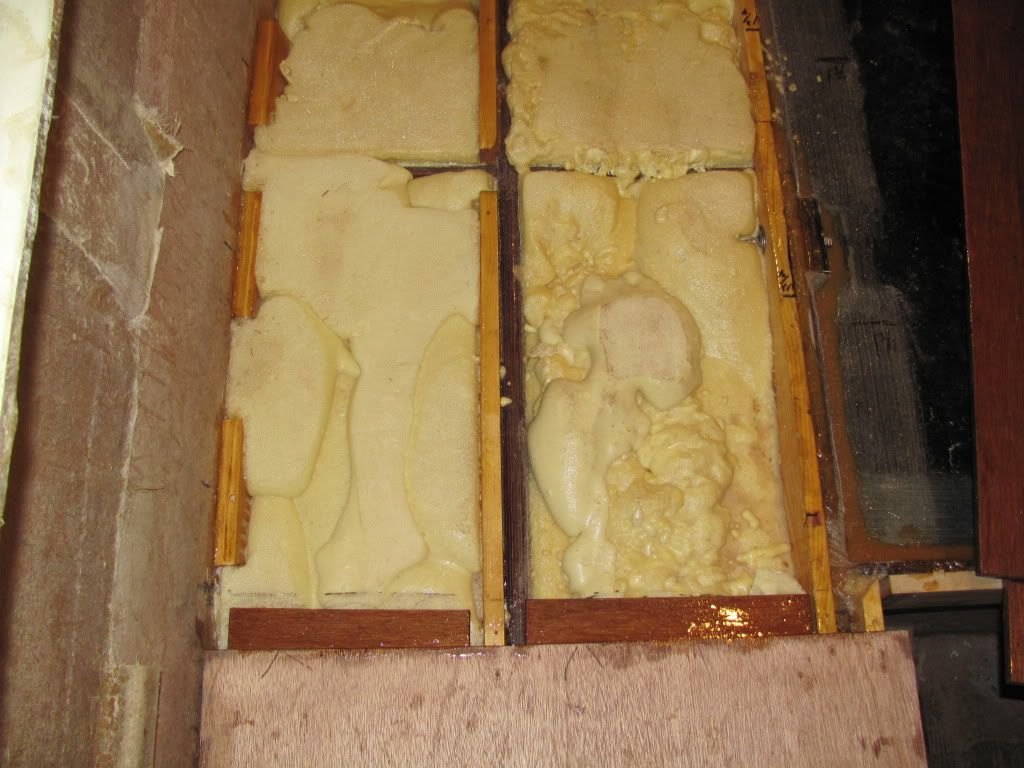
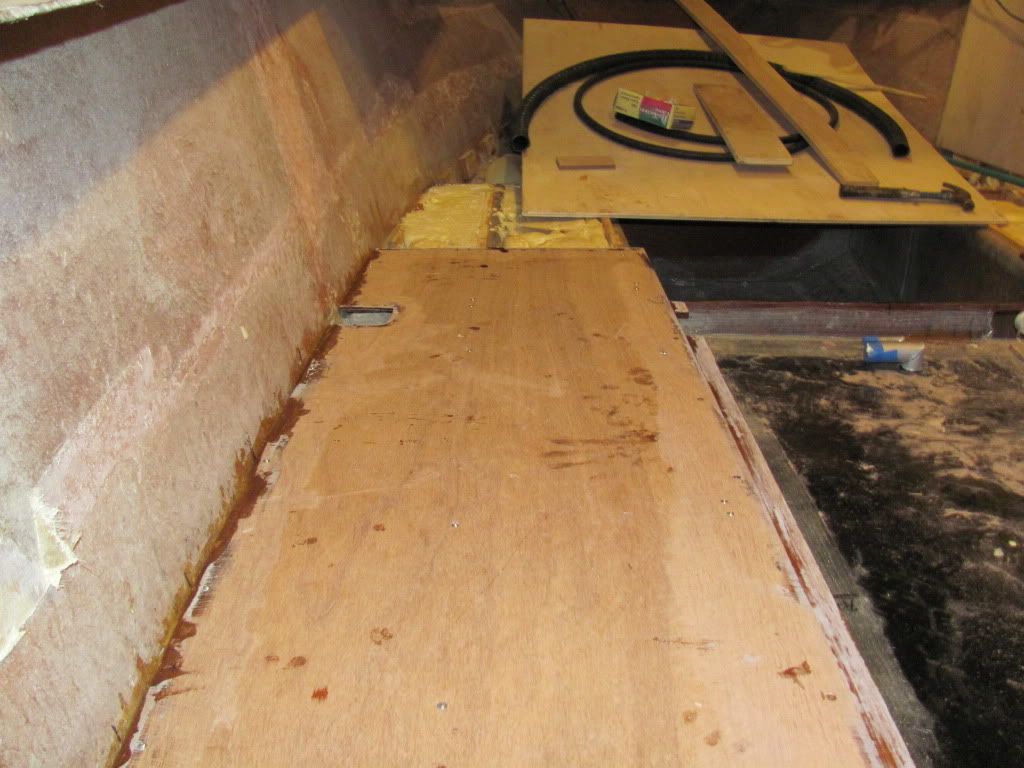

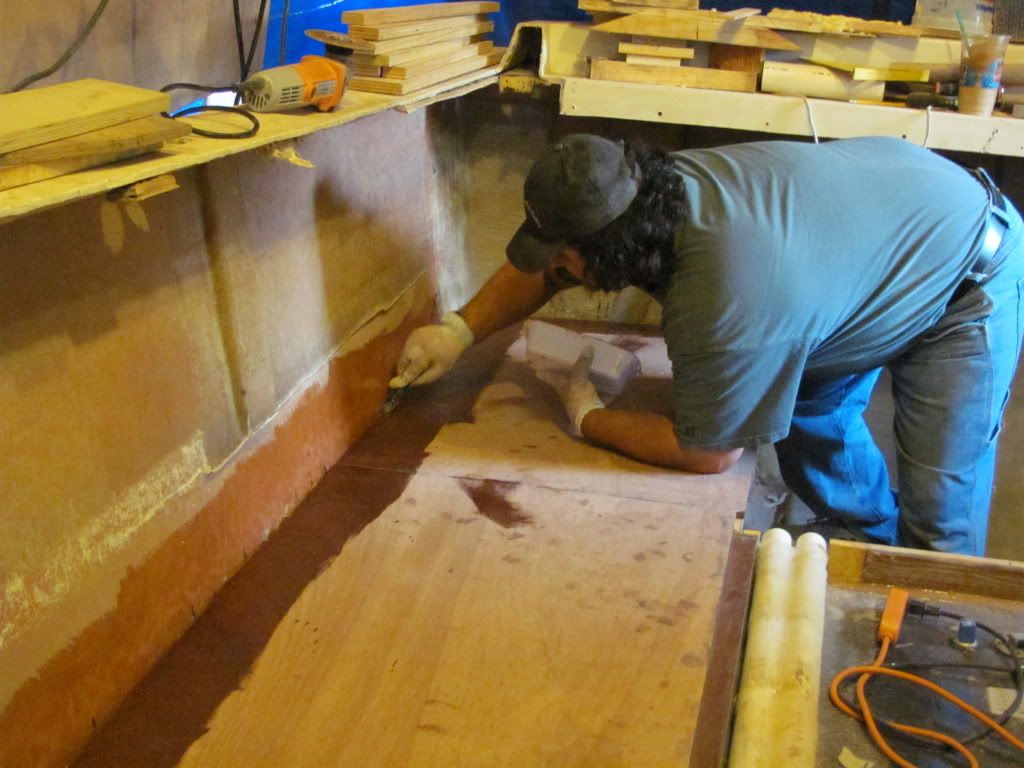
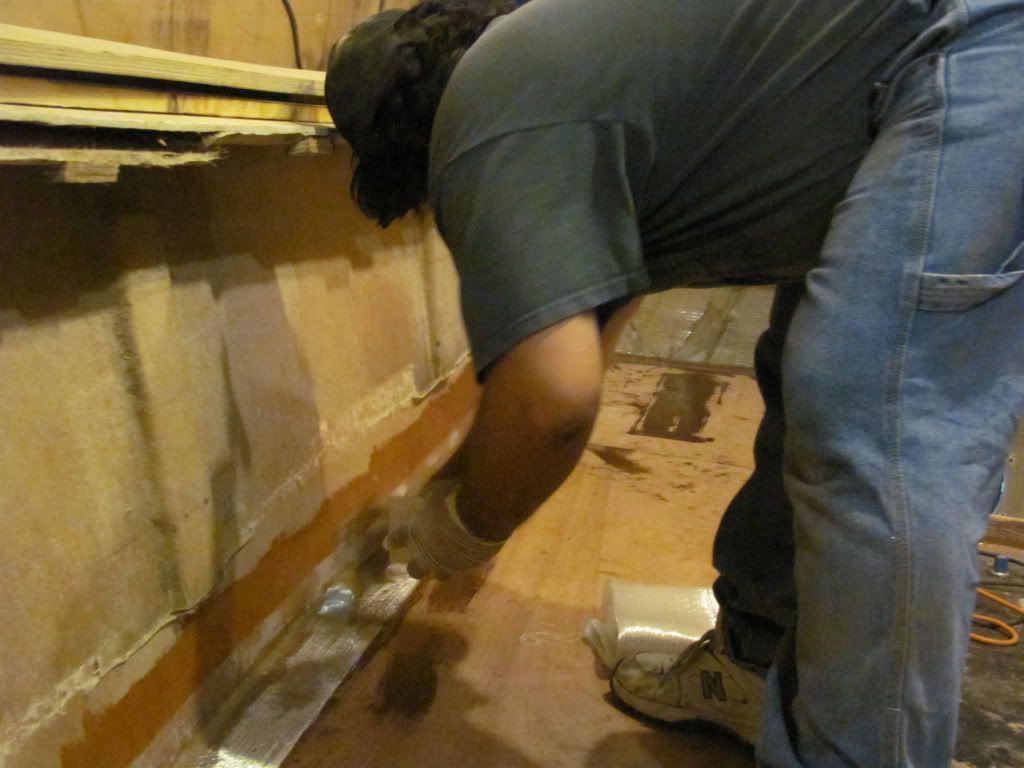
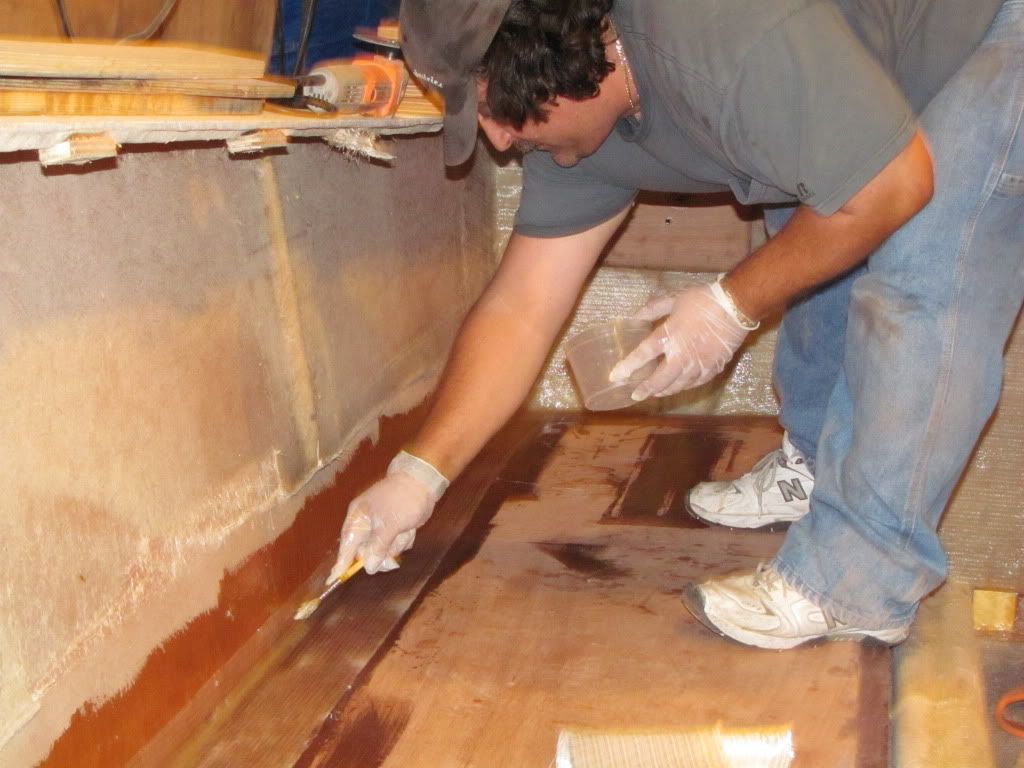
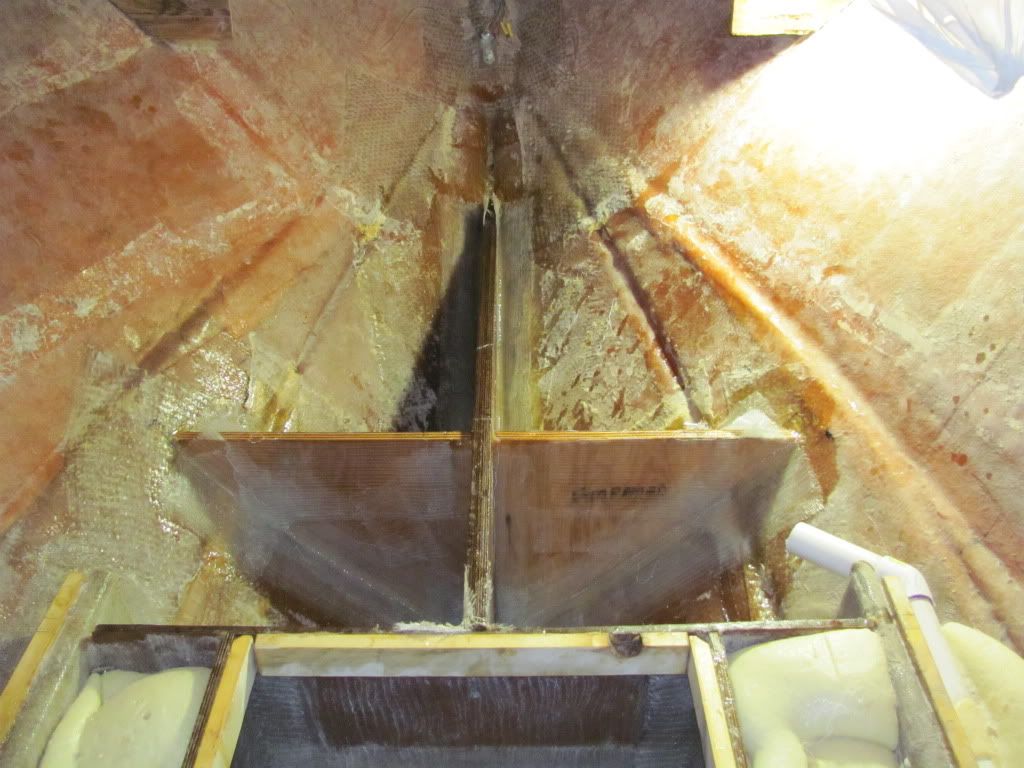

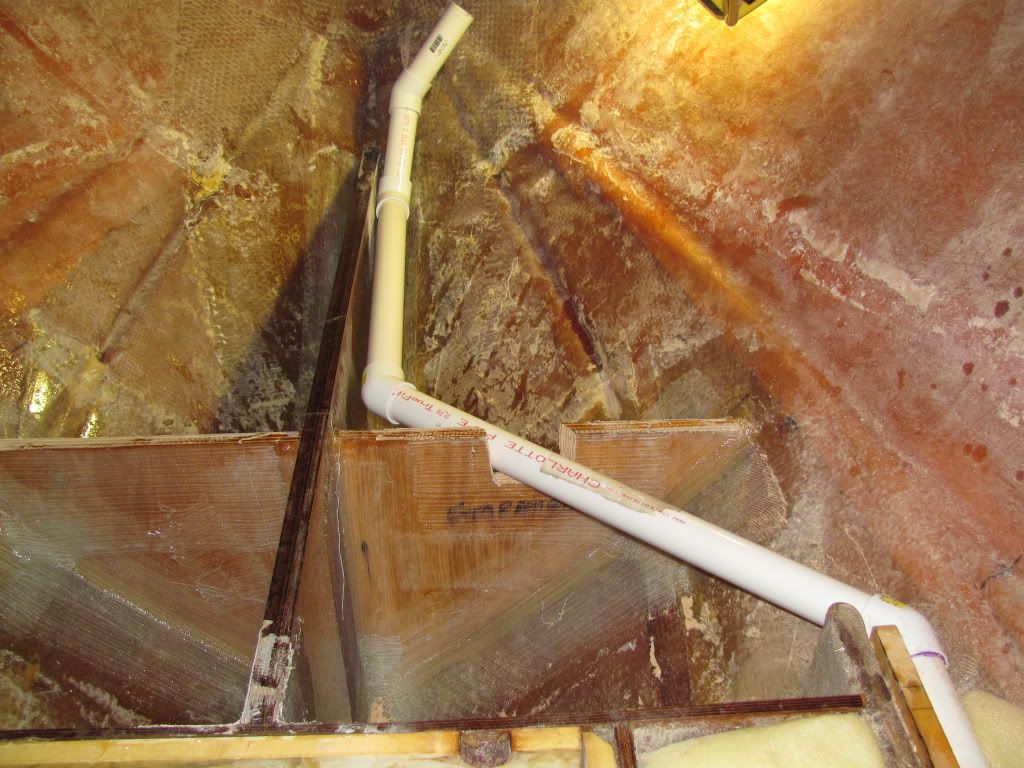
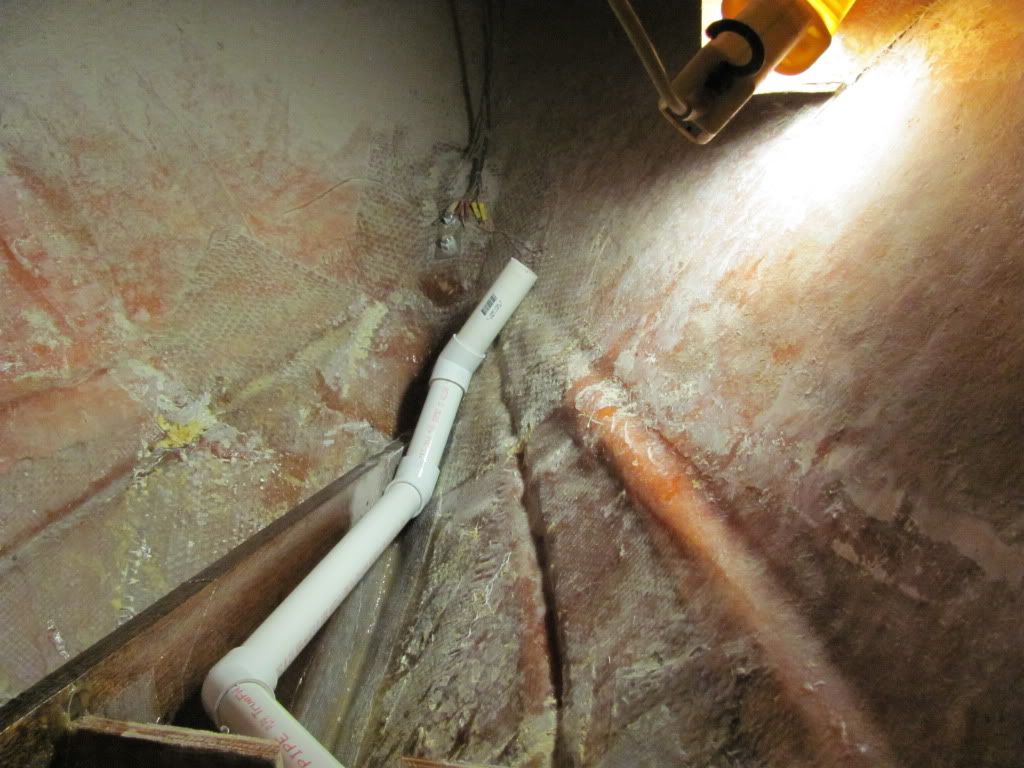
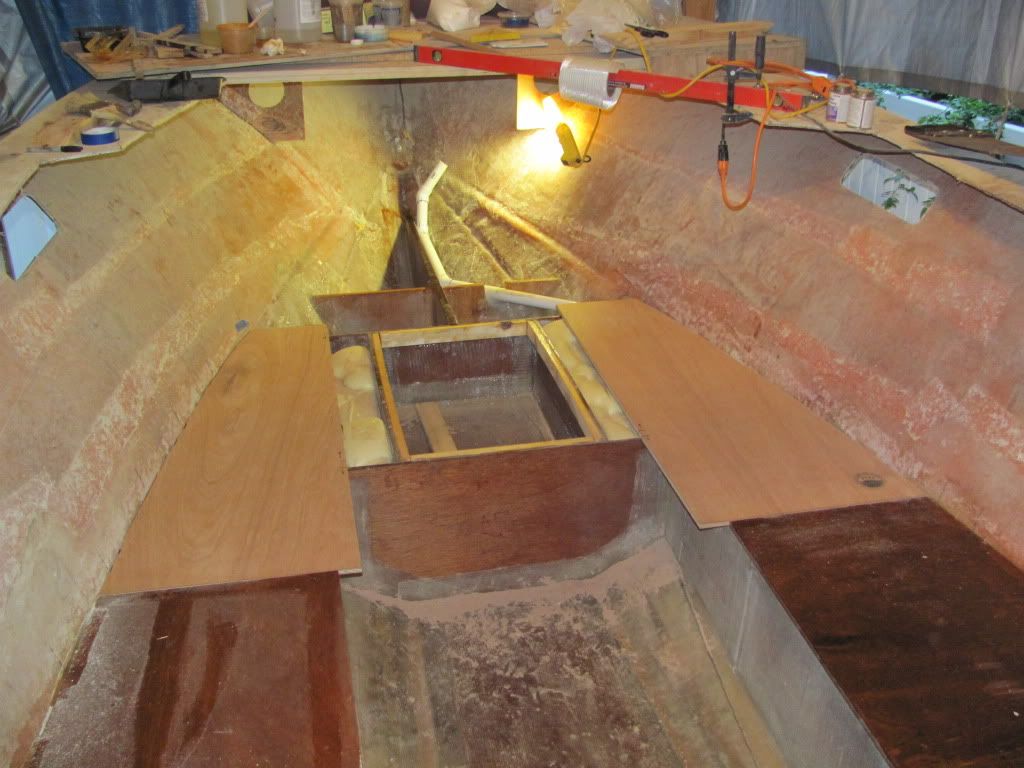
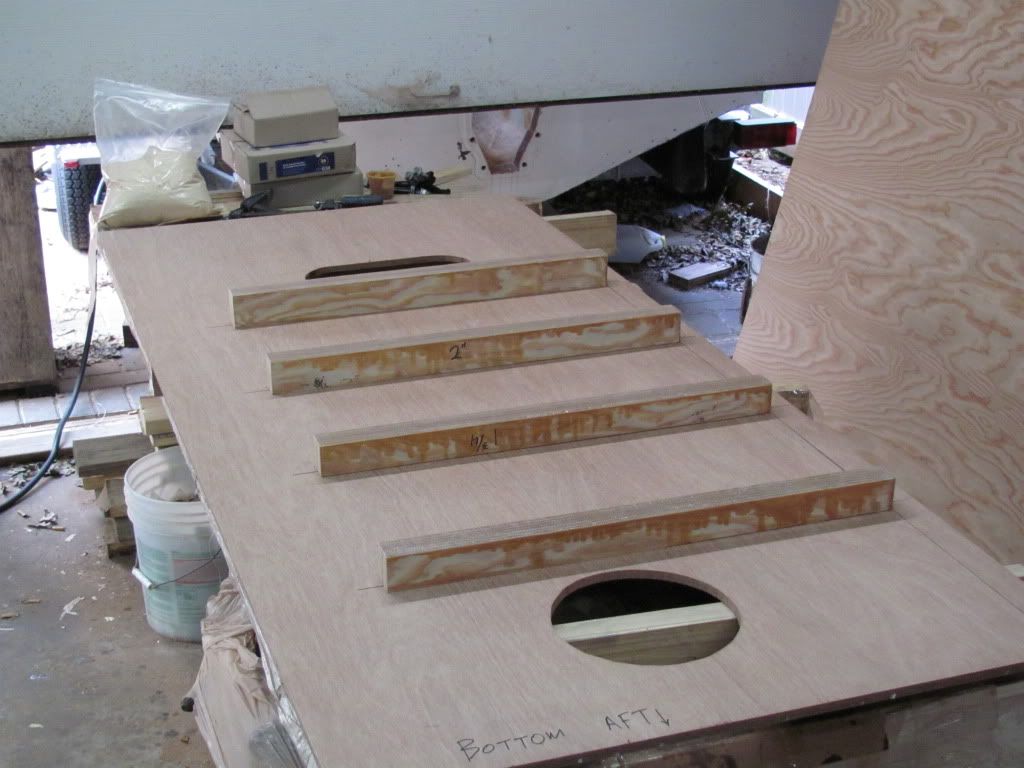
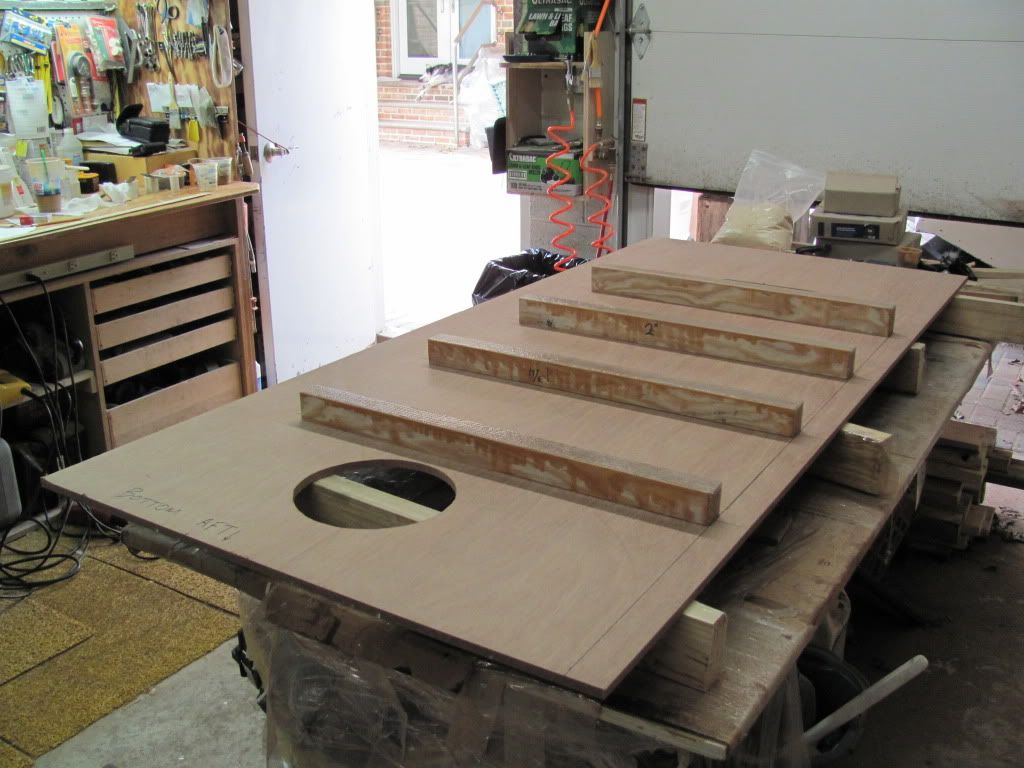
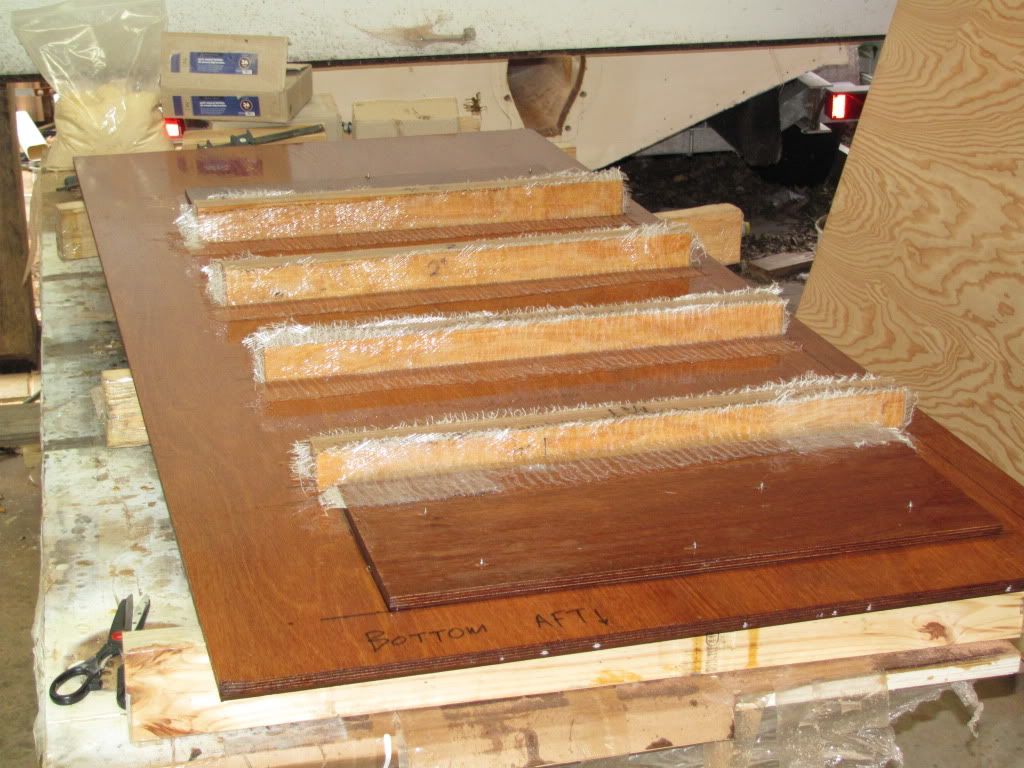
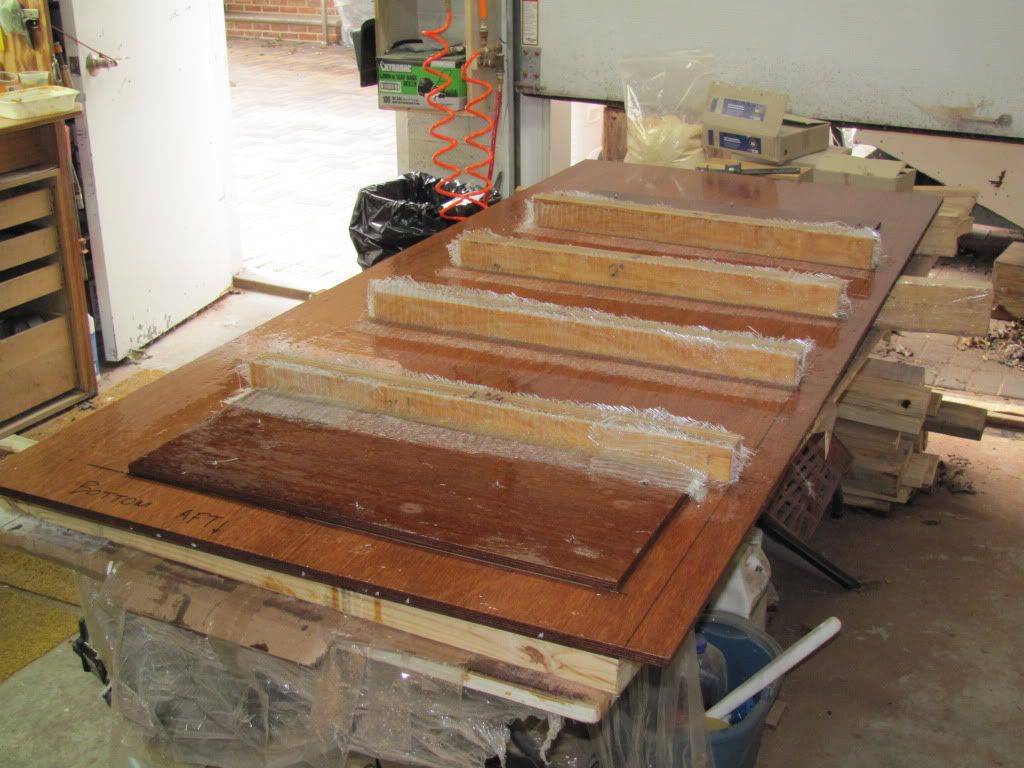
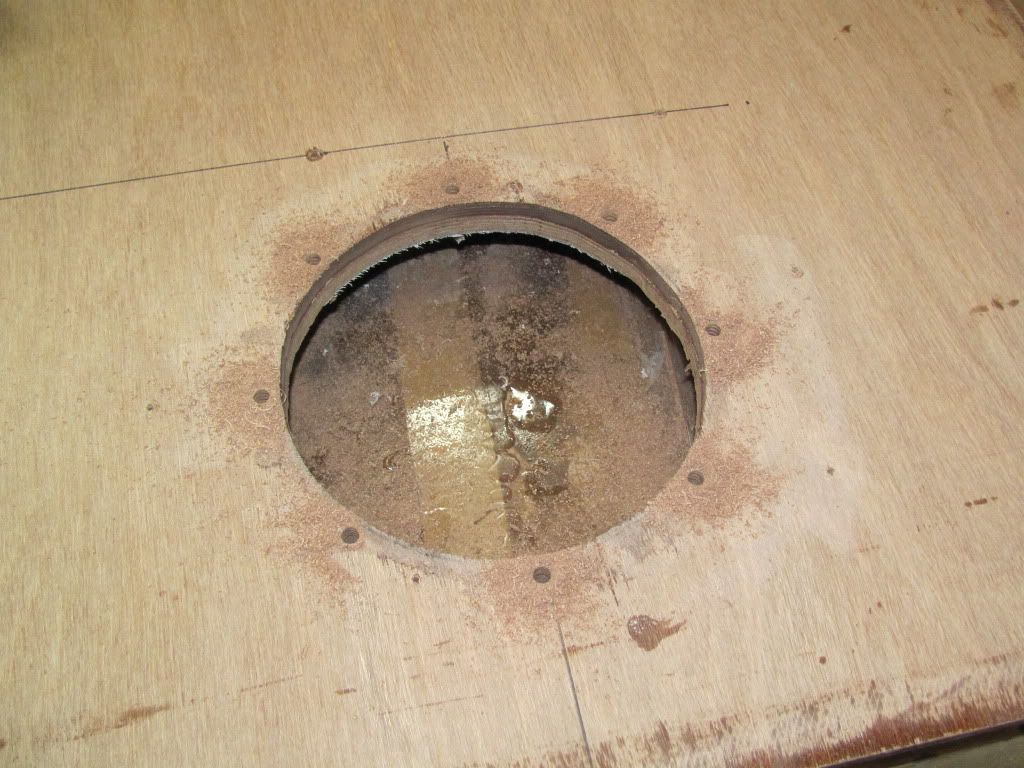
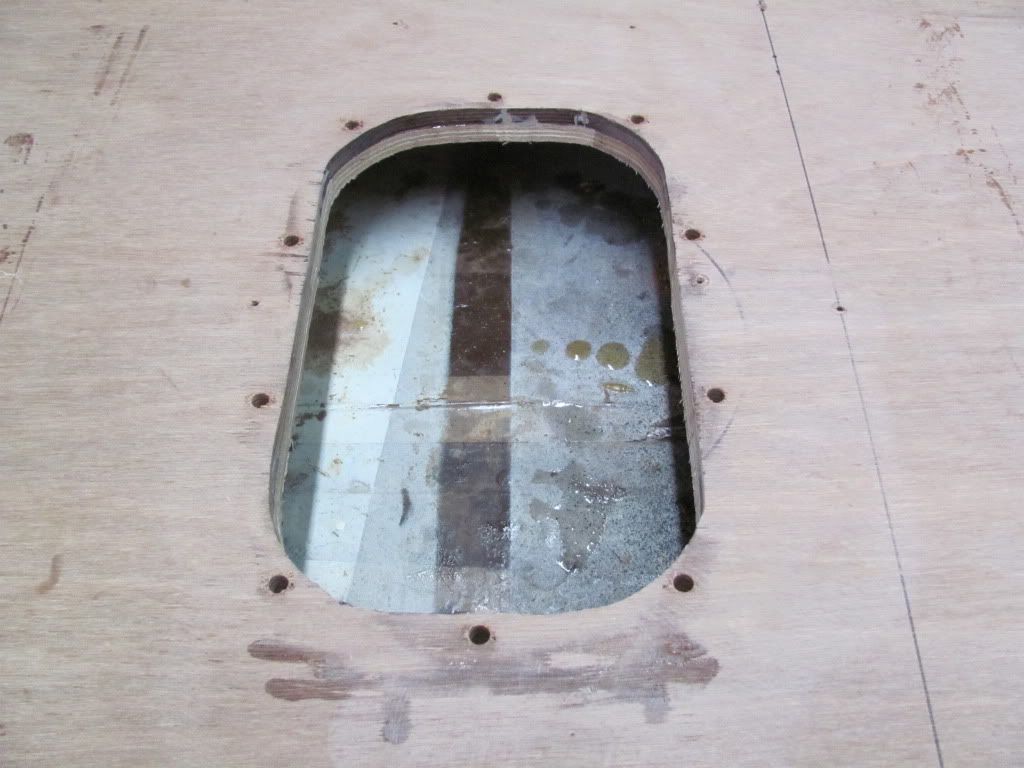
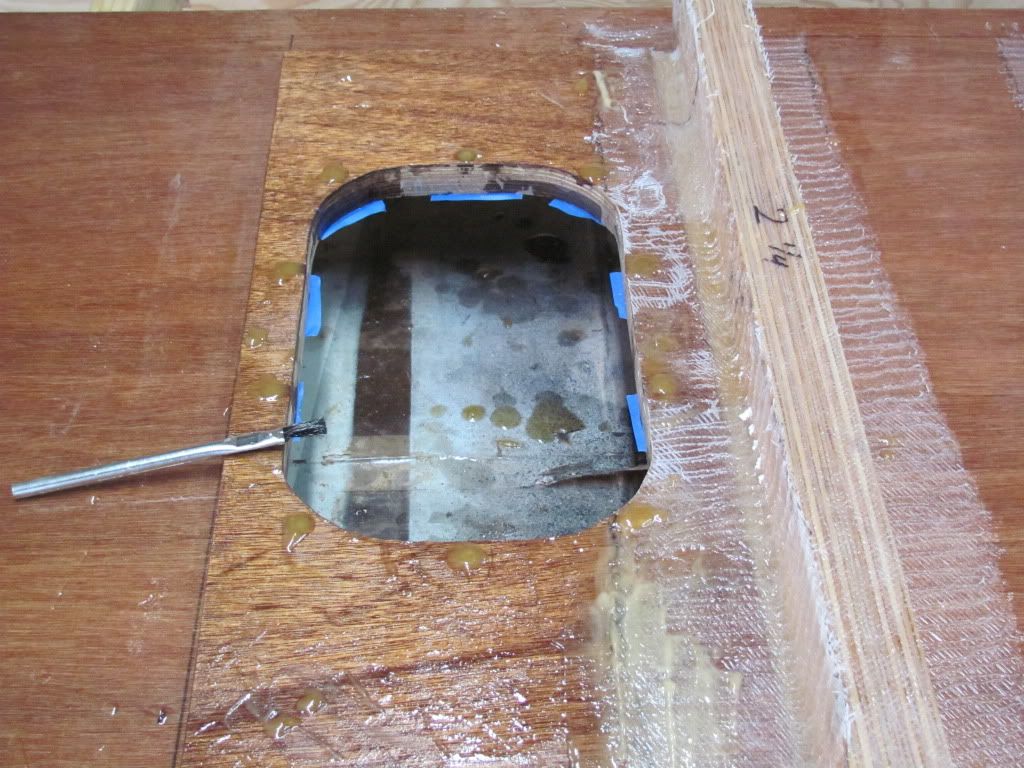
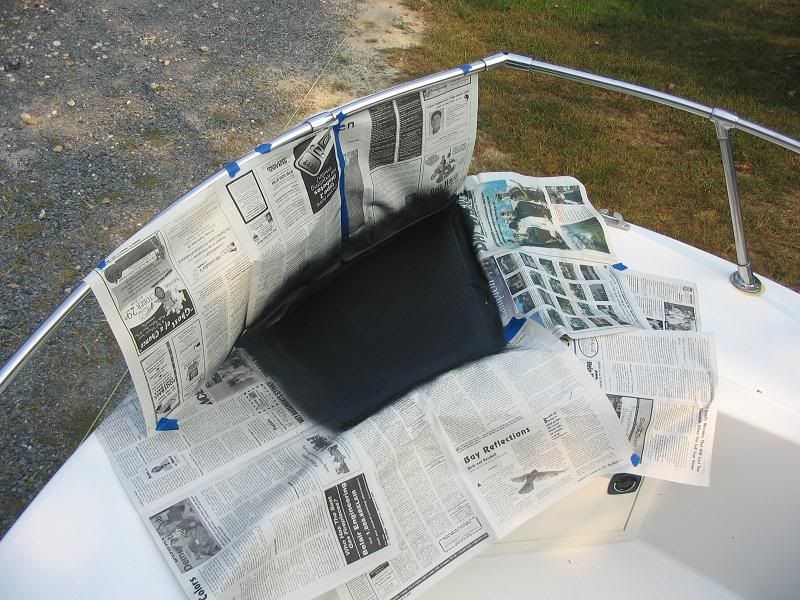
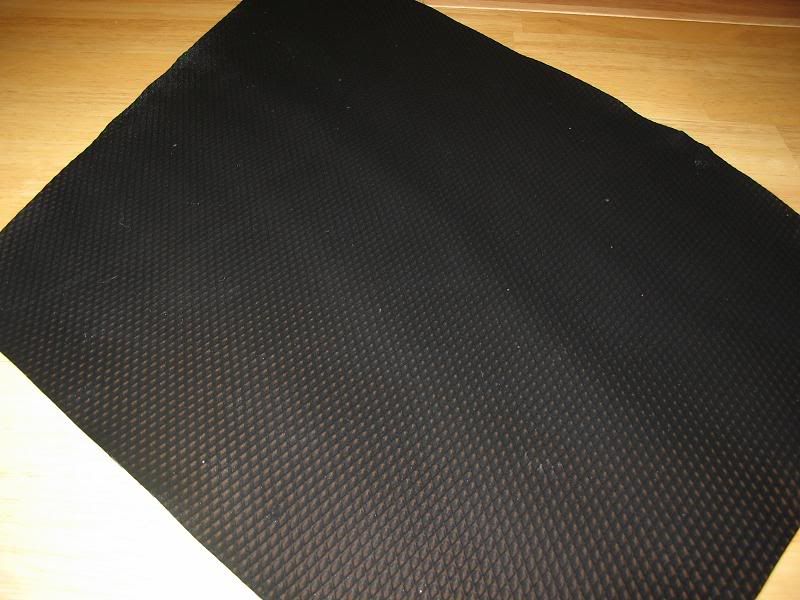
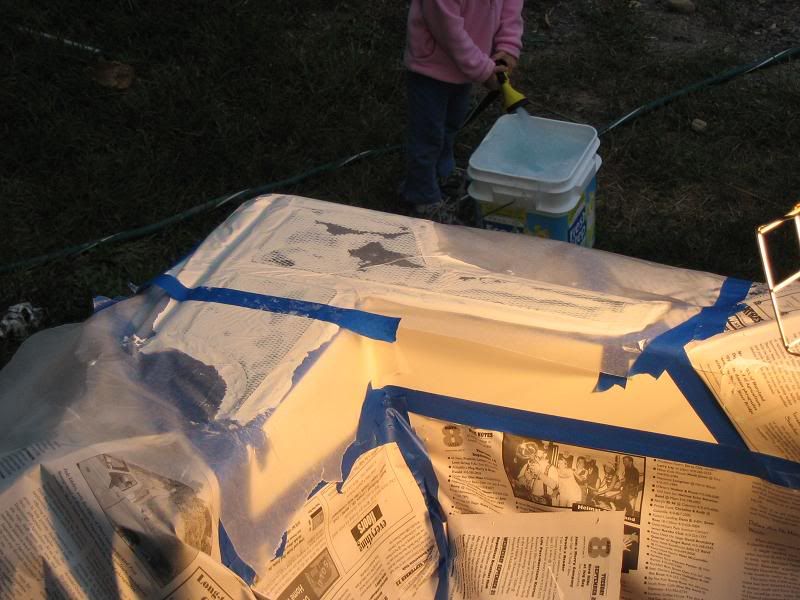
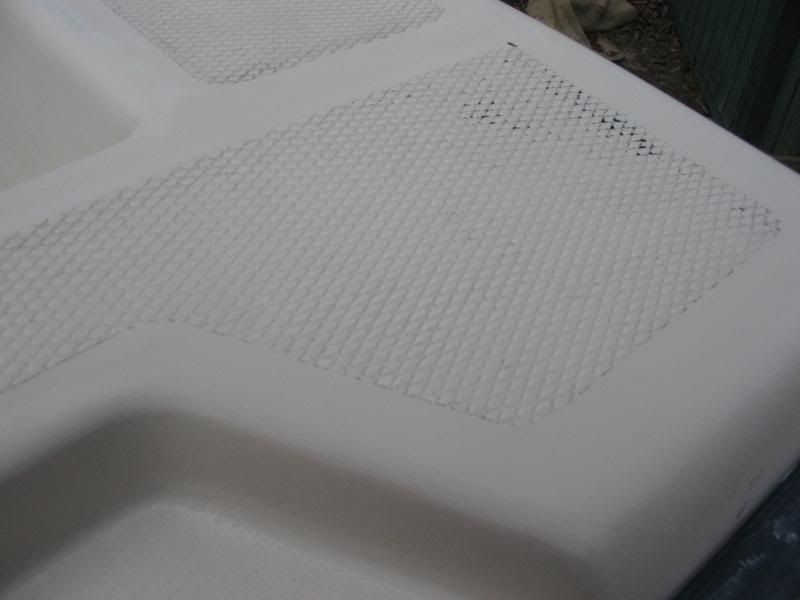
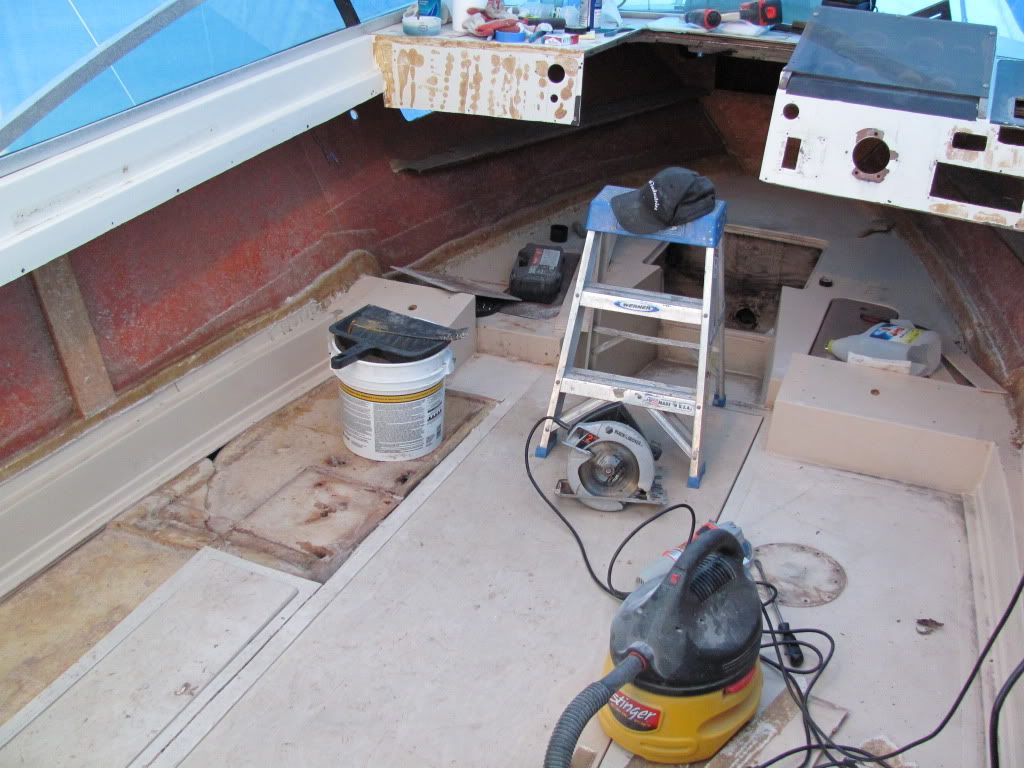

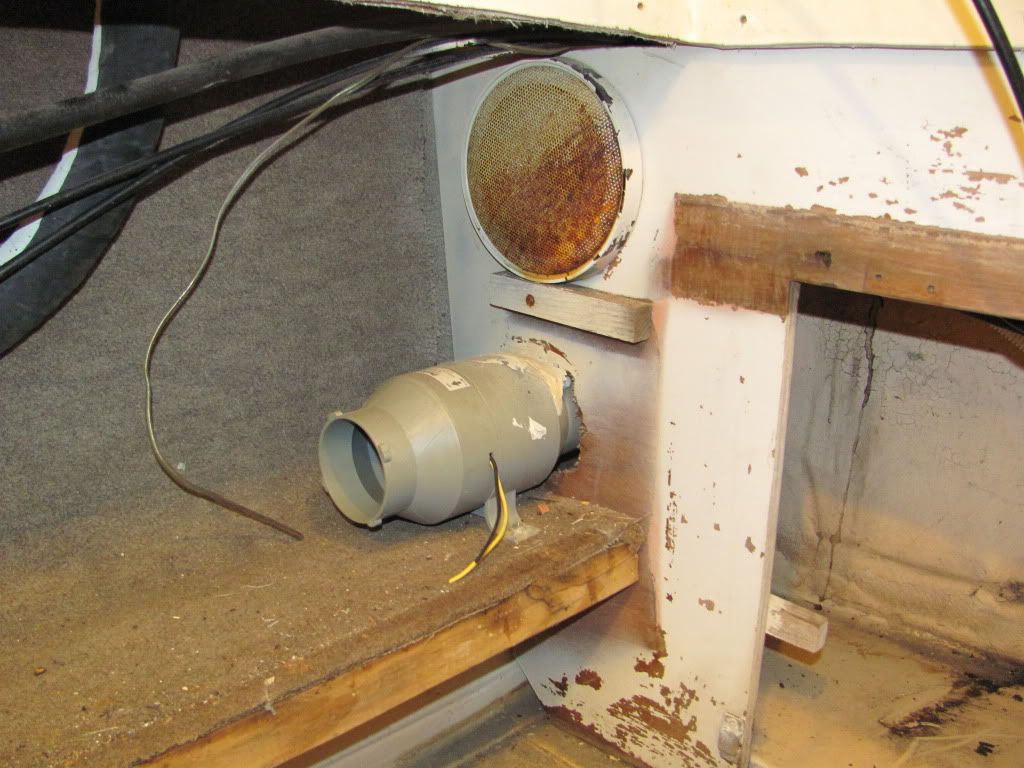
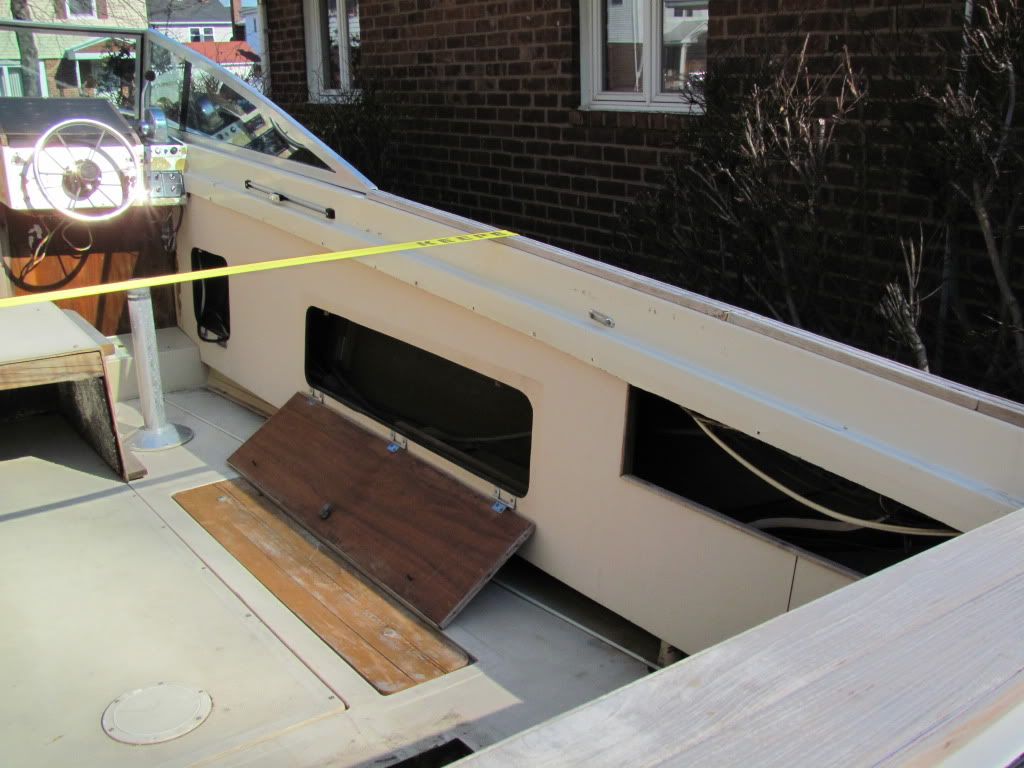
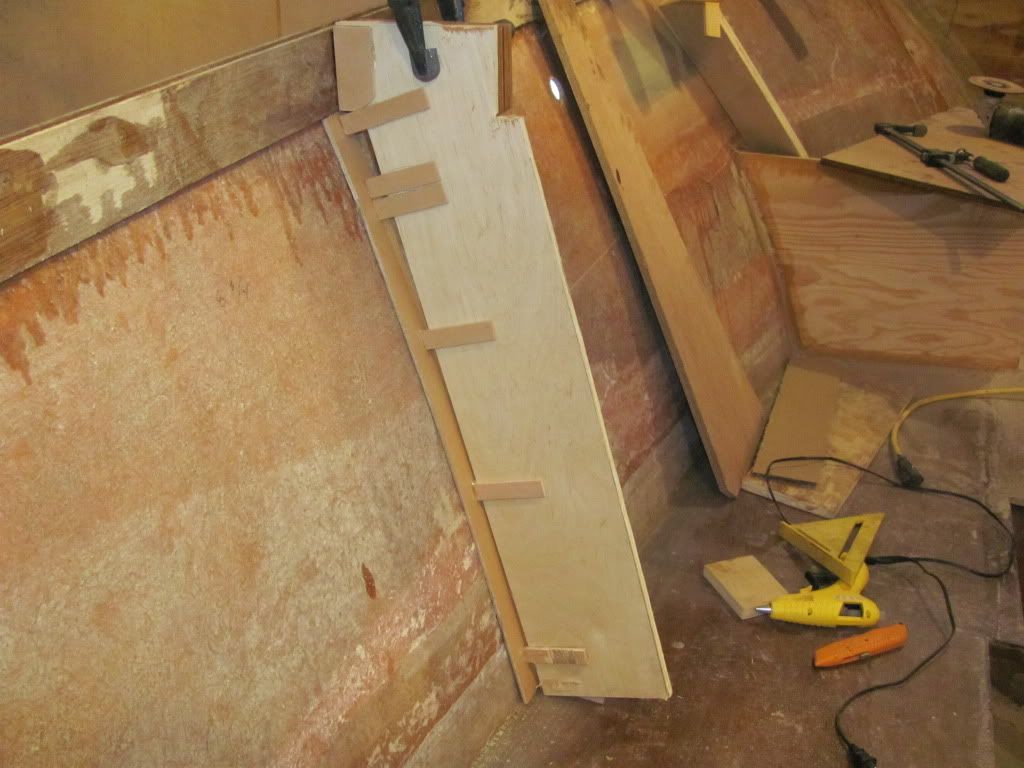
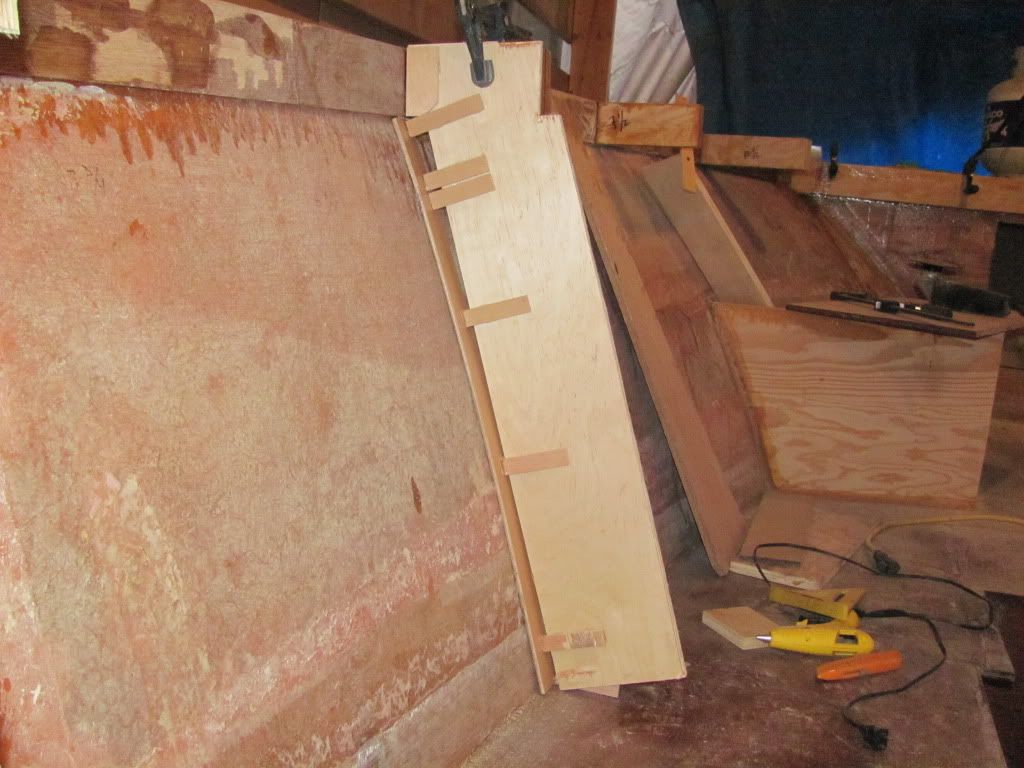
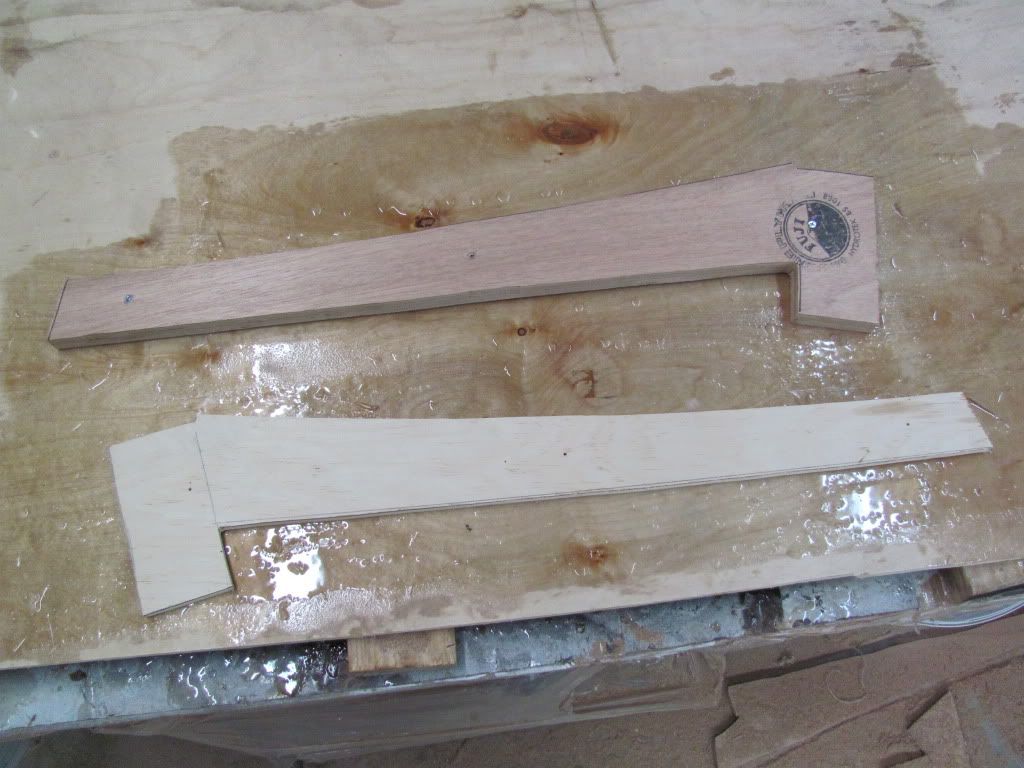
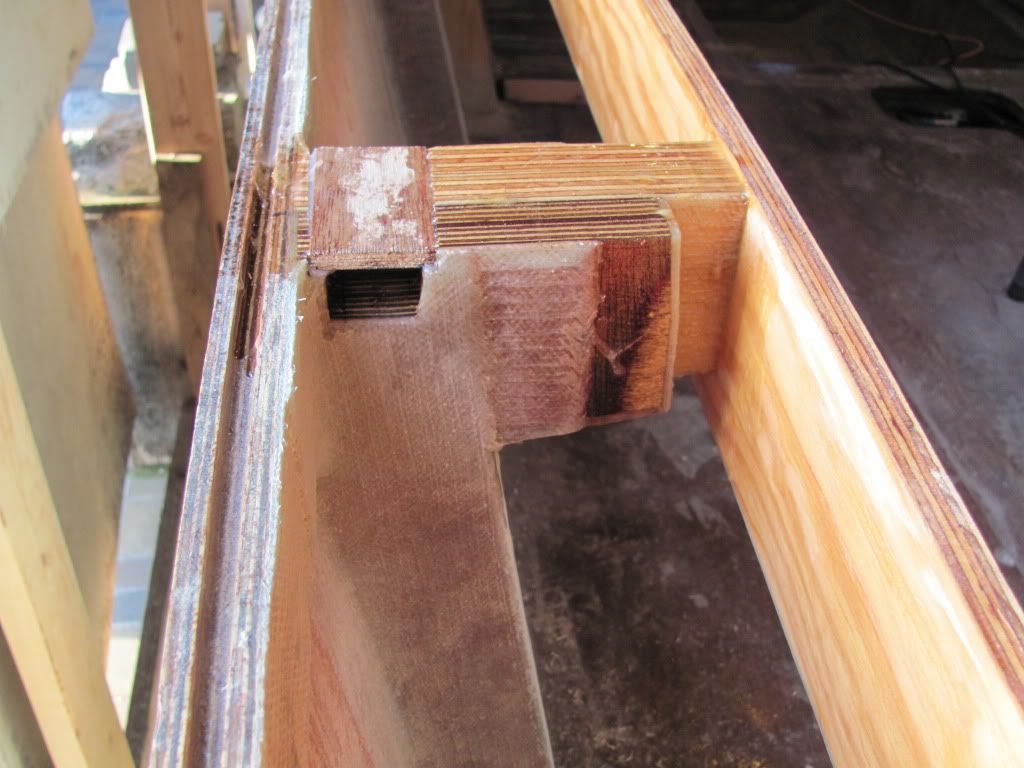
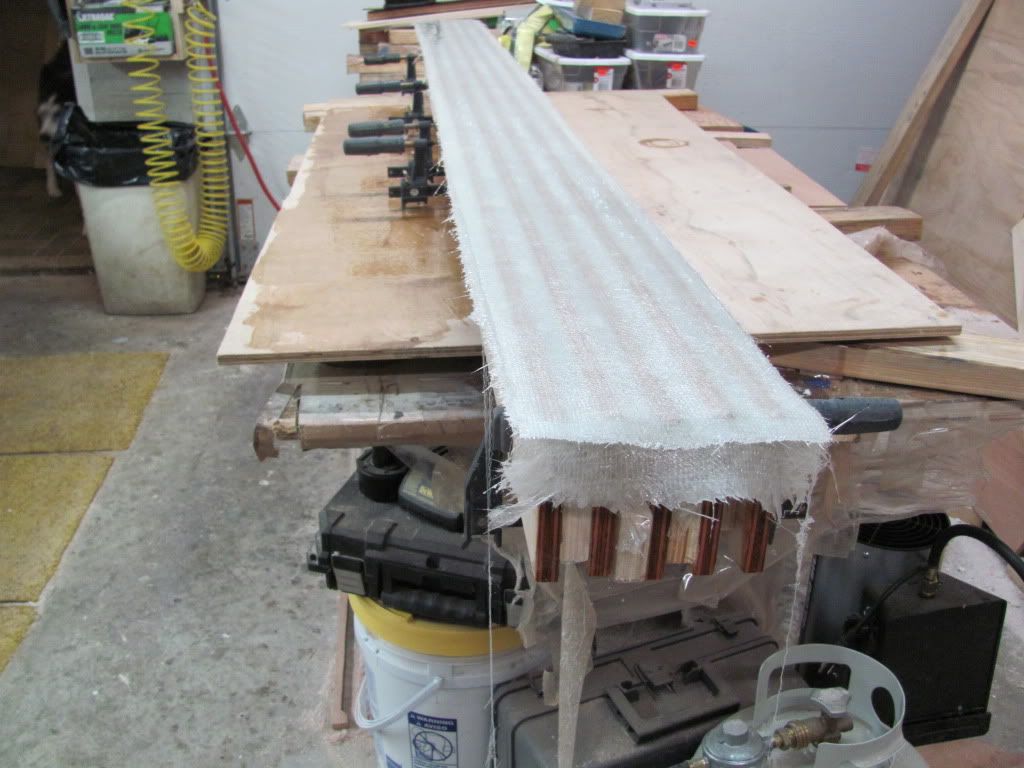
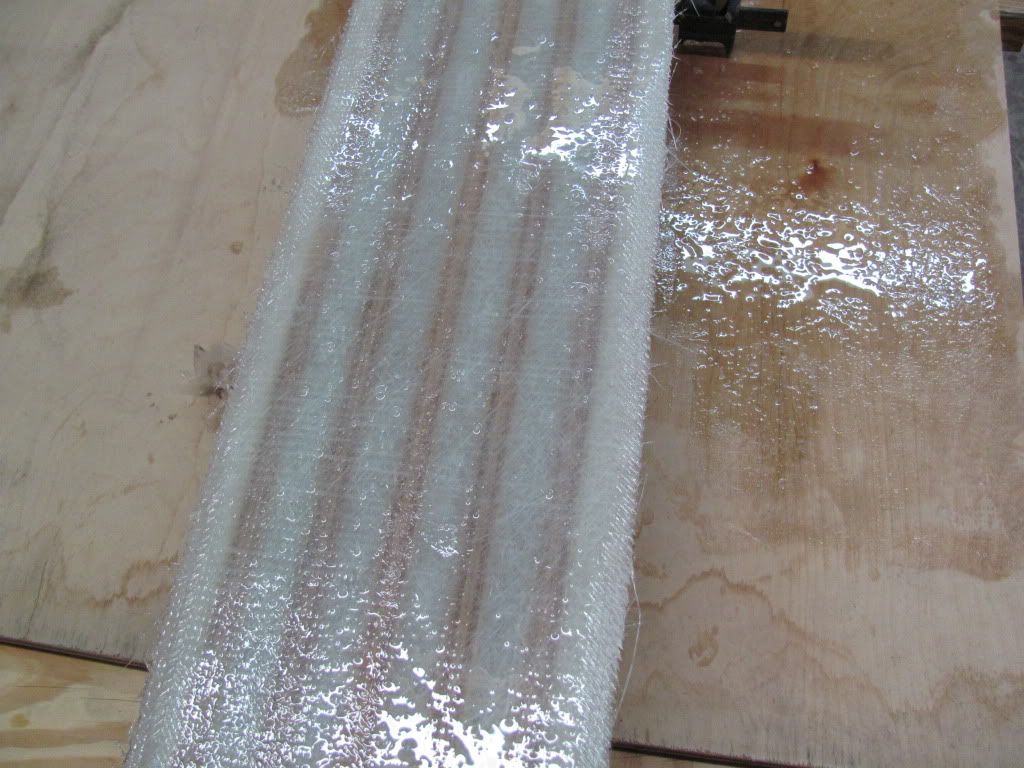

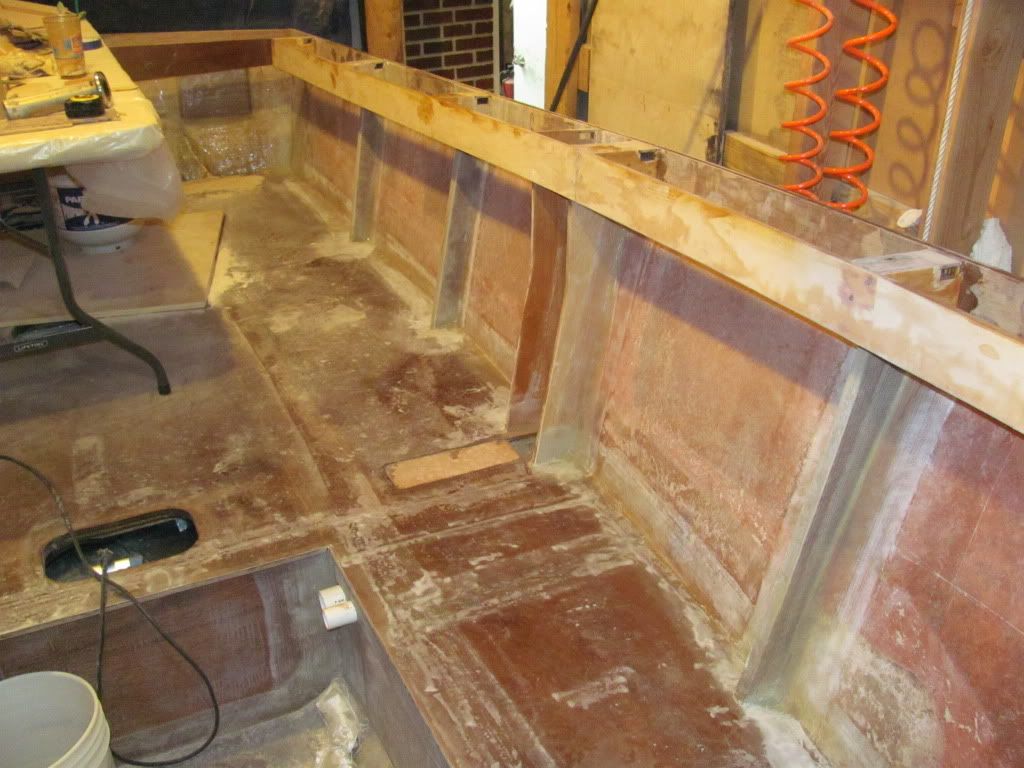
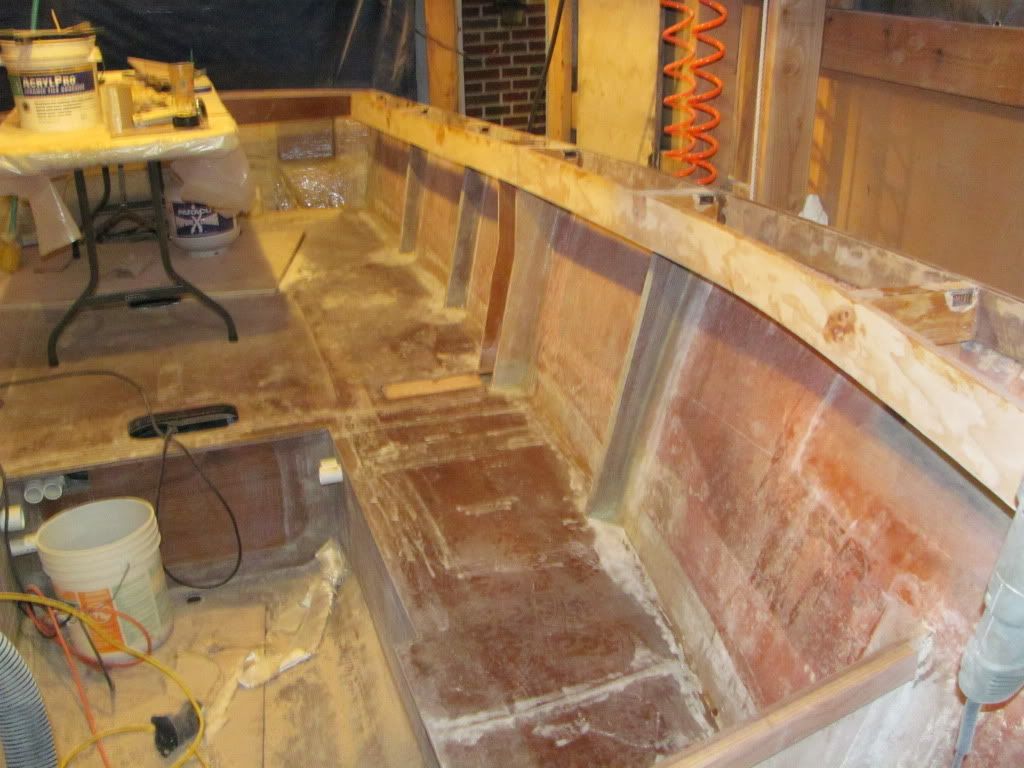
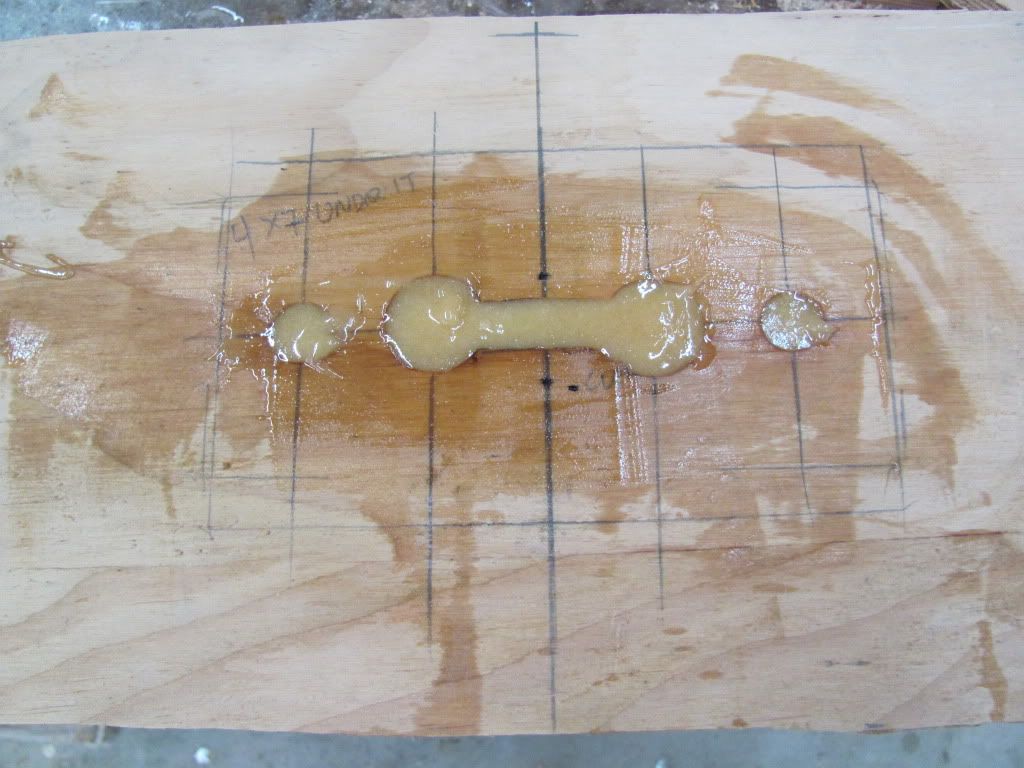
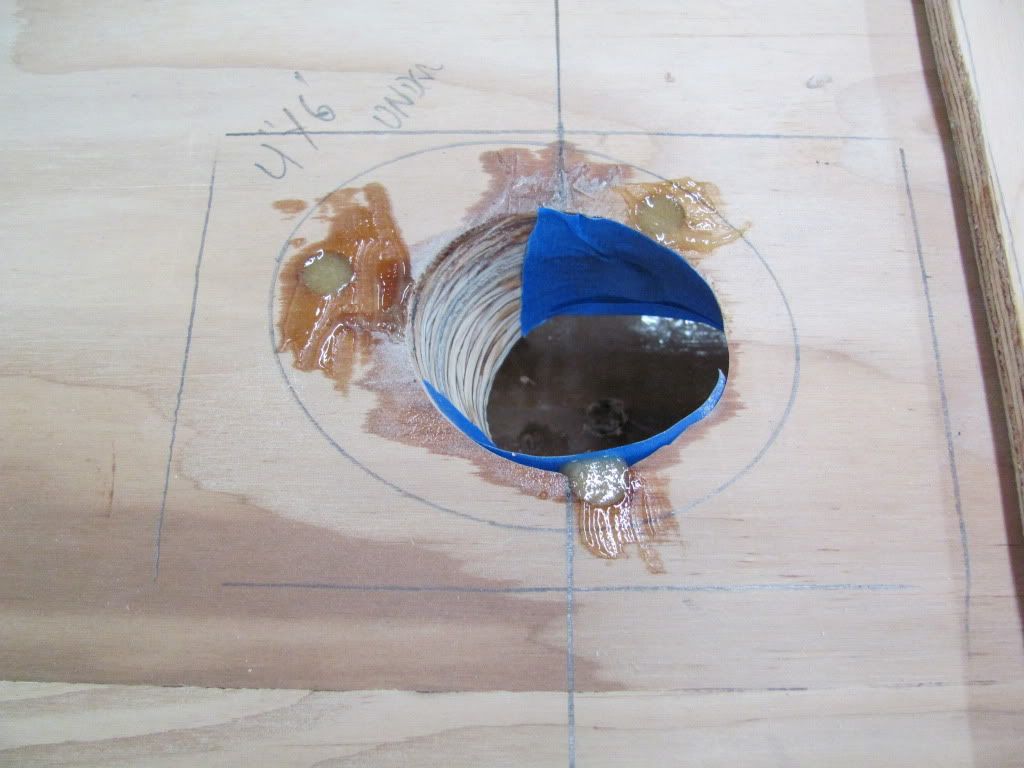
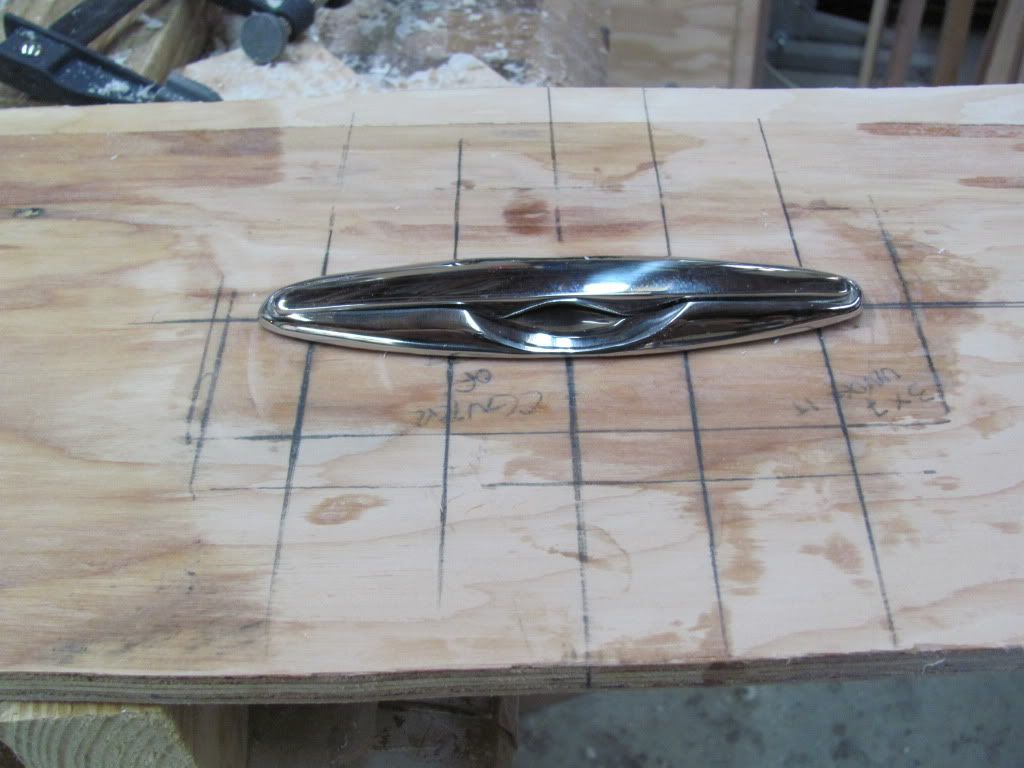


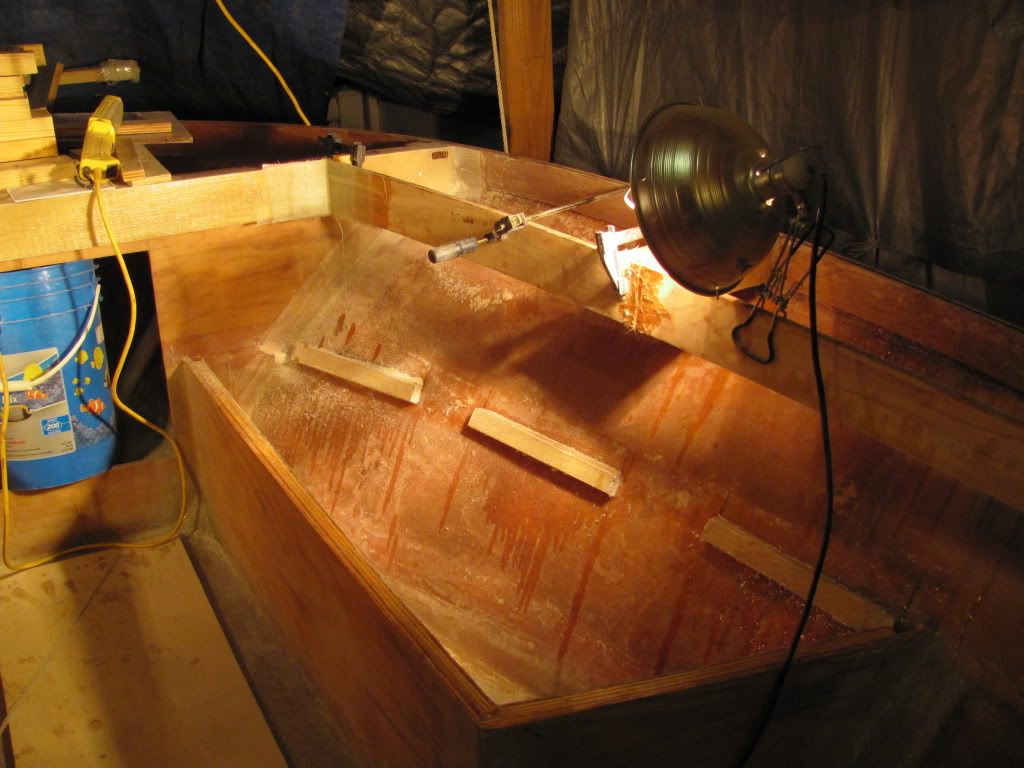
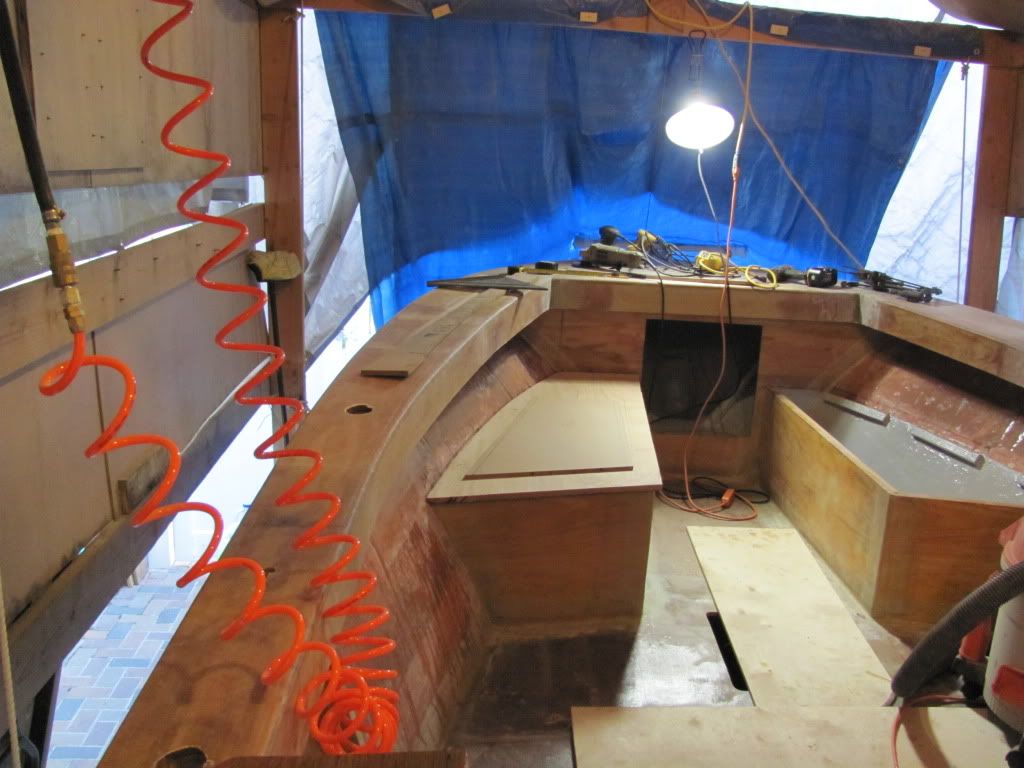
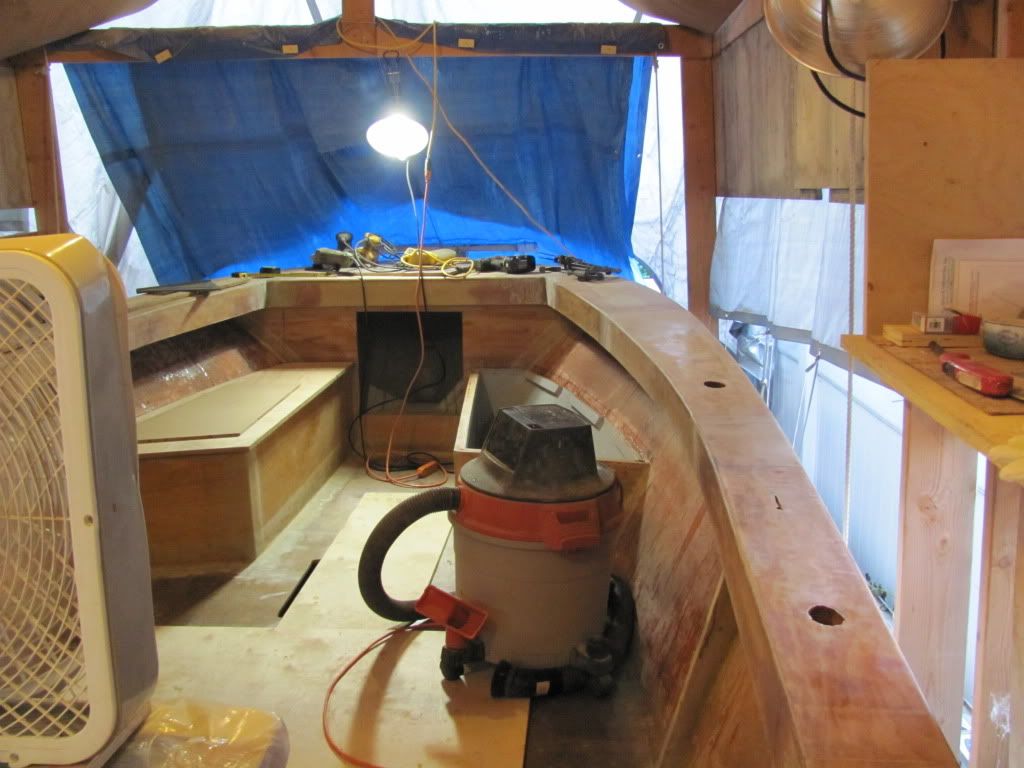
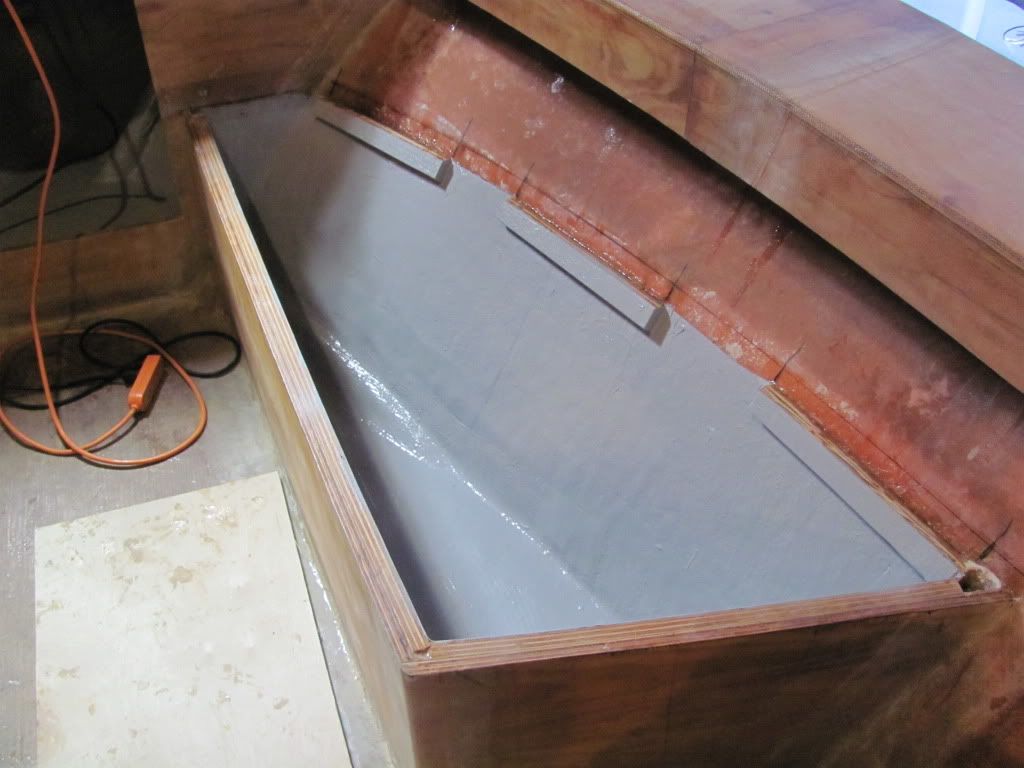
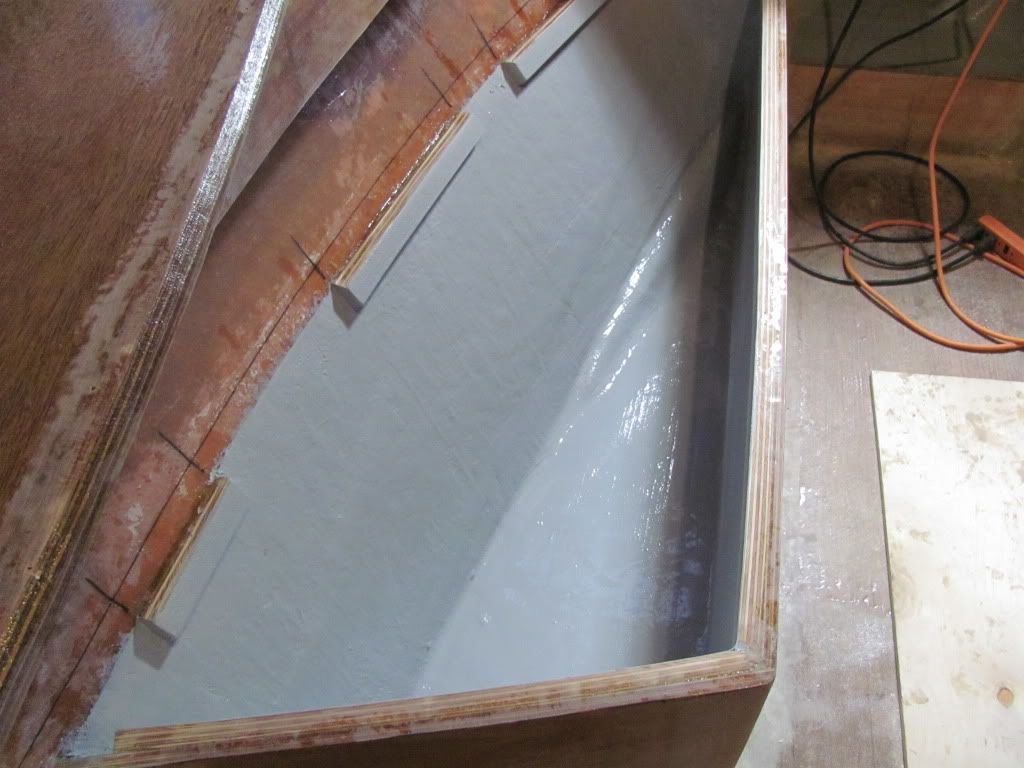


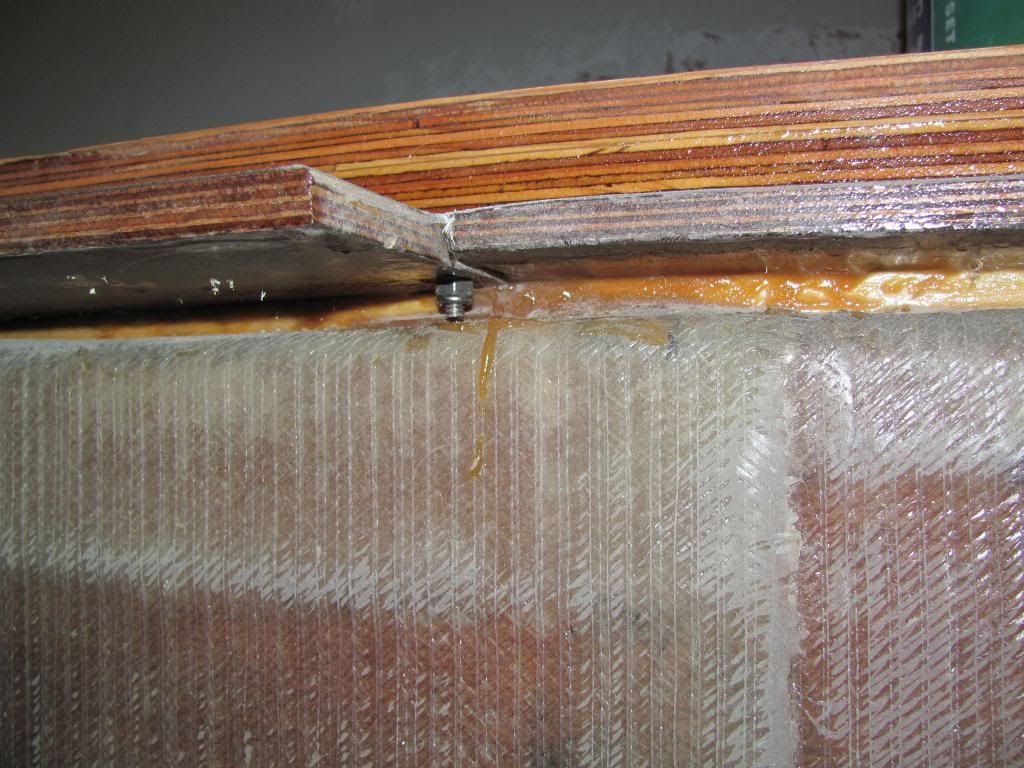
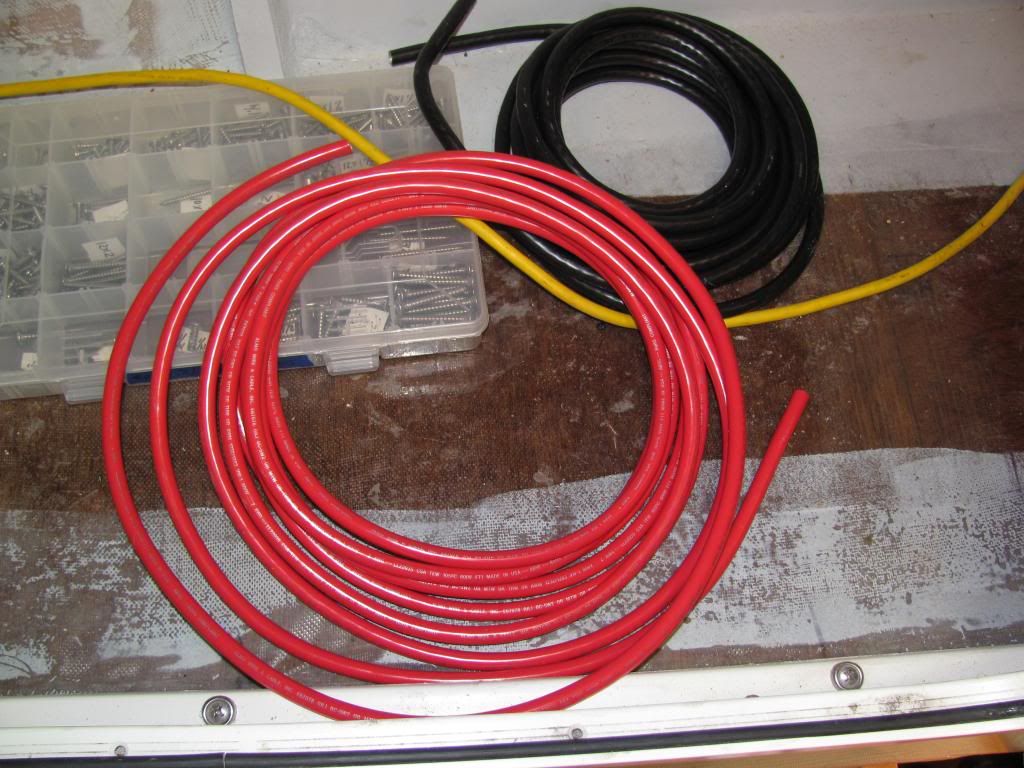
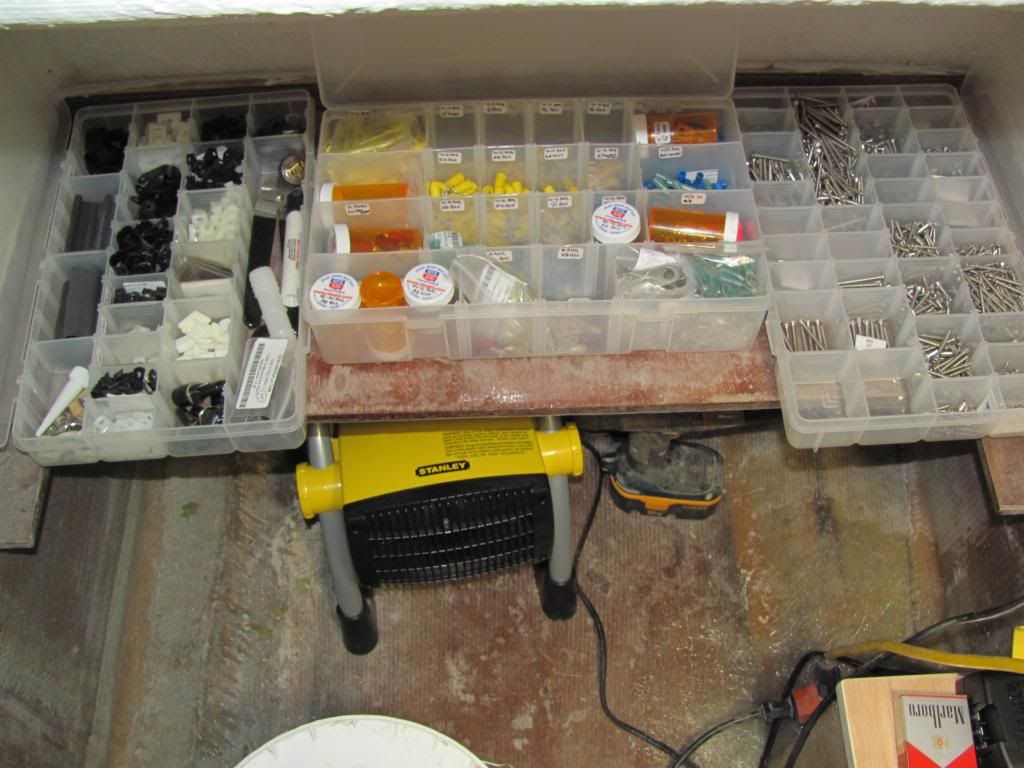

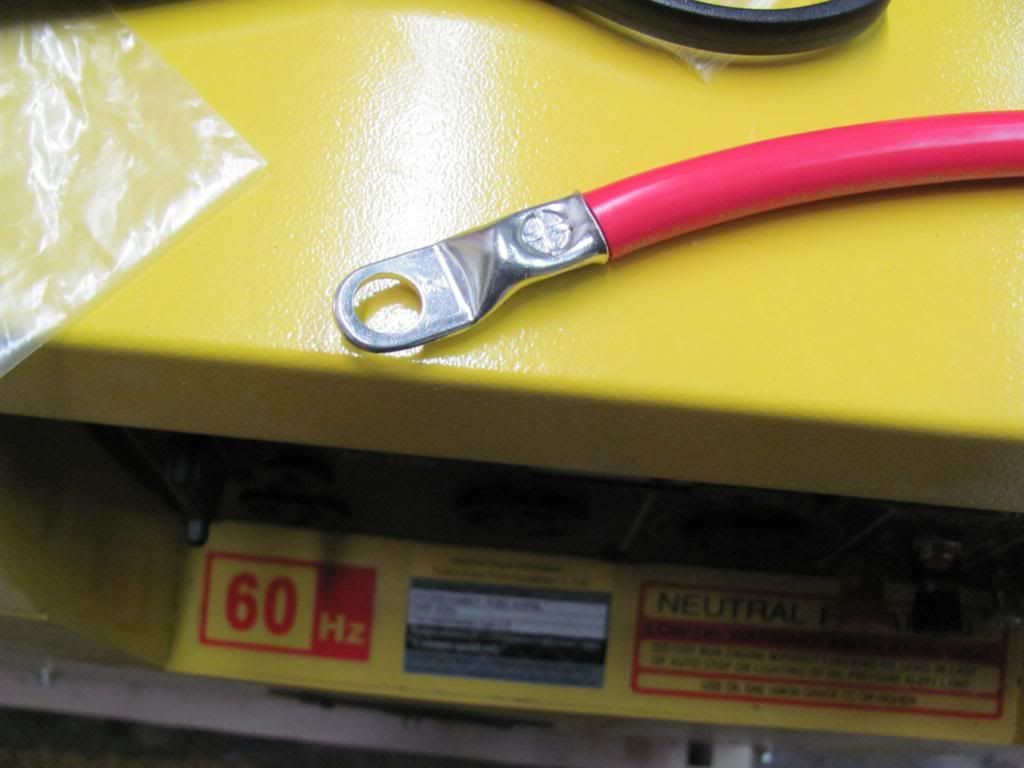
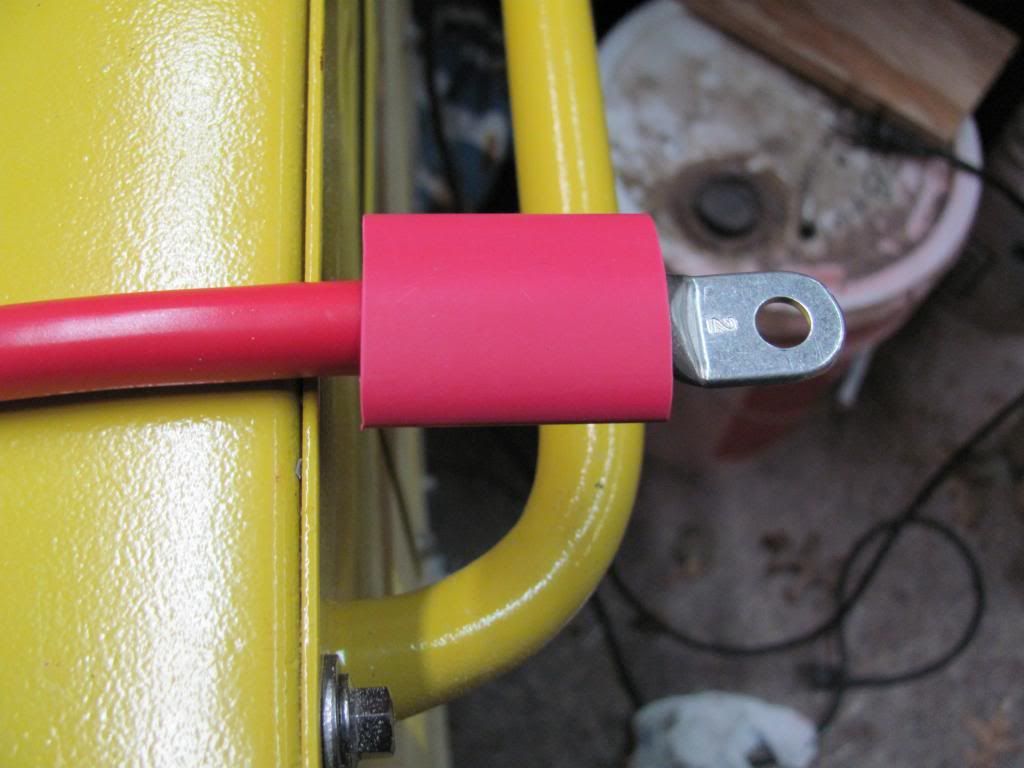
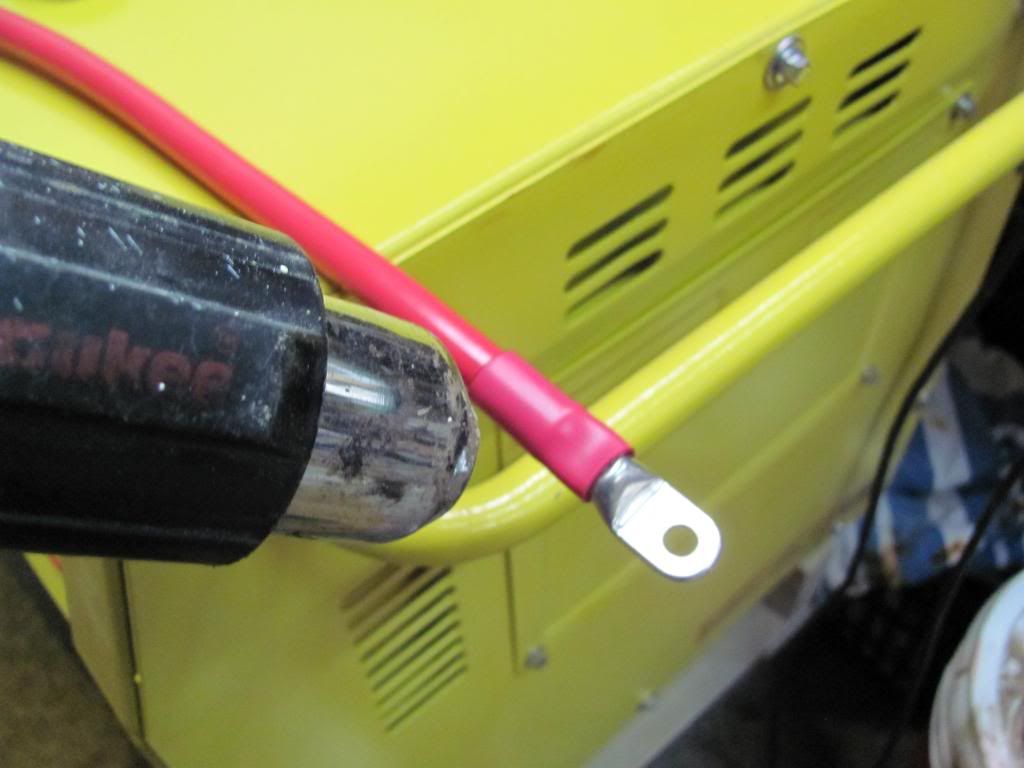
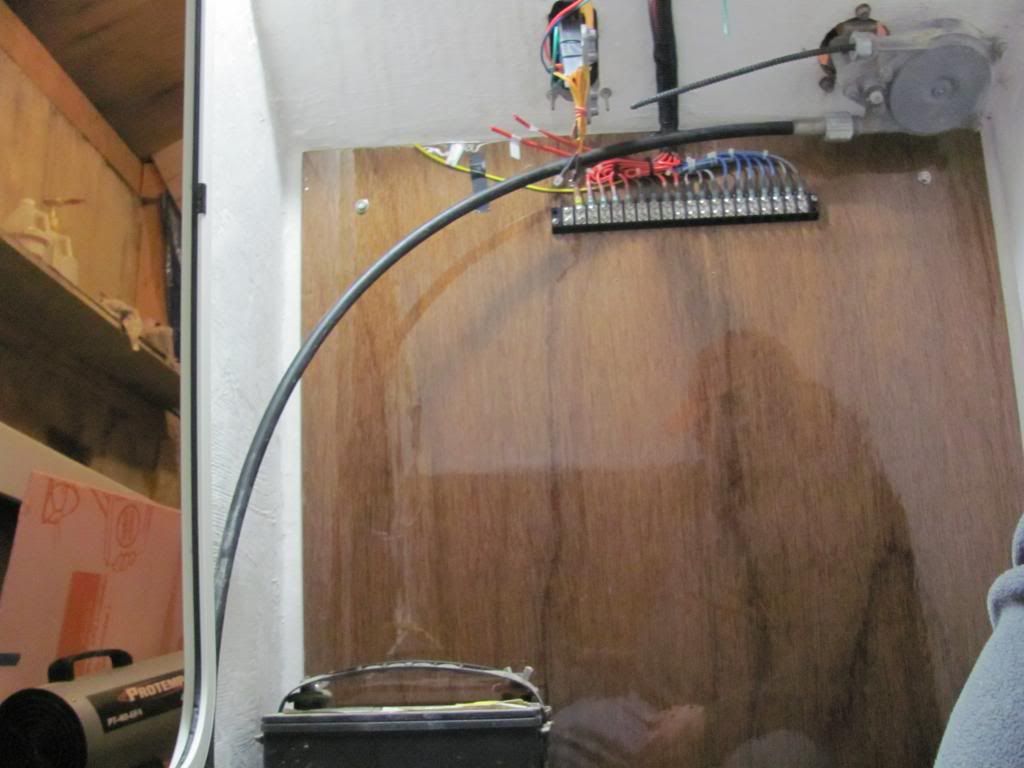
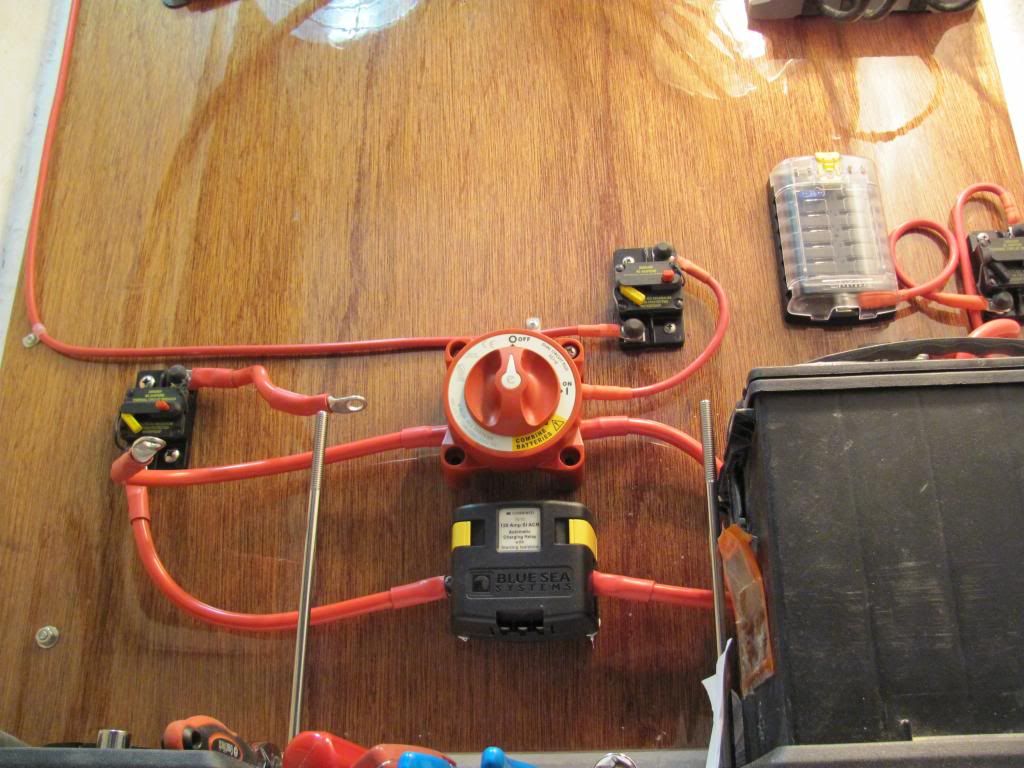
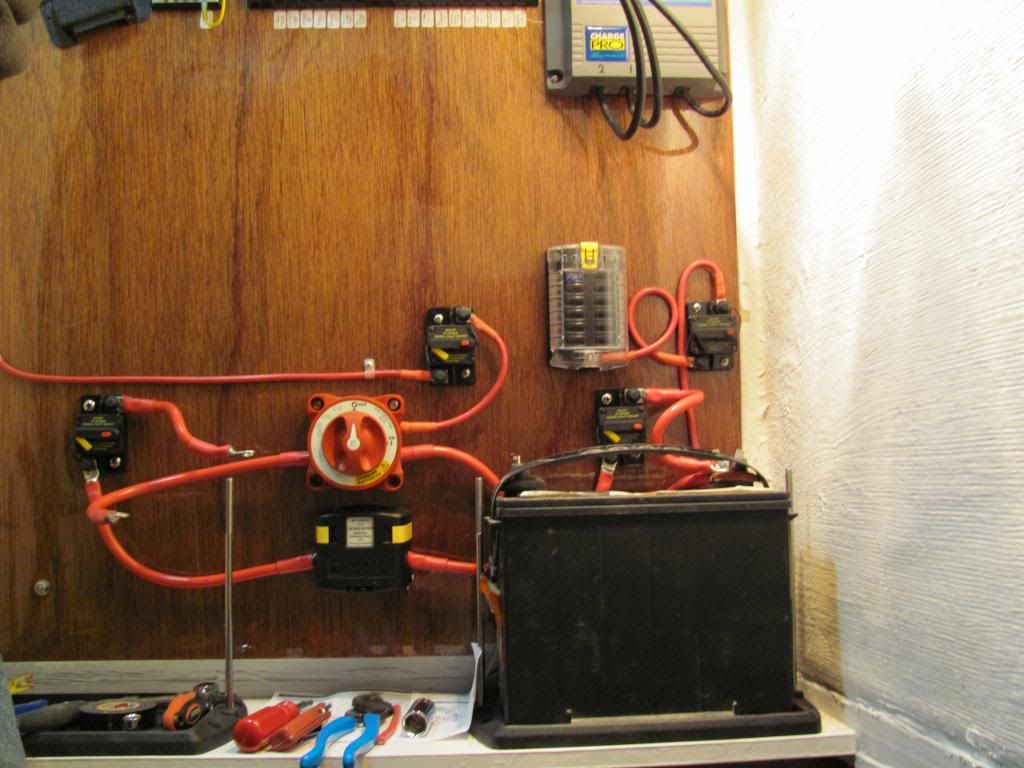
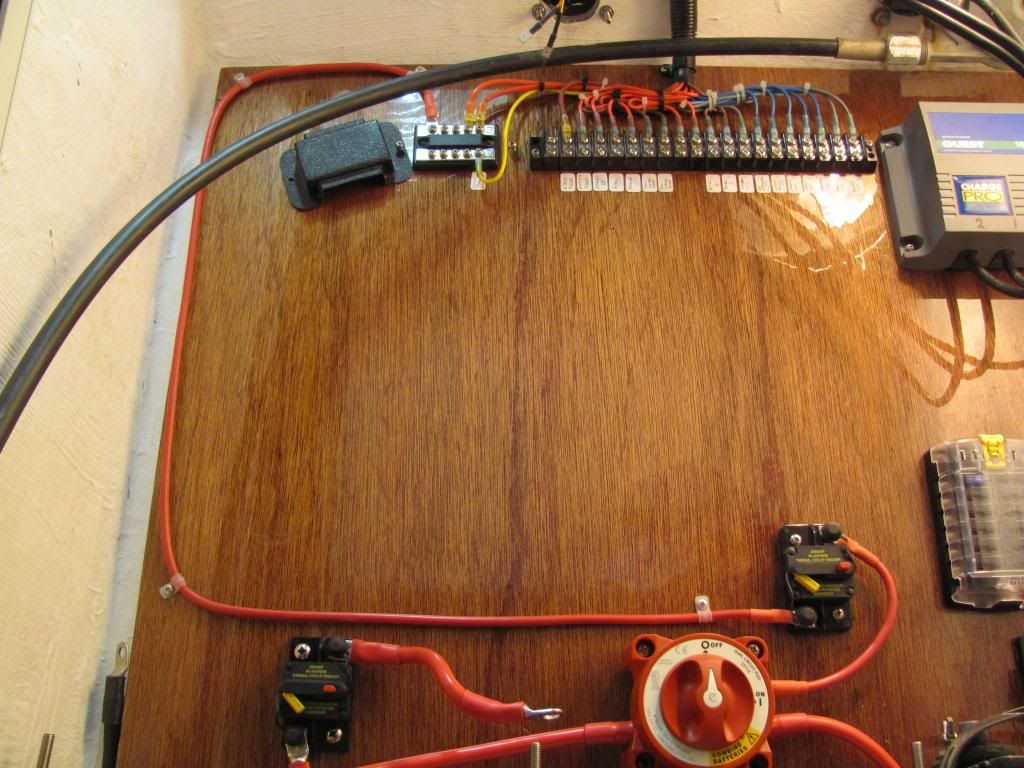


