Page 1 of 1
A British FS17
Posted: Thu Jul 26, 2007 6:11 pm
by steve292
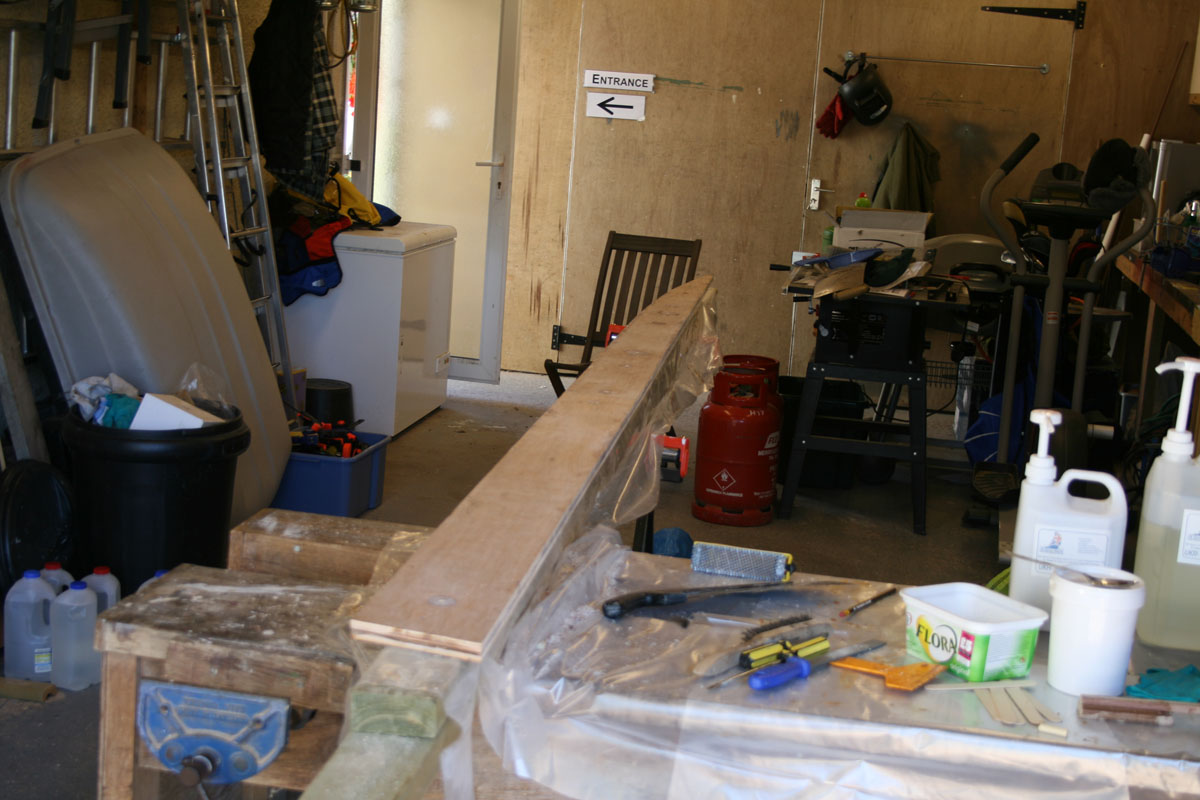
Hi, Just started cutting out the stringers today(small child I can only work when she is having a nap,got 1 1/2marked & cut).I'll put up some photo's when i'm a bit further along.
cheers,
steve
Posted: Mon Jul 30, 2007 12:56 pm
by Lower
Good luck with the build Steve. I'm starting this boat as well, under very similair circumstances...two little ones. Look forward to comparing notes.
Posted: Tue Jul 31, 2007 4:28 am
by steve292
Hi lower thanks for the reply,how are you doing?
cut frame A & finished cutting the stringers.
Missed the deliveryof the epoxy I ordered yesterday,hopefully it will be delivered today,so I can start sticking stuff together, then I will feel like I am making progress.Anybody got tips that they want to share?
cheers,
Steve
Posted: Tue Jul 31, 2007 6:59 am
by WobblyLegs
steve292 wrote:Anybody got tips that they want to share?
cheers,
Steve
Hi Steve - have you read the tutorials? I'm guessing that your stringers are two pieces of ply thick, so you want to make sure that your glue mix is right (ketchup), and also that you have a flat place for them to rest while curing.
Don't go cheap on clamps - ensure that they are well clamped for the whole length, but not over-tight squeezing all the glue out.
Same for when you do the transom.
Stringers and transom are likely the first bits to be glued, and you want to make them strong.
Good luck with it, enjoy, and don't rush. Post pics.
Regards,
Tim.
Posted: Tue Jul 31, 2007 7:15 am
by steve292
Thanks for the reply wobbly,
I have read the how-to's but it is always nice to pick other peoples brains as it were. I've been lurking for a while & reading builders threads as well(you've got a bueatifull boat B.T.W & you should be proud of what you have acheived),good informative thread as well, I hope I can do something as good. I will post pictures as soon as I can.
Cheers,
Steve
Posted: Tue Jul 31, 2007 9:43 am
by Lower
Steve...I just got the ball rolling over the weekend. Cut frame C and D out of scrap plywood. Plan to do the bow mold tonight. Just getting the hang of things before the "good wood" shows up. Like you I've read everything on the site there is to read. Now it's just time to jump in and start. Once I get the wood, etc, I'll start a build thread as well.
Posted: Wed Aug 01, 2007 5:44 pm
by steve292
I'll try a pic
It worked!!!
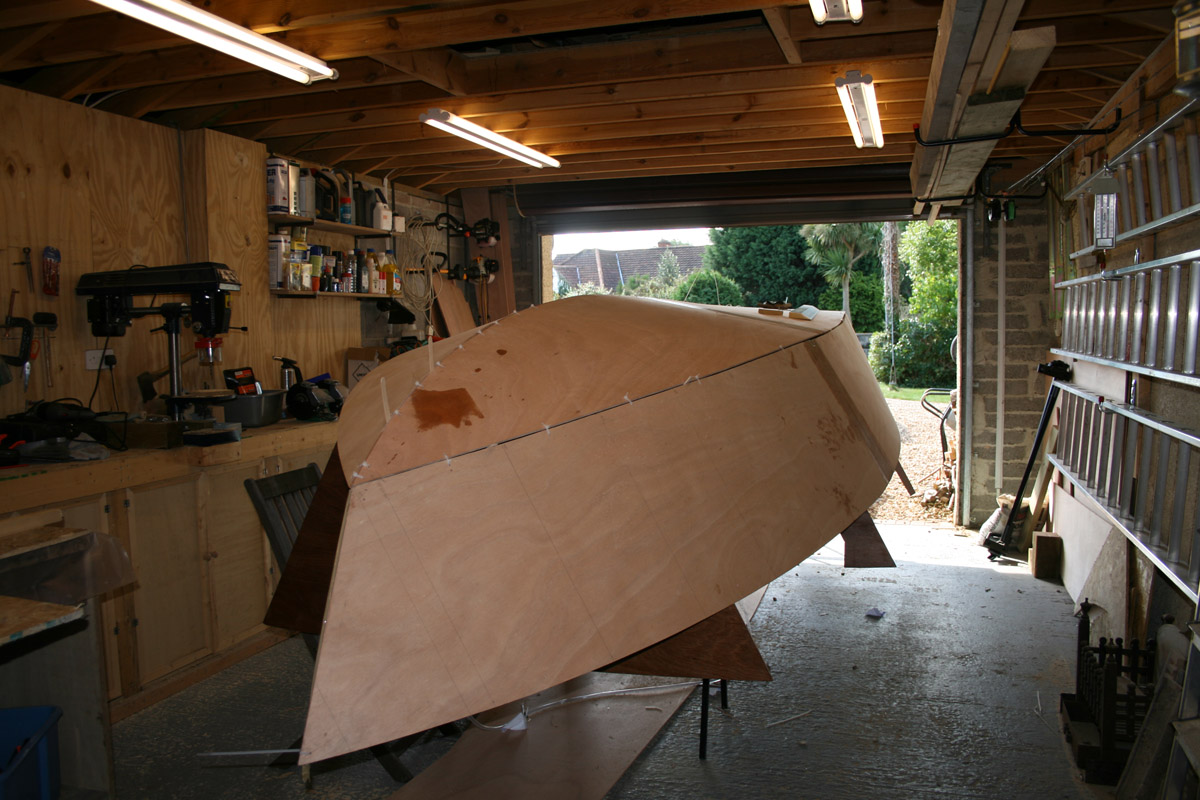
this is frame A cut out -more pics later
Posted: Fri Aug 03, 2007 11:41 am
by Lower
Hey Steve...I think that's the first official picture of a FS17 on the site! Congrats!

Posted: Fri Aug 03, 2007 1:14 pm
by ks8
Welcome to the group!
Any double or triple layer ply laminations can be easily held in place while laminating them, by using dowels, or wood screws that get removed and the holes filled later. You want to use something though, else those panels will slide all around on the goo. Use wood flour for plywood laminations, and not the fairing blend with the microballoons in it. I think you'll have all this info in your plans and instructions, or you've seen it in the how to's. I remember when I first laminated my transom and showed it to people. They thought it would be a tiny boat when looking at that transom, but it grew more than they imagined when all the panels came together and took shape! Enjoy planning and building and launching. If you post to a thread to document the build, they'll be quite a few of us watching the build as it progresses. I really like the open cockpit option of that design with all its wide open room. Enjoy!

Posted: Fri Aug 03, 2007 2:04 pm
by steve292
That pic is a bit small...anyone got any advice about getting nice big pagefillers in..a la KS8, Wobblylegs, Cracker larry & co
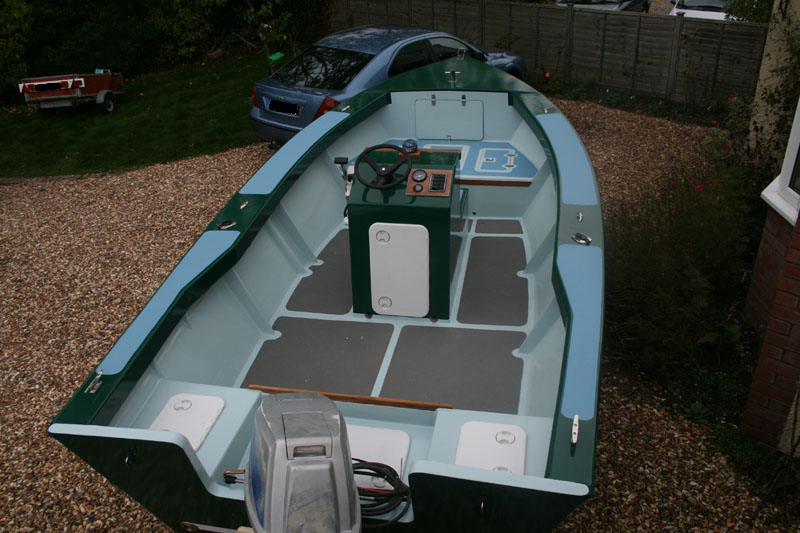
The boat is going to be the raised freeboard version with a small casting deck,175 mm wide gunnells & a centre console. I am thinking of putting the fuel tank in the bottom of the console with the batteries in the bottom of a small flip -flop type seat .
But one thing at a time, get the hull built first ready to flip.
BTW the raised freeboard has nothing to do with any perception of sea keeping ability, just the fact that I have a two year old & it will be safer for her.
Steve
Posted: Fri Aug 03, 2007 2:47 pm
by jeremy
Sure, you linked to the thumbnail instead of the other photo.
Click on the thumbnail in the gallery to open the page and link to that picture instead.

Posted: Fri Aug 03, 2007 5:23 pm
by steve292
[quote="jeremy"]Sure, you linked to the thumbnail instead of the other photo.
Click on the thumbnail in the gallery to open the page and link to that picture instead.
thanks! such a simple thing to do when you know how.
Steve
Posted: Fri Aug 03, 2007 5:32 pm
by Cracker Larry
anyone got any advice about getting nice big pagefillers in..a la KS8, Wobblylegs, Cracker larry
I usually resize all my pictures to 800 X 600 and try to keep the file size in the 200KB range. These fill the page without being too large for it.
Good luck with the build. The best advice I can give is, if you don't know something, ask, and don't proceed until you know

Posted: Sat Aug 04, 2007 4:02 pm
by hglucky13
good lucK with the build!! i am very excited to see your build
I am building the same boat, with the raised freeboard ,center cockpit, and intended to build a full height bench against the motor well for bait and coolers. I have also tossed around the idea of having a casting deck out to the b station.or at least midway between a and b. I like the raised freeboard for the ability to lean my thighs against the gunwale when fishing for tuna. but want the casting deck for bass fishing. trying to make this an all around boat for myself and my kids. wish i could afford two boats!!!!
Posted: Sat Aug 04, 2007 6:20 pm
by steve292
[quote I like the raised freeboard for the ability to lean my thighs against the gunwale when fishing for tuna. quote]
I don't think i'll be doing much tuna fishing in the Bristol channel, but I can dream. I to aim to have the casting deck out to station B, as I enjoy fly fishing & spinning for our european bass.There seems to be a lot of interest in these boats,so I feel the pressure from my peers already,& not a panel spliced yet.
PROGRESS.
frames A,B,E cut, both motorwell sides cut out,frames C & D marked out. Transom marked out,stringers cut.
I am doing it in stages mainly because I have limited storage for the ply, I cant store it flat so I am only buying 6 or so sheets at a time, I am tying to get all the frames,both stingers & the transom ready(laminated) before I aquire more materials.
will post pics on Monday(family gathering tomorrow).
Cheers,
Steve
Posted: Wed Aug 08, 2007 5:57 pm
by steve292
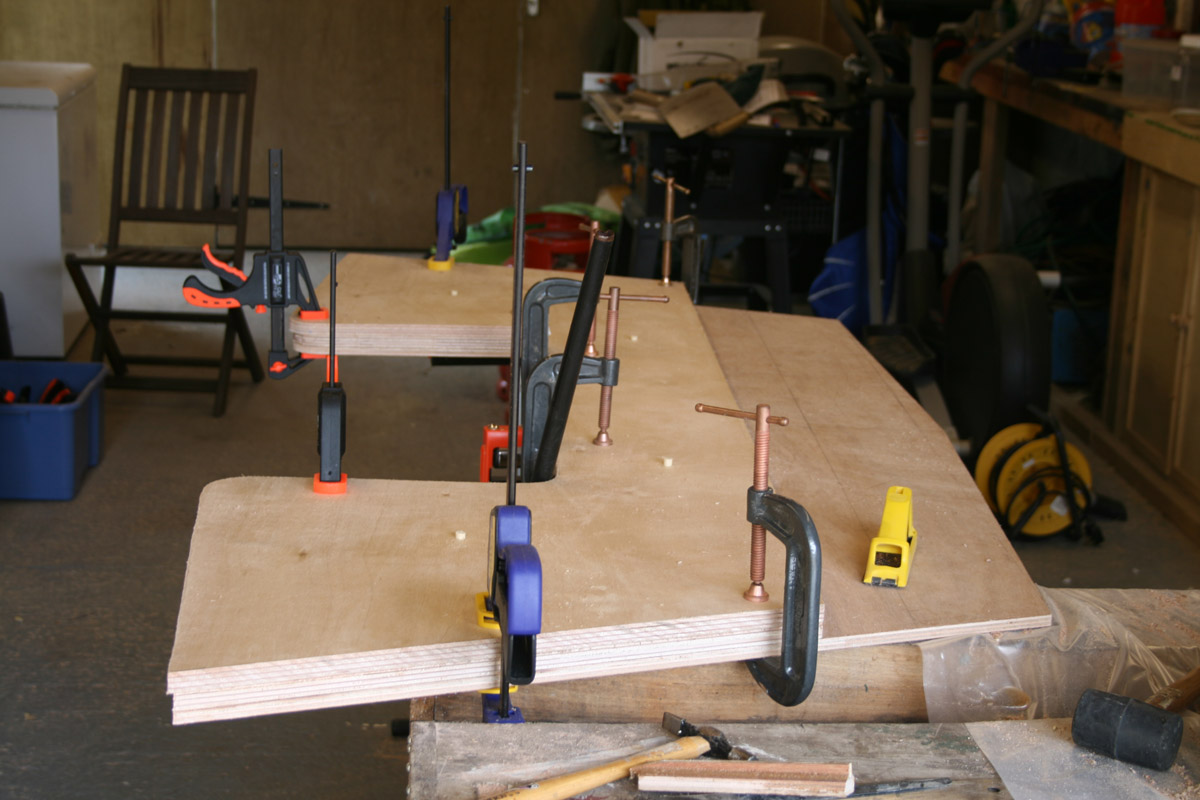
Big evening for me,got the first stringer laminated.I thought having 30 odd clamps was enough, but I think i'm wrong by about a factor of three.
I have some pic's which I will post tomorrow when I have some more time.I used the dowel method to keep the stringer pieces in alingnment during glueing.It has also been a usefull excercise in mixing glue to get a good consistency.Had a small amount left at the end ,so I thickened it a bit more & filleted some scrap together out of interest, just to see if I have got the idea in my head properly.
Regards,
Steve
Posted: Sat Aug 11, 2007 4:37 pm
by steve292
Today I finally got both stringers assembled & dressed.
I used the dowels to hold the pieces in perfect alignment during the epoxy glue cure-
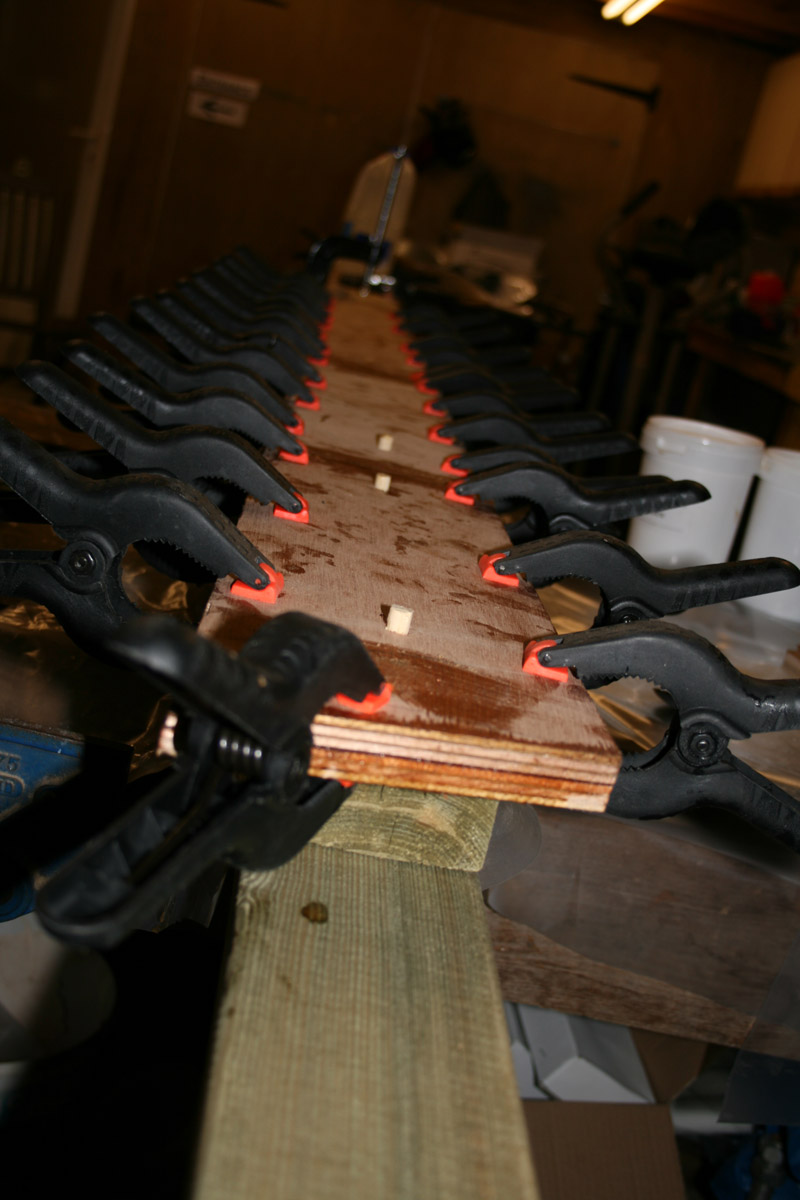
I underestimated how many clamps I'd need so I went & got another half dozen before I embarked on the second stringer-
After the glue had set up overnight I used a surform to remove the epoxy that had oozed out of the joint,while it was still green. They now look like stringers & have stiffened up considerably.
I now feel up to the my next little milestone, which is assembling & glueing the transom clamping boards. I will post more pics as I go on
regards,
steve
P.S the thinking chair tip I got from the Dougster
Posted: Mon Aug 13, 2007 1:51 pm
by mecreature
Its going to be fune to watch this thing go together..
I got a feeling that work space is going to fill up quick..
keep the pics coming..
Posted: Mon Aug 13, 2007 2:43 pm
by tech_support
Steve, you do not need that many clamps

One of the only mistakes you can make with epoxy is squeezing too hard. The more epoxy left in the joint the better
Posted: Tue Aug 14, 2007 9:20 am
by Lower
You killin me Steve. I am dying to get working on the boat, but life keeps interfering. Heading up to Maine for a few days. When I get back, I gotta get busting.
Thanks for posting pics. Fun to watch the build. Also helps others (like myself) when we get to that point. Sorry you don't have anyone to follow, but someone has to lead the show!
Posted: Tue Aug 14, 2007 5:19 pm
by steve292
Progress-
Today I got the transom clamping boards routed to there final sizes & the first layer glued to the full transom. I should add here that the clamping board is made from 2 layers of 18mm ply as I already had a sheet in the shop. I did ask JM first if it was o.k. As I am raising the freeboard the 2 inserts have used a whole sheet of ply.
Some pictures for your viewing,all comments welcome.
This is the 2 roughed out inserts clamped & doweled to the full transom,I then used a router with a trimming cutter, which has a bearing to allow it to run on a template to trim the insert using the full transom as the template.
Just to show the transom & clamping board assembly after finish machining.
Finally the first 2 pieces of the transom glued & clamped
I didn't use as many clamps this time!(thanks for the advice Shine)
The dowels I find simplify alingnment of components greatly(thanks KS8)
cheers,
Steve
Posted: Tue Aug 14, 2007 6:13 pm
by WobblyLegs
Steve,
Looking really good so far!
It looks like you have a nice workshop there, makes for easier building than in a tent in the garden!
Regards,
Tim.
Posted: Wed Aug 15, 2007 9:43 am
by mecreature
Nice pics.. thanks for taking the time to post them..
Posted: Wed Aug 15, 2007 5:38 pm
by steve292
WobblyLegs wrote:Steve,
Looking really good so far!
It looks like you have a nice workshop there, makes for easier building than in a tent in the garden!
Regards,
Tim.
Thanks Tim. I thought about your build in your tent the other day when I was in the garage routing away with the rain hammering down outside.It can't be easy being weather dependent. The transom is fully assembled & is curing as I type.
Next step is to order some 6mm okume from robbins for the hull panels,clear the garage & think about the best way to mount them to mark & cut out. I am leaning towards the type of frames that Cracker Larry used to cut out his OD18 panels. My main problem is the garage is'nt wide enough to allow me to construct the building jig & lay out the panels at the same time, or store the sheets of ply flat & work which is going to slow me down shortly so I am buying stuff on a JIT basis. I must say that I am finding it fun so far

.The comments from the other forum members I find motivates me to try harder to make a decent fist of it as well.
Posted: Thu Aug 16, 2007 2:52 pm
by colonialc19
Transom looks great Steve! Hope to have mine done soon. I think I'll use a router to trim up my transom pieces also, great idea.
Daniel
Posted: Thu Aug 16, 2007 4:42 pm
by WobblyLegs
steve292 wrote:The comments from the other forum members I find motivates me to try harder to make a decent fist of it as well.
In the voice of the "Churchill" advert: 'O-o-o-o-h yes!'
Apologies to the 'mericans if you don't get this....
Posted: Thu Aug 23, 2007 5:59 pm
by colonialc19
Steve, Hows the boat coming? Just wondering how it was going. I started cutting out the lower hull panels this afternoon, still have some to cut out before I can start splicing. Hope its going well.
Daniel
Posted: Thu Aug 23, 2007 6:55 pm
by steve292
Daniel,
Work has got in the way this week.I work shift,all 12hr days & nights so when I work the boatbuilding stops, I'm afraid. This is when I try to mow the lawn, weed the borders & do all the little jobs around the place.
This is my last night tonight & then I'm off for a while so more progress next week I hope. I had the 6mm ply delivered on wednesday,& hope to be building a frame to lay out on fri/saturday. I have also cleared the garage to give a uncluttered workspace.
Taking an enforced break has the advantage however that you can stand back & think about the next step. Currently I am thinking about the strongback & try to source some reasonably straight timber at a reasonable price(not as easy as it sounds in the U.K.).
I Hope you are making good progress as well.I would like to think we will hear from some other FS17 builders soon, I can't think we are the only ones starting building,as it seemed a very popular design.
regards,
Steve
Posted: Thu Aug 23, 2007 8:18 pm
by ks8
You'll be amazed how strong and solid that transom is when it is tabbed on the hull and glassed and ready to hang an engine on it. The whole thing gets stronger and stronger as the entire hull comes together. Enjoy watching it come to life!
Keep those pictures coming!
Posted: Thu Aug 23, 2007 10:02 pm
by Lower
Things are looking good Steve. Daniel...you look like you are making headway as well. I'm trying to squeeze some in whenever I can. I just got back from a trip midweek and am leaving with the family up to maine agian this weekend. I did manage to draw up "B", "E" and my stringers last night though. This should be my last trip for a bit. Then I gotta get going. It's fun to watch your progress, but I'm getting jeleous.
I'll start a build thread as soon as I start cuttin stuff! Good luck the next few days and I'll pop back in when I return.
Posted: Fri Aug 24, 2007 8:50 am
by colonialc19
Steve, I feel your pain on the 12hr swing shift. Just got off night shift this a.m. start back on days monday, I'm lucky though my wife loves to mow the yard, I guess any time she gets a break from the kids she's happy. Well, good luck this weekend.
Daniel
Posted: Tue Aug 28, 2007 6:00 pm
by steve292
Hi,
Since I last posted I have taken delivery of 10 sheets of 6mm okume plywood from Robbins timber in Bristol. For the frames I used far eastern bs1088,but this stuff is worlds apart.The hull skin will be made from this & the side decks for the gunwales. The sole will be 10mm robbins elite as well,with the console a mixture of the far eastern stuff & robbins elite.

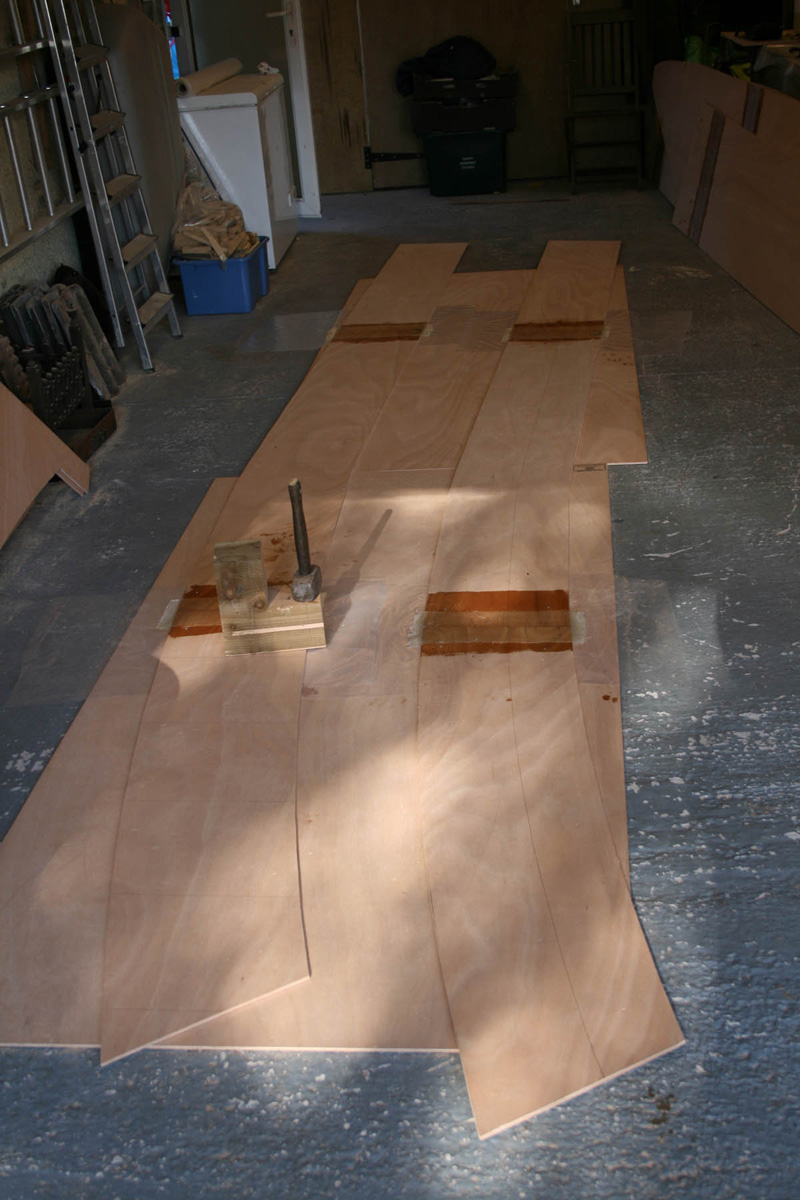
I have cut out the side & bottom panels of the hull & tonight I started to tape the panel sections together.Room is a bit tight,as you may be able to see from the photo's, so some planning is required so I don't paste myself in a corner.
I went & got a fabric cutter from our local haberdashery which is making short work of cutting the biax tape.(thanks wobbly!)
I would welcome any comments on the picture of the tape lamination below.I think it is o.k,with no bubbles in it but it is the first one i've done
so ANY constructive comment is appreciated.
I am also using any leftover resin to coat the frames, so far between the gluing & taping I have coated all of A, both motorwell sides & half of E
as you can also see in the pics.
cheers,
Steve
Posted: Tue Aug 28, 2007 9:11 pm
by Lower
Looks great Steve. Making great progress.
? for you...what's the width of the motor well cut on the transom. Can't seem to find that measurement. Thanks.
Posted: Wed Aug 29, 2007 3:49 am
by steve292
Lower,
The motorwell is 32" wide.(812mm)
I have just been out to check the fg tape I put on last night, & all seems o.k,so I am well pleased.
Steve
Posted: Wed Sep 05, 2007 5:52 pm
by steve292
Just a quickie-
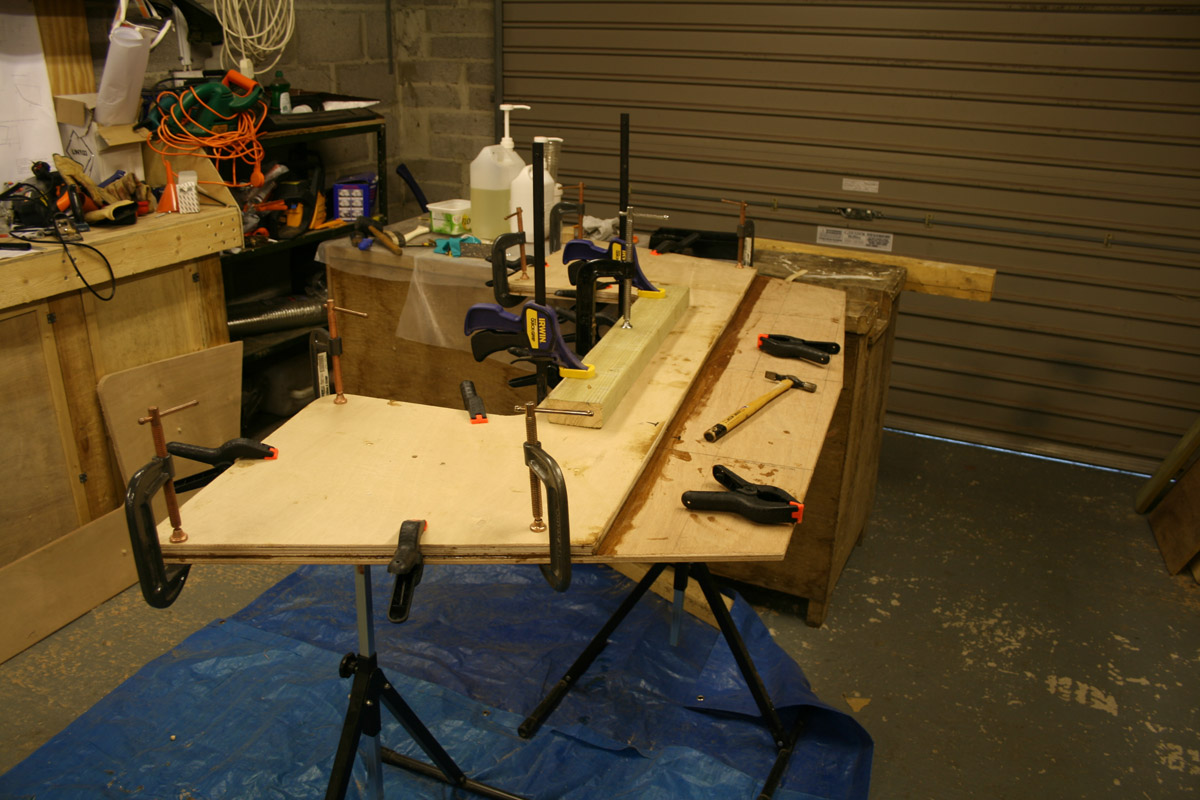
I have finished cutting out all the side panels, the last fg splices are curing as I write. The wood for the jig is coming friday, so hopefully i'll have some more to show then, with pictures I promise.
Steve
Posted: Sun Sep 09, 2007 5:51 pm
by steve292
Progress
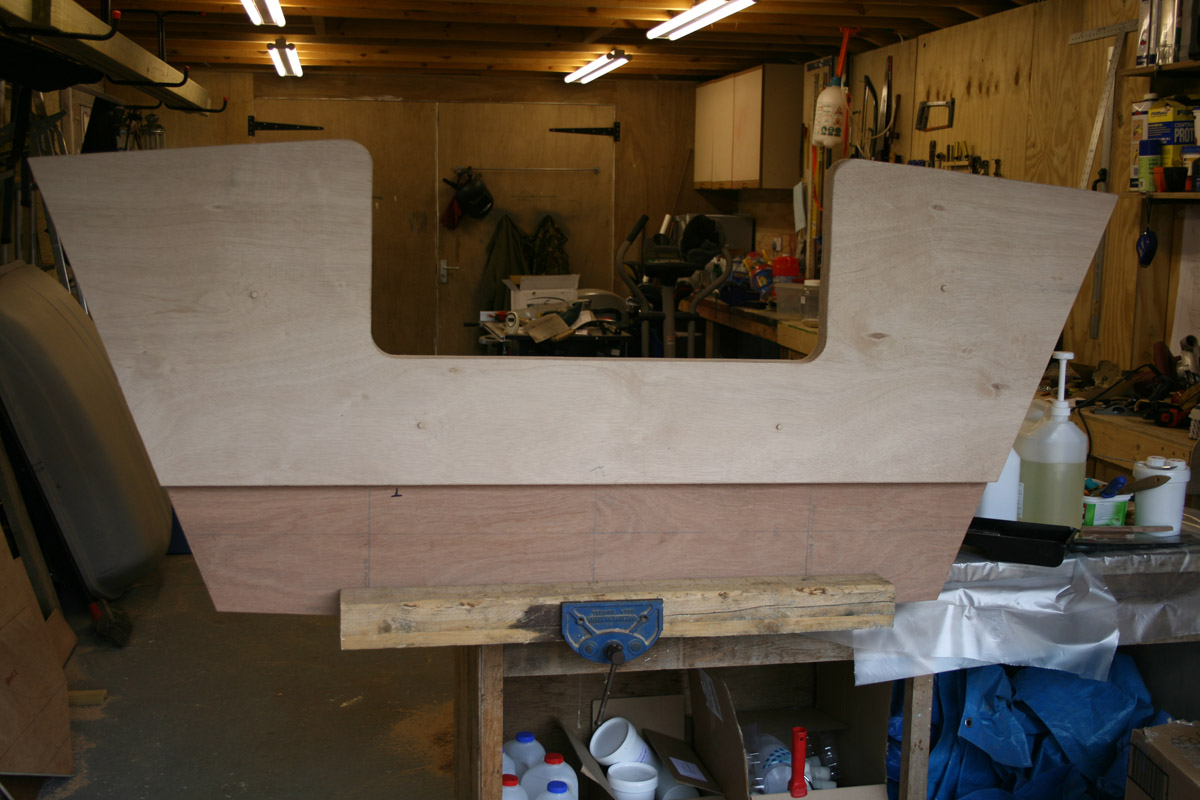
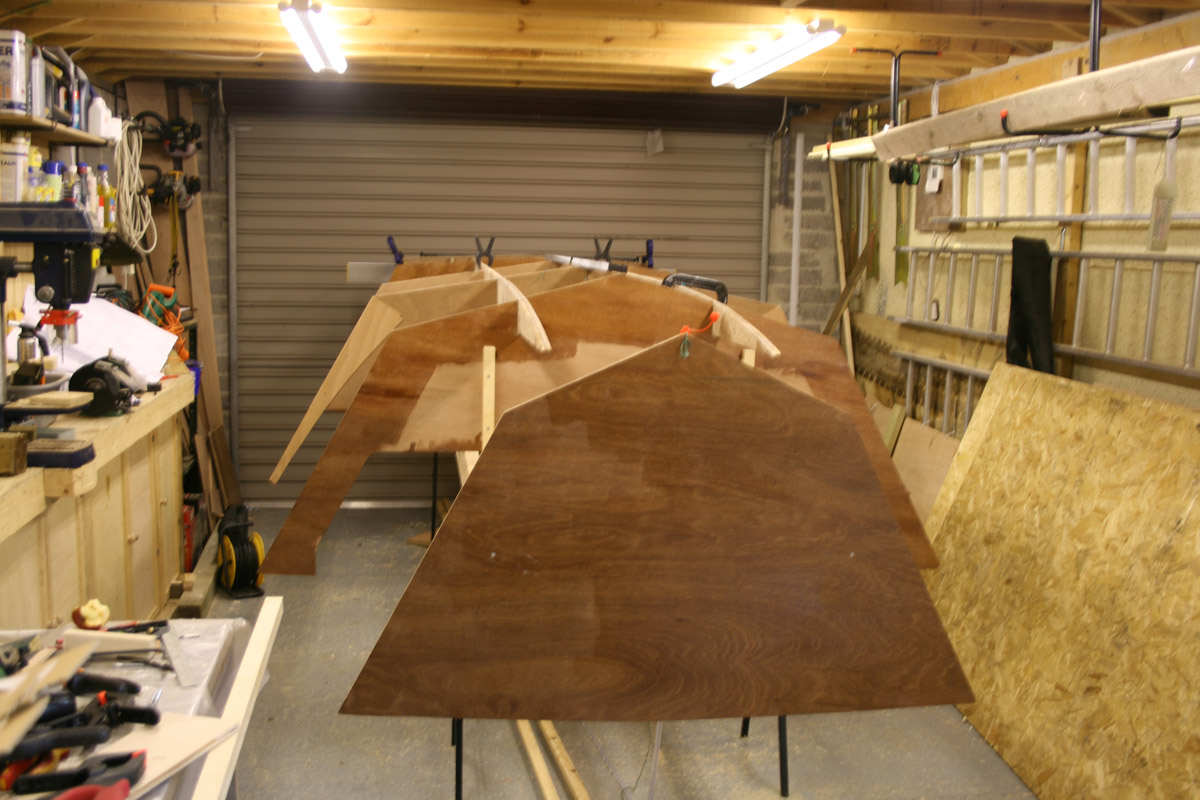
I have finished assembling all the hull panels & have used the side panels to mark & cut the bulwark extensions as described in the building notes.
Here they are with the splices curing-
I have also built the jig,
BUT incredible as it might seem a fortnight of rummaging through every timber yard for a raduis of ten miles did'nt yeild two straight,unwarped 2x8 beams. So I have selected two of the least bent ones. These are straight lengthways but have a slight
upwards cast to them,so I am going to lift the frames slightly on the jig to allow me to adjust them up or down using a water level. To this end I have mounted frame A about 40mm high & levelled it. This I will use as the datum for all the other frames.
You may be able to see the deck line above the jig crossmember in this pic-
to centre the frames I have marked the centre of the jig using a stringline.
A couple of views of the jig-
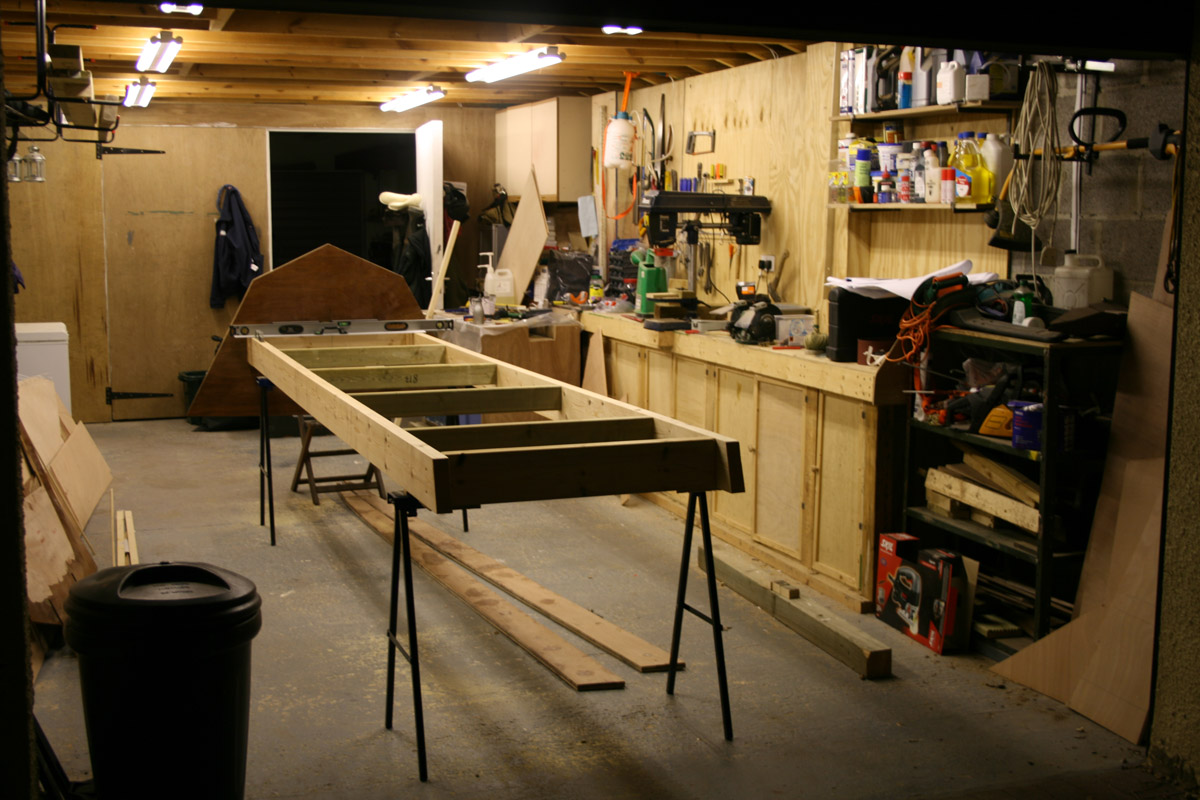
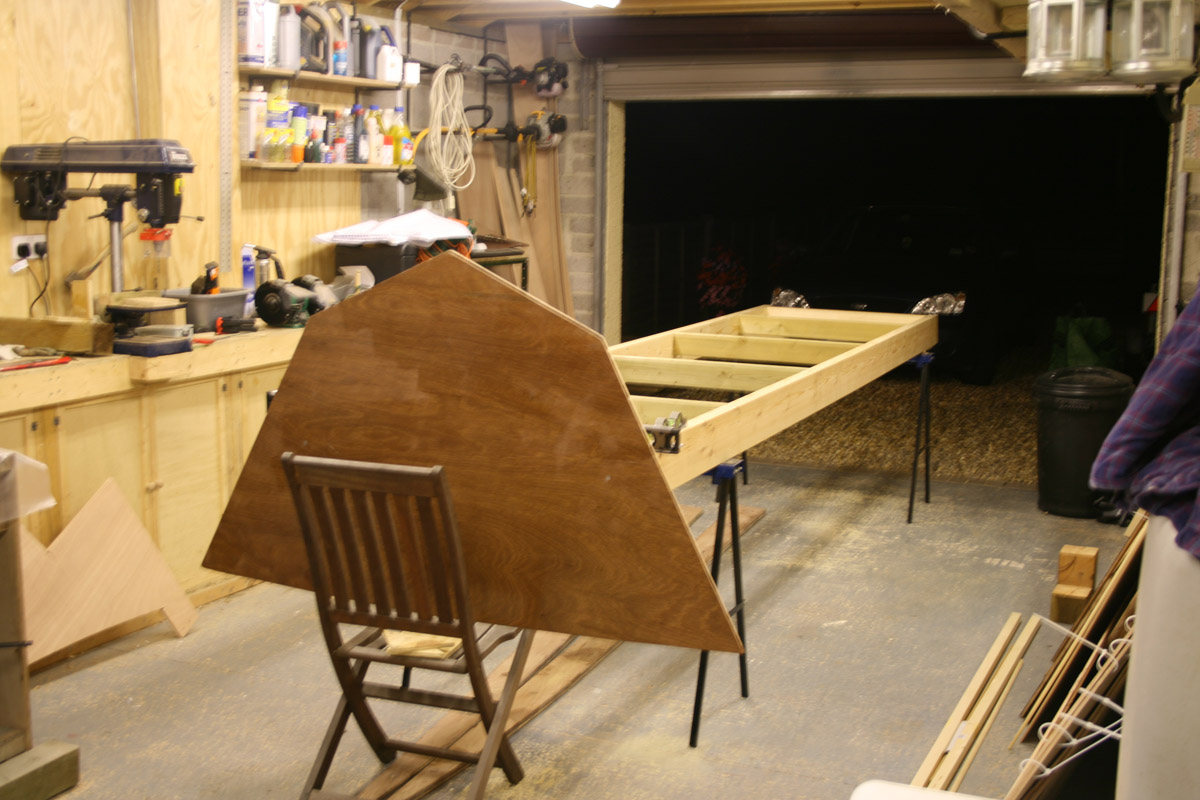
The chair was my third hand with some scrap ply packers, as I am single handed. I'd be lost without speed clamps.
Regards,
steve
Posted: Mon Sep 10, 2007 8:29 am
by Daniel Huckleberry
That chair also gives the rest of us a good reference for scale. Her bow looks big! Nice work and keep the pics coming.
Huck
Posted: Mon Sep 10, 2007 3:23 pm
by Lower
Doing a great job Steve! I think you'll be one step ahead of me the entire build. Keep posting pics. I love checking them out.
Posted: Mon Sep 10, 2007 5:52 pm
by steve292
Thanks guys,
Today I have mounted B & C frames & levelled them. I am thinking about the transom now as the building notes describe setting it of the width of the jig,& using the motorwell sides to set the height. As I have a wonky jig I will have to think of a way to do something similar, but up in the air.
That may make interesting reading, when I get there!
cheers,
Steve
P.S
The beams that looked straight when I bought them are'nt "!"£$**% straight either. £60 for wood thats not true..........at least dick Turpin had the decency to wear a mask when he did highway robbery.
Posted: Tue Sep 11, 2007 2:41 pm
by colonialc19
Your making progress Steve and looks great so far, can't wait to see more!
Daniel
Posted: Thu Sep 20, 2007 12:13 pm
by steve292
Slow progress this week,due to the rugby world cup, but some never the less,
I have mounted the frames on the jig & also the transom.
I am going to have to re-cut frame D due to what is best described as a momentary loss of brain function in that I marked it with a measurement that is not on any of the drawings, anywhere. I was always taught to think thrice , measure twice & cut once.One day I will take that advice & save myself time in the process. Nevermind.I can use the ply later on something else. I am gong to recut the frame from OSB later today.
I made some screwed adjusting brackets for the transom mounting as it was to big & heavy to hold & adjust on my own.
here are some pics-
overall view of transom
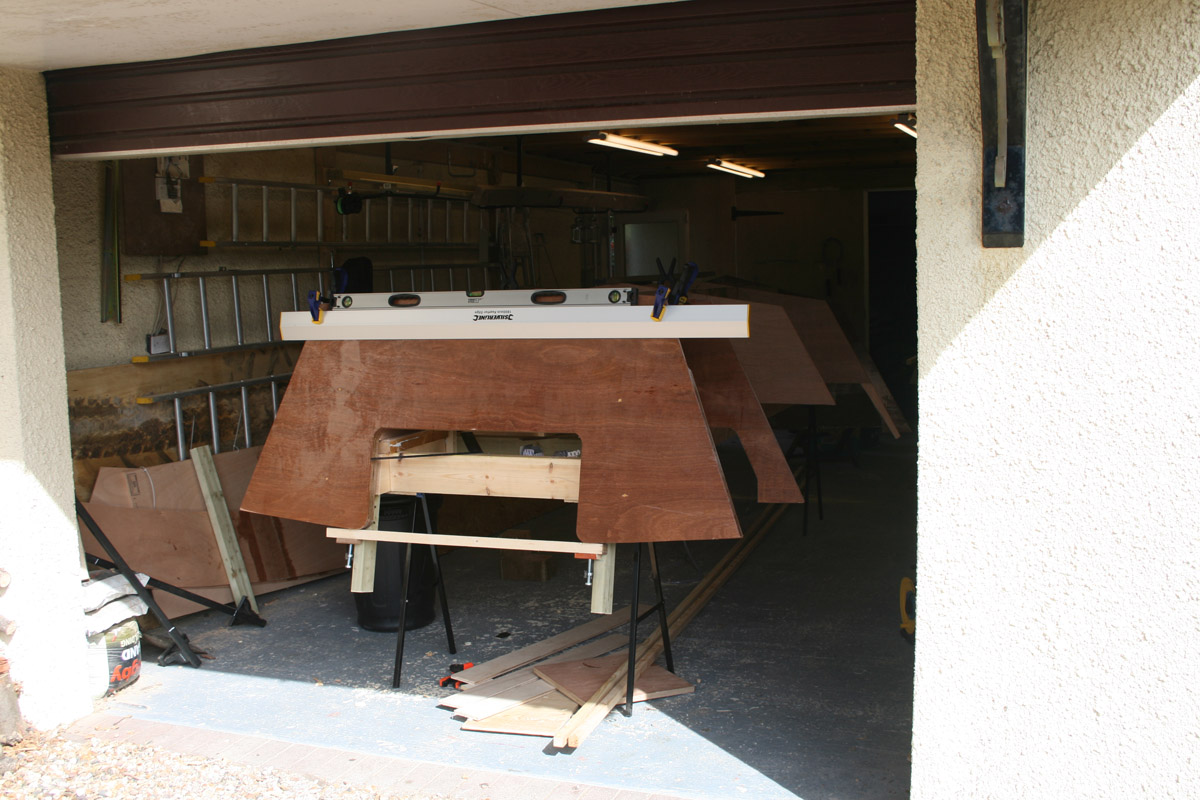
& one of the adjusting gizmo-
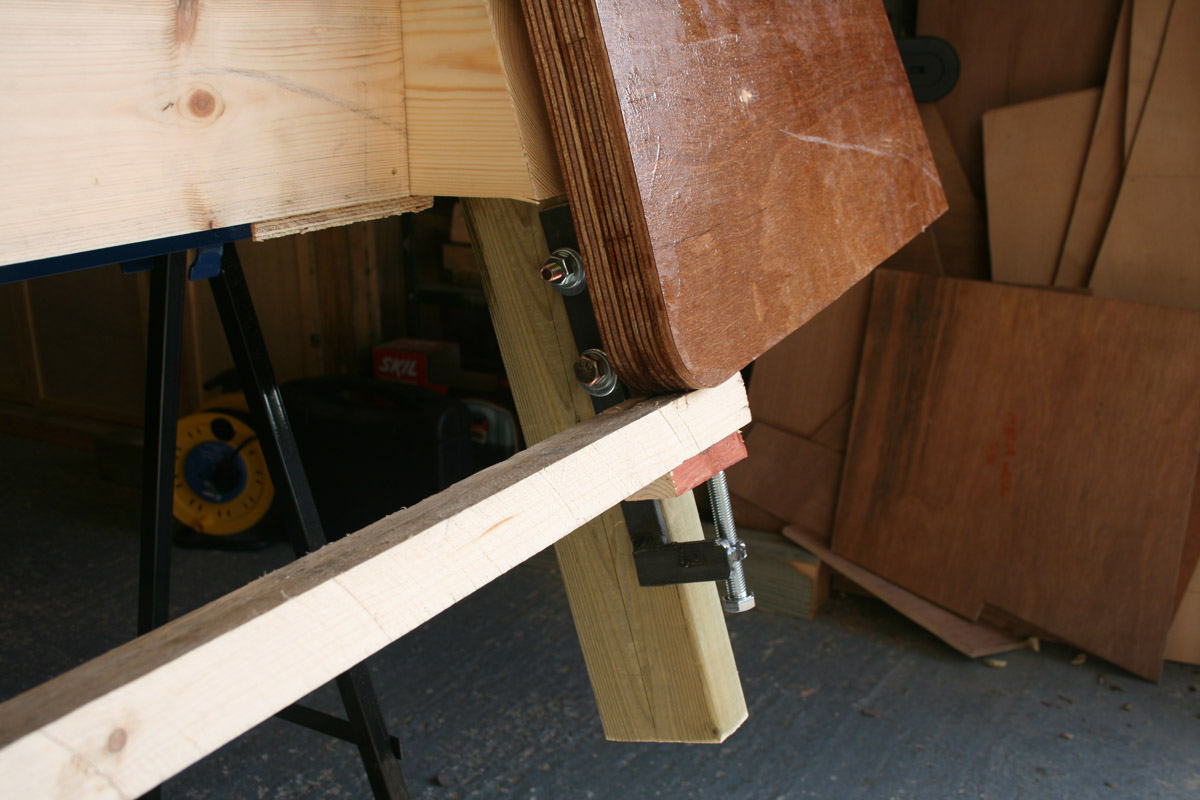
& last another view of the molds on the strongback
You might be able to see that the stringer is proud of frame D. the measurement I got wrong was the baseline to chine. Should have been 89, marked & cut at 59. 59 appears nowhere on the frames drawing,so what I was thinking I don't know.
Steve
Posted: Thu Sep 20, 2007 1:04 pm
by Daniel Huckleberry
If that's the worst mistake you make, you will be superfine!
Looks great. Build on!
Huck
Posted: Thu Sep 20, 2007 2:06 pm
by Jerry-rigged
Wow

Seeing the frames all cut out makes me relize that boat is a lot bigger than I was thinking when the plans were released...
Looks Nice...
Jerry
Posted: Thu Sep 20, 2007 3:35 pm
by Lower
Looking good man. Your pulling ahead of me! I've made zero progress. Left suddenly last week to attend a funeral. Just returned today. Can't wait to get going again.
Jerry...just an FYI...he is building the raised sheer version. Makes those pieces look bigger than the standard build.
Posted: Thu Sep 20, 2007 3:54 pm
by steve292
Lower wrote:
Jerry...just an FYI...he is building the raised sheer version. Makes those pieces look bigger than the standard build.
It will be interesting to see a standard boat on it's jig to see just how bigger 8 extra inches of side panel makes it appear. I will agree with Jerry tho, it looks bigger than I envisioned.
Lower, you can only go as fast as life lets you............I am so keen to get on that I am trying to find time where none exists,thats how the stupid small mistakes are creeping in. Rushing.
Posted: Thu Sep 20, 2007 5:57 pm
by colonialc19
Steve, great progress, good to see the jig up, keep pluggin along!
Daniel
Posted: Wed Sep 26, 2007 10:21 am
by steve292
some photo's in the album "steves FS17" update later tonight,time permitting.
Steve.
Posted: Wed Sep 26, 2007 11:59 pm
by steve292
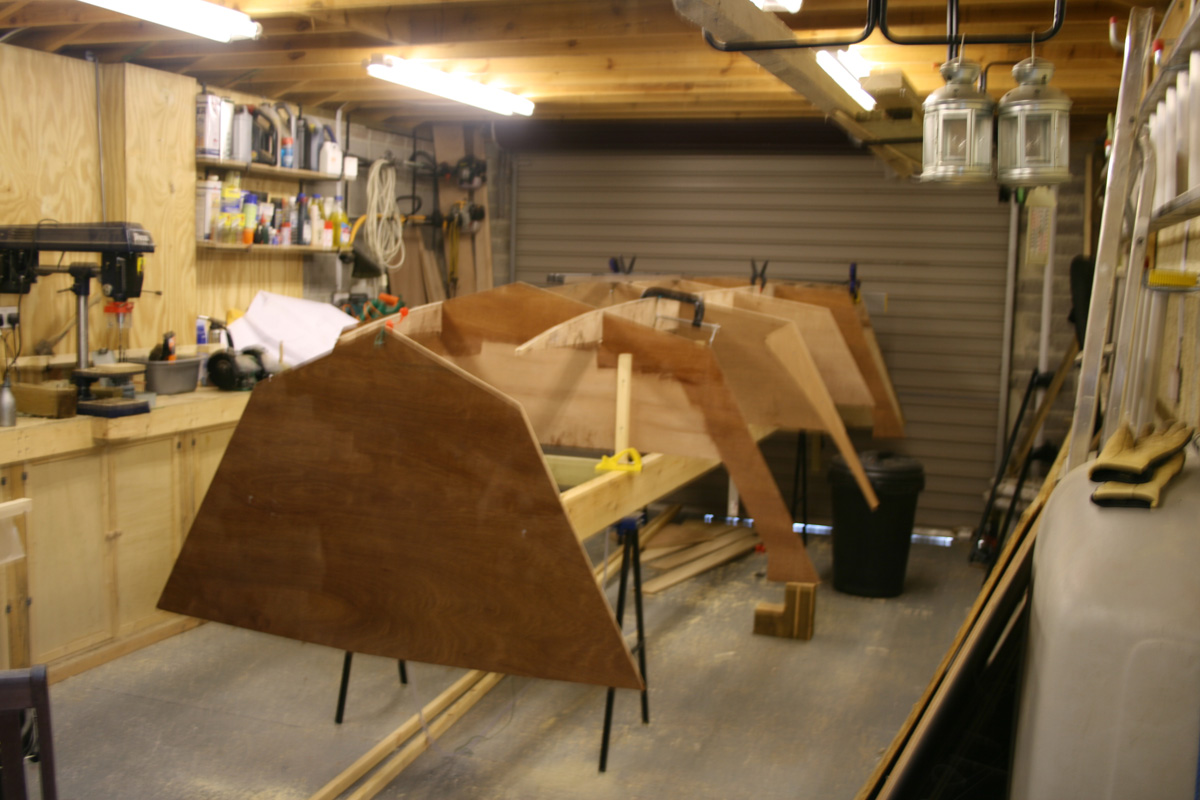
since last time I updated this thread I have recut frame "c" from OSB (horrible stuff to work with btw) & mounted it on the jig.
I had two evenings last week where I had a couple of hours at a time to work & here is the result
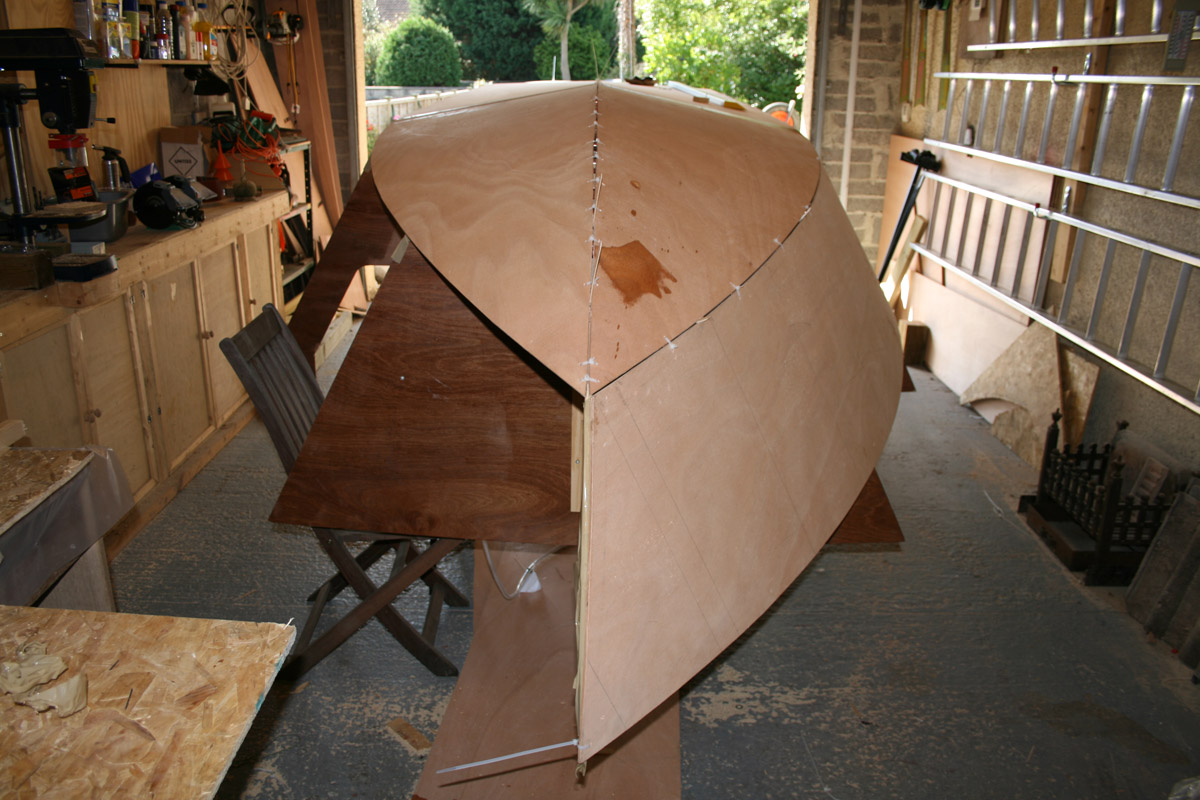
As you can see both bottom panels are on & stitched, this went easy with hardly any stiches pulled tight on the straight part of the keel.The keel & planing surfaces seem really good with no hook or rocker that I can see or measure with the 1800mm staight edge I have. I realise this may change as the sides are hung.
It is also sitting nicely on the frames & stringers. The bow I did have to open up the gap between the panels with a jigsaw as the stitching pulled it into shape.
this is the view along the keel from the transom-
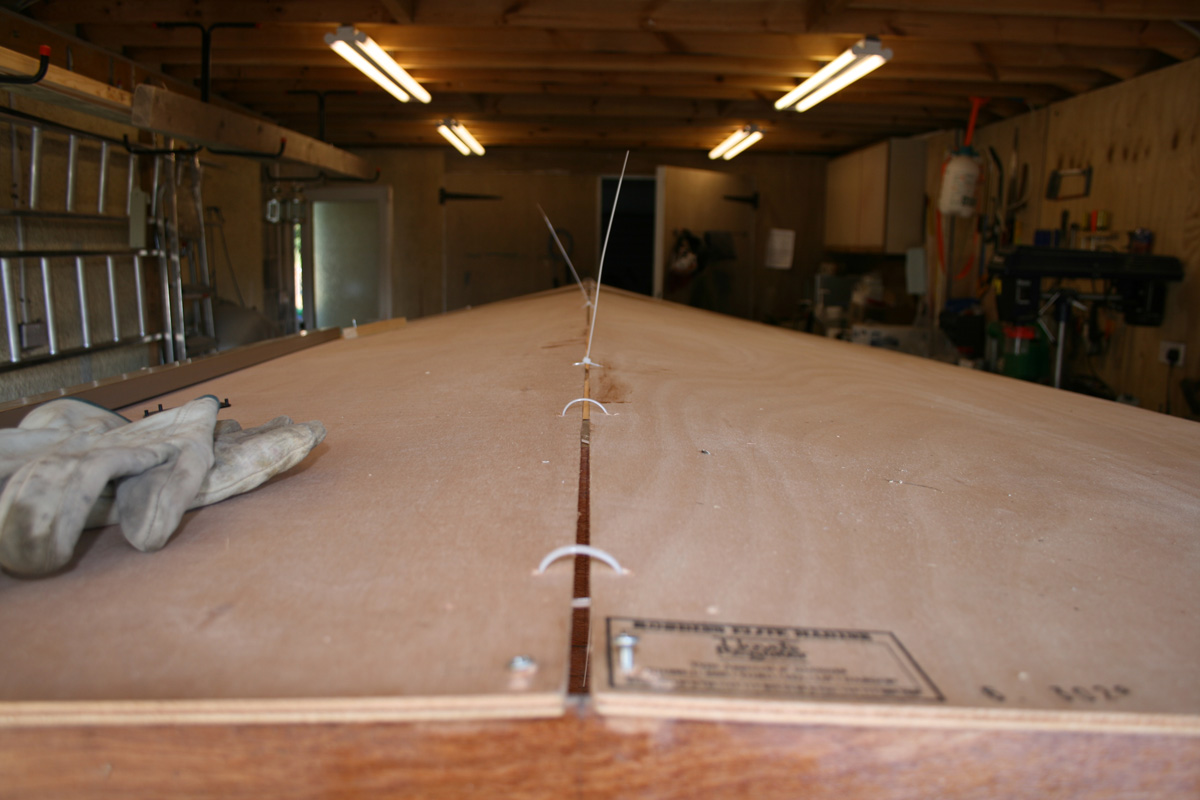
& one down the centre from the front-
finally, the tip of the bow panel came out right on the money at the bow mold,which I was dead chuffed about

I will post a pic later of that, with a hopefully fully assembled stitched hull.
I can tell you it looks a lot bigger than I thought,a bit daunting thinking about sanding
I realise I might be a trifle ahead of myself here, but am now looking for suggestions on the best way to tape the hull, i.e do the transom then the keel,then chines or?????. which way produces the neatest overlaps?. I don't think I will be able to fillet & tape in one session, my plan is this;
-fillet all the seams in one session & let cure
-radius all the edges & sand,precut all the tapes at my leisure
-coat seams with epoxy & tape all in one go
-unless someone has a better one

any suggestions/tips would be appreciated please.
Steve
Posted: Thu Sep 27, 2007 3:29 pm
by Lower
Awesome Steve! That's what I've been waiting for. Hull looks nice...and like you say BIG! I'm slowly moving along as well. Just finished cutting everything out and put my epoxy order in. Time to start glueing things together. Thanks again for posting the pics. I'm enjoying watching it come together.
Posted: Thu Sep 27, 2007 4:53 pm
by colonialc19
Looking great Steve! hope mine comes together that good.
Daniel
Posted: Thu Sep 27, 2007 5:21 pm
by WobblyLegs
Steve, it's looking really good!!
steve292 wrote:
-fillet all the seams in one session & let cure
-radius all the edges & sand,precut all the tapes at my leisure
-coat seams with epoxy & tape all in one go
Yup, that about sums it up... That's how I did it. Think about the order you want to tape it... I did the keel-to-bow first (furthest to reach), then the chine tape overlapped the bow tape at the front, both sides, then the transom tape overlapped both the keel tape and the chine tape.
Don't mix too much fillet at a time, squeeze it through the gaps from outside until you see it coming out the other side, a little bulge inside, no more.
Later, when you flip, get yourself a Dremel (if you don't have one) and use a grinding cylinder to take out that bulge. It's my second most used tool.
You can guess which gets used most...
Regards,
Tim.
Posted: Thu Sep 27, 2007 8:48 pm
by steve292
WobblyLegs wrote:Steve, it's looking really good!!
Yup, that about sums it up... That's how I did it. Think about the order you want to tape it... I did the keel-to-bow first (furthest to reach), then the chine tape overlapped the bow tape at the front, both sides, then the transom tape overlapped both the keel tape and the chine tape.
Don't mix too much fillet at a time, squeeze it through the gaps from outside until you see it coming out the other side, a little bulge inside, no more.
Later, when you flip, get yourself a Dremel (if you don't have one) and use a grinding cylinder to take out that bulge. It's my second most used tool.
You can guess which gets used most...
Regards,
Tim.
Let me guess

................ I know a tape measure!!!!!!

Thanks for the input....good practical advice about doing the keel line first, I had'nt thought of that

& thanks for the nice comments guys. It helps keep up the enthusiasm levels!!
The dremel's just shot to the top in my letter to santa..........................
Posted: Fri Sep 28, 2007 4:09 am
by WobblyLegs
steve292 wrote:
Let me guess
................ I know a tape measure!!!!!!
Nope. One day I'll post a pic of all my worn out sanding discs........
Weather's supposed to be a bit warmer this weekend - enjoy it!
Posted: Tue Oct 02, 2007 8:49 am
by ozzy FS 17
great to see your progress, I should be cutting ply myself but between the car and the washing machine my boat budget got smashed, but I'm lucky my wife lets me keep the overtime Ive been getting so soon will be getting things cut.
It has been a fantastic help with the forum and I feel I'm going into the project with 2nd boat experience and have gained much trial and error without the time and expence.
keep the posts coming
Posted: Wed Oct 03, 2007 4:33 am
by steve292
I know that feeling,I was going to have a pop at a panga, but something similar happenned to me, then the FS17 plans came out,which is a better boat for me.
, lucky, hey?
Mind you I still have the PG22 plans.....................
Beware the BBV....
Steve
Posted: Thu Oct 04, 2007 5:25 pm
by steve292
This weeks update;
Goes like this-
stitch, , measure for bottom straightness,curse.
unstitch
stitch,measure for straightness,ect
unstitch
& so on
But we got there in the end.The boat is now fully stitched & tonight I have put some small epoxy fillets down the chines. The bow I have shaped with a surform to blend in the transits between the panels & filled with epoxy putty. I will take some photo's tomorrow when the bow is set & post them later.I had limited time tonight so, Build or take pics ?.easy answer
some pics, as always all comments taken on board,
A view down the bow,

And another one from a slighty lower angle,

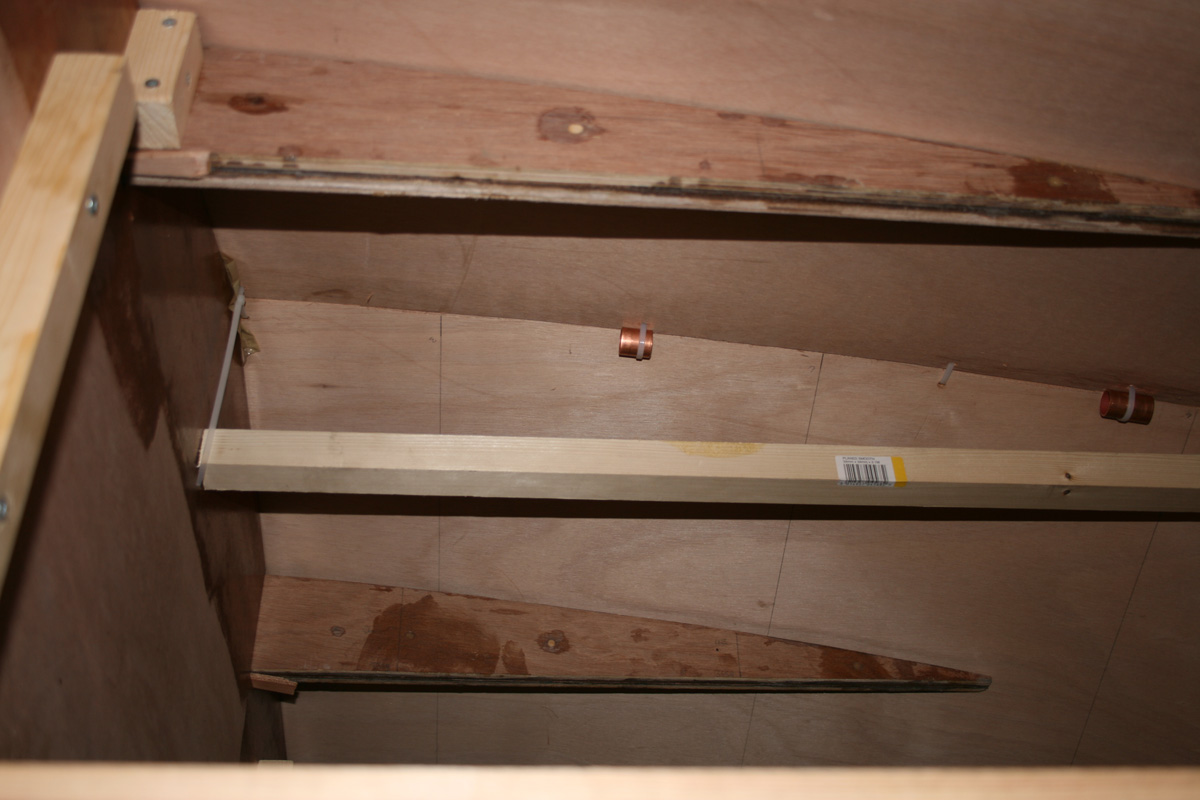
& two of the stringers touching nicely inside the hull, one between frame A & B, & one between C & D.

Posted: Thu Oct 04, 2007 5:43 pm
by TomW
Looking great Steve keep up the good work and you'll have her glassed and ready to turn in no time.
Tom
Posted: Thu Oct 04, 2007 5:57 pm
by WobblyLegs
Steve,
That looks like a boat!
It takes time, but I found the stitch-unstitch-restitch-etc. process quite fun...
'cos when it all finally fits, it's wow!
Keep building,
Tim.
Posted: Thu Oct 04, 2007 6:06 pm
by jeremy
That looks fantastic Steve. I can't wait to see her hit the water.
Posted: Thu Oct 04, 2007 7:40 pm
by colonialc19
Looking great Steve, keep posting, it keeps me going
daniel
Posted: Fri Oct 05, 2007 9:40 am
by jgroves
Wow, seeing the boat take shape is amazing! Great progress. I am waiting on wood for the same boat.... I'm enjoyin' the pics for obvious reasons. Keep them coming.
Jeremy Groves
Posted: Fri Oct 05, 2007 11:14 am
by mecreature
Nice to see eveything stitched together.. I am sure the pics dont do the work justise... Looks like beautiful wood.
Posted: Sun Oct 07, 2007 12:26 pm
by steve292
mecreature wrote:Nice to see eveything stitched together.. I am sure the pics dont do the work justise... Looks like beautiful wood.
Nice spot.................the bow on photo's were lifted with photoshop as they came out very dark & I did'nt have time for any more
The wood is LLoyds certified okume 6mm for the hull panels,& you are right,it is beautiful wood,both to look at & work with.nice stable plys,bends uniformly,cuts & shapesgreat ,Well worth the money IMHO.
Posted: Mon Oct 08, 2007 8:28 pm
by Lower
Awesome Steve! Definitly inspiring. Been away on business...getting back at it agian. Epoxy came in while I was away
! I was marking up the stringer notches on my molds and when I was almost finished I noticed in the building notes it says to make them 1/4" bigger (5mm). I'm not questioning Jacques...just wondered if you made them bigger and if it helped when putting it all together??
I know I'll have more questions for you as I begin to put this thing together. Thanks again for the pics. Love to see them.
Posted: Mon Oct 08, 2007 8:49 pm
by steve292
Lower wrote:Awesome Steve! Definitly inspiring. Been away on business...getting back at it agian. Epoxy came in while I was away
! I was marking up the stringer notches on my molds and when I was almost finished I noticed in the building notes it says to make them 1/4" bigger (5mm). I'm not questioning Jacques...just wondered if you made them bigger and if it helped when putting it all together??
I know I'll have more questions for you as I begin to put this thing together. Thanks again for the pics. Love to see them.
I cut the notches on the lines with the jigsaw,instead of inside them which gave me about 4mm total clearance.I wanted the clearance to be fairly small to help alignment of the parts.But it is better I think if you have some float instead of to tight a fit as this allows easy adjustments without pulling everything about.I read Lucky Louis's posts on setting up the jig (i'm not proud & will pinch a good idea from anyone)Which has some great tips on keeping it all together, & would recommend that as reading(its called lucky louis's OB17).Cracker larry, Wobblylegs,& Deedaddy's threads are well worth a visit as well while we are on the subject.
I was wondering why you had'nt posted.I have glued up the transom today & tabbed the chines with some small fillets,started to shape the bow & fill some of the holes. Pic's to follow.
hope
Posted: Mon Oct 08, 2007 10:10 pm
by Lower
Thanks again Steve. I hope you don't mind me running these questions by you! As for the threads you've mentioned...I've definitly looked them over. When it's time to put the jig together I'll revisit them.
Your making great progress. I hope mine comes together half as clean as yours! Keep up the good work.
Posted: Mon Oct 08, 2007 10:50 pm
by gk108
Stringer notches need to be a bit large to make sure there are no hard contact points. When you put it all together, you should have a layer of thickened epoxy in that gap. 1/8" is ideal, so ¼" extra will give you the right amount on each side, in theory.
Posted: Thu Oct 11, 2007 6:10 am
by spjoyce
Hey Steve,
Can you please hurry up and finish that boat so I can decide if I am going to build one or not?
Just kidding.. Build on! looking good.
/another Steve
Posted: Thu Oct 11, 2007 8:05 am
by steve292
spjoyce wrote:Hey Steve,
Can you please hurry up and finish that boat so I can decide if I am going to build one or not?
Just kidding.. Build on! looking good.
/another Steve
Ha! you could be in for a long wait!
An FS17 would be ideal for the more sheltered Fjords where you are.
Posted: Fri Oct 12, 2007 12:05 am
by Betowess
Looking good Steve! I am another of the many who has contemplated this boat. I bought the Garvey 13 plans, but have to construct a shop for the build first. I'm trying to talk myself into making a bigger shop, enabling a build of the FS 17, so I've been lurking on yours. I like both designs, but of course the FS 17 is a more capable skiff.
I am also interested in a slightly higher freeboard, maybe not the max. So thanks for sharing and keep the pictures coming! Good luck with the rest of the build. regards, bob
Posted: Sun Oct 14, 2007 6:25 pm
by steve292
Hi, not much time to work on the boat this week,but FWIW here is a progress update.
I have completed all the external filleting around the keel, bow and transom & rounded all the plywood edges with this-somebody said i'd need it...I think this is a start of a long love hate relationship!

Also built up the bow profile-
roughed out-

& smoothed over

I built some small fillets along the panel edges & let them cure,then remove the cable tie stiches-no big sproing which was good!
then sanded the welds for a key for the next application of fillet.
like this-
I also decided because the transom is so thick in the area of the clamping boards that I would get under the boat & fillet the transom sides from the inside as well, to make sure that there are no voids in the fillets.

that's the inside of the transom to the hull side you can see there, the picture fails to show an epoxy precoat, but it is there.
After filleting was complete & cured (next day) I rounded all the edges with a surform & RO


These photos were taken during the process, as I had to go in for the nightshift, & time was short, the round overs are better than the pics show.
Next up is to fill in some small imperfections, & then we should be good to go with the taping.
More pics tomorrow , I hope.
Steve
Posted: Mon Oct 15, 2007 12:33 pm
by Cracker Larry
Looks great
Posted: Mon Oct 15, 2007 3:40 pm
by steve292
Thanks larry!
As promised more pics

These 2 are of the finished bow profile,I am really pleased how this turned out
.

This is the transom edges rounded over ready for taping, all the edges that will be taped are finished like this.

This is my biggest gap to fill so far caused by over enthusiasm with a jigsaw when creating a decent sized gap for the fillet.
you may be able to see the wobbly line above it where the red mist descended, after i'd seen my faux pas, I should have stepped back for 10 minutes

& finally the hull without the raised sides, waiting to be taped & glassed.

Garge floor swept, tools away,(most of em , anyway)
Epoxy being ordered later this week, I only bought 7.5 kg's first off, I have used about 4.5 kg's so far.
As you may have gathered, from other parts of the forum, I am a first time builder,so anyone is welcome to chip in here,I appreciate it.I am using my experience in engineering & fabrication to guide me, along with forum searches & questions BUT, people chipping with any handy tips,is nice too.
Steve
Posted: Mon Oct 15, 2007 3:48 pm
by WobblyLegs
steve292 wrote:
That's a nice looking hull. I like the shape, and angle from bottom panels to the bow section.
It looks to me like the FS17 is a very popular design, lot's of new threads about it!
Nice work on joining all those bits of wood together!
Quick question: how many pieces of ply make up one side panel, as in the pic - it looks to me like only two?
Tim.
Posted: Mon Oct 15, 2007 4:05 pm
by steve292
WobblyLegs wrote:
That's a nice looking hull. I like the shape, and angle from bottom panels to the bow section.
It looks to me like the FS17 is a very popular design, lot's of new threads about it!
Nice work on joining all those bits of wood together!
Quick question: how many pieces of ply make up one side panel, as in the pic - it looks to me like only two?
Tim.
Hi Tim,
there are two full sheets & about 700mm of a third IIRC, I changed the nesting a bit because roobins timber ply is slightly longer than 2440mm,
the reason being that the drawing for the panel uses a plywood edge as a station line, & it didn't quite work out using the suggested nesting,for reasons I don't quite recall
Old age creeping up I suppose.
you can just see the splice in this pic of the transom to hull skin joint
steve
Posted: Mon Oct 15, 2007 4:09 pm
by WobblyLegs
OK, I see it now. Your 'short' section is near the transom - my short sections are near the bow.
Cheers,
Tim.
Posted: Sat Oct 20, 2007 10:12 pm
by colonialc19
Steve, great work! everything looks like its coming together nicely, pretty work!
Daniel
Posted: Sat Oct 20, 2007 11:00 pm
by steve292
colonialc19 wrote:Steve, great work! everything looks like its coming together nicely, pretty work!
Daniel
Thanks Daniel, The seams are taped now, some pics in the gallery, full post to follow,nights again this weekend ,although I was ill on friday ,spent the day in bed. I haven't had a headache like that for years
Have to order cloth next week so I am starting to dry fit the raised side panels while I wait.
hows your build?, lots of FS17's popping up,aren't there?
Steve
Posted: Mon Oct 22, 2007 5:33 pm
by steve292
Hi,this weeks update
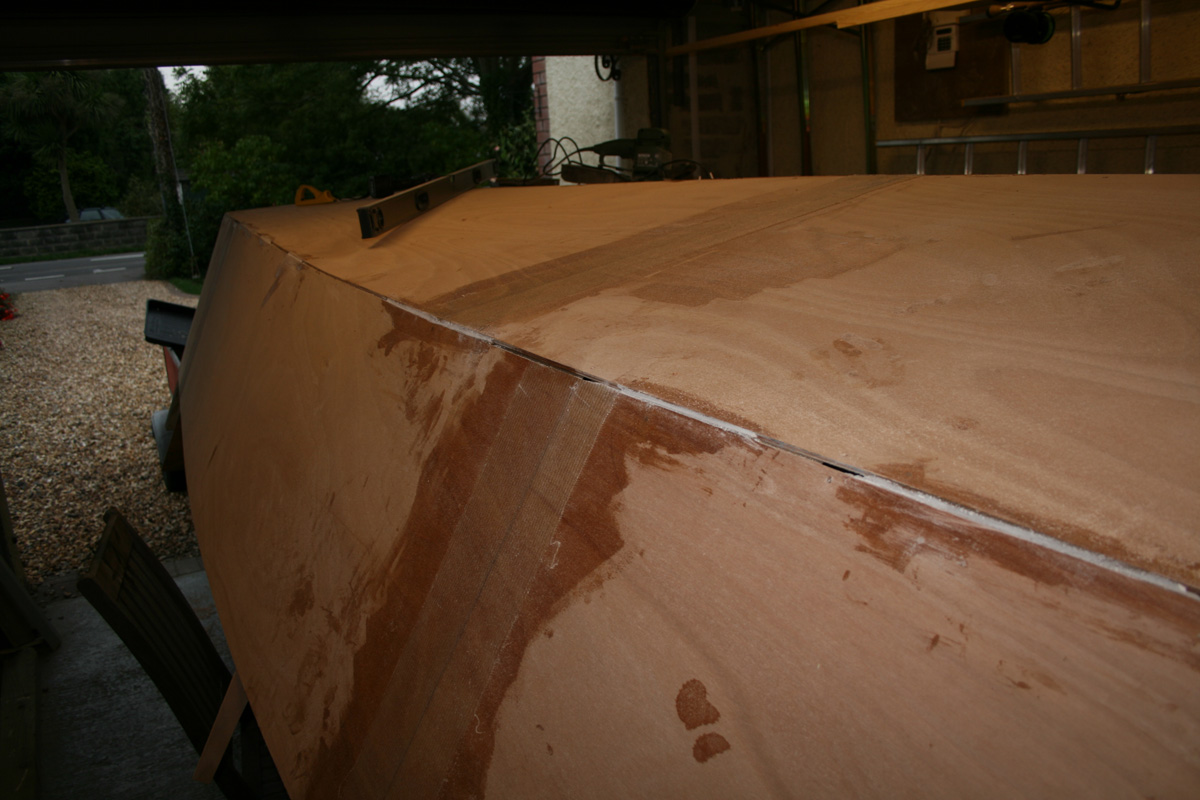
the taping of the outside seams is now complete.
some pics-
Two layers of tape on keel

view down the CL-see the air bubble about a foot down?

Can anyone tell me the best way to deal with this?- I am thinking of drilling a small hole in it and injecting some slightly thickened epoxy into it.
Two layers transom tape-

And an overall view-

There are already four layers of biax over the area where the keel meets the bow, which is impressive when you realise that with the extended sides taped along the bow seam there will be 11 layers of biax in total(inside & out) at that point.

Finally, I am waiting for cloth to turn up(ordered yesterday) so I have started to dry fit the extended sides, to mark & drill for screws for when the time comes.I was going to glue them on before glassing the outside of the hull, but I am leaning away from this.

The reason I am leaning away from putting the sides on before glassing is that the cloth will go right up to the top of the designed side along quite a bit of its length. I need some guidance here- can I Install the side panel over the top of the fibreglass,after the hull has been glassed or does it need to go on first & then glass up over the extended side?
I asked something similar in the power boat section earlier, but I am hoping that these pictures will help, I know quite a few boats have a double panel side, so there must be a lot of experience out there.
Steve
Posted: Mon Oct 22, 2007 5:55 pm
by WobblyLegs
steve292 wrote:Can anyone tell me the best way to deal with this?- I am thinking of drilling a small hole in it and injecting some slightly thickened epoxy into it....
...can I Install the side panel over the top of the fibreglass,after the hull has been glassed or does it need to go on first & then glass up over the extended side?...
Fantastic progress Steve... I saw some of your pics earlier today, including the bubble one.
I had a similar issue: I drilled a small hole through the glass at each of the furthest ends of the bubble, and squeezed straight epoxy in one hole until it oozed out the other. Problem solved.
As far as the sides go, what do your plans say? On my boat the plans call for glass going up 6" from the chine. That is all I did. Unless your plans say otherwise, or you intend bumping into quay-sides/rocks without fenders, I see no reason to go further. Though, I know some peeps like covering their entire hulls in glass, it's going to add a lot of weight, glass and cost. If you want to cover the lower side panels completely with glass, I'd do it before the upper panels go on. The extra thickness might mean that the uppers (as they have been moved out a mm or two) might not meet at the front - no prob - gaps can be filled.
Just remember, from a cost-of-glass point of view, the glass might not be wide enough to run from the overlap at the keel all the way to the top of the lower side panel, so to extend it means at least another half-width sheet of glass at, what, about 6 - 6.5 metres long?
IMHO, stick to the plans - if they don't call for glass, don't add it.
Just my thoughts.
Looking fine!
Tim.
Posted: Mon Oct 22, 2007 7:00 pm
by TomW
Steve, I have looked over my C19 plans today to try to help you. Hopefully JimW will also kick in since he has built a C19. Anyway, go ahead and put your bulwarks(additional freeboard) on now. Fiberglass it to the lower hull and then run your rubrail to strengthen the upper portion of it from to transom and bow.
Tom
Posted: Tue Oct 23, 2007 7:54 am
by WobblyLegs
WobblyLegs wrote:I drilled a small hole through the glass at each of the furthest ends of the bubble, and squeezed straight epoxy in one hole until it oozed out the other.
I should have said - injected epoxy into one hole
with a syringe until it came out the second hole.
Tim.
Posted: Tue Oct 23, 2007 8:25 am
by steve292
WobblyLegs wrote:WobblyLegs wrote:I drilled a small hole through the glass at each of the furthest ends of the bubble, and squeezed straight epoxy in one hole until it oozed out the other.
I should have said - injected epoxy into one hole
with a syringe until it came out the second hole.
Tim.
Thanks for the advice, Tim.I've been looking for big bore syringes this morning. The glass just turned up for the hull
,so time to get everything sanded methinks.
Steve
Posted: Tue Oct 23, 2007 8:54 am
by WobblyLegs
steve292 wrote:I've been looking for big bore syringes this morning.
Use little 10ml ones.
I have a couple of big ones, but never used them. Even with the little ones, you can feel the epoxy warming up inside them, so I think big ones might go off too quickly.
Tim.
Posted: Tue Oct 23, 2007 10:15 am
by retrosub
I have the FS17 plans, so I have been following your build with great interest. I built a FS17 model with raised bulwarks, you can see it if you search on it (and some amusing additions done in photoshop).
I was thinking it would be easier to put the biax cloth on first, bulwarks afterwards. Since the bulwarks overlap the sides by 12", you could run the ragged end of the cloth say, 10" from the edge of the panel and never bother fairing it in. Just run the bulwark panel over the top of the glass and you've saved yourself some fairing.
Posted: Tue Oct 23, 2007 11:51 am
by steve292
retrosub wrote:I have the FS17 plans, so I have been following your build with great interest. I built a FS17 model with raised bulwarks, you can see it if you search on it (and some amusing additions done in photoshop).
I was thinking it would be easier to put the biax cloth on first, bulwarks afterwards. Since the bulwarks overlap the sides by 12", you could run the ragged end of the cloth say, 10" from the edge of the panel and never bother fairing it in. Just run the bulwark panel over the top of the glass and you've saved yourself some fairing.
I used your model photos as a screensaver for a while(replaced with my own boat pic now
). very good model BTW, I doubt if mine would have been as good.
The sides overlap 6" onto the hull panels,but your idea is still a good,valid timesaver of an idea,which I am leaning towards more & more,because the side will still cover a lot of the glass edge.
Steve
Posted: Tue Oct 23, 2007 12:15 pm
by mecreature
Steve are you doing the raised bulwark by the plan.. re: 12in with 6in overlap...??
Posted: Tue Oct 23, 2007 5:50 pm
by steve292
mecreature wrote:Steve are you doing the raised bulwark by the plan.. re: 12in with 6in overlap...??
Well...............nearly, I am going 7" up (175mm) and overlapping the side panel by 155mm(6 1/4 ish"). The reason being, the way I nested the ply,this was the most I could get easily.I did this not because of any doubt about the seakeeping ability of the design but because I have a little girl who will be 3 in febuary, & I think it will be safer if she comes on the boat with me, & it will give me more peace of mind.
Posted: Tue Oct 23, 2007 6:55 pm
by TomW
Steve that is a great point for raising the bulwarks(sides). A 3 year old is a precious comodity. I looked at my C19 plans again. The instructions are basically mark the area on the lower hull where the upper bulwark will set. Then apply glue to both parts, you might want put some small nails or screws to support the upper bulwark, in the frames.
You should have extended the frames for the extra bulwark. if not do it before doing the above. This is why Jacque says flip it now with out attaching the rubrail.
Tom
Posted: Tue Oct 23, 2007 7:17 pm
by Deedaddy
I would use the same method I used to glue the false laps on my skiff.
http://www.paysbs.com/forum/index.php?topic=3.0
FS 17 Starting Dec
Posted: Sat Oct 27, 2007 10:18 am
by Cockspur
Steve, I've been following your build with interest I am starting 1st week in Dec. I would like to come up from poole and have a chat what is the best way of contacting you. Roger
Contact
Posted: Sat Oct 27, 2007 10:19 am
by Cockspur
Sorry steve I should have said email me through the link at the bottom of my profile cheere Roger
Posted: Sat Oct 27, 2007 5:15 pm
by steve292
Cockspur, I have e-mailed you, let me know if you got it.
Steve
Posted: Sat Oct 27, 2007 5:24 pm
by steve292
steve292 wrote:Cockspur, I have e-mailed you, let me know if you got it.
Steve
just got your reply
Size
Posted: Thu Nov 01, 2007 10:09 am
by Cockspur
Steve, Thank you for putting up with me yesterday when you were glassing the bottom. Work always fascinated me when someone else is doing it !
I think you are doing a sterling job and she looks great.
The visit answered a lot of questions, I was intending to cut my teeth on the FS17 and then go for the big one next year, ie an LB26.
But as Pamela Anderson is reputabley to have said " Anybody who says size doesn't matter is a liar". I have now decided to cut my teeth on a Tender and build the LB26 starting next year. I will continue to monitor your progress with interest. Roger
Re: Size
Posted: Thu Nov 01, 2007 3:21 pm
by steve292
Cockspur wrote:Steve, Thank you for putting up with me yesterday when you were glassing the bottom. Work always fascinated me when someone else is doing it !
I think you are doing a sterling job and she looks great.
The visit answered a lot of questions, I was intending to cut my teeth on the FS17 and then go for the big one next year, ie an LB26.
But as Pamela Anderson is reputabley to have said " Anybody who says size doesn't matter is a liar". I have now decided to cut my teeth on a Tender and build the LB26 starting next year. I will continue to monitor your progress with interest. Roger
It was no problem Roger, I hope I was some help to you in making your decision.
Since I last posted I have sanded down the whole boat to prepare it for fibreglassing the outside of the hull-I went a bit wild with the RO doing this & ground through 1 layer of tape on the bow

Cue some hasty posting to the fibreglass section of the forum, thanks to shine for the quick answers on how to repair it.
I cut a patch of biax to cover it which overlapped the damaged area by about 3" all round, which I later put on about an hour before I glassed the big sheets on the hull.
I laid out & trimmed the big sheets dry -

The cardboard on the top of the hull Has "PUT THE REPAIR PATCH ON FIRST"written on it BTW, as I am terrible at remembering things like that.
So, I folded one sheet of fabric back out of the way, glassed in the patch repair, injected neat epoxy in the air bubble,measured out 12, 8 pump batches of resin with no hardener(as I find it easier just to add the hardener to each batch as it is required) glassed one sheet of fabric, had a cup of tea, chatted to cockspur, who had come up from Poole to have a look, folded back over the other cloth panel & glassed that as well
.
just out of interest, I used a spreader to move the epoxy around on the glass, for speed & then went back & worked it with a foam roller to push it through the glass. This also makes the epoxy spread further.I wish I had weighed the glass & a batch of mixed resin so I could work out how I am doing on a resin/glass ratio.Oh well.
some pics
overall view

& one along the chine

I will glass the transom after the side panels are on, the other pic is some small air bubbles(tiny)that I will drill & fill with epoxy in due course.


as always comments welcome,
Steve
Posted: Thu Nov 01, 2007 4:25 pm
by mecreature
Very nice...
Posted: Thu Nov 01, 2007 5:42 pm
by topwater
Great job steve, i have been watching youre build since the start. I finally joined the web site. Iwas also was going to build the fs17 but when i saw the pic's of the abaco23 i decided to wait for those plans. In the mean time i will probably build an fs14 to get ready. Keep up the good work and post more pic's.
Posted: Thu Nov 01, 2007 7:35 pm
by jbo_c
I'm gonna be a few months behind you if my wife doesn't leave me.
Can't wait to see when you flip it. Need you in the picture to give the size some perspective.
Great job so far. I hope I do as well.
What's your intent on the interior layout? or did I miss that earlier in the thread?
Jbo
Posted: Fri Nov 02, 2007 2:08 am
by Cockspur
topwater wrote:Great job steve, i have been watching youre build since the start. I finally joined the web site. Iwas also was going to build the fs17 but when i saw the pic's of the abaco23 i decided to wait for those plans. In the mean time i will probably build an fs14 to get ready. Keep up the good work and post more pic's.
Sorry did I miss something where did you see the pics of the ABACO 23 ?
Posted: Fri Nov 02, 2007 12:54 pm
by steve292
jbo_c wrote:I'm gonna be a few months behind you if my wife doesn't leave me.
Can't wait to see when you flip it. Need you in the picture to give the size some perspective.
Great job so far. I hope I do as well.
What's your intent on the interior layout? or did I miss that earlier in the thread?
Jbo
I am going with the centre console & gunnels(gunwales?)layout.It will have a full frame at A with an anchor locker, fuel in the console under the front seat.Battery located possibly in a different, sealed compartment in the console or in one of the stern lockers, I dont know yet.It is intended as a boat for family days out as well as a fishing boat so some compromise between deck space & seating will have to be done.Perhaps some removeable thwart type seats or suchlike.
Steve
Posted: Fri Nov 02, 2007 4:07 pm
by topwater
Cockspur I saw the pic;s of the abaco23 in the questions before buying plans forum. posted nov 1. Also saw the thread alury bro's 23 and was waiting to see what jac's was going to do with it. I knew it would be good.
Posted: Tue Nov 06, 2007 12:17 pm
by steve292
since last posting, I haven't had much time to work on the boat as I have either been working or on daddy duty, but I have managed to glue both bulwark panels on.
I did this by first dry fitting the panels & marking the hull where they lay when I was satisfied with their position,


I then marked 2 parallel lines 4 1/2 " apart along the bulwark panels with the first line set in 1" from what will be the style line. Then I drilled clearance holes for 3/4 long no8 woodscrews 6" apart with each row staggered 3" from the other in the bulwark panel only.78 screws in each panel.
I made 4 simple supports to clamp on the transom & frames A,B & E to hold the panels at the right height while setting up & screwing the panels on.

It was then fairly straightforward to roller a coat of straight epoxy where the panels mate to each other, & mix & apply a fairly stiff glue of woodflour & 'poxy, rest the panels on the supports, shuffle them back & forth to the correct position & screw them on, working back from the bow to the stern. It all looks very fair to me, but the sanding will soon tell me I suppose. I have also laid the first fillet in the bow seam & when everything has set I will start to shape the bow for taping.

glued & screwed panel resting on supports

First side set ,second side setting........bow seam filled.
I will try to get some pics with me in for perspective soon.
one thing at a time..........................................but its a bloody big 17 & a bit footer!
regards,
Steve
Posted: Tue Nov 06, 2007 12:39 pm
by jbo_c
By how much did you raise the sides again? That looks enormous.
And how many extra sheets did it take?
Jbo
Posted: Tue Nov 06, 2007 1:52 pm
by steve292
jbo_c wrote:By how much did you raise the sides again? That looks enormous.
And how many extra sheets did it take?
Jbo
you saying that set me wondering...............I was aiming for a 155mm (61/4") overlap with a 175mm(7") height extension. I've just been out and measured the extension at 190mm with a 150mm overlap.the frames all line up except frame E, so I am now wondering where I put in a consistently wrong measurement.which leads on to the next question- is that extension too high? it looks ok aesthetically but is there any other reason to be wary?Jacques does say you can go higher than 150mm so I dont think that 40mm is going to be to much.It took four more sheets of 1/4 btw.
Just to give you a reference i'm 6" the highest point on the chine is chest height with the sheer line at the same point mid thigh.
Posted: Tue Nov 06, 2007 2:29 pm
by jgroves
Hey Steve,
Lookin' good! I like the raised sides on your boat! I thought the standard FS 17 was big... wow I like the raised sides! Keep the pics coming!!!
Jeremy Groves
Posted: Tue Nov 06, 2007 4:58 pm
by steve292
jbo_c wrote: Need you in the picture to give the size some perspective.
Jbo
Her you go-

I am 6' tall & the straight edge I am holding across the hull is also 6'
Posted: Tue Nov 06, 2007 7:06 pm
by gk108
I like the way that worked out. It's like scaling the boat up, but different.
Posted: Tue Nov 06, 2007 8:08 pm
by jbo_c
Perfect, Thanks.
Other than (potentially)safety in heavy seas, what is your intention in extending the sides? You won't really add any capacity and it might tend to be tippy. What are you after?
I'm not trying to sharpshoot you. But how do you know you haven't added more problems than you solved. I know Jacques says the sides can be raised, but he doesn't actually "suggest" it.
I ask mainly because I'm considering adding to mine, but I don't know what I'll really gain(I'm leaning against right now). Maybe your thoughts will help.
Thanks.
Jbo
PS What's the max beam with the extended sides?
Posted: Wed Nov 07, 2007 2:06 am
by Cockspur
Steve, Have you discovered how you ended up with that height of extension yet? I am back on for building mine starting in Dec and was looking at raised sides as we discussed when we met. I am now a little concerned having seen your pics. I agree with Jacques you are going to have an awkward job reaching in and out of the turned hull to fit stringers and frames. I am also interested in Jacques views on the result. I guess we are not going to know the scope of tipyness until she hits the water. I am thinking that maybe you have added to the safety issue by going so high. I don't want to rain on your parade, but this is what these forums are all about, I will be following the feedback and your progress with interest. Roger
Posted: Wed Nov 07, 2007 4:40 am
by Cockspur
Steve, I am away for the next 10 days, sailing with the jubilee Sailing Trust
www.jst.org Did not want you thinking I ... uck
Roger
Posted: Wed Nov 07, 2007 10:19 am
by mecreature
Looks pretty cool to me.. maybe a bit more tippy on the water but it is all give and take.
I bet side by side with a FS17 without the raised panels it will seem like a much bigger boat...
Are you going to raise the front deck any?
Posted: Wed Nov 07, 2007 2:53 pm
by steve292
jbo_c wrote:Perfect, Thanks.
Other than (potentially)safety in heavy seas, what is your intention in extending the sides? You won't really add any capacity and it might tend to be tippy. What are you after?
Thanks.
Jbo
PS What's the max beam with the extended sides?
The beam at station C has gone out from 2090mm to 2280mm which equates to about 7 5/8" extra overall. The 6" extension that JM shows how to cut in the plans will put the beam out by about 5" overall by my rough measurement(the jig is in the way) anyhow. This is without a rubrail obviously.
The reason for the raised sides are so I don't have to superglue a 3 yr old to the deck to stop her getting out/flying over the side.The boat is perfectly seaworthy as it is designed I think.The raised sides just ensure I can enjoy my day out with a bit less stress.
Steve, Have you discovered how you ended up with that height of extension yet? I am back on for building mine starting in Dec and was looking at raised sides as we discussed when we met. I am now a little concerned having seen your pics. I agree with Jacques you are going to have an awkward job reaching in and out of the turned hull to fit stringers and frames. I am also interested in Jacques views on the result. I guess we are not going to know the scope of tipyness until she hits the water. I am thinking that maybe you have added to the safety issue by going so high. I don't want to rain on your parade, but this is what these forums are all about, I will be following the feedback and your progress with interest. Roger
Roger,
you are quite right if I did'nt want to share stuff I would'nt post here, all polite comments are welcome. At least people here are frank.(which is a good thing). the bulwark panel should have been 330mmwide total(175 + 155) but has ended up 340mm(150+190) wide, which I just think I got the wrong figure in my head(tape measure blindness).Lets put this in perspective.It is 15mm higher than I planned due to a combination of measurement & positioning errors,& 40mm higher than the extension shown in the plans.It's not like i'm building the Mary rose is it.
I will, if JM does'nt read this thread & comment in the next 24hrs post in the power boat section & ask his advice before filleting & glassing the bulwark to the transom, so I can cut it down if nessesary.I know the inside work will be a challenge until the sole starts going in, or at least the stringers are in, but I will cross that particular bridge when I come to it.
Looks pretty cool to me.. maybe a bit more tippy on the water but it is all give and take.
I bet side by side with a FS17 without the raised panels it will seem like a much bigger boat...
Are you going to raise the front deck any?
Mecreature, thanks,the plan is to have a full frame at A with a deck to the bow.
keep the opinions coming i'm open to debate
Posted: Wed Nov 07, 2007 3:35 pm
by Cockspur
Steve, when you quote the measurements it is not as drastic as it looked in your pics, and it is always difficult to judge when looking at a hull upside down I take on doard fully your reasoninhg for doing it, and when the sole is in the gunnel is going to be about knee height, which will stop abyone being catapulted over the side if they fall backwards against the gunnel. You are doing a great job both on the build and keeping us all up to date with details and pics, and I commend for it. Roger
Posted: Wed Nov 07, 2007 3:37 pm
by Cockspur
Typing is atrocious must be that second glass of cockspur !!
Posted: Wed Nov 07, 2007 3:53 pm
by tech_support
Cockspur wrote:Typing is atrocious must be that second glass of cockspur !!
All you need is a third to help limber up the fingers
Posted: Thu Nov 08, 2007 2:50 am
by steve292
Typing is atrocious must be that second glass of cockspur !!
All you need is a third to help limber up the fingers
Cider works for me, only trouble is I can't see the keyboard to type after a few...........
Posted: Thu Nov 08, 2007 7:10 pm
by Lower
Hey Steve...I saw you over on Jeremy's thread trying to get some motivation...I think your doing just fine!!! Work has gotten the best of me lately. Looks to be settling a bit. Going to start the jig soon. Love your thread, always one of the first I goto when I have a chance. Keep up the good work!
Posted: Sat Nov 17, 2007 6:19 pm
by steve292
Not much to report really,I had a think about the sides & stood back while I did it. I am going with them as they are & be damned.
So, I have taped the bow seam with 2 layers of tape, & the same with the bulwark panels at the transom. The transom has been glassed fully tonight, & I am using 2 halogen lights on it to keep up the temprature while it cures. I have been frustrated by not being able to do this before, due to some freezing weather, as it was the last major glassing before I could begin fairing.Other stuff I have made progress with includes cutting the rubrail strips, laminating a skeg out of 3 layers of 12mm 1088, 7 feet long, this I will glass before I fillet & tape it to the hull. I will post pics early next week when I have more time to do it. It is nice to have my motivation back, & I thank Jeremy Groves , Daniel & lower for posting progress which has got me going again.
Cheers,
Steve
Posted: Sat Nov 17, 2007 8:35 pm
by colonialc19
Sounds like good progress to me Steve, keep at it. The weather here has also cooled off a bit, have had a few nights at or below freezing. Hopefully it will warm a bit this week, im looking to mix some glue and start tacking my panels together.
Rock on!
Daniel
Posted: Thu Nov 22, 2007 4:28 pm
by steve292
Its not much but here are a few pics of what I have managed to get done in the last week or so,

After the glassing of the transom, I sanded off the edges of the tapes on the transom, the mixed up some fairing compound. This I bought from the epoxy supplier, I believe it is mostly made up of microballoons & some other stuff.
Anyway, the weather was cold through the day as well as the night,& even with two 500w halogens shining on it it took the best part of 18 hrs to go off. The end result is as you can see it ran & sagged a bit.What can I add to minimize sagging?. I have used silica on my vertical fillets,but hesitate to use it for fairing as I believe it is hard to sand. Any advice please?I also need to make a long board.
look at the temperature range I am working in, its not much fun.

I have some quickfair on order, I will build up the transom with the homemade stuff in thin layers to minimise sagging,& use the QF to finish it as QF is £126 for 5.7 litres by the time the shipping is added.
I also cut a skeg from three layers of 12mm 7 feet long

But I dont like it, too big & blocky. I think I will cut it down a bit & use a constant taper from front to back.
Also I have cut the rubrails, 3 layers of 6mm 45mm wide

& dry fitted the first layer on one side

so there it is, pitifully slow, but forwards neverless,
Regards,
steve
Posted: Fri Nov 23, 2007 8:01 am
by Daniel Huckleberry
That's great progress, Steve. Especially in chilly weather. The boat looks great, too. It is amazing how much you really got done, after you list it all. Can't wait to see her over!
Huck
Posted: Fri Nov 23, 2007 10:55 am
by Beach
Try a space heater in your workspace...and place one UNDER your hull...heat rises and will warm the hull and help "kick" epoxies off...use electric and babysit them...dont allow them to run unattended...
Posted: Fri Nov 23, 2007 12:03 pm
by Spokaloo
Id give anything to have those temps back!
17F here today (-8C)
Looking nice!
E
Posted: Fri Nov 23, 2007 4:34 pm
by topwater
Looks great steve.....Cant wait to you roll her.
Posted: Fri Nov 23, 2007 4:54 pm
by steve292
Spokaloo wrote:Id give anything to have those temps back!
17F here today (-8C)
Looking nice!
E
now thats cold!!(to a brit anyway) Thats inside the garage mind you with the door shut.Its quite wet & breezy here as well which is making it feel raw. I just get frustrated that I seem to have lost a lot of the momentum I had. Tho' seeing Daniel's TX18 go in gave me quite a fillip, you could feel his joy over the 'net.
If the weather starts to beat me what I think I will do is to cut all the console parts, skeg, sprayrails & start fitting the rubrails as that will only be small areas that need heating.
I did toy with Beach's suggestion of space heaters but the garage is attached to the house.................I have a memory like a sieve sometimes ,so good idea but not for me....I will just have to be patient, & go green at Jeremys progress. He will have his boat in by the time mines flipped I think
Edit; -3C here in work tonight
Posted: Fri Nov 23, 2007 5:34 pm
by chicagoross
And here I am getting ready to build in Guam, where its always 85 - 90 degrees, and maybe I was the only one ordering slow hardener this week.
Posted: Fri Nov 23, 2007 5:35 pm
by TomW
Steve my wife and I have a cabin that we heat with electric space heaters. They have there own there own thermostats and keep us a nice toasty 50 when it is 0C. We only use 2 in 1200 sq ft. With electric you don't have to worry about watching them. Have had them for 10 years now. Paid about $29 for them at our home depot/lumber store. Saw them there for the same price last week. You could get a third and build an epoxy booth to keep your epoxy warm before you apply it. Another thing would be to help would be to get a couple of heat lamps and point them at the hull from the ceiling.
Tom
Posted: Wed Nov 28, 2007 3:53 pm
by jgroves
Howdy Steve!
How is the boat coming? Have you got your quickfair yet? The stuff works wonders! I have used it in some fairly cold temps 30s F all the way up to 90s F.
It is colder here as well. Atleast cold enough that I am afraid to use the fast hardner at night. I am currently in the process of priming, but again it's cold and the primer Interlux primer needs 50 F to work properly.
Your boat's going to look great when your done.... I'm looking forward to seeing the raised sides upright.
Jeremy
Posted: Wed Nov 28, 2007 4:29 pm
by mecreature
I will 2nd... or is it 3rd or 4ths... the electic heater... give it and hour or so and it warms it up nice..
that boat looks great.. it will be nice when you get her flipped.
Nice work
Posted: Wed Nov 28, 2007 6:10 pm
by familyman
Keep at it man, she is looking very nice
I didn't have to fool with the cold during this build, but I did live in Alaska before moving back to FL. Even a slightly heated space will work wonders for your progress and your sanity.
I believe you are on track for a beautiful boat.
You are certainly right about moving forwards. My motto was "something done each day is something that wasn't done the day before" Persistance pays.
Posted: Wed Nov 28, 2007 6:11 pm
by steve292
jgroves wrote:Howdy Steve!
How is the boat coming? Have you got your quickfair yet? The stuff works wonders! I have used it in some fairly cold temps 30s F all the way up to 90s F.
It is colder here as well. Atleast cold enough that I am afraid to use the fast hardner at night. I am currently in the process of priming, but again it's cold and the primer Interlux primer needs 50 F to work properly.
Your boat's going to look great when your done.... I'm looking forward to seeing the raised sides upright.
Jeremy
Jeremy, I have got the QF, came yesterday. I have to thank Paul McClure from KHL systems for that & the words of encouragement, nice fella to deal with so he gets the nod for the paint system as well.Did you seal the QF with epoxy before priming as it says so on the tin, or as the primer is epoxy based, did you just go straight into it?. This week I am fitting the rubrails & currently have one layer on each side glued, with another layer on the starboard side dry fitted for tomorrow. Also I have re-profiled the skeg & will probably shape it a bit more with the plane & sander, fair it a bit before fitting it after the fairing is done. I was going to tape it as well as epoxy glue it, but the boat will only rarely be run up on a beach, so I dont think it is nessecary. I am undecided wether or not to paint or coat the bottom of the hull with graphite as yet. The transom had another layer of homemade compound, as this I think is going to be the hardest bit to fair, because of all the glass overlaps & it will cut down on the QF use a bit, also I have made 2 long boards as well. I will post some pics over the weeekend if I can.
how about some more pics of your masterpiece ?
will 2nd... or is it 3rd or 4ths... the electic heater... give it and hour or so and it warms it up nice..
that boat looks great.. it will be nice when you get her flipped
Thanks Mecreature................It will be nice to flip it, I look forward to it
The space heater, I am still thinking about, I may get one in the new year, the weather has warmed up a bit here this week
.
regards,
Steve
Re: Nice work
Posted: Wed Nov 28, 2007 6:14 pm
by steve292
familyman wrote:Keep at it man, she is looking very nice
I didn't have to fool with the cold during this build, but I did live in Alaska before moving back to FL. Even a slightly heated space will work wonders for your progress and your sanity.
I believe you are on track for a beautiful boat.
You are certainly right about moving forwards. My motto was "something done each day is something that wasn't done the day before" Persistance pays.
Your right about persistence..............thanks for the kind words, praise indeed from someone who has just turned out a mighty fine piece of work.
thank you,
steve
Posted: Thu Nov 29, 2007 7:27 am
by jgroves
Howdy Steve,
I will hopefully get some more pics up tomorrow. Last night I couldn't do much more than wipe the dust off.....

. I did not seal the quickfair with epoxy before I primed.... I hope I didn't mess up. However I only have one coat of Interlux Barier Kote on it so taking it off and applying epoxy is still possible. If you or anyone has advice on that I would be greatfull.
Jeremy
Posted: Thu Nov 29, 2007 7:53 am
by TomW
j don't know that mu;ch about the Interlux products without looking them up but if it is an epoxy based primer no problem.
Tom
Posted: Thu Nov 29, 2007 8:07 am
by jgroves
TomW wrote:j don't know that mu;ch about the Interlux products without looking them up but if it is an epoxy based primer no problem.
Tom
Sheeeeeew! Yeah, I just check and the Barier Kote/ Primekote is an epoxy based primer. THanks for responding. I would hate to have to sand the primer off
Jeremy
Posted: Thu Nov 29, 2007 8:34 am
by TomW
Jeremy your not using Primekote below the waterline are you, when you said barrier coat in your first post I didn't know that, but Primekote is made to go under Perfection above the waterline. Double check me it's been a little while but that is my recollection.
Tom
Posted: Thu Nov 29, 2007 8:54 am
by jgroves
TomW wrote:Jeremy your not using Primekote below the waterline are you, when you said barrier coat in your first post I didn't know that, but Primekote is made to go under Perfection above the waterline. Double check me it's been a little while but that is my recollection.
Tom
Hello TomW,
I was hoping that I could... Any idea what speed I would have to go to take the paint off
? I honestly hadn't paid much attention to the primer for the bottom but if I need to sand it off of the bottom now is the time. Thanks for you help Tom!!!
Sorry for getting off of your build Steve!
Jeremy
Posted: Thu Nov 29, 2007 9:01 am
by steve292
jgroves wrote:TomW wrote:Jeremy your not using Primekote below the waterline are you, when you said barrier coat in your first post I didn't know that, but Primekote is made to go under Perfection above the waterline. Double check me it's been a little while but that is my recollection.
Tom
Hello TomW,
I was hoping that I could... Any idea what speed I would have to go to take the paint off
? I honestly hadn't paid much attention to the primer for the bottom but if I need to sand it off of the bottom now is the time. Thanks for you help Tom!!!
Sorry for getting off of your build Steve!
Jeremy
Don't worry about it. anyway this discussion has relevance for me as well, although I am planning to use all system 3 products for fairing, priming & painting where possible.
Steve
Posted: Thu Nov 29, 2007 9:05 am
by BruceM
I wouldn't worry about using that primer below the waterline if it is the 2 part primer Interlux . Are you trailering your boat? That primer is an epoxy primer. You should be fine.
Posted: Thu Nov 29, 2007 9:24 am
by jgroves
BruceM wrote:I wouldn't worry about using that primer below the waterline if it is the 2 part primer Interlux . Are you trailering your boat? That primer is an epoxy primer. You should be fine.
Hey BruceM,
Yes I will be trailering the boat. I think that's how I came to the conclusion that I could use the Primekote (formerly named Barrier Kote) on the entire boat. Upon my new concerns I did read that Primekote is not for high speeds...??? I don't know if I will be considered fast or not
.
Any additional help/info (good or bad) is GREATLY APPRECIATED!!!!!
Posted: Thu Nov 29, 2007 9:42 am
by TomW
Jeremy I have some time this morning, I'm down with a bug. I'll try to pull the tech sheet and see what it says.
Tom
Posted: Thu Nov 29, 2007 10:22 am
by jgroves
TomW wrote:Jeremy I have some time this morning, I'm down with a bug. I'll try to pull the tech sheet and see what it says.
Tom
Thanks Tom!
I emailed Interlux and as far as I can tell the Primekote should be ok to use. However I gave the tech guy all the info I could on how I'm using it and the temps and types of use and I will see what he says.
Jeremy
Posted: Thu Nov 29, 2007 10:49 am
by TomW
Jeremy pulled the Data Sheet under
Number of Coats Above the Waterline: 1-2 Below the Waterline 5-6
That's a direct quote from the sheet. There is no mention about speed and with your FS17 I would not worry about it. That is usually only a problem for the over 50's guys if it is a problem.
Tom
Posted: Thu Nov 29, 2007 10:59 am
by PaulMcClure
steve292 wrote:Did you seal the QF with epoxy before priming as it says so on the tin, or as the primer is epoxy based, did you just go straight into it?
Steve, you can go direct to primer if you are using the epoxy primer.
Posted: Thu Nov 29, 2007 11:03 am
by jgroves
TomW wrote:Jeremy pulled the Data Sheet under
Number of Coats Above the Waterline: 1-2 Below the Waterline 5-6
That's a direct quote from the sheet. There is no mention about speed and with your FS17 I would not worry about it. That is usually only a problem for the over 50's guys if it is a problem.
Tom
THANKS TOM for taking the time to look into it! More coats on the bottom shouldn't be a problem as that's the area I enjoy reaching
There are times I wish I would have used S3 for the paints because of the wealth of info on here about them. However a custom boat shop is on one side of me and Carolina Classic boat company on the other. Both within yellin' distance. They use interlux often and that is why I thought Interlux first.
Jeremy
Posted: Thu Nov 29, 2007 12:14 pm
by steve292
PaulMcClure wrote:steve292 wrote:Did you seal the QF with epoxy before priming as it says so on the tin, or as the primer is epoxy based, did you just go straight into it?
Steve, you can go direct to primer if you are using the epoxy primer.
Thanks Paul, I started using QF on the transom this afternoon, got one thin coat on & sanded & another one on & curing-wonderful stuff is'nt it, goes on bueatifully & sands like a dream.............also ordered another load of sandpaper....norton abrasives must love me
Steve
Posted: Wed Dec 05, 2007 8:59 pm
by steve292
I hate fairing
I am starting to fair the bottom of the hull. I am using the homemade fairing compound to fill the weave of the fabric & build up the low spots. The transom is about 75% faired at the moment, what I plan to do is this;
get the bottom there or thereabouts & then square the transom bottom edge, I have some milled cotton fibre for this.Then I will finish the fairing.
I made 2 fairing boards 600mm long by 115mm wide with doorknob handles

this one is 2 layers of 18mm ply glued together, the other is 1 layer, I did that to see which one worked best.I use spray adhesive to hold the paper on-

I am using norton paper, cracking stuff.
It is a slow process at the moment as I am unsure of the best way to proceed with fairing really, so don't be shy with suggestions please.
other stuff I have been doing is fitting the rubrail one layer at a time. the port side is complete, just needs the kerfs filling & sanding to a finish, which I will do after the fairing proccess is over. I fitted these now because the raised sides seemed a tad flimsy, The rail has cured that
I used 6mm dowels in each layer, sanding them off & re-drilling for the next one.
This is the 1st layer on the port side glued ready for 2nd layer to be fitted

& this is the finished rail on the starboard side ready to be sanded.It may look a bit wavy in the pic but I assure you it isn't.Just the camera

slooowly ever onwards,
Steve
Posted: Thu Dec 06, 2007 1:46 am
by colonialc19
Steve, looking great man! let me know how the fairing board works out for you, I'll be needing one soon i hope. Looks like you went with dowls for installing the rub rail?
Wish I could help you with the fairing question, but cant, no experience yet. Shines fs12 thread may be of some help, I think they touched on it some.
Dainel
Posted: Thu Dec 06, 2007 7:56 am
by jgroves
Looking Great Steve! Fairing seems to be a long process for most everyone. I like your fairing board! I believe 3M makes a velcro type material you can permanently glue to your board... then the paper just velcros on to that.
The more I look the more I like your raised sides! Great looking boat.
Posted: Thu Dec 06, 2007 9:58 am
by mecreature
2 18 mil ply is a thick board.. .1 ply is thick. that is what I made and am going to make another even thinner to better match the curve of the panels.
You should be making good time with either of those board I would think. You just have to do your time is what I gather. I dont know how people can fair these big boats without help..
I use beer to help me.
That is going to be one sweet boat.
Posted: Thu Dec 06, 2007 10:51 am
by Lower
Awesome as usual Steve. I love the dowel idea and plan to use it as well. Don't think I quite get the cutting and re-drilling?? Can't drill all the way through and use the same dowel for all three?? Not doubting you, just curious. Sometimes things make more sense when your actually at that step!
Posted: Thu Dec 06, 2007 2:48 pm
by steve292
Lower wrote:Awesome as usual Steve. I love the dowel idea and plan to use it as well. Don't think I quite get the cutting and re-drilling?? Can't drill all the way through and use the same dowel for all three?? Not doubting you, just curious. Sometimes things make more sense when your actually at that step!
Lower,
what I did was fit one layer of rail at a time. because I dont have enough clamps to do both sides at once I dry fitted the first layer one one side & drilled for dowels then removed it, glued it ,& fitted it. Whilst that side was curing I dry fitted the layer on the other side ready,using what clamps I had left, which believe it or not was just enough
.I did one layer at a time on alternate sides of the boat over four evenings & have one side completed & one more layer to go on the other. I read something by Shine once that to laminate one layer at a time is possibly the strongest way as long as you stagger your joints, it certainly was the easiest way for me as I can do a layer in the short work sessions that I seem to get.
Anyway today I lowered the boat down to make it easier to sand as it partially collapsed the trestles that the strong back was on, when moving side to side during sanding. I was going to do it anyway but the crunch came when the boat rocked away from me during a sanding stroke & kept going
.luckily no damage done
but a lesson learnt, I knew it was going to happen & should have been a bit less lazy & did something sooner.Tomorrow I will get under it with a level & re-level the strongback which is now on some big wood blocks & check everything carefully to make sure nothing is twisted.I dont think so from a check of the frames & stringers all seem pretty much where they where before.
Regards,
Steve
Posted: Thu Dec 06, 2007 2:52 pm
by steve292
mecreature wrote:2 18 mil ply is a thick board.. .1 ply is thick. that is what I made and am going to make another even thinner to better match the curve of the panels.
I use beer to help me.
How thin would you suggest? I am all ears for any advice here.
Beer is a great help to me in many things
But also has been my undoing a few times
regards,
Steve
Posted: Thu Dec 06, 2007 3:43 pm
by TomW
Steve 4 or 6 mil 1m. long works just fine for the non-straight areas. You get just enough pressure on each stroke for a good sand. You also sand fore to aft up and down so you don't have any big curves. You can also sand on an angle at the bow. Just be consistent in your sanding over the boat.
Tom
Posted: Thu Dec 06, 2007 4:01 pm
by mecreature
I am going to make one with 1/4 in... just what Tom suggests. It will help make a fair curve. I have 2 ever so small flat spots where my butt blocks went. (fingers crossed).
also for small areas I recently tried some of those sandblasters.
http://www.3mestore.com/70071359817.htm ... OAodORGGAQ
Posted: Thu Dec 06, 2007 4:15 pm
by jgroves
mecreature wrote:
for small areas I recently tried some of those sandblasters.
They work well, but don't last long. I began wraping disc paper around the soft blocks when they sandblasters ran out. Also 3M makes a hand held sander (also called SandBlaster) about 6" long that I found indespensable! It was purple and looked fragile.... The thing is now quickfair tan and still going!
Jeremy
Posted: Thu Dec 06, 2007 5:03 pm
by PaulMcClure
Steve,
3M do a couple of types of longboard. One is a fairly rigid wooden one which doesn't flex and a lighter weight one which bends to the hull. They are designed to work with their Hook-It range of velcro-fastening abrasives. You get the board and buy the abrasive by the roll then just velcro the sandpaper on.
My preference is for the more flexible one since it's easier to follow the curves in the hull and get a nice even finish. I notice you are using your home-rolled fairing compound. You'll find the process much quicker and more pleasant when you start using the QuikFair, since it sands so much easier.
As to your eventual finish, it depends on what you want to achieve. My boats always look good from a distance - preferably through binoculars
I always start out with the intention of finishing it perfectly, but deadlines loom and I end up rushing to get the thing in the water, so I don't always take as much care over the faring process as I should.
If you are going for a really good finish then get a can of dark car spray paint. When the hull looks reasonably well faired, mist a coat of paint over the hull and pass over it with the longboard. Any hollows will show up with paint in them and should be filled and faired again. Repeat until you are either happy or lose the will to live...
If you get the fairing spot on the paint has a much better finish right out of the tin.
Paul.
Posted: Thu Dec 06, 2007 5:32 pm
by steve292
Thanks so much for the advice guys.I will make a thinner board over the weekend, probably out of 6mm cheap ply. Paul I am going for as good a finish as I can. I already bought the black spray paint
. Time is not the issue here at the moment, it takes as long as it takes. I am using the homemade stuff to fill the weave & the tape edges, to make the QF go a bit further. the starbord side got its first coat of QF before I came to work tonight, so hopefully things will speed up a bit now.
thank you all for your input,
regards,
Steve
Posted: Fri Dec 07, 2007 11:45 am
by Lower
I'm sorry Steve, I guess what I was getting at is, I thought it might be possible to clamp all three to the boat. Drill the hole through all three, add dowel, then remove strips. Then clamp one layer at a time, but only have to drill for the dowels once. Again, it's probably not a big deal, I was just curious.
Posted: Fri Dec 07, 2007 12:28 pm
by steve292
Lower wrote:I'm sorry Steve, I guess what I was getting at is, I thought it might be possible to clamp all three to the boat. Drill the hole through all three, add dowel, then remove strips. Then clamp one layer at a time, but only have to drill for the dowels once. Again, it's probably not a big deal, I was just curious.
Hi Lower,
It never crossed my mind to do it like that
It may have saved some work I guess.I see Jeremy did his rails off the boat & then fitted the whole rail in one,as I read it. I didn't have the room for that. I think as long as you achieve the right end result it what you do to get there,within reason is up to you. How is your boat going BTW?
Posted: Fri Dec 07, 2007 4:59 pm
by Lower
It was more of a question than anything Steve. Your absolutly right in saying it's the end result that matters. I'll end up doing my rubrails just as you...with dowels. I was trying to figure it out. To be honest I wasn't even sure at first if you left them in or removed them somehow, but your saw off comment answered that.
I'm getting there. Jig is finished...finally. Panels are all spliced and holes are predrilled. I'm hoping to start hanging them this weekend. I'm having a blast with it to be honest...it's just taking longer than expected. I just keep telling myself...have fun...it gets done when it gets done. I think you wrote that somewhere too.
One last thing...I give you guys that are out in front a lot of credit. It's tough leading the show. As much as I'd like to be at your point, being a little behind has had some advantages, like that motorwell thing...Thanks again.
Posted: Sun Dec 09, 2007 5:23 pm
by steve292
Lower wrote:One last thing...I give you guys that are out in front a lot of credit. It's tough leading the show. .
I think every other FS17 under construction will be in the water before I finish fairing
Posted: Sun Dec 09, 2007 5:38 pm
by Steven
jgroves wrote:TomW wrote:Jeremy your not using Primekote below the waterline are you, when you said barrier coat in your first post I didn't know that, but Primekote is made to go under Perfection above the waterline. Double check me it's been a little while but that is my recollection.
Tom
Hello TomW,
I was hoping that I could... Any idea what speed I would have to go to take the paint off
? I honestly hadn't paid much attention to the primer for the bottom but if I need to sand it off of the bottom now is the time. Thanks for you help Tom!!!
Sorry for getting off of your build Steve!
Jeremy
I used Barrier Kote on my GV-11 and have been very pleased with it. I didn't use it on the inside, and I can definately tell the difference. No problems with it on the outside.
Posted: Sun Dec 30, 2007 4:57 pm
by steve292
Hi, I hope everyone had a good christmas or whatever your choice of holiday/religous festival
.
Some progress has been made on the fairing front. I am getting more assured of the best way to progress, which for me means one thin skim of compound, followed by sanding, fill all visible imperfections with more compound & sand again. Sounds obvious, but when I started I was putting on too much compound which was causing me to sand way more off than I needed too.After the hull fell off the stands I lowered & relevelled it on stacked 4x4 timbers, which now means that besides being much easier to reach everything, there's no rocking as I sand
.I have finished one side of the hull bottom ready to prime, the transom is 90% done & I am currently working on the starboard lower panel.
A pic of the hull now it's lowered-

& one sort of semi side on-

I like that photo, I think it shows progress-or is that wishfull thinking?I also think it is the only one so far of a high sided FS17, though I may be wrong.
other stuff.... I finished the skeg-it is attached to the batten so I could hold it in the vice(or is it vise?
)

& the first bits of hardware are here, towing & bow eyes, 8mm s/s with a 4800kg SWL

I hope you all have a good new year, see you then
Regards,
Steve
Posted: Sun Dec 30, 2007 11:31 pm
by Dyce
Steve,
Nice job! As a result of the seven additional inches of freeboard, what is the new overall length of the boat?
Doug
Posted: Mon Dec 31, 2007 1:02 am
by steve292
Dyce wrote:Steve,
Nice job! As a result of the seven additional inches of freeboard, what is the new overall length of the boat?
Doug
I have'nt measured it but it is about 7-8" longer at a guess I think,because the transom is further back as well.
I can measure it if it is important to you.
regards,
steve
Posted: Mon Dec 31, 2007 1:12 am
by Dyce
Thanks Steve, that's a close enough guesstimate...just kicking around the idea of building a boat that big in my garage.
Posted: Mon Dec 31, 2007 2:29 pm
by colonialc19
Steve, looking great! Thanks for the pics and info!
Daniel
Posted: Tue Jan 01, 2008 9:15 am
by jgroves
Steve,
Looks great! Thanks for posting pics.
Jeremy
Posted: Wed Jan 02, 2008 1:31 pm
by Lower
Steve, your boat is looking really good. I'm so jelous...wish I was that far along.
Posted: Sun Jan 13, 2008 8:33 am
by PaulMcClure
Steve,
How's progress? I'm interested to see how you got on with the fairing job
Paul.
Posted: Sun Jan 13, 2008 1:26 pm
by steve292
PaulMcClure wrote:Steve,
How's progress? I'm interested to see how you got on with the fairing job
Paul.
Hi Paul,
I am slowly making progress with the fairing,although I am decorating a bedroom for my daughter, also have to do the nursery as well, we have a second baby due in march.

Also I have found that any quikfair on my skin at all brings me out in an incredible rash, this includes dust from sanding,so I have got to put on long sleeved shirts, tyvek overalls, face visor, respirator,barrier cream on any exposed skin,uncle tom cobbley and all.I found this out when I went outside the garage to stretch my legs, took my mask & gloves off & wiped my lips with the back of my hand after toucching the hull
the blisters took 2 weeks to go away
Apart from that it is going well I would say about 70% finished.Bear in mind that since end November I have probably put in less than 20 hours in total on the hull as having to dress up as above sort of puts paid to short sessions
. I am hoping to put in a hour or 2 later tonight to start sharpening up the port chine. The trouble is I want a fairly good finish & on the other hand have the boat flipped by easter
as then I will have plenty of stuff that I can spend the odd hour on.I will take some pics later to show what I have done.
regards,
Steve
Posted: Mon Jan 14, 2008 1:47 pm
by Lower
Whenever you feel like your further behind than you would like to be...just think of me and all of a sudden your that much further ahead!
Congrats on the little one. Now your really going to have your hands full. I hope the Mrs. is doing well.
To bad about that fairing reaction. Sucks. At my pace, I'll find out if I have it in 09'!
Posted: Mon Jan 14, 2008 3:37 pm
by jgroves
Steve,
I hate to hear about the allergic reactions. I wonder what your allergic too in the quickfair?
Looking on the bright side the cooler temps will make the tyvek suit easier to wear
. Congrats on the baby too!!! Do you know if your have a boy or girl? Amazing you have time to sleep man! My wife and I had our first child on Sept 1st. One week later I hear the loudest blood curling scream I have ever experienced.... the dog and I looked at each other and seemed to have a mutual understanding... "time to get a hobby"! By the end of the month I had started the boat in the garage
. Our little girl is a blast! She actually spends all day at work with me which is great. However, her lungs have only grown stronger
Jeremy
Posted: Mon Jan 14, 2008 3:58 pm
by PaulMcClure
Steve,
Sorry about the reaction. Normally S3 stuff is very allergy tolerant. I'll ask the guys and get back to you.
Paul.
Posted: Mon Jan 14, 2008 5:06 pm
by PaulMcClure
Steve,
I checked with System Three tech support about your reaction. They think that given your reaction it looks like you have already been sensitized to epoxy prior to using the QuickFair. Here's a quote:
"In our experience it is highly unlikely that one can develop a sensitization from contact with solidified but partially cured epoxy. However, individuals who are already sensitized may have a reaction from contact with sanding dust from totally cured epoxy. For this reason sensitized persons should give up their use of epoxy resin."
That is probably not the prognosis you were looking for. Had you got uncured epoxy on your skin prior to using QuickFair? We always recommend using disposable gloves when working with epoxy and changing them frequently. Also, never use any solvent to remove epoxy from skin as it actually helps drive the epoxy into the skin.
Some people can get a reaction fairly quickly but most don't experience any problems. But maintaining a barrier is the est way of avoiding the problem. I do get slightly concerned seeing pics of people working on their boats in bare legs and flip-flops since the risk of getting uncured epoxy on their skin is obviously greater. Well, at least judging by the state of my work overalls
Posted: Mon Jan 14, 2008 5:30 pm
by steve292
Paul,
I always wear nitrile gloves.I have got epoxy on my wrists 3 or 4 times when removing my gloves. I also once had a bag burst when filleting. These are the only times I have had contact with uncured resin.I had never worked with epoxy in any significant quantity prior to this.I think the problem with the dust on my lips was due to the fact that I had a heavy headcold & already had a tender area(red coldsore) under my nose. I removed the respirator(3M 4277 BTW) & rubbed my nose, & thats how the dust got in.
However now I am aware of the fact that I seem to be one of the people whose skin can't tolerate exposure by contact, I will be extra carefull.
I will quantify this by saying thatI have worked in the petrochemical and power industries for 22 years and this is the first time I have had any sort of reaction.Thanks for your help & concern BTW, I may give you a ring to discuss it a bit more in the next few days if you don't mind.Have you got any of that nice primer yet?I will carry on with the quickfair as it is truly a time saver.I also sometimes wince when I see people working with no gloves ect.
Posted: Mon Jan 14, 2008 5:45 pm
by TomW
Steve someone else mentioned having a reaction to QF when he hadn't had a reaction to the epoxy recently in another post. I guess there may be something in the QF that is different from straight epoxy that can cause a reaction. Me I itch all over from the fiberglass fibers no reaction from the epoxy. Haven't got to QF yet.
Just be safe and cover up no use looking like a lobster.
Tom
Posted: Mon Jan 14, 2008 5:53 pm
by PaulMcClure
Steve,
Give me a call anytime. ETA for primer (and everything else I'm bringing over) is in the UK on the 12th of Feb. It usually takes a week or so to clear customs before it's in the warehouse.
Some people do get worse reactions than others. I know Jacques has mentioned he's been working with epoxy for years with no problems. With some epoxies I get a slight itching on my skin when I'm near uncured hardener, rather than the resin. But I don't seem to get any reaction when using System Three, which is fortunate under the circumstances
Having said that I'm really careful not to get any uncured epoxy on my skin and always work with a boiler suit (sleeves down) and disposable gloves. I'm probably more careful than average, firstly because I really enjoy building boats, but secondly because it's now my main business and I can't afford to be allergic to what I sell
Posted: Mon Jan 14, 2008 6:20 pm
by steve292
jgroves wrote:Steve,
I hate to hear about the allergic reactions. I wonder what your allergic too in the quickfair?
Looking on the bright side the cooler temps will make the tyvek suit easier to wear
. Congrats on the baby too!!! Do you know if your have a boy or girl? Amazing you have time to sleep man! My wife and I had our first child on Sept 1st. One week later I hear the loudest blood curling scream I have ever experienced.... the dog and I looked at each other and seemed to have a mutual understanding... "time to get a hobby"! By the end of the month I had started the boat in the garage
. Our little girl is a blast! She actually spends all day at work with me which is great. However, her lungs have only grown stronger
Jeremy
Ha!!! In the U.K you can wear a tyvek suit all year except for maybe 2 days in August
I know where you are coming from with the hobby thing, with me it was a boat or a kit car.you can't fish out of a kit car so the boat won
. we don't know if the baby is a boy or a girl, I like suprises
.Lower, hang in there it's not a race,It will get done when it gets done.
See, I am hoping to paint before Easter, as when the baby comes work will come to almost a halt for a while.Oh, & did I mention SWMBO wants the kitchen & dining room extended & reworked as well
If the hull is rightside up I will be able to snatch an hour here & there, even it is just lots of dry fitting,sanding ready for filleting & taping,cutting cloth ect,so when I get half a day,or wondrous thing, a whole day I can get a bit done.
my partner works 2 days a week at the moment so I do daddy duty then which cuts down what I can do boatwise, obviously.BUT she starts her time off in febuary so I am hoping to have a bit of a push then...before she has a bit of a push ,if you get my drift
.
Posted: Tue Jan 15, 2008 8:30 pm
by colonialc19
Steve,
Hate to hear about your quickfair problems, thats a bummer man.
Congratulations on the new addition
, love kids myself, have 3 boys
keep at it, the fairing process doesnt last forever, like Jeremy said at least its winter.
Daniel
Posted: Wed Jan 16, 2008 4:01 am
by steve292
thank you all for your comments.
HOWEVER
I think I did the quickfair a bit of a disservice by blaming it totally for the reaction I had. I have been using blended filler as well in the deeper spots, & what I now think happened is that I sanded a mixture of QF & some not quite cured epoxy/filler mix,which then got into what was essentialy an open wound
, which set the blistering away .
I would not want to dissuade anyone from using QF, it is superb for fairing,much quicker to set & easier to sand than anything else.
having said that I am going to be much more carefull around epoxy in general & sanding it when cured in particular from now on.
I would certainly take every precaution if my employer asked me to use it in the course of my work, so why take short cuts at home?
Regards,
Steve
Posted: Wed Jan 16, 2008 8:32 am
by tech_support
Right now we are using QF every day with no reactions, BUT I know the hardener side is harsh. There is another builder here in FL who has had the same reaction to QF.
Allergies are interesting how they appear suddenly and only for some people. Best to use normal protective gear to avoid a possible allergy to any boat building material.
Posted: Mon Jan 28, 2008 3:30 am
by colonialc19
Steve, hows the comming along?? havent heard anything from you since the qiuckfair reaction, just wondering how its working out.
Daniel
Posted: Mon Jan 28, 2008 3:56 am
by steve292
Hi Daniel,
Its moving along slowly,I only do an hour here and there. I would say about 80% complete with the fairing.I have some more to do on the port side of the hull bottom,the sides up to the bulwark panels are done,edges need to be squared off, transom nearly done. The bulwark panels just need all the filler on the screw holes sanded back, splices faired in & a coat of epoxy. I haven't posted much as fairing is an incremental thing, which only the person doing it will see until it comes together,so not much to show.I am going to use the new S3 primer,but it won't be in the UK until towards the end of Feb by all accounts,so I am hoping to be faired to my satisfaction by then.I really would like to flip around Easter. I have used about 4/5 off the 3.7 litre kit of QF I bought & am hoping it lasts out.
How about you?
Posted: Mon Jan 28, 2008 5:25 am
by Aripeka Angler
Steve, greetings. Your build looks great
I have been watching your build for several months and thought maybe it would be a good time to offer you some encouragment.
I am the builder from Florida that Joel mentioned in his post. My Quick Fair experience has been interesting to say the least. It first started when I was mixing some of the stuff and removed one glove to sign for a package. Finished mixing wo glove and got a blob on my hand and some between the fingers. My hand began to burn and get red later in the evening. At first, I blamed it on the acetone that I shouldn't have used to clean my hand. Over the next several days I sanded QF with gloves in a short sleeved button type shirt. After the rash kicked in on my face and arms I figured out I was allergic to the dust too.
I took it easy for a few days to let the blisters and rash go away. Spent several nights itching and trying to decide if I wanted to abandon the project. I decided to get more protection as you have done. Coat your entire body with baby powder before suit up. Make sure the collar is tight as the chest is a big problem area.
Hang in there you will get through the fairing stage, I did. Next time I am going to use phenolic and blended filler instead
......Richard
Posted: Mon Jan 28, 2008 7:32 am
by steve292
Thanks Richard,
I don't know if it was sanding partially cured epoxy & fillers or the QF that did it, and I am in no hurry to find out
by repeating the experiment. I do much the same as you regarding protection now and have no real problems anymore.It is common sense when you think about it,& a bit of a no-brainer to wear appropriate PPE for the task in hand,like I said in an earlier post, I do it in work without comment or second thought, so why do so many of us not do it at home?
I have used blended filler to help with costs as it is about 1/3 the money of QF,but it is a PITA to sand.What I have found it good for is to build up areas such as the transom end of the hull where there are multiple glass overlaps. I build it up level,give it a sand, then use QF to finish.It is a shame really that its taken me so long to work this out
but it will be handy if I can swing the catamaran that has been mooted on the forum recently
I read & watch your build as well, I find it very interesting to see how other builders approach things. That XF20 sure looks like a nice boat,built by a skilled man who takes pride in what he does.It will be one of my coming milestones to find a trailer as well.
thanks for the encouragement,
regards,
steve
Posted: Mon Jan 28, 2008 4:00 pm
by Aripeka Angler
Steve glad your doing better. I am sure it was the QF that messed me up and it probably worked on you as well. I am almost done with the paint so I really won't have to use the stuff for a while.
It's a shame that we are allergic to the stuff because it really is the bomb.
Good luck on your build
....Richard
Posted: Mon Jan 28, 2008 5:30 pm
by colonialc19
Steve, sounds like you have it moving along, I'm certainly guilty of improper PPE, been lucky so far, Don't think I'll push my luck anymore though.
Glad to hear of your progress,
Daniel
( the slowest Fs17 build on the board

)
Posted: Tue Jan 29, 2008 12:09 pm
by Lower
colonialc19 wrote:Steve, sounds like you have it moving along, I'm certainly guilty of improper PPE, been lucky so far, Don't think I'll push my luck anymore though.
Glad to hear of your progress,
Daniel
( the slowest Fs17 build on the board
)
Daniel...Think I'm going to have to challenge you on this one!!!!!! hahahaha
Posted: Wed Feb 06, 2008 5:01 pm
by bushmaster
Hi Steve,
Congrats on the new baby. Hope mom and baby doing well.
Sorry to hear about the problem with QF or other filler. I hope that every thing works out well soon and you are back to the build.
I am itching all over from sanding fiberglass that I had to remove when the join on the bottom panels did not come out right. Had a gap of 1/16" between panels.
Any way it's OK right now.
I am taking my time also. no hurry.
Bushmaster
Posted: Wed Feb 06, 2008 5:08 pm
by PaulMcClure
I don't think Steve's baby has shown up yet - got a while to go I think
Posted: Wed Feb 06, 2008 5:22 pm
by steve292
PaulMcClure wrote:I don't think Steve's baby has shown up yet - got a while to go I think
1st week in March,so not long.still fairing quietly,starting to really come together now.some photos at the end of the week ,maybe.
Paul, I will call you at the end of this week or the start of next about paint & primer
Regards,
Steve
Posted: Thu Feb 07, 2008 3:57 pm
by Lower
Any colors in mind??? You plan to use S3 correct? Whatever you decide, I'm sure it will look awesome, as the rest of your build has been impressive.
Posted: Thu Feb 07, 2008 5:23 pm
by steve292
Hi Lower, how goes it?Thanks for the complement
You are right S3 it is,for 2 reasons
1. It's water based so it should be safer than a solvent based paint
2. Paul McClure comes across as a nice guy,(he is the UK supplier).
As for colours, Mercer green for the sides & console, with some off white or tan for the inside & gunwale, not finally decided yet.The bottom I am leaning towards graphite & epoxy as the boat will be trailer launched & I like the look of it from some of the recent posts,bit worried about application tho'.Jeremy has thrown down the gauntlet with the finish required
,so I am trying not to embarrass myself with crap fairing
If I ever manage to finish fairing that is,everything is conspiring against me laying a hand on the b***** hull
regards,
Steve
Posted: Thu Feb 07, 2008 5:27 pm
by PaulMcClure
Paul McClure comes across as a nice guy,(he is the UK supplier).
Nah, I'm horrible really, I just speak nice to people willing to part with their money
Posted: Thu Feb 21, 2008 1:48 pm
by PaulMcClure
Steve,
Paint in tomorrow or Monday (at last)
Cheers,
Paul.
Posted: Thu Feb 21, 2008 1:58 pm
by steve292
PaulMcClure wrote:Steve,
Paint in tomorrow or Monday (at last)
Cheers,
Paul.
lovely............. I will phone on monday to spend this years bonus
Steve
Fairing is nearly over 8)Photo's soon
Posted: Thu Feb 21, 2008 2:15 pm
by PaulMcClure
lovely............. I will phone on monday to spend this years bonus Shocked
How much do I wish you were a City trader?
How did you get on with the rest of the fairing? Any adverse reaction?
Posted: Thu Feb 21, 2008 2:26 pm
by steve292
PaulMcClure wrote:
lovely............. I will phone on monday to spend this years bonus Shocked
How much do I wish you were a City trader?
How did you get on with the rest of the fairing? Any adverse reaction?
I wish I had the money those guys have but to live to work? Not for me.
I have been a lot more careful with the PPE, so haven't had much trouble, some itching occasionally,I did pick up a spreader that had some uncured
QF on it that give me a bit of a rash, but generally ok.The fairing is going well seeinng that I only seem to apply some compound on, say a Friday, sand it off the following Thursday, don't get to do anything for a week & so on.However I have decorated 2 rooms & built a 12ft greenhouse as well, so I am not idle
.Hopefully another week or so should see the end of it.The hull is looking good.
steve
Posted: Thu Feb 21, 2008 3:00 pm
by PaulMcClure
I wish I had the money those guys have but to live to work? Not for me.
Quite right. I worked for years as a freelance IT consultant to banks and so on. Got utterly sick of it hence why I do what I do now. Much more interesting and frankly a much nicer class of customer
Posted: Tue Feb 26, 2008 2:04 pm
by PaulMcClure
Posted: Tue Feb 26, 2008 2:18 pm
by jgroves
Hey hey!!! Congrats Steve on the new addition!!! Looks like your going to have to add several seats in your boat
Jeremy
Posted: Tue Feb 26, 2008 2:32 pm
by colonialc19
Congratulations Steve
Hope everyone is doing well with the birth of #2
Daniel
Posted: Tue Feb 26, 2008 6:27 pm
by steve292
Thanks, I hope that I can still find time for the boat but it will take a bit of a back seat for a while
,but hopefully I can pootle along a bit.I am almost ready to paint.I would have put some photos up but the camera is in hospital with SWMBO, & I think if I had mentioned taking boat pics today I would have been disemboweled
I did come home tonight & have an hour at it to wind down.Very theraputic, sanding
maybe tomorrow
Steve
Posted: Tue Feb 26, 2008 7:47 pm
by Betowess
Haven't been here in a while. The hull looks terrific. The FS17 is on my wanna build list and I like the higher freeboard option. Congrats on the new girl too!
Posted: Tue Feb 26, 2008 8:40 pm
by Lower
Congrats on the little one! Very exciting!! I wish the family all the best.
Posted: Thu Mar 06, 2008 3:46 am
by steve292
First boat post for a while
Fairing is almost over,just the Fg splices on the raised sides to fair in & some small spots on the bottom starboard hull panel to do.Also left is squaring/ rounding the corners where the raised side panels meet the transom.I have sanded off the fairing compound back to the FG where the skeg will mount in preparation for glueing as well.
Some pictures-

Squared off transom edges-

View from the bow-

And a view from the garage rafters of the hull from above-

I have a wobbly style line between the side panels which I am planning to cover with a Doug fir rubrail/ spray rail arrangement, the fir is here, just need to visualise & shape the rail before fitting.
The paint & primer came yesterday(really quick delivery, only 24 hrs after order,thanks Paul
).I can't tell you how glad I will be to be doing something other than sanding
regards,
Steve
Posted: Thu Mar 06, 2008 6:47 am
by PaulMcClure
Great work Steve, it's looking superb. I've got a feeling this is going to be one of those boats with a sickeningly good finish to make us mortals give up.
I better get some paint on my boat before I get put off
Posted: Thu Mar 06, 2008 7:43 am
by Steven
Is that your skeg on the hull? If so, I would give it a longer taper and taper it in from the sides as well. Also, I'd stop it 8" short of the transom. You don't want to create turbulence at the prop. Having it finely tapered and not too close should prevent that.
Posted: Thu Mar 06, 2008 8:49 am
by mecreature
man its big...Looks great.
Posted: Thu Mar 06, 2008 9:45 am
by jgroves
Steve! Brother that looks amazing! I can't wait to see this boat flipped!!!
The painting will show some spot that may need more fairing compound... as it is shiney and shows any flaws. From the looks of layers of compounds and sanding you probably got most all the "flaws" out. Keep us posted!
Congrats again on the little one!
Jeremy
Posted: Thu Mar 06, 2008 10:07 am
by TomW
Steve boat looks great.
Congrats on your new daughter. Pics?
Tom
Posted: Thu Mar 06, 2008 6:29 pm
by topwater
Good to see you're back at it.
Congrats on the newest crew member
Posted: Fri Mar 07, 2008 6:36 am
by bushmaster
Steve,
Excellent build. keep up the good work and keep those pictures coming.
I will try to glass the chines and keel and along the transom this weekend, I will try to do that all in one day.
Question! Do I sand down the edges before laying the big cloth or just lay it on top of the tape?
Thanks for your answer.
Bushmaster
Posted: Fri Mar 07, 2008 7:23 am
by steve292
If you let the epoxy cure,you will need to sand the tape to provide a "key"for the next layer.I sanded the tape lightly to do this with the R.O,and to remove rough spots that can stop the fabric laying down tidy. This will also help to prevent air bubbles.Sand the edges of the tape to a feather edge,this will help with fairing(but don't sand to far into the middle of the tape,for obvious reasons.
Hope this answers your question,
Steve
Posted: Fri Mar 07, 2008 7:45 am
by bushmaster
Thanks Steve.
Yes. This answer my question. Now I have to decide if I should do it all in one day or two.
Bushamster
Posted: Tue Mar 11, 2008 7:49 pm
by Aripeka Angler
Steve, your boat is looking very nice.
The pain of the fairing will be over soon. I know how you have suffered with the QF allergy.
It looks like you will be priming soon. If you are using S3 high build primer and the temp is cool mix the paint and let it sit for an hour at least. The paint dries alot better in cool weather if it has time to kick. I covered a batch and was able to use it 24 hours after I mixed it.
Good luck with your new addition
Richard
Posted: Tue Mar 11, 2008 8:20 pm
by PaulMcClure
Steve has got the new S3 Yacht Primer. I'm interested to see how he gets on with it, since he got the first tin sold in Europe
Posted: Wed Mar 12, 2008 4:41 am
by Aripeka Angler
Paul, thats pretty neat. I am assuming it is the same stuff that we get over here.
Steve I think you will like the S3 primer. Put it on thin or it will dry slower than the time it takes for two handicapped snails to breed.
Richard
Posted: Thu Mar 27, 2008 8:15 am
by PaulMcClure
Steve,
How are things progressing?
Paul.
Posted: Thu Mar 27, 2008 8:23 am
by jgroves
Hey Steve,
Thanks for the nice comments on my build! But more importantly, how is yours coming along?

I know the family stuff can be time consuming for sure! I'm sure the extra height on the sides adds to the fairing and prep for paint.... but boy oh boy it will sure look sweet and be dry!
Posted: Thu Mar 27, 2008 6:22 pm
by steve292
Hey Steve,
Thanks for the nice comments on my build! But more importantly, how is yours coming along? I know the family stuff can be time consuming for sure! I'm sure the extra height on the sides adds to the fairing and prep for paint.... but boy oh boy it will sure look sweet and be dry!
Steve,
How are things progressing?
Paul.
I haven't done a lot over the past few weeks, as I have been working quite a bit, & catching up with stuff around the house.
What I have done is to glue the skeg on & put a nice fillet around it. It needs to be sanded smooth before coating with graphite. I coated the skeg with an epoxy/graphite mix before attaching it as I had never done it before.I had a load left & coated about a third of the bottom,then SWMBO opened the garage door,the wind blew all the dust out of the rafters onto the wet hull,gave it a nice anti-slip finish so I have sanded that back.Target for this weekend is to finish the sanding of the skeg, & repair the mess on the bottom.I also have 2 fir strakes cut & shaped to go on the rear 6ft or so of the style line between the side panels,maybe fit them as well.
Pics early next week I hope.
thanks for asking,
Steve
Posted: Tue Apr 01, 2008 3:27 pm
by WobblyLegs
Steve, it looks like you had a busy weekend! (Just saw your new photos).
Regards,
Tim.
Posted: Tue Apr 01, 2008 3:44 pm
by jgroves
Pic flippin and you have some new ones up! Looking good!
Posted: Tue Apr 01, 2008 6:25 pm
by steve292
Thanks,
I see you are back at it as well Tim...will it float this year?
I did four coats in the end,with some filling & sanding after the first two.
I just looked & there are 2 small areas of pin holes on the transom end that I will have to go back to. But I am happy with it,tho' I am toying with the idea of sanding it to a matt finish.If you want to find out where your imperfections are,graphite & epoxy shows 'em brilliantly
Anyway some pics...
Skeg on ready to sand...darn fillet mix gets everywhere

These are all taken after the 3rd graphite coat.You may be able to see a light spot on the bow in one pic, which is where I flled a few pinholes,& a scratch with QF.


Its shiny....very,very shiny
Regards,
Steve
Posted: Tue Apr 01, 2008 6:35 pm
by WobblyLegs
steve292 wrote:I see you are back at it as well Tim...will it float this year?
In the voice of the Churchill advert: "Oooh, Yes!"
Looking good Steve, you're making rapid progress!
Posted: Mon Apr 14, 2008 10:22 am
by colonialc19
Steve, I was checking out your graphite job, looks great by the way, and was wondering Did you stop your graphite at the chine?
or did you come down the side of the hull a little?
Hope to have mine done this week, but unsure of where to break between topside paint and graphite.
Your thoughts and ideas would be welcome and a help
I think I may put this on the power boats page for every one to chime in on also
Thanks
Daniel
Posted: Mon Apr 14, 2008 11:27 am
by steve292
What a coincidence, I have just read your question
I was going to post about painting the sides there as well,but lets see if we get an answer here
I have stopped at the chine for now. I am thinking that I will prime & final sand the sides, & when that is to my satisfaction bring the graphite down the sides to just above the DWL,then paint the sides.
Or maybe the other way round I.E paint first then bring the graphite down? which is the better way,can you or anyone else tell me?.
I can get a 2" wide vinyl tape to use as a boot stripe & apply it when the paint is dry. I am dreading this painting stuff as I am a complete novice at it
. I am planning to go around the bow as well,over the graphite with the primer & with the topsides paint(S3 mercer green)
On the plus side I am very close to painting now, just some final detail stuff to do. I am going to drill, fill & redrill all my hull hardware holes before priming as well except the scupper holes & motorwell drains.
If I could get a bit of time to really get after this It would start to come together really quick now.
How far away from paint are you BTW ?
Steve
Posted: Mon Apr 14, 2008 11:49 am
by WobblyLegs
steve292 wrote:bring the graphite down the sides to just above the DWL,then paint the sides.
Or maybe the other way round I.E paint first then bring the graphite down? which is the better way,can you or anyone else tell me?
Mmm, I would think graphite first = epoxy on epoxy. Painting first means you might end up with epoxy over paint = likely to peel off at some stage?
Having said that, I'd probably leave it as you've done it - after all, it's protection for the bottom from scrapes and knocks, isn't it? The sides aren't likely to need that level of protection, I think.
Just my 2p.
Tim.
Posted: Mon Apr 14, 2008 12:31 pm
by colonialc19
Steve, Thanks for the reply
I think I'm going to graphite to DWL, after reading WobblyLeggs post and Tom's comments in the powerboats section
I may leave the FS in the water a couple days and want to make sure I have no problems.
As for paint, havent even ordered it yet, but I hope to get the graphite on the bottom this week
Going out now to apply a skim coat of QF,
hopefully the last for the bottom
The vinyl boot stripe is a good idea
Mercer green is nice, but not for my fairing abilities I'm going with off white/cream? Banbridge white S3?
Daniel
Posted: Mon Apr 14, 2008 1:12 pm
by steve292
colonialc19 wrote:
Mercer green is nice, but not for my fairing abilities Daniel
It may not be for mine either......we shall see
Posted: Mon Apr 14, 2008 1:15 pm
by steve292
WobblyLegs wrote:[
Mmm, I would think graphite first = epoxy on epoxy. Painting first means you might end up with epoxy over paint = likely to peel off at some stage?
Tim.
Well,I thought that as well, but I am unsure.
things to ponder....might have to go to System3's tech support & find out
thanks for the reply
Steve
Posted: Mon Apr 14, 2008 3:20 pm
by donk
Steve, I think Shine put graphite over paint on the FS 12 they did.
don
Posted: Mon Apr 14, 2008 3:27 pm
by Cracker Larry
Actually they put the graphite over System 3 primer, which is a 2 part epoxy primer. I did the same thing.
Posted: Thu Apr 17, 2008 2:14 pm
by PaulMcClure
Steve, I'd do the graphite first. The paint is designed to effectively self prime over epoxy. The epoxy isn't designed to be applied over paint
Posted: Thu Apr 17, 2008 4:16 pm
by Cracker Larry
Quoted from Bateaus FS12 build...
Posted: Mon Jul 16, 2007 8:00 am Post subject:
--------------------------------------------------------------------------------
Cracker Larry wrote:
Joel, am I correct that you painted the bottom with a primer before you epoxy/graphited?
Yes, we primed the whole bottom, but that was not totally necessary. The primer really does help with the final fairing, and we wanted to show the entire process.
It works either way
Posted: Thu Apr 17, 2008 4:26 pm
by PaulMcClure
Larry, if they used the S3 Primer, that's an epoxy based primer, so you are still applying the graphite/epoxy over an epoxy base. My concern would be based on if you were to apply the topcoat then the epoxy graphite mix, because I think you would potentially experience poor adhesion in that case.
Posted: Thu Apr 17, 2008 4:29 pm
by Cracker Larry
That's exactly what I said above...
Actually they put the graphite over System 3 primer, which is a 2 part epoxy primer. I did the same thing.
Posted: Thu Apr 17, 2008 5:07 pm
by PaulMcClure
Cross purposes
I just wanted to make sure folks weren't thinking they could topcoat the boat then apply the epoxy graphite mix. Over epoxy primer is indeed no problem
Posted: Thu Apr 17, 2008 6:25 pm
by Cracker Larry
Posted: Thu Apr 17, 2008 6:38 pm
by steve292
Well, thats what I'll do-primer first,then epoxy/graphite to the waterline or just above,then bring the topcoat to the graphite
thanks for the input chaps
Steve
Posted: Sun Apr 20, 2008 4:28 am
by steve292
This weekend.............................
I drilled the mounting holes for the transom U bolts..used a 12mm drill,then filled with an epoxy/milled fibre mix.redrilled to 9mm for the 8mm u bolt when set.This is a pic of the port side. The edge you can see is the edge of the motorwell cut out in the transom

Also I have attached two doug fir rubbing strips along the style line where the two side panels meet.I did this to cover a wavy bit in the line
anyway, here is the glue up on the starboard side.I used three screws to hold it while the epoxy cured

Then after the epoxy had cured I removed the screws, dilled for a 9mm dowel & glued them in

I also put a nice fillet along the style line. I used QF for this as it is purely cosmetic, & it will sand easy,therefore saving a bit of time.
Also I have put a fillet under the rubrail, but of epoxy & blended filler as it was a much bigger fillet than the style line, so QF would have been to expensive a material to use

I am hopeing to prime this coming week
at last!!!!!!
Posted: Sun Apr 20, 2008 6:19 am
by PaulMcClure
Looking great Steve. Good work.
Posted: Sun Apr 20, 2008 8:16 am
by colonialc19
Steve, Your making some good progress, I like the " rub strips " they look right at home with the raised sheer, you see alot of sportfishers with em' around this part of U.S., I think they may act like a spray rail as well.
Keep posting your progress,
D
Posted: Sun Apr 20, 2008 10:28 am
by Cracker Larry
Nice work, Steve
Posted: Sun Apr 20, 2008 12:16 pm
by jgroves
NICE WORK!!! I like the rails! Your boat certainly looks ready for primer!
JEremy
Posted: Sun Apr 20, 2008 3:17 pm
by ks8
Nice! Rails, functional or not, look good! Do you plan to paint them a different highlight color? Getting close!
Posted: Sun Apr 20, 2008 3:39 pm
by steve292
ks8 wrote:Nice! Rails, functional or not, look good! Do you plan to paint them a different highlight color? Getting close!
Finished bright hopefully,as long as I don't make a complete a*** of the painting
thanks for all the nice comments
Posted: Sun Apr 20, 2008 3:42 pm
by ks8
Bright against what main hull color? Now you've gone and got me curious.
Posted: Sun Apr 20, 2008 4:19 pm
by PaulMcClure
Mercer green, if the invoice is correct
Posted: Sun Apr 20, 2008 7:15 pm
by topwater
Looks good steve glad to see youre back at it
Posted: Sun Apr 20, 2008 8:54 pm
by bushmaster
Steve
That's coming along nicely, I too will try to use graphite with epoxy mix on the bottom. Any suggestions?
Thanks
Bushmaster
Posted: Tue Apr 22, 2008 8:08 am
by gerry
I would suggest practice on a scrap piece of plywood first, do some test coats and work out what rollers and brush you will use (fluff and and bristles from cheap ones waste a lot of time, it is not worth it), sand it back with good wet and dry paper "wet" and apply another coat to see if you can get the finish you want unsanded, which is an amazing shiny black. As a backup see if you can get a finish with wet and dry and polishing you will be happy with....research street rods they have a lot of tips that can also apply to painting curved surfaces of a boat.
I am going to put another two coats on after sanding the whole bottom again. The first one will be straight epoxy mixed with half the amount of graphite that I used for the first three, the second and last coat will have 10% actone mixed in to thin it (getting cold now) to try and get that gloss finish I wanted unsanded, if that fails I will sand it (wet) with 1200 - 2000 grit and polish with a mop which looks great as well.
Wear a bright head lamp, the graphite absorbs all the light and it is hard to see what you are doing.
Try to borrow or get a good flying bug zapper!!
As long as the epoxy completely seals the bottom that should be primary goal, the surface finish can be the last coat or two. Fair the bottom the best you can before the graphite mix coats, it makes for a much easier job..
that was my brain dump from trying it the first time...
and great looking boat, very nice work
Gerry
Posted: Tue Apr 22, 2008 8:14 am
by jgroves
Off topic but Gerry I really like your site! You are documenting your build with some great photos
Posted: Wed Apr 23, 2008 6:26 pm
by steve292
First coat of primer is on
I finished sanding the panel join & rubrail fillets,then sealed the upper panel by rolling on a coat of neat epoxy,
here 'tis


After 24hrs,when it had cured, I sanded it with some 120 grit, then I vacuumed the entire garage,& the hull, put the tools away,put some newspaper on the bench,read the primer tin again, & masked off the bits that needed masking.
I mixed the primer exactly as stated on the tin,& while I was waiting for it to induct,wiped the hull with some isopropyl alcohol damped rags.
I rolled on the primer with a foam roller.
Hopefully i'll get 2 more coats on tomorrow
Some pics of the result-


For those of you that may be interested, it took 625 ml of primer to do the first coat,with very little left over
Regards,
Steve
Posted: Wed Apr 23, 2008 6:51 pm
by PaulMcClure
Excellent! Almost there now. How did you find the new primer? I've not used it yet - I just spent a few hours (until 11pm) at the boat shed sanding down my boat ready for the primer in the next couple of days.
Posted: Wed Apr 23, 2008 7:05 pm
by colonialc19
Steve,
It wont be long now till she's flipped
625ml Thanks for that measurement, kinda give me an idea of coverage, I'll probally use a little more than half of what you have with those raised sides, they really make the boat look BIG
Great Job
Daniel
Posted: Thu Apr 24, 2008 4:49 am
by steve292
PaulMcClure wrote:Excellent! Almost there now. How did you find the new primer? I've not used it yet .
It is very nice to use,although I have nothing else to compare it against, as it is the first time i've used this type of coating. I have just put the second coat on this morning, & now the primer is starting to build, hiding the graphite on the hull. I have quite a few pinholes to fill, I think later I will try Shine's brush dabbing trick to see how many I can fill.
Daniel,
If it's of any use to you I used about 400 ml of epoxy/graphite mix per coat on the bottom,mixed the graphite in about 1/3rd by volume, perhaps a little less.
Steve
Posted: Thu Apr 24, 2008 7:51 am
by jgroves
Looking GREAT! You will have it flipped in no time now!!! Keep the pics coming!
Posted: Thu Apr 24, 2008 8:52 am
by colonialc19
Steve,
That will help me know what to expect, Thanks
Daniel
Posted: Thu Apr 24, 2008 11:10 am
by WobblyLegs
Steve, looking real smooth from here!
No spray rails?
Keep up the good work,
Tim.
Posted: Thu Apr 24, 2008 12:47 pm
by mecreature
Looking very good.
IMO the newer primer seems to cover better/more even. It has a duller look and feel.
I got caught in the middle of the restock I had some old and some new. the older was tough stuff. I had a big scratch that is how I found out.. I just hope the newer is just as tough.
Posted: Thu Apr 24, 2008 2:48 pm
by steve292
WobblyLegs wrote:Steve, looking real smooth from here!
No spray rails?
Tim.
No, I'll try without them first,If it needs them I can always retrofit.
Steve
Posted: Thu Apr 24, 2008 10:11 pm
by bushmaster
Very nice Steve
Keep those pictures coming.
Bushmaster
Posted: Sun May 18, 2008 6:06 pm
by steve292
Been a little while since I updated, but her I am again.
Snce I last posted I have put on two primer coats, & filled in a few small imperfections that the primer picked out, then put on another two coats & sanded to 320 grit.
Here's some pics-


Then, after the hull had reached the nirvana like state known as "good'nuff"
, I applied 3 coats of graphite epoxy mix to the sides.The line is set at 180mm down from the chine, which should be about 40mm above the DWL. The bottom got another coat as well,making 4 coats on the bottom.
So then I cleaned the hull down, masked off the waterline & the wood strakes & put on the first coat of mercer green
It went very well,but I have some questions about it flowing out,as there are some brush marks in it. I will ask the question in the paints section of the forum,but I am pleased to have got this far
.It seems a very long road to walk when you are fairing, & to reach the end of it for this stage of the build is a great feeling.
See what you think-


All tips on painting welcome, as I have never done this before,(unless you count painting doors
)
Regards,
Steve
Posted: Sun May 18, 2008 6:56 pm
by topwater
Steve i really like the color combo.
White boot stripe?
Posted: Sun May 18, 2008 7:57 pm
by Spokaloo
Im a big fan of an additive called Penetrol. It seems to give better flow and brushability without the drying issues of using thinners, at least when I used it.
E
Posted: Sun May 18, 2008 8:41 pm
by ks8
Mercer Green makes me think you are using the waterbase System Three, in which case I'm not sure of the wisdom of trying Penetrol with a waterbase coating.
Color looks good. I have not had excellent results with roll and tip or brush with S3. Sometimes good, but never excellent. Others have. I can spray it alright when I have the time to prep for it, but not lately. Many very thin coats seems to be a theme, but as much as people think me patient,
, the idea of having to brush 8 or 9 coats does not sit well with me, even if that is what must be done for best results. It runs on a vertical so easily.

. I'm trying small sections with a preval this week. It would be excellent if Preval sold spare nozzles for a nickel each. Still, I too will look forward to any S3 tips.
Boat is looking fine!
Posted: Sun May 18, 2008 8:47 pm
by Spokaloo
Ohh, its water based?
I retract my earlier comment.....
E
Posted: Mon May 19, 2008 12:30 pm
by steve292
topwater wrote:Steve i really like the color combo.
White boot stripe?
Yes, the bootstripe will be white,Probably a 50mm vinyl one, as I do't think I feel competent enough to paint one at present,but we will see.
Posted: Mon May 19, 2008 12:31 pm
by steve292
Spokaloo wrote:Ohh, its water based?
I retract my earlier comment.....
E
Yes, it is the system 3 stuff
I really like the paint job on your Nina BTW.
Posted: Mon May 19, 2008 1:33 pm
by airman40
I have had the best results doing roll and tip on S3 using a foam brush. Even a very soft bristle brush seems to leave small brush lines.
David
Posted: Mon May 19, 2008 1:39 pm
by jgroves
I like your color choices! It's funny to look at your pics because I know how large your boat is, however without you standing next to it it is hard to get proportions
Once you flip you will have to stand next to it!
In regards to the brush marks... I had the same problem. It was random though. Some of the coats were fine, then some had brush marks. I would sand the brush marks out which would sometimes bring me back to the original surface
then paint again. I tried my best to figure out what was happening. I even went so far as to switch brush companies and call interlux. My conclusion was that the cooler temps I was painting in caused the paint to be "thicker" and more apt to leave streaks. The best finish to date came from a rainy evening at 50 degrees???? According to the directions that should have been the worst day to paint on
.
Keep us posted.
Jeremy
Posted: Mon May 19, 2008 1:47 pm
by jgroves
Oh yeah, I almost forgot to mention.... last week I was visiting a gentelman who rebuilds boats in my area and he had in the rafters of his shed an original high side Simmons Sea Skiff 20'. It was VERY neat to see the hull. The high sides reminded me of your boat! The paint colors were blue and white.... very good looking, but in bad shape. If I go back I will have to take some pics so you can see what I'm talking about. I hope he gets around to fixing it up!
Posted: Wed May 21, 2008 9:19 pm
by colonialc19
Steve,
Its great your getting some paint on it, sounds like its giving you a bit of trouble, Hope you get a handle on it before the last coat. The color scheme is gonna look sweet
.
Got my order of paint today, its gonna have the graphite bottom, san juan tan topsides, black boot stripe, undecided on the kiwi grip.
Keep us posted on that paint job
Daniel
Posted: Wed May 21, 2008 11:57 pm
by Betowess
airman40 wrote:I have had the best results doing roll and tip on S3 using a foam brush. Even a very soft bristle brush seems to leave small brush lines.
David
Same here with S3 clear satin. Quality 4" panel roller followed with a cheap foam brush worked great, no lines. I rolled it on fairly light, tipping with a small 1.5"-2" foam brush - three coats on top of epoxy sealed Okoume. Did it mostly at night in cool weather in my garage.with the door closed. Looking forward to your flip!
Posted: Fri May 23, 2008 3:28 pm
by steve292
over the last few days I have applied 5 coats of paint. After sanding back the first unthinned coat with 320 grit to get rid of the brushmarks, I then applied the next 5 coats thinned by about 15-20% by volume with water.
None of the coats have cross linker in, I'll explain why in a minute.
This has almost entirely cured the problem of the paint not flowing especially once I switched to using a foam brush for tipping off.
Here are a few pictures-


I apologise for the wonky pic of the bow ,but I slipped a bit as I took it

I did say that it had almost entirely solved the flowing out problem, but I still have some brush marks on the transom,due to the paint refusing to flow, which I put down to the heat from the sun shining on the black door of the garage.I have only been able to paint in the afternoon as I am on a run of nightshifts at the moment, so the sun is on the transom when I paint.( which is also why the coats are'nt crosslinked). I don't have the room to paint with the door shut.
What I plan to do is to flip the boat( June 5th planned) & put the boat back in the garage the other way round, I.E bow to the door. This will allow me to work on the transom in the cool, shaded part of the garage at my leisure.I am then going to fix this-

Posted: Fri May 23, 2008 3:35 pm
by WobblyLegs
Steve, that look really nice - good job!
Are you going to leave the graphite as it is?
Regards,
Tim.
Posted: Fri May 23, 2008 3:36 pm
by mecreature
I like the
"his has almost entirely cured the problem of the paint not flowing"
that is exactly were I was. Everyone I show says wow looks great.. then I go and say.. stand over here.. look you can see brush marks.. they just look at me wierd..
that boat is looking sweet.. close to flipping.
Posted: Fri May 23, 2008 3:38 pm
by jgroves
Buddy that looks great! I will have to try the foam brush for tipping when I get to painting the inside!
Do you have a name picked out for her?
Posted: Fri May 23, 2008 3:52 pm
by steve292
Lord that was quick posting
I hadn't finished the post, but had uploaded what I'd already typed as I lost a load of stuff I wrote once due to a wrong keystroke.
I will continue here
I have had a bit of the paint pull off with the masking tape here, & a little bit of bleed under the tape which I will have to fix
In an ideal world I would do it all before I flipped, but if it does not go over in early June, it will be mid July before I get another chance, due to work stuff, & people being about. So I don't really have a choice.
What I will do, I think is to put the boot stripe on next(vinyl, 50mm wide, white) , clean up the graphite a bit, bit of polish & stuff
, and after it is flipped & all the through hulls are done sand with 320, lightly & give it 3 or 4 crosslinked coats. This seems the best plan at present to me, anyway.
Steve
Posted: Fri May 23, 2008 3:56 pm
by steve292
mecreature wrote:
that is exactly were I was. Everyone I show says wow looks great.. then I go and say.. stand over here.. look you can see brush marks.. they just look at me wierd..
that boat is looking sweet.. close to flipping.
Aha,...my missus looks at me like that when I say " yes, but if you come here, crouch down & look at it from this angle you can see the brush marks"
glad to see I am not alone in this world of strange analness( is that a word)
Posted: Fri May 23, 2008 3:57 pm
by steve292
jgroves wrote:Buddy that looks great! I will have to try the foam brush for tipping when I get to painting the inside!
Do you have a name picked out for her?
Not yet.... I was going to name her after SWMBO but I can't get (edited, to save loads of grief)
Posted: Fri May 23, 2008 4:02 pm
by steve292
WobblyLegs wrote:Steve, that look really nice - good job!
Are you going to leave the graphite as it is?
Regards,
Tim.
Thanks Tim
what do you mean? I am going to put a boot stripe on but the bottom is done. The boat will live on a trailer so I don't really see the point in getting the ultimate finish on the graphite( although JIM M's OB17 nearly pushed me that way) I am pushed for time, because of the flip as I said above anyway.
Posted: Fri May 23, 2008 4:11 pm
by bernd1
Steve,
what should I say - perfect work.
You can be proud to that boat - really !
Enjoy the last steps of building.
Bye
Bernd
Posted: Fri May 23, 2008 4:41 pm
by WobblyLegs
steve292 wrote:I am going to put a boot stripe on but the bottom is done.
OK, missed that...
Dunno how long you'll stay married with the name comment though
Tim.
Posted: Fri May 23, 2008 6:09 pm
by steve292
WobblyLegs wrote:steve292 wrote:I am going to put a boot stripe on but the bottom is done.
OK, missed that...
Dunno how long you'll stay married with the name comment though
Tim.
That will stay on here for 1 night only.....I'm not that daft.
Posted: Fri May 23, 2008 6:11 pm
by steve292
bernd1 wrote:Steve,
what should I say - perfect work.
You can be proud to that boat - really !
Enjoy the last steps of building.
Bye
Bernd
Thanks Bernd,
I think I am halfway to being halfway
steve
Posted: Fri May 23, 2008 8:40 pm
by bushmaster
Steve
You did one heck of a job on that boat. Great painting, looks beautiful.
keep on posting pictures.
Bushmaster
Posted: Mon Jun 02, 2008 11:39 am
by jgroves
Steve,
It's the 2nd!
Please don't think I'm rushing you... but is the 5th the flip day? I think I'm looking forward to your boat flip more than I am splashing mine
Do you have your unsuspecting friends lined up yet? I have seen good results when you tempt them with alcohol. Your boat is significantly larger than mine and I needed every bit of 3 people to get my boat up. I would say 6 would have been the perfect number. I didn't build a cradle for it and it held up fine. I used my neighbors overgrown grass for flipping. Flipping was a bigger deal than I made it out to be though. It's a HUGE turning point (no pun intended) in the build.
Keep me posted.
Jeremy
Posted: Mon Jun 02, 2008 4:00 pm
by steve292
Jeremy,
It will be the 5th,unforseen events permitting.
I have taken the strongback out from under the hull & have built a cradle with it, complete with castors for moving it around the garage.It is going over with the stringers & station molds in the hull to help with keeping the hull fairly rigid.To this end I have tabbed the frames in with small pieces of biax.I am working tonight,but time permitting I will post some photos tomorrow.
I must confess to being a trifle nervous about seeing all my hard work on its side,but it will be nice to see it go over.
.
Steve
Posted: Mon Jun 02, 2008 4:14 pm
by Cracker Larry
I must confess to being a trifle nervous about seeing all my hard work on its side,but it will be nice to see it go over.
So was I
Not to worry. Just plan it out carefully, every step. Sam and I flipped ours by ourselves. We spent about a week thinking it over, an hour rigging tackle, and maybe 10 minutes to flip it. It was uneventful
The scariest part is when it's straight up on it side and going over the hump.
It's all in the planning.
Of course if you have 6 people it doesn't take much planning, but if not....slow and easy

Posted: Thu Jun 05, 2008 6:00 pm
by steve292
Well it's flipped
Over the last week or so I prepared the hull to flip.
first I got under the hull & tabbed in the frames with 3 small bits of biax on each frame-

This was taken after the strong back was out & the bracing put in
Then I jacked up the hull off the strong back & supported it on axle stands,4 of them,2 under the transom & 2 on the sheer at frame B-

I slid the strong back out from under the boat, & used it to form the base of a cradle to support the hull after flipping.I put wheels on it so I can place the hull where I want it in the garage.-

I also screwed some 1x3 timber across the rubrail at stations A,B & C & cross braced it, you will see that in some of the later pics
SWMBO has a friend who I insulated a loft for earlier this year,when I did it I found she had 3 old mattresses in there, so I scavanged them this week.
I also managed to borrow 6 4x2' 1" thick ply boards from work(we use them to allow machinery access over gravelled areas ect)
Anyway, today came & we (3 fellas & 1 lady) flipped it by first taking the cradle of the hull & putting it out of the way.Then moving the hull out of the garage by lifting the transom end,& using a sack truck under the bow


Then we rotated the hull through 180 so the bow is now towards the garage door when pushed back in.
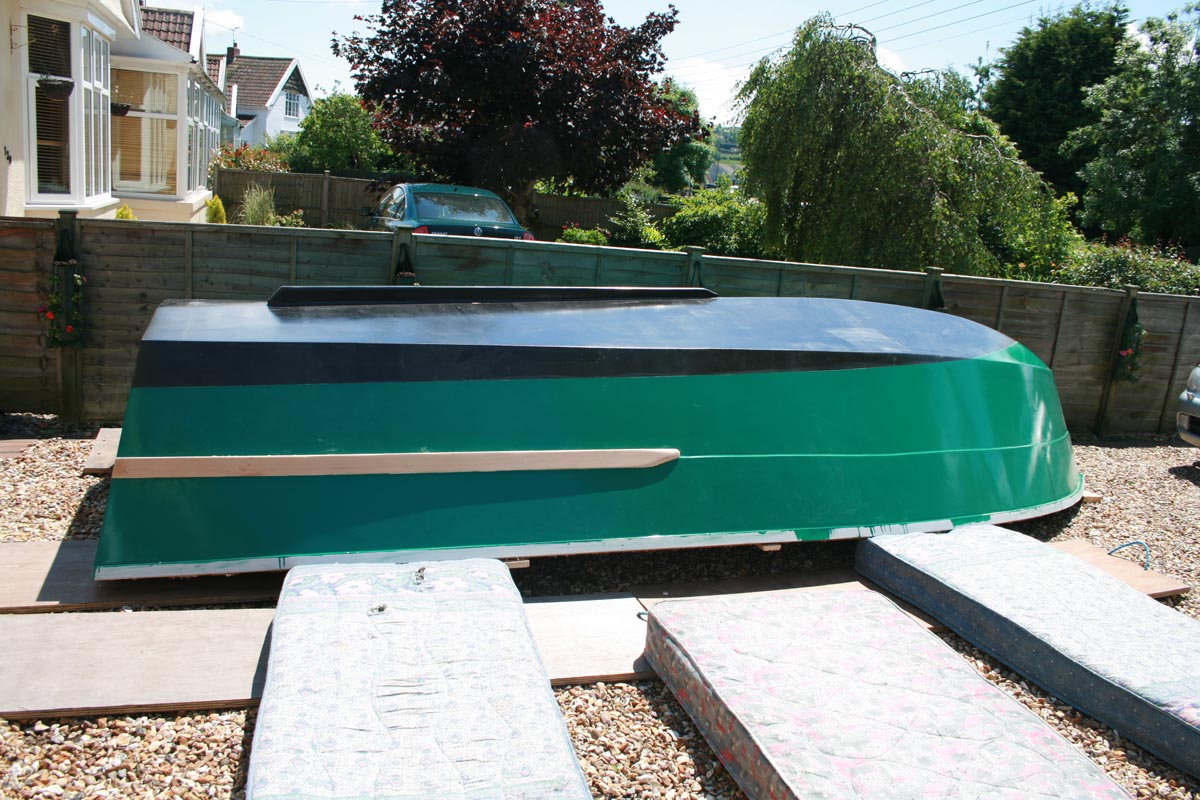
You can see the mattresses laid ready in this pic.
The actual flip itself I have no pictures of as I was busy
But here it is over-


You can see the bracing here.
Then we put the cradle on the wood boards & 3 of us lifted the hull into it & pushed it back into the garage


Over the next week I will true the hull up to remove any twist & level it
Then I think I will clean up the epoxy drips on the rubrail as some of them are sharp.
QED in the end, I don't know why I was so fussed about it
Regards,
Steve
Posted: Thu Jun 05, 2008 8:10 pm
by Cracker Larry
Smartly done
Looks great Steve
There's a lot of good building going on around here
Posted: Thu Jun 05, 2008 8:15 pm
by TomW
Steve I don't know if I have missed it before but that is one sharp looking hull. Your color with the graqhite is right on. Good going on the interior.
Tom
Posted: Fri Jun 06, 2008 8:04 am
by jgroves
Woohoo! Great job on the flip! The boat looks terrific. I like the way you braced the boat! Matresses were a great idea too! I like your paint color and graphite! Nice spray rails too! The boat is huge. Have you measured it yet?
Now that it's over you have to start glassing again
KEEP US POSTED!
Posted: Fri Jun 06, 2008 9:47 am
by topwater
Good job on the flip, glad to see all went well.
I'll bet the the boat looks alot bigger now
Posted: Fri Jun 06, 2008 10:08 am
by WobblyLegs
Well done Steve - a major milestone passed!
Did you find it lighter than expected?
Tim.
Posted: Fri Jun 06, 2008 11:33 am
by donk
Steve,
It's looking real good. Glad everything went smoothly.
Keep up the good work.
don
Posted: Fri Jun 06, 2008 12:01 pm
by mecreature
Good job.. It looks great.. and big...
Posted: Fri Jun 06, 2008 1:12 pm
by colonialc19
Steve, Congrats on your flip
The boat looks great ! Nice cradle, heavy duty for sure
I'm waiting on a batch of primer to bubble out so I can roll a coat on my build now
.
It Looks Great!
Daniel
Posted: Sat Jun 07, 2008 7:08 am
by steve292
Thanks for the compliments
Did you find it lighter than expected?
Yes , 3 of us lifted it up fairly easily,and none of us are bodybuilders,just your average bloke.Although I would not call it light,you wouldn't want to drop it on your foot
.
Bear in mind the frames & stringers were still in it as well.This is good in context of the overall weight of the boat I think.
It was also much less 'flimsy' than I thought it would be.No creaking or groaning as it went over at all.
Good job.. It looks great.. and big...
I'll bet the the boat looks alot bigger now
Yes.. it looks flipping huge
; brings it home how much is left to do as well
The boat is huge. Have you measured it yet?
Just roughly....from the bow tip to the top of the transom in a straight line
I:e an inclined, not horizontal line is 17' 6" Transom height overall is 35 1/2 " more or less, beam at C is 7'6" including the rubrail.
Posted: Fri Jun 13, 2008 2:02 pm
by Lower
Awesome Steve! Just awesome! Paint looks great and the flip was perfectly executed! Must feel good to look at the boat from a different angle.
Posted: Fri Jun 13, 2008 5:44 pm
by steve292
Hey Lower,nice to hear from you,how have you been?
Posted: Fri Jun 13, 2008 6:27 pm
by steve292
The hull is now back in the garage.-

This week I have taken the twist out of the hull, so it is now sitting true on the cradle.
This is a pic just for jeremy,who wanted to see me in the hull for scale-

I am stood on a plank across the stringers at frame C.
bear in mind the bottom of the hull is about a foot off the ground so the hull looks a lot higher than it is.
So, This is how I went about it.
Before I did anything I measured across the shear at B,C & D so I have a reference measurement to pull it back into before the frames go back in.
Then I ground off the FG tabs holding the frames in place,as I could not get the hull to twist with the frame,ect still in & removed them & the stringers.
I then put 2 panel pins in the top of the rubrail the same distance down from the bow on each side. I used frame A's location for this but I suppose it isn't really critical.Then I put another 2 panel pins in the transom corners & ran a string diagonally across the boat-

For those who don't know the hull is free of twist when the 2 strings just touch where they cross.It took some twiddling to get this bit right.
I then measured from the bow tip to each corner of the transom to check how square the hull is.I am pleased I must say as it is within 4mm(3/16") side to side. sometimes it is better to be lucky than good
I now have to figure out how to glass the inside without moving it.
I have a cunning plan,watch this space
At the moment it involves a section of the ladder you can see & some rope
I think I will probably glass in the transom first while I have a ponder.
In an ideal world I would be able to do all the inside glassing wet on wet, but alas, I don't think that will happen, so to do the transom area which I can get at easy is a start at least.
Regards,Steve
Posted: Fri Jun 13, 2008 6:32 pm
by chicagoross
Looks like good rafters overhead - hanging from the ceiling upside down like mission impossible?
Posted: Fri Jun 13, 2008 6:37 pm
by steve292
Posted: Fri Jun 13, 2008 6:44 pm
by gk108
They would probably get one look, back off and send in a robot to check things out.
Posted: Fri Jun 13, 2008 8:46 pm
by bushmaster
Nice looking boat Steve.
By how much did you raise the sides by? It sure looks big.
Keep sending pictures, I am taking notes.
Bushmater
Posted: Tue Jul 22, 2008 6:45 pm
by steve292
This is slow going as life keeps getting in the way
But I have made a little progress in the last month.
first I taped the keel with two layers of biax.

I then put a layer of tape on each chine, but I seem to not have taken a photo of that bit
I had to lay the wide fabric one side at a time, due to time constraints, so I could not do it wet on wet,which allow me to tell you is a real PITA. I have about 8 or 9 small air bubbles in the laminate as a result. No big ones, so I will sand them out & patch them with a bit of woodflour & epoxy. I have two on the chine which I will also put a bit of tape on as well
Here is an example-

& a picture of the finished lamination

I went about 10" or so up the hull sides with the fabric. I plan to glass inside the front lockers so that will add to the bow glass anyway.I had to nest the fabric as I didn't have enough to go full length in one go. I staggered the overlaps to make it easy on myself

I put the stringers on today,laid on a bead of epoxy after I marked the stringer positions & sanded the fabric to provide a key. After it sets up I will lay a fillet down the sides & tape over them wet on wet,one side at a time. I set them up using the frames lifted up on 1x1 battens so they don't stick to the stringer
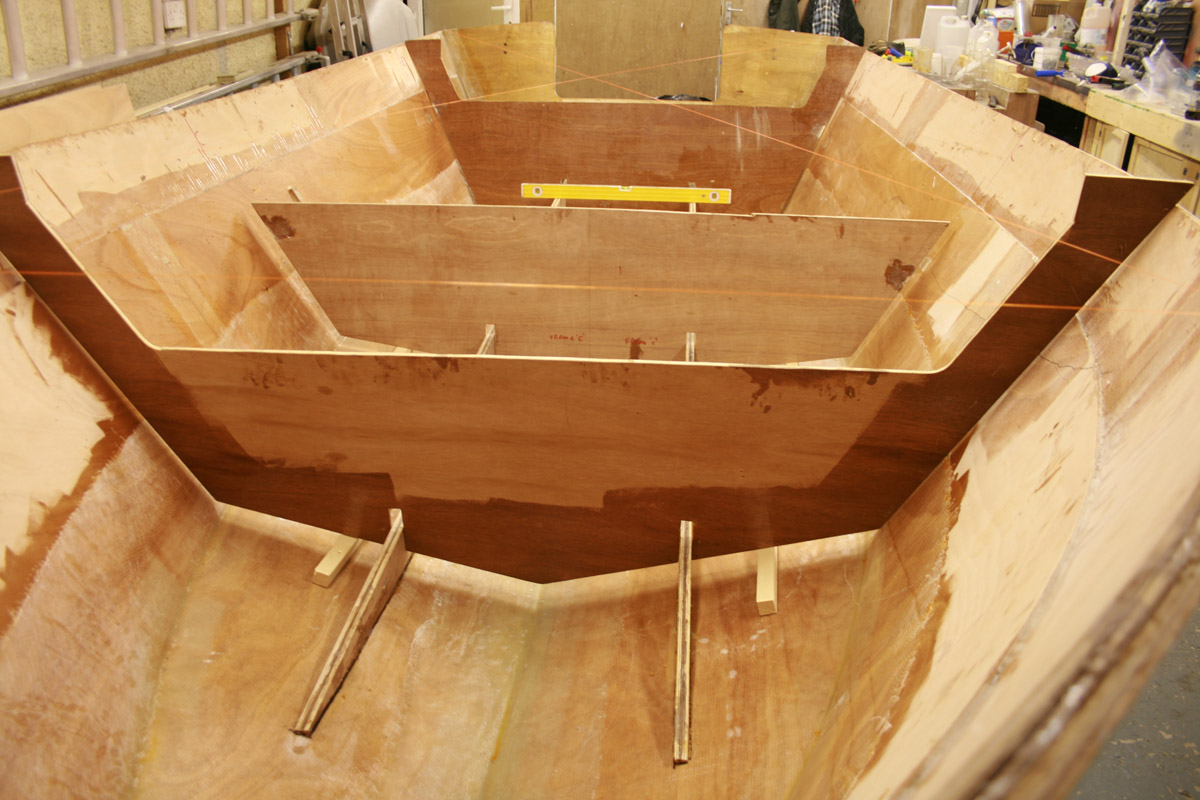
So, there you have it,onwards & upwards
regards,
Steve
Posted: Tue Jul 22, 2008 7:04 pm
by chicagoross
Looks great! Glassing in all the bits and pieces now with tape is time-consuming, but you're over the hump of having to lay huge sheets of fabric without wrinkles or bubbles!
Posted: Wed Jul 23, 2008 9:26 am
by jgroves
I knew you were doing something this past month
Your moving right along!
Posted: Wed Jul 23, 2008 11:28 am
by Lower
Me too Jeremy. He's been quite, but I knew he was making progress! Me on the other hand...
Posted: Wed Jul 30, 2008 8:02 pm
by steve292
I have finished filleting & taping the stringers in this week.
They took longer to do & a lot more epoxy than I anticipated , so I did the starboard one,then ordered more resin.
Some pics-


These are the finished stringers.
I had a roller foam up on me today as I worked, & start to smoke,that is the first one I've had do this,good is'nt it?
While I was waiting for the epoxy to arrive I have also made a start on the through hull fittings.
I drilled the transom with holesaws to take the transom drain plug fitting,& the scuppers

The drain plug screw holes have been drilled oversize & fillrd with a thickened epoxy mix ready for redrilling for the fasteners,all the other holes were coated with neat epoxy first, then two liberal coats of thickened epoxy after the neat stuff tacked up


I have also fitted a plywood backing strip to the location of the bow eye

This is a layer of 1/2" 1" wide backed with a layer of 1/4 " ,1/2" wide bedded into an epoxy woodflour mix.After it had set up I went back over it with an epoxy/silica mix & made a nice fillet.I have since redrilled oversize,filled with epoxy/silica & redrilled it for the eye,no pics of that though.
There are some more pics in the gallery.
so there it is, slow compared to Shine,AKA the rocket man, but progress
.
Steve
Posted: Thu Jul 31, 2008 3:28 pm
by mecreature
man that looks nice.. Have you been pondering the tubes for running your lines yet...
Posted: Thu Jul 31, 2008 4:16 pm
by tech_support
very nice. clean and thorough work
Posted: Thu Jul 31, 2008 7:32 pm
by K-1
Contemplating building this same boat myself ... congrats on your excellent progress so far and we can't wait to see the outcome
Posted: Thu Aug 07, 2008 5:05 pm
by steve292
I have started to install the frames into the hull. Before I did this I leveled the hull side to side & fore & aft on the cradle. I also checked that the hull wasn't twisted by using the crossed strings method.
I blocked the cradle off the ground to do this as I don't want it to move on the wheels at all as the frames get installed.

I made a simple jig to hold the frame sections in place,just some bits of 1x1 screwed together.
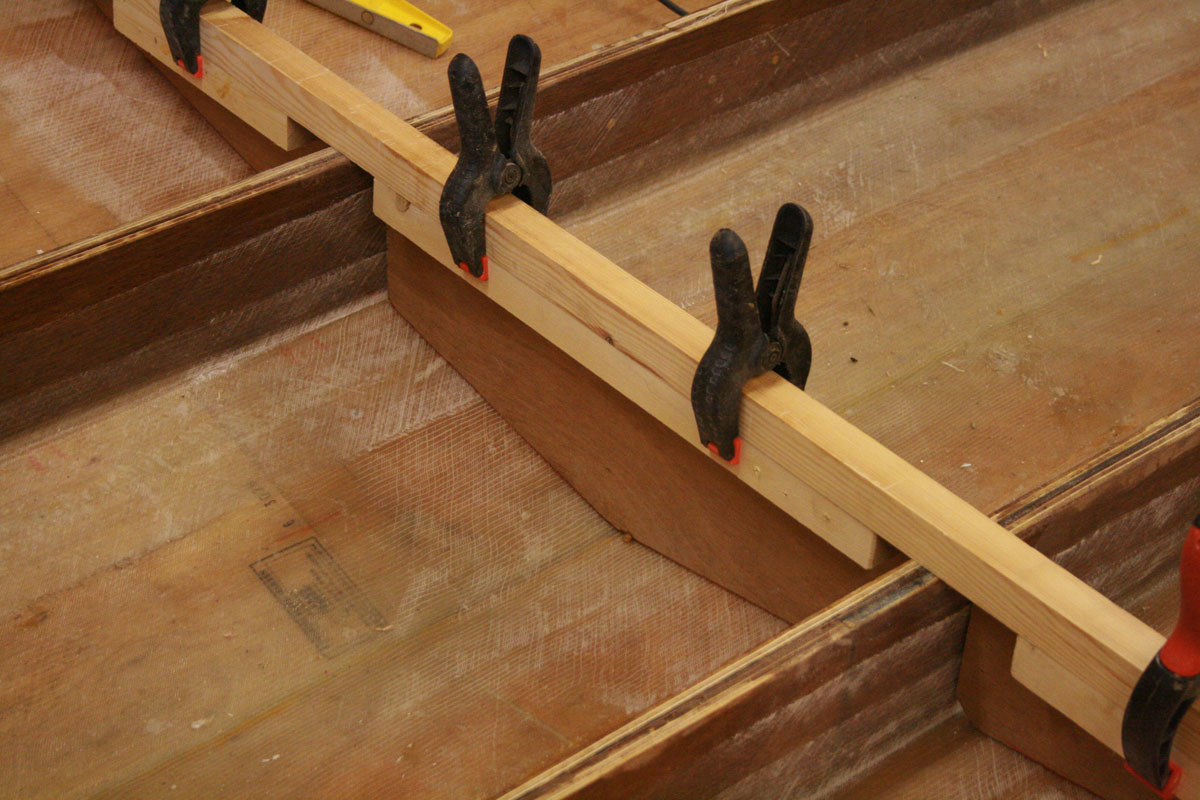
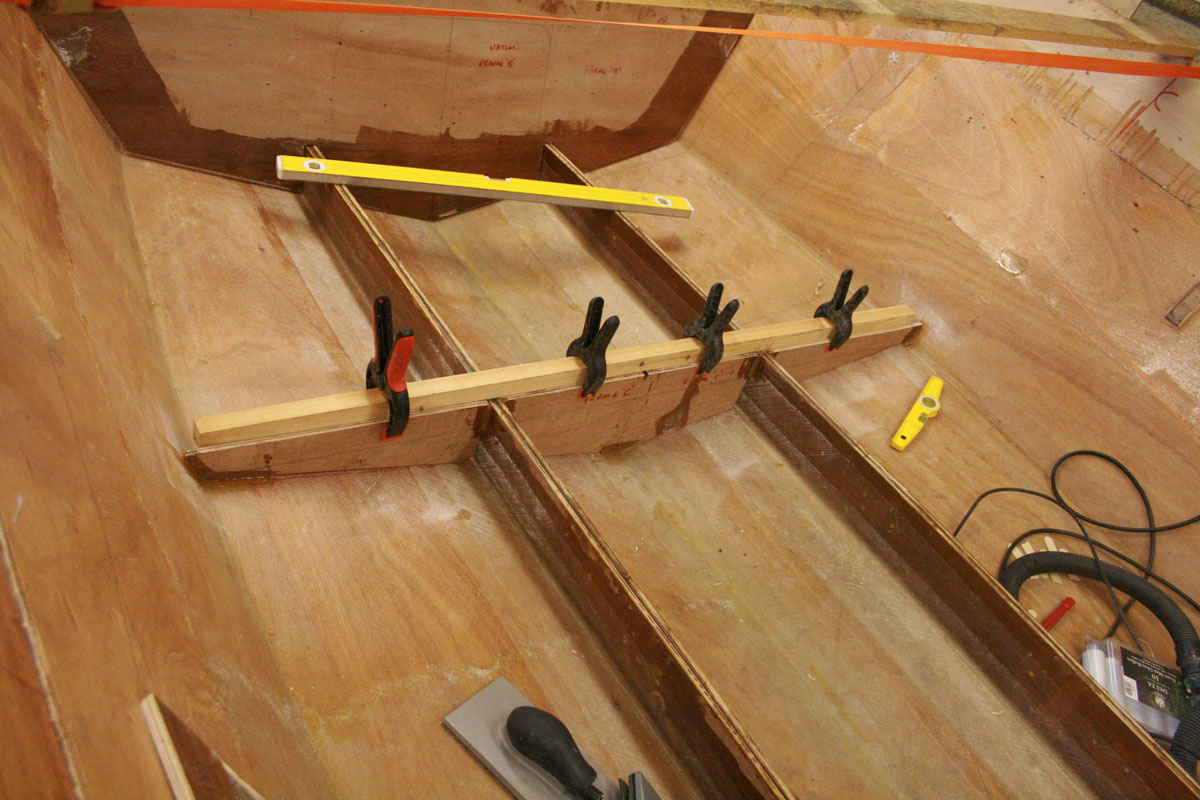
In that one you can see the epoxy tacks setting up.
So, I precut all my tapes last night for frames B, C, & D. I decided just to fillet & tape B & D so to give myself more room to work.
The temps here are around 20C late afternoons so I filleted at about 6.30 pm, & waited until 8.30ish to tape. I tried wetting out off the hull in the white tray that you see but, it is not for me, I can't get on with it at all
So, as off today that is how far I am on B & D taped, C tacked in.

I have also started to work on hatch framing on frame A, you can see that in the last pic.
Posted: Thu Aug 07, 2008 5:53 pm
by gk108
I tried wetting tape in a tray and had a hard time, too. I didn't write off the method totally, though. There have been a few occasions where it was about the only way to go. For those times, I just wet some short strips of tape on a sheet of plastic laid on a table.
Boat is looking great. Perspective threw me off in that last picture. At first, I wondered where you got that gigantic white level.
Posted: Thu Aug 07, 2008 9:08 pm
by bushmaster
Coming along nicely Steve
How were you able to transition the mercer green with the graphite on the hull and transom side?
I have just finished the graphite on my FS17 which I extended to just above the water line.
Keep those pictures coming.
Bushmaster
Posted: Fri Aug 08, 2008 8:12 am
by steve292
I didn't write off the method totally, though. There have been a few occasions where it was about the only way to go. For those times, I just wet some short strips of tape on a sheet of plastic laid on a table.
I will give the wetting out in the tray another shot later in the build, I can see the advantages of doing it that way,but when I tried it the tape just would not go where I wanted it to,although it was all precut. It kept bunching up or stretching
.
How were you able to transition the mercer green with the graphite on the hull and transom side ?
I haven't yet as the hull will have a few more coats yet. I have a white vinyl boot stripe 2" wide, I will probably sand the transition smooth then cover it with that. Or maybe not
I haven't really given it that much thought as yet.... How was your luck with the graphite sanding ?
Now then...... I have a question to ask later,when I can find the photo.
Steve
Posted: Mon Aug 11, 2008 7:33 am
by cape man
Steve,
Disregard my post on my thread... The boat looks sweet. Great work man!
Posted: Sun Aug 17, 2008 6:13 pm
by steve292
Progress this week
I posted a question in the power boats section about draining the area behind the motorwell bulkhead. I am specifically worried about this-

The black line is the baseline,which is also the bottom of the sole, so if the scupper fitting was to develope a leak, the water would be under the sole level. The plans don't show a sole behind E,so I am going to leave it out. The next thing is I now need to create a path back to the bilge pump and/or the transom drain. I have drilled a 20mm hole in the base of each stringer about 40mm forward of the transom to do this.

I also cut 2, 18 mm backing plates for the scupper fittings & glued them in.

This will give the locknut a flat surface to bed down on.
Cut a backer of 1/2 1088 for the bilge pump discharge-.

Frame A had a gap at the top on each side, which looked like it would take a lot of epoxy to fill, so I cut some strips of 1/4 as filler& glued them in.

Thats the gap
& filled in.

Then, tonight I have taped it in, & given it a coat of epoxy

I have also made a start on cleating out the floor frames & stringers for the sole.Using 34mm square pine for this.

Next is to tape frame E & finish off the cleats,& epoxy coat the holes in the stringers somehow,maybe fill & redrill?
I've also got some corrugated pipe for chase tubes, so that is in the near future as well,followed by foam
This is my garage after a year of on /off boatbuilding.Needs a serious clean & tidy

Regards,
Steve
Posted: Mon Aug 18, 2008 12:38 am
by Steve_MA
Nice looking work. I just wanted to offer my 2 cents on the subject of wetting out the tape seperately. I actually found it was alot easier that wetting it out in place.
I used a piece of clean scrap wood about 2ftx6ft, it was OSB actually. If you have a 3-4ft piece of tape to wet out, it gives you plenty of room. I just poured the epoxy and spread it around with the spreader. When saturated, remove the excess with the spreader - just push it off the tape. The tape wont stretch at all - at least worked for me. Then I usually folded it in half lengthwise to apply. I doesnt really stick together unless you really crunch it together.
THe biggest problem is keeping the board reasonably clean.
I did about 10 ft lengths on the bottom of my boat once for the chine tape....no problem. Folded it in half twice, dropped in place, used spreader to press down and smooth out.
I found the tape alot easier to wet out on a flat surface. Just my experience, maybe you'll find a nugget in there.
Posted: Mon Aug 18, 2008 8:21 am
by Daddy
I would add to Steve's idea that you put a piece of poly film over your work table when wetting out off the boat. Next day the excess epoxy on the film with come off with a shake and be ready to start again. It really works well.
Daddy
Posted: Mon Aug 18, 2008 10:47 am
by Steve_MA
true....I tried that. I think I might just use kitchen plastic wrap next time. I didnt want to use a new piece each time and those little flakes of dried epoxy are hard to see - I didnt want any transferring to the tape.
Posted: Tue Aug 19, 2008 7:51 am
by colonialc19
Steve, I was just reading up on your thread, your moving right along. I hope my tape work, and layups come out as clean and neat as yours, they look great.
Last night I gave up on the idea of tring to do the whole interior wet on wet, and started taping in the transom.
Keep building,
Daniel
Posted: Tue Aug 19, 2008 1:38 pm
by steve292
Daniel,
If I could I would try to do the big pieces of glass in one session.
It is a huge PITA to do else.I had quite a few areas with air bubbles to repair after.
Steve
Posted: Tue Aug 19, 2008 10:19 pm
by bwd3
For what it's worth, a way to wet tape that works really well is to loosely roll the tape up and stick it in the cup you mix resin in, let it soak a minute or two, then flip it over and wet the other end of the roll.
Massage it a bit and unroll onto your fillet (still wet right?).
Or you can use a ziplock bag instead of the mixing cup, also works well.
The cup has the advantage of letting you have the excess epoxy right there in the bottom where you can still use it easily.
On the other hand if you want to have say a staggered multilayer tape, eg 3 inch tape under 6 inch tape, it's worth it to make a wetout table.
How I do it at least...
Posted: Wed Aug 20, 2008 10:52 am
by jgroves
Steve! Lookin' great! Your doing some tough stuff glassing the inside... your moving right along though! I set up a step stool next to the transom and mixed next to it. It was like a stairmaster workout. Up, down, wet out, up, down, mix... repeat until complete
. Also the holes you cut in the motorwell sides is a good idea. I didn't originally do that however a couple of weeks ago I decided it should have them.... Not really any water running through them but just in case it now drains to the bildge pump.
Posted: Wed Sep 24, 2008 7:05 pm
by steve292
Thanks for the kind comments.
I have been on holiday, & doing the bathroom,garden & everything else.
So the boat has been on the back burner again for a bit, but I have done some stuff. Ther are some pics in the gallery & I will take some more & write a proper post tomorrow.
Steve
Posted: Thu Sep 25, 2008 5:07 pm
by topwater
Good to see you're back at it steve
Posted: Thu Sep 25, 2008 5:08 pm
by steve292
This is where I am at-
Filled the area under the bow locker with 2 part foam-some more went in after this picture was taken. It took about 1 1/2 cubic feet,maybe a little more to fill.

To make the floor piece for the bow locker I used some offcuts to save cutting into a full sheet. I used some 1/8th hardboard to make a template & used three pieces joined with a butt block.These are the two biggest bits setting up on the bench

This is now glued in but will be filleted & taped later. The triangular piece in the pic is the third bit to be glued in.

The cleating for the floor is finished, I glued in the last two cleats earlier

You can see I have started to foam some compartments as well.
The holes for the chase tubes are drilled, 2 40mm & 1 25mm to the transom thro' frames D & E & the starboard stringer & 1 25mm thro' the port stringer which will take a chase up under the gunwhale. They have been given 2 coats of epoxy & will get one more.


The strips of ply glued to the stringer & cleat tops are correcting a mistake in setting out earlier
, this will save me using huge lumps of epoxy to glue down the sole.
moving on, ever upwards
Steve
Posted: Thu Sep 25, 2008 8:46 pm
by colonialc19
Nice work Steve, I like how you manage to keep everything nice and clean
I see and read that you have your cleats all in, I was reading the other day in CL's thread how he wished he'd have run larger chase tubes/conduit
I'm sure you've thought it over good
, but I wanted to put it out there
.
Glad to see you back at the boat, keep up the good work
Daniel
Posted: Fri Sep 26, 2008 9:14 am
by jgroves
Lookin' good! Your cruising right along!
Posted: Fri Sep 26, 2008 1:30 pm
by steve292
colonialc19 wrote:Nice work Steve, I like how you manage to keep everything nice and clean
I see and read that you have your cleats all in, I was reading the other day in CL's thread how he wished he'd have run larger chase tubes/conduit
I'm sure you've thought it over good
, but I wanted to put it out there
.
Glad to see you back at the boat, keep up the good work
Daniel
It only looks that way because I don't show the area around the boat
There isn't alot of room to get more/larger chases through frame E between the hull side & the motorwell side,which is why I am running one up to the gunwhale
Steve
Posted: Fri Sep 26, 2008 2:42 pm
by colonialc19
Steve, under the gunnel sounds great, ive heard it before but somehow hadn't gave it much thought in my build.
Daniel
Posted: Fri Sep 26, 2008 3:59 pm
by jgroves
That's certainly a good idea to add more chase tubes under the gunwale. I wish I had about two more lines when I ran all my wiring. I got it to fit but had to spray silicone on many of the lines to get them to slide through. Bigger the better because once the sole is on it's hard to go back!
Posted: Sun Sep 28, 2008 5:36 pm
by steve292
colonialc19 wrote:Nice work Steve, I like how you manage to keep everything nice and clean
IDaniel
Just for you Daniel-

Thats just this weekend.
Some progress pics-

I cut the chase tubes ready to fit,gave all the holes 2 more coats of epoxy as well.

Started foaming between B & C, but ran out of foam at this stage-

Needs a bit more in here just to finish up. I have more on order,hopefully it will be here tomorrow.
So, in the absence of more foam, I have measured up & cut the first part of the sole for the cockpit floor. The butt blocks are setting up as I write.
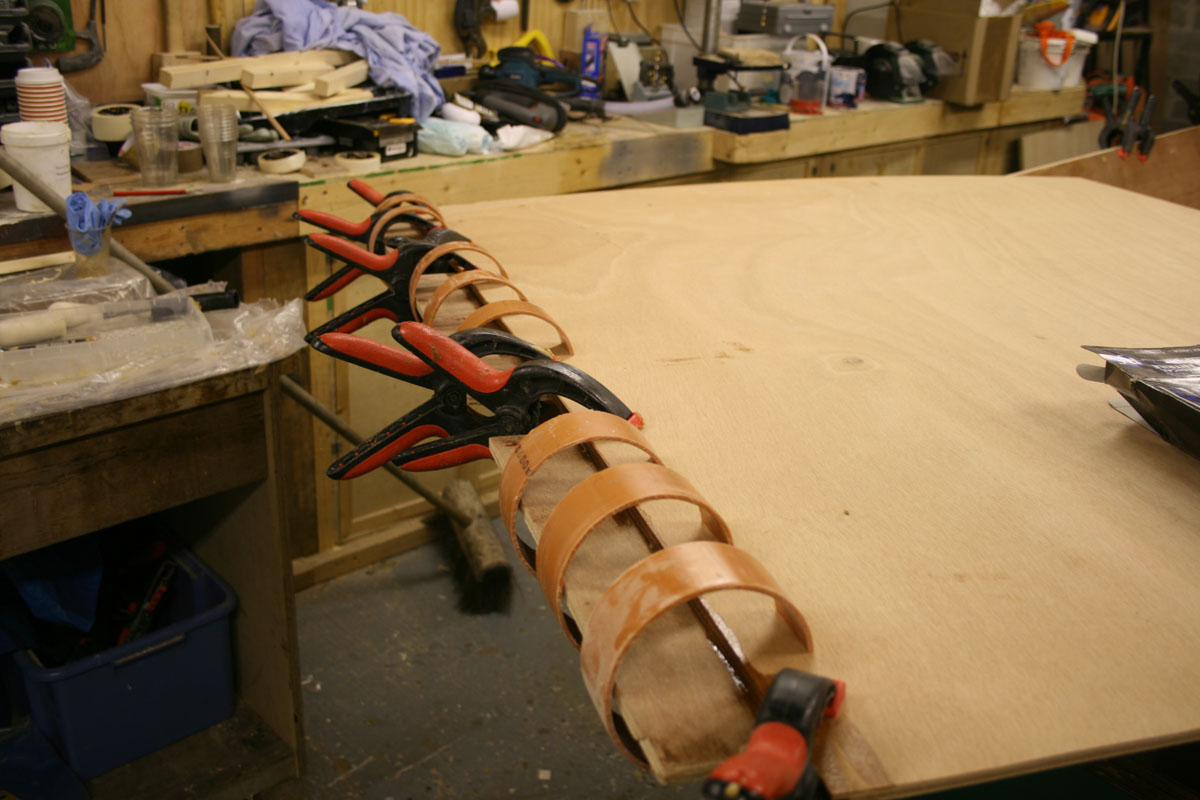
Steve
Posted: Sun Sep 28, 2008 8:17 pm
by colonialc19
Great progress Steve, Yeah thats about what my work bench looks like too
.
I hope to post some progress of my build soon, but in the meantime your keeping me motivated
Daniel
Posted: Fri Oct 03, 2008 3:10 pm
by Lower
I've been checking in on occasion Steve and have been watching your progress. Doing a great job! Keep up the good work!
Posted: Tue Oct 14, 2008 5:03 pm
by steve292
I have finished the foaming of the floor & fitted the chase tubes. There are four tubes, three to the starboard rear transon locker & one to the port gunwale.I hope this is enough
. In hindsight , I would think twice about using the corrugated hose again, as although it forms nice easy long bends, it is a pain to keep neat when you foam.Between the sole & the space under the bow locker I have used 24kg of foam, which I think is about 6 US gallons,maybe a bit less as the part b feels heavier than water.
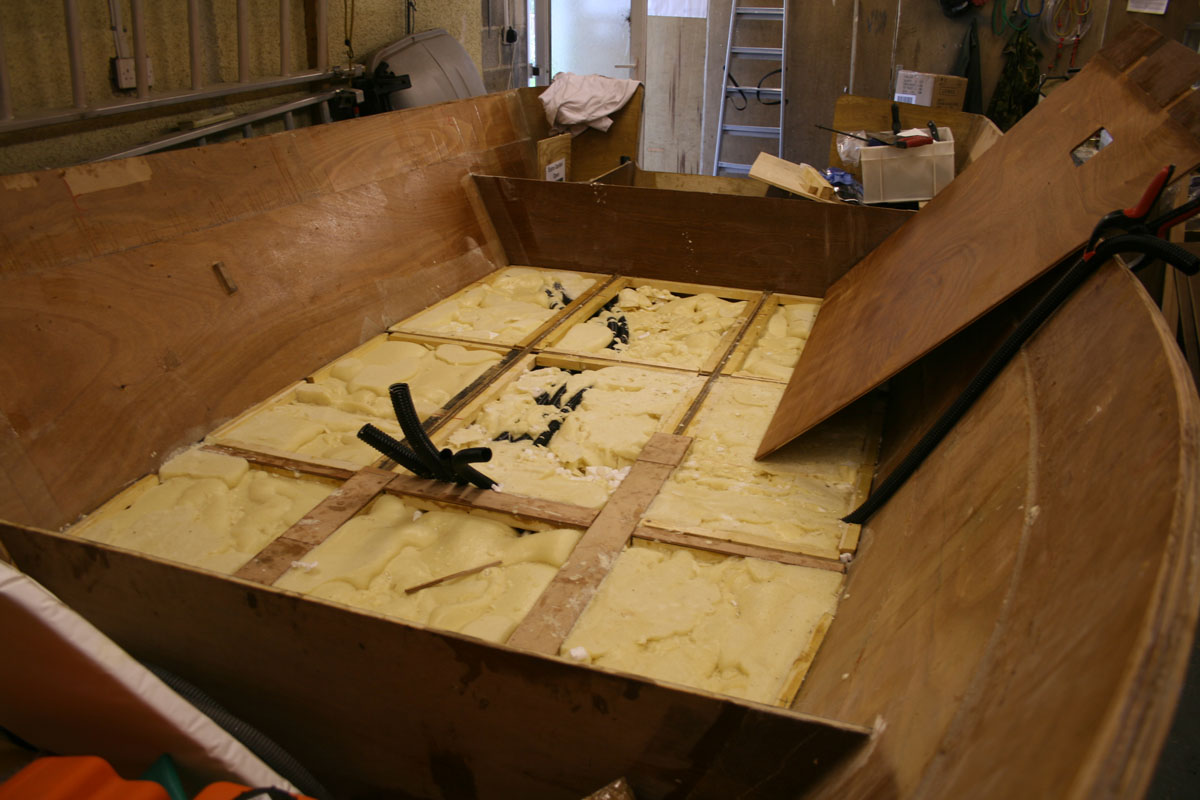


You can see the chase tubes in the pics clearly.
You can also see the first piece of the main cockpit sole precoated with epoxy ready to go down. It got another coat of pigmented epoxy(thanks for the tip Shine
) & now is glued in.

I have also cut the rest of the cockpit sole pieces & glued up butt blocks where required

Hopefully I will get the floor down in the next couple of days,filleted & taped & then start in here-

The plan is to have an anchor locker in here, under the casting deck,with a smallish storage locker each side of it. I plan to raise the sole in here by a 1/2" or so at the front to make drainage out onto the main floor easier.
Onwards & upwards
Regards,
Steve
Posted: Wed Oct 15, 2008 8:36 am
by jgroves
Hey Steve! Great progress!!!!!!
Is the inside of the chase tubes smooth or corregated? For your sake I'm hoping it is smooth. Otherwise I think it will be difficult to get your lines through the tubes. I used PVC pipe and it worked but when trying to stuff 5 pounds of goods in a 1 pound bag I always got snagged at the connections of pipe. I used silicone spray that helped it slide through but only after a day of sweating and cussing.
Posted: Wed Oct 15, 2008 8:39 am
by Cracker Larry
Those are corrugated inside.
Steve, are you planning on getting steering and control cables in those tubes too?
Posted: Wed Oct 15, 2008 11:41 am
by ks8
While you're wrestling with a way to get your cables through that tubing, I thought I'd compliment you on what you've done with the kitchen... btw, where's the fridge?
I've pulled cables through just about anything. Need to be creative about how you secure the cable or tubing to your pulling *device*. Use something that will bump and slide easily on the corrugations. The biggest problem, which has been said before, is when the pipes are not large enough. The more pressure on the sides during the pull, the more friction, and the more need for no one else to be within hearing distance.
Enjoy those final moments, when you get there. Shaping up nicely Steve!
Posted: Wed Oct 15, 2008 3:08 pm
by steve292
ks8 wrote: btw, where's the fridge?
Its on the left,full of cider
Larry, Jeremy, I am hoping to get the control & throttle cables in one 1 1/2" tube to the transom & the wiring in the other, with the 1" chase to the transom for the fuel line.I do have a 1" up to the port gunnel as well to help out.
I have used this stuff in the past to carry SWA 16 amp cable up the garden with no real problems,& pulled it 150',having said that steering cables may be a different kettle of fish
Are your concerns based around the corrugations of the pipe or the diameters? All comments appreciated here, although it is to late to run more pipes, as the second bit of the sole has just gone down.
Steve
Posted: Wed Oct 15, 2008 3:33 pm
by jgroves
Are your concerns based around the corrugations of the pipe or the diameters? All comments appreciated here, although it is to late to run more pipes, as the second bit of the sole has just gone down.
Hey Steve,
The number of chase tubes are probably enough, but when trying to get the ends of the the control cables through you will probably have a really tough time with the corregations. I wish I would have had bigger/more lines. I recommend running the small stuff first. Such as wiring for lights, speedometer tube, anything extra. Do the big stuff last.
There was a point that I almost cut the sole up and ran another chase tube! That was after I had painted the boat and everything! An option of an under the gunwale chase is not a bad idea either!
Posted: Wed Oct 15, 2008 3:42 pm
by jgroves
One more thing... I taped everything with an edge with black electrical tape and used silicone spray to help them slide through. I have heard of a product like grease that is made for running lines in a chase tubes. When the salesman came to me I had been in the boat pulling, sweating, cussing and yelling. The salesman made parallels between running my lines and a cow giving birth.
Posted: Thu Oct 16, 2008 5:39 pm
by steve292
Cockpit sole's glued down
I had to use screws to pull all three sections down flush, but no dramas
You can see how roomy it is now.
A view looking down from the bow locker-
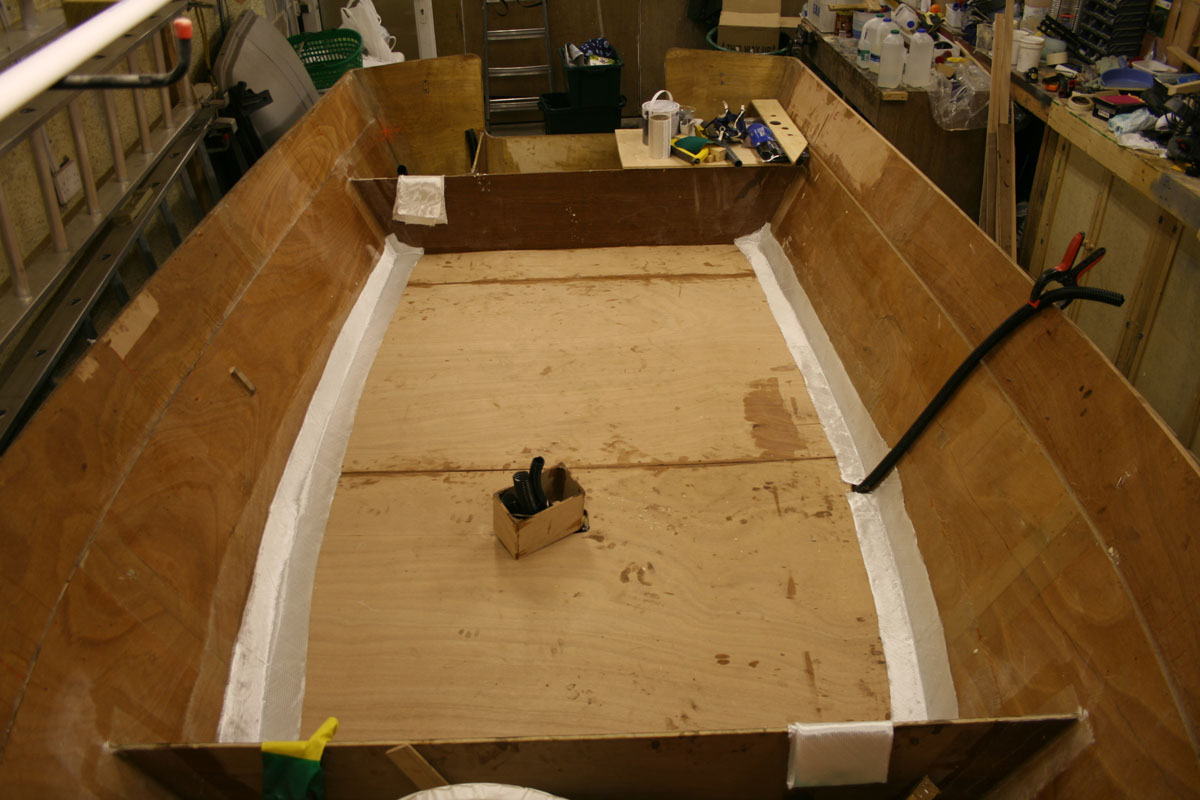
& one looking from the transom-

taping tommorrow!
Steve
Posted: Tue Oct 21, 2008 1:03 pm
by Lower
Lookin really good Steve! Keep on truckin!
Question...Were you planning on gunnels (similiar to what Jeremy did?). I'm just curious as I thought you were but it looks like you cut your frames down below the sole? Maybe you plan to add them after? Just curious.
Posted: Tue Oct 21, 2008 1:15 pm
by jgroves
I like the looks of your layout. I'm looking forward to seeing your boat on the water! I think it's going to be one dry ride!
Keep up the great work!!!
Posted: Tue Oct 21, 2008 3:52 pm
by ks8
stir it up!
Posted: Tue Oct 21, 2008 5:25 pm
by steve292
I am planning on gunnels,but I wanted to put the sole down with as few cuts as possible, so the frames will be added later(soon?
)
The sole is now taped, & has a coat of epoxy rolled on to seal it.

I used biax, as per the lamination schedule around the edges, & 200gr woven along the joints between the sole pieces. I will sand the sole later this week, hopefully,& lay some cloth on it. I am going to use 200gr woven for this, as it is for wear resistance not strength.
Today I started measuring up for the casting deck & cutting cleats for mounting.It is cold enough now here to slow the cure of the epoxy down a lot so I have had to work from the outside, so I won't be able to fit these until tommorrow
. I am also figuring(pondering?)the best way to raise the sole 10mm or so in the lockers under the casting deck to get good drainage from the anchor locker.
Thanks for all the positive comments,
steve
Posted: Tue Oct 21, 2008 6:18 pm
by ks8
All these super clean pictures of builds... I wonder if it will discourage the normal people.
Every now and then we need a picture of a mess, dust everywhere, blood stains ... then we can joke for a few posts and not feel so pressured for the perfect build in the perfect workshop ... after cleaning up of course.
Posted: Tue Oct 21, 2008 9:32 pm
by Lower
I figured that's what you would do Steve. Just didn't know if mattered that the frames were one piece or not. I like the way you did it, as you don't have to cut the "slots" in the sole. I'm going to keep watching as I'll be there someday!
I agree ks8...I'm going to make it a point to post more of those! It would be really easy to start with the blood stain pics...
Posted: Wed Oct 29, 2008 4:38 pm
by steve292
Not much building this week
......working lots, & cold here (2C) night & day

.
I have dry built a console & cut some cleats for the front deck, but thats about it. I'll take some photo's in the next few days.
Steve
Posted: Wed Oct 29, 2008 8:29 pm
by ks8
That's what the colder days are for... prepping those other jobs. Or laminating those smaller pieces or modules that can then be bonded or bolted in later. I'm hoping I can get two or three more painting sessions in, but its in the 30's F at night here too ... ≈ 1° -> 4° C . Warmer days are a tease, but I'm hoping to get in some painting none the less and light it up at night with those heat throwing inefficient incandescent bulbs.
Thinking chair, sketch pad... have at it. And don't forget to buy roses and go out for the night with the lady of the house, often, to help keep important matters warm.
Posted: Thu Nov 13, 2008 3:41 am
by steve292
Some progress in the last week or so
I glued in the cleats for the sole in the anchor locker, then glued a 3/4 x 3 piece of timber on top to raise the sole in the locker

While this was curing I cut 2 pieces of 1/2 ply to support the casting deck along the hull sides & glued these in also.You can see them in the above pic.
I am running out of big sheets of ply, so I made the sole in for the locker in 3 pieces.

you can also see the casting deck cut out in that pic. It is cut a little long at the moment, overhngs the B bulkhead by 6mm or so. It is doweled to the cleats in 4 places, to ensure it goes back to the same place for marking for hatches later

After pre coating the undersides of the 2 side pieces I laid a good thick bead of glue down & laid the sections on top

The centre section, along with the 2 sides of the centre locker I Pre- glassed with 450gr biax before fitting as this is the anchor locker, & I want good abrasion resistance here. This is a pre glassed side panel-

& this is the centre sole panel glued down. It overlaps the side pieces by 50mm.

[/img]
& this is it with a good fillet around & taped in, you can also see it has had a good coat of epoxy as well-

This morning I will hopefully be able to tape the locker sides in, using 200gr woven tape. I tacked them in last night-


I have also started on the console. This is a mixture of Jeremy's & cracker larry's measurements, with a few variations of my own. The seat is a bit longer as I am going to put the fuel tanks in it. I may raise it 75mm yet, with a sort of toe kick type thing,but I will think about it for a bit yet.

& in it's proper position-

I've put this in to show the distance between the front of the console & the casting deck.

& one from the back-

Steve
Posted: Thu Nov 13, 2008 8:55 am
by topwater
Looking good Steve
Posted: Thu Nov 13, 2008 3:34 pm
by Lower
Awesome as usual Steve. Can tell your an engineer by the way you think things out so thoroughly! Again, I'm glad to be lagging behind, as I don't have to think as much. Thanks for posting the pics.
Posted: Sun Dec 07, 2008 7:42 pm
by cape man
Steve, Looking awesome. Saw where you posted lots of new pics in the gallery, but nothing here. Would love to hear about the casting deck, as that is my next step.
Posted: Mon Dec 08, 2008 8:01 am
by steve292
cape man wrote:Steve, Looking awesome. Saw where you posted lots of new pics in the gallery, but nothing here. Would love to hear about the casting deck, as that is my next step.
I'll do it tonight,in work now
Steve
Posted: Mon Dec 08, 2008 5:56 pm
by steve292
Slow progress
I'll do some detail on the casting deck for Craig here,
The forward locker dividers under the casting deck are now taped in & the cleats to hold the casting deck have been fitted

To fit the casting deck I am using 4, 8mm dowels to locate the deck,so it goes back in the same place every time.

to get the location for the stiffeners/ hatch framing on the underside, I first found the centreline of the deck & drew it on, I then drew the positions of the hatch dividers on the top. Then I worked out my offsets for the hatches & drew out the hatch cutouts.
Before I cut out the hatches I let in for the hinges I am planning to use which are flush type Lazerette hinges.(keeps the cutouts square)Thes pics were taken after the fact BTW, which is why you can see the epoxy filled holes for the hinge screws.

Then cut them out, Looks like this.

I hav'nt finished with the actual hatches yet.
Now you can reach through the hatch cutouts to mark out where the cleats lie with your marker pen to guide where you put your hatch framing.I used some 75mm by 18mm planed pine from B&Q(our big box store if you like)for this, because I want the "meat" under there as I am 15st.
I glued up the framing & then used a router with a guide bush to form the hatch frame openings.

I have also taken the sheer angle off with a block plane to allow the side decks to sit flat.

I am fitting a good strong breasthook to the boat, as most of my winter fishing will be uptiding for cod,I hope
, which is done from anchor.
The breasthook is made from 12mm meranti, with a strip running back to frame A where it will be taped in.This will extend eventually right into the point of the bow.The whole assembly rests on 2 18mm square cleats, & will have a deck of 6mm okume laminated over the top,which will be glassed with 450gr biax extending onto the rubrail. making a 180mm wide, 30mm thick piece, glassed on the topside, & filleted & taped at the back to mount hardware on.That should hold it.This is the start of it.

.
I hope to fair the insides of the lockers & paint next, before gluing down the casting deck & breasthook.
Hope that helps Craig
Regards,
Steve
Posted: Mon Dec 08, 2008 11:07 pm
by Fonda@kauai
Lookin premium Steve. I'm using the same hinges on my hatches, so I'm curious what kind of lock/pullring are you gonna use?
Posted: Mon Dec 08, 2008 11:43 pm
by cape man
Steve,
Thanks alot. Don't be mad when I copy your work. Looking very sharp.
Had to look up the stone vs pound conversion. Depending on how many hands your height is (or is that just for horses?), 15 aint (that means "is not") that bad.
Glad to see you back and building. It's a beautiful boat you are making.
Posted: Thu Dec 11, 2008 6:43 pm
by PaulMcClure
Steve, you're a lightweight. 16 stone here, 224 pounds for our US friends
Posted: Thu Dec 11, 2008 10:17 pm
by steve292
PaulMcClure wrote:Steve, you're a lightweight. 16 stone here, 224 pounds for our US friends
Ah, yeah,but how tall are you? If you're 6' 5" thats not to heavy,but if you're 5' that makes you a rotund chap
.
Nice to hear from you,where you been hiding?
You must know that I've been pondering paint for the inside
Steve
Posted: Fri Dec 12, 2008 9:09 pm
by bushmaster
Steve
Your boat is coming along very nicely, I am following you very closely and may copy a thing or two when I flip.
Please keep sending those pictures
Bushmaster
Posted: Tue Dec 16, 2008 3:11 am
by steve292
cape man wrote:Steve,
Thanks alot. Don't be mad when I copy your work.
Hey, it won't bother me, I go all over these forums pinching ideas
I have glassed the casting deck & the hatches with some 200gr woven fabric. I found this much harder to use than the biaxial, in that the epoxy seems harder to "push" through the weave. There are some small bubbles that I could not get out,which I'll have to get out in the fairing.
This is the glassed deck.

& these are the hatches,glassed. I have also cut out & glued 6mm backing plates onto them, as you can see.

While waiting for the glassing to set up, I painted the breasthook assembly & the foward lockers with 2 coats of a grey coloured bilge/locker paint, after knocking of the sharp edges & ridges of the glass inside them. Before this, I had drilled drain holes from the lockers under the casting deck onto the main sole,(25mm) & from the bow locker into the anchor locker(13mm).They got 2 coats of epoxy to seal them.

Note the arc light & the heater, it's not warm here

The breasthook is upside down drying, in the photo
You can see the difference in the sole heights in the lockers to each other
& the main sole in this pic.

& put the first coat on the underside of the casting deck

I am starting to work out the Gunwales now, & have settled on a 250mm wide 'wale with a 100mm deep inwale, & have made cardboard templates for them at frame "B"

Hope to glue in the breasthook today & get the 2nd coat on the bottom of the casting deck, to glue that in tommorrow
Steve
Posted: Tue Dec 16, 2008 8:50 am
by jgroves
WOW where have I been
Your cruising right along! I like your casting deck and woodwork. You have done a great job. I still can't wait to see your boat on the water.
Posted: Wed Dec 17, 2008 2:16 pm
by mecreature
that is one big casting deck... I am also glad to see you progress. Looks like fun.. Looking great.
Posted: Wed Dec 17, 2008 6:42 pm
by ks8
Yeah. Looking good! Soon, more fairing fun...
Posted: Thu Dec 18, 2008 6:05 am
by bernd1
It looks good !
Which outside temperature do you have today? Inside temp. ?
I have to take a break ........outside 32F.....too much for my heater in my garage..
Bye
Bernd
Posted: Thu Dec 18, 2008 8:23 am
by steve292
Bernd,
Today it is 4C outside, 10C in the garage. I am using a 2kw heater /blower & 2 150w arc lamps on the epoxied/painted areas to promote the epoxy curing & the paint drying. The larger glassed areas I have done recently I took into a warm (20C) enviroment to do
.
I have to admit on a few days here the garage has got down to 3C,which is to cold for me let alone the epoxy
.
Just glued down the bow deck BTW, pics later
What's it like in Germany now?
BTW, I used to work for Siemens KWU, installing & maintaining gas turbines for power generation,worked with a lot of guys from Berlin, Mulhiem, & karlsruhe, & your English is still 100% better than my German
Steve
Posted: Thu Dec 18, 2008 8:21 pm
by colonialc19
The boat is looking great Steve, I like the way you did your casting deck, and hatches. Its chilly here but not as cold as it is aross the pond.
Daniel
Posted: Fri Dec 19, 2008 10:19 am
by bernd1
Hi Steve,
today we have about 3°C and a very, very wet weather - awful to work in this climate.
Unfortunately I'am ill - obstinate cold - damned weather - break on building.
I live 60km away from Stuttgart and 100km away from the lake of Konstanz
(Bodensee).
Five years ago I worked also for the Siemens Company "Building Technologies" - I often visited my colleagues in Karlsruhe.
Enjoy the building !
Best regards
Bernd
Posted: Sat Dec 20, 2008 6:24 pm
by cape man
Looking great Steve. I need to get out there and start cutting some wood!
Posted: Tue Dec 23, 2008 7:27 pm
by steve292
I have now got the casting deck glued down, but not taped in yet, I will do this sometime after Christmas, as my old router has given up the ghost & I would like to round over the front edge. I think I am getting a new one for Christmas

The breasthook is now glued down

After the glue had set, I took a plane to the sheer & took out a few small bumps in the sheer to bring it level with the B'hook

This is the cleat under the rear of the assembly, it is forcing the B'hook slightly up at the back, creating a slight camber to the bow deck, not much about 3mm over the whole width.

Then I filled the gap between the breasthook & the sheer with a nice fillet, struck over level with the sheer

Cut some 38mm square timber for bow deck cleats,coated with neat epoxy & glued in

This is the bow deck rough cut.Using 6mm okume for this, as when it is glued onto the breasthook &covered with a layer of biax, it should be plenty strong.

Here you can see how the top of station A will form the drip rail for the bow deck. This was always the intention.

& this last one is the deck glued down. It is laminated onto the breasthook with a generous amount of glue.you can see the heater blowing into the locker area to help set the epoxy.
I have taped the console as well, but don't have any pics as yet.
& finally I would like to wish you all a happy & prosperous, peacefull Christmas!!!
regards,
Steve
Posted: Wed Dec 24, 2008 1:06 pm
by jgroves
Merry Christmas to you too! Your boat looks great! Thanks for all the pics.
Posted: Wed Dec 24, 2008 1:59 pm
by colonialc19
Merry Christmas Steve, & every one
like Jeremy said the pics are great thanks for posting
, your build is going together nicley, that breast hook looks to be tough as nails.
Posted: Wed Dec 31, 2008 2:43 pm
by HungOne
Most impressive work! Really appreciate detailed descriptions...that boat looks to have more storage than my 18 Parker. I am a big fan of recessed hinges and latches, more so when barefooted. ? Is the hinge mechanism actually located on the underside of the hatch? Not that I have the patience right now to attempt, but for future reference.
Thanks,
Kevin
Posted: Wed Dec 31, 2008 4:37 pm
by Murry
That looks fantastic Steve.
Posted: Thu Jan 01, 2009 7:27 am
by steve292
I am a big fan of recessed hinges and latches, more so when barefooted. ? Is the hinge mechanism actually located on the underside of the hatch?
Kevin, it is a lazzerette type hinge, the mechanism is recessed into the plywood. There is no through hole because the hatch framing backs it & the recess was cut before the framing glued up. I am going to try some rare earth magnets as latches, just to see & if they affect the boats compass to much I will have to think of some other way.
...that boat looks to have more storage than my 18 Parker.
It is the higher sheer option of the FS17, but it has more available space for storage than almost any other boat of its type that I have personally seen. The beauty of building your own is you can decide how to use the available space
& I did get the new router
...........everything is going to be rounded
Steve
Posted: Fri Jan 02, 2009 11:14 am
by Murry
That's going to look great Steve.
I'm planning to use the same hinges with magnets to keep things shut also.
Daniel
Posted: Sat Jan 17, 2009 3:21 am
by steve292
This pic was taken on Christmas eve 2008-

you can see that I had cut the woven cloth ready to lay on the sole,but the weather we have had since then scuppered that idea
What I have tried to do is smaller glassing jobs , just to keep on ,keeping on,if you get my drift.
So, rounded over the edge of the casting deck & taped it, & filleted & taped all round the deck-

I have also made a start on the gunwale frames,cutting out B, C, D & E & an intermediate frame to go between D & E where the gunwale will narrow.
C & D are filleted & taped in-

This is a closer look at C-

I have been using a 2kw heater to help the epoxy set up, which is making this a long process.

Also, I wrapped some 1 1/2 " pvc pipe in scrap biax,wet it out & wrapped it tight with some plastic sheet & packing tape. This will form part of the drains through frame E to the transom.

The white is where I sanded down some resin ridges caused by wrinkles in the plastic.
I am using a plastic glassing box to wet out tape off the hull, once you get the hang of this it makes taping using multiple shortiish lengths of tape much quicker.

The only other thing I have done is to cut most of the cleats ready for the stern lockers & the gunwale framing.

The're in there so they don't get mistaken for firewood
the weather is supposed to break here this week so I might get a bit more done. I am in conversation with a guy in South Wales, just over the bridge to build me a trailer. I am hoping to get it on a trailer for the end of Feb, so I can take it out of the garage to sand & prep for paint.
Still lots to do, but I can see the end of it now
I don't know what i'll do when it's finished
Steve
Posted: Sat Jan 17, 2009 8:35 am
by colonialc19
Steve your getting right much done considering the season.
Is that the console that came with the plans?? It looks good with the raised sheer,
Not sure if I'm gonna like it for my standard sheer, might look too big
, but thats just my opinon.
That raised sheer makes it look like a whole diffrent larger boat.
Looks great,
Daniel
Posted: Sat Jan 17, 2009 8:51 am
by steve292
colonialc19 wrote:Is that the console that came with the plans?? It looks good with the raised sheer,
Not sure if I'm gonna like it for my standard sheer
Looks great,
Daniel
Daniel, the centre console was built using the cracker's & Jeremy's console measurements as a guide. It is longer than both,to acommodate the 2 fuel tanks under the seat. I am toying with the idea of raising it 2"with a toekick so I can paint the main part of it before glassing it in. If you want me to measure it just say the word.I mocked it up with hardboard first,just to save ply if I did'nt like it.
Thanks for the compliments
Steve
Posted: Sat Jan 17, 2009 10:00 am
by jgroves
Hey Brother! I'm diggin' it! I really like your raised sheer... if I haven't mentioned that before
Posted: Sat Jan 17, 2009 10:38 am
by bernd1
Hi Steve,
nice work - unfortunately I have the same bad weather here in Germany - no work the last time
.
I hope we European have luck and the temperatures increases.
Bye
Bernd
Posted: Sat Jan 17, 2009 12:30 pm
by colonialc19
Steve, thanks for the reply and offer, but I think I'll do as you and use cardbord to mock up one
.
A toe kick sounds like a good idea Steve
.
Daniel
Posted: Mon Jan 19, 2009 11:11 am
by Lower
Steve...the inside is coming together beatifully! Looks really nice. Can tell you've put some hours into thinking things through. Congrats on working through the cold too! I'm on hold for a bit, as our temps are just too darn cold! Keep up the good work. Your getting there now!
Posted: Fri Jan 30, 2009 6:55 am
by steve292
Thanks for the kind comments.
It is still cold here, & forecast to get colder over the next few days.
Having said that I have managed to get some bits & pieces done over the last 2 or three days.
I have filleted up & taped in both the final parts of frame B-

I had to use 150w halogen lamps as you can see to get the epoxy to kick.
I am keeping the epoxy in the house,in the utility room BTW, to keep it a a nice temprature.
I also cut out the tops for the stern lockers. One of them has now been glassed with woven cloth, hatch framing installed, opening cut out, & had a weave filling coat of epoxy/woodflour slurry applied(because I had some epoxy left after doing the frames & I hate wasting it.)I need to run the router around the opening to make it nice yet.

You can see the frames with the lights on in that pic.
I bottled out of making hatches at the back & bought some, 1 for each locker & 1 for the motorwell.The hatches don't need to be flush at the stern,so I thought why not?

Also I am slowly cleating out the stern lockers & the frames to take the tops & gunwales.Using 34mm square pine for this.


I am planing the cleats at the hull sides to follow the hull, to use less glue.

also I have glued the glassed pvc pipe I made into 2 12mm backing blocks ready to be installed as drain spigots into the motorwell bulkhead

These need to be trimmed & cleaned up yet, before drilling the bulkhead & fitting.
There you have it,onward & upwards
Steve
Posted: Fri Jan 30, 2009 8:52 am
by Cracker Larry
Nice work Steve
Very good progress!
Posted: Fri Jan 30, 2009 9:24 am
by Murry
Nice idea on the hull side cleats, Steve.
It does take alot of glue to fill those voids, otherwise.
Looking good,
Daniel
Posted: Sat Feb 21, 2009 9:33 am
by steve292
Slowly, slowly ever upward.
It is starting to warm up a bit here, which as luck would have it has come at the same time as a load of overtime at work, & a firefighting course
- not that I am complaining too much, what with the current state of the UK economy.
I have got some bits & pieces, so here is a run down of what I have gotten done.
I glued in the drain spigots to the rear lockers-

I drilled the hole in the frame the same size as the OD of the fibreglassed pipe, & used a pvc pipe the same size as the ID as a guide to set it up.
This ensures that after I grind out the epoxy that has extruded, there won't be any lip between the sole & the drain pipe.

This is the pipe I used as a guide

& here you can see, after I removed the guide pipe, the epoxy that needs to be cleaned out.
I have painted the port locker out with 2 coats of bilge paint, & the lid.

This I have glued down this morning
.
made an intermediate support for the side decks, halfway between D & E.
this is where the deck will taper down from 10 3/4 " to about 6".

I have glued up all the cleats for the wide portions of the side decks, & am starting to frame out the decks. For this I am using doug fir strips 1" wide 1/2" thick. There will be a strip top & bottom.

You can see the cleat arrangement in this one.
I need to plane the cleats a bit to use less epoxy, & to keep the width constant along the length.

Hopefully I'll get a little more done today,
Steve
Posted: Sat Feb 21, 2009 9:40 am
by peter-curacao
Nice and clean work Steve, hang in there spring is around the corner
Posted: Mon Feb 23, 2009 8:56 am
by colonialc19
Nice work Steve,
Your transom corner boxes look to be huge
with the raised sheer, lots of storage.
Fire brigade training, fun
, I have some of that myself starting this week, just finished medical training, i'm now what you call an EMT for the plant along with regular duties.
Looking good, keep posting,
Daniel
Posted: Sat Mar 07, 2009 8:36 am
by steve292
just 2 quick pics,

I am starting to glue up the gunwales,I am pleasantly suprised how strong they are
, when they are made basically from 1/4 ply,with a bit of framing.I am starting to lean towards using a light cloth on them,just for a bit of extra strength & abrasion resistance,as biax may be overkill & just added weight.I can stand on it just to give you an idea,& I am 210lbs(100kg). I would welcome opinions on this.
This is a cross section of the construction.

I need to cut the angle to bring the gunwale in at the stern, thats why the gunwale ends abruptly at the frame.
I can see fairing ahead, again
Steve
Posted: Sat Mar 07, 2009 9:33 am
by Steven
I'm a little concerned with the joint where the sheer deck meets the foredeck. The glue surface on the cleat is small compared to the typical area in a buttblock type butt joint. You may get some asthetic cracks there even with a light cloth. I would probably sand a slight recess on both sides of the joint and cover with Biax for strength. Then cover it with the light cloth and fair as needed.
On another look, it appears the shear deck butts into the frame just below the level of the foredeck. Is that correct? If so, you might want to add another support a foot before the frame. Stepping on that area might flex the sheer deck enough so that a crack forms over time.
Posted: Mon Mar 23, 2009 1:16 pm
by steve292
First thanks for the generous comments.I have come back to this after posting pictures to add some comment,btw.
Some pic's,
The side decks are nearly done
.I am pleased with how strong they are, I can sit or stand on them with absolutely no flex,all 210 lbs(98kg)of me.
Port side deck glassed with 400gr biax

Another view,

Glass wrapped over rubrail,I feel this is greatly contributing to the strength, & will help protect the rail

Glassed foredeck,Again this is to help spread the load from the anchor bollard, & roller.

This is basically all the boat left to build,& mount the CC. I am trying to hunt down an engine & all the bits & pieces that go with it before gluing down the starboard stern locker top, as it will help with pulling the cables & wires. likewise the motorwell lid.

Aforementioned CC in progress,needs a little more cutting/ glasswork & fairing yet.to make one of these is a thread in itself,someone should do so.

Box made around chase tubes on deck,will be foam filled & sealed with an epoxy /woodflour 'cap'. This will help as it is about 8" high if I get a good 'un over the side,to stop anything getting under the sole.Not that I intend to do that but stranger things & that

Nearly time to break out the sandpaper again.
Steve
Beautiful work on a beautiful day? as far as I can see the sun is shining
yep, up to a sunny warm 15C
, It is nice to be able to work in shirtsleeves again.
Posted: Mon Mar 23, 2009 1:34 pm
by Murry
This is basically all the boat left to build,& mount the CC
I'm very excited for you Steve.
You work looks great. You've done a very nice job blending the decks to the rubrail around the boat. That is going to look top notch when finished.
Daniel
Posted: Mon Mar 23, 2009 1:36 pm
by Cracker Larry
Beautiful work Steve. I like it
Posted: Mon Mar 23, 2009 2:39 pm
by TomW
Steve it looks great. You are doing some very nice work there. You will have a great lady when you are done.
Tom
Posted: Mon Mar 23, 2009 3:09 pm
by peter-curacao
Beautiful work on a beautiful day? as far as I can see the sun is shining


Posted: Mon Mar 23, 2009 4:00 pm
by steve292
Steven wrote:I'm a little concerned with the joint where the sheer deck meets the foredeck. The glue surface on the cleat is small compared to the typical area in a buttblock type butt joint. You may get some asthetic cracks there even with a light cloth. I would probably sand a slight recess on both sides of the joint and cover with Biax for strength. Then cover it with the light cloth and fair as needed.
On another look, it appears the shear deck butts into the frame just below the level of the foredeck. Is that correct? If so, you might want to add another support a foot before the frame. Stepping on that area might flex the sheer deck enough so that a crack forms over time.
Thanks Steven, I will probably do that
Advice is always welcome here, even if I don't take it
steve
Re: A British FS17
Posted: Wed Mar 25, 2009 11:29 am
by steve292
this took some finding
Re: A British FS17
Posted: Sun May 03, 2009 6:22 pm
by steve292
wow, right down on page 3
I have been slowly plugging away at it, & have made some steady,if unspectacular progress.
some pics,

Glued down the console. The red you see on these pictures is a red tint I put in the epoxy I used to coat the sole where I put the console down, so I could see that I got a good coverage with no missed bits.

Taped in console with one layer biax tape all round. sole is laid with 400gr biax cloth,lapped up the console sides, giving another layer.Fairing compound applied to console, I use any epoxy I have left after a job, mix it with microballoons & put it on something, as I hate wasting it.

Good ol' ebay supplied 2 stainless rod holders, which duly have been fitted.These are fitted thro' the butt block joining the gunwale pieces which was deliberatly made oversize for this.

Faired,primed & Painted the casting deck hatches & started to fit the hardware. These will have non slip applied as well. The screws are in epoxy plugged holes & will have sikaflex applied before final assembly onto the boat.The paint is blakes baltic blue, if your interested.I only show one but you get my drift.

Faired the foredeck, just a few minor imperfections left,put on 2 primer coats, drilled holes for the bow roller & anchor bollard fixings oversize ready to epoxy fill.The foredeck where the holes go through is 30mm thick & the hardware will have 3mm thick 316 stainless backing plates.

Glued, filleted & taped a pvc half round over the chase to the port gunnel.That is a wavy inwale you see, I make them a little oversize & haven't dressed that one yet.

Gave the box I made to surround the chase tubes where they came through the deck 3 coats of epoxy. the box was foam filled & topped off with epoxy/woodflour & given 3 coats also.I will seperate the fuel tanks from the rest of the area with a ply bulkhead,more later in the build about that.I stuffed them up there to store them out of the way, one won't really be upside down, honest
Finally a view from the bow-

& from the transom=

Steve
Re: A British FS17
Posted: Sun May 03, 2009 9:52 pm
by cape man
Steve,
Looking fantastic. Been a while since I got on your thread. You are always just a few steps ahead of my boat, so it's always good to see what you're up to. Love the gunwales. They look very strong and nice and wide.
Where are you in the UK? I am going to Birmingham for work the second week of June and may have some time on my hands. Send me an email if you're anywhere close to Birmingham or London and interested in me stopping by.
"cawatson at ufl dot edu"
Re: A British FS17
Posted: Tue May 05, 2009 11:41 am
by topwater
Great job as always Steve
Love the gunwales and layout of the cockpit.
Re: A British FS17
Posted: Tue May 05, 2009 1:04 pm
by jgroves
Steve,
Boats looking great. It's been a while since I have been on here... you have made some major progress. I'm diggin' the glass on the gunwale.
Jeremy
Re: A British FS17
Posted: Tue May 05, 2009 3:58 pm
by Lower
Hey Steve...boats looking great! You've done an excellent job. Nice to see it all coming together! Your getting closer...
Re: A British FS17
Posted: Wed May 06, 2009 2:44 am
by TomW
Steve everything looks great. Your providing a lot of ideas for our first timers and building a nice solid well thought out boat. Keep up the good work and the ideas coming.
Tom
Re: A British FS17
Posted: Sun May 10, 2009 1:04 pm
by bushmaster
Hi Steve,
Boat's looking real beautiful. I guess the weather is getting better in England right now. England beat WI 2-1.
It's really hot now in Homestead, Florida..95 degrees yesterday.
Good building
Bushamster
Re: A British FS17
Posted: Wed May 13, 2009 4:00 pm
by cape man
Steve,
Send me another email if you could. I can not find the other one you sent. Will have a car while there next month, and looks like I will have some spare time. I'll bring you a present...
cawatson at ufl dot edu
Re: A British FS17
Posted: Mon Jun 15, 2009 7:33 am
by cape man
Steve,
Was great meeting you and the family. The boat is awesome and the cider is in the frig out in the barn. Had a nice trip back to London on the route you gave me. I'll post the pics I took later. Got home at 2 am this morning and need to catch up on some sleep.
Re: A British FS17
Posted: Mon Jun 15, 2009 9:56 am
by steve292
cape man wrote:Steve,
Was great meeting you and the family. The boat is awesome and the cider is in the frig out in the barn. Had a nice trip back to London on the route you gave me. I'll post the pics I took later. Got home at 2 am this morning and need to catch up on some sleep.
It was great meeting you as well,Craig & Just to prove Capeman was here-

there are worse ways to spend an hour or 2 than having a beer whilst leaning on a boat hull
I phoned the trailer people about the U bolt that you pointed out had snapped & they are getting another one out to me
Now if I can just talk SWMBO into the Boca Grande thing
...............................
Enjoy the cider.
Here are some more photo's of the boat on the trailer.


I have also pulled the steering, shift, & throttle cables through one of the chases, & the fuel line through another 1" one.

steve
Re: A British FS17
Posted: Mon Jun 15, 2009 10:23 am
by georgesboyer
Hey, is that a high shear version? I noticed a "clinker" seam in the topsides.
Re: A British FS17
Posted: Mon Jun 15, 2009 11:40 am
by TomW
Nicely done Steve! Looking good. The high shear really looks good sitting on the trailer.
Tom
Re: A British FS17
Posted: Mon Jun 15, 2009 2:58 pm
by Cracker Larry
Yep, looking really good Steve! Is that a wheel lock on the trailer tire?
Did Cape Man leave you with a hangover
Re: A British FS17
Posted: Mon Jun 15, 2009 5:26 pm
by BassMunn
Hey Steve that boat looks really nice. The high sheer looks really good
Re: A British FS17
Posted: Mon Jun 15, 2009 6:48 pm
by cape man
Did Cape Man leave you with a hangover
I resemble that remark! Steve has two beautiful young girls that he was in charge of while I was there, and I had to drive back to my hotel at night, through half a dozen roundabouts, on the wrong side of the road... We were very civil and responsible.
Wait till I post the pics of the wild leads they make there for holding baits to the bottom in the current (The coast there has the second largest tide after the Bay of Fundi - it was just under 10 meters while I was there!).
As to Boca Grande next year, you need to start the conversations now Steve! With the exchange rate it's almost free for you to visit us, and I can guarantee we will take you and the family fishing while you are here.
Re: A British FS17
Posted: Mon Jun 15, 2009 8:42 pm
by bushmaster
Great job Steve
I suppose that you will finish the rest with the boat on the trailer...Like final painting, installing electrical, mounting motor,etc..
Please keep posting
Bushmaster
Re: A British FS17
Posted: Mon Jun 15, 2009 10:08 pm
by Cracker Larry
I had to drive back to my hotel at night, through half a dozen roundabouts, on the wrong side of the road... We were very civil and responsible.
I would have called a cab.
Re: A British FS17
Posted: Tue Jun 16, 2009 2:41 am
by steve292
I think Craig was taking it easy because he wanted to be away sightseeing early on saturday.
He must have been past my place early as he left his leatherman here, & I put it on the casting deck for him to pick up. I was up at 7 & it was gone then.
Did you see the 'henge Craig? What always strikes me when you drive through Wiltshire is how empty it is
Boca Grande, we are having serious chats about.
Steve
Re: A British FS17
Posted: Tue Jun 16, 2009 6:14 am
by steve292
[quote="Cracker Larry"]Yep, looking really good Steve! Is that a wheel lock on the trailer tire?
quote]
Yes it is Larry. I will have to have one for insurance purposes, when the trailer is parked at the slip. There is a hitchlock in the socket of the ball hitch mechanism as well.It takes so little time to fit them,I may as well make sure the outfit is as secure as is reasonably possible at home as well.
Somebody close to here lost £20000 of caravan off his drive a little while back, someone backed up to it, unbolted his hitch,bolted another on & drove off with it,leaving the original hitch complete with lock behind.I am going to tack the bolts with my arc welder to make that less likely as well.
Re: A British FS17
Posted: Tue Jun 16, 2009 6:17 am
by steve292
bushmaster wrote:Great job Steve
I suppose that you will finish the rest with the boat on the trailer...Like final painting, installing electrical, mounting motor,etc..
Please keep posting
Bushmaster
Thanks Farouk.
Yes, hopefully all what is left will be done outside. I have the option to put it back under cover for the final painting if the weather is against me.
Steve
Re: A British FS17
Posted: Wed Jun 17, 2009 4:58 pm
by cape man
Re: A British FS17
Posted: Wed Jun 17, 2009 5:08 pm
by cape man
The last post was something else...
Here's the real deal. The "anchor" is held in place by tension and the grooves in the side of the lead and break free when a fish runs with the bait or you pull hard on the line. Pretty slick...

Re: A British FS17
Posted: Wed Jun 17, 2009 5:26 pm
by TomW
Now that's a lead! Steve do you just drop them on the fish and net them when they float to the surface.
Tom
Re: A British FS17
Posted: Mon Jul 06, 2009 10:40 pm
by cape man
Hey man! How goes the life? Seems like you and I are both standing still these days... Or maybe you are busy fishing!
Have you got any more done since I saw her? I have been stuck at the painting stage. Hope to do something this week or next.
Re: A British FS17
Posted: Tue Jul 07, 2009 9:04 am
by steve292
Hi Craig.
Life is good, the sun came out last week, so me & the kids had some play time on the beach & in the park.
I am plodding away at the boat, engine mounting holes are drilled, filled & redrilled, steering is in, engine harness is in.Motorwell top is on & taped also.
I am fairing away at the inside slowly, but the last 2 days have been a bit wet. Also started on instruments & electrical, 85 ah leisure battery is coming.
I will take some pics tonight maybe, but fairing is pretttttty unexciting
Steve.
Re: A British FS17
Posted: Tue Jul 07, 2009 7:08 pm
by cape man
but fairing is pretttttty unexciting
...which is exactly why there isn't anything new on my thread!
The cider was EXCELLENT! Thanks again! It will go on the wall of fame in the barn for sure.
Re: A British FS17
Posted: Mon Jul 27, 2009 11:00 pm
by cape man
Hey Steve,
You out there? Any progress?
Re: A British FS17
Posted: Tue Jul 28, 2009 2:12 am
by steve292
cape man wrote:Hey Steve,
You out there? Any progress?
Some,got the gunwales & casting deck faired,motorwell & stern lockers,some of the console done.
The weather is s***, & slowing me right up.
But I'm off for a month starting today, so I hope to push right along now
Steve
Re: A British FS17
Posted: Tue Jul 28, 2009 6:26 am
by cape man
Cool. Was just checking on 'ya. We'll get these girls in the water soon!
Re: A British FS17
Posted: Tue Jul 28, 2009 8:23 pm
by colonialc19
I was wondering the same as Craig, can't wait to see some pics
Daniel
Re: A British FS17
Posted: Thu Aug 20, 2009 11:19 am
by cape man
But I'm off for a month starting today, so I hope to push right along now
Been three weeks...any luck getting to work on her?
Re: A British FS17
Posted: Thu Aug 20, 2009 7:06 pm
by steve292
I am nearly done fairing, just the sole to side joint left really.
Ive just come in & I am whacked, I'll put some photo's up tomorrow sometime.
I had to cry uncle to the weather in the end & stick it back in the garage
Just need to finally decide where to put the cleats in the gunwales & drill some holes....I got some pop up cleats at a good price.
steve
Re: A British FS17
Posted: Thu Aug 20, 2009 7:15 pm
by cape man
Cool! Go man go! We are neck and neck again! Wouldn't it be cool to post launch pictures together!
Re: A British FS17
Posted: Thu Aug 20, 2009 9:29 pm
by Murry
Why to go Steve,
Looking forward to seeing those pixs.
Daniel
Re: A British FS17
Posted: Thu Aug 20, 2009 9:34 pm
by ks8
Great feeling buying some of that *final* (
) hardware, eh?
Re: A British FS17
Posted: Fri Aug 21, 2009 5:25 pm
by steve292
long time no post.
I moved the boat outside on to it's trailer, at the end of june,with the idea of finishing it in the fresh air,it then rained nearly every day in july
So eventually,to try to get back some time I had to move it back into the garage. but to get the door shut I have had to take the tongue off the trailer, & use axle stands to support it, with some wood packing under the keel to stop the hull bouncing.

What I do to fair,is to first sand down the binder tape of the glass, & any epoxy drips ect. Then I apply the fairing compounds & sand, repeating until it appears fair and smooth to me. Then I put on 1 coat of primer, which allow me to tell you will immediatly tell you how wrong you were
.Then I start filling & sanding the offending areas,this saves lots of primer over the often read advice of putting on three coats just to sand it all off again, & is why the photoshow a mix of primed & unprimed cockpit. It all had primer on once, it just has been sanded to allow the fairing compounds to be re-applied.
So some pics....

This one , the boat was still outside, & shows the gunwale faired & the control box & steering mounted. I used 38mm pond hose for chase tubes, & was ****ing myself that the steering cable wouldn't fit but it went easy. I am using a teleflex nfb system btw.

This shows the engine mounting bolt holes. The bolts are 10mm dia, the holes were drilled to 30mm filled with epoxy & woodflour & redrilled to 10mm.
some pics of the inside...

As you can see only the sole to side joint needs fairing & part of the console. I have picked up some treadmaster mat for the floor at a really good price. I will stick it down with contact adhesive as the sole already has three coats of epoxy & a layer of biax.

Casting deck faired.

Picked up some nice pop up cleats of the net at a really good price

I've also made a very rudimentary instrument panel, which I shall mount into the console in due course.

& after all that the sun decides to poke it's head out
Steve
Re: A British FS17
Posted: Fri Aug 21, 2009 6:15 pm
by BassMunn
Wow Steve, your boat is looking real good. Not long to go now.
Re: A British FS17
Posted: Fri Aug 21, 2009 6:20 pm
by peter-curacao
BassMunn wrote:Wow Steve, your boat is looking real good. Not long to go now.
I Agree , but his garden looks also great, why am I not surprised about that? O yeah he's English
Re: A British FS17
Posted: Fri Aug 21, 2009 11:05 pm
by cape man
Steve,
Looking great man! For everyone else, Steve and his wife planted almost everything there. A beautiful garden it is!
Re: A British FS17
Posted: Fri Sep 04, 2009 6:37 pm
by steve292
Re: A British FS17
Posted: Fri Sep 04, 2009 7:09 pm
by cape man
Too cool Steve! Lots of work to get that! Was going to ask if you were left handed when I saw the controls mounted on the port side of the console...then remembered where you live and how you guys all drive on the wrong side!
We will wet these babies soon...soon!
Love the detail on the drip rail...nice touch.
Re: A British FS17
Posted: Sat Sep 05, 2009 1:15 am
by ks8
Nice! She's looking hungry for water and spray.
Re: A British FS17
Posted: Sat Sep 05, 2009 9:13 am
by gk108
It may seem like a devil now, but wait until you go out on a "spray day". All of that detail will go to work for you to conduct that spray right back to where it belongs without bothering the bilge pump or designated bailer.
Re: A British FS17
Posted: Sat Sep 05, 2009 3:36 pm
by frazoo
VERY nice! I especially appreciate the pic of your controls on the console. My old motor's controls were originally made and mounted on the starboard side of the boat that had the pilot's seat on that side. I could not figure out how I would get to it with a center console, but your pic show that it looks just fine and dandy on the left of a console.
thanks!
frazoo
Re: A British FS17
Posted: Tue Sep 08, 2009 6:27 am
by cape man
The island nation of Samoa just switched to driving on the wrong side of the road to make it easier for the visitors from New Zealand and Australia.
Re: A British FS17
Posted: Thu Sep 10, 2009 12:00 am
by Murry
Way to go Steve.
I know you're happy to finished with the fairing.
She's beautiful
Daniel
Re: A British FS17
Posted: Mon Sep 14, 2009 6:36 pm
by steve292
I have made some progress,
Made some paper templates for the deck mats. I have now cut out the mats & they are ready to fit.

The inside of the hull has had 2 coats of blakes baltic grey applied after sanding the primer to 120 grit & I have just finished putting on the second coat of moss green enamel from nauteco on the foredeck & gunwales.

Thats the grey. The photo was taken with only one oat of green on, thats why it's patchy.

& this is how she stands tonight, 2 coats on the gunwales,& at least one more needed to get a nice even colour. I thinned the 2nd coat by about 8% with xylene & tipped it with a foam brush

Nearly there....................just the console left,need to cut for the hinged seat to store the fuel tanks. Needs a little more prep also before painting, & the control box loom pulled out to fit a gaiter(forgot first time around.)
Baby steps...............
Steve
Re: A British FS17
Posted: Mon Sep 14, 2009 8:13 pm
by cape man
Too cool Steve!! Where do I sit?
Soon baby...soon! Love the color scheme! Would be too dark for Florida, but there on the sunny coast of England.... she will turn some heads for sure. Have a pint of cider for me. I'm going to go out and pop open a BBB.
Re: A British FS17
Posted: Mon Sep 14, 2009 8:21 pm
by TomW
Nice Steve. That is one pretty boat.
Tom
Re: A British FS17
Posted: Mon Sep 14, 2009 8:59 pm
by Bowmovement
Steve,
Boats looing great. Almost there!!
Matt
Re: A British FS17
Posted: Mon Sep 14, 2009 9:31 pm
by peter-curacao
Yep she's a beauty
Re: A British FS17
Posted: Mon Sep 14, 2009 9:48 pm
by Steven
What kind of deck mats are you using?
Regards,
Steven
Re: A British FS17
Posted: Tue Sep 15, 2009 3:48 am
by steve292
Steven wrote:What kind of deck mats are you using?
Regards,
Steven
I got some treadmaster mats off e-bay,grey in colour. I am using them as I need a good no skid floor for the kids, & I don't want to fair the floor
. I am going to stick them down with contact glue first & see if that works.
I see you are pounding away at your ob19
...good stuff.
Steve
Re: A British FS17
Posted: Tue Sep 15, 2009 8:37 am
by topwater
Looking good Steve
Re: A British FS17
Posted: Wed Sep 16, 2009 11:36 am
by Steven
Thanks. I saw some floor covering at Lowes or HD that interlocks. I might give it a go if it's UV resistent. Can't decide on that or Rhino Lining. My father had it applied on his Twin-Vee cat and loves it. The Twin-Vee had it applied while it was in for some warranty work. Soft on the feet, good non skid and easy to clean. Gonna look around to see if I can find someone here that will apply it.
Re: A British FS17
Posted: Mon Sep 21, 2009 10:43 am
by cape man
Report! Report!
Re: A British FS17
Posted: Mon Sep 21, 2009 4:11 pm
by steve292
cape man wrote:Report! Report!
Tomorrow! Tomorrow!
Working tonight, but I have got some done on the boat. She's got some of her jewellery now, & the gunnel paintings finished, hatches fitted to the stern(they all open BTW
) cut the console seat to fashion a lid for the fuel storage,cut the mats.
I am working quite a bit extra lately & had a wedding to go to over the weekend, so the big stuff like console sanding will have to wait until midweek.
I'll put pics up tomorrow Craig,just for you
.
Steve
Re: A British FS17
Posted: Mon Sep 21, 2009 6:54 pm
by cape man
they all open BTW
OUCH!
Just checking in...your close...
Re: A British FS17
Posted: Tue Sep 22, 2009 5:00 pm
by steve292
As promised, some pics. Excuse the poor quality,I'd only just got up.

Bow roller & anchor bollard. All fittings have A4 stainless bolts holding them on, with 1/8 stainless backing plates in addition to a 1/2 plywood plate.

2 pop up cleats & a 6" normal cleat. 1 s/s rod holder on each side. you can also see some of the mats dry fitted to the deck
Back in a bit Chilli is ready
Re: A British FS17
Posted: Tue Sep 22, 2009 5:59 pm
by steve292
Fully fuelled up
This is the start of the construction of the lid for the locker for the fuel tanks.
First I have cut the top of the console seat off to for the lid.
Like so.-


Next I will glue in some strips of ply to form the lip to position the lid & keep the worst of the water out.
I also have to put a bulkhead at the back of the locker to isolate the fuel from the battery & electrics & 2 drains out the console sides & some nice big vents in the locker.
I'll get some pics of the hatches at the stern tomorrow. & some better ones of the layout of the deck mats.
Steve
Re: A British FS17
Posted: Tue Sep 22, 2009 6:14 pm
by Murry
Those pop up cleats look very nice Steve and that fuel compartment lid is going to turn out great!
You're almost there man.
What brand paint did you go with and how did you apply it
Daniel
Re: A British FS17
Posted: Tue Sep 22, 2009 7:48 pm
by steve292
Murry wrote:Those pop up cleats look very nice Steve and that fuel compartment lid is going to turn out great!
You're almost there man.
What brand paint did you go with and how did you apply it
Daniel
Thanks Daniel.
The green is a coach enamel from a UK company called Nauteco, 3 coats rolled & tipped with a cheap foam brush. I'll link to it just so's you can see what it is. Very easy to use 1 coat unthinned & 2 coats thinned by about 5% with xylene.
http://www.nauteco.co.uk/component/virt ... litre.html
The blue/grey is a Blakes paint,biscay grey it's called just rolled on in 2 thinnish coats,no tipping.
http://www.boatpaint.co.uk/acatalog/Boa ... s_126.html
Again easy to use no thinning req'd.
I have had some bleeding under tapes, so I have got some rattle can auto paint, & I am going to try the light spray on the edges trick. Also I inadvertantly left a rag with rubbing alcohol on some uncured paint
, so I have a bit of touching up to do,but no big thing.
Steve
Re: A British FS17
Posted: Tue Sep 22, 2009 11:04 pm
by Murry
Thanks for sharing those links Steve.
Re: A British FS17
Posted: Wed Sep 23, 2009 6:32 am
by cape man
Nice job cutting the lid for the fuel compartment. That would have been a scary cut for me!
Looking good man. Looking good!
Re: A British FS17
Posted: Wed Sep 23, 2009 10:58 am
by Steven
I"m assuming the plywood strips in the fuel locker will stand proud of the box and the lid will close over them? If so, You could use solid wood and chamfer the face back a bit. Apply a weather strip to the chamfered face, and when the lid closes you'll have a watertight seal. Hope that makes sense.
Re: A British FS17
Posted: Wed Sep 23, 2009 3:08 pm
by steve292
Steven wrote:I"m assuming the plywood strips in the fuel locker will stand proud of the box and the lid will close over them? If so, You could use solid wood and chamfer the face back a bit. Apply a weather strip to the chamfered face, and when the lid closes you'll have a watertight seal. Hope that makes sense.
Thats a good idea, I may go down that route. It doesn't really matter about 100% weathertight/watertight as there will be drains in the locker & vents for fume. I will have a think about how much extra work I am prepared to do at this point.
Steve
Re: A British FS17
Posted: Thu Sep 24, 2009 7:48 am
by cape man
I will have a think about how much extra work I am prepared to do at this point.
Man do I hear that! Really doesn't need to be water tight. If you make the lip as Steven suggests but skip the gasket it will be very water resistant. The edge along the hinges will be the challenge.
Re: A British FS17
Posted: Thu Sep 24, 2009 8:23 am
by steve292
cape man wrote:I will have a think about how much extra work I am prepared to do at this point.
Man do I hear that! Really doesn't need to be water tight. If you make the lip as Steven suggests but skip the gasket it will be very water resistant. The edge along the hinges will be the challenge.
I hear you as well
As long as it keeps out the worst of the spray & rain it'll be ok.
I am finding I am having to constantly tell myself to slow down, I've spent to long at this to bolt over the final fences.
Steve
Re: A British FS17
Posted: Thu Sep 24, 2009 12:12 pm
by cape man
I screwed up the install on a couple of the hinges because I was in too much of a hurry to thoroughly clean out all the paint in the recesses I had made. Now I have to remove them, clean them up, fill the screw hole again with epoxy, redrill and reinstall. Yeah, I want to be done, but need to keep in mind that it isn't a race. These final details are all important!
Re: A British FS17
Posted: Thu Sep 24, 2009 12:37 pm
by Steven
cape man wrote:I will have a think about how much extra work I am prepared to do at this point.
Man do I hear that! Really doesn't need to be water tight. If you make the lip as Steven suggests but skip the gasket it will be very water resistant. The edge along the hinges will be the challenge.
If using flush mount hinges, the hinge edge can be done similarly. You'll need a gap between the inner edge of the lip on the bottom of the lid, and the lip protruding up from the console. This will provide clearance for the bottom edge of the lid lip to clear as the lid is raised.
Re: A British FS17
Posted: Tue Oct 27, 2009 6:10 am
by cape man
Pics? Want to see the new paint. Also post the year and model on the engine and maybe someone here can hep you find a PTT.
Re: A British FS17
Posted: Tue Oct 27, 2009 3:19 pm
by steve292
I'll have to get the pics later in the week. Nightshift tonight, & the weather is bad here at the moment, so I need to finish up the electricals in the garage first, & a little sealing of wood where I moved a clip for a hatch. But the boat is finished, all bar a battery hold down. I am going to run on a portable tank with a 50:1 mixture in until I am sure that the oil injection is working.
Also need to by a flushing muff as my old one has answered the call of the wild & gone walkabout.
Steve
Re: A British FS17
Posted: Tue Oct 27, 2009 9:17 pm
by cape man
[quoteAlso need to by a flushing muff as my old one has answered the call of the wild & gone walkabout.][/quote]
Probably out there with my vice grips. Hope they are having fun!
Re: A British FS17
Posted: Fri Oct 30, 2009 2:37 pm
by steve292
Re: A British FS17
Posted: Fri Oct 30, 2009 2:46 pm
by BassMunn
GeeWiz Steve your boat looks awesome. I love the different colours in the cockpit.
That is one serious looking FS17. The hatch lids in the bow area look amazing
Re: A British FS17
Posted: Fri Oct 30, 2009 4:18 pm
by Lon
That boat looks so good I'm envious and would like to own it, but then I would have to sell my home and move towards bigger water.
Guess I'll go outside and stomp the s*#t out'a some sagebrush.

Re: A British FS17
Posted: Fri Oct 30, 2009 4:31 pm
by Larry B
That is a Sweet job you did there. All I can say is WOW. I also like the colors you have done. Hatches look fantastic as does the console. Great Job. She is PRETTY
Re: A British FS17
Posted: Fri Oct 30, 2009 5:20 pm
by TomW
Outstanding Steve
When you getting her wet. Have you solved the PTT problem.
Tom
Re: A British FS17
Posted: Fri Oct 30, 2009 10:19 pm
by cape man
The paint is awesome! Nice man! Nice!
Re: A British FS17
Posted: Fri Oct 30, 2009 11:35 pm
by gk108
Excellent! I'm with Lon, I'd like to have one of those, too. Don't have any sagebush around here, but I did stomp a few ant hills today.
There's one thing I see in the first picture that concerns me, though. It looks like the trailer suspension is squatting a little too much.
Re: A British FS17
Posted: Sat Oct 31, 2009 4:31 am
by steve292
Thanks guys,
Ah yeah,but Lon i'd love to live in montana,all that wide open space,proper summers & proper winters,not like here where the only difference is the rain is warmer in the summer
GK, I thought that as well,
. But the swinging arms are not horizontal
. the trailer has a 600kg capacity,750kg all up, & I don't think I am up to that weight. I am going to order some new tie down straps on monday , & then I will go to the weighbridge & then we'll know for sure..
Re: A British FS17
Posted: Sat Oct 31, 2009 4:48 am
by steve292
To answer Tom,
I bust open the PTT pump/motor assembly. It looks like the o ring between the pump reservior, & the motor casing failed, allowing water into the electric motor.The hydromotor is fine. I have sourced a brand new complete unit, at a very good price(£100) although it is for a dt115. I will see if it works, & if so all good but if not,I have found a gas assisted tit for it, so I will buy that or one like it & convert it. I nearly solved it with a honda 4 stroke yesterday, but the domestic accountant talked me out of it
.
pics of the offending motor


Re: A British FS17
Posted: Sat Oct 31, 2009 7:32 am
by peter-curacao
Steve sorry I'm late
Your boat is gorgeous good job

Re: A British FS17
Posted: Sat Oct 31, 2009 8:03 am
by cape man
I nearly solved it with a honda 4 stroke yesterday, but the domestic accountant talked me out of it .
Keep asking...isn't that how they get stuff out of us? Have you tried crying? Or maybe just stop talking for a week or so and when asked what's the matter just say "Nothing sweetheart" (best done while looking at the broken outboard). I too love the colors. Wouldn't work in our sun and heat but will be sweet where you are. What is the new paint?
Re: A British FS17
Posted: Sat Oct 31, 2009 8:50 am
by gk108
then I will go to the weighbridge & then we'll know for sure..
OK. I just wanted to make sure you don't start gaining experience at repairing/replacing damaged trailer axles the way that I have over the years. It's never fun, whether it's 2 miles from home or 2000 miles from home.
Re: A British FS17
Posted: Sat Oct 31, 2009 12:26 pm
by TomW
Ouch Steve that's a nasty looking electric motor on your PTT. No wonder it didn't work. Hope the 115 one works out for you here's keeping the fingers crossed. If not how about getting that one rewound and refurbished. As a thought I have an elctric shop in town that rewinds any electric motor that you bring them looks like new when it leaves there shop. Last time I took a starter in for my Belarus Russian tractor it cost me $35, don't know what that is in Euro's.
Tom
Re: A British FS17
Posted: Sat Oct 31, 2009 3:59 pm
by bernd1
Hi Steve,
a real beautiful boat - I think a should take a visit to Great Britan
Bye
Bernd
Re: A British FS17
Posted: Sat Oct 31, 2009 4:07 pm
by steve292
gk108 wrote:then I will go to the weighbridge & then we'll know for sure..
OK. I just wanted to make sure you don't start gaining experience at repairing/replacing damaged trailer axles the way that I have over the years. It's never fun, whether it's 2 miles from home or 2000 miles from home.
Yes, I have to agree with you. I onc had a wheel collapse on a busy main road in the morning rush hour...not good
& potentialy very dangerous. I appreciate the heads up, I have been thinking that the trailer looks a bit overloaded for a while,but I have no frame of reference, so it needs to go on the 'bridge. I was'nt dismissing what you had to say, I always consider peoples opinions/advice.(I may not take it,but thats life
)
Steve
Re: A British FS17
Posted: Sat Oct 31, 2009 5:15 pm
by Bowmovement
Great looking boat
I have been looking hard at the FS17.
Re: A British FS17
Posted: Sun Nov 01, 2009 4:42 am
by steve292
cape man wrote:I nearly solved it with a honda 4 stroke yesterday, but the domestic accountant talked me out of it .
Keep asking...isn't that how they get stuff out of us? Have you tried crying? Or maybe just stop talking for a week or so and when asked what's the matter just say "
Nothing sweetheart" (best done while looking at the broken outboard). I too love the colors. Wouldn't work in our sun and heat but will be sweet where you are. What is the new paint?
You just may have given this boat a name
, as I said lots of that every time a packet came with more stuff for the build
The reality is I will have to get by with what I have for a while,until the finances recover. The consolation is that I know I have built a good sound hull, & it will still be good & sound in a year or 2.
The paint is by a company called Nauteco. It is a single pack enamel in what they call moss green. Very close to British racing green.
Oh to have sun & heat
Its p*****g down here, no engine testing today,either
.
Steve
Re: A British FS17
Posted: Sun Nov 01, 2009 6:26 am
by bernd1
Hi Steve,
about the engine - friends of mine bought this year 4 stroke from Honda - we tested these engines this year on serveral trips - they are very good engines with very, very low fuel. We were surprised how less they take and how less the weight for 4 stroke engines they have.
If I have money left over I will buy in future a Honda 4 stroke for my GF16 (20HP/ 48kg). But at the moment I have to use my 25HP 2stroke Mariner (a very drunken engine
).
Enjoy the boating !
Bye
Bernd
Re: A British FS17
Posted: Sun Nov 01, 2009 7:03 am
by steve292
bernd1 wrote:Hi Steve,
a real beautiful boat - I think a should take a visit to Great Britan
Bye
Bernd
Thanks Bernd...your welcome anytime.
It'll be a fourstroke or a tldi tohatsu when I have the money.
Steve
Re: A British FS17
Posted: Sun Nov 01, 2009 9:57 am
by Murry
Wow, Steve. You've done a beautiful job. It's got to be rewarding being able to see what you've built everyday and it's not going anywhere, it'll be ready for that new engine when ever you're able to get it.
Great job Steve
Re: A British FS17
Posted: Sun Nov 01, 2009 10:28 am
by cape man
Belarus Russian tractor it cost me $35, don't know what that is in Euro's.
Tom, he's in Great Britain. When they refused to put the Queen's picture on it, they refused the Euro!
Re: A British FS17
Posted: Sun Nov 01, 2009 10:50 am
by TomW
cape man wrote:Belarus Russian tractor it cost me $35, don't know what that is in Euro's.
Tom, he's in Great Britain. When they refused to put the Queen's picture on it, they refused the Euro!
I know he's in GB I forgot they didn't convert to Euro's
Sorry Steve.
Tom
Re: A British FS17
Posted: Sun Nov 01, 2009 11:00 am
by cape man
Re: A British FS17
Posted: Sun Nov 01, 2009 3:27 pm
by TomW
Re: A British FS17
Posted: Sun Nov 01, 2009 9:56 pm
by Bowmovement
Steve,
Boat looks awesome. Love the green.
I am thinking about the FS17 extended sheer alot lately.
Would you please tell me how much you extended the sheer and also what your max beam is? I am sure it has been mentioned here somewhere but my wife is yelling at me to get off the computer.
Not really yelling, I dont like no smart mouth wife, aint gonna put up with one niether.....Dont tell her I said that
Thanks,
Matt
Re: A British FS17
Posted: Mon Nov 02, 2009 9:23 am
by tech_support
Great job Steve. Its fun to see such a different finish for the same boat (running surface anyway) as mine. Yesterday I was fishing in the lagoon and while running to one spot I got mixed in a few large yachts heading south for the winter, so the effect was about a 2'-3' steep and confused chop. I did not need to come off plane to cruise through mess without slamming. I started thinking how well a regular,or extended, sheer FS17 would handle
Im looking forward to your launch report.
Joel
Re: A British FS17
Posted: Mon Nov 02, 2009 10:36 am
by jim1030
Steve
An awesome boat!
I just purchased the FS17 plans and intend to have an increased sheer line also. Your very detailed photo journal of the build is truly inspiring. You gave me many useful hints.
Great job!
Jim
Re: A British FS17
Posted: Mon Nov 02, 2009 11:12 am
by steve292
Bowmovement wrote:Steve,
Boat looks awesome. Love the green.
I am thinking about the FS17 extended sheer alot lately.
Would you please tell me how much you extended the sheer and also what your max beam is? I am sure it has been mentioned here somewhere but my wife is yelling at me to get off the computer.
Not really yelling, I dont like no smart mouth wife, aint gonna put up with one niether.....Dont tell her I said that
Thanks,
Matt
Matt,
The sheer is extended by by 8" vertically above the regular sheer line, with 6" below it,
Beam is 7' 9" without a rubber rubrail.
thanks for the compliment.
steve
Re: A British FS17
Posted: Mon Nov 02, 2009 11:26 am
by steve292
shine wrote:Great job Steve. Its fun to see such a different finish for the same boat (running surface anyway) as mine. Yesterday I was fishing in the lagoon and while running to one spot I got mixed in a few large yachts heading south for the winter, so the effect was about a 2'-3' steep and confused chop. I did not need to come off plane to cruise through mess without slamming. I started thinking how well a regular,or extended, sheer FS17 would handle
Im looking forward to your launch report.
Joel
Thats nice to know Joel. My only question really is how much more "tippy" the boat may be. I bet your not looking foward to the launch report as much I am looking foward to making it
. I plan to use it a lot of the west coast of pembrokeshire,in Wales. this is where the Bristol channel & the Irish sea meet, so it can be rough, not that I plan to deliberatly go out in bad conditions
, but it can get choppy quick.
The FS17 looks like it may become one of the most versatile inshore boat plans you sell, in it's ease of adaptation to a wide range of uses, which is testament to Jacques design skills
Steve.
Re: A British FS17
Posted: Tue Nov 03, 2009 8:36 am
by cran
Nice job! I am also interested in building the FS17 with extended sheer and would love to hear how the launch goes. Am I correct that you added an extra panel to increase the sheer instead of extending the panel on the plans?
Re: A British FS17
Posted: Tue Nov 03, 2009 1:23 pm
by Lower
Beautiful job Steve! The boat really came together!! Can't wait to see how she looks on the water. I'm still plugging along as well. I really need to update my page. Life's been crazy. We just had our third. Your my inpiration though. I know you still got quite a bit done in spite of a new little one! Hope the family is well. I truly agree with what you and Joel are saying. This boat is so versitile. It really can be adapted in so many ways. So far just from the ones posted on this site, we haven't seen two the same!
Good luck with the launch...I'll be watching!
Re: A British FS17
Posted: Tue Nov 03, 2009 7:59 pm
by steve292
cran wrote:Nice job! I am also interested in building the FS17 with extended sheer and would love to hear how the launch goes. Am I correct that you added an extra panel to increase the sheer instead of extending the panel on the plans?
Thats right, a seperate panel to raise the sheer
Lower wrote:Beautiful job Steve! The boat really came together!! Can't wait to see how she looks on the water. I'm still plugging along as well. I really need to update my page. Life's been crazy. We just had our third. Your my inpiration though. I know you still got quite a bit done in spite of a new little one! Hope the family is well. I truly agree with what you and Joel are saying. This boat is so versitile. It really can be adapted in so many ways. So far just from the ones posted on this site, we haven't seen two the same!
Good luck with the launch...I'll be watching!
Hey man.. long time no post. Congratulations on the addition to the family!!.. I trust all is well?
The boat will get done when it's done, you just have to fit it in when you can. I have weeks of not doing anything on it,but thats how it goes with kids.
Steve
Re: A British FS17
Posted: Sat Nov 14, 2009 8:45 pm
by Lower
All is well thanks! Still trying to find here and there to work on the boat. Like you said, slowly but surely!! Told my wife it should be done just on time to give to the baby as a graduation gift!
Re: A British FS17
Posted: Tue Dec 08, 2009 11:46 am
by steve292
Today we went aweighing.

Boat is rigged, engine, steering, controls, battery all in. No anchor or rode, or personal kit. no fuel. oil injection tank on engine full
Suzi DT60 oil injected 2 stroke 1984. if anyone can tell me the weight of this(Tom W?) i'd be eternally in your debt.
How heavy the boat minus trailer
?
tell you later.
Steve
Re: A British FS17
Posted: Tue Dec 08, 2009 12:16 pm
by Cracker Larry
I'll wag 1,200 pounds.
Re: A British FS17
Posted: Tue Dec 08, 2009 4:08 pm
by TomW
Steve I'd say right around 950-1000lbs. with the console, raised sheer, 1st time builder extra epoxy
, don't know what size fuel tank. If anything I may be high.
and she'll come in at 850.
Here's my reasoning:
Base boat per Jacques: 325: raisede sheer 75: console 120: engine 200: tank and miscellaneous other parts 250: Totol 970
Tom
Re: A British FS17
Posted: Tue Dec 08, 2009 6:59 pm
by cape man
1350 minus the trailer.
Re: A British FS17
Posted: Tue Dec 08, 2009 8:41 pm
by steve292
Cracker Larry wrote:I'll wag 1,200 pounds.
Are you following me around ?
Your bang on the money, 1220lbs all up
Tom, you forgot gunwales, casting deck, bowdeck,glassed in ply frames,none of which are in the base version
as shown here-

plus all surfaces that can be stood on are glassed, mostly with biax, console is completely glassed, most of it in biax, anchor locker is biax'ed
I used 75kgs of epoxy on it, which is about 68 litres or about 18 1/2 US gallons,twice what is called for in the BOM
5 extra sheets of 1/4 , & 3 extra 9mm sheets of okume. there is also 25 kg of 2 part foam in there, as it was poured in colder weather than is ideal & did'nt expand quite as much as Ideal conditions would have made it.
That suzi is a big beast as well, that will go for a lighter engine when the budget recovers. As far as I can find out it's somwhere around 240lbs dry, & its got about 3 litres of 2 stroke oil in it.
I am not unhappy with it,I knew that the extras would bring a lot to the party, although it's getting close to the trailer gross weight limit. On the plus side it towed well
Re: A British FS17
Posted: Tue Dec 08, 2009 9:09 pm
by Cracker Larry
Are you following me around ?
Your bang on the money, 1220lbs all up
No, I've built and weighed boats before though
I've been watching, and figured she had to be real close to mine.
Re: A British FS17
Posted: Tue Dec 08, 2009 9:30 pm
by Joe H
Hey Steve that's a lot of little boat, love the high sides, that would work well for jigging for walleye in the rivers here in Mich.
I spent a little time in England when I worked as a CAD manager for a company called Britex, got to board a 19th century warship in Portsmouth, I can't remember the name of the ship but it was very cool. I'll have to dig up the pictures some day.
I also have an 84 outboard on my OD16, only a 25hp, I planned on replacing it also but it's been a couple of years now and still running great!
Right-on Larry, whats the prize for guessing right Steve? A fishing trip in the U.K
, let me know, I'd like to tag along, ha ha
Joe H
Re: A British FS17
Posted: Wed Dec 09, 2009 12:44 am
by TomW
Steve I didn't forget I just didn't think it would add up to that much more. 250lbs is more than I anticiipated the increase to be.
Nicely done though and she should be a great boat for you and glad she pulls good.
Congrats Larry well done.
Tom
Re: A British FS17
Posted: Tue Jan 12, 2010 8:21 pm
by cape man
Launch pictures? Don't make me come over there!
Re: A British FS17
Posted: Wed Jan 13, 2010 7:17 am
by steve292
In this weather? you'd have to be mad
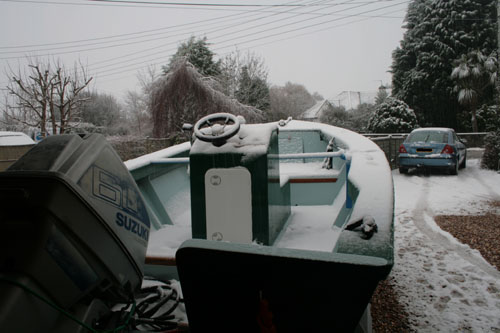
The veiw down the road outside my house this morning-

It was going in the harbour in Bristol yesterday, but the harbour is shut to pleasure craft as it is frozen solid.
I'm only a bit jealous of your trip, honest
Steve
Re: A British FS17
Posted: Wed Jan 13, 2010 7:49 am
by cape man
I don't remember all that beautiful white sand...
If it's any consolation, we have frozen hard every night for the past week. Unprecedented weather.
Re: A British FS17
Posted: Wed Jan 13, 2010 8:56 am
by chrisobee
Joe H wrote:got to board a 19th century warship in Portsmouth, I can't remember the name of the ship but it was very cool. I'll have to dig up the pictures some day.
Hopefully the Victory, Nelsons flagship. It would be a shame to go aboard a 19th centery ship in portsmouth that wasn't the Victory.
Re: A British FS17
Posted: Wed Jan 13, 2010 2:29 pm
by icelikkilinc
Excellent workanship.. congrats Steve and I hope you have a nice launch/ride with her..
Re: A British FS17
Posted: Wed Jan 13, 2010 3:59 pm
by bernd1
steve292 wrote:In this weather? you'd have to be mad
The veiw down the road outside my house this morning-
It was going in the harbour in Bristol yesterday, but the harbour is shut to pleasure craft as it is frozen solid.
I'm only a bit jealous of your trip, honest
Steve
Hi Steve,
I saw in TV and read in the newspaper that England has a lot of snow and big trouble with the traffic - here in Germany (South/Stuttgart) we have snow too -but we live every year with it. I agree with you , this is no building weather too cold too wet . But I'm sure in spring you can test your beautiful FS17......if I'm not too busy I may take a look to your boat and take a visit to you if you like.
Bye
Bernd
Re: A British FS17
Posted: Wed Jan 13, 2010 6:22 pm
by steve292
You would be welcome Bernd, anytime
Thanks for the nice comments Ilker
Steve
Re: A British FS17
Posted: Wed Jan 27, 2010 3:33 pm
by steve292
To quote Capeman- "Today is a good day"
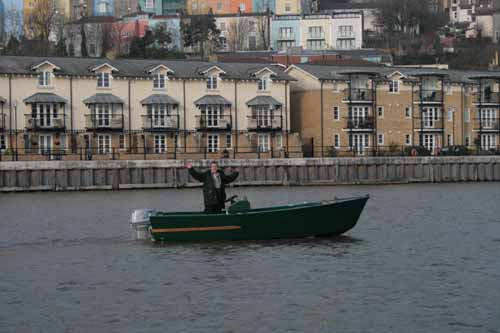
We launched into the harbour at Bristol, which seemed the best place to go, as there is no tide here(in & out of the basin by lock). Good job to as we had a bit of trouble getting the engine to fire at first. Turned out it was the "o" ring on the connector to the engine letting air past. Took 30mins of faffing about to find & cure it,but at least we didn't have to race the tide
Here's some pics
At the slip
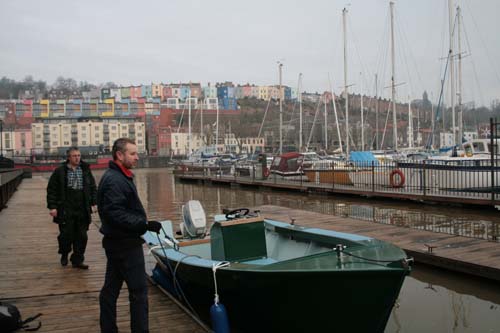
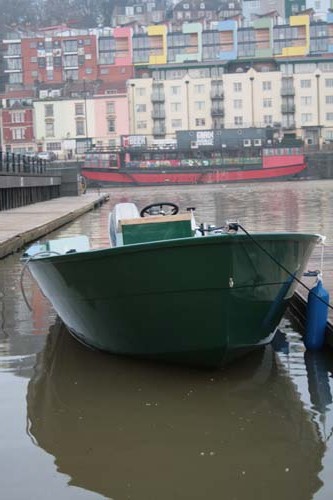
Backing out, the smoke is because I am using 50:1 in the fuel until I can prove the oil injection is working(it is, level dropped today in the injection tank
) the other fella is my yachty workmate who kindly leant a hand. I'm the one in the check shirt

Re: A British FS17
Posted: Wed Jan 27, 2010 4:03 pm
by colonialc19
Congratulations Steve
, she sits the water great
How about those scuppers, are they above the water still with a load?
You have to be proud, and you should be, job well done.
Daniel
Edit: I see you were in the harbor, were you able to get out and run at planing speeds???
Re: A British FS17
Posted: Wed Jan 27, 2010 4:18 pm
by steve292
The system won't let me write long posts?
Everytime I get down to far on the page it scrolls back to top when I type.
So excuse the multiple posts
After we launched, we went for a run up around the dock basin & some of the feeder canals, there is over 6miles of navigable water in here
.
A happy me driving
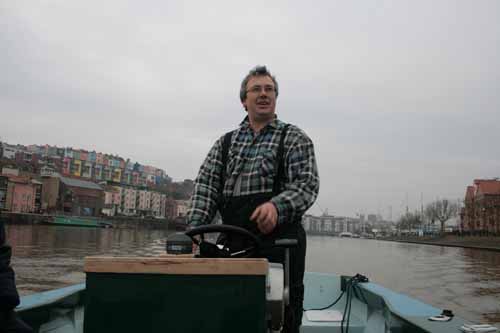
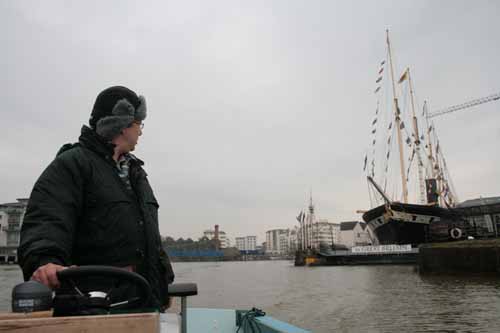
The big black ship is the SS Great britain. Built by one Isambard kindom Brunel, who I have a sneaking feeling knew a bit about engineering
Behind it is the replica Matthew, which carried John Cabot across the atlantic to discover(sic?) Newfoundland
Re: A British FS17
Posted: Wed Jan 27, 2010 4:45 pm
by steve292
Thanks Daniel, no we couldn't run at more than 6mph, & they are very strict on it as the harbour is full of rowers & houseboats.
The scuppers sit here at the dock-
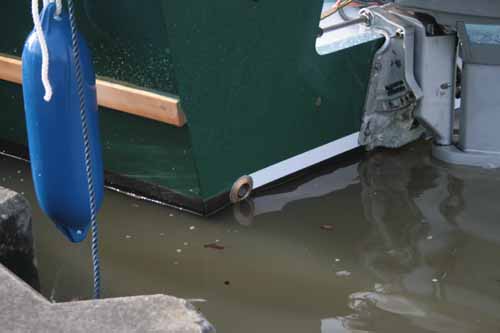
The top of the graphite is the level of the bottom of the sole. It is about 40mm above the water. The boat has a 60hp engine(2st) & there is 25ltrs of fuel in a portable tank just behind the motorwell when this pic was taken, so when the fuel is in the front of the console, it will improve a bit. with three of us in it, 2 at the back I had to plug the scuppers, but I expected that.
After a bit we tied up & went to the pub for lunch
Civilised, eh?
Then the others walked back to the slip, not far, & we did a photocall before we went home.Swmbo took all the photo's BTW
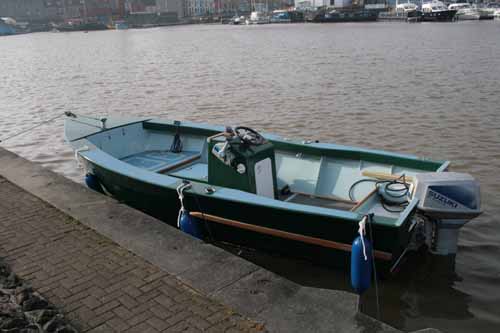
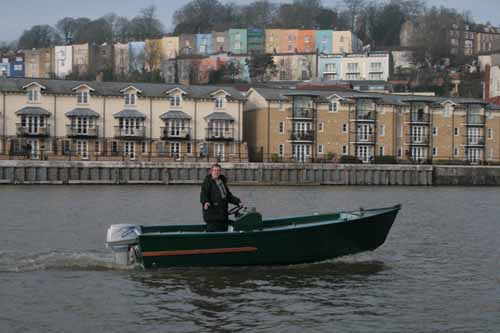
Regards,
Steve
Re: A British FS17
Posted: Wed Jan 27, 2010 5:18 pm
by Cracker Larry
Congrat's Steve
She looks great in the water, that high sheer makes her look much bigger. The FS17 is a really versatile design.
Amazing how much the Bristol waterfront looks just like downtown Savannah. I guess because we were one of the first colony's, and Savannah was designed by James Oglethorpe, an Englishman
Re: A British FS17
Posted: Wed Jan 27, 2010 9:05 pm
by Joe H
Congradulations Steven, she looks great!
Cheers
Joe H
Re: A British FS17
Posted: Wed Jan 27, 2010 10:43 pm
by TomW
Congratulations, Steve! She really looks great!
Tom
Re: A British FS17
Posted: Thu Jan 28, 2010 12:06 am
by ks8
Congrats! That brightwork looks great on that color. Enjoy!
Re: A British FS17
Posted: Thu Jan 28, 2010 1:19 am
by kdog
Woohoo! Congrats on the launch and a fine looking boat! I really like the FS17 with the high sheer.
Nothing beats your first launch, great feeling isn't it?!
Re: A British FS17
Posted: Thu Jan 28, 2010 1:31 am
by gk108
The boat looks excellent on the water. Congratulations
Re: A British FS17
Posted: Thu Jan 28, 2010 1:46 am
by rcihard
Congrats on the launch, boat looks fantastic (But it looks bloody coooold!)
Like the high sheer.
Richard
Re: A British FS17
Posted: Thu Jan 28, 2010 9:24 am
by cape man
Re: A British FS17
Posted: Thu Jan 28, 2010 10:11 am
by topwater
Congrats Steve
I am glad to see you could wipe the snow off and get her wet.
How long did it take to wipe that smile off your face
Re: A British FS17
Posted: Thu Jan 28, 2010 1:47 pm
by mecreature
She looks great...
Very cool place for the launch too.
Re: A British FS17
Posted: Fri Jan 29, 2010 9:16 am
by peter-curacao
Sorry I'm late, Looking great but indeed very cold also! congratulations on the splash!
Cracker Larry wrote:Amazing how much the Bristol waterfront looks just like downtown Savannah.
Larry take a look at the background and then my avatar, yeah yeah I know with a lot of imagination, but still the pastel colors are there
Re: A British FS17
Posted: Sat Jan 30, 2010 11:33 am
by steve292
Thanks for all the nice comments
.. yes it was cold, but I was determined to get the boat in the water, it's taken long enough as it is.
Larry I had a look back at your thread, about Savannah, & it is uncanny. Bristol isn't really a working harbour any more as it is ten miles up the tidal avon river, but in the days of empire was one of the biggest ports in the UK. Also it was one of the principle slaving ports & a lot of the big mansions were built on the backs of misery, sadly
I will, I will & I am:lol: I know its a sin but I can't help it.....do you walk around yours thinking did I really build that?
How long did it take to wipe that smile off your face
All day, & the rest of the evening
We did about 7 miles in total, It showed up a few niggles, like not enough throttle adjustment in reverse, need a few extra cleats for fenders. The bow hatch is to small to get right up into the front to get at anything easy, but all small stuff & easy to fix.
I would like to thank everyone who took the time, & had the patience to help me & steer me when I needed it.This is surely the best boat building resource on the net, I don't think I would have anything as good as what I ended up with,without the advice from everyone
, from the talented amatuers who contribute to the professionals who run the site
Thanks,all of you
Steve.
Re: A British FS17
Posted: Sat Jan 30, 2010 11:58 am
by Cracker Larry
Also it was one of the principle slaving ports & a lot of the big mansions were built on the backs of misery, sadly
Same here Steve
One of the greatest travesties man has ever committed against other men.
Re: A British FS17
Posted: Sat Jan 30, 2010 6:46 pm
by BassMunn
Hey congrats on the Splash Steve. Boat looks really nice in the water. That's gotta be one satisfying experience. I can't wait for mine
Re: A British FS17
Posted: Sun Jan 31, 2010 10:43 am
by Steven
Looking great Steve. Can't wait for some action shots and performance numbers once you can open 'er up.
Re: A British FS17
Posted: Mon Feb 01, 2010 6:20 am
by cape man
Re: A British FS17
Posted: Mon Feb 01, 2010 7:50 am
by Larry B
I think that would be more like:
Quality Time
Re: A British FS17
Posted: Mon Feb 01, 2010 5:46 pm
by wegcagle
Beautiful work Steve. Can't wait to be in your shoes.
Will
Re: A British FS17
Posted: Mon Feb 01, 2010 7:38 pm
by Bluefish2
Steve, You did a wonderful job. Hope my FS17blooks half as good when complete.
Mark
Re: A British FS17
Posted: Wed Feb 03, 2010 2:12 pm
by Lower
CONGRATS on the launch!!!! Very, very exciting! I'm a bit jelous. Life has been quite busy with the new little one. It's starting to settle, looking forward to getting back to the boat! You did an excellent job on the build, you should be proud. Must have been quite the feeling to see her in the water for the first time.
Bet you are looking forward to the warm weather this year!
Congrats again and enjoy!
Re: A British FS17
Posted: Thu May 13, 2010 4:09 pm
by steve292
Bit of an update.
Today I had the chance to put the boat in at a local watersports lake.I don't have any photos so you'll all have to take my word for it.
The boat was loaded with a 1/2 load of fuel (6 uk gallons) ,5kg plough anchor, 18ft of 8mm chain & 180ft of 1/2" rode, & me
About 1550lbs all up.
The lake is about 1/4 mile long so I got some decent runs in upwind & down.
Some figures, bear in mind the engine is a 1983 vintage suzi DT60.....speeds from gps.
1000rpm .......5.3mph
2000rpm.......10mph
3000rpm .......17mph....planing
4000rpm........22mph
4500rpm........25mph...nice cruising speed
5000rpm........29mph
5300rpm(WOT)...32.5mph...dead stable, even in a hard turn
The max recommended rev range in the Clymer manual is 4800 to 5400, so I am pretty sure I am close with the prop.
There is a very slight porpoising at WOT, which I am sure a Doelfin or similar will cure.
Virtually no hole shot, straight up & go
, No slip in turns, it flies around like its on rails
The only chop I could run it in was my wake bouncing back of the revetment, but no spray or slamming even at WOT, but only the real world will prove the last point.
The best bit of the day?.....the guy at the slip who asked me where the custom build boatyard that built my hull was
I am a happy chap
Any thoughts on a fin for the cavitation plate?
Steve
Re: A British FS17
Posted: Thu May 13, 2010 4:33 pm
by sitandfish
To me it all sounds fantastic. And I am especially impressed in the way you buried your own weight in the "1550 lbs all up".
I'll let the experts recommend a doelfin but, they all seem to be great products to me. I have two. Real impressed with your documentation.
Very helpful.
Re: A British FS17
Posted: Thu May 13, 2010 5:09 pm
by TomW
Can't do any better with the prop Steve anything within 100rpms is very good. You'd be playing with fire to try to get anything better an 1" of pitch less would give you 2-250 more rpms but might give less mph, the same if you tried to decup the prop you have. Taking a little cup out would give you some rpm but again it may affect speed and handling. I'd stay with what you have. It sounds like it is tracking and really doing a good job for you. If your not getting any ventilation in hard turns you might try raising the motor up 1 hole and seeing how that works. That will give you some speed and rpm without changing the prop. We ended up with Kurt's FS down in Florida up 1 or 2 notches up with his 60hp Yamaha giving it some improvement each time.
As I recall Cracker Larry put on a Stingray this time but don't remember which one and recommended it to Macs.
The dockmaster's comment's had to make you feel GREAT!
Tom
Re: A British FS17
Posted: Thu May 13, 2010 5:22 pm
by BassMunn
Sounds good Steve, those are pretty good numbers for an old 60, it's obviously old but still good
I know a lot of guys like those dolphin fins, personally I don't. They are mainly designed to help get out of the hole, which you don't have a problem with, but they do help with porpoising but at the expense of a little speed due to the increased drag they cause.
I would try shifting a little weight further aft first before handing out the dough for a fin.
Your prop size sounds perfect, the only way to improve it would be to go stainless, it would give very slightly better performance and help with the porpoising, but you could buy a couple fins for the price of the prop.
So I would say try weight distribution first, if that fails try the fin.
Re: A British FS17
Posted: Thu May 13, 2010 5:24 pm
by BassMunn
steve292 wrote:
The best bit of the day?.....the guy at the slip who asked me where the custom build boatyard that built my hull was
I am a happy chap
Gotta love it
Re: A British FS17
Posted: Thu May 13, 2010 7:44 pm
by Cracker Larry
Those numbers look great with the old zuke
There is a very slight porpoising at WOT, which I am sure a Doelfin or similar will cure.
Does that engine have power trim? If so, can you stop the porpoising by trimming the engine down? A slight porpoise is normal at WOT and high engine trim, but if you can't trim it out, then a hydrofoil will stop it for sure.
I'll let the experts recommend a doelfin but, they all seem to be great products to me. I have two.
They are great products for light and fast boats. I've owned 4 or 5 Doel Fins and they improved the handling of every boat I put them on. I've got a Stingray now, my first one and I'll say that it has more authority than a Doel Fin. Before I put the fin on, the boat would porpoise at high speeds and I couldn't completely correct it by trim, even with 40 gallons of fuel under the casting deck, the bow would bounce. The fin completely stops this and lets me trim the boat to any sea condition. I can trim the bow up high in a head sea or trim it down in a following sea. I can trim it down enough now to actually stuff it. Got to be careful with that
This stingray fin is like having trim tabs.
That being said, it's also slowed my top speed down about 4 mph, and lowered my max RPM by about 400. She was perfectly propped before adding the fin. To get right again I need to either raise the engine, or buy a new prop, or both
Or not
The engine is high now and can't go much more without ventilation. I never go that fast anyway, but I don't want the engine to lug either. I've got a jackplate on order from Joel, that will help some I think. Just a matter of time before I bust this prop and have to replace it anyway
Doel Fins have never given me the large reduction in speed and RPMs that the Stingray has, and has always solved my porpoising problems in light, fast boats, but the Stingray has more power to it. I love it for trim control, but I don't like it for RPM loss. I'm past the statue of limitations with my dealer in swapping props
To sum this up, my opinion only, if you can't stop the porpoising with power trim, then a Doel Fin will solve it at a minimum speed and RPM loss. The Stingray is more extreme and you will probably have to re-prop, and will still loose some speed. It's fairly large and has a lot of drag, but it also has a LOT of lift and will sure get the bow down.
Doel fin on GF16..

Stingray on OD18

They are mainly designed to help get out of the hole,
Not at all, that just one of many benefits
quoting Stingray marketing
The StingRay™ Hydrofoil Stabilizer applies the laws of physics to provide the extra performance every boat needs. It’s aerodynamic design creates a higher water pressure on the underside of the hydrofoil surface, which creates lift to bring the stern up and force the bow down. No other product improves performance so dramatically.
I agree with all that, but the higher pressure decreases prop RPM. They don't tell you that
Unlike other so called foils, the StingRay™ keeps on improving performance once the boat is up and running. In addition to providing a superior hole shot, the StingRay™ lets the boat cruise at lower speeds, stops porpoising, eliminates chinewalking, stabilizes handling, increases top end speed and improves fuel economy.
I agree with everything except higher top end speed. Not on my boat anyway.
Re: A British FS17
Posted: Thu May 13, 2010 8:55 pm
by TomW
Nice report on the fin Larry.
Good info to have.
Tom
Re: A British FS17
Posted: Thu May 13, 2010 9:30 pm
by cape man
Steve,
ABOUT time you got that girl back out. Great report. You must be a happy camper! Have a pint of cider for me!
Re: A British FS17
Posted: Sun May 16, 2010 7:23 am
by steve292
Thanks for the replies & opinions. I had more or less decided on a fin, but Cl reply has tipped me toward the lighter(& cheaper)
fin rather than the aluminuim one I had considered, which was very much like CL's stingray. The reasoning behind this is I don't have a bad porpoise & it only happens right at WOT. Ithink between that & Bassmuns suggestion of weight distribution I'll get it
Thank you for taking the time to post such a considered & insightfull reply, Larry.
Does that engine have power trim? If so, can you stop the porpoising by trimming the engine down? A slight porpoise is normal at WOT and high engine trim, but if you can't trim it out, then a hydrofoil will stop it for sure.
It has PTT & trim but I couldn't get rid of the porpoising by trimming. I may be chasing perfection, as I know people who have the same characteristic, & just reduce speed by 1-2 mph, but I figure why come all this way & stop now?
If your not getting any ventilation in hard turns you might try raising the motor up 1 hole and seeing how that works. That will give you some speed and rpm without changing the prop
Thanks Tom, I'll try that if the fin rips too much off the speed & rpm.
BassMunn wrote:steve292 wrote:
The best bit of the day?.....the guy at the slip who asked me where the custom build boatyard that built my hull was
I am a happy chap
Gotta love it
Funny thing is I am storing the outfit at a Leisure storage facility about mile from the house, as I want the drive clear to do some stuff, & the yard foreman said much the same thing, followed by..."no...your kidding, did you really build it?.. thats great"
& 25minutes of questions
And I am especially impressed in the way you buried your own weight in the "1550 lbs all up".
Re: A British FS17
Posted: Tue Jun 08, 2010 10:22 am
by jgroves
Hey Steve! Man your boat looks great and I'm excited to see your numbers on it! I really dig the high sides!
I peep in ocassionally to look at the builds but not as much as I should. I hope you enjoy yours as much as I do mine. It's hard to imagine what I did before a boat
Re: A British FS17
Posted: Tue Jun 08, 2010 1:45 pm
by cape man
About time for both of you to post some new pics of the boats and you having fun...
Re: A British FS17
Posted: Tue Jun 08, 2010 5:46 pm
by steve292
cape man wrote:About time for both of you to post some new pics of the boats and you having fun...
soon....working lots, & 3 years worth of house stuff to catch up on. weather is on & off too.
jgroves wrote:Hey Steve! Man your boat looks great and I'm excited to see your numbers on it! I really dig the high sides!
I peep in ocassionally to look at the builds but not as much as I should. I hope you enjoy yours as much as I do mine. It's hard to imagine what I did before a boat
Thanks jeremy, nice to hear from you again
steve
Re: A British FS17
Posted: Sat Jun 19, 2010 5:55 pm
by steve292
No pics as it was a bit to rough, but I went to Weymouth today, & fished the shambles bank, along with 5 other boats from the club I am in. The forecast was for a calm sea, but we were faced with a 3ft, closed spaced chop. The Fs handled it great, keeping going at a steady 12-13knts,just on plane, with only occasional windblown spray coming onboard. I also found out that I need to get 3/8 fuel hose instead of 5/16 because when running for a long period the engine is starving of fuel, & the primer bulb is collapsing. That coupled to the fact I had VHF trouble as well, & to be frank the fishing was crap, sent me in after 3hrs, with just a few mackerel & 2 dogfish to show for my troubles.160 mile round trip towing as well
...never mind if you don't go you don't know, do you.?
However, I towed down in the morning,due to work stuff, & the others went down on Friday & sampled the nightlif in weymouth, there were some fine sights when we were putting in
, that was some compensation.
Steve
Re: A British FS17
Posted: Sat Jun 19, 2010 9:10 pm
by colonialc19
Well, like you said, you don't know if you don't go
,
sounds like a productive trip all in all, you found out you needed a 3/8" fuel line, and that you need to work on your VHF,and the sight seeing is always a plus
Re: A British FS17
Posted: Thu Jun 24, 2010 3:53 pm
by Lower
A couple trips to work out the kinks and your good to go. Glad to hear your getting out and enjoying the boat! I too look foward to some new pics!
Re: A British FS17
Posted: Thu Jun 24, 2010 5:15 pm
by Cracker Larry
I also found out that I need to get 3/8 fuel hose instead of 5/16 because when running for a long period the engine is starving of fuel, & the primer bulb is collapsing.
Steve, the check valve in those chickensh@t primer bulbs are famous for failure and collapse. It may be as simple as a bad primer. I forget which engine you have, but if it's a 2 stroke especially be careful of running it hard while starving for fuel. This in effect leans out the fuel mixture, reduces lubrication and causes extremely high cylinder temps, hot enough to melt the pistons
Ask how I know
Re: A British FS17
Posted: Tue Mar 08, 2011 6:52 am
by TomD
Steve,
Great looking boat - was wondering whether you had some advice on good UK suppliers for fittings and deck hardware. I was at university in Bristol - but live in East Africa - am passing through the UK and was hoping to fill my suitcase with goodies....
Re: A British FS17
Posted: Tue Mar 08, 2011 8:30 am
by WobblyLegs
steve292 wrote:Some pics
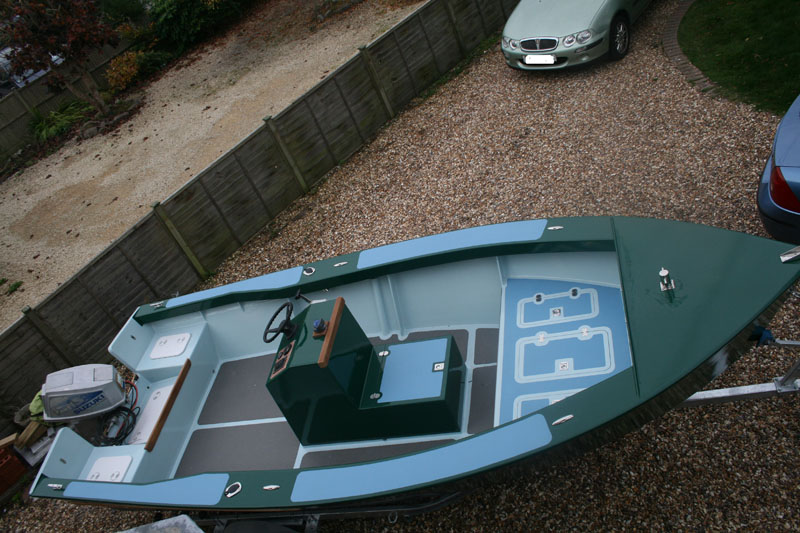
Hi Steve,
Been a long time since I visited your thread, and I must say the boat is looking very, very good.
Just one thing, based on a recent experience out at sea here where the sharks are, you night want to put a grab handle somewhere on your console - I did a fishing trip with a friend and granted, it was a two metre swell plus a chop, but without something to hold on to, you're going to get very wet. In fact, the skipper I went with was thrown overboard while driving a couple of weeks after that trip - it's only due to his anchor-man's quick thinking that he is still with us. And he had grab handles!
Enjoy the boat.
Tim.
Re: A British FS17
Posted: Tue Mar 08, 2011 4:20 pm
by steve292
TomD wrote:Steve,
Great looking boat - was wondering whether you had some advice on good UK suppliers for fittings and deck hardware. I was at university in Bristol - but live in East Africa - am passing through the UK and was hoping to fill my suitcase with goodies....
I got a lot of my stuff off ebay, but I'll have a look through to see for you, after anything in particular? When are you passing through?
WobblyLegs wrote:
Hi Steve,
Been a long time since I visited your thread, and I must say the boat is looking very, very good.
Just one thing, based on a recent experience out at sea here where the sharks are, you night want to put a grab handle somewhere on your console - I did a fishing trip with a friend and granted, it was a two metre swell plus a chop, but without something to hold on to, you're going to get very wet. In fact, the skipper I went with was thrown overboard while driving a couple of weeks after that trip - it's only due to his anchor-man's quick thinking that he is still with us. And he had grab handles!
Enjoy the boat.
Tim.
Thanks Tim, hows the nipper?
Believe it or not I have some grabrails on the way for the gunwales ( iroko, i found them on the bay of E cheaper than I can buy the material) & am sourcing some for the console, probably stainless.
I have decided there is something not quite right about the console & am thinking about making a new one, but a grabrail for it is on the cards.
Nice to hear from you again.
Steve
Re: A British FS17
Posted: Tue Mar 08, 2011 4:41 pm
by TomD
Steve,
I am in the UK for the next 2 weeks - see the relatives and friends etc. Was looking for hinges and latches for C19 I am building as well as steering cable and wheel and also a washdown pump and thru hull fitting! Not sure suitcase is big enough!
Re: A British FS17
Posted: Tue Mar 08, 2011 5:14 pm
by steve292
http://www.nautequipe.co.uk/ - try these for steering
http://stores.ebay.co.uk/imsuppliesboatingchandlery - general bits
http://stores.ebay.co.uk/Ride-The-Waves ... 4340.l2563 I got most of my cleats, bow roller, through hulls from here.
http://stores.ebay.co.uk/stainlessbolts ... 4340.l2563 - good for stainless bolts
If you have the time to search e-bay will yeild most stuff.
Where are you?
Steve
Re: A British FS17
Posted: Tue Mar 08, 2011 6:39 pm
by TomD
Am in London at the moment but was thinking of taking a trip to Bristol to catch up with some old friends one of these weekends.Where is your boat based?
Re: A British FS17
Posted: Wed Mar 09, 2011 4:32 am
by steve292
I am just outside weston super mare, 20 miles south of Bristol.
I work shifts,so you take pot luck if i'm about but if your in the area & I am ,let me know & i'll get the boat out of the storage compound to show you. you are more than welcome to come for a beer/coffee/bullshit
Steve
Re: A British FS17
Posted: Fri Jul 22, 2011 3:03 pm
by Marshall Moser
I haven't read the entire thread to see if you said already but, how many extra sheets of ply did you use with the additional sheer and the gunnels?
Re: A British FS17
Posted: Fri Jul 22, 2011 4:50 pm
by steve292
I used 5 extra sheets of 6mm IIRC. 4 for the raised sides & one for the gunwales.
steve
Re: A British FS17
Posted: Sat Jul 23, 2011 9:52 am
by Marshall Moser
thanks for the info.
Re: A British FS17
Posted: Mon May 03, 2021 1:01 am
by TomW1
Hey Steve how are you and the family with the British Covid problem. I know it has been 10 years since you built that beautiful raised sheer FS17 but I always remember it. Do you still have it.. I know you really liked how it performed for you. I sent you an e-email in case you don't see this.
Regards and hope all is well.
Tom Wolery, North Carolina
Re: A British FS17
Posted: Wed Jun 16, 2021 6:23 pm
by steve292
TomW1 wrote: ↑Mon May 03, 2021 1:01 am
Hey Steve how are you and the family with the British Covid problem. I know it has been 10 years since you built that beautiful raised sheer FS17 but I always remember it. Do you still have it.. I know you really liked how it performed for you. I sent you an e-email in case you don't see this.
Regards and hope all is well.
Tom Wolery, North Carolina
Hi Tom,
Thanks for asking. We are ok, and my wife and i have just had our 2nd vaccinations. I still have the boat although it's not seen that much use, life got in the way.
I have rejoined the forum as I may either build something or renovate the one I have....watch this space
Re: A British FS17
Posted: Wed Jun 16, 2021 6:34 pm
by cape man
Dude! So good to see you back! Have to tell you someday the story of playing bingo and dancing with the pensioners at the hotel bar my last night there. What are you thinking of building?
Re: A British FS17
Posted: Wed Jun 16, 2021 8:31 pm
by steve292
cape man wrote: ↑Wed Jun 16, 2021 6:34 pm
Dude! So good to see you back! Have to tell you someday the story of playing bingo and dancing with the pensioners at the hotel bar my last night there. What are you thinking of building?
i can imagine the dancing
. I probably won't build anything, but I am thinking of dragging the FS17 home from storage and setting about it. I may build something small, a 'yak maybe.
How are you keeping ? I hesitated before writing that because of the times we find ourselves in, so I hope I find you and yours safe.
Re: A British FS17
Posted: Wed Jun 16, 2021 8:38 pm
by steve292
Although I like the look of the Novi23................
Re: A British FS17
Posted: Wed Jun 16, 2021 9:44 pm
by Fuzz
Funny how small the world can be. I have a daughter in a PHD program at Bristol. If she does her part I am guessing I will have to make a trip there in a year or so if this covid crap allows.
Re: A British FS17
Posted: Thu Jun 17, 2021 2:28 pm
by steve292
Fuzz wrote: ↑Wed Jun 16, 2021 9:44 pm
Funny how small the world can be. I have a daughter in a PHD program at Bristol. If she does her part I am guessing I will have to make a trip there in a year or so if this covid crap allows.
Be a bit more crowded than Alaska.
Re: A British FS17
Posted: Thu Jun 17, 2021 2:45 pm
by TomW1
Steve glad all is well and understand about things getting in the way.
Regards, Tom
Re: A British FS17
Posted: Fri Jun 18, 2021 10:41 am
by cape man
i can imagine the dancing
.
It was busload from a suburb of London, and the ladies wanted to dance but only a few of the old men were interested. One guy who was pretty much trashed actually got in my face for dancing with his wife, but a whole group got in between us and settled him down. He later actually fell off his chair!!!
They kept me up until well after midnight, and did a good job of getting me snockered. Was actually one of the highlights of that trip. I think I told you but I also spent a whole day driving as far as I could through the northern part of Wales which was amazing. Thank God they used letters and numbers for the roads, because I couldn't have navigated with names like llanfairpwllgwyngyllgogerychwyrndrobwllllantysiliogogogoch!!
How are you keeping ? I hesitated before writing that because of the times we find ourselves in, so I hope I find you and yours safe.
We made it through Covid with no real issues. My job was deemed essential and I worked throughout, but had to cancel all travel. No one here or any of the their family members got it.
I got my second shot the second week of April, and have been behaving as if I am 95% immune since. I finished the OD 18 and have been using it pretty hard, and built an SC18 a few years ago for slow, inland/shoreline use. Actually heading down to the Florida Keys tomorrow with the OD18 and hoping to take it offshore if the weather allows. Have an FS18 that a builder here started in the barn waiting for me to get motivated...
Have a retirement countdown that is below 2 years now, and planning a MAJOR road trip across North America (Key West Florida to Deadhorse Alaska and back) in the Spring/Summer of '23. I'm sending you a PM so we can communicate by email. My offer is still good if you ever get to Florida.
Re: A British FS17
Posted: Fri Jun 18, 2021 5:56 pm
by steve292
Thats great to hear Cape Man. If you are ever over this way , I still live in the same place you are welcome through my door any time.
I've had my two shots as well, but we still stick to the "i've got it or you've got it lets not spread it" way of behaving regarding masks and social distancing.
I, and my wife are essential workers and have worked all the way through. ATM I am tested when om shift twice a week and my wife tests 3 times a week at the school where she works.
The PM sound great. I will PM you my Mail address.
Re: A British FS17
Posted: Fri Jun 18, 2021 5:57 pm
by steve292
TomW1 wrote: ↑Thu Jun 17, 2021 2:45 pm
Steve glad all is well and understand about things getting in the way.
Regards, Tom
Thanks Tom. Are you and yours OK?
Re: A British FS17
Posted: Fri Jun 18, 2021 8:21 pm
by Fuzz
steve292 wrote: ↑Thu Jun 17, 2021 2:28 pm
Fuzz wrote: ↑Wed Jun 16, 2021 9:44 pm
Funny how small the world can be. I have a daughter in a PHD program at Bristol. If she does her part I am guessing I will have to make a trip there in a year or so if this covid crap allows.
Be a bit more crowded than Alaska.
Not sure how much worse it can be. I went to town today and had to wait on two cars before I could pull out onto the road
Re: A British FS17
Posted: Fri Jun 18, 2021 10:49 pm
by Jaysen
Fuzz wrote: ↑Fri Jun 18, 2021 8:21 pm
steve292 wrote: ↑Thu Jun 17, 2021 2:28 pm
Fuzz wrote: ↑Wed Jun 16, 2021 9:44 pm
Funny how small the world can be. I have a daughter in a PHD program at Bristol. If she does her part I am guessing I will have to make a trip there in a year or so if this covid crap allows.
Be a bit more crowded than Alaska.
That’s what you get for going into town at rush hour.
Not sure how much worse it can be. I went to town today and had to wait on two cars before I could pull out onto the road
Re: A British FS17
Posted: Sun Jan 07, 2024 7:22 pm
by TomW1
steve292 wrote: ↑Fri Jun 18, 2021 5:57 pm
TomW1 wrote: ↑Thu Jun 17, 2021 2:45 pm
Steve glad all is well and understand about things getting in the way.
Regards, Tom
Thanks Tom. Are you and yours OK?
Well as can be as we both hit our 70's.
Tom