Page 1 of 1
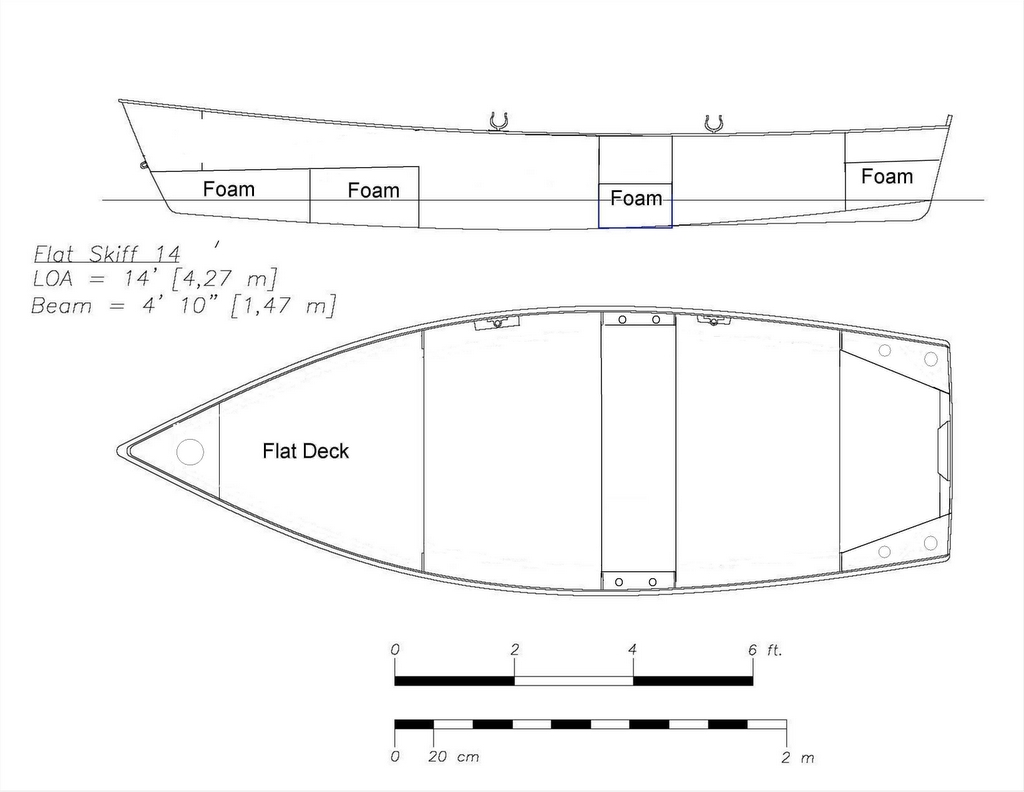
Baba’s FL14: MadMax in Toronto
Posted: Mon Feb 13, 2006 11:09 pm
by baba101
Everybody thinks I have gone crazy¦.and sometimes I wonder if I really have¦ this virtual community of boat builders is not real¦¦well I am going to find out¦stay tuned as Baba starts his first Boat building project.

Quick history: (How did this happen¦?)
I would have to blame my ex-boss Martin¦he showed me this website and talked about the Stitch and glue method for building boats: sounded easy, so I started lurking on
http://boatplans-online.com ¦.reading discussion forums¦just being invisible. Two years later.. realized that I had become an addict¦I had to build a boat or I would go crazy. God Damn it¦Here I am¦
Don™t know anything about boats¦never really been in one either¦I have seen people in em ¦and its looks kinda fun. That™s about it¦oh and another thing¦I am not a handy man either¦until six months ago¦I had never even used a drill machine. If I fail this project I will be letting down the geeks of the world¦.Well that just ain™t gonna happen.

Target Start Date: April 1st 2006 (still too cold here)
Target Finish Date May 1st 2007.

Preparations so far:
I have a mental picture of how œMadMax 1
Posted: Tue Feb 14, 2006 2:09 am
by Mike Adams
Hi Baba! As you've discovered by now, this is not so much a hobby as a disease...!

Thanks for the kind words -

- not sure they're deserved, but if I can help, just ask via the forum or direct by my email link.
Best of luck with your build - just take your time and you'll be fine. Enjoy!
Don't forget to post pics of your progress.
Cheers from Oz,
Mike
Posted: Tue Feb 14, 2006 9:27 am
by gunner
Good luck. I have a similar strt date planned. I believe at this time I will build the OD16 as it is the boat that addicted me to the site. I also priced plywood at Noahs but I plan to do as you did and get the fiberglass kit here. I have motor/ trailer and an old bowrider that is too long in the tooth to be a practical repair. My present assests will let me get into the boatbuilding again at a minimum investment for the first boat.
We are in the same area. lets keep in touch and good luck!
Posted: Tue Feb 14, 2006 10:08 am
by MadRus
Baba you've got it bad, man. You're already making promises to the wife- excellent. Welcome to the ward.
You'll do fine. Patience is key, and use everyone here if you run into problems.
Posted: Mon Mar 06, 2006 2:05 am
by baba101
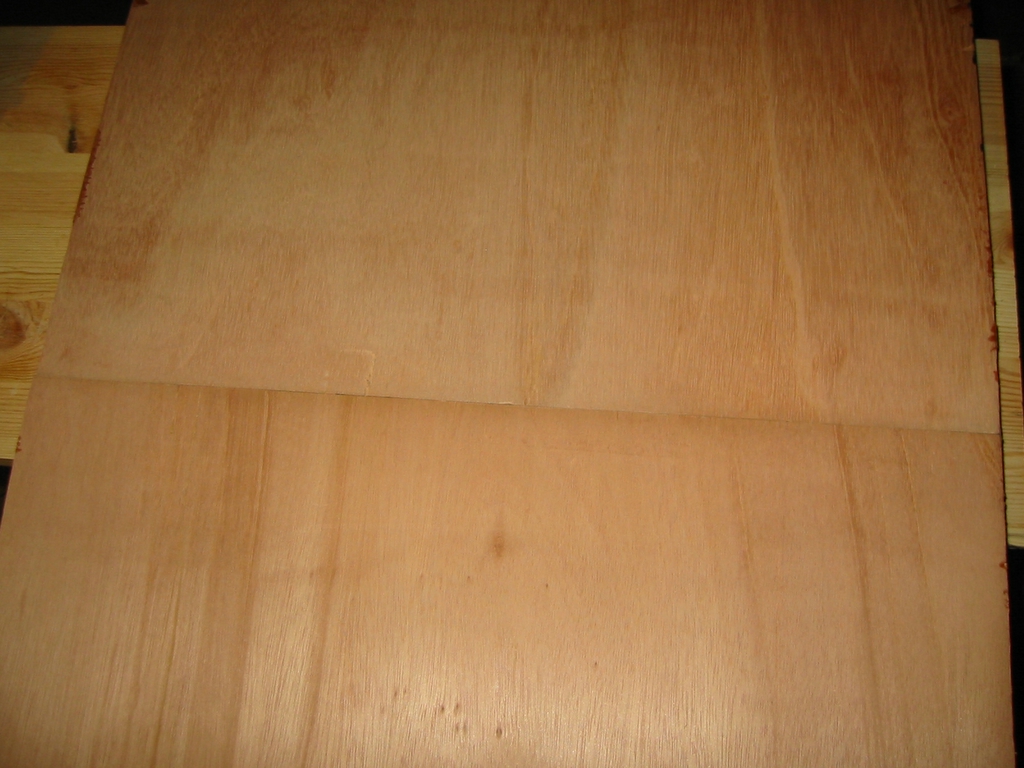
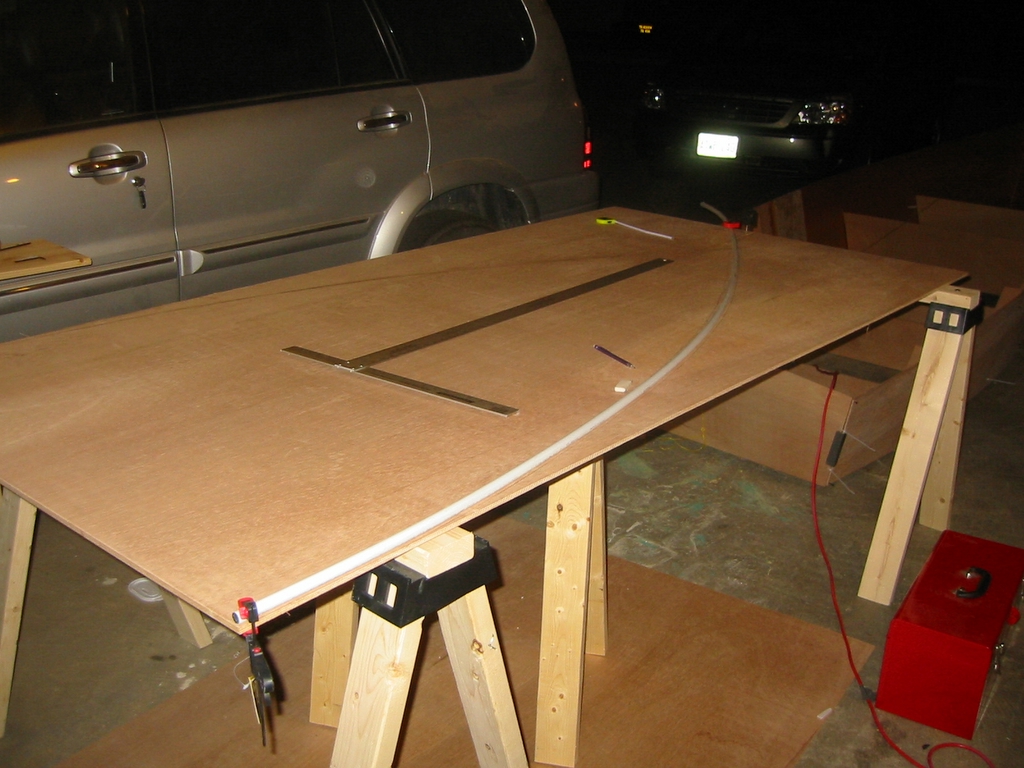
The weather is pretty warm in Torornto for this time of year...so picked up the Meranti BS6566. Thought I'd get a head start...
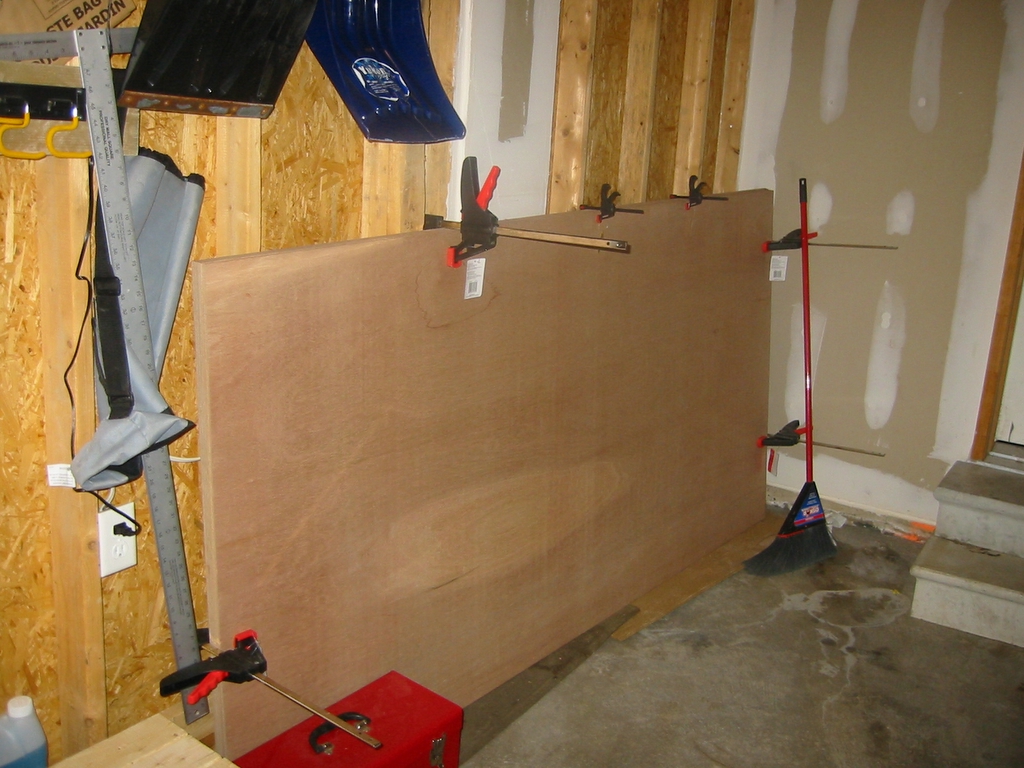
4 hours to scribe the dimensions
and another 4 hours to cut the pieces
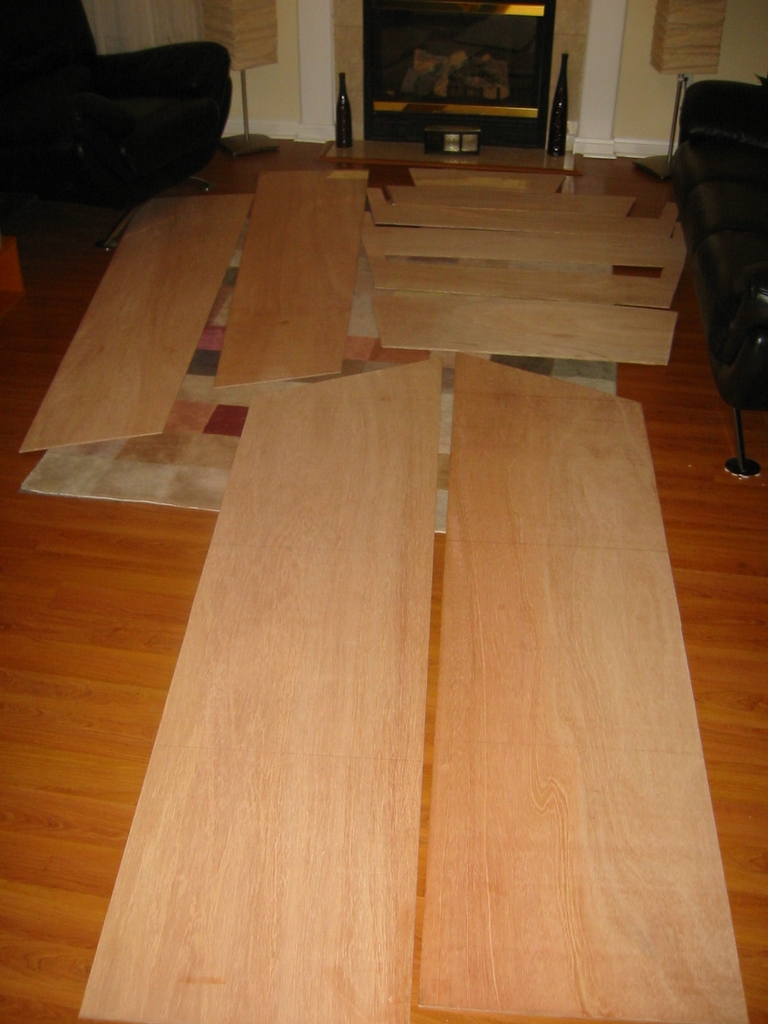
This ply splintered quite badly when cutting across the grains..changing to different types of Jig Saw blades did not help. Finally applying hocky tape to the cut lines worked...here is the mug shot of the splintered cuts (done without Hocky Tape).
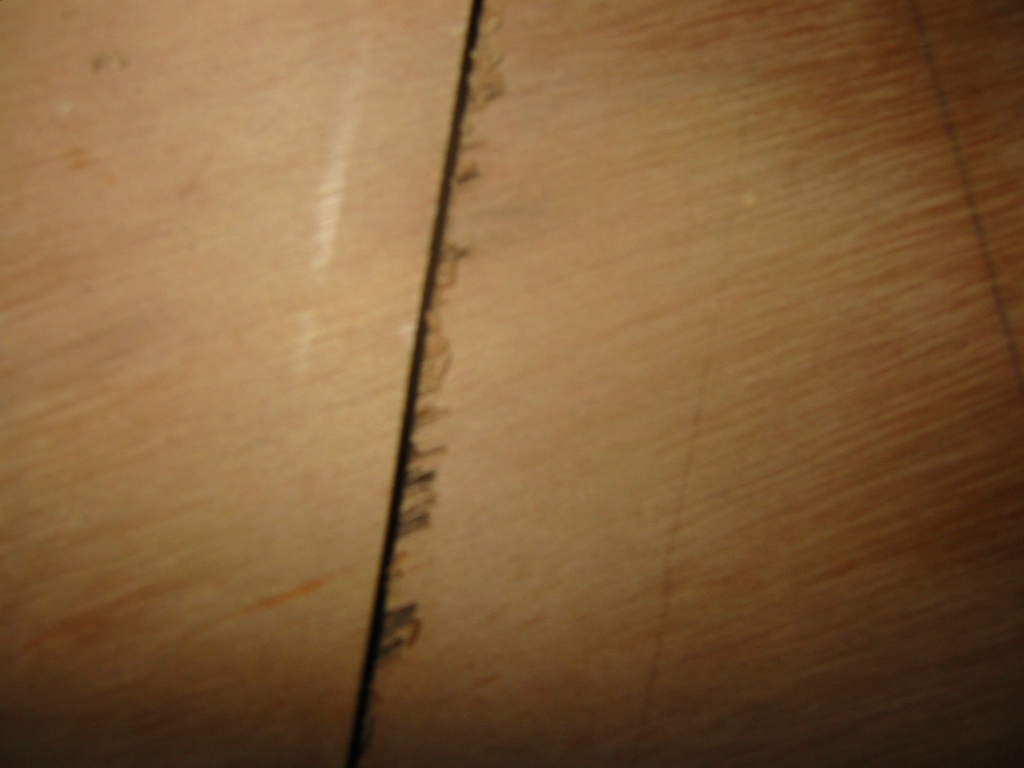
I found this ply to be too light and fragile...
.....No believers in the family yet...
Posted: Mon Mar 06, 2006 5:51 am
by Mike Adams
Good to see you've started, Baba!

It is easy to splinter any plywood with a jigsaw when cutting across the grain - it needs a fine toothed blade and a fairly slow, steady cut to avoid doing this, and even then it sometimes happens. (I used a metal blade rather than a wood blade because it has much finer teeth). Don't worry about it - the edges will all be covered with epoxy and glass tape, anyway!
Looking forward to more pics....
Posted: Mon Mar 06, 2006 11:03 am
by rjezuit
Good progress Baba. reminds me of me about a year ago. Rick
Posted: Tue Mar 07, 2006 1:43 am
by baba101
Thanks Rick and Mike....
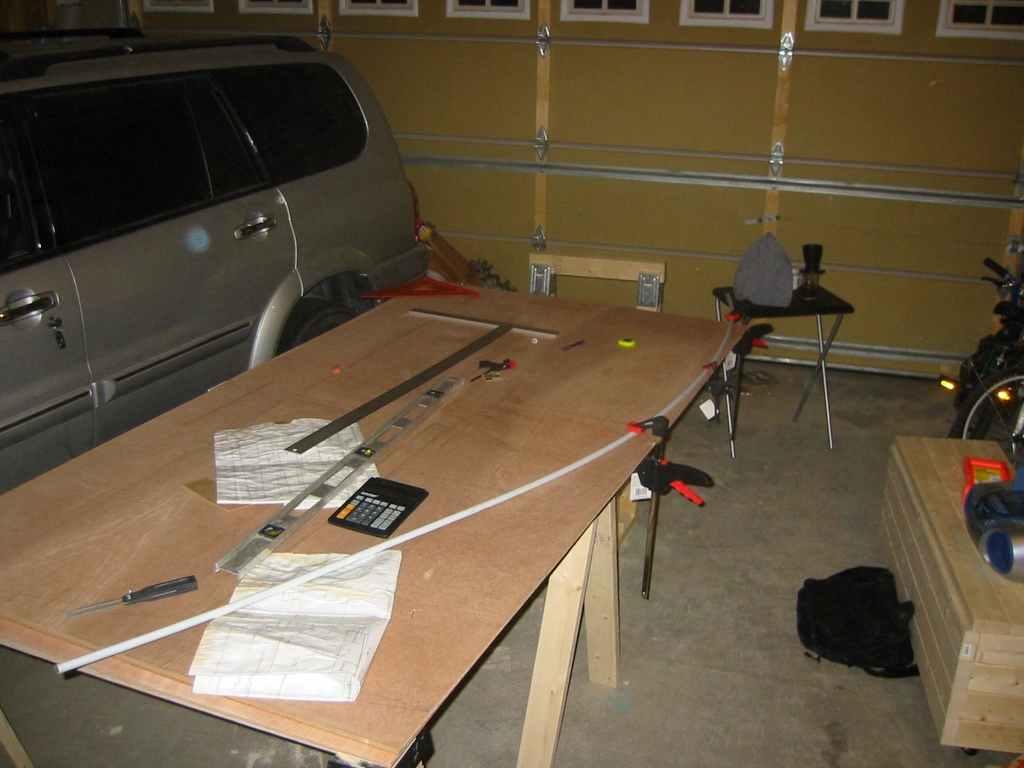
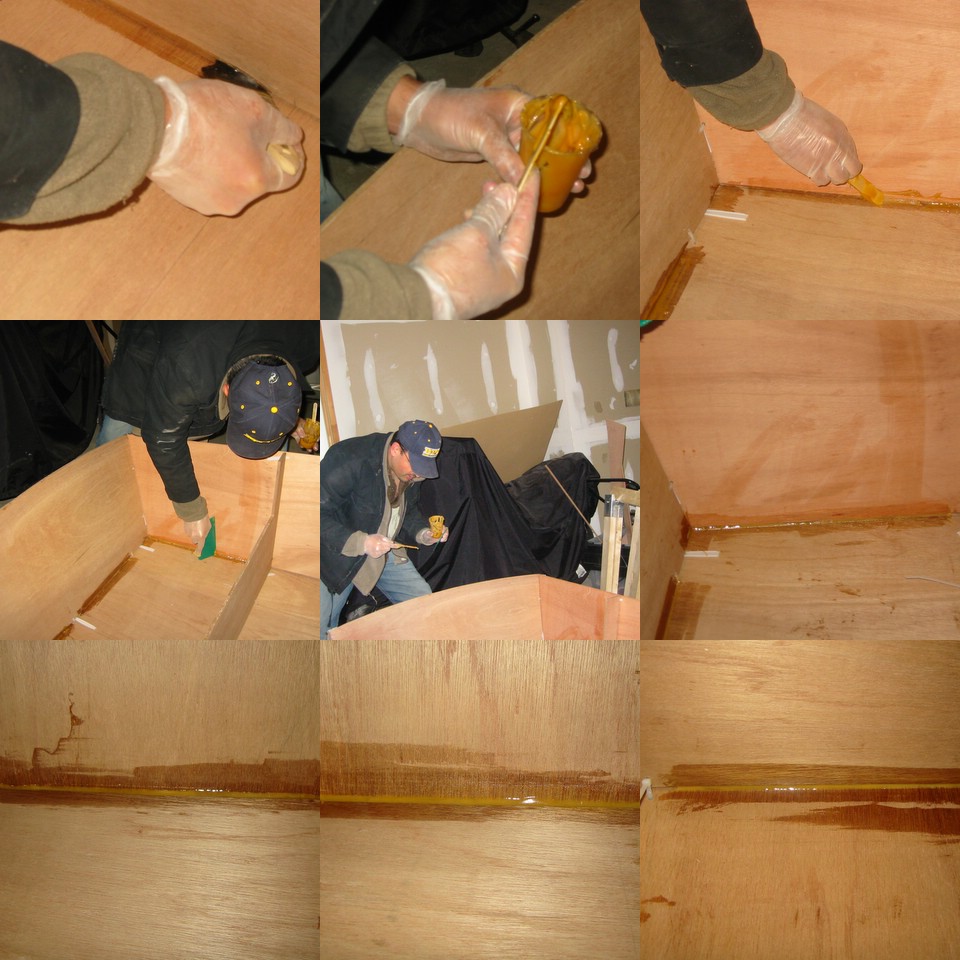
Brushes with attitude....topless and grounded...trimmed the tops and added epoxy to the bottom.
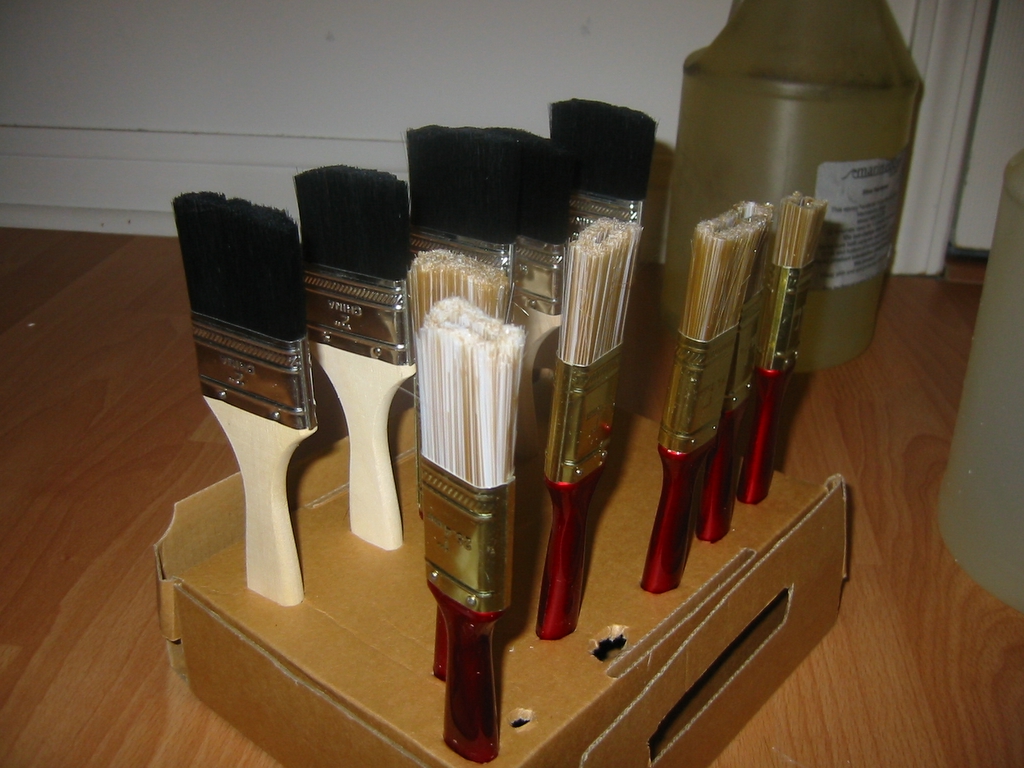
Yours Truly...not taking any chances with epoxy or the cold winter nights of Toronto...
:

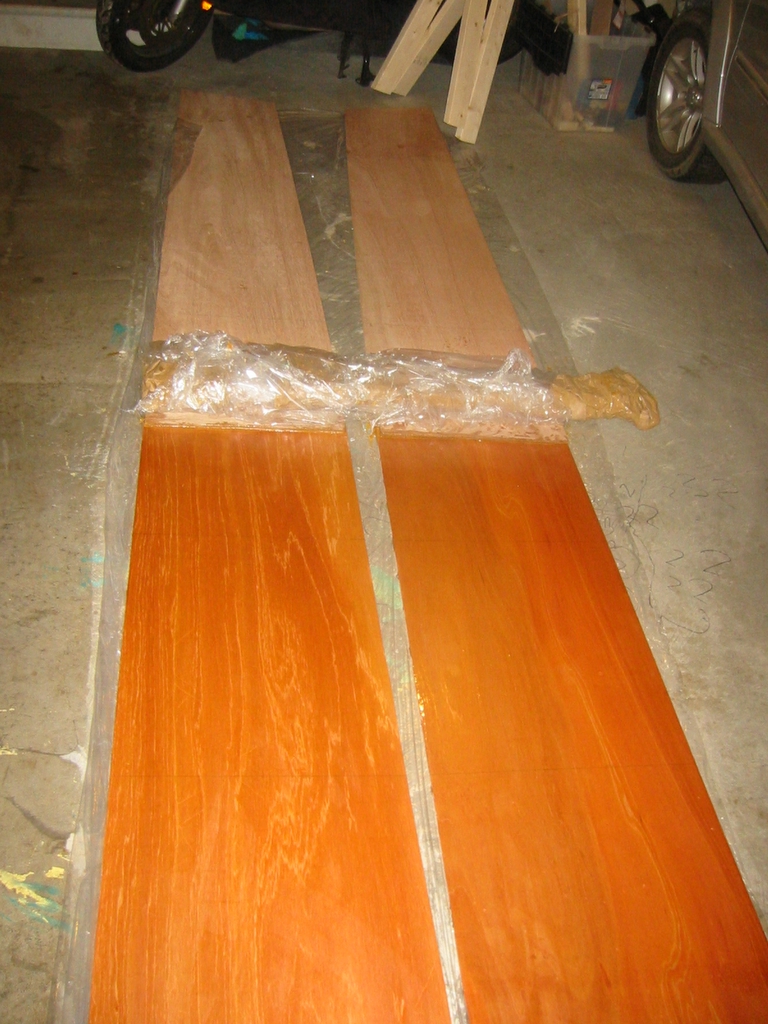
Long panels are now bonded...kept thinking about peanut butter consistency...looked more like melted Toffee when I applied it...I don't know if it was too much or too little...
Sanded the sides, wiped with tissue dipped in Ocetone, dried and then applied epoxy resin followed by the toffee glue...

About 7 hours for all this and clean up...also includes a child lock I installed to the Garage entrance ...:lol
Posted: Tue Mar 07, 2006 3:18 am
by Mike Adams
Baba,
It looks like you are epoxy coating the panels before assembly - you might find it difficult to bend the panels if you do this.
Mike
Posted: Tue Mar 07, 2006 9:30 am
by baba101
Emmmm....I had like 0.5 OZ of resin left in the jar...thought I would just apply it on a few inches of the panel...but the thing just kept on spreading...
Should I sand it down...?
Posted: Tue Mar 07, 2006 10:09 am
by Gubbs
I had the same thing happen with my V-12. No problems bending the panels. I would say don't worry about it until it becomes a problem.
Cheers
Posted: Tue Mar 07, 2006 10:16 am
by baba101
Gubbs wrote:I had the same thing happen with my V-12. No problems bending the panels. I would say don't worry about it until it becomes a problem.
Cheers
I am thinking if one side of the panel is stiffer than the other...that might cause the boat to be lopsided...
should I double the mistake and to the same Sh*t to the other side...

I.e a super thin coat of Epoxy on one half of the other panel...

Posted: Tue Mar 07, 2006 10:24 am
by chrisobee
You could epoxy the other side but I don't think that it will make a big difference. If you do the panels differently just look and see that the shape that is produced on both sides is fair amd similar. If not take it apart and epoxy and reassemble. I think you will find however that the difference is slight.
Posted: Tue Mar 07, 2006 11:03 am
by Gubbs
I had the same situation you have, one coated one not. I did not have any problems.
Cheers
Posted: Tue Mar 07, 2006 11:03 am
by rjezuit
With the relatively thin 1/4" ply, and the number of frames on the FL14, I doubt you will have a problem. Look for smooth curves and a fair hull. The small boats such as the FL series are very forgiving of errors. It is not a planing hull, so shape will be somewhat less important than on a bigger one that planes. I would not worry about it. Rick
Posted: Tue Mar 07, 2006 11:17 am
by ArizonaBuilder
This ply splintered quite badly when cutting across the grains..changing to different types of Jig Saw blades did not help.
I cut all my pieces using a circular saw with a min 100 tooth blade. Set the blade depth just enough to go through the wood, you can cut most of the curves with the circular saw. For really tight curves I would use the jigsaw.
Long panels are now bonded...kept thinking about peanut butter consistency...looked more like melted Toffee when I applied it...I don't know if it was too much or too little...
Remember, peanut butter for fillets and molasses for glue.

Posted: Tue Mar 07, 2006 11:31 am
by baba101
Guys...THIS is a wicked place to build a boat ....
Thanks for all the comments....
Posted: Tue Mar 07, 2006 11:39 am
by baba101
ArizonaBuilder wrote:Remember, peanut butter for fillets and molasses for glue.
"Molasses"...emmm so its more dilute than Peanut butter...Is that somewhere in the tutorials...?
I put a thin layer on each side...enough to make the grains disapear...and the consistancy was like peanut butter...Will I get a strong bond...?

Posted: Tue Mar 07, 2006 11:55 am
by Gubbs
Pre-coat ply with unthickened epoxy. then thin layer of peanut butter or molasses. press together. wait. won't be able to pull apart.
Cheers
Posted: Tue Mar 07, 2006 12:53 pm
by baba101
Gubbs wrote:Pre-coat ply with unthickened epoxy. then thin layer of peanut butter or molasses. press together. wait. won't be able to pull apart.
Cheers
HALALOOYA....
I am on a ROLL guys...

Posted: Tue Mar 07, 2006 4:28 pm
by ArizonaBuilder
baba101 wrote:ArizonaBuilder wrote:Remember, peanut butter for fillets and molasses for glue.
"Molasses"...emmm so its more dilute than Peanut butter...Is that somewhere in the tutorials...?
I put a thin layer on each side...enough to make the grains disapear...and the consistancy was like peanut butter...Will I get a strong bond...?
You can look at a tutorial here:
http://bateau2.com/content/view/99/28/
Jacques refers to the glue as having a consistency of ketup...
Posted: Tue Mar 07, 2006 5:24 pm
by Barney
Again, I too coated one panel of my V12 with epoxy and not the other, and had no problems bending.
With your jigsaw, I found that if I tried to cut too fast it would sort of tear and splinter the timber instead of making a nice clean cut. When I slowed down and didn't force the jigsaw through the cut I got much better results. I cut the whole boat with one very cheap timber jigsaw blade, and this held true right to the end.
Looks great, keep up the commentary - and Baba, its not just your family waiting to see how you go any more- you've got a whole lot of people from all around the world waiting to see how your boat turns out now!
Only difference is that we all know you'll do it
Posted: Tue Mar 07, 2006 6:41 pm
by ks8
Posted: Tue Mar 07, 2006 7:13 pm
by Rich_L
Why is this build taking so long!?
Posted: Tue Mar 07, 2006 7:30 pm
by MadRus
Rich, is that a terrier or an Irish wolf hound, or what? Kerry Blue? Maybe you've answered this before.
Posted: Wed Mar 08, 2006 11:21 am
by Rich_L
MadRus wrote:Rich, is that a terrier or an Irish wolf hound, or what? Kerry Blue? Maybe you've answered this before.
She's an Airedale terrier, 15 years old. And true to the breed, she's still active and curious into old age. But she's obviously pretty laid back in the picture, taken while she waited patiently for me to finish my V12.
Rich
Posted: Wed Mar 08, 2006 1:00 pm
by baba101
Yep...and in the Stitch and Glue 101 Tutoral

Its ....
"Epoxy glue is liquid epoxy resin mixed with woodflour to a peanut butter consistency."
The long panels are still bonding in my icy cooool Garage...I am going to give em two more days....

Posted: Wed Mar 08, 2006 1:39 pm
by tech_support
If ice will not melt, then epoxy will not cure
Posted: Wed Mar 08, 2006 3:08 pm
by baba101
Bottom on top or inside of the Long Panels...
I have seen some builders place the bottom ontop of the Long Panels and other have placed it inside (like the Stitch and Glue 101 Tutorial).
Whats your advice...I did not leave any gap on the butt blocks of the side panels to accomodate the bottom inside....but am willing to sand if that is the only way to do it...
Thanks in advance...
Posted: Wed Mar 08, 2006 4:02 pm
by rjezuit
I put the plywood on the bottom of the boat, traced the outside, cut and stitched. Then when glassing I put a generous radius at the joint. Rick
Posted: Wed Mar 08, 2006 5:02 pm
by Mike Adams
I did the same as Rick. You will find this easier than trying to stitch the bottom to the inside edges of the sides and leaving a gap. For a displacement hull like the FL14 hard spots are not a real issue, and if the bottom panel sits evenly on the edges of the sides, as mine did, it will be just fine.
Posted: Wed Mar 08, 2006 11:22 pm
by baba101
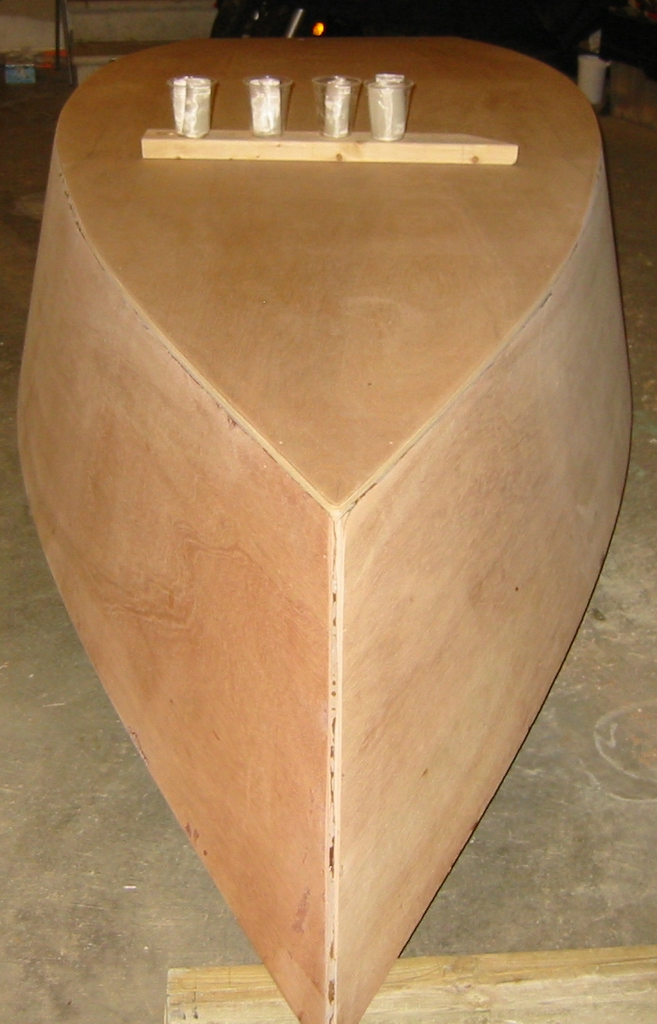
Yes I went ahead and epoxied the other wing...slap on the wrist - Tisk Tisk...Bad Baba..!
Used these cups to accurately measure small amounts of Epoxy+Hardner (less than half an oz).
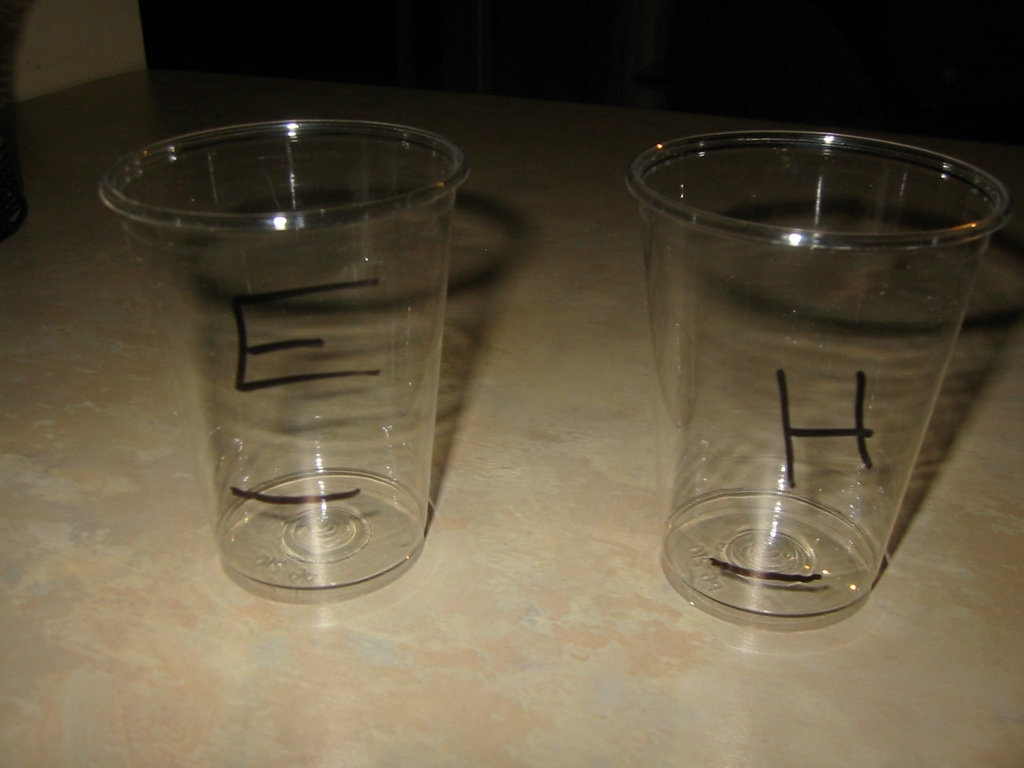
48 hours later and the Epoxy is still getting harder.....
 Let this be a warning to all you Torontonians out there....Don't start your builds yet...its still too cold.
 it may seem like summer but ice does not melt in the Garage just yet...Thanks shine for that input. I now have an ice cube in the garage and its melting extremely slowly.
Posted: Wed Mar 08, 2006 11:41 pm
by rjezuit
Baba, Mark a single cup with two lines. one for resin, the other hardener. Saves on transferring and cups. I did 6 ounce batches. Filled a cup with 4 oz. of water, marked the side. Put in another 2 oz. , marked it (2:1). Emptied and dried, marked a bunch and went to town. Rick
Posted: Thu Mar 09, 2006 12:00 am
by baba101
rjezuit wrote:Baba, Mark a single cup with two lines. one for resin, the other hardener..... Rick
Yeah.... thanks
Posted: Thu Mar 09, 2006 9:36 am
by tech_support
Hey Baba,
All you need it 55-60 degrees for the reaction to really get going. You could get those but blocks cured in half a day if you put a small electric bathroom heater on them.
Posted: Thu Mar 09, 2006 11:04 am
by rjezuit
I had the Marinepoxy cure last March/April with cold weather, frost/freezing outside in an unheated garage. It just took a little longer when it was in the 40's inside. Rick
Posted: Thu Mar 09, 2006 1:46 pm
by baba101
Bond baby Bond....! After 48 hours decided to throw money at this slow hardner....
Posted: Thu Mar 09, 2006 1:56 pm
by ks8
Because the panels are sitting on the floor, that area may stay even colder for longer even though the temps rise outdoors. As Shine said, aim some sort of heater at it. I used an IR element heater since it heats surfaces it is aimed at, and not the air. But of course, don't place it a foot away and set the thing ablaze. I kept mine 3 to 4 feet away, and the wood got very warm though 35 outside the tent (before I buitl the cathedral and used lightbulbs to heat under the double tent). With a heater, watch the clear wrap! It may be flammable with a low flashpoint. Monitor every hour or so when you first set it up. But in those cold temps, do use some sort of safe heater setup, and that goop will set right up in a day or two.
Whenever using any sort of heater, of course be extra careful and check it frequently the first hour, including how hot the plug is getting.
ks
Posted: Thu Mar 09, 2006 4:52 pm
by baba101
Baba will do whatever it takes....

Raised the wings, removed the plastic ; as suggested...This crazy heater is blowing luke warm air...I am working from my Garage today...and keeping a very close Eye..the epoxy is pretty hard by now...but I can still dent it with a sharp object.
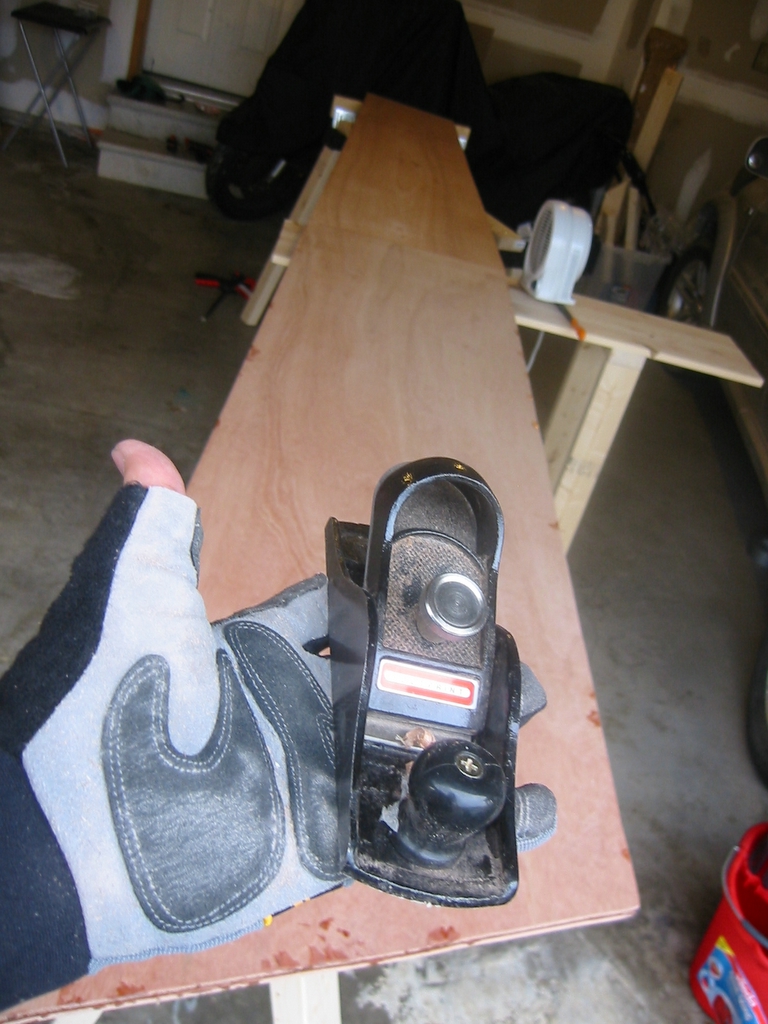
Made a new friend today....The Planer. Its good for scraping off Epoxy mess from Madmax...
Posted: Thu Mar 09, 2006 5:32 pm
by rjezuit
You will love the planer for taking off the raised edge off of the taped joints also. I did it that way and it worked great. Look into cabinet scrapers too. They work wonders on sags and drips. Saves on sanding, and you will appreciate it. Be careful when the weather breaks and you are working when its warm, the epoxy becomes an entirely different animal. Rick
Posted: Fri Mar 10, 2006 2:21 am
by baba101
Finaly Mr Luke (my crazy heater that only blows luke warm air) Came through for me. The Butt was Bonded pretty strong..here is the other side....
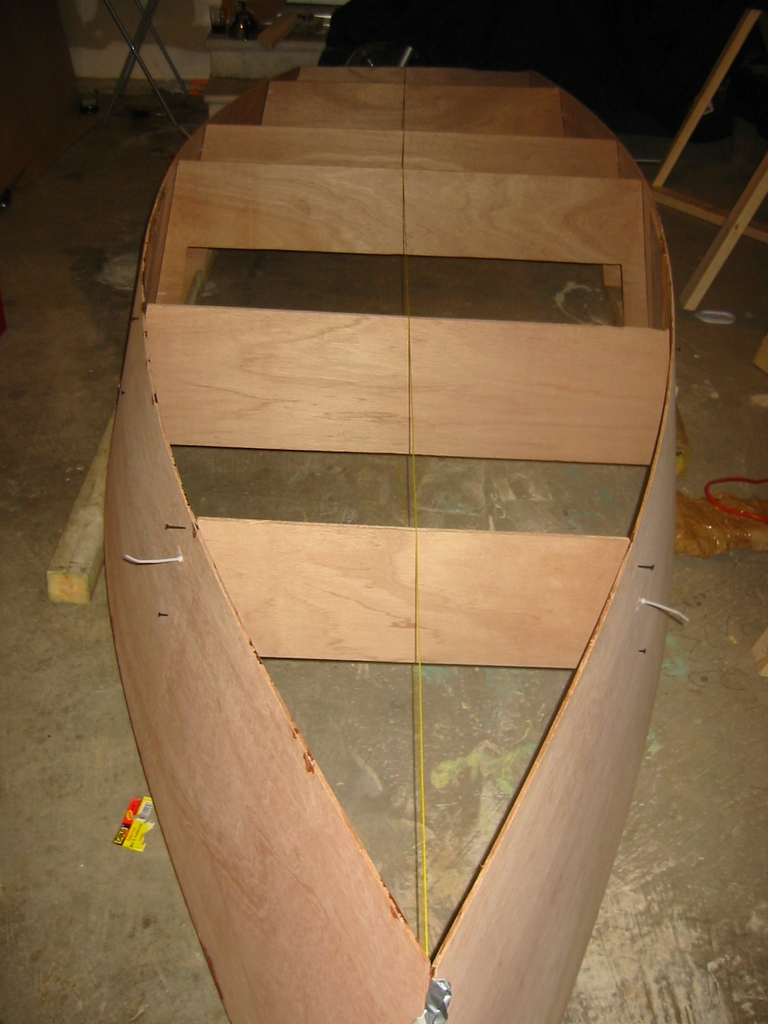
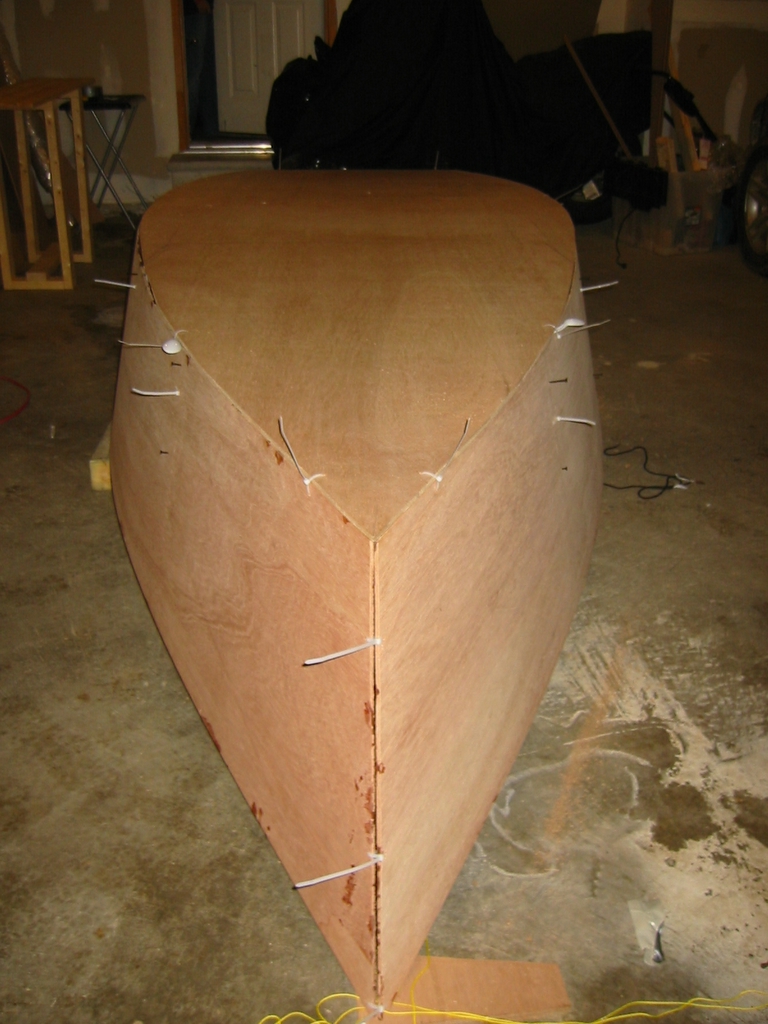
Stitched the bow with consistant slack using the pencil..kept them 10" apart and 3/8" from the edge.
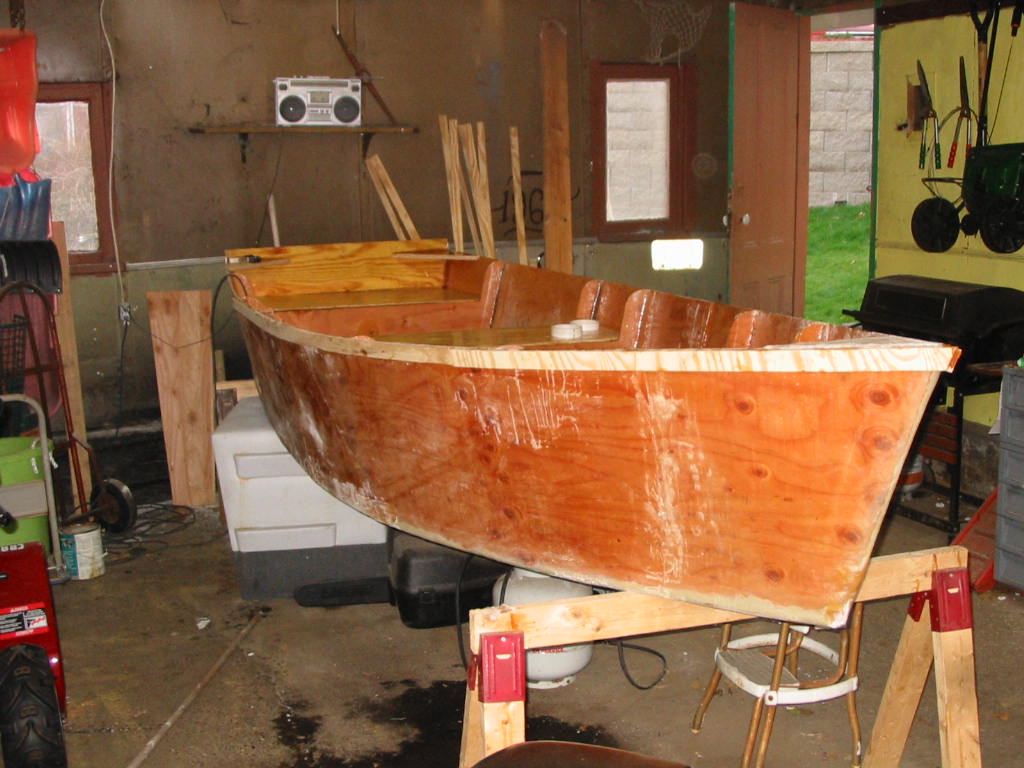
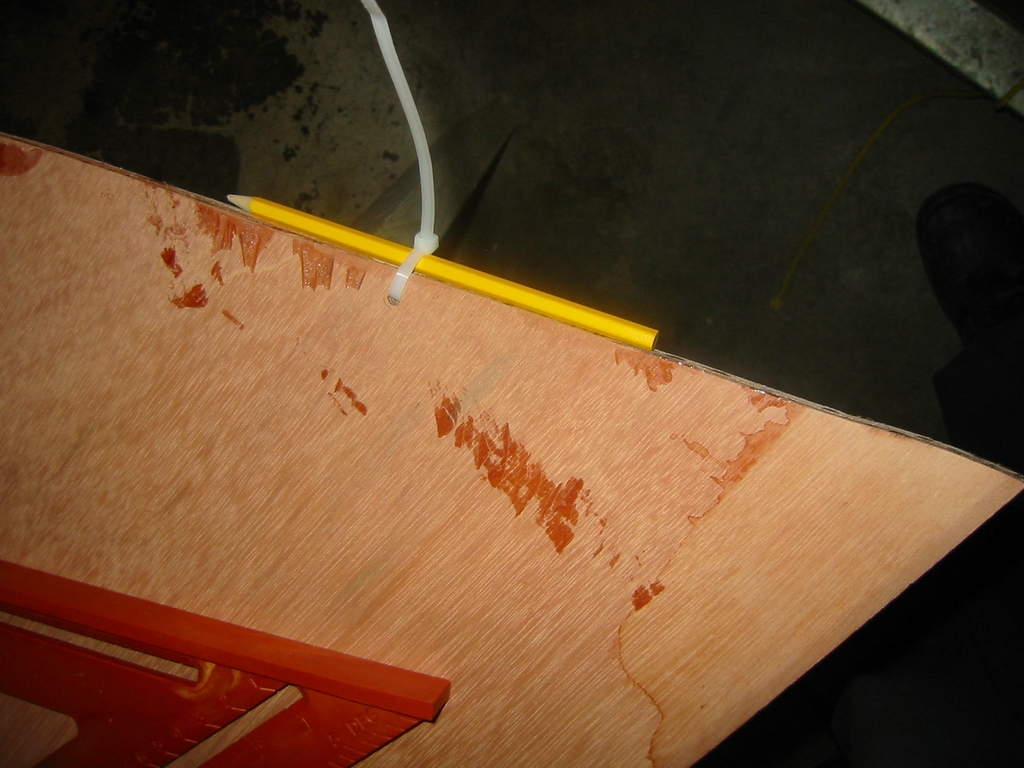 Gentlemen please welcome ....MadMax...
After the Butt was bonded it took 3 hours to get some of the frames tied... I reckon another three hours before I can take measurements for the bottom...
Posted: Fri Mar 10, 2006 8:46 am
by rjezuit
Baba, Flip it, measure diagonals, tighten the ties, measure, measure, measure and trace the bottom. Isn't it great when it finaly takes shape? Rick
Posted: Fri Mar 10, 2006 10:07 am
by baba101
Roger than Rick....
This weekend will be dedicated for measurements only...
Yes it feels good.....the cool thing is that no one has seen it...the garage stays locked.....
Posted: Fri Mar 10, 2006 1:22 pm
by LBrewer
Excellent! It's coming together very nicely.
Posted: Fri Mar 10, 2006 4:30 pm
by ks8
Go Baba Go!
Do lots of diagnol checking before mixing the goop for fillets, and hopefully the weather will be in the 50's or 60's F consistently soon, which makes fillets and taping much more productive. With large exposed surfaces of wet epoxy, you really don't want it dropping below freezing anymore. You could get frost, and then as it melts, you get water contamination in the still wet epoxy, so be patient with what you tackle next.
Have you decided to do spot welds and then wet on wet, or embed the tie wraps? I'm a fan of spot welds, though it adds more time, but its nice to know the fillets are clean and free of tie wraps when done. I have 6 pieces of wire stitches in forever, cause the panels were very stubborn there. Looks like you're having fun now!
Looking good!
ks
Posted: Fri Mar 10, 2006 6:58 pm
by Mike Adams
Baba,
I found it useful to run a stringline down the centre of the boat and check that it was perfectly symetrical. It only takes a few minutes to do and will ensure that you don't have any twist from stem to stern. Check the line is at right angles to the transom and that the distances to the sides on either side of the line at the frames are equal:
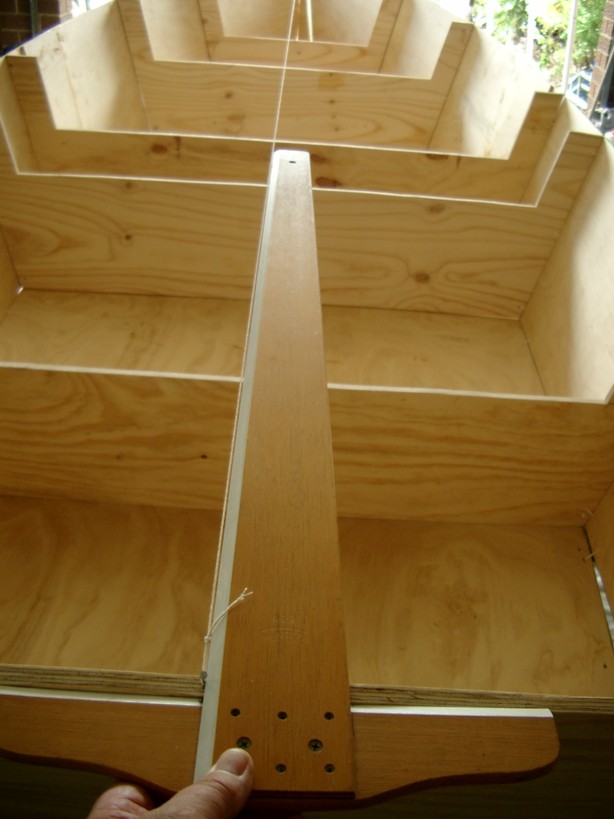
Mike
Posted: Sat Mar 11, 2006 12:14 pm
by baba101
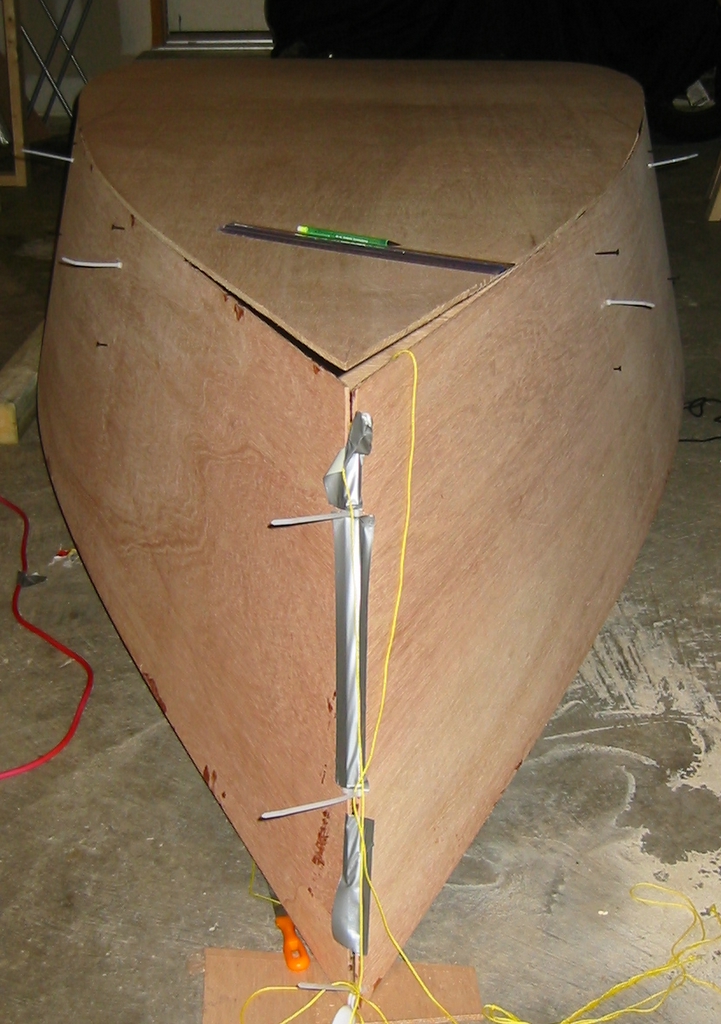
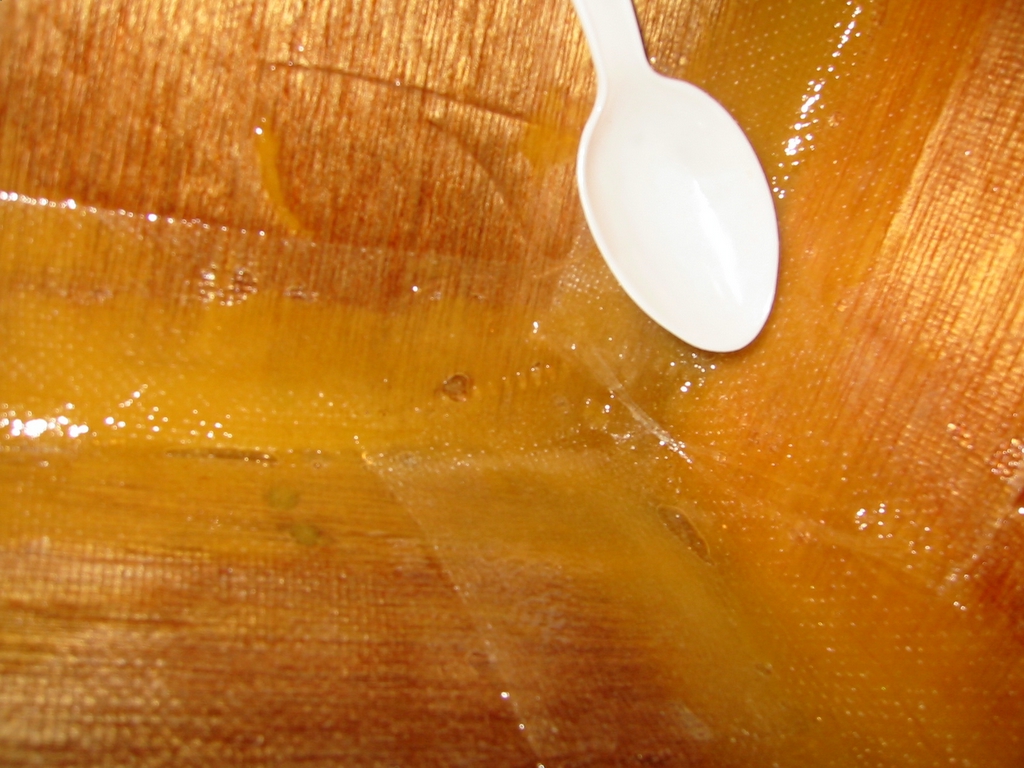
Inorder to keep a consistent gap between the joints I used the Sacrificial plastic spoons.
A combination of Tie Wraps and Dry wall screws were needed to control the gaps and the symmetry of the frame. Screws to push and Tie wraps to pull.
So I started the measurement process...Used the strings like Mike Said...added one at the bottom too...I could easily move the Transom to get a perfect symmetry...but only a slight movement was needed to get everything twisted again.
Finally with the help of supports, MadMax was sitting perfectly square...and Baba scribed the Bottom...
Checked for smoothness and symmetry using a PVC pipe....Picked up my Jigsaw...
and Suddenly I heard voices (in my head). It was Rick and Lbrewer and Mike...saying MEASURE MEASURE...TURN UPSIDE DOWN AND MEASURE...Also remembered an old friend saying Banana boats go round in circles...
I had been afraid of turning Madmax upside down..because the frame were too flimsy...
But like real trooper......Baba Decided to put away the bottom panels and turned the fragile skeleton of Madmax upside down...some of the screws came off but no real damage....
This was definitely a good move...accurate measurements can only be done with the frame upside down...
Baba is happy...
Posted: Sat Mar 11, 2006 12:45 pm
by bredstein
baba101 wrote:Baba is happy...
Congratulations! BTW - isn't it said in the 3 pages manual, that you should start assembling upside down?
Best,
Andrey
Posted: Sat Mar 11, 2006 12:46 pm
by rjezuit
Good weekend to be working also. Nice spring weather this week. Rick
Posted: Sat Mar 11, 2006 8:06 pm
by baba101
ks8 wrote:......Have you decided to do spot welds and then wet on wet, or embed the tie wraps?....ks
Well I am making the plan as I go along...but as I see this thing happening in my mind....
I am thinking I should take one section at a time...spot weld, remove the ties/screws and complete the section before moving to the next.
I guess the epoxy welds have to be pretty hard before I take the ties/screws out...
I am going to take this project slow...and experiment and learn as I go along...
I feel very furtunate to have experienced builders provide their feedback on my work...Very valuable indeed....
Its like attending one of those cooking classes...you pay to attend...learn a new skill and go home with the food you make...
Posted: Sat Mar 11, 2006 10:03 pm
by rjezuit
Do the spot welds. It locks everything in and then you can fillet abnd tape. Wet on wet with the cool weather is pretty easy and saves from amine blush. Rick
Posted: Sun Mar 12, 2006 4:36 am
by baba101
After lots and lots of measurements.....Madmax gets a perfectly square Bottom.
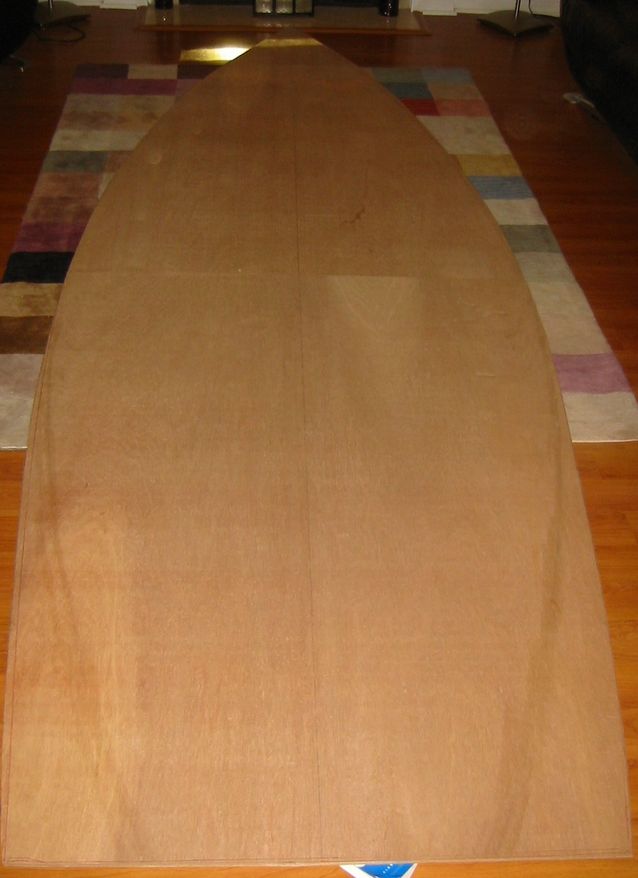
Will butt the bottom tonight...and stitch madmax next weekend....
I found a really nice spray glue for attaching sand paper to the Fairing board I will make with scrap plywood...Hopefully pictures next week.
Posted: Sun Mar 12, 2006 12:35 pm
by ArizonaBuilder
Exclamation I found a really nice spray glue for attaching sand paper to the Fairing board I will make with scrap plywood...Hopefully pictures next week.
I like to use 3M's 77 spray adhesive for attaching sandpaper. It will peel off fairly easy.
If you find that the glue is working too well. I will put a piece of 100 grit pape r on the board and glue the new pieces to the 100grit piece already on the board. The roughness of the underlying paper will help in the removal of the paper so you can put on a new piece.
Posted: Sun Mar 12, 2006 9:21 pm
by baba101
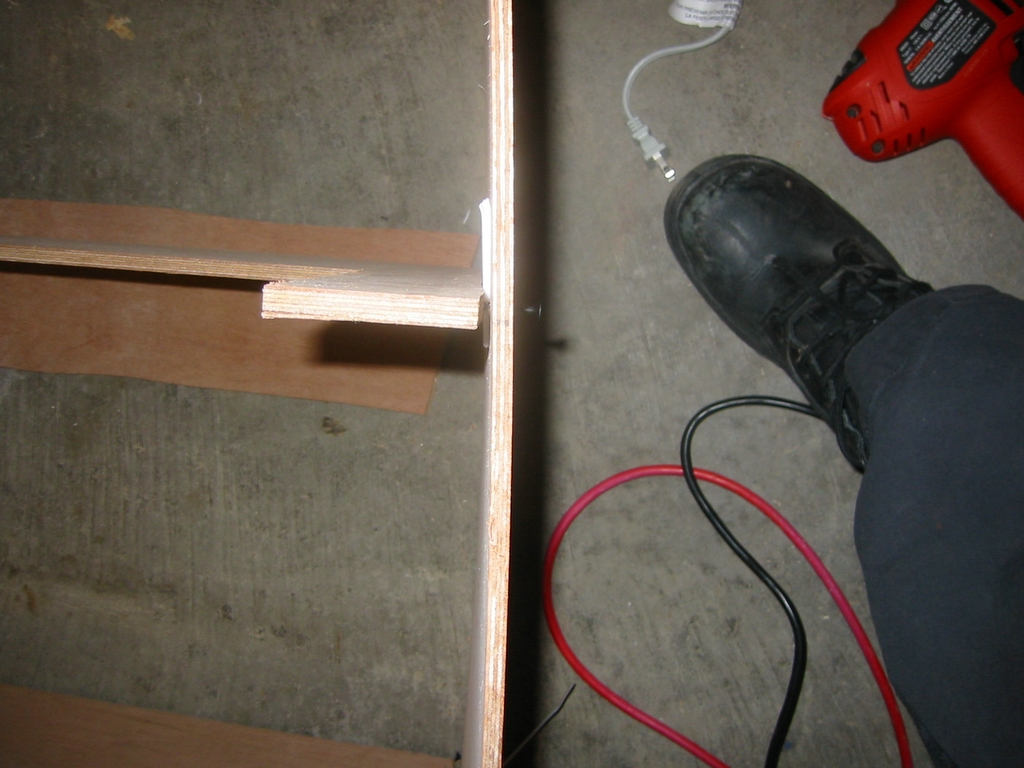
Butt block for the bottom: I decided to leave 1/4" on either side, and rounded the corners just incase...(my big modification)
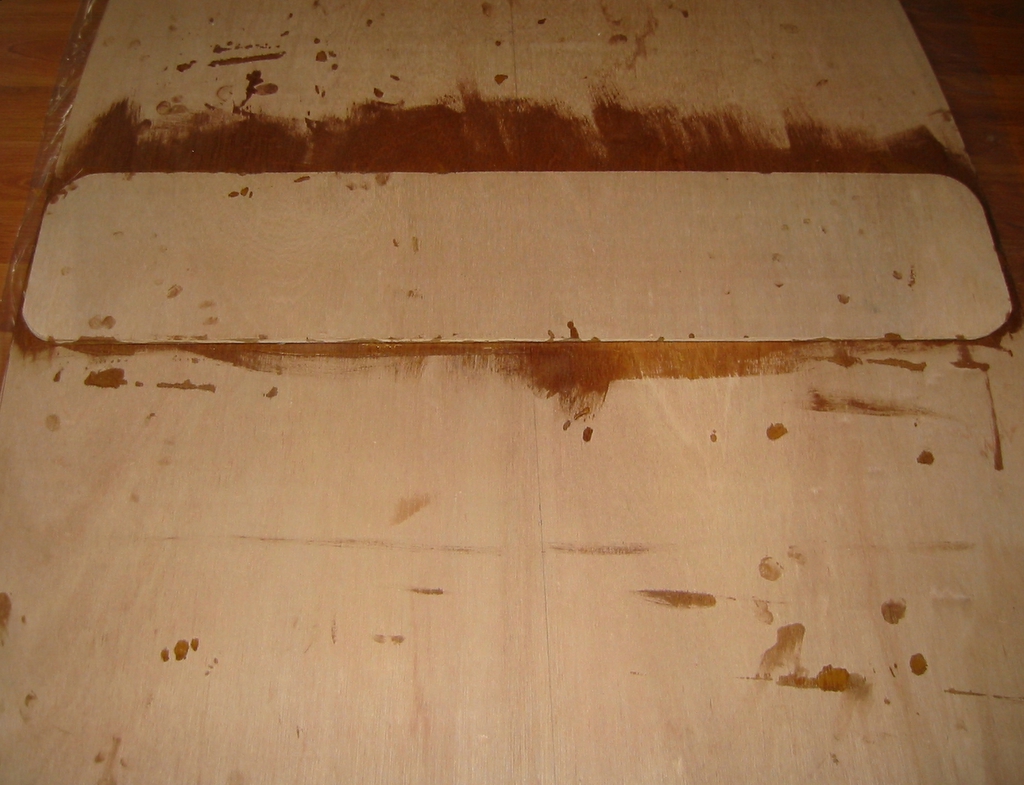
I had scribed the shape of the bottom from measurements I took from Madmax. Made sure the bottom was symmetrical. Was very happy to see that it was a perfect fit...
Lets see if the frame is still square when I turn it upside down.
Posted: Sun Mar 12, 2006 11:29 pm
by baba101
With Majority of the cuttings out of the way....
I would like to work really slowly on the rest of the build....The aim is to enjoy the build and learn as much as possible about boat building. I reckon this could be a nice retirement hobby.
After seeing the ply looking like a boat for the first time...my wife advised me to have it inspected by a "professional" before taking it to water....
Lets see if I hate sanding…Here is my friend...

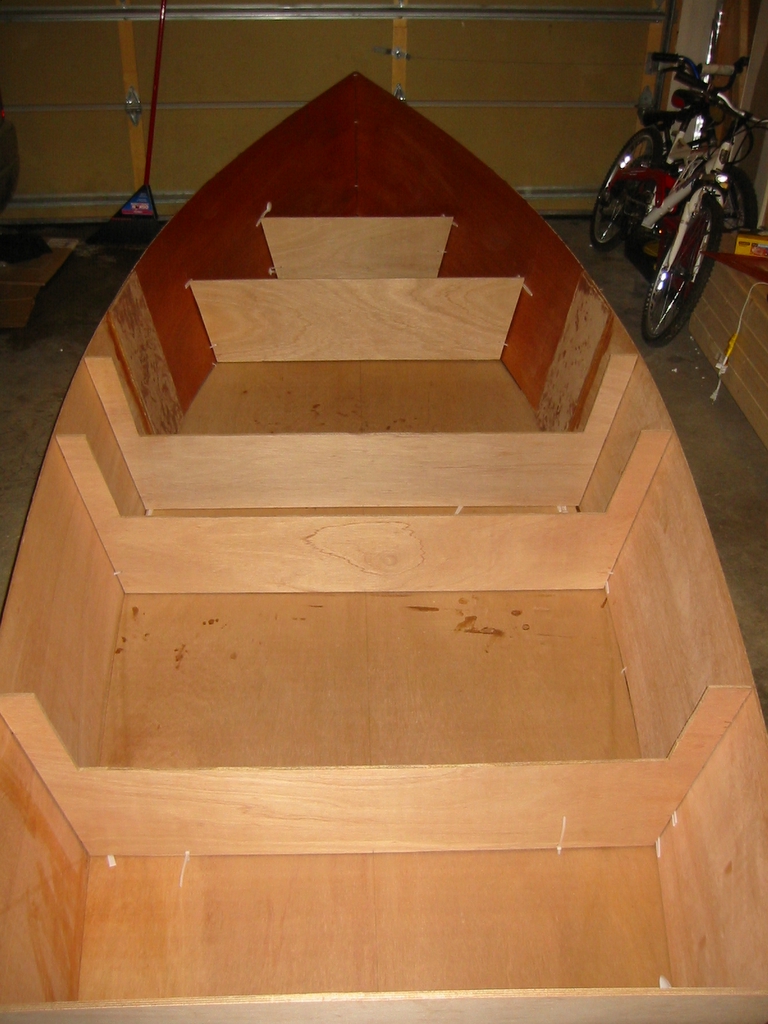
Front frames
Posted: Mon Mar 13, 2006 2:34 pm
by bredstein
Hi Baba,
I've just noticed that you modified two front frames - my plans indicate "horns" on them , just like the rest of them, while your look more like a transom. What was the reason for it?
Best,
Andrey
Re: Front frames
Posted: Mon Mar 13, 2006 2:45 pm
by baba101
bredstein wrote:... my plans indicate "horns" on them ...while your look more like a transom... What was the reason for it?...
I am planning to create one large casting deck (using the front two frames) the horns were taking up the space in the front which is already very tight...
I am jealous that you are building your boat in burmuda shorts...while I have to wear 4 layers of clothing to get into my Garage...
Posted: Mon Mar 13, 2006 5:59 pm
by ks8
If you spot weld, those spots have to be totally cured before pulling out stitches. Remember to keep measuring as you go to make sure things stay square and true. With that cold garage, take your time for those cures. That one small heater is not going to heat the whole room enough for a quick cure of the spotwelds.
It is looking very much a boat with the bottom cut and fitted. Nice work.
ks
Posted: Tue Mar 14, 2006 12:34 am
by baba101
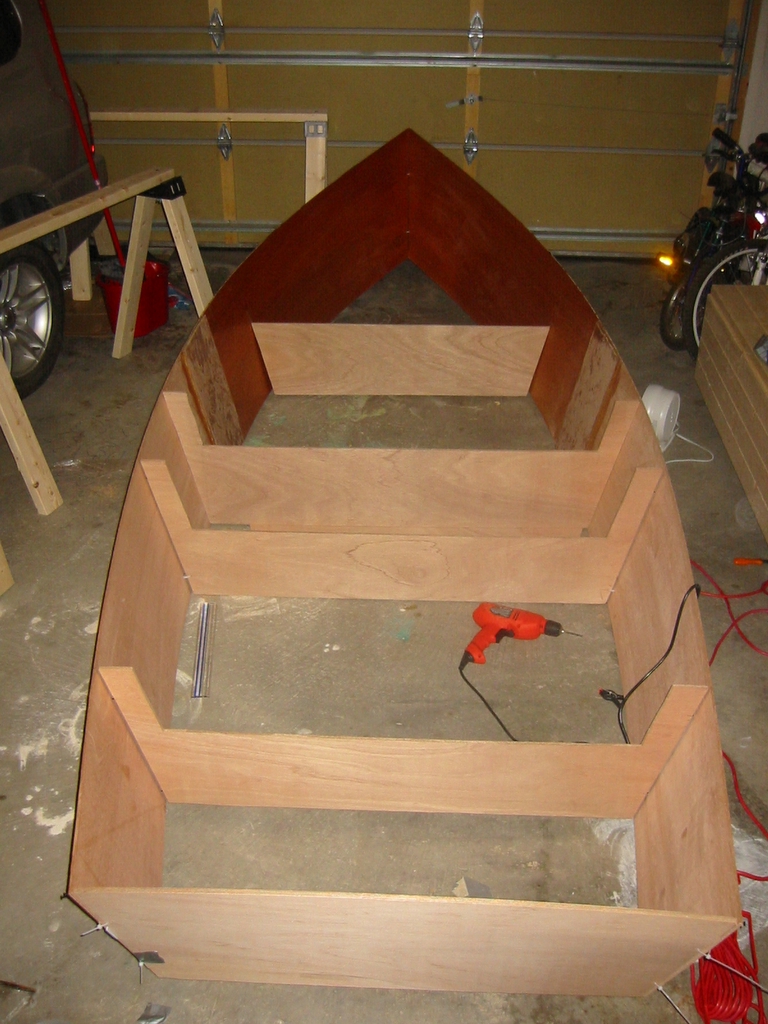
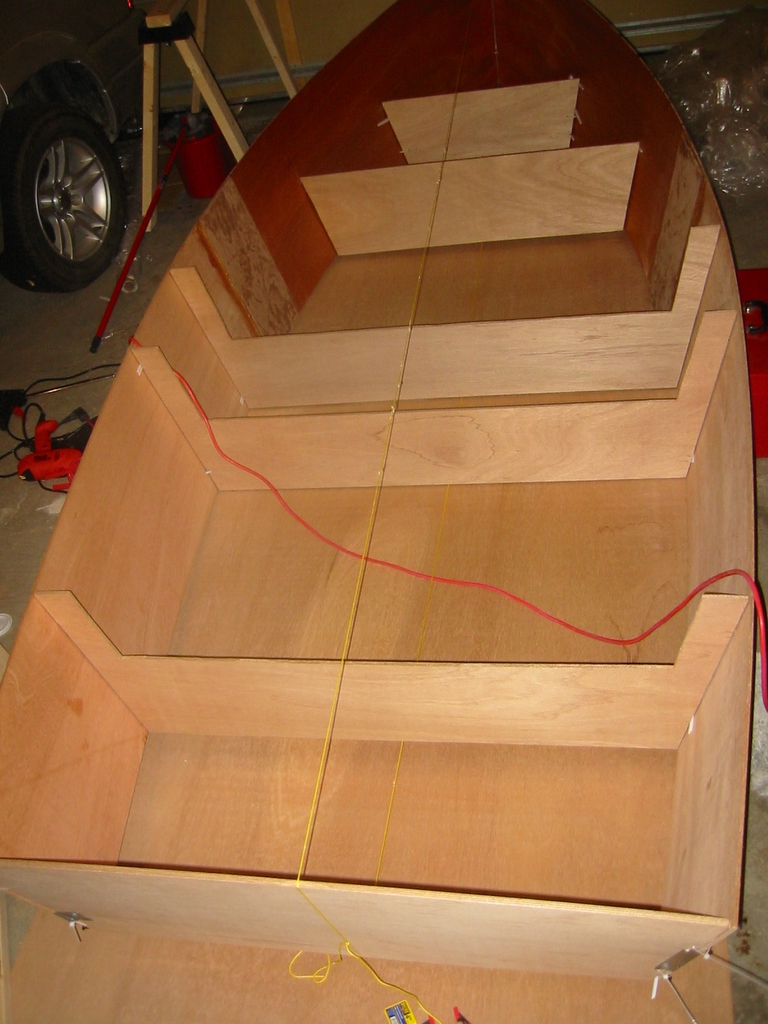
The Bottom is now stitched up
I flipped the hull, and spent about three hours tweaking with tie wraps, screws and plastic spoons to get a perfectly square hull.
I also made sure there is no wood to wood contact anywhere...Cleaned up the boat with damp kitchen roll. The outside seems are now duck taped…
Baba is ready to rock and roll with epoxy...
Re: Front frames
Posted: Tue Mar 14, 2006 2:28 am
by bredstein
baba101 wrote:
I am planning to create one large casting deck (using the front two frames)
I still don't dig - what are you going to do with this deck? The plan looks nice.
baba101 wrote:
I am jealous that you are building your boat in burmuda shorts...
while I have to wear 4 layers of clothing to get into my Garage...
Very soon I'll be envious about your climate - you can put on more layers when it's cold, but what can you take off when its 110 in your garage?!
BTW, this winter we had one days with only 37 degrees, and the schools were closed...
Posted: Tue Mar 14, 2006 2:30 am
by bredstein
baba101 wrote:
I also made sure there is no wood to wood contact anywhere
Baba, now I'm completely lost - am I missing something from the plans/tutorials? What is so bad in wood to wood contact?
Posted: Tue Mar 14, 2006 8:57 am
by rjezuit
If you have wood to wood contact you can create hard points, points of high stress. his is not as important with and FL14, but very important with a planing hull. You will never get going fast enough with an FL14 to cause any major damage. Rick
Re: Front frames
Posted: Tue Mar 14, 2006 10:36 am
by baba101
bredstein wrote:
......am I missing something from the plans/tutorials? What is so bad in wood to wood contact?
Like Rick said this is an overkill for a displacement hull. But I am just learning...One day I'd like to build the OB19.
To keep a consistent gap between ply, I have inserted long ends of plastic spoons. Used Screws to push wood away and Tie wraps to pull it closer together. I have shown a closeup of this screw+spoon method, ine one of my build pictures..
bredstein wrote: I still don't dig - what are you going to do with this deck? The plan looks nice....
Best way to think about this modification is to consider the front two seats are joined together, to make one big seat stretching from the bow
Posted: Tue Mar 14, 2006 2:55 pm
by baba101
I am about to start the glue of the Hull..
After applying the Fibre glass (woven cloth) should I keep saturating it Wet on wet until the weave is full...or let the first coat cure completely ...and fill the weave only when the entire hull is supposed to be coated with epoxy...?
Posted: Tue Mar 14, 2006 3:19 pm
by ks8
Make sure that it minimally goes transparent, that is, get's fully wetout. When it comes to filling the weave, some fill it somewhat right then with epoxy, but this is only necessary if you want brightwork seams, otherwise, you can fill the weave with fairing compound, except where other structural bonds must be added later to it. The How-to describes strategies. If you try to fill the weave right away, with straight epoxy, the glass may float up on pooled epoxy. When I fill weave with epoxy, I wait for the first batch to just barely setup, so that the glass will not float. My first few *lessons* were not so well learned!
If you wait til it cures, then before bonding anything to the existing cured seam, just make sure you wash the blush off, let it dry very well (NOT with a heat gun, as you know what that will do!), and then rough it up well, trying not to cut too deeply into any glass fibers, with 50 or 80 grit and vacuum and wash and dry again, then you'll be ready to bond other structures to it, or epoxy coat and quickfair fill the weave before any other structures, like a seat chamber, cover them up for good. On a first build, it can be awkward to try and wet on wet everything without first having an excellent grasp of where and when and how everything else will get added and finished. Don't panic. Take your time, and give the epoxy plenty time to cure in those cold temps. Have fun!
Posted: Tue Mar 14, 2006 4:03 pm
by rjezuit
Baba, I taped and took off the high sport well before fairing/filling the weave. Less epoxy is better, it makes a stronger lamination. As long as the joint is not starved and it all wets out transpanently, you have enough epoxy. I let it cure a while(at least a couple of days) took off the high spots with a planer/surform tool and let it fully cure and went over it with a cabinet scraper. Then I filled the weave with fairing mix. This avoided sanding away the glass. Rick
Posted: Wed Mar 15, 2006 1:45 am
by baba101
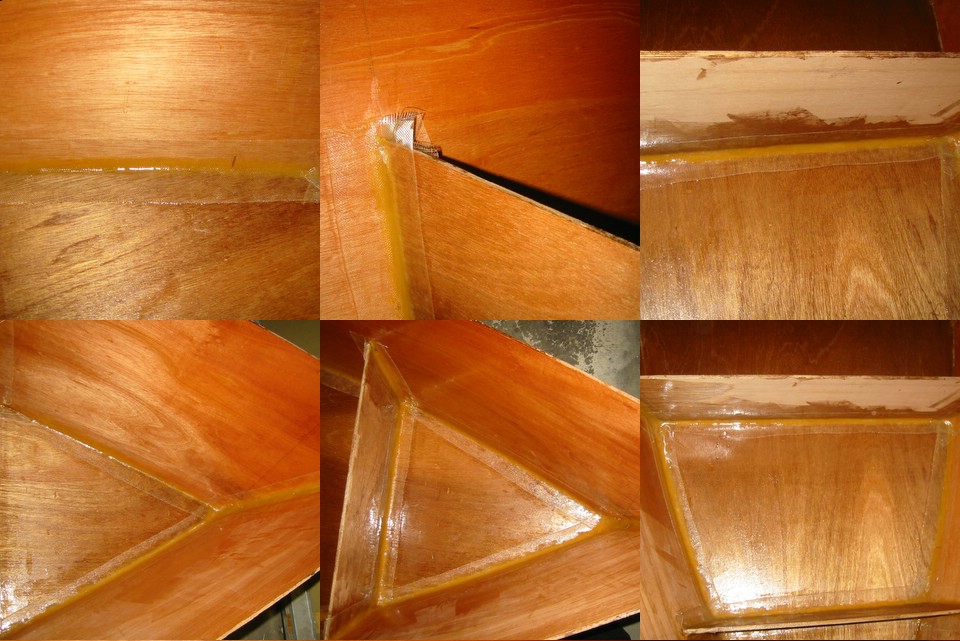
This is my first attampt at Tac welding. Next step will be to build the fillets and add Woven cloth...
My son agreed to take the pictures....while I work...
Long live the Squigi....
It was nice to have the gaps between the ply...this way Baba did not have to remove the frames to pre-coat with epoxy.
I also added the epoxy + glue on the outside seams of the Bow (where the Butt block joins the long panels, I intend to add a Fiber Glass cloth there). Just to make sure its super smooth and no air pockets are created when adding the fiber glass...
This is an entirely new set of skills for Baba....very refreshing and great for the sole....
Baba is very Happy
Posted: Wed Mar 15, 2006 9:23 am
by rjezuit
You're going along like I did last year. You WILL be getting epoxy on you. Get yourself a Tyvek suit. It saves on clothes. Rick
Posted: Wed Mar 15, 2006 12:12 pm
by baba101
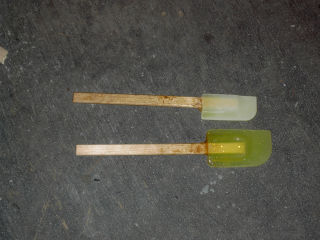
Next ....."Battle of Sands".
Please welcome Lt. General Fair Sand.

Made from 1/4" Meranti BS6566 (4.5" X 33")
Attaching the Sand paper : "Elmer's" to the rescue...
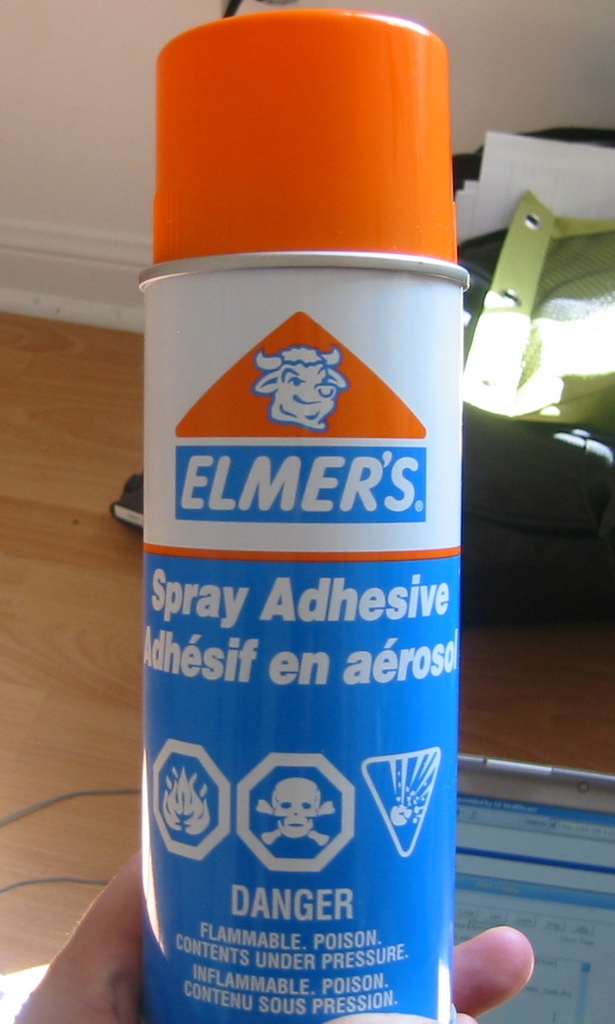
The manufacturer claims: A temporary bond can be achieved by a light spray followed by 5 minutes of air before bonding...Fingers crossed.
I also have to look at cabinet Scrapers ...Don't know what they look like...hopefully the boys and girls at Home Depot do..
Posted: Wed Mar 15, 2006 1:13 pm
by tech_support
nice board
Posted: Wed Mar 15, 2006 1:47 pm
by rjezuit
Baba will have large arms after his FL14. You will learn to hate sanding. Ask most people, it is by far the worst part of building a boat. The rest is fun, sanding is drudgery. Rick
Posted: Wed Mar 15, 2006 3:27 pm
by baba101
rjezuit wrote:Baba will have large arms after his FL14. You will learn to hate sanding. Ask most people, it is by far the worst part of building a boat. The rest is fun, sanding is drudgery. Rick
Rick If you are trying to scare Baba...its not going to work....I will work slow and if it takes a year than so be it...
I am more intimidated with painting...Specially after some of the builders have had their paint peel off due to contamination...
I am sure its easy when you know how...
Posted: Wed Mar 15, 2006 4:06 pm
by rjezuit
I'm not trying to scare you, just telling you like it is. I really enjoyed building my FL14, but after sanding for a week or so, it got REAL boring. You sand and sand, and don't see the obvious progress that you could see with the other phases of the build. Once the weather gets nice you will want to float MadMAx, and the build schedule will compress. Summers aren't that long up here in the north, and you have to get in the fun you can in a few months. Rick
Posted: Wed Mar 15, 2006 5:04 pm
by ks8
The sanding proves the man.
And it will prove Baba!
Enjoy it. Run your hand over it and feel where it needs a bit more board. When I visit friends, sometimes I catch myself with this terrible habit of putting a napkin under my hand and running it over the kitchen table laminate to see how fair it is. It's ok. Most people know I'm odd..

Don't forget a good respirator once all that dust gets a flyin'. Then you can make Darth Vader speeches to shop visitors.
Luke... I'm your father.
Posted: Thu Mar 16, 2006 1:20 pm
by baba101
Baba's Next steps:
Edited based on comments by Rick and KS8
1. Complete the Tac weld of the entire hull. Making sure the Hull stays straight.
2. Apply Fiber glass tape to outside of the bow joints:
a
. Smooth out the bow joints (already pre-coated with epoxy resin and filled with glue) on the outside of the hull. DO NOT use quikfair/or fairing compound .
b. Sand, pre-coat with epoxy and then apply Fibre glass tape to it.
c. Fill weave as the cloth cures. Let cure completely.
d. If cloth cured completely : Fill weave with quikfair.
3. Tape inside joints.
a.. Pre-cut and mark all fiberglass tape lengths.
b. Once the Tac welds have fully cured, remove all screws and tie wraps.
c. Lightly sand the taping area using a moist block sander. Wipe before and after sanding with damp cloth.
d. Create smooth glue joints using plastic spoons. Make sure you have a generous radius on the outside joints.
e. Once the joints reach bubblegum consistency…pre-coat with epoxy resin and apply the fiberglass tape.
f. Gently remove all air-bubbles using a squigi until the tape is transparent. If cloth gets misty gently tap with a brush wipe leave.
g. Fill weave as the cloth starts to cure. Let seem fully cure
h. If the cloth dries before completely filling the weave then apply quickfair. (avoid quickfair on places where structural bonding is needed.
Baba can't wait to try this shit.....
Posted: Thu Mar 16, 2006 1:40 pm
by rjezuit
Baba, Make sure you have a generous radius on the outside joints.This makes it stronger and easier to form the tape around. I glassed the inside and vertical joints on the transom and bow first (in and out), and then flipped and did the chine. I guess it doesn't matter, but it was one less movement while only tacked. Rick
Posted: Thu Mar 16, 2006 2:16 pm
by ks8
Review the plans well. Note any spots along those tape seams where other structural components will need to be added, including mods that may take a load, like a rod holder that you may fish with *dead stick*, and do NOT quickfair those sections of tape until the final components are bonded and glassed in. You don't want to structurally bond anything over quickfair, if it can be reasonably avoided.
Wipe the spot welds with a damp cloth(s) turning the cloth often, before sanding, to get most of any possible amine blush off the surface of the cured epoxy welds. Then you can sand 'em a bit, else the amine residue may get into the grooves the sanding block cuts and be even harder to remove.
When you squeege, don't get too crazy with it and end up overworking the epoxy or you can actually start to whip very tiny bubbles into the epoxy and it will start to get cloudy. If areas begin to get cloudy from whipping, tap them with the edge of the squeege, straight on, to push any remaining larger bubbles out, then do a quick swipe to smooth the surface, and call it done. You'll know when it looks right. If some spots get a little cloudy, you should be fine, but now that you are aware of it, try to avoid it. You've got to know when to walk away, and know when to run...
Have fun!
Posted: Thu Mar 16, 2006 3:00 pm
by baba101
ks8 wrote:..... You don't want to structurally bond anything over quickfair, if it can be reasonably avoided.......Have fun!
This is good advice...thanks...
Watch out for Clowdiness under tape, and tap the bubbles out when needed.
Wipe epoxy with damp cloth before and after sanding.
This "Amine blush dude" Baba hasn't seen it yet....I am using slow hardner and the temperatures are low....do you think that could be the reason for no amine...

Posted: Thu Mar 16, 2006 3:56 pm
by ks8
You don't want to be tapping like your mincing garlic!
Just enough to get the obvious bubbles out, if any. Some people use special epoxy rollers, some people use the ends of the bristles of a cheap brush. I use the cheap brush and a squeege, sometimes my fingers (in a protective glove is best if you must use your fingers). If you get any whipped cloudiness, it may be under or over the tape. Developing cloudiness is a sign to ease up on overworking that area, or add a bit more fresh epoxy, jam it with the ends of the brush bristles a little to replace the air pocket with epoxy, swipe with the squeege to get the glass down to the wood and smoothed out, and call it done. Not too much epoxy or the glass may float up on the pooled epoxy.
You may have been spared the blush so far, but it doesn't hurt to be safe as you can't always see it. About 10 percent of my batches over the years very obviously blushed. Humidity is a factor also. You could see and feel the greasy waxy residue plainly. But even when you can't, there may be enough there to hinder an excellent secondary bond, so the washing is always a good idea. 40 percent of my batches had zero blush, but I washed anyway. A bad blush may require going over it a few times with clean wet or damp rags. A damp rag, as opposed to wet, keeps you from soaking all the surrounding wood and then having to wait days for the wood to dry out. But with a rag that is only damp, keep turning it to a clean section as you move along, since there is no flow of water to carry away the amine.
scrub a dub dub...
Posted: Thu Mar 16, 2006 4:01 pm
by rjezuit
Baba, It's a wonder the epoxy cures at all with the slow hardener. Mine took a while with medium if it got real cold. You'll be able to feel the blush if you rum your finger along it. It slides like a coating of thin oil is on it. Work wet on wet where you can, this avoids the problem and gives a better bond. Rick
Posted: Thu Mar 16, 2006 4:40 pm
by pirate
my understanding is that the slow hardener doesn't blush. mine cures overnight, but i live in l.a., gets very hot in my garage!!
Posted: Fri Mar 17, 2006 7:18 pm
by baba101
Well this slow hardner takes its own sweat time to cure...I tac welded the insides 48 hours ago...and they are still soft.
This weekend is a wash......
Just as well...time to play with my kids....
Posted: Fri Mar 17, 2006 7:20 pm
by chrisobee
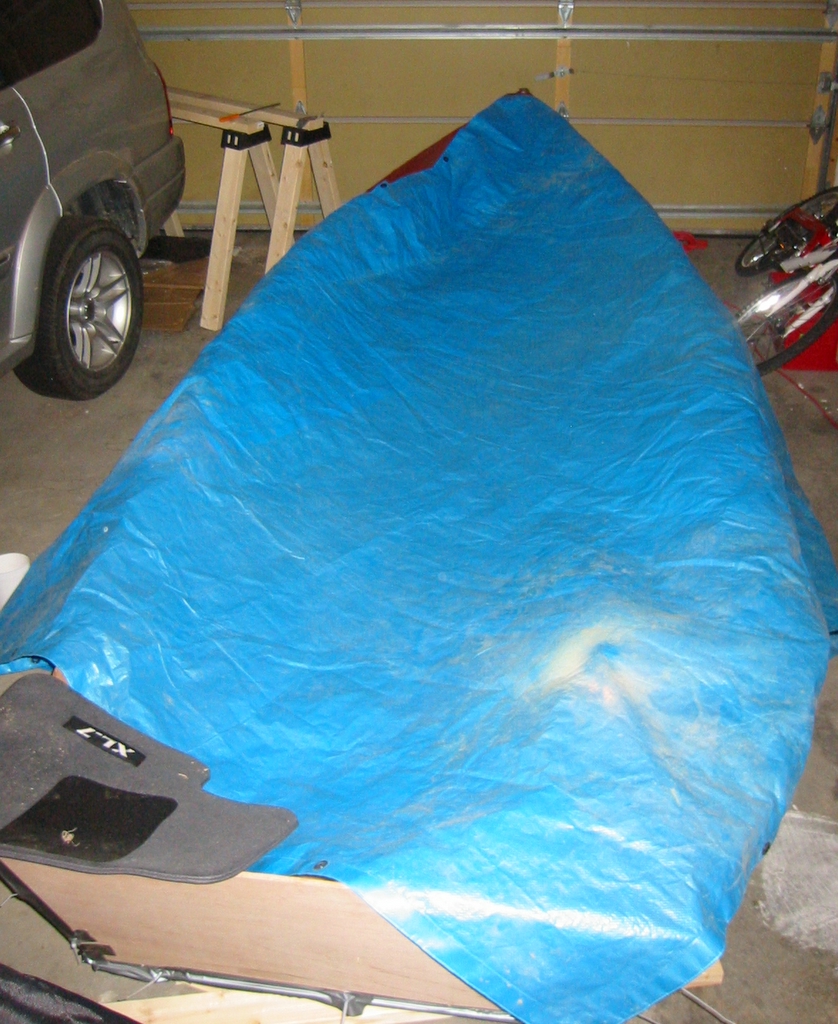
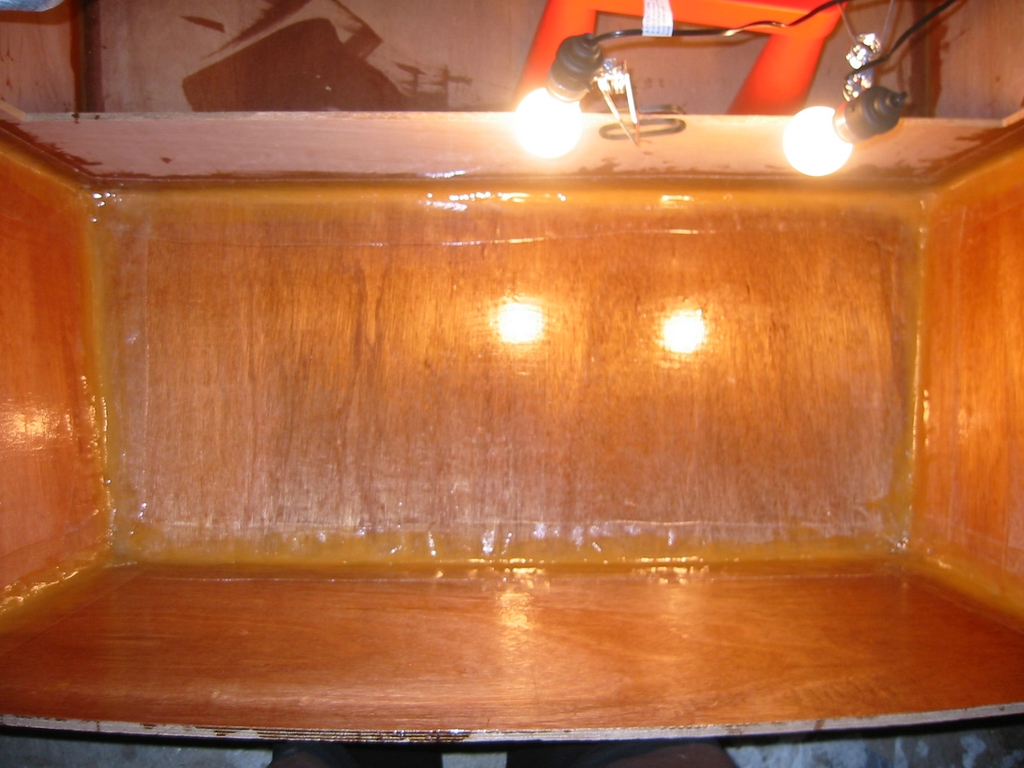
cover the boat with a tarp that will trap in the air under the boat. Put a 100 watt light bulb under the boat and tarp. It will not be long before the temp rises under the tarp and the cure times will fall.
Posted: Fri Mar 17, 2006 7:55 pm
by baba101
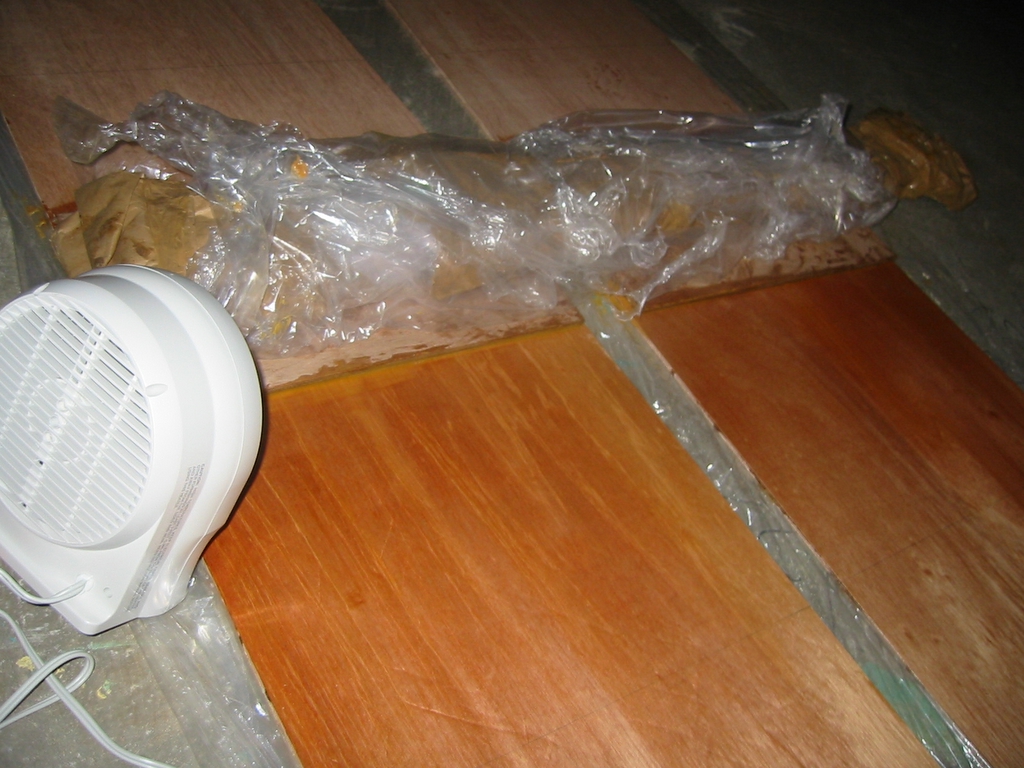
Here you go Chris.
I made sure the bulb does not touch the plastic. Current temperature in the garage is close to freezing.
Posted: Fri Mar 17, 2006 9:58 pm
by ks8
If possible, keep that bulb at least a foot away from the tarp. Maybe cut some cheap fir stripping the same beam as the boat at four or five stations (an inch or two extra), lay them across the top of the sheer, and then lay the tarp over that. A hot bulb can easily melt plastic or worse, or ignite wood under some conditions. Mount the bulb appropriately, and let it do its wonder!
My building *cathedral* is spacious. Four 100 watt work lamps bring the temp up about 20 deg in the winter. I just checked... outdoors it is 28 F. It is 56 F in the cathedral.
The bulbs are kept well away from the tarp, especially when unattended.
cook that goo! safely.
ks
Posted: Sat Mar 18, 2006 12:47 am
by baba101
Here it is under the hood....
This method of heating epoxy has proved to be very effective.
This should be switched off when not under supervision. I will continue to move it around every four hours.
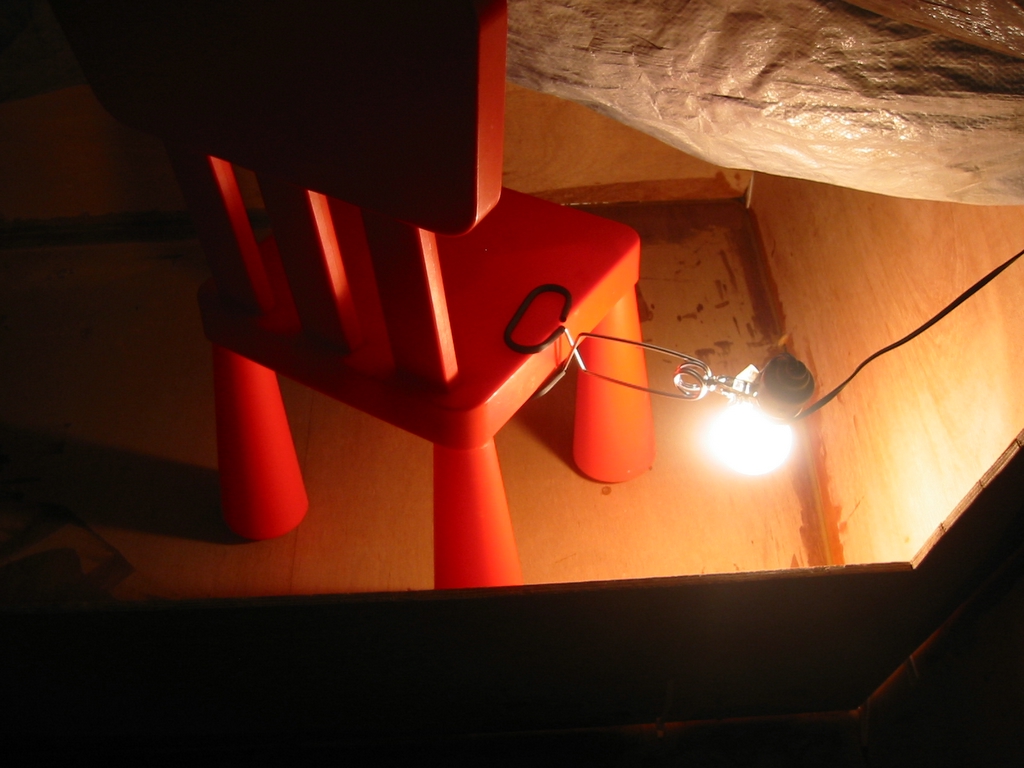
Baba is very pleased with this new discovery...thanks to Chris...
Posted: Sat Mar 18, 2006 8:41 am
by chrisobee
Everything I know I learned by compulsivly reading every post on this board for the last 3 years. I do not recall who first suggested it perhaps it was J. M. I am pleased that it is working out for you.
Posted: Sat Mar 18, 2006 11:19 am
by ks8
Double it up! Got another chair? Another bulb on a spring mount like that? Those fixtures are fairly cheap at the big box store. Get a couple more in there! It looks like the chair back keeps the tarp plenty far away... The extra heat will help, in that cold garage, when you do the taping. I like having the remote thermometer in my boat. I can quickly check the temp as the goo cooks, from the kitchen table, all winter long. I have another in the garage in case it is border line warm enough to do some laminations in there without lights and tarp. If it drops below freezing, I bring the smaller curing components into the basement.
Have fun!
Posted: Sat Mar 18, 2006 8:56 pm
by baba101
As suggested....Baba's Goo cooker is now Turbo Charged.
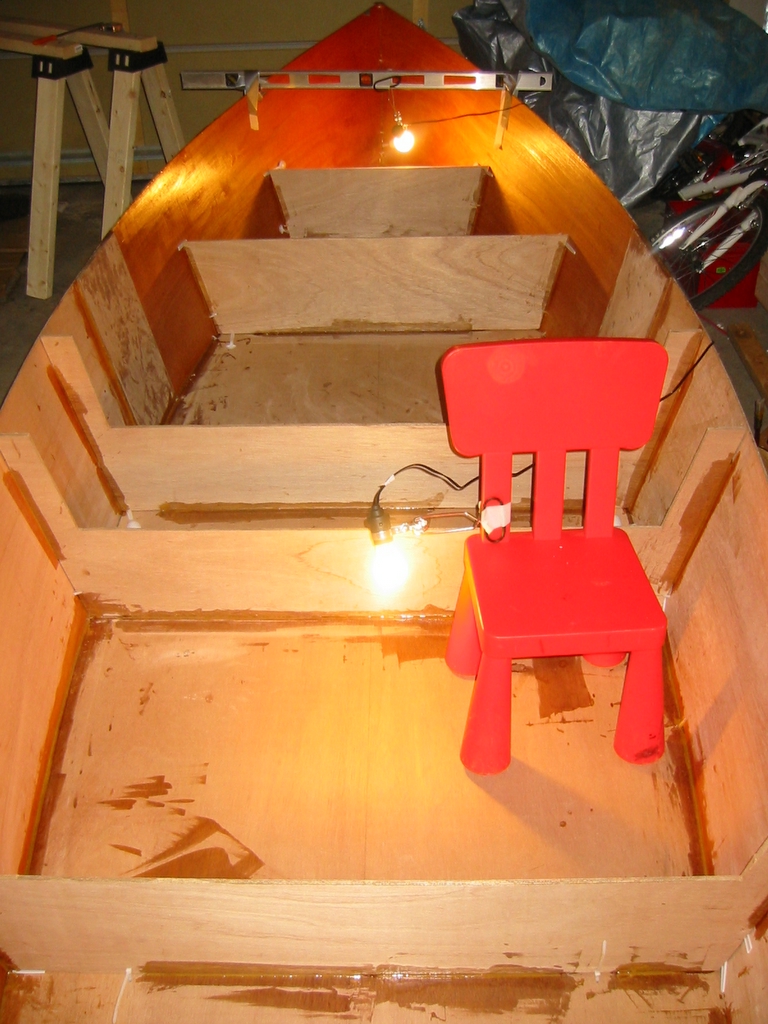
Although the epoxy had already cured...I decided to give it another 24hours of love.
Baba will be away from Madmax for the next 4 weeks...will start again in Mid April.
Posted: Mon Mar 20, 2006 12:40 am
by ks8
baba101 wrote:Baba will be away from Madmax for the next 4 weeks...will start again in Mid April.
Since Madmax is now a recognizeable entity, have you broken the news yet regarding the prolonged absence, to assure *max* that it is not neglect?

Posted: Mon Mar 20, 2006 12:58 pm
by baba101
Madmax needs a rest...and knows Baba will be back...!
Posted: Mon Mar 20, 2006 1:29 pm
by rjezuit
That would be a sight.......... MadMax sitting in the corner of the garage whimpering for Baba. Rick
Bubbles
Posted: Tue Mar 21, 2006 7:58 pm
by baba101
I had a few spare hours last night...thought I'd try my skills with Fiberglass...
Started glassing the outside of the bow...so far so good.
Feeling a little more confident...Baba proceeded to build the seams for the Transom box. Believe it or not, took me about 2 hours to get this far...
Waited for glue to harden like gum, coated with epoxy again and applied the tape: ERRRR BUBBLES...
The glass is pretty hard now...Based on the knowledge base in the forum...Here is Baba’s plan. (Comments welcome...)
Let epoxy cure fully
Sand down the bubbles.
Fill holes with thick glue (epoxy wooodflour)
Apply fiberglass patches to the patched areas.
How Bad is this ..
Posted: Tue Mar 21, 2006 9:16 pm
by tech_support
Its pretty darn good for your first time
your fillets look nice, laying the tape on a little earlier might have helped with the bubbles. Honestly for little bubbles like those, I would not worry about grinding them out. Good idea starting will an area that will not show.
Joel
Posted: Tue Mar 21, 2006 9:24 pm
by baba101
Shine wrote:.... I would not worry about grinding them out....Joel
Phew...! Thanks Man
Posted: Tue Mar 21, 2006 11:53 pm
by ArizonaBuilder
Baba, pretty good for your first time and as Joel stated, I wouldn't worry about the bubbles.
I would like to make a couple of suggestions after looking at the photo's.
It looks like your fillets in a couple of places are not the 1/2" radius. In the second photo from the bottom, it looks like the fillet is a little small and could have contributed to the bubbles. The 4 oz woven tape can be pretty stiff and without a nice 1/2" radius, it can pull away a little. Also it may have been that you let the fillets harden a little too long and got some high and low points in the fillet.
If you are using a spoon to create the fillets it can work but I found that fillets made with a spoon were a little small and not uniform along their length due to tipping of the spoon.
I like to use a 3-4" length of 1" pvc pipe which gives me consistent fillets of the correct size. After I have created the fillets, I will take the precut pieces of tape and wet them out on a table covered in plastic. I will then take the prewetted tape and place it over the seam. The tape may not be touching the fillet material at this point. So I will use my brush and push the outside edges towards the center of the seam and you will see the tape contact the fillet. If you make sure you have good contact with the wood and fillet and don't disturb the fillet you should get a nice bubbleless
seam.
It just takes practice and you will develop your own style..
Good job so far.
Re: Bubbles
Posted: Wed Mar 22, 2006 12:40 am
by bredstein
Hi Baba, your boat is looking great! I also started fglassing, will post some pics soon. From how you describe I saw that my way differs a little bit.
baba101 wrote:Waited for glue to harden like gum, coated with epoxy again and applied the tape: ERRRR BUBBLES...
I put the glue with a plastic knife, and helped myself with my own finger
Didn't wait, just put some epoxy on top, and placed the precut dry tape, made it stick to the filleted seam, and then put more epoxy with small pieces of a sponge. I found it good - you can apply more pressure than with a brush. Made it transparent, and that's it. Now, six hours later, it became hard and I'll proceed with the next box this evening.
baba101 wrote:
Sand down the bubbles.
Fill holes with thick glue (epoxy wooodflour)
Apply fiberglass patches to the patched areas.
Why bother? The strength will remain the same, the insulation also won't improve, and after all it will not be seen by anybody!
Good luck!
Andrey
Posted: Wed Mar 22, 2006 1:05 am
by ks8
Pretty good for first seams! Pretty good for second seams!
My first seams were not wet on wet, so it took awhile to grind and sand the fillets nice and smooth for the taping, but they were very smooth then. Small ridges can cause air pockets to form into bubbles.
Most of those bubbles I remove by dipping the cheap 1 inch brush in straight epoxy, for wetting out, and then jabbing the bubbles a few times with the end of the bristle, with a fair amount of zeal. It forces the epoxy to displace the air, but this is where you can overwork it also and whip in those very tiny air bubbles resulting in the *cloudy* appearance, if you are not careful. But the jabbing does get them out usually. Then the easy swipe to even out the surface epoxy distribution.
Now that I do wet on wet, and have had some practice at it, I do not wait for the fillets to get gummy, but that is because I have learned how to fine tune form the fillet through the tape before the tape is finally wetout. I had some problems with the gummy pre cure, because if the fillet wasn't perfect, if it had any ridge at all outside the curve, from the fillet forming tool of choice, then air could hide along that ridge, and need to be displaced out with epoxy somehow, but you couldn't really eliminate the ridge because it was now a bit too permanent. Taping over a freshly laid fillet is just another way of doing wet on wet, which reduces the potential of those hard to flatten ridges and air pockets, because you can still flatten the ridge into non-existence by pressing the tape into it, but it does require some final smoothing and reforming after the final tape wetout since the fillet is so pliable under the tape while you're trying to wet it out well. As said, you will develop your own technique soon enough, but it looks like you have an excellent start! Some builders can get very smooth fillets with no ridges before they gum. I can't do that so well, so I go fresh, splat, squish, but it took some practice for that also.
When epoxy starts setting abit, and I still am jabbing a few bubbles, even then there is a technique or motion with the brush that can *jab epoxy in* but minimize the brush sticking to the tape and pulling it back up again. You just jab, and then slightly twist the brush as you lift. It flattens the tape down, displaces the bubble, but minimizes pulling the tape back up and forming the bubble pocket again. But too much and this motion whips. We could fill pages with every little pizzazz of what everyone has discovered that works well for them. I can't stand the unwieldly prewetout cloth, though it works well if you keep things clean and well placed the first shot. I'm not that good an aim when laying down gooey tape on soft fillets. Everyone gets a style and preference. You get the idea. With each seam you'll discover some other little trick that seems so simple, but makes an appreciable difference for you, so when you finally get the VG37 or DE48 plans, you'll have a good level of confidence...
.
Very nice first seams!
Wait a minute... I thought Baba needed a rest?! It's too late now. Plainly, you have the disease...

Posted: Wed Mar 22, 2006 1:16 am
by gk108
I have had the best results with these fillet tools:
You won't have to deal with that little ridge of putty beside the fillet that you get with the spoon. Filleting becomes as easy as frosting a cake.
I usually prime the bare wood for the width of the tape before starting the putty fillet. 2" on each side of the seam for 4" tape. While the putty is still a bit mushy I bend (don't crease) the dry tape and lay the bend in the putty first and then smooth the edges onto the sticky primed wood. Wet the tape and use the spatula to squeegee the excess resin out and finish shaping the fillet.
YMMV
Posted: Wed Mar 22, 2006 1:36 am
by baba101
Thanks Gentlemen, Great comments...Baba is now totally Psyched about playing with Epoxy.
I have to warn you though... Baba has to stay away from building MadMax till mid April….
Posted: Wed Mar 22, 2006 1:48 am
by bredstein
baba101 wrote:Baba has to stay away from building MadMax till mid April….
Baba, forget about it! Haven't you heard from a specialist, that it is a desease? So come on, finish your boat and order plans for a new one
Posted: Wed Mar 22, 2006 9:46 am
by tech_support
ArizonaBuilder wrote: The (9) oz woven tape can be pretty stiff and without a nice 1/2" radius, it can pull away a little.
We cant wait to get the 6 oz. biax tape in, Its going to take corners much better - not to mention be stronger than the 9 oz. tape
Joel
Posted: Wed Mar 22, 2006 11:02 am
by baba101
bredstein wrote:.... finish your boat and order plans for a new one
Hey Andrey,
Have you decided what you want to build next...I am going to winterize my Garage and get wife's car out before I decide on my next boat.
This is going to sound crazy...but I am really excited about Sanding..I think it will be really cool....
Posted: Wed Mar 22, 2006 11:52 am
by bredstein
baba101 wrote:Have you decided what you want to build next
Yes, I want to make a small (10') sailboat, and learn to sail.
Posted: Wed Mar 22, 2006 12:03 pm
by Jerry-rigged
Shine wrote:ArizonaBuilder wrote: The (9) oz woven tape can be pretty stiff and without a nice 1/2" radius, it can pull away a little.
We cant wait to get the 6 oz. biax tape in, Its going to take corners much better - not to mention be stronger than the 9 oz. tape
Joel
Can you bright finish the biax tape, like you can the woven tape?
Jerry
Posted: Wed Mar 22, 2006 12:49 pm
by tech_support
It will only be 6 oz., but there will be a stitching that will not go 100% clear.
Posted: Thu Mar 30, 2006 9:42 am
by MadRus
Baba,
I noticed you posted a picture of a modified OB19 intended to one day be your great lakes boat. First, I like the layout you show. Second, I'd like your opinion on which boats in the 17-21' range you think would be nice boats for lake Ontario, if you ever fish it. I was thinking the Nina, the pilot 21, the OB19 or the OB17. What do you think about those choices? I live in Mass, but would like to head out to NY every summer for a week or so and do some fishing, with two or three people total on board.
I used to charter, but that boat was big- bigger than anything I could build.
So I guess what I'm asking is, in your experience why the OB19, and do see any problems with any of the boats I've listed?
-Dave
Posted: Thu Mar 30, 2006 10:55 am
by baba101
Hi Dave,
I am not a fisherman (yet) and have never owned a boat (other than my River Kayak). So my choices are only theoretical.
I had been looking for a Ski/Fish boat (Incidentally I don’t know anything about skiing either….last time I went water skiing was about 15 years ago and have no idea what boat it was..)
As you know Lake Ontario is almost an Ocean…and its easy to get 2-3 foot chops on a regular day…so that ruled out the PH series and anything else with a flat bottom.
I was looking for a compromise all rounder boat…i.e. OK for wakeboarding on the flats and reasonably good for chops of the great lakes…I guess Nina and pilot would not have the acceleration to pull a skier. The C19 was too deep, harder to build and harder to get in an out of for Skiiers…
I also looked at the Panga…but I figured it was too wet for the north…OB17 is probably a good choice too…but if I am going to spend three years building a boat…it better be worth it…OB19 gave me the additional deck space…option for a bigger outboard and more confidence to go further.
Most ski boats have an open front and the console is further up…but that is only practical for the flats (which is where this sport really lives). Baba’s Closed flat deck is good for bad weather (keeps the storms out and improves the buoyancy) and provide some fishing space. Console and seating closer to the transom (compared to Skii boats) will provide better comfort for passengers in choppy water.
The Wakeboard tower will be located closer to the center of the boat…Tower frames will sit on the gunwale, so the boat gets on a plan faster.
OB19 is not your boat if you are going to be spending more than a day on board...
Others on the forum will be able to tell you more about Nina/Pilot etc..they are proabably your better choices for what you have in mind.
Posted: Thu Mar 30, 2006 11:14 am
by MadRus
Thanks Baba, I appreciate you taking the time to answer.
-Dave
Doubling the Transom:
Posted: Thu Apr 06, 2006 11:51 am
by baba101
April 15th (restart date for building of MadMax) is close…and Baba is eager to get started…I have been building the boat over and over in my mind for the last three weeks…
I have two questions that I’d like help with:
The plans give an option for a full-length half height (above the transom seat) ¾â€
Posted: Thu Apr 06, 2006 12:31 pm
by MadRus
1. Weight is always an issue. But it's a trade off for what you're trying to accomplish by thickening the transom.
2. I use, I think it's fir, 5/4 ballister stock for my cleats. Hand picked, so it's nice and straight. I think it's like .40/ft. or something, it's not that bad. It seems to hold up just fine and it's got a nice finish to it that doesn't require much attention if any. I've used it for my cleats as well as my rubrail on the GV13 which is now 3 or 4 years old and shows no signs of decay or even chipping paint. Of course, it's garaged, but the cleat material seems good to go. You can get 3' lengths of this stock at HD, but I haven't seen it in longer lengths there. I get 16' from my local lumber yard.
Posted: Thu Apr 06, 2006 1:40 pm
by rjezuit
Double up the transom fully if you want. It only adds a little weight. Mine is 3/4" thick and I was thinking of adding another piece of 3/8". I have no strength problems, but it will look more substantial. If you are trailering, the added weight is of no consequence. Add a trolling motor battery to the boat, and you've added half agai the hull weight, so the little extra wood is of no consequence.
Posted: Thu Apr 06, 2006 3:26 pm
by ks8
I used D Fir for cleats, because it was avail and cheap, and rot resistant. But if you use thick D Fir, you want to seal it well to minimize it splitting open over time. On hull curve sections of cleat, I ripped it half the thickness needed, vertically, and then re-laminated the two pieces with grain direction balanced opposite to help stabilize it, and in order to preform the curve needed, on a jig, but that's me.
I never want to have to see or touch them again once the seat tops are on. But full length cleats are not needed on many of these boats, as you may have noticed in the howto files. You may need to buy lots of 2x4's to be able to rip out good clear sections, but the 2x4's are cheap. Choose them wisely with effective lumber kungfu. I don't know about the spruce for cleats. Really... don't know, but it is not as rot resistant.
When you bond cleats to hull, prepare the hull surface well, making sure it is clean, and use a fillet under the cleat. Some builders have had cleats pop off (easily repaired). There is no tape helping to increase the bond surface with a cleat. Cleat popping is not a common problem, but just clean the surfaces well, and use a fillet, as always. The taping on the top of the seat tops, to the hull, helps much to make up for a lack of tape underneath. It's all very easy.
Other than the curved sections, none of my cleats are ripped and reglued, but they are sealed. They are approx 1.25 x 1.25 inches. So far they are fine. Even though D Fir is somewhat rot resistant, seal it anyway to stabilize. The thicker the D Fir, the greater the chance of a split developing as it dimensionally expands and contracts with moisture or heat, so seal it. I have some pictures of that nastiness, but never posted them.
I don't forsee a problem with doubling transom. It will add weight. Use good ply there, and fill voids as best you can on transom plywood. I'm not a designer. Ultimately the designer is best voice regarding the transom of your boat, if one of them can respond soon. I think J is across the lake yet.
Remember, as a displacement hull, you'll never want to hang a HUGE engine off that transom anyway. That hull will not jump out of the hole, but only dig in deeper with more engine. So the spec transom/option will do the trick, unless, like me, you purchase a HEAVY 4x4 that happens to use the same block as the 9.9 HP. With fuel, over 80 pounds! I did not beef up my transom just to have fun!
I may yet do the small Honda 4 stroke 2 HP, at 1/4 the weight!
Posted: Thu Apr 06, 2006 5:28 pm
by baba101
ks8 wrote:.... On hull curve sections of cleat, I ripped it half the thickness needed, vertically, and then re-laminated the two pieces with grain direction balanced opposite to help stabilize it....
This is a great idea...Baba is going to do this everywhere....
Overengineering you say...God damn it yes......but good learning experience for me...
The FL14 has an option for doubling the transom but only half height..as Rick said the full height will add only a little more weight and increase the strenth...He wants to do that on his FL14...which makes me think its probably great idea...So Baba will do this too (unless Jac/Sean tell me oherwise).
Here is the engine for my FL14 4HP 4S....as you can see weight is not a problem...but good for a bumpy ride on a trailer...etc..
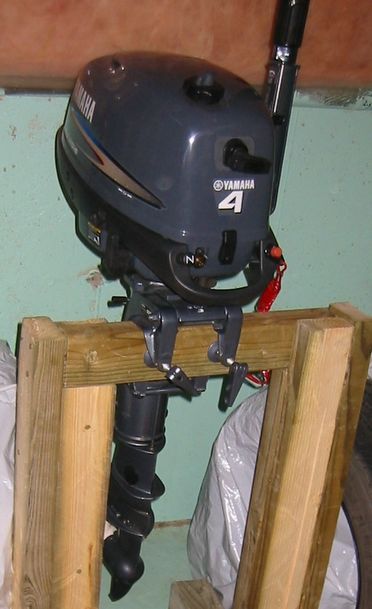
I am resisting real hard not to over engineer....but its not easy....
Posted: Thu Apr 06, 2006 7:38 pm
by Mike Adams
Baba,
I used three layers of plywood in my transom - two layers of 12mm ply and one layer of 7mm. The two full height 12mm layers were epoxy glued together and separately biax taped to the sides. The half height 7mm layer was then added above the rear seat and bright finished. Total thickness about 31mm - about 1 1/4â€
Posted: Thu Apr 06, 2006 8:54 pm
by baba101
Mike Adams wrote:....I used three layers of plywood in my transom - two layers of 12mm ply and one layer of 7mm. The two full height 12mm layers were epoxy glued together and separately biax taped to the sides. ....Mike
Thats a very strong boat Mike...
Based on your experience and Ricks recommendation Baba will double the transom, and attach a second layer of 9 oz cloth for good measure...
Thanks
Posted: Sat Apr 15, 2006 3:41 pm
by bredstein
Hey, Baba, how was the break? Is it warmer now in your polar country
? Are you back to this epoxy business? Where are the pics - we've been missing your MadMax!
Andrey
Posted: Sun Apr 16, 2006 4:05 am
by baba101
Baba is back from Vacation...I mean from work to Vacation...As promised..! I put in a good 18 hours of epoxy work on Madmax (this weekend). Doubled the transom, completed the seems from inside and added one layer of epoxy coat on the inside.
Baba is now licensed to Kill ….Bubbles…I will post a picture of my weapons of mass destruction of bubbles…Needless to say epoxy has been a lot of fun…Applying the fiberglass tape soon after building the fillets has been the key in bubble elimination.
I have used the cake mixer, spoon, fingers and squeegee for building better fillet…and all methods work quite well. Cutting one corner of the squeegee for the perfect radius of the fillet has been my favorite method so far.
Next step flip this baby and smooth out all the corners….fiberglass hull…(next weekend..) Can’t wait….
Weather in Torornto is perfect for boat building these days....
Posted: Sun Apr 16, 2006 7:34 am
by Oceola
Baba,
Re: Wood for cleats..I've mentioned this before in another thread...
At the Home Depot near me here in Houston they have in their "better wood" section, you know where all the wood is stacked on end, a section marked "western pine". Turnes out if you read the little tag with the bar code that it is "Radiata Pine" and it's from New Zeland. This is some of the nicest pine I have ever seen. It seems fairly dense and hard, has zero knots and strait grain, and is beautifully finished. I just bought 16 ea. 8'x1"x2" pieces to use for cleats, rub and spray rails. I have them on a shelf, stacked and clamped to avoid warping in my hot, humid garage. They cost about $3.00 ea. This wood also comes in other widths and I plan on using it for my skegs.
I don't know how rot resistant it is but I really don't care. The whole point of three coat of epoxy plus glass plus god only knows how many coats of primer and paint is to seal out moisture/oxygen, and the boat will be trailered and garage kept.
Anyone know anything about Radiata Pine. It sure doesn't look anything like the second growth crap they've been feeding us for the last 30yrs or so.
Frank
P.S Nice work on your boat!
Posted: Sun Apr 16, 2006 7:25 pm
by baba101
Thanks for the tip..frank ...Just in time too...I will check out the local HD to see we have the special lumber section in Tororonto stores.
Madmax finally catches a glimpse of the Toronto sunshine...after many winter months of living in artificial light...

The Transom has been doubled...and a second layer of 9oz FG tape is applied to the new layer of plywood.
Posted: Tue Apr 18, 2006 1:51 am
by baba101
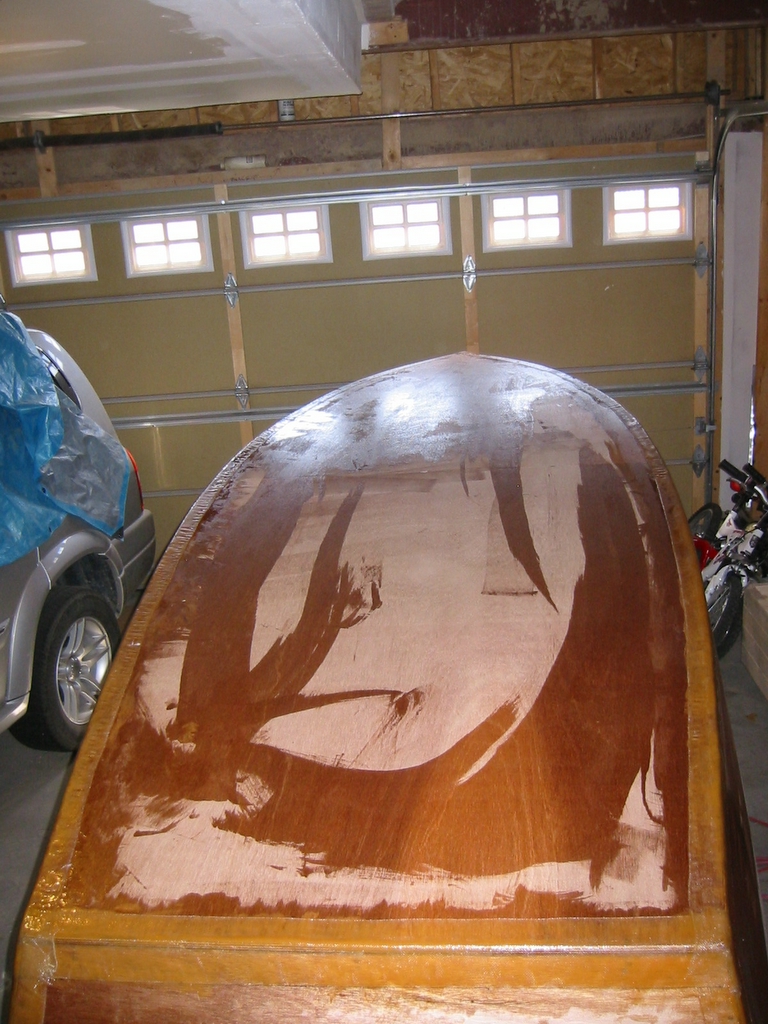
I flipped the hull today...sanded it down nice and easy...here are a few mug shots...
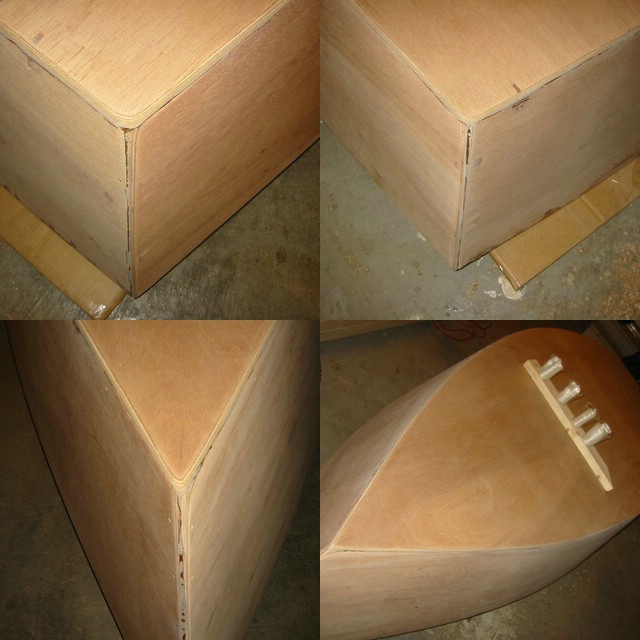
Baba LOVES sanding....I had to stop my self from over doing it....its sooo calming for the nerves....
I was really impressed with the strength of the epoxy/wood flour...the boat feels rock solid...after the tape from the outside and cloth....this thing might be too strong....then there is the rub rail...knees and my mini Gunwale...this design is over engineered to start with....God Damn it this is fun....
Baba Loves Madmax....
Baba just wants to sit infront of Madmax on the thinking chair....for hours sipping tea....just starring....
Posted: Tue Apr 18, 2006 2:17 am
by baba101
Oceola wrote:.... At the Home Depot near me here in Houston they have in their "better wood" section, you know where all the wood is stacked on end, a section marked "western pine". .... Frank
Hey Frank...they have the same
clear pine (without knots) here in Torornto...but feels pretty soft...
I can also get
Duglus Fir from a local supplier...for 69 cents per linear foot...
Don't know which one is better ...
Help would be most appreciated....thanks in advance...
Posted: Tue Apr 18, 2006 2:17 am
by ArizonaBuilder
Looking good baba,
Don't forget to create a nice 1/2" radius at the seams so the tape does not pull away and give you lots of bubbles.
Posted: Tue Apr 18, 2006 2:20 am
by baba101
ArizonaBuilder wrote:Looking good baba,
Don't forget to create a nice 1/2" radius at the seams...
Roger that Terry...!
Posted: Tue Apr 18, 2006 3:07 am
by bredstein
Oceola wrote:I just bought 16 ea. 8'x1"x2" pieces to use for cleats, rub and spray rails.
Frank, I found today this wood in our HD (Austin, TX), but don't you think that 1'' is too thick for a rubrail? I would rather put two layers of 1/4, or one 3/8, or 1/4 and 3/8 maximum. The problem here may be that 1'' is hard enough to change the shape of your sides.
Best,
Andrey
Posted: Tue Apr 18, 2006 8:26 am
by MadRus
I used 1" stock for rubrails on my first boat and the plywood build up to 3/4" on my second boat. I liked both results. The 1" was difficult to get to stay in place, but it didn't change the shape of my sides or anything like that. Later, when I had access to my radial arm saw and other equipment, I was able to rip the proper width for the 1/4" plywood. That also came out nice. I don't think I prefer one over the other. Just one opinion.
BTW, Baba, it's looking good. That 4-up shot is perfect for showing people what a tab looks like when it's been sanded down and the corners have been rounded over. Is that a glass dispenser on the bottom of the hull?
rub rail
Posted: Tue Apr 18, 2006 8:27 am
by msujmccorm
I was thinking about using the lattice molding HD sells. It's 1/4"x1 1/2" pine strips.
Jeff
Posted: Tue Apr 18, 2006 11:02 am
by baba101
MadRus wrote:.... Is that a glass dispenser on the bottom of the hull?
I didn't want to add impurities to the tape by writing on it....so I marked the disposable glasses that are used to store the Tape.
Guys...I am as ignorant about wood qualities as I am about fishing...so some help in making a decision here would be most appreciated...
i.e. Plan is to use
Scrap ply for Rub rails
Laminated strips of lumber for cleats, as KS suggested.
Solid lumber piece for the Skeg.
and would like to decide on lumber :
HD has
Clear pine, Red Cedar and Oak in their premium section.
Local supplier has
D Fir/ Philipean Mahogany/ Red Cedar/ White Ash...they are all about the same price....
How is the
finger jointed clear pine moldings for addition outside of the seat tops to join to the bulkhead...I can also use
oak or pine moldings for this purpose.
Posted: Tue Apr 18, 2006 11:38 am
by ks8
I only used laminated dimensional wood for the curved cleats on the hull sides, because I wanted one long cleat per section with the curve pre conditioned into the cleat so that minimal clamping would be needed when actually bonding those long pieces to the hull. It was much more labor intensive than was necessary, but I wanted to experiment and learn . There are many much easier methods of making and bonding in cleats for the seats. I don't regret what I did though, except perhaps for the time involved, but they are nice, strong, continuous full length cleats. They required a jig to laminate at the proper curve (slightly more curve than needed so it would relax into the right curve).
Red Oak is more rot prone than Doug Fir.
For rubrails I used strips of plywood, but also added a shorter and thin mahoghany cap...
Posted: Tue Apr 18, 2006 2:03 pm
by baba101
KS,
Thats one hell of a boat man....! Baba feels humbled...
Posted: Tue Apr 18, 2006 2:49 pm
by ks8
baba101 wrote:KS,
Thats one hell of a boat man....! Baba feels humbled...
yea, well, I think I lost control ...
I hope it floats. Yours is shaping up very nicely and quickly. I posted that picture so you can see how easy it is dress up an otherwise simple plywood laminate rubrail. The plywood laminates were very easy to do, and that very simple strip of mahoghany does wonders. Since the mahog is very thin it was simple to form it to the curves of the sheer. The rubrail, other than the mahog, will be a blend of white green and blue, slightly lighter than Mercer Green, but with a tinge of Blue in it, and of course, the mahog will be bright finished. It doesn't have to take a lot of work to put a nice touch on a rub rail, but the plywood multiple laminate was super easy to install. If I built another, I'd do the rubrail the same way, if not put a rope on it in place of the mahog.
Have fun deciding...
ks
Posted: Tue Apr 18, 2006 3:40 pm
by mpacek
I used ext 3.8" plywood ripped down to 4' l x 1 1/2"w. I built the whole boat out of ext. I did glass the whole exterior hull. If you see my gallery you can see. I thought the boat was stiff before once I added the rub rail it was like a rock.
I built the skeg as per the plans. 2 scrap pieces of 3/8" epoxy togther and cut out. Screw and glue on.
You will love the results. This design is strong. Holds my family and has never creaked, groaned, or popped. My level of finish is not as nice as others here but that is a lesson I learned about cold weather gluing and painting.
You are making great progress keep it up.
Posted: Wed Apr 19, 2006 1:24 pm
by gk108
How is the finger jointed clear pine moldings for addition outside of the seat tops to join to the bulkhead...
You should avoid the finger jointed pine. Most of it won't have waterproof glue in the joints. It also tends to break at the joints if you bend it.
GK
Posted: Thu Apr 20, 2006 11:07 am
by baba101
mpacek wrote:....I built the skeg as per the plans. 2 scrap pieces of 3/8" epoxy togther and cut out. Screw and glue on....
Thanks ...looks like its time for Baba to read the building notes again .... I like the idea of using scarp laminated ply as much as possible...saves money and you know its not going to get deformed.
GK ...appreciate the heads up about Finger jointed wood....I won't use it...
Posted: Thu Apr 20, 2006 1:09 pm
by baba101
Baba is happy to report there were no Bubbles....but frequent waves on the surface...
Looks Like Baba has to use a lot of woodflour to fill the wavy surface of FG tape...before apllication of Cloth on the bottom....Also means I will have to work wet on wet for cloth else Mr Bubbles...(I understand this is not the time for quikfair).
The reason for this wavy surface is too much woodflour in the first place...and maybe application of the tape too soon after glue.

As Baba continues to learn from this experience...he may comfort himself in the fact that strength of the boat has not been compromised...scope of work and cost of material has increased.
I have approx 1.25 Gal of rasin plus .75 gal of hardner left...wonder if its enough...?
Posted: Thu Apr 20, 2006 3:40 pm
by gk108
That looks pretty good. Don't worry about the wavy tape too much. It will look better after you put the cloth over it. You will probably want to cut down the rough edges of the tape first. I like to use a
Stanley Surform to do that.
I have approx 1.25 Gal of rasin plus .75 gal of hardner left...wonder if its enough...?
Are you going to completely cover the outside with cloth?
I put a total of 9 yds of 6 oz cloth on the outside of my D15 and used right at 1 gal total resin and hardener to do it. If you are only going to cover the bottom with the minimum amount of glass, you should have enough to complete the bottom. Your tape seams look like you know how to squeeze the extra resin out of the fiberglass. Just do the same when you put the cloth on. The subsequent coats of resin to fill the cloth and seal everything won't use as much resin if you roll them on.
GK
Posted: Thu Apr 20, 2006 3:59 pm
by bredstein
baba101 wrote:I have approx 1.25 Gal of rasin plus .75 gal of hardner left...wonder if its enough...?
Everything is in the hands of God... But just FYI, I have at this point a little bit of resin left in the first can, maybe 1/15, and a little more than a half of the hardener. But I am done with the cleats, which makes me left with almost the same amount of epoxy, so don't worry, even if you ran out of it, you are not going to be the only one!
Posted: Thu Apr 20, 2006 4:03 pm
by rjezuit
I used more epoxy than was specified in the kit, but I did some additional gluing and used it to fair. I bought an additional 1/2 gallon of resin and qt. of hardener and I have a little less than half of that left, and I have wasted some. Epoxy goes off a lot quicker at 70 degrees than it does at 50 degrees, so I lost a few cups worth at the end of the build. Rick
Posted: Thu Apr 20, 2006 4:47 pm
by baba101
Cool thanks....No wood flour it is....and "God to Decide" if the epoxy is enough.
Baba will be away from Madmax until Tuesday...by then the epoxy would have cured nice...Mr Stanley and my faithful sander will smooth the edges before Madmax is all dressed up.
For the Bottom I have 9oz Cloth and the wings get 12oz Biax.
Why...? just to to learn the difference in the two materials....
Baba Can't wait till tuesday....
Until then....adios...!
Posted: Fri Apr 21, 2006 11:58 am
by ks8
Hello Baba,
The wavy bumps in the tape are from a bit too much epoxy that pooled under the tape and lifted the tape. I don't think you'll have any problem though. The woven tape almost seems to have a tendency to do that on outside curves anyway. You have to be careful not to over apply the epoxy when first laminating the tape. You wet it out of course, but then wait a bit and only add more on top if it looks like it might be starving. Sometimes it just lifts and needs to be squeeged back down. Sometimes you do need to add a bit more epoxy, but if you really lay the epoxy on thick, that is when the tape can start to float up on pools, and it gets wavy or little mounds.
The bottom cloth may do the same if you overapply epoxy to try and fill weave on the first application, that is, the glass may float up on pools of epoxy, maybe not as waves, but as little mounds. This happend to the glass on the inside of my transom, pretty bad. Since it is a small section, I'll probably sand down the ridges and put another piece of 4 or 6 oz on, smooth this time. I was way over zealous the first time around!
When you do the cloth, just get it wetout well, with no bubbles, nice and flat. When it starts to tack a bit, and is well adhered to the hull, then you can fill the weave a bit, but filling the weave is often done with fairing compound rather than straight epoxy, unless you are going to bright finish. I like to use a bit more straight epoxy after the application has set, then final fairing is done with the fairing game later, but this will use what's left of your epoxy. You may need more.
The first build tweaks many of these technique details, but the boat will be fine just as she is coming along. Structural strength comes first, then cosmetic. Your boat looks strong and pining for water! You can fair her nice before primer later. And you will want to knock edges of the tape off before the cloth goes on.
Happy glassing! Looking good!
ks
Posted: Fri Apr 21, 2006 12:54 pm
by baba101
ks8 wrote:...The wavy bumps in the tape are from a bit too much epoxy that pooled under the tape and lifted the tape. ....ks
KS : here is my theory to the origins of the ridges:
Using slow hardner I created woodflour seems that were about 5 inches wide (which should have been 1/2").
I then applied the tape immidiately after...since the woodflour was totally soft...poking with the brush to remove bubbles... created the redges. Plus the fact that a straight tape will have a tendency to create ridges due to the curvy shear lines.
Under the high spots I see dense yellow glue....
I was careful to remove the excess epoxy with a roller and spread it over the bottom...
This leads me to believe that the tape is not floating over epoxy but hardglue... would you agree...?
Posted: Fri Apr 21, 2006 2:21 pm
by Oceola
Breadstine,
The 1"x2" Radiata pine I was talking about is "dimentional" lumber so it is actually only 3/4"x 1 1/2". Most of the small boats like my D-15 call for a 3/4" rubrail. I will either soak or steam, clamp to the shear, let dry in place, remove to let the shear line dry, then epoxy in place. It should work. It's been mentioned here before in many threads, and of course has been done for eons on conventional wooden boats.
Happy Friday,
Frank
Posted: Fri Apr 21, 2006 2:52 pm
by bredstein
Oceola wrote:I will either soak or steam, clamp to the shear, let dry in place, remove to let the shear line dry, then epoxy in place.
Frank, I don't have any experience with either soaking or steaming. I also believe it requires some equipment? What do you think about kerfs? Would it be OK? I really liked this pine in HD, and my only concern is how to make it take the form I need. Is it possible at all to do it without steam/water?
Thanks, good luck!
Andrey
Posted: Fri Apr 21, 2006 5:18 pm
by baba101
Why not strip your pine at 1/4" or 3/4" (thickness) and add 2 or three layers for your rubrail...
If I don't have enough Scrap ply left thats what I am thinking of doing...also I will go 3" wide strips...they will look better like HookieBuilders FL14.
Posted: Fri Apr 21, 2006 5:20 pm
by ks8
Hello Baba,
Yes, if you had much soft wood flour mix there and applied the tape wet on wet, it is actually sort of the same principle, where, instead of excess epoxy lumping or pooling, you had wood flour lumping or gathering. If you squeeged well, the wood flour blend probably began setting up before the fresher straight epoxy and you just couldn't flatten it anymore, but, so you know, people who did not use that wide strip of wood flour mix can get the same problem with only epoxy. I found the woven tape is a bit less likely to have that wavy tendency if you trim off the larger edge of the tape with scissors or razor, about 1/8 inch off, but then the tape is more likely to shed a little. Many techniques for same final effect. Advantages and disadvantages to each. All things boats are in a world of compromise, including techniques while building them.
I'll let you get back to planning the cloth layup.... while I finish the last two plank laminates of my faux transom (It's turning out better than I thought it would!).
MadMax is looking good!
ks
Posted: Fri Apr 21, 2006 5:22 pm
by MadRus
I can say, I used 1 x 1 (I'm pretty sure it's some kind of pine) balluster stock and it was easy to bend for a rubrail, and I added a piece of 3/4 cove molding underneath for a touch. To bend the 1 x stock, just get it as long as possible, start on one end and bend and clamp as you move forward. The idea is to use each successive clamp as the fulcrum of the lever, being sure to get a long length of stock for good leverage as you slowly move the fulcrum forward, matching the curvature of the sheerline. It worked for me.
Note: You must use either screws or serious clamps, not cut PVC clamps if the sheer has any dramatic curves in it. The PVC clamps will not hold the torsion.
Posted: Sat Apr 22, 2006 11:45 am
by baba101
Friday night Fever
Baba couldn't wait till Tuesday.....Just Couldn't sleep last night ...kept building Madmax over and over in my mind as I laid in bed...
To hell with these self imposed restrictions...lets go build my boat....started 10pm...
I first used a hand planer to rip out the sharp edges of the tape. Then sanded them down. Wiped clean with a damp cloth and let it dry fully. here is the result.
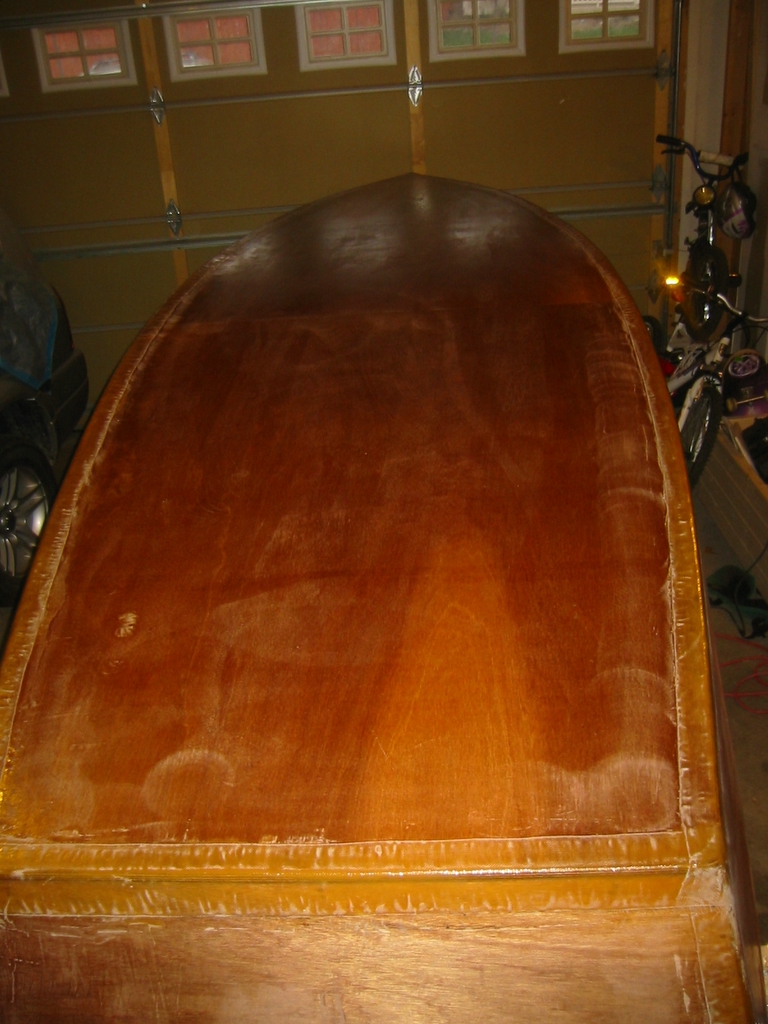
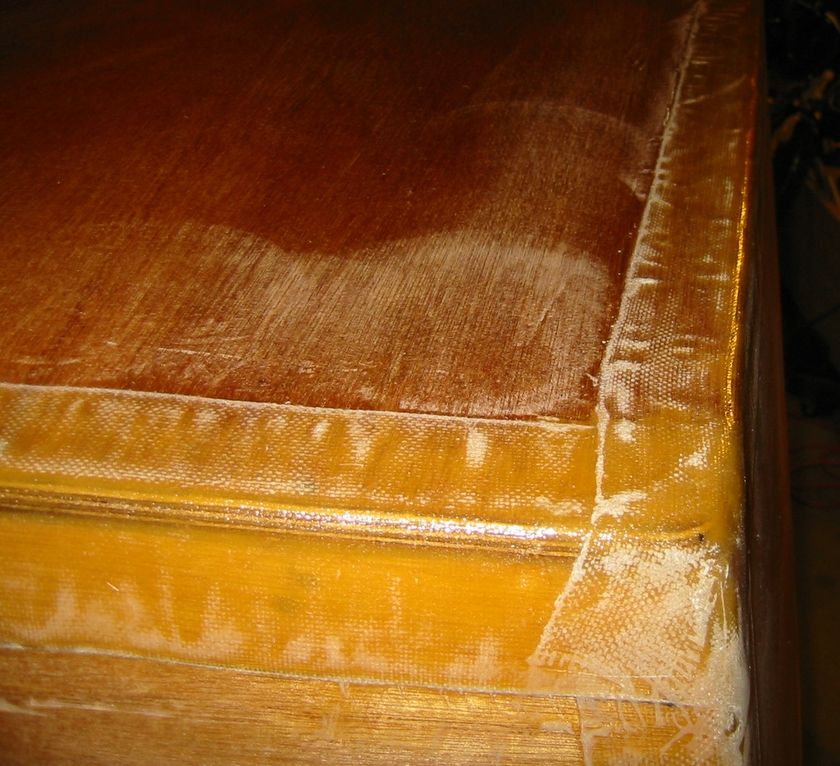
To apply epoxy....I used a Brush/Roller and a Squeggi..all methods worked really well. Squeggi was great to remove excess epoxy...brush was good for the uneven surface...and foam roller was great for spreading the epoxy evenly afterwords.
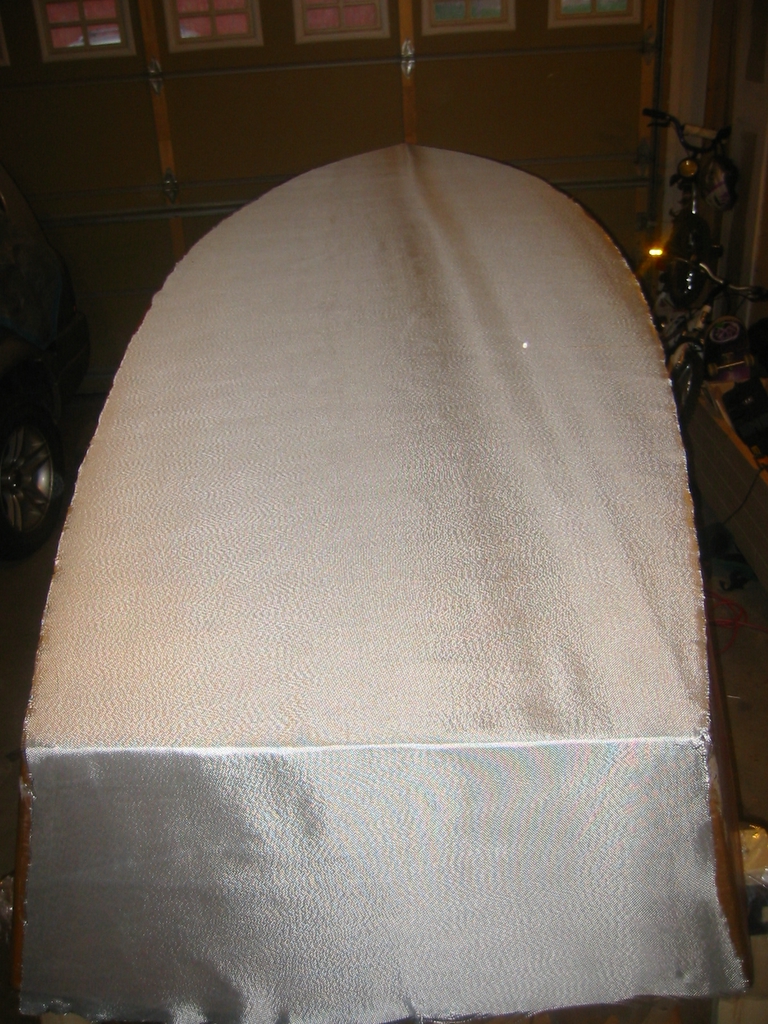
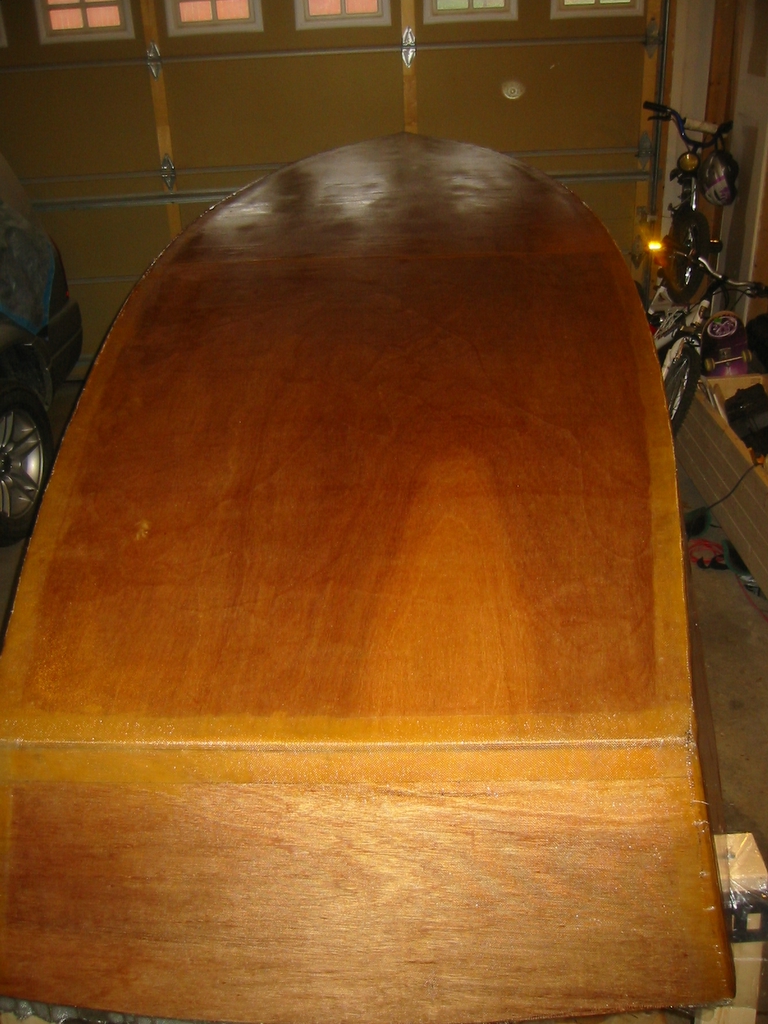
It was fun...
I was very pleased with the results...
Great music on the Radio too...
I would highly recommend boat building as a Friday Night activity...beats going to those sleezy clubs..full of AIDS, Rabbies and what not...!
Baba really needs to pace himself...otherwise the boat might be finished too soon..and the fun will be over... Baba is angry with himself
.
...
Tisk tisk (slap on the wrist) Bad Baba...!
bottom cloth
Posted: Sat Apr 22, 2006 3:24 pm
by msujmccorm
Baba,
Did you precoat the bottom before the cloth or did you put the epoxy on dry cloth?
Jeff
Posted: Sat Apr 22, 2006 3:35 pm
by baba101
Hi Jeff,
I precoated the bottom..and then let it cure completely..Sanded, wiped clean etc..
Then applied epoxy to dry cloth...it was very easy...
Posted: Sat Apr 22, 2006 4:03 pm
by bredstein
baba101 wrote:[...] applied epoxy to dry cloth...
Looks very nice! Congratulations! Baba, I am thinking about FGlassing from outside. Can you tell me how many yards was that piece? I need to know how much of this stuff to order.
Posted: Sat Apr 22, 2006 4:10 pm
by baba101
I wasted a lot of cloth by applying one piece only on the bottom...
5 yds of 9oz cloth (60 in wide) plus lots of scrap (left over) for bottom.
I bought another 5 yds (50 inches wide) for the sides...(again I have waste)
I think if you apply it sideways like Mike did, there will be no waste. Fairing will be a little harder though..
Posted: Sun Apr 23, 2006 10:37 am
by bredstein
baba101 wrote:I think if you apply it sideways like Mike did, there will be no waste. Fairing will be a little harder though..
I read in one the threads that biaxial is used to add strength where there are connected/bending parts. It makes sense to me because you have ALL the strings (or how you call them) work, not only half of them. But why put biaxial on bottom/sides - don't you think that 4 oz filled with epoxy protects your ply in the same way (and reduce the weight)?
Posted: Sun Apr 23, 2006 11:09 am
by ks8
Applying it sideways is not to make it like biax, in this case. It is simply to avoid more waste in laying out the cloth, but it makes bumpy seams every 50 inches or so, athwartships, that need to be faired.
On a boat the size of the FL14, I suppose 4 oz would help a little with abrasion resistance, but it seems 6 oz or 9 oz might be more protective. Why? The boat is heavier than, say, a PK78, so when it bumps or scrapes on something there is a bit more inertia in the grind or scrape action. 4 oz is good to stabilize fir plywood and keep it from checking, but if I were possibly pulling a heavier boat over a rocky beach (ouch), or nudging sharp rocks, I don't know how long 4 oz would do what is expected of it. 9 or 12 oz biax is heavier still, and if you really intend to beat on the hull, get some thin hardwood runners on the bottom, or maybe you should switch to steel plate?
Posted: Sun Apr 23, 2006 1:31 pm
by baba101
bredstein wrote:.... But why put biaxial on bottom/sides - don't you think that 4 oz filled with epoxy protects your ply in the same way (and reduce the weight)?
Andrey part of the answer is in the name "Madmax"...its crazy over engineering.....and weight is not an issue for me...since its a displacement hull.
I used 9oz cross weave at the bottom because at the time of cutting that’s all I had...
When I realized I needed another 5 yds of FG I decided to go for 12oz Biax, purely as a learning exercise.
Plus I thought I needed the stronger cloth on the sides(rather than the bootom) for the following reasons:
The bottom will be Carbon Fibered...making it very abrasion resistant.
All the overlap is at the bottom...which is also made from a thicker ply i.e. 3/8"..
The 12oz will compensate for the lack of EARs in the bow section.
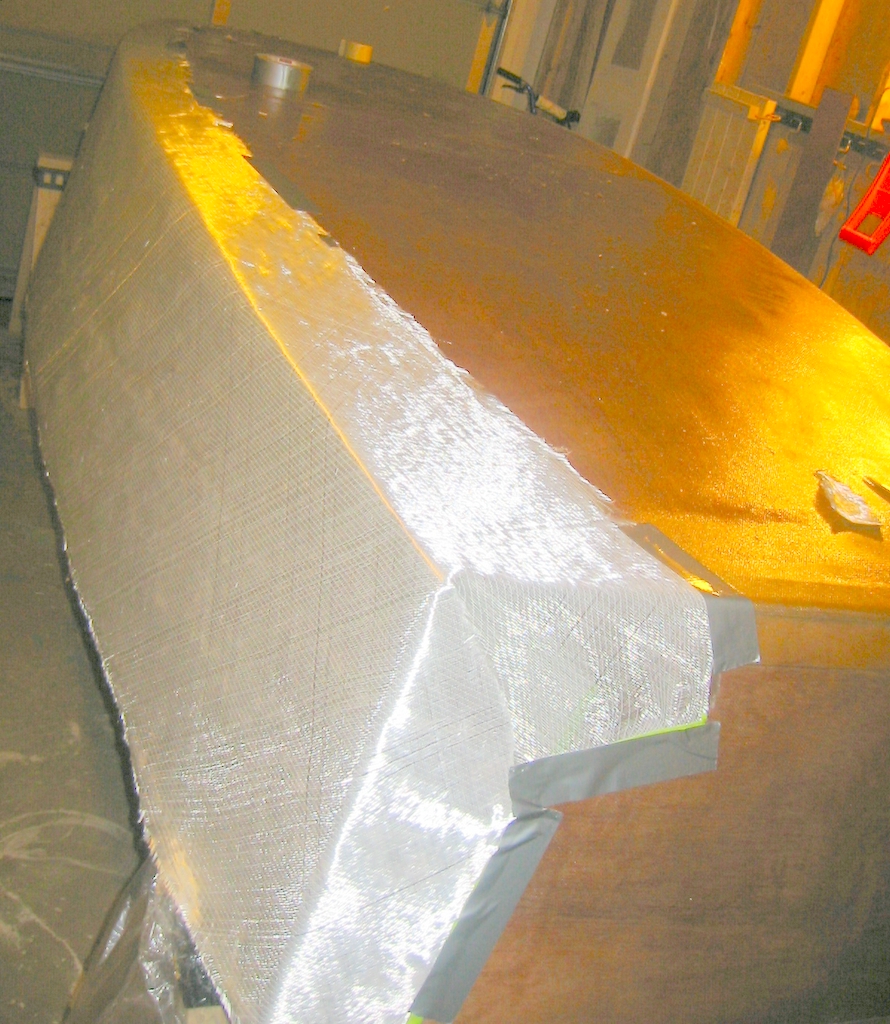

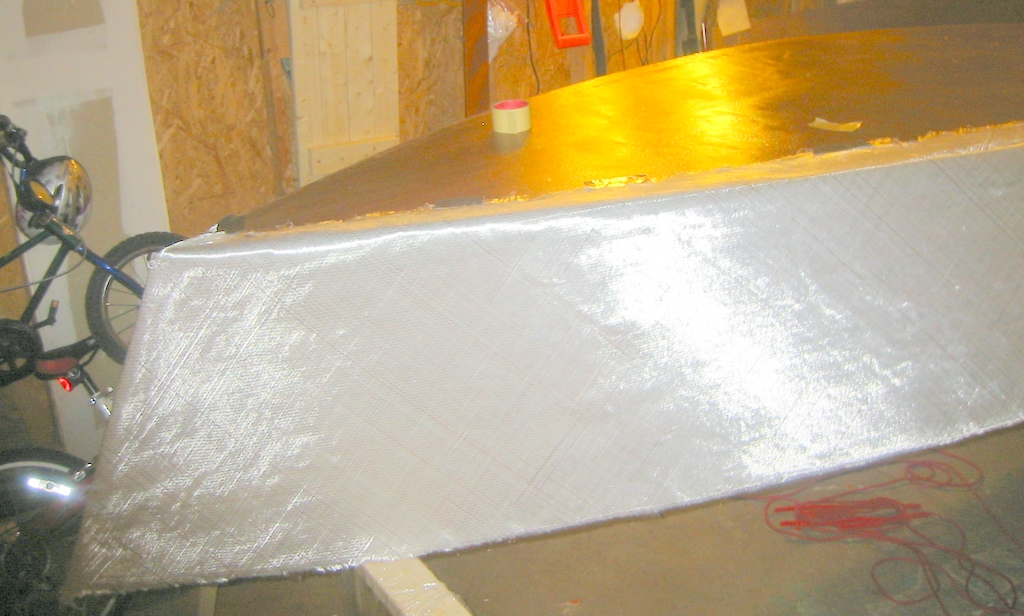
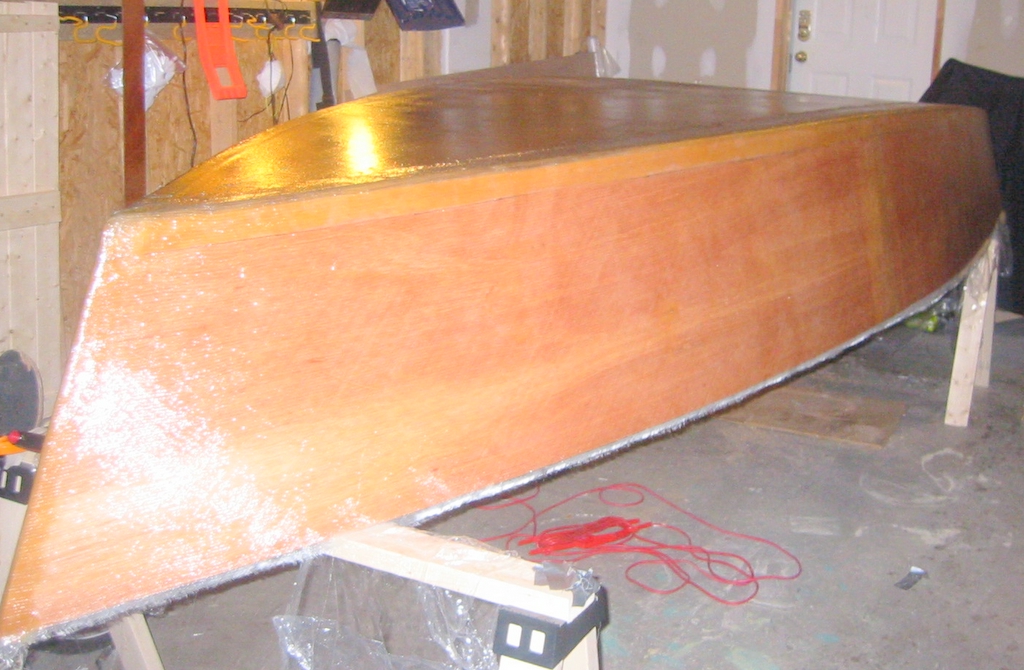
It took me 4 hours last night to glass one side.
Posted: Sun Apr 23, 2006 7:45 pm
by ks8
Well now, I guess I could vainly consider myself a very conservative builder in comparison!
It's looking like nicely wetout glass...
Remember how much it weighed when there was no glass on it yet? Wait until you heave it up again with it all glassed!
I lifted the Caravelle last weekend, well, the transom. It is quite a different boat from when it was only a plywood pickle dish. But then, it is quite a different boat! I will not try lifting it alone again except in an emergency (ugh). I'm getting too old for my voice to go up an octave.
She's right about what I guestimated with the mods and extra glass... right around 300 lbs, maybe slightly over (320?) once the final finish is applied and CB and rudder swinging, without batteries or rig.
Let us know how much madmax gains once glassed.
Posted: Mon Apr 24, 2006 5:29 am
by Mike Adams
bredstein wrote:Why put biaxial on bottom/sides - don't you think that 4 oz filled with epoxy protects your ply in the same way (and reduce the weight)?
As designed, the FL14 does not need any glass on the bottom and sides, but of course it does add protection. However, a bigger boat will require the use of biaxial fabric, so if the FL14 is your 'practice' boat, using it gives you some experience with biax before building the big one.
Mike
Posted: Mon Apr 24, 2006 9:29 am
by MadRus
baba101 wrote: I decided to go for 12oz Biax, purely as a learning exercise.
I don't know... from what I see, Baba looks ready for the big boat now. That's a nice glassing job from the pictures.
Posted: Mon Apr 24, 2006 6:21 pm
by baba101
Final layer of Glass took three hours....I also sanded down all sharp edges from the other sides..
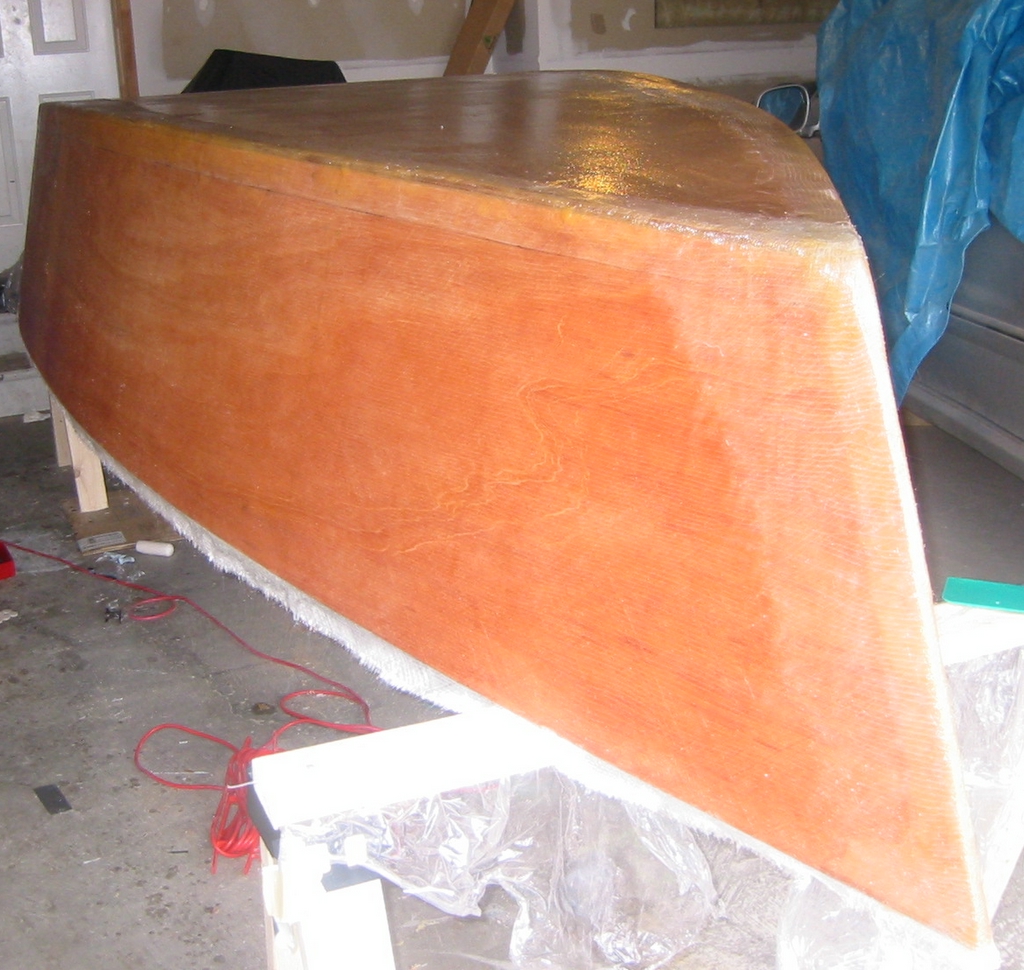
Thanks for the encouragement Madrus...
Baba was hit by a new wave of inspiration while I glassed the wings...
Baba would like to spend his last years building a VG26 at a Holiday resort (like Panama/Malasia or something)…with an open invitation to all my close friends to join me in this adventure…an opportunity to work hard, play hard and catch up on old times and build new memories…as we see this monster take shape.
And finally to sail forever........
P.s. and don't look at the Dingy (Madmax) while you imagine this...
Posted: Mon Apr 24, 2006 10:51 pm
by rjezuit
Baba, This baby will be done before nice weather sets in. Keep going and enjoy this summer. Maybe change the name to Battle Cruiser MadMax. The biax should give you ability to navigate the falls. Rick
Posted: Mon Apr 24, 2006 10:52 pm
by rjezuit
A thought just occured to me "Maid of the Max" ??????
Posted: Mon Apr 24, 2006 11:27 pm
by baba101
Rick,
I gotta slow down....I will be sad when this project is over...won't know what to do with the boat once in a Lake...
I might get bored ...or might have to learn to fish or something....
I do Like the idea of taking on the Falls...are you going to watch me from your side of the border...
Posted: Tue Apr 25, 2006 1:07 am
by baba101
Baba's Project Monitor will ensure many months of fun and a timely launch in April 2007.

Posted: Tue Apr 25, 2006 8:45 am
by rjezuit
Baba, I like the Microsoft Project work, but speed it up, times a wastin'. Even when your boat is done, it will not be done. There are numerous tweaks you will find yourself doing. Let me know when you are going to navigate the falls, I'll bring my camera. Rick
Posted: Tue Apr 25, 2006 10:53 am
by bredstein
baba101 wrote:Baba's Project Monitor will ensure many months of fun and a timely launch in April 2007.
The plan looks great, but it requires a great deal of self discipline! I remember how Baba was going to wait till Tuesday, but could wait only till Friday, and at 10 pm sharp said: "To hell with these self imposed restrictions!"
Isn't this plan just another self imposed restriction?
Posted: Tue Apr 25, 2006 10:59 am
by rjezuit
Life is full of self imposed restrictions. Boat building is supposed to be fun. Do what you can while you have the urge. I went like crazy up until the sanding, sanding, sanding part. Then it ceased to be as much fun. So the sanding took about the same length of time as the building in calendar days, but not hours. I found myself working many hours a day on the fun stuff, but not as many when it came to the drudgery. Rick
Posted: Tue Apr 25, 2006 11:01 am
by baba101
bredstein wrote: Isn't this plan just another self imposed restriction?
It is indeed...I know this is just a Dingy...but if I don't learn to be patient with boat building...my next boat might start to rule my life...and then there is this danger of a perfectly good obsession becoming a mild case of insanity...
Baba must learn to control the urge
Posted: Tue Apr 25, 2006 11:19 am
by baba101
I see everyone has built compartments in all the seats....which adds strength to the seat tops.
Baba will be filling all the seats with foam...and will not need the compartments..I am assuming the design does not require these reinforcements...?
Just cleats around the the four walls of the seats will be enough...?
Posted: Tue Apr 25, 2006 12:52 pm
by Lon
Posted: Tue Apr 25, 2006 12:57 pm
by baba101
Thanks man...I was thinking more on the lines of standing on the seat tops... 7cm dia is still kinda hard to reach... but a 100KG Balarina could do it
Since Baba is no Balarina...No additional crossbeams ..
Posted: Tue Apr 25, 2006 1:41 pm
by ks8
If you foam to the top with the two part foam, and then cut it flush with the top, the foam will also add some support. I hear an electric kitchen knife works well to cut the messy stuff, but I haven't had the pleasure yet .
Maybe with the added support of the foam, Baba will learn to do pirouettes on his seat tops while reeling in the bass and dreaming of the VG26 build at a resort hotel. Now I have to spend the rest of the day getting that mental image out of my head...
Posted: Tue Apr 25, 2006 4:19 pm
by rjezuit
Instead of the 100kg ballerina, I prefer the images from the canadian ballet. Rick
Posted: Wed Apr 26, 2006 9:22 am
by baba101
This week:
1. Rip out 1/2" X 3" strips of clear pine for Rubrails. (dont' have enough Scrap Ply left for this).
2. Make Skeg with either Clear Pine Stock or 2X 3/4" Ply.
Posted: Wed Apr 26, 2006 11:37 am
by ks8
For a 1.5 inch skeg? Oh, I forgot, that will go nicely with the biax sides and carbon fiber bottom ...
... during mine sweeper operations...
You make me feel good about my boat, which will be comparatively quite light,

, but not as strong as that carbon fiber treatment.
Actually, my skeg will be about an inch thick also, maybe inch and an eigth, and I'm biaxing it on, so, as usual, who am I to talk...
I hope you finish this year, or soon. I'm looking forward to seeing Max displace some water.
Posted: Wed Apr 26, 2006 11:57 am
by baba101
If I decide to split the rubail in two halves and insert a Rope in the middle...
What would be the best way to attach the rope to the rubrails...is it glued (3M 5200) or just tied..?
Posted: Wed Apr 26, 2006 12:12 pm
by ks8
When I was planning that, I was going to lash it somehow, so it was easily removeable, yet easy to tighten so it wouldn't fall out. Maybe hidden lashings every foot or so in between the two rubrails. But I think many jam it into silcone or such, or make the rub rails outer edge a little narrower than the rope diameter so the rope is pushed into the chamber, yet protrudes about 1/3 for desired protection.
FL 14 Seats
Posted: Wed Apr 26, 2006 12:13 pm
by mpacek
On the seats. The forward seat if built as per plan will need some reinforcement when a 250lb boat builder tries it out by sitting on the edge. Filling the forward compartment and the rear seat compartment with foam will provide more than enough flotation for the weight of the boat.
I used the mid seat compartment for storing the trolling motor battery. Alot of the lakes around me do not allow gas engines so oars and trolling motor are nice. By the way the 36LB thrust MinnKota pushes the FL14 along at 2-3 knots with 600lbs of passengers and gear.
I hope to be fishing this weekend when I get the cover off the boat I will show more pics of the battery compartment.
Your glass job came out great.
Re: FL 14 Seats
Posted: Wed Apr 26, 2006 3:54 pm
by bredstein
mpacek wrote: the 36LB thrust MinnKota pushes the FL14 along at 2-3 knots with 600lbs of passengers and gear.
Do you think 30 Lb MinnKota will work? In Academy the difference between new 30 and 36 is about $30 ($80 vs $110), but I have a good deal on a used 30 lb motor. My concerns are power, and more important, shaft length. Since I am building the same FL14 as yours, do you think a shorter and weaker motor will work on your boat?
Thanks!
Posted: Wed Apr 26, 2006 4:16 pm
by rjezuit
I have an older 20# thrust that will push my FL14 along in still water with 4 people aboard. Not going really fast, but faster than rowing. Rick
Posted: Wed Apr 26, 2006 5:24 pm
by bredstein
rjezuit wrote:I have an older 20# thrust that will push my FL14 along in still water with 4 people aboard. Not going really fast, but faster than rowing.
Rick, what's the length of your shaft? The chart in Academy says that their 30 Lbs is OK if you have up to 10'' from the upper side of the transom down to the waterline. My boat is not built yet, so how do I know where this line is
Posted: Wed Apr 26, 2006 5:28 pm
by MadRus
bredstein wrote:
Rick, what's the length of your shaft?
Oh man, now we're gonna get some fish stories!
Posted: Wed Apr 26, 2006 7:40 pm
by rjezuit
It's huge, but the shaft on my trolling motor is about 3' long. It slides up/down through a friction collar. When fully down it is well below the bottom of the boat(at least a foot), and that is how I run it most of the time. It just makes it easier to steer without having to reach up to the motor handle. I usually mount it to the far right side of the transom and sit in the middle or left side with the battery also on the right, this balances out the weight. No rocket science just clamped on the transom. Mostly I use it on a small lake near where we camp or on the Erie canal. There is no current on either, just maybe fighting wind going one way. Rick
Posted: Fri Apr 28, 2006 11:45 am
by baba101
I installed the Skeg last night...and laminated the rubrails...
Currently the rub rails are from 1" x 2" Clear pine lumber...and it bends real easy...I intend to add one layer of 1/4" Ply to it.
Is there any need to strip the pine to 1/2"...?
Posted: Fri Apr 28, 2006 12:10 pm
by tech_support
Baba,
Multiple laminated thin layers will have less springback then fewer layers (or just one layer. If you laminate 2 layer of 1/2" as opposed 1 layer of 1" - you will have less spring back. This is not really an issue since your boat is already "put together". But imagine it was just a shell, the spring back, could distort the shape of the hull.
Joel
Posted: Fri Apr 28, 2006 1:04 pm
by gk108
Put the pine on the boat first and then laminate the plywood on top of it. Don't try to laminate first. That would make it very tough to bend around the hull.
Posted: Fri Apr 28, 2006 6:52 pm
by baba101
Started building the skeg last night..first made it from the clear pine...only to realise the lumber was slightly bent...after fiddling with it for two hours...(wasted 6 bucks).
Started again with a straight 2X4...and striped it to slightly over an inch wide (as per specs). My Jigsaw gave up when the thickness exceeded 2.5 inches. It was pedal to the metal...burnin a lotta rubber but not movin. Had to resort to handsaw...which worked fine.
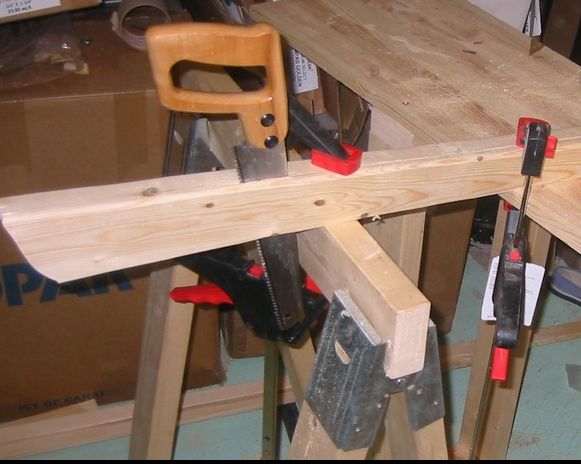

Started the cleats today. This is fun....but had to stop when I ran out of clamps...

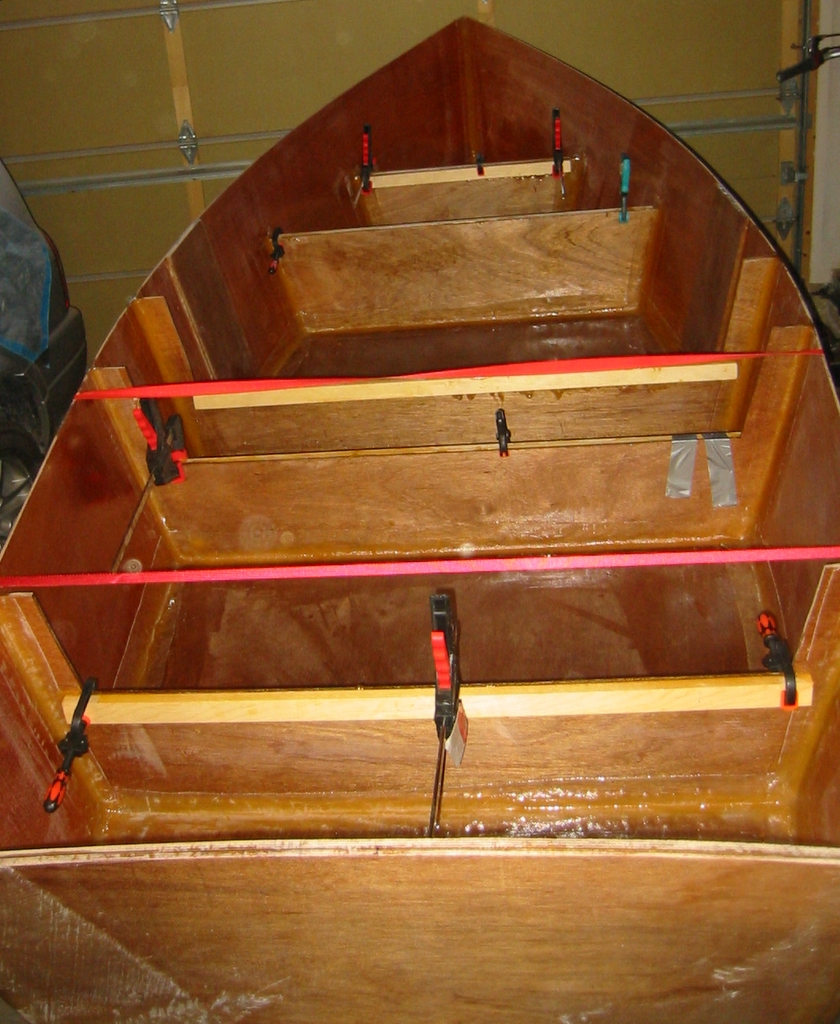
Posted: Fri Apr 28, 2006 6:56 pm
by dewers
Shine wrote:Baba,
Multiple laminated thin layers will have less springback then fewer layers (or just one layer. If you laminate 2 layer of 1/2" as opposed 1 layer of 1" - you will have less spring back. This is not really an issue since your boat is already "put together". But imagine it was just a shell, the spring back, could distort the shape of the hull.
Joel
Shine, do you laminate them togeter before you instal them as a rubrail, or one at atime along the length?
Posted: Fri Apr 28, 2006 7:05 pm
by baba101
dewers wrote:
....do you laminate them togeter before you instal them as a rubrail, or one at atime along the length?...
I made one long rubrail out of 2X8' and will add it as one piece...on the other side I want to glue them straight on the hull..which I now think will be a better method. Since it will allow me to get the perfect fit on the hull.
I will however work on both rubrails at the same time...
Once the First layer is hard...I will apply another layer of ply...as suggested by KS8 above.
Posted: Fri Apr 28, 2006 11:39 pm
by bredstein
baba101 wrote:Started building the skeg last night..first made it from the clear pine...only to realise the lumber was slightly bent...after fiddling with it for two hours...(wasted 6 bucks).
You know what, you should have tried to play with a heatgun. If your wood is bent, especially 'slightly' you can find the center of the curve, then heat a small area about 1'' to both sides of this center. Not to much, the lumber can get brown, but no burning! Then while heating, start to pull in the direction you need. Once it took the shape, stop heating, and the wood will remember its new form forever. And for the minor imperfections there is a belt sander.
baba101 wrote:Started again with a straight 2X4...and striped it to slightly over an inch wide (as per specs).
Specs are important, but do we really need to worship them to such extent? I am absolutely positive, that 2x4 will work exactly as good as your ripped one. Which is, btw, in fact is not 2, but only 1 and 1/2 of an inch...
Your progress looks great! Good luck!
Posted: Sat Apr 29, 2006 1:39 am
by baba101
bredstein wrote:....you should have tried to play with a heatgun. If your wood is bent, especially 'slightly' you can find the center of the curve .....
Thanks Andrey...something to remember for my next boat... I did use the planer and my Orbit Sander to try and get it perfectly straight...but it was hard...and the Skeg was gettng a little too thin at the front....
When I was riping the 2X4 I was thinking speed..and drag...Imagining racing my Yam 4 verses a sports canoe or a dragon boat...
didn't want to loose just because I was too lazy to rip the 2X4 when it was time.
Also fear of the unknown...like when we made the butt blocks wider than specs...you cracked the joint...and I lost the smooth sheerline on Madmax..I figured when in doubt stick to the plans...
My Next boat OB19...will be ruthlessly to spec...this Baby as you know is a pratice boat...and I want to learn as much as possible...and am happy that I picked a displacement hull for this purpose...
Having never used or owned a boat before (not knowing what to expect) ...I naturally aspire to make mine stronger than it needs to be...like the old engineers...who without precise understanding of stresses over-engineered bridges to be 10 times stronger than needed...
Posted: Sun Apr 30, 2006 4:14 am
by baba101
Installation of the rubrails 4 hours...
This is a very gooie task for one person...the rail fell off a few times...had to scrap off the muck...and start again.
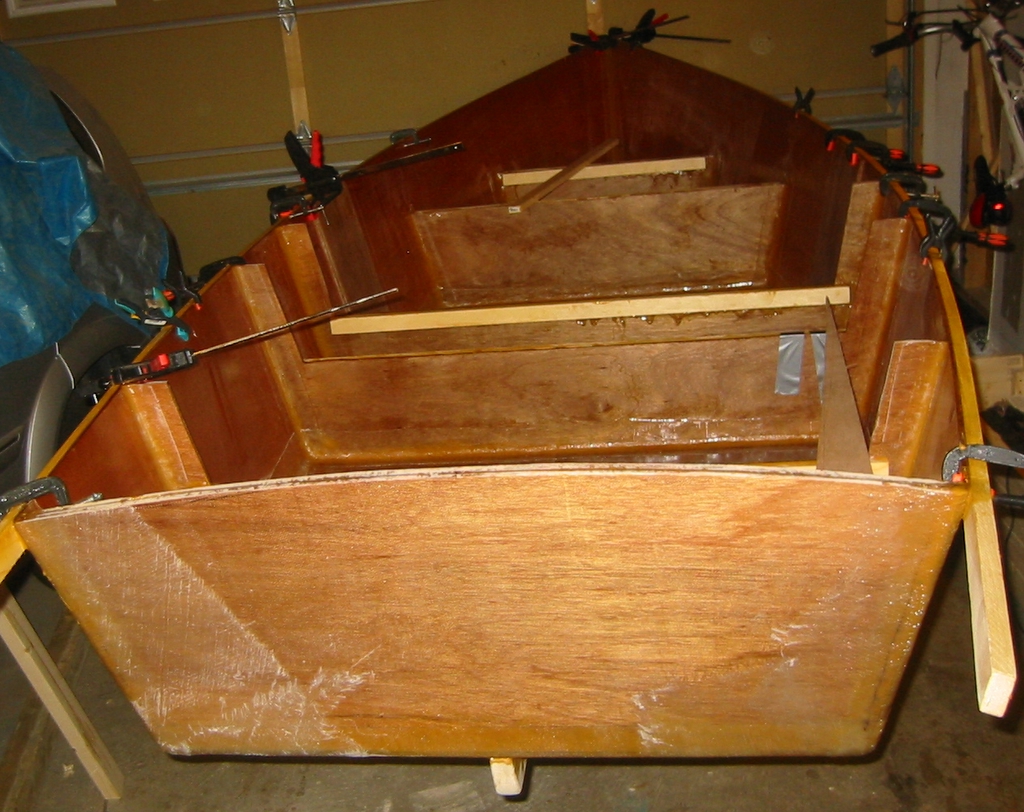
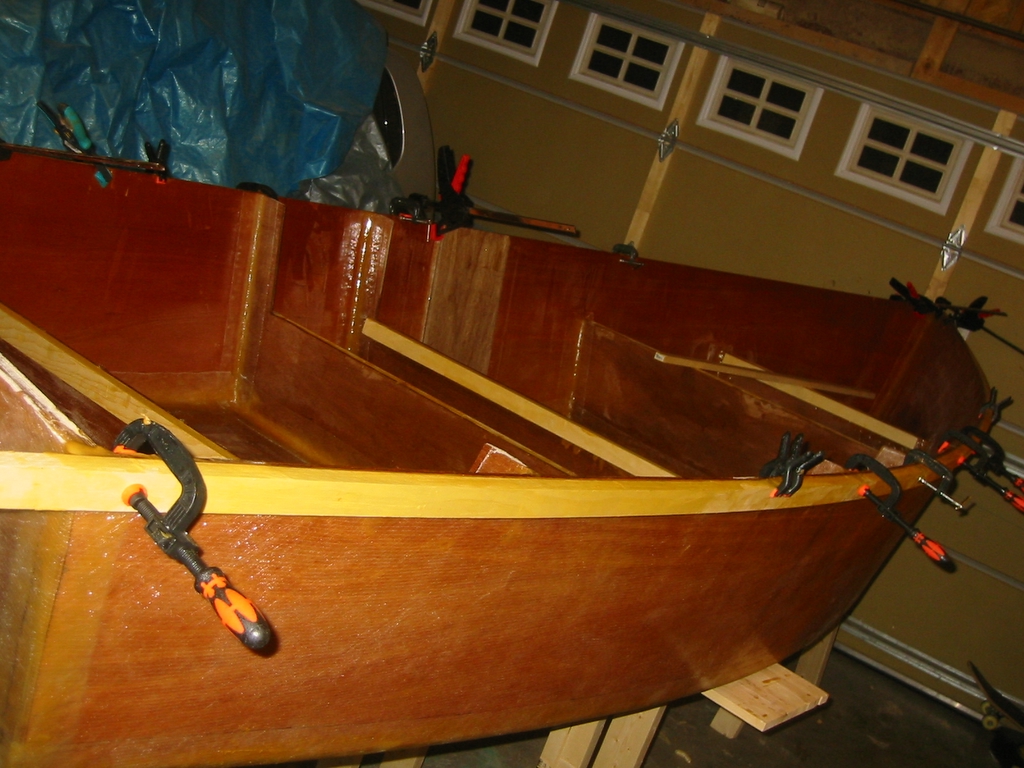
Baba
is not too happy with the esthetics of this Rubrail...I want to maybe double the width, round off the top corner then FG it from the top and sides (to provide better protection). It will also give a nice grip.
Baba plans to install a single piece on the bow front to close the loop.
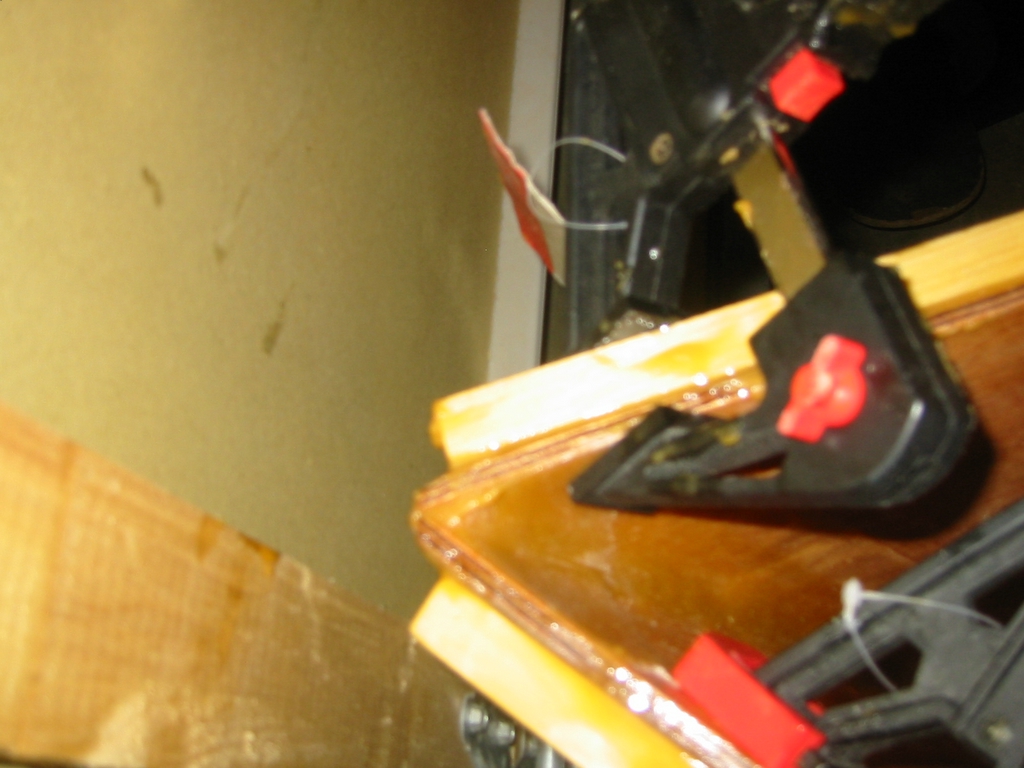
This is how I joint the rubrails..
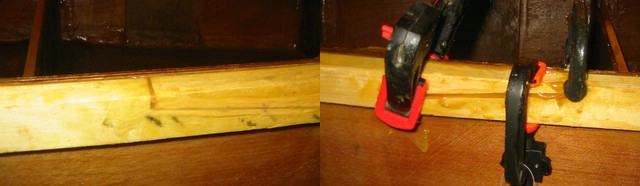
Baba has finished the last of his epoxy (used up 4.5GL kit so far ) ...need to order another 1.5GL on Monday which also means Baba has no choice but to take a break.
Posted: Sun Apr 30, 2006 9:51 am
by gk108
That 12 oz biax can soak up a lot of resin.
That's a good looking splice. I have just scarfed on a 45° angle and glued before I put the rail on the boat. This is what my CC rubrails look like:
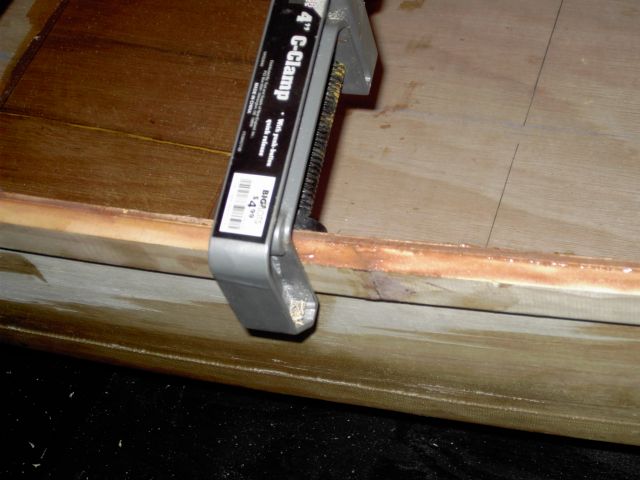
My glue joints are good when they hold, but one splice for the D15 has failed 3 times. I finally got a good bond on the fourth try. I'm sure that impatience had a part in that. I waited four days to remove the clamps on the last (successful) attempt.
I was not happy with the looks of my CC rubrail so I put another 3/4X1 strip on the inside:
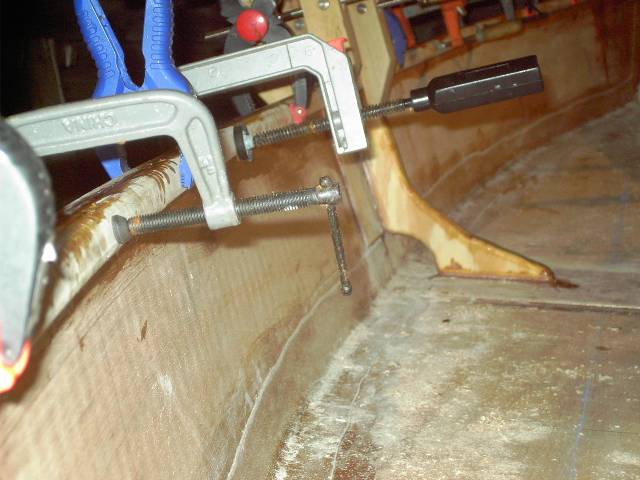
After wrapping with tape it made a very strong rail.
This is the cross section of the rubrail for both of my boats:
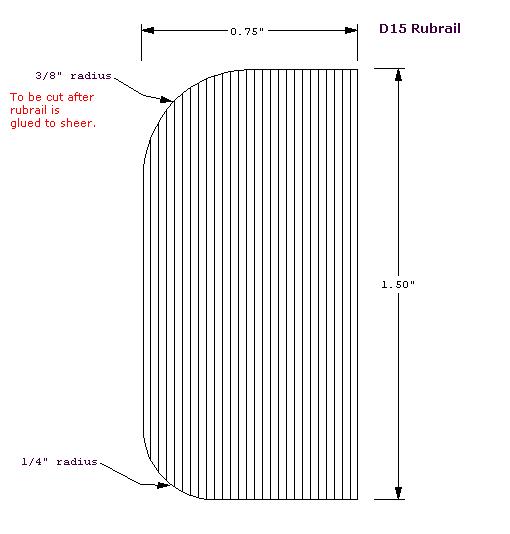
I used a router with corner rounding bits to cut the radii.
Posted: Sun Apr 30, 2006 3:47 pm
by bredstein
gk108 wrote:I used a router with corner rounding bits to cut the radii.
I may sound ignorant, but these boats are not space ships IMHO, so why bother with such precise devices as routers? Our fathers made nice boat with axes - so I personally is absolutely fine with a belt sander, that is my sort of a modern ax
Posted: Sun Apr 30, 2006 4:04 pm
by MADwand
But why would you use an axe if you have a belt sander? So why wouldn't you use a router if you had one? I would never round over an edge with a sander instead of my router...big waste of sandpaper as well as a lot of wasted effort.
Posted: Sun Apr 30, 2006 4:24 pm
by gk108
Hey Andrey,
Rounding 30 ft of corner in 5 mins is one good reason.
Repeatability is another. Especially for "wear" items like a rubrail that may need a section repaired in the future.
Best reason. I already have the router and bits. For this project I have treated myself to a new extra long flush trimming bit for some work in the cockpit.
If I didn't have a router, you can bet that my belt sander would do the job, but hey what's the difference? A power tool is a power tool, eh? If I really wanted to go retro, I could use a hand molding plane with a blade sharpened to my desired radius. That's how that guy on PBS would do it.
Posted: Mon May 01, 2006 10:49 am
by bredstein
MADwand wrote:But why would you use an axe if you have a belt sander? So why wouldn't you use a router if you had one? I would never round over an edge with a sander instead of my router...big waste of sandpaper as well as a lot of wasted effort.
Well, you're right. Router can do a great job. I was probably thinking about some more hand control over the process, you know, when it is in the tips of your fingers. Especially since it is not a mass production... I remember rounding edges for the dining table I made, it was fun doing with a sand paper... So the effort was not wasted
Posted: Mon May 01, 2006 11:03 am
by tech_support
gk108 wrote:That's how that guy on PBS would do it.
See also the wooden boat crowd.
Many of them dislike power tools and epoxy........ "purist"
Sentimental or aesthetics issues aside; wood is a great material for boat building- hard to beat when you consider its price, availability, and ease of working. Wood has an amazing ability to resist fatigue when compared to solid polyester FRP.
Posted: Mon May 01, 2006 12:47 pm
by gk108
My problem is that I never developed good freehand skills. That's obvious by looking at my chine. It's a bit lumpy looking here and there. I'll slap a little quick fair on it, but I'm really going to try to
not make a radius gauge out of cardboard and check the chine against it as I fair the hull.
I'm not going to do that for the bow either. I'll just paint my nicely radiused rubrail a light color and hope people notice it before they see the lumpy chine.
Posted: Mon May 08, 2006 9:28 pm
by baba101
Baba continues to wait for his Epoxy
with nothing to do but dream...!
One thing that has been bothering me is that the skeg is not perfectly straight...Its within milimeters at the Transom but 3/8" to one side at the end. How important is it to fix this error...
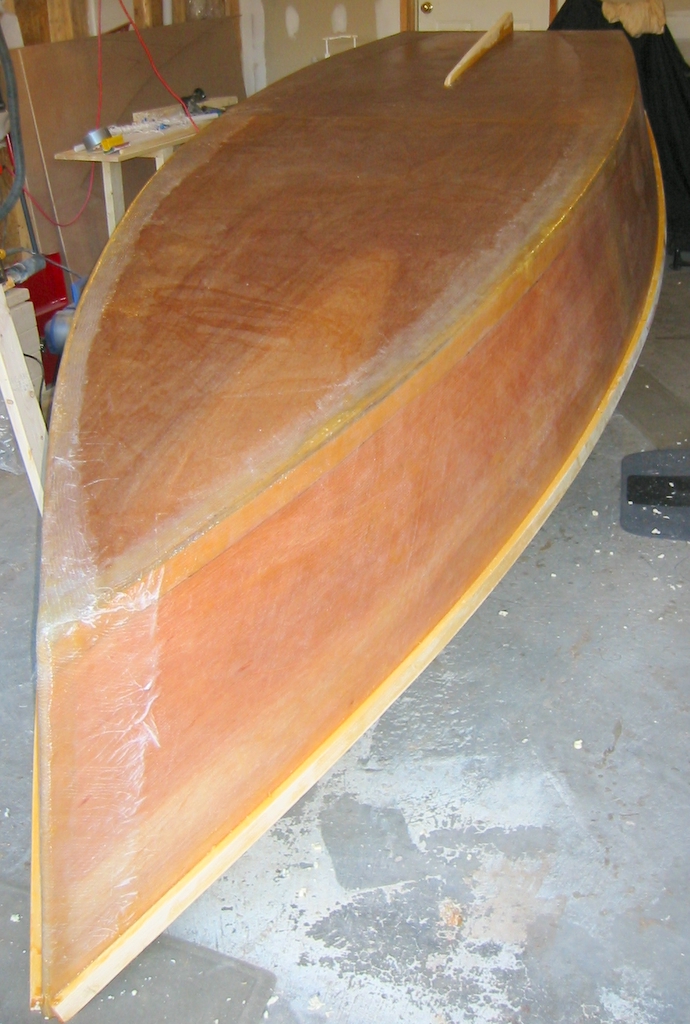

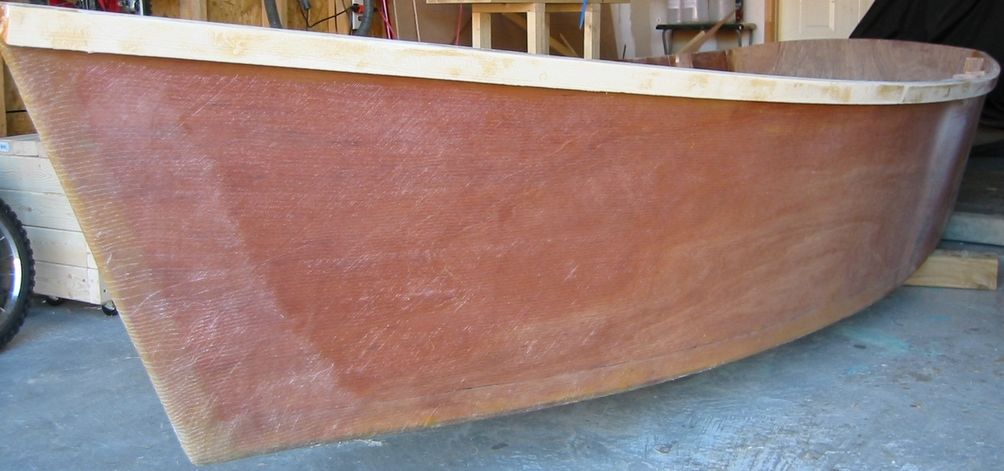
I was really impressed with marine epoxy as it always managed to cure perfectly in really low temperatures (slow hardner) without any amine blush and the acuracy of the pumps was great...both hardner and Epoxy finished.
I have tried to get System 3 epoxy locally in Toronto...but the slow hardner is not available. I am going to have to go for EAST system for my last gallon....
Posted: Wed May 10, 2006 9:13 pm
by baba101
I was able to squeeze enough resin and hardener out of the two bottles to attach some cleats today...Baba gets the epoxy next week....
After monkeying around with different contraptions to squeeze the cleats tight against the wall...I finally ended up using Mike's invention...It works very well...
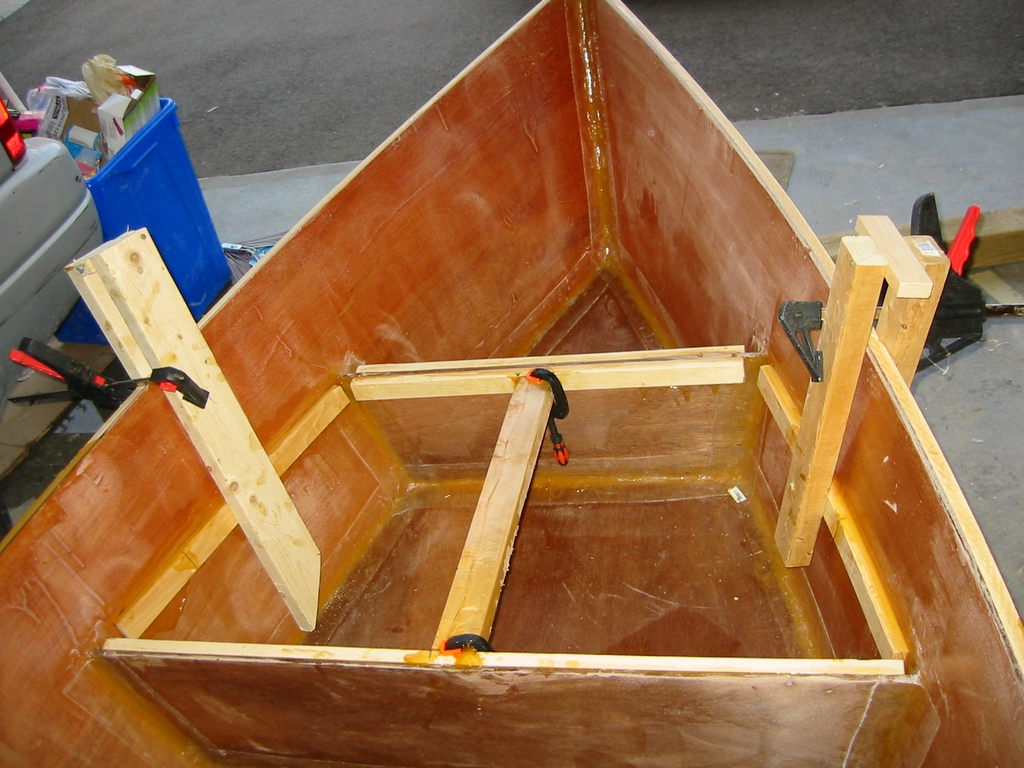
Posted: Sat May 13, 2006 3:03 pm
by baba101
Posted: Sat May 20, 2006 12:24 am
by baba101
Thats 450lbs of floatation just in the front seat...Time to buy some more of this stuff...
I guess I'd like madmax to be like a Giant tube...and never sink...
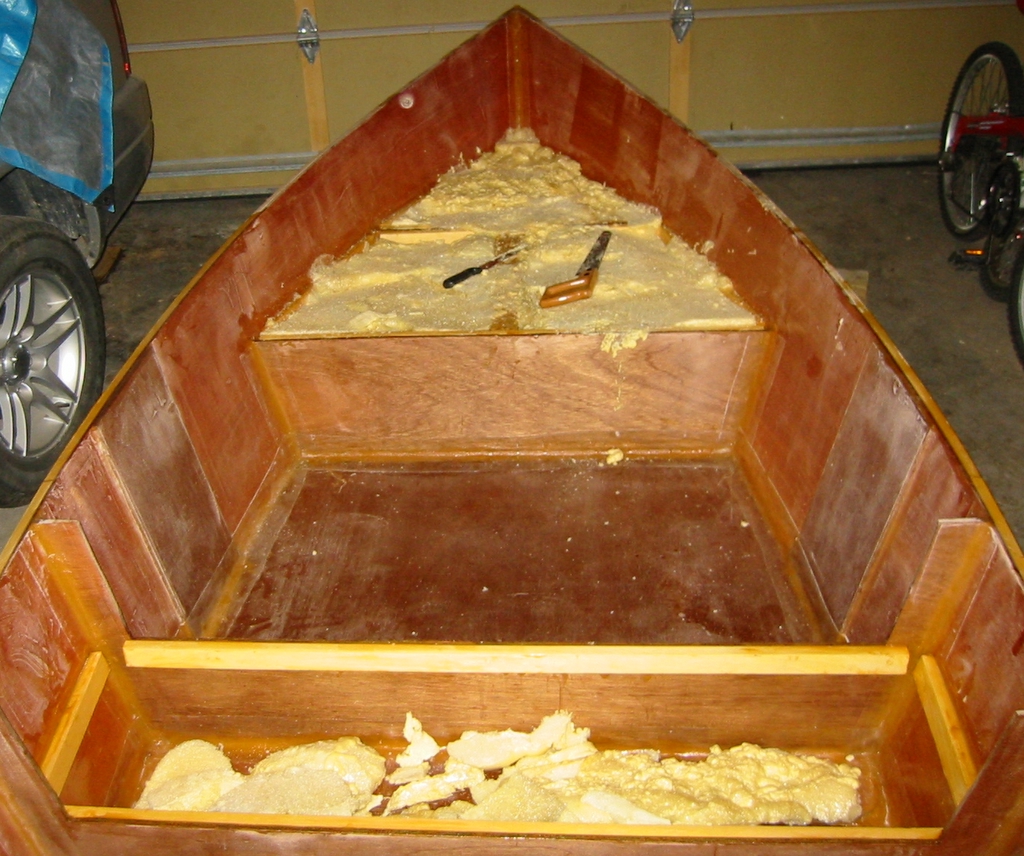
Posted: Sat May 27, 2006 2:16 am
by baba101
900 Lbs of floatation: Is that why they call you "Madmax"?
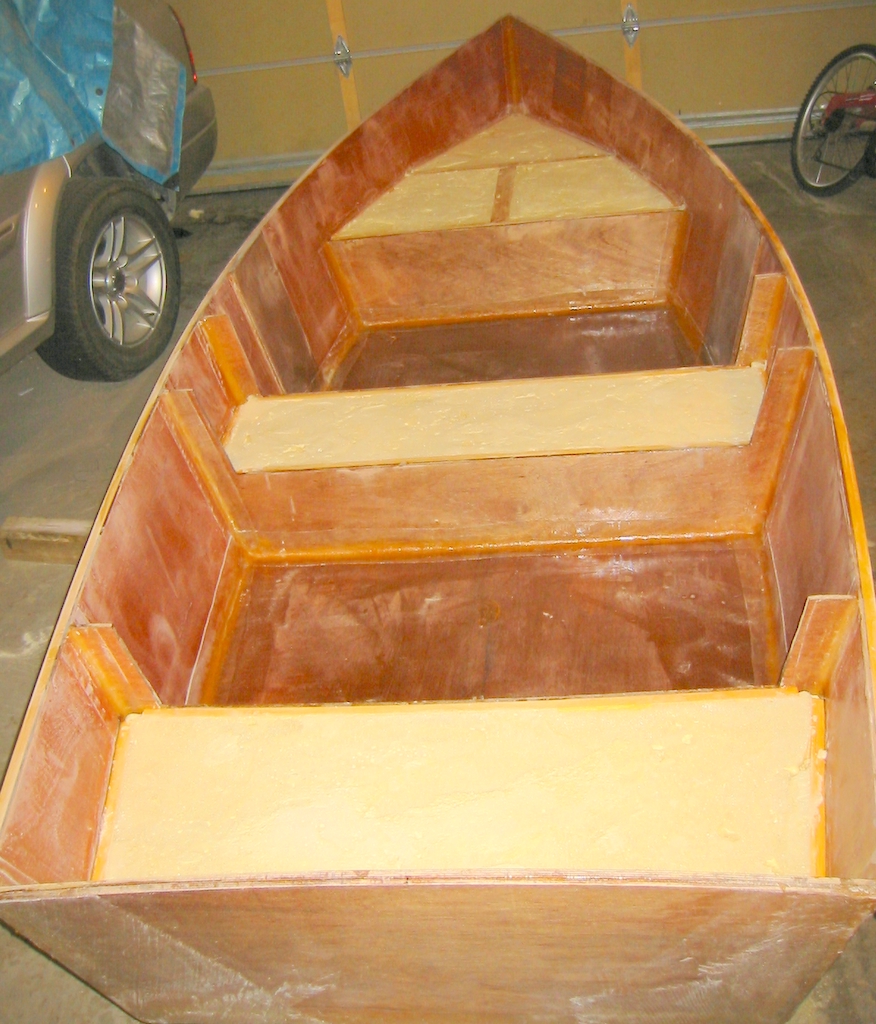
I reckon its safe for madmax to pound around in lake ontario...Heck its just a giant floatation device (PFD for boats)...it should float no matter what...
This floatation foam is good sh**t... makes a strong bond and adds a lot of structural strength to the boat...easy to sand too...
I feel good about my boat...
Posted: Sat May 27, 2006 2:40 am
by maxgsx
That's a really neat and tidy job baba.
Posted: Sat May 27, 2006 2:47 am
by gk108
That's a lot of foam
I hope my foam will be that neat looking when I'm done.
Posted: Sat May 27, 2006 3:07 am
by dewers
how many gallons of floatation is that? and how did you make it so smooth?
Thanks
Dave
Posted: Sat May 27, 2006 8:47 am
by Deltaskipper
baba101 wrote:
One thing that has been bothering me is that the skeg is not perfectly straight...Its within milimeters at the Transom but 3/8" to one side at the end. How important is it to fix this error...
I woud fix it. I think it would act like a rudder trim tab set to turn the direction of the offset.
Posted: Sat May 27, 2006 10:53 am
by baba101
dewers wrote:how many gallons of floatation is that? and how did you make it so smooth..
Thats 16 liters of foam kit...very expensive stuff as you know...I sanded it down to make it smooth..there are still some small holes left in the front two seats...I will fill them before I add the seat top.
My fear has been any air pockets left under the seat tops are likely to expand when heated...not good for an air tight chamber...
Deltaskipper wrote:...I woud fix it. I think it would act like a rudder trim tab set to turn the direction of the offset....
I think you are right ...sand from one side and fill on the other....I should be able to cover the 3/8"...even though its a displacement hull...I'd like to go straight when rowing....we have lots of lakes where no motors are allowed...there Madmax will be a two man rowing machine...should be a good workout moving this heavy thing around
Posted: Sat May 27, 2006 7:31 pm
by rjezuit
Baba, Do you have too much time or money? The foam looks great. It should float even if you take it over the falls. Rick
Posted: Sat May 27, 2006 8:55 pm
by bredstein
baba101 wrote:16 liters of foam kit...very expensive stuff as you know...
And that was my concern - I just felt like throwing my money away. So I ended with access hatches and rubber balls under the seats. That will give me almost the same floatation as foam, but I will save a lot of presidents's pictures plus have a peace of mind that nothing gets wet in the sealed chambers
Posted: Sun May 28, 2006 1:34 am
by baba101
rjezuit wrote:Baba, Do you have too much time or money? The foam looks great. It should float even if you take it over the falls. Rick
Sorry guys ..it was more an emotional decision...than a practical one...and am not endorsing this behaviour for any new builders....(do this at your own financial risk).
You'd be happy to know that Baba doesn't drink/smoke or buy ready made coffee...all these savings have gone into the floatation foam.
I was at the falls today with my Mum...The power of Niagra falls never seizes to amaze me...just the sound is monsterous...I reckon I need more Fiberglass....
Posted: Sun May 28, 2006 1:39 am
by maxgsx
Baba,
You only need to fit a couple of foot straps and a thick seat cusion and I'm sure you and Madmax would make it over

Posted: Sun May 28, 2006 10:21 pm
by baba101
4 hours to make and dry fit the seat tops today...
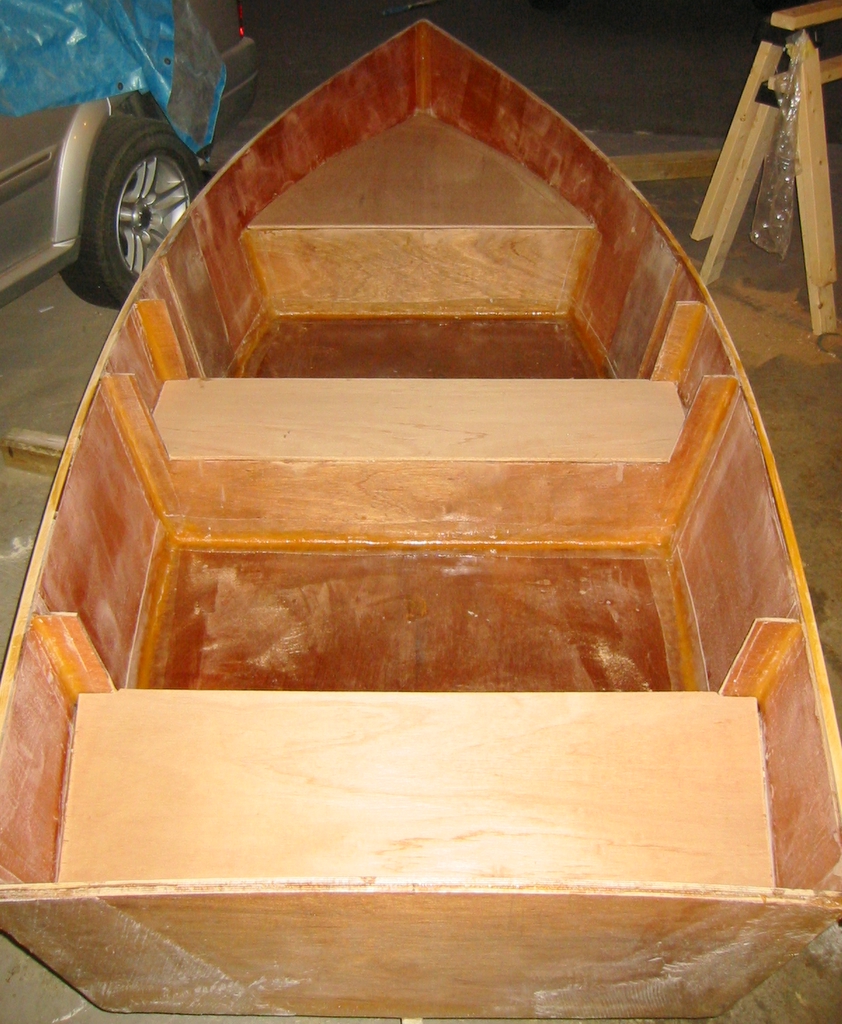
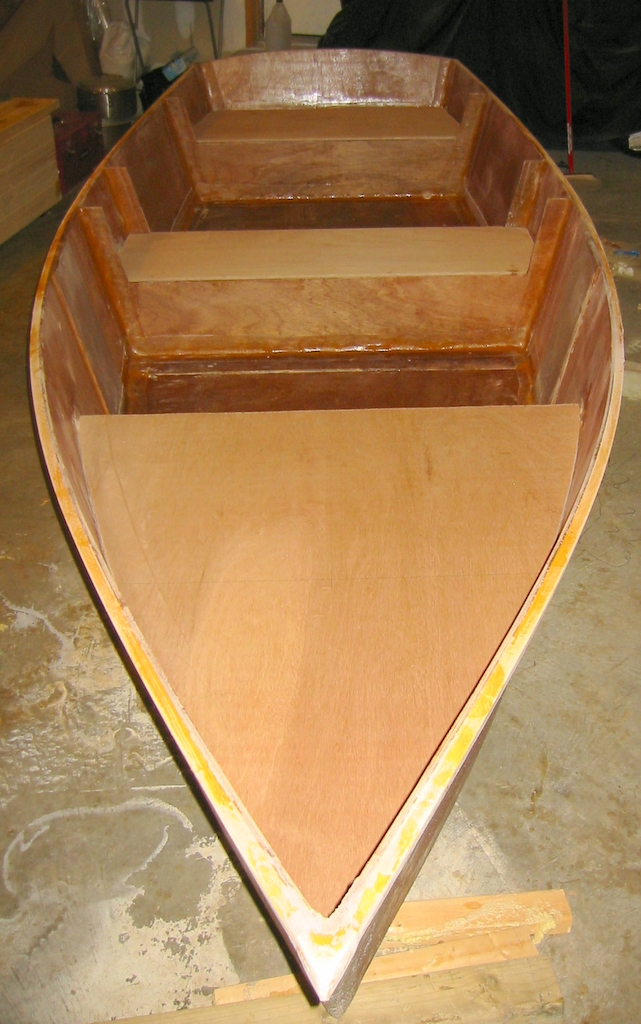
Getting prepared for the Falls...!
Posted: Mon May 29, 2006 11:52 am
by rjezuit
Today would be a great day for the falls trip, nice and warm and humid. Rick
Posted: Mon May 29, 2006 1:50 pm
by ks8
You'll need a few stout UBlots in there to clip yourself in... so you don't depart from the boat on the way down!
Posted: Mon May 29, 2006 7:48 pm
by rjezuit
He should really use a "planing" hull. That way he'll really FLY.
Posted: Mon May 29, 2006 11:57 pm
by ks8
Bolt a ragallo wing to it. Then the hull only has to handle the landing... on top of the Maid of the Mist?!
Posted: Tue May 30, 2006 12:14 am
by baba101
ks8 wrote:Bolt a ragallo wing to it. Then the hull only has to handle the landing...
Now you guys are getting too technical...if you really want Baba to do this...he needs simple instructions...
I am sure words like God..Pray...and Mercy would be part of the procedure...
Posted: Tue May 30, 2006 12:29 am
by ks8
baba101 wrote:ks8 wrote:Bolt a ragallo wing to it. Then the hull only has to handle the landing...
...
I am sure words like God..Pray...and Mercy would be part of the procedure...
And a bit of Willy Wonka's *No. Stop. Don't do it. Come back.*
Posted: Tue May 30, 2006 11:32 am
by gk108
ks8 wrote:baba101 wrote:ks8 wrote:Bolt a ragallo wing to it. Then the hull only has to handle the landing...
...
I am sure words like God..Pray...and Mercy would be part of the procedure...
And a bit of Willy Wonka's *No. Stop. Don't do it. Come back.*
I believe all of the above can be covered with one word by invoking the name of that great Native American leader.
Posted: Sat Jun 03, 2006 12:40 am
by baba101
4 hours to glue three seats together....2 hours for the front seat and 2 for the rear.

Thanks to comments by Rick...I packed the foam real tight...and filled all tiny holes with foam powder..so there will be minimum amount of air under the seat tops....
Posted: Mon Jun 05, 2006 1:55 am
by baba101
3 hours and 1 qtr of Quik fair..This stuff smells nice.
Thought I would go a little thin..
Sand it lightly
Then add a final layer for a smooth finish b4 applying the Graphite Mix.
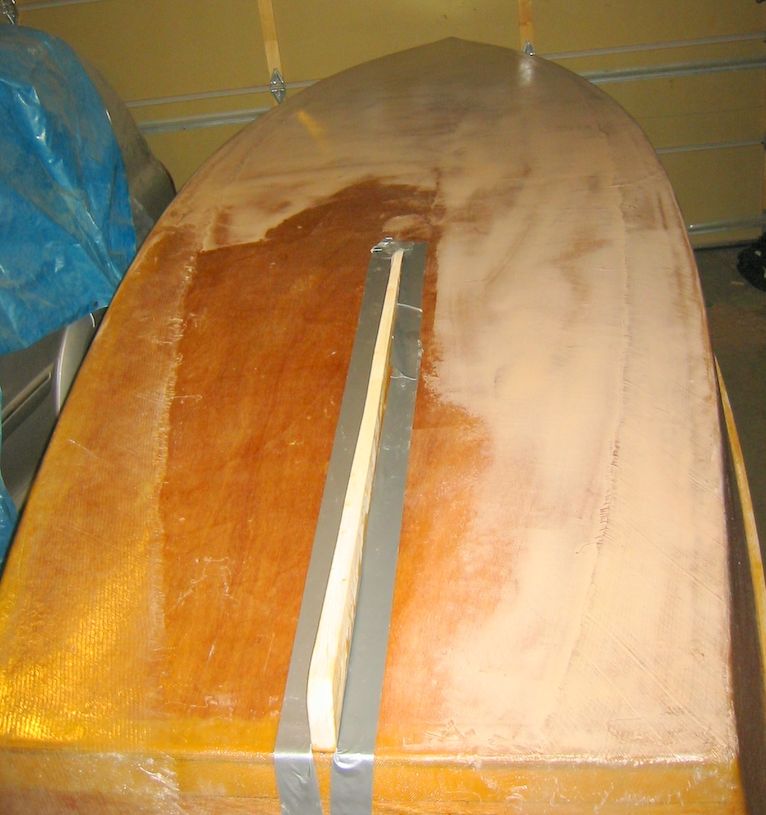
Posted: Thu Jun 08, 2006 12:42 am
by baba101
After lightly sanding the bottom...I applied a 2nd coat of Quikfair...(first coat on the transorm).
Used 2.5 qtr of Quikfair in total.
Next step - > sand and apply S3 primer on the bottom...b4 graphite...

Still need to fair the Skeg...its bumby and wavy...as can be seen in his picture..
Posted: Thu Jun 08, 2006 1:39 am
by maxgsx
Baba,
Looking good.
Are you sure you want / need / should use primer before graphite !!!
Posted: Thu Jun 08, 2006 2:07 am
by dewers
You do not want to primer the bottom if you are going to use graphite. It will not be as strong. Check out the D15 tht is being built
Posted: Thu Jun 08, 2006 11:00 am
by baba101
maxgsx wrote:....Are you sure you want / need / should use primer before graphite !!!
dewers wrote:You do not want to primer the bottom if you are going to use graphite. It will not be as strong. Check out the D15 tht is being built
Ok Guys no primer...on the bottom...thanks for the heads up...
Posted: Fri Jun 09, 2006 10:20 am
by baba101
After sanding the pass two of quikfair...the bottom still had bumps that I can feel with my fingers...
Applied Pass 3 of Quikfair...and used up my remaining quikfair (used 3qt so far).
I have a Gallon of Primer and would like to use it next if if the bottom does not cooperate after the next pass...
Are you sure that primer will weaken the bond for a Graphite Bottom...
Posted: Fri Jun 09, 2006 6:40 pm
by gk108
Remember, the epoxy + graphite will self level on horizontal (or near) surfaces. There was a low spot next to my skeg that I completely overlooked when fairing. It was the depth of a layer of 9 oz tape. I noticed it after the first coat of graphite and just dripped a little extra on it during the second coat. I had to smooth it a little bit with a foam brush, but it all levelled out so that when the third coat was applied, the low spot disappeared.
Basically, I just faired to the point of being ready for primer and put the graphite + epoxy on.
Good luck
Posted: Fri Jun 09, 2006 7:50 pm
by baba101
gk108 wrote:Remember, the epoxy + graphite will self level on horizontal (or near) surfaces. ...Good luck
Yeah...thats what I wanted to hear....thanks
Posted: Sun Jun 11, 2006 1:17 am
by baba101
MadMax Launch date is unchanged at April 2007.
This schedule is based on Baba working 1 day a week...plus three months of slack will take me to the April Launch...

Posted: Sun Jun 11, 2006 1:35 am
by maxgsx
I thought you would be getting wet within a couple of weeks
Posted: Sun Jun 11, 2006 1:40 pm
by baba101
maxgsx wrote:I thought you would be getting wet within a couple of weeks
Baba will be sad when the boat is finished.....I have to get my money's worth of fun building this machine....
I am down to couple of hours of work a week now....plus some weeks off will put me comfortably for an April launch... (December Launch doesn't make much sense in this part of the world).
Posted: Mon Jun 19, 2006 12:58 am
by baba101
Added 12oz Biax to the Skeg and sanded the Quikfair (pass three) on the Bottom.
Biax overlap is visible from under the fairing compound but feels smooth when I run my fingers on it. Used up the leftover epoxy on the bottom.
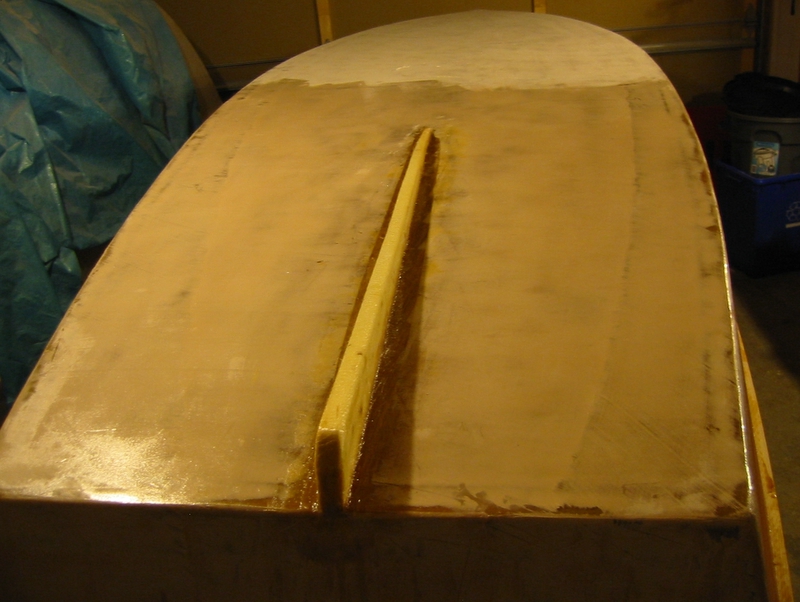
Next Step: Fair the Skeg (using Quikfair) Final Prep for the Bottom for Graphite.
Posted: Sat Jun 24, 2006 3:41 am
by baba101
3 hours of boatbuilding done on Friday night:
Filled the weave of 12 oz biax
On Skeg with Epoxy/woodflour (using a brush)
On Bow with Epoxy + Phenolic Microballons and Silica Thickener pre-blended. (using roller)
Added a super thin layer of epoxy on Bottom which will be sanded as a final prep for Graphite.
Posted: Mon Jun 26, 2006 9:51 pm
by baba101
Posted: Mon Jun 26, 2006 10:55 pm
by robbiro
Baba
It is looking more like a boat everytime that I see it. Thanks for all of the great pics that are helping many of us who are several steps (no bottom in the boat yet, but maybe this weekend??) behind you. My GF-16 is coming along after a small cutting error that made me not quite square, but that has been fixed. Keep up the good work
Robbie
Posted: Sun Jul 09, 2006 12:17 pm
by baba101
Posted: Sun Jul 09, 2006 12:49 pm
by msujmccorm
Looking good Baba.
Man, I just thought I had done alot of sanding.
Are Baba's arms getting big like he predicted early in the build??
Posted: Sun Jul 09, 2006 1:10 pm
by gk108
Sanding team??? Are you the coach?
Posted: Sun Jul 09, 2006 9:04 pm
by baba101
gk108 wrote:Sanding team??? Are you the coach?
Me and my Sanders...(I bought a finishing Sander for the SKeg) and found it very useful (uses 1/3 of the Sheet) for fairing....
GK ...Do you think the bottom is ready for Graphite...Look at the last picture of the bottom (against the sun light) you can see its uneven...it feels smooth when I run my fingers on it ...also a picture at a steeper angle (and not into the sunlight) makes the surface look super smooth....
I was thinking maybe it needs another coat of my Fairing compound...?
msujmccorm wrote:Looking good Baba.
Man, I just thought I had done alot of sanding.
Are Baba's arms getting big like he predicted early in the build??
I didn't use the Fairing board very much...mostly my orbit sander...and more recently the Finishing Sander....
I really don't know how smooth the surface needs to be (bottom -> Graphite, and bow -> Primer).
Please advise...
Posted: Sun Jul 09, 2006 10:08 pm
by msujmccorm
I just put the primer on and when I ran my fingers over the bottom I couldn't feel any bumps but if I could see it, it showed up under the primer. Very frustrating. I only wanted two coats of primer but this morning I could see a few spots of uneven thickness in the primer so I put another coat of primer on and I'm glad I did. It looks better than I was expecting(to me anyway). I'm convinced that no matter how fine it feels you will see imperfections but you will be more criticall than anyone else.
Posted: Mon Jul 10, 2006 10:53 am
by Mike Adams
msujmccorm wrote:I'm convinced that no matter how fine it feels you will see imperfections but you will be more criticall than anyone else.
One of the 'tricks' mentioned elsewhere in this forum is to spray a cheap primer coat first, then sand the whole thing down again. The tiny dimples and low spots in the hull will show up using this method, making it much easier to see where more filler is needed.
Mike
Posted: Mon Jul 10, 2006 11:03 am
by baba101
Mike Adams wrote:....One of the 'tricks' mentioned elsewhere in this forum is to spray a cheap primer coat first, ....Mike
Thanks Mike...I am sort of doing this already...since the sanded filler looks white and un-sanded looks tan...
I will try this technique when applying the primer...on the bow.
My immediate concern is the bottom...since I am told I can't use a primer on it...and I don't know if I'll be sanding the Graphite...looks to me atleast one more coat of filler is needed..
Posted: Mon Jul 10, 2006 11:26 am
by jeremy
The graphite will be very glossy and will show off all those imperfections. If you want a super smooth finish, you should do a bit more fairing.
However, it's not like that will slow this boat down appreciably, so it's really up to you - what kind of finish would you like to achieve?
Posted: Mon Jul 10, 2006 11:38 am
by tech_support
The bottom will not be seen as much, but the epoxy/graphite is quite glossy. One thing is certain, you do not want to sand the graphite/epoxy. Roll it on using 2-3 thin coats to avoid sagging (sanding)
Joel
Posted: Mon Jul 10, 2006 1:16 pm
by baba101
Baba's new friend...
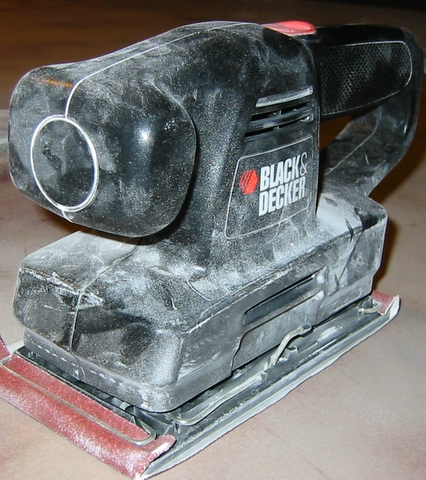
One more layer of fairing compound...and sanding is what I hear...
I must admit this part of boat building has been a lot more fun than I thought...
Posted: Mon Jul 10, 2006 5:58 pm
by gk108
Yep. A little more fairing and sanding is needed to get rid of those low spots. I did almost all of my bottom sanding with a longboard.
The trick of using a contrasting color of cheap spray paint and sanding it off to reveal the low spots might help you a lot. I didn't do it and missed a couple of spots on my last pass. They showed through slightly, but as Joel hinted, If I don't tell anyone, they probably won't notice.
Check this pic:
http://gallery.bateau2.com/albums/userp ... /0805x.jpg
The area circled on the right is the worst. You can see a line running from the skeg to the chine. Can't feel it, though.
The other circle is where I completely overlooked fairing a spot and managed to fill it by dripping some extra resin + graphite on it during the second coat and letting it level out itself. I feel like I got lucky there because it ended up really smooth and undetectable by the time the third coat cured.
Posted: Wed Jul 12, 2006 2:11 pm
by baba101
B4 Baba adds another layer of fairing compound...I did a bit of sanding during the lunch break...
Here is the result...
First two pictures using special lighting to highlight Bumps......
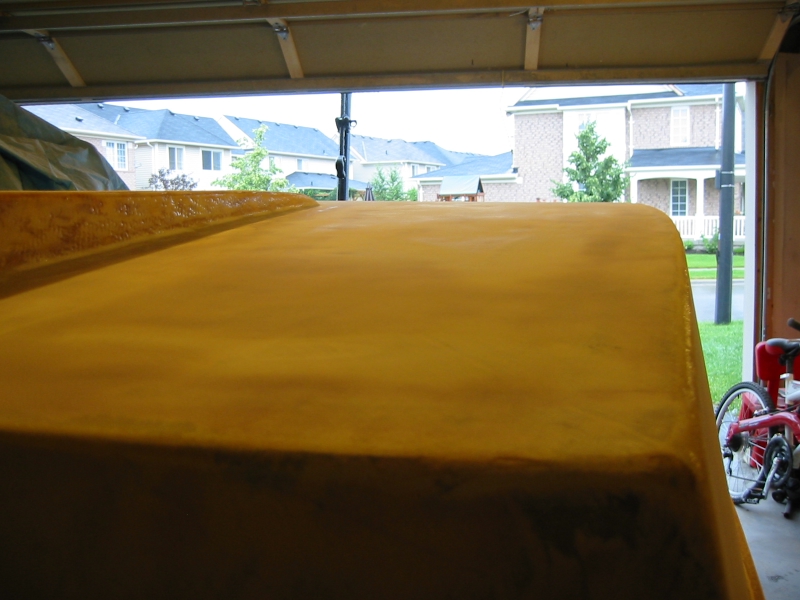
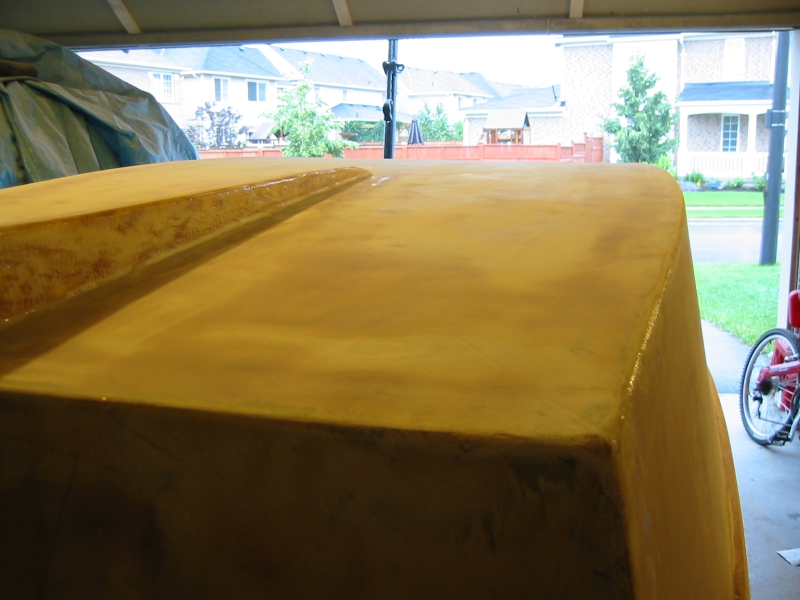 Next picture I used a Flash...(more like how it looks with the Naked Eye)..
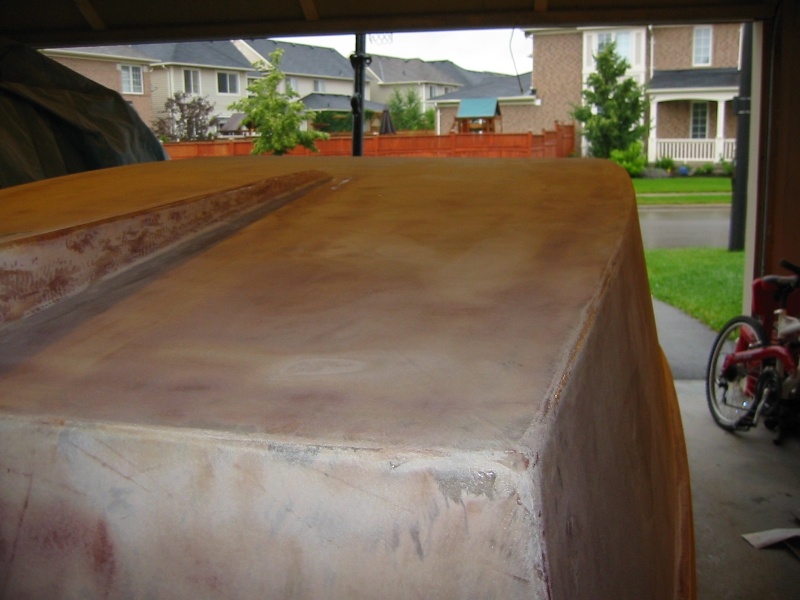
Since I need to Fair the Skeg anyway...I will add one additional layer of Fairing compound and sand it ready for Graphite....
Baba is really excited...
One comment I would like to make about Quikfair is that its very easy to leave squiggy marks on the surface and they don't go easily...
Therefore Baba prefers the home brew for filling the weave ....using Quikfair for places where thicker lumps are needed...
Since this advice seems to go against the
common wisdom on this forum..(new builders should exercise
caution...when deciding between the two)…i.e don’t take my word for it..
Posted: Mon Jul 17, 2006 3:43 pm
by msujmccorm
Baba,
What color are you going with? I used red and wish i would have faired more or used a lighter color. Every bump shows up even if you can't feel them.
Jeff
Posted: Mon Jul 17, 2006 3:54 pm
by baba101
msujmccorm wrote:Baba,
What color are you going with? I used red and wish i would have faired more or used a lighter color. Every bump shows up even if you can't feel them.
Jeff
Thanks for the heads up...Jeff...I will Sand more..
I have S3 Orcas white...but as you know the bottom will be graphite...without primer...
Posted: Fri Jul 21, 2006 11:41 pm
by baba101
After laying another thick layer of fairing compound...I started to Sand....It looked good for a moment and I thought that finally Baba has nailed the technique for building beautiful boats....I could almost touch the smooth lines of my future Power Sail Cat....
My fantasies came to an abrupt end after I wiped the bottom with a wet cloth.....as the water started to dry off...I could see ridges...here are a few pictures of what I saw...
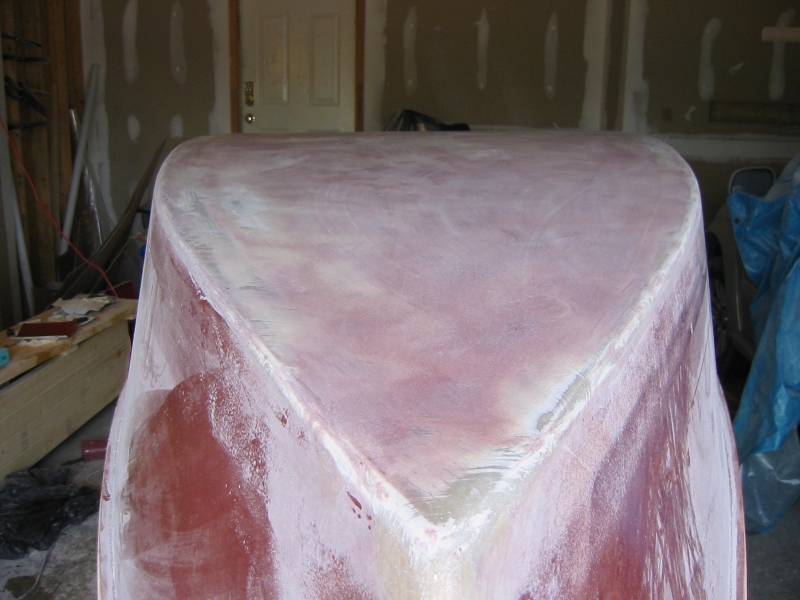
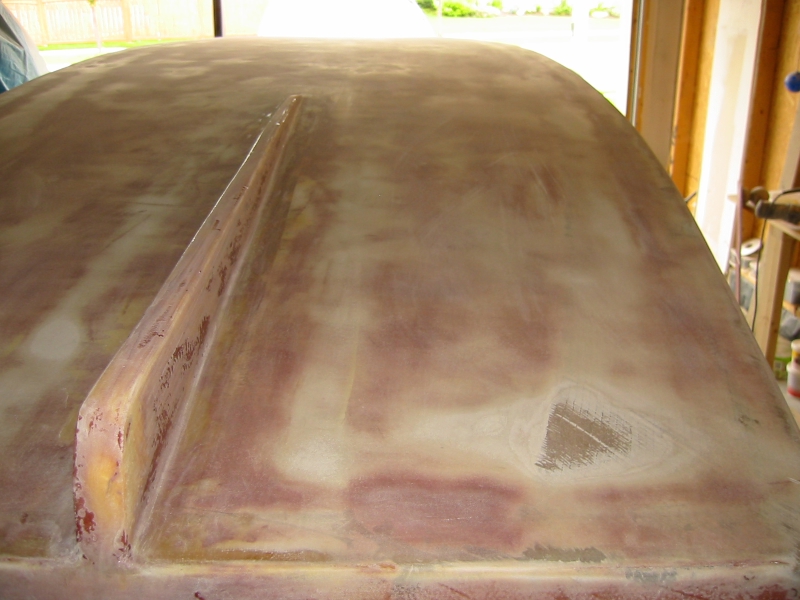
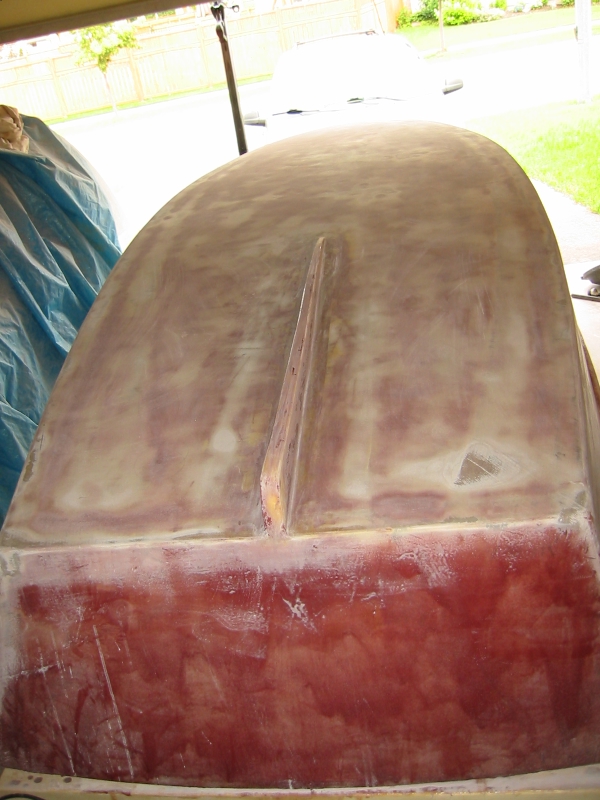
Its a small improvement after 3 hours of sanding....
maybe there is something wrong with my technique...?
I think the next step is to try this cheap spray paint technique or maybe just the straight edge to mark the low spots technique...I manged to scrape some FG but its only the 2nd layer...so no Danger....
Posted: Sat Jul 22, 2006 7:35 pm
by rjezuit
Baba, What happened to the hand board sander you made? You may be sanding in the low spots by using a smaller sander. Rick
Posted: Sat Jul 22, 2006 8:10 pm
by jeremy
Just remember that this boat isn't a planing boat so those dips won't really affect performance. People won't often look at the bottom of the boat, either.
I can certainly understand the desire to get the bottom looking as good as you possibly can and I respect that. However, if you decide to call it good enough, no harm done.
Posted: Tue Jul 25, 2006 10:25 am
by baba101
jeremy wrote:Just remember that this boat isn't a planing boat so those dips won't really affect performance. People won't often look at the bottom of the boat, either....
Agreed...here is whats going through my mind....
I have a lot of epoxy left over...and time is not really an issue...I see this boat as a learning exercise...i.e. if I can't do a nice enough finish I may think twice about my next project.
rjezuit wrote:Baba, What happened to the hand board sander you made? You may be sanding in the low spots by using a smaller sander. Rick
I have used my hand sander a bit...but was saving it mostly for the primer...now looking back at my last sanding exercise...I would agree with you that I might have been sanding in the low spots....
I will be traveling mostly during the next 4 weeks....so its time for a break...on my return I will sand again...with the hand sander...
Gotta kick the butt of these low spots....Now Baba is really psyched..
Posted: Mon Sep 25, 2006 9:48 pm
by baba101
Baba is Back....
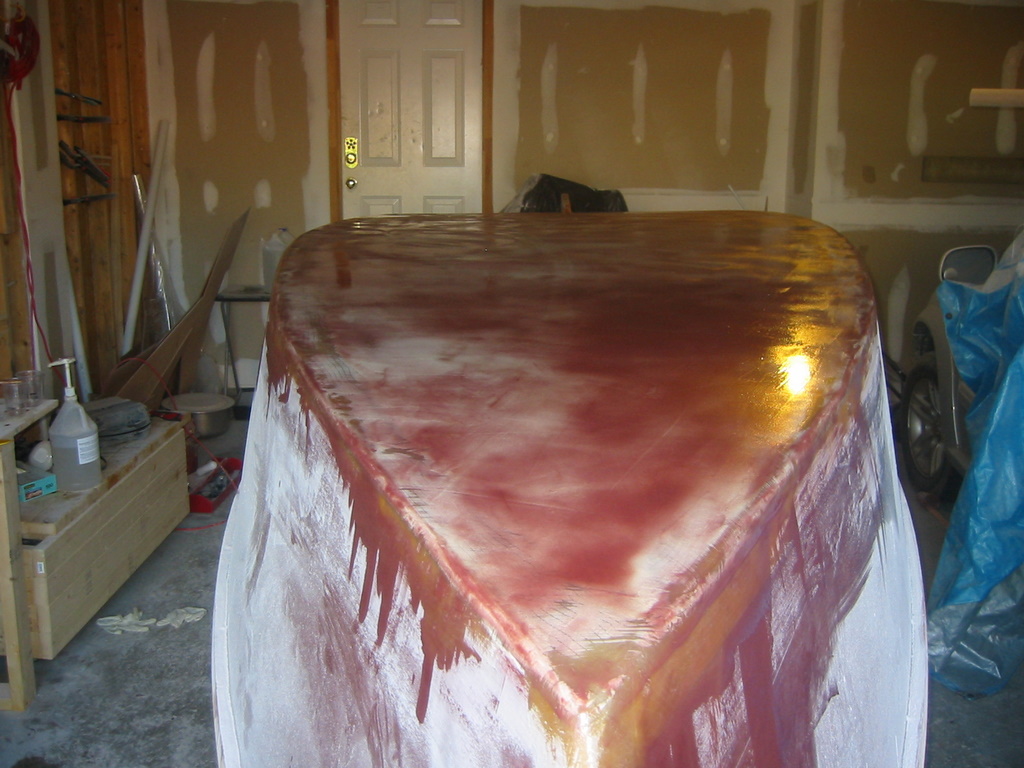
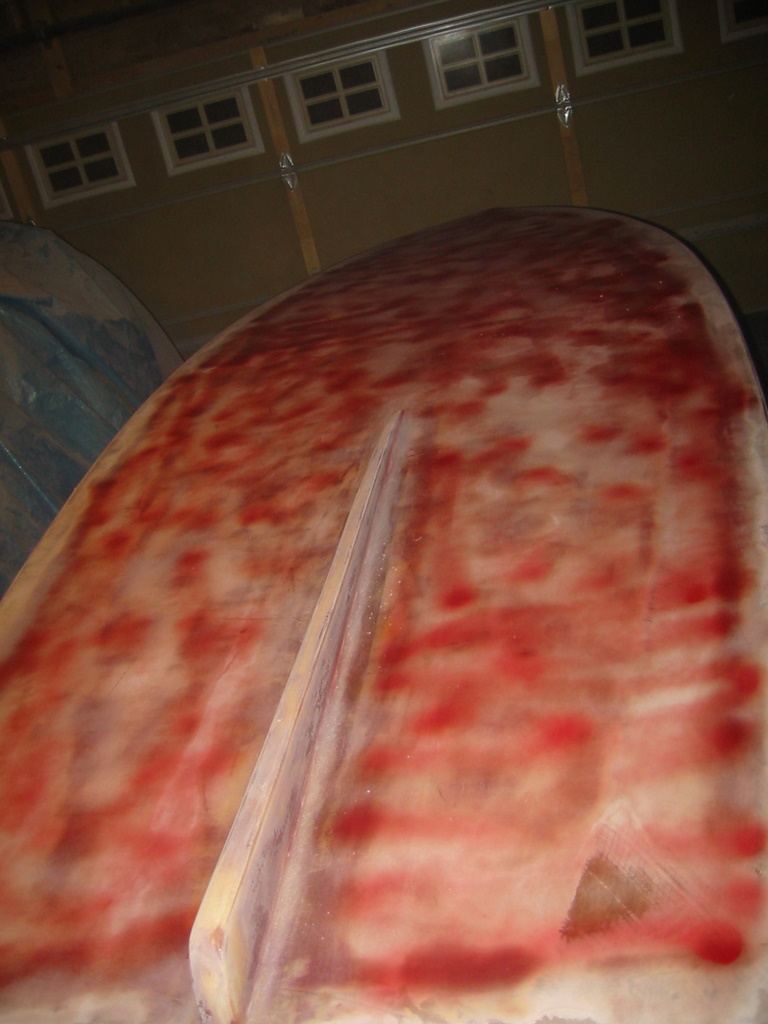
 Please clean your monitor screen for the next one...
I used 18 oz of Epoxy with 25% volume Graphite for one coat...
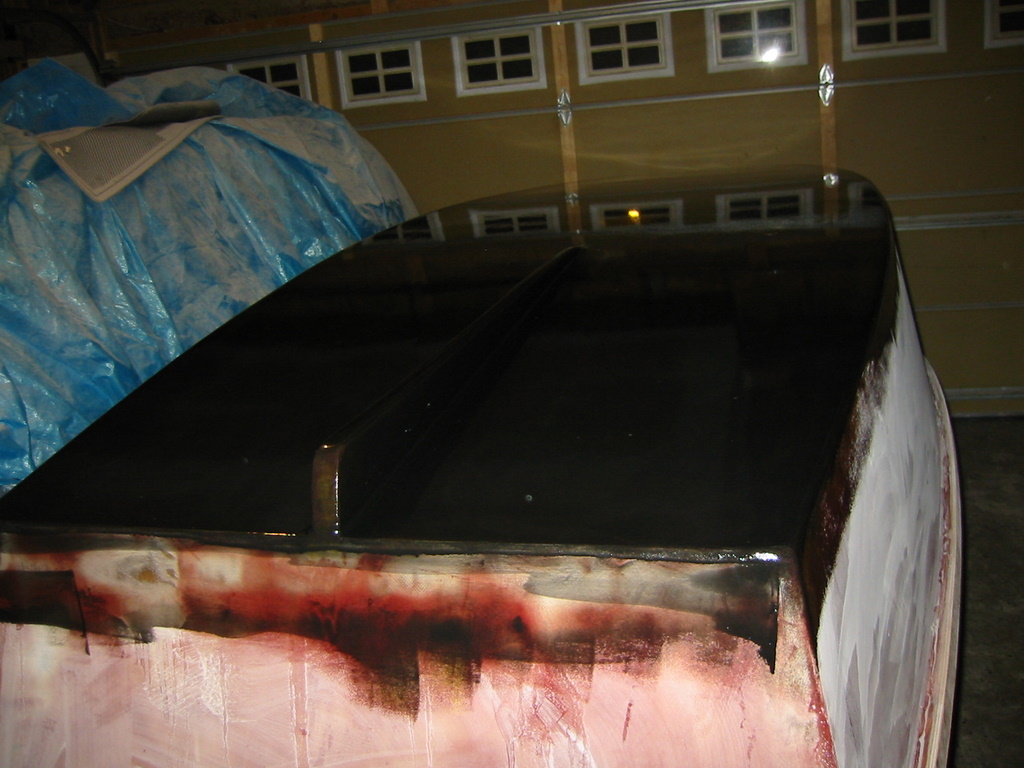
Although I strained the graphite fine (twice) before adding to Epoxy...I still see minute grains in it...don't know if its dust or bubbles. After the 2nd coat...if it doesn't go away...I will let the whole thing dry...and sand it lightly before the final coat.
Still to the untrained eye it looks like a million bucks...
Two more coats of Graphite to Go...slow harder and cool canadian winds mean 24 hour wait before its ready for coat 2.
Posted: Tue Sep 26, 2006 7:15 am
by msujmccorm
Glad you are back. Looks great, like looking in a mirror.
How many coats of the graphite are you planning?
Jeff
Posted: Tue Sep 26, 2006 7:34 am
by baba101
Jeff,
I am thinking three coats...
unless someone here tells me otherwise...
Posted: Tue Sep 26, 2006 8:05 am
by tech_support
3 coats should be enough.
Posted: Tue Sep 26, 2006 8:10 am
by baba101
In daylight the dust particles show up pretty bad...
Shine...I am thinking about letting this thing dry out..and sanding it with my finishing sander...
Then wipe it clean with with a tac cloth...before I apply the next two coats...
Is there any compatibility issue with the Chemicals in the Tac cloth and Epoxy...? whats the best way to remove dust...
Posted: Tue Sep 26, 2006 8:18 am
by tech_support
Some tack cloths use a resin (what makes it sticky) you dont want that on the surface.
Remember, you will almost NEVER look at the bottom of the boat again once you flip it over. Save your energy (and quick fair) for the sides and interior
Posted: Tue Sep 26, 2006 10:08 am
by gk108
I have a lot of specks in my graphite from dust and stuff. Rather than expend the effort of getting rid of them, I decided to let Mother Nature take care of them. She has provided wet sanding medium in just about all of the places I intend to use the boat.
Each coat of graphite will cover the bugs on the previous coat well enough to not be worried. The final coat will look better simply because of the learning curve. If the bugs on the final coat are more than you can possibly live with, wet sanding with 600 grit will help, but it's a trade-off since you will be
removing protective coating material. My philosophy is build it up now and wear it off through regular use.
Joel is right about the tack cloth. The old fashioned rosin soaked cheesecloth tack rag will leave residue in the worst places. I have had to use a lint free cloth soaked in turpentine followed with an acetone soaked cloth to clean that residue good enough to prevent fisheyes in paint. Thanks to the miracles of modern science, we now have micro-fiber tack cloths that use no adhesive, hence no residue. Dust shakes (or launders) out so you can reuse it for a long time. Plus, micro-fiber is another cool high-tech sounding term to throw out there along with graphite, biaxial tape, composite and all the others. (When discussing my boat in some circles, the bottom isn't coated in graphite, it's covered with
buckyballs.)
Posted: Tue Sep 26, 2006 11:13 am
by baba101
GK108 wrote:
....If the bugs on the final coat are more than you can possibly live with, wet sanding with 600 grit will help....
....Thanks to the miracles of modern science, we now have micro-fiber tack cloths that use no adhesive, hence no residue. Dust shakes (or launders) out so you can reuse it for a long time....
Excellent ideas...gotta love this forum...Baba just keeps on learning...
Posted: Tue Sep 26, 2006 11:59 am
by msujmccorm
I got the micro fiber tack cloth from one of the big boxes for about $5.00.
It works great.
Posted: Tue Sep 26, 2006 9:56 pm
by baba101
Finishing Sander with 220 grit paper
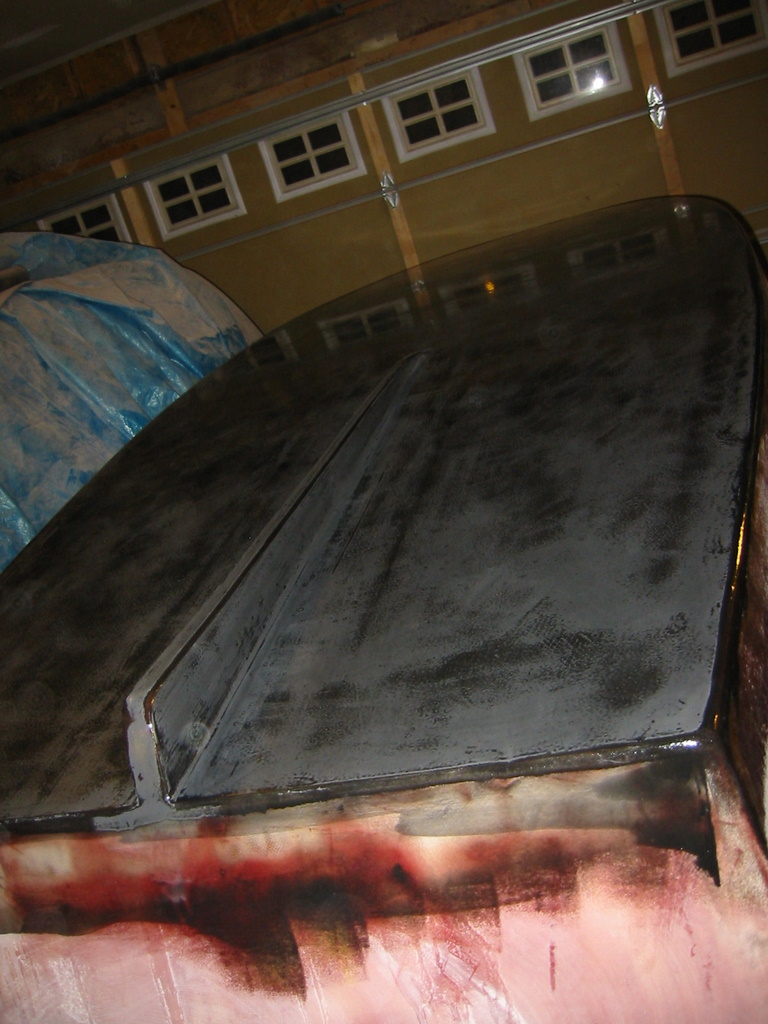
Wipe down followed by Microfiber tac cloth and then 12 OZ epoxy.
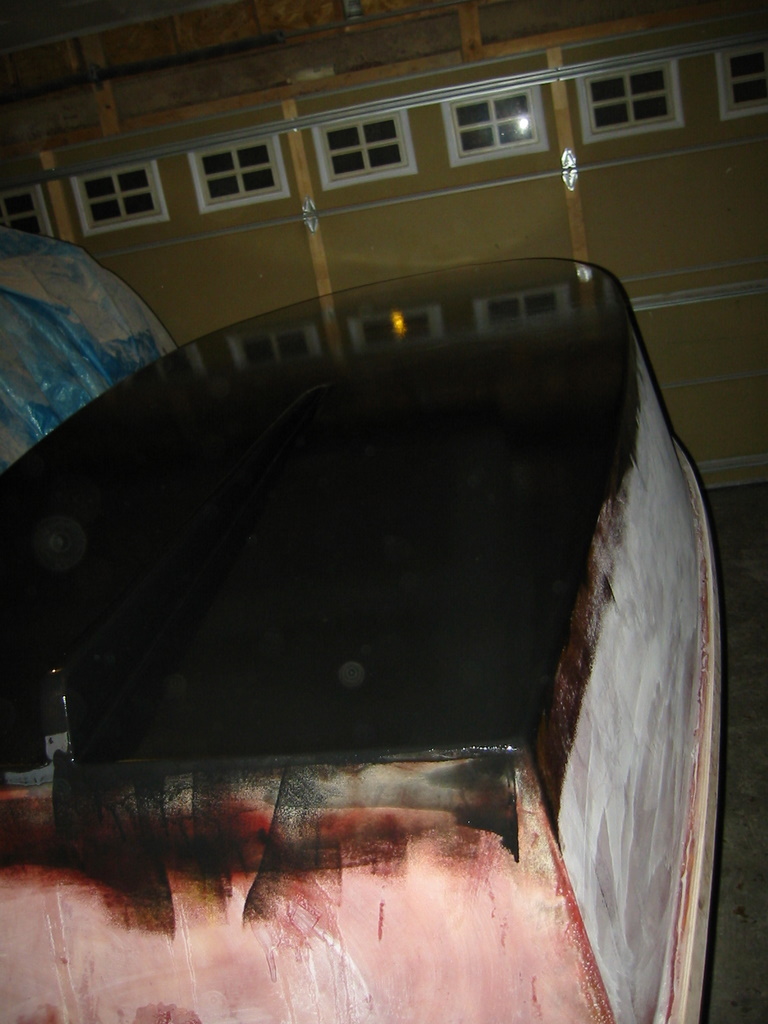
I think there is a slight improvement...but chances are it will look different in the morning....
If more Dust in daylight...then execute plan B.
Sand 220, tac micro fiber , Epoxy+graphite and then wetsand with 600....
Baba will eat these dust particles for lunch.....ERRRRRR...
Posted: Tue Sep 26, 2006 10:12 pm
by ks8
Just remember... Mad Maxx yearns to go afloatin'. As I must keep telling myself, *When it's good enough, get the next task done*, or else Measure of Faith may be in the water before Mad Maxx!
Certainly looks good from where I'm sitting.
Posted: Tue Sep 26, 2006 10:44 pm
by baba101
KS I can't argue with that...but here is my take on this...
This is a learning experience for me...and I have never been good at much anything I have done with my hands...Jac made this process of boat building and this forum sooo easy that all you need is hard work...no real skill or prior knowledge to make strong and beautiful boats...I guess this is my chance to prove to myself that Baba is not just a Geek....
I set the launch date as April 1st 2007....I think finishing MadMax any sooner will not get me in the water any earlier...here in Toronto.
And you guys are right.. there is not much point in wasting time...makin the bottom any smoother....
...but I have to weigh this rational against my fear that this may be the last boat I build...as the world is full of great new things and Baba might get addicted to something different next year (in my quest to discover and learn) ..and if that happens ...I want to give it my best shot...
Right Here Right Now
Plus its a battle between Baba and the Dust in my Graphite...BABA MUST WIN.... FREEEEEEDOM.....
ks8 wrote
...Certainly looks good from where I'm sitting.
After seeing the graphite bottom ....Yesterday my 10 year old son told me.."Baba I gotta admit...you are a good boat builder..."
Posted: Wed Sep 27, 2006 3:38 pm
by ks8
Posted: Tue Oct 10, 2006 8:56 pm
by baba101
Posted: Wed Oct 11, 2006 11:20 am
by msujmccorm
Looking good. I bet MadMax was getting lonely. I like the extended "knees" in the back. My clamping board was originally 1" thick but the clamps on the mercury I bought wouldn't get that small so I had to add 3/4".
Posted: Wed Oct 11, 2006 12:52 pm
by ks8
I still think you'll finish before me.
shaping up... speaking of which, I'm curious on the shape you chose for the gunnel in the stern. Is it so you can lean back in that *curve*, and if so, are you going to build up a curved seat back?
Posted: Wed Oct 11, 2006 1:52 pm
by baba101
.... I'm curious on the shape you chose for the gunnel in the stern. Is it so you can lean back in that *curve*, and if so, are you going to build up a curved seat back?
Yes the curve was to give me more butt space on the stern seat. And the long knees..to merge the ears that stick out on FL14....
The concept of Madmax is no sharp edges...a true unibody hull...spread the stress on the entire boat...
With the outboard on....I doubt that I will be using the stern seat...its too close to the tiller...I will probably sit on a cooler placed between the stern and middle seat.
The super large breast hook also doubles as a seat....my daughter calls it a table...
Looking good. I bet MadMax was getting lonely.
Thanks man... I work on it frequently...smoke a cigar now an then just staring at it....thinking about the super smoooooth graphite bottom skimming on lakes like a surfboard...
Posted: Wed Oct 11, 2006 2:39 pm
by WobblyLegs
...smoke a cigar now an then just staring at it...
And that, sir, can be very gratifying in itself. There are times when I can't work/won't work/don't want to work, and just want to spend a few moments (sometimes long ones) just sitting in the boat and imagining things to come.
I like your "knees" (new term to me) (well, the boat's knees anyway).
Tim.
Posted: Wed Oct 11, 2006 10:56 pm
by baba101
Hey Wobbs ....I should have mentioned that I grew up in your neck of the woods (12 years in various parts of Britain) spent many years riddin bikes a Hooligan wannabie I guess ... everything I ever earned went into my bikes...loved speeding...pulling those easy wheelies...hhhhhhh....I miss the wet fresh Welsh roads THE A470, Cardiff, Swansea, Abbrestwidth , Caernarfon, Bangor, Wrexham Chester.....and the Hot Fish and chips at the end of a tough ride, and the Chicken Vindaloo on Chips.... Gad Damn it….I am afraid to go there again….things might not be as beautiful as I remember them….Plus I am all gown up now……
I used to keep my RD350 in my bedroom....it was stolen twice from the curb outside by joy riders...
Even though it’s an Island….Britain never felt like a boating country….more like the land of the bikers...
Posted: Thu Oct 12, 2006 4:06 pm
by WobblyLegs
Hey Wobbs ....I should have mentioned that I grew up in your neck of the woods (12 years in various parts of Britain) spent many years riddin bikes a Hooligan wannabie I guess ... everything I ever earned went into my bikes...loved speeding...pulling those easy wheelies...hhhhhhh....I miss the wet fresh Welsh roads THE A470, Cardiff, Swansea, Abbrestwidth , Caernarfon, Bangor, Wrexham Chester.....and the Hot Fish and chips at the end of a tough ride, and the Chicken Vindaloo on Chips.... Gad Damn it….I am afraid to go there again….things might not be as beautiful as I remember them….Plus I am all gown up now……
I used to keep my RD350 in my bedroom....it was stolen twice from the curb outside by joy riders...
Even though it’s an Island….Britain never felt like a boating country….more like the land of the bikers...
Baba, I've lived here nearly 12 years, and have always felt the waterways are severly under-utilised, especially the Thames. We have a "public" transport system that hardly works, and yet when I go to other cities in Europe with major waterways there always seems to be so much more traffic, commercial and pleasure.
Heres mine:

Posted: Thu Oct 12, 2006 4:53 pm
by WobblyLegs
Duplicate post.
Posted: Wed Nov 01, 2006 9:16 am
by baba101
For seat tops...I ended up taping only the Open sides..
Sides touching the Transom and bow were cut approx 1/4" short...glued to the Cleats and then glued to the walls. The gap filled with glue made them very strong.Seats are foam filled ...jumping on them (175Lbs) I felt no movement.
After reading Timoub007's account of cracked seat seam...I ended up reading the tutorial again...G*d Damn...every time I read it I pick up something new...Its says...
.all seams of the seat top should be taped..there is even a picture of Jac taping the FL11 seat top.
http://gallery.bateau2.com/forum/viewto ... &start=105
Timoub007 wrote
You know the one thing I forgot to do when I stole the cockpit seat arrangement from the D15 was to put the radius curves in the seat tops where they meet the transom. When I was finished cutting the seat tops I looked back and said, "Oh crap, I was supposed to radius those." I didn't think much more of it and figured I had enough structure otherwise. Well, on Friday while scouting for ducks I found out that it really is important. I cracked my seat-to-transom joint where there was only an epoxy/glue filet. First of all, I should have put the 3" radius on the seat tops. Secondly, I should have put some glass in that corner.
It cracked when I was trying to "jump" a small finger of marsh, about 3 feet across. I was in one ditch and wanted in another one. Mental note, the tunnel doesn't mean that I can run in zero water. LOL
Madmax seats “as isâ€
Posted: Wed Nov 01, 2006 2:56 pm
by ks8
Happy taping Baba!
Posted: Wed Nov 01, 2006 10:46 pm
by baba101
Thanks KS8.... Taping is now done...Its been my best FG effort to date...I used less than half the Epoxy and half the time..
Gettin ready for my Barebone Seasled....
But being realistic...I have a lot to learn before starting anything new...next step...spend a summer or two on the lakes...and experience the water for the first time..
Posted: Thu Nov 02, 2006 10:52 am
by baba101
A quick sanity check...if you work only a couple of hours at a time...a simple task like prime and paint can take 4 months... this is how....
Oarlocks
- Create and glue Backing plates
- Create over sized epoxy filled holes 1
3 in 1 roder holder
- Make and glue cleats
- Create epoxy filled holes 1
Solo Rod holder
- Backing plate
- Epoxy filled holes 1
Hooks
- Epoxy Filled holes 1
Fair inside 5
Prime inside 5
Glue Gunnel pieces 1
Prime sides 5
Paint sides 5
Paint inside 5
Final Coat of Graphite on Bottom 2
Total 32days or 4 winter months (Asuming I don't work every day....)
Posted: Thu Nov 30, 2006 4:04 pm
by baba101
Madmax....a preview....
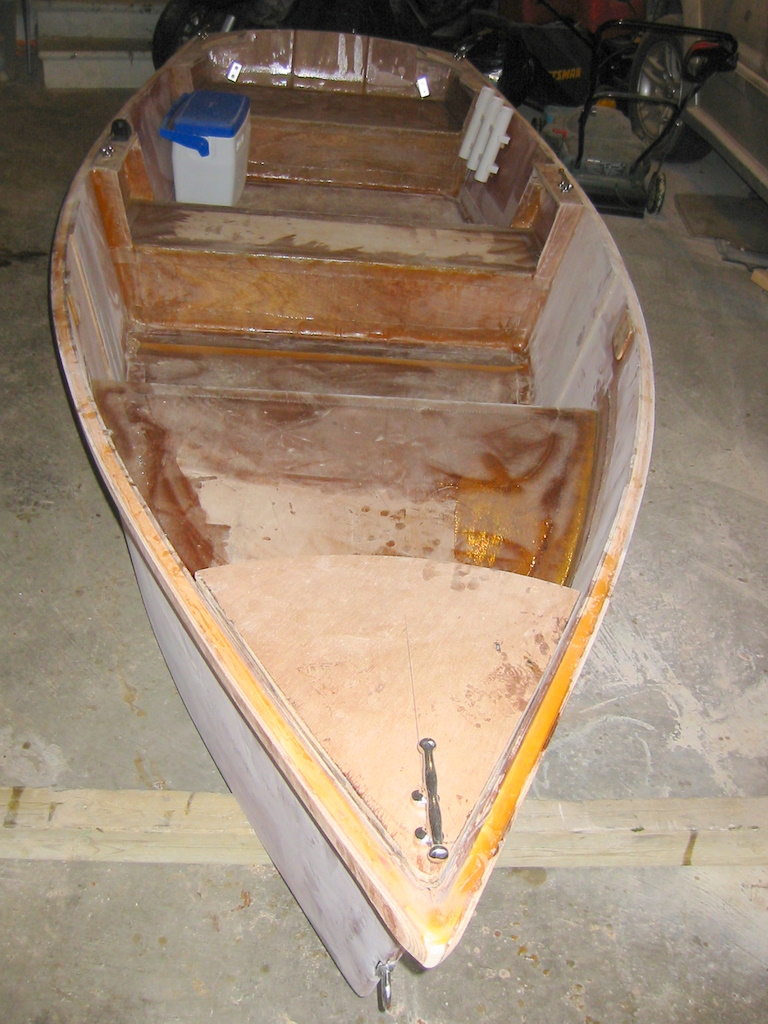
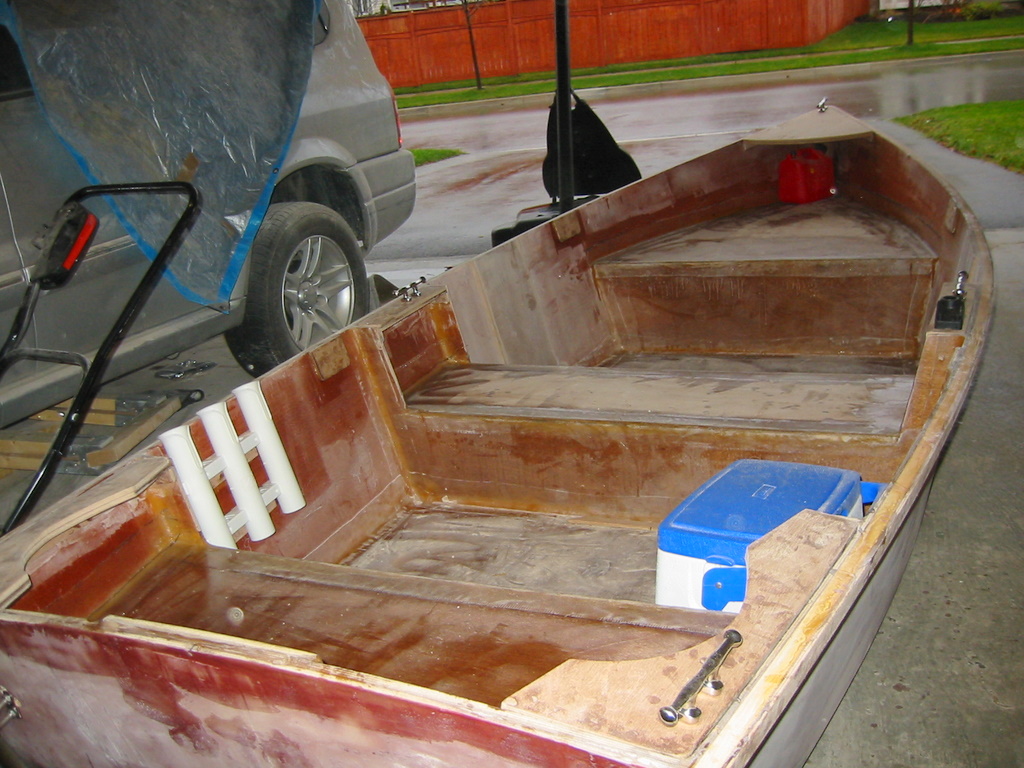
Incase you are wondering...
Baba Sits on the Cooler....I found the Rear seat to be too close to the Tiller.
The deep Breast Hook doubles as a seat....when anchored.
The large front Deck is the fishing Platform....hopefully the FL14 is stable enough to stand on.
Posted: Sat Dec 02, 2006 1:51 am
by baba101
Filled the oversized holes with epoxy + woodflour.
After precoating the holes with epoxy...
First tried adding chopped FG in the mixture...it become soo guey and elastic that I could not get the bubbles out of the holes. Wasted that batch of epoxy.
Next I kept the glue at the consistancy of Honey...but it was still tough to get the bubbles out.
Adding more woodflour (consistancy of peanut butter) made it easy as icing a cake.
When I return from my road trip in a weeks time...the Sanding begins...Thats Baba's fav part of boat building.
A lot of people ask me about what power tools are needed to build one of these boats...
So far I have the following:
1. Drill Machine
2. Jigsaw
3. Randomn Orbit Sander
4. Finishing sander (1/3 sheet)
5. Mouse Sander
Posted: Sun Dec 03, 2006 8:36 am
by Daniel Huckleberry
Baba
nice to see you are still working. the weather looks pretty good, or at least the grass is very green! good luck and have a safe trip.
huck
Posted: Fri Mar 09, 2007 11:10 am
by msujmccorm
Posted: Fri Mar 09, 2007 4:46 pm
by Daniel Huckleberry
I E-mailed him today to ask the same question
. I will check it tonight when I get home to see of he has replied. He just kinda fell off the planet.
Huck
Posted: Fri Mar 09, 2007 8:23 pm
by Knottybuoyz
He just kinda fell off the planet.
He's probably frozen in solid like the rest of us up here in the Great White North! We've been in the freezer for almost 7 weeks now with -20 deg C every day. That's about -5 deg F for you fella's. Last three days we woke up to -24 C. That's freakin' cold!
I was kinda wonderin' about Babba too, maybe he had to cut up Max to burn in the fireplace for heat! Yikes!
Posted: Mon Mar 12, 2007 10:52 am
by Daniel Huckleberry
No word from baba on the e-mail. We may need to send out a search and rescue. He knows he should have left a float plan!
Huck
Posted: Sun Apr 08, 2007 2:34 pm
by baba101
Baba is back...!
Danial there is a surprise for you in the mail....
Jeff...love your boat....the extended back seat...the colors...inspirational..
Knottyboyz....when are you starting with your Monster boat...?
Madmax got some fairing compound on the inside 8 hours of 3M bubbles mixed with epoxy...It was great fun...
Hoping to get this baby in the water by June.....Its nice to see you guys are still here....
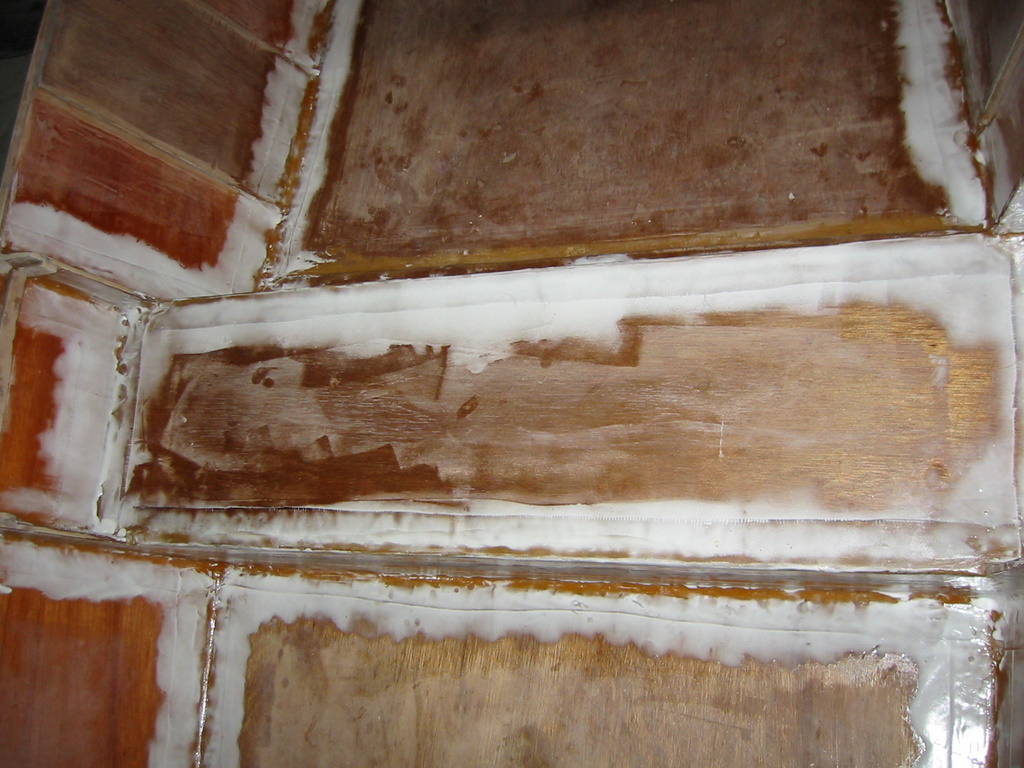
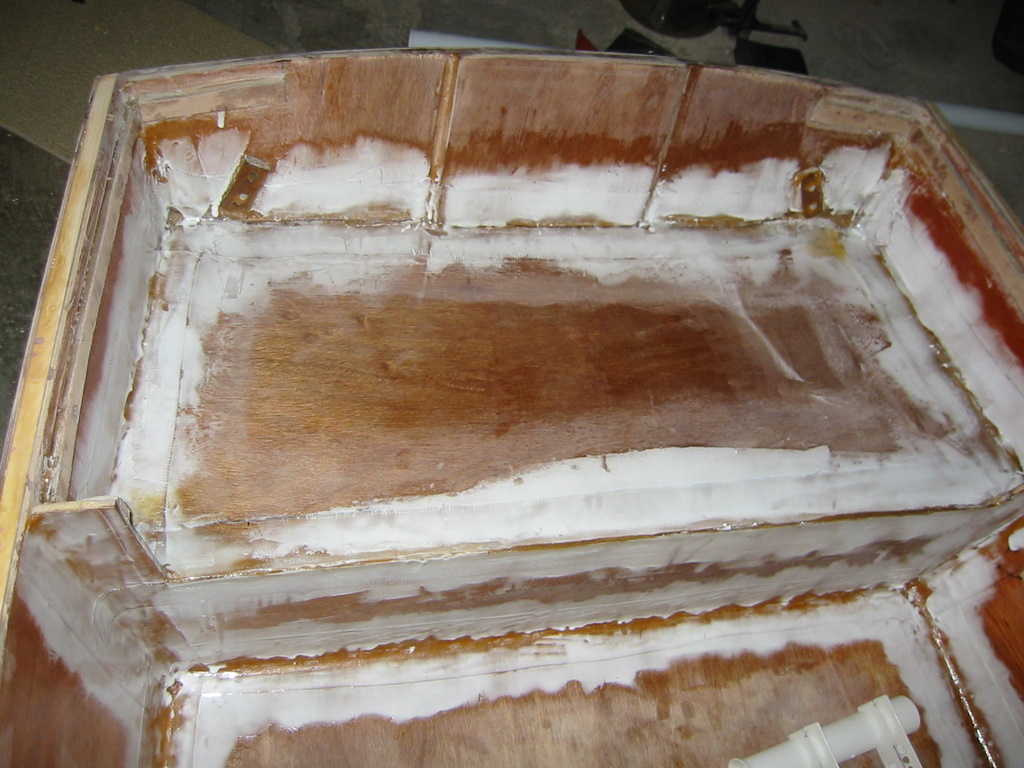
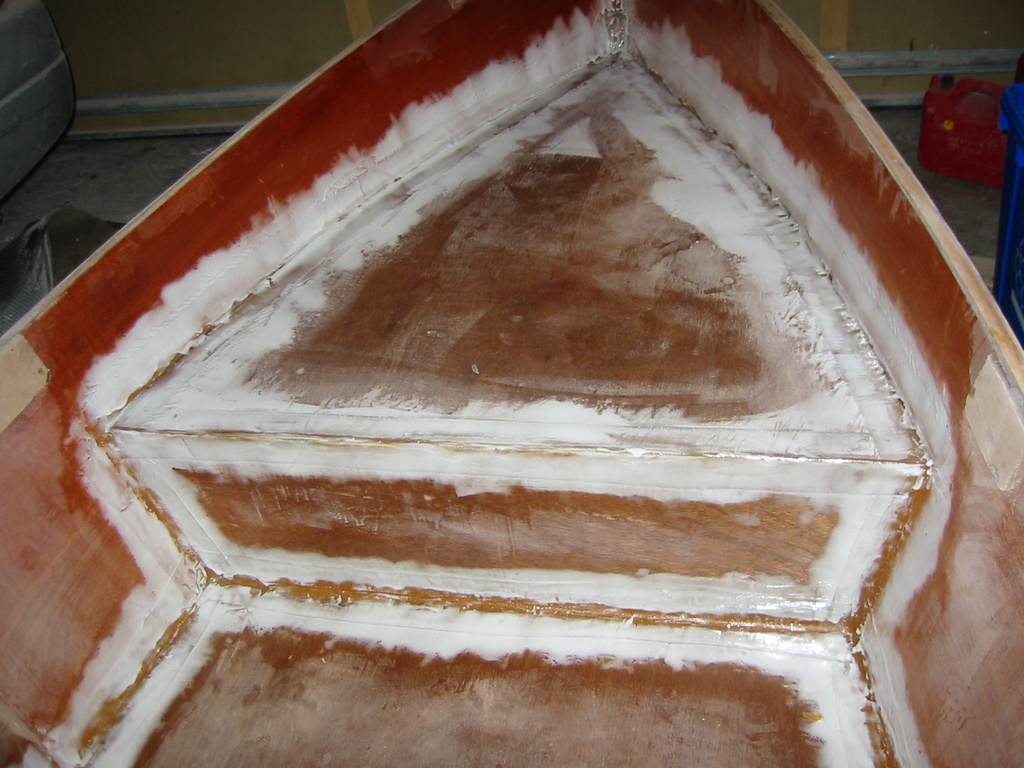
Today MadMax had his first visitor....my local video store owner who runs a fishing tournament....a year ago he told me that he would never want to own a fiberglass boat...lets see if we can change his mind...
Posted: Sun Apr 08, 2007 2:48 pm
by WobblyLegs
And where have you been?
Posted: Sun Apr 08, 2007 2:52 pm
by Jimmiller
WElcome back,,
Baba's,, Madmax is looking good
jim going on two yrs for PH18
Posted: Sun Apr 08, 2007 3:04 pm
by tech_support
Nice to hear from you again, I guess everything is beginning to thaw out up there
Posted: Sun Apr 08, 2007 3:07 pm
by baba101
Wobbs..your work is intimidating for a messy builder like myself.....good to hear from you again...
Thanks fo your support
Jim...I have the Plans of the PH18 on my office wall ...that was my first Love...! I wanted to build it for wake boarding in vancouver...
Shine its nice to be back...thanks for being here....I would like to get my hands on these Mpeg files you are creating for the FS12...what do I have to do...to get them...
Baba gets all fired up....when he sees all you crazy dudes....building your dreams...
Now I want to finish Mine....
Posted: Sun Apr 08, 2007 5:01 pm
by ks8
Hey hey! He lives! (A remark I usually reserve for another... how timely!) Welcome back!
June... hmmmm.... may you fair better than I!
Posted: Sun Apr 08, 2007 5:56 pm
by msujmccorm
Where have you been?? We thought you fell off the planet.
Mad Max is probably very mad about being ignored.
Glad you are back.
Posted: Sun Apr 08, 2007 6:30 pm
by Knottybuoyz
Knottyboyz....when are you starting with your Monster boat...?
Welcome back baba. Glad to see you thawed out with a minimal loss of brain cells due to frostbite.
)
We'll start KBIII next March if all goes according to plan. Re-wiring KBII, new pin-stripes, buff hull and a few other repairs then for-sale sign goes on it. We have a place to build. Buying steel pipe to make a temp structure 30' x 36'. Have to pour a cement pad too. Just a lil' over budget on that part of the plan.
(
When are you going to get Max in the water? It's painful sitting here watching the paint dry! *wink*
Posted: Sun Apr 08, 2007 11:51 pm
by Daniel Huckleberry
Glad you are back, Baba
We have all wondered about you. I guess you had to get your DSL lines thawed
Can't wait for the surprise; hope its that INV clip.
Huck
Posted: Mon Apr 09, 2007 1:18 am
by baba101
It is indeed....
Posted: Sun May 13, 2007 1:34 pm
by baba101
Sanded the fairing Compound
Applied two coats of Graphite + epoxy Mixture and one coat of Epoxy all wet on wet
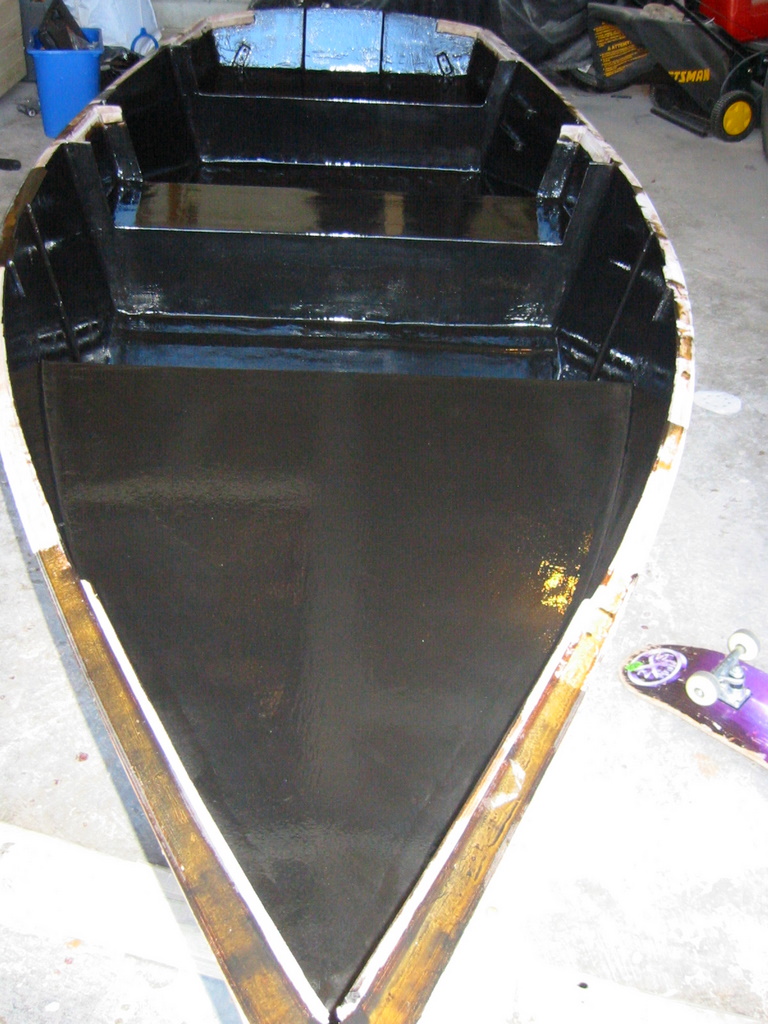
[/img]
Posted: Sun May 13, 2007 5:08 pm
by msujmccorm
Looks really smooth, but you are going to burn your a?? in the summer
Glad to see mad max is no longer neglected. I'm envious, prime fishing months here and I'm sidelined with rotator cuff surgery.
Looks great Baba, can't wait for splash. Trailer him down for the fall get together????
Posted: Sun May 13, 2007 10:03 pm
by baba101
msujmccorm wrote:Looks really smooth, but you are going to burn your a?? in the summer
I am going to sand the last coat of epoxy and then add system 3 Primer /paint...Just wanted to seal the inside with Graphite...for long lasting protection...this was the only surface not covered in FG...Now I have bragging rights to
"FG and Graphite composite sandwitch"
msujmccorm wrote:
I'm envious, prime fishing months here and I'm sidelined with rotator cuff surgery.
Looks great Baba, can't wait for splash. Trailer him down for the fall get together????
Here is to your health buddy...but don't be envious...I still have a few months to splash day...You might be out fishing before Baba...
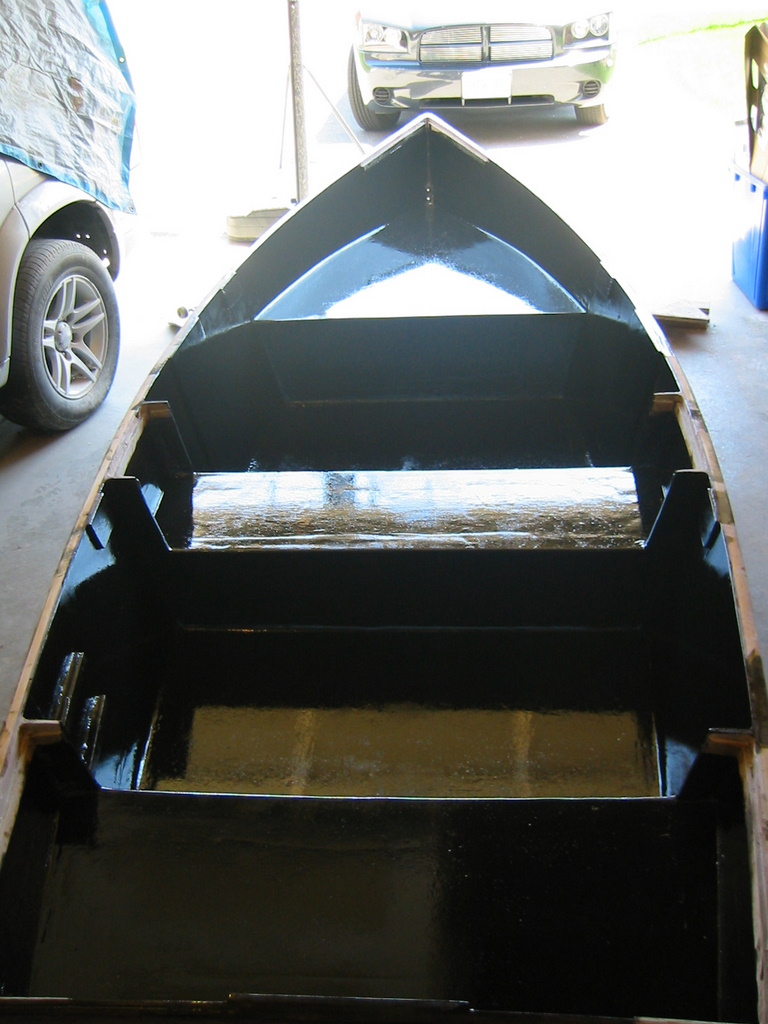
Posted: Mon May 14, 2007 10:40 am
by Daniel Huckleberry
Cool Baba
and not a bad idea for the interior surfaces. I got the INV clip. It is nice to see these things running. You could actually see the air escaping from under the hull at times! Glad you're back to work and posting. You guys should do a late Summer meet on the lake and maybe some of us would try to come! My brother lives in Elkhart, In, not too far from you I think.
Huck
Posted: Mon May 14, 2007 4:40 pm
by Russ5924
Nice! But will the paint stick to the graphite
Posted: Mon May 14, 2007 5:31 pm
by baba101
Russ5924 wrote:Nice! But will the paint stick to the graphite
Thats a fair question...here is what I have done...

Since the primer is on a sanded epoxy only...which is chemically bonded to two layers of Epoxy+ Graphite...(i.e. wet on wet)
Baba figures its gonna be OK...?
Posted: Tue May 15, 2007 8:16 am
by gunner
your logic is good Baba. I think it should work too. I am going to just graphite the botton of mine up to a bootstrap line. Maybe too fancy for what I'm doing but the graphite botton it great if we decide to beach them.
Posted: Tue May 15, 2007 8:20 am
by baba101
Hey Gunner when are you coming to see My Boat...? you probably drive by my house every day...drop in sometime...
Posted: Tue May 15, 2007 8:40 am
by jeremy
Looks good, but, man, I don't envy you trying to sand the epoxy and graphite. Best of luck to you!
Posted: Tue May 15, 2007 8:42 am
by gunner
I will. I am finshing the "honey do stuff this week". Then I will be clear. I still have your phone # and address in the FS 14 file I hope. I really want to get going but many things have been in the way. Skied lots this year and got all behnd on other things. Wife is retiring shortly and we have a series of event s to go to as well. I want to finish the 14 before the Simmons plans or New FSS17 or 19 are done .
Posted: Tue May 15, 2007 8:44 am
by tech_support
jeremy wrote:Looks good, but, man, I don't envy you trying to sand the epoxy and graphite. Best of luck to you!
Me either
Its very hard, so you will go through more sand paper, you will also look like a coal miner. the epoxy primer should stick to it no problem.
BTW, the regular epoxy would have been plenty tough for the inside
Posted: Tue May 15, 2007 8:49 am
by baba101
shine wrote: Me either
Its very hard, so you will go through more sand paper, you will also look like a coal miner. the epoxy primer should stick to it no problem.
Already done...since I only sanded the epoxy layer...it took about 1 hour...and three discs....no black powder either...only Epoxy...
I will post a picture shortly...
Posted: Tue May 15, 2007 9:54 am
by ks8
Baba put a coat of straight epoxy over the whole thing, if I recall... like I do over fairing compound, so the final sand should be just epoxy being prepped for primer.
shine wrote:BTW, the regular epoxy would have been plenty tough for the inside
Yea, but we must remember... it is MAD MAX! Niagra Falls... etc....
Posted: Tue May 15, 2007 10:08 am
by baba101
ks8 wrote:...Yea, but we must remember... it is MAD MAX! Niagra Falls... etc....
You gottit ...finally someone understands Baba
....Its a fools game...
but Madmax must survive...even after all life forms (as we know them today) seize to exist....
not even the cockroaches must out live this beast....
Posted: Tue May 15, 2007 6:29 pm
by Russ5924
What I wonder is just how big a mess that graphite is going to make when you start sanding. Used to go into a few graphite places and work on there equipment,couldn't wear my shoes in the house for at least two days or left nice foot prints
Would like to put that on my FL12 bottom but since working by the back door would hate a mess. Me tracking it in and the dog laying in it
Posted: Tue May 15, 2007 7:03 pm
by ks8
Look two posts up, and at the top of this page. When he sands, ideally he will never get to the graphite.
Posted: Fri May 18, 2007 12:22 am
by baba101
Sanded the third coat of epoxy...
These sanding grips (A & B) were handy for corners and edges...

wiped with damp cloth, then again with latex glove (until all dust particles are moved to safe corners)...Vacuumed dust from all corners..
I found wiping with Latex gloves was very effective in removing the dust...as you can feel the dust particles on your fingers and palm. When the surface feels smooth you know dust has been removed....
Applied one last coat of epoxy all over the inside...
Read the instructions for the S3 primer... seemed simple enough...
> Clean surface
> Mix primer in can with Drill
> Mix primer and harder 2:1 ratio into a mixing cup
> Thin about 20% with water and alcohol (50:50 mixture)
> Apply three coats...dry between each coat...
> Sand upto 220 grit....
Baba is ready to Rock and Roll...
Posted: Fri May 18, 2007 4:11 pm
by ks8
Baba! Wait! Stop!
you forgot the kevlar!
Posted: Fri May 18, 2007 4:53 pm
by baba101
ks8 wrote:Baba! Wait! Stop! you forgot the kevlar!
Don't worry man ...I will be wearing it....
Posted: Fri May 18, 2007 5:18 pm
by ks8
Posted: Fri May 18, 2007 5:21 pm
by msujmccorm
Posted: Fri May 18, 2007 6:08 pm
by ks8
Who knows how Baba might test the strength of MADMAX while prepping it for primer?!
Posted: Sat May 19, 2007 12:43 am
by baba101
Posted: Sat May 19, 2007 12:49 pm
by ks8
hmmmm... Mad Max's most modest moment...
Many memories in Mad Max's manufacturer most certainly!
Posted: Sat May 19, 2007 1:45 pm
by msujmccorm
That black looks like it's gonna take awhile to cover. Baba can if anybody can. Are you wearing the kevlar yet?
Posted: Sat May 19, 2007 8:21 pm
by Daniel Huckleberry
Baba
What's that duct taped on attachment for the drill. Is that some sort of jousting equipment...maybe a laser scope?
Keep up the good work!
If you hurry you will still beat ks!
Huck
Posted: Sat May 19, 2007 9:29 pm
by baba101
msujmccorm wrote:That black looks like it's gonna take awhile to cover.....
After the second coat of primer it looks pretty good...Added quick fair today to beautify/Glorify Madmax...I Recon will need two more coats of primer before sanding...
Daniel Huckleberry wrote
What's that duct taped on attachment for the drill....Is that some sort of jousting equipment...maybe a laser scope?
Its a level for the drill...I needed it steady at different angles while drilling through Transorm and Bow.
If you hurry you will still beat ks!
No I want to be the first one to splash after KS...
Posted: Sun May 20, 2007 4:06 am
by baba101
Primer Coat number 3.
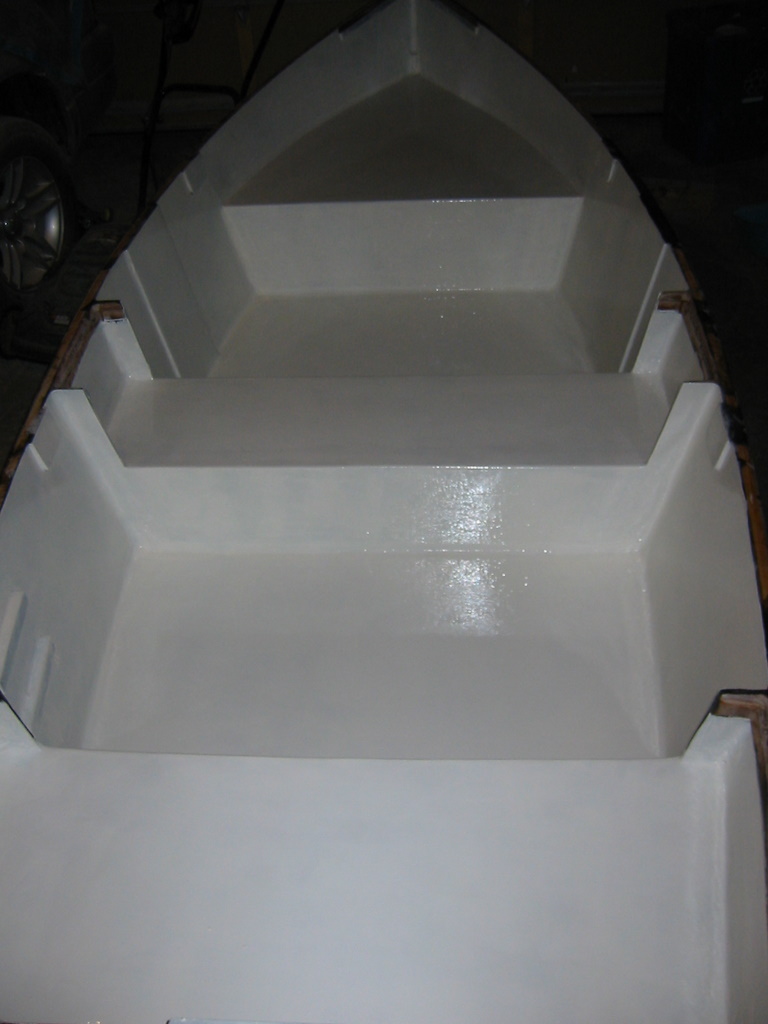
I must have done something wrong here, because I have only enough Primer left for one more coat....Looks like I need another gallon of this stuff for the outside...
Posted: Sun May 20, 2007 10:23 am
by msujmccorm
I used right at 1/2 gallon for the outside, 3 coats and really should have added another coat. I didn't prime the inside. The rustoleum boat paint said it would cover over straight epoxy. Hope they were right.
Looking good. What color top coats or will that be a surprise?
Posted: Sun May 20, 2007 10:25 am
by Daniel Huckleberry
I wouldn't think you've done anything wrong, Baba. That primer doesn't cover very many sq ft. You used as much as you needed to cover the inside so that was the right amount. As a good chef once asked me as a test "how long do you cook spinach?" The answer......until it's done.
Good work Baba
Huck
Posted: Sun May 20, 2007 11:19 am
by ks8
baba101 wrote: If you hurry you will still beat ks!
No I want to be the first one to splash after KS...
Just after the comet hits?!
I still have to install CB, finish underside, topcoat (two colors?) and clear coat everything, etc.
But I might splash before the finish is complete, if that is the date you were thinking about. Then, it should be this summer. (Yes, you can laugh now Bill...)
Posted: Sun May 20, 2007 2:41 pm
by baba101
msujmccorm wrote:.... What color top coats or will that be a surprise?
I have the S3 Orca white... thinking I might tint it a little....seems a long way off though...
Posted: Sun May 20, 2007 5:49 pm
by Charlie
22 pages of commentary and still no weight. When will you put it on the scale?
Posted: Sun May 20, 2007 7:47 pm
by msujmccorm
He has to take it to a highway weigh station!!
Posted: Mon May 28, 2007 7:06 pm
by Russ5924
Has a boat ever sank from it's own weight
Wasn't there a sailing ship build in EUROPE they keep adding guns an people and the ship in a turn water ran in the gun ports and sank on it's first voyage
Posted: Mon May 28, 2007 8:16 pm
by rudar
Sounds like the VASA. Swedish man-of-war. I used to live in Stockholm just across the bay from where it's now a museum piece.
http://www.abc.se/~m10354/publ/vasa.htm
Posted: Mon May 28, 2007 9:38 pm
by baba101
Since this is a displacement Hull...weight is not a major factor....having said that....if Madmax was to sink on its Maiden Voyage (due to its own weight)...Baba will eat his sock..and promise never to build boats again...Hell I'll even buy a Seadoo and become a hooligan...!
Last night Baba used a router for the first time...I
rounded all the edges...
This is for strength, safety and comfort.
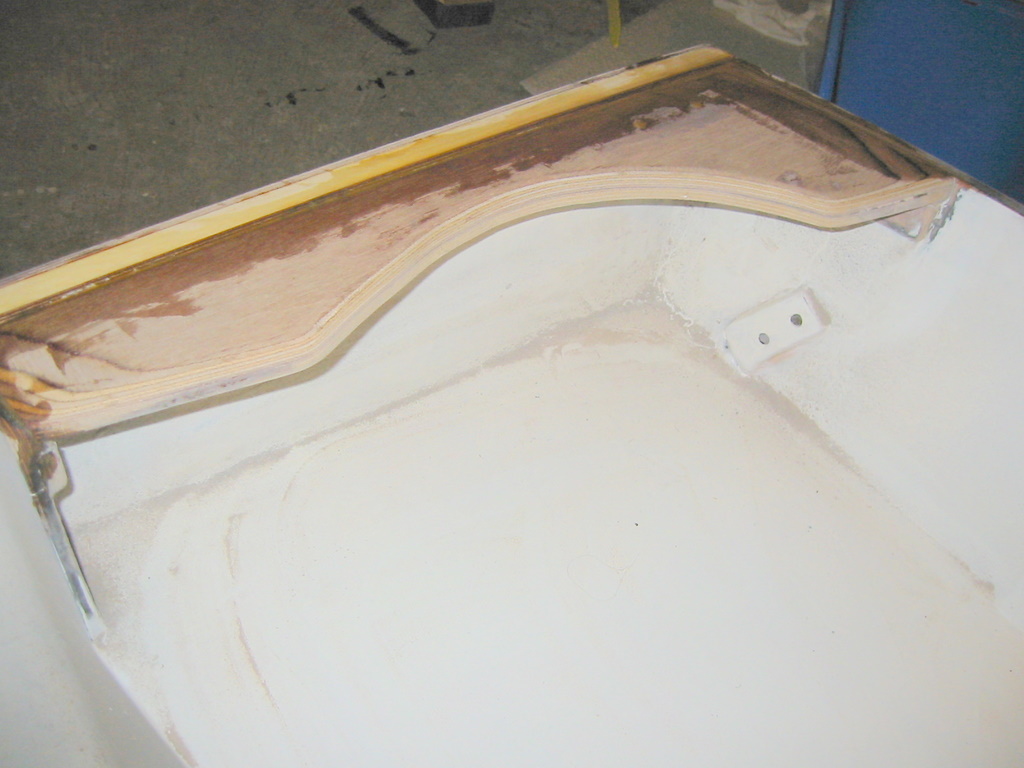
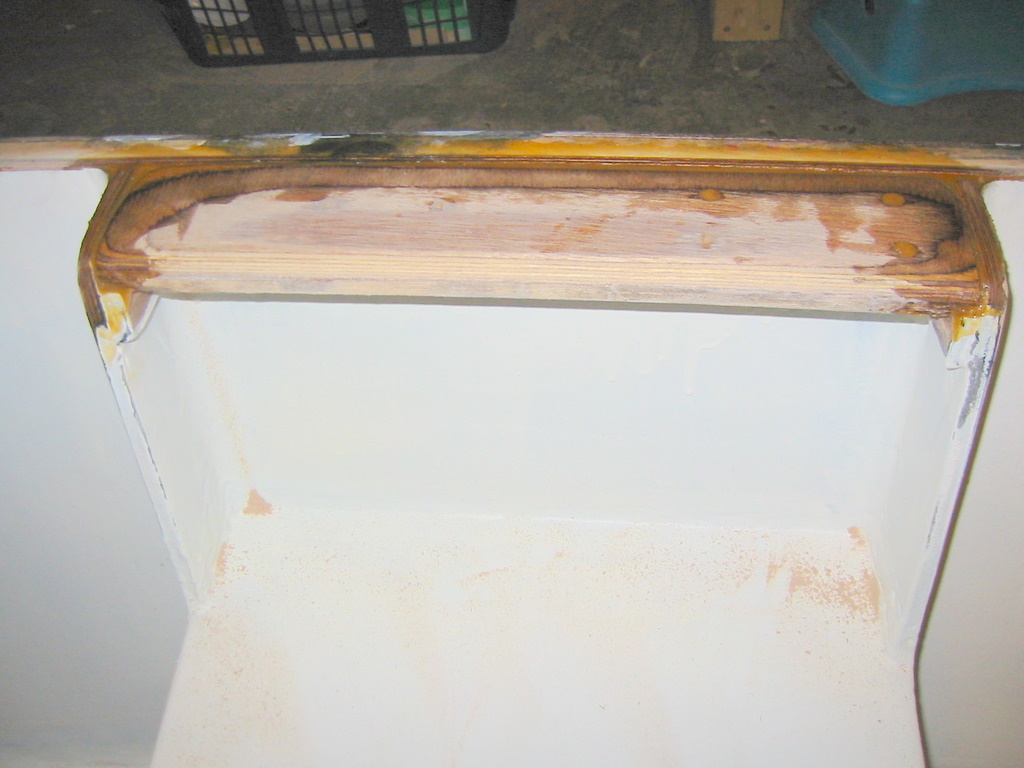
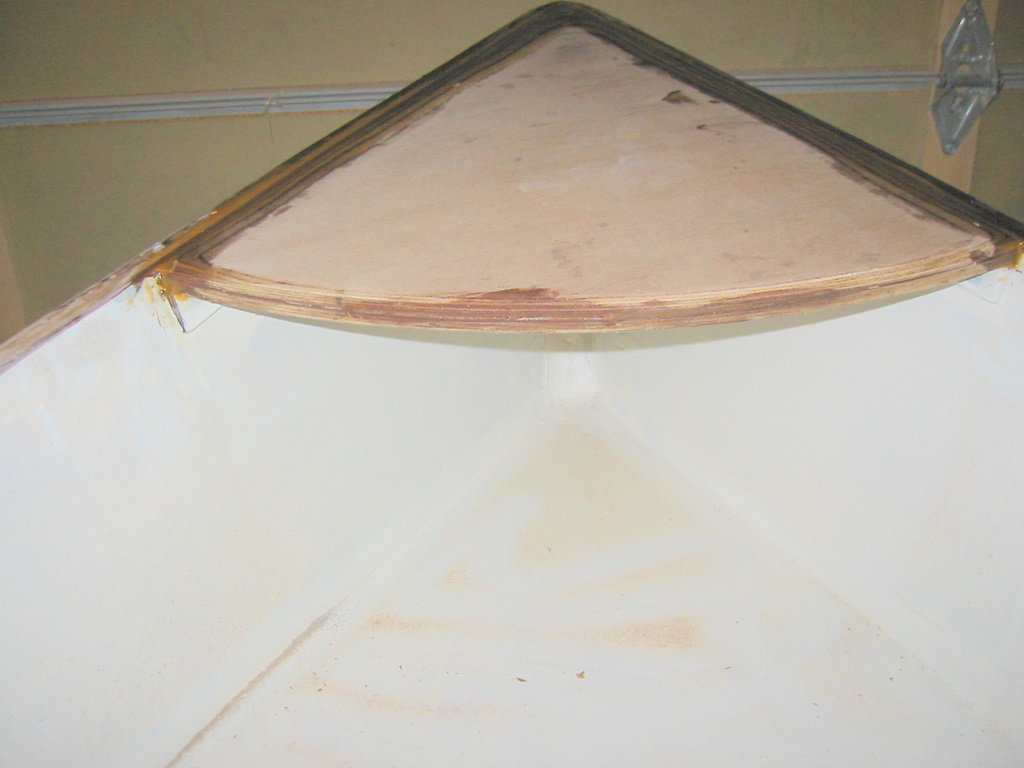

Posted: Tue May 29, 2007 7:37 am
by gunner
excellent router work for a first job!
Posted: Tue May 29, 2007 6:50 pm
by Russ5924
Sorry ! Shouldn't have said that
? Anything than a Seadoo. Was on the news last night one burned down to the water line was a 20 footer. Guy said just bought it a few weeks ago. Started with just a little smoke and 4 adults and 6 kids had to get out of the boat into the water ALL OK
Posted: Tue May 29, 2007 9:22 pm
by zignman
Be careful with that router, they get addictive. Soon you will be rounding things just for the fun of it!
Posted: Thu May 31, 2007 10:43 am
by baba101
zignman wrote:Be careful with that router, they get addictive. Soon you will be rounding things just for the fun of it!
I hear ya...Zignman...been thinkin about what else I can do with this router....
Last night I spent an hours or so sanding the primer....and am happy to report that this stuff is rock solid after a few days of drying…
Next two coats of primer...will be sanded as soon as its dry...otherwise its almost impossible...(Baba likes this stuff.. )
....Found a local dealer for more S3 Primer in Toronto...its expensive when compared to Bateau prices but $65 broker fee into Canada pretty much makes this local purchase a bargain.
MadMax feels unbelievably solid at this stage...Baba is Happy....
June launch is not very likely based on my progress so far….plus finding a decent flat bed trailer in time…will be another challenge.
Posted: Thu May 31, 2007 12:27 pm
by gunner
BAba- walmart in Milton has a few flat bed trailers against the garden center fence. Seem cheap for new at the price they reduced them to. They have been tere a while. Have 12'' wheels and no sides. Also buy a copy of the TRIAD at the variety store. Scads of used stuff in trailers- unfortunately you pay about $3 canadian for an issue.
Posted: Thu May 31, 2007 12:30 pm
by baba101
gunner wrote:BAba- walmart in Milton has a few flat bed trailers against the garden center fence.....
Yes I have been drooling over them for a while...wasn't sure if its a good buy...? at CA$647
Will check out the TRIAD....thanks...
Posted: Thu May 31, 2007 3:24 pm
by Russ5924
Ever think about just finding an older used boat and trailer for sale. Can find one of those cheaper than you can buy a new Trailer.Shouldn't be to hard to find something up there with all that water
That is what I have started looking for if nothing else junk out the boat and may even find one with a good motor
Posted: Thu Jun 07, 2007 11:56 pm
by Dukydo
Baba
Been keeping an eye on your project. It was once asked if you have too much time or too much money. I think the word is integrity. You
and Mad Max have it.
As far as a trailer......... consider this one deliverd to your door. Not sure about extra costs going into CA.
http://www.ezloader.com click on galvanized trailers, then click UPS kit trailer.
Keep up the good work.
Duke
Posted: Tue Jun 12, 2007 9:02 am
by dj
Posted: Sun Jun 24, 2007 2:30 pm
by msujmccorm
Got Paint?????
Posted: Mon Jun 25, 2007 11:29 am
by baba101
msujmccorm wrote:Got Paint?????
Hey Jeff...Nice to hear from you again...No not much work done recently...
Sanded the Primer...ordered another Kit of S3 Primer...and got this little 1oz bottle of S3 Red paint...for $5.
I am hoping to mix it with my Orcas White to add a Red Line to Madmax...don't know if it will be enough...The guys at Composite Canada Told me that this is Red Pigment and is enough to convert a Galon of Orcas white to Red...
The label says its just the S3 Top coat (WR-LPU)...Oh well it Pays read sometimes...
Posted: Mon Jun 25, 2007 11:39 am
by baba101
Huke & DJ,
Thanks for the links for the Trailers...
My understanding is that I need to get imported Trailers locally inspected in Canada (vehicle inspection fee etc...making it more expensive). PLus these good folks are not interested in shiping to Canada
.
Baba needs to source the EZ trailers locally...
Posted: Mon Jun 25, 2007 10:46 pm
by Dukydo
Baba
Here is what I found as far as getting a EZ Loader trailer in Ontario.
Barrett Marketing Group Ltd.
150 Colborne St. E.
Lindsay, Ontario, Canada
K9V 6K4
FAX 705 324 1527
FAX 800 417 8202
PHONE 705 324 4499
PHONE 800 668 3481
You will need to ask about the UPS kit trailer.
Refer to the EZ Loader URL in my last post
Good luck..... DUKE
Posted: Tue Jun 26, 2007 8:00 am
by Daniel Huckleberry
Hey Baba
I saw your post on the Hickman sled. Are stray thoughts occupying your time? MadMax must be dying to float!!!
All kidding aside, I would really like to see you get to start a HS18. You are after all the one who pushed to make it happen. I might even want to build one someday if I like the performance of the TX18.
Good luck and build on.
Huck
Posted: Tue Jun 26, 2007 8:47 am
by baba101
Daniel Huckleberry wrote:Hey Baba
I saw your post on the Hickman sled. Are stray thoughts occupying your time? MadMax must be dying to float!!!.....Huck
Yes Guilty as charged...
This may sound a little crazy...but I don't want to finish Madmax Until I have something else to do....unlike most of you I have never owned or used a boat...My journey was more about the Boat Building....not really about being in the water....
I am torn between starting the SB18 and HS18...they are both unique...and the experience of owning a Sail Boat vs Speed boat will be equally new to me.
In any Case I won't start my next project until August 2008, would like to Drag this one for as long as I can....If it sinks I will find a new Hobby.
Can't wait to see your TX18 in the water though....I won't make a Decision until then....
Baba
Posted: Tue Jun 26, 2007 9:25 am
by Daniel Huckleberry
O.K. Baba
Now the pressure is really on me. Question is, how are we going to get you a ride?
I will admit that my brother and I are considering the SB18. He is the sailor, not me but I like the idea of a fast flying boat! He was in a motorcycle accident a little over a year ago so singlehanding is out of the question for him (for now). I think the build would be good therapy so we are talking about starting after I build my family a house this fall. Gotta finish the sled first, though! So many boats to build, so little time
Huck
Posted: Tue Jun 26, 2007 7:52 pm
by Dukydo
Baba....... if you look back a page you'll find links for the EZ LOADER in CA... then, you can spend some of your time putting that together so that MAX has a place to rest.
Don't stop now.
Duke
Posted: Tue Jun 26, 2007 11:57 pm
by navyarkangel
Baba the boat is looking great!!! I am buying the plans and epoxy kit as soon as my sons get up here to help me with the build....want to make it a family affair. Look forward to seeing pictures of Mad Max in the water.
Are you still trying to find a trailor? Have you looked at Toronto craigslist, because there is always good trailors on there.
Posted: Tue Jul 24, 2007 1:28 pm
by Daniel Huckleberry
Any progress lately, Baba? Summer is short there, right
. I know MadMax would love to wet her tail feathers at least once this fall. I am doing my best to finish the sled. Maybe then you can make a move on your next one.....assuming Jacques doesn't lure us another way with another great new design. I'm digin' that new launch he's working on.
Just checkin' in on ya
Huck
Posted: Tue Jul 24, 2007 3:08 pm
by baba101
Daniel Huckleberry wrote:Any progress lately, Baba? ...Huck
Little by Little I get closer to tha Launch Date....still saving up for a trailer and a Hitch...just found out that Hitches are not allowed on my Company car...Wife's car will be insured next year....so finishing any sooner is not going to help much...
I have the primer sanded on the inside and the boat flipped.
Daniel Huckleberry wrote:.....assuming Jacques doesn't lure us another way with another great new design. I'm digin' that new launch he's working on....Huck
I love that new project Jac is workin on....infact these guys are doin my head in with such beautiful new designs....
Baba has to stay focused like you Huck....
BTW I am lovin your blog and can't wait for the sea trials....
Posted: Wed Jul 25, 2007 7:35 am
by Daniel Huckleberry
Baba
Sorry to hear about your hitch......hitch
. It seems like it is always something.
I am thinking about the trailer, too. I need to get started on it but can's seem to get away from the boat long enough to do it. I guess it will just have to wait.
I have to put some pressure on the wife to finalize a color choice. I made the mistake of giving her the final decision of several colors so we'll see how that turns out. Might just have to sea-trial in primer. Hey, wet is wet, right!
Build on
Huck
Posted: Fri Jul 27, 2007 4:38 am
by TomW
Baba, any trailer for your FS14 should be easy to find locally. Down here marinas have the best prices, just call around. Use you local paper, the FS14 doesn't need a gold plated trailer(EZ-Loader).
On another note glad you liked my research on the article. Most guys don't realize that when they add a peice of metal to there skeg there are consequences.
Love MadMax just get it in the water soon so we can all cheer you as a new launchee.
Tom
Posted: Mon Jul 30, 2007 7:53 pm
by baba101
Madmax was still looking a bit tacky this afternoon...here are a couple of mug shots before Baba got started...
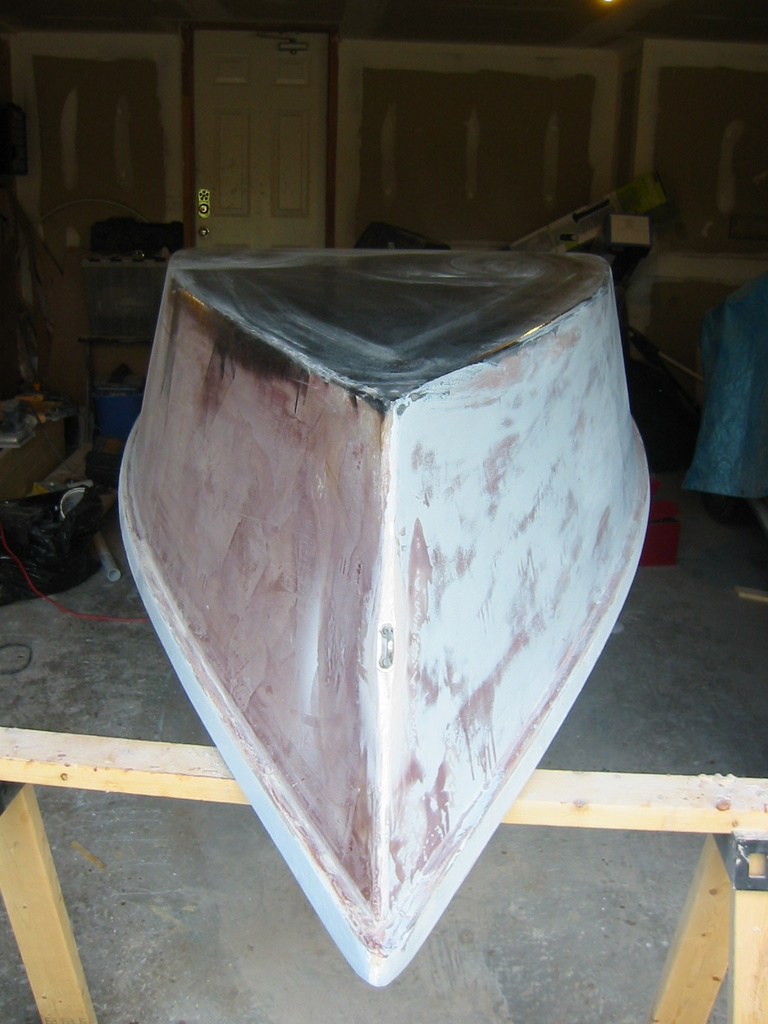
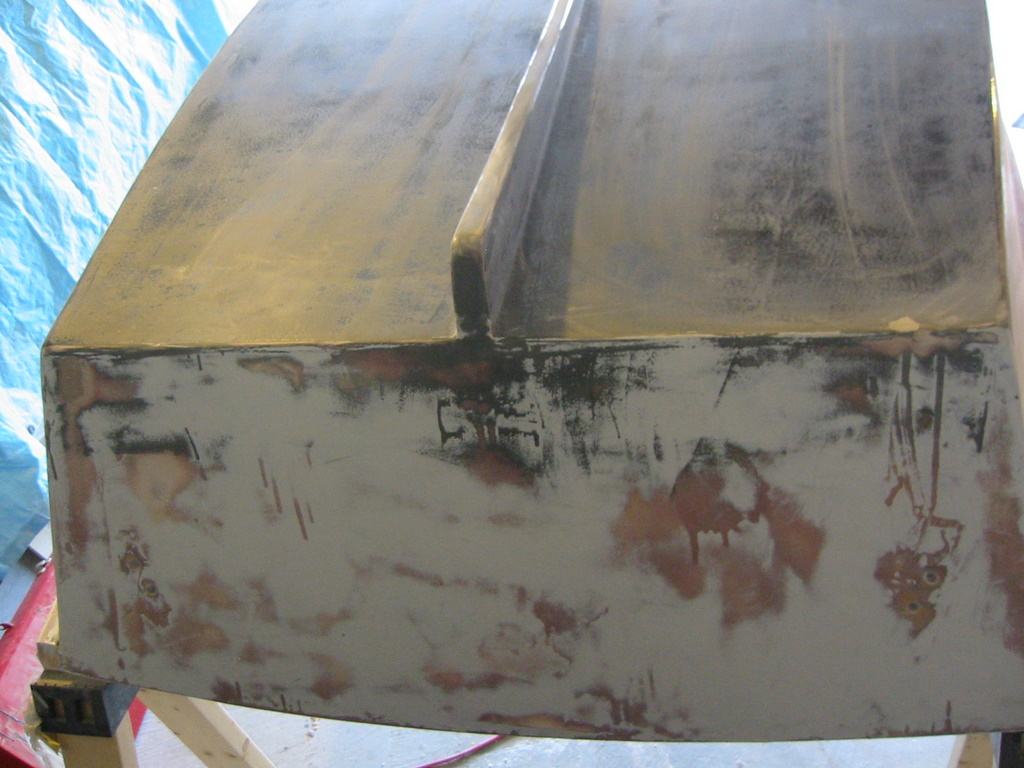
I needed an EXTREME MAKEOVER
so I called in the professionals...
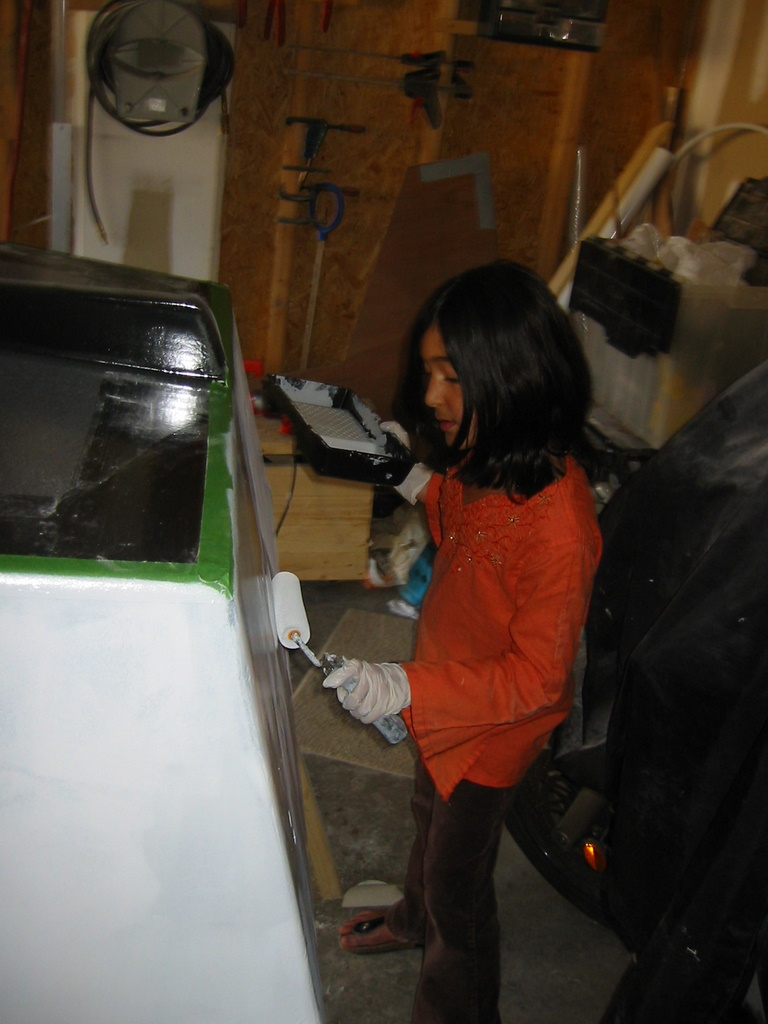
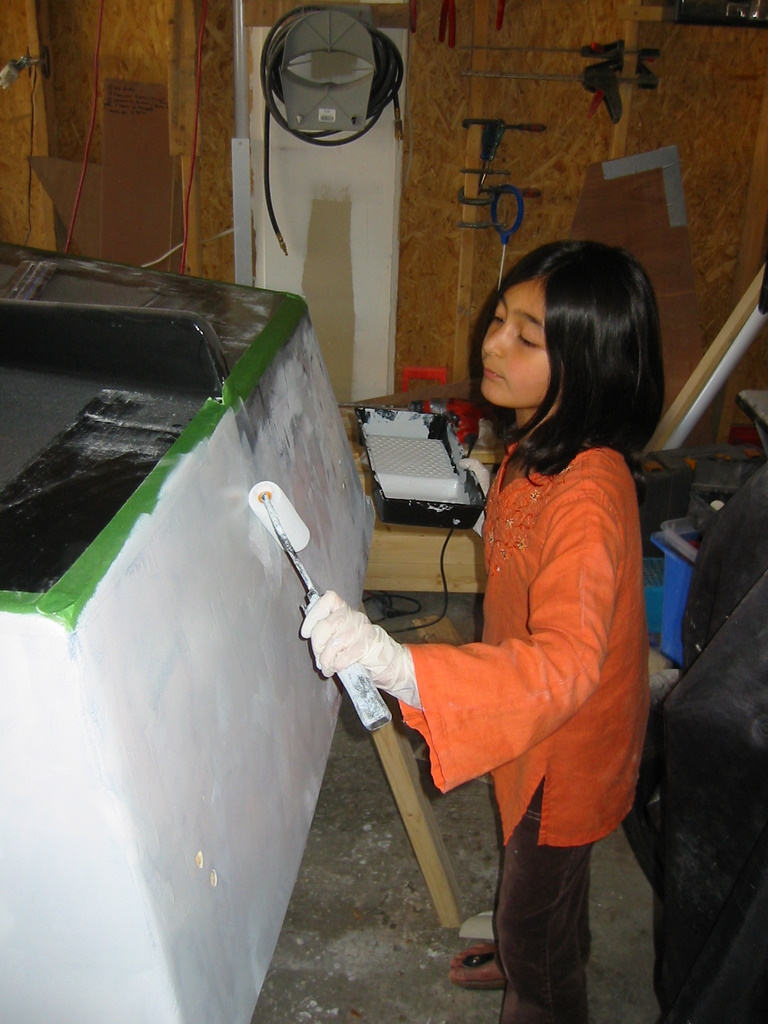 Much better...Thanks Eman (my Daughter)
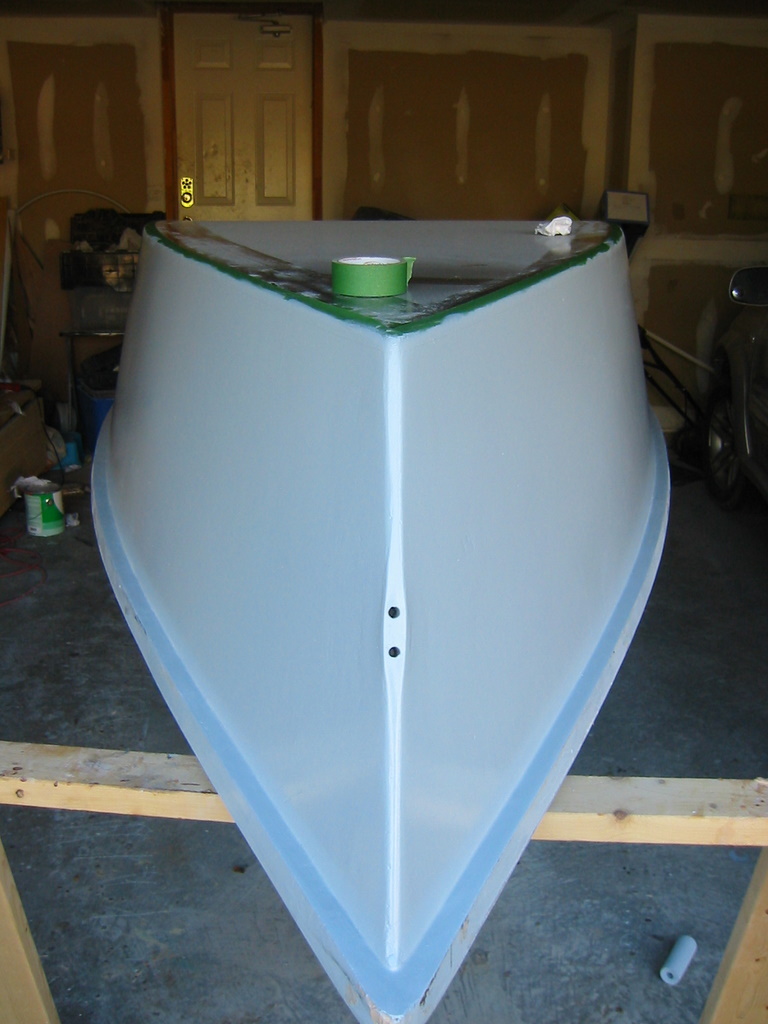
I ordered a flatbed trailer kit from our local Canadian Tires...Hopefully it arrives on Thursday.
The local license office said that no inspection was needed...just fill in a form pay 35 bucks and take your number plate.
Thanks Tom/Huck/Duke/NavytArkangle for your support...I decided to go as far as I can this summer....
Posted: Mon Jul 30, 2007 11:58 pm
by TomW
She's looking nice.
Tom
Posted: Tue Jul 31, 2007 2:04 am
by Dukydo
With a crew like you have I'd be done with mine by now. (Just kidding) Seriously tho, Eman has the talent for boat finishing. Nice work. It looks great.
Duke
So far...So Good
Posted: Tue Jul 31, 2007 8:05 am
by msujmccorm
Baba,
Looking good as always.
Posted: Tue Jul 31, 2007 8:21 am
by gunner
Baba-my SUV GMC has a huge hitch and its wired. I am just down the road!. George
Posted: Tue Jul 31, 2007 9:01 am
by Daniel Huckleberry
Looking good, Baba! Glad to see some new pics. Congratulate your daughter on some fine work
. I assume this has earned her the right to first passenger on board? Good luck and get wet!
Huck
Posted: Tue Jul 31, 2007 9:02 am
by baba101
gunner wrote:Baba-my SUV GMC has a huge hitch and its wired. I am just down the road!. George
Thanks George…this is a very generous offer.
Launch date is still a distant dream...My daughter is pushing me for a launch this year...I feel I owe it to her since she was the only believer when I started this project...(while others laughed and joked about my aspirations to build a boat....she stood up and said that she will be the one to paint it....)
Although the primer looks pretty good in the picture
....there are a lot of holes that need to be filled with QF. I will post a few close-ups…
In the meantime I take comfort in the fact that this will be a True "Work Boat Finish"…..Can’t imagine getting close to the finish Jeff/Mike and others got on their FL14s.
I wanted to try the Ultra Tuff on the inside like Huck and company....but the local BPS does not stock it....any ideas...?
Huck wrote
I assume this has earned her the right to first passenger on board?
Yes and she has reserved the front seat for her self...even showed me how she will sleep in it....and play cards...
Posted: Tue Jul 31, 2007 10:01 am
by Daniel Huckleberry
I ordered my Ultra tuff from the manufacturer (After recommendation from Copro). Check out the link in the Ultra Tuff thread under paint/resins. Obviously I am not sure about shipping to Canada but it was affordable for me. I hope to be applying within a week. I'll let you know how it goes.
Sounds like fun with your daughter. The only help I get out of mine is when she sleeps! She is always ready for a boat ride or fishing trip, though. She loves watching them flop on the deck.
Huck
Posted: Fri Aug 03, 2007 10:06 am
by baba101
Baba is still workin Hard...
> Filled the low spots with QF
> Sanded primer to 150 grit
> Epoxy all QF spots (visible in the picture as wet areas)
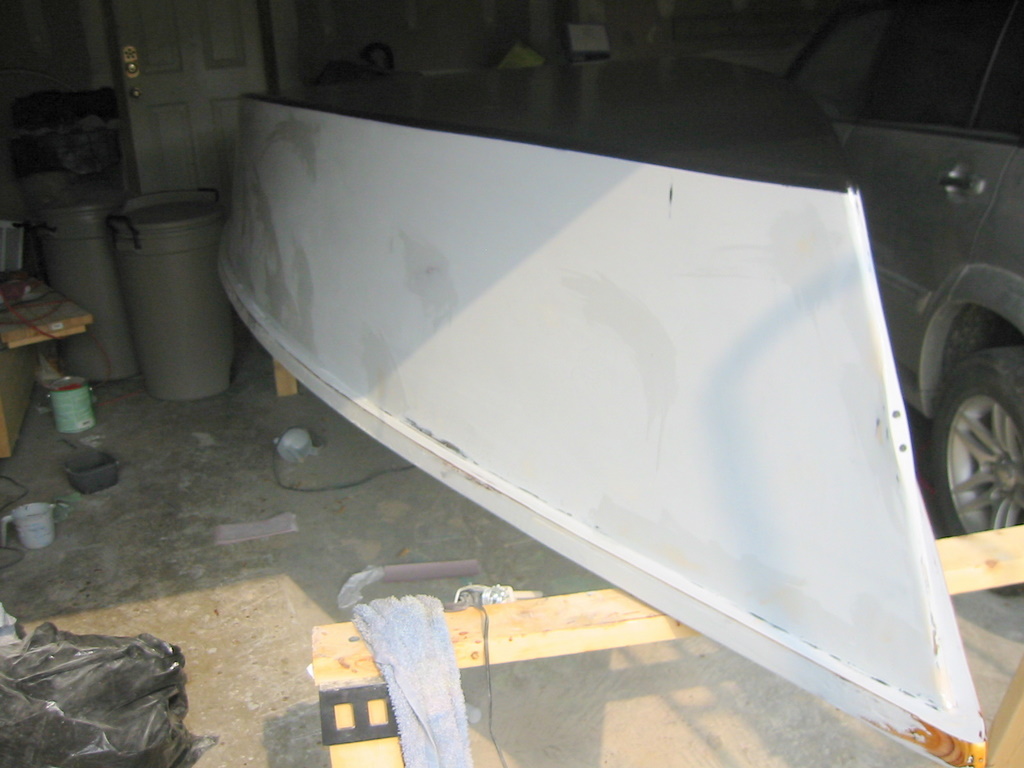
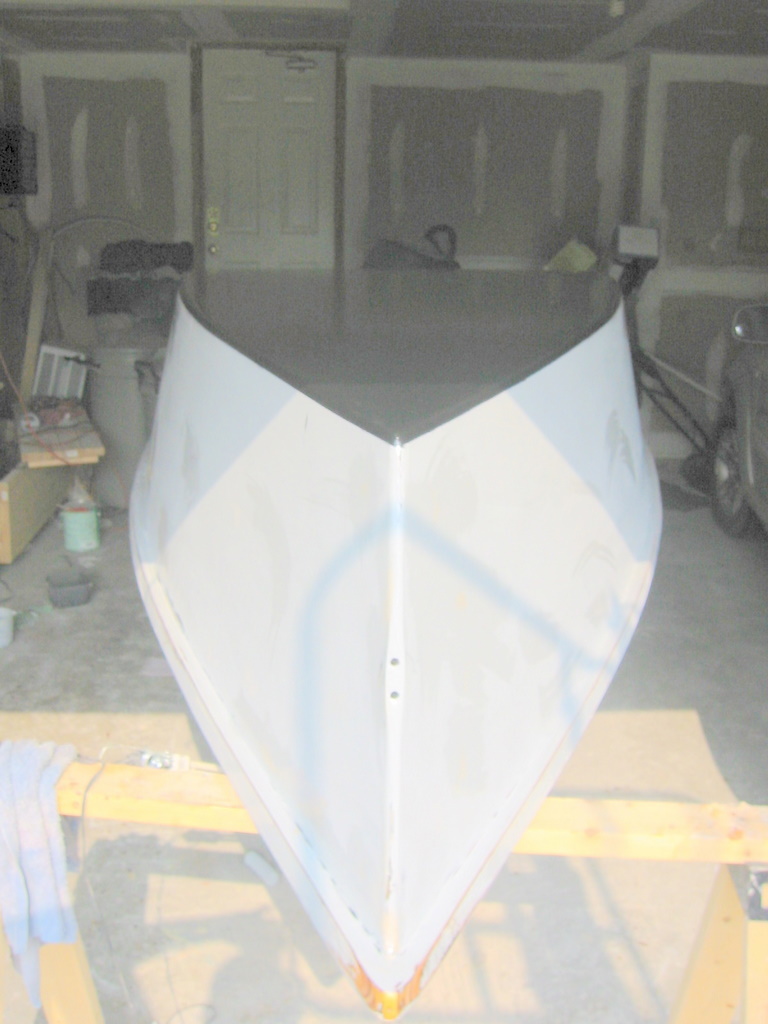
Thinking real hard...weather to apply one more layer of Primer before Top coat....or go for the workboat finish....I think i will sleep on it...
In the meantime any suggestions would be welcome...
I have about 1 qtr of primer left...and maybe I should save it for the inside...
Posted: Fri Aug 03, 2007 11:07 am
by ks8
A qt of primer won't be enough for the inside anyway.
Good to hear from you again! Good to see MaddMax isn't streaking anymore... clothed at last!
Posted: Fri Aug 03, 2007 11:23 am
by gunner
At our house all the SWMBO is keep finding tasks to delay me! We are going to the north to cottage leter in the month and everyone is insisting I resuurect the old boat for tubing/skiing. It is time wasted and I need building time. My goal is next spring launch on the NEW hull. Son and kids moved to Paris on the Grand River. After a float with canoes(rented) they all want those now. I may just rent a storage unit and hide to work. You know we could just rent a flat trailer from U haul (YUK!!) and transport the FL14 to a test lauch.
Posted: Fri Aug 03, 2007 6:40 pm
by Russ5924
Baba! I think you have surpassed that work boat finish some time ago
Posted: Fri Aug 17, 2007 11:57 am
by baba101
Decided that no more primer is needed...it is what it is...
So Last night Baba did two coats of System 3 topcoat..
First without the crosslinker and the 2nd with...I was hoping to do three more last night and be done with it...but SWMBO had other plans...
Baba will have to sand off the gloss to apply three more coats (I used about 20 ozs of paint) so far....this stuff is easy to apply...after watching the tutorial on Youtube.
The results are not perfect...But Baba is happy....
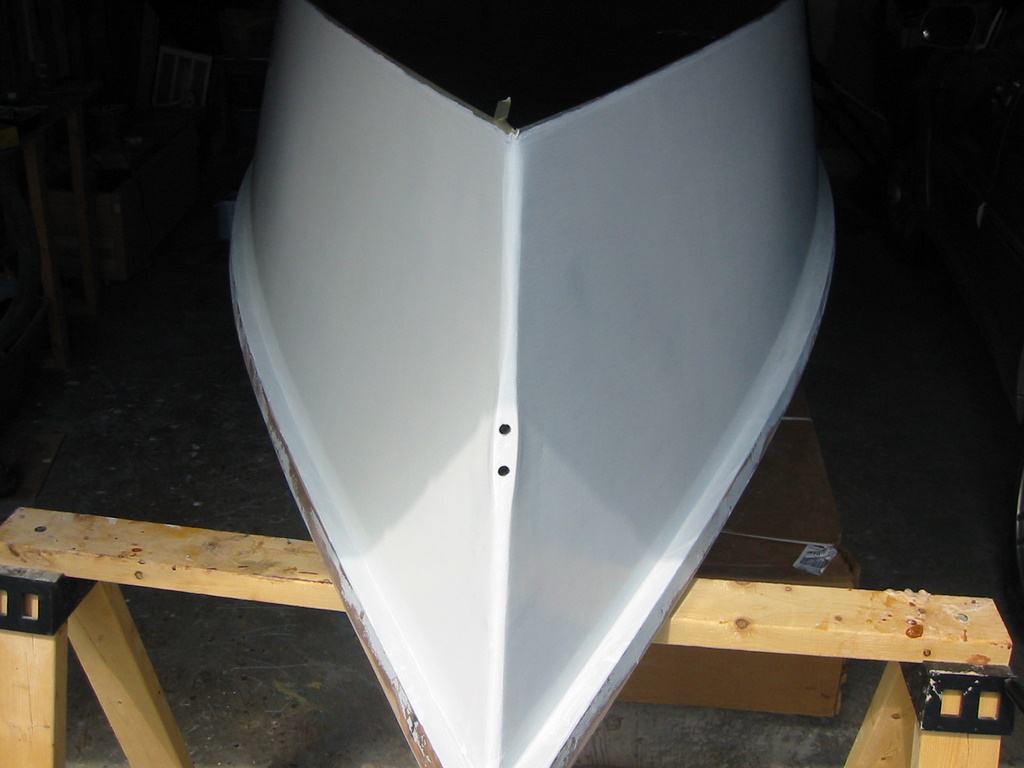

Posted: Fri Aug 17, 2007 1:58 pm
by Daniel Huckleberry
Very nice, Baba. SWMBO's have a way of doing that to us. What is the color? We have been leaning toward a gray white lately and that is what you look to have used. Glad to see you working still.
Huck
Posted: Fri Aug 17, 2007 2:10 pm
by baba101
Daniel Huckleberry wrote:.... What is the color? We have been leaning toward a gray white lately and that is what you look to have used....Huck
Huck this is the Orca White...really difficult to take a close up because of the glare.......but I tried...
Are you going to put the top coat on and then wait for 2 weeks before launch (allow paint to cure)..?
Posted: Fri Aug 17, 2007 3:44 pm
by msujmccorm
Looking good Baba. Work boat finish my a$$. Looks much better than that. I had to be careful around my top caot for about 3 days because it scratched easily.
Posted: Fri Aug 17, 2007 3:51 pm
by Daniel Huckleberry
Baba I plan to launch and check everything out. Then I'll paint.
Huck
Posted: Thu Oct 04, 2007 2:02 pm
by baba101
Posted: Thu Oct 04, 2007 4:10 pm
by robbiro
GO
Baba, GO
MAD MAX is really looking good. I am about to glass FIRST LIGHT in the next couple of weeks if my back will allow me to. I have enjoyed the saga of MAD MAX and most of the questions you have had answered were ones that I had at some point in time. Keep up the GREAT
WORK
Hope to see Max really wet soon.
Keep on Buildin'
Robbie
Posted: Thu Oct 04, 2007 7:21 pm
by Cracker Larry
That looks great, Baba
Posted: Thu Oct 04, 2007 10:34 pm
by ks8
Max is getting clothed, and in his right mind? Great job!
I hope I can get the bottom of mine faired half as good as that.
Don't wait for me! Just laminated the skeg today, but not on yet. You are ahead of me.... no surprise...
Posted: Fri Oct 05, 2007 8:03 am
by Daniel Huckleberry
Looks really good, Baba!
She is so fair! You gonna get wet before winter? Keep us posted
Huck
Posted: Fri Oct 05, 2007 7:09 pm
by Russ5924
Up that way winter could only be two or three weeks away
Posted: Sun Oct 07, 2007 10:29 pm
by rjezuit
I'm not that far from Baba, and it was in the 80's this weekend, calling for more 80's this week. Rick
Posted: Tue Oct 09, 2007 3:55 pm
by Russ5924
But last year in Mid October didn't you get snow. I can remember some years Pheasant hunting in snow the third week in October. Lived in and around Buffalo or many years. And am glad I got the hell out of there (tax's)
Posted: Tue Oct 09, 2007 7:01 pm
by rjezuit
Yea, we had 2 feet overnight, then it warmed up into the 50's /low 60's the next day. Then had nearly no snow at all until the second week of January.
Posted: Mon Oct 29, 2007 4:46 pm
by baba101
Last weekend I got Madmax on the trailer.
A flat bed trailer kit, sanded down to the bone...and painted with an anti rust guooo.
I needed a utility trailor for the Old Bike (to take to the local tracks) and for hauling goods in and out of the house.
Quite pleased with the final result...will need a hitch extention atleast 2 feet to Haul Madmax....Thats for another day...
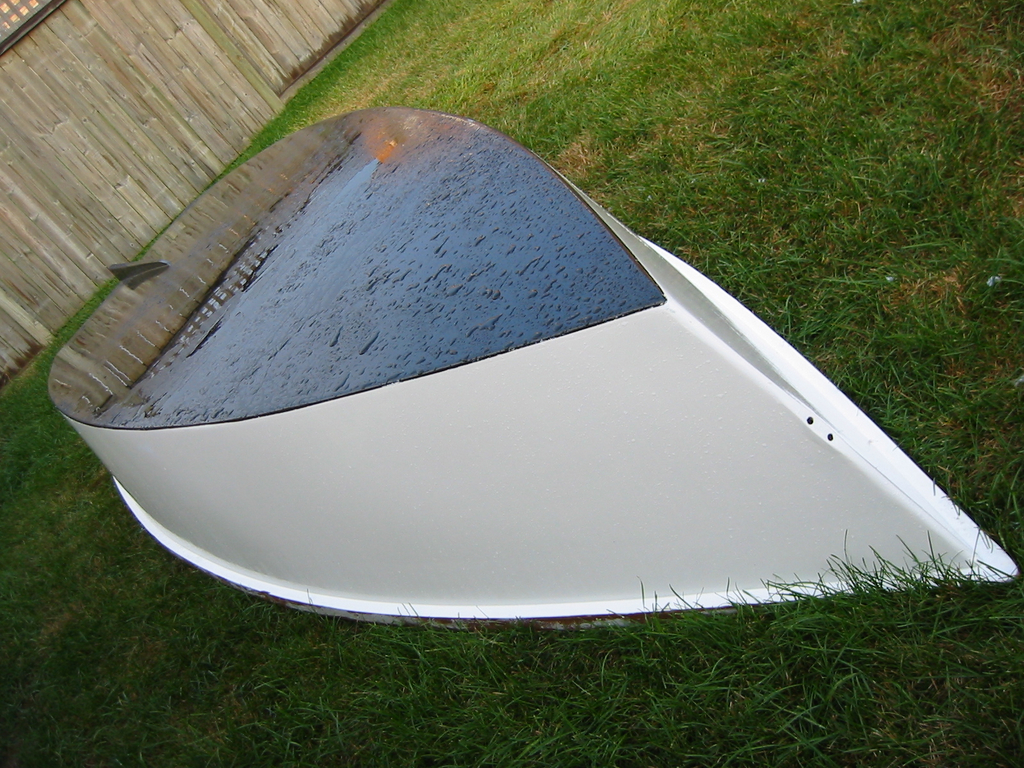
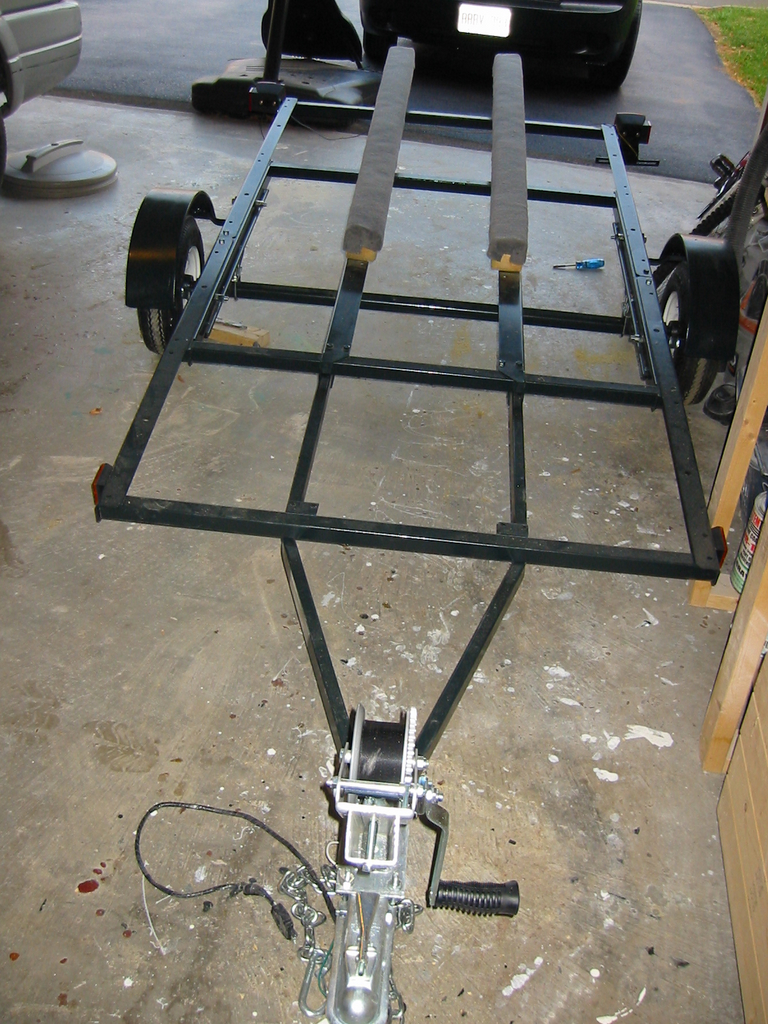
I made this contraption myself.....over engineered as usual.....fear of the unknown causes me to overbuild...
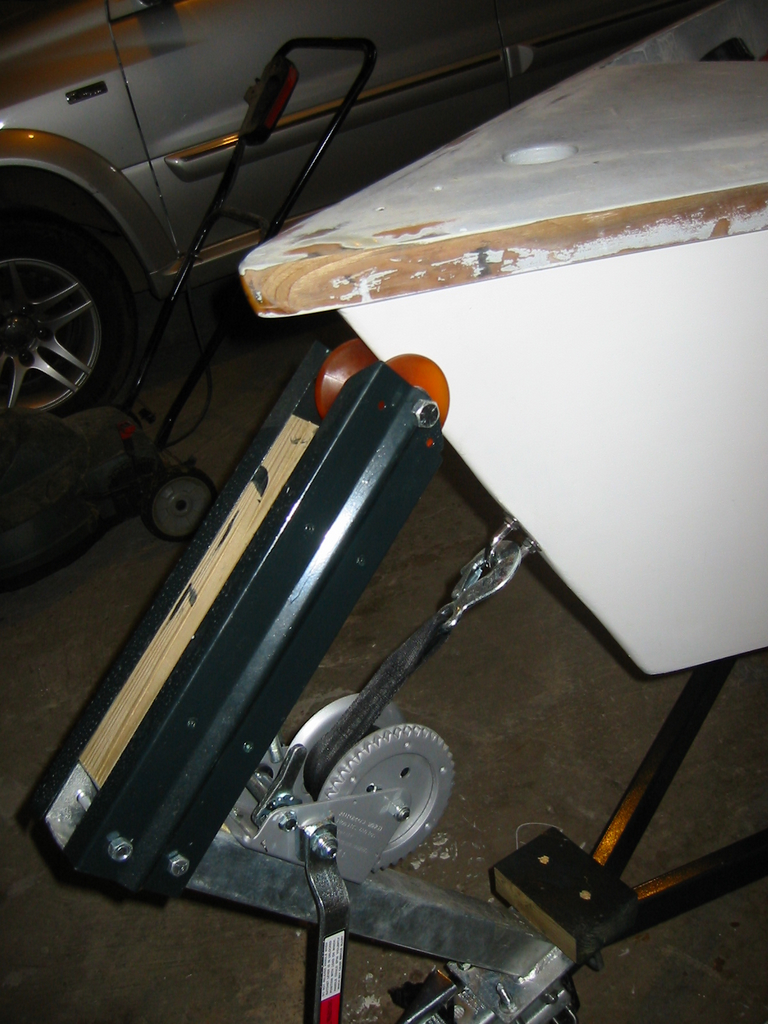

Posted: Mon Oct 29, 2007 9:02 pm
by gk108
Nice bow stop on the trailer. That should keep the boat out of the back seat when you have to slam on the brakes.
Posted: Tue Oct 30, 2007 1:07 pm
by Daniel Huckleberry
Everything looks great, as usual, Baba! Trailer should really do the trick. BTW, I notice gear on board. Have you done a stealth launch without telling us or are you just hiding in the garage, sitting in the boat, and pretending to "Pilot!"
Keep up the great work. It will all pay off soon.
Huck
Posted: Tue Oct 30, 2007 1:26 pm
by baba101
Daniel Huckleberry wrote:...I notice gear on board...... are you just hiding in the garage, sitting in the boat, and pretending to "Pilot!"
...Huck
Yes ... Guilty as charged....
Posted: Tue Oct 30, 2007 1:29 pm
by Daniel Huckleberry
It's just part of the Virus! I do the same. Can't wait to get mine upright so I can sit inside, not on top (bottom?), again.
Huck
Fine looking craft!
Posted: Fri Nov 02, 2007 9:40 am
by davekf
Baba... that is one nice looking boat!
I've read through the report of your entire build and must say, Thanks. My plans are very similar to yours, as I want to build one of the VG sloops like the VG18, but I have no experience at boat building. So I think I should build a small boat first just to get the experience. Although, after seeing the fine work you did on the FL14, I think you probably could have jumped right in and started with the bigger boat.
I like the FL14 because it's large enough to fit my family, wife and 3 kids, and it's supposed to be easier to build than others. Knowing that MadMax is built to the extreem
, and that a boat built to the plans would cost less, how much do I need to plan on spending for my FL14?
I can't wait to see some pics of MadMax on launch day!
-Dave
Posted: Fri Nov 02, 2007 12:29 pm
by baba101
Hi Dave,
Thanks for reading my entire Journal (I have never met anyone, other than myself who did).
I am not a good craftsman and neatness wise I am certainly at the bottom of the barrel, when comparing with other builders on the site.
I guess what I am trying to say is that….building on this website is easy…and if I can do it then anyone can...
The only two things you need are as follows:
1. Recourses (time, money, Space)
2. Dedication/interest/Obsession
Certainly the more you build, more efficient you will become in the use of Epoxy, and your boat will be lighter and stronger.
I have spent over $2000 on mine, only because I over-built it. My next boat will be as designed.
Cost estimate of the first FL14, built as designed: Look at the BOMs on the plan and
Double the amount of Epoxy
Add $200 for consumables and tools
Two Gallons of Primer
One Gallon of Paint.
That otta do it…
I am very happy with my boat...my advise to you is either build something really simple like a cheap canoe for practice or build something that you would like to keep.
If you are confidant that FL14 meets your requirements than great...otherwise FS14, FS17 are also good starter boats...Bigger/Faster may be better for a lot of people...as your kids growup and you want to go further out in bigger Lakes
Good luck
P.S: Madmax will be launched next April, I don't have tow vehicle until then.
Posted: Fri Nov 02, 2007 1:41 pm
by msujmccorm
Baba,
Looking good. Are you planning a spring launch or do you think maybe sooner?
Dave,
I finished mine for right at $500.00 in materials(including lots of sandpaper). I spent more on sandpaper than plywood!
By the time I bought a new mercury 4hp and got it all coast gaurd legal I probably have $1700 invested. By the way it's for sale.
Once again, Great job Baba!
Posted: Fri Nov 02, 2007 2:13 pm
by davekf
Baba... thanks for the info. That will definately help in my decision.
Waiting till Spring... you are a patient man!
msujmccorm... You're kidding!
More $ on sand paper than plywood?
-Dave
Posted: Fri Nov 02, 2007 2:20 pm
by steve292
davekf wrote:Baba... thanks for the info. That will definately help in my decision.
Waiting till Spring... you are a patient man!
msujmccorm... You're kidding!
More $ on sand paper than plywood?
-Dave
Easily, if you buy good paper & you are building a small boat.Crap sandpaper is worse than useless.Also while we are on the subject of budget, brushes & rollers will be a bigger expense than most realise.
Steve
Posted: Sun Nov 11, 2007 1:25 am
by baba101
Is this the right hight for my Motor...
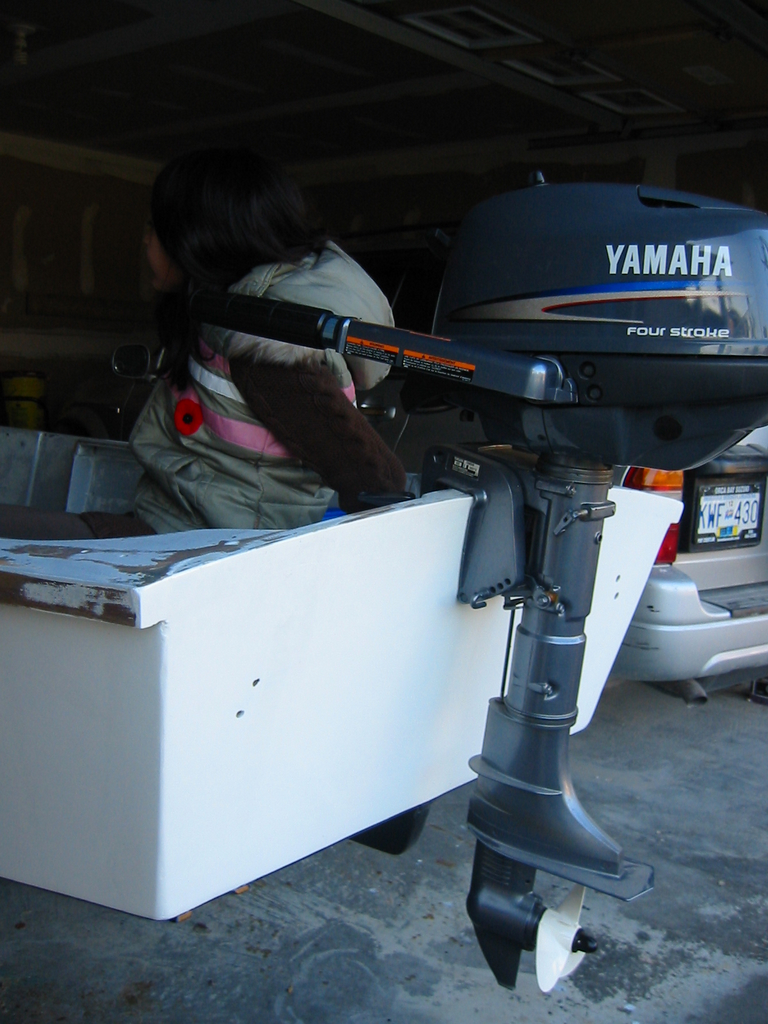 Here is my most trusted help (my daughter Eman)......full of energy and faith. Like a rock...she never doubted Baba in this adventure...
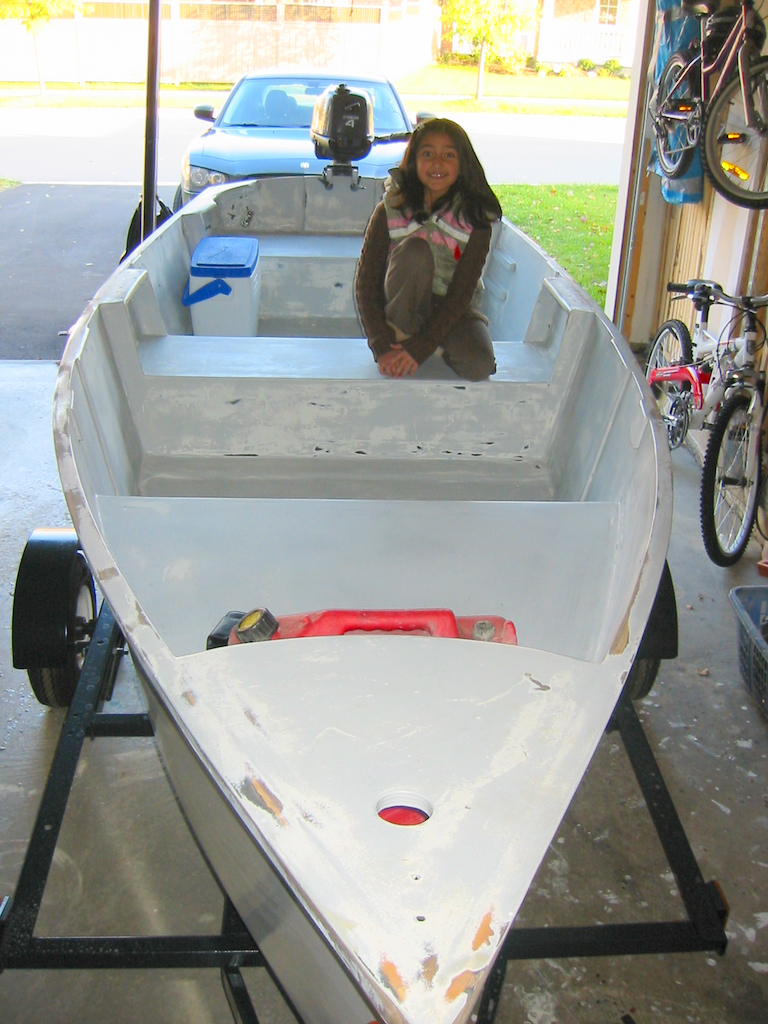
Posted: Sun Nov 11, 2007 1:44 am
by Lon
IMHO, yes with the following exception. A rocker hull can be so lightly loaded with the load centered or forward that the bottom of the transom may be above water. If so, shift weight a little.
PS. Great helper - my grandkids are older.
Right hight
Posted: Sun Nov 11, 2007 10:39 am
by Mike Redmond
Yes, from what Ive learned the cavitation plate should be in line with the bottom of the boat give or take half an inch,but on a rockered bottom things might be different give the small horsepower I dont see any problems with it tough.Mike
Posted: Fri Feb 01, 2008 1:05 pm
by ks8
Baba,
Where are you and madmax? Did you attempt the falls?
Waiting for temps to paint? Update?
Posted: Sun Feb 03, 2008 4:28 pm
by baba101
ks8 wrote:.....Where are you and madmax? Did you attempt the falls?
Waiting for temps to paint? Update?
Work (job) has been quite exciting lately...and I haven't thought much about Madmax.
As things start to heat up here in Toronto in the next couple of months....I will need to put in about a week of work to launch this Baby.
In the meantime I am torn between SB18, HS18 and LB26. Can't decide...what to do...?
If something is going to consume so much of my time and attention...it might as well be something I feel really proud of.
Nothing to do with practicality or Need...just the passion to make something...that tells me that Baba was here...
Posted: Sun Feb 03, 2008 5:08 pm
by ks8
Good to hear from you. We'll be watching for those pictures of the launch.
Posted: Mon Jun 02, 2008 12:21 am
by Daniel Huckleberry
Baba!
Your couple of month's are up! Where are the water pic's? Is your job that exciting?
Just kiddin' you man. Wondering what was up and how thing's are going.
Huck
Launch Of Baba's Madmax
Posted: Mon Jul 14, 2008 11:33 am
by baba101
Thanks Huck & KS8...for the followup...You got me thinking about launching Madmax...don't know when I will get around to finishing it...A test run was needed....
SO...last Sunday Morning we planned for this launch in Lake Ontario.
It was a covert operation...merely a float test ....we left 7:30 am...while the wiives and kids slept at home. We didn't know if Madmax was going to float....or if we would ever come back alive...?
Three single bread earners of three families...put their trust on Jacs design.
This project has been one of the most rewarding experiences of my last three years.
Thanks Jac, Joel and all the Gods of boat building central....that helped and encouraged me in this journey.
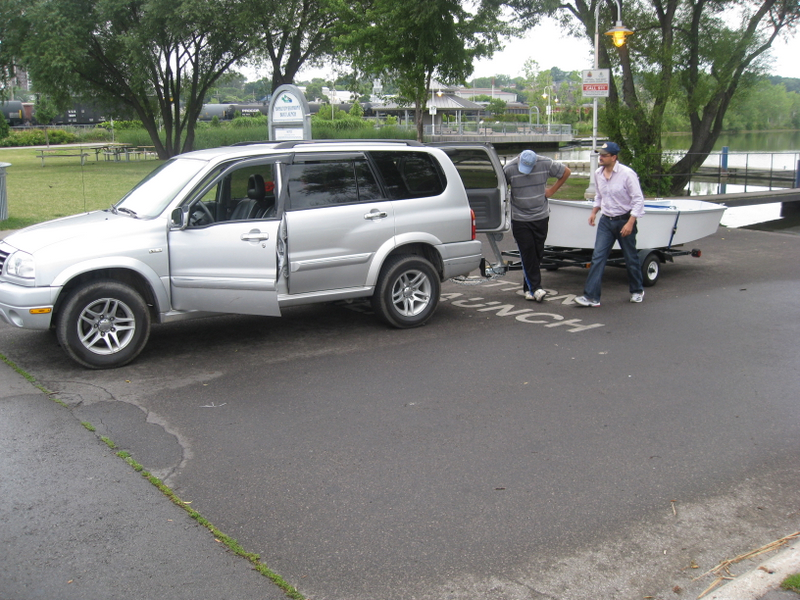
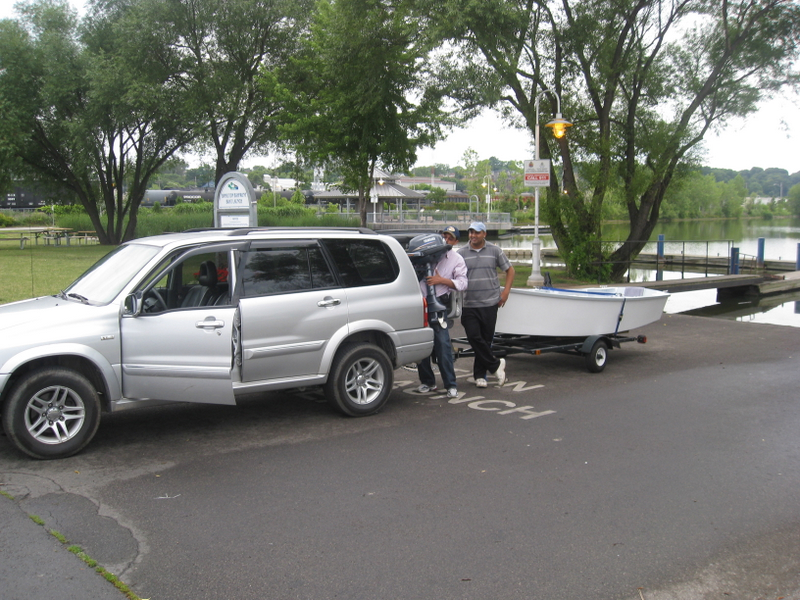
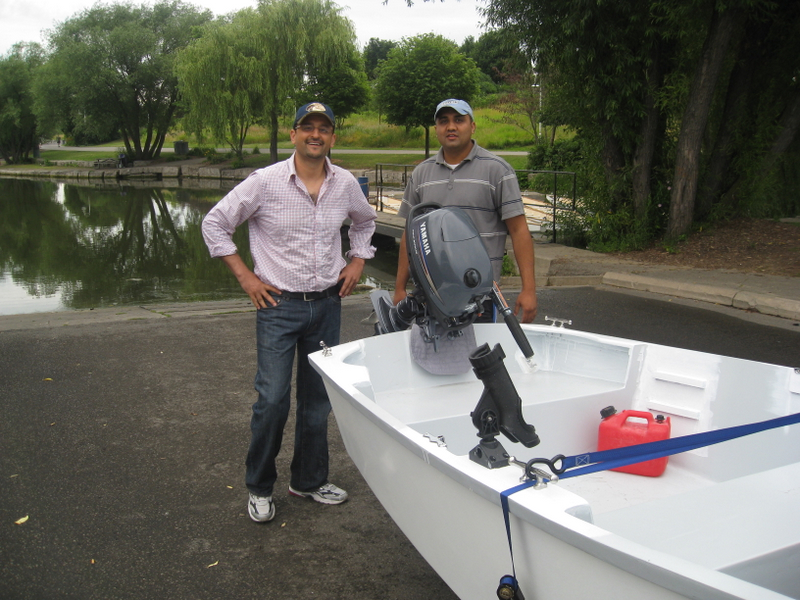
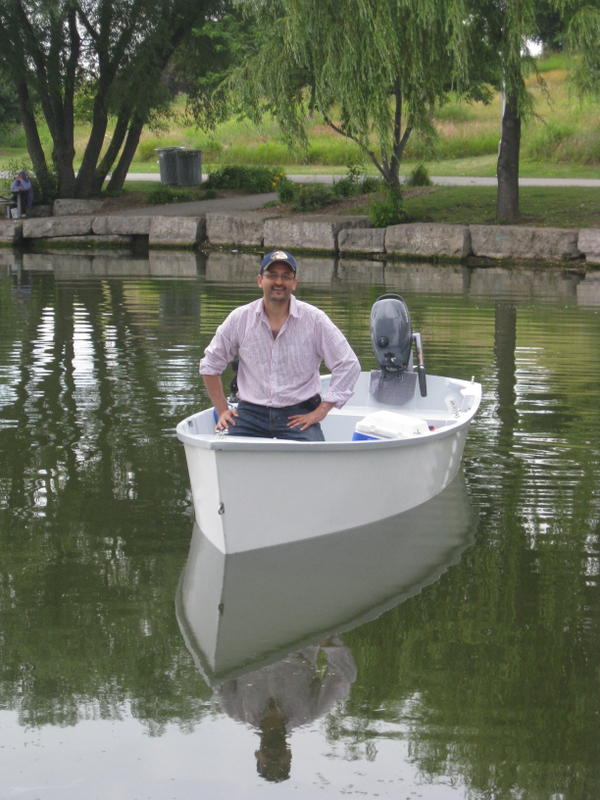


Needless to say...a 10 minute test run became a 5 hours cruise in Lake Ontario ...it was like a dream.....
This 4 HP Yam used about half a galan of fuel. I will post a Video link in the next few days if anyone is interested in watching us in this "need for speed machine" ...
As the three 200Lbs guys walked around in Madmax. One of my buddies pointed out a crack on the floor...there was no water comming though it...so we continued floating around for another hour before returning to the ramp.
Here is a snapshot of the crack...
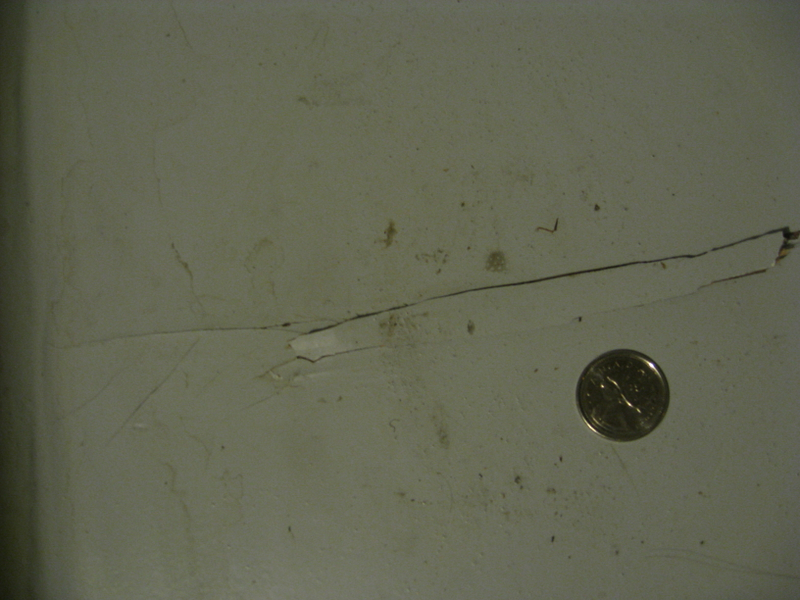
The primer and epoxy and a couple of layers of ply peeled off with my fingers...and I sanded it down. I am thinking I should just fill it with Epoxy and woodflour, then prime paint it.
Any explaination for this...?
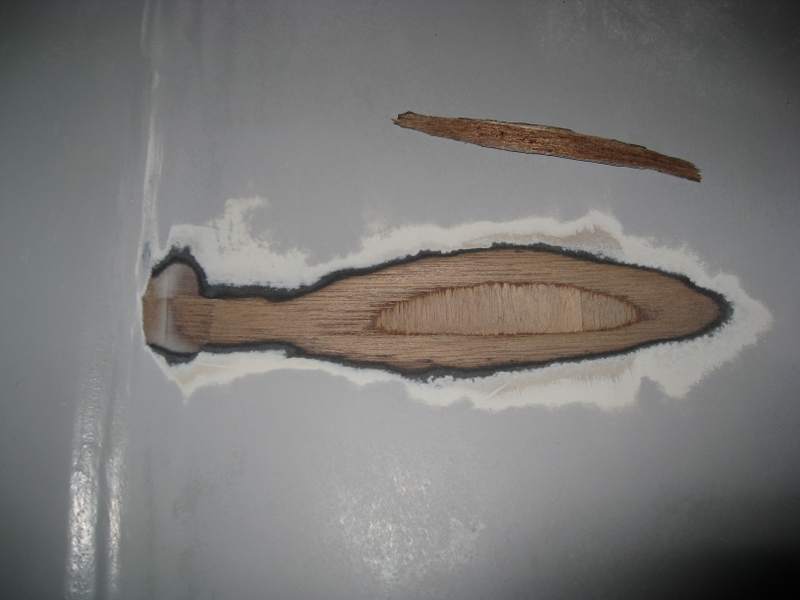
Posted: Mon Jul 14, 2008 11:43 am
by WobblyLegs
Nice to see it floating. You look pleased. And should be.
Any chance the hull got bashed from the other side where that crack is? Is it glassed or only epoxied there?
Either way - you built it, you can fix it!
Regards,
Tim.
Posted: Mon Jul 14, 2008 11:50 am
by Dukydo
Baba,
She looks good in the water.
As for the crack... Where is it located? Inside or outside? Its hard to tell.
I'd say you are doing the right thing. As for why... I'm not qualified to even take a guess.
The smiles look like all the work was worth it. Congratulations
Duke
Posted: Mon Jul 14, 2008 11:53 am
by baba101
Hi Wobbs/Duke,
The crack is on the inside bottom.
I am thinking its most likely a void on the ply that cracked due to flexing...while we walked around in the boat.
The outside of the bottom has a 9 ounce cloth and Graphite bottom...it has no visible damage just a rub type long scratch on port side (outside bottom). This was caused by a breeching across a reef...a rock scratched the bottom at about 6 MPH. However I doubt that it has anything to do with the crack in question.
Posted: Mon Jul 14, 2008 12:08 pm
by rjezuit
Walking around in the boat on land, on the trailer or in the water? Rick
Posted: Mon Jul 14, 2008 12:20 pm
by baba101
rjezuit wrote:Walking around in the boat on land, on the trailer or in the water? Rick
In the water is my guess...
It looked like a crack in the paint...when I peeled it off with my finders...it took off two layers of the ply with it.
Posted: Mon Jul 14, 2008 12:40 pm
by MadRus
Hey Baba,
Looks awesome! I'm a little surprised you didn't come home with a bunch of trout. What gives?
That crack looks like a pre-existing sliver that may have been created and separated before you bough the wood and it probably went unnoticed during construction and finishing and then, when pressure was applied, it simply cracked around the edges of the paint and primer that were holding it down. Those kinds of imperfections happen and can go undetected. Usually in poorer quality panels than you bought, those are meranti 6566, which is usually in perfect shape. In any case, it doesn't look very deep and it looks like you did the right repair right away.
-Dave
Posted: Mon Jul 14, 2008 1:07 pm
by baba101
Thanks Dave...This was the first boat launch of my life.
I still have to learn to fish...
I plan on doing the repairs before the next test flight...
Here is the speed Demon on Video....you have a view of Lake Ontario and two of my Buddies...Some of the comentary is also in English..
Excuse my colourful language toward the end...it was not directed toward anyone or any Religion. I was just expressing my joy....
http://www.youtube.com/watch?v=-B9xvRtn1ls
Baba
Posted: Mon Jul 14, 2008 3:51 pm
by MadRus
Excellent video. Next time, some video of the boat passing by, so we can see her lines on the water. Well, you're in the right pond to learn to fish, we used to go to Lake Ontario every summer to fish for trout and salmon. Good fishing. I actually got a Canadian tagged rainbow trout one year. I sent the tag back to Canada dept. of fisheries to get any information I could get on it, but they never got back to me- I thought they'd be more responsive than American agencies, but I guess not.
Posted: Mon Jul 14, 2008 5:09 pm
by Knottybuoyz
Baba looks happy in the video! Wind in his hair! Ya coulda opened her up to show us what she'll really do!
I don't usually admit it but I work for federal Department of Fisheries and Oceans *sigh* actually Coast Guard is an agency within DFO. Not much chance you'd get a response from them. Now if you sent the tag to the provincial ministry of Natural Resources you might have gotten a response.
http://www.mnr.gov.on.ca/en/index.html
Keep cruisin' Baba! Looks good!
Posted: Mon Jul 14, 2008 6:24 pm
by gk108
Way to go Baba! Mad Max looks good on the water.
I agree that it looks like a small bad spot in the plywood. No problem for an experienced boatbuilder like yourself.
Posted: Mon Jul 14, 2008 9:47 pm
by Workin Man
Looks good Baba. Where abouts on the lake were you? I didn't recognize it, but then I usually see it from the QEW or the Gardner.
Posted: Tue Jul 15, 2008 1:01 am
by Daniel Huckleberry
Very cool, Baba!!
Glad to see you on the water, and glad to know you're still kicking. I know the joy you felt was great.
Now it's time to get some blood on it!
Huck
Posted: Tue Jul 15, 2008 7:51 am
by MadRus
Now if you sent the tag to the provincial ministry of Natural Resources you might have gotten a response.
Yeah, I'm sorry, it was a few years ago, I can't remember exactly which dept. I sent it to, but it was the originating department- the one which taggged the fish. They said they'd get back to me with all kinds of information, but never did.
Posted: Mon Jul 21, 2008 8:57 am
by msujmccorm
Hey old buddy! Glad you are back. Congratulations on the launch. Pretty great feeling isn't it? Beautiful job. Planning to attend the Central Gulf Meet in October?
Should be alot warmer here than there!
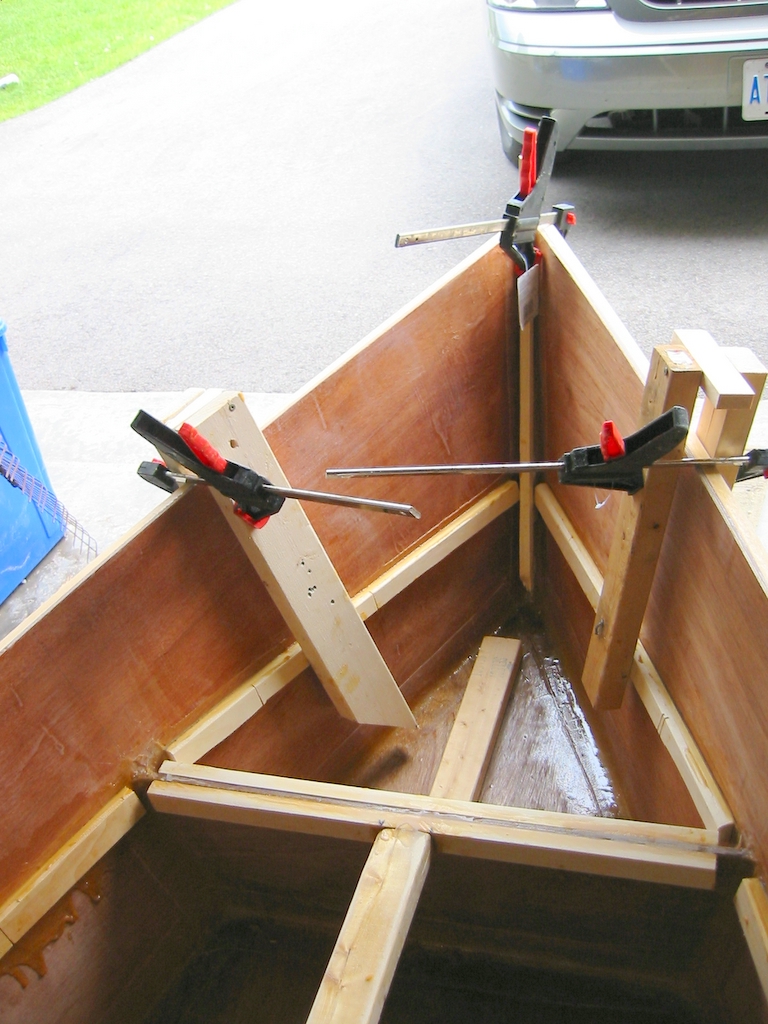
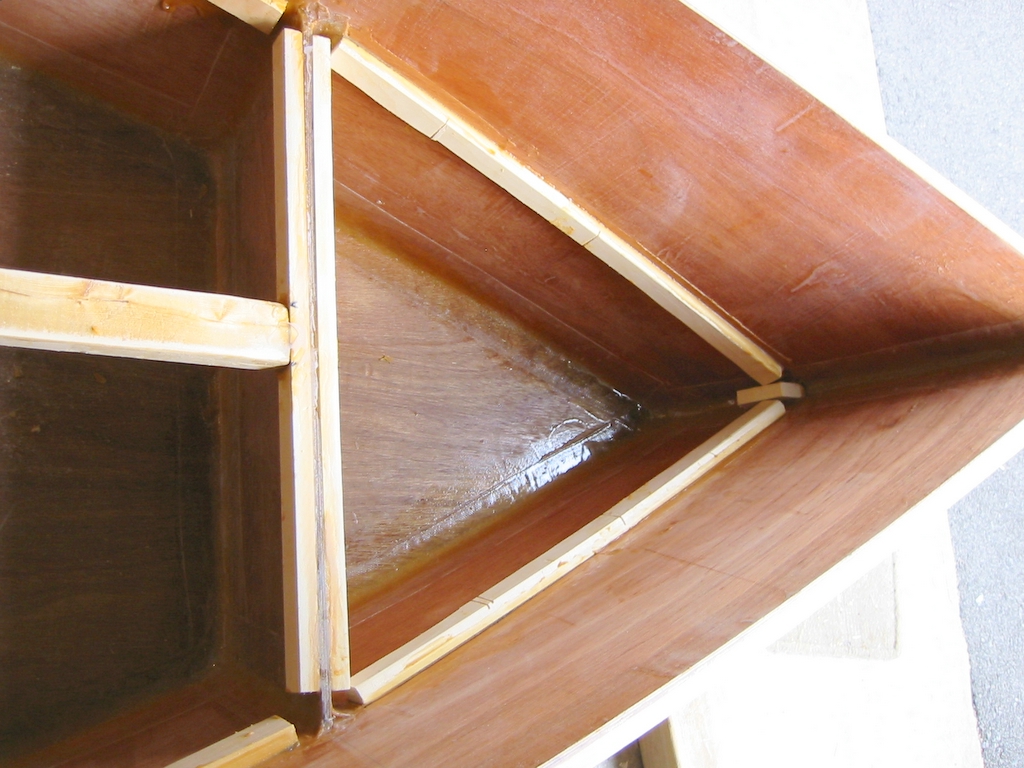

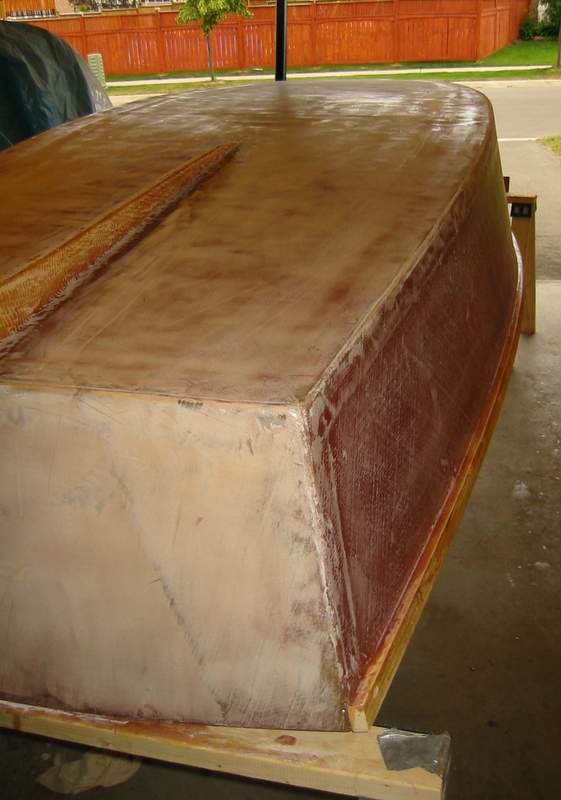
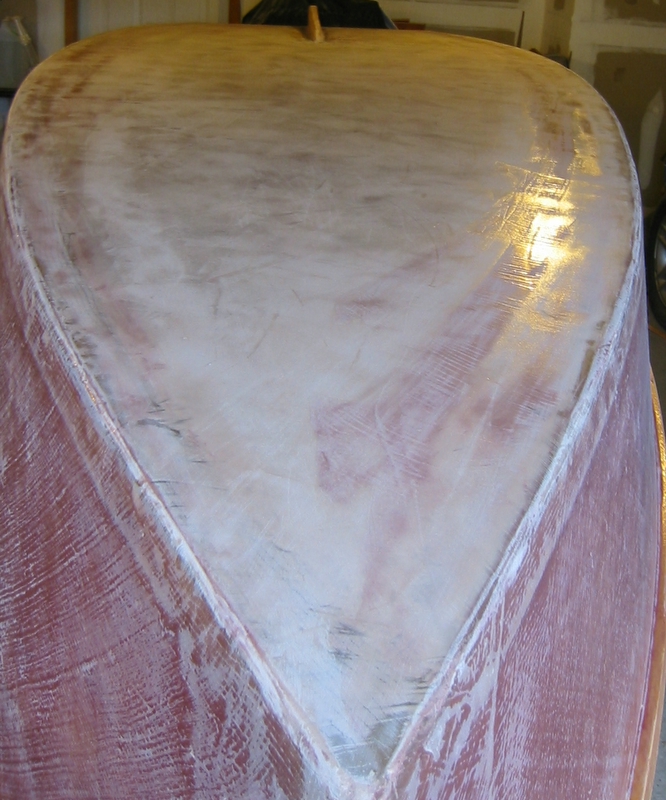
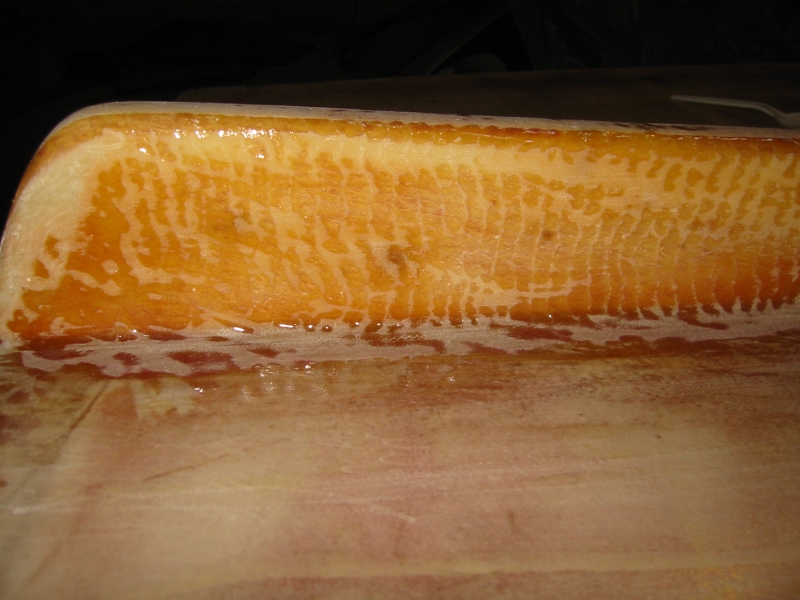
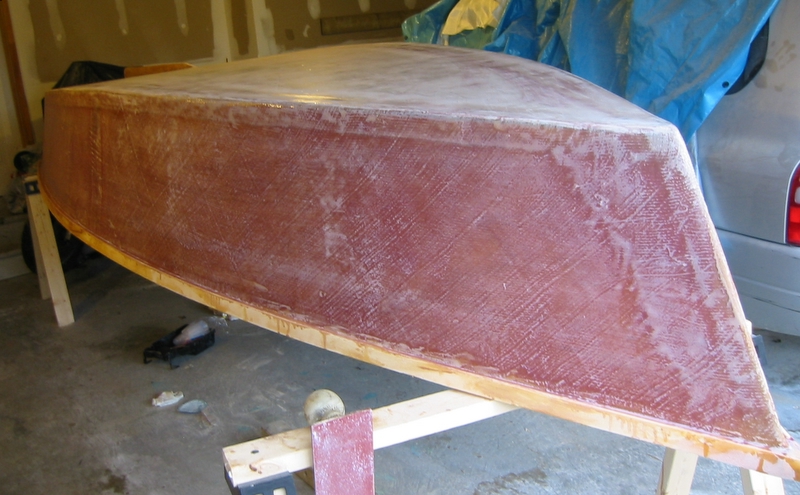
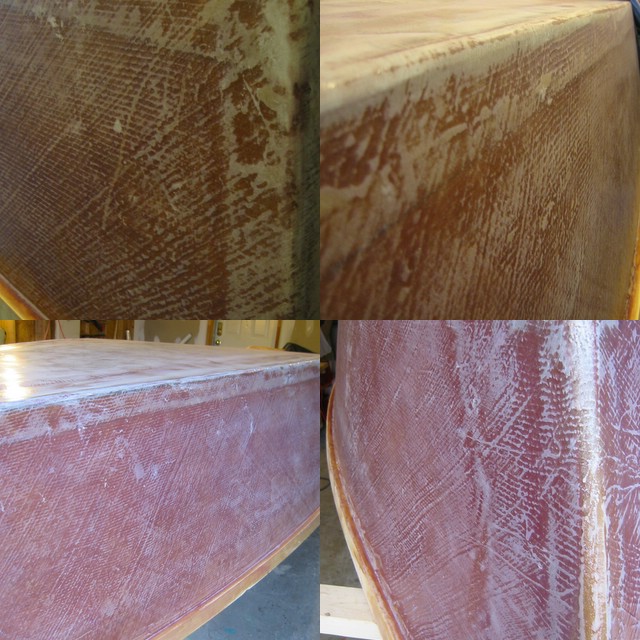
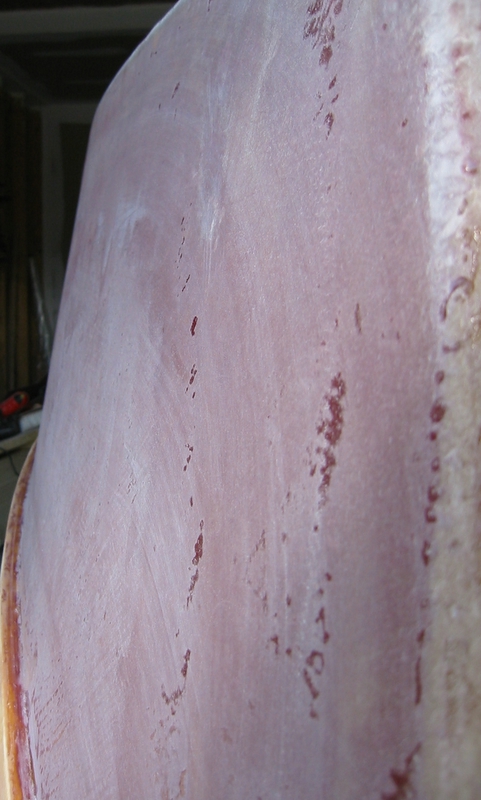
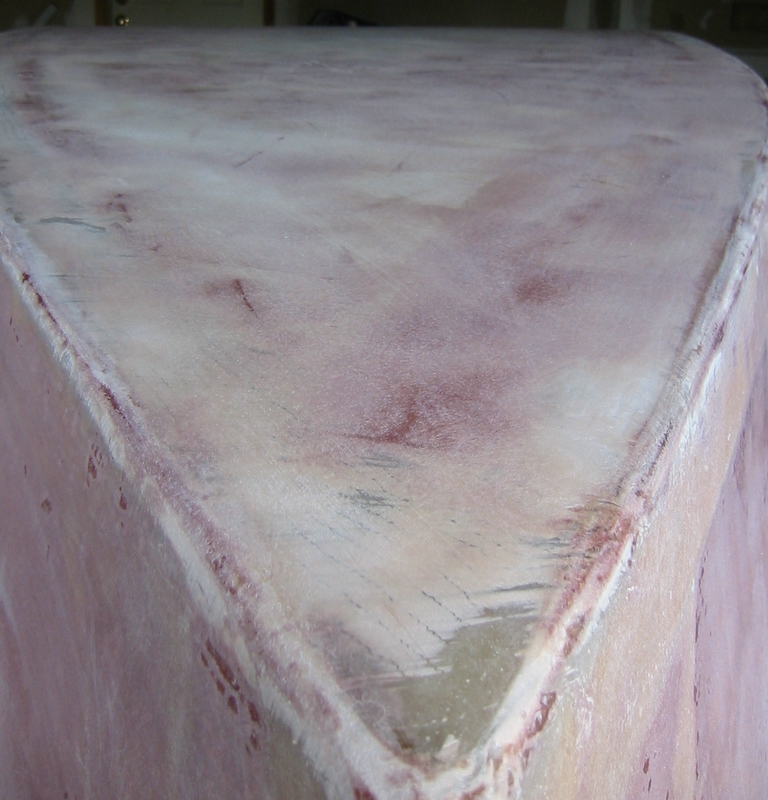
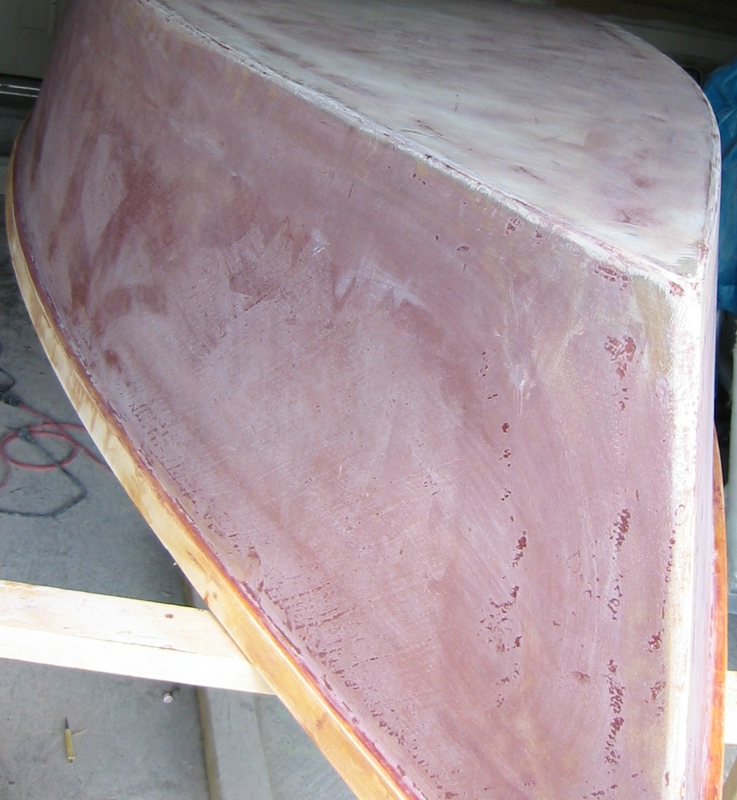
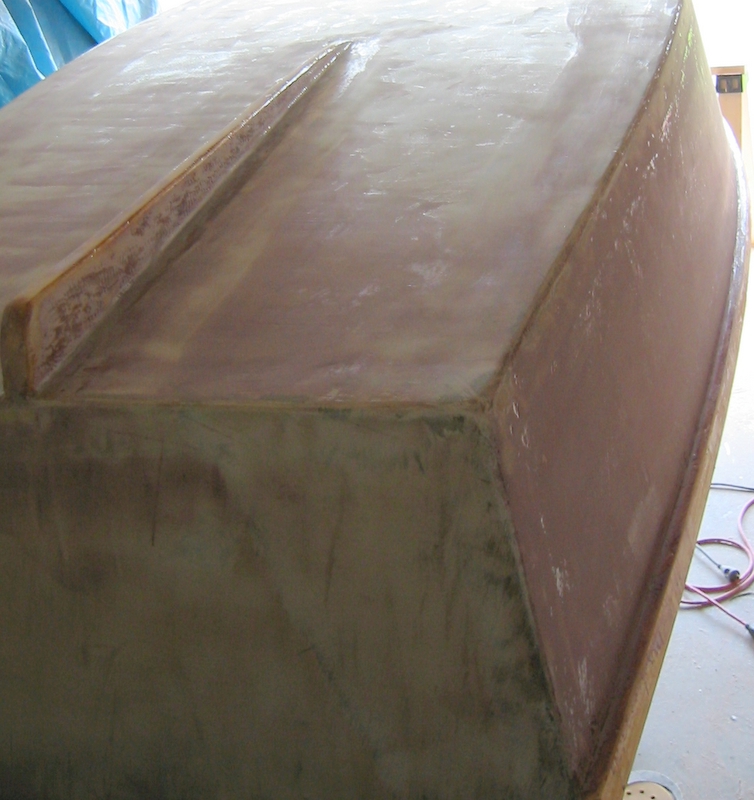
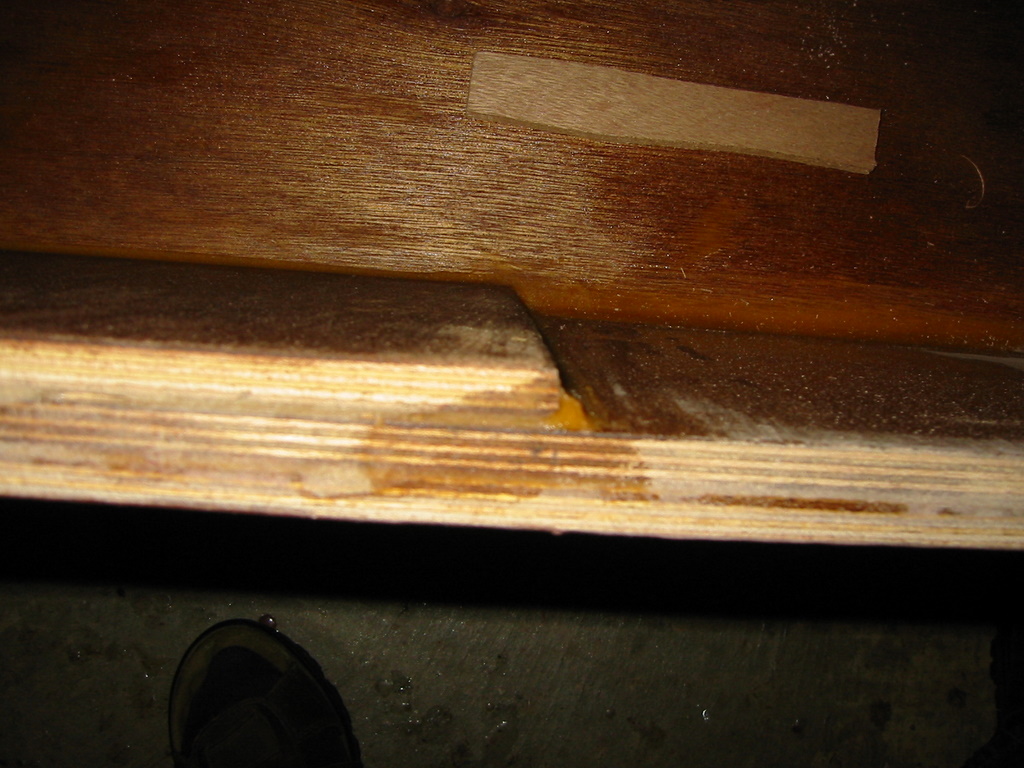

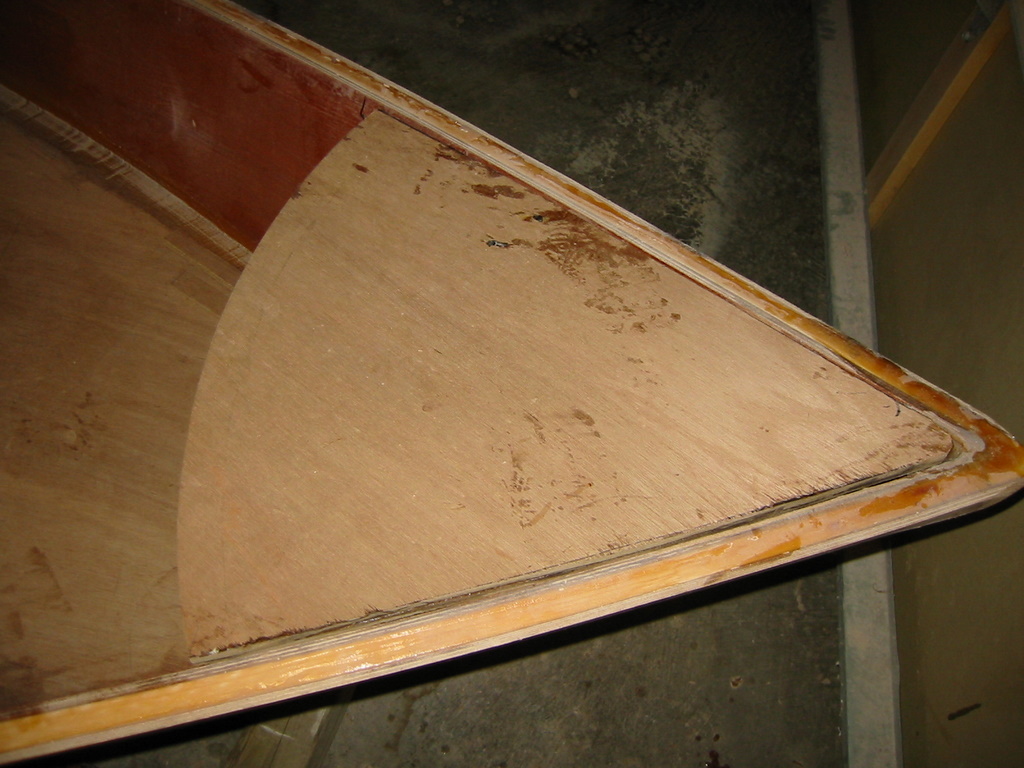
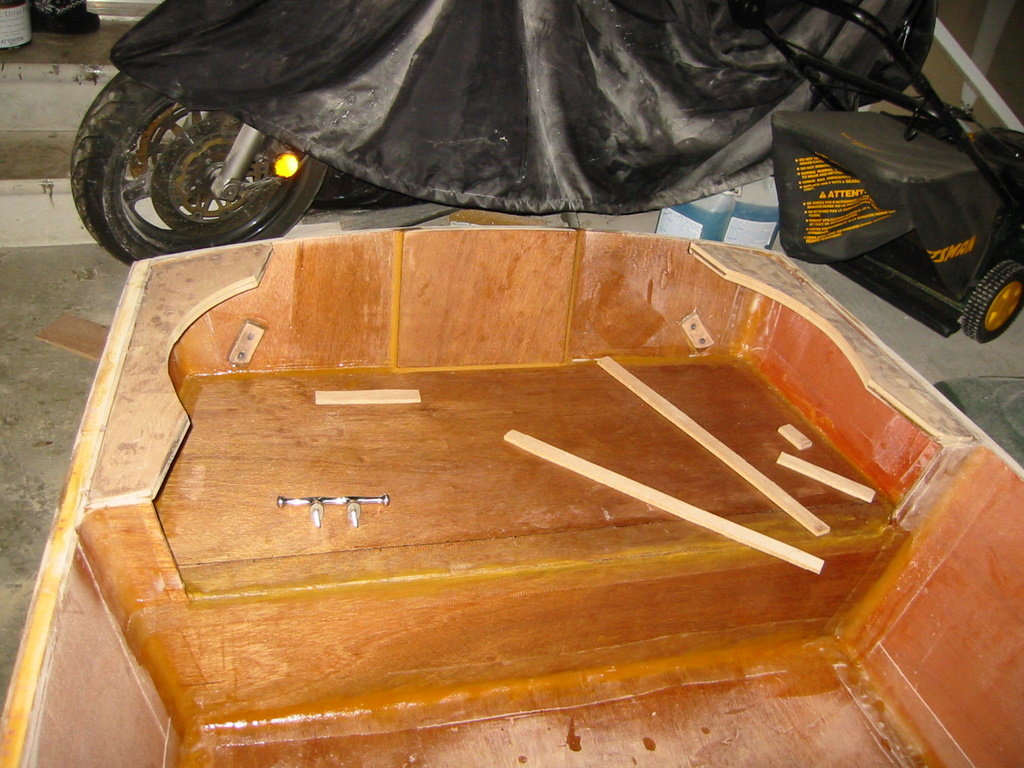
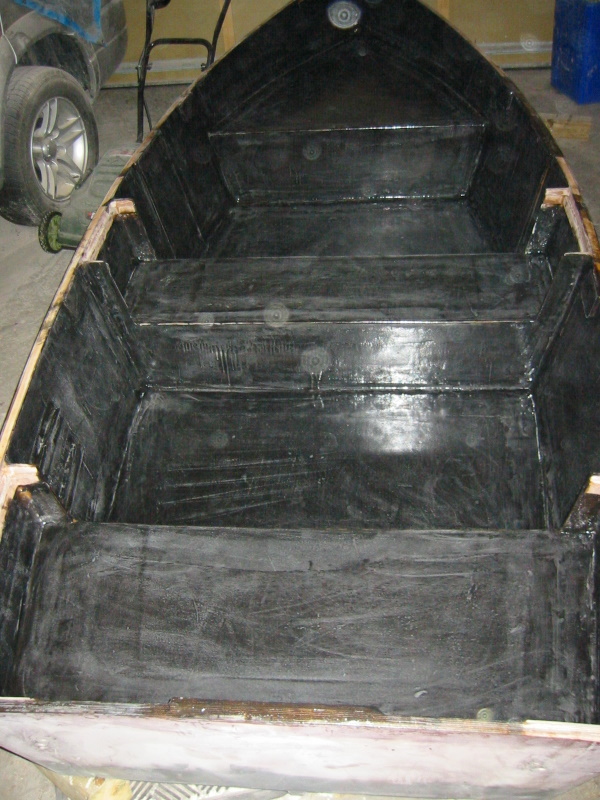
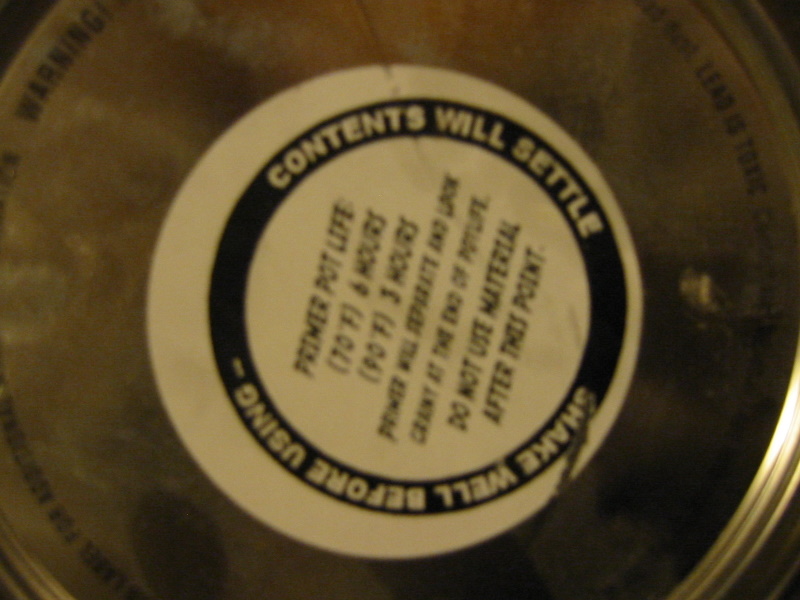
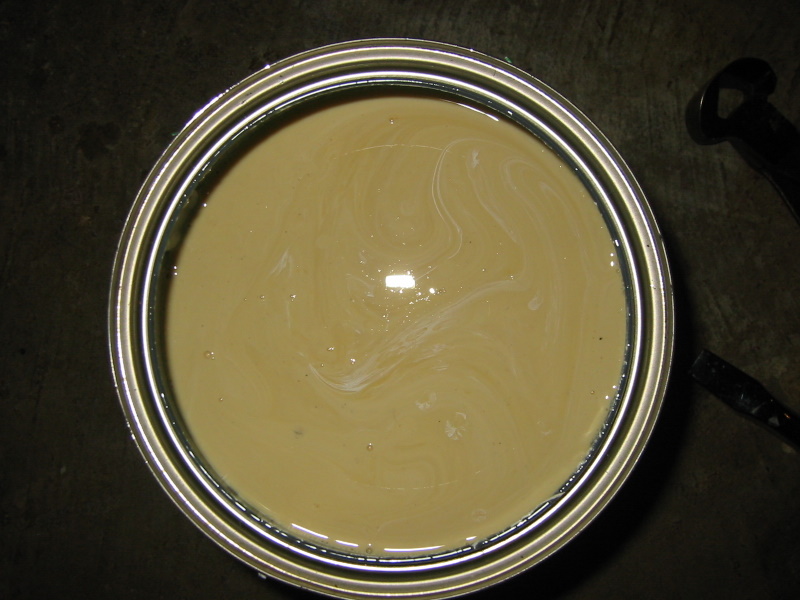
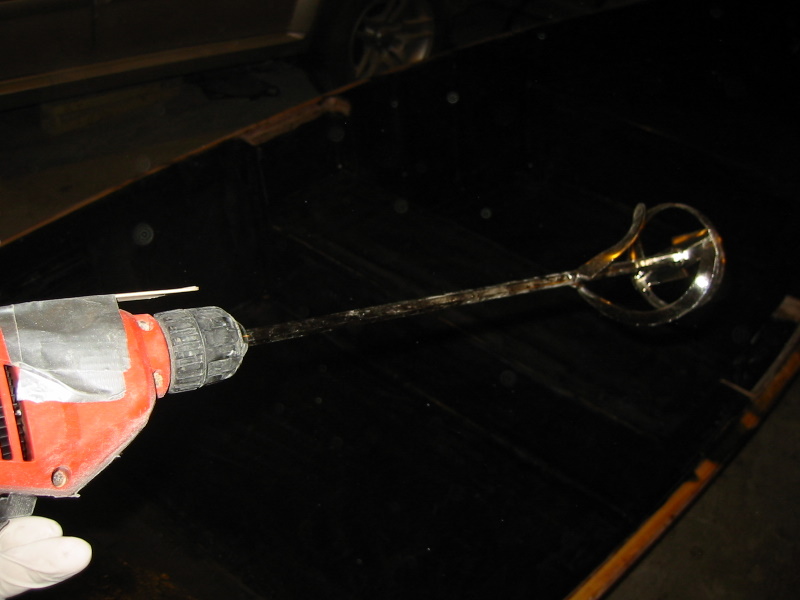
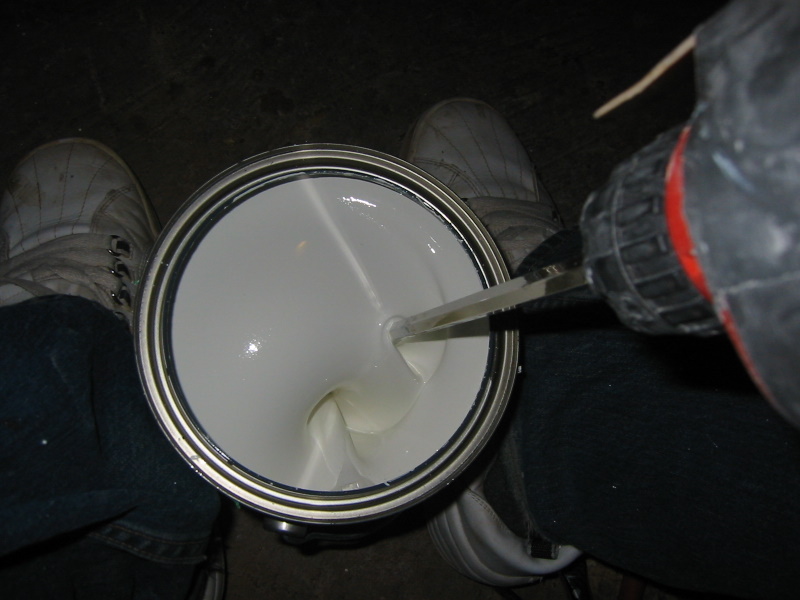
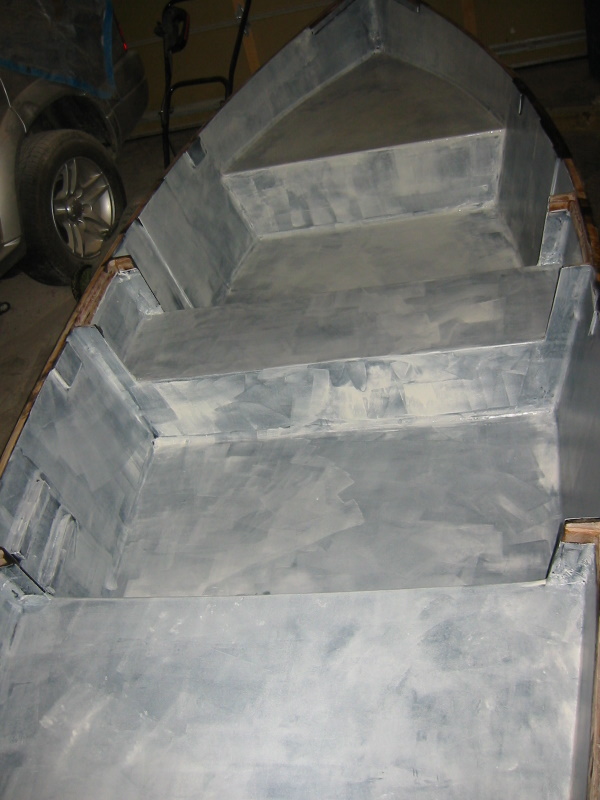
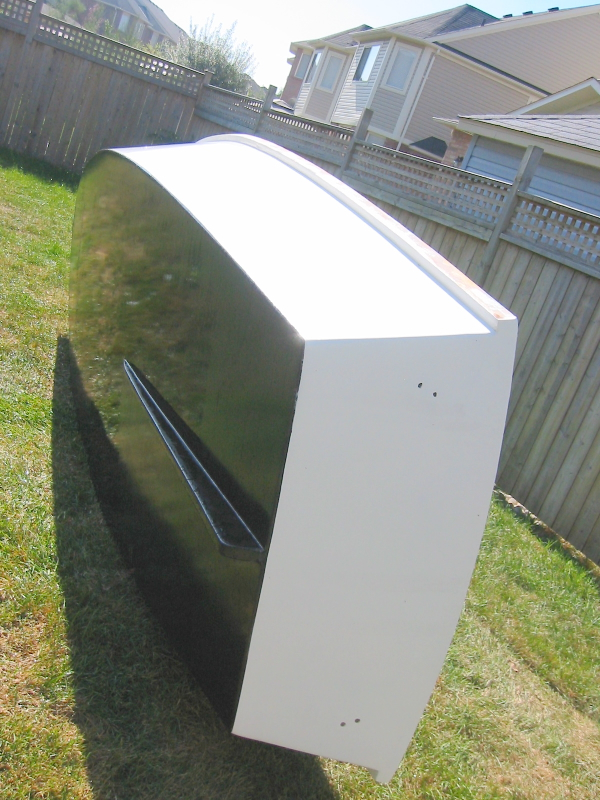
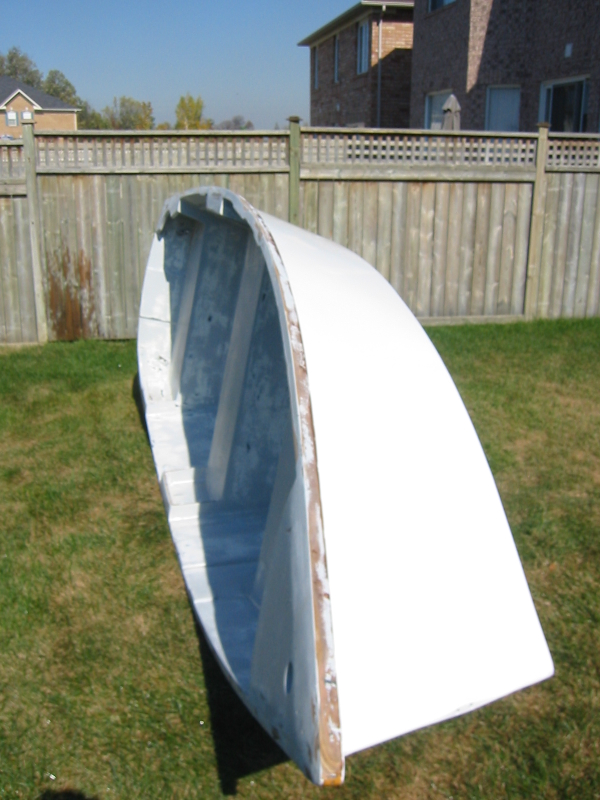
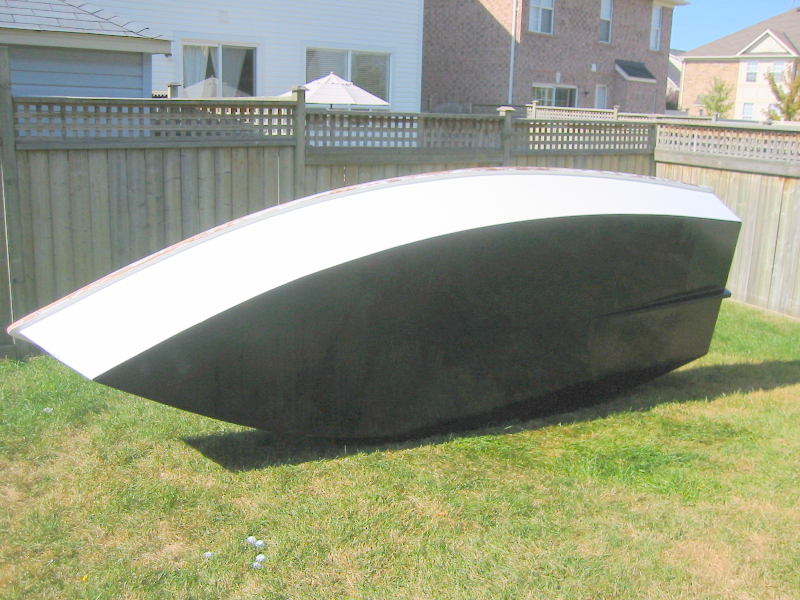
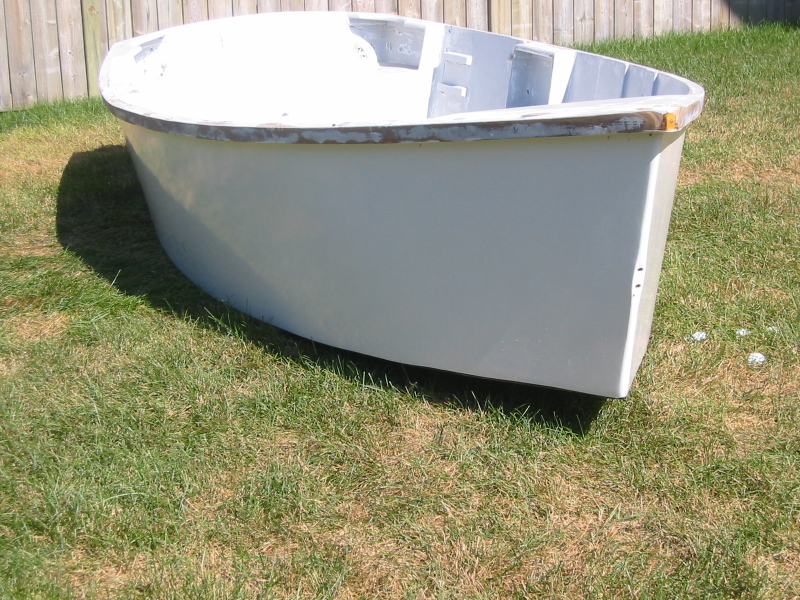
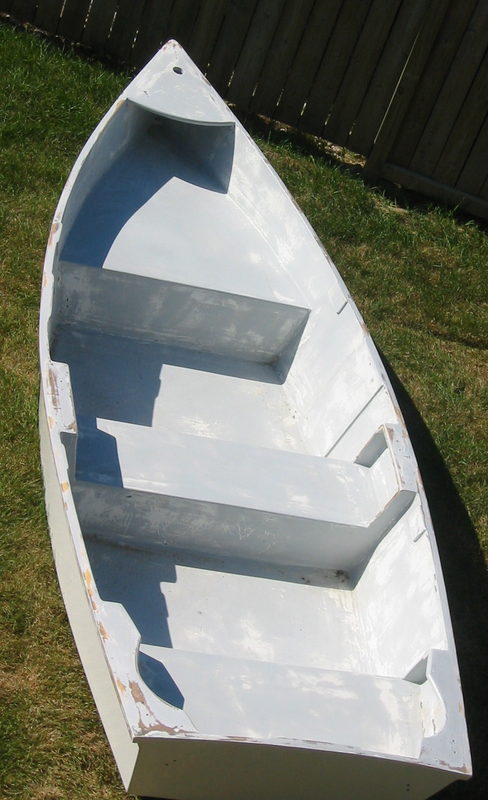
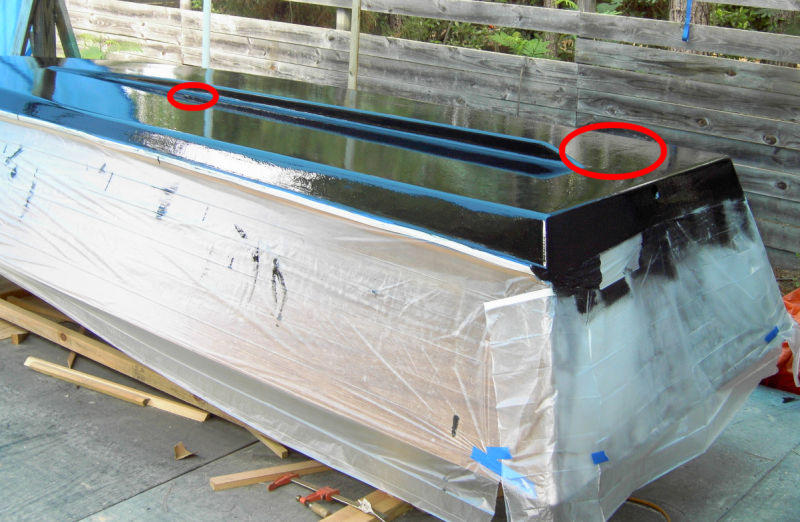